tastytrendingredients

  • Home
  • Recipes
    • Appetizers
    • Breakfast
    • Dessert
    • Dinner
    • Drinks
    • Salads
    • Snacks
    • Soups
  • About me
  • Contact me
menu icon
go to homepage
  • Home
  • Recipes
    • Appetizers
    • Breakfast
    • Dessert
    • Dinner
    • Drinks
    • Salads
    • Snacks
    • Soups
  • About me
  • Contact me
search icon
Homepage link
  • Home
  • Recipes
    • Appetizers
    • Breakfast
    • Dessert
    • Dinner
    • Drinks
    • Salads
    • Snacks
    • Soups
  • About me
  • Contact me
×

Delightful Pink Witch Punch: A Refreshing Festive Treat

October 4, 2025 by Grace Snow Leave a Comment

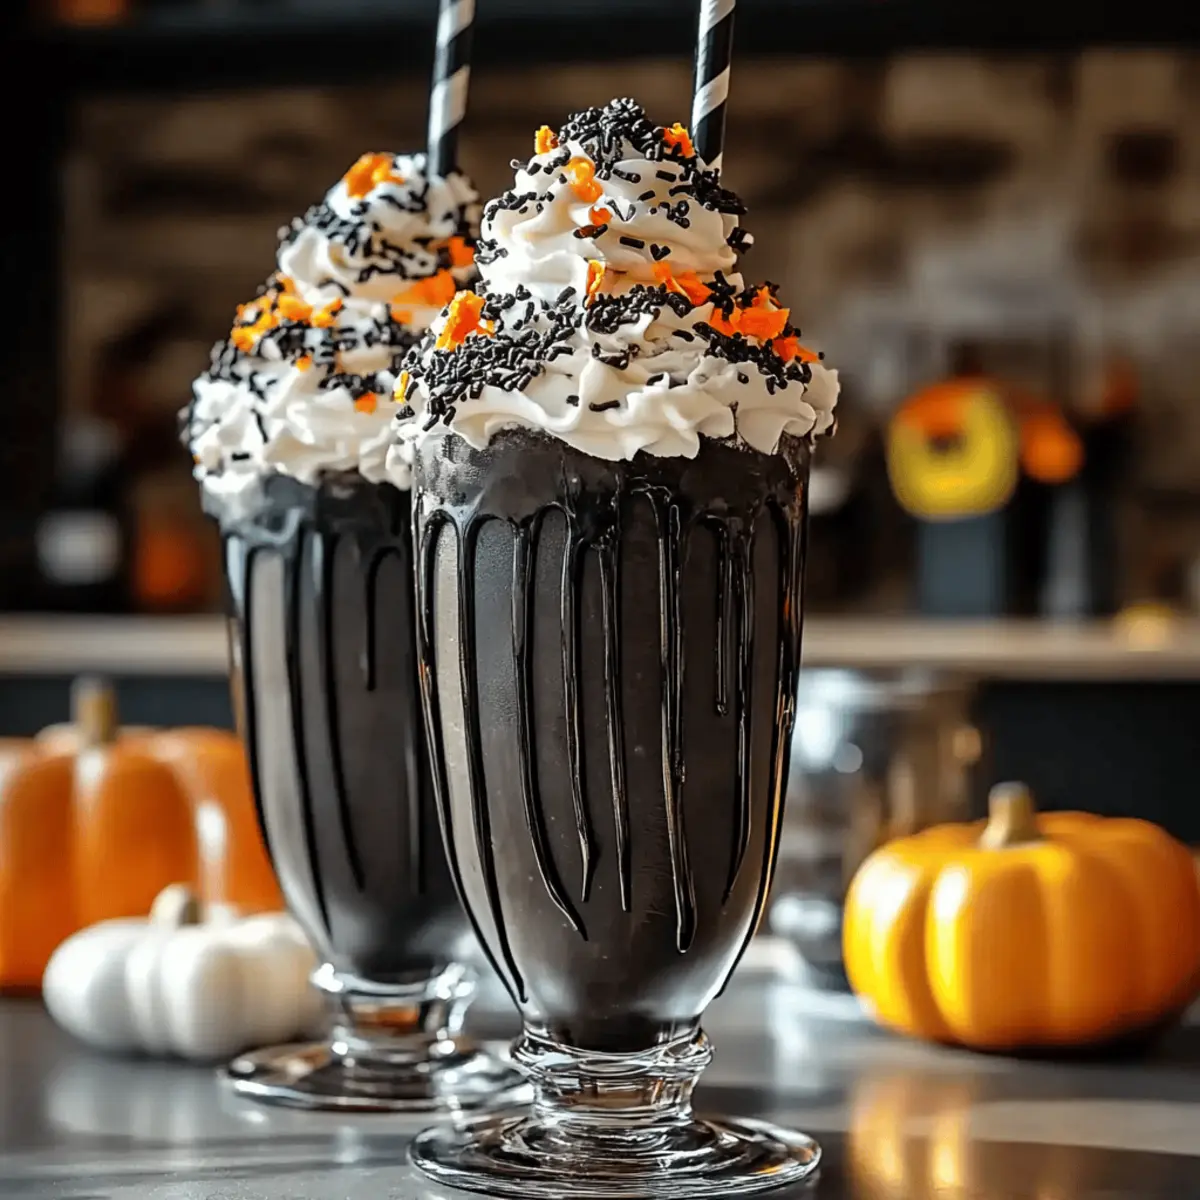
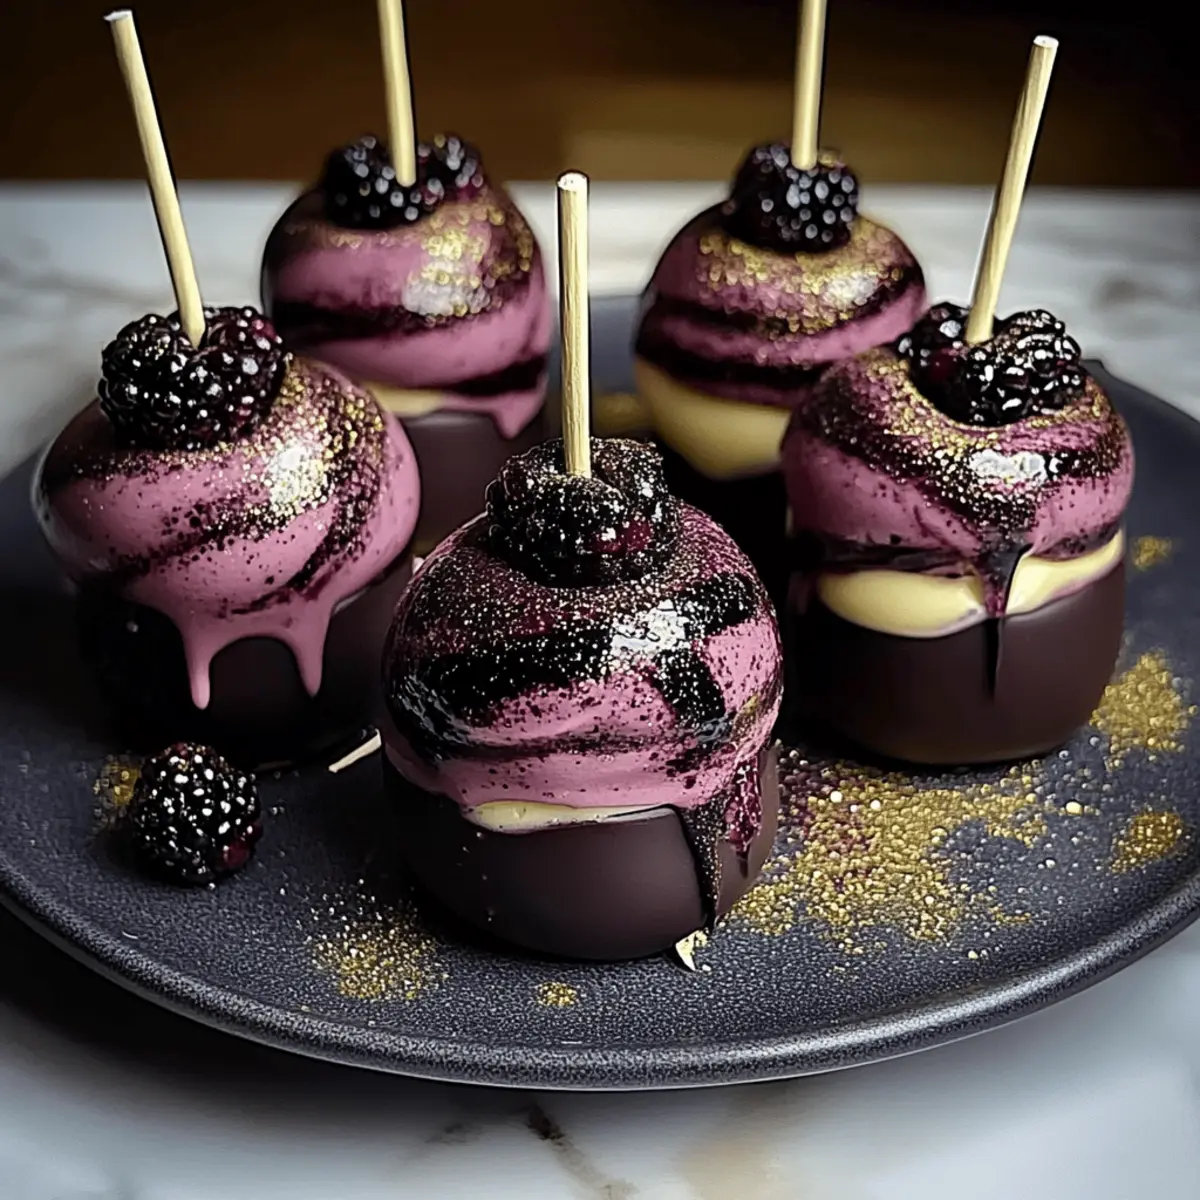
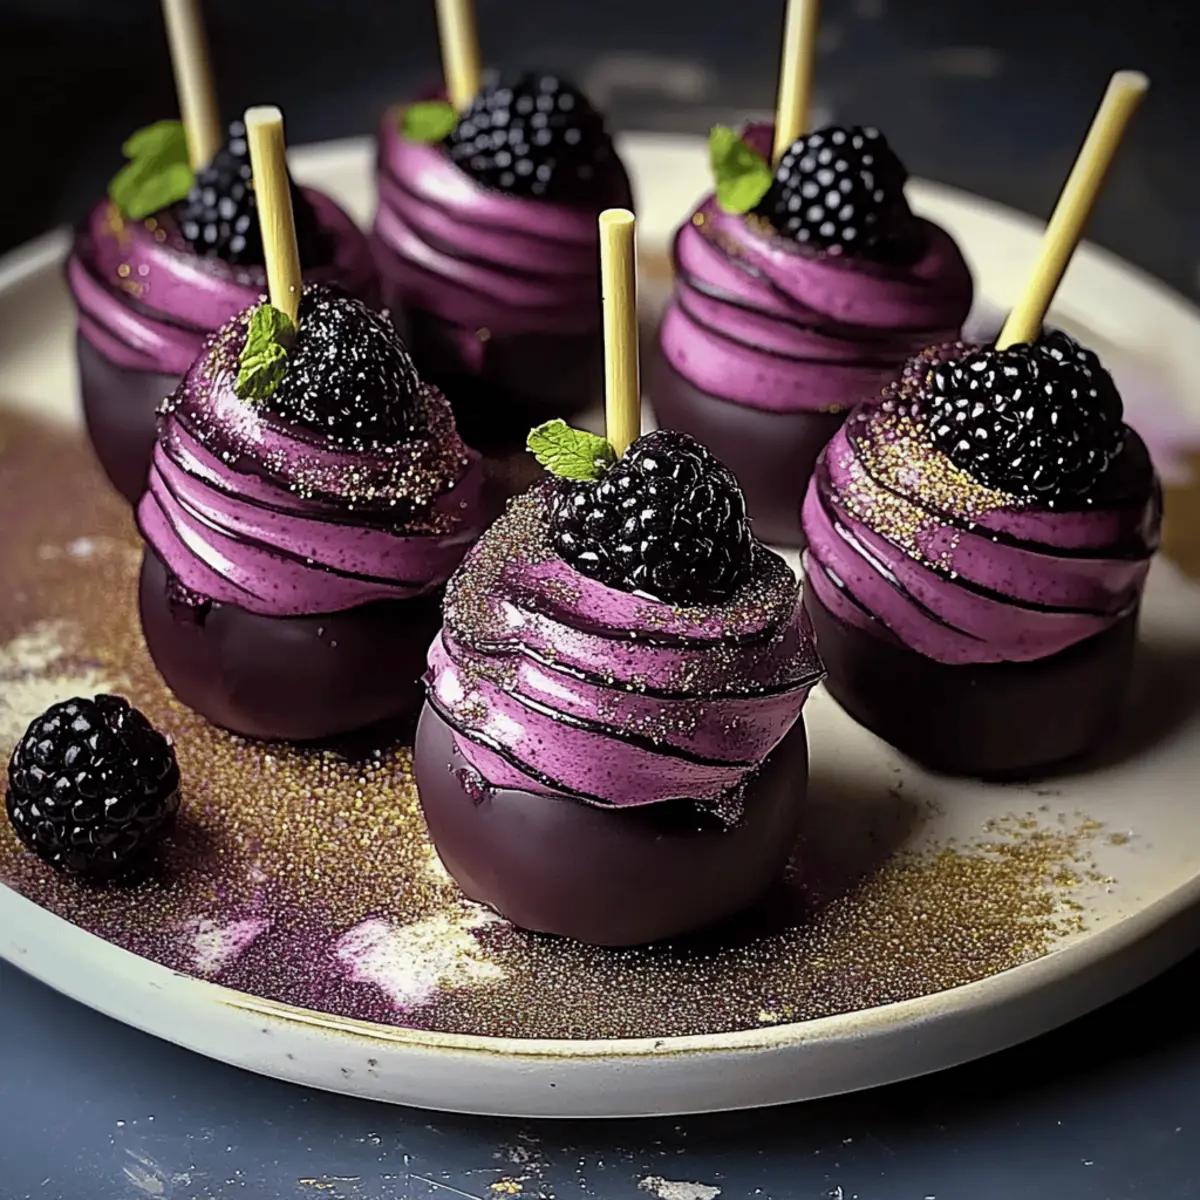
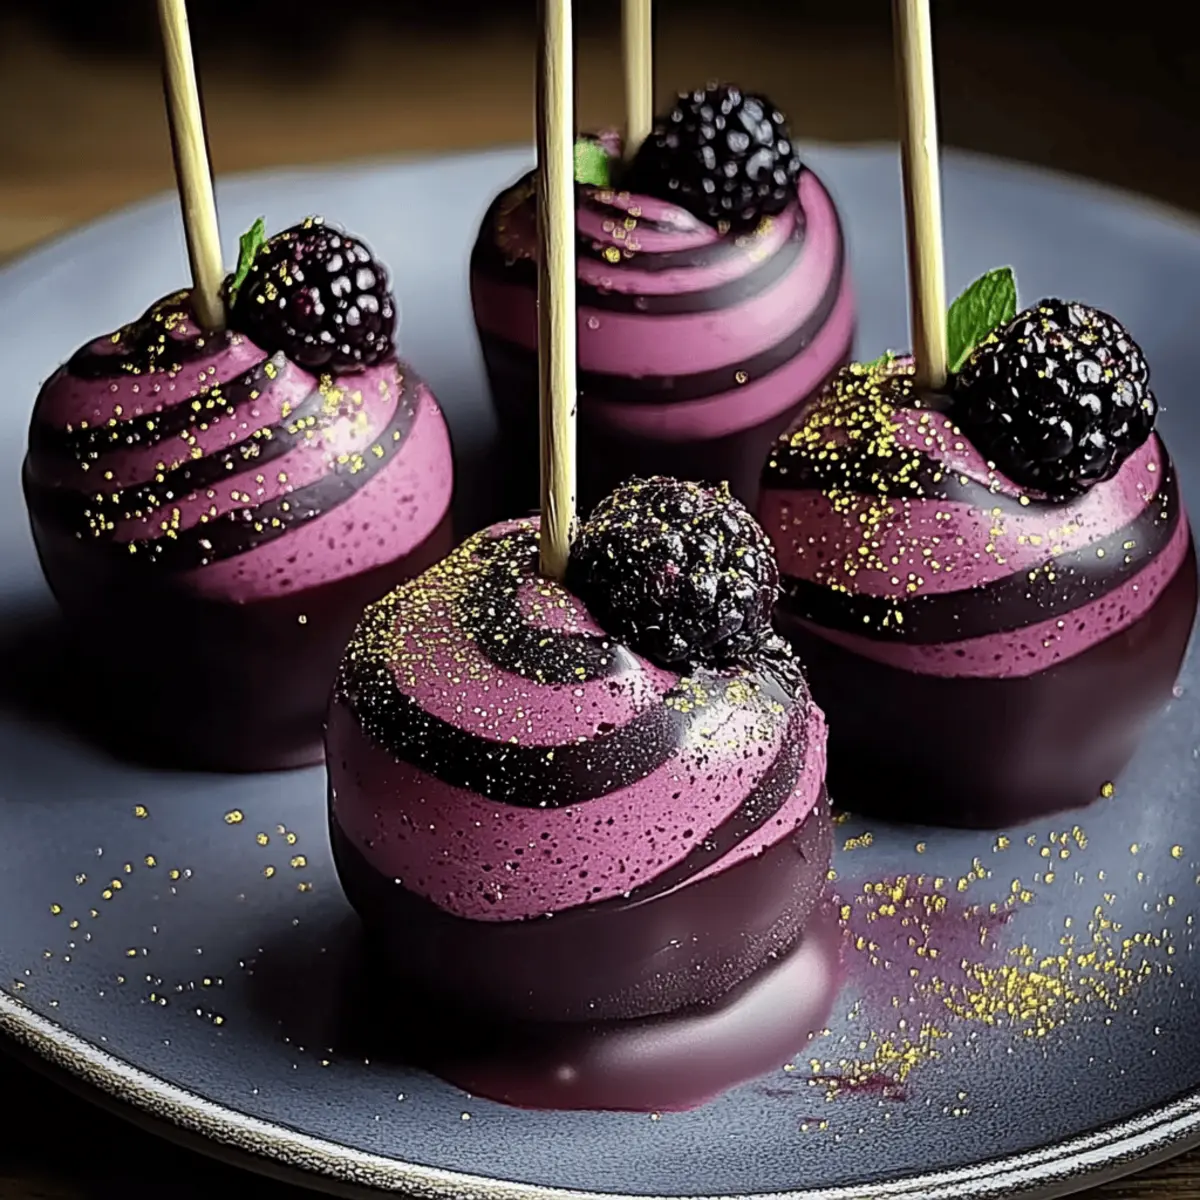
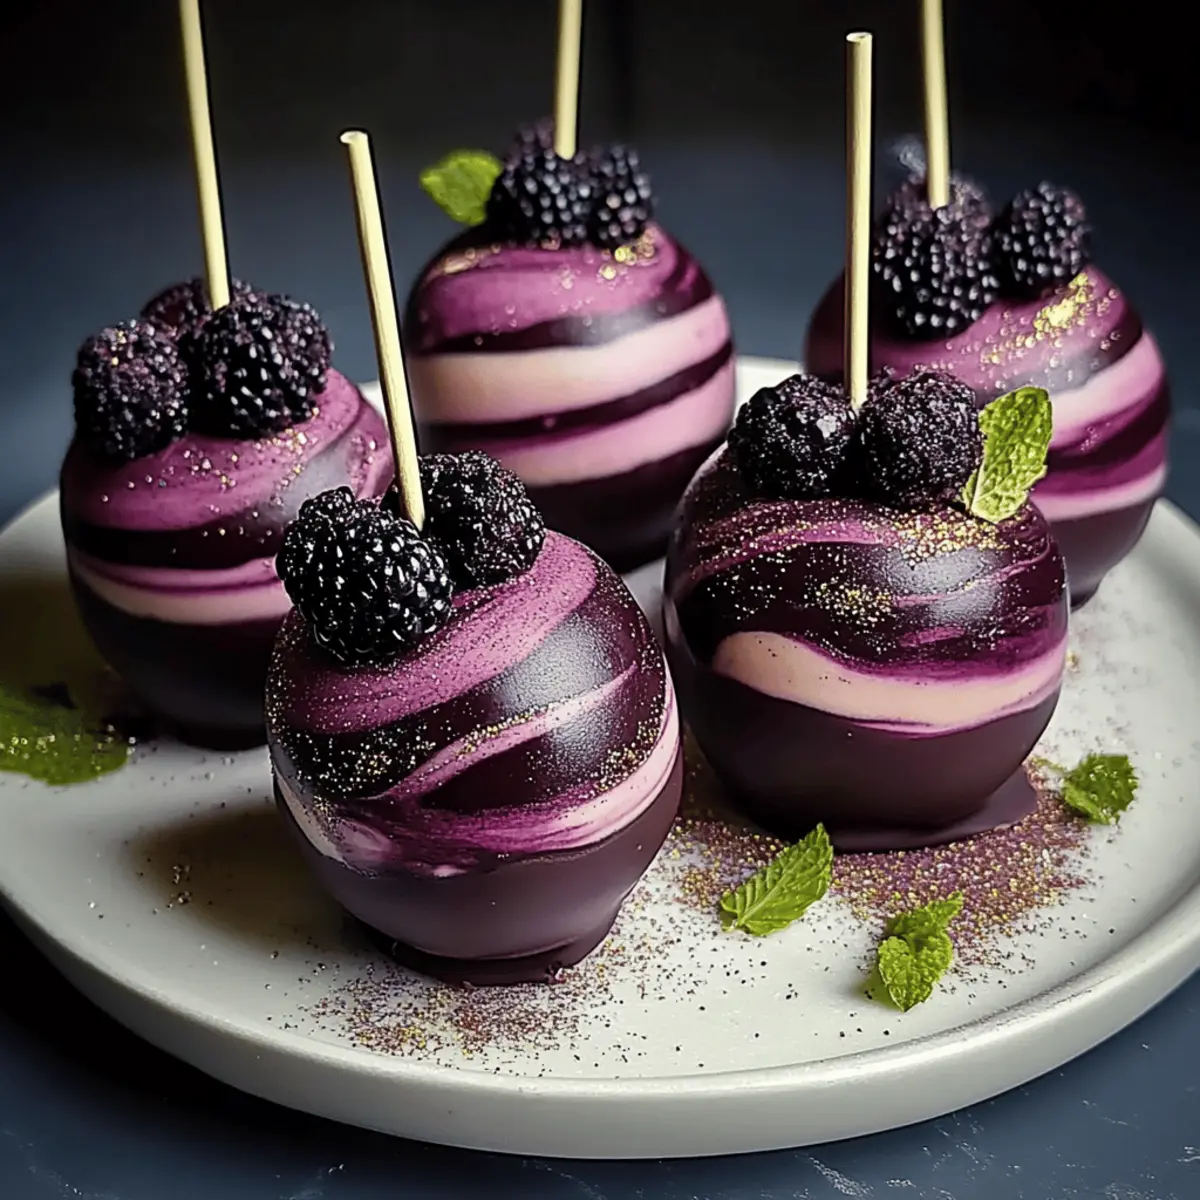
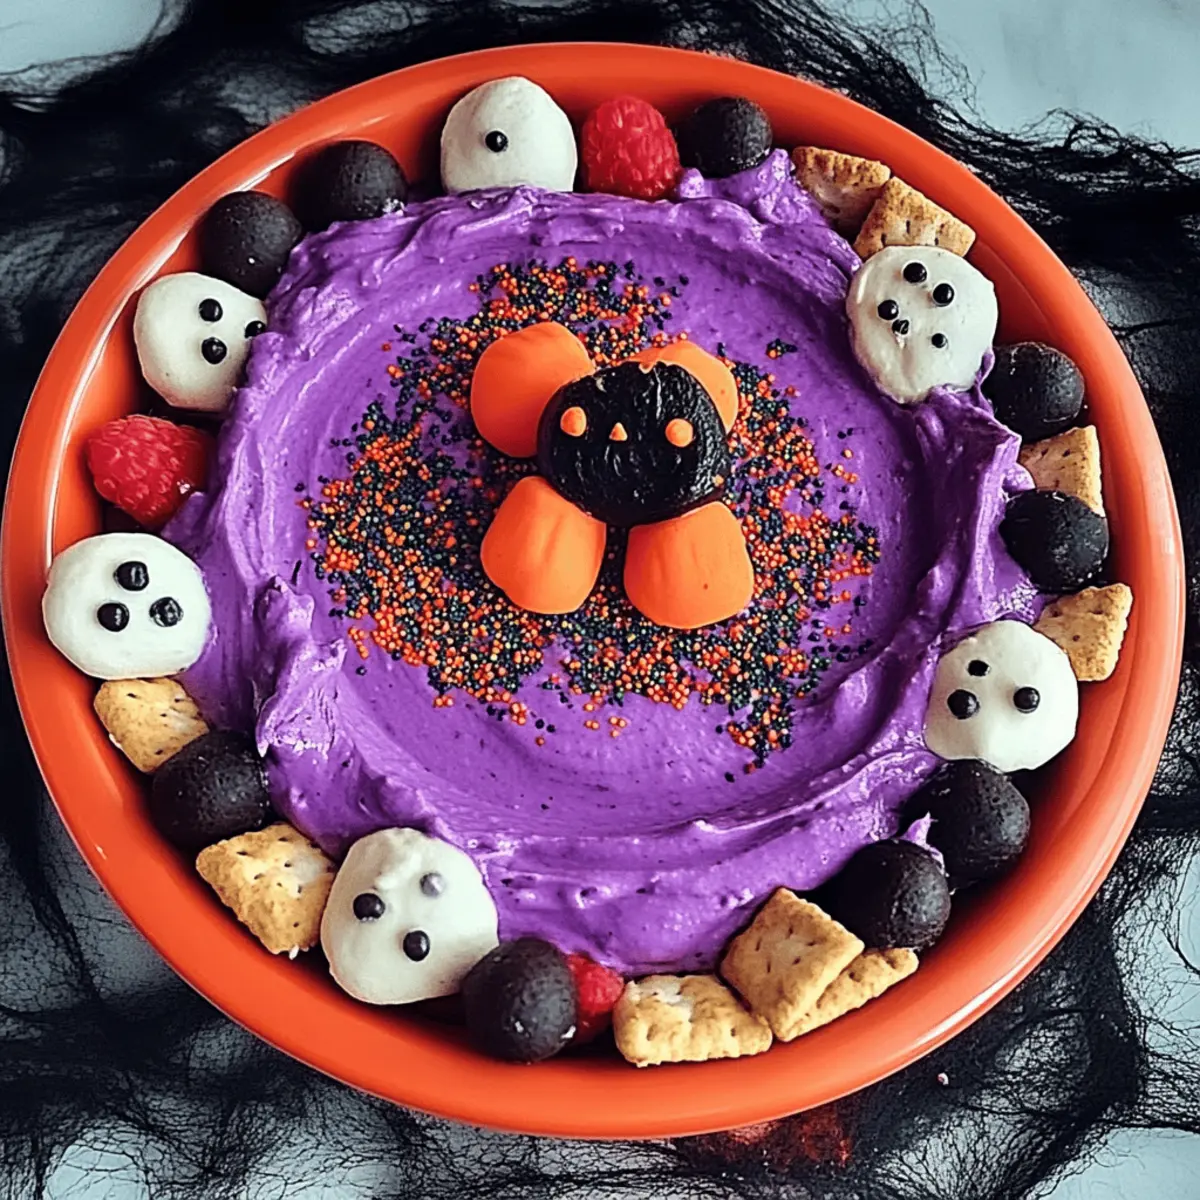
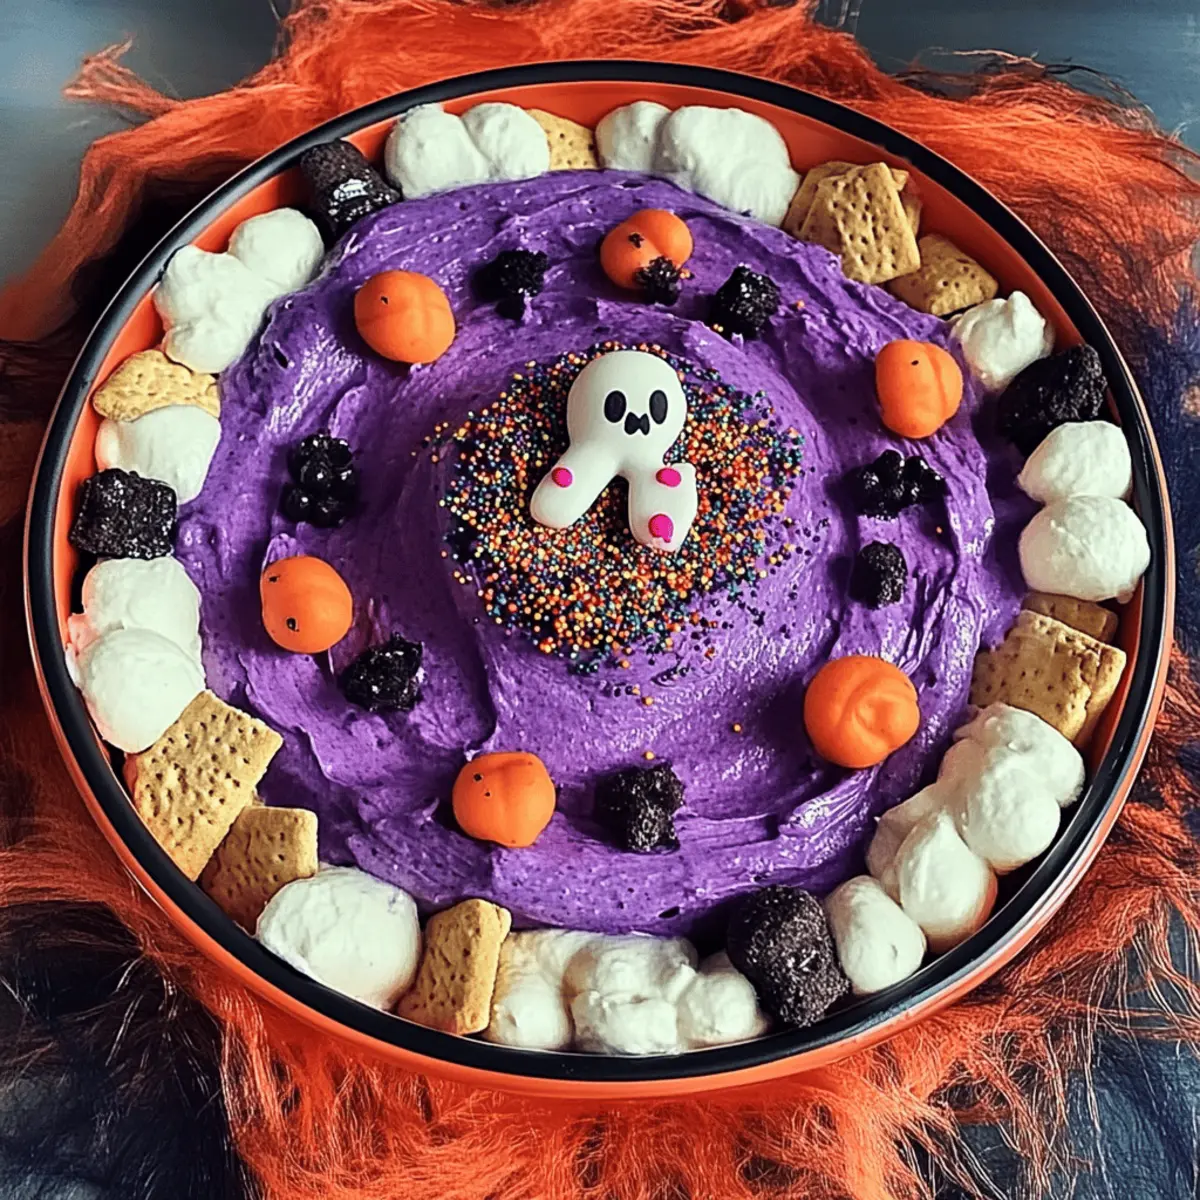
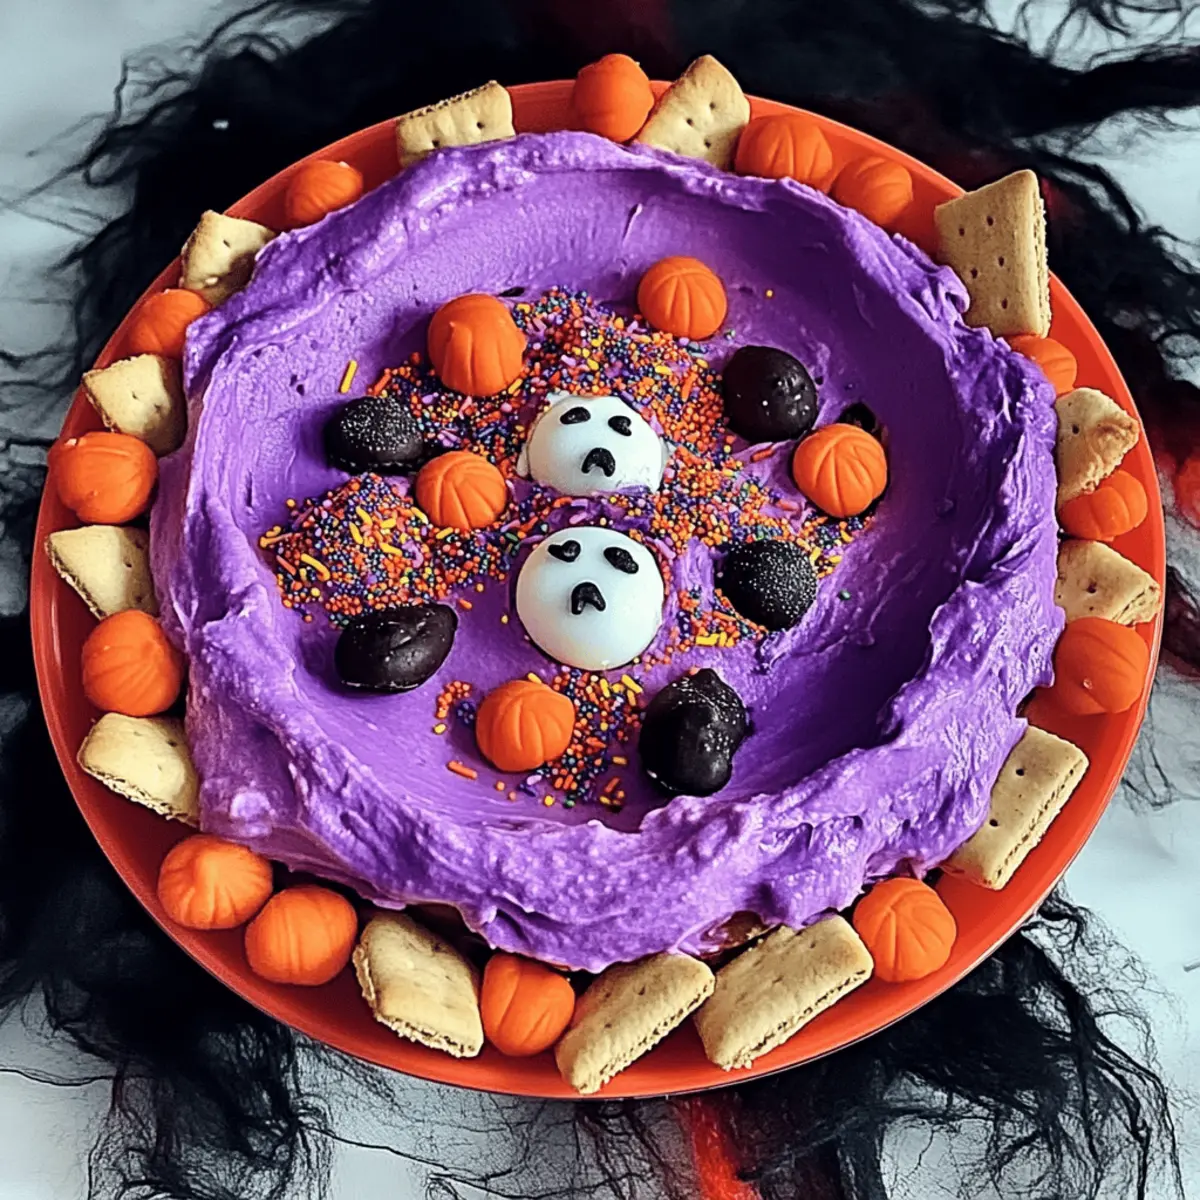
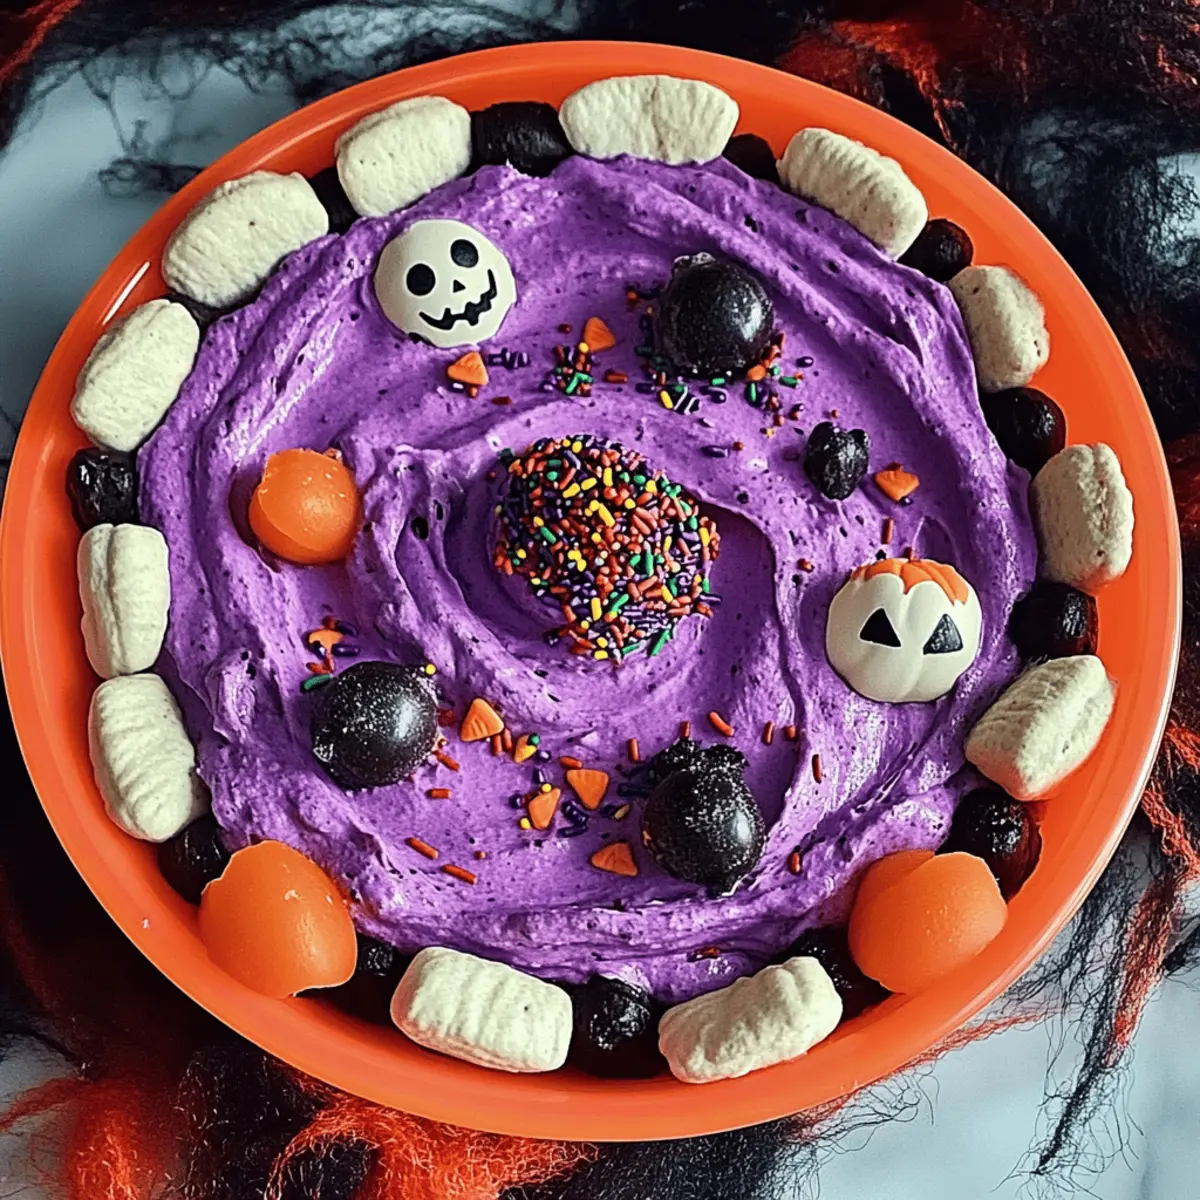
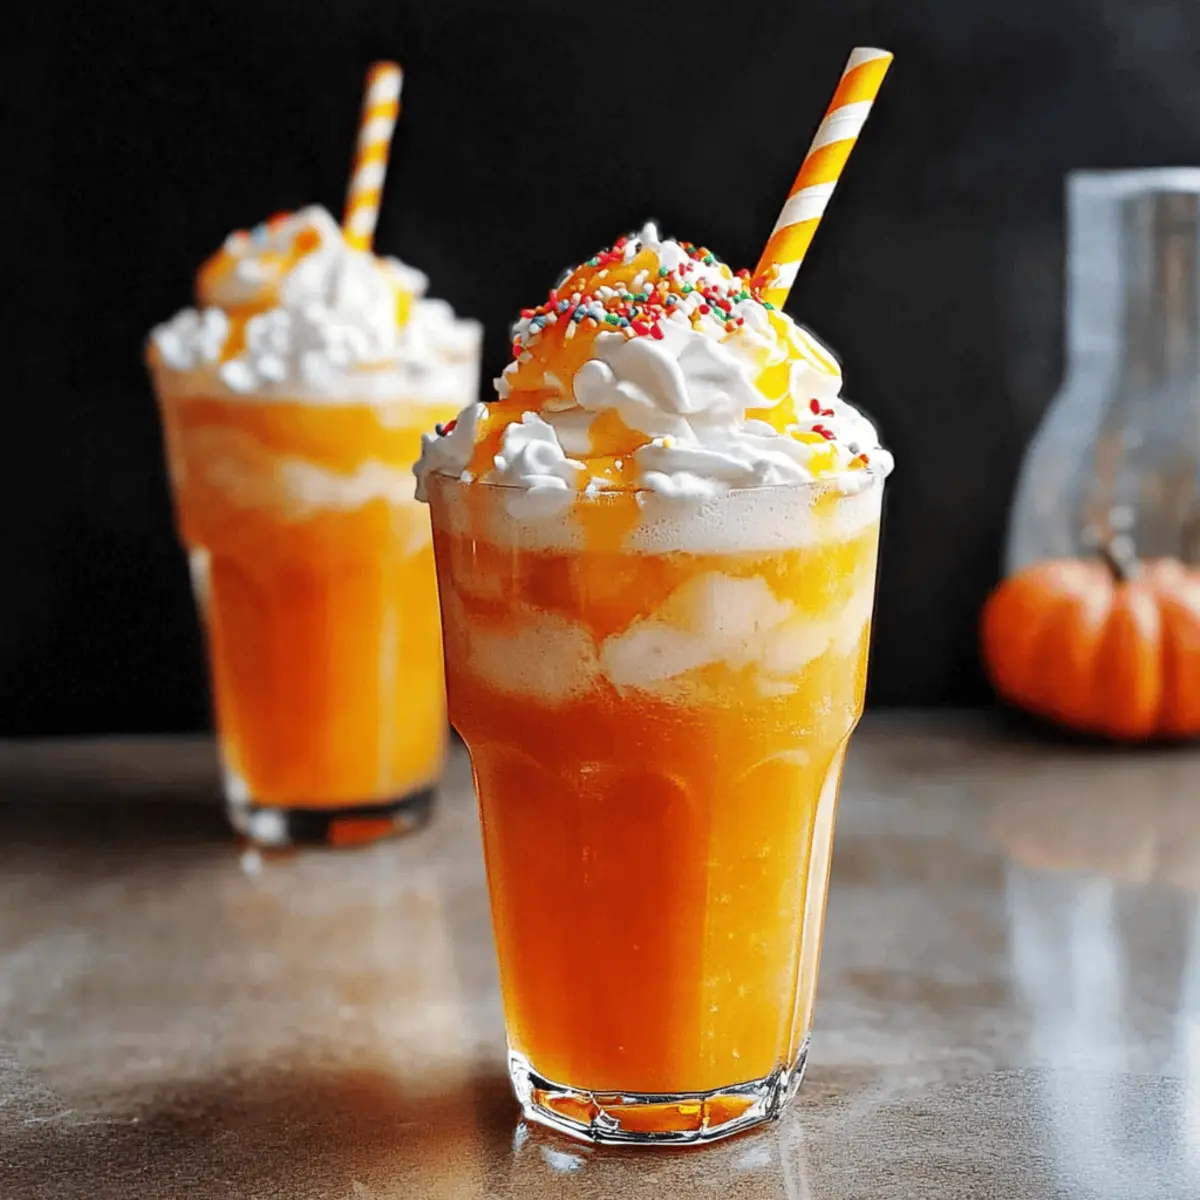
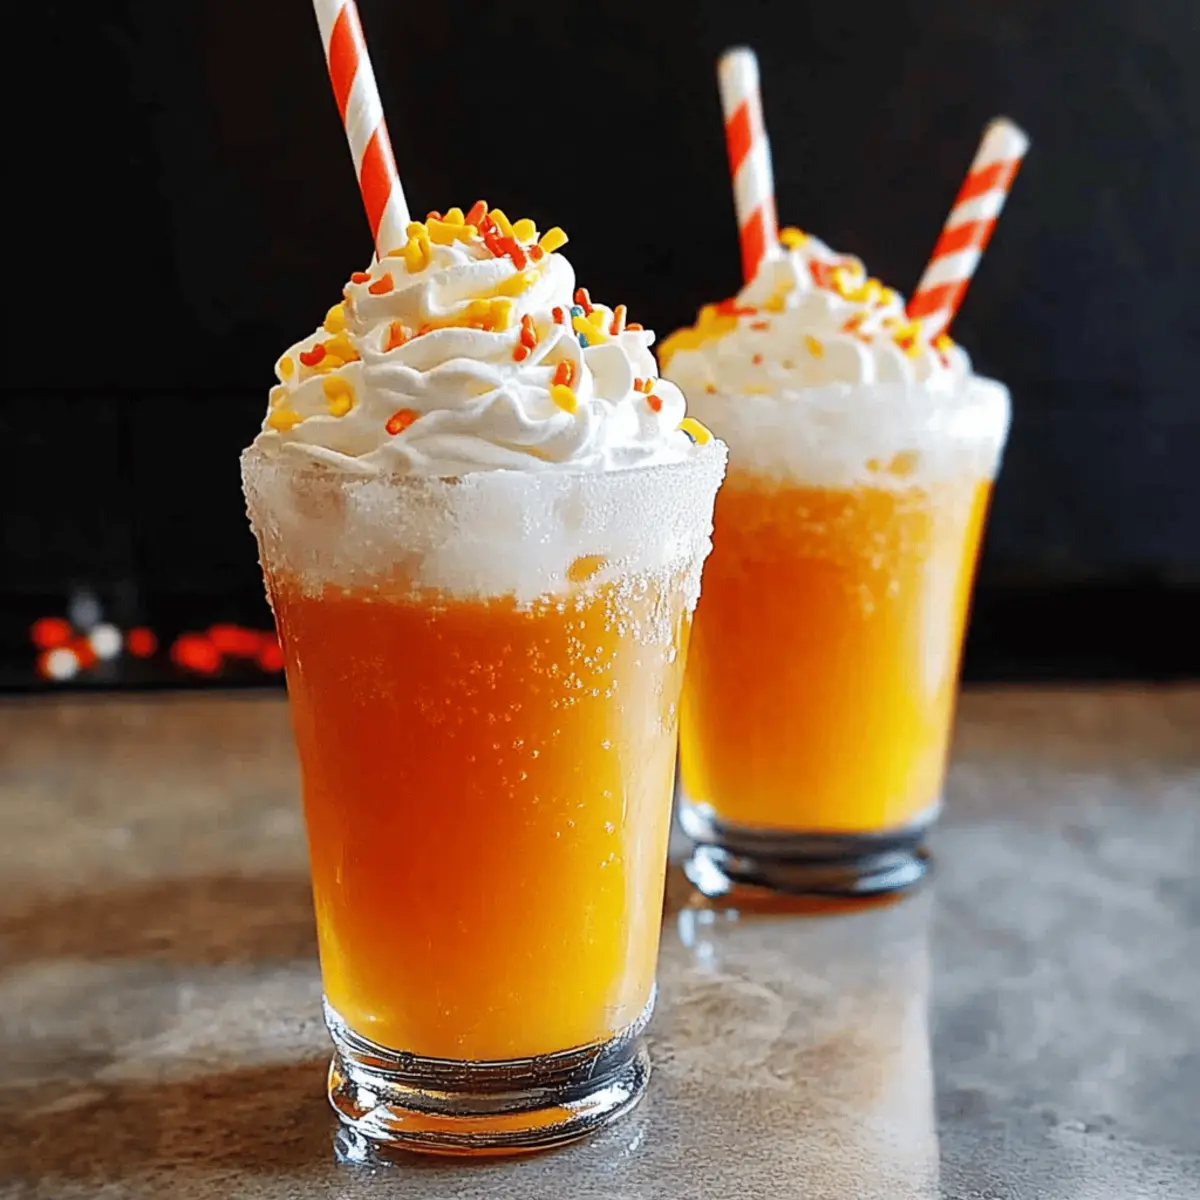
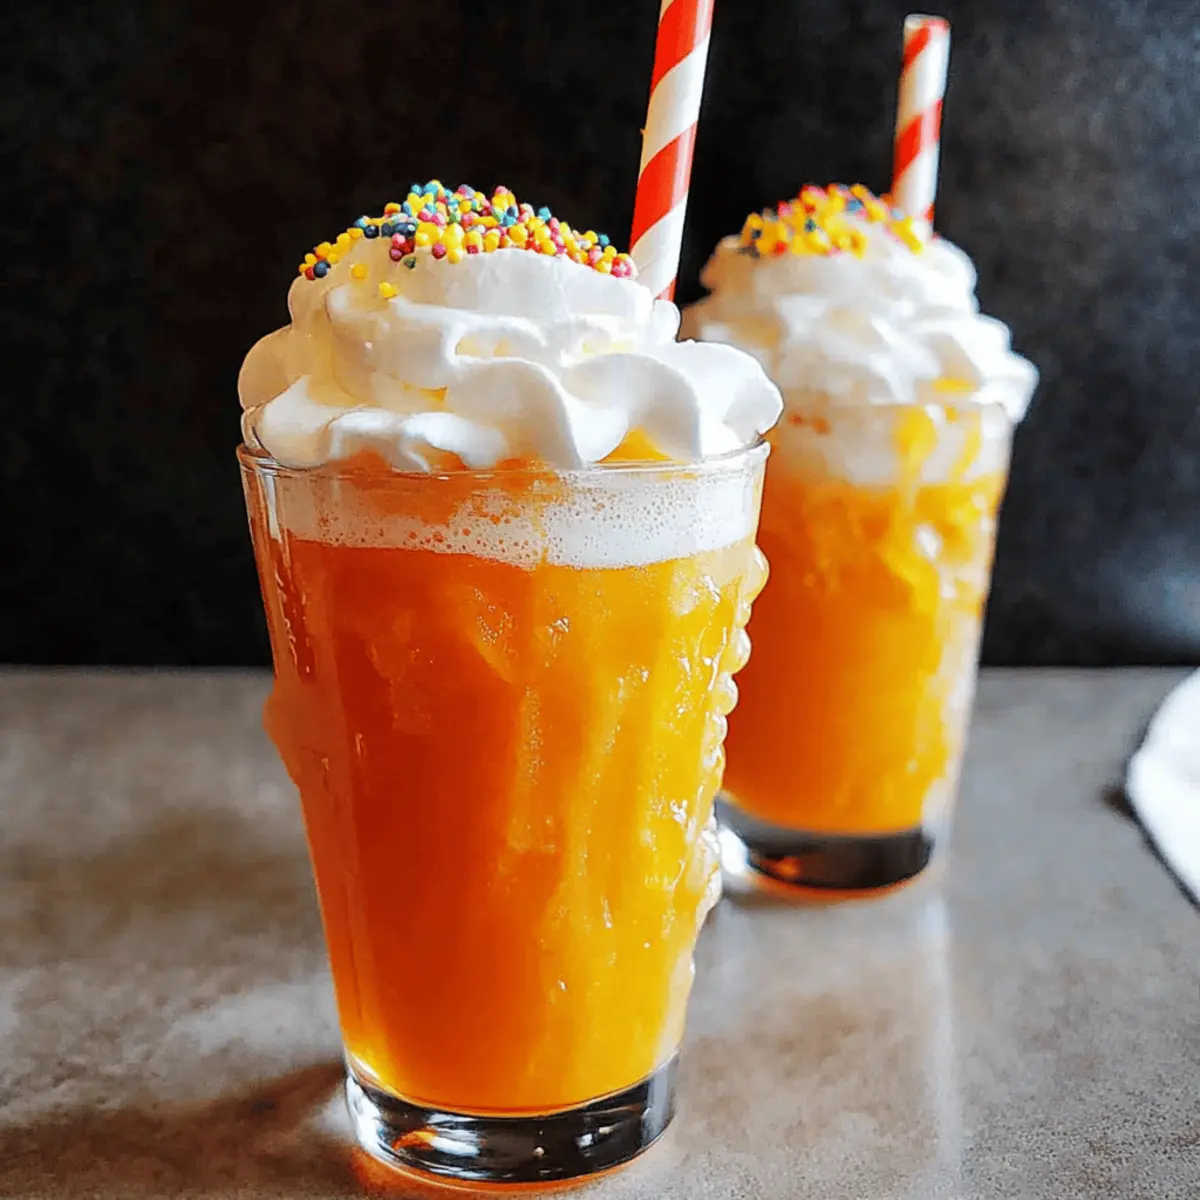
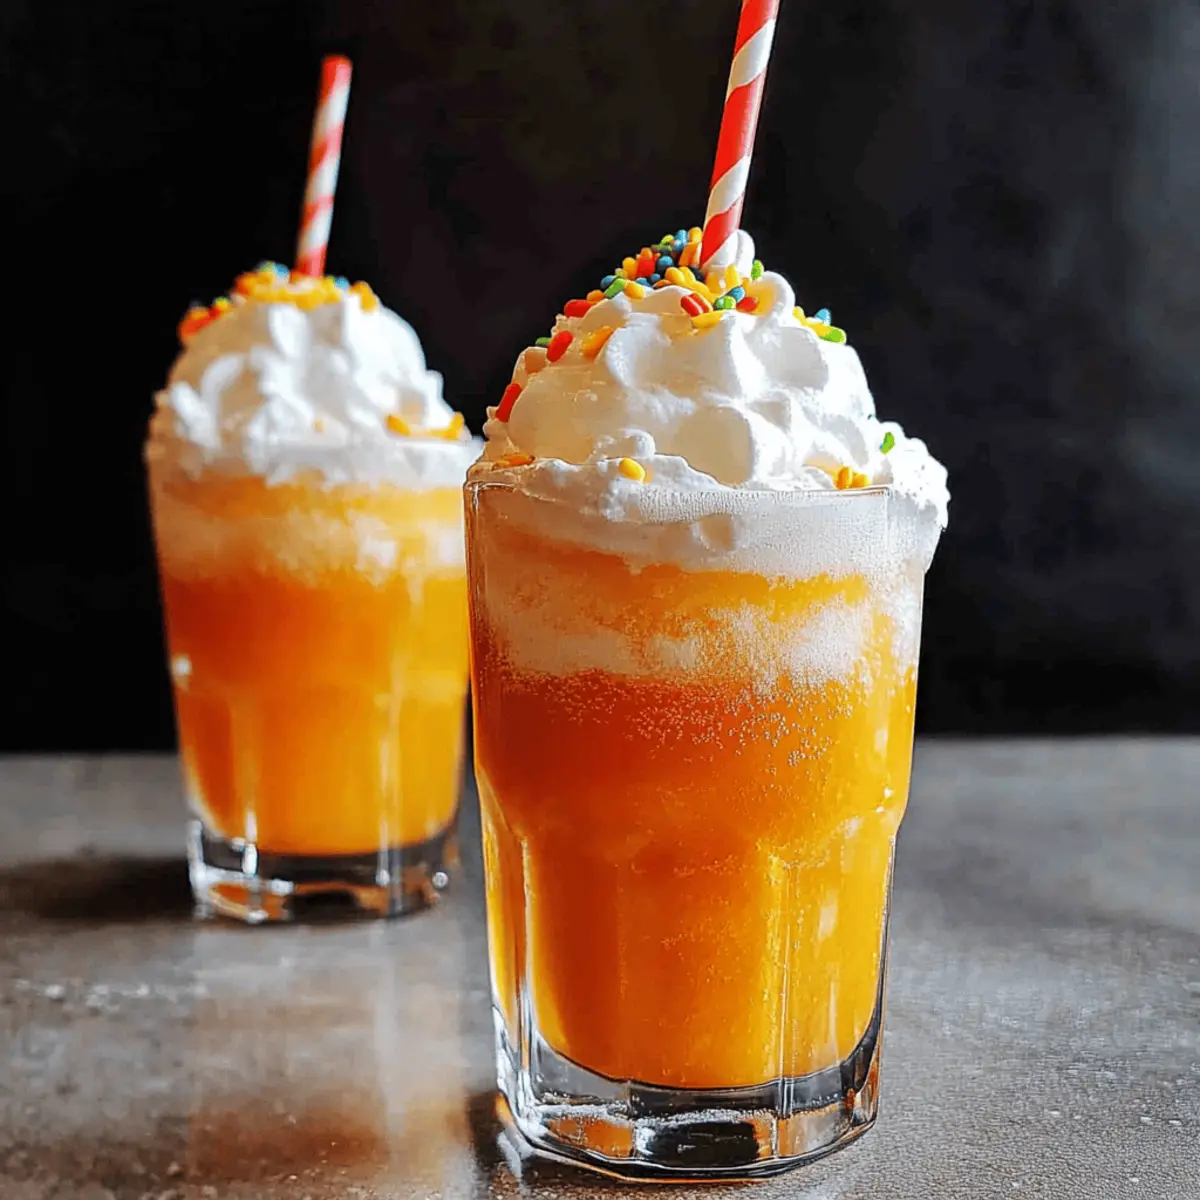
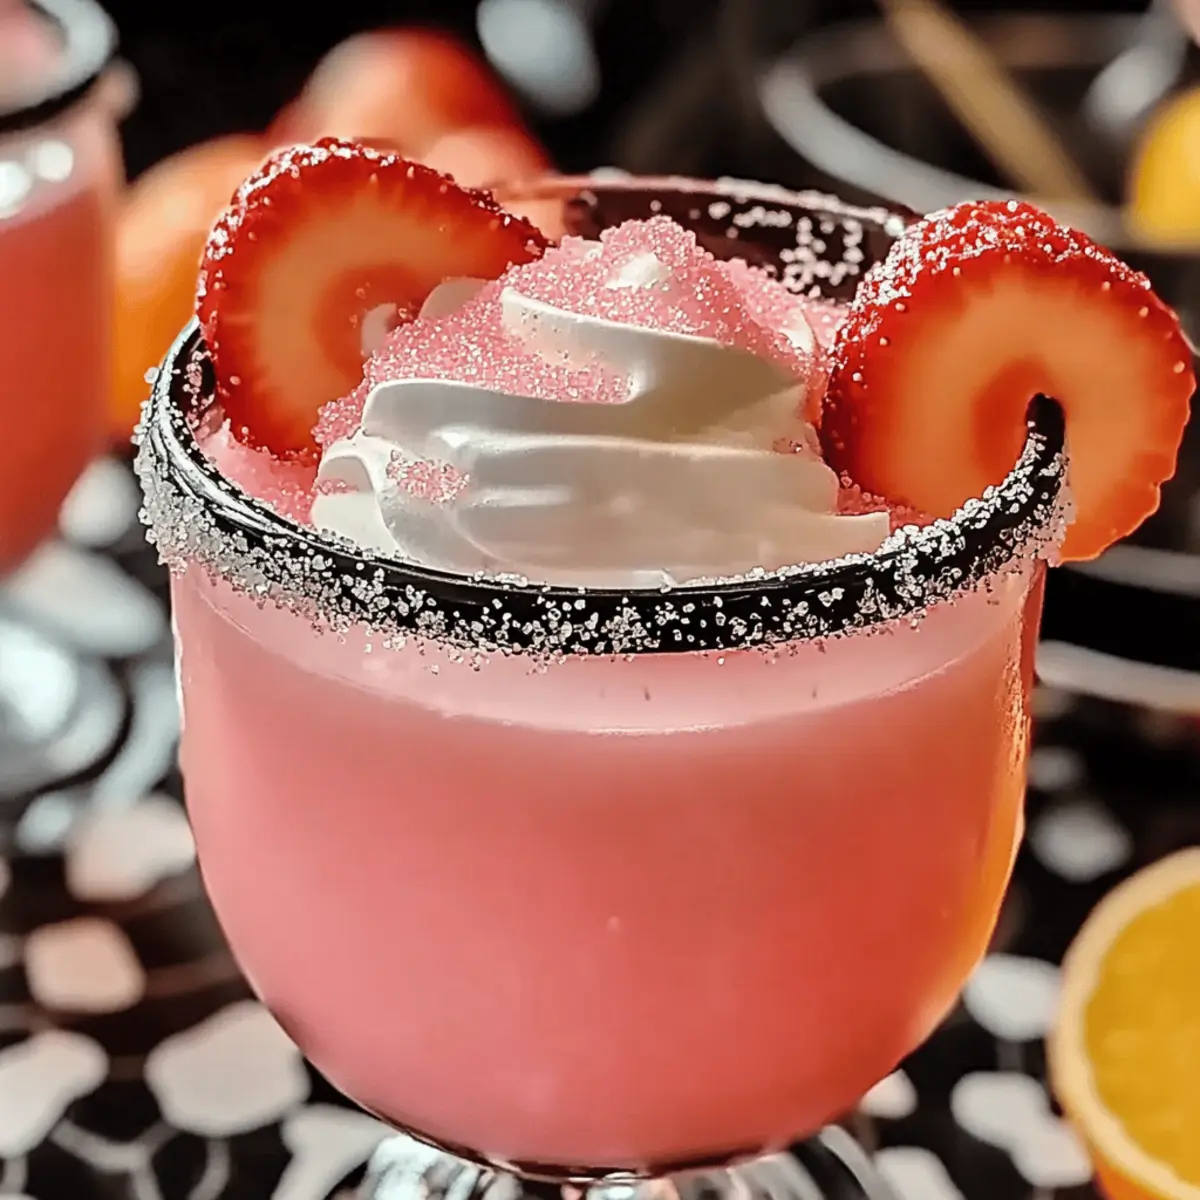
As I poured the bright pink liquid into the jug, I couldn’t help but feel the joyful spirit of the season fill the room. Enter the Enchanting Pink Witch Punch—a vibrant, kid-friendly drink that's perfect for any gathering, from whimsical Halloween parties to cheerful baby showers. This refreshing concoction marries bubbly ginger ale, zesty pink lemonade, and a hint of tart cranberry juice for a delightful sip that’s fun to customize. With its effortless preparation and the ability to wow guests of all ages, this punch promises to bring smiles and spark conversations. So, what fun twists will you add to your own magical punch bowl?

Why is Pink Witch Punch a Must-Try?

Kid-friendly and refreshing: This delightful punch is perfect for all ages, making it an instant hit at any gathering.
Vibrant visuals: Its eye-catching pink hue not only looks stunning but invites everyone to pour a glass.
Effortless preparation: With simple ingredients and quick steps, you can whip it up in no time, allowing you to focus on enjoying the party!
Customizable options: Feel free to mix in your favorite fruits or flavor enhancements, like orange juice or ginger beer, to create a unique twist that suits your taste.
Great for gatherings: Whether it's a Halloween bash or a baby shower, this punch is designed to bring joy and laughter, sparking conversations among friends and family.
Make-ahead friendly: Prepare your punch base in advance and store it; this way, you’ll be ready to impress with minimal last-minute effort.

Pink Witch Punch Ingredients

For the Punch

  • Ginger Ale – Provides fizz and refreshment; substitute with diet ginger ale for a lower-calorie option.
  • Pink Lemonade – This main flavor offers sweetness and color; regular lemonade mixed with cranberry or raspberry juice can also achieve the pink hue.
  • Cranberry Juice – Adds tartness and depth; opt for unsweetened to reduce sugar content.

For Creamy Decoration

  • Whipped Topping – Adds creaminess and serves as a cheerful decoration for the punch.

For Festive Touch

  • Edible Pink Glitter – Use sparingly for a magical sparkle; it's an optional yet fun addition.
  • Pink Sanding Sugar – Ideal for rimming glasses, enhancing both sweetness and visual appeal; adhere with lemon juice.

For Chilling

  • Ice – Keeps the drink chilled; why not use ice cubes made from pink lemonade or cranberry juice for added flavor?

For Garnishing

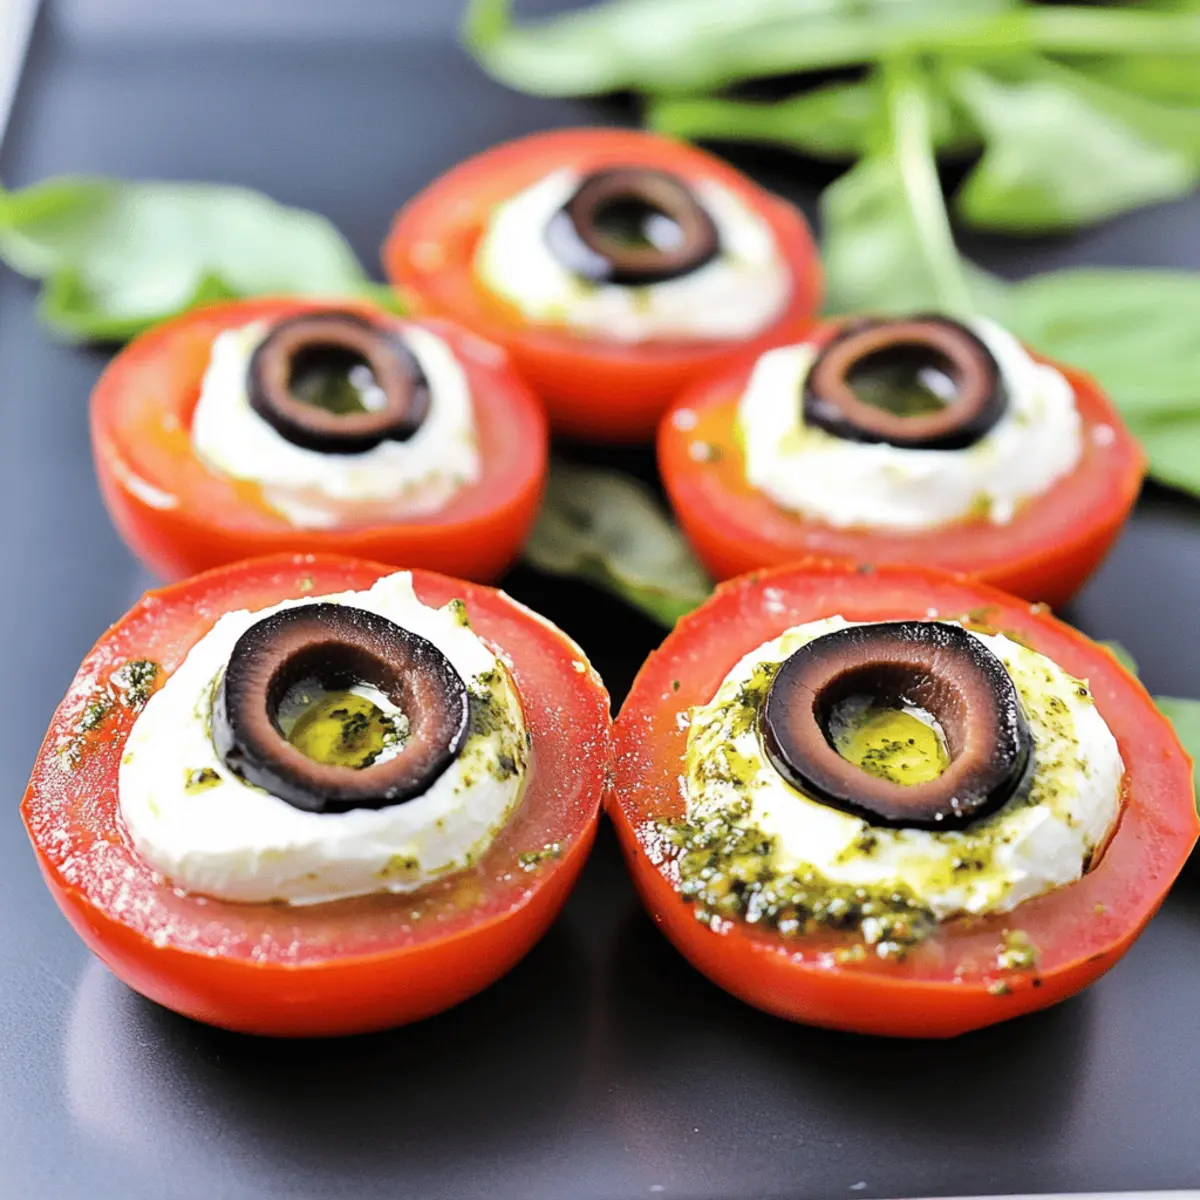
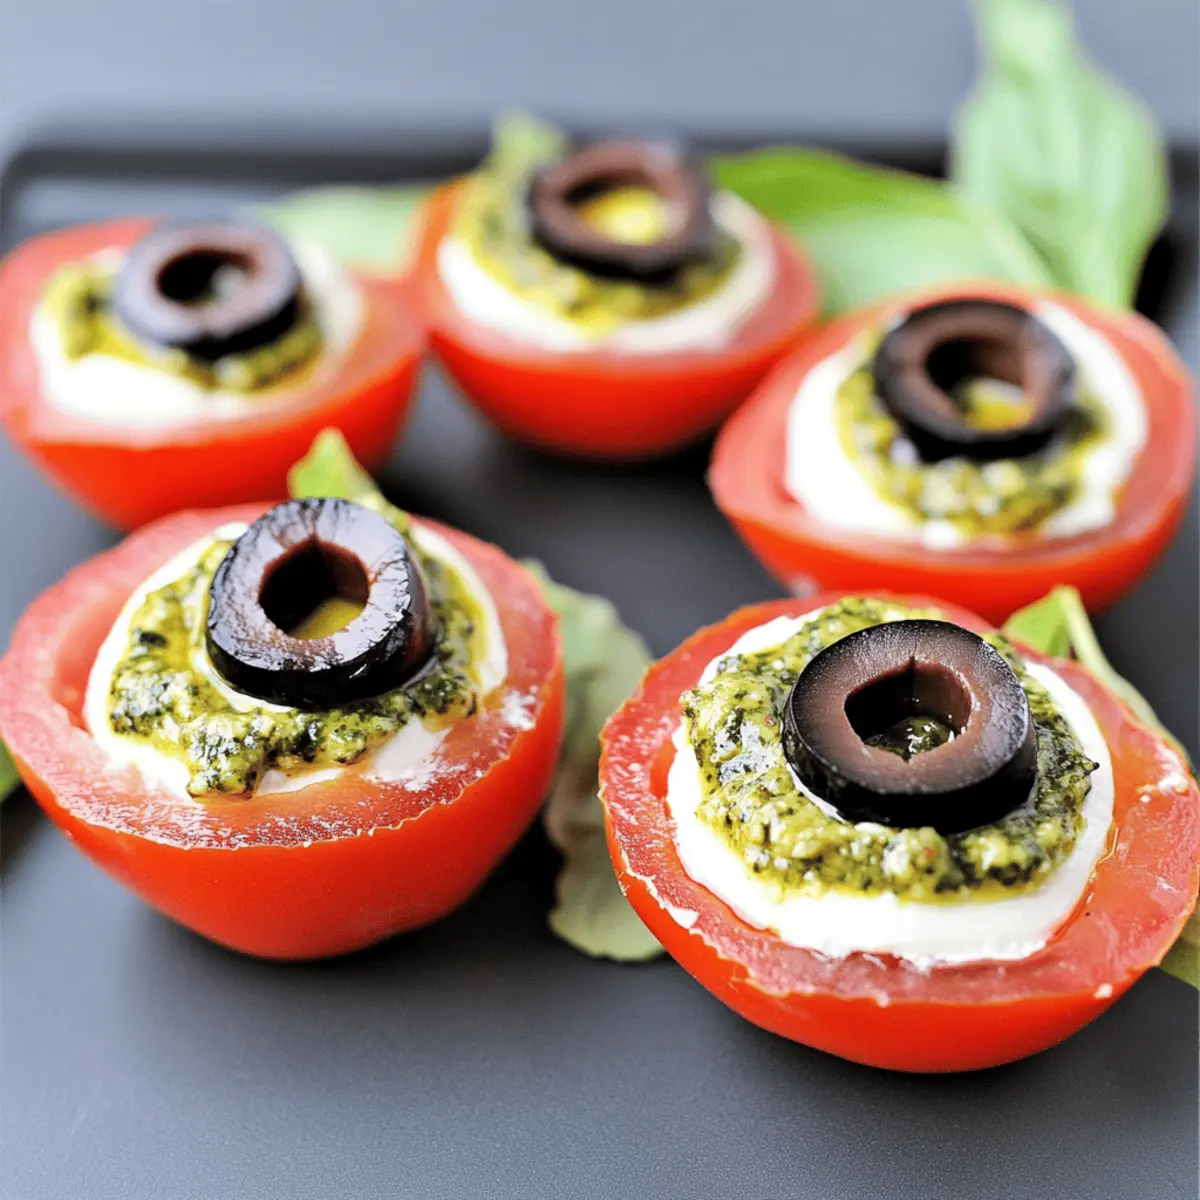
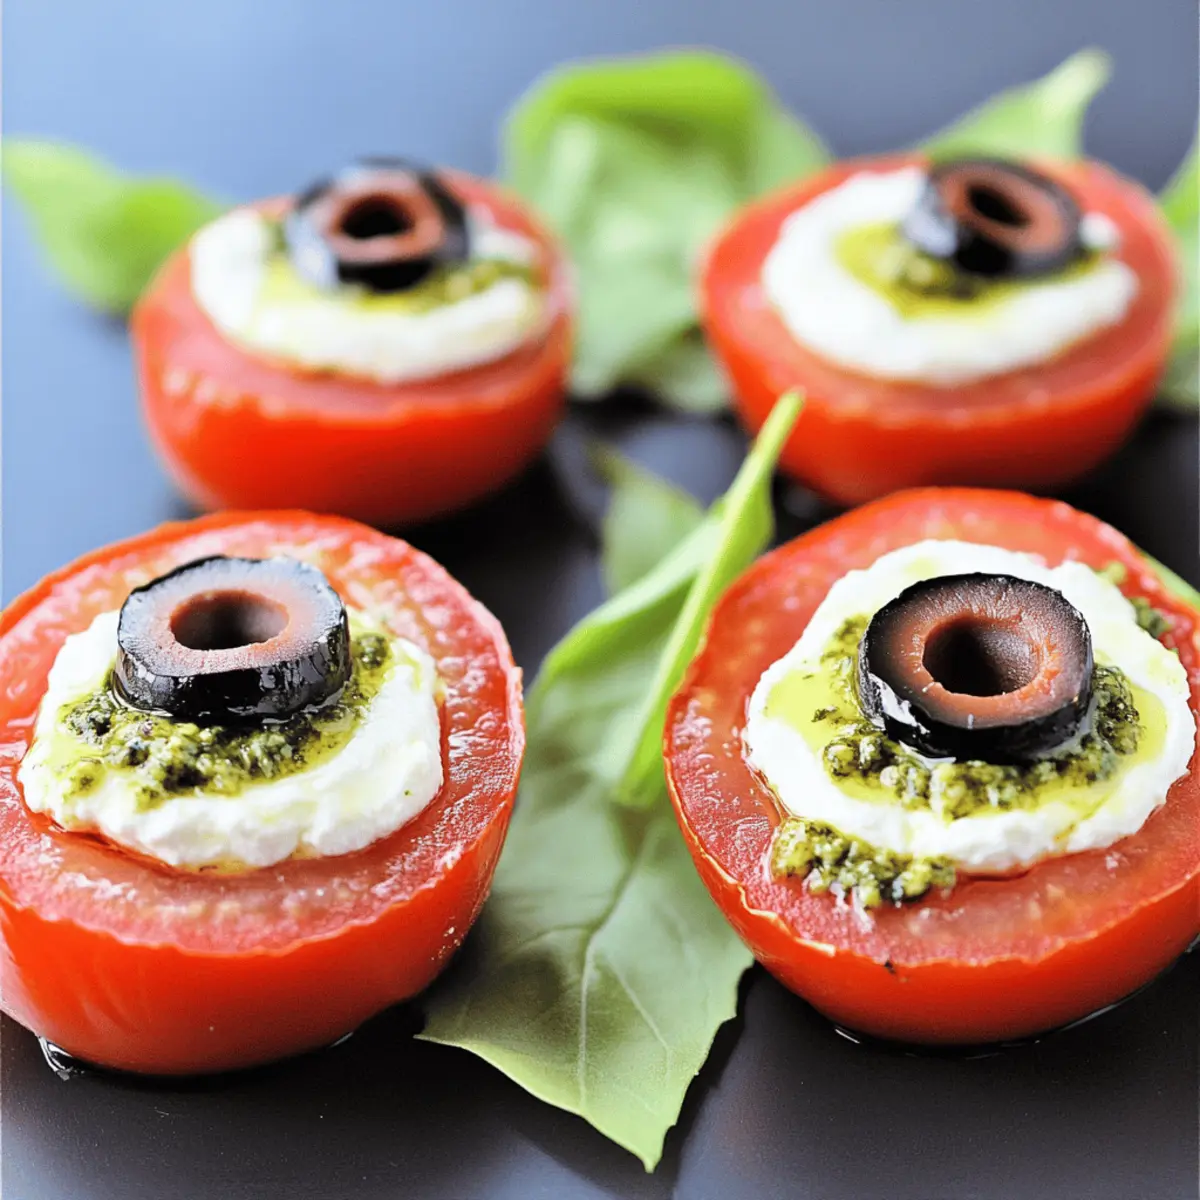
  • Sliced Fruit (e.g., strawberries, oranges, lemons) – Optional but great for decoration and flavor enhancement; they're perfect for a fresh touch in your Pink Witch Punch!

Step‑by‑Step Instructions for Pink Witch Punch

Step 1: Chill Ingredients
Begin by placing your pink lemonade, ginger ale, and cranberry juice in the refrigerator for 1-2 hours. This ensures that all the components of your Pink Witch Punch are delightfully cold when it's time to serve, enhancing the refreshing experience. Visualize the vibrant colors getting even more enticing as they chill!

Step 2: Rim the Glasses (Optional)
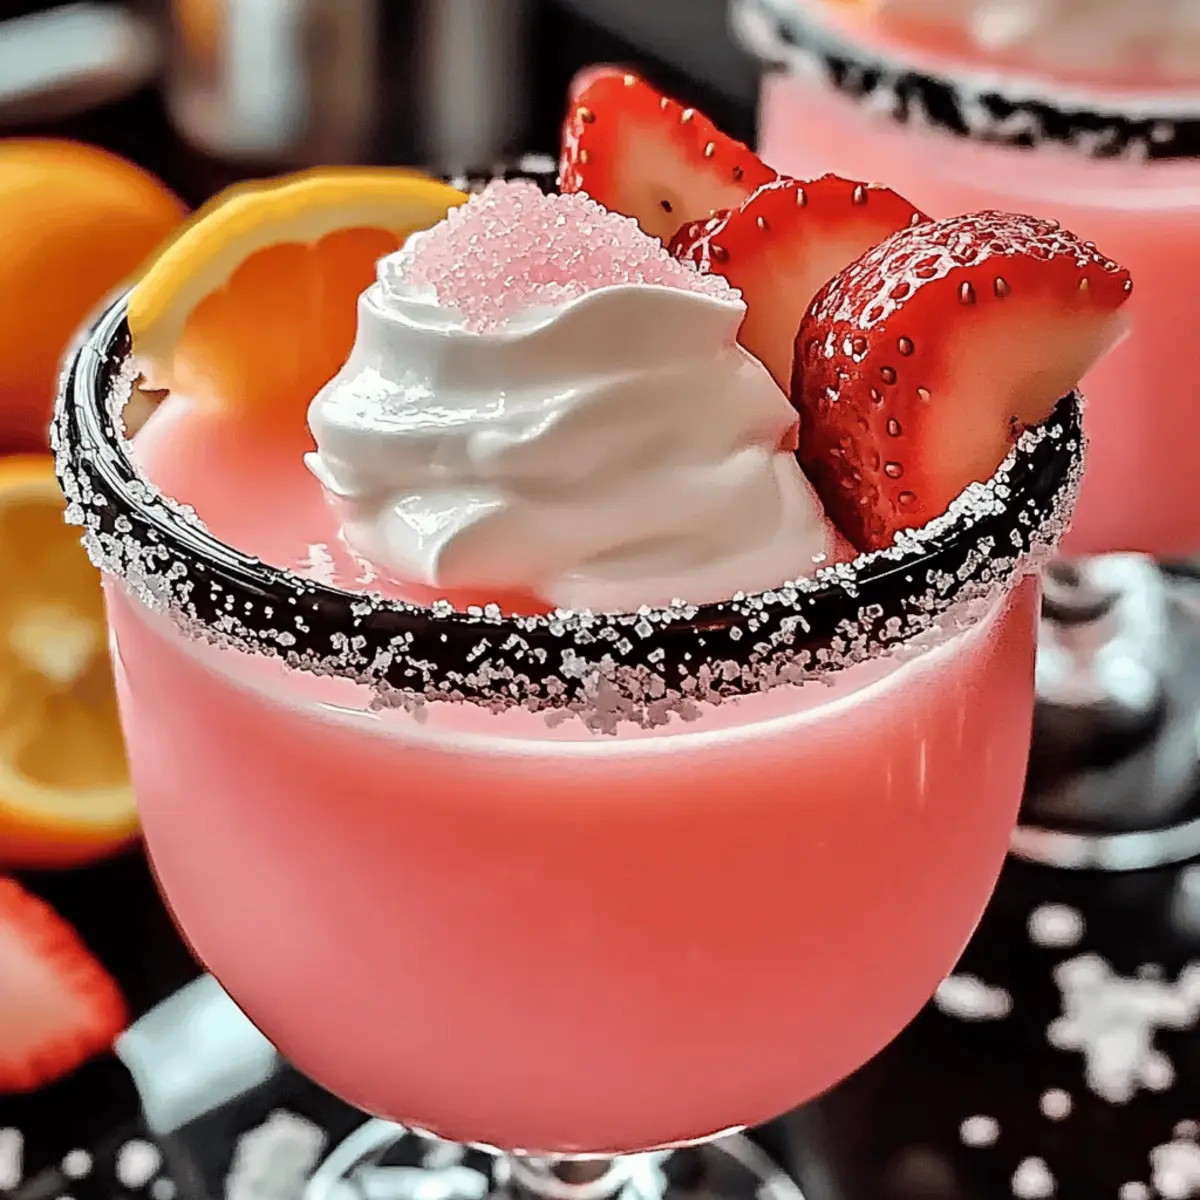
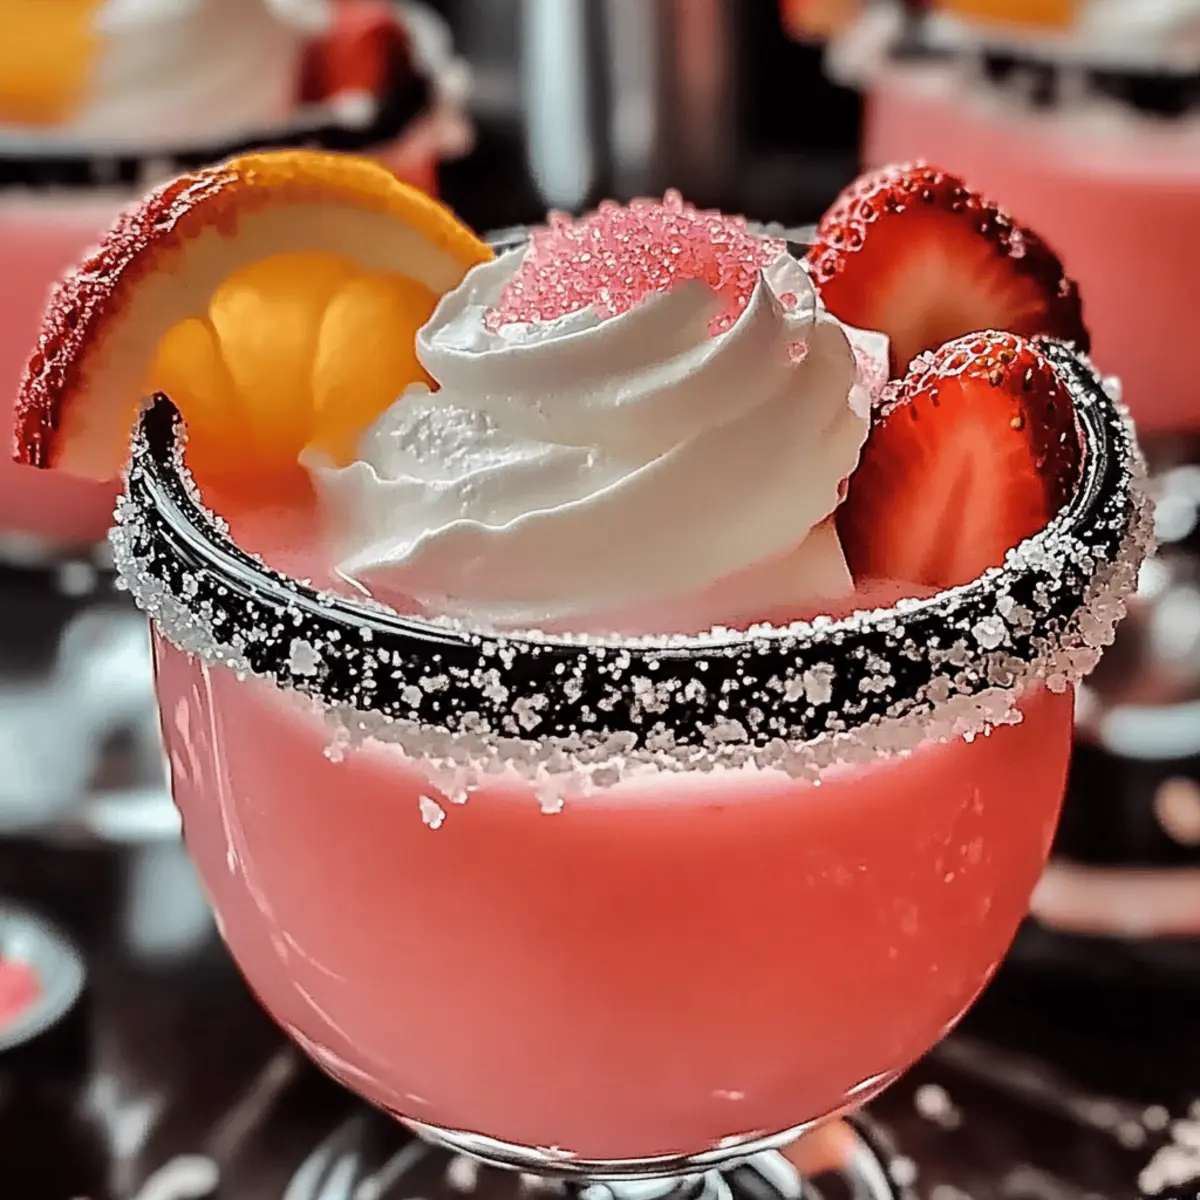
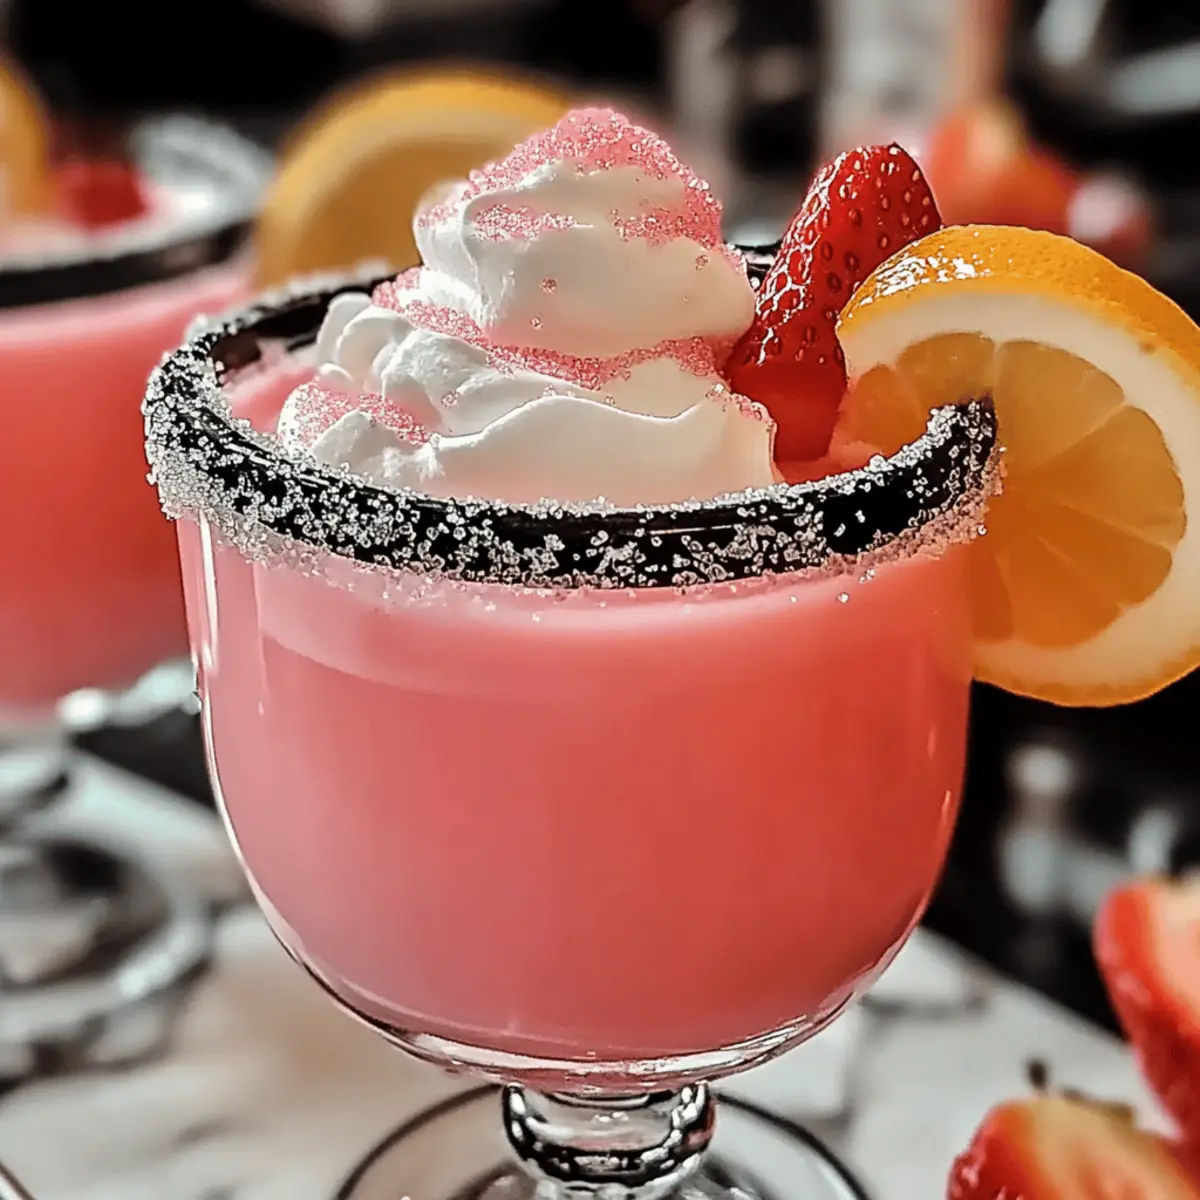
While the ingredients chill, prepare your glasses for serving. Dampen the rims with a bit of lemon juice, then dip them into pink sanding sugar, creating a sweet and sparkly border. This fun step adds visual appeal to your Pink Witch Punch and sets the festive mood for your gathering.

Step 3: Mix the Base
In a large punch bowl, combine the chilled pink lemonade and cranberry juice. Using a large spoon, stir the mixture gently for about 30 seconds until well blended. The beautiful pink hue will emerge, signaling that your punch base is ready for the next step. Keep the bowl nearby for serving later!

Step 4: Add Ginger Ale
Now it's time to add the bubbly ginger ale! Slowly pour it into the punch bowl while gently stirring for 15-20 seconds. This helps maintain the carbonation and prevent any overflow of bubbles. The fizzy texture of your Pink Witch Punch will make it even more refreshing and lively!

Step 5: Garnish
Enhance the look and taste of your Pink Witch Punch by adding optional whipped topping, sprinkling a bit of edible glitter for sparkle, and layering in sliced fruits like strawberries, oranges, or lemons. These additions not only beautify your punch but also infuse delightful flavors into every glass.

Step 6: Serve
Carefully ladle the mixed Pink Witch Punch into your prepared glasses, filling them about three-quarters full. Make sure to serve immediately to keep the fizz alive. Watch as your guests smile with delight, eager to indulge in the enchanting and refreshing drink you’ve created.

Make Ahead Options

These Enchanting Pink Witch Punch preparations are perfect for busy home cooks looking to save time without sacrificing flavor! You can prepare the punch base (pink lemonade and cranberry juice) up to 3 days in advance. Simply mix these two ingredients and store them in an airtight container in the refrigerator to maintain their refreshing taste. To keep it fizzy, wait to add the ginger ale until just before serving. You can also freeze pink lemonade and cranberry juice in ice cube trays for up to 2 months for quick flavor-enhanced ice cubes. This way, you’ll have a stunning and magical drink ready to impress your guests without any last-minute effort!

What to Serve with Enchanting Pink Witch Punch

Sip on the magic of this vibrant, fizzy punch while indulging in delightful pairings that enhance your festive gatherings.

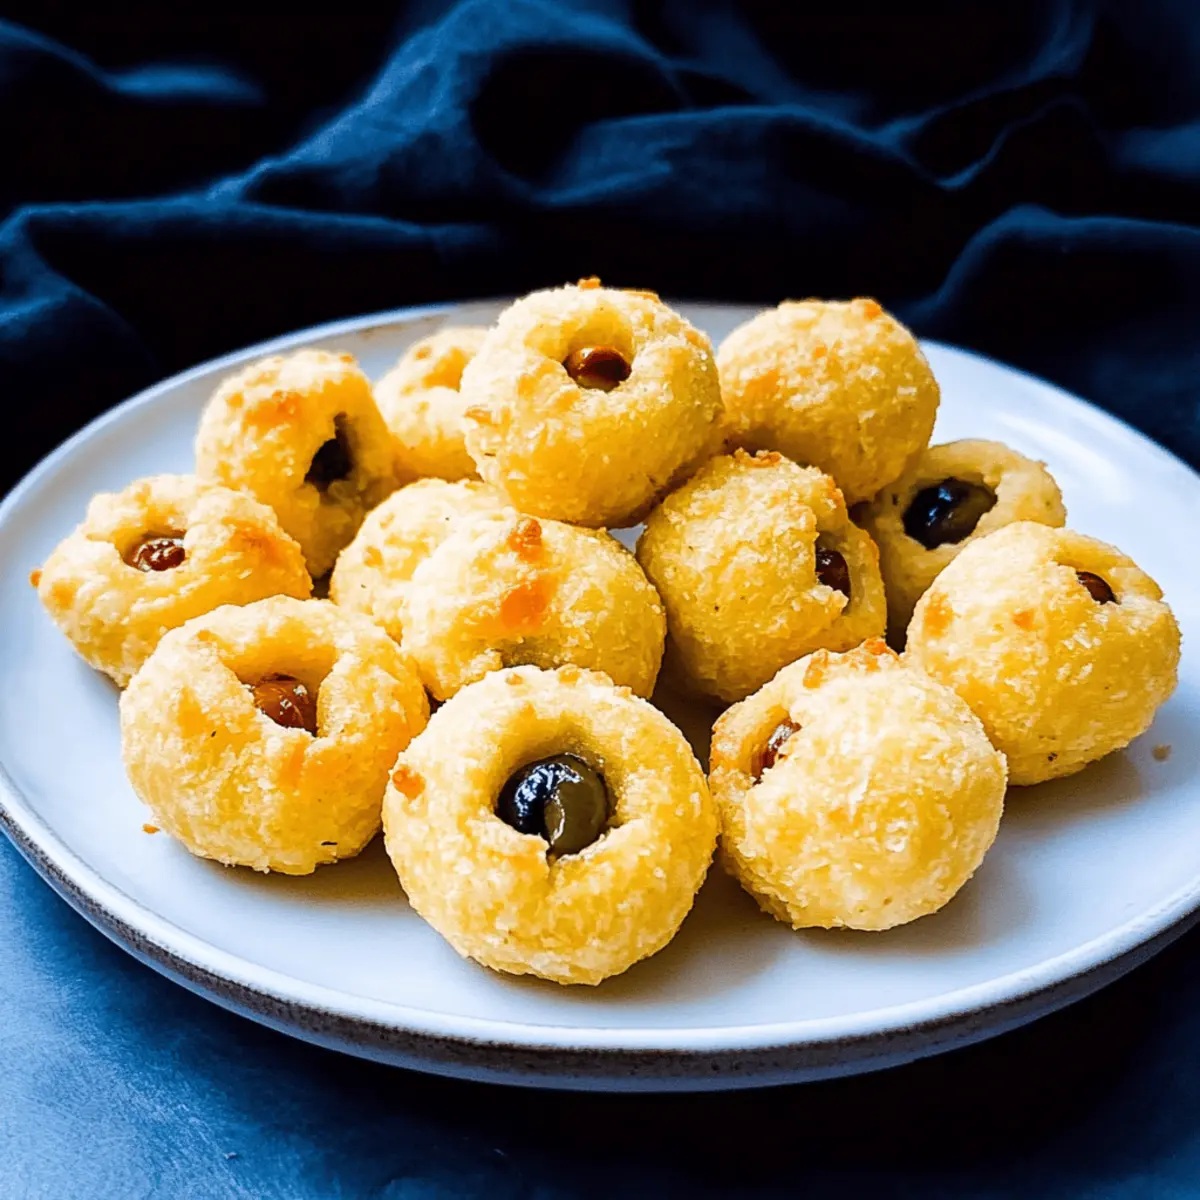
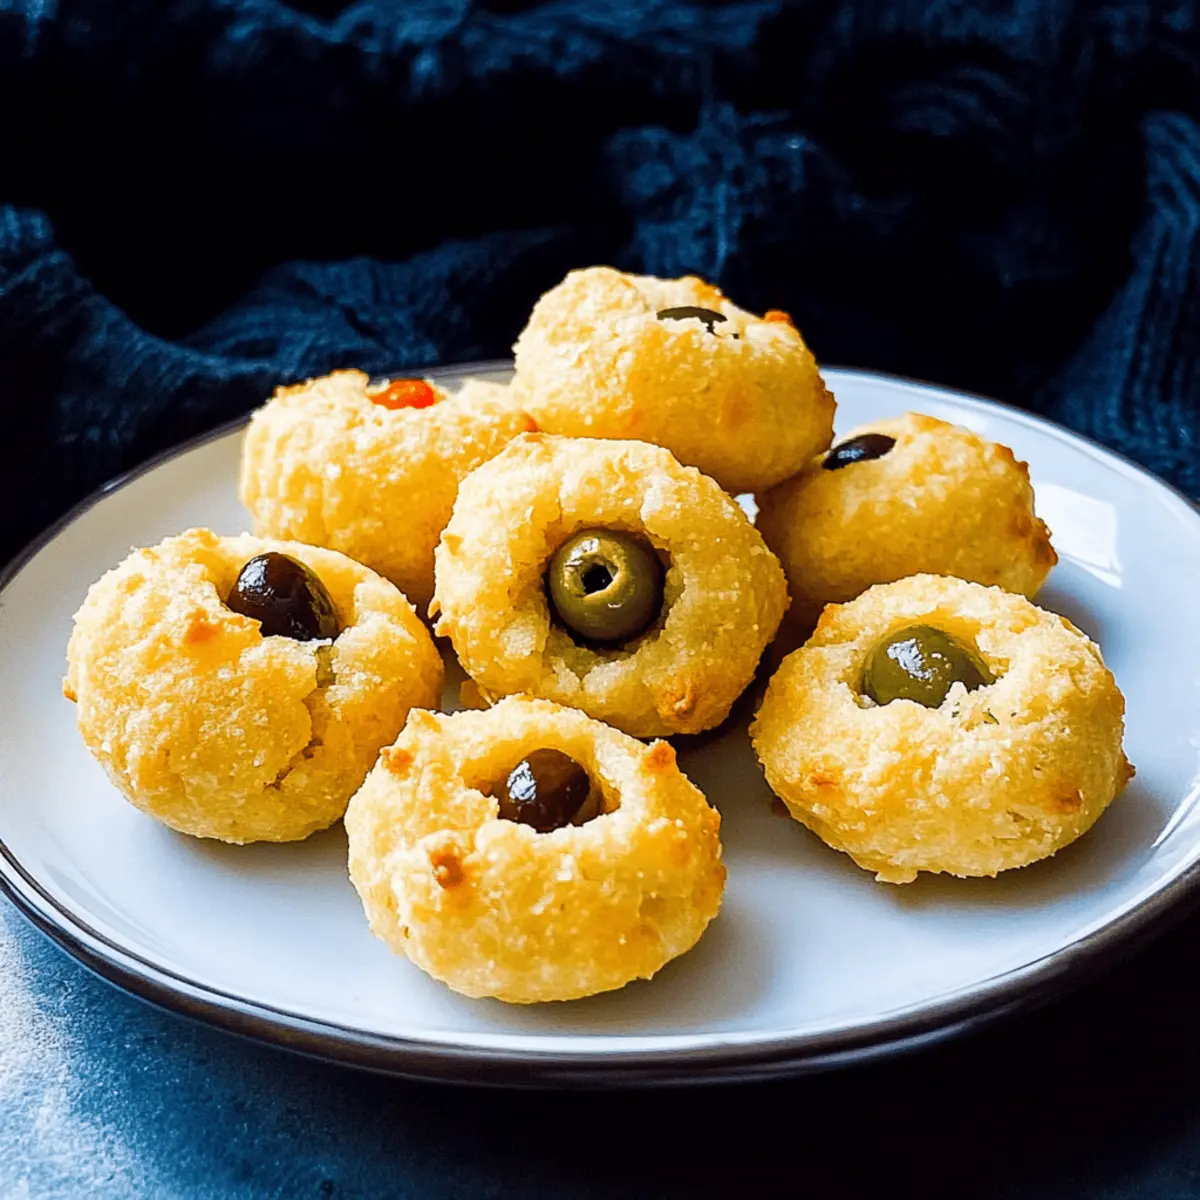
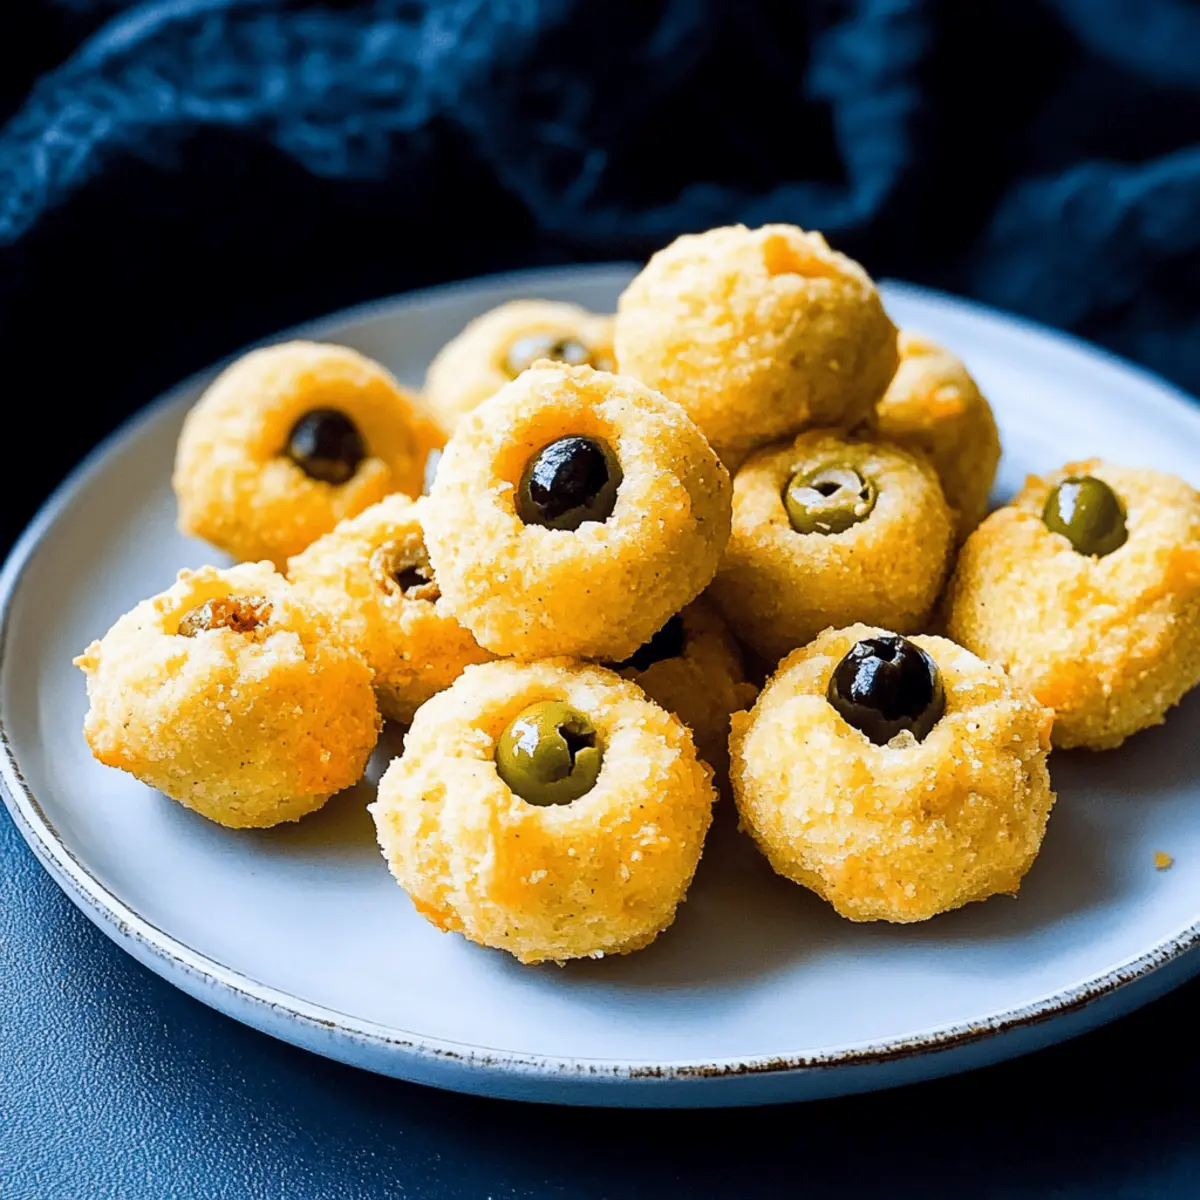
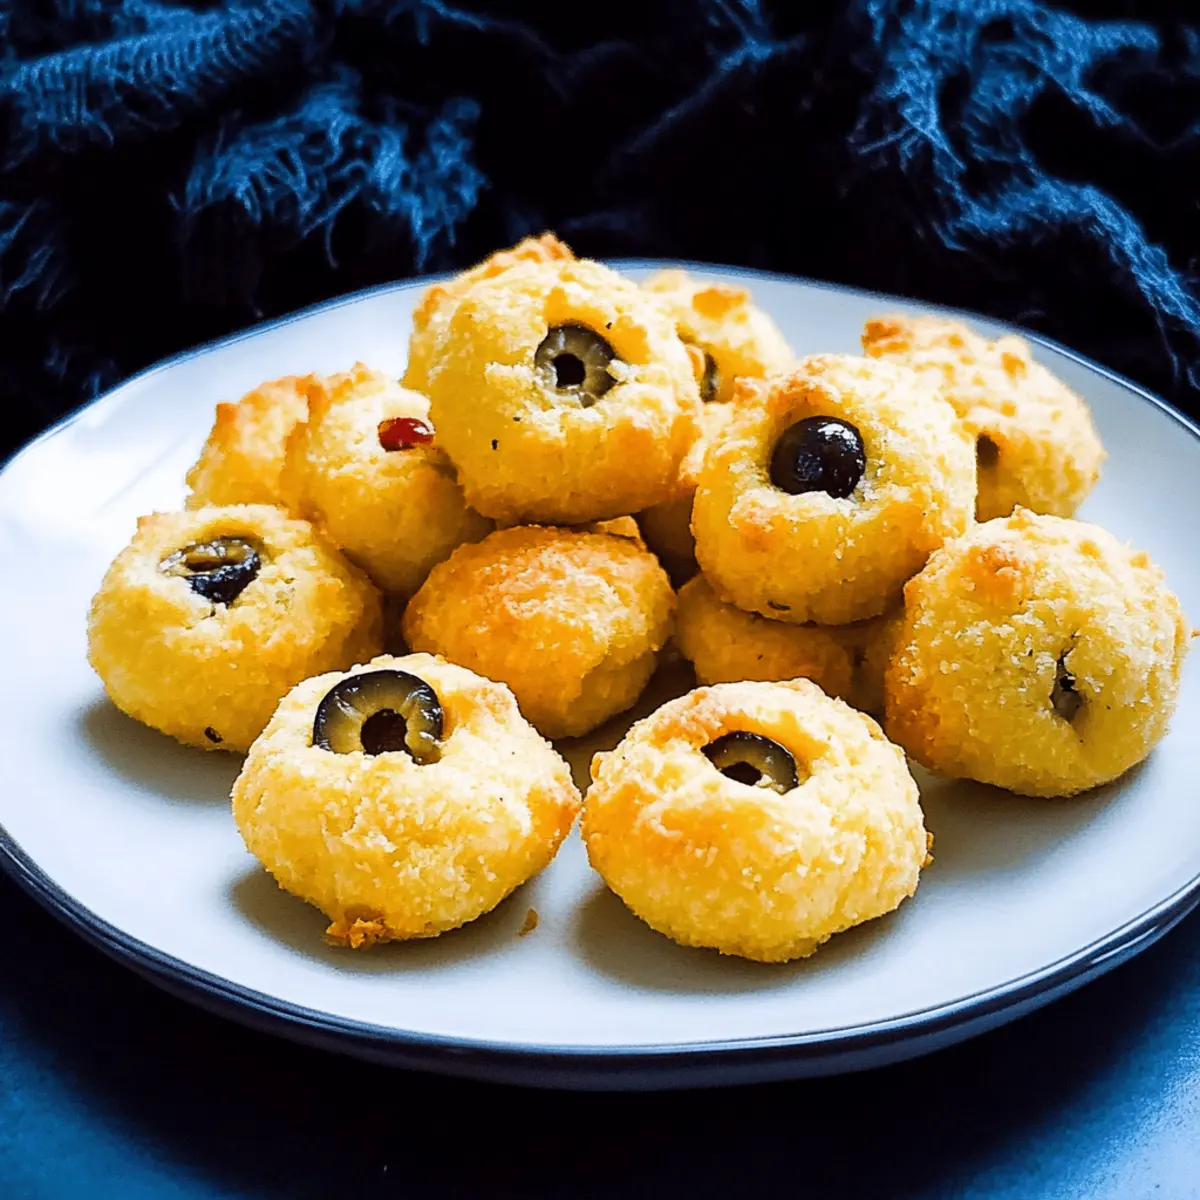
  • Cheesy Thumbprint Appetizers: These savory bites provide a satisfying contrast to the sweet notes in your Pink Witch Punch. Their creamy texture is sure to be a crowd-pleaser.

  • Fruity Skewers: Bright pieces of fresh fruit on skewers not only echo the lively colors of the punch but also add a refreshing, juicy element to your spread. They are easy to grab and enjoy!

  • Halloween Cupcake Pops: Sweet, festive treats that mirror the enchanting spirit of the punch. Their whimsical appearance will capture the hearts of both kids and adults alike, making your event memorable!

  • Savory Mini Quiches: These cute bite-sized quiches offer a delicious savory option, balancing out the sweetness of the Pink Witch Punch and providing hearty sustenance for all those fun festivities!

  • Sparkling Water with Fruit: For those who may prefer a lighter beverage, offering sparkling water infused with seasonal fruits can complement the punch beautifully, adding a refreshing twist.

  • Chocolate-Dipped Pretzels: A delightful mix of salty and sweet, these treats are the perfect crunchy accompaniment to your drink, enhancing the flavor experience while adding fun texture.

  • Ghostly Marshmallow Treats: Soft and chewy, these mini marshmallow snacks evoke playful Halloween vibes, making them ideal companions to your enchanting punch. They're simple to make and fun to eat!

  • Cranberry and Orange Salad: A crisp, tangy salad echoes the flavors in the punch, adding a fresh, zesty note to balance your menu while keeping the festive theme alive.

  • Non-Alcoholic Sparkling Cider: Offer a sophisticated yet kid-friendly drink choice that pairs seamlessly with the Pink Witch Punch, ensuring everyone feels included in the toasts and celebrations!

Pink Witch Punch Variations & Substitutions

Feel free to sprinkle some creativity into your punch and make it truly your own!

  • Dairy-Free: Substitute whipped topping with coconut whipped cream to keep it light and vegan-friendly. Your guests won't even miss the dairy!
  • Flavor Booster: Add a splash of orange juice for an extra citrus kick or use blended berry puree in place of some pink lemonade for a rich fruitiness. The versatility in flavors can lead to delightful surprises.
  • Spicy Twist: For a more adult-friendly version, replace ginger ale with ginger beer for a spicier touch, or try adding club soda or lemon-lime soda for a lighter fizz. This twist can ignite some exciting conversations at your gathering!
  • Frozen Fruit Ice Cubes: Freeze chunks of fruit like strawberries or oranges into ice cubes to keep your punch chilled and add vibrant pops of color and flavor. Not only will they look beautiful, but they’ll keep your drink flavorful too.
  • Herbal Infusion: Infuse your punch with fresh mint or basil for a refreshing twist. This unexpected addition can awaken the senses and make your drink even more enchanting.
  • Less Sweet: Opt for unsweetened cranberry juice and diet ginger ale to cut down on sugar, making it a great choice for those watching their intake without sacrificing flavor.
  • Garnish Creativity: Experiment with different fruits as garnishes, such as kiwis or pomegranates, to introduce new textures and tastes to your Pink Witch Punch. A colorful arrangement can turn your drink into a stunning centerpiece!
  • Customized Sweetener: If you're looking for alternative sweetness, consider using stevia or agave syrup to accommodate various dietary preferences, ensuring everyone at the table can enjoy this festive drink!

Hosting a party soon? Pair your enchanted punch with snacks like Cheesy Thumbprint Appetizers or Fruity Skewers for even more fun! Enjoy mixing and matching to create your perfect Pink Witch Punch!

Expert Tips for Pink Witch Punch

• Chill Ingredients Well: Ensure all your liquids are thoroughly chilled before mixing; this enhances the refreshing taste of your Pink Witch Punch.

• Add Ginger Ale Last: To maintain the fizz, add ginger ale just before serving. Mixing it in too early can lead to a flat punch.

• Control Sweetness: Use unsweetened cranberry juice and diet ginger ale to reduce sugar content and make your punch less sweet.

• Be Creative with Garnishes: Feel free to incorporate various fruits or edible glitter, but don't let them overpower the refreshing taste of your Pink Witch Punch.

• Serve Immediately: For the best bubbly experience, serve the punch right after preparation to keep its delightful effervescent quality.

• Make-ahead Magic: Prepare your punch base and store it in the fridge for up to 3 days for easy serving; just add ginger ale before drinking!

Storage Tips for Pink Witch Punch

  • Fridge: Store any leftover Pink Witch Punch in an airtight container in the refrigerator for up to 3 days. Give it a gentle stir before serving to reinvigorate the flavors.
  • Freezer: For longer-term storage, freeze the pink lemonade and cranberry juice in ice cube trays for up to 2 months. Use these cubes to chill future servings of your punch without diluting it.
  • Reheating: While this drink is best served cold, if you want a warm version, gently heat the ingredients and enjoy as a cozy beverage! Just note, it will lose its fizzy charm.

Pink Witch Punch Recipe FAQs

How do I choose the right ingredients for my Pink Witch Punch?
Absolutely! For an enchanting Pink Witch Punch, ensure your ginger ale is fresh and fizzy for that perfect sparkle. When selecting pink lemonade, look for brands without artificial flavors or colors; you can also make your own by mixing regular lemonade with a splash of cranberry or raspberry juice. For cranberry juice, opt for unsweetened varieties if you're mindful of sugar content.

What is the best way to store leftover Pink Witch Punch?
After your gathering, you can store any leftover Pink Witch Punch in an airtight container in the refrigerator for up to 3 days. Just remember to give it a gentle stir before serving again to revive its refreshing flavor. If you've kept the ginger ale separate, add it back just before serving for that delightful fizz!

Can I freeze ingredients for later use in the Pink Witch Punch?
Absolutely! For longer-term storage, freeze your pink lemonade and cranberry juice in ice cube trays for up to 2 months. When you’re ready to whip up another batch of Pink Witch Punch, simply drop a couple of these flavored ice cubes into your pitcher to cool your drink without watering it down.

What should I do if my punch isn’t bubbly enough?
If your Pink Witch Punch lacks the desired fizziness, check how you added your ginger ale; remember to pour it in slowly and mix gently right before serving to maintain carbonation. If it's already combined, try adding more chilled ginger ale to your batch and serve immediately to reinstate that fizzy goodness!

Can I make this festive drink suitable for my kids and guests with allergies?
Very much so! The Pink Witch Punch is naturally kid-friendly, but always double-check the labels on your ingredients for any allergens, especially if serving guests with dietary restrictions. If you're catering for those with a sensitivity to gluten or certain dyes, choose gluten-free ginger ale and natural food colorings to keep everyone safe while they enjoy this refreshing treat!

Pink Witch Punch

Delightful Pink Witch Punch: A Refreshing Festive Treat

Experience the joy of Pink Witch Punch, a vibrant and customizable drink perfect for festive gatherings.
Print Recipe Pin Recipe
Prep Time 15 minutes mins
Chilling Time 2 hours hrs
Total Time 2 hours hrs 15 minutes mins
Servings: 8 cups
Course: Drinks
Cuisine: American
Calories: 90
Ingredients Equipment Method Nutrition Notes

Ingredients
  

For the Punch
  • 2 liters Ginger Ale Can substitute with diet ginger ale for lower calories.
  • 6 cups Pink Lemonade Can use regular lemonade mixed with cranberry or raspberry juice.
  • 2 cups Cranberry Juice Opt for unsweetened to reduce sugar content.
For Creamy Decoration
  • 1 cup Whipped Topping Adds creaminess and cheer.
For Festive Touch
  • 1 tablespoon Edible Pink Glitter Use sparingly for sparkle.
  • 1 cup Pink Sanding Sugar Use for rimming glasses with lemon juice.
For Chilling
  • 4 cups Ice Use ice cubes made from pink lemonade or cranberry juice.
For Garnishing
  • 1 cup Sliced Fruit Can include strawberries, oranges, or lemons.

Equipment

  • Large punch bowl
  • Serving Glasses
  • ice cube trays

Method
 

Preparation Steps
  1. Chill Ingredients: Place pink lemonade, ginger ale, and cranberry juice in the refrigerator for 1-2 hours.
  2. Rim the Glasses: Dampen the rims with lemon juice and dip into pink sanding sugar.
  3. Mix the Base: In a large punch bowl, combine pink lemonade and cranberry juice. Stir gently for about 30 seconds until well blended.
  4. Add Ginger Ale: Slowly pour the ginger ale into the punch bowl while gently stirring for 15-20 seconds.
  5. Garnish: Add whipped topping, edible glitter, and sliced fruits to enhance flavor and appeal.
  6. Serve: Ladle the Pink Witch Punch into prepared glasses, filling them about three-quarters full.

Nutrition

Serving: 1cupCalories: 90kcalCarbohydrates: 22gSodium: 15mgPotassium: 50mgSugar: 20gVitamin C: 25mg

Notes

Chill all ingredients well and serve immediately for the best bubbly experience. You can prepare the punch base ahead of time and store it in the fridge for up to 3 days; just add ginger ale before serving.

Tried this recipe?

Let us know how it was!

Spooky Black Halloween Milkshake: A Fun Treat for Kids

October 4, 2025 by Grace Snow Leave a Comment

As I stirred the bubbling cauldron of creativity in my kitchen, I couldn’t help but smile at the thought of Halloween treats that go beyond just candy. Enter the Spooky Black Halloween Milkshake, a delightful concoction that adds a delicious twist to your spooky festivities. This nonalcoholic delight boasts a striking black hue that’s sure to enchant guests of all ages and bring a bit of whimsy to your gatherings. Not only is it incredibly quick and easy to whip up, but it’s also highly customizable, allowing everyone to add their favorite toppings for a personal touch. Perfect for kids' parties and themed dinners, this milkshake sets the stage for a memorable Halloween treat. Are you ready to dive into this creamy, sweet adventure?

Why is this milkshake perfect for Halloween?

Simplicity Meets Fun: This Spooky Black Halloween Milkshake is a breeze to make, combining just a few ingredients for a quick, delicious treat.

Eye-Catching Appeal: Its striking black color and playful toppings create a fun visual that’s perfect for Halloween celebrations, making it a hit with kids and adults alike.

Endless Customizations: You can easily adapt this recipe with your favorite flavors and toppings, from chocolate ice cream to colorful sprinkles. Need more inspiration? Check out our Sweet Potatoes Black for delightful pairings!

Interactive Fun: Set up a toppings bar for guests to personalize their shakes, turning dessert time into a memorable experience.

Seasonal Delight: This nonalcoholic drink captures the essence of Halloween, making it a must-have for seasonal festivities!

Spooky Black Halloween Milkshake Ingredients

For the Milkshake

  • Vanilla Ice Cream – The creamy base that provides sweetness; opt for dairy-free for a vegan alternative.
  • Milk – Adds fluidity; whole or 2% milk recommended for a richer consistency.
  • Black Gel Food Coloring – Creates the dramatic black hue; substitute with food-grade activated charcoal for a natural twist.
  • Vanilla Extract – Enhances flavor; no need for substitutions, although imitation vanilla can suffice in a pinch.

For the Toppings

  • Whipped Cream – Adds a fluffy texture and sweetness; consider dairy-free options for a vegan touch.
  • Black and Orange Sprinkles – Festive and fun, these sprinkles bring a playful touch to your milkshake.
  • Crushed Chocolate Cookies – Provides extra texture and chocolate flavor; swap with similar or gluten-free cookies if needed.
  • Halloween-themed Candy – Optional candies like gummy worms or candy eyeballs can elevate the spooky fun.
  • Black Straws or Spoons – Perfect for serving and enhances the overall presentation.

This Spooky Black Halloween Milkshake will surely be a showstopper at your Halloween gathering!

Step‑by‑Step Instructions for Spooky Black Halloween Milkshake

Step 1: Blend the Base
In a blender, combine 4 cups of vanilla ice cream, 1 cup of whole milk, 1 teaspoon of vanilla extract, and 1 teaspoon of black gel food coloring. Blend on medium speed for about 30 seconds until the mixture is smooth and creamy. You want a thick yet pourable consistency, so add more food coloring if a richer black hue is desired.

Step 2: Adjust Consistency
Taste the milkshake, and if you'd like it thicker, slowly add another scoop of vanilla ice cream and blend again for 15 seconds. Alternatively, if it's too thick, pour in a splash of milk until you reach your desired consistency. This step ensures your Spooky Black Halloween Milkshake is just right for sipping!

Step 3: Chill Your Glasses
While adjusting the consistency, prepare your serving glasses by chilling them in the freezer for about 10 minutes. Chilled glasses help maintain the shake's temperature and create a refreshing experience for your guests. Once ready, remove them from the freezer and set them aside.

Step 4: Pour and Top It Off
Carefully pour the blended mixture into your chilled glasses, filling them about three-quarters full. Now comes the fun part: top each milkshake with a generous swirl of whipped cream, creating a fluffy mountain atop each glass. The contrast of the whipped cream against the black shake is visually striking!

Step 5: Add Festive Toppings
Sprinkle a handful of black and orange sprinkles onto the whipped cream for a festive touch that screams Halloween. Next, layer on some crushed chocolate cookies for texture and extra flavor. Don’t forget to add your favorite Halloween-themed candy, such as gummy worms or candy eyeballs, to really make your Spooky Black Halloween Milkshake a showstopper!

Step 6: Serve with Style
Lastly, insert black straws or spoons into each glass for easy sipping and a fun presentation. Serve these delightful treats immediately to friends and family, enjoying the spooky atmosphere they create. Your Spooky Black Halloween Milkshake is now ready to bring smiles and spooky vibes to your celebration!

What to Serve with Spooky Black Halloween Milkshake?

Indulging in a creamy, whimsical delight, this Halloween milkshake pairs perfectly with a variety of treats to enhance your spooky celebration.

  • Ghoulish Halloween Cupcakes: These colorful cupcakes add a sweet touch, with decorations that evoke the spirit of Halloween.

  • Crispy Pumpkin Fries: The savory crunch of pumpkin fries contrasts beautifully with the milkshake's sweetness, ensuring every bite is a delightful surprise.

  • Chocolate-Dipped Pretzels: The salty-sweet combination creates a fun texture that complements the rich flavors of the milkshake.

  • Ghostly Fruit Kebabs: Fresh fruits on a stick, like strawberries and bananas, add a refreshing pop of color and healthiness to offset the indulgent shake.

  • Monster Cheese Plate: A selection of cheeses with Halloween-themed crackers or garnishes provides a savory contrast to the dessert while being a visually appealing spread.

  • Spooky Popcorn: Drenched in dark chocolate and sprinkled with festive candies, popcorn offers a delightful crunch alongside your milkshake.

  • Black Velvet Brownies: Rich and fudgy brownies add a decadent element, complimenting the milkshake’s texture with every bite.

  • Fruit Punch Mocktail: An equally festive drink, a refreshing fruit punch can cleanse the palate and keep the festive spirit alive!

Embrace the Halloween season by pairing these delightful options with your Spooky Black Halloween Milkshake for an unforgettable gathering.

Make Ahead Options

These Spooky Black Halloween Milkshake preparations are perfect for busy cooks seeking time-saving solutions! You can pre-scoop the vanilla ice cream into serving glasses and store them in the freezer for up to 24 hours. Additionally, you can mix the milk, vanilla extract, and food coloring and refrigerate this mixture in an airtight container for up to 3 days. When you're ready to serve, simply blend the chilled mixture with the frozen ice cream until smooth and creamy. This way, you can create your delicious milkshake with minimal effort while ensuring it remains just as tasty and delightful for your Halloween festivities!

Spooky Black Halloween Milkshake Variations

Feel free to let your imagination run wild with these delightful twists on the classic milkshake!

  • Chocolate Ice Cream: Swap vanilla for chocolate ice cream to add a rich, indulgent depth that chocolate lovers will adore.

  • Dairy-Free Delight: Use almond or coconut milk along with dairy-free ice cream for a wholesome vegan option without sacrificing taste.

  • Candy Corn Twist: Blend orange sherbet with vanilla ice cream for a cheerful, candy corn-inspired version that’s sure to surprise your guests!

  • Galaxy Swirl: Combine black and purple milkshakes for a stunning galaxy effect. Just blend in a few tablespoons of blueberry flavored yogurt to add a pop of color.

  • Nutty Flavor: Stir in a spoonful of almond or hazelnut spread to the milkshake base for a deliciously nutty flavor that brings new life to your treat!

  • Spicy Kick: For the bold, a pinch of cayenne pepper or a few drops of hot sauce can add an unexpected kick to your spooky shake, perfect for adventurous palates!

  • Cheesecake Cream: Fold in some cheesecake-flavored yogurt or cream cheese for a unique, creamy texture that will leave everyone wanting more.

  • Colorful Sprinkles: Instead of just black and orange, introduce rainbow sprinkles for a festive look, making each sip a delightful surprise!

For even more creative ideas, consider trying our Blackberry Crisp Amp which showcases the beauty of seasonal ingredients or pair it with our tasty Sweet Potatoes Black dish for a complete Halloween feast. Enjoy your spooky culinary adventure!

Expert Tips for Spooky Black Halloween Milkshake

  • Color Care: Use gel food coloring: It yields a vibrant black hue compared to liquid options. This ensures your milkshake stands out during the festivities.
  • Blend Smartly: Gradually adjust ingredients: Instead of overdoing it, add more ice cream or milk slowly to achieve your desired consistency for the perfect spooky black Halloween milkshake.
  • Chill for Success: Pre-chill glasses: Keeping your serving glasses in the freezer means longer-lasting cold shakes—no one wants a lukewarm treat at a Halloween party!
  • Topping Fun: Create a toppings bar: Let guests customize their milkshakes with toppings of their choice. It adds excitement and personal flair to each delightful sip!
  • Safety First: Ensure food-grade activated charcoal: If opting for this natural alternative, always verify it’s safe for edible use to keep your spooky recipes worry-free.

How to Store and Freeze Spooky Black Halloween Milkshake

Fridge: Store any leftover milkshake in an airtight container for up to 2 days. Stir well before serving as it may separate.

Freezer: Freeze leftover milkshake in a freezer-safe container for up to 1 month. Allow it to thaw slightly before enjoying, and stir to regain creaminess.

Reheating: As a milkshake, it’s best enjoyed cold. If frozen, let it sit at room temperature for a few minutes before blending again for a refreshing sip.

Make-Ahead: Consider pre-scooping the ice cream into glasses and storing them in the freezer. Blend the remaining ingredients when ready to serve your Spooky Black Halloween Milkshake!

Spooky Black Halloween Milkshake Recipe FAQs

How do I select the right vanilla ice cream for this milkshake?
Absolutely! For the best results, choose a high-quality vanilla ice cream for a creamy and sweet base. If you want a vegan option, look for dairy-free ice cream made from coconut or almond milk. This way, everyone can enjoy the festive treat!

What’s the best way to store leftovers from my milkshake?
Very easy! Store any leftover Spooky Black Halloween Milkshake in an airtight container in the fridge for up to 2 days. Just give it a good stir before serving, as it may separate. If you prefer to freeze it, use a freezer-safe container and keep it for up to 1 month. Let it thaw slightly before re-blending for a creamy texture.

Can I freeze my Spooky Black Halloween Milkshake? If so, how?
Certainly! To freeze, pour any leftover milkshake into a freezer-safe container and freeze it for up to 1 month. When you're ready to enjoy it again, allow it to thaw at room temperature for about 10-15 minutes, then stir well to regain some creaminess. This method will bring back the delightful texture you love!

Why did my milkshake turn out too thick/thin?
No worries! If your Spooky Black Halloween Milkshake is too thick, gradually add a splash of milk and blend until you reach your desired consistency. Conversely, if it's too thin, you can thicken it up by adding another scoop of ice cream. Just blend for a few seconds until perfectly smooth. It’s all about adjusting to your preference!

Are there any dietary considerations for this milkshake?
Absolutely! This recipe can be easily adjusted for dietary restrictions. For a dairy-free option, simply use dairy-free ice cream and almond or soy milk. Always check the ingredient labels for allergens such as gluten or nuts, especially in toppings like cookies and candy. Your Spooky Black Halloween Milkshake can be inclusive for all guests!

Can I use activated charcoal instead of food coloring?
Yes, you can! Make sure to use food-grade activated charcoal if you want a natural coloring alternative. Start by adding a small amount and then gradually increase until you achieve your desired black hue. Just be cautious and ensure it's safe for consumption. Enjoy experimenting with this spooky twist!

Spooky Black Halloween Milkshake

Spooky Black Halloween Milkshake: A Fun Treat for Kids

Spooky Black Halloween Milkshake is a delightful and nonalcoholic treat that adds a delicious twist to Halloween festivities.
Print Recipe Pin Recipe
Prep Time 10 minutes mins
Total Time 10 minutes mins
Servings: 4 milkshakes
Course: Dessert
Cuisine: American
Calories: 350
Ingredients Equipment Method Nutrition Notes

Ingredients
  

For the Milkshake
  • 4 cups Vanilla Ice Cream Opt for dairy-free for a vegan alternative.
  • 1 cup Milk Whole or 2% milk recommended for a richer consistency.
  • 1 teaspoon Black Gel Food Coloring Substitute with food-grade activated charcoal for a natural twist.
  • 1 teaspoon Vanilla Extract Imitation vanilla can suffice in a pinch.
For the Toppings
  • 1 cup Whipped Cream Consider dairy-free options for a vegan touch.
  • 1 cup Black and Orange Sprinkles Festive and fun.
  • 1 cup Crushed Chocolate Cookies Swap with similar or gluten-free cookies if needed.
  • Halloween-themed Candy Optional candies like gummy worms or candy eyeballs.
  • Black Straws or Spoons Perfect for serving.

Equipment

  • Blender
  • freezer
  • Serving Glasses

Method
 

Step-by-Step Instructions
  1. In a blender, combine 4 cups of vanilla ice cream, 1 cup of whole milk, 1 teaspoon of vanilla extract, and 1 teaspoon of black gel food coloring. Blend on medium speed for about 30 seconds until the mixture is smooth and creamy.
  2. Taste the milkshake, and if you'd like it thicker, slowly add another scoop of vanilla ice cream and blend again for 15 seconds. Alternatively, if it's too thick, pour in a splash of milk until you reach your desired consistency.
  3. While adjusting the consistency, prepare your serving glasses by chilling them in the freezer for about 10 minutes.
  4. Carefully pour the blended mixture into your chilled glasses, filling them about three-quarters full. Top each milkshake with a generous swirl of whipped cream.
  5. Sprinkle a handful of black and orange sprinkles onto the whipped cream. Layer on some crushed chocolate cookies and add your favorite Halloween-themed candy.
  6. Insert black straws or spoons into each glass for easy sipping and serve immediately.

Nutrition

Serving: 1milkshakeCalories: 350kcalCarbohydrates: 45gProtein: 7gFat: 15gSaturated Fat: 9gPolyunsaturated Fat: 1gMonounsaturated Fat: 4gCholesterol: 50mgSodium: 150mgPotassium: 400mgFiber: 1gSugar: 30gVitamin A: 500IUCalcium: 200mgIron: 0.5mg

Notes

Store any leftover milkshake in an airtight container for up to 2 days or freeze for up to 1 month. Let frozen milkshake sit at room temperature for a few minutes before blending again for a refreshing sip.

Tried this recipe?

Let us know how it was!

Blackberry Cheesecake Pops: Easy No-Bake Delight for All

October 4, 2025 by Grace Snow Leave a Comment

As I stood in my kitchen, the scent of blackberry jam bubbling on the stovetop whisked me away to a sun-drenched orchard filled with plump, juicy berries. This inspired me to create my Forbidden Forest Blackberry Cheesecake Pops—a delightful no-bake treat that perfectly blends whimsy with flavor. With a creamy cheesecake base swirled with vibrant blackberries and coated in rich dark chocolate, these pops are a crowd-pleaser for both kids and adults. They’re not just quick to whip up; they’re also customizable, so whether you’re vegan, gluten-free, or just want to have some fun with flavors, there's a version for everyone. Imagine serving these enchanting treats at your next gathering, leaving everyone enchanted! Ready to dive into the magic of making these delightful Blackberry Cheesecake Pops? Let’s get started!

Why are Blackberry Cheesecake Pops irresistible?

Whimsical Presentation: These mesmerizing pops are not just treats; they are little pieces of art that add flair to any occasion.
No-Bake Convenience: Enjoy the ease of a no-bake dessert that lets you focus on fun time in the kitchen rather than lengthy preparations!
Customizable Options: Whether you're catering to dietary restrictions or just looking to switch things up, there are endless variations available, from vegan delights to gluten-free options.
Family Friendly: Kids and adults alike will be enchanted by the playful pop format and delicious flavors. They make dessert a delightful experience!
Quick to Prepare: With minimal ingredients and steps, you can whip these up easily, making them perfect for last-minute gatherings. Treat yourself with these pops or serve them alongside Watermelon Popsicles Blissful for an unforgettable dessert spread!

Blackberry Cheesecake Pops Ingredients

For the Cheesecake Base

  • Cream Cheese – Adds creaminess and structure to the cheesecake. Substitution: Vegan cream cheese for a dairy-free option.
  • Granulated Sugar – Sweetens the cheesecake base. Prep Note: Consider using a sugar substitute for a lower-calorie version.
  • Vanilla Extract – Enhances flavor depth in the cheesecake. No substitution necessary, but use pure extract for the best taste.
  • Whipped Topping – Contributes to the light texture. Substitution: Use coconut whipped cream for a dairy-free alternative.
  • Graham Cracker Crumbs – Provides the crust-like texture in the cheesecake. Substitution: Gluten-free graham crackers are available for those with dietary restrictions.

For the Blackberry Swirl

  • Blackberries – Adds tartness and vibrant color to the swirl. Substitution: Raspberries or strawberries can be used for different flavor profiles.
  • Lemon Juice – Balances sweetness and enhances blackberry flavor. No substitution necessary.

For the Coating

  • Dark Chocolate Melting Wafers – Coats the pops, adding richness. Substitution: Use dairy-free chocolate for the vegan version.
  • Edible Glitter – For decorative touch that adds whimsy. Sprinkles can be used as an alternative.

For Decoration (Optional)

  • Crushed Graham Crackers or Nuts – Optional for additional texture in decoration. No specific substitution needed.

Step-by-Step Instructions for Blackberry Cheesecake Pops

Step 1: Prepare Blackberry Swirl
In a medium saucepan over medium heat, combine blackberries, granulated sugar, and lemon juice. Cook for about 10 minutes, stirring occasionally, until the mixture has thickened and becomes syrupy. Remove from heat and let it cool. For a smoother texture, strain the mixture to remove seeds, if desired, and set aside half for marbling later in your Blackberry Cheesecake Pops.

Step 2: Make Cheesecake Base
In a large mixing bowl, beat the cream cheese and granulated sugar with an electric mixer until creamy and smooth, about 3 minutes. Gradually add the vanilla extract and whipped topping, mixing until fully incorporated. Gently fold in the graham cracker crumbs and half of the cooled blackberry swirl to create a beautiful marbled effect throughout the cheesecake mixture for your delightful Blackberry Cheesecake Pops.

Step 3: Shape Pops
Using a cookie scoop or your hands, form the cheesecake mixture into small balls, about 1 inch in diameter. Place them on a parchment-lined baking sheet for easy removal later. Insert a popsicle stick into each ball and freeze for at least 1 hour or until they are completely solid. This step is crucial to ensure the pops hold their shape when you coat them in chocolate.

Step 4: Coat in Chocolate
While the cheesecake pops are freezing, prepare a double boiler or a microwave-safe bowl to melt the dark chocolate melting wafers. Heat the chocolate in 30-second intervals, stirring in between, until completely melted and smooth. Once your pops are solid, remove them from the freezer and dip each one into the melted chocolate, letting any excess chocolate drip off back into the bowl.

Step 5: Decorate the Pops
While the chocolate coating on the pops is still soft, sprinkle with edible glitter or crushed graham crackers for added texture and whimsy. If desired, drizzle the remaining blackberry swirl over the pops for a stunning presentation. Return the decorated blackberry cheesecake pops to the freezer for 15-20 minutes to allow the chocolate to set completely before serving or enjoying this delightful treat.

How to Store and Freeze Blackberry Cheesecake Pops

Fridge: Keep your Blackberry Cheesecake Pops in an airtight container in the refrigerator for up to 3 days. This ensures they stay fresh and creamy for your enjoyment!

Freezer: For longer storage, freeze the pops without the chocolate coating in a single layer on a parchment-lined sheet for up to 1 month. Once frozen solid, transfer them to a zip-top bag.

Reheating: If frozen, let the pops thaw in the refrigerator for about 1 hour before serving, or enjoy them straight from the freezer for a refreshing treat!

Presentation: Remember, for the best presentation, wait to decorate your pops with glitters or toppings just before serving, ensuring they look as delightful as they taste!

Expert Tips for Blackberry Cheesecake Pops

  • Chill Properly: Ensure the cheesecake balls are completely frozen before dipping in chocolate. This prevents cracks in the coating and helps maintain their shape.

  • Right Temperature: Allow your melted chocolate to cool slightly before dipping the pops. This will help you achieve a smoother, more even coating on your Blackberry Cheesecake Pops.

  • Maximize Flavor: Use high-quality vanilla extract for the best flavor in your cheesecake base. You’ll be amazed at the difference it makes!

  • Don’t Skimp on Swirls: Reserve some of the blackberry swirl for marbling into the cheesecake mix. It will enhance both the taste and visual appeal of your pops.

  • Beautiful Presentation: Decorate with edible glitter just before serving to keep your Blackberry Cheesecake Pops looking whimsical and fresh.

Make Ahead Options

These Blackberry Cheesecake Pops are perfect for meal prep, allowing you to enjoy a delightful treat with minimal last-minute effort! You can prepare the cheesecake base and form the pops up to 24 hours in advance. Simply follow the initial steps to create the blackberry swirl, cheesecake mixture, and shape the pops; then freeze them until solid. To ensure the best quality, store the pops in an airtight container in the freezer. When you're ready to serve, coat them in chocolate and decorate as desired. In just a few minutes, you’ll have charming treats that are just as delicious as if made fresh!

What to Serve with Blackberry Cheesecake Pops

Indulge in a delightful dessert experience that perfectly balances sweet and tart flavors, brightening any gathering.

  • Creamy Vanilla Ice Cream: The velvety texture of ice cream complements the pops’ richness while providing a cool contrast.
  • Fresh Berry Salad: A medley of seasonal berries enhances the blackberry flavor, adding freshness and a colorful touch to your table.
  • Sparkling Lemonade: The bright and bubbly lemonade cuts through the cheesecake richness, bringing a refreshing zing to your palate.
  • Chocolate Dipped Strawberries: Tie in the chocolate theme with these classic treats, adding a decadent twist that chocolate lovers crave.
  • Coconut Whipped Cream: Light and fluffy, this topping adds a creamy coconut flavor that pairs delightfully with the berry-filled pops.
  • Pineapple Sorbet: Its tropical sweetness balances the tartness of blackberries, creating a harmonious dessert duo that’s bursting with flavor.
  • Mint Tea: A soothing cup of mint tea cleanses the palate and adds a refreshing herbal finish to your dessert experience.
  • Lemon Sorbet: This zesty option brightens up the plate while harmonizing beautifully with the blackberry notes in the pops.
  • Nuts & Dried Fruit Platter: A crunchy and chewy assortment adds texture, offering a savory counterpoint to the sweet pops.
  • Chocolate Milk: This nostalgic drink brings a comforting touch, perfect for kids and kids-at-heart to enjoy alongside their cheesecake pops.

Blackberry Cheesecake Pops Variations & Substitutions

Feel free to indulge your creativity and personalize your Blackberry Cheesecake Pops to suit your taste and dietary needs!

  • Berry Bliss: Swap blackberries for raspberries or strawberries for a refreshing twist. Each berry offers its own delightful flavor that dances on your palate.

  • Choco Delight: Use white chocolate or vibrant candy melts for a colorful coating. This playful change adds visual interest and a sugary crunch that kids will love!

  • Minty Freshness: Stir in a hint of mint extract to the cheesecake mix for a cool, refreshing flavor. Imagine each bite as a delightful breeze on a warm day!

  • Nutty Crunch: Incorporate finely crushed nuts into the cheesecake mixture for extra texture. The added crunch creates a lovely contrast with the creamy filling.

  • Vegan Swap: For a decadent yet dairy-free version, simply opt for all vegan ingredients. You won't miss a thing with this wonderfully creamy alternative!

  • Spiced Variation: Infuse your cheesecake base with warm spices like cinnamon or nutmeg. It's a cozy twist reminiscent of holiday treats that everyone will adore.

  • Gluten-Free Goodness: Replace traditional graham cracker crumbs with gluten-free options to ensure everyone can enjoy these pops without a worry. Flavor remains delicious and delightful!

  • Caramel Drizzle: For an extra indulgent touch, drizzle warm caramel sauce over the chocolate coating just before serving. This sweet addition creates a luscious flavor contrast.

Each customizable option ensures that you can create a unique version of these enchanting treats. Enjoying these delicious pops alongside Blackberry Crisp Amp or a batch of Watermelon Popsicles Blissful adds even more fun to your dessert lineup!

Blackberry Cheesecake Pops Recipe FAQs

What kind of blackberries should I use for the swirl?
Absolutely! Look for ripe blackberries that are plump and firm, free from dark spots or mushiness. Fresh berries will lend the best flavor and vibrant color to your cheesecake pops. If fresh blackberries aren't available, frozen ones can work too. Just make sure to thaw and drain excess moisture before cooking.

How should I store leftover Blackberry Cheesecake Pops?
Keep your Blackberry Cheesecake Pops in an airtight container in the refrigerator for up to 3 days. This helps retain their creamy texture. If you're planning to keep them longer, I recommend storing them in the freezer without the chocolate coating for up to 1 month.

Can I freeze these pops for later?
Definitely! To freeze, shape your Blackberry Cheesecake Pops as instructed and arrange them in a single layer on a parchment-lined baking sheet. Freeze until solid, about 1-2 hours, then transfer them to a zip-top bag, squeezing out excess air. This method helps prevent freezer burn.

What if my chocolate coating cracks while dipping?
Very! To avoid cracks, be sure your cheesecake pops are well-frozen before dipping, and let the melted chocolate cool slightly to prevent it from being too hot. If cracking happens, you can dip them again after the first layer sets, which not only repairs cracks but also adds a thicker, smoother coating!

Can I make these pops dairy-free or gluten-free?
Absolutely! For a dairy-free version, substitute cream cheese and whipped topping with vegan alternatives and ensure that your dark chocolate is dairy-free too. To make them gluten-free, simply use gluten-free graham cracker crumbs. These pops are wonderfully adaptable for various dietary needs!

Can I add other flavors to the cheesecake base?
Very! Feel free to explore your flavor preferences. Adding mint extract for a refreshing twist or incorporating spices such as cinnamon for a cozy note can elevate these pops even further! The more the merrier when it comes to matching your personal taste with these delightful Blackberry Cheesecake Pops.

Blackberry Cheesecake Pops

Blackberry Cheesecake Pops: Easy No-Bake Delight for All

These Blackberry Cheesecake Pops are a delightful no-bake treat combining creamy cheesecake and vibrant blackberries.
Print Recipe Pin Recipe
Prep Time 15 minutes mins
Cook Time 10 minutes mins
Freezing Time 1 hour hr
Total Time 1 hour hr 25 minutes mins
Servings: 12 pops
Course: Dessert
Cuisine: American
Calories: 150
Ingredients Equipment Method Nutrition Notes

Ingredients
  

For the Cheesecake Base
  • 8 oz Cream Cheese Substitution: Vegan cream cheese for a dairy-free option.
  • 1/2 cup Granulated Sugar Consider using a sugar substitute for a lower-calorie version.
  • 1 tsp Vanilla Extract Use pure extract for the best taste.
  • 8 oz Whipped Topping Substitution: Use coconut whipped cream for a dairy-free alternative.
  • 1 cup Graham Cracker Crumbs Substitution: Gluten-free graham crackers are available.
For the Blackberry Swirl
  • 1 cup Blackberries Substitution: Raspberries or strawberries can be used.
  • 1 tbsp Lemon Juice
For the Coating
  • 1 cup Dark Chocolate Melting Wafers Substitution: Use dairy-free chocolate for the vegan version.
  • 1 tbsp Edible Glitter Sprinkles can be used as an alternative.
For Decoration (Optional)
  • Crushed Graham Crackers or Nuts No specific substitution needed.

Equipment

  • Medium saucepan
  • Mixing Bowl
  • Electric mixer
  • Parchment Paper
  • Popsicle sticks
  • Double boiler or microwave-safe bowl

Method
 

Step-by-Step Instructions
  1. In a medium saucepan over medium heat, combine blackberries, granulated sugar, and lemon juice. Cook for about 10 minutes, stirring occasionally, until the mixture has thickened and becomes syrupy. Remove from heat and let it cool. Set aside half for marbling later.
  2. In a large mixing bowl, beat the cream cheese and granulated sugar with an electric mixer until creamy and smooth, about 3 minutes. Gradually add the vanilla extract and whipped topping, mixing until fully incorporated. Fold in the graham cracker crumbs and half of the cooled blackberry swirl.
  3. Using a cookie scoop or your hands, form the cheesecake mixture into small balls, about 1 inch in diameter. Place them on a parchment-lined baking sheet. Insert a popsicle stick into each ball and freeze for at least 1 hour or until solid.
  4. Prepare a double boiler or microwave-safe bowl to melt the dark chocolate melting wafers. Heat in 30-second intervals, stirring in between, until completely melted and smooth. Dip each solid pops into the melted chocolate, letting excess drip off.
  5. While the chocolate coating is still soft, sprinkle with edible glitter or crushed graham crackers. Drizzle remaining blackberry swirl over the pops. Return to the freezer for 15-20 minutes to set.

Nutrition

Serving: 1popCalories: 150kcalCarbohydrates: 20gProtein: 2gFat: 8gSaturated Fat: 5gMonounsaturated Fat: 3gCholesterol: 25mgSodium: 50mgPotassium: 100mgFiber: 1gSugar: 10gVitamin A: 100IUVitamin C: 5mgCalcium: 30mgIron: 0.5mg

Notes

Ensure cheesecake balls are completely frozen before dipping in chocolate to prevent cracks. Use high-quality vanilla extract for best flavor.

Tried this recipe?

Let us know how it was!

Spooky Dunkaroo Dip: Creepy-Cool Treat for Halloween Fun

October 4, 2025 by Grace Snow Leave a Comment

As Halloween approaches, I find myself sensing a delightful blend of excitement and spookiness in the air. What better way to embrace the festive spirit than with a fun and easy treat like Spooky Dunkaroo Dip? This no-cook recipe is perfect for last-minute gatherings and is sure to delight everyone from tiny ghosts to grown-up goblins. With a creamy texture that spreads like a dream and a colorful presentation that brings joy to any table, this dip is both a crowd-pleaser and a customizable canvas for your creative culinary whims. Serve it with cookies, fruit, or whatever dippers your heart desires, and watch as it vanishes faster than a witch on a broomstick! Are you ready to dive into this spooky treat?

Why is Spooky Dunkaroo Dip a Must-Try?

Halloween Magic: This dip brings the festive spirit to life with its vibrant colors and playful toppings, making it an instant hit.

Easy and Quick: With no cooking required, you can whip up this delightful treat in just minutes, allowing you to enjoy more time with your loved ones.

Customizable Fun: Add your own flair! Swap in different cake mixes, toppings, or food colors to create a unique dip tailored to your taste or Halloween theme.

Family-Friendly: Kids and adults alike will adore this light, fluffy dip that delivers smiles all around. It’s perfect for parties or cozy evenings at home.

Dippers Galore: Whether you prefer cookies, fruit, or pretzels, this dip pairs beautifully with a variety of options. Consider trying it with graham crackers or mini marshmallows for added fun!

Don't miss out on this festive treat that brings joy and flavor to your Halloween celebration. Make it a part of your seasonal lineup, and check out our suggestions for Serving Suggestions to keep the fun rolling!

Spooky Dunkaroo Dip Ingredients

• Whip up this festive treat in no time!

For the Dip

  • White Cake Mix – Provides sweetness and structure; for added fun, use funfetti cake mix!
  • Greek Yogurt – Adds a creamy tanginess; substitute with vanilla yogurt for extra sweetness.
  • Whipped Topping – Contributes an irresistible fluffiness; make sure it’s thawed for the best results.
  • Purple Food Coloring – Enhances the dip’s spooky hue; swap in orange or green for a different Halloween vibe.

For the Toppings

  • Halloween Sprinkles – Add a playful touch for visual appeal; use seasonal themes to keep it festive.
  • Gummy Worms – A fun, creepy addition that kids will love; perfect for that Halloween touch!
  • Crushed Graham Crackers – Mix in for added texture, giving your dip a delightful crunch.

Now that you have everything you need, let's get ready to create a Spooky Dunkaroo Dip that will be the talk of the Halloween party!

Step‑by‑Step Instructions for Spooky Dunkaroo Dip

Step 1: Sift the Cake Mix
Begin by sifting 1 cup of white cake mix into a medium mixing bowl using a wire mesh sieve. This process, which takes about 2 minutes, will eliminate lumps and ensure a fluffy texture in your Spooky Dunkaroo Dip. Make sure to gently tap the sieve to facilitate the sifting if needed.

Step 2: Mix in Ingredients
Next, add 1 cup of Greek yogurt and 1 cup of thawed whipped topping to the bowl containing the sifted cake mix. Then, include 3–4 drops of purple food coloring for that Halloween flair. Stir everything together with a spatula for about 2–3 minutes until fully incorporated, creating a smooth and creamy mixture.

Step 3: Combine Until Smooth
Continue mixing the ingredients vigorously for another minute, aiming for a luxurious, fluffy consistency that resembles cake batter. You'll know it's ready when there are no visible clumps, and the dip has a light, airy texture. This step is crucial for achieving the delightful creaminess of your Spooky Dunkaroo Dip.

Step 4: Chill
Cover your mixing bowl tightly with plastic wrap or a lid and place it in the refrigerator. Chill the dip for at least 30 minutes to allow the flavors to meld and enhance the overall texture. This resting period ensures a more cohesive and delicious flavor profile, making your dip even more enticing.

Step 5: Present
Once chilled, take the Spooky Dunkaroo Dip out of the fridge. Transfer it to a festive serving bowl, using a spatula to smooth the surface. To make it extra cheerful, top the dip with a generous sprinkle of Halloween-themed sprinkles, adding a pop of color and fun to your presentation.

Step 6: Serve with Dippers
Finally, arrange your favorite dippers around the bowl to complete the spooky spread. Consider using cookies, pretzels, or fresh fruit to offer a variety of textures and flavors. The combination of the creamy Spooky Dunkaroo Dip with crunchy or fruity dippers creates a delightful experience that will enchant your guests.

What to Serve with Spooky Dunkaroo Dip?

As you prepare for a Halloween gathering, consider these delightful pairings to elevate your Spooky Dunkaroo Dip experience!

  • Crispy Graham Crackers: Their sweet crunch complements the dip, providing a delightful contrast in texture. Perfect for scooping!

  • Juicy Apple Slices: Fresh and tart, they offer a refreshing balance to the creamy dip, making each bite feel wholesome.

  • Chocolate-Covered Pretzels: The salty crunch adds depth to the sweet dip, creating a satisfying flavor contrast that's delightful for snacking.

  • Mini Marshmallows: Soft and chewy, they can be dipped or sprinkled atop the dip for added fluff and fun!

  • Caramel Sauce: Drizzle over the dip for a rich, sweet addition that enhances the overall flavor profile, making it even more irresistible.

  • Pineapple Chunks: Bright and tropical, these juicy pieces provide a fruity burst that harmonizes beautifully with the creamy dip.

  • Halloween-Themed Cookies: Add a playful touch to your platter; their festive shapes and flavors will charm guests of all ages!

  • Pumpkin Spice Hot Chocolate: Sip alongside your dip for a cozy drink that complements the flavors of fall in every bite.

Elevate your spooky celebration with these delectable dippers and drinks—the perfect match for your enchanting Spooky Dunkaroo Dip!

Spooky Dunkaroo Dip: Variations & Substitutions

Get ready to unleash your creativity and customize this delightful dip for your Halloween festivities!

  • Dairy-Free: Use dairy-free yogurt and coconut whipped topping for a plant-based version that’s just as delicious.

  • Color Fun: Swap the purple food coloring for orange or green to fit your Halloween theme or any festive occasion. The possibilities are endless!

  • Flavor Boost: Incorporate a teaspoon of vanilla extract to elevate the flavor profile for a richer, sweeter taste.

  • Textural Twist: Fold in crushed graham crackers for a delightful crunch that complements the creamy dip beautifully.

  • Fun Toppings: Top your dip with gummy worms or candy eyes for a playful decoration sure to delight both kids and adults.

  • Choco Delight: Mix in chocolate chips or drizzle chocolate syrup on top for an extra indulgent twist that chocolate lovers will appreciate.

  • Hearty Option: Substitute Greek yogurt with ricotta cheese for a creamy base that offers a unique texture twist while still keeping the dip light and fluffy.

Remember, the fun in cooking lies in experimenting with flavors and textures. Explore these variations to make the Spooky Dunkaroo Dip your own, and don’t forget to check out our suggestions for Serving Suggestions to level up your festive spread!

Make Ahead Options

These Spooky Dunkaroo Dip preparations are ideal for busy home cooks looking to save time without sacrificing flavor! You can assemble the dip and refrigerate it for up to 3 days in an airtight container. Simply complete steps 1-4, covering the bowl tightly to maintain freshness and prevent any odors from seeping in. When you're ready to serve, remove it from the fridge and just give it a quick stir to restore its fluffy texture before transferring it to a festive bowl. Add the Halloween sprinkles right before serving to keep them vibrant and prevent sogginess. With these make-ahead options, you’ll enjoy a delicious, stress-free treat that’s just as captivating days later!

Storage Tips for Spooky Dunkaroo Dip

  • Fridge: Store your Spooky Dunkaroo Dip in an airtight container in the refrigerator for up to 3 days. This will help it stay fresh and delicious while maintaining its fluffy texture.

  • Make-Ahead: Feel free to prepare the dip a day in advance. Just remember to cover the bowl tightly with plastic wrap to prevent any moisture or odors from affecting the creamy mixture.

  • Avoid Freezing: It’s best not to freeze the dip, as freezing can alter the texture and creaminess. Enjoy it fresh for the best taste experience!

  • Reheating: If you notice the dip has thickened in the fridge, give it a gentle stir to bring back its original fluffy consistency before serving.

Expert Tips for Spooky Dunkaroo Dip

  • Sifting Matters: When sifting the cake mix, take your time! This ensures a smooth dip without lumps, improving the overall texture.

  • Gentle Mixing: Be careful not to overmix your ingredients; a gentle fold is all you need to maintain that fluffy texture in the Spooky Dunkaroo Dip.

  • Refrigeration is Key: Don’t skip chilling! Letting the dip rest enhances flavors and improves its creamy consistency, making it even more enjoyable.

  • Decorate Last Minute: Add sprinkles and whimsical toppings just before serving to keep them vibrant and appealing—nobody likes soggy decor!

  • Experiment with Dippers: While cookies and fruits are classic choices, try pretzels or caramel sauce for delightful textural contrast. You and your guests won't be disappointed!

Spooky Dunkaroo Dip Recipe FAQs

What type of cake mix should I use for the Spooky Dunkaroo Dip?
You can use white cake mix for a classic flavor, but I highly recommend using funfetti cake mix for added color and whimsy! This little switch makes your dip even more festive and fun, especially for Halloween.

How long can I store the Spooky Dunkaroo Dip in the fridge?
Store your Spooky Dunkaroo Dip in an airtight container for up to 3 days in the refrigerator. This way, it remains fresh and maintains its delightful fluffy texture. Just give it a gentle stir before serving if it thickens up a bit!

Can I freeze the Spooky Dunkaroo Dip?
I wouldn’t advise freezing it, as the texture can change and become grainy after thawing. For the best taste and creamy consistency, enjoy the dip fresh within a few days of making it.

What if my Spooky Dunkaroo Dip is too thick?
If you find your dip is thicker than expected, simply stir in a bit more Greek yogurt or a splash of milk to loosen it up. Do this gradually, mixing well until you've achieved your desired consistency without losing any fluffiness.

Are there any dietary considerations I should keep in mind for this recipe?
Absolutely! Check ingredient labels for potential allergens, especially if serving guests. If you're accommodating gluten sensitivities, opt for gluten-free cake mix. You can also create a dairy-free version using dairy-free yogurt and coconut whipped topping.

How can I customize my Spooky Dunkaroo Dip?
Get creative! You can swap the purple food coloring for orange or green to fit different themes. Incorporate chocolate chips for a richer flavor, or fold in crushed graham crackers for added texture. The options are endless, so make it fun and personal!

Spooky Dunkaroo Dip

Spooky Dunkaroo Dip: Creepy-Cool Treat for Halloween Fun

Spooky Dunkaroo Dip is a delightful no-cook treat perfect for Halloween gatherings that will please both kids and adults.
Print Recipe Pin Recipe
Prep Time 10 minutes mins
Chill Time 30 minutes mins
Total Time 40 minutes mins
Servings: 8 servings
Course: Dessert
Calories: 150
Ingredients Equipment Method Nutrition Notes

Ingredients
  

For the Dip
  • 1 cup White Cake Mix or funfetti cake mix for added fun
  • 1 cup Greek Yogurt substitute with vanilla yogurt for extra sweetness
  • 1 cup Whipped Topping make sure it’s thawed for best results
  • 3-4 drops Purple Food Coloring swap in orange or green for a different color
For the Toppings
  • 1 cup Halloween Sprinkles for visual appeal
  • 1 cup Gummy Worms for a fun and creepy addition
  • 1 cup Crushed Graham Crackers for added texture

Equipment

  • Mixing Bowl
  • Wire Mesh Sieve
  • Spatula
  • plastic wrap

Method
 

Preparation Steps
  1. Sift the cake mix into a medium mixing bowl using a wire mesh sieve.
  2. Add Greek yogurt and whipped topping to the sifted cake mix.
  3. Add purple food coloring and stir everything together until fully incorporated.
  4. Continue mixing vigorously for a luxurious and fluffy consistency.
  5. Chill the dip for at least 30 minutes in the refrigerator.
  6. Transfer the dip to a festive serving bowl and top with sprinkles.
  7. Arrange favorite dippers around the bowl to serve.

Nutrition

Serving: 1servingCalories: 150kcalCarbohydrates: 20gProtein: 3gFat: 7gSaturated Fat: 4gPolyunsaturated Fat: 0.5gMonounsaturated Fat: 1.5gCholesterol: 20mgSodium: 85mgPotassium: 125mgSugar: 14gVitamin A: 250IUCalcium: 45mgIron: 0.5mg

Notes

Perfect for parties and customizable. Consider experimenting with different dips and toppings to suit your Halloween theme.

Tried this recipe?

Let us know how it was!

Halloween Muddy Buddies Popcorn Mix: Sweet, Crunchy Fun Await!

October 4, 2025 by Grace Snow Leave a Comment

“Can you smell the chocolate?” I overheard my neighbor’s kids exclaiming as they made their way to my door on Halloween night. It’s that magical time of year when spooky treats take center stage, and nothing brings the joy of the season quite like this Halloween Muddy Buddies Popcorn Mix! This easy snack combines the delightful crunch of popcorn with the rich flavors of chocolate and peanut butter, making it a deliciously fun treat for kids and adults alike. Not only is it a crowd-pleaser for movie nights and festive gatherings, but it also offers the flexibility to swap in healthier ingredients if you're looking to lighten things up. So, what’s your favorite Halloween memory—snacking in costume or whipping up festive treats in the kitchen? Let’s dive into this playful recipe!

Why is this Halloween treat so special?

Unique flavors: The combination of chocolate, peanut butter, and popcorn creates a delightful medley that is hard to resist.

Kid-friendly fun: This recipe invites children to help in the kitchen, making it a perfect bonding activity that sparks creativity.

Easy to customize: Whether you prefer healthier options, like using natural peanut butter, or festive colors with eye sprinkles, this mix adapts to your tastes.

Perfect for sharing: Ideal for Halloween parties, movie nights, or classroom treats—everyone will enjoy these whimsical clusters.

Quick and simple: Just a few steps to a delicious snack means you can whip this up in no time, making it stress-free for busy schedules! Plus, if you enjoy family-friendly recipes, you might want to check out our easy snacks collection for more tasty ideas.

Halloween Muddy Buddies Popcorn Mix Ingredients

Get ready to create this fun holiday treat!

For the Cereal Base

  • Chex Cereal – Provides a crunchy texture and acts as the base for the mix; you can use any variety to spark your family's preference.
  • Peanut Butter – Adds richness and creaminess; swap with a natural or no-sugar added peanut butter for a healthier option.
  • Powdered Sugar – Sweetness and coating for the mix; look for organic options when possible for a cleaner treat.

For the Chocolate Coating

  • Chocolate Chips – Gives the mix its sweet chocolatey flavor; consider high-quality brands like Ghirardelli or allergy-friendly Enjoy Life Chocolate Chunks for a fabulous taste.
  • Butter – Helps to bind the ingredients; opt for grass-fed butter for a healthier alternative.
  • White Chocolate Chips/Almond Bark – For drizzling, this adds sweetness; choose reputable brands depending on your preference for a creamy finish.

For the Popcorn

  • Popcorn – The main volume of the mix that provides lightness; pop your own using avocado oil for a wellness-focused choice, or use brands like Skinny Pop for convenience.

For the Festive Touch

  • Eye Sprinkles – A decorative delight that brings Halloween aesthetics to life!
  • Candy Coated Chocolate (e.g., Reese's Pieces, UNREAL Chocolate Gems) – Adds color and flavor; opt for less sugary options if desired to keep things healthier.

The Halloween Muddy Buddies Popcorn Mix transforms any gathering into a delightful occasion, enticing kids and adults alike with its irresistible crunch and sweetness!

Step‑by‑Step Instructions for Halloween Muddy Buddies Popcorn Mix

Step 1: Prep Cereal
In a large mixing bowl, combine 6 cups of Chex cereal with a melted mixture of 1 cup of chocolate chips and ½ cup of peanut butter. Stir the mixture until the cereal is well-coated and glistening, about 2-3 minutes. You’ll know it’s ready when each piece is covered in a delicious chocolate-peanut buttery sheen.

Step 2: Set Cereal
Spread the coated Chex cereal evenly on two baking sheets lined with parchment paper. Allow it to set at room temperature for about 15-20 minutes, or until the chocolate coating is firm to the touch. This step is essential for creating that delightful crunch in your Halloween Muddy Buddies Popcorn Mix.

Step 3: Melt White Chocolate
While the cereal sets, place 1 cup of white chocolate chips or almond bark in a microwave-safe bowl. Microwave in 30-second intervals, stirring between each until the chocolate is completely melted and smooth, which should take about 1-2 minutes. Be cautious; avoid overheating to ensure a silky texture for drizzling.

Step 4: Combine Mix
In a large bowl, combine the popped popcorn (about 8 cups) with the set Chex Muddy Buddies cereal. Gently mix the two together using a spatula, ensuring even distribution without crushing the popcorn or cereals. This step encourages that wonderful mix of textures in your Halloween Muddy Buddies Popcorn Mix.

Step 5: Drizzle Chocolate
Pour the melted white chocolate over the popcorn and cereal mixture. Gently toss the mix using a spatula until everything is coated in the creamy, sweet chocolate. This will create a luscious combination of flavors and add an extra layer of sweetness to your Halloween treat.

Step 6: Decorate
Immediately sprinkle the mixture with colorful eye sprinkles and candy-coated chocolates, like Reese's Pieces, for that festive Halloween flair. As you do this, continue to toss the mix gently to distribute the decorations evenly. This fun step adds a playful touch and whimsy to your Halloween Muddy Buddies Popcorn Mix.

Step 7: Cool & Serve
Once decorated, allow the mix to cool completely on the baking sheets for about 15 minutes. After it's set, break the mixture into clusters and serve in charming festive bowls. Your Halloween Muddy Buddies Popcorn Mix is now ready to enjoy—perfect for sharing at parties or cozy movie nights!

Halloween Muddy Buddies Popcorn Mix Variations

Feel free to get creative and make this Halloween Muddy Buddies Popcorn Mix your own with these delicious and fun substitutions!

  • Nut-Free Option: Replace peanut butter with almond butter for a nut-free alternative while keeping the creamy texture.
  • Choco Delight: Swap in dark chocolate chips for a bolder chocolate flavor that adults will appreciate.
  • Texture Twist: Instead of popcorn, try using a mix of pretzels and corn chips for a salty crunch to balance the sweetness.
  • Sweetener Swap: Opt for honey or maple syrup in place of powdered sugar for a more natural sweetness that still sticks well.
  • Extra Crunch: Mix in your favorite nuts or seeds to the popcorn mixture, adding extra crunch and nutrition.
  • Spicy Kick: For a twist, add a pinch of cayenne or chili powder for an unexpected heat that contrasts beautifully with the sweetness.
  • Vegan Version: Use vegan chocolate chips and coconut oil instead of butter to make this treat suitable for a vegan diet.
  • Festive Sprinkles: Incorporate seasonal candy corn or pumpkin-shaped candies alongside eye sprinkles for an extra festive and colorful touch.

Whichever variation you choose, this Halloween Muddy Buddies Popcorn Mix is sure to be a hit! Dive into more creative ideas with our easy snacks collection for family gatherings.

How to Store and Freeze Halloween Muddy Buddies Popcorn Mix

Room Temperature: Store the Halloween Muddy Buddies Popcorn Mix in an airtight container at room temperature for up to 1 week to maintain its crunchiness.

Fridge: If you live in a humid climate, you can refrigerate it in an airtight container for up to 2 weeks. Just allow it to come to room temperature before enjoying to restore texture.

Freezer: For longer storage, freeze the mix in a zip-top bag or airtight container for up to 3 months. Thaw overnight in the fridge before serving.

Reheating: There's no need to reheat this snack! Just enjoy directly from your storage container for perfect munching.

Expert Tips for Halloween Muddy Buddies Popcorn Mix

  • Seal Tight: Ensure the zip-top bag for shaking the cereal is firmly closed to prevent spills, making cleanup a breeze.

  • Quality Counts: Use high-quality ingredients for the best flavor and texture in your Halloween Muddy Buddies Popcorn Mix; it truly makes a difference!

  • Melting Chocolate: Be cautious while melting chocolate; always do it in short bursts to avoid burning. Stirring is key to achieving a smooth consistency.

  • Engage Allies: Involve the kids in each step of the process for a fun and engaging family activity. Let them sprinkle and mix for added joy!

  • Customize Wisely: Experiment with substitutions carefully if you're aiming for healthier options, ensuring the delightful balance of flavors is still delightful.

What to Serve with Halloween Muddy Buddies Popcorn Mix

Create a delightful spread that will enchant your guests and make your gatherings unforgettable.

  • Caramel Apples: The crispness of fresh apples coated in caramel provides a delightful counterbalance to the chocolatey sweetness of the popcorn mix. Just imagine each bite filled with a crunchy and gooey treat, perfect for Halloween festivities!

  • Mummy Hot Dogs: These fun and quirky snacks are easy to prepare and kids will love getting involved! Wrapped in crescent dough and baked to golden perfection, they pair perfectly with the sweet treat by adding a savory element to the mix.

  • Pumpkin Spice Cookies: Offer a comforting and seasonal touch with these soft cookies drizzled with icing. Their warm spices complement the rich flavors of the Halloween Muddy Buddies Popcorn Mix, creating a beautifully balanced dessert table.

  • Cheese Platter: A selection of cheeses, nuts, and dried fruits will add sophistication to your Halloween spread. The creaminess of cheese balances the sweet crunch of the popcorn, appealing to both kids and adults alike.

  • Hot Chocolate Bar: Warm, rich hot chocolate topped with whipped cream and sprinkles can be the perfect beverage to enjoy alongside your mix. The cozy flavors create a wonderfully festive atmosphere for your gathering.

  • Fruit Skewers: Bright, fresh fruits like strawberries, oranges, and grapes add a refreshing crunch and contrasting flavor profile that lightens the sweet treat. These vibrant skewers not only look stunning but also provide a healthier option for your guests!

Make Ahead Options

These Halloween Muddy Buddies Popcorn Mix treats are perfect for busy home cooks looking to save time! You can prepare the Chex Muddy Buddies mixture up to 24 hours in advance; simply mix and coat the cereal and let it set on the baking sheets. After it has cooled, store the coated cereal in an airtight container at room temperature to maintain its crunch. When you're ready to create the popcorn mix, combine the popcorn and the prepped Chex, drizzle with melted white chocolate, and toss in the sprinkles just before serving. This way, you’ll have a festive and delicious snack ready to impress with minimal effort!

Halloween Muddy Buddies Popcorn Mix Recipe FAQs

How do I choose the right Chex cereal?
Absolutely! You can use any variety of Chex cereal for this mix, whether it's rice, corn, or wheat. Each brings its own unique texture. Just make sure to select a cereal that's fresh—look for boxes without any damage or expired dates for the best results!

How should I store leftovers?
Store your Halloween Muddy Buddies Popcorn Mix in an airtight container at room temperature for up to 1 week. This will keep it crunchy and fresh. If the air is particularly humid where you live, consider refrigerating it in an airtight container for up to 2 weeks. Just let it come back to room temperature before enjoying for the best texture.

Can I freeze the Halloween Muddy Buddies Popcorn Mix?
Yes, you can! For longer storage, simply place your mix in a zip-top freezer bag or airtight container and freeze it for up to 3 months. To thaw, just transfer it to the fridge overnight. Be sure to enjoy it chilled, as there's no need to reheat this snack!

What if my chocolate is too thick while melting?
Very! If your chocolate isn’t melting smoothly, it may have been overheated or you may need to add a splash of coconut oil or a little bit of butter for a smoother consistency. Microwave it in 10-second bursts while stirring well each time until you achieve that creamy texture—this will help it coat your mix perfectly!

Are there any allergy considerations for this recipe?
Definitely, yes! If you're making this treat for others, keep in mind any allergies. You can use sunflower seed butter instead of peanut butter for a nut-free variant. Also, please check the labels for chocolate chips to ensure they’re free from allergens like dairy or gluten, especially if you’re using allergy-friendly brands. It’s important to cater to everyone’s needs!

Can I make healthier substitutions?
Absolutely! For healthier tweaks, consider using natural or no-sugar added peanut butter, high-quality dark chocolate instead of milk chocolate, and popping your own popcorn using avocado oil. You can also add nuts or seeds for added crunch and nutrition! The more the merrier when it comes to flavor combinations, so feel free to experiment!

Halloween Muddy Buddies Popcorn Mix

Halloween Muddy Buddies Popcorn Mix

Enjoy this Halloween Muddy Buddies Popcorn Mix, a sweet, crunchy treat perfect for festive gatherings!
Print Recipe Pin Recipe
Prep Time 20 minutes mins
Cook Time 10 minutes mins
Setting Time 20 minutes mins
Total Time 50 minutes mins
Servings: 8 cups
Course: Snacks
Cuisine: American
Calories: 300
Ingredients Equipment Method Nutrition Notes

Ingredients
  

Cereal Base
  • 6 cups Chex Cereal any variety
  • 1 cup Peanut Butter natural or no-sugar added for healthier option
  • ½ cup Powdered Sugar organic options preferred
Chocolate Coating
  • 1 cup Chocolate Chips high-quality brands like Ghirardelli
  • ½ cup Butter grass-fed for healthier alternative
  • 1 cup White Chocolate Chips/Almond Bark for drizzling
Popcorn
  • 8 cups Popcorn popped using avocado oil or ready-made brands like Skinny Pop
Festive Touch
  • 1 cup Eye Sprinkles
  • 1 cup Candy Coated Chocolate e.g., Reese's Pieces or UNREAL Chocolate Gems

Equipment

  • large mixing bowl
  • Baking Sheets
  • Parchment Paper
  • Microwave-safe bowl
  • Spatula

Method
 

Preparation Steps
  1. In a large mixing bowl, combine Chex cereal with melted chocolate chips and peanut butter, stirring until well-coated.
  2. Spread coated cereal on baking sheets lined with parchment paper and let set at room temperature for about 15-20 minutes.
  3. Melt white chocolate chips or almond bark in a microwave-safe bowl, stirring until smooth.
  4. Combine popped popcorn with the set Chex Muddy Buddies cereal in a large bowl and mix gently.
  5. Drizzle the melted white chocolate over the popcorn and cereal mixture, and toss gently to coat.
  6. Sprinkle with eye sprinkles and candy-coated chocolates, continuing to toss for even distribution.
  7. Allow the mix to cool completely, break into clusters, and serve.

Nutrition

Serving: 1cupCalories: 300kcalCarbohydrates: 40gProtein: 4gFat: 15gSaturated Fat: 5gPolyunsaturated Fat: 1gMonounsaturated Fat: 5gCholesterol: 15mgSodium: 150mgPotassium: 120mgFiber: 2gSugar: 20gVitamin A: 200IUVitamin C: 1mgCalcium: 50mgIron: 1mg

Notes

Store in an airtight container to maintain crunchiness. Can be customized with healthier ingredients or different sprinkles.

Tried this recipe?

Let us know how it was!

Halloween Caprese Eyeballs: Spooky Low-Carb Appetizers

October 3, 2025 by Grace Snow Leave a Comment

As I rifled through my pantry, a sudden inspiration struck—an eerie twist on a classic favorite! Enter Halloween Caprese Eyeballs: these delightful, spooky appetizers are perfect for any costume party or trick-or-treat gathering. What I love most about this recipe is not just how easy it is to whip up but also how you can present them in either a “clean” or “infected” style, bringing a fun edge to your Halloween spread. Plus, they’re a low-carb, diabetic-friendly treat that everyone can enjoy. Just imagine your guests marveling at these creepy creations while savoring the creamy, herby goodness of fresh ingredients! Are you ready to elevate your Halloween festivities with these unforgettable bites?

Why Are Halloween Caprese Eyeballs Irresistible?

Unique Presentation: These eyeballs stand out on any platter, perfect for spicing up your Halloween décor!

Kid-Friendly Fun: Kids will love the spooky aesthetic while enjoying fresh flavors, making them an ideal treat for family parties.

Quick and Easy: With just a handful of ingredients and straightforward steps, you can assemble these appetizers in no time—perfect for busy hosting.

Versatile Options: Serve them “clean” for a charming look or “infected” for a gruesome touch; the choice is yours!

Health-Conscious Delight: At only 70 calories each, they're low-carb and diabetic-friendly—everyone can indulge without guilt! Integrate them into your Halloween spread along with other delightful appetizers, and the compliments will roll in!

Halloween Caprese Eyeballs Ingredients

For the Eyeballs

  • Small Tomatoes – Choose ripe, firm tomatoes to ensure they hold their shape for the spooky presentation.
  • Whipped Cream Cheese – Provides a creamy texture; substitute with ricotta for a lighter option.
  • Sliced Black Olives – Acts as the eyeball pupil, adding a salty kick; green olives can be used for a twist in color.

For the “Infection” Effect

  • Pesto Sauce – Adds a flavorful layer and visual appeal; store-bought pesto saves time while still impressing your guests.

For Serving

  • Fresh Basil – Use as a base for an attractive presentation and to impart a lovely aromatic flavor.

Feel free to get creative and elevate your Halloween Caprese Eyeballs with this ingredient breakdown! These delightful, low-carb bites are sure to enchant everyone at your gathering!

Step‑by‑Step Instructions for Halloween Caprese Eyeballs

Step 1: Prepare the Tomatoes
Begin by washing your small tomatoes thoroughly under cold running water. Then, using a sharp knife, carefully slice each tomato in half horizontally. Scoop out the insides with a small spoon, discarding the pulp and seeds while keeping the skins intact for that spooky shape. Set the emptied tomato halves on a clean plate, cut-side up, ready for their eerie filling.

Step 2: Apply the Pesto Sauce
Next, pour your pesto sauce into a squirt bottle for easy application. Squeeze the pesto around the inner rim of each tomato half, creating a “ghoulish” effect that will add flavor and visual appeal to your Halloween Caprese Eyeballs. This step takes just a couple of minutes, but remember to keep the filling side clean for the next ingredients!

Step 3: Fill with Cream Cheese
Now, take the whipped cream cheese and use a small spatula or spoon to fill each tomato half generously. As you fill them, allow a bit of the pesto to mix in for a fun marbled effect. Aim for a nice, rounded top, ensuring it’s visible above the rim. This should take about 5 minutes, and the creamy mixture will create a delightful contrast against the red tomato skin.

Step 4: Add the Black Olive Pupils
To create the perfect eyeball effect, gently press a sliced black olive into the center of each filled tomato. This will serve as the eyeball’s pupil, adding that savory push to your appetizer’s flavor profile. Ensure the olive sits snugly in the cream cheese so it doesn’t topple over. This step only requires a couple of minutes, and you’ll already see the ghoulish look taking shape!

Step 5: Enhance with More Pesto
For an extra touch of flair, squirt a small dot of pesto into the center of each olive pupil. This’ll create a striking contrast and enhance the eye's “infected” appearance, reinforcing the Halloween theme with vibrant color. Take your time with this step to ensure each eyeball looks its creepiest!

Step 6: Plate and Serve
Finally, to present your Halloween Caprese Eyeballs, arrange them on a large basil leaf or your favorite festive platter. Stick a toothpick through each eyeball to hold it in place if needed. Get creative with the arrangement, and serve them immediately for the best visual impact. These spooky appetizers are now ready to wow your guests!

Storage Tips for Halloween Caprese Eyeballs

Fridge: Assemble the Halloween Caprese Eyeballs a few hours before serving and store them in the refrigerator in an airtight container for up to 4 hours.

Freezer: These appetizers are best enjoyed fresh; however, if you have leftovers, avoid freezing as the tomatoes and creamy filling may change texture.

Reheating: If you need to adjust any chilled leftovers, let them sit at room temperature for about 20 minutes before serving, ensuring they return to their delicious, creamy state.

Presentation: When ready to serve, arrange the stored eyeballs on fresh basil leaves for an attractive presentation that still captivates the Halloween spirit!

Make Ahead Options

These Halloween Caprese Eyeballs are perfect for meal prep enthusiasts! You can hollow out and fill the tomato halves with cream cheese up to 24 hours in advance, ensuring they don't collapse. Just keep the assembled tomatoes refrigerated in an airtight container to maintain their freshness. The pesto can also be prepared ahead and stored separately to prevent it from browning, making your prep hassle-free. When you're ready to serve, simply add the black olive pupils and a final touch of pesto to each eyeball, and arrange them beautifully on a platter. You'll have spooky, delicious appetizers that are just as appetizing as if made fresh!

Expert Tips for Halloween Caprese Eyeballs

  • Choose Firm Tomatoes: Make sure to opt for ripe, firm tomatoes. This will prevent them from collapsing under the weight of the filling and help maintain their spooky shape.

  • Pesto Application: Using a squirt bottle for the pesto makes it easier to create that dramatic “infected” effect. Clarify any excess around the rim to keep the presentation clean.

  • Mixing It Up: Feel free to experiment with different fillings, like herbed cheese spreads or flavored labneh, to offer various flavor profiles while enjoying the Halloween Caprese Eyeballs.

  • Presentation Tips: Use fresh basil leaves creatively for an eye-catching display. Secure the eyeballs with toothpicks for easier serving and a professional touch.

  • Preparation Ahead: These appetizers can be made a few hours in advance. Just prepare and store in the refrigerator until you’re ready to serve, ensuring they stay fresh.

Halloween Caprese Eyeballs Variations

Feel free to unleash your creativity and customize these delightful Halloween Caprese Eyeballs into something uniquely yours!

  • Herbed Cheese Swap: Substitute whipped cream cheese with herbed cheese spread for a burst of flavor. Your taste buds will thank you!

  • Creamy Labneh Twist: Try using flavored labneh instead of cream cheese for a tangy twist. It adds a creamy richness that’s absolutely irresistible!

  • Goat Cheese Variation: Replace the cream cheese with herbed goat cheese for a more pronounced flavor. The combination with tomatoes is a match made in heaven.

  • Cherry Tomato Option: Use cherry tomatoes instead of small ones for bite-sized eyeballs. Their sweetness will add an extra layer of deliciousness!

  • Olive Alternatives: Swap black olives for green olives to experiment with color and taste. Who knew eyeballs could come in different hues?

  • Heat It Up: Add a jalapeño slice atop each eyeball for a fiery kick. It's a spooky surprise that’ll certainly thrill your adventurous guests!

  • Basil Infusion: Mix finely chopped fresh basil into the cream cheese for a herbal infusion that amplifies the freshness of the Caprese Eyeballs.

  • Vegan Delight: For a vegan option, replace cheese with a cashew cream spread. You can achieve both the same texture and a delightfully unique flavor.

Explore these variations to keep the Halloween spirit alive while ensuring your spooky appetizers are as joyful and delicious as any other family-favorite recipe! And if you’re curious about other Halloween themes, don’t miss checking out some mouthwatering appetizer ideas for Halloween parties. Whether it’s for a festive gathering or a cozy night in, these tips will ensure your table remains trick-or-treat ready!

What to Serve with Halloween Caprese Eyeballs

Elevate your spooky spread with these delightful pairings that complement the creamy, herby flavors of your Halloween Caprese Eyeballs.

  • Crispy Vegetable Chips: Add a crunch to the mix! Pairing these eyeballs with crunchy veggie chips creates a delightful texture contrast.

  • Zesty Garlic Bread: The warm, toasty aroma of garlic bread brings a comforting element that beautifully balances the coolness of the Caprese Eyeballs.

  • Chilled White Wine: A crisp Sauvignon Blanc refreshes the palate, enhancing the fresh flavors of tomato and basil while keeping the vibe festive.

  • Savory Cheese Platter: Featuring an array of cheeses, nuts, and dried fruits can round out your appetizer spread, providing a variety of tastes for all guests.

  • Roasted Pumpkin Soup: Serve in small cups for a seasonal touch; its warm, creamy texture pairs perfectly with the cold, savory eyeballs.

  • Herbaceous Salad: A simple arugula salad with lemon vinaigrette adds freshness, making it a great counterpoint to the rich cream cheese filling.

  • Spicy Deviled Eggs: Bring an extra kick to the table! The creamy yet spicy flavor will harmonize with the thrilling taste of your Halloween Caprese Eyeballs.

  • Chocolate Mousse Cups: For a sweet finish, decadent chocolate mousse provides a rich dessert that will satisfy any sweet tooth after the savory appetizers.

These pairings create a well-rounded Halloween gathering that’s sure to impress your guests!

Halloween Caprese Eyeballs Recipe FAQs

What kind of tomatoes should I use for the Halloween Caprese Eyeballs?
Absolutely go for small, firm tomatoes! Ripe varieties like cherry or grape tomatoes work perfectly. The firmness helps them hold their shape during preparation and adds a delightful bite when you eat them.

How should I store the Halloween Caprese Eyeballs?
These delicious little treats are best enjoyed fresh, but you can assemble them a few hours ahead of time. Store them in an airtight container in the refrigerator for up to 4 hours to keep everything nice and fresh. Just make sure to keep them chilled until serving!

Can I freeze Halloween Caprese Eyeballs?
I recommend avoiding the freezer for these appetizers. Freezing can alter both the texture of the tomatoes and the creamy filling, making them less enjoyable. Instead, prepare them fresh and keep leftovers in the fridge for up to 3 days, if any are left, of course!

What alternatives can I use for the filling besides whipped cream cheese?
The more the merrier! Instead of whipped cream cheese, you can use herbed cheese spreads or even ricotta for a lighter twist. If you want to go fancy, flavored labneh or goat cheese can add a wonderful depth of flavor and make your Halloween Caprese Eyeballs even more delightful.

Are there any dietary considerations I should keep in mind?
Absolutely! These Halloween Caprese Eyeballs are not only low-carb and diabetic-friendly, but they are also gluten-free. If you're serving guests with allergies, ensure that the pesto used does not contain any nuts, as some brands may include pine nuts. Always check labels for allergens to keep everyone safe!

What should I do if my tomatoes are too soft?
Great question! If you happen to pick up soft tomatoes, no worries! Simply let them sit at room temperature for a short while to see if they firm up a bit; however, if they're too far gone, it’s best to use them for a different recipe to avoid collapsing eyeballs. Always choose tomatoes that feel sturdy and firm to the touch.

Halloween Caprese Eyeballs

Halloween Caprese Eyeballs: Spooky Low-Carb Appetizers

Discover Halloween Caprese Eyeballs, creative low-carb appetizers perfect for spooky gatherings.
Print Recipe Pin Recipe
Prep Time 20 minutes mins
Total Time 20 minutes mins
Servings: 12 eyeballs
Course: Appetizers
Cuisine: Italian
Calories: 70
Ingredients Equipment Method Nutrition Notes

Ingredients
  

For the Eyeballs
  • 12 small Tomatoes Choose ripe, firm tomatoes
  • 8 oz Whipped Cream Cheese Substitute with ricotta for a lighter option
  • 12 slices Black Olives Acts as the eyeball pupil; green olives can be used for a twist
For the “Infection” Effect
  • 1 cup Pesto Sauce Store-bought pesto saves time
For Serving
  • 1 bunch Fresh Basil Use as a base for presentation

Equipment

  • squirt bottle
  • small spoon
  • Sharp Knife
  • Spatula
  • platter

Method
 

Step-by-Step Instructions
  1. Prepare the Tomatoes: Wash tomatoes and slice each in half horizontally. Scoop out the insides while keeping the skins intact.
  2. Apply the Pesto Sauce: Pour pesto into a squirt bottle and squeeze around the inner rim of each tomato half.
  3. Fill with Cream Cheese: Use a spatula to fill each tomato half with cream cheese, mixing in some pesto.
  4. Add the Black Olive Pupils: Press a sliced black olive into the center of each filled tomato.
  5. Enhance with More Pesto: Squirt a small dot of pesto into the center of each olive pupil.
  6. Plate and Serve: Arrange on a large basil leaf or festive platter and serve immediately.

Nutrition

Serving: 1eyeballCalories: 70kcalCarbohydrates: 3gProtein: 2gFat: 6gSaturated Fat: 4gPolyunsaturated Fat: 0.5gMonounsaturated Fat: 2gCholesterol: 20mgSodium: 240mgPotassium: 150mgFiber: 1gSugar: 1gVitamin A: 500IUVitamin C: 10mgCalcium: 60mgIron: 0.5mg

Notes

These appetizers can be made a few hours in advance and kept in the refrigerator until serving.

Tried this recipe?

Let us know how it was!

Delicious Old-Fashioned Pumpkin Soda for Fall Festivities

October 3, 2025 by Grace Snow Leave a Comment

As the crisp fall air descends, my mind often drifts to delightful autumnal flavors, and nothing captures that spirit quite like my Old-Fashioned Pumpkin Soda. This refreshing drink perfectly marries the sweetness of real pumpkin with fizzy soda, making it an instant hit for sharing with friends and family. Whether you're hosting a Halloween party or simply indulging in some cozy self-care, this non-alcoholic beverage is both a nostalgia-packed treat and a healthier alternative to fast food options. Plus, it’s a breeze to whip up, with variations for individual servings or a pitcher, allowing you to customize it for any gathering. Ready to bring a little fall magic into your kitchen? Let’s dive into the recipe and discover how simple and fun satisfying your pumpkin cravings can be!

Why is Pumpkin Soda So Irresistible?

Nostalgic Flavors: This Old-Fashioned Pumpkin Soda evokes warm memories of autumn celebrations, making every sip a comforting delight.
Easy to Make: With just a few simple ingredients, creating this festive drink requires minimal effort and expertise, perfect for novice chefs and busy parents alike.
Versatile Treat: Whether you prefer individual servings or a pitcher for a crowd, this recipe perfectly fits your gathering needs without sacrificing flavor.
Kid-Approved: The bubbly nature and fun toppings, like whipped cream and sprinkles, ensure it’s a hit with kids, providing a fun alternative to sugary sodas.
Customizable: Adjust sweetness or explore variations like Pumpkin Cream Soda, enhancing the recipe to suit your taste or dietary preferences.

Old-Fashioned Pumpkin Soda Ingredients

• Dive into the delicious world of Old-Fashioned Pumpkin Soda with this simple list of ingredients!

For the Syrup

  • Water – Solvent for making the syrup; filtered water works best for a clean taste.
  • Sugar – Provides sweetness; substitute with brown sugar or a non-sugar alternative for a healthier option.
  • Pumpkin Puree – Adds genuine pumpkin flavor and vibrant color; ensure it’s pure pumpkin, not pie filling for optimal results.
  • Pumpkin Pie Spice – Enhances the flavor with warm spices; can be swapped with a mix of cinnamon and nutmeg if you're out.

For the Soda

  • Cold Soda Water – This is what gives your drink its fizz; make sure it's cold for the best experience.

For Toppings

  • Whipped Cream – Adds a creamy texture and lovely decoration; use dairy-free whipped cream to keep it vegan-friendly.
  • Halloween Sprinkles – Totally optional but highly recommended! Customize sprinkles based on your party theme for added fun.

Step‑by‑Step Instructions for Old-fashioned pumpkin soda

Step 1: Prepare Pumpkin Spice Syrup
In a small saucepan, combine equal parts sugar and filtered water over medium heat. Stir gently until the sugar dissolves, avoiding boiling which can alter flavors. Once dissolved, add pumpkin puree and pumpkin pie spice, mixing well. Allow this delicious mixture to cool for about 20 minutes, ensuring a rich flavor develops as it thickens. Strain it through a fine mesh sieve lined with cheesecloth to remove any sediment for a smooth syrup.

Step 2: Assemble Individual Servings
For a personalized touch, grab your favorite glass and pour in 1 ounce of the freshly made pumpkin syrup. Top it off with 6 ounces of cold soda water, creating a fizzy effect. The blending of the syrup and soda should become a bubbly delight. Add a generous dollop of whipped cream on top, letting it cascade down the sides, and finish with colorful Halloween sprinkles for that festive appearance.

Step 3: Create a Pitcher for Sharing
If you're hosting a gathering, pour the cooled pumpkin syrup into a large pitcher. Carefully mix it with enough cold soda water to serve the desired number of guests. Stir gently to combine, taking care not to lose the fizz. Serve immediately in cups filled with ice, adding whipped cream and sprinkles as optional garnishes on each for a visually appealing presentation.

Step 4: Adjust Sweetness as Desired
To tailor your Old-fashioned pumpkin soda to personal tastes, feel free to adjust the syrup-to-soda ratio. If you prefer a sweeter drink, simply add an extra splash of syrup into your glass, stirring to mix thoroughly. This flexibility ensures that everyone can enjoy this festive beverage according to their own sweetness preferences.

Old-Fashioned Pumpkin Soda Variations

Feel free to let your creativity shine as you customize this delightful pumpkin soda to your taste!

  • Pumpkin Cream Soda: Add 1 ounce of heavy cream along with the syrup for a richer, creamier touch. The combination of bubbles and cream will make each sip a luxurious experience!

  • Pumpkin Spice Latte Soda: Incorporate a splash of strongly brewed coffee or espresso for a flavorful kick. This variation blends the warm notes of fall with an energizing twist!

  • Dairy-Free Delight: Substitute whipped cream with a coconut-based option for a tasty vegan version. The slight coconut flavor will complement the pumpkin beautifully.

  • Spicy Pumpkin Soda: Stir in a dash of cayenne pepper or crushed red pepper flakes to add a gentle heat. This unexpected twist elevates the flavor to new, exciting heights!

  • Cinnamon Sugar Rim: Before pouring your soda, coat your glass rim with cinnamon sugar for added sweetness. It’s a simple enhancement that elevates the presentation.

  • Pumpkin Float: Top your soda with a scoop of vanilla or pumpkin ice cream for an indulgent dessert-style treat. The melting ice cream mixes wonderfully with the soda!

  • Nutty Touch: Drizzle a little almond or hazelnut syrup to add a nutty twist to your drink. This inspired addition will bring a cozy warmth to your pumpkin soda.

  • Mix with Other Flavors: Combine your pumpkin syrup with other fruity sodas like ginger ale or apple soda for a unique blend. The fusion of flavors keeps things fun and interesting at any gathering!

For more pumpkin-themed ideas, consider trying out these delectable Pumpkin Brownies Decadent or some beautifully layered Pumpkin Cinnamon Rolls to complete your fall festivities!

Storage Tips for Old-Fashioned Pumpkin Soda

Fridge: Store any leftover pumpkin syrup in an airtight container for up to 1 week in the refrigerator. Keeping it sealed ensures maximum freshness and flavor.

Freezer: Optional but effective! You can freeze the syrup in ice cube trays for up to 3 months. This method allows for quick and easy use in future sodas.

Reheating: If you want to enjoy the syrup warm, gently reheat it in a small saucepan over low heat before mixing it with your cold soda water.

Soda Mixing: Always combine the syrup with cold soda water for the best effervescence. Remember, once the soda is mixed, it’s best enjoyed immediately for that perfect fizzy experience!

Make Ahead Options

These Old-Fashioned Pumpkin Soda preparations are perfect for busy home cooks looking to save time during the festive season! You can make the pumpkin spice syrup up to 3 days in advance; store it in an airtight container in the refrigerator to maintain its rich flavor. When ready to serve, simply mix 1 ounce of the chilled syrup with 6 ounces of cold soda water in each glass. Top with whipped cream and sprinkles just before serving for that delightful presentation. This way, you'll have a refreshing, homemade drink ready to impress your guests with minimal effort!

Expert Tips for Old-Fashioned Pumpkin Soda

  • Syrup Consistency: Ensure your syrup simmers gently; boiling can change its flavor and texture, resulting in a less delightful Old-Fashioned Pumpkin Soda.
  • Choose Quality Ingredients: Opt for pure pumpkin puree and high-quality soda water to elevate the drink's flavors and ensure the best experience.
  • Sweetness Adjustment: If you're unsure about sweetness, start with less syrup; you can always add more, ensuring a perfect fit for your taste buds.
  • Experiment with Toppings: Get creative with toppings beyond whipped cream; consider crushed graham crackers or chocolate shavings for a delightful twist on the classic presentation.
  • Chill Soda Water: For a fizzy treat, ensure your soda water is ice-cold before mixing; lukewarm soda water can dilute the refreshing experience of this fun drink.

What to Serve with Old-Fashioned Pumpkin Soda

The warm hues of fall inspire delightful pairings that complement this fizzy apple treat, enhancing your seasonal gatherings with every sip.

  • Savory Pumpkin Soup: A rich, creamy pumpkin soup pairs beautifully, echoing the flavors of your soda while offering warmth and comfort.
  • Spiced Apple Cider: This brings a cozy aroma to the table, creating a harmonious blend of fall flavors that guests will adore.
  • Cinnamon Sugar Donuts: Their sweetness and warmth contrast with the soda's effervescence, providing a scrumptious bite for a delightful snack.
  • Cheese Platter with Crackers: A selection of sharp cheeses and crunchy crackers offers a savory balance to the fizzy drink's sweetness, elevating your gathering.

For a sweet treat, consider serving spiced cookies alongside for the ultimate autumn indulgence. Their crispy edges and soft centers will leave your friends happily reminiscing about childhood fall adventures.

  • Pumpkin Muffins: Muffins create a delightful texture contrast; their moistness enhances your pumpkin experience and make for perfect on-the-go treats!
  • Caramel Popcorn: Sweet, crunchy, and just a bit salty, this festive snack offers delightful textures, making it a fun pairing with your bubbly drink!
  • Ginger Ale Float: For a twist, introduce a ginger ale float topped with whipped cream; the spicy kick will create an exciting flavor profile alongside your similar bubbly soda!

Old-Fashioned Pumpkin Soda Recipe FAQs

What is the best way to select pumpkin puree?
Absolutely! When choosing pumpkin puree, make sure it’s 100% pure pumpkin, without any added spices or sweeteners. Check the label to avoid canned pumpkin pie filling, which often contains extra sugars and flavors that can alter your soda’s taste. A good quality puree will have a rich, deep orange color and a thick consistency.

How should I store any leftover pumpkin syrup?
You can store your pumpkin syrup in an airtight container in the refrigerator for up to 1 week. Just make sure that the container is sealed tightly to maintain the syrup's freshness and flavor. If you plan on keeping it longer, I often recommend freezing it in ice cube trays. This way, you can pop out a cube whenever you’re in the mood for a refreshing Old-Fashioned Pumpkin Soda—even months down the line!

Can I freeze the pumpkin syrup, and how?
Yes, you can freeze your pumpkin syrup! To do this, pour the cooled syrup into ice cube trays and freeze until solid. Once frozen, transfer the cubes to a resealable freezer bag and store them for up to 3 months. When you're ready to use them, simply add the cubes directly to your soda water and let them melt for a delightful pumpkin treat!

What should I do if my syrup becomes too thick?
If you find your syrup is a bit too thick, don't worry! Just add a little warm water to the syrup and stir well until it reaches your desired consistency. Aim for a pourable texture that flows easily from a measuring cup. Remember, thin syrup is easier to mix with the soda, ensuring a bubbly effervescence in your pumpkin drink.

Is this recipe safe for individuals with dietary restrictions?
This Old-Fashioned Pumpkin Soda is quite versatile! It’s naturally vegetarian and can be made vegan by choosing a dairy-free whipped cream. If allergies are a concern, be sure to check ingredient labels for potential allergens in the whipped cream or sprinkles you choose. For sweetness, consider using alternatives like agave nectar or maple syrup if you have dietary restrictions with sugar.

Old-fashioned pumpkin soda

Delicious Old-Fashioned Pumpkin Soda for Fall Festivities

Enjoy this Old-fashioned pumpkin soda, a nostalgic and fizzy drink perfect for fall gatherings.
Print Recipe Pin Recipe
Prep Time 20 minutes mins
Cooling Time 20 minutes mins
Total Time 40 minutes mins
Servings: 4 cups
Course: Drinks
Cuisine: American
Calories: 120
Ingredients Equipment Method Nutrition Notes

Ingredients
  

For the Syrup
  • 1 cup Water filtered for the best taste
  • 1 cup Sugar can substitute with brown sugar or a non-sugar alternative
  • 1 cup Pumpkin Puree ensure it's pure pumpkin, not pie filling
  • 1 tablespoon Pumpkin Pie Spice can swap with a mix of cinnamon and nutmeg
For the Soda
  • 6 ounces Cold Soda Water ensure it's cold for the best experience
For Toppings
  • 1 dollop Whipped Cream use dairy-free whipped cream for a vegan option
  • to taste none Halloween Sprinkles customize based on your party theme

Equipment

  • Saucepan
  • Fine-mesh sieve
  • glass
  • pitcher

Method
 

Prepare Pumpkin Spice Syrup
  1. In a small saucepan, combine equal parts sugar and filtered water over medium heat. Stir gently until the sugar dissolves, avoiding boiling. Add pumpkin puree and pumpkin pie spice, mixing well. Allow the mixture to cool for about 20 minutes.
Assemble Individual Servings
  1. Pour 1 ounce of the freshly made pumpkin syrup into a glass. Top it with 6 ounces of cold soda water. Add a generous dollop of whipped cream and finish with colorful Halloween sprinkles.
Create a Pitcher for Sharing
  1. Pour the cooled pumpkin syrup into a large pitcher and mix it with enough cold soda water for the desired number of guests. Serve immediately with ice and optional garnishes.
Adjust Sweetness as Desired
  1. If preferred, adjust the syrup-to-soda ratio for desired sweetness by adding more syrup.

Nutrition

Serving: 1cupCalories: 120kcalCarbohydrates: 31gSodium: 5mgPotassium: 150mgFiber: 1gSugar: 26gVitamin A: 50IUVitamin C: 1mgCalcium: 1mgIron: 1mg

Notes

Store any leftover pumpkin syrup in an airtight container for up to 1 week. Optional to freeze syrup in ice cube trays for up to 3 months.

Tried this recipe?

Let us know how it was!

Cheesy Halloween Breadstick Bones for Spooky Fun Dipping

October 3, 2025 by Grace Snow Leave a Comment

As the sun sets and Halloween creeps in, I can’t help but think about the fun, spooky snacks that make this season so special. Enter my Spine-Chilling Cheesy Halloween Breadstick Bones, a delightful treat that transforms ordinary pizza dough into bone-shaped wonders. This easy-to-make recipe is not just a crowd-pleaser but also a fantastic way to engage your inner chef without the fuss—perfect for a last-minute Halloween gathering! They’re beautifully crispy on the outside and wonderfully gooey on the inside, making them an unforgettable addition to your spooky festivities. Dip them into marinara “blood” for an extra thrill! Are you ready to create some Halloween magic in your kitchen?

Why You'll Crave These Breadstick Bones?

Crispy Yet Gooey: These Spine-Chilling Cheesy Halloween Breadstick Bones combine golden crispiness with a deliciously gooey center that’s irresistible!

Fun Presentation: With a spooky bone shape, they add playfulness to any Halloween party, making them a hit with guests of all ages.

Quick and Easy: Ready in under 30 minutes, these delightful breadsticks are perfect for last-minute snacks and gatherings—no need for elaborate preparations!

Customizable Goodness: Adapt the recipe to suit dietary needs with gluten-free dough or vegan cheese, making it inclusive for everyone at your table.

Dip It Good: No Halloween treat is complete without the right dip—pair these with warm marinara for a thrilling flavor combo that will have everyone reaching for more! For more cheesy delights, check out my Cheesy Corn Fritters and Cheesy Garlic Bread recipes!

Cheesy Halloween Breadstick Bones Ingredients

• Get ready to whip up these spooky delights with fascinating flavors!

For the Dough

  • All-purpose flour – For dusting, it ensures the dough doesn’t stick while shaping into those fun bone forms.
  • 1 pound pizza dough – This is your main ingredient; feel free to substitute with gluten-free pizza dough for a variation!

For the Flavor

  • 2 tablespoons unsalted butter, melted – Adds rich flavor and helps the breadsticks turn golden brown; olive oil can be used for a dairy-free option.
  • ½ cup grated Parmesan cheese – Offers a sharp, salty kick; freshly grated is best for flavor and texture.
  • 1 cup shredded mozzarella cheese – This is what gives them that cheesy gooeyness; swap for dairy-free cheese for a vegan alternative.

For Dipping

  • Marinara sauce – A must-have for dipping; you can use store-bought or make your own for a personal touch.

By gathering these simple yet effective ingredients, you'll be on your way to creating the most delightful Cheesy Halloween Breadstick Bones that will surely steal the show at your next gathering!

Step‑by‑Step Instructions for Cheesy Halloween Breadstick Bones

Step 1: Preheat the Oven
Start by preheating your oven to 375°F (190°C). While the oven warms up, line two baking sheets with parchment paper—this prevents the Cheesy Halloween Breadstick Bones from sticking and makes clean-up a breeze.

Step 2: Shape the Dough
Take your 1 pound of pizza dough and divide it into 10 equal portions. Roll each piece into approximately 8-inch ropes, ensuring the ends are slightly thicker to create the classic bone shape. Dust with flour as needed to prevent sticking.

Step 3: Snip the Ends
Using kitchen scissors, carefully snip both ends of each dough rope to shape them like bones. Pull slightly at the ends to give them a more pronounced bone appearance. This playful shaping will have your breadsticks looking spooky and fun for Halloween.

Step 4: Brush and Bake
Once all the breadsticks are shaped, place them on the prepared baking sheets. Brush each stick generously with the melted butter and sprinkle on the grated Parmesan cheese. Bake them in the preheated oven for 15 minutes, or until they are golden brown and crispy on the outside.

Step 5: Add Mozzarella
After 15 minutes, carefully remove the baking sheets from the oven. Top each breadstick with shredded mozzarella cheese, making sure to cover them well for that ultimate cheesy goodness. Return them to the oven for another 5-7 minutes, until the cheese is melted and bubbly.

Step 6: Serve
Once the Cheesy Halloween Breadstick Bones are golden and the cheese is delightfully gooey, take them out of the oven. Serve warm with a side of marinara sauce for dipping, adding a splash of “blood” for a fun Halloween twist that will have everyone reaching for more!

How to Store and Freeze Cheesy Halloween Breadstick Bones

Airtight Storage: Store baked Cheesy Halloween Breadstick Bones in an airtight container at room temperature for up to 3 days to maintain their delightful crispy texture.

Reheating Instructions: For best results, reheat the breadsticks in the oven at 350°F (175°C) for about 8-10 minutes, which will help restore their crispiness.

Freezing Options: If you want to save some for later, freeze the baked breadsticks in a single layer initially, then transfer them to a freezer-safe bag for up to 2 months.

Thawing and Reheating: To enjoy frozen breadsticks, thaw in the fridge overnight, then reheat in the oven to bring back the gooey goodness and crisp crust.

Cheesy Halloween Breadstick Bones Variations

Get creative and customize these spooky delights to suit your tastes and dietary needs!

  • Gluten-Free: Use gluten-free pizza dough for a deliciously spooky treat that everyone can enjoy at the party.

  • Dairy-Free: Swap in vegan cheese for both the mozzarella and Parmesan, creating a fully plant-based version that still packs flavor.

  • Herb Infusion: Add dried herbs like oregano or basil to the melted butter before brushing to give your breadsticks a flavor boost.

  • Spicy Kick: Mix in some crushed red pepper flakes with the cheese to give your breadsticks a fiery twist that will excite adventurous eaters.

  • Cheesy Trio: Combine mozzarella, cheddar, and pepper jack cheese for a magical medley that will spread delight with every bite.

  • Sweet Dip: For a unique twist, serve with a side of honey mustard or barbecue sauce for an unexpected yet delicious pairing.

  • Stuffed Version: Roll the pizza dough around a small piece of string cheese before shaping for an extra gooey surprise inside!

  • Festive Toppings: Sprinkle edible glitter or Halloween-themed sprinkles on top of the melted cheese for a fun, festive touch that kids will love!

With these variations, you can turn your delicious Cheesy Zucchini Bake or Cheesy Garlic Bread into even more spooky fun!

Expert Tips for Cheesy Halloween Breadstick Bones

  • Dough Temperature: Always let pizza dough sit at room temperature for about 30 minutes before shaping to make it easier to work with.

  • Scissors Technique: Use kitchen scissors to achieve clean cuts at the ends of the breadsticks, ensuring a proper bone shape and preventing tearing.

  • Cheese Quality Matters: Opt for freshly grated cheese instead of pre-packaged; it melts better and enhances the flavor of your Cheesy Halloween Breadstick Bones.

  • Avoid Overloading: Be cautious not to overload the breadsticks with mozzarella; too much cheese can lead to sogginess and reduce that delightful crispy texture.

  • Make-Ahead Magic: Prepare the dough and shape the breadsticks in advance. When ready to bake, simply brush with butter and cheese, then pop them in the oven for a quick treat.

  • Freezing Options: Baked breadsticks can be frozen for later enjoyment but make sure to freeze them on a baking sheet before transferring to a container to preserve their shape.

Make Ahead Options

These Spine-Chilling Cheesy Halloween Breadstick Bones are perfect for busy cooks who want to save time while still impressing their guests! You can prepare the breadsticks up to 24 hours in advance. Simply shape the dough into bones and place them on a baking sheet lined with parchment paper. Cover them tightly with plastic wrap and refrigerate until you're ready to bake. When it's time to serve, remove from the fridge, brush with melted butter, and sprinkle with Parmesan, then bake as directed, adding mozzarella during the final minutes. This method ensures that your breadsticks maintain their delicious crispiness, making them just as delightful as if made fresh!

What to Serve with Spine-Chilling Cheesy Halloween Breadstick Bones

Prepare for a spook-tacular meal that elevates your Halloween gathering with these delightful, theme-inspired sides!

  • Crispy Pumpkin Wedges: These roasted pumpkin slices bring a sweet, earthy flavor that pairs perfectly with your cheesy breadsticks while adding festive color to the plate.

  • Witch’s Brew Soup: A soothing, creamy soup dotted with vibrant green peas, it adds a comforting touch and serves as a delicious dip for your breadsticks.

  • Garlic Butter Pasta: Tossed in savory garlic butter, this dish offers a rich flavor that complements the cheesy goodness of the breadsticks, creating a delightful contrast.

  • Hot Apple Cider: Infused with cinnamon and nutmeg, this spiced beverage warms the heart and ties in the seasonal flavors of Halloween with a cozy finish.

  • Halloween Salad: Crunchy lettuce, dark olives (for a spooky touch!), and roasted squash blend beautifully to create a fresh, vibrant salad that balances out the indulgence of the cheesy treats.

  • Mummy Meatballs: Whip up some meatballs wrapped in dough strips that resemble mummies—fun and thematic, these tasty morsels are sure to be a hit alongside your breadstick bones!

Each of these ideas highlights complementary textures and flavors, ensuring your Halloween spread is as hauntingly delicious as your breadstick bones!

Cheesy Halloween Breadstick Bones Recipe FAQs

What type of pizza dough should I use?
You can use store-bought pizza dough, which is super convenient! If you're looking for alternatives, gluten-free pizza dough works wonderfully as a substitute to cater to dietary needs.

How should I store the baked Cheesy Halloween Breadstick Bones?
To keep your breadsticks fresh, store them in an airtight container at room temperature for up to 3 days. They’ll maintain their crispy texture and delicious flavor, perfect for snacking!

Can I freeze Cheesy Halloween Breadstick Bones?
Absolutely! To freeze, wait until the baked breadsticks have completely cooled. Lay them in a single layer on a baking sheet and freeze. Once solid, transfer them to a freezer-safe bag or container. They can be frozen for up to 2 months.

How do I reheat frozen breadsticks?
For the best results, thaw the frozen breadsticks overnight in the fridge. To reheat, place them in a preheated oven at 350°F (175°C) for about 8-10 minutes. This will help restore their crispiness and gooey cheese texture.

What if my breadsticks are soggy?
If you find your Cheesy Halloween Breadstick Bones are a bit soggy, it might be because of too much cheese or moisture in the dough. For future batches, use a bit less mozzarella and ensure they cool on a wire rack after baking to help maintain their crispiness.

Are these breadsticks suitable for dietary restrictions?
Yes! The recipe can easily accommodate various dietary needs. For a dairy-free option, swap the mozzarella with dairy-free cheese, and for gluten-free enthusiasts, use a gluten-free pizza dough. These yummy breadsticks are customizable to enjoy by all!

Cheesy Halloween Breadstick Bones

Cheesy Halloween Breadstick Bones for Spooky Fun Dipping

Transform pizza dough into Cheesy Halloween Breadstick Bones, a fun and spooky snack perfect for Halloween gatherings.
Print Recipe Pin Recipe
Prep Time 15 minutes mins
Cook Time 20 minutes mins
Total Time 35 minutes mins
Servings: 10 breadsticks
Course: Snacks
Cuisine: American
Calories: 150
Ingredients Equipment Method Nutrition Notes

Ingredients
  

For the Dough
  • 1 pound pizza dough substitute with gluten-free pizza dough if desired
  • all-purpose flour for dusting
For the Flavor
  • 2 tablespoons unsalted butter, melted or olive oil for a dairy-free option
  • ½ cup grated Parmesan cheese freshly grated is best
  • 1 cup shredded mozzarella cheese swap for dairy-free cheese for vegan option
For Dipping
  • marinara sauce for dipping, store-bought or homemade

Equipment

  • Oven
  • Baking Sheets
  • Parchment Paper
  • kitchen scissors

Method
 

Step-by-Step Instructions
  1. Preheat your oven to 375°F (190°C) and line two baking sheets with parchment paper.
  2. Divide the pizza dough into 10 equal portions and roll each into 8-inch ropes.
  3. Carefully snip both ends of each dough rope to shape them like bones.
  4. Brush each breadstick with melted butter and sprinkle Parmesan cheese on top.
  5. Bake in the preheated oven for 15 minutes or until golden brown.
  6. Top with shredded mozzarella cheese and return to oven for an additional 5-7 minutes.
  7. Serve warm with marinara sauce for dipping.

Nutrition

Serving: 1breadstickCalories: 150kcalCarbohydrates: 18gProtein: 6gFat: 7gSaturated Fat: 4gMonounsaturated Fat: 3gCholesterol: 20mgSodium: 250mgPotassium: 100mgFiber: 1gVitamin A: 200IUCalcium: 200mgIron: 1mg

Notes

Let dough sit at room temperature for 30 minutes before shaping. Use kitchen scissors for clean cuts. Freshly grated cheese melts better. Don't overload with mozzarella to maintain crispness. Prepare in advance for quick baking.

Tried this recipe?

Let us know how it was!

Irresistible Cheese Olive Balls for Every Party Delight

October 3, 2025 by Grace Snow Leave a Comment

The kitchen filled with laughter and the delightful aroma of baking, as I watched friends gather around the table, eager to dig into these Spooky Cheese Olive Balls. Perfect for Halloween or any festive gathering, this easy recipe combines the savory crunch of cheddar with the tangy burst of olives. Whether you’re hosting a party or simply looking for a delicious make-ahead snack, these cheesy bites are sure to impress. They've got that golden puff that's not just visually appealing, but also a comforting indulgence for everyone. Plus, they’re simple enough to whip up even on a busy weeknight! Curious about how to make them the star of your next event? Let’s dive into this fun and flavorful adventure!

Why are Cheese Olive Balls a Must-Try?

Irresistible Flavor: The combination of savory cheddar and briny olives creates a mouthwatering snack that pleases every palate.

Easy Preparation: These Cheese Olive Balls are an easy recipe, perfect for both novice cooks and seasoned chefs.

Versatile Options: Feel free to substitute ingredients—try pepper jack cheese for added heat or swap in pickles for a fun twist!

Make-Ahead Convenience: Prepare them a day in advance or freeze for later use, making entertaining effortless.

Crowd-Pleasing Delight: Whether it's Halloween or a casual get-together, these savory bites are guaranteed to impress your guests. Serve with your favorite dips, and you'll have a hit on your hands! For more festive ideas, check out my Jello Salad for a complete party spread.

Cheese Olive Balls Ingredients

For the Dough

  • All-Purpose Flour – Provides structure to the cheese ball; use regular flour for best results.
  • Dry Mustard – Enhances the cheese flavor and adds depth to the overall taste.
  • Cayenne Pepper – Adds a mild heat to the mix; adjust to your taste preference for perfect spice levels.
  • Finely Grated Cheddar Cheese – The star of the recipe; freshly grated cheese melts better, enhancing flavor and binding.
  • Melted Butter – Combines with flour and cheese to create a cohesive, easy-to-handle dough.

For the Filling

  • Pimento-Stuffed Manzanilla Olives – The delightful surprise inside; can substitute with Kalamata olives for a bolder flavor profile.

These Cheese Olive Balls are not just a hit at Halloween but are perfect for any party or gathering!

Step‑by‑Step Instructions for Cheese Olive Balls

Step 1: Whisk the Dry Ingredients
In a large mixing bowl, combine 2 cups of all-purpose flour, 1 teaspoon of dry mustard, and 1/4 teaspoon of cayenne pepper. Whisk these dry ingredients together until they're evenly blended. This step is crucial as it sets the flavor foundation for your Cheese Olive Balls.

Step 2: Incorporate the Cheese
Add 1 cup of finely grated cheddar cheese to the bowl and gently toss it with the dry mixture until the cheese is well coated. The cheese should start to clump with the flour, indicating that it’s integrating nicely. This prepares the mixture for the next step, where the richness of the cheese really shines through.

Step 3: Form the Dough
Create a well in the center of your mixture and pour in 1/2 cup of melted butter. With a spoon or your hands, mix the ingredients until they come together to form a cohesive dough. The dough should be soft yet slightly sticky; if it’s too dry, a touch more melted butter can help.

Step 4: Prepare the Olives
Take your pimento-stuffed Manzanilla olives and pat them dry with a paper towel to absorb any excess moisture. This step prevents any sogginess in your Cheese Olive Balls. After preparation, you’ll be ready to wrap the dough around the olives for a delightful surprise inside.

Step 5: Wrap the Dough
Scoop about a teaspoon of dough and flatten it in your palm. Encase each olive by carefully wrapping the dough around it, ensuring part of the olive remains exposed for that charming look. Repeat this process until all olives are wrapped, forming around 20 Cheese Olive Balls.

Step 6: Chill the Balls
Place the shaped Cheese Olive Balls on a baking sheet lined with parchment paper. Refrigerate them for one hour. Chilling allows the balls to firm up, helping them maintain their shape while baking. This is a great time to preheat the oven as well for the next step.

Step 7: Bake the Cheese Olive Balls
Preheat your oven to 400°F (200°C). Once ready, remove the Cheese Olive Balls from the refrigerator and bake for about 15-20 minutes. Keep an eye on them; they should turn golden brown and puff up beautifully, indicating they are ready to enjoy.

Step 8: Serve Warm
Once baked, let the Cheese Olive Balls cool for a few minutes before transferring them to a serving platter. Serve these delightful cheesy bites warm, either on their own or with your favorite dipping sauces. Their irresistible combination of flavors will surely impress your guests!

What to Serve with Spooky Cheese Olive Balls

These delightful bites are perfect companions for a festive spread or cozy gathering, making your table a feast for the senses.

  • Crispy Veggie Platter: Fresh, crunchy vegetables like carrots, celery, and bell peppers add a refreshing contrast and a pop of color to your appetizer spread. Pairing with a creamy dip elevates their appeal.

  • Savory Spinach Dip: A rich, creamy dip brimming with flavor complements the savory notes of the Cheese Olive Balls, creating a harmonious balance that will have everyone reaching for more.

  • Zesty Salsa: Bright, tangy salsa offers a delightful kick that contrasts wonderfully with the cheesy flavor, making every bite an adventure.

  • Sweet and Spicy Mustard: A tangy mustard with a kick pairs perfectly, enhancing the cheese's richness and adding depth to your experience.

  • Warm Breadsticks: Soft, buttery breadsticks provide a comforting side option, perfect for dipping and enjoying alongside your cheesy delight.

  • Herbed Cream Cheese Spread: A light, herby spread adds a creamy element that beautifully balances the richness of the Cheese Olive Balls, inviting guests to indulge.

  • Suggested Wine Pairing: A crisp Sauvignon Blanc or a light-bodied red like Pinot Noir complements the flavors of cheese and olives, enhancing the experience with every sip.

  • Seasonal Dessert: Finish off your meal with a spiced pumpkin pie or apple crisp, embracing the flavors of the season and adding a sweet contrast to the savory appetizers.

How to Store and Freeze Cheese Olive Balls

Fridge: Store any leftover Cheese Olive Balls in an airtight container for up to 3 days. Reheat in the oven at 350°F (180°C) for about 5-7 minutes until warm and crispy.

Freezer: For longer storage, freeze the unbaked Cheese Olive Balls on a baking sheet before transferring them to a freezer-safe bag. They can be frozen for up to 3 months.

Reheating: Bake frozen Cheese Olive Balls directly from the freezer at 400°F (200°C), adding an extra 5 minutes to the baking time.

Make-Ahead Tip: Prepare Cheese Olive Balls a day in advance and refrigerate before baking to make your party planning a breeze!

Expert Tips for Cheese Olive Balls

Freshly Grated Cheese: Use freshly grated cheddar cheese for superior melting and binding, ensuring your Cheese Olive Balls hold together perfectly.

Olive Drying: Make sure to thoroughly dry your olives; excess moisture can lead to a soggy dough, compromising the delightful texture.

Chill Time: Don’t skip the refrigeration step! Chilling the formed balls solidifies the dough, helping them maintain their shape during baking.

Baking Watch: Keep an eye on your Cheese Olive Balls while baking; they should puff up and turn a lovely golden hue, indicating they're done.

Dough Consistency: If your dough feels too sticky, add a little more flour until it reaches a soft yet manageable consistency for wrapping around olives.

Make Ahead Options

These Cheese Olive Balls are perfect for meal prep enthusiasts! You can prepare the dough up to 24 hours in advance, wrapping the olives and refrigerating them until you're ready to bake. For even longer storage, assemble the Cheese Olive Balls and freeze them unbaked for up to 3 months. Just remember to place them on a parchment-lined baking sheet before freezing to prevent sticking, and ensure they’re well covered to maintain their quality. When you're ready to enjoy, simply bake from frozen, adding a few extra minutes to the cooking time. This makes it easy to have a delightful appetizer prepared for your next gathering with minimal effort!

Cheese Olive Balls Variations & Substitutions

Feel free to get creative and make these Cheese Olive Balls uniquely yours – your taste buds will thank you!

  • Spicy Twist: Substitute cheddar with pepper jack cheese for an extra kick, tantalizing heat in every bite. Your guests will love the surprise!

  • Herb-Infused: Add dried herbs like oregano or thyme to the dough for a fragrant twist. Fresh flavors will elevate this dish even more!

  • Olive Swap: Replace the pimento-stuffed olives with Kalamata olives for a bolder, saltier flavor profile. Different olives open up exciting new tastes!

  • Veggie Delight: Swap the olives for small pickles or stuffed peppers, creating a delightful crunch that adds a fun surprise to each bite. Perfect for those who love a little tang!

  • Cheddar or Gouda: Use gouda cheese instead of cheddar for a richer, slightly sweet flavor that pairs beautifully with the crisp outer shell.

  • Nutty Addition: Incorporate finely chopped nuts, like walnuts or pecans, into the dough for a delightful crunch and depth of flavor. They add a wonderful texture and taste contrast.

  • Dipping Delights: Serve with homemade spicy mustard or garlic aioli for a delectable dipping experience. Both options will take these Cheese Olive Balls to the next level.

  • Make It Mini: For smaller, bite-sized treats, shape the dough into tiny balls and use cocktail olives to create perfect party snacks. These mini morsels are great for sharing!

For additional festive inspiration, don’t forget to check out my Jello Salad to round out your party spread or consider trying my delectable Potato Blue Cheese dish for a unique flavor party hit! These easy variations will make every gathering memorable!

Cheese Olive Balls Recipe FAQs

How do I choose the right olives?
Absolutely! For the best flavor in your Cheese Olive Balls, opt for pimento-stuffed Manzanilla olives. These olives have a nice briny flavor that complements the cheddar well. Ensure they are well-drained before wrapping them in dough to prevent excess moisture, which can affect the ball's structure. If you’re after something bolder, Kalamata olives make a delicious substitution!

What’s the best way to store leftover Cheese Olive Balls?
Very! Store any leftover Cheese Olive Balls in an airtight container in the fridge for up to 3 days. For the best texture, when you reheat them, place them in a preheated oven at 350°F (180°C) for about 5-7 minutes until they’re warm and crispy again.

Can I freeze Cheese Olive Balls?
Absolutely! To freeze, form the Cheese Olive Balls but do not bake them first. Place on a baking sheet lined with parchment paper in a single layer and freeze until firm. Then, transfer to a freezer-safe bag. They can be frozen for up to 3 months. When you’re ready to enjoy them, bake straight from the freezer at 400°F (200°C), adding an extra 5 minutes to the baking time.

What should I do if my dough is too sticky?
If you find that your dough is too sticky to wrap around the olives, don't worry! Start by adding a little more all-purpose flour—about a tablespoon at a time—until it reaches a soft yet manageable consistency. Remember that slightly sticky dough is better than dry, so keep an eye on the texture; you want it to mold easily around the olives without falling apart.

Are there any dietary considerations for Cheese Olive Balls?
The more the merrier! Cheese Olive Balls can contain gluten and dairy, so if you have guests with dietary restrictions, consider using a gluten-free flour blend and a dairy-free cheese alternative. For those with a nut allergy, double-check the ingredient labels of any substitutes you use to ensure they’re safe for everyone.

Cheese Olive Balls

Irresistible Cheese Olive Balls for Every Party Delight

These Cheese Olive Balls are a savory and delightful snack, perfect for any gathering or party.
Print Recipe Pin Recipe
Prep Time 30 minutes mins
Cook Time 20 minutes mins
Chill Time 1 hour hr
Total Time 1 hour hr 50 minutes mins
Servings: 20 balls
Course: Appetizers
Cuisine: American
Calories: 80
Ingredients Equipment Method Nutrition Notes

Ingredients
  

For the Dough
  • 2 cups all-purpose flour Use regular flour for best results
  • 1 teaspoon dry mustard Enhances cheese flavor
  • 1/4 teaspoon cayenne pepper Adjust to taste
  • 1 cup finely grated cheddar cheese Freshly grated melts better
  • 1/2 cup melted butter Helps form cohesive dough
For the Filling
  • 20 pieces pimento-stuffed Manzanilla olives Can substitute with Kalamata olives

Equipment

  • Mixing Bowl
  • Baking Sheet
  • Parchment Paper

Method
 

Step-by-Step Instructions
  1. In a large mixing bowl, combine 2 cups of all-purpose flour, 1 teaspoon of dry mustard, and 1/4 teaspoon of cayenne pepper. Whisk until evenly blended.
  2. Add 1 cup of finely grated cheddar cheese and gently toss it with the dry mixture until the cheese is well coated.
  3. Create a well in the center of the mixture and pour in 1/2 cup of melted butter. Mix until it forms a cohesive dough.
  4. Pat your pimento-stuffed olives dry to absorb excess moisture.
  5. Scoop about a teaspoon of dough, flatten it, and wrap it around each olive, ensuring part of the olive remains exposed.
  6. Place the balls on a baking sheet and refrigerate for one hour.
  7. Preheat your oven to 400°F (200°C). Bake the Cheese Olive Balls for about 15-20 minutes until golden brown.
  8. Let the Cheese Olive Balls cool for a few minutes before serving warm.

Nutrition

Serving: 1ballCalories: 80kcalCarbohydrates: 6gProtein: 2gFat: 6gSaturated Fat: 4gMonounsaturated Fat: 2gCholesterol: 15mgSodium: 150mgPotassium: 30mgVitamin A: 200IUCalcium: 100mg

Notes

For best results, always use freshly grated cheese and ensure olives are dried properly before wrapping.

Tried this recipe?

Let us know how it was!

Nutter Butter Acorn Cookies: A Fun Fall Baking Adventure

October 3, 2025 by Grace Snow Leave a Comment

As I gathered just a handful of simple ingredients this fall, a wave of nostalgia washed over me—flavors of crunchy peanut butter and silky chocolate igniting joyous memories of baking with my kids. Enter the delightful Nutter Butter Acorn Cookies, a whimsical treat that takes minimal time and effort while dazzling everyone at your Thanksgiving gatherings. These easy, kid-friendly cookies are not only a fun way to involve your little ones in the kitchen, but they also transform your dessert table into a festive masterpiece. Whether enjoyed straight from the platter or gifted in charming cellophane bags, these acorn-shaped bites promise to be a sweet highlight, bringing a sprinkle of joy to your autumn festivities. So, are you ready to indulge in some creative baking magic?

Why are Nutter Butter Acorn Cookies irresistible?

Playful Design: These acorn-shaped delights are not just delicious; they bring a whimsical charm that kids will love to help create.

Effortless Delight: With only a few ingredients and minimal prep time, you can whip up a batch in a heartbeat, making them the perfect treat for busy fall days.

Flavor Fusion: The rich peanut butter from Nutter Butter cookies combined with the sweetness of chocolate is a crowd-pleaser that delights every palate.

Festive Appeal: Ideal for Thanksgiving celebrations or autumn parties, these cookies will effortlessly elevate your dessert table and bring smiles to your guests.

For more fun cookies, check out my easy Matcha Cookies Soft for a unique twist or add holiday spirit with delicious Eggnog Cookies Soft.

Nutter Butter Acorn Cookies Ingredients

• Get ready for a delightful treat!

For the Cookies

  • Nutter Butter Bites – These creamy cookies provide the perfect peanut butter flavor and structure for your acorns.
  • Hershey's Kisses – Use these sweet chocolates for the acorn tops; they add a delicious chocolatey twist.

For the Assembly

  • Semi-Sweet Chocolate Chips – Melt these to act as glue for attaching the Hershey's Kisses and mini chips—watch them closely to avoid burning!
  • Mini Semi-Sweet Chocolate Chips – These resemble the acorn caps; regular-sized chips can work as a fun substitution if needed.

Dreaming about how to make Nutter Butter Acorn Cookies? You'll find all the magic in these ingredients!

Step‑by‑Step Instructions for Nutter Butter Acorn Cookies

Step 1: Melt the Chocolate
Begin by placing 1/4 cup of semi-sweet chocolate chips into a microwave-safe bowl. Heat them in the microwave in 15-30 second increments, stirring after each round until the chocolate is fully melted and glossy. Be careful not to overheat, as burnt chocolate can ruin the taste. This melted chocolate will act as the glue for your delightful Nutter Butter acorn cookies.

Step 2: Attach the Hershey's Kisses
Take a Nutter Butter bite and spread a small amount of the melted chocolate on one flat side. Carefully press a Hershey's Kiss onto the chocolate-covered side, applying gentle pressure to ensure it sticks. Hold it for a moment until the chocolate begins to set. This step creates the classic acorn shape and adds that delicious chocolate flavor on top of your Nutter Butter acorn cookies.

Step 3: Melt the Mini Chocolate Chips
Next, repeat the melting process with the mini semi-sweet chocolate chips to use as the acorn caps. Microwave these in 15-30 second bursts, stirring until they achieve a smooth consistency. Once melted, use a toothpick or a small spoon to apply a tiny amount of melted chocolate on the top of the Hershey's Kiss and carefully stick a mini chocolate chip on it, making your acorn cookies look irresistibly cute.

Step 4: Arrange the Cookies
After assembling all your Nutter Butter acorn cookies, it’s time for presentation! Arrange them neatly on a serving platter, or package them in lovely cellophane bags for gifting. Make sure they are spaced out comfortably to maintain their shape and allow for easy serving. These festive treats will not only look delightful but will surely tempt everyone at your holiday gathering!

Make Ahead Options

These Nutter Butter Acorn Cookies are perfect for meal prep enthusiasts looking to save time during the holiday rush! You can assemble the cookies up to 24 hours in advance, making them an ideal treat to prepare ahead of time. Just follow the steps to melt the chocolate, attach the Hershey's Kisses, and adhere the mini chips. Once assembled, arrange them on a platter and cover with plastic wrap before refrigerating. This will keep them fresh and prevent the chocolate from melting. When you're ready to serve, simply take them out of the refrigerator, and they'll be just as delicious and charming as if they were freshly made. Enjoy effortless baking and the joy these cookies bring!

Expert Tips for Nutter Butter Acorn Cookies

• Melt with Care: Always melt chocolate in short bursts and stir frequently. This prevents burning and ensures a smooth texture for your Nutter Butter acorn cookies.

• Perfect Placement: When sticking on the Hershey's Kisses and mini chocolate chips, press gently but firmly to secure them. A little patience will help create a clean, finished look.

• Creative Alternatives: If you don't have mini chocolate chips on hand, consider using crushed nuts or sprinkles as acorn caps for a fun twist on your Nutter Butter acorn cookies.

• Cooling Time: After assembling, let the cookies sit for a few minutes to allow the melted chocolate to set. This makes transporting and serving much easier!

• Avoid Chocolate Clumping: Make sure your microwave is on medium power when melting chocolate, as too high heat can cause it to clump instead of melt smoothly.

How to Store and Freeze Nutter Butter Acorn Cookies

Room Temperature: Keep the cookies in an airtight container at room temperature for up to 1 week to maintain their delightful texture and flavor.

Fridge: If you prefer a longer shelf-life, store them in the fridge for up to 2 weeks. Allow them to come to room temperature before serving for the best taste.

Freezer: To freeze, wrap each cookie individually in plastic wrap and place them in a zip-top bag. They can last in the freezer for up to 3 months.

Reheating: If you want to enjoy them warm, pop the thawed cookies in the microwave for about 10-15 seconds—just enough to soften a bit without melting the chocolate again!

Nutter Butter Acorn Cookies: Customization Options

Feel free to get creative and make these cute little acorns your own with these fun variations!

  • Lighter Option: Substitute Nutter Butters with mini Nilla wafers for a delightful, airy twist that’s equally charming.

  • Nutty Crunch: Add a sprinkle of crushed pecans or walnuts on top for an extra crunch and a savory flavor that complements the sweetness perfectly.

  • Decorative Drizzle: Drizzle melted white chocolate over the completed cookies for an elegant finishing touch that really makes them stand out!

  • Caramel Surprise: Incorporate a touch of caramel drizzle in place of melted chocolate to add a sweet, gooey surprise under the mini chocolate chips.

  • Flavor Boost: Mix in a teaspoon of cinnamon or pumpkin spice in the melted chocolate for a cozy, warm flavor that perfectly captures the essence of fall.

  • Fruitiness: Consider adding a few mini chocolate-covered raisins instead of chocolate chips for a playful touch that adds both sweetness and surprises in texture.

  • Spicy Kick: If you enjoy a bit of heat, try adding a dash of cayenne pepper to the melted chocolate for a surprising and deliciously bold flavor.

For more delightful cookie ideas, don’t miss out on my charmingly soft Matcha Cookies or festive Eggnog Cookies Soft that will brighten up your baking adventures this season!

What to Serve with Nutter Butter Acorn Cookies?

As you prepare these adorable cookies, consider adding delightful pairings to create a memorable fall feast that warms the heart.

  • Warm Apple Cider: Nothing evokes the essence of autumn like a cup of spiced apple cider, balancing sweetness with a hint of cinnamon that perfectly complements the cookies.

  • Pumpkin Spice Muffins: These fluffy treats add a cozy touch to your table, bringing in rich fall flavors that harmonize with the nutty acorns.

  • Chocolate Milk: A glass of this classic favorite dives deep into the playful nature of your cookies, echoing the delightful chocolate layer of each acorn.

  • Roasted Sweet Potatoes: Their natural sweetness and crispy edges contrast beautifully with the creamy cookies, enhancing the overall heartiness of your fall menu.

  • Caramel-Pecan Brownies: These fudgy brownies create a blissful indulgence, with gooey layers and nutty crunches that echo the textures present in the Nutter Butter acorns.

  • Ginger Snap Cookies: With their warm spices and crisp textures, ginger snaps provide a satisfying crunch, enhancing the cozy dessert experience.

  • Vanilla Ice Cream: Serve a scoop alongside the cookies for a delightful contrast of temperatures; the creaminess melts into the savory sweet of the acorn treats.

  • Hot Chocolate: This rich, velvety drink is a classic companion, perfectly blending with the chocolatey goodness of your cookies for a heartwarming treat.

  • Pecan Pie: An iconic fall dessert, having a slice brings out nutty flavors that resonate with the base of your delightful acorn creations, making it a festive addition.

  • Homemade Whipped Cream: A dollop of this light and airy cream on the side allows folks to take their cookies to new levels of deliciousness.

Nutter Butter Acorn Cookies Recipe FAQs

How do I select ripe ingredients for the Nutter Butter Acorn Cookies?
Absolutely! For this recipe, the primary ingredients are packaged items, so you want to make sure that the Nutter Butter cookies are fresh. Check the expiration date on the package. For the chocolate, look for a smooth texture without any white streaks, which can indicate it has bloomed and may affect the taste.

How should I store leftover Nutter Butter Acorn Cookies?
Store your cookies in an airtight container at room temperature for up to 1 week. They can stay fresh longer if you keep them in the fridge for up to 2 weeks, but be sure to let them sit at room temperature for about 10-15 minutes before serving to enhance their flavors.

Can I freeze Nutter Butter Acorn Cookies?
Absolutely! To freeze, simply wrap each cookie individually in plastic wrap to prevent freezer burn, and then place them in a zip-top freezer bag. They will keep well for up to 3 months. When you're ready to indulge, just take them out and let them thaw at room temperature for about 30 minutes, or pop them in the microwave for about 10-15 seconds for a warm treat!

What should I do if the melted chocolate is clumping?
Very! If you notice your chocolate clumping while melting, it might be overheating or the bowl might have some moisture. Always melt chocolate in short intervals (15-30 seconds), and stir vigorously between each burst. If it clumps, you can try adding a tiny bit of vegetable oil to help smooth it out!

Are Nutter Butter Acorn Cookies safe for pets or those with allergies?
Caution is key! While the cookies are delightful for humans, they are not safe for pets due to chocolate. Additionally, people with peanut allergies should avoid these cookies, as they contain peanut butter in the Nutter Butter cookies. Always check ingredient labels to ensure they're comfortable for everyone at your gathering.

Nutter Butter Acorn Cookies

Nutter Butter Acorn Cookies: A Fun Fall Baking Adventure

Nutter Butter Acorn Cookies are a delightful treat bringing nostalgia with crunchy peanut butter and chocolate, perfect for fall festivities.
Print Recipe Pin Recipe
Prep Time 15 minutes mins
Cook Time 5 minutes mins
Cooling Time 10 minutes mins
Total Time 30 minutes mins
Servings: 24 cookies
Course: Dessert
Cuisine: American
Calories: 80
Ingredients Equipment Method Nutrition Notes

Ingredients
  

For the Cookies
  • 16 ounces Nutter Butter Bites These provide the perfect peanut butter flavor.
  • 12 pieces Hershey's Kisses Use for the acorn tops.
For the Assembly
  • 1/4 cup Semi-Sweet Chocolate Chips Melt for attaching pieces.
  • 1/4 cup Mini Semi-Sweet Chocolate Chips Resemble acorn caps.

Equipment

  • Microwave
  • Microwave-safe bowl
  • toothpick
  • Serving Platter

Method
 

Step-by-Step Instructions
  1. Begin by placing 1/4 cup of semi-sweet chocolate chips into a microwave-safe bowl. Heat in 15-30 second increments until fully melted.
  2. Spread a small amount of melted chocolate on one side of a Nutter Butter bite and press a Hershey's Kiss onto it.
  3. Melt the mini chocolate chips in the same way and use them to attach to the top of the Hershey's Kiss with more melted chocolate.
  4. Arrange the completed cookies on a platter or package them in cellophane bags.

Nutrition

Serving: 1cookieCalories: 80kcalCarbohydrates: 9gProtein: 1gFat: 5gSaturated Fat: 2gPolyunsaturated Fat: 1gMonounsaturated Fat: 1gCholesterol: 5mgSodium: 50mgPotassium: 30mgSugar: 6g

Notes

For best results, melt chocolate carefully and allow cookies to cool for easier handling.

Tried this recipe?

Let us know how it was!
  • « Previous Page
  • 1
  • …
  • 129
  • 130
  • 131
  • 132
  • 133
  • …
  • 179
  • Next Page »

Welcome!

Hi, I’m Grace, a Sydney-based home cook with a passion for bold flavors and trending ingredients. Whether you’re a busy beginner or a seasoned foodie, you’ll find dishes here that are fresh, fun, and full of flavor.

More about me

Popular Recipes

  • Cheesy Chicken Garlic Bread Sandwich
    Cheesy Chicken Garlic Bread Sandwich for Cozy Family Moments
  • Easy Chicken Ranch Wraps
    Easy Chicken Ranch Wraps: Quick, Creamy & Totally Satisfying
  • Chicken Caesar Sandwiches
    Delicious Chicken Caesar Sandwiches for Quick Comfort Food
  • best Cuban sandwich
    The Best Cuban Sandwich You’ll Want Every Weeknight!

Footer

↑ back to top

About

  • Privacy Policy
  • Disclaimer
  • Terms & Conditions

Newsletter

  • Sign Up! for emails and updates

Contact

  • About me
  • Contact me

Copyright © 2025 TastyTrendIngredients