tastytrendingredients

  • Home
  • Recipes
    • Appetizers
    • Breakfast
    • Dessert
    • Dinner
    • Drinks
    • Salads
    • Snacks
    • Soups
  • About me
  • Contact me
menu icon
go to homepage
  • Home
  • Recipes
    • Appetizers
    • Breakfast
    • Dessert
    • Dinner
    • Drinks
    • Salads
    • Snacks
    • Soups
  • About me
  • Contact me
search icon
Homepage link
  • Home
  • Recipes
    • Appetizers
    • Breakfast
    • Dessert
    • Dinner
    • Drinks
    • Salads
    • Snacks
    • Soups
  • About me
  • Contact me
×

Deliciously Easy Christmas Fruitcake Cookies to Festively Share

December 4, 2025 by Grace Snow Leave a Comment

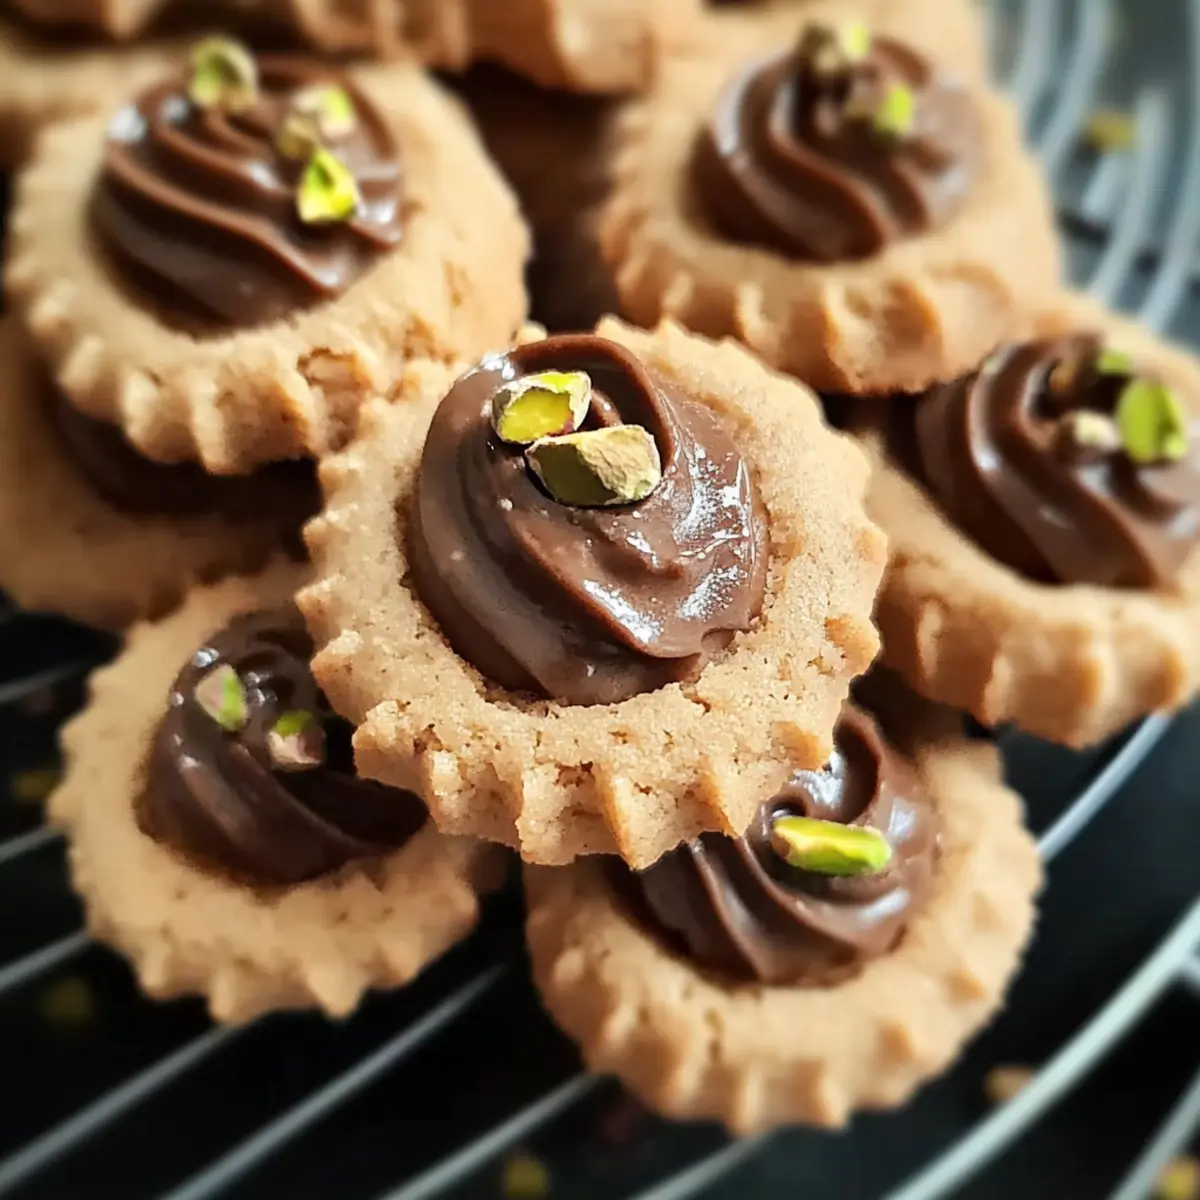
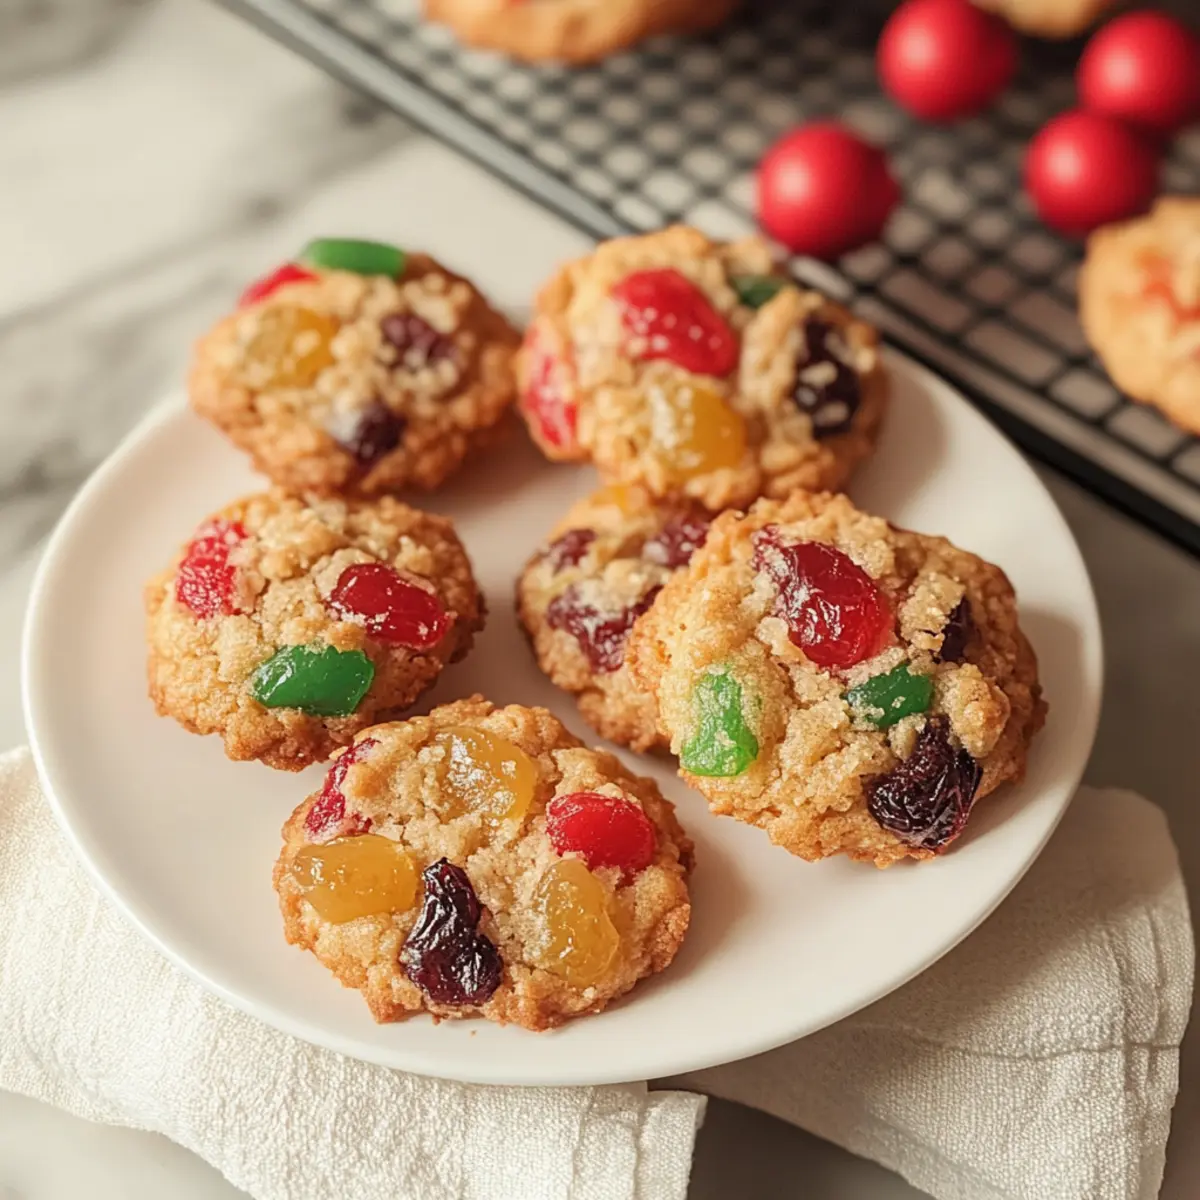
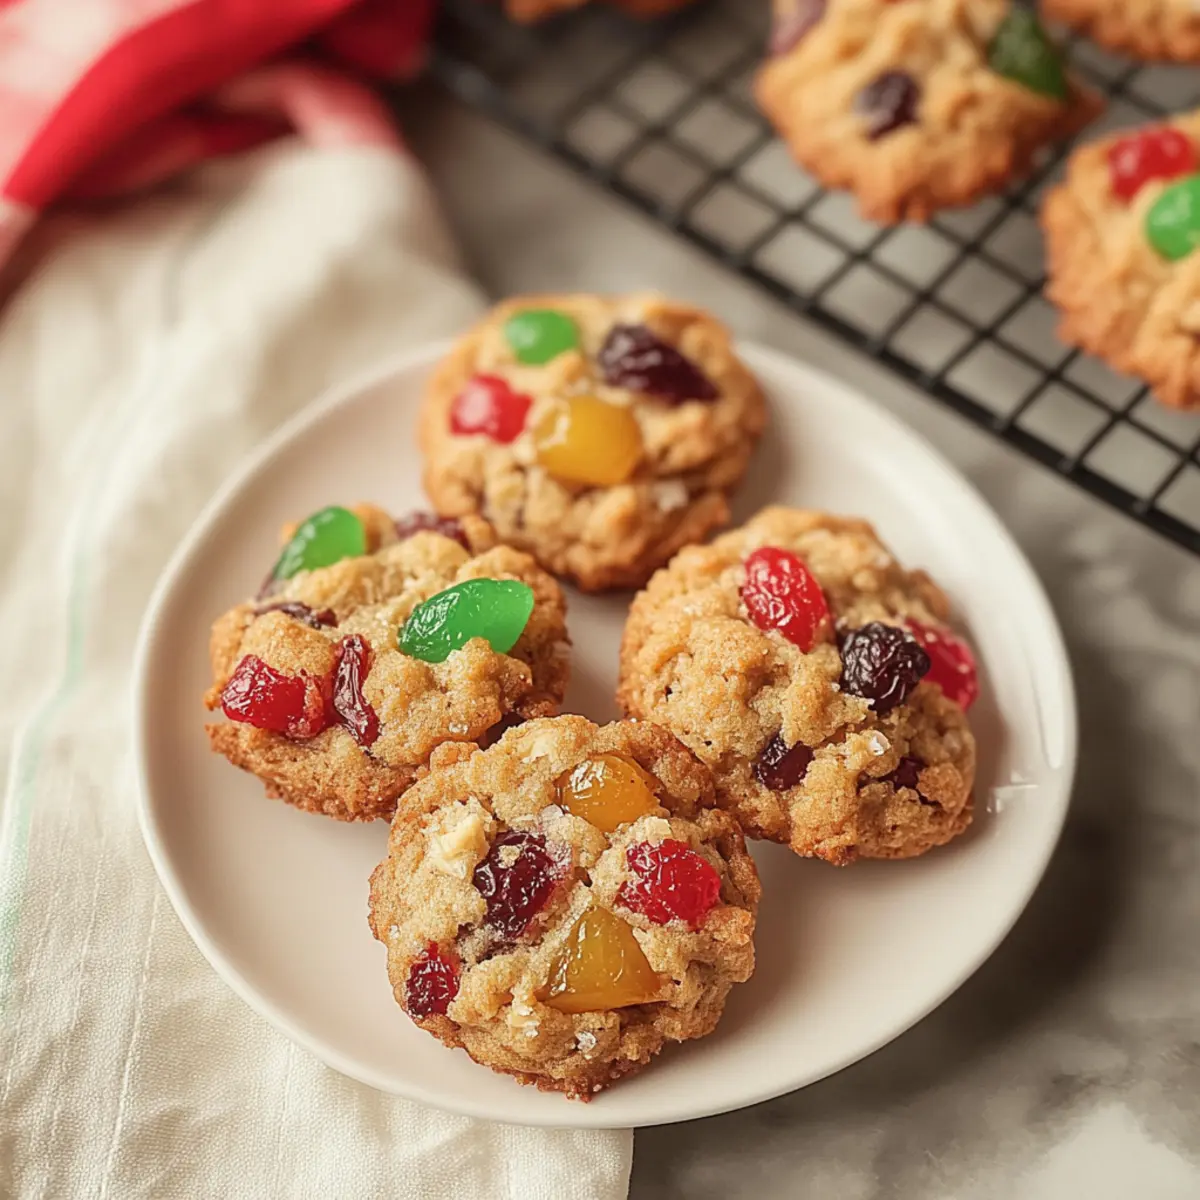
As I sifted through my pantry, a riot of vibrant candied fruits and warm spices called to me, whispering memories of holidays past. That’s when the idea struck—why not reimagine the often-mocked fruitcake into something delightful and approachable? Enter Easy Christmas Fruitcake Cookies! These little gems manage to capture the spirit of festive baking with their sweetness and crunch, all while being incredibly simple to whip up. Not only are they perfect for cookie exchanges, but they also get better with time, allowing you to make them ahead of your holiday gatherings. Whether you’re a seasoned home chef or just looking to escape the fast-food rut, these cookies are sure to become a new favorite! Ready to dive into the cheerful world of holiday baking? Let’s get started!

Why Are These Cookies a Must-Try?

Irresistible Flavor: The blend of candied fruits and warm spices creates an unforgettable taste that captures the essence of the holidays.

Effortless Preparation: With straightforward instructions, even novice bakers can whip these up in no time—no advanced skills needed!

Make-Ahead Magic: Bake now and enjoy later! These cookies actually improve in flavor over time, perfect for busy holiday schedules.

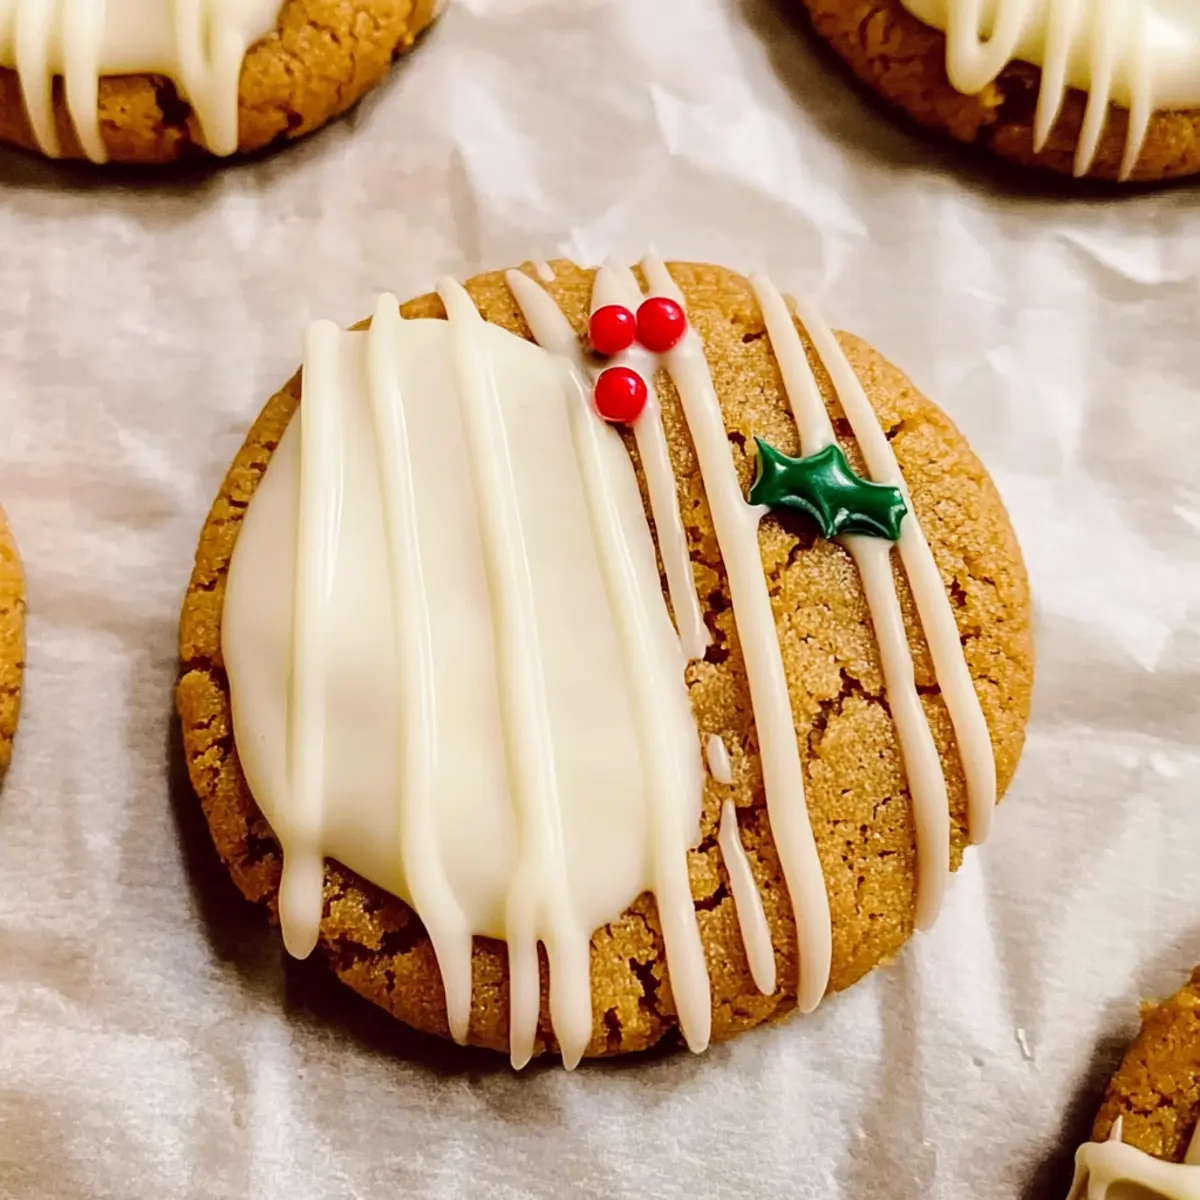
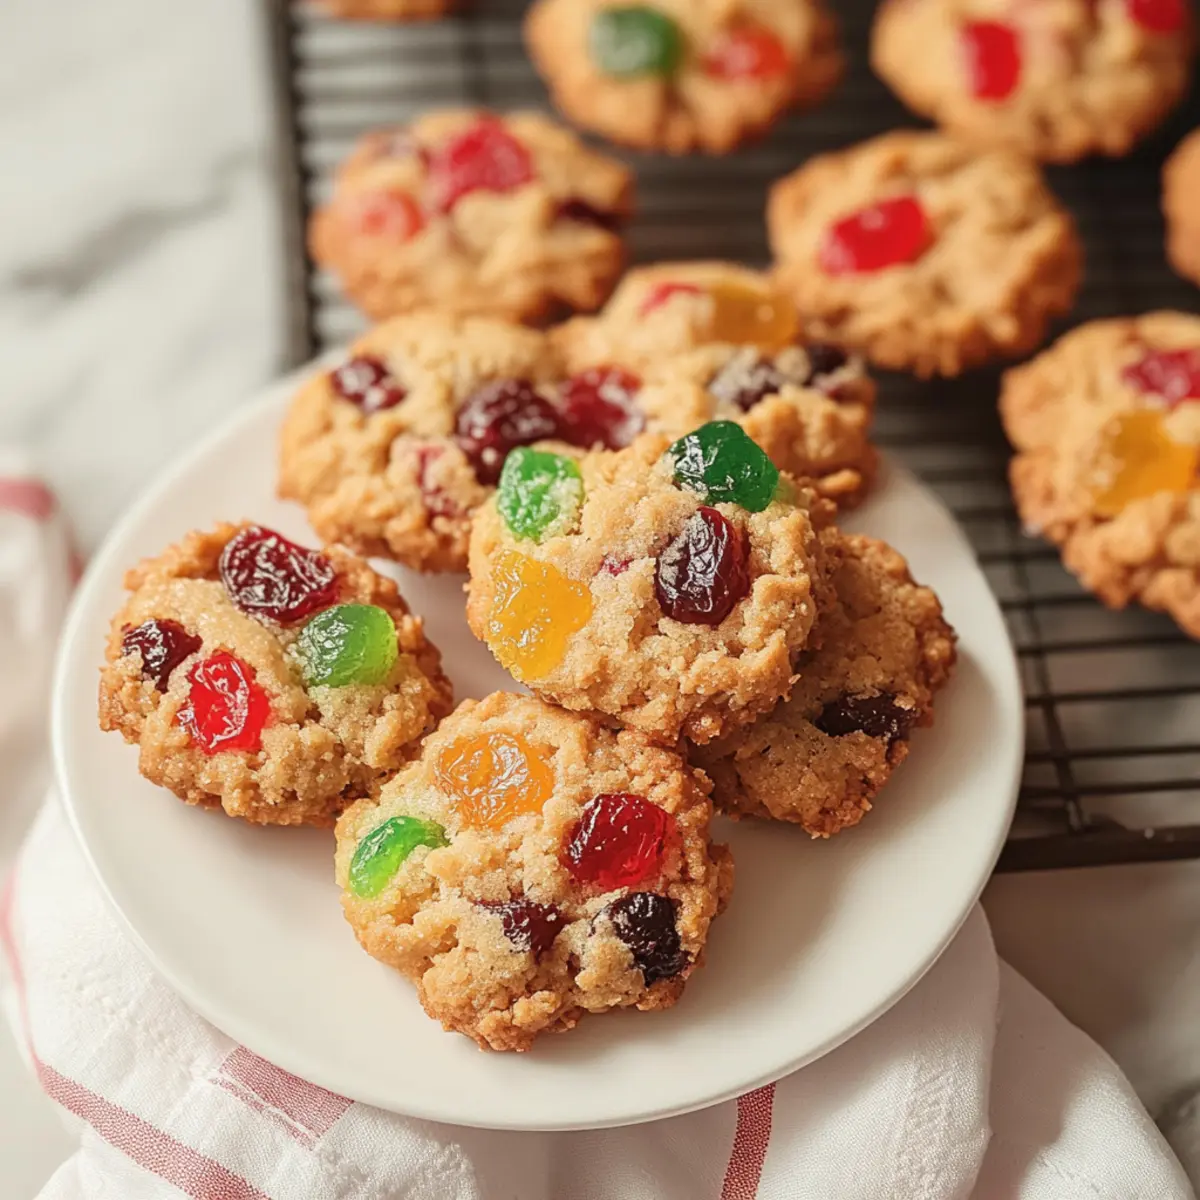
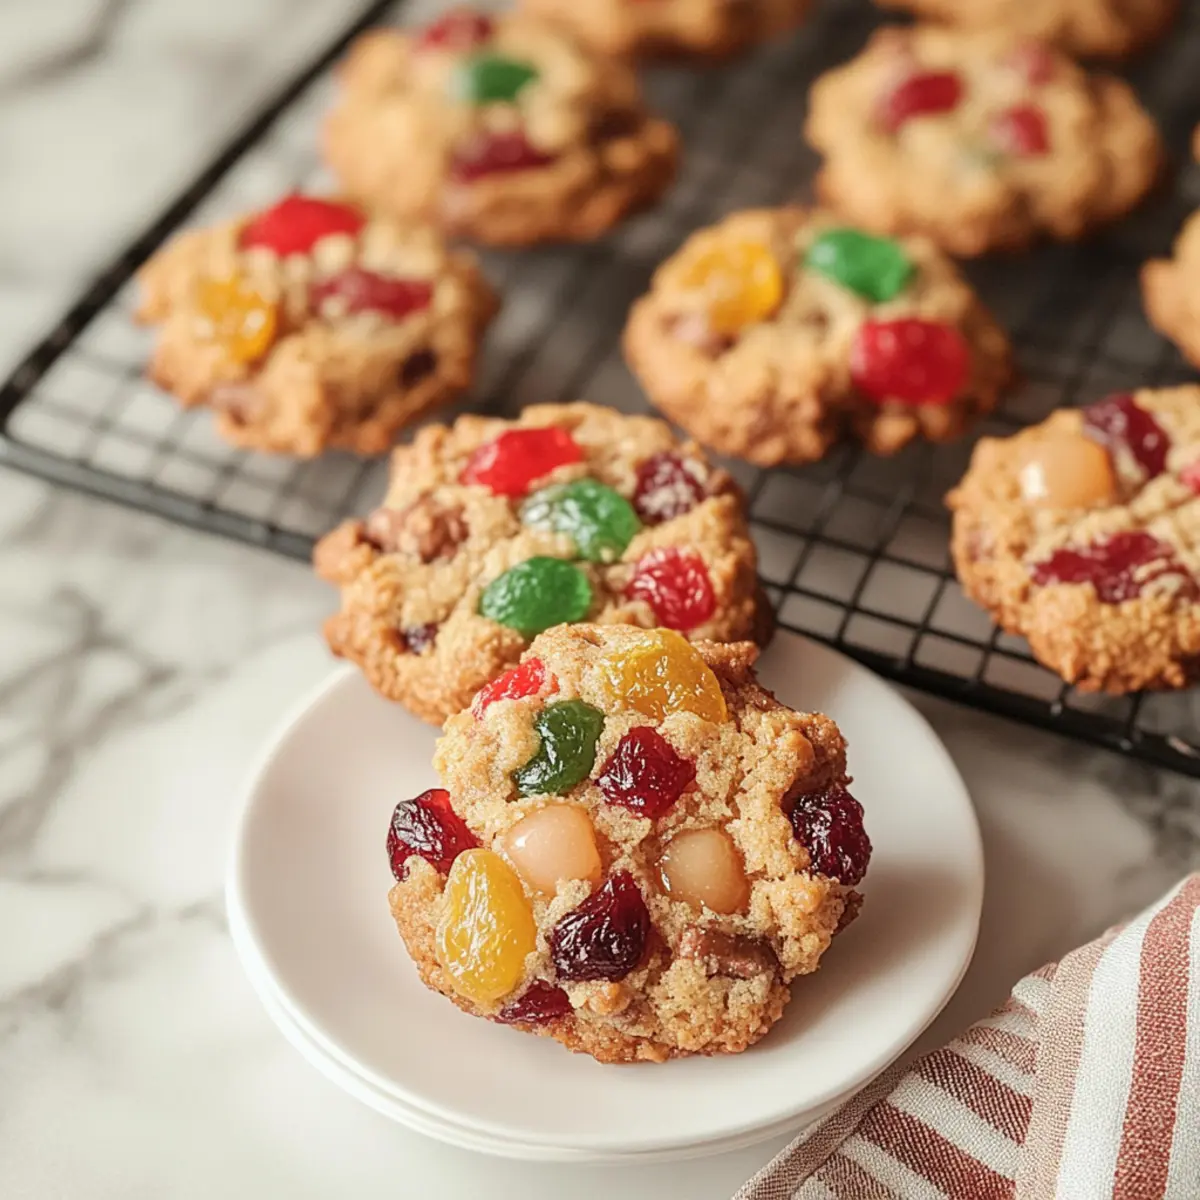
Festive Appeal: Their vibrant colors and delicious aroma make them a show-stopping addition to any holiday cookie platter or gift exchange. If you’re looking for more delightful variations, consider making Thumbprint Cookies Melt or Peaches Cream Cookies to add to your festive spread!

Versatile Ingredients: Feel free to customize by swapping in different dried fruits or nuts to suit your taste preferences—your creation will be uniquely yours!

Christmas Fruitcake Cookies Ingredients

For the Cookie Dough
• Unsalted Butter – adds richness and moisture, ensuring your cookies have a delightful texture.
• Granulated Sugar – sweetens the dough; opt for this standard for even sweetness.
• Egg – binds the ingredients together and provides moisture; always use room temperature for best blending results.
• Vanilla Extract – infuses warm depth; consider substituting with almond or lemon extracts for a unique twist.
• All-Purpose Flour – the base structure of your cookies; for gluten-free alternatives, switch it for a gluten-free flour blend.
• Salt – brings out the flavors; an essential ingredient that shouldn’t be skipped, even in sweet treats.
• Baking Soda – acts as a leavening agent, helping your cookies rise delightfully.

For the Fruity Mix
• Candied Fruits – the star of these Christmas Fruitcake Cookies; chop into 1/4 inch pieces to minimize clumping. Consider mixed dried fruits for a fun variety!
• Pecans – add crunch and nuttiness; feel free to replace with walnuts or your nut of choice for a personal touch.

Feel free to gather these ingredients, and let’s bring some festive cheer into your kitchen!

Step‑by‑Step Instructions for Easy Christmas Fruitcake Cookies

Step 1: Preheat Your Oven
Begin by preheating your oven to 300°F (150°C). While the oven warms, take a moment to line a cookie sheet with parchment paper to ensure easy cookie removal. This preparation step sets the stage for baking your delightful Easy Christmas Fruitcake Cookies.

Step 2: Cream the Butter and Sugar
In a large mixing bowl, combine softened unsalted butter and granulated sugar. Using an electric mixer, beat the mixture on medium speed until it becomes light and fluffy, which should take about 3-5 minutes. This creamy base provides the richness your cookies will need for a melt-in-your-mouth texture.

Step 3: Incorporate Egg and Extracts
Next, crack an egg into the creamed mixture along with the vanilla extract. Beat until the mixture is smooth and well combined, ensuring each ingredient is fully integrated. This step adds moisture and a warm depth of flavor, making your Easy Christmas Fruitcake Cookies extra special.

Step 4: Mix Dry Ingredients
In a separate bowl, whisk together all-purpose flour, baking soda, and salt. Gradually add this dry mixture to the wet ingredients, mixing on low speed until just combined. Be careful not to overmix—this ensures your cookies maintain a tender crumb, perfect for the holiday delight you’re aiming to create.

Step 5: Fold in Candied Fruits and Nuts
Gently fold in the chopped candied fruits and chopped pecans into the dough. Ensure the fruits and nuts are evenly distributed without overworking the dough. This addition not only gives your Easy Christmas Fruitcake Cookies a vibrant, festive look but adds a delightful crunch and sweetness.

Step 6: Shape the Cookies
Using a heaping tablespoon, scoop dough portions onto your prepared cookie sheet, leaving space between each cookie to allow for spreading. Be sure to form nice rounded mounds; they’ll look charming as they bake into delectable little bites.

Step 7: Bake to Perfection
Place the cookie sheet in the preheated oven and bake for 20-25 minutes. Keep an eye on the cookies—you're looking for golden edges while the centers remain slightly soft. This baking time ensures the best texture for your Easy Christmas Fruitcake Cookies.

Step 8: Cool and Store
Allow the cookies to cool on the sheet for about 5 minutes after baking. Then, transfer them to a wire rack to cool completely. This final step not only ensures they set properly but also allows you to see the vibrant colors of your festive treats before enjoying or storing them.

How to Store and Freeze Christmas Fruitcake Cookies

Room Temperature: Store cookies in an airtight container at room temperature for up to one week to maintain their delightful texture and flavor.

Fridge: For longer storage, keep cookies in the refrigerator for up to three weeks. This will help them stay fresh, and you can enjoy their rich flavors even after the holidays.

Freezer: Freeze cookies in a single layer in a freezer-safe container for up to three months. When ready to enjoy, thaw at room temperature and savor the taste of your Christmas Fruitcake Cookies once again.

Reheating: For a warm treat, you can gently reheat cookies in the microwave for about 10-15 seconds or in a preheated oven at 300°F (150°C) for 5 minutes. Enjoy them while cozying up with loved ones!

Make Ahead Options

These Easy Christmas Fruitcake Cookies are perfect for meal prep enthusiasts looking to save time during the busy holiday season! You can prepare the cookie dough up to 24 hours in advance by mixing all the ingredients and then refrigerating the dough. To maintain their delightful texture and flavors, tightly wrap the dough in plastic wrap. When you’re ready to bake, simply scoop the chilled dough onto a cookie sheet and bake as directed. Alternatively, you can bake the cookies and store them in an airtight container for up to 1 week at room temperature. By making these Easy Christmas Fruitcake Cookies ahead of time, you'll enjoy freshly baked treats with minimal effort just when you need them!

What to Serve with Easy Christmas Fruitcake Cookies

As you prepare these festive treats, consider how to create a delightful holiday spread that enchants your guests.

  • Creamy Mashed Potatoes: The rich, buttery texture pairs beautifully with the sweetness of the cookies, offering a comforting balance to your meal.

  • Spiced Mulled Wine: This warm, aromatic beverage complements the spices in the cookies while providing a festive touch to your celebrations.

  • Roasted Brussels Sprouts: Their crispy exterior and earthy flavors introduce a lovely crunch that contrasts delightfully with the tender fruitcake cookies.

  • Cinnamon Roasted Apples: This sweet side echoes the fruit flavors in the cookies, making for a deliciously cohesive holiday theme.

  • Gingerbread Cheesecake: A creamy dessert with spiced notes that harmonizes with your cookies, creating a festive end to any meal.

  • Peppermint Hot Chocolate: This rich drink offsets the cookies’ texture and sweetness, adding a refreshing holiday flair to your gathering.

By blending these mouthwatering options with your Easy Christmas Fruitcake Cookies, you'll craft a memorable festive feast that warms hearts and delights taste buds!

Christmas Fruitcake Cookies: Delicious Variations

Feel free to personalize your Christmas Fruitcake Cookies with these exciting twists that will surely elevate their festive charm!

  • Chocolate Fun: Substitute candied fruits with chocolate chips for a decadent treat that brings a rich, sweet contrast to the holiday flavors.

  • Nut Options: Swap pecans for almond slivers or walnuts for a different texture—both nuts contribute unique flavors that enhance the cookies beautifully.

  • Dried Fruit Delight: Use a mix of dried fruits like cranberries, raisins, or apricots instead of candied fruits to create a more natural sweetness with chewy bites that add delightful variety.

  • Citrus Zing: Replace lemon extract with orange zest for a bright, zesty flavor that will awaken your taste buds and offer a refreshing twist on traditional holiday flavors.

  • Spicy Surprise: Add a touch of cinnamon or nutmeg to the dough to amplify warmth; these spices complement the fruit and nut mix wonderfully, providing a cozy holiday aroma.

  • Gluten-Free Treats: Use a gluten-free flour blend instead of all-purpose flour to cater to gluten-sensitive guests while retaining that delightful cookie texture.

  • Add a Kick: For a bit of heat, fold in some finely chopped crystallized ginger along with the fruits; it adds a lovely spicy warmth that pairs excellently with the sweetness.

  • Flavor Fusion: Combine the essence of the holidays with a splash of almond extract alongside vanilla for a nutty depth that makes each bite unforgettable.

These variations are just the starting line of your creative holiday baking journey. If you’re looking for more festive flavors, why not try your hand at Eggnog Cookies Soft for a creamy twist or indulge in Mexican Wedding Cookies that are sure to delight everyone on your cookie platter? Happy baking!

Expert Tips for Christmas Fruitcake Cookies

Prevent Clumping: Coat candied fruits in a little flour before adding them to the dough to keep them from sticking together.

Perfect Baking: Remove cookies from the oven when the edges are golden and centers are slightly soft to ensure a tender texture.

Chill Dough: Refrigerate the dough for about 15 minutes before baking to control spreading, resulting in perfectly shaped cookies.

Storage Secrets: Store cookies in an airtight container with a slice of bread to maintain moisture and keep them fresh for longer.

Flavor Variations: Feel free to experiment with different dried fruits or nuts for a personal twist on these Christmas Fruitcake Cookies!

Easy Christmas Fruitcake Cookies Recipe FAQs

What type of candied fruits should I use?
Absolutely! You can use a mix of your favorite candied fruits like cherries, pineapple, or citrus peels. Just make sure to cut them into 1/4 inch pieces to reduce clumping in your cookies. If you're looking for alternatives, mixed dried fruits work wonderfully too!

How should I store the Christmas Fruitcake Cookies?
Store your cookies in an airtight container at room temperature for up to one week. To keep them extra fresh, add a slice of bread inside the container; this helps maintain moisture. For longer storage, refrigerate them for up to three weeks, or freeze for up to three months.

Can I freeze the Christmas Fruitcake Cookies?
Definitely! To freeze the cookies, lay them out in a single layer on a baking sheet and freeze until solid. Then, transfer them to a freezer-safe container or zip-top bag. They’ll keep well for up to three months. When you're ready to enjoy, simply thaw at room temperature.

What should I do if my cookies spread too much?
If your cookies spread excessively, it might be due to the dough being too warm or not enough flour. To counteract this, refrigerate the dough for about 15 minutes before scooping it onto the cookie sheet. This chilling step helps maintain their shape during baking.

Are these cookies safe for pets?
It's important to keep these cookies away from pets, as they contain ingredients like sugar and nuts, which can be harmful to them in large quantities. Always consult your vet if you're unsure about sharing your baked delights with your furry friends.

Christmas Fruitcake Cookies

Deliciously Easy Christmas Fruitcake Cookies to Festively Share

Make delightful Christmas Fruitcake Cookies, capturing holiday spirit with vibrant flavors and festive colors.
Print Recipe Pin Recipe
Prep Time 15 minutes mins
Cook Time 25 minutes mins
Cooling Time 5 minutes mins
Total Time 45 minutes mins
Servings: 24 cookies
Course: Dessert
Cuisine: American
Calories: 150
Ingredients Equipment Method Nutrition Notes

Ingredients
  

For the Cookie Dough
  • 1 cup Unsalted Butter softened
  • 1 cup Granulated Sugar
  • 1 large Egg room temperature
  • 1 teaspoon Vanilla Extract or almond or lemon extract
  • 2 cups All-Purpose Flour or gluten-free flour blend
  • 1/2 teaspoon Salt
  • 1 teaspoon Baking Soda
For the Fruity Mix
  • 2 cups Candied Fruits chopped into 1/4 inch pieces
  • 1 cup Pecans chopped

Equipment

  • Mixing Bowl
  • Electric mixer
  • Cookie Sheet
  • Parchment Paper

Method
 

Step-by-Step Instructions
  1. Preheat your oven to 300°F (150°C) and line a cookie sheet with parchment paper.
  2. In a large mixing bowl, cream together softened unsalted butter and granulated sugar until light and fluffy.
  3. Add the egg and vanilla extract to the creamed mixture, beating until smooth.
  4. In a separate bowl, whisk together all-purpose flour, baking soda, and salt. Gradually add to the wet mixture, mixing on low.
  5. Fold in the chopped candied fruits and pecans gently.
  6. Scoop dough portions onto the prepared cookie sheet, leaving space between them.
  7. Bake for 20-25 minutes until golden around the edges and slightly soft in the center.
  8. Cool on the sheet for 5 minutes before transferring to a wire rack to cool completely.

Nutrition

Serving: 1cookieCalories: 150kcalCarbohydrates: 20gProtein: 2gFat: 7gSaturated Fat: 4gPolyunsaturated Fat: 1gMonounsaturated Fat: 2gCholesterol: 30mgSodium: 100mgPotassium: 80mgFiber: 1gSugar: 10gVitamin A: 200IUCalcium: 20mgIron: 0.5mg

Notes

These cookies improve in flavor over time. For longer storage, refrigerate or freeze as needed.

Tried this recipe?

Let us know how it was!

Deliciously Soft Coffee Butter Cookies to Savor Anytime

December 4, 2025 by Grace Snow Leave a Comment

As I stood in my kitchen, the rich aroma of freshly brewed coffee wafted through the air, instantly transporting me to my favorite cafe. That's when it hit me: why not bring that delightful experience home with my own creation—Coffee Butter Cookies? These cookies offer an effortless baking adventure with their quick prep time and the option to customize them to suit any dietary need, like gluten-free or dairy-free. With a perfect balance of slightly crisp edges and a soft, buttery center, they’re perfect for cozy nights in or festive gatherings. Whether you're pairing them with your morning cup or indulging solo, these Coffee Butter Cookies are sure to become a new favorite. Have you ever tried baking with coffee before? Let’s dive in!

Why Bake Coffee Butter Cookies?

Deliciously soft, these cookies are a coffee lover’s dream, with irresistible flavors that make them the perfect treat for any occasion. Quick prep ensures you spend less time in the kitchen and more time savoring your creations. Versatile options cater to dietary needs – try gluten-free or dairy-free variations without sacrificing taste! Crowd-pleasing, they’re sure to impress family and friends alike, making them ideal for festive gatherings or simple afternoons at home. Pair them with a cup of hot chocolate for a memorable experience! These cookies truly make every bite feel special.

Coffee Butter Cookies Ingredients

• Dive into the delightful flavors of Coffee Butter Cookies and gather the essentials for this irresistible treat!

For the Cookie Dough

  • Instant Coffee – Provides the distinct coffee flavor that defines the cookies; choose robust granules for a stronger taste.
  • Hot Water – Used to dissolve the instant coffee; let cool slightly for even flavor distribution.
  • Icing Sugar – Adds sweetness and helps achieve a light, fluffy texture; can also be substituted with powdered sugar.
  • Unsalted Butter – The base fat for rich flavor and tender texture; ensure it's at room temperature for best results.
  • Egg – Binds ingredients and adds moisture; a large beaten egg is ideal for optimal consistency.
  • All-Purpose Flour – Provides structure; a gluten-free blend can be substituted to meet dietary restrictions.
  • Cornstarch – Lightens texture for tender cookies; avoid substitutions unless due to allergens.
  • Ground Cinnamon – Adds warmth and spice; feel free to adjust the amount according to your personal taste.

Step‑by‑Step Instructions for Coffee Butter Cookies

Step 1: Dissolve Coffee
Start by dissolving 1 tablespoon of instant coffee in 2 tablespoons of hot water. Allow the mixture to cool slightly while you prepare the other ingredients; this will help integrate the rich coffee flavor throughout the dough.

Step 2: Cream Butter and Sugar
In a mixing bowl, use an electric mixer to beat together 1 stick of softened unsalted butter and 1 cup of icing sugar. Mix until the mixture is light and fluffy, which should take about 3-4 minutes—this step is crucial for achieving soft Coffee Butter Cookies.

Step 3: Add Egg and Coffee Mixture
Next, incorporate 1 large beaten egg into the butter and sugar mixture. Mix until fully combined, then gently fold in the cooled coffee mixture until you notice a harmonious blend of flavors in the creamy dough.

Step 4: Mix Dry Ingredients
In a separate bowl, whisk together 2 cups of all-purpose flour, 1 tablespoon of cornstarch, and 1 teaspoon of ground cinnamon. This combination will provide structure and tenderness to your Coffee Butter Cookies, ensuring a delightful bite every time.

Step 5: Combine Wet and Dry Ingredients
Gradually fold the dry ingredients into the wet mixture, combining everything until just mixed. Be careful not to over-mix; you want the cookie dough to remain light and fluffy for the best texture in the finished Coffee Butter Cookies.

Step 6: Prepare for Baking
Transfer the cookie dough into a piping bag fitted with a star tip. Pipe the dough onto a lined baking tray, creating small dollops that will hold their shape during baking.

Step 7: Chill the Dough
To maintain their design and prevent spreading, freeze the piped cookies for 5-10 minutes. This quick chill will help create those slightly crisp edges when baked, which is key to your Coffee Butter Cookies.

Step 8: Preheat the Oven and Bake
Preheat your oven to 350°F (175°C). Once the cookies have chilled, bake them for about 8 minutes, or until they are lightly golden around the edges. Keep an eye on them; they should look slightly underbaked for the perfect melt-in-your-mouth texture.

Step 9: Chocolate Dip and Toppings
After the cookies have cooled, dip the base of each one in melted dark chocolate, allowing any excess to drip off. Immediately sprinkle with chopped pistachios for a delightful crunch that complements the rich coffee flavor in your Cookies.

Coffee Butter Cookies Variations & Substitutions

Feel free to let your creativity shine and customize these cookies to suit your taste buds!

  • Dairy-Free: Swap the unsalted butter for vegan butter or coconut oil for a creamy, dairy-free delight.
  • Nutty Twist: Replace pistachios with walnuts or almonds to add a rich, nutty flavor that perfectly complements the coffee.
  • Spice It Up: Introduce cardamom or nutmeg into the mix, or add a touch of citrus zest for a refreshing lift.
  • Textured Add-Ins: Consider folding in chocolate chips, dried fruits, or even chopped nuts for a delightful texture surprise in each cookie.
  • Sweet Drizzle: Drizzle melted white chocolate over the cookies instead of dark chocolate for a sweeter treat that still satisfies.
  • Flour Alternatives: Use a high-quality gluten-free flour blend for a gluten-free version that doesn’t compromise on taste.
  • Chilling Options: For an exciting change, chill the dough overnight for deeper flavors and a firmer texture before baking.

These variations and substitutions not only enhance the flavors but make every baking session feel unique! Explore your options and savor the magic of these versatile Coffee Butter Cookies. If you’re looking for more delectable treats, how about trying out my Matcha Cookies Soft or indulging in some Eggnog Cookies Soft? Happy baking!

What to Serve with Coffee Butter Cookies?

Imagine savoring a delightful cookie while the comforting scents of coffee and spices envelop your home — the perfect setting to build a memorable meal.

  • Rich Hot Chocolate: The creamy, sweet flavors of hot chocolate perfectly balance the coffee notes, enhancing every bite of your cookie.

  • Vanilla Ice Cream: A scoop of velvety vanilla ice cream adds a delightful contrast to the cookie's texture, creating a harmonious dessert experience.

  • Fresh Berries: Juicy strawberries or raspberries provide a burst of freshness, cutting through the richness and brightening the overall flavor.

  • Spiced Chai Tea: Warm spiced chai deepens the aroma of the coffee and brings out the warm cinnamon notes in the cookies, making every sip a warming delight.

  • Pistachio Milkshake: The nutty flavor complements the pistachio topping on the cookies and makes for a fun, creamy treat that is both satisfying and delicious.

  • Chocolate Ganache Dip: Serve with a rich chocolate ganache for those who crave extra indulgence, enhancing the chocolate from the cookie’s bottom.

Sharing these ideas will elevate your Coffee Butter Cookies into the spotlight of your next gathering. Each pairing promises to create a memorable experience and make your homemade baking feel extra special.

Expert Tips for Coffee Butter Cookies

  • Room Temperature Butter: Ensure butter is fully softened; this results in a creamy, light mixture that's essential for the best Coffee Butter Cookies texture.
  • Chill for Shape: Don't skip freezing the piped dough for 5-10 minutes; it helps maintain cookie shape and prevents excessive spread during baking.
  • Perfect Bake Time: Watch the cookies closely! They should look slightly underbaked when removing them from the oven to ensure a delightful melt-in-your-mouth experience.
  • Substitution Suggestions: For gluten-free Coffee Butter Cookies, use a quality gluten-free flour blend, ensuring your baking adventures are inclusive for all dietary needs.
  • Flavor Adjustments: Feel free to adjust the cinnamon according to your taste; adding a pinch more can enhance the warmth in these delicious treats.

Make Ahead Options

These Coffee Butter Cookies are perfect for busy home cooks who want to save time without sacrificing flavor! You can prepare the cookie dough up to 24 hours ahead; simply follow the instructions until you've mixed in all the dry ingredients. Once the dough is ready, transfer it into a piping bag and refrigerate, ensuring it remains sealed to maintain freshness. When you're ready to bake, simply pipe the cookies onto a lined baking tray directly from the fridge and chill them in the freezer for 5-10 minutes before baking. This method not only enhances convenience but ensures your Coffee Butter Cookies come out just as delicious, with their irresistible soft centers and perfectly crisp edges.

How to Store and Freeze Coffee Butter Cookies

Airtight Container: Store your Coffee Butter Cookies in an airtight container at room temperature for up to 1 week to keep them fresh and soft.

Refrigeration: If you prefer, refrigerate cookies for up to 2 weeks. However, note that refrigeration may slightly alter their texture.

Freezing for Longevity: For longer storage, layer cookies between parchment paper in an airtight container or freezer bag. They can be frozen for up to 3 months without losing flavor.

Reheating: To enjoy cookies warm, pop them in the microwave for 10-15 seconds or enjoy at room temperature.

Coffee Butter Cookies Recipe FAQs

What type of instant coffee should I use for Coffee Butter Cookies?
For the best flavor, opt for a robust instant coffee granule. A strong blend enhances the cookies’ characteristic coffee taste and ensures that each bite is rich and satisfying.

How long can I store Coffee Butter Cookies?
You can store your Coffee Butter Cookies in an airtight container at room temperature for up to 1 week, or refrigerate them for up to 2 weeks. Just keep in mind that refrigeration may slightly alter their chewy texture!

Can I freeze Coffee Butter Cookies?
Absolutely! To freeze, layer the cookies between sheets of parchment paper in an airtight container or freezer bag. They can be frozen for up to 3 months without losing flavor. Just remember to let them thaw at room temperature before enjoying.

What should I do if my cookie dough is too soft?
If your cookie dough is too soft to pipe, it's likely due to the butter being too warm or not enough flour added. Chill the dough in the refrigerator for about 30 minutes, then retry piping. Alternatively, you can sprinkle a little more flour until it reaches a manageable consistency.

Are these Coffee Butter Cookies gluten-free?
Yes, you can easily make these cookies gluten-free! Simply replace the all-purpose flour with a gluten-free flour blend. Just ensure that your baking powder or any other ingredients used are also certified gluten-free to maintain the desired texture and flavor.

Can pets eat Coffee Butter Cookies?
It’s best to keep these cookies away from pets. The chocolate and sugar found in these cookies can be harmful to animals. Instead, share pet-friendly treats that are tailored to their dietary needs for a safe indulgence!

Coffee Butter Cookies

Deliciously Soft Coffee Butter Cookies to Savor Anytime

Indulge in these Coffee Butter Cookies, a delightful treat perfect for any occasion with a rich coffee flavor.
Print Recipe Pin Recipe
Prep Time 15 minutes mins
Cook Time 8 minutes mins
Chill Time 10 minutes mins
Total Time 33 minutes mins
Servings: 24 cookies
Course: Dessert
Cuisine: American
Calories: 120
Ingredients Equipment Method Nutrition Notes

Ingredients
  

For the Cookie Dough
  • 1 tablespoon instant coffee choose robust granules for stronger taste
  • 2 tablespoons hot water let cool slightly
  • 1 cup icing sugar can be substituted with powdered sugar
  • 1 stick unsalted butter ensure at room temperature
  • 1 large egg beaten for optimal consistency
  • 2 cups all-purpose flour can substitute with gluten-free blend
  • 1 tablespoon cornstarch avoiding substitutions unless due to allergens
  • 1 teaspoon ground cinnamon adjust according to taste

Equipment

  • Mixing Bowl
  • Electric mixer
  • piping bag
  • Baking tray

Method
 

Step-by-Step Instructions for Coffee Butter Cookies
  1. Dissolve 1 tablespoon of instant coffee in 2 tablespoons of hot water and let cool slightly.
  2. Beat together 1 stick of softened unsalted butter and 1 cup of icing sugar until light and fluffy (3-4 minutes).
  3. Incorporate 1 large beaten egg into the mixture, then fold in the cooled coffee mixture.
  4. In a separate bowl, whisk 2 cups of all-purpose flour, 1 tablespoon of cornstarch, and 1 teaspoon of ground cinnamon.
  5. Gradually fold the dry ingredients into the wet mixture until just mixed.
  6. Transfer the dough into a piping bag and pipe small dollops onto a lined baking tray.
  7. Chill the piped cookies in the freezer for 5-10 minutes.
  8. Preheat the oven to 350°F (175°C) and bake for about 8 minutes until lightly golden.
  9. Dip cooled cookies in melted dark chocolate and sprinkle with chopped pistachios.

Nutrition

Serving: 1cookieCalories: 120kcalCarbohydrates: 15gProtein: 1gFat: 6gSaturated Fat: 4gPolyunsaturated Fat: 0.5gMonounsaturated Fat: 1.5gCholesterol: 20mgSodium: 50mgPotassium: 30mgSugar: 6gVitamin A: 200IUCalcium: 5mgIron: 0.5mg

Notes

Store cookies in an airtight container at room temperature for up to 1 week. Can be refrigerated for 2 weeks or frozen for 3 months.

Tried this recipe?

Let us know how it was!

Chewy Maple Cinnamon Cookies for Cozy Nights In

December 4, 2025 by Grace Snow Leave a Comment

As the chill of winter whispers through the window, I shuffle into the kitchen, relishing the warmth that comes from my oven. The sweet scent of cinnamon wafts in the air, instantly transporting me to cozy holiday gatherings. That’s when I whip up a batch of my favorite Chewy Maple Cinnamon Cookies dipped in white chocolate. These delightful cookies are not only simple to make—no mixer required!—but they also promise a soft, chewy texture that makes them a total crowd-pleaser. Whether you’re treating yourself after a long day or looking to impress friends at your next gathering, these comforting treats are perfect for any occasion. Are you ready to fill your home with that irresistible aroma and surprise everyone with a gourmet delight? Let’s dive into the recipe!

Why Choose Chewy Maple Cinnamon Cookies?

Irresistible aroma: The delightful scent of cinnamon and maple fills your home, creating a warm and inviting atmosphere.
No mixer needed: This simple recipe makes baking accessible for everyone, no hassle!
Chewy texture: These cookies are soft and chewy, offering the perfect bite every time.
Versatile pairing: Enjoy them with hot cocoa or coffee, making them a cozy companion for any beverage.
Festive touch: The creamy white chocolate dip and optional sprinkles elevate these treats for any celebration. Don't forget to check out my Eggnog Cookies Soft for another delightful holiday treat!

Chewy Maple Cinnamon Cookies Ingredients

For the Cookies
• 1/2 cup pure maple syrup – Adds deep maple flavor; note: use pure maple syrup for best taste.
• 1 teaspoon maple extract – Enhances maple notes; substitution: vanilla extract can work for a milder flavor.
• 1 cup brown sugar – Provides chewiness and moisture for the cookie texture.
• 1/2 cup melted butter – Contributes richness; unsalted butter is recommended for controlling salt levels.
• 1 egg – Binds the dough together and helps achieve that soft structure.
• 2 cups all-purpose flour – Forms the structure of the cookies.
• 1 teaspoon cinnamon – Adds warmth and spice; adjust for a more or less intense flavor.
• 1/2 teaspoon baking soda – Helps cookies rise to that perfect chewy texture.
• 1/4 teaspoon salt – Enhances all the flavors beautifully.

For the Chocolate Dip
• 1 cup white chocolate melting wafers – For dipping to provide creaminess and a decorative finish.
• Holly berry sprinkles (optional) – Adds a festive touch to your cookies; perfect for holiday baking and gatherings.

Indulge in the wonderful world of Chewy Maple Cinnamon Cookies!

Step‑by‑Step Instructions for Chewy Maple Cinnamon Cookies

Step 1: Whisk the Wet Ingredients
In a large mixing bowl, whisk together 1/2 cup of melted unsalted butter, 1 cup of brown sugar, 1/2 cup of pure maple syrup, and 1 teaspoon of maple extract until the mixture is smooth and well-combined. Then, gently stir in 1 egg, ensuring that everything blends together seamlessly. This step creates a rich, flavorful base for your Chewy Maple Cinnamon Cookies.

Step 2: Combine the Dry Ingredients
In a separate bowl, combine 2 cups of all-purpose flour, 1 teaspoon of cinnamon, 1/2 teaspoon of baking soda, and 1/4 teaspoon of salt. Mix these dry ingredients well to ensure that the baking soda and salt are evenly distributed. Gradually add this flour mixture to the wet ingredients, stirring until a soft dough forms. This dough will be the heart of your chewy cookies.

Step 3: Chill the Dough
Once your dough is mixed, cover the bowl with plastic wrap or a clean kitchen towel and refrigerate it for 30 minutes. Chilling the dough helps the flavors meld and ensures the cookies maintain their chewiness and shape while baking. This step is crucial for achieving the perfect texture in your Chewy Maple Cinnamon Cookies.

Step 4: Prepare for Baking
Preheat your oven to 350°F (175°C) while the dough chills. Line a light-colored baking sheet with parchment paper to prevent over-browning. Once the oven is ready and the dough has chilled, it's time to scoop and shape your cookies. This preparation will lead to evenly baked, aesthetically pleasing cookies.

Step 5: Shape the Cookies
Scoop the chilled dough into 1.5-ounce balls (about the size of a golf ball) and place them on the prepared baking sheet, spacing them at least 2 inches apart. This space allows the cookies to spread while baking. You should see perfectly formed balls that are ready to create those delightful Chewy Maple Cinnamon Cookies you love.

Step 6: Bake to Perfection
Bake the cookies in the preheated oven for 10-12 minutes. Look for cookies where the edges are set, and the centers are slightly puffy but not browned. They may look underbaked in the center, but they will firm up as they cool. After baking, allow the cookies to rest on the baking sheet for 5 minutes before transferring them to a wire rack to cool completely.

Step 7: Melt the Chocolate
While the cookies cool, prepare the chocolate dip. In a microwave-safe bowl, melt 1 cup of white chocolate melting wafers at half power. Stir every 30 seconds until the chocolate is smooth and silky. Melting the chocolate properly ensures a creamy consistency for dipping, which will enhance your cookies further.

Step 8: Dip and Decorate
Once the cookies are completely cool, dip half of each cookie into the melted white chocolate, allowing the excess to drip off. Place the dipped cookies on parchment paper and drizzle any remaining white chocolate over the top. If desired, sprinkle with holly berry sprinkles before the chocolate hardens to add a festive touch, making your Chewy Maple Cinnamon Cookies truly special.

Step 9: Set and Serve
Allow the dipped cookies to set completely at room temperature or in the refrigerator for quicker results. Once the chocolate hardens, your chewy cookies are ready to serve or store. Enjoy the delightful combination of flavors and the comforting aroma that fills your home!

How to Store and Freeze Chewy Maple Cinnamon Cookies

Room Temperature: Store your cookies in an airtight container at room temperature for up to 5 days to keep them fresh and chewy.

Fridge: If you prefer, you can refrigerate the cookies in an airtight container for up to a week, but this may affect their texture.

Freezer: Freeze baked cookies without the chocolate dip for up to 2 months. Ensure they're wrapped tightly to prevent freezer burn.

Reheating: To enjoy the cookies warm, simply heat them in the microwave for about 10-15 seconds before serving. This will revive that soft, chewy goodness!

Make Ahead Options

These Chewy Maple Cinnamon Cookies are perfect for home cooks looking to save time during busy days! You can prepare the cookie dough up to 24 hours in advance by making it and then wrapping it tightly in plastic wrap or storing it in an airtight container in the refrigerator to maintain freshness. If you prefer, you can also freeze the shaped cookie balls for up to 3 months; just make sure to place them on a baking sheet to freeze individually before transferring to a freezer bag. When you're ready to bake, simply preheat your oven and bake from frozen, adding an extra minute or two to the baking time. This way, you’ll have delicious, freshly baked Chewy Maple Cinnamon Cookies whenever you need a comforting treat without the stress!

What to Serve with Chewy Maple Cinnamon Cookies

The delightful pairing of flavors can elevate your cookie experience, making every bite even more memorable.

  • Hot Cocoa: The rich chocolate flavor of cocoa complements the sweetness of the cookies, creating a cozy, comforting treat.
  • Coffee or Espresso: The bitterness of coffee balances the sweetness of the cookies, enhancing the overall taste experience. Pairing these two warms not just your hands but your heart as well.
  • Vanilla Ice Cream: A scoop of creamy vanilla ice cream brings a delightful contrast to the chewy texture, making every bite a joyful treat.
  • Spiced Chai Tea: The warm spices in chai enhance the cinnamon notes in the cookies, resulting in a harmonious blend that feels like a warm hug.
  • Fruit Salad: Fresh fruits add a burst of freshness that contrasts beautifully with the rich flavor of the cookies. The bright colors and textures create a pleasant visual and culinary experience.
  • Maple Pecan Pie: For a more decadent dessert spread, serve these cookies alongside a rich maple pecan pie for a true celebration of maple flavors. The combination would fulfill any sweet tooth!
  • Ginger Ale: The effervescent zing of ginger ale offers a refreshing palate cleanser that complements the cookies' warmth beautifully, perfect for a festive gathering.

Chewy Maple Cinnamon Cookies Variations

Feel free to put your own spin on these irresistible cookies with some delicious twists!

  • Dark Chocolate: Swap white chocolate for dark chocolate for a richer, bolder flavor that beautifully complements the maple.

  • Peppermint Twist: Add crushed peppermint candies to the dough for a festive, minty flavor perfect for the holiday season.

  • Gluten-Free: Substitute almond flour for all-purpose flour to create a gluten-free version. Just be sure to adjust the moisture accordingly!

  • Nutty Crunch: Fold in chopped walnuts or pecans for added texture and a delightful nutty crunch that pairs wonderfully with the soft cookie.

  • Cinnamon Rolls: Turn these cookies into a cinnamon roll-inspired treat by adding a swirl of cinnamon-sugar filling before baking.

  • Cardamom Spice: Spice things up by incorporating ground cardamom with the cinnamon for a unique and aromatic flavor profile.

  • Honey Sweetened: Replace the maple syrup with honey for a different sweetener that doesn’t skimp on flavor. It adds a nice floral note!

  • Chewy Maple Cinnamon Roll Muffins: If you're in the mood for muffins, try using this dough in a mini muffin tin for bite-sized delights! Check out my Pumpkin Cinnamon Roll for more muffin inspiration.

Get creative and mix and match these variations to find your perfect cookie creation!

Expert Tips for Chewy Maple Cinnamon Cookies

  • Use Quality Syrup: Ensure you use pure maple syrup, not imitation. It significantly enhances the flavor of your Chewy Maple Cinnamon Cookies.

  • Perfect Bake Time: Keep an eye on the cookies while baking; they should be puffy but not browned. Overbaking can lead to dryness, so take them out while they still look slightly underdone.

  • Chill for Texture: Don’t skip the chilling step! Refrigerating the dough for 30 minutes helps maintain the shape and chewy texture during baking.

  • Use Light Baking Sheets: Opt for light-colored baking sheets to prevent over-browning. Dark pans can heat unevenly and lead to burnt bottoms.

  • Uniform Cookie Sizes: For even baking, use a kitchen scale to measure out dough balls at 1.5 ounces. This ensures all your Chewy Maple Cinnamon Cookies bake evenly.

Chewy Maple Cinnamon Cookies Recipe FAQs

How do I select the best maple syrup for this recipe?
Absolutely! For the best flavor, always choose pure maple syrup over imitation syrup. Look for one that is rich and deep in color, indicating a stronger flavor profile. A Grade A dark variety is often ideal for baking as it brings out the maple flavor beautifully in your cookies.

How should I store my Chewy Maple Cinnamon Cookies?
To keep your cookies fresh and chewy, store them in an airtight container at room temperature for up to 5 days. If you find you can’t finish them in that time, the refrigerator is an option, but it may slightly change their texture, making them a bit firmer.

Can I freeze Chewy Maple Cinnamon Cookies?
Yes, you can freeze your baked cookies without the white chocolate dip for up to 2 months! Simply allow them to cool completely, then place them in a single layer on a baking sheet, freeze until solid, and then transfer to an airtight container or freezer bag. To enjoy later, just thaw and, if desired, reheat in the microwave for about 10-15 seconds.

What should I do if my cookie dough is too sticky?
Very often, this can happen if your ingredients are too warm or if you have over-measured the wet ingredients. If your dough feels excessively sticky, you can add a tablespoon of flour at a time to help bind it together. Alternatively, chilling the dough for a longer period can also make it easier to handle and shape before baking.

Are these cookies safe for people with nut allergies?
Yes! The Chewy Maple Cinnamon Cookies are nut-free, making them suitable for those with nut allergies. However, always double-check your ingredients, especially the chocolate wafers, for any potential cross-contamination warnings that might apply.

What are the best ways to serve Chewy Maple Cinnamon Cookies?
For a truly comforting experience, I recommend pairing these delightful cookies with a warm cup of hot cocoa or freshly brewed coffee. The combination of sweet, chewy cookie and your favorite beverage will surely elevate those cozy nights in, creating a perfect moment to savor during the chilly months!

Chewy Maple Cinnamon Cookies

Chewy Maple Cinnamon Cookies for Cozy Nights In

These Chewy Maple Cinnamon Cookies are the perfect winter treat, combining soft texture with a delightful aroma that fills your home.
Print Recipe Pin Recipe
Prep Time 30 minutes mins
Cook Time 12 minutes mins
Chilling Time 30 minutes mins
Total Time 1 hour hr 12 minutes mins
Servings: 24 cookies
Course: Dessert
Cuisine: American
Calories: 150
Ingredients Equipment Method Nutrition Notes

Ingredients
  

For the Cookies
  • 1/2 cup pure maple syrup Adds deep maple flavor; use pure maple syrup for best taste.
  • 1 teaspoon maple extract Enhances maple notes; vanilla extract can work for a milder flavor.
  • 1 cup brown sugar Provides chewiness and moisture.
  • 1/2 cup melted butter Unsalted butter recommended for controlling salt levels.
  • 1 whole egg Binds the dough.
  • 2 cups all-purpose flour Forms the structure of the cookies.
  • 1 teaspoon cinnamon Adjust for flavor intensity.
  • 1/2 teaspoon baking soda Helps cookies rise.
  • 1/4 teaspoon salt Enhances flavors.
For the Chocolate Dip
  • 1 cup white chocolate melting wafers For dipping.
  • holly berry sprinkles Optional; adds a festive touch.

Equipment

  • Mixing Bowl
  • Whisk
  • Baking Sheet
  • Parchment Paper
  • Microwave-safe bowl

Method
 

Step-by-Step Instructions
  1. Whisk together melted unsalted butter, brown sugar, maple syrup, and maple extract until smooth, then stir in the egg.
  2. In a separate bowl, mix flour, cinnamon, baking soda, and salt. Gradually incorporate into wet mixture until a soft dough forms.
  3. Cover the dough and refrigerate for 30 minutes to meld flavors and maintain chewiness.
  4. Preheat oven to 350°F (175°C) and line a baking sheet with parchment paper.
  5. Scoop chilled dough into 1.5-ounce balls and place on the baking sheet, spaced 2 inches apart.
  6. Bake for 10-12 minutes until edges are set and centers are puffy. Cool on sheet for 5 minutes before transferring to a rack.
  7. Melt white chocolate wafers in a microwave-safe bowl, stirring every 30 seconds until smooth.
  8. Dip half of each cookie into melted chocolate, allowing excess to drip. Place on parchment and sprinkle with holly berries if desired.
  9. Let dipped cookies set until chocolate hardens, then serve or store.

Nutrition

Serving: 1cookieCalories: 150kcalCarbohydrates: 20gProtein: 1gFat: 7gSaturated Fat: 4gPolyunsaturated Fat: 0.5gMonounsaturated Fat: 2gCholesterol: 20mgSodium: 80mgPotassium: 60mgFiber: 0.5gSugar: 10gVitamin A: 100IUCalcium: 10mgIron: 0.5mg

Notes

For best results, use pure maple syrup and a light-colored baking sheet to prevent over-browning. Consider refrigerating before reheating for optimal texture.

Tried this recipe?

Let us know how it was!

Billionaire Bacon: Sweet & Spicy Bliss for Your Brunch Spread

December 3, 2025 by Grace Snow Leave a Comment

There’s a reason they call it Billionaire Bacon, and once you take a bite, you’ll see why! Drawing inspiration from Snoop Dogg's famous cookbook, "From Crook to Cook," this delightful recipe delivers an unbeatable combination of sweet and spicy flavors that’s sure to captivate your taste buds. Perfect for brunch, parties, or simply as a savory snack, this candied bacon boasts an irresistible crispy texture coated in a luscious glaze. Not only is it a crowd-pleaser that brings star power to your dinner table, but it's also remarkably easy to whip up, allowing you to spend less time in the kitchen and more time with friends and family. Are you ready to elevate your bacon game and bring a little celebrity flair to your next meal? Let’s dive into the deliciousness!

Why Is Billionaire Bacon So Irresistible?

Flavor Fusion: The combination of sweet brown sugar and spicy red pepper flakes creates a taste sensation that will have everyone reaching for more.

Effortless Preparation: Simply coat and bake! This recipe is super easy, requiring minimal cooking skills, making it perfect for both novice cooks and seasoned chefs.

Perfect for Any Occasion: Whether for brunch, snacks, or parties, Billionaire Bacon effortlessly fits every gathering, offering a delightful shareable treat.

Celebrity Inspiration: Bringing Snoop Dogg's flair to your kitchen, this dish adds star quality to your meals, impressing family and friends alike.

Versatile Variations: Customize your bacon by mixing in smokiness with smoked paprika or dialing down the heat for a milder version.

Transform your next brunch spread with this mouthwatering dish, and pair it with some refreshing fresh fruits or even a hearty German Potato Salad for a delightful contrast.

Billionaire Bacon Ingredients

• Get ready to treat yourself!

For the Coating

  • Brown Sugar – Adds sweetness and caramelizes beautifully during baking; choose light or dark based on your preference.
  • Crushed Red Pepper Flakes – Provides a delightful spice; you can remove the seeds for a milder flavor if desired.
  • Freshly Ground Black Pepper – Elevates the taste with a subtle kick that complements the sweet.

For the Bacon

  • Thick-Sliced Bacon – The star of the show; ensure you use thick slices for that perfect crispy texture.

For Baking

  • Nonstick Cooking Spray – Essential for preventing sticking, making cleanup a breeze after your Billionaire Bacon is done.

Step‑by‑Step Instructions for Billionaire Bacon

Step 1: Preheat and Prepare
Begin by preheating your oven to 350°F (175°C). While it’s warming up, line a baking sheet with aluminum foil for easy cleanup, and place a baking rack on top. This will allow the heat to circulate evenly around the bacon, helping it to cook crispy. Ensure the rack is secured on the baking sheet to catch any drippings during baking.

Step 2: Spritz the Rack
Generously spray the baking rack with nonstick cooking spray. This crucial step will prevent the bacon from sticking while it bakes, ensuring that your delicious Billionaire Bacon comes off the rack effortlessly and maintains its beautiful shape. The glossy finish is just a bonus to the careful preparation.

Step 3: Mix the Coating
In a small mixing bowl, combine brown sugar, crushed red pepper flakes, and freshly ground black pepper. Stir the mixture until well blended; the brown sugar should be clumpy and fragrant. This sweet and spicy coating is what gives the Billionaire Bacon its irresistible flavor, so take a moment to savor the enticing aroma as you mix.

Step 4: Coat the Bacon
Take each thick-sliced bacon strip and generously coat both sides with the brown sugar mixture. Use your hands to press the mixture firmly onto the bacon to ensure it adheres well. The goal is to have every inch covered end-to-end, enhancing the flavor and creating that signature glaze as it bakes.

Step 5: Arrange on the Rack
Carefully place the coated bacon strips onto the prepared baking rack in a single layer, ensuring they don’t overlap. This arrangement is key for even cooking and crisping. As you place each strip, admire how the glaze is glistening—that visual cue represents the delightful future you’re about to enjoy with your Billionaire Bacon!

Step 6: Bake to Perfection
Slide the baking sheet into the preheated oven and allow the bacon to bake for around 30 minutes. Start checking for doneness at the 20-minute mark. You’re looking for a golden brown color and crunchy texture. Depending on your oven, it may take a few more minutes, so keep an eye on this delectable treat!

Step 7: Cool and Drain
Once your Billionaire Bacon has achieved a beautiful caramelized glaze, remove it from the oven and allow it to cool on the pan for about 10 minutes. This cooling period lets the glaze firm up, making the bacon easier to handle. Use paper towels to blot any excess grease, ensuring each piece remains crispy and has that perfect bite.

Step 8: Serve and Enjoy
Now that your Billionaire Bacon is ready, serve it warm as a show-stopping addition to your brunch spread or a tasty snack. This sweet and spicy treat will surely win everyone over, making it a darling at any gathering. Enjoy every crispy morsel of this delightful dish you've created!

What to Serve with Billionaire Bacon

Picture a cozy brunch table, where delicious aromas dance in the air and every bite feels like a little celebration of flavor.

  • Fluffy Scrambled Eggs: The creamy texture of scrambled eggs balances the crispy sweetness of Billionaire Bacon, making for a delightful pairing. They soak up the glaze beautifully, enhancing every bite.

  • Fresh Fruit Salad: A refreshing fruit salad brings a vibrant, juicy counterpoint to the savory dish, offering a burst of natural sweetness and color that invites everyone to dig in.

  • Buttermilk Biscuits: Flaky, buttery biscuits are perfect for mopping up any leftover glaze and provide a comforting, soft texture that complements the crunchy bacon splendidly.

  • Simple Greens Salad: A light mixed greens salad tossed in a lemon vinaigrette offers a fresh, zesty contrast to the rich bacon, ensuring a well-rounded meal.

  • Brunch Cocktails: Serve with mimosas or Bloody Marys, whose bright flavors elevate the occasion and enhance the flavor profiles of both the bacon and any accompanying dishes.

  • Gourmet Toast: Avocado toast topped with feta adds a creamy and savory element, creating a sophisticated contrast that pairs well with the sweet and spicy notes of the bacon.

Transform your meal into a star-studded affair by combining your Billionaire Bacon with these fantastic sides and drinks!

Make Ahead Options

These Billionaire Bacon strips are a fantastic choice for meal prep, allowing you to savor their sweet and spicy flavors while saving time during busy mornings or brunch gatherings. You can coat the bacon in the brown sugar mixture up to 24 hours ahead of time—simply place the coated strips in an airtight container and refrigerate. For the best results, bake it fresh right before serving; this way, you'll achieve that perfectly crispy texture. When you’re ready to enjoy, just preheat your oven and bake the bacon for about 30 minutes. With these make-ahead options, you'll have a deliciously prepared dish that will impress your guests without the last-minute fuss!

Storage Tips for Billionaire Bacon

Room Temperature: Allow the Billionaire Bacon to cool completely before storing. It can be left at room temperature for up to 2 hours after cooking.

Fridge: Place any leftover bacon in an airtight container or wrap it tightly in plastic wrap. It will remain fresh for up to 2 days in the fridge.

Freezer: For longer storage, you can freeze Billionaire Bacon. Wrap individual pieces in plastic wrap and then place them in a freezer-safe bag. They can last up to 2 months.

Reheating: To reheat, place the bacon on a foil-lined baking sheet and warm it in a preheated oven at 350°F for about 7 minutes, ensuring it crisps up beautifully again.

Billionaire Bacon: Delicious Customizations

Feel free to make this recipe your own, experimenting with flavors and textures that excite your palate!

  • Dairy-Free: Swap out the thick-sliced bacon for turkey bacon to create a lighter version without compromising taste.
  • Smoky Delight: Add smoked paprika to the sugar mix for a deeper, smoky flavor that elevates your bacon to the next level.
  • Extra Kick: Toss in some cayenne pepper if you're looking to spice things up even more—a little goes a long way!

Transform your brunch by pairing this with options like a classic German Potato Salad or a fresh fruit salad.

  • Sweet and Savory: Mix in some maple syrup alongside the brown sugar for added sweetness that complements the savory bacon beautifully.
  • Herbal Infusion: Fresh rosemary or thyme can be sprinkled on the bacon before baking, imparting a lovely aroma and depth of flavor.
  • Nutty Crunch: After baking, sprinkle on some chopped pecans for added texture and a nutty contrast to the crispy bacon.
  • Citrus Zing: Finish with a squeeze of lime or lemon juice just before serving to brighten the rich flavors and add an exciting twist.

Remember, the sky's the limit with Billionaire Bacon—flavor combinations are a fun way to create a unique dish every time!

Expert Tips for Billionaire Bacon

  • Watch the Clock: Keep an eye on your bacon during baking, especially after 20 minutes. The edges can crisp up faster than the center, so rearranging may be necessary.

  • Cool Properly: Allow the Billionaire Bacon to cool undisturbed for at least 10 minutes. This helps the glaze solidify and ensures maximum crunchiness.

  • Storage Savvy: Store any leftover bacon in an airtight container for up to 2 days. Enjoy it cold or reheat it in a foil-lined baking sheet for optimal texture.

  • Adjust the Spice: If you prefer a milder flavor, simply skip the crushed red pepper flakes. You can still enjoy the sweet magic of the bacon!

  • Experiment with Flavor: Feel free to customize your Billionaire Bacon by adding smoked paprika for a deeper flavor or cayenne for an extra kick.

Billionaire Bacon Recipe FAQs

What type of bacon is best for Billionaire Bacon?
I recommend using thick-sliced bacon for this recipe. Thick slices not only provide a more satisfying crunch but also hold up well to the sweet and spicy glaze, giving you the perfect balance of flavors and texture.

How can I tell if the bacon is ripe or fresh?
Look for fresh bacon that is firm to the touch and has a pinkish-red color. Avoid any packages with dark spots or unpleasant odors. If the bacon has a slimy texture, it's better to pass on it.

What’s the best way to store leftover Billionaire Bacon?
Make sure to cool the bacon completely before storing it. Place it in an airtight container or wrap it tightly with plastic wrap. You can keep it in the fridge for up to 2 days. If you want to enjoy it later, freezing is also an option!

Can I freeze Billionaire Bacon?
Absolutely! To freeze, wrap each piece of bacon with plastic wrap and then place them in a freezer-safe bag. This way, they won’t stick together. Billionaire Bacon can last up to 2 months in the freezer. When you're ready to enjoy, just reheat it straight from the freezer!

What should I do if my Billionaire Bacon is not crispy enough?
If your bacon isn't as crispy as you'd like, it may need a bit more time in the oven. Try adding an extra 5 minutes, but keep an eye on it to ensure it doesn’t burn. Remember, each oven is different, so the cooking time can vary.

Are there any dietary considerations with Billionaire Bacon?
This recipe contains bacon, which is not suitable for vegetarians or vegans. If you have dietary restrictions due to allergies, make sure to review the ingredient labels, especially for the spices, as some brands might contain allergens. Enjoy it responsibly, and feel free to customize with your favorite alternatives!

Billionaire Bacon

Billionaire Bacon: Sweet & Spicy Bliss for Your Brunch Spread

Billionaire Bacon is a delightful blend of sweet and spicy flavors that will elevate your brunch experience!
Print Recipe Pin Recipe
Prep Time 10 minutes mins
Cook Time 30 minutes mins
Cooling Time 10 minutes mins
Total Time 50 minutes mins
Servings: 4 slices
Course: Snacks
Cuisine: American
Calories: 200
Ingredients Equipment Method Nutrition Notes

Ingredients
  

For the Coating
  • 1 cup Brown Sugar Light or dark based on preference
  • 1 teaspoon Crushed Red Pepper Flakes Remove seeds for less heat
  • 1/2 teaspoon Freshly Ground Black Pepper
For the Bacon
  • 12 slices Thick-Sliced Bacon Use thick slices for better texture
For Baking
  • 1 can Nonstick Cooking Spray Essential for preventing sticking

Equipment

  • Oven
  • Baking Sheet
  • Baking Rack
  • Mixing Bowl
  • Spray Bottle

Method
 

Step-by-Step Instructions
  1. Preheat your oven to 350°F (175°C) and line a baking sheet with aluminum foil.
  2. Spray the baking rack generously with nonstick cooking spray.
  3. Mix brown sugar, crushed red pepper flakes, and black pepper in a bowl until blended.
  4. Coat each bacon strip with the brown sugar mixture on both sides.
  5. Arrange the coated bacon strips on the prepared baking rack in a single layer.
  6. Bake for around 30 minutes, checking for doneness starting at 20 minutes.
  7. Allow the bacon to cool on the pan for about 10 minutes before handling.
  8. Serve warm as a delicious addition to your brunch or as a snack.

Nutrition

Serving: 2slicesCalories: 200kcalCarbohydrates: 15gProtein: 10gFat: 14gSaturated Fat: 5gPolyunsaturated Fat: 2gMonounsaturated Fat: 6gCholesterol: 30mgSodium: 400mgPotassium: 200mgSugar: 10gCalcium: 20mgIron: 1mg

Notes

Store leftovers in an airtight container for up to 2 days. Reheat in the oven to maintain crispiness.

Tried this recipe?

Let us know how it was!

Delicious Air Fryer Calzones: Quick, Crispy, and Customizable

December 3, 2025 by Grace Snow Leave a Comment

As the air fryer hums in the kitchen, a wave of excitement washes over me—today, I’m creating Quick Air Fryer Calzones, the perfect canvas for culinary creativity. These delightful pockets of joy feature a crispy, golden crust that embraces your choice of savory fillings, making them a fantastic option for super busy days or casual gatherings. With the flexibility to swap ingredients and even use pre-made dough, they not only promise a satisfying meal but also a chance to customize everything to your liking. Whether you’re fueled by a need for comfort food or a craving for something fun and interactive, these calzones are your answer. What mouthwatering filling will you choose for your own delicious masterpiece?

What makes these calzones irresistible?

Customization at Its Finest: You can easily swap fillings to match your taste—try pepperoni, veggies, or even some bold spices!

Quick Cooking: Utilizing the air fryer not only saves time but also gives that perfect crispness without the oil of traditional frying.

Family-Friendly Fun: Kids can join in on the fun, creating their unique calzones with their favorite ingredients.

Gourmet Appeal: The golden crust and gooey filling elevate simple meals to gourmet experiences.

Meal Prep Friendly: Prepare extra calzones for hassle-free lunches, just like these tasty Air Fryer Fish sticks that can be made and frozen for later!

Crowd-Pleaser: Perfect for gatherings, these flavorful pockets are sure to please guests, combining comfort food vibes with a modern twist.

Air Fryer Calzone Ingredients

For the Dough
• All-Purpose Flour – Provides structure; substitute with gluten-free flour for a gluten-free option.
• Salt – Essential for enhancing the flavor in the dough.
• Sugar – Aids in fermentation and browning; use small amounts of alternative sweeteners if desired.
• Olive Oil – Adds moisture and richness; can be replaced with avocado oil or melted butter.
• Instant Yeast – Helps the dough rise quickly; regular yeast is an option but requires longer rising time.
• Warm Water – Activates yeast and hydrates the dough; avoid hot water to keep the yeast alive.

For the Filling
• Shredded Mozzarella Cheese – Provides a gooey, melted texture; swap for cheddar for a sharper taste.
• Cooked Chicken Ham – Offers protein and flavor; substitute with any cooked protein like sausage or turkey.
• Turkey Bacon – Adds a smoky flavor; you can use regular bacon or omit for a vegetarian option.
• Diced Bell Peppers – Contributes freshness and crunch; can replace with other veggies like spinach or zucchini.
• Sliced Mushrooms – Adds earthy flavor; can easily be omitted or substituted with your favorite veggies.
• Garlic Powder – Enhances flavor; fresh minced garlic works beautifully too.
• Dried Oregano – Provides aromatic herbal notes; Italian seasoning is a perfect substitute.

For the Egg Wash
• Egg – Gives a beautiful golden finish when baked; use milk as a vegan alternative if desired.

Explore the delightful versatility of Air Fryer Calzones with this comprehensive ingredients list, and let your culinary creativity shine!

Step‑by‑Step Instructions for Air Fryer Calzones

Step 1: Combine Dry Ingredients
In a large mixing bowl, whisk together 2 cups of all-purpose flour, 1 teaspoon of salt, 1 teaspoon of sugar, and 1 packet of instant yeast until thoroughly blended. This mixture will create a solid base for your Air Fryer Calzones, ensuring the dough rises beautifully.

Step 2: Add Liquids
Create a well in the center of the dry mixture and pour in ¾ cup of warm water and 2 tablespoons of olive oil. Stir with a wooden spoon until the dough begins to come together, which should take about 1-2 minutes. This is crucial for activating the yeast and ensuring a smooth, cohesive dough.

Step 3: Knead Dough
Transfer the dough onto a floured surface and knead for 8-10 minutes until it is smooth and elastic. You'll want the dough to be soft yet slightly tacky; this step is essential for developing the gluten that gives your calzones their delightful chewiness.

Step 4: Let Dough Rise
Place the kneaded dough in a lightly oiled bowl, cover it with a damp kitchen towel, and let it rise in a warm place for 1-1.5 hours, or until it doubles in size. You’ll know it’s ready when it looks puffy and springs back slightly when poked.

Step 5: Prepare Fillings
While the dough is rising, cook and chop up 4 slices of turkey bacon and ½ cup of chicken ham. Dice one bell pepper and slice ½ cup of mushrooms. In a mixing bowl, combine these ingredients with 1 cup of shredded mozzarella cheese, ½ teaspoon of garlic powder, and 1 teaspoon of dried oregano while setting the mixture aside for later use.

Step 6: Divide Dough
After the dough has risen, punch it down gently to release the air. Divide it into 6 equal portions and roll each piece into a circle about 6 inches in diameter. The rolled-out dough will be the perfect canvas for your delicious Air Fryer Calzones.

Step 7: Assemble Calzones
Take one circle of dough and spoon a portion of the filling onto one half, leaving space at the edges. Fold the dough over to meet the edges and crimp the sides to seal tightly. Repeat the process with the remaining dough and filling, ensuring each calzone is well secured.

Step 8: Apply Egg Wash
In a small bowl, beat one egg to create an egg wash. Brush the tops of each calzone with the egg wash using a pastry brush; this will give your Air Fryer Calzones a beautiful golden finish as they cook.

Step 9: Preheat Air Fryer
Preheat your air fryer to 375°F (190°C) for about 3-5 minutes. Allowing the air fryer to come up to temperature ensures even cooking and perfect crispiness for your calzones.

Step 10: Cook Calzones
Place 2-3 calzones in the air fryer basket, making sure they are not overcrowded. Air fry them for 12-15 minutes, flipping them halfway through, until they are golden brown and crispy on the outside. You’ll know they’re done when the aroma fills your kitchen!

Step 11: Serve
Once cooked, remove the calzones from the air fryer and let them cool slightly for about 5 minutes before serving. These delicious Air Fryer Calzones pair perfectly with your favorite dipping sauce, making them a delightful addition to any meal!

What to Serve with Quick Air Fryer Calzones

Savor the bliss of crafting a memorable meal by pairing these delightful calzones with complementary sides that enhance every bite.

  • Marinara Sauce: A classic dip that adds a tangy, rich flavor, perfect for those warm, cheesy bites.

  • Fresh Side Salad: Light and crisp greens tossed in a zesty dressing provide balance and freshness to your meal.

  • Garlic Breadsticks: The buttery, garlicky goodness complements the savory filling, creating a comforting Italian experience.

  • Roasted Vegetables: Seasoned veggies bring a textural contrast and a vibrant mix of flavors, warming up the palate beautifully.

  • Crispy Potato Wedges: Golden and crunchy, these wedges add heartiness next to the soft, cheesy calzones.

  • Herbed Yogurt Dip: Creamy and cool, this dip adds a refreshing touch and enhances the flavors of seasoned fillings.

  • Sparkling Lemonade: Crisp and bright, this drink is a delightful contrast to the savory richness of the calzones.

  • Dessert Pairing: Serve with a slice of warm apple pie to end the meal on a sweet note, offering a delightful balance to the savory main.

Expert Tips for Air Fryer Calzones

  • Avoid Soggy Filling: Make sure your fillings are not too watery, as this can lead to soggy calzones. Drain any excess liquid before assembling.

  • Prep Ahead: For a quicker dinner, prepare the dough in advance and refrigerate it for up to 24 hours before using. This way, you can enjoy homemade Air Fryer Calzones in no time!

  • Experiment with Flavors: Don’t be afraid to try different cheeses or spices in your calzone filling. Unique flavor combinations can elevate your dish to a whole new level.

  • Freeze Extras: If you have leftovers, unbaked calzones can be frozen. Just adjust the cooking time when you air fry them straight from the freezer.

  • Perfect the Dough: Knead the dough well to develop gluten, ensuring your calzones have a delightful chewy texture. This step is crucial for that perfect bite!

Make Ahead Options

These Air Fryer Calzones are perfect for meal prep enthusiasts! You can prepare the dough up to 24 hours in advance by mixing the dry ingredients and refrigerating the formed dough; ensure it's lightly oiled and covered to prevent drying out. Additionally, the filling can be prepped up to 3 days in advance by cooking and chopping your proteins and veggies; just store the mixture in an airtight container in the fridge. When you’re ready to enjoy, simply assemble the calzones and air fry for that freshly cooked taste—resulting in delicious, golden pockets with minimal effort! Perfect for busy weeknights!

Air Fryer Calzones Variations

Feel free to get creative with your Air Fryer Calzones—there’s a world of delicious possibilities waiting for you!

  • Vegetarian: Replace meats with a medley of your favorite vegetables, like zucchini, mushrooms, and spinach for a fresh twist. The vibrant colors and flavors will brighten your meal!

  • Spicy Kick: Add chopped jalapeños or crushed red pepper flakes to the filling for a warm, zesty bite. Feel the heat intensify and enjoy the burst of flavors with every bite!

  • Cheesy Delight: Mix different cheeses like feta, gouda, or pepper jack for a gourmet feel. Combining cheeses creates a rich, multi-dimensional flavor profile to savor.

  • Protein Swap: Try ground beef, turkey, or even quinoa for a different protein source. Each option offers its unique taste and texture, enhancing the calzone experience.

  • Sweet Indulgence: For dessert, fill calzones with Nutella and sliced bananas or berries. Air frying these will create a warm, gooey treat that’s utterly irresistible!

  • Herb Infusion: Add fresh herbs like basil or parsley to your filling for an aromatic touch. The fragrant blend elevates the taste and makes each calzone feel like a true Italian delight.

  • Classic Italian: Incorporate ricotta and spinach with your mozzarella for a classic Italian fill. This traditional combination brings a burst of creamy goodness to every mouthful.

If you’re looking for more cooking inspiration, try pairing these calzones with a side of Air Fryer Fish sticks for a fun and balanced meal. And remember, the sky's the limit—let your imagination soar as you explore the endless possibilities of your homemade Air Fryer Calzones!

How to Store and Freeze Air Fryer Calzones

Fridge: Store cooked calzones in an airtight container in the refrigerator for up to 3 days to maintain freshness and flavor.

Freezer: Unbaked calzones can be frozen for up to 2 months. Place them on a baking sheet to freeze individually before transferring to a freezer bag to prevent sticking.

Reheating: To restore their crispy texture, reheat cooked calzones in the air fryer at 350°F (175°C) for 5-7 minutes. Avoid the microwave, as it may make the crust soggy.

Make-Ahead Tips: Prepare the dough and fillings in advance, refrigerating the dough for up to 24 hours before assembly, making it easy to whip up your Air Fryer Calzones on a busy day.

Air Fryer Calzones Recipe FAQs

What type of flour should I use for the dough?
You can use all-purpose flour for a classic calzone dough. If you're looking for a gluten-free option, feel free to substitute with gluten-free flour. Just make sure to check for a blend that can rise well, and you might also need to adjust the hydration slightly.

How should I store leftover calzones?
Store any cooked Air Fryer Calzones in an airtight container in the refrigerator for up to 3 days. I recommend placing parchment paper between layers if you're stacking them to keep them nice and crispy! When you're ready to munch again, simply reheat them in the air fryer at 350°F (175°C) for about 5-7 minutes to restore that delicious crunch.

Can I freeze unbaked calzones?
Absolutely! To freeze, assemble the unbaked calzones and place them on a baking sheet lined with parchment paper. Freeze them individually for about 1-2 hours until solid, then transfer them to a freezer bag for up to 2 months. When you're ready to cook, simply remove from the freezer and air fry at 375°F (190°C) for about 15-20 minutes. Just add a few extra minutes to account for the frozen dough!

What can I do if my calzone dough isn't rising enough?
If your dough isn't rising as it should, it might be due to inactive yeast. Make sure to check the expiration date on your yeast packet! Also, ensure your water was warm, not hot, when mixing with the yeast. For better results, try letting the dough rise in a warmer spot, like inside an oven that's turned off but has the light on, as the added warmth can help.

Can my pets have any of the ingredients in these calzones?
It's best to keep calzones away from pets, especially if they contain ingredients like garlic or onion, which can be harmful to them. If you'd like to share a little treat with your furry friend, consider baking a plain version without those harmful ingredients or using pet-friendly replacements instead!

Air Fryer Calzones

Delicious Air Fryer Calzones: Quick, Crispy, and Customizable

Make quick and customizable Air Fryer Calzones with a crispy crust and savory fillings—perfect for busy days and gatherings.
Print Recipe Pin Recipe
Prep Time 20 minutes mins
Cook Time 15 minutes mins
Rising Time 1 hour hr 30 minutes mins
Total Time 2 hours hrs 5 minutes mins
Servings: 6 calzones
Course: Dinner
Cuisine: Italian
Calories: 280
Ingredients Equipment Method Nutrition Notes

Ingredients
  

For the Dough
  • 2 cups All-Purpose Flour Substitute with gluten-free flour for a gluten-free option.
  • 1 teaspoon Salt Essential for enhancing flavor.
  • 1 teaspoon Sugar Can use alternative sweeteners.
  • 2 tablespoons Olive Oil Can be replaced with avocado oil or melted butter.
  • 1 packet Instant Yeast Regular yeast can be used, but rising time will increase.
  • ¾ cup Warm Water Warm, not hot, to activate yeast.
For the Filling
  • 1 cup Shredded Mozzarella Cheese Can swap for cheddar for a sharper taste.
  • ½ cup Cooked Chicken Ham Substitute with any cooked protein.
  • 4 slices Turkey Bacon Use regular bacon or omit for vegetarian.
  • 1 medium Diced Bell Pepper Substitute with other veggies if desired.
  • ½ cup Sliced Mushrooms Can be omitted or substituted.
  • ½ teaspoon Garlic Powder Fresh minced garlic works too.
  • 1 teaspoon Dried Oregano Italian seasoning can be substituted.
For the Egg Wash
  • 1 large Egg Use milk as a vegan alternative.

Equipment

  • Air fryer
  • Mixing Bowl
  • Wooden spoon
  • Pastry brush
  • Baking Sheet

Method
 

Step-by-Step Instructions
  1. In a large mixing bowl, whisk together 2 cups of all-purpose flour, 1 teaspoon of salt, 1 teaspoon of sugar, and 1 packet of instant yeast until thoroughly blended.
  2. Create a well in the center of the dry mixture and pour in ¾ cup of warm water and 2 tablespoons of olive oil. Stir with a wooden spoon until the dough begins to come together.
  3. Transfer the dough onto a floured surface and knead for 8-10 minutes until smooth and elastic.
  4. Place the kneaded dough in a lightly oiled bowl, cover, and let it rise for 1-1.5 hours until it doubles in size.
  5. While the dough is rising, cook and chop 4 slices of turkey bacon and ½ cup of chicken ham. Dice one bell pepper and slice ½ cup of mushrooms. Combine these with 1 cup of shredded mozzarella cheese, ½ teaspoon of garlic powder, and 1 teaspoon of dried oregano.
  6. After the dough has risen, punch it down gently and divide into 6 equal portions. Roll each piece into a circle about 6 inches in diameter.
  7. Take a circle of dough, spoon a portion of the filling onto one half, fold, and crimp the sides to seal tightly.
  8. Beat one egg to create an egg wash. Brush the tops of each calzone with the egg wash.
  9. Preheat your air fryer to 375°F (190°C) for about 3-5 minutes.
  10. Place 2-3 calzones in the air fryer basket, and air fry for 12-15 minutes, flipping halfway through, until golden brown and crispy.
  11. Once cooked, remove calzones from the air fryer and let cool slightly before serving.

Nutrition

Serving: 1calzoneCalories: 280kcalCarbohydrates: 30gProtein: 12gFat: 10gSaturated Fat: 3gPolyunsaturated Fat: 1gMonounsaturated Fat: 6gCholesterol: 70mgSodium: 470mgPotassium: 200mgFiber: 2gSugar: 1gVitamin A: 200IUVitamin C: 12mgCalcium: 200mgIron: 2mg

Notes

Ensure fillings are not too watery to avoid soggy calzones. Prepare dough in advance for quicker meals. Unbaked calzones can be frozen.

Tried this recipe?

Let us know how it was!

Creamy Cowboy Butter Chicken Linguine Your Family Will Love

December 3, 2025 by Grace Snow Leave a Comment

The sizzling sound of chicken hitting a hot skillet transports me to a cozy kitchen, bustling with the excitement of a family dinner. Today, I’m whipping up a delightful Cowboy Butter Chicken Linguine that’s not just easy, but also a true showstopper. In under 30 minutes, this creamy, garlicky pasta dish brimming with tender chicken will charm your taste buds and leave everyone asking for seconds. One of the best parts? It’s an easily customizable recipe, so whether you’re catering to picky eaters or just looking for a convenient weeknight meal, this family-friendly dinner accommodates all. Are you ready to add this delectable dish to your rotation and impress your loved ones? Let’s dive into the full recipe and make some magic happen!

Why is Cowboy Butter Chicken Linguine a Must-Try?

Simplicity at Its Best: This recipe requires minimal effort while delivering maximum flavor, making it ideal for busy weeknights.

Creamy and Delicious: The rich, garlicky sauce envelops the linguine and chicken, creating a delightful dish that tastes gourmet yet homemade.

Customizable Options: With substitutions for protein and dietary needs, this recipe caters to every taste, whether you go for shrimp or a vegetarian twist!

Family-Friendly: It's a surefire hit with everyone at the table, sure to turn any meal into a satisfying family gathering.

Quick to Cook: You can whip this up in under 30 minutes—perfect for when you need a speedy, comforting dinner.

Serving Suggestions: Pair it with a side of garlic bread or a fresh salad to elevate the dining experience even further! Enjoy, and don’t forget to check out my Crockpot Butter Chicken for more delicious chicken options!

Cowboy Butter Chicken Linguine Ingredients

• Get ready for a flavor-packed journey!

For the Chicken
• Boneless, skinless chicken breasts – Provides tender, juicy protein; try using sliced turkey or shrimp for variety.

For the Pasta
• Linguine pasta – Serves as the perfect base to capture the creamy sauce; substitute with fettuccine or spaghetti if desired.

For the Sauce
• Olive oil – Adds depth while browning chicken and prevents sticking.
• Butter – Essential for the rich "cowboy butter" flavor; swap with plant-based butter for a dairy-free version.
• Garlic – Freshly minced for aromatic flavor; it’s the backbone of the sauce.
• Dijon mustard – Introduces a subtle tang that elevates overall taste.
• Paprika – Adds smoky undertones and vibrant color.
• Red pepper flakes (optional) – For added heat; adjust according to spice preference.
• Lemon juice and zest – Brightens and balances the dish’s creaminess.
• Chicken broth or reserved pasta water – Helps achieve the desired sauce consistency.
• Heavy cream – Essential for creamy texture; replace with coconut cream for a dairy-free option.
• Grated parmesan cheese – Adds savory flavor; use vegan cheese as an alternative.
• Salt and black pepper – Essential seasonings to enhance flavor.

For Garnish
• Fresh parsley – Provides herbaceous notes and adds a pop of color to your dish.

Step‑by‑Step Instructions for Cowboy Butter Chicken Linguine

Step 1: Cook Pasta
Start by bringing a large pot of salted water to a boil. Add the linguine pasta and cook according to the package instructions until al dente, usually around 8–10 minutes. Once cooked, drain the pasta, reserving ½ cup of the starchy pasta water for later. Set the linguine aside while you prepare the Cowboy Butter Chicken.

Step 2: Brown Chicken
In a large skillet, heat 2 tablespoons of olive oil and 2 tablespoons of butter over medium-high heat. Once the butter is melted and bubbling, add the minced garlic and sauté for about 30 seconds until fragrant. Add the boneless, skinless chicken breasts, seasoning them with salt and pepper, and cook for 6–7 minutes on each side until golden brown and cooked through. Remove the chicken from the skillet and slice it into bite-sized pieces.

Step 3: Make Sauce
In the same skillet, lower the heat and stir in 1 tablespoon of Dijon mustard, 1 teaspoon of paprika, and optional red pepper flakes. Cook for 1 minute, allowing the spices to bloom. Next, add the reserved lemon juice and zest, scraping up any browned bits from the bottom of the pan. Pour in ½ cup of chicken broth and 1 cup of heavy cream, stirring to combine. Let it simmer for about 3–5 minutes until the sauce thickens slightly.

Step 4: Combine
Return the sliced chicken to the skillet, mixing it with the creamy sauce for about 2 minutes, allowing the flavors to meld together. Add the cooked linguine to the skillet, tossing until the pasta is evenly coated with the Cowboy Butter sauce. If the sauce is too thick, gradually stir in the reserved pasta water until the desired consistency is reached.

Step 5: Serve
Once well combined, remove the skillet from heat and plate the Cowboy Butter Chicken Linguine. Finish by sprinkling with freshly chopped parsley and grated parmesan cheese. For an extra touch, serve with garlic bread on the side, and enjoy this comforting, family-friendly dinner that’s ready in no time!

Cowboy Butter Chicken Linguine Variations

Feel free to let your creativity shine by customizing this delightful dish to fit your family's preferences!

  • Turkey Twist: Substitute chicken with sliced turkey for a leaner option that still delivers on flavor. Turkey pairs wonderfully with the rich sauce.

  • Vegetarian Delight: Opt for mushrooms or tofu instead of chicken, creating a fulfilling vegetarian dish that brings out the sauce's creamy richness.

  • Spicy Kick: Amp up the heat by adding extra red pepper flakes or a dash of your favorite hot sauce. Spice lovers will rejoice at this flavor enhancement!

  • Dairy-Free Dream: Replace butter and heavy cream with plant-based butter and coconut cream, making this dish friendly for those with lactose intolerance.

  • Zesty Lemon: For an extra zing, add more lemon juice and zest in the sauce. It brightens the dish and enhances the overall flavor profile.

  • Pasta Variety: Swap out linguine for whole grain or gluten-free pasta options like zoodles or chickpea pasta. Explore different textures while staying health-conscious!

  • Herb Infusion: Experiment with fresh herbs like basil or thyme for a lovely aromatic touch that elevates the flavor to new heights—just freshen that Cowboy spirit!

And if you're looking for other chicken recipes to spice up your dinner rotation, don't miss my Chipotle Lime Chicken and Rice and Honey Garlic Chicken Thighs that are sure to please!

Storage Tips for Cowboy Butter Chicken Linguine

Fridge: Store leftovers in an airtight container for up to 3 days. Make sure to cool the pasta and sauce completely before sealing to prevent condensation.

Freezer: For longer storage, separate the sauce and pasta, placing them in airtight containers. Freeze for up to 2 months, ensuring no air remains to prevent freezer burn.

Reheating: To reheat, thaw overnight in the fridge if frozen. Add a splash of milk or reserved pasta water when warming in a skillet to restore creaminess and avoid drying out.

Leftover Tips: Use any leftover Cowboy Butter Chicken Linguine in a wrap or salad for a delicious twist on lunch the next day!

Make Ahead Options

These Cowboy Butter Chicken Linguine are perfect for busy weeknights when you need a delicious meal with minimal last-minute prep! You can marinate and slice the chicken up to 24 hours in advance, storing it in an airtight container in the refrigerator. Additionally, you can prepare the creamy sauce, combining the garlic, Dijon mustard, paprika, and heavy cream up to 3 days ahead; just store it separately to maintain its luscious texture. When ready to serve, simply reheat the sauce in a skillet while cooking the linguine (using the reserved pasta water if needed), then toss everything together for a warm, satisfying dinner that's just as delightful as if you made it fresh!

What to Serve with Cowboy Butter Chicken Linguine

Elevate your meal with delightful sides and beverages that perfectly complement this creamy, garlicky pasta dish.

  • Garlic Bread: A classic pairing, buttery garlic bread is perfect for soaking up every drop of the luscious sauce.
  • Caesar Salad: Crisp romaine and tangy dressing provide a refreshing contrast to the rich linguine, adding a burst of color to your table.
  • Roasted Vegetables: Caramelized seasonal veggies like zucchini, bell peppers, or asparagus balance the meal with their charred flavors and nutrients.
  • Parmesan Crusted Zucchini: These crispy bites offer a crunchy texture while harmonizing with the pasta's creamy goodness.
  • Coleslaw: A crunchy, tangy slaw adds brightness and a refreshing crunch after every savory bite of linguine.
  • Chardonnay: A chilled glass of Chardonnay complements the creamy flavors, adding a delightful acidity that enhances each mouthful.
  • Lemon Sorbet: For dessert, a light lemon sorbet refreshes the palate, offering a sweet yet tart end to your meal that ties back to the dish's citrus notes.

Mix and match these suggestions to create a heartwarming and well-rounded dinner your family will cherish!

Expert Tips for Cowboy Butter Chicken Linguine

  • Chicken Selection: Choose plump, boneless, skinless chicken breasts for the best texture; avoid pieces with dark spots that may indicate spoilage.

  • Pasta Perfect: Ensure you don't overcook the linguine; aim for al dente to maintain its structure when tossed with the creamy sauce.

  • Sauce Consistency: If the sauce is too thick, add reserved pasta water gradually until it reaches your desired creamy consistency.

  • Adjust for Spice: Love heat? Don't hesitate to add more red pepper flakes! For a milder dish, simply omit them entirely for a family-friendly Cowboy Butter Chicken Linguine.

  • Storing Leftovers: Keep any leftovers in an airtight container for 3 days, but for longer storage, separate the sauce and pasta before freezing to maintain quality.

  • Hearty Garnish: Elevate your dish with a sprinkle of fresh parsley and extra parmesan before serving for added flavor and a colorful presentation!

Cowboy Butter Chicken Linguine Recipe FAQs

What type of chicken is best for this recipe?
Absolutely! I recommend using plump boneless, skinless chicken breasts for the best texture. Look for pieces that are firm and free of dark spots, which can indicate spoilage. If you prefer, sliced turkey or even shrimp can be delightful alternatives to maintain that juicy protein base.

How should I store leftovers?
Very good question! Store any leftover Cowboy Butter Chicken Linguine in an airtight container and refrigerate for up to 3 days. Make sure you allow the dish to cool completely before sealing it to prevent condensation, which can make your pasta soggy.

Can I freeze Cowboy Butter Chicken Linguine?
Definitely! For optimal texture, I suggest separating the sauce and pasta before freezing. Place each in airtight containers, and they should stay fresh for about 2 months. When you're ready to enjoy, thaw overnight in the fridge, then reheat gently. To keep it creamy, add a splash of milk or reserved pasta water while warming.

What if I have dietary restrictions?
This recipe is wonderfully customizable! If you're catering to someone with dairy allergies, simply swap out the butter and cream for plant-based alternatives. You can also adjust the spice level by leaving out the red pepper flakes for a milder flavor or using vegetarian protein options like mushrooms or tofu.

How do I know if my pasta is cooked properly?
Great question! You want to aim for al dente, which means it should be firm to the bite. Usually, this takes around 8–10 minutes of cooking time in salted water. Remember to occasionally check the pasta while cooking, as every stove and pot can vary slightly in cooking times. Just taste a piece to ensure it's just right before draining!

What can I serve alongside Cowboy Butter Chicken Linguine?
You can't go wrong! Pairing it with garlic bread or a fresh salad can elevate your meal. A side of roasted vegetables or a light, zesty coleslaw works beautifully too, adding a refreshing balance to the richness of the pasta dish. Enjoy your culinary adventure!

Cowboy Butter Chicken Linguine

Creamy Cowboy Butter Chicken Linguine Your Family Will Love

This Cowboy Butter Chicken Linguine is a creamy, flavorful dish that the whole family will love.
Print Recipe Pin Recipe
Prep Time 10 minutes mins
Cook Time 20 minutes mins
Total Time 30 minutes mins
Servings: 4 servings
Course: Dinner
Cuisine: American
Calories: 600
Ingredients Equipment Method Nutrition Notes

Ingredients
  

For the Chicken
  • 1 lb boneless, skinless chicken breasts Try using sliced turkey or shrimp for variety.
For the Pasta
  • 8 oz linguine pasta Substitute with fettuccine or spaghetti if desired.
For the Sauce
  • 2 tbsp olive oil Adds depth while browning chicken.
  • 2 tbsp butter Essential for the rich 'cowboy butter' flavor.
  • 4 cloves garlic Freshly minced for aromatic flavor.
  • 1 tbsp Dijon mustard Introduces a subtle tang.
  • 1 tsp paprika Adds smoky undertones.
  • 1/2 tsp red pepper flakes Optional, adjust according to spice preference.
  • 1 tbsp lemon juice Brightens the dish.
  • 1 tbsp lemon zest
  • 1/2 cup chicken broth Or reserved pasta water.
  • 1 cup heavy cream Replace with coconut cream for a dairy-free option.
  • 1/2 cup grated parmesan cheese Use vegan cheese as an alternative.
  • to taste salt Essential seasoning.
  • to taste black pepper Essential seasoning.
For Garnish
  • 1/4 cup fresh parsley Provides herbaceous notes.

Equipment

  • Large pot
  • Large skillet
  • Measuring Spoons
  • measuring cups
  • Colander

Method
 

Step‑by‑Step Instructions
  1. Bring a large pot of salted water to a boil. Add the linguine pasta and cook according to package instructions until al dente, around 8–10 minutes. Drain, reserving ½ cup of starchy pasta water.
  2. In a large skillet, heat olive oil and butter over medium-high heat. Add minced garlic and sauté for about 30 seconds until fragrant. Add chicken, seasoning with salt and pepper, and cook for 6–7 minutes on each side until golden brown. Remove and slice into bite-sized pieces.
  3. In the same skillet, lower the heat and stir in Dijon mustard, paprika, and optional red pepper flakes. Cook for 1 minute. Add lemon juice and zest, scraping up browned bits. Pour in chicken broth and heavy cream, stirring to combine. Let simmer for 3–5 minutes until slightly thickened.
  4. Return sliced chicken to skillet, mixing it with the sauce for about 2 minutes. Add cooked linguine, tossing until evenly coated. Gradually stir in reserved pasta water if sauce is too thick.
  5. Remove from heat and plate the Cowboy Butter Chicken Linguine. Garnish with parsley and Parmesan cheese, and serve with garlic bread on the side.

Nutrition

Serving: 1plateCalories: 600kcalCarbohydrates: 65gProtein: 35gFat: 20gSaturated Fat: 12gPolyunsaturated Fat: 2gMonounsaturated Fat: 5gCholesterol: 150mgSodium: 800mgPotassium: 600mgFiber: 3gSugar: 2gVitamin A: 500IUVitamin C: 10mgCalcium: 200mgIron: 3mg

Notes

For optimal texture, use plump chicken breasts and do not overcook the linguine. Adjust red pepper flakes to your heat preference. Store leftovers in airtight containers.

Tried this recipe?

Let us know how it was!

High Protein Pepperoni Pizza Rolls: Guilt-Free Comfort Bites

December 3, 2025 by Grace Snow Leave a Comment

As I stood in my kitchen, the aroma of pepperoni and melted cheese wafted through the air, instantly transporting me to cherished pizza nights with family. Today, I'm thrilled to share my versatile recipe for High-Protein Pepperoni Pizza Rolls—a delightful twist on a classic comfort food that promises satisfaction without the guilt. Perfect for meal prep or a quick post-workout snack, these rolls are crispy on the outside while offering a cheesy, savory surprise inside. With a high-protein boost and customizable filling options, they cater to fitness enthusiasts and taste enthusiasts alike. Ready to elevate your pizza game? Let's dive into this deliciously healthy adventure together!

Why are these pizza rolls a must-try?

Deliciously Healthy: These High-Protein Pepperoni Pizza Rolls offer a guilt-free way to enjoy your favorite flavors without the extra calories.
Customization: With multiple filling options, you can make these rolls your own—try sautéed vegetables for a vegetarian twist or spicy buffalo chicken!
Meal Prep Friendly: Perfect for busy weeks, prepare a batch ahead of time and enjoy on-the-go snacks or post-workout treats.
Satisfying Crunch: The crispy exterior contrasts beautifully with the melty cheese and savory filling, creating a delightful texture you won't forget.
Protein Power: Each roll packs a punch with 15-20g of protein, making it an ideal choice for fitness enthusiasts. Enjoy them with a side of marinara or Greek yogurt for extra flavor!

High Protein Pepperoni Pizza Rolls Ingredients

For the Rolls
• High-Protein Tortillas or Wraps – These serve as the base, so look for options providing 8-10g of protein per serving. Whole wheat or cauliflower wraps can also be a great substitution.
• Lean Ground Turkey or Chicken – This ingredient provides the rolls with protein and substance. Opt for ground meat with minimal fat for the best results.
• Reduced-Fat Mozzarella Cheese – Melting beautifully, this cheese adds creaminess without the guilt. Mix in light ricotta or cottage cheese for extra creaminess if desired.
• Turkey Pepperoni Slices – These slices give that classic pizza flavor while keeping fat content lower. For a vegetarian option, consider plant-based pepperoni.
• Marinara Sauce (No Sugar Added) – This sauce adds moisture and flavor without unnecessary sugars. You can replace it with crushed tomatoes mixed with herbs if you prefer.
• Garlic Powder & Oregano – Essential spices that enhance the overall flavor profile without adding calories.
• Olive Oil Spray or Egg Wash – This is used to achieve that perfect crispiness on the outside of the rolls.

For Serving
• Marinara Sauce – Perfect for dipping, adds an extra layer of flavor to each bite.
• Greek Yogurt – Mix with fresh herbs for a delicious and healthy dip option.

These High Protein Pepperoni Pizza Rolls are not just a feast for your taste buds, but also a smart choice for maintaining your nutrition goals. Enjoy bringing these delightful bites to your home!

Step‑by‑Step Instructions for High Protein Pepperoni Pizza Rolls

Step 1: Cook the Meat
In a skillet over medium heat, brown the lean ground turkey or chicken, stirring occasionally for about 5–7 minutes until fully cooked. Season with garlic powder and oregano to infuse the meat with flavor. Once cooked, drain any excess fat and allow the meat to cool slightly while you prepare the filling.

Step 2: Assemble the Filling
In a mixing bowl, combine the cooked meat, reduced-fat mozzarella cheese, turkey pepperoni slices, and marinara sauce. Mix gently until all ingredients are evenly coated. This delightful blend will form the heart of your high-protein pepperoni pizza rolls, so ensure everything is well combined for maximum flavor.

Step 3: Fill the Wraps
Take your high-protein tortillas or wraps and lay them flat on a clean surface. Spoon a generous amount of the filling into the center of each tortilla, making sure not to overstuff. Fold the sides in towards the center, then roll them tightly from the bottom up, much like a burrito, to securely encase the delicious filling inside.

Step 4: Seal and Crisp
Preheat your air fryer to 375°F (190°C) or oven to 400°F (200°C). Brush the outside of each rolled wrap lightly with olive oil or an egg wash for added crispiness. This step will ensure a beautiful golden color and a satisfying crunch when baked, enhancing the overall enjoyment of your high-protein pepperoni pizza rolls.

Step 5: Cook
If using an air fryer, arrange the filled rolls in a single layer and cook for 8–10 minutes, flipping halfway through for even crisping. For the oven, place the rolls on a baking sheet and bake for 12–15 minutes until they are golden brown and crispy. Both methods will yield wonderfully textured rolls that are best served hot.

Step 6: Serve
Once cooked, remove the rolls from the air fryer or oven and allow them to cool for a few minutes. These high-protein pepperoni pizza rolls are delightful when served with a side of marinara sauce for dipping or a dollop of Greek yogurt mixed with fresh herbs for a refreshing touch.

Make Ahead Options

These High-Protein Pepperoni Pizza Rolls are ideal for those who want to save time while enjoying delicious homemade food! You can prepare the filling (cooked meat, cheese, turkey pepperoni, and marinara) up to 3 days in advance; simply store it in an airtight container in the refrigerator. The assembled rolls can be made and refrigerated for up to 24 hours before baking, ensuring they stay fresh and flavorful. To maintain quality, brush the rolls with olive oil or egg wash just before cooking, making sure not to overload on sauce to avoid sogginess. When you're ready to serve, preheat the air fryer or oven, and bake for the recommended time until crispy and golden, resulting in a satisfying meal with minimal effort!

What to Serve with High Protein Pepperoni Pizza Rolls

These delightful rolls deserve a vibrant meal to accompany their cheesy goodness, so let's explore some perfect pairings.

  • Classic Marinara Sauce: A side of marinara enhances the pizza flavor and adds a zesty deliciousness for dipping.
  • Creamy Greek Yogurt Dip: Mix Greek yogurt with fresh herbs for a refreshing alternative to traditional ranch dressing, offering a light and tangy contrast.
  • Crispy Side Salad: Perhaps a fresh arugula salad topped with cherry tomatoes and a light vinaigrette—it adds a crisp texture and balances the meal beautifully.
  • Garlic Parmesan Roasted Vegetables: Roasted broccoli or cauliflower drizzled with garlic and Parmesan cheese provides a savory, crunchy side that complements the rolls perfectly.
  • Sweet Potato Fries: Baked sweet potato fries bring a hint of sweetness and a satisfying crunch, creating a delightful contrast with the savory rolls.
  • Fruit-Centric Dessert: Serve with fresh berries or a fruit salad for a refreshing finish that adds a light, sweet note to round off your meal.

Expert Tips for High Protein Pepperoni Pizza Rolls

  • Drain the Meat: Make sure to drain the cooked meat well to prevent soggy rolls that can compromise your high-protein pepperoni pizza rolls' texture.

  • Mind the Saucing: Avoid over-saucing the filling; too much marinara can make the rolls difficult to seal and eat, impacting the overall experience.

  • Crisp to Perfection: Cook until the rolls are golden brown for that delightful crunchy exterior. A few extra minutes can elevate your dish!

  • Experiment with Fillings: Don’t hesitate to play with different protein sources or vegetables—this helps customize your high-protein pepperoni pizza rolls while keeping the deliciousness intact.

  • Storage Smartly: If making ahead, ensure the rolls are completely cooled before storing. They stay fresh for up to 4 days in the fridge or up to 2 months in the freezer.

  • Serving Styles: Pair with a zesty dipping sauce or herb-infused Greek yogurt to elevate flavors and keep every bite exciting.

High Protein Pepperoni Pizza Rolls Variations

Feel free to get creative with your High-Protein Pepperoni Pizza Rolls and make them uniquely yours!

  • Vegetarian Delight: Swap the meat for sautéed mushrooms or spinach for a delightful and hearty twist. The earthy flavor of the mushrooms brings a richness that pairs beautifully with cheese.

  • Spicy Buffalo: Use shredded buffalo chicken with low-fat cream cheese and a sprinkle of cheddar for a fiery kick. The heat will awaken your taste buds and turn up the excitement at your dinner table!

  • Hawaiian Style: Create a sweet and savory Hawaiian version with turkey ham, pineapple chunks, and mozzarella. This tropical touch adds a surprising zing that’s perfect for a laid-back evening.

  • Tex-Mex Fiesta: Opt for black beans, corn, diced jalapeños, and cheddar for a Tex-Mex flair. This zesty combination offers a delightful crunch and a burst of flavors that will make you crave more!

  • Breakfast Roll: For a morning twist, fill the rolls with scrambled eggs, turkey sausage, and a sprinkle of cheese. It's breakfast on the go, keeping your protein levels up and your mornings bright!

  • Cheesy Spin: Introduce different types of cheese, like pepper jack for a kick, or a blend of mozzarella and fontina for extra creaminess. Each cheese adds a unique melt-in-your-mouth experience.

  • Mediterranean Medley: Incorporate feta cheese, olives, and sundried tomatoes for a refreshing Mediterranean touch. This variation brings an explosion of flavors that your friends will talk about beautifully!

These High-Protein Pepperoni Pizza Rolls are not only delicious but can also be tailored to match your cravings and dietary preferences. Ready to dive into these tasty transformations? Enjoy your delicious adventure!

Don't forget to check out these delightful recipes for more inspiration: Lemon Ricotta Protein, or if you’re in the mood for a savory dish, try some Garlic Chicken Thighs.

Storage Tips for High Protein Pepperoni Pizza Rolls

Fridge: Store your rolls in an airtight container for up to 4 days. Allow them to cool completely before sealing to maintain crispness.

Freezer: For longer storage, freeze these delicious high-protein pepperoni pizza rolls for up to 2 months. Wrap each roll tightly in plastic wrap, then place them in a freezer bag.

Reheating: Reheat in an air fryer at 375°F (190°C) for about 5–7 minutes for a crispy finish. Alternatively, bake in a preheated oven at 400°F (200°C) for 10–12 minutes, until warmed through.

Make-Ahead Tips: Prepare a batch in advance to enjoy as quick snacks or post-workout meals. Just be sure to follow proper storage methods to keep them fresh!

High-Protein Pepperoni Pizza Rolls Recipe FAQs

How do I select the best ingredients for my High-Protein Pepperoni Pizza Rolls?
Absolutely! When choosing high-protein tortillas or wraps, look for those that offer 8-10g of protein per serving; this will keep the rolls satisfying. For the meat, opt for lean ground turkey or chicken with minimal fat—around 93% lean is ideal. Fresh toppings like reduced-fat mozzarella should just melt beautifully, enhancing that cheesy goodness!

What are the best storage methods for leftover High-Protein Pepperoni Pizza Rolls?
These rolls can be stored in an airtight container in the refrigerator for up to 4 days. To maintain their crispiness, allow them to cool completely before placing them in the container. If you want to enjoy them later, they can also be frozen for up to 2 months, which I often do for a handy snack!

Can I freeze High-Protein Pepperoni Pizza Rolls? If so, how?
Yes, absolutely! To freeze, wrap each roll tightly in plastic wrap and place them in a freezer-safe bag—this prevents freezer burn. They can be stored for up to 2 months. When you're ready to enjoy, just reheat them straight from the freezer in an air fryer at 375°F (190°C) for around 5–7 minutes or bake at 400°F (200°C) for 10–12 minutes until heated through.

Any common troubleshooting tips for my High-Protein Pepperoni Pizza Rolls?
Very! One common issue can be sogginess—make sure to drain any excess fat from your cooked meat and avoid over-saucing the filling. If your rolls aren't sealing properly, try rolling them a bit tighter or using a bit of the marinara sauce as a 'glue' to help them stay closed during cooking.

Are there any dietary considerations I should keep in mind with these rolls?
Definitely! If you or anyone eating these rolls has allergies, consider substituting turkey pepperoni with plant-based options or eliminating cheese for a dairy-free version. Additionally, make sure your marinara sauce is free from added sugars for a healthier choice. These modifications also make the rolls friendly for various dietary needs!

High Protein Pepperoni Pizza Rolls

High Protein Pepperoni Pizza Rolls: Guilt-Free Comfort Bites

High Protein Pepperoni Pizza Rolls offer a deliciously healthy way to enjoy comfort food without guilt.
Print Recipe Pin Recipe
Prep Time 20 minutes mins
Cook Time 15 minutes mins
Cooling Time 5 minutes mins
Total Time 40 minutes mins
Servings: 4 rolls
Course: Snacks
Cuisine: American
Calories: 200
Ingredients Equipment Method Nutrition Notes

Ingredients
  

For the Rolls
  • 4 pieces High-Protein Tortillas or Wraps Whole wheat or cauliflower wraps can also be a great substitution.
  • 1 pound Lean Ground Turkey or Chicken Opt for ground meat with minimal fat for the best results.
  • 1 cup Reduced-Fat Mozzarella Cheese Mix in light ricotta or cottage cheese for extra creaminess if desired.
  • 4 ounces Turkey Pepperoni Slices For a vegetarian option, consider plant-based pepperoni.
  • 1 cup Marinara Sauce (No Sugar Added) Can replace it with crushed tomatoes mixed with herbs if you prefer.
  • 1 teaspoon Garlic Powder
  • 1 teaspoon Oregano
  • 1 tablespoon Olive Oil Spray or Egg Wash
For Serving
  • 1 cup Marinara Sauce Perfect for dipping.
  • 1 cup Greek Yogurt Mix with fresh herbs for a delicious and healthy dip option.

Equipment

  • Skillet
  • Mixing Bowl
  • Air fryer
  • Oven
  • Baking Sheet

Method
 

Step-by-Step Instructions
  1. In a skillet over medium heat, brown the lean ground turkey or chicken, stirring occasionally for about 5–7 minutes. Season with garlic powder and oregano. Drain excess fat and cool slightly.
  2. In a mixing bowl, combine the cooked meat, reduced-fat mozzarella cheese, turkey pepperoni slices, and marinara sauce. Mix gently until evenly coated.
  3. Take your high-protein tortillas or wraps and lay them flat. Spoon a generous amount of filling into the center, fold the sides in, and roll tightly from the bottom up.
  4. Preheat your air fryer to 375°F (190°C) or oven to 400°F (200°C). Brush each rolled wrap lightly with olive oil or egg wash.
  5. If using an air fryer, arrange the rolls in a single layer and cook for 8–10 minutes, flipping halfway through. For the oven, bake for 12–15 minutes until golden brown.
  6. Remove the rolls from the air fryer or oven and allow them to cool for a few minutes. Serve with marinara sauce or Greek yogurt mixed with fresh herbs.

Nutrition

Serving: 1rollCalories: 200kcalCarbohydrates: 20gProtein: 15gFat: 7gSaturated Fat: 3gPolyunsaturated Fat: 0.5gMonounsaturated Fat: 2gCholesterol: 35mgSodium: 450mgPotassium: 250mgFiber: 3gSugar: 2gVitamin A: 10IUVitamin C: 5mgCalcium: 15mgIron: 10mg

Notes

These rolls stay fresh for up to 4 days in the fridge or up to 2 months in the freezer. Reheat in an air fryer or oven for a crisp finish.

Tried this recipe?

Let us know how it was!

Savory Cowboy Butter Chicken Linguine: Quick & Comforting Delight

December 3, 2025 by Grace Snow Leave a Comment

As I stood at the stove, the inviting aroma of garlic and butter wafted through my kitchen, instantly transporting me to a cozy restaurant in the heart of Texas. Enter Cowboy Butter Chicken Linguine, a dish that melds the rustic charm of cowboy cooking with the elegance of Italian cuisine. It’s the perfect solution for busy weeknights, coming together in just 30 minutes to deliver comfort food that feels both hearty and gourmet. With its creamy, garlicky sauce embracing tender chicken and linguine, this recipe is endlessly customizable—craving a kick? Toss in some red pepper flakes; prefer a lighter protein? Feel free to swap the chicken for shrimp or turkey. Whatever your choice, there’s something inherently satisfying about creating a meal that your family will love. Are you ready to elevate your weeknight dinners with this delightful fusion?

Why is Cowboy Butter Chicken Linguine special?

Quick, weeknight solution: In just 30 minutes, you can whip up this delicious meal, perfect for busy families.
Creamy, irresistible sauce: The combination of garlic, butter, and cream creates a decadent coating that hugs each strand of pasta beautifully.
Customizable options: Whether you want to spice it up with red pepper flakes or adjust the protein, this dish adapts to your taste.
Crowd-pleasing flavors: The rich blend of spices and savory ingredients ensures this dish will satisfy everyone's cravings.
Easy to make ahead: With simple storage tips, you can prep this meal in advance or save leftovers for quick lunches or dinners.
If you enjoy savory dishes with a twist, check out my Crockpot Butter Chicken or Honey Garlic Chicken Thighs for more flavorful inspirations!

Cowboy Butter Chicken Linguine Ingredients

For the Chicken
• Boneless, skinless chicken breasts – This tender protein ensures a juicy centerpiece; swap with turkey or shrimp for a twist.

For the Pasta
• Linguine pasta – Perfect for capturing the creamy sauce; you can use fettuccine or spaghetti if preferred.

For the Sauce
• Olive oil – Adds richness and prevents sticking; essential for sautéing.
• Butter – Delivers a rich flavor; for a dairy-free option, use plant-based butter.
• Garlic – Freshly minced for an addictive, aromatic depth; it’s crucial for the sauce.
• Dijon mustard – Imparts a subtle tang, enhancing the sauce's complexity.
• Paprika – Offers a lovely smokiness and color; adjust to your desired flavor intensity.
• Red pepper flakes (optional) – Perfect for adding a kick; tailor based on your spice preference.
• Lemon juice and zest – Brightens the dish, balancing its rich creaminess.
• Chicken broth/reserved pasta water – A flavorful base for the sauce; using pasta water helps with consistency.
• Heavy cream – Ensures the sauce is luxuriously creamy; coconut cream makes for a great dairy-free substitute.
• Grated parmesan cheese – Adds umami flavors; feel free to omit or replace with vegan cheese for a dairy-free version.
• Salt and black pepper – Essential seasonings enhancing the dish's overall taste.

For Garnish
• Fresh parsley – Adds a vibrant, herbaceous touch; ideal for garnishing the finished dish.

This Cowboy Butter Chicken Linguine recipe promises to be a crowd-pleaser, with its rich, creamy sauce and perfectly cooked pasta. Enjoy crafting a meal that brings everyone together!

Step‑by‑Step Instructions for Cowboy Butter Chicken Linguine

Step 1: Prepare Pasta
Begin by bringing a large pot of salted water to a rolling boil. Add the linguine and cook according to the package instructions, typically around 8-10 minutes for al dente. Once cooked, reserve about ½ cup of the pasta water for later and drain the linguine, returning it to the pot while you finish the Cowboy Butter Chicken sauce.

Step 2: Sauté Chicken
In a large skillet, heat 2 tablespoons of olive oil and 2 tablespoons of butter over medium-high heat. Cut the boneless, skinless chicken breasts into bite-sized pieces and season with salt and pepper. Cook the chicken for 5-7 minutes or until golden brown and cooked through, stirring occasionally. Remove the chicken from the skillet and set aside, keeping it warm.

Step 3: Make Sauce
In the same skillet, lower the heat to medium and add minced garlic, Dijon mustard, paprika, and red pepper flakes (if using). Sauté for about 1-2 minutes or until fragrant, ensuring the garlic doesn’t burn. Next, pour in 1 cup of chicken broth and the lemon juice and zest, stirring to combine all the flavors.

Step 4: Add Cream
Increase the heat slightly and add 1 cup of heavy cream to the skillet. Allow the mixture to come to a gentle simmer, stirring continuously to avoid curdling. Cook for about 3-5 minutes or until the sauce thickens slightly and becomes creamy. Adjust seasoning with salt and pepper to taste for your Cowboy Butter Chicken Linguine.

Step 5: Combine
Return the cooked chicken to the skillet, followed by the drained linguine. Toss everything together until the pasta is evenly coated in the creamy sauce. If the sauce is too thick, gradually add in the reserved pasta water until you reach your desired consistency.

Step 6: Serve
Once well combined, remove the skillet from heat. Serve your Cowboy Butter Chicken Linguine hot, garnished with fresh parsley and a sprinkle of grated parmesan cheese. Enjoy this comforting dish with a side of garlic bread or a fresh garden salad for a complete meal!

Expert Tips for Cowboy Butter Chicken Linguine

  • Choose Quality Chicken: Use plump, fresh chicken breasts without dark spots for the best flavor and tenderness in your Cowboy Butter Chicken Linguine.
  • Pasta Cooking Time: Ensure linguine is cooked al dente—slightly firm—to prevent mushiness when combined with the sauce.
  • Adjust Creaminess: Gradually add reserved pasta water to reach your preferred sauce consistency; don’t rush this step to avoid a too-thick texture.
  • Garlic Precautions: Sauté garlic just until fragrant, about 1-2 minutes; overcooking can lead to bitterness that affects the overall dish.
  • Custom Spice Levels: Start with less red pepper flakes if you're unsure about the heat; you can always add more to your Cowboy Butter Chicken Linguine for extra warmth.
  • Storage Tips: Cool leftovers completely before transferring to airtight containers; it keeps the sauce from thickening too much while stored.

How to Store and Freeze Cowboy Butter Chicken Linguine

Fridge: Store leftovers in an airtight container for up to 3 days. Ensure the pasta and sauce are mixed for optimal flavor retention.

Freezer: For long-term storage, separate the pasta and sauce, then freeze in airtight containers for up to 2 months. This helps maintain texture upon thawing.

Reheating: Gently reheat on the stove over low heat, adding a splash of reserved pasta water or milk to restore creaminess to your Cowboy Butter Chicken Linguine.

Make-Ahead Tips: Prepare the sauce in advance, storing it in the fridge for up to 3 days, and cook the pasta fresh when ready to serve for a quick meal.

Make Ahead Options

These Cowboy Butter Chicken Linguine are perfect for meal prep enthusiasts looking to save time on busy weeknights! You can chop the chicken and vegetables and portion the sauce (minus the cream) up to 24 hours in advance, storing them separately in the refrigerator. You can also cook the linguine ahead of time, just be sure to toss it with a little olive oil to prevent sticking. When ready to serve, simply sauté the chicken, whisk in the cream with the sauce, and combine everything together; it will taste just as delicious! This method ensures a flavorful meal on the table with minimal effort—perfect for busy families!

What to Serve with Cowboy Butter Chicken Linguine?

When it comes to creating a hearty, satisfying meal, the right accompaniments can elevate your dining experience to new heights.

  • Garlic Bread: The perfect side to soak up the creamy goodness, garlic bread adds a crunchy texture that contrasts beautifully with the smooth pasta sauce.

  • Mixed Green Salad: A refreshing salad with a zingy vinaigrette complements the richness of the dish, adding brightness and a satisfying crunch with each bite.

  • Roasted Vegetables: Seasonal veggies like zucchini or bell peppers bring vibrant colors and an extra layer of flavor; their natural sweetness pairs perfectly with the savory sauce.

  • Parmesan Crisps: These crunchy bites offer a delightful salty contrast to the creamy pasta, bringing an element of surprise and added texture to your meal.

  • Steamed Asparagus: A simple, elegant side that brings a fresh earthiness to the table, balancing the richness of the Cowboy Butter Chicken Linguine.

  • Chilled White Wine: A crisp Sauvignon Blanc enhances the dish's flavors while providing a cool contrast to the warmth of the pasta, making for a balanced meal.

  • Lemon Sorbet: Finish your meal on a light note with this refreshing dessert; it cleanses the palate and echoes the bright lemon notes in the pasta.

Cowboy Butter Chicken Linguine Variations

Customize your Cowboy Butter Chicken Linguine to perfectly suit your family’s taste buds and dietary needs!

  • Protein Swap: Replace chicken with shrimp or turkey for a delightful twist. Shrimp cooks quickly and infuses a lovely seafood flavor, while turkey provides a leaner option.
  • Vegetarian Version: Use chickpeas or tofu instead of chicken, pairing them with seasonal veggies like spinach or mushrooms. This adds both nutrition and texture, making every bite a story of flavor.
  • Pasta Alternatives: Swap linguine for gluten-free pasta or whole wheat varieties to suit dietary preferences. The sauce clings beautifully to any pasta shape, so feel free to get creative!
  • Extra Veggies: Toss in seasonal vegetables, such as diced zucchini or roasted bell peppers, for added nutrition and a pop of color. Vegetables enrich the dish while enhancing the creamy sauce.
  • Spicy Kick: Increase red pepper flakes or add chopped jalapeños for a fiery twist. Spice fans will love the added heat that elevates the dish to new flavor heights!
  • Citrus Twist: Try adding lime juice and zest instead of lemon for a zesty, tropical flair. The citrus balance brightens the creamy richness, creating a refreshing finish.
  • Herbs Galore: Experiment with different fresh herbs, like basil or cilantro, to change the flavor profile. Fresh herbs add a burst of aroma and elegance to your Cowboy Butter Chicken Linguine.

For more delicious chicken inspiration, don’t miss out on my easy Crockpot Butter Chicken or my flavorful Chicken Adobo Again!

Cowboy Butter Chicken Linguine Recipe FAQs

What type of chicken should I use for Cowboy Butter Chicken Linguine?
Absolutely! For the best results, choose plump, boneless, skinless chicken breasts. Look for chicken without dark spots for optimal tenderness. If you’re feeling adventurous, you can also substitute chicken with shrimp or turkey, which will still deliver delicious flavors.

How should I store leftovers of Cowboy Butter Chicken Linguine?
Very! Store your Cowboy Butter Chicken Linguine leftovers in an airtight container in the fridge for up to 3 days. Make sure to mix the pasta and sauce together before storing to keep the flavors intact!

Can I freeze Cowboy Butter Chicken Linguine?
Definitely! For freezing, it’s best to separate the pasta and sauce. You can freeze them in airtight containers for up to 2 months. When you’re ready to enjoy it again, simply thaw in the refrigerator overnight, then reheat gently on the stove.

What can I do if my sauce becomes too thick?
If you find your sauce getting too thick, don’t fret! Just gradually add a splash of the reserved pasta water while stirring until it reaches your desired consistency. This will help restore the creaminess of your Cowboy Butter Chicken Linguine.

Are there any dietary considerations for this recipe?
Absolutely! If you’re cooking for those who are lactose intolerant or following a dairy-free diet, you can easily substitute the butter, heavy cream, and parmesan cheese with plant-based alternatives. There are excellent dairy-free options available that maintain the creamy texture of the sauce.

How can I adjust the spice level in Cowboy Butter Chicken Linguine?
The more the merrier! If you're unsure about the heat level, start with a small amount of red pepper flakes and add more gradually. This way, everyone can enjoy the dish tailored to their spice preferences!

Cowboy Butter Chicken Linguine

Savory Cowboy Butter Chicken Linguine: Quick & Comforting Delight

Cowboy Butter Chicken Linguine is a quick and comforting dish that blends rustic cowboy cooking with Italian elegance, ready in just 30 minutes.
Print Recipe Pin Recipe
Prep Time 10 minutes mins
Cook Time 20 minutes mins
Total Time 30 minutes mins
Servings: 4 servings
Course: Dinner
Cuisine: Italian, Texan
Calories: 650
Ingredients Equipment Method Nutrition Notes

Ingredients
  

For the Chicken
  • 1 pound boneless, skinless chicken breasts
For the Pasta
  • 12 ounces linguine pasta
For the Sauce
  • 2 tablespoons olive oil
  • 2 tablespoons butter can use plant-based butter for dairy-free
  • 4 cloves garlic freshly minced
  • 1 tablespoon Dijon mustard
  • 1 teaspoon paprika
  • 1 teaspoon red pepper flakes optional
  • 2 tablespoons lemon juice
  • 1 teaspoon lemon zest
  • 1 cup chicken broth/reserved pasta water
  • 1 cup heavy cream can use coconut cream for dairy-free
  • 1/2 cup grated parmesan cheese omit for dairy-free
  • to taste salt
  • to taste black pepper
For Garnish
  • 2 tablespoons fresh parsley chopped

Equipment

  • Large pot
  • Large skillet

Method
 

Cooking Instructions
  1. Begin by bringing a large pot of salted water to a rolling boil. Add the linguine and cook according to the package instructions, typically around 8-10 minutes for al dente. Once cooked, reserve about ½ cup of the pasta water for later and drain the linguine, returning it to the pot while you finish the Cowboy Butter Chicken sauce.
  2. In a large skillet, heat 2 tablespoons of olive oil and 2 tablespoons of butter over medium-high heat. Cut the boneless, skinless chicken breasts into bite-sized pieces and season with salt and pepper. Cook the chicken for 5-7 minutes or until golden brown and cooked through, stirring occasionally. Remove the chicken from the skillet and set aside, keeping it warm.
  3. In the same skillet, lower the heat to medium and add minced garlic, Dijon mustard, paprika, and red pepper flakes (if using). Sauté for about 1-2 minutes or until fragrant, ensuring the garlic doesn’t burn. Next, pour in 1 cup of chicken broth and the lemon juice and zest, stirring to combine all the flavors.
  4. Increase the heat slightly and add 1 cup of heavy cream to the skillet. Allow the mixture to come to a gentle simmer, stirring continuously to avoid curdling. Cook for about 3-5 minutes or until the sauce thickens slightly and becomes creamy. Adjust seasoning with salt and pepper to taste for your Cowboy Butter Chicken Linguine.
  5. Return the cooked chicken to the skillet, followed by the drained linguine. Toss everything together until the pasta is evenly coated in the creamy sauce. If the sauce is too thick, gradually add in the reserved pasta water until you reach your desired consistency.
  6. Once well combined, remove the skillet from heat. Serve your Cowboy Butter Chicken Linguine hot, garnished with fresh parsley and a sprinkle of grated parmesan cheese. Enjoy this comforting dish with a side of garlic bread or a fresh garden salad for a complete meal!

Nutrition

Serving: 1servingCalories: 650kcalCarbohydrates: 60gProtein: 30gFat: 30gSaturated Fat: 15gPolyunsaturated Fat: 2gMonounsaturated Fat: 8gCholesterol: 80mgSodium: 700mgPotassium: 500mgFiber: 3gSugar: 3gVitamin A: 700IUVitamin C: 5mgCalcium: 200mgIron: 3mg

Notes

Store leftovers in an airtight container for up to 3 days. For long-term storage, separate the pasta and sauce, then freeze for up to 2 months. Reheat gently on the stove, adding a splash of reserved pasta water to restore creaminess.

Tried this recipe?

Let us know how it was!

Honey Garlic Sheet Pan Sausage: Quick Comfort Food Magic

December 3, 2025 by Grace Snow Leave a Comment

As I took a moment to breathe in the sweet and savory aromas wafting from my kitchen, I couldn't help but feel excited about my latest creation: Honey Garlic Sheet Pan Sausage with Sweet Potatoes and Broccoli. This one-pan dinner is a game changer for anyone tired of the same old fast food routine. The beauty of this recipe lies not just in its quick prep time but also in its incredible versatility, allowing you to tailor the ingredients to fit your dietary needs or flavor preferences. Whether you're a fan of chicken sausage, plant-based options, or just looking to sneak in more veggies, this dish delivers a balanced meal that’s both comforting and healthy. Curious about how this delicious fusion of flavors comes together? Let’s dive into the recipe!

Why is this sheet pan magic?

Ease of Preparation: With just one pan to clean, this Honey Garlic Sheet Pan Sausage makes weeknight dinners a breeze.

Versatile Options: Swap in your favorite sausage and seasonal vegetables, whether you're leaning towards chicken, turkey, or a plant-based alternative.

Flavor Explosion: The sweet and savory honey garlic glaze enhances the dish, creating harmony between the sausage and the caramelized sweet potatoes.

Nutritious & Balanced: Packed with protein, fiber, and vibrant colors, every bite satisfies both your taste buds and nutritional needs.

Quick & Convenient: Ready in under 30 minutes, this dish is perfect for those who crave delicious meals without the long prep time.

For a delightful pairing, consider serving over quinoa or enjoying it alongside a slice of Cheesy Garlic Bread for added comfort!

Honey Garlic Sheet Pan Sausage Ingredients

• Explore all the essential components for a perfect one-pan meal!

For the Sausage

  • Chicken or Turkey Sausage – A lean protein that pairs beautifully with the glaze; feel free to use pork, beef, or plant-based options for variety.

For the Vegetables

  • Sweet Potatoes – These cubes bring a natural sweetness and hearty texture; substitute with butternut or delicata squash for a seasonal twist.
  • Broccoli Florets – Packed with nutrients and color; consider bell peppers, onions, or Brussels sprouts for different tastes.

For the Glaze

  • Unsalted Butter – Adds richness to the glaze; olive oil or vegan butter makes a great dairy-free swap.
  • Garlic (minced) – Essential for aromatic depth; fresh garlic delivers the best flavor.
  • Honey – Offers sweetness to the glaze; swap with maple syrup or agave for a vegan option.
  • Low-Sodium Soy Sauce – Infuses umami and savory notes; tamari is a gluten-free alternative.
  • Apple Cider Vinegar – Balances and enhances sweetness; rice vinegar works in a pinch.
  • Salt and Black Pepper – Crucial for seasoning; adjust according to taste.

For Garnish

  • Fresh Parsley (minced) – Brightens the dish with freshness just before serving.

Step‑by‑Step Instructions for Honey Garlic Sheet Pan Sausage

Step 1: Preheat Oven
Begin by preheating your oven to 400°F (200°C) to create the perfect roasting environment. While the oven warms up, line a large sheet pan with parchment paper to prevent sticking and make cleanup easier later. This preparation is essential for achieving that delightful caramelization on your vegetables and sausage.

Step 2: Prepare Ingredients
Next, slice your chicken or turkey sausage into bite-sized pieces, peeling and dicing sweet potatoes into ½-inch cubes. Cut fresh broccoli florets into smaller ½-inch sections to ensure even cooking. Arrange all the prepared ingredients evenly on the lined sheet pan, creating a vibrant medley that will roast beautifully together.

Step 3: Make the Glaze
In a medium saucepan, melt unsalted butter over medium heat. Add minced garlic and sauté for about 1 minute until it's fragrant but not burnt. Then stir in honey, low-sodium soy sauce, apple cider vinegar, a pinch of salt, and black pepper. Allow the glaze to simmer gently for about 2-3 minutes, letting the flavors meld beautifully.

Step 4: Combine and Coat
Once the glaze is ready, drizzle it over the sausage, sweet potatoes, and broccoli on the sheet pan. Toss everything together thoroughly using a spatula or your hands, ensuring that every piece of sausage and vegetable is coated in the delicious honey garlic mixture for maximum flavor in your Honey Garlic Sheet Pan Sausage.

Step 5: Roast
Place the sheet pan in your preheated oven and roast for 25-30 minutes. Remember to stir the ingredients halfway through to encourage even cooking. The sweet potatoes should become fork-tender, and the sausage should be nicely browned, filling your kitchen with inviting aromas.

Step 6: Serve
When the dish is done roasting, remove it from the oven and let it cool for a few moments. Just before serving, garnish with freshly minced parsley for a pop of color and flavor. This final touch elevates your Honey Garlic Sheet Pan Sausage, making it a beautiful dish ready to impress your family or guests.

Honey Garlic Sheet Pan Sausage Variations

Invite your taste buds on a flavorful adventure by customizing this delightful dish with these creative twists!

  • Chicken Sausage: Swap chicken sausage for turkey or pork for a different flavor profile. Each option adds a delightful twist to your meal.

  • Plant-Based: Use plant-based sausage for a vegan-friendly version that’s just as satisfying. The rich glaze keeps it full of flavor without the meat!

  • Mixed Vegetables: Incorporate seasonal veggies like asparagus or bell peppers to elevate your dish's color and nutrition. Roasting different vegetables brings a new life to your one-pan wonder.

  • Sweet Potato Alternatives: Try butternut squash or delicata squash for a seasonal swap that maintains the dish's heavenly sweetness. Each alternative adds a unique, comforting touch.

  • Extra Spice: For those who crave heat, add red pepper flakes or a dab of sriracha to the honey garlic glaze. Spice enthusiasts will love this flavor enhancement!

  • Garlic Lovers: Infuse even more garlic by adding extra minced cloves or using garlic powder in the glaze. Each added layer of garlic provides a punch that’s sure to please.

  • Serving Suggestion: Pair this dish with a side of steamed rice or quinoa for a wholesome meal. Complement your dinner with a slice of Cheesy Garlic Bread to soak up that delicious glaze!

  • Quick Meal Prep: Assemble and freeze your ingredients before cooking; when you're ready, just defrost and roast for an effortless dinner option. This ensures that delicious homemade flavors are just a breeze away!

What to Serve with Honey Garlic Sheet Pan Sausage

As the sweet aroma of the honey garlic glaze fills the air, imagine a cozy dinner that brings warmth and harmony to your family table.

  • Creamy Mashed Potatoes: Silky and buttery, they absorb juicy flavors from the sausage, adding richness that complements the dish's heartiness.

  • Garlic Bread: Freshly baked and crispy, it provides a delightful crunch and a wonderful way to wipe up any remaining glaze.

  • Steamed Green Beans: Their crisp-tender texture offers a refreshing and vibrant contrast, while brightening the plate with a splash of color.

  • Quinoa Salad: Tossed with fresh herbs and lemon, this nutty grain salad adds a nutritious punch and balances the sweetness of the glaze.

  • Roasted Brussels Sprouts: Their caramelized edges and earthy flavor create a delightful pairing that elevates your one-pan meal.

  • Apple Cider: This sweet and tangy drink mirrors the flavors of the honey glaze, creating an enchanting culinary experience.

  • Chocolate Chip Cookies: End your meal on a sweet note; their warm familiarity and chocolatey goodness bring comfort—a perfect finish after savoring your Honey Garlic Sheet Pan Sausage!

Make Ahead Options

These Honey Garlic Sheet Pan Sausage meals are perfect for meal prep enthusiasts! You can prepare the sausage and vegetable mixture up to 24 hours in advance by slicing the sausage and dicing the sweet potatoes and broccoli. Simply combine them on the sheet pan, drizzle with the honey garlic glaze, and cover tightly with plastic wrap before refrigerating. To maintain quality, store it in the coldest part of your fridge to keep everything fresh. When you’re ready to enjoy, just preheat your oven and roast as directed for 25-30 minutes. You'll have a delicious, healthy dinner with minimal effort, ready to impress your family!

How to Store and Freeze Honey Garlic Sheet Pan Sausage

Fridge: Store leftover Honey Garlic Sheet Pan Sausage in an airtight container for up to 4 days to maintain freshness.

Freezer: Portion leftover servings into individual airtight containers and freeze for up to 3 months. Label containers for easy identification later.

Reheating: When ready to enjoy, reheat in the oven at 350°F (175°C) covered with foil for about 15-20 minutes or in a microwave for 2-3 minutes, adding a splash of water to keep it moist.

Serving Suggestions: Feel free to pair it with grains like quinoa or rice to round out your meal when serving leftovers.

Expert Tips for Honey Garlic Sheet Pan Sausage

  • Uniform Chopping: Ensure sweet potatoes and broccoli are cut into uniform sizes for even cooking, avoiding undercooked or overcooked pieces.

  • Flavor Boost: For an extra kick, consider adding red pepper flakes or a splash of hot sauce to your honey garlic glaze, enhancing your Honey Garlic Sheet Pan Sausage with a delightful heat.

  • Storage Wisdom: Store leftovers in an airtight container for up to 4 days. Reheat in the oven or microwave with a splash of water to keep the glaze moist and flavorful.

  • Sautéing Spice: Don’t rush the garlic sautéing process! Cooking it just until fragrant prevents bitterness and brings out its best flavors.

  • Alternate Veggies: If you’re feeling adventurous, substitute the broccoli or sweet potatoes with seasonal veggies like Brussels sprouts or asparagus for variety and seasonal freshness.

  • Check Doneness: Ensure your sausage is fully cooked and sweet potatoes are fork-tender; use a quick temperature check for peace of mind on doneness and safety.

Honey Garlic Sheet Pan Sausage Recipe FAQs

How do I choose the right sausage for this recipe?
Absolutely! For the best flavor, pick high-quality chicken or turkey sausage, as they pair beautifully with the honey garlic glaze. However, feel free to explore variations with pork, beef, or even plant-based options depending on your preference. If you enjoy spicier dishes, Italian sausage makes for a delightful twist!

What vegetables can I substitute if I don’t have sweet potatoes or broccoli?
Very! This recipe is wonderfully versatile. If sweet potatoes aren’t available, try using butternut squash or even regular potatoes. For broccoli, consider bell peppers, Brussels sprouts, or carrots, which all roast well and add vibrant colors and textures to your dish.

How should I store leftovers and how long do they last?
For optimal freshness, store leftover Honey Garlic Sheet Pan Sausage in an airtight container for up to 4 days. Ensure it’s completely cool before sealing. When reheating, adding a splash of water while microwaving can help retain moisture and prevent the glaze from drying out.

Can I freeze the Honey Garlic Sheet Pan Sausage? If so, how?
Absolutely! To freeze, portion your leftovers into individual airtight containers or freezer bags. Label each with the date, and they're good for up to 3 months. When you’re ready to enjoy, simply defrost in the refrigerator overnight before reheating, or you can cook from frozen at 350°F (175°C) for about 30-40 minutes, covered with foil.

Are there any dietary considerations for this dish?
Yes! If you’re preparing this for individuals with dietary restrictions, opt for gluten-free tamari in place of soy sauce to keep the dish gluten-free. For vegan needs, simply switch the sausage for a plant-based alternative and use maple syrup instead of honey. Always double-check labels to confirm no allergens are present.

What do I do if my sweet potatoes aren't cooking evenly?
If you find your sweet potatoes are not cooking evenly, it’s best to ensure uniformity when chopping them into ½-inch cubes. For future recipes, if you notice inconsistent cooking, consider parboiling the sweet potatoes for 5 minutes before roasting; this will give them a head start and ensure fork-tender results alongside perfectly cooked sausage.

Honey Garlic Sheet Pan Sausage

Honey Garlic Sheet Pan Sausage: Quick Comfort Food Magic

Enjoy a delightful Honey Garlic Sheet Pan Sausage loaded with sweet potatoes and broccoli, perfect for quick weeknight dinners.
Print Recipe Pin Recipe
Prep Time 10 minutes mins
Cook Time 30 minutes mins
Total Time 40 minutes mins
Servings: 4 servings
Course: Dinner
Cuisine: American
Calories: 350
Ingredients Equipment Method Nutrition Notes

Ingredients
  

For the Sausage
  • 1 pound Chicken or Turkey Sausage Feel free to use pork, beef, or plant-based options for variety.
For the Vegetables
  • 2 cups Sweet Potatoes Cubed, can substitute with butternut or delicata squash.
  • 2 cups Broccoli Florets Can substitute with bell peppers, onions, or Brussels sprouts.
For the Glaze
  • 2 tablespoons Unsalted Butter Or olive oil for a dairy-free option.
  • 2 cloves Garlic (minced) Fresh garlic delivers the best flavor.
  • 1/4 cup Honey Can use maple syrup or agave for a vegan option.
  • 2 tablespoons Low-Sodium Soy Sauce Tamari is a gluten-free alternative.
  • 1 tablespoon Apple Cider Vinegar Rice vinegar works in a pinch.
  • 1 teaspoon Salt Adjust according to taste.
  • 1/2 teaspoon Black Pepper Adjust according to taste.
For Garnish
  • 2 tablespoons Fresh Parsley (minced) For garnish before serving.

Equipment

  • Oven
  • sheet pan
  • Medium saucepan
  • Parchment Paper

Method
 

Step-by-Step Instructions
  1. Preheat oven to 400°F (200°C) and line a large sheet pan with parchment paper.
  2. Slice sausage into bite-sized pieces, peel and dice sweet potatoes into ½-inch cubes, and cut broccoli into smaller sections. Arrange on the sheet pan.
  3. In a medium saucepan, melt butter over medium heat. Add minced garlic and sauté for 1 minute until fragrant. Stir in honey, soy sauce, apple cider vinegar, salt, and pepper. Simmer for 2-3 minutes.
  4. Drizzle the glaze over the sausage, sweet potatoes, and broccoli on the sheet pan. Toss everything thoroughly to coat.
  5. Roast in the oven for 25-30 minutes, stirring halfway through for even cooking.
  6. Remove from oven and garnish with parsley before serving.

Nutrition

Serving: 1servingCalories: 350kcalCarbohydrates: 30gProtein: 20gFat: 15gSaturated Fat: 5gPolyunsaturated Fat: 2gMonounsaturated Fat: 8gCholesterol: 70mgSodium: 600mgPotassium: 800mgFiber: 5gSugar: 10gVitamin A: 12000IUVitamin C: 80mgCalcium: 50mgIron: 2mg

Notes

For an extra kick, consider adding red pepper flakes to the glaze. Store leftovers in an airtight container for up to 4 days.

Tried this recipe?

Let us know how it was!

Delicious Garbage Bread: Your New Go-To Comfort Food!

December 3, 2025 by Grace Snow Leave a Comment

At the end of a long day, there’s something wonderfully satisfying about taking whatever you have on hand and turning it into a cozy meal. Enter Garbage Bread, a dish that’s as adaptable as it is delicious. Whether you’re hosting friends for game night or simply trying to use up leftovers from the week, this recipe is the ultimate solution. Picture a warm, golden crust bursting with your favorite fillings—meat, veggies, cheese—you name it! Plus, it’s not just quick to prep; it’s also a crowd-pleaser that invites everyone to customize their slice. Are you ready to roll up your sleeves and create a unique version of this comfort food classic?

Why is Garbage Bread a Must-Try?

Versatile and Customizable: Garbage Bread is the ultimate canvas for your culinary creativity—swap fillings to suit your taste, whether you prefer hearty meats, vibrant veggies, or gooey cheeses.

Quick Preparation: With just a few simple steps, you can have a mouthwatering dish ready to enjoy in no time, making it perfect for weeknight dinners or last-minute gatherings.

Crowd-Pleasing Appeal: This recipe is guaranteed to delight family and friends, as everyone can personalize their slice with their favorite ingredients.

Delicious Leftover Solution: Transform yesterday's odds and ends into a scrumptious meal, helping to reduce food waste while you indulge in comfort food bliss.

Perfect for All Occasions: From game nights to cozy dinners, this Garbage Bread shines as an appetizer or main course, easily pairing with a fresh salad or your favorite dipping sauces.

Try it alongside a homemade Cornbread Breakfast Casserole for a full feast experience!

Garbage Bread Ingredients

• Unlock the secrets to an unforgettable family favorite!

For the Dough

  • 1 lb pizza dough – The base of the Garbage Bread, offering a perfect structure; use store-bought for ease or homemade for authenticity.

For the Filling

  • 1/2 lb ground beef, cooked – Adds savory depth and richness; feel free to substitute with turkey or plant-based meat for a lighter version.
  • 1/2 lb bacon, cooked and crumbled – Infuses flavor and richness; omit for a vegetarian touch or substitute with cooked sausage.
  • 1 cup mozzarella cheese, shredded – Melts beautifully for that gooey, cheesy goodness; explore other options like cheddar or pepper jack for a flavor kick.
  • 1/2 cup marinara sauce – Provides moisture and a burst of flavor; try BBQ sauce for a fun twist!
  • 1 onion, diced and sautéed – Adds aromatic sweetness to your filling; shallots work perfectly for a milder taste.
  • Optional vegetables (peppers, mushrooms) – Enhances taste and texture, while using up any veggies you have on hand; sauté moisture-rich varieties first to prevent sogginess.

Enjoy making your delicious Garbage Bread with this flexible ingredients list that allows for endless customization!

Step‑by‑Step Instructions for Garbage Bread

Step 1: Prepare Dough
Roll out the pizza dough on a lightly floured surface into a large rectangle, about ¼ inch thick. Ensure the dough is even and smooth, making it easier to fill and roll later. Preheat your oven to 375°F (190°C), so it’s ready for baking once the Garbage Bread is assembled.

Step 2: Cook Fillings
In a skillet over medium heat, brown the cooked ground beef until it's heated through, then add crumbled bacon and sauté until crispy. Next, toss in the diced onion and any optional vegetables like peppers or mushrooms, cooking until the onions are translucent and everything is tender. This fragrant filling will add depth to your Garbage Bread.

Step 3: Assemble
Spread the marinara sauce evenly across the rolled-out pizza dough, leaving a small border around the edges. Next, layer the cooked beef, bacon, mozzarella cheese, and any sautéed vegetables on top of the sauce, creating a colorful display of ingredients that will make every bite delicious.

Step 4: Roll
Starting from the edge closest to you, carefully roll the dough around the fillings to create a tight log shape. Make sure to keep the filling inside as you roll, and pinch the edges together to seal it securely. This step is crucial for ensuring your Garbage Bread holds together during baking.

Step 5: Bake
Transfer the rolled Garbage Bread to a baking sheet lined with parchment paper, seam side down. Place it in the preheated oven and bake for 25 minutes, or until the bread is golden brown and crisp to the touch. Keep an eye on it as it cooks to achieve that perfect crunchy exterior.

Step 6: Cool & Slice
Once baked, remove the Garbage Bread from the oven and let it cool for about 10 minutes on the baking sheet. This resting period is essential for the fillings to set slightly and makes slicing easier. Use a serrated knife to cut into thick slices, revealing the gooey, cheesy interior bursting with flavor.

How to Store and Freeze Garbage Bread

Fridge: Store leftover Garbage Bread in an airtight container for up to 3 days. This helps maintain its delicious flavors while preventing it from drying out.

Freezer: Wrap slices or the whole loaf tightly in plastic wrap followed by aluminum foil, and freeze for up to 2 months. This locks in freshness and keeps your bread ready for future cravings.

Reheating: To enjoy, reheat slices in a toaster oven at 350°F (175°C) for about 10-15 minutes, restoring that crispy crust and gooey interior.

Make-Ahead Tip: Assemble the Garbage Bread ahead of time and refrigerate overnight or freeze before baking; adjust the baking time depending on whether it's chilled or frozen.

Make Ahead Options

Garbage Bread is fantastic for meal prep, allowing you to enjoy homemade goodness without the last-minute rush! You can assemble the entire bread up to 24 hours in advance. Simply prepare it through the rolling step, then tightly wrap it in plastic wrap and refrigerate. To maintain quality, make sure there's minimal air exposure to prevent drying out. When you're ready to bake, simply remove it from the fridge, let it sit for about 10-15 minutes while the oven preheats to 375°F (190°C), then bake as directed. This way, you’ll still get that crunchy, golden crust and gooey filling—just as delicious as if freshly made!

What to Serve with Ultimate Garbage Bread?

Pairing a delightful spread with your warm, cheesy creation can elevate your meal into an unforgettable feast.

  • Fresh Green Salad: A crisp salad with mixed greens provides a refreshing contrast to the richness of the Garbage Bread, adding vibrant flavors. Toss in some cherry tomatoes and a light vinaigrette for a delightful balance.

  • Garlic Breadsticks: The extra crunch of buttery garlic breadsticks pairs beautifully, enhancing the whole experience with aromatic flavors. They're perfect for dunking in marinara or ranch sauce on the side.

  • Steamed Vegetables: Bright, colorful steamed veggies keep the meal light while offering a nutritious pop of flavor. Broccoli or asparagus drizzled with lemon will complement the underlying richness of the bread.

  • Chilled Antipasto Platter: A selection of olives, marinated artichokes, and cheeses make for an enticing appetizer spread. The variety presents great textures and flavors that mingle well before diving into the main dish.

  • Spicy Buffalo Wings: For those who crave spice, the heat from buffalo wings perfectly contrasts the cheesy goodness of the Garbage Bread. Enjoy them together for a fun flavor explosion.

  • Craft Beer or Red Wine: A chilled craft beer or a glass of bold red wine completes the meal, enhancing the flavors within the Garbage Bread and balancing the savory notes perfectly.

  • Chocolate Chip Cookies: End your evening on a sweet note! Warm, gooey cookies offer a satisfying finish and contrast with the savory bread experience. They’ll leave you with that cherished homemade comfort food feeling.

Expert Tips for Garbage Bread

  • Proper Sealing: Ensure edges are well-sealed while rolling; if not, the filling may leak out, making a mess during baking.
  • Ingredient Balance: Avoid using excessive wet ingredients like marinara; too much moisture can lead to a soggy Garbage Bread.
  • Even Slicing: Use a serrated knife to slice through the bread neatly without squashing the filling, preserving the delightful presentation.
  • Pre-cook Fillings: Sauté vegetables before adding; moisture-rich veggies should be cooked to prevent a soggy consistency.
  • Versatile Options: Don't hesitate to experiment with fillings; swap meats and cheeses or try vegetarian ingredients to make your Garbage Bread unique!

Garbage Bread Variations & Substitutions

Feel free to get creative and customize your Garbage Bread, making it even more delicious with these exciting twists!

  • Vegetarian Delight: Swap the ground beef and bacon for a medley of your favorite sautéed vegetables like zucchini, spinach, and bell peppers for a vibrant and wholesome version. Embrace the colorful flavors!

  • Healthy Makeover: Opt for whole wheat pizza dough, plenty of fresh veggies, and low-fat cheese to make a guilt-free, nutritious version that doesn’t skimp on taste. Your body will thank you for this nutritious twist!

  • Spicy Kick: Add jalapeños or crushed red pepper flakes to the filling to spice things up. Just a bit of heat can elevate the whole experience and make it more memorable!

  • Cheesy Explosion: Mix in different cheeses like sharp cheddar or pepper jack to amplify the flavor of your Garbage Bread. The gooey, melted goodness will have everyone coming back for more.

  • BBQ Bliss: Substitute the marinara sauce with BBQ sauce for a smoky twist. This unique combination will delight your taste buds and give the bread a whole new character.

  • Mushroom Medley: Incorporate a mix of mushrooms, sautéed until golden brown, for an earthy flavor boost. Their meaty texture adds substance without any meat in the mix.

  • Dippable Version: Arrange your filling ingredients into smaller logs for individual servings that are perfect for dipping. Pair them with marinara, ranch, or a spicy aioli for added flavor with each delicious bite.

Have fun exploring these ideas, and don’t forget to enjoy your creations with a side of delicious Cheesy Garlic Bread or a hearty Cornbread Breakfast Casserole. Mix and match to suit your taste, and savor every memorable bite!

Garbage Bread Recipe FAQs

What type of vegetables work best in Garbage Bread?
Absolutely! You can use any vegetables you have on hand. Popular choices include bell peppers, mushrooms, or spinach. I often sauté moisture-rich vegetables before adding them to prevent sogginess in the final bake.

How should I store leftover Garbage Bread?
Store leftover Garbage Bread in an airtight container in the fridge for up to 3 days. This helps maintain its delicious flavors and prevents it from drying out. If you notice any dark spots or unusual texture, it’s best to discard it.

Can I freeze Garbage Bread? How?
Yes! To freeze Garbage Bread, wrap slices or the whole loaf tightly in plastic wrap followed by aluminum foil, then freeze for up to 2 months. This locks in freshness. When you're ready to enjoy, just thaw it in the fridge overnight, then reheat in a toaster oven at 350°F (175°C) for about 10-15 minutes for that crispy texture.

What if my Garbage Bread is too soggy?
To prevent sogginess, try to avoid using too many wet ingredients, and always sauté your vegetables before adding them. If your Garbage Bread turns out soggy, let it cool slightly, then pop it in the oven for a few extra minutes to help crisp up the crust.

Are there any dietary considerations for Garbage Bread?
Yes, be mindful of allergies! If you're serving guests, offer vegetarian options and be cautious with ingredients like cheese and meats that may not suit everyone's dietary preferences. Always check labels if you're unsure about allergens.

Can I make Garbage Bread ahead of time?
Very! You can assemble Garbage Bread ahead of time and refrigerate it overnight or even freeze it before baking. Just remember to adjust the baking time if it’s chilled or frozen—start checking for doneness a bit earlier to avoid overcooking!

Garbage Bread

Delicious Garbage Bread: Your New Go-To Comfort Food!

Garbage Bread is a versatile and crowd-pleasing dish perfect for using up leftovers and satisfying cravings.
Print Recipe Pin Recipe
Prep Time 15 minutes mins
Cook Time 25 minutes mins
Cooling Time 10 minutes mins
Total Time 50 minutes mins
Servings: 8 slices
Course: Snacks
Cuisine: American
Calories: 350
Ingredients Equipment Method Nutrition Notes

Ingredients
  

For the Dough
  • 1 lb pizza dough Use store-bought for ease or homemade for authenticity.
For the Filling
  • 1/2 lb ground beef, cooked Can substitute with turkey or plant-based meat.
  • 1/2 lb bacon, cooked and crumbled Omit for a vegetarian option or use cooked sausage.
  • 1 cup mozzarella cheese, shredded Cheddar or pepper jack can be used for a flavor kick.
  • 1/2 cup marinara sauce BBQ sauce can be a fun twist.
  • 1 unit onion, diced and sautéed Shallots work for a milder taste.
  • optional vegetables (peppers, mushrooms) Sauté moisture-rich varieties to prevent sogginess.

Equipment

  • Skillet
  • Baking Sheet
  • Parchment Paper
  • Rolling Pin

Method
 

Step‑by‑Step Instructions
  1. Roll out the pizza dough on a lightly floured surface into a large rectangle, about ¼ inch thick. Preheat your oven to 375°F (190°C).
  2. In a skillet over medium heat, brown the cooked ground beef until heated through, then add crumbled bacon and sauté until crispy. Add the diced onion and any optional vegetables, cooking until the onions are translucent.
  3. Spread the marinara sauce evenly across the rolled-out pizza dough. Layer the cooked beef, bacon, mozzarella cheese, and any sautéed vegetables on top.
  4. Starting from the edge closest to you, carefully roll the dough around the fillings to create a tight log shape. Pinch the edges together to seal it.
  5. Transfer the rolled Garbage Bread to a baking sheet lined with parchment paper, seam side down. Bake for 25 minutes, or until golden brown and crisp.
  6. Let the Garbage Bread cool for about 10 minutes on the baking sheet before slicing with a serrated knife.

Nutrition

Serving: 1sliceCalories: 350kcalCarbohydrates: 30gProtein: 20gFat: 15gSaturated Fat: 7gPolyunsaturated Fat: 2gMonounsaturated Fat: 5gCholesterol: 50mgSodium: 800mgPotassium: 300mgFiber: 2gSugar: 2gVitamin A: 10IUVitamin C: 5mgCalcium: 20mgIron: 15mg

Notes

Ensure edges are well-sealed while rolling to prevent leaks during baking. Sauté vegetables before adding to prevent sogginess. Experiment with fillings for uniqueness.

Tried this recipe?

Let us know how it was!
  • « Previous Page
  • 1
  • …
  • 128
  • 129
  • 130
  • 131
  • 132
  • …
  • 221
  • Next Page »

Welcome!

Hi, I’m Grace, a Sydney-based home cook with a passion for bold flavors and trending ingredients. Whether you’re a busy beginner or a seasoned foodie, you’ll find dishes here that are fresh, fun, and full of flavor.

More about me

Popular Recipes

  • World’s Best Chocolate Cake
    World's Best Chocolate Cake That Melts in Your Mouth
  • Strawberry Chocolate Shell Cake
    Heavenly Strawberry Chocolate Shell Cake for Your Sweet Tooth
  • Air Fryer Tilapia
    Air Fryer Tilapia: Quick, Crispy, and Flavor-Packed Delight
  • Salmon Fettuccine Alfredo
    Creamy Salmon Fettuccine Alfredo with a Zesty Twist

Footer

↑ back to top

About

  • Privacy Policy
  • Disclaimer
  • Terms & Conditions

Newsletter

  • Sign Up! for emails and updates

Contact

  • About me
  • Contact me

Copyright © 2025 TastyTrendIngredients