tastytrendingredients

  • Home
  • Recipes
    • Appetizers
    • Breakfast
    • Dessert
    • Dinner
    • Drinks
    • Salads
    • Snacks
    • Soups
  • About me
  • Contact me
menu icon
go to homepage
  • Home
  • Recipes
    • Appetizers
    • Breakfast
    • Dessert
    • Dinner
    • Drinks
    • Salads
    • Snacks
    • Soups
  • About me
  • Contact me
search icon
Homepage link
  • Home
  • Recipes
    • Appetizers
    • Breakfast
    • Dessert
    • Dinner
    • Drinks
    • Salads
    • Snacks
    • Soups
  • About me
  • Contact me
×

Vibrant Chinese Chicken Salad: Fresh, Crunchy, and Customizable

November 23, 2025 by Grace Snow Leave a Comment

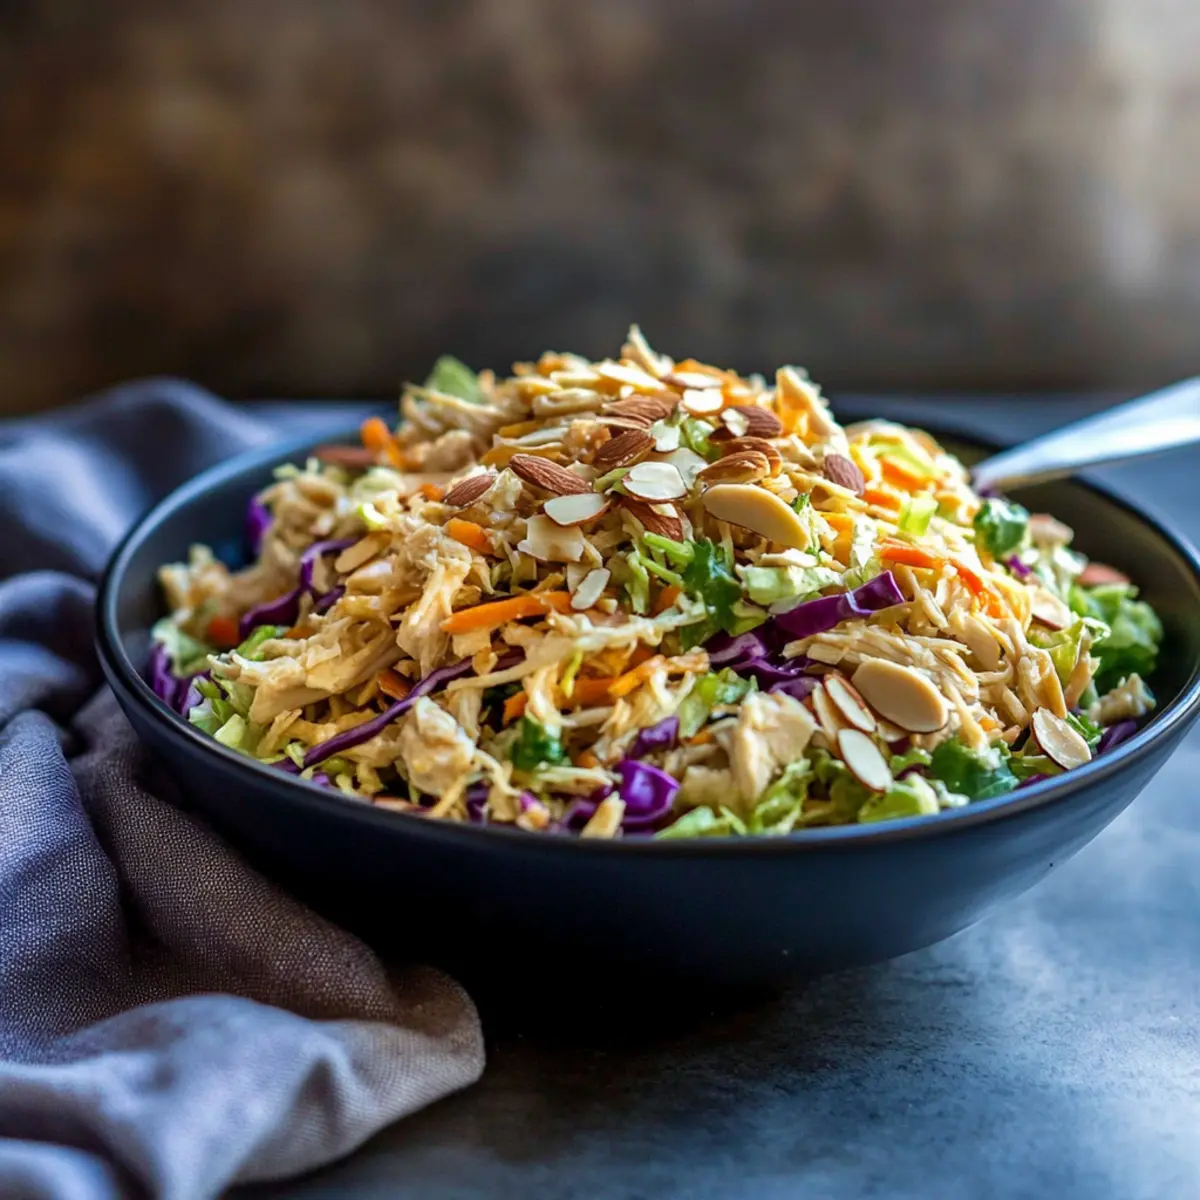
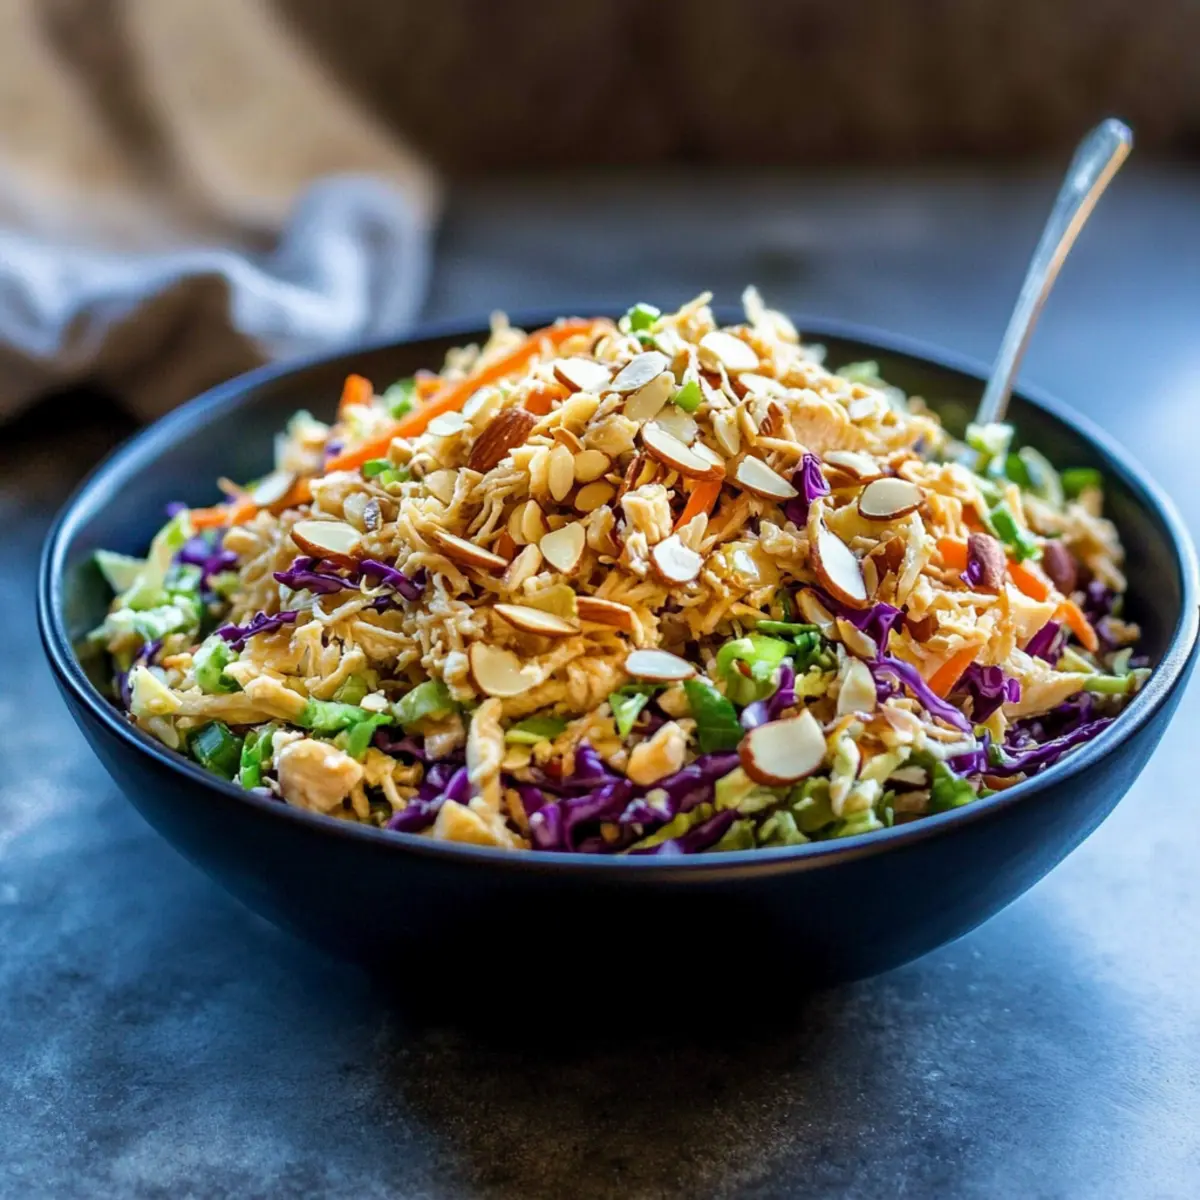
As I sliced into the crisp red cabbage, the vibrant colors of my Quick & Flavorful Chinese Chicken Salad made my kitchen feel alive. It’s the kind of dish that proves healthy can be utterly delightful—perfect for a quick lunch or a light dinner, this salad is ready in just 15 minutes! The satisfying crunch of fresh vegetables combined with tender, juicy chicken creates a wonderful symphony of textures, while a zesty Asian dressing ties everything together beautifully. Plus, it’s incredibly customizable; whether you want to swap out the chicken for tofu or add a sprinkle of chili for a bit of heat, the possibilities are endless. How do you usually like to jazz up your salads?

Why is this salad a must-try?

Vibrant flavors await you in this delightful dish! This Quick & Flavorful Chinese Chicken Salad is not only incredibly easy to whip up in 15 minutes but also offers endless customization options to suit your taste buds. Crunchy textures from fresh vegetables and toastiness from almonds elevate this salad’s appeal. It's perfect as a light meal and pairs beautifully with other dishes, like Crock Pot Chicken or serves as a refreshing side. Healthy and satisfying, this recipe promotes a balanced diet without sacrificing taste.

Chinese Chicken Salad Ingredients

• Line 1: Here’s a delightful mix to get started!

For the Salad

  • Rotisserie Chicken Breast – Juicy and full of flavor; can be replaced with grilled chicken or shredded tofu for a vegetarian option.
  • Red Cabbage – Adds a beautiful crunch and vibrant color; swap with green or napa cabbage for a twist.
  • Carrots – Offers a natural sweetness; freshly grated is best, and diced bell peppers work as an alternative.
  • Green Onions – Provides a mild kick; if unavailable, regular onions can be used, but they’ll change the flavor profile.

For the Crunch

  • Almonds – Bring a nutty crunch; feel free to substitute with peanuts, cashews, or a seed mix to vary the texture.
  • Wonton Strips – These add extra crunchiness; crispy rice noodles or tortilla strips can also do the trick.

The combination of these colorful ingredients will set the stage for a refreshing Chinese Chicken Salad that's not only quick to prepare but also customizable to your liking!

Step‑by‑Step Instructions for Chinese Chicken Salad

Step 1: Prep Chicken
Begin by shredding the rotisserie chicken breast into bite-sized pieces. Use two forks for a quicker shredding process, making sure it's tender and juicy. This step should take about 5 minutes. Once shredded, set the chicken aside in a large mixing bowl, ready to mingle with the vegetables.

Step 2: Prepare Vegetables
Next, thinly slice or grate the red cabbage and carrots. Aim for a uniform texture to ensure a delightful crunch in your Chinese Chicken Salad. Chop the green onions into small pieces to add a fresh flavor. This colorful vegetable prep should take around 5 minutes, filling your kitchen with vibrant aromas.

Step 3: Combine Ingredients
In the large bowl with the shredded chicken, add the prepared red cabbage, carrots, and green onions. Toss everything together gently with your hands or sturdy salad tongs for an even mix. The goal is to combine the ingredients without bruising the vegetables—this should take about 2 minutes to achieve a harmonious blend of textures.

Step 4: Add Toppings
Sprinkle the mixed salad with crunchy almonds and crispy wonton strips. These toppings will enhance the texture and add a delightful crunch to your dish. Ensure that the toppings are evenly distributed throughout the salad. This step should only take about 1 minute, resulting in a visually appealing and appetizing salad.

Step 5: Dress the Salad
For the final touch, serve the Chinese Chicken Salad with the Asian dressing on the side. This way, each guest can drizzle the dressing according to their own taste preference, keeping the salad crisp until served. This last step should take about 2 minutes, ensuring a fresh presentation that excites everyone at the table.

What to Serve with Chinese Chicken Salad?

Elevate your dining experience with perfect pairings that balance flavors and textures beautifully.

  • Steamed Jasmine Rice: The fluffy and fragrant grains provide a satisfying base, allowing the salad's vibrant flavors to shine even brighter.
  • Sesame Ginger Dressing: Drizzle this onto your salad for an extra layer of flavor that complements the key ingredients perfectly.
  • Sushi Rolls: Add a delightful touch of Japanese cuisine; their subtle flavors and soft textures pair beautifully with the salad's crunch.
  • Grilled Shrimp Skewers: The smoky, charred taste of shrimp adds a delightful contrast to the fresh salad, making it feel like a gourmet meal.
  • Miso Soup: This warm, savory soup offers a comforting contrast to the crispness of the salad, creating a delightful meal pairing.
  • Spring Rolls: These fresh, crunchy rolls are a light accompaniment, bursting with textures that mirror the salad while adding their own unique flavor profile.
  • Spicy Edamame: A deliciously zesty snack, these little beans provide a kick that pairs well with the sweet and savory notes in your salad.
  • Lemonade or Iced Green Tea: Refreshing drinks that cleanse the palate between bites, enhancing the overall dining experience.
  • Fruit Sorbet: For a light dessert, this cool treat refreshes the mouth after the savory flavors of the meal, providing a sweet ending.

Chinese Chicken Salad Variations

Feel free to explore delightful twists and turns for your Chinese chicken salad that will elevate your dish even further.

  • Vegetarian Option: Replace the chicken with shredded tofu for a satisfying plant-based version. Tofu is wonderful at soaking up the flavors of dressings and spices.

  • Seafood Delight: Swap in shrimp for a fresh seafood twist. Cook shrimp until pink and juicy for a wonderful alternative that offers a delightful texture.

  • Crispy Alternatives: Feel free to use crispy rice noodles instead of wonton strips; they add a fun crunch that's equally delicious in texture and flavor.

  • Colorful Veggie Boost: Mix in bell peppers, snap peas, or bean sprouts for extra color and crunch. The more colors in your salad, the more vibrant and appealing it becomes!

  • Nutty Variations: Choose cashews or sunflower seeds over almonds for a flavor shift that adds both crunch and creaminess. Each nut brings a different texture that enhances your salad experience.

  • Hearty Grains: Toss in cooked quinoa or brown rice for added heartiness making it a fulfilling meal. This can add fiber and extra nutrients to keep you satisfied longer.

  • Spicy Kick: Add sliced chili peppers or a dash of Sriracha to your dressing if you’re craving some heat. A little spice can liven up the flavors and give it that extra zing!

  • Creamy Dressing: Mix some Greek yogurt with your Asian dressing to create a creamy version. This rich texture pairs surprisingly well with the fresh ingredients, creating a unique experience in every bite.

These variations keep your cooking exciting and encourage you to personalize your culinary creations. Whether enjoying it as is or pairing it with a savory dish like Honey Garlic Chicken, your Chinese chicken salad is sure to be a hit!

Expert Tips for the Best Chinese Chicken Salad

  • Stay Crisp: To maintain the crunchiness of your Chinese Chicken Salad, avoid tossing it with dressing until serving. This keeps the vegetables fresh and vibrant.

  • Prep Ahead: If making this salad in advance, store the components separately—chicken, veggies, and toppings—in airtight containers to keep everything fresh longer.

  • Double the Dressing: Consider doubling your Asian dressing recipe. It’s perfect for marinating chicken or drizzling over future salads, enhancing flavor every time.

  • Mind Your Substitutes: If swapping out ingredients, keep in mind that different vegetables or proteins will change the flavor and texture. Stick to complementary options for the best results.

  • Add Spice Wisely: For those who enjoy a bit of heat, opt for fresh chili slices sparingly at first, so everyone can adjust to their preferred spice level in this customizable salad.

Make Ahead Options

These vibrant Chinese Chicken Salad components are perfect for meal prep, making your busy weeknights easier! You can shred the rotisserie chicken and prepare the vegetables (cabbage, carrots, and green onions) up to 24 hours in advance. Simply store the chicken in an airtight container and refrigerate the veggies in a separate bag to maintain their crunch. For the best results, wait to add the almonds and wonton strips until you're ready to serve, ensuring they stay crispy. When it's time to enjoy your salad, combine everything in a bowl, drizzle with the dressing, and you're set for a delightful and fresh meal that feels just as delicious as when first made!

How to Store and Freeze Chinese Chicken Salad

Room Temperature: Leave the salad out for no more than 2 hours. After that, it’s best to refrigerate to prevent spoilage.

Fridge: Store the components separately in airtight containers for freshness—salad lasts up to 2 days when uncombined. Keep the dressing separate until ready to serve.

Freezer: While it's not recommended to freeze the mixed salad due to texture changes, you can store shredded chicken for up to 3 months. Thaw in the fridge before using.

Reheating: If using frozen chicken, ensure it’s fully thawed before incorporating it into your salad. Enjoy your Chinese Chicken Salad fresh for the best flavor and crunch!

Chinese Chicken Salad Recipe FAQs

What type of chicken is best for this salad?
Absolutely! Rotisserie chicken breast provides the moisture and flavor needed for this dish. If you prefer, grilled or poached chicken breasts make excellent alternatives, and you can even use canned chicken (drained) for a quick option.

How should I store leftover salad?
To keep everything fresh, store the components separately in airtight containers in the refrigerator. This way, your flavorful Chinese Chicken Salad will last for up to 2 days. Keep the dressing in a small container to prevent the salad from getting soggy until you're ready to serve.

Can I freeze the chicken used in this salad?
Yes! While it's not ideal to freeze the mixed salad due to texture changes, you can freeze the shredded chicken for up to 3 months. To freeze, place it in a sealed freezer bag and remove excess air. When you're ready to use it, thaw the chicken in the refrigerator overnight for best results.

How can I prevent the salad from becoming soggy?
To maintain that delightful crunch, do not toss the salad with dressing until you're ready to eat. I often recommend preparing the dressing separately and allowing each person to drizzle it on their portion. This keeps the vegetables fresh and vibrant.

What dietary considerations should I be aware of?
When customizing your Chinese Chicken Salad, keep in mind any allergies or dietary preferences. If you're serving guests, consider using gluten-free wonton strips and check for nut allergies if offering almonds. For vegetarian options, shredded tofu is a great substitute for chicken.

How do I know my ingredients are fresh?
When selecting vegetables, look for vibrant colors and firm textures. For example, red cabbage should be crisp with no dark spots, while carrots should feel solid and have a bright orange color. Fresh ingredients not only taste better but also make your Chinese Chicken Salad visually appealing!

Chinese Chicken Salad

Vibrant Chinese Chicken Salad: Fresh, Crunchy, and Customizable

This Chinese Chicken Salad is a colorful, crunchy dish that's healthy, customizable, and ready in just 15 minutes.
Print Recipe Pin Recipe
Prep Time 15 minutes mins
Total Time 15 minutes mins
Servings: 4 servings
Course: Salads
Cuisine: Chinese
Calories: 320
Ingredients Equipment Method Nutrition Notes

Ingredients
  

For the Salad
  • 1 lb Rotisserie Chicken Breast Juicy and full of flavor; can be replaced with grilled chicken or shredded tofu.
  • 2 cups Red Cabbage Adds crunch; swap with green or napa cabbage for a twist.
  • 1 cup Carrots Freshly grated is best.
  • 3 stalks Green Onions Chopped into small pieces.
For the Crunch
  • 1/2 cup Almonds Nutty crunch; can substitute with peanuts or cashews.
  • 1 cup Wonton Strips Adds extra crunchiness.

Equipment

  • Mixing Bowl
  • salad tongs
  • Grater

Method
 

Step-by-Step Instructions
  1. Shred the rotisserie chicken breast into bite-sized pieces and set aside.
  2. Thinly slice or grate the red cabbage and carrots. Chop the green onions.
  3. In a large bowl, combine the shredded chicken, red cabbage, carrots, and green onions, and toss gently.
  4. Sprinkle the salad with crunchy almonds and crispy wonton strips.
  5. Serve the salad with the Asian dressing on the side.

Nutrition

Serving: 1servingCalories: 320kcalCarbohydrates: 25gProtein: 30gFat: 18gSaturated Fat: 2gPolyunsaturated Fat: 3gMonounsaturated Fat: 10gCholesterol: 80mgSodium: 600mgPotassium: 450mgFiber: 5gSugar: 7gVitamin A: 150IUVitamin C: 90mgCalcium: 6mgIron: 8mg

Notes

To maintain crunchiness, keep the salad components separate and serve with dressing on the side.

Tried this recipe?

Let us know how it was!

One Pan Balsamic Chicken: Easy Italian Flavor for Your Table

November 23, 2025 by Grace Snow Leave a Comment

Walking into my kitchen, the aroma of balsamic vinegar mingling with fresh garlic and roasted tomatoes envelops me like a warm hug. It’s the perfect moment to dive into my favorite weeknight treat: One Pan Balsamic Chicken. This dish not only comes together in one pan—keeping clean-up a breeze—but also triggers a tasty Italian escape that feels far from a simple dinner. With juicy chicken beautifully coated in a sweet yet tangy balsamic glaze, and topped with melty mozzarella and vibrant tomatoes, you can whip it up in about 30 minutes. It becomes a household favorite, showcasing how easy it is to cook something flavorful and satisfying at home. Curious about the simple steps to bring this mouthwatering meal to your table? Let’s dive in!

Why Is One Pan Balsamic Chicken So Special?

Simplicity at Its Best: This recipe only requires one pan, making prep and cleanup a breeze.

Flavor Explosion: The combination of tangy balsamic vinegar, savory garlic, and fresh tomatoes creates a taste sensation that feels gourmet.

Versatile Ingredients: You can easily swap chicken breasts for thighs or adjust the topping to include goat cheese for a delightful twist.

Quick Preparation: With only 30 minutes from start to finish, you can enjoy a satisfying meal on even the busiest days.

Health-Conscious: This dish is gluten-free and low-carb, making it suitable for various diets without sacrificing flavor.

Elevate your weeknight dinners with this easy Italian delight that rivals any restaurant meal. For more delicious chicken recipes, check out Honey Garlic Chicken and Crock Pot Chicken!

One Pan Balsamic Chicken Ingredients

• Get ready to create a delightful Italian feast!

For the Chicken

  • Boneless, Skinless Chicken Breasts – Tender and perfectly absorbs the sweet-tangy balsamic flavor; substitute with thighs for extra juiciness.
  • Olive Oil – Provides richness while sautéing the chicken to a beautiful golden brown.
  • Garlic – Aromatic and flavorful, it enhances the overall taste of the dish.

For the Sauce

  • Balsamic Vinegar – Imparts a sweet acidity to the sauce, elevating the flavors of your one-pan balsamic chicken.

For the Toppings

  • Grape Tomatoes – Sweet and juicy; they burst with flavor when roasted, adding freshness to the dish.
  • Mozzarella Cheese – Melts beautifully on top, contributing a creamy texture that complements the other ingredients.
  • Fresh Basil – Offers a refreshing aromatic finish, adding a touch of color and flavor when garnished.

Step‑by‑Step Instructions for One Pan Balsamic Chicken

Step 1: Preheat the Oven
Begin by preheating your oven to 400°F (200°C). While the oven warms up, heat a large oven-safe skillet over medium-high heat. Once hot, add a drizzle of olive oil and swirl it around to coat the pan. This will prepare the skillet for searing the chicken, ensuring it gets a beautiful golden-brown crust.

Step 2: Sear the Chicken
Carefully place the boneless, skinless chicken breasts in the skillet once the oil is shimmering. Sear them for about 6-7 minutes per side until they turn a lovely golden brown and develop a crisp exterior. This step not only adds texture but locks in the flavors, making your One Pan Balsamic Chicken delicious and juicy.

Step 3: Add Garlic and Balsamic Vinegar
With the chicken nicely browned, reduce the heat to medium and add minced garlic to the skillet. Sauté for about 1 minute until fragrant, then pour in the balsamic vinegar. Stir to deglaze the pan, scraping up any flavorful bits. Let it simmer for another minute, allowing the vinegar to reduce slightly and enhance the sauce's complexity.

Step 4: Layer the Toppings
Next, layer the sweet grape tomatoes on top of the chicken, spreading them out evenly. Then, sprinkle shredded mozzarella cheese over everything. The combination of these ingredients atop your One Pan Balsamic Chicken will create a melty, flavorful topping as it bakes, enhancing the dish beautifully.

Step 5: Bake to Perfection
Now, transfer the skillet to your preheated oven. Bake for 20-25 minutes or until the chicken reaches an internal temperature of 165°F (75°C). The cheese should melt and begin to bubble, creating a rich, inviting topping. Keep an eye on it for that lovely golden finish as the flavors meld together.

Step 6: Garnish and Serve
Once baked, remove the skillet from the oven and let it rest for a few minutes. Finally, sprinkle fresh basil over the top for a burst of color and fresh flavor. Ladle the One Pan Balsamic Chicken onto plates, ready to enjoy with your favorite side like rice or crusty bread to soak up the delightful sauce.

One Pan Balsamic Chicken Variations

Feel free to tweak this recipe to suit your taste and pantry essentials, turning it into a signature dish for your family!

  • Tomato Swap: Use cherry tomatoes instead of grape for a sweeter flavor explosion. They burst wonderfully while baking!

  • Cheese Change: Go for goat cheese or feta instead of mozzarella for a tangy twist. This adds a delightful creamy depth that complements the balsamic beautifully.

  • Chicken Thighs: Substitute boneless, skinless chicken thighs for breasts to achieve a juicier and more flavorful result. Their rich taste pairs perfectly with the glaze.

  • Add Veggies: Toss in some spinach or zucchini towards the end of baking for extra nutrition and color. This boosts the dish’s health value while maintaining the lovely one-pan charm.

  • Herb Infusion: Mix in some fresh thyme or oregano with the basil for a fragrant herbal boost. These flavors dance harmoniously with the balsamic.

  • Spice it Up: Add red pepper flakes for a touch of heat. This simple addition ignites a delightful zing in each bite, making your dish a little more adventurous.

  • Grain Base: Serve the chicken over cooked quinoa or farro instead of traditional sides. This not only adds texture but elevates the dish to a wholesome meal.

For more exciting chicken ideas, don’t miss out on Honey Bbq Chicken or explore the vibrant flavors in Chipotle Lime Chicken and Rice!

Expert Tips for One Pan Balsamic Chicken

  • Keep it Spaced: Ensure chicken breasts aren’t crowded in the skillet. This promotes even cooking and helps achieve that lovely golden-brown crust.

  • Flavor With Freshness: Always use fresh garlic for a more aromatic flavor in your One Pan Balsamic Chicken—it's a key player in elevating your dish!

  • Watch Your Bake Time: If using chicken thighs instead of breasts, start checking for doneness 7-10 minutes earlier. Adjust cooking times as needed for perfectly cooked meat.

  • Deglaze Wisely: When adding balsamic vinegar, scrape any browned bits off the skillet. This incorporates rich flavors into your sauce, intensifying the overall taste.

  • Basil Matters: Don’t skip fresh basil as a garnish—it’s the finishing touch that adds bright flavor and makes the dish look stunning on the plate.

Storage Tips for One Pan Balsamic Chicken

Fridge: Store any leftover One Pan Balsamic Chicken in an airtight container in the refrigerator for up to 3 days. This keeps the flavors fresh and ready for a quick meal!

Freezer: If you want to prepare ahead, freeze the chicken in a sealed container for up to 3 months. Thaw in the fridge overnight before reheating for optimal taste.

Reheating: To reheat, place the chicken in a preheated oven at 350°F (175°C) for about 15-20 minutes or until heated through. This method helps maintain the soft texture of the chicken and melted cheese.

Serving Tip: Best served fresh, but leftovers can be turned into a delicious sandwich or salad—great for lunch the next day!

What to Serve with One Pan Balsamic Chicken

Creating a balanced meal around your one pan creation brings out a world of flavor that everyone will love.

  • Creamy Mashed Potatoes: Their buttery texture perfectly complements the savory chicken and absorbs the delightful balsamic sauce.
  • Garlic Bread: Crunchy and warm, this classic companion not only enhances your meal but is perfect for scooping up any leftover glaze.
  • Roasted Asparagus: Bright and slightly crisp, the freshness of asparagus provides a lovely contrast to the richness of the chicken.
  • Mixed Greens Salad: A light, refreshing salad topped with a tangy vinaigrette balances the hearty chicken and brings vibrant colors to your plate.
  • Quinoa Pilaf: Light and nutty, quinoa is a nutritious choice that adds a unique texture while soaking up the balsamic flavor beautifully.
  • White Wine: A chilled glass of Pinot Grigio highlights the dish’s Italian roots while enhancing the overall dining experience. Enjoy these pairings, and watch your family relish every bite!

Make Ahead Options

These One Pan Balsamic Chicken meals are perfect for busy home cooks looking to save time during the week! You can marinate the chicken in balsamic vinegar, garlic, and olive oil up to 24 hours in advance; this lets the flavors meld beautifully. The toppings, including the grape tomatoes and mozzarella, can be prepared and stored separately in the fridge for up to 3 days. When you're ready to cook, simply sear the marinated chicken, layer on the tomatoes and cheese, and bake as instructed. This not only streamlines your prep time but ensures your meal is just as delicious and fresh as if made from scratch!

One Pan Balsamic Chicken Recipe FAQs

What type of chicken is best for this recipe?
I recommend using boneless, skinless chicken breasts for a tender result that absorbs the balsamic flavor beautifully. However, chicken thighs can be substituted for a juicier option. The key is to ensure whatever cut you choose is even in thickness for uniform cooking.

How do I know if my balsamic vinegar is good?
Look for a balsamic vinegar that is thick and syrupy, indicating a higher quality. If it’s too thin or tastes overwhelmingly sour, it might be best to try a different brand. A good quality balsamic will have a balanced sweetness with a slight tart finish, enhancing the dish perfectly!

How should I store leftovers?
Place any leftover One Pan Balsamic Chicken in an airtight container and refrigerate. It can be stored for up to 3 days. A trusty tip is to ensure it's sealed well to keep those delicious flavors intact for your next meal!

Can I freeze One Pan Balsamic Chicken?
Absolutely! To freeze, let the chicken cool completely, then place it in an airtight freezer-safe container or heavy-duty freezer bag. It will last up to 3 months. To reheat, thaw it overnight in the fridge and bake at 350°F (175°C) for 15-20 minutes until heated through.

What should I do if my chicken isn’t cooking evenly?
If you notice some pieces of chicken cooking slower than others, it's essential to maintain space in the skillet during the searing process. An overcrowded pan creates steaming rather than searing. If you find it’s still uneven, cover your skillet while cooking to help distribute heat better, and check that the heat is set correctly.

Is this recipe suitable for gluten-free diets?
Yes, One Pan Balsamic Chicken is naturally gluten-free! It's a great option for those avoiding gluten while still enjoying a flavorful dish. Just ensure that any extras or sides you serve with it are also gluten-free, and you’re all set!

One Pan Balsamic Chicken

One Pan Balsamic Chicken: Easy Italian Flavor for Your Table

One Pan Balsamic Chicken is a delightful Italian dish that combines juicy chicken with balsamic glaze, ready in about 30 minutes.
Print Recipe Pin Recipe
Prep Time 10 minutes mins
Cook Time 20 minutes mins
Total Time 30 minutes mins
Servings: 4 servings
Course: Dinner
Cuisine: Italian
Calories: 350
Ingredients Equipment Method Nutrition Notes

Ingredients
  

For the Chicken
  • 4 pieces Boneless, Skinless Chicken Breasts or thighs for extra juiciness
  • 2 tablespoons Olive Oil for sautéing
  • 3 cloves Garlic minced
For the Sauce
  • 1/2 cup Balsamic Vinegar for sauce
For the Toppings
  • 1 cup Grape Tomatoes halved
  • 1 cup Mozzarella Cheese shredded
  • 1/4 cup Fresh Basil for garnish

Equipment

  • oven-safe skillet

Method
 

Step-by-Step Instructions
  1. Preheat your oven to 400°F (200°C) and heat a large oven-safe skillet over medium-high heat. Add olive oil to coat the pan.
  2. Sear the chicken in the skillet for 6-7 minutes per side until golden brown.
  3. Add minced garlic and sauté for 1 minute, then add balsamic vinegar and scrape the pan.
  4. Layer grape tomatoes and mozzarella on top of the chicken.
  5. Bake for 20-25 minutes until chicken reaches 165°F (75°C) and cheese is melted.
  6. Garnish with fresh basil and serve.

Nutrition

Serving: 1servingCalories: 350kcalCarbohydrates: 10gProtein: 30gFat: 18gSaturated Fat: 6gPolyunsaturated Fat: 2gMonounsaturated Fat: 8gCholesterol: 85mgSodium: 400mgPotassium: 600mgFiber: 2gSugar: 5gVitamin A: 400IUVitamin C: 15mgCalcium: 200mgIron: 3mg

Notes

Store leftovers in an airtight container for up to 3 days. Best served fresh but can also be used in sandwiches or salads.

Tried this recipe?

Let us know how it was!

Delicious Grilled Chicken & Broccoli Bowls with Creamy Garlic Sauce

November 23, 2025 by Grace Snow Leave a Comment

The smell of smoky grilled chicken wafts through the air, immediately transporting me to family barbecues where laughter and delicious food come together. Today, I’m excited to share my recipe for Grilled Chicken & Broccoli Bowls with Creamy Garlic Sauce. This dish is not only a feast for the senses but also a delightful way to nourish your body. With effortless prep and a customizable flair, it’s perfect for a busy weeknight dinner or meal prepping for your lunches ahead. Featuring tender grilled chicken, crisp roasted broccoli, and a velvety sauce that ties it all together, you’ll find it’s a satisfying experience for both you and your loved ones. So grab your apron and let’s dive into a wholesome bowl of goodness! What variations are you excited to try?

Why are Grilled Chicken & Broccoli Bowls amazing?

Versatile and Customizable: This recipe allows for endless variations. You can easily swap chicken for grilled tofu or chickpeas for a plant-based twist, making it suitable for everyone at the table.

Flavor-Packed Delight: The smoky grilled chicken paired with tender roasted broccoli and a rich creamy garlic sauce creates a symphony of flavors that will keep your taste buds dancing.

Quick and Easy Meal Prep: With a straightforward cooking process, this dish is perfect for busy weeknights or meal prepping for the week ahead. Simply prepare the components and assemble when ready to eat!

Nutritious and Wholesome: Packed with lean protein and fresh vegetables, these bowls provide a healthful meal without sacrificing flavor. You'll also love how they satisfy cravings without resorting to fast food.

Whether you're looking for a Honey Garlic Chicken recipe for another night or considering a light option like Lemon Chicken Soup, this recipe fits right in!

Grilled Chicken & Broccoli Bowl Ingredients

For the Chicken
• Chicken Breasts – A lean protein source that serves as the main component. Substitute with tofu or chickpeas for a vegetarian option.

For the Broccoli
• Broccoli Florets – Provides vitamins and a satisfying crunch. Can swap with other vegetables like bell peppers or zucchini.

For the Grains
• Grains (Rice/Quinoa/Couscous) – Offers a hearty base for the bowl. Use cauliflower rice for a low-carb alternative.

For the Creamy Garlic Sauce
• Garlic – Adds aromatic flavor to the sauce. Adjust quantity to taste depending on your love for garlic.
• Heavy Cream – Gives richness to the sauce. Substitute with plant-based cream for dairy-free options.
• Butter – Enhances flavor in the sauce. Omit for a dairy-free version.

For Cooking & Seasoning
• Olive Oil – Used for grilling and roasting. Avocado oil can be a substitute if preferred.
• Salt & Pepper – Essential seasonings for enhancing overall flavor. Use to taste to achieve your ideal seasoning.
• Lemon Juice – Brightens and balances the flavors. Vinegar can be used as an alternative for acidity.

For Garnish
• Fresh Herbs (Parsley/Chives) – Offers a fresh garnish. Optional but recommended for a lovely finishing touch.

With these ingredients in hand, you’re ready to create delicious Grilled Chicken & Broccoli Bowls with Creamy Garlic Sauce, providing comfort and nourishment for you and your loved ones. Happy cooking!

Step‑by‑Step Instructions for Grilled Chicken & Broccoli Bowls with Creamy Garlic Sauce

Step 1: Grill the Chicken
Begin by preheating your grill or grill pan to medium-high heat. While it's heating, coat the chicken breasts with olive oil, sprinkle with salt, and add any other spices you love. Grill the chicken for about 6-8 minutes on each side, checking until the internal temperature reaches 165°F, ensuring it's thoroughly cooked and juicy. Once done, set aside to rest.

Step 2: Roast the Broccoli
While the chicken rests, toss your broccoli florets in a bowl with olive oil, a splash of lemon juice, and salt. Spread the broccoli evenly on a baking sheet, making sure not to overcrowd them. Roast in a preheated oven at 400°F for 15-20 minutes until they are tender and slightly crispy, which will enhance their natural flavors and provide delightful texture.

Step 3: Cook the Grains
Next, prepare your choice of grains, be it rice, quinoa, or couscous, according to the package instructions. For extra flavor, consider using broth instead of water for cooking. Once they are fluffy and fully cooked, take them off the heat, fluff with a fork, and keep them warm for assembly later in your Grilled Chicken & Broccoli Bowls.

Step 4: Make the Creamy Garlic Sauce
In a medium saucepan over medium heat, melt the butter and sauté minced garlic until fragrant, about 1-2 minutes. Then, pour in the heavy cream, stirring continuously. Season with salt and pepper to taste, and let the sauce simmer gently for about 3-5 minutes, allowing it to thicken slightly. This creamy garlic sauce will be the perfect complement to your bowls.

Step 5: Assemble the Bowls
Now it’s time to create your delicious Grilled Chicken & Broccoli Bowls! Start by placing a generous portion of the cooked grains in the bottom of your bowls. Layer sliced grilled chicken and a heap of roasted broccoli on top. Drizzle the creamy garlic sauce generously over the entire bowl and finish off with a sprinkle of fresh herbs for a vibrant touch, offering a feast for both the eyes and the palate.

How to Store and Freeze Grilled Chicken & Broccoli Bowls

Fridge: Store leftover Grilled Chicken & Broccoli Bowls in an airtight container for up to 3 days. To prevent sogginess, keep the creamy garlic sauce separate until ready to eat.

Freezer: For longer storage, freeze individual portions in airtight containers or freezer bags for up to 3 months. Thaw in the fridge overnight before reheating.

Reheating: Reheat in the microwave or on the stove. If the creamy garlic sauce has thickened, add a splash of water or milk to achieve the desired consistency while warming.

Room Temperature: Ideally, consume the bowls within 2 hours of preparation if left at room temperature to ensure food safety.

Grilled Chicken & Broccoli Bowls Variations

Feel free to get creative with your Grilled Chicken & Broccoli Bowls—there are so many delightful twists to explore!

  • Vegetarian Delight: Replace chicken with grilled tofu or chickpeas. This flavorful swap maintains the satisfying texture while catering to plant-based diets.
  • More Veggies: Add bell peppers, mushrooms, or zucchini for a colorful mix. This enhances flavor and adds nutritional benefits, keeping your meal vibrant and delicious!
  • Spice It Up: For a kick, introduce red pepper flakes or cayenne to the creamy garlic sauce. This fiery twist will excite your taste buds and add depth to the dish!
  • Greens Base: Swap grains for a bed of fresh greens, like spinach or arugula. This lightens the meal while providing extra vitamins in every bite.
  • Grain Choice: Use quinoa or couscous for a different texture. Then, consider adding a hint of herbs, like dill or basil, to elevate the flavor profile further.
  • Dairy-Free Cream: Substitute heavy cream with coconut milk or a plant-based cream for a rich and creamy flavor without dairy. Your bowls will remain deliciously creamy!
  • Savory Sauces: Experiment with teriyaki or soy sauce instead of creamy garlic sauce for an Asian-inspired twist. This will add a new layer of flavor to your meal!

If you enjoyed these variations, you might want to check out my Chicken Salad with Apples for another take on a wholesome dish! Happy cooking!

Make Ahead Options

These Grilled Chicken & Broccoli Bowls with Creamy Garlic Sauce are perfect for those who want to save time during busy weeknights! You can grill the chicken and roast the broccoli up to 24 hours in advance; just be sure to let them cool completely before refrigerating in airtight containers to maintain their texture. The creamy garlic sauce can also be prepared ahead and stored in the fridge for up to 3 days—simply reheat gently on the stove, adding a splash of cream or water if it thickens too much. When ready to serve, layer the grains, chicken, and broccoli in bowls, drizzle with the sauce, and add fresh herbs for a comforting meal just as delicious as when made fresh!

What to Serve with Grilled Chicken & Broccoli Bowls with Creamy Garlic Sauce

Transform your meal into a delightful feast with these perfect pairings that balance flavors and textures.

  • Creamy Mashed Potatoes: Their buttery richness complements the smoky chicken, adding a comforting texture to the bowl. A scoop of these potatoes will elevate every bite.

  • Garlic Bread: Soft and crispy, garlic bread brings a delightful aroma and buttery flavor that pairs wonderfully with the creamy garlic sauce. It’s perfect for soaking up every drop of that velvety goodness.

  • Simple Green Salad: Fresh, crisp greens mixed with a tangy vinaigrette provide a refreshing contrast to the warmth of the bowl. Toss in your favorite seasonal veggies for extra crunch!

  • Roasted Sweet Potatoes: These naturally sweet chunks offer a pleasant caramelization that plays beautifully off the savory elements of your meal. The sweetness brightens each forkful.

  • Quinoa Salad: A light and nutty quinoa salad with cherry tomatoes and cucumber not only enhances texture but also adds a burst of freshness that complements the creamy sauce.

  • Lemon Herb Rice: Brightened with lemon juice and fresh herbs, this fluffy side adds a zesty flavor profile that harmonizes perfectly with the savory chicken and rich sauce.

  • Fruit Smoothie: An icy fruit smoothie can be a refreshing drink option, contrasting nicely with the warm bowls while providing a sweet, nutritious twist.

  • Chocolate Mousse: For a decadent dessert, a silky chocolate mousse melts away stress and rounds off your meal with a luxurious treat. It'll leave your guests wanting to come back for more!

Expert Tips for Grilled Chicken & Broccoli Bowls

Perfectly Cooked Chicken: Ensure juiciness by using a meat thermometer; it should read 165°F. Let it rest after grilling to keep its moisture.

Crispy Broccoli: Avoid overcrowding the baking sheet. Spacing helps the broccoli roast rather than steam, resulting in delightful crispiness without sogginess.

Meal Prep Ready: For a seamless week, cook all components in advance. Store them separately in airtight containers, and simply reassemble when it's time to eat.

Adjusting the Sauce: If your creamy garlic sauce thickens too much during reheating, just stir in a splash of water or milk for desired consistency.

Endless Variations: Feel free to customize your Grilled Chicken & Broccoli Bowls by incorporating different vegetables or grains to match your family’s preferences and dietary needs.

Grilled Chicken & Broccoli Bowls with Creamy Garlic Sauce Recipe FAQs

How do I choose ripe broccoli?
Absolutely! Look for broccoli florets that are bright green with tightly packed buds. Avoid those with yellowing florets or dark spots, as these are indicators of aging. Fresh broccoli should also have a firm stem and a crisp texture.

How long can I store leftovers of Grilled Chicken & Broccoli Bowls?
You can store leftover Grilled Chicken & Broccoli Bowls in an airtight container in the fridge for up to 3 days. To maintain the best texture, keep the creamy garlic sauce separate until you're ready to enjoy your meal!

Can I freeze these bowls?
Very! To freeze, portion the Grilled Chicken & Broccoli Bowls into airtight containers or freezer bags for up to 3 months. Thaw in the refrigerator overnight before reheating. When ready, reheat gently in the microwave or on the stove. If the creamy sauce has thickened, add a splash of water or milk to bring it back to a creamy consistency.

What should I do if the chicken turns out dry?
If your chicken happens to be dry, consider marinating it longer next time for extra moisture. When grilling, be attentive to the cooking time—6-8 minutes per side is ideal, or until the internal temperature reaches 165°F. If you find yourself with dry chicken, try serving it with a bit more of the creamy garlic sauce to add moisture and flavor.

Are there any dietary considerations for allergies?
For those with dietary restrictions, this recipe can easily be tailored! To make it gluten-free, ensure you choose gluten-free grains like rice or quinoa. For dairy-free options, swap heavy cream and butter with plant-based alternatives. Always double-check ingredient labels to avoid allergens that may affect you or your loved ones.

Can I customize the vegetables in the bowls?
Absolutely! This recipe is wonderfully flexible. Feel free to mix in other vegetables like bell peppers, zucchini, or even toss in some spinach. The key is to balance flavors and textures, so choose what you love or have on hand. Enjoy experimenting!

Grilled Chicken & Broccoli Bowls with Creamy Garlic Sauce

Delicious Grilled Chicken & Broccoli Bowls with Creamy Garlic Sauce

Enjoy these Grilled Chicken & Broccoli Bowls with Creamy Garlic Sauce, a flavorful and nutritious meal option.
Print Recipe Pin Recipe
Prep Time 10 minutes mins
Cook Time 40 minutes mins
Resting Time 5 minutes mins
Total Time 55 minutes mins
Servings: 4 bowls
Course: Dinner
Cuisine: American
Calories: 600
Ingredients Equipment Method Nutrition Notes

Ingredients
  

For the Chicken
  • 4 pieces Chicken Breasts Substitute with tofu or chickpeas for a vegetarian option.
For the Broccoli
  • 4 cups Broccoli Florets Can swap with other vegetables like bell peppers or zucchini.
For the Grains
  • 2 cups Grains (Rice/Quinoa/Couscous) Use cauliflower rice for a low-carb alternative.
For the Creamy Garlic Sauce
  • 4 cloves Garlic Adjust quantity to taste depending on your love for garlic.
  • 1 cup Heavy Cream Substitute with plant-based cream for dairy-free options.
  • 2 tablespoons Butter Omit for a dairy-free version.
For Cooking & Seasoning
  • 2 tablespoons Olive Oil Avocado oil can be a substitute if preferred.
  • to taste Salt & Pepper Use to taste to achieve your ideal seasoning.
  • 2 tablespoons Lemon Juice Vinegar can be used as an alternative for acidity.
For Garnish
  • 1 bunch Fresh Herbs (Parsley/Chives) Optional but recommended for a lovely finishing touch.

Equipment

  • Grill
  • Grill pan
  • Baking Sheet
  • Saucepan

Method
 

Step-by-Step Instructions
  1. Preheat your grill or grill pan to medium-high heat. Coat the chicken breasts with olive oil, sprinkle with salt, and grill for 6-8 minutes on each side until the internal temperature reaches 165°F. Set aside to rest.
  2. Toss broccoli florets in a bowl with olive oil, lemon juice, and salt. Spread evenly on a baking sheet and roast at 400°F for 15-20 minutes until tender and crispy.
  3. Prepare your choice of grains according to the package instructions. Use broth instead of water for extra flavor. Keep warm for assembly.
  4. In a medium saucepan, melt butter and sauté minced garlic until fragrant. Add heavy cream, season with salt and pepper, and let it simmer for 3-5 minutes until thickened.
  5. Assemble your bowls with cooked grains at the bottom, topped with sliced grilled chicken, roasted broccoli, and drizzled with creamy garlic sauce. Garnish with fresh herbs.

Nutrition

Serving: 1bowlCalories: 600kcalCarbohydrates: 40gProtein: 45gFat: 30gSaturated Fat: 15gPolyunsaturated Fat: 5gMonounsaturated Fat: 15gCholesterol: 150mgSodium: 800mgPotassium: 900mgFiber: 6gSugar: 2gVitamin A: 900IUVitamin C: 100mgCalcium: 150mgIron: 2mg

Notes

Leftovers should be stored in an airtight container for up to 3 days. Keep the sauce separate until ready to eat.

Tried this recipe?

Let us know how it was!

Savory Chicken Marsala Casserole for Cozy Family Nights

November 23, 2025 by Grace Snow Leave a Comment

As I pulled the bubbling Chicken Marsala Casserole from the oven, the rich aroma of sautéed mushrooms and savory chicken danced through my kitchen, instantly transporting me to a cozy Italian trattoria. This one-pan meal beautifully fuses comfort and sophistication, making it the perfect solution for anyone craving that homemade touch without the fuss. With its creamy texture and crispy breadcrumb topping, this family-friendly dish not only pleases the palate but also saves time on busy weeknights. Whether you're serving it at a gathering or enjoying it for a quiet dinner at home, I promise it’ll quickly become a staple in your repertoire. Curious to discover how easily you can whip this up? Let's dive into the details!

Why Choose Chicken Marsala Casserole?

Comforting and Cozy: This Chicken Marsala Casserole is your go-to dish for creating warm, inviting family meals.

One-Pan Wonder: With just one baking dish required, clean-up is a breeze, letting you enjoy dinner without stress.

Flavor Fusion: The blend of tender chicken, umami-rich mushrooms, and creamy cheese creates a dish that's both satisfying and delicious.

Endless Variations: Feel free to add veggies or try out different cheeses; the recipe adapts to suit your taste.

Time-Saving Option: Perfect for busy nights, it’s a quick way to serve a homemade meal that will impress your family.

Gather everyone around the table and serve this warm casserole alongside a fresh salad or some garlic bread for a delightful experience!

Chicken Marsala Casserole Ingredients

Get ready to create a delightful dish with these essential ingredients!

For the Casserole

  • Chicken – Provides protein and the heart of the dish; feel free to choose between breast or thigh meat based on your preference.
  • Mushrooms – Add umami flavor and texture; substituting with cremini or shiitake mushrooms can enhance the taste.
  • Marsala Wine – Infuses a rich depth of flavor; a mix of grape juice and a splash of balsamic vinegar makes for a tasty non-alcoholic version.
  • Pasta (Penne) – Adds heartiness; consider fusilli, farfalle, or rigatoni as alternatives for fun shapes.
  • Cheese (e.g., Mozzarella) – Melts beautifully to add creaminess; experimenting with a cheese blend can elevate the flavor experience.
  • Breadcrumbs – Offers a crispy topping; using seasoned breadcrumbs or making your own from stale bread adds an extra layer of flavor.

These simple ingredients combine to craft a delicious Chicken Marsala Casserole that the whole family will love!

Step‑by‑Step Instructions for Chicken Marsala Casserole

Step 1: Preheat the Oven
Begin by preheating your oven to 350°F (175°C). This ensures that your Chicken Marsala Casserole will bake evenly and develop that delicious golden crust when it’s time to put it in the oven. While the oven is warming up, gather all your ingredients to make the cooking process smooth and enjoyable.

Step 2: Sauté the Mushrooms
In a large sauté pan, heat a drizzle of olive oil over medium-high heat. Add sliced mushrooms to the pan and cook until they are golden brown and fragrant, about 5-7 minutes. Stir occasionally to prevent sticking. Once done, remove the mushrooms from the pan and set them aside while you prepare the chicken, keeping all those flavorful bits in the pan.

Step 3: Cook the Chicken
In the same pan used for the mushrooms, add a bit more oil if needed and then add diced chicken. Cook for approximately 5-7 minutes until the chicken is browned and no longer pink inside. This helps to seal in the flavors. Once cooked, it's time to add the signature sauce; remember, this Chicken Marsala Casserole is all about those rich, savory flavors.

Step 4: Combine Ingredients with Marsala Wine
Return the sautéed mushrooms to the pan with the chicken. Pour in about ½ cup of Marsala wine and stir to combine. Allow the mixture to simmer for 4-5 minutes until the liquid has thickened slightly, creating a delectable sauce that enhances the Chicken Marsala Casserole. This simmering phase releases the deep flavors of the wine and enriches the dish beautifully.

Step 5: Prepare the Pasta
While the chicken and sauce are simmering, cook the pasta in a large pot according to package directions until al dente, usually around 8-10 minutes. Once cooked, drain the pasta thoroughly, then add it to the chicken and mushroom mixture in the pan. Stir to ensure the pasta is evenly coated with that delicious sauce, setting the stage for your Chicken Marsala Casserole.

Step 6: Assemble the Casserole
Transfer the pasta mixture into a greased 9x13-inch baking dish. Spread it out evenly for uniform baking. Sprinkle generously with your favorite cheese, such as mozzarella, and then top with breadcrumbs for that extra bit of crunch. The combination of textures in this Chicken Marsala Casserole will make it a winner at your dinner table!

Step 7: Bake the Casserole
Place the assembled Chicken Marsala Casserole in the preheated oven and bake for 25-30 minutes. Keep an eye on it, and look for a bubbly golden top as the cheese melts and the breadcrumbs crisp up. This final baking step is where all the flavors meld together, making your home smell tantalizing and inviting.

Step 8: Cool and Serve
Once baked to perfection, carefully remove the casserole from the oven and let it cool for about 5-10 minutes. This cooling period helps the layers set, making it easier to slice and serve. Your Chicken Marsala Casserole is now ready to be enjoyed alongside a fresh salad or garlic bread for a complete meal experience!

Chicken Marsala Casserole Variations

Feel free to explore these variations to unleash your creativity in the kitchen!

  • Quick Rotisserie: Use rotisserie chicken for a faster meal. It brings a savory flavor and saves you time without compromising taste.
  • Veggie Boost: Incorporate spinach or broccoli for added nutrition. These colorful greens not only enhance the flavor but also bring a beautiful freshness to the dish.
  • Cheese Variety: Experiment with different cheese varieties like gouda or cheddar for varied flavor. Each cheese brings its unique character, making each casserole experience special.
  • Pasta Options: Swap penne for fusilli or farfalle for fun shapes. The pasta's texture can elevate the dish and make it even more enjoyable for little ones at the table.
  • Non-Alcoholic Twist: Substitute Marsala wine with a mix of grape juice and a splash of balsamic vinegar. This keeps the rich flavor profile with a family-friendly touch.
  • Herb Infusion: Add fresh herbs like thyme or rosemary into the filling for a fragrant touch. This can infuse lovely notes that transport you to a rustic Italian kitchen.
  • Heat Level: Spice things up with a pinch of red pepper flakes if you like some heat. It provides an exciting contrast to the creamy base of the casserole.
  • One-Pan Wonder: To save on dishes, cook the chicken and mushrooms directly in your casserole dish, then add pasta, sauce and bake. It streamlines preparation and makes cleanup a breeze.

Remember, the beauty of this Chicken Marsala Casserole lies in its adaptability. Whether you're craving something classic or something new, there's a variation waiting just for you. Enjoy every bite!

Make Ahead Options

These Chicken Marsala Casseroles are perfect for meal prep enthusiasts! You can assemble the entire casserole up to 24 hours in advance, ensuring that you have a delicious homemade meal ready to bake at a moment's notice. Simply prepare the dish up to the baking step, cover tightly with foil or plastic wrap, and refrigerate. To maintain the quality, consider waiting to add the breadcrumbs and cheese until just before baking, which prevents them from getting soggy. When you're ready to serve, preheat your oven and bake the casserole for an additional 5-10 minutes if it has been refrigerated, ensuring that every bite is just as delicious as if it were made fresh!

Expert Tips for Chicken Marsala Casserole

• Sautéing Secrets: Ensure mushrooms are well caramelized for maximum flavor; this enhances the overall taste of your Chicken Marsala Casserole.

• Don’t Rush Cooling: Allow the casserole to cool for 5-10 minutes after baking. This helps it set and makes slicing neater.

• Prep Ahead: Assemble your Chicken Marsala Casserole a day in advance. Refrigerate it and add 5-10 minutes to the baking time when cooking from chilled.

• Pasta Perfection: Cook pasta al dente; it will absorb some sauce while baking, ensuring it remains firm and flavorful in the dish.

• Breadcrumb Tips: Use seasoned breadcrumbs for added flavor or make your own from leftover bread. This little detail can elevate the dish!

How to Store and Freeze Chicken Marsala Casserole

Fridge: Store any leftover Chicken Marsala Casserole in an airtight container for up to 3-4 days. Allow it to cool completely before sealing for optimal freshness.

Freezer: You can freeze the casserole for up to three months. Wrap it tightly in plastic wrap and then aluminum foil to prevent freezer burn.

Reheating: To reheat, thaw in the fridge overnight, then warm in the oven at 350°F (175°C) for about 20-25 minutes until heated through.

Make-Ahead Tip: Assemble the casserole ahead of time and refrigerate (unbaked) for up to 24 hours. Just add an extra 5-10 minutes to the baking time if baking from chilled.

What to Serve with Chicken Marsala Casserole?

To create a comforting meal that embraces all the flavors of home, consider pairing your casserole with these delightful sides.

  • Garlic Bread: The perfect accompaniment to a creamy casserole, garlic bread's warm, buttery texture invites you to savor each bite. It's a classic that never disappoints!

  • Fresh Green Salad: Add a refreshing crunch with a crisp salad, featuring mixed greens and a light vinaigrette to balance the richness of the casserole.

  • Roasted Vegetables: Seasonal roasted veggies like carrots, bell peppers, and zucchini add vibrant colors and a smoky flavor, enhancing the overall dining experience.

  • Creamy Mashed Potatoes: Indulge in velvety mashed potatoes, which pair wonderfully with the rich sauce of the casserole, allowing each mouthful to melt in your mouth.

  • Herb-Infused Rice: Fluffy rice seasoned with fresh herbs brings a subtle earthiness that complements the savory notes of the Chicken Marsala Casserole while soaking up all that delicious sauce.

  • Sautéed Spinach: Quick sautéed spinach with garlic offers a nutritious and flavorful addition, providing a burst of freshness alongside the casserole.

  • Chilled Lemonade or Iced Tea: Pair your meal with a refreshing drink; a chilled lemonade or iced tea will balance the flavors and keep everyone refreshed while enjoying dinner.

These enticing sides create a well-rounded meal that elevates the comforting Chicken Marsala Casserole into a delightful dining experience for you and your loved ones!

Chicken Marsala Casserole Recipe FAQs

What type of chicken is best for Chicken Marsala Casserole?
Absolutely! Both chicken breast and thigh meat work wonderfully in this recipe. Breasts are lean and cook up tender, while thighs are juicy and flavorful. Choose whichever you prefer, or even try a mix of both for added texture!

How do I store leftovers of Chicken Marsala Casserole?
You can easily store your Chicken Marsala Casserole in an airtight container in the fridge for up to 3-4 days. Just make sure it’s completely cooled before sealing it up. This allows for the best flavor retention!

Can I freeze Chicken Marsala Casserole?
Yes, you can freeze it! Wrap your casserole tightly in plastic wrap and then in aluminum foil to protect it from freezer burn. It can be kept in the freezer for up to three months. To reheat, just thaw it overnight in the fridge and warm in a preheated oven at 350°F (175°C) for about 20-25 minutes.

What are some common issues when making Chicken Marsala Casserole?
If your casserole seems dry, it's likely because the pasta absorbed too much liquid. To fix this next time, ensure you don't overcook the pasta and consider adding a little extra Marsala wine or chicken broth to the mixture. Another tip: if your breadcrumbs aren’t crispy enough, broil the casserole for a couple of minutes at the end of the baking time, but watch it closely to prevent burning!

Can I make Chicken Marsala Casserole ahead of time?
Certainly! You can assemble the casserole in advance and keep it in the refrigerator for up to 24 hours before baking. Just remember to cover it well to prevent drying out. When you're ready to bake, simply add an additional 5-10 minutes to the baking time if it's chilled.

Are there dietary considerations for Chicken Marsala Casserole?
Yes! This dish can be adapted for various dietary needs. For a gluten-free version, swap out regular pasta for gluten-free pasta and use gluten-free breadcrumbs. Additionally, for those avoiding alcohol, substituting Marsala wine with a mix of grape juice and balsamic vinegar offers similar depth of flavor. Always check for any allergies pertaining to specific ingredients like cheese or mushrooms!

Chicken Marsala Casserole

Savory Chicken Marsala Casserole for Cozy Family Nights

This Chicken Marsala Casserole is a comforting and flavorful one-pan meal perfect for busy weeknights.
Print Recipe Pin Recipe
Prep Time 15 minutes mins
Cook Time 30 minutes mins
Cooling Time 10 minutes mins
Total Time 55 minutes mins
Servings: 6 servings
Course: Dinner
Cuisine: Italian
Calories: 450
Ingredients Equipment Method Nutrition Notes

Ingredients
  

For the Casserole
  • 2 cups diced chicken breast or thigh meat
  • 8 oz mushrooms sliced, can substitute with cremini or shiitake
  • 1/2 cup Marsala wine for a non-alcoholic version, use grape juice and balsamic vinegar
  • 8 oz pasta (penne) alternatives include fusilli, farfalle, or rigatoni
  • 2 cups cheese (e.g., Mozzarella) use a cheese blend for enhanced flavor
  • 1 cup breadcrumbs use seasoned or homemade from stale bread

Equipment

  • large sauté pan
  • 9x13-inch baking dish
  • Large pot

Method
 

Step‑by‑Step Instructions
  1. Preheat your oven to 350°F (175°C), and gather all your ingredients.
  2. In a large sauté pan, heat a drizzle of olive oil over medium-high heat. Add sliced mushrooms and cook until golden brown, about 5-7 minutes. Remove and set aside.
  3. In the same pan, add a bit more oil if needed and add diced chicken. Cook for approximately 5-7 minutes until browned and no longer pink.
  4. Return sautéed mushrooms to the pan with chicken. Pour in Marsala wine and simmer for 4-5 minutes until thickened.
  5. While the mixture is simmering, cook the pasta according to package directions until al dente, about 8-10 minutes. Drain and add to the chicken and mushrooms.
  6. Transfer the pasta mixture into a greased 9x13-inch baking dish, spread evenly, sprinkle with cheese, and top with breadcrumbs.
  7. Bake in the preheated oven for 25-30 minutes until bubbly and golden.
  8. Allow to cool for 5-10 minutes before serving.

Nutrition

Serving: 1servingCalories: 450kcalCarbohydrates: 45gProtein: 30gFat: 15gSaturated Fat: 7gPolyunsaturated Fat: 2gMonounsaturated Fat: 5gCholesterol: 80mgSodium: 600mgPotassium: 700mgFiber: 3gSugar: 4gVitamin A: 500IUVitamin C: 2mgCalcium: 200mgIron: 2mg

Notes

Serve alongside fresh salad or garlic bread for a complete meal. You can assemble the casserole a day in advance and bake it chilled for convenience.

Tried this recipe?

Let us know how it was!

Melt In Your Mouth Chicken That Will Wow Your Family Tonight

November 23, 2025 by Grace Snow Leave a Comment

Amid the bustle of everyday life, we often find ourselves yearning for that comforting plate of home-cooked goodness. Enter my latest favorite: Melt In Your Mouth Chicken! This dish is a lifesaver for busy weeknights, transforming simple chicken breasts into a tender, juicy delight with just a few ingredients. With its creamy crust made from mayonnaise or Greek yogurt, this recipe doesn’t just prioritize flavor; it's also a fantastic option for those aiming for something a little healthier. Whether you're feeding a family or impressing guests, this easy dinner promises to please every palate. Curious about how to make this decadent comfort food that’ll leave everyone asking for seconds? Let's dive in!

Why Is This Chicken Recipe So Special?

Melt-in-your-mouth comfort: Each bite of this chicken is a tender, juicy explosion of flavor, thanks to the creamy topping.
Ease of preparation: With only a handful of ingredients and quick prep time, it fits perfectly into even the busiest schedules.
Versatility: Enjoy it with a side of roasted veggies or elevate it with a fresh salad for a complete meal. If you're in the mood for other chicken dishes, check out Crockpot Butter Chicken or Honey BBQ Chicken.
Healthy twist: For a lighter option, swap mayonnaise for Greek yogurt without sacrificing creaminess.
Crowd-pleaser: This recipe is sure to be a hit at family dinners or gatherings, leaving everyone asking for your secret!

Melt In Your Mouth Chicken Ingredients

Curious about what you need for this delightful dish?

For the Chicken

  • Boneless Skinless Chicken Breast Halves – Ensure even thickness for consistent cooking and tender results.

For the Creamy Topping

  • Mayonnaise or Greek Yogurt – Either option will provide moisture and creamy goodness, with Greek yogurt offering a healthier choice.
  • Parmesan Cheese (Grated) – Freshly grated adds a rich flavor and helps create that delicious crispy crust.
  • Dry Minced Onion – Opt for this to enhance flavor subtly; fresh onion works too, just adjust cooking time.
  • Garlic Powder – A convenient way to add savory depth; fresh minced garlic can bring a brighter taste instead.
  • Dried Parsley – For a pop of color and mild herby notes; feel free to use fresh parsley if you have it on hand.
  • Salt and Black Pepper – Essential for seasoning; adjust to your taste preferences for a perfect balance.

Step‑by‑Step Instructions for Melt In Your Mouth Chicken

Step 1: Preheat the Oven
Begin by preheating your oven to 375°F (190°C). This temperature is ideal for baking the chicken to juicy perfection while allowing the creamy topping to develop a beautiful golden crust. As the oven heats, gather your ingredients and equipment to create a smooth workflow in the kitchen.

Step 2: Make the Creamy Mixture
In a small mixing bowl, combine mayonnaise (or Greek yogurt), grated Parmesan cheese, dry minced onion, garlic powder, dried parsley, salt, and pepper. Stir these ingredients together until you achieve a smooth and creamy consistency. This tasty blend will form the luxurious topping that makes your Melt In Your Mouth Chicken so irresistible.

Step 3: Prepare the Chicken
Take your boneless skinless chicken breast halves and, if needed, slice them in half horizontally to ensure even cooking. Lightly spray a baking dish with non-stick cooking spray to prevent sticking. Arrange the chicken breasts in the dish, ensuring they are evenly spaced for optimal heat circulation while baking.

Step 4: Apply the Creamy Topping
Generously cover each piece of chicken with the creamy mixture you prepared earlier. Use a spatula to spread the mixture evenly, ensuring that every exposed surface of the chicken is coated. This allows the topping to crisp up beautifully while the chicken remains tender and moist during baking.

Step 5: Bake to Crispy Perfection
Carefully place the baking dish in the preheated oven and bake for 35-45 minutes. You’ll know the chicken is done when it reaches an internal temperature of 165°F (75°C) and the topping is golden brown and bubbly. Keep an eye on it during the last few minutes to prevent over-browning, adjusting the time as necessary.

Step 6: Let It Rest
Once out of the oven, allow the Melt In Your Mouth Chicken to rest for about 5 minutes. This resting period helps the juices redistribute, ensuring each bite is tender and flavorful. During this time, you can prepare any sides you'd like to serve, such as fresh salad or roasted vegetables.

Step 7: Serve and Enjoy
Slice the chicken and serve it warm, garnished with fresh parsley if desired. Each piece will be tender, juicy, and covered in a delicious creamy crust that’s sure to impress. Pair the dish with your favorite sides for a comforting meal that your family will love!

Melt In Your Mouth Chicken Variations

Feel free to let your culinary creativity shine by adding your personal touch to this recipe!

  • Dairy-Free: Substitute Greek yogurt with a plant-based yogurt for a creamy yet dairy-free option that remains satisfying.

  • Spice It Up: Incorporate a dash of cayenne pepper for a kick of heat; it adds a delightful contrast to the creamy topping.

  • Ranch Twist: Replace the mayonnaise with ranch dressing for a zesty alternative that still keeps the dish rich and flavorful.

  • Veggie Boost: Add in thinly sliced bell peppers or zucchini on top of the chicken to infuse more veggies and flavors; it's a great way to sneak in some nutrition!

  • Herby Delight: Try using fresh herbs like thyme or rosemary instead of dried parsley to bring a vibrant, aromatic flair to your dish. Fresh herbs can transform the flavor profile entirely!

  • Cheesy Layers: Mix in some shredded mozzarella or cheddar cheese with the Parmesan to amp up the cheesy goodness for a melty experience you'll adore.

  • Pesto Chicken: Spread a layer of pesto on the chicken before adding the creamy topping, offering a twist of Italian flavor that makes your dish pop.

  • Crispy Topping: For added crunch, sprinkle some crushed breadcrumbs or panko on the topping before baking; it creates a delightful texture contrast.

Mix and match these ideas to create a dish that suits your taste buds. And if you're on the hunt for more chicken inspiration, don't miss out on recipes like Chipotle Lime Chicken or Spatchcock Chicken Flavor. Happy cooking!

Storage Tips for Melt In Your Mouth Chicken

  • Fridge: Store leftovers in an airtight container in the refrigerator for up to 3 days to retain flavor and moisture. Make sure to allow the chicken to cool down before sealing.

  • Freezer: For longer storage, freeze the cooked chicken wrapped tightly in plastic wrap and then aluminum foil for up to 2 months. Thaw in the fridge overnight before reheating.

  • Reheating: To reheat, place the Melt In Your Mouth Chicken in a baking dish covered with foil at 350°F (175°C) for about 15-20 minutes until heated through.

  • Room Temperature: Avoid leaving chicken out at room temperature for more than 2 hours to ensure safety and quality.

Expert Tips for Melt In Your Mouth Chicken

  • Choose Fresh: Using fresh ingredients, especially the chicken and herbs, enhances flavor and ensures the best texture in your Melt In Your Mouth Chicken.

  • Uniform Thickness: For even cooking, make sure your chicken breasts are of similar thickness; this prevents some pieces from drying out while others remain undercooked.

  • Cooking Temperature: Always check that the internal temperature reaches 165°F (75°C) to ensure your chicken is safe to eat and perfectly cooked.

  • Foil for Moisture: Cover your baking dish with foil for the first 25 minutes if you prefer a softer texture; uncover it to achieve that crispy topping everyone loves.

  • Experiment with Cheese: Feel free to mix in other cheeses like mozzarella or cheddar with the Parmesan for additional flavors in your creamy topping!

  • Revive Leftovers: To keep leftovers from drying out, reheat them in the oven rather than the microwave for a similar texture to the original Melt In Your Mouth Chicken.

Make Ahead Options

These Melt In Your Mouth Chicken preparations are perfect for saving time during busy weeknights! You can prepare the creamy topping (using mayonnaise or Greek yogurt) up to 24 hours in advance and store it in the refrigerator. Simply mix the ingredients together and keep it covered until you’re ready to use. Additionally, you can season and place the chicken breasts in the baking dish, topping them with the mixture right before cooking. When you're ready to bake, just preheat the oven and pop the dish in; it will still be just as delicious with that crispy crust. This smart meal prep ensures you can enjoy a comforting homemade dinner with minimal effort!

What to Serve with Melt In Your Mouth Chicken

Create a memorable meal that will have everyone coming back for seconds!

  • Creamy Mashed Potatoes: Their buttery richness pairs perfectly with the savory flavors of the chicken, offering a comforting side that everyone loves. Imagine the smooth potatoes soaking up the delicious juices from the chicken on your plate.

  • Garlic Roasted Broccoli: This vibrant, crunchy veggie brings bright color and delightful texture to your dinner table, balancing the richness of the dish.

  • Fresh Garden Salad: A crisp salad with mixed greens and a light vinaigrette introduces a refreshing contrast to the creamy chicken. You can throw in some cherry tomatoes and avocado for added flavor and nutrition.

  • Quinoa Pilaf: This nutty grain adds a wholesome element, making your meal more filling while complementing the succulent chicken flavors. The added herbs and spices will elevate each bite beautifully.

  • Honey-Glazed Carrots: Sweet and tender, these roasted carrots provide a lovely sweetness that works harmoniously with the savory chicken, creating a delightful contrast.

  • Crispy French Bread: A warm, crusty loaf is perfect for sopping up any creamy topping or juices left on your plate. Plus, who can resist fresh bread?

  • Chardonnay: Enhance your dining experience with a chilled glass of Chardonnay, as its buttery notes harmonize beautifully with the flavors of the chicken.

  • Chocolate Mousse: For dessert, consider a light chocolate mousse. Its rich yet airy quality offers a perfect ending to your comforting meal, leaving everyone satisfied and delighted.

Melt In Your Mouth Chicken Recipe FAQs

What type of chicken is best for this recipe?
Using boneless skinless chicken breast halves is ideal as they cook evenly and become tender. Ensure that all pieces are of similar thickness for consistent cooking results. If you prefer, thigh pieces can also work well, just adjust the cooking time slightly as they may require a bit longer.

How do I store leftovers from Melt In Your Mouth Chicken?
Absolutely! Leftovers should be stored in an airtight container in the refrigerator for up to 3 days. It’s important to allow the chicken to cool before sealing to retain its moisture and flavor. When ready to reheat, place it in a baking dish covered with foil at 350°F (175°C) for about 15-20 minutes.

Can I freeze Melt In Your Mouth Chicken?
Very! For longer storage, wrap the cooked chicken tightly in plastic wrap and then in aluminum foil. This will keep it good in the freezer for up to 2 months. When you’re ready to enjoy it again, simply thaw it in the fridge overnight before reheating.

What’s the best way to reheat it?
To maintain that delicious texture, reheat your Melt In Your Mouth Chicken in a baking dish covered with foil at 350°F (175°C) for about 15-20 minutes. This method helps retain moisture compared to using a microwave, ensuring each bite remains tender and flavorful.

How can I ensure my chicken is cooked properly?
You should always use a food thermometer to check that your chicken reaches an internal temperature of 165°F (75°C). This ensures it’s safe to eat and maintains its juiciness. If you’re unsure, the juices should run clear, and the meat should no longer be pink.

Can I substitute any ingredients for dietary reasons?
Absolutely! If you have dietary considerations, using Greek yogurt in place of mayonnaise not only lightens the dish but also adds a unique tanginess. For seasoning, you can adjust the amount of salt or skip it entirely, and fresh herbs can replace dried ones for an enhanced flavor profile.

Melt In Your Mouth Chicken

Melt In Your Mouth Chicken That Will Wow Your Family Tonight

Melt In Your Mouth Chicken is a comforting, easy-to-make dish that transforms chicken breasts into a tender delight.
Print Recipe Pin Recipe
Prep Time 10 minutes mins
Cook Time 40 minutes mins
Resting Time 5 minutes mins
Total Time 55 minutes mins
Servings: 4 servings
Course: Dinner
Cuisine: American
Calories: 350
Ingredients Equipment Method Nutrition Notes

Ingredients
  

For the Chicken
  • 4 pieces Boneless Skinless Chicken Breast Halves Ensure even thickness for consistent cooking.
For the Creamy Topping
  • 1 cup Mayonnaise or Greek Yogurt Greek yogurt offers a healthier choice.
  • 1/2 cup Parmesan Cheese (Grated) Freshly grated adds rich flavor.
  • 1 tsp Dry Minced Onion Enhances flavor subtly.
  • 1 tsp Garlic Powder Add fresh minced garlic for a brighter taste.
  • 1 tsp Dried Parsley Feel free to use fresh if available.
  • to taste Salt and Black Pepper Essential for seasoning.

Equipment

  • Baking Dish
  • Mixing Bowl
  • Spatula
  • Oven

Method
 

Step-by-Step Instructions
  1. Preheat your oven to 375°F (190°C).
  2. In a small mixing bowl, combine mayonnaise (or Greek yogurt), grated Parmesan cheese, dry minced onion, garlic powder, dried parsley, salt, and pepper until smooth.
  3. Slice the chicken if needed for even cooking and arrange in a lightly sprayed baking dish.
  4. Generously cover each chicken piece with the creamy mixture.
  5. Bake in the preheated oven for 35-45 minutes until the chicken reaches 165°F (75°C) and topping is golden brown.
  6. Let the chicken rest for 5 minutes before serving.
  7. Slice and serve warm, garnished with fresh parsley if desired.

Nutrition

Serving: 1pieceCalories: 350kcalCarbohydrates: 5gProtein: 30gFat: 23gSaturated Fat: 5gPolyunsaturated Fat: 1gMonounsaturated Fat: 6gCholesterol: 95mgSodium: 700mgPotassium: 500mgSugar: 1gVitamin A: 500IUCalcium: 200mgIron: 1mg

Notes

Using fresh ingredients enhances flavor and ensures the best texture. Uniform thickness is key for even cooking.

Tried this recipe?

Let us know how it was!

Delicious Monterey Chicken Spaghetti Ready in 40 Minutes

November 23, 2025 by Grace Snow Leave a Comment

As I stood in the kitchen, the enticing aroma of sautéed onions and bell peppers filled the air, instantly lifting my spirits. This is the magic of Monterey Chicken Spaghetti—a hearty, creamy dish that has become my go-to for busy weeknights. Whipping up a bowl of this comforting goodness is not only quick and easy but also customizable to suit any dietary preference. Whether you opt for tender chicken, savory turkey, or hearty vegetarian substitutions, this dish can adapt to your family’s taste buds with effortless flair. Imagine gathering around the table, sharing laughter and stories, all while enjoying a meal that is both satisfying and downright delicious. Ready to dive into this creamy paradise? Let’s make some Monterey Chicken Spaghetti that everyone will love!

Why is Monterey Chicken Spaghetti special?

Creamy Delight: The rich blend of sour cream and cream of chicken soup creates a luscious sauce that lovingly coats every strand of spaghetti.
Customizable Pleasure: Whether you prefer chicken, ground beef, or a hearty vegetarian option, this recipe flexes to fit your cravings.
Quick & Simple: With just 40 minutes required, this dish is perfect for those busy weeknights when you want a homemade meal without fuss.
Comfort Food Classic: This dish embodies everything comforting and cheerful about pasta, making it a surefire hit for family gatherings.
Consider pairing your Monterey Chicken Spaghetti with some delicious Garlic Bread to round out the experience!

Monterey Chicken Spaghetti Ingredients

For the Pasta

  • Spaghetti – Serves as the perfect base; feel free to swap with your favorite pasta like fettuccine or penne.

For the Sauce

  • Cooked Chicken – Provides richness and protein; rotisserie chicken is a great time-saver.
  • Cream of Chicken Soup – Adds creaminess; for a vegetarian version, opt for cream of mushroom soup.
  • Sour Cream – Brings tanginess and creaminess; use reduced-fat for a lighter twist.
  • Milk – Adjusts the sauce consistency; chicken broth works for a lighter option.
  • Garlic Powder – Enhances the flavor with a hint of warmth.
  • Onion Powder – Complements the garlic and amplifies the overall taste.
  • Salt and Pepper – Essential for seasoning; adjust to your personal preference.

For the Veggies

  • Olive Oil – Ideal for sautéing and preventing sticking; adds flavor too.
  • Onion (1/2 cup, chopped) – Infuses sweetness and depth into the dish.
  • Bell Pepper (1/2 cup, chopped) – Offers a fresh crunch and vibrant color.
  • Mushrooms (1/2 cup, sliced) – Contributes umami; swap out with your favorite veggies for variety.

For the Cheesy Layer

  • Monterey Jack Cheese (1 cup, shredded) – Essential for that melty, gooey texture; Colby Jack or mozzarella can be used instead.
  • Cheddar Cheese (1/2 cup, shredded) – Adds an extra layer of cheesiness.

For Garnish

  • Fresh Parsley (optional, chopped) – Adds a touch of brightness and color to your dish.

With every scoop of this Monterey Chicken Spaghetti, you're bound to experience comfort and joy, perfect for a family gathering or a cozy dinner at home!

Step‑by‑Step Instructions for Monterey Chicken Spaghetti

Step 1: Cook the Pasta
Begin by bringing a large pot of salted water to a boil. Add spaghetti and cook according to package instructions, typically 8-10 minutes, until al dente. Once cooked, drain the pasta in a colander and set it aside, allowing it to cool slightly while you prepare the sauce.

Step 2: Sauté Vegetables
In a large skillet, heat 2 tablespoons of olive oil over medium heat. Add ½ cup of chopped onion, ½ cup of chopped bell pepper, and ½ cup of sliced mushrooms. Sauté the vegetables for about 5-7 minutes, stirring occasionally, until they are soft and aromatic, creating a colorful base for your Monterey Chicken Spaghetti.

Step 3: Make the Sauce
Lower the heat and stir in one can (10.5 oz) of cream of chicken soup and 1 cup of sour cream. Sprinkle in ½ teaspoon each of garlic powder and onion powder, then pour in ½ cup of milk. Stir everything together until well combined and smooth, cooking for an additional 2-3 minutes until the sauce is heated through and creamy.

Step 4: Add Chicken and Cheese
Next, add in your cooked shredded chicken and half of the shredded Monterey Jack cheese (1 cup). Stir continuously until the cheese melts completely, and the chicken is warmed, allowing those flavors to meld beautifully together into the sauce for your Monterey Chicken Spaghetti.

Step 5: Combine with Pasta
Add the drained spaghetti directly into the skillet with the sauce mixture. Using a pair of tongs, gently toss the pasta with the sauce until every strand is well-coated and you see that creamy goodness enveloping your noodles. This should take about 2-3 minutes, ensuring even distribution.

Step 6: Optional Baking
If you prefer a baked version, preheat your oven to 350°F (175°C). Transfer the pasta mixture to a greased baking dish. Sprinkle the remaining half cup of Monterey Jack cheese on top and bake for 20-25 minutes, or until the cheese is bubbly and golden, creating a comforting crust.

Step 7: Serve
Once baked or simply stovetop-cooked, remove your Monterey Chicken Spaghetti from the heat. If desired, garnish with freshly chopped parsley for a pop of color and freshness. Serve warm and enjoy the cozy flavors of this delicious dish with your loved ones gathered around the table.

Make Ahead Options

These Monterey Chicken Spaghetti are perfect for meal prep enthusiasts! You can assemble the entire dish up to 24 hours in advance by preparing the sauce and tossing it with the cooked spaghetti, allowing the flavors to meld beautifully. Simply refrigerate the unbaked casserole in a covered dish. When you're ready to serve, preheat your oven to 350°F (175°C) and bake for 20-25 minutes until bubbly and golden. Alternatively, store leftovers in an airtight container for up to 3 days—just reheat them with a splash of milk to restore creaminess. By prepping ahead, you'll enjoy the comforting embrace of this creamy pasta dish with minimal effort on busy weeknights!

What to Serve with Monterey Chicken Spaghetti

Building a delicious meal around Monterey Chicken Spaghetti enhances your dining experience with flavors and textures that delight the senses.

  • Garlic Bread: Crisp and buttery, garlic bread is the perfect companion, balancing the creamy sauce and offering satisfying crunch. It’s also fantastic for mopping up any leftover sauce!

  • Caesar Salad: A refreshing Caesar salad adds crisp romaine, crunchy croutons, and creamy dressing, cutting through the richness of the spaghetti for a delightful contrast.

  • Roasted Vegetables: A medley of roasted vegetables like zucchini, bell peppers, and asparagus provides a sweet, caramelized flavor that pairs wonderfully with the creamy strands of pasta.

  • Steamed Green Beans: Lightly seasoned green beans add a fresh crunch and vibrant color, making them a superb choice to complement the heartiness of the dish.

  • Red Wine: A glass of medium-bodied red wine, such as Merlot or Pinot Noir, enhances the flavors of the dish while providing a cozy touch to your meal.

  • Lemon Sorbet: For dessert, serve light lemon sorbet. Its citrusy freshness creates a bright finish after the comforting pizza, perfect for cleansing the palate.

  • Corn on the Cob: Sweet corn adds a fun, playful element to the table and a burst of flavor that kids and adults adore.

  • Crispy Brussels Sprouts: These bite-sized delights provide a nutty crunch that pairs beautifully with the creamy Monterey Chicken Spaghetti. Roasting them with a drizzle of balsamic can elevate their taste even more.

How to Store and Freeze Monterey Chicken Spaghetti

Fridge: Store in an airtight container for up to 3 days. This allows you to enjoy the creamy goodness later in the week without losing flavor.

Freezer: For longer storage, freeze in a freezer-safe container for up to 2 months. Be sure to label it so you can easily find your Monterey Chicken Spaghetti later.

Reheating: When ready to enjoy, thaw overnight in the fridge and reheat gently on the stovetop. Add a splash of milk to restore creaminess and flavor.

Airtight Precaution: Ensure the container is tightly sealed to prevent freezer burn and maintain the dish's rich taste.

Monterey Chicken Spaghetti Variations & Substitutions

Feel free to explore different twists on this classic dish, making it uniquely yours!

  • Turkey Swap: Use shredded turkey instead of chicken for a lighter protein that’s just as delicious.
    Boost the flavor profile with a sprinkle of herbs for freshness.

  • Ground Beef: Substitute cooked ground beef for a heartier option that packs in protein.
    This change adds a fun twist and pairs wonderfully with the creamy sauce.

  • Vegetarian Delight: Replace chicken with vibrant zucchini or roasted broccoli, switching to cream of mushroom soup.
    It’s a fantastic way to add veggies while still keeping things creamy and satisfying.

  • Gluten-Free Pasta: Opt for gluten-free spaghetti for a safe yet scrumptious meal for those with dietary restrictions.
    You won’t lose any of that creamy goodness with this swap!

  • Dairy Alternatives: Try lactose-free sour cream and cheese or vegan cheese for a dairy-free take on this dish.
    This way everyone can enjoy it without sacrificing texture or taste.

  • Spicy Kick: Add some chopped jalapeños or a dash of red pepper flakes to the sautéed vegetables for an extra kick.
    Feel the heat balance the creaminess perfectly!

  • Herb Infusion: Toss in fresh herbs like basil or thyme for a fresh garden essence.
    This adjustment takes your Monterey Chicken Spaghetti to a whole new level of flavor.

Looking for more delicious ideas? Check out my other recipes for Taco Spaghetti Cheesy or Honey Garlic Chicken for exciting flavors!

Expert Tips for Monterey Chicken Spaghetti

  • Don't Overcook Pasta: Always cook spaghetti until al dente; this prevents it from becoming mushy when mixed with the sauce.

  • Mix & Match Veggies: Feel free to customize with seasonal vegetables like zucchini or spinach; just ensure they're cooked until tender before combining.

  • Cheese Melting: Stir in cheese gradually; this helps achieve the perfect creamy texture throughout your Monterey Chicken Spaghetti.

  • Baking Tip: If you choose to bake, cover with foil for the first 15 minutes to keep the moisture locked in; remove it for the last 10 minutes for a golden crust.

  • Leftover Love: Store leftovers in an airtight container in the fridge; reheat gently on the stovetop, adding a splash of milk for creamy consistency.

Monterey Chicken Spaghetti Recipe FAQs

How do I choose ripe ingredients for my Monterey Chicken Spaghetti?
When selecting your ingredients, look for bright, firm bell peppers and fresh mushrooms, avoiding any with dark spots or mushiness. For onions, choose those that feel heavy for their size with dry, papery skins for the best flavor and sweetness.

How should I store leftover Monterey Chicken Spaghetti, and how long will it last?
Store your leftover Monterey Chicken Spaghetti in an airtight container in the fridge for up to 3 days. It’s vital to let it cool to room temperature before sealing to prevent moisture buildup, which could affect the quality.

Can I freeze Monterey Chicken Spaghetti, and what’s the best way to do it?
Absolutely! To freeze your Monterey Chicken Spaghetti, first let it cool completely. Then, transfer it to a freezer-safe container or heavy-duty freezer bag, removing as much air as possible. Label it with the date, and it can be stored for up to 2 months. For reheating, thaw it overnight in the fridge and gently reheat on the stovetop with a splash of milk.

What should I do if my sauce is too thick?
If you find your sauce is a bit thicker than you’d like, simply stir in a little more milk or chicken broth (start with 2 tablespoons) until you reach the desired consistency. Mixing over low heat helps the sauce adjust smoothly.

Are there any dietary considerations I should keep in mind for this recipe?
Yes! If you’re cooking for someone with dairy allergies, consider using lactose-free sour cream and cheese. For gluten-free options, substitute regular spaghetti with gluten-free pasta. It’s also great to offer a vegetarian version using cream of mushroom soup instead of cream of chicken soup!

Can I make Monterey Chicken Spaghetti ahead of time?
Very! You can assemble the dish in advance and refrigerate it for up to 24 hours before baking. Just cover the dish tightly with foil or plastic wrap. When you’re ready to serve, bake it directly from the refrigerator, adding an extra 5-10 minutes to the cooking time if needed. This makes mealtime a breeze for busy weeknights!

Monterey Chicken Spaghetti

Delicious Monterey Chicken Spaghetti Ready in 40 Minutes

Monterey Chicken Spaghetti is a creamy, customizable dish perfect for busy weeknights, combining flavors of chicken, pasta, and cheese in just 40 minutes.
Print Recipe Pin Recipe
Prep Time 10 minutes mins
Cook Time 30 minutes mins
Total Time 40 minutes mins
Servings: 4 servings
Course: Dinner
Cuisine: American
Calories: 550
Ingredients Equipment Method Nutrition Notes

Ingredients
  

For the Pasta
  • 8 ounces spaghetti
For the Sauce
  • 2 cups cooked chicken shredded
  • 1 can (10.5 oz) cream of chicken soup or cream of mushroom soup for vegetarian option
  • 1 cup sour cream reduced-fat for lighter option
  • 0.5 cup milk or chicken broth for lighter option
  • 0.5 teaspoon garlic powder
  • 0.5 teaspoon onion powder
  • to taste teaspoon salt
  • to taste teaspoon pepper
For the Veggies
  • 2 tablespoons olive oil
  • 0.5 cup onion chopped
  • 0.5 cup bell pepper chopped
  • 0.5 cup mushrooms sliced
For the Cheesy Layer
  • 1 cup Monterey Jack cheese shredded
  • 0.5 cup Cheddar cheese shredded
For Garnish
  • fresh parsley optional, chopped

Equipment

  • Large pot
  • Colander
  • Large skillet
  • Baking Dish
  • Tongs

Method
 

Cooking Instructions
  1. Cook the spaghetti according to package instructions, typically 8-10 minutes, until al dente. Drain and set aside.
  2. In a skillet, heat olive oil over medium heat. Add chopped onion, bell pepper, and mushrooms. Sauté for about 5-7 minutes until soft.
  3. Lower the heat and stir in cream of chicken soup and sour cream. Add garlic powder, onion powder, and milk. Stir until smooth and cook for 2-3 minutes.
  4. Add cooked chicken and half of the Monterey Jack cheese. Stir until melted and combined.
  5. Toss the cooked spaghetti with the sauce mixture until well coated.
  6. For baked version, preheat oven to 350°F (175°C). Transfer to baking dish, top with remaining Monterey Jack cheese, and bake for 20-25 minutes.
  7. Garnish with chopped parsley and serve warm.

Nutrition

Serving: 1servingCalories: 550kcalCarbohydrates: 60gProtein: 35gFat: 20gSaturated Fat: 10gPolyunsaturated Fat: 2gMonounsaturated Fat: 3gCholesterol: 80mgSodium: 800mgPotassium: 700mgFiber: 3gSugar: 4gVitamin A: 500IUVitamin C: 30mgCalcium: 300mgIron: 2mg

Notes

Customize with seasonal vegetables for variety, and store leftovers in an airtight container for up to 3 days.

Tried this recipe?

Let us know how it was!

Melt-in-Your-Mouth Ooey-Gooey Cheesy Garlic Chicken Wraps

November 23, 2025 by Grace Snow Leave a Comment

There's nothing quite like the moment when a warm, cheesy wrap comes out of the skillet, sending out its irresistible aroma and pulling you right in. Enter my ooey-gooey cheesy garlic chicken wraps—a delightful dish that combines tender chicken, rich cheese, and a hint of aromatic garlic, all snugly tucked in a soft tortilla. This easy recipe is perfect for busy weeknights or when you have guests over; it takes minimal time to prepare while offering maximum satisfaction. Plus, it's wonderfully customizable, whether you're looking for gluten-free options or craving a spicy kick. Imagine the joy of whipping up these wraps, knowing they'll quickly become a family favorite. Curious about how to create this delicious meal? Let’s dive in!

Why Will You Love These Wraps?

Quick Preparation: These wraps come together in a flash, making them perfect for busy weeknight dinners or last-minute gatherings.

Customizable Fillings: Get creative! Swap in different proteins, veggies, or spices to suit your taste—whether you prefer a spicy kick with jalapeños or a veggie-packed version with sautéed onions.

Comfort Food Vibes: The combination of gooey cheese and savory chicken wrapped in crispy tortillas delivers ultimate comfort, reminding you of family meals.

Crowd-Pleaser: These wraps are sure to impress guests and family alike, making them an excellent addition to any gathering.

Easy Make-Ahead Option: Prepare them in advance, and simply warm them up when you're ready to serve. Check out how these cheesy garlic chicken wraps pair beautifully with a fresh green salad or seasoned potato wedges for a complete meal!

Ooey-Gooey Cheesy Garlic Chicken Wraps Ingredients

For the Filling
• Chicken – Use tender grilled chicken for a hearty base; rotisserie chicken is a convenient substitute if you're short on time.
• Garlic – Fresh minced garlic brings the boldest flavor; use garlic powder in a pinch if needed.
• Olive Oil – Essential for sautéing; swap with butter or a neutral oil for different taste preferences.
• Cheese (e.g., Cheddar & Mozzarella) – The gooeyness is unbeatable; try pepper jack for a spicy twist or gouda for extra creaminess.

For the Wrap
• Tortillas – Encapsulates all the deliciousness; choose gluten-free tortillas if needed for dietary restrictions.
• Butter – Used for toasting the wraps, enhancing flavor; olive oil serves as a lighter alternative for a crispy finish.

For Garnish
• Parsley (optional) – Adds a pop of color and freshness to your finished wraps; feel free to omit if desired.

Now that you have all the ingredients ready, you’re just a few steps away from enjoying these ooey-gooey cheesy garlic chicken wraps!

Step‑by‑Step Instructions for Ooey-Gooey Cheesy Garlic Chicken Wraps

Step 1: Cook Chicken
Begin by preheating your oven to 375°F (190°C) if baking. Season your chicken breast or thighs with salt and pepper, then cook them by either baking for 25–30 minutes or sautéing on medium heat for about 7-10 minutes until fully cooked through and golden. Once done, let them cool slightly before dicing into bite-sized pieces for the ooey-gooey cheesy garlic chicken wraps.

Step 2: Sauté Garlic
In a large skillet, heat 2 tablespoons of olive oil over medium heat. Add 3-4 minced garlic cloves and sauté for 30 seconds to 1 minute until they turn golden and fragrant, taking care not to burn them. The aroma will fill your kitchen, signaling that it's time to proceed to the next step of creating your delicious filling.

Step 3: Combine Filling
Add your cooked and diced chicken to the skillet with the sautéed garlic, tossing to evenly coat the chicken in that lovely garlic flavor. Remove the skillet from heat and add 1 cup of shredded cheese, such as a blend of cheddar and mozzarella. Stir until the cheese starts to melt and create a gooey filling for your wraps—this ooey-gooey cheesy garlic chicken mixture is what makes these wraps irresistible!

Step 4: Prepare Wraps
Lay a tortilla flat on a clean surface and spoon a generous amount of the cheesy chicken mixture into the center. Carefully fold the sides of the tortilla inwards and roll it up tightly, securing all the delicious filling inside. Repeat this process with the remaining tortillas until your fillings are all wrapped up securely, ready for toasting.

Step 5: Toast Wraps
In the same skillet, melt 1 tablespoon of butter over medium heat. Place the wraps seam-side down in the skillet and cook for 2-3 minutes until they develop a golden brown, crispy exterior. Carefully flip the wraps and toast the other side for an additional 2-3 minutes. This step is crucial for achieving that delightful crunch on the outside of your ooey-gooey cheesy garlic chicken wraps.

Step 6: Serve
After toasting, let the wraps rest for 1-2 minutes to cool slightly before slicing them in half diagonally. If desired, garnish with freshly chopped parsley for a pop of color and added flavor. Serve these delicious, warm wraps with a set of your favorite dipping sauces or a fresh green salad, and enjoy the cheesy goodness together with family and friends!

Storage Tips for Ooey-Gooey Cheesy Garlic Chicken Wraps

Room Temperature: Enjoy your cheesy garlic chicken wraps fresh and warm out of the skillet. If left at room temperature, consume within 2 hours for the best taste and safety.

Fridge: Store any leftovers in an airtight container for up to 2 days. To maintain the cheesy goodness, wrap them tightly in foil before placing them in the container.

Freezer: For longer storage, freeze the wraps tightly wrapped in plastic wrap and then in aluminum foil for up to 2 months. Thaw in the fridge overnight before reheating.

Reheating: To revive the ooey-gooey greatness, heat on a skillet over medium-low heat for about 5 minutes per side or until warmed through and crispy again. Avoid microwaving to keep the texture delightful!

What to Serve with Cheesy Garlic Chicken Wraps

The perfect meal is all about balance and flavor; these cheesy wraps deserve delightful companions to elevate your dining experience.

  • Fresh Green Salad: A light, crisp salad with mixed greens and a tangy vinaigrette complements the rich flavors of the wraps. It adds freshness and balances the cheesy goodness perfectly.
  • Seasoned Potato Wedges: Crispy, herbed potato wedges bring a satisfying crunch, while their warmth and heartiness make for a comforting side alongside the ooey-gooey cheesy garlic chicken wraps.
  • Tomato Soup: A bowl of velvety tomato soup for dipping provides a luscious contrast to the crispy wraps. The acidity of the tomatoes cuts through the richness of the cheese, creating harmony on your plate.
  • Roasted Vegetables: Mixed roasted veggies, like bell peppers and zucchini, add vibrant colors and a slight sweetness that pairs beautifully with the savory chicken. Plus, you sneak in some healthy goodness!
  • Coleslaw: A crunchy, tangy coleslaw adds a refreshing crispness that balances the warm, gooey filling. It’s a delightful textural contrast that lifts each bite.
  • Herbal Iced Tea: Cool down with a glass of herbal iced tea, lightly sweetened, which refreshes the palate without overpowering the wraps.
  • Guacamole: A side of creamy guacamole contributes a rich, buttery flavor and enhances the wraps' taste, making each bite even more enjoyable.
  • Salsa: A zesty salsa, whether fruity or spicy, offers an exciting kick that pairs perfectly with the cheesy nature of your wraps while providing a burst of freshness.
  • Cheesy Garlic Bread: For those who can’t get enough cheese, a side of buttery, toasted garlic bread is an indulgent treat that resonates with the wraps' flavor profile while offering a delightful crunch.
  • Chocolate Mousse: For dessert, a silky chocolate mousse provides a luxuriously rich end to the meal, contrasting with the savory elements while satisfying a sweet tooth.

Expert Tips for Ooey-Gooey Cheesy Garlic Chicken Wraps

  • Hot Chicken Mix: Ensure the chicken is hot when you stir in the cheese; this helps it melt beautifully, creating that ooey-gooey texture.

  • Secure Filling: Always start cooking the wraps seam-side down. This helps to keep the filling securely tucked inside as they toast.

  • Cook in Batches: If making multiple wraps, work in batches to avoid overcrowding the skillet. This ensures each wrap gets nice and crispy, enhancing the overall flavor.

  • Avoid Soggy Wraps: Don't microwave leftovers. Instead, reheat them in a skillet or toaster oven, so the wraps stay crispy and enjoyable.

  • Flavor Variations: Don’t hesitate to mix up the spices! Adding a pinch of paprika or cayenne to the chicken enhances the flavor and complements the cheesy goodness.

Make Ahead Options

These ooey-gooey cheesy garlic chicken wraps are perfect for meal prep, allowing busy cooks to save time throughout the week! You can prepare the chicken filling (chicken, garlic, and cheese) up to 24 hours in advance, just refrigerate it in an airtight container to maintain its flavor and freshness. When you’re ready to serve, simply reheat the filling in a skillet, allowing the cheese to melt sufficiently. Assemble your wraps with fresh tortillas, then toast them as per the recipe instructions. This way, you’ll still have that delightful crispy exterior and warm, cheesy filling, making your meal just as delicious as if you made it fresh that day!

Ooey-Gooey Cheesy Garlic Chicken Wraps Variations

Feeling inspired? Customize your cheesy garlic chicken wraps with these delightful twists that tickle your taste buds and elevate your meal!

  • Gluten-Free: Swap regular tortillas for gluten-free options to accommodate dietary needs without sacrificing flavor.
  • Spicy Kick: Add chopped jalapeños or hot sauce to the filling for a fiery flavor boost that adds excitement to each bite.
  • Veggie-Packed: Toss in sautéed vegetables like zucchini, bell peppers, or spinach to enhance nutrition and colorful appeal.

For a delightful crunch, try adding some thinly sliced cucumbers or radishes in the wrap. They add freshness, balancing the gooey cheese beautifully.

  • Smoky Flavor: Incorporate smoked paprika or chipotle powder into the chicken mix to introduce a warm, smoky depth.
  • Creamy Alternative: Substitute regular cheese with cream cheese or a cheese spread for an even richer, creamier filling.

You might love trying a blend of ricotta and mozzarella; it brings a unique twist that's simply decadent!

  • Protein Swap: Use shredded rotisserie chicken for an even quicker meal or replace chicken with cooked ground turkey or beef for a different protein flavor.
  • Cheese Variety: Get creative! Try using pepper jack for extra heat, or even a blend of cheeses for a more complex taste.

Want more hand-held goodness? Don't miss out on trying these with a side of Cheesy Garlic Bread, or enjoy them with a refreshing salad alongside your Crock Pot Chicken for a full meal experience!

Ooey-Gooey Cheesy Garlic Chicken Wraps Recipe FAQs

What type of chicken is best for this recipe?
I recommend using tender grilled chicken for a hearty base. If you’re short on time, rotisserie chicken is a fantastic substitute. Just shred it and mix it into the filling for convenience without sacrificing flavor!

How should I store leftover wraps?
Store any leftover cheesy garlic chicken wraps in an airtight container in the fridge for up to 2 days. To maintain the cheesy goodness and crispiness, wrap them tightly in foil before placing them in the container.

Can I freeze the wraps?
Absolutely! For longer storage, wrap each cheesy garlic chicken wrap tightly in plastic wrap and then in aluminum foil. They can be frozen for up to 2 months. When you're ready to enjoy, thaw them in the fridge overnight before reheating.

What should I do if my wraps get soggy?
To prevent soggy wraps, avoid microwaving leftovers. Instead, reheat them in a skillet over medium-low heat for about 5 minutes per side or until warmed through and crispy again. This way, you’ll bring back that delightful texture!

What dietary adjustments can I make?
Feel free to customize based on dietary needs! Use gluten-free tortillas for a gluten-free option, incorporate more veggies for a healthier alternative, or choose low-fat cheese to reduce calories. Remember, the more the merrier—get creative with your fillings!

How can I tell if my garlic is fresh?
Fresh garlic should be firm and have a strong aroma. If it's sprouting green shoots or has dark spots all over, it’s best to toss it. Fresh minced garlic adds the boldest flavor to your ooey-gooey cheesy garlic chicken wraps, enhancing their taste beautifully!

Ooey-Gooey Cheesy Garlic Chicken Wraps

Melt-in-Your-Mouth Ooey-Gooey Cheesy Garlic Chicken Wraps

Enjoy these ooey-gooey cheesy garlic chicken wraps featuring tender chicken, rich cheese, and garlic, all wrapped in a soft tortilla.
Print Recipe Pin Recipe
Prep Time 10 minutes mins
Cook Time 30 minutes mins
Resting Time 2 minutes mins
Total Time 42 minutes mins
Servings: 4 wraps
Course: Dinner
Cuisine: American
Calories: 350
Ingredients Equipment Method Nutrition Notes

Ingredients
  

For the Filling
  • 2 cups cooked grilled chicken or rotisserie chicken
  • 4 cloves fresh minced garlic
  • 2 tablespoons olive oil or butter
  • 1 cup shredded cheese e.g., Cheddar & Mozzarella
For the Wrap
  • 4 pieces tortillas gluten-free if needed
  • 1 tablespoon butter for toasting
For Garnish
  • parsley optional

Equipment

  • Skillet
  • Oven
  • Cutting Board
  • Knife

Method
 

Step-by-Step Instructions
  1. Preheat your oven to 375°F (190°C). Season chicken with salt and pepper, then cook by baking for 25–30 minutes or sautéing on medium heat for 7-10 minutes until fully cooked. Cool slightly and dice.
  2. Heat 2 tablespoons of olive oil in a large skillet over medium heat. Add 3-4 minced garlic cloves and sauté for 30 seconds to 1 minute until golden and fragrant.
  3. Combine cooked chicken in the skillet with sautéed garlic. Toss to coat, then add 1 cup of shredded cheese. Stir until cheese starts to melt.
  4. Lay a tortilla flat, spoon cheesy chicken mixture into the center, fold sides inwards, and roll tightly. Repeat with remaining tortillas.
  5. Melt 1 tablespoon of butter in the skillet over medium heat. Place wraps seam-side down and cook for 2-3 minutes until golden brown. Flip and toast the other side for another 2-3 minutes.
  6. Allow the wraps to rest for 1-2 minutes, slice in half, and garnish with parsley if desired. Serve warm with dipping sauces or a salad.

Nutrition

Serving: 1wrapCalories: 350kcalCarbohydrates: 25gProtein: 20gFat: 18gSaturated Fat: 8gPolyunsaturated Fat: 1gMonounsaturated Fat: 5gCholesterol: 60mgSodium: 600mgPotassium: 400mgFiber: 2gSugar: 1gVitamin A: 200IUVitamin C: 1mgCalcium: 200mgIron: 1mg

Notes

These wraps are easily customizable with different proteins or spices and can be prepared in advance for convenience. Store leftovers in an airtight container for up to 2 days.

Tried this recipe?

Let us know how it was!

Savory Teriyaki Chicken Recipe Perfect for Busy Nights

November 23, 2025 by Grace Snow Leave a Comment

The sizzling sound of chicken thighs meeting a hot skillet fills the air, instantly making my kitchen feel like a cozy retreat. With just a handful of ingredients, I dive into preparing this delightful Teriyaki Chicken Recipe, a dish that promises to turn any busy weeknight into a flavorful celebration. The sweet and savory teriyaki sauce, infused with soy sauce and ginger, not only complements the juicy chicken but also transforms the mundane into something extraordinary. What I love most is how effortlessly this meal comes together—perfect for those nights when time is short but the desire for a homemade feast is high. Plus, it can easily be customized for spice lovers or those seeking a veggie twist. Ready to elevate your dinner routine? Let’s get cooking!

Why is Teriyaki Chicken So Beloved?

Quick Preparation: This dish comes together in under 30 minutes, making it perfect for busy weeknights.

Flavor Explosion: The harmonizing flavors of sweet soy sauce and fresh ginger create a mouthwatering glaze that everyone will love.

Versatile Options: Easily adjust the recipe for spice enthusiasts or switch to a veggie version with tofu for a refreshing twist.

Crowd-Pleaser: Serve it alongside fluffy rice or vibrant stir-fried vegetables for a meal that satisfies even the pickiest eaters.

Easy Storage: Leftovers hold up beautifully in the fridge, making this dish a fantastic option for meal prep or quick lunches.

For a delightful variation, check out my Chipotle Lime Chicken. You’ll find that effortless and delicious meals like this one can truly transform your cooking routine!

Teriyaki Chicken Recipe Ingredients

• Get ready for a flavor-packed dish!

For the Chicken

  • Chicken Thighs – Juicy and tender; substitute with skinless chicken breasts for a leaner option.

For the Sauce

  • Soy Sauce – Offers saltiness and umami; use Tamari for a gluten-free Teriyaki Chicken Recipe.
  • Honey or Brown Sugar – Adds the perfect touch of sweetness; maple syrup can work as a substitute.
  • Rice Vinegar (or Apple Cider Vinegar) – Introduces acidity and tang; white vinegar is a suitable alternative.
  • Water – Adjusts the sauce consistency; low-sodium chicken broth adds extra flavor.
  • Fresh Ginger, minced – Imparts aromatic warmth and depth; if using ground ginger, reduce the quantity.
  • Garlic, minced – Enhances flavor with an irresistible savory kick; garlic powder serves as a quick substitute.
  • Vegetable Oil – Ideal for cooking the chicken; any neutral oil, like canola, works well.
  • Cornstarch mixed with water (slurry) – Thickens the sauce for a luscious glaze; arrowroot powder can also be used.
  • Salt and Pepper – Elevate overall taste; low-sodium alternatives can be used as needed.

For Garnish

  • Sesame Seeds – Adds visual appeal and a delightful crunch.
  • Chopped Green Onions – Freshness and color that brighten up the dish.

Step‑by‑Step Instructions for Teriyaki Chicken Recipe

Step 1: Prep the Sauce
In a small bowl, whisk together soy sauce, honey, rice vinegar, water, minced ginger, and garlic until well combined. This sweet and savory mixture lays the foundation for your Teriyaki Chicken. Allow the sauce to sit while you prepare the chicken, so the flavors meld beautifully together.

Step 2: Cook the Chicken
Heat a tablespoon of vegetable oil in a large skillet over medium-high heat. Once the oil is shimmering, season the chicken thighs with salt and pepper and carefully add them to the hot skillet. Sear the chicken for about 5-7 minutes on each side, or until they turn golden brown and reach an internal temperature of 165°F.

Step 3: Add the Sauce
Pour the prepared teriyaki sauce over the seared chicken thighs in the skillet. Stir gently to coat each piece evenly, allowing the sauce to start bubbling and caramelizing. Let this simmer for about 2-3 minutes, as the sauce envelops the chicken with its vibrant flavors, creating an irresistible glaze.

Step 4: Thicken the Sauce
Reduce the skillet's heat to low and prepare to thicken your sauce. Mix cornstarch with a bit of water to create a slurry, then add this to the skillet, stirring continuously. Cook for an additional 2-3 minutes until the sauce thickens and coats the chicken beautifully, achieving that glossy finish typical of a great Teriyaki Chicken.

Step 5: Serve and Garnish
Remove the skillet from heat and prepare to serve your Teriyaki Chicken. Plate the chicken over a bed of fluffy rice or alongside noodles, then sprinkle sesame seeds and chopped green onions on top for a burst of brightness. The delicious aroma and vibrant colors make this dish a feast for both the eyes and the palate.

Teriyaki Chicken Recipe Variations

Feel free to dive into these creative twists to make this Teriyaki Chicken Recipe uniquely yours!

  • Spicy Kick: Add red pepper flakes or sriracha to the sauce for an extra layer of heat. Adjust to your preference to create the perfect fiery addition to this dish.
  • Vegetarian Option: Swap the chicken for tofu or seitan, marinating them in the same sweet and savory sauce. The result is a delightful plant-based alternative that doesn’t skimp on flavor.
  • Crispy Chicken: After searing the chicken, pop it in the oven at 400°F for 10-15 minutes for an extra crispy finish. This will add a delightful crunch to elevate your meal.
  • Colorful Veggies: Stir in colorful veggies like bell peppers, snap peas, or broccoli during the last few minutes of cooking. Not only does this add nutrition, but it also makes the dish visually appealing and vibrant!
  • Soba Noodles: For a fun twist, serve the teriyaki chicken over soba noodles instead of rice. These noodles offer a nutty flavor and are perfect for soaking up that delicious sauce.
  • Citrus Zest: Add a splash of orange juice or zest to the sauce for a bright, refreshing flavor. Citrus adds a lively note that perfectly balances the sweetness of the teriyaki.
  • Garlic Lovers: Double the amount of garlic if you're a fan of its bold flavor. The extra garlic will create a savory aroma that makes the dish even more irresistible.
  • Store for Convenience: Consider doubling the recipe for easy meal prep! Store leftovers in the fridge for quick lunches, or freeze for tasty dinners later that can quickly be reheated. Don’t forget to check out my Crock Pot Chicken for an easy meal prep option that holds up beautifully throughout the week.

Each variation offers a delicious way to keep your meals fresh and exciting while enjoying the timeless flavors of teriyaki. Happy cooking!

Expert Tips for Teriyaki Chicken Recipe

  • Uniform Chicken Cuts: Ensure chicken pieces are uniform in size for even cooking. This helps achieve a perfectly golden-brown crust on all sides.

  • Don’t Rush the Sauce: Allow the teriyaki sauce to simmer properly to develop its flavors fully. A rushed sauce won’t achieve that rich, sticky glaze we love.

  • Thickness Matters: Always use the cornstarch slurry to thicken your sauce. Skipping this step results in a liquidy sauce that won’t cling well to your chicken.

  • Experiment with Spice: For a kick, add red pepper flakes or sriracha to your sauce. Start with a small amount and adjust to your taste for a personalized Teriyaki Chicken Recipe.

  • Veggie Add-Ins: Feel free to toss in vegetables like snow peas or bell peppers during the last few minutes of cooking, enhancing nutrition and adding vibrant colors.

  • Storing Leftovers: Store any leftover Teriyaki Chicken in an airtight container in the fridge for 3-4 days. This makes meal prep for the week a breeze!

Storage Tips for Teriyaki Chicken Recipe

Fridge: Store any leftover Teriyaki Chicken in an airtight container for up to 3-4 days. This keeps the flavors intact and preserves moisture.

Freezer: For longer storage, freeze the Teriyaki Chicken in a freezer-safe container for up to 2 months. Be sure to let it cool completely before freezing to avoid ice crystals.

Reheating: When ready to enjoy, thaw in the refrigerator overnight and reheat gently on the stovetop or microwave until heated through. This helps maintain the dish's delightful sauce and tenderness.

What to Serve with Teriyaki Chicken

Get ready to build a harmonious meal that perfectly complements the sweet and savory flavors of this succulent dish.

  • Fluffy Steamed Rice: A classic pairing, fluffy rice absorbs the rich teriyaki sauce, creating a delightful contrast with each bite.
  • Stir-Fried Vegetables: Colorful veggies sautéed in a touch of sesame oil add a crunchy texture and fresh taste, rounding out your dinner beautifully.
  • Cucumber Salad: Crisp and refreshing, a light cucumber salad with rice vinegar offers a cooling balance to the warm flavors of the chicken.
  • Soba Noodles: For a twist, serve teriyaki chicken over soba noodles, which soak up the sauce and add a nutty flavor element.
  • Sesame Garlic Green Beans: Sautéed green beans tossed with garlic and a sprinkle of sesame seeds lend a vibrant touch and enhance the meal's Asian flair.
  • Sweet and Sour Pineapple: For an extra zing, serve pineapple chunks on the side; the sweetness complements the savory sauce deliciously and adds a tropical twist.
  • Chilled Green Tea: A refreshing drink that cleanses the palate, green tea's subtle flavor complements the richness of the teriyaki chicken.
  • Mochi Ice Cream: For dessert, end your meal on a sweet note with mochi ice cream, providing a chewy texture that contrasts beautifully with the chicken's sticky glaze.

Make Ahead Options

These Teriyaki Chicken recipes are perfect for meal prep enthusiasts! You can prepare the teriyaki sauce up to 3 days in advance by combining the soy sauce, honey, rice vinegar, ginger, and garlic in an airtight container, then refrigerating it to maintain freshness. You can also marinate the chicken thighs in this sauce for up to 24 hours for an even deeper flavor. When you're ready to serve, simply cook the chicken as outlined, add the prepped sauce, thicken it with cornstarch, and your delicious meal will be just as satisfying as if you'd made it fresh. Taking these steps will save you time on busy weeknights, ensuring flavorful results without the last-minute rush!

Teriyaki Chicken Recipe FAQs

How do I choose the right chicken for Teriyaki Chicken?
Absolutely! For the juiciest and most tender experience, I recommend using chicken thighs. They have more fat and flavor compared to chicken breasts. If you’re looking for a leaner option, skinless chicken breasts work well too, just be mindful not to overcook them to keep them moist.

How should I store leftover Teriyaki Chicken?
Great question! Store any leftover Teriyaki Chicken in an airtight container in the refrigerator. It will stay fresh for about 3-4 days. Make sure it cools completely before sealing to preserve its deliciousness and prevent condensation.

Can I freeze Teriyaki Chicken?
Certainly! To freeze, let your cooked Teriyaki Chicken cool down first, then transfer it to a freezer-safe container or a zip-top bag. It can be enjoyed for up to 2 months. When you’re ready to eat, thaw overnight in the fridge and then reheat gently in a skillet for the best results.

What if my teriyaki sauce isn’t thickening?
Oh no! If your sauce isn't thickening, it might be due to skipping the cornstarch slurry. Here's how to fix it: Mix 1 tablespoon of cornstarch with 2 tablespoons of cold water to create a slurry. Stir it into your simmering sauce while constantly mixing. Cook on low until it reaches that desired glossy consistency—usually within about 2-3 minutes.

Are there any dietary considerations for this Teriyaki Chicken Recipe?
Very! For those with gluten sensitivities, simply swap regular soy sauce with tamari for a gluten-free Teriyaki Chicken option. If you’re cooking for your furry friends, avoid onion and garlic in sauces; they can be harmful to pets. Always check labels for any hidden allergens!

Can I add vegetables to my Teriyaki Chicken?
The more the merrier! You can definitely add veggies like bell peppers, snap peas, or broccoli during the last few minutes of cooking. This not only enhances nutrition but also brightens up the dish with color and texture. Enjoy experimenting with your favorite vegetables!

Teriyaki Chicken Recipe

Savory Teriyaki Chicken Recipe Perfect for Busy Nights

This Teriyaki Chicken Recipe is a quick and flavorful dish perfect for busy weeknights that combines juicy chicken thighs with a sweet and savory sauce.
Print Recipe Pin Recipe
Prep Time 10 minutes mins
Cook Time 20 minutes mins
Total Time 30 minutes mins
Servings: 4 servings
Course: Dinner
Cuisine: Japanese
Calories: 300
Ingredients Equipment Method Nutrition Notes

Ingredients
  

For the Chicken
  • 1 pound Chicken Thighs Juicy and tender; substitute with skinless chicken breasts for a leaner option.
For the Sauce
  • 1/2 cup Soy Sauce Offers saltiness and umami; use Tamari for a gluten-free option.
  • 1/4 cup Honey or Brown Sugar Adds the perfect touch of sweetness; maple syrup can work as a substitute.
  • 2 tablespoons Rice Vinegar Introduces acidity and tang; white vinegar is a suitable alternative.
  • 1/4 cup Water Adjusts the sauce consistency; low-sodium chicken broth adds extra flavor.
  • 1 tablespoon Fresh Ginger, minced Imparts aromatic warmth and depth.
  • 2 cloves Garlic, minced Enhances flavor with an irresistible savory kick.
  • 1 tablespoon Vegetable Oil Ideal for cooking the chicken; any neutral oil works well.
  • 1 tablespoon Cornstarch mixed with water (slurry) Thickens the sauce for a luscious glaze.
  • to taste Salt and Pepper Elevate overall taste.
For Garnish
  • 1 tablespoon Sesame Seeds Adds visual appeal and a delightful crunch.
  • 2 tablespoons Chopped Green Onions Freshness and color that brighten up the dish.

Equipment

  • Skillet
  • Mixing Bowl

Method
 

Preparation Steps
  1. In a small bowl, whisk together soy sauce, honey, rice vinegar, water, minced ginger, and garlic until well combined.
  2. Heat a tablespoon of vegetable oil in a large skillet over medium-high heat. Season the chicken thighs with salt and pepper and add them to the skillet. Sear for about 5-7 minutes on each side until golden brown.
  3. Pour the prepared teriyaki sauce over the chicken thighs in the skillet. Stir gently to coat, allowing the sauce to bubble and caramelize. Let this simmer for about 2-3 minutes.
  4. Mix cornstarch with a bit of water to create a slurry, then add this to the skillet, stirring continuously. Cook for an additional 2-3 minutes until the sauce thickens.
  5. Remove the skillet from heat and plate the chicken over rice or noodles, then sprinkle with sesame seeds and chopped green onions.

Nutrition

Serving: 1servingCalories: 300kcalCarbohydrates: 22gProtein: 24gFat: 12gSaturated Fat: 2gPolyunsaturated Fat: 2gMonounsaturated Fat: 7gCholesterol: 100mgSodium: 800mgPotassium: 400mgFiber: 1gSugar: 8gVitamin A: 100IUVitamin C: 2mgCalcium: 30mgIron: 2mg

Notes

Store any leftover Teriyaki Chicken in an airtight container in the fridge for 3-4 days. For freezing, cool completely before placing in a freezer-safe container for up to 2 months.

Tried this recipe?

Let us know how it was!

Delicious Chicken Bubble Biscuit Bake Casserole Your Family Will Love

November 23, 2025 by Grace Snow Leave a Comment

“Did you hear what the kids said at dinner last night? They called this Chicken Bubble Biscuit Bake Casserole the ‘ultimate cozy meal!’” I couldn’t help but smile as I watched their eyes light up while digging into this warm, comforting dish. With just 10 minutes of hands-on time, this casserole comes together swiftly, making it a go-to for busy weeknights. What I love most is its incredible adaptability—whether you're craving a cheesy ranch version, a spicy buffalo twist, or a veggie-packed option, everyone at the table can build their perfect bite. It’s not just a meal; it’s a heartwarming experience that even the pickiest eaters will appreciate. Ready to see how easy it is to whip up this family-friendly favorite? Let's dive right in!

Why is this casserole a crowd-pleaser?

Comforting and Hearty: This Chicken Bubble Biscuit Bake Casserole wraps everyone in warmth with its creamy sauce and fluffy biscuits. Quick Preparation: Just 10 minutes of active time means you can spend more moments enjoying dinner with your loved ones. Versatile Options: With variations like a cheesy ranch or a buffalo chicken twist, there’s something for everyone. Kid-Approved: Even the pickiest eaters will ask for seconds! Easily Made Ahead: Prep it the night before for a hassle-free family dinner. It’s guaranteed to become a favorite, just like our Honey Garlic Chicken Thighs or Crock Pot Chicken.

Chicken Bubble Biscuit Bake Casserole Ingredients

• Gather your essentials for this comforting meal:

For the Casserole

  • Cooked Chicken – Provides protein and essential flavor; shredded rotisserie chicken works best for time-saving.
  • Cream of Chicken Soup – Forms the creamy base; you can try cream of mushroom or celery for a flavor twist.
  • Sour Cream – Adds tanginess and creaminess; substitute Greek yogurt for a lighter version.
  • Milk – Enhances the creamy texture; any milk or non-dairy alternative will do.
  • Frozen Mixed Vegetables – Adds nutrition and color; peas, carrots, corn, and beans are all excellent choices.
  • Garlic Powder – For added flavor.
  • Onion Powder – Enhances the overall taste profile.
  • Salt & Pepper – Essential for seasoning.

For the Biscuits

  • Refrigerated Biscuit Dough – The star of the dish, creating pillowy textures; cut each biscuit into quarters before baking.
  • Shredded Cheese – Provides gooeyness and richness; cheddar is classic, but try a blend of mozzarella and Monterey Jack for extra flavor.
  • Melted Butter – Optional for brushing on top for added richness.

This Chicken Bubble Biscuit Bake Casserole is sure to delight your family with its warm embrace of flavors and textures!

Step‑by‑Step Instructions for Chicken Bubble Biscuit Bake Casserole

Step 1: Preheat the Oven
Start by preheating your oven to 350°F (175°C). While the oven warms up, take a moment to grease a 9x13-inch baking dish with your choice of cooking spray or butter. This will ensure your Chicken Bubble Biscuit Bake Casserole doesn’t stick and comes out perfectly golden.

Step 2: Combine the Ingredients
In a large mixing bowl, combine the cooked chicken, cream of chicken soup, sour cream, and milk. Stir in the frozen mixed vegetables, garlic powder, onion powder, salt, and pepper until everything is well-blended and smooth. The creamy mixture should look inviting and enticing, setting the foundation for your casserole.

Step 3: Add Biscuit Pieces
Next, take the quartered biscuit pieces and gently fold them into the creamy chicken mixture. Ensure that each biscuit piece is coated thoroughly, as this will help them soak up all the flavorful juices while baking. This harmonious blend is key to achieving the fluffy texture that makes the Chicken Bubble Biscuit Bake Casserole so delightful.

Step 4: Transfer to Baking Dish
Carefully transfer the mixture into the prepared baking dish, spreading it out evenly with a spatula. After leveling the top, sprinkle a generous amount of shredded cheese over the casserole. This cheesy layer will melt into the dish, adding a delicious gooeyness that enhances the overall comfort of your meal.

Step 5: Bake the Casserole
Cover your baking dish with aluminum foil and place it in the preheated oven. Bake for 20 minutes, allowing the flavors to meld together beautifully. After this initial time, remove the foil and continue baking for an additional 10-15 minutes. The casserole will be ready when the biscuits are puffed, golden brown, and cooked through.

Step 6: Serve and Enjoy
Once out of the oven, let your Chicken Bubble Biscuit Bake Casserole cool for a few minutes. If desired, brush the tops with melted butter for an added richness. Serve warm, and watch as your family digs into this comforting dish that’s sure to become a favorite at the dinner table!

Make Ahead Options

This Chicken Bubble Biscuit Bake Casserole is a perfect choice for those looking to save time during busy weeknights! You can prepare the entire casserole up to 24 hours in advance by assembling it in the baking dish, covering it tightly with plastic wrap, and storing it in the refrigerator. This ensures the flavors meld beautifully while maintaining freshness. If you want to prepare it even further ahead, you can freeze it for up to 2 months. Just be sure to bake it straight from frozen, adding an extra 10-15 minutes to the cooking time. When you’re ready to serve, simply uncover and bake as instructed for that delightful, comforting meal your family loves!

Chicken Bubble Biscuit Bake Casserole Variations

Feel free to explore delightful twists on this casserole that will make your family's taste buds dance with joy!

  • Cheesy Ranch Version: Stir in ranch seasoning to the creamy base for a zesty kick that enhances the dish's flavor profile.

  • Buffalo Chicken Twist: Mix buffalo sauce into the creamy mixture and swap for mozzarella cheese for a spicy and cheesy version that packs a punch.

  • Veggie Lover's Bake: Add steamed vegetables like broccoli, carrots, or peas for a colorful and nutritious boost. This can easily make the casserole a heartier meal option.

  • Loaded Casserole: Top with crispy bacon crumbles and a sprinkle of green onions before serving for an extra layer of flavor and texture. The smoky richness of the bacon pairs beautifully with the creamy base.

  • Turkey Swap: Use leftover Thanksgiving turkey instead of chicken for a delicious way to repurpose holiday leftovers. This variation is especially comforting and festive.

  • Dairy-Free Delight: Substitute sour cream and milk with coconut yogurt and unsweetened almond milk. You can still enjoy all the comforting flavors without the dairy!

  • Spicy Southwest Twist: Add black beans, corn, and taco seasoning for a south-of-the-border flair that transforms the casserole into a fiesta on your plate.

  • Herbed Mediterranean Style: Incorporate spinach, artichokes, and a blend of Italian herbs for a fresh and savory Mediterranean twist that will elevate your meal wonderfully.

With these exciting variations, your Chicken Bubble Biscuit Bake Casserole will never be boring! If you're looking for even more flavorful ideas, don't forget to check out our Honey BBQ Chicken or Chipotle Lime Chicken and Rice recipes too!

How to Store and Freeze Chicken Bubble Biscuit Bake Casserole

Fridge: Store leftovers in an airtight container for up to 4 days. Reheat gently in the microwave or oven, ensuring it’s heated through.

Freezer: If you prepare the casserole in advance, bake and cool it completely, then wrap tightly in foil. It can be frozen for up to 2 months.

Reheating: To reheat from frozen, bake it at 350°F (175°C) for about 45 minutes, covered with foil, then uncover for an additional 10-15 minutes until bubbly.

Make-Ahead Tips: Assemble the Chicken Bubble Biscuit Bake Casserole up to 24 hours ahead and store it in the fridge. Simply pop it in the oven when you're ready!

Expert Tips for Chicken Bubble Biscuit Bake Casserole

  • Prep Ahead: Prepare the casserole up to 24 hours in advance. Simply cover it and store in the fridge for a time-saving dinner option.
  • Avoid Soggy Biscuits: Ensure the biscuit pieces are coated but not overly saturated. This keeps them fluffy and avoids a mushy texture.
  • Customize Wisely: When substituting ingredients, like using Greek yogurt instead of sour cream, remember it may alter the creaminess of the Chicken Bubble Biscuit Bake Casserole slightly.
  • Check Doneness: Use a knife to ensure biscuits are fully cooked; it should come out clean without any dough sticking to it.
  • Leftovers Storage: Store any leftovers in an airtight container for up to 4 days, making for a quick and comforting lunch or dinner.

What to Serve with Chicken Bubble Biscuit Bake Casserole

This delightful casserole invites warm conversations around the table while pairing perfectly with a variety of tasty side dishes.

  • Simple Side Salad: Adds a fresh crunch and balances the creamy casserole with vibrant veggies and a light vinaigrette.

  • Garlic Bread: Perfect for mopping up every bit of creamy sauce, this crispy, buttery treat enhances the meal's comforting vibe.

  • Steamed Broccoli: The tender florets introduce a nutrient-packed green element that complements the dish's richness beautifully.

  • Honey Glazed Carrots: Their natural sweetness contrasts nicely with the savory flavors of the casserole, creating a delightful flavor harmony.

  • Roasted Root Vegetables: A medley of carrots, potatoes, and beets adds earthy flavors and hearty textures, making the meal more filling.

  • Fruit Salad: A light, refreshing option that adds sweetness and a splash of color, helping to cleanse the palate between bites.

  • Crisp White Wine: A chilled glass of Sauvignon Blanc or Pinot Grigio elevates the dining experience, enhancing flavors without overpowering the dish.

  • Chocolate Lava Cake: For a sweet finish, this decadent dessert provides a rich and gooey contrast to the comforting chicken casserole.

Chicken Bubble Biscuit Bake Casserole Recipe FAQs

How do I choose the best cooked chicken for this casserole?
Absolutely! For the best flavor and ease, I recommend using shredded rotisserie chicken. It saves time and adds a delicious, seasoned taste. If you're cooking chicken specifically for this dish, opt for boneless, skinless chicken breasts as they'll cook quickly and stay tender.

What is the best way to store leftovers?
Store your Chicken Bubble Biscuit Bake Casserole in an airtight container in the fridge for up to 4 days. Make sure to let it cool completely before sealing it up. When reheating, use the microwave or warm it up gently in the oven for the best experience!

Can I freeze this casserole?
Absolutely! To freeze, bake the casserole and let it cool completely. Wrap it tightly in aluminum foil or transfer it to a freezer-safe container. It can last for up to 2 months in the freezer. When you’re ready to enjoy, defrost overnight in the fridge and bake at 350°F (175°C) for about 45 minutes until it's heated through.

How do I ensure the biscuits are perfectly cooked?
To check if your biscuits are fully cooked, insert a knife into the center of the casserole—if it comes out clean, you're good to go! If you see any wet dough, pop it back in the oven for a few more minutes. This ensures that each bite is fluffy and delicious.

Are there any dietary considerations I should be aware of?
Great question! If you're accommodating guests with dietary restrictions, consider using gluten-free biscuit dough or non-dairy sour cream and milk alternative to make this Chicken Bubble Biscuit Bake Casserole friendly for different diets. Always double-check for allergies with ingredient swaps, especially with frozen vegetables.

What can I use if I don’t have cream of chicken soup?
If you don't have cream of chicken soup on hand, you can substitute it with cream of mushroom soup or a homemade white sauce. To make a simple white sauce, cook equal parts butter and flour (about 2 tablespoons each) together, then whisk in 1 cup of milk until thickened, and season with salt, pepper, and garlic powder for added flavor.

Chicken Bubble Biscuit Bake Casserole

Delicious Chicken Bubble Biscuit Bake Casserole Your Family Will Love

Chicken Bubble Biscuit Bake Casserole is the ultimate cozy meal, combining creamy sauce, fluffy biscuits, and versatile ingredients for a family-friendly dish.
Print Recipe Pin Recipe
Prep Time 10 minutes mins
Cook Time 35 minutes mins
Total Time 45 minutes mins
Servings: 6 servings
Course: Dinner
Cuisine: American
Calories: 450
Ingredients Equipment Method Nutrition Notes

Ingredients
  

For the Casserole
  • 2 cups cooked chicken shredded rotisserie chicken works best
  • 1 can cream of chicken soup can substitute with cream of mushroom or celery
  • 1 cup sour cream can substitute with Greek yogurt
  • 1/2 cup milk any milk or non-dairy alternative
  • 2 cups frozen mixed vegetables peas, carrots, corn, and beans are excellent choices
  • 1 teaspoon garlic powder
  • 1 teaspoon onion powder
  • to taste salt
  • to taste pepper
For the Biscuits
  • 1 can refrigerated biscuit dough cut each biscuit into quarters before baking
  • 1 cup shredded cheese cheddar or blend of mozzarella and Monterey Jack
  • 2 tablespoons melted butter optional for brushing on top

Equipment

  • 9x13-inch baking dish
  • Mixing Bowl
  • Spatula

Method
 

Step-by-Step Instructions
  1. Preheat your oven to 350°F (175°C) and grease a 9x13-inch baking dish.
  2. In a large mixing bowl, combine the cooked chicken, cream of chicken soup, sour cream, and milk. Stir in the frozen mixed vegetables, garlic powder, onion powder, salt, and pepper until well blended.
  3. Gently fold in the quartered biscuit pieces, ensuring they are coated thoroughly.
  4. Transfer the mixture into the prepared baking dish and sprinkle shredded cheese on top.
  5. Cover with aluminum foil and bake for 20 minutes. Then remove foil and bake for an additional 10-15 minutes until biscuits are puffed and golden brown.
  6. Let cool for a few minutes before serving. Brush the tops with melted butter if desired.

Nutrition

Serving: 1servingCalories: 450kcalCarbohydrates: 35gProtein: 30gFat: 22gSaturated Fat: 10gPolyunsaturated Fat: 1gMonounsaturated Fat: 10gCholesterol: 100mgSodium: 800mgPotassium: 600mgFiber: 3gSugar: 2gVitamin A: 20IUVitamin C: 15mgCalcium: 25mgIron: 10mg

Notes

This casserole can be prepared up to 24 hours in advance and stored in the fridge for easy reheating.

Tried this recipe?

Let us know how it was!

30-Minute Santa Fe Chicken Skillet for Bold Flavor Lovers

November 23, 2025 by Grace Snow Leave a Comment

Last week, I found myself in a culinary crunch. After a long day, the last thing I wanted was to settle for takeout. That’s when the idea of a Santa Fe Chicken Skillet danced into my mind—quick, comforting, and bursting with southwest flavors. With tender chicken, hearty black beans, sweet corn, and zesty Ro-tel tomatoes, this dish is ready in just 30 minutes, making it perfect for those busy nights when you crave something homemade. Plus, with melted cheese blanketing it all, you can’t help but feel a warm embrace from every bite. Whether you’re a seasoned home chef or just looking to spice up your weeknight routine, this skillet meal is a crowd-pleaser and a breeze to whip up. Are you ready to dive into a plate of colorful goodness? Let’s get cooking!

Why Choose Santa Fe Chicken Skillet?

Quick and Easy: Ready in just 30 minutes, this dish is perfect for busy nights when time is tight but you still want something delicious.

Bold Southwest Flavors: Combining zesty Ro-tel tomatoes, hearty black beans, and sweet corn, each bite bursts with exciting tastes that’ll transport your palate to the sunny Southwest.

Family-Friendly Appeal: With melted cheese bringing everything together, it’s sure to satisfy even the pickiest eaters. Pair it with a refreshing side salad to balance the flavors—check out some ideas for that here.

Customizable: Whether you want to go vegetarian or spice it up with jalapeños, this skillet adapts to your tastes, making it versatile for everyone at the table.

One-Pan Cleanup: Enjoy all the flavors without the fuss of multiple pots and pans! After a satisfying meal, just pop the skillet in the dishwasher.

Santa Fe Chicken Skillet Ingredients

Get ready to whip up a delightful dish that embodies southwest flavors!

For the Chicken

  • Chicken Breasts – Choose boneless, skinless for quicker cooking and lean protein.
  • Garlic Powder – Use this for a milder garlicky flavor; fresh garlic can boost potency.
  • Chili Powder – Adjust to your spice preference for customizing the heat.
  • Salt & Pepper – Essential seasonings that enhance the overall flavors; taste as you go!
  • Olive Oil – Ideal for sautéing; avocado oil is a great substitute if you prefer.

For the Skillet

  • Onion – Opt for yellow or white for the best sweetness.
  • Ro-tel Diced Tomatoes & Green Chilies – These provide acidity and a mild kick; any canned diced tomatoes can replace them but may lack the same zest.
  • Black Beans – A fantastic source of protein and fiber; pinto beans or refried beans can switch things up!
  • Corn – Adds subtle sweetness; frozen corn works just as well if canned isn’t on hand.
  • Smoked Paprika – Essential for that signature smoky flavor; regular paprika is fine in a pinch.

For Topping

  • Mexican Cheese Blend – Melts beautifully and enhances flavor; cheddar or Monterey Jack can be used instead.
  • Fresh Cilantro – A vibrant herb that brightens up the dish; feel free to omit for a simpler taste.

This Santa Fe Chicken Skillet is not just a meal; it's your ticket to vibrant southwest flavors in a flash!

Step‑by‑Step Instructions for Santa Fe Chicken Skillet

Step 1: Preheat the Oven
Begin by preheating your oven to 400°F (200°C) and position the oven rack in the middle. This will ensure an even bake for the Santa Fe Chicken Skillet later on. While the oven heats, gather your ingredients and prepare your skillet so you can move swiftly through the steps ahead.

Step 2: Prepare the Chicken
Slice the boneless, skinless chicken breasts into four cutlets. Season generously with garlic powder, chili powder, salt, and pepper, ensuring each piece is well coated. This flavorful seasoning will infuse the chicken with the bold southwest flavors characteristic of the Santa Fe Chicken Skillet, setting a tasty foundation for your dish.

Step 3: Sear the Chicken
In an oven-safe skillet, heat 2 tablespoons of olive oil over medium-high heat until shimmering. Carefully add the seasoned chicken cutlets and pan-fry for about 3-4 minutes on each side until they reach a golden-brown color. This browning not only enhances flavor but also creates a beautiful appearance that will make your Santa Fe Chicken Skillet vibrant.

Step 4: Sauté the Onions
Once the chicken is browned, remove the cutlets from the skillet and set them aside. In the same skillet, add chopped onions and sauté for about 5 minutes, stirring frequently. They should become soft and translucent, absorbing all the delightful flavors left behind by the chicken, which will add depth to your Santa Fe Chicken Skillet.

Step 5: Add the Remaining Ingredients
To the sautéed onions, add the Ro-tel diced tomatoes and green chilies, black beans, corn, and smoked paprika. Stir well, allowing the mixture to heat through for about 3-4 minutes. This step combines all the rich flavors, creating a hearty base for your dish while the aromatic spices fill your kitchen with enticing scents.

Step 6: Combine Chicken and Mixture
Return the seared chicken cutlets to the skillet, nestling them in the flavorful mixture. Spoon some of the bean and corn concoction over the chicken, ensuring it's covered well. Sprinkle a generous amount of the Mexican cheese blend on top, creating a cheesy layer that will melt beautifully as it bakes.

Step 7: Bake to Perfection
Transfer your Santa Fe Chicken Skillet to the preheated oven and bake for 5-7 minutes, or until the chicken reaches an internal temperature of 165°F (74°C) and the cheese is bubbling and melted. For an extra touch, you can broil the dish for an additional minute or two, giving the cheese a lovely brown crust.

Step 8: Garnish and Serve
Once out of the oven, let the skillet rest for a moment to cool slightly. Garnish with freshly chopped cilantro for a pop of color and flavor before serving. This final touch not only enhances the presentation but also provides a fresh, vibrant taste that complements the hearty elements of your Santa Fe Chicken Skillet.

Make Ahead Options

These Santa Fe Chicken Skillet preparations are a lifesaver for busy weeknights! You can season and sear the chicken cutlets, then store them in the refrigerator for up to 24 hours. Additionally, the bean and corn mixture can be prepared a day in advance and refrigerated too, making it quick to combine when ready to cook. When you're prepped, simply layer the sautéed mixture and chicken in the skillet, sprinkle cheese on top, and bake for 5-7 minutes until bubbly. To ensure quality, keep the components stored in airtight containers, which will help maintain freshness. This way, you'll enjoy a delicious homemade meal with minimal effort!

Santa Fe Chicken Skillet Variations

Feel free to explore your creativity in the kitchen and add a personal touch to this mouthwatering dish!

  • Vegetarian Swap: Replace the chicken with sautéed zucchini or mushrooms for a hearty vegetarian option that’s just as satisfying.

  • Spicy Kick: Add diced jalapeños or a splash of hot sauce to the mixture for an extra layer of heat that will delight spice lovers.

  • Chickpeas Upgrade: Use chickpeas instead of black beans for a different texture and nutty flavor, packed with protein too!

  • Flavor Boost: Stir in a tablespoon of lime juice right before serving to brighten up the dish and enhance those southwest flavors.

  • Smoky Variants: Incorporate a chipotle pepper in adobo sauce for a smoky depth that pairs beautifully with the other ingredients—don’t forget to check out my Chipotle Lime Chicken for more ideas!

  • Creamy Addition: Mix in a dollop of sour cream or Greek yogurt before serving, adding a creamy contrast that complements the flavors.

  • Crispy Topping: Top it with crushed tortilla chips or panko breadcrumbs and broil for a couple of minutes until golden for an added crunch that everyone will love.

  • Nutty Optional: Toss in toasted pumpkin seeds for a delightful crunch and a nutrition boost—this is a great way to add a twist without changing much of your original recipe!

Cooking is all about experimentation, and these variations will keep your Santa Fe Chicken Skillet exciting each time you prepare it!

What to Serve with Santa Fe Chicken Skillet?

Looking to enhance your meal experience with some delightful sides that perfectly complement your Santa Fe Chicken Skillet?

  • Creamy Avocado Salad:
    This refreshing salad adds creaminess and a hint of coolness, balancing the skillet's bold flavors. Toss diced avocados with lime juice, tomatoes, and red onion for a vibrant touch.

  • Cilantro Lime Rice:
    Fluffy rice infused with lime and fresh cilantro pairs beautifully with the southwest spices, providing a light and zesty contrast to your dish.

  • Roasted Vegetables:
    A medley of colorful seasonal veggies like bell peppers, zucchini, and carrots roasted to perfection adds texture and nutrition, rounding out the meal beautifully.

  • Cornbread Muffins:
    Soft and slightly sweet, cornbread complements the savory skillet, making each bite a taste of comfort. Serve warm for that extra touch of home.

  • Street Corn Salad:
    Grilled corn mixed with mayo, cotija cheese, and spices brings a sweet and creamy element that echoes the flavors in your skillet.

  • Margaritas:
    Sip on a refreshing margarita to elevate your dining experience. The citrusy drink pairs perfectly with the southwest flair, making it a fun addition.

  • Chocolate Flan:
    For dessert, indulge in a silky chocolate flan. Its rich, creamy texture and subtle sweetness are a delightful way to conclude your meal.

  • Tortilla Chips:
    Serve with some crispy tortilla chips for a fun, crunchy side. They provide a delightful contrast to the rich ingredients of the skillet.

  • Pico de Gallo:
    Fresh pico de gallo adds brightness and a punch of flavor. The mix of tomatoes, onion, cilantro, and lime enhances the overall taste of the meal.

  • Chilled White Wine:
    A nice glass of chilled white wine enhances the experience, bringing a refreshing note that pairs wonderfully with the vibrant flavors of the skillet.

How to Store and Freeze Santa Fe Chicken Skillet

Fridge: Store any leftovers in an airtight container for up to 3 days. This keeps the flavors fresh and ready for reheating!

Freezer: You can freeze the Santa Fe Chicken Skillet for up to 3 months. Just ensure it’s cooled completely, then transfer to a freezer-safe container, sealing it tightly to prevent freezer burn.

Reheating: To enjoy your leftovers, reheat in the microwave in short increments or place in an oven-safe dish and warm in the oven at 350°F (175°C) until heated through. The cheese will become melty and delightful again!

Avoid Overstoring: While this dish is delicious, consuming it within the recommended timeframes ensures the best taste and texture, preserving the unique southwest flavors.

Expert Tips for Santa Fe Chicken Skillet

  • Preheat Properly: Ensure your skillet is hot before adding chicken to prevent sticking and achieve that beautiful sear.

  • Season Everything: Don’t skip seasoning your beans and corn mixture with the same spices used on the chicken; it enhances the overall flavor.

  • Oven-Safe Skillet: If your skillet isn’t oven-safe, be sure to transfer the mixture to a baking dish before baking to avoid any kitchen mishaps.

  • Customize Spice Levels: Adjust the chili powder according to your taste; if you're sensitive to heat, start with less and add more as needed.

  • Leftover Magic: If you have leftovers, mix them into a salad or wrap for a quick lunch the next day to avoid waste and enjoy the flavors again!

Santa Fe Chicken Skillet Recipe FAQs

How do I select ripe ingredients for my Santa Fe Chicken Skillet?
Absolutely! For the best flavors, choose fresh ingredients. Look for chicken breasts that are pink and plump without any dark spots. When selecting Ro-tel tomatoes, aim for cans that are sealed and undamaged. Fresh corn should have bright yellow kernels and a green husk. If you’re using onions, ensure they’re firm without any soft spots or sprouting.

How should I store leftovers from the Santa Fe Chicken Skillet?
Very! You can store leftovers in an airtight container in the fridge for up to 3 days. Be sure to let the dish cool down before sealing it. To reheat, simply use the microwave or place it in an oven-safe dish at 350°F (175°C) until warmed through. This way, you maintain that delicious flavor and texture!

Can I freeze Santa Fe Chicken Skillet?
Yes, you can! For freezing, allow the dish to cool completely. Transfer it to a freezer-safe container or freezer bag, ensuring no air is trapped inside to prevent freezer burn. The Santa Fe Chicken Skillet can be frozen for up to 3 months. When ready to enjoy, thaw it overnight in the fridge before reheating it in the oven or microwave.

What should I do if my chicken is dry after cooking?
Don't worry! If you find your chicken is overcooked and dry, consider making a quick sauce to drizzle over it for moisture. Mix a little sour cream or Greek yogurt with lime juice and cilantro, then pour it over the chicken just before serving. It adds creaminess and brings the dish back to life!

Are there any dietary considerations for the Santa Fe Chicken Skillet?
Certainly! If you have dietary preferences or restrictions, this dish is versatile. For a gluten-free option, ensure all your ingredients (like spices and beans) are certified gluten-free. If serving to kids or individuals sensitive to spice, reduce the chili powder. Also, for vegetarians, substitute the chicken with sautéed mushrooms or zucchini. Just make sure to adjust cooking times accordingly!

How can I avoid soggy beans and corn in my Santa Fe Chicken Skillet?
Great question! To prevent sogginess, use canned beans and corn that have been drained and rinsed properly before adding them to the skillet. If you prefer using frozen corn, give it a quick sauté until heated through but not overcooked. This will help maintain the texture and ensure every bite is delightful!

Santa Fe Chicken Skillet

30-Minute Santa Fe Chicken Skillet for Bold Flavor Lovers

This Santa Fe Chicken Skillet is quick, comforting, and bursting with bold southwest flavors, perfect for busy weeknights.
Print Recipe Pin Recipe
Prep Time 10 minutes mins
Cook Time 20 minutes mins
Total Time 30 minutes mins
Servings: 4 servings
Course: Dinner
Cuisine: Southwest
Calories: 450
Ingredients Equipment Method Nutrition Notes

Ingredients
  

For the Chicken
  • 1 pound boneless, skinless chicken breasts
  • 1 teaspoon garlic powder
  • 1 teaspoon chili powder adjust to taste
  • to taste salt & pepper
  • 2 tablespoons olive oil can substitute with avocado oil
For the Skillet
  • 1 medium onion yellow or white
  • 1 can Ro-tel Diced Tomatoes & Green Chilies can substitute with any canned diced tomatoes
  • 1 can black beans can substitute with pinto or refried beans
  • 1 cup corn frozen corn works as well
  • 1 teaspoon smoked paprika regular paprika can be used in a pinch
For Topping
  • 1 cup Mexican cheese blend can substitute with cheddar or Monterey Jack
  • to taste fresh cilantro omit if desired

Equipment

  • Skillet
  • Oven

Method
 

Cooking Instructions
  1. Preheat your oven to 400°F (200°C) and position the oven rack in the middle.
  2. Slice the chicken breasts into four cutlets. Season with garlic powder, chili powder, salt, and pepper.
  3. Heat olive oil in an oven-safe skillet over medium-high heat. Add the chicken and pan-fry for 3-4 minutes on each side until golden brown.
  4. Remove the chicken and set aside. In the same skillet, sauté chopped onions for about 5 minutes until soft.
  5. Add Ro-tel tomatoes, black beans, corn, and smoked paprika to the onions. Heat through for 3-4 minutes.
  6. Return the chicken to the skillet and spoon the bean and corn mixture over it. Sprinkle cheese on top.
  7. Bake in the oven for 5-7 minutes until the chicken reaches 165°F and the cheese is melted.
  8. Garnish with chopped cilantro before serving.

Nutrition

Serving: 1servingCalories: 450kcalCarbohydrates: 35gProtein: 30gFat: 20gSaturated Fat: 8gPolyunsaturated Fat: 2gMonounsaturated Fat: 8gCholesterol: 75mgSodium: 550mgPotassium: 600mgFiber: 10gSugar: 5gVitamin A: 500IUVitamin C: 15mgCalcium: 200mgIron: 3mg

Notes

Enjoy all the flavors without the fuss of multiple pots and pans! Leftovers can be used in salads or wraps.

Tried this recipe?

Let us know how it was!
  • « Previous Page
  • 1
  • …
  • 98
  • 99
  • 100
  • 101
  • 102
  • …
  • 180
  • Next Page »

Welcome!

Hi, I’m Grace, a Sydney-based home cook with a passion for bold flavors and trending ingredients. Whether you’re a busy beginner or a seasoned foodie, you’ll find dishes here that are fresh, fun, and full of flavor.

More about me

Popular Recipes

  • Butter Pecan Cookies
    Irresistibly Soft Butter Pecan Cookies for Cozy Moments
  • Decadent Turtle Bars
    Decadent Turtle Bars: Indulge in Sweet Gooey Perfection
  • Salted Caramel Butter Bars
    Decadent Salted Caramel Butter Bars You Can't Resist
  • Easy Italian Pasta Salad
    Easy Italian Pasta Salad: A Summer Delight to Share

Footer

↑ back to top

About

  • Privacy Policy
  • Disclaimer
  • Terms & Conditions

Newsletter

  • Sign Up! for emails and updates

Contact

  • About me
  • Contact me

Copyright © 2025 TastyTrendIngredients