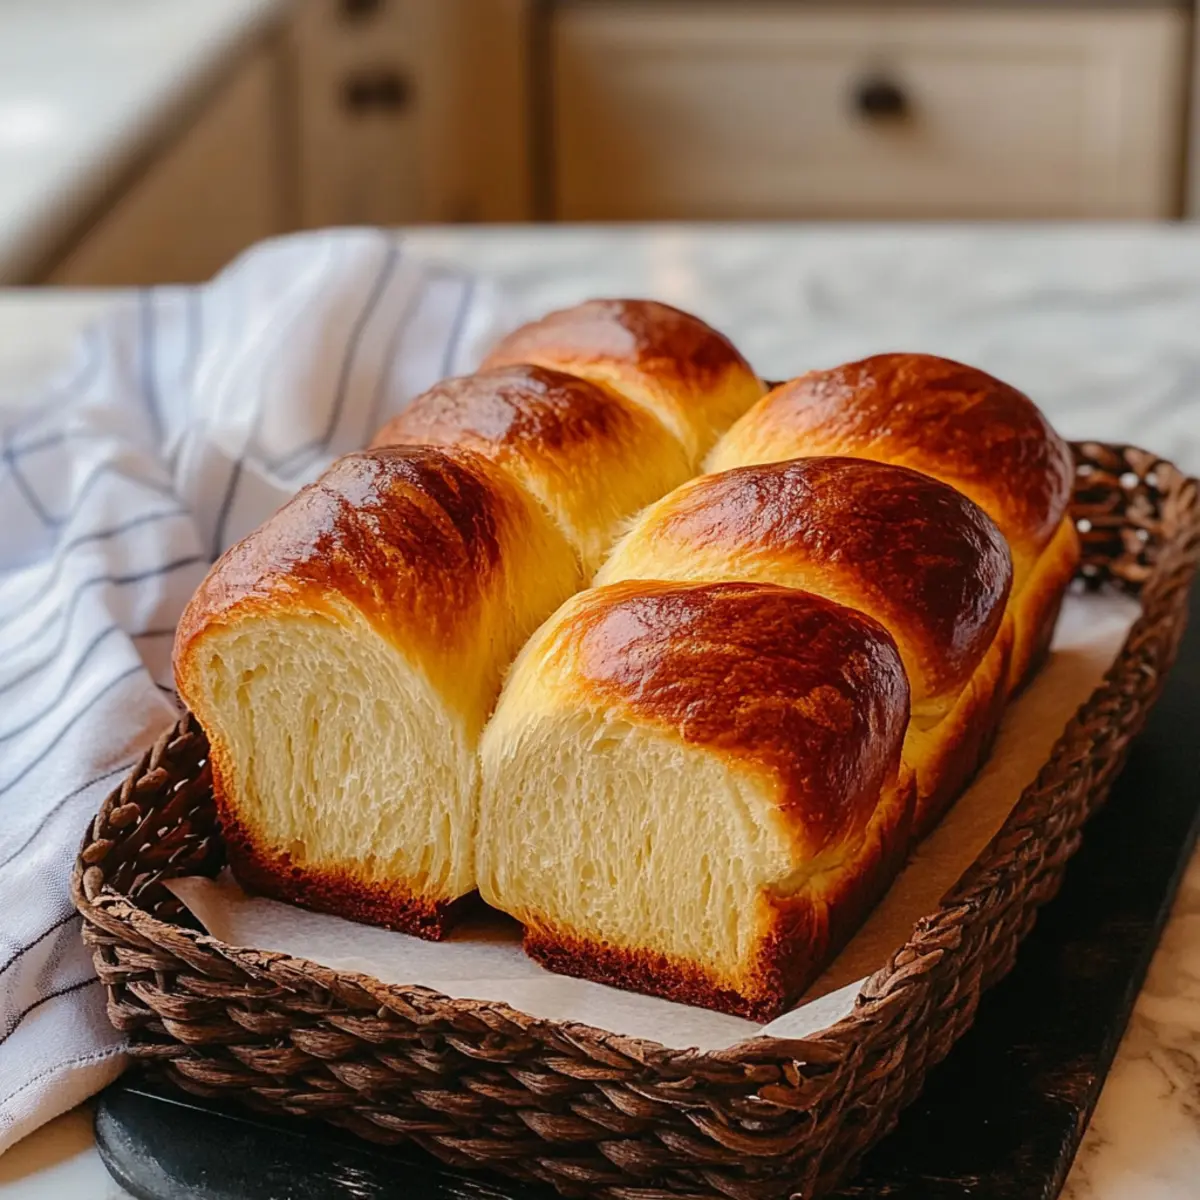
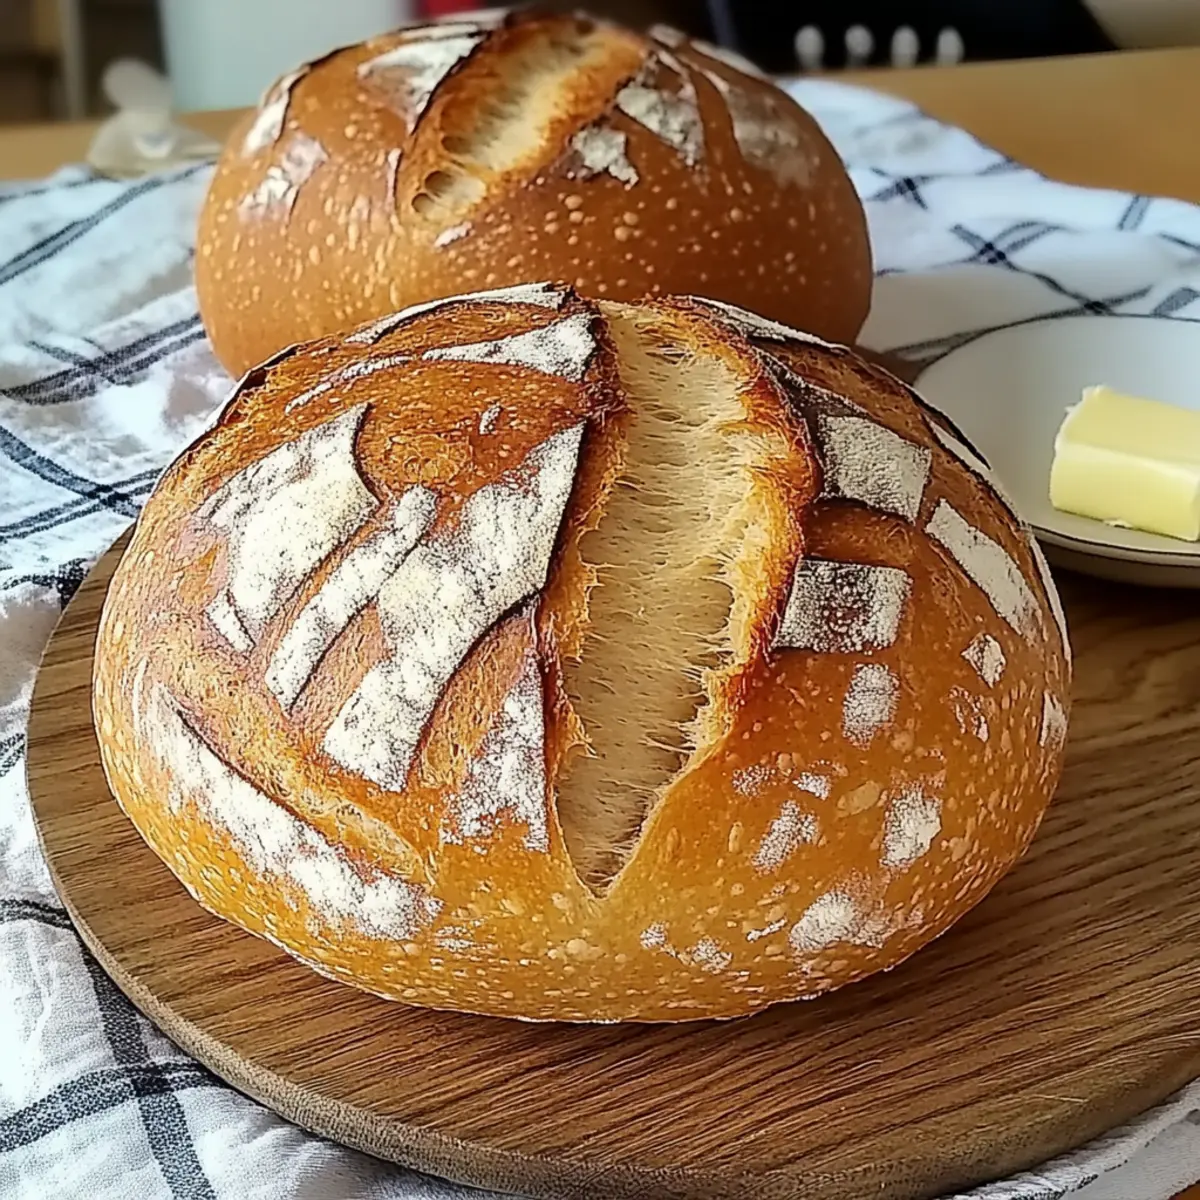
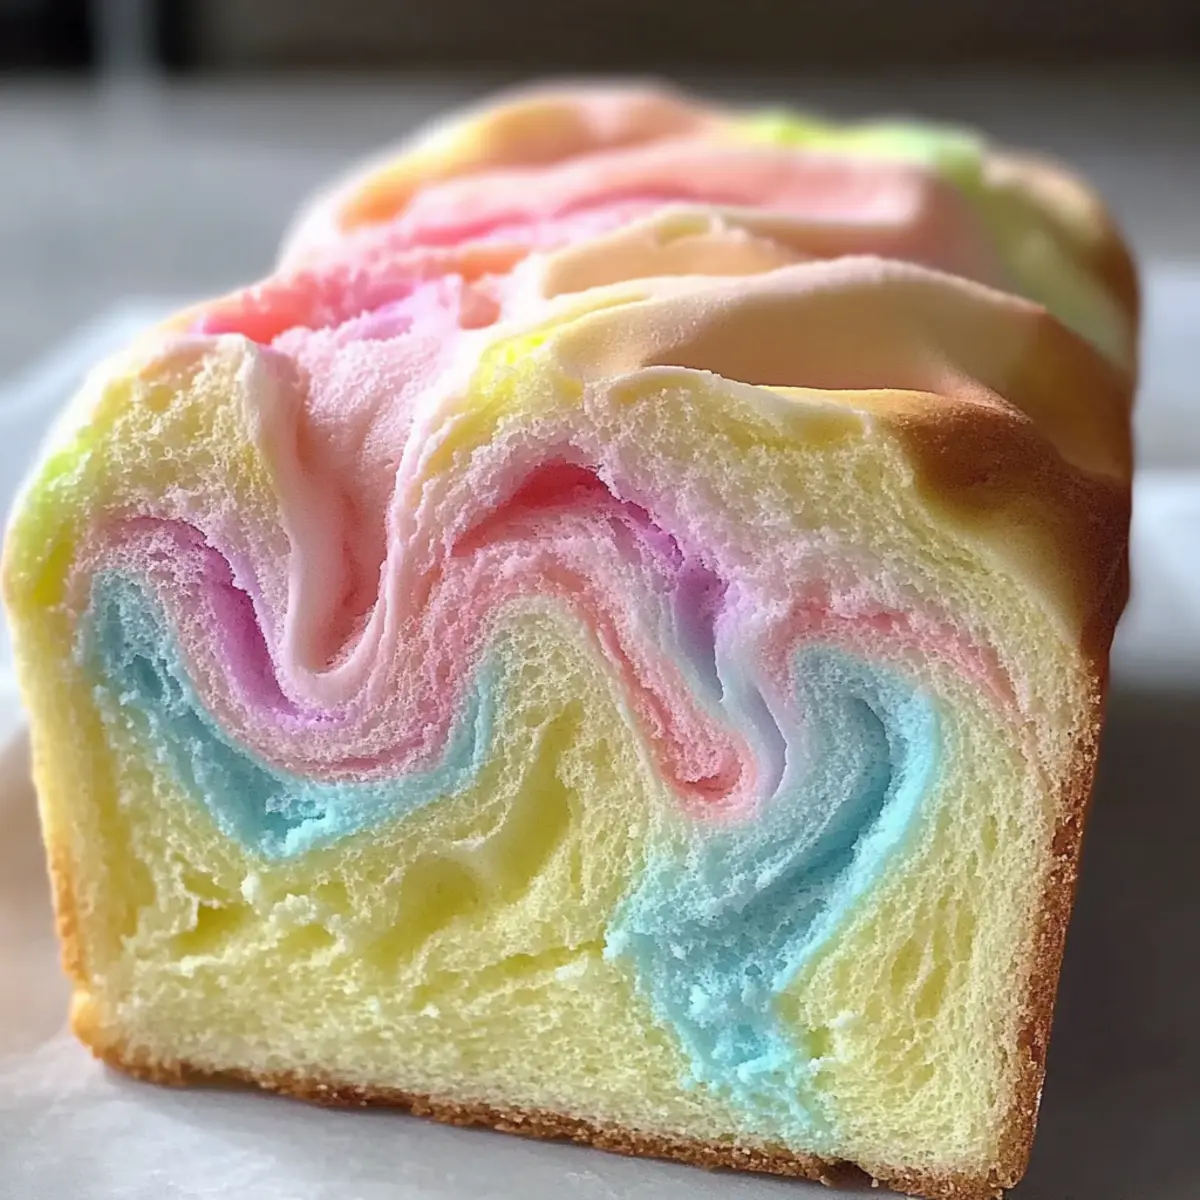
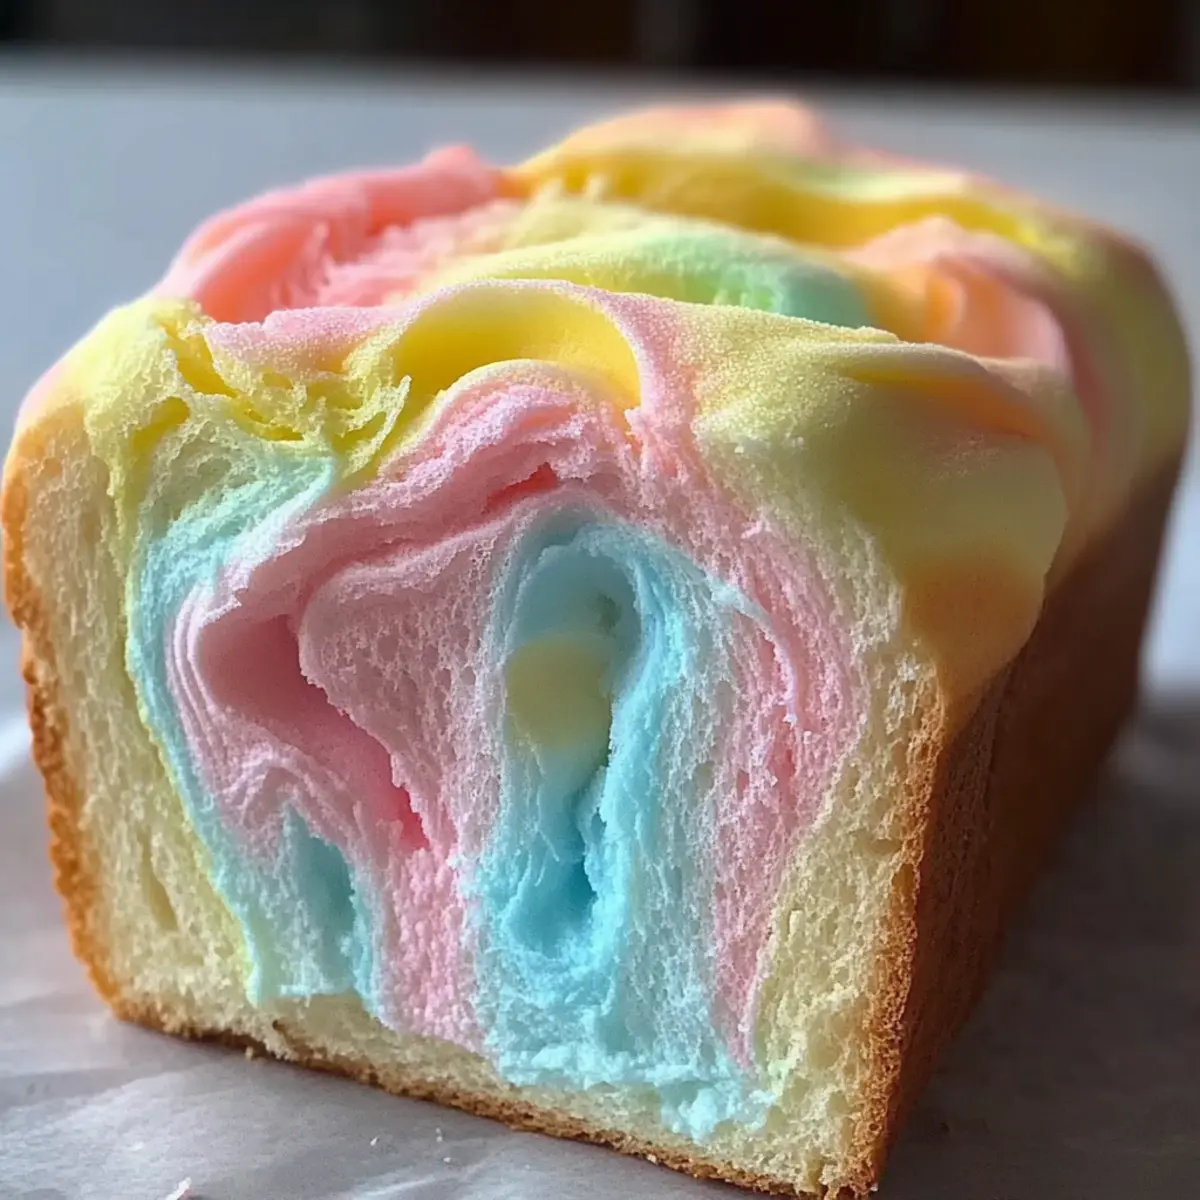
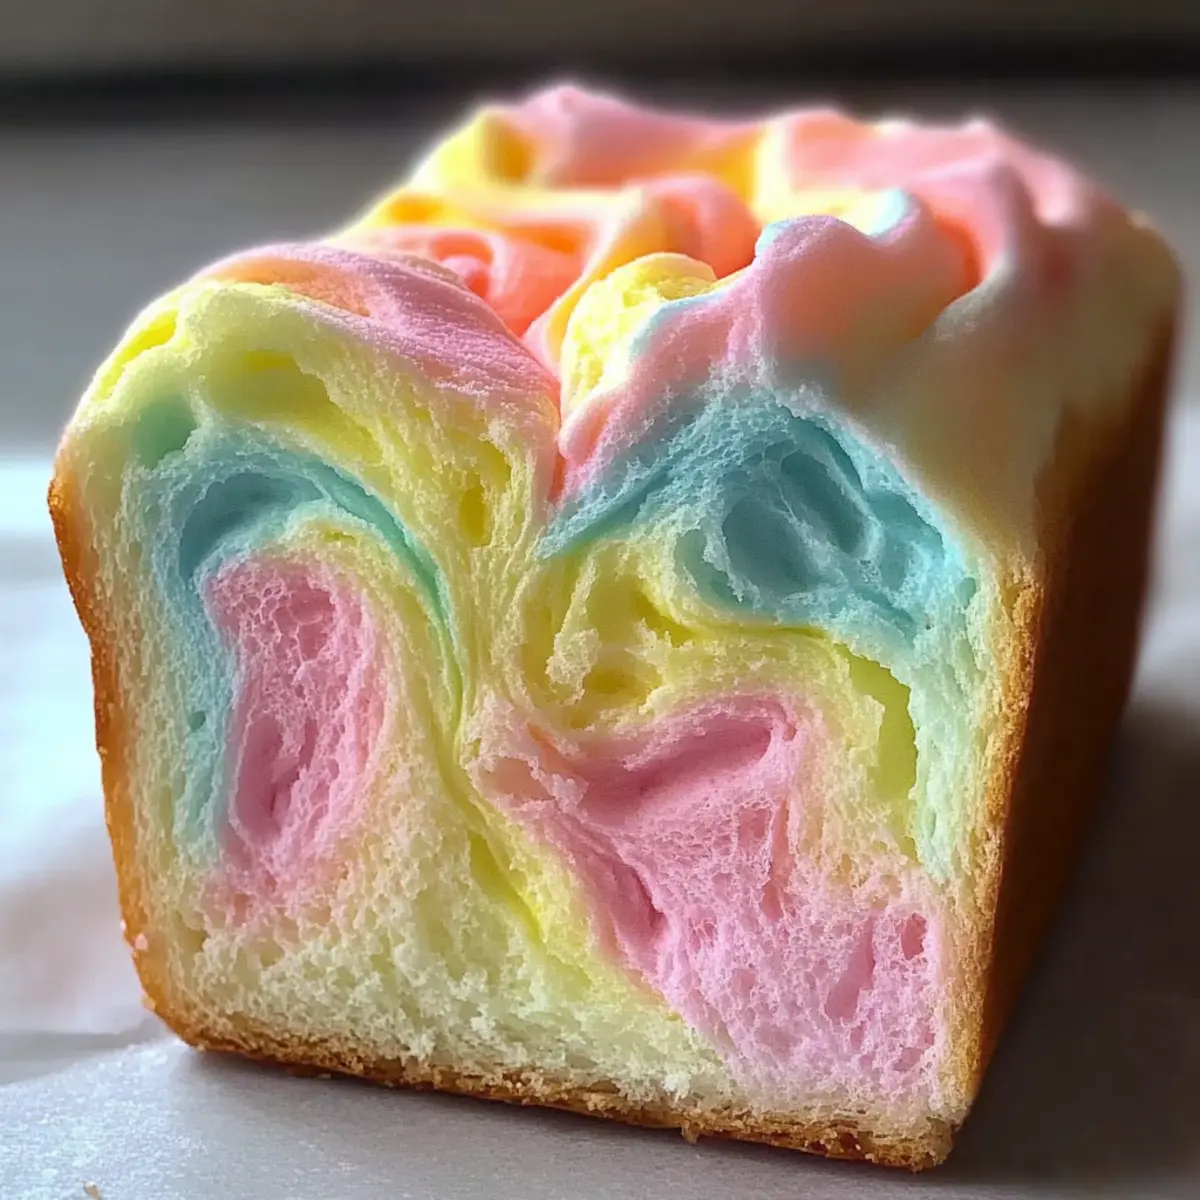
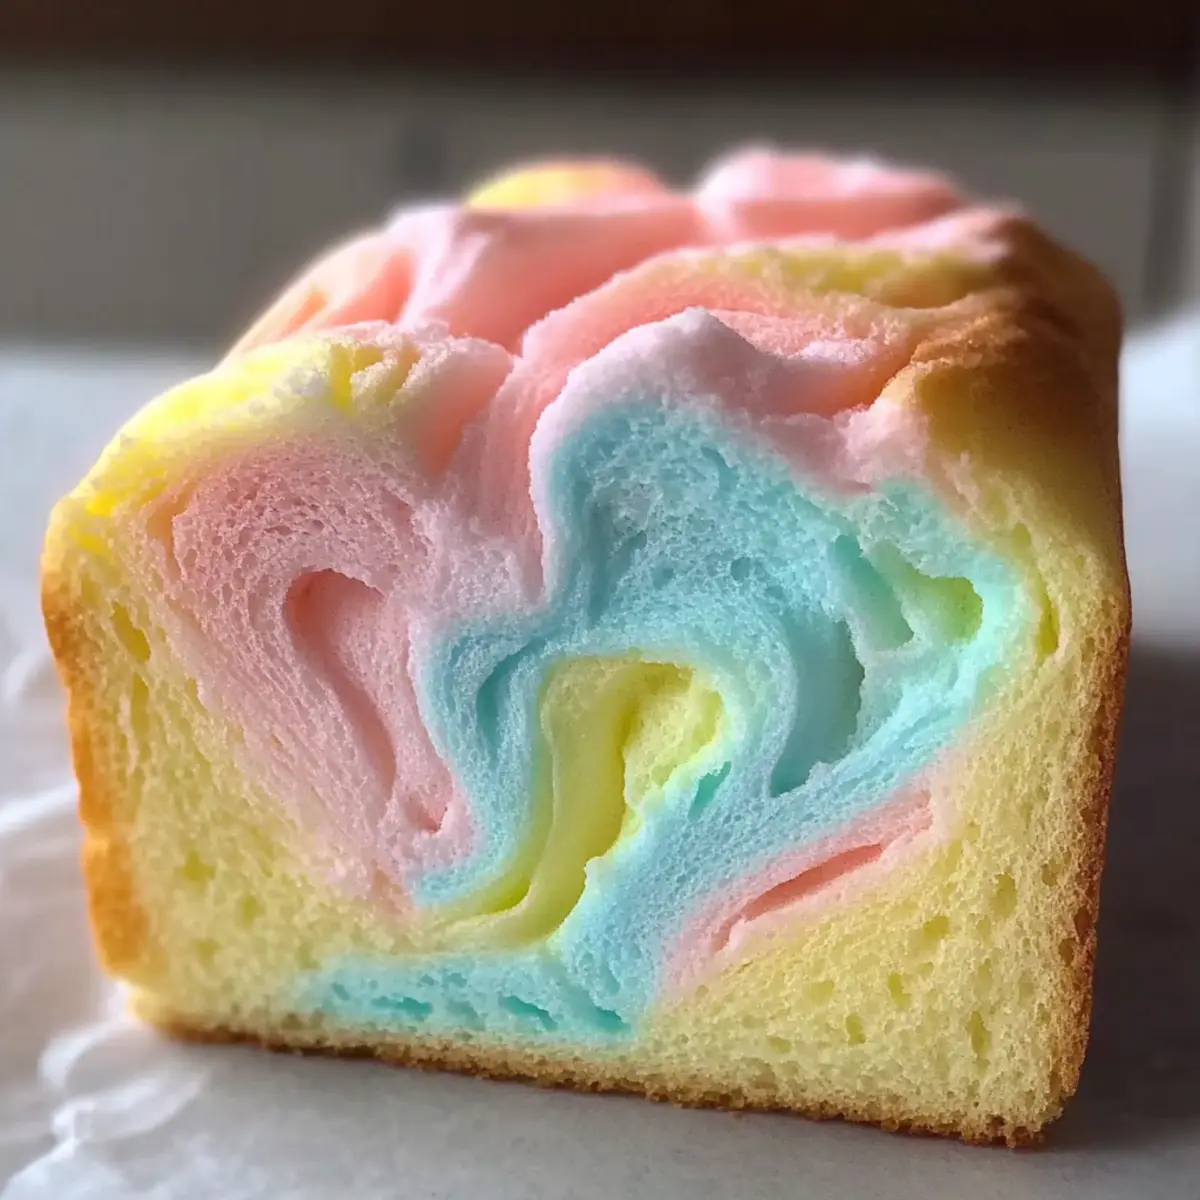
As the first winter flakes begin to fall, the warm spice of gingerbread fills the air, conjuring memories of cozy gatherings and festive cheer. I’m thrilled to share my take on this season's irresistible dessert: Gingerbread Latte Mousse Domes. These gourmet delights seamlessly blend the cozy flavors of gingerbread with a smooth hint of espresso, resembling your favorite café treat. Not only do they look stunning with their glossy mirror glaze, but they’re also surprisingly easy to make, ensuring you impress your guests without spending all day in the kitchen. Perfect for holiday dinners or just a special treat for yourself, these mousse domes are a delightful way to embrace the spirit of the season. Curious about how to create this elegant dessert? Let’s dive in!
Why Are These Mousse Domes Unique?
Gourmet Appeal: These Gingerbread Latte Mousse Domes are a show-stopping dessert that combines the cozy essence of gingerbread with a luxurious mousse, perfect for impressing guests.
Easy to Make: Surprisingly simple, this recipe is accessible to both novice bakers and seasoned chefs looking to elevate their dessert game.
Festive Flavors: Infused with spices like cinnamon and nutmeg, each bite brings warmth and nostalgia, making them ideal for Christmas gatherings.
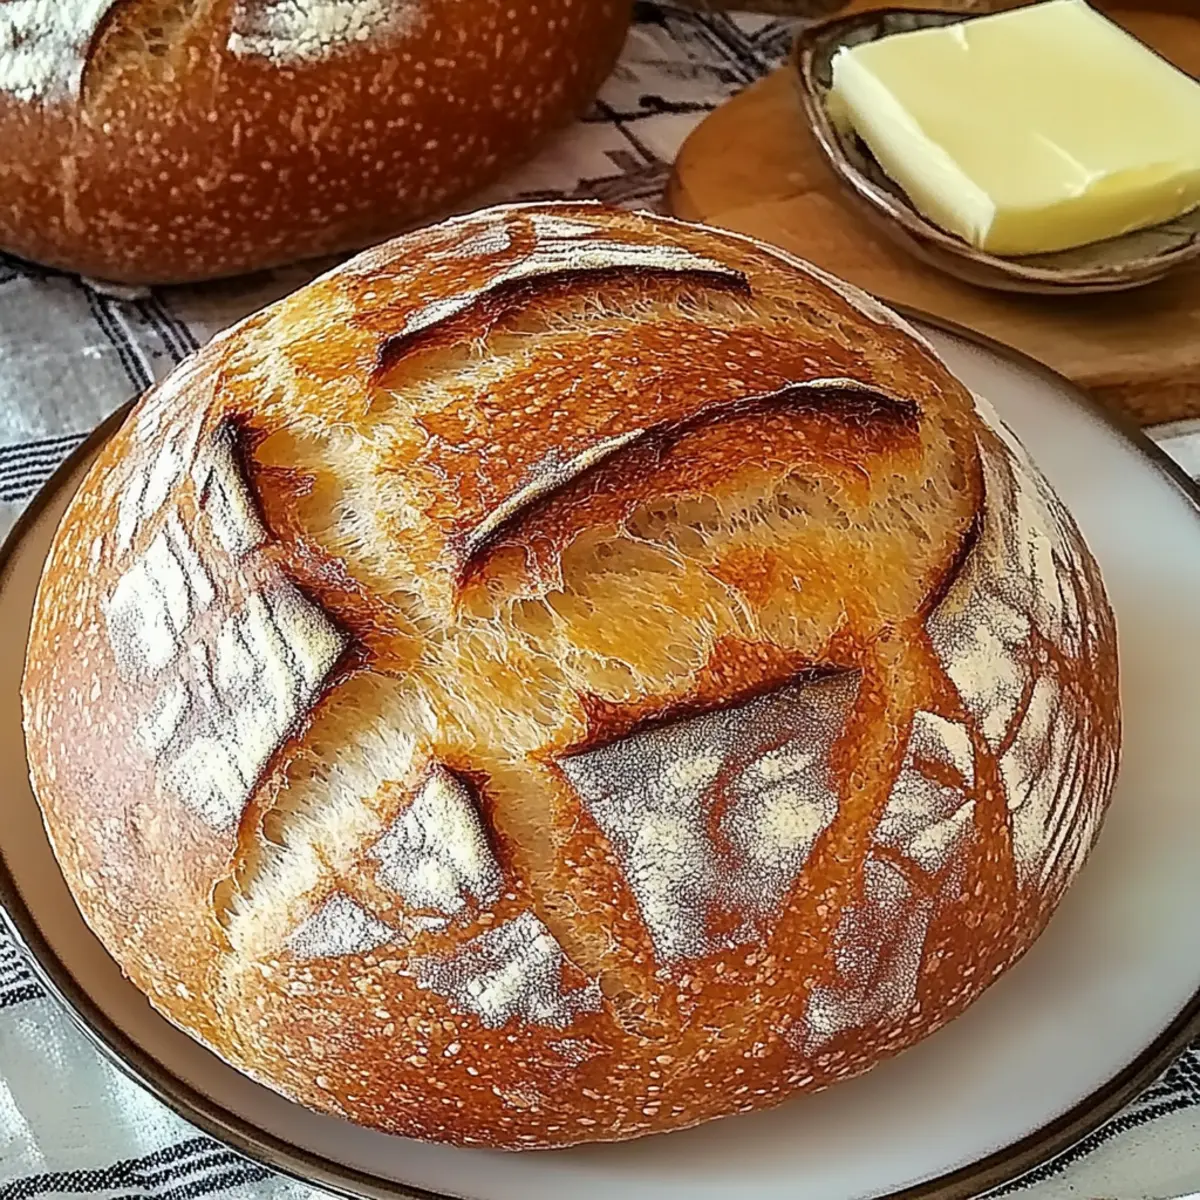
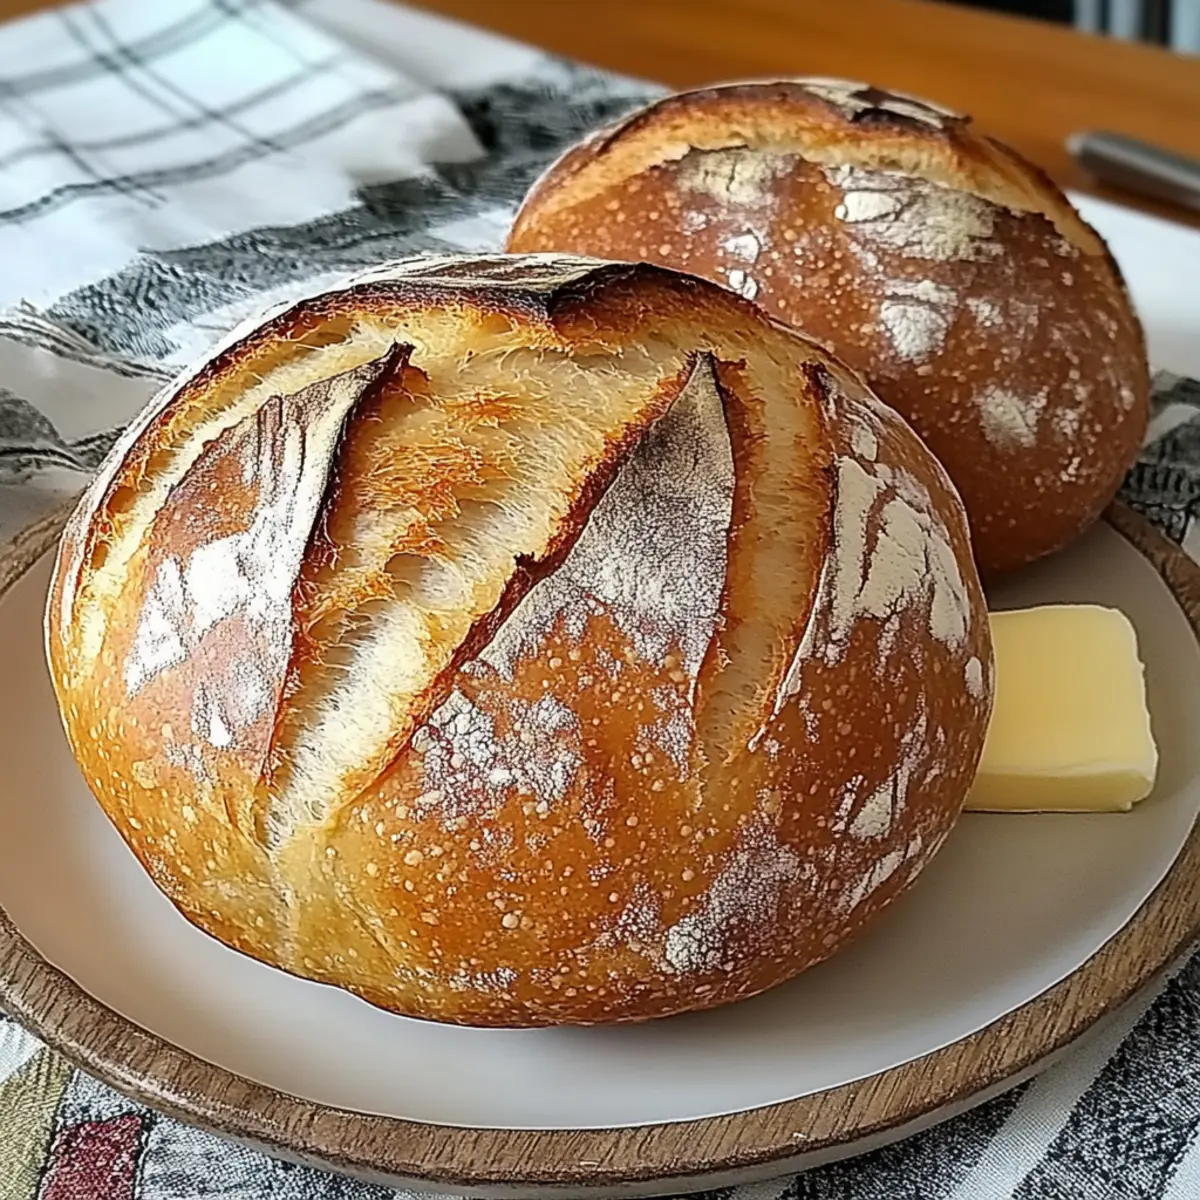
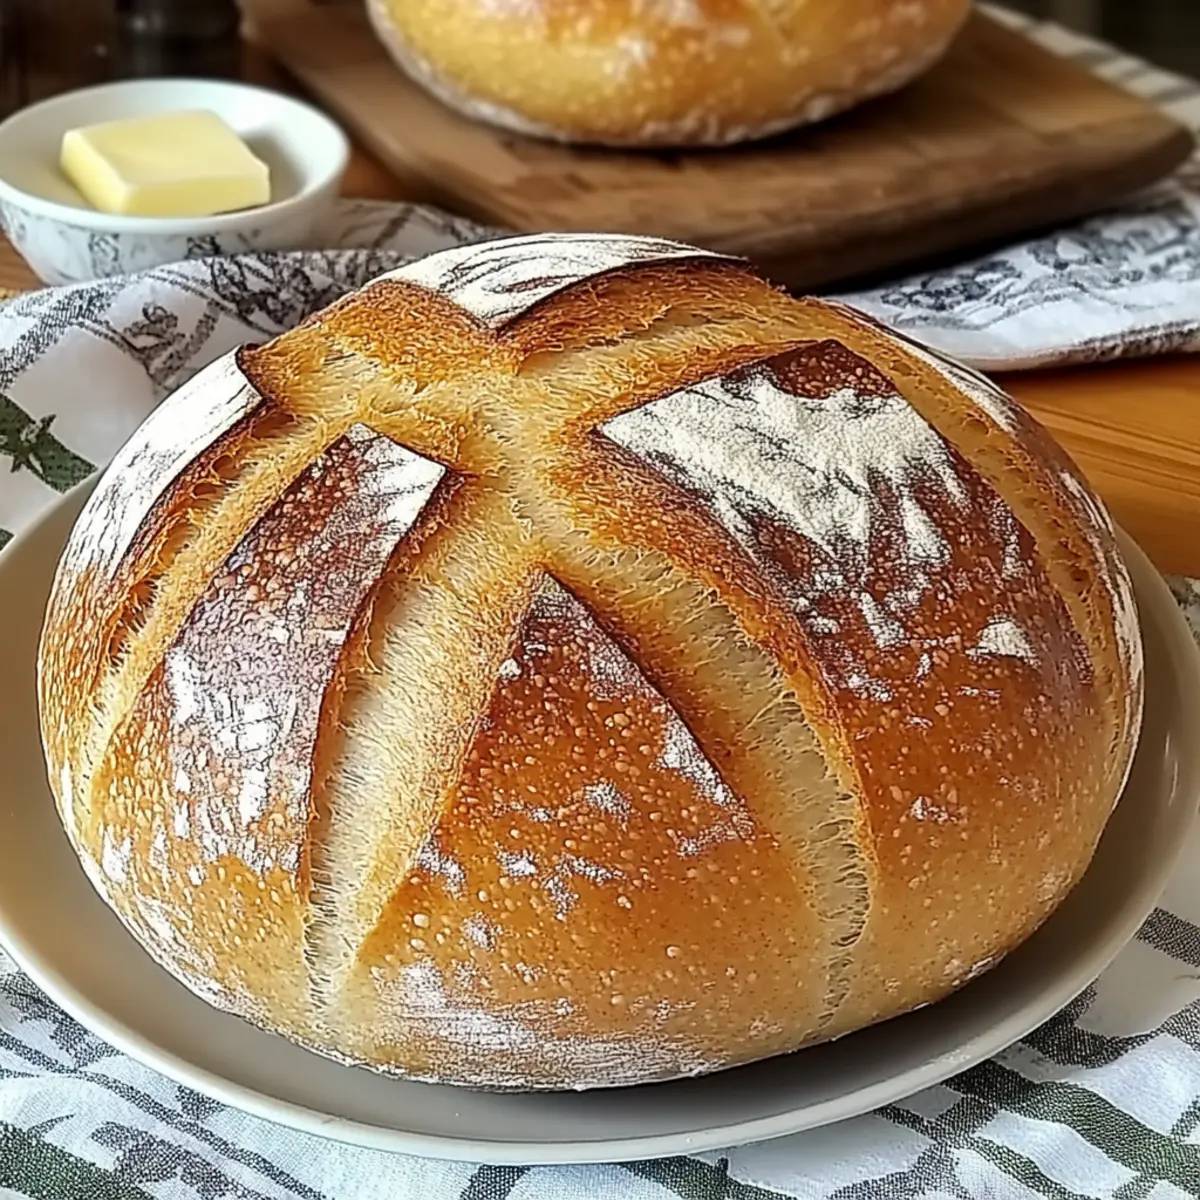
Visually Stunning: The glossy mirror glaze provides a beautiful finish that captures attention, ensuring your dessert stands out on any holiday table.
Versatile Options: Feel free to experiment with flavor variations or different coatings to personalize your mousse domes, catering to various tastes.
Make-Ahead Friendly: Prepare these sweet treats in advance and store them in the freezer, allowing you more time to enjoy the festivities with friends and family. Whether you're hosting a holiday dinner or sharing a cozy evening at home, these mousse domes will surely delight your palate and enhance your celebrations!
Gingerbread Latte Mousse Domes Ingredients
For the Mousse
- Espresso – Provides a robust flavor and enhances the ginger and spices; use strong brewed coffee if espresso is unavailable.
- Brown Sugar – Contributes sweetness and depth to the mousse base.
- White Chocolate – Adds creaminess and richness to the mousse texture.
- Cinnamon, Cloves, Nutmeg – Spices that impart warmth and a holiday aroma, perfectly complementing your gingerbread latte mousse domes.
- Gelatin – Stabilizes the mousse, ensuring it holds shape when frozen and glazed; bloom it in warm liquid before mixing.
- Mascarpone Cheese – Adds smoothness and body without weighing down the mousse; substitute with cream cheese for a tangier result.
- Molasses – Provides additional sweetness and depth, pivotal for that authentic gingerbread flavor.
- Egg Yolk – Binds the mousse, keeping it tender yet firm.
- Ginger – Delivers the hallmark flavor of gingerbread, perfect for this festive treat.
For the Cookie Base
- Sugar, Flour, Spices – Create a sturdy foundation for the mousse dome, ensuring a perfect contrast between the crispy base and airy mousse.
Step‑by‑Step Instructions for Gingerbread Latte Mousse Domes
Step 1: Prepare Cookie Base
In a large mixing bowl, combine flour, brown sugar, ground ginger, cinnamon, cloves, and nutmeg to create the gingerbread cookie dough. Add molasses and egg, mixing until a smooth dough forms. Roll the dough out on a lightly floured surface to about ¼ inch thick. Cut out rounds slightly larger than your silicone molds. This will serve as the base for the Gingerbread Latte Mousse Domes.
Step 2: Bake Cookies
Preheat your oven to 350°F (175°C). Place the cookie rounds on a parchment-lined baking sheet, ensuring they’re evenly spaced. Bake for 8–10 minutes or until firm to the touch. Let the cookies cool completely on the baking sheet. This step is crucial to ensure the cookies retain their shape and have the perfect texture as the base of your mousse domes.
Step 3: Bloom Gelatin
In a small bowl, mix espresso with brown sugar, warming it gently until the sugar dissolves. Sprinkle the gelatin over the warm espresso mixture and let it sit for about 5 minutes to bloom. This process activates the gelatin, allowing it to properly gel when added to your Gingerbread Latte Mousse Domes later, ensuring a stable structure.
Step 4: Prepare Mousse
Melt the white chocolate in a heatproof bowl over simmering water, stirring until smooth. Remove from heat and pour in the bloomed gelatin and espresso mixture, combining thoroughly. Allow the mixture to cool slightly, but not set. This rich blend will form the base of your mousse, bringing together the flavors of gingerbread and espresso beautifully.
Step 5: Whip Cream and Mascarpone
In a large mixing bowl, whip the cream with an electric mixer until soft peaks form. In another bowl, beat the mascarpone cheese until smooth. Gently fold the whipped cream into the mascarpone until fully combined, being careful not to deflate the mixture. This creates a light and airy mousse, crucial for the overall texture of the Gingerbread Latte Mousse Domes.
Step 6: Combine Mousse Ingredients
Slowly fold the cooled espresso and white chocolate mixture into the whipped cream and mascarpone blend. Use a spatula to gently incorporate the ingredients until everything is well mixed and smooth. Take care not to overmix, as you want to maintain the light, fluffy texture that makes your mousse so delightful.
Step 7: Assemble Domes
Spoon the mousse mixture into your silicone molds, filling each one about halfway. Place the baked cookie rounds on top of the mousse, pressing them down gently. Tap the molds lightly against the counter to release any air bubbles. Freeze the molds for at least 4 hours or overnight, allowing the Gingerbread Latte Mousse Domes to firm up entirely.
Step 8: Glaze Preparation
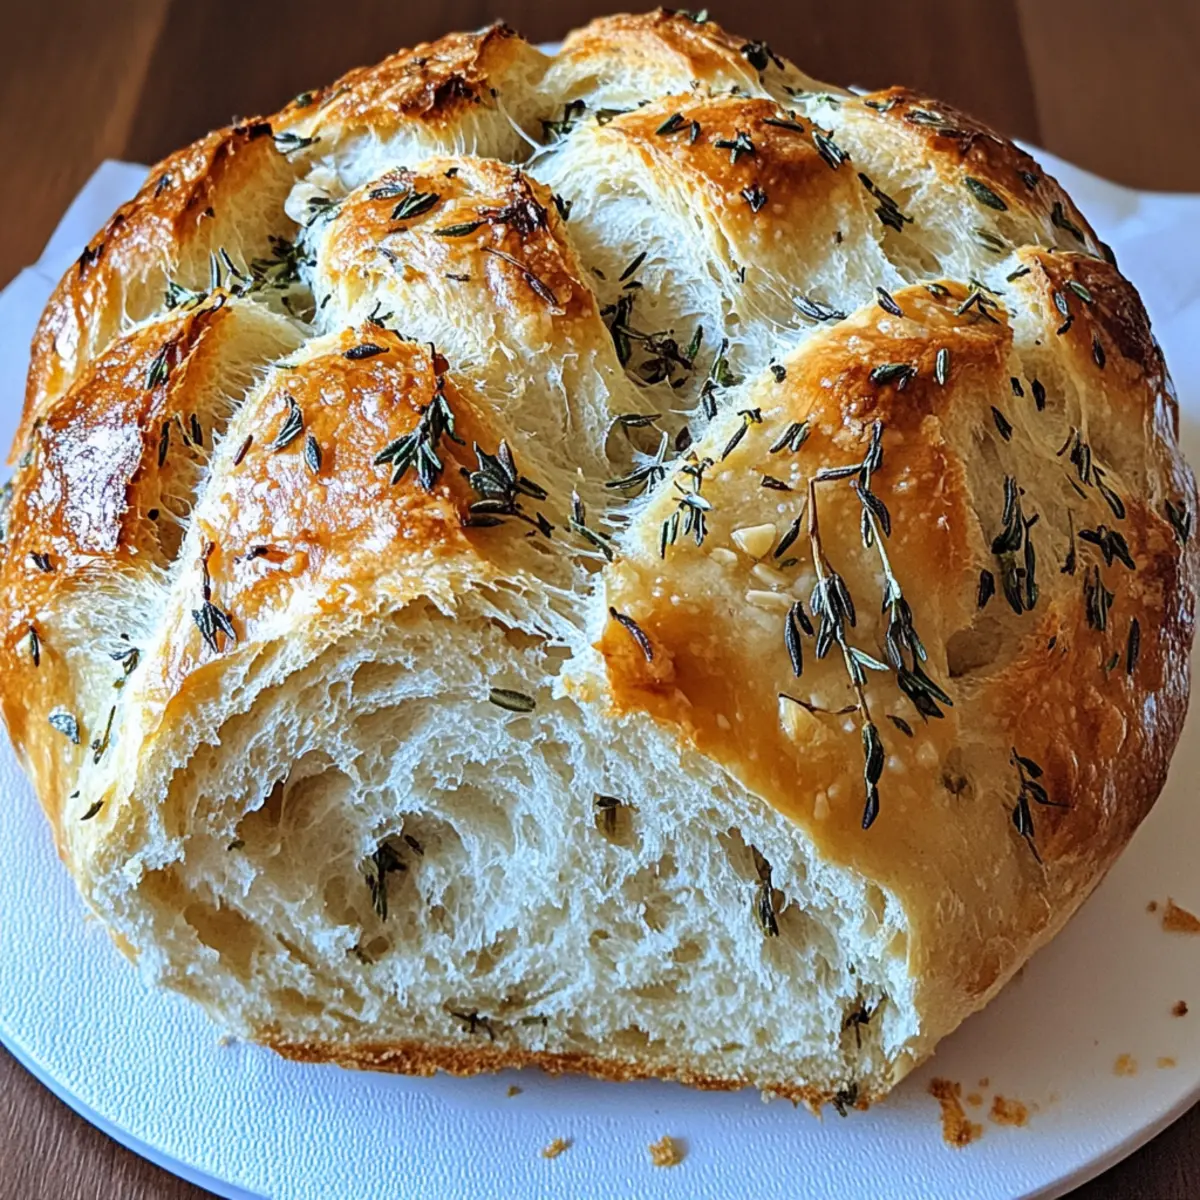
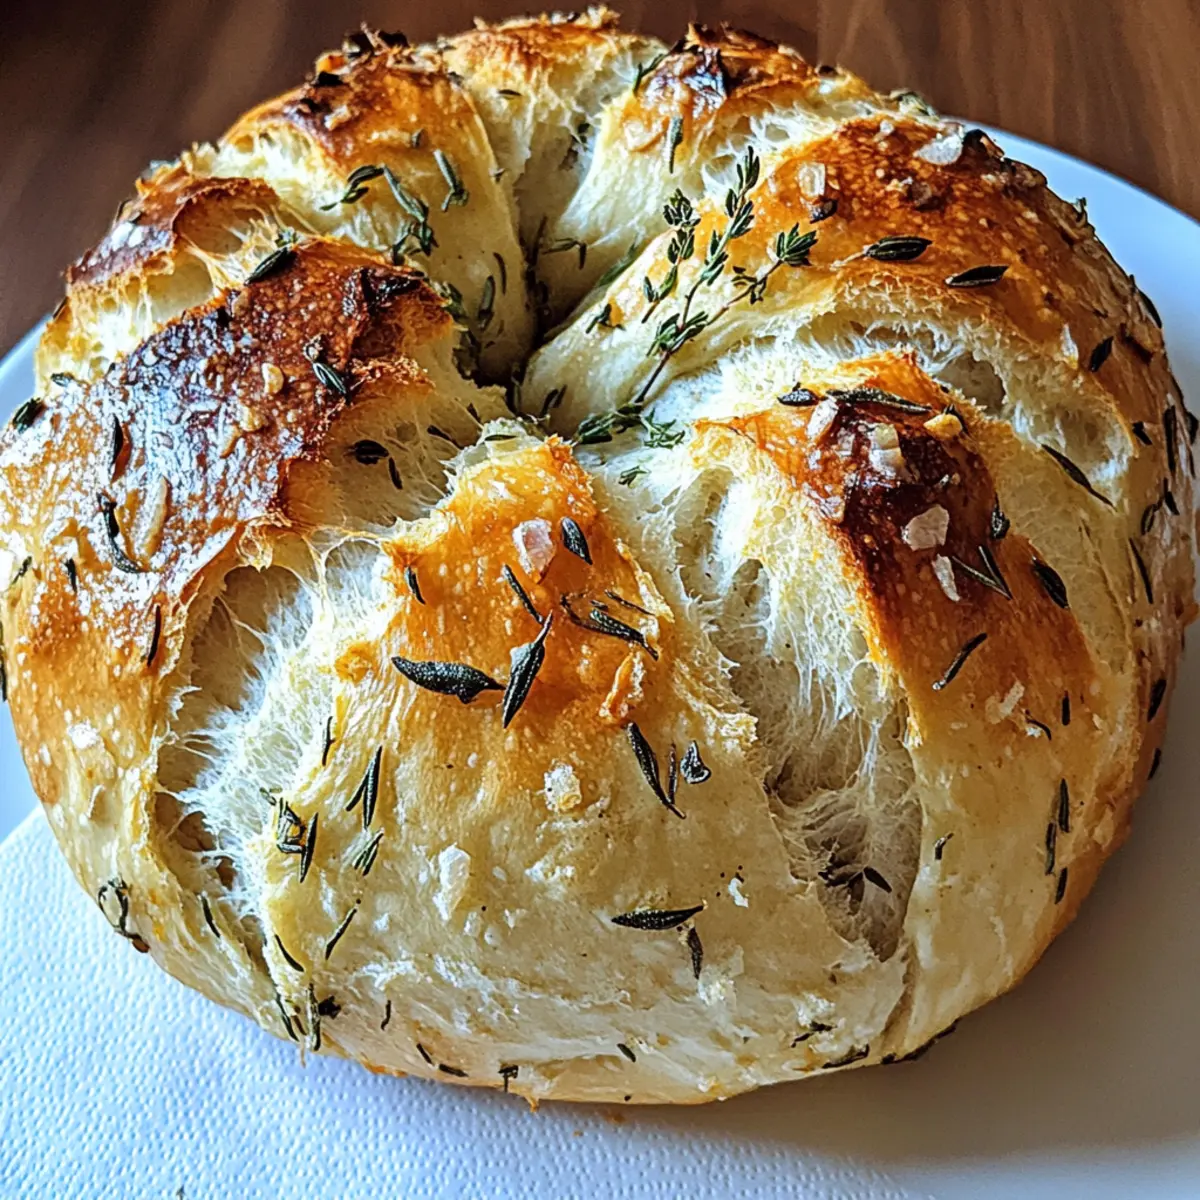
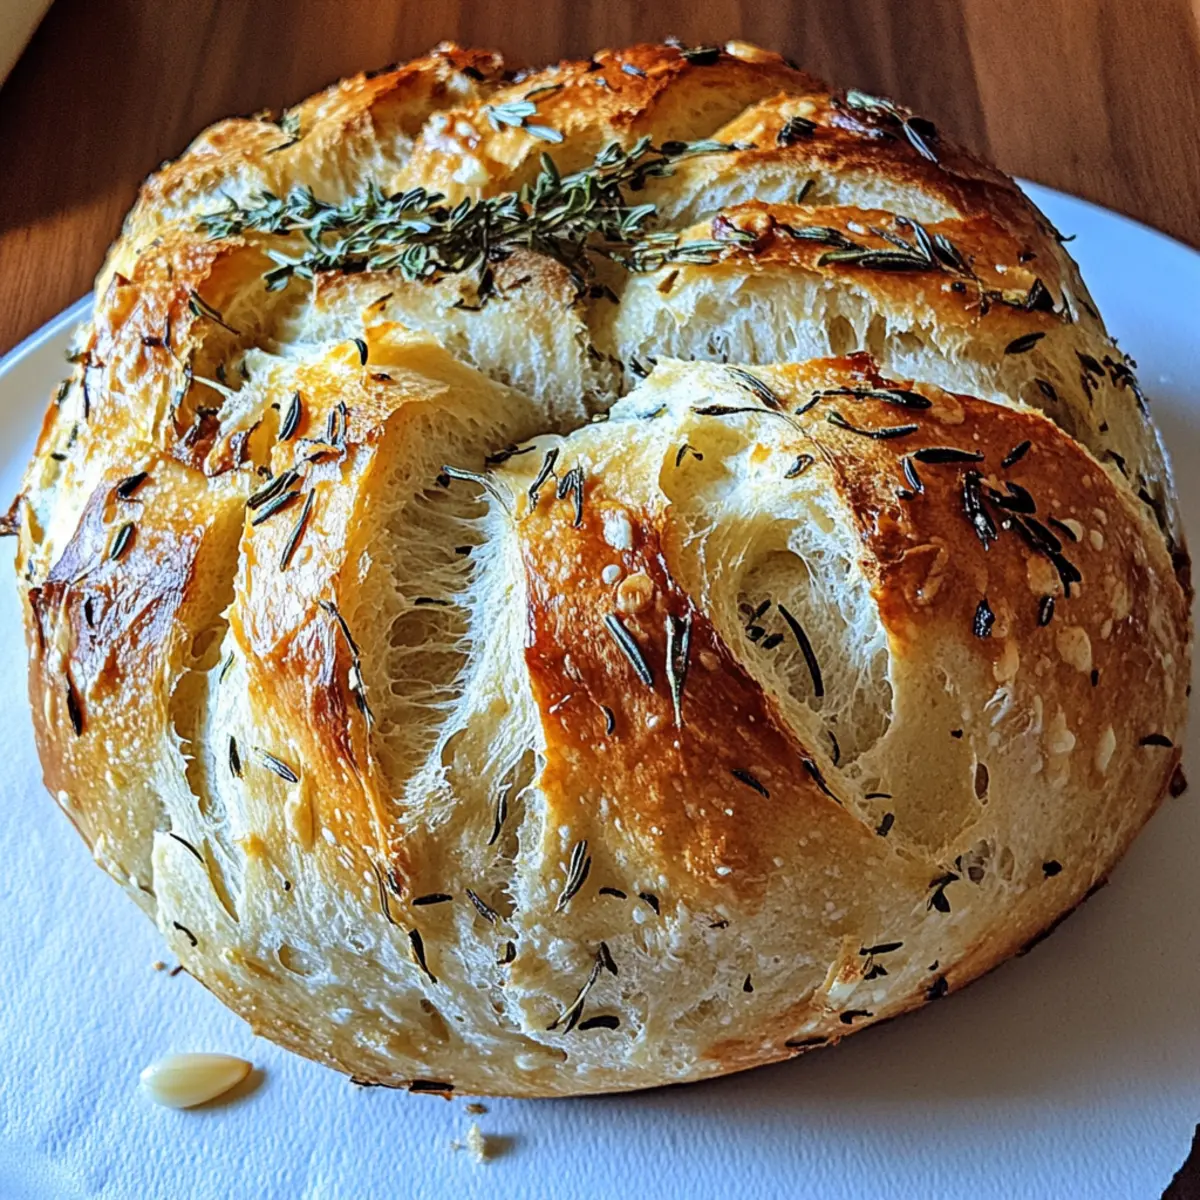
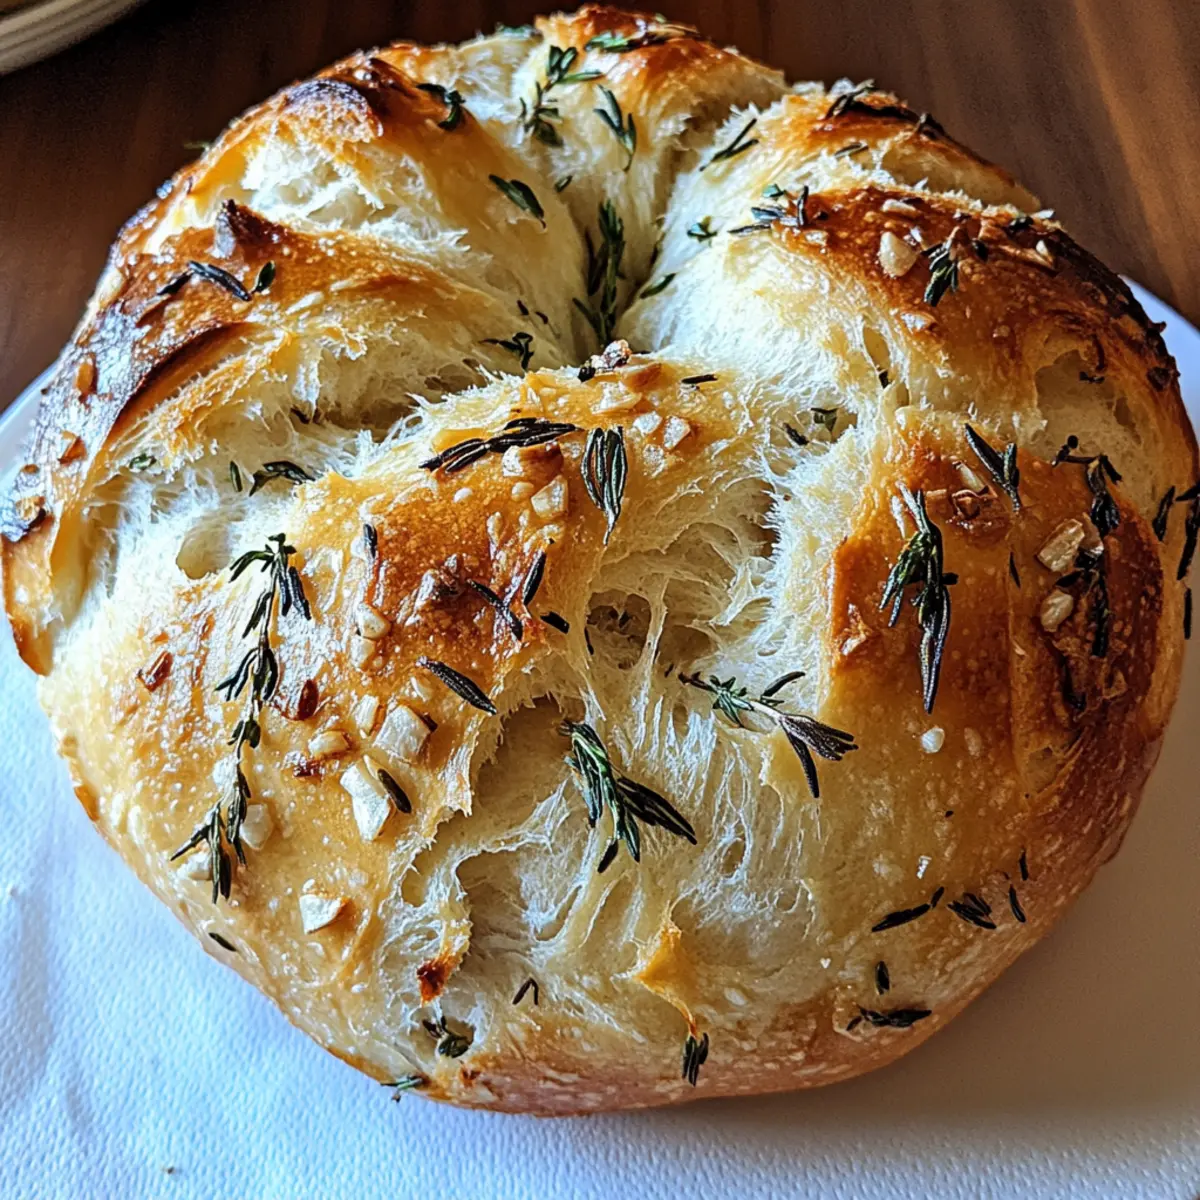
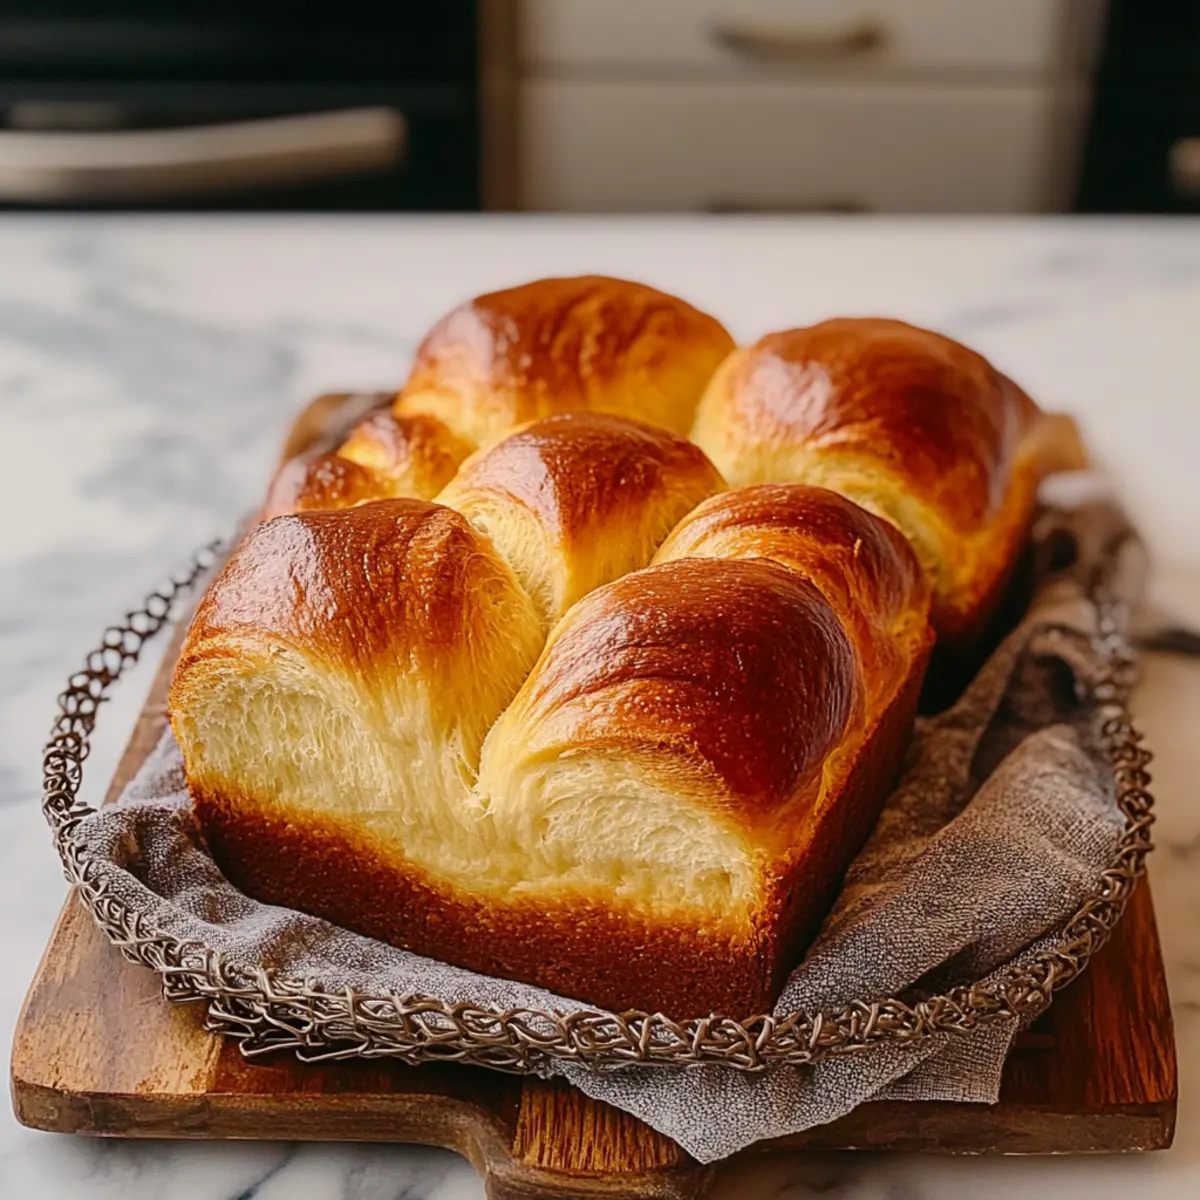
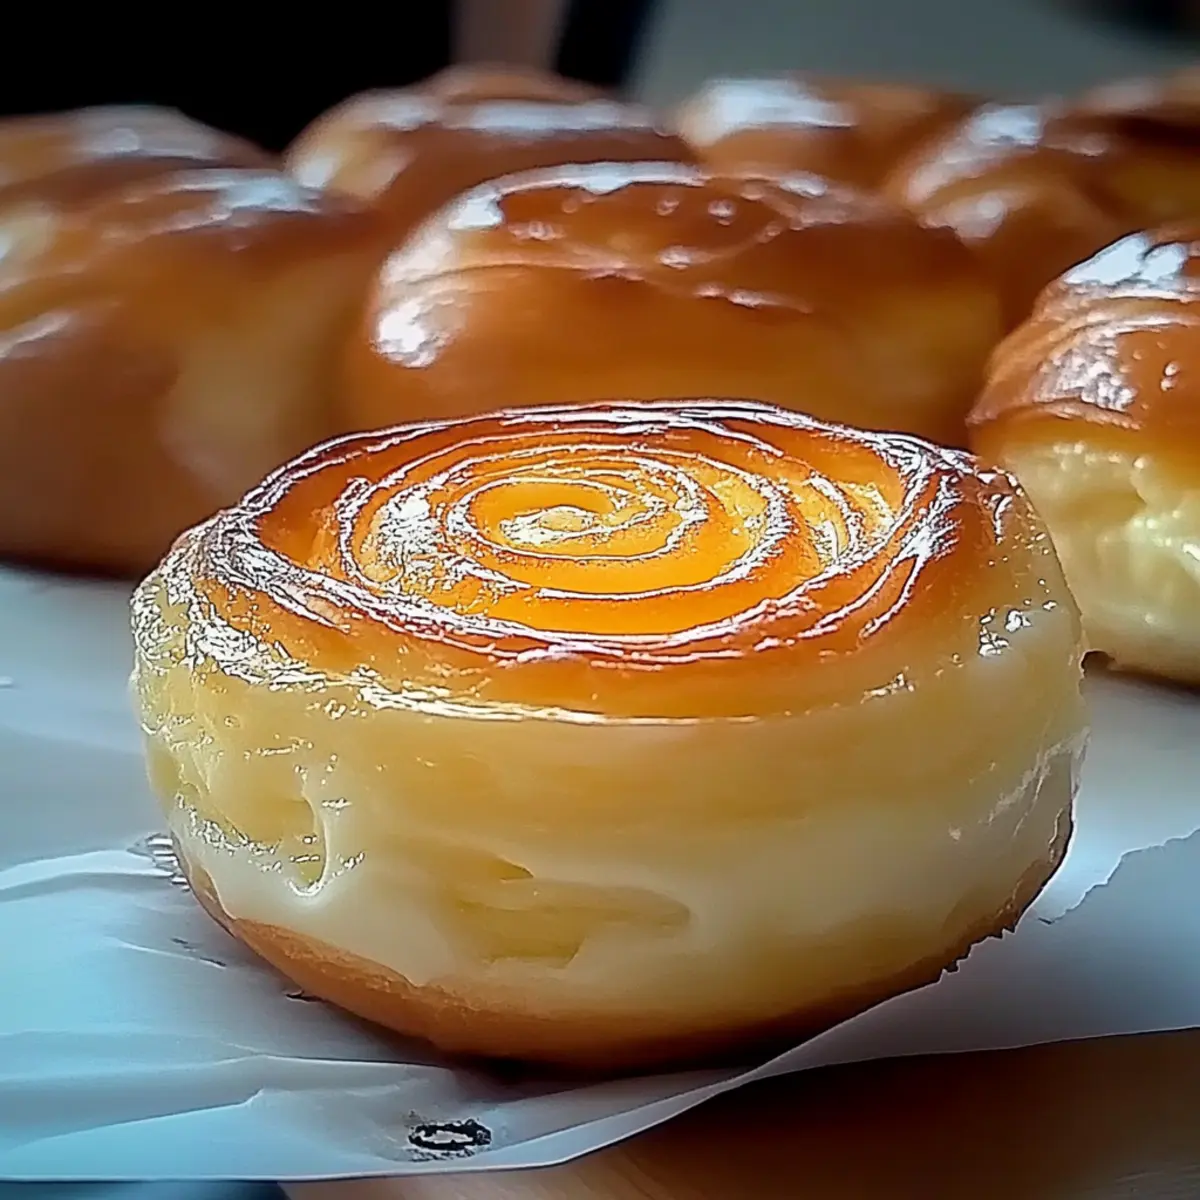
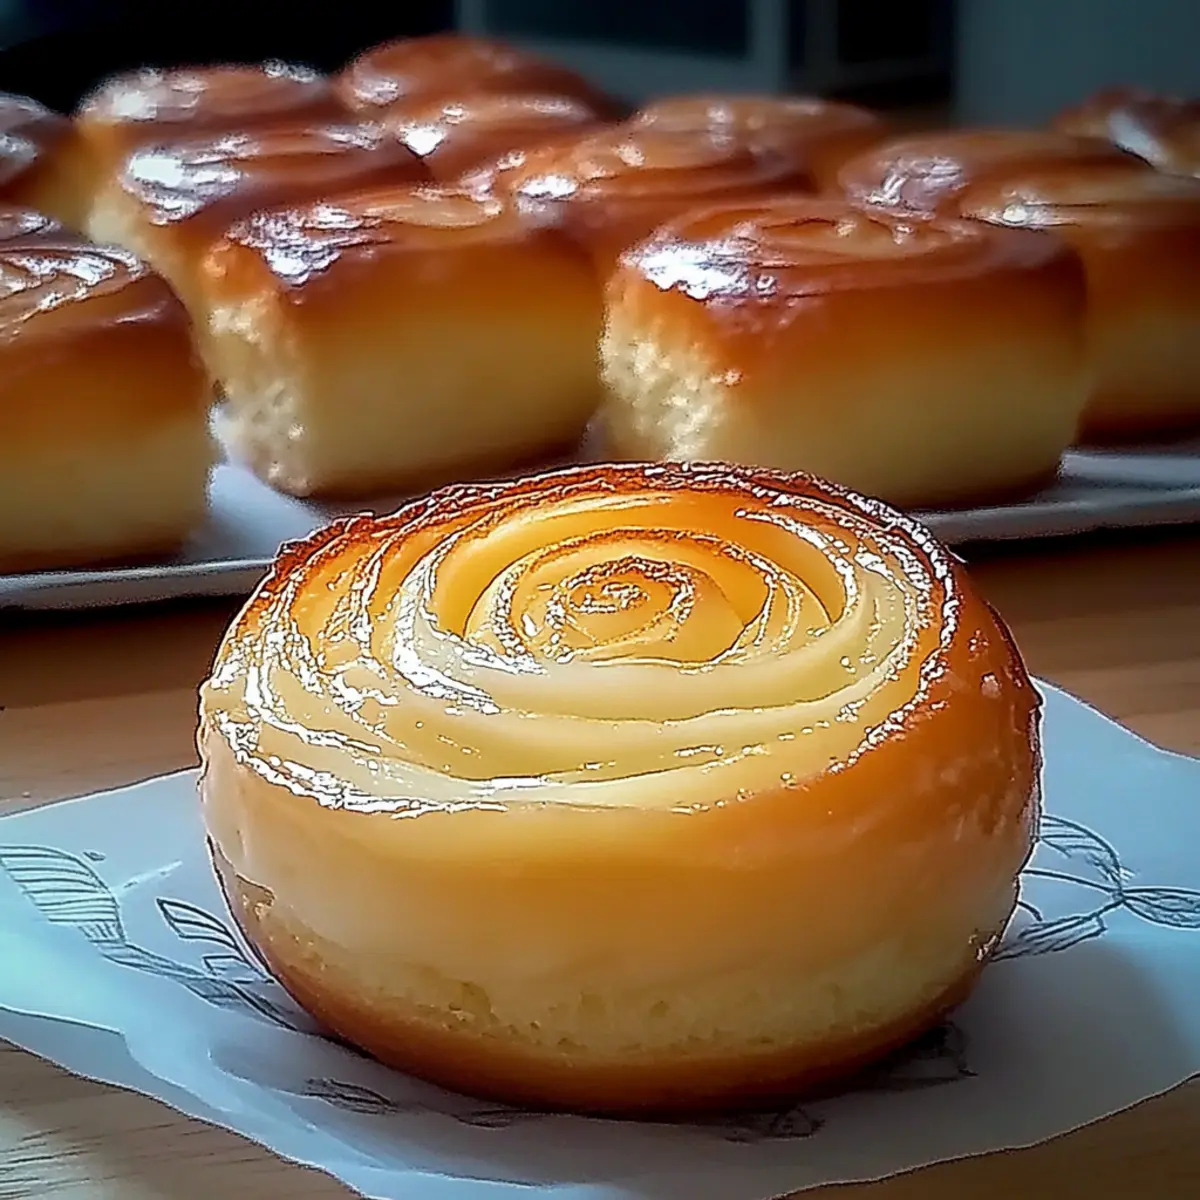
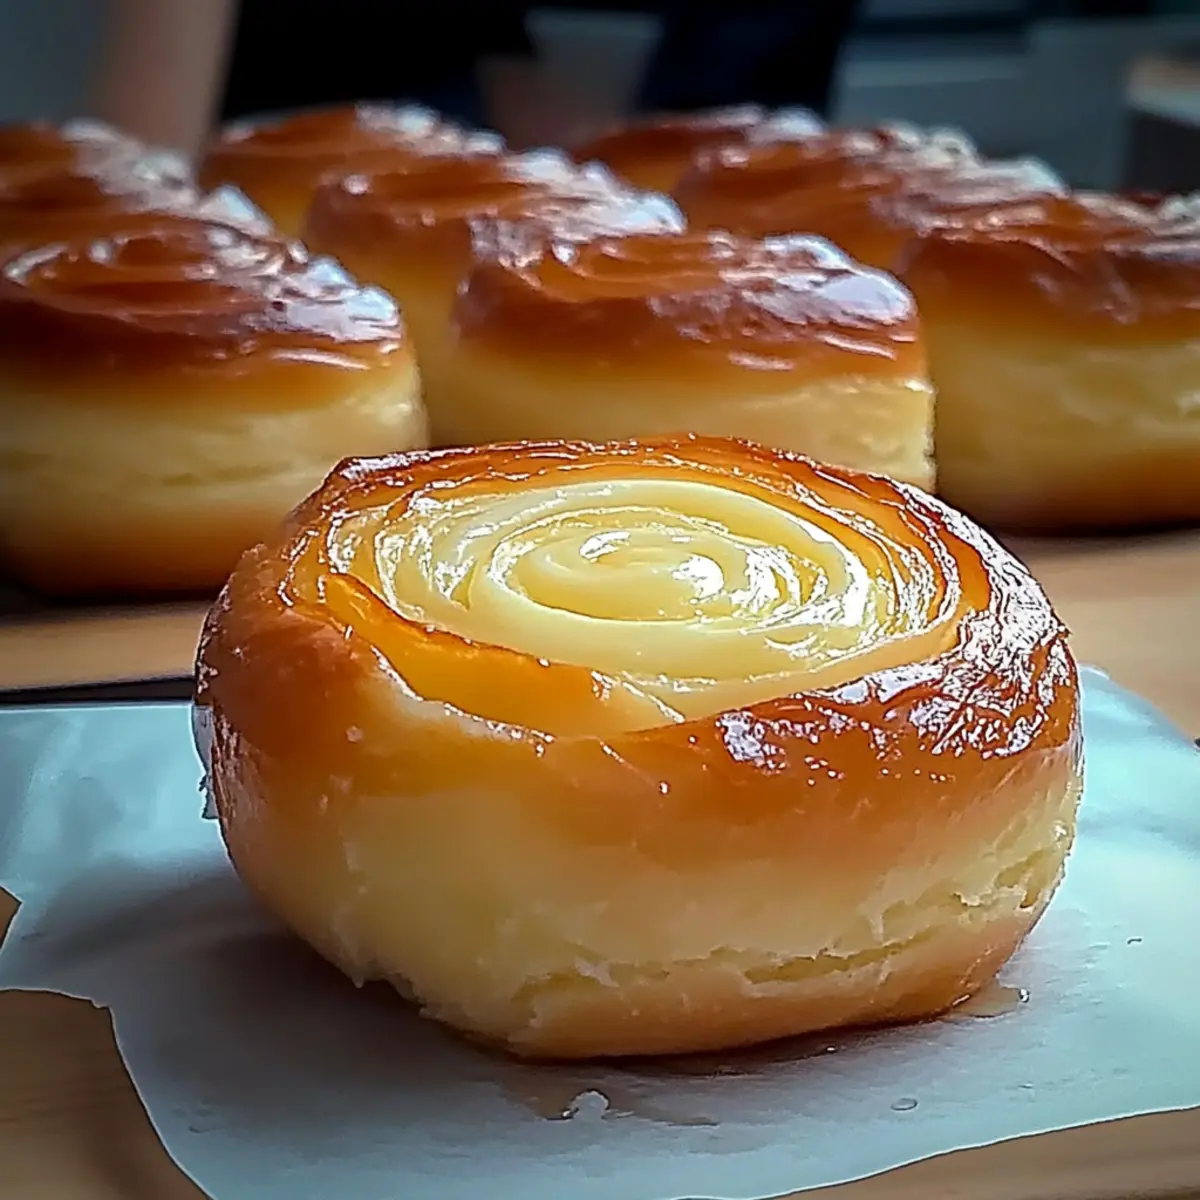
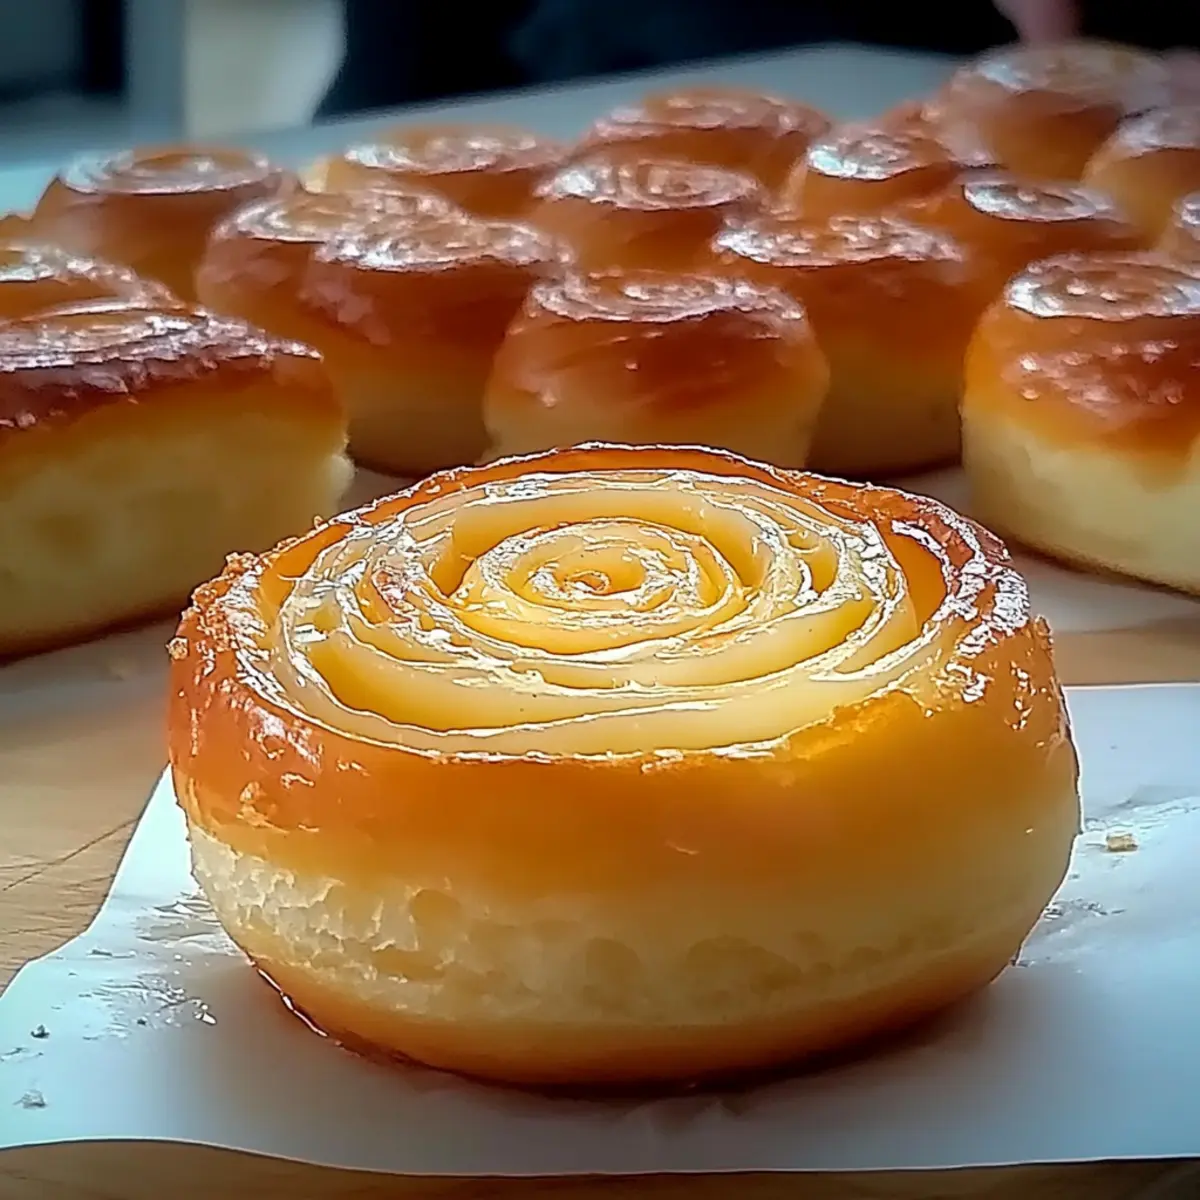
To prepare the mirror glaze, heat it gently to 90°F (32°C), stirring until smooth and lump-free. Once the mousse domes are completely frozen, carefully invert the molds to release the domes onto a wire rack. Pour the warm glaze evenly over the domes, ensuring an even coat. This glossy finish will enhance the festive look of your Gingerbread Latte Mousse Domes as they set.
What to Serve with Gingerbread Latte Mousse Domes
The Gingerbread Latte Mousse Domes create a divine experience, whether celebrating the holidays with loved ones or treating yourself to an elegant dessert at home.
- Creamy Mashed Potatoes: The buttery richness and smooth texture create a cozy contrast that balances the sweetness of the mousse.
- Spiced Winter Salad: Featuring candied pecans, apple slices, and a light vinaigrette, this salad adds freshness and a crunchy element to the meal.
- Mulled Wine: A fragrant blend of spices and fruity notes is a perfect pairing, complementing the warm gingerbread flavors beautifully.
- Chocolate Fondue: The indulgent and rich experience of dipping fruits or marshmallows enhances the festive atmosphere of your dessert spread.
- Pumpkin Bread: This moist, spiced loaf not only ties in seasonal flavors but also provides a satisfying texture alongside the delicate mousse.
- Cinnamon Hot Chocolate: Rich and comforting, sipping this beverage echoes the warm spices in the mousse, delightful for cold winter evenings.
- Candied Ginger Cookies: Offering a similar flavor profile, these cookies create a harmonious tastescape, perfect for sharing alongside the mousse domes.
Gingerbread Latte Mousse Domes Variations
Feel free to get creative with your Gingerbread Latte Mousse Domes! Explore these delightful twists that will take your dessert to the next level.
-
Dairy-Free: Swap mascarpone and cream with coconut cream for a luscious, dairy-free mousse option that’s still rich and satisfying.
-
Chocolate Lovers: Substitute half of the white chocolate with dark chocolate for a deeper flavor, blending perfectly with the spices in the mousse.
-
Nutty Crunch: Add crushed pecans or walnuts to the cookie base for extra crunch and a delicious nutty flavor that complements the gingerbread.
-
Spiced Rum: Incorporate a splash of spiced rum into the mousse for an adult twist that pairs beautifully with the ginger and coffee flavors.
-
Fruity Fusion: Mix in some finely chopped dried cranberries or candied ginger for a fruity zing, adding a textural surprise alongside the creamy mousse.
-
Minty Fresh: Replace the spices with peppermint extract for a refreshing twist, making it feel even more festive during the holiday season.
-
Heat It Up: Add a pinch of cayenne pepper to the mousse for a subtle kick that gives a surprising depth to the sweet flavors of ginger and chocolate.
-
Mirror Glaze Variations: Instead of the classic glaze, try a chocolate or caramel glaze for a different flavor profile while retaining that glossy wow factor.
Enhancing your Gingerbread Latte Mousse Domes is simple and fun! For more ideas on desserts with a festive flair, check out my Joyful Holiday Dessert Ideas and Magical Seasonal Treats that are sure to impress your guests.
Storage Tips for Gingerbread Latte Mousse Domes
- Fridge: Store the mousse domes in an airtight container for up to 3 days. Ensure they are properly covered to maintain their freshness and prevent absorption of other odors.
- Freezer: The domes can be frozen for up to 1 week. Wrap each dome tightly in plastic wrap and store them in a freezer-safe container to preserve texture and flavor.
- Thawing: When ready to serve, thaw the frozen domes in the refrigerator for several hours. Avoid thawing at room temperature to maintain stability and prevent melting.
- Glazing: For best results, glaze the Gingerbread Latte Mousse Domes just before serving. This ensures a glossy finish and perfect texture that impresses your holiday guests.
Make Ahead Options
These Gingerbread Latte Mousse Domes are perfect for meal prep, allowing you to enjoy the flavors of the season without the last-minute stress! You can prepare the mousse mixture and freeze it in the molds for up to 3 days in advance. To do this, simply assemble the mousse in the molds, place the cookie bases on top, and freeze overnight. When you're ready to serve, glaze the domes with the mirror glaze and let them set before enjoying. To ensure the domes remain just as delicious, store them in an airtight container to prevent freezer burn. With this make-ahead method, you’ll have a stunning dessert ready to impress at your holiday gatherings!
Expert Tips for Gingerbread Latte Mousse Domes
-
Choose Quality Ingredients: Using high-quality espresso and chocolate elevates the flavor of your Gingerbread Latte Mousse Domes significantly.
-
Bloom Gelatin Correctly: Ensure the gelatin is completely bloomed in warm liquid before mixing. This step is crucial for a stable mousse that holds its shape.
-
Monitor Whipping: Avoid overwhipping the cream and mascarpone—stop once soft peaks form. This retains the light, airy texture vital for your mousse.
-
Freezing Precision: Make sure to freeze the domes fully before glazing. If they’re not firm enough, the glaze may run off instead of creating a beautiful coat.
-
Maintain Temperature: Heat the mirror glaze to the correct temperature (90°F). If too hot or cold, it could lead to a lumpy finish on your domes.
-
Storage Tips: Prepare and freeze your Gingerbread Latte Mousse Domes a day ahead to save time on the day of your gathering.
Gingerbread Latte Mousse Domes Recipe FAQs
How should I select ripe ginger for my mousse?
When picking ginger for your Gingerbread Latte Mousse Domes, choose root pieces that feel plump and firm. They should be smooth without any dark spots or wrinkles. If the ginger has a strong, fragrant aroma, it's a sign of freshness and potency!
What’s the best way to store leftover mousse domes?
Store any leftover mousse domes in an airtight container in the refrigerator for up to 3 days. To keep them fresh and flavorful, ensure they are well-covered to prevent them from absorbing odors from other foods.
Can I freeze the Gingerbread Latte Mousse Domes?
Absolutely! You can freeze these delightful mousse domes for up to 1 week. Wrap each dome tightly in plastic wrap to avoid freezer burn and place them in a freezer-safe container. When you’re ready to enjoy them, just thaw them in the refrigerator for several hours.
My mousse didn't set properly; what might have gone wrong?
If your mousse didn’t set, the most common reasons are under-bloomed gelatin or not incorporating the mousse components properly. Ensure you properly bloom the gelatin in warm espresso as instructed and gently fold all ingredients together without overmixing. If you’re still having trouble, try letting it chill longer in the fridge next time.
Are there any dietary substitutions for the ingredients?
Definitely! If you're looking for alternatives, you can swap mascarpone with cream cheese for a somewhat denser mousse but still delicious. For a dairy-free option, consider using coconut cream instead. Additionally, be wary of any allergens; ensure your guests have checked for allergies concerning ingredients like eggs, chocolate, or espresso.
How do I achieve a flawless mirror glaze?
To ensure a perfect mirror glaze, start by heating the glaze to a precise temperature of 90°F (32°C)—too hot, and it can separate; too cold, and it won’t flow properly. Once your mousse domes are frozen solid, carefully pour the warm glaze over them, allowing it to settle evenly. If any drips occur, gently wipe the bottom of the dome to keep everything tidy before serving!
Gingerbread Latte Mousse Domes That Wow Your Holiday Guests
Ingredients
Equipment
Method
- In a large mixing bowl, combine flour, brown sugar, ground ginger, cinnamon, cloves, and nutmeg to create the gingerbread cookie dough. Add molasses and egg, mixing until smooth.
- Preheat your oven to 350°F (175°C). Place cookie rounds on a baking sheet and bake for 8–10 minutes. Let cool completely.
- Mix espresso with brown sugar, warming gently until dissolved. Sprinkle gelatin over warm mixture and let sit for about 5 minutes to bloom.
- Melt white chocolate in a heatproof bowl. Remove from heat, pour in bloomed gelatin and espresso mixture. Cool slightly.
- Whip cream to soft peaks. Beat mascarpone cheese until smooth. Fold whipped cream into mascarpone until combined.
- Fold cooled espresso mixture into whipped cream and mascarpone blend. Mix until smooth.
- Spoon mousse into silicone molds, fill halfway. Place cookie rounds on top and freeze for at least 4 hours.
- Heat mirror glaze to 90°F (32°C). Invert molds to release domes and pour glaze over them.