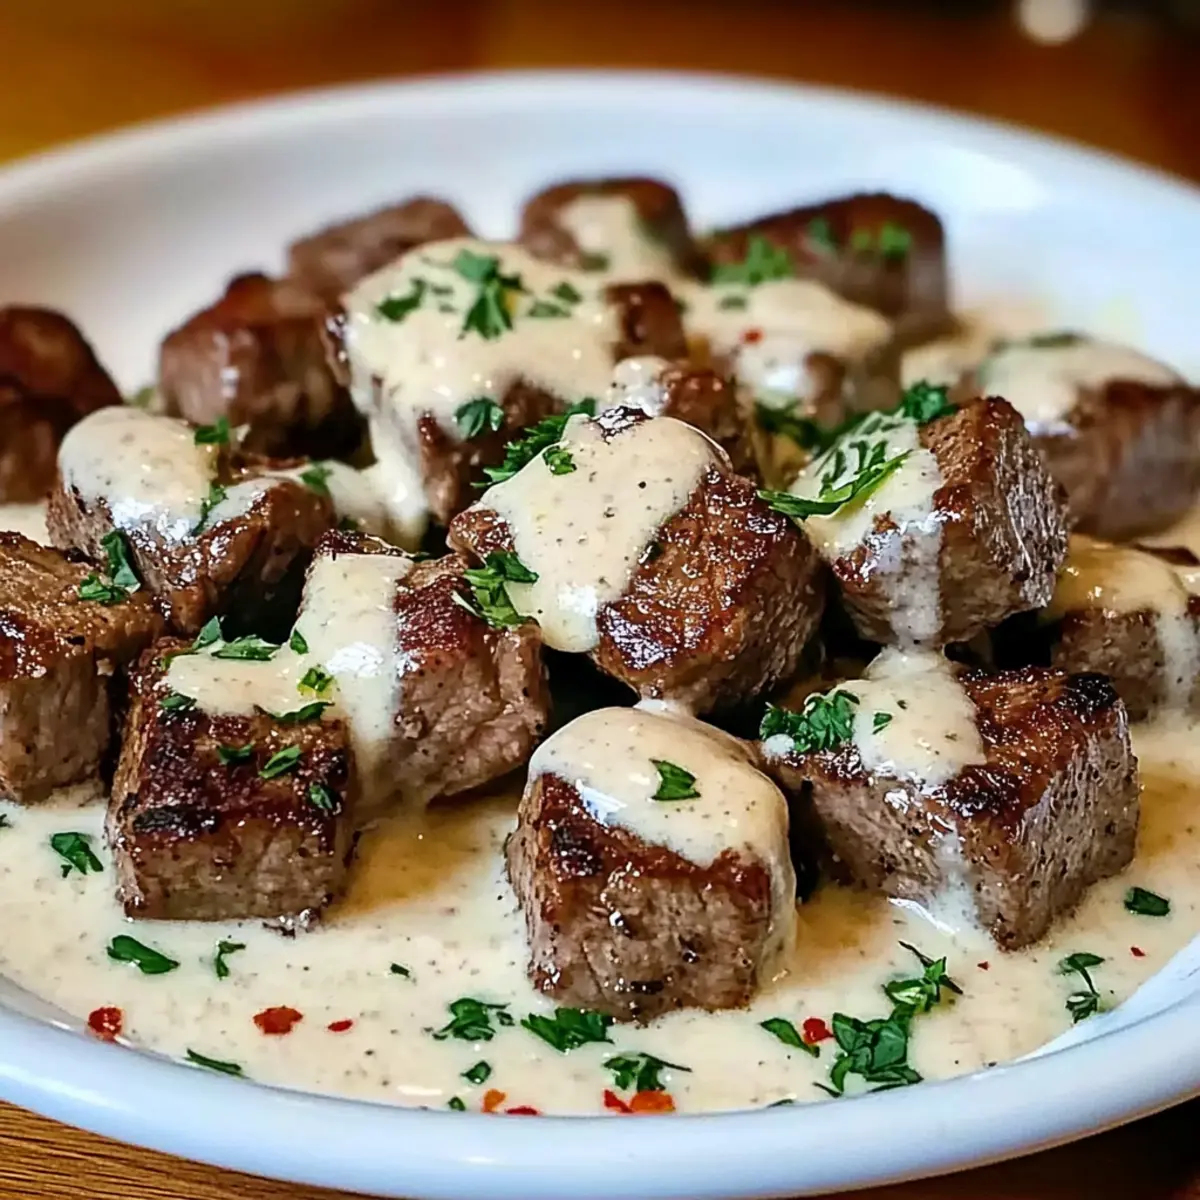
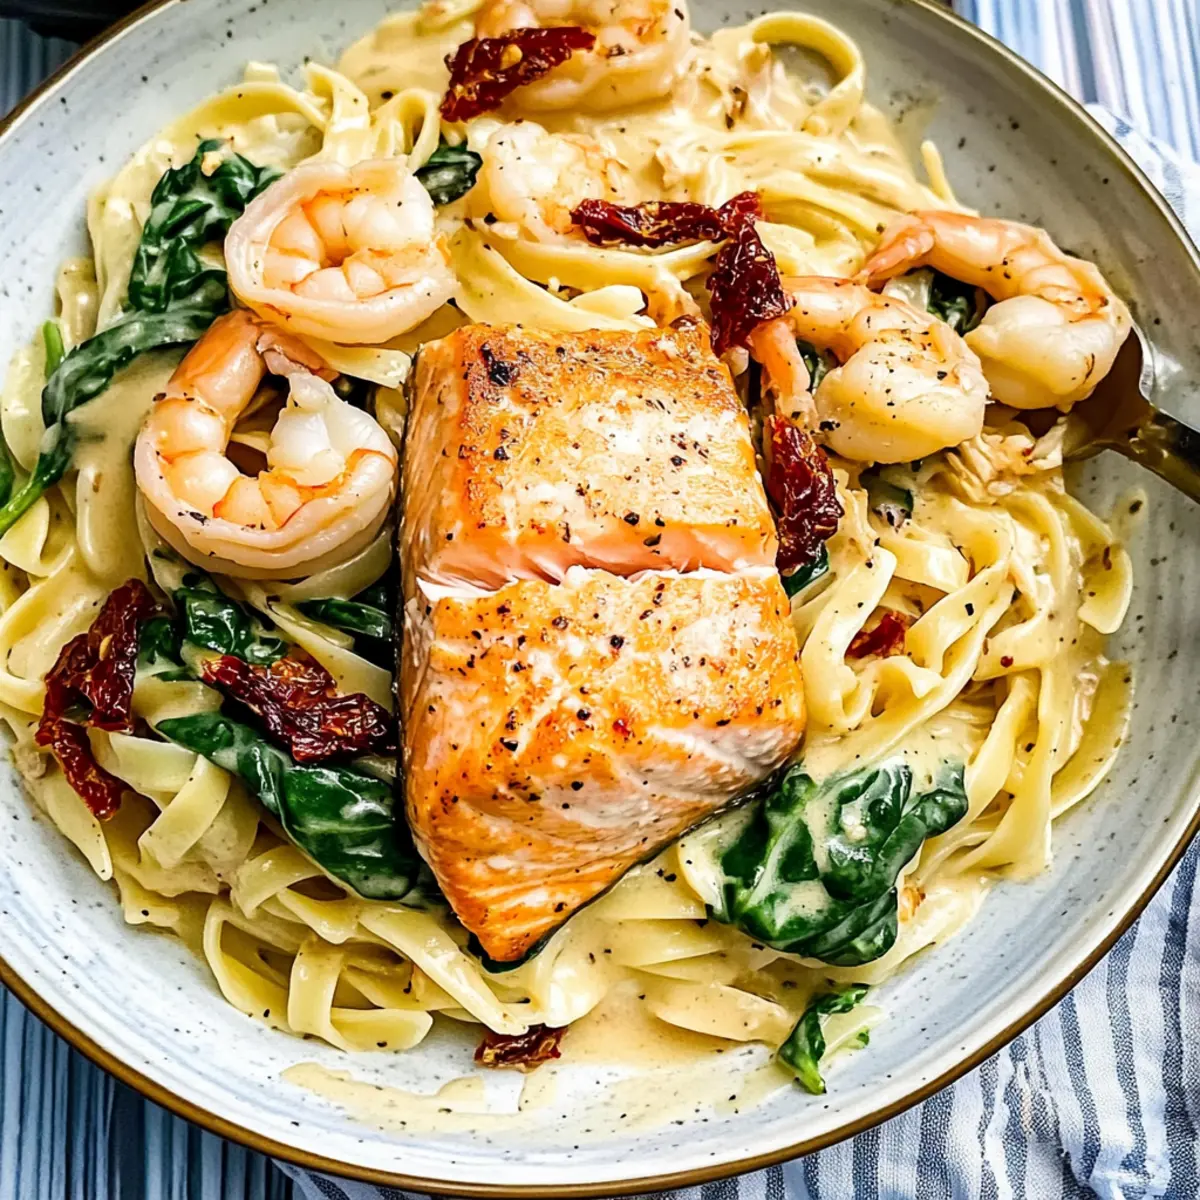
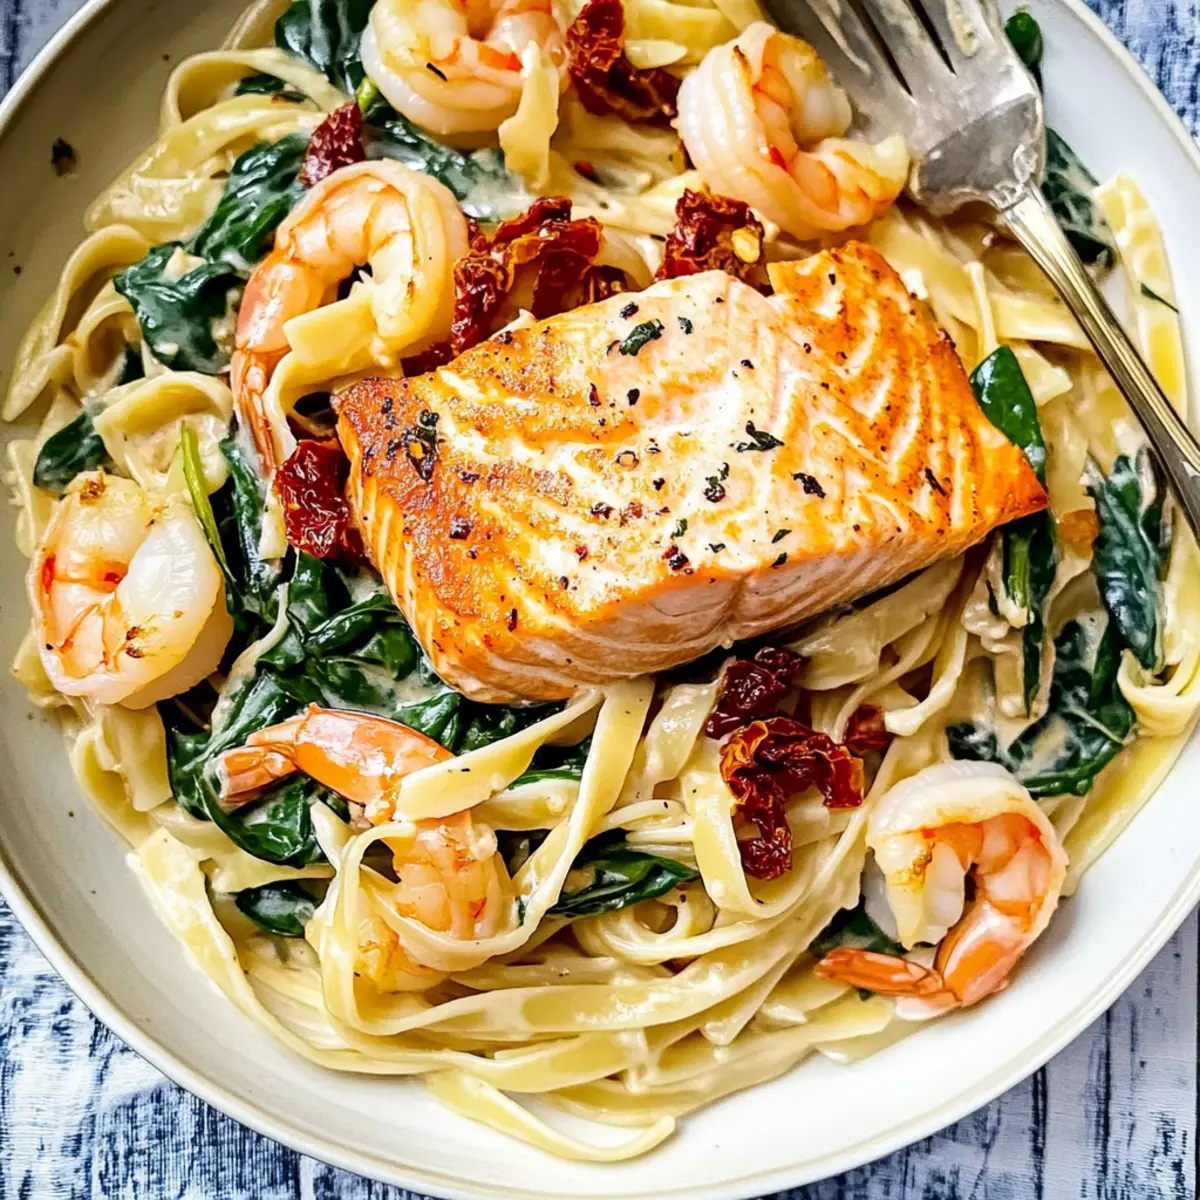
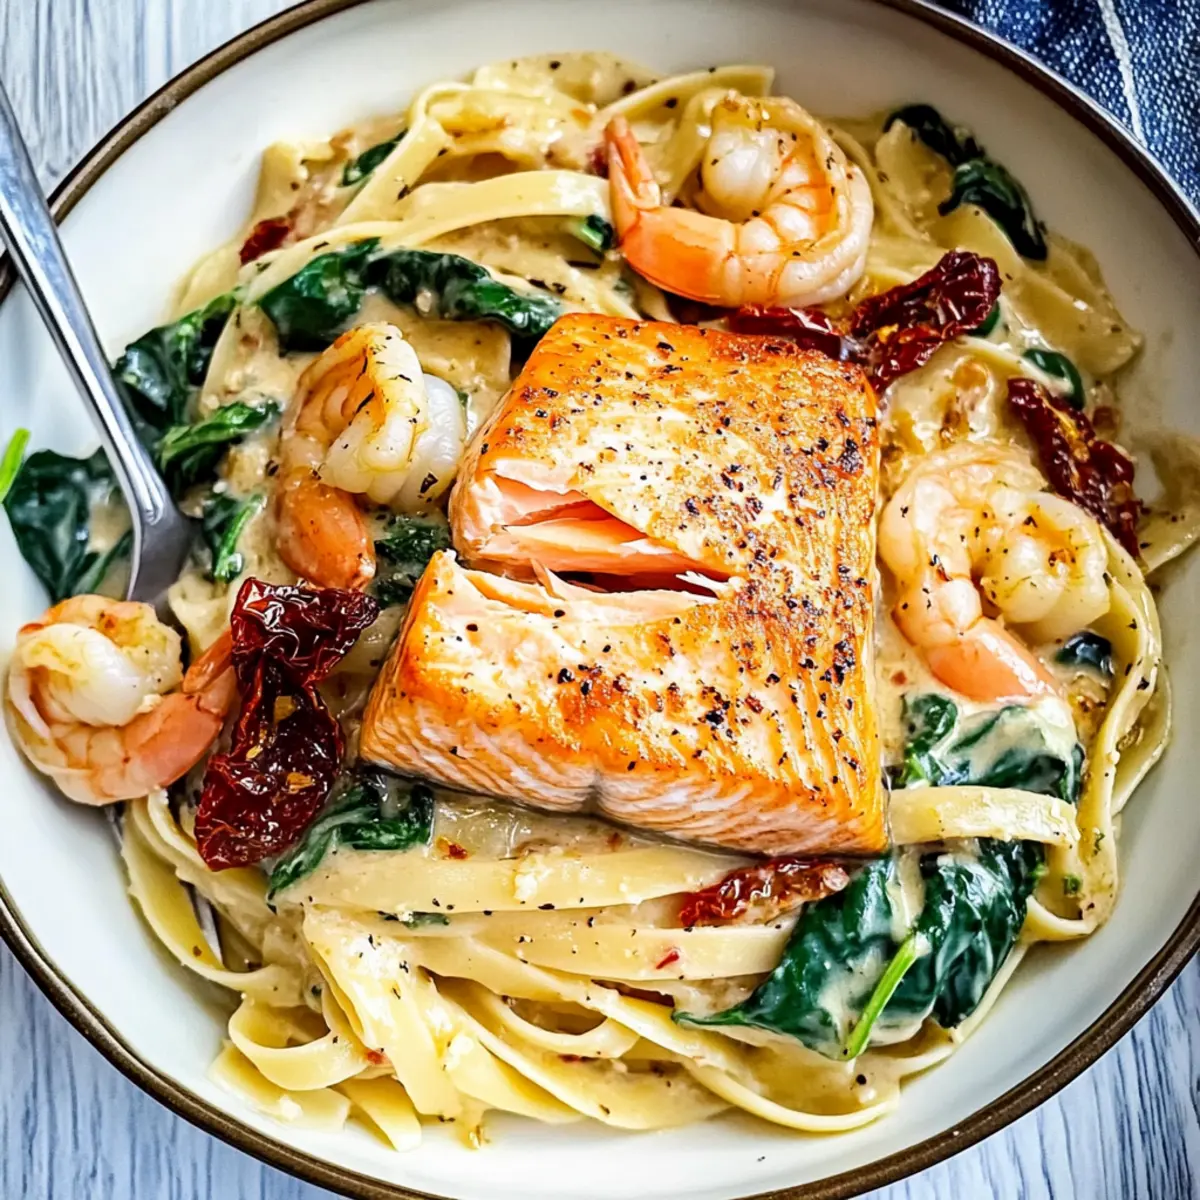
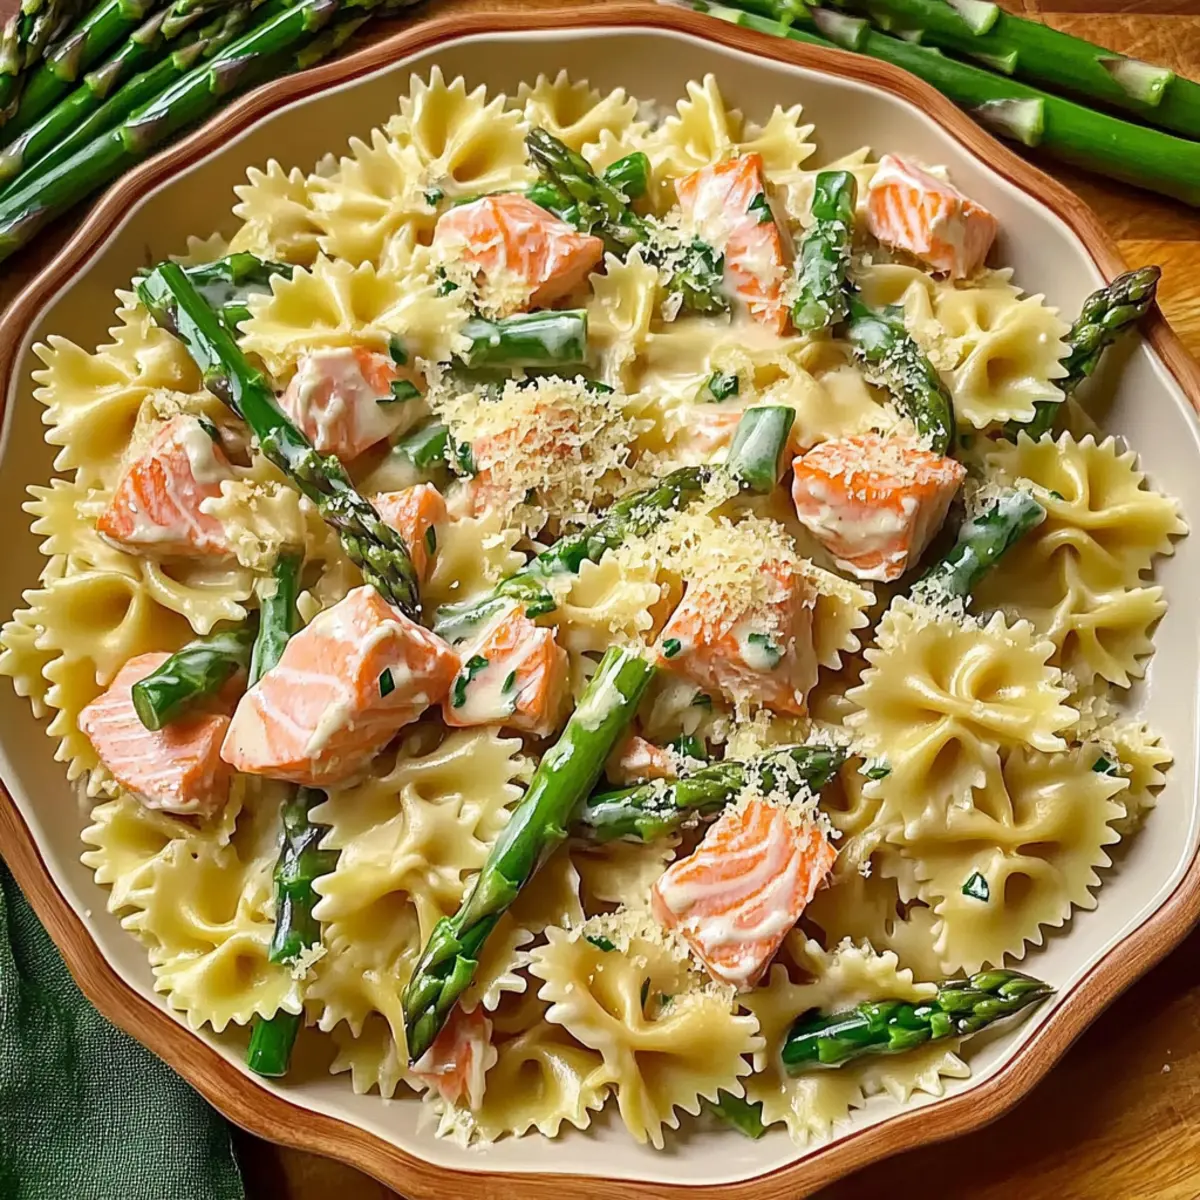
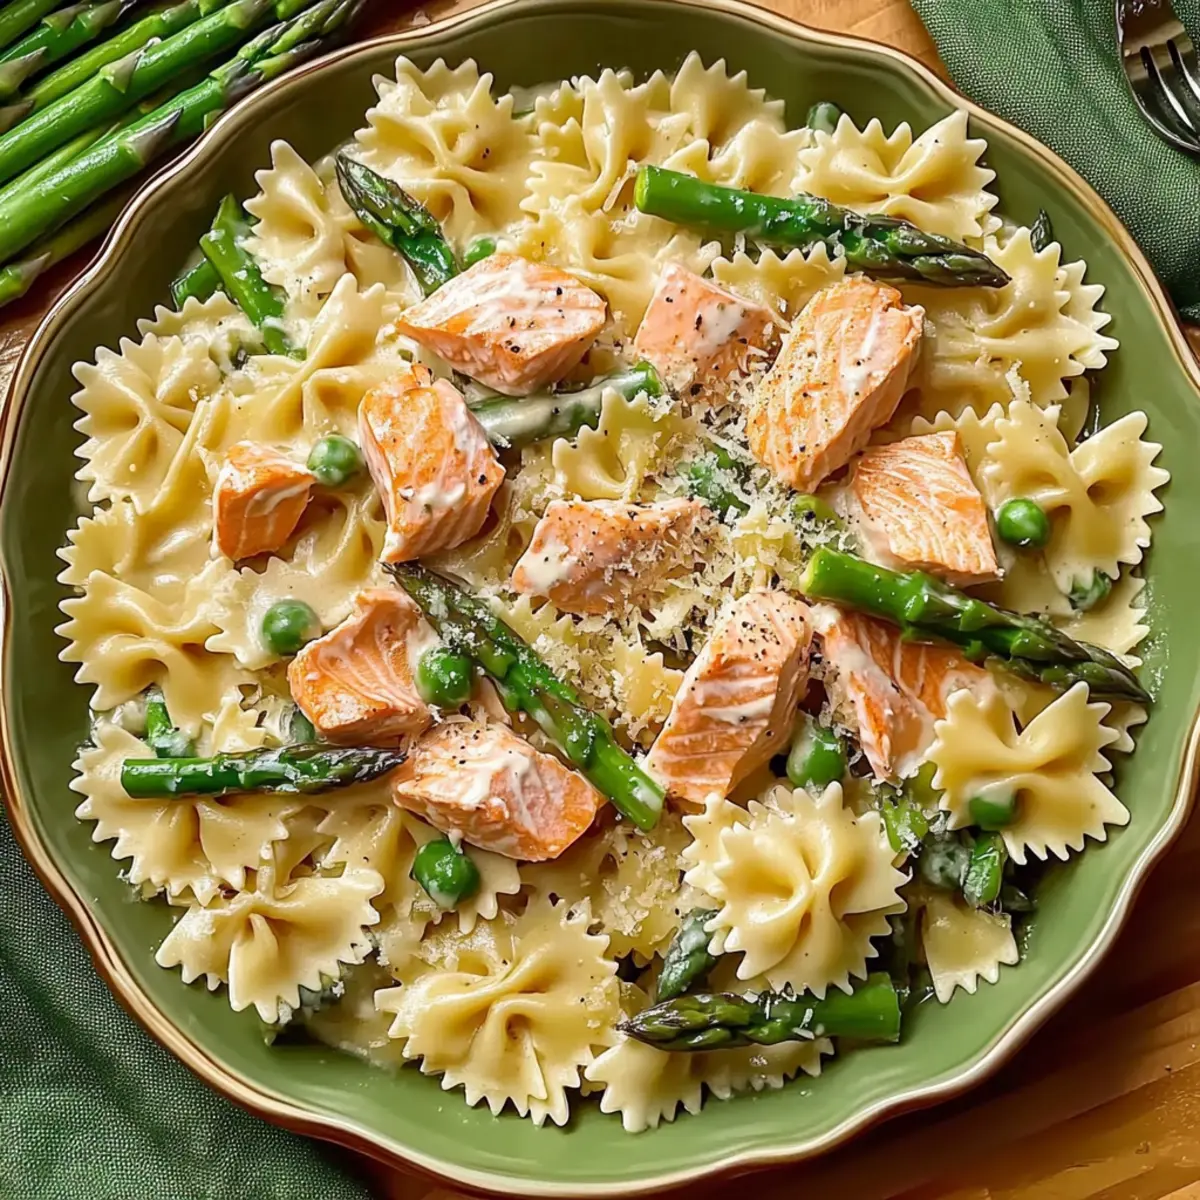
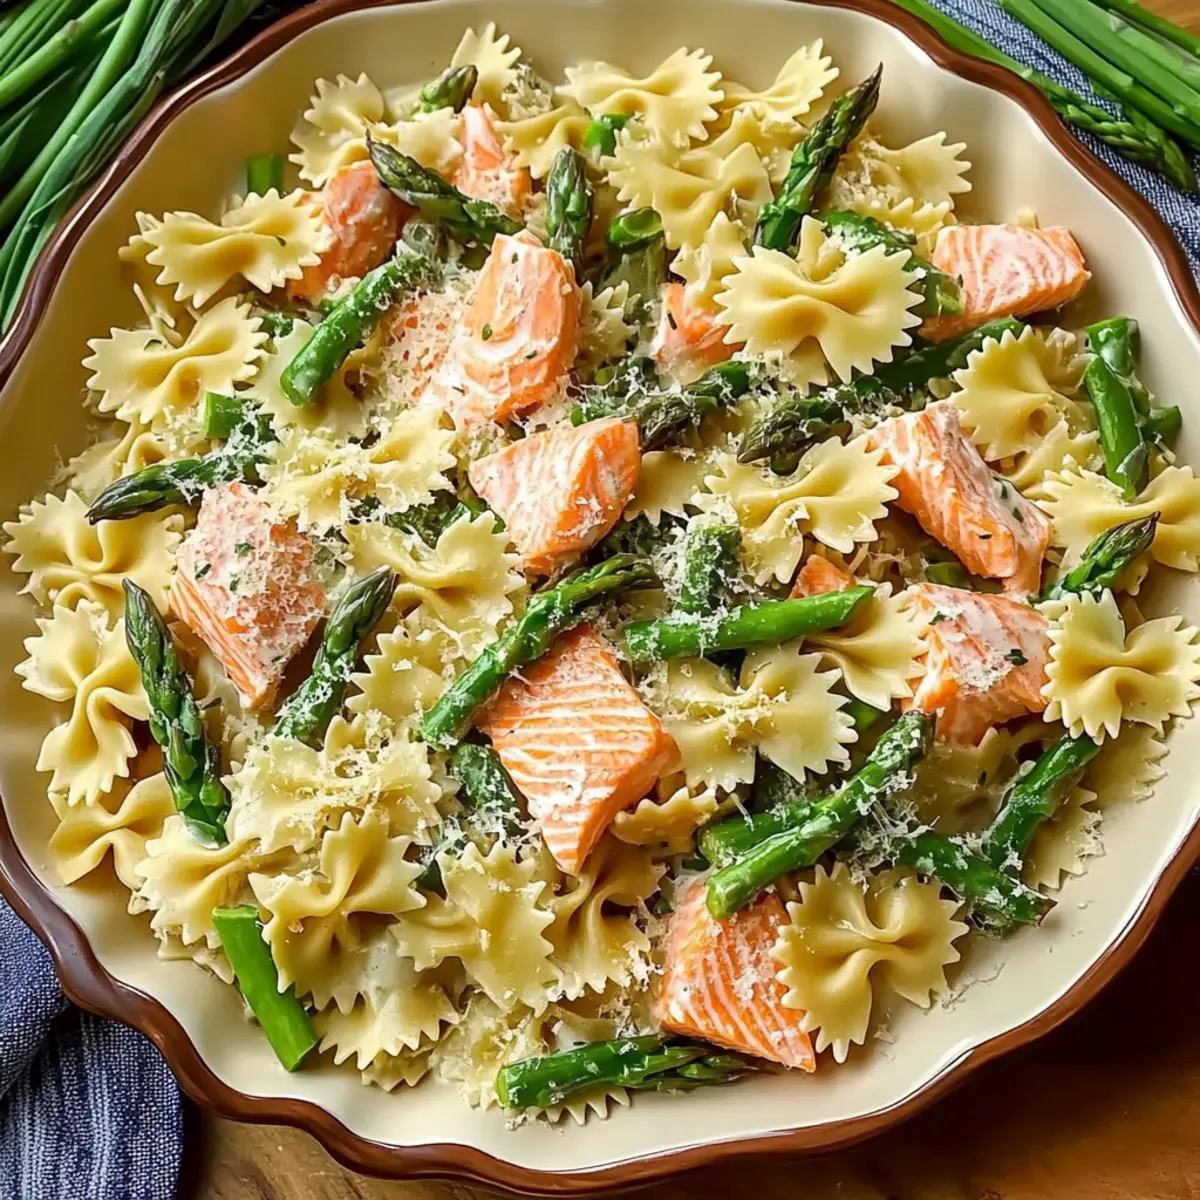
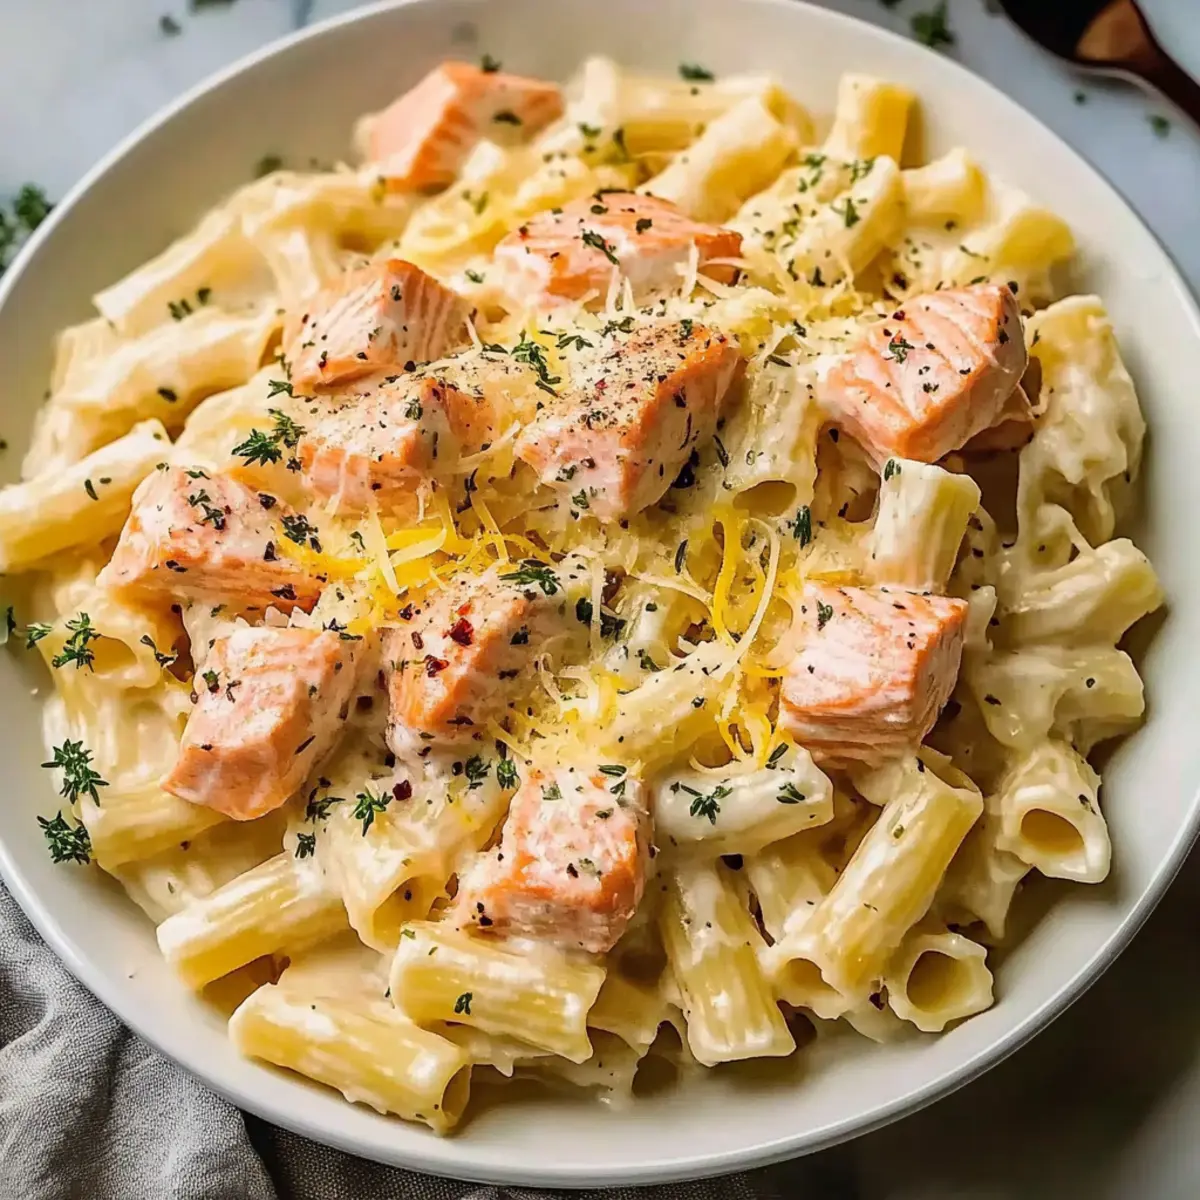
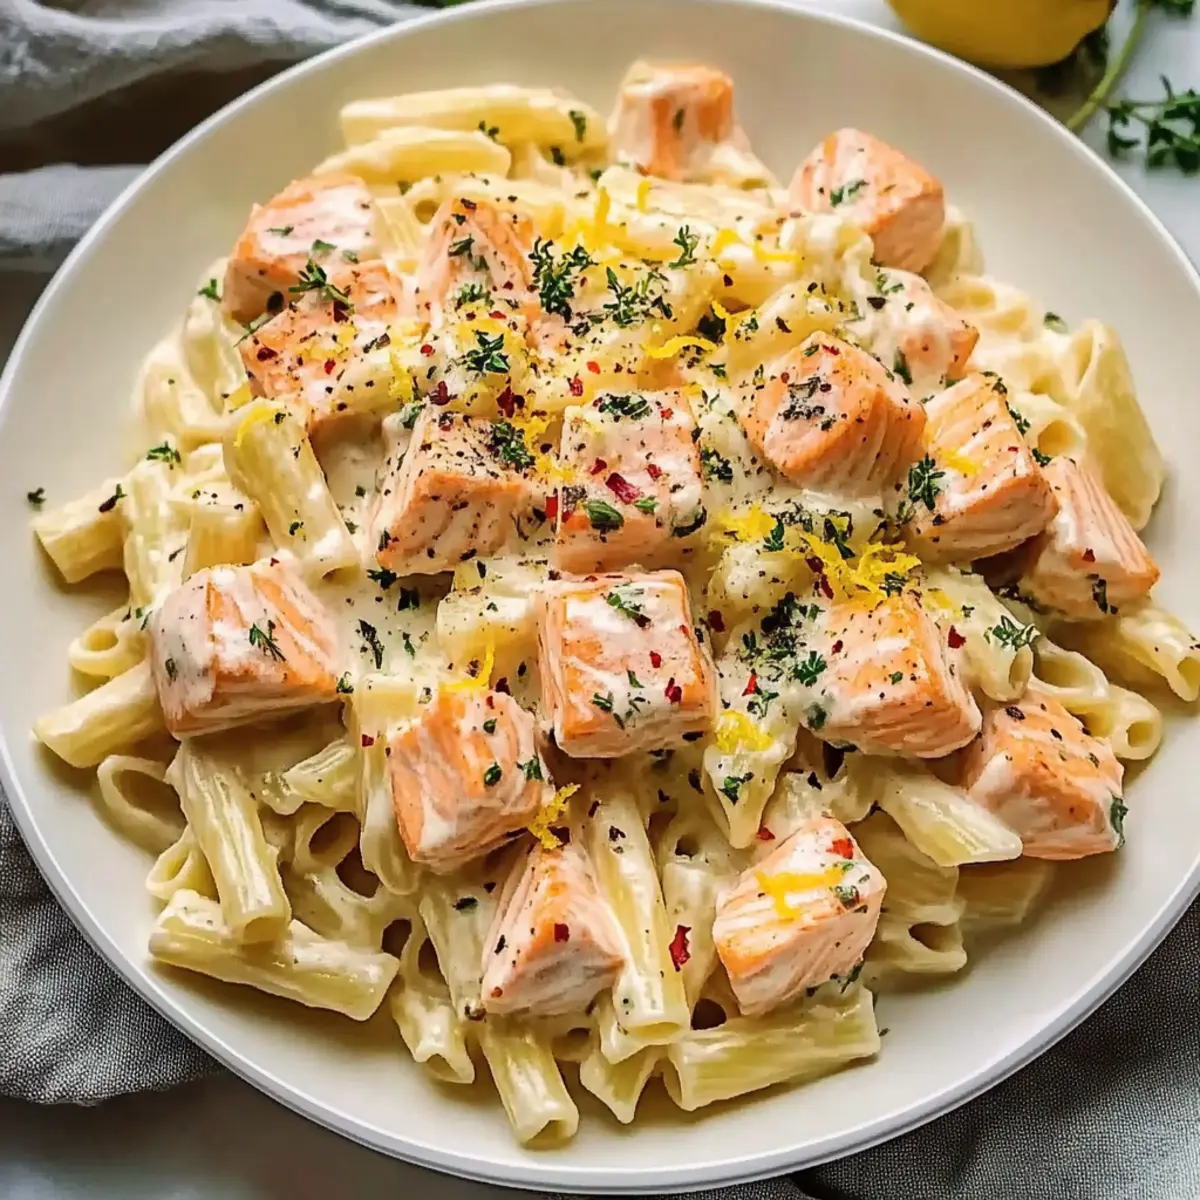
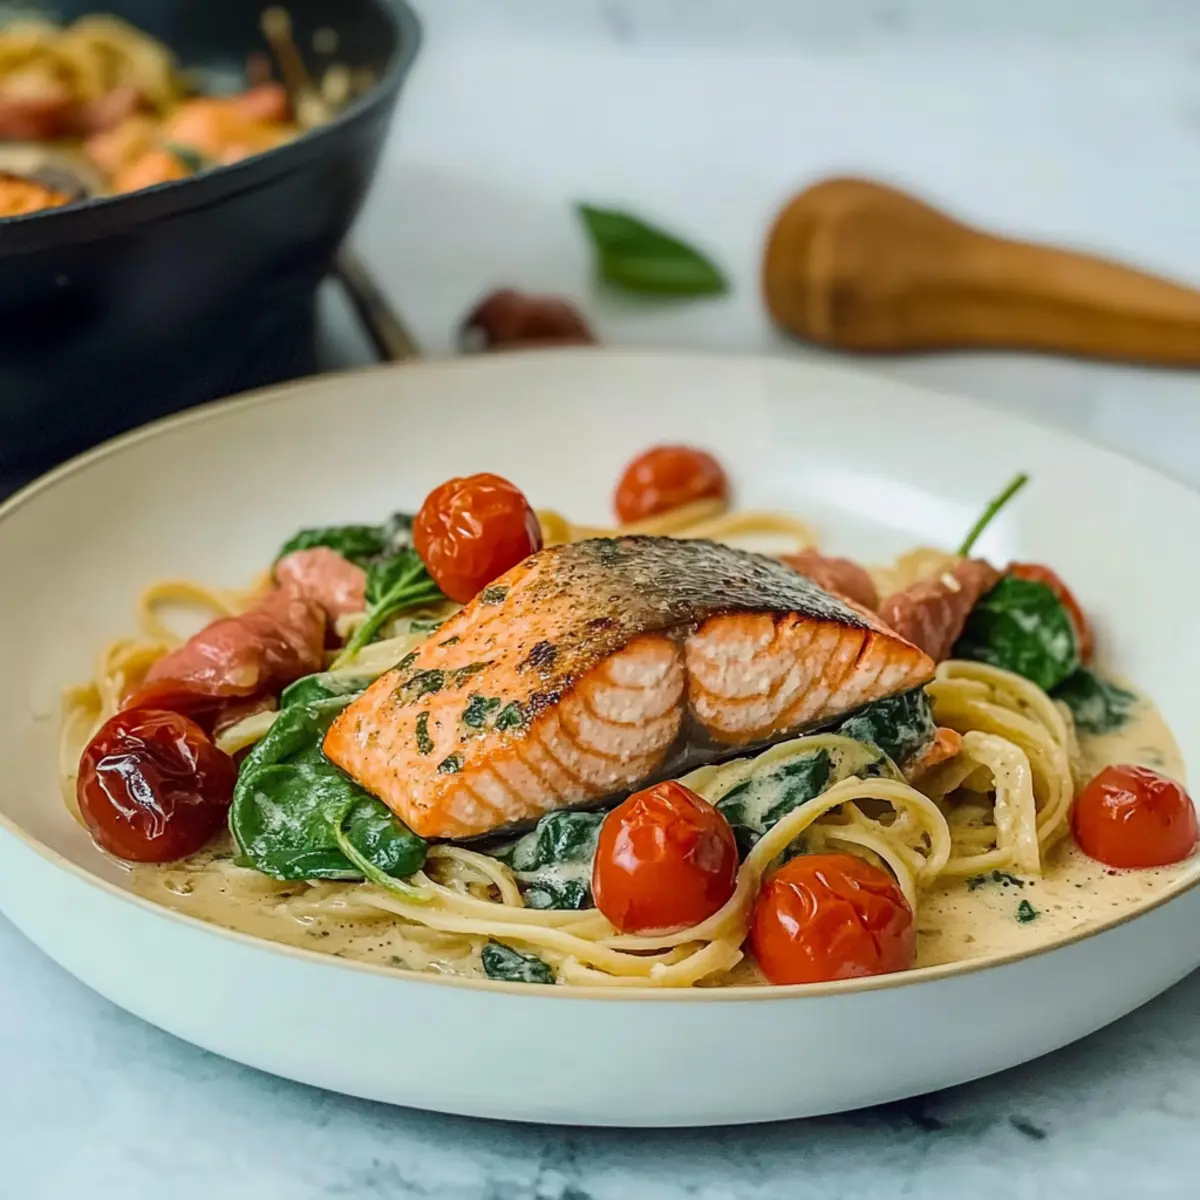
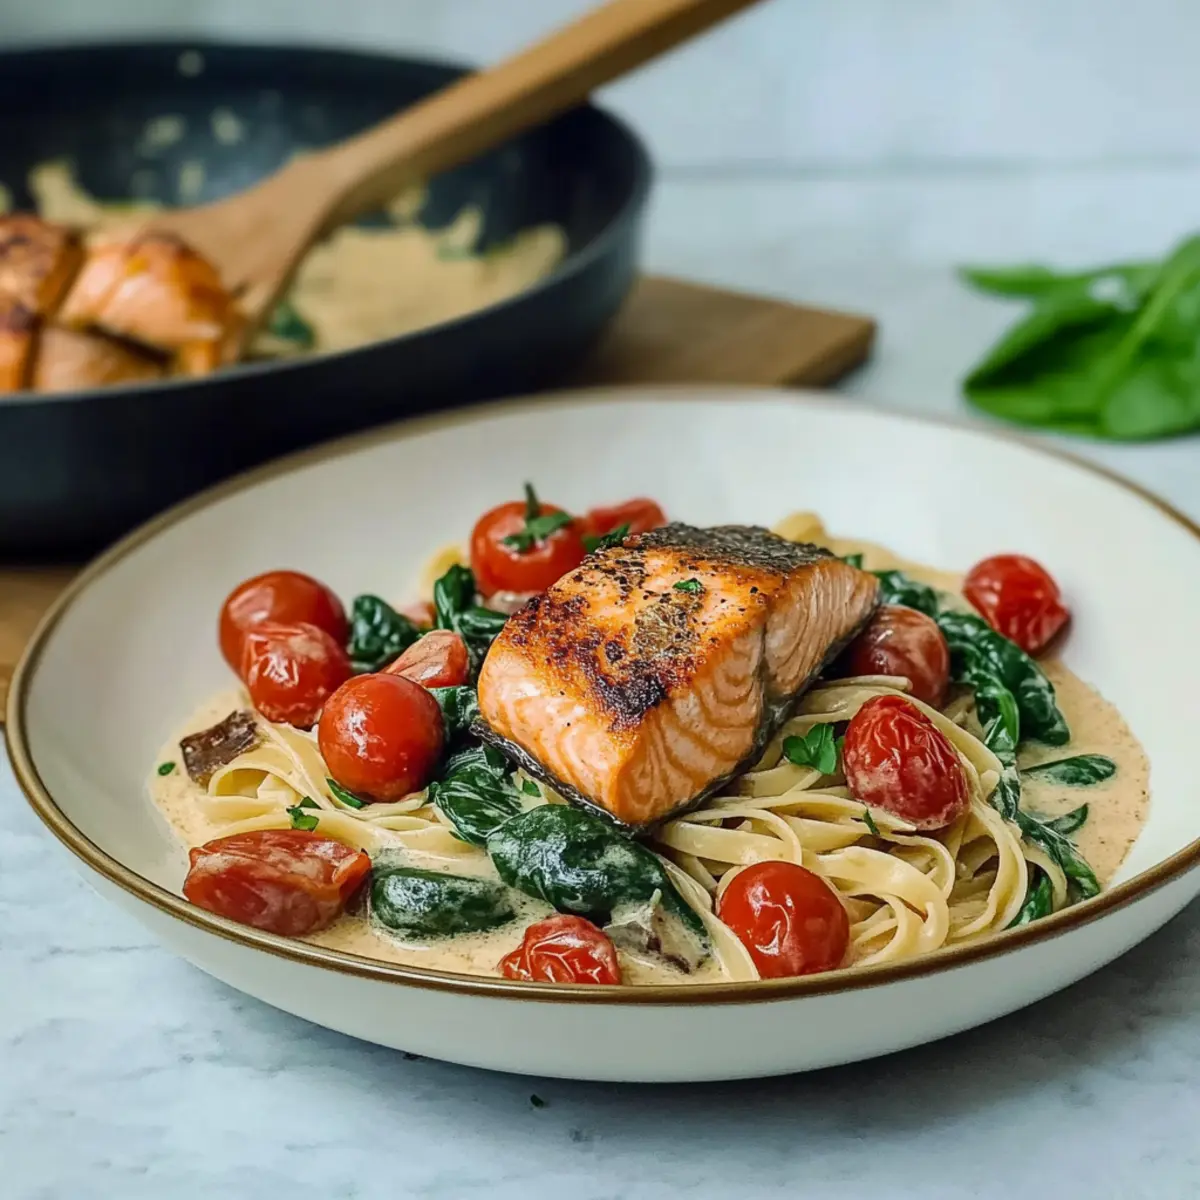
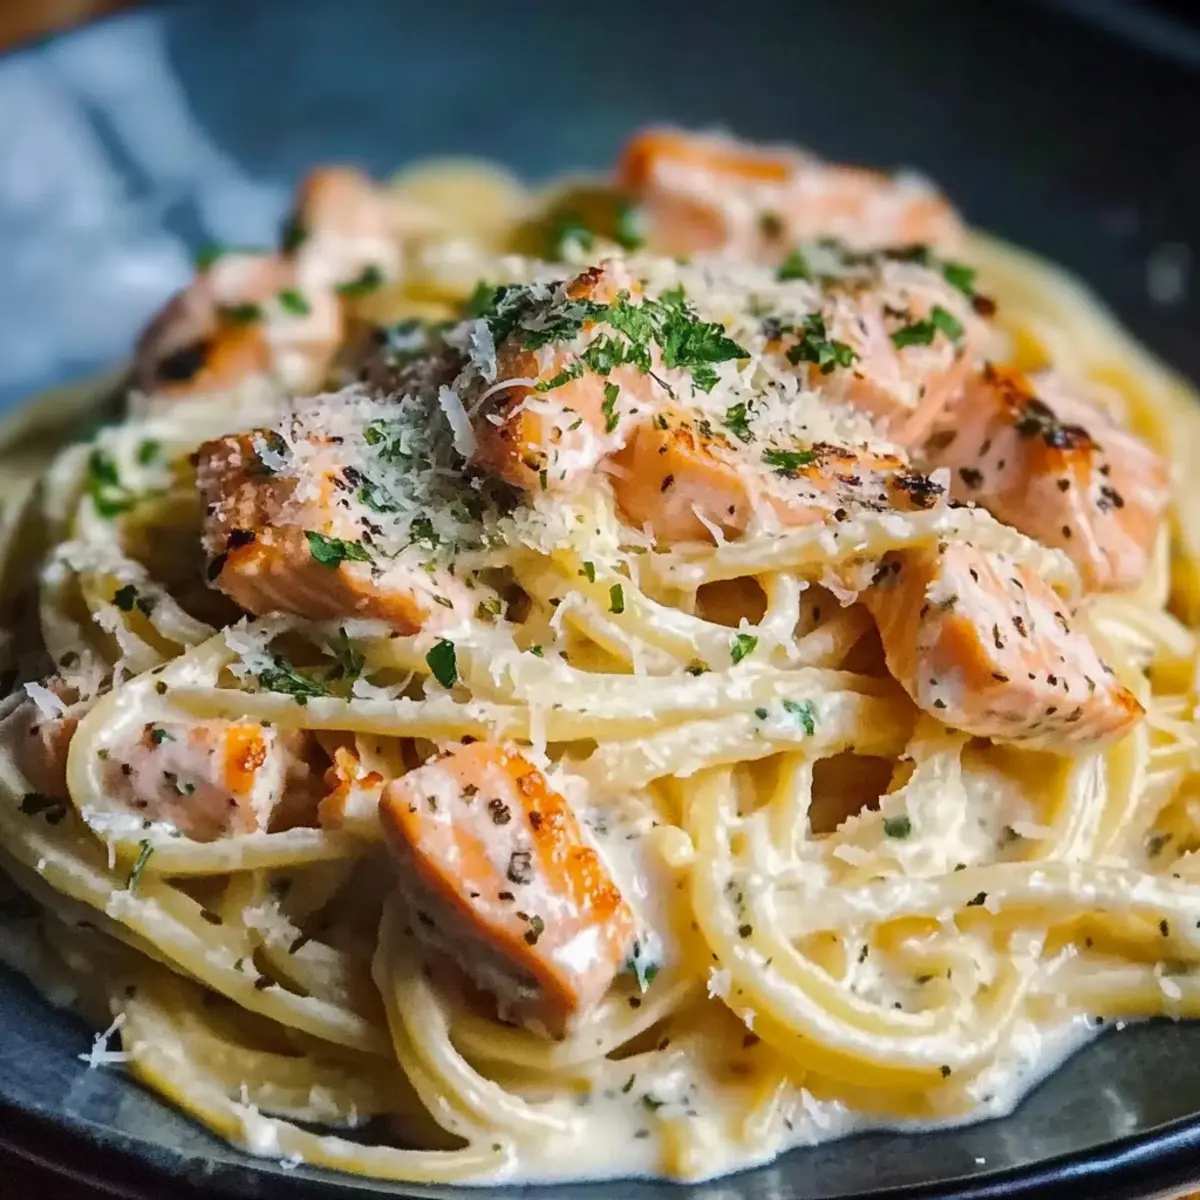
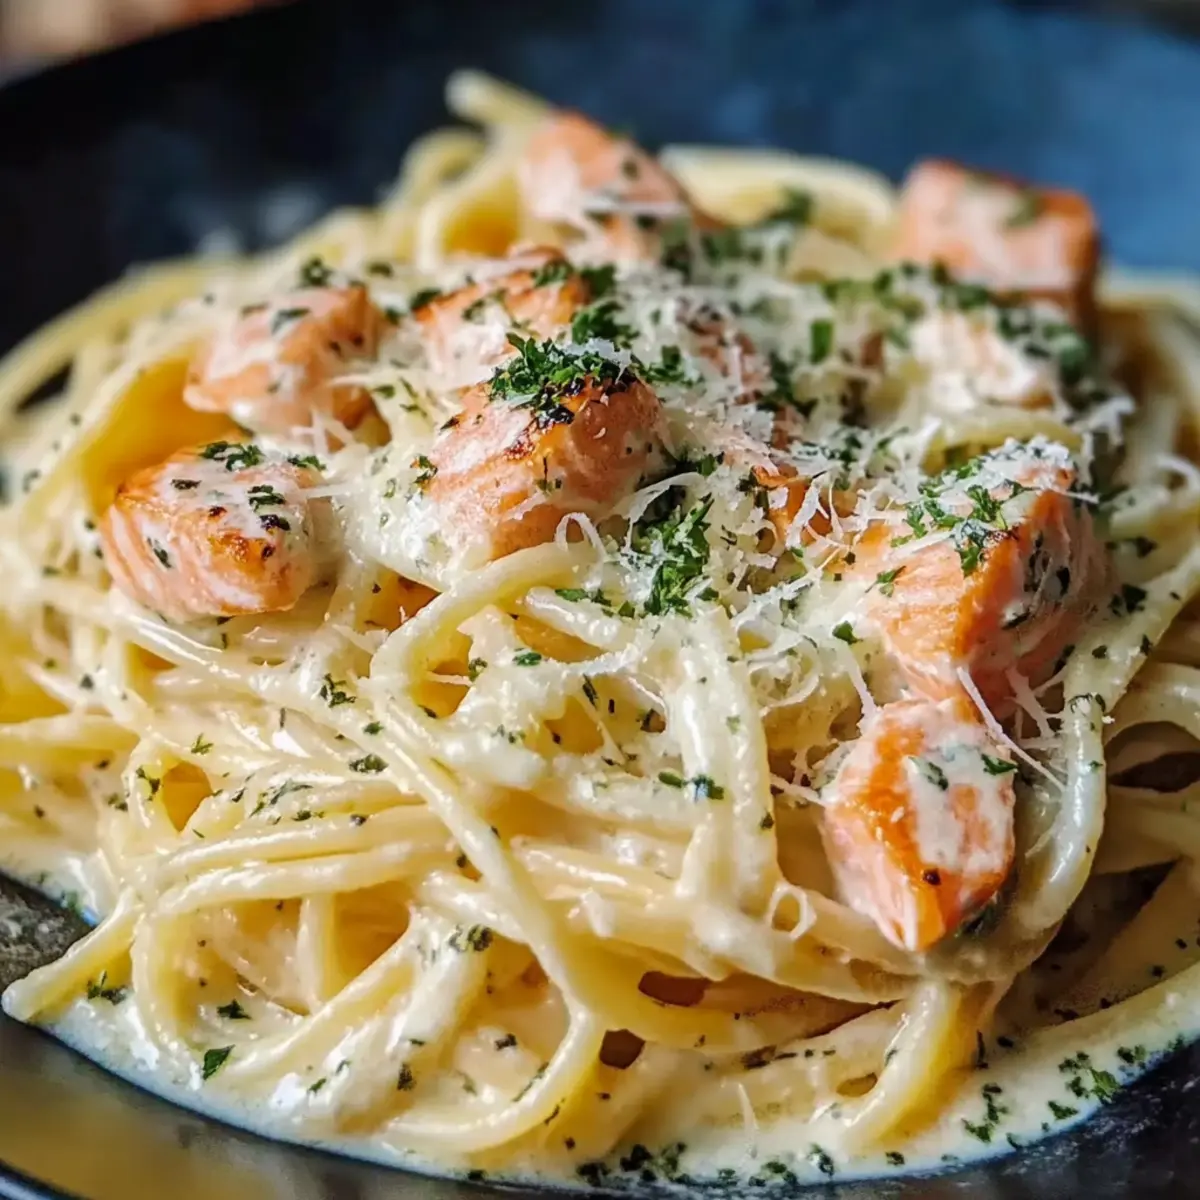
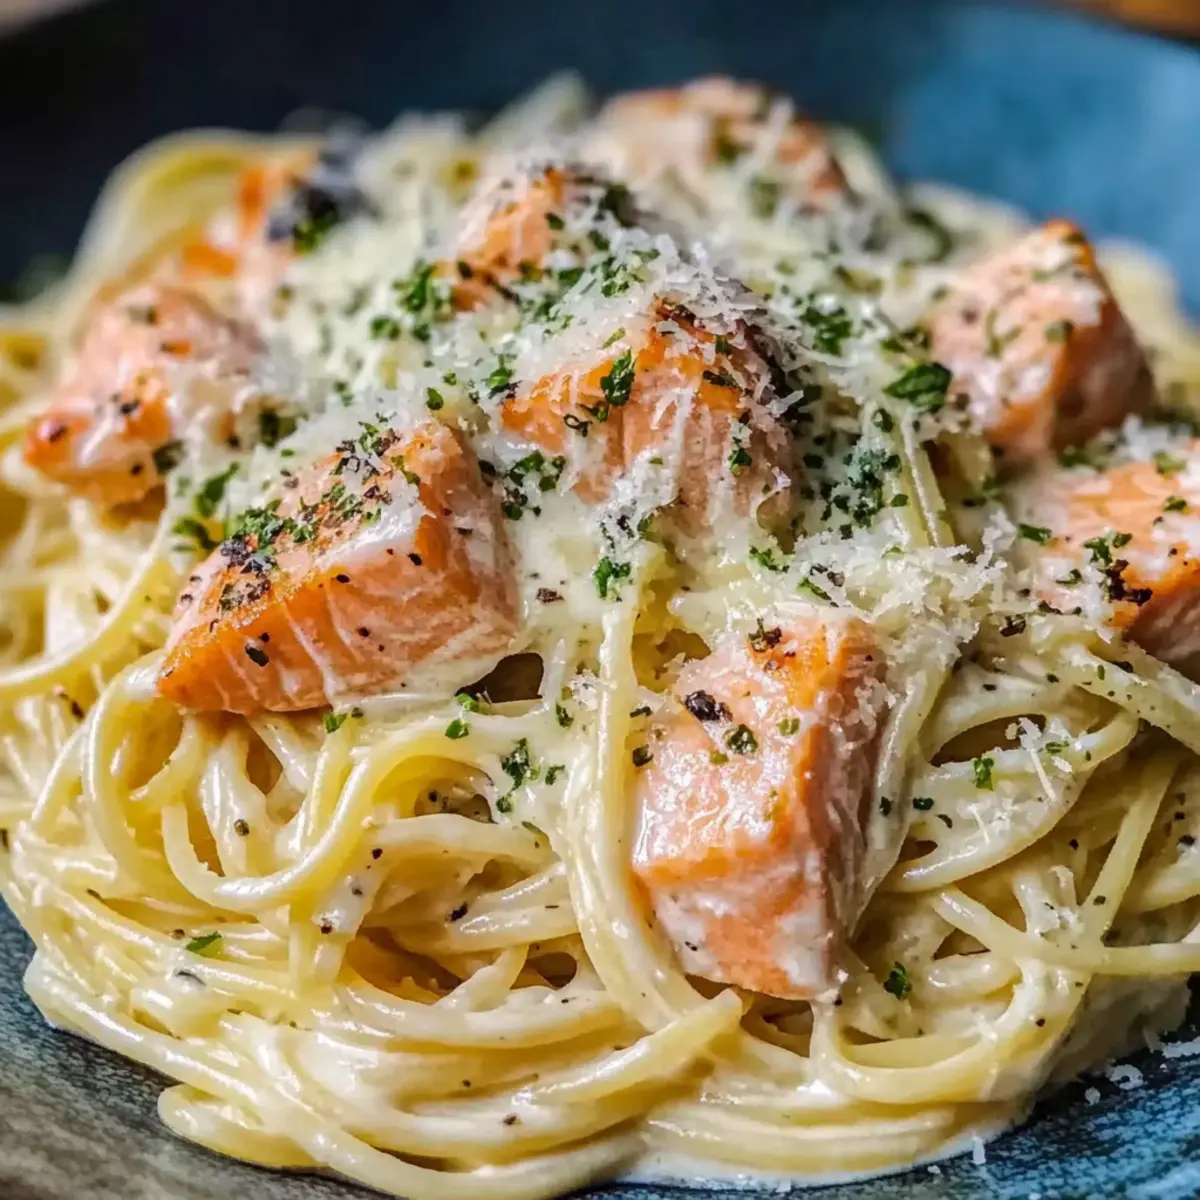
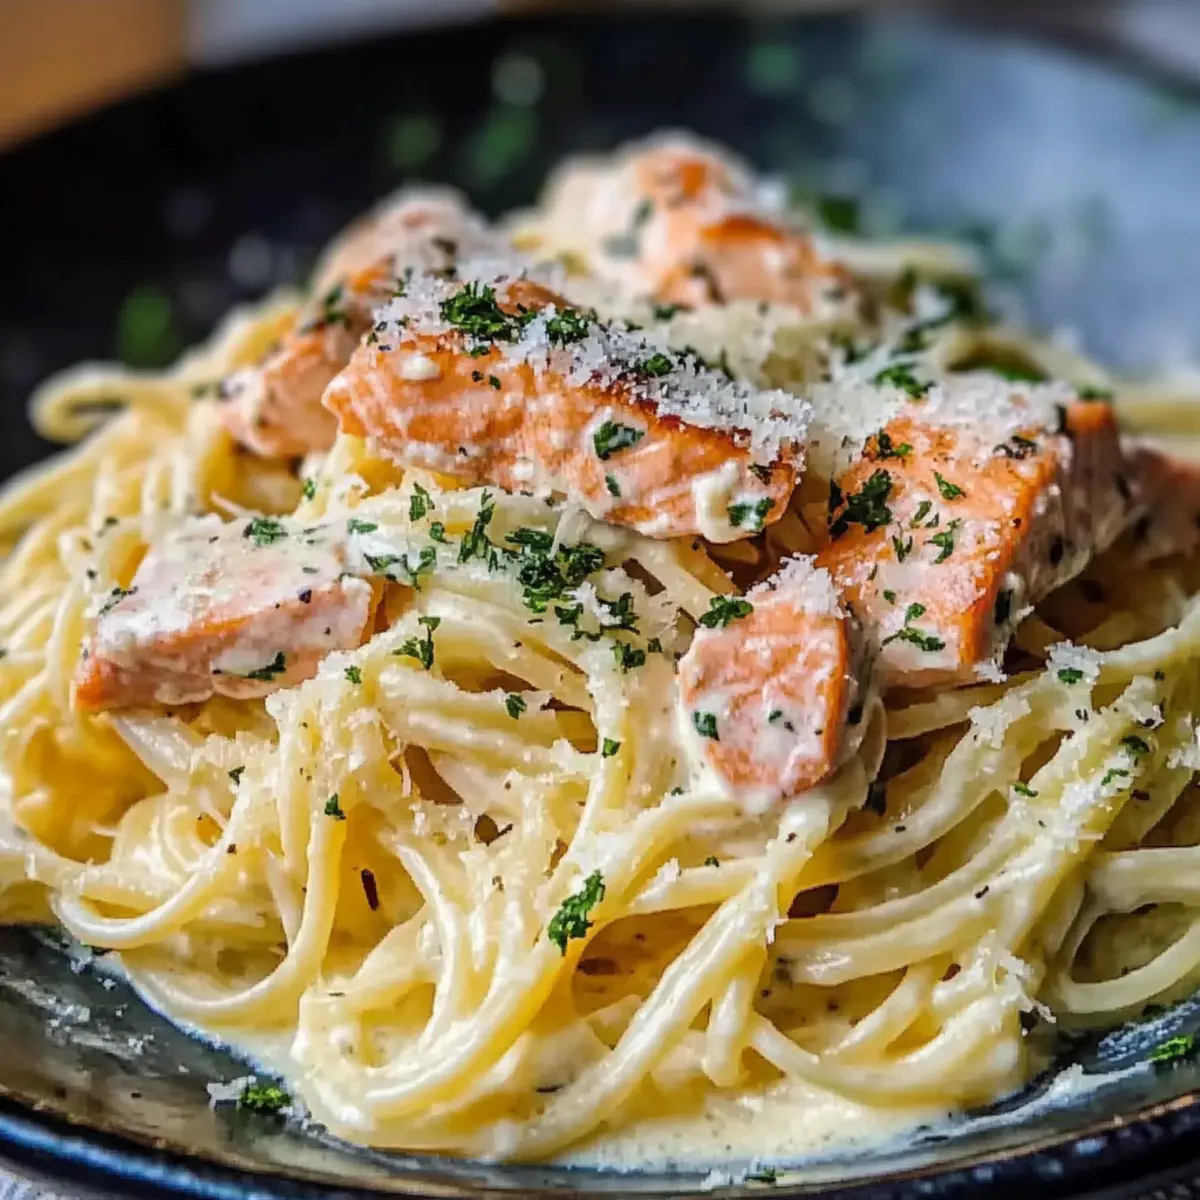
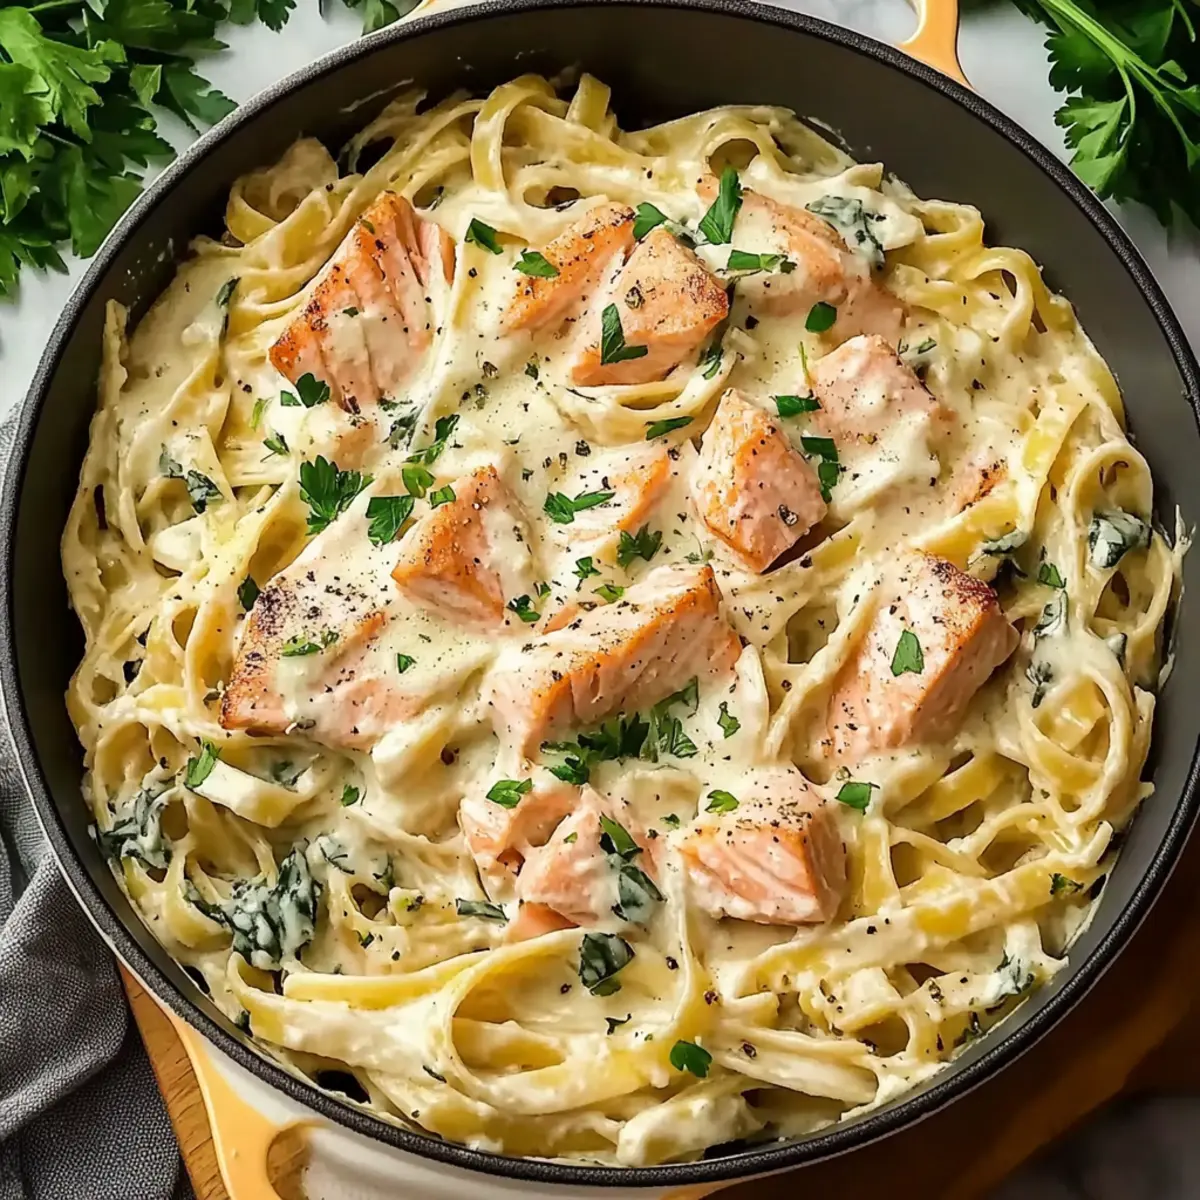
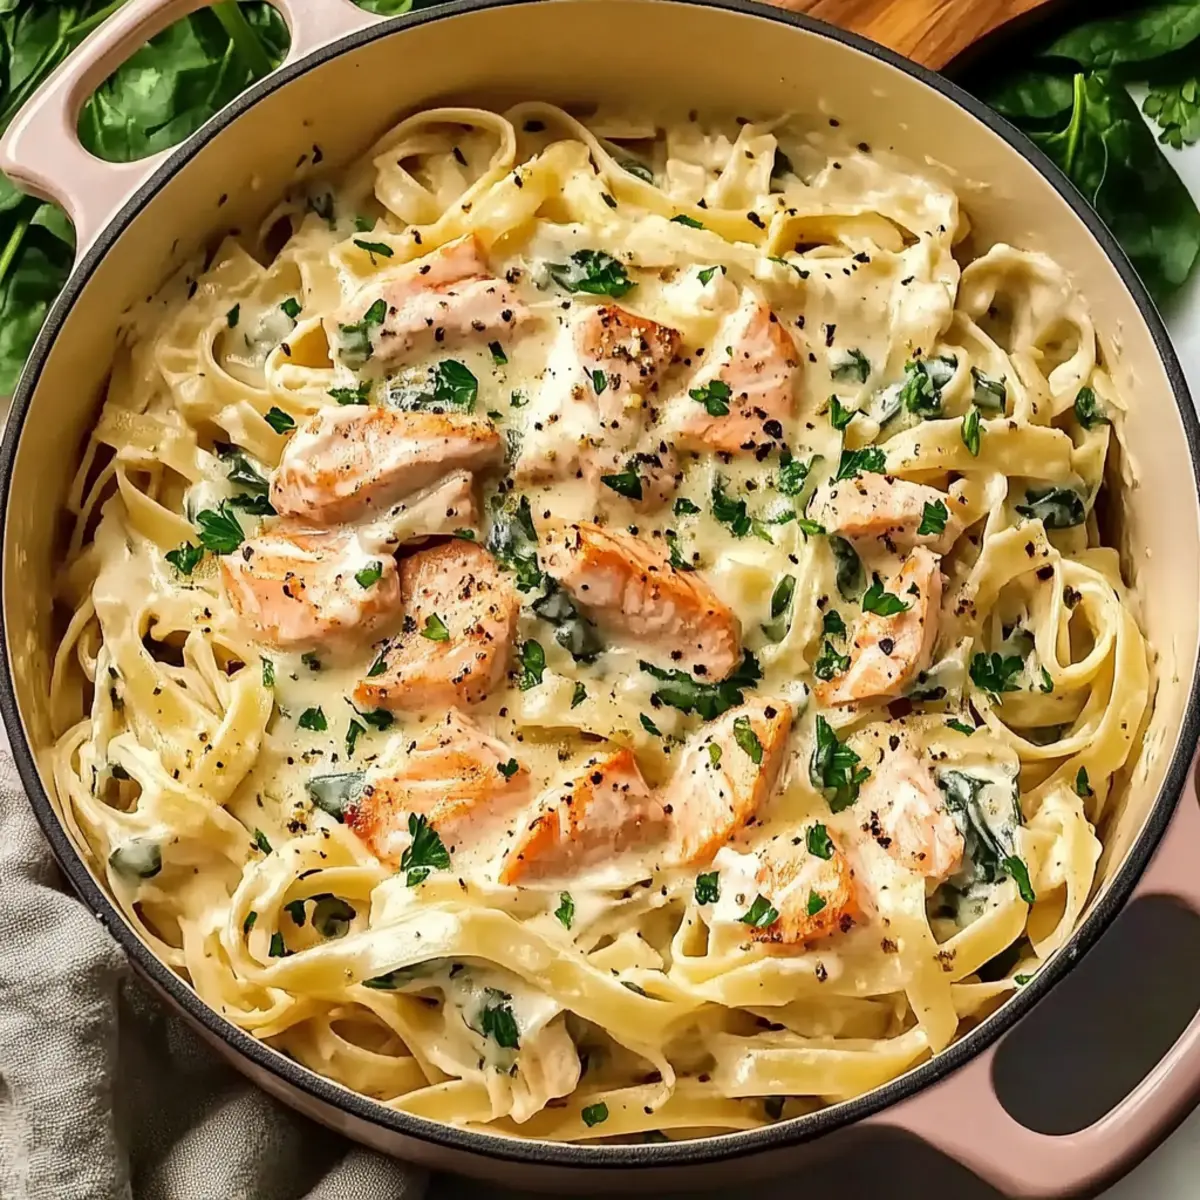
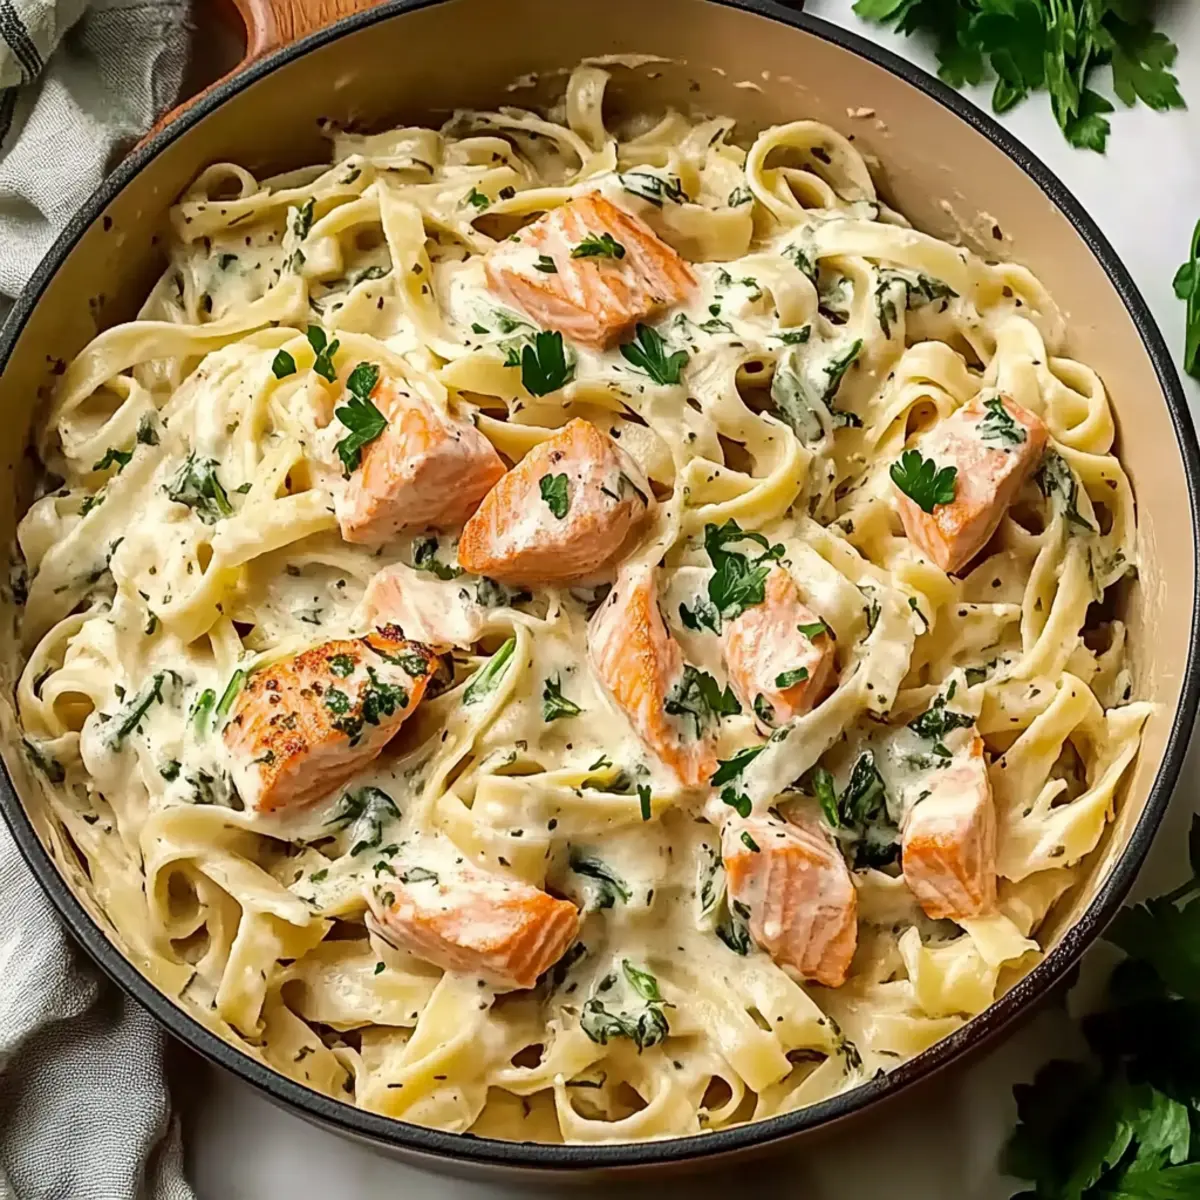
tastytrendingredients

  • Home
  • Recipes
    • Appetizers
    • Breakfast
    • Dessert
    • Dinner
    • Drinks
    • Salads
    • Snacks
    • Soups
  • About me
  • Contact me
menu icon
go to homepage
  • Home
  • Recipes
    • Appetizers
    • Breakfast
    • Dessert
    • Dinner
    • Drinks
    • Salads
    • Snacks
    • Soups
  • About me
  • Contact me
search icon
Homepage link
  • Home
  • Recipes
    • Appetizers
    • Breakfast
    • Dessert
    • Dinner
    • Drinks
    • Salads
    • Snacks
    • Soups
  • About me
  • Contact me
×

Crispy Hash Brown Crust Quiche Perfect for Brunch Bliss

March 30, 2026 by Grace Snow Leave a Comment

There’s something magical about the sound of sizzling hash browns kissing the pan, and I can’t help but think it’s the perfect introduction to our Crispy Hash Brown Crust Quiche with Prosciutto. This dish takes the classic quiche and elevates it with a crunchy, golden base that contrasts beautifully with the creamy, savory filling. Perfect for brunch or dinner, it’s both a labor of love and a simple recipe to whip up for those unexpected guests. Plus, you can easily customize it with your favorite ingredients, whether you fancy bacon or smoked salmon instead of prosciutto. With this quiche, not only will your friends and family be impressed, but their smiles will be exactly what you need to make your kitchen feel like home. Curious to see how this dish comes together? Let’s get cooking!

Why is this quiche a game changer?

Simplicity: You won’t believe how easy it is to make this Crispy Hash Brown Crust Quiche! With just a handful of ingredients, it’s perfect for even novice cooks.

Customizable Flair: Enjoy the flexibility to switch out fillings—try Pumpkin Brownies Decadent for those who love sweet indulgences, or mix in any favorite vegetables to suit your taste.

Deliciously Crunchy: The unique hash brown base adds a satisfying crunch that transforms traditional quiche into a mouthwatering experience.

Brunch Star: Whether it’s a cozy breakfast at home or a festive gathering, this dish is sure to steal the show! Pair it with a refreshing mimosa or coffee for an unforgettable brunch.

Time-Saving: Quick to prepare and perfect for make-ahead meals, this quiche is a fantastic option for busy mornings or unexpected guests.

Crispy Hash Brown Crust Quiche Ingredients

• Dive into this delightful dish with these easy-to-find ingredients!

For the Crust

  • Frozen Hash Browns – Perfect for creating a sturdy base; feel free to substitute fresh grated potatoes after squeezing out excess moisture.
  • Eggs – The heart of the quiche, providing essential protein and a creamy texture.

For the Filling

  • Heavy Cream – Adds a luxurious richness; coconut milk serves as a delicious dairy-free substitute.
  • Gruyere Cheese – Offers a deep, nutty flavor; mozzarella or cheddar make excellent alternatives if you prefer.
  • Prosciutto – The star of the show, providing savory elegance; you can easily switch to bacon, ham, or even smoked salmon.
  • Spinach – A great way to pack in vitamins; it’s optional but delicious if you choose to include it!
  • Cherry Tomatoes – For a pop of color and flavor; these can be omitted or replaced with bell peppers for a different twist.

Now that you're equipped with the ingredients, let’s get ready to bring this Crispy Hash Brown Crust Quiche to life and impress everyone at your table!

Step‑by‑Step Instructions for Crispy Hash Brown Crust Quiche

Step 1: Prepare the Hash Brown Crust
Begin by preheating your oven to 375°F (190°C). While it heats, take the frozen hash browns and thoroughly squeeze out any excess moisture using a clean kitchen towel. Press the dry hash browns evenly into a greased pie dish or round cake pan, forming a crust. Bake for about 20 minutes, or until the crust turns a lovely golden brown.

Step 2: Mix the Filling
In a large mixing bowl, whisk together 6 eggs and 1 cup of heavy cream until well combined. Next, gently fold in 1 cup of shredded Gruyere cheese, 4 oz of chopped prosciutto, 1 cup of fresh spinach, and ½ cup of halved cherry tomatoes. The mixture should be rich and colorful, showcasing the delightful combination of flavors for your Crispy Hash Brown Crust Quiche.

Step 3: Combine and Bake
Once your hash brown crust has pre-baked to perfection, remove it from the oven and pour the egg filling over the crust, spreading it evenly. Return the quiche to the oven and bake at 375°F (190°C) for 30 to 40 minutes. You'll know it's ready when the filling is set and the top is lightly golden, creating an inviting aroma that fills your kitchen.

Step 4: Cool and Serve
After baking, allow the Crispy Hash Brown Crust Quiche to cool for about 10 minutes before slicing. This slight cool-down helps the filling set further and makes for neater slices. Serve warm, perhaps alongside a fresh green salad or your favorite beverage, and prepare to be greeted with delighted smiles around the table!

Make Ahead Options

These Crispy Hash Brown Crust Quiches are a dream for meal prep enthusiasts! You can prepare the hash brown crust up to 24 hours in advance, pressing the drained hash browns into the pie dish and pre-baking them. Store the cooled crust covered in the refrigerator to maintain its crispiness. You can also mix the filling (eggs, cream, cheese, prosciutto, spinach, and tomatoes) up to 3 days ahead—just be sure to whisk it well before pouring it into the crust. When you’re ready to enjoy your quiche, simply pour the filling over the pre-baked crust and bake as directed. This will ensure you'll have a delicious, time-saving meal with minimal effort on busy weeknights!

Expert Tips for Crispy Hash Brown Crust Quiche

• **Dry Hash Browns: ** Make sure to thoroughly squeeze out moisture from your hash browns; excess moisture can lead to a soggy crust.

• Pre-bake for Success: Always pre-bake your hash brown crust until golden brown; this simple step ensures it stays crisp even after adding the filling.

• Egg-to-Liquid Ratio: Keep a balanced egg-to-liquid ratio for the filling to set properly; too much cream can lead to a runny quiche.

• Use Foil: If the edges of your quiche brown too quickly, lightly cover them with foil for the last baking stages to avoid burning.

• Customize Carefully: When swapping ingredients for the Crispy Hash Brown Crust Quiche, maintain similar moisture levels to keep your quiche texture perfect.

Storage Tips for Crispy Hash Brown Crust Quiche

Fridge: Store leftover quiche in an airtight container for up to 3 days, ensuring it stays fresh and delectable for your next meal.

Freezer: Freeze slices tightly wrapped in plastic wrap or aluminum foil for up to 2 months. For best results, store them in a freezer-safe container.

Reheating: To reheat, place the quiche in an oven preheated to 350°F (175°C) for about 15-20 minutes, ensuring it warms through without losing its deliciously crispy texture.

What to Serve with Crispy Hash Brown Crust Quiche

Brighten your dining table with scrumptious sides that perfectly complement this delightful quiche.

  • Fresh Green Salad: Crisp greens with a zesty vinaigrette contrast beautifully with the quiche's rich filling. The freshness lightens each bite!
  • Sautéed Asparagus: Tender spears, lightly dressed with olive oil and garlic, add a lovely crunch and earthy flavor that enhances the overall meal experience.
  • Roasted Cherry Tomatoes: Their sweet juiciness pairs beautifully with the savory quiche, creating a harmony of flavors that delights the palate.
  • Fruit Salad: A refreshing mix of seasonal fruits offers a sweet, light note that balances the richness of the quiche, making every forkful exciting!
  • Mimosas: This classic brunch cocktail adds a festive sparkle, and the citrus notes uplift the flavors in the quiche while keeping the meal light and bubbly.
  • Cup of Iced Coffee: The rich, robust flavor of iced coffee brings a comforting warmth to the table, making it a perfect pairing for brunch conversations.
  • Cheesy Breadsticks: Warm, gooey breadsticks bring a comforting, cheesy element into the mix, adding a touch of indulgence that complements the quiche's crispy crust perfectly.
  • Fruit Tart for Dessert: End on a sweet note with a light fruit tart. Its crisp crust and creamy filling serve as an elegant and refreshing finale to your meal.

Crispy Hash Brown Crust Quiche Variations

Feel free to explore these delightful twists that can transform your quiche into a personal masterpiece!

  • Bacon Swap: Substitute prosciutto with crispy bacon for a heartier, classic flavor. The wonderful smokiness will take your dish up a notch!

  • Smoked Salmon: For a gourmet touch, replace prosciutto with smoked salmon. This variation adds a lovely oceanic flavor, perfect for a brunch that feels a little fancy.

  • Cheese Variety: Swap Gruyere for mozzarella or sharp cheddar for a different flavor profile. Each cheese brings its own richness, making it easy to find your perfect bite.

  • Vegetable Medley: Incorporate seasonal veggies like zucchini or bell peppers for added texture and color. Just sauté them lightly before adding to the filling for optimal flavor.

  • Dairy-Free Delight: Use coconut milk instead of heavy cream to create a dairy-free option. This will maintain creaminess while providing a subtle sweetness.

  • Herb Infusion: Toss in fresh herbs like basil or dill for an aromatic twist that elevates every forkful. Fresh herbs enhance the dish with vibrant flavors, making it even more delightful.

  • Add Heat: If you love a little spice, try adding diced jalapeños or a sprinkle of red pepper flakes. A touch of heat can turn this quiche from comforting to exciting!

As you customize your quiche, consider pairing it with sides like Parmesan Artichoke Hearts or enjoy with Fish Taco Bowls to complement your meal with glorious flavor. Your culinary creativity knows no bounds!

Crispy Hash Brown Crust Quiche Recipe FAQs

How do I select hash browns for the crust?
Absolutely! When choosing hash browns, look for those that are frozen and without added ingredients. Fresh grated potatoes are also an option, but make sure to squeeze out all excess moisture to ensure a crispy base.

What is the best way to store leftover quiche?
For the best results, place your leftover Crispy Hash Brown Crust Quiche in an airtight container in the fridge, where it can stay fresh for up to 3 days. If you want to keep it for longer, wrap slices tightly in plastic wrap or aluminum foil and freeze them for up to 2 months.

Can I freeze the quiche? If yes, how?
Certainly! To freeze your quiche, allow it to cool completely after baking, then slice it. Wrap each slice individually in plastic wrap and place them in a freezer-safe container. Label it with the date, and it should be good for about 2 months. When you’re ready to enjoy, simply reheat from frozen as explained below!

What’s the best way to reheat the quiche?
To reheat, preheat your oven to 350°F (175°C). Place your quiche or slices on a baking sheet and cover them loosely with aluminum foil to prevent over-browning. Heat for about 15-20 minutes until warmed through and enjoy the crispy texture once again!

Can I customize this quiche for dietary preferences or allergies?
Very much so! The Crispy Hash Brown Crust Quiche is highly customizable and can cater to various dietary needs. If you need a dairy-free option, simply replace heavy cream with coconut milk and use dairy-free cheese alternatives. For vegetarian options, you can omit the prosciutto and toss in extra veggies like zucchini or bell peppers—deliciously inclusive!

How can I fix a soggy quiche?
If you find your quiche is soggy, don’t worry! Ensure the hash browns are completely dry before pressing them into the dish, and make sure to pre-bake the crust thoroughly. If the filling is too watery, you can include fewer liquid ingredients or use a little more cheese or eggs to balance things out. Keeping an eye on the egg-to-liquid ratio is crucial for that perfect quiche texture!

Crispy Hash Brown Crust Quiche

Crispy Hash Brown Crust Quiche Perfect for Brunch Bliss

This Crispy Hash Brown Crust Quiche combines a crunchy base with creamy filling, perfect for brunch or dinner.
Print Recipe Pin Recipe
Prep Time 20 minutes mins
Cook Time 40 minutes mins
Cooling Time 10 minutes mins
Total Time 1 hour hr 10 minutes mins
Servings: 6 slices
Course: Breakfast
Cuisine: American
Calories: 350
Ingredients Equipment Method Nutrition Notes

Ingredients
  

For the Crust
  • 1 package Frozen Hash Browns Feel free to substitute fresh grated potatoes after squeezing out excess moisture.
  • 2 large Eggs The heart of the quiche, providing essential protein and a creamy texture.
For the Filling
  • 1 cup Heavy Cream Coconut milk serves as a delicious dairy-free substitute.
  • 1 cup Shredded Gruyere Cheese Offers a deep, nutty flavor; mozzarella or cheddar make excellent alternatives.
  • 4 oz Chopped Prosciutto The star of the show; can be substituted with bacon, ham, or smoked salmon.
  • 1 cup Fresh Spinach Optional but adds great flavor and nutrients.
  • ½ cup Halved Cherry Tomatoes Can be omitted or replaced with bell peppers for a different twist.

Equipment

  • Pie dish
  • Mixing Bowl
  • Whisk

Method
 

Preparation
  1. Preheat your oven to 375°F (190°C). Squeeze out excess moisture from the hash browns using a clean kitchen towel and press them evenly into a greased pie dish to form a crust. Bake for about 20 minutes until golden brown.
  2. In a large mixing bowl, whisk together the eggs and heavy cream until well combined. Gently fold in the shredded Gruyere cheese, chopped prosciutto, fresh spinach, and halved cherry tomatoes.
  3. Once the crust is pre-baked, pour the egg filling over it, spreading it evenly. Bake at 375°F (190°C) for 30 to 40 minutes until the filling is set and the top is lightly golden.
  4. Allow the quiche to cool for about 10 minutes before slicing. Serve warm alongside a fresh green salad or your favorite beverage.

Nutrition

Serving: 1sliceCalories: 350kcalCarbohydrates: 30gProtein: 15gFat: 22gSaturated Fat: 10gPolyunsaturated Fat: 2gMonounsaturated Fat: 8gCholesterol: 150mgSodium: 800mgPotassium: 400mgFiber: 2gSugar: 3gVitamin A: 20IUVitamin C: 15mgCalcium: 25mgIron: 10mg

Notes

Ensure to squeeze out moisture from the hash browns for a crispy crust. Pre-bake your hash brown crust until golden brown to guarantee it stays crisp after adding the filling.

Tried this recipe?

Let us know how it was!

Easy and Creamy Fail-Proof Egg Custard That Melts in Your Mouth

March 30, 2026 by Grace Snow Leave a Comment

As I stirred the silky mixture of eggs and warm milk, I couldn’t help but smile at how an Easy and Creamy Fail-Proof Egg Custard could turn the simplest of ingredients into a comforting masterpiece. This delightful dessert embraces the essence of home cooking, reminiscent of cozy family gatherings and warm evenings spent at the kitchen table. It's a quick-to-make indulgence that soothes the soul and satisfies sweet cravings with its creamy texture and subtle vanilla flavor. Plus, it's easily adaptable for various dietary preferences, allowing everyone to enjoy this homemade delight. Ready to whip up a treat that feels like a warm hug in a bowl? Let’s dive into the creamy goodness together!

What Makes This Custard So Special?

Simplicity at its finest: With just a handful of ingredients, making this creamy custard is a breeze, even for novice cooks.
Rich, Silky Texture: Each spoonful offers a melt-in-your-mouth experience that's hard to resist!
Versatility for all diets: Adjust the ingredients easily to create vegan or healthier options without sacrificing flavor.
Crowd-Pleasing Delight: This dessert is sure to charm your guests and family, making it perfect for gatherings or a sweet end to any meal.
Quick to Prepare: In less than an hour, you can transform everyday items into an elegant dessert that everyone will love—just like my Breakfast Egg Muffins or a delightful Avocado Egg Salad.

Easy and Creamy Egg Custard Ingredients

For the Custard Base
• Eggs – Fresh large eggs are preferred for richness; use an egg replacer for a vegan option.
• Milk – Whole milk provides the best creamy texture; almond or soy milk can be alternatives, just note the flavor may change.
• Sugar – Granulated sugar adds sweetness, but switching to brown sugar deepens the flavor; consider stevia for a calorie-friendly alternative.
• Vanilla Extract – Pure vanilla extract is key for that classic flavor; vanilla essence can work if you’re looking for something milder.
• Salt – A pinch enhances the overall sweetness, bringing everything together beautifully.

For Serving
• Nutmeg – A sprinkle of ground nutmeg adds an aromatic touch before serving; try it for an extra layer of warmth in your Easy and Creamy Egg Custard!

Step‑by‑Step Instructions for Easy and Creamy Fail-Proof Egg Custard

Step 1: Preheat the Oven
Begin by preheating your oven to 325°F (165°C), ensuring it's ready for your Easy and Creamy Fail-Proof Egg Custard. This temperature allows for gentle cooking, promoting that luscious, silky texture we adore.

Step 2: Whisk the Eggs
In a medium-sized mixing bowl, gently whisk the fresh large eggs until just combined. Take care not to overbeat them; just aim for a uniform consistency. This step is crucial for ensuring a smooth custard base as you move forward with your recipe.

Step 3: Warm the Milk
Place a saucepan over medium heat and pour in your choice of milk. Warm the milk until small bubbles begin to form around the edges, which should take about 3-5 minutes; be careful not to let it boil. This warmth will help blend seamlessly into your egg mixture.

Step 4: Combine Milk and Eggs
Gradually whisk the warm milk into the eggs, a little at a time, to temper them and avoid cooking the eggs. This slow incorporation is key for achieving that smooth and creamy texture in your Easy and Creamy Fail-Proof Egg Custard.

Step 5: Add Sweetness and Flavor
Stir in the sugar, vanilla extract, and a pinch of salt until fully dissolved. The sugar balances the richness of the eggs and milk, while the vanilla enhances the overall flavor. This step sets up the sweet foundation of your delightful custard.

Step 6: Strain the Mixture
To ensure a flawless texture, strain the combined egg and milk mixture through a fine sieve into a measuring cup or another bowl. This will remove any lumps and create a velvety custard, which is essential for that melt-in-your-mouth experience.

Step 7: Prepare the Ramekins
Pour the custard mixture into ramekins, filling each about three-quarters full. This portioning allows the custard to cook evenly. Arrange your ramekins in a deep baking dish, making sure they’re ready for the water bath that will help achieve a gentle bake.

Step 8: Create a Water Bath
Carefully add hot water to the baking dish, filling it halfway up the sides of the ramekins. This water bath helps regulate the temperature around the custard, preventing overcooking and ensuring a beautifully creamy texture in your Easy and Creamy Fail-Proof Egg Custard.

Step 9: Bake the Custard
Place the baking dish in your preheated oven, and bake for about 35-40 minutes. The custard should be set around the edges but slightly jiggly in the center when done. This is a sign that it will firm up perfectly as it cools, yielding that luscious custard texture.

Step 10: Cool and Chill
Once baking is complete, remove the ramekins from the water bath and allow them to cool to room temperature. After cooling, refrigerate them for at least 2 hours before serving. Chilling enhances the flavor and texture of the Easy and Creamy Fail-Proof Egg Custard, making it even more delightful.

Step 11: Garnish and Serve
Before serving, sprinkle a touch of ground nutmeg or your preferred topping over the custard for added flavor. These final touches will elevate your Easy and Creamy Fail-Proof Egg Custard, ready to be enjoyed by family and friends alike!

Easy and Creamy Egg Custard Variations

Feel free to let your creativity shine by customizing this custard to suit your taste and dietary needs!

  • Vegan Custard: Substitute eggs with a mixture of silken tofu and almond milk for a creamy, plant-based option. Blend until smooth for a similar texture.

  • Almond Flavor: Swap vanilla extract for almond extract to give your custard a delightful nutty twist. This subtle change brightens up the flavor profile beautifully!

  • Chocolate Delight: Melt dark chocolate and whisk it into the custard mixture before baking. This indulgent twist creates a rich, decadent treat that chocolate lovers will adore.

  • Coconut Dream: Use coconut milk instead of regular milk for a tropical flair. The coconut adds a lovely creaminess, making it feel like a mini vacation in each bite!

  • Citrus Zing: Add a tablespoon of lemon or orange zest to the milk mixture. This brightens up the flavors, giving a refreshing citrus kick that perfectly balances the sweetness.

  • Maple Sweetness: Replace granulated sugar with pure maple syrup. This adds a unique flavor element while maintaining the sweetness—delightful for maple enthusiasts!

  • Berry Topping: Serve your custard with fresh berries like strawberries or blueberries for a burst of freshness and color. They not only enhance the dessert visually but provide a nice tart contrast to the sweet custard.

These variations ensure every spoonful is unique. Whether you prefer a traditional take or want to explore fun twists, there's a satisfying option for everyone. For another delicious treat, consider making Chickpea Spinach Curry or a comforting Egg Drop Soup to accompany your custard!

How to Store and Freeze Easy and Creamy Fail-Proof Egg Custard

Fridge: Store any leftover custard in an airtight container in the refrigerator for up to 3 days. Make sure it's completely cooled before sealing to maintain its creamy texture.

Freezer: You can freeze the custard for up to 2 months. To freeze, pour the cooled custard into a freezer-safe container or silicone mold, leaving space for expansion. Thaw overnight in the fridge before serving.

Reheating: For best results, gently reheat the custard in a microwave or on the stove over low heat. Add a splash of milk if needed to revive its silky consistency. Enjoy your delightful Easy and Creamy Fail-Proof Egg Custard!

Make Ahead Options

These Easy and Creamy Fail-Proof Egg Custards are perfect for busy home cooks looking to save time during the week! You can prepare the custard mixture up to 24 hours in advance; simply follow the recipe through Step 6, then cover and refrigerate the mixture until you're ready to bake. When you're ready to enjoy a delightful dessert, pour the mixture into ramekins and proceed from Step 7. Keeping the mixture well-sealed prevents any unwanted flavors from seeping in, ensuring your custard remains just as delicious. Additionally, once baked, the custards can be stored in the refrigerator for up to 3 days, making them an excellent make-ahead treat!

Expert Tips for Easy and Creamy Fail-Proof Egg Custard

  • Tempering Technique: Gradually whisking warm milk into the eggs prevents scrambling, ensuring a smooth, luxurious custard texture.

  • Check for Doneness: Remove from the oven when the center is still slightly jiggly—it will set up nicely as it cools.

  • Avoid Overcooking: Keep a close eye while baking; overcooking may lead to a grainy custard, detracting from its creaminess.

  • Experiment with Flavors: Don't hesitate to add citrus zest or flavored extracts. Infusions can enhance your Easy and Creamy Fail-Proof Egg Custard in delightful ways.

  • Chill Before Serving: Refrigerating the custard for at least two hours improves flavor and texture, making each bite a creamy delight.

What to Serve with Easy and Creamy Fail-Proof Egg Custard

There's nothing like a beautifully crafted dessert to complete your meal, and this one pairs wonderfully with a variety of delightful treats.

  • Fresh Berries: Juicy strawberries or blueberries add a burst of flavor and freshness that elevates the custard's creaminess. They bring a lovely tartness that perfectly complements the sweetness of the custard.

  • Whipped Cream: Light and airy, a dollop of freshly whipped cream on top enhances the indulgent experience. It adds an elegant touch to every spoonful, providing a beautiful contrast in texture.

  • Chocolate Sauce: Drizzling rich chocolate sauce over your custard will make it irresistible to chocolate lovers. The mix of creamy and chocolatey notes creates a delightful contrast that feels luxurious.

  • Caramel Drizzle: The sweetness of caramel provides a sticky, rich complement that enhances the custard’s warm, vanilla flavor. Together, they form a decadent treat that's sure to impress.

  • Baked Cinnamon Apples: Warm, spiced apples create a cozy, autumnal pairing. Their buttery, tender texture with a hint of cinnamon complements the custard beautifully, inviting cozy memories of family gatherings.

  • Espresso or Coffee: A warm cup of coffee or espresso pairs wonderfully with the creamy dessert. The bold flavor cuts through the richness, creating a balanced and satisfying end to your meal.

  • Shortbread Cookies: Crumbly, buttery shortbread cookies add a delightful crunch that contrasts with the smooth custard. They are perfect for dipping and offer a nostalgic touch to your dessert experience.

  • Almond Biscotti: Crunchy and flavorful, almond biscotti provides an enjoyable texture and nutty flavor that pairs ideally with the silky custard. Dip them in your custard for an unforgettable treat!

Easy and Creamy Fail-Proof Egg Custard Recipe FAQs

How do I choose the best eggs for this recipe?
Absolutely! For the best results, opt for fresh large eggs, as they provide richness and flavor. If you're looking for vegan options, consider using an egg replacer; various brands are available that mimic the texture quite well.

What is the proper way to store leftovers?
You can store any leftover Easy and Creamy Fail-Proof Egg Custard in an airtight container in the refrigerator for up to 3 days. Just make sure it's completely cooled before sealing. It can be enjoyed cold or allowed to sit at room temperature for a few minutes before serving!

Can I freeze Easy and Creamy Egg Custard?
Yes, you can! To freeze, pour the cooled custard into a freezer-safe container, making sure to leave some room at the top to allow for expansion. Seal tightly and freeze for up to 2 months. When you're ready to enjoy it, simply thaw the custard overnight in the refrigerator and gently reheat if desired.

What should I do if my custard comes out grainy?
Very! If your Easy and Creamy Fail-Proof Egg Custard turns out grainy, it may have been overcooked or the eggs might have scrambled. To fix this, you should temper your eggs properly by gradually adding warm milk instead of mixing them all at once. Additionally, always watch the baking time—remove it from the oven when it's slightly jiggly in the center, as it will continue to firm up while cooling.

Are there any dietary considerations for this recipe?
Definitely! This recipe can be easily adapted for different dietary needs. Use almond or soy milk for a dairy-free version and an egg replacer for a vegan option. If you’re concerned about sugar, consider using stevia or honey as an alternative sweetener. Always check ingredient labels to ensure they fit your dietary preferences!

Easy and Creamy Fail-Proof Egg Custard

Easy and Creamy Fail-Proof Egg Custard That Melts in Your Mouth

This Easy and Creamy Fail-Proof Egg Custard is a delightfully smooth dessert that is perfect for any occasion.
Print Recipe Pin Recipe
Prep Time 15 minutes mins
Cook Time 40 minutes mins
Chilling Time 2 hours hrs
Total Time 2 hours hrs 55 minutes mins
Servings: 4 ramekins
Course: Dessert
Cuisine: American
Calories: 200
Ingredients Equipment Method Nutrition Notes

Ingredients
  

For the Custard Base
  • 4 large Eggs Fresh large eggs are preferred for richness; use an egg replacer for a vegan option.
  • 2 cups Milk Whole milk provides the best creamy texture; alternatives include almond or soy milk.
  • 3/4 cup Granulated Sugar Can switch to brown sugar or stevia for alternatives.
  • 1 tablespoon Vanilla Extract Pure vanilla extract is key for flavor; go for vanilla essence for milder taste.
  • 1/4 teaspoon Salt A pinch enhances overall sweetness.
For Serving
  • 1 teaspoon Ground Nutmeg A sprinkle adds an aromatic touch before serving.

Equipment

  • Mixing Bowl
  • Saucepan
  • ramekins
  • Baking Dish
  • fine sieve

Method
 

Step-by-Step Instructions
  1. Preheat your oven to 325°F (165°C).
  2. In a medium-sized mixing bowl, gently whisk the eggs until just combined.
  3. Warm the milk in a saucepan over medium heat until small bubbles form around the edges.
  4. Gradually whisk the warm milk into the eggs to temper them.
  5. Stir in the sugar, vanilla extract, and a pinch of salt until fully dissolved.
  6. Strain the mixture through a fine sieve into a measuring cup or bowl.
  7. Pour the custard mixture into ramekins, filling each about three-quarters full.
  8. Create a water bath by adding hot water to the baking dish halfway up the sides of ramekins.
  9. Bake for about 35-40 minutes until the edges are set but slightly jiggly in the center.
  10. Allow to cool to room temperature, then refrigerate for at least 2 hours before serving.
  11. Before serving, sprinkle ground nutmeg or your preferred topping over the custard.

Nutrition

Serving: 1ramekinCalories: 200kcalCarbohydrates: 25gProtein: 6gFat: 8gSaturated Fat: 4gPolyunsaturated Fat: 0.2gMonounsaturated Fat: 2gCholesterol: 150mgSodium: 100mgPotassium: 200mgSugar: 18gVitamin A: 300IUCalcium: 150mgIron: 1mg

Notes

This custard is versatile; feel free to experiment with flavors like citrus zest or different extracts.

Tried this recipe?

Let us know how it was!

Savory Lentil Breakfast Bowl: Fuel Your Morning with Flavor

March 30, 2026 by Grace Snow Leave a Comment

As I stood in my kitchen, the comforting aroma of spices danced through the air, coaxing my senses awake. Today, I’m excited to share my Savory Lentil Breakfast Bowl—a dish that not only fuels my mornings but also adds a vibrant twist to the breakfast routine. Packed with protein-rich lentils and topped with sautéed greens and creamy avocado, this bowl is a hearty yet light way to kickstart your day. Whether you’re meal prepping for a busy week or simply craving a nourishing breakfast, this recipe is your ticket to a satisfying morning. It’s not just about filling your plate; it’s about cultivating a mindful moment to savor. Curious about elevating your breakfast game? Let’s dive into this delicious journey together!

Why is this bowl a breakfast game-changer?

Nutrient-Packed: This Savory Lentil Breakfast Bowl is loaded with plant-based protein and fiber, ensuring you stay energized throughout the day.

Versatile Toppings: Customize with your favorite greens, eggs, or spices to make it uniquely yours! Transform it daily with additions like sautéed mushrooms or roasted sweet potatoes.

Time-Saving: Ideal for meal prep, you can whip up the lentil base ahead of time. Serve warm with fresh toppings for a delicious and nutritious breakfast all week long.

Comforting Aroma: The fragrant spices create a warm, inviting environment that’ll have you dreaming of brunch far beyond the table.

Crowd-Pleasing: Perfect for the whole family, it appeals to both vegans and omnivores alike! Pair with a sweet touch from a Breakfast Banana Split for a delightful brunch spread.

Savory Lentil Breakfast Bowl Ingredients

This dish will transform your mornings with wholesome flavors!

For the Base

  • Lentils – Main protein source; choose brown or green lentils for the best texture.
  • Vegetable Broth – Cooking liquid for added flavor; substitute with water or low-sodium broth for a lighter option.
  • Onion – Aromatic base for depth of flavor; shallots can be used as a milder alternative.
  • Garlic – Adds a robust flavor; fresh garlic provides the best taste.
  • Olive Oil – For sautéing; can substitute with avocado oil for a similar effect.
  • Spices (Cumin, Coriander, Paprika) – Enhance flavor profile; adjust quantities according to your taste preference.

For the Toppings

  • Assorted Greens (Spinach or Kale) – Nutrient-rich topping; use any leafy greens available for added health benefits.
  • Eggs – Adds creaminess and protein; for a vegan version, omit and consider a tofu scramble or cashew cream.
  • Avocado – Creamy texture and healthy fats; substitute with hummus for a different flavor profile.
  • Feta Cheese (optional) – For a tangy finish; omit for a vegan option or replace with nutritional yeast.

With these ingredients, your Savory Lentil Breakfast Bowl is all set to be deliciously nutritious!

Step‑by‑Step Instructions for Savory Lentil Breakfast Bowl

Step 1: Build the Aromatic Base
In a medium saucepan over medium heat, add 1 tablespoon of olive oil. Once shimmering, add 1 diced onion and 2 minced garlic cloves, sautéing for about 4-5 minutes until the onion is translucent and fragrant. This aromatic foundation will elevate the Savory Lentil Breakfast Bowl with delightful depth.

Step 2: Toast the Spices
Stir in 1 teaspoon each of cumin, coriander, and paprika into the onion and garlic mix. Cook for another 1-2 minutes, allowing the spices to bloom and release their aroma. You'll know it's ready when the spices become fragrant and the oil takes on a warm color, enhancing the flavor of your lentils.

Step 3: Cook the Lentils
Pour in 1 cup of rinsed lentils and 3 cups of vegetable broth, stirring everything together. Raise the heat to bring it to a gentle boil, then reduce to a low simmer. Cover and let cook for 20-25 minutes, or until the lentils are tender but not mushy. Keep an eye on the pot, gently stirring occasionally.

Step 4: Prepare the Toppings
While your lentils simmer, heat a separate skillet over medium heat. Add a drizzle of olive oil and toss in 2 cups of your preferred greens, such as spinach or kale. Sauté for about 3-4 minutes until wilted and vibrant, then transfer to a plate. Optionally, poach or soft-boil 2 eggs during this time for a creamy finish on the bowl.

Step 5: Assemble Your Breakfast Bowl
Once the lentils are tender, it's time to build your Savory Lentil Breakfast Bowl. In a deep bowl, spoon in a generous portion of the warm lentil mixture. Top with the sautéed greens, place the egg on top, and add sliced avocado alongside. Garnish with crumbled feta, if desired, and any extra toppings to personalize your delicious breakfast!

How to Store and Freeze Savory Lentil Breakfast Bowl

Fridge: Store the lentil base in an airtight container for up to 5 days. Keep toppings separate for optimal freshness and texture.

Freezer: Freeze cooked lentils in portioned containers for up to 3 months. Thaw overnight in the fridge before reheating for a quick meal.

Reheating: Gently reheat the lentil mixture on the stovetop over low heat, adding a splash of vegetable broth or water to maintain moisture. Serve warm with fresh toppings.

Meal Prep: Prepare the lentil base ahead of time to simplify your morning routine. Just add your favorite toppings when ready to serve!

Savory Lentil Breakfast Bowl Variations

Feel free to get creative with your bowl and elevate your breakfast experience!

  • Roasted Veggies: Swap greens for roasted sweet potatoes or butternut squash for a delightful sweetness and texture contrast. The earthy flavors will make your breakfast even more satisfying.

  • Sautéed Additions: Top with sautéed mushrooms, caramelized onions, or vibrant pickled vegetables for extra flavor dimensions. These toppings bring an added burst of excitement with every bite!

  • Spice It Up: Add a dash of your favorite hot sauce or chopped fresh herbs to awaken your taste buds. A sprinkle of chili flakes can also create a heartbeat of warmth.

  • Hearty Tofu Scramble: For a vegan twist, replace the egg with a flavorful tofu scramble seasoned with turmeric and cumin. It’s hearty and packed with plant-based protein.

  • Texture Twist with Nuts: Sprinkle toasted nuts or seeds on top for a crunchy contrast to the creamy avocado. This small addition makes your bowl crunchy and nutty, creating a perfect balance.

  • Flavorful Hummus: Instead of avocado, consider adding a dollop of your favorite hummus for a creamy twist that's rich in flavor. Hummus adds dimension while still being wonderfully light!

  • Cheesy Goodness: If you’re not vegan, try a sprinkle of cheese like feta or goat cheese. Their tangy notes will elevate the savory profile of your bowl. Pair it with a side of toast, and your morning is complete!

For an exciting brunch experience, why not enjoy this meal alongside a refreshing Breakfast Acai Bowl Nutritious to balance out those hearty flavors?

Make Ahead Options

These Savory Lentil Breakfast Bowls are perfect for meal prep, allowing you to enjoy a quick, nutritious breakfast throughout the week! You can cook the lentil base up to 5 days in advance; simply let it cool, then refrigerate it in an airtight container to maintain its quality. For the best texture, always store the toppings (like sautéed greens and eggs) separately and prepare them fresh each morning for maximum flavor. When you’re ready to serve, just reheat the lentils in the microwave or on the stove. Top with your sautéed greens, avocado, and any other toppings you love, and you'll have a delicious, wholesome breakfast waiting in no time!

Expert Tips for Savory Lentil Breakfast Bowl

  • Choose Fresh Ingredients: Use fresh vegetables and spices to enhance the overall flavor profile of your Savory Lentil Breakfast Bowl. Fresh ingredients really make a difference!

  • Avoid Overcooking Lentils: To prevent mushy lentils, keep a close eye on your cooking time. They should be tender yet slightly firm, typically around 20-25 minutes.

  • Customize Toppings: Don’t be afraid to mix up toppings! Experiment with different greens, proteins, or sauces to create a unique twist on the Savory Lentil Breakfast Bowl every time.

  • Meal Prep Made Easy: Cook a larger batch of lentils and store them separately from toppings. This keeps everything fresh and allows for easy assembly throughout the week!

  • Taste as You Go: As you prepare, taste your lentil mixture. Adjust the seasoning with salt, pepper, or additional spices to match your preferences for the perfect bowl.

What to Serve with Savory Lentil Breakfast Bowl

Start your meal adventure with delightful sides that elevate your Savory Lentil Breakfast Bowl into a fulfilling feast.

  • Creamy Avocado Toast: The buttery flavor and texture of avocado toast perfectly complement the hearty lentils while adding a satisfying crunch.

  • Sautéed Greens: Tossed in garlic and a drizzle of olive oil, their vibrant color and rich taste enhance the overall nutritional value of your breakfast bowl.

  • Roasted Sweet Potatoes: The natural sweetness balances the savory elements, bringing an inviting warmth that adds to a cozy breakfast experience.

  • Herbed Yogurt: A dollop of tangy herbed yogurt introduces a refreshing contrast, brightening the flavors with its creamy texture and herbs.

  • Fresh Fruit Salad: A medley of seasonal fruits provides a zesty finish, offering a sweet and vibrant contrast that can lighten your morning meal.

  • Nutty Granola Parfait: Layering nutty granola with yogurt adds a delightful crunch and creaminess, creating a perfect dessert-like ending to your breakfast.

Pairing these options with your Savory Lentil Breakfast Bowl will turn your simple morning into a culinary celebration!

Savory Lentil Breakfast Bowl Recipe FAQs

What type of lentils should I use?
Absolutely! I recommend using brown or green lentils for the best texture in your Savory Lentil Breakfast Bowl. These varieties hold their shape during cooking, providing a hearty base that complements the other ingredients beautifully. Avoid red lentils, as they tend to become too mushy for this dish.

How should I store leftovers?
Very simply! Store the lentil base in an airtight container in the refrigerator for up to 5 days. It's best to keep the sautéed greens and any other toppings separate until you're ready to enjoy your breakfast again. This way, everything stays fresh and maintains the right texture!

Can I freeze cooked lentils?
Absolutely! Freezing cooked lentils is a great way to save time for future meals. Just portion them into airtight containers or freezer bags and freeze for up to 3 months. When you're ready to use them, thaw in the fridge overnight and gently reheat on the stovetop over low heat, adding a splash of vegetable broth or water to keep the dish moist.

How do I avoid mushy lentils when cooking?
To avoid mushy lentils, keep an eye on the cooking time and test for doneness around the 20-minute mark. You want them tender yet slightly firm to the bite. If they begin to look overly soft, immediately drain any excess liquid and remove them from heat to prevent overcooking.

Are there any dietary considerations I should keep in mind?
Yes, definitely! For those with gluten sensitivities, verify that all ingredients are gluten-free, especially the vegetable broth or any brands of feta cheese used. If you're preparing this for kids or pets, just omit the spicy toppings and ensure that any egg included is fully cooked to avoid any health risks. It's always best to tailor the dish to suit everyone's needs!

What are some customizable topping ideas?
Very! The beauty of this Savory Lentil Breakfast Bowl lies in its customizability! You can top it with sautéed veggies like mushrooms or sweet potatoes, fresh herbs like cilantro or parsley, or even a drizzle of hot sauce for an extra kick. Try experimenting with different toppings to keep your mornings exciting and flavorful!

Savory Lentil Breakfast Bowl

Savory Lentil Breakfast Bowl: Fuel Your Morning with Flavor

Discover how the Savory Lentil Breakfast Bowl can energize your mornings with nutritious ingredients and vibrant flavors.
Print Recipe Pin Recipe
Prep Time 10 minutes mins
Cook Time 25 minutes mins
Total Time 35 minutes mins
Servings: 2 bowls
Course: Breakfast
Cuisine: American
Calories: 450
Ingredients Equipment Method Nutrition Notes

Ingredients
  

For the Base
  • 1 cup Lentils (brown or green) rinsed
  • 3 cups Vegetable Broth or water for a lighter option
  • 1 medium Onion diced
  • 2 cloves Garlic minced
  • 1 tablespoon Olive Oil for sautéing
  • 1 teaspoon Cumin
  • 1 teaspoon Coriander
  • 1 teaspoon Paprika
For the Toppings
  • 2 cups Assorted Greens (Spinach or Kale)
  • 2 Eggs omit for vegan option
  • 1 medium Avocado sliced
  • 1/4 cup Feta Cheese optional

Equipment

  • Medium saucepan
  • Skillet
  • Cutting Board
  • Knife

Method
 

Step-by-Step Instructions
  1. In a medium saucepan over medium heat, add the olive oil. Once shimmering, add the diced onion and minced garlic, sautéing for about 4-5 minutes until the onion is translucent and fragrant.
  2. Stir in the cumin, coriander, and paprika into the onion and garlic mix. Cook for another 1-2 minutes, allowing the spices to bloom.
  3. Pour in the rinsed lentils and vegetable broth, stirring everything together. Bring to a gentle boil. Reduce to a low simmer, cover, and let cook for 20-25 minutes, or until lentils are tender.
  4. While your lentils simmer, heat a separate skillet over medium heat. Add a drizzle of olive oil and toss in your preferred greens. Sauté for about 3-4 minutes.
  5. Once the lentils are tender, spoon in a generous portion of the warm lentil mixture into a deep bowl. Top with the sautéed greens, eggs, sliced avocado, and optional feta.

Nutrition

Serving: 1bowlCalories: 450kcalCarbohydrates: 60gProtein: 20gFat: 15gSaturated Fat: 2gPolyunsaturated Fat: 3gMonounsaturated Fat: 10gCholesterol: 186mgSodium: 400mgPotassium: 800mgFiber: 15gSugar: 5gVitamin A: 2700IUVitamin C: 30mgCalcium: 150mgIron: 5mg

Notes

Customize with different toppings and spices for a unique flavor every time. Store lentils separately from toppings for optimal texture.

Tried this recipe?

Let us know how it was!

Mediterranean Baked Feta Eggs: A Creamy Delight Under 30 Minutes

March 30, 2026 by Grace Snow Leave a Comment

Stepping into my kitchen often feels like a mini adventure, especially when the scent of baked feta starts swirling in the air. Today, I'm excited to share my recipe for Mediterranean Baked Feta Eggs—a dish that’s become a staple for my busy mornings and cozy dinners alike. With its vibrant tomato sauce, creamy feta, and perfectly baked eggs, this recipe transforms simple ingredients into a delightful, vegetarian feast in under 30 minutes. The beauty of this dish lies in its versatility: it’s not just a quick breakfast; it's also an impressive option for guests or a satisfying snack whenever the craving hits. Are you ready to whip up something that will elevate your meals and impress everyone at your table?

Why Are Mediterranean Baked Feta Eggs a Must-Try?

Flavor Explosion: The blend of creamy feta, juicy tomatoes, and fresh herbs creates an irresistible taste that will make your taste buds sing.

Quick and Easy: Ready in under 30 minutes, this dish is perfect for busy mornings or a spontaneous dinner with friends.

Versatile Variations: Feel free to customize it with your favorite ingredients—add leafy greens or substitute with goat cheese for a unique twist!

Crowd-Pleaser: Whether it’s a brunch gathering or a cozy weeknight dinner, this comforting meal will impress your guests every time.

Nutrient-Packed: Packed with protein and healthy fats, these Mediterranean Baked Feta Eggs are both satisfying and nutritious, setting you up for a great day ahead.

If you love quick, flavorful, and health-conscious meals, you might also want to explore our Turkish Eggs Discover or try a refreshing touch with Matcha Baked Doughnuts.

Mediterranean Baked Feta Eggs Ingredients

• Gather the following ingredients to create your delicious Mediterranean Baked Feta Eggs; you'll be amazed at how these simple components transform into a delightful dish!

For the Base

  • Feta Cheese – A creamy and tangy addition; best to use block feta in brine for optimal melting.
  • Cherry Tomatoes – Adds a burst of sweetness; choose ripe tomatoes for maximum flavor.
  • Garlic – Fresh minced garlic enhances the aroma and flavor; choose fresh for best results.
  • Shallot – Finely chopped shallots provide subtle sweetness and depth to the dish.
  • Olive Oil – Extra virgin olive oil is recommended for sautéing, adding richness to the dish.
  • Dried Oregano – Offers a classic Mediterranean herbal flavor; feel free to substitute with fresh oregano.

For the Eggs

  • Eggs – The star of the dish; ensure they are at room temperature for even baking.

To Finish

  • Crushed Red Pepper Flakes – Adds a hint of heat; adjust according to your spice preference.
  • Salt – Needed for seasoning; enhance the overall flavor of the dish with a pinch.
  • Fresh Herbs (Parsley or Basil) – For garnish; add a fresh touch to serve; dill or cilantro works too.

For a beautiful presentation, serve your Mediterranean Baked Feta Eggs hot, alongside warm pita or crusty bread, and enjoy this nourishing meal that will surely become a favorite!

Step‑by‑Step Instructions for Mediterranean Baked Feta Eggs

Step 1: Preheat the Oven
Begin by preheating your oven to 375°F (190°C). This ensures it reaches the perfect temperature for baking your Mediterranean Baked Feta Eggs. While the oven heats, gather your ingredients and prepare your skillet, readying yourself for a delightful cooking experience.

Step 2: Sauté the Aromatics
In an oven-safe skillet, heat a generous drizzle of extra virgin olive oil over medium heat. Add minced garlic and finely chopped shallots, sautéing for 2-3 minutes until they are fragrant and softened. The aroma should be inviting, creating a warm backdrop for the vibrant flavors to come.

Step 3: Cook the Tomatoes
Next, introduce the ripe cherry tomatoes into the skillet. Cook them for about 5-7 minutes, stirring occasionally, until they blister and become juicy. You'll know they're ready when they begin to burst, releasing their sweet juices and melding beautifully with the garlic and shallots.

Step 4: Season the Mixture
Sprinkle in the dried oregano, crushed red pepper flakes, and a pinch of salt. Stir everything together for about 1 minute to allow the flavors to combine and deepen. This step enhances the Mediterranean essence of your dish, setting the stage for the star ingredient—feta cheese.

Step 5: Add the Feta Cheese
Nestle chunks of creamy feta cheese into the tomato mixture in the skillet. Let it simmer gently for an additional 2 minutes, allowing the feta to soften slightly and its flavors to mingle with the tomatoes. The combination will begin to look vibrant and inviting, perfect for the next step.

Step 6: Crack the Eggs
Create small wells in the tomato and feta mixture with the back of a spoon. Carefully crack an egg into each well, ensuring the yolks stay intact. At this point, the dish transforms into the Mediterranean Baked Feta Eggs you’ve been envisioning, ready for the oven.

Step 7: Bake the Dish
Transfer the skillet to the preheated oven and bake for 8-10 minutes. Keep a close eye on your dish—you’re looking for the egg whites to be set while the yolks remain slightly runny. This timing ensures a creamy texture that perfectly complements the rich tomato sauce.

Step 8: Rest and Garnish
Once baked, remove the skillet from the oven and let it rest for 2 minutes. This allows the flavors to settle. Garnish your Mediterranean Baked Feta Eggs with fresh herbs like parsley or basil and a light drizzle of olive oil for an added touch of flavor and freshness before serving.

Step 9: Serve Warm
Serve your Mediterranean Baked Feta Eggs hot, alongside warm pita or crusty bread. The combination of textures and flavors will create a delightful meal, perfect for any time of day, making it a true standout dish in your culinary repertoire.

Make Ahead Options

Mediterranean Baked Feta Eggs are ideal for meal prep, allowing for easier serving on busy days. You can prepare the tomato and feta base up to 3 days in advance; simply sauté the garlic, shallots, and tomatoes, then mix in the feta and refrigerate. To maintain quality, store the mixture in an airtight container and reheat when ready to serve. When you're set to enjoy this delicious dish, just crack the eggs into the warmed tomato mixture and bake for 8-10 minutes at 375°F (190°C). This way, you’ll have a flavorful breakfast or light dinner ready with minimal effort, ensuring it tastes just as delightful as freshly made!

Expert Tips for Mediterranean Baked Feta Eggs

Room Temperature Eggs: Ensure your eggs are at room temperature before cracking them; this helps achieve a creamy texture while baking.

Perfect Skillet Choice: Use a ceramic or enameled skillet for even heat distribution, which is key for perfectly baked Mediterranean Baked Feta Eggs.

Avoid Overcrowding: When sautéing, avoid overcrowding the tomatoes in the skillet. This ensures they blister beautifully, releasing their natural sweetness.

Timing is Crucial: Keep a close eye on the baking time, as a few minutes can change the runniness of the yolks, so monitor closely for best results.

Let it Rest: After baking, letting the dish rest for a couple of minutes allows the flavors to meld and improves texture, enhancing your dining experience.

What to Serve with Mediterranean Baked Feta Eggs

There's something truly special about pairing this vibrant dish with complementary sides that elevate your dining experience.

  • Warm Pita Bread: Soft, fluffy pita is perfect for scooping up the silky eggs and rich tomato sauce, adding a delightful texture.
  • Arugula Salad: A peppery arugula salad drizzled with lemon vinaigrette adds a refreshing contrast to the creamy feta and eggs.
  • Roasted Vegetables: Seasonal roasted veggies like zucchini and bell peppers bring a sweet, caramelized flavor that balances the dish beautifully.
  • Herbed Couscous: Fluffy couscous tossed with fresh herbs creates a light side that enhances the Mediterranean essence of your meal.
  • Olive Tapenade: A spread of savory olive tapenade brings a bold, briny flavor to the table, enhancing each bite of the baked feta eggs.
  • Crisp White Wine: A chilled glass of Sauvignon Blanc pairs exquisitely, complementing the creamy feta and tangy tomatoes while refreshing your palate.
  • Fruity Sorbet: For dessert, a light and fruity sorbet offers a sweet, cool finish that contrasts nicely with the warmth of your main dish.

Mediterranean Baked Feta Eggs Variations

Feel free to explore the delightful possibilities of customizing this recipe to suit your taste preferences!

  • Leafy Greens: Add sautéed spinach or kale for a nutritious and colorful boost that enhances the dish’s visual appeal and flavor.

  • Sun-Dried Tomatoes: Swap out fresh tomatoes for sun-dried ones to introduce a deeper, richer flavor that complements the creaminess of the feta beautifully.

  • Cheese Alternatives: Experiment with goat cheese or ricotta for a different texture that adds a unique twist to your Mediterranean creation.

  • Herb Infusion: Substitute dried oregano with freshly chopped basil, dill, or chives, bringing in vibrant flavors that celebrate the essence of the Mediterranean.

  • Smoked Paprika: Sprinkle in some smoked paprika to add a warm, smoky flavor that elevates the dish's depth and complexity.

  • Mixed Peppers: Toss in diced bell or chili peppers for added sweetness and a gentle kick of heat, creating excitement in every bite.

  • Chickpeas: Incorporate chickpeas for a protein-packed addition that makes this dish even heartier and satisfying.

  • Pesto Drizzle: Finish with a drizzle of pesto to infuse a burst of flavor and freshness, giving your Mediterranean Baked Feta Eggs an extra layer of taste.

Looking for more delicious variations? Don't miss out on exploring our flavorful Skillet Pasta Feta for a delightful dinner option!

How to Store and Freeze Mediterranean Baked Feta Eggs

Fridge: Store leftovers in an airtight container for up to 3 days. Make sure to cool the dish completely before refrigerating to maintain freshness.

Freezer: For longer storage, freeze the Mediterranean Baked Feta Eggs for up to 2 months. Portion them in freezer-safe containers and thaw in the refrigerator before reheating.

Reheating: Gently reheat in the oven or on the stovetop until warmed through. Avoid microwaving, as it may result in rubbery eggs.

Make-Ahead Tips: Prepare the tomato and feta base in advance. Store it in the fridge, then quickly crack in the eggs and bake when you’re ready to serve.

Mediterranean Baked Feta Eggs Recipe FAQs

What type of feta cheese should I use for Mediterranean Baked Feta Eggs?
Absolutely! For the best melting texture and flavor, I recommend using block feta cheese that’s stored in brine. This will ensure your dish has a lovely creaminess, mixing beautifully with the other ingredients.

How should I store leftovers of Mediterranean Baked Feta Eggs?
After enjoying your dish, store any leftovers in an airtight container for up to 3 days in the fridge. Make sure the dish is cooled completely before sealing it up—this helps maintain freshness!

Can I freeze Mediterranean Baked Feta Eggs?
Yes, you certainly can! To freeze, portion the dish into freezer-safe containers, and it will keep well for up to 2 months. When you're ready to enjoy it again, thaw in the refrigerator overnight and reheat gently in the oven to avoid rubbery eggs.

What can I do if my eggs are overcooked?
If you find that your eggs have cooked more than desired, don't worry too much! Next time, keep an eye on the baking time and check for egg whites that are set while yolks remain slightly runny. Remember, they’ll continue to cook a bit even after you remove them from the oven, so a little resting time goes a long way!

Are there any allergy concerns with Mediterranean Baked Feta Eggs?
Absolutely! Since this dish contains feta cheese and eggs, it's essential to consider allergies. If someone has a dairy allergy, you might try using a dairy-free cheese alternative, like a creamy almond or cashew cheese to achieve a similar consistency. Always double-check with your guests to confirm what they can enjoy!

Can I prepare the tomato base in advance?
Very! You can definitely make the tomato and feta base ahead of time. Simply prepare it as usual, store in the fridge, and when you're ready to serve, crack the eggs in and bake. This can cut down your prep time significantly when you want to whip up a delicious meal quickly!

Mediterranean Baked Feta Eggs

Mediterranean Baked Feta Eggs: A Creamy Delight Under 30 Minutes

Mediterranean Baked Feta Eggs is a delightful dish featuring creamy feta, juicy tomatoes, and perfectly baked eggs, ready in under 30 minutes.
Print Recipe Pin Recipe
Prep Time 10 minutes mins
Cook Time 20 minutes mins
Resting Time 2 minutes mins
Total Time 32 minutes mins
Servings: 2 servings
Course: Breakfast
Cuisine: Mediterranean
Calories: 350
Ingredients Equipment Method Nutrition Notes

Ingredients
  

For the Base
  • 200 grams Feta Cheese best to use block feta in brine for optimal melting
  • 200 grams Cherry Tomatoes choose ripe tomatoes for maximum flavor
  • 3 cloves Garlic fresh minced for best results
  • 1 medium Shallot finely chopped
  • 2 tablespoons Olive Oil extra virgin recommended
  • 1 teaspoon Dried Oregano can substitute with fresh oregano
For the Eggs
  • 4 large Eggs ensure they are at room temperature
To Finish
  • 1 teaspoon Crushed Red Pepper Flakes adjust according to spice preference
  • 1 teaspoon Salt needed for seasoning
  • 2 tablespoons Fresh Herbs (Parsley or Basil) for garnish; dill or cilantro works too

Equipment

  • oven-safe skillet

Method
 

Cooking Steps
  1. Preheat your oven to 375°F (190°C).
  2. In an oven-safe skillet, heat extra virgin olive oil over medium heat. Add minced garlic and chopped shallots, and sauté for 2-3 minutes until fragrant.
  3. Introduce cherry tomatoes into the skillet and cook for 5-7 minutes, until they blister and become juicy.
  4. Sprinkle in dried oregano, crushed red pepper flakes, and salt. Stir for 1 minute to combine flavors.
  5. Nestle chunks of feta cheese into the mixture and simmer for 2 minutes until it softens.
  6. Create small wells in the mixture and crack an egg into each well.
  7. Transfer the skillet to the oven and bake for 8-10 minutes, until egg whites are set and yolks are slightly runny.
  8. Remove from oven and let rest for 2 minutes. Garnish with fresh herbs and a drizzle of olive oil.
  9. Serve hot alongside warm pita or crusty bread.

Nutrition

Serving: 1servingCalories: 350kcalCarbohydrates: 9gProtein: 18gFat: 28gSaturated Fat: 10gPolyunsaturated Fat: 2gMonounsaturated Fat: 14gCholesterol: 370mgSodium: 750mgPotassium: 450mgFiber: 2gSugar: 4gVitamin A: 450IUVitamin C: 30mgCalcium: 300mgIron: 2mg

Notes

Ensure eggs are at room temperature before use for best results. Use a ceramic or enameled skillet for even baking.

Tried this recipe?

Let us know how it was!

Baked Eggs Napoleon: Elegant Brunch with a Flaky Twist

March 30, 2026 by Grace Snow Leave a Comment

Baked Eggs Napoleon: What a delightful surprise it is to unearth a dish that makes brunch feel like a chic dining experience right at home! These flaky puff pastry cups cradle creamy baked eggs, enhanced by a luscious spinach and cheese filling. Not only does this Baked Eggs Napoleon look elegant, but it also offers a customizable canvas to cater to every palate—be it vegetarian delights or savory meat additions. The recipe's quick prep time means you can whip up this impressive feast without spending hours in the kitchen, making it the perfect answer for anyone seeking an escape from the fast-food routine. Ready to elevate your brunch game with a dish that’s both stunning and simple? Let’s dive into how to make this deliciousness come to life!

Why Is Baked Eggs Napoleon So Special?

Elegance Made Easy: This recipe transforms simple ingredients into a stunning dish that looks right at home on any brunch table.

Endless Customization: With options for different cheeses and veggies, you can tailor every bite to your preferences. Imagine using seasonal asparagus or swapping in creamy feta!

Crowd-Pleasing Appeal: Whether serving family or friends, this dish consistently wows guests and sparks conversations, making it the highlight of your brunch gathering.

Quick Preparation: Spend less time in the kitchen with a recipe that can be whipped up in under an hour, perfect for those busy weekends.

Gourmet Comfort Food: The flaky pastry and creamy filling create a delightful contrast, ensuring every bite is satisfying and memorable—ideal for those feeling bored with fast food.

Serve alongside a fresh salad or a fruit platter to elevate your meal further. If you’re intrigued by more brunch ideas, don’t miss out on these glorious Turkish Eggs Discover and Matcha Baked Doughnuts to complement your culinary repertoire!

Baked Eggs Napoleon Ingredients

  • For the Puff Pastry Shells
    • Frozen Puff Pastry Sheets – Use fully thawed sheets for the perfect flaky texture.
    • Unsalted Butter – Helps to grease ramekins and can be brushed on pastry edges for a beautiful shine.

  • For the Egg Filling
    • Eggs – Large eggs are key for filling the ramekins nicely without overflow.
    • Fresh Spinach – Adds a pop of color and nutrients; feel free to substitute with sautéed kale for a different flavor.
    • Gruyere Cheese – Provides a rich and creamy taste; try swapping for cheddar if you desire a sharper profile.
    • Chopped Prosciutto or Cooked Ham – Adds a savory depth; can be left out for a delicious vegetarian option.
    • Heavy Cream – Elevates the creaminess of the egg filling; whole milk works if you're looking for a lighter option.
    • Nutmeg – A pinch adds warmth and depth; freshly grated nutmeg gives the best flavor.
    • Salt and Pepper – Essential for seasoning; adjust according to your taste preferences.

  • For Garnish
    • Chopped Fresh Chives – Elevates the dish's presentation and adds a fresh flavor contrast.

This Baked Eggs Napoleon is not just about taste; its elegant presentation and customizable ingredients make it a perfect addition to your brunch repertoire!

Step‑by‑Step Instructions for Baked Eggs Napoleon

Step 1: Preparation
Start by thawing the frozen puff pastry sheets in the refrigerator overnight or at room temperature for about 30 minutes. Once ready, preheat your oven to 400°F (200°C) and gather four 4-inch ramekins. Grease the ramekins with unsalted butter ensuring full coverage to prevent sticking.

Step 2: Form Shells
Roll out the thawed puff pastry on a lightly floured surface to a thickness of 1/8 inch. Using a circular cutter, cut out circles slightly larger than the ramekins. Carefully press each pastry circle into the ramekins, allowing the edges to hang over the sides, creating a cozy cup to hold your delicious filling.

Step 3: Blind Bake
Cover the pastry shells with parchment paper and fill them with pie weights or dried beans to prevent puffing. Place the ramekins in the preheated oven and bake for 12-15 minutes, until the pastry is golden and slightly puffed. Remove the weights and parchment, then return them to the oven for an additional 3-5 minutes to crisp up further.

Step 4: Make Filling
In a sauté pan, heat olive oil over medium heat and add diced shallots and minced garlic, cooking until fragrant and translucent, about 2-3 minutes. Add fresh spinach and sauté until wilted, about 1-2 minutes. Remove from heat and combine with cream cheese, heavy cream, grated Parmesan, and a pinch of nutmeg. Season with salt and pepper to taste.

Step 5: Assemble
Spoon the savory spinach mixture into the pre-baked puff pastry shells, filling them generously without overflowing. Crack a large egg on top of each filled shell. Season the eggs lightly with salt and pepper, ensuring each one is ready to bake to perfection.

Step 6: Finishing Touch
For added elegance, brush the overhanging edges of the pastry with beaten egg for a stunning golden finish. Optionally, sprinkle Everything bagel seasoning on top for flavor and visual appeal. This step enhances the overall look of your Baked Eggs Napoleon.

Step 7: Final Bake
Return the assembled Baked Eggs Napoleon to the oven and bake for 12-18 minutes, depending on your preference for yolk doneness—12-14 minutes for runny yolks and 16-18 minutes for firmer eggs. Keep an eye on them as they bake, watching for the perfect, slightly set yolk.

Step 8: Garnish & Serve
Once baked to your liking, remove the ramekins from the oven and allow them to cool slightly. Garnish with freshly chopped chives for a touch of color and flavor. Serve your elegant Baked Eggs Napoleon warm, either directly from the ramekin or plated for a fancy brunch experience.

Storage Tips for Baked Eggs Napoleon

  • Room Temperature: Best enjoyed fresh from the oven. Avoid leaving the dish at room temperature for more than 2 hours to ensure food safety.

  • Fridge: Store leftover Baked Eggs Napoleon in an airtight container for up to 2 days. To retain the pastry's texture, reheat in the oven for about 10 minutes at 350°F (175°C).

  • Freezer: If you need to freeze them, do so before baking. Wrap individual assembled but unbaked Baked Eggs Napoleon in plastic wrap and foil. They can be frozen for up to 1 month.

  • Reheating: For baked versions, reheat in the oven at 350°F (175°C) until heated through—about 15 minutes. This ensures the puff pastry remains crisp and delicious.

Make Ahead Options

These Baked Eggs Napoleon are perfect for busy home cooks looking to simplify their meal prep! You can prepare the puff pastry shells up to 24 hours in advance; simply blind bake them and store them in an airtight container in the refrigerator to maintain their flaky texture. The spinach filling can also be made ahead and refrigerated for up to 3 days. When you’re ready to serve, just fill the pastry cups with the prepared filling, crack an egg on top, and bake for 12-18 minutes until the eggs reach your desired doneness. This way, you can enjoy a gourmet brunch experience without the rush!

What to Serve with Baked Eggs Napoleon

Looking to create a delightful brunch experience that will impress your guests and elevate your dining table?

  • Light Green Salad: A crisp mix of arugula and spinach dressed with lemon vinaigrette adds a refreshing contrast to the rich flavors of the eggs.

  • Fresh Fruit Salad: Juicy berries and sweet melons offer a burst of natural sweetness, providing a perfect balance to the savory dish and brightening the plate.

  • Artisan Bread: Serve warm, crusty baguette or whole grain toast for dipping into those luxurious runny yolks—an absolute must for bread lovers!

  • Crispy Roasted Potatoes: Golden, seasoned potatoes add a satisfying crunch and hearty element, making your brunch spread feel complete and hearty.

  • Savory Scones: Consider a batch flavored with chives and cheddar; their tender crumb and buttery richness pair beautifully with the creamy filling of the Baked Eggs Napoleon.

  • Mimosa or Bellini: A light, sparkling drink like a mimosa or peach bellini is a classic brunch choice, with its effervescence cutting through the richness of the eggs.

  • Vanilla Yogurt Parfait: Layer creamy yogurt with granola and seasonal fruits for a light dessert that feels indulgent, perfect for wrapping up your brunch with a hint of sweetness.

  • Herb-Infused Tea: Offering a soothing cup of herbal tea can round off the meal while enhancing the experience with its delicate aroma and warmth.

Expert Tips for Baked Eggs Napoleon

  • Chill the Pastry: Keep the puff pastry cold before baking to ensure it puffs beautifully; warm pastry won't rise as well.

  • Mind the Fillings: Avoid overfilling the ramekins to prevent spills; a neat presentation adds to the elegance of your Baked Eggs Napoleon.

  • Watch the Time: Baking time affects yolk doneness; check at 12 minutes for runny yolks or up to 18 minutes for firm eggs—adjust with care.

  • Use Quality Eggs: Large, fresh eggs make a significant difference in flavor and texture for this dish, ensuring a delightful bite with each serving.

  • Customize Wisely: Feel free to experiment with different cheeses and vegetables, but keep humidity in mind; watery ingredients can lead to soggy pastry.

  • Garnish Smartly: Fresh herbs enhance flavor and presentation; try not to skip this step for the best final touch!

Baked Eggs Napoleon Variations

Feel free to explore these delightful twists to customize your Baked Eggs Napoleon into something uniquely yours!

  • Cheese Options: Replace Gruyere with sharp cheddar, goat cheese, or a creamy feta for unexpected flavor profiles. Each cheese brings its own personality to the dish!

  • Vegetarian Additions: Add seasonal toppings like roasted asparagus or sun-dried tomatoes for a burst of color and freshness. The veggies can add a wonderful depth without sacrificing flavor.

  • Meat Alternatives: Swap prosciutto for crispy bacon or sausage, enhancing the savory essence. Experiment until you find your perfect blend of flavors that tantalize your taste buds!

  • Herb Infusions: Try fresh thyme, rosemary, or even dill for a fragrant twist. Fresh herbs can brighten and elevate the entire dish, creating a lovely aroma as it bakes.

  • Spicy Kick: Add a sprinkle of red pepper flakes or sautéed jalapeños for those who enjoy a little heat. Pairing spiciness with creamy eggs is always a delightful adventure for the palate!

  • Creamy Enhancements: A dollop of crème fraîche prior to serving elevates the experience, bringing an extra layer of richness. It’s a simple addition that speaks volumes!

  • Exotic Twists: Incorporate ingredients like truffle oil or smoked salmon to turn your brunch into a gourmet feast. This openness to flavors can transport your taste buds to a whole new realm!

Don’t forget to check out other brunch favorites like Turkish Eggs Discover for more brunch ideas or to sweeten the deal with Matcha Baked Doughnuts that perfectly complement your culinary adventures!

Baked Eggs Napoleon Recipe FAQs

What type of puff pastry should I use for Baked Eggs Napoleon?
Use frozen puff pastry sheets that are fully thawed for the best flaky texture. If you prefer homemade, ensure the dough is rolled out evenly to guarantee proper puffing.

How can I store leftover Baked Eggs Napoleon?
Store leftovers in an airtight container in the fridge for up to 2 days. To maintain the pastry's crispiness, reheat them in the oven at 350°F (175°C) for about 10 minutes until warmed through.

Can I freeze Baked Eggs Napoleon?
Absolutely! If you want to freeze them, wrap the unbaked, assembled Baked Eggs Napoleon tightly in plastic wrap and then in foil. These can be stored in the freezer for up to 1 month. When ready to bake, you can cook them directly from frozen, just add a few extra minutes to the baking time.

What should I do if my puff pastry doesn't rise properly?
If your puff pastry doesn’t rise as expected, it could be due to warm pastry or insufficient baking time. Make sure the pastry is kept cold before baking, and always keep an eye on it during the final bake. A golden, crisp exterior is what you’re aiming for!

Can I make Baked Eggs Napoleon vegetarian-friendly?
Very! You can easily omit the prosciutto or cooked ham and add more vegetables like sautéed asparagus or sun-dried tomatoes. Just remember to avoid watery vegetables or they may make the pastry soggy.

What if I have an egg allergy; are there alternatives?
If you’re allergic to eggs, consider using a tofu or chickpea-based alternative to achieve a similar texture. For a binding agent, you could combine silken tofu with nutritional yeast, which also provides a cheesy flavor.

Baked Eggs Napoleon

Baked Eggs Napoleon: Elegant Brunch with a Flaky Twist

Baked Eggs Napoleon is an elegant brunch dish featuring flaky puff pastry cups filled with creamy baked eggs and spinach, perfect for customization.
Print Recipe Pin Recipe
Prep Time 30 minutes mins
Cook Time 30 minutes mins
Total Time 1 hour hr
Servings: 4 servings
Course: Breakfast
Cuisine: French
Calories: 350
Ingredients Equipment Method Nutrition Notes

Ingredients
  

For the Puff Pastry Shells
  • 2 sheets Frozen Puff Pastry Sheets Fully thawed for flaky texture.
  • 1 tablespoon Unsalted Butter For greasing ramekins.
For the Egg Filling
  • 4 Large Eggs Key for filling ramekins.
  • 2 cups Fresh Spinach Can substitute with sautéed kale.
  • 1 cup Gruyere Cheese Can swap for cheddar.
  • 1/2 cup Chopped Prosciutto or Cooked Ham Optional for vegetarian option.
  • 1/2 cup Heavy Cream Whole milk can be used for lighter option.
  • 1/4 teaspoon Nutmeg Freshly grated for best flavor.
  • 1 teaspoon Salt Adjust according to taste.
  • 1 teaspoon Pepper Adjust according to taste.
For Garnish
  • 2 tablespoons Chopped Fresh Chives For presentation and flavor.

Equipment

  • Oven
  • ramekins
  • sauté pan
  • Circular Cutter
  • Rolling Pin

Method
 

Preparation
  1. Thaw frozen puff pastry sheets in the refrigerator or at room temperature. Preheat the oven to 400°F (200°C) and grease four 4-inch ramekins with unsalted butter.
Form Shells
  1. Roll out the puff pastry to 1/8 inch thickness and cut out circles larger than the ramekins. Press circles into the ramekins.
Blind Bake
  1. Cover pastry shells with parchment paper and fill with weights. Bake for 12-15 minutes until golden, then remove weights and bake for another 3-5 minutes.
Make Filling
  1. Sauté shallots and garlic in olive oil until translucent. Add spinach and cook until wilted. Combine with cream cheese, heavy cream, nutmeg, salt, and pepper.
Assemble
  1. Spoon the filling into pastry shells and crack an egg on top. Season with salt and pepper.
Finishing Touch
  1. Brush pastry edges with beaten egg and sprinkle with Everything bagel seasoning if desired.
Final Bake
  1. Bake for 12-18 minutes, adjusting time for yolk doneness.
Garnish & Serve
  1. Let cool slightly, garnish with chives, and serve warm.

Nutrition

Serving: 1servingCalories: 350kcalCarbohydrates: 20gProtein: 12gFat: 25gSaturated Fat: 12gPolyunsaturated Fat: 2gMonounsaturated Fat: 10gCholesterol: 300mgSodium: 500mgPotassium: 300mgFiber: 1gSugar: 1gVitamin A: 30IUVitamin C: 15mgCalcium: 20mgIron: 10mg

Notes

This dish is an impressive yet simple option for brunch, allowing for many ingredient variations.

Tried this recipe?

Let us know how it was!

Creamy Polenta with Poached Eggs for a Cozy Delight

March 30, 2026 by Grace Snow Leave a Comment

A subtle aroma of comfort wafts through the kitchen as I stir a pot of creamy polenta, dreaming of the perfect poached eggs that will soon crown this delightful base. This Creamy Polenta with Poached Eggs recipe is my go-to dish for lazy weekends and hectic weeknights alike, embracing the beauty of nourishing food without a hefty time investment. Not only is this dish gluten-free, but it also offers endless variations to cater to your family's tastes, from sautéed veggies to a sprinkle of herbs. It's the kind of satisfying meal that brings everyone around the table, creating moments that linger long after the last bite. Curious how to elevate this simple comfort food into your next favorite dish? Let’s dive into the details!

Why is Creamy Polenta a Must-Try?

Creamy Texture: The velvety smoothness of polenta creates a comforting base that contrasts beautifully with the soft poached eggs.

Versatile Options: This recipe invites endless variations – from adding sautéed mushrooms to swapping eggs for grilled vegetables, it fits every palate.

Quick & Easy: In just about 30 minutes, you can whip up this delightful dish, making it perfect for busy weekdays or leisurely weekends.

Gluten-Free Delight: Enjoy a wholesome, gluten-free meal that everyone at the table can savor, leaving no one behind!

Crowd-Pleasing Comfort: This dish is a guaranteed crowd-pleaser, ideal for family dinners or brunch gatherings that will have everyone asking for seconds.

Explore more deliciousness with Buffalo Tofu Caesar Salad for a satisfying vegan option, or pair your polenta with a refreshing salad like Mixed Greens Salad to elevate your meal experience further!

Creamy Polenta with Poached Eggs Ingredients

For the Polenta
• Polenta – The creamy base of the dish; for best results, use coarse or medium-ground.
• Water or Broth – This cooking liquid enhances flavor; using homemade or low-sodium broth makes a delicious difference.
• Milk or Cream (Optional) – For extra richness, substitute with plant-based milk if you want a vegan version.
• Butter – Adds a silky depth to the polenta; swap for vegan butter or olive oil for a dairy-free option.
• Parmesan Cheese (Optional) – Infuses a savory umami flavor; can be replaced with nutritional yeast for vegan preparations.
• Salt & Black Pepper – Essential for seasoning; adjust to your taste preference.

For the Eggs
• Eggs – They are the key protein component, offering a delicate richness when poached.
• White Vinegar – Helps keep the egg whites intact during the poaching process.

For Garnish
• Fresh Parsley or Chives (Optional) – Adds a burst of flavor and color, brightening up your dish beautifully.

This Creamy Polenta with Poached Eggs is not just a meal; it's an experience that brings the family together and warms the heart. Get ready for some delightful cooking!

Step‑by‑Step Instructions for Creamy Polenta with Poached Eggs

Step 1: Prepare the Polenta
In a medium saucepan, bring 4 cups of water or low-sodium broth to a gentle simmer over medium heat. Gradually whisk in 1 cup of coarse or medium-ground polenta, stirring continuously to prevent lumps. Reduce the heat to low and cook for about 15-20 minutes, stirring frequently, until the mixture is creamy and thickened. As it cooks, you’ll see a gradual transformation to a smooth texture.

Step 2: Enhance the Polenta
Once the polenta reaches a creamy consistency, remove it from the heat and stir in 2 tablespoons of butter and, if desired, 1/2 cup of grated Parmesan cheese for added richness. Season it generously with salt and black pepper to taste. If you'd like, you can also mix in a splash of milk or cream for an extra velvety touch before setting it aside to keep warm.

Step 3: Poach the Eggs
While the polenta rests, fill a wide pot with about 3 inches of water and bring it to a gentle simmer over medium-low heat. Add 1 tablespoon of white vinegar, which helps keep the egg whites intact. Crack each egg into individual small bowls, then create a gentle whirlpool in the simmering water and carefully slide the eggs in. Poach the eggs for about 3-4 minutes until the whites are set and the yolks remain runny.

Step 4: Assemble the Dish
With your polenta and poached eggs ready, take warm bowls and spoon about a cup of creamy polenta into each one. Carefully top each portion with a poached egg, allowing the golden yolk to sink into the polenta, creating a deliciously inviting appearance. If desired, sprinkle freshly chopped parsley or chives on top to add a vibrant touch.

Step 5: Serve Immediately
Serve your delightful Creamy Polenta with Poached Eggs right away while everything is warm and fresh. The contrasting textures of the smooth polenta and the soft poached eggs create a comforting bite. Enjoy this cozy comfort food as a satisfying breakfast, brunch, or light dinner any day of the week!

Make Ahead Options

These Creamy Polenta with Poached Eggs are perfect for busy home cooks looking to save time during hectic weekdays! You can prepare the polenta up to 3 days in advance; just cook it as usual, then cool it and store it in an airtight container in the refrigerator. When you're ready to serve, simply reheat the polenta in a saucepan over low heat, adding a splash of water or broth to restore its creamy texture. The poached eggs are best made fresh, but you can crack them into bowls and store them in cold water overnight for easier cooking. Just poach them right before serving, and you'll have restaurant-quality results with minimal effort!

Expert Tips for Creamy Polenta with Poached Eggs

• Fresh Eggs: Use the freshest eggs possible for the best poaching results—they hold their shape better and have firmer whites.

• Gentle Simmering: Maintain a gentle simmer when poaching to prevent the eggs from breaking apart; vigorous boiling can ruin their shape.

• Whisk Gradually: When adding polenta to the simmering liquid, whisk it in gradually to avoid lumps and ensure a creamy consistency.

• Reheating Polenta: If making ahead, reheat polenta with a splash of liquid to restore its creamy texture; it's crucial for enjoying this Creamy Polenta with Poached Eggs again!

• Season to Taste: Always taste your polenta before serving; adjusting the seasoning can elevate the overall flavor and ensure a satisfying meal.

• Garnish Wisely: Experiment with different herbs for garnish—fresh parsley or chives are great, but try basil or thyme for an exciting flavor twist!

Creamy Polenta with Poached Eggs Variations

Feel free to get creative and elevate your creamy polenta with poached eggs experience!

  • Vegan Twist: Swap the poached eggs for sautéed tofu or grilled veggies for a delightful plant-based option. A sprinkle of nutritional yeast can add a cheesy touch!

  • Flavor Boost: Mix in sautéed mushrooms, roasted garlic, or caramelized onions into the polenta for a savory infusion that will awaken your taste buds. The added depth will make each bite memorable.

  • Cheese Lovers: Experiment with different cheeses like feta, goat cheese, or a sharp cheddar to bring a new flavor dimension to your dish. The creamy goodness pairs beautifully with the polenta’s smooth texture.

  • Spicy Kick: Add a pinch of red pepper flakes or a dollop of your favorite hot sauce atop the poached eggs for those who love heat. It gives the dish an exciting zing!

  • Herb Garden: Enhance the dish with a mix of fresh herbs such as basil, thyme, or a sprinkle of za'atar. Fresh herbs brighten the flavors and make the meal visually appealing.

  • Crispy Addition: Top the dish with crispy bacon bits or crumbled sausage to add a satisfying crunch alongside the creamy polenta. The contrast in texture makes for a delightful meal.

  • Nutty Pearls: Stir in some toasted pine nuts or chopped walnuts for a delightful crunch and added nutritional value. The nuttiness balances the creaminess of the polenta.

Don't forget, you can enjoy your polenta alongside delicious options like Cocoa Crusted Peppers or pair with a refreshing salad such as Mixed Greens Salad for a complete meal that everyone will love!

What to Serve with Creamy Polenta with Poached Eggs

A cozy bowl of creamy polenta topped with golden poached eggs is just the beginning of a delightful meal experience.

  • Mixed Greens Salad: A crisp, refreshing salad brings a burst of color and lightness, balancing the dish's creaminess. Toss in a citrus vinaigrette for a zesty kick that wakes up your taste buds.

  • Sautéed Kale: Earthy and slightly bitter, sautéed kale adds a nutritional boost and a vibrant green complement to the smooth polenta. The light garlic seasoning enhances the overall flavor harmony, making each bite satisfying.

  • Roasted Cherry Tomatoes: Sweet, roasted cherry tomatoes provide a juicy burst of flavor on top of the creamy polenta, enriching the dish with natural sweetness that contrasts beautifully with savory notes.

  • Mushroom Medley: A mix of sautéed mushrooms offers an umami-rich addition, enhancing the dish's depth with their earthy flavors. They create a delightful texture while harmonizing with the creamy base.

  • Crispy Bacon or Prosciutto: For non-vegetarians, a sprinkle of crispy bacon or prosciutto adds a crunchy, salty element that brilliantly contrasts the polenta and poached eggs. Just imagine that satisfying crunch!

  • Herbed Yogurt Sauce: A dollop of herbed yogurt sauce provides a creamy tang that elevates the polenta, making every bite feel luxuriously indulgent. The fresh herbs add an aromatic touch that amplifies the overall experience.

  • Chardonnay or Pinot Grigio: Pair your meal with a glass of Chardonnay or Pinot Grigio to enjoy a crisp and refreshing sip that complements the creaminess of the polenta and the richness of the poached eggs.

Let these delightful pairings transform your creamy polenta into a full-spectrum dining experience that nourishes body and soul!

How to Store and Freeze Creamy Polenta with Poached Eggs

Fridge: Store leftover creamy polenta in an airtight container in the fridge for up to 3 days. Reheat gently with a splash of broth or milk to restore its creaminess.

Freezer: You can freeze the creamy polenta for up to 2 months. Portion it into freezer-safe containers, leaving some space for expansion, and thaw overnight before reheating.

Poached Eggs: It's best to enjoy poached eggs fresh, but if you have leftovers, store them in a bowl of cold water in the fridge for up to 2 days. Reheat gently in simmering water for a few minutes before serving.

Make-ahead Tip: Prepare the polenta ahead of time and reheat when needed for an easy meal; just ensure it stays creamy for the best results!

Creamy Polenta with Poached Eggs Recipe FAQs

Can I use instant polenta for this recipe?
Absolutely not! For the best texture and creaminess, I recommend using coarse or medium-ground polenta. Instant polenta lacks the needed depth and will not yield the same velvety result.

How should I store leftover creamy polenta?
Store any remaining creamy polenta in an airtight container in the refrigerator for up to 3 days. When you're ready to enjoy it, reheat gently with a splash of broth or milk, stirring until it regains that desired creamy texture.

Can I freeze creamy polenta?
Yes, you can freeze creamy polenta for up to 2 months! Portion it out into freezer-safe containers, leaving some space for expansion. To reheat, simply thaw overnight in the refrigerator and then warm it gently, adding a splash of liquid if necessary to keep it smooth.

What are some ways to troubleshoot poached eggs?
To achieve perfectly poached eggs, use very fresh eggs, as they hold their shape better. Ensure your water has reached a gentle simmer – not a rolling boil – as this will help maintain the egg structure. If the egg whites stray too much, adding a splash of vinegar helps to keep them intact.

Can I make this recipe vegan?
Very easily! For a vegan version of the Creamy Polenta with Poached Eggs, simply substitute the eggs with sautéed tofu or grilled vegetables and use plant-based milk instead of regular milk. You can also replace butter with olive oil and omit the cheese or swap it for nutritional yeast.

What should I do if my polenta turns out gritty?
If your polenta has a gritty texture, it could be due to cooking it over too high of heat or not whisking it slowly enough. The next time, make sure to whisk it gradually into simmering water or broth and cook over low heat, stirring frequently until smooth and creamy. Enjoy your cooking journey!

Creamy Polenta with Poached Eggs

Creamy Polenta with Poached Eggs for a Cozy Delight

This Creamy Polenta with Poached Eggs recipe is a comforting, gluten-free dish perfect for weekends and weeknights.
Print Recipe Pin Recipe
Prep Time 10 minutes mins
Cook Time 20 minutes mins
Total Time 30 minutes mins
Servings: 4 servings
Course: Breakfast
Cuisine: Italian
Calories: 350
Ingredients Equipment Method Nutrition Notes

Ingredients
  

For the Polenta
  • 1 cup coarse or medium-ground polenta Use for best results.
  • 4 cups water or low-sodium broth Enhances flavor.
  • 2 tablespoons butter Adds silkiness; swap for vegan option.
  • 1/2 cup grated Parmesan cheese Optional for richness.
  • to taste salt Essential for seasoning.
  • to taste black pepper Essential for seasoning.
  • 1 splash milk or cream Optional for extra richness.
For the Eggs
  • 4 large eggs Key protein component.
  • 1 tablespoon white vinegar Helps keep egg whites intact.
For Garnish
  • to taste fresh parsley or chives Optional for garnish.

Equipment

  • Medium saucepan
  • wide pot
  • Whisk
  • Bowl

Method
 

Cooking Instructions
  1. In a medium saucepan, bring 4 cups of water or low-sodium broth to a gentle simmer over medium heat. Gradually whisk in 1 cup of polenta, stirring continuously to prevent lumps. Cook for 15-20 minutes until creamy.
  2. Remove from heat and stir in 2 tablespoons of butter and 1/2 cup grated Parmesan cheese if desired. Season with salt and black pepper to taste.
  3. In a wide pot with 3 inches of simmering water, add 1 tablespoon of white vinegar. Crack each egg into small bowls, create a whirlpool and slide in the eggs. Poach for 3-4 minutes.
  4. Spoon about a cup of creamy polenta into warm bowls and top each with a poached egg. Garnish with chopped parsley or chives if desired.
  5. Serve immediately while warm and fresh.

Nutrition

Serving: 1servingCalories: 350kcalCarbohydrates: 35gProtein: 12gFat: 18gSaturated Fat: 10gPolyunsaturated Fat: 2gMonounsaturated Fat: 4gCholesterol: 215mgSodium: 250mgPotassium: 300mgFiber: 2gSugar: 1gVitamin A: 500IUVitamin C: 2mgCalcium: 200mgIron: 1.5mg

Notes

Using fresh eggs will yield the best poaching results. Maintain a gentle simmer to keep eggs intact.

Tried this recipe?

Let us know how it was!

Grilled Salsa Verde Pepper Jack Chicken for a Flavorful Feast

March 29, 2026 by Grace Snow Leave a Comment

As the sun sets and the aroma of grilled chicken wafts through the air, I can’t help but feel a surge of excitement—and not just because it's dinner time! My Grilled Salsa Verde Pepper Jack Chicken is a vibrant dish, marrying the zesty tang of salsa verde with the creamy bite of pepper jack cheese. Perfect for a quick weeknight meal or a weekend gathering, this recipe is a real crowd-pleaser that packs bold flavors with just minimal prep time. Plus, each juicy bite is naturally gluten-free and delectable enough to impress friends or family alike. Whether served solo, over rice, or as a delightful topping for tacos, it's a versatile dish that will surely leave everyone asking for seconds. Ready to fire up the grill? Let’s dive into the details!

Why is this chicken recipe a must-try?

Bold flavors: Each bite bursts with the zesty tang of salsa verde and the creamy spice of pepper jack cheese, ensuring a delicious flavor explosion. Quick & Easy: This recipe requires minimal preparation and cooks in under 20 minutes, making it perfect for busy weeknights. Versatile Dining: Enjoy it as a standalone dish, over rice, or as a topping for fresh tacos. For a delightful vegetarian alternative, try grilling portobello mushrooms instead! Crowd Pleaser: Friends and family will rave about this dish, making it a fantastic addition to any gathering. Healthy Choice: Naturally gluten-free and lower in calories, it’s a guilt-free option for everyone. Ready to add a flavorful twist to your dinner table? Don’t miss out!

Grilled Salsa Verde Pepper Jack Chicken Ingredients

For the Chicken
• Thin-sliced boneless skinless chicken breasts – The main protein source; can substitute with bone-in chicken (just adjust the cooking time).
• Olive oil – Enhances moisture and flavor; avocado oil can also be used for a similar effect.
• Lime juice – Adds acidity for flavor balance; feel free to substitute with lemon juice if needed.
• Cumin – Infuses a warm, earthy flavor; adjust or omit based on your spice preferences.
• Salt – Essential for enhancing flavor; adjust according to your taste.
• Freshly ground black pepper – Adds just the right amount of mild heat; pre-ground is suitable if you're in a pinch.

For the Salsa Verde
• Salsa verde – Provides tanginess and moisture; use store-bought for convenience or make your own for a homemade touch.

For Topping and Garnish
• Pepper Jack cheese slices – Melts beautifully for a creamy, spicy flavor; swap it for Monterey Jack or mild cheddar for less heat.
• Fresh cilantro (optional) – A sprinkle adds brightness and freshness; omit if cilantro isn’t your thing.
• Lime wedges (optional) – For serving, they add an extra layer of tanginess to your meal.

Optional Extras
• Grilled vegetables – Enhance your plate with grilled bell peppers, onions, or zucchini for a colorful side.
• Chili peppers or flakes – Elevate your dish by adding diced jalapeños or red pepper flakes into the salsa verde for that extra kick.

Ready to gather these ingredients? This Grilled Salsa Verde Pepper Jack Chicken will be a delightful highlight at your dinner table!

Step‑by‑Step Instructions for Grilled Salsa Verde Pepper Jack Chicken

Step 1: Prepare the Chicken
Begin by seasoning the thinly sliced boneless skinless chicken breasts with salt, freshly ground black pepper, and cumin, ensuring both sides are covered evenly. Let the seasoned chicken sit for about 5 minutes to allow the flavors to meld.

Step 2: Marinate
In a medium bowl, combine salsa verde, olive oil, and lime juice, mixing well. Add the seasoned chicken breasts to the bowl, coating them thoroughly in the marinade. Cover the bowl with plastic wrap and allow the chicken to marinate in the refrigerator for at least 30 minutes, or up to several hours for richer flavor.

Step 3: Preheat Grill
While the chicken marinates, preheat your grill to medium-high heat, around 400°F to 450°F. Once heated, oil the grill grates lightly with a paper towel soaked in olive oil, which will prevent the chicken from sticking and ensure those beautiful grill marks.

Step 4: Grill Chicken
Carefully place the marinated chicken breasts on the hot grill. Cook for 4-5 minutes on the first side without moving them, allowing the internal temperature to rise. You’ll know they're ready to flip when grill marks develop, showing off that perfect char.

Step 5: Add Cheese
After flipping the chicken for the second side, grill for another 4-5 minutes until the internal temperature reaches 165°F. In the final minute of cooking, place a slice of pepper jack cheese on each breast and close the grill lid to allow it to melt beautifully.

Step 6: Serve
Once cooked through and cheese has melted, remove the chicken from the grill. Garnish with fresh cilantro if desired, and serve with lime wedges for a refreshing tang. This Grilled Salsa Verde Pepper Jack Chicken can be enjoyed on its own, over rice, or as a vibrant topping for tacos.

Expert Tips for Grilled Salsa Verde Pepper Jack Chicken

  • Marination Matters: Allow your chicken to marinate longer, even overnight, for a deeper infusion of flavor that will make a noticeable difference in each bite.

  • Preheat the Grill: Always ensure your grill is preheated well for at least 10-15 minutes. This helps achieve those grill marks and prevents sticking for perfect grilled chicken.

  • Check Doneness: Use a meat thermometer to check for doneness. The internal temperature should reach 165°F to ensure juicy, safe chicken—no guesswork!

  • Customize Heat: If you enjoy a bit of spiciness, consider adding diced jalapeños or crushed red pepper flakes to your salsa verde before marinating the chicken for an extra kick.

  • Don’t Overcook: Keep a close eye on the chicken while grilling. Overcooking can lead to dryness. You want that juicy tenderness combined with the melty pepper jack cheese.

  • Storage Solutions: Any leftovers of your Grilled Salsa Verde Pepper Jack Chicken can be stored in an airtight container in the fridge for up to 3 days—reheat with a splash of salsa verde to keep it moist!

What to Serve with Grilled Salsa Verde Pepper Jack Chicken

Gather your loved ones and elevate your dining experience with these delightful pairings that perfectly complement this vibrant grilled dish.

  • Creamy Guacamole: This smooth, buttery dip enhances the zesty flavors of chicken, making each bite feel indulgent and satisfying. Serve it with tortilla chips for an appetizer that’s hard to resist.

  • Fluffy Cilantro-Lime Rice: The bright and fresh notes of cilantro-lime rice balance the bold flavors of the dish, adding a lovely texture without overpowering the main attraction. It’s perfect for soaking up the flavorful juices!

  • Savory Black Bean Salad: This hearty and colorful salad brings a refreshing crunch and a protein boost. Tossed with lime dressing, it pairs wonderfully with the spiciness of the chicken for a delightful contrast.

  • Grilled Vegetables: Enhance your plate with a medley of grilled bell peppers, zucchini, and onions. Their smoky sweetness complements the spicy chicken beautifully, creating a wholesome and vibrant meal experience.

  • Fresh Garden Salad: Crisp greens dressed in a light vinaigrette offer a refreshing crunch, helping to cut through the richness of the melted cheese. Top with cherry tomatoes and cucumber for added color and flavor.

  • Chilled White Wine Spritzer: A refreshing, slightly fizzy drink that cools down any spice while enhancing the dish's flavors. Choose a light, fruity white wine mixed with sparkling water for a festive touch.

  • Lime Sorbet: For dessert, a light and zesty lime sorbet provides the perfect sweet and tangy finish to your meal, cleansing the palate after the savory chicken. A refreshing way to end the night!

Make Ahead Options

These Grilled Salsa Verde Pepper Jack Chicken breasts are a fantastic option for meal prep enthusiasts! You can marinate the chicken in the salsa verde mixture up to 24 hours in advance—just be sure to refrigerate it to keep the flavors fresh and vibrant. Additionally, you can slice the pepper jack cheese and chop cilantro ahead of time—it helps save precious minutes come dinnertime. When you’re ready to grill, simply preheat your grill, cook the marinated chicken for about 4-5 minutes per side until it reaches an internal temperature of 165°F, and then add the cheese during the last minute. You'll have a delicious, hassle-free dinner that tastes just as fresh as if you had made it that day!

Variations & Substitutions for Grilled Salsa Verde Pepper Jack Chicken

Feel free to explore these delicious variations, allowing you to personalize your Grilled Salsa Verde Pepper Jack Chicken to suit your taste buds!

  • Add Spice: Mix in diced jalapeños or red pepper flakes to the salsa verde before marinating for extra heat. A little kick can elevate the dish to new heights!

  • Vegetarian Option: Swap the chicken for grilled portobello mushrooms or firm tofu to make a delightful meat-free version. Both options soak up flavors beautifully and add a satisfying texture.

  • Grilled Vegetables: Serve alongside grilled bell peppers, onions, or zucchini to create a colorful and hearty meal. Grilled veggies add a fresh crunch that pairs perfectly with the chicken.

  • Low-Carb Alternative: Place your chicken on a bed of cauliflower rice or crisp lettuce instead of traditional rice. This keeps it light and refreshing, ideal for low-carb diets.

  • Citrus Twist: For a brighter flavor, squeeze orange juice or add orange zest to your marinade. It brings a delightful sweetness that contrasts beautifully with the spice!

  • Herbed Version: Mix some fresh herbs—like thyme or oregano—into the marinade for an aromatic twist. The fragrance will enhance the grilled flavor and make your taste buds dance!

  • Different Cheese Choices: Use Monterey Jack or mild cheddar cheese instead of pepper jack for a milder taste. Both will melt wonderfully and create a creamy finish.

  • Try a Gravy Upgrade: Drizzle some homemade salsa verde sour cream over the chicken before serving for a creamy and tangy addition. Your guests will love this indulgent touch!

For even more inspiration, check out my delicious Chipotle Lime Chicken or the vibrant flavor of Crock Pot Chicken that can perfectly complement your culinary journey!

How to Store and Freeze Grilled Salsa Verde Pepper Jack Chicken

Fridge: Store leftovers in an airtight container for up to 3 days. To maintain moisture, consider adding a bit of extra salsa verde before sealing.

Freezer: Freeze the chicken in an airtight container or freezer bag for up to 2-3 months. Ensure it’s well-wrapped to prevent freezer burn.

Reheating: When ready to enjoy leftovers, reheat in the microwave or on the stovetop. Add a splash of salsa verde to keep it juicy, warming until heated through.

Thawing: For frozen chicken, thaw overnight in the fridge before reheating to ensure even cooking and flavor in your Grilled Salsa Verde Pepper Jack Chicken.

Grilled Salsa Verde Pepper Jack Chicken Recipe FAQs

What type of chicken is best for this recipe?
Absolutely! Thin-sliced boneless skinless chicken breasts are ideal for this recipe because they cook quickly and evenly. However, you can use bone-in chicken—just remember to adjust grilling time, cooking longer until it's fully cooked through, around 25-30 minutes depending on the thickness.

How should I store leftovers?
The more the merrier! Store any leftover Grilled Salsa Verde Pepper Jack Chicken in an airtight container in the fridge for up to 3 days. To keep it juicy, I recommend adding a splash of salsa verde before sealing to ensure it stays moist and delicious.

Can I freeze the chicken?
Yes, you can freeze it! Just place the chicken in an airtight container or freezer bag and store it for up to 2-3 months. Make sure to wrap it well to avoid freezer burn. When ready to eat, thaw in the fridge overnight and then reheat gently for the best results.

How can I ensure the chicken is cooked perfectly?
Use a meat thermometer to check the internal temperature, which should reach 165°F. It’s important not to overcook the chicken as it can become dry. Start checking a minute or two before the recommended cooking time to ensure it remains juicy and tender.

Is this dish suitable for those with dietary restrictions?
Very! This Grilled Salsa Verde Pepper Jack Chicken is naturally gluten-free due to its main ingredients. Be cautious with salsa verde if you purchase it store-bought; always check ingredients for any hidden gluten. For those with cheese allergies or preferences, you can easily substitute pepper jack cheese with Monterey Jack or a dairy-free cheese alternative, allowing everyone to enjoy this flavorful dish.

How can I make this recipe spicier?
For an extra kick, you can add diced jalapeños or red pepper flakes into the salsa verde before marinating the chicken. If you prefer a less spicy option, stick to the recipe as is or opt for milder cheese varieties. Remember, you can always add more spice after cooking if needed!

Grilled Salsa Verde Pepper Jack Chicken

Grilled Salsa Verde Pepper Jack Chicken for a Flavorful Feast

This Grilled Salsa Verde Pepper Jack Chicken recipe combines the tang of salsa verde with creamy pepper jack for a bold, gluten-free dinner option.
Print Recipe Pin Recipe
Prep Time 10 minutes mins
Cook Time 10 minutes mins
Marination Time 30 minutes mins
Total Time 50 minutes mins
Servings: 4 servings
Course: Dinner
Cuisine: Mexican
Calories: 350
Ingredients Equipment Method Nutrition Notes

Ingredients
  

For the Chicken
  • 4 pieces boneless skinless chicken breasts Thin-sliced
  • 2 tablespoons olive oil Can substitute with avocado oil
  • 2 tablespoons lime juice Can substitute with lemon juice
  • 1 teaspoon cumin Adjust based on spice preferences
  • 1 teaspoon salt Adjust according to taste
  • 1 teaspoon freshly ground black pepper Pre-ground is suitable
For the Salsa Verde
  • 1 cup salsa verde Use store-bought or homemade
For Topping and Garnish
  • 4 slices pepper jack cheese Can substitute with Monterey Jack or mild cheddar
  • fresh cilantro Optional
  • lime wedges Optional for serving
Optional Extras
  • 1 cup grilled vegetables Such as bell peppers, onions, or zucchini
  • chili peppers or flakes To add extra kick

Equipment

  • Grill
  • Mixing Bowl
  • Meat Thermometer

Method
 

Chicken Preparation
  1. Season the chicken breasts with salt, pepper, and cumin; let sit for 5 minutes.
  2. In a bowl, combine salsa verde, olive oil, and lime juice; add chicken and marinate.
  3. Preheat the grill to medium-high heat.
  4. Grill the chicken for 4-5 minutes per side until internal temperature reaches 165°F.
  5. During the last minute, place pepper jack cheese on each breast to melt.
  6. Serve garnished with cilantro and lime wedges.

Nutrition

Serving: 1servingCalories: 350kcalCarbohydrates: 2gProtein: 30gFat: 20gSaturated Fat: 9gPolyunsaturated Fat: 1gMonounsaturated Fat: 5gCholesterol: 100mgSodium: 800mgPotassium: 500mgSugar: 1gVitamin A: 10IUVitamin C: 5mgCalcium: 200mgIron: 2mg

Notes

Allow chicken to marinate longer for deeper flavor. Check doneness with a thermometer to avoid overcooking.

Tried this recipe?

Let us know how it was!

Smoky Steak and Veggie Rice Bowl: A Flavor-Packed Delight

March 29, 2026 by Grace Snow Leave a Comment

As I opened the fridge looking for inspiration, a colorful array of fresh veggies caught my eye, instantly sparking the idea for tonight’s dinner: an Easy Smoky Steak and Veggie Rice Bowl. This delightful dish brings together tender seared steak and vibrant vegetables, all resting on a bed of fluffy rice. Not only is it perfect for weeknight meals, but it’s also meal prep-friendly, allowing me to create multiple servings ahead of time. With its rich, smoky flavor—thanks to a sprinkle of smoked paprika—it impressively channels the essence of outdoor grilling, even without a background of sizzling coals. Plus, the customization options for toppings ensure that every bowl is uniquely yours. So, are you ready to whip up this deliciously satisfying dish that will have everyone asking for seconds?

Why is This Recipe So Irresistible?

Simplicity: The Easy Smoky Steak and Veggie Rice Bowl requires minimal cooking skills, making it perfect for both seasoned chefs and newbies alike.

Flavor Explosion: The smoky flavor from the paprika is a game changer, transforming basic ingredients into a mouthwatering meal that tantalizes your taste buds.

Customizable: With endless topping options, feel free to experiment by adding things like pickled onions or jalapeños, allowing you to craft your personal favorite with each serving.

Meal Prep Friendly: Prepare multiple bowls ahead of time for a convenient, hearty weeknight dinner, saving you time while still enjoying a home-cooked meal.

Crowd-Pleaser: This dish is great for gatherings! Serve it family-style, so everyone can build their ideal bowl, making it a fantastic option for entertaining.

Are you intrigued? Try pairing it with Cocoa Crusted Steak for a smoky sensation or use it as a base to explore recipes like One Pot Rice for a quick meal!

Smoky Steak and Veggie Rice Bowl Ingredients

For the Steak

  • Ribeye or Sirloin – Choose a tender cut for the best flavor and texture.
  • Smoked Paprika – Provides the essential smoky flavor without any grilling.
  • Salt – Enhances the steak's flavor; season generously before cooking.

For the Veggies

  • Bell Peppers – Adds vibrant color and crunch; any color works!
  • Onions – Brings sweetness and depth; slice thin for faster cooking.
  • Optional Vegetables – Feel free to swap or add zucchini or snap peas for variety.

For the Rice

  • White, Brown, or Jasmine Rice – The perfect base for soaking up those delicious flavors.

For the Toppings

  • Pickled Onions – Offers a tangy contrast to the smoky steak.
  • Jalapeños – Adds a spicy kick for those who love heat.
  • Chimichurri or Hot Honey – Drizzle for an extra layer of flavor and sweetness.

This Smoky Steak and Veggie Rice Bowl is all about using fresh ingredients to create a customizable meal that's full of flavor and ideal for meal prep!

Step‑by‑Step Instructions for Smoky Steak and Veggie Rice Bowl

Step 1: Prep the Steak
Begin by patting your chosen ribeye or sirloin steak dry with paper towels. Generously rub the steak with smoked paprika and salt, ensuring an even coating. Allow the seasoned steak to rest at room temperature for at least 10 minutes, letting the flavors meld while you prepare the rice.

Step 2: Cook Rice
In a medium saucepan, bring water to a boil, then add your preferred rice—whether it’s white, brown, or jasmine. Follow the package instructions for cooking time, typically around 15-20 minutes. Once cooked, fluff the rice with a fork and set it aside, covering it to keep warm.

Step 3: Sear Steak
Heat a cast-iron pan over high heat until it’s smoking hot, which should take about 5 minutes. Carefully place the steak in the pan, allowing it to sear for 3-4 minutes without moving it, forming a beautiful crust. Flip the steak and sear the other side for an additional 3-4 minutes, or until it reaches your desired doneness.

Step 4: Cook Veggies
After removing the steak, add sliced bell peppers and onions to the same hot pan. Sauté for 3-5 minutes until they become crisp-tender and slightly charred, stirring frequently to ensure even cooking. The residual flavors from the steak will enhance the veggies, creating a savory base for your Smoky Steak and Veggie Rice Bowl.

Step 5: Assemble the Bowl
In serving bowls, start by layering a generous scoop of warm rice at the bottom. Next, slice the seared steak against the grain and arrange it on top of the rice, followed by the sautéed veggies. This colorful display will make your Smoky Steak and Veggie Rice Bowl both visually appealing and delicious.

Step 6: Add Toppings
Finish your bowl by adding any desired toppings to elevate the flavors. Consider adding pickled onions for tang, sliced jalapeños for heat, or a drizzle of chimichurri or hot honey for extra depth. These customizable touches let you make each Smoky Steak and Veggie Rice Bowl uniquely yours, bringing your meal to the next level.

Smoky Steak and Veggie Rice Bowl Twists

Feel free to let your culinary creativity flow with these delightful variations that make this dish even more exciting!

  • Protein Swap: Substitute steak with grilled chicken or marinated tofu for a lighter option that still satisfies.
  • Low-Carb Option: Replace rice with quinoa or cauliflower rice for a nutritious, low-carb alternative packed with flavor.
  • Zestier Veggies: Incorporate seasonal veggies like zucchini or snap peas to add vibrant flavors and textures to your bowl.
  • Spice it Up: Kick up the heat with diced serrano peppers or a sprinkle of chili flakes for those who love a fiery bite.
  • Savory Sauce: Drizzle a rich teriyaki or barbecue sauce over the top for an exciting twist on the smoky flavor profile.
  • Herbaceous Touch: Toss in fresh herbs like cilantro or parsley just before serving for an aromatic burst of flavor.
  • Crunchy Toppings: Add crispy fried onions or crushed tortilla chips for extra crunch and texture to your Smoky Steak Bowl.
  • Citrus Boost: A squeeze of fresh lime or lemon juice right before serving brightens the flavors and adds a refreshing zing.

These variations allow you to customize your meal further—just like how a memorable gathering can feel complete with lively conversations and shared experiences, each bowl tells your unique story. Remember, if you’re looking for more wonderful meal ideas, consider exploring dishes like the Smoky Sweet Potatoes with Black Beans or the refreshing Acai Bowl Nutritious. Happy cooking!

What to Serve with Easy Smoky Steak and Veggie Rice Bowl

Elevate your dining experience by complementing your flavorful steak bowl with delightful side dishes and beverages that enhance every bite.

  • Creamy Avocado Salad: A refreshing twist that adds creamy richness and balances the smoky flavors of the bowl. The coolness of ripe avocado pairs wonderfully with the heat of jalapeños.

  • Garlic Breadsticks: Crispy on the outside and soft on the inside, these breadsticks are perfect for mopping up any extra sauce left on your plate. Their savory flavor enhances the overall meal experience!

  • Roasted Brussels Sprouts: Their caramelized edges and earthy taste provide a crunchy texture that contrasts beautifully with the tender steak and rice.

  • Spicy Black Bean Salad: Bright, zesty, and packed with protein, this salad complements the bowl with its refreshing crunch and a kick of heat that perfectly matches the smoky steak.

  • Mango Salsa: A sweet and tangy salsa adds a burst of tropical flavor, enhancing the rich smokiness of the dish. It’s light, fresh, and a feast for the senses.

  • Chilled Lemonade: A cool, tart beverage that cuts through the richness of the steak while keeping your palate refreshed. The citrus notes complement the smoky profile without overpowering it.

  • Chocolate Mousse: For dessert, indulge in a silky chocolate mousse. Its rich, smooth texture provides a delightful contrast to the savory meal, rounding out the evening with a touch of sweetness.

How to Store and Freeze Smoky Steak and Veggie Rice Bowl

Fridge: Store individual components separately in airtight containers for up to 3 days to retain freshness and texture.

Freezer: For longer storage, freeze fully cooled components separately; the steak and veggies will last up to 3 months.

Reheating: Reheat rice, steak, and veggies separately in the microwave with a splash of water to restore moisture, ensuring a satisfying Smoky Steak and Veggie Rice Bowl.

Tip for Meal Prep: Layer the rice, steak, and veggies just before serving to maintain crispness and flavor, making it perfect for quick weeknight dinners.

Expert Tips for Smoky Steak and Veggie Rice Bowl

  • Hot Pan Essential: Ensure your pan is screaming hot before searing the steak. This prevents steaming or boiling, giving you that perfect crust.

  • Proper Slicing: Always slice the steak against the grain after cooking. This keeps each bite tender and enhances the overall texture of your Smoky Steak and Veggie Rice Bowl.

  • Meal Prep Storage: For fresh meals throughout the week, store the rice, steak, and veggies separately. This maintains their individual textures and flavors during meal prep.

  • Customize Wisely: Don’t hesitate to experiment with toppings! From spicy jalapeños to sweet hot honey, each addition can transform your Smoky Steak and Veggie Rice Bowl into a new favorite.

  • Rice Method Matters: Rinse your rice before cooking it. This removes excess starch and helps achieve that fluffy texture essential for the perfect base.

Make Ahead Options

These Easy Smoky Steak and Veggie Rice Bowls are perfect for meal prep, saving you precious time during busy weeknights! You can season and cook the steak up to 24 hours in advance, allowing it to marinate in the smoked paprika for even deeper flavor. Cook the rice ahead of time and store it in the refrigerator for up to 3 days. Sauté the veggies just before serving to maintain their crispiness. To finish, simply reheat the steak and rice gently, and sauté the veggies in a bit of oil until warmed through. With this make-ahead strategy, you can enjoy a delicious, restaurant-quality meal with minimal effort!

Smoky Steak and Veggie Rice Bowl Recipe FAQs

What steak cut is best for this recipe?
Choosing a tender cut like ribeye or sirloin ensures your Smoky Steak and Veggie Rice Bowl is packed with flavor and has the right texture. Both options can be seasoned beautifully, giving you that juicy bite you crave.

How should I store leftovers?
Store your leftover Smoky Steak and Veggie Rice Bowl components in separate airtight containers in the fridge. This way, they’ll remain fresh for up to 3 days. Keeping them separate helps maintain the texture of the rice, steak, and veggies, so you can enjoy a delicious meal later!

Can I freeze the steak and veggies?
Absolutely! For the best results, freeze your fully cooled components in separate containers. The steak and veggies will retain their quality for up to 3 months in the freezer. When you're ready to enjoy, simply thaw overnight in the fridge, then reheat as needed.

What if my rice turns out mushy?
If you find your rice is mushy, it may have been overcooked or had too much water added. To remedy this, spread the cooked rice on a baking sheet and allow it to cool and dry out a bit. For future cooking, make sure to measure the water accurately according to your rice type, and rinse the rice beforehand to achieve that perfect fluffy texture!

Can I customize the toppings for dietary restrictions?
Yes, indeed! This Smoky Steak and Veggie Rice Bowl is incredibly customizable. Substitute the steak with grilled chicken or tofu to make it vegetarian-friendly. If you're allergic to certain toppings, like jalapeños, feel free to explore alternatives, such as avocado or roasted nuts, ensuring that everyone can enjoy their own tailored bowl while respecting dietary needs!

How long will the cooked veggies stay fresh?
Cooked veggies can be stored in the fridge in a sealed container for about 3 to 4 days. If you want to enjoy them beyond that, freezing is an option. Just remember to thaw, reheat gently, and you’ll have perfectly crisp veggies ready to go in a pinch!

Smoky Steak and Veggie Rice Bowl

Smoky Steak and Veggie Rice Bowl

A flavorful Smoky Steak and Veggie Rice Bowl that combines seared steak, vibrant vegetables, and fluffy rice, perfect for dinner.
Print Recipe Pin Recipe
Prep Time 15 minutes mins
Cook Time 25 minutes mins
Resting Time 10 minutes mins
Total Time 50 minutes mins
Servings: 4 bowls
Course: Dinner
Cuisine: American
Calories: 550
Ingredients Equipment Method Nutrition Notes

Ingredients
  

For the Steak
  • 1 pound Ribeye or Sirloin steak Choose a tender cut for the best flavor and texture.
  • 2 teaspoons Smoked Paprika Provides the essential smoky flavor without any grilling.
  • 1 teaspoon Salt Enhances the steak's flavor; season generously before cooking.
For the Veggies
  • 1 cup Bell Peppers Adds vibrant color and crunch; any color works.
  • 1 cup Onions Brings sweetness and depth; slice thin for faster cooking.
  • 1 cup Optional Vegetables Feel free to swap or add zucchini or snap peas for variety.
For the Rice
  • 1 cup White, Brown, or Jasmine Rice The perfect base for soaking up those delicious flavors.
For the Toppings
  • 1/2 cup Pickled Onions Offers a tangy contrast to the smoky steak.
  • 1/4 cup Jalapeños Adds a spicy kick for those who love heat.
  • 2 tablespoons Chimichurri or Hot Honey Drizzle for an extra layer of flavor and sweetness.

Equipment

  • Medium saucepan
  • Cast-iron pan
  • Knife
  • Cutting Board

Method
 

Step‑by‑Step Instructions
  1. Begin by patting your chosen ribeye or sirloin steak dry with paper towels. Generously rub the steak with smoked paprika and salt, ensuring an even coating. Allow the seasoned steak to rest at room temperature for at least 10 minutes.
  2. In a medium saucepan, bring water to a boil, then add your preferred rice—whether it’s white, brown, or jasmine. Follow the package instructions for cooking time, typically around 15-20 minutes. Once cooked, fluff the rice with a fork and set it aside, covering it to keep warm.
  3. Heat a cast-iron pan over high heat until it’s smoking hot, which should take about 5 minutes. Carefully place the steak in the pan, allowing it to sear for 3-4 minutes without moving it, forming a beautiful crust. Flip the steak and sear the other side for an additional 3-4 minutes, or until it reaches your desired doneness.
  4. After removing the steak, add sliced bell peppers and onions to the same hot pan. Sauté for 3-5 minutes until they become crisp-tender and slightly charred, stirring frequently to ensure even cooking.
  5. In serving bowls, start by layering a generous scoop of warm rice at the bottom. Next, slice the seared steak against the grain and arrange it on top of the rice, followed by the sautéed veggies.
  6. Finish your bowl by adding any desired toppings to elevate the flavors. Consider adding pickled onions for tang, sliced jalapeños for heat, or a drizzle of chimichurri or hot honey for extra depth.

Nutrition

Serving: 1bowlCalories: 550kcalCarbohydrates: 60gProtein: 34gFat: 21gSaturated Fat: 8gPolyunsaturated Fat: 2gMonounsaturated Fat: 9gCholesterol: 80mgSodium: 680mgPotassium: 800mgFiber: 4gSugar: 5gVitamin A: 30IUVitamin C: 80mgCalcium: 40mgIron: 3mg

Notes

This Smoky Steak and Veggie Rice Bowl is all about using fresh ingredients to create a customizable meal that's full of flavor and ideal for meal prep!

Tried this recipe?

Let us know how it was!

Creamy Herb Chicken with Mashed Potatoes & Glazed Carrots Bliss

March 29, 2026 by Grace Snow Leave a Comment

As I stirred the pot, a delightful aroma filled my kitchen, instantly transporting me back to my grandmother’s home where love was served alongside every meal. Today, I’m excited to share my recipe for Creamy Herb Chicken with Mashed Potatoes & Glazed Carrots—a comforting one-pot meal that combines tender chicken in a luscious herb sauce with fluffy mashed potatoes and sweet, buttery carrots. This dish not only delivers incredible flavor but also offers the convenience of quick preparation, making it perfect for busy weeknights when you crave something truly nourishing without the fuss of multiple pots and pans. Whether you’re cooking for family or enjoying a cozy dinner for one, this recipe is adaptable and even budget-friendly. So, are you ready to whisk up some comfort and warmth in your kitchen? Let’s dive in!

Why is this comfort dish a favorite?

Simplicity at its Core: This recipe is truly a breeze, allowing you to create a delicious home-cooked meal in just one pot.

Adaptable for All: Easily tailor it to fit your dietary needs—swap ingredients for gluten-free or lighter options without sacrificing flavor.

Rich, Creamy Goodness: The creamy herb sauce envelops the chicken, making every bite a burst of savory delight that everyone will love.

Perfectly Balanced: Fluffy mashed potatoes and sweet, glazed carrots complement the dish, creating a complete and satisfying meal that brings comfort to your table.

Why not pair this with some Roasted Sweet Potatoes for an added touch of sweetness? This dish is a crowd-pleaser that guarantees smiles around the dinner table!

Creamy Herb Chicken Ingredients

Indulge in the heartwarming flavors of this comforting dish with these key ingredients.

For the Chicken

  • Chicken Breasts (or Thighs) – Boneless, skinless pieces cook quickly and remain juicy.
  • Salt & Pepper – Essential for enhancing the flavor profile; adjust based on preference.
  • Garlic Powder (1/2 tsp) – This adds savory depth; fresh minced garlic can be used instead for more zing.
  • Dried Thyme (1/2 tsp) and Dried Rosemary (1/2 tsp) – These herbs bring aromatic warmth; fresh herbs can substitute beautifully.
  • Olive Oil (1 tbsp) and Butter (1 tbsp) – A lovely combination for browning the chicken while adding rich flavor.
  • Garlic (3 cloves, minced) – Provides an aromatic foundation for the creamy sauce; fresh garlic boosts flavor potency.
  • Chicken Broth (1/2 cup) – Vital for flavor depth; vegetable broth works for a lighter option.
  • Heavy Cream (1/2 cup or half-and-half) – This creates the luscious creaminess in the sauce; Greek yogurt can lighten it up.
  • Parmesan Cheese (1/3 cup) – Adds a rich, cheesy component to the sauce; nutritional yeast is a good dairy-free alternative.
  • Dijon Mustard (1/2 tsp, optional) – An optional tangy kick that beautifully contrasts the richness; feel free to omit it.
  • Parsley or Chives (1 tbsp, for garnish) – Fresh herbs add a pop of color and freshness to the final presentation.

For the Mashed Potatoes

  • Yukon Gold or Russet Potatoes (1.5 lbs) – These potatoes create the perfect creamy texture; sweet potatoes can be a flavorful swap.
  • Milk or Cream (1/2 cup) – Achieve a silky consistency; non-dairy milk keeps it light and versatile.
  • Butter (2-3 tbsp) – Adds richness and flavor; olive oil can substitute for a dairy-free variant.

For the Glazed Carrots

  • Baby Carrots (3 cups) – Their natural sweetness complements the meal; regular carrots can be sliced into sticks.
  • Brown Sugar or Honey (1 tbsp) – This sweetener enhances the glaze; maple syrup can be a delightful replacement.
  • Salt (1/4 tsp) – Boosts the flavor in the glazed carrots.
  • Cinnamon or Thyme (pinch, optional) – A subtle addition that can elevate the glaze with warm notes.

With these ingredients on hand, you’re set to create a mouthwatering Creamy Herb Chicken with Mashed Potatoes & Glazed Carrots that will surely warm hearts and fill stomachs!

Step‑by‑Step Instructions for Creamy Herb Chicken with Mashed Potatoes & Glazed Carrots

Step 1: Prepare Mashed Potatoes
Begin by peeling and cubing the Yukon Gold or Russet potatoes. Place them in a large pot, cover with cold salted water, and bring to a boil over high heat. Cook for 15–20 minutes, or until fork-tender. Drain and return to the pot, then mash with butter and milk until smooth, keeping them warm while you prepare the rest of the dish.

Step 2: Glaze Carrots
In a medium saucepan, combine the baby carrots, butter, brown sugar, and a splash of water. Cover and simmer over medium heat for 10–12 minutes, stirring occasionally, until the carrots are tender. Remove the lid for the last 2-3 minutes to thicken the glaze, allowing the sweet aroma to fill your kitchen as you prepare your other components.

Step 3: Cook Chicken
Season your chicken breasts or thighs generously with salt, pepper, garlic powder, dried thyme, and rosemary. In a large skillet, heat the olive oil and butter over medium-high heat. Sear the seasoned chicken for 4–5 minutes per side until golden brown and cooked through. Use a meat thermometer to ensure an internal temperature of 165°F (75°C). Once done, set the chicken aside on a plate.

Step 4: Make Herb Cream Sauce
Using the same skillet, reduce the heat to medium and sauté the minced garlic for about 30 seconds, until fragrant. Pour in the chicken broth and stir, scraping any browned bits from the bottom of the pan for added flavor. Slowly add the heavy cream, Parmesan cheese, and optional Dijon mustard. Let this simmer for 3–5 minutes until the sauce is slightly thickened and creamy.

Step 5: Return Chicken to Pan
Place the cooked chicken back into the skillet, ensuring it's coated in the delicious creamy herb sauce. Spoon the sauce over the chicken and let it simmer for an additional 2 minutes. This allows the chicken to absorb the rich flavors, creating a mouthwatering Creamy Herb Chicken that pairs perfectly with the sides.

Step 6: Assemble and Serve
On each plate, heap the fluffy mashed potatoes and add a generous portion of glazed carrots alongside the creamy herb chicken. Drizzle any remaining sauce over the chicken and potatoes. Garnish with fresh parsley or chives for an inviting touch. Serve immediately and revel in the comforting flavors of your homemade dinner.

Creamy Herb Chicken Variations

Feel free to transform this hearty dish and make it your own with these delightful options!

  • Gluten-Free: Use gluten-free flour or cornstarch as a thickener for the sauce, allowing everyone to enjoy this meal without worry.
  • Creamy and Light: Swap heavy cream for Greek yogurt for a lighter, tangy twist that still offers a rich texture.
  • Vegetable Boost: Toss in spinach or sautéed mushrooms into the cream sauce for extra nutrition and vibrant color. They add earthy flavors that complement the dish beautifully.
  • Herb Alternatives: Experiment with fresh basil or dill instead of thyme and rosemary for a refreshing take on this classic dish.
  • Heat Up the Flavor: Add a pinch of crushed red pepper flakes to the sauce for a spicy kick that balances the creaminess beautifully.
  • Sweet Potato Delight: Use sweet potatoes instead of Yukon Gold for the mashed potatoes to introduce a subtle sweetness that pairs well with the savory chicken.
  • Zesty Kick: Stir in a dash of lemon juice or zest when finishing the sauce for a bright, zesty note that dances on the palate.
  • Nutty Flavor: Incorporate toasted pine nuts or walnuts into your mashed potatoes for added texture and a nutty flavor that's truly irresistible.

Looking to keep it cozy? Pair this with some Lemon Chicken Soup for a beautifully comforting meal, or try the Fiesta Lime Chicken with Avocado for a fresh twist on your family’s dinner table. The possibilities are endless!

Expert Tips for Creamy Herb Chicken

  • Season Generously: Always season your chicken well with salt and pepper before cooking. This enhances the flavor of the creamy herb chicken, ensuring each bite is savory and satisfying.

  • Deglaze for Flavor: Don’t skip the deglazing step! Scraping the browned bits from the skillet adds depth to your herb cream sauce, making it rich and flavorful.

  • Watch the Potatoes: For perfectly creamy mashed potatoes, avoid overcooking them, which can make them gluey. Use a potato ricer for extra fluffiness—your family will thank you!

  • Use Fresh Ingredients: Fresh herbs elevate the dish significantly. If you have access, opt for fresh thyme and rosemary over dried to really capture that aroma in your creamy chicken.

  • Control Creaminess: Adjust the creaminess of the sauce by using Greek yogurt instead of heavy cream for a lighter version, perfect for those mindful of their diets while still being comforting.

How to Store and Freeze Creamy Herb Chicken

Fridge: Refrigerate leftovers in airtight containers for up to 3-4 days, ensuring each item is well-covered to maintain freshness.

Freezer: For long-term storage, freeze the creamy herb chicken and sauce separately from mashed potatoes and glazed carrots in airtight containers for up to 3 months.

Reheating: Thaw frozen chicken and sauce in the fridge overnight before reheating. Gently warm in a skillet over low heat, adding a splash of chicken broth if needed to maintain creaminess.

Mashed Potatoes: If freezing mashed potatoes, consider adding a little extra milk or cream when reheating to restore their creamy texture.

Make Ahead Options

These Creamy Herb Chicken with Mashed Potatoes & Glazed Carrots are ideal for meal prep, saving you valuable time on busy evenings! You can prepare the mashed potatoes and glazed carrots up to 24 hours in advance; simply store them in airtight containers in the refrigerator to maintain their freshness. For the chicken, season and brown it a day ahead—just reheat gently in the skillet before adding the creamy herb sauce. Ensure the sauce is made fresh to serve, as it retains the best flavor and texture. When ready to enjoy, warm up your potatoes and carrots, complete the dish, and relish a homemade meal without the hassle!

What to Serve with Creamy Herb Chicken with Mashed Potatoes & Glazed Carrots

Create a satisfying meal that warms the heart and delights the palate, complementing this comforting dish beautifully.

  • Garlic Bread: The crispy, buttery texture adds a delightful crunch, perfect for mopping up that luscious creamy sauce.
  • Caesar Salad: Crisp romaine, tangy dressing, and crunchy croutons provide a refreshing contrast to the rich flavors of the chicken.
  • Steamed Green Beans: These bright, green veggies add a fresh crunch, complementing the creamy potatoes and sweet carrots beautifully.
  • Roasted Brussels Sprouts: Earthy flavors and caramelized edges bring a savory twist, enhancing the comforting elements of the dish.
  • Honey-Glazed Beets: Sweet and slightly earthy, these vibrant veggies offer a colorful presentation and a delicious contrast to the savory chicken.
  • Red Wine: A glass of Pinot Noir or Merlot enhances the meal experience, balancing the creaminess and enriching the overall flavor profile.
  • Dessert: Finish the meal with a light, fruity dessert like berry sorbet to cleanse the palate after the indulgent main course.

With these options, you’ll create a dynamic, comforting table that celebrates the heartwarming vibes of homemade cooking.

Creamy Herb Chicken with Mashed Potatoes & Glazed Carrots Recipe FAQs

What type of chicken should I use for this recipe?
I recommend using boneless, skinless chicken breasts or thighs for convenience and to ensure they cook quickly and stay juicy. If you prefer dark meat, thighs are a great option as they tend to be more flavorful.

How should I store leftovers of Creamy Herb Chicken with Mashed Potatoes & Glazed Carrots?
Refrigerate your leftovers in airtight containers for up to 3-4 days. Be sure to separate the components (chicken, sauce, and mashed potatoes) to maintain their textures and flavors. When stored correctly, you can enjoy this comforting meal even after a busy day!

Can I freeze this dish?
Absolutely! For freezing, I suggest packaging the creamy herb chicken and sauce separately from the mashed potatoes and glazed carrots. This way, everything freezes well individually. Use airtight containers and you can store them for up to 3 months. When ready to enjoy, simply thaw in the refrigerator overnight.

What should I do if my sauce turns out too thick?
If you find your herb cream sauce is too thick, don’t worry! You can gently whisk in a bit of chicken broth or milk over low heat until reaching your desired consistency. Alternatively, if your sauce is too thin, let it simmer a little longer to reduce and thicken up.

Is this recipe suitable for those with dietary restrictions?
Yes! This Creamy Herb Chicken recipe is quite adaptable. You can make it gluten-free by ensuring that all your ingredients, especially broth and sauces, are gluten-free. Moreover, you can substitute heavy cream with Greek yogurt for a lighter version, and if you have dairy allergies, try using non-dairy milk and nutritional yeast instead of Parmesan cheese.

How can I tell if my potatoes are properly cooked for mashing?
To check if your potatoes are cooked just right for mashing, insert a fork into a piece—if it easily breaks apart or slides off the fork, they're done! Typically, this takes about 15-20 minutes of boiling. Avoid overcooking them to prevent a gluey texture in your mashed potatoes.

Creamy Herb Chicken with Mashed Potatoes & Glazed Carrots

Creamy Herb Chicken with Mashed Potatoes & Glazed Carrots Bliss

A comforting one-pot meal featuring tender chicken in a creamy herb sauce, served with fluffy mashed potatoes and glazed carrots.
Print Recipe Pin Recipe
Prep Time 15 minutes mins
Cook Time 40 minutes mins
Total Time 55 minutes mins
Servings: 4 servings
Course: Dinner
Cuisine: American
Calories: 660
Ingredients Equipment Method Nutrition Notes

Ingredients
  

For the Chicken
  • 1 lbs Boneless, skinless chicken breasts or thighs
  • 1 tsp Salt
  • 1 tsp Pepper
  • 0.5 tsp Garlic powder
  • 0.5 tsp Dried thyme
  • 0.5 tsp Dried rosemary
  • 1 tbsp Olive oil
  • 1 tbsp Butter
  • 3 cloves Garlic, minced
  • 0.5 cup Chicken broth
  • 0.5 cup Heavy cream or half-and-half
  • 0.33 cup Parmesan cheese
  • 0.5 tsp Dijon mustard optional
  • 1 tbsp Parsley or chives for garnish
For the Mashed Potatoes
  • 1.5 lbs Yukon Gold or Russet potatoes
  • 0.5 cup Milk or cream
  • 2-3 tbsp Butter
For the Glazed Carrots
  • 3 cups Baby carrots
  • 1 tbsp Brown sugar or honey
  • 0.25 tsp Salt
  • pinch Cinnamon or thyme optional

Equipment

  • Large pot
  • Skillet
  • Medium saucepan
  • potato masher

Method
 

Step-by-Step Instructions
  1. Step 1: Prepare Mashed Potatoes - Peel and cube the potatoes, cover with cold salted water in a large pot, bring to a boil, and cook until fork-tender. Drain, mash with butter and milk.
  2. Step 2: Glaze Carrots - Combine baby carrots, butter, brown sugar, and a splash of water in a saucepan. Cover and simmer until tender, uncovering for the last few minutes to thicken the glaze.
  3. Step 3: Cook Chicken - Season chicken with salt, pepper, garlic powder, thyme, and rosemary. Heat oil and butter in a skillet, sear chicken until golden and cooked through.
  4. Step 4: Make Herb Cream Sauce - Sauté minced garlic, add chicken broth, reduce heat, then stir in cream, Parmesan, and optional mustard. Simmer until thickened.
  5. Step 5: Return Chicken to Pan - Place chicken back in the skillet, coat with sauce, and simmer for an additional two minutes.
  6. Step 6: Assemble and Serve - Serve mashed potatoes with the chicken and glazed carrots, drizzle sauce over, and garnish with parsley or chives.

Nutrition

Serving: 1servingCalories: 660kcalCarbohydrates: 45gProtein: 40gFat: 34gSaturated Fat: 19gPolyunsaturated Fat: 1gMonounsaturated Fat: 13gTrans Fat: 1gCholesterol: 160mgSodium: 900mgPotassium: 800mgFiber: 6gSugar: 8gVitamin A: 10000IUVitamin C: 15mgCalcium: 200mgIron: 2mg

Notes

This dish allows for ingredient substitutions for dietary preferences, making it versatile and easy to adapt.

Tried this recipe?

Let us know how it was!

Deviled Egg Potato Salad: A Tangy Twist Everyone Will Love

March 29, 2026 by Grace Snow Leave a Comment

As the sizzling sun brings life to our backyard barbeques, I’m reminded of the tantalizing flavors of summer gatherings. That’s when I perfected my Deviled Egg Potato Salad—a delightful blend that nods to childhood nostalgia while inviting fresh creativity. This creamy and tangy side dish promises to win hearts with ease, making it a kid-friendly crowd-pleaser that’s perfect for potlucks and cookouts alike. With just a quick preparation and the added perk of being make-ahead-friendly, you’ll have more time to mingle with loved ones. So, why not add a twist to your classic potato salad today? Are you ready to discover the savory fun that awaits in each bite?

Why Choose Deviled Egg Potato Salad?

Nostalgic Flavor: This dish combines the beloved taste of deviled eggs with creamy potato salad, taking you on a delightful trip down memory lane.

Versatile Additions: Want to get creative? You can easily mix in ingredients like crispy bacon or grilled chicken, tailoring it to your taste.

Make-Ahead Wonder: Perfect for busy schedules, this salad tastes even better the next day, making it an effortless option for gatherings.

Crowd Favorite: Whether at a summer barbecue or festive potluck, this dish will be the star of the show—just like a classic German Potato Salad.

Kid-Friendly: Your little ones will love the creamy texture and scrumptious flavors, putting an end to fast food boredom!

Easy Prep: With a simple preparation process, you can whip this up in no time, allowing you to focus on enjoying the occasion.

Deviled Egg Potato Salad Ingredients

  • For the Salad Base
    • Eggs – 10 large eggs provide creaminess and protein; using older eggs makes peeling easier.
    • Russet Potatoes – 2 lbs, peeled and cubed; they form the salad base, offering delightful texture. Consider Yukon Gold potatoes as a fantastic alternative.
    • Celery – 3 stalks, diced; they add a wonderful crunch and freshness to the dish, and cucumbers can be swapped in if desired.

  • For the Flavor
    • Red Onion – ½, finely diced; introduces a mild sharpness, while shallots or green onions can give a gentler flavor.
    • Green Onions – ⅓ cup, diced; they enhance flavor with a hint of bite; chives can be a suitable substitute.
    • Mayonnaise – 1 ¼ cup; this is key for creaminess and body; swap for Greek yogurt for a lighter twist.
    • Dijon Mustard – 1 tablespoon; adds a delightful tang; yellow mustard is a perfect substitute if needed.
    • Stone-Ground Mustard – 1 teaspoon; for a textured element; use more Dijon if stone-ground isn't available.
    • Sweet Pickle Relish – ½ cup; brings in sweetness and tang; use dill relish for a less sweet option.
    • Salt and Pepper – To taste; these will elevate the overall flavor profile.
    • Paprika – ½ teaspoon; for garnish and a subtle hint of flavor.
    • Fresh Dill – Diced, for garnish; it's optional but gives a nice touch, while parsley can stand in if you prefer.

This Deviled Egg Potato Salad is a perfect blend of flavors that can be enjoyed in many ways!

Step‑by‑Step Instructions for Deviled Egg Potato Salad

Step 1: Boil Eggs
Start by placing 10 large eggs in a pot and covering them with cold water. Bring the water to a full boil over medium-high heat, then cover the pot with a lid and turn off the heat. Let the eggs sit in the hot water for 15 minutes before transferring them to an ice bath. Once cooled, peel the eggs, ensuring the shells come off cleanly.

Step 2: Boil Potatoes
In a separate pot, fill with water and add 2 lbs of peeled, cubed russet potatoes. Salt the water for added flavor and bring it to a boil. Cook the potatoes for 8-10 minutes until they are tender but not falling apart. Drain the potatoes and rinse them with cold water to stop cooking, then set aside to cool completely.

Step 3: Prepare Dressing
While the eggs and potatoes are cooling, cut the boiled eggs in half and carefully separate the yolks from the whites. In a mixing bowl, mash the yolks with 1 ¼ cups of mayonnaise, 1 tablespoon of Dijon mustard, 1 teaspoon of stone-ground mustard, ½ cup of sweet pickle relish, and salt and pepper to taste. Aim for a smooth consistency to create the creamy dressing for your Deviled Egg Potato Salad.

Step 4: Combine Ingredients
Chop the egg whites and add them to a large mixing bowl along with the cooled potatoes, diced celery, ½ finely diced red onion, and ⅓ cup of diced green onions. Pour the prepared dressing over the mixture, gently stirring everything together until each ingredient is evenly coated. The combination of flavors will make your Deviled Egg Potato Salad truly delightful.

Step 5: Chill and Serve
Once combined, garnish your Deviled Egg Potato Salad with a sprinkle of paprika and additional egg halves if desired. Cover the bowl and refrigerate for at least one hour before serving to allow the flavors to meld beautifully. This dish can be prepared a day in advance, making it perfect for summer gatherings or potlucks.

Deviled Egg Potato Salad Variations

Feel free to explore these scrumptious variations that will elevate your Deviled Egg Potato Salad to new heights!

  • Add Meat: Incorporate cooked ham, grilled chicken, or turkey for a heartier salad. The savory flavors will meld beautifully, making every bite satisfying.

  • Bacon Addition: Mix in crispy bacon for a delightful crunch and smoky flavor. This twist adds a dimension of richness, perfect for meat lovers.

  • Spicy Version: Spice things up by adding chopped jalapeños or a sprinkle of cayenne. The kick will harmonize with the creamy base, giving a fiery touch that’s unforgettable.

  • Ranch Flavor: Substitute ranch seasoning for the mustard to create a creamy, herbaceous dressing. This change brings a tasty twist that will please ranch lovers!

  • Mexican-Inspired: Add taco seasoning, fresh lime juice, and chopped cilantro for a zesty variation. This bright flavor combination takes your taste buds on a delightful adventure.

  • Fresh Herbs: Instead of dill, try using parsley or basil for a vibrant fresh touch. The new herbs will impart a different aroma and flavor profile, enhancing the dish's complexity.

  • Cheesy Addition: Stir in some shredded cheddar or crumbled feta for a cheesy kick. The creaminess will align perfectly with the potatoes and eggs for a comfort dish.

  • Nutty Crunch: Add toasted walnuts or pecans for a fantastic crunch and depth of flavor. The nuts will add earthy notes that bring a satisfying texture contrast.

These variations are great opportunities to experiment and make the dish your own. If you're looking for something lighter, you can always check out my recipes for Avocado Egg Salad or for a fun side, consider making a Jello Salad Cottage! Each variation offers its unique flair, complementing the classic charm of Deviled Egg Potato Salad, ensuring everyone at your table finds something to love. Enjoy your culinary journey!

How to Store and Freeze Deviled Egg Potato Salad

Airtight Container: Store your Deviled Egg Potato Salad in an airtight container in the fridge for up to 3 days to keep it fresh and tasty.

Prepping Ahead: If preparing in advance, mix all ingredients and store the dressing separately until ready to serve for the best flavor and texture.

Freezer Tips: While freezing isn't ideal for creamy salads, if needed, freeze in a sealed container for up to 1 month; defrost in the fridge overnight for best results.

Reheating: For best enjoyment, this salad is best served cold and does not require reheating; serve straight from the fridge for a refreshing treat!

What to Serve with Deviled Egg Potato Salad

As you gather around the table, this creamy side dish is the perfect base for building a memorable meal that brings everyone together.

  • Grilled Chicken: The smoky, savory flavors of grilled chicken beautifully complement the creamy salad, creating a satisfying harmony of tastes.

  • Corn on the Cob: Sweet, tender corn is a classic summer pairing. The juicy bites contrast beautifully with the richness of the potato salad.

  • Pulled Pork Sandwiches: The tangy sweetness of pulled pork sandwiches offers a delightful contrast, making every bite a celebration of flavor.

  • Crispy Potato Chips: For added crunch, serve with crispy potato chips. They not only enhance the texture but also make for a fun side to munch on.

  • Caprese Salad: A fresh, vibrant Caprese salad brings bright flavors and a refreshing touch to round out your meal beautifully.

  • Fruit Salad: A light and refreshing fruit salad provides a sweet contrast, helping to cleanse the palate amidst the creaminess of your Deviled Egg Potato Salad.

  • Lemonade or Iced Tea: Cool, citrusy lemonade or refreshing iced tea makes for the perfect drink pairing, balancing the richness of the salad with a burst of freshness.

  • Brownie Bites: End your meal on a sweet note with bite-sized brownies for a delightful chocolate contrast to a savory feast.

Each pairing brings its unique flavors to the table, ensuring your meal with Deviled Egg Potato Salad is a delightful experience!

Expert Tips for Deviled Egg Potato Salad

  • Perfect Eggs: Start with cold water for boiling eggs to avoid cracking. This helps them cook evenly and peel easily.

  • Cool Ingredients: Ensure both the potatoes and eggs are thoroughly cooled before mixing. Warm ingredients can lead to a runny dressing!

  • Taste Test: Adjust seasoning at the end! After mixing, taste the salad and add kosher salt and black pepper as needed for the best flavors.

  • Texture Balance: Combine softened potatoes gently to maintain texture—over-mixing can make the salad too mushy.

  • Flavor Enhancements: Experiment with ingredients—a dash of vinegar in boiled water can help make eggs easier to peel, adding a zing to your Deviled Egg Potato Salad!

Make Ahead Options

Preparing this Deviled Egg Potato Salad ahead of time is a fantastic way to save precious minutes during busy weeknights or gatherings! You can boil the eggs and potatoes up to 24 hours in advance, ensuring they are completely cool before refrigerating them separately. The dressing can also be prepared ahead of time and stored in an airtight container for up to 3 days. When you’re ready to assemble, simply chop the egg whites and combine all ingredients, tossing everything in the dressing until evenly coated. To maintain the salad's delightful creaminess, refrigerate it for at least an hour before serving, allowing the flavors to meld beautifully. Just as delicious, this make-ahead option frees you up to enjoy your time with loved ones!

Deviled Egg Potato Salad Recipe FAQs

What type of eggs should I use for this salad?
I recommend using large eggs for the best results; older eggs are easier to peel after boiling, making your prep process smoother.

How long can I store Deviled Egg Potato Salad in the fridge?
You can store this delicious salad in an airtight container in the refrigerator for up to three days. Keeping it sealed helps maintain its freshness and flavor.

Can I freeze Deviled Egg Potato Salad?
Freezing is generally not recommended for creamy salads like this one due to their texture. However, if you must freeze, place the salad in a sealed container, and it should last up to one month. When you're ready to enjoy it, defrost it in the refrigerator overnight.

What should I do if my potatoes become mushy?
To avoid mushy potatoes, ensure you boil them just until tender, about 8-10 minutes, and then rinse in cold water immediately to stop cooking. If they mush up despite your best efforts, try using a firmer potato variety like Yukon Gold next time!

Are there any dietary considerations I should keep in mind?
Absolutely! This salad is generally kid-friendly, but keep an eye on the ingredients if serving to friends with allergies. For a lighter option, you can substitute mayonnaise with Greek yogurt. Always check for allergens in mustards or pickles as well.

Can I add different ingredients to my Deviled Egg Potato Salad?
Very much so! You can mix in extras like cooked ham, grilled chicken, or crispy bacon for heartiness. Feel free to explore flavors with jalapeños for a spicy kick or ranch seasoning for a twist—cooking is all about creativity!

Deviled Egg Potato Salad

Deviled Egg Potato Salad: A Tangy Twist Everyone Will Love

Deviled Egg Potato Salad is a creamy and tangy side dish, ideal for summer gatherings and kid-friendly potlucks.
Print Recipe Pin Recipe
Prep Time 20 minutes mins
Cook Time 25 minutes mins
Chilling Time 1 hour hr
Total Time 1 hour hr 45 minutes mins
Servings: 8 cups
Course: Salads
Cuisine: American
Calories: 300
Ingredients Equipment Method Nutrition Notes

Ingredients
  

For the Salad Base
  • 10 large eggs provides creaminess and protein; using older eggs makes peeling easier.
  • 2 lbs russet potatoes peeled and cubed; consider Yukon Gold as an alternative.
  • 3 stalks celery diced; adds crunch and freshness, cucumbers can be swapped in.
For the Flavor
  • 0.5 red onion finely diced; introduces mild sharpness.
  • 0.33 cup green onions diced; enhances flavor with a hint of bite.
  • 1.25 cups mayonnaise key for creaminess; swap for Greek yogurt for a lighter twist.
  • 1 tablespoon Dijon mustard adds a delightful tang.
  • 1 teaspoon stone-ground mustard for a textured element; use more Dijon if stone-ground isn't available.
  • 0.5 cup sweet pickle relish brings sweetness and tang; use dill relish for a less sweet option.
  • salt and pepper to taste; elevate overall flavor.
  • 0.5 teaspoon paprika for garnish and subtle flavor.
  • fresh dill diced; optional garnish.

Equipment

  • pot
  • Mixing Bowl
  • Ice Bath

Method
 

Step-by-Step Instructions
  1. Boil 10 large eggs in a pot covered with cold water; bring to a boil, cover, turn off heat, and sit for 15 minutes before transferring to an ice bath.
  2. In a separate pot, boil 2 lbs of peeled, cubed russet potatoes in salted water for 8-10 minutes until tender. Drain and cool completely.
  3. Mash the yolks of the boiled eggs with 1 ¼ cups mayonnaise, 1 tablespoon Dijon mustard, 1 teaspoon stone-ground mustard, ½ cup relish, and season with salt and pepper.
  4. Chop the egg whites and mix with cooled potatoes, diced celery, ½ red onion, and ⅓ cup green onions. Combine with the dressing.
  5. Garnish with paprika and additional egg halves if desired. Refrigerate for at least one hour before serving.

Nutrition

Serving: 1cupCalories: 300kcalCarbohydrates: 35gProtein: 8gFat: 15gSaturated Fat: 3gPolyunsaturated Fat: 1gMonounsaturated Fat: 10gCholesterol: 180mgSodium: 300mgPotassium: 600mgFiber: 3gSugar: 2gVitamin A: 10IUVitamin C: 20mgCalcium: 2mgIron: 8mg

Notes

This dish can be prepared a day in advance and is perfect for summer gatherings or potlucks.

Tried this recipe?

Let us know how it was!
  • « Previous Page
  • 1
  • …
  • 11
  • 12
  • 13
  • 14
  • 15
  • …
  • 199
  • Next Page »

Welcome!

Hi, I’m Grace, a Sydney-based home cook with a passion for bold flavors and trending ingredients. Whether you’re a busy beginner or a seasoned foodie, you’ll find dishes here that are fresh, fun, and full of flavor.

More about me

Popular Recipes

  • Starbucks Copycat Banana Bread
    Starbucks Copycat Banana Bread: Moist, Flavor-Packed Delight
  • Mediterranean Chicken Bowl
    Mediterranean Chicken Bowl: Fresh, Flavorful, and Healthy Delight
  • Cottage Cheese Banana Bread
    Cottage Cheese Banana Bread: Moist, Protein-Packed Goodness
  • Banana Bread Donuts
    Irresistibly Soft Banana Bread Donuts You Can’t Resist

Footer

↑ back to top

About

  • Privacy Policy
  • Disclaimer
  • Terms & Conditions

Newsletter

  • Sign Up! for emails and updates

Contact

  • About me
  • Contact me

Copyright © 2025 TastyTrendIngredients