tastytrendingredients

  • Home
  • Recipes
    • Appetizers
    • Breakfast
    • Dessert
    • Dinner
    • Drinks
    • Salads
    • Snacks
    • Soups
  • About me
  • Contact
menu icon
go to homepage
  • Home
  • Recipes
    • Appetizers
    • Breakfast
    • Dessert
    • Dinner
    • Drinks
    • Salads
    • Snacks
    • Soups
  • About me
  • Contact
search icon
Homepage link
  • Home
  • Recipes
    • Appetizers
    • Breakfast
    • Dessert
    • Dinner
    • Drinks
    • Salads
    • Snacks
    • Soups
  • About me
  • Contact
×

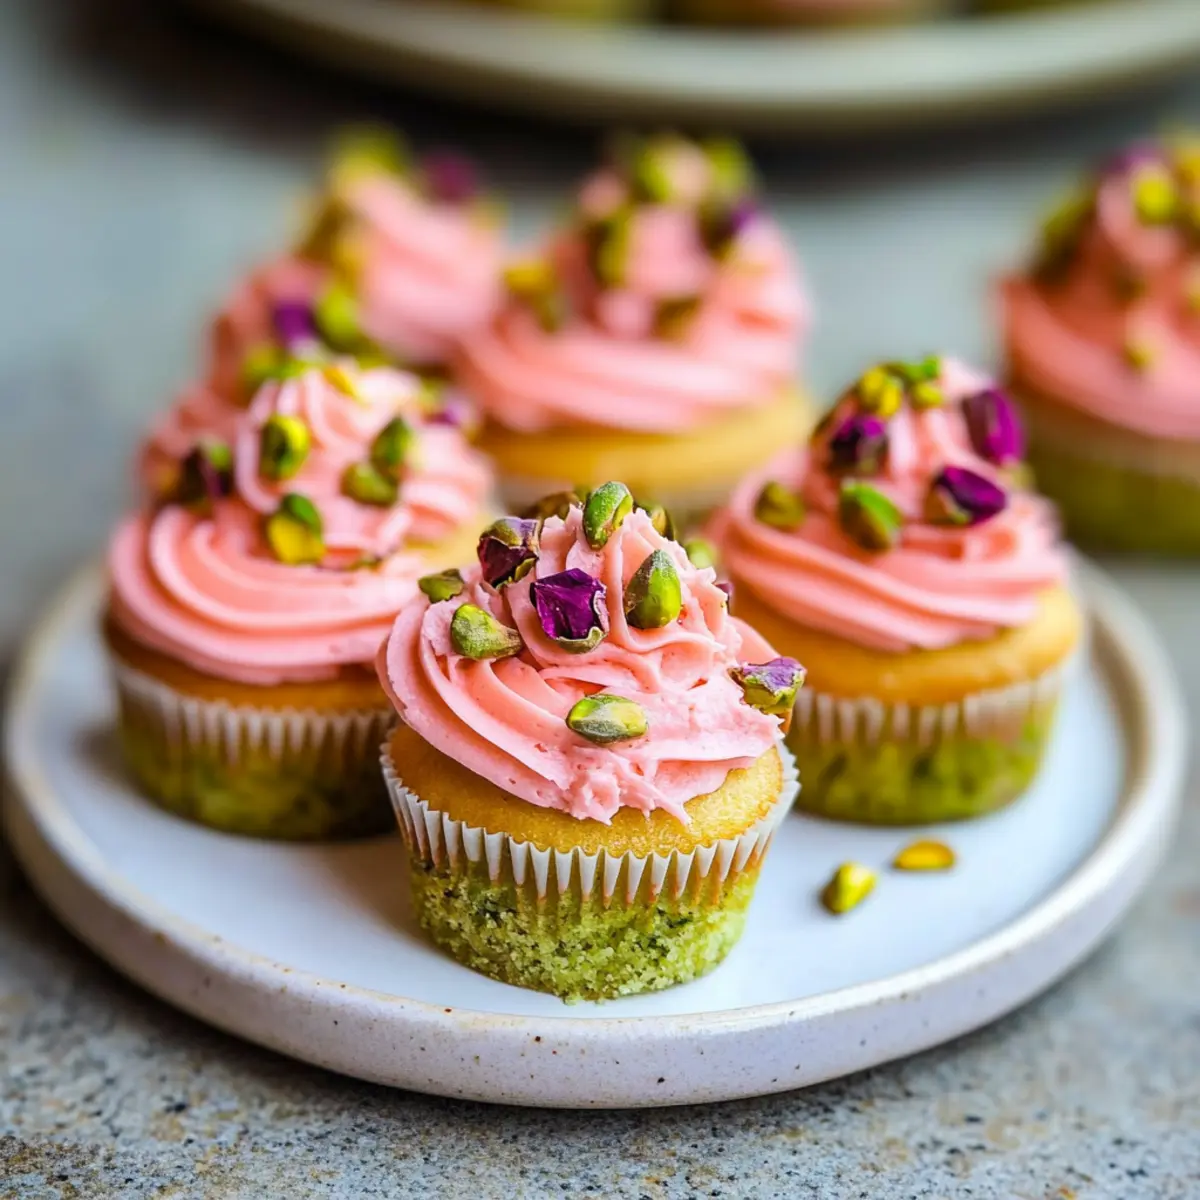
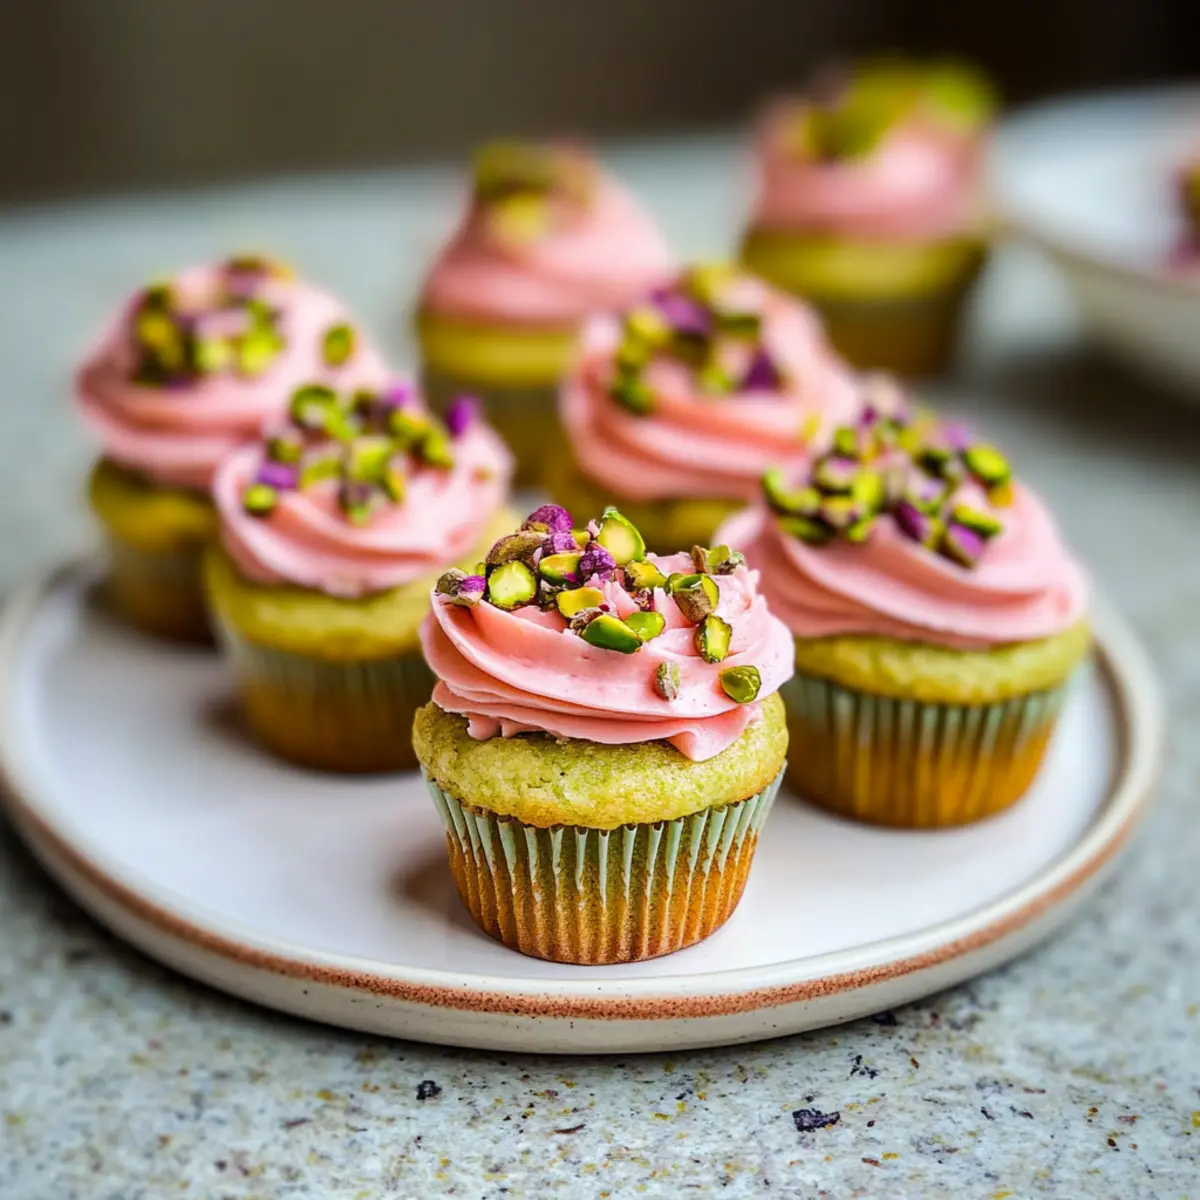
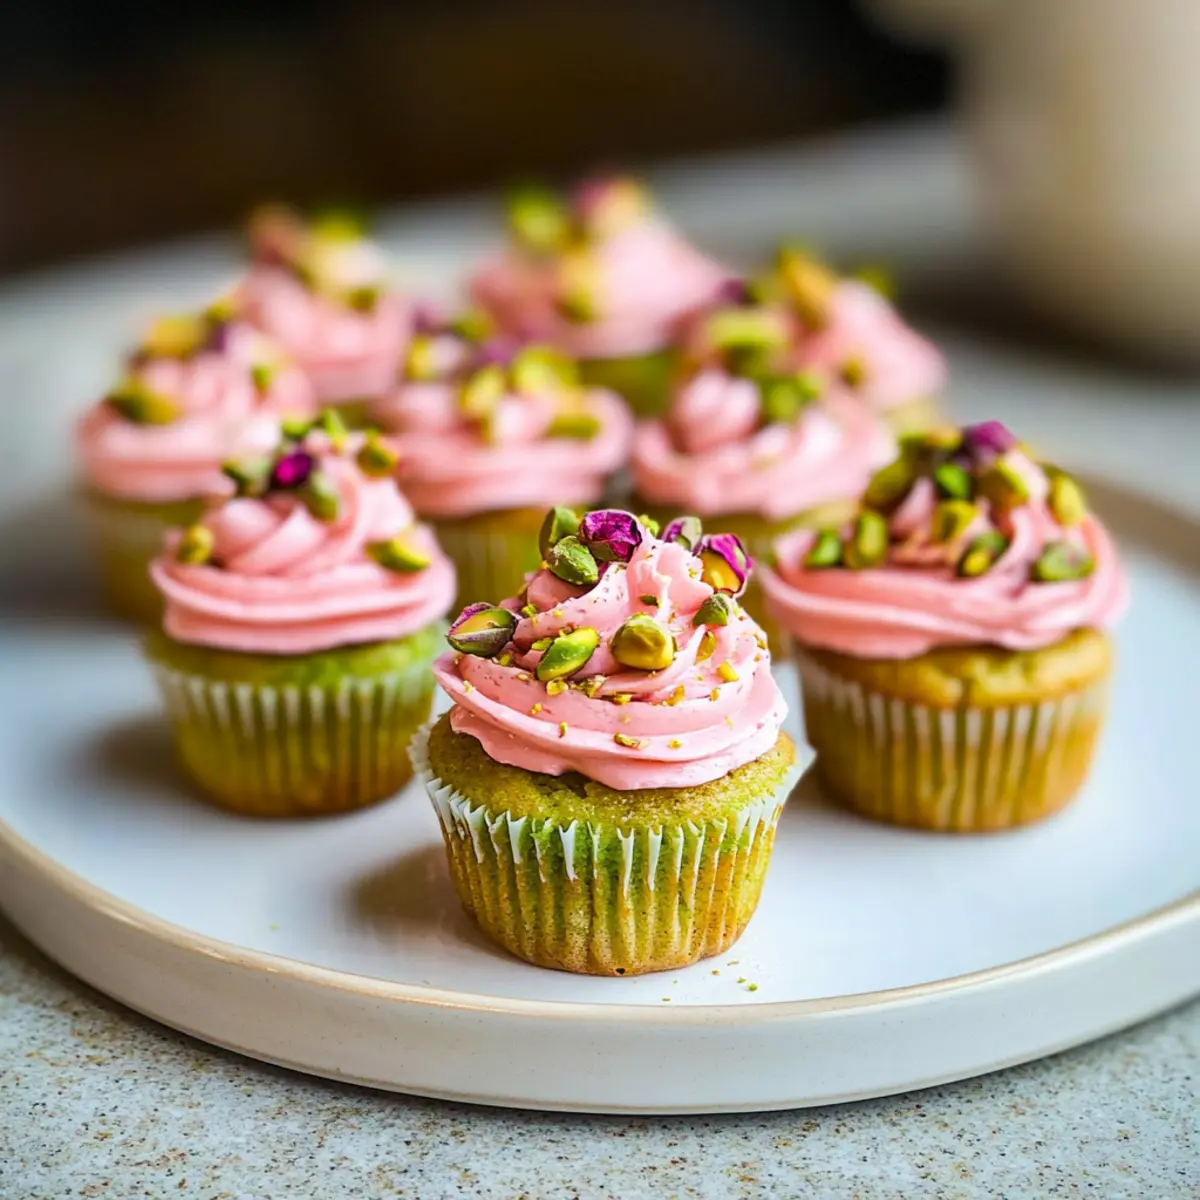
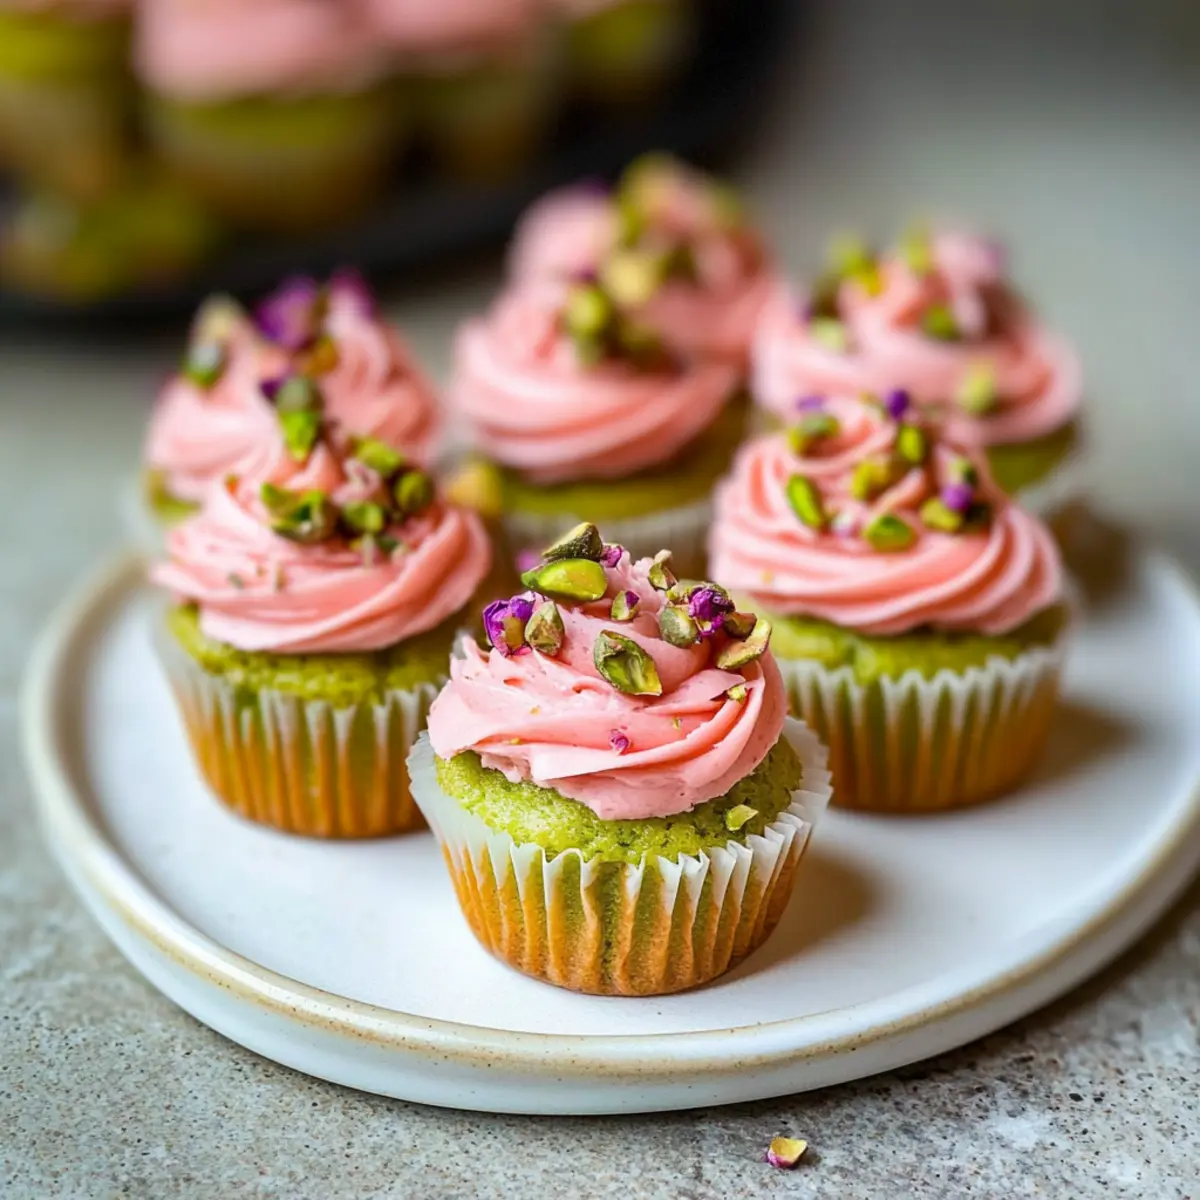
Delight in Mini Rose Pistachio Cupcakes for Any Celebration

January 12, 2026 by Grace Snow Leave a Comment

The aroma of delicate rose and nutty pistachio wafting through the air instantly transports me to my favorite bakery, where each cupcake is a work of art. Today, I’m excited to share my recipe for Vegan Mini Rose Pistachio Cupcakes, a delightful treat that’s perfect for your next celebration. Whether you’re planning a birthday bash, a cozy tea party, or simply want to impress at your next gathering, these cupcakes will dazzle your guests while staying entirely plant-based and dairy-free. What makes them even better? They’re quick to whip up and offer a stunning visual appeal that will leave everyone reaching for seconds. Are you ready to bake something beautiful and scrumptious? Let’s dive in!

Why Are They Perfect for Celebrations?

Versatile for Any Occasion: These Mini Rose Pistachio Cupcakes shine at birthday parties, baby showers, and even festive gatherings like Valentine's Day or St. Patrick’s Day.

Quick and Easy: Whip them up in no time thanks to simple ingredients and straightforward steps, making baking less daunting and more fun.

Visually Stunning: The pastel colors and delicate rose frosting create an eye-catching display that’s sure to impress your guests.

Delectable Flavor Combination: The light rose and nutty pistachio flavors blend perfectly for a delightful taste experience everyone will cherish.

Plant-Based Goodness: Gluten-free and dairy-free, these cupcakes ensure that everyone can indulge without compromise – making them a crowd-pleaser!

Pair with Tea or Coffee: Elevate your serving experience by enjoying these delicious cupcakes alongside a warm cup of your favorite beverage, just like my Mini Tropical Pavlovas. Your guests will feel pampered and delighted!

Mini Rose Pistachio Cupcakes Ingredients

• For the Cupcakes

  • Soy Milk – Provides moisture and acts as a vegan buttermilk substitute; can be replaced with oat milk for a nut-free version.
  • Lemon Juice – Adds acidity to react with baking soda, creating a light texture; equivalent amount of vinegar can be used as a substitute.
  • Extra Virgin Olive Oil – Acts as the fat source for moisture and richness; can be substituted with melted coconut oil for a different flavor.
  • Vanilla Extract – Enhances the sweetness and flavor profile; use almond extract for a twist.
  • Granulated White Sugar – Sweetens the batter; coconut sugar can be used for a healthier option, keeping in mind the change in color and flavor.
  • Sea Salt – Balances sweetness; ensure you use the right measurement for optimal flavor.
  • All-Purpose Flour – Provides structure for the cupcakes; substitute with a gluten-free flour blend for a gluten-free version.
  • Baking Powder & Baking Soda – Leavening agents for a light, fluffy texture; do not substitute; both are required for best results.
  • Vegan Green Food Dye – Gives a pastel green color to the batter; omit if desired; natural color from ingredients can be used.
  • Chopped Raw Pistachio Kernels – Adds flavor and texture to the cupcakes; substituting with any nut will change the flavor profile.

• For the Buttercream Frosting

  • Vegan Butter – Base for the buttercream frosting, providing creaminess; use coconut cream for a lighter option.
  • Powdered Sugar – Sweetens and gives structure to the buttercream; use agave syrup for a lower sugar alternative but adjust consistency.
  • Lemon Juice & Rose Water – Flavorings for the buttercream, providing freshness and floral notes; vanilla extract can substitute rose water if preferred.
  • Red Food Dye – Adds color to the buttercream; omit for a minimalist look or adjust for desired hue.
  • Mini Dried Rose Buds – Decorative element; optional; can use edible flowers for a similar effect.

These Mini Rose Pistachio Cupcakes are a glorious treat that brings color, flavor, and festivity to any gathering!

Step‑by‑Step Instructions for Mini Rose Pistachio Cupcakes

Step 1: Preheat the Oven
Begin by preheating your oven to 340ºF (170ºC). While the oven warms up, line a mini cupcake tray with colorful cupcake liners to give your Mini Rose Pistachio Cupcakes a delightful presentation. Ensure your oven reaches the right temperature by waiting a few minutes before starting the batter.

Step 2: Mix Wet Ingredients
In a mixing bowl, whisk together 1 cup of soy milk and 1 tablespoon of lemon juice; let it sit for about 5 minutes to curdle slightly. Then, add 1/3 cup of extra virgin olive oil, 1 teaspoon of vanilla extract, 3/4 cup of granulated sugar, and a pinch of sea salt. Mix until well combined, creating a smooth, creamy base for your cupcakes.

Step 3: Combine Dry Ingredients
In another bowl, sift together 2 cups of all-purpose flour, 1 teaspoon of baking powder, and 1/2 teaspoon of baking soda. Gradually add the dry mixture into the wet ingredients while stirring gently to avoid overmixing. Aim for a smooth batter with no lumps, ensuring your Mini Rose Pistachio Cupcakes will be light and fluffy.

Step 4: Add Color and Flavor
To the batter, incorporate a few drops of vegan green food dye, mixing just until the desired pastel color is achieved. Gently fold in 1/2 cup of chopped raw pistachio kernels, which will provide an enjoyable crunch and nutty flavor that complements the rose essence.

Step 5: Fill Cupcake Liners
Spoon the batter into each prepared mini cupcake liner, filling them about halfway to allow room for rising. Place the tray in the preheated oven and bake for approximately 25 minutes, or until the tops are lightly golden and a toothpick inserted comes out clean. Midway, you can rotate the tray for even baking.

Step 6: Prepare Buttercream Frosting
While the cupcakes cool, prepare the buttercream frosting. In a mixing bowl, cream together 1/2 cup of softened vegan butter with 2 cups of powdered sugar until fluffy and light. Gradually add 2 tablespoons of lemon juice and 1 tablespoon of rose water, mixing until the frosting is smooth and spreadable, ready to top your Mini Rose Pistachio Cupcakes.

Step 7: Cool Cupcakes
Once baked, remove the cupcakes from the oven and allow them to cool in the tray for about 10 minutes. After that, transfer them to a wire rack to cool completely for at least 30 minutes. This step is crucial to ensure the frosting does not melt when applied.

Step 8: Decorate Your Cupcakes
Once fully cooled, use a piping bag to swirl the rose-infused buttercream frosting onto each Mini Rose Pistachio Cupcake. For an extra touch, sprinkle a few additional chopped pistachios on top and adorn with mini dried rose buds or edible flowers for a charming finish.

Mini Rose Pistachio Cupcakes Variations

Feel free to get creative with your Mini Rose Pistachio Cupcakes and make them uniquely yours!

  • Nut-Free: Use ground sunflower seeds instead of pistachios for a delicious nut-free version that everyone can enjoy.
  • Gluten-Free: Swap out all-purpose flour with a gluten-free flour blend to cater to gluten-sensitive friends; just be sure to check packaging for cooking ratios.
  • Floral Twist: Replace rose water with orange blossom water for a delightful citrus-floral flavor that dances on the palate!
  • Sugar-Free: Try using mashed ripe bananas or unsweetened applesauce instead of sugar for a naturally sweetened option that's healthier too!
  • Flavor Burst: Add a hint of cardamom for an exotic twist that elevates the warm, fragrant flavor profile of these charming cupcakes.
  • Minimalist Aesthetic: Choose to forgo food dyes to showcase the natural colors of your ingredients, appealing to those who appreciate simplicity in desserts.
  • Whipped Topping: For a lighter touch, consider a whipped coconut cream instead of buttercream for a refreshing and airy texture.
  • Decadent Stuffing: Hollow out the center of your cupcakes and fill them with a rose ganache made from coconut cream and vegan dark chocolate for an elegant surprise!

Experiment with these options as you create your own delicious versions! Your baking experience could be even sweeter, just like when I enjoyed making my delightful Mini Tropical Pavlovas for special occasions. Let your imagination flourish, and enjoy every bit of the process!

What to Serve with Vegan Mini Rose Pistachio Cupcakes

Looking to create the perfect spread that complements these delightful vegan treats?

  • Earl Grey Tea: The aromatic notes of bergamot paired with the cupcakes enhance the floral rose flavor, making for an elegant pairing.
  • Coconut Whipped Cream: Add a light and airy texture; its sweetness balances the nutty pistachios beautifully alongside the rich frosting.
  • Fresh Berries: Juicy raspberries or sweet strawberries provide a refreshing tartness, brightening each bite and adding vibrant color to your table.
  • Minty Lemonade: A chilled glass of mint lemonade offers a zesty refreshment that contrasts flavors perfectly, invigorating the palate.
  • Pistachio Crumble: For an added crunch, sprinkle crumbled pistachios on the table. It mirrors the cupcake's flavor and creates a gourmet feel.
  • Chocolate Drizzle: A light drizzle of dairy-free chocolate elevates the cupcakes to a new level of indulgence—a treat for any chocolate lover!
  • Simple Green Salad: A fresh salad with citrus vinaigrette can cleanse the palate, allowing you to fully enjoy the delicate sweetness of the cupcakes.
  • Charming Fruit Tart: Pairing a fruit tart brings a visual feast and complements the delicate flavors with its sweet freshness and buttery crust.

Expert Tips for Mini Rose Pistachio Cupcakes

  • Avoid Overmixing: When combining wet and dry ingredients, mix gently to prevent tough cupcakes. A few lumps are perfectly fine!

  • Cool Before Frosting: Ensure your cupcakes are completely cool before applying frosting, or else it may melt and lose its shape.

  • Room Temperature Ingredients: Let your vegan butter soften at room temperature for easier mixing, resulting in a creamy, fluffy buttercream for your cupcakes.

  • Mind the Liquid: When making the frosting, avoiding adding too much liquid is key for the right consistency—aim for a spreadable yet thick texture.

  • Flavor Adjustments: Feel free to experiment with substitutions, like using almond extract in place of vanilla for a different flavor twist in your Mini Rose Pistachio Cupcakes!

  • Audience Notes: If serving at a party, consider labeling ingredients for any guests with allergies or dietary restrictions to ensure everyone feels included!

How to Store and Freeze Mini Rose Pistachio Cupcakes

  • Room Temperature: Store uneaten cupcakes at room temperature for up to 1 day in an airtight container to maintain freshness. A little bit of frosting won't affect their longevity!

  • Fridge: If you want to keep them longer, place the Mini Rose Pistachio Cupcakes in the fridge for up to 4 days, well covered, to prevent drying out.

  • Freezer: For longer storage, freeze the unfrosted cupcakes in a single layer on a baking sheet for 1-2 hours, then transfer to a freezer-safe bag and store for up to 3 months.

  • Reheating: Thaw frozen cupcakes in the fridge overnight. Frost them just before serving for the best texture and flavor experience!

Make Ahead Options

These Vegan Mini Rose Pistachio Cupcakes are perfect for busy home cooks looking to save time while hosting! You can bake the cupcakes up to 24 hours in advance; simply store them in an airtight container at room temperature to keep them moist. The buttercream frosting can also be prepared ahead and refrigerated for up to 3 days. To maintain its creamy texture, let the frosting sit at room temperature for about 30 minutes before using. When you’re ready to serve, frost the cupcakes and add any decorative elements—like chopped pistachios or mini dried rose buds. Enjoy beautiful, delicious cupcakes with minimal effort!

Mini Rose Pistachio Cupcakes Recipe FAQs

How do I choose the right soy milk for my Mini Rose Pistachio Cupcakes?
Absolutely! When selecting soy milk, opt for unsweetened and unflavored varieties to avoid overpowering the natural flavors of your cupcakes. If you or someone you’re serving has a nut allergy, you can also use oat milk as a fantastic nut-free alternative.

How should I store leftover Mini Rose Pistachio Cupcakes?
Store your cupcakes at room temperature in an airtight container for up to 1 day to keep them fresh. If you want them to last longer, refrigerate them, where they will stay good for up to 4 days. Just cover them well to prevent drying out—trust me, you’ll want them to retain that delicious moistness.

Can I freeze Mini Rose Pistachio Cupcakes for later?
Yes, you can! To freeze them, lay the unfrosted cupcakes on a baking sheet and freeze them for about 1-2 hours until firm. Then, transfer them to a freezer-safe bag or container, where they can stay fresh for up to 3 months. When you’re ready to enjoy them, simply thaw in the fridge overnight and frost them right before serving.

What should I do if my cupcake batter is too thick?
If your batter seems too thick, that's a common issue! Gently mix in a tablespoon of plant-based milk at a time until you reach the desired pourable consistency. Just be careful not to overmix—this can lead to dense cupcakes rather than the light, fluffy texture we’re aiming for.

Are there any dietary considerations I should be aware of?
When baking these Mini Rose Pistachio Cupcakes, it's always helpful to keep your guests’ dietary restrictions in mind. Most ingredients here are vegan and dairy-free, which is great for those with lactose intolerance. Additionally, if you substitute the all-purpose flour with a gluten-free blend, you can cater to gluten-sensitive friends. Just make sure to note any nut allergies related to the pistachios used in the recipe!

Mini Rose Pistachio Cupcakes

Delight in Mini Rose Pistachio Cupcakes for Any Celebration

These Mini Rose Pistachio Cupcakes are a delightful vegan treat perfect for any celebration, combining the aroma of rose with the nutty flavor of pistachio.
Print Recipe Pin Recipe
Prep Time 15 minutes mins
Cook Time 25 minutes mins
Cooling Time 30 minutes mins
Total Time 1 hour hr 10 minutes mins
Servings: 12 cupcakes
Course: Dessert
Cuisine: Vegan
Calories: 180
Ingredients Equipment Method Nutrition Notes

Ingredients
  

For the Cupcakes
  • 1 cup soy milk can be replaced with oat milk for a nut-free version
  • 1 tablespoon lemon juice or equivalent amount of vinegar
  • 1/3 cup extra virgin olive oil can be substituted with melted coconut oil
  • 1 teaspoon vanilla extract can use almond extract for a twist
  • 3/4 cup granulated white sugar coconut sugar can be used for a healthier option
  • 1 pinch sea salt
  • 2 cups all-purpose flour substitute with gluten-free flour blend for gluten-free option
  • 1 teaspoon baking powder required for best results
  • 1/2 teaspoon baking soda required for best results
  • a few drops vegan green food dye omit if desired
  • 1/2 cup chopped raw pistachio kernels substituting with any nut will change the flavor profile
For the Buttercream Frosting
  • 1/2 cup vegan butter can use coconut cream for a lighter option
  • 2 cups powdered sugar can use agave syrup for a lower sugar alternative
  • 2 tablespoons lemon juice
  • 1 tablespoon rose water vanilla extract can substitute
  • a few drops red food dye omit for a minimalist look
  • a few mini dried rose buds optional, use edible flowers for a similar effect

Equipment

  • Mixing Bowl
  • Whisk
  • Cupcake tray
  • piping bag

Method
 

Step-by-Step Instructions for Mini Rose Pistachio Cupcakes
  1. Preheat your oven to 340ºF (170ºC) and line a mini cupcake tray with colorful cupcake liners.
  2. In a mixing bowl, whisk together soy milk and lemon juice; let it sit for about 5 minutes. Add olive oil, vanilla extract, granulated sugar, and sea salt, mixing until well combined.
  3. In another bowl, sift together all-purpose flour, baking powder, and baking soda. Gradually add to the wet ingredients and stir gently.
  4. Incorporate vegan green food dye and fold in chopped pistachio kernels.
  5. Spoon the batter into cupcake liners, filling them halfway and bake for about 25 minutes.
  6. Prepare the buttercream by creaming vegan butter and powdered sugar; add lemon juice and rose water until smooth.
  7. Cool the cupcakes in the tray for 10 minutes, then transfer to a wire rack for at least 30 minutes.
  8. Use a piping bag to swirl the buttercream on the cooled cupcakes, decorating as desired.

Nutrition

Serving: 1cupcakeCalories: 180kcalCarbohydrates: 24gProtein: 2gFat: 8gSaturated Fat: 1gPolyunsaturated Fat: 0.5gMonounsaturated Fat: 6gSodium: 150mgPotassium: 100mgFiber: 1gSugar: 10gVitamin C: 1mgCalcium: 80mgIron: 1mg

Notes

Avoid overmixing and ensure cupcakes are cool before frosting. Adjust flavors as desired.

Tried this recipe?

Let us know how it was!

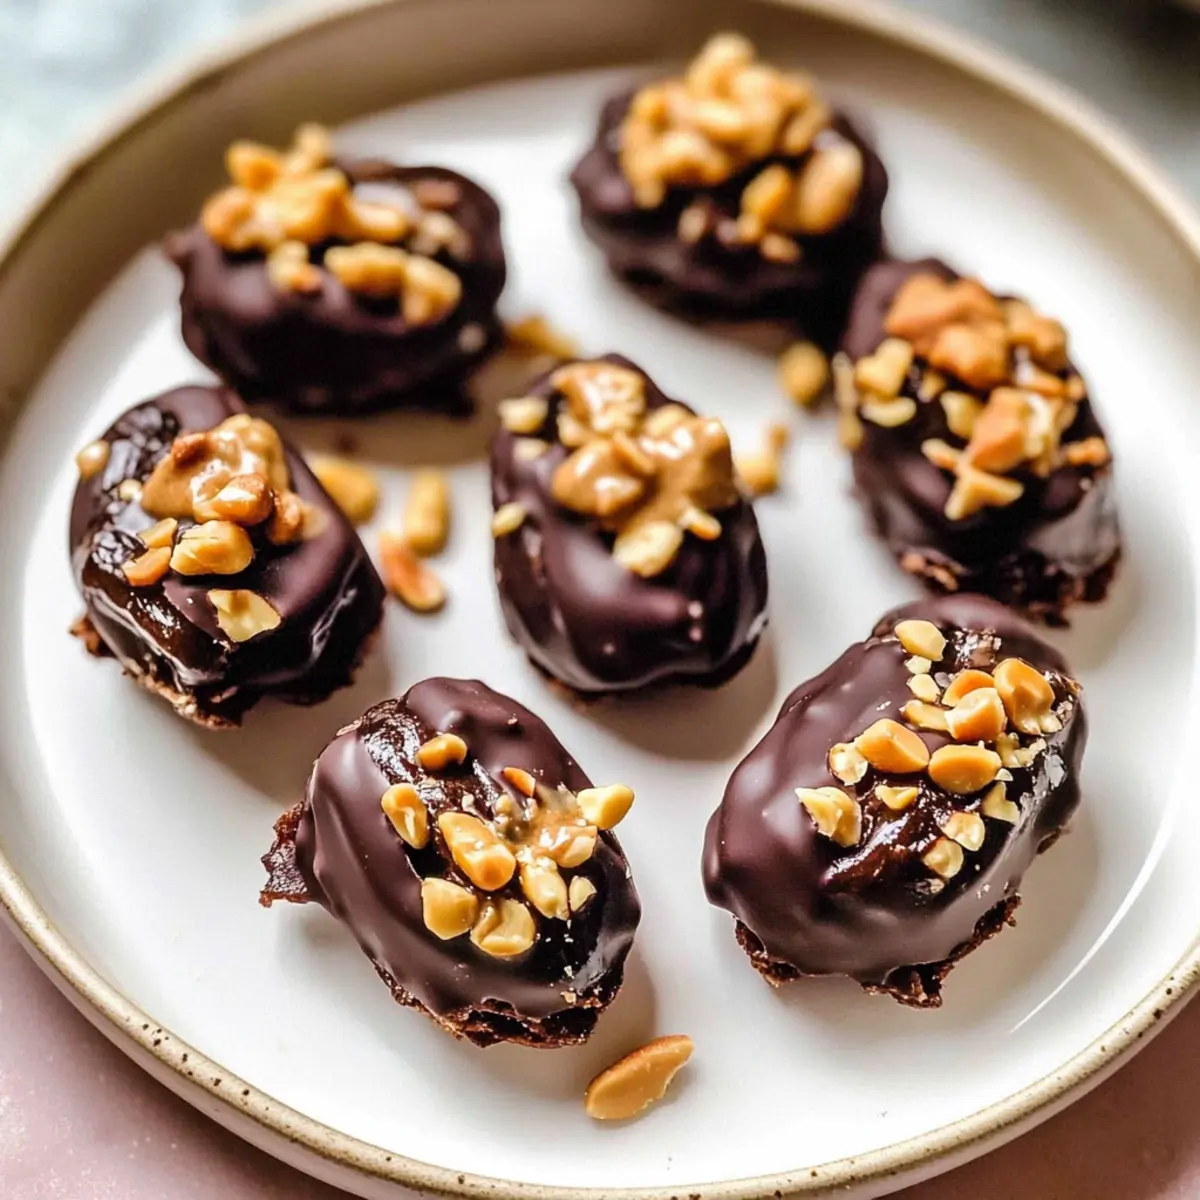
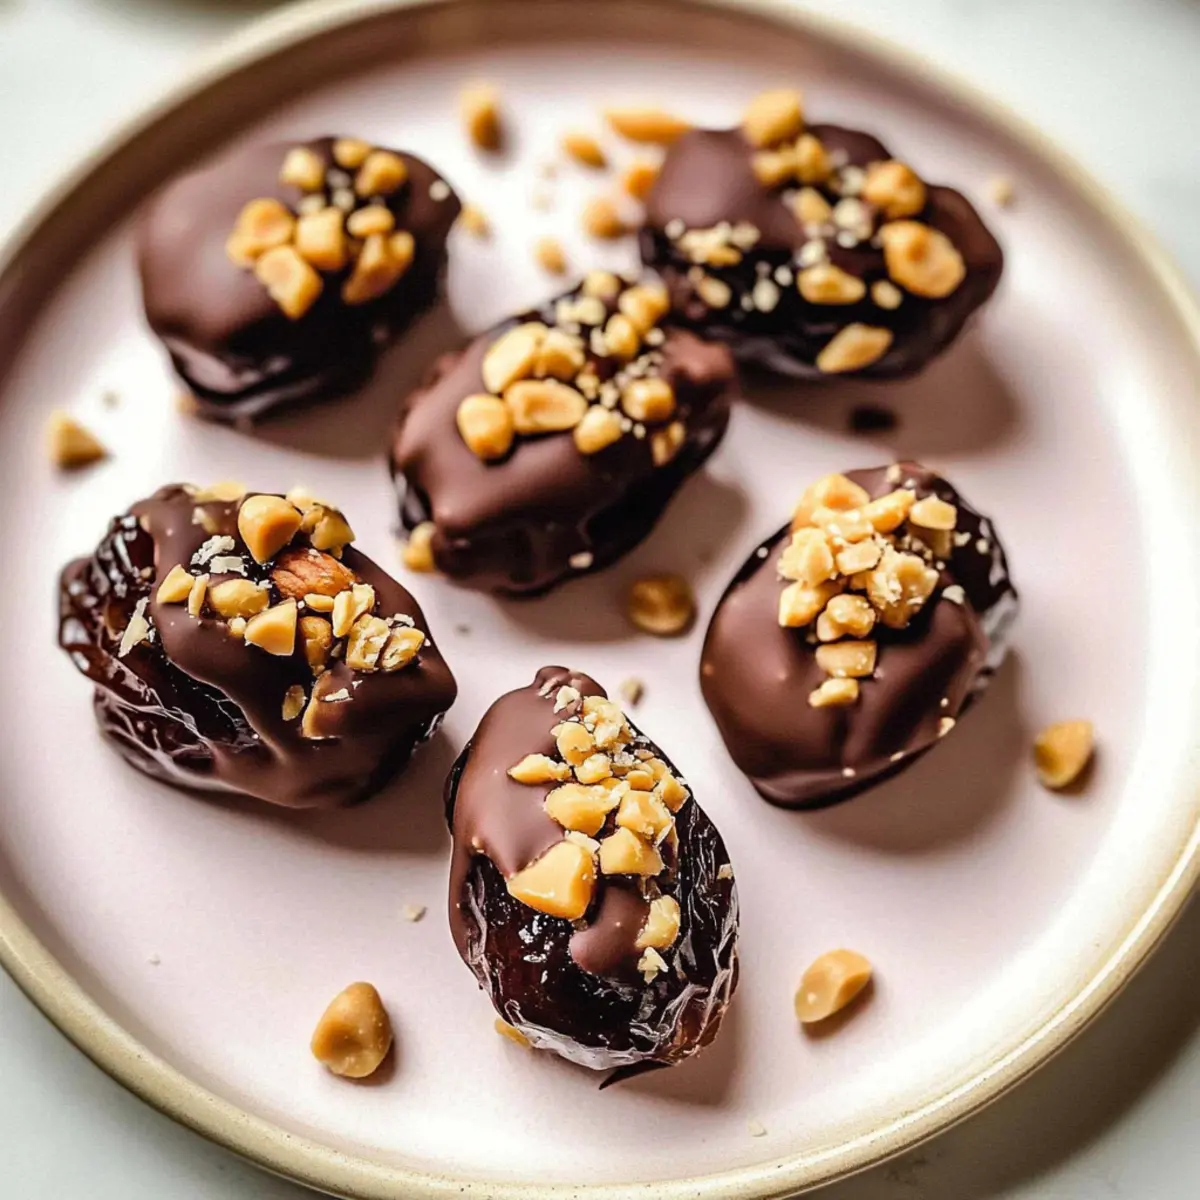
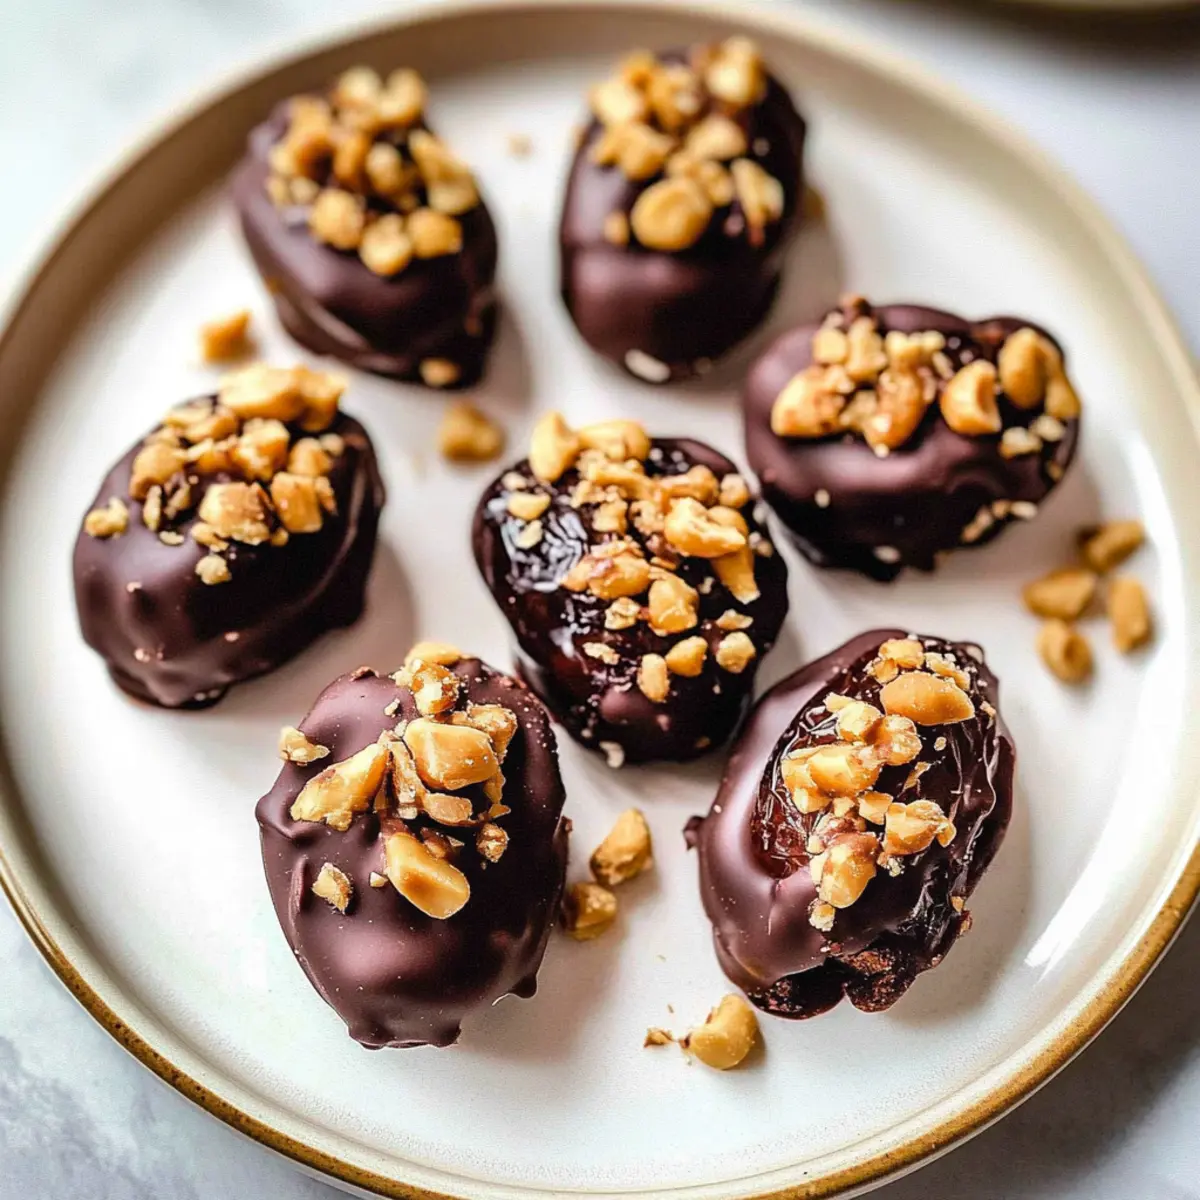
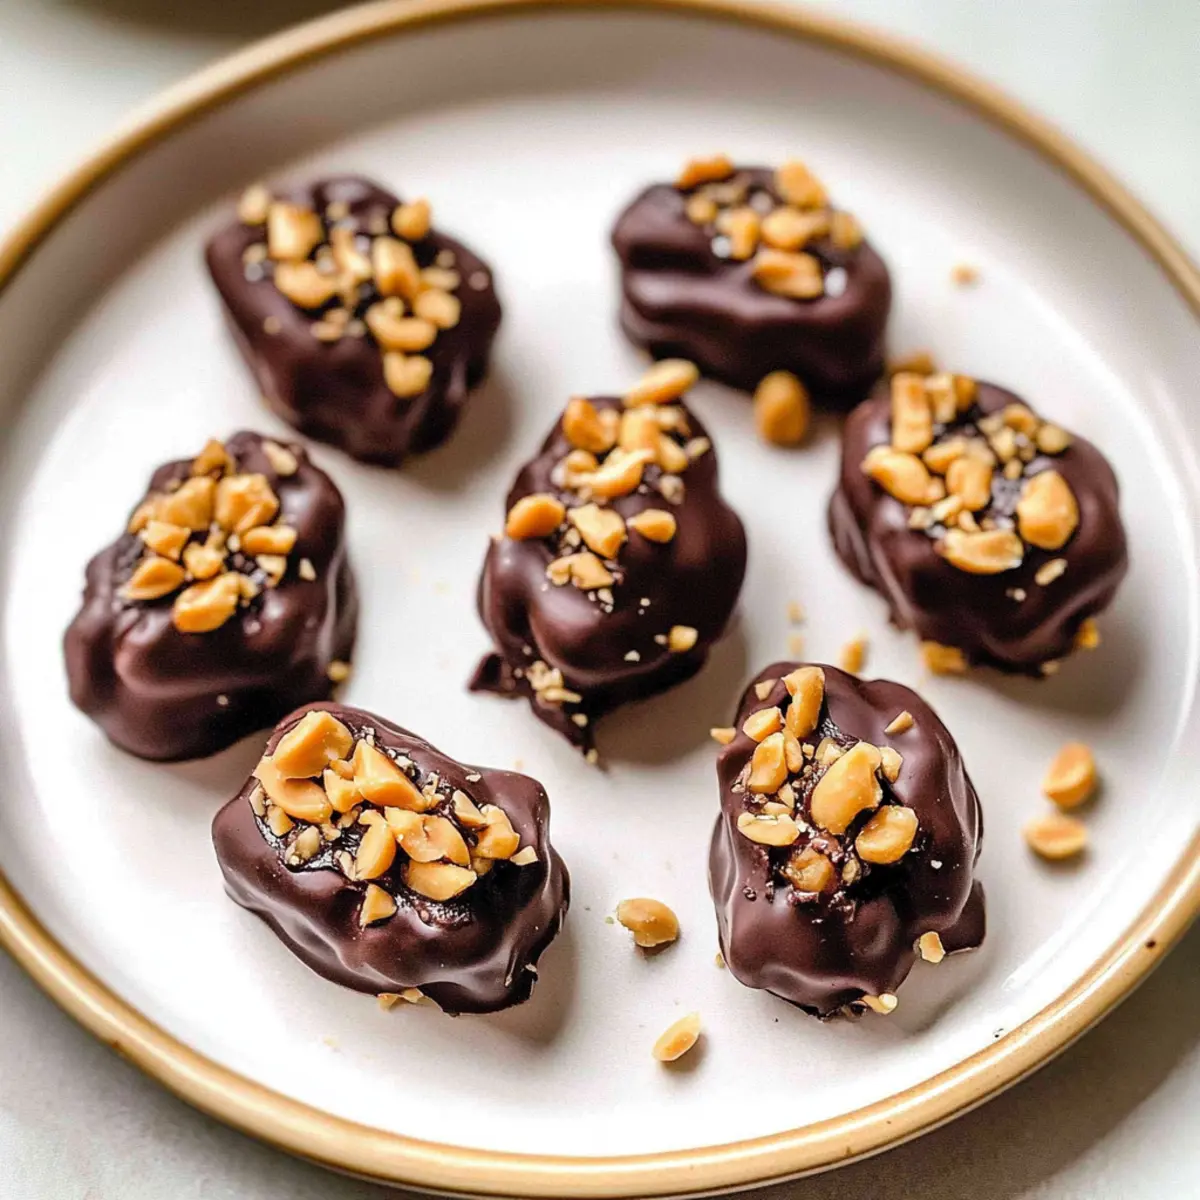
Indulge Guilt-Free: Chocolate Covered Dates Stuffed with Peanut Butter

January 12, 2026 by Grace Snow Leave a Comment

Nostalgia washed over me as I took a bite of these delightful Chocolate Covered Dates Stuffed with Peanut Butter, instantly reminiscent of my favorite childhood candy bars. Who would have thought a simple combination of just four ingredients could satisfy my sweet cravings without the guilt? These no-bake, gluten-free treats not only spin a healthy twist on your typical dessert but also come together in a flash. The chewy Medjool dates draped in luscious chocolate and packed with creamy peanut butter create the perfect melt-in-your-mouth indulgence that's sure to impress. Whether you're looking to treat yourself or share these delightful bites at your next gathering, you’ll find they’re a crowd-pleaser that’s simple to make. Ready to discover how to whip up this scrumptious snack?

Why are these dates a must-try?

Irresistible Satisfaction: The rich flavor of chocolate combined with the sweetness of chewy dates and creamy peanut butter makes for a delightful indulgence.

Quick & Easy: With just four ingredients and no baking required, you can whip up a batch in no time – perfect for spontaneous cravings or unexpected guests!

Guilt-Free Treat: They are gluten-free and can cater to various dietary needs, allowing everyone to enjoy these delicious bites.

Customizable Delight: Feel free to switch up nut butters or add your favorite toppings, like shredded coconut or dried fruit, for a unique twist!

Crowd-Pleaser: Serve them as a snack, dessert, or party treat, and watch them disappear fast – people will ask for the recipe! If you love easy yet stunning snacks, these Chocolate Covered Dates Stuffed with Peanut Butter are the perfect treat to elevate your gatherings.

Chocolate Covered Dates Stuffed with Peanut Butter Ingredients

• Prepare to indulge with these heavenly treats!

For the Dates
• Medjool Dates – Opt for fresh, plump dates to enhance the caramel-like flavor.
• All-Natural Smooth Peanut Butter – Adds creaminess and depth; can be substituted with almond or cashew butter for a nut-free alternative.

For the Coating
• Semi-Sweet Chocolate Chips – Perfect for a rich chocolate coating; use dark chocolate chips for less sweetness.
• Coconut Oil – Helps to melt the chocolate smoothly; can be replaced with vegetable oil for glossiness.

For the Crunch
• Chopped Peanuts – Provides a delightful crunch; substitute with chopped almonds or leave out for a nut-free option.

Get ready to enjoy these Chocolate Covered Dates Stuffed with Peanut Butter as a quick, healthy, and utterly satisfying dessert!

Step‑by‑Step Instructions for Chocolate Covered Dates Stuffed with Peanut Butter

Step 1: Prepare Your Work Surface
Begin by lining a sturdy baking sheet with parchment paper to create a non-stick surface for your chocolate covered dates. This will make transferring them to the fridge much easier and keep your workspace tidy. Set your baking sheet aside while you prep the dates and peanut butter filling.

Step 2: Pit the Dates
Carefully take each Medjool date and cut a lengthwise slit down the middle, taking care not to slice all the way through. Gently remove the pit, discarding it, and ensure the date remains intact. As you complete this step, you’ll notice the soft, chewy texture of the dates that make them ideal for stuffing; set them aside in a single layer.

Step 3: Stuff the Dates
Generously fill each pitted date with all-natural smooth peanut butter, using approximately one teaspoon for each. After stuffing, sprinkle a few chopped peanuts on top of the peanut butter to add a delightful crunch. Place the filled dates on the lined baking sheet, ensuring they are spaced apart, which will make the chocolate coating easier later.

Step 4: Melt the Chocolate
In a small microwave-safe bowl, combine semi-sweet chocolate chips and a teaspoon of coconut oil. Heat in the microwave in 30-second increments, stirring between each session until the mixture is smooth and glossy—this should take about 1-2 minutes total. Make sure there are no lumps, as this silky chocolate will coat your chocolate covered dates perfectly.

Step 5: Coat the Dates
Using a fork or a spoon, drizzle the melted chocolate generously over each stuffed date, ensuring they are completely covered. Allow any excess chocolate to drip off back into the bowl before returning the coated dates back to the baking sheet. The rich, glossy chocolate coating will make these chocolate covered dates irresistibly tempting.

Step 6: Add Finishing Touches
If desired, sprinkle a pinch of flaky sea salt over each chocolate covered date before the chocolate hardens. This touch not only enhances the flavors but also gives a beautiful contrast to the sweetness of the chocolate and peanut butter. The dates will look stunning with this simple yet elegant addition.

Step 7: Chill to Set
Refrigerate the prepared chocolate covered dates for about 30 minutes, or until the chocolate coating is fully hardened. You’ll know they’re ready when the chocolate feels firm to the touch. As they chill, the flavors will meld beautifully, making this sweet treat an ideal snack or dessert.

Make Ahead Options

These delightful Chocolate Covered Dates Stuffed with Peanut Butter are perfect for meal prep enthusiasts! You can prepare the stuffed dates up to 24 hours in advance by pitting and filling them with peanut butter, then placing them on a lined baking sheet. Cover them tightly with plastic wrap and refrigerate to maintain freshness. When you're ready to enjoy this healthy dessert, simply melt your chocolate and drizzle it over the prepped dates, then refrigerate for about 30 minutes until the chocolate hardens. This prep-ahead method not only saves time but ensures that these sweet bites are just as delicious when you’re ready to serve them!

Chocolate Covered Dates Stuffed with Peanut Butter Variations

Feel free to get creative with these delightful treats and make them your own!

  • Nut-Free Option: Replace peanut butter with tahini or sunflower seed butter for a tasty nut-free snack. The creamy texture remains while accommodating allergies.

  • Crunchy Texture: Instead of chopped peanuts, try using crispy rice cereal mixed into the peanut butter filling for an exciting crunch. It adds an unexpected twist that the kids will love!

  • Sweet & Salty: Drizzle a bit of honey or maple syrup over the chocolate before it sets for a touch of extra sweetness, harmonizing perfectly with the salty notes of peanut butter. The contrast makes for an elevated flavor experience.

  • Dried Fruit Delight: Add chopped dried apricots or cranberries to the peanut butter filling for a fruity burst of flavor. This change makes each bite a little surprise with each chewy delight.

  • Flavored Chocolate: Use dark chocolate infused with flavors like mint or orange zest for a refreshing twist on the classic. It’s a fun way to infuse seasonal flair into your treats.

  • Coconut Coating: Roll the chocolate-covered dates in shredded coconut before refrigerating. This adds a tropical flair and extra chewiness that suits those beachy summer vibes.

  • Spicy Kick: Mix a pinch of cayenne pepper into the melted chocolate for a spicy kick that beautifully contrasts with the sweetness of the dates. It's perfect for those who love a surprising burst of heat!

  • Decadent Drizzle: After the chocolate hardens, drizzle a bit of nut butter on top for an eye-catching finish. It not only looks beautiful but also enhances the rich flavor profile you love.

These optional variations can turn your chocolate covered dates into a unique experience each time you make them. And if you want to explore other delightful flavors, check out my Herby Ricotta Stuffed Peppers or try some delicious German Chocolate Poke for more creative cooking ideas!

Expert Tips for Chocolate Covered Dates Stuffed with Peanut Butter

Stay Warm: Ensure the chocolate remains warm and pourable while drizzling to achieve a smooth coating without any clumps.

Quality Matters: Choose plump Medjool dates for the best chewy texture. Freshness enhances the overall flavor of these delicious chocolate covered dates stuffed with peanut butter.

Vary Your Nuts: Don't hesitate to substitute with almond butter or cashew butter. This adds variety, catering to personal preferences and dietary needs.

Tidy Up: Line your workspace with parchment paper for mess-free chocolate melting and easy cleanup.

Don’t Rush the Chill: Allow the dates to set in the fridge long enough to firm the chocolate. Patience here ensures a perfect bite!

How to Store and Freeze Chocolate Covered Dates Stuffed with Peanut Butter

Fridge: Keep your chocolate covered dates in an airtight container; they will stay fresh for up to two weeks. This is the best way to maintain their flavor and texture.

Freezer: For longer storage, freeze the dates in a single layer on a baking sheet, then transfer to a freezer-safe container. They can last for up to three months without losing their delectable taste.

Thawing: To enjoy, simply thaw them in the fridge overnight or at room temperature for an hour. This way, you don't rush the flavors!

Reheating: If desired, you can gently reheat them in the microwave for about 10-15 seconds to slightly soften the chocolate, enhancing that melty texture before indulging.

What to Serve with Chocolate Covered Dates Stuffed with Peanut Butter

These delightful treats are perfect for creating a memorable meal that evokes warmth and joy.

  • Creamy Greek Yogurt: The cool, tangy yogurt adds a refreshing contrast to the sweet and rich chocolate dates, enhancing every bite.

  • Fresh Berries: Strawberries or raspberries bring a burst of tartness, balancing the sweetness of the dates and providing vibrant color to your plate.

  • Nutty Trail Mix: A mix of assorted nuts and seeds adds crunch and protein, making your dessert feel more substantial while complementing the chewy dates.

  • Coconut Whipped Cream: Light and airy, this vegan option adds a tropical twist that pairs beautifully with the chocolate and nutty flavors of the dates.

  • Herbal Tea: A warm cup of chamomile or peppermint tea creates an inviting, cozy atmosphere and helps cleanse the palate between bites of this decadent treat.

  • Dark Chocolate Squares: For true chocolate lovers, serving a small piece alongside the dates intensifies the chocolate experience and completes the indulgence.

  • Homemade Granola: Crunchy clusters lend a satisfying texture and heartiness, turning your sweet treat into a wholesome snack or light breakfast option.

  • Ice Cream: Pair these dates with a scoop of vanilla or coconut ice cream for an indulgent dessert that feels like a party in your mouth. Try serving them as an afternoon treat or after dinner!

Chocolate Covered Dates Stuffed with Peanut Butter Recipe FAQs

What should I look for when selecting Medjool dates?
Absolutely! When picking Medjool dates, opt for fresh, plump ones that feel slightly sticky to the touch. Avoid dates with dark spots all over, as these may indicate they're overripe. If possible, choose dates that are soft yet firm, which ensures a perfect chewy texture for stuffing.

How should I store Chocolate Covered Dates Stuffed with Peanut Butter?
To keep your chocolate covered dates fresh, store them in an airtight container in the fridge for up to two weeks. This helps maintain their moisture and flavor while preventing them from absorbing any unwanted odors from your refrigerator.

Can I freeze these chocolate covered dates?
Sure thing! To freeze, place the chocolate covered dates in a single layer on a baking sheet and pop them into the freezer until solid—about 1 to 2 hours. Once frozen, transfer to a freezer-safe container or bag. They can be stored for up to three months. When you're ready to enjoy, simply thaw them in the fridge overnight or at room temperature for about an hour.

What can I do if the chocolate coating is not smooth?
Very! If your chocolate coating isn't smooth, it might have cooled too quickly. If this happens, return the bowl to the microwave and heat it in 10-second increments, stirring in between, until the chocolate is uniform again. Additionally, you can add a touch more coconut oil to help achieve that silky texture.

Are these chocolate covered dates safe for pets or individuals with nut allergies?
It's always important to be cautious! While these treats are designed for human consumption, they should not be shared with pets, particularly dogs, as chocolate can be toxic to them. For those with nut allergies, try using a nut-free alternative such as sunflower seed butter or tahini in place of peanut butter to create a delicious and allergy-friendly treat without compromising flavor!

Chocolate Covered Dates Stuffed with Peanut Butter

Indulge Guilt-Free: Chocolate Covered Dates Stuffed with Peanut Butter

Chocolate Covered Dates Stuffed with Peanut Butter are a guilt-free indulgence that satisfies sweet cravings with just four ingredients.
Print Recipe Pin Recipe
Prep Time 10 minutes mins
Cook Time 2 minutes mins
Chill Time 30 minutes mins
Total Time 42 minutes mins
Servings: 12 dates
Course: Dessert
Cuisine: American
Calories: 180
Ingredients Equipment Method Nutrition Notes

Ingredients
  

For the Dates
  • 12 pieces Medjool Dates Opt for fresh, plump dates.
  • 1 cup All-Natural Smooth Peanut Butter Can be substituted with almond or cashew butter.
For the Coating
  • 1 cup Semi-Sweet Chocolate Chips Use dark chocolate chips for less sweetness.
  • 1 tablespoon Coconut Oil Can be replaced with vegetable oil.
For the Crunch
  • 1/4 cup Chopped Peanuts Substitute with chopped almonds or leave out for a nut-free option.

Equipment

  • Microwave
  • Baking Sheet
  • Parchment Paper
  • Microwave-safe bowl

Method
 

Step-by-Step Instructions
  1. Prepare Your Work Surface: Line a sturdy baking sheet with parchment paper.
  2. Pit the Dates: Cut each Medjool date lengthwise, remove the pit.
  3. Stuff the Dates: Fill each date with peanut butter and sprinkle with chopped peanuts.
  4. Melt the Chocolate: Combine chocolate chips and coconut oil in a bowl, microwave until smooth.
  5. Coat the Dates: Drizzle melted chocolate over the stuffed dates.
  6. Add Finishing Touches: Sprinkle with flaky sea salt if desired.
  7. Chill to Set: Refrigerate for about 30 minutes until the chocolate hardens.

Nutrition

Serving: 1dateCalories: 180kcalCarbohydrates: 24gProtein: 4gFat: 9gSaturated Fat: 3gPolyunsaturated Fat: 1gMonounsaturated Fat: 5gSodium: 50mgPotassium: 200mgFiber: 3gSugar: 15gCalcium: 20mgIron: 1mg

Notes

These treats are customizable with different nut butters and toppings. Store in an airtight container for up to two weeks in the fridge or freeze for up to three months.

Tried this recipe?

Let us know how it was!

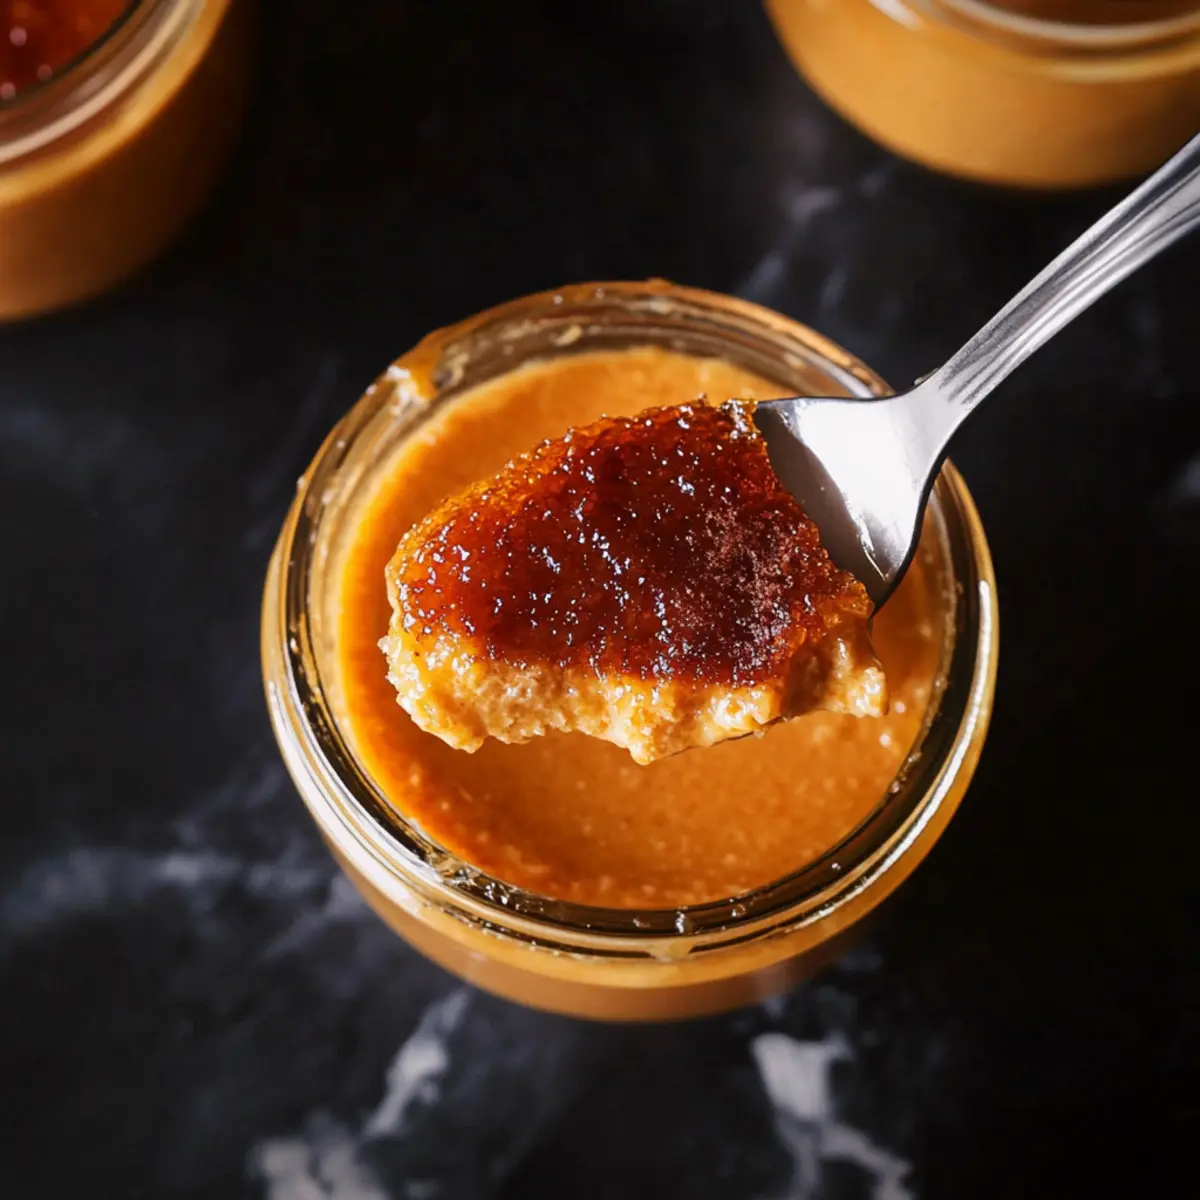
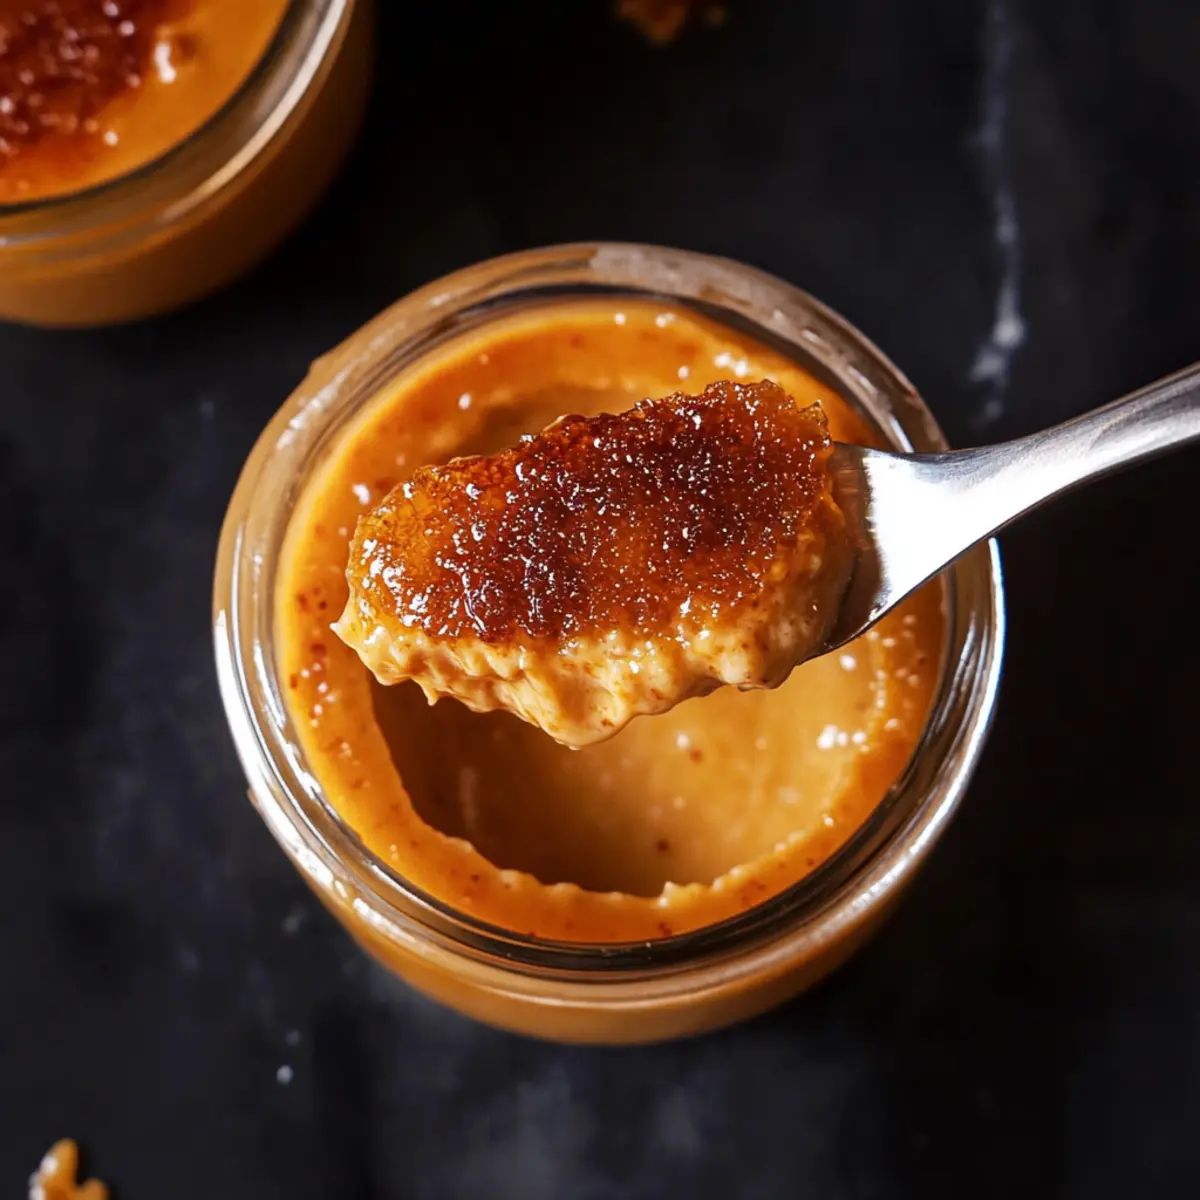
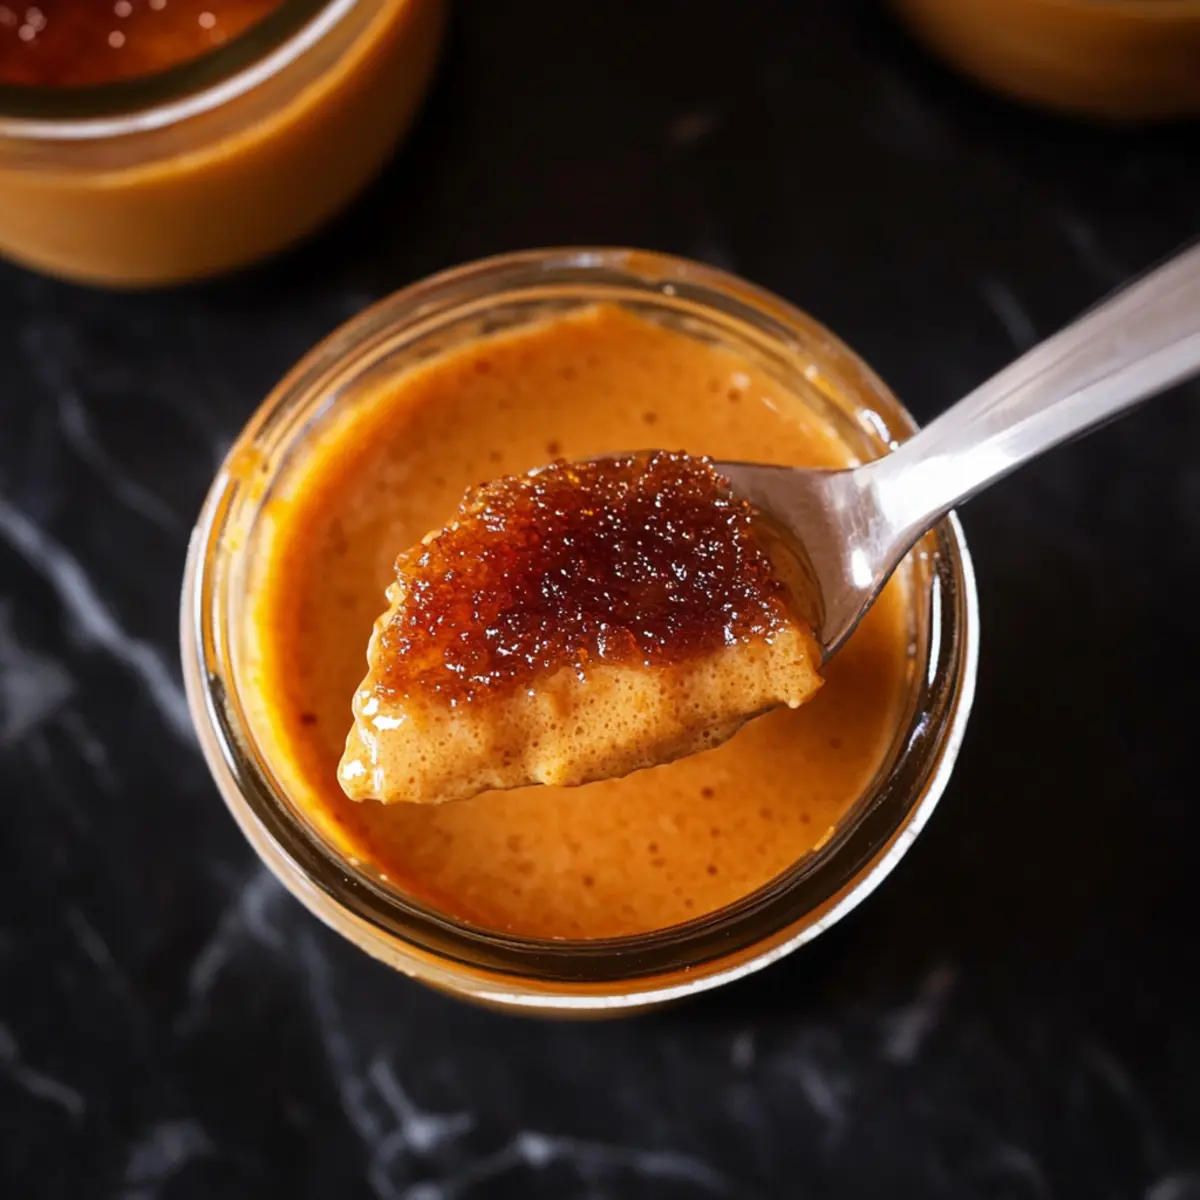
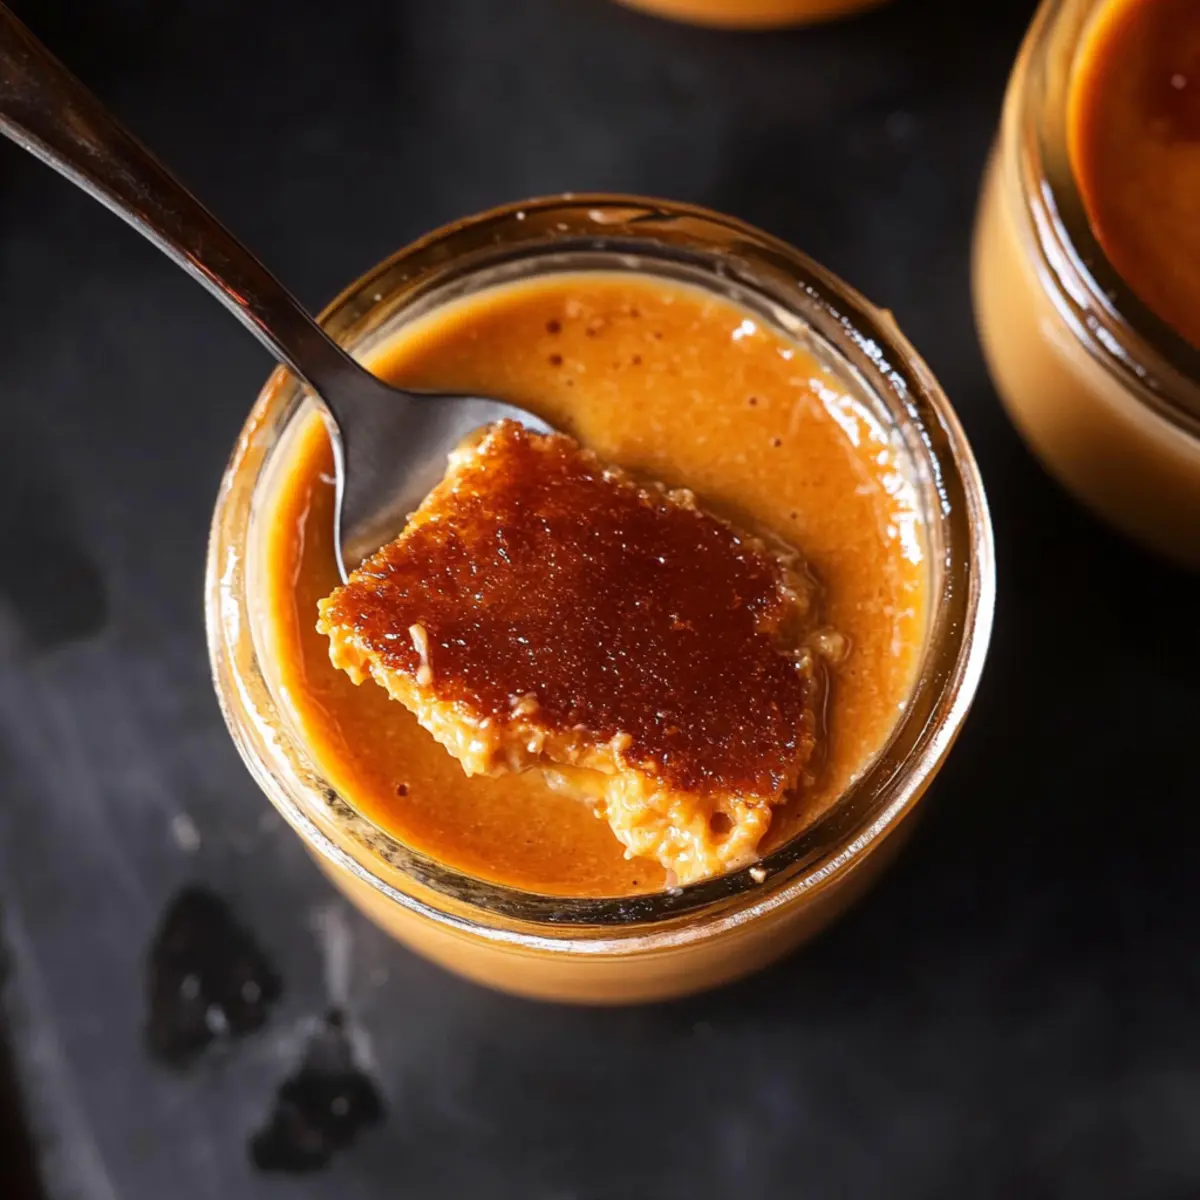
Thai Tea Crème Brûlée: A Creamy Twist on a Classic Dessert

January 12, 2026 by Grace Snow Leave a Comment

On a bustling evening filled with laughter and the clinking of glasses, I overheard a couple raving about the most enchanting dessert they had ever tasted—a sublime Thai Tea Crème Brûlée. Intrigued, I realized it was time to explore and create this silky custard delight in my own kitchen. Infusing the familiar comfort of custard with the vibrant flavors of traditional Thai tea, this recipe offers a delightful escape from everyday sweets. With minimal prep time and the ability to impress even the most discerning guests, you’ll find yourself reaching for this dessert time and again. Are you ready to elevate your dessert game and indulge in a unique twist on a classic? Let’s dive into this delicious adventure together!

Why is Thai Tea Crème Brûlée irresistible?

Unique Flavor Fusion: The combination of classic crème brûlée and aromatic Thai tea creates an unforgettable dessert experience.

Effortlessly Impressive: You can wow your guests with elegant presentation and irresistible flavors, making it perfect for dinner parties.

Simple to Prepare: With just a few key ingredients and straightforward steps, this recipe is approachable even for novice bakers.

Versatile Options: Feel free to experiment with flavors by adding spices or using coconut cream for a tropical twist.

Ready to surprise your family with something extraordinary? Serve it alongside Cheesy Garlic Bread to balance the meal beautifully!

Thai Tea Crème Brûlée Ingredients

Unleash the magic of flavors with these key ingredients!

For the Custard
• Heavy Cream – Provides a rich, creamy base essential for the custard’s silky texture; substitute with coconut cream for a lighter version.
• Milk – Adds creaminess and helps lighten the custard; almond milk can be used as a dairy-free alternative.
• Thai Tea Mix – Infuses the crème brûlée with aromatic flavors; using the Pantai brand ensures an authentic Thai tea taste.
• Large Egg Yolks – Acts as a thickener, giving the custard its signature richness; ensure no whites are included for best results.
• Sweetened Condensed Milk – Adds sweetness and a depth of flavor, but feel free to swap it for a vegan condensed milk alternative for a dairy-free dessert.

For the Caramelized Topping
• Granulated Sugar – Essential for creating that signature crunchy caramel top; no substitutes recommended for the best texture and flavor.

Elevate your dessert game with this Thai Tea Crème Brûlée and impress everyone with a unique twist on a classic!

Step‑by‑Step Instructions for Thai Tea Crème Brûlée

Step 1: Preheat and Prepare the Water Bath
Begin your Thai Tea Crème Brûlée by preheating your oven to 300°F (150°C). While the oven warms, prepare a water bath by filling a deep dish pan with hot water, enough to reach halfway up the sides of your ramekins. This gentle cooking method ensures a smooth custard without curdling.

Step 2: Infuse the Cream
In a medium saucepan, combine heavy cream, milk, and Thai tea mix. Heat the mixture over medium heat, stirring regularly, until it reaches a boil. Once boiling, reduce the heat, cover, and let it steep for 5-10 minutes until the flavors meld beautifully, releasing the aromatic essence of Thai tea.

Step 3: Strain the Mixture
After steeping, remove the saucepan from heat and strain the infused cream mixture through a fine mesh sieve into a large mixing bowl. This removes any solid tea leaves, leaving you with a smooth, fragrant liquid ready to blend into your custard base.

Step 4: Whisk the Egg Yolks and Sweetened Condensed Milk
In a separate heatproof bowl, whisk together the large egg yolks and sweetened condensed milk until well combined. The mixture should become smooth and creamy, creating the perfect base for your Thai Tea Crème Brûlée.

Step 5: Temper the Egg Yolks
Slowly drizzle the hot tea-infused cream into the yolk mixture while whisking gently to prevent curdling. This gradual process, known as tempering, ensures that your egg yolks remain smooth and don’t scramble when combined with the hot cream.

Step 6: Fill the Ramekins
Carefully divide the custard mixture evenly among your prepared ramekins. Place these ramekins into the water bath, ensuring they sit securely in the hot water for even baking. This step is essential for achieving the luscious texture characteristic of a perfectly made crème brûlée.

Step 7: Bake to Perfection
Bake the Thai Tea Crème Brûlée for 25-30 minutes, or until the edges are set and the center jiggles slightly when gently shaken. The custard should remain firm yet tender, a sign of your dessert's creamy perfection just waiting to chill.

Step 8: Cool and Chill
Once baked, remove the ramekins from the water bath and allow them to cool at room temperature for about 30 minutes. After cooling, refrigerate them for at least 2 hours to firm up the custard and enhance the flavors of your exquisite Thai Tea Crème Brûlée.

Step 9: Caramelize the Sugar Topping
Before serving, sprinkle an even layer of granulated sugar on top of each chilled crème brûlée. Use a kitchen torch to caramelize the sugar until it turns golden brown and forms a delightful, crunchy crust. Be attentive during this step, as the sugar can burn quickly if not watched carefully.

Step 10: Serve and Enjoy
Once the sugar has caramelized, allow the Thai Tea Crème Brûlée to cool for a brief moment before serving. This gorgeous dessert is now ready to impress your family and friends with its silky custard and striking caramel topping!

How to Store and Freeze Thai Tea Crème Brûlée

Fridge: Store in an airtight container for up to 3 days. For the best texture, avoid torching the sugar until ready to serve.

Freezer: Though freezing isn't recommended for this delicate custard, if necessary, you can freeze uncaramelized custards for up to 2 months. Thaw in the fridge and torch the sugar just before serving.

Reheating: If the custard has been refrigerated, allow it to come to room temperature before caramelizing to ensure an even texture when served.

Serving Tip: For the freshest taste and texture, plan to enjoy your Thai Tea Crème Brûlée within a few days of preparation.

What to Serve with Thai Tea Crème Brûlée?

Imagine an exquisite evening where the warm aroma of vanilla and the crisp caramel topping of your dessert beckon your guests to savor every last bite.

  • Fresh Berries: Juicy raspberries or strawberries add a burst of flavor and a refreshing contrast to the creamy custard.
  • Coconut Macaroons: Chewy, sweet coconut treats enhance the tropical notes of the Thai tea, perfect for a cohesive flavor experience.
  • Minted Fruit Salad: A vibrant medley of seasonal fruits with a hint of mint brings a light, refreshing element to balance the richness.

Pairing your Thai Tea Crème Brûlée with a light dessert wine, such as Muscat, creates an elegant finale to your meal. The sweet undertones of the wine harmonize wonderfully with the custard’s flavors, leaving a lasting impression on your palate.

Thai Tea Crème Brûlée Variations

Feel free to explore your culinary creativity with these delectable twists on the classic Thai Tea Crème Brûlée!

  • Coconut Cream: Swap heavy cream for coconut cream for a tropical flair that enhances the dessert's richness while maintaining its creaminess.
    Coconut adds a luscious texture, making each spoonful feel extra indulgent.

  • Dairy-Free: Use almond milk and a vegan condensed milk alternative to cater to dairy-free diets while still enjoying the sweet, rich base.
    Your guests won't miss the dairy!

  • Spiced Up: Infuse your custard with cardamom or cinnamon to introduce warm, aromatic notes that complement the Thai tea beautifully.
    This subtle spice elevates the flavor profile and makes it even more special.

  • Flavor Fusions: Try adding a splash of vanilla extract or a hint of orange zest for a bright twist that pairs well with the tea's earthy tones.
    Something as simple as a citrus zing can take your crème brûlée to new heights.

  • Different Teas: Experiment with chai tea or jasmine tea instead of Thai tea for unique flavor variations that give a whole new experience of this classic dessert.
    Each type of tea brings its special character, so have fun exploring!

  • Brown Sugar Crust: Replace granulated sugar with brown sugar for the caramelized topping to enhance the flavor depth, creating a more robust crust.
    The molasses in brown sugar adds a delightful complexity that pairs well with the rest of the dish.

  • Nutty Twist: Consider a sprinkling of crushed pistachios or toasted coconut flakes on top for added texture and a nutty flavor.
    The crunch beautifully contrasts the smooth custard, making for a fun mouthfeel.

  • Chili Heat: For those who crave a kick, infuse the cream with a few slices of fresh chili before steeping.
    This unexpected addition adds a spicy surprise, balancing the sweetness and creating an unforgettable dessert experience.

Don’t forget to serve your Thai Tea Crème Brûlée alongside a delightful dish like Grilled Balsamic Steak Salad for a well-rounded meal! Enjoy the scrumptious journey of flavors as you put your own unique spin on this beloved dessert!

Expert Tips for Thai Tea Crème Brûlée

  • Perfect Tempering: Slowly drizzle the hot cream into the egg yolks while whisking to prevent scrambling; this is crucial for smooth custard.
  • Water Bath Importance: The water bath is essential for baking the custard evenly; avoid skipping this step for the best texture.
  • Sugar Caramelization: Watch the sugar closely while using the torch; it can burn quickly, ruining your beautiful topping.
  • Cooling Time: Be patient! Cooling the custard at room temperature before refrigerating enhances flavor and texture.
  • Make Ahead: Prepare your Thai Tea Crème Brûlée a day in advance; it allows the flavors to meld beautifully and is perfect for hosting.

Make Ahead Options

These Thai Tea Crème Brûlée are a fantastic choice for meal prep, allowing you to indulge in a rich dessert without last-minute stress. You can prepare the custard mixture up to 24 hours in advance; simply store it in the fridge after you’ve filled the ramekins. This keeps the flavors well-developed and ensures the custard remains creamy. On baking day, just pop them in the oven as per the instructions to create that delightful texture. After chilling for at least 2 hours, remember to torch the sugar topping just before serving to maintain its crunchy perfection. Enjoy a sophisticated dessert with minimal effort on presentation night!

Thai Tea Crème Brûlée Recipe FAQs

How do I choose the right Thai tea mix?
Absolutely! When selecting a Thai tea mix, look for brands like Pantai or other authentic Thai tea varieties. Authentic Thai tea will have a deep amber color and a rich, aromatic scent. Avoid any blends that have added artificial flavors or colors, as genuine varieties will showcase the natural essence of the tea.

What is the best way to store leftovers of Thai Tea Crème Brûlée?
You can store your Thai Tea Crème Brûlée in an airtight container in the refrigerator for up to 3 days. It's best to keep the sugar topping uncaramelized until just before serving to maintain that delightful crunch. If you've already toasted the sugar, try to consume it within 1-2 days.

Can I freeze Thai Tea Crème Brûlée?
While I don't typically recommend freezing crème brûlée due to its delicate texture, you can freeze the uncaramelized custard for up to 2 months. To do this, let the custards cool completely, then place them in airtight containers. Thaw in the fridge overnight, and torch the sugar just before serving for the best results.

What should I do if my custard is too runny?
If your custard ends up runny, it may not have baked enough. Ensure that, when you check for doneness, the edges should be set and the center should jiggle slightly but not slosh. You can also try baking a little longer, checking every few minutes until the perfect consistency is achieved. It's a delicate process, but don’t worry—you’ll master it with a few tries!

Are there any dietary considerations for Thai Tea Crème Brûlée?
Yes, if you have dietary restrictions, you can adapt this recipe! Substitute heavy cream with coconut cream for a dairy-free version, and the sweetened condensed milk can be replaced with a vegan alternative. Additionally, ensure the Thai tea mix is free from allergens if needed, as some pre-packaged blends may contain additives.

Thai Tea Crème Brûlée

Thai Tea Crème Brûlée: A Creamy Twist on a Classic Dessert

Experience the enchanting Thai Tea Crème Brûlée, a creamy twist on classic dessert with aromatic flavors.
Print Recipe Pin Recipe
Prep Time 20 minutes mins
Cook Time 30 minutes mins
Cooling Time 2 hours hrs
Total Time 2 hours hrs 50 minutes mins
Servings: 6 servings
Course: Dessert
Cuisine: Thai
Calories: 280
Ingredients Equipment Method Nutrition Notes

Ingredients
  

For the Custard
  • 2 cups heavy cream Substitute with coconut cream for a lighter version.
  • 1 cup milk Almond milk can be used as a dairy-free alternative.
  • 3 tablespoons Thai Tea Mix Using the Pantai brand ensures an authentic Thai tea taste.
  • 4 large egg yolks Ensure no whites are included for best results.
  • 1/2 cup sweetened condensed milk Feel free to swap it for a vegan condensed milk alternative.
For the Caramelized Topping
  • 1/4 cup granulated sugar No substitutes recommended for the best texture and flavor.

Equipment

  • Oven
  • Medium saucepan
  • Fine-mesh sieve
  • Heatproof bowl
  • ramekins
  • kitchen torch
  • deep dish pan

Method
 

Step‑by‑Step Instructions for Thai Tea Crème Brûlée
  1. Preheat your oven to 300°F (150°C) and prepare a water bath by filling a deep dish pan with hot water.
  2. In a medium saucepan, combine heavy cream, milk, and Thai tea mix, heating until it reaches a boil, then let it steep for 5-10 minutes.
  3. Strain the infused cream mixture through a fine mesh sieve into a large mixing bowl.
  4. In a separate heatproof bowl, whisk together the large egg yolks and sweetened condensed milk until smooth.
  5. Slowly drizzle the hot tea-infused cream into the yolk mixture while whisking gently.
  6. Divide the custard mixture evenly among the prepared ramekins and place them into the water bath.
  7. Bake for 25-30 minutes until the edges are set and the center jiggles slightly.
  8. Allow the ramekins to cool at room temperature for about 30 minutes, then refrigerate for at least 2 hours.
  9. Before serving, sprinkle an even layer of granulated sugar on top of each crème brûlée and caramelize with a kitchen torch.
  10. Let cool briefly before serving for a delightful dessert experience.

Nutrition

Serving: 1servingCalories: 280kcalCarbohydrates: 28gProtein: 5gFat: 16gSaturated Fat: 10gCholesterol: 210mgSodium: 70mgPotassium: 200mgSugar: 20gVitamin A: 500IUCalcium: 150mgIron: 1mg

Notes

Prepare the crème brûlée a day in advance for best flavors and texture. Store in an airtight container for up to 3 days without torching the sugar until ready to serve.

Tried this recipe?

Let us know how it was!

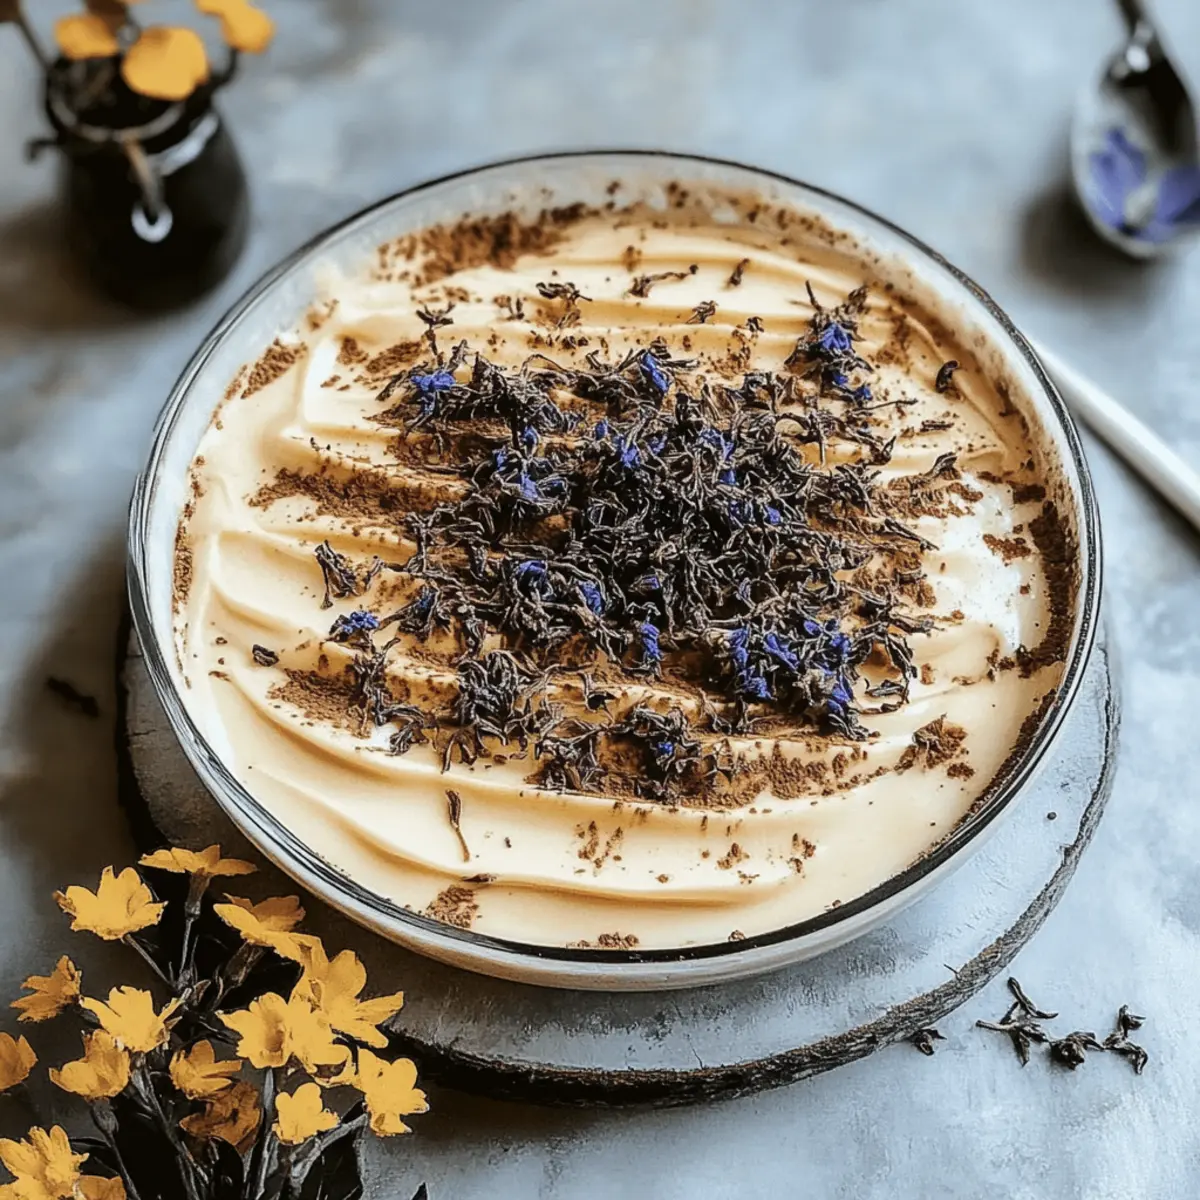
Earl Grey Tiramisu: An Elegant Twist on a Classic Favorite

January 12, 2026 by Grace Snow Leave a Comment

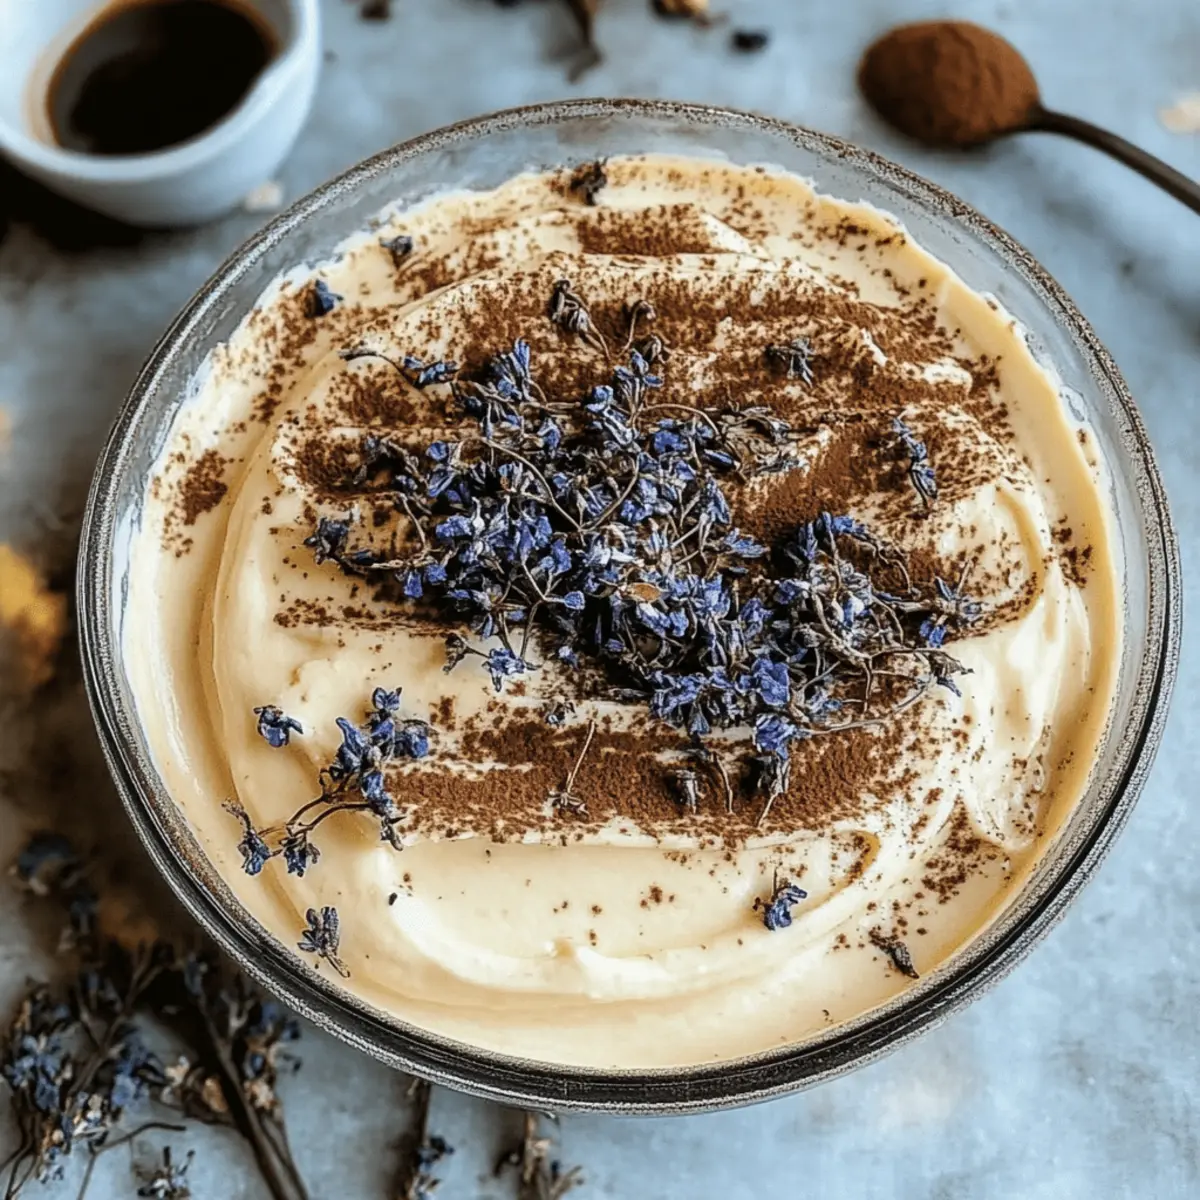
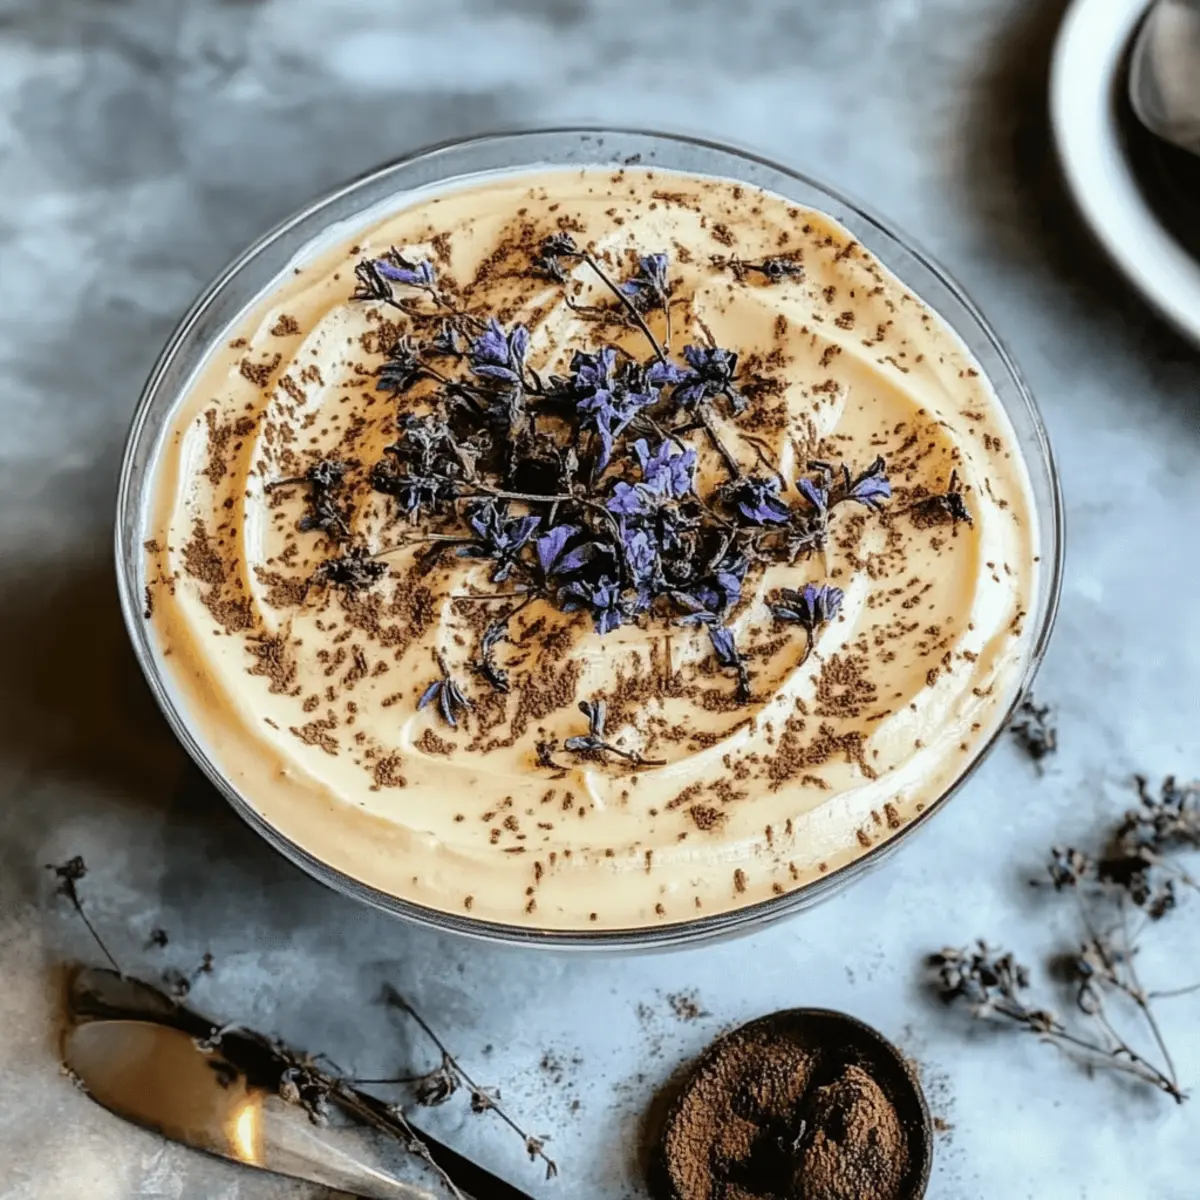
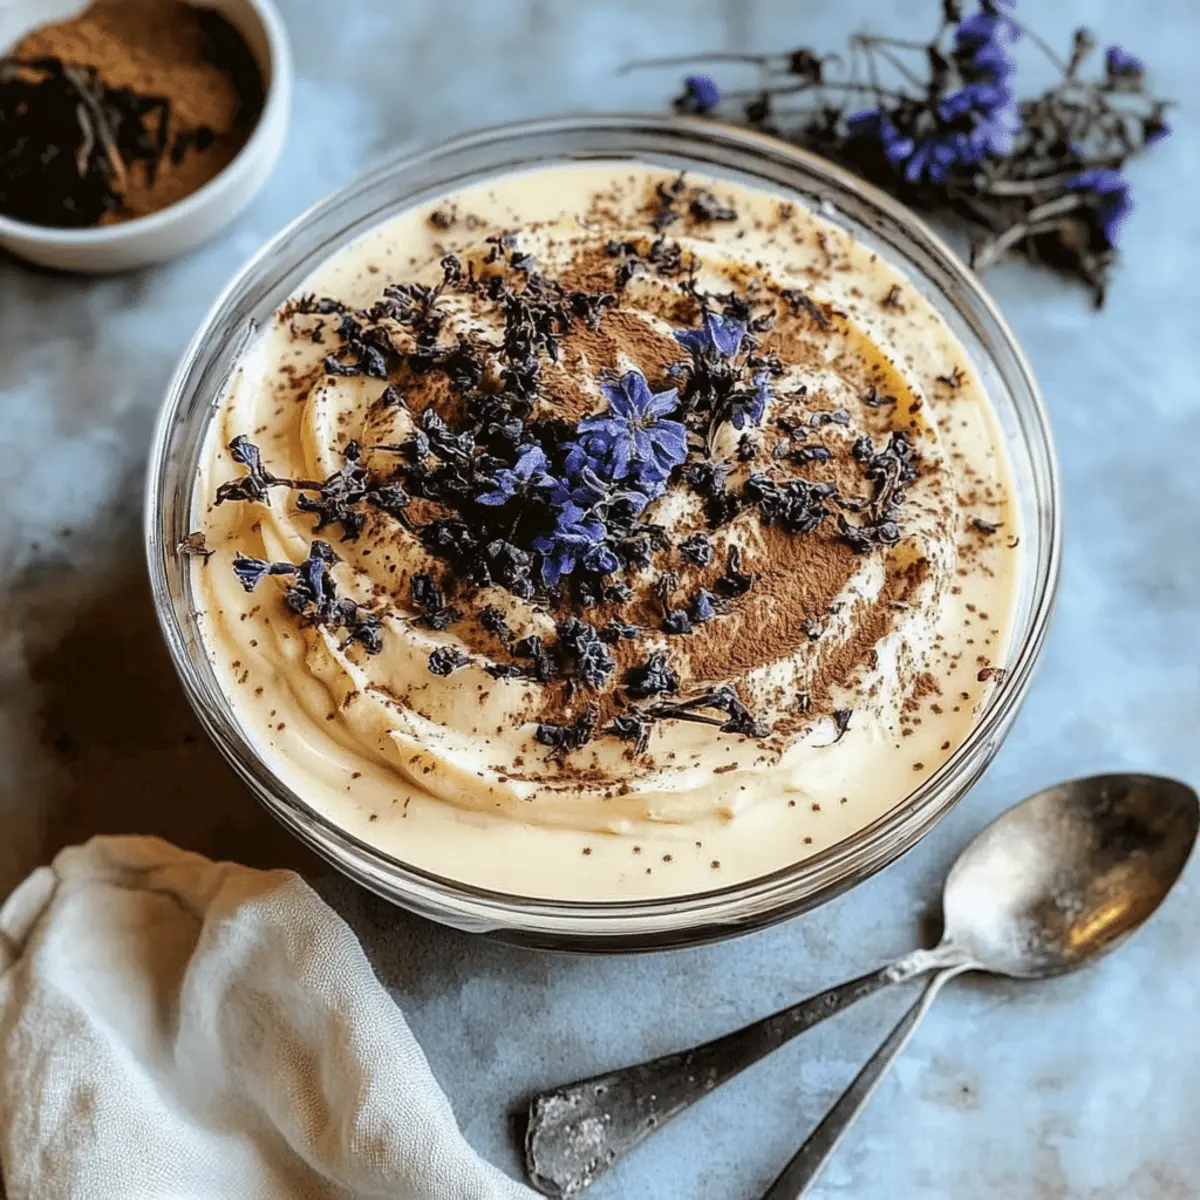
As I savored each spoonful of this elegant dessert, I couldn't help but appreciate how the classic tiramisu got a delightful makeover with the infusion of Earl Grey tea. The luscious mascarpone mingles perfectly with the fragrant notes of bergamot, transforming an already beloved treat into a sophisticated experience. This Earl Grey Tiramisu is not just a feast for the senses but also incredibly easy to prepare, making it the ideal sweet sensation for impressing guests at your next gathering. Plus, it can be made ahead of time, leaving you free to relax and enjoy the company of friends and family. Curious about how a simple twist can elevate your dessert game? Let’s dive in!

Why is Earl Grey Tiramisu unique?

Elegance in Every Bite: This recipe transforms traditional tiramisu into something truly special by introducing aromatic Earl Grey tea, adding rich floral and citrus notes.
Effortless Preparation: With straightforward steps and simple ingredients, you can easily impress your guests without spending hours in the kitchen.
Perfect for Any Occasion: Whether it’s a festive gathering or a cozy dinner party, this dessert's sophisticated flavor makes it a crowd-pleaser.
Make-Ahead Convenience: Prepare it in advance for a stress-free entertaining experience, allowing the flavors to meld beautifully overnight.
Endless Variations: Feel free to explore different tea flavors or garnishes to personalize your creation, ensuring each serving is uniquely yours.

Eager to elevate your dessert repertoire? Try pairing this delightful dish with chocolate shavings for an extra layer of indulgence!

Earl Grey Tiramisu Ingredients

For the Creamy Filling
• Mascarpone Cheese – Essential for the creamy filling; no direct substitutes recommended, but cream cheese can be used for a tangier taste.
• Egg Yolks – Provides stability and richness to the filling; can use egg substitutes if necessary for dietary restrictions, though the result may differ.
• Sugar – Adds sweetness; substitute with powdered sugar for a smoother blend in the cream.

For the Infused Base
• Earl Grey Tea – Provides the signature floral and citrus notes; use loose tea leaves or tea bags.
• Coffee – Offers moisture and flavor; standard brewed coffee can be substituted with decaf or flavored coffee if preferred.

For Layering
• Ladyfingers – Essential for structure; traditional sponge cake strips work best, though homemade savoiardi can also be made.

For the Finish
• Cocoa Powder – Adds a delightful chocolatey finish; Dutch-processed cocoa adds richness.

Explore the delightful world of Earl Grey Tiramisu and see how easy it is to elevate your dessert game!

Step‑by‑Step Instructions for Earl Grey Tiramisu

Step 1: Brew the Tea
Begin by brewing a strong cup of Earl Grey tea using about 1 cup of freshly boiled water and 2 tea bags or 2 teaspoons of loose tea leaves. Allow it to steep for 5 minutes for a robust flavor, then remove the tea bags or strain the leaves. Set the tea aside to cool completely before using it for layering.

Step 2: Prepare the Cream Mixture
In a mixing bowl, whisk together 4 egg yolks and ½ cup of granulated sugar until the mixture is pale and creamy, about 3 to 5 minutes. This will help create a rich filling for your Earl Grey Tiramisu. Gradually fold in 1 cup of mascarpone cheese until fully combined and smooth, ensuring there are no lumps.

Step 3: Set Up Dipping Stations
Next, prepare your dipping stations by separating the cooled coffee and the brewed Earl Grey tea into two shallow dishes. Use about 1 cup of brewed coffee for dipping. This method allows you to create distinct layers in your tiramisu, enhancing the unique flavors of the dessert as you assemble it.

Step 4: Dip the Ladyfingers
Take your ladyfingers and quickly dip each one, about 2 seconds per side, into the brewed coffee to avoid sogginess. Make sure not to let them soak too long as you want them to maintain some structure. Arrange the dipped ladyfingers in a single layer at the bottom of a glass dish or individual serving glasses, forming the base for your Earl Grey Tiramisu.

Step 5: Add the First Layer of Cream
Once the ladyfingers are laid out, spread half of the mascarpone mixture over the ladyfingers evenly. Use a spatula to smooth it out to the edges of your dish, creating a luscious layer. The creamy, velvety filling shall envelop the ladyfingers beautifully, asserting the classic tiramisu essence with a twist of Earl Grey.

Step 6: Layer Tea-Soaked Ladyfingers
Now, dip a second batch of ladyfingers quickly in the cooled Earl Grey tea and layer them over the mascarpone cream. Just as before, be careful not to soak them too long. This step introduces the fragrant floral notes of the Earl Grey, harmonizing perfectly with the other ingredients in your delightful dessert.

Step 7: Finish with Remaining Cream
Finally, spread the remaining mascarpone mixture over the tea-soaked ladyfingers. Again, smooth it out to cover the dessert evenly. This final touch completes the layering process, ensuring that every spoonful of your Earl Grey Tiramisu is rich and creamy, with a perfect balance of coffee and tea flavors.

Step 8: Chill to Set
Cover your dish with plastic wrap and place it in the refrigerator to chill for at least 4 hours, or ideally overnight. This chilling time is crucial as it allows the flavors of the Earl Grey Tiramisu to meld beautifully, resulting in a harmonious, sophisticated dessert that’s sure to impress.

Step 9: Dust with Cocoa Powder
Just before serving, gently remove the plastic wrap and dust the top of your chilled Earl Grey Tiramisu with cocoa powder using a fine sieve. This finishing touch adds an elegant, chocolatey aroma, complementing the creamy layers beneath. Serve chilled, either directly from the dish or in individual dessert glasses for a delightful presentation.

Make Ahead Options

Earl Grey Tiramisu is a fantastic dessert to prepare ahead of time, making it perfect for busy weeknights or special occasions! You can assemble the entire tiramisu and refrigerate it for up to 3 days before serving, allowing the flavors to meld beautifully. To maintain quality, be sure to cover the dish tightly with plastic wrap to prevent any absorption of odors. When you're ready to serve, simply dust the top with cocoa powder right before presentation to keep the finishing touch fresh. This way, you’ll have a luxurious dessert that tastes just as delicious as if it were made on the same day, saving you precious time for hosting!

Earl Grey Tiramisu Variations & Substitutions

Feel free to get creative with your Earl Grey Tiramisu and make it your own with these delightful twists!

  • Chai Infusion: Substitute Earl Grey with chai tea for a spicy, aromatic profile. Perfect for warming flavors on a chilly evening!
  • Matcha Layer: Replace the Earl Grey tea with matcha for a vibrant green dessert that adds an earthy tone to the sweetness. This unique swap can surprise and delight your guests.
  • Dairy-Free Delight: Use coconut cream instead of mascarpone for a decadent dairy-free option that brings a hint of tropical flavor. The creaminess remains intact, making every bite luscious!
  • Chocolate Twist: Fold in dark chocolate shavings into the mascarpone mixture for an indulgent chocolaty layer. It creates a beautiful richness and pairs wonderfully with the tea notes.
  • Citrus Zest: Add a teaspoon of lemon or orange zest into the mascarpone mix to brighten flavors and add freshness. The citrus lifts the dish beautifully, creating a lovely contrast.
  • Kahlua Kick: For coffee lovers, consider adding a splash of Kahlua to the coffee before dipping ladyfingers. The coffee liqueur enhances both the flavor and the indulgence of your dessert!
  • Nutty Crunch: Sprinkle some crushed pistachios or hazelnuts on top of the cocoa powder for an added crunch. This texture twist not only looks gorgeous but also elevates the tasting experience.
  • Fruity Finish: Garnish with fresh berries, like raspberries or strawberries, just before serving to add a vibrant splash of color and a tart contrast to the creamy layers.

So whether you opt for a coffee liqueur or a nutty crunch, let your creativity soar!

Storage Tips for Earl Grey Tiramisu

Fridge: Store your Earl Grey Tiramisu in an airtight container for up to 2 days to maintain its freshness and delightful flavors.

Freezer: If you need to store it for a longer period, you can freeze the tiramisu for up to 1 month. Wrap it tightly in plastic wrap and then in aluminum foil.

Reheating/Thawing: To enjoy, thaw in the refrigerator overnight. Avoid refreezing after thawing to maintain texture and flavor integrity.

Serving: Always serve chilled, and dust fresh cocoa powder on top just before serving to keep that beautiful presentation.

Expert Tips for Earl Grey Tiramisu

  • Avoid Soggy Layers: Dip ladyfingers quickly in coffee and tea for 2 seconds each side; too long can make them mushy, ruining the texture.

  • Chill for Flavor: Refrigerate the tiramisu for at least 4 hours—or overnight to enhance the flavors and allow the dessert to set beautifully.

  • Personalize It: Feel free to experiment! Try using different flavored teas, like chai or matcha, to add unique twists to your Earl Grey Tiramisu.

  • Layer Smoothly: When spreading the mascarpone mixture, use a spatula to create even layers; this ensures a lovely presentation and consistent flavor in every bite.

  • Use Quality Ingredients: Opt for high-quality mascarpone and fresh coffee for the best flavor; they make a significant difference in this sophisticated dessert.

What to Serve with Earl Grey Tiramisu?

Elevate your dessert experience by complementing the delightful layers of Earl Grey Tiramisu with these mouthwatering pairings.

  • Fresh Berries: Their natural tartness balances the sweet creaminess, adding a vibrant splash of color and freshness to your plate.
  • Whipped Cream: Light and airy, a dollop of freshly whipped cream enhances the richness of the tiramisu and adds a fluffy texture. Consider a lightly sweetened version to keep it simple.
  • Dark Chocolate Shavings: Sprinkle dark chocolate on top for an elegant touch that deepens flavors and adds a luscious bite. This flavor contrast harmonizes beautifully with the bergamot notes.
  • Mint Leaves: Fresh mint leaves provide a refreshing touch, cutting through the sweetness and adding a pop of color to your presentation.
  • Espresso: A strong shot of espresso is an excellent pairing, offering a bold flavor that complements the coffee layers in the tiramisu.
  • Almond Biscotti: Enjoying crunchy almond biscotti alongside your dessert can provide a pleasing textural contrast, perfect for dipping into the creamy layers.
  • Chai Tea: For those who want to maintain the tea theme, a warm cup of chai tea enhances the flavors of the tiramisu while adding a cozy vibe to your gathering.
  • Prosecco: A chilled glass of prosecco brings a celebratory feel and effervescence, creating a delightful experience for any occasion.
  • Vanilla Ice Cream: A scoop of creamy vanilla ice cream melting alongside the tiramisu enhances the dessert's luxurious feel, making every bite even more indulgent.

Earl Grey Tiramisu Recipe FAQs

What kind of Earl Grey tea should I use?
You can use either loose Earl Grey tea or tea bags, depending on your preference. Loose leaf tends to provide a fresher flavor, while tea bags are more convenient. Look for high-quality blends that highlight the bergamot for the best results.

How can I store leftover Earl Grey Tiramisu?
Store your Earl Grey Tiramisu in an airtight container in the refrigerator for up to 2 days. It's important to keep it sealed to preserve its luscious creaminess and prevent it from absorbing any odors from your fridge.

Can I freeze Earl Grey Tiramisu?
Absolutely! To freeze, wrap the tiramisu tightly in plastic wrap and then in aluminum foil. It can be frozen for up to 1 month. When you're ready to enjoy it, just thaw in the refrigerator overnight. This step is crucial to help maintain the dessert's delicate texture and flavors.

What if my ladyfingers become too soggy?
If your ladyfingers become soggy, it can negatively affect the texture of your tiramisu. To prevent this, dip them quickly—just 2 seconds per side in coffee and tea. Additionally, ensure your dips are cool; warm dips absorb more moisture quickly!

Is there a way to make Earl Grey Tiramisu suitable for vegans?
Yes! For a vegan version, you can replace the mascarpone with a coconut cream alternative or a cashew cream. Use chia eggs or flaxseed eggs as an alternative to the egg yolks, and ensure the ladyfingers you use are vegan-friendly. Each of these changes will slightly alter the taste and texture, but it will still be delicious!

What is the best way to serve Earl Grey Tiramisu?
Serve your Earl Grey Tiramisu chilled, ideally in elegant glasses or dessert dishes. Dust the top with cocoa powder just before serving to enhance presentation. You can also garnish with fresh mint or berries for a vibrant touch.

Earl Grey Tiramisu

Earl Grey Tiramisu: An Elegant Twist on a Classic Favorite

Discover the delightful Earl Grey Tiramisu, a sophisticated twist on the classic dessert that combines creamy mascarpone with fragrant bergamot.
Print Recipe Pin Recipe
Prep Time 30 minutes mins
Chill Time 4 hours hrs
Total Time 4 hours hrs 30 minutes mins
Servings: 8 slices
Course: Dessert
Cuisine: Italian
Calories: 250
Ingredients Equipment Method Nutrition Notes

Ingredients
  

For the Creamy Filling
  • 1 cup Mascarpone Cheese Essential for the creamy filling; no direct substitutes recommended, but cream cheese can be used for a tangier taste.
  • 4 large Egg Yolks Provides stability and richness to the filling; can use egg substitutes if necessary.
  • ½ cup Sugar Adds sweetness; substitute with powdered sugar for a smoother blend.
For the Infused Base
  • 2 teaspoons Earl Grey Tea Use loose tea leaves or tea bags.
  • 1 cup Brewed Coffee Can be substituted with decaf or flavored coffee.
For Layering
  • 24 pieces Ladyfingers Essential for structure; traditional sponge cake strips work best.
For the Finish
  • 2 tablespoons Cocoa Powder Adds a delightful chocolatey finish; Dutch-processed cocoa adds richness.

Equipment

  • Mixing Bowl
  • Whisk
  • Spatula
  • Shallow dish
  • fine sieve
  • Refrigerator

Method
 

Step-by-Step Instructions
  1. Brew a strong cup of Earl Grey tea using about 1 cup of freshly boiled water and 2 tea bags or 2 teaspoons of loose tea leaves. Allow it to steep for 5 minutes and then set aside to cool.
  2. In a mixing bowl, whisk together 4 egg yolks and ½ cup of sugar until the mixture is pale and creamy, then fold in 1 cup of mascarpone cheese until smooth.
  3. Prepare your dipping stations by separating the cooled coffee and brewed Earl Grey tea into two shallow dishes.
  4. Quickly dip each ladyfinger into the brewed coffee for about 2 seconds per side and arrange them in a single layer at the bottom of a glass dish.
  5. Spread half of the mascarpone mixture over the ladyfingers evenly using a spatula.
  6. Dip a second batch of ladyfingers quickly in the cooled Earl Grey tea and layer them over the mascarpone cream.
  7. Spread the remaining mascarpone mixture over the tea-soaked ladyfingers evenly.
  8. Cover the dish with plastic wrap and refrigerate for at least 4 hours or overnight.
  9. Dust the top of your chilled tiramisu with cocoa powder just before serving.

Nutrition

Serving: 1sliceCalories: 250kcalCarbohydrates: 30gProtein: 4gFat: 12gSaturated Fat: 7gPolyunsaturated Fat: 1gMonounsaturated Fat: 4gCholesterol: 150mgSodium: 50mgPotassium: 100mgSugar: 18gVitamin A: 500IUCalcium: 50mgIron: 0.5mg

Notes

Avoid soggy layers by dipping ladyfingers quickly; refrigerating enhances flavor. Experiment with different teas or garnishes for personalization.

Tried this recipe?

Let us know how it was!

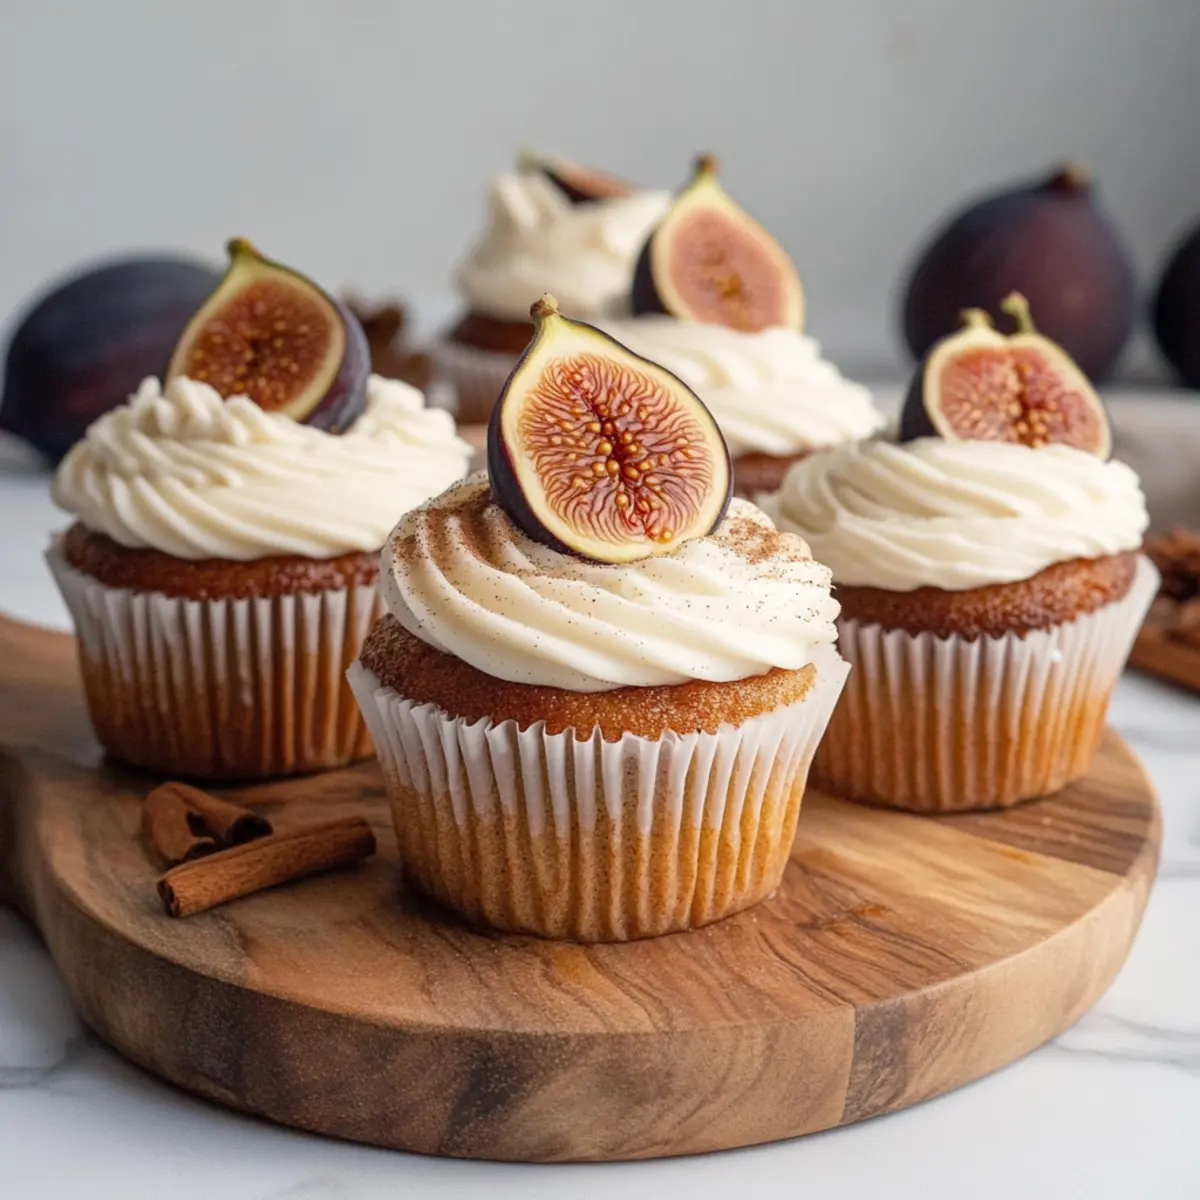
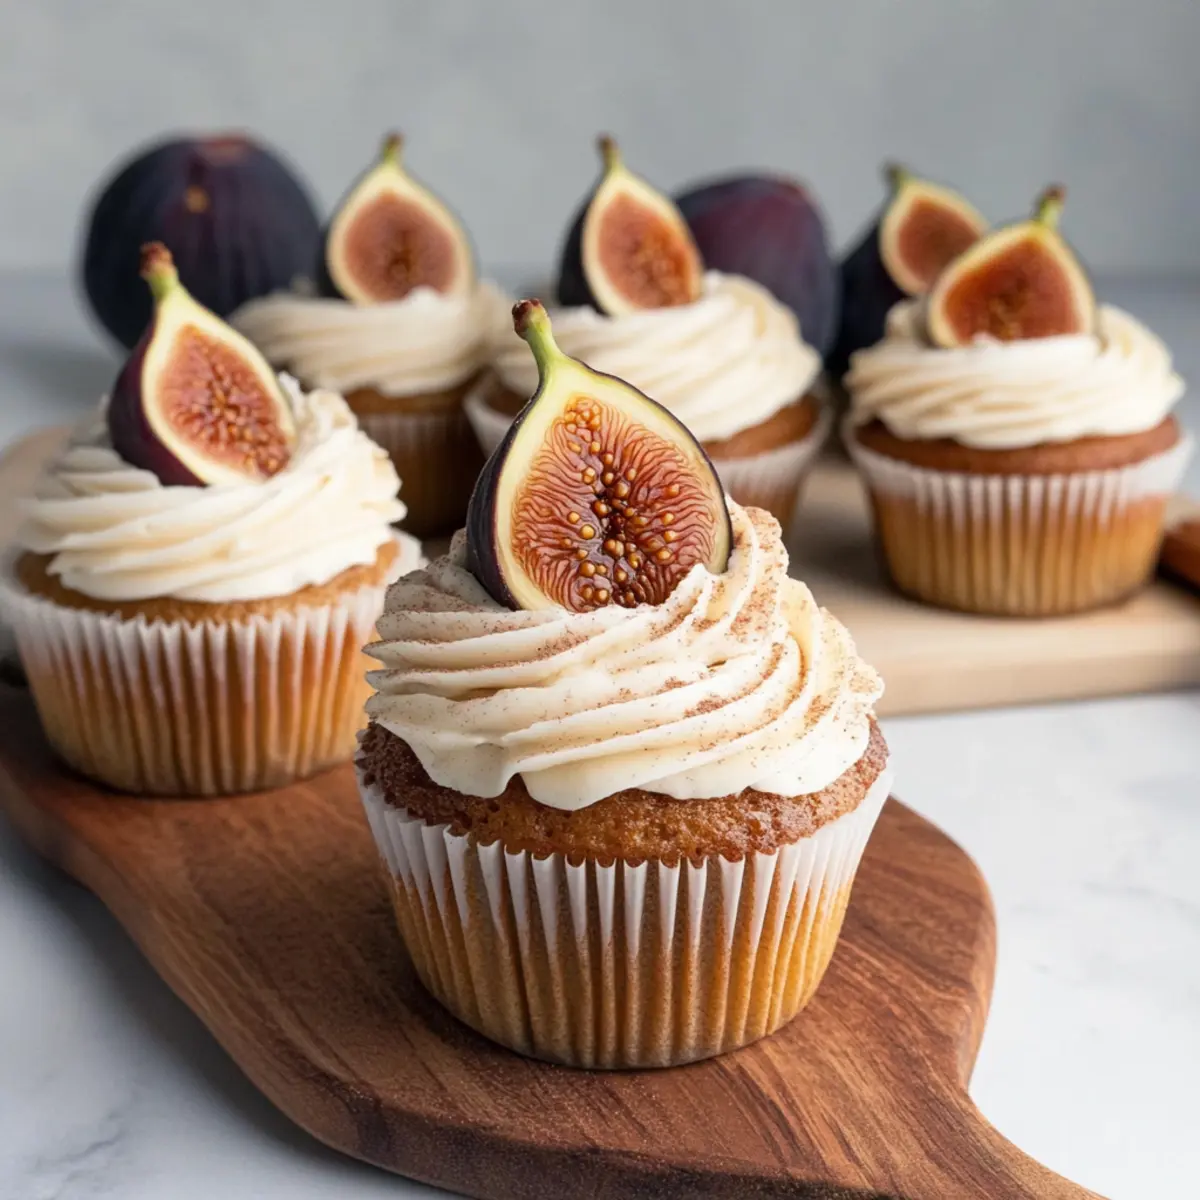
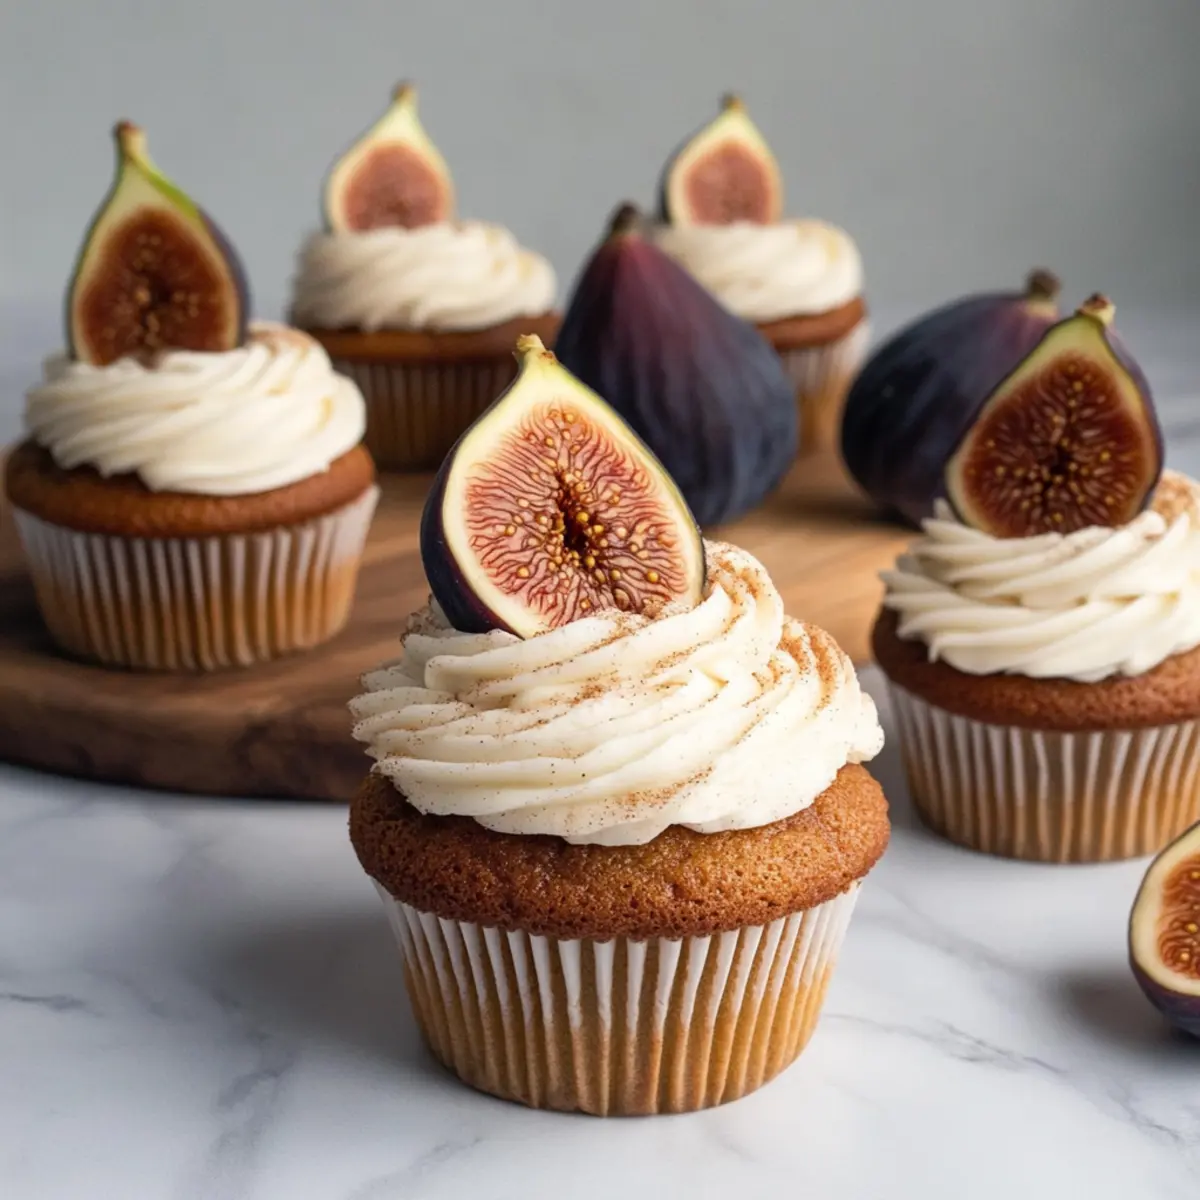
Delicious Fig Cupcakes with Honey Cream Cheese Frosting Treats

January 12, 2026 by Grace Snow Leave a Comment

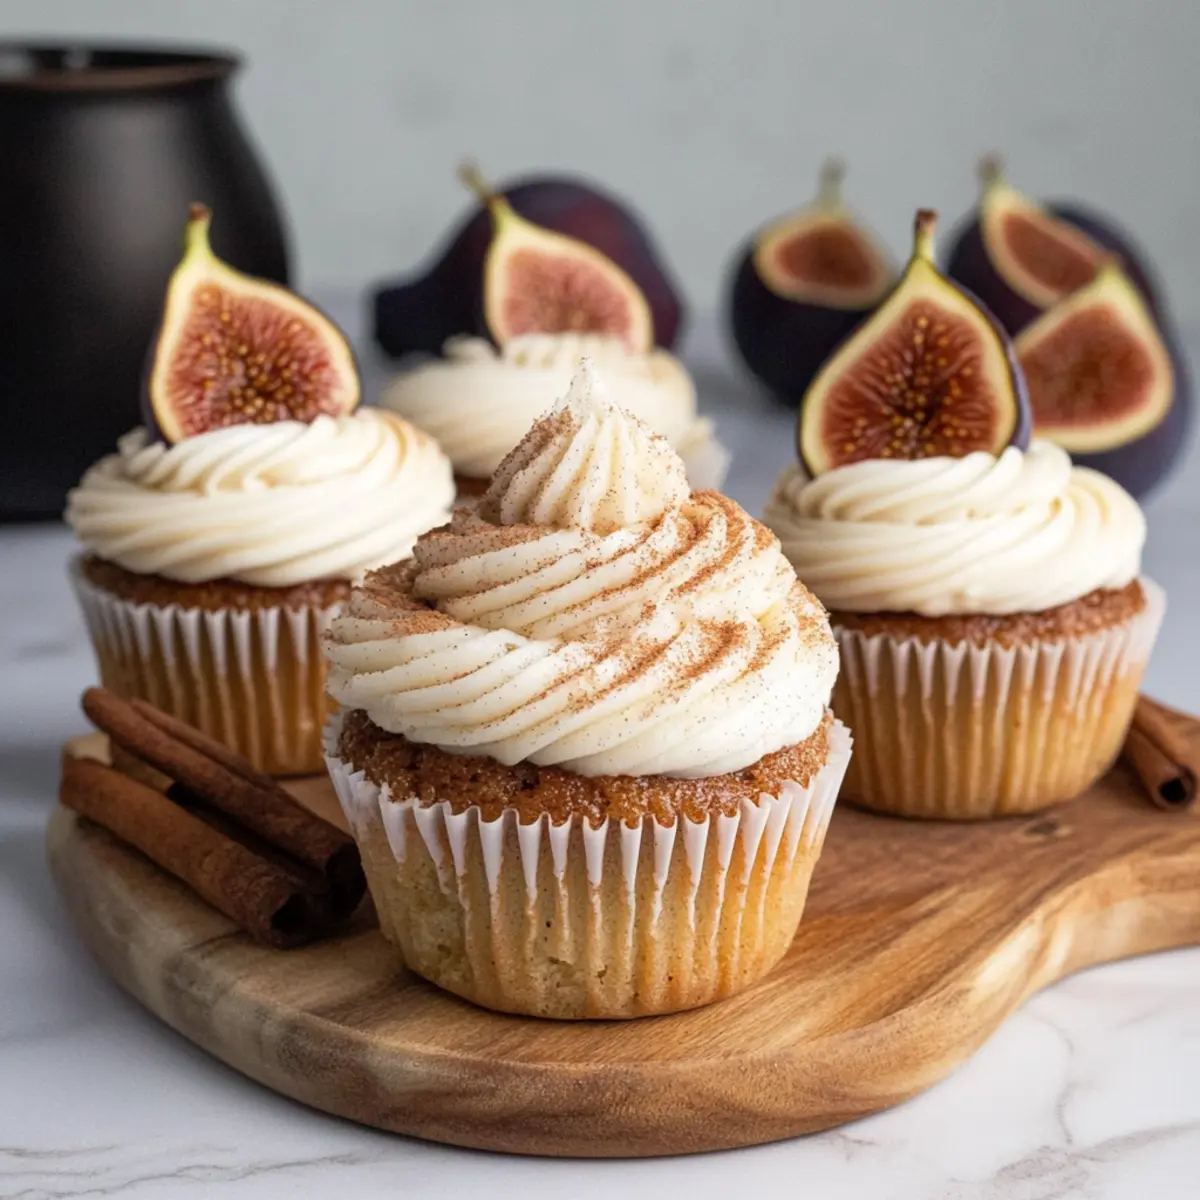
As I was enjoying a crisp autumn morning, the sweet scent of figs wafted through my kitchen, sparking an idea that would soon delight friends and family alike: Fig Cupcakes with Honey Cream Cheese Frosting. These little bites of joy beautifully blend fresh figs, warm spices, and a creamy frosting that will make your heart sing. What’s more, they offer a quick and easy way to impress at any gathering, turning even the simplest occasions into a festive celebration. With their moist, dense crumb reminiscent of a cozy carrot cake, these cupcakes are perfect for enjoying alongside a warm cup of coffee or tea. Curious how to recreate this fall favorite in your own home? Let’s dive into the recipe together!

Why Fig Cupcakes are a Must-Try?

Unique Combination: These Fig Cupcakes marry the rich sweetness of figs with warm spices, creating an unforgettable flavor profile.

Easy to Make: With simple ingredients and straightforward steps, this recipe is perfect for both novice and seasoned bakers.

Versatile Treat: Enjoy them as a dessert or snack; they pair delightful with coffee or tea, making them a versatile choice for any occasion.

Fall-Inspired Delight: Seasonal ingredients embrace the spirit of autumn, adding a festive touch to your gatherings.

Exquisite Frosting: The honey cream cheese frosting is not only luxurious but also perfectly balances the cupcake's sweetness.

Experiment more with fruit flavors using substitutions like apples or pears for a twist! These cupcakes are sure to be a crowd-pleaser, much like my Honey Garlic Chicken and Honey BBQ Chicken recipes.

Fig Cupcakes with Honey Cream Cheese Frosting Ingredients

• You'll be amazed at how easy these ingredients come together!

For the Cupcakes

  • All-Purpose Flour – Structure for the cupcakes; substitute with gluten-free flour for a gluten-free version.
  • Baking Soda – This leavening agent helps your cupcakes rise to fluffy perfection.
  • Ground Cinnamon – Adds warmth; try nutmeg for a different spice profile.
  • Ground Ginger – Complements the figs beautifully with a touch of spice.
  • Ground Cardamom – Enhances fall flavors; use extra cinnamon if needed.
  • Fine Sea Salt – Balances sweetness and elevates the flavors.
  • Large Eggs – Provides necessary moisture and binding; no substitute recommended for best results.
  • Granulated Sugar – Sweetness for your cupcakes; consider coconut sugar for a flavorful alternative.
  • Extra Virgin Olive Oil – Adds moisture and a delightful flavor; vegetable oil can work as a neutral substitute.
  • Sour Cream – Contributes to the moist crumb; Greek yogurt makes a great substitute.
  • Chopped Fresh Figs – The star of your cupcakes; dried figs can be a substitute, but fresh is best!
  • Fig Jam – Intensifies the fig flavor; feel free to swap with apple or apricot jam.
  • Old-Fashioned Oats or Chopped Walnuts – Offers texture and a delightful crunch; omit for a nut-free option.

For the Honey Cream Cheese Frosting

  • Unsalted Butter – Key for richness and body in your frosting.
  • Cream Cheese – The base providing tartness; full-fat is recommended for the best taste.
  • Honey – Adds sweetness and natural flavor to your frosting; use maple syrup for a vegan option.
  • Vanilla Extract – Enhances the sweetness of the frosting beautifully.
  • Confectioners’ Sugar – Sweetens and thickens the frosting for that perfect creamy consistency.

Embrace the baking magic of Fig Cupcakes with Honey Cream Cheese Frosting, and watch them disappear faster than you can say “fall favorite!”

Step‑by‑Step Instructions for Fig Cupcakes with Honey Cream Cheese Frosting

Step 1: Prepare the Batter
Begin by preheating your oven to 325°F (163°C) and lining a cupcake pan with liners. In a large mixing bowl, whisk together all-purpose flour, baking soda, ground cinnamon, ground ginger, ground cardamom, and fine sea salt until fully combined. In another bowl, beat the large eggs with granulated sugar for about 2-3 minutes until fluffy. Gradually add in the extra virgin olive oil and sour cream, mixing until smooth.

Step 2: Combine Ingredients
Carefully fold the dry ingredients into the wet mixture until just combined to avoid overmixing. Next, add chopped fresh figs, fig jam, and old-fashioned oats or chopped walnuts to the batter. Gently mix until the figs and oats are evenly distributed, creating a thick and hearty batter for your Fig Cupcakes.

Step 3: Bake the Cupcakes
Using an ice cream scoop or spoon, fill each cupcake liner about two-thirds full with the batter. Place the pan in the preheated oven and bake for 25 minutes. The cupcakes are done when they spring back to the touch and a toothpick inserted into the center comes out clean. Remove from the oven and let them cool in the pan for 10 minutes before transferring to a wire rack to cool completely.

Step 4: Make the Frosting
While the cupcakes cool, prepare the honey cream cheese frosting. In a medium bowl, beat room temperature unsalted butter and cream cheese together until the mixture is smooth and creamy. Gradually add in honey and vanilla extract, continuing to beat until fully incorporated. Sift in the confectioners’ sugar, blending until you achieve a thick and velvety frosting perfect for your Fig Cupcakes.

Step 5: Frost the Cupcakes
Once the cupcakes are completely cooled, use a spatula or piping bag to frost each cupcake generously with the honey cream cheese frosting. For an optional touch, sprinkle a bit of ground cinnamon on top and garnish with a slice of fresh fig, if desired. These beautifully frosted Fig Cupcakes with Honey Cream Cheese Frosting are now ready to be served!

Make Ahead Options

These Fig Cupcakes with Honey Cream Cheese Frosting are ideal for meal prep, allowing you to save time and impress your guests with minimal effort! You can prepare the cupcake batter up to 24 hours in advance by mixing the dry and wet ingredients separately; simply store them in the refrigerator to maintain freshness. Additionally, consider baking the cupcakes up to 3 days ahead of your event, then store them at room temperature in a loosely sealed container. For the frosting, make it a day prior and keep it in the fridge to ensure a creamy consistency. When you're ready to serve, just frost the cupcakes and enjoy delightful, moist treats with their original charm.

Expert Tips for Fig Cupcakes

  • Measure Flour Precisely: Accurate measurements prevent dry cupcakes; consider using a kitchen scale for consistent results.
  • Baking Timing: Monitor your cupcakes closely towards the end of baking; they can go from perfect to overdone quickly.
  • Cool Completely: Always frost your cupcakes once they are completely cooled to prevent melting and a messy outcome with the honey cream cheese frosting.
  • Frosting Consistency: If your frosting is too runny, add a bit more confectioners' sugar for thickness. Conversely, if too thick, soften with a splash of milk.
  • Flavor Variations: Explore substitutions like pears or apples to create new flavors, while keeping the essence of your delectable Fig Cupcakes.
  • Storage Rules: Store the frosted cupcakes in an airtight container in the fridge to maintain freshness and flavor for up to 4 days.

Fig Cupcakes with Honey Cream Cheese Frosting Variations

Feel free to tweak this recipe and create your own perfect version of these delightful cupcakes that will fill your kitchen with warmth and inviting aromas!

  • Fruit Swap: Replace chopped fresh figs with pears or apples for a fruity twist full of texture.

  • Gluten-Free Option: Use gluten-free flour in place of all-purpose flour to cater to gluten sensitivities while preserving the moist texture.

  • Sugar Alternative: For a richer flavor, substitute granulated sugar with coconut sugar, giving your cupcakes a hint of caramel essence.

  • Creamy Goodness: Swap out sour cream for Greek yogurt for a protein boost while maintaining the cupcakes' moisture and fluffiness.

  • Add Nuts: Feel free to incorporate chopped pecans or hazelnuts for a delightful crunch, enhancing both flavor and texture.

  • Flavor Boost: Mix in a pinch of nutmeg or extra cinnamon to elevate the warm spices and create a cozier feel in every bite.

  • Vegan Twist: For a delightful vegan alternative, use flax eggs in place of large eggs and switch to plant-based cream cheese and butter for the frosting.

  • Jam Substitute: Trade fig jam for apple or apricot jam if you're looking for a refreshing twist without losing that luscious sweetness.

Each variation brings its own flavor adventure, so don't hesitate to play with these options! You might even find a new favorite. Just like my beloved Cajeta Ice Cream or the delightful Ice Cream Cake, these cupcakes can surprise your taste buds and leave everyone asking for seconds!

What to Serve with Fig Cupcakes with Honey Cream Cheese Frosting

These delightful cupcakes are not just a treat on their own; they create a warm celebration of flavors that perfectly complements your autumn gatherings.

  • Creamy Mashed Potatoes: Smooth and buttery, they provide a comforting contrast to the sweet cupcakes, perfect for a cozy dinner gathering.

  • Spiced Apple Cider: The sweet and spiced notes of this drink add a charming seasonal touch that enhances the fig flavors beautifully.

  • Roasted Vegetables: A mix of seasonal veggies brings fresh earthiness to your table, balancing the sweetness of the cupcakes.

  • Greek Yogurt Parfait: Layered with fresh fruit and granola, this tart yet creamy side enriches the flavors and offers a refreshing contrast.

  • Honey-Glazed Carrots: Sweet and savory, these carrots echo the sweetness of the cupcakes, making them a harmonious addition to your meal.

  • Chai Tea: The warm spices in chai complement the flavors of your cupcakes, creating a comforting pairing that's hard to resist.

Imagine enjoying these cupcakes alongside a warm cup of spiced tea or cider, wrapping you in the cozy embrace of fall flavors.

Storage Tips for Fig Cupcakes with Honey Cream Cheese Frosting

  • Room Temperature: Unfrosted cupcakes can be stored at room temperature in a loosely sealed container for up to 4 days, allowing the flavors to deepen while keeping them fresh.

  • Fridge: Store frosted cupcakes in an airtight container in the fridge for up to 4 days; let them sit at room temperature for 15-20 minutes before serving to enhance the frosting's creamy texture.

  • Freezer: Unfrosted cupcakes can be frozen for up to 2 months; freeze them in an airtight container or wrap them tightly in plastic wrap, then thaw completely before frosting to recreate the fresh taste of your Fig Cupcakes.

Fig Cupcakes with Honey Cream Cheese Frosting Recipe FAQs

How do I choose the best figs for these cupcakes?
Absolutely! When selecting figs, look for ones that are plump, firm, and slightly yielding to the touch, with a rich purple or green color. Avoid figs with dark spots or wrinkles, as these are signs of overripeness. Fresh figs should have a sweet aroma and should not be overly soft or mushy. If fresh figs are out of season, dried figs can be used as a substitute, though they will offer a different texture.

How should I store my frosted Fig Cupcakes?
Great question! Frosted cupcakes should be stored in an airtight container in the fridge to maintain their freshness for up to 4 days. Let them sit at room temperature for about 15-20 minutes before serving to allow the frosting to soften and come into its delicious creamy texture. Unfrosted cupcakes can be stored at room temperature in a loosely sealed container for the same duration.

Can I freeze the Fig Cupcakes?
Yes, you can! To freeze unfrosted Fig Cupcakes, place them in an airtight container or wrap them tightly in plastic wrap. They can be stored in the freezer for up to 2 months. When ready to enjoy, simply thaw them in the fridge overnight before frosting them. This way, you retain all that delightful flavor and moisture!

What should I do if my frosting is too runny?
No worries! If you find your honey cream cheese frosting is too runny, try adding more confectioners' sugar, a little at a time, until you reach the desired consistency. Alternatively, chill the frosting in the fridge for about 15-20 minutes; this can help thicken it up. If it’s too thick, a splash of milk will soften it just right for easy spreading.

Are these cupcakes suitable for those with nut allergies?
Very! To make your Fig Cupcakes nut-free, you can simply omit the chopped walnuts or substitute them with old-fashioned oats to maintain texture. Ensure that all your other ingredients, especially any jams or spreads, are free from cross-contamination with nuts. Always check labels for any hidden allergens just to be safe.

Can I make these cupcakes vegan?
Absolutely! For a vegan version of Fig Cupcakes with Honey Cream Cheese Frosting, substitute eggs with flax eggs (1 tablespoon of ground flaxseed mixed with 3 tablespoons of water equals one egg) and use plant-based butter and cream cheese for the frosting. Additionally, replace honey with maple syrup for a delicious, vegan-friendly twist!

Fig Cupcakes with Honey Cream Cheese Frosting

Delicious Fig Cupcakes with Honey Cream Cheese Frosting Treats

Enjoy delicious Fig Cupcakes with Honey Cream Cheese Frosting, a delightful blend of flavors perfect for any occasion.
Print Recipe Pin Recipe
Prep Time 25 minutes mins
Cook Time 25 minutes mins
Cooling Time 10 minutes mins
Total Time 1 hour hr
Servings: 12 cupcakes
Course: Dessert
Cuisine: American
Calories: 250
Ingredients Equipment Method Nutrition Notes

Ingredients
  

For the Cupcakes
  • 1 cup All-Purpose Flour Substitute with gluten-free flour for a gluten-free version.
  • 1 tsp Baking Soda This leavening agent helps your cupcakes rise to fluffy perfection.
  • 1 tsp Ground Cinnamon Adds warmth; try nutmeg for a different spice profile.
  • 1 tsp Ground Ginger Complements the figs beautifully with a touch of spice.
  • 1/2 tsp Ground Cardamom Enhances fall flavors; use extra cinnamon if needed.
  • 1/2 tsp Fine Sea Salt Balances sweetness and elevates the flavors.
  • 2 large Large Eggs Provides necessary moisture and binding; no substitute recommended for best results.
  • 1 cup Granulated Sugar Sweetness for your cupcakes; consider coconut sugar for a flavorful alternative.
  • 1/2 cup Extra Virgin Olive Oil Adds moisture and a delightful flavor; vegetable oil can work as a neutral substitute.
  • 1/2 cup Sour Cream Contributes to the moist crumb; Greek yogurt makes a great substitute.
  • 1 cup Chopped Fresh Figs The star of your cupcakes; dried figs can be a substitute, but fresh is best!
  • 1/4 cup Fig Jam Intensifies the fig flavor; feel free to swap with apple or apricot jam.
  • 1/2 cup Old-Fashioned Oats or Chopped Walnuts Offers texture and a delightful crunch; omit for a nut-free option.
For the Honey Cream Cheese Frosting
  • 1/2 cup Unsalted Butter Key for richness and body in your frosting.
  • 8 oz Cream Cheese The base providing tartness; full-fat is recommended for the best taste.
  • 1/4 cup Honey Adds sweetness and natural flavor to your frosting; use maple syrup for a vegan option.
  • 1 tsp Vanilla Extract Enhances the sweetness of the frosting beautifully.
  • 2 cups Confectioners’ Sugar Sweetens and thickens the frosting for that perfect creamy consistency.

Equipment

  • Cupcake pan
  • Mixing bowls
  • Whisk
  • Spatula
  • piping bag

Method
 

Step-by-Step Instructions
  1. Preheat your oven to 325°F (163°C) and line a cupcake pan with liners.
  2. In a large mixing bowl, whisk together all-purpose flour, baking soda, ground cinnamon, ground ginger, ground cardamom, and fine sea salt until fully combined.
  3. In another bowl, beat the large eggs with granulated sugar for about 2-3 minutes until fluffy.
  4. Gradually add in the extra virgin olive oil and sour cream, mixing until smooth.
  5. Carefully fold the dry ingredients into the wet mixture until just combined to avoid overmixing.
  6. Next, add chopped fresh figs, fig jam, and old-fashioned oats or chopped walnuts to the batter. Gently mix until evenly distributed.
  7. Fill each cupcake liner about two-thirds full with the batter and bake for 25 minutes.
  8. Allow the cupcakes to cool in the pan for 10 minutes before transferring to a wire rack.
  9. For the frosting, beat unsalted butter and cream cheese until smooth and creamy.
  10. Gradually add honey and vanilla extract, continuing to beat until fully incorporated.
  11. Sift in confectioners’ sugar, blending until you achieve a thick and velvety frosting.
  12. Frost each cupcake generously with the honey cream cheese frosting.

Nutrition

Serving: 1cupcakeCalories: 250kcalCarbohydrates: 35gProtein: 3gFat: 12gSaturated Fat: 6gPolyunsaturated Fat: 1gMonounsaturated Fat: 5gCholesterol: 40mgSodium: 200mgPotassium: 150mgFiber: 1gSugar: 18gVitamin A: 500IUCalcium: 50mgIron: 1mg

Notes

Store frosted cupcakes in an airtight container in the fridge for up to 4 days. Unfrosted cupcakes can be stored at room temperature for up to 4 days.

Tried this recipe?

Let us know how it was!

Delicious Raspberry Brownie Date Bites for Guilt-Free Indulgence

January 12, 2026 by Grace Snow Leave a Comment

There’s something magical about the combination of chocolate and fruit, especially when it comes in bite-sized form. Meet my No-Bake Raspberry Brownie Date Bites—the perfect little indulgence for anyone looking to ditch the fast food routine without sacrificing that sweet tooth! These delightful snacks are not only gluten-free and vegan, but they’re also incredibly easy to whip up, requiring no baking at all. Who wouldn’t love a delicious fix that’s both healthy and satisfying? With the natural sweetness of medjool dates and a rich brownie texture complemented by a burst of tart raspberry, these treats are sure to impress at any gathering or provide a wholesome snack on-the-go. Curious about how to make these irresistible bites yourself? Let’s dive into the recipe!

Why Will You Love Raspberry Brownie Date Bites?

Irresistible Convenience: No baking means you can whip these up effortlessly—perfect for busy lifestyles!
Guilt-Free Indulgence: With gluten-free and vegan ingredients, you can enjoy a sweet treat without the guilt.
Bursting with Flavor: The combination of rich chocolate and tangy raspberry tantalizes your taste buds in every bite.
Versatile Delights: Feel free to experiment with different jams or nut butters to make these bites your own.
Perfectly Portable: Ideal for on-the-go snacking or a delightful addition to your dessert table, these bites are sure to impress! Plus, if you're a fan of indulgent yet healthy snacks, you might also enjoy our Pumpkin Brownies Decadent for another delicious fix!

Raspberry Brownie Date Bites Ingredients

Here’s everything you need to make these delightful, guilt-free snacks!

For the Raspberry Jam

  • Frozen raspberries – A tangy base for the jam; if fresh are available, feel free to use those!
  • Chia seeds – These tiny seeds help thicken the jam while adding a boost of healthy omega-3s.
  • Water – Necessary for cooking the chia seeds into a lovely jam consistency.
  • Arrowroot powder – Gives the raspberry jam a glossy finish; you can use cornstarch as a substitute if needed.

For the Brownie Mixture

  • Medjool dates – Sweet, chewy, and free of refined sugar; ensure they’re pitted for smooth blending!
  • Cocoa powder – Choose unsweetened for rich brownie flavor—it's the star of this treat!
  • Maple syrup – A natural sweetener perfect for balancing flavors; adjust based on your desired sweetness level.
  • Runny nut butter (e.g., almond butter) – Adds creaminess and binds everything together; swap with sunbutter for a nut-free option.
  • Oat flour – Provides the structure needed for the brownies; use store-bought gluten-free flour for convenience.
  • Almond milk – Acts as a liquid to bring the batter together; any plant-based milk will work beautifully.
  • Vanilla extract – Enhances all the flavors in your brownie mix.
  • Chocolate chips – High-quality chips like Pascha deliver an extra layer of chocolatey goodness.
  • Coconut oil – Offers richness to the chocolate layer; you can skip it if you're looking for a lighter version.

These Raspberry Brownie Date Bites are sure to be a hit with family and friends, making them the perfect healthy treat for any occasion!

Step‑by‑Step Instructions for Raspberry Brownie Date Bites

Step 1: Prepare Raspberry Jam
In a saucepan, combine 1 cup of frozen raspberries, 2 tablespoons of water, and 1 tablespoon of chia seeds. Cook over low heat for about 10-15 minutes, stirring frequently, until the mixture thickens and becomes syrupy. Once the jam has reached a desired consistency, stir in 1 tablespoon of arrowroot powder to give it a glossy finish. Set aside to cool while you prepare the brownie layer.

Step 2: Make Brownie Mixture
In a mixing bowl, combine 1 cup of cocoa powder, 1 cup of oat flour, 1/4 cup of maple syrup, 1/2 cup of runny nut butter (like almond butter), 1/4 cup of almond milk, and 1 teaspoon of vanilla extract. Mix well until you achieve a smooth and thick brownie batter. The consistency should be creamy and easily spreadable. This rich brownie mixture will serve as the base for your Raspberry Brownie Date Bites.

Step 3: Form Bites
To create the bites, you can either use a silicone mold or roll the brownie mixture into small balls. For the base, flatten each medjool date slightly to form a sturdy platform. Make sure your dates are soft and moist for the best texture. This layering will ensure a delightful combination of flavors in your Raspberry Brownie Date Bites.

Step 4: Assemble
Place a brownie bite on top of each flattened medjool date. Use a spoon to add a dollop of your raspberry jam over each brownie bite, allowing the vibrant color and flavor to shine through. The combination of chocolate and raspberry should be visually enticing. Assemble the bites on a tray or cutting board, ready for chilling.

Step 5: Chill
Transfer the assembled Raspberry Brownie Date Bites to the freezer and let them chill for about 1 hour. This will help them firm up and hold their shape. After an hour, you can either enjoy them right away or store them in the fridge in an airtight container for up to one week. The chilling process ensures that all flavors meld beautifully while also providing a satisfying texture.

Expert Tips for Raspberry Brownie Date Bites

  • Silicone Mold Best: Using a silicone mold helps create perfectly shaped bites that are easy to pop out; rolling them by hand works too, but requires a bit more care.

  • Chill Enough: Allow sufficient time for the bites to chill in the freezer; this ensures they hold their shape and prevents the chocolate layer from melting.

  • Choose Ripe Dates: Opt for soft and moist medjool dates for the ideal texture; dry dates can result in a crumbly mixture that doesn’t stick well.

  • Adjust Sweetness: Taste your brownie mixture and adjust the maple syrup to your preference; sometimes the cocoa powder can be quite bitter.

  • Experiment Freely: Don’t hesitate to try different jam flavors or nut butters to create unique variations of these Raspberry Brownie Date Bites that suit your taste!

How to Store and Freeze Raspberry Brownie Date Bites

Fridge: Store your Raspberry Brownie Date Bites in an airtight container in the fridge for up to 1 week, keeping them fresh and easy to grab for a healthy snack.

Freezer: For longer storage, freeze the bites in a single layer on a baking sheet for 1 hour, then transfer them to a freezer-safe container. They’ll keep well for up to 3 months.

Thawing: To enjoy frozen bites, simply remove them from the freezer and let them sit at room temperature for about 15-20 minutes before serving.

Reheating: These no-bake bites are best enjoyed chilled, but if you prefer them warm, gently microwave for 10-15 seconds—just enough to soften, not melt!

What to Serve with Raspberry Brownie Date Bites

These dreamy treats are delightful on their own, but pairing them with a few sides can elevate your snacking experience!

  • Creamy Coconut Yogurt: Its silky texture and subtle sweetness balance the chewy and chocolaty bites, making every mouthful a treat.
  • Fresh Berries Salad: A medley of seasonal berries adds brightness and a burst of flavor, perfectly complementing the rich chocolate and tart raspberry.
  • Nutty Granola: Crunchy granola brings a satisfying crunch that contrasts beautifully with the soft, fudgy bites while adding wholesome texture.
  • Mint Tea: The refreshing notes of mint tea cleanse the palate, providing a light and aromatic contrast to the sweetness of the bites.
  • Dark Chocolate Dip: For the ultimate indulgence, a warm chocolate dip offers an extra layer of luxury that chocolate lovers will adore.
  • Almond Milk Smoothie: A creamy almond milk smoothie spiked with banana or spinach makes a nutritious accompany that fits perfectly in this healthy snack scenario.
  • Coconut Chia Pudding: This light and nutritious pudding offers a creamy texture and hints of coconut, enhancing the tropical vibes of your dessert table.
  • Matcha Latte: The earthy flavor profile of a matcha latte provides a unique twist and caffeine kick, making this a delightful pairing for a cozy snack time.

Make Ahead Options

These delightful Raspberry Brownie Date Bites are ideal for meal prep enthusiasts! You can prepare the raspberry jam up to 3 days in advance; just store it in an airtight container in the refrigerator to retain its vibrant flavor and consistency. Additionally, the brownie mixture can be made 24 hours ahead; simply keep it covered in the fridge to maintain its creamy texture. When you’re ready to serve, just assemble the bites and chill them for about 1 hour to firm up. This way, you’ll have a quick and healthy snack on hand that’s just as delicious as if you made it fresh!

Raspberry Brownie Date Bites Variations

Feel free to make these delightful bites your own with these easy swaps and tweaks!

  • Berry Bliss: Swap frozen raspberries with blueberries or strawberries to create a fruity twist. Each bite will surprise your taste buds with something different!

  • Nut-Free Joy: Use sunbutter or pumpkin seed butter instead of nut butter to keep it nut-free. This option ensures that everyone can indulge without worry.

  • Extra Crunch: Toss in some chopped nuts or seeds like almonds or pumpkin seeds into the brownie mixture. This not only adds a delightful crunch but also elevates the texture!

  • Flavor Explosion: Replace cocoa powder with a mix of cocoa and espresso powder for a rich mocha flavor. Coffee lovers will appreciate this energizing twist!

  • Sweet Heat: Add a dash of cayenne pepper or chili powder to the brownie mix for a surprising kick. The heat complements the chocolate beautifully!

  • Jam Variety: Don’t just limit yourself to raspberry jam—try using cherry or apricot preserves for a unique flavor profile. Each fruit brings its own charm!

  • Decadent Chocolate: Mix in some dark chocolate chunks or fudge sauce for an even richer experience. Who can resist an extra layer of chocolate?

  • Coconut Lovers: Incorporate shredded coconut into the brownie mix or sprinkle on top for a tropical twist. It adds a hint of sweetness and extra texture!

These Raspberry Brownie Date Bites are so versatile! If you’d like to explore other delicious treats, you might also want to check out our Pumpkin Brownies Decadent or think about using various jams for an exciting variation. Enjoy crafting your perfect bite!

Raspberry Brownie Date Bites Recipe FAQs

How do I choose the right medjool dates?
Absolutely! When selecting medjool dates, look for ones that are plump, soft, and not dried out. They should feel slightly sticky and have a rich, caramel-like aroma. Avoid dates with dark spots or any that feel hard, as this can indicate they’re past their prime.

What’s the best way to store these bites?
Very! Store your Raspberry Brownie Date Bites in an airtight container in the fridge for up to 1 week. If you're looking to keep them longer, they can be frozen for up to 3 months. Make sure to separate layers with parchment paper to prevent sticking!

Can I freeze Raspberry Brownie Date Bites?
Absolutely! To freeze, arrange the assembled bites in a single layer on a baking sheet for about an hour until firm. After that, transfer them to a freezer-safe container with layers separated by parchment paper. When you’re ready to enjoy, let them thaw at room temperature for 15-20 minutes.

Why do my bites crumble or fall apart?
Very! If your Raspberry Brownie Date Bites are crumbling, it could be due to dry medjool dates or not enough binding ingredients in the brownie mixture. Make sure your dates are soft and adjust the amount of nut butter or maple syrup to achieve the right consistency. If you notice your mixture is too dry, adding a splash more almond milk can help bind it better.

Are there any allergy considerations for these bites?
Absolutely! These bites are naturally gluten-free and vegan, but if you’re concerned about nut allergies, you can swap out almond butter for seed butter like sunbutter. Always check the labels of your ingredients to ensure they are free of allergens. Also, be mindful if serving to kids or pets; while healthy, chocolate can be harmful to dogs, so keep those treats safely out of reach!

What if I want to use fresh raspberries instead of frozen?
Very! If you prefer fresh raspberries for your jam, that's perfectly fine! Simply replace the frozen raspberries with an equal amount of fresh ones, but be prepared for a slightly different texture. You may need to add a bit more chia seeds to achieve the desired thickness. Cook them on low heat for about 5-10 minutes instead to reach the right consistency for your delicious Raspberry Brownie Date Bites.

Raspberry Brownie Date Bites

Delicious Raspberry Brownie Date Bites for Guilt-Free Indulgence

Indulge in these Raspberry Brownie Date Bites, a delicious and guilt-free treat combining rich chocolate and tangy raspberry.
Print Recipe Pin Recipe
Prep Time 15 minutes mins
Cook Time 15 minutes mins
Chilling Time 1 hour hr
Total Time 1 hour hr 30 minutes mins
Servings: 12 bites
Course: Dessert
Cuisine: Vegan
Calories: 150
Ingredients Equipment Method Nutrition Notes

Ingredients
  

Raspberry Jam
  • 1 cup Frozen raspberries Fresh can also be used if available.
  • 2 tablespoons Water
  • 1 tablespoon Chia seeds
  • 1 tablespoon Arrowroot powder Cornstarch can be used as a substitute.
Brownie Mixture
  • 1 cup Medjool dates Ensure they are pitted.
  • 1 cup Cocoa powder Use unsweetened.
  • 1/4 cup Maple syrup Adjust based on desired sweetness.
  • 1/2 cup Runny nut butter (e.g., almond butter) Can use sunbutter for nut-free option.
  • 1/4 cup Oat flour Use gluten-free flour if necessary.
  • 1/4 cup Almond milk Any plant-based milk works.
  • 1 teaspoon Vanilla extract
  • 1/2 cup Chocolate chips High-quality recommended.
  • 2 tablespoons Coconut oil Optional for a lighter version.

Equipment

  • Saucepan
  • Mixing Bowl
  • Silicone Mold

Method
 

Preparation Steps
  1. In a saucepan, combine 1 cup of frozen raspberries, 2 tablespoons of water, and 1 tablespoon of chia seeds. Cook over low heat for about 10-15 minutes, stirring frequently, until the mixture thickens and becomes syrupy. Stir in 1 tablespoon of arrowroot powder to give it a glossy finish. Set aside to cool.
  2. In a mixing bowl, combine 1 cup of cocoa powder, 1 cup of oat flour, 1/4 cup of maple syrup, 1/2 cup of runny nut butter, 1/4 cup of almond milk, and 1 teaspoon of vanilla extract. Mix until smooth and thick.
  3. Flatten each medjool date slightly to create a base. Use a silicone mold or roll the brownie mixture into small balls.
  4. Place brownie bite on top of each flattened medjool date and top with a dollop of raspberry jam. Assemble on a tray.
  5. Transfer to the freezer for about 1 hour. Enjoy immediately or store in the fridge for up to one week.

Nutrition

Serving: 1biteCalories: 150kcalCarbohydrates: 20gProtein: 2gFat: 7gSaturated Fat: 2gPolyunsaturated Fat: 2gMonounsaturated Fat: 2gSodium: 5mgPotassium: 150mgFiber: 4gSugar: 8gVitamin C: 5mgCalcium: 2mgIron: 5mg

Notes

Using a silicone mold ensures perfectly shaped bites. Allow sufficient time to chill for the best texture.

Tried this recipe?

Let us know how it was!

Irresistible Red Velvet Oreo Cheesecake Recipe to Delight You

January 11, 2026 by Grace Snow Leave a Comment

As I sifted through my pantry on a rainy afternoon, the idea for a Red Velvet Oreo Cheesecake struck me like a lightning bolt. Combining the timeless allure of red velvet with creamy cheesecake and that signature Oreo crunch felt like an invitation to a delicious adventure. This stunning dessert isn't just about eye-catching layers; it brings a delightful balance of textures and flavors that's sure to impress your friends and family. The best part? It’s surprisingly easy to make and requires minimal prep time. Whether you’re celebrating a special occasion or just in need of a sweet treat, this Red Velvet Oreo Cheesecake Recipe is your go-to solution for all things indulgent. So, are you ready to dive into this creamy, dreamy creation? Let’s get started!

Why is This Cheesecake So Irresistible?

Decadent Layers: Each bite melds together the rich red velvet cake, creamy cheesecake, and crunchy Oreo crust for an indulgence that delights your senses.
Easy Preparation: With straightforward steps, this Red Velvet Oreo Cheesecake makes for a perfect weekend baking project that anyone can master!
Showstopper Appeal: Its vibrant colors and stunning presentation will wow your guests, making it ideal for celebrations or special occasions.
Versatile Options: Feel free to switch up the crust or use natural beetroot powder for a twist on the classic recipe.
Make-Ahead Magic: Prepare this cheesecake one or two days in advance; its flavors only deepen, giving you a delicious treat ready to impress at a moment's notice!

Red Velvet Oreo Cheesecake Ingredients

To make this decadent dessert, gather the following ingredients to ensure your Red Velvet Oreo Cheesecake turns out perfectly!

For the Oreo Crust

  • Ground Oreos – Provides a crunchy base that's essential for that signature flavor.
  • Butter – Melted – Binds the crust together and enhances richness.

For the Red Velvet Cake Layer

  • All-Purpose Flour – Gives the cake structure without being too dense.
  • Cocoa Powder – Adds a deep chocolate flavor that complements the red velvet.
  • Granulated Sugar – Sweetens the cake while balancing the slight bitterness of cocoa.
  • Eggs – Help bind the ingredients while providing moisture.
  • Red Food Coloring – Ensures that classic vibrant red color; beetroot powder can be a wholesome substitute.

For the Cheesecake Layer

  • Cream Cheese – Softened – The star of your cheesecake layer, ensuring creaminess and richness.
  • Sour Cream – Adds a tangy flavor that balances the sweetness.
  • Sugar – Sweetens the cheesecake, enhancing the overall taste.
  • Eggs – Important for consistency; avoid overmixing to keep the batter smooth.

For the Red Velvet Glaze (Topping)

  • Spare Red Velvet Batter or Powdered Sugar – Can be used to create a delightful drizzle for visual appeal.
  • Cream – Incorporate to achieve a drizzle-like consistency.

For Decoration

  • Whipped Cream – Lightens the dessert and adds a fluffy texture to each slice.
  • Oreo Crumbles – Sprinkled on top to enhance presentation and add extra crunch.

With these ingredients, your Red Velvet Oreo Cheesecake is bound to be a crowd-pleaser that will elevate any dessert table!

Step‑by‑Step Instructions for Red Velvet Oreo Cheesecake Recipe

Step 1: Prep the Pan
Begin by greasing a 9-inch springform pan with butter or cooking spray. Then, line the bottom with parchment paper for easy removal later. This prep step is crucial to ensure your Red Velvet Oreo Cheesecake lifts out smoothly once it’s set and chilled, allowing you to showcase its beautiful layers.

Step 2: Make the Crust
In a mixing bowl, combine the crushed Oreos with melted butter until well combined and crumbly. Press this mixture evenly into the bottom of the prepared springform pan, using the back of a measuring cup for a firm base. Chill the crust in the refrigerator for about 15 minutes while you prepare the red velvet layer, ensuring it sets nicely.

Step 3: Prepare the Red Velvet Cake Layer
In another bowl, whisk together the all-purpose flour, cocoa powder, and sugar until blended. In a separate mixing bowl, combine the eggs, red food coloring, and a dash of vanilla extract, then whip until it's well mixed. Slowly incorporate the dry ingredients into the wet mixture, stirring just until combined. Pour the rich red velvet batter over the chilled crust and smooth it out.

Step 4: Bake the Red Velvet Layer
Preheat your oven to 350°F (175°C). Place the springform pan in the center of the oven and bake for 25 to 30 minutes. The cake layer is done when a toothpick inserted into the center comes out clean or with a few moist crumbs attached. This layer will provide a stunning, vibrant base for your cheesecake.

Step 5: Make the Cheesecake Layer
While the red velvet layer cools slightly, beat the softened cream cheese and sugar in a large bowl until smooth and creamy. Then, add in the eggs one at a time, mixing gently to avoid overmixing which can result in cracks. Once blended, pour this silken cheesecake batter evenly over the cooled red velvet cake layer, ensuring a beautiful contrast of colors.

Step 6: Bake the Cheesecake
Lower the oven temperature to 325°F (165°C) and place the cheesecake in the oven. Bake it for about 55 to 60 minutes, or until the edges are set while the center still has a subtle jiggle. This gentle approach helps create that creamy texture in the Red Velvet Oreo Cheesecake that everyone loves.

Step 7: Cool Slowly
Once baked, turn off the oven and crack the door open, allowing the cheesecake to cool gradually inside for an hour. This step is vital for preventing cracks in your cheesecake. The gradual cooling will help stabilize the texture while creating a delightful environment for the flavors to mingle.

Step 8: Chill the Cheesecake
After the initial cooling, remove the cheesecake from the oven and refrigerate for at least 4 hours, but overnight is recommended for best flavor development and texture. This long chill time allows the layers to set properly and makes for easier slicing.

Step 9: Decorate
Before serving, prepare to beautify your Red Velvet Oreo Cheesecake! Top it with whipped cream, drizzle with red velvet glaze made from spare batter, or some powdered sugar mixed with cream for a silky finish. Finally, sprinkle Oreo crumbles on top for that extra crunch and visual appeal, making it as delightful to the eyes as it is to the palate.

Make Ahead Options

These Red Velvet Oreo Cheesecake layers are perfect for those busy weeknights! You can prepare the Oreo crust and red velvet cake layer up to 24 hours in advance by simply pressing the crust into the pan and baking the cake layer before refrigerating them. For optimal flavor, let the cheesecake layer also chill in the refrigerator for 1-3 days before serving. Just remember to cover it tightly with plastic wrap to prevent any moisture loss or fridge odors from sneaking in. When it’s time to serve, simply whip up the cream and top your cheesecake with the red velvet glaze and Oreo crumbles for a show-stopping finish. Enjoy all the deliciousness with less fuss!

How to Store and Freeze Red Velvet Oreo Cheesecake

Refrigerator: Store leftover slices in an airtight container in the fridge for up to 5 days. This helps maintain its creamy texture and rich flavors.

Freezer: For longer storage, wrap the cheesecake tightly in plastic wrap followed by aluminum foil, and freeze for up to 2 months. Thaw in the fridge overnight before serving.

Reheating: If you prefer a warm slice, gently warm it in the microwave for about 10-15 seconds. Just be careful not to overheat, as it can alter the texture.

Serving Suggestions: When ready to serve, let it come to room temperature to enhance the flavors, and top with fresh whipped cream for an extra touch!

What to Serve with Red Velvet Oreo Cheesecake

Creating the perfect dining experience is easy when you have a luscious dessert like this cheesecake as the star of the show.

  • Fresh Berries: Strawberries or raspberries add a vibrant pop of color, balancing the richness of cheesecake with their tartness.
  • Whipped Cream: A dollop of freshly whipped cream adds lightness and enhances the cheesecake's indulgent flavors, inviting more than one slice.
  • Mint Chocolate Chip Ice Cream: The creamy texture and minty freshness elevate your dessert platter while providing a cool contrast to the warm spices in red velvet.
  • Chocolate Drizzle: Drizzling melted chocolate on top can add a rich layer of decadence, making each bite even more irresistible.
  • Coffee or Espresso: A cup of coffee or espresso pairs beautifully with the sweetness of the cheesecake, helping to cleanse the palate and enhance flavors.
  • Black Tea: A warm cup of classic Earl Grey complements the flavors perfectly, with its subtle notes of bergamot enhancing the cake’s richness.
  • Chocolate Chip Cookies: For a comforting touch, serve alongside a few warm chocolate chip cookies—this classic treat pairs well with the cheesecake’s flavor profile.
  • Cheese Platter: A selection of cheeses like brie or tangy blue cheese provides a unique savory contrast that showcases the sweetness of the dessert beautifully.
  • Chocolate-Covered Strawberries: For an elegant touch, these bite-sized treats are not only visually appealing but also an indulgent addition to your dessert spread.

Expert Tips for Red Velvet Oreo Cheesecake

  • Room Temperature Ingredients: Ensure your cream cheese and eggs are at room temperature. This helps create a smooth batter without lumps in your Red Velvet Oreo Cheesecake.
  • Mind the Mixer: Avoid overmixing when combining eggs. This keeps the cheesecake layer creamy and helps prevent cracks in the baked cheesecake.
  • Chill Time is Key: Refrigerate overnight if possible; this step allows the flavors of the cheesecake to deepen and ensures perfect texture when slicing.
  • Oven Door Ajar: After baking, let the cheesecake cool slowly with the oven door cracked to minimize the chance of cracks forming.
  • Use Quality Ingredients: Opt for high-quality Oreos and cream cheese, as they significantly elevate the flavor and smoothness of your Red Velvet Oreo Cheesecake.

Red Velvet Oreo Cheesecake Variations

Feel free to make this Red Velvet Oreo Cheesecake your own with these delightful twists!

  • Graham Cracker Crust: Swap Oreos for graham cracker crumbs for a different flavor profile that pairs beautifully with the red velvet.

  • Beetroot Powder: Use beetroot powder instead of red food coloring for a wholesome and natural color source.

  • Chocolate Cream Cheese: Opt for chocolate cream cheese to add an extra layer of rich flavor that complements the red velvet beautifully.

  • Nutty Surprise: Stir in some finely chopped nuts like pecans or walnuts into the cheesecake layer for added crunch and depth.

  • Coconut Cream Topping: Replace regular whipped cream with coconut cream for a tropical twist that adds a delightful creaminess.

  • Spiced Up: Add a pinch of cinnamon or nutmeg to the cheesecake layer for a warm, spiced flavor that brings a new depth to the dessert.

  • Mini Cheesecake Bites: Pour the batter into mini muffin tins to create individual-sized cheesecakes for a fun and shareable treat.

  • Fruit Infusion: Top or swirl in fresh fruit puree, like raspberry or strawberry, for a burst of tartness that contrasts nicely with the sweetness of the cheesecake.

Enhancing your cheesecake with these variations can make each bite a unique experience, reminiscent of other cherished treats. If you're feeling adventurous, combine a few ideas, like the chocolate cream cheese with coconut cream topping, for an unforgettable flavor journey. Don't forget, you can always reference delightful recipes like Chicken Adobo Again to pair alongside your gorgeous cheesecake for a complete meal!

Red Velvet Oreo Cheesecake Recipe FAQs

How do I choose the best ingredients for my cheesecake?
Absolutely! When selecting ingredients for your Red Velvet Oreo Cheesecake, it's essential to choose the freshest items available. Look for cream cheese that's smooth and spreadable, eggs that are bright and intact, and quality Oreos without any broken pieces. Opting for pasteurized eggs can reduce health risks if you're concerned. If using red food coloring, a liquid or gel-based option will give you the best vibrant hue!

How should I store my leftover cheesecake?
Very! To keep your leftover Red Velvet Oreo Cheesecake fresh, place the slices in an airtight container and store them in the refrigerator. This method will maintain its creamy texture and delicious flavors for up to 5 days. Just remember to cover it well to prevent it from absorbing any odors from other foods in your fridge.

Can I freeze slices of cheesecake?
Absolutely! Freezing your Red Velvet Oreo Cheesecake is an excellent way to keep it for longer. Wrap each slice tightly in plastic wrap and then in aluminum foil to prevent freezer burn. You can freeze it for up to 2 months. When you're ready to enjoy it, thaw the slices overnight in the refrigerator. This slow defrosting method helps maintain the creamy texture and flavors.

What should I do if my cheesecake has cracks?
No worries! If you notice cracks in your cheesecake, it might be due to overmixing, baking at too high a temperature, or cooling too quickly. For future bakes, ensure your oven is calibrated to the correct temperature and bake at a lower setting. Cooling the cheesecake gradually in the oven, with the door ajar, can also help prevent cracks. If cracks appear after baking, you can disguise them with toppings like whipped cream and Oreo crumbles.

Are there any dietary considerations I should be aware of?
Certainly! While this Red Velvet Oreo Cheesecake does not contain any typical allergens like nuts, it does include dairy and eggs. If you're serving guests with dietary restrictions, consider using lactose-free cream cheese and dairy-free whipped topping. For vegan options, you could replace the cream cheese with cashew or almond cream and use egg substitutes in the cake layer. Always check with your guests to ensure your treats are safe for everyone!

How long does it take for the flavors to develop?
Very! For the best flavor experience, I often recommend chilling your cheesecake overnight. This waiting period allows the flavors to meld beautifully, enriching the overall taste. When you're ready to serve, the cheesecake will slice perfectly, showcasing those deliciously vibrant layers.
Red Velvet Oreo Cheesecake Recipe

Irresistible Red Velvet Oreo Cheesecake Recipe to Delight You

This Red Velvet Oreo Cheesecake blends rich cake layers with creamy cheesecake for a delightful dessert experience.
Print Recipe Pin Recipe
Prep Time 30 minutes mins
Cook Time 1 hour hr 25 minutes mins
Chill Time 4 hours hrs
Total Time 5 hours hrs 55 minutes mins
Servings: 8 slices
Course: Dessert
Cuisine: American
Calories: 400
Ingredients Equipment Method Nutrition Notes

Ingredients
  

Oreo Crust
  • 24 cookies Ground Oreos
  • 1/2 cup Butter Melted
Red Velvet Cake Layer
  • 1 cup All-Purpose Flour
  • 2 tablespoons Cocoa Powder
  • 1 cup Granulated Sugar
  • 2 large Eggs
  • 1 tablespoon Red Food Coloring
Cheesecake Layer
  • 16 ounces Cream Cheese Softened
  • 1/2 cup Sour Cream
  • 1/2 cup Sugar
  • 2 large Eggs
Red Velvet Glaze (Topping)
  • 1/2 cup Spare Red Velvet Batter or Powdered Sugar
  • 1/4 cup Cream
Decoration
  • 1 cup Whipped Cream
  • 1/2 cup Oreo Crumbles

Equipment

  • 9-inch springform pan
  • Mixing bowls
  • Whisk
  • measuring cups
  • Mixer

Method
 

Preparation Steps
  1. Prep the pan by greasing a 9-inch springform pan and lining the bottom with parchment paper.
  2. Make the crust by combining crushed Oreos with melted butter, then press into the pan and chill for 15 minutes.
  3. Prepare the red velvet cake layer by whisking flour, cocoa powder, and sugar together, then mixing in eggs and red food coloring.
  4. Bake the red velvet layer at 350°F for 25-30 minutes, until a toothpick comes out clean.
  5. Make the cheesecake layer by beating cream cheese and sugar until smooth, then adding eggs one at a time.
  6. Bake the cheesecake at 325°F for 55-60 minutes, allowing a subtle jiggle in the center.
  7. Cool slowly in the oven for an hour to prevent cracks.
  8. Chill the cheesecake for a minimum of 4 hours, preferably overnight.
  9. Decorate with whipped cream, drizzle with glaze, and sprinkle with Oreo crumbles before serving.

Nutrition

Serving: 1sliceCalories: 400kcalCarbohydrates: 45gProtein: 5gFat: 25gSaturated Fat: 15gPolyunsaturated Fat: 1gMonounsaturated Fat: 5gCholesterol: 95mgSodium: 300mgPotassium: 200mgFiber: 2gSugar: 24gVitamin A: 500IUCalcium: 80mgIron: 1.5mg

Notes

Ensure cream cheese and eggs are at room temperature for the best texture. Refrigerate leftovers in an airtight container for up to 5 days.

Tried this recipe?

Let us know how it was!

Blueberry Cheesecake Crumb Cake: Irresistible Homemade Delight

January 11, 2026 by Grace Snow Leave a Comment

As I stood in my kitchen, the intoxicating scent of sweet blueberries began to waft through the air, whisking me away to sun-drenched summer days spent picking fresh fruit. That’s when I decided it was time to create something special: the Blueberry Cheesecake Crumb Cake. This easy dessert recipe brings together the creamy goodness of cheesecake with the delightful texture of crumb cake, all topped with a perfect sprinkle of crumbly topping. Not only is this recipe a showstopper for gatherings, but it also comes together quickly, making it an ideal weeknight treat for those of us who crave homemade goodness without sacrificing time. Trust me, once you take a bite, you might just find yourself dreaming of your next bake! Ready to dive into a slice of happiness?

Why is this cake so irresistible?

Versatile and Adaptable: This Blueberry Cheesecake Crumb Cake can easily be transformed by swapping blueberries for your favorite fruits like cherries or raspberries. Quick to Prepare: With simple ingredients and a straightforward method, you can enjoy homemade bliss in no time. Perfect for Any Occasion: Whether it's for brunch, a dinner party, or a cozy night in, this cake is always a crowd-pleaser. Texture Explosion: The combination of creamy cheesecake and buttery crumb cake creates a delightful contrast that's impossible to resist. And if you loved this treat, you might also want to try my delicious Chocolate Pudding Cake or the delightful German Chocolate Poke Cake!

Blueberry Cheesecake Crumb Cake Ingredients

Indulge your baking senses with these essential components!

For the Crumb Topping

  • Flour – Provides structure; opt for all-purpose flour for the best consistency.
  • Baking Powder – This leavening agent ensures your crumb cake rises beautifully.
  • Salt – A pinch enhances the overall flavor of the cake.
  • Butter – Use cold, cubed unsalted butter for that perfect crumbly texture.
  • Light Brown Sugar – Adds moisture and a subtle, toffee-like flavor to the topping.
  • Sugar – Sweetens this delightful mix for a balanced sweetness.

For the Cheesecake Layer

  • Eggs – Ensure to use large eggs to bind the ingredients and create that luscious cheesecake structure.
  • Mascarpone Cheese – Creates a rich, creamy texture; you can substitute with double cream cheese if needed.
  • Cream Cheese – Adds extra creaminess; can be replaced with mascarpone for a different spin.
  • Caster Sugar – Finer sugar mixes smoothly into the cheesecake; regular granulated sugar will work too.
  • Corn Starch – Stabilizes the filling; optional if you prefer a lighter texture.
  • Vanilla – Enhances flavor; extract is preferred for its aromatic quality.
  • Blueberries – The star ingredient for this Blueberry Cheesecake Crumb Cake, fresh or frozen works beautifully.

For the Glaze

  • Powdered Sugar – Combine with milk to create a smooth, drizzling glaze that elevates this cake to irresistible heights.

These delightful ingredients come together for a dessert that’s sure to impress and satisfy your cravings!

Step‑by‑Step Instructions for Blueberry Cheesecake Crumb Cake

Step 1: Preheat the Oven
Begin by preheating your oven to 350°F (175°C). While it heats, prepare a 9-inch springform pan by greasing it lightly and lining the bottom with parchment paper. This will prevent sticking and make removing the Blueberry Cheesecake Crumb Cake much easier once baked. Set the pan aside as you move on to the next step.

Step 2: Prepare the Crumb Topping
In a large mixing bowl, combine the all-purpose flour, baking powder, salt, light brown sugar, and regular sugar. Using a pastry cutter or your fingers, cut in the cold, cubed butter until the mixture resembles coarse crumbs, about the size of peas. This crumb topping is essential for that perfect texture. Reserve about 1 cup of this mixture for the topping later.

Step 3: Make the Crust
To the remaining crumb mixture, add eggs and vanilla extract, mixing until just combined. The dough should be slightly sticky. Press 2/3 of this mixture firmly into the bottom of the prepared springform pan to create a sturdy crust. Ensure it’s evenly spread, as this will hold the luscious cheesecake layer in place. Refrigerate the crust while you prepare the cheesecake filling.

Step 4: Create the Cheesecake Filling
In another bowl, whisk together the mascarpone cheese, cream cheese, vanilla extract, caster sugar, and corn starch until smooth. Then, add the eggs one at a time, mixing gently to combine after each addition. Be careful not to overmix; a few lumps are fine. This creamy mixture is the heart of your Blueberry Cheesecake Crumb Cake.

Step 5: Layer the Cheesecake
After the crust has chilled, pour half of the cheesecake filling over the crust in the pan. Spread it evenly with a spatula. Next, sprinkle a generous layer of fresh or frozen blueberries over the cheesecake mixture. Pour in the remaining cheesecake filling over the blueberries, smoothing it out gently to ensure an even layer.

Step 6: Add the Crumb Topping
Take the reserved crumb mixture and crumble it over the top of the cheesecake layer, ensuring all areas are covered. For added flavor and texture, sprinkle additional blueberries on top of the crumb topping. This not only enhances the visual appeal but also adds extra bursts of flavor to each slice of your Blueberry Cheesecake Crumb Cake.

Step 7: Bake the Cake
Carefully place the springform pan in the preheated oven and bake for 65-75 minutes. The cake is done when it turns golden brown, and a toothpick inserted into the center comes out clean, or with a few moist crumbs. If the top starts to brown too quickly, lightly cover it with aluminum foil to prevent burning.

Step 8: Cool and Glaze
Once baked, remove the Blueberry Cheesecake Crumb Cake from the oven and allow it to cool in the pan for about 15 minutes. Then, carefully release the sides of the springform pan. For an elegant finish, whisk together powdered sugar and a little milk to create a drizzling consistency. Once the cake is fully cooled, glaze it generously to enhance both flavor and presentation.

Step 9: Serve and Enjoy
After glazing, let the cake set for at least 30 minutes before slicing. You can serve it warm or chilled, paired with a dollop of whipped cream or a scoop of vanilla ice cream for that extra indulgence. Relish each delightful bite of your homemade Blueberry Cheesecake Crumb Cake!

Expert Tips for Blueberry Cheesecake Crumb Cake

  • Room Temperature Ingredients: Ensure your ingredients, especially the cream cheese and eggs, are at room temperature to achieve a smooth, creamy filling for your Blueberry Cheesecake Crumb Cake.

  • Avoid Overmixing: Be cautious not to overmix the cheesecake filling; mix just until smooth to prevent unwanted air bubbles that can cause cracks.

  • Frozen Blueberries: If you’re using frozen blueberries, there’s no need to thaw them. They can go directly into the batter, keeping your cake extra moist.

  • Check for Doneness: Aim for a slight jiggle in the center of your cheesecake when baking. It will set as it cools, so don’t wait for it to firm up completely in the oven.

  • Cooling Time: Allow the cake to cool in the pan for at least 15 minutes before removing the springform. This helps maintain its shape and prevents cracking.

Blueberry Cheesecake Crumb Cake Variations

Feel free to get creative and customize your Blueberry Cheesecake Crumb Cake to suit your taste!

  • Berry Bliss: Swap out blueberries for raspberries or cherries for a fruity twist. Each fruit brings a unique flavor that can brighten the cake's profile.

  • Gluten-Free Delight: Use a gluten-free flour blend instead of all-purpose flour. It allows everyone to enjoy this treat, no matter their dietary needs!

  • Nutty Crunch: Add a handful of chopped walnuts or pecans into the crumb topping for an extra layer of texture and flavor. The nuttiness beautifully contrasts the creamy cheesecake.

  • Lemon Zing: Mix in some lemon zest into your cheesecake filling for a bright, zesty flavor that elevates the taste profile. It adds a refreshing touch perfect for summertime.

  • Chocolate Swirl: Marble in some melted dark chocolate to the cheesecake filling for a rich, chocolaty experience. Each bite will reveal delightful chocolate pools throughout the cake!

  • Spicy Kick: Incorporate a pinch of cinnamon or nutmeg into the crumb topping for a warm, aromatic spice that enhances the cozy feel of this dessert. The warmth of the spices pairs wonderfully with the sweet blueberries.

  • Vanilla Bean Dream: Use vanilla bean paste instead of regular vanilla extract for a more intense vanilla flavor. You’ll create a luxurious depth that makes the cheesecake layer even more decadent.

For those who love to experiment, this cake offers endless possibilities! You might also enjoy my tempting Ice Cream Cake for a refreshing treat or explore a classic Chocolate Pudding Cake for another indulgent dessert experience.

What to Serve with Blueberry Cheesecake Crumb Cake

Elevate your dessert experience with these delightful accompaniments that complement every luscious bite.

  • Whipped Cream: Light and airy, it adds a creamy touch that enhances the cake's richness. A dollop on each slice takes this dessert to new heights.

  • Vanilla Ice Cream: The cold and creamy texture contrasts beautifully with the warm cake, delivering a satisfying balance of flavors and temperatures for a truly indulgent experience.

  • Fresh Berries: A side of mixed fresh berries brightens the plate, adding a burst of color and a tangy freshness that pairs perfectly with the sweet blueberry cheesecake.

  • Coffee or Espresso: The deep, rich flavors of coffee complement the dessert wonderfully, balancing the sweetness while providing an extra layer of warmth and comfort.

  • Chocolate Sauce: Drizzling a rich chocolate sauce over your slice creates an enticing fusion of flavors, adding a touch of decadence that chocolate lovers will adore.

  • Lemon Zest: A sprinkle of fresh lemon zest on top brightens the cake with zippy notes, cutting through the creaminess while enhancing the blueberry flavor.

  • Mint Leaves: Garnishing with fresh mint leaves not only beautifies the presentation but adds a refreshing aroma that uplifts each bite of the crumb cake.

  • Sparkling Water or Lemonade: For a refreshing beverage option, fizzy sparkling water or homemade lemonade provides a bubbly counterpoint to the creamy texture of the cheesecake, making it perfect for warm-weather gatherings.

  • Almond Biscotti: Crunchy almond biscotti on the side offers a delightful texture contrast, perfect for dipping and enhancing your dessert experience with a nutty flavor.

How to Store and Freeze Blueberry Cheesecake Crumb Cake

Fridge: Store the Blueberry Cheesecake Crumb Cake in an airtight container in the refrigerator for up to 5 days. This helps maintain its moist texture and flavor.

Freezer: For longer storage, freeze the cake in a tightly wrapped portion or individual slices for up to 3 months. Make sure to wrap it well in plastic wrap and foil to prevent freezer burn.

Thawing: When ready to enjoy, thaw the cake in the refrigerator overnight. Reheat individual slices in the microwave for 15-20 seconds for a warm treat, or enjoy chilled!

Make-Ahead Tip: This cake can be made a day ahead for enhanced flavor since it sets beautifully overnight in the fridge.

Make Ahead Options

Planning ahead with this Blueberry Cheesecake Crumb Cake is a wonderful time-saver for busy weeknights and gatherings! You can prepare the crumb topping and crust up to 24 hours in advance. Simply store the crumb mixture in an airtight container in the refrigerator, and remember to refrigerate the crust in the springform pan. As for the cheesecake filling, it can be made up to 3 days ahead and stored in the refrigerator until you're ready to assemble. When you're ready to bake, layer the filling in the crust, top with the reserved crumb mixture, and toss it in the oven. This way, you ensure that your dessert remains just as delicious and fresh while saving you precious time!

Blueberry Cheesecake Crumb Cake Recipe FAQs

How do I choose the perfect blueberries for this recipe?
Absolutely! When selecting blueberries, look for plump, firm berries with a vibrant color. They should have a slight bloom on their surface, which is a natural protective coating. Avoid any with dark spots or signs of mushiness, as this indicates overripeness. If using frozen blueberries, no need to thaw them; just toss them right into the mix for a fresh burst of flavor!

How should I store the Blueberry Cheesecake Crumb Cake?
To keep your delicious Blueberry Cheesecake Crumb Cake fresh, store it in an airtight container in the refrigerator. It'll stay good for up to 5 days, loading it with flavor. If you want to enjoy it later, you can freeze it for up to 3 months. Just be sure to wrap it tightly in plastic wrap followed by aluminum foil to prevent freezer burn.

Can I freeze Blueberry Cheesecake Crumb Cake?
Yes, you can! To freeze, slice the cake first, as it's easier to thaw individual pieces. Wrap each slice in plastic wrap, then place them in a freezer bag or airtight container. Thaw in the refrigerator overnight when you're ready to indulge again. If you like it warm, you can briefly microwave each slice for 15-20 seconds.

What do I do if my cheesecake filling is too runny?
If your filling is runny, it could be due to overmixing or using ingredients that weren’t at room temperature. To troubleshoot, make sure you only mix until smooth. You can also try adding a bit more cornstarch to help stabilize it. If you find yourself in a pinch, cooking the cheesecake mixture gently on the stovetop over low heat can help thicken it slightly. Just be sure to cool it before using it in the cake!

Is this Blueberry Cheesecake Crumb Cake suitable for people with allergies?
While this cake is a delightful treat, it's important to note that it contains common allergens such as eggs, dairy (cream cheese and mascarpone), and gluten (all-purpose flour). If you’re baking for someone with specific dietary restrictions, consider substituting gluten-free flour blends and dairy-free cream cheese alternatives. Always check labels to ensure they're safe for those with allergies.

What should I serve with the Blueberry Cheesecake Crumb Cake?
Very! Serve it warm or chilled with a dollop of whipped cream or a scoop of vanilla ice cream for an indulgent treat. You can also pair it with a dusting of powdered sugar or a drizzle of caramel sauce for extra sweetness.

Blueberry Cheesecake Crumb Cake

Blueberry Cheesecake Crumb Cake: Irresistible Homemade Delight

This Blueberry Cheesecake Crumb Cake combines creamy cheesecake with a crumbly topping for a delightful dessert experience.
Print Recipe Pin Recipe
Prep Time 20 minutes mins
Cook Time 1 hour hr 15 minutes mins
Cooling Time 15 minutes mins
Total Time 1 hour hr 50 minutes mins
Servings: 8 slices
Course: Dessert
Cuisine: American
Calories: 320
Ingredients Equipment Method Nutrition Notes

Ingredients
  

For the Crumb Topping
  • 1 cup all-purpose flour Provides structure; opt for all-purpose flour for best consistency.
  • 1 teaspoon baking powder This leavening agent ensures your crumb cake rises beautifully.
  • 1/4 teaspoon salt A pinch enhances the overall flavor of the cake.
  • 1/2 cup unsalted butter Use cold, cubed butter for a perfect crumbly texture.
  • 1/4 cup light brown sugar Adds moisture and a subtle, toffee-like flavor.
  • 1/4 cup granulated sugar Sweetens this delightful mix for balanced sweetness.
For the Cheesecake Layer
  • 2 large eggs Bind the ingredients and create a luscious cheesecake structure.
  • 8 oz mascarpone cheese Creates a rich, creamy texture.
  • 8 oz cream cheese Adds extra creaminess.
  • 1/2 cup caster sugar Finer sugar mixes smoothly into the cheesecake.
  • 2 tablespoons corn starch Stabilizes the filling.
  • 1 teaspoon vanilla extract Enhances flavor.
  • 1 cup blueberries Fresh or frozen works beautifully.
For the Glaze
  • 1 cup powdered sugar Combine with milk to create a smooth glaze.

Equipment

  • 9-inch springform pan
  • Mixing bowls
  • Whisk
  • Spatula
  • Pastry cutter

Method
 

Preparation
  1. Preheat your oven to 350°F (175°C) and prepare a 9-inch springform pan by greasing it lightly and lining the bottom with parchment paper.
  2. In a large mixing bowl, combine the all-purpose flour, baking powder, salt, light brown sugar, and granulated sugar. Cut in the cold, cubed butter until the mixture resembles coarse crumbs.
  3. To the remaining crumb mixture, add eggs and vanilla extract, mixing until just combined. Press 2/3 of this mixture firmly into the bottom of the prepared springform pan to create a sturdy crust.
  4. In another bowl, whisk together the mascarpone cheese, cream cheese, vanilla extract, caster sugar, and corn starch until smooth. Add eggs one at a time, mixing gently.
  5. Pour half of the cheesecake filling over the crust, sprinkle blueberries, and pour the remaining cheesecake filling over it.
  6. Crumble the reserved mixture over the top, and sprinkle more blueberries if desired.
  7. Bake for 65-75 minutes until golden brown and a toothpick comes out clean.
  8. Allow the cake to cool in the pan for 15 minutes, then remove the springform. Whisk together powdered sugar and milk for the glaze and drizzle over the cooled cake.
  9. Let the cake set for 30 minutes before slicing, and serve with whipped cream or vanilla ice cream.

Nutrition

Serving: 1sliceCalories: 320kcalCarbohydrates: 45gProtein: 4gFat: 15gSaturated Fat: 9gPolyunsaturated Fat: 0.5gMonounsaturated Fat: 4gCholesterol: 90mgSodium: 240mgPotassium: 160mgFiber: 1gSugar: 25gVitamin A: 600IUVitamin C: 3mgCalcium: 80mgIron: 1mg

Notes

Ensure room temperature ingredients for a smooth filling and avoid overmixing to prevent cracks in the cheesecake.

Tried this recipe?

Let us know how it was!

Irresistibly Creamy Hot Chocolate Cheesecake for Winter Joy

January 11, 2026 by Grace Snow Leave a Comment

On chilly winter evenings, wrapping my hands around a warm mug of hot chocolate is my favorite ritual, but what if I told you that you could transform that cozy experience into a delightful dessert? Enter the Hot Chocolate Cheesecake—a creamy, chocolatey masterpiece that features a crunchy Oreo crust and a luscious filling, inspired by the classic winter beverage we all love. This recipe not only satisfies your sweet cravings in no time but also serves as the ultimate crowd-pleaser for festive gatherings. With a rich flavor that evokes warmth and nostalgia, it’s hard to resist a slice (or two). Curious how this indulgent treat could brighten your next winter gathering? Let's dive into the recipe!

Why is this Hot Chocolate Cheesecake irresistible?

Indulgent Flavor: Each bite of this cheesecake transports you to a world of rich cocoa goodness, perfectly balancing sweetness with a touch of nostalgia.

Effortless to Make: With simple steps and minimal baking experience required, creating this impressive dessert is a breeze—perfect for busy home cooks!

Crowd-Pleasing Delight: Whether it's a holiday gathering or a cozy family dinner, this cheesecake is bound to impress guests of all ages.

Gorgeous Presentation: Topped with fluffy whipped cream and soft marshmallows, this dessert looks as fantastic as it tastes. Serve it alongside a warm mug of Homemade Hot Chocolate for a truly decadent experience!

Versatile Base: While the Oreo crust is divine, consider swapping it out for graham cracker crumbs for a delightful twist, as suggested in this German Chocolate Poke recipe!

Hot Chocolate Cheesecake Ingredients

For the Crust
• Oreo Cookies – A delicious crunch base; swap for graham crackers if you prefer a milder flavor.
• Unsalted Butter – Binds the crust; use salted butter if unsalted isn’t on hand.

For the Filling
• Cream Cheese – The heart of the cheesecake providing creaminess; make sure it’s at room temperature for easy mixing.
• Granulated Sugar – Sweetens the filling; brown sugar can deepen the flavor profile.
• Hot Chocolate Mix – Infuses the cheesecake with a familiar cocoa taste; opt for a sugar-free version if desired.
• Unsweetened Cocoa Powder – Enhances the chocolate richness while balancing sweetness.
• Sour Cream – Adds moisture and a pleasant tang; Greek yogurt serves as a perfect substitute.
• Vanilla Extract – Elevates the flavor; almond extract can be a delightful twist.
• Heavy Cream – Contributes to the richness and stabilizes the whipped topping.
• Eggs – Provides structure to the cheesecake; make sure they’re at room temperature for smooth incorporation.

For the Topping
• Whipped Cream – Light and fluffy, it contrasts beautifully with the dense cheesecake.
• Mini Marshmallows – An adorable addition that brings a nostalgic hot cocoa vibe; consider flavored marshmallows for a fun twist.
• Cocoa Powder – A light dusting on top for extra visual appeal and taste.
Now that you have all the ingredients ready, let’s start crafting your heavenly Hot Chocolate Cheesecake!

Step‑by‑Step Instructions for Hot Chocolate Cheesecake

Step 1: Prepare the Crust
Start by preheating your oven to 350°F (175°C). In a food processor, crush Oreo cookies into fine crumbs. Then, melt the unsalted butter and mix it with the cookie crumbs until well combined. Press this mixture into the bottom of a parchment-lined springform pan, ensuring it extends slightly up the sides. Bake the crust for 10 minutes to set, then allow it to cool while you prepare the filling.

Step 2: Make the Filling
In a large mixing bowl, beat the room-temperature cream cheese and granulated sugar together until the mixture is smooth and creamy, about 2-3 minutes. Gradually add the hot chocolate mix, unsweetened cocoa powder, sour cream, vanilla extract, and heavy cream into the bowl. Mix well until everything is fully incorporated and it has a luxurious, creamy texture that embodies the essence of hot chocolate.

Step 3: Incorporate the Eggs
Next, add the room-temperature eggs to the mixture, one at a time. Beat on low speed after each addition just until combined, ensuring you don’t overmix. The filling should be beautifully thick and well-blended. This step is crucial for the stability of your Hot Chocolate Cheesecake, so take your time and ensure that everything is perfectly mixed together.

Step 4: Bake the Cheesecake
Pour the cheesecake filling over the cooled Oreo crust and gently tap the pan on the counter to remove any air bubbles. Create a steam bath by placing the springform pan in a larger baking dish filled with hot water, then bake at 300°F (150°C) for 60-75 minutes. The edges should be set, while the center remains slightly jiggly—this will ensure a creamy texture once cool.

Step 5: Cool Gradually
Once baked, turn off the oven and crack the door open. Let the cheesecake cool in the oven for 1 hour; this gradual cooling helps prevent cracks from forming on the surface. The residual heat will gently finish cooking the center. When the time is up, remove it from the oven and let it cool completely at room temperature.

Step 6: Chill
Transfer the cooled cheesecake to the refrigerator and allow it to chill overnight. This step is essential for achieving the perfect texture and flavor, as the cheesecake will firm up and set beautifully, allowing all the rich flavors of the hot chocolate to meld perfectly together.

Step 7: Decorate & Serve
After chilling, carefully remove the Hot Chocolate Cheesecake from the springform pan. Top it with a generous layer of whipped cream, sprinkle mini marshmallows on top, and dust with cocoa powder for an inviting finish. Slice, serve, and watch as everyone enjoys this delightful winter dessert that captures the essence of hot chocolate in every bite!

What to Serve with Hot Chocolate Cheesecake

Cozy up to the perfect winter meal by complementing your heavenly dessert with delightful accompaniments that enhance its rich flavor.

  • Creamy Mashed Potatoes: The smooth texture and buttery flavor provide a comforting balance to the sweetness of the cheesecake. Think of it as a cozy hug for your taste buds!
  • Warm Apple Crisp: This warm, spiced dessert offers a contrast in flavor while echoing the comforting vibes of winter. The crunchy topping pairs beautifully with the creamy cheesecake.
  • Buttery Garlic Bread: The savory, crispy edges of garlic bread create an unexpected but delicious contrast to the sweet and decadent cheesecake.
  • Roasted Brussels Sprouts: Their slight bitterness and crispy edges offer a savory flavor profile, perfectly balancing the sweetness of your Hot Chocolate Cheesecake.
  • Decadent Hot Chocolate: Elevate your dessert experience with a mug of rich hot chocolate, drizzled with chocolate syrup. Its warmth makes the cheesecake feel even more indulgent.
  • Fluffy Vanilla Ice Cream: A scoop of vanilla will complement the rich chocolate flavors beautifully while adding a refreshing chill against the dense cheesecake.
  • Spiced Mulled Wine: The warm spices in mulled wine enhance the comforting essence of the cheesecake, creating a cozy vibe that’s perfect for gatherings.
  • Chocolate-Covered Strawberries: Gorgeous and sweet, these add a fresh, fruity touch that cuts through the richness of the dessert, making each bite a delight!

How to Store and Freeze Hot Chocolate Cheesecake

Fridge: Keep the cheesecake in an airtight container for up to 3-4 days. This will retain its creamy texture and delicious flavor for your indulgence.

Freezer: For longer storage, you can freeze the cheesecake without toppings for up to 1 month. Wrap it tightly in plastic wrap and then foil to prevent freezer burn.

Thawing: To enjoy frozen Hot Chocolate Cheesecake, transfer it to the fridge and let it thaw overnight before serving. This will ensure that the texture remains perfect and ready to delight your taste buds.

Reheating: If you prefer your cheesecake slightly warmed, microwave individual slices on low power for 10-15 seconds. Enjoy the magic of hot chocolate in cheesecake form!

Hot Chocolate Cheesecake Variations

Indulge your creativity by customizing this delicious dessert to suit your preferences and dietary needs!

  • Graham Cracker Crust: Swap the Oreo cookies for graham cracker crumbs for a lighter, slightly sweeter base.

  • Dairy-Free: Use non-dairy cream cheese and coconut cream for the filling and topping, ensuring a luscious texture without the dairy.

  • Sugar-Free: Opt for sugar-free hot chocolate mix and a low-calorie sweetener to make this dessert more diet-friendly while still enjoying that rich flavor.

  • Minty Fresh: Add peppermint extract to the filling for a refreshing twist that captures the essence of holiday treats. This gives an extra festive flair that pairs perfectly with winter gatherings.

  • Nutty Delight: Toss in some finely chopped nuts like walnuts or pecans into the crust for added crunch and flavor. It adds a delightful layer of texture that surprises the palate.

  • Chocolate Chip Infusion: Mix in chocolate chips or chunks into the cheesecake batter before baking for extra chocolatey goodness. This elevates the richness, creating a real treat for chocolate lovers!

  • Swirl It Up: Create a marbled effect by swirling in some melted chocolate or a raspberry puree before baking. This not only looks stunning but adds an unexpected burst of flavor.

  • Extra Toppings: Serve with a drizzle of caramel or chocolate sauce over the whipped cream for added sweetness. A sprinkle of sea salt can also enhance the flavors beautifully, making each bite irresistible!

It’s time to let your imagination run wild and elevate your Hot Chocolate Cheesecake experience! For even more delightful recipes, consider checking out the indulgent German Chocolate Poke that can inspire your next sweet creation.

Make Ahead Options

These Hot Chocolate Cheesecakes are fantastic for anyone looking to save time during the busy winter season! You can prepare the crust and filling separately up to 24 hours in advance. For the crust, crush the Oreo cookies and mix with melted butter, then press it into the pan and refrigerate it. You can also make the filling ahead: beat the cream cheese, sugar, cocoa, and other ingredients, then cover it and store it in the refrigerator. When you're ready to bake, simply pour the filling over the prepared crust and bake as directed. This way, you ensure that the cheesecake remains just as delicious while freeing up your schedule to enjoy the festivities!

Expert Tips for Hot Chocolate Cheesecake

• Room Temperature Ingredients: Ensure your cream cheese and eggs are at room temperature; this allows for smoother mixing and a creamier texture in your Hot Chocolate Cheesecake.

• Avoid Overmixing: Mix the filling just until combined after adding the eggs. Overmixing can introduce air, leading to cracks in your cheesecake.

• Steam Bath Method: Use a steam bath while baking to keep your cheesecake moist and prevent it from drying out, ensuring a luscious final product.

• Gradual Cooling: Always cool your cheesecake slowly in the oven to prevent cracks. Leaving the oven door slightly ajar for an hour helps with this process.

• Chill Overnight: Don’t skip the chilling step! Allow your cheesecake to set overnight for the best flavor and texture before serving.

Hot Chocolate Cheesecake Recipe FAQs

How do I choose ripe ingredients for my Hot Chocolate Cheesecake?
Absolutely! For the best results, make sure your cream cheese is fresh and at room temperature for easy mixing. When selecting eggs, look for ones that are not cracked and have a smooth shell. For the cocoa powder and hot chocolate mix, check the expiration date for optimal taste.
How should I store my Hot Chocolate Cheesecake?
Store your cheesecake in an airtight container in the fridge for up to 3-4 days. This keeps it fresh while maintaining its creamy texture. If you’re looking to keep it longer, you can freeze the cheesecake without any toppings for up to 1 month. Just wrap it tightly in plastic wrap and then foil to prevent freezer burn.

Can I freeze Hot Chocolate Cheesecake? If so, how?
Yes! To freeze your cheesecake, first ensure it has cooled completely after baking and chilling. Wrap it securely in plastic wrap and then in aluminum foil to protect it from freezer burn. When you’re ready to enjoy it, transfer the cheesecake to the refrigerator to thaw overnight. This gradual thawing helps maintain its delightful texture.

What should I do if my cheesecake cracks while baking?
Very! If your cheesecake cracks, it could be due to overmixing or baking at too high a temperature. To avoid this, make sure to mix your filling just until combined after adding the eggs, and use a steam bath while baking to keep the moisture. If you do end up with cracks, don’t worry! You can cover them with whipped cream and marshmallows for a beautiful presentation.

Can I make this dessert suitable for special diets or allergies?
Indeed! If someone has a dairy allergy, consider substituting the cream cheese with a dairy-free alternative and use a vegan whipped cream for topping. For gluten sensitivity, swap out the Oreo crust for gluten-free graham crackers. Always check the labels for hot chocolate mixes to ensure they meet dietary needs—there are sugar-free and allergy-friendly options available.

Is there a different way to enhance the flavors of my Hot Chocolate Cheesecake?
Absolutely! For an added layer of flavor, you might incorporate peppermint extract into the filling for a festive twist or sprinkle some mini chocolate chips into the batter before baking for an extra chocolatey bite. This gives your Hot Chocolate Cheesecake a delicious new spin while keeping it true to its cozy roots!

Hot Chocolate Cheesecake

Irresistibly Creamy Hot Chocolate Cheesecake for Winter Joy

This Hot Chocolate Cheesecake blends creamy texture with rich chocolate flavor, making it the perfect winter dessert.
Print Recipe Pin Recipe
Prep Time 30 minutes mins
Cook Time 1 hour hr 15 minutes mins
Chilling Time 12 hours hrs
Total Time 13 hours hrs 45 minutes mins
Servings: 12 slices
Course: Dessert
Cuisine: American
Calories: 400
Ingredients Equipment Method Nutrition Notes

Ingredients
  

For the Crust
  • 24 cookies Oreo Cookies
  • 1/2 cup Unsalted Butter Melted
For the Filling
  • 24 oz Cream Cheese Room Temperature
  • 1 cup Granulated Sugar
  • 1 cup Hot Chocolate Mix
  • 1/4 cup Unsweetened Cocoa Powder
  • 1 cup Sour Cream Or Greek Yogurt
  • 1 tsp Vanilla Extract
  • 1 cup Heavy Cream
  • 3 large Eggs Room Temperature
For the Topping
  • 2 cups Whipped Cream
  • 1 cup Mini Marshmallows
  • 2 tbsp Cocoa Powder For dusting

Equipment

  • Oven
  • Springform pan
  • Food Processor
  • Mixing Bowl

Method
 

Preparation Steps
  1. Preheat your oven to 350°F (175°C). Crush Oreo cookies into fine crumbs.
  2. Melt the unsalted butter and mix it with the cookie crumbs. Press into the bottom of a springform pan.
  3. Bake the crust for 10 minutes, then allow it to cool.
  4. In a mixing bowl, beat cream cheese and sugar until smooth. Add hot chocolate mix, cocoa powder, sour cream, vanilla extract, and heavy cream, mixing until combined.
  5. Add eggs one at a time, beating on low speed after each addition.
  6. Pour cheesecake filling over the cooled crust. Bake at 300°F (150°C) for 60-75 minutes.
  7. Once baked, turn off the oven and leave the cheesecake inside with the door cracked for 1 hour.
  8. Transfer the cheesecake to the refrigerator to chill overnight.
  9. Remove from the pan, top with whipped cream, mini marshmallows, and dust with cocoa powder before serving.

Nutrition

Serving: 1sliceCalories: 400kcalCarbohydrates: 38gProtein: 6gFat: 28gSaturated Fat: 17gPolyunsaturated Fat: 1gMonounsaturated Fat: 10gCholesterol: 79mgSodium: 270mgPotassium: 150mgFiber: 1gSugar: 26gVitamin A: 500IUVitamin C: 1mgCalcium: 90mgIron: 1mg

Notes

Ensure all ingredients are at room temperature for best results. Avoid overmixing to prevent cracks in the cheesecake.

Tried this recipe?

Let us know how it was!

Indulge in Mint Chocolate Cheesecake Bliss at Home

January 11, 2026 by Grace Snow Leave a Comment

As I poured the rich chocolate ganache over my Mint Chocolate Cheesecake, memories of holiday gatherings flooded back. This stunning dessert is inspired by those delightful Andes mints we all love, blending cool mint with velvety chocolate for a truly irresistible treat. With its gluten-free Oreo crust, this Mint Chocolate Cheesecake offers the perfect balance of rich creaminess and refreshing flavor, making it an ideal choice for birthdays or any celebration. Plus, it's a breeze to prepare, ensuring you can wow your guests without spending all day in the kitchen. But what truly sets this recipe apart is how each slice delivers a joyful mix of textures and tastes. Are you ready to create a dessert that will have everyone asking for seconds?

Why Is This Cheesecake So Irresistible?

Decadent layers: The Mint Chocolate Cheesecake combines smooth mint-infused cream cheese with rich chocolate ganache, creating an explosion of flavor in every bite.

Gluten-free goodness: With a gluten-free Oreo crust, everyone can indulge, making it perfect for gatherings or a cozy night in.

Quick preparation: You’ll appreciate how this treat comes together easily, allowing you to spend more time enjoying it with loved ones.

Celebration-worthy: Whether for birthdays, holidays, or just because, this cheesecake's vibrant taste and stunning presentation are sure to impress.

Don’t forget to try some of our other delightful desserts like Homemade Hot Chocolate to accompany this cheesecake!

Mint Chocolate Cheesecake Ingredients

  • For the Crust

  • Oreo cookies – Provides the perfect base for a crunchy, sweet crust; opt for gluten-free if needed.

  • Unsalted butter – Binds the crust together, ensuring a firm and buttery foundation.

  • For the Cheesecake Batter

  • Cream cheese – The star of the show, offering a rich, creamy texture; make sure it's at room temperature for easy blending.

  • Granulated sugar – Sweetens the cheesecake, balancing out the minty and chocolatey flavors.

  • Sour cream – Adds moisture and a slight tang that enhances the overall creaminess.

  • Vanilla extract – Infuses warm undertones, elevating the flavor profile beautifully.

  • Mint or peppermint extract – The main flavoring agent; use mint for a softer flavor or peppermint for a bold kick.

  • Salt – Enhances all flavors, bringing harmony to the sweetness.

  • Eggs – Provides stability to the cheesecake; have them at room temperature for best results.

  • Green food coloring – Optional, but adds a festive touch; use sparingly to avoid overwhelming the color.

  • Andes mints – Chopped pieces create bursts of minty flavor throughout the batter.

  • For the Ganache and Topping

  • Chocolate chips or chopped chocolate – Forms the base for the rich ganache, adding luxurious chocolate depth.

  • Heavy cream – Used for both ganache and whipped cream, ensuring a velvety texture.

  • Confectioners' sugar – Sweetens whipped cream and stabilizes its texture for perfect peaks.

Get ready to dive into this incredible Mint Chocolate Cheesecake, guaranteed to elevate your dessert game and leave everyone craving more!

Step‑by‑Step Instructions for Mint Chocolate Cheesecake

Step 1: Prepare the crust
Preheat your oven to 350°F (175°C). Crush 24 Oreo cookies in a food processor until they resemble fine crumbs. Mix the cookie crumbs with 1/2 cup of melted unsalted butter until well combined. Press this mixture firmly into the bottom of a 9-inch springform pan to form an even layer. Bake the crust for 10 minutes, then reduce the oven temperature to 325°F (163°C).

Step 2: Make the cheesecake batter
In a large mixing bowl, beat 24 ounces of room-temperature cream cheese and 1 cup of granulated sugar with an electric mixer until smooth and creamy. Add in 1 cup of sour cream, 1 teaspoon of vanilla extract, 1 teaspoon of mint extract, and a sprinkle of salt. Mix until fully integrated. Gradually add 3 large room-temperature eggs, mixing minimally after each addition to prevent air pockets.

Step 3: Incorporate the special ingredients
Gently fold in a couple of drops of green food coloring and 1 cup of chopped Andes mints into your cheesecake batter. Ensure the mints are evenly distributed throughout the mixture, creating bursts of flavor in your Mint Chocolate Cheesecake. Avoid over-mixing the batter at this stage to maintain a smooth, rich texture.

Step 4: Prepare the baking pan
Wrap the outside of the springform pan with aluminum foil to create a water bath. Place the wrapped pan inside a larger baking dish filled with hot water, creating a gentle steam environment that helps the cheesecake bake evenly. Pour the cheesecake batter into the prepared crust, smoothing the top with a spatula.

Step 5: Bake the cheesecake
Bake your Mint Chocolate Cheesecake in the preheated oven for 70 minutes at 325°F (163°C). The edges should appear firm while the center remains slightly jiggly. Once baked, turn off the oven and let the cheesecake cool inside with the door slightly ajar for about 30 minutes to prevent cracking.

Step 6: Chill the cheesecake
After cooling, allow your cheesecake to reach room temperature before transferring it to the refrigerator. Chill the cheesecake for at least 4 hours, but overnight is best to achieve optimal flavor and texture. This cooling step allows the cheesecake to set and become easier to slice.

Step 7: Prepare the ganache
In a microwave-safe bowl, combine 1 cup of chocolate chips or chopped chocolate with 1/2 cup of heavy cream. Microwave in 30-second intervals, stirring after each, until the mixture is smooth and glossy. Once your cheesecake has chilled and set, pour the ganache over the top, spreading it evenly to coat the surface.

Step 8: Make the whipped cream
Using a clean mixing bowl, whip 1 cup of heavy cream with 1/4 cup of confectioners' sugar and 1/2 teaspoon of mint extract until stiff peaks form. This airy whipped cream will add a delightful touch atop your Mint Chocolate Cheesecake. Decorate the cheesecake generously with the whipped cream, adding any additional garnishes like chocolate shavings or sprigs of mint as desired.

Make Ahead Options

These Mint Chocolate Cheesecake slices are perfect for meal prep, making your busy weeknights a whole lot easier! You can prepare the cheesecake batter up to 24 hours in advance; simply mix everything together and store it in the refrigerator until you’re ready to pour it into the crust. Additionally, you can make the ganache up to 3 days ahead and keep it covered in the fridge. When you’re ready to serve, just bake the cheesecake and allow it to chill overnight for the best flavor and texture. This way, you’ll achieve that luscious, rich taste without the last-minute hassle, keeping your dessert just as delicious as if you made it fresh!

Mint Chocolate Cheesecake Variations

Feel free to get creative and put your own spin on this delightful Mint Chocolate Cheesecake!

  • Dairy-Free: Substitute the cream cheese and heavy cream with dairy-free alternatives like cashew cream for a non-dairy option. The flavors will still be vibrant and enjoyable!

  • Nut Crust: Swap the Oreo crust for a mixture of crushed nuts and dates for a gluten-free and healthier twist. This adds a delightful crunch and a touch of natural sweetness.

  • Different Mints: Play around with various mint candies, such as Junior Mints or peppermint patties, to change up the flavor and texture of each slice.

  • Chocolate Ganache Variation: Add a splash of coffee or espresso powder to the chocolate ganache for an enriched flavor that pairs beautifully with chocolate and mint.

  • Flavorful Swirls: Swirl in some raspberry or strawberry puree into the cheesecake batter before baking for a fruity twist that contrasts well with the creamy mint.

  • Extra Chocolate: Consider adding mini chocolate chips or chunks throughout the cheesecake batter for additional bursts of chocolate goodness in every bite!

  • Spicy Mint: Add a pinch of cayenne pepper to the batter for a fun, spicy kick that complements the mint beautifully. Just a tiny bit will elevate the flavor!

  • Layered Delight: Create a layered effect by alternating layers of mint cheesecake with chocolate cheesecake for an indulgent combination that will captivate flavor lovers.

Each of these ideas can elevate your Mint Chocolate Cheesecake experience. And if you're inspired to try another delightful dessert, don’t forget to check out our German Chocolate Poke recipes for more sweet inspiration!

What to Serve with Mint Chocolate Cheesecake

The perfect companion to your decadent dessert awaits, enhancing each delicious bite with vibrant flavors and comforting textures.

  • Fresh Berries: Sweet, juicy berries like raspberries or strawberries add a refreshing contrast to the rich cheesecake, providing a burst of tartness.
  • Chocolate Ganache Drizzle: Extra ganache on the plate not only looks stunning but amplifies the chocolate flavor, making every slice even more indulgent.
  • Vanilla Ice Cream: Creamy vanilla ice cream perfectly balances the minty cheesecake, creating a delightful melting sensation in your mouth.
  • Mint Tea: A warm cup of mint tea enhances the mint experience, offering a soothing finish to your rich dessert.
  • Espresso or Coffee: Rich coffee or espresso serves as a bold counterpart that balances the sweetness, perfect for your post-dinner treat.
  • Whipped Cream: A dollop of freshly whipped cream adds a light, airy texture, elevating the creaminess of the cheesecake and creating visual appeal.
  • Chocolate-Covered Almonds: Crunchy chocolate-covered almonds lend a delightful contrast in texture and an irresistible nutty flavor, enhancing the overall tasting experience.
  • Mint Sprigs for Garnish: Bright green mint leaves not only freshen the presentation but also offer an aromatic hint that complements your cheesecake beautifully.
  • Chocolate Mousse: A small serving of airy chocolate mousse brings an extra layer of chocolate indulgence. This delightful pairing can make your dessert table truly memorable.

How to Store and Freeze Mint Chocolate Cheesecake

Fridge: Store leftover slices of your Mint Chocolate Cheesecake wrapped in plastic or in an airtight container for up to 5 days. This keeps the cheesecake fresh and delicious.

Freezer: For longer storage, freeze your cheesecake for up to 3 months. Remove the whipped cream before freezing, and wrap it tightly in plastic and aluminum foil to prevent freezer burn.

Thawing: To enjoy frozen cheesecake, transfer it to the fridge and let it thaw overnight. Avoid rapid temperature changes to maintain its creamy texture.

Reheating: If you want to enjoy it slightly warm, let it come to room temperature and serve, or microwave a slice for 10-15 seconds—and voila, your Mint Chocolate Cheesecake is ready to delight again!

Expert Tips for Mint Chocolate Cheesecake

  • Room Temperature Ingredients: Ensure all cheesecake components, especially cream cheese and eggs, are at room temperature to achieve a creamy texture and prevent cracks.

  • Gentle Mixing: When adding eggs, mix minimally to avoid incorporating too much air, which can lead to cracking during baking.

  • Crust Variations: For a stronger mint flavor, consider using mint-flavored Oreos for the crust. This step enhances the overall mintiness of your Mint Chocolate Cheesecake.

  • Careful Color Adding: If using green food coloring, start with a drop or two. You can always add more for a richer hue, but it's hard to lighten a vivid color.

  • Cooling Tips: Allow the cheesecake to cool gradually to room temperature before refrigerating. This helps minimize temperature shocks that can cause cracks.

  • Water Bath Method: Don’t skip the water bath! This technique helps the mousse-like texture of the cheesecake and prevents it from drying out.

Mint Chocolate Cheesecake Recipe FAQs

What type of Oreos should I use for the crust?
You can use regular or gluten-free Oreos for the crust of your Mint Chocolate Cheesecake. If you want to enhance the mint flavor, try using mint-flavored Oreos instead—this will add an extra burst of mintiness that pairs beautifully with the cheesecake!

How should I store leftover cheesecake?
Store any leftover slices of Mint Chocolate Cheesecake in an airtight container or wrapped tightly with plastic wrap in the refrigerator for up to 5 days. This ensures the cheesecake remains fresh and delectable for your next indulgence.

Can I freeze Mint Chocolate Cheesecake?
Absolutely! You can freeze your cheesecake for up to 3 months. Just make sure to remove the whipped cream topping before you freeze it. Wrap the cheesecake securely in plastic wrap and then in aluminum foil to prevent freezer burn, and when you’re ready to enjoy it, thaw it overnight in the fridge.

Why did my cheesecake crack during baking?
Cracking can occur for a few reasons. Ensure ingredients are at room temperature for smooth mixing, and avoid over-mixing after adding the eggs. Lastly, using a water bath will create a humid baking environment that helps prevent cracks. If your cheesecake does crack, don't worry; it will still taste divine!

Is there a way to make this cheesecake dairy-free?
You can substitute the cream cheese with a dairy-free cream cheese alternative and use coconut cream instead of heavy cream. Be mindful that the flavor and texture might alter slightly, but it can still be a delicious version of this Mint Chocolate Cheesecake, suitable for those with dairy allergies or intolerances.

Can pets eat mint chocolate cheesecake?
No, chocolate is toxic to dogs and cats. It’s important to keep your Mint Chocolate Cheesecake away from pets. If you’re looking to include your furry friends in your celebrations, consider making a pet-friendly treat just for them, using safe ingredients!

Mint Chocolate Cheesecake

Mint Chocolate Cheesecake

This Mint Chocolate Cheesecake combines creamy mint-infused cheese with rich chocolate, creating an irresistible dessert that celebrates holiday flavors.
Print Recipe Pin Recipe
Prep Time 30 minutes mins
Cook Time 1 hour hr 10 minutes mins
Chilling Time 4 hours hrs
Total Time 5 hours hrs 40 minutes mins
Servings: 12 slices
Course: Dessert
Cuisine: American
Calories: 350
Ingredients Equipment Method Nutrition Notes

Ingredients
  

For the Crust
  • 24 cookies Oreo cookies Use gluten-free if needed
  • 1/2 cup Unsalted butter Melted
For the Cheesecake Batter
  • 24 ounces Cream cheese Room temperature
  • 1 cup Granulated sugar
  • 1 cup Sour cream
  • 1 teaspoon Vanilla extract
  • 1 teaspoon Mint or peppermint extract Use peppermint for a bolder flavor
  • 1 pinch Salt
  • 3 large Eggs Room temperature
  • a few drops Green food coloring Optional for color
  • 1 cup Andes mints Chopped
For the Ganache and Topping
  • 1 cup Chocolate chips or chopped chocolate
  • 1/2 cup Heavy cream For ganache
  • 1/4 cup Confectioners' sugar For whipped cream

Equipment

  • 9-inch springform pan
  • Food Processor
  • Mixing Bowl
  • Electric mixer
  • Microwave-safe bowl
  • Spatula

Method
 

Make the Cheesecake
  1. Preheat your oven to 350°F (175°C). Crush 24 Oreo cookies in a food processor until they resemble fine crumbs. Mix well with 1/2 cup of melted unsalted butter. Press into the bottom of a 9-inch springform pan. Bake for 10 minutes, then reduce the oven temperature to 325°F (163°C).
  2. In a large mixing bowl, beat 24 ounces of room-temperature cream cheese and 1 cup of granulated sugar until smooth. Add in 1 cup of sour cream, 1 teaspoon of vanilla extract, 1 teaspoon of mint extract, and a sprinkle of salt. Mix until fully integrated.
  3. Gradually add 3 large room-temperature eggs, mixing minimally after each addition to prevent air pockets.
  4. Gently fold in a couple of drops of green food coloring and 1 cup of chopped Andes mints into your batter.
  5. Wrap the outside of the springform pan with aluminum foil. Place inside a larger baking dish filled with hot water. Pour the cheesecake batter into the crust.
  6. Bake for 70 minutes at 325°F (163°C). Cool in the oven with the door slightly ajar for about 30 minutes.
  7. Chill the cheesecake for at least 4 hours, preferably overnight, in the refrigerator.
  8. Combine 1 cup of chocolate chips and 1/2 cup of heavy cream in a microwave-safe bowl. Microwave in 30-second intervals until smooth. Pour over the chilled cheesecake.
  9. Whip 1 cup of heavy cream with 1/4 cup of confectioners' sugar and 1/2 teaspoon of mint extract until stiff peaks form. Decorate the cheesecake with whipped cream.

Nutrition

Serving: 1sliceCalories: 350kcalCarbohydrates: 30gProtein: 5gFat: 24gSaturated Fat: 14gPolyunsaturated Fat: 1gMonounsaturated Fat: 8gCholesterol: 80mgSodium: 340mgPotassium: 150mgFiber: 1gSugar: 22gVitamin A: 500IUVitamin C: 1mgCalcium: 50mgIron: 1mg

Notes

Ensure all ingredients are at room temperature for best results. Using mint Oreos can enhance the flavor.

Tried this recipe?

Let us know how it was!
  • « Previous Page
  • 1
  • …
  • 28
  • 29
  • 30
  • 31
  • 32
  • …
  • 65
  • Next Page »

Welcome!

Hi, I’m Grace, a Sydney-based home cook with a passion for bold flavors and trending ingredients. Whether you’re a busy beginner or a seasoned foodie, you’ll find dishes here that are fresh, fun, and full of flavor.

More about me

Popular Recipes

  • Pomegranate Caramels
    Pomegranate Caramels - Irresistibly Chewy Homemade Treats
  • Blueberry–Lemon Curd Tart
    Blueberry-Lemon Curd Tart: A Refreshing Summer Delight
  • Winter Wonderland Chocolate Chip Christmas Cookies
    Winter Wonderland Chocolate Chip Christmas Cookies Bliss
  • Oreo Chocolate Chip Cookies
    Chewy Oreo Chocolate Chip Cookies You Can't Resist

Footer

↑ back to top

About

  • Privacy Policy
  • Disclaimer
  • Terms & Conditions

Newsletter

  • Sign Up! for emails and updates

Contact

  • About me
  • Contact me

Copyright © 2025 TastyTrendIngredients