tastytrendingredients

  • Home
  • Recipes
    • Appetizers
    • Breakfast
    • Dessert
    • Dinner
    • Drinks
    • Salads
    • Snacks
    • Soups
  • About me
  • Contact
menu icon
go to homepage
  • Home
  • Recipes
    • Appetizers
    • Breakfast
    • Dessert
    • Dinner
    • Drinks
    • Salads
    • Snacks
    • Soups
  • About me
  • Contact
search icon
Homepage link
  • Home
  • Recipes
    • Appetizers
    • Breakfast
    • Dessert
    • Dinner
    • Drinks
    • Salads
    • Snacks
    • Soups
  • About me
  • Contact
×

Irresistibly Soft Strawberry Cheesecake Cookies to Savor

January 19, 2026 by Grace Snow Leave a Comment

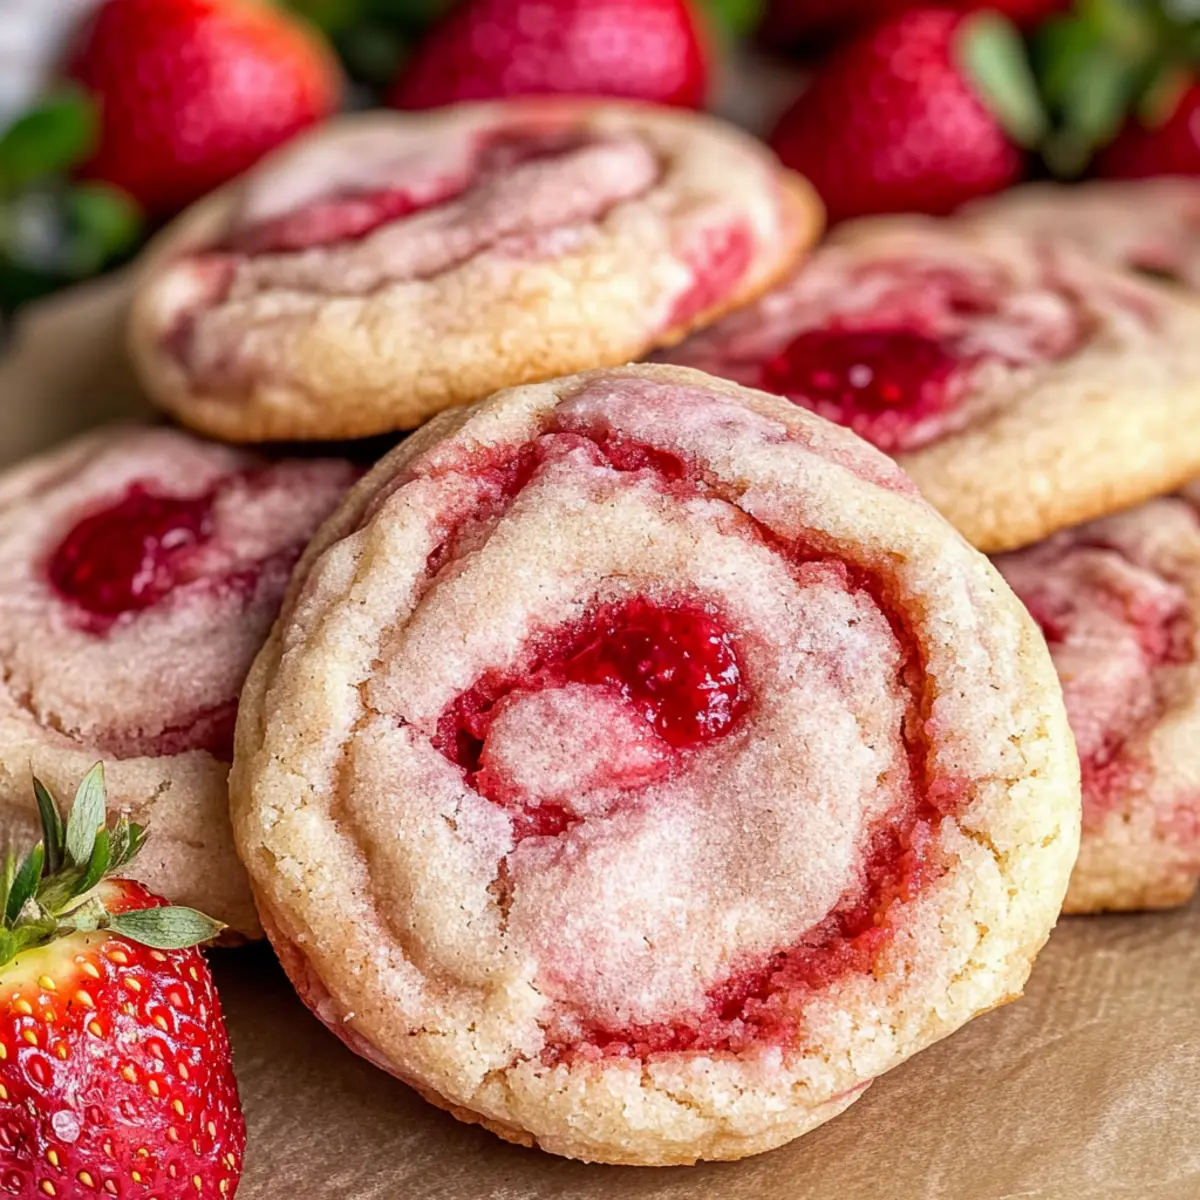
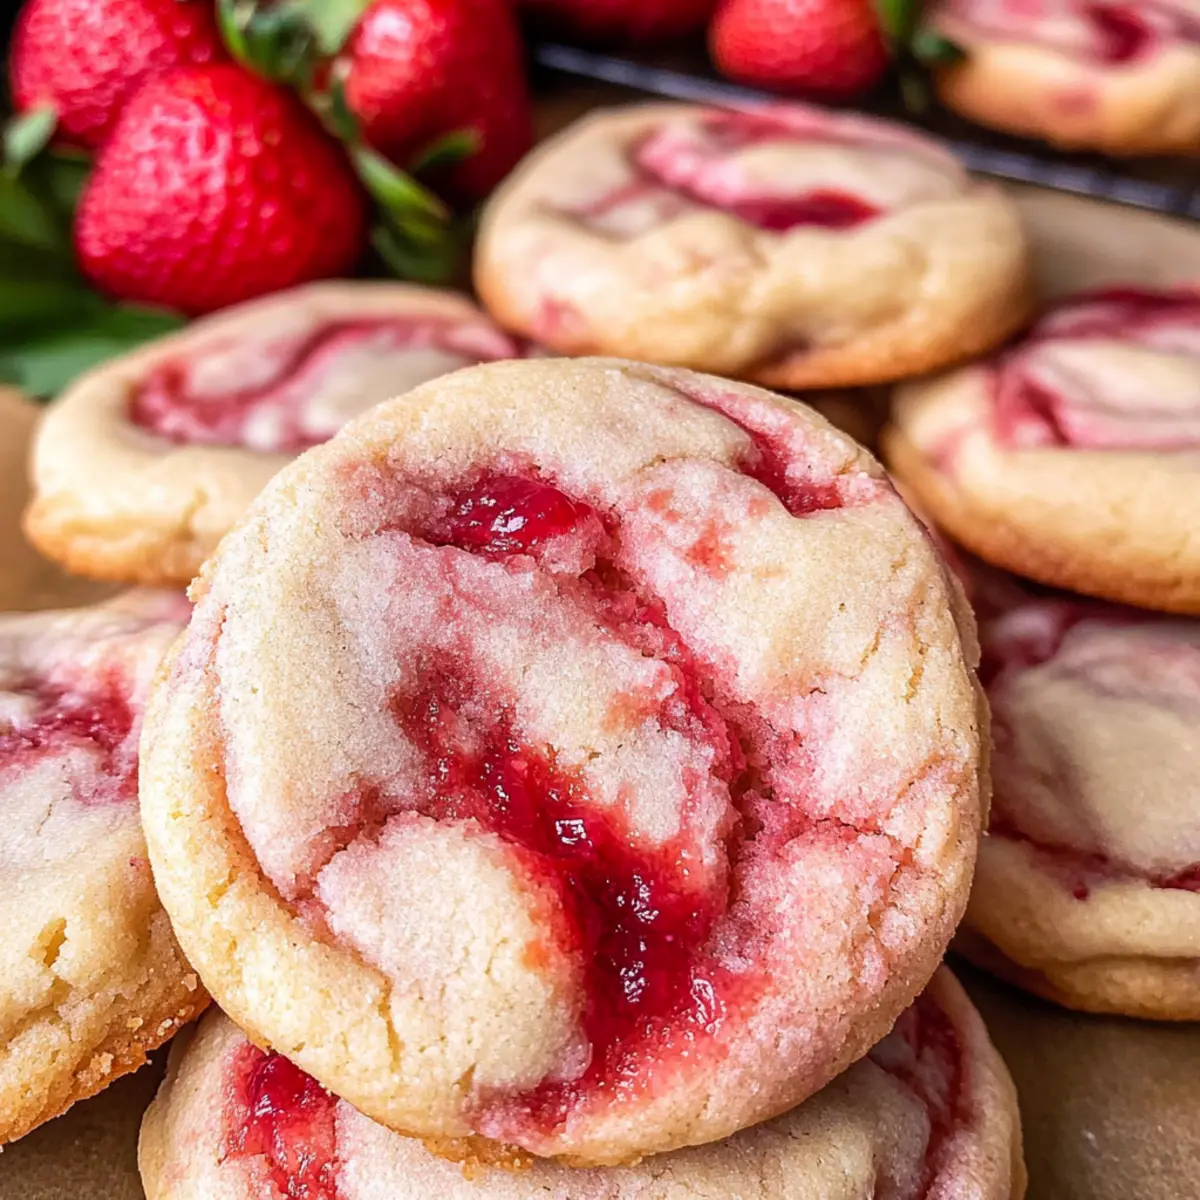
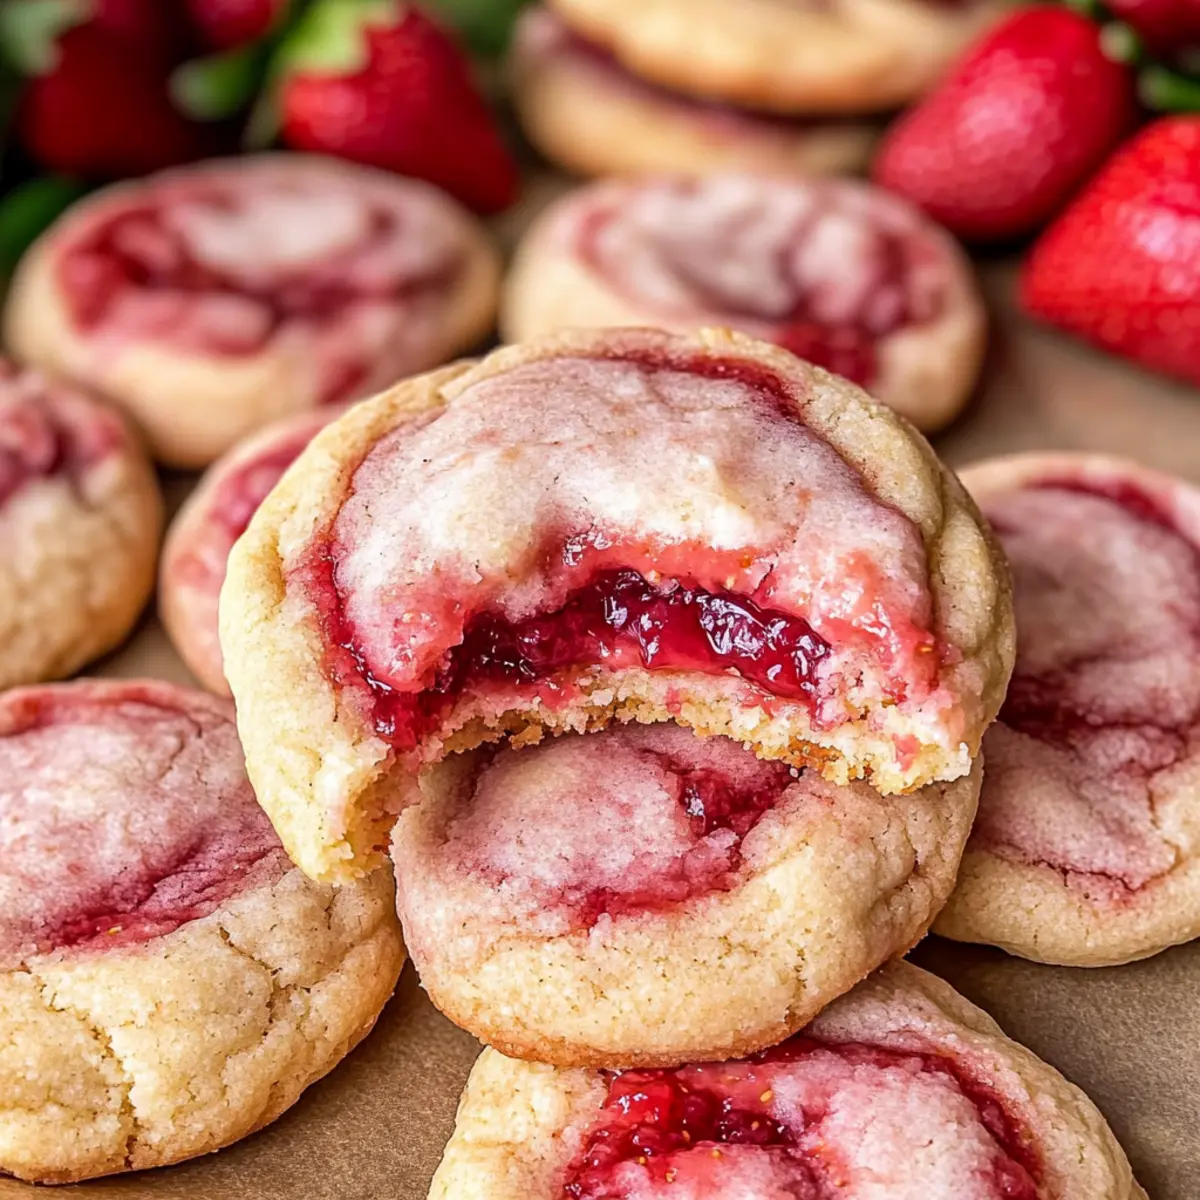
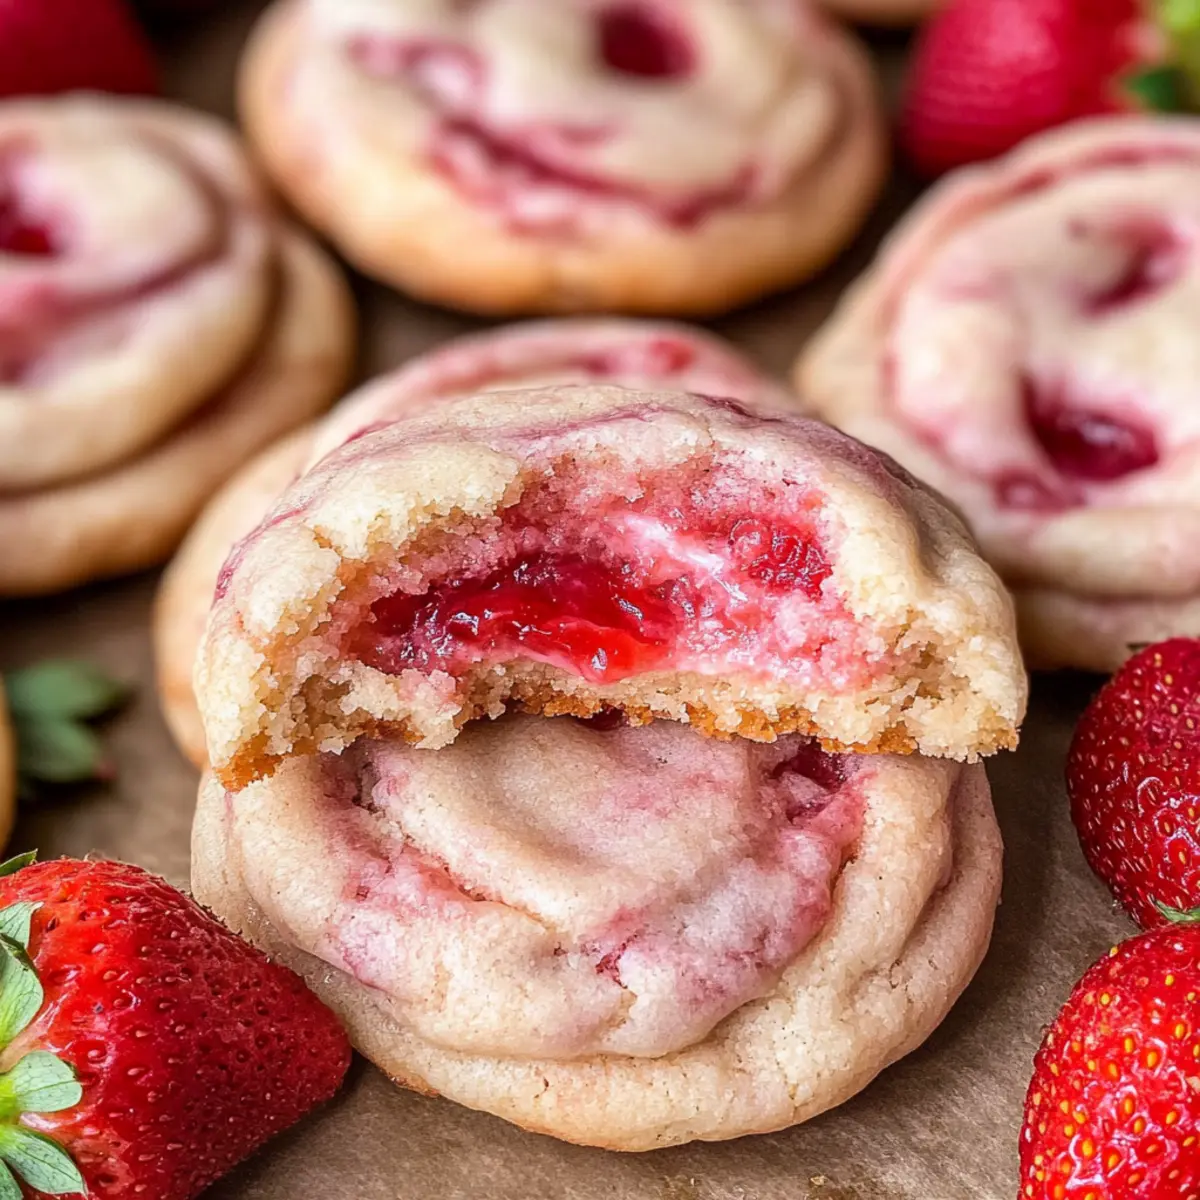
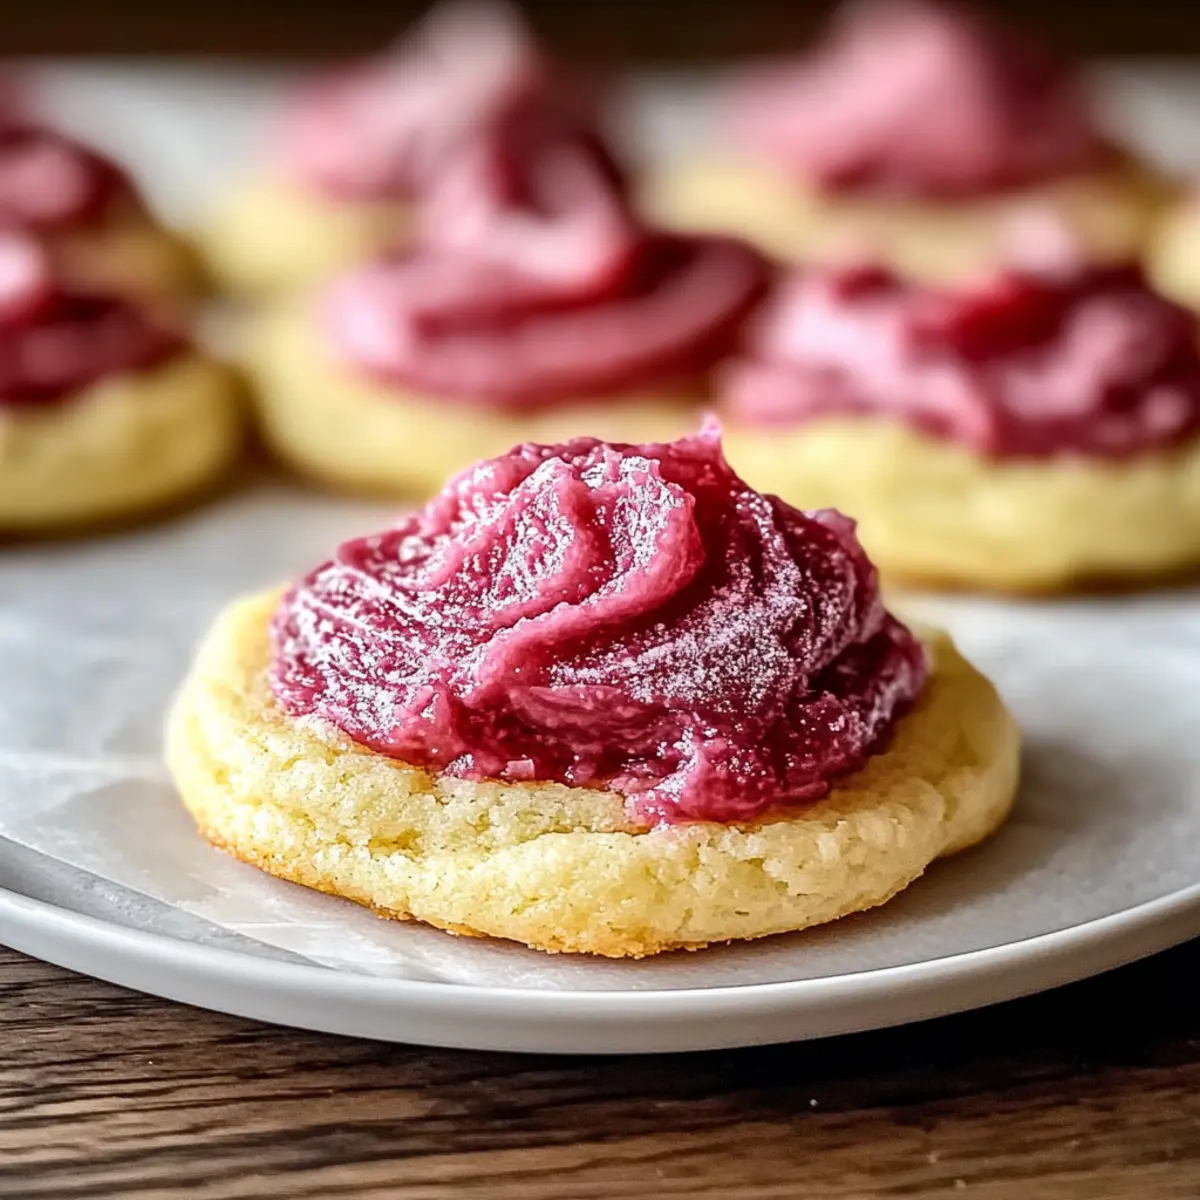
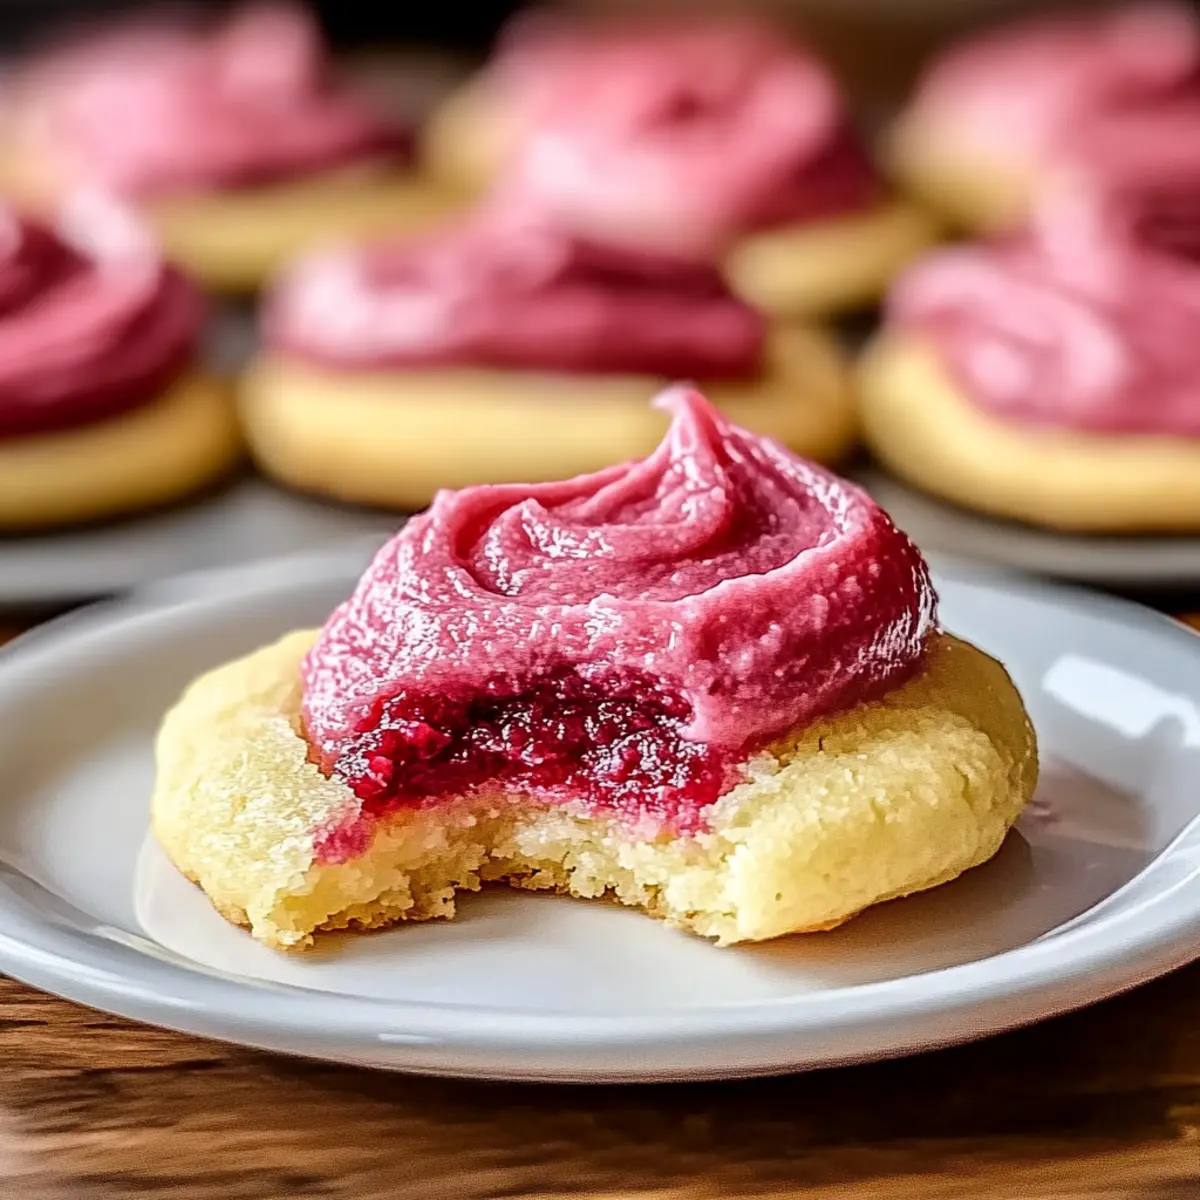
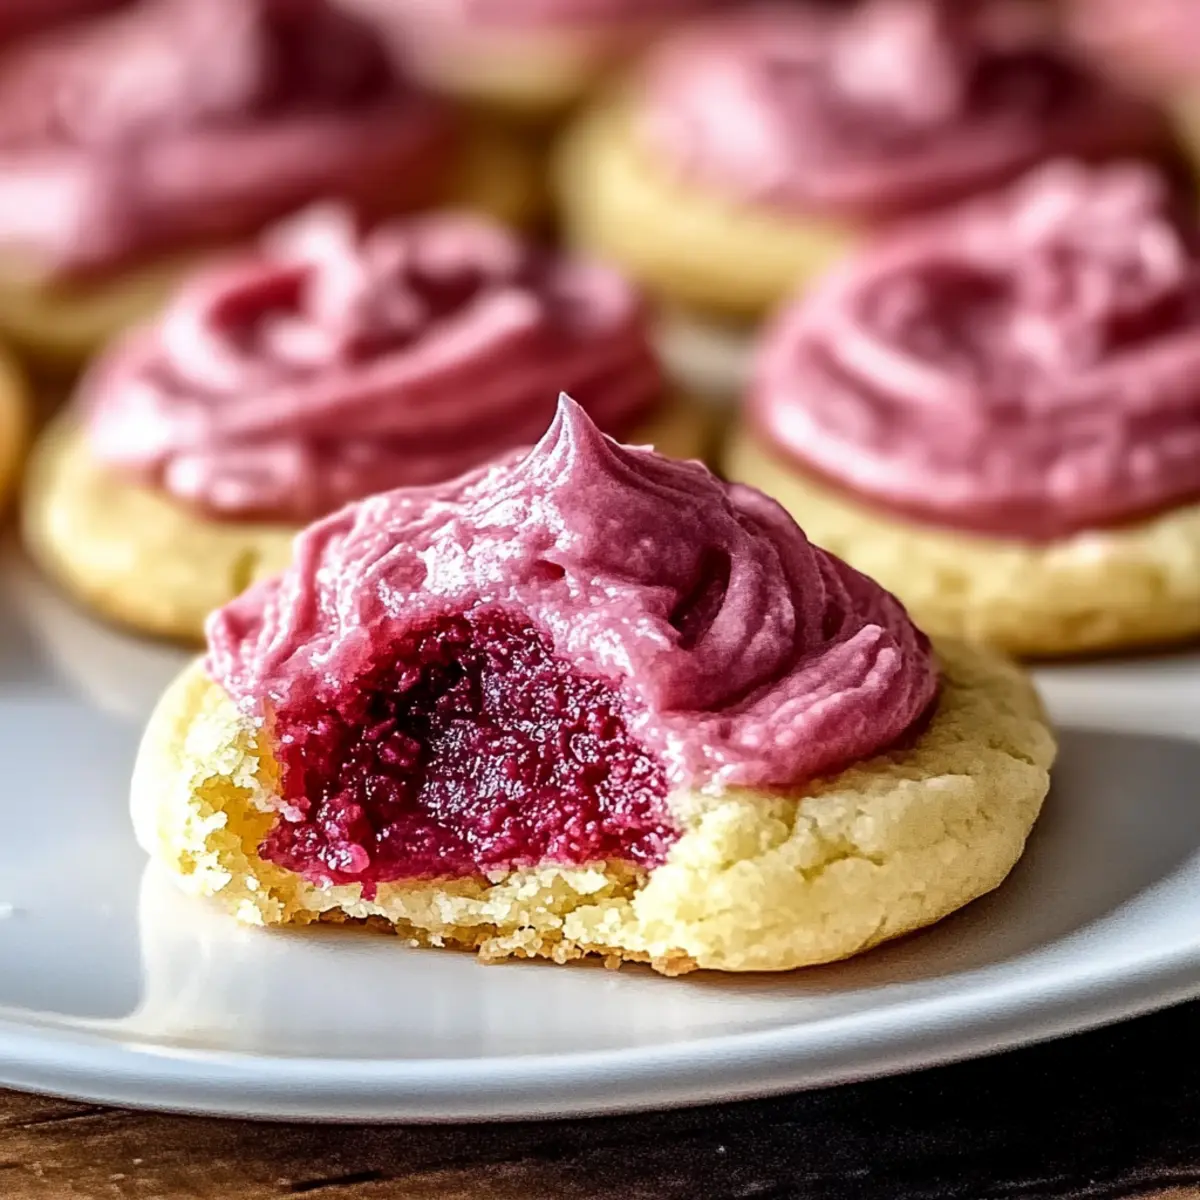
There’s something genuinely magical when strawberries meet creamy cheesecake. As I set out to create my Soft Strawberry Cheesecake Cookies, the anticipation of that perfect bite filled with jammy swirls and a luscious cheesecake filling drove me to the kitchen. These delightful cookies are not only irresistibly delicious but also wonderfully soft, making them ideal for anyone yearning to stray from fast food. Plus, they’re a show-stopping dessert that will have your friends and family begging for the recipe! With minimal prep time and the ability to impress at any gathering, these strawberry cheesecake cookies are truly a culinary triumph. Are you ready to embark on this sweet baking adventure with me?

Why Are These Cookies So Magical?

Irresistibly soft, these Strawberry Cheesecake Cookies offer a blissful bite that feels like a hug in cookie form. Jammy swirls of homemade strawberry jam elevate each cookie, delivering a burst of natural sweetness. Creamy filling made with rich cream cheese adds a delightful surprise in every munch. Perfectly chewy texture means they won’t crumble on you. Quick prep time is a win for busy bakers, allowing you to whip these up in no time. Pair them with a cup of tea or a glass of milk, and you're set for a delightful treat that can beat any fast food!

Strawberry Cheesecake Cookies Ingredients

For the Cheesecake Filling

  • Cream Cheese – Provides the creamy cheesecake filling; use cold cream cheese for best mixing.
  • Granulated White Sugar – Sweetens both the cheesecake filling and cookie; no direct substitution recommended.
  • Vanilla Extract – Adds warmth and depth; use pure vanilla for the best flavor.

For the Strawberry Jam

  • Fresh Strawberries – Essential for that homemade jammy swirl; frozen strawberries can be used if fresh are unavailable.
  • Granulated Sugar – Helps to sweeten the jam; adjust according to your taste sweetness preference.

For the Cookie Dough

  • All-Purpose Flour – Forms the structure of the cookies; be sure to spoon and level for accurate measurement.
  • Baking Powder – A leavening agent that helps the cookies rise while maintaining a soft texture.
  • Baking Soda – Works with baking powder to ensure a wonderfully chewy cookie.
  • Salt – Enhances the flavors of the cookie.
  • Unsalted Butter – Key for a rich buttery flavor; should be very softened for optimal creaming with sugar.
  • Egg – Binds the dough and gives the cookies a chewy texture; use at room temperature for effective mixing.
  • Sugar for Rolling – Provides a sweet outer coating that enhances flavor and texture; perfect for that adorable sparkle outside.

These Strawberry Cheesecake Cookies are a delightful treat that brings together the tangy flavor of cream cheese and the sweetness of strawberries, ready to impress at any occasion!

Step‑by‑Step Instructions for Strawberry Cheesecake Cookies

Step 1: Prepare Cheesecake Filling
In a mixing bowl, blend cold cream cheese, granulated sugar, and vanilla extract until fluffy and smooth, about 2-3 minutes. Scoop the mixture into small discs on a lined baking sheet, approximately 1 inch in diameter. Pop these discs in the freezer for about 30 minutes, or until solid, to ensure they maintain their shape during baking.

Step 2: Make Strawberry Jam
Take fresh strawberries and chop them into small pieces. In a saucepan over medium heat, combine the diced strawberries with sugar, cooking for about 45 minutes while stirring occasionally until you achieve a thick, jam-like consistency. Once cooked, transfer the jam to a bowl and chill in the refrigerator until cool, allowing it to set properly for the cookies.

Step 3: Mix Cookie Dough
Preheat your oven to 350°F (175°C) and line baking sheets with parchment paper. In a bowl, whisk together all-purpose flour, baking powder, baking soda, and salt. In a separate large mixing bowl, cream softened unsalted butter with granulated sugar until light and fluffy, about 4-5 minutes. Then, add one egg and vanilla extract, mixing until well combined before folding in the dry ingredients gently.

Step 4: Combine
Gradually add the flour mixture to the buttery mixture, folding it in just until combined. Carefully swirl in the homemade strawberry jam to maintain beautiful, visible swirls throughout the cookie dough—not fully mixing it in. This will give each Strawberry Cheesecake Cookie a burst of strawberry goodness.

Step 5: Assemble Cookies
Scoop about two tablespoons of cookie dough and flatten it into a disk shape in your hand. Place a frozen cheesecake disc in the center and wrap the dough around it, ensuring complete coverage. Roll the filled cookies in granulated sugar and shape them into neat discs before placing them on the prepared baking sheets for a sweet exterior.

Step 6: Bake
Bake the assembled Strawberry Cheesecake Cookies in the preheated oven for 11-12 minutes or until the edges are golden and the centers look slightly underbaked. After baking, use a cookie cutter to reshape the cookies while they’re warm, if desired, to achieve a perfect shape.

Step 7: Cool
Allow the cookies to cool on the baking sheets for about 5 minutes before transferring them to a wire rack to cool completely. This step is essential for letting the cheesecake filling set, ensuring your Strawberry Cheesecake Cookies are perfectly soft and creamy.

Expert Tips for Strawberry Cheesecake Cookies

  • Chill Filling: Ensure your cheesecake filling is thoroughly frozen before assembling the cookies. This keeps the filling from leaking during baking.
  • Measure Flour Properly: Use the spoon and level method for flour measurements. Too much flour can lead to dry cookies.
  • Quality Strawberries: Choose the freshest strawberries for your homemade jam. They make a significant difference in flavor for these strawberry cheesecake cookies.
  • Cool Cookies Completely: Let the cookies cool fully on a wire rack to allow the cheesecake filling to firm up, ensuring that perfect creamy bite.
  • Adjust Baking Time: Keep an eye on cookies while baking; larger ones may need extra time. The edges should be golden, but the centers look slightly underbaked for best texture.

Storage Tips for Strawberry Cheesecake Cookies

Room Temperature: Store cookies in an airtight container at room temperature for up to 3 days to maintain their soft texture.

Fridge: If you prefer a chilled treat, keep the cookies in the fridge for up to a week. Just ensure they're in an airtight container to prevent drying out.

Freezer: For longer storage, freeze unbaked cookie dough balls for up to 2 weeks. When ready to bake, simply add a couple of extra minutes to the baking time.

Reheating: To enjoy warm cookies, microwave them for about 10-15 seconds for a soft, melty experience—perfect for a cozy snack!

What to Serve with Soft Strawberry Cheesecake Cookies?

There's nothing quite like enjoying these delicious treats alongside delightful pairings that enhance their sweet, creamy goodness.

  • Creamy Vanilla Ice Cream: The cool creaminess complements the warm cookies, creating a delightful contrast. A scoop next to those soft strawberry cheesecake cookies feels like a summer dream!

  • Fresh Fruit Salad: Bright, juicy fruits like blueberries and kiwi enhance the fruity flavors of the cookies. Plus, the freshness cuts through the sweetness, making every bite refreshing.

  • Chocolate Sauce: Drizzle some rich, melted chocolate on top for a decadent treat that adds a luscious feel. This combination is perfect for chocolate lovers seeking an extra indulgent experience.

  • Coffee or Espresso: A warm cup of coffee or espresso brings out the cheesecake flavor beautifully. The bitterness of the coffee perfectly balances the sweetness of the cookies for an exquisite dessert moment.

  • Whipped Cream: Light, airy whipped cream adds an exquisite touch; a dollop on each cookie delivers a dreamy texture that makes your taste buds sing!

  • Lemonade or Iced Tea: Refreshing beverages like lemonade or iced tea cleanse the palate between bites, making for a bright and cheerful complement to the cookies.

  • Dark Chocolate-Covered Strawberries: These decadent bites enhance the strawberry flavor, creating a sweet and slightly tart experience that pairs perfectly with the cookies’ creamy filling.

  • Milk: A classic pairing, a tall glass of cold milk works wonders. It softens the cookie with each bite, reminding you of childhood snack times.

Make Ahead Options

These delightful Strawberry Cheesecake Cookies are perfect for meal prep enthusiasts! You can prepare the cheesecake filling and homemade strawberry jam up to 3 days in advance. Simply mix the cream cheese, sugar, and vanilla, then scoop and freeze the filling discs (this prevents leaking during baking). For the jam, refrigerate it after cooking until cool. When you’re ready to enjoy these cookies, simply mix the cookie dough and assemble them with the frozen filling and jam swirls. Bake according to the instructions, and you'll have soft Strawberry Cheesecake Cookies fresh from the oven with minimal last-minute effort! Enjoy the satisfaction of homemade sweetness without the rush!

Strawberry Cheesecake Cookies Variations

Feel free to personalize your Strawberry Cheesecake Cookies with these fun and delightful twists!

  • Berry Swap: Substitute fresh strawberries with raspberries or blueberries for a tasty fruit variation. Each berry brings its unique flavor to your cookie.

  • Flavored Cream Cheese: Use flavored cream cheese, like strawberry or vanilla, to elevate your cheesecake filling. It adds that extra zing that can really surprise your taste buds.

  • Chocolate Twist: Incorporate cocoa powder into the dough or dip the finished cookies in melted chocolate for a rich, decadent treat. Chocolate and strawberry are a timeless pairing!

  • Nutty Crunch: Mix in chopped nuts, like pecans or walnuts, for added texture and a nutty flavor. This twist creates a satisfying crunch that complements the softness of the cookies.

  • Cinnamon Sugar Roll: Roll the cookie dough balls in a blend of cinnamon and sugar for a warm flavor boost. It’s a delightful twist that pairs wonderfully with the strawberry sweetness.

  • Vegan Friendly: Replace the cream cheese with vegan cream cheese, use flax eggs, and substitute dairy butter with coconut oil. You’ll have a plant-based version that retains all the magic.

  • Zesty Lemon: Add a teaspoon or two of lemon zest to the dough for a refreshing citrus brightness. Lemon and strawberry together create a burst of summer flavor!

  • Spicy Kick: If you're feeling adventurous, consider incorporating a pinch of cayenne pepper or chili powder into the dough for a surprising spicy note that elevates your cookies in a delightful way.

These variations can keep the magic alive and ensure there’s always a new cookie experience waiting for you. And if you're looking for more indulgent recipes, don't forget to check out these delicious Matcha Cookies Soft or delightful Thumbprint Cookies Melt. Happy baking!

Strawberry Cheesecake Cookies Recipe FAQs

How do I choose ripe strawberries for the jam?
Absolutely! Look for strawberries that are vibrant red, with no green or white patches, and have a sweet fragrance. Avoid any berries with dark spots or mold, as these indicate overripeness. If you find perfectly ripe strawberries, they will yield a sweeter and more flavorful jam.

What’s the best way to store leftover Strawberry Cheesecake Cookies?
Very! Keep your cookies in an airtight container at room temperature, and they'll remain delicious for up to 3 days. If you prefer them chilled, refrigerate them in a sealed container, where they can last for an entire week. That way, you can savor the delightful flavors whenever you fancy a treat!

Can I freeze the cookie dough for later use?
Absolutely! You can freeze unbaked cookie dough balls for up to 2 weeks. To do this, scoop the dough and shape it into balls, then place them on a baking sheet lined with parchment paper and freeze until solid. Once frozen, transfer them to a freezer-safe bag or container. When ready to bake, just add an extra couple of minutes to the baking time!

What can I do if my cheesecake filling leaks out during baking?
If you notice the cheesecake filling leaking, it's likely because it wasn’t frozen solid enough. In the future, ensure that your filling is frozen for at least 30 minutes before assembling the cookies. Also, wrapping the dough completely around the filling can help protect it during baking. Don’t worry, though; even if it leaks a bit, those cookies will still taste amazing!

Are these cookies suitable for people with dairy allergies?
Unfortunately, these Strawberry Cheesecake Cookies contain cream cheese, making them unsuitable for those with dairy allergies. However, you could experiment with dairy-free cream cheese alternatives that are now available in many supermarkets. Just make sure the substitute will maintain a similar texture and flavor profile in the filling!

How do I tell if the cookies are baked perfectly?
For that perfect bake, keep an eye on the edges while they're in the oven. They should be golden brown while the centers look slightly underbaked. This will help maintain that soft, chewy texture we all love in Strawberry Cheesecake Cookies. It's a bit of an art, but practice makes perfect!

Strawberry Cheesecake Cookies

Irresistibly Soft Strawberry Cheesecake Cookies to Savor

These Strawberry Cheesecake Cookies are irresistibly soft and bursting with the flavors of creamy cheesecake and sweet strawberries.
Print Recipe Pin Recipe
Prep Time 30 minutes mins
Cook Time 12 minutes mins
Cooling Time 5 minutes mins
Total Time 47 minutes mins
Servings: 12 cookies
Course: Dessert
Cuisine: American
Calories: 150
Ingredients Equipment Method Nutrition Notes

Ingredients
  

Cheesecake Filling
  • 8 oz Cream Cheese Use cold for best mixing
  • 1/3 cup Granulated White Sugar No direct substitution recommended
  • 1 teaspoon Vanilla Extract Use pure vanilla for best flavor
Strawberry Jam
  • 2 cups Fresh Strawberries Frozen can be used if fresh are unavailable
  • 1/2 cup Granulated Sugar Adjust for sweetness preference
Cookie Dough
  • 2 cup All-Purpose Flour Spoon and level for accurate measurement
  • 1 teaspoon Baking Powder Leavening agent for soft texture
  • 1/2 teaspoon Baking Soda Ensures a wonderfully chewy cookie
  • 1/4 teaspoon Salt Enhances flavor
  • 1/2 cup Unsalted Butter Should be very softened
  • 1 large Egg Use at room temperature
  • 1/4 cup Sugar for Rolling Provides a sweet outer coating

Equipment

  • Mixing Bowl
  • Saucepan
  • Baking Sheets
  • Parchment Paper
  • Refrigerator
  • Oven

Method
 

Preparation
  1. In a mixing bowl, blend cold cream cheese, granulated sugar, and vanilla extract until fluffy and smooth, about 2-3 minutes.
  2. Scoop the mixture into small discs on a lined baking sheet, approximately 1 inch in diameter.
  3. Pop these discs in the freezer for about 30 minutes, or until solid.
  4. Chop fresh strawberries into small pieces, and combine with sugar in a saucepan over medium heat.
  5. Cook for about 45 minutes while stirring until thick, then cool and chill the jam.
  6. Preheat your oven to 350°F (175°C) and line baking sheets with parchment paper.
  7. In a bowl, whisk together flour, baking powder, baking soda, and salt.
  8. Cream softened butter with granulated sugar for about 4-5 minutes, then add egg and vanilla.
  9. Gradually fold in the dry ingredients and carefully swirl in the strawberry jam.
  10. Scoop about two tablespoons of dough, flatten it, and wrap it around a cheesecake disc.
  11. Roll in sugar and shape into discs before placing them on baking sheets.
  12. Bake for 11-12 minutes until edges are golden, using a cookie cutter for shape if desired.
  13. Cool on sheets for about 5 minutes, then transfer to a wire rack.

Nutrition

Serving: 1cookieCalories: 150kcalCarbohydrates: 20gProtein: 2gFat: 7gSaturated Fat: 4gPolyunsaturated Fat: 1gMonounsaturated Fat: 2gCholesterol: 30mgSodium: 100mgPotassium: 50mgFiber: 1gSugar: 10gVitamin A: 250IUVitamin C: 10mgCalcium: 40mgIron: 0.5mg

Notes

Chill the cheesecake filling thoroughly before assembling cookies and allow cookies to cool completely for best texture.

Tried this recipe?

Let us know how it was!

Crumbl Salted Caramel Cheesecake Cookies You'll Love to Make

January 19, 2026 by Grace Snow Leave a Comment

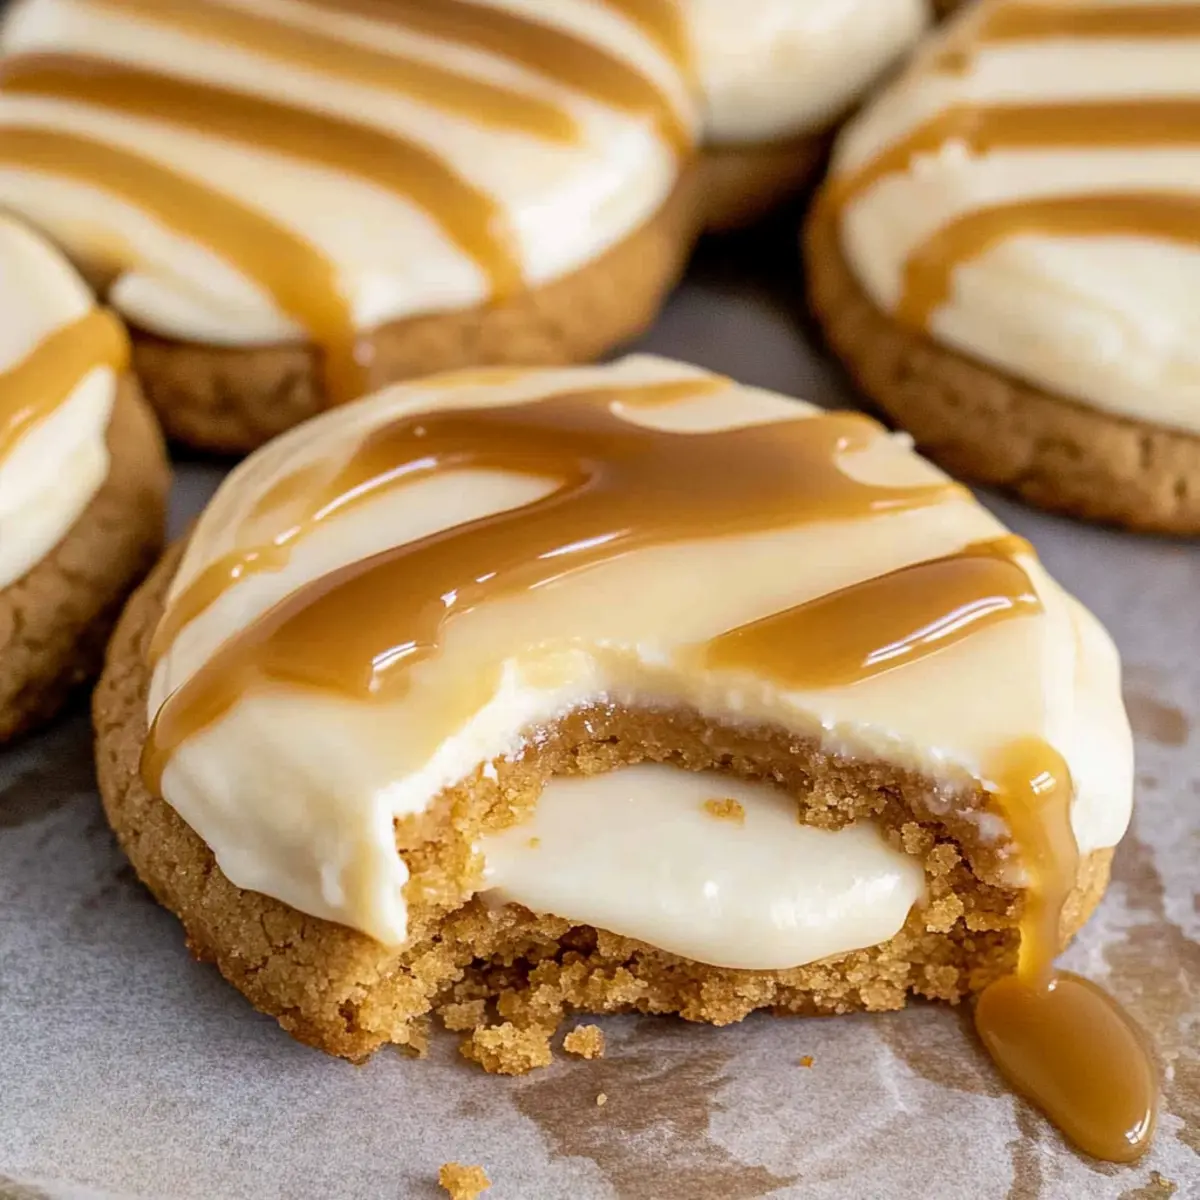
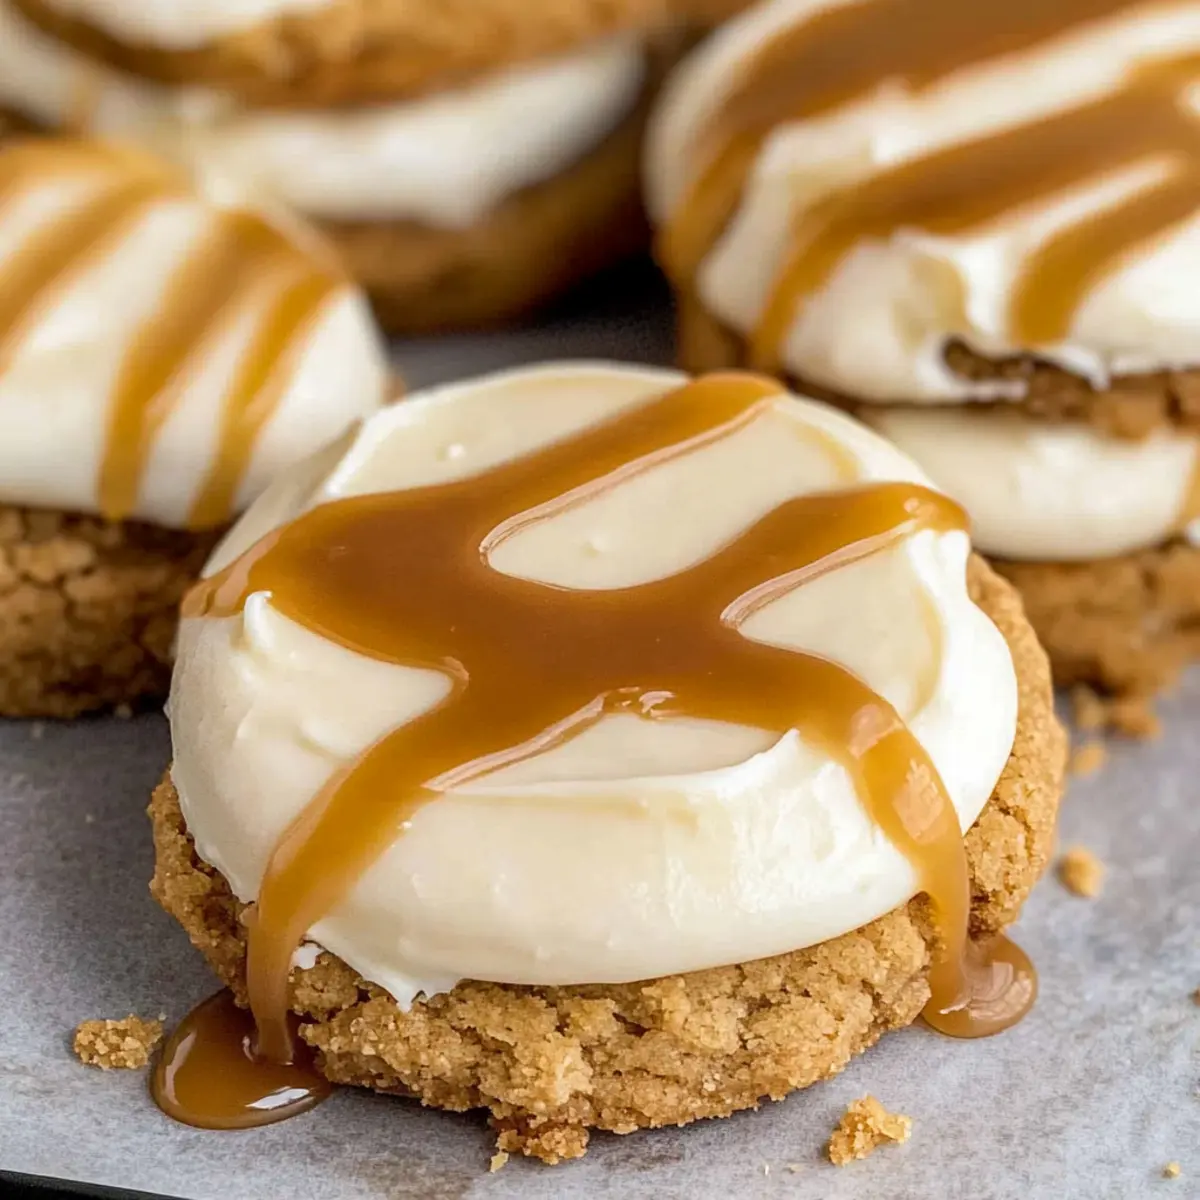
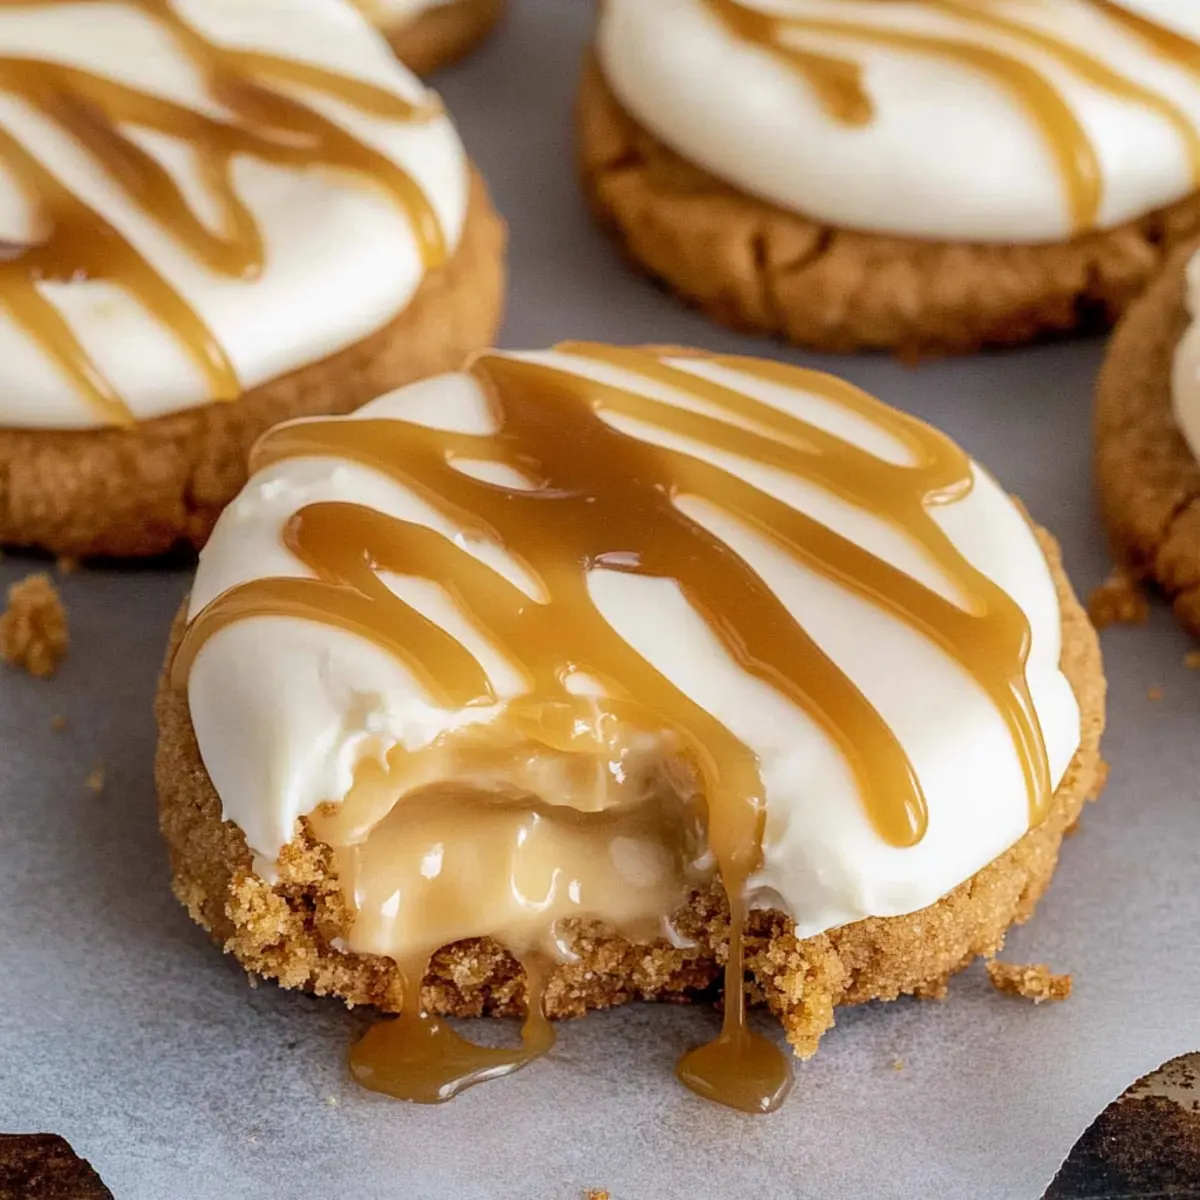
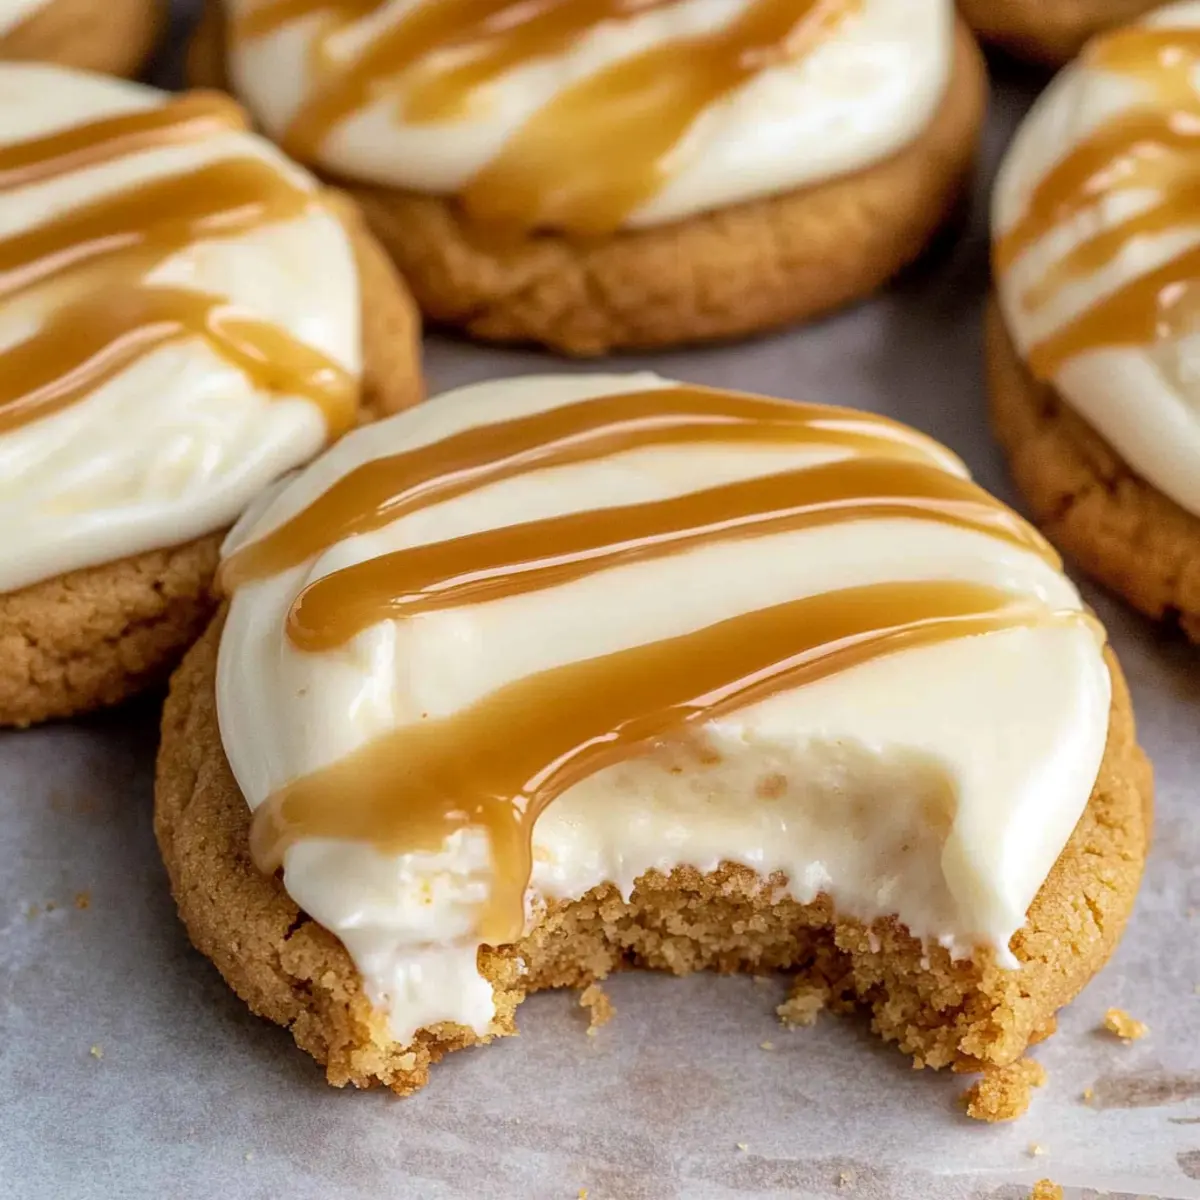
As I stood in my kitchen, the tantalizing aroma of warm cookies filled the air, instantly transporting me to my favorite bakery. Today, I’m excited to share my take on the Copycat Crumbl Salted Caramel Cheesecake Cookies, a delightful blend of crunchy graham cracker base, creamy cheesecake frosting, and a drizzle of homemade caramel sauce. Not only are these cookies a definite crowd-pleaser, but they’re also impressively simple to make, making them perfect for any occasion. Whether you enjoy them straight from the oven or with a chilled glass of milk, each bite is a comforting reminder that homemade treats always beat fast food. Are you ready to bring a slice of bakery bliss right to your home?

Why Are These Cookies So Irresistible?

Indulgent Flavor: The combination of rich caramel and creamy cheesecake frosting creates a dessert experience that’s simply unforgettable.
Easy to Make: With simple ingredients and straightforward steps, you’ll be amazed at how quickly you can whip up these cookies.
Perfect for Any Occasion: Whether it's a family gathering, holiday celebration, or just a cozy night in, these cookies are sure to delight!
Impressive Presentation: The beautiful drizzle of homemade caramel on top gives these cookies a bakery-quality look, perfect for impressing guests or filling a dessert table.
Customization Friendly: Feel free to swap out the graham cracker base with crushed Oreos for a fun twist, or try the rich chocolate frosting option!

If you’re a fan of cookies, don’t miss out on trying the flavors of Matcha Cookies Soft or make some Eggnog Cookies Soft to expand your baking repertoire!

Crumbl Salted Caramel Cheesecake Cookies Ingredients

For the Cookie Base

  • ¾ cup butter (softened) – Provides richness and moisture; use unsalted for better control of saltiness.
  • ⅓ cup sugar – Adds sweetness and structure; granulated sugar works best for this recipe.
  • ⅓ cup brown sugar – Introduces moisture and depth of flavor; can substitute with an equal amount of coconut sugar.
  • 2 eggs – Acts as a binder for structure; room temperature eggs yield better emulsion.
  • 2 tsp vanilla extract – Enhances the cookie’s flavor; consider using pure vanilla for a richer taste.
  • 1½ cups all-purpose flour – The main structure component; gluten-free flour can be used for a gluten-free version.
  • 1½ cups graham crackers (crushed) – Adds a delightful crunch and flavor; substitute with crushed digestive biscuits if unavailable.
  • ½ tsp salt – Balances sweetness; adjust based on taste preferences.
  • ¼ tsp baking soda – Helps cookies rise; ensure fresh for effectiveness.
  • ½ tsp baking powder – Provides additional lift; ensure freshness for best results.
  • ½ cup graham cracker crumbs (for rolling) – Enhances texture on the cookie surface.

For the Cream Cheese Frosting

  • 8 oz cream cheese (softened) – Primary component of frosting, lending creaminess; can use a vegan cream cheese alternative.
  • 8 oz powdered sugar – Sweetens and stabilizes frosting.
  • 2½ cups powdered sugar – Further sweetens frosting, ensuring it holds shape.
  • 1 tsp vanilla extract (for frosting) – Adds flavor to the frosting.

For the Caramel Sauce

  • 1¼ cup brown sugar (for caramel) – Sweetener and base for caramel sauce.
  • ½ cup whipping cream – Creates a smooth consistency for caramel; heavy cream can be substituted for a thicker sauce.
  • 5 tbsp butter (for caramel) – Provides richness to the sauce; unsalted is preferred.
  • 1 tbsp vanilla extract (for caramel) – Enhances the flavor of caramel.
  • ¼ tsp salt (for caramel) – Brightens flavors in the caramel sauce.

Bring these delightful ingredients together, and you’re well on your way to creating irresistibly decadent Crumbl Salted Caramel Cheesecake Cookies that your taste buds will thank you for!

Step‑by‑Step Instructions for Crumbl Salted Caramel Cheesecake Cookies

Step 1: Prepare for Baking
Begin by preheating your oven to 350°F (175°C). Line two baking sheets with parchment paper to prevent sticking and for easy cleanup. This setup is essential to ensure your Crumbl Salted Caramel Cheesecake Cookies bake evenly and retain their delightful shape.

Step 2: Mix Wet Ingredients
In the bowl of a stand mixer, combine ¾ cup softened butter, ⅓ cup granulated sugar, and ⅓ cup brown sugar. Beat on medium speed until the mixture is light and fluffy, about 3-4 minutes. Add 2 room-temperature eggs and 2 teaspoons of vanilla extract, then mix until fully incorporated, ensuring a smooth, creamy texture.

Step 3: Combine Dry Ingredients
In a separate bowl, whisk together 1½ cups all-purpose flour, ½ teaspoon salt, ¼ teaspoon baking soda, and ½ teaspoon baking powder. Gradually add this dry mixture to the wet ingredients, mixing on low speed until just combined. Be careful not to overmix; you want a soft dough that holds together well.

Step 4: Incorporate Graham Crackers
Gently fold in 1½ cups of crushed graham crackers into the dough using a spatula. This step adds that beloved crunch and flavor, giving your Crumbl Salted Caramel Cheesecake Cookies a delightful texture. Mix until the graham crackers are evenly distributed, being careful to keep the dough light and airy.

Step 5: Shape Cookies
Using a 2-inch cookie scoop, portion out the dough and roll each piece in ½ cup of graham cracker crumbs. Place the cookie balls on the prepared baking sheets, spacing them about 2 inches apart. Flatten each ball slightly to about ¾-inch thick for even baking.

Step 6: Bake Cookies
Bake your cookies in the preheated oven for 8-10 minutes, or until the edges are golden brown. Keep an eye on them to prevent over-baking, as they should remain slightly soft in the center. Once baked, allow the cookies to cool on the sheets for 5 minutes before transferring them to wire racks to cool completely.

Step 7: Prepare Frosting
While the cookies cool, prepare the frosting by creaming together 8 oz of softened cream cheese and 5 tablespoons of unsalted butter in a mixing bowl until smooth. Add 2½ cups of powdered sugar and 1 teaspoon of vanilla extract. Mix on low speed until combined, then increase the speed until the frosting is fluffy and light.

Step 8: Frost Cookies
Once the cookies are completely cool, use a piping bag or a butter knife to generously frost each cookie with the cream cheese frosting. The frosting should be spreadable but hold its shape, enhancing the indulgence of your Crumbl Salted Caramel Cheesecake Cookies.

Step 9: Make Caramel
To create the homemade caramel, combine 5 tablespoons of butter, 1¼ cups of brown sugar, and ½ cup of whipping cream in a saucepan over medium heat. Cook while stirring constantly for about 5-7 minutes, or until the mixture thickens and bubbles. Remove from heat and stir in 1 tablespoon of vanilla extract and ¼ teaspoon of salt.

Step 10: Drizzle Caramel
Allow the caramel to cool slightly before spooning or drizzling it over the frosted cookies. This final drizzle of decadent homemade caramel ties together the flavors beautifully. Let the caramel set for a few minutes before serving, ensuring a lush finish to your Crumbl Salted Caramel Cheesecake Cookies.

How to Store and Freeze Crumbl Salted Caramel Cheesecake Cookies

Room Temperature: Store the cookies in an airtight container at room temperature for up to 5 days. This will keep them fresh and chewy, ready for snacking anytime!

Fridge: For longer storage, refrigerate the cookies in a sealed container. They can last up to 7 days, though they might lose some of their initial softness.

Freezer: Freeze frosted or unfrosted cookies in a single layer on a baking sheet until solid, then transfer to a freezer-safe bag. They will maintain quality for up to 3 months.

Reheating: To enjoy a warm cookie experience, reheat the cookies in the oven at 350°F for about 5 minutes, or until warmed through.

Make Ahead Options

These Copycat Crumbl Salted Caramel Cheesecake Cookies are perfect for busy home cooks looking to save time! You can prepare the cookie dough and refrigerate it for up to 24 hours before baking, which helps the flavors meld beautifully. Additionally, the cream cheese frosting can be made up to 3 days in advance; just store it in an airtight container in the refrigerator. To maintain quality, allow the dough to sit at room temperature for about 10 minutes before scooping and baking. When you're ready to serve, simply bake the cookies and frost them before drizzling with the homemade caramel. Enjoy decadent results with minimal last-minute effort!

Crumbl Salted Caramel Cheesecake Cookies Variations

Feel free to explore these delightful twists to customize your Crumbl Salted Caramel Cheesecake Cookies!

  • Chocolate Frosting: Substitute the cream cheese frosting with rich chocolate frosting for a decadent twist. Chocolate lovers will adore this variation!

  • Nutty Crunch: Incorporate chopped nuts like pecans or walnuts into the cookie dough for a delightful crunch and added flavor. The extra texture elevates your cookie experience.

  • Oreo Base: Swap the graham crackers for crushed Oreos for a completely different flavor profile. This substitution creates a luxurious, chocolatey cookie that’s hard to resist!

  • Spiced Cookies: Add a teaspoon of cinnamon or nutmeg to the dry ingredients for a warm spice element. This subtle twist gives your cookies a comforting holiday vibe.

  • Salted Caramel Drizzle: Enhance the caramel drizzle by sprinkling a touch of sea salt on top just before serving. This adds a salty-sweet contrast that’s truly addictive.

  • Vegan Version: Use vegan butter and a plant-based cream cheese alternative to make this recipe vegan-friendly. You can still achieve that creamy frosting and delicious cookie base!

  • Chill Your Dough: Allow the cookie dough to chill in the refrigerator for 30 minutes before baking. This will intensify the flavors and reduce spreading, giving you a thicker cookie.

  • Layered Treat: For an extra indulgent treat, make a cookie ice cream sandwich by placing a scoop of vanilla or caramel ice cream between two cookies. A fantastic dessert for warm weather!

With so many opportunities for delicious customization, you might also want to explore other sweet treats like the comforting Eggnog Cookies Soft or the decadent Thumbprint Cookies Melt. Happy baking!

Expert Tips for Crumbl Salted Caramel Cheesecake Cookies

  • Butter Perfection: Ensure your butter is soft but not melted; this is crucial for achieving the perfect creaming consistency for the cookie dough.
  • Egg Temperature Matters: Use room temperature eggs for better mixing and emulsion, which helps the cookies achieve a tender texture.
  • Don’t Overmix: When combining dry and wet ingredients, mix just until incorporated. Overmixing can lead to tough cookies!
  • Monitor Baking Time: Check your cookies from 8 minutes onward; they should be golden around the edges but still soft in the center for that perfect chewy bite.
  • Set the Caramel: Allow the caramel to cool slightly before drizzling; this prevents it from running off the cookies, ensuring a beautiful presentation.

What to Serve with Crumbl Salted Caramel Cheesecake Cookies

Elevate your cookie experience by pairing these delightful treats with complementary sides and drinks that enhance their rich flavors.

  • Fresh Berries: Juicy strawberries or raspberries add a tart contrast to the sweet richness of the cookies, cleansing your palate beautifully.
  • Vanilla Ice Cream: Creamy, cold ice cream creates a lush pairing, with its sweetness balancing the caramel and cheesecake flavors perfectly.
  • Espresso or Coffee: The bold, robust flavors of espresso or freshly brewed coffee cut through the cookie's sweetness, making each bite more enjoyable.
  • Hot Chocolate: A warm mug of rich hot chocolate brings a cozy, indulgent vibe, amplifying the sweet, decadent experience of the cookies.
  • Caramel Sauce: For those who crave extra decadence, a drizzle of additional caramel sauce over the cookies enhances their luxurious appeal.
  • Nutty Biscotti: Crunchy, nutty biscotti offer a satisfying textural contrast, while complementing the flavors with their own rich nutty notes.
  • Whipped Cream: A dollop of lightly sweetened whipped cream elevates the dessert's presentation and adds a light, airy balance to the rich cookie.
  • Milk: An old-fashioned pairing that never fails! A cold glass of milk complements that comforting childhood nostalgia while softening each bite.
  • Chocolate Chip Muffins: Their fluffy texture and semi-sweet chocolate bits resonate well with the graham cracker and caramel cookie base, creating a delightful harmony.
  • Fruit Salad: A refreshing fruit salad adds a light and healthy touch to the meal, with the varying fruits providing a vibrant splash of color.

Crumbl Salted Caramel Cheesecake Cookies Recipe FAQs

How do I choose the right ripeness for my ingredients?
Absolutely! When it comes to baking, using softened butter is key; let it sit at room temperature for about 30 minutes. For the cream cheese, ensure it's also softened to make mixing easier. Fresh eggs at room temperature emulsify better, giving your cookies the perfect texture.

How should I store my cookies and for how long?
You can store your Crumbl Salted Caramel Cheesecake Cookies in an airtight container at room temperature for up to 5 days. For extended freshness, refrigerate them for up to 7 days in a sealed container. This keeps the cookies chewy and ready to enjoy whenever you want!

Can I freeze these cookies? How do I do it?
Absolutely! You can freeze both frosted and unfrosted cookies. First, place them in a single layer on a baking sheet and freeze until solid, about 1-2 hours. Once set, transfer them to a freezer-safe bag or container. They will maintain quality for up to 3 months! To enjoy, just reheat in the oven at 350°F for about 5 minutes.

What common issues might arise while baking these cookies?
Very! One common issue is overmixing the cookie dough, which can lead to tough cookies. Mix the dry and wet ingredients just until combined to avoid this. Additionally, keep an eye on the baking time; cookies should be golden around the edges but slightly soft in the middle. If they spread too much while baking, ensure your butter isn’t too warm and your ingredients are measured accurately.

Are there any dietary considerations for my guests?
Yes! If serving to guests with dietary restrictions, consider using vegan cream cheese for the frosting and double-check ingredient labels to avoid allergens. For gluten-free options, swap the all-purpose flour for a gluten-free blend. Always keep potential allergies in mind, especially for ingredients like cream cheese and butter.

How can I enhance the flavors of my cookies?
You can customize your Crumbl Salted Caramel Cheesecake Cookies by adding nuts like pecans or walnuts for extra crunch! Additionally, feel free to swap out the graham cracker crust for crushed Oreos for a fun twist on flavor. Get creative with toppings too; sprinkle sea salt on the caramel drizzle for a bit of flair!

Crumbl Salted Caramel Cheesecake Cookies

Crumbl Salted Caramel Cheesecake Cookies You'll Love to Make

Enjoy the delightful Crumbl Salted Caramel Cheesecake Cookies with a rich blend of flavors in every bite.
Print Recipe Pin Recipe
Prep Time 20 minutes mins
Cook Time 10 minutes mins
Cooling Time 5 minutes mins
Total Time 35 minutes mins
Servings: 12 cookies
Course: Dessert
Cuisine: American
Calories: 240
Ingredients Equipment Method Nutrition Notes

Ingredients
  

For the Cookie Base
  • ¾ cup butter (softened) Unsalted for better control of saltiness.
  • ⅓ cup sugar Granulated sugar works best.
  • ⅓ cup brown sugar Can substitute with an equal amount of coconut sugar.
  • 2 large eggs Room temperature for better emulsion.
  • 2 tsp vanilla extract Consider using pure vanilla for richer taste.
  • 1½ cups all-purpose flour Gluten-free flour can be used.
  • 1½ cups graham crackers (crushed) Substitute with crushed digestive biscuits if unavailable.
  • ½ tsp salt Adjust based on taste preferences.
  • ¼ tsp baking soda Ensure fresh for effectiveness.
  • ½ tsp baking powder Ensure freshness for best results.
  • ½ cup graham cracker crumbs (for rolling)
For the Cream Cheese Frosting
  • 8 oz cream cheese (softened) Can use a vegan alternative.
  • 2½ cups powdered sugar Further sweetens frosting.
  • 1 tsp vanilla extract (for frosting)
For the Caramel Sauce
  • 1¼ cups brown sugar (for caramel)
  • ½ cup whipping cream Heavy cream can be substituted.
  • 5 tbsp butter (for caramel) Unsalted is preferred.
  • 1 tbsp vanilla extract (for caramel)
  • ¼ tsp salt (for caramel)

Equipment

  • Stand Mixer
  • Baking Sheets
  • Parchment Paper
  • Saucepan
  • piping bag

Method
 

Step‑by‑Step Instructions
  1. Preheat your oven to 350°F (175°C) and line two baking sheets with parchment paper.
  2. In a stand mixer, combine softened butter, granulated sugar, and brown sugar. Beat until light and fluffy.
  3. Add room temperature eggs and vanilla extract, mixing until fully incorporated.
  4. In a separate bowl, whisk together all-purpose flour, salt, baking soda, and baking powder. Gradually mix into wet ingredients.
  5. Gently fold in crushed graham crackers until evenly distributed.
  6. Using a cookie scoop, portion dough and roll in graham cracker crumbs. Place them on prepared baking sheets.
  7. Bake for 8-10 minutes until edges are golden brown. Cool on sheets for 5 minutes before transferring to wire racks.
  8. Prepare the frosting by creaming together cream cheese and unsalted butter until smooth. Add powdered sugar and vanilla, mixing until fluffy.
  9. Frost cooled cookies with cream cheese frosting using a piping bag or knife.
  10. To make caramel, combine butter, brown sugar, and whipping cream in a saucepan. Cook while stirring for 5-7 minutes until thickened. Stir in vanilla and salt.
  11. Drizzle caramel over frosted cookies. Allow to set before serving.

Nutrition

Serving: 1cookieCalories: 240kcalCarbohydrates: 35gProtein: 2gFat: 10gSaturated Fat: 6gPolyunsaturated Fat: 1gMonounsaturated Fat: 3gCholesterol: 25mgSodium: 150mgPotassium: 100mgSugar: 18gVitamin A: 200IUCalcium: 20mgIron: 0.5mg

Notes

Store cookies in an airtight container at room temperature for up to 5 days or refrigerate for longer storage.

Tried this recipe?

Let us know how it was!

Mini Turtle Cheesecakes: Decadent No-Bake Dessert Bliss

January 19, 2026 by Grace Snow Leave a Comment

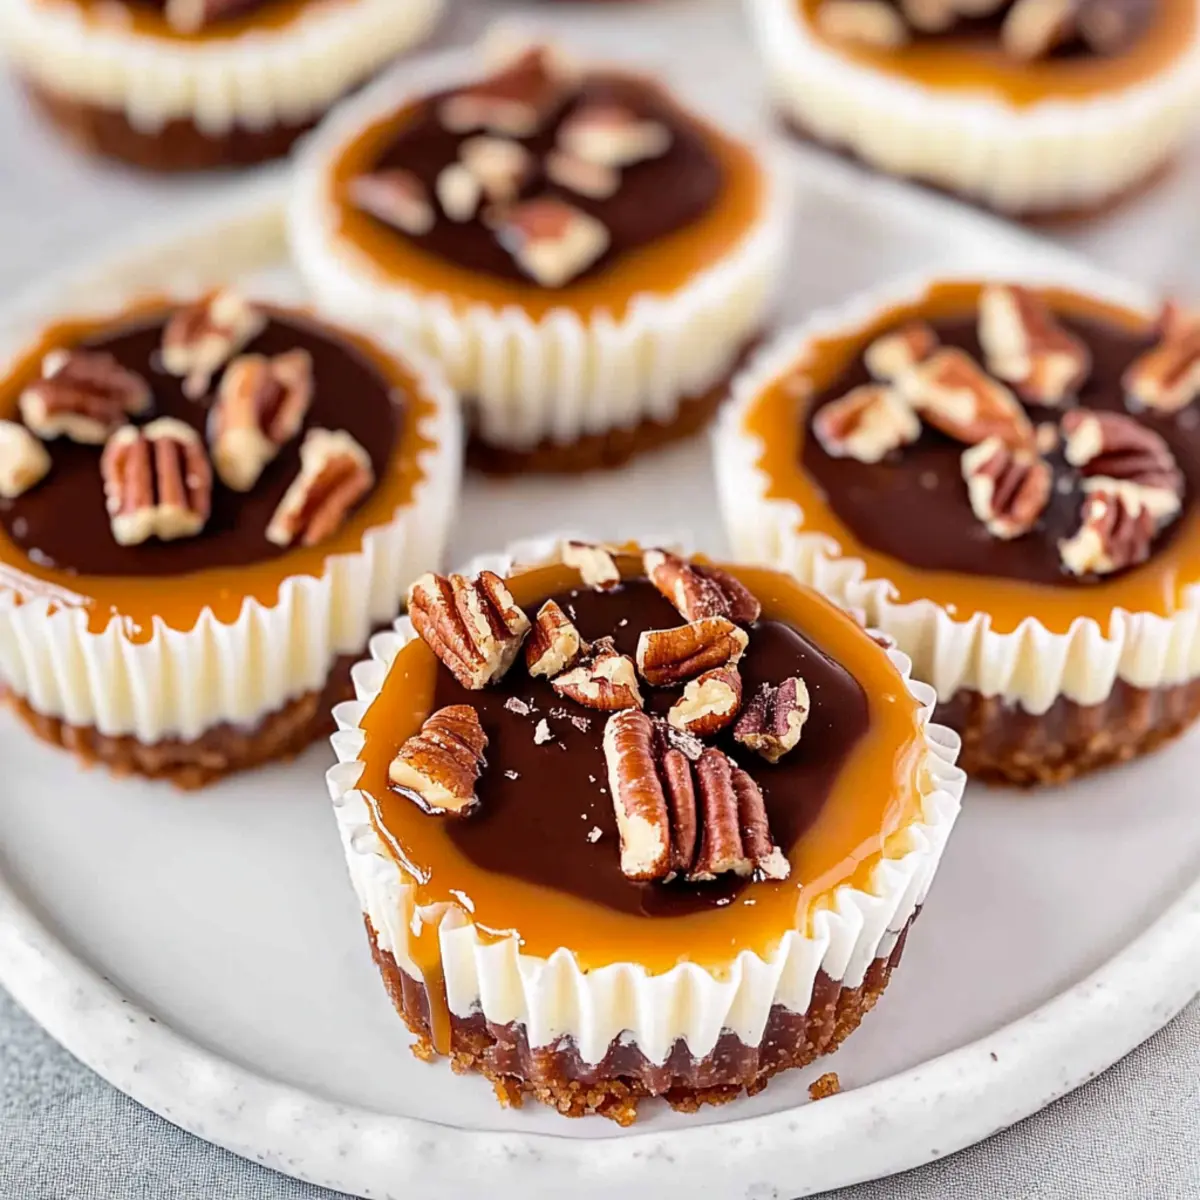
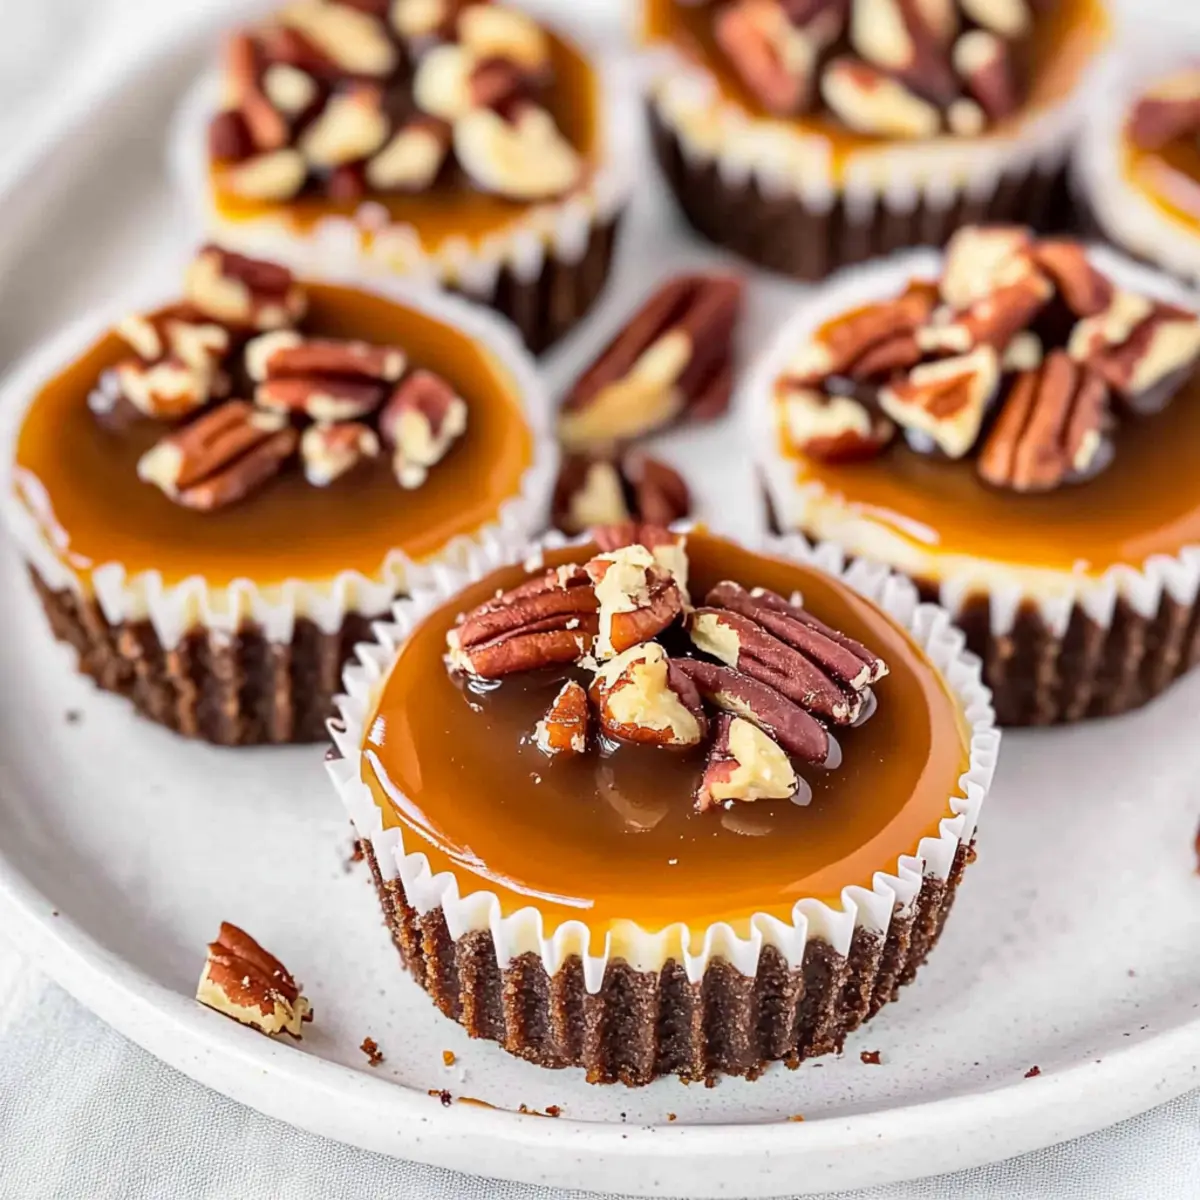
As I slid the last tray of mini turtle cheesecakes out of the fridge, I couldn’t help but smile. The combination of smooth chocolate, luscious caramel, and crunchy nuts perched atop a creamy cheesecake base offered a beautiful nod to the beloved candy they’re inspired by. These no-bake mini turtle cheesecakes are an absolute dream for those days when you crave a delicious dessert without spending hours in the kitchen. They’re not only quick to whip up but also perfect for grab-and-go sweetness at parties and gatherings. You’ll love how easily they satisfy sweet cravings while looking elegant enough to impress your guests. So, are you ready to dive into this delightful recipe?

Why Are These Mini Cheesecakes a Hit?

Irresistible Flavor: The fusion of rich chocolate, gooey caramel, and crunchy nuts creates an explosion of taste that will have everyone coming back for seconds.

No-Bake Simplicity: Perfect for busy days, these cheesecakes can be prepared without any baking, saving you time while still delivering a stunning dessert.

Gourmet Experience: Elevated ingredients like fresh cream cheese and homemade ganache provide a restaurant-quality treat right in your kitchen.

Crowd-Pleasing Size: Mini portions make these desserts ideal for parties and gatherings, allowing guests to indulge without feeling guilty.

Versatile Toppings: Feel free to customize with your favorite toppings like Mini Tropical Pavlovas or a seasonal twist for festive occasions!

Mini Turtle Cheesecake Ingredients

These delightful mini turtle cheesecakes come together with easily accessible ingredients for a sweet treat that's sure to impress!

For the Crust

  • Graham Cracker Crumbs – Provides a crunchy base for the cheesecake; substitute with crushed cookies like digestive biscuits for a unique twist.
  • Unsalted Butter – Binds everything together and adds a rich flavor; can be swapped with coconut oil for a dairy-free version.

For the Cheesecake Filling

  • Full Fat Cream Cheese – Essential for that creamy, luscious texture; Neufchâtel cheese could be used for a lighter option.
  • Granulated Sugar – Sweetens the filling; consider a sugar substitute for a lower-calorie option if desired.
  • Vanilla Extract – Adds a beautiful aroma and depth; opt for pure vanilla extract to enhance flavor.
  • Large Eggs – Provides firmness and stability; you can replace with flax eggs for an egg-free twist.

For the Toppings

  • Jarred Caramel Sauce – Adds a drizzle of sweetness on top; homemade caramel can elevate this dessert.
  • Chocolate Ganache – A rich, silky topping made from semi-sweet chocolate and heavy cream for the ultimate decadence.
  • Chopped Nuts (Pecans recommended) – Gives a satisfying crunch; feel free to substitute with walnuts or almonds based on your taste!

These mini turtle cheesecakes combine simplicity with elegance, making them perfect for any occasion!

Step‑by‑Step Instructions for Mini Turtle Cheesecakes

Step 1: Prepare Crust
Preheat your oven to 350°F (175°C) and line a muffin pan with paper liners. In a mixing bowl, combine graham cracker crumbs and melted butter until the mixture resembles wet sand. Evenly distribute about 1-2 tablespoons of this mixture into each liner, pressing down firmly to form a crust. Bake for 5 minutes until lightly golden, then allow to cool.

Step 2: Make Cheesecake Filling
In a large mixing bowl, beat the room-temperature cream cheese and granulated sugar with an electric mixer on medium speed for 1-2 minutes until smooth. This mixture should be creamy and free of lumps. Next, add vanilla extract and eggs, mixing until just combined to avoid incorporating too much air, which can lead to cracking.

Step 3: Assemble Mini Cheesecakes
Carefully distribute the creamy cheesecake filling evenly among the cooled crusts in the muffin tin. Use a spatula to smooth the tops for a neat finish. This step ensures that every mini turtle cheesecake is filled to perfection, setting the stage for the wonderful textures and flavors that follow.

Step 4: Bake
Place the muffin pan in the preheated oven and bake the mini turtle cheesecakes for 15-17 minutes. You’ll know they’re done when the edges appear set but the centers have a slight jiggle, signaling just the right level of creaminess. Keep an eye out; overbaking can lead to cracks!

Step 5: Cool and Chill
After baking, remove the pan from the oven and let it cool to room temperature. This cooling process is essential for achieving the perfect texture. Once cooled, transfer the mini cheesecakes to the refrigerator and chill for at least 4 hours, allowing them to firm up and develop their flavors.

Step 6: Garnish and Serve
Before serving, drizzle the cooled mini turtle cheesecakes with jarred caramel sauce and decadent chocolate ganache. Sprinkle with chopped nuts for an added crunch that complements the silky cheesecake. These mini turtle cheesecakes are now ready to impress your guests!

Make Ahead Options

These mini turtle cheesecakes are a fantastic choice for meal prep! You can prepare the crust and cheesecake filling up to 24 hours in advance. Simply mix the graham cracker crumbs with melted butter and set it in the liners, then prepare the filling and pour it over the crusts. Cover the muffin pan tightly with plastic wrap and refrigerate. When ready to serve, bake them fresh for about 15-17 minutes, cool to room temperature, then refrigerate for at least 4 hours before garnishing with caramel sauce, ganache, and nuts. This way, you'll have delectable mini turtle cheesecakes ready to impress your guests with minimal effort!

How to Store and Freeze Mini Turtle Cheesecakes

Fridge: Store your mini turtle cheesecakes in an airtight container for up to 1 week. This keeps them fresh and delicious while allowing those sweet flavors to meld beautifully.

Freezer: For longer storage, freeze these mini cheesecakes in individual portions for up to 3 months. Wrap each in plastic wrap and then place them in a freezer-safe bag to prevent freezer burn.

Thawing: When you're ready to enjoy your frozen mini turtle cheesecakes, transfer them to the fridge to thaw overnight. This gentle thawing helps maintain their creamy texture.

Reheating: These cheesecakes are best enjoyed cold; however, if you want to soften them slightly, let them sit at room temperature for about 15 minutes before serving. Enjoy!

Variations & Substitutions for Mini Turtle Cheesecakes

Get ready to personalize these delightful mini turtle cheesecakes to suit your taste and dietary needs!

  • Oreo Crust: Swap out graham crackers for crushed Oreos for a rich, chocolatey base.
    This adds a fun twist and a deep flavor, perfect for any chocolate lover.

  • Peanut Butter Swirl: Stir in creamy peanut butter into the cheesecake filling for a nutty flavor.
    This twist brings a classic combination, elevating each bite to pure bliss!

  • Honey or Maple Syrup: Replace granulated sugar with honey or maple syrup for a natural sweetener.
    These substitutes can impart a unique flavor profile that warms the soul while still satisfying your sweet tooth.

  • Nut-Free Option: Use sunflower seed butter and omit the nuts entirely for a nut-free treat.
    This makes them suitable for allergy-friendly gatherings, ensuring everyone can indulge!

  • Caramel Sauce Alternatives: Try using homemade caramel for a gourmet touch or a sugar-free version for a lighter option.
    Homemade caramel can elevate the overall taste and make it truly special, while a sugar-free version keeps guilt at bay.

  • Dairy-Free Version: Substitute full-fat cream cheese with a dairy-free cream cheese alternative.
    This keeps the creaminess intact while catering to those with lactose intolerance or vegan preferences.

  • Flavor Infusion: Add a splash of espresso or coffee to the cheesecake mixture for a mocha twist.
    The combination of coffee with chocolate is magical, creating a sophisticated dessert that delights all the senses!

  • Fruit Topping: Top with fresh berries or fruit preserves for a refreshing contrast.
    This adds a lovely pop of color and a tart juiciness that beautifully balances the rich flavors of the cheesecake.

With these variations, you can explore different flavors and textures while making your mini turtle cheesecakes uniquely yours. Perhaps consider pairing them with a delightful batch of Mini Tropical Pavlovas for a fun dessert spread at your next gathering!

Expert Tips for Mini Turtle Cheesecakes

  • Room Temperature Cream Cheese: Ensure your cream cheese is at room temperature to achieve a smooth and creamy filling; cold cream cheese can create lumps.

  • Gentle Mixing: When adding eggs to the cheesecake filling, mix gently to avoid over-aeration, which can lead to cracking during baking—a common pitfall when making mini turtle cheesecakes.

  • Jiggle Test: The ideal doneness for these mini cheesecakes means they should jiggle slightly in the center when you take them out of the oven; this indicates perfect creaminess.

  • Cool Gradually: Let the mini cheesecakes cool to room temperature before refrigerating; this gradual cooling prevents condensation that can affect texture.

  • Chill Time Matters: Refrigerate for at least 4 hours (or overnight) before serving; this allows flavors to meld beautifully and achieves the ideal firmness.

What to Serve with Mini Turtle Cheesecakes

Indulging in these mini treats opens up a world of flavor pairings to elevate your dessert experience even further.

  • Fresh Berries: The tartness of strawberries or raspberries balances the sweetness of the cheesecakes, creating a delightful contrast. Their vibrant colors also add a touch of elegance to your presentation.

  • Whipped Cream: A dollop of airy whipped cream enhances the richness of the cheesecake while adding a light texture. It’s a classic pairing that never goes out of style.

  • Coffee: A warm cup of robust coffee or espresso complements the creamy sweetness beautifully, providing a perfect finish for your dessert platter.

  • Chocolate Sauce: For the true chocolate lovers, a drizzle of extra chocolate sauce can intensify the flavors of your mini turtle cheesecakes, making them even more decadent.

  • Vanilla Ice Cream: Serve alongside a scoop of creamy vanilla ice cream for a contrasting temperature and added sweetness that takes the dessert to the next level.

  • Nutty Cookies: A plate of buttery pecan or almond cookies can add an additional crunchy texture that echoes the nutty flavor of the mini cheesecakes, enhancing every bite.

Pair these suggestions with your mini turtle cheesecakes for a delightful and unforgettable dessert spread!

Mini Turtle Cheesecakes Recipe FAQs

How do I select ripe ingredients for my mini turtle cheesecakes?
Absolutely! When choosing your cream cheese, go for a fresh, smooth package without any lumps, and make sure it’s at room temperature for easy mixing. For the eggs, opt for large, clean, and uncracked eggs that have been properly stored in the refrigerator. If you're using nuts, select those that smell fresh and have no dark spots or signs of rancidity.

How should I store my mini turtle cheesecakes?
Very simply! Store your mini turtle cheesecakes in an airtight container in the fridge for up to one week. Make sure they are properly cooled before placing them in the container to prevent condensation. This keeps them fresh and allows the flavors to develop nicely.

Can I freeze mini turtle cheesecakes?
Absolutely! To freeze, wrap each mini cheesecake in plastic wrap and then place them in a freezer-safe bag. They can be stored for up to three months! When you’re ready to enjoy, just transfer them to the refrigerator for overnight thawing. Avoid reheating them, as they’re best enjoyed chilled or at room temperature.

What if my mini turtle cheesecakes crack during baking?
No worries—this can happen to the best of us! To avoid cracking, be gentle when mixing your batter, especially after adding the eggs. Overmixing introduces air bubbles that can lead to cracks. Also, make sure to bake them until the edges are set with a slight jiggle in the center. Cooling them gradually at room temperature before refrigerating also helps.

Can I make mini turtle cheesecakes if I have dietary restrictions?
Very much so! For a gluten-free version, use gluten-free graham crackers for the crust. To make them dairy-free, swap out the cream cheese for a non-dairy cream cheese alternative and use coconut oil in place of butter. If you're looking for an egg-free version, try substituting eggs with flax eggs—mix 1 tablespoon of flaxseed meal with 2.5 tablespoons of water for each egg.

How do I ensure my mini turtle cheesecakes have the perfect texture?
Follow the jiggle test! After baking, the centers should still have a slight jiggle while the edges appear set—this indicates a creamy texture. Make sure your cream cheese is at room temperature and beat it well to eliminate lumps. Gradual cooling is key, so let them cool at room temperature before refrigerating for at least 4 hours. Enjoy the delightful texture of your mini turtle cheesecakes!

Mini Turtle Cheesecakes

Mini Turtle Cheesecakes: Decadent No-Bake Dessert Bliss

Mini Turtle Cheesecakes are a rich, no-bake dessert combining chocolate, caramel, and nuts for a sweet treat everyone loves.
Print Recipe Pin Recipe
Prep Time 30 minutes mins
Cook Time 15 minutes mins
Chilling Time 4 hours hrs
Total Time 4 hours hrs 45 minutes mins
Servings: 12 cheesecakes
Course: Dessert
Cuisine: American
Calories: 300
Ingredients Equipment Method Nutrition Notes

Ingredients
  

For the Crust
  • 1.5 cups Graham Cracker Crumbs Substitute with crushed cookies for a unique twist.
  • 0.5 cups Unsalted Butter Can be swapped with coconut oil for a dairy-free version.
For the Cheesecake Filling
  • 8 oz Full Fat Cream Cheese Neufchâtel cheese could be used for a lighter option.
  • 0.5 cups Granulated Sugar Consider a sugar substitute for a lower-calorie option.
  • 1 tsp Vanilla Extract Opt for pure vanilla extract to enhance flavor.
  • 2 large Large Eggs Can replace with flax eggs for egg-free version.
For the Toppings
  • 0.5 cups Jarred Caramel Sauce Homemade caramel can elevate this dessert.
  • 0.5 cups Chocolate Ganache Made with semi-sweet chocolate and heavy cream.
  • 0.5 cups Chopped Nuts Pecans recommended; can substitute with walnuts or almonds.

Equipment

  • Muffin Pan
  • Mixing bowls
  • Electric mixer
  • Spatula

Method
 

Step‑by‑Step Instructions
  1. Preheat your oven to 350°F (175°C) and line a muffin pan with paper liners. Combine graham cracker crumbs and melted butter until it resembles wet sand. Evenly distribute 1-2 tablespoons into each liner for the crust and bake for 5 minutes. Allow to cool.
  2. In a large bowl, beat room-temperature cream cheese and granulated sugar with an electric mixer until smooth. Add vanilla and eggs, mixing gently until just combined.
  3. Distribute the cheesecake filling evenly among the cooled crusts in the muffin tin and smooth the tops with a spatula.
  4. Bake cheesecakes for 15-17 minutes until the edges are set and the center has a slight jiggle.
  5. Cool to room temperature, then transfer to the fridge and chill for at least 4 hours.
  6. Before serving, drizzle with caramel sauce and chocolate ganache, then sprinkle with chopped nuts.

Nutrition

Serving: 1cheesecakeCalories: 300kcalCarbohydrates: 30gProtein: 4gFat: 20gSaturated Fat: 10gPolyunsaturated Fat: 2gMonounsaturated Fat: 5gCholesterol: 70mgSodium: 200mgPotassium: 100mgFiber: 1gSugar: 15gVitamin A: 500IUCalcium: 50mgIron: 0.5mg

Notes

Ensure room temperature cream cheese for a smooth filling and mix eggs gently to avoid cracks.

Tried this recipe?

Let us know how it was!

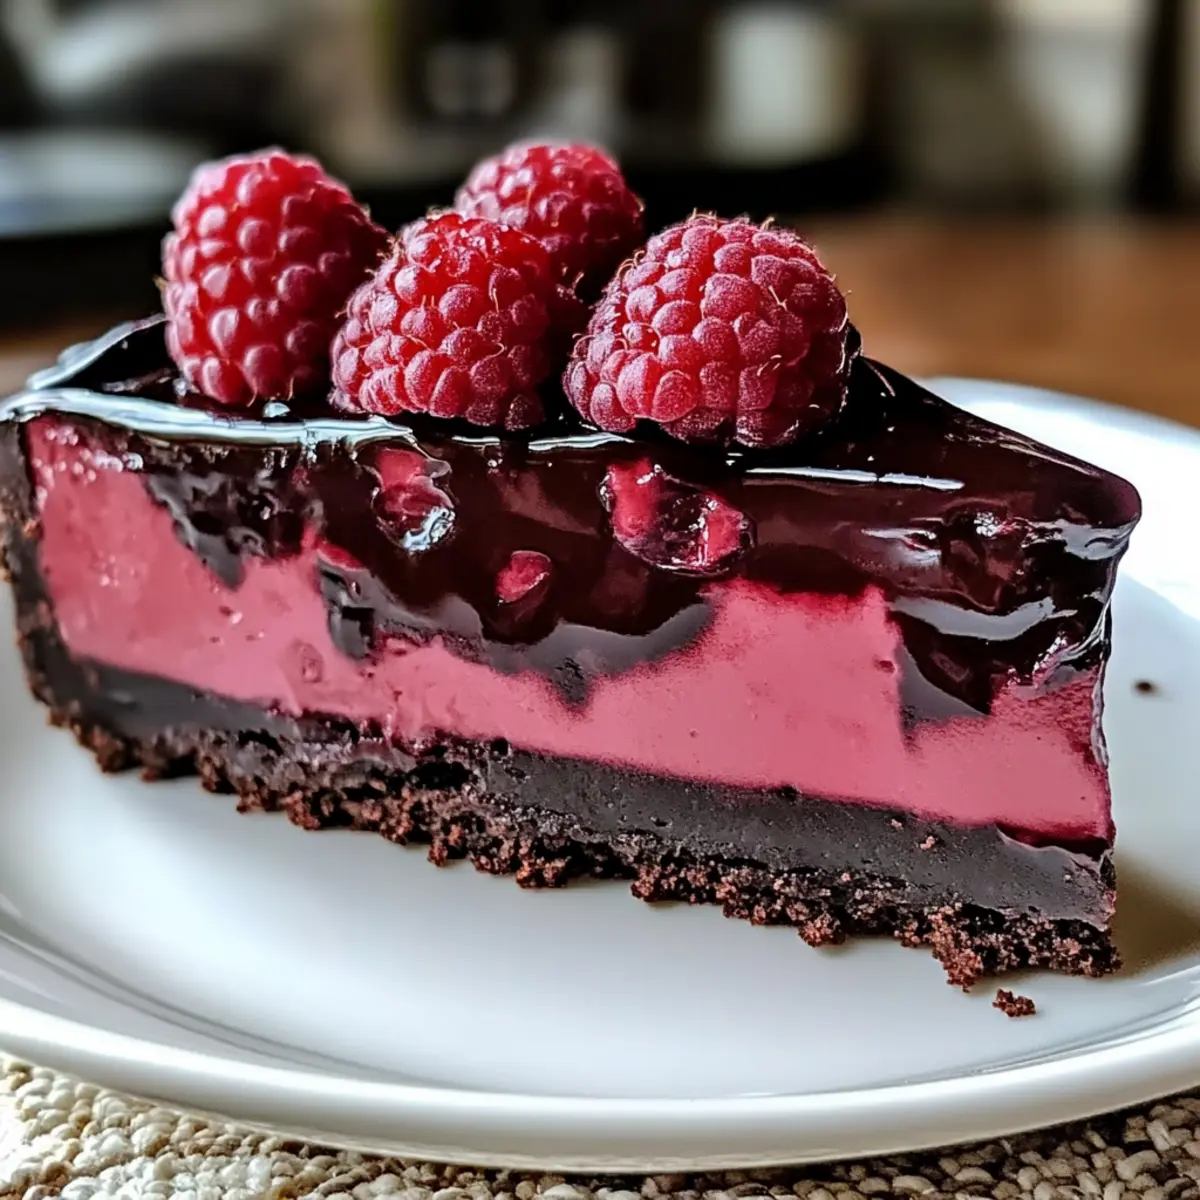
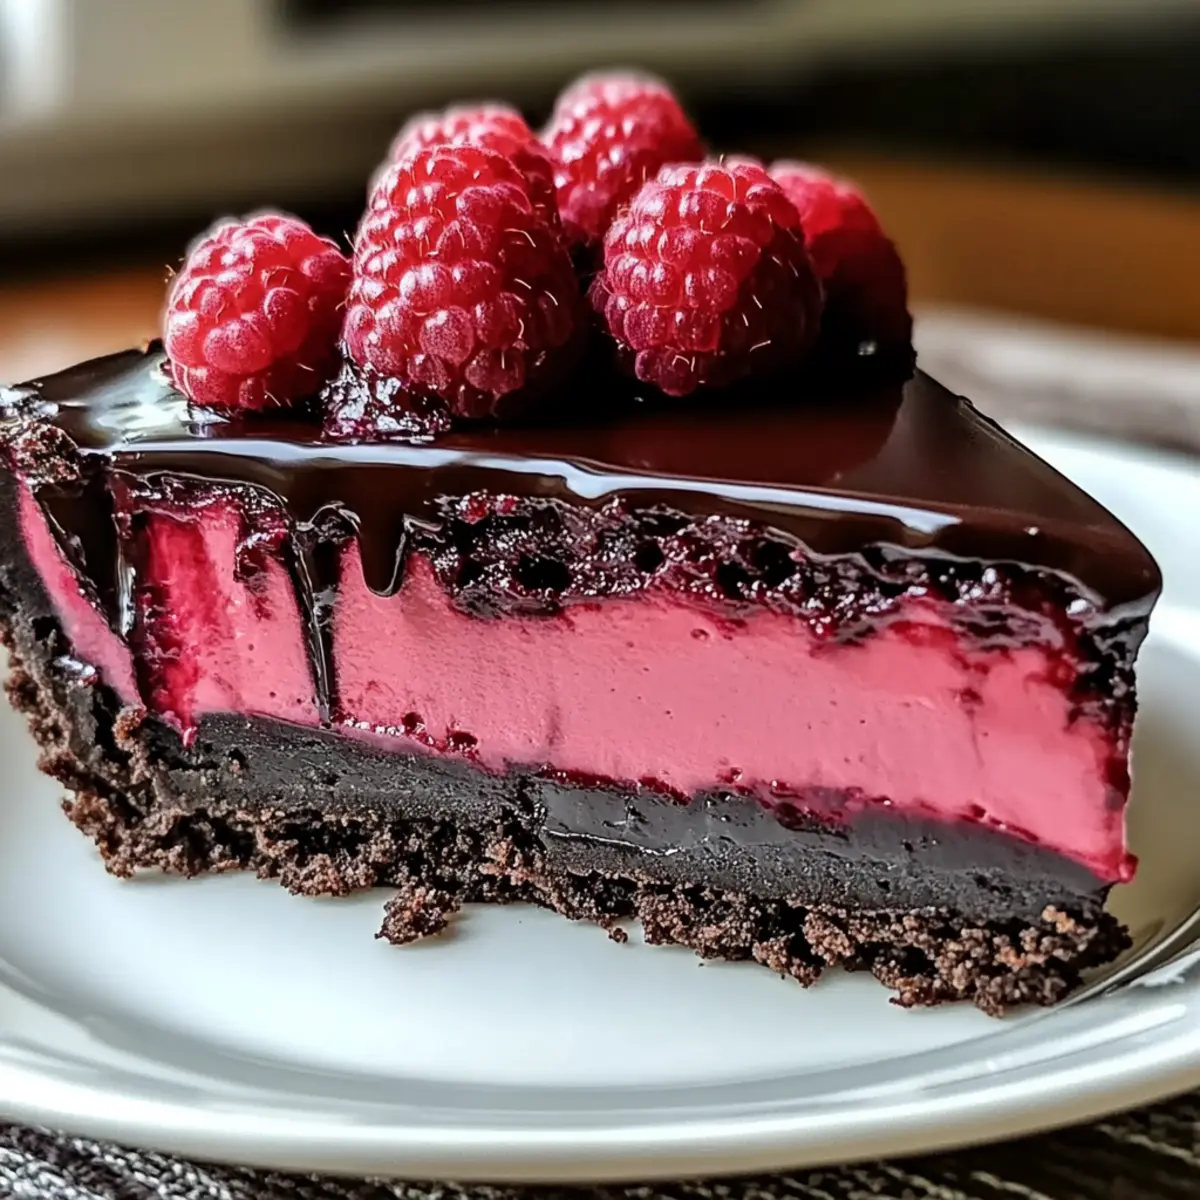
Decadent Dark Chocolate Raspberry Cheesecake You'll Love

January 19, 2026 by Grace Snow Leave a Comment

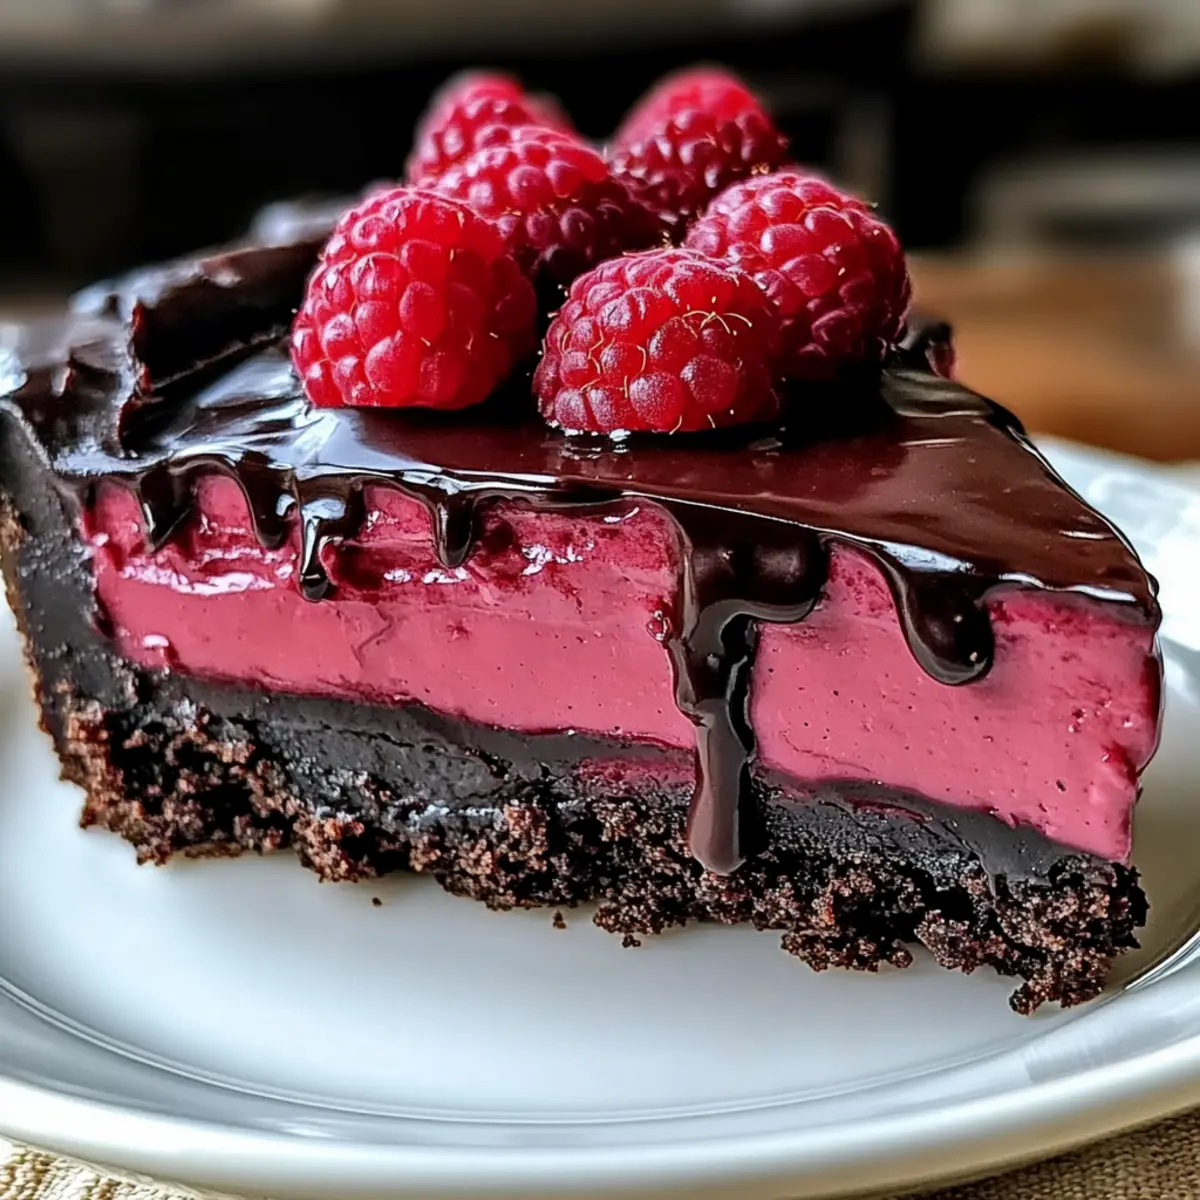
As I stood in my kitchen, the sweet aroma of melting dark chocolate filled the air, sweeping me away to my happiest culinary moments. That's when I decided to whip up a Decadent Dark Chocolate Raspberry Cheesecake, a dessert that marries velvety creaminess with the tart spark of fresh raspberries—pure bliss! This cheesecake not only looks stunning on any table but also boasts an effortless preparation process that even novice bakers can master. With its rich flavor profile and the option to customize the crust or toppings, it’s the kind of dessert that transforms ordinary gatherings into special occasions. Are you ready to indulge in a slice of this heavenly delight? Let’s get baking!

Why is this cheesecake a must-try?

Decadent Delight: Each slice of this cheesecake is a velvety masterpiece that brings together rich dark chocolate and tart raspberries, delivering a flavor explosion that’s unmatched.

Effortless Elegance: It's surprisingly easy to prepare, making it ideal for both seasoned chefs and baking newcomers alike.

Versatile Variations: You can easily switch up the crust or toppings, tailoring it to your taste or dietary needs—think gluten-free options or different berry substitutions!

Crowd-Pleasing Appeal: Perfect for gatherings, this dessert is sure to impress your guests at dinner parties or family celebrations.

Make Ahead Magic: Prepare components in advance for stress-free baking; simply chill and serve on the big day!

Trust me, this Decadent Dark Chocolate Raspberry Cheesecake will bring pure joy to your table and heart. For more delightful treats, check out our Homemade Hot Chocolate for a perfect pairing!

Decadent Dark Chocolate Raspberry Cheesecake Ingredients

Note: Gather these ingredients to create the perfect Decadent Dark Chocolate Raspberry Cheesecake!

  • For the Crust:
    • Crushed Chocolate Cookies – Provides the base crust with a rich chocolate flavor. Substitute with graham crackers for a classic taste.
    • Melted Butter – Binds the crust ingredients together for a firm base. No substitutions recommended.

  • For the Cheesecake Filling:
    • Cream Cheese (16 oz) – Creates the cheesecake’s creamy texture. Use full-fat brick-style for best results.
    • Granulated Sugar (1 cup) – Sweetens the filling. Light brown sugar can enhance the flavor depth.
    • Melted Dark Chocolate (8 oz) – Adds richness and depth to the cheesecake. Opt for chocolate with 60% to 72% cocoa for the best balance.
    • Vanilla Extract (1 tsp) – Enhances flavor complexity. No alternatives suggested.
    • Large Eggs (3) – Provides structure to the cheesecake. Beat minimally to avoid cracking.
    • Fresh Raspberries (1 cup) – Adds tartness and visual appeal. Frozen can be used but may alter texture.

With these fantastic ingredients, you’re all set to create a delightfully rich and creamy cheesecake that will have everyone asking for seconds! Happy baking!

Step‑by‑Step Instructions for Decadent Dark Chocolate Raspberry Cheesecake

Step 1: Preheat the Oven
Begin by preheating your oven to 325°F (160°C). While it warms up, take a 9-inch springform pan and grease the bottom and sides to ensure your cheesecake releases easily after baking. This is an essential step for your Decadent Dark Chocolate Raspberry Cheesecake to turn out beautifully.

Step 2: Make the Crust
In a mixing bowl, combine crushed chocolate cookies with melted butter. Stir until you achieve a crumbly mixture that holds together when pressed. Firmly pack this mixture into the bottom of your prepared springform pan, smoothing it out evenly with the back of a measuring cup. This will create a rich base that complements the cheesecake filling.

Step 3: Prepare the Cream Cheese Mixture
In a large bowl, beat the cream cheese and granulated sugar together until smooth and creamy, about 3-4 minutes. It's best to use a hand mixer or stand mixer for this step to avoid lumps. Next, gently fold in the melted dark chocolate and vanilla extract until fully combined, creating that luscious chocolatey base for your Decadent Dark Chocolate Raspberry Cheesecake.

Step 4: Incorporate the Eggs
Add the eggs one at a time into the cream cheese mixture, mixing on low speed after each addition until just combined. Be careful not to overmix, as this can cause cracks in your cheesecake. Finally, gently fold in the fresh raspberries, keeping some whole for presentation, which will enhance both flavor and appearance.

Step 5: Prepare for Baking
Pour the cheesecake batter over the chocolate cookie crust in the springform pan. Smooth the top with a spatula, ensuring an even surface. Give the pan a gentle tap on the counter to release any trapped air bubbles. This step is crucial for achieving a smooth finish on your Decadent Dark Chocolate Raspberry Cheesecake.

Step 6: Bake the Cheesecake
Place the springform pan in the preheated oven and bake for about 60 minutes. Keep an eye on the cheesecake; it should be slightly jiggly in the center when ready. This slight wobble indicates that it will set perfectly while cooling.

Step 7: Cool the Cheesecake
Once baking is complete, turn off the oven and crack the door open, allowing your cheesecake to cool slowly for about 1 hour. This gradual cooling helps prevent cracks. Afterward, refrigerate the cheesecake for at least 4 hours or overnight, which helps the flavors meld beautifully and enhances its creaminess.

Step 8: Serve and Garnish
When ready to serve your Decadent Dark Chocolate Raspberry Cheesecake, carefully remove the side of the springform pan. Slice into pieces and garnish with extra fresh raspberries or a drizzle of melted chocolate if desired. This final touch makes for an impressive presentation, ready to delight your guests!

What to Serve with Decadent Dark Chocolate Raspberry Cheesecake

Enhancing your baking skills is one thing, but creating a memorable meal is another. Let’s beautifully complement your luscious cheesecake with flavors that elevate the experience.

  • Silky Vanilla Ice Cream: The creamy, cool texture of vanilla ice cream perfectly balances the rich chocolate and tart raspberries.

  • Fresh Fruit Salad: A medley of seasonal fruits adds a refreshing contrast, brightening each bite of the cheesecake. Think strawberries, blueberries, or kiwi—each provides a delightful pop of flavor.

  • Mocha Coffee: A steaming cup of mocha coffee creates a warm, comforting vibe, enhancing the dessert experience while echoing the chocolate notes.

  • Chocolate Drizzle: A warm chocolate ganache drizzle on top of the cheesecake adds an extra layer of indulgence. It's like inviting a rich chocolate hug with every slice.

  • Whipped Cream: Light, fluffy whipped cream is a classic pairing that adds a creamy counterpoint while highlighting the rich chocolate flavor.

  • Sparkling Water with Lime: For a refreshing drink, the crispness of sparkling water with a splash of lime cleanses the palate, making each bite of cheesecake more memorable.

Pair these delightful accompaniments with your Decadent Dark Chocolate Raspberry Cheesecake and watch your gathering transform into a sensational treat for all!

Make Ahead Options

These Decadent Dark Chocolate Raspberry Cheesecakes are perfect for meal prep! You can prepare the crust (using crushed chocolate cookies and melted butter) up to 24 hours in advance, simply store it in an airtight container in the refrigerator. Additionally, the cheesecake filling can be made ahead of time but should be poured into the crust and baked on the same day to maintain its creamy texture. Remember, once baked, chill the cheesecake for at least 4 hours or overnight for the best flavor development. When you're ready to serve, garnish with fresh raspberries or a drizzle of melted chocolate, and you'll have a stunning dessert that tastes just as delicious as if it were made fresh that day!

How to Store and Freeze Decadent Dark Chocolate Raspberry Cheesecake

Fridge: Store leftovers in an airtight container for up to 5 days, ensuring it retains its creamy texture and flavor.

Freezer: For longer storage, wrap slices tightly in plastic wrap and then aluminum foil. Freeze for up to 1 month; thaw overnight in the fridge for best results.

Reheating: For a deliciously smooth experience, allow thawed cheesecake to sit at room temperature for about 30 minutes before serving, enhancing its flavor and texture.

Preparation Tips: You can prepare the cheesecake components up to 24 hours in advance, making it effortless to serve during your gatherings.

Expert Tips for Decadent Dark Chocolate Raspberry Cheesecake

  • Room Temperature Ingredients: Ensure your cream cheese and eggs are at room temperature for a smooth batter, reducing the risk of lumps and cracks.

  • Avoid Overmixing: When incorporating eggs, mix on low speed and just until combined to prevent over-aeration, which can lead to cracks on the cheesecake surface.

  • Water Bath Wonder: Consider using a water bath while baking to maintain an even temperature and prevent the cheesecake from drying out, enhancing its creaminess.

  • Chill for Best Flavor: Allow the cheesecake to chill overnight if possible; this resting time deepens the flavors, making the Decadent Dark Chocolate Raspberry Cheesecake even more irresistible.

  • Clean Slicing: Use a hot, wet knife to slice the cheesecake for clean edges—this optimistic touch ensures a beautiful presentation on your dessert table.

Decadent Dark Chocolate Raspberry Cheesecake Variations

Dive into a world of creative possibilities with this Decadent Dark Chocolate Raspberry Cheesecake! Every tweak opens a new avenue of deliciousness just waiting to be explored.

  • Berry Bliss: Substitute raspberries with strawberries or blueberries for a different fruity flavor. The sweetness of strawberries will give your cheesecake a refreshing twist that's perfect for summer celebrations.

  • Gluten-Free Option: Use almond flour or gluten-free cookie crumbs for the crust. This substitution allows all your gluten-sensitive friends to join in on the indulgence without feeling left out.

  • Nutty Flavor: Add crushed hazelnuts or almonds to the crust for extra crunch. This twist elevates the texture and adds a delightful nuttiness that pairs beautifully with chocolate.

  • Zesty Twist: Mix in citrus zest, such as lemon or orange, to brighten the flavor profile. The zesty notes will cut through the richness, creating a vibrant balance that excites the palate.

  • Chocolate Lovers: Incorporate chocolate chips into the batter or sprinkle on top before serving. This extra chocolatey layer will delight anyone craving a truly decadent experience.

  • Caramel Drizzle: Top with a warm caramel sauce for an indulgent finish. The sweetness of the caramel complements the tartness of the raspberries beautifully, creating an unforgettable dessert.

  • Spiced Sensation: Add a pinch of cinnamon or a dash of espresso powder to the filling for added warmth and depth. These subtle changes can transform the overall flavor, making it truly special.

  • Minty Fresh: Toss in some finely chopped mint leaves for a refreshing flavor kick. This adds a hint of herbaceousness that brightens the cheesecake and enhances the chocolate.

By experimenting with these variations, you can easily craft your own signature dessert! And while you’re at it, why not pair this cheesecake with a cozy mug of Homemade Hot Chocolate to create a truly comforting experience? Your taste buds will thank you!

Decadent Dark Chocolate Raspberry Cheesecake Recipe FAQs

How do I choose the right raspberries for my cheesecake?
Absolutely! For the best flavor and presentation, look for firm, plump fresh raspberries that are deep red in color, free from blemishes or dark spots. If you encounter any that are mushy or show signs of spoilage, it’s best to avoid those. If fresh raspberries aren't available, frozen ones can work in a pinch, but keep in mind they may alter the texture slightly and should be thawed and drained before using.

What’s the best way to store leftovers of this cheesecake?
You can store any leftover slices of your Decadent Dark Chocolate Raspberry Cheesecake in an airtight container in the refrigerator for up to 5 days. This helps maintain its creamy texture and scrumptious flavor. If you want to store it for longer, wrap each slice tightly in plastic wrap and then in aluminum foil and freeze them for up to 1 month. Just remember to thaw overnight in the fridge before serving for the best taste!

Can I prepare the cheesecake in advance?
Very! You can definitely prepare the cheesecake components up to 24 hours in advance. Just make the crust and the filling, pour them into the springform pan, and refrigerate it until you're ready to bake. This way, all you need to do is bake it when you're ready for dessert, making it an excellent choice for stress-free entertaining!

What’s the best way to freeze this cheesecake?
To freeze your Decadent Dark Chocolate Raspberry Cheesecake, allow it to cool completely after baking. Wrap each slice tightly in plastic wrap followed by aluminum foil to prevent freezer burn. Label with the date and it can be frozen for up to 1 month! When you're ready to enjoy, simply remove the desired slice from the freezer and allow it to thaw overnight in the refrigerator. For best taste, let it sit at room temperature for about 30 minutes before serving to enhance the creamy texture.

Are there any dietary considerations I should keep in mind?
Yes, indeed! If you're baking for guests with allergies, you might want to confirm that they don’t have sensitivities to dairy or gluten. To make this cheesecakes gluten-free, substitute the chocolate cookie crust for gluten-free cookie crumbs or almond flour. Always check the labels on packaged products to ensure they fit specific dietary needs, and consider offering alternative toppings to cater to various preferences!

Decadent Dark Chocolate Raspberry Cheesecake

Decadent Dark Chocolate Raspberry Cheesecake You'll Love

Indulge in a Decadent Dark Chocolate Raspberry Cheesecake, where rich chocolate meets tart raspberries for a blissful dessert experience.
Print Recipe Pin Recipe
Prep Time 20 minutes mins
Cook Time 1 hour hr
Cooling Time 4 hours hrs
Total Time 5 hours hrs 20 minutes mins
Servings: 8 slices
Course: Dessert
Cuisine: American
Calories: 350
Ingredients Equipment Method Nutrition Notes

Ingredients
  

For the Crust
  • 2 cups crushed chocolate cookies Substitute with graham crackers for a classic taste.
  • 1/2 cup melted butter No substitutions recommended.
For the Cheesecake Filling
  • 16 oz cream cheese Use full-fat brick-style for best results.
  • 1 cup granulated sugar Light brown sugar can enhance flavor depth.
  • 8 oz melted dark chocolate Opt for 60% to 72% cocoa for best balance.
  • 1 tsp vanilla extract No alternatives suggested.
  • 3 large eggs Beat minimally to avoid cracking.
  • 1 cup fresh raspberries Frozen can be used but may alter texture.

Equipment

  • 9-inch springform pan
  • Mixing Bowl
  • Electric mixer
  • Spatula
  • measuring cups
  • Measuring Spoons

Method
 

Preparation Steps
  1. Preheat your oven to 325°F (160°C). Grease the bottom and sides of a 9-inch springform pan.
  2. In a mixing bowl, combine crushed chocolate cookies with melted butter. Press the mixture into the prepared springform pan.
  3. In a large bowl, beat the cream cheese and sugar until smooth. Fold in melted dark chocolate and vanilla extract.
  4. Add eggs one at a time, mixing on low speed. Fold in raspberries, keeping some whole for presentation.
  5. Pour the filling over the crust and smooth the top. Tap the pan to release air bubbles.
  6. Bake for about 60 minutes. The center should be slightly jiggly when done.
  7. Turn off the oven and crack the door open, allowing cheesecake to cool for 1 hour. Then refrigerate for at least 4 hours or overnight.
  8. Remove the sides of the springform pan, slice, and garnish with extra raspberries or melted chocolate if desired.

Nutrition

Serving: 1sliceCalories: 350kcalCarbohydrates: 45gProtein: 6gFat: 18gSaturated Fat: 10gPolyunsaturated Fat: 0.5gMonounsaturated Fat: 6gCholesterol: 80mgSodium: 300mgPotassium: 250mgFiber: 2gSugar: 30gVitamin A: 500IUVitamin C: 5mgCalcium: 80mgIron: 1.5mg

Notes

For best results, use room temperature ingredients and avoid overmixing to prevent cracks. Chill overnight for improved flavor.

Tried this recipe?

Let us know how it was!

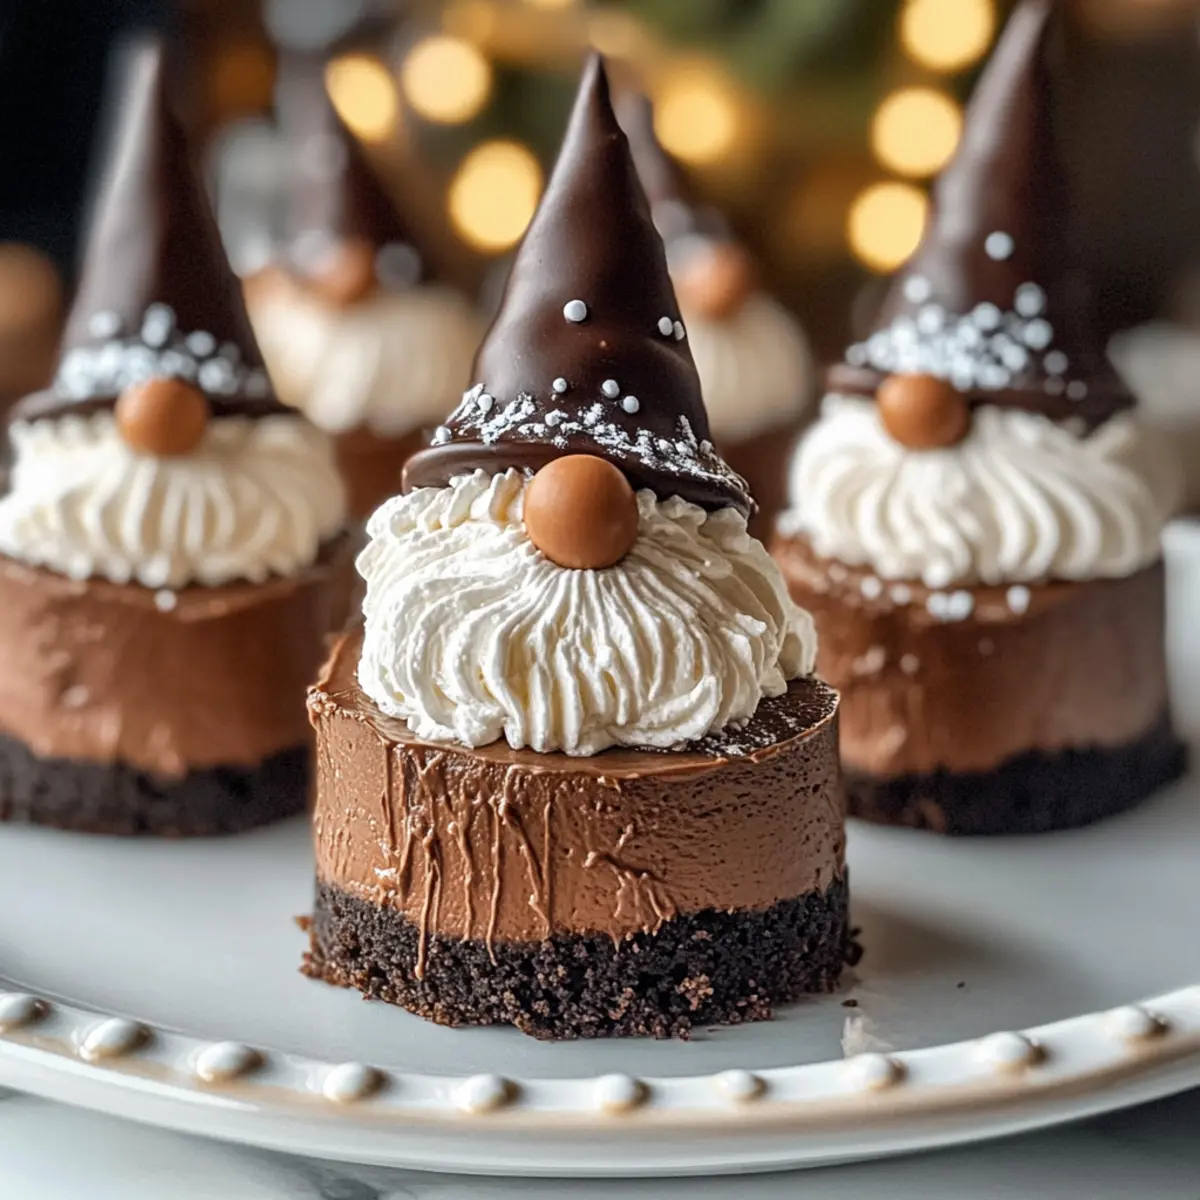
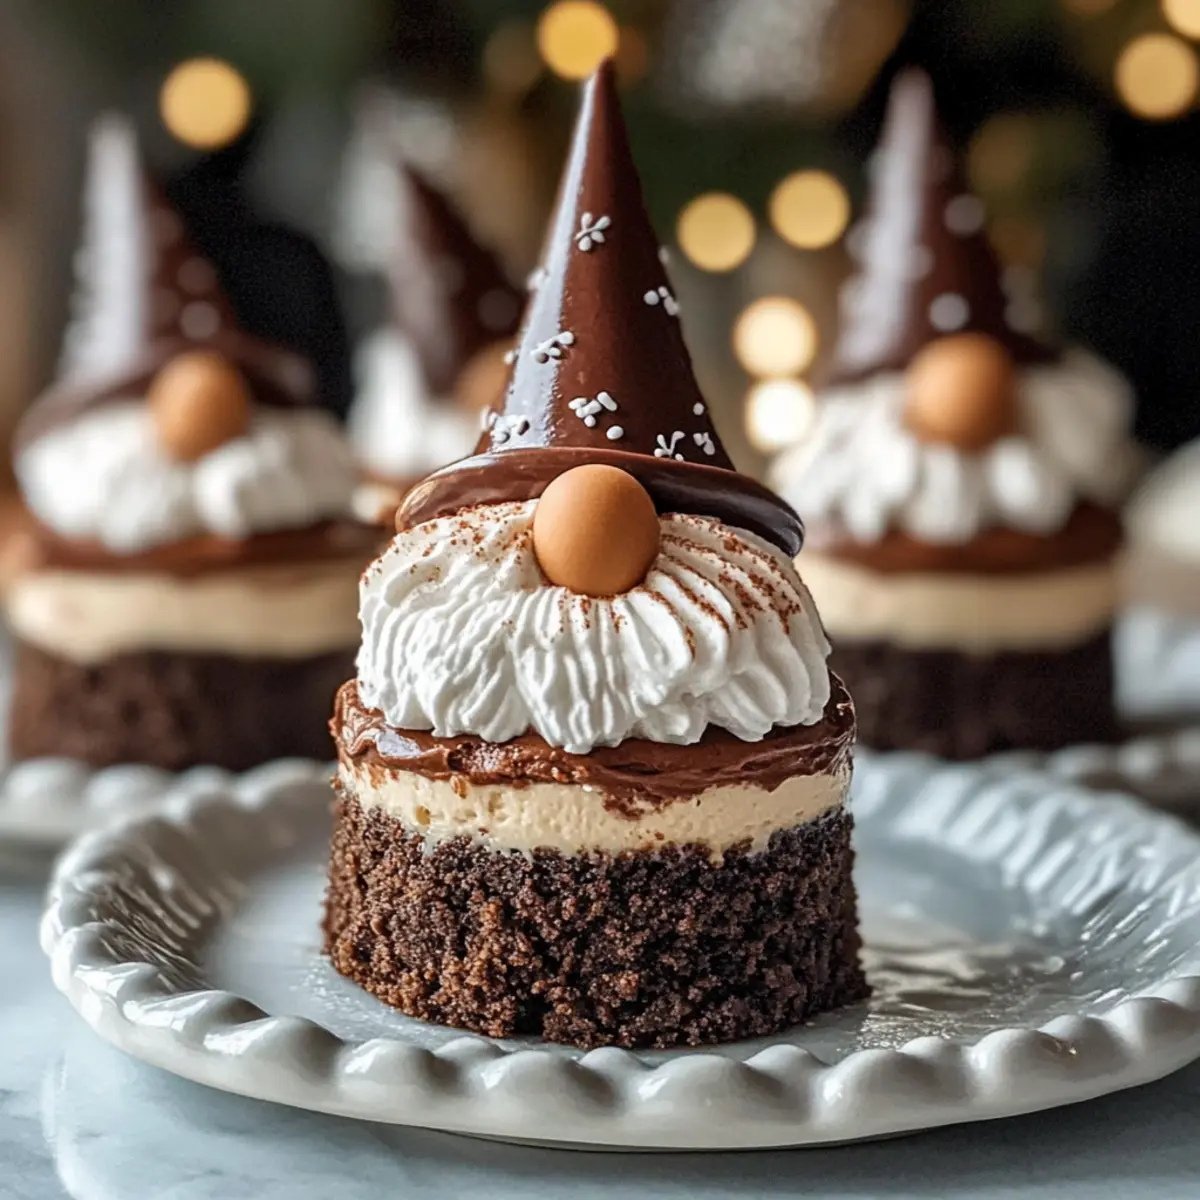
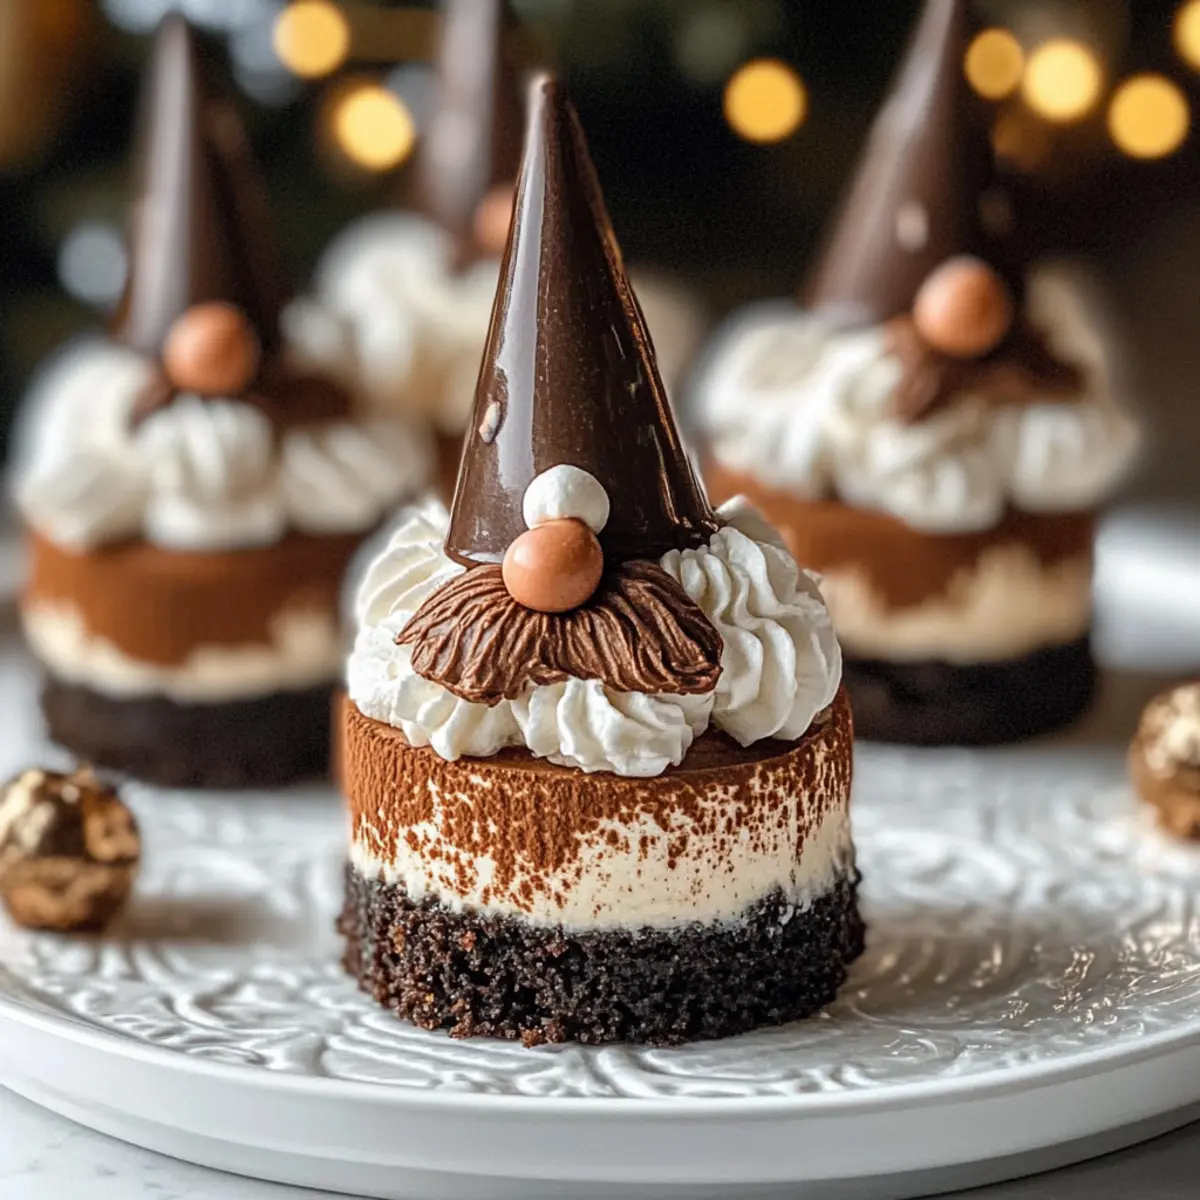
Irresistible Chocolate Gnome Cheesecakes for Festive Fun

January 19, 2026 by Grace Snow Leave a Comment

The kitchen filled with laughter as my niece and I transformed everyday ingredients into magical treats—enter the enchanting world of Chocolate Gnome Cheesecakes! With their playful design and rich, velvety chocolate flavor, these delightful mini cheesecakes are not just a dessert; they’re a whimsical centerpiece for holiday gatherings. The buttery chocolate cookie crust cradles a creamy filling that’s utterly irresistible. Plus, these treats come with options galore—from switching up the gnome hats with strawberry flair to experimenting with dark chocolate for a deeper richness. Not only are they crowd-pleasers, but they also make for perfect gifts, beautifully presented and uniquely fun. Who wouldn’t want to share a bit of holiday cheer in every bite? Ready to embark on this festive baking adventure? Let’s dive into the delicious magic of these Chocolate Gnome Cheesecakes together!

Why Are Chocolate Gnome Cheesecakes Special?

Whimsical Design: Each gnome cheesecake is not only delicious but also a fun project, perfect for sharing laughs with friends and family in the kitchen.

Decadent Flavor: The rich chocolate filling paired with a buttery cookie crust creates a melt-in-your-mouth experience that will keep your guests coming back for more!

Versatile Options: From swapping the gnome hats with strawberries to trying dark chocolate, these cheesecakes can be tailored to suit every taste and occasion.

Make-Ahead Friendly: Prepare and chill ahead of time, so you can spend more time enjoying the festivities and less time in the kitchen.

Kid-Friendly Fun: Invite the kids to decorate their own gnome faces, stirring creativity and joy around the holiday table. Pair these treats with a warm Homemade Hot Chocolate for a sweet holiday moment!

Chocolate Gnome Cheesecakes Ingredients

For the Cookie Crust
• Chocolate Cookie Crumbs – Adds flavor and structure to the crust; substitution: use crushed graham crackers or gluten-free cookies for a different twist.
• Melted Butter – Binds the cookie crumbs together; substitution: coconut oil can be a great dairy-free alternative.

For the Cheesecake Filling
• Cream Cheese – Provides the rich creamy base of the cheesecake; substitution: vegan cream cheese for a dairy-free option.
• Granulated Sugar – Sweetens the filling perfectly; substitution: consider using a sugar alternative like stevia for a lighter option.
• Sour Cream (or Greek Yogurt) – Enhances the creaminess with a hint of tang; substitution: non-dairy yogurt can work well if needed.
• Vanilla Extract – Adds a lovely depth of flavor; for a twist, try almond extract instead.
• Semi-Sweet Chocolate – Delivers that rich chocolate flavor; substitution: try dark chocolate for an intense taste or milk chocolate for a sweeter cheesecake.
• Eggs – Essential for setting the filling during baking; substitution: flax eggs serve as a vegan alternative.

For Decoration
• Whipped Cream – Creates a delightful gnome's beard for decoration; tip: use stabilized whipped cream for a longer-lasting finish.

With these ingredients, you're all set to create your very own Chocolate Gnome Cheesecakes! Perfect for indulging during the holiday season and sharing joy with loved ones.

Step‑by‑Step Instructions for Chocolate Gnome Cheesecakes

Step 1: Preheat and Prepare
Begin by preheating your oven to 325°F (160°C). As it warms up, line a 12-cup muffin tin with paper liners to ensure easy removal of your delightful Chocolate Gnome Cheesecakes later. This step is crucial for achieving that perfect, whimsical shape as you create your mini cheesecakes.

Step 2: Make the Crust
In a mixing bowl, combine chocolate cookie crumbs and melted butter until the mixture resembles wet sand. Press this mixture evenly into the bottom of each lined cup, forming a sturdy crust. Bake in the preheated oven for 5 minutes, then remove and allow to cool while you prepare the filling. The crust should look slightly set and smell delicious.

Step 3: Prepare the Cheesecake Filling
In a large mixing bowl, beat the cream cheese with a hand mixer until smooth and creamy, about 2 minutes. Gradually add granulated sugar and sour cream, mixing until everything is fluffy and well combined. Melt semi-sweet chocolate in the microwave in 30-second intervals, stirring until smooth. Gently mix this into your cream mixture, ensuring no lumps remain.

Step 4: Incorporate Eggs
Next, crack in the eggs one at a time, mixing gently on low speed between additions. This is a key step in making the Chocolate Gnome Cheesecakes rich and creamy. Be careful not to overmix, as this could lead to cracks during baking. Your filling should now be velvety and well-blended, ready to be poured.

Step 5: Bake the Cheesecakes
Divide the cheesecake filling evenly among the crusts, filling each cup about ¾ full. Bake in the oven for 18-20 minutes, or until the edges are set but the centers still have a slight jiggle. This visual cue is essential for ensuring your cheesecakes are silky and not overbaked.

Step 6: Cool the Cheesecakes
Once baked, turn off the oven and leave the door ajar while allowing the cheesecakes to cool for an additional 10 minutes. This gradual cooling process helps prevent cracks. After the cooling period, remove them from the oven and let them cool to room temperature before transferring to the refrigerator. Chill for at least 2 hours to fully set.

Step 7: Decorate the Gnomes
When ready to decorate, prepare a quick ganache by melting chocolate with a bit of cream. Pipe stabilized whipped cream on top for the gnome's beard and place a chocolate or strawberry hat atop each cheesecake. Ensure to add candy noses and dust with powdered sugar to create that snow-like effect, making your Chocolate Gnome Cheesecakes truly enchanting!

What to Serve with Chocolate Gnome Cheesecakes?

Elevate your holiday gatherings with delightful pairings that complement the rich, velvety magic of your Chocolate Gnome Cheesecakes.

  • Fresh Berries: Their tartness provides a refreshing contrast, balancing the sweet cheesecake beautifully. Strawberries or raspberries also make for a stunning garnish.
  • Espresso or Coffee: The bold flavors of espresso enhance the chocolate, making each bite even more satisfying. Perfect for cozy after-dinner moments!
  • Vanilla Ice Cream: A scoop of creamy vanilla adds an indulgent creaminess that perfectly pairs with the cheesecake's rich chocolate flavor.
  • Chocolate Ganache Drizzle: A richer chocolate drizzle heightens the decadent experience, creating an inviting dessert that's visually stunning. Is there ever too much chocolate?
  • Peppermint Hot Cocoa: This festive drink not only warms you up but also ties in lovely peppermint notes that contrast deliciously with the cheesecake.
  • Spiced Nuts: Crunchy, spiced nuts add a delightful texture and a savory element to your dessert spread, creating a perfect balance of flavors.
  • Whipped Cream: A simple dollop of whipped cream brings extra creaminess to the table, enhancing the gnome cheesecake's festive charm.
  • Mini Fruit Tarts: These light and fruity treats bring a refreshing finish to your meal, soothing your palate after the richer chocolate flavors.

Each of these delightful pairings not only complements the Chocolate Gnome Cheesecakes but also creates a festive atmosphere perfect for sharing joy with loved ones.

Chocolate Gnome Cheesecakes Variations

Feel free to add your personal touch to these delightful treats with these fun variations—let your creativity shine!

  • Dairy-Free: Use coconut cream and vegan cream cheese to create a luscious, dairy-free cheesecake that everyone can enjoy.
  • No-Bake Option: Swap the baked crust for a chilled graham cracker crust, allowing for a refreshing no-bake version.
  • Different Hat Flavors: Experiment with fruit-flavored gnome hats by using strawberry or blueberry toppings for a colorful twist!
  • Additional Texture: Add crushed nuts to the cookie crust for an extra crunchy base that brings delightful texture to each bite.
  • Flavor Infusion: Incorporate orange zest into the filling for a zesty, holiday glow that adds a lovely citrus note to the chocolate.
  • Dark Chocolate Delight: Opt for rich dark chocolate instead of semi-sweet for a deeper flavor—perfect for chocolate lovers!
  • Spicy Kick: Sprinkle in a pinch of cinnamon or cayenne for a warm, unexpected spice that elevates your Chocolate Gnome Cheesecakes.
  • Glam Up with Ganache: Instead of plain whipped cream, adorn them with shiny chocolate ganache drizzles for an extra touch of indulgence.

With so many fun possibilities, these Chocolate Gnome Cheesecakes can easily become a personalized favorite. And if you're looking for a rich drink to accompany them, try pairing them with warm Homemade Hot Chocolate for an ultimate cozy experience!

How to Store and Freeze Chocolate Gnome Cheesecakes

  • Room Temperature: Chocolate Gnome Cheesecakes should not be left at room temperature for more than 2 hours to ensure freshness and maintain their wonderful flavor.
  • Fridge: Store any leftovers in an airtight container in the refrigerator for up to 4 days, making sure to avoid contaminating the surface with your utensils.
  • Freezer: You can freeze undecorated cheesecakes for up to 1 month; wrap them tightly in plastic wrap and aluminum foil to prevent freezer burn. Thaw overnight in the fridge before decorating.
  • Reheating: These cheesecakes are best served chilled. If desired, let them sit at room temperature for about 15 minutes before serving to soften slightly and enhance their flavors.

Make Ahead Options

These Chocolate Gnome Cheesecakes are perfect for meal prep, allowing you to get a head start on your festivities! You can prepare and bake the cheesecakes up to 24 hours in advance. Once cooled, refrigerate them in an airtight container for optimal freshness. If time is tight, the crusts can be made ahead and stored for up to 3 days. To ensure they remain just as delicious, avoid decorating until the day you serve them, as this will keep the whipped cream fresh and fluffy. When ready to serve, simply decorate your cheesecakes with ganache and whimsical toppings for a delightful presentation that will impress your guests!

Expert Tips for Perfect Chocolate Gnome Cheesecakes

  • Room Temperature Cream Cheese: Ensure your cream cheese is at room temperature to achieve a luxuriously smooth filling without lumps.

  • Gentle Mixing: When incorporating eggs, mix gently. Overmixing can result in cracks during baking, compromising the creamy texture of your cheesecake.

  • Proper Cooling: Allow the cheesecakes to cool in the oven with the door ajar. This gradual cooling prevents sudden temperature changes, which can cause cracks.

  • Stabilized Whipped Cream: For decoration, opt for stabilized whipped cream. It holds up better for longer, ensuring your gnomes look fabulous during gatherings!

  • Flexible Decorations: Feel free to switch up decorations! Use colorful candies for hats and noses, tailoring your Chocolate Gnome Cheesecakes to any festive occasion.

Chocolate Gnome Cheesecakes Recipe FAQs

How do I choose the best chocolate for the cheesecake?
Choosing the right chocolate is essential for a rich flavor. I recommend using semi-sweet chocolate for a well-balanced sweetness, but if you're looking for a stronger, more intense flavor, opt for dark chocolate. Just make sure it’s high-quality and melts smoothly for the best results.

How should I store my Chocolate Gnome Cheesecakes?
Store your Chocolate Gnome Cheesecakes in an airtight container in the refrigerator for up to 4 days. Always use a clean utensil for serving to prevent contamination. If the weather is humid, I recommend placing a paper towel in the container to absorb excess moisture!

Can I freeze Chocolate Gnome Cheesecakes?
Absolutely! You can freeze undecorated cheesecakes for up to 1 month. Just wrap each cheesecake tightly in plastic wrap followed by aluminum foil to prevent freezer burn. When you're ready to enjoy them, simply thaw them overnight in the refrigerator before decorating.

What can I substitute for eggs in this recipe?
For a vegan alternative, you can replace each egg with a flax egg. To make a flax egg, mix 1 tablespoon of ground flaxseed with 2.5 tablespoons of water and let it sit for about 5 minutes until it thickens. This substitution works wonderfully in maintaining the creamy texture of your cheesecakes.

How can I avoid cracks in my cheesecakes?
To prevent cracks, ensure your cream cheese is at room temperature before mixing, and avoid overmixing after adding the eggs. Also, cool the cheesecakes slowly in the oven with the door ajar. These steps help to stabilize the filling, resulting in smooth, crack-free cheesecakes.

Can I use non-dairy options for this recipe?
Yes! You can easily adapt the Chocolate Gnome Cheesecakes to be dairy-free. Use vegan cream cheese, coconut oil instead of butter, and non-dairy yogurt in place of sour cream. The flavor and texture will remain delightful, ensuring everyone can enjoy them!

Chocolate Gnome Cheesecakes

Irresistible Chocolate Gnome Cheesecakes for Festive Fun

Delight in the whimsical world of Chocolate Gnome Cheesecakes, featuring rich flavors and playful designs perfect for holiday gatherings.
Print Recipe Pin Recipe
Prep Time 20 minutes mins
Cook Time 25 minutes mins
Chilling Time 2 hours hrs
Total Time 2 hours hrs 45 minutes mins
Servings: 12 cheesecakes
Course: Dessert
Cuisine: American
Calories: 250
Ingredients Equipment Method Nutrition Notes

Ingredients
  

For the Cookie Crust
  • 1 cup Chocolate Cookie Crumbs Substitute with crushed graham crackers or gluten-free cookies if desired.
  • 1/4 cup Melted Butter Coconut oil can be a dairy-free alternative.
For the Cheesecake Filling
  • 16 oz Cream Cheese Consider vegan cream cheese for a dairy-free option.
  • 1/2 cup Granulated Sugar Use a sugar alternative like stevia for a lighter option.
  • 1/2 cup Sour Cream Non-dairy yogurt can work well if needed.
  • 1 teaspoon Vanilla Extract Almond extract can be an interesting twist.
  • 8 oz Semi-Sweet Chocolate Substitute with dark chocolate for a more intense flavor.
  • 2 large Eggs Flax eggs can be used as a vegan alternative.
For Decoration
  • 1 cup Whipped Cream Stabilized whipped cream is preferred.

Equipment

  • Oven
  • Muffin tin
  • Mixing Bowl
  • hand mixer
  • Spatula
  • piping bag

Method
 

Step-by-Step Instructions
  1. Preheat your oven to 325°F (160°C) and line a 12-cup muffin tin with paper liners.
  2. In a mixing bowl, combine chocolate cookie crumbs and melted butter, then press into the bottom of each lined cup. Bake for 5 minutes and let cool.
  3. Beat the cream cheese until smooth. Gradually mix in granulated sugar and sour cream. Melt semi-sweet chocolate and incorporate it into the mixture.
  4. Add eggs one at a time, mixing gently on low speed. Avoid overmixing to prevent cracks.
  5. Divide the cheesecake filling among the crusts, filling each about ¾ full. Bake for 18-20 minutes until the edges are set.
  6. Allow the cheesecakes to cool in the oven with the door ajar for 10 minutes, then cool to room temperature and chill for at least 2 hours.
  7. Prepare ganache and decorate with whipped cream for gnome's beard, adding chocolate or strawberry hats and candy noses.

Nutrition

Serving: 1cheesecakeCalories: 250kcalCarbohydrates: 28gProtein: 4gFat: 15gSaturated Fat: 8gPolyunsaturated Fat: 1gMonounsaturated Fat: 6gCholesterol: 50mgSodium: 200mgPotassium: 100mgFiber: 1gSugar: 15gVitamin A: 250IUCalcium: 50mgIron: 1mg

Notes

These delightful cheesecakes are perfect for the festive season and can be customized for various occasions.

Tried this recipe?

Let us know how it was!

Lemon Cookies with Raspberry Frosting – A Zesty Delight!

January 16, 2026 by Grace Snow Leave a Comment

While rummaging through my pantry, I spotted a lonely lemon just begging to be transformed into something special. That's when I decided to whip up a batch of my Easy Lemon Cookies with Raspberry Frosting, and let me tell you, they did not disappoint! These cookies perfectly balance sweet and tangy flavors, offering a delightfully melt-in-your-mouth texture that pairs beautifully with the vibrant raspberry frosting. What I love most about this recipe is how quick it is to prepare, making it an effortless choice for a festive gathering or a cozy afternoon pick-me-up. The cheerful burst of lemon with every bite will light up your day—who could resist? So, are you ready to elevate your baking game and impress your friends and family with these delightful treats? Let's get started!

Why are these lemon cookies irresistible?

Bright, Zesty Flavor: The boldness of lemon zest shines through, creating a refreshing taste that awakens your senses.
Frosting Fun: A vibrant raspberry frosting not only adds a pop of color but also a delightful sweet-tart contrast.
Quick Prep Time: With simple steps and minimal waiting, you can indulge in these treats in no time!
Perfect for Any Occasion: They're versatile enough to charm at brunch, tea time, or festive celebrations with family and friends.
Store and Share: Keep them fresh for days, or gift a batch as a cheerful surprise, just like those scrumptious Eggnog Cookies Soft!

Lemon Cookies Raspberry Frosting Ingredients

Let’s get baking and gather these delightful ingredients to create the perfect Lemon Cookies with Raspberry Frosting!

For the Cookie Dough

  • Butter – Use unsalted for better control over the cookie's saltiness and richness.
  • Granulated Sugar – This classic sweetener not only sweetens but helps achieve a lovely golden color; you can substitute with coconut sugar for a twist.
  • Brown Sugar – Adds a hint of caramel flavor and moisture to keep cookies chewy.
  • Lemon Zest – The key to that bright, zesty flavor; make sure to only zest the yellow part to avoid bitterness.
  • Salt – Enhances all the flavors; even a pinch can make a significant difference.
  • Vanilla Extract – Opt for pure vanilla for the best aromatic sweetness in your cookies!
  • Egg – Acts as a binder and adds moisture; consider a flax egg for a vegan alternative.
  • All-Purpose Flour – Provides the cookie’s structure; a gluten-free blend can also work wonders!
  • Baking Soda – Essential for leavening, ensuring a fluffy texture in just 12 minutes of baking.

For the Raspberry Frosting

  • Raspberry Powder – Infuses gorgeous raspberry flavor; if you can't find it, use fresh or frozen raspberries that have been puréed and strained.
  • Confectioners' Sugar – Keeps the frosting sweet and silky; sifting helps achieve that smooth consistency.
  • Milk – Adjusts the frosting to your desired thickness; feel free to swap in non-dairy milk for a substitute.

With these wonderful ingredients, you're just a few steps away from creating a batch of lemony, raspberry-topped happiness!

Step‑by‑Step Instructions for Lemon Cookies Raspberry Frosting

Step 1: Prepare Dough
Begin by preheating your oven to 350°F (175°C) and lining two baking sheets with parchment paper. In a mixing bowl, beat together the unsalted butter, granulated sugar, brown sugar, and fresh lemon zest for about 4-5 minutes until the mixture is light and fluffy. Next, add the egg and continue mixing for another 2 minutes. Gradually incorporate the all-purpose flour and baking soda until just combined to create the base for your Lemon Cookies.

Step 2: Portion Cookies
Scoop out tablespoon-sized portions of the dough and roll them into balls. Place the dough balls on the prepared baking sheets, making sure to leave space between them for spreading. Use a floured measuring cup to gently flatten each ball slightly, ensuring even baking and a lovely round shape for your cookies.

Step 3: Bake
Slide the baking sheets into your preheated oven and bake the cookies for 12 minutes. Keep an eye on them — you want the edges to be set and the bottoms to be just golden. Once baked, remove them from the oven and let the cookies cool completely on the baking sheet to ensure they retain their soft texture.

Step 4: Make Frosting
While the cookies cool, prepare the raspberry frosting. In a medium mixing bowl, beat together softened butter, a pinch of salt, vanilla extract, and confectioners' sugar until the mixture is smooth and creamy. Gradually add in raspberry powder and a splash of milk to achieve your desired frosting consistency, which should be spreadable but not too runny.

Step 5: Frost Cookies
After your lemon cookies have cooled completely, it’s time to frost them. Use a spoon or a spatula to dollop about 1 tablespoon of raspberry frosting onto the center of each cookie. Spread the frosting evenly, allowing some to gently drape over the edges for a delightful finish. Enjoy the delightful blend of flavors with each bite of your Lemon Cookies with Raspberry Frosting.

Make Ahead Options

These Easy Lemon Cookies with Raspberry Frosting are perfect for meal prep and can save busy home cooks valuable time! You can prepare the cookie dough up to 24 hours in advance; simply mix the ingredients and shape the dough into balls, then refrigerate them in an airtight container to keep their freshness. The raspberry frosting can also be made up to 3 days ahead, stored in the fridge in a sealed container—this helps the flavors meld beautifully. When you're ready to enjoy your cookies, simply bake the chilled dough and frost them immediately after they've cooled. This way, you'll have delightful, freshly-baked treats with minimal effort!

Storage Tips for Lemon Cookies Raspberry Frosting

Room Temperature: Store cookies in an airtight container at room temperature for up to 3 days to maintain their freshness and soft texture.

Fridge: If you want to keep them longer, refrigerate in an airtight container for up to one week, layering parchment paper between cookies to prevent sticking.

Freezer: For even longer storage, freeze the cookies for up to 3 months. Place them in a freezer-safe container, separating layers with wax paper.

Reheating: If you prefer warm cookies, gently reheat in the microwave for 10-15 seconds. Be careful not to overheat, as this can make them tough. Enjoy your Lemon Cookies with Raspberry Frosting!

Expert Tips for Lemon Cookies Raspberry Frosting

  • Room Temperature Ingredients: Ensure your butter and egg are at room temperature for a smoother dough and better cookie texture.

  • Careful Mixing: Avoid overmixing after adding the flour; gentle mixing prevents tough cookies and keeps the texture light and chewy.

  • Sifting Matters: Always sift your confectioners' sugar and raspberry powder to eliminate lumps in your frosting, ensuring a smooth finish for your Lemon Cookies.

  • Adjust Frosting Thickness: If your raspberry frosting is too thick, add a splash of milk; too runny? A bit more confectioners' sugar will help thicken it up!

  • Proper Cooling: Let cookies cool completely on the baking sheet; this will help them maintain their softness before frosting.

  • Storage Tips: Store your Lemon Cookies Raspberry Frosting in an airtight container with parchment paper between layers to keep them fresh for days.

What to Serve with Easy Lemon Cookies with Raspberry Frosting

These delightful treats are best enjoyed with a thoughtful selection of accompaniments that elevate your dessert experience.

  • Fresh Berries: Juicy strawberries, blueberries, or raspberries provide a refreshing contrast that harmonizes beautifully with the lemon cookies’ zesty flavors.
  • Herbal Tea: A soothing cup of chamomile or mint tea works wonders, bringing warmth and a gentle aromatic touch to every bite.
  • Creamy Cheesecake: A slice of rich cheesecake offers a delightful contrast in texture, balancing the cookies' lightness with its creamy depth.
  • Lemonade: Bright and bubbly, a glass of homemade lemonade is a perfect way to amplify the lemony goodness while refreshing your palate.
  • Ice Cream: Vanilla bean or raspberry sorbet brings a cool, creamy element that complements the cookies perfectly. Imagine that sweet-tart flavor dancing in your mouth with each scoop!
  • Chocolate Drizzle: A simple drizzle of dark chocolate adds a luxurious finish, enhancing both sweetness and flavor complexity with a touch of richness.
  • Fruit Salad: A bowl of mixed fruit featuring melons, citrus, and grapes brings a vibrant, fresh element to the table, lightening the overall dessert experience.
  • Scones: Serve alongside buttery, flaky scones for a delightful brunch pairing that resonates with the cookies' flavor profile while adding heartiness.
  • Sparkling Water: A twist of lime in fizzy sparkling water creates an elegant refreshment that cleanses the palate between bites of the cookies.

Lemon Cookies Raspberry Frosting Variations

Customize these delightful lemon cookies to make them your own and find new flavor adventures!

  • Meyer Lemon: Swap regular lemons with Meyer lemons for an extra sweet, floral twist. These cookies will have a lovely, unique taste that will surprise your palate!

  • Different Fruit Frostings: Use strawberry or blueberry powder in place of raspberry for a new frosting flavor. Each fruit introduces its own character, transforming your cookies with delightful variations.

  • Zesty Add-ins: Stir in lemon or orange zest for an extra citrus punch. You can even add poppy seeds for texture and a fun twist reminiscent of traditional lemon poppyseed treats.

  • Nutty Crunch: Add chopped nuts, like almonds or pistachios, to the cookie dough for a nutty flavor and delightful crunch. This added texture brings a wonderful dimension to each bite!

  • Gluten-Free Option: Swap out all-purpose flour for a high-quality gluten-free flour blend. Enjoy the same soft, chewy experience without gluten.

  • Additional Spice: A pinch of cardamom or ginger can elevate your cookies with aromatic warmth, creating a unique flavor profile that will make your cookies stand out at gatherings.

  • Frosting Variations: Add a hint of almond extract to your frosting for an unexpected flavor boost, or incorporate cream cheese for a richer, tangy profile rewarding each cookie with a different delight.

Each of these simple swaps or additions can transform your lemon cookies into a new bakery-style treat. And if you're looking to explore other delightful desserts, why not check out these scrumptious Matcha Cookies Soft or Thumbprint Cookies Melt? Happy baking!

Lemon Cookies Raspberry Frosting Recipe FAQs

How do I select the perfect lemons for my cookies?
Absolutely! When choosing lemons, look for ones that are bright yellow, firm, and heavy for their size. Avoid any that have dark spots or are dull, as these may not be as juicy or flavorful. Fresh lemons should also have a slightly fragrant aroma, which indicates ripeness and offers that wonderful zesty flavor in your cookies.

How should I store my Lemon Cookies with Raspberry Frosting?
To keep your cookies fresh, store them in an airtight container at room temperature for up to 3 days. If you want to enjoy them longer, place them in the refrigerator, where they’ll last up to one week. Just make sure to layer parchment paper between cookies to prevent them from sticking together!

Can I freeze my Lemon Cookies with Raspberry Frosting?
Very! To freeze, first place the cookies in a single layer on a baking sheet for about 1-2 hours until they’re firm. Then, transfer them to a freezer-safe container, separating layers with wax paper. They can be frozen for up to 3 months. When ready to enjoy, let them thaw at room temperature. If desired, you can rewarm them gently in the microwave for 10-15 seconds.

What should I do if my frosting is too thick or too runny?
Oh, troubleshooting frosting is easy! If your raspberry frosting is too thick, simply add a tiny splash of milk (1 teaspoon at a time) and mix until you achieve your desired consistency. Conversely, if it's too runny, add a little more sifted confectioners' sugar until it thickens up to the right spreadable texture. Remember, it’s all about balance!

Are there any allergenic ingredients in this recipe?
This recipe primarily contains common ingredients like butter, egg, and flour. If you’re baking for someone with food allergies, consider using alternatives such as a flax egg instead of a regular egg for a vegan option or substituting the all-purpose flour with a gluten-free flour blend to accommodate gluten sensitivities. Always check the labels of specialized products for cross-contamination if allergies are a concern!

Lemon Cookies Raspberry Frosting

Lemon Cookies with Raspberry Frosting – A Zesty Delight!

Delightful lemon cookies topped with vibrant raspberry frosting for a perfect blend of sweet and tangy flavors.
Print Recipe Pin Recipe
Prep Time 20 minutes mins
Cook Time 12 minutes mins
Cooling Time 10 minutes mins
Total Time 42 minutes mins
Servings: 12 cookies
Course: Dessert
Calories: 150
Ingredients Equipment Method Nutrition Notes

Ingredients
  

For the Cookie Dough
  • 1 cup Unsalted Butter softened
  • 3/4 cup Granulated Sugar
  • 1/4 cup Brown Sugar
  • 1 tbsp Lemon Zest
  • 1/4 tsp Salt
  • 1 tsp Vanilla Extract
  • 1 large Egg or flax egg for vegan
  • 1 3/4 cups All-Purpose Flour or gluten-free blend
  • 1 tsp Baking Soda
For the Raspberry Frosting
  • 1/2 cup Raspberry Powder or puréed fresh/frozen raspberries
  • 2 cups Confectioners' Sugar sifted
  • 2 tbsp Milk or non-dairy milk

Equipment

  • Mixing Bowl
  • Baking Sheets
  • Parchment Paper
  • Spoon or Spatula
  • measuring cups
  • Mixer

Method
 

Step‑by‑Step Instructions
  1. Preheat your oven to 350°F (175°C) and line two baking sheets with parchment paper.
  2. In a mixing bowl, beat together the unsalted butter, granulated sugar, brown sugar, and lemon zest for about 4-5 minutes until fluffy.
  3. Add the egg and continue mixing for another 2 minutes. Gradually incorporate the all-purpose flour and baking soda until just combined.
  4. Scoop out tablespoon-sized portions of the dough and roll them into balls. Place on prepared baking sheets, leaving space for spreading.
  5. Use a floured measuring cup to gently flatten each ball slightly.
  6. Bake for 12 minutes until the edges are set and the bottoms are golden. Allow to cool completely on baking sheets.
  7. While cookies cool, beat together softened butter, a pinch of salt, vanilla extract, and confectioners' sugar until smooth.
  8. Gradually mix in raspberry powder and milk to reach a spreadable consistency.
  9. Frost cooled cookies with about 1 tablespoon of frosting each, spreading evenly.

Nutrition

Serving: 1cookieCalories: 150kcalCarbohydrates: 20gProtein: 2gFat: 6gSaturated Fat: 4gCholesterol: 20mgSodium: 100mgSugar: 10g

Notes

Ensure ingredients are at room temperature for better mixing. Store in an airtight container with parchment paper between layers to keep fresh.

Tried this recipe?

Let us know how it was!

Brookies Cookies: The Ultimate Fudgy-Sweet Delight

January 16, 2026 by Grace Snow Leave a Comment

As I opened my oven door, a heavenly aroma floated through my kitchen, instantly lifting my spirits—there's nothing quite like the irresistible scent of freshly baked Brookies Cookies. This scrumptious hybrid of brownies and cookies merges two beloved desserts into one ooey-gooey masterpiece that's perfect for any occasion. What makes these Brookies Cookies truly special is their quick preparation time—less than 30 minutes from start to finish, and there’s no chilling required! With their rich, fudgy texture complemented by the chewy goodness of chocolate chip cookies, you'll have a sweet indulgence that pleases every palate. Let’s dive into this fun and straightforward recipe together—who's ready to transform their baking game?

Why are Brookies Cookies a must-try?

Quick Preparation: With less than 30 minutes from assembly to oven, these cookies fit perfectly in a busy schedule.

Irresistible Aroma: There's nothing like the heavenly smell of freshly baked Brookies wafting through your home—it's pure bliss!

Two Classics in One: Experience the best of both worlds with this satisfying fusion of gooey brownie and chewy cookie in every bite.

Crowd-Pleasing Delight: Whether for a party or a cozy night in, these cookies are sure to impress guests and family alike. Pair them with a scoop of vanilla ice cream for an elegant touch, or serve warm on their own!

Endless Customization: Feel free to get creative—experiment with Matcha Cookies Soft or add seasonal flavors like peppermint for a special twist.

Perfect for Sharing: They’re an awesome choice for school events, potlucks, or just satisfying a sweet tooth. Who wouldn’t love a Brookie?

Brookies Cookies Ingredients

• To make your delicious Brookies Cookies, gather these essential ingredients!

For the Brownie Layer

  • Unsalted Butter – Adds richness and moisture; margarine can be used for a dairy-free option.
  • Light Brown Sugar – Provides sweetness with a hint of caramel flavor; can substitute with dark brown sugar for a deeper taste.
  • Egg – Binds ingredients and contributes to texture; flaxseed meal mixed with water serves as a vegan alternative.
  • Vanilla Extract – Enhances flavor; opt for pure vanilla extract for the best taste, while imitation works as a budget-friendly substitute.
  • Dutch-Process Cocoa Powder – Infuses a deep chocolate flavor; regular unsweetened cocoa powder is a great backup.
  • All-Purpose Flour – Provides structure to these cookies; whole wheat flour can offer a healthier take.
  • Baking Soda – Essential for leavening the dough, so don’t skip it!
  • Salt – Balances sweetness and enhances flavors; recommended for a richer taste.

For the Cookie Layer

  • Unsalted Butter – Use cold butter here to create a perfectly chewy texture.
  • Granulated Sugar – Sweetens the cookies; you can reduce the amount for less sweetness if desired.
  • Egg Yolk – Includes an extra yolk to amplify richness and tenderness.
  • Semi-Sweet Chocolate Chips – Delivers chocolatey goodness; swap for dark chocolate chips for a bolder flavor.

Now that you have the ingredients ready, let’s embark on this delightful baking adventure to create your Brookies Cookies!

Step‑by‑Step Instructions for Brookies Cookies

Step 1: Preheat the Oven
Begin by preheating your oven to 350°F (175°C). This crucial step ensures that your Brookies Cookies bake evenly and reach that perfect level of gooeyness. While the oven is heating, take two baking sheets and line them with parchment paper to prevent sticking and make cleanup a breeze.

Step 2: Prepare the Brownie Cookie Dough
In a large mixing bowl, cream together ½ cup of unsalted butter and ½ cup of light brown sugar with an electric mixer for about 3 minutes until fluffy. Mix in one egg and 1 teaspoon of vanilla extract, blending until smooth. Gradually incorporate ½ cup of all-purpose flour, ¼ cup of Dutch-process cocoa powder, ½ teaspoon of baking soda, and a pinch of salt, stirring until a rich brownie batter forms. Lastly, fold in ½ cup of semi-sweet chocolate chips.

Step 3: Prepare the Chocolate Chip Cookie Dough
Using a separate bowl, cream ½ cup of cold unsalted butter with ½ cup of granulated sugar and ½ cup of light brown sugar for approximately 4 minutes, achieving a light and airy texture. Add one egg and an extra egg yolk along with 1 teaspoon of vanilla extract, mixing well. In two additions, incorporate 1 ½ cups of all-purpose flour and ½ teaspoon of baking soda, stirring just until the dry ingredients disappear, then fold in ½ cup of chocolate chips.

Step 4: Portion the Doughs
Scoop uniform portions from both the brownie and cookie doughs, aiming for about 2 tablespoons per ball. Gently roll each portion into a ball, then take one brownie ball and one cookie ball. Combine them into a single ball, ensuring the layers mix slightly for that signature Brookies Cookies appearance.

Step 5: Arrange on Baking Sheets
Place the dough balls on the prepared baking sheets, making sure to leave at least 2 inches of space between each ball. This spacing allows the Brookies Cookies to spread out properly as they bake, ensuring a chewy, delightful texture with the perfect fusion of brownie and cookie.

Step 6: Bake the Cookies
Bake your Brookies Cookies in the preheated oven for 8-9 minutes. Keep a close eye on them as they should puff up slightly while remaining soft in the center. You’ll know they are done when the edges look set, but the middle still appears a bit undercooked, as they will firm up while cooling.

Step 7: Cool and Serve
Once baked, carefully transfer the cookies to a wire rack to cool completely. This step is essential for maximizing that soft, gooey texture! If desired, sprinkle a touch of flaky sea salt on top of the warm Brookies Cookies for an extra flavor boost before serving. Enjoy the delightful fusion of flavors!

Brookies Cookies Variations & Substitutions

Feel free to get creative and tweak these Brookies Cookies to make them uniquely yours!

  • Dairy-Free: Substitute unsalted butter with coconut oil or margarine for a delicious dairy-free treat. The flavor remains rich and satisfying.
  • Nutty Twist: Add ½ cup of chopped walnuts or pecans to the brownie layer for a delightful crunch. It enhances the texture while bringing in extra flavor!
  • White Chocolate Delight: Swap semi-sweet chocolate chips for white chocolate chips in the cookie layer for a sweet, creamy contrast to the fudgy brownie base.
  • Gluten-Free: Use a 1:1 gluten-free flour blend instead of all-purpose flour for a gluten-free alternative that doesn’t sacrifice taste or texture.
  • Seasonal Spice: Incorporate a teaspoon of cinnamon or a dash of nutmeg for a warm, cozy touch—perfect for autumn baking.
  • Minty Fresh: Add ½ teaspoon of peppermint extract to the brownie batter for a refreshing seasonal flavor. It’s a delightful twist for the holidays!
  • Caramel Swirl: Drizzle melted caramel over the top just before baking for an added layer of sweetness. Mix in chocolate chips for extra decadence!
  • Chocolate Chunk: Instead of using chips, chop up a bar of dark chocolate for bigger bites of chocolatey goodness throughout the cookies.

These variations offer a wonderful opportunity to explore different flavor profiles and textures, making your Brookies Cookies truly one-of-a-kind! If you're looking for other creative cookie inspirations, don’t forget to check out Eggnog Cookies Soft or Thumbprint Cookies Melt. Happy baking!

How to Store and Freeze Brookies Cookies

Room Temperature: Store Brookies Cookies in an airtight container at room temperature for up to 5 days to keep them soft and delicious.

Fridge: If you prefer a firmer texture, you can refrigerate the cookies in a tightly sealed container for up to 1 week, but note that they may lose some of their gooeyness.

Freezer: For longer storage, freeze the cookies in a single layer, then transfer them to a freezer-safe bag for up to 2 months. Thaw at room temperature or warm briefly in the oven.

Reheating: To enjoy that fresh-baked taste, reheat frozen cookies in a preheated oven at 350°F (175°C) for about 5-7 minutes until warm and gooey again.

Make Ahead Options

These Brookies Cookies are perfect for busy home cooks looking to save time without sacrificing flavor! You can prepare both doughs up to 24 hours in advance by wrapping them tightly in plastic wrap and refrigerating. For even longer storage, both doughs can be frozen for up to 2 months—just portion them into balls and place them in an airtight container. To maintain their delicious quality, let the frozen dough sit at room temperature for about 30 minutes before baking. When ready to enjoy, simply preheat your oven and bake directly from the fridge or after thawing from the freezer, following the original baking instructions for perfectly gooey Brookies Cookies in no time!

What to Serve with Brookies Cookies?

Indulging in the soft, fudgy bliss of Brookies Cookies opens up a world of delightful pairings to elevate your dessert experience.

  • Vanilla Ice Cream: The cool, creamy texture perfectly complements the warm, gooey cookies. Scoop it on top for a classic dessert experience.

  • Fresh Berries: Add a burst of brightness with juicy strawberries or raspberries. Their tartness balances the sweetness of the cookies beautifully.

  • Caramel Sauce: Drizzle warm caramel over the Brookies for a decadent finish. It enhances the rich chocolate flavors and adds an irresistible gooeyness.

  • Espresso or Coffee: A steaming cup of coffee brings out the chocolate in the cookies while providing a cozy feel that’s hard to resist.

  • Chocolate Milk: Treat yourself to a nostalgic pairing with chilled chocolate milk. This classic combo amplifies the sweet goodness of Brookies Cookies!

  • Nutty Whipped Cream: Top your cookies with freshly whipped cream mixed with crushed nuts for added texture and an unexpected crunch. Such a delightful surprise!

Expert Tips for Brookies Cookies

  • Don’t Overmix: Overmixing can lead to tough cookies; mix just until incorporated for a tender texture.

  • Batter Consistency: If your batter seems runny, let it rest for a few minutes—this helps it thicken before baking.

  • Underbake Gently: Aim for slightly underbaked centers; they will continue to set as they cool for that perfect gooeyness.

  • Measuring Dough: Use a digital kitchen scale to measure your dough portions for consistency, ensuring evenly baked Brookies Cookies.

  • Keep an Eye on Time: Ovens can vary, so check your cookies a minute or two before the recommended baking time for best results.

  • Experiment with Flavors: Don’t hesitate to mix in your favorite add-ins, such as nuts or seasonal flavors, to customize your Brookies Cookies!

Brookies Cookies Recipe FAQs

What kind of cocoa powder should I use for Brookies Cookies?
I recommend using Dutch-process cocoa powder for its deep, rich chocolate flavor. If you don't have it on hand, regular unsweetened cocoa powder works in a pinch—just remember that the taste might be slightly less intense.

How should I store Brookies Cookies to keep them fresh?
Store your Brookies Cookies in an airtight container at room temperature for up to 5 days. This helps maintain their soft and gooey texture. If you want to keep them longer, you can refrigerate them for up to a week, though they might lose a bit of that delicious gooeyness.

Can I freeze Brookies Cookies?
Absolutely! To freeze your Brookies Cookies, place them in a single layer on a baking sheet until firm, then transfer them to a freezer-safe bag. They last up to 2 months in the freezer! When you're ready to enjoy them, just thaw at room temperature or reheat briefly in a 350°F (175°C) oven for about 5-7 minutes.

What if my cookie dough is too runny?
If your cookie dough seems a bit runny, no worries! Just let it sit for a few minutes; this allows the flour to absorb some moisture and the dough will thicken. You'll get that perfect cookie-brownie consistency once baked!

Are Brookies Cookies safe for those with nut allergies?
Always check your ingredients, as chocolate chips and other elements may contain traces of nuts. For a nut-free option, simply leave out any nuts you might add, and use chocolate chips specifically labeled as nut-free to ensure they’re safe for those with allergies.

How can I customize my Brookies Cookies?
The more the merrier! Feel free to experiment with different types of chocolate chips, like dark chocolate or white chocolate. You can also add nuts, caramel bits, or seasonal flavors—think peppermint extract during the holidays—to make your Brookies Cookies truly unique!

Brookies Cookies

Brookies Cookies: The Ultimate Fudgy-Sweet Delight

Brookies Cookies combine brownies and cookies into one fudgy-sweet treat that's quick to prepare—perfect for any occasion.
Print Recipe Pin Recipe
Prep Time 15 minutes mins
Cook Time 9 minutes mins
Total Time 24 minutes mins
Servings: 12 cookies
Course: Dessert
Calories: 150
Ingredients Equipment Method Nutrition Notes

Ingredients
  

Brownie Layer
  • ½ cup Unsalted Butter Adds richness and moisture.
  • ½ cup Light Brown Sugar Provides sweetness with a hint of caramel flavor.
  • 1 large Egg Binds ingredients and contributes to texture.
  • 1 teaspoon Vanilla Extract Enhances flavor.
  • ¼ cup Dutch-Process Cocoa Powder Infuses a deep chocolate flavor.
  • ½ cup All-Purpose Flour Provides structure.
  • ½ teaspoon Baking Soda Essential for leavening the dough.
  • 1 pinch Salt Balances sweetness and enhances flavors.
  • ½ cup Semi-Sweet Chocolate Chips Delivers chocolatey goodness.
Cookie Layer
  • ½ cup Unsalted Butter Use cold for chewy texture.
  • ½ cup Granulated Sugar Sweetens the cookies.
  • ½ cup Light Brown Sugar Contributes to sweetness.
  • 1 large Egg
  • 1 large Egg Yolk Amplifies richness and tenderness.
  • 1 teaspoon Vanilla Extract
  • 1½ cups All-Purpose Flour
  • ½ teaspoon Baking Soda
  • ½ cup Chocolate Chips Use semi-sweet or dark.

Equipment

  • Electric mixer
  • Baking Sheets
  • Parchment Paper
  • Mixing bowls
  • wire rack

Method
 

Preparation
  1. Preheat your oven to 350°F (175°C) and line baking sheets with parchment paper.
  2. In a bowl, cream together the butter and brown sugar for the brownie layer. Mix in the egg and vanilla, then gradually add flour, cocoa powder, baking soda, and salt before folding in chocolate chips.
  3. In another bowl, cream cold butter with sugars for the cookie layer. Add in egg and yolk along with the vanilla. Slowly incorporate flour and baking soda, and fold in chocolate chips.
  4. Scoop uniform portions from both doughs and combine them into single balls.
  5. Space the dough balls on the baking sheets and bake for 8-9 minutes.
  6. Transfer cookies to a wire rack to cool completely before serving.

Nutrition

Serving: 1cookieCalories: 150kcalCarbohydrates: 20gProtein: 2gFat: 7gSaturated Fat: 4gPolyunsaturated Fat: 1gMonounsaturated Fat: 2gCholesterol: 20mgSodium: 95mgPotassium: 50mgFiber: 1gSugar: 10gVitamin A: 250IUCalcium: 10mgIron: 1mg

Notes

Feel free to experiment with add-ins or seasonal flavors for a unique twist on Brookies Cookies.

Tried this recipe?

Let us know how it was!

Peanut Butter Pretzel Cookies: Sweet & Salty Magic!

January 16, 2026 by Grace Snow Leave a Comment

As the aroma of freshly baked cookies wafts through my kitchen, I can’t help but smile at the delightful chaos of mixing ingredients. My latest creation, Peanut Butter Pretzel Cookies, perfectly embodies the sweet and salty magic that makes life a little brighter. With their soft, chewy centers and crunchy pretzel accents, these cookies are not just treats; they're the ultimate crowd-pleasers that can easily fit into any occasion—from cookie swaps to after-school snacks. Plus, they come with a gluten-free twist for those needing a special diet adjustment, making them versatile for everyone. Ready to create a cookie that will have both friends and family asking for seconds? Let’s dive into this delicious journey together!

Why are these cookies irresistible?

Sweet and Salty Bliss: The fusion of creamy peanut butter and crunchy pretzels creates a delightful contrast that keeps you coming back for more.
Gluten-Free Adaptable: Easily swap all-purpose flour for a gluten-free blend without sacrificing taste or texture.
Quick and Easy: With just a few simple steps, you’re on your way to cookie perfection in no time!
Crowd Favorite: Whether at parties or cozy family dinners, these cookies are sure to impress and satisfy every craving.
Customizable Options: Experiment with flavors—add chocolate chips, nuts, or even spices for a personalized twist!
Perfect for Any Occasion: These cookies are equally great for lunchboxes, after-school snacks, or cozy evenings at home with a warm cup of coffee.

Peanut Butter Pretzel Cookies Ingredients

• Perfect for sweet and salty lovers!

For the Cookie Dough
• Unsalted Butter – Provides richness and moisture; substitute with vegan butter for a dairy-free version.
• Light Brown Sugar – Adds sweetness and a hint of caramel flavor; can be replaced with coconut sugar for a lower glycemic option.
• Granulated Sugar – Contributes additional sweetness; swap with a sugar substitute for a low-calorie version if needed.
• Creamy Peanut Butter – Adds flavor and chewiness; use any nut butter for alternatives or make it nut-free with sun butter.
• All-Purpose Flour – Provides structure; for gluten-free Peanut Butter Pretzel Cookies, substitute with a gluten-free flour blend and add 1 teaspoon of xanthan gum if not included.
• Baking Soda – Helps cookies rise; no substitutes necessary.
• Baking Powder – Works with baking soda to add fluffiness; ensure freshness for optimal results.
• Salt – Enhances flavor and balances sweetness; use sea salt for a gourmet touch.

For the Mix-Ins
• Dark Chocolate Chunks – Adds decadent richness; alternatives include chocolate chips or milk chocolate for a sweeter profile.
• Mini Pretzel Twists – Provide crunch and saltiness; use gluten-free pretzels if making a GF version.

Step‑by‑Step Instructions for Peanut Butter Pretzel Cookies

Step 1: Prepare the Dough
Begin by creaming together ½ cup of softened unsalted butter, ½ cup of light brown sugar, and ½ cup of granulated sugar in a large mixing bowl until the mixture is light and fluffy, about 3-4 minutes with a hand mixer. Next, mix in 1 cup of creamy peanut butter until fully incorporated, creating a rich, smooth base for your Peanut Butter Pretzel Cookies.

Step 2: Combine Dry Ingredients
In a separate bowl, whisk together 1 ½ cups of all-purpose flour, 1 teaspoon of baking soda, ½ teaspoon of baking powder, and a pinch of salt. This mixture will create the structure of your cookies. Gradually add this dry mixture to the wet dough from the first step, mixing until just combined, avoiding overmixing to keep your cookies tender.

Step 3: Add Mix-Ins
Fold in 1 cup of dark chocolate chunks and 1 cup of mini pretzel twists into the dough using a spatula. Make sure the chocolate and pretzels are evenly distributed throughout the mixture for delightful bursts of flavor in every bite of your Peanut Butter Pretzel Cookies, while reserving a few pretzels for topping later.

Step 4: Chill the Dough
Using a cookie scoop, scoop rounded tablespoons of dough onto a lined baking sheet. Press the reserved pretzel bits gently into the top of each dough ball for extra crunch. Chill the baking sheet in the refrigerator for 2 hours or overnight, allowing the dough to set and preventing excessive spreading during baking, ensuring cookies are perfectly thick and chewy.

Step 5: Bake the Cookies
Preheat your oven to 350°F (175°C) while the dough chills. Once ready, place the chilled cookie dough in the oven and bake for 11-12 minutes. Be sure to give the pan a gentle bang halfway through baking, which helps the cookies spread slightly and creates those irresistible chocolate puddles and even texture—golden and slightly firm around the edges with a soft center.

Step 6: Cool Down
After baking, let the cookies cool on the baking sheet for 10 minutes. This resting time allows them to set up further while maintaining their softness. Finally, transfer the cookies to a wire rack to cool completely. For an extra touch, sprinkle a little flakey sea salt on top just before serving for that perfect sweet and salty balance that makes Peanut Butter Pretzel Cookies so irresistible.

Peanut Butter Pretzel Cookies Variations

Feel free to experiment with fun twists that will make your cookies uniquely yours!

  • Nut-Free: Use sunflower seed butter instead of peanut butter for a nut-free delight that everyone can enjoy. It offers a similar creamy texture with a slightly different flavor.

  • Gluten-Free: Substitute all-purpose flour with a gluten-free flour blend, adding 1 teaspoon of xanthan gum if not included. This way, everyone can savor the joy of these cookies!

  • Flavor Boost: Mix in a cup of M&Ms or butterscotch chips for a playful pop of color and sweetness. Your cookies will be fun and visually appealing!

  • Spice it Up: Consider adding a dash of cinnamon or nutmeg to the dough for a warm spice profile. It adds a lovely warmth, especially during the colder months!

  • Chunky Style: Replace dark chocolate chunks with white chocolate chips or milk chocolate for a different sweetness level. The contrast of flavors will delight your taste buds!

  • Caramel Drizzle: Drizzle caramel sauce over the baked cookies for an extravagant treat. This sweet addition elevates the rustic cookie to something truly special.

  • Peanut Butter Swirl: For more peanut butter flavor, swirl in some extra creamy peanut butter on top of the cookie dough before baking. This creates beautiful patterns and enhances that signature taste.

  • Holiday Twist: Add festive sprinkles to the dough around holidays for a cheerful vibe that adds a touch of celebration to your treats.

These Peanut Butter Pretzel Cookies are versatile enough for any mood or occasion! For more variations, check out my Matcha Cookies Soft or Eggnog Cookies Soft for fresh new ideas!

Expert Tips for Peanut Butter Pretzel Cookies

  • Softened Butter: Ensure your butter is truly softened at room temperature, allowing for easy creaming, which helps create that light texture.
  • Chill Time Matters: Don’t rush the chilling process! Taking the time to chill the dough prevents excessive spreading and ensures a chewy cookie.
  • Uniform Size: Use a cookie scoop to maintain consistent cookie sizes; this promotes even baking, so all your Peanut Butter Pretzel Cookies come out perfectly delicious.
  • Mix-In Variations: Feel free to experiment with different mix-ins like butterscotch chips or nuts to create unique flavor combinations while keeping the comforting base intact.
  • Extra Dough Storage: Save any leftover dough in the refrigerator for up to 5 days; this way, you can bake fresh cookies whenever cravings hit!

What to Serve with Peanut Butter Pretzel Cookies

Indulge in a delightful selection of pairings that elevate your cookie experience to new heights.

  • Cold Milk: Nothing beats a classic! Pair your cookies with a tall glass of cold milk to balance their sweetness and complement the salty pretzels.

  • Rich Coffee: Enjoy these cookies with a warm cup of coffee. The bitterness of the brew contrasts beautifully with the cookies, creating a cozy dessert moment.

  • Vanilla Ice Cream: A scoop of vanilla ice cream drizzled with warm chocolate sauce pairs perfectly, offering a delightful contrast of textures and flavors.

  • Fruit & Nut Platter: Add some fresh fruit and mixed nuts to your spread for a refreshing and crunchy balance to the sweet and salty cookies.

  • Hot Chocolate: Embrace the sweetness and warmth of hot chocolate during colder months, enriching your cookie experience with creamy and sweet vibes.

  • Cheese Plate: For an unexpected twist, serve alongside a savory cheese platter, where the salty cheeses add an exciting contrast to the cookies' sweetness.

  • Chai Tea: The warm spices of chai tea add a beautiful depth that harmonizes with the rich peanut butter flavor of the cookies.

  • Caramel Sauce: Serve with a side of warm caramel sauce for dipping; it's a guilty pleasure that enhances the flavors and offers a luscious experience.

  • Coconut Macaroons: Add these chewy, coconut-flavored delights for a unique texture that complements the crunchy pretzels in the cookies nicely.

  • White Chocolate Mousse: This airy mousse serves as a silky, decadent dessert that creates a luxurious pairing with your Peanut Butter Pretzel Cookies.

Make Ahead Options

These Peanut Butter Pretzel Cookies are perfect for busy home cooks looking to streamline their meal prep! You can prepare the cookie dough up to 3 days in advance, storing it in the refrigerator to maintain freshness. Simply scoop the dough onto a lined baking sheet, top with reserved pretzel bits, and chill it. When you're ready to bake, just preheat your oven and bake for 11-12 minutes straight from the fridge—no need to let it come to room temperature. For longer storage, you can freeze the dough for up to 3 months; just place the balls of dough in an airtight container. This way, you can enjoy warm, freshly baked Peanut Butter Pretzel Cookies whenever the craving hits, keeping your busy weeknights deliciously sweet!

Storage Tips for Peanut Butter Pretzel Cookies

  • Room Temperature: Store baked Peanut Butter Pretzel Cookies in an airtight container at room temperature for up to 1 week to maintain freshness and flavor.
  • Fridge: For prolonged storage, keep cookies in the fridge for up to 2 weeks; just ensure they’re wrapped tightly to prevent drying out.
  • Freezer: Freeze unbaked dough balls individually on a baking sheet, then transfer them to an airtight container or freezer bag for up to 3 months for fresh-baked cookies anytime.
  • Reheating: To enjoy warm cookies, microwave individual cookies for about 10-15 seconds or place in a preheated oven at 350°F (175°C) for 5-7 minutes until warmed through.

Peanut Butter Pretzel Cookies Recipe FAQs

How do I choose the best pretzels for these cookies?
Absolutely! When selecting pretzels, look for mini twists that are nice and crispy to provide an enjoyable crunch. If you're making a gluten-free version, be sure to check that the pretzels are labeled gluten-free to maintain the integrity of the recipe.

How should I store Peanut Butter Pretzel Cookies?
Baked Peanut Butter Pretzel Cookies can be stored in an airtight container at room temperature for up to a week. For longer freshness, keep them in the fridge for up to two weeks—but ensure they are tightly wrapped to prevent them from drying out.

Can I freeze the cookie dough for later use?
Very! To freeze the unbaked cookie dough, scoop rounded tablespoons onto a lined baking sheet and freeze them until solid. Once frozen, transfer the dough balls to an airtight container or freezer bag, where they can stay for up to 3 months. When you're ready to bake, just add an extra minute or two to the baking time—no need to thaw!

What if my cookie dough seems too dry?
If you find your dough is crumbly or dry, it could be due to overmeasuring the flour. To fix this, try adding a teaspoon of milk or additional creamy peanut butter until you achieve a workable consistency. It’s all about that perfect balance!

Are these cookies safe for my pets to eat?
No, these cookies should not be shared with pets. While peanuts in moderation are generally safe for dogs, the sugar and chocolate can be harmful. Always keep treats meant for humans out of reach of your furry friends.

Peanut Butter Pretzel Cookies

Peanut Butter Pretzel Cookies: Sweet & Salty Magic!

Delight in the sweet and salty magic of Peanut Butter Pretzel Cookies, perfect for every occasion.
Print Recipe Pin Recipe
Prep Time 15 minutes mins
Cook Time 12 minutes mins
Chill Time 2 hours hrs
Total Time 2 hours hrs 27 minutes mins
Servings: 24 cookies
Course: Dessert
Cuisine: American
Calories: 180
Ingredients Equipment Method Nutrition Notes

Ingredients
  

For the Cookie Dough
  • ½ cup unsalted butter softened; substitute with vegan butter for dairy-free
  • ½ cup light brown sugar can be replaced with coconut sugar
  • ½ cup granulated sugar swap with a sugar substitute for low-calorie
  • 1 cup creamy peanut butter or other nut butters; make it nut-free with sun butter
  • 1½ cups all-purpose flour use gluten-free blend with 1 teaspoon xanthan gum
  • 1 teaspoon baking soda
  • ½ teaspoon baking powder ensure freshness
  • 1 teaspoon salt use sea salt for a gourmet touch
For the Mix-Ins
  • 1 cup dark chocolate chunks or chocolate chips
  • 1 cup mini pretzel twists use gluten-free pretzels for GF version

Equipment

  • Mixing Bowl
  • Baking Sheet
  • Spatula
  • Cookie Scoop
  • Whisk

Method
 

Step-by-Step Instructions
  1. Cream together the unsalted butter, light brown sugar, and granulated sugar in a large mixing bowl until light and fluffy, about 3-4 minutes.
  2. Mix in the creamy peanut butter until fully incorporated.
  3. In a separate bowl, whisk together the all-purpose flour, baking soda, baking powder, and salt.
  4. Gradually add the dry mixture to the wet dough, mixing until just combined.
  5. Fold in the dark chocolate chunks and mini pretzel twists until evenly distributed, reserving a few pretzels for topping.
  6. Scoop rounded tablespoons of dough onto a lined baking sheet and press reserved pretzels gently on top. Chill for 2 hours or overnight.
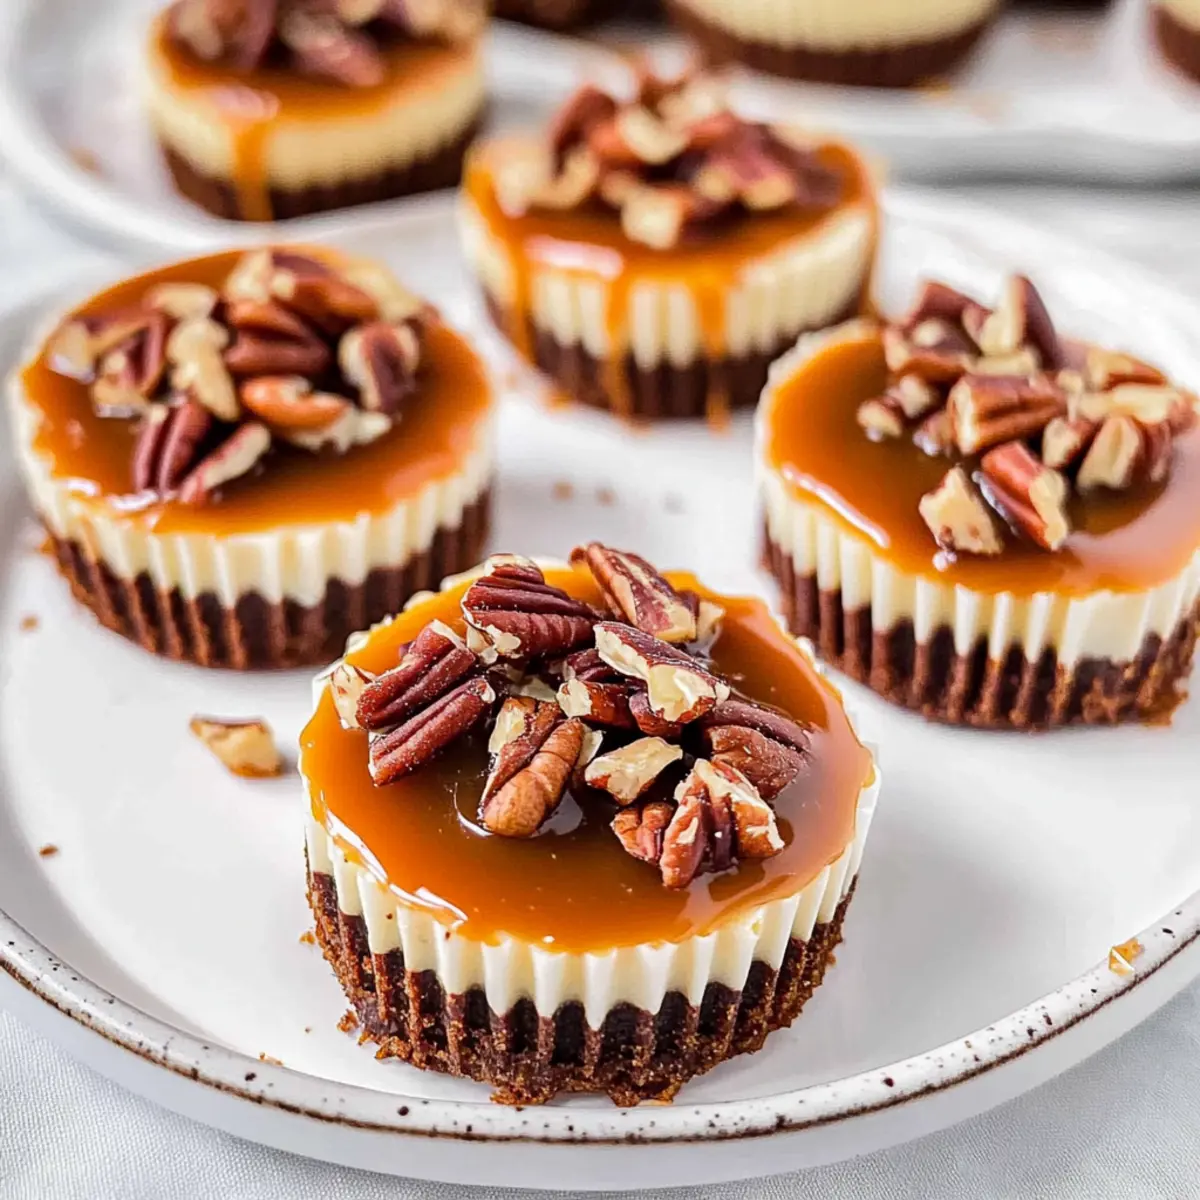
  7. Preheat oven to 350°F (175°C). Bake cookies for 11-12 minutes; bang the pan halfway through baking.
  8. Let cookies cool on the baking sheet for 10 minutes, then transfer to a wire rack to cool completely.
  9. Sprinkle with flakey sea salt before serving for the perfect sweet and salty balance.

Nutrition

Serving: 1cookieCalories: 180kcalCarbohydrates: 20gProtein: 3gFat: 9gSaturated Fat: 2gPolyunsaturated Fat: 0.5gMonounsaturated Fat: 5gCholesterol: 10mgSodium: 100mgPotassium: 150mgFiber: 1gSugar: 10gVitamin A: 100IUCalcium: 20mgIron: 0.5mg

Notes

Ensure butter is softened and chill dough to maintain thickness during baking. Experiment with mix-ins for unique flavors.

Tried this recipe?

Let us know how it was!

Delicious Traditional Greek Honey Cookies to Sweeten Your Holidays

January 16, 2026 by Grace Snow Leave a Comment

As the aroma of spiced sweetness fills my kitchen, I can’t help but feel the warmth of tradition wrap around me like a cozy blanket. These Traditional Greek Honey Cookies, known as Melomakarona, are a cherished holiday gem that transforms any gathering into a celebration. Infused with rich flavors from fragrant spices and soaked in luscious syrup, they embody both the joy and the history of Greek festive baking. They are deceptively quick to prepare, making them a perfect last-minute treat for Christmas gatherings, and they’re ideal for sharing with beloved friends and family. Every bite offers a soft, crumbly texture delightfully accented by crunchy walnuts, a harmonious blend that’s hard to resist. Which festive occasion are you looking forward to celebrating with these delightful cookies?

Why are these cookies a holiday must-try?

Irresistible Kick of Flavor: The blend of warm spices and honey creates a rich taste that will leave you wanting more.

Cultural Tradition: Enjoying these cookies means embracing Greek history and the traditions that come with it, making every bite feel special.

Quick Preparation: With simple steps, delicious home-baked goodness is just around the corner, perfect for the holiday rush.

Soft Yet Crunchy: The unique texture—soft, crumbly cookies topped with crunchy walnuts—will tantalize your taste buds.

Perfect for Sharing: These cookies make a wonderful addition to any holiday gathering, sure to impress friends and family, much like my Honey Garlic Chicken or Honey BBQ Chicken Rice. 💖

Traditional Greek Honey Cookies Ingredients

• Dive into the world of flavors with these delightful cookies!

For the Dough

  • Orange Juice – Fresh juice provides a fruity zest that balances the sweetness beautifully.
  • Olive Oil – Adds richness; substitute half with sunflower oil for a lighter touch.
  • Honey – An essential ingredient that brings natural sweetness and a characteristic flavor.
  • Water – Helps dissolve sugar and achieve the perfect syrup consistency.
  • Sugar – Contributes to the overall sweetness and aids in the cookie's texture.
  • Ground Cinnamon – Infuses warmth and depth, a classic spice for traditional Greek desserts.
  • Ground Clove – Enhances the rich flavor profile typical of holiday confections.
  • Ground Nutmeg – Adds a subtle sweet-spicy hint that complements other spices.
  • Vanillin Powder/Vanilla Extract – Boosts sweetness and aroma for a chef’s touch.
  • Zested Orange – Provides a fresh, vibrant note that uplifts the cookie flavor.
  • Baking Soda – Essential for helping the cookies rise and achieve an airy texture.
  • Fine Semolina – Creates a delightful crumbly texture in every bite.
  • All-Purpose Flour – The building block that gives the cookies their form and structure.
  • Baking Powder – Assists in leavening, leading to lighter cookies.

For the Syrup

  • Sugar (Syrup) – The key to sweetness, making each cookie irresistibly moist.
  • Honey (Syrup) – Adds gloss and a delightful stickiness to the finished cookies.
  • Water (Syrup) – Used to achieve that syrupy perfection your Melomakarona needs.
  • Cinnamon Stick, Dried Cloves, Orange Peel – These ingredients enhance the syrup with a spiced aroma that elevates the overall experience.

For the Garnish

  • Ground Walnuts – Sprinkle on top for a delightful crunch that complements the soft cookie texture.

Step‑by‑Step Instructions for Traditional Greek Honey Cookies

Step 1: Prepare the Dough
In a large mixing bowl, combine fresh orange juice, olive oil, honey, water, and sugar. Whisk vigorously until the sugar is fully dissolved. This mixture should be smooth and slightly viscous. Allow it to sit for a moment to blend the flavors while you prepare to incorporate the dry ingredients.

Step 2: Mix Ingredients
Gradually add the fine semolina, all-purpose flour, baking powder, ground cinnamon, ground clove, nutmeg, and vanillin powder to the liquid mixture. Knead gently until a soft, oily dough forms, ensuring everything is well combined. The dough should be slightly sticky yet smooth, an indication that it's ready for shaping into cookies.

Step 3: Shape Cookies
Take small portions of the dough and roll them into oval shapes, about the size of a golf ball. Place each cookie on a parchment-lined baking tray, ensuring there’s ample space between them for air circulation. You should see a smooth surface on each cookie, which will help achieve an even bake.

Step 4: Decorate
With a sharp knife or grater, gently press down to make criss-cross patterns on the top of each oval-shaped cookie. This not only adds a decorative touch but also allows them to absorb the syrup better later. The patterns should be noticeable yet delicate, enhancing both the appearance and flavor of the Traditional Greek Honey Cookies.

Step 5: Bake
Preheat your oven to 180°C (356°F). Once the oven reaches the right temperature, place the baking tray inside and bake for about 20 minutes. You’re looking for a light brown color, indicating they are baked through. The aroma wafting through your kitchen will be a delightful hint of what's to come!

Step 6: Make Syrup
While your cookies are baking, prepare the syrup by boiling a mixture of water, sugar, honey, a cinnamon stick, dried cloves, and orange peel in a saucepan. Bring it to a gentle boil for 4 minutes without stirring. You should see a syrupy consistency forming, which will soon coat your freshly baked cookies.

Step 7: Soak Cookies
Once the cookies are out of the oven and still warm, immediately dip them into the hot syrup for a few seconds. Make sure they’re fully immersed to allow the syrup to soak in but be careful not to leave them too long; they should feel tender but not falling apart. Let them drain on a cooling rack to remove excess syrup.

Step 8: Serve
After cooling, drizzle the Traditional Greek Honey Cookies with a little extra honey and sprinkle with ground walnuts for garnish. These final touches add an irresistible sweetness and texture, creating a beautiful presentation. Serve them to your friends and family, and watch them delight in every bite of this festive treat.

How to Store and Freeze Traditional Greek Honey Cookies

Room Temperature: Store in an airtight container at room temperature to maintain softness and flavor for up to 3 weeks.

Fridge: If you prefer a longer shelf life, you can refrigerate cookies for up to 1 month, but allow them to return to room temperature before serving for the best texture.

Freezer: For extended storage, freeze the Traditional Greek Honey Cookies in a single layer, then transfer to an airtight container, keeping them fresh for up to 3 months.

Reheating: When ready to enjoy, thaw cookies in the fridge overnight, then warm them briefly in the oven at 150°C (302°F) for about 5 minutes for that just-baked feel.

Expert Tips for Traditional Greek Honey Cookies

• Perfecting the Dough: Ensure your dough is well-kneaded but not overworked. A soft, oily texture is ideal for the best Traditional Greek Honey Cookies.

• Syrup Timing: Soak the cookies while they're warm to achieve the best flavor absorption. Don’t leave them too long in the syrup; just a few seconds will do!

• Garnish Wisely: Add ground walnuts only after the cookies cool down slightly to prevent them from becoming soggy. This will keep your cookies crunchy.

• Storing Secrets: Keep your cookies in an airtight container at room temperature. Proper storage helps maintain their softness and flavor for up to three weeks.

• Monitoring Bake Time: Keep an eye on the cookies as they bake to ensure they reach a light golden color. Underbaking may lead to a doughy texture in the Traditional Greek Honey Cookies.

Make Ahead Options

These Traditional Greek Honey Cookies (Melomakarona) are fantastic for meal prep enthusiasts! You can prepare the cookie dough up to 24 hours in advance by mixing all the wet and dry ingredients, then refrigerate it tightly wrapped. The unbaked cookies can also be shaped and placed on a baking tray for up to 3 days in the fridge—this keeps their freshness intact. When you're ready to bake, just pop them into the oven, bake until light brown, and soak them in syrup immediately after baking for that delightful syrupy finish. By prepping ahead, you'll save time on busy holiday mornings while enjoying homemade treats that taste just as delicious as if they were freshly baked!

Variations & Substitutions for Traditional Greek Honey Cookies

Feel free to explore these delightful twists on the classic recipe, bringing your own magical touch to each batch!

  • Nut-Free: Swap walnuts for sunflower seeds or pumpkin seeds for a delicious crunch without nuts. You won’t lose any of that satisfying texture!
  • Dairy-Free: Use coconut oil instead of olive oil to keep these cookies completely dairy-free while adding a hint of tropical flavor. Your taste buds will dance with joy!
  • Gluten-Free: Replace all-purpose flour with a gluten-free flour blend for a similar texture and flavor. Just ensure it contains xanthan gum for structure!
  • Low-Sugar Option: Use stevia or monk fruit sweetener in place of sugar to cut down on sweetness without compromising flavor. Your cookie enjoyment is still fully intact!
  • Spiced Syrup: Infuse the syrup with ginger or cardamom for an exciting spicy kick. This unique twist will add warmth with each delicious bite!
  • Chocolate Lovers: Fold in cocoa powder into the dough for a rich, chocolatey version of these cookies. Top with chocolate drizzle for the ultimate treat.
  • Citrus Zest: Enhance the cookie flavor by adding lemon or lime zest into the dough. This subtle change brings freshness that will brighten up your cookie platter!
  • Syrup Varieties: Experiment with flavored syrups, like almond or hazelnut syrup, instead of honey for a unique sweetness that's sure to be a conversation starter at your holiday gatherings.

Whichever variation you choose, you’ll be celebrating the love and warmth of traditional Greek desserts in every bite! And if you're looking for more inspiration, consider trying my delightful Matcha Cookies Soft or festive Eggnog Cookies Soft for some extra holiday cheer!

What to Serve with Traditional Greek Honey Cookies

As you delight in the sweet embrace of these honey-soaked treasures, consider rounding out your meal with some complementary dishes and treats.

  • Greek Coffee: The robust flavor of this traditional brew perfectly balances the sweetness of the cookies, making every nibble and sip an experience of harmony.

  • Sliced Fruit Platter: A medley of fresh, juicy citrus fruits and berries refreshes the palate between bites, enhancing their delightful taste.

  • Spiced Red Wine: Mulled wine infused with cloves and cinnamon echoes the warm spices of the cookies, creating a cozy, festive atmosphere.

  • Homemade Chocolate Bark: A touch of dark chocolate offers a rich contrast to the cookies’ sweetness while adding an enticing crunch.

  • Cheese Board: Serve with tangy feta or creamy goat cheese for a delightful flavor contrast; the savory notes elevate the dessert experience.

  • Baklava: Layered phyllo pastry with nuts and syrup creates a delightful double-dessert scenario; this classic complements the melomakarona beautifully.

  • Vanilla Ice Cream: Creamy, cool vanilla ice cream drizzled with honey complements the warm flavors of the cookies, turning dessert into a dreamy delight.

  • Nutty Trail Mix: A mix of toasted almonds and pistachios adds crunch and heartiness, providing a savory contrast to your sweet cookie indulgence.

  • Cinnamon Tea: A soothing cup of this spiced infusion enhances the flavors of your cookies, creating a comforting moment reminiscent of holiday gatherings.

Each of these pairings helps to enhance your cookie experience, making them the perfect centerpiece for your festive celebrations!

Traditional Greek Honey Cookies Recipe FAQs

How do I choose ripe ingredients for the cookies?
Absolutely! For the best flavor, always use fresh orange juice, as it adds a delightful fruity note. When picking your oranges, look for ones that are firm and heavy, indicating juiciness. Also, make sure to use high-quality honey for a richer syrup; pure honey should have a clear, sweet aroma.

What are the best storage methods for these cookies?
Store your Traditional Greek Honey Cookies in an airtight container at room temperature to maintain their softness and flavor for up to 3 weeks. If you choose to refrigerate them, they can last up to 1 month, but be sure to let them come to room temperature before serving for optimal taste and texture.

Can I freeze Traditional Greek Honey Cookies? If so, how?
Yes, you can freeze these delicious cookies! First, place them in a single layer on a baking sheet lined with parchment paper to prevent sticking. Once frozen solid, transfer the cookies to an airtight container or freezer bag. They will stay fresh for up to 3 months. When ready to enjoy, let them thaw overnight in the fridge, then heat them briefly in the oven at 150°C (302°F) for about 5 minutes to revive that wonderful texture.

What should I do if my cookies come out too hard or doughy?
If your cookies turn out hard, it may be due to overbaking. Aim for a light golden color when baking for the perfect texture. On the other hand, if they are doughy, ensure you’ve measured your ingredients correctly. A common mistake is adding too much liquid. To salvage slightly dry cookies, soak them a moment longer in the warm syrup to reintroduce moisture.

Are Traditional Greek Honey Cookies safe for pets or certain allergies?
These cookies contain ingredients like honey and nuts, which are not safe for pets. If you have nut allergies, consider substituting the walnuts with seeds like sunflower or pumpkin seeds. Additionally, ensure that your chosen honey is pure and allergen-free if necessary. Always check with guests regarding any dietary restrictions before serving.

Traditional Greek Honey Cookies

Delicious Traditional Greek Honey Cookies to Sweeten Your Holidays

These Traditional Greek Honey Cookies, known as Melomakarona, are a holiday gem filled with rich flavors and spiced sweetness.
Print Recipe Pin Recipe
Prep Time 30 minutes mins
Cook Time 20 minutes mins
Cooling Time 15 minutes mins
Total Time 1 hour hr 5 minutes mins
Servings: 24 cookies
Course: Dessert
Cuisine: Greek
Calories: 120
Ingredients Equipment Method Nutrition Notes

Ingredients
  

For the Dough
  • 1 cup Fresh Orange Juice
  • 1/2 cup Olive Oil or sunflower oil for a lighter touch
  • 1/2 cup Honey essential for sweetness
  • 1/2 cup Water
  • 1 cup Sugar for sweetness
  • 1 teaspoon Ground Cinnamon
  • 1/4 teaspoon Ground Clove
  • 1/4 teaspoon Ground Nutmeg
  • 1 teaspoon Vanillin Powder/Vanilla Extract
  • 1 tablespoon Zested Orange
  • 1 teaspoon Baking Soda
  • 1 cup Fine Semolina
  • 2 cups All-Purpose Flour
  • 1 teaspoon Baking Powder
For the Syrup
  • 1 cup Sugar (Syrup)
  • 1/2 cup Honey (Syrup)
  • 1 cup Water (Syrup)
  • 1 piece Cinnamon Stick
  • 4 pieces Dried Cloves
  • 1 piece Orange Peel
For the Garnish
  • 1/2 cup Ground Walnuts for decoration

Equipment

  • Mixing Bowl
  • Baking tray
  • Saucepan
  • Whisk
  • Oven

Method
 

Preparation Steps
  1. In a large mixing bowl, combine fresh orange juice, olive oil, honey, water, and sugar. Whisk vigorously until the sugar is fully dissolved.
  2. Gradually add the fine semolina, all-purpose flour, baking powder, ground cinnamon, ground clove, nutmeg, and vanillin powder to the liquid mixture. Knead gently until a soft, oily dough forms.
  3. Take small portions of the dough and roll them into oval shapes, placing each cookie on a parchment-lined baking tray.
  4. Gently press down to make criss-cross patterns on the top of each oval-shaped cookie.
  5. Preheat your oven to 180°C (356°F) and bake for about 20 minutes until they reach a light brown color.
  6. Prepare the syrup by boiling a mixture of water, sugar, honey, a cinnamon stick, dried cloves, and orange peel for about 4 minutes without stirring.
  7. Once baked, immediately dip cookies into the hot syrup for a few seconds, then let them drain on a cooling rack.
  8. Drizzle with extra honey and sprinkle with ground walnuts for garnish before serving.

Nutrition

Serving: 1cookieCalories: 120kcalCarbohydrates: 18gProtein: 1gFat: 5gSaturated Fat: 1gPolyunsaturated Fat: 1gMonounsaturated Fat: 3gSodium: 30mgPotassium: 50mgFiber: 0.5gSugar: 10gVitamin A: 25IUVitamin C: 1mgCalcium: 5mgIron: 0.3mg

Notes

Store in an airtight container to maintain softness and flavor for up to three weeks. Refrigerate for up to one month or freeze for up to three months.

Tried this recipe?

Let us know how it was!

Lemon Curd Cookies That Burst with Citrus Love

January 16, 2026 by Grace Snow Leave a Comment

As I took a bite of one of these Zesty Lemon Curd Thumbprint Cookies, a burst of sunshine filled my senses. The soft, tender cookie cradled a luscious, tangy lemon curd that danced on my taste buds, offering a delightful alternative to a heavy tart. If you're craving that vibrant lemon zing without the fuss, this recipe for Lemon Curd Cookies is your answer! It's not only easy to whip up but also a guaranteed crowd-pleaser. With surprisingly quick prep, these cookies are perfect for any gathering or simply to satisfy your sweet tooth. What flavor twist will you try—passion fruit, blood orange, or maybe a zesty lime?

Why Are Lemon Curd Cookies So Irresistible?

Delightful Balance: The combination of soft cookies and creamy lemon curd crafts a perfect harmony of textures and flavors that will impress anyone.

Easy to Make: Despite their elegance, these cookies are simple to assemble, making them ideal for a quick baking session in your kitchen.

Versatile Options: Feel free to switch up the flavor with alternatives like passion fruit or blood orange curd—the variations are endless!

Perfect for Any Occasion: Whether for afternoon tea, a casual get-together, or a sweet indulgence, these cookies will shine at any event.

Make-Ahead Friendly: You can prepare the cookies and curd in advance; they wait patiently in your fridge until you’re ready to assemble, saving you time when you need it most!

Each bite offers a refreshing getaway from mundane flavors—once you try these zesty lemon curd cookies, you’ll understand why they keep your cravings satisfied!

Lemon Curd Cookies Ingredients

For the Cookies

  • Unsalted Butter – Provides essential moisture and richness; bring to room temperature for best blending results.
  • Powdered Sugar – Crucial for a tender texture; its fine consistency creates soft cookies.
  • Lemon Zest – Elevates the lemon flavor beautifully; always use fresh zest for the brightest taste.
  • Vanilla Extract – Introduces a depth of flavor; opt for standard vanilla for classic results.
  • Large Whole Egg – Functions as a binding agent, ensuring your cookies maintain their shape.
  • Morton’s Kosher Salt – Ensures balanced flavor; stick with this specific salt for consistent results.
  • Baking Powder – Aerates the dough, giving cookies a light and fluffy texture.
  • All-Purpose Flour – Provides crucial structure; helps prevent cookies from spreading too thin.

For the Lemon Curd

  • Fresh Lemon Juice – Provides that fresh and vibrant lemon flavor; avoid bottled juices for authentic taste.
  • Egg Yolk – Adds a luxurious richness and aids in thickening the lemon curd.
  • Granulated Sugar – Sweetens the curd while balancing the sourness; castor sugar can be substituted if needed.
  • Strained Lemon Curd – Combines egg yolks, whole eggs, sugar, and lemon juice; straining smooths the texture before finishing with unsalted butter for added silkiness.

These Lemon Curd Cookies are not just a treat; they're a slice of sunshine that will bring joy to your baking adventures!

Step‑by‑Step Instructions for Lemon Curd Cookies

Step 1: Prepare Cookie Dough
Start by creaming together 1 cup of room-temperature unsalted butter and 1 cup of powdered sugar in a mixing bowl until the mixture is light and fluffy, around 3-5 minutes. Next, add in 1 large egg and 1 teaspoon of vanilla extract, mixing until fully incorporated and smooth. This forms the base of your delicious Lemon Curd Cookies.

Step 2: Add Dry Ingredients
Gradually add 2 ½ cups of all-purpose flour, 1 teaspoon of baking powder, ½ teaspoon of Morton’s kosher salt, and the zest of 1 lemon to the wet mixture. Mix gently until the dough just comes together, ensuring not to overmix, which will keep your cookies tender. The texture should be slightly sticky yet hold its shape well.

Step 3: Chill Dough
Divide the dough into equal portions and roll them into balls, about 1 inch in diameter. Place the balls on a parchment-lined baking sheet and make a deep indentation in the center of each using your thumb. Chill the cookies in the refrigerator for at least 1 hour to help them maintain their shape during baking.

Step 4: Bake Cookies
Preheat your oven to 350°F (180°C). Once the dough has chilled, bake the cookies on the center rack for 12-15 minutes, or until the edges are lightly golden. Keep an eye on them; they should be firm at the edges but still soft in the center. Let them cool on the baking sheet for a few minutes before transferring to a wire rack.

Step 5: Make Lemon Curd
While the cookies are baking, prepare the lemon curd. In a saucepan, whisk together 3 large egg yolks, 2 whole eggs, ½ cup of granulated sugar, and ¾ cup of freshly strained lemon juice. Cook the mixture over medium heat, stirring constantly until it thickens, which takes about 10 minutes, ensuring it does not boil.

Step 6: Finish Curd
Once thickened, remove the lemon curd from heat and whisk in ½ cup of unsalted butter, one tablespoon at a time, until smooth and creamy. If desired, strain the curd through a fine mesh sieve to ensure a silky texture. Let it cool slightly before assembling your delightful Lemon Curd Cookies.

Step 7: Assemble Cookies
Once both the cookies and the lemon curd have cooled sufficiently, fill the indents of each cookie with a generous spoonful of lemon curd. Allow the cookies to sit for about 30 minutes to set the curd slightly before enjoying your zesty Lemon Curd Cookies.

Expert Tips for Lemon Curd Cookies

  • Room Temperature Ingredients: Ensure your butter and eggs are at room temperature. Cold ingredients can lead to dense cookies that lack the desired tenderness.

  • Don’t Rush the Chilling: Chilling the dough is crucial for maintaining cookie shape. Skipping this step might lead to flat cookies that lose their beautiful indents.

  • Mind the Indentation: Make a deep indent for the curd, but be careful not to pierce through the bottom of the cookie! This prevents any delicious lemon curd from leaking out while baking.

  • Strain for Smoothness: Always strain your lemon juice and curd after cooking to ensure there are no lumps or pulp. This will create a silky texture that pairs perfectly with your cookies.

  • Experiment with Flavors: Don't hesitate to substitute different curd flavors like passion fruit or blood orange. These variations can elevate your Lemon Curd Cookies to a whole new level!

  • Avoid Overmixing: Mix the dough until just combined. Overmixing can lead to tough cookies, so let those delicate flavors shine through!

Make Ahead Options

These Lemon Curd Cookies are perfect for busy home cooks looking to save time! You can prepare the cookie dough up to 24 hours in advance; simply shape the balls, make indents, and refrigerate. The lemon curd can also be made up to 3 days ahead—just ensure it’s properly cooled and stored in an airtight container in the refrigerator to maintain its creamy texture. When you're ready to bake, simply remove the chilled dough from the fridge, bake as directed, fill with curd, and allow to set for about 30 minutes. This prep-ahead strategy saves you precious time while still delivering delicious, fresh Lemon Curd Cookies that are just as delightful!

Lemon Curd Cookies Variations

Embrace your culinary creativity and explore delightful twists to these scrumptious cookies!

  • Passion Fruit Curd: Swap lemon curd for tangy passion fruit curd for a tropical burst of flavor.
  • Blood Orange Curd: Use blood orange curd instead of lemon for a sweeter, vibrant alternative that’s equally delicious.
  • Lime Curd: Craving something different? Lime curd can bring a zesty kick that’s refreshingly unique.
  • Berry Topping: Top each cookie with a fresh raspberry or strawberry slice for an added fruity flair and visual appeal.
  • Nutty Crunch: Add finely chopped nuts, like pistachios or almonds, into the cookie dough for extra texture and flavor.
  • Chocolate Drizzle: Elevate the cookies by drizzling dark chocolate over the filled curd for a rich contrast that chocolate lovers will adore.
  • Coconut Add-In: Mix in shredded coconut into the dough for a chewy, flavorful tease of the tropics in every bite.
  • Herbal Infusion: Experiment with a hint of fresh mint or basil in the lemon curd to create an unexpected and refreshing herbal note.

For those who love a hint of diversity, why not pair your cookies with herbal tea or a light dessert wine? You might also enjoy trying your hand at Thumbprint Cookies Melt or Mexican Wedding Cookies for more delightful variations!

How to Store and Freeze Lemon Curd Cookies

Room Temperature: Store unfilled cookies in an airtight container at room temperature for up to 2 days to keep them soft and fresh.

Fridge: For filled Lemon Curd Cookies, keep them in an airtight container in the refrigerator. They will stay fresh for up to 5 days, but are best enjoyed within the first 1–3 days.

Freezer: You can freeze unfilled cookies for up to 3 months; layer them between parchment paper in a freezer-safe bag. Thaw in the fridge before filling with lemon curd.

Reheating: If you prefer warm cookies, pop them in a preheated oven at 350°F (175°C) for about 5-10 minutes to regain their fresh-baked texture.

What to Serve with Zesty Lemon Curd Thumbprint Cookies

There's nothing quite like complementing your sweet treats with delightful sides that enhance the experience.

  • Herbal Iced Tea: A refreshing drink that perfectly balances the sweetness of cookies with its herbal notes, keeping you cool and complemented.

  • Fresh Berries: A medley of raspberries and blueberries provides a juicy burst of freshness and brightens up your dessert presentation. Serve with a dollop of whipped cream for a creamy contrast.

  • Almond Biscotti: The crunchy texture of biscotti adds a nice contrast to the soft, gooey lemon curd center, making for an enjoyable dipping experience.

  • Vanilla Ice Cream: Serve on the side or atop your cookies for a creamy, indulgent treat. The coldness of the ice cream beautifully counteracts the tanginess of the lemon curd.

  • Citrus Sorbet: An elegant, light finish that echoes the lemon flavors and cleanses the palate for a refreshing end to your dessert.

  • Champagne Cocktail: Elevate your treat with a bubbly drink that brings a festive touch, enhancing the fruity notes of lemon while offering a celebratory flair.

  • Lemon Scented Shortbread: These buttery bites share the citrus theme and add a subtle crunch, creating a harmonious blend of flavors across your dessert spread.

  • Pistachio Financier: These nutty, moist little cakes offer a rich contrast to the lemony freshness, making each bite a delightful surprise.

  • Chocolate Fondue: The richness of dark chocolate beautifully complements the bright lemon flavors, creating a deliciously decadent experience. Dip fruits, cookies, or marshmallows for extra fun!

Lemon Curd Cookies Recipe FAQs

How do I select the best lemons for this recipe?
Absolutely! Look for lemons that are firm and heavy for their size, as this indicates juiciness. A vibrant, bright yellow skin is a good sign of freshness, while avoid any that have dark spots or blemishes. Fresh zest is key, so choosing top-quality lemons will really amplify the flavor of your cookies!

What’s the best way to store my Lemon Curd Cookies?
To keep your cookies fresh, store unfilled Lemon Curd Cookies in an airtight container at room temperature for up to 2 days. For filled cookies, I recommend placing them in the refrigerator. They stay fresh for up to 5 days but are best enjoyed within the first 1-3 days for maximum flavor and texture.

Can I make the cookies and lemon curd ahead of time?
Very! You can prepare the cookie dough and lemon curd in advance. The cookies can be rolled and chilled in the fridge for a few hours or even overnight. Likewise, the lemon curd can be made up to a week in advance and stored in the fridge. Just assemble them together closer to serving time for a fresher taste!
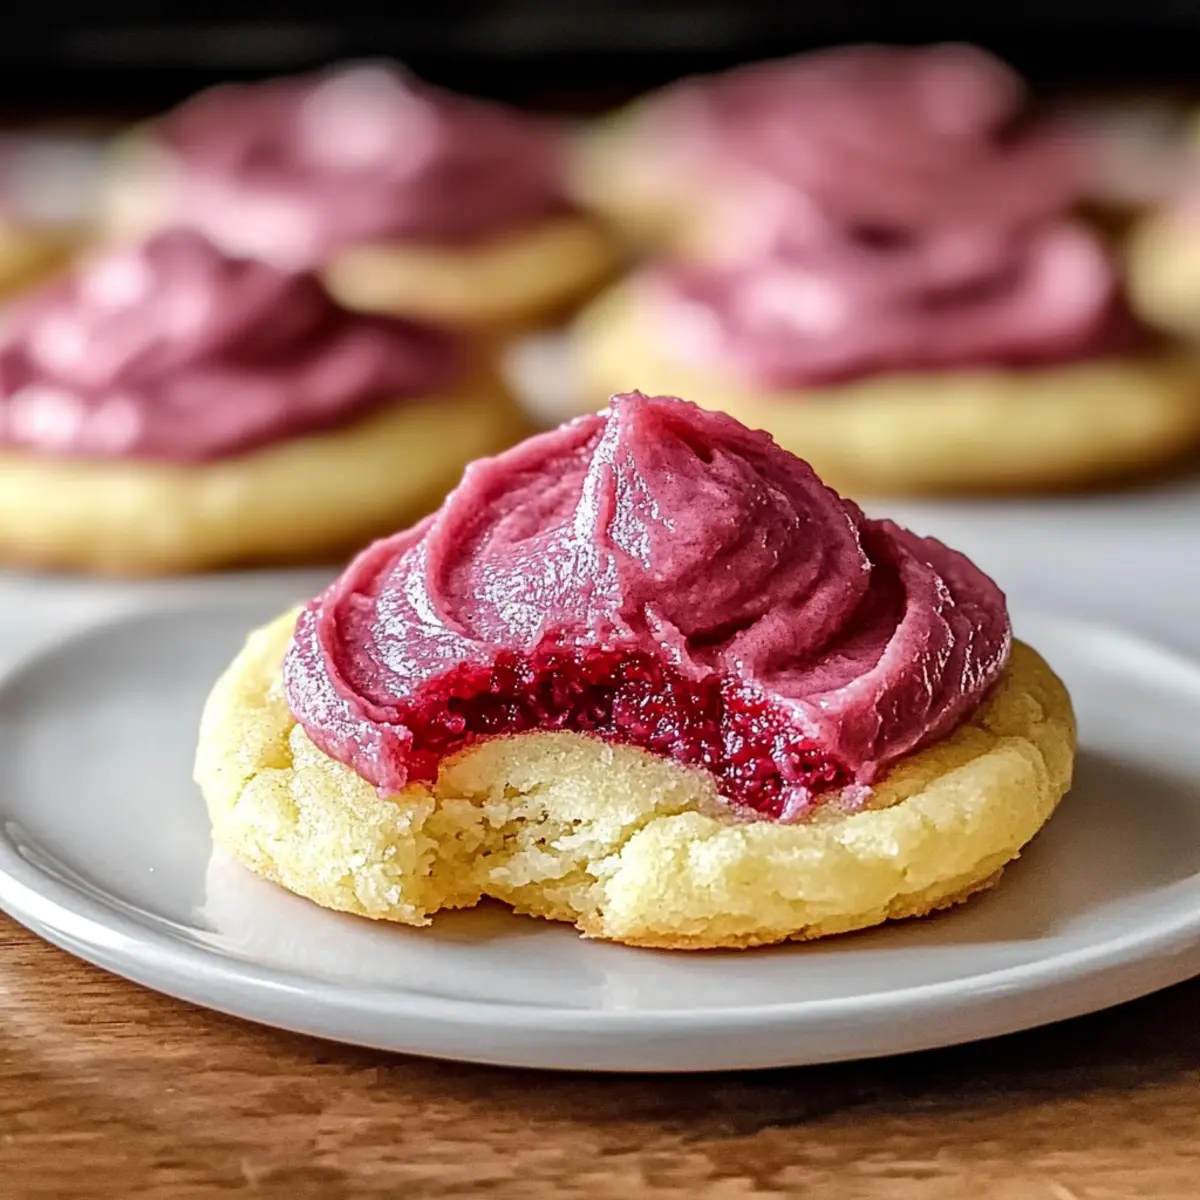
How can I freeze Lemon Curd Cookies?
For sure! You can freeze unfilled cookies for up to 3 months. Simply place them on a baking sheet in a single layer until frozen, then transfer them to a freezer-safe bag, layering parchment paper between cookies to avoid sticking. When ready to serve, thaw in the fridge and then fill them with lemon curd before enjoying!

What should I do if my cookies turn out flat?
Don't worry! Flat cookies often result from not chilling the dough long enough. If they flatten out too much, try chilling them for an additional 30 minutes next time. Always ensure that your baking powder is fresh, as old leavening agents can also lead to a lack of rise in cookies.

Is this recipe suitable for those with egg allergies?
While this recipe does contain eggs, you can make an egg-free version using a substitute, such as 1/4 cup unsweetened applesauce or 1 tablespoon of flaxseed meal mixed with 2.5 tablespoons of water for each egg. Keep in mind that this may slightly alter the texture, but will still result in delicious cookies!

Lemon Curd Cookies

Lemon Curd Cookies That Burst with Citrus Love

These Lemon Curd Cookies offer a vibrant zesty flavor with a tender texture, perfect for any occasion.
Print Recipe Pin Recipe
Prep Time 30 minutes mins
Cook Time 15 minutes mins
Chilling Time 1 hour hr
Total Time 1 hour hr 45 minutes mins
Servings: 24 cookies
Course: Dessert
Cuisine: Baking
Calories: 120
Ingredients Equipment Method Nutrition Notes

Ingredients
  

For the Cookies
  • 1 cup Unsalted Butter Room temperature
  • 1 cup Powdered Sugar For tender texture
  • 1 tablespoon Lemon Zest Fresh for best flavor
  • 1 teaspoon Vanilla Extract Standard for classic taste
  • 1 large Whole Egg Binding agent
  • 0.5 teaspoon Morton’s Kosher Salt For balanced flavor
  • 1 teaspoon Baking Powder Lightens texture
  • 2.5 cups All-Purpose Flour Provides structure
For the Lemon Curd
  • 0.75 cup Fresh Lemon Juice Avoid bottled juices
  • 3 large Egg Yolks For richness
  • 0.5 cup Granulated Sugar Sweetens the curd
  • 0.5 cup Unsalted Butter Added for silkiness

Equipment

  • Mixing Bowl
  • Whisk
  • Saucepan
  • Parchment Paper
  • Oven

Method
 

Cookie Preparation
  1. Cream together unsalted butter and powdered sugar in a mixing bowl until light and fluffy for about 3-5 minutes.
  2. Add egg and vanilla extract; mix until fully incorporated.
  3. Gradually add flour, baking powder, salt, and lemon zest, mixing until just combined.
  4. Roll dough into balls and make a deep indentation using your thumb; chill for at least 1 hour.
  5. Preheat oven to 350°F (180°C) and bake cookies for 12-15 minutes until edges are golden.
Lemon Curd Preparation
  1. Whisk together egg yolks, whole eggs, sugar, and lemon juice in a saucepan.
  2. Cook over medium heat, stirring constantly until thickened, about 10 minutes.
  3. Remove from heat and whisk in butter until smooth. Strain if desired.
Assembling Cookies
  1. Once cookies and curd are cooled, fill cookie indents with lemon curd.
  2. Allow cookies to sit for about 30 minutes before serving.

Nutrition

Serving: 1cookieCalories: 120kcalCarbohydrates: 15gProtein: 1.5gFat: 6.5gSaturated Fat: 4gPolyunsaturated Fat: 0.5gMonounsaturated Fat: 2gCholesterol: 30mgSodium: 90mgPotassium: 50mgSugar: 6gVitamin A: 250IUVitamin C: 5mgCalcium: 10mgIron: 0.5mg

Notes

Ensure butter and eggs are at room temperature for best results. Do not rush the chilling process to maintain cookie shape.

Tried this recipe?

Let us know how it was!
  • « Previous Page
  • 1
  • …
  • 26
  • 27
  • 28
  • 29
  • 30
  • …
  • 65
  • Next Page »

Welcome!

Hi, I’m Grace, a Sydney-based home cook with a passion for bold flavors and trending ingredients. Whether you’re a busy beginner or a seasoned foodie, you’ll find dishes here that are fresh, fun, and full of flavor.

More about me

Popular Recipes

  • Pomegranate Caramels
    Pomegranate Caramels - Irresistibly Chewy Homemade Treats
  • Blueberry–Lemon Curd Tart
    Blueberry-Lemon Curd Tart: A Refreshing Summer Delight
  • Winter Wonderland Chocolate Chip Christmas Cookies
    Winter Wonderland Chocolate Chip Christmas Cookies Bliss
  • Oreo Chocolate Chip Cookies
    Chewy Oreo Chocolate Chip Cookies You Can't Resist

Footer

↑ back to top

About

  • Privacy Policy
  • Disclaimer
  • Terms & Conditions

Newsletter

  • Sign Up! for emails and updates

Contact

  • About me
  • Contact me

Copyright © 2025 TastyTrendIngredients