tastytrendingredients

  • Home
  • Recipes
    • Appetizers
    • Breakfast
    • Dessert
    • Dinner
    • Drinks
    • Salads
    • Snacks
    • Soups
  • About me
  • Contact
menu icon
go to homepage
  • Home
  • Recipes
    • Appetizers
    • Breakfast
    • Dessert
    • Dinner
    • Drinks
    • Salads
    • Snacks
    • Soups
  • About me
  • Contact
search icon
Homepage link
  • Home
  • Recipes
    • Appetizers
    • Breakfast
    • Dessert
    • Dinner
    • Drinks
    • Salads
    • Snacks
    • Soups
  • About me
  • Contact
×

Chewy Pistachio Cream Cookies for a Sweet Escape

January 16, 2026 by Grace Snow Leave a Comment

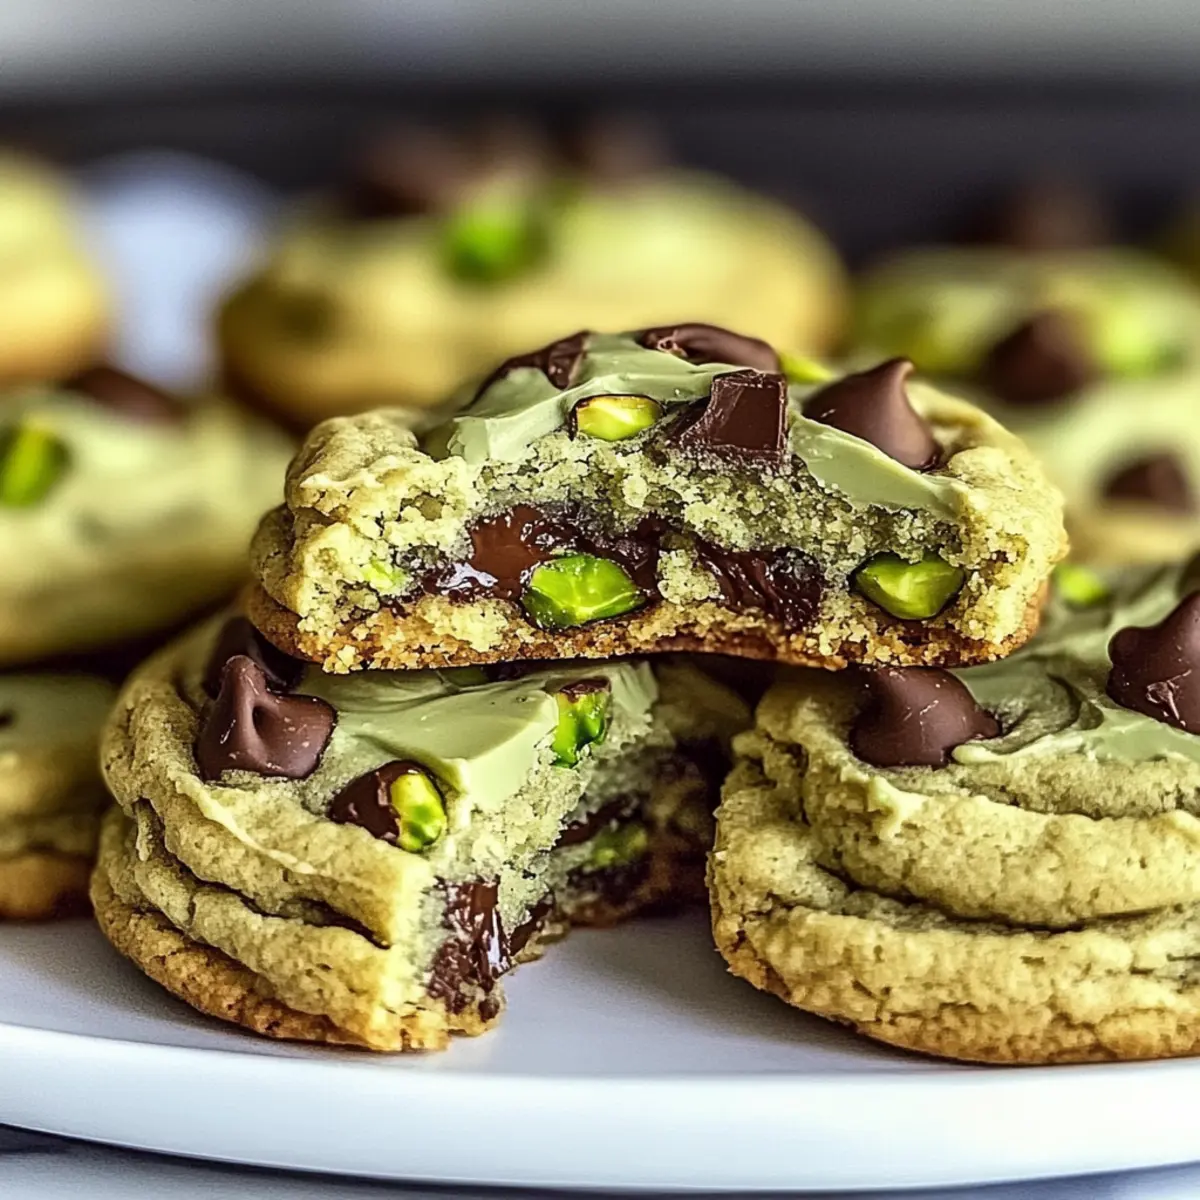
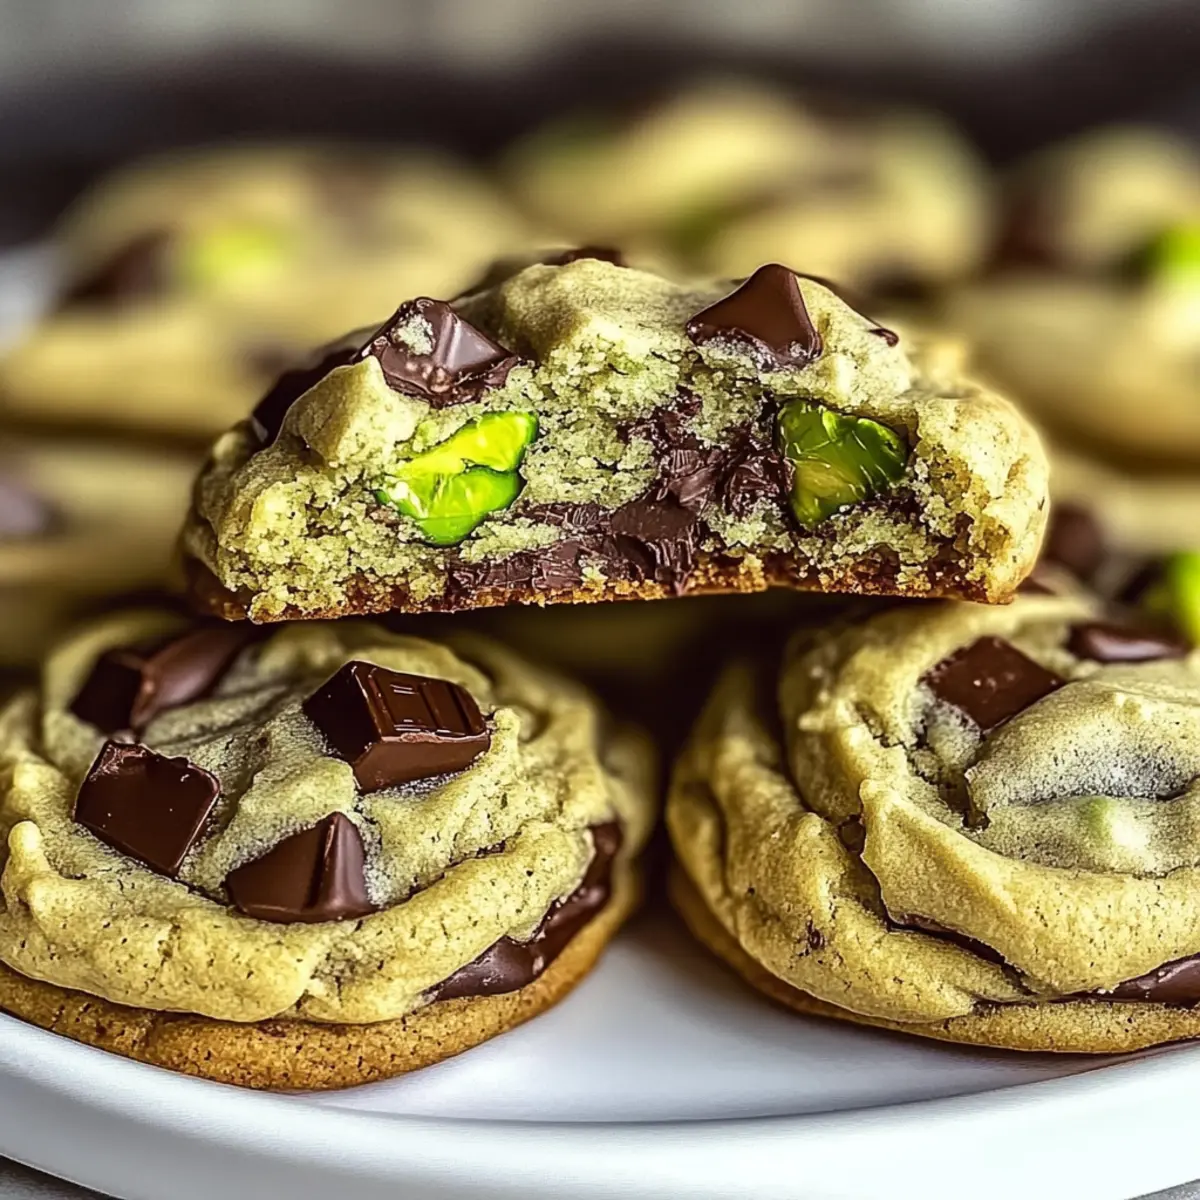
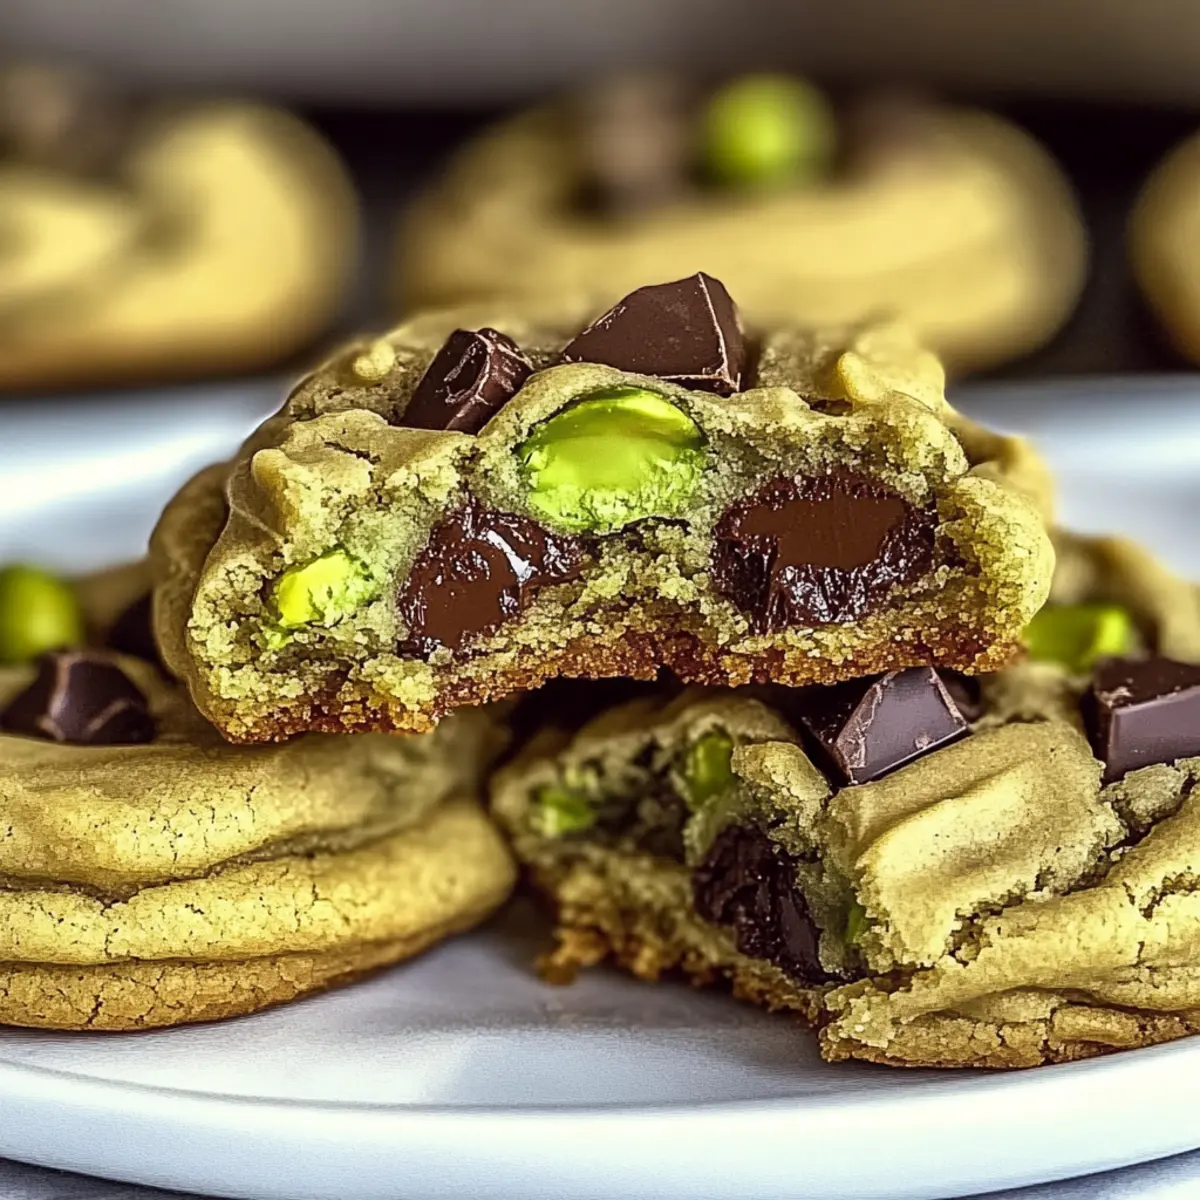
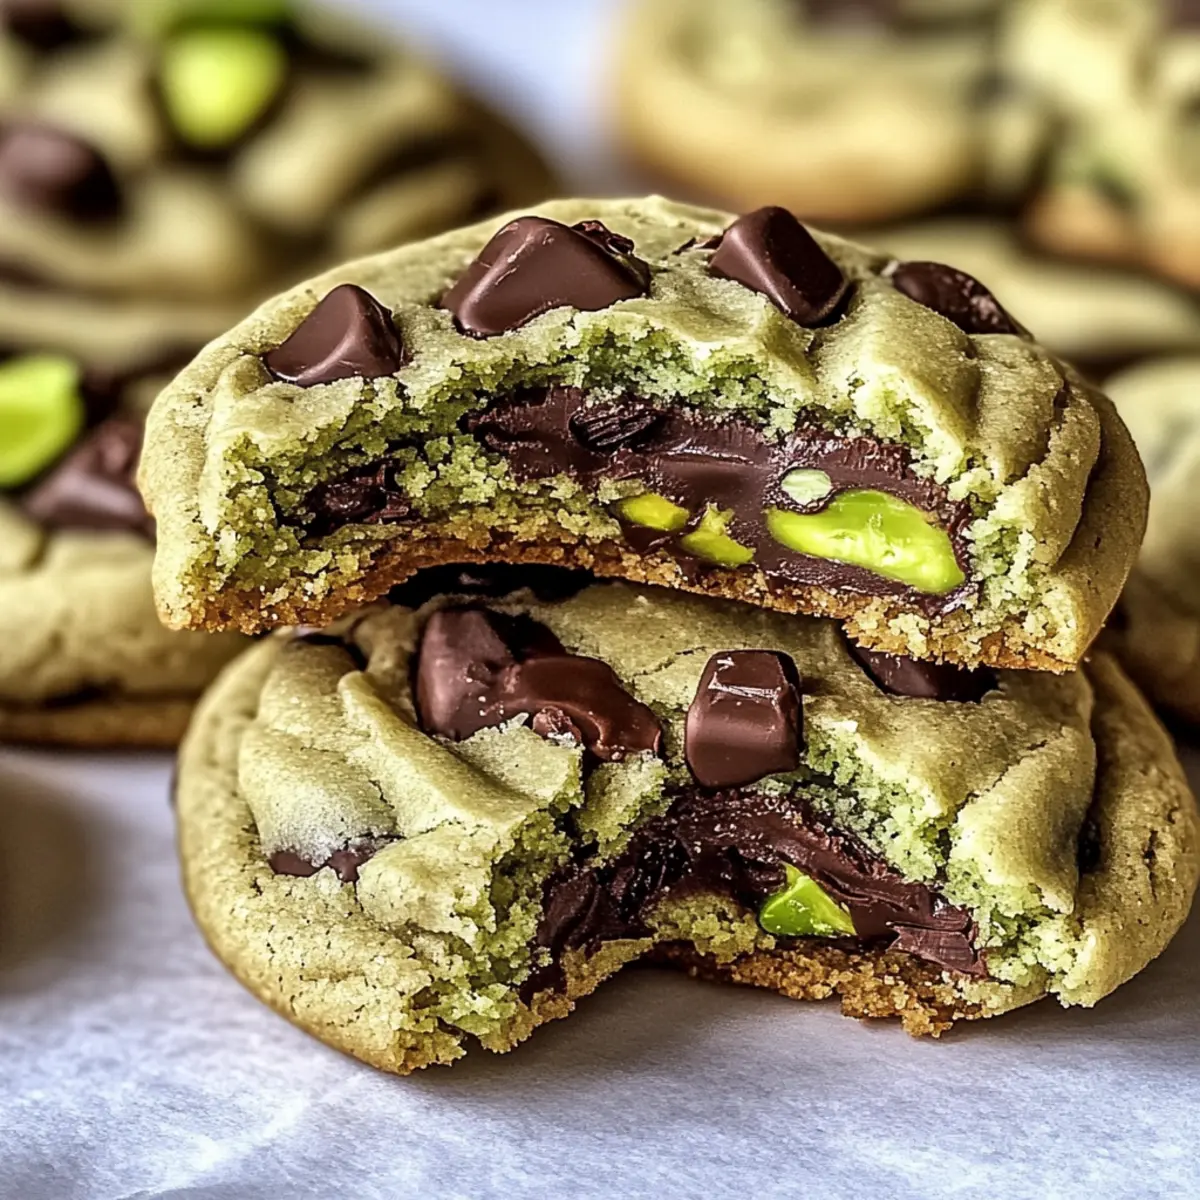
Stepping into the cozy aroma of freshly baked sweets always brings a smile to my face, and it's even more delightful when the star of the show is a batch of Chewy Pistachio Cream Cookies with Chocolate Chunks. These lovely cookies effortlessly blend the vibrant crunch of roasted pistachios with the rich embrace of gooey chocolate, creating an irresistible taste experience. And here’s the best part—they’re incredibly easy to whip up in under 30 minutes! Whether you're entertaining guests or treating yourself after a long day, these nut-based delights are the perfect quick indulgence. Plus, I've even included options for creating nut-free versions, so everyone can join in on the fun. Are you ready to embark on this delightful baking adventure together? Let’s dive into the recipe!

Why are Pistachio Cream Cookies a must-try?

Irresistible Flavor: These cookies boast a unique nutty richness from pistachio cream, perfectly balanced with melty chocolate chunks for a heavenly bite.

Quick and Easy: Made in under 30 minutes, this recipe suits anyone craving a homemade treat without a time commitment.

Versatile Variations: Feel free to swap nuts or chocolate types based on your taste, giving you endless possibilities to play with flavors. Consider trying these Matcha Cookies Soft for a different twist!

Perfect for Any Occasion: Whether it's a casual afternoon snack or a dessert for guests, these cookies shine in every setting, promising to please.

Crowd-Pleaser: With their chewiness and delightful flavors, they garner compliments every time you share them! So, gather your ingredients and get ready to impress your family and friends.

Pistachio Cream Cookies Ingredients

For the Dough
• Pistachio Cream – Adds nutty richness and flavor; substitute with any unsweetened nut cream or butter if necessary.
• Unsalted Butter – Acts as a fat source for moisture and texture; make sure it’s at room temperature for optimal blending.
• Granulated Sugar – Provides sweetness and contributes to texture; feel free to adjust based on your sweetness preference.
• All-Purpose Flour – Gives structure to the cookies; sift for lighter, airier treats.
• Baking Soda – Essential for leavening; ensures your cookies are soft and chewy.
• Sea Salt – Enhances flavors; adjust based on the saltiness of your pistachios.

For the Mix-ins
• Roasted Pistachios – Adds a delightful crunch and nutty flavor; choose salted or unsalted based on your taste.
• Chocolate Chunks – Offers sweet pockets of chocolate; can substitute with chocolate chips if preferred.

These Pistachio Cream Cookies are not just a treat, but a wonderful way to bring a slice of homemade goodness into your day!

Step‑by‑Step Instructions for Pistachio Cream Cookies

Step 1: Prepare the Dough
In a large mixing bowl, combine the pistachio cream and softened unsalted butter. Using a hand mixer, blend them together on medium speed until smooth and creamy, which should take about 1-2 minutes. Gradually add the granulated sugar, mixing until the mixture becomes light and fluffy.

Step 2: Incorporate Dry Ingredients
In a separate bowl, sift together the all-purpose flour, baking soda, and sea salt. Slowly fold this dry ingredient mixture into the pistachio blend using a spatula. This ensures even distribution while preventing overmixing. Continue folding until just combined, with no dry flour remaining, to maintain the soft texture of your Pistachio Cream Cookies.

Step 3: Add Mix-ins
Gently fold in the roasted pistachios and chocolate chunks, distributing them evenly throughout the dough. The vibrant colors and textures will be visible as you stir. Ensure that every cookie will be infused with the delicious nutty and chocolate goodness, but stop mixing once the add-ins are well incorporated to keep the dough light and fluffy.

Step 4: Shape Cookies
Preheat your oven to 350°F (175°C) and line a baking sheet with parchment paper. Using a cookie scoop or tablespoon, dollop the dough onto the prepared baking sheet, spacing them about 2 inches apart. Gently flatten each cookie slightly with the back of a spoon, preparing them for even baking while retaining a nice dome shape.

Step 5: Bake
Once your oven is preheated, place the baking sheet in the center rack. Bake the cookies for 10-12 minutes, or until the edges are golden and the centers look soft and lightly puffed. Keep a close eye to avoid overbaking; the centers will firm up while cooling, ensuring that melt-in-your-mouth quality you expect from Pistachio Cream Cookies.

Step 6: Cool
After baking, allow the cookies to cool on the baking sheet for about 5 minutes. This step is crucial as it helps them set. Then, transfer them carefully to a wire rack to cool completely. During this time, they will continue to develop their perfect chewy texture and deepen in flavor.

Step 7: Serve and Store
Once cooled, decide how you want to enjoy your delicious Pistachio Cream Cookies! They pair wonderfully with coffee or milk. If you need to store them, place the cookies in an airtight container at room temperature, where they will remain fresh for up to a week.

Make Ahead Options

These Pistachio Cream Cookies are ideal for busy home cooks looking to save precious time! You can prepare the cookie dough up to 24 hours in advance by mixing it, then wrapping it tightly in plastic wrap and refrigerating it (this allows the flavors to meld beautifully). You can also scoop the dough balls onto a baking sheet, freeze them for about an hour until firm, then transfer them to a zip-top bag and freeze for up to 3 months. When you’re ready to enjoy these delicious treats, simply place the frozen dough on a lined baking sheet, let them thaw for about 15 minutes, and bake as instructed. This ensures your cookies are just as delightful as if they were made fresh!

Pistachio Cream Cookies Variations

Feel free to make these delightful cookies your own with some clever twists!

  • Nut-Free Option: Swap pistachio cream with sunflower seed butter for a nut-free delight that all can enjoy.

  • Gluten-Free: Use a gluten-free flour blend to cater to gluten sensitivities. The texture will still be delightful without the gluten!

  • Chocolate Lovers: Replace chocolate chunks with rich dark chocolate or white chocolate to cater to different taste preferences. Try mixing both for a fun medley of flavors!

  • Added Flavor: Incorporate a splash of vanilla extract for a warm, aromatic twist that elevates the cookie experience. Just a teaspoon can work wonders!

  • Spiced Up: Add a sprinkle of cinnamon or cardamom to the dry ingredients for an exotic flavor boost that perfectly complements the nutty notes.

  • Fruity Delight: Fold in dried cranberries or chopped dates for an added sweetness and chewy texture, creating a lovely contrast with the rich pistachios.

  • For a Crunch: Toast the pistachios before adding them to the dough to enhance their flavor and add an extra layer of crunchiness.

  • Twists on Serving: Enjoy these cookies warm with a scoop of vanilla ice cream, or why not try a drizzle of caramel sauce on top for a mouthwatering dessert?

For those looking to explore more cookie styles, you might enjoy these Eggnog Cookies Soft or the charming Peaches Cream Cookies!

Expert Tips for Pistachio Cream Cookies

• Check Butter Temperature: Ensure your unsalted butter is at room temperature for better blending, which helps achieve a soft and creamy dough.

• Avoid Overbaking: Monitor your cookies closely in the oven; they should be slightly soft in the center when removed, as they'll firm up while cooling.

• Chill the Dough: For thicker cookies, consider chilling the dough for about 30 minutes before baking. This prevents spreading and enhances the texture.

• Use Fresh Ingredients: Always check the freshness of your baking soda and flour to ensure optimal rising and texture in your Pistachio Cream Cookies.

• Customize Your Mix-ins: Don’t hesitate to swap out mix-ins! Experiment with different nuts or chocolate types to create your own unique flavor profile.

Storage Tips for Pistachio Cream Cookies

Room Temperature: Store your cookies in an airtight container at room temperature for up to 7 days, maintaining their chewy texture and delicious flavor.

Fridge: For an extra layer of freshness, consider refrigerating them in an airtight container, where they can last for up to 10 days. Just allow them to come to room temperature before serving.

Freezer: Freeze baked cookies for up to 3 months. Wrap individually in plastic wrap and place in a freezer-safe bag; thaw at room temperature before enjoying.

Reheating: To enjoy a warm cookie experience, reheat in the microwave for 10-15 seconds or in a preheated oven at 350°F (175°C) for about 5 minutes. This will bring back the gooey deliciousness of the chocolate chunks in your Pistachio Cream Cookies.

What to Serve with Chewy Pistachio Cream Cookies?

Indulge your senses with a delightful pairing that complements the rich flavors of these heavenly cookies.

  • Creamy Vanilla Ice Cream: A scoop of creamy vanilla ice cream creates a luscious contrast that will leave you craving more.

  • Fresh Berries: Juicy strawberries or tart raspberries add a burst of freshness and balance the sweetness of the cookies. Picture a vibrant berry medley on your plate!

  • Espresso or Coffee: A warm cup of robust espresso or coffee elevates the cookie experience, enhancing the nutty flavors with each sip.

  • Milk: Dip your cookies in a glass of cold milk for a classic pairing that brings back fond childhood memories.

  • Chocolate Ganache Dip: For the chocolate lovers, a rich chocolate ganache dip adds an indulgent twist, deepening the chocolate experience of each bite.

  • Pistachio Milkshake: Blend pistachio cream and vanilla ice cream for a creamy milkshake that echoes the flavors of the cookies.

  • Coconut Macaroons: These chewy coconut delights will bring in a delightful tropical vibe that pairs surprisingly well with the nutty richness of your cookies.

  • Cupcake Frosting: Top a vanilla cupcake with cookie crumbles and a light cream cheese frosting to create a sweet, crunchy dessert fit for any occasion.

  • Herbal Tea: A warm cup of calming herbal tea, like chamomile or mint, provides a gentle lift to the rich cookie experience without overshadowing it.

  • Dark Chocolate Bar: Enjoy a few squares of dark chocolate alongside your cookies to complement the sweetness with a touch of richness and sophistication.

Pistachio Cream Cookies Recipe FAQs

What type of pistachio cream should I use?
I recommend using a high-quality unsweetened pistachio cream for the best flavor. If you can’t find it, feel free to substitute with any unsweetened nut butter or cream, such as almond or cashew, keeping in mind that this may slightly alter the flavor profile.

How should I store Pistachio Cream Cookies?
To keep your cookies fresh, store them in an airtight container at room temperature for up to 7 days. If you'd like them to last longer, refrigerate them for up to 10 days. Just be sure to let them come back to room temperature before enjoying!

Can I freeze these cookies?
Absolutely! You can freeze baked Pistachio Cream Cookies for up to 3 months. To do this, wrap them individually in plastic wrap, then place them in a freezer-safe bag. When ready to enjoy, simply thaw at room temperature. For a warm treat, pop them in the microwave for 10-15 seconds or reheat in a preheated oven at 350°F (175°C) for about 5 minutes.

What if my cookies are too flat after baking?
If your cookies spread too much, ensure your butter is softened but not melted. Next time, you can chill the dough for about 30 minutes in the fridge before baking; this helps the cookies maintain their shape. Also, check that your baking soda is fresh, as expired leavening agents can affect the texture.

Are there any allergy considerations for this recipe?
Yes, this recipe contains nuts and dairy. If you’re making these for someone with nut allergies, substitute the pistachio cream with a nut-free alternative, like sunbutter. Additionally, use dairy-free butter if avoiding dairy. Always verify the brands you choose to ensure they're safe for those with allergies.

Can I make these cookies nut-free?
Certainly! To create nut-free Pistachio Cream Cookies, swap the pistachio cream for a nut-free alternative like sunflower seed butter or oat flour mixed with a bit of coconut milk for moisture. This will allow everyone to enjoy these treats without any nut concerns!

Pistachio Cream Cookies

Chewy Pistachio Cream Cookies for a Sweet Escape

Indulge in Chewy Pistachio Cream Cookies packed with flavors of pistachios and chocolate chunks. A quick and easy dessert perfect for any occasion!
Print Recipe Pin Recipe
Prep Time 15 minutes mins
Cook Time 12 minutes mins
Cooling Time 5 minutes mins
Total Time 30 minutes mins
Servings: 12 cookies
Course: Dessert
Calories: 150
Ingredients Equipment Method Nutrition Notes

Ingredients
  

For the Dough
  • 1 cup Pistachio Cream Substitute with unsweetened nut cream or butter if necessary.
  • 1/2 cup Unsalted Butter Should be at room temperature.
  • 3/4 cup Granulated Sugar Adjust based on sweetness preference.
  • 1 cup All-Purpose Flour Sift for lighter, airier treats.
  • 1/2 teaspoon Baking Soda Essential for leavening.
  • 1/4 teaspoon Sea Salt Adjust based on the saltiness of your pistachios.
For the Mix-ins
  • 1/2 cup Roasted Pistachios Choose salted or unsalted.
  • 1 cup Chocolate Chunks Can substitute with chocolate chips.

Equipment

  • Mixing Bowl
  • hand mixer
  • Spatula
  • Cookie Scoop
  • Baking Sheet
  • Parchment Paper

Method
 

Step-by-Step Instructions
  1. In a large mixing bowl, combine the pistachio cream and softened unsalted butter. Blend with a hand mixer until smooth and creamy.
  2. Gradually add the granulated sugar, mixing until light and fluffy.
  3. In a separate bowl, sift together the all-purpose flour, baking soda, and sea salt.
  4. Fold the dry ingredient mixture into the pistachio blend using a spatula until just combined.
  5. Gently fold in the roasted pistachios and chocolate chunks.
  6. Preheat your oven to 350°F (175°C) and line a baking sheet with parchment paper.
  7. Dollop the dough onto the baking sheet, spacing them 2 inches apart. Flatten slightly with the back of a spoon.
  8. Bake for 10-12 minutes, until edges are golden and centers are soft.
  9. Allow cookies to cool on the baking sheet for 5 minutes before transferring to a wire rack.
  10. Store in an airtight container at room temperature for up to 7 days.

Nutrition

Serving: 1cookieCalories: 150kcalCarbohydrates: 20gProtein: 2gFat: 8gSaturated Fat: 5gPolyunsaturated Fat: 1gMonounsaturated Fat: 1gCholesterol: 20mgSodium: 50mgPotassium: 80mgFiber: 1gSugar: 10gVitamin A: 150IUCalcium: 15mgIron: 0.5mg

Notes

These cookies are perfect for pairing with coffee or milk. Additionally, storing them properly ensures they maintain their chewy texture and flavor.

Tried this recipe?

Let us know how it was!

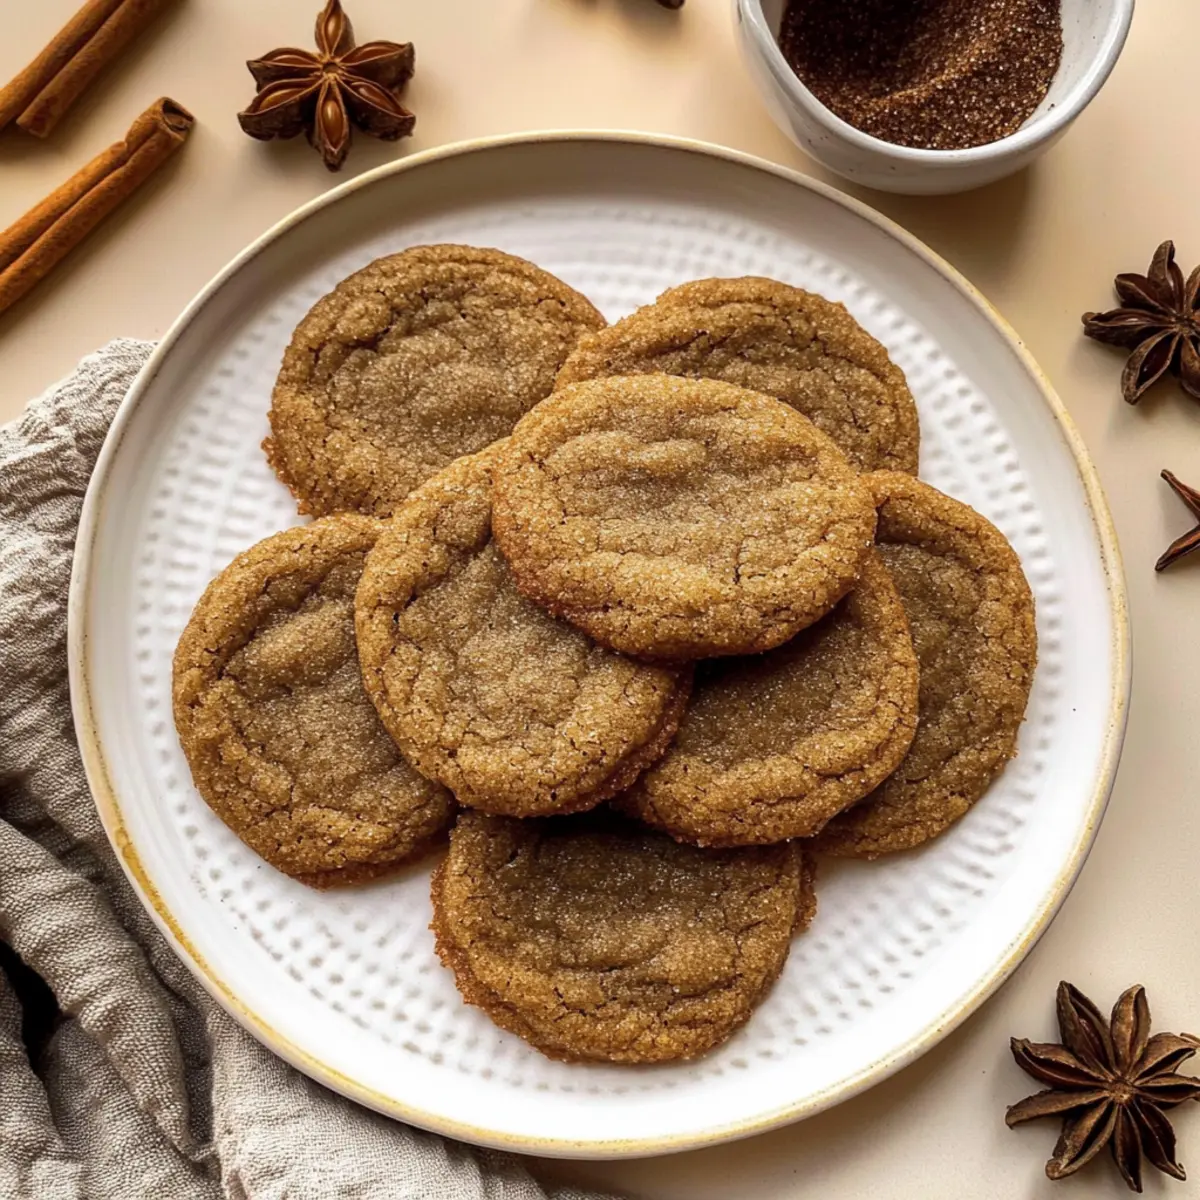
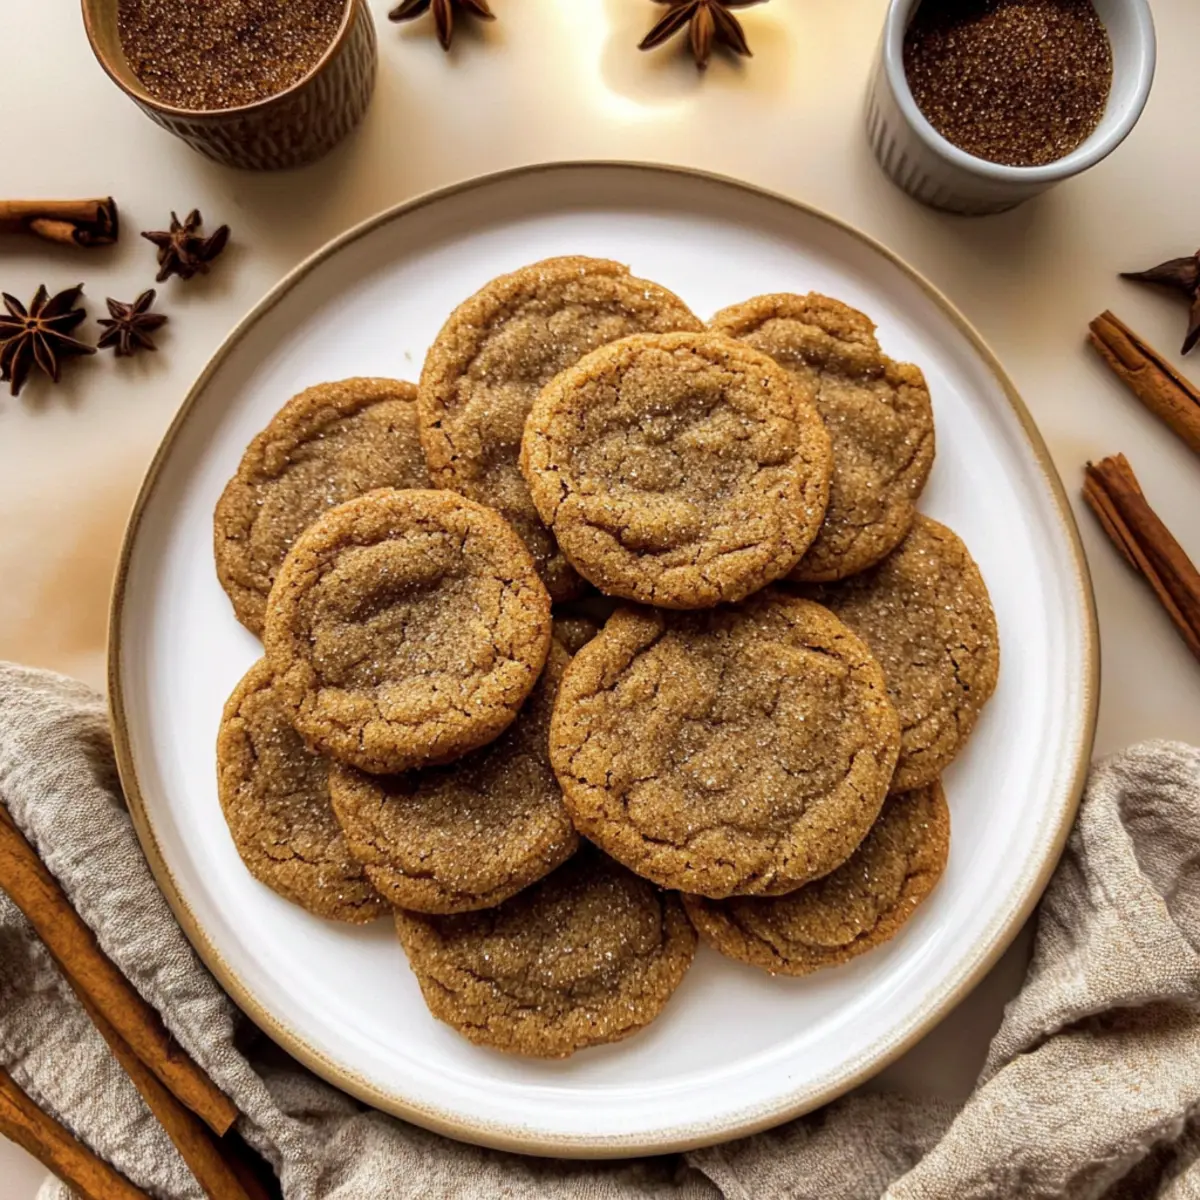
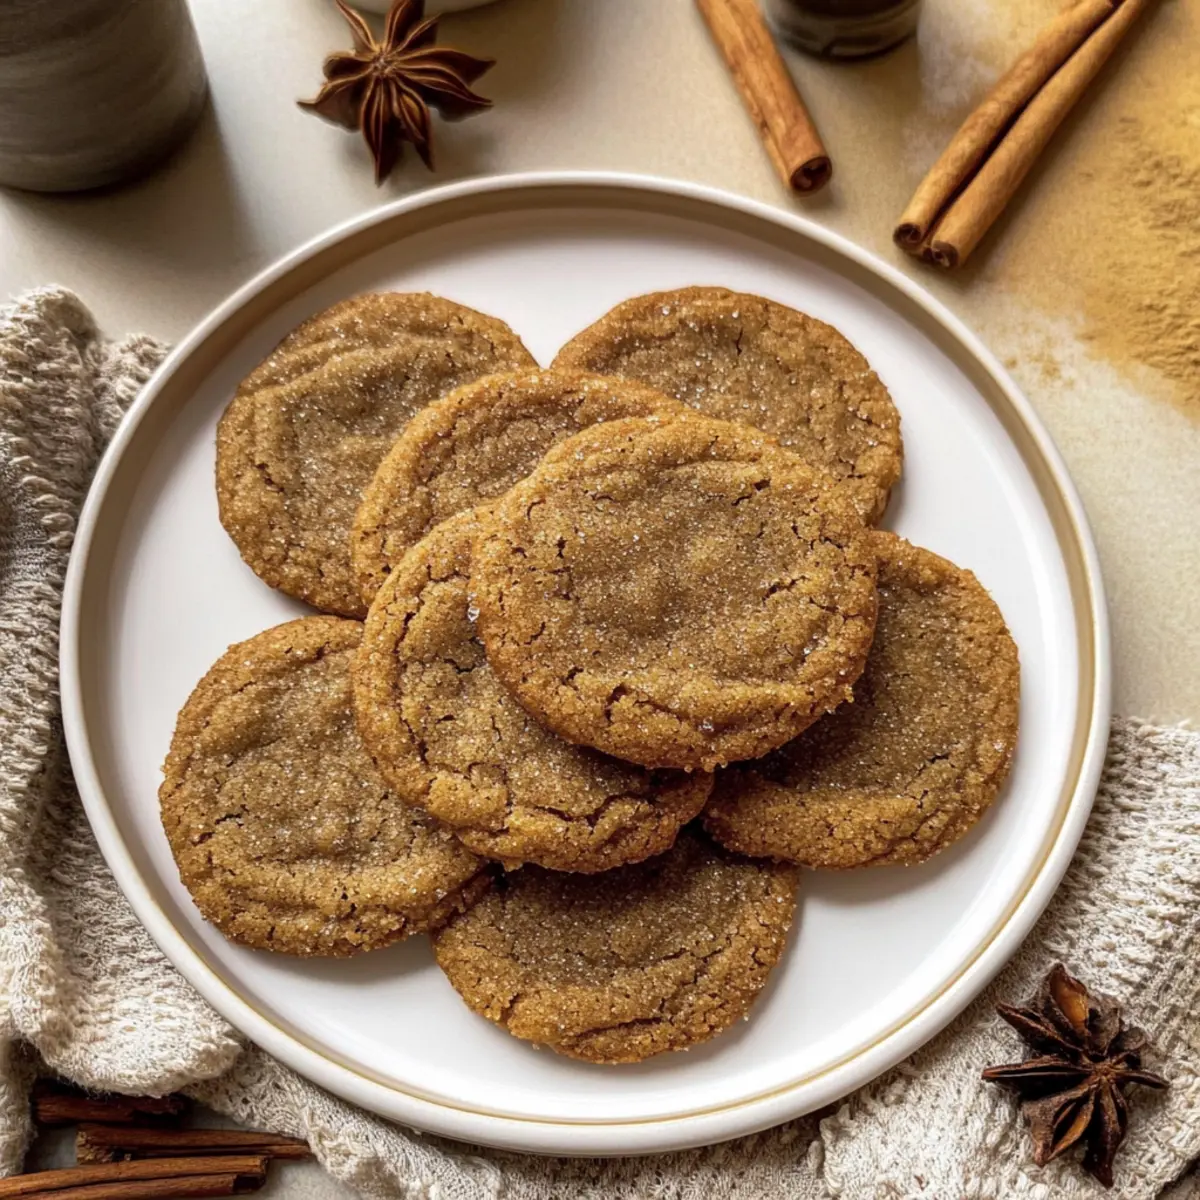
Vegan Brown Sugar Chai Cookies for Cozy Moments

January 16, 2026 by Grace Snow Leave a Comment

The kitchen filled with the comforting aroma of spices as I pulled my latest creation from the oven—Soft & Chewy Vegan Brown Sugar Chai Cookies. With an alluring blend of cinnamon, cardamom, and ginger, these cookies transform an ordinary day into something extraordinary. Not only are they incredibly quick to prepare in just one bowl, but their delightful chewy texture makes them a crowd favorite, perfect for sharing—or secretly indulging all by yourself! Whether you're a seasoned home-chef or someone craving a cozy treat, this recipe is your ticket to warm, homemade goodness without the fuss. Curious how these cookies can become your new go-to sweet fix? Let’s dive right in!

Why will you crave these cookies?

Irresistible aroma: The moment they bake, your kitchen will be enveloped in a warm, inviting scent that beckons everyone to gather around.

Quick & Easy: With just one bowl and minimal prep time, you’ll have these delightfully chewy Vegan Brown Sugar Chai Cookies ready in no time.

Crowd-Pleasing Flavor: The warming chai spices of cinnamon, cardamom, and ginger create a unique flavor that stands out, making them perfect for gatherings or cozy nights in. Pair them with a cup of tea for an idyllic treat!

Flexible Options: Easily customize your cookies by adding nuts or swapping in oat flour, ensuring every batch fits your taste buds.

Perfect Texture: Enjoy a delightful combination of tender center and chewy edges, making these cookies a satisfying indulgence that everyone will love. Don't miss out on other cozy favorites like Eggnog Cookies Soft or Mexican Wedding Cookies!

Vegan Brown Sugar Chai Cookies Ingredients

For the Cookie Base

  • Vegan Butter – ½ cup for moisture and richness, can substitute with Earth Balance or Miyoko's butter.
  • Dark Brown Sugar – ½ cup + 2 tablespoons adds sweetness and a soft texture; light brown sugar works too.
  • Ground Cinnamon – ½ teaspoon provides warmth and flavor; feel free to adjust to taste.
  • Ground Cardamom – ¼ teaspoon enhances the chai flavor profile; optional but recommended.
  • Ground Ginger – ¼ teaspoon brings spice and depth to the cookie; fresh grated ginger can be substituted but may require adjustments.
  • Star Anise – ⅛ teaspoon for a nuanced flavor; omit if unavailable.
  • Black Pepper – ⅛ teaspoon adds mild spiciness; skip for a more subtle treat.
  • Flax Egg – 1 egg substitute for binding; mix 1 tablespoon ground flaxseed with 3 tablespoons water.
  • Vanilla Bean Paste – 1 teaspoon introduces a sweet aromatic flavor; vanilla extract can substitute.
  • All-Purpose Flour – 1 cup + 2 tablespoons forms the cookie structure; a gluten-free blend can be used for a gluten-free option.
  • Salt – ¼ teaspoon to balance sweetness and enhance flavors.
  • Baking Soda – ½ teaspoon helps the cookies rise and develop texture.
  • Granulated Sugar – 2 tablespoons for optional rolling ante, creating a lovely crinkly surface; can omit if desired.

With these ingredients, you’re just moments away from baking a batch of Vegan Brown Sugar Chai Cookies that are sure to be adored by all. Happy baking!

Step‑by‑Step Instructions for Vegan Brown Sugar Chai Cookies

Step 1: Cream the Ingredients
In a large mixing bowl, use a hand mixer or wooden spoon to cream together ½ cup of vegan butter and ½ cup plus 2 tablespoons of dark brown sugar until the mixture is light and fluffy, about 2-3 minutes. The texture should be smooth, with a slight sheen, indicating that the sugars are well incorporated. Add in ½ teaspoon of ground cinnamon, ¼ teaspoon of ground cardamom, ¼ teaspoon of ground ginger, ⅛ teaspoon of star anise, and ⅛ teaspoon of black pepper, mixing until fully blended.

Step 2: Add the Flax Egg and Vanilla
Next, introduce the flax egg—prepared by combining 1 tablespoon of ground flaxseed with 3 tablespoons of water—and 1 teaspoon of vanilla bean paste into the creamed mixture. Beat everything together until smooth, which should take about 1-2 minutes. This step is crucial for infusing moisture and flavor in your Vegan Brown Sugar Chai Cookies, making them irresistibly tender.

Step 3: Combine Dry Ingredients
Gradually sift in 1 cup plus 2 tablespoons of all-purpose flour, ½ teaspoon of baking soda, and ¼ teaspoon of salt into the bowl. Stir gently with a spatula until a thick, slightly sticky dough forms, ensuring not to overmix. The dough should stick together but not be overly wet; it should hold its shape well when you scoop it.

Step 4: Chill the Dough
Cover the mixing bowl with plastic wrap or a clean kitchen towel and place it in the refrigerator for at least 1 hour. Chilling the dough is essential as it firms up the mixture and helps prevent the cookies from spreading too much during baking. Use this time to preheat your oven.

Step 5: Preheat the Oven
After the dough has chilled, preheat your oven to 350°F (175°C). While the oven warms, prepare a baking tray by lining it with parchment paper, ensuring that your Vegan Brown Sugar Chai Cookies won’t stick and will bake evenly.

Step 6: Shape the Cookies
Once the oven reaches temperature, take the dough from the refrigerator. Using a cookie scoop or your hands, portion out 10-12 small balls of dough, rolling them gently in your palms for a smooth finish. If desired, roll each ball in 2 tablespoons of granulated sugar for a sparkling, crinkly crust that adds extra sweetness to your Vegan Brown Sugar Chai Cookies.

Step 7: Bake the Cookies
Place the cookie dough balls on the prepared baking tray, ensuring they are spaced about 2 inches apart to allow for spreading. Do not flatten the balls. Bake in the preheated oven for 11-13 minutes, or until the edges are lightly golden brown and the centers appear soft but set.

Step 8: Create Crinkly Toppings
Once baked, carefully remove the tray from the oven. Immediately tap the tray against the counter to help create those beautiful crinkly tops that make these Vegan Brown Sugar Chai Cookies so appealing. Allow the cookies to cool on the tray for about 5-10 minutes before transferring them to a wire rack to cool completely.

Step 9: Cool and Serve
After a brief cooling time, carefully move your cookies to a wire rack, letting them cool fully. Once cooled, you can store them in an airtight container or indulge immediately! Enjoy the delicious aroma and flavor that fill your kitchen with warmth, perfect for any cozy occasion.

Vegan Brown Sugar Chai Cookies Variations

Feel free to put your own spin on these delightful cookies by exploring the myriad of variations below!

  • Light Brown Sugar: Substitute dark brown sugar with light brown for a slightly crispier texture. This minor swap can body the flavors while keeping them sweet.

  • Nutty Surprise: Add chopped walnuts or pecans for an extra crunch. The nuts not only enhance the cookie's flavor but also add a delightful texture that complements the chewy base.

  • Oat Flour: Swap half of the all-purpose flour with oat flour for a unique taste and a heartier texture. You’ll experience a lovely nutty flavor that elevates each bite.

  • Chai Extract: For a more intense chai flavor, add a few drops of chai extract into the dough. It infuses the cookies with a robust spice essence sure to warm your spirits!

  • Spicy Kick: Increase the black pepper or add a pinch of cayenne for an unexpected heat. This twist beckons adventurous palates looking for that perfect synergy of sweet and spicy.

  • Chocolate Delight: Fold in vegan chocolate chips or cacao nibs for a rich, decadent treat that enhances every bite, bringing a sweet, creamy element to balance the spices.

  • Coconut Sugar: Consider using coconut sugar in place of dark brown sugar for a deep caramel flavor with slightly less sweetness. It's a fantastic alternative that syncs well with the flavors of chai.

  • Herbal Infusion: Experiment by tossing in a dash of dried lavender or mint for a refreshing herbal twist. This unexpected addition creates a beautifully aromatic cookie that intrigues the senses.

These variations allow you to explore your creativity in the kitchen, ensuring that every batch of Vegan Brown Sugar Chai Cookies becomes uniquely yours. If you enjoy these cookies, consider trying other tempting options like Vegan Cacao Nib or Matcha Cookies Soft for even more deliciousness!

How to Store and Freeze Vegan Brown Sugar Chai Cookies

Room Temperature: Store cookies in an airtight container for up to 3 days to maintain their chewy texture.

Fridge: If you prefer a longer shelf life, these Vegan Brown Sugar Chai Cookies can be refrigerated for up to 1 week in an airtight container.

Freezer: For extended storage, freeze the cookies in a single layer on a baking sheet. Once solid, transfer them to a freezer-safe bag and store for up to 3 months.

Reheating: To enjoy them warm, reheat cookies in the oven at 350°F (175°C) for about 5 minutes. This revitalizes their softness and enhances the aromatic flavors.

What to Serve with Vegan Brown Sugar Chai Cookies?

These heartwarming, spiced cookies create a delightful experience when paired with complementary dishes that enhance their flavors.

  • Chai Tea: A steaming cup of chai mirrors the cookie’s spices, creating a soothing match perfect for cozy afternoons.

  • Vanilla Ice Cream: The creamy, cold ice cream contrasts beautifully with the warm cookies, making each bite a luscious treat.

  • Fresh Berries: Juicy raspberries or strawberries add a refreshing burst that balances the sweetness of the cookies.

  • Coconut Milk Pudding: This creamy dessert adds an enjoyable, tropical twist that harmonizes with the chai spices.

  • Spiced Almond Milk: Warm spiced almond milk resonates with the chai flavors, creating a perfectly comforting drink pairing.

  • Homemade Whipped Cream: Light and airy, whipped cream adds a delightful texture and creaminess to the experience, making it indulgent.

  • Peanut Butter: A dollop of creamy peanut butter can elevate the flavor profile, adding a nutty richness that enhances each cookie’s chewy goodness.

  • Coffee: A rich cup of coffee offers a contrasting bitterness that beautifully balances the sweetness of the cookies, creating a lovely pairing for mornings or afternoon snacks.

  • Hot Chocolate: Cozy up with a cup of rich hot chocolate; its sweetness and warmth create a perfect synergy with the spiced cookie.

These suggestions will elevate your cookie experience, making any gathering feel special and cozy.

Expert Tips for Vegan Brown Sugar Chai Cookies

Cream Thoroughly: Ensure your vegan butter and dark brown sugar are well-creamed for a light, airy texture that promotes chewiness in your cookies.

Chill the Dough: Don’t skip chilling! This step helps maintain the shape of your Vegan Brown Sugar Chai Cookies, preventing excessive spreading during baking.

Parchment Paper: Always line your baking tray with parchment paper to avoid sticking and ensure evenly cooked bottoms, resulting in the perfect cookie.

Monitor Baking Time: Keep an eye on the baking time; take them out when the edges are golden but the centers are still soft for that ideal chewy bite.

Tapping Trick: Remember to tap the tray on the counter right after baking to encourage those delightful crinkly tops that make every cookie look appealing.

Make Ahead Options

These Vegan Brown Sugar Chai Cookies are perfect for busy home cooks looking to prepare ahead! You can make the dough up to 24 hours in advance by chilling it in the refrigerator. Simply follow through steps 1-4 and cover the bowl tightly to prevent drying out. When you’re ready to bake, scoop and roll the chilled dough into balls, then simply bake as instructed. If you prefer, you can also roll the cookie balls in granulated sugar up to 3 days before baking; just store them in an airtight container in the fridge. This way, you'll have fresh, chewy cookies ready for any time you crave a sweet treat!

Vegan Brown Sugar Chai Cookies Recipe FAQs

What type of brown sugar should I use for these cookies?
I recommend using dark brown sugar because it has a higher moisture content, which contributes to a softer, chewier cookie. If you’re in a pinch, light brown sugar can be used as a substitute, but the texture may be slightly crispier.

How should I store my Vegan Brown Sugar Chai Cookies?
To keep your cookies fresh, store them in an airtight container at room temperature for up to 3 days. If you'd like them to last longer, they can be refrigerated for up to 1 week, which helps maintain their chewy texture.

Can I freeze these cookies?
Absolutely! To freeze, place the baked cookies on a baking sheet to firm up individually. Once frozen solid, transfer them to a freezer-safe bag. They can be stored for up to 3 months. To enjoy them again, simply reheat them in the oven at 350°F (175°C) for about 5 minutes for that fresh-baked feel.

What should I do if my cookie dough is too sticky?
If you find your dough is very sticky, don’t worry! Simply chill it in the refrigerator for an additional 15-30 minutes. The cool temperature will firm up the dough, making it easier to handle. You might also sprinkle a little flour on your hands when shaping the cookies if it's still sticky.

Are these cookies suitable for those with allergies?
These Vegan Brown Sugar Chai Cookies are free from animal products, making them suitable for vegans. However, they do contain gluten due to the all-purpose flour. If you have gluten allergies, I recommend using a gluten-free 1:1 flour blend as an alternative, which works wonderfully in this recipe!

How can I enhance the chai flavors in my cookies?
For an even deeper chai flavor, consider increasing the spices slightly according to your taste—like adding an extra pinch of cardamom or cinnamon. You could also steep a chai tea bag in the flax egg for a twist, so its essence infuses into the cookie dough for an aromatic experience.

Vegan Brown Sugar Chai Cookies

Vegan Brown Sugar Chai Cookies for Cozy Moments

Enjoy these Vegan Brown Sugar Chai Cookies filled with warming spices, perfect for a cozy treat!
Print Recipe Pin Recipe
Prep Time 15 minutes mins
Cook Time 13 minutes mins
Chilling Time 1 hour hr
Total Time 1 hour hr 28 minutes mins
Servings: 12 cookies
Course: Dessert
Cuisine: Vegan
Calories: 120
Ingredients Equipment Method Nutrition Notes

Ingredients
  

For the Cookie Base
  • 0.5 cup Vegan Butter can substitute with Earth Balance or Miyoko's butter
  • 0.5 cup Dark Brown Sugar adds sweetness and a soft texture; light brown sugar works too
  • 0.5 teaspoon Ground Cinnamon provides warmth and flavor; feel free to adjust to taste
  • 0.25 teaspoon Ground Cardamom enhances the chai flavor profile; optional but recommended
  • 0.25 teaspoon Ground Ginger brings spice and depth to the cookie; fresh grated ginger can be substituted
  • 0.125 teaspoon Star Anise for a nuanced flavor; omit if unavailable
  • 0.125 teaspoon Black Pepper adds mild spiciness; skip for a more subtle treat
  • 1 Flax Egg Flax Egg mix 1 tablespoon ground flaxseed with 3 tablespoons water
  • 1 teaspoon Vanilla Bean Paste introduces a sweet aromatic flavor; vanilla extract can substitute
  • 1.125 cup All-Purpose Flour forms the cookie structure; a gluten-free blend can be used for a gluten-free option
  • 0.25 teaspoon Salt to balance sweetness and enhance flavors
  • 0.5 teaspoon Baking Soda helps the cookies rise and develop texture
  • 2 tablespoons Granulated Sugar for optional rolling ante; can omit if desired

Equipment

  • Mixing Bowl
  • hand mixer or wooden spoon
  • Cookie Scoop
  • Baking tray
  • Parchment Paper
  • Refrigerator

Method
 

Step-by-Step Instructions
  1. In a large mixing bowl, cream together vegan butter and dark brown sugar until light and fluffy, about 2-3 minutes.
  2. Add in ground cinnamon, ground cardamom, ground ginger, star anise, and black pepper, mixing until fully blended.
  3. Introduce the prepared flax egg and vanilla bean paste into the creamed mixture. Beat until smooth, about 1-2 minutes.
  4. Gradually sift in all-purpose flour, baking soda, and salt. Stir gently until a thick, slightly sticky dough forms.
  5. Cover the mixing bowl and chill in the refrigerator for at least 1 hour.
  6. Preheat your oven to 350°F (175°C) and prepare a baking tray lined with parchment paper.
  7. Portion out 10-12 small balls of dough, rolling them gently in your palms.
  8. Place the dough on the baking tray, spaced about 2 inches apart, and bake for 11-13 minutes.
  9. Tap the tray against the counter to create crinkly tops and allow cookies to cool on the tray for 5-10 minutes before transferring to a wire rack.
  10. Move cookies to a wire rack to cool fully and enjoy!

Nutrition

Serving: 1cookieCalories: 120kcalCarbohydrates: 15gProtein: 1gFat: 6gSaturated Fat: 1gPolyunsaturated Fat: 0.5gMonounsaturated Fat: 4gSodium: 95mgPotassium: 60mgFiber: 0.5gSugar: 5gCalcium: 1mgIron: 4mg

Notes

For best results, cream butter and sugar well, chill the dough, and line the baking tray with parchment paper to prevent sticking.

Tried this recipe?

Let us know how it was!

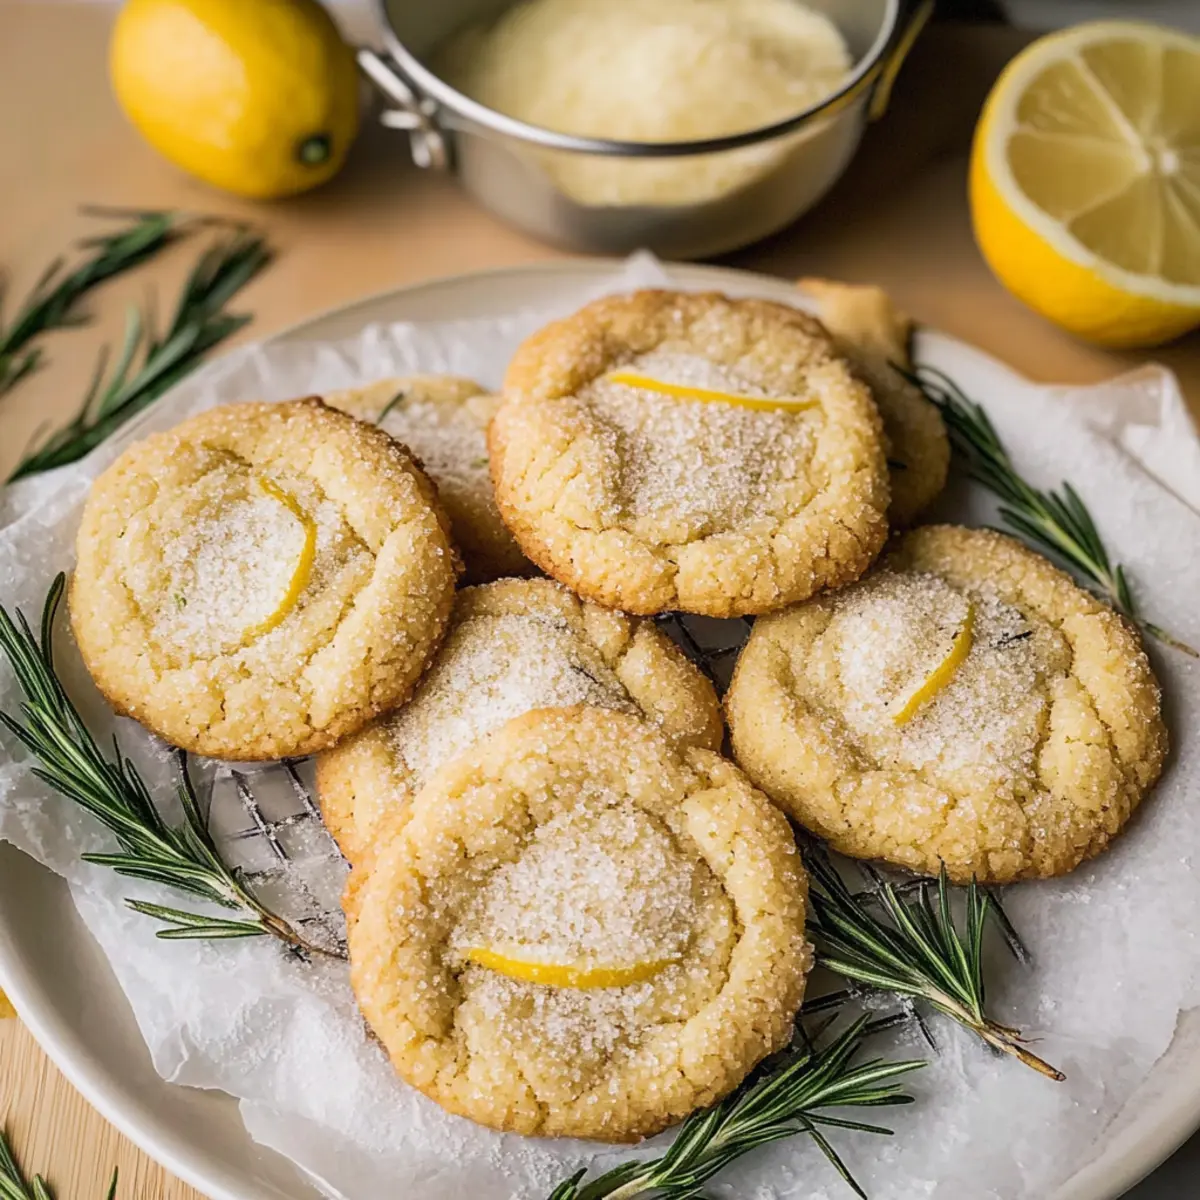
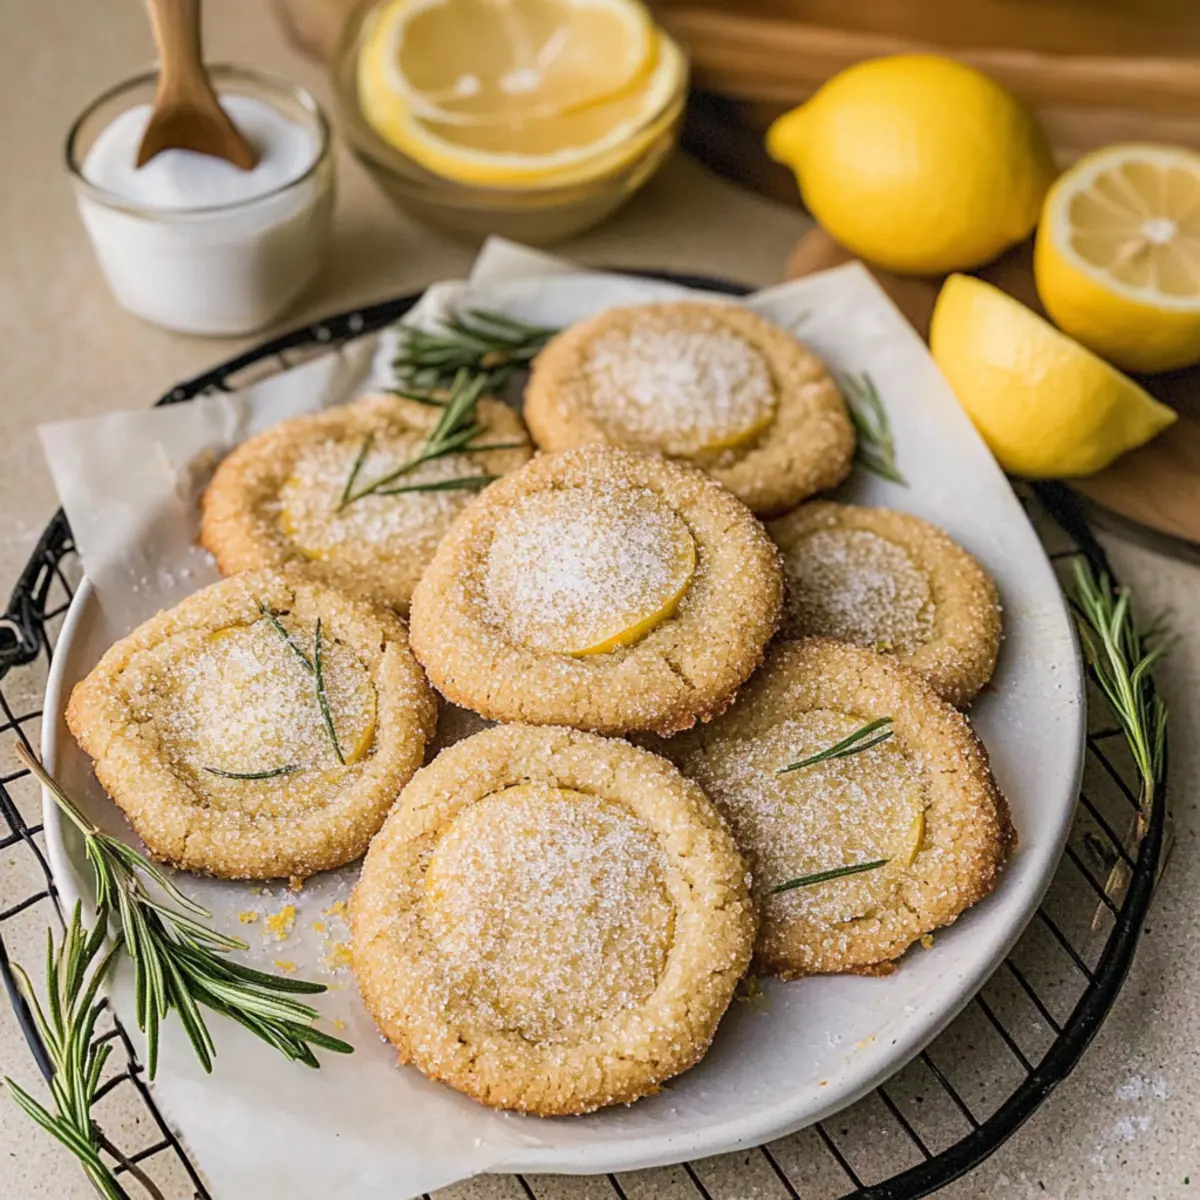
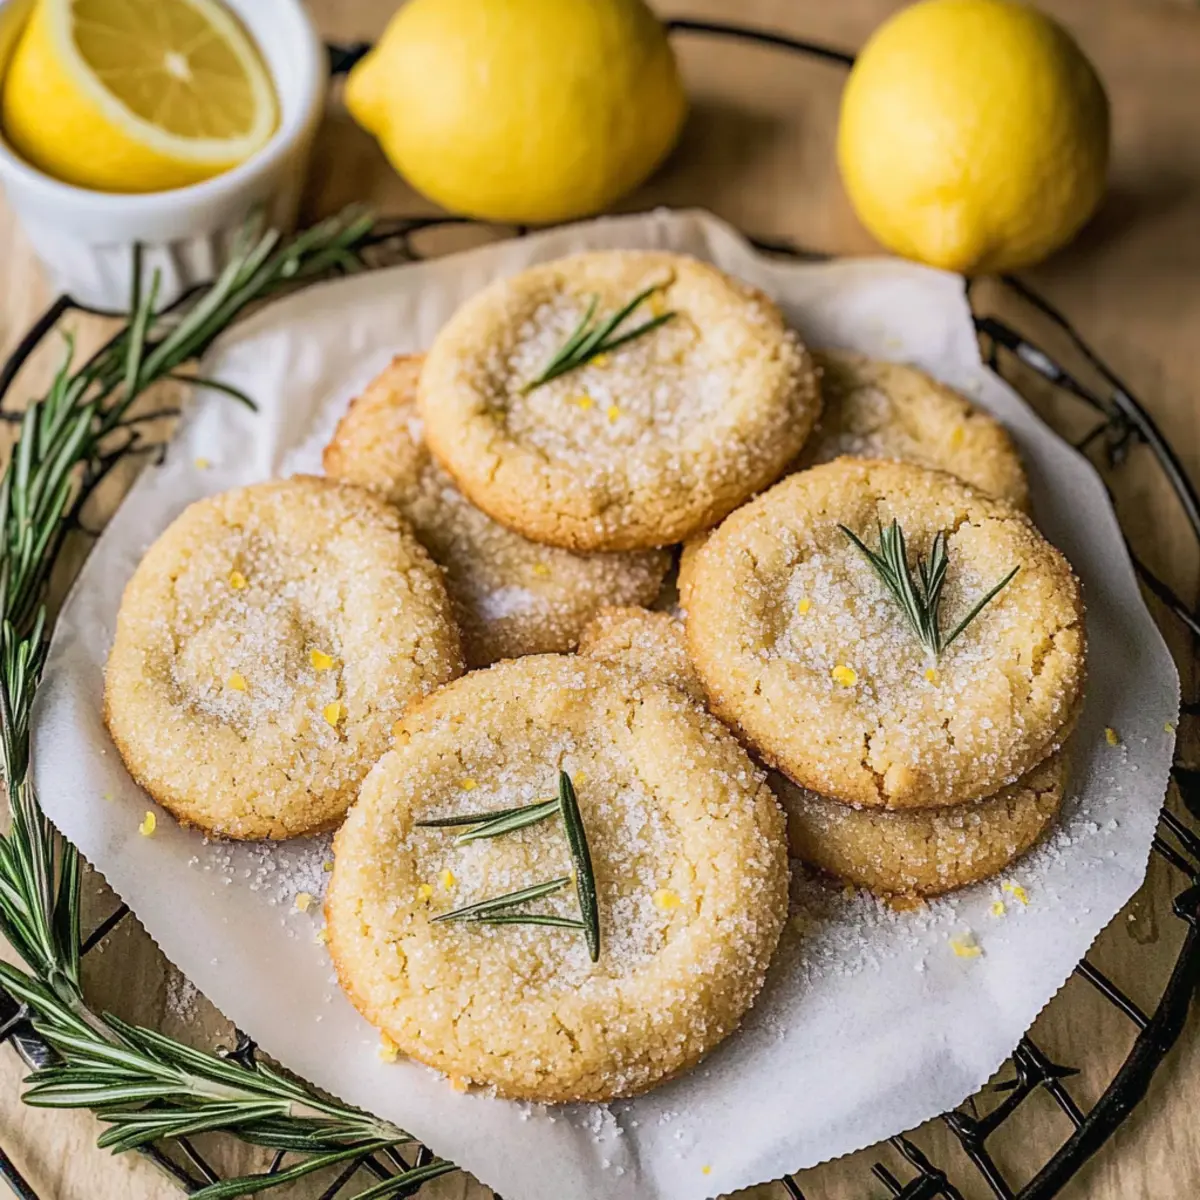
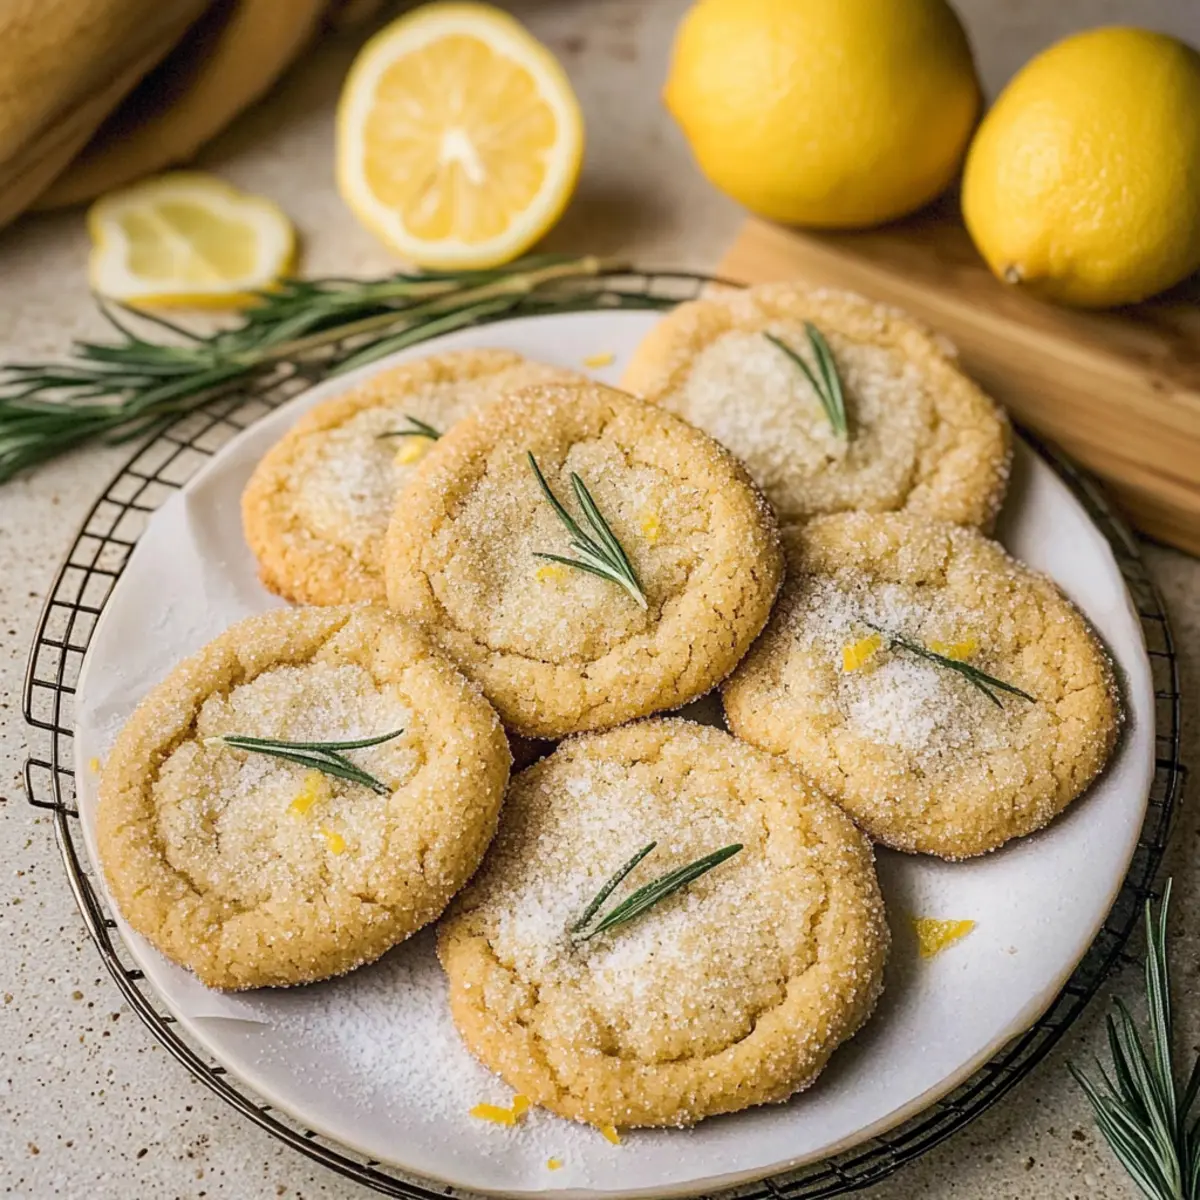
Rosemary Cookies with Lemon Sugar: A Fresh Twist on Treats

January 16, 2026 by Grace Snow Leave a Comment

As I took a bite of these Rosemary Cookies with Lemon Sugar, the enchanting blend of herb and zest transported me straight to warm, sun-soaked afternoons. The nutty aroma of brown butter melds beautifully with fragrant rosemary, making each cookie a true testament to the magic that happens when savory meets sweet. What sets these cookies apart is their delightful texture—soft and chewy with a crunchy lemon-sugar crust that adds a bright burst of flavor. Perfect for an unexpected tea party or just a cozy evening snack, they’re the kind of treat that feels fancy yet is effortlessly simple to whip up. Can you envision the surprised smiles when you share these cookies with family and friends? Let's dive into this delightful recipe together!

Why Rosemary Cookies with Lemon Sugar?

Unique Flavor Fusion: The combination of savory rosemary and zesty lemon creates a delightful contrast that's both refreshing and comforting.
Easy to Make: This recipe requires simple steps and basic ingredients, making it ideal for bakers of any skill level.
Perfect for Any Occasion: Whether it's a tea party, family gathering, or a cozy night in, these cookies are sure to impress guests and family alike.
Texture Sensation: Enjoy the chewy center paired with a slightly crisp lemon-sugar coating, offering a satisfying bite.
Versatile Treat: Feel free to explore flavors by swapping lemon for orange or adding white chocolate chips, just like in my Matcha Cookies Soft or Thumbprint Cookies Melt.

Rosemary Cookies with Lemon Sugar Ingredients

For the Cookies

  • Unsalted Butter (1 cup + 2 tbsp) – Adds richness and moisture; using unsalted helps control the overall saltiness.
  • Fresh Rosemary (1 sprig and 2 teaspoons chopped) – Introduces a unique herbaceous flavor; substitute dried rosemary at half the amount if fresh isn't available.
  • White Granulated Sugar (1 ⅓ cups + ½ cup for lemon sugar) – Provides the sweetness these cookies crave; coconut sugar can be an interesting alternative for a twist.
  • Large Eggs (1 whole + 1 yolk) – Acts as a binder for soft and chewy cookies; ensure they're at room temperature for best results.
  • Vanilla Extract (1 teaspoon) – Enhances the overall flavor profile; can omit if you're looking for a simpler taste.
  • All-Purpose Flour (2 ½ cups, spooned and leveled) – Essential for structure; precise measurements will avoid overly dense cookies.
  • Baking Soda (1 teaspoon) – A vital leavening agent that helps create that desirable rise.
  • Baking Powder (½ teaspoon) – Works alongside baking soda to ensure a light and airy texture.
  • Salt (¼ teaspoon) – Balances the sweetness and enhances flavors; adjust to your taste preference.
  • Lemon Zest (2 teaspoons) – Provides a burst of citrus brightness; feel free to modify based on your love for lemon flavor.

For the Lemon Sugar Coating

  • Lemon Zest (from the above) – Same as before; it infuses the sugar with delightful citrus notes.
  • White Granulated Sugar (½ cup, from above) – The perfect combination with lemon zest gives these cookies their deliciously sweet and tangy crust.

Dive into this delicious Rosemary Cookies with Lemon Sugar journey and let the blending of savory and sweet enchant your taste buds!

Step‑by‑Step Instructions for Rosemary Cookies with Lemon Sugar

Step 1: Prepare Brown Butter
In a medium saucepan over medium heat, melt 1 cup and 2 tablespoons of unsalted butter, swirling it occasionally. Add a sprig of rosemary and watch for the butter to turn a deep golden brown, about 5-7 minutes, releasing a nutty aroma. Once browned, remove the rosemary and let the butter cool for 30-45 minutes in the refrigerator until slightly thickened.

Step 2: Mix Wet Ingredients
In a large mixing bowl, combine the cooled brown butter with 1 ⅓ cups of granulated sugar and use an electric mixer to beat for 2 minutes until light and fluffy. Next, add in one large egg and one egg yolk along with 1 teaspoon of vanilla extract, beating for an additional minute to ensure everything is well incorporated.

Step 3: Combine Dry Ingredients
In a separate bowl, sift together 2 ½ cups of all-purpose flour, 1 teaspoon of baking soda, ½ teaspoon of baking powder, and ¼ teaspoon of salt. Stir in 2 teaspoons of chopped fresh rosemary, creating a delightful herb-infused mix. Gradually add this dry mixture to the wet ingredients until just combined, being careful not to overmix.

Step 4: Chill the Cookie Dough
Using a 1 ¼ oz ice cream scoop, portion the dough onto a parchment-lined cookie sheet, setting them a couple of inches apart. Cover the sheet with plastic wrap and refrigerate the dough balls for at least 30 minutes to help maintain their shape while baking.

Step 5: Prepare Lemon Sugar
In a small bowl, mix together the zest of one lemon with ½ cup of white granulated sugar. Use your fingertips to rub the lemon zest into the sugar until it becomes fragrant, allowing the oils to infuse the sugar. Set this lemon sugar mixture aside to use as a coating for the cookies.

Step 6: Bake Cookies
Preheat your oven to 350°F (175°C) and line another baking sheet with parchment paper. Roll each chilled dough ball in the lemon sugar, ensuring they are well-coated, and arrange them on the prepared sheet about 2 inches apart. Bake for 12 minutes, until the edges are lightly golden, but the centers are still puffy. Allow the cookies to cool completely on a wire rack before savoring!

Make Ahead Options

These Rosemary Cookies with Lemon Sugar are perfect for meal prep, allowing you to enjoy fresh-baked cookies with minimal hassle! You can prepare the cookie dough up to 24 hours in advance by scooping it onto a parchment-lined baking sheet and covering it tightly with plastic wrap in the refrigerator. Alternatively, you can also mix and chill the brown butter and combine the wet and dry ingredients up to 3 days ahead—just store the dough in an airtight container. When you're ready to bake, simply roll the chilled dough balls in the lemon sugar and pop them into the oven. The cookies will turn out just as delicious with their delightful texture and unique flavor!

Rosemary Cookies with Lemon Sugar Variations

Feel free to explore these exciting alternatives to make the recipe truly your own!

  • Citrus Swap: Use orange or lime zest instead of lemon for a delicious twist.

  • Chocolate Chippers: Add a handful of white chocolate chips for a creamy contrast that pairs beautifully with rosemary.

  • Scone Style: Transform the cookies into scones by adding cream and baking powder for a more biscuit-like texture. They'd be fantastic for brunch!

  • Nutty Delight: Mix in chopped nuts like almonds or walnuts to introduce a lovely crunch and earthy flavor.

  • Herb Medley: Incorporate a mix of fresh herbs, such as thyme or basil, alongside rosemary for a unique garden flavor.

  • Sweet Spices: Add a pinch of cinnamon or cardamom for warmth and complexity.

  • Savory Spice: For an unexpected kick, sprinkle in a touch of black pepper; it enhances the herbaceous notes beautifully.

  • Pie-Inspired: Crumble in some raspberry or lemon zest jam to the dough for a pie-inspired treat that bursts with fruity flavor.

These variations allow you to take a classic recipe and personalize it to suit your own palate, just like you would with my Lemon Chicken Soup or Eggnog Cookies Soft for that extra special touch. Enjoy experimenting!

What to Serve with Rosemary Cookies with Lemon Sugar

Enjoy these delightful cookies alongside offerings that enhance their unique herbaceous and citrusy flavors!

  • Refreshing Herbal Tea: A cup of chamomile or mint tea provides a light and soothing contrast, enhancing the cookies' herbal notes.
  • Zesty Lemonade: Bright and tangy, a chilled glass of lemonade complements the lemon sugar coating, creating a refreshing palate cleanse.
  • Savory Cheese Plate: Pair with soft cheeses like goat cheese or brie, which balance the sweetness and create an exquisite flavor harmony.
  • Mixed Berries: A simple bowl of fresh strawberries, blueberries, and raspberries enhances the cookie experience with juicy freshness and natural sweetness.
  • Light Meringues: These airy desserts are a perfect counterpart, adding a delicate crunch that will make every bite feel like a fancy affair.
  • Vanilla Ice Cream: A scoop of creamy vanilla ice cream serves as a delightful contrast in temperature and richness, making for an indulgent treat.
  • Dark Chocolate Drizzle: A light drizzle of dark chocolate over the cookies creates a lovely balance, with the bittersweet flavor complementing the rosemary beautifully.
  • Sparkling Water with Citrus: A glass of fizzy water infused with lemon or lime gives a refreshing sip that cleanses the palate perfectly between bites.
  • Chocolate-Covered Almonds: Their nutty notes and rich chocolate add a delicious textural difference, while their crunch nicely contrasts with the chewy cookies.

Expert Tips for Rosemary Cookies with Lemon Sugar

  • Choose the Right Butter: Always use unsalted butter for these rosemary cookies; it helps to balance the flavors without unwanted saltiness.
  • Cool Brown Butter: After browning, let the butter chill properly to create a perfect cookie texture—too warm, and they'll spread too much!
  • Measure Flour Correctly: Spoon and level your flour when measuring to avoid dense cookies. An accurate measurement is key for soft and chewy results.
  • Refrigerate Dough: Chilling the dough before baking is essential to prevent spreading. Aim for at least 30 minutes in the fridge!
  • Lemon Zest Importance: Using fresh lemon zest in your sugar really elevates the flavor; don’t skip this step, as it infuses every bite of the cookies with bright zest.
  • Taste Test: Feel free to taste a bit of the dough before baking, but remember that raw eggs are involved. This will help you adjust flavors before they bake!

Storage Tips for Rosemary Cookies with Lemon Sugar

Room Temperature: Store cookies in an airtight container at room temperature for up to 5-7 days to maintain their softness and flavor.

Fridge: If you prefer a cooler treat, you can keep the cookies in the fridge for up to 10 days; just ensure they’re well-wrapped to prevent drying out.

Freezer: For longer storage, freeze the cookies in a single layer, then transfer them to a freezer-safe container for up to 2-3 months.

Thawing: When you’re ready to enjoy your frozen rosemary cookies with lemon sugar, let them thaw at room temperature for 30-60 minutes for a delicious, fresh taste!

Rosemary Cookies with Lemon Sugar Recipe FAQs

How do I choose the best fresh rosemary?
Absolutely! When selecting fresh rosemary, look for vibrant green sprigs that are fragrant and free of dark spots. Avoid any that appear dry or wilted. Fresh, aromatic rosemary will enhance the flavor of your cookies wonderfully!

What is the best way to store freshly baked rosemary cookies?
Very! To keep your rosemary cookies with lemon sugar fresh, store them in an airtight container at room temperature for up to 5-7 days. Ensure they’re completely cool before sealing to maintain their delightful softness and flavor.

Can I freeze rosemary cookies, and how do I do it properly?
Of course! To freeze your cookies, first, arrange them in a single layer on a baking sheet and place them in the freezer until firm. Once hardened, transfer them to a freezer-safe container or zip-top bag, separating layers with parchment paper. They can be stored this way for up to 2-3 months. When ready to enjoy, simply let them thaw at room temperature for 30-60 minutes.

My cookie dough turned out too sticky; what can I do?
Oh no! If your dough is too sticky, it’s likely that the butter was too warm or there was insufficient flour. To remedy this, add a tablespoon of flour at a time until the dough reaches the desired consistency. Chilling the dough for at least 30 minutes can also help to firm it up for easier handling.

Are there any allergy considerations with this recipe?
Certainly! This recipe includes common allergens such as eggs and gluten (from all-purpose flour). If you have a gluten intolerance, consider using a gluten-free flour blend designed for baking, and keep in mind that you can substitute eggs with flax eggs or chia eggs for egg-free versions. Always consult with your doctor for specific dietary needs.

Can I use dried rosemary instead of fresh, and if so, how much?
Yes, you can! Use half the amount of dried rosemary compared to fresh. So if the recipe calls for 2 teaspoons of fresh rosemary, use just 1 teaspoon of dried. Just like magic, it still brings that lovely herbal note to your cookies!

Rosemary Cookies with Lemon Sugar

Rosemary Cookies with Lemon Sugar: A Fresh Twist on Treats

These Rosemary Cookies with Lemon Sugar offer a unique flavor fusion of savory and sweet in a delightful cookie.
Print Recipe Pin Recipe
Prep Time 45 minutes mins
Cook Time 12 minutes mins
Chilling Time 30 minutes mins
Total Time 1 hour hr 27 minutes mins
Servings: 12 cookies
Course: Dessert
Cuisine: American
Calories: 150
Ingredients Equipment Method Nutrition Notes

Ingredients
  

For the Cookies
  • 1 cup + 2 tbsp cups Unsalted Butter Adds richness and moisture.
  • 1 sprig and 2 tsp sprig Fresh Rosemary Substitute dried rosemary at half amount if fresh isn't available.
  • 1 ⅓ cups + ½ cup cups White Granulated Sugar Provides sweetness; coconut sugar can be an alternative.
  • 1 whole + 1 large eggs Egg Ensure eggs are at room temperature.
  • 1 teaspoon Vanilla Extract Enhances overall flavor.
  • 2 ½ cups All-Purpose Flour Essential for structure; spooned and leveled.
  • 1 teaspoon Baking Soda Helps create a desirable rise.
  • ½ teaspoon Baking Powder Ensures light and airy texture.
  • ¼ teaspoon Salt Balances sweetness.
  • 2 teaspoons Lemon Zest Provides a burst of citrus brightness.
For the Lemon Sugar Coating
  • ½ cup cups White Granulated Sugar Infused with lemon zest.
  • Lemon Zest Lemon Zest Same as before; infuses sugar with citrus notes.

Equipment

  • Medium saucepan
  • large mixing bowl
  • Electric mixer
  • Parchment Paper
  • Ice cream scoop

Method
 

Step-by-Step Instructions
  1. In a medium saucepan over medium heat, melt 1 cup and 2 tablespoons of unsalted butter, add a sprig of rosemary and cook until it turns deep golden brown, about 5-7 minutes. Remove rosemary and let cool for 30-45 minutes in the refrigerator.
  2. In a large mixing bowl, combine the cooled brown butter with 1 ⅓ cups of granulated sugar and beat for 2 minutes until light and fluffy. Then add in one large egg, one egg yolk, and 1 teaspoon of vanilla extract, beating for an additional minute.
  3. In a separate bowl, sift together 2 ½ cups of all-purpose flour, 1 teaspoon of baking soda, ½ teaspoon of baking powder, and ¼ teaspoon of salt. Stir in 2 teaspoons of chopped fresh rosemary. Gradually add this to the wet ingredients until just combined.
  4. Using a 1 ¼ oz ice cream scoop, portion the dough onto a parchment-lined cookie sheet, cover with plastic wrap, and refrigerate for at least 30 minutes.
  5. In a small bowl, mix together the zest of one lemon with ½ cup of white granulated sugar. Rub the lemon zest into the sugar until fragrant. Set aside.
  6. Preheat your oven to 350°F (175°C) and line a baking sheet with parchment paper. Roll each dough ball in the lemon sugar and arrange them on the sheet about 2 inches apart. Bake for 12 minutes until edges are lightly golden. Cool completely on a wire rack.

Nutrition

Serving: 1cookieCalories: 150kcalCarbohydrates: 18gProtein: 2gFat: 8gSaturated Fat: 5gPolyunsaturated Fat: 0.5gMonounsaturated Fat: 2.5gCholesterol: 20mgSodium: 50mgPotassium: 30mgSugar: 10gVitamin A: 300IUVitamin C: 1mgCalcium: 15mgIron: 0.5mg

Notes

Store cookies in an airtight container to maintain softness for up to 5-7 days. Refrigerate for up to 10 days, or freeze for 2-3 months.

Tried this recipe?

Let us know how it was!

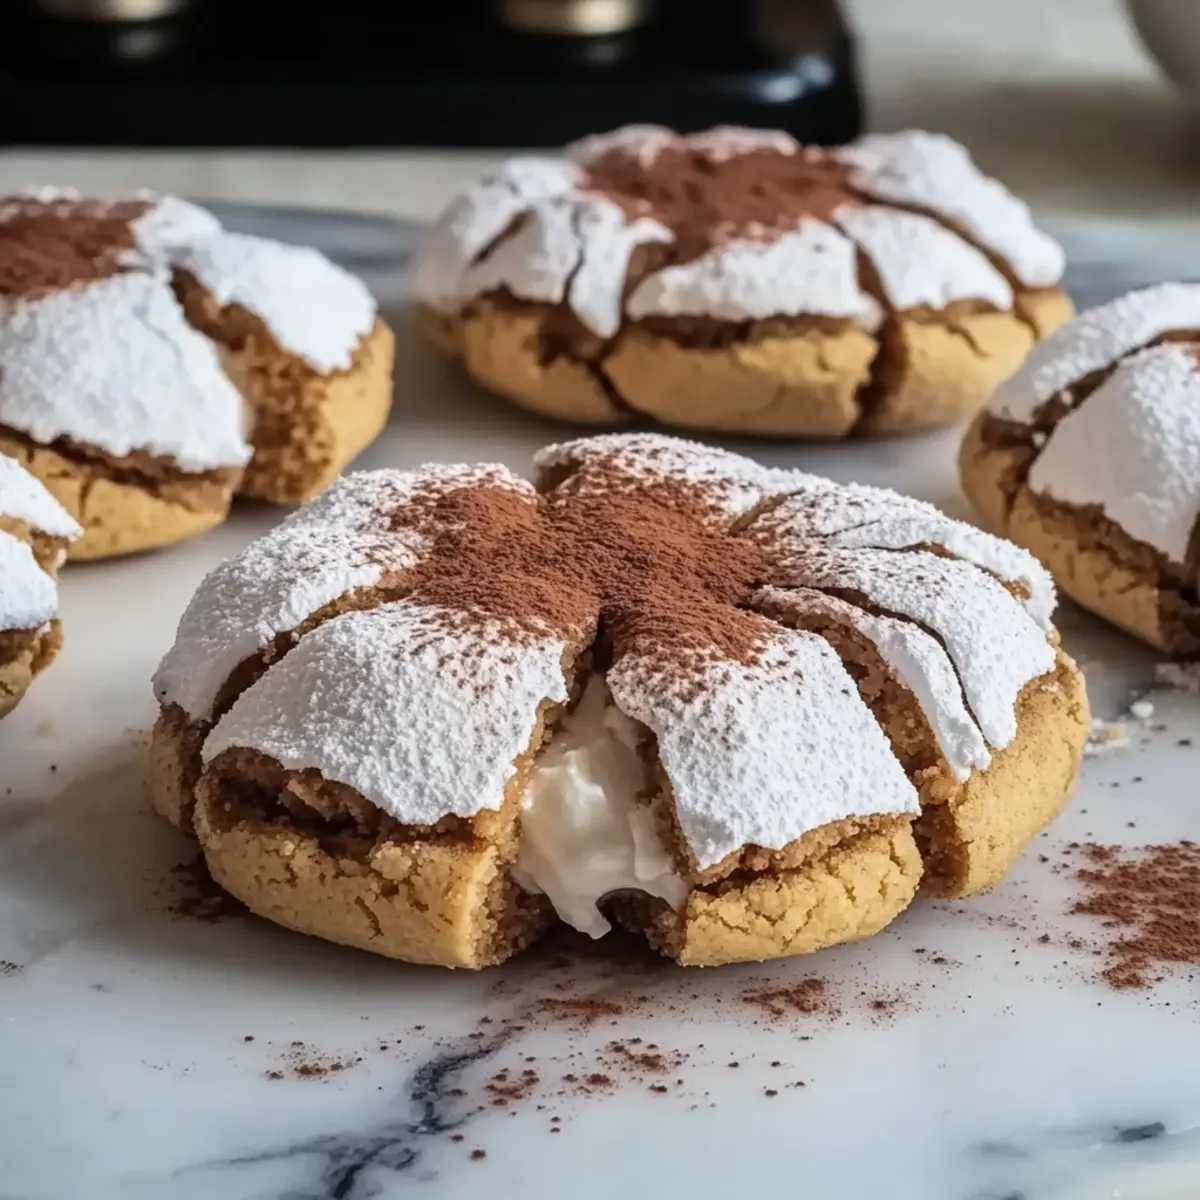
Tiramisu Crinkle Cookies that Will Wow Your Taste Buds

January 16, 2026 by Grace Snow Leave a Comment

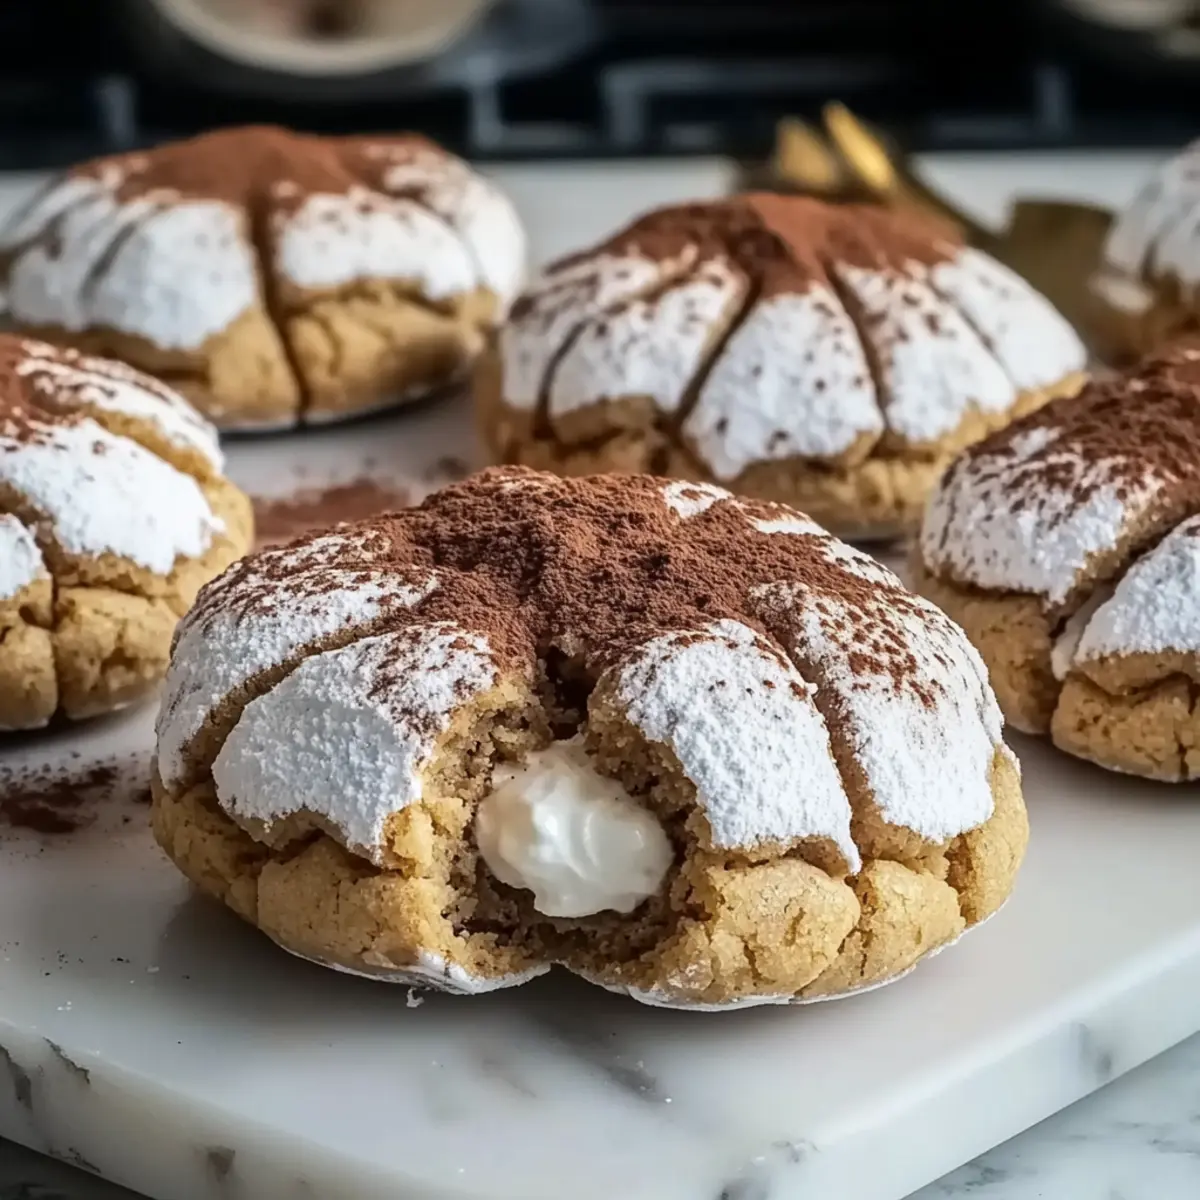
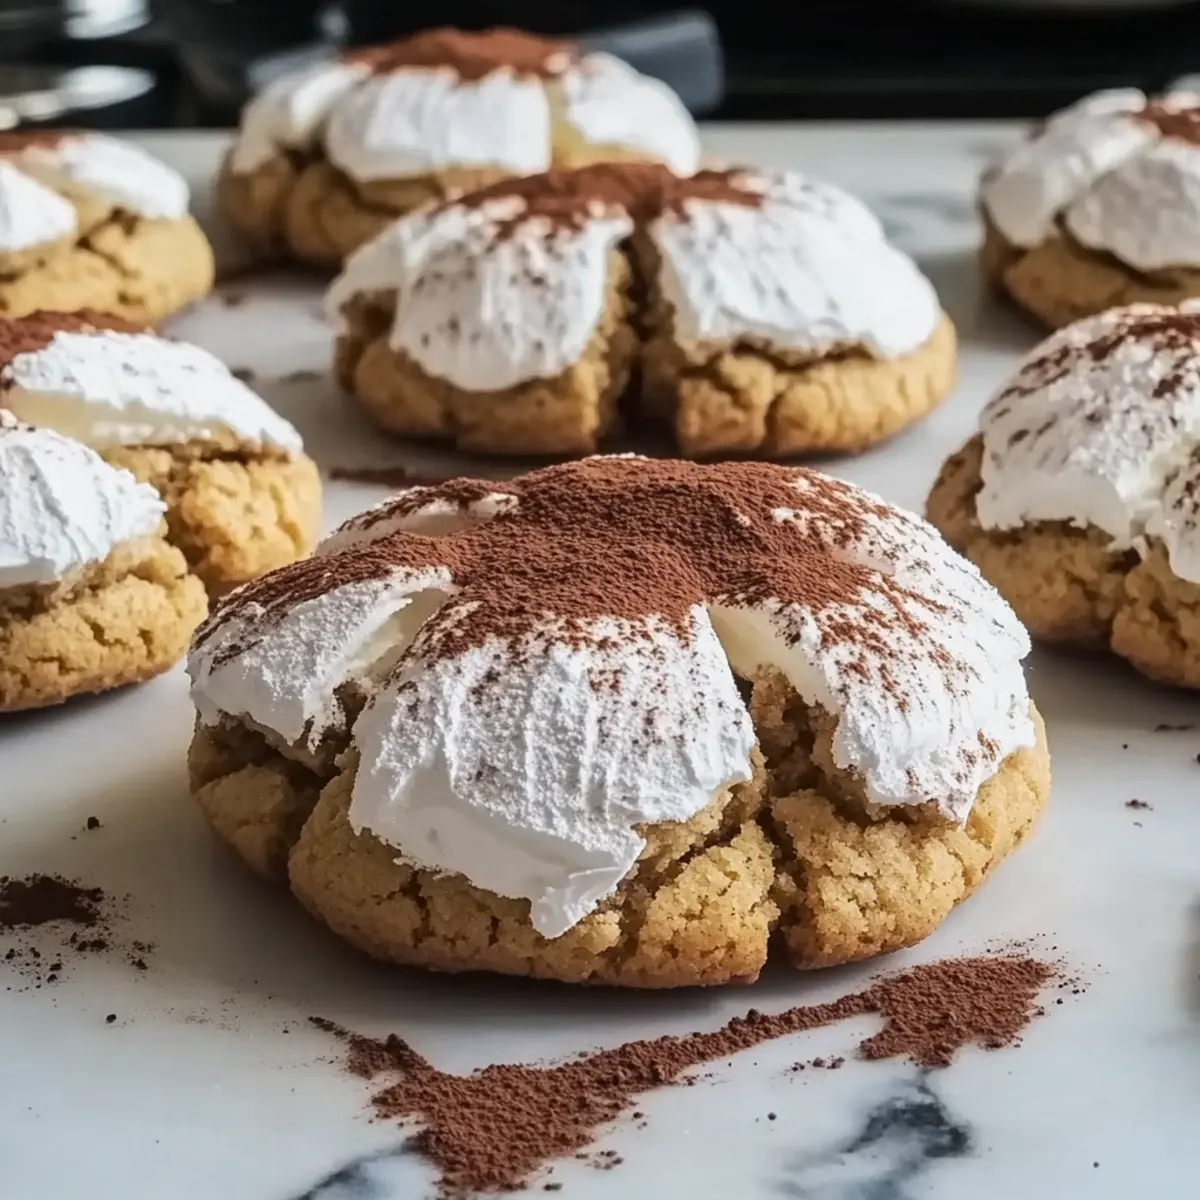
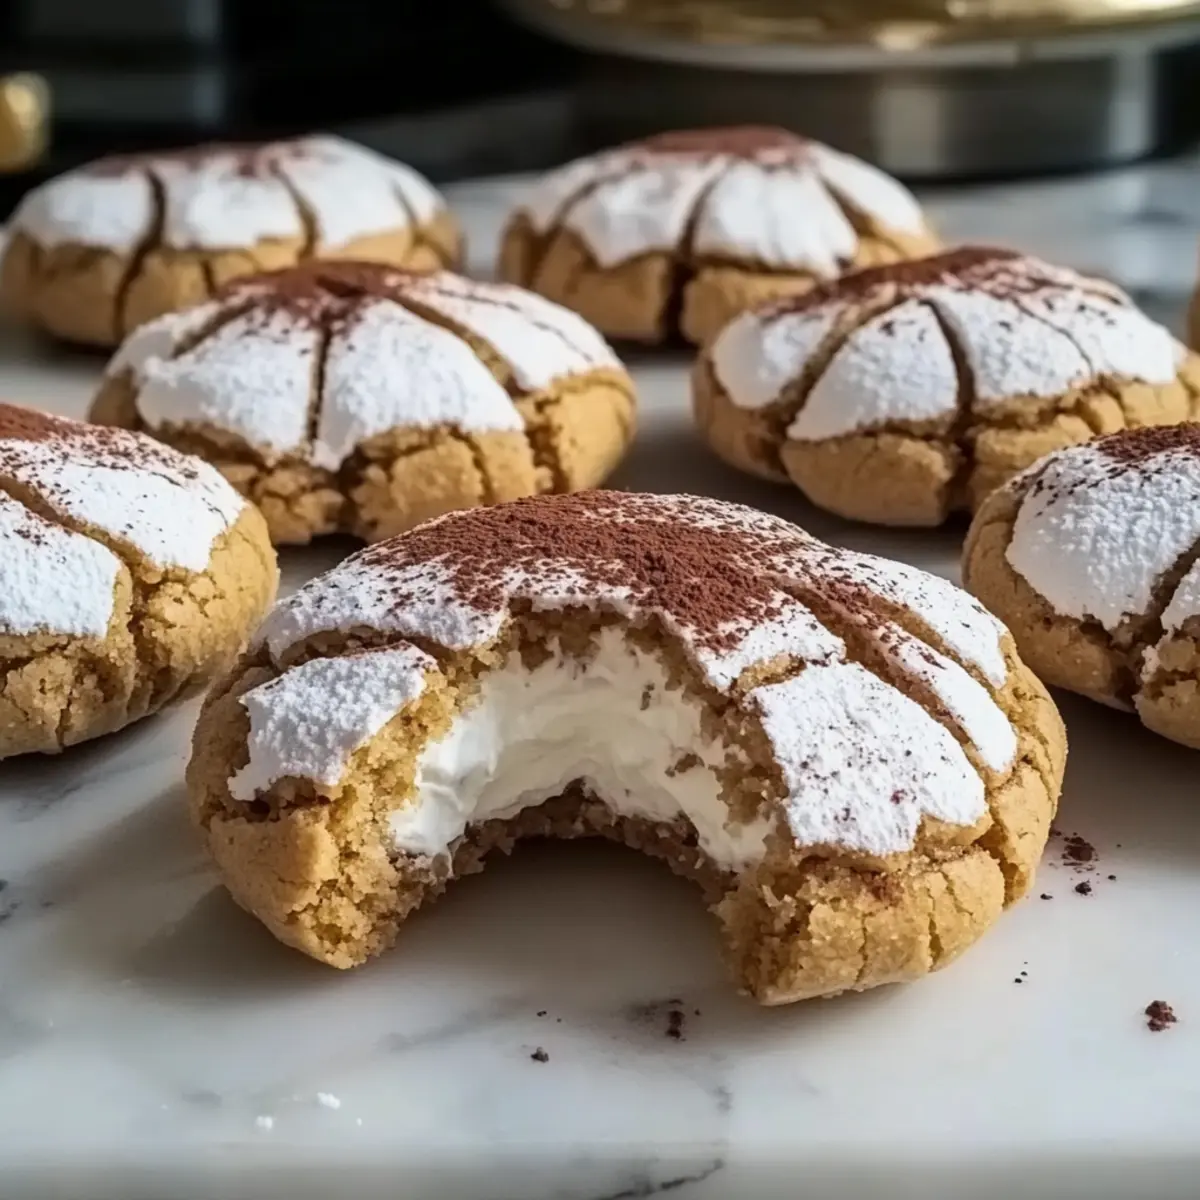
There’s a certain magic in the air during the holidays—a scent wafting through the kitchen that makes your heart swell with joy. These Tiramisu Crinkle Cookies capture that enchantment beautifully, blending the rich and aromatic flavors of traditional tiramisu into a delightful cookie form. With their soft, chewy centers and charming powdered sugar crinkles, they are not only a show-stopping addition to your holiday dessert platter but also an indulgence that’s surprisingly quick to whip up. Whether you're sitting down with a warm cup of coffee or sharing them with friends and family, these cookies promise to bring smiles and satisfy cravings. Intrigued? Let’s dive into the sweet world of these irresistible treats!

Why Are These Cookies So Irresistible?

Decadent Flavor: The rich combination of espresso and mascarpone brings a taste of Italy that you won’t want to miss.

Impressive Visuals: Their crinkled tops and snowy powdered sugar make these cookies a showpiece on any platter.

Quick to Make: In just a few simple steps, you can whip up these delightful cookies, saving you time for all your festive activities.

Perfect Pairing: Enjoy them with a warm cup of coffee or as part of a dessert tray alongside Eggnog Cookies Soft.

Year-Round Appeal: These cookies aren't just for the holidays; they’re perfect for any gathering, ensuring all guests leave satisfied!

Tiramisu Crinkle Cookies Ingredients

For the Cookies

  • All-Purpose Flour – Provides structure; be mindful of the flour measurement to avoid cookies that spread too much or too little.
  • Granulated Sugar – Sweetens the dough without overshadowing the filling's flavors.
  • Powdered Sugar – Essential for rolling the cookies and achieving that signature crinkle effect.
  • Unsalted Butter – Creates a soft texture and allows for even cracking during baking; soften to room temperature for best results.
  • Eggs – Vital for binding the ingredients; make sure they are at room temperature for easy incorporation.
  • Salt – Enhances the cookie's flavors, balancing the sweetness perfectly.
  • Espresso Powder – Infuses the cookies with the iconic tiramisu flavor; opt for high-quality espresso for the richest taste.

For the Filling

  • Mascarpone Cheese – The star of the filling; ensure it’s at room temperature for smooth blending.
  • Heavy Cream – Helps achieve a light, airy filling; whip until glossy to avoid any graininess.
  • Powdered Sugar – Sweetens the filling; mix until just combined for the best texture.

For the Dusting

  • Cocoa Powder – Adds a beautiful finish and a hint of bitterness that balances the sweetness; dust generously!

Step‑by‑Step Instructions for Tiramisu Crinkle Cookies

Step 1: Dough Preparation
In a large mixing bowl, cream together the unsalted butter and granulated sugar until light and fluffy, about 3-5 minutes. Beat in the eggs one at a time, fully incorporating each egg before adding the next. Stir in a splash of vanilla extract for extra flavor. Gradually add the all-purpose flour, espresso powder, and salt until just combined, ensuring a rich, smooth dough for your tiramisu crinkle cookies.

Step 2: Chill Dough
Once the dough is well mixed, cover the bowl with plastic wrap and refrigerate for at least 30 minutes. This chilling step is crucial as it firms up the dough, making it easier to handle and ensuring that your cookies maintain their shape while baking. While chilling, take a moment to preheat your oven to 175°C (350°F) to prepare for the next steps.

Step 3: Form Cookies
After the dough has chilled, remove it from the refrigerator and scoop out portions using a tablespoon or cookie scoop. Roll each portion into a ball and then generously coat it with powdered sugar; this step creates the signature crinkle effect as the cookies bake. Arrange the powdered sugar-coated balls on a lined baking sheet, keeping them spaced apart for even baking.

Step 4: Bake
Place the baking sheet in your preheated oven and bake the tiramisu crinkle cookies for 10-12 minutes. Keep an eye on them; the edges should be set, and the tops will crack beautifully. Once baked, remove them from the oven and allow them to cool on the baking sheet for a moment before transferring to a wire rack to cool completely.

Step 5: Create Filling Wells
While the cookies are still warm, gently press the center of each cookie with the back of a spoon to create a small well. This step is important as it will hold the creamy mascarpone filling and enhance the overall presentation of your tiramisu crinkle cookies. Be careful not to press too hard to avoid breaking the cookie.

Step 6: Filling Preparation
In a mixing bowl, combine room temperature mascarpone cheese, heavy cream, and a bit of powdered sugar. Using a hand mixer, whip them together until the mixture becomes glossy and smooth, taking care not to overmix to maintain a light texture. This creamy filling will complement the rich flavors of the tiramisu crinkle cookies perfectly.

Step 7: Fill Cookies
Using a piping bag or a spoon, fill each well of the cookies with the mascarpone mixture, ensuring an even distribution. For an added touch, lightly dust the filled cookies with cocoa powder for a classic tiramisu finish. Don’t rush this step; a little care will make your cookies look stunning and inviting!

Step 8: Chill and Serve
To set the filling slightly, place the filled tiramisu crinkle cookies in the refrigerator for about 15-20 minutes before serving. This chilling time helps the flavors meld and firm up the filling, making each bite even more delightful. Once chilled, they’re ready to serve and share with family or friends—enjoy these irresistible treats!

What to Serve with Tiramisu Crinkle Cookies

These delightful treats are sure to be a crowd-pleaser, especially when teamed up with the perfect accompaniments that enhance their rich, coffee-infused charm.

  • Rich Espresso: A cup of freshly brewed espresso not only complements the tiramisu flavors but also enhances the cookies' coffee notes.

  • Vanilla Ice Cream: The creamy sweetness of vanilla ice cream contrasts beautifully with the chewy texture of the cookies, creating a delightful indulgence.

  • Chocolate Fondue: Dip these cookies into warm, melted chocolate for a luxurious treat that takes your dessert game to a whole new level.

  • Whipped Cream: A dollop of lightly sweetened whipped cream adds a lightness that balances the dense, rich flavors of the cookies.

  • Honey Almond Biscotti: Serve alongside these crunchy cookies for a delightful textural contrast, perfect for dipping in coffee or tea.

  • Hazelnut Liqueur: A small glass of hazelnut liqueur pairs wonderfully, enhancing the nutty undertones in the tiramisu.

  • Mini Fruit Tarts: These colorful tartlets bring a refreshing, fruity note, offering a perfect balance of sweetness and acidity that complements the cookies.

  • Spiced Chai Latte: Its aromatic spices intertwine beautifully with the coffee flavor of the cookies, creating a cozy pairing for chilly evenings.

Tiramisu Crinkle Cookies Variations

Feel free to get creative and make these delightful cookies your own—each variation will elevate your cookie game!

  • Stronger Espresso: Increase espresso powder for a bolder coffee flavor that truly sings. Perfect for coffee lovers!
  • Tiramisu Brownies: For a denser treat, make a thicker dough, skip the filling, and dust with cocoa after baking. A brownie twist that packs a punch!
  • Cream Cheese Swap: Replace mascarpone with cream cheese for a tangy spin; just remember it may alter the cookie's texture.
  • Add Chocolate Chips: Mix in dark chocolate chips to the dough for an extra layer of sweetness that complements the coffee notes beautifully.
  • Nutty Delight: Stir in chopped hazelnuts for a delightful crunch that perfectly echoes traditional tiramisu flavors.
  • Spiced Up: Stir in a pinch of cinnamon or nutmeg to the dough for cozy holiday spices that warm the heart.
  • Dairy-Free Option: Replace heavy cream and mascarpone with dairy-free alternatives to cater to lactose-intolerant friends or family.
  • Gluten-Free Variation: Use a gluten-free all-purpose flour blend to make these cookies gluten-free while still keeping the delicious taste!

For a distinct twist, try pairing these cookies with some delightful Thumbprint Cookies Melt on your dessert platter for even more options!

Expert Tips for Tiramisu Crinkle Cookies

  • Room Temperature Essentials: Ensure your mascarpone and eggs are at room temperature for smoother mixing. Cold ingredients can lead to lumps in your filling.

  • Chilling is Key: Don’t skip refrigerating the dough! This step helps the cookies hold their shape during baking, preventing excessive spreading.

  • Watch Your Baking Time: Keep an eye on the cookies; they should have set edges and cracked tops while remaining soft inside. Overbaking can lead to dryness.

  • Perfect Filling Technique: When filling, avoid overmixing the mascarpone mixture. A glossy, slightly airy texture enhances the experience of these tiramisu crinkle cookies.

  • Adjusting Flavor: For a more intense coffee flavor, feel free to up the espresso powder. Just remember, variations can affect the cookie's final texture.

Storage Tips for Tiramisu Crinkle Cookies

  • Room Temperature: Unfilled cookies can be stored at room temperature for up to 5 days. Keep them in an airtight container to maintain freshness.

  • Fridge: Filled tiramisu crinkle cookies are best consumed within 2 days and should be stored in the refrigerator in an airtight container to preserve the creamy filling.

  • Freezer: For longer storage, freeze unfilled cookies for up to one month. Wrap them tightly in plastic wrap, then place in a freezer bag for easy access later.

  • Reheating: To enjoy the cookies warm, gently microwave unfilled cookies for 10-15 seconds. Avoid overheating to keep the textures just right.

Make Ahead Options

These Tiramisu Crinkle Cookies are perfect for busy home cooks looking to save time without sacrificing flavor! You can prepare the cookie dough up to 24 hours in advance by mixing and chilling it in the refrigerator. Simply roll the chilled dough into balls and coat them in powdered sugar just before baking. Additionally, you can whip up the mascarpone filling up to 3 days ahead and store it in an airtight container in the fridge. When you're ready to serve, fill each cooled cookie with the mascarpone mixture and chill for 15-20 minutes for the ideal texture. This make-ahead approach ensures your Tiramisu Crinkle Cookies stay just as delicious while reducing your prep time on busy days!

Tiramisu Crinkle Cookies Recipe FAQs

What should I look for when selecting espresso powder?
Absolutely! For the best flavor in your Tiramisu Crinkle Cookies, choose a high-quality espresso powder. Look for finely ground options that are aromatic and rich, as this will provide the cookies with the signature coffee flavor. If you're in a pinch, you can substitute it with strong brewed coffee, though it may affect the dough's texture slightly.

How should I store leftover filled cookies?
Very important! Filled tiramisu crinkle cookies should be stored in the refrigerator and consumed within 2 days for optimal freshness. Place them in an airtight container to keep the creamy filling from becoming runny and to maintain their divine flavor. If you have unfilled cookies left, you can keep them at room temperature for up to 5 days.

Can I freeze unfilled Tiramisu Crinkle Cookies?
Certainly! Freezing is a fantastic option for these cookies. To freeze, simply let the unfilled cookies cool completely. Then, wrap each one tightly in plastic wrap and place them in a freezer-safe bag. They can be stored in the freezer for up to one month. When you’re ready to enjoy them, just let them thaw at room temperature or microwave briefly for a fresh-baked taste.

Why did my cookies not crinkle properly?
Oh no! If your Tiramisu Crinkle Cookies didn’t crinkle as expected, it could be due to a few reasons. Ensure your dough has enough chilling time—chilling for at least 30 minutes helps prevent excessive spreading. Also, coat the cookie balls generously in powdered sugar before baking; this creates the beautiful crinkle effect. Lastly, keep an eye on your baking time; pulling them out just as they begin to crack is key!

Is there a way to make these cookies dairy-free or suitable for my allergies?
Definitely! For a dairy-free version of Tiramisu Crinkle Cookies, you can substitute mascarpone cheese with a dairy-free cream cheese or a whipped coconut cream. Just ensure that all other ingredients, such as the butter, are dairy-free alternatives. Additionally, always check for allergens in your espresso powder and sugar brands to ensure they meet your dietary needs. This way, everyone can enjoy these delightful treats!

Tiramisu Crinkle Cookies

Tiramisu Crinkle Cookies that Will Wow Your Taste Buds

Experience the joy of Tiramisu Crinkle Cookies, a delightful blend of traditional tiramisu flavors in cookie form.
Print Recipe Pin Recipe
Prep Time 30 minutes mins
Cook Time 12 minutes mins
Chill Time 30 minutes mins
Total Time 1 hour hr 12 minutes mins
Servings: 24 cookies
Course: Dessert
Cuisine: Italian
Calories: 150
Ingredients Equipment Method Nutrition Notes

Ingredients
  

For the Cookies
  • 2 cups All-Purpose Flour Be mindful of the flour measurement to avoid cookies that spread too much or too little.
  • 1 cup Granulated Sugar Sweetens the dough without overshadowing the filling's flavors.
  • 1 cup Powdered Sugar Essential for rolling the cookies and achieving that signature crinkle effect.
  • 1/2 cup Unsalted Butter Creates a soft texture; soften to room temperature for best results.
  • 2 large Eggs Ensure they are at room temperature for easy incorporation.
  • 1/4 teaspoon Salt Enhances the cookie's flavors, balancing the sweetness perfectly.
  • 2 tablespoons Espresso Powder Opt for high-quality espresso for the richest taste.
For the Filling
  • 8 oz Mascarpone Cheese Ensure it’s at room temperature for smooth blending.
  • 1/2 cup Heavy Cream Helps achieve a light, airy filling.
  • 1/4 cup Powdered Sugar Mix until just combined for the best texture.
For the Dusting
  • 1 tablespoon Cocoa Powder Dust generously for a hint of bitterness that balances sweetness.

Equipment

  • Mixing Bowl
  • Baking Sheet
  • piping bag
  • Cookie Scoop

Method
 

Step‑by‑Step Instructions
  1. In a large mixing bowl, cream together the unsalted butter and granulated sugar until light and fluffy, about 3-5 minutes. Beat in the eggs one at a time.
  2. Stir in a splash of vanilla extract for extra flavor. Gradually add the all-purpose flour, espresso powder, and salt until just combined.
  3. Cover the bowl with plastic wrap and refrigerate for at least 30 minutes.
  4. Preheat your oven to 175°C (350°F) while the dough chills.
  5. Remove the dough from the refrigerator, scoop portions, and roll into balls. Coat them with powdered sugar.
  6. Arrange the balls on a lined baking sheet, spaced apart.
  7. Bake for 10-12 minutes until edges are set and tops crack.
  8. Cool briefly on the baking sheet before transferring to a wire rack.
  9. While warm, gently press the center of each cookie to create a well.
  10. In a mixing bowl, combine mascarpone, heavy cream, and powdered sugar, whipping until glossy and smooth.
  11. Fill each well with the mascarpone mixture and lightly dust with cocoa powder.
  12. Chill in the refrigerator for about 15-20 minutes before serving.

Nutrition

Serving: 1cookieCalories: 150kcalCarbohydrates: 20gProtein: 2gFat: 7gSaturated Fat: 4gPolyunsaturated Fat: 1gMonounsaturated Fat: 2gCholesterol: 30mgSodium: 50mgPotassium: 50mgSugar: 10gVitamin A: 200IUCalcium: 40mgIron: 0.5mg

Notes

Ensure your ingredients are at room temperature for best results. Chill dough to maintain shape during baking.

Tried this recipe?

Let us know how it was!

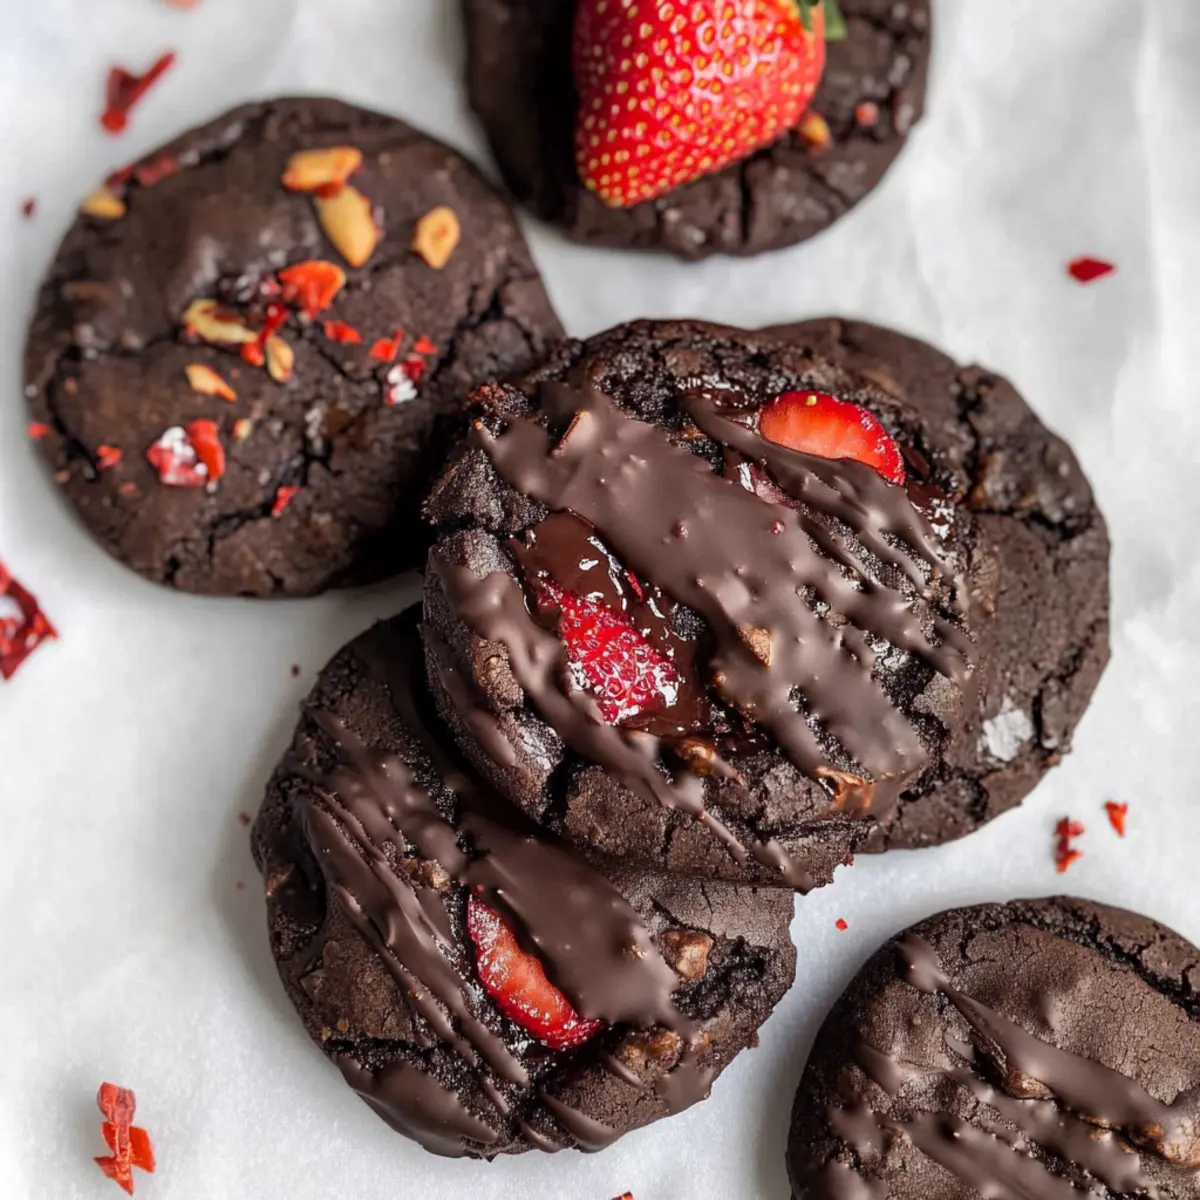
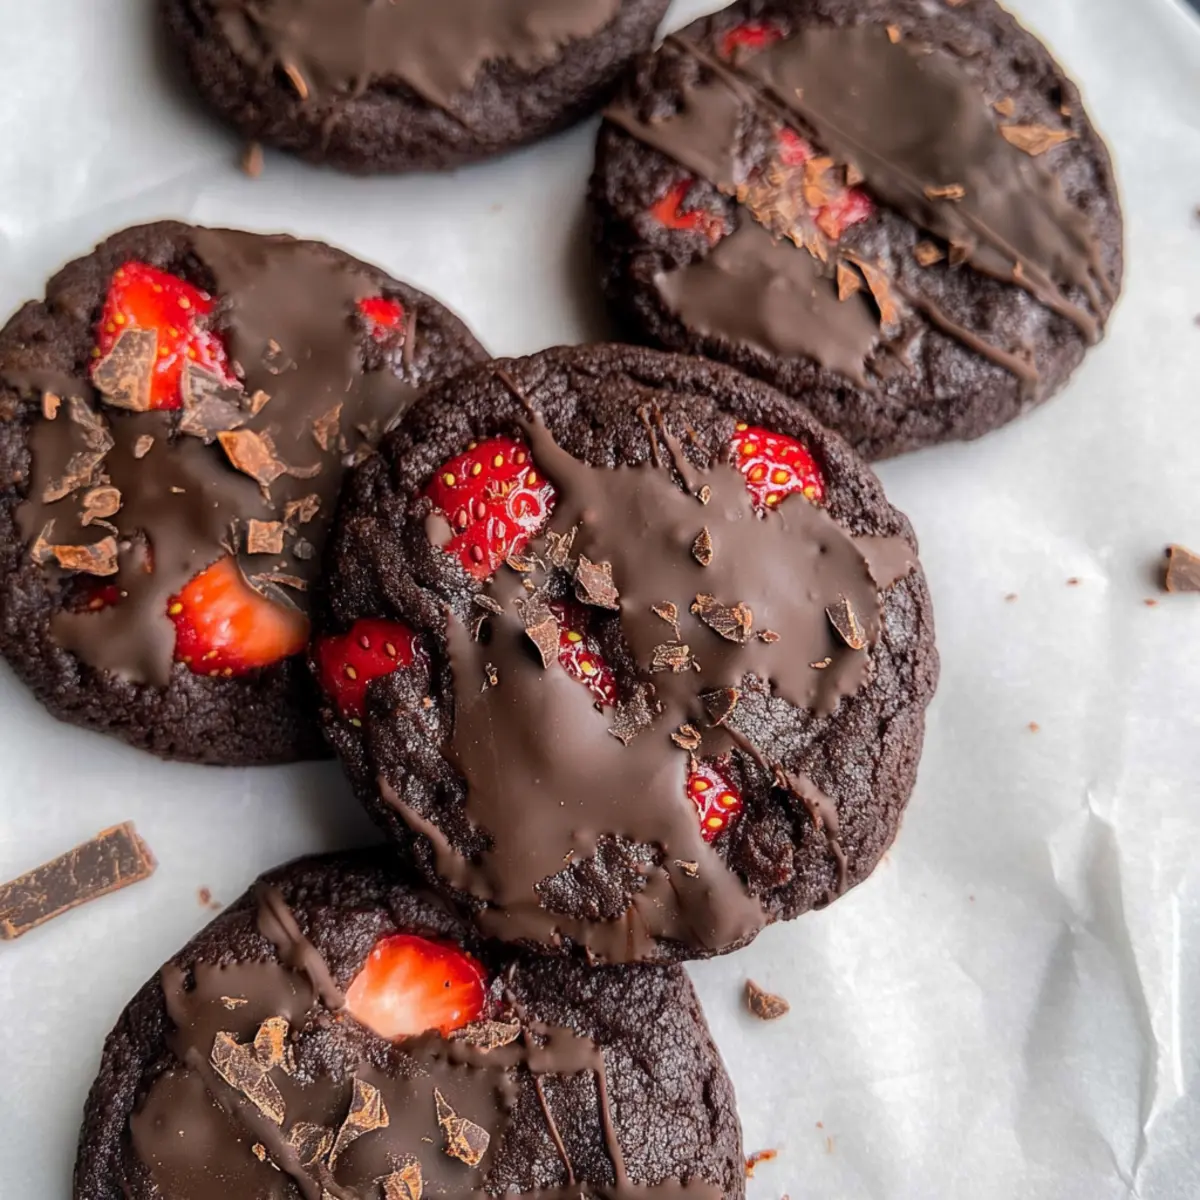
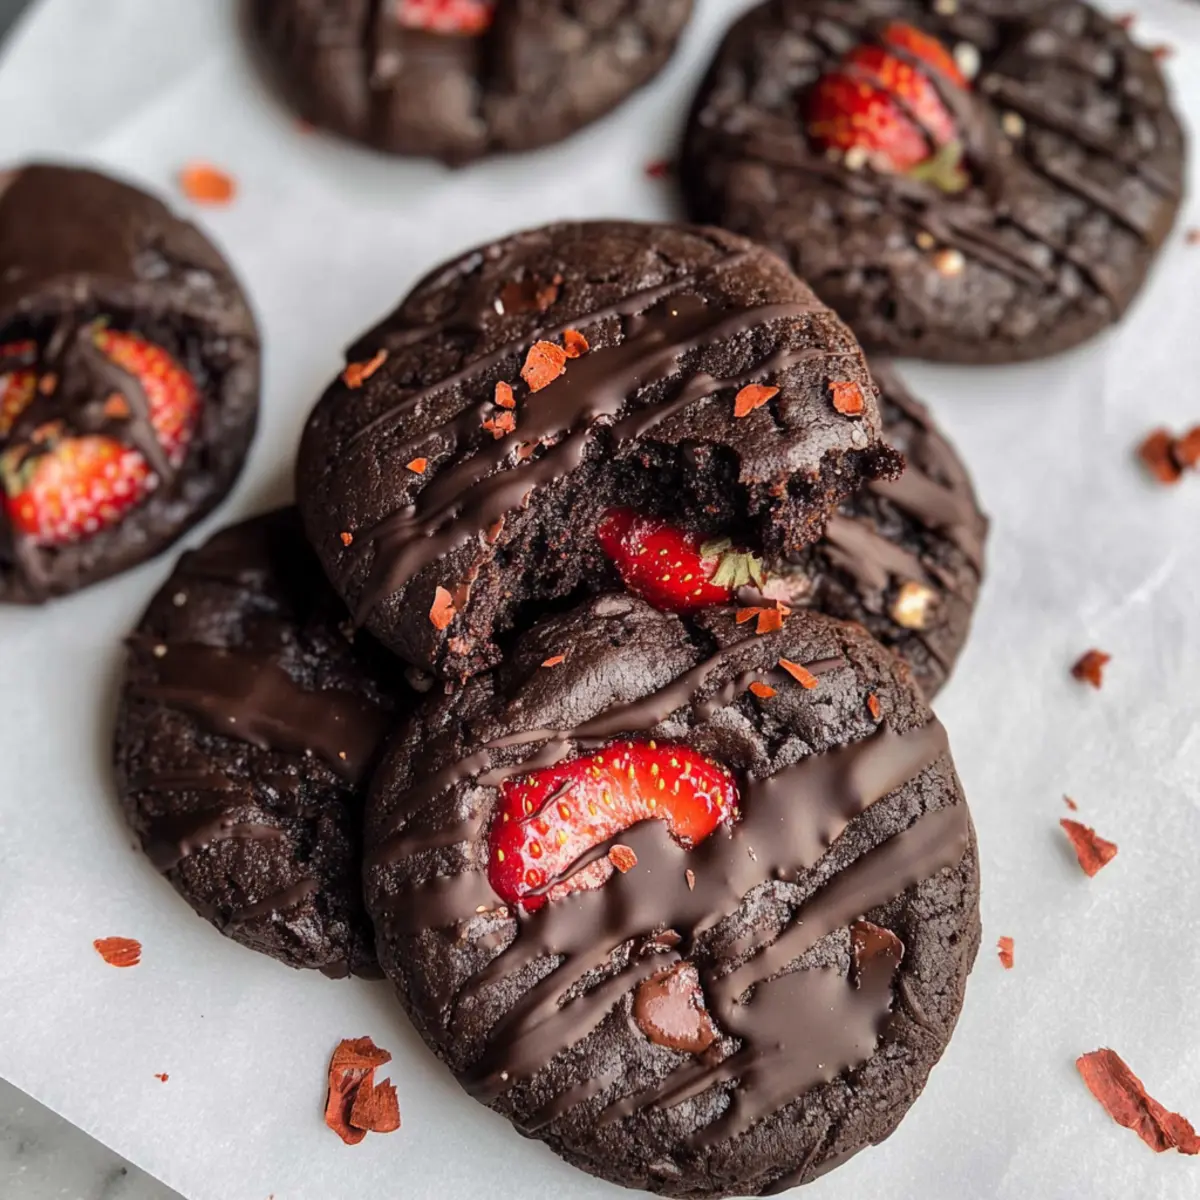
Irresistible Chocolate Covered Strawberry Cookies for Lovers

January 16, 2026 by Grace Snow Leave a Comment

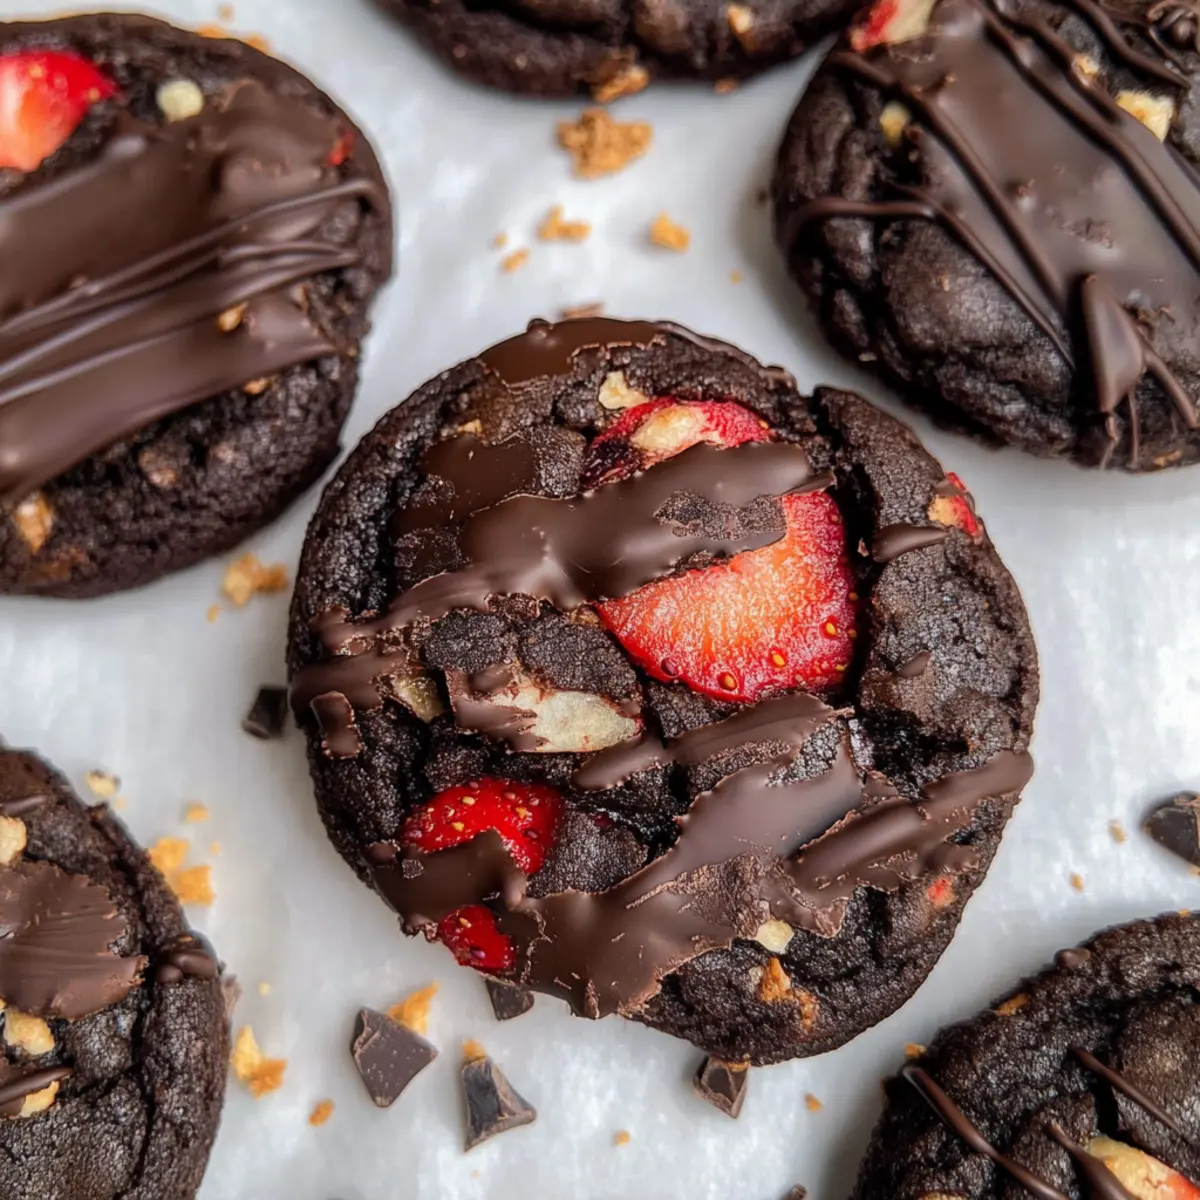
As I sank my teeth into a warm cookie fresh from the oven, I was immediately transported to that magical moment of biting into a chocolate-covered strawberry—a delightful combination that feels like a hug for your taste buds. Today, I’m excited to share my recipe for Fudgy Chocolate Covered Strawberry Cookies, a decadent dessert that strikes the perfect balance between rich chocolate and tangy strawberry goodness. Not only are these cookies easy to whip up, but their uniquely chewy texture paired with an irresistible chocolate coating makes them perfect for special occasions—especially Valentine's Day! Whether you're celebrating love or simply indulging yourself, these cookies are guaranteed to bring joy to any gathering. What special moment will you create with these irresistible treats?

Why are these cookies a must-try?

Decadent Flavor: Rich chocolate and sweet strawberry flavors combine flawlessly, creating an indulgent treat that’s sure to impress your taste buds.

Chewy Texture: Soft on the inside and crispy on the outside, these cookies offer the perfect balance of textures that you won't want to miss.

Quick and Easy: Time-saving preparation means you can have these delectable cookies baked and enjoyed in no time—ideal for last-minute events.

Versatile & Fun: Customize with alternative freeze-dried fruits or toppings, making them a crowd-pleaser for any occasion, from Valentine’s Day to casual gatherings.

Memorable Presentation: Chocolate-dipped with a drizzle on top, they’re not just delicious but also visually stunning, making them the perfect centerpiece for your dessert table.

Elevate your dessert game and try these alongside delightful options like Matcha Cookies Soft or the holiday favorite Eggnog Cookies Soft.

Chocolate Covered Strawberry Cookies Ingredients

For the Cookies

  • Unsalted Butter – Adds moisture and richness; you can use salted butter but reduce any additional salt.
  • Light Brown Sugar – Sweetens the cookies with a hint of caramel flavor; substitute with granulated sugar for a lighter taste.
  • Large Egg – Vital for binding and providing structure; it helps create a chewy texture.
  • Vanilla Extract – Enhances flavor depth; choose pure vanilla for the best outcome.
  • All-Purpose Flour – Gives the cookies structure; feel free to use gluten-free flour for a tasty alternative.
  • Dutch-Processed Cocoa Powder – Delivers a rich chocolate flavor; if unavailable, regular unsweetened cocoa works well, too.
  • Baking Soda – Acts as a leavening agent, essential for the cookie's rise; don’t skip it!
  • Baking Powder – Works with baking soda for an airy texture; both are needed for the best rise.
  • Salt – Balances the sweetness and elevates overall flavor; a must-have ingredient!
  • Freeze Dried Strawberries – Introduces fruity flavor and texture to the cookies; avoid fresh strawberries for this recipe.
  • Semisweet Chocolate Chips – Add delightful chocolate chunks; consider dark or milk chocolate for a different twist.
  • Coconut Oil – Helps melt the chocolate coating smoothly and gives a glossy finish.

For the Chocolate Coating

  • Semisweet Chocolate Chips – These create a luscious chocolate shell; feel free to mix in different chocolate varieties for variety.
  • Coconut Oil – Aids in melting the chocolate perfectly; use it for a seamless dip and shine.

Experience the joy of creating these delicious Chocolate Covered Strawberry Cookies that will surely charm anyone who takes a bite!

Step‑by‑Step Instructions for Fudgy Chocolate Covered Strawberry Cookies

Step 1: Preheat Oven
Preheat your oven to 350°F (175°C) and prepare your baking sheets by lining them with parchment paper. This ensures the cookies will bake evenly and come off the sheets easily once they're done. Have your mixing bowl and the necessary measuring tools ready for the next steps to create your fudgy chocolate covered strawberry cookies.

Step 2: Mix Butter & Sugar
In a mixing bowl, combine unsalted butter and light brown sugar. Use an electric mixer to beat them together on medium speed for about 2 minutes, until the mixture is light and fluffy. This step is crucial as it creates the base for your chocolate covered strawberry cookies, helping to integrate air and ensure a tender texture.

Step 3: Add Egg & Vanilla
Once your butter and sugar mixture is fluffy, add the large egg and vanilla extract. Continue to mix for another 2 minutes until the blend becomes light in color and slightly thickens. This incorporation is important as the egg acts as a binder, holding the dough together while enhancing the flavors of your cookies.

Step 4: Combine Dry Ingredients
In a separate bowl, whisk together the all-purpose flour, Dutch-processed cocoa powder, baking soda, baking powder, and salt. Gradually add this dry mixture to the wet ingredients, mixing gently until just combined. Be careful not to overmix, as this helps keep your fudgy chocolate covered strawberry cookies wonderfully chewy.

Step 5: Fold in Add-ins
Now, gently fold in the freeze-dried strawberries and semisweet chocolate chips using a spatula. Make sure they are evenly distributed throughout the dough for bursts of fruity flavor and rich chocolate in every bite. This step adds texture and flavor complexity to the cookie dough, enhancing the experience of your chocolate covered strawberry cookies.

Step 6: Scoop Dough
Using a 1 ½ ounce cookie scoop, portion out the cookie dough onto your prepared baking sheets, spacing them about 2 inches apart. This allows room for the cookies to spread while baking. The dough should look rounded and slightly heaped, which ensures that your fudgy chocolate covered strawberry cookies will have a beautiful shape.

Step 7: Bake
Place the baking sheets in the preheated oven and bake for 10-12 minutes. Keep an eye on them—when the edges are set and the centers appear slightly gooey, you know they’re ready. These will transform into lovely fudgy chocolate covered strawberry cookies as they cool, creating that delightful chewy texture you crave.

Step 8: Cool Cookies
After baking, remove the cookies from the oven and let them cool on the sheets for about 15 minutes. This cooling period allows them to firm up slightly while retaining their chewy center. As you wait, the temptation to sample a warm cookie will surely be hard to resist!

Step 9: Prepare Chocolate Coating
While your cookies cool, melt the semisweet chocolate chips and coconut oil together in a microwave-safe bowl. Heat in 30-second intervals, stirring after each, until the mixture is completely smooth and glossy. This delectable chocolate coating will add a luxurious finish to your fudgy chocolate covered strawberry cookies.

Step 10: Dip Cookies
Once the cookies have cooled, dip the bottom of each cookie into the melted chocolate, ensuring a generous coating. Place the cookies on parchment paper to set. For an extra touch, consider drizzling any remaining melted chocolate over the tops. Let them rest for about 30 minutes until the chocolate has set to perfection.

Chocolate Covered Strawberry Cookies Variations

Get ready to personalize your cookie experience with these delightful twists that promise to elevate your baking game.

  • Berry Burst: Substitute freeze-dried strawberries with raspberries or cherries for a tangy flavor explosion. The alternate berries will bring their unique sweetness, creating an unexpected yet delightful contrast in every bite.

  • Chill for Softness: For a softer cookie, chill the dough for 30 minutes before scooping and baking. This little pause allows the flavors to meld and creates a tender, melt-in-your-mouth texture that’s a true treat.

  • Nutty Delight: Add chopped hazelnuts or walnuts to the dough for a satisfying crunch. The nutty addition complements the chocolate and strawberry flavors beautifully, adding a delightful texture to each cookie.

  • Cocoa Variations: Swap Dutch-processed cocoa powder for regular unsweetened cocoa for a lighter chocolate tone. This subtle switch will yield a slightly different flavor profile while still satisfying your chocolate cravings.

  • Drizzle Decadence: Enhance the chocolate coating by drizzling white chocolate over the tops for a visually stunning contrast. The creamy sweetness of white chocolate would pair wonderfully with the rich chocolate and tangy strawberries.

  • Spicy Surprise: Incorporate a pinch of cayenne pepper or cinnamon into the dough for a hint of warmth. This surprising addition will elevate your cookies, providing a captivating flavor twist that is sure to pique everyone’s curiosity.

  • Gourmet Touch: For added elegance, consider rolling the completed cookies in crushed freeze-dried strawberries before they set. This not only adds a burst of color but also enhances the fruity flavor profile, making them irresistible.

Now that you're inspired to experiment, why not pair these delicious cookies with a side of Thumbprint Cookies Melt or serve them alongside an indulgent slice of German Chocolate Poke? The possibilities are endless! Enjoy the delightful journey of creating your own takes on these Chocolate Covered Strawberry Cookies.

Storage Tips for Chocolate Covered Strawberry Cookies

Room Temperature: Keep cookies in an airtight container at room temperature for up to 1 week to maintain their freshness and chewy texture.

Fridge: For extended freshness, you can refrigerate the cookies in an airtight container for up to 2 weeks, but let them come to room temperature before enjoying to fully experience their fudgy goodness.

Freezer: Store in a freezer-safe bag or container for up to 3 months. Allow cookies to thaw at room temperature before indulging in your delicious chocolate covered strawberry cookies.

Reheating: If you'd like to warm them up, microwave each cookie for about 10-15 seconds. This will bring back their delightful softness—perfect for that fresh-from-the-oven feel!

What to Serve with Fudgy Chocolate Covered Strawberry Cookies

Indulging in these decadent cookies opens the door to delightful meal pairings that perfectly complement their rich flavors and textures.

  • Glass of Milk: A classic pairing, it balances the cookies' richness while enhancing the chocolatey flavors.

  • Vanilla Ice Cream: The creaminess of vanilla ice cream adds a refreshing contrast to the fudgy texture. Serve it a la mode for sweet decadence!

  • Fresh Berries: A handful of fresh strawberries or raspberries offers a pop of color and an extra burst of fruity flavor that echoes the cookies' ingredients.

  • Coffee or Espresso: The boldness of coffee enhances the chocolate notes, making for a delightful afternoon pick-me-up alongside your cookies.

  • Chocolate Fondue: For a fun twist, serve with a side of melted chocolate to dip or drizzle, elevating the cookies into a luxurious dessert experience.

  • Sparkling Wine: A bubbly drink like Prosecco or Champagne pairs wonderfully, bringing a celebratory touch to your dessert table that’s perfect for special occasions.

Elevate your dessert experience with these pairings and create moments to cherish!

Make Ahead Options

These Fudgy Chocolate Covered Strawberry Cookies are perfect for busy home cooks who love meal prep! You can prepare the cookie dough up to 24 hours in advance by mixing all the ingredients and storing the unbaked dough in an airtight container in the refrigerator. When you're ready to bake, simply scoop and bake the chilled dough directly without thawing. Additionally, once you've dipped the cookies in chocolate, they can be stored in the refrigerator for up to 3 days to maintain their freshness. Just allow them to come to room temperature before serving. With these make-ahead tips, you’ll have delicious cookies at your fingertips, making any occasion sweeter!

Expert Tips for Chocolate Covered Strawberry Cookies

  • Room Temperature Ingredients: Ensure all ingredients are at room temperature for even mixing, which leads to a consistent texture in your chocolate covered strawberry cookies.

  • Don't Overmix: Mix the dough gently and only until combined. Overmixing can lead to tough cookies instead of the tender, fudgy center you desire.

  • Even Cookie Size: Use a cookie scoop for uniform size, ensuring even baking and perfect presentation of your chocolate covered strawberry cookies.

  • Watch the Bake Time: Keep an eye on your cookies while baking. Aim for a slightly gooey center to maintain that chewy texture; they continue to cook slightly as they cool.

  • Set the Chocolate Properly: Allow the dipped cookies to rest on parchment paper until the chocolate is fully set, preventing unwanted sticky fingers and maintaining a beautiful finish.

Chocolate Covered Strawberry Cookies Recipe FAQs

How do I select ripe freeze-dried strawberries?
Absolutely! Look for freeze-dried strawberries that have a vibrant color—this indicates they were properly processed. Avoid those with dark spots all over, as it can indicate poor quality. The more intense the color, the better the fruit flavor in your cookies!

How should I store my chocolate covered strawberry cookies?
Keep your cookies in an airtight container at room temperature for up to 1 week to maintain their freshness. If you're a fan of chewy cookies, this method is perfect! For longer storage, refrigerate them for up to 2 weeks, but let them come back to room temperature before indulging to enjoy their full flavor.

Can I freeze chocolate covered strawberry cookies?
Absolutely! To freeze your cookies, simply place them in a freezer-safe bag or container and store them for up to 3 months. Make sure they're completely cooled before freezing, and separate layers with parchment paper to avoid sticking. When you're ready to enjoy, thaw the cookies at room temperature or pop them in the microwave for 10-15 seconds to regain that fresh-baked warmth.

What if my cookies are too dry or crumbly?
If your cookies feel dry, it could be due to overmixing or using too much flour. To prevent this, measure flour carefully and handle the dough gently. If you've already baked them, try adding a drizzle of chocolate or a spoonful of warm milk on top to revitalize their texture.

Are there any dietary considerations for pets or allergies?
Very! These cookies are meant for human consumption, as chocolate is toxic to dogs and other pets. Additionally, ensure that your guests are aware of potential allergens, such as eggs and nuts if you decide to add them. Always double-check ingredient labels for possible allergens when making adjustments.

How do I achieve the best chocolate coating?
For a silky smooth chocolate coating, make sure to melt the chocolate and coconut oil correctly. Heat in a microwave-safe bowl at 30-second intervals, stirring until completely smooth. After dipping, allow the cookies to set on parchment paper for about 30 minutes to achieve that lovely glossy finish. Enjoy your wonderful chocolate covered strawberry cookies!

Chocolate Covered Strawberry Cookies

Irresistible Chocolate Covered Strawberry Cookies for Lovers

Delight in these Chocolate Covered Strawberry Cookies, a perfect blend of rich chocolate and tangy strawberries, ideal for special occasions.
Print Recipe Pin Recipe
Prep Time 15 minutes mins
Cook Time 12 minutes mins
Cooling Time 15 minutes mins
Total Time 42 minutes mins
Servings: 24 cookies
Course: Dessert
Cuisine: American
Calories: 150
Ingredients Equipment Method Nutrition Notes

Ingredients
  

For the Cookies
  • 1 cup Unsalted Butter Adds moisture and richness; can use salted butter but reduce additional salt.
  • 1 cup Light Brown Sugar Sweetens with a hint of caramel flavor; substitute with granulated sugar if desired.
  • 1 large Egg Vital for binding and texture.
  • 1 teaspoon Vanilla Extract Choose pure for best results.
  • 2 cups All-Purpose Flour Feel free to use gluten-free flour.
  • 1/2 cup Dutch-Processed Cocoa Powder Delivers rich chocolate flavor; regular cocoa can be used.
  • 1 teaspoon Baking Soda Essential for the cookie's rise.
  • 1 teaspoon Baking Powder Needed for the best rise.
  • 1/4 teaspoon Salt Balances sweetness.
  • 1 cup Freeze Dried Strawberries Introduces fruity flavor and texture.
  • 1 cup Semisweet Chocolate Chips For delightful chocolate chunks.
  • 2 tablespoons Coconut Oil Helps melt chocolate smoothly.
For the Chocolate Coating
  • 1 cup Semisweet Chocolate Chips Creates a luscious chocolate shell.
  • 1 tablespoon Coconut Oil Aids in melting chocolate perfectly.

Equipment

  • Mixing Bowl
  • Electric mixer
  • Cookie Scoop
  • Baking Sheets
  • Parchment Paper
  • Microwave-safe bowl

Method
 

Step-by-Step Instructions
  1. Preheat your oven to 350°F (175°C) and prepare your baking sheets by lining them with parchment paper.
  2. In a mixing bowl, combine unsalted butter and light brown sugar. Beat until light and fluffy.
  3. Add the egg and vanilla extract, mixing until light in color and thickened.
  4. Whisk together the flour, cocoa powder, baking soda, baking powder, and salt in a separate bowl, then gradually add to the wet ingredients.
  5. Fold in the freeze-dried strawberries and chocolate chips until evenly distributed.
  6. Scoop the dough onto prepared sheets, spacing them 2 inches apart.
  7. Bake for 10-12 minutes until edges are set and centers are gooey.
  8. Cool cookies on sheets for about 15 minutes.
  9. Melt semisweet chocolate chips and coconut oil together until smooth.
  10. Dip the bottom of each cookie into the melted chocolate and place on parchment to set.

Nutrition

Serving: 1cookieCalories: 150kcalCarbohydrates: 20gProtein: 2gFat: 7gSaturated Fat: 5gPolyunsaturated Fat: 0.5gMonounsaturated Fat: 1gCholesterol: 25mgSodium: 80mgPotassium: 100mgFiber: 1gSugar: 10gVitamin A: 200IUVitamin C: 1mgCalcium: 10mgIron: 0.5mg

Notes

Ensure ingredients are at room temperature for even mixing. Do not overmix the dough.

Tried this recipe?

Let us know how it was!

Fudgy M&M’s Brownies That Will Steal Your Heart!

January 12, 2026 by Grace Snow Leave a Comment

You know that moment when you taste something so rich and chocolaty that it transports you straight back to childhood? That's exactly what these M&M’s brownies do for me. They’re not just a dessert; they’re a celebration in a pan. Fudgy, easy-to-make, and a guaranteed crowd-pleaser, this recipe brings joy and color with every vibrant M&M that dances atop the gooey surface. Whether you’re hosting a gathering or simply in need of a sweet pick-me-up, this chocolate dream is here to satisfy your cravings. Plus, you can customize these treats to fit any occasion by mixing up the colors of M&M’s! Have you ever thought about how satisfying it is to bake something both scrumptious and fun? Let's dive in!

Why Are M&M's Brownies So Irresistible?

Fudgy Perfection: These brownies are a chocolate lover's dream, oozing with rich, fudgy goodness that will have you reaching for seconds.
Easy to Make: With just a handful of ingredients and minimal steps, you’ll have these mouthwatering brownies ready in no time.
Customizable Fun: Feel free to swap in your favorite M&M colors for holidays or celebrations, making them as unique as your love for chocolate! Want more ideas? Check out my Pumpkin Brownies Decadent for a seasonal twist.
Crowd-Pleaser: Perfect for gatherings, these brownies ensure that there will be smiles all around when you serve them.
Delightful Textures: Each bite features a slightly crackly top, with a gooey center and bursts of sweetness from the M&M's. Trust me; this recipe will keep everyone coming back for more!

M&M's Brownies Ingredients

For the Brownies
• Semi-Sweet Chocolate – Adds rich chocolate flavor and moisture; for a deeper flavor, consider bittersweet or dark chocolate.
• Unsalted Butter – Provides fat for richness; you can use salted butter but skip the added salt.
• Granulated Sugar – Sweetens and contributes to fudginess; combine with brown sugar for enhanced flavor.
• Brown Sugar – Adds moisture and a caramel taste; it makes your brownies extra chewy.
• Eggs – Provides structure; remember to add them one at a time for the best texture.
• Cocoa Powder – Boosts the chocolate flavor; unsweetened cocoa is great but may lighten the color slightly.
• Vanilla Extract – Essential for a rich flavor; don’t skip this key ingredient!
• Flour – The main structure; if gluten-free is needed, substitute 1:1 with a blend containing xanthan gum.
• Salt – Enhances flavor; can be left out if you're using salted butter.
• M&M's Candies – Adds sweetness and vibrant color; feel free to mix different colors for fun and festive looks!

For Serving
• Vanilla Ice Cream – A classic pairing that balances the chocolate richness beautifully.
• Whipped Cream – Adds a light, creamy texture; perfect for topping those warm brownies.

This delightful M&M's Brownies recipe is sure to be a hit, turning any gathering into a joyous celebration!

Step‑by‑Step Instructions for M&M’s Brownies

Step 1: Melt the Chocolate Mixture
Begin by melting the semi-sweet chocolate and unsalted butter together in a double boiler over medium heat, stirring until smooth and glossy, which usually takes about 5-7 minutes. Remove the bowl from heat, then mix in both granulated and brown sugar until well combined. Allow the mixture to cool for about 5-10 minutes while you prepare the next steps.

Step 2: Incorporate the Eggs
Once the chocolate mixture has cooled slightly, add the eggs one at a time, making sure to beat well after each addition. This step is crucial for achieving the rich and fudgy texture of your M&M’s brownies. Continue to mix until the batter looks shiny and smooth, then proceed to the next step.

Step 3: Add Dry Ingredients
Gently fold in the cocoa powder, salt, and vanilla extract, mixing until fully combined. Be careful not to overmix; a few small streaks are okay at this stage. This step enhances the chocolate flavor and incorporates necessary ingredients for your moist M&M’s brownies, creating a luscious chocolate base.

Step 4: Fold in the Flour
Now, sift in the flour and gently fold it into the batter with a spatula until just a few streaks of flour remain. This helps maintain the fudgy texture you’re aiming for. Avoid overworking the batter to keep your brownies rich and chewy. Once combined, you’re ready for the baking dish.

Step 5: Prepare the Baking Dish
Line an 8 x 8-inch baking dish with parchment paper for easy removal later. Pour the brownie batter into the prepared dish, smoothing the top with a spatula to create an even layer. This ensures that your M&M’s brownies bake evenly, giving each slice a perfect shape.

Step 6: Add the M&M's
Sprinkle a generous amount of M&M’s on top of the brownie batter, making sure they are spread evenly. Don’t press them into the mixture, as they will sink slightly during baking, creating delightful pockets of color and sweetness in each bite of your fudgy brownies.

Step 7: Bake the Brownies
Preheat your oven to 350°F (175°C) and place the baking dish inside. Bake for 45-50 minutes, or until the edges are set but the center is slightly gooey. A toothpick inserted into the side should come out with a few moist crumbs clinging to it. This ensures your brownies will be decadently fudgy.

Step 8: Cool and Slice
Allow the brownies to cool completely in the baking dish for about 30-45 minutes before lifting them out using the parchment paper. Once cooled, slice them into squares, revealing the colorful M&M’s throughout. Enjoy the rich, fudgy goodness of your homemade M&M’s brownies!

Storage Tips for M&M's Brownies

Room Temperature: Store brownies in an airtight container at room temperature for up to 3 days. This keeps them moist and fudgy, maintaining their delightful texture.

Fridge: If you want them to last a bit longer, brownies can be refrigerated for up to a week. Just be sure to wrap them tightly to prevent drying out.

Freezer: For longer storage, freeze brownies for up to 3 months. Cut them into squares, wrap each piece in plastic wrap, and place them in a freezer-safe container.

Reheating: Enjoy brownies warm by gently reheating in the microwave for about 10-15 seconds, bringing back that melt-in-your-mouth experience every chocolate lover craves!

Make Ahead Options

These M&M's brownies are a fantastic make-ahead treat for busy home cooks! You can prepare the brownie batter up to 24 hours in advance; simply mix it and store it in an airtight container in the refrigerator. For the best results, line your baking dish with parchment paper and keep it ready, but avoid adding the M&M's until you're ready to bake. This prevents any color bleeding and ensures they remain vibrant. When you’re ready to bake, pour the batter into the prepared dish, sprinkle the M&M's on top, and bake as directed. You’ll have freshly baked brownies that are just as delicious as if you made them on the spot!

Expert Tips for M&M's Brownies

Use Room Temperature Eggs: This helps with emulsification, resulting in a smoother batter and a fudgier end product.

Mind the Baking Time: Avoid overbaking your brownies; they should be slightly gooey in the center for that ideal fudgy texture.

Customize M&M Colors: Tailor your brownies for any occasion by using seasonal M&M colors, adding a festive touch to your treats!

Store Properly: Keep brownies in an airtight container at room temperature for up to 3 days for the best texture and flavor retention.

Don’t Overmix: When incorporating the flour, mix only until just combined to maintain the desired fudginess in your M&M's brownies.

What to Serve with M&M's Brownies

There's nothing quite like pairing a rich chocolate dessert with delightful complementing flavors for the ultimate indulgent experience.

  • Vanilla Ice Cream: A classic choice that balances the fudginess of the brownies, providing a creamy, cool contrast.
  • Whipped Cream: Light and fluffy, it adds a touch of elegance and extra sweetness, perfect for those warm brownie moments.
  • Fresh Berries: Juicy raspberries or strawberries bring a tart freshness that cuts through the chocolate richness, offering a vibrant twist.
  • Chocolate Sauce: For the ultimate chocolate lover's extravagance, drizzle warm chocolate sauce over the brownies for a decadent finish.
  • Coffee: A freshly brewed cup enhances the chocolate flavor, creating a delightful pairing that is perfect for an afternoon treat.
  • Mint Chocolate Chip Ice Cream: Adds a refreshing minty twist to the classic brownie combination, making each bite feel extra special.
  • Caramel Sauce: Drizzle on top for a sweet and sticky treat, enriching the brownies with a sumptuous layer of gooey goodness.
  • Milk: A simple glass of cold milk is always a crowd-pleaser, balancing out the richness of the brownies beautifully.
  • Chocolate-Covered Strawberries: Elevate your dessert table by serving chocolate-covered strawberries alongside for a fun, shared treat.

Variations & Substitutions for M&M’s Brownies

Feel free to let your creativity shine and customize these brownies to match your taste and occasion!

  • Nutty Delight: Add chopped walnuts or pecans for a crunchy texture contrast that complements the fudginess beautifully.
  • Gluten-Free Option: Substitute regular flour with gluten-free flour to cater to dietary needs without sacrificing flavor.
  • Peanut Butter Swirl: Incorporate swirls of peanut butter in the batter before baking for a deliciously nutty twist.
  • Minty Fresh: Replace regular M&M's with mint-flavored ones for a refreshing take; pair them with a scoop of vanilla ice cream!
  • Double the Recipe: Use a 9 x 13 pan and double your ingredients for larger gatherings. Everyone will want to take some home!
  • Spicy Kick: Add a sprinkle of cayenne pepper to the batter for a surprising heat that balances the sweetness.
  • Seasonal Colors: Swap M&M’s for themed colors—think pastel hues for spring or red, white, and blue for patriotic events. Tailoring these brownies can make any celebration special.
  • Chocolate Chip Upgrade: Mix in chocolate chips alongside the M&M's for an even deeper chocolate experience. For an alternative, consider my Pumpkin Brownies Decadent for a seasonal flavor exploration!

Enjoy experimenting with these variations to create your perfect M&M's brownies!

M&M's Brownies Recipe FAQs

How do I select the right chocolate for M&M's brownies?
Absolutely! For the best flavor, I recommend using semi-sweet chocolate. If you're looking for a bolder taste, bittersweet or dark chocolate can elevate your brownies. Just be mindful that darker chocolate will result in a more intense flavor profile, so choose based on your personal preference for sweetness.

What’s the best way to store M&M's brownies?
To maintain their rich, fudgy texture, store your M&M's brownies in an airtight container at room temperature for up to 3 days. If you want them to last longer, they can be refrigerated for about a week—just make sure to wrap them well so they don't dry out! For longer storage, freeze the brownies wrapped individually in plastic wrap inside a freezer-safe container; they can last up to 3 months this way.

Can I freeze M&M's brownies, and how should I do it?
Yes, you can definitely freeze M&M's brownies! After baking and cooling completely, cut them into squares. Wrap each brownie tightly in plastic wrap and then place them in a freezer-safe container or zip-top bag. Make sure to label them with the date, and they will stay fresh for up to 3 months. When you’re ready to enjoy, simply thaw them in the fridge overnight or at room temperature for a few hours.

What should I do if my brownies are too dry?
If you find your M&M's brownies are coming out dry, there are a couple of troubleshooting tips to keep in mind. First, ensure that you’re not overbaking them; they should be slightly gooey when you pull them out—look for firm edges and a soft center, with a toothpick coming out with a few moist crumbs. If they turn out dry after baking, consider adding a dollop of whipped cream or a scoop of vanilla ice cream to enhance moisture and flavor when serving!

Are these brownies safe for people with nut allergies?
Yes, these M&M's brownies can be safe for those with nut allergies as the base recipe doesn't include any nuts. However, always check the packaging of your M&M's and other ingredients to ensure they are produced in nut-free facilities. If you're uncertain, it’s best to swap in alternative candies or chocolate chips that are explicitly labeled as nut-free to prevent any allergic reactions.

Can I customize the M&M's for special occasions?
Very much! The beauty of M&M's brownies lies in their versatility. You can easily swap in seasonal M&M's, such as red and green for Christmas or pastel colors for Easter. This not only adds a festive flair but also makes your brownies even more appealing for any celebration or get-together!

M&M’s Brownies

Fudgy M&M’s Brownies That Will Steal Your Heart!

These M&M’s brownies are fudgy, easy to make, and a guaranteed crowd-pleaser, perfect for any occasion.
Print Recipe Pin Recipe
Prep Time 10 minutes mins
Cook Time 50 minutes mins
Cooling Time 45 minutes mins
Total Time 1 hour hr 45 minutes mins
Servings: 16 squares
Course: Dessert
Cuisine: American
Calories: 200
Ingredients Equipment Method Nutrition Notes

Ingredients
  

For the Brownies
  • 8 oz Semi-Sweet Chocolate Can substitute with bittersweet or dark chocolate.
  • 1/2 cup Unsalted Butter Alternatively, use salted butter.
  • 1 cup Granulated Sugar Combine with brown sugar for enhanced flavor.
  • 1/2 cup Brown Sugar Adds chewiness.
  • 3 large Eggs Add one at a time.
  • 1/2 cup Cocoa Powder Use unsweetened for a richer flavor.
  • 1 teaspoon Vanilla Extract Essence for richer flavor.
  • 1 cup Flour Substitute with gluten-free blend if needed.
  • 1/2 teaspoon Salt Omit if using salted butter.
  • 1 cup M&M's Candies Can mix different colors.
For Serving
  • 2 scoops Vanilla Ice Cream Classic pairing.
  • 1 cup Whipped Cream For topping.

Equipment

  • Double Boiler
  • 8 x 8-inch baking dish
  • Parchment Paper
  • Spatula

Method
 

Step‑by‑Step Instructions for M&M’s Brownies
  1. Melt the semi-sweet chocolate and unsalted butter together in a double boiler over medium heat, stirring until smooth and glossy, about 5-7 minutes.
  2. Remove from heat and mix in granulated and brown sugar until well combined. Allow to cool for 5-10 minutes.
  3. Add the eggs one at a time, beating well after each addition until the batter looks shiny and smooth.
  4. Gently fold in the cocoa powder, salt, and vanilla extract until fully combined.
  5. Sift in the flour and gently fold it in until just a few streaks of flour remain.
  6. Line an 8 x 8-inch baking dish with parchment paper. Pour the batter into the dish, smoothing the top.
  7. Sprinkle M&M’s on top of the batter, evenly spreading them without pressing down.
  8. Preheat the oven to 350°F (175°C) and bake for 45-50 minutes until the edges are set and the center is slightly gooey.
  9. Allow the brownies to cool completely in the dish for 30-45 minutes before slicing into squares.

Nutrition

Serving: 1squareCalories: 200kcalCarbohydrates: 30gProtein: 2gFat: 9gSaturated Fat: 5gCholesterol: 40mgSodium: 100mgPotassium: 100mgFiber: 1gSugar: 20gCalcium: 2mgIron: 6mg

Notes

Store brownies in an airtight container at room temperature for up to 3 days.

Tried this recipe?

Let us know how it was!

Delicious No-Bake Cheesecake in a Jar for Guilt-Free Indulgence

January 12, 2026 by Grace Snow Leave a Comment

When I first spotted those adorable mini mason jars at the store, a light bulb flickered in my mind—why not create a no-bake cheesecake in a jar? This Healthier No-Bake Cheesecake in a Jar is not just a delightful dessert; it’s also a promise that you can indulge your sweet tooth without the guilt. Packed with creamy Greek yogurt and a buttery graham cracker crust, it's quick to prepare, making it perfect for both last-minute gatherings and cozy weeknight treats. Imagine the joy of a delicious dessert that’s as nutritious as it is satisfying! With a luscious cherry topping and a rich filling that won’t weigh you down, I know you’ll love every bite. Are you ready to dive into this sweet creation and impress your friends and family?

Why Try This No-Bake Cheesecake in a Jar?

Delectable and Guilt-Free: This no-bake cheesecake is a heavenly treat that lets you indulge in dessert without the heavy calories.

Quick & Easy: With minimal prep time, you’ll have fancy mini desserts ready in no time—perfect for unexpected guests or a sweet weeknight surprise!

Versatile Options: Mix it up by adding your favorite fruits or even chocolate to customize every jar to your liking.

Impressive Presentation: These adorable jars make serving easy and elegant, making your dessert look as good as it tastes!

Healthier Ingredients: With Greek yogurt as a base, you can satisfy your cravings while sticking to healthier choices—check out how it fits into healthy dessert ideas to explore more guilt-free recipes.

No-Bake Cheesecake in a Jar Ingredients

For the Cherry Topping
• Pitted Cherries – Provides a sweet topping and vibrant color; you can use fresh or frozen varieties for convenience.
• Pure Maple Syrup – Adds natural sweetness with a rich flavor; honey or agave syrup can be excellent substitutes.
• Fresh Lemon Juice – Enhances brightness and balances sweetness; feel free to swap with lime juice if needed.
• Corn Starch – Thickens the cherry sauce effectively; if you wish to avoid it, consider using arrowroot instead.

For the Cheesecake Filling
• Cream Cheese – Forms the decadent base of the cheesecake filling; use light cream cheese for a lower-fat option or vegan cream cheese for a plant-based alternative.
• Plain Full-Fat Greek Yogurt – Provides delightful creaminess and a healthier alternative to heavy cream; low-fat Greek yogurt can be used, but it may affect the tanginess.

For the Crust
• Graham Cracker Crumbs – Creates a sweet, crunchy texture for the base; crushed oats or gluten-free crumbs make for a great gluten-free option.
• Butter (melted) – Binds the crust together beautifully; melted coconut oil is a fantastic dairy-free substitute.

With these delightful No-Bake Cheesecake in a Jar ingredients, you’re well on your way to making a dessert that’s both delicious and wholesome!

Step‑by‑Step Instructions for Healthier No-Bake Cheesecake in a Jar

Step 1: Prepare Cherry Topping
In a medium saucepan over medium heat, combine pitted cherries, pure maple syrup, fresh lemon juice, and a splash of water. Sprinkle in corn starch to thicken the mixture. Stir frequently and allow it to bubble gently for about 5-10 minutes until the sauce has thickened and the cherries are tender. Remove from heat and let it cool completely before assembling your no-bake cheesecake in a jar.

Step 2: Make Cheesecake Filling
In a large mixing bowl, start by beating softened cream cheese until it’s creamy and smooth. Gradually add in the plain full-fat Greek yogurt, pure maple syrup, and fresh lemon juice. Use a hand mixer on medium speed for about 2-3 minutes until all ingredients are well combined and the mixture is velvety. Set aside and refrigerate for a moment to allow the flavors to meld.

Step 3: Prepare Graham Cracker Crust
Melt the butter in a small saucepan over low heat or the microwave, being careful not to overheat. In a separate bowl, mix the melted butter with graham cracker crumbs until they are well combined and resemble wet sand. This step ensures the crust holds together beautifully.

Step 4: Assemble Mini Cheesecake Jars
Take your mason jars and evenly divide the graham cracker crust mixture into the bottom of each jar. Pack it down gently using the back of a spoon, creating a firm base. Layer the creamy cheesecake filling on top of the crust, smoothing it out with a spatula. Tap the jars lightly on the counter to settle the filling.

Step 5: Top with Cherry Mixture
Once the cheesecake filling is in place, generously spoon the cooled cherry topping over each jar, making sure to cover the filling completely. The vibrant red topping will contrast beautifully against the creamy cheesecake. If there are any leftover cherries, feel free to sprinkle them on top for an added touch!

Step 6: Chill
Now that your healthier no-bake cheesecake in a jar is assembled, place them in the refrigerator to chill for at least 1 hour. This cooling period allows the cheesecake to firm up and the flavors to deepen. If you’re short on time, you can enjoy them immediately, but a little chill will enhance the overall taste and texture.

Expert Tips for No-Bake Cheesecake in a Jar

Chill for Texture: Ensure to refrigerate the jars for at least an hour; this helps the cheesecake firm up and improves the overall texture.

Adjust Sweetness: Taste your cheesecake filling and cherry topping before serving; feel free to add more maple syrup if you like it sweeter.

Soften Cream Cheese: To prevent lumps, let your cream cheese sit at room temperature for about 30 minutes before mixing; this ensures a smooth filling for your no-bake cheesecake in a jar.

Crust Consistency: Ensure the graham cracker mixture resembles wet sand; too dry will lead to a crumbly crust that doesn't hold together well.

Add Extra Flavor: Experiment with extracts like vanilla or almond in the cheesecake filling for a flavorful twist that enhances your no-bake cheesecake experience.

What to Serve with Healthier No-Bake Cheesecake in a Jar

Elevate your dessert experience by pairing this guilt-free delight with complementary flavors and textures that will impress your guests.

  • Fresh Berries: Juicy strawberries or blueberries add a burst of flavor that balances the creamy cheesecake beautifully.

  • Minted Fruit Salad: A refreshing mix of seasonal fruits like melon and pineapple tossed with mint invigorates and cleanses the palate.

  • Chocolate Drizzle: Adding a light drizzle of dark chocolate gives a rich contrast to the sweet cheesecake, creating a luxurious touch.

  • Whipped Coconut Cream: This dairy-free topping adds a luscious texture and tropical flair that pairs perfectly with the cheesecake jars.

  • Almond Biscotti: Crunchy and slightly sweet, these delightful cookies provide an appealing contrast in texture, enhancing the overall dessert experience.

  • Herbal Iced Tea: Sweetened or unsweetened, a refreshing herbal iced tea is a light beverage option that complements the cheesecake without overpowering it.

  • Espresso or Coffee: A strong, black coffee enhances the dessert’s sweetness and rounds out the flavors—a perfect finish after a satisfying meal.

  • Vanilla Ice Cream: A scoop of creamy vanilla ice cream adds richness and a cold contrast to the smooth cheesecake in every spoonful.

Storage Tips for No-Bake Cheesecake in a Jar

Fridge: Store your no-bake cheesecake jars in the refrigerator for up to 1-2 days. Ensure the lids are tightly sealed or cover with plastic wrap to maintain freshness.

Freezer: If you want to freeze them, do so without the cherry topping. Place the jars in an airtight container, and they will last for up to 2 months.

Thawing: When ready to enjoy, simply transfer the jars from the freezer to the fridge and let them thaw overnight before serving.

Reheating: This dessert is best served cold, so avoid reheating. Just add the cherry topping before serving for a refreshing treat!

No-Bake Cheesecake in a Jar Variations

Feel free to play around with this delightful recipe and make it truly your own, beckoning flavors that dance on your palate!

  • Fruitful Swaps: Substitute cherries for blueberries or strawberries for a fresh twist, adding seasonal flair.
    Imagine the vibrant colors and juicy bites transforming your jars into a fruity festival!

  • Choco-Madness: Incorporate cocoa powder into the cheesecake filling for a rich chocolate version, perfect for chocoholics.
    Each spoonful will be like indulging in a lighter chocolate mousse—absolute bliss!

  • Nutty Crunch: Mix crushed nuts into the graham cracker crust for a delightful texture and nuttier flavor.
    Think of the satisfying crunch as you dig in, offering a delightful contrast to the creamy filling.

  • Dairy-Free Delight: Swap out cream cheese for vegan cream cheese and use coconut yogurt for a dairy-free dessert.
    Enjoy the creamy goodness without dairy, making it a celebration fit for all dietary needs!

  • Sweeten It Up: Use honey or agave syrup instead of maple syrup for a different sweetness profile.
    This subtle change can elevate the entire jar, creating a unique flavor experience!

  • Spicy Gingerbread: Add ground ginger or cinnamon to the crust for a warm, spiced dessert reminiscent of the holidays.
    The warm aroma will wrap around you like a cozy blanket, perfect for chilly evenings.

  • Zesty Lemons: Incorporate lemon zest into the cheesecake filling for an extra zing of brightness.
    This little twist will have your taste buds singing with fresh citrus joy!

  • Heat Things Up: Stir in a touch of cayenne pepper into the cherry topping for a surprising kick.
    The blend of sweet and spicy will ignite your senses—are you ready for this adventure?

Get creative and enjoy these variations to make your No-Bake Cheesecake in a Jar even more special! For more culinary inspiration, check out our ideas on healthy dessert alternatives that will satisfy your sweet tooth without guilt.

Make Ahead Options

These Healthier No-Bake Cheesecakes in a Jar are ideal for meal prep, making your busy weeknights a breeze! You can prepare the cherry topping and cheesecake filling up to 24 hours in advance. To do this, make the cherry sauce and let it cool, then refrigerate it in an airtight container. Similarly, prepare the cheesecake filling and store it in the fridge; keeping it well-covered will ensure it stays fresh. The graham cracker crust can also be assembled in the jars up to 3 days ahead of time. Just remember to add the cherry topping just before serving to maintain that vibrant flavor and prevent any sogginess. With these steps, you’ll enjoy quick, delicious desserts anytime!
No-Bake Cheesecake in a Jar Recipe FAQs

What type of cherries should I use for the topping?
Absolutely! You can use either fresh or frozen pitted cherries for your no-bake cheesecake jars. Fresh cherries will give you the best flavor and color, but frozen cherries work wonderfully and are just as convenient. When using frozen, just thaw them slightly before cooking to ensure they mix well with your other ingredients.

How long can I store the no-bake cheesecake in the fridge?
Very! You can keep your no-bake cheesecake jars in the refrigerator for up to 1-2 days. Just make sure to seal them tightly with lids or plastic wrap to help maintain their freshness and prevent them from absorbing any odors from the refrigerator.

Can I freeze my no-bake cheesecake jars?
Definitely! If you want to freeze your cheesecake jars, it’s best to do so without the cherry topping. Place the jars in an airtight container, and they should last in the freezer for up to 2 months. When you’re ready to enjoy, simply move the jars to the fridge overnight to thaw, then add your cherry topping fresh before serving.

Why is my cheesecake filling lumpy?
A common issue! This typically happens when the cream cheese isn't softened enough before mixing. To avoid lumps, allow the cream cheese to sit at room temperature for about 30 minutes before beating it. Also, mixing at medium speed for a couple of minutes should yield a smooth and creamy filling without lumps.

Can I substitute for any of the ingredients due to dietary restrictions?
Of course! To make this no-bake cheesecake suitable for dietary restrictions, you can substitute light cream cheese for regular cream cheese, and a dairy-free cream cheese can be used as a vegan alternative. For the crust, crushed gluten-free crackers or oats can replace graham cracker crumbs to accommodate gluten-free diets. Adjust these substitutions to fit your preferences while keeping the delightful taste intact!

How do I adjust the sweetness in the dessert?
Absolutely! Start by tasting your cheesecake filling and cherry topping before serving. If you wish to make it sweeter, gradually add more maple syrup, a teaspoon at a time, until you reach your desired sweetness. Remember that the natural flavors from the lemon juice and cherries also contribute a delicious tang, so find the right balance that suits your palate!

No-Bake Cheesecake in a Jar

Delicious No-Bake Cheesecake in a Jar for Guilt-Free Indulgence

Enjoy this guilt-free No-Bake Cheesecake in a Jar, a rich and creamy dessert perfect for indulgences without the calories.
Print Recipe Pin Recipe
Prep Time 15 minutes mins
Cook Time 10 minutes mins
Chill Time 1 hour hr
Total Time 1 hour hr 25 minutes mins
Servings: 4 jars
Course: Dessert
Cuisine: American
Calories: 230
Ingredients Equipment Method Nutrition Notes

Ingredients
  

For the Cherry Topping
  • 2 cups Pitted Cherries Fresh or frozen varieties
  • 1/4 cup Pure Maple Syrup Honey or agave syrup can be substitutes
  • 1 tablespoon Fresh Lemon Juice Can swap with lime juice
  • 1 tablespoon Corn Starch Arrowroot can be used as a substitute
For the Cheesecake Filling
  • 8 oz Cream Cheese Use light or vegan cream cheese for alternatives
  • 1 cup Plain Full-Fat Greek Yogurt Low-fat Greek yogurt can be used
For the Crust
  • 1 cup Graham Cracker Crumbs Crushed oats or gluten-free crumbs can substitute
  • 1/4 cup Butter (melted) Melted coconut oil is a dairy-free substitute

Equipment

  • Medium saucepan
  • large mixing bowl
  • small saucepan
  • Mason jars
  • hand mixer
  • Spatula
  • Spoon

Method
 

Step-by-Step Instructions
  1. In a medium saucepan over medium heat, combine pitted cherries, pure maple syrup, fresh lemon juice, and a splash of water. Sprinkle in corn starch to thicken the mixture. Stir frequently and allow it to bubble gently for about 5-10 minutes until the sauce has thickened and the cherries are tender. Remove from heat and let it cool completely before assembling your no-bake cheesecake in a jar.
  2. In a large mixing bowl, start by beating softened cream cheese until it’s creamy and smooth. Gradually add in the plain full-fat Greek yogurt, pure maple syrup, and fresh lemon juice. Use a hand mixer on medium speed for about 2-3 minutes until all ingredients are well combined and the mixture is velvety. Set aside and refrigerate for a moment to allow the flavors to meld.
  3. Melt the butter in a small saucepan over low heat or the microwave, being careful not to overheat. In a separate bowl, mix the melted butter with graham cracker crumbs until they are well combined and resemble wet sand.
  4. Take your mason jars and evenly divide the graham cracker crust mixture into the bottom of each jar. Pack it down gently using the back of a spoon, creating a firm base. Layer the creamy cheesecake filling on top of the crust, smoothing it out with a spatula.
  5. Once the cheesecake filling is in place, generously spoon the cooled cherry topping over each jar, making sure to cover the filling completely.
  6. Place them in the refrigerator to chill for at least 1 hour.

Nutrition

Serving: 1jarCalories: 230kcalCarbohydrates: 30gProtein: 5gFat: 10gSaturated Fat: 5gPolyunsaturated Fat: 1gMonounsaturated Fat: 3gCholesterol: 20mgSodium: 150mgPotassium: 150mgFiber: 2gSugar: 15gVitamin A: 250IUVitamin C: 5mgCalcium: 50mgIron: 0.5mg

Notes

Ensure to refrigerate the jars for at least an hour to improve texture. Taste and adjust sweetness before serving.

Tried this recipe?

Let us know how it was!

Oreo Truffle-Stuffed Strawberries That Will Wow Your Guests

January 12, 2026 by Grace Snow Leave a Comment

As I stood in my kitchen, a lightbulb moment struck: what if I transformed the classic treat into something even more delightful? Enter the irresistible Oreo Truffle-Stuffed Strawberries—a no-bake dessert that combines the creamy decadence of Oreo truffles with the refreshing burst of juicy strawberries. With just four easy ingredients, these beauties are a breeze to whip up, making them the ultimate solution for those last-minute summer gatherings or a quick indulgence after a long day. Not only do they look stunning on a platter, but they also pack a flavor punch that’ll have everyone coming back for more. Are you ready to dive into this delectable dessert with me?

Why Are These Strawberries Irresistible?

Decadent Delight: Biting into these Oreo Truffle-Stuffed Strawberries delivers an explosion of creamy Oreo flavor, perfectly balanced by the freshness of juicy strawberries.

Four Simple Ingredients: With just four ingredients, you can whip up this no-bake treat in no time, making it an ideal choice for busy days or impromptu gatherings.

Crowd-Pleaser: Whether at a summer BBQ or a cozy family night, these strawberries are guaranteed to impress, drawing compliments from both kids and adults alike!

Versatile Variations: Feel free to customize with different flavors like golden Oreos or even chocolate-covered strawberries to keep things exciting.

Quick Assembly: Save time by prepping the truffle filling in advance—just refrigerate to make assembly a breeze! You’ll definitely want to add these beauties to your dessert lineup, alongside other favorites like Panna Cotta Sweet.

Oreo Truffle-Stuffed Strawberries Ingredients

For the Filling
• Big Fresh Strawberries – Choose large, juicy berries for optimal stuffing; they provide the perfect sweet contrast to the creamy center.
• Double Stuf Oreo Cookies – These cookies add sweetness and a rich, indulgent flavor; the double filling enhances the truffle experience that truly brings out the Oreo Truffle-Stuffed Strawberries magic.
• Cream Cheese – Binds the crushed Oreos into a creamy filling; for a lighter option, you can substitute it with mascarpone cheese.

For the Coating
• Chocolate Candy Melts – Coating the strawberries in melted chocolate provides a smooth, chocolaty shell; any brand works well, including Ghirardelli.
• Chocolate Sprinkles – Add these optional sprinkles for extra texture and a pop of visual appeal!

Step‑by‑Step Instructions for Oreo Truffle-Stuffed Strawberries

Step 1: Prepare the Strawberries
Start by rinsing your large, fresh strawberries under cool water. Gently pat them dry with a paper towel to remove excess moisture, which is key to keeping the filling intact. Next, carefully remove the green tops and hull out the centers using a melon baller, creating little pockets for the delicious filling. Set the prepared strawberries aside on a plate.

Step 2: Make the Oreo Truffle Filling
In a food processor, add the Double Stuf Oreo cookies and pulse them until they turn into fine crumbs. Then, add in the cream cheese and blend until you achieve a moist, well-combined mixture that resembles a thick dough. This will form the rich filling for your Oreo Truffle-Stuffed Strawberries, so scrape down the sides as needed to ensure everything is mixed evenly.

Step 3: Stuff the Strawberries
Take small portions of the Oreo truffle filling and roll them into balls, about the size of a marble. Gently press these balls into the hulled centers of the prepared strawberries, filling them to the top. Ensure that the filling is smooth and even with the berry surface, creating a beautiful and inviting treat. Set the stuffed strawberries back on the plate once completed.

Step 4: Melt the Chocolate Coating
In a microwave-safe bowl, heat the chocolate candy melts according to the package instructions, typically in 30-second intervals until fully melted and smooth. Stir in between each interval to ensure the chocolate is evenly melted and free of lumps. Once your chocolate is silky and warm, it’s time to coat the filled strawberries.

Step 5: Coat and Decorate the Strawberries
Carefully dip the stuffed end of each strawberry into the melted chocolate, ensuring the filling is fully covered. Allow any excess chocolate to drip back into the bowl. For an extra touch, you can roll the chocolate-coated strawberries in chocolate sprinkles or crushed Oreo crumbs while the coating is still wet. Place the decorated strawberries on a parchment-lined baking sheet.

Step 6: Set the Chocolate and Serve
Let the Oreo Truffle-Stuffed Strawberries sit at room temperature or in the refrigerator for about 15–20 minutes, allowing the chocolate to set and harden. For the best taste and texture, serve these delightful treats the same day they are made, when their freshness shines through. Enjoy this quick no-bake dessert at your next gathering!

Expert Tips for Oreo Truffle-Stuffed Strawberries

  • Choose the Right Strawberries: Opt for large, firm strawberries. They not only look stunning but also hold the filling better, preventing any messy spills.

  • Dry Before Filling: Make sure to thoroughly dry the strawberries after rinsing. Excess moisture can cause the truffles to slip out and the chocolate coating to clump.

  • Chill the Filling: For easier assembly, prepare the Oreo truffle filling in advance and refrigerate it. This not only makes it firmer but also speeds up the stuffing process.

  • Melt Chocolate Slowly: When melting chocolate candy melts, use short intervals in the microwave. This gentler method prevents overheating, which could ruin the smooth texture needed for coating.

  • Customize Your Coating: Feel free to get creative! Roll your chocolate-coated strawberries in crushed Oreos, nuts, or even coconut for a delightful twist on the classic Oreo Truffle-Stuffed Strawberries.

How to Store and Freeze Oreo Truffle-Stuffed Strawberries

Room Temperature: These Oreo Truffle-Stuffed Strawberries are best enjoyed immediately. If left out, they should be consumed within 1 hour to maintain their freshness.

Fridge: If you have leftovers, store them in an airtight container in the refrigerator for up to 1 day. This helps to keep the strawberries fresh and prevents the chocolate from becoming sticky.

Freezer: While freezing isn’t recommended due to their delicate nature, if you must, lay them on a baking sheet before freezing to prevent sticking. They can be frozen for up to 1 week, but expect some texture loss upon thawing.

Reheating: For an optimal taste experience, enjoy these strawberries cold fresh from the fridge rather than reheating. The delicious contrast of chilled strawberry and creamy filling is what makes these treats special!

Make Ahead Options

These Oreo Truffle-Stuffed Strawberries are a fantastic choice for meal prep! You can prepare the Oreo truffle filling up to 24 hours in advance; just store it in an airtight container in the refrigerator to maintain its creaminess. The strawberries can also be hulled and prepped ahead of time—just remember to keep them dry to prevent any slipping of the filling. When you're ready to serve, simply fill the strawberries with the prepared truffle mixture, dip them in melted chocolate, and allow them to set. This ensures that your dessert is just as delicious while saving you precious time during your busy day!

Oreo Truffle-Stuffed Strawberries Variations

Feel free to get creative with these delightful Oreo Truffle-Stuffed Strawberries—after all, a little twist can make them even more scrumptious!

  • Golden Oreos: Swap regular Oreos for golden Oreos to add a hint of vanilla and a different flavor profile to your truffles. The sweetness will pair beautifully with the strawberries.

  • Cream Cheese Alternative: Use mascarpone instead of cream cheese for a lighter, fluffier filling that still maintains that delicious creaminess. The subtle difference in taste can offer a delightful surprise!

  • Greek Yogurt Twist: Replace cream cheese with Greek yogurt for a tangier filling that's lower in fat. This variation not only lightens the dessert but adds a refreshing zing that complements the sweetness.

  • Mini Chocolate Chips: Incorporate mini chocolate chips into the Oreo mixture for added texture and extra chocolatey goodness. The little bursts of chocolate will take the classic flavor to new heights.

  • Spicy Kick: Add a pinch of cayenne or chili powder to the melted chocolate for a surprising spicy twist! It’s a playful take that can elevate your dessert experience.
  • Nutty Crunch: Roll the chocolate-coated strawberries in crushed nuts like almonds or hazelnuts for an added crunch. This will not only enhance the flavor but also add an appealing texture contrast.

  • Fruit Filling: Try stuffing the strawberries with a mix of diced bananas or raspberries along with the Oreo filling. This fruity addition will provide a delightful freshness and new flavor layer!

  • Chocolate-Covered Surprise: For an upgraded presentation, dip the entire strawberry in chocolate before the stuffing and then re-dip the top part in chocolate again. This creates a gorgeous layered look and extra elegance for special occasions.

Remember, you can always experiment! If you're looking for more buttery deliciousness to accompany your treats, why not also try pairing them with a divine Panna Cotta Sweet? Happy cooking!

What to Serve with Oreo Truffle-Stuffed Strawberries

These delightful treats are perfect for building a memorable summer meal that will leave everyone craving more.

  • Whipped Cream: A dollop of fluffy whipped cream adds a light, airy texture that beautifully balances the rich Oreo filling.

  • Fruit Platter: Serve alongside a refreshing fruit platter for a colorful contrast; the crispness of other fruits enhances the strawberries’ juiciness.

  • Vanilla Ice Cream: The creaminess of vanilla ice cream provides a classic pairing, while its coolness complements the rich sweetness of the truffles.

  • Chocolate Fondue: Dip these strawberries into warm chocolate fondue for an interactive dessert experience—perfect for sharing and indulging!

  • Sparkling Water: Refreshing sparkling water adds a touch of fizz to your dessert spread and cleanses the palate between bites of sweet treats.

  • Mint Sprigs: Garnish with fresh mint leaves to bring a pop of color and a hint of herbal brightness, elevating the presentation and flavor.

  • Coffee or Espresso: Pair these strawberries with a cup of rich coffee or a shot of espresso for a delightful contrast between sweet and bitter.

Choosing any of these pairings will enhance your Oreo Truffle-Stuffed Strawberries experience, making your gathering even more special!

Oreo Truffle-Stuffed Strawberries Recipe FAQs

What type of strawberries should I use?
Absolutely, for the best results, choose large, firm fresh strawberries. The bigger the better, as they not only provide enough space for the filling but also ensure a beautiful presentation on your platter!

How should I store leftover Oreo Truffle-Stuffed Strawberries?
If you have any leftovers, store them in an airtight container in the refrigerator for up to 1 day. This keeps the strawberries fresh and prevents the chocolate coating from becoming sticky. Just be sure to enjoy them as soon as possible for optimal taste!

Can I freeze Oreo Truffle-Stuffed Strawberries?
While freezing isn't the best option due to their delicate nature, if necessary, you can freeze them for up to 1 week. Lay them flat on a baking sheet to freeze initially, preventing them from sticking together. Keep in mind, some texture might change once they're thawed, so for the best flavor and texture, it’s lovely to enjoy them fresh!

How do I ensure my truffle filling stays in the strawberries?
Very! Make sure to hull the strawberries carefully and dry them thoroughly after washing. Moisture can cause the filling to slip out. To make stuffing easier, you can refrigerate the Oreo truffle filling beforehand. A firmer mixture will press neatly into the strawberries without any fuss.

Are there any dietary concerns to consider with these strawberries?
Yes! If you’re preparing these treats for guests with allergies, be mindful that the Double Stuf Oreos contain gluten and dairy. You might consider using gluten-free cookies or a non-dairy cream cheese alternative to accommodate specific dietary needs!

How do I know when the chocolate is melted properly?
To achieve that perfect coat, heat the chocolate candy melts in the microwave in 30-second intervals, stirring in between. When the chocolate is smooth and fully melted, you’ll have a lovely, glossy finish for your strawberries. This careful melting prevents burning and ensures a silky coating!

Oreo Truffle-Stuffed Strawberries

Oreo Truffle-Stuffed Strawberries That Will Wow Your Guests

Oreo Truffle-Stuffed Strawberries are a delicious no-bake dessert that combines creamy Oreo truffles with juicy strawberries.
Print Recipe Pin Recipe
Prep Time 20 minutes mins
Chilling Time 20 minutes mins
Total Time 40 minutes mins
Servings: 12 servings
Course: Dessert
Cuisine: American
Calories: 150
Ingredients Equipment Method Nutrition Notes

Ingredients
  

For the Filling
  • 12 large Fresh Strawberries Choose large, juicy berries for optimal stuffing.
  • 1 package Double Stuf Oreo Cookies These cookies add sweetness and indulgence.
  • 4 oz Cream Cheese Can substitute with mascarpone cheese for a lighter option.
For the Coating
  • 1 cup Chocolate Candy Melts Any brand works well, including Ghirardelli.
  • 1/4 cup Chocolate Sprinkles Optional for extra texture.

Equipment

  • Food Processor
  • Microwave-safe bowl
  • melon baller
  • Parchment Paper

Method
 

Preparation
  1. Rinse strawberries under cool water and dry them gently.
  2. Remove green tops and hull out the centers using a melon baller.
  3. Set prepared strawberries aside on a plate.
Oreo Truffle Filling
  1. In a food processor, pulse the Oreo cookies into fine crumbs.
  2. Add cream cheese and blend until well combined into a dough-like mixture.
Stuffing
  1. Roll portions of the Oreo filling into balls and gently press into the hulled strawberries.
  2. Ensure the filling is even with the berry surface.
Melting Chocolate
  1. Melt chocolate candy melts in a microwave-safe bowl using 30-second intervals.
  2. Stir in between until the chocolate is smooth.
Coating and Decorating
  1. Dip the stuffed end of each strawberry into melted chocolate, covering the filling.
  2. Allow excess chocolate to drip back into the bowl and optionally roll in sprinkles or crushed Oreos.
Cooling
  1. Let the strawberries sit at room temperature or refrigerate for 15–20 minutes to set.
  2. Serve the same day for best taste.

Nutrition

Serving: 1strawberryCalories: 150kcalCarbohydrates: 20gProtein: 2gFat: 8gSaturated Fat: 5gMonounsaturated Fat: 3gCholesterol: 20mgSodium: 110mgPotassium: 120mgFiber: 1gSugar: 12gVitamin A: 500IUVitamin C: 8mgCalcium: 30mgIron: 0.5mg

Notes

Enjoy these strawberries cold for the best taste experience. Customization includes using various Oreo flavors or different toppings.

Tried this recipe?

Let us know how it was!

Indulge in Fudgy Almond Flour Chocolate Brownies Today!

January 12, 2026 by Grace Snow Leave a Comment

As I stood in the kitchen, the sweet aroma of melting chocolate filled the air, instantly transporting me to my childhood. There’s something magical about making Almond Flour Chocolate Brownies; these gluten-free delights have a fudgy richness that even non-gluten-free fans can’t resist. In just a matter of minutes, you can whip up a batch that promises to satisfy any chocolate craving, all while keeping dietary restrictions in check. What I love most is their versatility—serve them warm with a scoop of ice cream, or let them shine on their own with a light dusting of powdered sugar. They're perfect for sharing at gatherings or for a cozy night in. Curious about how to make these chocolatey wonders? Let’s dive into the recipe!

Why Are Almond Flour Chocolate Brownies Perfect?

Decadent Indulgence: These brownies are rich, fudgy, and utterly satisfying, making them an indulgent treat that you won’t believe is gluten-free!

Quick and Easy: With simple steps and minimal ingredients, you’ll have a batch fresh from the oven in no time—ideal for those last-minute dessert cravings!

Flavorful Richness: The combination of almond flour and dark chocolate creates an authentic taste that rivals traditional brownies.

Versatile Serving Options: Enjoy them warm a la mode with a scoop of vanilla ice cream, or savor them chilled with a sprinkle of powdered sugar.

Diet-Friendly Delight: Perfect for accommodating guests with dietary restrictions, these almond flour chocolate brownies allow everyone to enjoy a classic dessert without compromise. Whether you’re whipping them up for a gathering or treating yourself, these brownies hit the sweet spot every time!

Almond Flour Chocolate Brownie Ingredients

• Gather everything you need for a fudgy treat!

For the Brownies

  • Almond Flour – Acts as the main structure, ensuring your brownies are moist and gluten-free.
  • Cocoa Powder – Use unsweetened cocoa for rich chocolate flavor that elevates these almond flour chocolate brownies.
  • Baking Powder – Aiding in slight rising for that perfect texture.
  • Salt – Balances out the sweetness and enhances every chocolatey bite.
  • Eggs – Essential for binding, adding moisture, and achieving the ideal chewy consistency.
  • Unsalted Butter – Provides richness and fudginess; can be substituted with dairy-free butter for a lighter option.
  • Granulated Sugar – Sweetens the brownies; feel free to adjust to your taste preference.
  • Vanilla Extract – Infuses a delightful warmth that enhances the overall flavor.
  • Chopped Dark Chocolate or Chocolate Chips – These chocolate pockets add texture and extra indulgence with every bite.

Now that you have the ingredients ready, let’s turn this dreamy collection into delicious treats!

Step‑by‑Step Instructions for Almond Flour Chocolate Brownies

Step 1: Prepare Baking Dish
Begin by preheating your oven to 350°F (175°C). While the oven is heating, prepare a square baking pan (8x8 inches) by greasing it with butter or lining it with parchment paper. This ensures your fudgy almond flour chocolate brownies release easily once baked, setting you up for a successful treat.

Step 2: Mix Dry Ingredients
In a medium mixing bowl, combine 1 cup of almond flour, 1/3 cup of unsweetened cocoa powder, 1 teaspoon of baking powder, and a pinch of salt. Whisk these dry ingredients together thoroughly until well blended. This step ensures an even distribution of the cocoa and baking powder, setting the stage for your brownies' rich flavor and perfect rise.

Step 3: Whisk Eggs
In a separate large bowl, crack two eggs and whisk them vigorously until they appear pale and frothy, about 2-3 minutes. Then, add 1/2 cup of melted unsalted butter and 1 teaspoon of vanilla extract, mixing gently until everything is fully combined. This mixture will provide the moisture necessary to create deliciously dense almond flour chocolate brownies.

Step 4: Combine Mixtures
Gradually add your dry mixture to the wet ingredients, stirring until just combined. Be careful not to overmix; a few lumps are perfectly fine. You want to keep the batter thick and rich so that your brownies will have that desirable fudgy texture once baked.

Step 5: Add Chocolate
Gently fold in 1/2 cup of chopped dark chocolate or chocolate chips into the brownie batter. Use a spatula to ensure the chocolate is evenly distributed throughout the mixture, adding pockets of melted chocolate that will elevate the richness of your almond flour chocolate brownies.

Step 6: Bake Brownies
Pour the brownie batter into your prepared baking pan, smoothing the top with an offset spatula. Place the pan in your preheated oven and bake for 20-25 minutes. The edges should look set, and the center should still be slightly soft; a toothpick inserted should come out with a few moist crumbs for the best fudgy texture.

Step 7: Cool and Slice
Once baked, remove the pan from the oven and let the brownies cool completely in the pan on a wire rack, about 20-30 minutes. This cooling step is crucial for achieving clean cuts and avoiding crumbling. Once cooled, slice into squares and enjoy your delectable almond flour chocolate brownies, either plain or topped with whipped cream and berries as a delightful treat!

Storage Tips for Almond Flour Chocolate Brownies

Room Temperature: Keep your brownies stored in an airtight container for up to 4 days. This will help maintain their fudgy texture and rich flavor without drying them out.

Freezer: For longer storage, freeze brownies in an airtight container or wrap them individually in plastic wrap. They can last up to 2 months in the freezer while still retaining their delicious quality.

Thawing: When ready to enjoy, thaw your almond flour chocolate brownies at room temperature for about 30 minutes or heat them gently in the microwave for a few seconds to bring back that fresh-baked taste.

Reheating: If you prefer them warm, reheat in the microwave for 10-15 seconds or pop them in a preheated oven at 350°F (175°C) for 5-10 minutes until warm throughout.

What to Serve with Fudgy Gluten-Free Almond Flour Chocolate Brownies

Treat yourself to an unforgettable dessert experience where each bite is pure bliss, perfect for sharing or indulging in alone.

  • Vanilla Ice Cream: Creamy and cold, it complements the warm, fudgy brownies beautifully, creating a delightful temperature contrast.

  • Fresh Berries: Ripe strawberries or raspberries add a juicy burst of flavor, balancing the richness of the brownies while adding a pop of color to your plate.

    Pairing these brownies with fresh berries is a great way to bring a hint of tartness, leaving your palate refreshed and satisfied afterwards.

  • Whipped Cream: A dollop of lightly sweetened whipped cream perfectly crowns these brownies, adding a light, airy texture that enhances every decadent bite.

  • Espresso or Coffee: A rich cup of espresso or a robust coffee acts as a perfect counterbalance to the sweetness, intensifying the chocolate flavors beautifully.

  • Peanut Butter Drizzle: A bit of creamy peanut butter drizzled on top brings a nutty richness that harmonizes with the almond flour, delivering a uniquely satisfying experience.

  • Hot Chocolate: For true chocolate lovers, serving these brownies alongside a warm cup of hot chocolate offers an extra layer of indulgence that's hard to resist!

Almond Flour Chocolate Brownies Variations

Feel free to get creative with these brownies and tailor them to your taste preferences or dietary needs!

  • Gluten-Free All-Purpose Flour: Swap almond flour with a gluten-free all-purpose flour blend for a different texture while maintaining the gluten-free goodness.

  • Dairy-Free Delight: Replace unsalted butter with dairy-free butter or coconut oil for a dairy-free version without losing any richness.

  • Sweet Swaps: For a sweeter treat, use milk chocolate instead of dark chocolate; it adds a lovely creaminess and enhances the sweetness.

  • Nutty Crunch: Fold in a handful of chopped walnuts or pecans to the batter for added crunch and nutty flavor contrast against the fudgy texture.

  • Fruit Infusion: Add in some mashed bananas or applesauce instead of some butter for a fruit twist that keeps the brownies moist and adds a hint of natural sweetness.

  • Spicy Kick: Mix in a teaspoon of cayenne pepper or chili powder for a surprising, spicy depth of flavor that pairs beautifully with chocolate.

  • Flavorful Extracts: Experiment with different extracts like almond or orange instead of vanilla to give your brownies a unique flavor twist.

  • Superfood Boost: Add a tablespoon of chia seeds or flaxseeds for a healthy fiber boost; this is a great way to make your brownies a bit more nutritious!

With these variations, you’ll find the perfect way to indulge in your very own chocolaty creations! And if you're ever in the mood for something different, why not try my delicious Pumpkin Brownies Decadent for a seasonal twist or check out other tempting treats like German Chocolate Poke for more chocolatey bliss!

Make Ahead Options

These Almond Flour Chocolate Brownies are perfect for meal prep enthusiasts looking to save time during busy weeks! You can prepare the brownie batter up to 24 hours in advance—simply mix all your ingredients and transfer the batter into your prepared baking pan. Cover it tightly with plastic wrap and refrigerate until you're ready to bake. This method locks in moisture and ensures the brownies are just as fudgy when baked. When you’re ready to enjoy, simply bake straight from the fridge; you might need to add an extra minute or two to the baking time. With this make-ahead option, you’ll achieve delicious, chocolatey bliss with minimal effort on a hectic day!

Expert Tips for Almond Flour Chocolate Brownies

  • Perfect Cooling: Allow your brownies to cool completely before slicing; this prevents crumbling and ensures clean cuts for that perfect presentation.

  • Moisture Adjustment: Since almond flour absorbs moisture differently than all-purpose flour, consider adding an extra egg if your batter seems too thick.

  • Chocolate Choices: Always double-check that your chocolate or chocolate chips are gluten-free, particularly if you're serving these brownies to guests with dietary restrictions.

  • Mixing Technique: Avoid overmixing after combining wet and dry ingredients. A few lumps are okay; overmixing can result in denser brownies than desired.

  • Storage Solutions: Store any leftover almond flour chocolate brownies in an airtight container to keep them fudgy and fresh for up to 4 days at room temperature.

Almond Flour Chocolate Brownies Recipe FAQs

What is the best way to select almond flour for my brownies?
When choosing almond flour, look for finely ground options to ensure a smooth texture in your brownies. Make sure it’s labeled gluten-free if you’re cooking for someone with dietary restrictions. For the best flavor, I often opt for blanched almond flour as it has a milder taste and lighter color, creating that deliciously rich aspect in my brownies.

How should I store the brownies, and how long do they last?
Store your almond flour chocolate brownies in an airtight container at room temperature for up to 4 days. They’ll maintain their fudgy texture beautifully. If you anticipate not finishing them within that timeframe, freezing is a great option. Simply place them in a freezer-safe container or wrap each brownie individually in plastic wrap. They’ll stay good for up to 2 months!

Can I freeze almond flour brownies, and how do I do it?
Absolutely! To freeze your almond flour chocolate brownies, first let them cool completely after baking. Once cooled, slice the brownies to your preferred portion size. Wrap each piece in plastic wrap and place them in a freezer-safe bag or container, making sure to press out any excess air. When you're ready to eat them, simply thaw at room temperature for about 30 minutes or microwave for a few seconds to enjoy that fresh-baked taste again!

What should I do if my brownies are too crumbly?
If your almond flour chocolate brownies turn out crumbly, it may be due to a couple of factors—either the almond flour absorbs moisture differently than wheat flour or the batter was overmixed. For next time, you can enhance binding by adding an extra egg. If you run into crumbly brownies already, try whipping up a quick ganache or frosting to hold the pieces together while still delivering the delicious taste.

Are almond flour brownies safe for people with nut allergies?
Unfortunately, almond flour chocolate brownies are not safe for those with nut allergies, as almond flour is made from ground almonds. If you’re looking for a nut-free alternative, consider using sunflower seed flour, which behaves similarly and yields delightful results. Be sure to monitor any chocolate or additional ingredients for cross-contamination if you’re serving guests with allergies.

Almond Flour Chocolate Brownies

Indulge in Fudgy Almond Flour Chocolate Brownies Today!

These Almond Flour Chocolate Brownies are gluten-free, fudgy, and perfect for satisfying chocolate cravings.
Print Recipe Pin Recipe
Prep Time 10 minutes mins
Cook Time 25 minutes mins
Cooling Time 30 minutes mins
Total Time 1 hour hr 5 minutes mins
Servings: 16 slices
Course: Dessert
Cuisine: American
Calories: 150
Ingredients Equipment Method Nutrition Notes

Ingredients
  

For the Brownies
  • 1 cup Almond Flour Acts as the main structure
  • 1/3 cup Unsweetened Cocoa Powder For rich chocolate flavor
  • 1 teaspoon Baking Powder Aiding in slight rising
  • 1 pinch Salt Balances out sweetness
  • 2 large Eggs Essential for binding
  • 1/2 cup Unsalted Butter Provides richness and can be substituted with dairy-free butter
  • 1 cup Granulated Sugar Sweetens the brownies
  • 1 teaspoon Vanilla Extract Infuses warmth into the flavor
  • 1/2 cup Chopped Dark Chocolate or Chocolate Chips Adds texture and extra indulgence

Equipment

  • 8x8 inch square baking pan
  • Mixing bowls
  • Whisk
  • Spatula

Method
 

Step-by-Step Instructions for Almond Flour Chocolate Brownies
  1. Preheat your oven to 350°F (175°C) and prepare an 8x8 inch square baking pan.
  2. In a medium bowl, combine almond flour, cocoa powder, baking powder, and salt. Whisk together.
  3. In a large bowl, whisk together eggs until pale and frothy. Add melted butter and vanilla; mix until combined.
  4. Gradually add the dry ingredients to the wet mixture, stirring until just combined.
  5. Fold in chocolate or chocolate chips until evenly distributed.
  6. Pour the batter into the prepared pan and bake for 20-25 minutes until edges are set.
  7. Remove from oven and let cool completely before slicing into squares.

Nutrition

Serving: 1sliceCalories: 150kcalCarbohydrates: 15gProtein: 3gFat: 9gSaturated Fat: 5gPolyunsaturated Fat: 0.5gMonounsaturated Fat: 3gCholesterol: 40mgSodium: 100mgPotassium: 150mgFiber: 2gSugar: 10gCalcium: 2mgIron: 6mg

Notes

Store leftover brownies in an airtight container for up to 4 days. For longer storage, freeze for up to 2 months.

Tried this recipe?

Let us know how it was!

Peanut Butter Brownie Swirl Cookies That Melt in Your Mouth

January 12, 2026 by Grace Snow Leave a Comment

Have you ever craved a dessert that unites two beloved treats in one satisfying bite? Introducing my Peanut Butter Brownie Swirl Cookies, where the rich allure of fudgy brownies meets the irresistible creaminess of peanut butter cookies. These delightful confections are not only a quick and easy bake, perfect for any occasion, but they also cater to various dietary preferences, allowing everyone to indulge. Imagine sinking your teeth into a soft, marbled cookie that offers a textural blend of chewy and creamy goodness—satisfying your sweet tooth without guilt. Ready to take a delicious journey into the world of cookies? Let’s dive into this heavenly recipe!

Why are These Cookies a Must-Try?

Irresistible Flavor Fusion: The marriage of creamy peanut butter with rich chocolate brownie creates a decadent treat that will satisfy any sweet craving.

Diet-Friendly Options: These Peanut Butter Brownie Swirl Cookies can easily be modified to be gluten-free, dairy-free, or vegan, so everyone can enjoy!

Quick & Easy: With simple ingredients that mix effortlessly, these cookies come together in no time, making them perfect for busy days or last-minute gatherings.

Marble Marvel: The stunning swirl design not only looks impressive but also offers a delightful contrast of flavors in each bite. Pair them with a glass of milk or alongside your favorite ice cream for an indulgent experience!

Crowd-Pleaser: No matter the occasion—family gatherings, bake sales, or cozy nights in—these cookies are sure to be a hit with everyone. If you love delectable treats, you might also enjoy Thumbprint Cookies Melt or try some Eggnog Cookies Soft for a festive twist!

Peanut Butter Brownie Swirl Cookies Ingredients

For the Peanut Butter Dough
• Creamy Peanut Butter – Adds nutty sweetness and moisture; consider swapping with almond butter for a peanut-free option.
• Butter (softened & melted) – Provides fat for richness and a tender texture; use dairy-free butter for a dairy-free version.
• Brown Sugar – Contributes sweetness and enhances chewiness; alternative: coconut sugar for a refined sugar-free variation.
• Egg – Binds the dough together; for vegan options, use flaxseed meal mixed with water.
• Vanilla Extract – Enhances flavor depth.
• All-Purpose Flour – Offers structure; substitute with a gluten-free blend accordingly.
• Baking Soda & Baking Powder – Leavening agents for a light texture.
• Salt – Balances sweetness and enhances flavor.

For the Brownie Dough
• White Sugar – Increases sweetness and moisture; replace with a sugar substitute for a refined-sugar-free version.
• Cocoa Powder – Adds rich chocolate flavor; ensure it's unsweetened.
• Chocolate Chips – Provides pockets of melted chocolate goodness; use dairy-free chocolate for a vegan option.

These delicious Peanut Butter Brownie Swirl Cookies will surely melt in your mouth with their perfect textures and delightful flavors!

Step‑by‑Step Instructions for Peanut Butter Brownie Swirl Cookies

Step 1: Prepare Peanut Butter Dough
In a large mixing bowl, use an electric mixer to beat together 1 cup of creamy peanut butter, ½ cup of softened and melted butter, and 1 cup of packed brown sugar until the mixture is light and fluffy. Mix in 1 egg and 1 teaspoon of vanilla extract until combined. In a separate bowl, whisk together 1 ½ cups of all-purpose flour, ½ teaspoon of baking soda, and a pinch of salt, then gradually blend this dry mixture into the peanut butter mix until just incorporated.

Step 2: Prepare Brownie Dough
In another mixing bowl, whisk together ½ cup of melted butter and 1 cup of white sugar until smooth. Add ½ cup of unsweetened cocoa powder, followed by 1 egg and 1 teaspoon of vanilla extract, mixing well after each addition. Gently fold in ¾ cup of all-purpose flour, ½ teaspoon of baking powder, and a pinch of salt, along with ½ cup of chocolate chips until fully combined, creating your rich brownie batter.

Step 3: Chill Both Doughs
Cover both the peanut butter dough and brownie dough with plastic wrap, and refrigerate for about 30 minutes. Chilling the dough makes it easier to handle and helps achieve the perfect texture in your Peanut Butter Brownie Swirl Cookies. While the dough chills, you can preheat your oven to 350°F (175°C) to prepare for baking.

Step 4: Form Cookies
Once chilled, line a baking sheet with parchment paper for easy cleanup. Using a cookie scoop or tablespoon, drop 1-2 tablespoons of peanut butter dough and brownie dough side by side onto the sheet. With a toothpick or skewer, gently swirl the two doughs together. Be careful not to overmix; you want the beautiful marbled appearance to shine through!

Step 5: Bake
Place your baking sheet in the preheated oven and bake the cookies for 9 to 11 minutes. You’ll know they are done when the tops look lightly crackled and the edges are set, yet the centers remain soft. Remember, the cookies will continue to firm up after cooling, so take care not to overbake them for the best texture.

Step 6: Cool
After removing the baking sheet from the oven, allow the Peanut Butter Brownie Swirl Cookies to cool on the sheet for about 5 to 10 minutes. This cooling time helps them set perfectly, making it easier to transfer them to a wire rack. Once they are slightly cool, carefully move the cookies to the rack to cool completely and enjoy the delightful fusion of flavors!

Expert Tips for Peanut Butter Brownie Swirl Cookies

  • Room Temperature Ingredients: Ensure all ingredients, especially butter and eggs, are at room temperature for better mixing and mouthfeel.

  • Gentle Swirling: When creating the swirl, use a light hand with a toothpick to avoid overmixing, preserving the beautiful marbled effect.

  • Cookie Size Consistency: Use a cookie scoop to maintain uniform portions, ensuring even baking throughout your Peanut Butter Brownie Swirl Cookies.

  • Perfect Baking Time: Keep an eye on the timer; bake until the tops are lightly crackled but soft in the center for that chewy texture you desire.

  • Cooling Tricks: Allow cookies to cool on the baking sheet before transferring them. This helps set their structure and prevents crumbling.

Storage Tips for Peanut Butter Brownie Swirl Cookies

Room Temperature: Store the cookies in an airtight container at room temperature for up to 1 week to maintain their delightful texture and flavor.

Fridge: If you prefer, you can keep the cookies in the fridge for up to 2 weeks. Just ensure they are well-wrapped to avoid drying out.

Freezer: For longer storage, freeze the cookies in an airtight container for up to 3 months. Separate layers with parchment paper to prevent sticking.

Reheating: To enjoy warm cookies, reheat in the microwave for 10-15 seconds. This will bring back that gooey goodness in every bite of your Peanut Butter Brownie Swirl Cookies!

Make Ahead Options

These Peanut Butter Brownie Swirl Cookies are fantastic for busy home cooks looking to save time! You can prepare both the peanut butter and brownie doughs up to 3 days in advance. Simply mix each dough, cover them tightly with plastic wrap, and refrigerate until you're ready to bake. This not only makes for easier meal prep but also allows the flavors to meld beautifully. When you're ready to enjoy these cookies, just scoop and swirl the chilled doughs, then bake as directed. They’ll emerge just as delicious, with the perfect balance of soft and chewy texture in every bite!

Peanut Butter Brownie Swirl Cookies Variations

Feel free to get creative with these Peanut Butter Brownie Swirl Cookies—let's make them truly your own!

  • Gluten-Free: Swap out the all-purpose flour for a 1:1 gluten-free baking blend for a delicious alternative. Enjoy the same texture without the gluten!
  • Dairy-Free: Use dairy-free butter and almond milk for a rich, creamy flavor without any dairy. A great choice for lactose intolerant friends!
  • Vegan: Replace eggs with flaxseed meal mixed with water and opt for vegan chocolate chips. Delight in a plant-based twist that’s still indulgent.
  • Refined Sugar-Free: Consider using coconut sugar or a no-calorie sweetener instead of brown and white sugar. Your sweet tooth can still be satisfied without refined sugar.
  • Nutty Flavor Boost: Add chopped nuts such as walnuts or pecans to the brownie dough for added crunch and flavor. These nuts bring a delightful surprise in every bite!
  • Spicy Kick: Mix in a pinch of cayenne or chili powder to the brownie dough for a unique heat that contrasts beautifully with the sweet flavors. Who said cookies can't have a little spice?
  • Extra Chocolatey: Stir in an extra ½ cup of chocolate chips for those who just can’t have enough chocolate! These cookies will be a chocoholic's dream come true.
  • Swirled with Jam: Add a spoonful of your favorite jam to the peanut butter dough before swirling. Raspberry or strawberry jam offers a fruity twist that elevates the cookie experience.

Feeling inspired to try something new? You might also love these Matcha Cookies Soft for a unique flavor journey!

What to Serve with Peanut Butter Brownie Swirl Cookies

Indulging in these delightful cookies opens the door to a world of perfect pairings that enhance their rich flavors.

  • Cold Glass of Milk: The classic pairing that complements the sweetness and creaminess of the cookies, making each bite even more enjoyable.
  • Vanilla Ice Cream: Serving these warm cookies with a scoop of vanilla ice cream creates a dreamy contrast of temperatures and flavors.
  • Fresh Berries: Juicy raspberries or strawberries add a bright, tart element that cuts through the rich, creamy sweetness of the cookies beautifully.
  • Coffee or Espresso: A strong cup brings out the deep chocolate flavors while balancing the nutty undertone of the peanut butter wonderfully.
  • Chocolate Sauce Drizzle: For true chocolate lovers, a drizzle adds extra richness and enhances the marbled appearance, making them even more decadent.
  • Coconut Whipped Cream: Light and airy, this adds a hint of tropical flavor which pairs beautifully with the chocolate and peanut butter.
  • Nutty Granola: A crunchy side to contrast the chewy cookie texture, offering a satisfying crunch with every mouthful.
  • Sparkling Water: A refreshing palate cleanser that lightens the experience and keeps the flavor sensations lively and fun.
  • Homemade Caramel Sauce:
    Drizzle this indulgent sauce over the cookies or serve it on the side for a sophisticated twist that elevates your dessert experience.
  • Tea: A warm cup of chamomile or chai complements the cookies' flavor profile while creating a cozy, comforting vibe for any gathering.

Peanut Butter Brownie Swirl Cookies Recipe FAQs

How do I choose the right peanut butter for the cookies?
Absolutely! Use creamy peanut butter for a smooth texture that blends well into the dough. Look for natural peanut butter with minimal ingredients, ideally just peanuts and salt. If you're avoiding peanuts, almond butter is a fantastic peanut-free alternative that still offers a nutty flavor.

What is the best way to store Peanut Butter Brownie Swirl Cookies?
To keep your cookies fresh and delicious, store them in an airtight container at room temperature for up to one week. If you’re keeping them for longer, refrigerate the cookies wrapped tightly for up to two weeks to prevent them from drying out.

Can I freeze these cookies? If so, how do I do it?
Absolutely! Freezing is a great way to preserve the cookies. Allow them to cool completely, then place them in an airtight container, separating layers with pieces of parchment paper to prevent sticking. They can be frozen for up to three months. When you're ready to enjoy them, simply thaw at room temperature or reheat in the microwave for 10-15 seconds for that just-baked warmth.

What if my dough is too sticky to form cookies?
No worries! If you find your dough is sticky, it may be due to the temperature of your ingredients or humidity levels. I recommend refrigerating the dough for an additional 15-30 minutes to firm it up, making it easier to scoop and swirl. If needed, you can also try adding a bit more flour, one tablespoon at a time, until you reach the right consistency.

Are these cookies suitable for people with dietary restrictions?
Yes! These Peanut Butter Brownie Swirl Cookies can easily accommodate various dietary needs. For a gluten-free option, simply substitute all-purpose flour with a 1:1 gluten-free baking blend. If you're looking for a dairy-free or vegan version, use dairy-free butter and flaxseed meal mixed with water in place of the egg. You can also replace granulated sugar with coconut sugar to create a refined sugar-free treat.

How can I tell when the cookies are finished baking?
Great question! The key indicators are lightly crackled tops and set edges while maintaining soft centers. Bake them for about 9-11 minutes in a preheated oven at 350°F (175°C). Remember, they will continue to firm up as they cool on the baking sheet, so it's best to err on the side of caution and not overbake them.

Peanut Butter Brownie Swirl Cookies

Peanut Butter Brownie Swirl Cookies That Melt in Your Mouth

Indulge in Peanut Butter Brownie Swirl Cookies, combining fudgy brownies and creamy peanut butter for a delicious treat.
Print Recipe Pin Recipe
Prep Time 30 minutes mins
Cook Time 11 minutes mins
Chilling Time 30 minutes mins
Total Time 1 hour hr 11 minutes mins
Servings: 24 cookies
Course: Dessert
Cuisine: American
Calories: 150
Ingredients Equipment Method Nutrition Notes

Ingredients
  

Peanut Butter Dough
  • 1 cup creamy peanut butter can substitute with almond butter for a peanut-free version
  • ½ cup butter softened & melted; dairy-free option available
  • 1 cup brown sugar substitute with coconut sugar for refined sugar-free
  • 1 large egg for vegan, use flaxseed meal mixed with water
  • 1 teaspoon vanilla extract
  • 1 ½ cups all-purpose flour can substitute with gluten-free blend
  • ½ teaspoon baking soda
  • 1 pinch salt
Brownie Dough
  • ½ cup butter melted
  • 1 cup white sugar can replace with sugar substitute
  • ½ cup cocoa powder unsweetened
  • 1 large egg
  • 1 teaspoon vanilla extract
  • ¾ cup all-purpose flour
  • ½ teaspoon baking powder
  • 1 pinch salt
  • ½ cup chocolate chips can use dairy-free for vegan

Equipment

  • Electric mixer
  • Mixing bowls
  • Cookie Scoop
  • Baking Sheet
  • Parchment Paper

Method
 

Peanut Butter Brownie Swirl Cookies
  1. Prepare Peanut Butter Dough: Beat together peanut butter, melted butter, and brown sugar until light and fluffy. Mix in egg and vanilla. Blend in dry ingredients until just incorporated.
  2. Prepare Brownie Dough: whisk melted butter and sugar until smooth; add cocoa, egg, vanilla, flour, baking powder, salt, and fold in chocolate chips.
  3. Chill Both Doughs: Cover both doughs and refrigerate for 30 minutes.
  4. Form Cookies: Drop scoops of dough side by side on a baking sheet and swirl them gently.
  5. Bake: Bake at 350°F for 9-11 minutes.
  6. Cool: Let cookies cool for 5-10 minutes on the sheet before transferring to a wire rack.

Nutrition

Serving: 1cookieCalories: 150kcalCarbohydrates: 20gProtein: 2gFat: 7gSaturated Fat: 4gPolyunsaturated Fat: 1gMonounsaturated Fat: 2gCholesterol: 15mgSodium: 100mgPotassium: 60mgFiber: 1gSugar: 10gVitamin A: 200IUCalcium: 20mgIron: 0.5mg

Notes

For best results, use room temperature ingredients and maintain consistent cookie sizes with a scoop.

Tried this recipe?

Let us know how it was!
  • « Previous Page
  • 1
  • …
  • 27
  • 28
  • 29
  • 30
  • 31
  • …
  • 65
  • Next Page »

Welcome!

Hi, I’m Grace, a Sydney-based home cook with a passion for bold flavors and trending ingredients. Whether you’re a busy beginner or a seasoned foodie, you’ll find dishes here that are fresh, fun, and full of flavor.

More about me

Popular Recipes

  • Pomegranate Caramels
    Pomegranate Caramels - Irresistibly Chewy Homemade Treats
  • Blueberry–Lemon Curd Tart
    Blueberry-Lemon Curd Tart: A Refreshing Summer Delight
  • Winter Wonderland Chocolate Chip Christmas Cookies
    Winter Wonderland Chocolate Chip Christmas Cookies Bliss
  • Oreo Chocolate Chip Cookies
    Chewy Oreo Chocolate Chip Cookies You Can't Resist

Footer

↑ back to top

About

  • Privacy Policy
  • Disclaimer
  • Terms & Conditions

Newsletter

  • Sign Up! for emails and updates

Contact

  • About me
  • Contact me

Copyright © 2025 TastyTrendIngredients