tastytrendingredients

  • Home
  • Recipes
    • Appetizers
    • Breakfast
    • Dessert
    • Dinner
    • Drinks
    • Salads
    • Snacks
    • Soups
  • About me
  • Contact
menu icon
go to homepage
  • Home
  • Recipes
    • Appetizers
    • Breakfast
    • Dessert
    • Dinner
    • Drinks
    • Salads
    • Snacks
    • Soups
  • About me
  • Contact
search icon
Homepage link
  • Home
  • Recipes
    • Appetizers
    • Breakfast
    • Dessert
    • Dinner
    • Drinks
    • Salads
    • Snacks
    • Soups
  • About me
  • Contact
×

Wholesome Blueberry Cottage Cheese Breakfast Bake to Energize Mornings

November 24, 2025 by Grace Snow Leave a Comment

There’s nothing quite like waking up to the aroma of something warm and delicious wafting through the house. That’s why I’m thrilled to share my Easy High-Protein Blueberry Cottage Cheese Breakfast Bake with you. This recipe is a perfect solution for busy mornings, packing over 20 grams of protein per serving while remaining irresistibly delightful and satisfying. Made with creamy cottage cheese, sweet blueberries, and hearty oats, this bake can be prepared in advance and simply popped in the oven while you go about your morning routine. Imagine having a nutritious breakfast on the table without the hassle of cooking from scratch! Plus, this dish makes an excellent meal prep option, ensuring you and your loved ones can kick off the day on a healthy note. Ready to dive into a breakfast that feels like a warm hug? Let's get started!
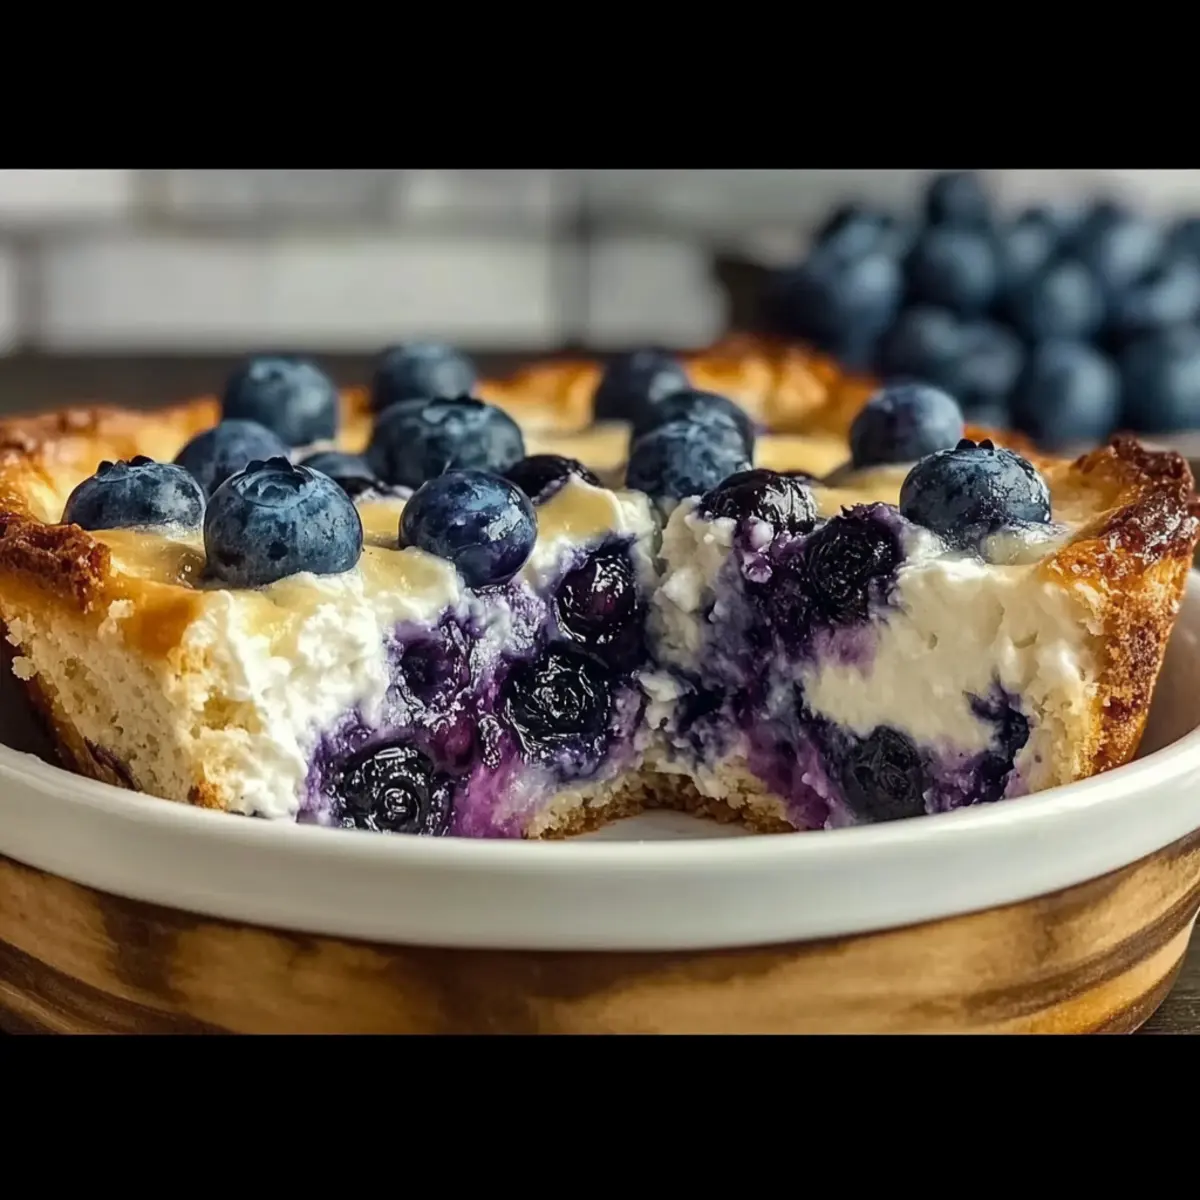
Why is this breakfast bake a must-try?

Deliciously Creamy: The blend of creamy cottage cheese and sweet blueberries creates a rich, satisfying bite that will leave you craving more.

High-Protein Boost: With over 20 grams of protein per serving, this recipe is an excellent choice for fueling your morning activities and curbing hunger.

Make-Ahead Friendly: Prepare it the night before and pop it in the oven in the morning, making breakfast less hectic and more enjoyable!

Versatile Ingredients: Feel free to swap in different fruits like raspberries or even diced apples for a fun twist!

Crowd-Pleasing: It’s perfect for the family table; who can resist a warm, bubbly bake that smells amazing? Try it alongside a Breakfast Banana Split for an exciting morning feast!

Blueberry Cottage Cheese Breakfast Bake Ingredients

For the Bake

  • Low-Fat Cottage Cheese – Adds creaminess and protein; for a richer texture, consider using full-fat.
  • Large Eggs – Provides structure and moisture; essential for the bake's integrity.
  • Honey or Maple Syrup – Sweetens the dish; you can use agave syrup for a vegan alternative.
  • Vanilla Extract – Enhances flavor; crucial for bringing out the best in this blueberry bake.
  • Ground Cinnamon – Offers warmth and spice; feel free to experiment with nutmeg for a twist.
  • Salt – Balances sweetness and enhances flavors; don't skip this ingredient for the best taste.
  • Rolled Oats – Provides texture and fiber; use certified gluten-free oats for a gluten-free option.
  • Almond Milk – Adds moisture; feel free to swap for any milk of choice, dairy or non-dairy.
  • Fresh or Frozen Blueberries – Key ingredient for natural sweetness and antioxidants; substitute with raspberries if desired.
  • Chopped Nuts (optional) – Adds crunch and healthy fats; walnuts or pecans complement the recipe beautifully.
  • Chia Seeds (optional) – Boosts nutrition with added fiber; omit if not available.

Step‑by‑Step Instructions for Blueberry Cottage Cheese Breakfast Bake

Step 1: Preheat and Prepare
Begin by preheating your oven to 350°F (175°C). While the oven warms, grease a 9x9-inch baking dish with butter to prevent sticking. This will ensure your Blueberry Cottage Cheese Breakfast Bake slides out easily after baking, giving you that perfect slice to serve.

Step 2: Whisk the Wet Ingredients
In a large mixing bowl, whisk together low-fat cottage cheese, large eggs, honey or maple syrup, vanilla extract, ground cinnamon, and a pinch of salt until smooth. This step creates the creamy base for your breakfast bake. Aim for a uniform consistency, ensuring everything is well combined before moving on to the dry ingredients.

Step 3: Combine with Oats and Milk
Next, stir in the rolled oats and almond milk into the mixture, blending thoroughly. Let this sit for about 5 minutes, allowing the oats to absorb the liquid slightly. This helps create that delightful texture and ensures the flavors meld perfectly in your Blueberry Cottage Cheese Breakfast Bake.

Step 4: Fold in the Blueberries
Gently fold in the blueberries, taking care not to burst them. If using nuts or chia seeds, add them at this stage as well for added texture and nutrition. The blueberries will provide sweet bursts of flavor throughout the bake, making every bite a delightful experience.

Step 5: Pour and Spread
Pour the mixture into the prepared baking dish, spreading it evenly with a spatula. This ensures that the bake cooks uniformly, giving you that lovely golden crust on top. Make sure the blueberries are distributed throughout for optimal flavor in every serving of your breakfast bake.

Step 6: Bake to Perfection
Place the dish in the preheated oven and bake for 40–45 minutes, or until the top is golden brown and a toothpick inserted in the center comes out clean. The wonderful aroma of your Blueberry Cottage Cheese Breakfast Bake will fill your kitchen, promising a delicious treat once it’s ready!

Step 7: Cool and Serve
After baking, allow the dish to cool for about 5–10 minutes. This cooling time helps firm up the bake so it’s easier to cut and serve. Enjoy it warm, perhaps paired with a dollop of Greek yogurt or a drizzle of maple syrup for an extra touch of indulgence.
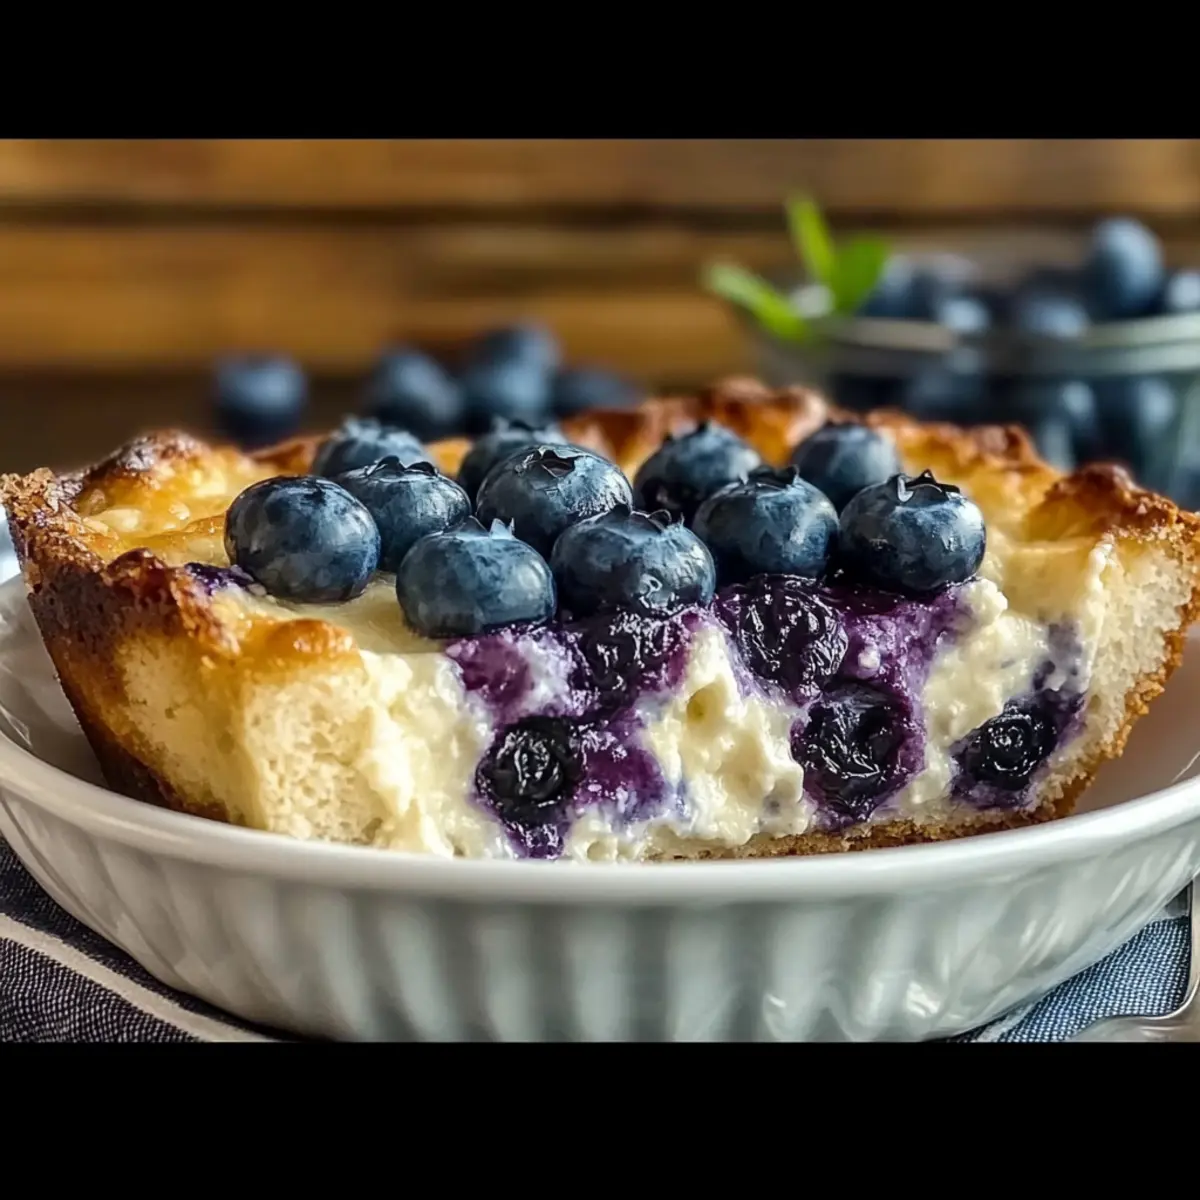
Expert Tips for Blueberry Cottage Cheese Breakfast Bake

  • Room Temperature Cheese: Let cottage cheese sit at room temperature for 30 minutes before mixing for a smoother batter that blends well into your Blueberry Cottage Cheese Breakfast Bake.

  • Immersion Blend Magic: For an ultra-creamy texture, use an immersion blender to mix your wet ingredients. This technique can make a noticeable difference in the consistency of your bake.

  • Avoid Overmixing: When folding in blueberries, be gentle to avoid bursting them. This keeps the berries intact, ensuring delightful pops of sweetness in every bite of your Blueberry Cottage Cheese Breakfast Bake.

  • Storage Solutions: Store leftovers in the refrigerator for up to 4 days. Consider cutting into individual portions for quick and easy access during busy mornings.

  • Garnish for Greatness: Enhance your serving with a dollop of Greek yogurt, a sprinkle of nuts, or a drizzle of honey for added flavor and nutritional benefits.

What to Serve with Blueberry Cottage Cheese Breakfast Bake

Start your day with a breakfast experience that tantalizes your taste buds and warms your heart.

  • Creamy Greek Yogurt: A dollop of Greek yogurt on top adds a luscious creaminess and boosts protein content.
  • Fresh Berry Medley: A mix of our favorite seasonal berries enhances the dish's fruity flavor and provides a burst of freshness.
  • Maple Syrup Drizzle: Drizzle a bit of pure maple syrup for a touch of sweetness; it pairs perfectly with the oats and blueberries.
  • Crunchy Granola: Sprinkle some granola on top for extra texture and a delightful crunch, making it feel like a wholesome breakfast bowl.
  • Nutty Trail Mix: Serve with a side of your favorite trail mix; the healthy fats will keep you fueled throughout the morning.
  • Chia Seed Pudding: Complement it with chia seed pudding filled with vanilla; it creates a lovely contrast in texture.
  • Smoothies: A refreshing fruit smoothie can round out the meal, offering more vitamins and a delicious sip to chase every bite.
  • Herbal Tea or Coffee: Pair with a soothing herbal tea or a warm cup of coffee; the warmth enhances the comforting morning vibe.
  • Cinnamon-Spiced Apples: Serve warm cinnamon-spiced apples as a side dish for a cozy feel that complements the bake beautifully.

Make Ahead Options

These Easy High-Protein Blueberry Cottage Cheese Breakfast Bake options are perfect for busy mornings! You can prepare the entire mixture up to 24 hours in advance by combining the cottage cheese, eggs, sweetener, and oats in a bowl. Simply cover it tightly with plastic wrap and refrigerate. When you're ready to bake, gently fold in the blueberries just before pouring the mixture into the baking dish, ensuring they stay intact for delicious bursts of flavor. Baking straight from the fridge will keep the bake's texture just right and ensure it remains just as delicious. Enjoy a nutritious breakfast with minimal effort on your busiest days!

How to Store and Freeze Blueberry Cottage Cheese Breakfast Bake

Fridge: Store any leftovers in an airtight container in the refrigerator for up to 4 days. This keeps the Blueberry Cottage Cheese Breakfast Bake fresh and ready to enjoy on busy mornings.

Freezer: For longer storage, freeze the baked dish in individual portions. Wrap each piece tightly in plastic wrap and then in aluminum foil for added protection. It can last for up to 3 months in the freezer.

Reheating: To reheat, simply thaw in the refrigerator overnight if frozen, then warm in the microwave or oven until heated through. A quick microwave method takes about 1-2 minutes, depending on your portion size.

Make-Ahead Tips: You can prepare the mixture and store it covered in the fridge overnight before baking in the morning. This way, your Blueberry Cottage Cheese Breakfast Bake will be a breeze to make!

Blueberry Cottage Cheese Breakfast Bake Variations

Feel free to get creative and customize your breakfast bake just the way you like it!

  • Fruit Swap: Try using raspberries or diced apples instead of blueberries for a fresh twist. Each fruit brings its own unique flavor and sweetness to the mix.

  • Nut-Free Option: Omit the chopped nuts entirely for a nut-free version or swap in sunflower seeds for added crunch without the allergens. Your breakfast will still be hearty and satisfying!

  • Savory Surprise: Experiment by replacing the sweet elements with herbs and cheese for a savory breakfast bake. Think crumbled feta and spinach, a delightful change from the usual sweet flavors.

  • Gluten-Free Twist: Use certified gluten-free oats to make this recipe gluten-free. This small adjustment ensures everyone can enjoy this wholesome dish.

  • Vegan Version: Swap the eggs with a flaxseed or chia egg and the cottage cheese with a plant-based alternative like silken tofu or non-dairy yogurt for a vegan delight. It’s still protein-packed and delicious!

  • Extra Spices: Boost the warmth by adding nutmeg or pumpkin spice to the mixture for a cozy autumn feel that’s perfect any time of year.

  • Creamy Upgrade: For an even richer texture, consider blending in a scoop of Greek yogurt into the wet ingredients. This not only enhances creaminess but also amps up the protein even more.

  • Heat It Up: If you like a bit of a kick, sprinkle in some cayenne or red pepper flakes for a surprising twist that beautifully contrasts the sweetness of the dish.

Once you try these variations, you might just find a new family favorite! Pair your Blueberry Cottage Cheese Breakfast Bake with a comforting side of Cornbread Breakfast Casserole or some delightful Breakfast Egg Muffins for an added breakfast feast. Enjoy experimenting!
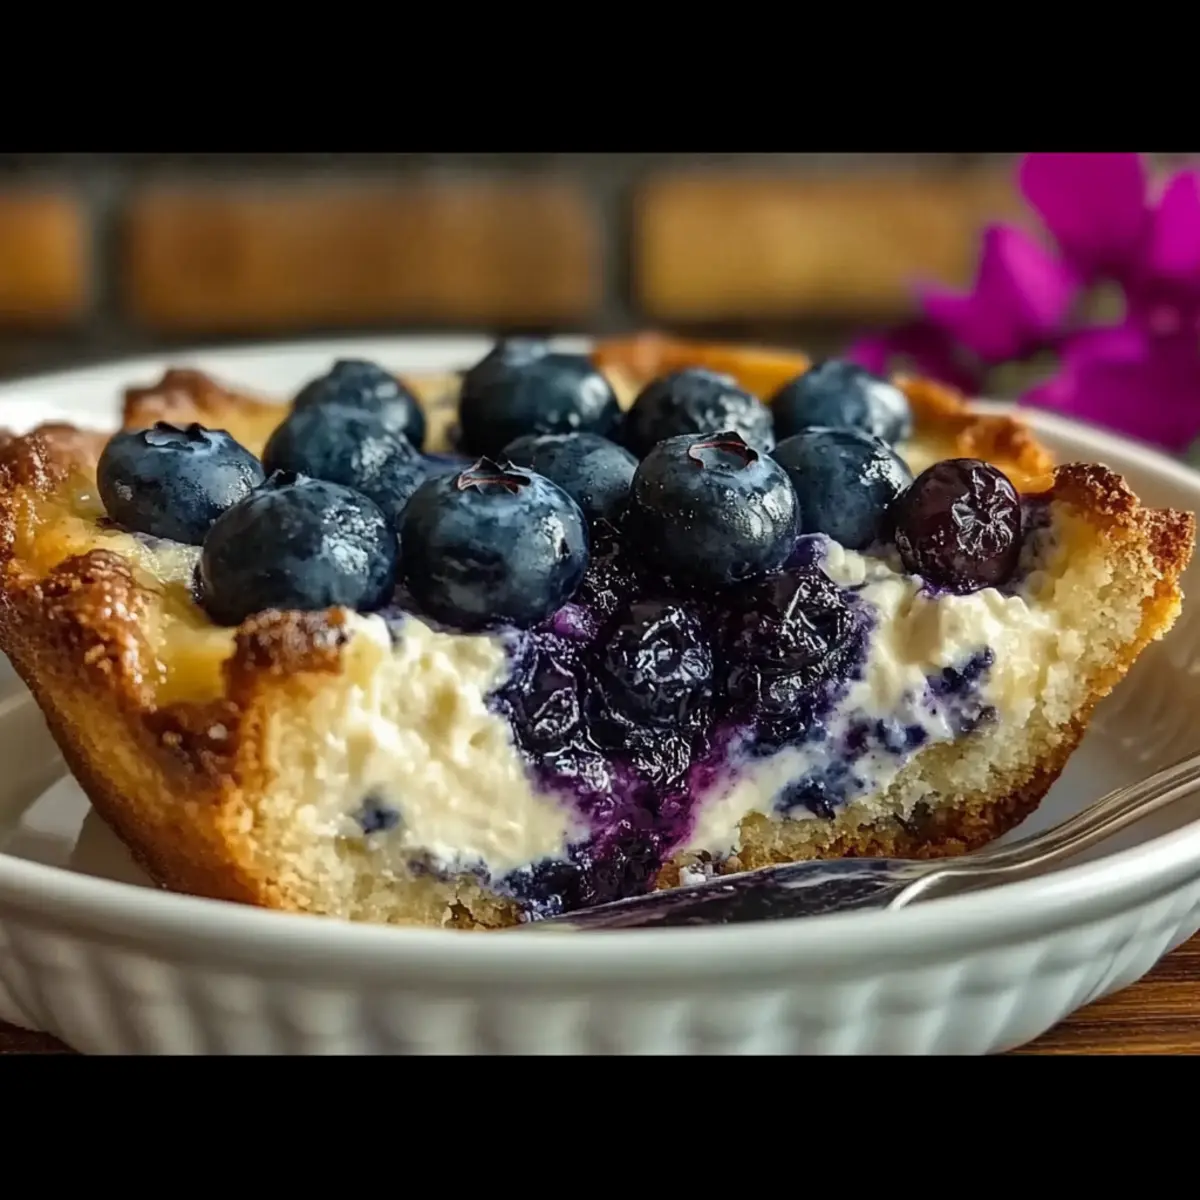
Blueberry Cottage Cheese Breakfast Bake Recipe FAQs

What should I look for when selecting blueberries?
Absolutely! When choosing blueberries, opt for plump, firm berries that are deep blue in color. Avoid those with dark spots or wrinkles, as these indicators suggest overripeness. Fresh blueberries should have a silvery bloom on their surface, indicating freshness. If you're using frozen blueberries, make sure they are unsweetened for the best flavor!

How should I store leftovers of the Blueberry Cottage Cheese Breakfast Bake?
You can keep your Blueberry Cottage Cheese Breakfast Bake in an airtight container in the fridge for up to 4 days. This method helps maintain its delicious flavor while keeping it fresh for the next couple of mornings. To serve, simply reheat it in the microwave for a quick and convenient breakfast.

Can I freeze the Blueberry Cottage Cheese Breakfast Bake?
Very! To freeze, cut the bake into individual portions for easy handling. Wrap each piece tightly in plastic wrap, followed by aluminum foil for added protection against freezer burn. It can stay fresh in the freezer for up to 3 months. When you're ready to enjoy, thaw overnight in the refrigerator and reheat in the microwave or oven until warmed through—perfect for those busy mornings!

What if my bake turns out too dry?
If your Blueberry Cottage Cheese Breakfast Bake ends up too dry, it might be due to overbaking, which can happen if the timer is missed or the oven runs hot. To troubleshoot, next time, start checking for doneness a few minutes earlier and consider covering it with foil during the end of baking to retain moisture. Also, adding an extra splash of almond milk can help maintain that lovely creamy texture.

Is this breakfast bake suitable for those with dairy allergies?
For dairy-sensitive individuals, this Blueberry Cottage Cheese Breakfast Bake can be adapted easily! Substitute low-fat cottage cheese with a dairy-free alternative, such as cashew or almond-based cheese. Make sure the other ingredients you choose, like milk, are also suitable for your dietary needs, ensuring a delightful, allergy-friendly breakfast experience!
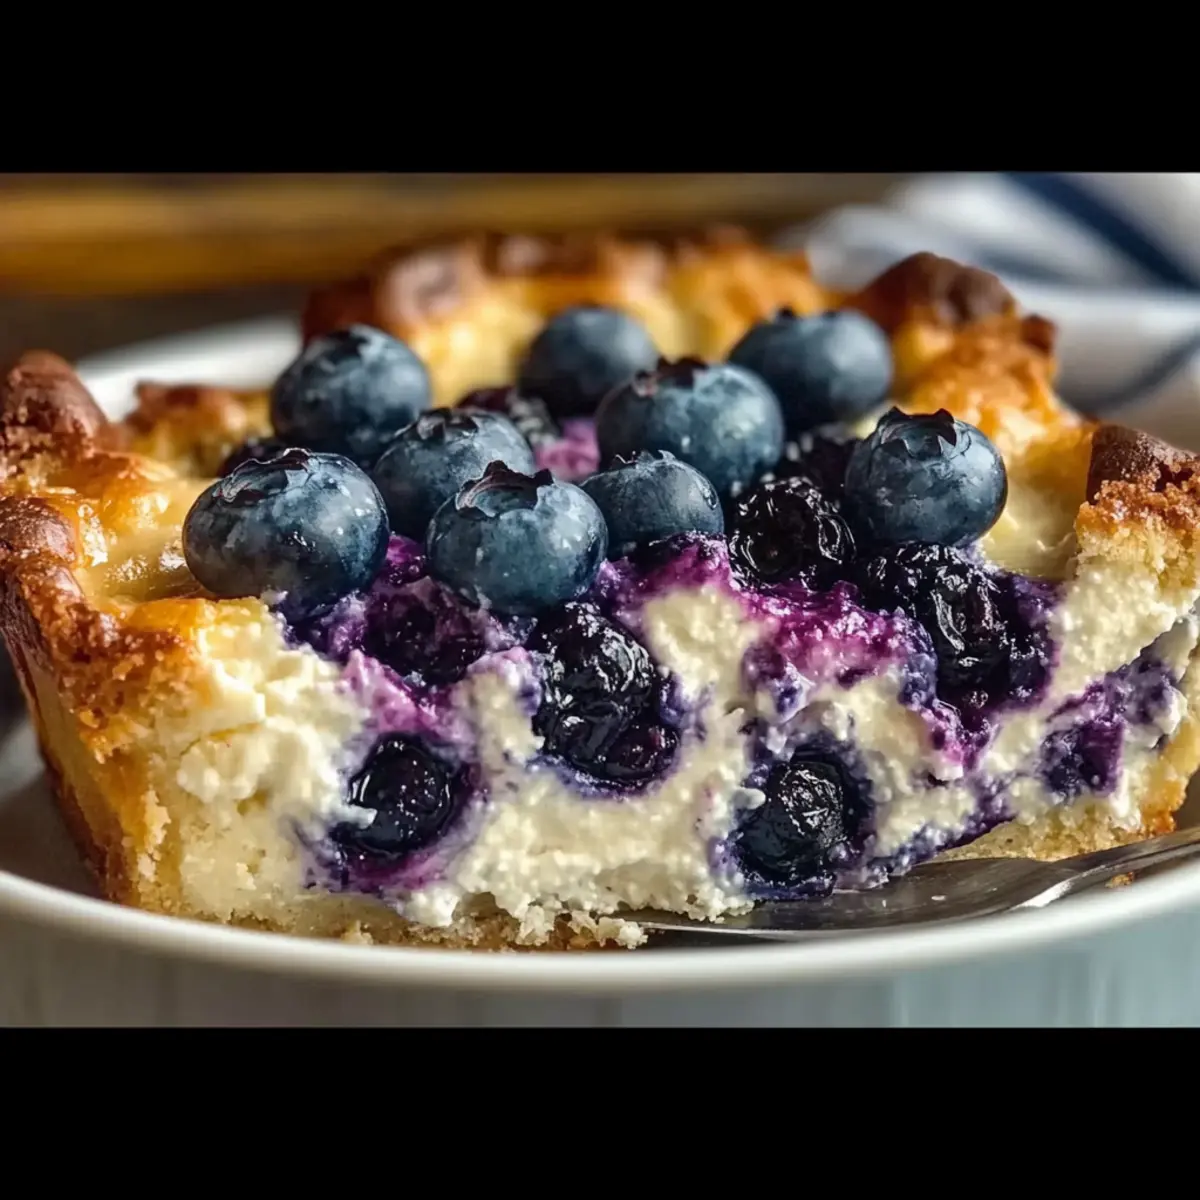
Blueberry Cottage Cheese Breakfast Bake

Wholesome Blueberry Cottage Cheese Breakfast Bake to Energize Mornings

A delicious Blueberry Cottage Cheese Breakfast Bake that’s high in protein and perfect for busy mornings.
Print Recipe Pin Recipe
Prep Time 10 minutes mins
Cook Time 45 minutes mins
Cooling Time 10 minutes mins
Total Time 1 hour hr 5 minutes mins
Servings: 6 slices
Course: Breakfast
Cuisine: American
Calories: 210
Ingredients Equipment Method Nutrition Notes

Ingredients
  

For the Bake
  • 2 cups Low-Fat Cottage Cheese Use full-fat for a richer texture.
  • 3 large Eggs Provides structure and moisture.
  • 1/4 cup Honey or Maple Syrup Agave syrup can be used as a vegan alternative.
  • 1 teaspoon Vanilla Extract Enhances flavor.
  • 1 teaspoon Ground Cinnamon Feel free to experiment with nutmeg.
  • 1/4 teaspoon Salt Balances sweetness.
  • 2 cups Rolled Oats Use certified gluten-free oats for a gluten-free option.
  • 1 cup Almond Milk Can be substituted with any milk of choice.
  • 2 cups Fresh or Frozen Blueberries Substitute with raspberries if desired.
  • 1/2 cup Chopped Nuts Optional, walnuts or pecans work well.
  • 2 tablespoons Chia Seeds Optional, boosts nutrition.

Equipment

  • Oven
  • Mixing Bowl
  • Baking Dish
  • Spatula

Method
 

Step-by-Step Instructions
  1. Preheat your oven to 350°F (175°C) and grease a 9x9-inch baking dish with butter.
  2. In a large mixing bowl, whisk together cottage cheese, eggs, honey or maple syrup, vanilla extract, cinnamon, and salt until smooth.
  3. Stir in rolled oats and almond milk, blending thoroughly, and let sit for about 5 minutes.
  4. Gently fold in blueberries and optional nuts or chia seeds.
  5. Pour the mixture into the prepared baking dish, distributing evenly.
  6. Bake for 40–45 minutes until golden brown and a toothpick comes out clean.
  7. Allow to cool for about 5–10 minutes before serving.
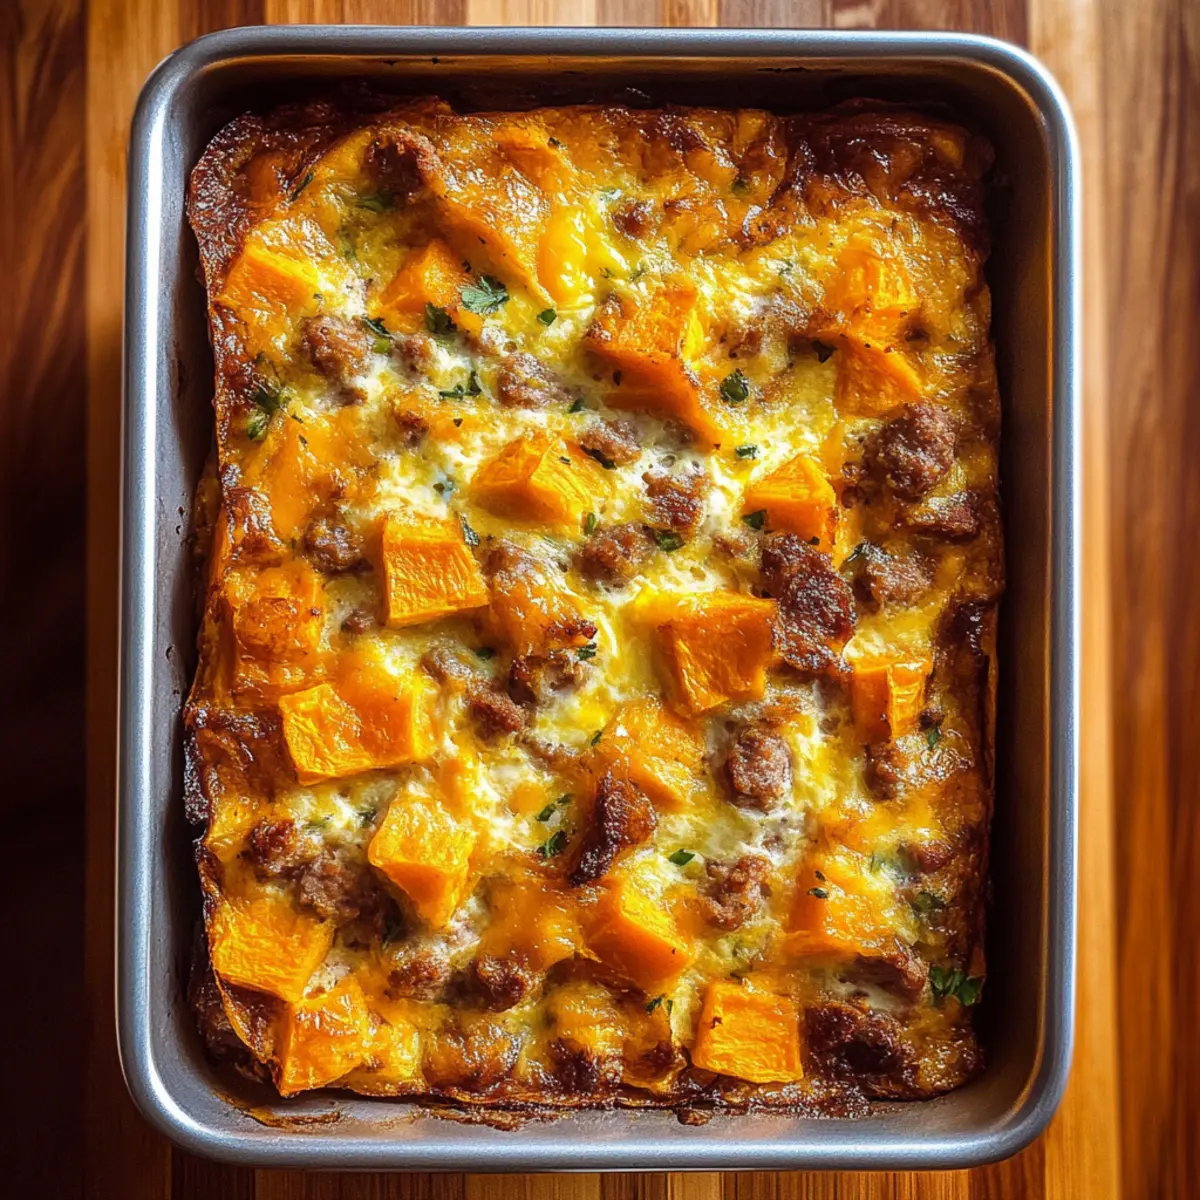
Nutrition

Serving: 1sliceCalories: 210kcalCarbohydrates: 30gProtein: 20gFat: 4gSaturated Fat: 1gPolyunsaturated Fat: 1gMonounsaturated Fat: 2gCholesterol: 70mgSodium: 150mgPotassium: 300mgFiber: 5gSugar: 8gVitamin A: 500IUVitamin C: 5mgCalcium: 150mgIron: 1mg

Notes

Store leftovers in the refrigerator for up to 4 days or freeze for up to 3 months. Reheat in the microwave or oven.

Tried this recipe?

Let us know how it was!

Easy Sweet Potato Egg Casserole for Busy Mornings

November 24, 2025 by Grace Snow Leave a Comment

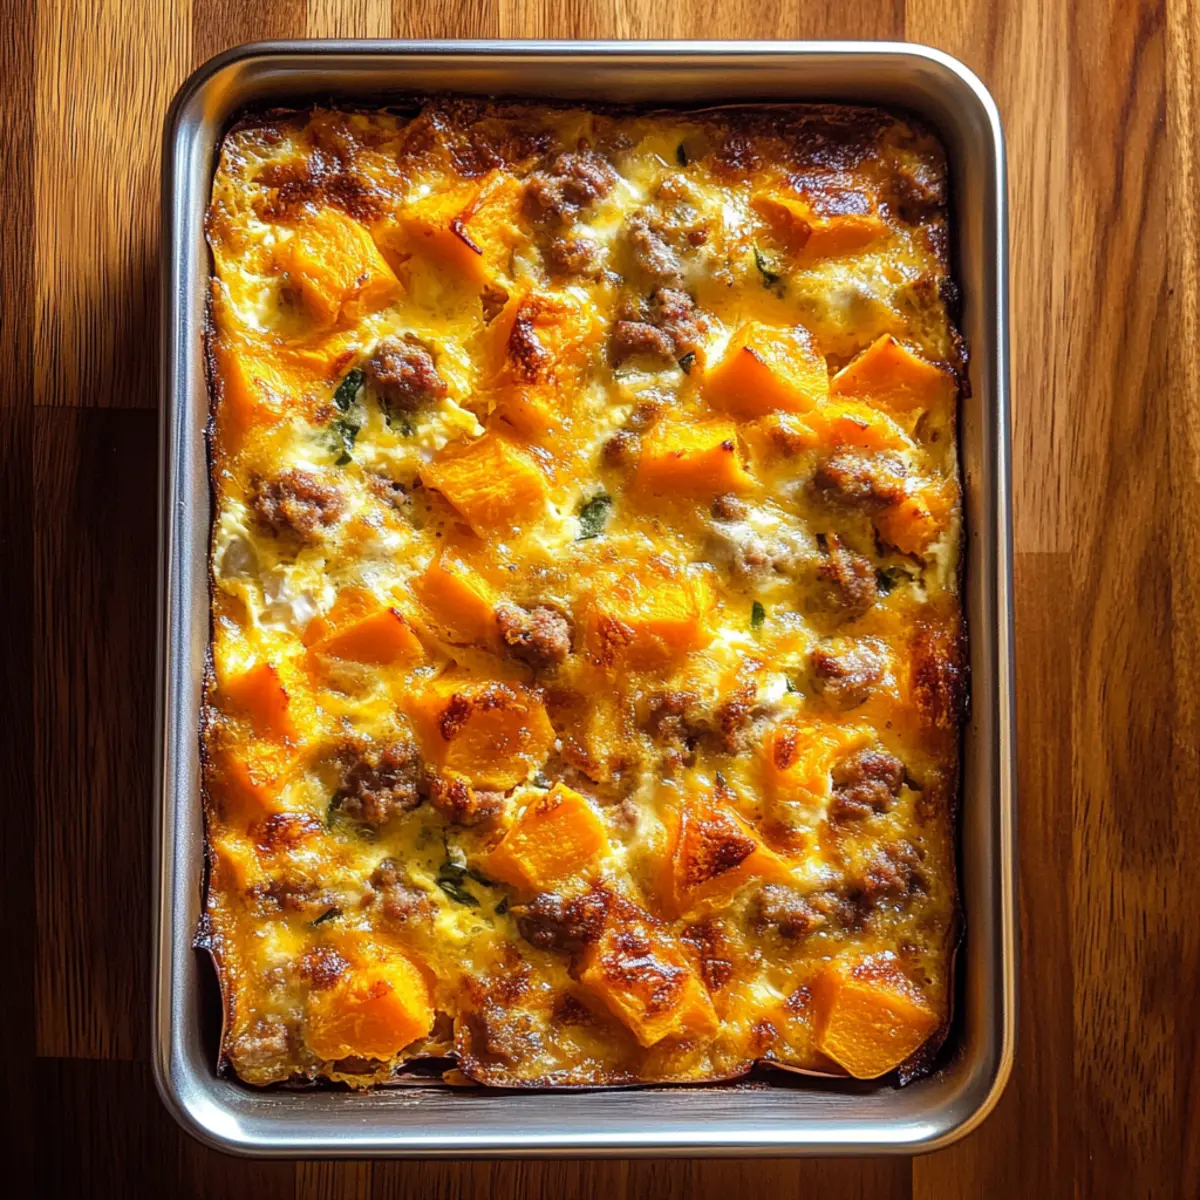
As I poured that golden egg mixture over the sautéed sweet potatoes and savory sausage, a wave of anticipation washed over me. This Easy Sweet Potato Egg Casserole is more than just a breakfast option; it's a symphony of flavors and textures that transforms busy mornings into something special. The comforting sweetness of roasted sweet potatoes paired with protein-rich eggs creates a nutritious and filling meal that can be prepped the night before, ensuring a warm, delightful start to your day. Plus, it’s easily reheatable, making it a fantastic choice for those hectic weekdays when time is of the essence. Curious about how this casserole can elevate your mornings? Let’s dive into the recipe!

Why is this casserole a breakfast game-changer?

Versatile: This Easy Sweet Potato Egg Casserole is perfect for any palate, allowing you to swap in your favorite ingredients like different cheeses or vegetables. Meal Prep-Friendly: Assemble it the night before for a hassle-free morning; just pop it in the oven! Nutrient-Rich: Packed with protein and vitamins, it’s a wholesome start to your day. Crowd-Pleaser: Great for family brunches or gatherings—everyone will want a slice! Plus, consider pairing it with a fresh fruit salad for extra brightness on your plate.

Easy Sweet Potato Egg Casserole Ingredients

For the Casserole
• Sweet Potatoes – the star ingredient providing natural sweetness and nutrients; Garnet or Jewel varieties work best.
• Onion – adds savory depth and enhances the overall flavor profile of the casserole.
• Green Pepper – brings a refreshing crunch and vibrant color; can be substituted with any bell pepper you prefer.
• Garlic – infuses aromatic flavor, elevating the dish to a delightful experience.
• Turkey Sausage – offers hearty protein; feel free to swap with chicken sausage or a plant-based option for versatility.
• Eggs – the binding agent that holds this Easy Sweet Potato Egg Casserole together, ensuring a satisfying texture.
• Milk – adds creaminess and moisture; can be replaced with non-dairy milk for a lighter alternative.
• Fresh Thyme – contributes an aromatic touch; dried thyme can be used if fresh isn’t available.
• Shredded Cheese – a melty topping that adds richness; cheddar or Monterey Jack are popular choices.

Step‑by‑Step Instructions for Easy Sweet Potato Egg Casserole

Step 1: Preheat the Oven
Begin your delicious journey by preheating your oven to 350°F (175°C). This temperature is perfect for cooking the casserole evenly, ensuring that the sweet potatoes and egg mixture come together beautifully. While the oven heats, you can prepare your casserole dish for an effortless baking experience.

Step 2: Prepare the Casserole Dish
Grease a 9×13-inch casserole dish generously with your favorite cooking oil or non-stick spray. This step is crucial for preventing the Easy Sweet Potato Egg Casserole from sticking, allowing for easy serving later. Set aside this prepared dish while you move on to the flavorful filling.

Step 3: Sauté the Vegetables
In a Dutch oven, heat a tablespoon of avocado oil over medium heat. Add chopped onion, green pepper, and sweet potato cubes, stirring occasionally for about 8-9 minutes until they soften. The sweet potatoes should be tender but not falling apart. In the last minute, stir in minced garlic, allowing its aromatic flavor to bloom before removing the pot from heat.

Step 4: Layer the Vegetables in the Dish
Spread the sautéed vegetable mixture evenly in the prepared casserole dish, creating a vibrant and colorful base for your Easy Sweet Potato Egg Casserole. The combination of sweet, savory, and aromatic ingredients will form a delightful foundation. This is a moment to appreciate the fragrant blend you've created.

Step 5: Cook the Turkey Sausage
Return to your Dutch oven and add the turkey sausage, breaking it into small pieces as it cooks over medium heat. Stir until the sausage is fully cooked and no longer pink, which usually takes about 5-7 minutes. Once done, mix this savory sausage into the vegetable layer in the casserole dish, ensuring even distribution.

Step 6: Prepare the Egg Mixture
In a mixing bowl, whisk together eggs, milk, fresh thyme, salt, pepper, and shredded cheese until the mixture is smooth and well-combined. This creamy egg base is key to holding the layers together in your Easy Sweet Potato Egg Casserole. Make sure to incorporate the cheese thoroughly for maximum flavor.

Step 7: Combine and Pour
Pour the egg mixture over the sausage and vegetable layer in the casserole dish. Gently stir with a spatula to distribute the egg mixture evenly, ensuring every bite of your casserole will be packed with flavor. The colors and textures should blend beautifully, promising a hearty breakfast.

Step 8: Bake the Casserole
Place the filled casserole dish into your preheated oven. Bake for 40-45 minutes, or until the center is firm and a light golden color appears on top. If the surface browns too quickly, cover it loosely with aluminum foil to prevent overcooking. This time is crucial for achieving that perfect fluffy texture in your Easy Sweet Potato Egg Casserole.

Step 9: Rest Before Serving
Once baked, remove the casserole from the oven and let it cool for 15 minutes before slicing. This cooling period helps the casserole set, making it easier to serve and maintain its shape. The enticing aroma will fill your kitchen, making the wait all the more worthwhile!

Storage Tips for Easy Sweet Potato Egg Casserole

  • Fridge: Store leftover casserole in an airtight container for up to 4 days. Make sure it’s fully cooled before sealing to maintain freshness.
  • Freezer: For longer storage, freeze individual portions wrapped tightly in plastic wrap and then in aluminum foil for up to 3 months. This way, you can enjoy your Easy Sweet Potato Egg Casserole anytime!
  • Reheating: To reheat, thaw overnight in the fridge if frozen. Warm individual portions in the microwave for about 1-2 minutes, or heat in the oven at 350°F (175°C) until warmed through.
  • Refrigerator Storage: Remember to keep the casserole covered to prevent it from absorbing other fridge odors, keeping it delicious for longer.

Easy Sweet Potato Egg Variations

Feel free to get creative and make this casserole your own with these fun twists!

  • Pork Sausage: Substitute turkey sausage for pork sausage for a richer flavor that adds heartiness.

  • Dairy-Free: Use non-dairy milk and dairy-free cheese for a vegan-friendly version while keeping that creamy texture.

  • Spinach Addition: Fold in fresh spinach before baking; it wilt perfectly, adding nutrients and a pop of color!

  • Zucchini: Swap in diced zucchini for the green pepper for a tender bite and extra veggies in your morning meal.

  • Herb Twist: Experiment with fresh basil or dill for a herbal flair that brightens the classic flavor profile.

  • Spicy Kick: Add diced jalapeños or a dash of red pepper flakes to the egg batter for a spicy surprise in each bite.

  • Cheese Variety: Change up the cheese! Try feta or pepper jack for different flavors that enhance the overall dish.

  • Roasted Peppers: Incorporate roasted sweet or red peppers for a smoky depth that complements the sweet potatoes beautifully.

If you're in the mood for more comforting dishes, you might enjoy exploring our Sweet Potato Casserole or sampling the delightful Smoky Sweet Potatoes. Each option offers a unique flavor experience that's sure to please!

Expert Tips for Easy Sweet Potato Egg Casserole

  • Even Cubes: Cut sweet potatoes into uniform ½ inch cubes to ensure they cook evenly. This helps avoid undercooked or mushy spots in the casserole.
  • Sauté Wisely: Avoid overcrowding the pan when sautéing vegetables; this prevents steaming and allows them to caramelize for deeper flavor.
  • Drain Sausage Fat: Drain excess liquid from the cooked turkey sausage to keep your casserole from becoming watery. A dry base helps the casserole maintain its structure.
  • Rest Before Serving: Let the casserole sit for 15 minutes after baking. This allows it to set properly, making it easier to slice and serve without falling apart.
  • Extra Creaminess: Consider topping your casserole with sliced avocado after baking for added creaminess and a fresh touch!

Make Ahead Options

These Easy Sweet Potato Egg Casseroles are a fantastic choice for meal prep! You can assemble the entire casserole up to 24 hours in advance by preparing the sweet potatoes, sausage, and vegetable mixture, then layering everything in the dish. Before baking, tightly cover it with plastic wrap or foil and refrigerate. To maintain quality, let it sit at room temperature for 15 minutes before popping it into the preheated oven. When you’re ready to serve, simply bake as directed until it’s golden and firm. With this prep method, you’ll turn busy mornings into a breeze, enjoying a warm, delicious breakfast without the stress!

What to Serve with Easy Sweet Potato Egg Casserole

Brighten your breakfast table and turn your Easy Sweet Potato Egg Casserole into a well-rounded feast with these delicious pairings.

  • Fresh Fruit Salad: Juicy and vibrant, a medley of seasonal fruits adds a refreshing contrast that complements the casserole's rich flavors perfectly. It’s a light, energizing side!

  • Warm Croissants: Flaky and buttery croissants pair beautifully, offering a different texture that elevates your breakfast experience to a delightful bakery-style brunch.

  • Simple Green Salad: A crisp salad with a zesty vinaigrette adds a wholesome crunch to your meal, balancing the richness of the casserole and enhancing its heartiness.

  • Herbed Yogurt Dip: A cool and creamy yogurt dip flavored with fresh herbs brings a tangy brightness that contrasts nicely with the sweet potatoes, making each bite a little more exciting.

  • Oven-Roasted Asparagus: Tender asparagus drizzled with olive oil and seasoning brings an earthy green element, providing a delightful chew that is light yet satisfying.

  • Coffee or Herbal Tea: A warm mug of your favorite coffee enhances the comforting morning vibe, while herbal tea offers a calming balance, perfect for a peaceful breakfast moment.

Consider these delightful accompaniments to make your Easy Sweet Potato Egg Casserole the star of a revitalizing breakfast experience!

Easy Sweet Potato Egg Casserole Recipe FAQs

What kind of sweet potatoes should I use?
Absolutely! For the best flavor and texture in your Easy Sweet Potato Egg Casserole, I recommend using Garnet or Jewel sweet potatoes. They provide a natural sweetness and creamy texture that's perfect for this dish.

How should I store leftovers?
Very! Store your leftover Easy Sweet Potato Egg Casserole in an airtight container in the refrigerator for up to 4 days. Make sure it has completely cooled before sealing it up to keep it fresh and delicious.

Can I freeze the casserole?
Absolutely! To freeze, cut the cooled casserole into individual portions and wrap them tightly in plastic wrap followed by aluminum foil. This will help to prevent freezer burn. You can store these portions in the freezer for up to 3 months. When you're ready to enjoy, simply thaw overnight in the fridge, and reheat in the microwave or oven until heated through!

What if my casserole comes out too watery?
If your Easy Sweet Potato Egg Casserole turns out watery, it’s likely due to excess moisture from the turkey sausage or sweet potatoes. To troubleshoot, make sure that you drain any fat from the sausage before mixing it with the vegetables. Additionally, cutting the sweet potatoes into uniform ½ inch cubes will help them cook evenly and not release too much moisture during baking.

Is this recipe suitable for those with dietary restrictions?
Absolutely! You can easily customize your Easy Sweet Potato Egg Casserole to accommodate various dietary preferences. For instance, opt for plant-based sausage if you're looking for a meat-free option and substitute regular milk with non-dairy alternatives like almond or oat milk. Just be sure to check for any allergies with the specific ingredients you choose!

How can I prepare this casserole in advance?
Very! You can assemble your Easy Sweet Potato Egg Casserole the night before by prepping all the ingredients and layering them in the casserole dish. Cover it tightly and store it in the fridge. In the morning, just let it sit at room temperature for about 15 minutes before popping it in the oven for a hassle-free breakfast!

Easy Sweet Potato Egg

Easy Sweet Potato Egg Casserole for Busy Mornings

This Easy Sweet Potato Egg Casserole combines roasted sweet potatoes and protein-rich eggs for a nutritious breakfast option.
Print Recipe Pin Recipe
Prep Time 15 minutes mins
Cook Time 45 minutes mins
Cooling Time 15 minutes mins
Total Time 1 hour hr 15 minutes mins
Servings: 6 slices
Course: Breakfast
Cuisine: American
Calories: 250
Ingredients Equipment Method Nutrition Notes

Ingredients
  

For the Casserole
  • 2 cups cubed sweet potatoes Garnet or Jewel varieties work best
  • 1 medium onion chopped
  • 1 cup green pepper chopped; can substitute with any bell pepper
  • 2 cloves garlic minced
  • 1 lb turkey sausage can be swapped with chicken sausage or plant-based option
  • 6 eggs
  • 1 cup milk can be replaced with non-dairy milk
  • 1 tbsp fresh thyme can use dried thyme if fresh is unavailable
  • 1 cup shredded cheese cheddar or Monterey Jack

Equipment

  • Dutch oven
  • 9x13-inch casserole dish
  • Mixing Bowl

Method
 

Step‑by‑Step Instructions for Easy Sweet Potato Egg Casserole
  1. Preheat the oven to 350°F (175°C).
  2. Grease a 9×13-inch casserole dish with cooking oil or non-stick spray.
  3. In a Dutch oven, heat a tablespoon of avocado oil over medium heat and sauté onion, green pepper, and sweet potato cubes for about 8-9 minutes. Stir in minced garlic in the last minute.
  4. Spread the sautéed vegetable mixture evenly in the prepared casserole dish.
  5. Cook the turkey sausage in the Dutch oven until fully cooked, about 5-7 minutes, then mix into the vegetable layer in the casserole dish.
  6. In a mixing bowl, whisk together eggs, milk, fresh thyme, salt, pepper, and shredded cheese until smooth.
  7. Pour the egg mixture over the sausage and vegetable layer in the casserole dish and gently stir to combine.
  8. Bake for 40-45 minutes until the center is firm and golden on top. Cover loosely with aluminum foil if browning too quickly.
  9. Let the casserole cool for 15 minutes before slicing.

Nutrition

Serving: 1sliceCalories: 250kcalCarbohydrates: 20gProtein: 15gFat: 10gSaturated Fat: 4gPolyunsaturated Fat: 0.5gMonounsaturated Fat: 3gCholesterol: 180mgSodium: 500mgPotassium: 400mgFiber: 3gSugar: 5gVitamin A: 4000IUVitamin C: 30mgCalcium: 150mgIron: 2mg

Notes

Slice and serve paired with a fresh fruit salad for added brightness.

Tried this recipe?

Let us know how it was!

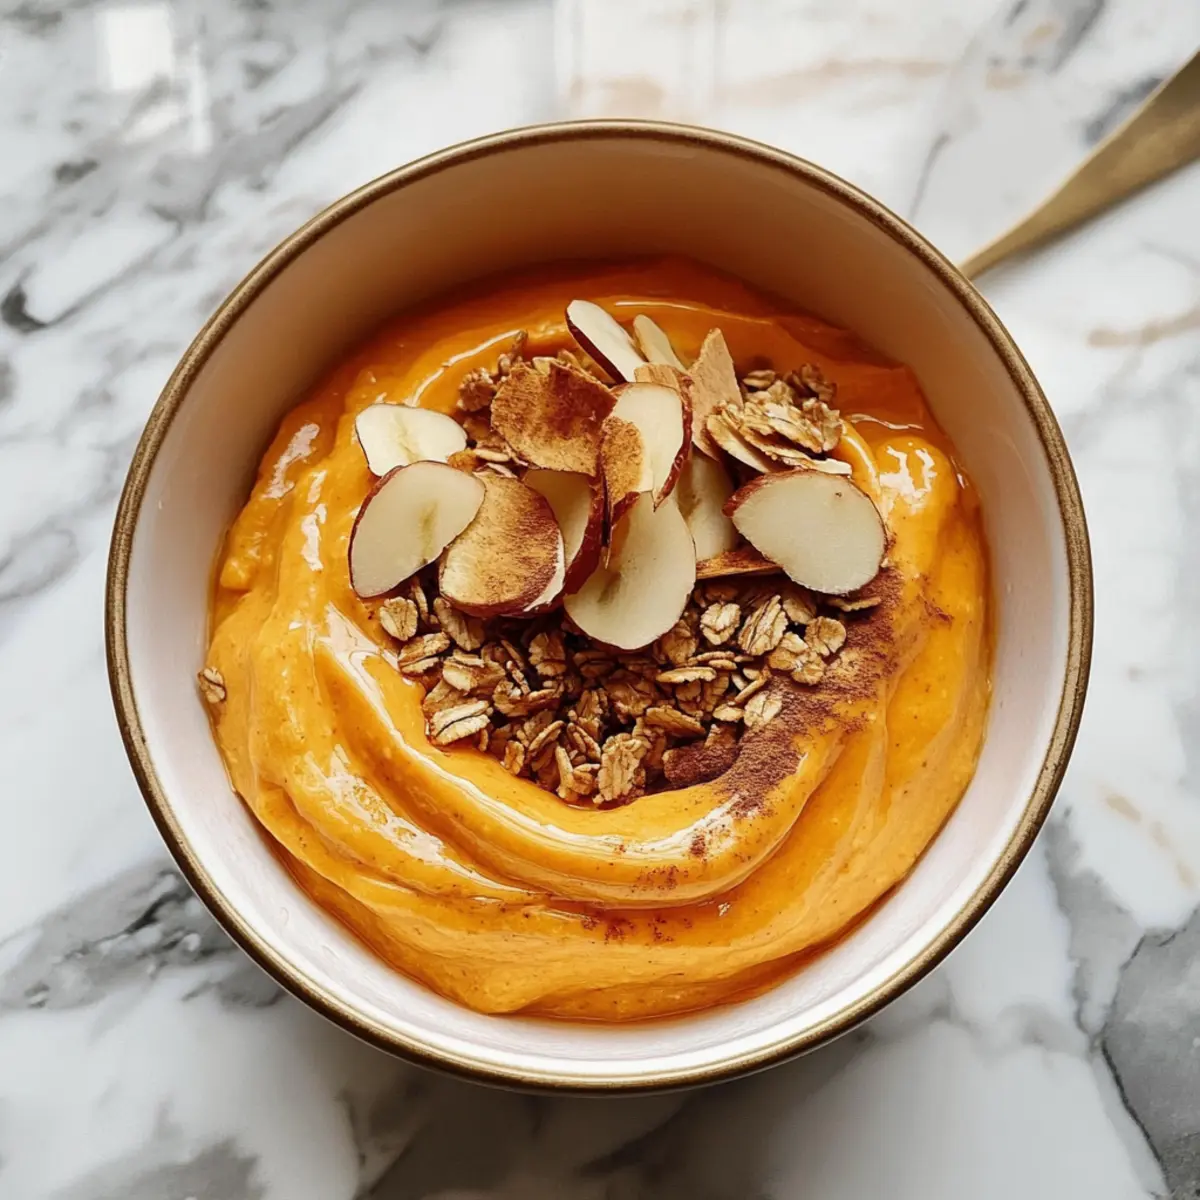
Creamy Pumpkin Whipped Cottage Cheese Breakfast Bowl Bliss

November 24, 2025 by Grace Snow Leave a Comment

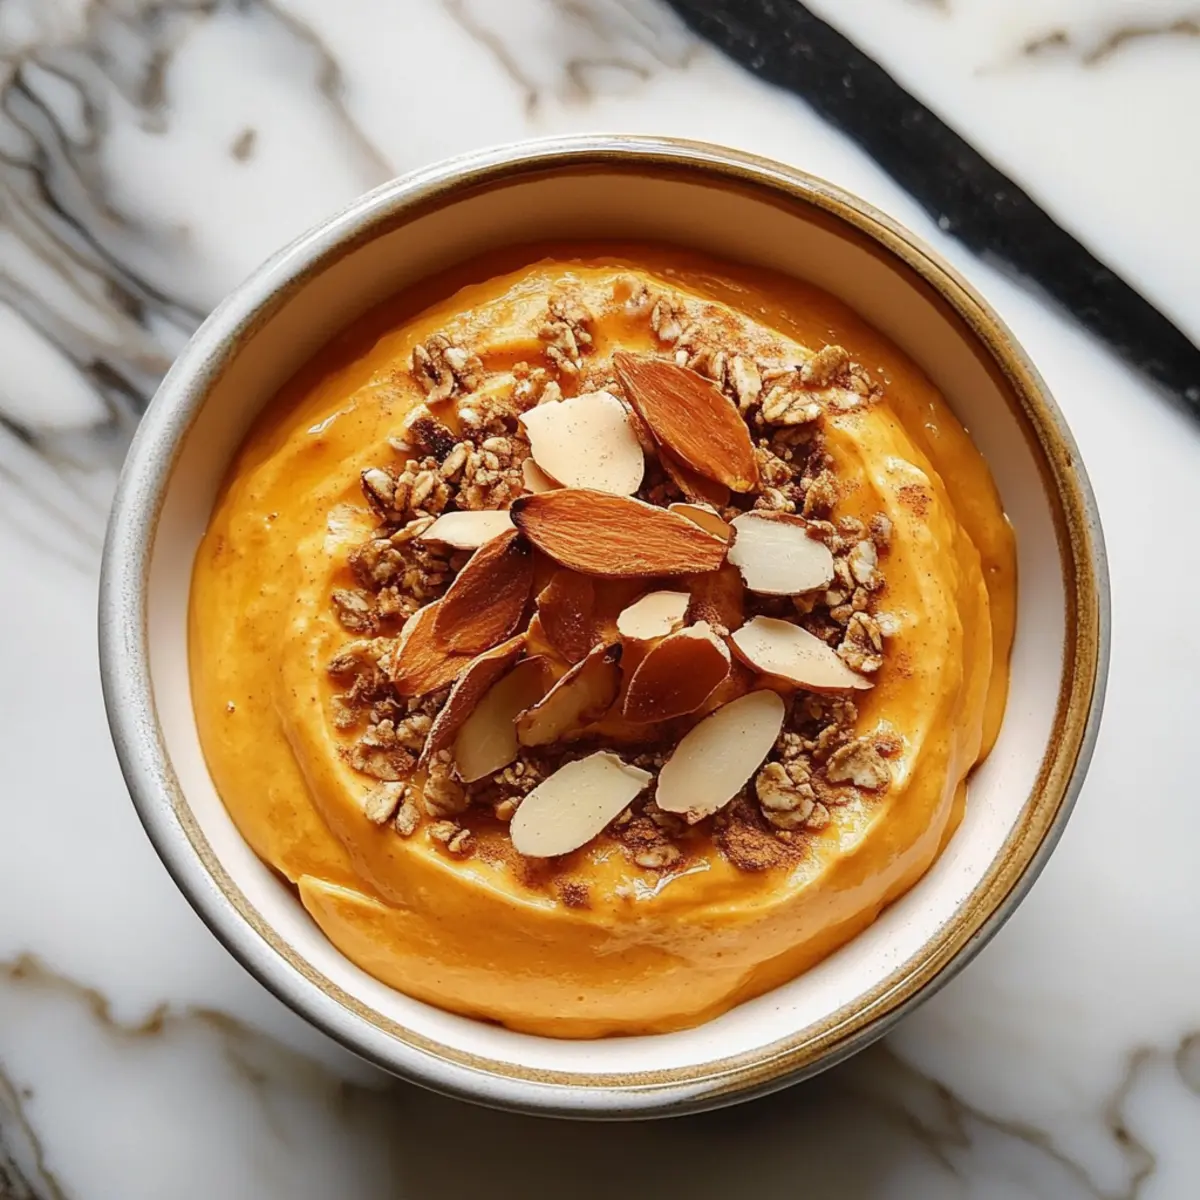
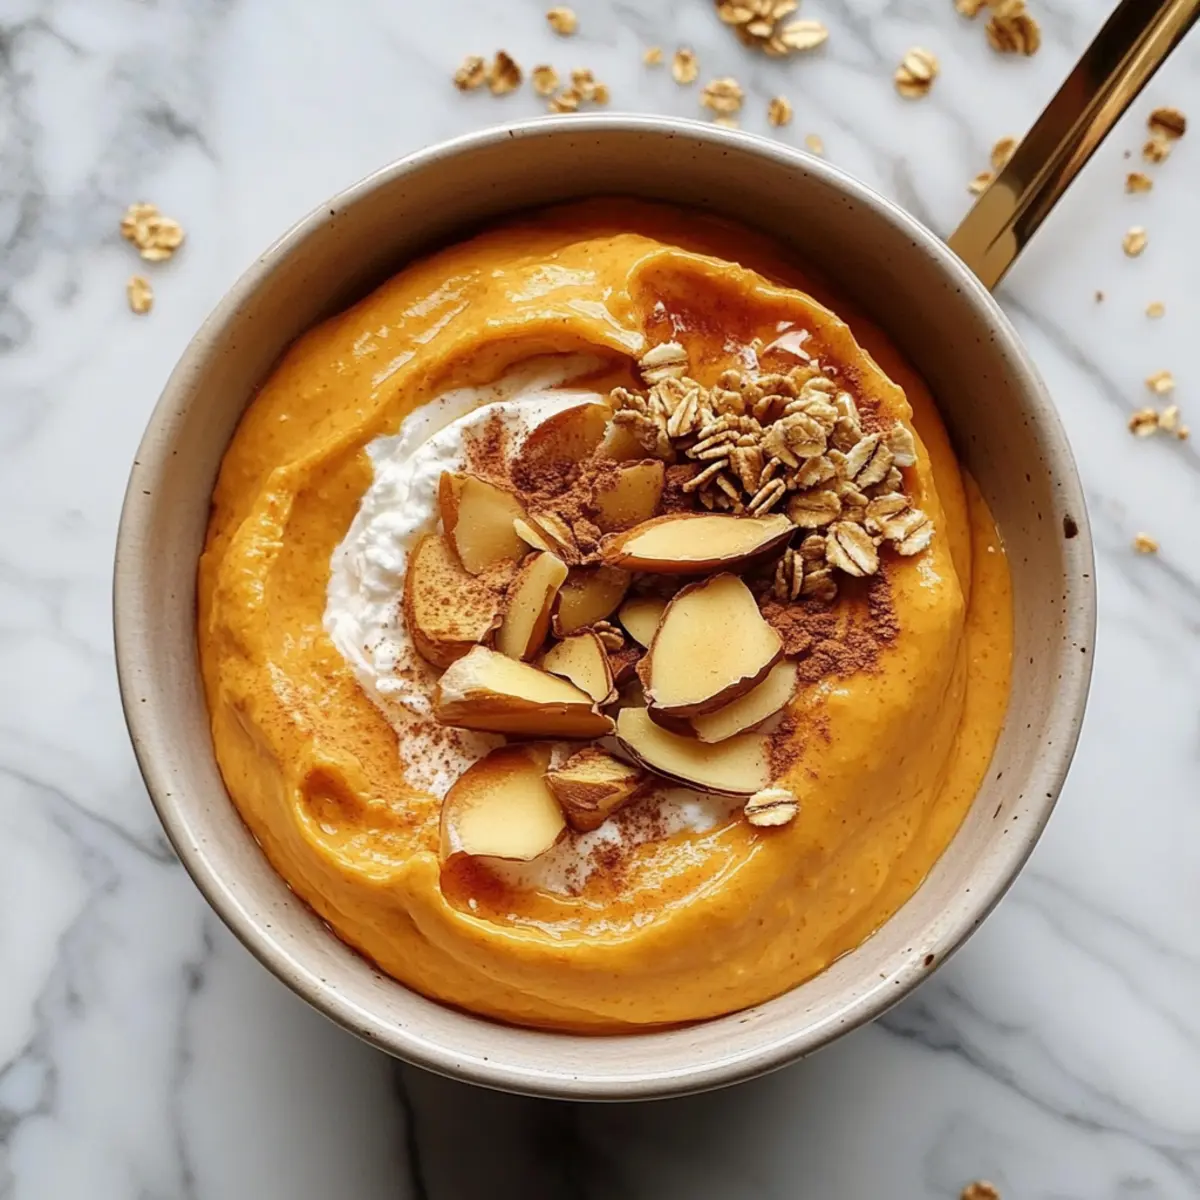
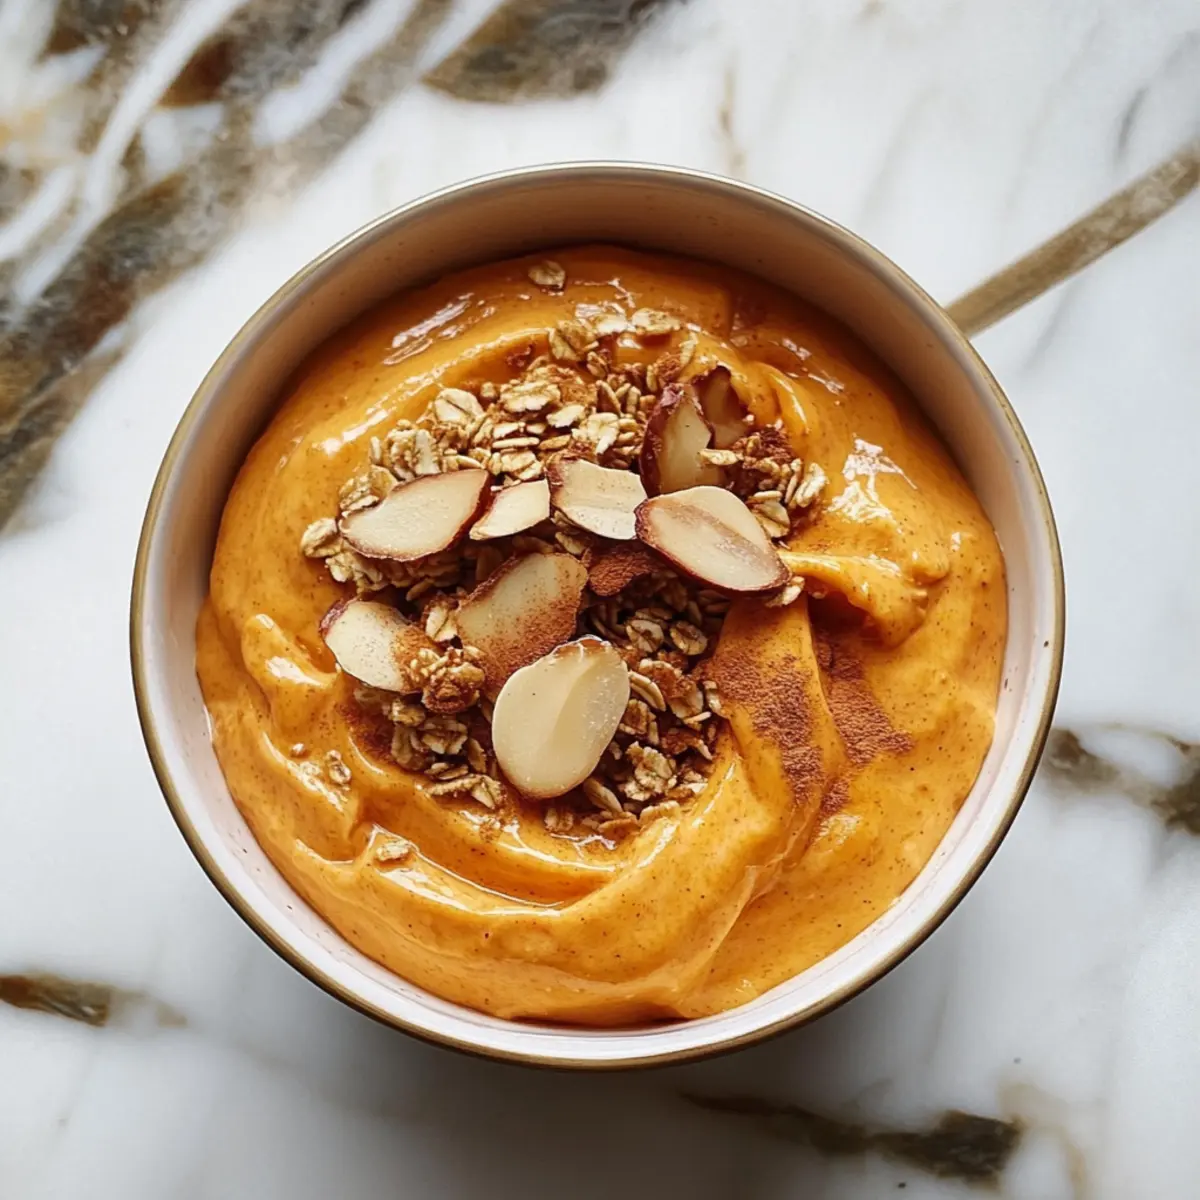
On a chilly autumn morning, I often find myself craving something cozy and comforting to kick-start my day. Enter the Pumpkin Whipped Cottage Cheese Breakfast Bowl! This delightful combination of creamy cottage cheese and velvety pumpkin puree, kissed with warm spices, is not only a breeze to whip up in just five minutes but also packs a protein punch to keep you fueled. Perfect for those who are looking to break free from the fast-food routine, this healthy breakfast option is a creamy indulgence that evokes the flavors of fall without any guilt. Who says mornings can’t be deliciously easy? Ready to transform your breakfast game? Let’s dive into this fall-inspired treat!

Why is this breakfast bowl so great?

Simplicity at Its Best: This Pumpkin Whipped Cottage Cheese Breakfast Bowl comes together in just five minutes, making it a quick win for busy mornings!

Creamy Delight: The blend of cottage cheese and pumpkin creates a luscious, velvety texture that feels indulgent while being healthy.

Protein Power: With approximately 21 grams of protein per serving, it’s a great way to kick-start your day and keep you satisfied until lunch.

Seasonal Flavors: Enjoy the delightful taste of fall with comforting spices like cinnamon, making every spoonful feel like a cozy hug.

Versatile Toppings: Top it with granola, nuts, or fresh fruits for a personal touch—whichever way you choose, it’s sure to impress! If you're in the mood for other healthy breakfasts, try the Breakfast Egg Muffins or enjoy a sweet treat with Pumpkin Brownies Decadent.

Pumpkin Whipped Cottage Cheese Breakfast Bowl Ingredients

For the Whipped Base

  • Cottage Cheese – Provides creaminess and protein; for a tangy twist, substitute with Greek yogurt.
  • Pumpkin Puree – Adds natural sweetness and a smooth texture; ensure it's pure pumpkin without added sugar.
  • Honey – Sweetens the dish beautifully; feel free to swap with maple syrup for a vegan alternative.
  • Cinnamon – Infuses warm, comforting flavor; consider using pumpkin pie spice for an extra seasonal kick.
  • Vanilla Extract – Adds a lovely aromatic sweetness; omit for a more straightforward taste.

For the Crunch

  • Granola – Introduces crunch and additional texture; substitute with nuts or seeds for a gluten-free option.

This Pumpkin Whipped Cottage Cheese Breakfast Bowl is not just delicious; it's a high-protein, creamy, and seasonal breakfast you're sure to adore!

Step‑by‑Step Instructions for Pumpkin Whipped Cottage Cheese Breakfast Bowl

Step 1: Blend the Base Ingredients
In a high-speed blender, combine 1 cup of cottage cheese, ½ cup of pumpkin puree, 1 tablespoon of honey, ½ teaspoon of cinnamon, and ¼ teaspoon of vanilla extract. Blend on high for 30-45 seconds until the mixture is thick and creamy. If needed, stop to scrape down the sides to ensure everything is well combined. You’ll want a smooth, luscious consistency for your Pumpkin Whipped Cottage Cheese Breakfast Bowl.

Step 2: Prepare for Serving
Once blended, take a moment to taste the mixture. Adjust the sweetness with more honey if preferred, then transfer the whipped pumpkin blend into serving bowls. Use a spoon to evenly portion the thick, creamy texture, creating a delightful base for your toppings. The vibrant orange color paired with the creamy white will make for an inviting breakfast display.

Step 3: Add the Crunch
To make your Pumpkin Whipped Cottage Cheese Breakfast Bowl even more delightful, sprinkle each bowl with approximately ¼ cup of granola just before serving. This crunchy topping contrasts beautifully with the smooth whipped base, adding texture and flavor. Feel free to mix and match your granola varieties to keep your breakfast exciting and tailored to your taste.
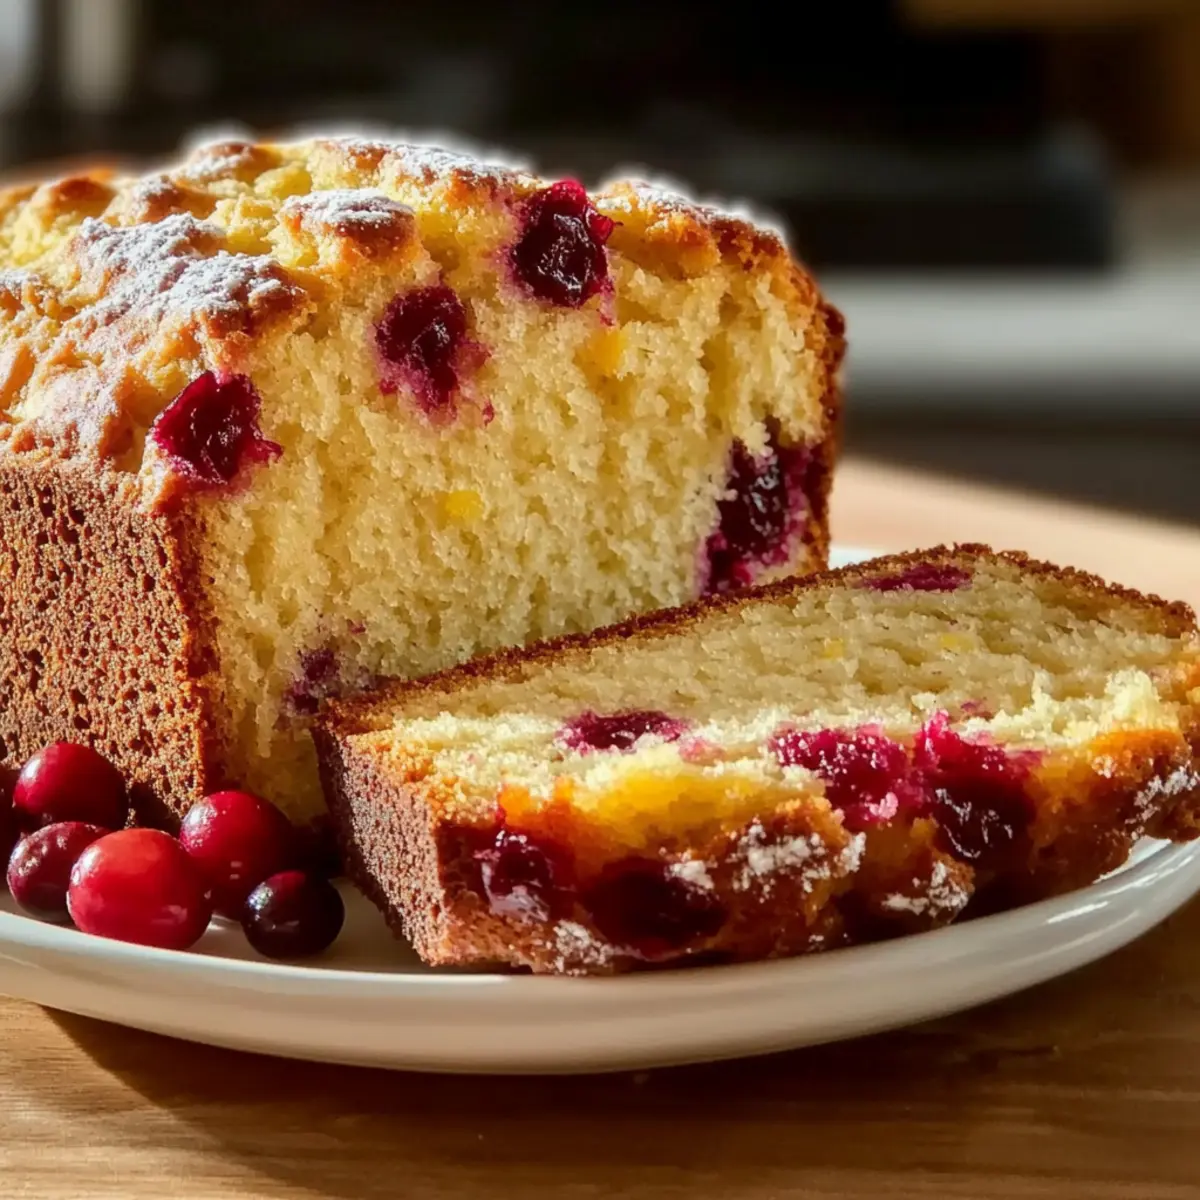
Step 4: Store Leftovers
If you have any leftovers, store them in an airtight container in the refrigerator for up to 3 days. Make sure to keep the granola separate until you're ready to enjoy another serving to maintain its crispness. When ready to serve again, give the mixture a good stir to bring back its creamy texture, and enjoy this wholesome Pumpkin Whipped Cottage Cheese Breakfast Bowl fresh!

Pumpkin Whipped Cottage Cheese Breakfast Bowl Variations

Feel free to mix things up with these delightful variations that cater to your taste buds!

  • Greek Yogurt Swap: Substitute cottage cheese with Greek yogurt for a tangy twist that adds creaminess and protein.

  • Spice It Up: Experiment with different spices like nutmeg or ginger for an exciting flavor profile that elevates your bowl.

  • Fruity Fun: Add fresh fruits such as banana slices or berries on top for a burst of freshness that complements the creamy base beautifully.

  • Nutty Crunch: Instead of granola, sprinkle your favorite chopped nuts or seeds for an extra crunch and a boost in healthy fats.

  • Vegan Delight: Use maple syrup instead of honey and coconut yogurt in place of cottage cheese for a delicious vegan version.

  • Oatmeal Inspiration: Mix in some cooked oatmeal for additional texture and heartiness, making it even more filling for your morning.

  • Go Savory: For a savory twist, omit the sweeteners and spices, and top with sliced avocado, cherry tomatoes, or a sprinkle of feta cheese.

  • Mix and Match: Combine various toppings from nuts to seeds to make it your very own signature breakfast bowl. The more, the merrier!

There's truly no limit to how you can make this pumpkin whipped cottage cheese breakfast bowl perfect for you! For more inspiration, try the hearty Breakfast Banana Split or go for the wholesome Acai Bowl Nutritious.

How to Store and Freeze Pumpkin Whipped Cottage Cheese Breakfast Bowl

Fridge: Store any leftovers in an airtight container for up to 3 days. Stir the mixture well before serving again to restore its creamy consistency.

Room Temperature: Best enjoyed fresh, but if necessary, you can leave it at room temperature for up to 2 hours before refrigeration.

Freezer: It’s not recommended to freeze this Pumpkin Whipped Cottage Cheese Breakfast Bowl, as freezing alters its creamy texture and flavor.

Reheating: If serving again after refrigeration, simply stir and enjoy cold for a refreshing treat, as reheating may affect the texture.

What to Serve with Pumpkin Whipped Cottage Cheese Breakfast Bowl

Elevate your cozy morning with some delightful pairings that enhance this creamy breakfast experience.

  • Spiced Apple Slices: Sweet, crisp apples sprinkled with cinnamon bring a fresh crunch to your pumpkin bowl.

  • Warm Oatmeal: A creamy bowl of oatmeal provides a filling base, creating a comforting contrast to the fluffy whipped cottage cheese.

  • Toasted Whole Grain Bread: Enjoy the nutty flavors and crunchy texture of toasted bread, perfect for dipping into the pumpkin goodness.

  • Maple Syrup Drizzle: A light drizzle of maple syrup adds sweetness and warmth, echoing the fall flavors perfectly.

  • Chia Pudding: A side of chia pudding offers a creamy, nutritious complement, packed with fiber and protein for sustained energy.

  • Herbal Tea: A cup of soothing herbal tea balances the richness of your breakfast bowl while providing a calming start to the day.

These pairings not only complete your meal but also add layers of texture and flavor that make every bite a celebration of fall!

Make Ahead Options

This Pumpkin Whipped Cottage Cheese Breakfast Bowl is perfect for busy mornings, allowing you to prep in advance and save time. You can blend the creamy base (1 cup of cottage cheese, ½ cup of pumpkin puree, 1 tablespoon of honey, ½ teaspoon of cinnamon, and ¼ teaspoon of vanilla extract) up to 24 hours ahead. Store it in an airtight container in the refrigerator to maintain its luscious texture. When you're ready to serve, simply give the mixture a good stir, spoon it into bowls, and top with granola right before serving to keep that delightful crunch. With these simple make-ahead steps, enjoy a wholesome breakfast that feels gourmet without the fuss!

Expert Tips for Pumpkin Whipped Cottage Cheese Breakfast Bowl

  • Whip Thoroughly: Ensure a super smooth texture by blending the ingredients thoroughly. A high-speed blender works best to achieve that indulgent creaminess.

  • Taste Test: Always taste the mixture before serving. Adjust sweetness with more honey or maple syrup to match your personal preference.

  • DIY Granola: Consider making your own granola for a healthier option. This way, you can control the sweetness and add your favorite nuts and seeds.

  • Skip the Freezer: Avoid freezing leftovers, as it can change the creamy texture of your Pumpkin Whipped Cottage Cheese Breakfast Bowl. Always refrigerate in an airtight container.

  • Spice It Up: Experiment with spices like nutmeg or ginger to add warmth and depth to your dish, making breakfast even more exciting!

  • Serve Fresh: For the best experience, prepare and serve the bowl just before eating to enjoy the delightful contrast between the creamy base and crunchy toppings.

Pumpkin Whipped Cottage Cheese Breakfast Bowl Recipe FAQs

What kind of pumpkin puree should I use?
Absolutely! It’s best to use canned pumpkin puree or freshly cooked pumpkin without any added sugars. This keeps your Pumpkin Whipped Cottage Cheese Breakfast Bowl healthy and lets the natural sweetness shine through.

How long can I store leftovers?
Store any leftovers in an airtight container in the fridge for up to 3 days. Just give it a good stir before enjoying, and it will be just as creamy and delicious as when you first made it!

Can I freeze the Pumpkin Whipped Cottage Cheese Breakfast Bowl?
I wouldn't recommend freezing this dish, as it alters the creamy texture that makes it so delightful. Instead, enjoy it fresh or store it in the fridge for a few days!

What if the mixture is too thick?
If you find your Pumpkin Whipped Cottage Cheese Breakfast Bowl mixture turns out thicker than expected, simply stir in a little splash of milk or dairy-free alternative to achieve your desired consistency. Blend again for about 10 seconds if needed!

Is it safe for those with dairy allergies?
For those with dairy allergies, substitute cottage cheese with a dairy-free yogurt alternative, like coconut or almond yogurt. It won't be quite the same, but it still offers a delicious, creamy texture! Always check the ingredients to ensure they're allergy-friendly.

What if I want to add extra flavors or toppings?
The more the merrier! You can spice it up with a dash of nutmeg or add fresh fruits like berries or banana slices for a burst of flavor. Feel free to customize your bowl with your favorite granola or seeds for added crunch!

Pumpkin Whipped Cottage Cheese Breakfast Bowl

Creamy Pumpkin Whipped Cottage Cheese Breakfast Bowl Bliss

Enjoy a cozy Pumpkin Whipped Cottage Cheese Breakfast Bowl packed with protein and warm spices for a delightful start to your day.
Print Recipe Pin Recipe
Prep Time 5 minutes mins
Total Time 5 minutes mins
Servings: 2 bowls
Course: Breakfast
Cuisine: American
Calories: 250
Ingredients Equipment Method Nutrition Notes

Ingredients
  

For the Whipped Base
  • 1 cup Cottage Cheese For a tangy twist, substitute with Greek yogurt.
  • 1/2 cup Pumpkin Puree Ensure it's pure pumpkin without added sugar.
  • 1 tablespoon Honey Feel free to swap with maple syrup for a vegan alternative.
  • 1/2 teaspoon Cinnamon Consider using pumpkin pie spice for an extra seasonal kick.
  • 1/4 teaspoon Vanilla Extract Omit for a more straightforward taste.
For the Crunch
  • 1/4 cup Granola Substitute with nuts or seeds for a gluten-free option.

Equipment

  • High-speed blender

Method
 

Step-by-Step Instructions
  1. Blend the Base Ingredients: In a high-speed blender, combine 1 cup of cottage cheese, ½ cup of pumpkin puree, 1 tablespoon of honey, ½ teaspoon of cinnamon, and ¼ teaspoon of vanilla extract. Blend on high for 30-45 seconds until the mixture is thick and creamy.
  2. Prepare for Serving: Taste the mixture and adjust sweetness if preferred. Transfer to serving bowls, creating a delightful base for your toppings.
  3. Add the Crunch: Sprinkle each bowl with approximately ¼ cup of granola just before serving.
  4. Store Leftovers: Store in an airtight container for up to 3 days. Keep granola separate until ready to enjoy again.

Nutrition

Serving: 1bowlCalories: 250kcalCarbohydrates: 30gProtein: 21gFat: 6gSaturated Fat: 3gPolyunsaturated Fat: 1gMonounsaturated Fat: 2gCholesterol: 15mgSodium: 200mgPotassium: 300mgFiber: 4gSugar: 8gVitamin A: 4500IUVitamin C: 2mgCalcium: 150mgIron: 1mg

Notes

For the best experience, prepare and serve just before eating to enjoy the creamy base and crunchy toppings.

Tried this recipe?

Let us know how it was!

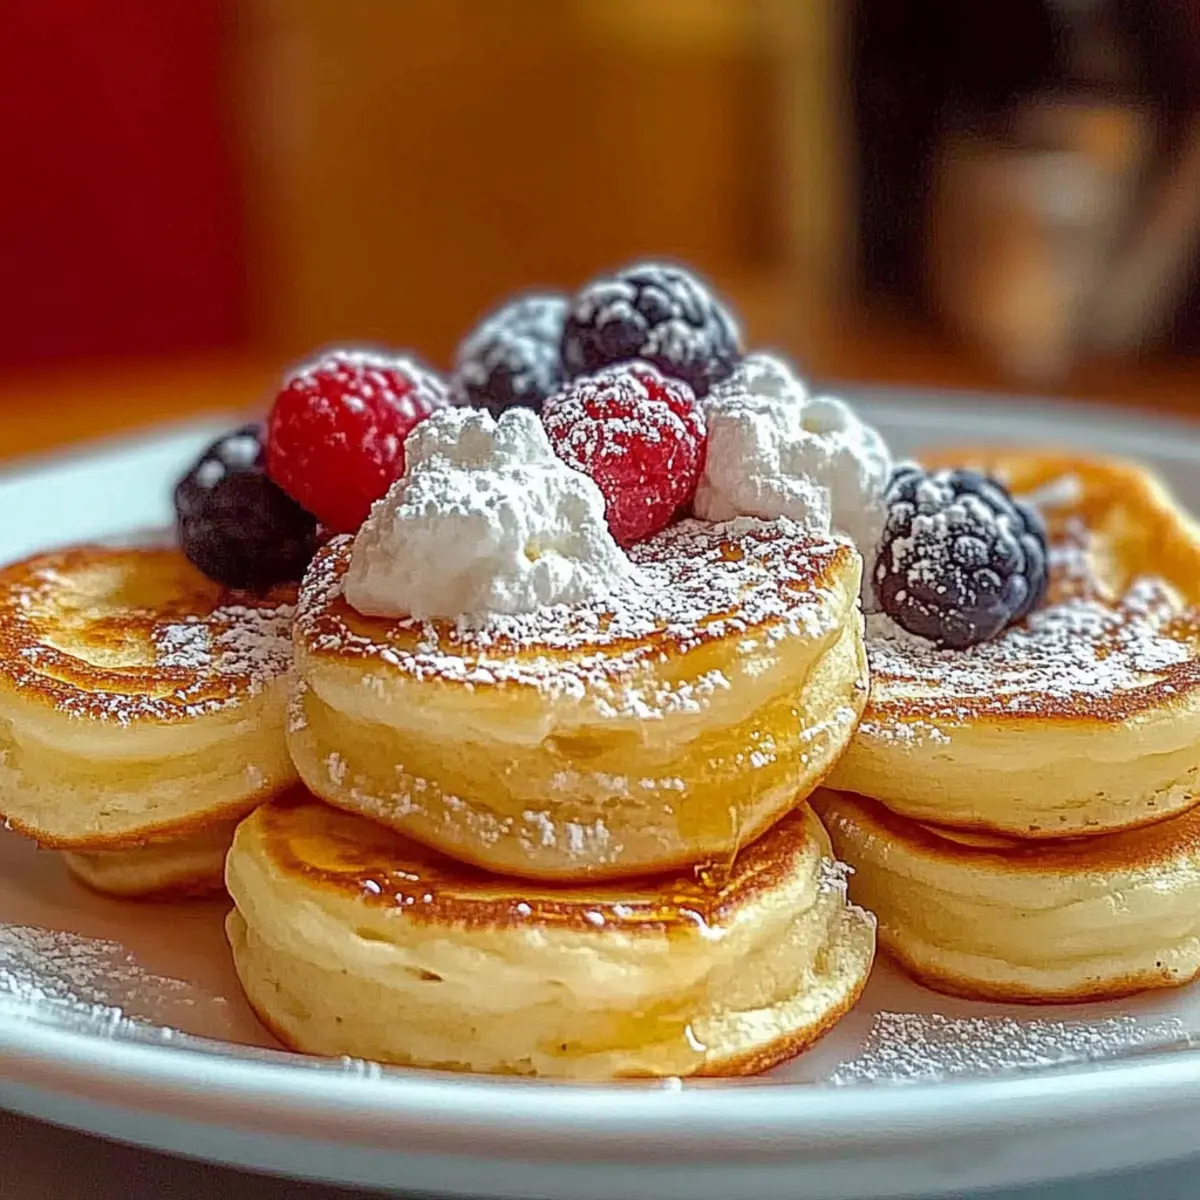
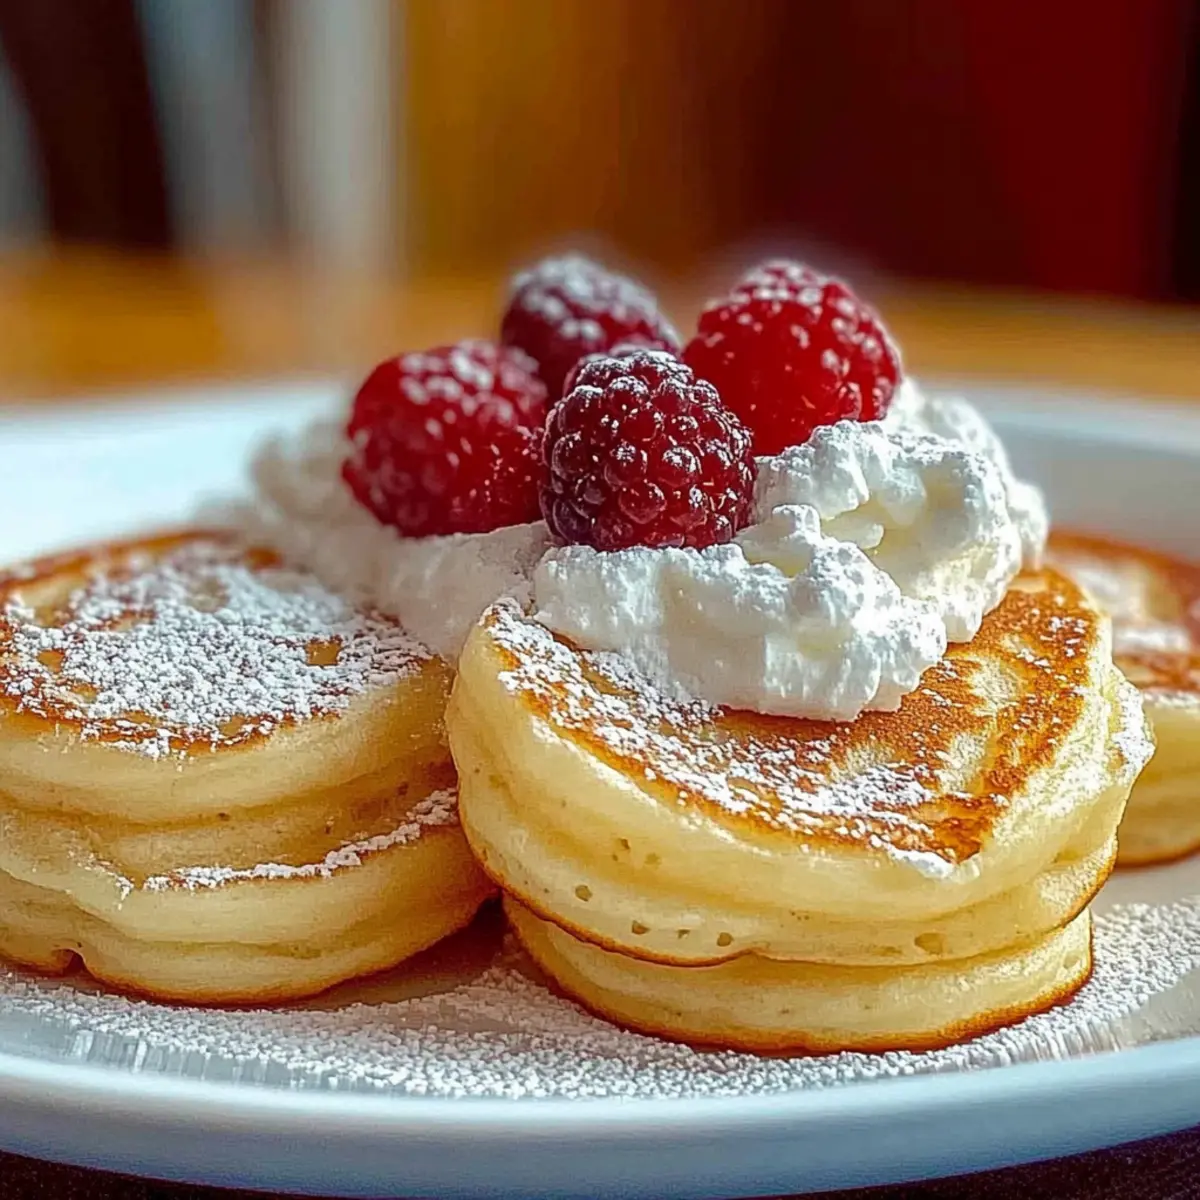
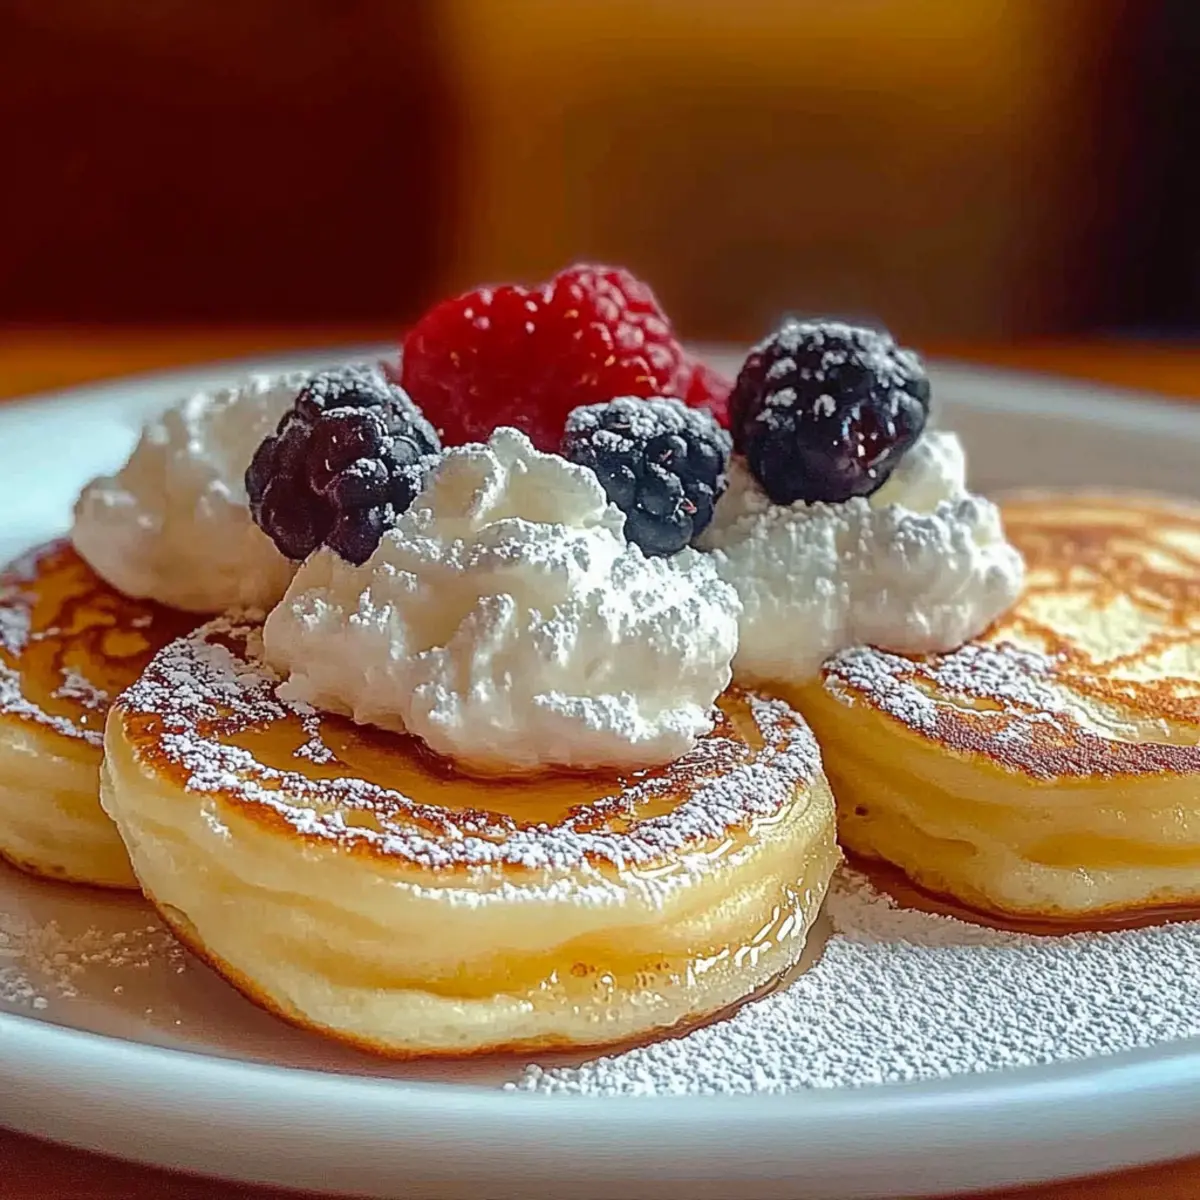
Mini German Pancakes Recipe: Fluffy Bites of Morning Joy

November 24, 2025 by Grace Snow Leave a Comment

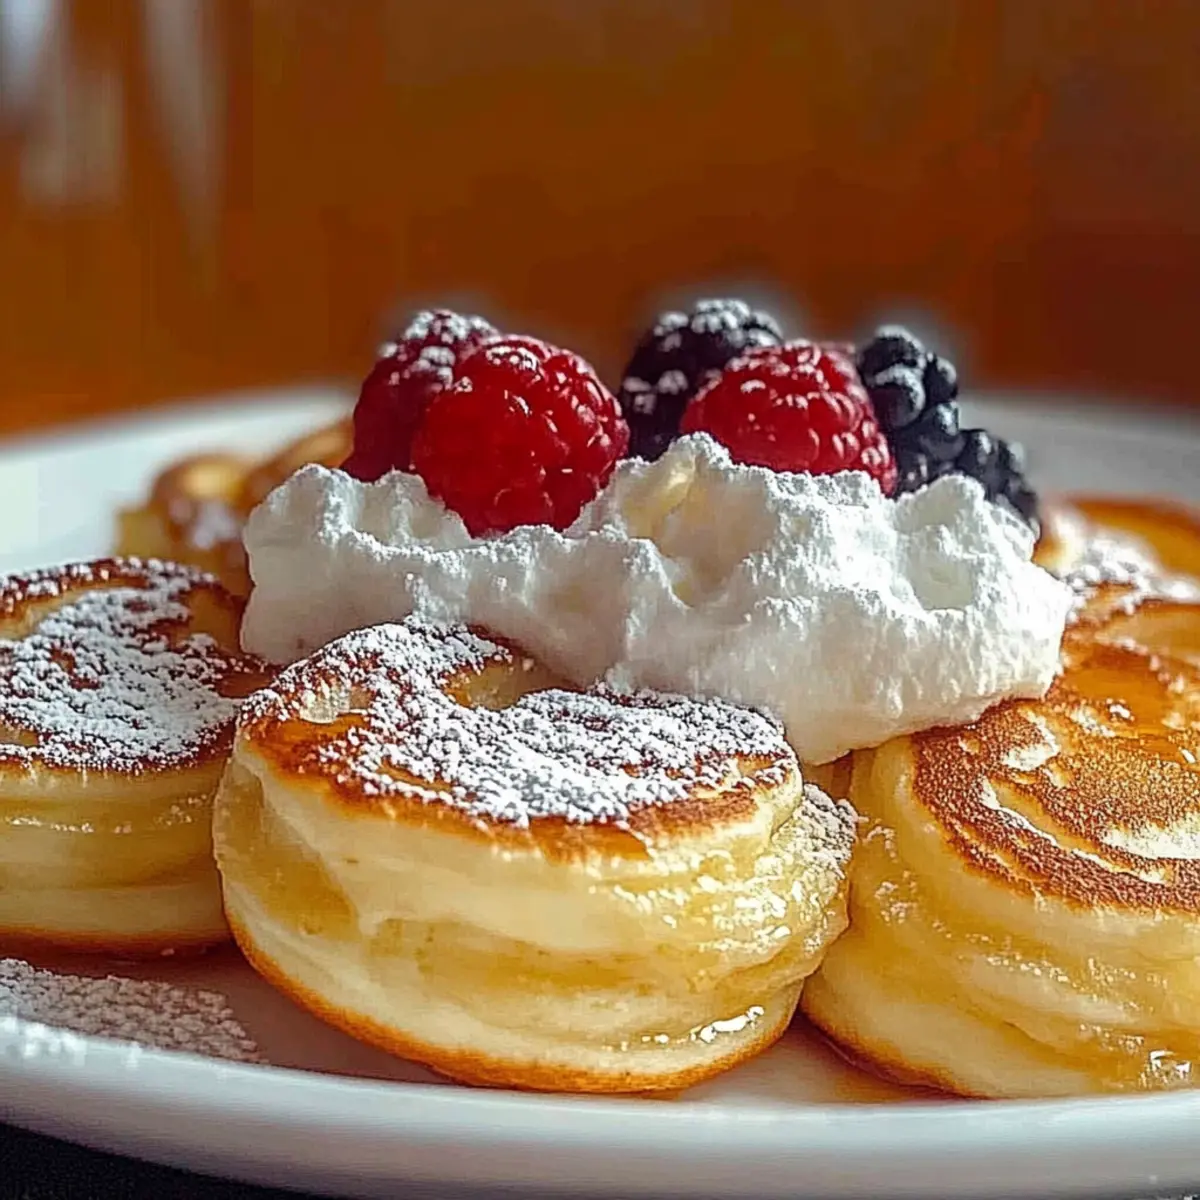
Stepping into my kitchen on a busy Sunday morning, the aroma of melting butter and eggs wafting through the air instantly lifts my spirits. I can’t wait to share my beloved Mini German Pancakes Recipe with you—a delightful twist on traditional breakfast fare that’s both quick and deceptively simple. These fluffy bite-sized treats are perfect for lazy brunches or hectic weekdays, plus they’re fully customizable to suit any palate. Picture a golden brown pancake that’s light and airy, with a tender bite—ideal for topping with fresh fruits, maple syrup, or even a sprinkle of cinnamon for that extra punch. Want to make it gluten-free? No problem! With endless variations, these pancakes will quickly become your go-to breakfast delight. Curious to dive in? Let’s get cooking!

Why are Mini German Pancakes Special?

Fluffy Texture: Each pancake puffs up beautifully in the oven, creating a light and airy bite that’s a joy to savor.

Versatile Toppings: Cut down the morning chaos—these pancakes are just waiting for your favorite toppings, from fresh fruits to whipped cream.

Quick and Easy: With a simple blend of ingredients, you can whip up this delightful breakfast in no time, perfect for busy mornings!

Customizable Options: Whether you prefer gluten-free alternatives or want to mix in spices like cinnamon for a warming touch, the options are endless.

Crowd-Pleasing Delight: Ideal for family brunches or gatherings, everyone loves these adorable pancakes that bring smiles to the table!

Mini German Pancakes Recipe Ingredients

For the Batter

  • All-purpose flour – Provides structure for the pancakes; can substitute with whole wheat flour for a healthier version.
  • Milk – Adds moisture and richness; use almond milk for a dairy-free alternative.
  • Large eggs – Binds the ingredients and adds richness; room temperature eggs yield better consistency.
  • Sugar – Adds sweetness to the batter; can reduce quantity or substitute with honey or agave nectar.
  • Vanilla extract – Enhances flavor with a sweet aroma; almond extract can be used for variation.
  • Salt – Balances flavors; essential for enhancing taste in baked goods.
  • Butter – Adds richness and prevents sticking; use coconut oil for a dairy-free option.

For Serving

  • Maple syrup – Drizzle over pancakes for that classic touch.
  • Fresh fruits – Top with berries or sliced bananas for a refreshing contrast.
  • Powdered sugar – Dust lightly for an elegant finish that enhances sweetness.
  • Whipped cream – Indulge with a dollop for extra creaminess and flavor.

With this Mini German Pancakes Recipe, you can customize flavors and toppings to suit your taste, turning every breakfast into a delightful adventure!

Step‑by‑Step Instructions for Mini German Pancakes Recipe

Step 1: Preheat the Oven
Start by preheating your oven to 400°F (200°C). While the oven is heating, place a muffin tin inside to warm up. This step is crucial, as a hot muffin tin will help the Mini German Pancakes puff up beautifully. Allow about 10 minutes for the oven to reach the desired temperature.

Step 2: Blend the Batter
In a blender, add the all-purpose flour, milk, large eggs, sugar, vanilla extract, and salt. Blend everything together until the mixture is smooth and well combined; this should take about 30 seconds. Your batter should be thick yet pourable, creating a luscious base for your Mini German Pancakes.

Step 3: Prepare the Muffin Tin
Once the oven has preheated, carefully remove the hot muffin tin with oven mitts to avoid burns. Add ½ tablespoon of butter to each muffin cup, letting it melt completely. The melted butter will not only add richness but also prevent the pancakes from sticking, ensuring a perfect release when they're done baking.

Step 4: Fill the Muffin Cups
Pour the batter into each prepared muffin cup, filling them about ¾ full. This will leave enough room for the Mini German Pancakes to puff up while baking. You should hear a gentle sizzle as the batter hits the hot butter, assuring you that you're on the right track to making these delightful treats.

Step 5: Bake the Pancakes
Place the muffin tin back in the oven and bake the Mini German Pancakes for 15-20 minutes. You'll know they are done when they have puffed up beautifully and turned a lovely golden brown. Keep an eye on them to prevent over-baking, as the texture should be airy and light.

Step 6: Serve Warm
Once baked, remove the muffin tin from the oven and allow the Mini German Pancakes to cool slightly before gently removing them. Serve these delicious bites warm, topped with your favorite ingredients like maple syrup, fresh fruits, or a sprinkle of powdered sugar for that perfect finishing touch!

Make Ahead Options

These Mini German Pancakes are perfect for meal prep enthusiasts! You can prepare the batter up to 24 hours in advance, storing it in an airtight container in the refrigerator. This allows the flavors to meld beautifully while saving you precious time on busy mornings. Additionally, you can bake the pancakes ahead and store them in the fridge for up to 3 days; simply reheat them in the oven for a few minutes before serving to ensure they retain their delightful fluffiness. To maintain quality, avoid overmixing the batter and let the pancakes cool before refrigerating. With a little prep, you'll have these fluffy breakfast delights ready to go whenever you need them!

How to Store and Freeze Mini German Pancakes

Fridge: Store leftover Mini German Pancakes in an airtight container for up to 3 days. Reheat them in the microwave or pop them in the toaster for a quick breakfast.

Freezer: For longer storage, freeze pancakes in a single layer on a baking sheet until firm, then transfer to an airtight container. They can last up to 3 months, perfect for easy breakfasts!

Reheating: To enjoy frozen Mini German Pancakes, simply microwave for 30-60 seconds, or reheat in the oven at 350°F (175°C) for about 10 minutes. Serve with your favorite toppings for a delightful treat!

Expert Tips for Mini German Pancakes

Preheat Properly: Ensure your oven is fully preheated before baking. This helps the pancakes puff up beautifully and achieve that signature airy texture.

Use Room Temperature Ingredients: Take eggs and milk out beforehand. Room temperature ingredients blend more smoothly, creating a better batter for your Mini German Pancakes.

Don’t Overmix: Blend the batter just until smooth. Overmixing can lead to dense pancakes instead of the fluffy, light texture we crave.

Creative Toppings: Experiment with toppings for variety! Fresh berries, yogurt, or a drizzle of chocolate syrup can elevate your Mini German Pancakes to new heights.

Watch the Baking Time: Keep an eye on your pancakes as they bake. Remove them once they turn golden brown to avoid dryness or a chewy texture.

What to Serve with Mini German Pancakes Recipe

The perfect meal is all about harmonizing flavors and textures, and these Mini German Pancakes are no exception!

  • Crispy Bacon: The salty crunch of bacon contrasts beautifully with the fluffy sweetness of the pancakes, creating a delightful balance on your plate. Pairing these two breakfast staples will make your meal irresistible.

  • Fresh Berries: Strawberries, blueberries, or raspberries add a burst of juicy freshness that brightens each bite. Their natural sweetness complements the pancakes perfectly while adding a lovely pop of color.

  • Maple Syrup: A classic pairing, the rich and golden syrup drizzled over the pancakes enhances their flavor and adds a comforting sweetness. It's a simple yet delightful addition that's hard to resist!

  • Whipped Cream: Light and airy whipped cream adds an indulgent touch to your pancakes, elevating them to even greater heights of deliciousness. It’s an excellent choice for brunch gatherings or special occasions!

  • Yogurt Parfait: Layer creamy yogurt with fruits and granola alongside the pancakes for a satisfying contrast in texture and a well-rounded breakfast. This adds nutritious elements while keeping everything light.

  • Honey Drizzle: Replace syrup with a drizzle of honey for a floral sweetness that pairs wonderfully with the vanilla essence of the pancakes. It’s a delightful twist that adds complexity to your breakfast.

  • Powdered Sugar: A light dusting of powdered sugar not only adds sweetness but also gives a rustic, comforting charm to your pancakes. It's the perfect finishing touch for an elegant presentation.

  • Hot Cocoa or Coffee: For a warm drink, serve a cup of rich hot cocoa or freshly brewed coffee alongside your pancakes. The warmth and flavor complement the sweetness of the pancakes while creating a cozy breakfast atmosphere.

Mini German Pancakes Recipe Variations

Feel free to put your own spin on this delightful recipe and customize the flavors to your heart's content!

  • Gluten-Free: Swap all-purpose flour with a gluten-free flour blend to enjoy a lighter pancake guilt-free.

  • Dairy-Free: Use almond milk or any plant-based milk in place of dairy milk for a creamy, lactose-free breakfast.

  • Sweet Enhancements: Add cinnamon or nutmeg to the batter for a warm, cozy flavor that complements your favorite toppings beautifully.

  • Nutty Twist: Stir in some chopped nuts like almonds or walnuts to the batter for added crunch and flavor; they pair wonderfully with maple syrup.

  • Fruitful Addition: Mash in ripe bananas or fold in blueberries for a fruity surprise that brings freshness to every bite.

  • Indulgent Treat: Top with caramel sauce or drizzle chocolate syrup over the mini pancakes for a decadent morning delight that satisfies your sweet tooth.

  • Whipped Cream Wonder: Serve these fluffy pancakes with a generous dollop of whipped cream alongside fresh fruits for a truly indulgent brunch experience.

As you embark on this culinary adventure, don’t hesitate to explore and create your own favorites. After all, breakfast should be a canvas for your imagination! If you're curious for more inspiration, check out these delicious Ricotta Protein Pancakes or consider serving these alongside a flavorful German Potato Salad for a brunch platter that impresses.

Mini German Pancakes Recipe FAQs

How do I know if my ingredients are ripe or fresh?
Absolutely! For the best Mini German Pancakes, ensure your eggs are fresh and are not past their expiration date. Choose milk that is still within its sell-by date and has no off-smells. All-purpose flour should be free of insects, and you’ll definitely want to avoid any dark spots or clumps. If you’re using fruits for toppings, look for firm, brightly colored berries or bananas with minimal brown spots for optimal flavor.

What are the best storage methods for leftover Mini German Pancakes?
Very! You can store your leftover Mini German Pancakes in an airtight container in the fridge for up to 3 days. Be sure to let them cool completely before sealing them, so they remain soft and don’t become soggy. For couples or families, this is a fantastic way to stretch breakfast across several days!

Can I freeze Mini German Pancakes? If so, how?
Of course! Freezing your Mini German Pancakes means you can enjoy this delightful breakfast anytime. First, lay the pancakes in a single layer on a baking sheet and park them in the freezer until firm, usually about 30 minutes. Then, transfer them to an airtight container or a resealable freezer bag, separating layers with parchment paper to prevent sticking. They can last up to 3 months. When you’re ready to enjoy them, reheat in the microwave for 30-60 seconds, or pop them into a preheated oven at 350°F (175°C) for about 10 minutes.

What should I do if my Mini German Pancakes don’t puff up?
Ah, no worries! If they didn’t puff up, it might be due to insufficient preheating or the batter being overmixed. Make sure you preheat your oven and muffin tin thoroughly—around 10 minutes at 400°F (200°C) is ideal. If your batter was mixed too much, try blending it only until smooth next time. And double-check your oven’s temperature. If it’s lower than expected, your pancakes might not rise as they should.

Can people with gluten intolerance enjoy these Mini German Pancakes?
Yes, indeed! You can still enjoy Mini German Pancakes with a simple swap. Use a gluten-free all-purpose flour blend instead of regular flour. Make sure the blend you choose contains xanthan gum, which helps replicate the texture of traditional flour. This way, everyone can delight in these fluffy bites without worry!

What are some allergy considerations for this recipe?
Certainly! The main ingredients to watch out for include dairy and eggs, as those are common allergens. If you’re cooking for someone with these allergies, I recommend using almond milk in place of regular milk and flax eggs as an egg substitute (1 tablespoon ground flaxseed mixed with 3 tablespoons of water equals 1 egg). Be sure to check all packaging for hidden allergens, especially when it comes to baking powder or vanilla extract.

Mini German Pancakes Recipe

Mini German Pancakes Recipe: Fluffy Bites of Morning Joy

Delightful Mini German Pancakes Recipe offers fluffy, bite-sized treats perfect for any breakfast occasion.
Print Recipe Pin Recipe
Prep Time 10 minutes mins
Cook Time 20 minutes mins
Total Time 30 minutes mins
Servings: 4 pancakes
Course: Breakfast
Cuisine: German
Calories: 120
Ingredients Equipment Method Nutrition Notes

Ingredients
  

For the Batter
  • 1 cup all-purpose flour can substitute with whole wheat flour
  • 1 cup milk use almond milk for dairy-free option
  • 3 large eggs room temperature
  • 2 tablespoons sugar can reduce or substitute with honey
  • 1 teaspoon vanilla extract almond extract can be used for variation
  • 1/4 teaspoon salt
  • 1/2 tablespoon butter can use coconut oil for dairy-free option
For Serving
  • 1 cup maple syrup
  • 1 cup fresh fruits such as berries or bananas
  • 1 cup powdered sugar for dusting
  • 1 cup whipped cream for topping

Equipment

  • Muffin tin
  • Blender

Method
 

Step-by-Step Instructions
  1. Preheat your oven to 400°F (200°C). Place a muffin tin inside to warm up for about 10 minutes.
  2. In a blender, blend together all-purpose flour, milk, eggs, sugar, vanilla extract, and salt until smooth, about 30 seconds.
  3. Remove the hot muffin tin and add ½ tablespoon of butter to each muffin cup, letting it melt completely.
  4. Pour the batter into each muffin cup, filling them about ¾ full.
  5. Bake for 15-20 minutes until puffy and golden brown.
  6. Allow to cool slightly before gently removing and serve warm with toppings.

Nutrition

Serving: 1pancakeCalories: 120kcalCarbohydrates: 14gProtein: 3gFat: 6gSaturated Fat: 4gPolyunsaturated Fat: 0.5gMonounsaturated Fat: 2gCholesterol: 80mgSodium: 150mgPotassium: 100mgFiber: 0.5gSugar: 3gVitamin A: 300IUCalcium: 100mgIron: 1mg

Notes

Customize flavors and toppings for an adventurous breakfast experience.

Tried this recipe?

Let us know how it was!

Apple Yogurt Pancakes: Fluffy, Fruity Breakfast Bliss

November 24, 2025 by Grace Snow Leave a Comment

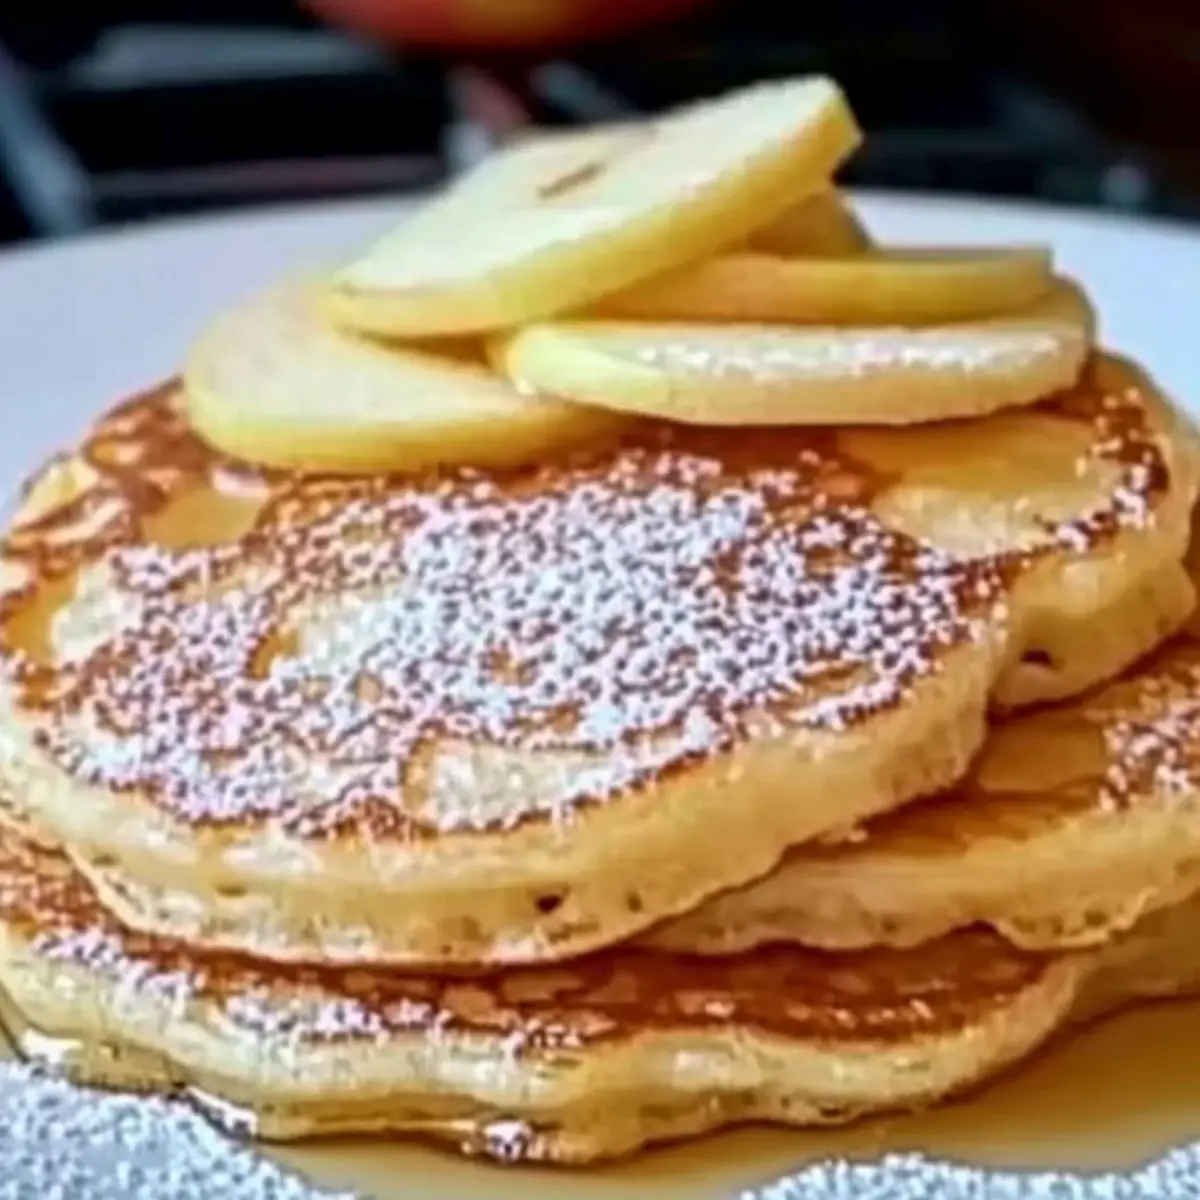
A delightful aroma wafted through my kitchen, instantly transporting me to cherished breakfasts of the past. These Apple Yogurt Pancakes are my go-to recipe for a quick and easy morning meal that never fails to bring a smile. With the natural sweetness from grated apples and the creaminess of yogurt, they are not only light and fluffy but also packed with nutrition. Whipping up these pancakes takes just minutes, allowing you to savor a delicious breakfast without the fuss. Plus, they are perfect for those busy weekdays or leisurely weekends alike. You can easily customize them with your favorite toppings or add-ins! Are you ready to transform your mornings with these scrumptious pancakes?

Why Are Apple Yogurt Pancakes So Amazing?

Fluffy Texture: These pancakes offer an irresistibly light and airy bite, thanks to the perfect balance of yogurt and grated apples.

Quick & Easy: In just a few steps, you can whip up a delicious breakfast that’s ready in under 30 minutes.

Nutritious: Packed with protein from yogurt and fiber from apples, you’ll feel good about starting your day with this wholesome meal.

Customizable: Feel free to experiment with different fruits or spices; try adding chopped nuts or raisins for an extra crunch.

Family Favorite: Perfect for kids and adults alike, these pancakes will have everyone reaching for seconds during breakfast!

If you enjoy fruit-packed breakfasts, why not also check out my Ricotta Protein Pancakes for another delightful option?

Apple Yogurt Pancakes Ingredients

• Get ready to create magic in your kitchen with these wholesome ingredients!

For the Batter

  • All-purpose flour – Provides structure to the pancakes; substitute with whole wheat flour for added fiber.
  • Plain yogurt (Greek or regular) – Adds moisture and richness; use non-dairy yogurt alternatives for a vegan option.
  • Milk – Helps to hydrate the batter; substitute with almond milk or any other non-dairy milk as needed.
  • Grated apple – Infuses natural sweetness and flavor; opt for sweet varieties like Fuji or Honeycrisp for the best results.
  • Large egg – Binds the ingredients together for a thicker batter; can replace with a flax egg for a vegan option.
  • Sugar – Enhances sweetness; reduce or omit if desired, especially if using sweet apples.
  • Baking powder – Provides leavening for light and fluffy pancakes; ensure it’s fresh for best results.
  • Ground cinnamon – Adds a warm, aromatic flavor; can substitute with nutmeg for different flavor nuances.
  • Salt – Balances sweetness and enhances flavors.
  • Vegetable oil – Used for moisture in the batter and frying; can use melted coconut oil for a different taste.

Optional Add-ins

  • Chopped nuts or raisins – Adds texture and additional flavor; a great way to boost nutrition and crunch in your Apple Yogurt Pancakes!

Step‑by‑Step Instructions for Apple Yogurt Pancakes

Step 1: Prepare Dry Ingredients
In a large bowl, whisk together 1 cup of all-purpose flour, 2 teaspoons of baking powder, 1 teaspoon of ground cinnamon, and a pinch of salt until they are well combined. This dry mixture lays the foundation for the fluffy texture of your Apple Yogurt Pancakes, so ensure there are no lumps before moving on.

Step 2: Mix Wet Ingredients
In a separate bowl, combine 1 cup of plain yogurt, 1/2 cup of milk, 1 large egg, 2 tablespoons of sugar, and 2 tablespoons of vegetable oil. Stir these ingredients together until smooth, ensuring everything is well incorporated. This mixture adds richness and moisture to your pancake batter, setting the stage for delightful flavor.

Step 3: Combine Grated Apple
Add 1 cup of finely grated apple to the wet mixture, gently folding it in with a spatula. The grated apple not only provides natural sweetness to your Apple Yogurt Pancakes but also enhances the delightful fruity flavor. Be careful not to overmix; you want to keep some of the airiness in the batter.

Step 4: Combine Mixtures
Slowly pour the wet ingredients into the dry ingredients, gently mixing with a spatula until just combined. Aim for a slightly lumpy texture, as overmixing can lead to dense pancakes. The batter will be thick with chunks of apple, creating a deliciously hearty consistency for your Apple Yogurt Pancakes.

Step 5: Heat the Pan
Preheat your non-stick skillet or griddle over medium heat for about 5 minutes, lightly greasing it with a bit of vegetable oil. The skillet should be hot but not smoking; a drop of water should sizzle and evaporate quickly. This ensures your pancakes cook evenly and develop a lovely golden brown hue.

Step 6: Cook Pancakes
Pour 1/4 cup of batter onto the heated skillet for each pancake. Cook them until bubbles form on the surface, usually around 2-3 minutes. When the edges appear set and you notice a slight browning, it's time to flip them over for that perfect golden finish.

Step 7: Flip
Carefully flip each pancake using a spatula and cook for another 2-3 minutes until they are golden brown on the other side. Be patient and watch for the bounce-back spring when lightly pressed to ensure they are fully cooked and fluffy throughout, delivering the delightful texture you desire.

Step 8: Keep Warm
As you finish cooking the remaining batter, transfer the cooked pancakes to a plate and cover them with a kitchen towel to keep them warm. This way, they will stay cozy and deliciously fluffy, ready to be served to your family or enjoyed with your favorite toppings when all the Apple Yogurt Pancakes are ready!

Expert Tips for Apple Yogurt Pancakes

  • Don’t Overmix: A few lumps are okay! Overmixing can lead to dense pancakes; gentle folding keeps them light and fluffy.

  • Check the Heat: If your pancakes brown too quickly, lower the skillet temperature. This way, they'll cook evenly without burning.

  • Use Fresh Baking Powder: Ensure your baking powder is fresh to achieve maximum fluffiness in your Apple Yogurt Pancakes; stale baking powder won't rise well.

  • Grate Apples Finely: The finer the grated apple, the more evenly distributed the sweetness throughout the batter. This makes each bite delightful!

  • Experiment with Flavors: Try adding different spices like nutmeg or cardamom for a unique twist on flavor. Your family will enjoy discovering new favorites!

Apple Yogurt Pancakes Variations & Substitutions

Feel free to let your creativity shine by customizing your Apple Yogurt Pancakes—with flavors and textures that tantalize your taste buds!

  • Dairy-Free: Use almond or oat milk and non-dairy yogurt for a delicious vegan twist that’s just as creamy.
  • Flavored Yogurt: Swap plain yogurt for vanilla or cinnamon yogurt for an extra layer of flavor that enhances the sweetness.
  • Whole Wheat Flour: Substitute all-purpose flour with whole wheat flour for a heartier, fiber-filled pancake that’s equally delightful.
  • Add Spice: Incorporate ground nutmeg or cardamom alongside the cinnamon for a warm aromatic kick and a cozy breakfast vibe.
  • Nutty Delight: Fold in a handful of chopped walnuts or pecans for a crunchy texture and added nutrition, making each bite a little more exciting.
  • Fruity Twists: Mix in blueberries or bananas in addition to the grated apples for a burst of color and flavor, elevating your pancakes to new heights!
  • Sweetener Alternative: Try replacing sugar with maple syrup or honey for a natural sweetness that pairs perfectly with the apples.
  • Gluten-Free: Use a gluten-free flour blend to cater to dietary needs without sacrificing taste, allowing everyone to enjoy this fabulous breakfast.

And if you're eager for more flavorful breakfast options, my delightful recipe for Chicken Salad Apples will surely satisfy your craving! Happy cooking!

What to Serve with Apple Yogurt Pancakes

Enhance your morning delight with these complementary flavors that perfectly highlight the fruity goodness of Apple Yogurt Pancakes.

  • Crispy Bacon: The savory crunch of bacon beautifully contrasts the sweetness of pancakes, creating a perfect savory-sweet harmony.

  • Maple Syrup Drizzle: A classic choice, the rich, caramel-like flavor of maple syrup adds an indulgent touch to your fluffy pancakes.

  • Fresh Berries: Bright, juicy berries like strawberries or blueberries provide a refreshing tartness that balances the pancake’s sweetness beautifully.

  • Whipped Cream: Light and airy whipped cream transforms your pancakes into a decadent dish, perfect for special occasions or weekend brunches.

  • Yogurt Parfait: Serve alongside a yogurt parfait layered with fruits and granola for a delightful textural contrast that enhances your meal experience.

  • Fresh Fruit Salad: A zesty fruit salad adds a vibrant splash of color, refreshing your palate between bites of the rich pancakes.

  • Chai Tea: Spice up your breakfast experience with a warm cup of chai, whose cinnamon notes harmonize wonderfully with the pancakes’ flavor.

Each pairing creates a unique twist, turning a simple breakfast into a memorable feast that invites everyone to the table!

How to Store and Freeze Apple Yogurt Pancakes

Fridge: Store leftover pancakes in an airtight container in the fridge for up to 2 days. Reheat in the microwave or on a skillet for a warm breakfast delight.

Freezer: Freeze pancakes in a single layer on a baking sheet, then transfer them to a zip-top bag for up to 1 month. They make for a quick and easy breakfast option!

Reheating: When ready to enjoy, reheat frozen pancakes in the microwave for 30 seconds to 1 minute, or toast them for a crispy finish.

Keep Fresh: If you have extra batter, it’s best to cook all of it and store the pancakes, as the batter may not hold up well after a night in the fridge.

Make Ahead Options

These Apple Yogurt Pancakes are a fantastic choice for meal prep! You can mix the dry ingredients (1 cup of flour, 2 teaspoons of baking powder, 1 teaspoon of cinnamon, and a pinch of salt) and store them in an airtight container for up to 3 days. The wet ingredients, including 1 cup of yogurt, 1/2 cup of milk, 1 egg, 2 tablespoons of sugar, and 2 tablespoons of vegetable oil, can be whisked together and kept in the fridge for up to 24 hours. Just remember to grate your apples fresh right before cooking to keep them from browning. When you're ready to serve, simply combine the wet and dry mix, cook, and enjoy a delicious breakfast with minimal effort—perfect for busy mornings!

Apple Yogurt Pancakes Recipe FAQs

How do I choose the right apples for my pancakes?
Absolutely! For the best results, select sweet varieties like Fuji or Honeycrisp. They provide the perfect balance of sweetness and flavor to your pancakes. If you prefer a tart flavor, Granny Smith can add a delightful contrast, but remember to adjust the sugar accordingly!

How should I store leftover Apple Yogurt Pancakes?
Store your leftover pancakes in an airtight container in the refrigerator for up to 2 days. To reheat, simply pop them in the microwave for about 30 seconds or warm them in a skillet for that freshly made taste.

Can I freeze Apple Yogurt Pancakes?
Yes, you can! To freeze, place cooked pancakes in a single layer on a baking sheet and let them cool completely. Once cooled, transfer them to a zip-top bag, separating layers with parchment paper, and store in the freezer for up to 1 month.

What’s the best way to reheat frozen pancakes?
For the best results, reheat your frozen pancakes by placing them in the microwave for 30 seconds to 1 minute. Alternatively, you can toast them in a toaster for a crispy finish. Remember, they’ll be ready in a jiffy, making breakfast a breeze!

Can I make these pancakes gluten-free?
Very! Substitute the all-purpose flour with a 1:1 gluten-free flour blend. Ensure your other ingredients, such as baking powder and yogurt, are gluten-free as well. This way, you can enjoy delicious Apple Yogurt Pancakes without any worries!

Are there any dietary considerations for pets or allergies?
Absolutely! While the pancakes are safe for human consumption, avoid sharing them with pets, especially due to ingredients like milk and eggs that can upset their stomachs. If anyone in your home has allergies, consider using non-dairy yogurt and nut-free options, like apple sauce, as a substitute for additional flavor!

Apple Yogurt Pancakes

Apple Yogurt Pancakes: Fluffy, Fruity Breakfast Bliss

These Apple Yogurt Pancakes are a quick, fluffy breakfast recipe with natural sweetness and nutrition.
Print Recipe Pin Recipe
Prep Time 10 minutes mins
Cook Time 20 minutes mins
Total Time 30 minutes mins
Servings: 4 pancakes
Course: Breakfast
Cuisine: American
Calories: 150
Ingredients Equipment Method Nutrition Notes

Ingredients
  

For the Batter
  • 1 cup all-purpose flour Substitute with whole wheat flour for added fiber.
  • 1 cup plain yogurt Greek or regular, non-dairy alternatives for vegan.
  • 1/2 cup milk Almond milk or other non-dairy milk as needed.
  • 1 cup grated apple Opt for sweet varieties like Fuji or Honeycrisp.
  • 1 large egg Can replace with a flax egg for vegan option.
  • 2 tablespoons sugar Reduce or omit if using sweet apples.
  • 2 teaspoons baking powder Ensure it’s fresh for best results.
  • 1 teaspoon ground cinnamon Can substitute with nutmeg.
  • 1 teaspoon salt Balances sweetness and enhances flavors.
  • 2 tablespoons vegetable oil Can use melted coconut oil for different taste.
Optional Add-ins
  • chopped nuts or raisins Adds texture and additional flavor.

Equipment

  • Mixing bowls
  • Whisk
  • non-stick skillet

Method
 

Instructions
  1. In a large bowl, whisk together flour, baking powder, cinnamon, and salt until well combined.
  2. In a separate bowl, combine yogurt, milk, egg, sugar, and vegetable oil. Stir until smooth.
  3. Add grated apple to the wet mixture and gently fold it in with a spatula.
  4. Slowly pour the wet ingredients into the dry ingredients, gently mixing until just combined.
  5. Preheat your non-stick skillet over medium heat and lightly grease with vegetable oil.
  6. Pour 1/4 cup of batter onto the skillet for each pancake and cook until bubbles form on the surface.
  7. Carefully flip each pancake and cook for another 2-3 minutes until golden brown.
  8. Transfer cooked pancakes to a plate and cover with a kitchen towel to keep warm.

Nutrition

Serving: 1pancakeCalories: 150kcalCarbohydrates: 24gProtein: 4gFat: 4gSaturated Fat: 1gCholesterol: 20mgSodium: 150mgPotassium: 150mgFiber: 2gSugar: 5gVitamin A: 150IUVitamin C: 2mgCalcium: 50mgIron: 1mg

Notes

Experiment with different fruits or spices for additional flavors. These pancakes can easily be customized to suit your taste.

Tried this recipe?

Let us know how it was!

Fluffy Ina Garten Cranberry Muffins with a Zesty Twist

November 20, 2025 by Grace Snow Leave a Comment

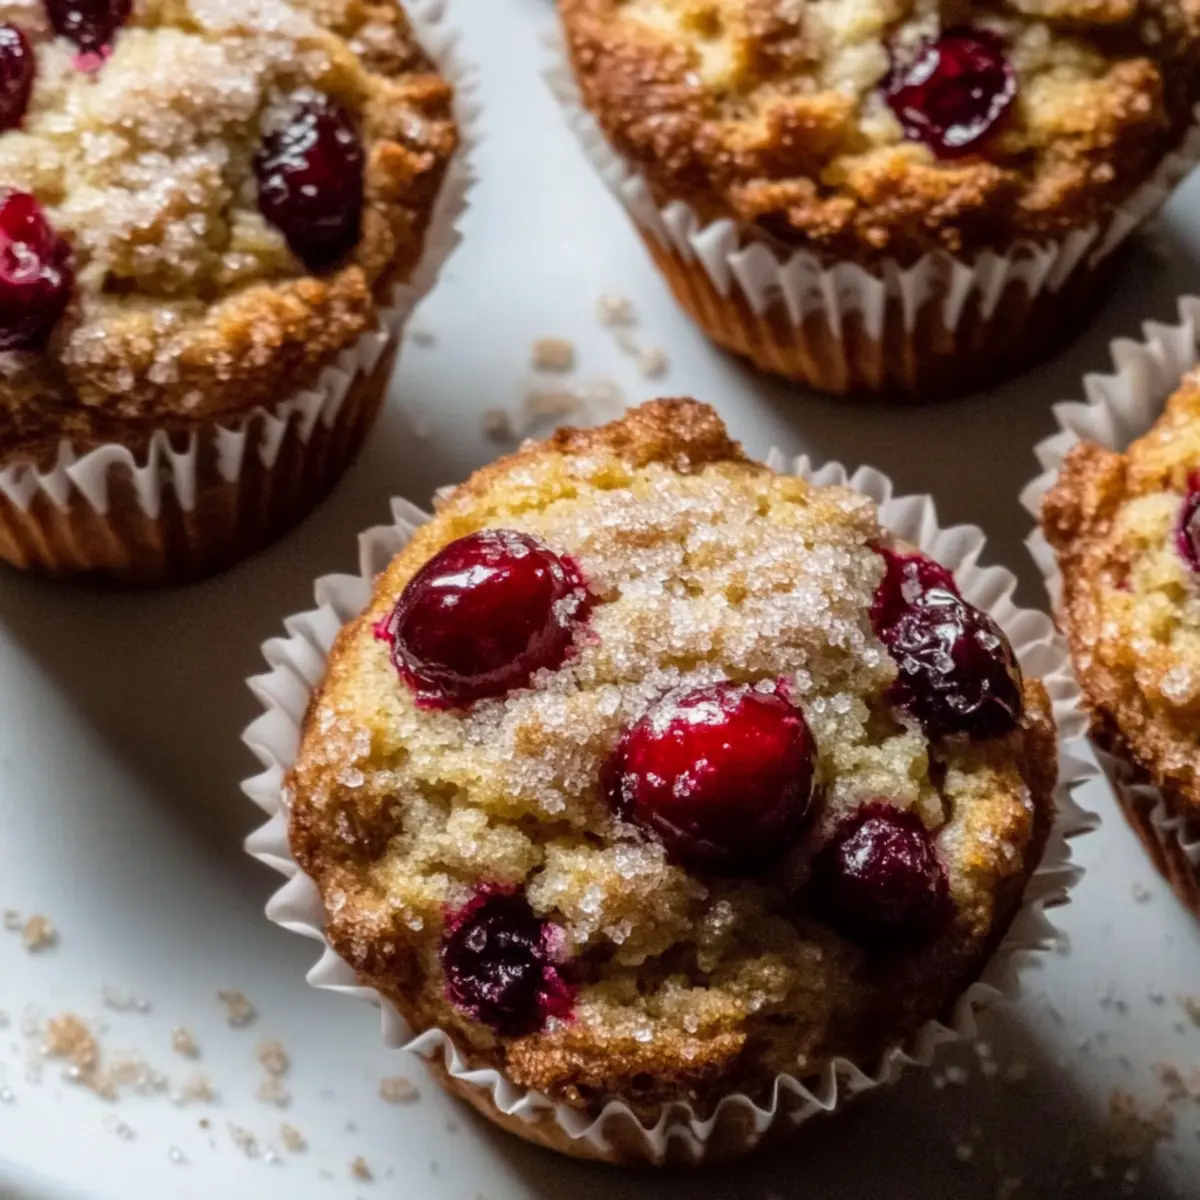
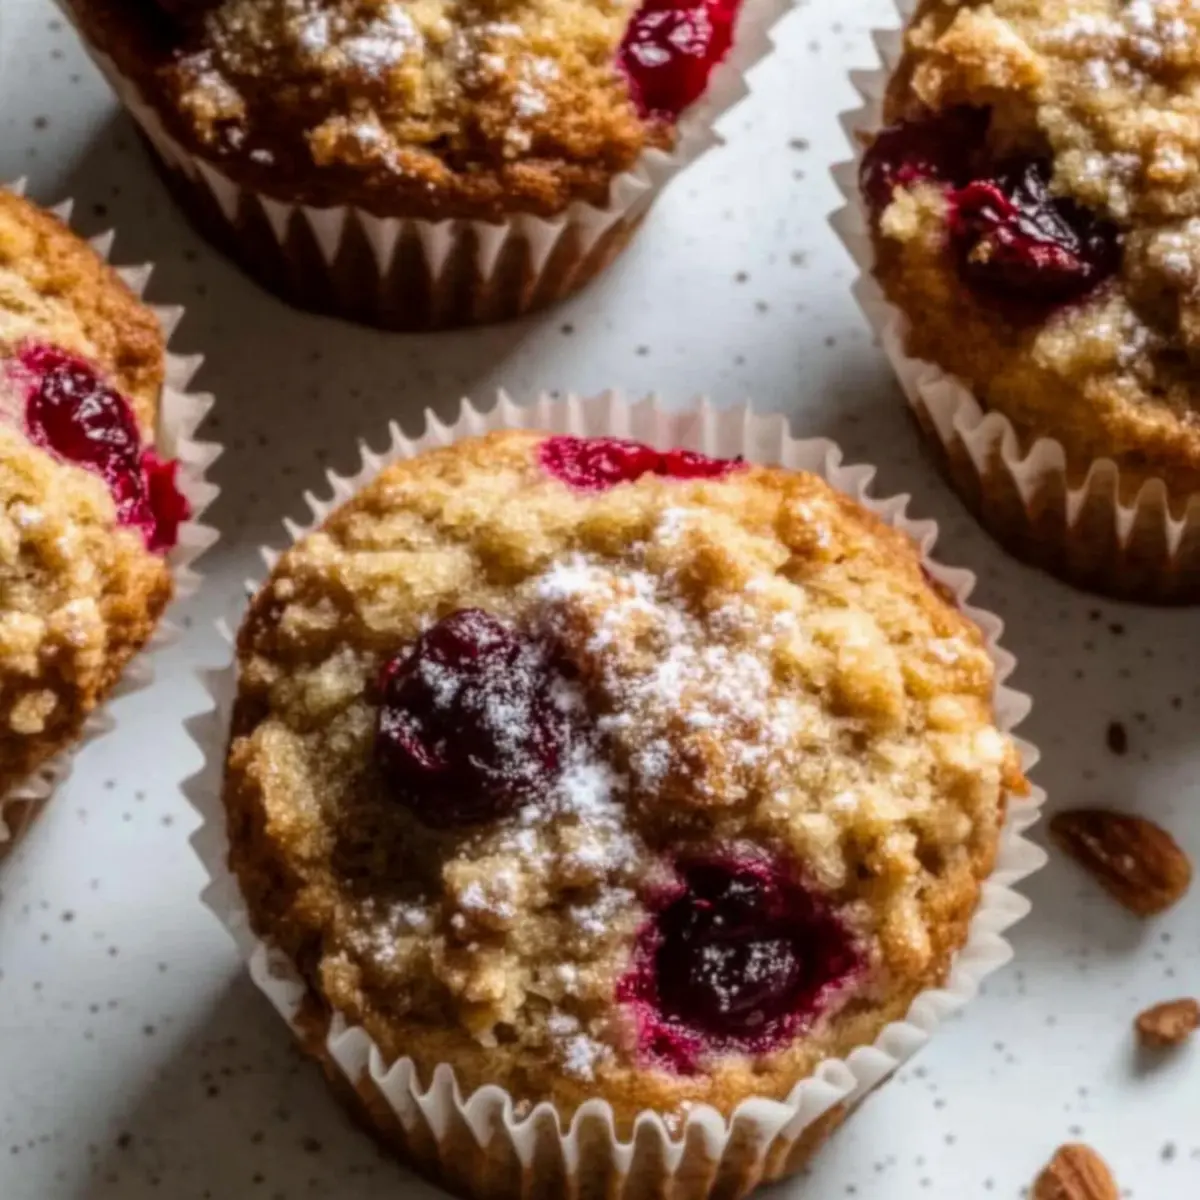
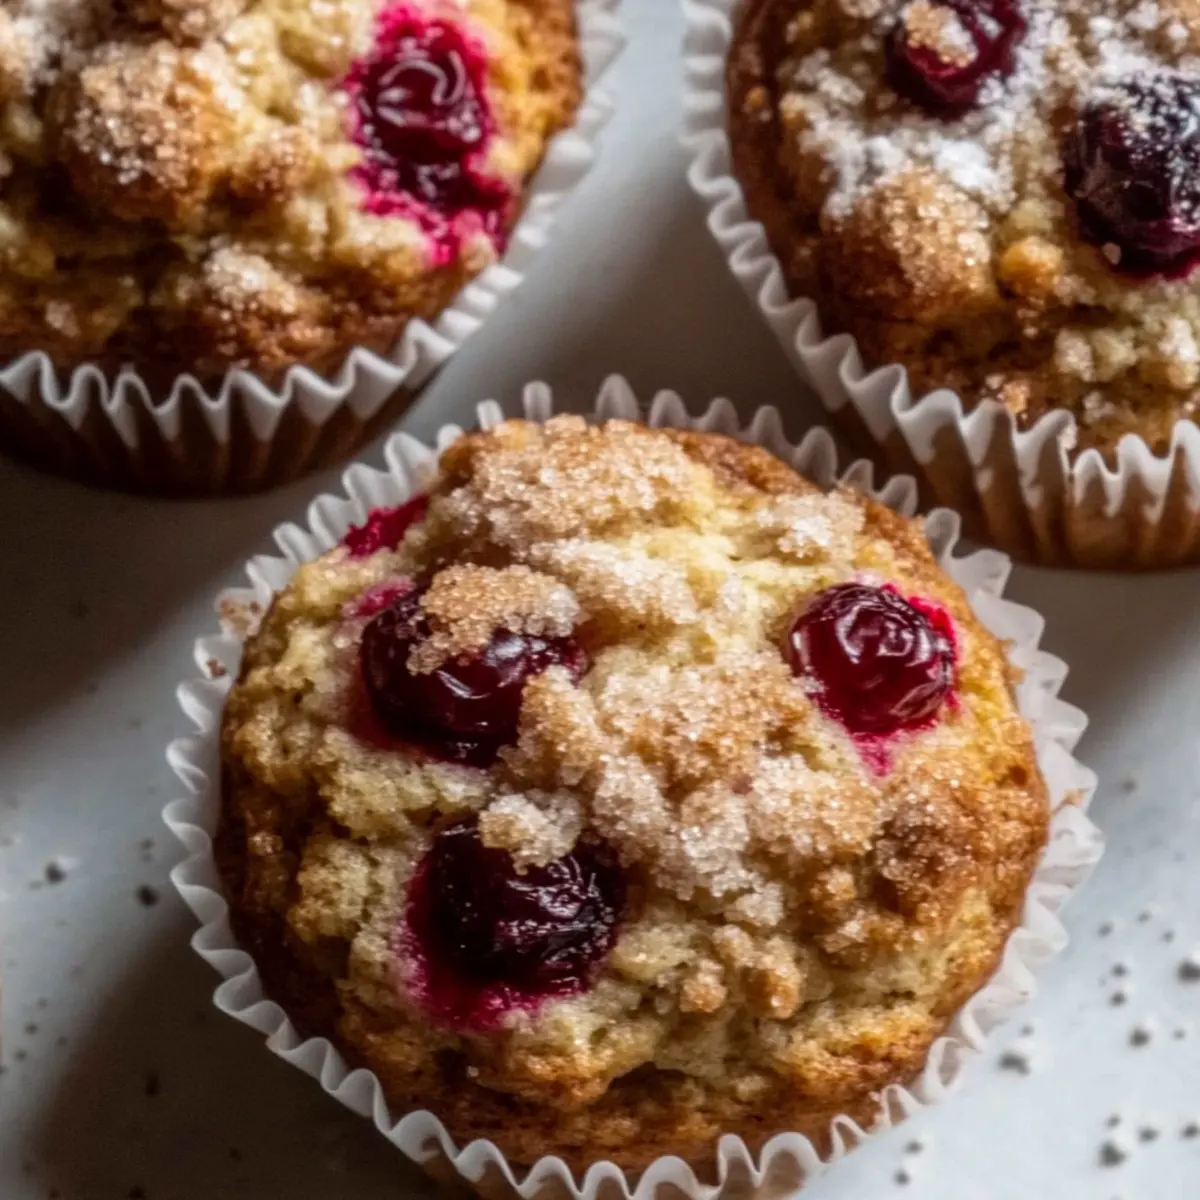
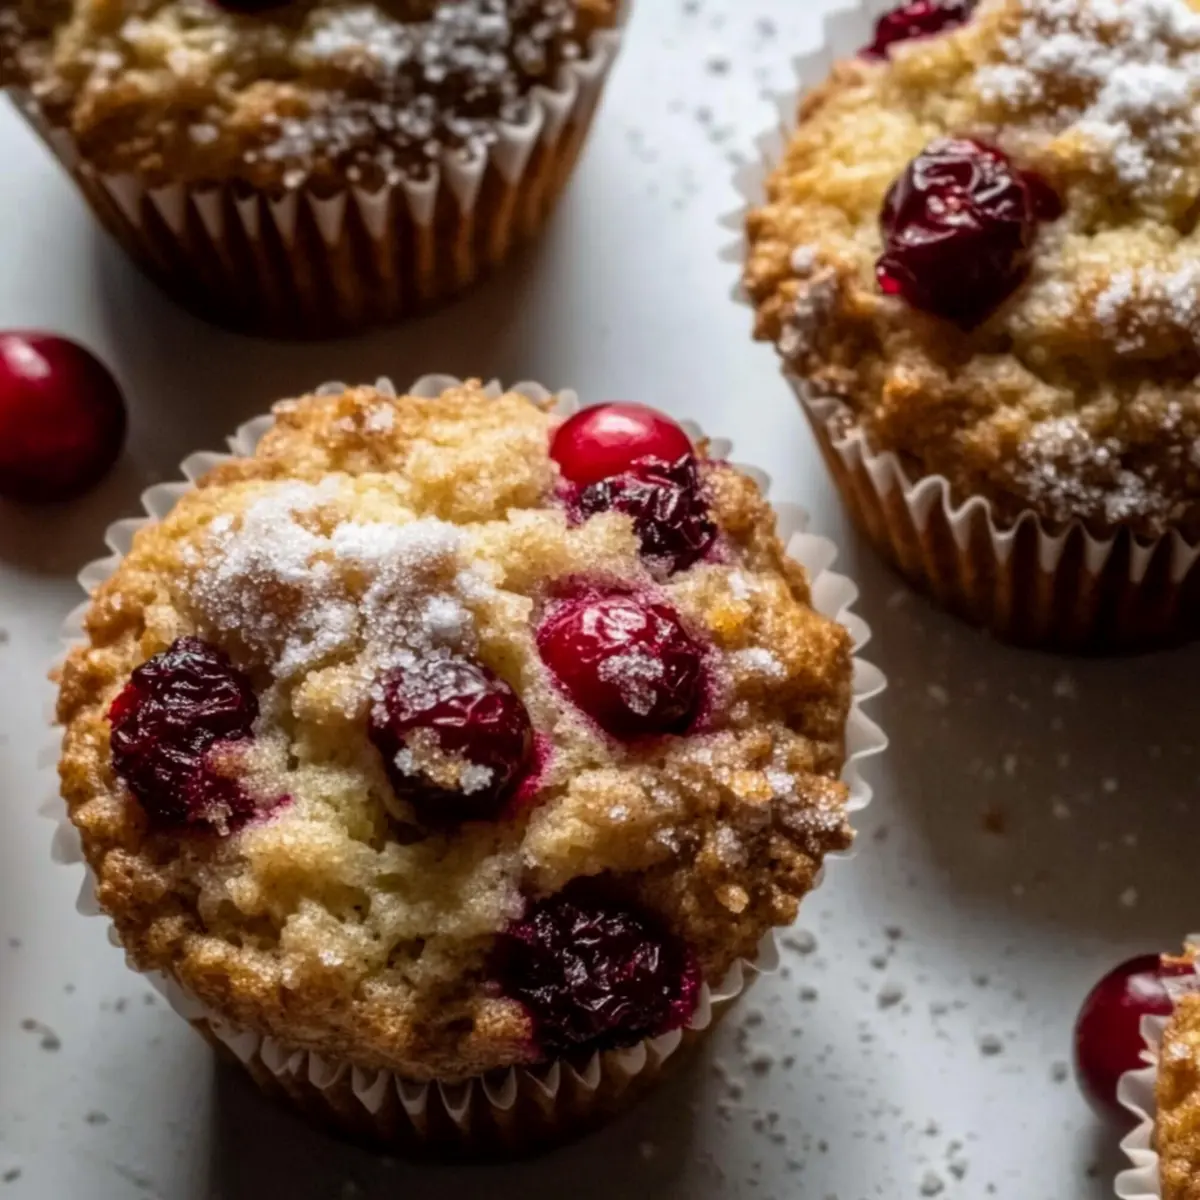
There's something wonderfully nostalgic about the aroma of cinnamon and cranberries wafting through the kitchen, isn't there? As the seasons change and the holidays approach, I find myself reaching for Ina Garten's Cranberry Muffins. These soft, moist breakfast muffins with a zesty kick of orange are a delightful way to start any day. What makes this recipe truly special is its simplicity; you can whip them up in just around 40 minutes, making them perfect for a leisurely weekend brunch or an easy weekday treat. Plus, with the option to sprinkle on a cinnamon sugar topping, they could easily steal the spotlight at your next gathering. Are you ready to fill your home with the delightful scent of freshly baked muffins? Let’s get started!

Why are these muffins so irresistible?

Simplicity at its finest: With only basic ingredients and minimal prep time, you’ll be enjoying warm muffins in no time.

Zesty enhancement: The addition of orange zest elevates the cranberry flavor, making each bite a burst of freshness.

Perfect texture: These muffins are delightfully soft and moist, ensuring a satisfying experience for all.

Customizable: Feel free to swap out cranberries for blueberries or add nuts for extra crunch—there’s a variation to please every palate!

Crowd-pleaser: Whether you’re enjoying breakfast with family or serving at gatherings, these muffins are sure to impress. Don’t forget to check out my Breakfast Egg Muffins for another fantastic morning recipe!

Ina Garten Cranberry Muffin Ingredients

• For those eager to bake the best muffins ever, here's what you'll need!

For the Muffin Batter

  • 2 cups flour – This provides the structure; gluten-free flour blend can work well for gluten-free muffins.
  • 1 cup sugar – Adds sweetness; brown sugar can deepen the flavor beautifully.
  • 1 ½ tsp baking powder – This leavening agent ensures perfect rise; make sure it's fresh!
  • ½ tsp baking soda – An extra boost for fluffiness; no substitutes necessary here.
  • ½ tsp salt – Balances the sweetness, a crucial ingredient for flavor enhancement.
  • ½ tsp cinnamon – Adds a warm flavor profile; omit if you prefer a tart muffin.
  • ½ cup melted butter – Richness and moisture are imparted; vegetable oil is a good alternative.
  • 2 eggs – Acts as a binding agent; for a vegan option, use flax eggs (2 tbsp ground flaxseed mixed with 6 tbsp water).
  • 1 tsp vanilla extract – Enhances the overall flavor; almond extract can be an interesting substitute.
  • ½ cup buttermilk – Contributes to a tender crumb; milk with a splash of vinegar can mimic buttermilk.
  • Zest of 1 orange – A must for enhancing the tartness of cranberries and overall flavor.
  • 1 ½ cups cranberries – Fresh or frozen work well; if using dried, reduce sugar to keep things balanced.

Optional Topping

  • ¼ cup sugar + ¼ tsp cinnamon – Adds sweetness and a lovely crunch; feel free to omit if preferred.

Now you're set to make the delicious Ina Garten Cranberry Muffins!

Step‑by‑Step Instructions for Ina Garten Cranberry Muffins

Step 1: Preheat the Oven
Begin by preheating your oven to 400°F (200°C). This crucial step ensures that your muffins will rise beautifully from the get-go. While the oven warms up, gather your muffin tin and line it with paper liners or lightly grease the cups to prevent sticking.

Step 2: Combine Dry Ingredients
In a large mixing bowl, whisk together 2 cups of flour, 1 cup of sugar, 1 ½ teaspoons of baking powder, ½ teaspoon of baking soda, ½ teaspoon of salt, and ½ teaspoon of cinnamon (if using). Make sure all ingredients are well incorporated to form an even mixture. The sweetness and warmth of these ingredients will set the foundation for your delightful Ina Garten Cranberry Muffins.

Step 3: Mix Wet Ingredients
In a separate bowl, combine ½ cup of melted butter, 2 eggs, 1 teaspoon of vanilla extract, and ½ cup of buttermilk. Whisk these wet ingredients together until smooth and blended. The melted butter adds richness while the buttermilk contributes to the muffins’ moistness, ensuring each bite is heavenly and soft.

Step 4: Combine Wet and Dry Mixtures
Pour the wet mixture into the bowl with the dry ingredients. Gently stir with a spatula until just combined; be careful not to overmix. The batter should be slightly lumpy but thoroughly blended—this keeps your muffins fluffy and ensures the texture remains soft, characteristic of classic Ina Garten Cranberry Muffins.

Step 5: Fold in the Cranberries
Now, gently fold in 1 ½ cups of fresh or frozen cranberries, ensuring they are evenly distributed throughout the batter. If you want to prevent them from sinking, toss the cranberries in a tablespoon of flour before adding them to the mixture. This step will elevate the tartness and give your muffins an inviting, fruity burst.

Step 6: Fill the Muffin Cups
Spoon the batter into your prepared muffin cups, filling them almost to the top to achieve those bakery-style muffin tops. If desired, sprinkle a mixture of ¼ cup of sugar and ¼ teaspoon of cinnamon over the batter for a sweet, crunchy topping. This adds an extra layer of flavor and a delightful texture to your Ina Garten Cranberry Muffins.

Step 7: Bake the Muffins
Place the muffin tin into the preheated oven and bake for 5 minutes at 400°F (200°C). Then, reduce the temperature to 375°F (190°C) and bake for an additional 15-20 minutes. Keep an eye on them; they’re done when a toothpick inserted into the center comes out clean, and the tops are golden-brown, indicating your muffins are perfectly baked.

Step 8: Cool and Serve
Once baked, let the muffins cool in the tin for about 5-10 minutes before transferring them to a wire rack to cool completely. This cooling process helps them set and develop their moist, soft texture. Serve warm or at room temperature, and enjoy the delightful flavors of your freshly baked Ina Garten Cranberry Muffins.

Ina Garten Cranberry Muffins Variations

Feel free to make these muffins your own, adding personal touches that will make each bite even more delightful!

  • Gluten-Free: Substitute with a gluten-free flour blend for a gluten-free version that’s just as scrumptious.
  • Richer Sweetness: Use brown sugar instead of white for a deeper, more caramel-like flavor that will tantalize your taste buds.
  • Dairy-Free: Replace butter with vegetable oil and use a non-dairy milk blend in place of buttermilk—deliciously light and fluffy!
  • Nutty Goodness: Stir in chopped walnuts or pecans for a delightful crunch that complements the tender muffin texture beautifully.
  • Fruit Fusion: Mix in fresh blueberries or raspberries alongside the cranberries for a medley of flavors; perfect for fruit lovers!
  • Spicy Kick: Add a dash of nutmeg or ginger for a warm spice surprise that will awaken your senses with each delightful bite.
  • Mini Muffins: Bread lovers rejoice! Bake mini muffins for bite-sized fun, reducing the baking time to about 10-12 minutes.
  • Cinnamon Sugar Topping: Go ahead and sprinkle more cinnamon sugar on top before baking—who could resist that sweet, crunchy finish?

And if you find yourself in need of more breakfast inspiration, don't forget to check out my Breakfast Egg Muffins—a fantastic addition to any morning!

Expert Tips for Ina Garten Cranberry Muffins

  • Use Fresh Ingredients: Ensure your baking powder is fresh for optimal rise; expired leavening agents can lead to dense muffins.

  • Don’t Overmix: Gently stir the batter until just combined; overmixing will result in tough, dry muffins, rather than the soft, moist texture you desire.

  • Cranberry Prep: Toss the cranberries in a bit of flour before folding them in; this helps prevent them from sinking to the bottom of the muffins.

  • Perfect Muffin Tops: For bakery-style muffin tops, fill the cups nearly to the brim and start with a high oven temperature.

  • Option for Variation: Feel free to swap cranberries for other fruits; blueberries or raspberries work wonderfully for a fresh twist on these Ina Garten Cranberry Muffins.

How to Store and Freeze Ina Garten Cranberry Muffins

Room Temperature: Store the muffins in an airtight container at room temperature for up to 3 days to maintain their soft and moist texture.

Fridge: For extended freshness, keep them in the refrigerator for up to 5 days. Be sure to cover them to prevent drying out.

Freezer: Freeze unwrapped muffins individually for up to 2 months. Once frozen, wrap them in plastic wrap to maintain moisture.

Reheating: To enjoy your muffins warm, reheat in the microwave for about 15-20 seconds or in a preheated oven at 350°F (175°C) for 5-10 minutes.

What to Serve with Ina Garten Cranberry Muffins

There's nothing quite like a spread of delectable sides to complement your warm, zesty muffins.

  • Fresh Fruit Salad: A vibrant mixture of seasonal fruits adds a refreshing touch and bright acidity, balancing the sweetness of the muffins.

  • Greek Yogurt Parfait: Rich and creamy yogurt layered with granola and berries provides a delightful crunch and protein boost, perfect for breakfast.

  • Honey Butter: A sweet, creamy spread adds an indulgent twist. The honey’s floral notes beautifully enhance the tartness of the cranberries.

  • Coffee or Tea: A warm cup of your favorite brew pairs perfectly with the muffins, making each bite feel like a cozy hug.

  • Avocado Toast: The rich, buttery flavor of avocado brings a savory element, offering a delicious contrast to the sweet muffins.

  • Cinnamon Roll Bites: For a sweet treat extension, these fluffy bites echo the warm spices in the muffins, creating a lovely breakfast duo.

  • Creamy Oatmeal: A bowl of hearty oatmeal topped with sliced bananas and nuts adds a wholesome touch, ensuring a satisfying and filling breakfast spread.

Make Ahead Options

These Ina Garten Cranberry Muffins are a fantastic choice for meal prep, helping you save precious time on busy mornings! You can prepare the dry ingredients (flour, sugar, baking powder, baking soda, salt, and cinnamon) and store them in an airtight container for up to 3 days. Additionally, you can mix the wet ingredients (butter, eggs, vanilla extract, and buttermilk) and refrigerate them overnight. When you're ready to bake, simply combine both mixtures, fold in the cranberries, and bake as directed. This method ensures your muffins stay just as delicious and moist while easing your morning routine. Enjoy a bakery-fresh breakfast with minimal effort!

Ina Garten Cranberry Muffins Recipe FAQs

How do I choose the best cranberries?
Absolutely! When selecting cranberries, look for firm, bright red berries. Avoid any that are soft or have dark spots, as these can indicate overripeness. Fresh cranberries are best, but if you have frozen ones, they work beautifully too—just be sure to adjust the sugar if using dried cranberries.

What is the best way to store leftover muffins?
The more the merrier! To keep your muffins fresh, store them in an airtight container at room temperature for about 3 days. If you want to keep them longer, refrigerate them for up to 5 days, but make sure they’re well-covered to prevent drying out.

Can I freeze these muffins?
Absolutely! To freeze your Ina Garten Cranberry Muffins, first, make sure they are completely cooled. Then, wrap each muffin individually in plastic wrap and place them in a freezer bag. They can be frozen for up to 2 months. When you're ready to enjoy one, simply thaw it at room temperature or reheat in the microwave for 15-20 seconds.

What if my muffins turn out dense or dry?
Very! If your muffins come out dense, it may be due to overmixing the batter or using expired baking powder. Remember to mix just until combined and check the freshness of your leavening agents. If they are dry, be careful to follow the baking times closely; overbaking can also lead to a dry texture.

Are these muffins suitable for people with allergies?
It's great that you're considering this! For those with gluten sensitivities, you can easily swap the all-purpose flour with a gluten-free blend. For vegan options, replacing the eggs with flax eggs works wonderfully. Always consider any additional allergens with your mix-ins!

Can I make these muffins in advance?
Absolutely! These muffins are perfect for prepping ahead of time. You can bake them a day or two in advance and store them as mentioned above. On the day you plan to serve, simply warm them slightly in the oven—this will make them taste freshly baked!

Ina Garten Cranberry Muffins

Fluffy Ina Garten Cranberry Muffins with a Zesty Twist

Delightful Ina Garten Cranberry Muffins are soft and moist with a zesty kick of orange, perfect for breakfast or brunch.
Print Recipe Pin Recipe
Prep Time 20 minutes mins
Cook Time 20 minutes mins
Cooling Time 10 minutes mins
Total Time 50 minutes mins
Servings: 12 muffins
Course: Breakfast
Cuisine: American
Calories: 210
Ingredients Equipment Method Nutrition Notes

Ingredients
  

For the Muffin Batter
  • 2 cups flour Gluten-free flour blend can be used for gluten-free muffins.
  • 1 cup sugar Brown sugar can deepen flavor.
  • 1.5 teaspoons baking powder Ensure it's fresh for best results.
  • 0.5 teaspoon baking soda No substitutes necessary.
  • 0.5 teaspoon salt Balances the sweetness.
  • 0.5 teaspoon cinnamon Optional, omit for tart muffins.
  • 0.5 cup melted butter Vegetable oil can be used as an alternative.
  • 2 whole eggs Can substitute with flax eggs for a vegan option.
  • 1 teaspoon vanilla extract Almond extract can be a substitute.
  • 0.5 cup buttermilk Milk with vinegar can mimic buttermilk.
  • 1 zest orange Enhances the tartness of cranberries.
  • 1.5 cups cranberries Fresh or frozen can be used.
Optional Topping
  • 0.25 cup sugar Adds sweetness and crunch.
  • 0.25 teaspoon cinnamon Adds flavor.

Equipment

  • Mixing Bowl
  • Whisk
  • Muffin tin
  • Spatula

Method
 

Step-by-Step Instructions
  1. Preheat your oven to 400°F (200°C) and prepare muffin tin with liners or grease.
  2. In a bowl, whisk together flour, sugar, baking powder, baking soda, salt, and cinnamon.
  3. In another bowl, mix melted butter, eggs, vanilla extract, and buttermilk until smooth.
  4. Pour the wet mixture into the dry ingredients and gently stir until just combined.
  5. Fold in the cranberries until evenly distributed.
  6. Spoon the batter into muffin cups, filling nearly to the top. Sprinkle optional topping if desired.
  7. Bake for 5 minutes at 400°F, then reduce temperature to 375°F (190°C) and bake for 15-20 minutes until golden.
  8. Let muffins cool in the tin for 5-10 minutes before transferring to a wire rack.

Nutrition

Serving: 1muffinCalories: 210kcalCarbohydrates: 30gProtein: 3gFat: 9gSaturated Fat: 5gPolyunsaturated Fat: 1gMonounsaturated Fat: 3gCholesterol: 50mgSodium: 200mgPotassium: 120mgFiber: 1gSugar: 12gVitamin A: 200IUVitamin C: 1mgCalcium: 30mgIron: 1mg

Notes

Ensure all ingredients are fresh for best results. Customize with different fruits or toppings as desired.

Tried this recipe?

Let us know how it was!

Fluffy Ina Garten Cranberry Muffins with a Zesty Twist

November 20, 2025 by Grace Snow Leave a Comment

There's something wonderfully nostalgic about the aroma of cinnamon and cranberries wafting through the kitchen, isn't there? As the seasons change and the holidays approach, I find myself reaching for Ina Garten's Cranberry Muffins. These soft, moist breakfast muffins with a zesty kick of orange are a delightful way to start any day. What makes this recipe truly special is its simplicity; you can whip them up in just around 40 minutes, making them perfect for a leisurely weekend brunch or an easy weekday treat. Plus, with the option to sprinkle on a cinnamon sugar topping, they could easily steal the spotlight at your next gathering. Are you ready to fill your home with the delightful scent of freshly baked muffins? Let’s get started!

Why are these muffins so irresistible?

Simplicity at its finest: With only basic ingredients and minimal prep time, you’ll be enjoying warm muffins in no time.

Zesty enhancement: The addition of orange zest elevates the cranberry flavor, making each bite a burst of freshness.

Perfect texture: These muffins are delightfully soft and moist, ensuring a satisfying experience for all.

Customizable: Feel free to swap out cranberries for blueberries or add nuts for extra crunch—there’s a variation to please every palate!

Crowd-pleaser: Whether you’re enjoying breakfast with family or serving at gatherings, these muffins are sure to impress. Don’t forget to check out my Breakfast Egg Muffins for another fantastic morning recipe!

Ina Garten Cranberry Muffin Ingredients

• For those eager to bake the best muffins ever, here's what you'll need!

For the Muffin Batter

  • 2 cups flour – This provides the structure; gluten-free flour blend can work well for gluten-free muffins.
  • 1 cup sugar – Adds sweetness; brown sugar can deepen the flavor beautifully.
  • 1 ½ tsp baking powder – This leavening agent ensures perfect rise; make sure it's fresh!
  • ½ tsp baking soda – An extra boost for fluffiness; no substitutes necessary here.
  • ½ tsp salt – Balances the sweetness, a crucial ingredient for flavor enhancement.
  • ½ tsp cinnamon – Adds a warm flavor profile; omit if you prefer a tart muffin.
  • ½ cup melted butter – Richness and moisture are imparted; vegetable oil is a good alternative.
  • 2 eggs – Acts as a binding agent; for a vegan option, use flax eggs (2 tbsp ground flaxseed mixed with 6 tbsp water).
  • 1 tsp vanilla extract – Enhances the overall flavor; almond extract can be an interesting substitute.
  • ½ cup buttermilk – Contributes to a tender crumb; milk with a splash of vinegar can mimic buttermilk.
  • Zest of 1 orange – A must for enhancing the tartness of cranberries and overall flavor.
  • 1 ½ cups cranberries – Fresh or frozen work well; if using dried, reduce sugar to keep things balanced.

Optional Topping

  • ¼ cup sugar + ¼ tsp cinnamon – Adds sweetness and a lovely crunch; feel free to omit if preferred.

Now you're set to make the delicious Ina Garten Cranberry Muffins!

Step‑by‑Step Instructions for Ina Garten Cranberry Muffins

Step 1: Preheat the Oven
Begin by preheating your oven to 400°F (200°C). This crucial step ensures that your muffins will rise beautifully from the get-go. While the oven warms up, gather your muffin tin and line it with paper liners or lightly grease the cups to prevent sticking.

Step 2: Combine Dry Ingredients
In a large mixing bowl, whisk together 2 cups of flour, 1 cup of sugar, 1 ½ teaspoons of baking powder, ½ teaspoon of baking soda, ½ teaspoon of salt, and ½ teaspoon of cinnamon (if using). Make sure all ingredients are well incorporated to form an even mixture. The sweetness and warmth of these ingredients will set the foundation for your delightful Ina Garten Cranberry Muffins.

Step 3: Mix Wet Ingredients
In a separate bowl, combine ½ cup of melted butter, 2 eggs, 1 teaspoon of vanilla extract, and ½ cup of buttermilk. Whisk these wet ingredients together until smooth and blended. The melted butter adds richness while the buttermilk contributes to the muffins’ moistness, ensuring each bite is heavenly and soft.

Step 4: Combine Wet and Dry Mixtures
Pour the wet mixture into the bowl with the dry ingredients. Gently stir with a spatula until just combined; be careful not to overmix. The batter should be slightly lumpy but thoroughly blended—this keeps your muffins fluffy and ensures the texture remains soft, characteristic of classic Ina Garten Cranberry Muffins.

Step 5: Fold in the Cranberries
Now, gently fold in 1 ½ cups of fresh or frozen cranberries, ensuring they are evenly distributed throughout the batter. If you want to prevent them from sinking, toss the cranberries in a tablespoon of flour before adding them to the mixture. This step will elevate the tartness and give your muffins an inviting, fruity burst.

Step 6: Fill the Muffin Cups
Spoon the batter into your prepared muffin cups, filling them almost to the top to achieve those bakery-style muffin tops. If desired, sprinkle a mixture of ¼ cup of sugar and ¼ teaspoon of cinnamon over the batter for a sweet, crunchy topping. This adds an extra layer of flavor and a delightful texture to your Ina Garten Cranberry Muffins.

Step 7: Bake the Muffins
Place the muffin tin into the preheated oven and bake for 5 minutes at 400°F (200°C). Then, reduce the temperature to 375°F (190°C) and bake for an additional 15-20 minutes. Keep an eye on them; they’re done when a toothpick inserted into the center comes out clean, and the tops are golden-brown, indicating your muffins are perfectly baked.

Step 8: Cool and Serve
Once baked, let the muffins cool in the tin for about 5-10 minutes before transferring them to a wire rack to cool completely. This cooling process helps them set and develop their moist, soft texture. Serve warm or at room temperature, and enjoy the delightful flavors of your freshly baked Ina Garten Cranberry Muffins.

What to Serve with Ina Garten Cranberry Muffins

There's nothing quite like a spread of delectable sides to complement your warm, zesty muffins.

  • Fresh Fruit Salad: A vibrant mixture of seasonal fruits adds a refreshing touch and bright acidity, balancing the sweetness of the muffins.

  • Greek Yogurt Parfait: Rich and creamy yogurt layered with granola and berries provides a delightful crunch and protein boost, perfect for breakfast.

  • Honey Butter: A sweet, creamy spread adds an indulgent twist. The honey’s floral notes beautifully enhance the tartness of the cranberries.

  • Coffee or Tea: A warm cup of your favorite brew pairs perfectly with the muffins, making each bite feel like a cozy hug.

  • Avocado Toast: The rich, buttery flavor of avocado brings a savory element, offering a delicious contrast to the sweet muffins.

  • Cinnamon Roll Bites: For a sweet treat extension, these fluffy bites echo the warm spices in the muffins, creating a lovely breakfast duo.

  • Creamy Oatmeal: A bowl of hearty oatmeal topped with sliced bananas and nuts adds a wholesome touch, ensuring a satisfying and filling breakfast spread.

Make Ahead Options

These Ina Garten Cranberry Muffins are a fantastic choice for meal prep, ensuring you always have a delicious breakfast option at hand. You can mix the dry ingredients (flour, sugar, baking powder, baking soda, salt, cinnamon, and orange zest) up to 24 hours in advance; just cover them tightly to keep them fresh. Additionally, you can prepare the wet ingredients (butter, eggs, vanilla extract, and buttermilk) and store them in the refrigerator for up to 3 days. When you're ready to bake, simply combine the wet and dry ingredients, fold in the cranberries, and bake as instructed. This way, you’ll enjoy warm, soft muffins just as delightful as when they were freshly made, saving you precious time on busy mornings!

Ina Garten Cranberry Muffins Variations

Feel free to make these muffins your own with these delightful twists that will spark joy in every bite!

  • Gluten-Free: Substitute the all-purpose flour with a gluten-free flour blend for a delicious, gluten-free treat.
    For a softer bite, try using a blend that contains almond flour for added moisture and flavor.

  • Low Sugar: Reduce the sugar to ¾ cup or use a sugar substitute to enjoy a healthier version.
    This will still keep the muffins soft and delicious without sacrificing taste!

  • Berry Mix: Swap out the cranberries for fresh blueberries or raspberries for a fruity twist.
    The sweetness of the berries will create a delightful contrast with the muffin’s texture.

  • Nutty Addition: Add ½ cup of chopped walnuts or pecans for an extra crunch.
    This variation elevates the muffins with a hearty finish that's sure to please nut lovers.

  • Spicy Kick: Increase the cinnamon to 1 teaspoon or add a pinch of nutmeg for a warm, spiced flavor.
    These additions create a cozy, aromatic muffin perfect for chilly mornings.

  • Dairy-Free: Replace buttermilk with almond milk and use coconut oil instead of butter for a dairy-free option.
    Your muffins will remain moist and fluffy, ensuring everyone can enjoy them!

  • Coconut Delight: Incorporate ½ cup of shredded coconut for a tropical twist.
    The coconut adds moisture and a hint of sweetness that pairs beautifully with cranberries.

  • Lemon Zest: Substitute the orange zest with lemon zest to give the muffins a bright citrus flavor.
    This makes for a refreshing, zesty muffin that’s perfect for spring brunches.

For even more delicious ideas, check out my recipe for Breakfast Egg Muffins for a well-rounded meal, or explore the flavors in my Cinnamon Roll Muffins for something sweet!

Expert Tips for Ina Garten Cranberry Muffins

  • Use Fresh Ingredients: Ensure your baking powder is fresh for optimal rise; expired leavening agents can lead to dense muffins.

  • Don’t Overmix: Gently stir the batter until just combined; overmixing will result in tough, dry muffins, rather than the soft, moist texture you desire.

  • Cranberry Prep: Toss the cranberries in a bit of flour before folding them in; this helps prevent them from sinking to the bottom of the muffins.

  • Perfect Muffin Tops: For bakery-style muffin tops, fill the cups nearly to the brim and start with a high oven temperature.

  • Option for Variation: Feel free to swap cranberries for other fruits; blueberries or raspberries work wonderfully for a fresh twist on these Ina Garten Cranberry Muffins.

How to Store and Freeze Ina Garten Cranberry Muffins

Room Temperature: Store the muffins in an airtight container at room temperature for up to 3 days to maintain their soft and moist texture.

Fridge: For extended freshness, keep them in the refrigerator for up to 5 days. Be sure to cover them to prevent drying out.

Freezer: Freeze unwrapped muffins individually for up to 2 months. Once frozen, wrap them in plastic wrap to maintain moisture.

Reheating: To enjoy your muffins warm, reheat in the microwave for about 15-20 seconds or in a preheated oven at 350°F (175°C) for 5-10 minutes.

Ina Garten Cranberry Muffins Recipe FAQs

How do I select the best cranberries for this recipe?
Absolutely! Look for fresh cranberries that are plump, firm, and shiny. Avoid any with dark spots or blemishes—they should be bright red and intact. If you're using frozen cranberries, there’s no need to thaw them, as they can be added directly to the batter.

What’s the best way to store Ina Garten Cranberry Muffins?
For optimal freshness, I recommend storing your muffins in an airtight container at room temperature for up to 3 days. If you want to keep them longer, refrigerate them for up to 5 days, but ensure they are well-wrapped, or they may dry out.

Can I freeze these muffins, and how should I do it?
Yes! To freeze Ina Garten Cranberry Muffins, first, let them cool completely. Then, wrap each muffin individually in plastic wrap or foil. Place them in an airtight container or freezer bag. They can be stored in the freezer for up to 2 months. When you're ready to enjoy them, reheat in the microwave for about 15-20 seconds or in a 350°F (175°C) oven for about 5-10 minutes.

What should I do if my muffins come out dense and not fluffy?
Very! If your muffins turn out dense, it often means the batter was overmixed. Remember to stir gently until just combined—lumps are okay! Also, check the freshness of your baking powder and baking soda; expired leavening agents can affect the rise. Tossing cranberries in flour before adding them to the batter can help distribute them better and prevent sinking.

Are there any dietary considerations for these muffins?
Of course! This recipe contains gluten and dairy, but you can easily adapt it to fit various dietary needs. For a gluten-free version, swap the all-purpose flour with a gluten-free flour blend, and for those avoiding dairy, use vegetable oil instead of butter and a non-dairy milk with a splash of vinegar in place of buttermilk. Flax eggs can also be used instead of regular eggs to make this muffin recipe vegan-friendly.

Can I add other fruits or ingredients to the muffins?
The more the merrier! Feel free to mix in chopped nuts, like walnuts or pecans, for added crunch, or substitute some of the cranberries with blueberries or raspberries for a fun twist. Just remember to adjust the sweetness slightly depending on the fruit you choose, especially if using sweeter fruits or dried cranberries!

Ina Garten Cranberry Muffins

Fluffy Ina Garten Cranberry Muffins with a Zesty Twist

Enjoy soft and moist Ina Garten Cranberry Muffins with a zesty kick of orange. Perfect for breakfast or gatherings!
Print Recipe Pin Recipe
Prep Time 20 minutes mins
Cook Time 20 minutes mins
Cooling Time 5 minutes mins
Total Time 40 minutes mins
Servings: 12 muffins
Course: Breakfast
Cuisine: American
Calories: 200
Ingredients Equipment Method Nutrition Notes

Ingredients
  

For the Muffin Batter
  • 2 cups flour gluten-free flour blend can work well for gluten-free muffins
  • 1 cup sugar brown sugar can deepen the flavor beautifully
  • 1.5 tsp baking powder ensure it's fresh
  • 0.5 tsp baking soda no substitutes necessary
  • 0.5 tsp salt balances the sweetness
  • 0.5 tsp cinnamon omit if you prefer a tart muffin
  • 0.5 cups melted butter vegetable oil is a good alternative
  • 2 pieces eggs for a vegan option, use flax eggs
  • 1 tsp vanilla extract almond extract can be a substitute
  • 0.5 cups buttermilk milk with a splash of vinegar can mimic buttermilk
  • 1 piece zest of orange must for flavor enhancement
  • 1.5 cups cranberries fresh or frozen work well
Optional Topping
  • 0.25 cups sugar adds crunch
  • 0.25 tsp cinnamon optional for topping

Equipment

  • Muffin tin
  • Mixing bowls
  • Whisk
  • measuring cups
  • Measuring Spoons

Method
 

Step-by-Step Instructions
  1. Preheat your oven to 400°F (200°C) and prepare a muffin tin.
  2. In a large bowl, whisk together flour, sugar, baking powder, baking soda, salt, cinnamon, and orange zest.
  3. In another bowl, blend melted butter, eggs, vanilla extract, and buttermilk until smooth.
  4. Pour the wet mixture into the dry ingredients and stir gently until just combined.
  5. Fold in cranberries carefully into the batter.
  6. Fill each muffin cup almost to the top with batter and sprinkle optional topping if desired.
  7. Bake at 400°F (200°C) for 5 minutes, then lower to 375°F (190°C) for another 15-20 minutes.
  8. Allow muffins to cool in the pan for 5 minutes before transferring to a wire rack.

Nutrition

Serving: 1muffinCalories: 200kcalCarbohydrates: 30gProtein: 3gFat: 8gSaturated Fat: 5gPolyunsaturated Fat: 1gMonounsaturated Fat: 2gCholesterol: 40mgSodium: 200mgPotassium: 150mgFiber: 1gSugar: 10gVitamin A: 200IUVitamin C: 2mgCalcium: 30mgIron: 1mg

Notes

For best results, use fresh ingredients and avoid overmixing to maintain a soft texture.

Tried this recipe?

Let us know how it was!

Moist and Zesty Cranberry Orange Bread Recipe You'll Love

November 20, 2025 by Grace Snow Leave a Comment

As I stood in my kitchen, the sweet and tangy aroma of fresh oranges filled the air, instantly transporting me to holiday celebrations of my childhood. This Cranberry Orange Bread recipe is the perfect way to capture that festive spirit in just one hour! With its moist and flavorful crumb, it’s a holiday showstopper that’s equally delightful at breakfast or as a homemade gift. Easy to whip up and adaptable for gluten-free diets, this quick bread brings joy and comfort to every bite. Whether you’re baking for family brunch or preparing a thoughtful treat for friends, you’ll find it’s a crowd-pleaser that brightens up any occasion. Have you ever tasted a loaf that could evoke such happy memories? Let’s dive into the recipe!

Why Is This Recipe a Must-Try?

Moist and Flavorful: The delightful blend of fresh oranges and tart cranberries creates a flavor explosion that’s both savory and sweet—a perfect fit for any occasion.

Quick and Easy: In just one hour, you can create this beautiful loaf without fuss, making it a fantastic addition to your busy holiday baking schedule.

Versatile Serving Options: Enjoy it as a cozy breakfast, a delightful afternoon snack, or even dressed up as a gift. It pairs beautifully with cream cheese or butter, as well as coffee or tea.

Nutritious Adaptation: With a simple swap to gluten-free flour, everyone can enjoy this scrumptious bread—perfect for accommodating various dietary needs.

Crowd-Pleasing Appeal: Its vibrant flavor and stunning presentation make it an instant hit on any brunch table or holiday gathering. This recipe is sure to spark smiles and warm memories. Don't forget to try it alongside our delicious Cheesy Garlic Bread for an unforgettable spread!

Cranberry Orange Bread Ingredients

For the Bread

  • All-Purpose Flour – Structure your bread; for a gluten-free version, substitute with a gluten-free flour blend.
  • Baking Powder – Serves as a leavening agent; always check for freshness to ensure a proper rise.
  • Salt – Enhances the overall flavor; no substitute needed, regular salt works perfectly.
  • Granulated Sugar – Adds the perfect sweetness; reduce slightly if using dried cranberries for balance.
  • Orange Zest – Boosts flavor; fresh zest brings a vibrant taste compared to the dried variety.
  • Fresh Orange Juice – Adds moisture and acidity; opt for fresh juice for the best flavor experience.
  • Unsalted Butter – Contributes richness and moisture; can be replaced with oil for a dairy-free option.
  • Eggs – Binds ingredients and keeps the bread moist; no direct substitutes are recommended in traditional recipes.
  • Vanilla Extract – Deepens flavor; use pure vanilla for the finest taste.
  • Fresh or Dried Cranberries – Provides tartness and texture; chop dried cranberries and reduce sugar if using.
  • Powdered Sugar – Optional garnish; you can use a glaze made from powdered sugar and orange juice if desired.

This Cranberry Orange Bread Recipe is set to become a family favorite, bringing warmth and nostalgia to your kitchen. Get ready to bake!

Step‑by‑Step Instructions for Cranberry Orange Bread Recipe

Step 1: Preheat the Oven
Begin by preheating your oven to 350°F (175°C). While the oven heats, prepare your 9x5-inch loaf pan by greasing it lightly with butter or lining it with parchment paper. This ensures easy removal of the Cranberry Orange Bread once it’s baked to golden perfection.

Step 2: Mix Dry Ingredients
In a large mixing bowl, whisk together the all-purpose flour, baking powder, salt, granulated sugar, and fresh orange zest until well combined. This step builds the foundation for your quick bread and should take about 1-2 minutes. Make sure there are no lumps for even rising and flavor distribution in your Cranberry Orange Bread.

Step 3: Combine Wet Ingredients
In a separate bowl, pour in the fresh orange juice, melted unsalted butter, eggs, and vanilla extract. Whisk these ingredients vigorously until the mixture is smooth and well-blended, about 2-3 minutes. The combination of these ingredients will bring moisture and richness to your delicious bread.

Step 4: Combine Mixtures
Gently pour the wet ingredients into the bowl of dry ingredients. With a rubber spatula, fold everything together until just combined; be careful not to overmix, as this could lead to a denser crumb. You’ll want to see a few streaks of flour remaining, which usually takes around 1 minute.

Step 5: Fold in Cranberries
Add in the chopped fresh or dried cranberries into the batter. Using your spatula, fold them in gently until evenly distributed throughout the mixture. This step is crucial as the tart cranberries will enhance the flavor of your Cranberry Orange Bread, creating delicious pockets of sweetness in every slice.

Step 6: Bake the Bread
Pour the batter into the prepared loaf pan, smoothing the top with your spatula. Place it in the preheated oven and bake for 50-60 minutes. The bread is done when a toothpick inserted into the center comes out clean and the top is lightly golden brown, enticing you with its warm citrus aroma.

Step 7: Cool and Garnish
Once baked, remove the Cranberry Orange Bread from the oven and let it cool in the pan for about 10 minutes. Carefully transfer it to a wire rack to cool completely. If desired, dust the top with powdered sugar for a lovely finishing touch that enhances its festive appeal.

Make Ahead Options

These Cranberry Orange Bread recipes are perfect for meal prep! You can mix the dry ingredients—flour, sugar, baking powder, salt, and orange zest—up to 24 hours in advance, storing them in an airtight container to keep them fresh. If you're using dried cranberries, chop them ahead of time and coat in a bit of flour to prevent sinking. When you’re ready to bake, combine the wet ingredients and fold everything together, finishing your bread in no time. This way, you can enjoy delicious homemade bread without the fuss on busy mornings or during festive gatherings! Just remember, to maintain that fluffy texture, don't overmix the batter.

What to Serve with Moist and Flavorful Cranberry Orange Bread

Indulging in a slice of this vibrant bread opens up a universe of delightful accompaniments that complement its bright flavors.

  • Cream Cheese Spread: The rich creaminess balances the tartness of the bread, making each bite feel luxurious.

  • Butter: A simple pat of butter melts beautifully, enhancing the moist texture and adding a comforting warmth.

  • Coffee: A steaming cup of coffee elevates any breakfast or snack time, providing a delightful contrast to the sweet and zesty loaf.

  • Herbal Tea: A soothing herbal tea offers a light contrast, allowing the flavors of the Cranberry Orange Bread to shine through.

  • Fresh Fruit Salad: Bright, juicy fruits like berries or oranges amplify the citrus notes and add a refreshing crunch to your plate.

  • Vanilla Ice Cream: For a decadent dessert, serve warm slices with a scoop of creamy vanilla ice cream that melts into every crevice.

  • Whipped Cream: Light and airy, whipped cream adds a delightful texture while enhancing the sweet citrus notes of the bread.

  • Sparkling Water: A fizzy beverage like sparkling water can cleanse the palate, letting the flavors linger pleasantly without overwhelming the senses.

Whichever you choose, these pairings will create a delightful array that celebrates the comforting joy of this Cranberry Orange Bread recipe!

Cranberry Orange Bread Recipe Variations

Feel free to add your personal touch to this delightful fruit bread and make it your own!

  • Nutty Twist: Fold in ½ cup of walnuts or pecans along with the cranberries for delightful crunch and richness. The added texture elevates your loaf to another level of flavor and satisfaction.

  • Muffin Makeover: Transform this quick bread into muffins! Bake the batter in a muffin tin for 20-22 minutes, and enjoy individual servings that are perfect for on-the-go snacking or breakfast.

  • Dairy-Free Option: Substitute the unsalted butter with coconut oil or your favorite plant-based oil to make a delicious dairy-free version. This swap maintains the moistness while allowing everyone to indulge.

  • Zesty Addition: For an extra punch of citrus, add a teaspoon of grated lemon zest along with the orange zest. It offers a refreshing twist that brightens every bite!

  • Spiced Delight: Mix in 1 teaspoon of cinnamon or nutmeg with the dry ingredients. The warm spices harmonize beautifully with the cranberries and orange, making your bread feel even cozier.

  • Choco-Cranberry Surprise: Add a cup of semi-sweet chocolate chips into the batter for a rich, sweet contrast to the tart cranberries. This indulgent twist will make a fantastic treat!

  • Dried Fruit Medley: Combine cranberries with other dried fruits like chopped apricots or cherries for varied flavors and textures. This sweet blend enhances the bread's character and provides a new adventure in every slice.

If you find yourself with leftover slices, don’t hesitate to pair them with a simple cream cheese spread or even try it alongside our mouthwatering Cornbread Breakfast Casserole for a delightful brunch combination!

Expert Tips for Cranberry Orange Bread

  • Prevent Sinking: Toss cranberries in a little flour before folding them into your batter. This keeps them evenly distributed throughout your bread.

  • Enhance Orange Flavor: For a bolder taste, consider adding a teaspoon of orange extract or an extra tablespoon of orange zest, making your Cranberry Orange Bread even more vibrant.

  • Avoid Overmixing: Gently combine wet and dry ingredients until just moistened. Overmixing can result in a dense, tough loaf rather than the moist, tender bread you desire.

  • Check for Doneness: Monitoring your bread a few minutes early can prevent overbaking, keeping your Cranberry Orange Bread perfectly moist and avoiding any dryness.

  • Cool Properly: Allow your bread to cool in the pan for 10 minutes, then transfer it to a wire rack. This helps maintain its soft texture while preventing sogginess.

How to Store and Freeze Cranberry Orange Bread

Room Temperature: Store wrapped tightly in plastic wrap or foil for up to 3 days to maintain moisture and freshness.

Fridge: If you want to extend the shelf life, refrigerate your bread wrapped tightly; it will last up to a week, though it may slightly dry out.

Freezer: For long-term storage, freeze slices or the whole loaf in an airtight container for up to 2 months.

Reheating: Thaw overnight in the fridge before serving. For a warm treat, reheat in the oven at 350°F (175°C) for about 10-15 minutes to regain softness.

Cranberry Orange Bread Recipe FAQs

How do I choose the best cranberries for this recipe?
Absolutely! When selecting cranberries, look for firm, plump berries with a vibrant red color. Avoid any with dark spots or wrinkles, as they may be overripe. If you can't find fresh cranberries, dried cranberries can work, but remember to chop them and slightly reduce the sugar in the recipe to balance the sweetness.

How should I store leftover Cranberry Orange Bread?
Very good question! Wrap your leftover bread tightly in plastic wrap or aluminum foil, and it will stay fresh at room temperature for up to 3 days. If you want the bread to last longer, you can store it in the refrigerator, where it should keep well for about a week, though it might dry out a bit.

Can I freeze Cranberry Orange Bread, and if so, how?
Absolutely, you can freeze it! For the best results, slice the bread and wrap each slice in plastic wrap to prevent freezer burn. Place the wrapped slices in an airtight container or freezer bag and freeze for up to 2 months. When you’re ready to enjoy it, simply thaw overnight in the fridge, then reheat in the oven at 350°F (175°C) for about 10-15 minutes if you prefer it warm.

What should I do if my Cranberry Orange Bread is too dense?
No worries! If your bread turns out dense, it may have been overmixed or overbaked. Remember, kneading or stirring too much can develop the gluten, making the loaf heavy. To fix next time, gently combine wet and dry ingredients until just moistened and look for a toothpick test; it should come out clean when it's done baking but still appear moist.

Is this recipe suitable for people with gluten allergies?
Yes! To make this Cranberry Orange Bread gluten-free, simply substitute the all-purpose flour with a gluten-free flour blend that is one-to-one for baking. Make sure to check the ingredients for any allergens, and enjoy a delicious loaf with friends and family!

Can I add other ingredients to this recipe?
The more the merrier! Feel free to incorporate ingredients like walnuts or pecans for some crunch. You can add about ½ cup when folding in the cranberries. For a convenient option, transform the loaf into muffins by baking in a muffin tin at 350°F (175°C) for about 20-22 minutes.

Cranberry Orange Bread Recipe

Moist and Zesty Cranberry Orange Bread Recipe You'll Love

Enjoy the delightful flavors of this Cranberry Orange Bread Recipe, perfect for festive occasions.
Print Recipe Pin Recipe
Prep Time 15 minutes mins
Cook Time 1 hour hr
Total Time 1 hour hr 15 minutes mins
Servings: 10 slices
Course: Breakfast
Cuisine: American
Calories: 180
Ingredients Equipment Method Nutrition Notes

Ingredients
  

For the Bread
  • 2 cups All-Purpose Flour Substitute with gluten-free flour for gluten-free version.
  • 2 tsp Baking Powder Check for freshness.
  • 1 tsp Salt
  • 1 cup Granulated Sugar Reduce slightly if using dried cranberries.
  • 1 tbsp Orange Zest Use fresh for best flavor.
  • 1 cup Fresh Orange Juice Opt for fresh for best flavor.
  • 1/2 cup Unsalted Butter Can replace with oil for dairy-free.
  • 2 large Eggs No substitutes recommended.
  • 2 tsp Vanilla Extract Use pure vanilla for best results.
  • 1 cup Fresh or Dried Cranberries Chop dried cranberries and reduce sugar.
  • 1 cup Powdered Sugar Optional for garnish.

Equipment

  • 9x5-inch loaf pan
  • Mixing bowls
  • Whisk
  • rubber spatula

Method
 

Step-by-Step Instructions for Cranberry Orange Bread Recipe
  1. Preheat your oven to 350°F (175°C). Grease your loaf pan or line it with parchment paper.
  2. In a large bowl, whisk together flour, baking powder, salt, granulated sugar, and orange zest until well combined.
  3. In another bowl, whisk together fresh orange juice, melted butter, eggs, and vanilla extract until smooth.
  4. Gently fold the wet ingredients into the dry ingredients until just combined, without overmixing.
  5. Fold in chopped cranberries gently until evenly distributed.
  6. Pour the batter into the loaf pan and bake for 50-60 minutes until golden brown and a toothpick comes out clean.
  7. Let it cool for about 10 minutes in the pan, then transfer to a wire rack. Dust with powdered sugar if desired.

Nutrition

Serving: 1sliceCalories: 180kcalCarbohydrates: 28gProtein: 3gFat: 7gSaturated Fat: 4gPolyunsaturated Fat: 1gMonounsaturated Fat: 2gCholesterol: 50mgSodium: 150mgPotassium: 180mgFiber: 1gSugar: 8gVitamin A: 250IUVitamin C: 8mgCalcium: 30mgIron: 1mg

Notes

For best flavor, enhance the orange essence with additional zest or extract. Avoid overmixing to keep the bread tender. Cool properly to maintain texture.

Tried this recipe?

Let us know how it was!

McGriddle Bites: Sweet Sausage Muffins Everyone Craves

November 17, 2025 by Grace Snow Leave a Comment

Sifting through a busy morning, I found myself longing for a breakfast that could bridge the gap between comfort and convenience. Enter McGriddle Bites: sweet sausage muffins that transform the way we approach breakfast. These delightful morsels combine fluffy pancake batter with savory sausage and a hint of maple syrup, making them a deliciously satisfying option that’s perfect for meal prep. Not only are they quick to whip up, but they're also freezer-friendly, ensuring that a warm, homemade breakfast is always within reach. Whether you like them spicy with jalapeños or sweet with blueberries, the customizable nature of this recipe means every bite can bring something new to your plate! Are you ready to dive into the irresistible world of McGriddle Bites?

Why Are McGriddle Bites a Must-Try?

Irresistible Flavor: The blend of fluffy pancake batter and savory sausage creates a flavor explosion that’ll make your taste buds dance.

Customizable Options: From adding jalapeños for a kick to blueberries for a sweet twist, you can personalize these bites to suit your cravings.

Quick and Easy: With just a few simple steps, you can whip up a batch in no time, perfect for those hectic mornings!

Meal Prep Friendly: They store beautifully in the freezer, ready to heat and serve whenever hunger strikes—ideal for busy households wanting homemade goodness.

Crowd-Pleasing Delight: They're the perfect addition to any brunch spread, guaranteed to impress family and friends! Enjoy alongside a vibrant fresh fruit salad or paired with crispy bacon for an unforgettable breakfast experience!

McGriddle Bites Ingredients

Prepare for a delicious homemade adventure!

For the Batter
• Breakfast Sausage – Adds savory richness; for a leaner option, try turkey sausage.
• Hungry Jack Pancake Mix – Provides structure and fluffiness; make sure it only requires water.
• Water – Essential for batter consistency; filtered or tap water works well.
• Maple Syrup – Infuses sweetness; opt for pure maple syrup for the best flavor.
• Cheddar Cheese – Brings creaminess; shred it yourself for enhanced melting.

Optional Add-Ins
• Diced Jalapeños – Adds a spicy kick for the adventurous palate.
• Blueberries – Introduces a sweet contrast, perfect for a fruity twist in your McGriddle Bites.

Step‑by‑Step Instructions for McGriddle Bites: Sweet Sausage Muffins

Step 1: Preheat the Oven
Begin by preheating your oven to 400ºF (204ºC) while you prepare your mini muffin tin by greasing it with cooking spray or butter to prevent sticking. This temperature will ensure your McGriddle Bites bake evenly and turn golden brown, creating that irresistible flavor and texture everyone loves.

Step 2: Cook the Sausage
In a skillet over medium-high heat, cook the breakfast sausage for about 5-7 minutes, breaking it apart with a spatula until it is fully browned and crumbled. Once it reaches a rich brown color, remove excess grease by draining it, leaving you with perfectly savory sausage pieces to fold into your McGriddle Bites batter.

Step 3: Make the Batter
In a large mixing bowl, combine the Hungry Jack pancake mix, water, and maple syrup. Gently stir the mixture until just combined; be cautious not to overmix, as this could impact the fluffiness of your muffins. As the batter comes together, you’ll notice a delightful aroma of maple sweetness wafting through your kitchen.

Step 4: Fold in Sausage and Cheese
Now it’s time to add your cooked sausage and shredded cheddar cheese to the batter. Carefully fold these ingredients together until they are evenly distributed throughout the mixture. The sight of warm sausage and gooey cheese mingling with the batter will spark excitement for your McGriddle Bites!

Step 5: Fill the Muffin Tin
Using a spoon, fill each muffin cup in your prepared tin about three-quarters full with the McGriddle Bites batter. This will allow room for them to rise while baking, forming those fluffy, delectable bites. You’ll want them to be generously filled to ensure each muffin is packed with flavor.

Step 6: Bake the Muffins
Place the muffin tin in the preheated oven and bake for 12-15 minutes, or until the tops turn a beautiful golden brown and a toothpick inserted into the center comes out clean. As they bake, you’ll witness the transformation of your batter into delicious McGriddle Bites, and the kitchen will fill with mouthwatering aromas.

Step 7: Cool and Serve
Once baked, remove the McGriddle Bites from the oven and let them cool slightly in the pan for about 5 minutes. Then, carefully transfer them to a wire rack to cool further. Serve warm alongside extra maple syrup for dipping, and watch as family and friends gather around to enjoy these comforting breakfast treats.

What to Serve with McGriddle Bites: Sweet Sausage Muffins

Indulge in a delightful breakfast experience by pairing these sweet sausage muffins with complementary dishes that elevate the flavors and enhance the overall meal.

  • Fresh Fruit Salad: Bright and vibrant, a mix of berries, melons, and citrus complements the sweetness of the McGriddle Bites, adding refreshing notes to every bite.
  • Greek Yogurt Parfait: Creamy yogurt layered with granola and honey provides a contrast to the fluffy muffins, making for a wholesome and satisfying breakfast.
  • Crispy Maple-Glazed Bacon: The savory crunch of bacon highlights the sweetness of the McGriddle Bites while bringing a deliciously smoky flavor to the table.
  • Scrambled Eggs with Herbs: Fluffy and flavorful, eggs seasoned with fresh herbs add a protein boost, beautifully rounding out the breakfast experience.
  • Savory Spinach & Cheese Frittata: This light, baked egg dish provides a nutritious option that complements the muffins while adding wholesome greens to your plate.
  • Iced Coffee or Fresh Orange Juice: Kickstart your morning with a refreshing beverage. Iced coffee balances sweet flavors, while orange juice adds a zesty burst of freshness.

Mix and match these pairings to create the perfect breakfast spread that will delight your family and keep you coming back for more!

Make Ahead Options

These McGriddle Bites are perfect for meal prep enthusiasts! You can prepare the batter and fill the muffin tin up to 24 hours in advance, storing it covered in the refrigerator to ensure freshness. Alternatively, bake the bites and let them cool completely, then freeze them in a single layer for up to 3 months before transferring to a freezer bag. When ready to enjoy, simply reheat from frozen in the microwave for about a minute or in a toaster oven at half power for an even texture. This way, you’ll have delicious, homemade breakfast treats available at a moment's notice, making busy mornings just a little easier!

McGriddle Bites Variations & Substitutions

Feel free to unleash your creativity with these customizable options that will enhance your McGriddle Bites experience!

  • Bacon Swap: Replace breakfast sausage with crispy bacon for a smoky flavor punch that everyone will love. The combination of fluffy batter and crunchy bacon creates a delightful texture contrast.

  • Plant-Based Option: Use plant-based sausage or a mix of sautéed vegetables for a vegetarian-friendly twist. This change not only caters to diverse diets but also brightens the flavor profile.

  • Spicy Kick: Add diced jalapeños for a zesty version that brings the heat. Each bite will have an exciting burst of flavor, sure to wake up your taste buds in the best way!

  • Fruity Delight: Incorporate fresh blueberries into the batter for a sweet twist, creating a deliciously fruity contrast with the savory elements. The sweetness of the blueberries pairs beautifully with maple syrup.

  • Cheese Varieties: Try swapping cheddar cheese for pepper jack to bring an extra spicy warmth. This simple swap can elevate your muffins to new flavor heights!

  • Herb Infusion: Include fresh herbs like chives or parsley for added freshness and depth. This subtle addition can really brighten up the overall flavor.

  • Syrup Experimentation: Change up the syrup by using flavored varieties like honey or agave. This way, you can enjoy different sweetness levels that will perfectly complement your McGriddle Bites.

  • Sweetened Batter: Mix in a pinch of cinnamon or vanilla extract to the batter for a delightful flavor enhancement. These notes will beautifully elevate your breakfast bites and make them even more inviting.

For additional ideas on how to enjoy sweet potatoes as a side, the Maple Roasted Sweet or Smoky Sweet Potatoes pair wonderfully with your McGriddle Bites!

Expert Tips for McGriddle Bites

  • Gentle Mixing: Avoid overmixing the batter to preserve that fluffy texture; it’s okay if there are a few lumps.

  • Proper Cooling: Cool McGriddle Bites completely before freezing to prevent ice crystals and maintain their deliciousness.

  • Reheating Right: When reheating, use a microwave or toaster oven at half power for about a minute to keep them cozy and prevent sogginess.

  • Flavorful Additions: Don’t hesitate to customize! Adding jalapeños or blueberries can elevate your McGriddle Bites and create unique flavor profiles.

  • Storage Tips: Keep leftovers in an airtight container in the fridge for up to 5 days, or freeze for 3 months to enjoy homemade goodness anytime.

Storage Tips for McGriddle Bites

Fridge: Store McGriddle Bites in an airtight container for up to 5 days. Make sure they are completely cooled before refrigerating to maintain their fluffy texture.

Freezer: These sweet sausage muffins can be frozen for up to 3 months. Place them in a freezer-safe bag or container, ensuring they're wrapped tightly to prevent freezer burn.

Reheating: When ready to enjoy, reheat your McGriddle Bites in the microwave at half power for about a minute or use a toaster oven to regain their delightful texture.

Serving Warm: For the best experience, serve warm with a drizzle of maple syrup on the side—perfect for dunking each bite!

McGriddle Bites: Sweet Sausage Muffins Recipe FAQs

What’s the best way to choose ripe ingredients for McGriddle Bites?
Absolutely! When selecting your breakfast sausage, opt for one that appears fresh and smells savory. If you're using jalapeños, look for firm peppers with a vibrant green color, avoiding any with dark spots or wrinkles. For blueberries, choose plump, firm berries that have a deep blue color without any signs of mushiness.

How should I store McGriddle Bites, and how long do they last?
Very! Store your McGriddle Bites in an airtight container in the fridge for up to 5 days. Allow them to cool completely before placing them in the container to maintain their fluffy texture. If you want to enjoy them later, freezing is a great option!

Can I freeze McGriddle Bites, and how should I do it?
Yes, indeed! After baking, allow your McGriddle Bites to cool completely. Once cooled, place them in a single layer on a baking sheet and freeze for about 2 hours. Then, transfer them to a freezer-safe bag or container, making sure to remove excess air. They can be stored for up to 3 months. When you're ready to eat, just reheat as needed!

What should I do if my McGriddle Bites are too dense?
Ah, that's an easy fix! If your McGriddle Bites come out dense, it’s likely due to overmixing the batter. When combining your ingredients, be gentle—just stir until combined, and it’s okay if there are a few lumps! This method preserves the light and fluffy texture that’s key to the recipe.

Are there any dietary considerations for McGriddle Bites?
Of course, it's important to be mindful! If you or your loved ones have dietary restrictions or allergies, consider using gluten-free pancake mix and substituting the breakfast sausage with turkey or plant-based sausage. Always check the ingredient labels to avoid allergies specifically related to cheese or any additional add-ins you choose to incorporate.

Can I customize my McGriddle Bites with different ingredients?
Absolutely! The more the merrier! You can swap out breakfast sausage for crispy bacon for a twist or mix in jalapeños if you prefer a spicy kick. For a sweeter option, toss in fresh blueberries or consider using flavored syrups! Enjoy experimenting with flavors to make each batch uniquely yours.

McGriddle Bites: Sweet Sausage Muffins

McGriddle Bites: Sweet Sausage Muffins Everyone Craves

Experience McGriddle Bites: sweet sausage muffins that blend fluffy pancake batter with savory sausage and maple syrup for a delightful breakfast.
Print Recipe Pin Recipe
Prep Time 15 minutes mins
Cook Time 15 minutes mins
Cooling Time 5 minutes mins
Total Time 35 minutes mins
Servings: 12 muffins
Course: Breakfast
Cuisine: American
Calories: 180
Ingredients Equipment Method Nutrition Notes

Ingredients
  

For the Batter
  • 1 pound Breakfast Sausage For a leaner option, try turkey sausage.
  • 2 cups Hungry Jack Pancake Mix Ensure it only requires water.
  • 1 cup Water Filtered or tap water works well.
  • 1/4 cup Maple Syrup Opt for pure maple syrup for the best flavor.
  • 1 cup Cheddar Cheese Shred it yourself for enhanced melting.
Optional Add-Ins
  • 1/4 cup Diced Jalapeños Adds a spicy kick.
  • 1/2 cup Blueberries Perfect for a fruity twist.

Equipment

  • Oven
  • mini muffin tin
  • Skillet
  • Mixing Bowl
  • Spatula
  • Spoon

Method
 

Step-by-Step Instructions
  1. Begin by preheating your oven to 400ºF (204ºC) while you prepare your mini muffin tin by greasing it.
  2. In a skillet, cook the breakfast sausage for about 5-7 minutes until fully browned.
  3. In a large bowl, combine the pancake mix, water, and maple syrup; gently stir until just combined.
  4. Add your cooked sausage and shredded cheddar cheese to the batter and fold together.
  5. Fill each muffin cup about three-quarters full with the batter.
  6. Bake for 12-15 minutes, or until the tops turn golden brown and a toothpick comes out clean.
  7. Let them cool slightly in the pan for about 5 minutes before transferring to a wire rack.

Nutrition

Serving: 1muffinCalories: 180kcalCarbohydrates: 20gProtein: 6gFat: 8gSaturated Fat: 3gPolyunsaturated Fat: 1gMonounsaturated Fat: 2gCholesterol: 20mgSodium: 300mgPotassium: 200mgFiber: 1gSugar: 3gVitamin A: 200IUVitamin C: 1mgCalcium: 150mgIron: 1mg

Notes

These muffins can be frozen for up to 3 months; reheat in the microwave at half power for about a minute. Serve warm with maple syrup for the best experience.

Tried this recipe?

Let us know how it was!

French Toast Nuggets: Crispy Bites of Sweet Morning Joy

November 17, 2025 by Grace Snow Leave a Comment

As the morning sun streams through the kitchen window, a familiar smell wafts through the air—warm, cinnamon-sugar bliss. That's the magical moment I prepare my Kid-Friendly French Toast Nuggets, a delightful twist on a classic breakfast that’s sure to please everyone, from toddlers to adults. These crispy, scrumptious bites are perfect for little hands to grasp and even easier for busy parents to whip up. With minimal prep time and a fun poppable shape, they make breakfast or lunch feel like a festive treat instead of a rushed affair. Plus, they are a hit with kids, making it a win-win for your family table. So, who’s ready to get creative in the kitchen and whip up some delicious French Toast Nuggets?

Why are French Toast Nuggets a must-try?

Kid-friendly fun awaits with these delightful nuggets! Crispy outside, fluffy inside make them irresistible for both kids and adults alike. Quick and easy to whip up, they’re perfect for any meal, whether breakfast or lunch. Versatile toppings like maple syrup or fresh fruit elevate the experience further. Healthy twist options exist too, including whole grain bread for guilt-free goodness! Don’t miss out on creating these fun bites—your family will be asking for more!

French Toast Nuggets Ingredients

For the Dough
• White Bread – Best if super-fresh and squishy for easy shaping.
• Eggs – Acts as the binding agent, essential for fluffy inside nuggets.
• Milk – Adds moisture and creaminess to the egg mixture.
• Sugar – Contributes sweetness to both the egg mixture and the cinnamon sugar coating.
• Vanilla Extract – Enhances flavor with a warm, sweet touch.

For Cooking
• Butter – For frying, ensures nuggets are golden brown and crispy.

For Coating
• Sugar (for topping) – Combines with cinnamon for a delightful sweet coating.
• Cinnamon – Provides an aromatic and flavorful topping that contrasts with the sweetness.

These French Toast Nuggets are sure to be a crowd-pleaser at breakfast or lunch!

Step‑by‑Step Instructions for French Toast Nuggets

Step 1: Prepare the Bread
Begin by tearing each slice of white bread into four equal pieces. Optionally, trim off the crusts for a smoother texture. Once done, use your hands to roll and smash each piece into tight, compact balls. This step is crucial for creating the perfect bite-sized form for your French Toast Nuggets, ensuring they hold together well during cooking.

Step 2: Make the Egg Mixture
In a bowl, whisk together 2 eggs, 1 cup of milk, 2 tablespoons of sugar, and 1 teaspoon of vanilla extract until fully combined. This mixture will bind your nuggets and provide them with a deliciously sweet flavor. Aim for a smooth consistency, and set the mixture aside to allow the flavors to meld while you prepare for dipping.

Step 3: Dip the Bread Balls
Heat a large frying pan over medium heat and add a generous pat of butter, letting it melt and sizzle. Dip each bread ball into the egg mixture, ensuring they are fully coated, allowing any excess to drip off. This step is essential for achieving that fluffy interior and golden exterior we're aiming for in the French Toast Nuggets.

Step 4: Fry the Nuggets
Once the butter is hot and bubbly, gently place the coated bread balls into the pan. Fry them for about 3-4 minutes on each side, or until they develop a lovely golden brown color. You may need to cook the nuggets in batches to avoid overcrowding the pan—this ensures even cooking and crispy edges.

Step 5: Prepare the Cinnamon Sugar Coating
While the nuggets are frying, prepare the cinnamon sugar topping. In a zip-top bag, combine 1/2 cup of sugar with 1 teaspoon of cinnamon. Shake well to mix the ingredients thoroughly. This sweet coating will give your French Toast Nuggets that irresistible flavor and aroma, making them a delightful treat.

Step 6: Coat the Cooked Nuggets
Once the nuggets turn golden brown and fluffy, carefully remove them from the frying pan and transfer them immediately into the prepared zip-top bag. Seal the bag and gently shake it to coat the nuggets evenly with the cinnamon sugar mixture. This step ensures every bite of your French Toast Nuggets is filled with sweet, cinnamon goodness.

Step 7: Serve and Enjoy
Finally, serve your delicious French Toast Nuggets warm, paired with syrup for dipping or fresh fruit on the side for an added nutritional boost. Watch as smiles spread across your family's faces with this fun, kid-friendly twist on a classic breakfast. Enjoy every bite of these delightful nuggets!

What to Serve with French Toast Nuggets?

Elevate your cozy morning moments with these delightful dishes that perfectly accompany your crispy, sweet bites of joy.

  • Maple Syrup: A classic choice for dipping, adding a luscious sweetness to the cinnamon-dusted nuggets. The warm syrup enhances every flavorful bite.

  • Fresh Berries: Juicy strawberries, blueberries, or raspberries offer a burst of freshness. They not only provide a vibrant contrast but also a nutritional boost to your breakfast.

  • Greek Yogurt: Creamy and tangy, a dollop of Greek yogurt adds a lovely contrast to the sweetness of the nuggets. Consider adding a drizzle of honey for an extra touch of indulgence.

  • Smoothie Bowl: Pair these nuggets with a refreshing smoothie bowl filled with spinach, banana, and almond milk for a balanced breakfast. The smoothie’s fruity flavors will complement the sweetness of the nuggets while providing filling nutrients.

  • Coconut Whipped Cream: A decadent topping that brings a tropical flair to your breakfast spread. Its light texture is the perfect match for the crispy nuggets.

  • Coffee or Hot Chocolate: A warm beverage rounds out the meal beautifully. Pair with robust coffee for adults, or soothe kids with rich, frothy hot chocolate, making it a truly comforting breakfast experience.

  • Cinnamon Sugar Fruit Salad: Combine seasonal fruits with a sprinkle of cinnamon sugar for a sweet twist that resonates with the flavors of your French Toast Nuggets. It adds both freshness and a delightful crunch.

How to Store and Freeze French Toast Nuggets

Fridge: Store leftover French Toast Nuggets in an airtight container for up to 3 days. This keeps them fresh and ready for quick snacks!

Freezer: Freeze the nuggets in a single layer on a baking sheet, then transfer to a freezer-safe bag for up to 2 months. This makes for easy meals on busy days!

Reheating: For best results, reheat in the oven at 350°F (175°C) for about 10 minutes, or use an air fryer for crispy texture. Enjoy them warm!

Make Ahead Options

These French Toast Nuggets are fantastic for meal prep, allowing you to save time for those busy mornings! You can prepare the bread balls and egg mixture up to 24 hours in advance. Simply follow the first two steps, then store the formed bread balls in an airtight container in the refrigerator, and whisk the egg mixture in a separate bowl. When you're ready to cook, just dip the chilled bread balls into the egg mixture and fry as directed. This not only keeps your nuggets just as delicious but also ensures they maintain their fluffy texture. Enjoy a delightful breakfast with minimal effort, perfect for busy home cooks!

French Toast Nuggets Variations & Substitutions

Customize your French Toast Nuggets and create a delightful twist that suits your family's taste buds!

  • Whole Grain Bread: Swap white bread for whole grain or flaxseed bread for added nutrients.

  • Cinnamon Raisin Delight: Use cinnamon raisin bread for a burst of fruity flavor that elevates sweetness.

  • Syrup Substitution: Replace sugar with a natural sweetener like honey or maple syrup for a healthier option.

  • Nutty Crunch: Add crushed nuts like pecans or walnuts to the cinnamon sugar mix for extra texture and crunch.

  • Dairy-Free Option: Use almond or oat milk instead of regular milk to make the recipe dairy-free without losing creaminess.

  • Air Fryer Method: For a healthier option, use an air fryer to cook the nuggets—just reduce the cooking time!

  • Savory Spice: Add a pinch of nutmeg or pumpkin pie spice to the egg mixture for an unexpected, warm flavor.

Think creatively! You might even enjoy pairing these nuggets with a homemade syrup by blending fresh fruit into a delicious topping inspired by your favorite Cherry Clafoutis French. Don't hesitate to explore your pantry and see what unique combinations you can make!

Expert Tips for French Toast Nuggets

• Fresh Bread Necessity: Always use fresh white bread for shaping; stale bread won't compress well into tight balls.

• Perfectly Heated Butter: Ensure the butter is hot enough before adding nuggets; this is key for achieving that crispy texture everyone loves.

• Safety First: Keep an eye on kids while frying; this will ensure safety during cooking and help prevent any accidents.

• Batch Cooking Advice: Fry nuggets in smaller batches to prevent overcrowding the pan; this ensures even cooking and golden results.

• Easy Coating Method: Use a larger zip-top bag for coating the nuggets; this helps minimize mess while ensuring even coverage with cinnamon sugar.

French Toast Nuggets Recipe FAQs

How should I choose the bread for French Toast Nuggets?
Absolutely! For the best texture and flavor, use super-fresh white bread. It should be squishy and soft for easy shaping into balls. Avoid stale bread, as it won't compress well and might result in a less cohesive nugget. If you're feeling adventurous, whole grain or cinnamon raisin bread can also add delicious flavor variations.

What is the best way to store leftover French Toast Nuggets?
To keep your nuggets fresh, store them in an airtight container in the refrigerator for up to 3 days. This method retains their delectable taste and soft texture, making them perfect for a quick snack or meal. If you need to save them for longer, freezing is a great option!

Can I freeze French Toast Nuggets?
Yes, you can! First, lay the nuggets on a baking sheet in a single layer and freeze them until firm, which usually takes about 1-2 hours. Once solid, transfer the nuggets to a freezer-safe bag or container to keep them for up to 2 months. This way, you'll have a convenient breakfast ready anytime!

How do I reheat French Toast Nuggets?
For the ultimate experience, reheat your frozen nuggets in the oven preheated to 350°F (175°C) for about 10 minutes. If you're using an air fryer, cook them for around 5-7 minutes for that perfect crispy texture. Just make sure they are warmed through before serving!

Can kids help in making French Toast Nuggets?
Very much! Children can assist with tearing the bread, rolling the balls, and even shaking them in the cinnamon sugar bag. Just ensure that they are supervised, especially around the hot stove. It can be a fun family activity that gets everyone involved!

Are there any dietary considerations with French Toast Nuggets?
Of course! If anyone in your family has allergies, be sure to substitute ingredients accordingly. For instance, you can use non-dairy milk, egg substitutes, or gluten-free bread to accommodate dietary restrictions. Personalizing the recipe ensures everyone can enjoy these scrumptious nuggets!

French Toast Nuggets

French Toast Nuggets: Crispy Bites of Sweet Morning Joy

These French Toast Nuggets are crispy outside with a fluffy inside, perfect for a delightful breakfast or snack.
Print Recipe Pin Recipe
Prep Time 15 minutes mins
Cook Time 20 minutes mins
Total Time 35 minutes mins
Servings: 4 nuggets
Course: Breakfast
Cuisine: American
Calories: 220
Ingredients Equipment Method Nutrition Notes

Ingredients
  

For the Dough
  • 8 slices White Bread Super-fresh and squishy for easy shaping.
  • 2 large Eggs Acts as the binding agent.
  • 1 cup Milk Adds moisture and creaminess.
  • 2 tablespoons Sugar Contributes sweetness.
  • 1 teaspoon Vanilla Extract Enhances flavor.
For Cooking
  • 2 tablespoons Butter For frying.
For Coating
  • 1/2 cup Sugar (for topping) For the cinnamon sugar coating.
  • 1 teaspoon Cinnamon Provides aromatic topping.

Equipment

  • frying pan
  • Whisk
  • Bowl
  • Zip-top bag

Method
 

Step-by-Step Instructions
  1. Tear each slice of white bread into four equal pieces and roll into tight balls.
  2. Whisk together eggs, milk, sugar, and vanilla extract until smooth.
  3. Heat butter in a frying pan and dip each bread ball into the egg mixture.
  4. Fry the coated bread balls until golden brown, about 3-4 minutes on each side.
  5. Combine sugar and cinnamon in a zip-top bag and shake to mix.
  6. Coat the cooked nuggets in the cinnamon sugar mixture.
  7. Serve warm with syrup or fresh fruit.

Nutrition

Serving: 4nuggetsCalories: 220kcalCarbohydrates: 30gProtein: 5gFat: 8gSaturated Fat: 4gPolyunsaturated Fat: 1gMonounsaturated Fat: 2gCholesterol: 150mgSodium: 300mgPotassium: 150mgFiber: 1gSugar: 12gVitamin A: 500IUCalcium: 150mgIron: 1mg

Notes

Use fresh bread for best results. Fry in batches to prevent overcrowding the pan for crispy nuggets.

Tried this recipe?

Let us know how it was!
  • « Previous Page
  • 1
  • …
  • 17
  • 18
  • 19
  • 20
  • 21
  • …
  • 25
  • Next Page »

Welcome!

Hi, I’m Grace, a Sydney-based home cook with a passion for bold flavors and trending ingredients. Whether you’re a busy beginner or a seasoned foodie, you’ll find dishes here that are fresh, fun, and full of flavor.

More about me

Popular Recipes

  • Honey Sriracha Salmon Bowls
    Delicious Honey Sriracha Salmon Bowls for Quick Dinners
  • Air Fryer Apple Pie Taquitos
    Crispy Air Fryer Apple Pie Taquitos for a Sweet Treat
  • Crispy Parmesan Crusted Cod
    Crispy Parmesan Crusted Cod: A Healthy Flavor Explosion
  • Air Fryer French Toast Bites
    Delicious Air Fryer French Toast Bites for Busy Mornings

Footer

↑ back to top

About

  • Privacy Policy
  • Disclaimer
  • Terms & Conditions

Newsletter

  • Sign Up! for emails and updates

Contact

  • About me
  • Contact me

Copyright © 2025 TastyTrendIngredients