tastytrendingredients

  • Home
  • Recipes
    • Appetizers
    • Breakfast
    • Dessert
    • Dinner
    • Drinks
    • Salads
    • Snacks
    • Soups
  • About me
  • Contact
menu icon
go to homepage
  • Home
  • Recipes
    • Appetizers
    • Breakfast
    • Dessert
    • Dinner
    • Drinks
    • Salads
    • Snacks
    • Soups
  • About me
  • Contact
search icon
Homepage link
  • Home
  • Recipes
    • Appetizers
    • Breakfast
    • Dessert
    • Dinner
    • Drinks
    • Salads
    • Snacks
    • Soups
  • About me
  • Contact
×

Honey Cinnamon Oatmeal Bread for Cozy Breakfasts at Home

December 13, 2025 by Grace Snow Leave a Comment

Waking up to the sun filtering through the kitchen window, I can already smell the sweet, warm notes of cinnamon swirling around my home. The best part? It’s coming from my Honey-Cinnamon Oatmeal Bread, a delightful recipe that pairs the heartiness of oats with the natural sweetness of honey. This bread isn’t just a breakfast option; it’s a comforting embrace after a long day, effortlessly blending quick prep with wholesome ingredients. Whether you're treating yourself to a quiet morning or hosting a gathering of family and friends, this loaf is sure to impress. Curious about how to create your own slice of morning bliss? Let’s dive into the recipe that transforms simple ingredients into something truly special!
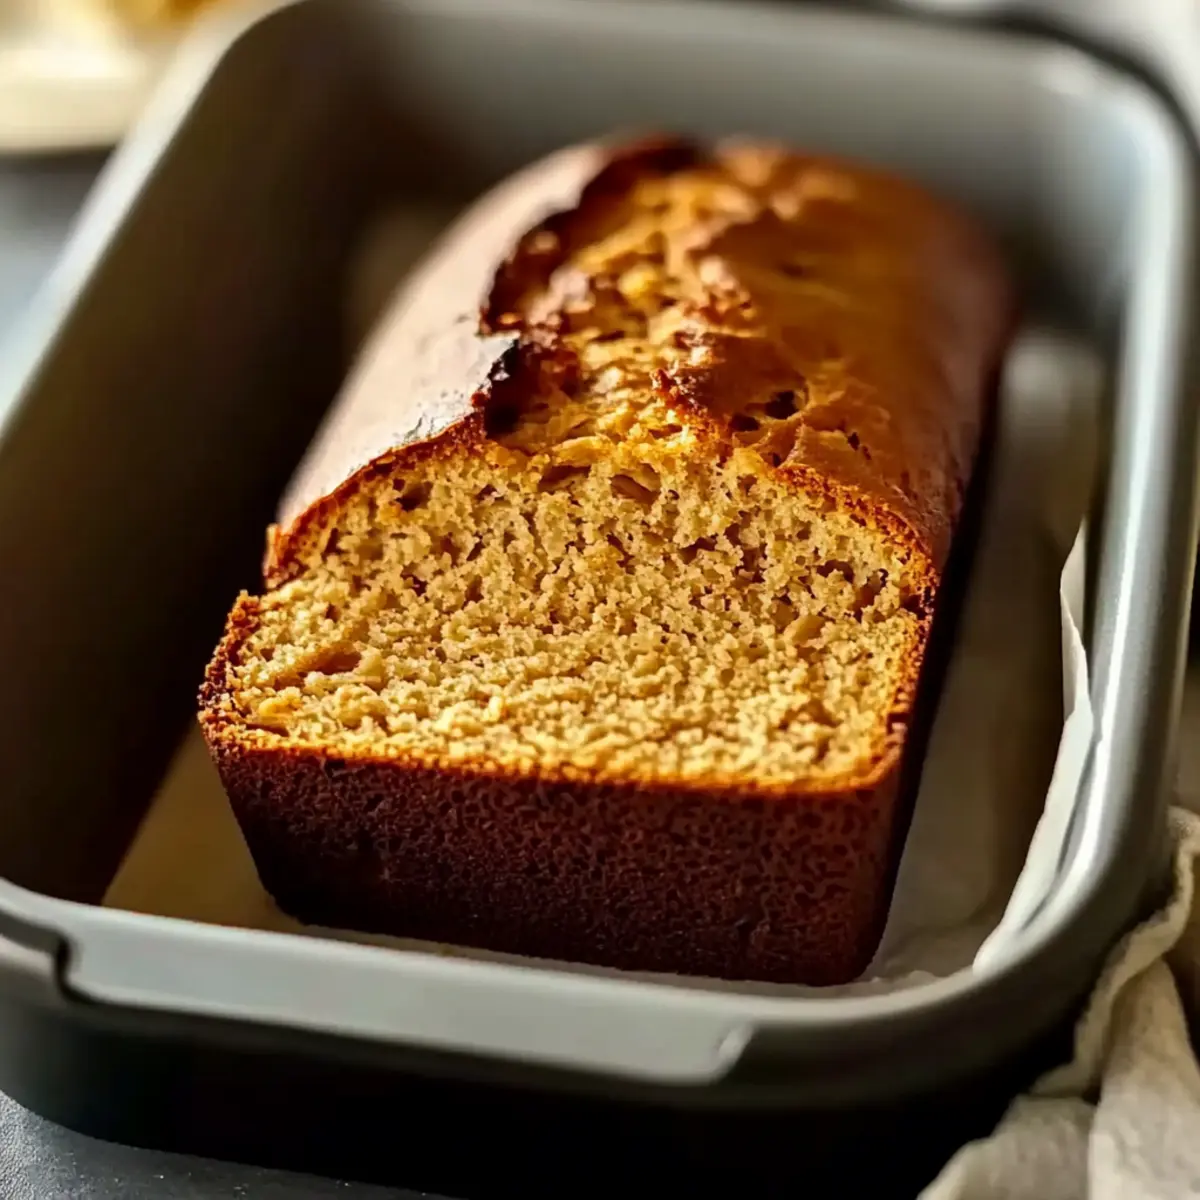
Why is Honey-Cinnamon Oatmeal Bread a Must-Try?

Irresistible Aroma: Just imagine filling your home with the delightful scent of cinnamon and honey as this bread bakes—it's an experience you don’t want to miss.

Wholesome Ingredients: Packed with oats, this bread is not only delicious but also nutritious, making it a heartwarming option for breakfast or a snack.

Easy Preparation: With simple steps, you can whip this up without any fuss, perfect for busy mornings or spontaneous cravings.

Customizable Delight: Want to elevate your loaf? Feel free to add your favorite nuts or dried fruits for a personal touch!

Crowd-Pleasing Flavor: Whether enjoyed fresh out of the oven or toasted, every slice promises a comforting blend of sweet and hearty goodness that everyone will love.

Get ready to make mornings a little sweeter with this amazing recipe for Homemade Pumpkin Cinnamon Roll and elevate your breakfast game even further!

Honey-Cinnamon Oatmeal Bread Ingredients

For the Bread

  • Honey – Provides natural sweetness and moisture; substitute with maple syrup for a vegan option.
  • Cinnamon – Adds warmth and flavor, enhancing the sweetness of honey; swap for ground nutmeg for a different spice profile.
  • Rolled Oats – Offers texture and nutrition; quick oats can be used but may lead to a softer texture.
  • All-Purpose Flour – Provides structure; whole wheat flour can be substituted for a healthier option.
  • Baking Soda – Helps the bread rise, creating a lighter texture; ensure it’s fresh for the best outcome.
  • Salt – Enhances flavor; don’t skip it for optimal taste.
  • Milk (or alternative) – Adds moisture; almond milk makes it dairy-free.
  • Butter (or alternative) – Adds richness; replace with coconut oil for a dairy-free version.

Optional Toppings

  • Extra Oats – Sprinkle on top for added texture and visual appeal; they bring a rustic touch to your loaf.
  • Chopped Nuts – Pecans or walnuts can add a delightful crunch and nutty flavor; they’re a fantastic addition!
  • Dried Fruits – Raisins or dried cranberries can introduce a fruity burst; feel free to mix and match your favorites!

With these ingredients on hand, you're well on your way to crafting your very own Honey-Cinnamon Oatmeal Bread that’s sure to become a family favorite. Happy baking!

Step‑by‑Step Instructions for Honey-Cinnamon Oatmeal Bread

Step 1: Preheat the Oven
Start by preheating your oven to 350°F (175°C). While the oven warms up, prepare a loaf pan by greasing it lightly with butter or non-stick spray. This will ensure your Honey-Cinnamon Oatmeal Bread releases easily after baking, allowing you to enjoy that perfect loaf without any hassle.

Step 2: Mix Dry Ingredients
In a large mixing bowl, combine the rolled oats, all-purpose flour, baking soda, ground cinnamon, and salt. Whisk these ingredients together until they are evenly blended, creating a dry mixture that sets the foundation for your hearty bread. You’ll know it’s ready when the cinnamon is well distributed and you can see the vibrant colors of oats and flour.

Step 3: Mix Wet Ingredients
In a separate bowl, whisk together the honey, milk, and melted butter until the mixture is smooth and well combined. The honey will add that beautiful sweetness while the melted butter enhances richness, making your Honey-Cinnamon Oatmeal Bread irresistibly moist. Take a moment to breathe in the sweet aroma as it melds together.

Step 4: Combine Mixtures
Gradually pour the wet ingredients into the dry mixture, stirring gently with a wooden spoon or spatula. Continue to mix until just combined; be careful not to overmix, as this could lead to a dense loaf. You’ll know it’s ready when no dry flour is visible, and everything feels moist and cohesive.

Step 5: Shape the Dough
Transfer the batter into the prepared loaf pan, using a spatula to smooth the top for an even bake. If you’d like, sprinkle some extra oats on top for added texture and a rustic look. This will create an inviting crust as your Honey-Cinnamon Oatmeal Bread bakes to golden perfection.

Step 6: Bake the Bread
Place the loaf pan in the oven and bake for 35-40 minutes. Keep an eye on the bread, and know it’s ready when it turns golden brown and a toothpick inserted in the center comes out clean. The delightful scent of honey and cinnamon will fill your kitchen, signaling a cozy treat is on the way.

Step 7: Cool the Bread
Once baked, remove the Honey-Cinnamon Oatmeal Bread from the oven and allow it to cool in the pan for about 10 minutes. Then, carefully transfer it to a wire rack to cool completely for at least 30 minutes before slicing. This cooling period allows the bread to set, ensuring each slice holds together beautifully.
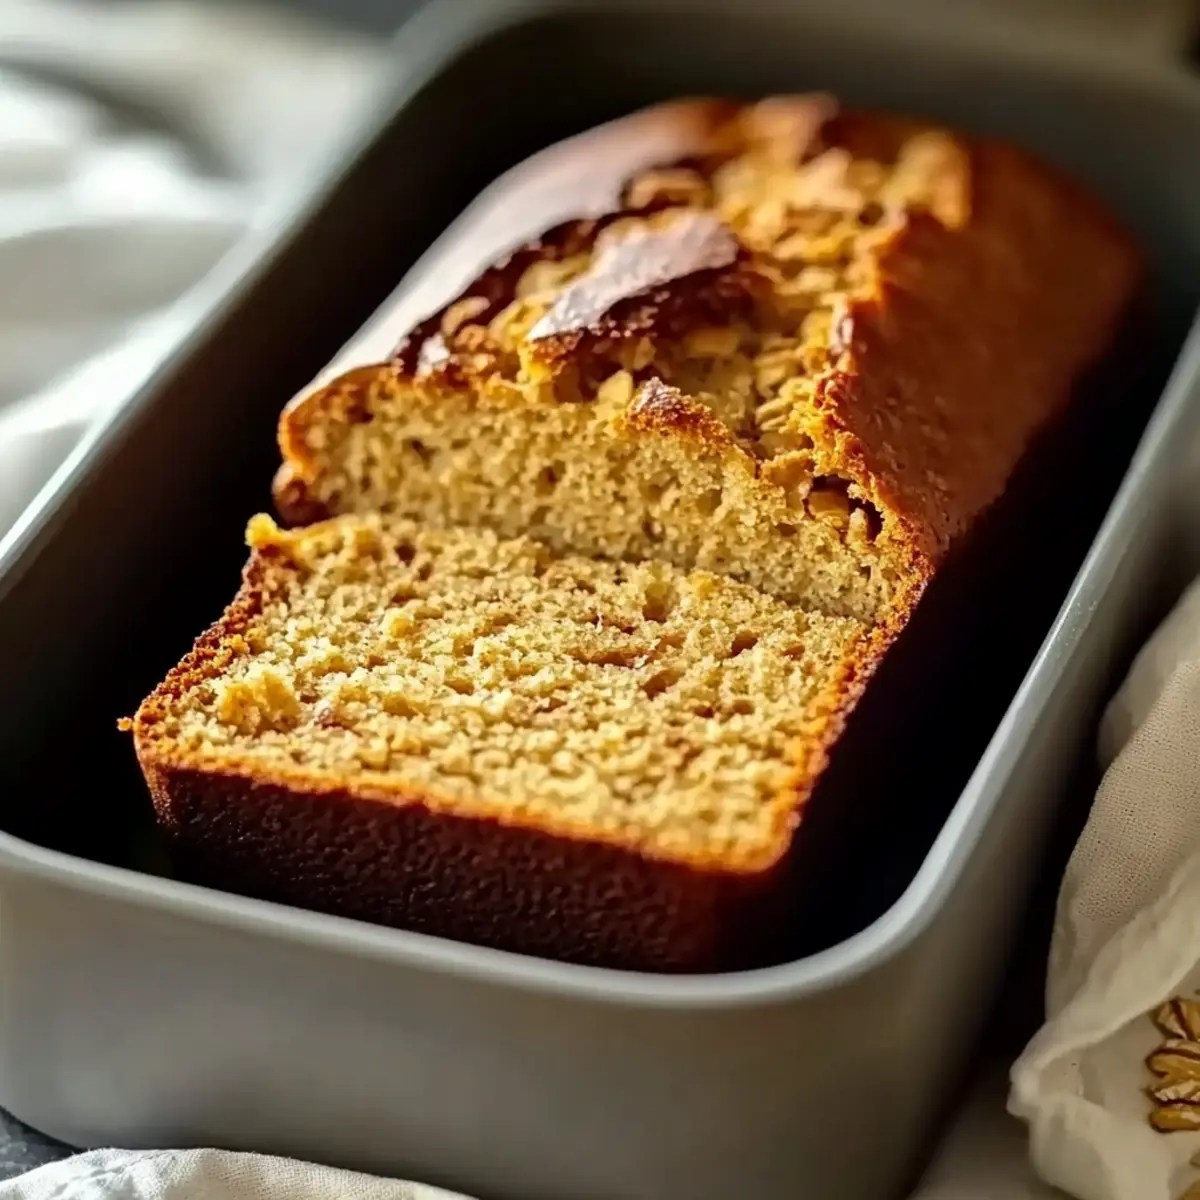
Honey Cinnamon Oatmeal Bread Variations

Feel free to sprinkle a little creativity into your Honey-Cinnamon Oatmeal Bread with these delightful variations!

  • Nuts: Add chopped pecans or walnuts to give your bread a satisfying crunch. The nuttiness enhances the overall flavor while providing extra texture.

  • Spices: Try a dash of nutmeg or ginger for a spiced twist. This subtle change can elevate the warmth of your bread to new heights, making every bite uniquely delightful.

  • Fruit: Incorporate raisins or dried cranberries for a fruity surprise. They add natural sweetness and beautiful little bursts of flavor throughout, making this loaf even more special.

  • Gluten-Free: Substitute gluten-free flour for a version that caters to dietary needs. This way, everyone can enjoy a slice of homemade goodness, no matter their restrictions!

  • Dairy-Free: Swap out regular milk for almond or oat milk and use coconut oil in place of butter. This keeps the bread light and suitable for those avoiding dairy.

  • Sweet Swirl: Add a cream cheese frosting swirl after baking for an indulgent treat. Imagine a sweet ribbon of cream cheese running through each slice, creating a luscious breakfast experience.

  • Savory Touch: Mix in cheddar cheese or herbs such as rosemary for an unexpected savory version. The mingling of sweet and savory can make delightful contrasts in each bite.

Enjoying a slice of this bread is a wonderful way to kick-start your day or share with loved ones, and if you’re looking for more cozy treats, consider trying this Homemade Pumpkin Cinnamon Roll for even more breakfast bliss!

Feel free to explore and find your favorite combination through these substitutions!

Make Ahead Options

These Honey-Cinnamon Oatmeal Bread loaves are perfect for meal prep enthusiasts! You can mix the dry ingredients (oats, flour, baking soda, cinnamon, and salt) up to 3 days in advance and store them in an airtight container to maintain freshness. Additionally, you can combine the wet ingredients (honey, milk, and melted butter) and refrigerate them for up to 24 hours. When you're ready to bake, simply bring the wet mixture to room temperature and combine with the dry ingredients, then proceed with shaping and baking as instructed. This way, you’ll have fresh, warm bread with minimal effort on busy mornings, making breakfast a breeze!

Expert Tips for Honey-Cinnamon Oatmeal Bread

  • Perfect Cooling Time: Allow the bread to cool for at least 30 minutes before slicing to prevent a gummy texture. Patience pays off!

  • Fresh Ingredients: Use fresh baking soda for the best rise. Stale ingredients can lead to a dense loaf that doesn’t quite meet your expectations.

  • Mix Gently: When combining the wet and dry ingredients, stir just until everything is moistened. Overmixing can toughen the bread, so be gentle!

  • Customize Wisely: Feel free to add nuts or fruits, but balance is key. Too many additions can alter the texture of your Honey-Cinnamon Oatmeal Bread.

  • Check Your Oven: Ovens can vary in temperature; consider using an oven thermometer to ensure accurate baking, leading to perfectly baked bread every time.

What to Serve with Honey-Cinnamon Oatmeal Bread

Delight in a complete breakfast experience that truly warms the soul and satisfies the palate.

  • Creamy Greek Yogurt: A dollop on the side adds tanginess and creaminess, enhancing the bread's sweetness in each delightful bite. Pairing yogurt with honey and oats brings a refreshing balance to your morning.

  • Fresh Berries: Strawberries, blueberries, or raspberries offer a burst of fruity freshness that perfectly complements the warm flavors of cinnamon and honey. Their natural sweetness adds a vibrant touch to your plate!

  • Scrambled Eggs: The richness of scrambled eggs creates a delicious contrast with the syrupy sweetness of the bread. When served alongside, they create a heartier breakfast that’s both satisfying and nourishing.

  • Honey Butter: Spread honey butter on warm slices for an extra layer of sweetness and a velvety texture. This sweet addition makes each bite feel indulgent and decadent.

  • Herbal Tea: Enjoy a soothing cup of chamomile or mint tea for a refreshing drink that offers a gentle, aromatic contrast to the bread's hearty flavors. The warmth of the tea perfectly complements your cozy breakfast.

  • Cinnamon-Spiced Apple Slices: Serve thinly sliced apples sprinkled with cinnamon as a crunchy, sweet accompaniment. Their crispness pairs beautifully with the soft texture of the bread, creating a delightful contrast.

Let these pairings enhance your Honey-Cinnamon Oatmeal Bread experience for a truly comforting breakfast spread!

How to Store and Freeze Honey-Cinnamon Oatmeal Bread

Room Temperature: Wrap the cooled loaf in plastic wrap or store it in an airtight container at room temperature for up to 2-3 days to keep it fresh and soft.

Fridge: If you prefer to extend the shelf life, refrigerate the bread in an airtight container for up to a week, though it may dry out slightly compared to room temperature storage.

Freezer: For long-term storage, slice the Honey-Cinnamon Oatmeal Bread and freeze the pieces in a freezer-safe bag for up to 3 months. Thaw overnight in the fridge or toast directly for a quick breakfast.

Reheating: To enjoy your bread warm, simply pop the slices in a toaster or reheat in the microwave for 10-15 seconds until warmed through.
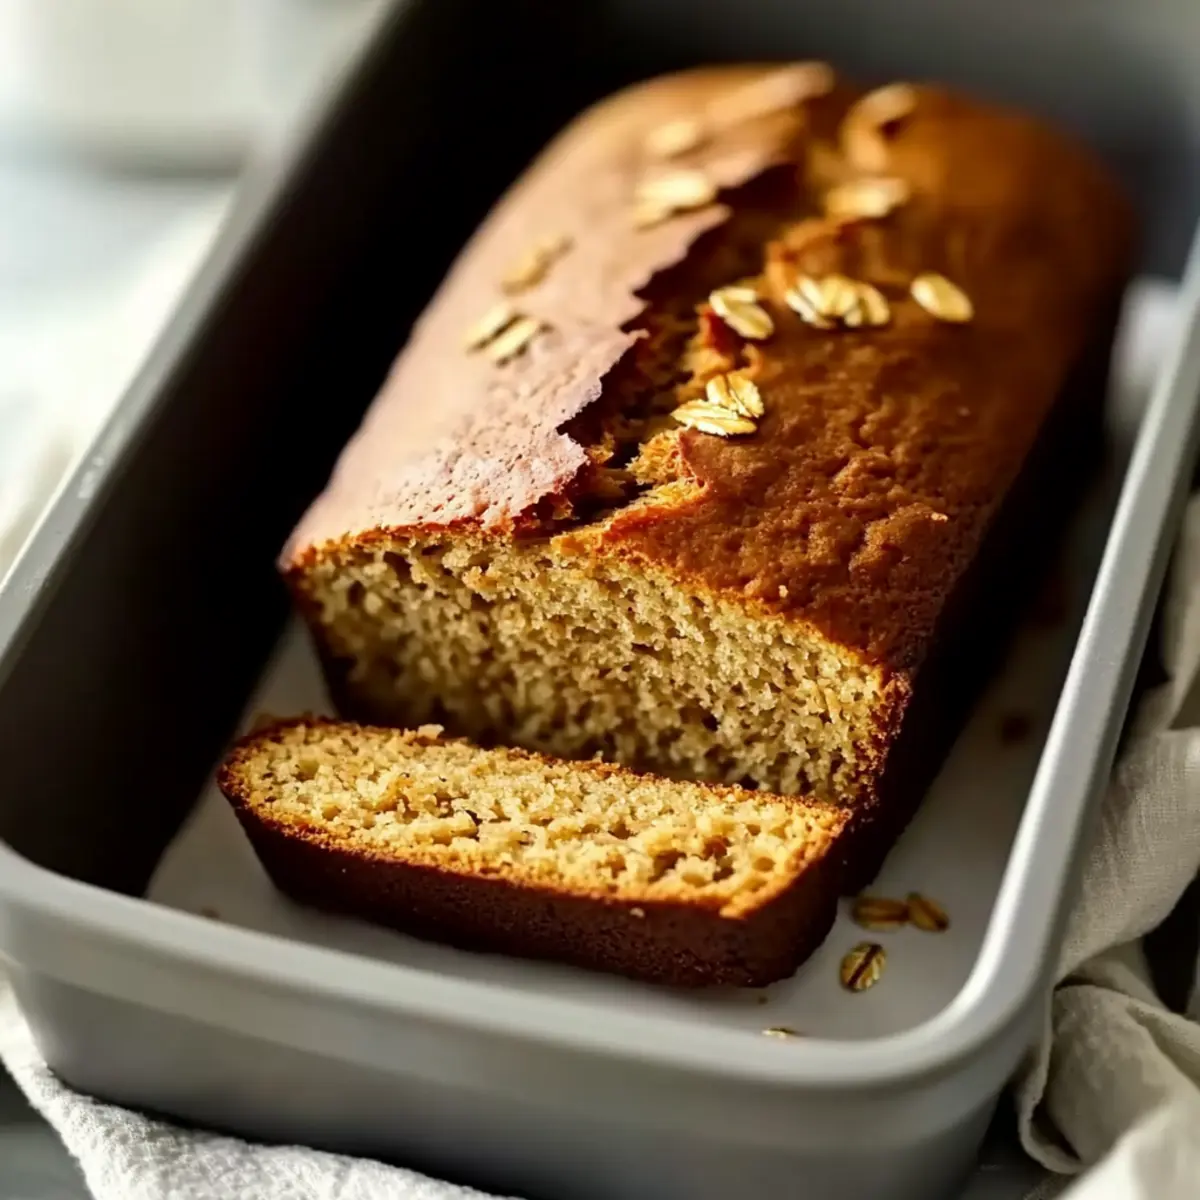
Honey-Cinnamon Oatmeal Bread Recipe FAQs

What kind of oats should I use for Honey-Cinnamon Oatmeal Bread?
You should use rolled oats for this recipe as they provide the best texture and nutrition. Quick oats can be used in a pinch, but remember they will result in a softer loaf.

How should I store Honey-Cinnamon Oatmeal Bread?
Wrap the cooled loaf in plastic wrap or store it in an airtight container at room temperature for up to 2-3 days. For longer preservation, refrigerate in an airtight container for up to a week, although it may lose some moisture.

Can I freeze my Honey-Cinnamon Oatmeal Bread?
Absolutely! Slice your loaf and freeze individual slices in a freezer-safe bag for up to 3 months. When you’re ready to enjoy, thaw overnight in the fridge or toast directly from the freezer for a quick, delightful breakfast.

What if my Honey-Cinnamon Oatmeal Bread is too dense?
If you find your bread turns out too dense, it may be due to overmixing or using stale baking soda. For the best results, mix the wet and dry ingredients gently until just combined. Always ensure your baking soda is fresh for optimal rise. If necessary, consider expanding the baking time slightly and checking for doneness with a toothpick.

Are there any dietary considerations for Honey-Cinnamon Oatmeal Bread?
This recipe can easily accommodate dietary needs! For a vegan option, substitute honey with maple syrup and use dairy-free milk and coconut oil. Additionally, if you or your loved ones have nut allergies, be cautious with any added nuts or dried fruits. Always read labels to ensure safety.

How do I know when my bread is done baking?
Look for a golden-brown color and a toothpick inserted in the center should come out clean. The delightful aroma of honey and cinnamon will fill your kitchen during baking, acting as a lovely indicator that your Honey-Cinnamon Oatmeal Bread is nearly ready to be enjoyed!
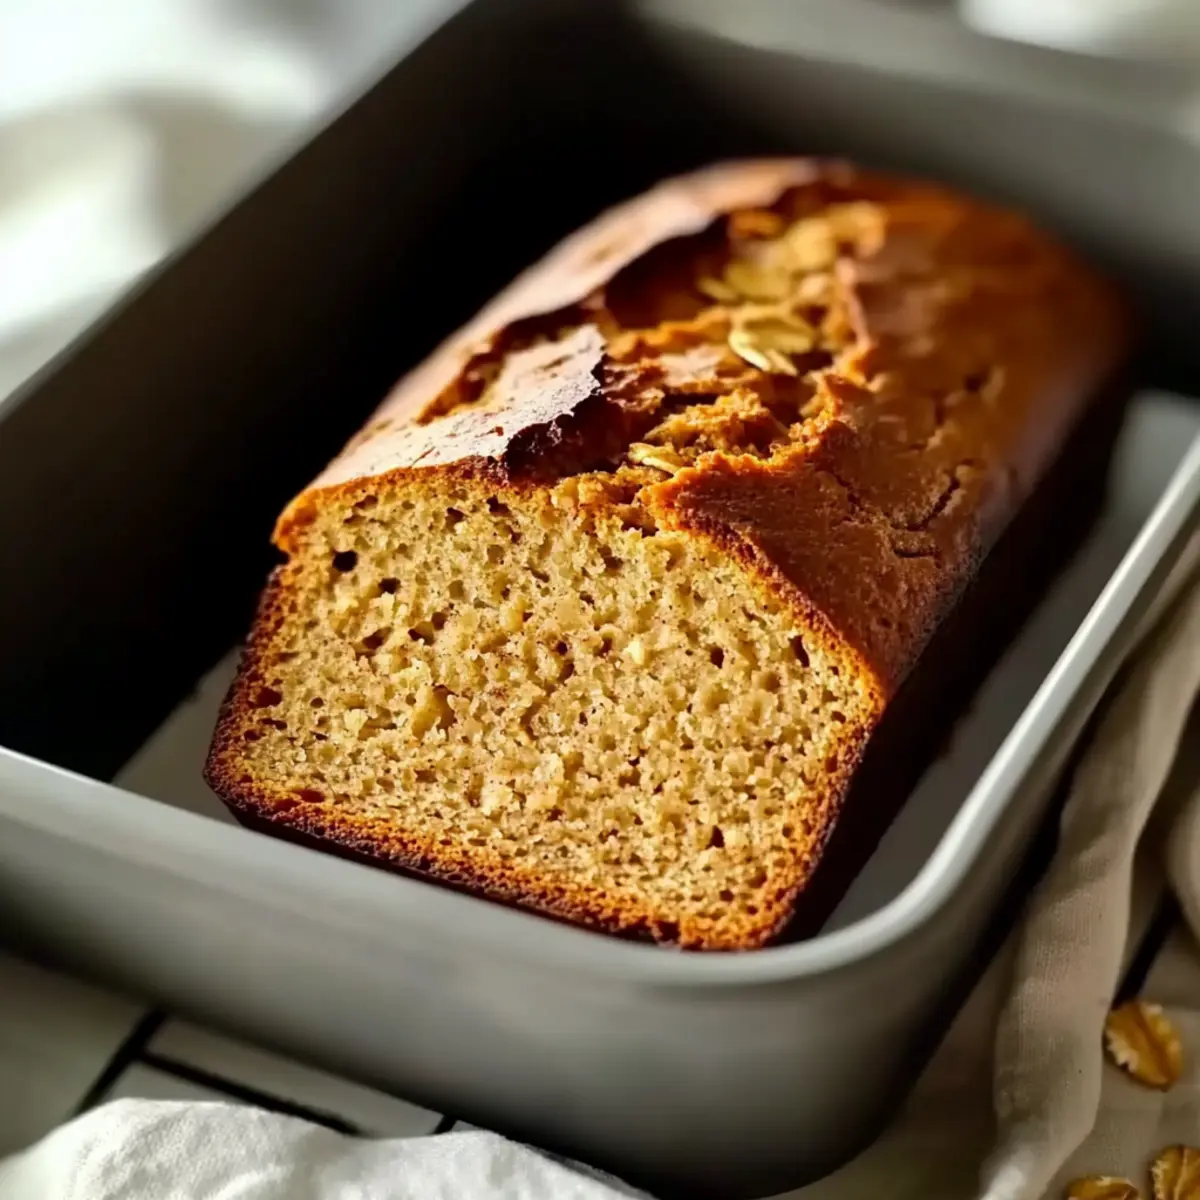
Honey Cinnamon Oatmeal Bread

Honey Cinnamon Oatmeal Bread for Cozy Breakfasts at Home

This Honey Cinnamon Oatmeal Bread is a warm and inviting breakfast choice, combining the heartiness of oats with the sweetness of honey.
Print Recipe Pin Recipe
Prep Time 15 minutes mins
Cook Time 40 minutes mins
Cooling Time 40 minutes mins
Total Time 1 hour hr 35 minutes mins
Servings: 8 slices
Course: Breakfast
Cuisine: American
Calories: 180
Ingredients Equipment Method Nutrition Notes

Ingredients
  

For the Bread
  • 1 cup Honey Substitute with maple syrup for a vegan option.
  • 1 teaspoon Cinnamon Swap for ground nutmeg for a different spice profile.
  • 2 cups Rolled Oats Quick oats can be used but may lead to a softer texture.
  • 1.5 cups All-Purpose Flour Whole wheat flour can be substituted for a healthier option.
  • 1 teaspoon Baking Soda Ensure it's fresh for the best outcome.
  • 0.5 teaspoon Salt Don't skip it for optimal taste.
  • 1 cup Milk (or alternative) Almond milk makes it dairy-free.
  • 0.25 cup Butter (or alternative) Replace with coconut oil for a dairy-free version.
Optional Toppings
  • 0.5 cup Extra Oats Sprinkle on top for added texture.
  • 0.5 cup Chopped Nuts Pecans or walnuts can add crunch.
  • 0.5 cup Dried Fruits Raisins or dried cranberries can be used.

Equipment

  • Loaf pan
  • Mixing bowls
  • Whisk

Method
 

Step-by-Step Instructions for Honey-Cinnamon Oatmeal Bread
  1. Preheat your oven to 350°F (175°C) and grease a loaf pan with butter or non-stick spray.
  2. In a large mixing bowl, combine the rolled oats, all-purpose flour, baking soda, ground cinnamon, and salt, whisking until blended.
  3. In a separate bowl, whisk together the honey, milk, and melted butter until smooth and combined.
  4. Gradually pour the wet ingredients into the dry mixture, stirring gently until just combined.
  5. Transfer the batter into the prepared loaf pan and smooth the top. Sprinkle extra oats on top if desired.
  6. Bake for 35-40 minutes, until golden brown and a toothpick inserted comes out clean.
  7. Allow the bread to cool in the pan for about 10 minutes before transferring to a wire rack to cool completely for at least 30 minutes.
Nutrition

Serving: 1sliceCalories: 180kcalCarbohydrates: 30gProtein: 4gFat: 6gSaturated Fat: 3gMonounsaturated Fat: 1gCholesterol: 15mgSodium: 200mgPotassium: 150mgFiber: 2gSugar: 8gVitamin A: 200IUCalcium: 40mgIron: 1mg

Notes

Allow the bread to cool for at least 30 minutes before slicing to avoid a gummy texture. Use fresh baking soda for the best rise. Mix wet and dry ingredients gently.

Tried this recipe?

Let us know how it was!

Garlic Herb Braided Bread: Your New Favorite Homemade Treat

December 13, 2025 by Grace Snow Leave a Comment

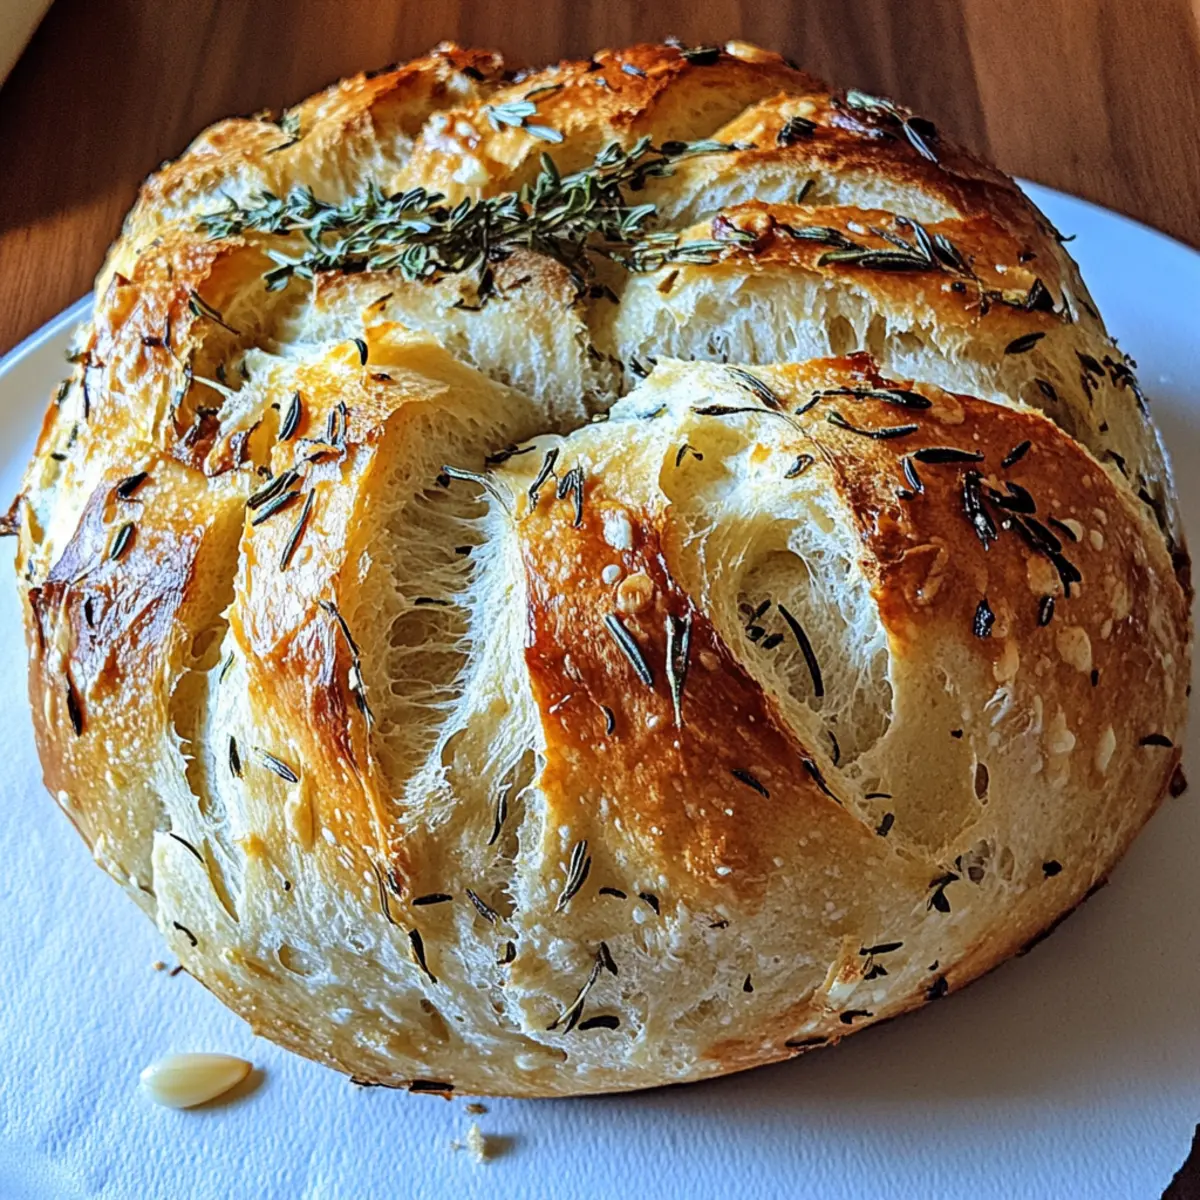
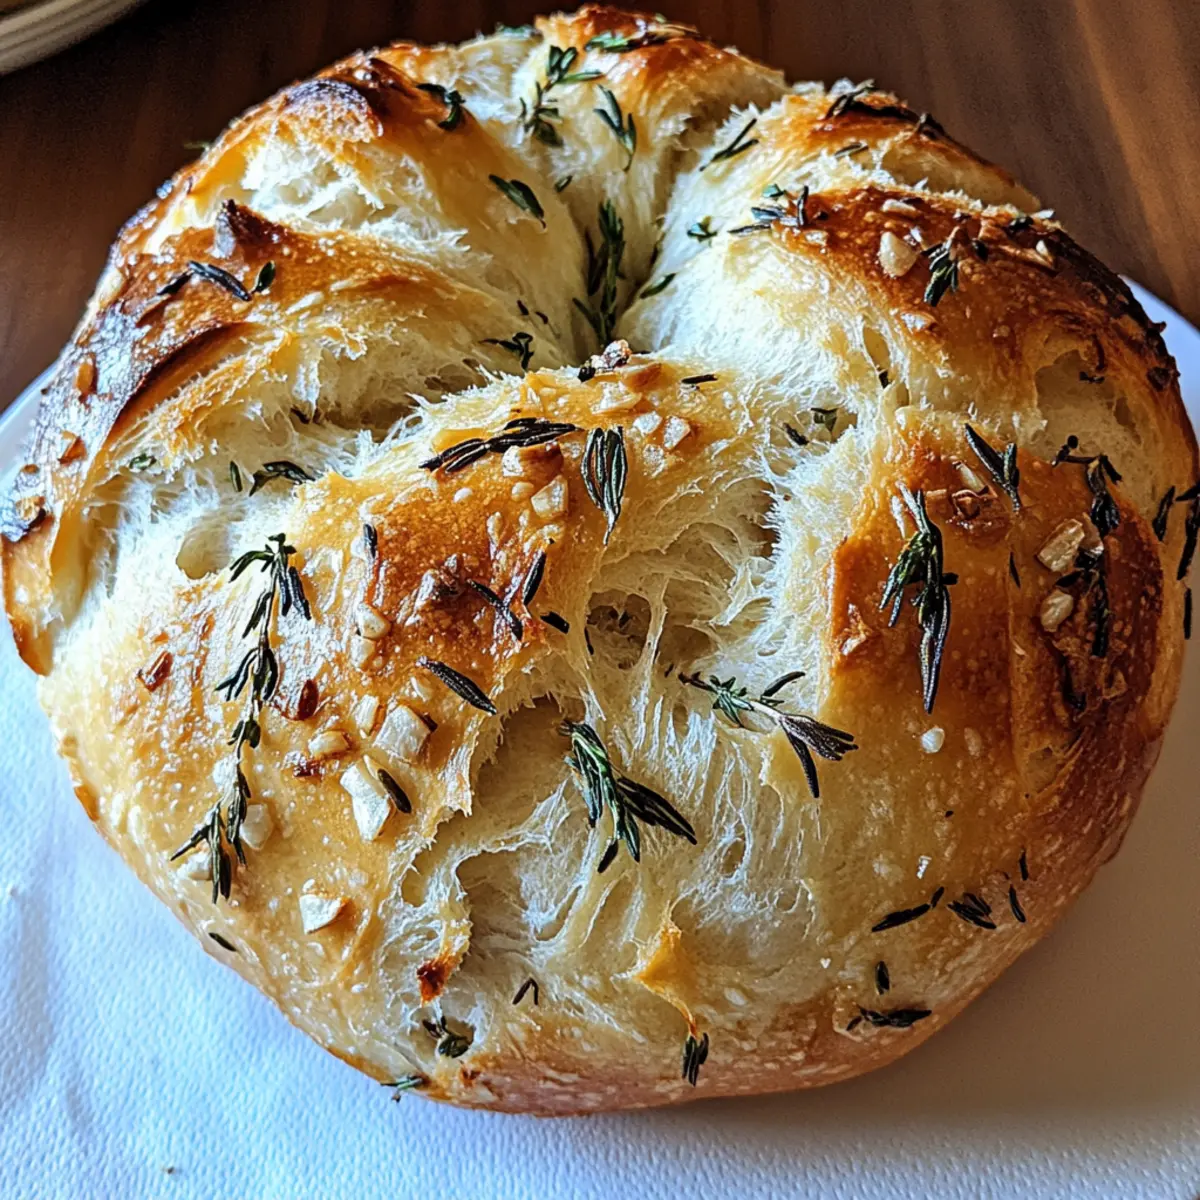
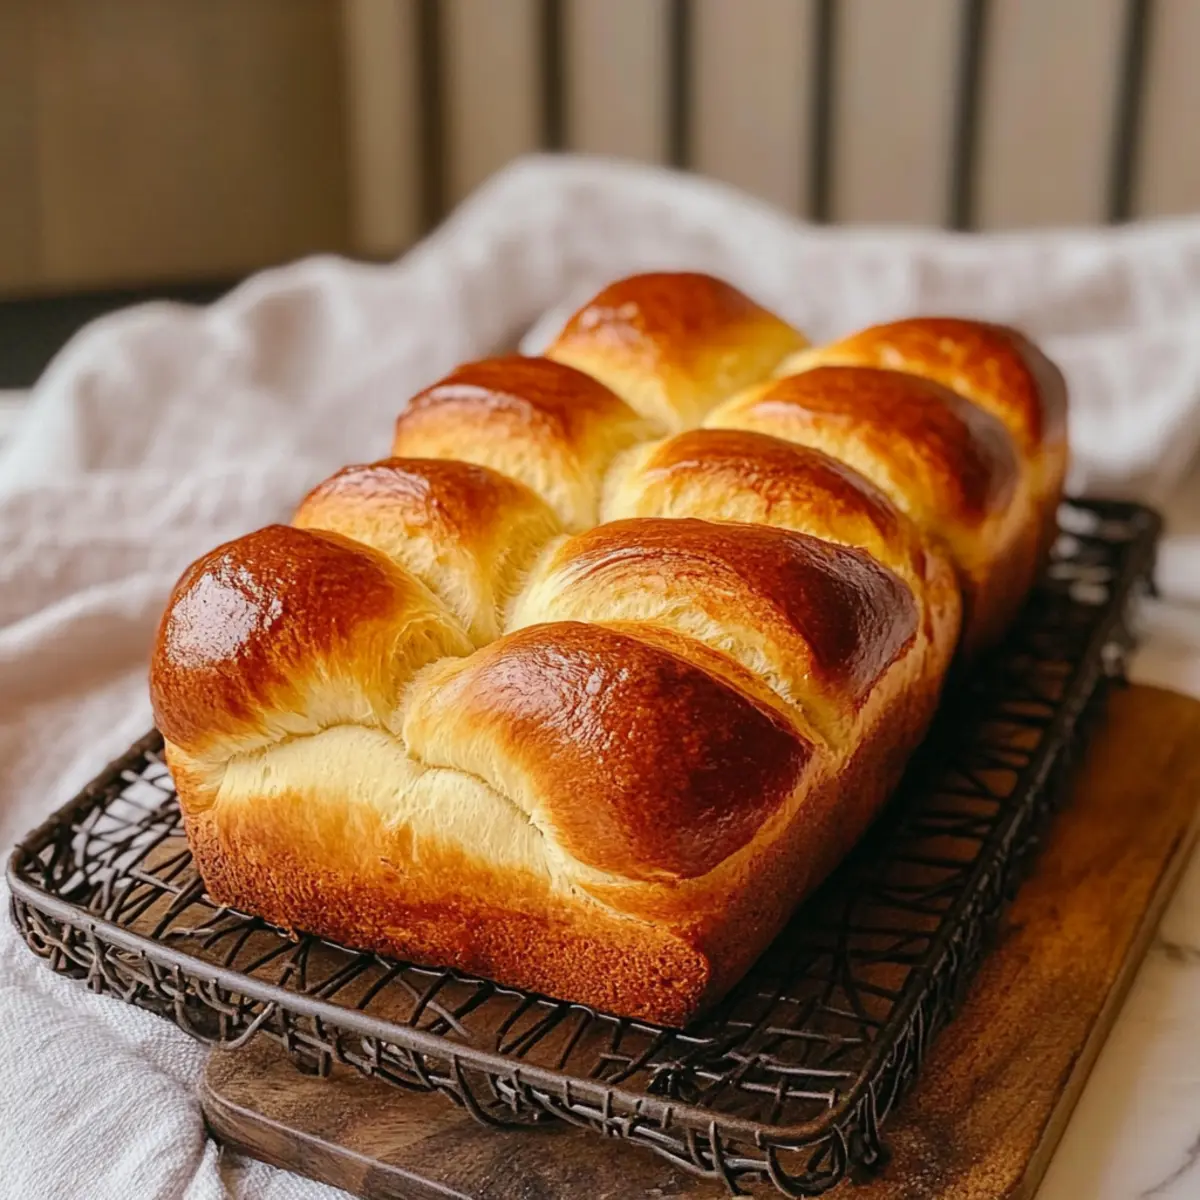
If you ever found yourself enchanted by the sight of a beautifully braided loaf in a bakery window, then this Garlic Herb Braided Bread will transport you right there. It’s astonishing how something so visually stunning can also be so approachable for home bakers. Not only will this recipe fill your kitchen with savory, mouthwatering aromas, but its golden crust and fluffy interior are a guaranteed crowd-pleaser at any gathering. Perfect for family dinners or cozy evenings, this bread effortlessly complements everything from hearty soups to fresh salads. Plus, it's beginner-friendly, meaning anyone can master this artisan classic with ease. So, are you ready to indulge in the warm comfort of freshly baked bread? Let’s dive in!

Why Is This Bread So Irresistible?

Aromatic Experience: The moment you bake this bread, your kitchen will fill with the irresistible scent of garlic and herbs, creating a warm and inviting atmosphere.

Artisan Quality: With its beautifully braided appearance, this Garlic Herb Braided Bread looks gourmet, making it perfect for special occasions or a simple weeknight dinner.

Beginner-Friendly: You don't need to be a pro baker to achieve this artisanal delight! The straightforward method and easy-to-find ingredients make it accessible for all skill levels.

Versatile Pairing: This bread works fabulously with various dishes! Serve it warm with your favorite butter, or pair it with dishes like Crockpot Potato Broccoli Cheddar Soup for a comforting meal.

Customizable: Feel free to unleash your creativity! Experiment by adding spices, herbs, or even cheese to make it uniquely yours.

Garlic Herb Braided Bread Ingredients

For the Dough

  • 3 cups all-purpose or bread flour – Provides structure; using bread flour yields a chewier texture.
  • 2¼ tsp active dry yeast – Acts as a leavening agent; instant yeast can reduce rise time by 15 minutes.
  • 1 cup warm water (110°F) – Activates the yeast and hydrates the dough.
  • 2 tbsp olive oil – Adds flavor and moisture; consider using garlic butter for a richer taste.
  • 1 tsp salt – Enhances the overall flavor.
  • 1 tbsp sugar – Feeds the yeast for a better rise.
  • 3–4 cloves garlic, minced or roasted – Infuses the bread with bold garlic flavor.
  • 1 tbsp dried mixed herbs (oregano, thyme, basil) – Offers aromatic qualities; substitute with 2 tbsp fresh herbs for a fresher taste.
  • ½ cup grated parmesan cheese – Contributes savory depth.

For Brushing & Topping

  • 1 tbsp melted butter – Adds shine and enhances crust flavor.

Optional Add-ins

  • ¼ tsp red pepper flakes – Introduces a delightful hint of heat.
  • 2 tbsp shredded mozzarella – For those who desire an extra cheesy indulgence.
  • 1 tbsp fresh parsley for garnish – Adds a pop of color for visual appeal.

With this Garlic Herb Braided Bread, you'll create a culinary masterpiece that not only delights the senses but also beckons for customization to suit your taste! Happy baking!

Step‑by‑Step Instructions for Garlic Herb Braided Bread

Step 1: Activate the Yeast
In a large mixing bowl, combine 1 cup of warm water (110°F) with 1 tablespoon of sugar, stirring gently. Sprinkle 2¼ teaspoons of active dry yeast over the top and let it sit undisturbed for 5 to 10 minutes until it's foamy and bubbly, indicating the yeast is alive and ready for your Garlic Herb Braided Bread.

Step 2: Mix the Dough
Once the yeast is activated, stir in 2 tablespoons of olive oil, minced garlic, dried herbs, 1 teaspoon of salt, and 2½ cups of flour. Mix until a shaggy dough forms, adding more flour gradually until the dough is neither too sticky nor too dry, creating the perfect base for your braided bread.

Step 3: Knead the Dough
Transfer the shaggy dough to a floured surface and knead it for about 6 to 8 minutes. During this time, gradually incorporate ½ cup of grated parmesan cheese until it's well distributed, and the dough becomes smooth and elastic. This step is vital for developing the bread's texture, ensuring that your Garlic Herb Braided Bread has that delightful chew.

Step 4: First Rise
Place the kneaded dough into a greased bowl, covering it with a damp cloth or plastic wrap. Set it in a warm, draft-free area for about 1 hour, or until the dough has doubled in size. This rising process allows the yeast to work its magic and gives your bread that light, airy structure.

Step 5: Shape the Ropes
After the dough has risen, gently punch it down to release any excess air. Divide it into three equal pieces, then roll each piece into a long rope, 14 to 16 inches in length. With these ropes prepared, you're ready to create the beautiful braid that will make your Garlic Herb Braided Bread both stunning and appetizing.

Step 6: Braid the Bread
Lay the three ropes side by side and pinch the ends together. Braid the ropes together tightly, tucking the ends underneath the loaf. Ensure the braid is uniform in thickness, as this will affect the final appearance and evenness of baking. Now, your braided loaf is taking shape and is sure to impress.

Step 7: Second Rise
Place your braided bread on a parchment-lined baking sheet, cover it again with a cloth, and let it rise for another 30 to 40 minutes in a warm spot. This second rise allows the dough to puff up even more, giving it a light and airy texture that will become irresistible when baked.

Step 8: Preheat and Prepare for Baking
While your Garlic Herb Braided Bread undergoes its second rise, preheat the oven to 375°F (190°C). Once the dough has completed its rise, gently brush the top with melted butter for a golden, glossy finish, and sprinkle any optional toppings, like red pepper flakes or shredded mozzarella, to elevate the flavors.

Step 9: Bake the Bread
Carefully place the baking sheet in the preheated oven and let your braided bread bake for 25 to 30 minutes. It's ready when it turns a beautiful golden brown and emits an enticing aroma. To check doneness, tap the bottom; if it sounds hollow, it’s perfect!

Step 10: Cool and Serve
Remove the Garlic Herb Braided Bread from the oven and let it cool on a wire rack for a few minutes before slicing. This will enhance its flavor and texture. As you slice into the warm loaf, you'll appreciate the beautiful braided pattern and delectable garlic and herb aroma calling out to you.

How to Store and Freeze Garlic Herb Braided Bread

Room Temperature: Keep the bread in an airtight container for up to 3 days to maintain freshness and texture.

Freezer: To freeze, wrap the cooled bread tightly in plastic wrap, then place it in a freezer bag. It can be stored for up to 3 months.

Reheating: For the best results, thaw in the fridge overnight, then reheat wrapped in foil at 350°F (175°C) for about 10-15 minutes before serving.

Slicing Tips: Slice the bread before freezing; this makes it convenient to reheat individual pieces when craving your delicious Garlic Herb Braided Bread.

Garlic Herb Braided Bread Variations

Feel free to explore your creativity and tailor this recipe to your personal taste for a delicious twist!

  • Gluten-Free: Substitute all-purpose flour with gluten-free flour blend for a wheat-free version that maintains the delicious flavors.
  • Cheesy Delight: Add ½ cup of shredded cheddar or mozzarella to the dough for a gooey, cheesy interior that complements the garlic perfectly.
  • Herb Twists: Try swapping in fresh rosemary or sage instead of dried herbs for a fragrant and seasonal variation that brightens the flavor.
  • Spice It Up: Mix in ¼ teaspoon of cayenne pepper or chili flakes to the dough for a delightful kick that warms you up.

The beauty of baking is that you can make it your own! For a stunning presentation, consider making individual braids or rolls instead of a single loaf. Plus, this Garlic Herb Braided Bread is delicious alongside hearty dishes like Crockpot Potato Broccoli Cheddar Soup or served with a slice of Honey Garlic Chicken. Enjoy experimenting!

Make Ahead Options

These Garlic Herb Braided Bread are perfect for busy home cooks looking to save time! You can prepare the dough up to 24 hours in advance by following steps 1 to 4, then cover it with plastic wrap and refrigerate. When you're ready to bake, simply remove the dough from the fridge, let it rest at room temperature for about 30 minutes, shape it, and proceed with the second rise (step 6 and 7). Keeping the dough chilled helps maintain its quality and flavor, ensuring your bread will be just as delicious as the day it was made. With this plan in place, you'll have freshly baked bread ready to impress with minimal effort!

Tips for the Best Garlic Herb Braided Bread

  • Pick the Right Flour: Use bread flour for extra chewiness. If you prefer a lighter texture, all-purpose flour works beautifully, too.

  • Watch the Yeast: Ensure your water is warm (about 110°F) but not hot, as overheating can kill the yeast. The yeast needs to foam to show it's alive!

  • Don’t Rush the Rise: Allow the dough plenty of time to rise until doubled in size. Rushing this step can yield a denser bread than desired.

  • Braiding Basics: Start with a 3-strand braid for ease; as your confidence builds, try more strands for a beautiful, intricate design in your garlic herb braided bread.

  • Flavor Boost: Add fresh herbs, cheese, or spices to customize the flavor. It’s easy to make this artisan classic uniquely yours!

  • Proper Cooling: Always cool your bread on a wire rack to prevent sogginess and maintain that perfect crispy crust.

What to Serve with Garlic Herb Braided Bread

Warm, inviting aromas and a golden crust make this bread the perfect centerpiece for a comforting meal.

  • Creamy Tomato Soup: The acidity and creaminess of tomato soup beautifully balance the savory flavors of the bread, creating a satisfying combination.

  • Garden Salad: A fresh salad featuring mixed greens, cherry tomatoes, and a zesty vinaigrette brightens the meal and adds crunch alongside the bread.

  • Roasted Vegetables: The earthy sweetness of roasted carrots and Brussels sprouts complements the herb-infused bread, adding depth to your dinner table.

  • Cheesy Garlic Dip: A warm, gooey cheese dip paired with slices of your braided bread turns every bite into an indulgent treat; perfect for gatherings!

  • Spaghetti Aglio e Olio: The simple garlic and olive oil pasta elevates the bread’s flavors while satisfying carb cravings in the most delightful way.

  • Grilled Chicken Breast: Juicy, seasoned chicken will pair wonderfully with the bread’s herbs and garlic, ensuring every bite is full of flavor.

  • Chardonnay or Chianti: A glass of chilled Chardonnay or a smooth Chianti not only complements the bread but adds an elegant touch to your dining experience.

  • Chocolate Chip Cookies: For a sweet finish, serve warm chocolate chip cookies as a delightful dessert that flows seamlessly from the bread's warm savoriness.

Garlic Herb Braided Bread Recipe FAQs

What is the best way to choose garlic for this recipe?
Absolutely! Look for garlic bulbs that are firm, with tight, dry skins and no dark spots. When using fresh garlic, choose cloves that are plump and free from any soft or sprouting signs. This ensures you’ll have the robust flavor for your Garlic Herb Braided Bread!

How should I store my Garlic Herb Braided Bread?
To keep your Garlic Herb Braided Bread fresh, store it in an airtight container at room temperature for up to 3 days. If you live in a humid environment, it’s best to wrap it in wax paper or a cloth before placing it in the container to help absorb moisture.

Can I freeze Garlic Herb Braided Bread, and how?
Yes, you can freeze it! First, let the bread cool completely after baking. Then, wrap it tightly in plastic wrap and place it in a freezer-safe bag. It can be stored for up to 3 months. For serving, thaw overnight in the fridge and reheat at 350°F (175°C) wrapped in foil for about 10-15 minutes for the best texture.

What should I do if my dough isn’t rising?
If your dough isn’t rising, ensure that your yeast is fresh. You can perform a quick test by adding it to warm water with sugar—if it doesn't foam after 10 minutes, it may be too old. Additionally, make sure your dough is placed in a warm, draft-free location, as drafts can impact rising. If it’s still cool in your kitchen, preheat your oven for a minute or two, turn it off, and let the dough rise there instead!

Is this recipe suitable for those with gluten sensitivity?
Definitely! You can make this Garlic Herb Braided Bread gluten-free by substituting the all-purpose or bread flour with a 1:1 gluten-free baking mix. Make sure the blend contains xanthan gum, which mimics the elasticity of gluten. Keep in mind that the texture may vary slightly, but it’s equally delightful!

Are there any allergy considerations I should keep in mind?
While this recipe is generally safe for many, those with dairy allergies should opt for vegan cheese or leave out the parmesan. Additionally, for nut allergies, double-check any pre-packaged ingredients you use. As always, it’s good to consult with those you’re serving if there are any dietary restrictions!

Garlic Herb Braided Bread

Garlic Herb Braided Bread

Discover the delight of baking Garlic Herb Braided Bread, a visually stunning and flavorful treat that's perfect for any occasion.
Print Recipe Pin Recipe
Prep Time 1 hour hr
Cook Time 30 minutes mins
Rising Time 40 minutes mins
Total Time 2 hours hrs 10 minutes mins
Servings: 8 slices
Course: Uncategorized
Cuisine: Baking
Calories: 150
Ingredients Equipment Method Nutrition Notes

Ingredients
  

For the Dough
  • 3 cups all-purpose or bread flour using bread flour yields a chewier texture.
  • 2.25 tsp active dry yeast instant yeast can reduce rise time by 15 minutes.
  • 1 cup warm water (110°F) activates the yeast and hydrates the dough.
  • 2 tbsp olive oil consider using garlic butter for a richer taste.
  • 1 tsp salt enhances the overall flavor.
  • 1 tbsp sugar feeds the yeast for a better rise.
  • 3–4 cloves garlic, minced or roasted infuses the bread with bold garlic flavor.
  • 1 tbsp dried mixed herbs (oregano, thyme, basil) substitute with 2 tbsp fresh herbs for a fresher taste.
  • 0.5 cup grated parmesan cheese contributes savory depth.
For Brushing & Topping
  • 1 tbsp melted butter adds shine and enhances crust flavor.
Optional Add-ins
  • 0.25 tsp red pepper flakes introduces a delightful hint of heat.
  • 2 tbsp shredded mozzarella for those who desire an extra cheesy indulgence.
  • 1 tbsp fresh parsley for garnish adds a pop of color for visual appeal.

Equipment

  • Mixing Bowl
  • Baking Sheet
  • Floured surface
  • wire rack

Method
 

Step-by-Step Instructions
  1. In a large mixing bowl, combine 1 cup of warm water (110°F) with 1 tablespoon of sugar, stirring gently. Sprinkle 2¼ teaspoons of active dry yeast over the top and let it sit undisturbed for 5 to 10 minutes until it's foamy and bubbly, indicating the yeast is alive and ready for your Garlic Herb Braided Bread.
  2. Once the yeast is activated, stir in 2 tablespoons of olive oil, minced garlic, dried herbs, 1 teaspoon of salt, and 2½ cups of flour. Mix until a shaggy dough forms, adding more flour gradually until the dough is neither too sticky nor too dry.
  3. Transfer the shaggy dough to a floured surface and knead it for about 6 to 8 minutes, incorporating ½ cup of grated parmesan cheese until it's well distributed and the dough becomes smooth and elastic.
  4. Place the kneaded dough into a greased bowl, covering it with a damp cloth. Set it in a warm area for about 1 hour, or until doubled in size.
  5. Gently punch down the dough and divide it into three equal pieces, rolling each into a long rope, 14 to 16 inches in length.
  6. Lay the ropes side by side, pinch the ends together, and braid them tightly, tucking the ends underneath.
  7. Place the braided bread on a parchment-lined baking sheet, cover with a cloth, and let it rise for another 30 to 40 minutes.
  8. Preheat the oven to 375°F (190°C). Once the dough has completed its rise, brush the top with melted butter.
  9. Bake for 25 to 30 minutes, until golden brown and hollow-sounding when tapped.
  10. Cool on a wire rack for a few minutes before slicing.

Nutrition

Serving: 1sliceCalories: 150kcalCarbohydrates: 25gProtein: 4gFat: 4gSaturated Fat: 1gMonounsaturated Fat: 3gCholesterol: 2mgSodium: 200mgPotassium: 90mgFiber: 1gSugar: 1gVitamin A: 100IUCalcium: 50mgIron: 1mg

Notes

Feel free to experiment with different herbs and cheeses to customize your Garlic Herb Braided Bread to your liking.

Tried this recipe?

Let us know how it was!

Judy’s Homemade Brioche: Soft, Buttery Perfection Awaits

December 13, 2025 by Grace Snow Leave a Comment

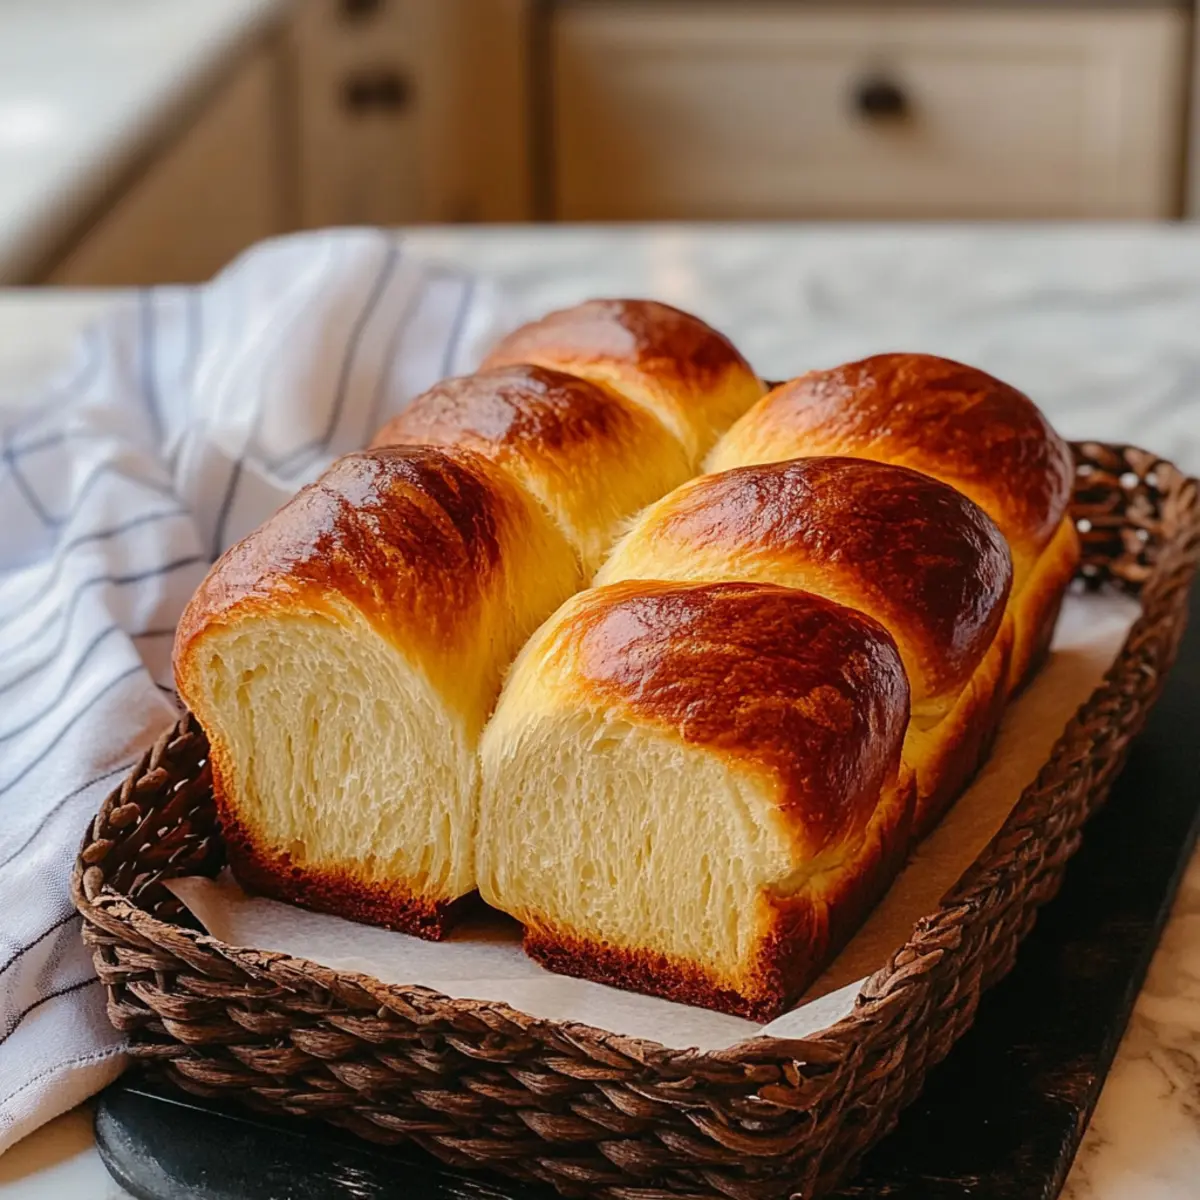
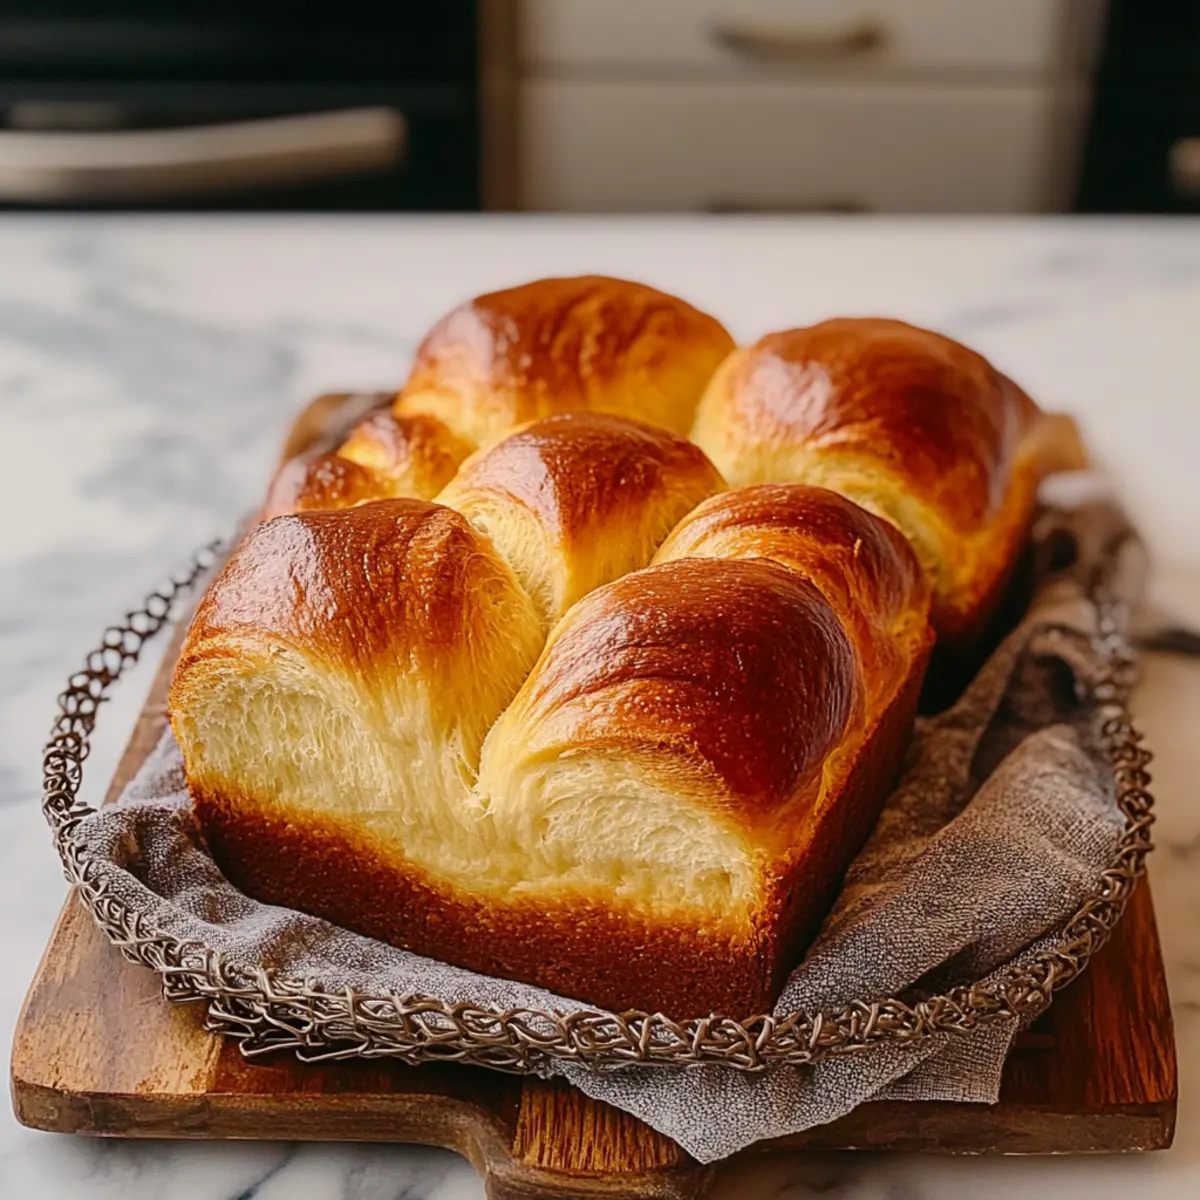
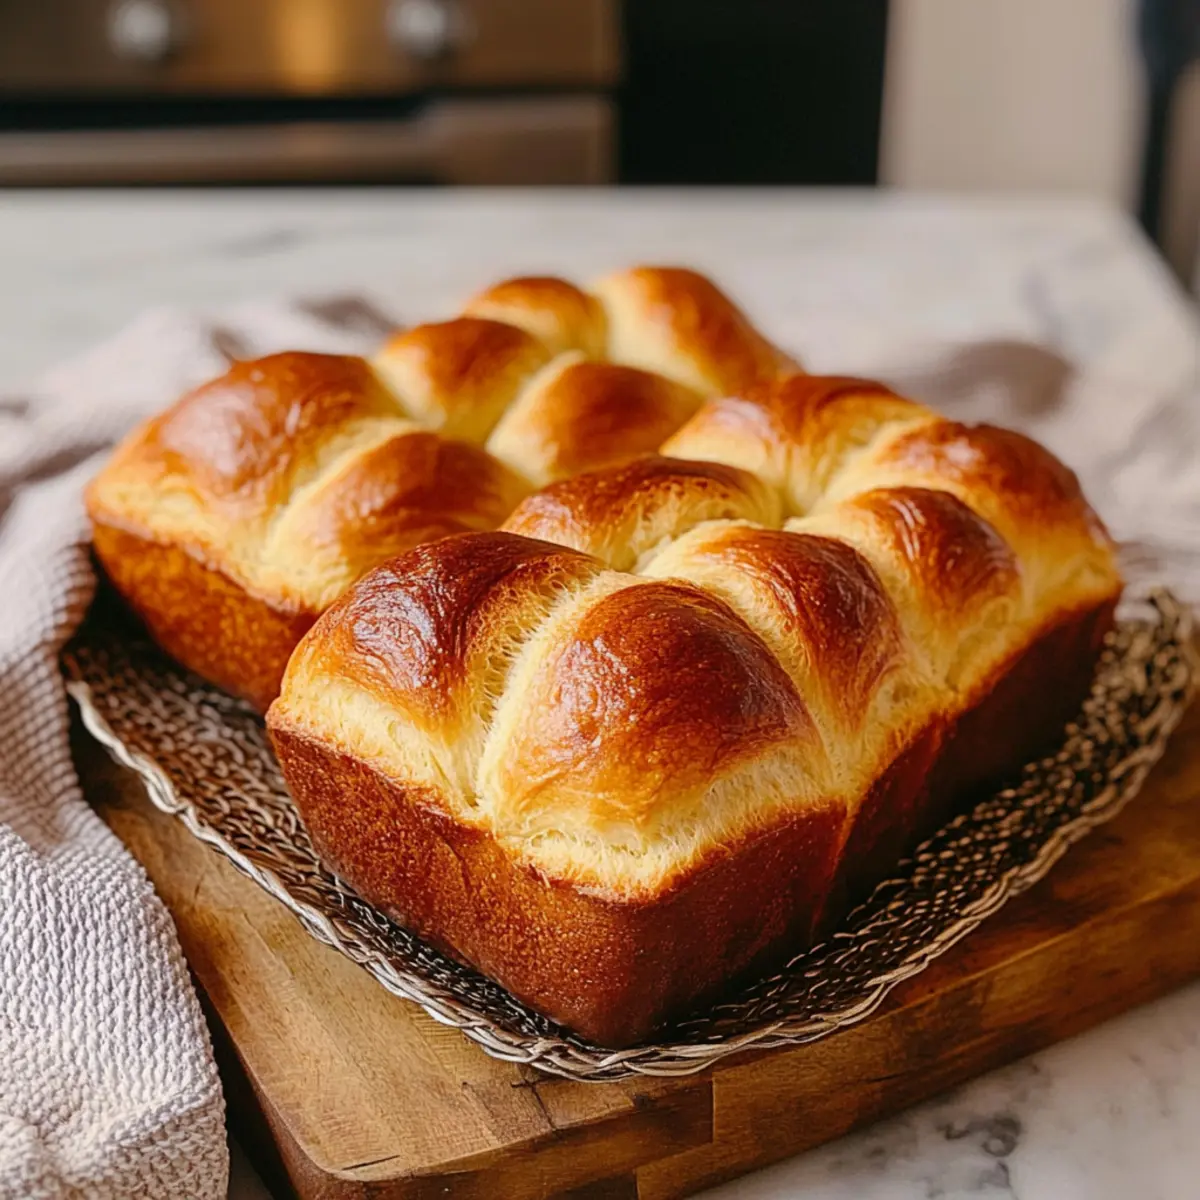
As I kneaded the soft, buttery dough, I couldn’t help but feel transported to my favorite Parisian bakery with the inviting scent of freshly baked bread all around me. Judy’s Homemade Brioche is more than just a delightful twist on traditional bread; it's a culinary experience that transforms everyday meals into something extraordinary. This luxurious bread not only boasts a golden, glossy crust but also a tender crumb that makes it perfect for sandwiches or toasted with a simple pat of butter. While it may require a bit of patience, the joy of pulling a warm, aromatic loaf out of the oven is immeasurable. Who can resist that gorgeous golden hue inviting you to take a bite? Are you ready to create your own moment of baking bliss? Let's dive in!

Why Is Homemade Brioche a Must-Try?

Irresistibly Soft: The texture of Judy’s Homemade Brioche is like biting into a cloud—perfectly soft and fluffy.

Rich Buttery Flavor: With its generous amount of butter, this bread offers a depth of flavor that elevates any meal.

Versatile Use: Whether for sandwiches, breakfast toast, or indulgent French toast, you'll find countless ways to enjoy this delightful bread. Why not try it alongside a warm cup of Homemade Hot Chocolate for a true treat?

Impressive Presentation: The glossy golden crust not only looks stunning but also makes it a showstopper at any gathering, impressing friends and family alike.

Time Well Spent: While it may take a little time, the joy of homemade baking creates unforgettable moments in your kitchen. Trust me, the delicious aroma as it bakes is worth every second!

Judy’s Homemade Brioche Ingredients

For the Dough

  • Eggs – Provides moisture and richness; use room temperature eggs for better incorporation.
  • Unsalted Butter – Adds flavor and a tender texture; use two sticks (1 cup) at room temperature for easy mixing.
  • All-Purpose Flour – Supplies structure and bulk; a total of 4¾ cups required, divided throughout the process.
  • Active Dry Yeast – Ferments the dough, helping it rise; ensure yeast is fresh for best results.
  • Granulated Sugar – Enhances sweetness and browning; a quarter cup is used for flavor, plus additional for the glaze.
  • Salt – Balances sweetness and strengthens gluten structure; a key ingredient for flavor enhancement.
  • Warm Water – Activates the yeast; should be around 120°F (49°C) for optimal fermentation.

For the Glaze

  • Sugar Water – For brushing on finished brioche to achieve a shiny finish; combine 2 teaspoons of sugar with 1 tablespoon of water.

With these simple yet essential ingredients, you'll be well on your way to creating Judy’s Homemade Brioche, which promises to fill your kitchen with warmth and mouthwatering aromas. Let’s get started!

Step‑by‑Step Instructions for Judy’s Homemade Brioche

Step 1: Prepare the Dough
Begin by bringing the eggs and unsalted butter to room temperature for about 30 minutes. In a stand mixer bowl, combine 1 cup of flour, active dry yeast, granulated sugar, and salt. With the mixer on medium speed, gradually add 120°F warm water, mixing until smooth. Incorporate the eggs one at a time, ensuring each is fully blended before adding the next.

Step 2: Add Flour and Butter
Once the eggs are fully mixed in, gradually add 2 cups of all-purpose flour, continuing to mix to form a cohesive dough. Next, begin adding the softened butter in 2–3 batches, allowing the dough to fully absorb each addition before adding more. This will create a rich and buttery texture in your Judy’s Homemade Brioche.

Step 3: Incorporate Remaining Flour
Add the remaining flour, a little at a time, until the dough becomes thick and slightly sticky. You may even need to switch to a dough hook if you haven’t already. Look for a dough that pulls away from the sides but sticks to the bottom of the bowl; this indicates a good texture for your brioche dough.

Step 4: First Rise
Once the dough is well-formed, cover the bowl with a clean kitchen towel or plastic wrap and let it rise at room temperature for about 3 hours, or until it has doubled in size. After the first rise, gently punch down the dough to release air, cover again, and refrigerate it overnight for optimal flavor development.

Step 5: Preheat and Shape
The next day, preheat your oven to 350°F (180°C). Take the chilled dough out of the refrigerator and divide it into two equal pieces. Shape each piece into a log and place them in greased 9"x5" loaf pans. Make sure the dough fits snugly, creating a beautiful shape for your brioche.

Step 6: Second Rise
Cover the shaped dough with plastic wrap or a damp kitchen towel and allow it to proof for 2½ to 3 hours. The dough should rise until it doubles again and reaches the top of the pans; this is crucial for achieving the light and airy texture synonymous with Judy’s Homemade Brioche.

Step 7: Bake the Brioche
Once the brioche has risen adequately, place the pans in the preheated oven. Bake for 37 to 40 minutes or until the tops are golden brown and a toothpick inserted in the center comes out clean. For extra shine, brush the warm loaves with the prepared sugar water during the last few minutes of baking.

Step 8: Cool and Serve
After baking, let the brioche cool in the pans for about 5 minutes before carefully transferring them to a wire rack. Allow the loaves to cool completely before slicing to maintain that fluffy texture. Enjoy the delightful aroma of Judy’s Homemade Brioche filling your kitchen!

Make Ahead Options

Judy’s Homemade Brioche is perfect for meal prep enthusiasts looking to save time during their busy week! You can prepare the dough up to 24 hours ahead by completing the first rise, then refrigerating it overnight to develop deep flavors. For optimal texture, ensure the dough is tightly covered to prevent drying out. On baking day, simply shape the chilled dough and let it proof for 2½ to 3 hours until it doubles in size before baking. This make-ahead method guarantees delicious results without the stress, letting you enjoy bakery-quality brioche with minimal effort when you're ready to serve!

What to Serve with Judy's Homemade Brioche?

Delight in crafting a complete meal that amplifies the rich, buttery flavor and soft texture of this exquisite bread.

  • Creamy Mashed Potatoes: Their velvety texture enhances the brioche's fluffiness, creating a comforting combination that's hard to resist.
  • Savory Herb Chicken: The savory flavors of roasted herbs complement the bread's sweetness, making for a well-rounded plate. Serve with a drizzle of your favorite sauce for added richness!
  • Fresh Mixed Greens Salad: Crisp greens add a refreshing contrast to the brioche's indulgent nature, while a tangy vinaigrette brightens up the entire meal.
  • Mushroom Stroganoff: This hearty dish offers earthy tones that harmonize beautifully with the brioche, perfect for soaking up every last drop. A spoonful of creamy stroganoff atop a slice of warm brioche is pure bliss.
  • Homemade Jam or Honey Butter: Spread some luscious jam or whipped honey butter over a slice of warm brioche; it elevates breakfast into a sweet, dreamy experience.
  • Warm Apple Crisp: The warmth and sweetness of baked apples with a hint of cinnamon pair fantastically with the soft bread, crafting extraordinary dessert moments.
  • Classic Hot Chocolate: A cozy drink to sip while enjoying warm brioche; its sweetness balances beautifully with the rich flavors of the bread.
  • Decadent Dark Chocolate Mousse: For a luxurious experience, serve this velvety dessert alongside sliceable brioche to enjoy an indulgent end to your meal.

Let these delightful pairings inspire you to create unforgettable moments around your table!

Expert Tips for Judy's Homemade Brioche

  • Use Room Temperature Ingredients: Warm eggs and butter mix more easily into the dough, ensuring a smooth and cohesive brioche.

  • Don't Skip the Cold-Proofing: Refrigerating the dough overnight enhances the flavor, giving your brioche a rich, complex taste that's worth the wait.

  • Watch the Dough Consistency: The dough should be sticky; avoid adding too much flour, as this can lead to a dense loaf instead of the light, airy texture of Judy's Homemade Brioche.

  • Proof in a Warm Place: Make sure your dough rises in a draft-free, warm spot to promote optimal yeast activity, ensuring it doubles in size as it should.

  • Monitor Baking Time: Keep an eye on your brioche while baking; if it browns too quickly, tent it with foil to prevent burning.

  • Store Properly: For best freshness, store completely cooled brioche in an airtight container; it can also be frozen for longer storage without losing its delicious flavor!

Storage Tips for Judy’s Homemade Brioche

Room Temperature: Store completely cooled brioche in an airtight container at room temperature for up to 3 days to maintain its soft texture and rich flavor.

Fridge: If you plan to keep it longer, refrigerating is not recommended, as it can dry out the bread. Instead, wrap it tightly in plastic wrap before freezing.

Freezer: For extended storage, freeze slices of Judy’s Homemade Brioche by placing them in a freezer bag or container. It can be stored for up to 3 months without losing quality.

Reheating: To enjoy your brioche, simply thaw slices at room temperature or pop them in a toaster for a quick breakfast treat that tastes freshly baked!

Judy's Homemade Brioche Variations & Substitutions

Get ready to create your own delicious twists on this classic recipe, turning every loaf into a unique masterpiece!

  • Add-Ins: Incorporate chocolate chips or dried fruit for a fun, sweet dimension. They melt or soften as the brioche bakes, adding bursts of flavor with every bite.
  • Whole Wheat: Use part whole wheat flour for a healthier option. The nutty flavor adds character while enhancing the nutritional profile of your brioche.
  • Different Shapes: Shape the dough into individual buns instead of loaves for perfect breakfast sliders, making them great for gatherings or brunch. These little delights are sure to impress!
  • Flavor Variations: Experiment with different flavors by adding a tablespoon of vanilla extract or zest from an orange or lemon to the dough for a delightful twist. Citrus brightness gives a refreshing taste to this rich bread.
  • Herb-Infused: Mix in fresh herbs like rosemary or thyme for a savory version. This adds an unexpected depth that pairs beautifully with soups or hearty salads.
  • Spiced Brioche: Enhance the flavor with spices such as cinnamon or nutmeg for a cozy touch. This warming flavor is perfect for fall or holiday gatherings and will fill your kitchen with inviting aromas.
  • Gluten-Free: Substitute with a gluten-free flour blend and a binding agent like xanthan gum for a gluten-free brioche. You won’t lose the delightful texture; it's still soft and buttery in every bite!

Try serving your brioche alongside a warm cup of Homemade Hot Chocolate or use a slice for a decadent French toast breakfast with a twist. With every variation you create, your homemade brioche will be a stunning culinary journey!

Judy's Homemade Brioche Recipe FAQs

How do I select the right eggs for making brioche?
Absolutely! For making Judy's Homemade Brioche, use fresh, large eggs at room temperature. This ensures better mixing and incorporation of ingredients, resulting in a light and fluffy texture in the final bread.

What is the best way to store homemade brioche?
Very! Once your brioche is completely cooled, store it in an airtight container at room temperature for up to 3 days. This will keep it fresh and soft. Avoid refrigeration as it can dry out the bread; the freezer is a better option for longer storage.

Can I freeze Judy's Homemade Brioche?
Absolutely! To freeze your brioche, slice it if desired and wrap each piece tightly in plastic wrap, then place them in a freezer bag. You can store it for up to 3 months. When you want to enjoy it, simply thaw at room temperature or toast it directly from frozen—it tastes just as good!

What if my brioche dough doesn't rise properly?
The more the merrier! If your dough isn't rising, it might be due to inactive yeast. Ensure you’re using fresh active dry yeast and that your warm water is around 120°F (49°C). If you notice warm water too hot, it can kill the yeast; if it's too cool, it won’t activate properly. A good tip is to bloom your yeast in warm water with a pinch of sugar for about 5-10 minutes until it becomes frothy!

Are there any dietary restrictions I should consider with brioche?
Very! Homemade brioche contains eggs, dairy, and gluten from all-purpose flour, making it unsuitable for those with egg, dairy, or gluten allergies. However, you can adapt the recipe by using egg substitutes like flax eggs and gluten-free flour blends; just be aware that substituting may affect texture and flavor.

How long does the dough need to rest in the refrigerator?
For optimal flavor development, allow your brioche dough to rest in the refrigerator overnight for at least 8-12 hours. This cold-proofing process enhances its taste and texture, making the final product much richer and more delicious. Trust me, it's well worth the wait!

Judy’s Homemade Brioche

Judy’s Homemade Brioche: Soft, Buttery Perfection Awaits

Judy's Homemade Brioche is a deliciously soft and buttery bread perfect for any meal.
Print Recipe Pin Recipe
Prep Time 30 minutes mins
Cook Time 40 minutes mins
Resting Time 3 hours hrs
Total Time 4 hours hrs 10 minutes mins
Servings: 12 slices
Course: Breakfast
Cuisine: French
Calories: 250
Ingredients Equipment Method Nutrition Notes

Ingredients
  

For the Dough
  • 4.75 cups All-Purpose Flour Divided throughout the process.
  • 1 cup Unsalted Butter At room temperature for easy mixing.
  • 1 cup Granulated Sugar Plus additional for glaze.
  • 1 packet Active Dry Yeast Ensure yeast is fresh for best results.
  • 2 large Eggs Room temperature for better incorporation.
  • 1 teaspoon Salt Balances sweetness.
  • 1.5 cups Warm Water Around 120°F (49°C) for optimal fermentation.
For the Glaze
  • 2 teaspoons Sugar For brushing on finished brioche.
  • 1 tablespoon Water Combine with sugar for glaze.

Equipment

  • Stand Mixer
  • 9x5 loaf pans

Method
 

Step-by-Step Instructions
  1. Prepare the Dough: Bring the eggs and unsalted butter to room temperature. Combine 1 cup of flour, active dry yeast, granulated sugar, and salt in a stand mixer bowl. Gradually add warm water, mixing until smooth. Incorporate eggs one at a time.
  2. Add Flour and Butter: Gradually add 2 cups of all-purpose flour, mixing to form a cohesive dough. Add softened butter in 2–3 batches, allowing full absorption each time.
  3. Incorporate Remaining Flour: Add the remaining flour until the dough is thick and slightly sticky. Switch to a dough hook if needed.
  4. First Rise: Cover and let the dough rise at room temperature for about 3 hours until doubled. Punch down, cover, and refrigerate overnight.
  5. Preheat and Shape: Preheat oven to 350°F. Divide the chilled dough into two equal pieces, shape into logs, and place in greased loaf pans.
  6. Second Rise: Cover and allow to proof for 2½ to 3 hours until doubled.
  7. Bake the Brioche: Bake for 37 to 40 minutes until golden brown. Brush with sugar water during the last few minutes for extra shine.
  8. Cool and Serve: Let cool in pans for 5 minutes, then transfer to a wire rack. Cool completely before slicing.

Nutrition

Serving: 1sliceCalories: 250kcalCarbohydrates: 27gProtein: 5gFat: 14gSaturated Fat: 8gPolyunsaturated Fat: 1gMonounsaturated Fat: 4gCholesterol: 50mgSodium: 150mgPotassium: 90mgFiber: 1gSugar: 3gVitamin A: 400IUCalcium: 10mgIron: 1mg

Notes

For best results, use room temperature ingredients, and don’t skip the overnight refrigeration for enhanced flavor.

Tried this recipe?

Let us know how it was!

Ham and Cheese Sourdough Croissant Loaf for Effortless Brunch

December 13, 2025 by Grace Snow Leave a Comment

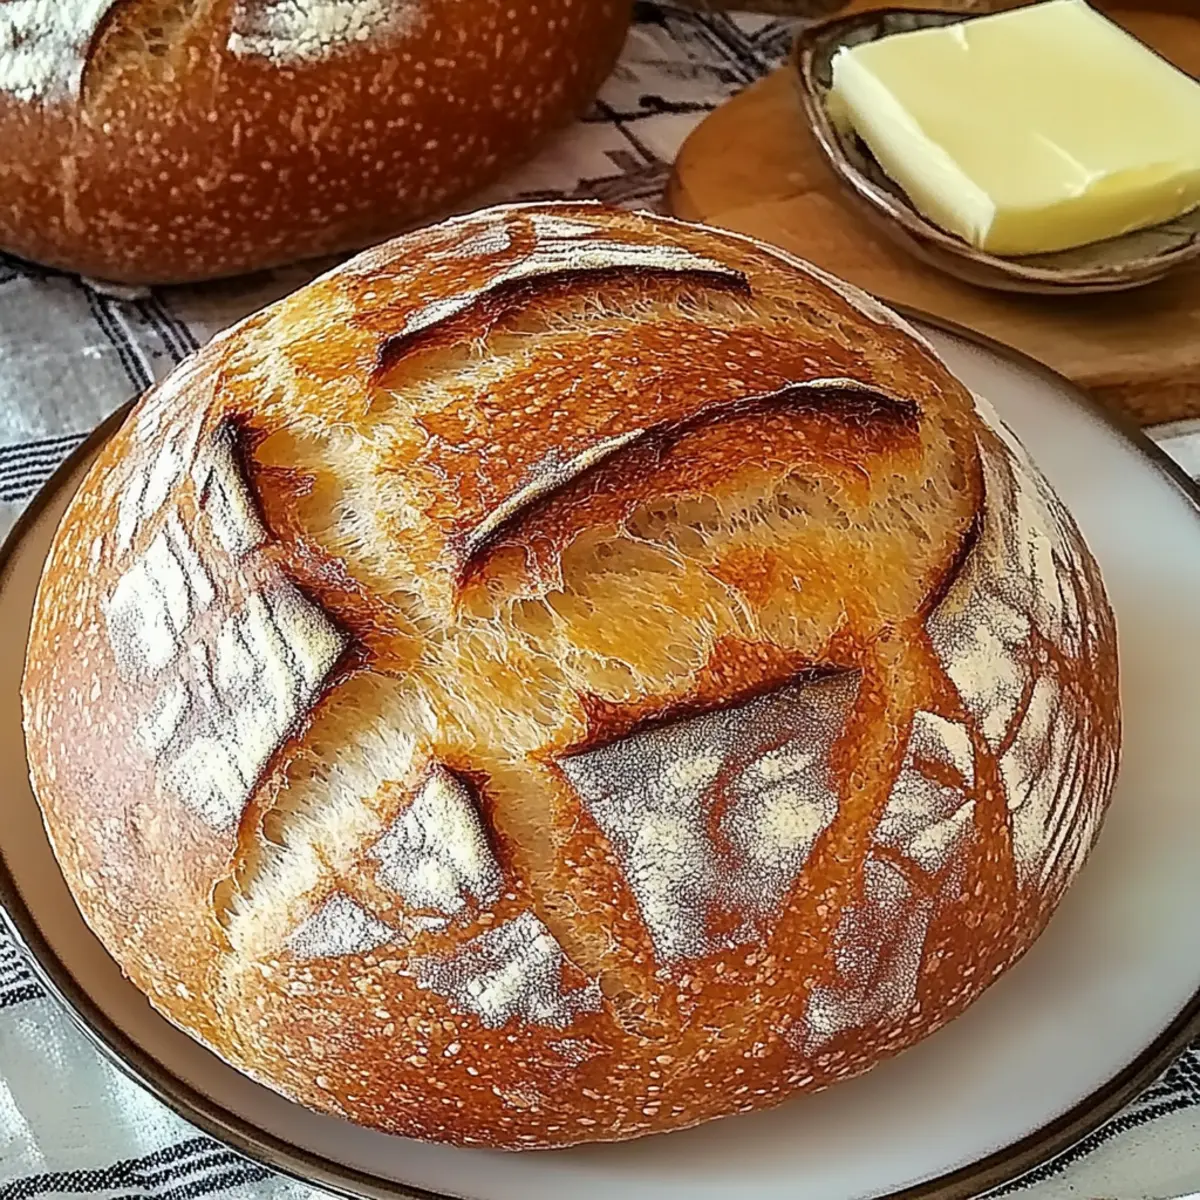
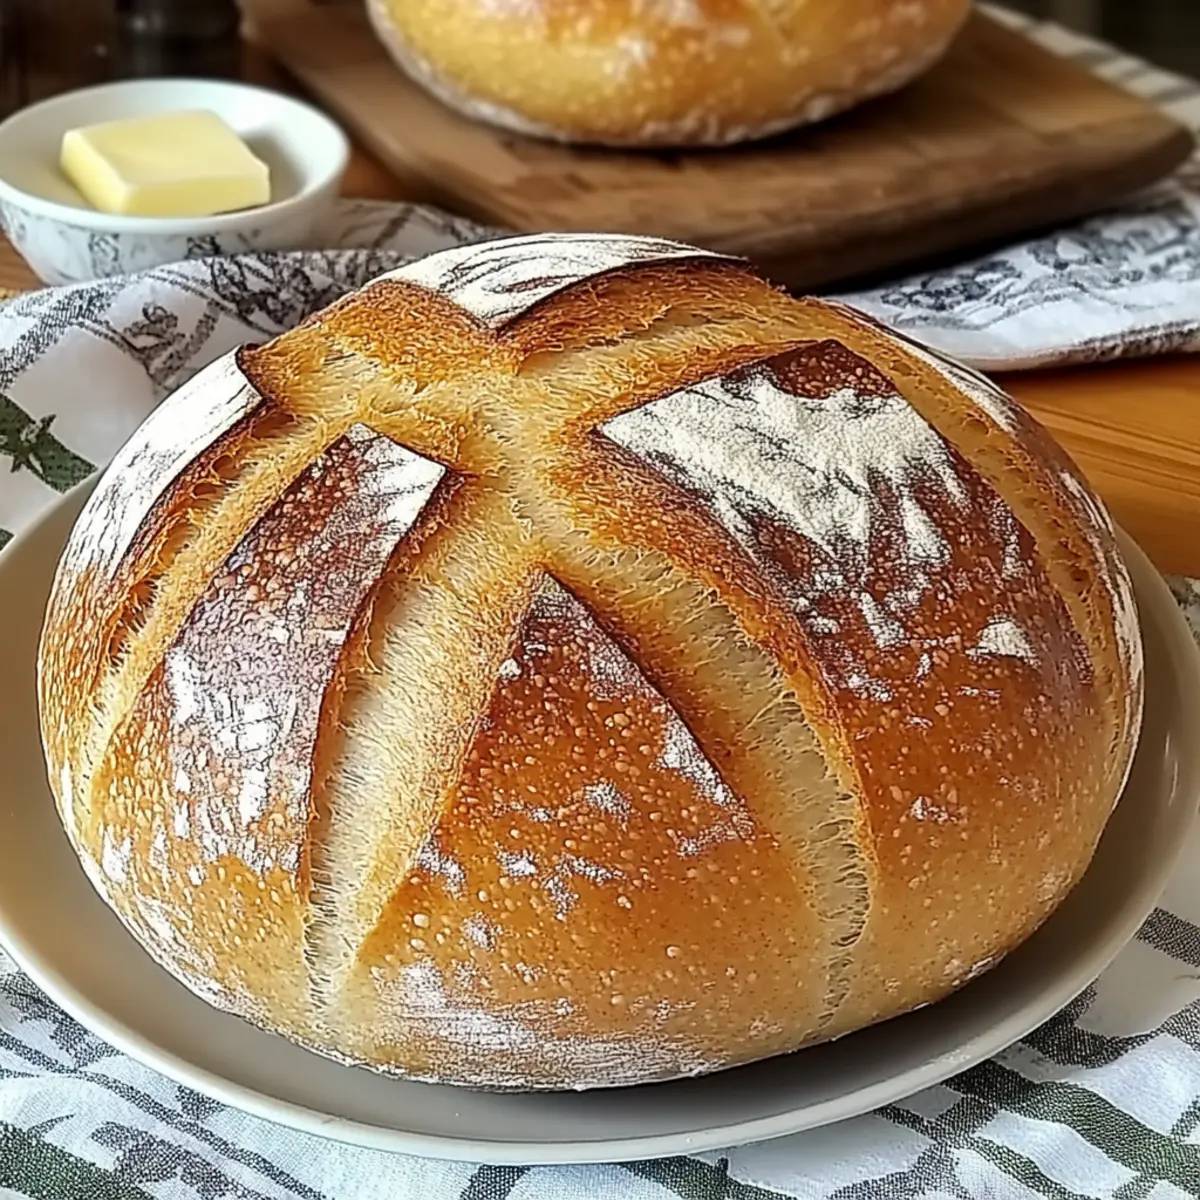
The rich aroma of warm sourdough wafting through my kitchen always brings a wave of comfort, but there's something about transforming that traditional bread into a Ham and Cheese Sourdough Croissant Loaf that electrifies my culinary spirit. This versatile recipe balances flaky layers with a deliciously savory filling, making it the perfect centerpiece for a brunch gathering or a delightful addition to a cozy weeknight meal. Imagine the joy of slicing into a loaf with a crunchy crust that reveals melty cheese and tender ham inside—it's pure bliss. Plus, it’s make-ahead friendly, ensuring you can savor every moment without the last-minute rush. Are you ready to elevate your brunch game? Let’s dive into the delectable details!

Why is this recipe a must-try?

Versatile Delight: This Ham and Cheese Sourdough Croissant Loaf effortlessly adapts to any occasion, from brunch to dinner.

Impressive Flavor: The harmony of tangy sourdough, rich Gruyère, and savory ham creates a flavor explosion that will wow both family and friends.

Simple Techniques: With straightforward steps, even novice bakers can master this artisanal loaf, making it accessible for everyone.

Make-Ahead Magic: Prepare it the night before, so your brunch can be a stress-free delight. Enjoy it fresh, warm, or even repurposed into scrumptious sandwiches later!

Crowd Pleaser: Serve it at gatherings, and watch guests rave about your homemade creation. Want more inspiration? Consider pairing it with a refreshing salad or check out our recipes for Chickpea Spinach Curry and Roasted Corn Fried for a well-rounded meal.

Ham and Cheese Sourdough Croissant Loaf Ingredients

For the Bread
• Sourdough Starter – This is the backbone of your loaf; ensure it’s bubbly and ripe for the best rise and flavor.
• All-Purpose/Bread Flour – Provides structure and chewiness; using bread flour can give your loaf an even better texture.
• Water – Hydrates the dough; warm water helps activate the yeast more effectively.
• Salt – Essential for flavor and gluten strength; don’t skip this for a well-seasoned loaf.
• Cold Butter – Key for creating those flaky layers; keep it chilled to ensure a light texture.

For the Filling
• Gruyère Cheese – Adds a rich, creamy flavor that beautifully complements the ham; you can also use Swiss or cheddar as a tasty alternative.
• Diced Ham – Offers a savory, protein-rich filling; consider turkey or roasted vegetables for a lighter twist.

Each of these ingredients contributes to the loving complexity of the Ham and Cheese Sourdough Croissant Loaf—your guests are bound to be impressed!

Step‑by‑Step Instructions for Ham and Cheese Sourdough Croissant Loaf

Step 1: Prepare Levain
Mix your ripe sourdough starter with flour and warm water in a bowl until combined. Cover it with a kitchen towel and place it in a warm spot for 10-12 hours, allowing the mixture to become bubbly and voluminous. This levain will be the flavorful base for your Ham and Cheese Sourdough Croissant Loaf.

Step 2: Make Dough
Once your levain is bubbly, combine it with more warm water and salt in a large mixing bowl. Gradually stir in flour until a sticky dough forms. Allow this mixture to rest for 30 minutes; this autolyse stage encourages gluten development, setting the stage for a chewy texture in your finished loaf.

Step 3: Incorporate Butter
After the rest period, fold cold butter into the dough. Work it in gently every 30 minutes for about 1.5 hours, ensuring the butter remains cold to achieve flaky layers. As you handle the dough, it will gradually become smoother and more elastic, preparing it for the rise to come.

Step 4: First Rise
Cover the dough with a damp towel and let it rise in a warm place for 6-7 hours. You’ll know it’s ready when it has risen about 70% and shows bubbles on the surface. This first rise builds flavor and structure for your Ham and Cheese Sourdough Croissant Loaf.

Step 5: Shape Loaf
Lightly flour your work surface and roll the risen dough into a rectangle. Layer the surface with Gruyère cheese and diced ham, then fold the dough over the filling and roll it tightly, sealing the edges well. This secures the savory filling inside your loaf and creates the delicious flaky texture.

Step 6: Cold Ferment
Wrap the shaped loaf in plastic wrap and refrigerate it for 12-18 hours. This cold fermentation allows the flavors to develop further while also improving the texture. Patience is key here, as the longer resting time enhances the taste of your Ham and Cheese Sourdough Croissant Loaf.

Step 7: Bake
Preheat your Dutch oven to 450°F. Carefully score the top of the loaf with a sharp knife to allow steam to escape, then sprinkle extra cheese on top if desired. Bake the loaf covered for 25 minutes, followed by an additional 20 minutes uncovered at 425°F until it turns golden brown and crispy.

Step 8: Cool
Once baked, carefully transfer your Ham and Cheese Sourdough Croissant Loaf to a cooling rack. Let it cool for at least 30 minutes before slicing to ensure proper texture and flavor. This waiting period is crucial for the crumb to set and allows the delicious aromas to settle into the loaf.

How to Store and Freeze Ham and Cheese Sourdough Croissant Loaf

Room Temperature: Store the Ham and Cheese Sourdough Croissant Loaf in a cool, dry place for up to 2 days, wrapped in a kitchen towel to maintain freshness.

Fridge: If you need to keep it longer, refrigerate in an airtight container for up to 1 week to prevent it from drying out.

Freezer: For longer storage, slice the loaf and freeze in airtight bags for up to 3 months. Reheat directly from frozen at 350°F for 10-15 minutes until warmed through.

Reheating: To enjoy leftovers, reheat slices in a toaster or oven to restore that crunchy exterior and melty interior, echoing the fresh-baked goodness of your Ham and Cheese Sourdough Croissant Loaf.

Expert Tips for Ham and Cheese Sourdough Croissant Loaf

  • Active Starter: Ensure your sourdough starter is bubbly and active for the best rise and flavor in your loaf. A weak starter will yield disappointing results.

  • Chill the Butter: Keeping the butter cold during lamination is crucial for achieving those signature flaky layers. Avoid letting it soften too much.

  • Proper Scoring: Use a sharp knife or a lame to score your loaf. This allows steam to escape without tearing the dough, ensuring an even bake.

  • Patience with Fermentation: Don’t rush the cold fermentation step; allowing your loaf to rest overnight deepens the flavors and improves texture.

  • Temperature Check: If you're unsure about doneness, use an instant-read thermometer; the internal temperature should be around 200°F for a perfectly baked Ham and Cheese Sourdough Croissant Loaf.

  • Experimentation: Feel free to modify the filling! Swap out ham for turkey or try different cheeses to make this recipe your own.

Make Ahead Options

These Ham and Cheese Sourdough Croissant Loaf are perfect for busy home cooks looking to save time! You can prepare the dough and shape the loaf up to 24 hours in advance. To do this, follow all steps up to the cold fermentation, wrap the shaped loaf tightly in plastic wrap, and refrigerate it. This not only allows you to develop richer flavors but also makes it easy to pop it in the oven whenever you're ready to serve. When it's time to bake, simply preheat your oven and follow the baking instructions—your loaf will turn out just as delicious as if made fresh! Enjoy the convenience of a gourmet treat without the last-minute rush!

Ham and Cheese Sourdough Croissant Loaf Variations

Feel free to explore these tantalizing variations and make this recipe uniquely yours!

  • Vegetarian Twist: Substitute diced ham with a mix of roasted vegetables for a delicious meat-free option. The earthy flavors elevate the loaf while keeping it hearty.

  • Cheese Swap: Experiment with different cheeses like Brie for a creamy richness or sharp cheddar for a bolder flavor. Each choice brings a new depth to your loaf.

  • Herb Infusion: Add fresh herbs, such as thyme or rosemary, into the filling for a fragrant twist. Not only does this enhance flavor, but it adds a beautiful aroma during baking.

  • Spice it Up: Dust the filling with a sprinkle of chili flakes or crushed black pepper for a kick. This subtle heat transforms the savory experience into something truly memorable.

  • Savory Spread: Before adding cheese and ham, spread a thin layer of garlic herb cream cheese on the dough. It introduces an extra creamy texture that pairs perfectly with the other flavors.

  • Nutty Addition: Fold in toasted nuts like walnuts or pecans into the filling for added crunch and a nutty depth. This variation not only improves texture but also offers a delightful surprise.

  • International Inspiration: Try adding flavors from around the globe! For instance, use feta and spinach for a Mediterranean flair or incorporate jalapeños and pepper jack cheese for a Tex-Mex spin.

  • Sweet Surprise: For a unique finish, add a swirl of fig jam between the layers. This delightful sweetness contrasts exquisitely with the savory filling, creating an unexpected taste sensation.

These variations not only keep the recipe fresh but inspire creativity! Consider pairing your loaf with a refreshing salad or enjoy it alongside a warm bowl of the delightful Pan Fried Mayo for a complete meal experience.

What to Serve with Ham and Cheese Sourdough Croissant Loaf

The perfect meal is just a dash of creativity away; let this delightful loaf take center stage while you explore mouthwatering pairings.

  • Crisp Green Salad: A refreshing side that balances the richness of the loaf, featuring mixed greens, cherry tomatoes, and a light vinaigrette.
  • Tomato Soup: A warm, creamy bowl of soup enhances the savory flavors while creating a comforting, nostalgic experience that warms the soul.
  • Herbed Quinoa: This nutrient-packed side offers a nutty flavor and a textured contrast that complements the loaf’s flakiness beautifully.
  • Roasted Vegetables: Toss your favorite veggies in olive oil and herbs. Their caramelized sweetness rounds out the savory richness of your Ham and Cheese Sourdough Croissant Loaf.
  • Fruit Salad: A vibrant medley of seasonal fruits adds a burst of sweetness, brightening up your plate and delighting the palate.
  • Sparkling White Wine: The effervescence cuts through the richness, creating a delightful pairing that elevates the brunch experience.
  • Chilled Iced Tea: A refreshing thirst-quencher that balances the savory notes while adding a hint of sweetness from your favorite infused blend.
  • Chocolate Chip Cookies: Cap off your meal with a sweet treat that delights the senses; after all, a touch of chocolate makes everything better!
  • Coffee or Espresso: Complete your brunch with a hot cup that complements the loaf’s flavors, ensuring each bite is as satisfying as the last.

Ham and Cheese Sourdough Croissant Loaf Recipe FAQs

How can I ensure my sourdough starter is ripe?
To ensure your sourdough starter is ripe, look for it to have doubled in size and be bubbly after feeding. This typically takes about 4-6 hours if kept at room temperature. A ripe starter will have a pleasant, slightly tangy aroma. If it passes the "float test" (a small dollop floats in water), it’s perfect for baking your Ham and Cheese Sourdough Croissant Loaf.

How should I store leftovers?
Store any leftover Ham and Cheese Sourdough Croissant Loaf in an airtight container at room temperature for up to 2 days. For longer freshness, refrigerate them for up to a week. Just ensure to wrap the loaf well to keep it from drying out.

Can I freeze the Ham and Cheese Sourdough Croissant Loaf?
Absolutely! To freeze your loaf, slice it first and then wrap each slice tightly in plastic wrap before placing it in an airtight freezer bag. It can be stored frozen for up to 3 months. When ready to enjoy, you can reheat the slices directly from frozen in a 350°F oven for about 10-15 minutes to restore their delightful warmth and texture.

What should I do if my dough doesn’t rise enough?
If your dough doesn’t rise enough, it could be due to a few factors. Make sure your sourdough starter is active before using it. If the dough hasn't risen after the recommended time, don’t panic—extend the rising time by an additional hour or so. Ensure it’s in a warm environment; an oven with the light on is perfect. You can also try warming the water slightly on the next attempt to help activate the yeast better.

Are there any dietary considerations I should watch for?
Yes! If you’re serving guests or family members with dietary restrictions, consider offering substitutes. For gluten-free options, use a gluten-free flour blend to ensure similar results, although the texture may vary. Additionally, if anyone is lactose intolerant, you can substitute Gruyère with lactose-free cheese or opt for a dairy-free cheese alternative.

Can I add different fillings to the loaf?
Very much so! The beauty of the Ham and Cheese Sourdough Croissant Loaf lies in its versatility. Feel free to swap out the ham for turkey, bacon, or even a medley of roasted seasonal vegetables for a vegetarian take. You can also experiment with various cheeses, such as Brie or blue cheese, to create new and exciting flavor profiles!

Ham and Cheese Sourdough Croissant Loaf

Ham and Cheese Sourdough Croissant Loaf for Effortless Brunch

This Ham and Cheese Sourdough Croissant Loaf is a delightful blend of flaky layers and savory filling, perfect for any brunch gathering.
Print Recipe Pin Recipe
Prep Time 1 hour hr
Cook Time 45 minutes mins
Fermentation Time 12 hours hrs
Total Time 13 hours hrs 45 minutes mins
Servings: 8 slices
Course: Breakfast
Cuisine: French
Calories: 250
Ingredients Equipment Method Nutrition Notes

Ingredients
  

For the Bread
  • 1 cup Sourdough Starter Ensure it’s bubbly and ripe
  • 3 cups All-Purpose/Bread Flour Bread flour is preferred for texture
  • 1 cup Water Warm to activate yeast
  • 1 tsp Salt Essential for flavor
  • 1/2 cup Cold Butter Keep chilled for flaky layers
For the Filling
  • 1 cup Gruyère Cheese Rich and complements the ham
  • 1 cup Diced Ham Savory filling option

Equipment

  • Mixing Bowl
  • Rolling Pin
  • Dutch oven
  • plastic wrap
  • Sharp Knife
  • cooling rack

Method
 

Step-by-Step Instructions
  1. Prepare the levain by mixing sourdough starter with flour and warm water. Cover and let sit for 10-12 hours.
  2. Make the dough by combining levain, warm water, and salt in a mixing bowl, then gradually add flour until sticky.
  3. Incorporate cold butter into the dough, folding it in every 30 minutes for about 1.5 hours.
  4. Let the dough rise covered in a warm place for 6-7 hours until about 70% risen.
  5. Shape the loaf by rolling it out, adding filling, and rolling it tightly, sealing the edges.
  6. Cold ferment the shaped loaf in plastic wrap for 12-18 hours in the refrigerator.
  7. Bake the loaf at 450°F for 25 minutes covered, then 20 minutes uncovered at 425°F until golden brown.
  8. Cool on a rack for at least 30 minutes before slicing to set the texture.

Nutrition

Serving: 1sliceCalories: 250kcalCarbohydrates: 30gProtein: 8gFat: 12gSaturated Fat: 7gPolyunsaturated Fat: 1gMonounsaturated Fat: 3gCholesterol: 30mgSodium: 600mgPotassium: 200mgFiber: 2gSugar: 1gVitamin A: 300IUCalcium: 150mgIron: 2mg

Notes

Ensure ingredients, especially the sourdough starter and butter, are properly prepared for best results.

Tried this recipe?

Let us know how it was!

Heavenly Custard-Filled Sweet Bread for Cozy Mornings

December 13, 2025 by Grace Snow Leave a Comment

There's something magical about the smell of freshly baked bread wafting through the kitchen, isn't there? This Creamy Custard-Filled Sweet Bread is where comfort meets creativity, making it an ultimate crowd-pleaser for breakfast or dessert. What I love most about this recipe is its versatility: you can enjoy it warm with a cup of tea, or cool with a dusting of powdered sugar for a delightful treat. Imagine diving into that soft, pillowy texture, only to discover a luscious custard center that simply melts in your mouth. Not only is it easy to whip up, but it's also a fun way to bring a touch of sweetness to any gathering. Are you ready to indulge in this comforting delight and surprise your loved ones?

Why is Custard-Filled Sweet Bread Irresistible?

Versatile Delight: This Custard-Filled Sweet Bread shines at any occasion, perfect for brunch gatherings or cozy desserts at home.

Creamy Center: Imagine that moment when you sink your teeth into the warm, soft dough, revealing a dreamy, creamy custard filling.

Easy to Make: With a straightforward preparation method, even novice bakers can master this delightful recipe.

Customizable Flavors: Feel free to play with different extracts or fillings, like the delightful addition of chocolate chips or zesty orange, for a unique twist!

Crowd-Pleasing: Everyone will love it, making it a fantastic choice for family get-togethers or holiday celebrations. Don’t forget to serve it alongside a slice of Cheesy Garlic Bread for a complementary flavor experience!

Custard-Filled Sweet Bread Ingredients

For the Dough
• All-purpose flour – Provides structure; use bread flour for a chewier texture.
• Granulated sugar – Adds sweetness; substitute with coconut sugar for a lower glycemic option.
• Butter – Brings moisture and richness; opt for unsalted or use coconut oil for dairy-free goodness.
• Milk – Infuses flavor; any nut milk, like almond, works as a dairy alternative.
• Yeast – Essential for leavening; active dry yeast is ideal, but instant yeast can be used without adjustments.
• Eggs – Serve as a binding agent and enhance flavor; flax eggs can replace for a vegan option.
• Vanilla extract – Enhances flavor; swap for almond extract for a unique profile.

For the Custard Filling
• Custard filling – The star of the show; premade custard saves time while providing a creamy texture and sweetness.

For Finishing Touch
• Powdered sugar – A beautiful dusting; optional but adds an elegant touch before serving.

Step‑by‑Step Instructions for Custard-Filled Sweet Bread

Step 1: Dough Preparation
In a large mixing bowl, combine all-purpose flour, granulated sugar, active dry yeast, and salt. In a separate bowl, gently warm the milk and melt the butter together until just lukewarm. Whisk in the eggs and vanilla extract, then pour this mixture into the dry ingredients. Mix until a dough forms, and knead for about 8-10 minutes until the dough is smooth and elastic.

Step 2: First Rise
Place the kneaded dough into a greased bowl, covering it with a damp cloth or plastic wrap. Let it rise in a warm place for about 1 hour, or until it has doubled in size. You’ll know it’s ready when your dough feels light and puffy to the touch, indicating the yeast is working its magic.

Step 3: Custard Making
While the dough is rising, prepare the custard filling. In a saucepan, combine your chosen custard ingredients, whisking continuously over medium heat until the mixture thickens, which should take about 5-7 minutes. Once thickened, remove from the heat and allow it to cool slightly while your dough continues to rise.

Step 4: Shaping
After the dough has completed its first rise, punch it down gently to release any air. Roll it out onto a floured surface, shaping it into a rectangle. Cut the dough into equal squares, placing a generous spoonful of custard in the center of each piece. Carefully fold the edges over to seal the custard inside, ensuring a tight closure to prevent leaks.

Step 5: Second Rise
Place the shaped custard-filled dough balls on a baking sheet lined with parchment paper. Cover them lightly and let them rise again for about 30 minutes, or until puffy. The dough should visibly expand and feel airy, resembling small pillows ready for baking.

Step 6: Baking
Preheat your oven to 350°F (175°C). Once preheated, bake the filled sweet breads for approximately 20 minutes, or until they turn a lovely golden brown. You’ll know they’re done when the tops are beautifully browned, and your kitchen fills with that irresistible aroma of baked bread.

Step 7: Cooling
After baking, remove the custard-filled sweet breads from the oven and allow them to cool on wire racks. Let them rest for about 10-15 minutes, allowing the custard filling to set slightly before dusting with powdered sugar for an elegant finish. Enjoy them warm or at room temperature!

What to Serve with Custard-Filled Sweet Bread

There's nothing quite like crafting a well-rounded meal around your favorite sweet breads, where flavors and textures dance in harmony.

  • Fresh Berries: The tartness of strawberries, blueberries, or raspberries contrasts beautifully with the creamy custard, offering a burst of freshness.

  • Vanilla Ice Cream: A scoop of creamy vanilla ice cream melting over the warm sweet bread transforms dessert into a delightful treat. The cool versus warm creates a dreamy experience.

  • Maple Syrup: Drizzling warm maple syrup adds a sweet, earthy dimension that complements the rich custard filling, enhancing every bite.

  • Coffee or Tea: Sipping a cup of freshly brewed coffee or herbal tea rounds out the meal, balancing the sweetness and creating a cozy ambiance.

  • Yogurt Parfait: Stacking layers of creamy yogurt with granola and fruits beside your sweet bread adds a refreshing and healthy crunch to your brunch spread.

  • Chocolate Sauce: Warm, silky chocolate sauce drizzled over a slice offers a dessert experience that feels indulgent and utterly luxurious.

  • Whipped Cream: A dollop of freshly whipped cream can elevate your custard-filled sweet bread into a sophisticated dessert, adding lightness while enhancing its sweetness.

Let these pairings inspire your next meal, turning a simple occasion into a delightful culinary celebration!

How to Store and Freeze Custard-Filled Sweet Bread

Room Temperature: Store your custard-filled sweet bread in an airtight container for up to 3 days to maintain its softness and freshness.

Fridge: If you need to keep it longer, refrigerate it for up to a week. Wrap it tightly to prevent it from drying out.

Freezer: For longer storage, freeze the sweet bread for up to 2 months. Ensure it's wrapped securely to prevent freezer burn.

Reheating: Rewarm in the oven at 350°F (175°C) for about 10 minutes, or microwave for 15-20 seconds, to enjoy that freshly baked texture again.

Custard-Filled Sweet Bread Variations

Feel free to get creative and customize your Custard-Filled Sweet Bread with these delightful twists, perfect for a baking adventure!

  • Chocolate Bliss: Fold chocolate chips into the custard filling for a rich chocolate experience. Each bite becomes a heavenly treat that chocolate lovers will adore.

  • Zesty Citrus: Add the zest of one orange or lemon to the dough for a refreshing hint of citrus. The brightness elevates the flavor profile and adds a lovely aroma.

  • Nutty Extra: Stir in chopped nuts, like pecans or walnuts, into the custard for added crunch. The combination of creamy and crunchy will leave your taste buds dancing.

  • Spiced Delight: Sprinkle cinnamon or nutmeg into the dough for a warm, aromatic twist. This variation will transport you to cozy winter mornings no matter the season!

  • Boozy Flavor: A splash of rum or brandy in the custard elevates this bread into dessert territory. Just imagine the incredible depth and warmth from each luscious slice.

  • Fruit Filling: Swap out the custard for your favorite jam or fruit preserves for a fruity surprise. Strawberry or apricot complements the sweet bread beautifully!

  • Vegan Option: Replace eggs with flax eggs and use almond milk instead of regular milk to make this recipe vegan-friendly while still maintaining its deliciousness.

  • Syrupy Sweet: Drizzle maple syrup over the warm bread just before serving to add an extra touch of sweetness. Pair it with a side of fresh fruits for balance!

Adventure awaits in your kitchen! If you enjoy experimenting, consider also preparing a side of Cornbread Breakfast Casserole or a delightful Sweet Potato Casserole to diversify your table. Happy baking!

Expert Tips for the Best Custard-Filled Sweet Bread

Warm Milk: Ensure your milk is warm but not hot when adding yeast; too much heat can kill the yeast, preventing proper rising.

Seal Carefully: Be sure to seal the dough properly around the custard filling; this prevents any delightful custard from leaking out while baking.

Rest Before Slicing: Let the baked sweet bread cool for at least 10-15 minutes before slicing; this helps set the custard and enhances the texture.

Knead Well: Knead the dough thoroughly for at least 8-10 minutes to develop the gluten, ensuring a soft, fluffy bread that holds its shape.

Don’t Rush the Rises: Give the dough ample time to rise in both stages; this is key for the light and airy texture of the custard-filled sweet bread.

Make Ahead Options

These Custard-Filled Sweet Breads are perfect for busy home cooks who love to meal prep! You can make the dough up to 24 hours in advance; simply prepare it, let it rise, and then refrigerate it in a covered bowl to slow down the fermentation. For the custard filling, you can prepare and refrigerate it for up to 3 days; this not only saves time but ensures it’s ready to use when you’re ready to assemble. When you’re set to bake, allow the dough to come to room temperature and complete the second rise for about 30 minutes before filling and baking. This way, you'll enjoy warm, fluffy sweet bread with rich custard, just as delicious as if freshly made!

Custard-Filled Sweet Bread Recipe FAQs

What type of flour is best for Custard-Filled Sweet Bread?
All-purpose flour is ideal for this recipe due to its balanced properties. However, if you're aiming for a chewier texture, bread flour can be a fantastic substitute. Just keep in mind that bread flour has a higher protein content, which may affect the bread’s final softness.

How should I store leftover Custard-Filled Sweet Bread?
Store your sweet bread in an airtight container at room temperature for up to 3 days. If you want to keep it fresh for a longer period, it can last in the fridge for up to a week when tightly wrapped to prevent drying.

Can I freeze Custard-Filled Sweet Bread and how?
Absolutely! To freeze, wrap the completely cooled sweet bread tightly in plastic wrap, followed by aluminum foil to prevent freezer burn. It will stay fresh for up to 2 months. When you're ready to enjoy it, simply unwrap and rewarm in the oven at 350°F (175°C) for about 10 minutes or until warmed through.

What should I do if my dough doesn’t rise?
If your dough fails to rise, it could be due to a few factors. First, make sure that the yeast is fresh and active—check the expiration date. Second, ensure your milk was warm (not hot!) when mixed with the yeast. If the environment is too cool, try placing the dough in a slightly warm area like an oven with just the light on. You can also let it rise longer until it doubles in size.

Are there any dietary considerations for Custard-Filled Sweet Bread?
Yes, if you have dietary restrictions, you can easily adapt this recipe. For a dairy-free version, replace the butter and milk with coconut oil and any nut milk. Additionally, you can use flax eggs as a plant-based alternative to traditional eggs. Just mix 1 tablespoon of ground flaxseed with 3 tablespoons of water per egg and let it sit until it thickens before adding to your dough.

Can I use premade custard for the filling?
Definitely! Using premade custard is an excellent way to save time and still achieve that creamy filling we all love. Just ensure to cool it slightly before adding to the dough to prevent disrupting the rising process!

Custard-Filled Sweet Bread

Heavenly Custard-Filled Sweet Bread for Cozy Mornings

This Custard-Filled Sweet Bread is a magical blend of comfort and creativity, perfect for breakfast or dessert.
Print Recipe Pin Recipe
Prep Time 30 minutes mins
Cook Time 20 minutes mins
Rising Time 1 hour hr 30 minutes mins
Total Time 2 hours hrs 20 minutes mins
Servings: 8 slices
Course: Dessert
Cuisine: Bakery
Calories: 180
Ingredients Equipment Method Nutrition Notes

Ingredients
  

For the Dough
  • 4 cups All-purpose flour Use bread flour for a chewier texture.
  • 1/4 cup Granulated sugar Substitute with coconut sugar for a lower glycemic option.
  • 1/2 cup Butter Opt for unsalted or coconut oil for dairy-free.
  • 1 cup Milk Any nut milk, like almond, works as a dairy alternative.
  • 2 teaspoons Active dry yeast Instant yeast can be used without adjustments.
  • 2 large Eggs Flax eggs can replace for a vegan option.
  • 1 teaspoon Vanilla extract Swap for almond extract for a unique profile.
For the Custard Filling
  • 2 cups Custard filling Premade custard saves time.
For Finishing Touch
  • 1 cup Powdered sugar Optional but adds an elegant touch.

Equipment

  • Mixing Bowl
  • Saucepan
  • Baking Sheet
  • Parchment Paper
  • wire rack

Method
 

Dough Preparation
  1. In a large mixing bowl, combine all-purpose flour, granulated sugar, active dry yeast, and salt.
  2. In a separate bowl, gently warm the milk and melt the butter together until just lukewarm.
  3. Whisk in the eggs and vanilla extract, then pour this mixture into the dry ingredients.
  4. Mix until a dough forms, and knead for about 8-10 minutes until the dough is smooth and elastic.
First Rise
  1. Place the kneaded dough into a greased bowl, covering it with a damp cloth or plastic wrap.
  2. Let it rise in a warm place for about 1 hour, or until it has doubled in size.
Custard Making
  1. While the dough is rising, prepare the custard filling by combining your chosen custard ingredients in a saucepan.
  2. Whisk continuously over medium heat until the mixture thickens, about 5-7 minutes.
  3. Once thickened, remove from heat and allow it to cool slightly.
Shaping
  1. After the dough has completed its first rise, punch it down gently to release any air.
  2. Roll it out onto a floured surface, shaping it into a rectangle.
  3. Cut the dough into equal squares, placing a generous spoonful of custard in the center of each piece.
  4. Carefully fold the edges over to seal the custard inside.
Second Rise
  1. Place the shaped custard-filled dough balls on a baking sheet lined with parchment paper.
  2. Cover them lightly and let them rise again for about 30 minutes.

Baking
  1. Preheat your oven to 350°F (175°C).
  2. Once preheated, bake the filled sweet breads for approximately 20 minutes, or until golden brown.
Cooling
  1. After baking, remove the custard-filled sweet breads from the oven and allow them to cool on wire racks.
  2. Let them rest for about 10-15 minutes before dusting with powdered sugar.

Nutrition

Serving: 1sliceCalories: 180kcalCarbohydrates: 25gProtein: 4gFat: 7gSaturated Fat: 4gPolyunsaturated Fat: 0.5gMonounsaturated Fat: 2.5gCholesterol: 40mgSodium: 120mgPotassium: 80mgFiber: 1gSugar: 6gVitamin A: 200IUCalcium: 50mgIron: 1mg

Notes

Allow the sweet bread to cool for at least 10-15 minutes before slicing to enhance the texture.

Tried this recipe?

Let us know how it was!

Delicious Homemade German Bread in Just 5 Minutes

December 13, 2025 by Grace Snow Leave a Comment

As the warm scent of baking bread wafts through my kitchen, I'm reminded of cozy family gatherings shared around the table. Today, I’m excited to share my recipe for Quick German Bread, a rustic loaf that you can whip up in just 5 minutes of prep! With its golden, crackly crust and soft, chewy interior, this homemade bread is a fantastic option for those busy weeknights when you crave a comforting touch. Plus, it’s incredibly versatile—use it for sandwiches, or enjoy a slice warm with butter. Not only does it embrace the heartiness of traditional German bread, but it also simplifies the process, making homemade goodness accessible to everyone. Are you ready to dive into this delicious adventure in baking?

Why is this German Bread so special?

Quick, No Fuss: In just 5 minutes of prep, you can create a stunning rustic loaf that impresses family and friends.

Amazing Aroma: The smell of freshly baked bread fills your home, bringing warmth and comfort to any occasion.

Endless Possibilities: This bread is a blank canvas! Mix it up with seeds, herbs, or even sun-dried tomatoes for a personal touch.

Perfect Texture: Enjoy a beautifully crackly crust with a soft, chewy interior that’s far from ordinary. It pairs perfectly with soups or can be transformed into delicious sandwiches.

Time-Saving Delight: Say goodbye to store-bought bread! With minimal ingredients and effort, this bread is your go-to for tasty homemade goodness.

Don't forget to check out German Potato Salad as a delightful side to complement your freshly baked bread!

German Bread Ingredients

For the Dough

  • All-purpose flour or bread flour – Provides structure and chewiness; substitute with whole wheat flour for a nuttier flavor.
  • Instant yeast – Leavens the bread quickly; you can use active dry yeast if activated in warm water first.
  • Warm water (around 110°F / 45°C) – Hydrates the flour and activates the yeast; ensure it's warm but not hot to avoid killing the yeast.
  • Salt – Enhances flavor and strengthens gluten structure; no substitutions recommended.
  • Honey or sugar – Adds slight sweetness and aids browning; can be replaced with maple syrup or agave.
  • Olive oil (optional) – Adds richness and moisture; this can be omitted without significant impact on the bread.

For the Toppings (optional)

  • Flaky salt – Sprinkling on top creates a delightful contrast to the bread's texture.
  • Everything bagel seasoning – Adds a flavorful twist for those who enjoy a bit more seasoning.

Let’s get started on baking that delicious German bread!

Step‑by‑Step Instructions for Quick German Bread

Step 1: Combine the Dry Ingredients
In a large mixing bowl, combine 3 cups of all-purpose flour, 2 teaspoons of instant yeast, and 1 teaspoon of salt. Stir the ingredients together until they are well mixed, creating a uniform dry mixture. This blend forms the essential foundation for your rustic German bread, ensuring even distribution of the yeast and enhancing the overall flavor.

Step 2: Mix in the Wet Ingredients
Pour in 1 and 1/4 cups of warm water (about 110°F / 45°C) and 1 tablespoon of honey into the dry ingredients. Using a wooden spoon or your hands, gently mix until a sticky dough begins to form. This should take about 1 to 2 minutes; the dough should hold together but remain slightly tacky, signaling that it’s ready for the next step.

Step 3: Knead the Dough
Transfer the sticky dough onto a well-floured surface. Knead it for 1 to 2 minutes, apply gentle pressure, and fold it over itself until it becomes smoother and slightly elastic. This brief kneading helps develop gluten, which is crucial for achieving that delightful chewy texture characteristic of homemade German bread.

Step 4: Let the Dough Rest
Place the kneaded dough back into the mixing bowl and cover it with a clean kitchen towel. Allow it to rest in a warm location for 5 to 10 minutes. This resting period will help the dough relax, making it easier to shape into a rustic loaf and ensuring a perfect rise during baking.

Step 5: Preheat the Oven
While the dough rests, preheat your oven to 425°F (220°C). Position a Dutch oven inside the oven as it heats. This step is essential for creating steam, which helps achieve that beautiful, crackly crust on your German bread, making it even more appealing once baked.

Step 6: Shape the Dough
After the rest period, gently punch down the dough to deflate it. Shape it into a rustic loaf that’s about the size of your Dutch oven. Using parchment paper can help in transferring it easily later. Just make sure your bread is not overly tight; it should still retain some airiness to allow proper expansion while baking.

Step 7: Score the Loaf
Carefully place the shaped dough onto parchment paper, then take a sharp knife and make a few slashes across the top of the loaf. This scoring not only enhances the presentation of your German bread but also allows for better expansion during baking, ensuring a beautifully risen loaf with a fantastic crust.

Step 8: Bake the Bread
Using oven mitts, remove the heated Dutch oven from the oven. Carefully lift the parchment paper with the dough and place it inside. Cover with the lid and bake for 20 minutes. After 20 minutes, uncover the Dutch oven and bake for an additional 5 to 10 minutes, until the top is golden brown and the bread sounds hollow when tapped on the bottom.

Step 9: Cool the Bread
Once baked, remove the Dutch oven from the oven and carefully take out the bread using the parchment paper. Let the bread cool on a wire rack for at least 10 minutes. Cooling is vital to allow the crust to set properly, and it also helps prevent the bread from becoming gummy when sliced.

German Bread Variations & Substitutions

Customize your German bread experience with these delightful twists and swaps that will elevate its flavor and texture!

  • Whole Wheat: Substitute half of the all-purpose flour with whole wheat for a nutty taste and extra fiber.
  • Rye Flour: Mix in half rye flour to create a denser, more traditional German flavor profile that both hearty and satisfying.
  • Sweetness Switch: Replace honey with maple syrup for a unique touch of sweetness that pairs wonderfully with this rustic loaf.
  • Herb Infusion: Add fresh herbs like rosemary or thyme into the dough for an aromatic twist that adds flavor depth.

Whether you’re experimenting with savory elements or exploring fragrant additions, the possibilities are endless! A sprinkle of everything bagel seasoning on top can add a delightful crunch to your loaf.

  • Savory Add-ins: Fold in chopped olives, sun-dried tomatoes, or crumbled feta cheese to infuse vibrant flavors into each bite.
  • Seed Variety: Toss in seeds like caraway or sesame for added texture and a delightful crunch, giving your bread a rustic flair.
  • Spice it Up: For a little kick, mix in a dash of crushed red pepper flakes into the dough for unexpected warmth.

There you go! Personalizing your bread is as simple as picking a flavor direction you love. Happy baking! Don’t forget to pair your bread with a side of German Potato Salad for a hearty meal that'll warm your heart!

Make Ahead Options

These Quick German Bread loaves are a lifesaver for meal prep enthusiasts! You can prepare the dough up to 24 hours in advance by mixing the dry ingredients and adding the wet components, then storing the dough covered in the refrigerator. This allows the flavors to develop beautifully while saving you time on busy weeknights. To maintain the quality, let the dough warm up at room temperature for about 30 minutes before shaping it into a loaf. When you're ready to bake, simply shape the dough, preheat the oven, and follow the baking instructions as usual, ensuring you enjoy fresh, homemade German bread with minimal effort!

What to Serve with Quick German Bread in Just 5 Minutes

There's something special about pairing your freshly baked loaf with delightful accompaniments that elevate your dining experience.

  • Creamy Tomato Soup: This classic pairing offers a warm, comforting experience, perfectly balancing the rustic texture of your bread.
  • Savory Cheese Platter: A variety of cheeses—think sharp cheddar or creamy brie—create a delightful contrast to the bread's chewy bite.
  • Herbed Olive Oil Dip: Drizzle this fragrant blend of olive oil and fresh herbs to enhance the bread's flavor and add a touch of Mediterranean flair.
  • Roasted Vegetables: The caramelized sweetness of vegetables like carrots and bell peppers complements the hearty facets of the German bread.
  • Crisp Green Salad: A fresh salad with tangy vinaigrette adds brightness to every bite, making for a balanced meal with texture and flavor.
  • Homemade Jam: Spread a layer of fruit jam for a sweet juxtaposition to the bread's rustic notes, turning your loaf into a breakfast delight.
  • German Potato Salad: This tangy, warm salad with crispy bacon ties back to traditional German cuisine, making it a perfect side addition.
  • Fruity Iced Tea: Pair your meal with a refreshing glass of iced tea infused with fruits for a delightful, thirst-quenching finish.
  • Decadent Chocolate Cake: For dessert, indulge in a rich chocolate cake to save the best for last, making every meal memorable and sweet.

Storage Tips for German Bread

Room Temperature: Store your German bread in an airtight container at room temperature for up to 3 days to maintain freshness and texture.

Freezer: For longer storage, wrap the loaf tightly in plastic wrap or aluminum foil, then place it in a freezer-safe bag. It can be frozen for up to 3 months.

Reheating: To restore the bread's crusty exterior, reheat slices in a warm oven (350°F/175°C) for about 5-10 minutes or until warmed through.

Cutting: Avoid slicing the bread until you're ready to eat it; this helps retain moisture and keeps the loaf fresher for longer.

Expert Tips for Quick German Bread

  • Fresh Yeast Required: Ensure your yeast is fresh and active; expired yeast can lead to dense bread that doesn’t rise well.

  • Monitor Dough Stickiness: If the dough is too sticky while kneading, sprinkle a bit more flour to make it manageable, but avoid adding too much.

  • Utilize Steam for Crust: For a beautifully crackly crust, place a shallow pan of water in the oven while it preheats. This steam enhances the baking process.

  • Perfect Bread Texture: Tap the bottom of the baked loaf—if it sounds hollow, your German bread is ready. This indicates a perfect bake inside!

  • Kneading Time: Don’t over-knead; a quick 1-2 minutes is sufficient for developing the right texture, ensuring the bread remains soft and chewy.

Quick German Bread Recipe FAQs

How do I choose the right flour for this German bread?
Absolutely! You can use either all-purpose or bread flour for your Quick German Bread. If you're looking for a nuttier flavor, I recommend trying whole wheat flour as a substitute. Just keep in mind that using whole wheat may alter the texture slightly, resulting in a denser loaf.

How should I store my German bread after baking?
To maintain its freshness, store your German bread in an airtight container at room temperature for up to 3 days. This keeps the texture soft and delightful. If you want to save it for longer, wrap the loaf tightly in plastic wrap or aluminum foil and place it in a freezer-safe bag where it can last for up to 3 months.

Can I freeze German bread? How?
Yes, you can freeze your delicious German bread! After cooling, wrap the entire loaf tightly in plastic wrap or aluminum foil to prevent freezer burn. Then, place it in a freezer-safe bag for added protection. When you're ready to enjoy it, simply thaw it at room temperature or reheat it directly from the freezer in a warm oven at 350°F (175°C) for about 10-15 minutes.

What should I do if my dough is too sticky?
If you find your dough is too sticky while kneading, don't worry! Just sprinkle a little more flour, about a tablespoon at a time, until it becomes manageable. Remember, it should remain slightly tacky but not overly sticky—this balance is key to achieving that perfect chewy texture in your German bread.

Are there any dietary considerations I should keep in mind?
Certainly! This Quick German Bread recipe contains gluten from the flour, so it's not suitable for those on a gluten-free diet. If you're looking to reduce sugar intake, you can use agave syrup or omit the sweetener altogether. For those with yeast sensitivities, consider experimenting with a sourdough starter; it may yield different, yet delightful results!

German Bread

Delicious Homemade German Bread in Just 5 Minutes

This quick and easy German Bread recipe delivers a rustic loaf with a golden crust and chewy interior, perfect for any occasion.
Print Recipe Pin Recipe
Prep Time 5 minutes mins
Cook Time 30 minutes mins
Resting Time 10 minutes mins
Total Time 45 minutes mins
Servings: 10 slices
Course: Breakfast
Cuisine: German
Calories: 120
Ingredients Equipment Method Nutrition Notes

Ingredients
  

Dough Ingredients
  • 3 cups all-purpose flour or bread flour
  • 2 teaspoons instant yeast
  • 1 teaspoon salt
  • 1.25 cups warm water around 110°F / 45°C
  • 1 tablespoon honey or sugar
  • 1 tablespoon olive oil optional
Topping Ingredients (optional)
  • to taste flaky salt
  • to taste everything bagel seasoning

Equipment

  • Mixing Bowl
  • Wooden spoon
  • Dutch oven
  • Parchment Paper
  • wire rack
  • oven mitts

Method
 

Step-by-Step Instructions
  1. Combine the dry ingredients in a large mixing bowl: 3 cups of all-purpose flour, 2 teaspoons of instant yeast, and 1 teaspoon of salt.
  2. Mix in the wet ingredients: Pour in 1.25 cups of warm water and 1 tablespoon of honey.
  3. Knead the dough on a floured surface for 1 to 2 minutes until smoother.
  4. Let the dough rest covered in a warm place for 5 to 10 minutes.
  5. Preheat the oven to 425°F (220°C) with the Dutch oven inside.
  6. Shape the dough into a rustic loaf and place it on parchment paper.
  7. Score the top of the loaf with a sharp knife for better expansion.
  8. Bake the bread in the Dutch oven for 20 minutes covered, then 5-10 minutes uncovered until golden brown.
  9. Cool the bread on a wire rack for at least 10 minutes before slicing.

Nutrition

Serving: 1sliceCalories: 120kcalCarbohydrates: 22gProtein: 4gFat: 2gSaturated Fat: 0.5gPolyunsaturated Fat: 0.3gMonounsaturated Fat: 1gSodium: 250mgPotassium: 60mgFiber: 1gSugar: 1gCalcium: 10mgIron: 1.2mg

Notes

Store in an airtight container at room temperature for up to 3 days or freeze for up to 3 months.

Tried this recipe?

Let us know how it was!

Crack Breakfast Casserole: A Cheesy Morning Delight

December 10, 2025 by Grace Snow Leave a Comment

As I flipped through my collection of cherished family recipes, I stumbled upon a gem that instantly whisked me back to bustling brunches filled with laughter and warmth—the Crack Breakfast Casserole. This dish is not just any breakfast; it’s a comforting blend of savory meats, creamy cheeses, and crispy hash browns, all baked to golden perfection. The beauty of this recipe lies in its incredible versatility, allowing for quick prep and the option to make it ahead of time—perfect for those busy mornings or special gatherings. Trust me; your family will adore this crowd-pleaser just as much as mine does. So, are you ready to discover how to elevate your breakfast game with this delightful casserole?

Why is Crack Breakfast Casserole a Must-Try?

Ease of Preparation: This recipe is designed to fit into your hectic mornings. With its make-ahead feature, you can assemble it the night before and simply bake it in the morning.

Versatile Options: Whether you prefer spicy sausage or wish to sneak in some veggies like bell peppers or spinach, this casserole accommodates your tastes effortlessly.

Unmatched Flavor: With layers of creamy cheese, savory meats, and crispy hash browns, every bite is a delight! It's comfort food at its best, ready to satisfy even the pickiest eaters.

Crowd-Pleasing Delight: Perfect for family brunches or gatherings, this dish will impress your guests and become a staple in your recipe rotation, just like my Sweet Potato Casserole.

Nutritional Adaptability: This casserole can easily be made gluten-free with a simple swap for gluten-free hash browns, ensuring everyone can enjoy it.

Experience the joy of serving a warm, hearty breakfast that fills the room with enticing aromas and happy faces!

Crack Breakfast Casserole Ingredients

For the Casserole Base
• Pork Sausage – Adds savory flavor and protein; you can use turkey sausage for a leaner option.
• Bacon – Introduces a crispy, salty texture; consider turkey bacon for a lighter version.
• Cream Cheese – Provides creaminess; Neufchâtel cheese is a lower-fat alternative.
• Sour Cream – Adds tanginess and moisture; Greek yogurt can be a healthier twist.
• Milk – Keeps the egg mixture moist; substitute with almond milk for a dairy-free option.
• Eggs – The binding agent; choose fresh eggs for the best results.

For Seasoning & Flavor
• Dry Ranch Seasoning – Delivers herby flavor; homemade ranch seasoning can enhance freshness.
• Onion Powder – Enhances overall flavor; fresh onions can add natural sweetness.
• Garlic Powder – Boosts flavor; use fresh garlic for a robust taste.
• Salt & Pepper – Essential for seasoning; adjust to taste for personal preference.

For Texture & Creaminess
• Hash Browns – Provides heartiness; opt for frozen, gluten-free varieties if needed.
• Cheddar Cheese – Key for creaminess and flavor; mozzarella or pepper jack can be tasty substitutes.

Embrace the joy of a Crack Breakfast Casserole with these simple, easily adaptable ingredients that promise a delightful meal experience!

Step‑by‑Step Instructions for Crack Breakfast Casserole

Step 1: Cook the Meats
In a large skillet over medium-high heat, add the pork sausage and bacon, cooking them until they are nicely browned and crispy—about 8-10 minutes. Stir occasionally to ensure even cooking and then carefully drain any excess fat. This step builds a savory base for your Crack Breakfast Casserole.

Step 2: Prep Egg Mixture
In a mixing bowl, combine the cream cheese and sour cream, blending them together until smooth and creamy. Next, whisk in the milk, eggs, dry ranch seasoning, onion powder, garlic powder, salt, and pepper until the mixture is homogenous and well-combined. This flavorful egg mixture will hold the casserole together beautifully.

Step 3: Combine Ingredients
Add the cooked meats to the egg mixture, followed by the hash browns and one cup of shredded cheddar cheese. Stir everything together until all the ingredients are evenly coated and mixed. This will help ensure that every bite of your Crack Breakfast Casserole is filled with delicious flavors and textures.

Step 4: Bake
Preheat your oven to 350°F (175°C) while you prepare the baking dish. Pour the combined mixture into a greased 9x13-inch baking dish. Top with the remaining cheddar cheese and cover it with aluminum foil. Bake for 50-60 minutes, then remove the foil and bake for an additional 8-10 minutes until the cheese is bubbly and golden brown.

Step 5: Rest and Serve
Once baked, allow the Crack Breakfast Casserole to cool for about 5-10 minutes before slicing. This slight cooling period helps the casserole set, making it easier to serve. Cut into squares, and serve warm to enjoy the melty cheese and savory flavors.

What to Serve with Crack Breakfast Casserole?

Transform your breakfast routine into a delightful feast with perfect pairings for this creamy, cheesy casserole.

  • Fresh Fruit Salad: The sweetness of seasonal fruits adds a refreshing contrast to the rich flavors of the casserole, balancing each bite beautifully. Add a splash of citrus juice to elevate the fruity notes!

  • Crispy Bacon-Wrapped Asparagus: This combination introduces a savory crunch, enhancing the overall texture of your meal. The earthy asparagus will complement the richness of the casserole.

  • Hollandaise Sauce: Drizzling this creamy sauce over your casserole takes it to the next level of indulgence. Its lemony zing cuts through the richness, creating a delightful flavor explosion.

  • Green Side Salad: A bright green salad with mixed greens and a light vinaigrette provides an excellent contrast, adding freshness to your plate. Top it off with cherry tomatoes for a burst of color!

  • Breakfast Smoothie: A creamy smoothie packed with spinach, bananas, and yogurt adds nutrition and a refreshing sip to your meal. This smooth drink is a great way to kick-start your day!

  • Savory Scones: Cheesy or herb-infused scones add rich, buttery comfort to your breakfast table. Enjoy them warm next to the casserole for a cozy, satisfying combination.

  • Mimosas: For a special touch, serve mimosas with your casserole. The bubbly citrus drink adds brightness and a celebratory feel to your breakfast gathering.

Consider these delicious options to round out your meal and ensure a truly delightful breakfast experience. Each accompaniment enhances the main dish, creating a well-balanced and satisfying spread!

How to Store and Freeze Crack Breakfast Casserole

Fridge: Store leftover Crack Breakfast Casserole in an airtight container for up to 4 days. Reheat in the microwave or oven to enjoy it warm and delicious.

Freezer: For longer storage, freeze the casserole in a properly wrapped dish or freezer-safe container for up to 3 months. Thaw in the fridge overnight before reheating.

Reheating: When you're ready to serve, preheat your oven to 350°F (175°C) and reheat covered with foil for about 25 minutes, or until heated through.

Make-Ahead Tip: Assemble the casserole fully and refrigerate it overnight, then bake in the morning for a seamless breakfast experience!

Make Ahead Options

These Crack Breakfast Casserole preparations are a lifesaver for busy mornings! You can assemble the entire casserole up to 24 hours in advance by mixing all the ingredients and storing the unbaked dish in the refrigerator. Be sure to cover it tightly with aluminum foil to prevent drying out. When you're ready to enjoy, simply bake it straight from the fridge, adding an additional 10-15 minutes to the baking time if it’s cold. If you have leftovers, they can be refrigerated for up to four days and reheated individually in the microwave or oven, keeping every bite just as delicious as the first. Enjoy the convenience of having a warm, hearty breakfast ready to go!

Expert Tips

  • Make Ahead Magic: Prepare the casserole the night before and refrigerate it. Just pop it in the oven in the morning for effortless baking.

  • Vegetable Consideration: If adding vegetables, sauté them beforehand to reduce moisture and prevent a soggy texture in your Crack Breakfast Casserole.

  • Cheese Choices: Experiment with different cheeses like mozzarella or pepper jack for a delightful twist on flavor while maintaining creaminess.

  • Egg Freshness: Always use the freshest eggs you can find, as they contribute to a firmer and more flavorful casserole.

  • Proper Baking: Ensure your oven reaches the right temperature before baking; this ensures even cooking and a perfectly browned top.

Crack Breakfast Casserole Variations

Customize your Crack Breakfast Casserole to suit your taste buds and dietary needs with these delightful twists!

  • Veggie Boost: Add diced bell peppers or fresh spinach for a burst of color and nutrition. It’s a wonderful way to sneak in some greens!

  • Cheese Swap: Replace cheddar cheese with mozzarella or pepper jack for a different flavor profile. Each type of cheese will impart a unique vibe to your dish.

  • Turkey Twist: Substitute pork sausage and bacon with turkey sausage and turkey bacon for a leaner version. It’s delicious and still satisfying!

  • Creamy Alternative: Use Neufchâtel cheese instead of cream cheese for a lower-fat creamy base. Your guests won't even notice the difference!

  • Adding Heat: Crank up the spice by incorporating jalapeños or a dash of cayenne pepper. A zesty kick makes every slice exciting!

  • Herb Infusion: Mix in fresh herbs like chives or parsley before baking for an aromatic and fresh flavor boost. The herbs will elevate each bite beautifully!

  • Hash Brown Choice: Opt for sweet potato hash browns instead to introduce a hint of sweetness. This twist is perfect for those who love a touch of sweetness in their breakfast.

As you embrace these variations, consider serving alongside a fresh fruit salad or a light side like Breakfast Egg Muffins for balance. Enjoy your culinary journey with this comforting dish!

Crack Breakfast Casserole Recipe FAQs

What type of pork sausage should I use?
I recommend using a savory pork sausage for the best flavor. However, if you're looking for a leaner option, turkey sausage works wonderfully too.

How should I store leftover Crack Breakfast Casserole?
Store any leftover casserole in an airtight container and refrigerate it for up to 4 days. You'll love how easy it is to reheat in the microwave or oven—just warm it until it's nice and hot again!

Can I freeze Crack Breakfast Casserole?
Absolutely! To freeze, let the casserole cool completely, then transfer it to a freezer-safe container or wrap tightly in aluminum foil. It can be frozen for up to 3 months. When you're ready to enjoy it, thaw it in the fridge overnight and reheat it in the oven.

What if my casserole is too watery after baking?
If your Crack Breakfast Casserole turns out watery, it may be due to excess moisture from the added ingredients. To troubleshoot, make sure to sauté any vegetables beforehand to reduce moisture, and avoid using frozen hash browns that are not fully drained.

Is this recipe suitable for gluten-free diets?
Yes, you can make the Crack Breakfast Casserole gluten-free! Just ensure you use gluten-free hash browns and double-check that your other ingredients, like ranch seasoning, do not contain gluten.

Can I make this casserole ahead of time?
Absolutely! You can assemble the entire casserole the night before. Just cover it and refrigerate. In the morning, pop it in the oven for a hassle-free breakfast. Bake as usual, adjusting the cooking time slightly if it’s cold from the fridge. Enjoy the simplicity of a delicious make-ahead meal!

Crack Breakfast Casserole

Crack Breakfast Casserole: A Cheesy Morning Delight

Discover the Crack Breakfast Casserole, a comforting blend of meats, cheeses, and hash browns that's perfect for busy mornings.
Print Recipe Pin Recipe
Prep Time 15 minutes mins
Cook Time 1 hour hr
Resting Time 10 minutes mins
Total Time 1 hour hr 25 minutes mins
Servings: 8 slices
Course: Breakfast
Cuisine: American
Calories: 350
Ingredients Equipment Method Nutrition Notes

Ingredients
  

For the Casserole Base
  • 1 pound Pork Sausage You can use turkey sausage for a leaner option.
  • 6 slices Bacon Consider turkey bacon for a lighter version.
  • 8 oz Cream Cheese Neufchâtel cheese is a lower-fat alternative.
  • 1 cup Sour Cream Greek yogurt can be a healthier twist.
  • 1 cup Milk Substitute with almond milk for a dairy-free option.
  • 6 large Eggs Choose fresh eggs for the best results.
For Seasoning & Flavor
  • 1 packet Dry Ranch Seasoning Homemade ranch seasoning can enhance freshness.
  • 1 teaspoon Onion Powder Fresh onions can add natural sweetness.
  • 1 teaspoon Garlic Powder Use fresh garlic for a robust taste.
  • to taste Salt Adjust to taste for personal preference.
  • to taste Pepper Adjust to taste for personal preference.
For Texture & Creaminess
  • 24 oz Hash Browns Opt for frozen, gluten-free varieties if needed.
  • 2 cups Cheddar Cheese Mozzarella or pepper jack can be tasty substitutes.

Equipment

  • Skillet
  • Mixing Bowl
  • Baking Dish
  • Whisk

Method
 

Step-by-Step Instructions
  1. Cook the Meats: In a large skillet over medium-high heat, add the pork sausage and bacon, cooking them until they are nicely browned and crispy—about 8-10 minutes.
  2. Prep Egg Mixture: In a mixing bowl, combine the cream cheese and sour cream, blending them together until smooth. Whisk in the milk, eggs, dry ranch seasoning, onion powder, garlic powder, salt, and pepper until well-combined.
  3. Combine Ingredients: Add the cooked meats to the egg mixture, followed by the hash browns and one cup of shredded cheddar cheese. Stir everything together until evenly mixed.
  4. Bake: Preheat your oven to 350°F (175°C). Pour the mixture into a greased 9x13-inch baking dish. Top with remaining cheddar cheese, cover with foil, and bake for 50-60 minutes. Remove foil and bake for an additional 8-10 minutes until the cheese is bubbly and golden.
  5. Rest and Serve: Allow the casserole to cool for about 5-10 minutes before slicing. Cut into squares and serve warm.

Nutrition

Serving: 1sliceCalories: 350kcalCarbohydrates: 25gProtein: 20gFat: 22gSaturated Fat: 10gPolyunsaturated Fat: 1gMonounsaturated Fat: 9gCholesterol: 150mgSodium: 800mgPotassium: 400mgFiber: 2gSugar: 1gVitamin A: 500IUVitamin C: 2mgCalcium: 300mgIron: 2mg

Notes

This casserole can easily be prepared the night before and baked in the morning for a convenient breakfast option.

Tried this recipe?

Let us know how it was!

Savory Cheddar & Bacon Dutch Baby: A Cozy Brunch Treat

December 9, 2025 by Grace Snow Leave a Comment

The moment I took my first bite of a Savory Cheddar & Bacon Dutch Baby, I felt like I had been transported to a cozy café where the aroma of freshly cooked pancakes fills the air. This dish is truly a showstopper—a fluffy pancake, crisped to perfection, generously topped with sharp cheddar and crunchy bacon that will have everyone asking for seconds. What I love most about this recipe is not just its stunning presentation, but how incredibly quick it is to whip up, making it perfect for lazy weekend brunches or a special weekday treat. Plus, with an easy swap for gluten-free flour, everyone can enjoy it. Are you ready to impress your friends and family with this comforting breakfast delight? Let's dive into the recipe and make some kitchen magic happen!

Why is this Dutch Baby a Must-Try?

Simplicity: The recipe is easy to follow, making it accessible for both novice and experienced cooks. Quick Cooking Time: Ready in just 30 minutes, it’s perfect for those busy mornings or weekend brunches. Flavor Explosion: The savory blend of cheddar and bacon creates a delightful taste that can’t be beaten. Gluten-Free Option: Easily swap the flour for a gluten-free blend, ensuring everyone can enjoy this treat! Showstopping Presentation: Its puffed-up appearance will impress family and friends, making it a perfect centerpiece for any gathering. If you’re craving something light yet hearty, don’t forget to check out our Seafood Pasta Savory for another irresistible option!

Savory Cheddar & Bacon Dutch Baby Ingredients

For the Batter

  • Eggs – Provide structure and help the pancake puff up; they are essential for this Dutch baby.
  • All-Purpose Flour – Creates the pancake's body; substitute with a gluten-free flour blend for a gluten-free Savory Cheddar & Bacon Dutch Baby.
  • Milk – Adds moisture and richness; use whole milk for best results, or oat/almond milk as lactose-free alternatives.
  • Melted Butter – Adds flavor and assists in browning; can be replaced with oil for a dairy-free option.
  • Salt – Enhances flavor; it's crucial for balance, so no substitutes are needed.
  • Black Pepper – Adds a hint of spice; adjust according to taste or omit for a milder flavor.

For the Topping

  • Sharp Cheddar Cheese – Provides savory flavor and gooey texture; substitute with gouda, feta, or pepper jack for a twist.
  • Bacon – Adds a savory, crunchy topping; for a vegetarian option, replace with sautéed mushrooms or crispy tempeh.

Step‑by‑Step Instructions for Savory Cheddar & Bacon Dutch Baby

Step 1: Preheat the Oven
Start by preheating your oven to 425°F (220°C). While the oven heats up, place a cast-iron skillet inside to warm; this will ensure your Savory Cheddar & Bacon Dutch Baby puffs up beautifully. Let the skillet heat for about 10 minutes, so it's ready for the batter.

Step 2: Blend the Batter
In a blender, combine the eggs, all-purpose flour, milk, melted butter, salt, and black pepper. Blend until the mixture is smooth and frothy, which should take about 30 seconds. Let the batter rest for 5 minutes while the skillet continues to heat up, allowing air to incorporate for a fluffier result.

Step 3: Prepare the Skillet
Once preheated, carefully remove the hot cast-iron skillet from the oven. Add a tablespoon of butter to the skillet, swirling it around to coat the bottom and sides. Pour the rested batter into the skillet immediately; you should hear a delightful sizzle when the batter hits the hot surface, indicating a good start for your Dutch baby.

Step 4: Add Toppings
Sprinkle the shredded sharp cheddar cheese and crumbled bacon evenly over the batter. The cheese will melt and create a gooey, savory layer while the bacon crisps up beautifully during baking. This combination is what makes the Savory Cheddar & Bacon Dutch Baby such a breakfast delight.

Step 5: Bake to Perfection
Place the skillet in the oven and bake for 20 to 25 minutes. Keep an eye on it; the edges should puff up and turn a golden brown, while the center remains slightly soft but set. Avoid opening the oven door during baking to prevent deflation of your delicious creation.

Step 6: Serve Warm
Once baked, carefully remove the skillet from the oven, and let it rest for a minute. You can garnish your Savory Cheddar & Bacon Dutch Baby with fresh parsley or chives for a touch of color and flavor. Slice and serve warm straight from the skillet, allowing everyone to enjoy this impressive breakfast treat!

What to Serve with Savory Cheddar & Bacon Dutch Baby

Discover the perfect accompaniments to enhance your savory delight, creating a memorable meal experience.

  • Crispy Green Salad: A fresh salad with mixed greens, cucumbers, and a light vinaigrette adds a bright crunch that balances the richness of the Dutch baby.

  • Roasted Asparagus: Tender asparagus, roasted with olive oil and garlic, brings a delightful earthiness that pairs beautifully with the cheesy pancake.

  • Sliced Avocado: Creamy avocado slices give a luxurious texture and additional healthy fats to your brunch spread, creating a satisfying contrast.

  • Fresh Fruit Medley: A vibrant mix of seasonal fruits, like berries and melons, provides a refreshing sweet touch that complements the savory flavors perfectly.

  • Honey Drizzle: A light drizzle of honey on top provides a sweet counterpoint to the cheese and bacon, making every bite irresistible.

  • Sparkling Water with Citrus: For a refreshing drink, serve sparkling water infused with lemon or lime slices for a zingy, palate-cleansing beverage.

Make Ahead Options

These Savory Cheddar & Bacon Dutch Babies are a game-changer for busy home cooks! You can prepare the batter up to 24 hours in advance; simply blend all the ingredients, and refrigerate it in an airtight container. Before baking, let the batter sit at room temperature for about 15-30 minutes to ensure a fluffy texture. Additionally, you can pre-cook the bacon and store it in the fridge for up to 3 days to save even more time. When you're ready to serve, just preheat the oven, melt butter in the skillet, pour in the chilled batter, sprinkle with cheese and bacon, and bake until perfectly puffed. Enjoy this comforting breakfast delight with minimal effort!

Storage Tips for Savory Cheddar & Bacon Dutch Baby

  • Fridge: Store leftovers in an airtight container for up to 2 days. This will help keep the flavors intact while preventing them from drying out.
  • Freezer: For longer storage, freeze individual slices wrapped tightly in plastic wrap and then placed in a freezer-safe bag for up to 2 months.
  • Reheating: Reheat in the oven at 350°F (175°C) for 10-15 minutes, ensuring the Savory Cheddar & Bacon Dutch Baby regains its fluffy texture.
  • Make-Ahead: The batter can be made and refrigerated for up to 24 hours. Just let it come to room temperature before pouring into the hot skillet for baking.

Expert Tips for Savory Cheddar & Bacon Dutch Baby

  • Preheat Properly: Make sure your oven and skillet are fully preheated; this ensures maximum puffiness for your Savory Cheddar & Bacon Dutch Baby.

  • Avoid Oven Door: Resist the urge to peek while it bakes; opening the oven door can cause your fluffy pancake to deflate, ruining its beautiful rise.

  • Serve Immediately: For the best texture, serve your Dutch baby right after baking; reheating can lead to a denser pancake, losing that delightful fluffiness.

  • Mix Well: Blend the batter until smooth and frothy for an airy finish; lumps will prevent the pancake from rising properly.

  • Customize Toppings: Feel free to get creative with different toppings or cheeses; variations will keep the dish exciting for repeat meals!

Savory Cheddar & Bacon Dutch Baby Variations

Feel free to get creative and make this dish your own with these delightful tweaks!

  • Gluten-Free: Substitute all-purpose flour with a gluten-free flour blend for a fluffy, inclusive treat.
  • Veggie Delight: Swap bacon for sautéed vegetables like bell peppers and spinach for a wholesome meatless option. The vibrant colors and flavors will keep you coming back for more!
  • Cheese Exchange: Try gouda or pepper jack for a flavor twist that will surprise and delight your taste buds. Each option brings a new personality to this beloved pancake.
  • Herb Infusion: Add fresh herbs like thyme or rosemary to the batter for a fragrant uplift. This simple touch can elevate the dish to a new level of deliciousness!
  • Spicy Kick: Mix in a pinch of cayenne pepper or chili flakes to the batter for a touch of heat, perfect for those who enjoy a spicy breakfast. Your taste buds will thank you for the fiery surprise.
  • Creamy Add-On: Drizzle a bit of sour cream or Greek yogurt on top before serving for a tangy richness that complements the savory flavors quite nicely. It adds a layer of creaminess that perfectly balances the pancake texture.
  • Sweet Savory Fusion: For a unique twist, add a drizzle of maple syrup or honey right before serving. This sweet contrast with savory flavors creates a deliciously unexpected combination.
  • Air Fryer Alternative: If you’re looking for a quicker method, you can cook your Dutch baby in an air fryer for a similar fluffy outcome. Just keep an eye on the timing to ensure it's just right!

By experimenting with these variations, you can add your personal touch and keep this dish fresh every time. And if you're looking for more delicious recipes, don't forget to check out our Santa Soup Savory or even consider pairing this with some tasty Grilled Mushrooms Savory as a side. Enjoy the kitchen adventures!

Savory Cheddar & Bacon Dutch Baby Recipe FAQs

What type of cheese works best for the Savory Cheddar & Bacon Dutch Baby?
I highly recommend using sharp cheddar cheese for its strong flavor and gooey texture. However, feel free to experiment with other cheeses like gouda, feta, or pepper jack for a delightful twist. Each cheese brings its unique taste, allowing you to customize your Dutch baby to your liking.

How should I store leftovers of the Savory Cheddar & Bacon Dutch Baby?
To keep your leftovers fresh, store them in an airtight container in the refrigerator for up to 2 days. If you want to maintain the best texture, I suggest reheating it in the oven at 350°F (175°C) for about 10-15 minutes, which will help regain its fluffy goodness.

Can I freeze the Savory Cheddar & Bacon Dutch Baby?
Absolutely! You can freeze individual slices of the Dutch baby. Wrap each slice tightly in plastic wrap, then place them in a freezer-safe bag. They can be kept in the freezer for up to 2 months. When you're ready to enjoy, simply reheat in the oven as mentioned above to restore its wonderful texture.

How do I ensure my Savory Cheddar & Bacon Dutch Baby comes out fluffy?
To achieve maximum puffiness, make sure your oven and cast-iron skillet are fully preheated before adding the batter. Blend the ingredients until smooth and frothy, and avoid opening the oven door while baking, as it can cause the Dutch baby to deflate. Serve immediately after baking for the best fluffy experience!

Are there any dietary considerations for this recipe, especially for allergies?
Yes! If you're looking for a gluten-free option, simply substitute the all-purpose flour with a gluten-free flour blend. Additionally, for those with dairy allergies, you can use oil instead of melted butter and non-dairy milk alternatives like oat or almond milk. For a vegetarian version, swap out the bacon for sautéed mushrooms or crispy tempeh.

How can I customize the toppings of my Savory Cheddar & Bacon Dutch Baby?
Feel free to get creative with your toppings! Instead of bacon, try sautéed vegetables like bell peppers and spinach for a healthy twist. You can also add fresh herbs like chives or parsley for a burst of color and flavor. If you want to change the flavor profile, mix different cheeses to level up your breakfast game!

Savory Cheddar & Bacon Dutch Baby

Savory Cheddar & Bacon Dutch Baby: A Cozy Brunch Treat

Savory Cheddar & Bacon Dutch Baby brings a delightful taste and stunning presentation, perfect for brunch or a cozy breakfast treat.
Print Recipe Pin Recipe
Prep Time 10 minutes mins
Cook Time 25 minutes mins
Resting Time 5 minutes mins
Total Time 35 minutes mins
Servings: 4 slices
Course: Breakfast
Cuisine: American
Calories: 300
Ingredients Equipment Method Nutrition Notes

Ingredients
  

For the Batter
  • 3 large Eggs Provide structure and help the pancake puff up.
  • 1 cup All-Purpose Flour Substitute with a gluten-free flour blend for a gluten-free option.
  • 1 cup Milk Use whole milk or oat/almond milk for lactose-free.
  • 4 tablespoons Melted Butter Can be replaced with oil for a dairy-free option.
  • 1 teaspoon Salt Essential for flavor balance.
  • 1 teaspoon Black Pepper Adjust according to taste.
For the Topping
  • 1 cup Sharp Cheddar Cheese Substitute with gouda, feta, or pepper jack for a twist.
  • 4 slices Bacon For a vegetarian option, replace with sautéed mushrooms or tempeh.

Equipment

  • cast iron skillet
  • Blender

Method
 

Step-by-Step Instructions
  1. Preheat your oven to 425°F (220°C) with a cast-iron skillet inside for about 10 minutes.
  2. In a blender, combine the eggs, all-purpose flour, milk, melted butter, salt, and black pepper. Blend until smooth and frothy, then let rest for 5 minutes.
  3. Remove the hot skillet from the oven, add 1 tablespoon of butter, and swirl to coat. Pour in the rested batter.
  4. Sprinkle the shredded sharp cheddar and crumbled bacon over the batter.
  5. Bake for 20 to 25 minutes until puffed and golden brown, avoiding opening the oven door.
  6. Let it rest for a minute, garnish with parsley or chives, slice, and serve warm.

Nutrition

Serving: 1sliceCalories: 300kcalCarbohydrates: 29gProtein: 12gFat: 18gSaturated Fat: 9gPolyunsaturated Fat: 1gMonounsaturated Fat: 6gCholesterol: 170mgSodium: 600mgPotassium: 300mgFiber: 1gSugar: 1gVitamin A: 500IUCalcium: 150mgIron: 1mg

Notes

Serve immediately for the best texture; reheating can make it dense. Feel free to customize toppings for variety.

Tried this recipe?

Let us know how it was!

Tasty Baked Apple Cinnamon Oatmeal Cups for Cozy Mornings

November 24, 2025 by Grace Snow Leave a Comment

As I stood in my kitchen this morning, a symphony of cinnamon and apples wafted through the air, invoking memories of cozy fall mornings. These Tasty Baked Apple Cinnamon Oatmeal Cups are not just a beautiful way to start your day; they’re a perfect meal prep solution for those busy weekdays when breakfast can easily fall by the wayside. Packed with wholesome ingredients, each muffin-like cup combines sweet apples, hearty oats, and aromatic spices, ensuring a healthy, satisfying meal that fits seamlessly into your routine. The best part? They freeze like a dream, promising warmth and comfort even on the most hectic of mornings. Curious how to whip up these delightful breakfast gems? Let’s dive into this delightful recipe together!

Why are these oatmeal cups irresistible?

Health Conscious: These Tasty Baked Apple Cinnamon Oatmeal Cups are packed with nutritious oats and apples, making them a wholesome, healthy breakfast option.

Meal Prep Masterpiece: They store well in the fridge or freezer, allowing you to create a batch ahead of time and have delicious, homemade breakfasts ready to go.

Customizable Goodness: Feel free to swap the apples for your favorite fruits or experiment with spices for a personal touch that keeps things exciting.

Time-Saving Delight: With just a few simple steps, you can have a warm and comforting breakfast that’s ready in under 30 minutes—ideal for busy mornings!

Crowd-Pleasing Comfort: Whether served to family or friends, these oatmeal cups are sure to impress with their delightful texture and cozy flavors. You can even serve them alongside options like Pumpkin Cinnamon Roll for a seasonal twist!

Tasty Baked Apple Cinnamon Oatmeal Cups Ingredients

For the Oatmeal Mixture

  • Old-fashioned rolled oats – Provides structure and a chewy texture; avoid instant or steel-cut oats for best results.
  • Cinnamon – Infuses warm, cozy flavor; adjust according to your taste preference.
  • Eggs – Binds ingredients together and adds richness; can be swapped with flax eggs for a vegan option.
  • Milk (any type) – Combines ingredients; plant-based milk is a great substitute for a dairy-free version.

For the Sweetness

  • Apples – Adds natural sweetness and moisture; use firm varieties like Honeycrisp or Granny Smith, chopped into 1/4-inch pieces.
  • Maple syrup (optional) – Enhances sweetness; honey or agave syrup can be used as alternatives.
  • Coarse sugar (optional) – Sprinkled on top for a crunchy finish; can be omitted if avoiding added sugars.

For the Crunch

  • Chopped nuts (optional) – Adds protein and texture; walnuts or pecans work well, but can be left out for a nut-free option.

These Tasty Baked Apple Cinnamon Oatmeal Cups are a heartfelt choice for your breakfast table, melding wholesome ingredients that contribute to both flavor and nutrition.

Step‑by‑Step Instructions for Tasty Baked Apple Cinnamon Oatmeal Cups

Step 1: Preheat Your Oven
Begin by preheating your oven to 350°F (177°C). While the oven warms up, grab a standard muffin pan and generously spray it with nonstick cooking spray to ensure easy removal of your Tasty Baked Apple Cinnamon Oatmeal Cups once they’re done baking. The warm aroma of cinnamon will soon fill your kitchen!

Step 2: Mix the Oatmeal Base
In a large mixing bowl, whisk together the old-fashioned rolled oats, ground cinnamon, eggs, milk, and optional maple syrup until fully combined. Take your time to ensure that there are no dry clumps of oats, creating a smooth mixture. This oatmeal base forms the hearty foundation of your delicious breakfast treat.

Step 3: Incorporate Apples and Nuts
Gently fold in the chopped apples and any desired nuts, ensuring an even distribution throughout the mixture. Aim for uniform apple pieces to prevent them from sinking during baking. The sweetness of the apples combined with the nutty crunch creates the perfect balance in your Tasty Baked Apple Cinnamon Oatmeal Cups.

Step 4: Fill the Muffin Pan
Carefully spoon the oatmeal batter into the prepared muffin cups, filling each about 3/4 full. This will provide enough room for the oatmeal cups to rise without overflowing. As you fill each cup, visualize the delightful golden-brown goods you're about to create, bringing excitement to your kitchen.

Step 5: Add the Finishing Touch
If you’re looking for an extra sweet touch, sprinkle a pinch of coarse sugar on top of each filled muffin cup. This optional step will give your Tasty Baked Apple Cinnamon Oatmeal Cups a delightful, crunchy topping that complements the comforting flavors within.

Step 6: Bake to Perfection
Place the muffin pan in your preheated oven and bake for 28-30 minutes. You're looking for golden-brown edges and a firm, set top. The enticing aroma of baked apples and cinnamon will fill your kitchen, signaling that it’s almost time to enjoy your cozy breakfast masterpiece.

Step 7: Cool and Enjoy
Once baked, let the Tasty Baked Apple Cinnamon Oatmeal Cups cool in the muffin pan for 5-10 minutes. This brief cooling period makes them easier to handle and helps them set perfectly. Afterward, gently remove them from the pan and savor the warm, comforting flavors you've created.

How to Store and Freeze Tasty Baked Apple Cinnamon Oatmeal Cups

  • Fridge: Store your oatmeal cups in an airtight container for up to 5 days. This keeps them fresh and ready for a quick grab-and-go breakfast!
  • Freezer: Individually wrap each cup in plastic wrap or foil, then place them in a freezer-safe bag. They can be frozen for up to 3 months.
  • Thawing: To enjoy, thaw them overnight in the fridge and reheat in the microwave for 30-60 seconds, adding a splash of milk to keep them moist.
  • Room Temperature: For short-term storage, these oatmeal cups can sit at room temperature for a few hours but should be refrigerated or frozen for longer-lasting freshness.

Tasty Baked Apple Cinnamon Oatmeal Cups Variations

Feel free to get creative with these oatmeal cups, and customize them to your heart's content!

  • Fruit Swap: Replace the apples with your favorite fruits like blueberries or mashed bananas for a different flavor.
  • Spice It Up: Experiment with spices like nutmeg or pumpkin pie spice to elevate the cozy flavors.
  • Nut-Free Version: Omit the nuts or substitute them with seeds for a crunchy texture that’s nut-free and just as satisfying.
  • Protein Boost: Stir in a scoop of your favorite protein powder into the oatmeal mixture for an extra nutritional kick.
  • Sweetness Options: Instead of maple syrup, try using honey or agave for an alternative sweetener that suits your taste.
  • Oat Variety: Swap old-fashioned rolled oats for steel-cut oats if you're looking for a heartier texture—just remember they'll require a longer baking time.
  • Dairy-Free Delight: Use almond milk, coconut milk, or oat milk to make these oatmeal cups suitable for a dairy-free diet.
  • Texture Twist: Add a layer of granola on top before baking for an extra crunchy finish that also gives a delightful presentation.

These variations allow you to enjoy the Tasty Baked Apple Cinnamon Oatmeal Cups in so many delightful ways! You might even like to pair them with some Pumpkin Cinnamon Roll for an autumn-inspired breakfast spread!

Expert Tips for Tasty Baked Apple Cinnamon Oatmeal Cups

  • Oats Matter: Avoid quick oats as they can lead to mushy oatmeal cups. Stick to old-fashioned rolled oats for the best texture in your Tasty Baked Apple Cinnamon Oatmeal Cups.

  • Apple Sizes: Ensure apple pieces are uniformly chopped to prevent them from sinking during baking. This will keep your oatmeal cups evenly balanced and flavorful.

  • Fill Wisely: Fill each muffin cup about 3/4 full. This allows space for rising and ensures even baking, so you enjoy a perfectly fluffy cup.

  • Sugar Topping: If you choose to sprinkle coarse sugar on top, do so sparingly. Too much can make it overly sweet—just a pinch will give you that delightful crunch without overpowering the cozy flavors.

  • Baking Watch: Keep an eye on the cups during baking. If the tops brown too quickly, gently cover them with aluminum foil to help them bake evenly without burning.

What to Serve with Tasty Baked Apple Cinnamon Oatmeal Cups

These scrumptious oatmeal cups make a delightful centerpiece for a heartfelt breakfast; let's elevate your meal with perfect pairings.

  • Greek Yogurt: Creamy and tangy, it complements the sweetness of the oatmeal cups while adding a protein boost for a satisfying start.
  • Fresh Berries: A burst of juicy strawberries or blueberries adds a refreshing contrast—a delightful and nutritious way to brighten your plate.
  • Scrambled Eggs: Fluffy, savory eggs provide a lovely contrast to the sweet oatmeal cups, making your breakfast feel balanced and hearty.
  • Maple Syrup Drizzle: A warm drizzle of maple syrup enhances the comforting flavors, turning each bite into an indulgent treat. It’s an extra touch that feels special!
  • Chopped Nuts: Crushed walnuts or pecans sprinkled on top provide an added crunch and nutty flavor that pairs beautifully with the cinnamon.
  • Herbal Tea: A warm cup of chamomile or peppermint tea adds a cozy finish to your meal, creating a soothing morning ritual.
  • Banana Slices: Simple and nutritious, fresh banana rounds add a creamy sweetness that complements the apple and cinnamon wonderfully.

These options will not only adorn your breakfast table but also enhance the heartwarming experience of enjoying Tasty Baked Apple Cinnamon Oatmeal Cups.

Make Ahead Options

These Tasty Baked Apple Cinnamon Oatmeal Cups are a fantastic meal prep solution for those bustling mornings! You can mix the oatmeal base, including oats, cinnamon, eggs, and milk, and refrigerate it for up to 24 hours. Additionally, chop the apples and nuts, and store them separately to preserve freshness. When you're ready to bake, simply combine everything and fill the muffin pan, then bake as usual. If preferred, you can also freeze the baked cups in individual portions for up to 3 months; just thaw them overnight in the refrigerator and reheat in the microwave for a quick breakfast that’s just as delicious! This makes every busy day a little easier and ensures you have a warm, wholesome option on hand.

Tasty Baked Apple Cinnamon Oatmeal Cups Recipe FAQs

What kind of apples should I use for the best results?
Absolutely! For the most flavorful Tasty Baked Apple Cinnamon Oatmeal Cups, opt for firm varieties like Honeycrisp or Granny Smith apples. These types not only add the right amount of sweetness but also provide a lovely texture that holds up well during baking. Make sure to chop them into 1/4-inch pieces to ensure even distribution throughout the cups.

How should I store my oatmeal cups after baking?
Very simple! After they’ve cooled, place your oatmeal cups in an airtight container in the refrigerator, where they'll stay fresh for up to 5 days. This makes them perfect for quick breakfasts, ensuring you have a wholesome meal ready whenever you need it.

Can I freeze Tasty Baked Apple Cinnamon Oatmeal Cups?
Absolutely! To freeze, individually wrap each cup in plastic wrap or foil and place them in a freezer-safe bag. They can be stored for up to 3 months. When you’re ready to enjoy one, just thaw it in the fridge overnight and reheat in the microwave for 30-60 seconds, adding a splash of milk to keep it moist.

What do I do if my oatmeal cups come out too dry?
If you find your oatmeal cups are a bit dry, there are a couple of steps you can take to remedy this for future batches. First, ensure you’re not overbaking; keep an eye on them, as baking for too long can lead to dryness. Another tip is to add a bit of extra milk or apples as moistening agents during preparation. Lastly, next time you reheat them, try adding a splash of milk or water to the container to create steam and add moisture back into the cups.

Are there any dietary considerations I should be aware of?
Yes! If you or someone you serve these oatmeal cups to has dietary restrictions, they’re quite flexible. You can easily substitute the eggs with flax eggs for a vegan option. For a dairy-free version, simply use almond milk or coconut milk instead of regular milk. Additionally, if you’re preparing these for a nut-free audience, just skip the nuts entirely for a delicious, safe breakfast treat.

Can I make these oatmeal cups gluten-free?
Certainly! To make Tasty Baked Apple Cinnamon Oatmeal Cups gluten-free, just use certified gluten-free oats. This is an easy swap that allows those with gluten sensitivities to enjoy these delicious breakfast cups without worry! Just confirm all other ingredients are also gluten-free to ensure safety.

Tasty Baked Apple Cinnamon Oatmeal Cups

Tasty Baked Apple Cinnamon Oatmeal Cups for Cozy Mornings

These Tasty Baked Apple Cinnamon Oatmeal Cups are a wholesome way to start your day, perfect for busy mornings and meal prep.
Print Recipe Pin Recipe
Prep Time 10 minutes mins
Cook Time 30 minutes mins
Cooling Time 10 minutes mins
Total Time 50 minutes mins
Servings: 12 cups
Course: Breakfast
Cuisine: American
Calories: 150
Ingredients Equipment Method Nutrition Notes

Ingredients
  

For the Oatmeal Mixture
  • 2 cups Old-fashioned rolled oats Avoid instant or steel-cut oats for best results.
  • 1 teaspoon Cinnamon Adjust according to your taste preference.
  • 2 large Eggs Can be swapped with flax eggs for a vegan option.
  • 1 cup Milk (any type) Plant-based milk is a great substitute for a dairy-free version.
For the Sweetness
  • 2 cups Apples Use firm varieties like Honeycrisp or Granny Smith, chopped into 1/4-inch pieces.
  • 1/4 cup Maple syrup Optional; honey or agave syrup can be used as alternatives.
  • 2 tablespoons Coarse sugar Optional; can be omitted if avoiding added sugars.
For the Crunch
  • 1/2 cup Chopped nuts Optional; walnuts or pecans work well, but can be left out for a nut-free option.

Equipment

  • Muffin Pan
  • Mixing Bowl
  • Whisk
  • Nonstick Cooking Spray

Method
 

Step-by-Step Instructions
  1. Preheat your oven to 350°F (177°C) and spray a muffin pan with nonstick cooking spray.
  2. In a large mixing bowl, whisk together the oats, cinnamon, eggs, milk, and optional maple syrup.
  3. Gently fold in the chopped apples and any desired nuts.
  4. Spoon the oatmeal batter into the prepared muffin cups, filling each about 3/4 full.
  5. Optionally, sprinkle coarse sugar on top of each filled muffin cup.
  6. Bake for 28-30 minutes until golden-brown and firm on top.
  7. Let the cups cool in the muffin pan for 5-10 minutes before removing.

Nutrition

Serving: 1cupCalories: 150kcalCarbohydrates: 25gProtein: 4gFat: 5gSaturated Fat: 1gPolyunsaturated Fat: 0.5gMonounsaturated Fat: 3gCholesterol: 50mgSodium: 150mgPotassium: 200mgFiber: 3gSugar: 8gVitamin A: 200IUVitamin C: 5mgCalcium: 80mgIron: 1mg

Notes

These oatmeal cups can be stored in an airtight container in the fridge for up to 5 days or frozen for up to 3 months. Thaw overnight in the fridge before reheating.

Tried this recipe?

Let us know how it was!

Mini Breakfast Omelets in Crispy Tater Tot Cups

November 24, 2025 by Grace Snow Leave a Comment

The aroma of freshly baked tater tots wafts through my kitchen, and I can't help but smile at the thought of my family's upcoming breakfast. These Mini Breakfast Omelets with a Tater Tot Crust are not just any ordinary breakfast; they’re a delightful twist on morning classics that are as fun to make as they are to eat. Ideal for busy holiday mornings or a quick family brunch, these egg muffins are incredibly customizable, meaning everyone can fill them with their favorite ingredients, from savory meats to vibrant veggies. Plus, they’re freezer-friendly, allowing you to prepare a batch ahead of time for those hectic weekdays. Who wouldn't want to start their day with a fluffy omelet nestled in a crispy crust? Ready to learn how to whip these up? Let’s dive in!

Why Are These Mini Breakfast Omelets Amazing?

Customization, Each bite can be tailored to your family's tastes—think bacon, spinach, or even jalapeños! Fun to Make, These little omelet cups are not only enjoyable to prepare but also a hit at the breakfast table. Freezer-Friendly, Make a large batch, freeze, and simply reheat for effortless breakfasts all week. Crowd-Pleasing, They're perfect for brunch gatherings or lazy Sunday mornings, ensuring everyone leaves satisfied. If you’re on the lookout for more quick breakfast ideas, check out Breakfast Egg Muffins or Cornbread Breakfast Casserole.

Mini Breakfast Omelets Ingredients

For the Tater Tot Crust
• Tater Tots – The crispy foundational layer that adds a delightful crunch to your mini omelets; frozen works perfectly for convenience.

For the Omelet Filling
• Large Eggs – The heart of the dish, providing rich protein; fresh eggs yield the fluffiest results.
• Milk – Creaminess enhancer for the eggs; almond milk is a great dairy-free alternative.
• Shredded Cheese – Adds a savory, gooey texture; Colby Jack or cheddar is recommended, but reduced-fat cheese can lighten the dish.
• Meat & Veggies – Personalize each muffin with your favorite fillings like sausage, bacon, bell peppers, or spinach; using pre-diced veggies will save time.
• Seasonings – A dash of salt, pepper, or your favorite herbs can elevate the flavor of these Mini Breakfast Omelets to new heights!

Step‑by‑Step Instructions for Mini Breakfast Omelets

Step 1: Preheat and Prepare
Start by preheating your oven to 400°F (200°C) while you generously grease a standard muffin pan with cooking spray or butter. This ensures that the mini breakfast omelets will easily release once baked. Place the muffin pan aside as you gather your ingredients, preparing for the tater tot crust that will form the base of your delightful omelets.

Step 2: Create the Tater Tot Crust
Take your frozen tater tots and microwave them in a bowl for about 2-3 minutes to soften. Once thawed, place three tater tots into each muffin cup and use the back of a spoon to smash them down into a flat, even layer. Bake the crusts in the preheated oven for 10 minutes until they start to turn golden brown and crispy.

Step 3: Add Meats and Veggies
Once the tater tot crusts are ready, reduce the oven temperature to 350°F (175°C). Carefully remove the muffin pan from the oven and distribute your choice of pre-cooked meats and diced vegetables evenly into each cup, packing them slightly to add flavor. This step allows you to customize your Mini Breakfast Omelets to suit every family member’s taste preferences.

Step 4: Whisk the Egg Mixture
In a separate mixing bowl, crack in the large eggs and add about a splash of milk for creaminess. Whisk together until the mixture is well combined and slightly frothy. Season it with salt, pepper, or any herbs you like. Pour this egg mixture into each muffin cup, filling them about 90% full to allow for rising while baking.

Step 5: Sprinkle with Cheese
Finally, sprinkle a generous amount of shredded cheese over each muffin, ensuring they are all covered for that gooey texture. Place the muffin pan back into the oven and bake for an additional 20 minutes. Keep an eye on them; you’ll know the mini breakfast omelets are done when the eggs are set, and the cheese has melted into a lovely golden crust.

Step 6: Cool and Serve
Once baked, carefully remove the muffin pan from the oven and allow the mini breakfast omelets to cool for about 5 minutes. This waiting period makes them easier to remove from the pan. Gently lift each omelet out using a fork or your fingers, and serve warm as a delicious family-friendly breakfast or brunch treat!

Expert Tips for Mini Breakfast Omelets

  • Mind the Fill: Avoid overfilling each cup as the egg mixture expands during baking, which could create a mess in your oven.
  • Ingredient Flexibility: Customize your Mini Breakfast Omelets with your preferred meats or veggies, but ensure that they are pre-cooked and properly diced for even cooking.
  • Freezing Success: Allow the egg muffins to cool completely before freezing to preserve their texture and taste; they can last up to 2 months for an easy grab-and-go breakfast!
  • Cheese Choices: Don't hesitate to mix and match different types of cheeses or skip it entirely for a dairy-free version, adapting to your family's dietary needs.
  • Spice It Up: Experiment with adding spices like paprika or chopped jalapeños to give your Mini Breakfast Omelets an added kick, making them even more delicious!

What to Serve with Mini Breakfast Omelets

Start your day on a high note with delightful pairings that elevate these charming breakfast bites into a complete meal experience.

  • Fresh Fruit Salad: A vibrant mix of seasonal fruits brings a refreshing contrast to the savory omelets, perfect for brightening your morning table. A splash of citrus juice or a sprinkle of mint can add an extra zing.

  • Crispy Bacon Strips: These salty, crunchy slices perfectly complement the eggs, adding an irresistible flavor profile. Pair them together for a breakfast that feels indulgent yet balanced.

  • Herbed Toast: A slice of warm, crusty bread topped with fresh herbs and olive oil enhances the meal's overall texture and adds a fragrant touch. It’s perfect for mopping up any eggy goodness left on your plate.

  • Creamy Avocado Slices: Silky avocado adds a dose of healthy fats and creaminess, creating a delightful mouthfeel. Its subtle flavor works harmoniously with the tater tot crust and egg filling.

  • Savory Breakfast Sausage: Juicy, savory sausage links provide a hearty element to your meal, enriching it with a satisfying bite. They can be served alongside or crumbled into the omelets for an extra treat.

  • Iced Coffee or Fresh Juices: A chilled beverage like juicy orange or invigorating iced coffee balances the warm, hearty omelets. Think of the bright citrus flavors invigorating your taste buds for a lively breakfast experience.

  • Mini Corn Muffins: Sweet, light muffins offer a delightful contrast with the crispy tater tot crust. They are great for adding a comforting carb option without overwhelming the palate.

  • Breakfast Smoothie: A luscious smoothie packed with greens and fruits can round out your meal, providing a nutritious boost and a creamy sidekick that pairs wonderfully with the flavors in your omelets.

Each pairing radiates warmth and deliciousness, ensuring that your breakfast is not just a meal, but a loving start to your day.

Make Ahead Options

For busy home cooks, these Mini Breakfast Omelets with a Tater Tot Crust are a dream! You can prepare the tater tot crusts up to 24 hours in advance—just stick to the initial baking instructions and allow them to cool completely before covering and refrigerating. The filling can also be prepped 3 days ahead; simply chop your meats and veggies, and store them in an airtight container. When you’re ready to serve, whisk your egg mixture and pour it over the prepped ingredients, then add the cheese before baking. This makes it super easy to enjoy a delicious, homemade breakfast, saving precious time on hectic mornings while maintaining that delightful, fluffy texture!

Mini Breakfast Omelets Variations

Feel free to add your own twist with these delightful suggestions that will make your mini breakfast omelets even more delicious!

  • Dairy-Free: Substitute milk with almond milk and cheese with a plant-based cheese for a creamy, guilt-free version.
  • Veggie-Packed: Load up on fresh spinach, zucchini, or mushrooms for a nutrient boost and vibrant colors.
  • Meat Lovers: Add crispy bacon or spicy chorizo for a heartier filling that will satisfy every meat enthusiast at the table.
  • Spicy Kick: Introduce diced jalapeños or a sprinkle of cayenne for those who love a little heat in their breakfast routine.
  • Herb-Infused: Fresh herbs like chives, basil, or parsley can elevate your omelets with refreshing flavors and a garden essence.
  • Cheese Alternatives: Experiment with different cheese types, such as feta for a tangy twist or goat cheese for a creamy surprise.
  • Sweet Tooth Option: Swap savory fillings for sweet ones by adding chopped fruits, such as apples or berries, topped with a sprinkle of cinnamon for a breakfast treat.
  • Low-Carb Delight: Replace tater tots with a cauliflower crust for a healthy, low-carb alternative while still enjoying that satisfying crunch.

For more great breakfast ideas, don't forget to check out our Breakfast Banana Split or make a sweet treat with Mini Tropical Pavlovas. Happy cooking!

How to Store and Freeze Mini Breakfast Omelets

  • Fridge: Store the mini breakfast omelets in an airtight container in the refrigerator for up to 5 days. This is perfect for quick breakfast options throughout the week.
  • Freezer: Allow the omelets to cool completely before wrapping each individually in plastic wrap and placing them in a freezer-safe bag. They can last for up to 2 months in the freezer.
  • Reheating: To reheat, simply remove the desired number of omelets from the freezer and microwave for 1-2 minutes, or heat them in the oven at 350°F (175°C) for about 10-15 minutes for best results.
  • Avoiding Ice Crystal Formation: If you're freezing a large batch, try to expel as much air as possible from the bag to prevent ice crystals and maintain the quality of your Mini Breakfast Omelets.

Mini Breakfast Omelets Recipe FAQs

What type of tater tots should I use?
Absolutely! You can use frozen tater tots for convenience. If you prefer homemade, ensure they’re cooked to a golden crisp before smashing them into the muffin pan.

How long can I store the mini breakfast omelets in the fridge?
These delightful mini breakfast omelets will stay fresh in an airtight container in the refrigerator for up to 5 days. This allows for quick and easy grab-and-go breakfasts throughout the week!

Can I freeze mini breakfast omelets, and how?
Yes, you can! Allow the omelets to cool completely after baking. Wrap each one individually in plastic wrap and then place them in a freezer-safe bag. They will keep well for up to 2 months. This way, you'll have easy breakfasts ready whenever you need them. Just follow these steps:

  1. Let them cool fully on a wire rack.
  2. Wrap each omelet tightly in plastic wrap.
  3. Place all wrapped omelets into a labeled freezer-safe bag, pressing out as much air as possible.

What if the omelets overflow during baking?
Very important! To prevent overflow, make sure to fill the muffin cups only about 90% full with the egg mixture. If you see any spills, you can carefully wipe the edges of the muffin pan before baking to avoid burnt bits.

Are these mini breakfast omelets suitable for special diets?
Yes! You can easily adapt these mini breakfast omelets to fit various dietary needs. Use plant-based meats or omit them for vegetarian options, opt for dairy-free cheese or milk alternatives, and even increase the veggie count for a nutrient boost. The more the merrier, so feel free to mix and match ingredients according to your family’s preferences!

Can I reheat the frozen mini breakfast omelets?
Certainly! To enjoy these mini breakfast omelets from the freezer, remove the desired number and microwave for 1-2 minutes. For the best texture, reheat them in the oven at 350°F (175°C) for about 10-15 minutes until heated through. Enjoy them warm for the best flavor!

Mini Breakfast Omelets

Mini Breakfast Omelets in Crispy Tater Tot Cups

Delightful Mini Breakfast Omelets with a crispy tater tot crust, perfect for a quick breakfast or brunch.
Print Recipe Pin Recipe
Prep Time 15 minutes mins
Cook Time 30 minutes mins
Cooling Time 5 minutes mins
Total Time 50 minutes mins
Servings: 6 cups
Course: Breakfast
Cuisine: American
Calories: 240
Ingredients Equipment Method Nutrition Notes

Ingredients
  

For the Tater Tot Crust
  • 2 cups Tater Tots Frozen works perfectly for convenience.
For the Omelet Filling
  • 6 large Eggs Fresh eggs yield the fluffiest results.
  • 0.5 cup Milk Almond milk is a great dairy-free alternative.
  • 1 cup Shredded Cheese Colby Jack or cheddar recommended.
  • 1 cup Meat & Veggies Personalize with favorite fillings like sausage, bacon, bell peppers, or spinach.
  • 1 teaspoon Seasonings Dash of salt, pepper, or favorite herbs.

Equipment

  • Standard muffin pan

Method
 

Step-by-Step Instructions for Mini Breakfast Omelets
  1. Preheat your oven to 400°F (200°C) and generously grease a standard muffin pan with cooking spray or butter.
  2. Microwave the frozen tater tots in a bowl for about 2-3 minutes to soften. Smash three tater tots into each muffin cup to form a flat layer. Bake for 10 minutes until golden brown.
  3. Reduce the oven temperature to 350°F (175°C) and distribute choice of pre-cooked meats and diced vegetables evenly into each cup.
  4. Whisk the large eggs with a splash of milk until well combined and slightly frothy. Pour the mixture into each muffin cup, filling them about 90% full.
  5. Sprinkle shredded cheese over each muffin and bake for an additional 20 minutes.

  6. Allow the mini breakfast omelets to cool for about 5 minutes before serving.

Nutrition

Serving: 1cupCalories: 240kcalCarbohydrates: 15gProtein: 12gFat: 15gSaturated Fat: 7gPolyunsaturated Fat: 1gMonounsaturated Fat: 6gCholesterol: 265mgSodium: 500mgPotassium: 300mgFiber: 1gSugar: 1gVitamin A: 500IUVitamin C: 2mgCalcium: 200mgIron: 2mg

Notes

Allow the egg muffins to cool completely before freezing. They can last up to 2 months for an easy grab-and-go breakfast.

Tried this recipe?

Let us know how it was!
  • « Previous Page
  • 1
  • …
  • 16
  • 17
  • 18
  • 19
  • 20
  • …
  • 25
  • Next Page »

Welcome!

Hi, I’m Grace, a Sydney-based home cook with a passion for bold flavors and trending ingredients. Whether you’re a busy beginner or a seasoned foodie, you’ll find dishes here that are fresh, fun, and full of flavor.

More about me

Popular Recipes

  • Honey Sriracha Salmon Bowls
    Delicious Honey Sriracha Salmon Bowls for Quick Dinners
  • Air Fryer Apple Pie Taquitos
    Crispy Air Fryer Apple Pie Taquitos for a Sweet Treat
  • Crispy Parmesan Crusted Cod
    Crispy Parmesan Crusted Cod: A Healthy Flavor Explosion
  • Air Fryer French Toast Bites
    Delicious Air Fryer French Toast Bites for Busy Mornings

Footer

↑ back to top

About

  • Privacy Policy
  • Disclaimer
  • Terms & Conditions

Newsletter

  • Sign Up! for emails and updates

Contact

  • About me
  • Contact me

Copyright © 2025 TastyTrendIngredients