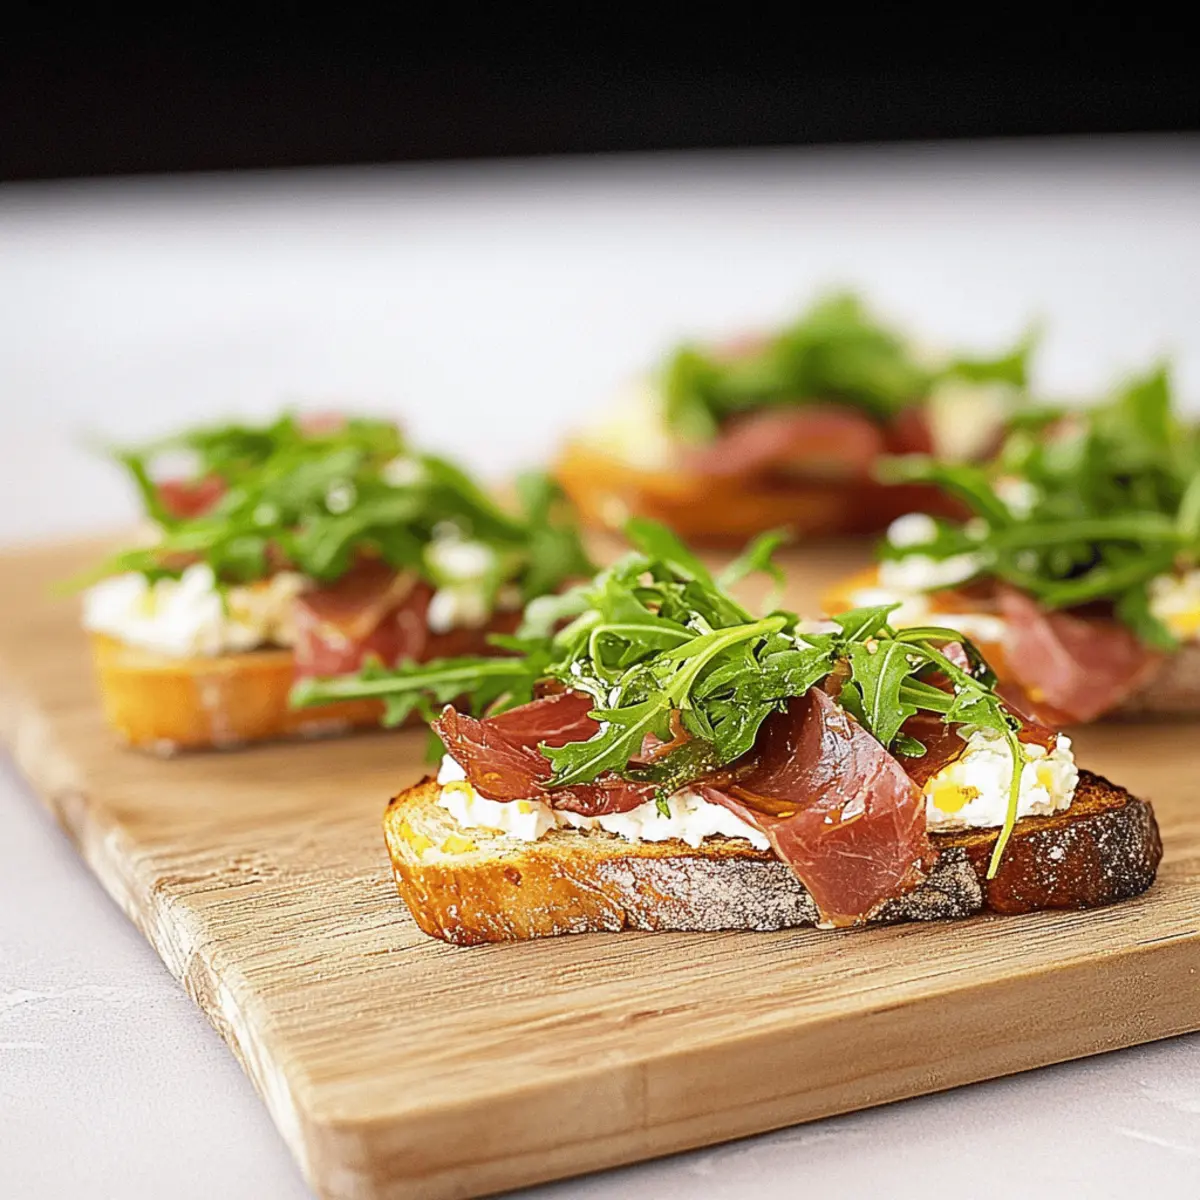
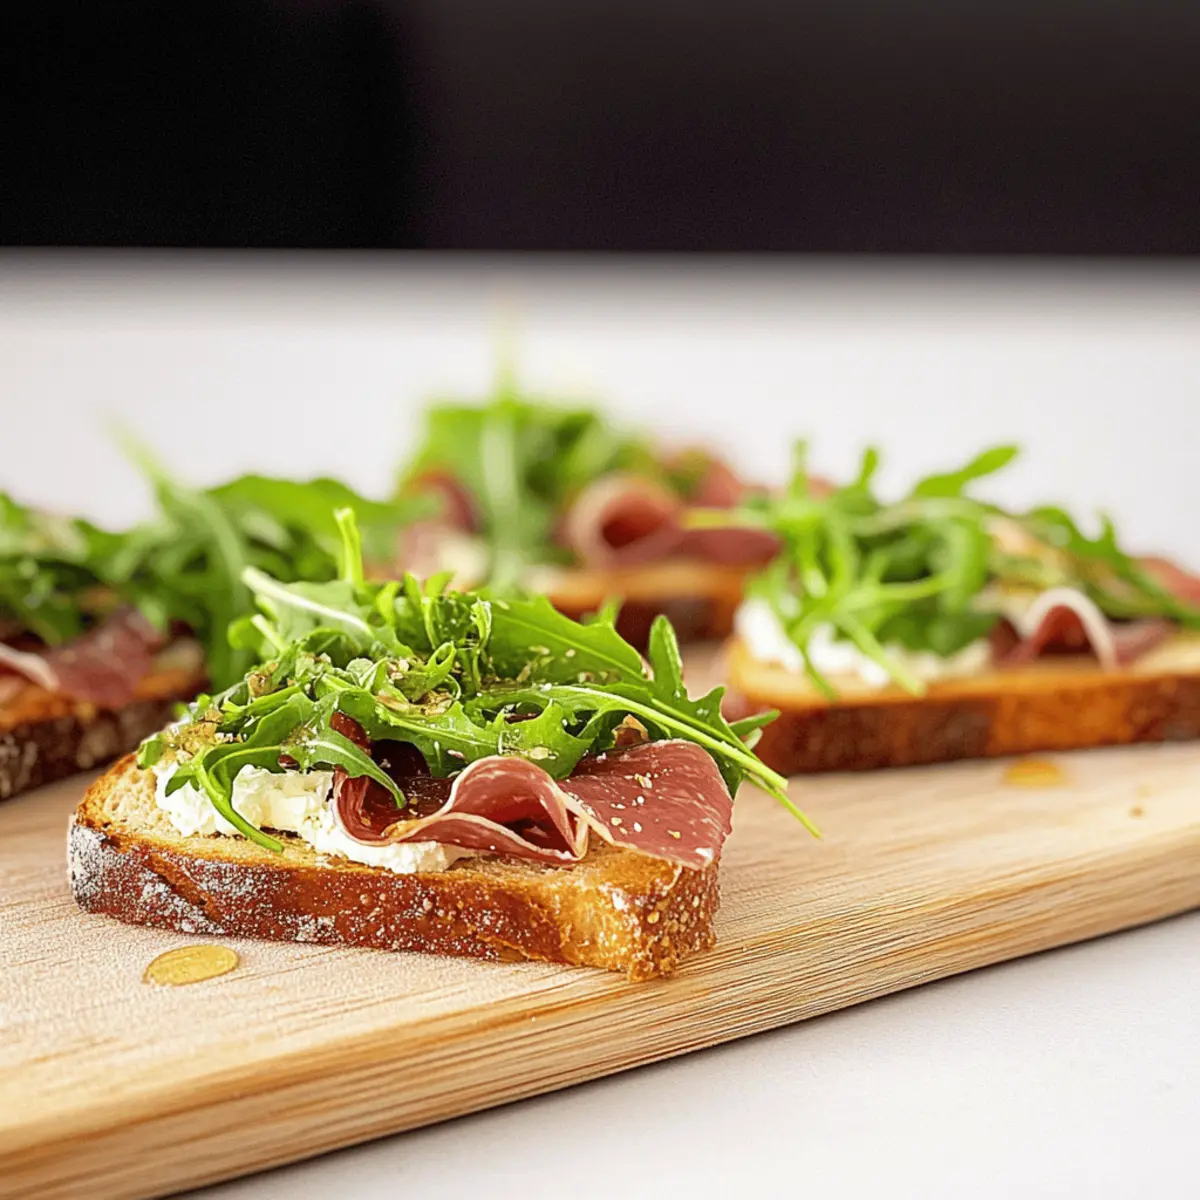
There's something truly magical about a simple gathering that transforms into a culinary celebration. This Elegant Prosciutto Arugula Bruschetta with Honey Mascarpone is your secret weapon for impressing guests without breaking a sweat. With just five ingredients, you can whip up a sophisticated appetizer that not only tantalizes the taste buds but also elevates your entertaining game. The salty richness of prosciutto aligns beautifully with the peppery arugula and the creamy mascarpone, all drizzled with a touch of honey for a playful finish. It’s a quick and elegant choice that’s perfect for last-minute gatherings or cozy dinners at home. Ready to learn how to put this tempting dish together? Let's dive into the details!
Why is Bruschetta a Favorite Appetizer?
Simplicity at Its Best: With just five ingredients, this bruschetta is incredibly easy to prepare, making it an ideal choice for any home cook.
Sophisticated Presentation: The vibrant colors and textures make each bite a feast for the eyes, perfect for impressing guests at any gathering.
Versatile Flavors: You can easily customize the toppings, swapping in different cheeses or adding roasted veggies to explore new flavor profiles.
Crowd-Pleasing Appeal: This dish strikes the perfect balance between salty, sweet, and creamy, leaving everyone wanting more.
Quick Preparation: In under 20 minutes, you’ll have an elegant appetizer ready to serve, ideal for those last-minute get-togethers.
Ready to treat your taste buds? Discover how to make this stunning Prosciutto Arugula Bruschetta now!
Prosciutto Arugula Bruschetta Ingredients
• Perfect for effortless entertaining.
For the Bread Base
- Baguette – Use thick slices for sturdiness and to prevent sogginess; ciabatta or sourdough are great alternatives.
For the Spread
- Mascarpone Cheese – Adds creaminess and a hint of sweet; if needed, ricotta or cream cheese can be good substitutes.
For the Main Toppings
- Prosciutto – Offers a salty, luxurious flavor; swap with coppa or bresaola for a different twist.
- Arugula – Provides a fresh, peppery bite; baby spinach or other greens can easily replace it.
For the Drizzle
- Honey – Balances the saltiness of prosciutto with its sweetness; maple syrup can be used for a unique flavor alternative.
Now that you have your ingredients ready, let’s dive into the deliciousness of making Prosciutto Arugula Bruschetta!
Step‑by‑Step Instructions for Prosciutto Arugula Bruschetta
Step 1: Gather Your Ingredients
Begin by assembling your ingredients: a fresh baguette, mascarpone cheese, prosciutto, arugula, and honey. Ensure that the baguette is firm and crusty for the best texture. Slice the bread into thick pieces, about 1 inch each, which will create a sturdy foundation for your Prosciutto Arugula Bruschetta.
Step 2: Toast the Bread
Preheat your oven to 400°F (200°C). Arrange the sliced baguette on a baking sheet and toast in the oven for 8–10 minutes until golden brown and crisp. Keep an eye on them, as you want a delightful crunch which will hold up against the creamy toppings. Once perfectly toasted, remove the bread and set it aside to cool slightly.
Step 3: Spread the Mascarpone
With your toasted baguette slices ready, spread a generous layer of mascarpone cheese on each slice. The creamy mascarpone should cover the bread evenly, providing a rich base for your toppings. This step not only enhances flavor but also adds a smooth texture to each bite of your Prosciutto Arugula Bruschetta.
Step 4: Add the Prosciutto
Tear the prosciutto into bite-sized pieces, allowing the saltiness to marinate the mascarpone below. Place a generous amount of prosciutto on top of the mascarpone-covered bread slices. The prosciutto should gently overlap, providing a luxurious layer that elevates the overall flavor of your bruschetta.
Step 5: Top with Arugula
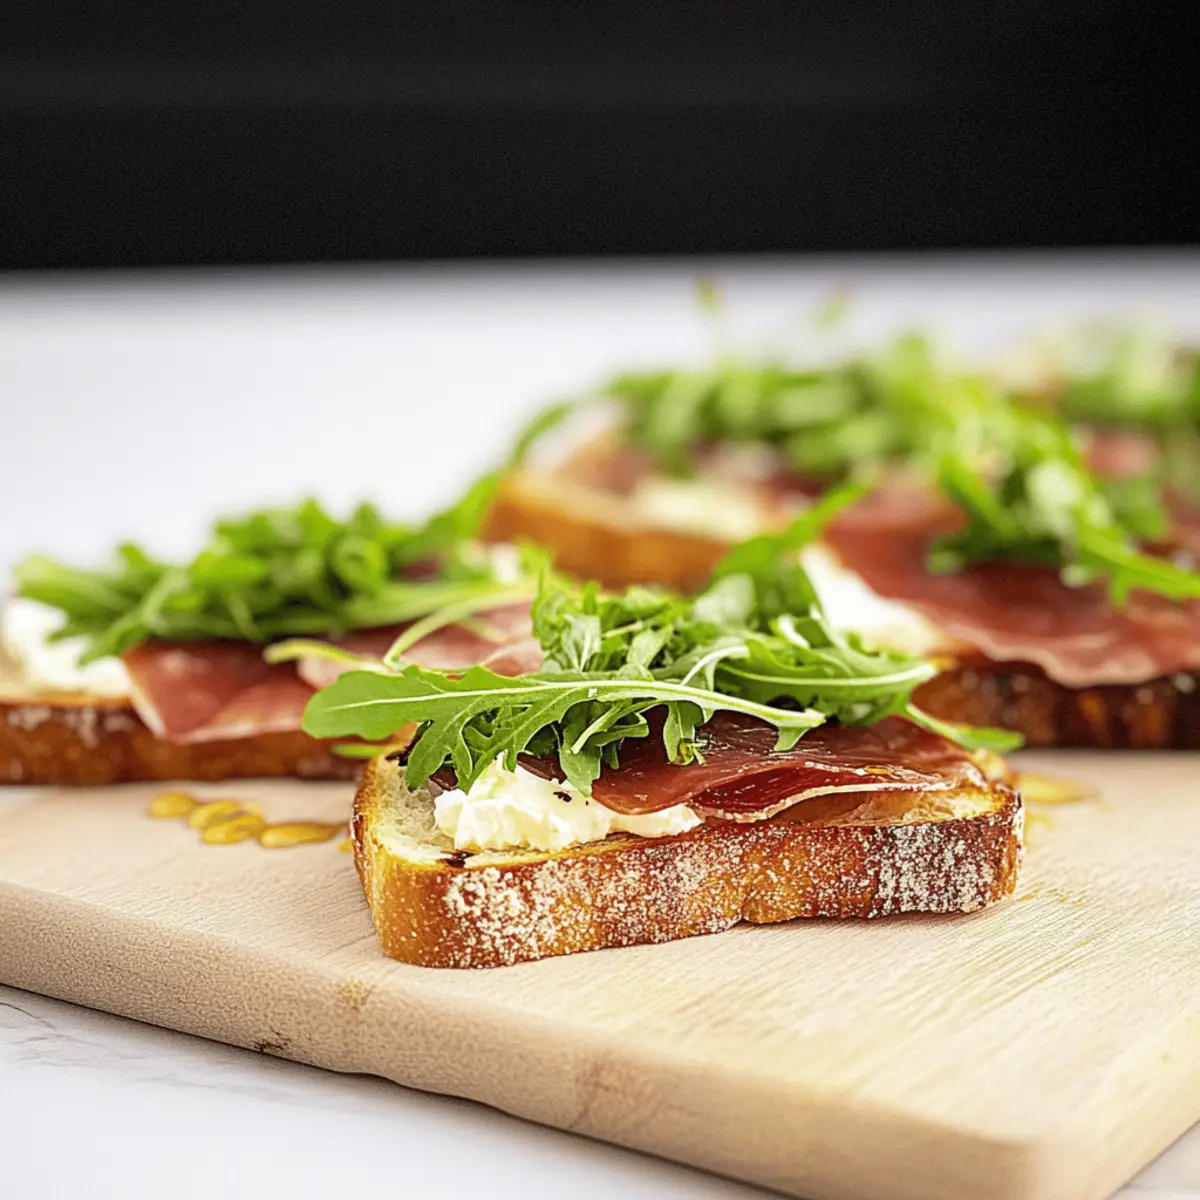
Next, take a handful of arugula and place it atop the prosciutto. The peppery green will bring a wonderful freshness and crunch, balancing out the richness of the mascarpone and the saltiness of the prosciutto. Be generous with the arugula to create an abundant and appealing look for your Prosciutto Arugula Bruschetta.
Step 6: Drizzle with Honey
Finally, finish each slice with a delicate drizzle of honey. This touch of sweetness will beautifully contrast with the savory elements, tying the entire dish together with a refined finish. Use a spoon or a small squirt bottle for precision, ensuring that each bruschetta is elegantly adorned.
Step 7: Serve Immediately
To maintain the texture of your Prosciutto Arugula Bruschetta, assemble everything right before serving. Place your beautifully crafted bruschetta on a serving platter and invite your guests to enjoy this delightful appetizer. The combination of crispy, creamy, and sweet will leave everyone captivated by your culinary creation.
What to Serve with Elegant Prosciutto Arugula Bruschetta
Imagine a delightful spread of flavors and textures that perfectly elevates your bruschetta experience, creating a meal that’s both sophisticated and satisfying.
-
Creamy Risotto: A luscious, creamy risotto complements the salty, rich prosciutto while adding a comforting texture to your dinner spread. The creaminess mirrors the mascarpone, creating an indulgent experience.
-
Caprese Salad: Fresh tomatoes, basil, and mozzarella will bring vibrant flavors to your table, balancing the richness of the bruschetta with their juicy sweetness.
-
Sparkling White Wine: A chilled glass of sparkling wine enhances the lightness of your meal while adding a celebratory touch, cutting through the creaminess of the mascarpone beautifully.
-
Garlic Herb Focaccia: A fragrant, warm focaccia will provide a delightful alternative bread option, allowing guests to enjoy additional dips or toppings while still echoing the flavors present in your bruschetta.
-
Roasted Asparagus: The earthy crunch of roasted asparagus adds a sophisticated flair and fits well with the peppery arugula, enhancing your overall gourmet presentation.
-
Fruit Platter: Fresh seasonal fruits like figs or cherries offer a sweet contrast that compliments the salty prosciutto and balances the dish, providing a refreshing palate cleanser.
-
Chocolate Mousse: For dessert, a silky chocolate mousse brings a rich, indulgent finish, creating a delightful juxtaposition to the sweet honey drizzle in your bruschetta.
-
Sparkling Water with Lemon: Keep it refreshing and light with sparkling water. A squeeze of lemon enhances the experience and complements the flavors beautifully.
These pairings not only enhance the experience of your Prosciutto Arugula Bruschetta but also create a memorable and delightful meal for any gathering.
Expert Tips for Prosciutto Arugula Bruschetta
• Perfect Bread Choice: Use thick slices of baguette for a sturdy base; avoid flimsy bread to prevent sogginess, which can ruin the bruschetta experience.
• Toast to Perfection: Ensure your bread is golden-brown and crispy after toasting; you want a delightful crunch that contrasts the creamy mascarpone beautifully.
• Layer Smartly: Spread mascarpone generously to create a barrier that protects against moisture from toppings; this will keep your bruschetta enjoyable longer.
• Fresh Assembly: Assemble your bruschetta just before serving; this prevents sogginess caused by juicy toppings like arugula, ensuring every bite is fresh and crisp.
• Experiment and Enjoy: Don't hesitate to try different ingredient variations for your Prosciutto Arugula Bruschetta, like swapping out cheeses or adding herbs for new flavors.
Prosciutto Arugula Bruschetta Variations
Feel free to unleash your culinary creativity with these delightful twists on a classic favorite!
-
Cheese Swap: Try goat cheese for a tangier flavor or feta for a crumbly texture that complements the other ingredients beautifully.
-
Veggie Addition: Add roasted cherry tomatoes for a burst of sweetness and color; their warm juiciness will elevate each bite.
-
Fresh Herbs: Incorporate torn basil or fresh thyme to the arugula for added fragrance and visual appeal—herbs always enhance flavor.
-
Spicy Kick: Drizzle some chili oil or sprinkle red pepper flakes on top of the bruschetta to introduce a zesty heat that balances the richness.
-
Add Nuts: Toss in some toasted pine nuts or sliced almonds atop the arugula for an unexpected crunch that elevates the texture profile wonderfully.
-
Vinegar Twist: A splash of balsamic reduction can create a striking flavor contrast alongside the sweetness of honey—perfect for the sophisticated palate.
-
Alternative Greens: Substitute arugula with peppery radish greens or crisp watercress for a fresh spin; it keeps the dish vibrant and exciting.
-
Sweet Upgrade: Experiment with different drizzles like agave syrup or a fig reduction to create depth and a rich sweetness that pairs nicely with savory flavors.
With these variations, you'll have an endless array of tastes and textures to explore. For more flavor ideas, check out my Delicious Roasted Cherry Tomato Recipe or consider trying a Balsamic Reduction to elevate your culinary creations even further!
Make Ahead Options
These Prosciutto Arugula Bruschetta are perfect for busy home cooks looking to save time! You can prepare the components in advance: toast the baguette slices and store them in an airtight container for up to 3 days; they will remain crisp and ready to use. You can also mix the mascarpone cheese with honey and refrigerate this mixture for up to 24 hours. However, assemble the bruschetta right before serving to prevent sogginess from the toppings. When you're ready to impress your guests, simply spread the honey mascarpone on the toasted bread, add prosciutto and arugula, and enjoy a sophisticated appetizer with minimal effort!
How to Store and Freeze Prosciutto Arugula Bruschetta
Fridge: Store any uneaten bruschetta in an airtight container for up to 3 days; however, remember that freshness is key, and textures may change.
Ingredients Separately: For optimal taste, keep the components—mascarpone, prosciutto, arugula, and honey—stored separately so you can easily assemble fresh bruschetta when you're ready to enjoy.
Freezer: Avoid freezing assembled bruschetta as the bread may become soggy upon thawing. Instead, freeze individual components like prosciutto for up to 2 months for later use.
Reheating: If you do have toasted bread remaining, reheat it in the oven at 350°F (175°C) for a few minutes to revive the crispness before reassembling your Prosciutto Arugula Bruschetta.

Prosciutto Arugula Bruschetta Recipe FAQs
What type of bread works best for bruschetta?
Absolutely! I recommend using a fresh baguette cut into thick slices (about 1 inch). This thickness provides the sturdiness to support the toppings without getting soggy. Ciabatta or sourdough are also excellent alternatives if you want to mix it up a bit!
How should I store leftover bruschetta?
For the best results, store any uneaten bruschetta in an airtight container for up to 3 days in the fridge. However, to maintain optimal freshness, it’s best to keep the components—mascarpone, prosciutto, arugula, and honey—separate. This way, you can assemble fresh bruschetta just when you're ready to serve.
Can I freeze prosciutto arugula bruschetta?
Unfortunately, I don’t recommend freezing assembled bruschetta as the bread tends to become soggy upon thawing. Instead, you can freeze the individual components, like prosciutto, for up to 2 months. Just remember to store them in airtight containers or heavy-duty freezer bags for the best preservation.
What if my bread gets soggy?
If you find that your bread has become soggy, it’s best to toast it again in the oven at 350°F (175°C) for a few minutes. This should help revive the crispiness. In the future, be sure to assemble the bruschetta just before serving to keep the textures intact!
Are there any dietary concerns to consider?
Yes! If you’re serving this bruschetta to guests, please note that it contains dairy (mascarpone cheese). For those with dietary restrictions or lactose intolerance, you can substitute the mascarpone with a dairy-free cream cheese alternative. Always check for specific allergies, particularly with prosciutto, as it’s a cured meat.
Can I add different toppings to my bruschetta?
The more, the merrier! Feel free to get creative by adding roasted cherry tomatoes, goat cheese, or even fresh herbs like basil or thyme for delightful flavor variations. Enjoying different toppings can make each toast feel unique and cater to everyone’s taste preferences!
Gourmet Prosciutto Arugula Bruschetta for Effortless Entertaining
Ingredients
Equipment
Method
- Gather your ingredients: a fresh baguette, mascarpone cheese, prosciutto, arugula, and honey.
- Preheat your oven to 400°F (200°C). Arrange the sliced baguette on a baking sheet and toast for 8–10 minutes until golden brown and crisp.
- Spread a generous layer of mascarpone cheese on each toasted baguette slice.
- Tear the prosciutto into bite-sized pieces and place it on top of the mascarpone-covered bread slices.
- Top with a handful of arugula to bring freshness and balance.
- Finish each slice with a delicate drizzle of honey.
- Serve immediately to maintain texture.