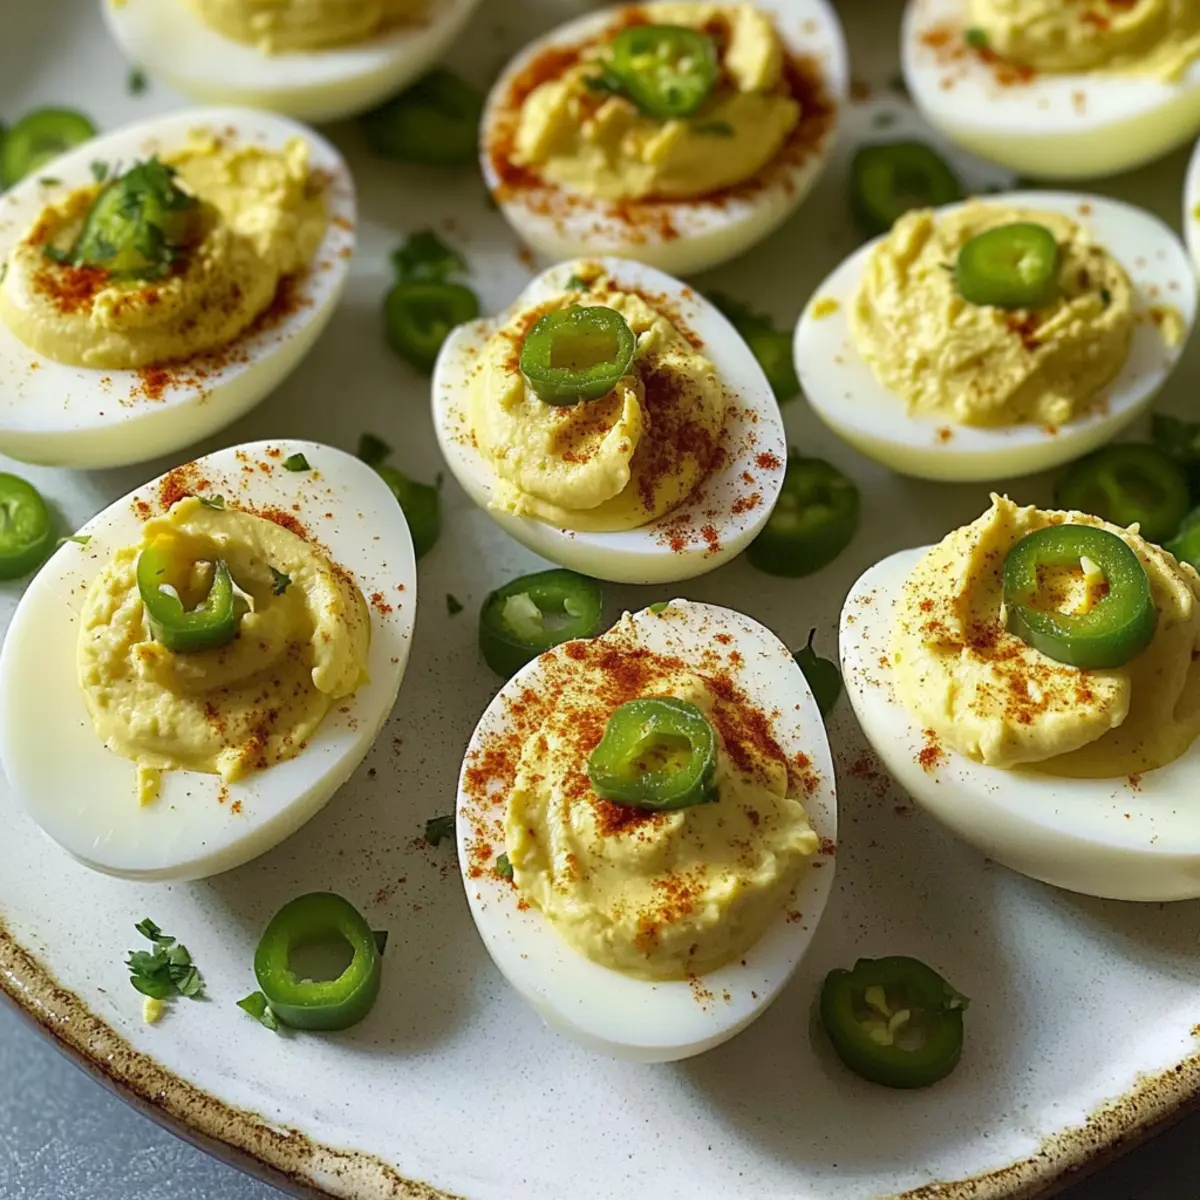
As I stood in my kitchen, the sun filtering through the window, I couldn’t help but marvel at the versatility of deviled eggs. Today, I was giving this classic appetizer a zesty twist with my Spicy Banana Pepper Deviled Eggs. With their creamy, vibrant yolk filling infused with the delightful kick of banana peppers, these crowd-pleasers are as much a feast for the eyes as they are for the taste buds. Not only are they effortlessly simple to whip up, but they also cater to those seeking a keto-friendly, low-carb option that’s bursting with nutrition. Whether it's a casual family get-together or a lively celebration, these deviled eggs will steal the show. Are you ready to spice up your next gathering? Let's dive into the recipe!
Why Are These Deviled Eggs Special?
Bursting with flavor, these Spicy Banana Pepper Deviled Eggs elevate a classic dish with a delightful kick. Easy to make, the recipe requires minimal ingredients and time, making it perfect for both beginner and seasoned cooks. Keto-friendly and low-carb, they satisfy cravings without the guilt. Visually stunning, the vibrant colors and garnishes enhance any appetizer spread. Versatile in spice level, you can easily adjust the heat to cater to your guests' preferences. Try serving these alongside Turkish Eggs for a complete brunch experience!
Spicy Banana Pepper Deviled Eggs Ingredients
• For the Filling
- Eggs – Use large, fresh eggs for the creamiest texture in your deviled eggs.
- Mayonnaise – This ingredient adds necessary creaminess; opt for a vegan or low-fat version if preferred.
- Banana Peppers – Choose pickled for extra tang, or fresh for a crunchy bite; adjust the quantity based on your preferred spice level.
- Smoked Paprika – Adds a delicious smokiness; regular paprika is a good alternative if you want to skip the smoke flavor.
- Salt & Pepper – Essential for enhancing flavor; tweak to your taste for perfect seasoning.
• Optional Garnishes
- Chives – Finely chopped chives add a fresh touch and vibrant color.
- Herbs – Fresh herbs like parsley or dill elevate the dish with flavor and visual appeal.
- Pepper Slices – Use slices of banana pepper for an extra zing and beautiful decoration.
These Spicy Banana Pepper Deviled Eggs will not just be a hit at any gathering; they'll leave your guests raving about them long after the last bite!
Step‑by‑Step Instructions for Spicy Banana Pepper Deviled Eggs
Step 1: Hard-Boil the Eggs
Begin by placing 6 large fresh eggs in a saucepan filled with cold water, ensuring they're submerged by at least an inch. Bring the water to a vigorous boil over medium-high heat. Once boiling, cover the pot, reduce to a low simmer, and cook for 10-12 minutes. When done, transfer the eggs to an ice water bath for about 5 minutes to halt cooking and make peeling easier.
Step 2: Peel and Halve the Eggs
Once the eggs are cool, gently tap them on a hard surface to crack the shell. Carefully peel the eggs under running water to remove all shell fragments. Slice each egg in half lengthwise using a sharp knife, and gently remove the yolks with a spoon, placing them in a mixing bowl. Set the egg whites aside on a serving platter.
Step 3: Prepare the Filling
In the mixing bowl, mash the yolks with a fork until finely crumbled. Add about 3 tablespoons of mayonnaise, 2-3 finely chopped banana peppers, 1 teaspoon of smoked paprika, and a pinch of salt and pepper. Mix everything until you achieve a smooth and creamy consistency. Feel free to adjust the amount of mayonnaise for a creamier filling in your Spicy Banana Pepper Deviled Eggs!
Step 4: Fill the Egg Whites
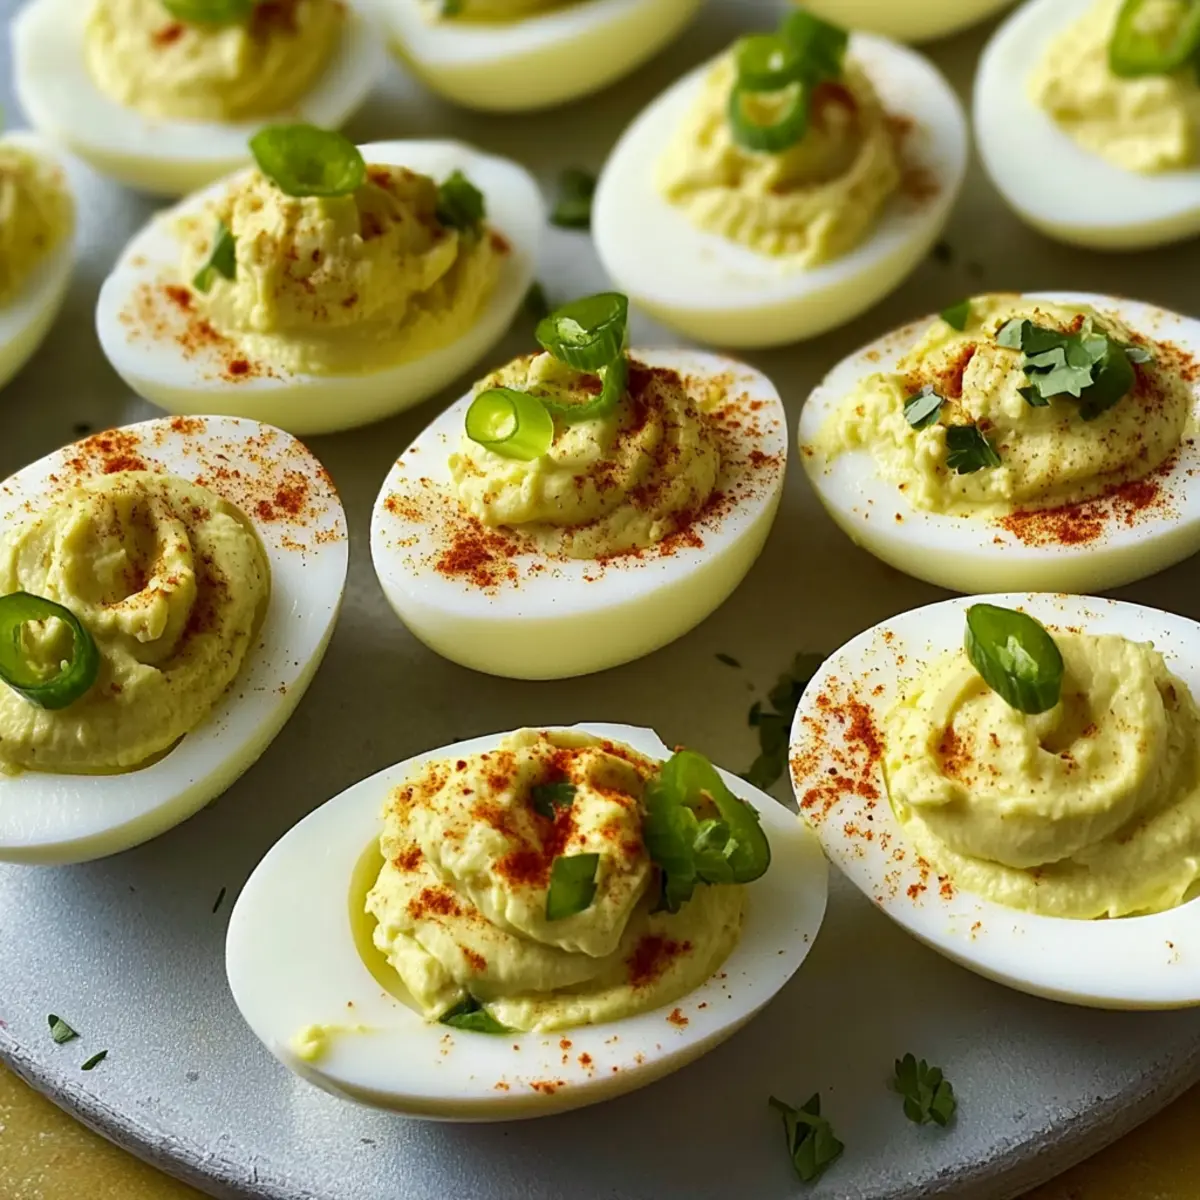
Using a piping bag or a simple spoon, carefully fill each egg white half with the yolk mixture. If using a piping bag, opt for a star-tip for a decorative finish. Ensure each egg white is generously filled, creating a lovely mound of the vibrant filling. This presentation not only looks appealing but adds to the flavor experience of your Spicy Banana Pepper Deviled Eggs.
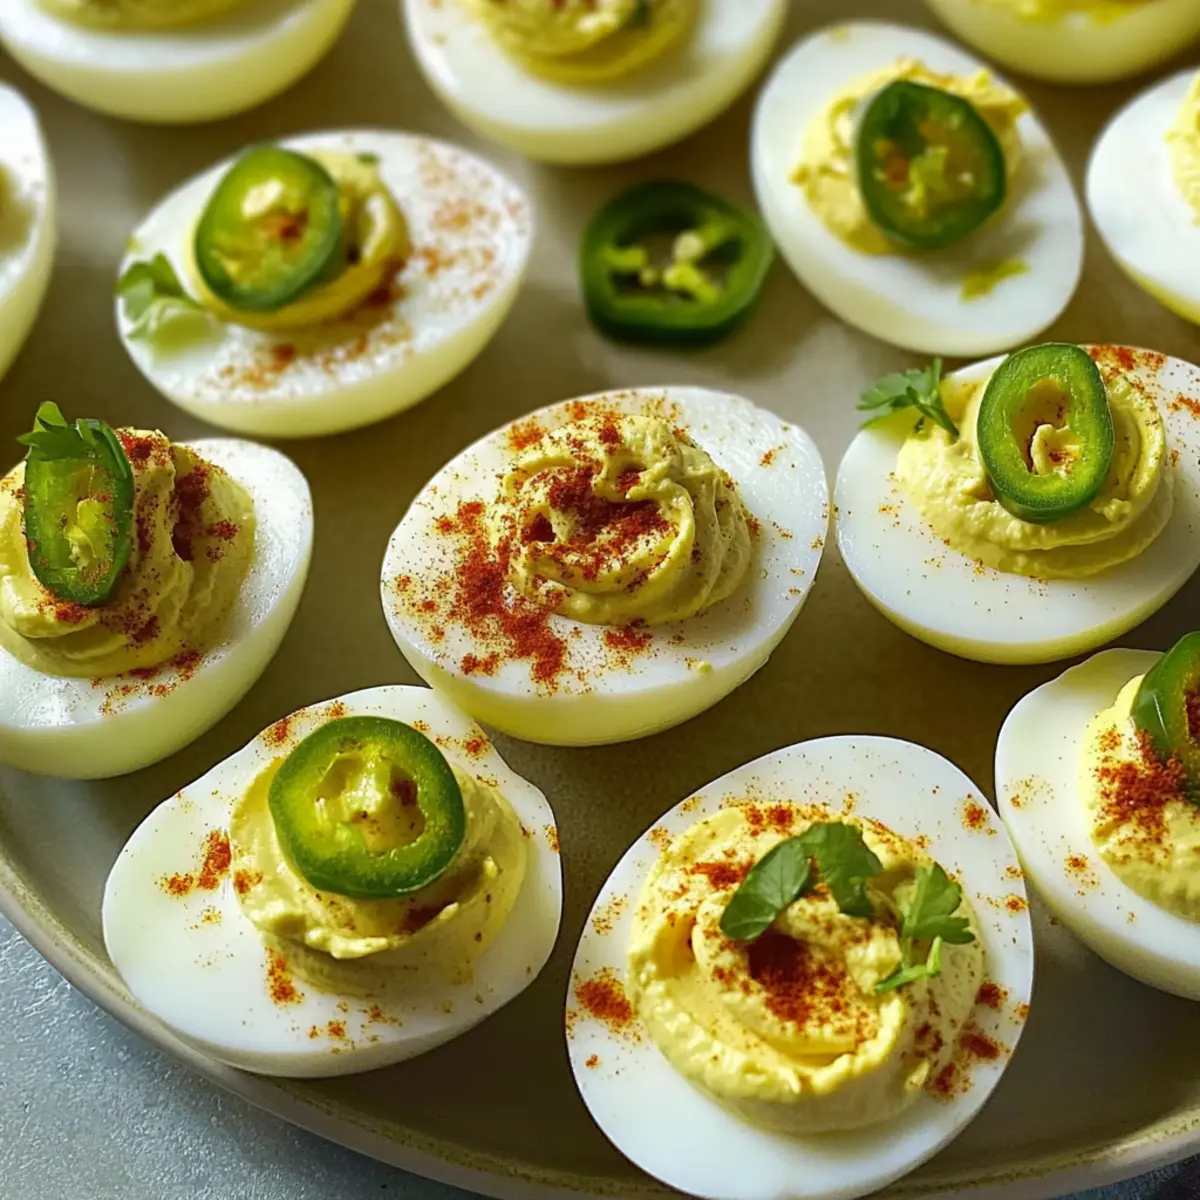
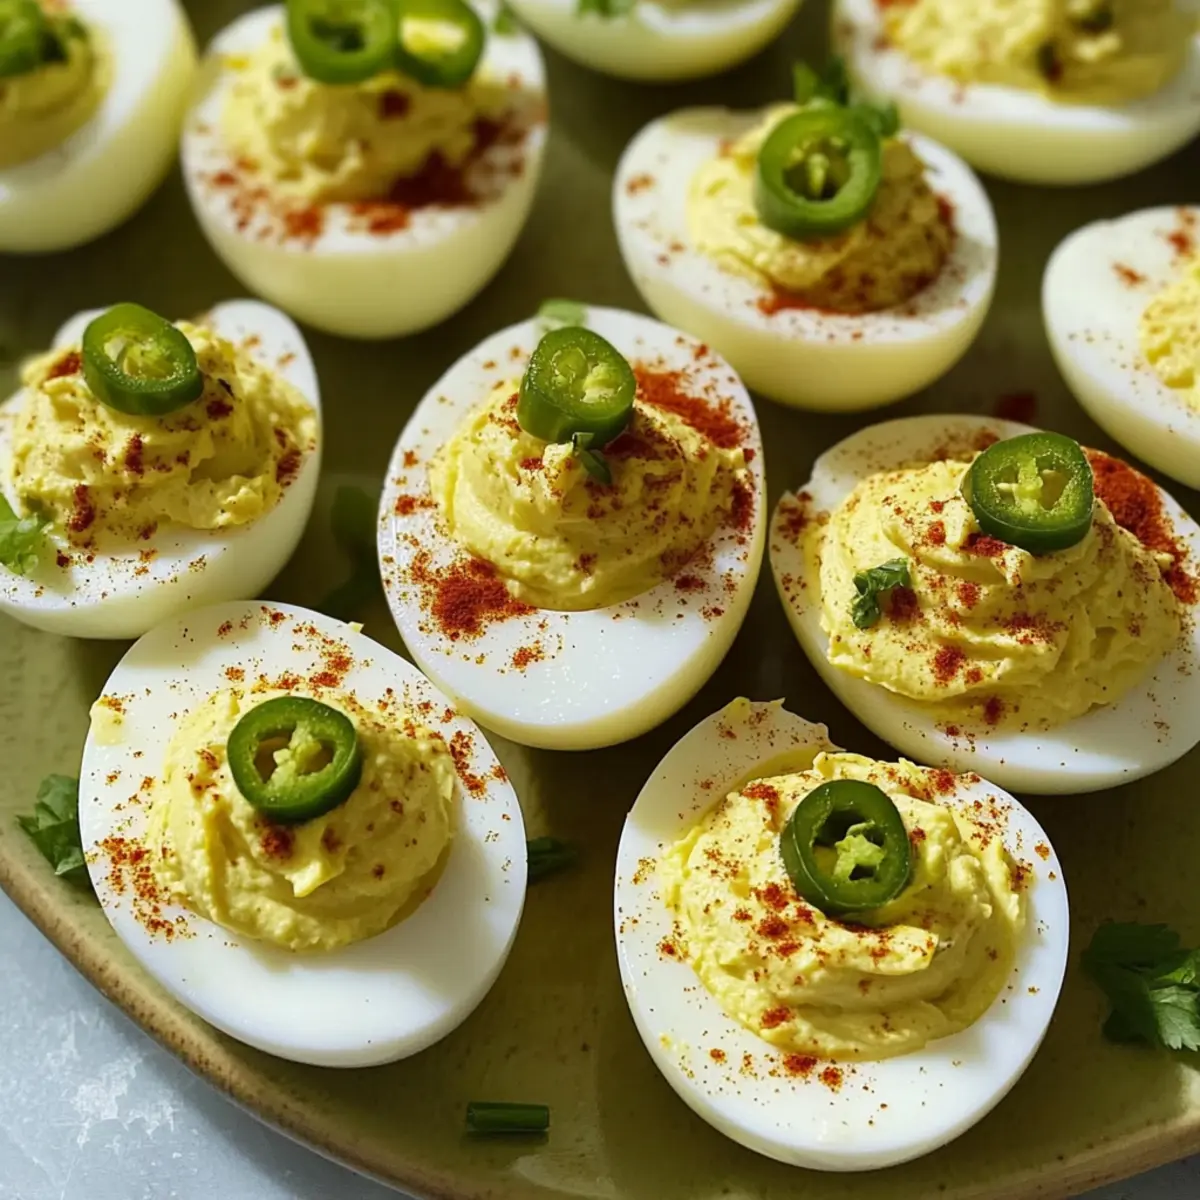
Step 5: Garnish as Desired
To elevate your Spicy Banana Pepper Deviled Eggs, sprinkle a dash of paprika on top for a pop of color. For an added touch of freshness, garnish with finely chopped chives or fresh herbs. Place a slice of banana pepper on each egg to highlight the spicy flavor. Your appetizers are now ready to delight your guests!
Spicy Banana Pepper Deviled Eggs Variations
Feel free to explore these creative variations to make your deviled eggs uniquely yours!
-
Extra Spicy: Add chopped jalapeños or a dash of hot sauce for a fiery kick that spice lovers will adore.
Incorporating hot elements brings not just heat, but a delightful burst of flavor that elevates your dish. -
Vegan-Friendly: Replace eggs with a chickpea salad filled with mashed chickpeas, vegan mayo, and banana peppers.
This variation offers a satisfying, creamy texture while remaining completely plant-based and packed with protein. -
Cheesy Twist: Mix in crumbled feta or shredded cheddar cheese into the yolk filling for a rich, savory taste.
The addition of cheese introduces a creamy, tangy element that pairs wonderfully with the smoked paprika. -
Sweet & Spicy: Add some finely chopped sweet pickled banana peppers to balance the spicy kick with a hint of sweetness.
This contrast can create a delightful synergy of flavors that will surprise your guests and keep them coming back for more. -
Crunchy Texture: Fold in some finely chopped celery or crispy bacon bits for an added layer of crunch and flavor.
This twist not only enhances the texture but adds a depth of savory richness to the eggs. -
Herb Infusion: Incorporate fresh herbs like dill or cilantro into the filling for a refreshing burst of flavor.
Herbs can transform the taste profile, making your deviled eggs lighter and fragrant, perfect for a summer gathering. -
Gourmet Touch: Top with a drizzle of truffle oil right before serving for an upscale flavor experience.
The luxurious aroma and taste of truffle oil can truly elevate your Spicy Banana Pepper Deviled Eggs into a gourmet delight.
For an amazing accompaniment to your deviled eggs, consider serving them with some delightful Breakfast Banana Split for a fun brunch menu!
Make Ahead Options
These Spicy Banana Pepper Deviled Eggs are a fantastic choice for meal prep, making your life easier during busy weeknights or gatherings. You can hard-boil the eggs and refrigerate them for up to 24 hours before assembly, ensuring they're ready when you are. Additionally, the yolk mixture can be made ahead of time and stored in an airtight container in the fridge for up to 3 days; this keeps the flavors melded while maintaining the creamy texture. Just remember to fill the egg whites shortly before serving to keep them fresh and visually appealing. By planning ahead in this way, you’ll have delicious, ready-to-serve appetizers with minimal effort!
What to Serve with Spicy Banana Pepper Deviled Eggs
A delightful spread complements the vibrant flavors of these zesty bites, enhancing your gathering with a culinary flourish.
- Fresh Salad: A crisp, mixed greens salad with citrus vinaigrette offers a refreshing contrast to the creamy deviled eggs.
- Crunchy Veggie Platter: Serve an assortment of colorful, crunchy vegetables like carrots and bell peppers, perfect for dipping in ranch or hummus.
- Savory Cheese Platter: Include a variety of cheeses, like sharp cheddar or creamy goat cheese, to balance the spicy notes and add richness.
- Light Soup: A chilled cucumber or gazpacho soup can be a refreshing starter, cleansing the palate between bites of the deviled eggs.
- Tangy Pickles: The acidity of dill pickles complements the eggs' creaminess while enhancing the overall flavor profile.
- Chardonnay or Sauvignon Blanc: Serve a chilled glass of either for a crisp, refreshing drink that pairs beautifully with the spice of the deviled eggs.
- Dessert Bars: Consider offering lemon or key lime bars as a sweet finish, providing a zesty note that echoes the tangy flavors of the eggs.
These delightful pairings will not only enhance your Spicy Banana Pepper Deviled Eggs but also create a memorable dining experience!
Expert Tips for Spicy Banana Pepper Deviled Eggs
-
Perfectly Hard-Boiled: Always start with eggs in cold water, bringing it to a boil. Cooling in ice water immediately prevents that unappealing green-gray ring around the yolk.
-
Adjustable Spice: Feel free to tweak the amount of banana peppers based on your spice tolerance. Adding fewer will make these Spicy Banana Pepper Deviled Eggs milder for sensitive palates.
-
Smooth Filling: For a creamy texture, ensure your mayonnaise is well-blended with the yolks. Use a fork to mash thoroughly, adding a little more mayo if necessary to reach your desired consistency.
-
Presentation Matters: Using a piping bag with a decorative tip can elevate your presentation, making each deviled egg not just delicious but also visually stunning for your guests.
-
Make Ahead: Both the hard-boiled eggs and yolk filling can be prepared ahead of time. Store them separately in the fridge until you’re ready to assemble for maximum freshness.
Storage Tips for Spicy Banana Pepper Deviled Eggs
Fridge: Store your assembled Spicy Banana Pepper Deviled Eggs in an airtight container for up to 2 days for optimal freshness.
Make-Ahead: You can hard-boil the eggs and prepare the yolk filling up to 24 hours in advance. Keep the yolk mixture covered in the fridge until you're ready to fill the egg whites.
Serving Temperature: Serve the deviled eggs chilled for the best flavor experience, especially when garnished just before serving to maintain visual appeal.
Freezer: It's not recommended to freeze deviled eggs, as they may change texture upon thawing. Enjoy them fresh for the best taste!
Spicy Banana Pepper Deviled Eggs Recipe FAQs
How do I select the best eggs for this recipe?
Absolutely! When choosing eggs for your Spicy Banana Pepper Deviled Eggs, aim for large, fresh eggs. Look for eggs with no cracks and a clean shell. Fresh eggs will provide the best flavor and texture, resulting in a creamier filling that your guests will love!
What’s the best way to store leftover deviled eggs?
Very good question! Store your assembled Spicy Banana Pepper Deviled Eggs in an airtight container in the fridge for up to 2 days. Make sure they are well-covered to prevent drying out. However, for the freshest taste, it’s best to consume them as soon as possible!
Can I freeze deviled eggs?
I wouldn’t recommend freezing deviled eggs, as they may change in texture once thawed. The creaminess of the yolk filling can become grainy, losing that delightful smoothness we all love. Instead, enjoy them fresh for the best flavor experience!
What should I do if my egg yolk mixture is too thick?
No worries! If your yolk mixture for the Spicy Banana Pepper Deviled Eggs is too thick, simply add a little more mayonnaise, one tablespoon at a time, until you reach your desired consistency. Mix thoroughly after each addition. You want a smooth, creamy filling that's easy to pipe into the egg whites.
Are these deviled eggs suitable for those with dietary restrictions?
Definitely! These Spicy Banana Pepper Deviled Eggs are keto-friendly and low-carb, making them a wonderful option for anyone watching their carbohydrate intake. If you have a mayo allergy, you can try substituting with an avocado or a vegan mayo alternative to keep them delicious and safe for everyone.
How can I customize the spice level?
The more the merrier! Feel free to adjust the amount of banana peppers based on your heat preference. For added heat, consider using hotter varieties or even a drizzle of hot sauce mixed into the yolk filling. Simply taste as you go and make adjustments that suit your guests’ preferences!
Spicy Banana Pepper Deviled Eggs That Steal the Show
Ingredients
Equipment
Method
- Begin by placing 6 large fresh eggs in a saucepan filled with cold water, ensuring they're submerged by at least an inch. Bring the water to a vigorous boil over medium-high heat. Once boiling, cover the pot, reduce to a low simmer, and cook for 10-12 minutes. When done, transfer the eggs to an ice water bath for about 5 minutes to halt cooking and make peeling easier.
- Once the eggs are cool, gently tap them on a hard surface to crack the shell. Carefully peel the eggs under running water to remove all shell fragments. Slice each egg in half lengthwise using a sharp knife, and gently remove the yolks with a spoon, placing them in a mixing bowl. Set the egg whites aside on a serving platter.
- In the mixing bowl, mash the yolks with a fork until finely crumbled. Add about 3 tablespoons of mayonnaise, 2-3 finely chopped banana peppers, 1 teaspoon of smoked paprika, and a pinch of salt and pepper. Mix everything until you achieve a smooth and creamy consistency.
- Using a piping bag or a simple spoon, carefully fill each egg white half with the yolk mixture. If using a piping bag, opt for a star-tip for a decorative finish.
- To elevate your Spicy Banana Pepper Deviled Eggs, sprinkle a dash of paprika on top for a pop of color. For an added touch of freshness, garnish with finely chopped chives or fresh herbs. Place a slice of banana pepper on each egg to highlight the spicy flavor.