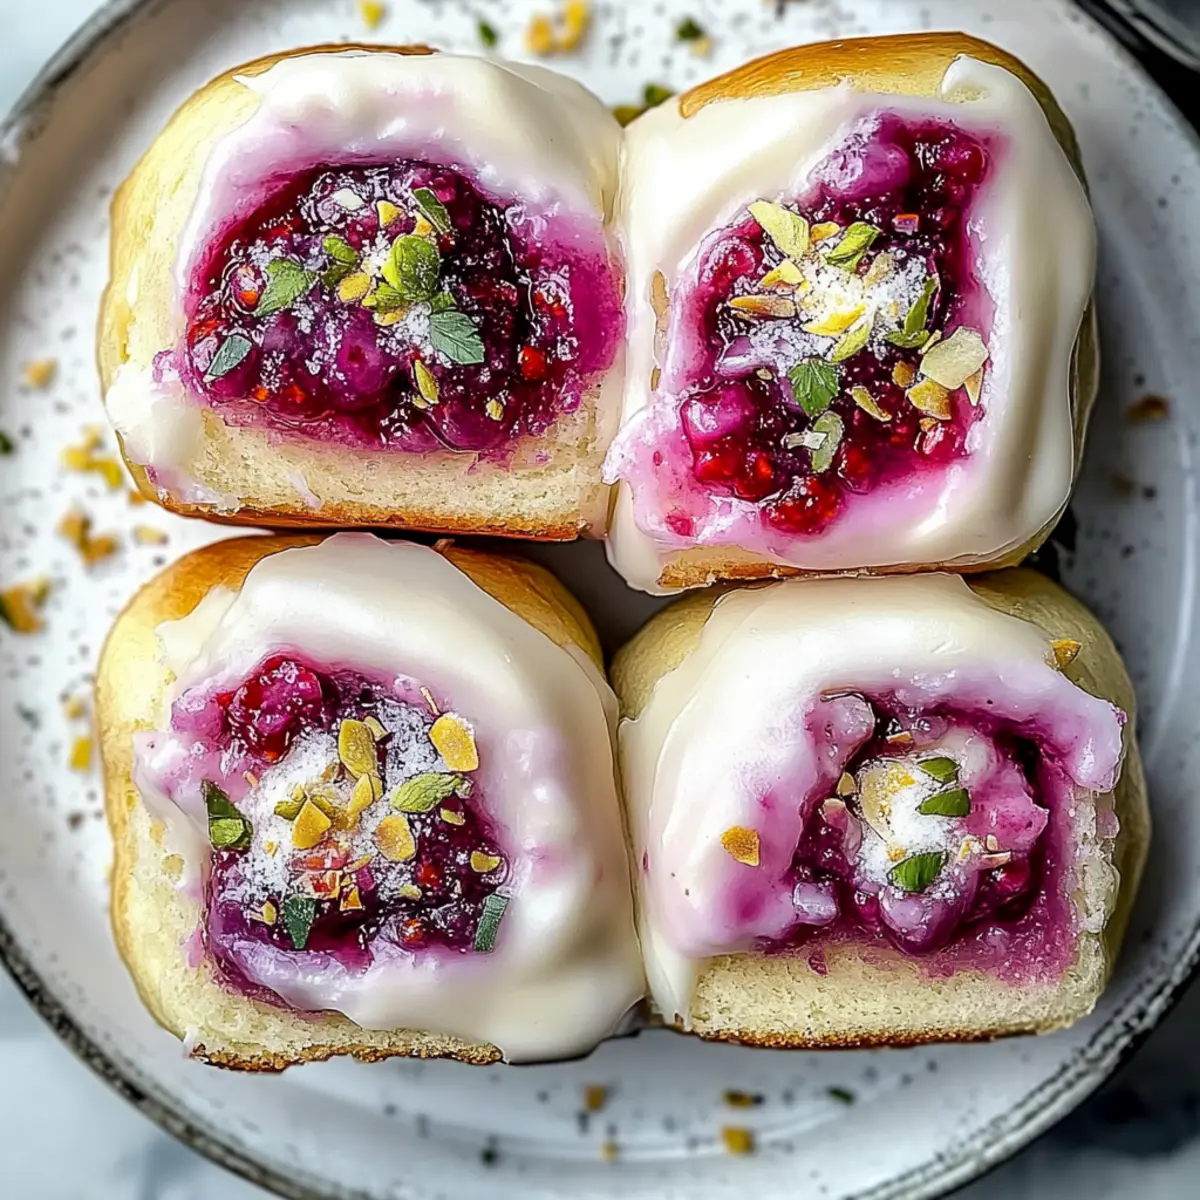
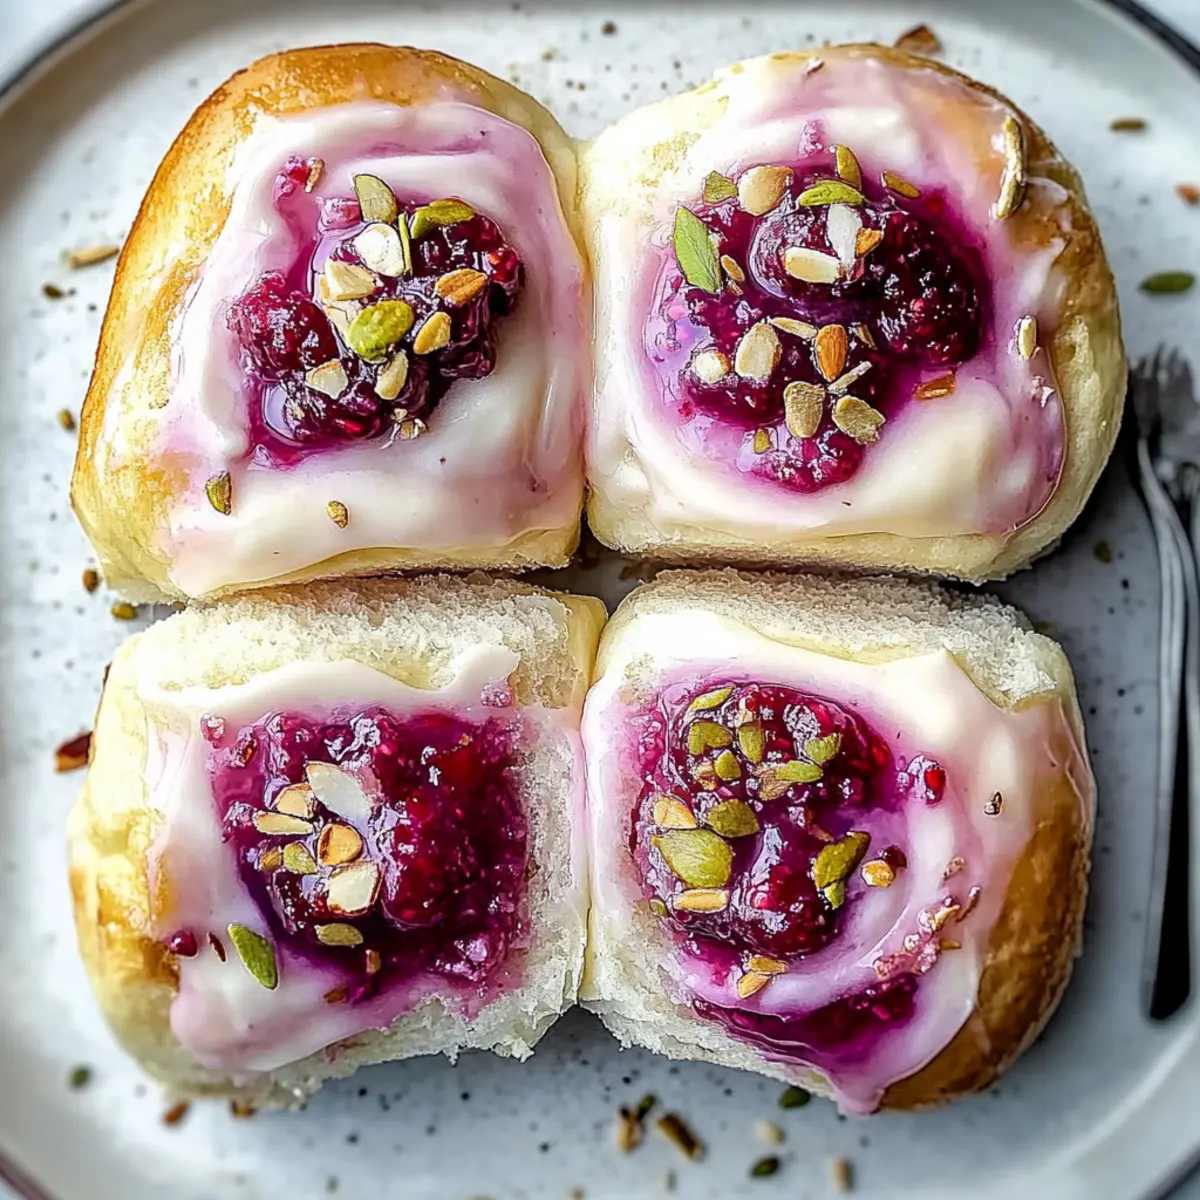
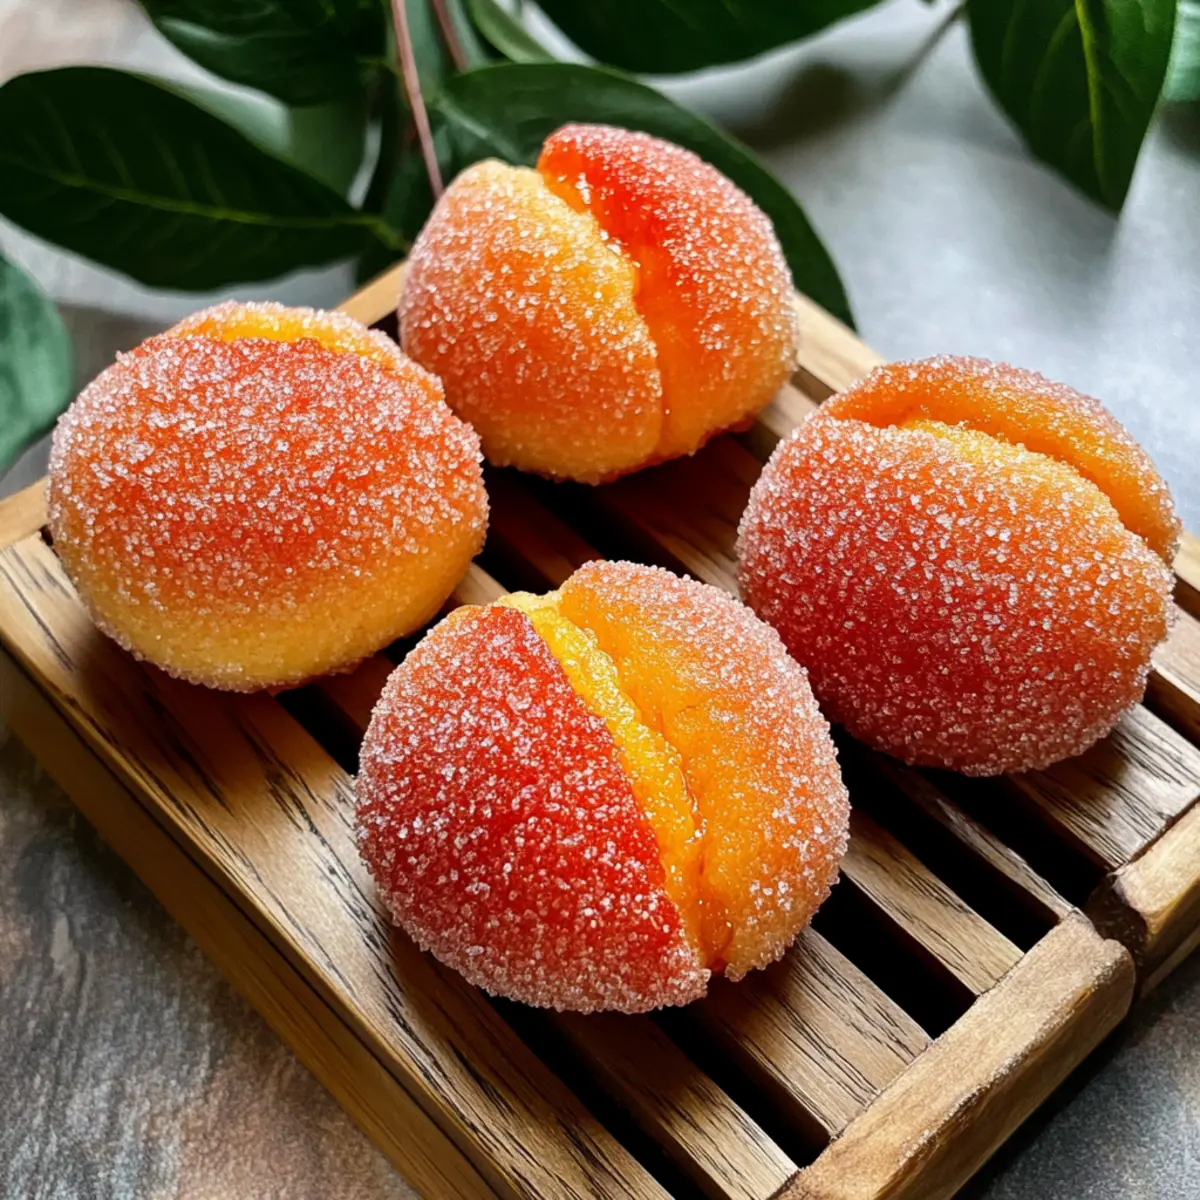
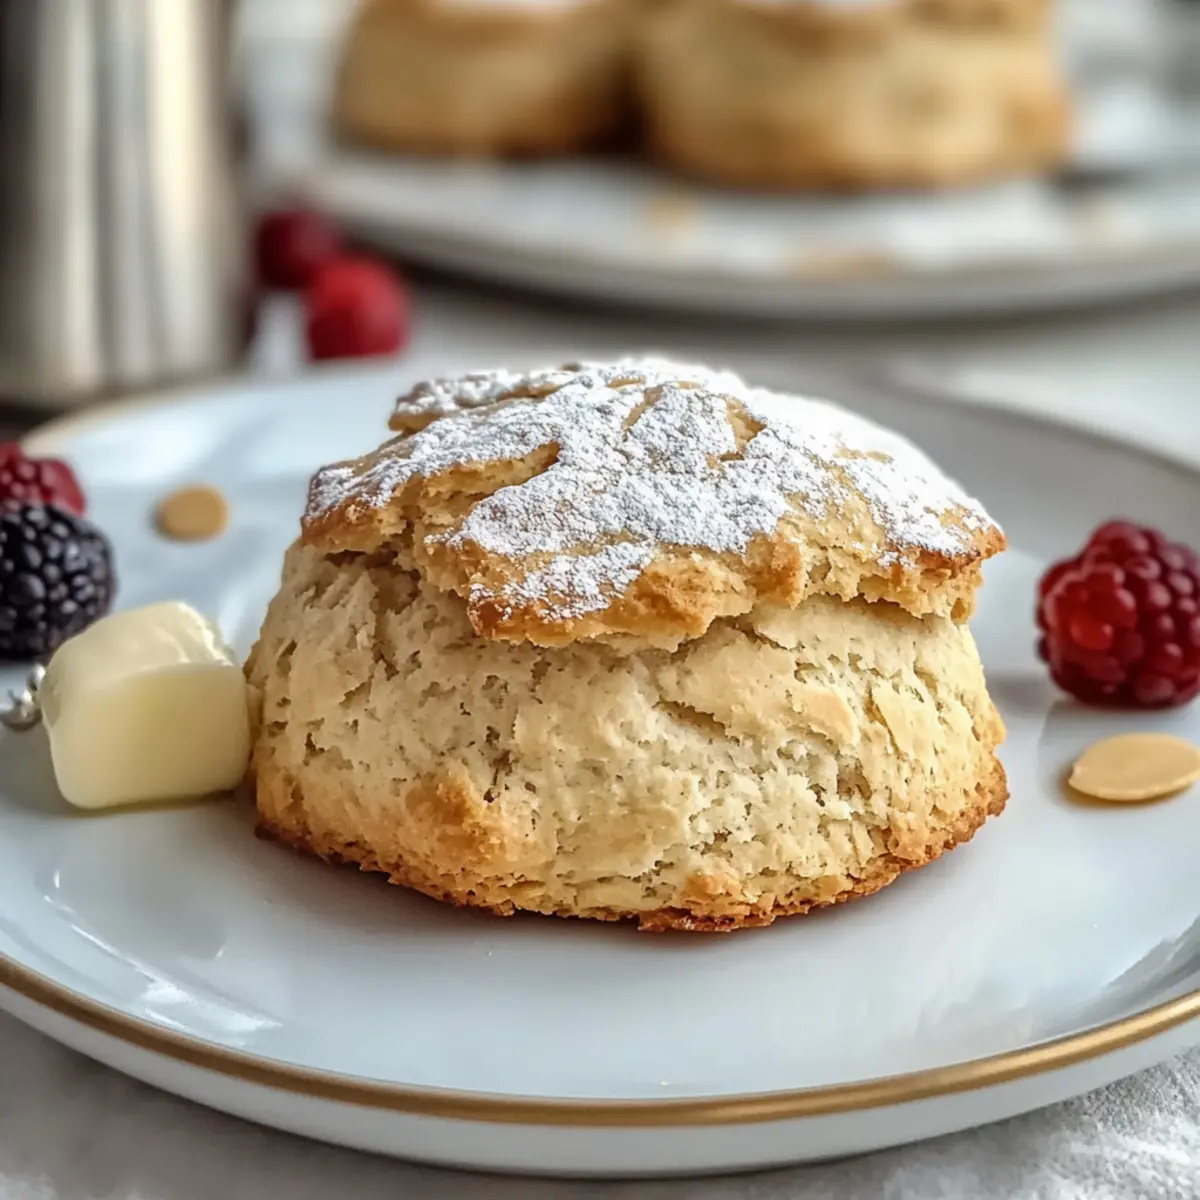
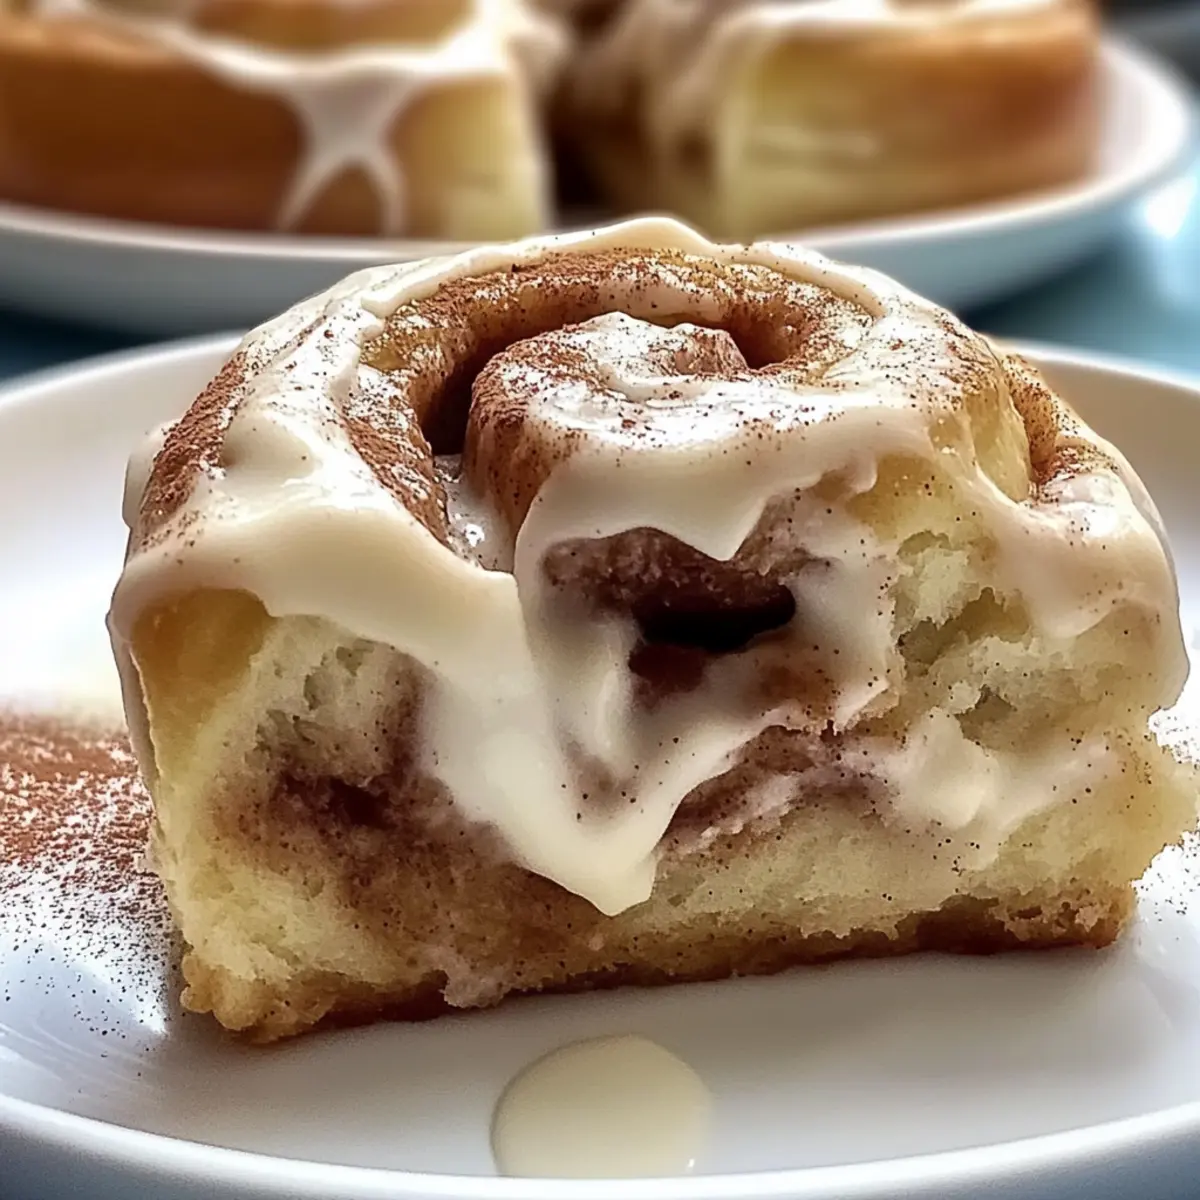
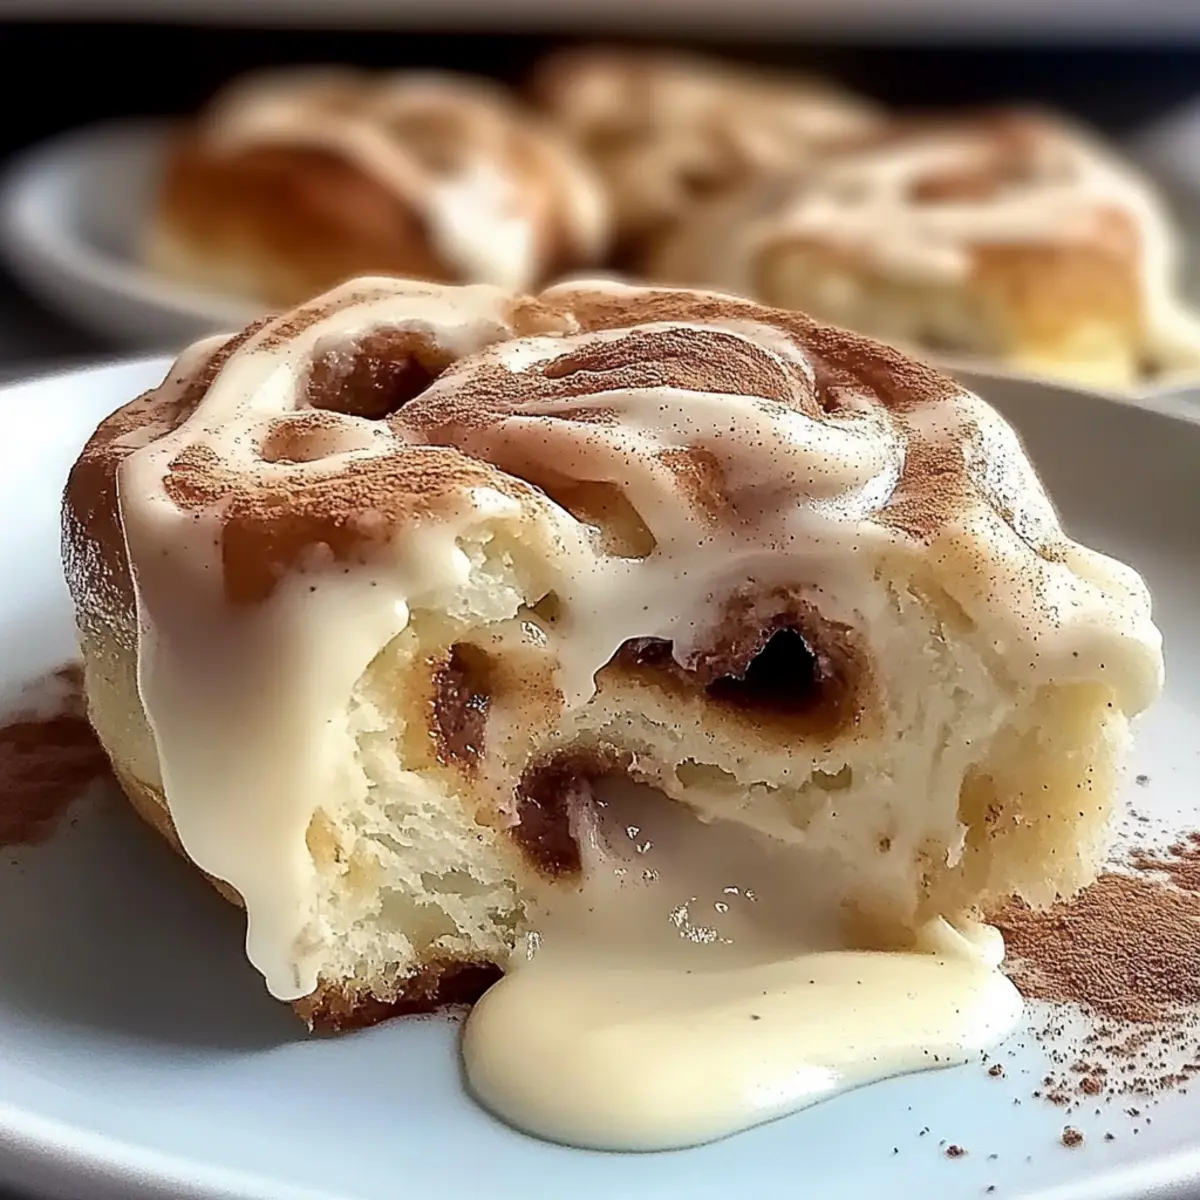
The aroma of fresh cinnamon rolls can transport me back to my grandmother’s cozy kitchen, where laughter and sweet indulgence danced together. Today, I’m excited to share my take on this classic treat with a delightful twist: Tres Leches Cinnamon Rolls. These fluffy rolls soak up a rich mixture of three types of milk, creating a melt-in-your-mouth experience that’s simply irresistible. Not only are they quick to whip up, but they also elevate any brunch or dessert table with their decadent flavors. Plus, for those following a gluten-free diet, I've got a simple substitution to ensure everyone can enjoy this comforting delight. Ready to embark on this delicious journey with me? Let’s get baking!
Why Are Tres Leches Cinnamon Rolls Irresistible?
Fluffy Texture: Each roll is light and airy, making it feel like a cloud of sweetness in your mouth.
Decadent Soak: With a luscious blend of three milks, they’re incredibly moist and bursting with flavor, a truly decadent treat!
Quick Prep Time: Easy to make, this recipe allows you to enjoy homemade goodness without spending all day in the kitchen.
Gluten-Free Option: Don’t worry if you need a gluten-free version; simply swap in your favorite gluten-free flour for the same delightful experience.
Crowd-Pleasing Delight: Perfect for brunch or dessert, they’re sure to impress friends and family, leaving everyone asking for seconds.
Pair these scrumptious rolls with a dollop of whipped cream or a scoop of vanilla ice cream for an unforgettable indulgence!
Tres Leches Cinnamon Rolls Ingredients
• Here’s everything you'll need to create these delightful rolls:
For the Dough
- All-Purpose Flour – Provides structure for the rolls, but can be substituted with gluten-free flour for those avoiding gluten.
- Granulated Sugar – Adds the perfect sweetness to the dough.
- Instant Yeast – Helps achieve that fluffy texture you crave.
- Salt – Enhances the overall flavor of your cinnamon rolls.
- Whole Milk (warm) – Activates the yeast and ensures the dough is well-hydrated.
- Unsalted Butter (melted) – Infuses the dough with rich flavor and moisture.
- Large Eggs – Acts as a binding agent to give the rolls structure.
- Vanilla Extract – Adds a warm aroma and enhances the sweetness.
For the Cinnamon Filling
- Unsalted Butter (softened) – Ensures a rich, spreadable filling that melds beautifully with the dough.
- Brown Sugar – Provides depth of flavor and sweetness to the filling.
- Ground Cinnamon – This spice gives the rolls their signature, comforting warmth.
For the Tres Leches Soak
- Whole Milk – Contributes creaminess that soaks into the rolls.
- Sweetened Condensed Milk – Adds rich sweetness, taking the soak to the next level.
- Evaporated Milk – Provides a smooth and creamy texture that enhances the flavor.
For the Frosting
- Powdered Sugar – Adds sweetness and a velvety finish to your frosting.
- Milk (to desired frosting consistency) – Adjust this to get your frosting just right for drizzling.
Now that you have all the delicious ingredients, you’re just a step away from creating these irresistible Tres Leches Cinnamon Rolls that will delight everyone at your table!
Step‑by‑Step Instructions for Tres Leches Cinnamon Rolls
Step 1: Activate Yeast
In a small bowl, combine 1/2 cup of warm milk, instant yeast, and 1 tablespoon of granulated sugar. Stir gently and let it sit for 5-10 minutes until it becomes frothy, signaling that the yeast is activated. This crucial step ensures your Tres Leches Cinnamon Rolls will rise beautifully and have that fluffy texture.
Step 2: Make Dough
In a large mixing bowl, whisk together 3 1/2 cups of all-purpose flour, the remaining sugar, and 1 teaspoon of salt. Create a well in the center, adding the melted butter, large eggs, vanilla extract, and the frothy yeast mixture. Mix until a soft dough forms, and be prepared to knead it to achieve that irresistible fluff.
Step 3: Knead & Rise
Turn the dough onto a lightly floured surface and knead for about 8-10 minutes until smooth and elastic. Form it into a ball and place it in a greased bowl, covering it with a clean kitchen towel. Let it rise in a warm location for 1 hour or until doubled in size, filling your kitchen with the delightful aroma of freshly baked bread.
Step 4: Prepare Filling
While waiting for the dough to rise, mix 1/2 cup of softened unsalted butter, 1 cup of brown sugar, and 2 tablespoons of ground cinnamon in a bowl until well combined. This sweet filling will ensure your Tres Leches Cinnamon Rolls are bursting with flavor, adding that signature touch.
Step 5: Shape Rolls
Once the dough has risen, gently punch it down and roll it out on a floured surface into a rectangle about 1/4-inch thick. Spread the cinnamon filling evenly over the surface, then tightly roll the dough into a log. Cut the log into 12 equal pieces, creating beautiful rolls ready for their second rise.
Step 6: Second Rise
Place the cut rolls into a greased 9x13-inch baking dish, positioning them closely together. Cover the dish with a towel and let the rolls rise again for 1 hour. During this time, the rolls will puff up, creating that dreamy fluffy texture that makes Tres Leches Cinnamon Rolls so delightful.
Step 7: Bake
Preheat your oven to 350°F (175°C). Once the rolls have risen, bake them in the preheated oven for 25-30 minutes, or until they are golden brown on top. The aroma will fill your home, signaling it’s almost time to indulge in the moist deliciousness of these rolls.
Step 8: Make Soak
In a medium bowl, whisk together the remaining whole milk, 1 can of sweetened condensed milk, and 1 can of evaporated milk until well blended. This rich tres leches soak will infuse every corner of your rolls, making them irresistibly moist and flavorful.
Step 9: Soak Rolls
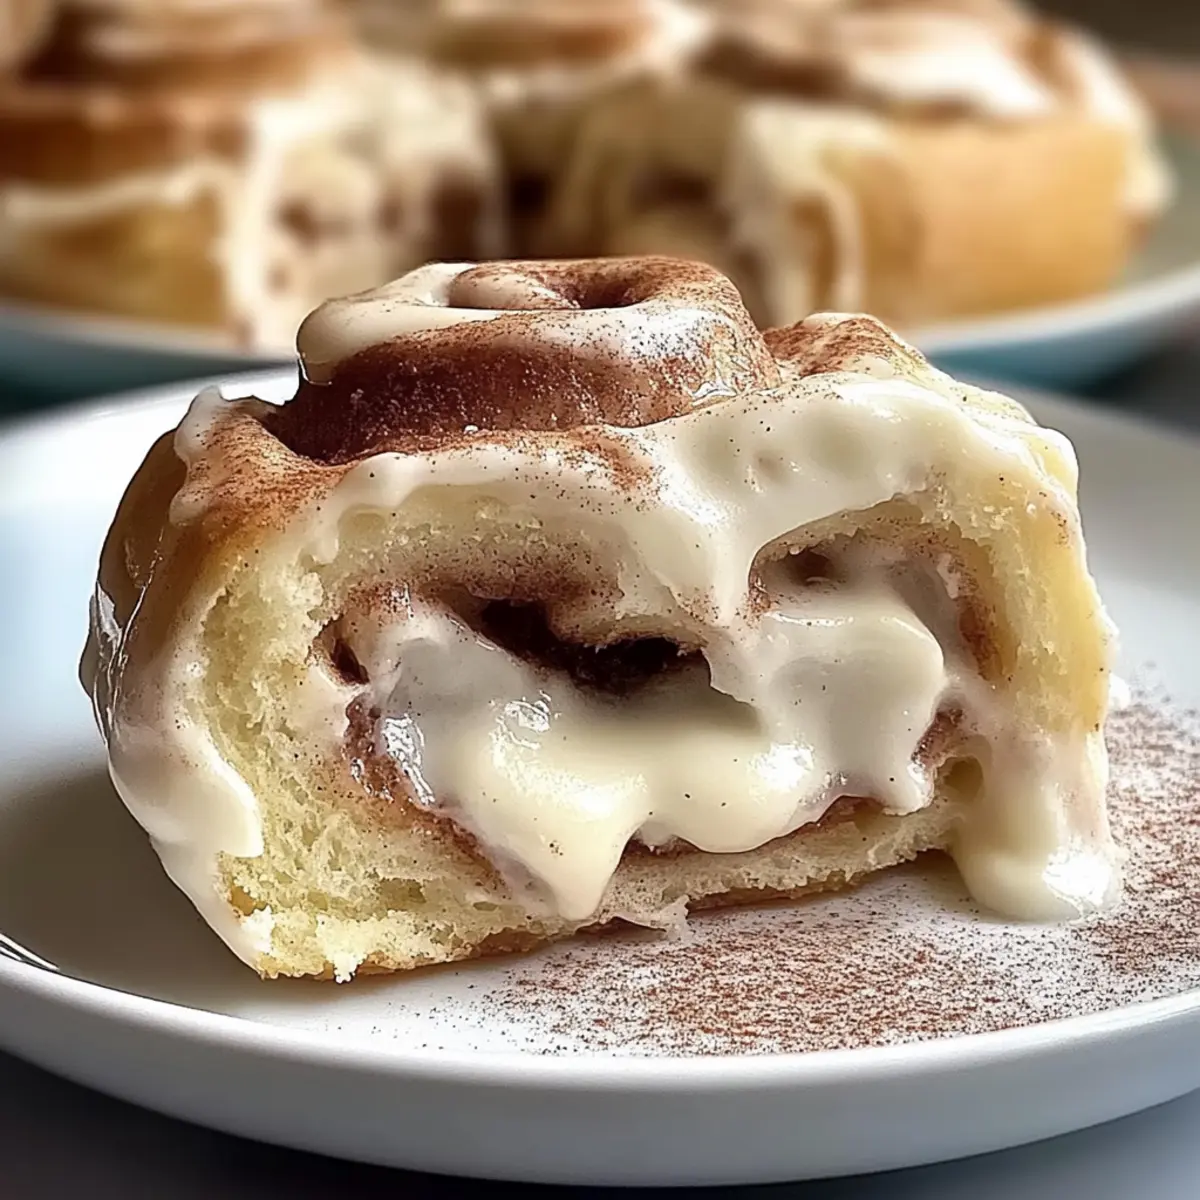
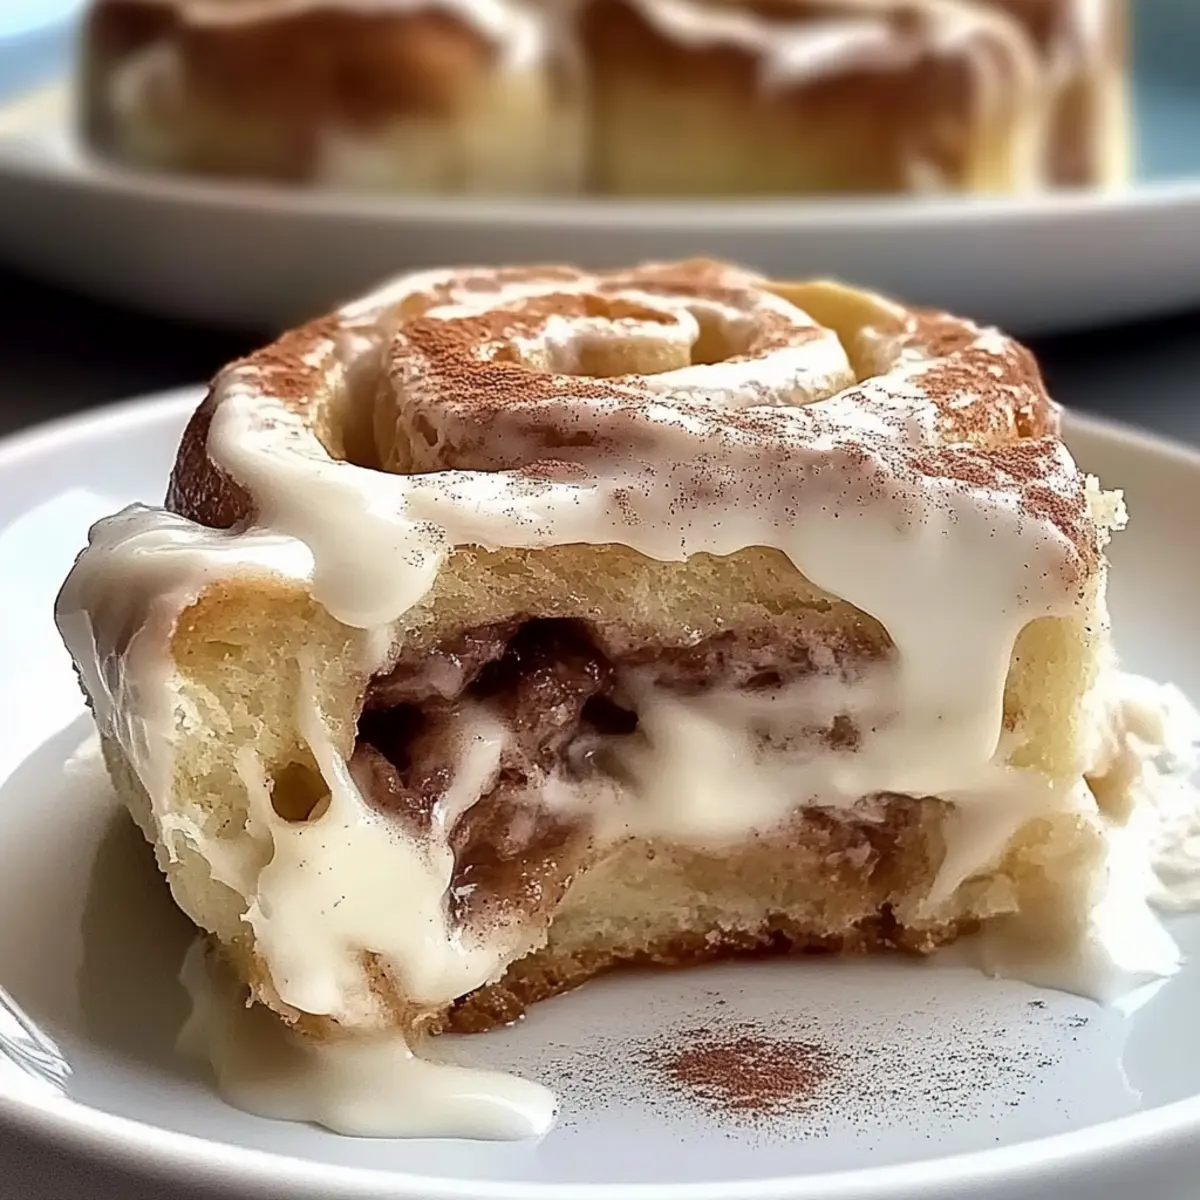
As soon as the rolls come out of the oven, pour the tres leches mixture evenly over the warm rolls. Let them absorb the soak for about 30 minutes; they will plump up beautifully, creating a decadent and creamy texture that is the hallmark of Tres Leches Cinnamon Rolls.
Step 10: Frost
To prepare the frosting, whisk together 1 cup of powdered sugar with enough milk to achieve a smooth, drizzling consistency. Once the rolls have absorbed the soaking milk, drizzle the frosting generously over them for the perfect finishing touch that adds sweetness and an appealing shine.
What to Serve with Tres Leches Cinnamon Rolls
Enjoying these fluffy, indulgent rolls is just the beginning. To elevate your experience further, consider these delightful pairings that embrace a variety of textures and flavors.
-
Fresh Fruit Salad: A vibrant mix of seasonal fruits adds a refreshing contrast to the creamy richness of the cinnamon rolls. The sweetness of strawberries, blueberries, and kiwi brightens up every bite.
-
Whipped Cream: Light, airy, and slightly sweet, whipped cream is the perfect accompaniment. It enhances the rolls’ luxurious feel, creating a dreamy dessert that just melts in your mouth.
-
Vanilla Ice Cream: A scoop of vanilla ice cream adds a delightful creaminess alongside the warm rolls. The contrast between hot and cold makes for a sensational treat you won’t forget!
-
Coffee: A rich cup of coffee offers a lovely bitterness that balances the sweetness of the rolls. The aroma fills the air, inviting warmth and connection around the table during brunch or dessert.
-
Chocolate Sauce: Drizzling warm chocolate sauce over your rolls introduces an irresistible twist. The depth of flavor makes each bite even more decadent—perfect for chocolate lovers!
-
Caramel Sauce: A drizzle of caramel sauce provides a luscious, sweet-salty layer to each roll, heightening the indulgent experience with every delightful mouthful.
Treat yourself to a combination of flavors and textures that will create memories as delightful as the rolls themselves!
Expert Tips for Tres Leches Cinnamon Rolls
-
Yeast Activation: Ensure your yeast mixture is frothy; this confirms it's active. Without this step, your dough may not rise properly.
-
Flour Substitution: If using gluten-free flour, check the blend’s ingredients and adjust the baking time to achieve the right fluffiness and texture.
-
Perfect Filling: Spread the cinnamon filling evenly and roll tightly to avoid leaks and ensure every bite is deliciously sweet.
-
Soak Timing: Let the rolls absorb the tres leches mixture while they’re still warm. This enhances the moistness, creating the ultimate soft and fluffy cinnamon rolls.
-
Avoid Overmixing: When preparing the dough, mix until just combined to prevent tough rolls. The key to fluffy Tres Leches Cinnamon Rolls is a light touch!
Make Ahead Options
These Tres Leches Cinnamon Rolls are perfect for busy home cooks looking to save time without sacrificing flavor! You can prepare the dough and let it rise up to 24 hours in advance, simply placing it in the refrigerator after the first rise. When you're ready to bake, allow it to come to room temperature for about 30 minutes before shaping. Additionally, you can mix the filling ahead of time and refrigerate it, ensuring all your components are ready to go. To maintain the rolls' fluffy texture, soak them in the tres leches mixture right after baking and enjoy warm. With these make-ahead tips, you’ll have a delicious, fuss-free treat waiting for you!
How to Store and Freeze Tres Leches Cinnamon Rolls
Fridge: Store leftover Tres Leches Cinnamon Rolls in an airtight container for up to 3 days to maintain their fluffiness.
Freezer: Wrap individual rolls in plastic wrap, then place them in a freezer-safe bag. They can be frozen for up to 3 months.
Reheating: To enjoy frozen rolls, thaw overnight in the fridge, then reheat in a warm oven (350°F) for 10-15 minutes for the best texture.
Room Temperature: For short-term enjoyment, leave covered rolls at room temperature for a day, but they're best enjoyed chilled or warmed after being soaked in the tres leches mixture.
Tres Leches Cinnamon Rolls Variations
Feel free to indulge your creativity with these delightful variations and substitutions!
-
Gluten-Free: Substitute all-purpose flour with a gluten-free blend to create a delicious version for those avoiding gluten. It still delivers that fluffy splendor!
-
Cream Cheese Glaze: Whip up a tangy cream cheese frosting instead of traditional glaze for an added layer of rich flavor. It’s a match made in cinnamon roll heaven!
-
Nutty Delight: Sprinkle in some chopped pecans or walnuts within the cinnamon filling for a delightful crunch. These little additions bring a satisfying texture that complements the sweetness perfectly.
-
Spicy Twist: Add a pinch of nutmeg or cardamom to the cinnamon filling for an aromatic upgrade that elevates the flavor profile. It gives your rolls a cozy warmth that dances on your palate!
-
Chocolate Drizzle: Melt some chocolate and drizzle it over the frosting for a decadent chocolatey finish that will make chocolate lovers swoon.
-
Fruit Infusion: Consider pairing your Tres Leches Cinnamon Rolls with fresh fruit, like sliced strawberries or blueberries, for a refreshing contrast to the rich flavors. The fruity burst cuts through sweetness beautifully!
-
Coffee Flavor: Replace a portion of the milk in the tres leches soak with brewed coffee for a delightful mocha flavor that will energize your mornings. It brings a whole new showstopper experience!
-
Churro Style: For a fun twist, roll the dough in cinnamon and sugar before baking to create a churro-like exterior. It’s an irresistible crunchy coating that complements the soft interior irresistibly.
For more imaginative desserts, don’t forget to check out my Pumpkin Cinnamon Roll Muffins that are sure to bring seasonal flavors to life!
Tres Leches Cinnamon Rolls Recipe FAQs
What kind of flour should I use for the best results?
You can use all-purpose flour for a classic Tres Leches Cinnamon Rolls experience. If you need a gluten-free option, I recommend a high-quality gluten-free flour blend that includes xanthan gum, as this will help mimic the texture and rise of traditional flour.
How do I store leftover tres leches cinnamon rolls?
To maintain their fluffy texture, store leftover rolls in an airtight container in the fridge for up to 3 days. This way, they keep their moistness. If you enjoy them warm, just pop them in the microwave for a few seconds to revive that fresh-baked goodness.
Can I freeze these cinnamon rolls?
Absolutely! To freeze your Tres Leches Cinnamon Rolls, wrap each roll tightly in plastic wrap, and then place them in a freezer-safe zip-top bag. They can be stored in the freezer for up to 3 months. When you’re ready to enjoy, simply thaw them in the fridge overnight and reheat them at 350°F (175°C) for 10-15 minutes for the perfect texture.
What should I do if my dough doesn’t rise?
If your dough isn’t rising, it could be due to a few factors. First, check that your yeast is fresh and active; it should foam when combined with warm milk and sugar. Warmth is crucial, too; if your kitchen is too cold, consider placing the dough in a warmer area or using your oven’s low setting to create a cozy environment for rising.
Is this recipe safe for people with lactose intolerance?
While Tres Leches Cinnamon Rolls use dairy ingredients, those who are lactose intolerant may substitute with lactose-free milk and creams. You can look for dairy substitutes like coconut or oat milk as alternatives for the tres leches soak, but this may slightly alter the flavor profile. Always check allergen labels to stay safe!
Can I add different toppings or flavors?
Yes, you can absolutely customize your Tres Leches Cinnamon Rolls! Consider adding a cream cheese glaze for extra richness or even fresh fruits like strawberries for a light, refreshing contrast. Feel free to experiment with spices like cardamom or nutmeg in the filling to give it your unique twist!
Tres Leches Cinnamon Rolls: Fluffy Bliss in Every Bite
Ingredients
Equipment
Method
- In a small bowl, combine 1/2 cup of warm milk, instant yeast, and 1 tablespoon of granulated sugar. Stir gently and let it sit for 5-10 minutes until frothy.
- In a large mixing bowl, whisk together 3 1/2 cups of flour, remaining sugar, and salt. Add melted butter, eggs, vanilla, and the frothy yeast mixture.
- Knead the dough for about 8-10 minutes until smooth and elastic. Let it rise in a greased bowl for 1 hour.
- Mix softened butter, brown sugar, and cinnamon in a bowl for the filling.
- Roll the risen dough into a rectangle and spread the filling evenly. Roll tightly and cut into 12 pieces.
- Place rolls in a greased dish and let rise again for 1 hour.
- Preheat oven to 350°F and bake for 25-30 minutes until golden brown.
- Whisk together milk, sweetened condensed milk, and evaporated milk for the soak.
- Pour the tres leches mixture over the warm rolls and let absorb for 30 minutes.
- Whisk powdered sugar with enough milk for a smooth consistency and drizzle over the rolls.