tastytrendingredients

  • Home
  • Recipes
    • Appetizers
    • Breakfast
    • Dessert
    • Dinner
    • Drinks
    • Salads
    • Snacks
    • Soups
  • About me
  • Contact
menu icon
go to homepage
  • Home
  • Recipes
    • Appetizers
    • Breakfast
    • Dessert
    • Dinner
    • Drinks
    • Salads
    • Snacks
    • Soups
  • About me
  • Contact
search icon
Homepage link
  • Home
  • Recipes
    • Appetizers
    • Breakfast
    • Dessert
    • Dinner
    • Drinks
    • Salads
    • Snacks
    • Soups
  • About me
  • Contact
×

Creamy Rose Pistachio Ice Cream for a Luxurious Treat

February 23, 2026 by Grace Snow Leave a Comment

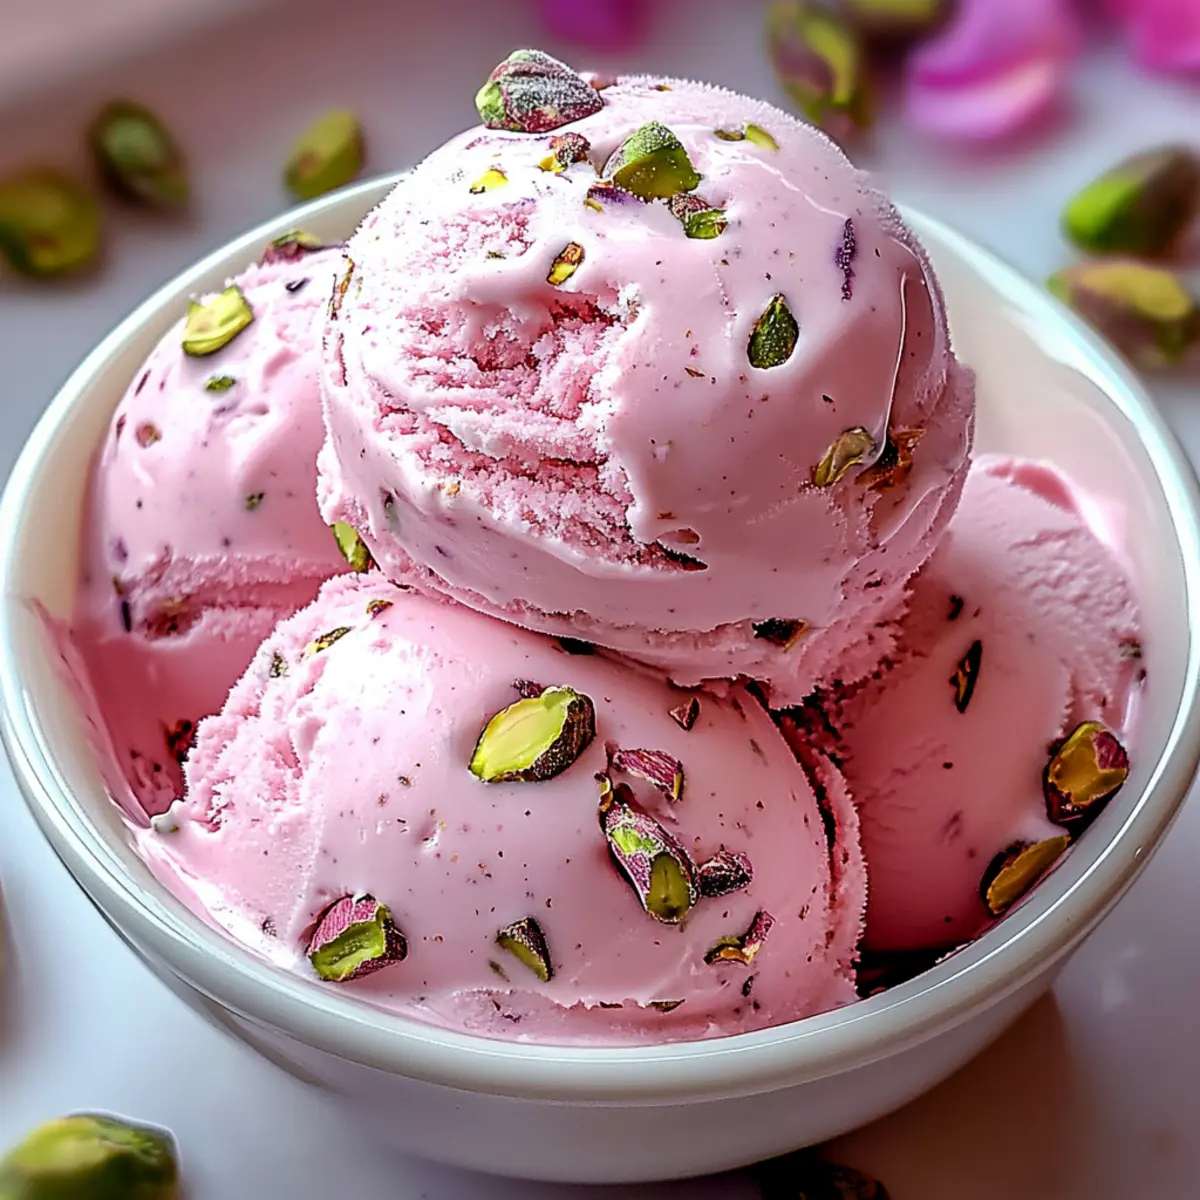
The first spoonful of this Rose Pistachio Ice Cream is like a cool breeze on a hot summer day—exotic, refreshing, and utterly delightful. As a passionate home chef, I constantly seek out new ways to elevate my dessert game, and this luxurious treat does just that. Featuring the silky creaminess of whipped cream, the gentle floral notes of rose water, and the satisfying crunch of roasted pistachios, this ice cream is a delightful twist on traditional flavors that will leave your guests in awe. Not only does it promise a sophisticated touch to your dessert table, but it also requires minimal prep time, allowing you to focus on the fun of entertaining. Plus, it’s vegetarian-friendly, making it a wonderful option for gatherings with diverse dietary preferences. Are you curious about how to whip up this enchanting dessert? Let’s dive in!

Why is Rose Pistachio Ice Cream Unique?

Luxurious Experience: This Rose Pistachio Ice Cream transforms ordinary dessert into a lavish treat that feels gourmet.

Exotic Flavor: The aromatic rose water combines seamlessly with the nutty pistachios, creating a truly unique flavor profile that tantalizes your taste buds.

Quick and Easy: With just a few simple steps, you can whip up this delight in no time—ideal for those last-minute summer gatherings!

Crowd-Pleasing Appeal: Say goodbye to boring ice cream! This rich and creamy dessert will impress your guests and keep them coming back for more.

Versatile Choices: Feel free to experiment with various nuts or even add a splash of citrus for a refreshing twist. Pair it with other treats like Peaches Cream Cookies to elevate your dessert game!

Rose Pistachio Ice Cream Ingredients

For the Cream Base
• Cream – provides richness and smooth texture; use full-fat cream for the best results.
• Sugar – sweetens the mix; adjust according to personal preference, particularly if you prefer a less sweet Rose Pistachio Ice Cream.

For the Flavoring
• Rose Water – adds a floral aroma; use sparingly to avoid overpowering the delicate flavors.
• Pistachios – introduces nuttiness and crunch; opt for unsalted, roasted pistachios for optimal flavor.

Optional Ingredients
• Condensed Milk – if using a no-churn method, it acts as a sweetener and stabilizer for that creamy texture.

Feel free to gather these ingredients and prepare to embrace a luscious dessert experience!

Step‑by‑Step Instructions for Rose Pistachio Ice Cream

Step 1: Whip the Cream
In a large mixing bowl, pour in the full-fat cream and sprinkle in your sugar. Using a hand mixer or stand mixer, whip the mixture on medium speed until soft peaks form, which should take about 3-5 minutes. You'll know it's ready when the cream holds its shape but still has a smooth texture, creating a luscious base for your Rose Pistachio Ice Cream.

Step 2: Fold in Flavors
With gentle care, drizzle in the rose water and add the crushed roasted pistachios to the whipped cream. Using a spatula, fold the mixture carefully until the rose water and pistachios are evenly distributed, ensuring every scoop of the Rose Pistachio Ice Cream will have that delicate floral flavor and the delightful crunch of nuts!

Step 3: Churn the Mixture
Transfer the creamy mixture into the bowl of your ice cream maker. Following the manufacturer's instructions, churn the mixture for about 25-30 minutes until it thickens and reaches a soft-serve consistency. This step is crucial to achieving that luxurious texture the Rose Pistachio Ice Cream is known for—look for it to be creamy but still pourable.

Step 4: Freeze for Firmness
Once churned, pour the ice cream into a sealed container, smoothing the top with a spatula. Place it in your freezer and allow it to set for at least 4 hours, or until it's firm enough to scoop. This freezing process will solidify the flavors and textures, transforming your mixture into a dreamy Rose Pistachio Ice Cream.

Step 5: Serve with Style
When you're ready to serve your delightful Rose Pistachio Ice Cream, let it sit at room temperature for about 5-10 minutes to soften slightly—a great way to enhance scoopability! Use an ice cream scoop to serve this exquisite dessert, and consider garnishing with a sprinkle of crushed pistachios for an elegant touch.

Make Ahead Options

For busy home cooks, this Rose Pistachio Ice Cream is a wonderful recipe to prep in advance! You can whip the cream and sugar together and fold in the rose water and crushed pistachios up to 24 hours ahead, storing the mixture in the refrigerator (in a covered container) to maintain its freshness. Simply churn the mixture when you’re ready—this ensures maximum flavor without losing that luxurious texture. After churning, the ice cream can be transferred to a sealed container and frozen for up to 2 weeks for optimal taste and quality. When it’s time to serve, allow the ice cream to sit at room temperature for about 5-10 minutes before scooping, ensuring that every bite is just as delightful as the first!

How to Store and Freeze Rose Pistachio Ice Cream

Fridge: Keep your homemade Rose Pistachio Ice Cream in the refrigerator for about 30 minutes before serving to soften slightly for easy scooping.

Freezer: Store the ice cream in an airtight container in the freezer for up to 2 weeks for optimal flavor and texture. Be mindful that ice crystals may form if kept longer.

Serving: When ready to enjoy, let the ice cream sit at room temperature for about 5-10 minutes to attain a creamy scoopable consistency before serving.

Reheating: There's no need to reheat this luxurious dessert, but if it freezes too hard, the brief warming ensures that each scoop remains a delight!

Expert Tips for Rose Pistachio Ice Cream

• Chill Your Tools: Ensure the ice cream maker's bowl is thoroughly chilled. This helps achieve the smooth and creamy texture you desire in your Rose Pistachio Ice Cream.

• Sweetness Balance: Taste the mixture before freezing. Adjust sugar levels according to your preference for a customized sweetness that suits your palate.

• Rose Water Precision: Use rose water sparingly; a little goes a long way. Overdoing it can lead to an overpowering flavor that masks the delicate notes of pistachio.

• Presentation Matters: For a beautiful finish, top your scoops with crushed pistachios and a drizzle of rose syrup. This adds an elegant touch to your dessert table.

• Storage Tips: Store leftover Rose Pistachio Ice Cream in an airtight container to maintain freshness for up to two weeks, but be aware of ice crystals forming if kept too long.

Rose Pistachio Ice Cream Variations

Feel free to make this Rose Pistachio Ice Cream your own with these delightful tweaks and swaps!

  • Nutty Swaps: Replace pistachios with almonds or hazelnuts to explore different nut flavors while maintaining that crunchy texture. Imagine a lovely almond-infused delight that brings another level of richness!

  • Citrus Twist: Adding a splash of lemon juice or zest brightens up the ice cream with a refreshing citrus note, pairing beautifully with the floral rose. The contrast can create a truly delightful harmony of flavors.

  • Infusion Options: Experiment with spices like cardamom or a hint of cinnamon to incorporate warm, aromatic undertones into your ice cream. This adds depth and a tantalizing warmth you won't want to miss.

  • Vegan-Friendly: For a dairy-free version, swap cream with coconut cream and adjust milk to maintain creaminess. The tropical notes of coconut combined with rose will find a lovely mix!

  • Chocoholics Unite: Stir in some dark chocolate chips or a swirl of chocolate sauce for an indulgent chocolate-rose experience. Chocolate pairs beautifully with the nutty pistachios for a delightful treat.

  • Frozen Treats Galore: Try making Rose Pistachio Ice Cream popsicles by pouring the mixture into molds and freezing. These fun treats are perfect for warm days and delightful for kids and adults alike.

  • Layered Cakes: Consider using this luxurious ice cream as a layer in an ice cream cake! Combine with a simple cake base and freeze for a refreshing multi-layer dessert, perfect for gatherings. For ideas, check out this Ice Cream Cake recipe.

  • Elegant Desserts: Serve with a drizzle of rose syrup and a sprinkle of crushed nuts over other desserts—like alongside Peaches Cream Cookies. This simple addition takes your dessert to new heights!

Each variation opens the door to new culinary adventures, so don't hesitate to get creative!

What to Serve with Rose Pistachio Ice Cream

Indulging in a bowl of silky Rose Pistachio Ice Cream can transport you to a fragrant garden, but pairing it with complementary sides takes your dessert experience to the next level!

  • Creamy Mashed Potatoes: These buttery, smooth potatoes offer a comforting contrast to the ice cream's rich and airy texture. Perfect for rounding out a delightful meal.

  • Honey Yogurt: A drizzle of honey yogurt creates a sweet, tart pairing that harmonizes with the floral notes of the ice cream, enhancing its exotic charm.

  • Fresh Berries: Juicy strawberries or raspberries add a vibrant, refreshing element that balances the sweet creaminess of Rose Pistachio Ice Cream beautifully.

  • Cardamom Cookies: Ambient spices in these crispy cookies complement the rose's floral notes, creating a delectable balance that excites the palate.

  • Mint Tea: Sipping on cool mint tea refreshes the senses, making it a perfect drink to accompany this luxurious dessert and cleanse the palate.

  • Baklava Bites: The nutty layers of baklava pair wonderfully with the pistachios in the ice cream, adding a delightful crunch and satisfying sweetness to your dessert table.

  • Coconut Macaroons: These chewy coconut treats introduce a tropical touch, enhancing the ice cream's indulgent experience while providing textural variety.

  • Almond Cake: Light and fluffy almond cake offers a nutty flavor that beautifully marries with the ice cream, creating a memorable dessert moment.

  • Rose Lemonade: A refreshing glass of rose lemonade echoes the delicate rose flavor, creating a delightful and cohesive theme for your gathering.

Rose Pistachio Ice Cream Recipe FAQs

How do I choose the best pistachios?
Absolutely! Look for unsalted, roasted pistachios with a vibrant green color and no dark spots. Fresh pistachios will have a pleasant nutty aroma and taste. If you can, buy them in bulk for the best flavor and texture in your Rose Pistachio Ice Cream.

What’s the best way to store leftover ice cream?
To keep your Rose Pistachio Ice Cream fresh, store it in an airtight container and place it in the freezer. It will maintain optimal flavor and texture for up to 2 weeks. Just remember to press a piece of parchment paper against the surface before sealing it. This helps prevent ice crystals from forming!

Can I freeze the Rose Pistachio Ice Cream for longer?
Yes, you can freeze it for up to 3 months, but consume it sooner for the best experience. If you're storing it long-term, ensure it's in a tightly sealed container. When ready to enjoy, let it soften for about 10-15 minutes at room temperature for perfect scoopability.

What if my ice cream is too hard to scoop?
No worries! If your Rose Pistachio Ice Cream turns out too hard, simply allow it to sit at room temperature for about 5-10 minutes before serving. This will help it soften. If it still doesn’t scoop easily, you can also run your ice cream scoop under warm water for a few seconds to make serving easier.

Is this dessert safe for those with nut allergies?
While this delightful Rose Pistachio Ice Cream is vegetarian-friendly, it does contain nuts. If you’re serving guests with nut allergies, consider substituting the pistachios with a nut-free alternative like sunflower seeds or simply omit them entirely. The ice cream will still retain its luxurious flavor with the addition of rose water!

Can I make this ice cream dairy-free?
Absolutely! Swap the full-fat cream with coconut cream or any dairy-free cream alternative. Adjust the sweetness as necessary since some alternatives can vary in sweetness. This way, you can enjoy the same indulgent Rose Pistachio Ice Cream, perfectly suited for vegan or lactose-intolerant individuals!

Rose Pistachio Ice Cream

Creamy Rose Pistachio Ice Cream for a Luxurious Treat

Discover the exotic and delightful flavors of Rose Pistachio Ice Cream, a perfect treat for summer gatherings.
Print Recipe Pin Recipe
Prep Time 5 minutes mins
Cook Time 30 minutes mins
Freezing Time 4 hours hrs
Total Time 4 hours hrs 35 minutes mins
Servings: 6 servings
Course: Dessert
Cuisine: Global
Calories: 250
Ingredients Equipment Method Nutrition Notes

Ingredients
  

Cream Base
  • 2 cups full-fat cream provides richness and smooth texture
  • 3/4 cup sugar adjust according to personal preference
Flavoring
  • 2 tablespoons rose water use sparingly
  • 1 cup unsalted roasted pistachios introduces nuttiness and crunch
Optional Ingredients
  • 1 can condensed milk acts as sweetener and stabilizer for no-churn method

Equipment

  • Ice cream maker
  • Mixing Bowl
  • Spatula

Method
 

Step-by-Step Instructions
  1. In a large mixing bowl, whip the full-fat cream and sugar until soft peaks form (3-5 minutes).
  2. Fold in the rose water and crushed roasted pistachios until evenly distributed.
  3. Churn the mixture in an ice cream maker for 25-30 minutes until thickened.
  4. Transfer to a sealed container and freeze for at least 4 hours until firm.
  5. Let sit at room temperature for 5-10 minutes before serving; garnish with crushed pistachios if desired.

Nutrition

Serving: 1scoopCalories: 250kcalCarbohydrates: 28gProtein: 4gFat: 14gSaturated Fat: 8gPolyunsaturated Fat: 1gMonounsaturated Fat: 5gCholesterol: 45mgSodium: 30mgPotassium: 150mgFiber: 1gSugar: 20gVitamin A: 500IUCalcium: 100mgIron: 1mg

Notes

Serve with a drizzle of rose syrup and a sprinkle of crushed pistachios for an elegant touch.

Tried this recipe?

Let us know how it was!

Homemade Orange Popsicles That Are Bursting with Flavor

February 23, 2026 by Grace Snow Leave a Comment

The first lick of summer couldn't feel sweeter than when you dive into a homemade popsicle on a hot day. That's why I'm thrilled to share my recipe for Homemade Orange Popsicles—simple, healthy, and bursting with that sunshine-filled flavor we crave. Whipping these up takes only about 15 minutes (plus a little waiting time), making them an easy go-to for anyone looking to refresh their afternoon or satisfy a sweet tooth without the guilt. With options to eliminate added sugars, these treats celebrate the natural sweetness of fresh oranges, giving you a delicious way to stay cool. Now, who’s ready to beat the heat with a tropical twist?

Why Love Homemade Orange Popsicles?

Freshness You Can Taste: Each popsicle is crafted with freshly squeezed orange juice, ensuring a vibrant flavor that no store-bought option can match.
Healthy Indulgence: With options for no added sugar, you can enjoy a guilt-free treat that’s tasty and good for you.
Versatile and Fun: Feel free to mix in unexpected flavors like coconut or other fruits for a personalized twist!
Quick and Easy: Ready in just 15 minutes (plus freezing), these popsicles fit perfectly into busy lifestyles, just like my Homemade Hot Chocolate.
Family-Friendly Appeal: Perfect for kids and adults alike, they’re a great way to indulge without the heaviness of fast food.
Ideal for Summer Gatherings: Serve them at parties or family get-togethers as a refreshing treat that everyone will love!

Homemade Orange Popsicles Ingredients

For the Popsicles
• Fresh Orange Juice – Use fresh-squeezed for optimal taste and brightness in your homemade orange popsicles.
• Granulated Sugar – Enhances sweetness; adjust to taste or substitute with honey or agave for a healthier option.
• Zest of 1 Orange – Adds aromatic oils and boosts the orange flavor for a richer experience.
• Lemon Juice – Optional; adds a tartness that beautifully balances the sweetness of the oranges.

Step‑by‑Step Instructions for Homemade Orange Popsicles

Step 1: Juicing the Oranges
Start by juicing 6-8 fresh oranges, aiming for about 2 cups of juice. Cut the oranges in half and use a citrus juicer to extract the juice, ensuring you remove any seeds. The bright, vibrant orange juice is the star ingredient for your Homemade Orange Popsicles, providing a fresh and tangy flavor that is hard to beat.

Step 2: Mixing the Ingredients
In a blender, combine the fresh orange juice with granulated sugar (or your preferred sweetener) and the zest of one orange. Blend until the sugar is fully dissolved—this should only take about 30 seconds. If you opt to add the lemon juice for a touch of tartness, now's the time! This mixture will create a beautifully aromatic base for your popsicles.

Step 3: Filling the Molds
Once your mixture is ready, carefully pour it into popsicle molds. Fill each mold, leaving a small space at the top to allow for expansion as they freeze. This step is crucial for achieving that perfect popsicle shape, so take your time. You should see the bright orange color fill the molds, creating a delightful preview of the refreshing treat to come.

Step 4: Freezing the Popsicles
Insert popsicle sticks into each mold, making sure they stand upright, and place the molds in the freezer. Allow the popsicles to freeze for at least 4-6 hours, or until they are completely solid. Check them periodically; they should feel firm to the touch. This patience will reward you with a cold treat that’s perfect for any hot day!

Step 5: Unmolding the Popsicles
To release your Homemade Orange Popsicles, run warm water over the outside of the molds for a few seconds. This will help loosen the popsicles. Gently pull out each popsicle; they should slide out smoothly if properly frozen. Enjoy their vibrant color and refreshing texture as you take your first bite!

How to Store and Freeze Homemade Orange Popsicles

  • Fridge: Store popsicles in an airtight container in the fridge for up to 3 days, but they may lose their icy texture.

  • Freezer: Keep your Homemade Orange Popsicles in the freezer in a sealed container for up to 2 weeks to maintain their freshness and flavor.

  • Unmolding Tip: If you make a batch and have leftovers, run the molds under warm water to easily release any popsicles that are still in the molds before storing.

  • Reheating: Enjoy popsicles straight from the freezer; no reheating necessary! Just let them sit for a minute if they feel too hard to bite into.

Homemade Orange Popsicles Variations

Feel free to let your imagination run wild with these delightful twists to make your popsicles even more fantastic!

  • Creamy Coconut: Add a splash of coconut milk to the orange juice blend for a rich, tropical flavor that feels like a vacation in every bite. The creaminess takes popsicles from simple to sublime!

  • Tropical Twist: Mix in pineapple or mango juice for a refreshing taste of the tropics. This fruity combination elevates the flavor profile, creating a sunny treat that’s perfect for summer gatherings.

  • Berry Burst: Toss in some blended berries like strawberries or raspberries for a pop of color and flavor. The sweet tartness pairs beautifully with the orange, making each lick a delicious surprise.

  • Spicy Kick: Add a pinch of cayenne or a dash of finely chopped jalapeño for those who like a little heat. This unexpected twist transforms your orange popsicles into a bold dessert, igniting your taste buds.

  • Zesty Citrus Mix: Substitute fresh orange juice with a blend of grapefruit and lime juices for a tangy edge. The mix will dance on your palate, offering a delightful variation for citrus lovers.

  • Honey Drizzle: Swap out granulated sugar in the mix for honey or maple syrup. This not only makes for a healthier option but also adds a beautiful hint of floral sweetness that enhances the overall flavor.

  • Nutty Flavor: Stir in some almond or peanut butter for a creamy texture and nutty taste. It creates a decadent popsicle that pairs surprisingly well with the vibrant orange flavor.

  • Herb Infusion: Crush some fresh mint or basil leaves and mix into your orange juice blend. This fragrant addition will provide a refreshing twist that’s both sophisticated and refreshing, perfect for garden parties!

While you’re exploring these variations, don’t forget to check out my Shakshuka Savor Bold for another vibrant recipe that showcases fresh flavors! Keep your summer heat-busting adventures going with these delightful twists on Homemade Orange Popsicles.

What to Serve with Homemade Orange Popsicles

Cool down your summer gatherings with these vibrant, refreshing popsicles, perfectly complemented by delicious sides and sips.

  • Fresh Fruit Salad: A colorful medley of seasonal fruits enhances the refreshing experience, balancing sweet and tart notes that pair perfectly with popsicles.
  • Coconut Whipped Cream: This light, fluffy topping adds a creamy, tropical twist, making each bite of popsicle feel like an indulgent treat.
  • Yogurt Parfait: Layer yogurt with granola and fresh berries for a satisfying, balanced snack that contrasts the icy popsicles while offering a creamy texture.
  • Minty Lemonade: This zesty beverage brightens up the meal while keeping the refreshing vibe intact, complementing the citrus notes in the popsicles.
  • Chocolate Sauce: Drizzle a bit of rich and velvety chocolate sauce on the popsicles for a sweet contrast, offering a deliciously indulgent surprise.
  • Tropical Smoothie: Blend up a smoothie with bananas, mangoes, and coconut milk to create a creamy, refreshing drink that pairs beautifully with the popsicles.
  • Granola Bars: Crunchy, nutty granola bars add a satisfying texture and energy boost, making them perfect companions for your homemade treats.
  • Chia Seed Pudding: This healthy, creamy dessert can be prepared in advance, providing a nutty, slightly sweet treat that pairs wonderfully with cold popsicles.
  • Iced Green Tea: A lightly sweetened iced green tea enhances the experience, offering a fragrant, refreshing sip that complements the bright orange flavors.

Make Ahead Options

These Homemade Orange Popsicles are perfect for meal prep enthusiasts! You can prepare the orange juice mixture and pour it into molds up to 24 hours in advance, allowing for easy assembly whenever you're ready to freeze. To maintain the freshest taste, be sure to use freshly squeezed juice and keep the mixture in the refrigerator until you're ready to fill the molds. When it's time to freeze, simply insert sticks and freeze for at least 4-6 hours until solid. With these make-ahead tips, you’ll have a refreshing snack waiting for you on busy weeknights—just as delicious and satisfying as if you made them fresh that day!

Expert Tips for Homemade Orange Popsicles

• Juicing Perfection: Use fresh oranges for the best flavor; avoid bottled juice as it lacks the vibrant taste of homemade orange popsicles.

• Sugar Alternatives: If you prefer no added sugar, let ripe oranges do the sweetening! Just remember, sweetness varies with fruit ripeness.

• Mixing Smoothly: Blend until all sugar is dissolved to prevent graininess; a smooth mixture is key for a delightful popsicle texture.

• Popsicle Mold Space: Don’t overfill your molds! Leave a little room for expansion during freezing to ensure perfect popsicle shapes.

• Easy Release Tip: If popsicles are hard to remove, run mold under warm water slightly longer for an effortless release; no broken popsicles here!

Homemade Orange Popsicles Recipe FAQs

What type of oranges should I use for the best flavor?
Absolutely! For the most vibrant flavor, use freshly squeezed orange juice from ripe, juicy oranges like navel or Valencia oranges. These varieties are sweeter and have a pleasant tang, enhancing your Homemade Orange Popsicles.

How long can I store Homemade Orange Popsicles in the freezer?
You can keep your Homemade Orange Popsicles in the freezer for up to 2 weeks. Ensure they're in a sealed container to prevent freezer burn, preserving their fresh flavor and texture for those warm day cravings!

Can I freeze leftover popsicles, and how do I do it?
Yes, of course! To freeze, allow your popsicles to set fully before running warm water over the outside of the molds to release them. Then, place the popsicles in an airtight container and keep them flat in your freezer, ensuring they are spaced apart to avoid sticking together.

What if my popsicles are too hard to eat?
This can happen if they freeze too long! If your Homemade Orange Popsicles feel overly hard, simply let them sit at room temperature for 1 to 2 minutes before trying to enjoy. Alternatively, running warm water over the mold can help soften them enough for easy eating.

Are these popsicles safe for children with allergies?
Definitely! These popsicles are simply made from natural ingredients like fresh orange juice and optional sweeteners, making them a healthier choice. However, always consider any specific allergies, especially if using sweeteners like honey, which shouldn’t be given to children under one year old.

Can I use other fruits to make variations of my popsicles?
Very much so! You can mix in pureed fruits like berries, mango, or pineapple for a tropical twist. Just keep the ratio similar to the orange juice to maintain a smooth consistency. Feel free to get creative with combinations to find your family's favorite!

Homemade Orange Popsicles

Homemade Orange Popsicles That Are Bursting with Flavor

Enjoy these Homemade Orange Popsicles that are simple, healthy, and bursting with flavor, perfect for beating the heat.
Print Recipe Pin Recipe
Prep Time 15 minutes mins
Freezing Time 5 hours hrs
Total Time 5 hours hrs 15 minutes mins
Servings: 6 popsicles
Course: Dessert
Cuisine: American
Calories: 80
Ingredients Equipment Method Nutrition Notes

Ingredients
  

For the Popsicles
  • 2 cups Fresh Orange Juice Use fresh-squeezed for optimal taste
  • 1/4 cup Granulated Sugar Adjust to taste or substitute with honey or agave
  • 1 whole Zest of Orange Adds aromatic oils for a richer experience
  • 2 tablespoons Lemon Juice Optional; adds tartness that balances sweetness

Equipment

  • citrus juicer
  • Blender
  • Popsicle molds

Method
 

Step-by-Step Instructions for Homemade Orange Popsicles
  1. Juicing the Oranges: Start by juicing 6-8 fresh oranges, aiming for about 2 cups of juice. Cut the oranges in half and use a citrus juicer to extract the juice, ensuring you remove any seeds.
  2. Mixing the Ingredients: In a blender, combine the fresh orange juice with granulated sugar (or your preferred sweetener) and the zest of one orange. Blend until the sugar is fully dissolved.
  3. Filling the Molds: Carefully pour the mixture into popsicle molds, filling each mold and leaving a small space at the top for expansion as they freeze.
  4. Freezing the Popsicles: Insert popsicle sticks into each mold and place the molds in the freezer. Allow the popsicles to freeze for at least 4-6 hours, or until solid.
  5. Unmolding the Popsicles: Run warm water over the molds for a few seconds to loosen the popsicles and gently pull them out.

Nutrition

Serving: 1popsicleCalories: 80kcalCarbohydrates: 20gPotassium: 180mgFiber: 1gSugar: 15gVitamin A: 5IUVitamin C: 100mgCalcium: 1mgIron: 1mg

Notes

Use fresh oranges for the best flavor and avoid overfilling the molds to ensure perfect popsicle shapes.

Tried this recipe?

Let us know how it was!

Zesty Arugula Citrus Salad for a Refreshing Lunch Burst

February 23, 2026 by Grace Snow Leave a Comment

As I bit into the first forkful of this Arugula Citrus Salad, a wave of freshness washed over me, reminding me of sun-drenched picnics and breezy summer days. With crisp arugula, juicy orange slices, and hearty chickpeas mingling together alongside nutty quinoa, this dish isn't just a salad; it’s a vibrant celebration of nourishing ingredients. Not only is it effortlessly gluten-free and vegan, but it also delivers a quick-prep option that's perfect for busy weeknights or an impressive side at your next gathering. Whether you're looking to revitalize your lunch routine or simply enjoy a burst of bright flavors, this salad truly has it all. Curious how to bring this refreshing dish to your table? Let’s dive into the recipe!

Why is this salad a must-try?

Vibrant ingredients: The Arugula Citrus Salad combines the peppery crunch of arugula with sweet, juicy oranges, creating an exquisite flavor harmony.

Nutrient-packed: With chickpeas and quinoa, it's a protein-rich dish that's both filling and healthy, making it a perfect choice for a satisfying lunch or a light dinner.

Quick preparation: In just 30 minutes, you'll have a colorful and nutritious salad ready to impress your family or guests, saving you time in the kitchen!

Versatile options: Feel free to customize this salad—swap in your favorite fruits or nuts for delightful twists. Consider pairing it with a refreshing Tofu Caesar Salad or a protein-packed Chicken Salad with Apples for a complete meal experience.

Crowd pleaser: The combination of textures and flavors makes this salad a guaranteed hit at gatherings, whether casual or formal!

Arugula Citrus Salad Ingredients

For the Salad

  • Quinoa – Adds protein and a chewy texture; substitute with couscous or farro for variety.
  • Arugula – Provides a peppery flavor and nutrient density; mix with other leafy greens like spinach for different flavors.
  • Chickpeas – Offers protein and creaminess; you can swap with black beans for a unique taste.
  • Avocados – Adds creaminess and healthy fats; diced cucumber works well as a substitute if needed.
  • Orange – Gives sweetness and acidity; feel free to use mandarin segments or fresh grapefruit as alternatives.
  • Slivered Almonds – Provide crunch and nuttiness; sliced almonds or walnuts are great substitutes.
  • Feta Cheese – Adds saltiness and creaminess; opt for vegan feta or leave it out for a dairy-free salad.

For the Vinaigrette

  • Olive Oil – Acts as the base for the vinaigrette; avocado oil can lend a different flavor.
  • Orange Juice – For dressing, adds brightness; swap with lemon juice for a punchier tartness.
  • Lemon Juice – Provides acidity akin to orange juice; adjust according to taste preferences.
  • Garlic – Imparts depth of flavor; adjust the amount to suit your palate.
  • Dijon Mustard – Acts as an emulsifier in the vinaigrette; use whole grain mustard for a different texture.
  • Pure Maple Syrup – Balances the vinaigrette's acidity; honey can be used as a sweetener if you're not vegan.
  • Chopped Red Onion or Shallots – Adds sharpness; consider omitting if you prefer a milder taste.
  • Salt & Pepper – Seasoning to taste; adjust based on the saltiness of feta and other ingredients.

This Arugula Citrus Salad is not only a feast for the eyes, but it’s bursting with nourishing ingredients that will brighten anyone’s day!

Step‑by‑Step Instructions for Arugula Citrus Salad

Step 1: Cook the Quinoa
Rinse 1 cup of quinoa thoroughly under cold water to remove bitterness. In a medium saucepan, combine the rinsed quinoa with 2 cups of vegetable broth. Bring to a boil over medium-high heat, then cover and reduce to a simmer for 15-20 minutes, or until the liquid is absorbed and the quinoa appears fluffy. Remove from heat and let it sit covered for 10 minutes before fluffing it with a fork.

Step 2: Toast the Almonds
While the quinoa is cooking, prepare the toasted slivered almonds for your Arugula Citrus Salad. Preheat your oven's broiler. Spread the slivered almonds on a baking sheet and place them under the broiler for 2-3 minutes, keeping a close eye to prevent burning. Alternatively, heat a skillet over medium heat and toast the almonds dry for 4-5 minutes until golden brown and fragrant, stirring frequently.

Step 3: Make the Vinaigrette
In a medium bowl, whisk together ¼ cup of olive oil, 3 tablespoons of freshly squeezed orange juice, 1 tablespoon of lemon juice, 2 crushed garlic cloves, 1 teaspoon of Dijon mustard, and 1 tablespoon of pure maple syrup. Add freshly chopped red onion or shallots, then season your vinaigrette with salt and pepper to taste. This zesty dressing will enhance the freshness of your Arugula Citrus Salad.

Step 4: Assemble the Salad
In a large salad bowl, combine 4 cups of fresh arugula, the cooked quinoa, 1 can of drained and rinsed chickpeas, segmented orange slices, diced avocado, toasted almonds, and crumbled feta cheese if using. Gently mix these ingredients together, allowing the colors and textures to blend beautifully. This nutritious combination is the heart of your Arugula Citrus Salad.

Step 5: Dress and Serve
Drizzle your homemade vinaigrette over the salad mixture and toss gently to ensure even coating without bruising the delicate arugula. Taste the salad and adjust any seasonings as needed. Serve it immediately for peak freshness, or let it chill for a few minutes to enhance the flavors further. Your vibrant Arugula Citrus Salad is now ready to brighten any meal!

Arugula Citrus Salad Variations

Invite your creativity to shine as you explore delightful twists on this Arugula Citrus Salad!

  • Protein Boost: Add grilled chicken or shrimp for a satisfying kick of protein. This helps turn the salad into a robust main dish, perfect for both lunch and dinner.

  • Seasonal Swaps: Replace oranges with seasonal fruits like strawberries or apples for a refreshing twist. The varying sweetness will keep your taste buds intrigued.

  • Nutty Alternatives: Include different nuts such as pecans or pistachios to switch up the flavor profile. The added crunch complements the salad beautifully.

  • Vegan Cheese: Swap feta cheese for creamy vegan cheese or omit it altogether for a dairy-free delight. This choice ensures everyone can enjoy the salad!

  • Herb Infusion: Incorporate fresh herbs like basil or mint to elevate the flavor with an aromatic touch. It’s a delightful way to brighten the overall dish.

  • Heat It Up: Sprinkle some red pepper flakes or chopped jalapeños to add a spicy flare. This adds excitement and brings a bold flavor to your salad experience.

For more delicious salads, consider trying my German Potato Salad or a vibrant Grilled Balsamic Steak Salad. There’s always an opportunity to discover something new!

What to Serve with Arugula Citrus Salad

Brighten your dining experience with delightful dishes that pair effortlessly with this refreshing salad.

  • Grilled Salmon: The rich, buttery flavor of salmon beautifully contrasts the salad's crispness, creating a well-rounded meal that's both light and fulfilling.

  • Garlic Bread: This warm, toasty addition brings comforting crunch, perfect for soaking up any residual vinaigrette from your salad.

  • Stuffed Bell Peppers: A hearty filling complements the lightness of your Arugula Citrus Salad, providing a satisfying, colorful contrast to your table.

  • Pasta Primavera: The vibrant veggies and olive oil in this pasta dish echo the salad’s fresh and zesty notes, enhancing a wholesome dining experience.

  • Quinoa Patties: For a similar texture, serve these protein-packed patties alongside your salad, ensuring a delightful feast of flavors and sensations.

  • Chilled White Wine: A crisp Sauvignon Blanc or a fruity Rosé will elevate your meal, bringing a refreshing burst that pairs perfectly with the citrus undertones of your salad.

  • Vanilla Sorbet: After the meal, a cool sorbet is a perfect light dessert, cleansing the palate with its sweet and refreshing notes against the zesty taste of your salad.

Expert Tips for Arugula Citrus Salad

  • Quinoa Rinsing: Always rinse your quinoa thoroughly under cold water. This step removes bitterness and results in a more pleasant flavor for your Arugula Citrus Salad.

  • Chill for Flavor: After tossing your salad, let it chill for 5-10 minutes. This allows all the flavors to meld beautifully, enhancing the overall taste experience.

  • Adjust the Vinaigrette: Taste the dressing before adding it to your salad. If you prefer a sweeter note, don’t hesitate to add a touch more maple syrup or adjust the Dijon mustard for a zingy kick.

  • Ingredient Flexibility: Feel free to swap ingredients based on availability or preference. For example, black beans can replace chickpeas, and mixed greens can stand in for arugula if needed.

  • Serving Freshness: Serve the salad immediately for a fresh crunch, or keep the vinaigrette separate until serving to maintain the arugula's crispness. This way, leftovers can last longer without wilting.

How to Store and Freeze Arugula Citrus Salad

Fridge: Store assembled salad in an airtight container for up to 2 days. Keep the vinaigrette separate until serving to prevent wilting.

Freezer: Freezing the salad is not recommended due to the texture changes in fresh ingredients like avocado and arugula.

Reheating: If you've stored leftover quinoa, reheat it in the microwave with a splash of water for moisture, but enjoy the salad cold for the best flavor.

Ingredient Storage: Fresh ingredients like avocados and oranges should be stored in the fridge, while quinoa can be kept in a sealed container in the pantry for up to 6 months.

Make Ahead Options

These vibrant Arugula Citrus Salad ingredients can be prepped in advance, saving you precious time during busy weeknights! You can cook the quinoa and store it in an airtight container in the refrigerator for up to 3 days, allowing the flavors to meld beautifully. Additionally, you can prepare the vinaigrette and refrigerate it for up to 1 week; just give it a good shake before using. For optimal freshness, wait to toss the salad with the arugula until right before serving, as this prevents wilting. Simply assemble the salad by combining the prepped components and drizzling the dressing when you’re ready to enjoy a refreshing and nourishing Arugula Citrus Salad!

Arugula Citrus Salad Recipe FAQs

What kind of arugula should I choose for the salad?
Look for bright green, vibrant arugula leaves without dark spots or wilting. Fresh, young arugula tends to have a milder, peppery flavor that's perfect for this salad. If you come across any that feels limp or has a bitter taste, it's best to pass them up.

How should I store leftover arugula citrus salad?
Store any leftover salad in an airtight container in the fridge for up to 2 days. It’s best to keep the vinaigrette separate until you're ready to serve, as this will prevent the arugula from wilting and losing its crunch!

Can I freeze the arugula citrus salad?
Freezing this salad is not recommended because the textures of fresh ingredients like arugula and avocado change significantly once frozen. Instead, you can prepare the quinoa in advance and store it separately in the fridge or freezer for up to 3 months. When ready to use, simply reheat and assemble with freshly cut salad ingredients.

What if the dressing is too tangy for my taste?
If you find the vinaigrette too tangy, you can reduce the acidity by adding a bit more maple syrup or a splash of olive oil to balance it out. Another option is to mix in a spoonful of yogurt or sour cream for creaminess—just be cautious if you’re keeping it vegan. Taste as you go to get it just right!

Are there any ingredient substitutions for those with dietary restrictions?
Absolutely! This Arugula Citrus Salad is quite flexible. If you're avoiding gluten or grains, you can leave out the quinoa. For vegan alternatives to feta cheese, consider using a crumbled tofu or a dairy-free cheese option. If you have a nut allergy, feel free to omit the slivered almonds or replace them with seeds like pumpkin or sunflower seeds. You can cater this dish to almost any dietary need while keeping it delicious!

Arugula Citrus Salad

Zesty Arugula Citrus Salad for a Refreshing Lunch Burst

This Arugula Citrus Salad combines vibrant ingredients for a refreshing and healthy meal option.
Print Recipe Pin Recipe
Prep Time 30 minutes mins
Cook Time 20 minutes mins
Total Time 50 minutes mins
Servings: 4 servings
Course: Salads
Cuisine: Gluten-Free, Vegan
Calories: 280
Ingredients Equipment Method Nutrition Notes

Ingredients
  

For the Salad
  • 1 cup Quinoa Substitute with couscous or farro for variety
  • 4 cups Fresh Arugula Mix with other leafy greens like spinach for different flavors
  • 1 can Chickpeas Drained and rinsed; you can swap with black beans
  • 1 medium Avocado Diced; substitute with cucumber if needed
  • 1 medium Orange Feel free to use mandarin segments or grapefruit
  • 1/2 cup Slivered Almonds Substitute with sliced almonds or walnuts
  • 1/2 cup Feta Cheese Opt for vegan feta or leave it out
For the Vinaigrette
  • 1/4 cup Olive Oil Avocado oil can lend a different flavor
  • 3 tablespoons Orange Juice Swap with lemon juice for a punchier tartness
  • 1 tablespoon Lemon Juice Adjust according to taste preferences
  • 2 cloves Garlic Crushed; adjust to taste
  • 1 teaspoon Dijon Mustard Use whole grain mustard for different texture
  • 1 tablespoon Pure Maple Syrup Honey can be used if not vegan
  • 1/4 cup Chopped Red Onion or Shallots Omit if you prefer a milder taste
  • Salt & Pepper Seasoning to taste

Equipment

  • Medium saucepan
  • Baking Sheet
  • Skillet
  • medium bowl
  • Large salad bowl

Method
 

Step-by-Step Instructions
  1. Rinse quinoa thoroughly under cold water. In a medium saucepan, combine rinsed quinoa with vegetable broth. Bring to a boil, cover and reduce to a simmer for 15-20 minutes until liquid is absorbed. Let it sit covered for 10 minutes before fluffing.
  2. Preheat oven's broiler. Spread slivered almonds on a baking sheet and toast for 2-3 minutes under the broiler, keeping a close eye. Alternatively, heat a skillet and toast almonds dry for 4-5 minutes until golden brown.
  3. In a medium bowl, whisk together olive oil, orange juice, lemon juice, crushed garlic, Dijon mustard, and pure maple syrup. Add chopped onion or shallots, and season vinaigrette with salt and pepper.
  4. In a large salad bowl, combine arugula, cooked quinoa, chickpeas, orange slices, avocado, toasted almonds, and feta if using. Gently mix to blend colors and textures.
  5. Drizzle vinaigrette over salad and toss gently to coat. Taste and adjust seasonings as needed. Serve immediately or let chill for a few minutes to enhance flavors.

Nutrition

Serving: 1servingCalories: 280kcalCarbohydrates: 35gProtein: 10gFat: 10gSaturated Fat: 1gPolyunsaturated Fat: 2gMonounsaturated Fat: 6gCholesterol: 5mgSodium: 180mgPotassium: 500mgFiber: 8gSugar: 5gVitamin A: 1500IUVitamin C: 70mgCalcium: 80mgIron: 3mg

Notes

Store assembled salad in an airtight container for up to 2 days. Keep vinaigrette separate until serving. Freezing is not recommended due to texture changes in fresh ingredients.

Tried this recipe?

Let us know how it was!

Fresh French-Style Potato and Green Bean Salad Bliss

February 23, 2026 by Grace Snow Leave a Comment

As I tossed the vibrant green beans and tender new potatoes together, the aroma of freshly chopped herbs wafted through the air, transporting me straight to a sunny café in the heart of Provence. This French-Style Potato and Green Bean Salad hits all the right notes: it’s refreshingly light yet satisfying, making it the ultimate choice for warm-weather lunches or casual gatherings. The zesty vinaigrette, bursting with Mediterranean flavors from olives and capers, adds just the right kick to this dish. Plus, it's not just vegetarian but also gluten-free, ensuring everyone can enjoy this delightful salad. I'm excited to share this recipe with you—do you think it might become a staple on your table too?

Why is this salad a must-try?

Vibrant Colors: The mix of crisp green beans and tender new potatoes creates a visually stunning dish that is as appealing to the eyes as it is to the palate.

Mediterranean Flair: This salad bursts with flavors from olives, capers, and a zesty vinaigrette—perfect for those who crave authentic Mediterranean cuisine.

Quick and Easy: With straightforward preparation and no specialized skills required, you can whip up this delightful dish in no time, making it ideal for weeknight dinners or impromptu gatherings.

Versatile Side: It complements various main dishes beautifully, whether it’s grilled chicken or a light fish, and adapts easily to different occasions, just like my Coconutty Beans Greens recipe.

Make-Ahead Friendly: This salad can be prepared ahead of time, allowing flavors to meld while saving you valuable moments when entertaining.

Healthy and Satisfying: Packed with protein from eggs and healthy fats from olives, it’s a nutritious choice that will keep you feeling full and energized!

French-Style Potato and Green Bean Salad Ingredients

For the Salad
• New Potatoes (2 lbs/900g) – Soft, waxy potatoes that hold their shape well; choose small, scrubbed, and halved potatoes for an ideal texture.
• Green Beans (1 lb/450g) – Crisp and vibrant, these beans add beautiful color; trim and cut them into thirds for even cooking.
• Hard-Boiled Eggs (2) – Offering a protein boost, they add heartiness to the salad; prefer boiling a day or so ahead for convenience.
• Black Olives (12, dry cured) – Imparts a rich, briny flavor that makes the salad pop; opt for wrinkled, salt-cured olives for the best taste.
• Fresh Parsley and Chives (4-5 sprigs each) – Milder herbs that enhance the flavor without overpowering; consider swapping in tarragon for a fresh twist.

For the Vinaigrette
• Extra Virgin Olive Oil (1/3 cup/75ml) – Acts as the base for a luxurious vinaigrette, bringing richness to the salad.
• Lemon Juice (2 tbsp/30ml) – Adds a fresh, zesty brightness that complements the earthy flavors.
• White Wine Vinegar (2 tbsp/30ml) – Essential for a classic vinaigrette; brings tanginess to the dressing.
• Garlic (2 cloves, minced) – Elevates the flavor profile, contributing a deep, aromatic touch to the vinaigrette.
• Dijon Mustard (2 tsp) – Aids in emulsifying the dressing while adding a delightful hint of heat.
• Capers (1 tbsp, chopped) – Provides a tangy kick that perfectly balances the salad’s freshness.
• Salt (½ tsp) and Black Pepper (½ tsp) – Essential for seasoning, bringing all the flavors together harmoniously.

Enjoy creating a delightful French-Style Potato and Green Bean Salad that not only tantalizes the taste buds but also nurtures the spirit!

Step‑by‑Step Instructions for French-Style Potato and Green Bean Salad

Step 1: Prepare Hard-Boiled Eggs
In a saucepan, gently place two eggs and cover them with cold water. Bring the water to a boil over medium-high heat, then turn off the heat and cover the pot, letting the eggs sit for about 10 minutes. Afterward, transfer the eggs to an ice bath to cool for a few minutes, then peel them and set aside. This step enhances your French-Style Potato and Green Bean Salad with protein and richness.

Step 2: Cook Potatoes and Beans
While the eggs cool, prepare two pounds of new potatoes by halving them for even cooking. In a large pot, bring salted water to a boil and cook the potatoes for about 12 minutes until tender but still firm. Next, add one pound of trimmed green beans cut into thirds and boil together for another 2-3 minutes. Drain the vegetables and immediately plunge them into ice water to halt cooking and preserve their vibrant color.

Step 3: Make Vinaigrette
In a jar or mixing bowl, combine 1/3 cup of extra virgin olive oil, 2 tablespoons of fresh lemon juice, and 2 tablespoons of white wine vinegar. Add 2 minced garlic cloves, 2 teaspoons of Dijon mustard, and 1 tablespoon of chopped capers, followed by salt and black pepper to taste. Shake or whisk well until the ingredients are emulsified. This zesty vinaigrette will bring life to your French-Style Potato and Green Bean Salad.

Step 4: Assemble Salad
In a large mixing bowl, combine your fresh parsley and chives with half of the zesty vinaigrette. Toss in the cooled potatoes and green beans, gently mixing to coat them evenly with the dressing. Quarter the hard-boiled eggs and gently nestle them on top of the salad, showcasing their richness and texture. Drizzle the remaining vinaigrette over the salad just before serving for an extra burst of flavor.

French-Style Potato and Green Bean Salad Variations

Feel free to tailor this salad to suit your preferences and pantry items for a delightful twist!

  • Herb Swap: Try tarragon or dill instead of parsley and chives for a fresh flavor kick. Each herb brings its own character to the dish—perfect for experimenting!

  • Olive Twist: Use green olives instead of black for a milder flavor. The green olives provide a nice pop of color and a slightly different taste that can surprise your palate.

  • Add Crunch: Toss in some toasted pine nuts or walnuts for an added texture contrast. The crunch complements the salad beautifully and adds healthy fats for energy.

  • Protein Boost: Include shredded rotisserie chicken or chickpeas to transform your salad into a hearty main course. This addition ensures everyone leaves the table satisfied and happy.

  • Zesty Kick: A sprinkle of red pepper flakes will turn up the heat and give the salad a lively twist! Just a pinch will enhance the flavor without overwhelming the palate.

  • Vegan Option: Replace hard-boiled eggs with cubed avocado for a creamy texture. Not only does this cater to a plant-based diet, but it also adds a rich, buttery flavor.

  • Vinaigrette Zing: Try swapping lemon juice for lime juice or adding a dollop of honey to the vinaigrette for an extra zing. This little change can brighten up the entire bowl, making every bite refreshing.

  • Citrus Splash: Incorporate some orange or grapefruit segments. The sweetness of citrus fruit balances the briny olives and tangy dressing, creating a harmonious blend of flavors.

I encourage you to also check out my Smoky Sweet Potatoes for a complementing side dish that will brighten any table. Enjoy the mix and match possibilities!

Expert Tips for French-Style Potato and Green Bean Salad

  • Optimal Cooking Time: Ensure you don’t overcook the potatoes and green beans; aim for tender but firm. This preserves the salad's delightful texture.

  • Flavor Development: Allow the salad to sit for a few hours or overnight in the fridge. This enhances the flavors of your French-Style Potato and Green Bean Salad, making it even more delicious.

  • Herb Substitution: Experiment with different herbs like tarragon or basil for a unique twist. These can change the flavor profile while maintaining the salad's freshness.

  • Cooking Eggs: For perfect hard-boiled eggs, place them in cold water and then bring it to a boil. This method produces a creamy yolk and easier peeling.

  • Mixing Olives: If using brined olives, remember they will impart a different flavor. Adjust the vinaigrette seasoning accordingly for balance.

How to Store and Freeze French-Style Potato and Green Bean Salad

Fridge: Store your salad in an airtight container for up to 3 days. This keeps the flavors fresh and vibrant while maintaining the salad's texture.

Make-Ahead: Feel free to prepare the French-Style Potato and Green Bean Salad a day in advance. Simply keep it refrigerated, and the flavors will meld beautifully over time.

Freezer: For best results, avoid freezing since the potatoes and beans may become mushy upon thawing. Instead, prepare only the component parts that can be frozen individually if needed, like the boiled potatoes.

Reheating: This salad is best enjoyed cold or at room temperature. If you've prepared it in advance, simply give it a gentle toss before serving to refresh the flavors.

What to Serve with Fresh French-Style Potato and Green Bean Salad

Elevate your dining experience by pairing this vibrant salad with the perfect complements that enhance its Mediterranean charm.

  • Grilled Chicken: Juicy, smoky grilled chicken adds a satisfying protein that balances the lightness of the salad beautifully. The flavors mingle delightfully, making every bite a treat.

  • Lemon Herb Grilled Shrimp: These succulent shrimp bring a zesty twist, echoing the bright vinaigrette and elevating your meal with their tantalizing flavors.

  • Crusty French Baguette: Freshly baked crusty baguette is ideal for sopping up the tangy vinaigrette, adding a delightful crunch and heartiness to your meal.

  • Roasted Mediterranean Vegetables: The sweet, caramelized notes of roasted bell peppers, zucchini, and eggplant pair wonderfully with the salad’s freshness, enhancing the Mediterranean vibe.

  • Feta Cheese Crumbles: Sprinkle feta cheese over your salad for a creamy, salty touch that enriches the flavors and adds a delightful texture contrast.

  • Sparkling Water with Lemon: A refreshing beverage choice, sparkling water infused with lemon slices brightens your meal while complementing the zesty aspects of the salad perfectly.

  • Fruit Sorbet: For dessert, a light fruit sorbet offers a refreshing, sweet finish that balances the savory aspects of the dish while keeping things light.

  • Red Wine (Pinot Noir): A chilled glass of Pinot Noir adds a wonderful layer of complexity and enhances the Mediterranean flavors of the salad beautifully, making it a perfect pairing.

Make Ahead Options

This French-Style Potato and Green Bean Salad is a fantastic choice for meal prep, allowing you to save precious time during busy weeknights. To prepare ahead, you can hard-boil the eggs up to a week in advance and store them in the refrigerator; they’ll remain just as delicious. The potatoes and green beans can also be cooked 24 hours ahead; simply blanch them and refrigerate in an airtight container to maintain their vibrant colors and fresh textures. When you're ready to serve, toss together the salad with the vinaigrette and top with the eggs for a delightful finish. This way, you’ll enjoy a refreshing, hearty salad without the last-minute rush!

French-Style Potato and Green Bean Salad Recipe FAQs

How do I choose the right potatoes for this salad?
Absolutely! For the best results, select small, waxy new potatoes as they hold their shape well after cooking. Look for potatoes that are firm and free from dark spots or blemishes. Yukon gold potatoes are a great alternative too; just reduce your cooking time by 1-2 minutes for optimal tenderness.

How should I store leftover salad?
Very! You can store your French-Style Potato and Green Bean Salad in an airtight container in the refrigerator for up to 3 days. Keeping it chilled preserves the vibrant flavors and texture. I encourage you to enjoy it cold—just give it a gentle toss before serving!

Can I freeze this salad?
For best results, it's better to avoid freezing this salad as the potatoes and green beans can become mushy when thawed. However, if you’d like to freeze component parts, you can freeze the boiled potatoes individually in freezer bags for up to 3 months. To use, thaw in the refrigerator overnight and mix them into fresh ingredients.

What should I do if my green beans turn out too soft?
No worries! If your beans turn out mushy, it often means they were boiled too long. In the future, aim for 2-3 minutes of boiling after adding them to the potatoes; then quickly transfer them to an ice bath. This halts cooking and keeps them crisp. Remember, texture is key for that fresh crunch!

Are there any dietary considerations for this salad?
Absolutely! The French-Style Potato and Green Bean Salad is vegetarian and gluten-free, making it suitable for various diets. However, if you're serving guests with specific allergies, ensure to check the labels on your olives and capers for any cross-contamination. This way, everyone can enjoy this delightful dish worry-free!

Can pets eat the salad ingredients?
It's best to avoid sharing this salad with pets. While potatoes are safe when cooked and plain, garlic, olives, and capers can be harmful to dogs and cats. To ensure your furry friends are safe, keep the salad ingredients away from them.

French-Style Potato and Green Bean Salad

Fresh French-Style Potato and Green Bean Salad Bliss

This French-Style Potato and Green Bean Salad is a light yet satisfying dish bursting with vibrant colors and Mediterranean flavors.
Print Recipe Pin Recipe
Prep Time 15 minutes mins
Cook Time 15 minutes mins
Cooling Time 10 minutes mins
Total Time 40 minutes mins
Servings: 4 servings
Course: Salads
Cuisine: French
Calories: 300
Ingredients Equipment Method Nutrition Notes

Ingredients
  

For the Salad
  • 2 lbs New Potatoes Soft, waxy potatoes, halved
  • 1 lb Green Beans Trimmed and cut into thirds
  • 2 pieces Hard-Boiled Eggs Boiled ahead for convenience
  • 12 pieces Black Olives Dry cured, wrinkled and salt-cured
  • 4-5 sprigs Fresh Parsley Milder herb; can substitute with tarragon
  • 4-5 sprigs Chives Milder herb; can substitute with tarragon
For the Vinaigrette
  • 1/3 cup Extra Virgin Olive Oil Base for vinaigrette
  • 2 tbsp Lemon Juice Fresh and zesty
  • 2 tbsp White Wine Vinegar Essential for tanginess
  • 2 cloves Garlic Minced for flavor
  • 2 tsp Dijon Mustard Emulsifies dressing
  • 1 tbsp Capers Chopped for tangy balance
  • 1/2 tsp Salt
  • 1/2 tsp Black Pepper

Equipment

  • Saucepan
  • Large pot
  • Mixing Bowl
  • Jar or mixing bowl for vinaigrette

Method
 

Preparation Steps
  1. Step 1: Prepare Hard-Boiled Eggs by placing them in a saucepan, covering with cold water, bringing to a boil, turning off heat and letting sit for 10 minutes before cooling in an ice bath.
  2. Step 2: Cook Potatoes by halving 2 lbs of new potatoes and boiling in salted water for 12 minutes. Add 1 lb of green beans and cook for an additional 2-3 minutes, then drain and plunge into ice water.
  3. Step 3: Make Vinaigrette by combining 1/3 cup olive oil, 2 tbsp lemon juice, 2 tbsp vinegar, 2 minced garlic cloves, 2 tsp mustard, 1 tbsp capers, salt, and pepper in a jar or bowl and whisking until emulsified.
  4. Step 4: Assemble Salad by mixing parsley and chives with half of the vinaigrette, adding cooled potatoes and green beans, mixing well, and garnishing with quartered hard-boiled eggs and remaining vinaigrette.

Nutrition

Serving: 1servingCalories: 300kcalCarbohydrates: 30gProtein: 10gFat: 15gSaturated Fat: 2gPolyunsaturated Fat: 2gMonounsaturated Fat: 10gCholesterol: 200mgSodium: 400mgPotassium: 600mgFiber: 5gSugar: 2gVitamin A: 500IUVitamin C: 15mgCalcium: 50mgIron: 2mg

Notes

This salad is best when allowed to sit for a few hours or overnight in the fridge to enhance flavors.

Tried this recipe?

Let us know how it was!

Gordon Ramsay Radish Salad: A Zesty, Refreshing Delight

February 23, 2026 by Grace Snow Leave a Comment

As I sliced into the fresh radishes, their crispness brought back memories of sun-soaked summer picnics and vibrant farmer's markets. This Gordon Ramsay Radish Salad with Lemon & Dill is a celebration of simplicity, turning everyday ingredients into a delightful dish. With just a few swift motions, we transform these peppery roots into a tantalizingly fresh salad that’s both light and invigorating, perfect for countering heavier meals or simply enjoying on its own. Not only does it come together in mere minutes, but it’s also packed with health benefits, providing a burst of vitamin C and low calories in every bite. Are you ready to elevate your salad game and impress your guests with this refreshing dish?

Why is this salad a must-try?

Freshness at its finest: Enjoy the vibrant crunch of radishes, perfectly paired with zesty lemon and aromatic dill that elevates each bite.
Simplicity shines through: This salad requires minimal effort, making it ideal for busy weeknights or quick lunch prep.
Versatile enjoyment: Serve as a side dish with grilled meats or lay it atop a bed of greens for a wholesome meal. Enhance it with your favorite additions like cucumbers or nuts for extra flair!
Health benefits abound: Low in calories and high in vitamin C, this salad not only tastes great but is a smart choice for health-conscious eaters.
Crowd-pleaser appeal: Whether for a casual family dinner or an elegant gathering, the Gordon Ramsay Radish Salad will impress everyone at the table!

Ingredients

Gordon Ramsay Radish Salad Ingredients

For the Salad

  • Radishes – Crisp and peppery, radishes lend a delightful crunch; try using French breakfast for a softer bite.
  • Lemon – The tangy acidity of lemon softens radishes and enhances their flavor; lime can be a refreshing alternative.
  • Olive Oil – Rich and smooth, olive oil adds depth; for a change, avocado oil is a great substitute!
  • Parmesan – Freshly grated for a savory touch, Parmesan adds complexity; skip for a dairy-free version or swap with crushed anchovies.
  • Fresh Dill – This bright herb elevates the dish; if unavailable, parsley or chives can fill in nicely.
  • Salt & Black Pepper – Essential for flavor enhancement; use sea salt for an extra crunchy bite.

For Extra Garnish

  • Lemon Zest – A finishing touch that brightens up the salad; it’s essential for that fresh burst of flavor!
  • Additional Parmesan – A light sprinkle brings an extra savory punch to the presentation.
  • Cracked Black Pepper – Adding spice and depth to your dish, this is a must for that final flair.

Unleash the refreshing vibrancy of the Gordon Ramsay Radish Salad at your next meal!

Step‑by‑Step Instructions for Gordon Ramsay Radish Salad

Step 1: Prep the Radishes
Begin by rinsing the radishes under cold water to remove any dirt. Slice them evenly into about 1/8" thick rounds; this uniformity ensures even texture throughout the salad. As you cut, notice the vibrant colors and crispness of the radishes, which will be the stars of your Gordon Ramsay Radish Salad.

Step 2: Massage with Lemon and Salt
In a mixing bowl, combine the sliced radishes with the juice of half a lemon and a generous pinch of sea salt. Using your hands, gently massage the radishes for 1-2 minutes. This technique softens their sharpness and infuses them with flavor. Watch for the radishes to become slightly translucent, which indicates they’ve absorbed the lemon juice.

Step 3: Add Olive Oil and Parm
Once the radishes are softened, drizzle in two tablespoons of olive oil, then fold in a handful of freshly grated Parmesan cheese and a generous handful of torn dill. Using a spatula, carefully combine the ingredients without smashing the salad. You want to keep the radishes intact while allowing the creamy Parmesan and aromatic dill to mingle throughout the salad.

Step 4: Plate the Salad
Now it’s time to present your creation! On a large plate, artfully arrange the radish slices for a visually appealing display. Finish by sprinkling lemon zest over the top along with a bit more grated Parmesan and cracked black pepper. This final touch will elevate the flavors, adding a zesty kick and an inviting aroma to your Gordon Ramsay Radish Salad.

Step 5: Serve Immediately
For the best flavor and texture, serve your salad right away. The freshness of the ingredients will be at its peak, making it a delightful accompaniment to any meal. The radishes should remain crisp, and the lemony brightness will complement the savory depth from the Parmesan. Embrace this refreshing dish at your dinner table for a light but satisfying treat!

Expert Tips for Gordon Ramsay Radish Salad

  • **Massage Radishes: ** Don’t skip this step! Massaging radishes with lemon and salt mellows their sharpness, creating a well-balanced salad.
  • Use Fresh Ingredients: Always select fresh radishes and herbs. This ensures the vibrant flavors truly shine in your Gordon Ramsay Radish Salad.
  • Thick Slices Matter: Keep your radish slices consistent at about 1/8". This helps maintain a similar crunch and texture throughout the dish.
  • Skip Overpowering Cheeses: Avoid creamy cheeses like feta or goat cheese, as they can overwhelm the light flavors of the salad.
  • Prepare Ahead Carefully: If making in advance, massage the radishes but hold off on adding the olive oil and parmesan until you’re ready to serve for maximum freshness.

Gordon Ramsay Radish Salad Variations

Feel free to mix things up and make this salad your own with these exciting twists!

  • Daikon Delight: Substitute traditional radishes with milder daikon, cutting them into thin slices for a unique texture.
  • Cucumber Crunch: Add diced cucumbers for a juicy pop of freshness, enhancing the salad with extra moisture and color.
  • Cherry Tomato Boost: Toss in halved cherry tomatoes for a burst of sweetness that pairs beautifully with the radishes.
  • Nuttier Option: Sprinkle a handful of chopped almonds or walnuts for added crunch and a nutty twist that elevates the flavors further.
  • Herb Variety: Swap out dill for parsley, cilantro, or chives to change the herbaceous note, bringing a new layer of flavor to the dish.
  • Spicy Kick: Incorporate sliced jalapeños or a sprinkle of red pepper flakes for a hint of heat that will tantalize your taste buds.
  • Avocado Creaminess: Introduce creamy avocado cubes for a rich, velvety texture that complements the crunchiness of the radishes beautifully.
  • Pineapple Zing: For a tropical twist, add diced pineapple for a sweet-and-sour punch that brightens the entire salad.

Don’t forget to pair your salad with a side of Grilled Balsamic Steak Salad for a delightful dinner experience! Each variation can create a unique and thrilling spin on Gordon Ramsay's Radish Salad. Enjoy your culinary adventure!

Storage Tips for Gordon Ramsay Radish Salad

Fridge: Store the salad in an airtight container for up to 3 days. To maintain freshness, hold off on adding olive oil and cheese until just before serving.

Make-Ahead: Pre-slice and massage the radishes with lemon and salt a few hours in advance, but only add additional ingredients right before serving for optimal crunch.

Freezer: This salad is best enjoyed fresh and should not be frozen. Freezing will alter the texture of the radishes, making them mushy.

Reheating: If you prefer a warm dish, consider briefly microwaving the radishes for 10-15 seconds, but it’s recommended to serve the Gordon Ramsay Radish Salad cold for the best flavor experience.

Make Ahead Options

These Gordon Ramsay Radish Salad preparations are ideal for busy cooks looking to save time during the week! You can prep the radishes by slicing and massaging them with lemon and salt up to 24 hours in advance, as this helps mellow their flavor while enhancing their crispness. Simply store them in an airtight container in the refrigerator to maintain their texture. However, it's best to add the olive oil, Parmesan, and dill right before serving to ensure they stay fresh and vibrant. When you're ready to enjoy, just toss everything together and plate it up for a delicious, refreshing side with minimal effort!

What to Serve with Gordon Ramsay Radish Salad

Crafting a meal around this refreshing salad invites vibrant flavors that will delight your senses and nourish your spirit.

  • Grilled Chicken Breasts: Savory chicken complements the salad’s zestiness, while a touch of char adds a mouthwatering depth.

  • Quinoa Pilaf: A fluffy, nutty quinoa pilaf serves as a wholesome base, providing a delicious contrast to the sharp crunch of radishes.

  • Roasted Salmon: The rich, flaky texture of roasted salmon pairs exquisitely with the salad, balancing its refreshing bite with creamy, savory flavors.

  • Crusty Bread: A slice of warm, crusty bread is perfect for scooping up the salad, enhancing the experience with its crispy exterior and soft center.

  • Herbed Couscous: Light and fluffy couscous infused with herbs makes a flavorful side, enhancing the fresh tastes of dill and lemon from the salad.

  • Sparkling Lemonade: A glass of sparkling lemonade matches the salad’s brightness and adds effervescence, lifting the entire meal to a refreshing level.

  • Chocolate Mousse: For dessert, a silky chocolate mousse provides a divine contrast to the salad’s brightness, ensuring a delightful end to the meal.

  • Caprese Skewers: Fresh mozzarella, tomatoes, and basil drizzled with balsamic glaze create a delightful appetizer that flows harmoniously with the salad’s flavors.

With these delightful pairings, you can create a memorable meal that will impress family and friends alike!

Gordon Ramsay Radish Salad Recipe FAQs

What type of radishes should I use for this salad?
Absolutely! Fresh, crisp radishes like the common red variety, French breakfast, or even watermelon radish work beautifully. For a milder flavor, consider using daikon radish. Just remember, the fresher, the better!

How do I store leftover radish salad?
Very! To keep your Gordon Ramsay Radish Salad fresh, store it in an airtight container in the fridge for up to 3 days. To maintain its vibrant flavor and texture, avoid adding olive oil and cheese until just before serving.

Can I make this salad ahead of time?
Yes, you can! I often prepare the radishes by slicing and massaging them with lemon juice and salt a few hours before serving. This technique allows the radishes to soften and absorb the flavors. However, hold off on adding olive oil, Parmesan, and any garnishes until you’re ready to serve for that delightful crunch.

Is it okay to freeze radish salad?
No, it’s not recommended to freeze this salad. Freezing will alter the crisp texture of the radishes, making them mushy. Instead, enjoy it fresh to experience the refreshing bite that makes this salad so special!

Can I substitute ingredients based on dietary restrictions?
Certainly! If you have dairy allergies, simply omit the Parmesan or replace it with crushed anchovies for a savory kick. For a vegan version, skip the cheese entirely and use avocado or nut-based alternatives. This salad is flexible, so feel free to embrace your preferences!

Are there any specific allergies I should be aware of?
Yes, individuals who are allergic to radishes or have a nightshade sensitivity should avoid this salad. It’s always wise to check for allergies when serving to guests. Enjoy this vibrant dish with confidence, letting everyone know how delightful it can be!

Gordon Ramsay Radish Salad

Gordon Ramsay Radish Salad: A Zesty, Refreshing Delight

Enjoy Gordon Ramsay Radish Salad, a zesty and refreshing delight packed with flavor and health benefits.
Print Recipe Pin Recipe
Prep Time 10 minutes mins
Total Time 10 minutes mins
Servings: 4 servings
Course: Salads
Cuisine: Mediterranean
Calories: 120
Ingredients Equipment Method Nutrition Notes

Ingredients
  

For the Salad
  • 1 bunch Radishes Crisp and peppery; try using French breakfast for a softer bite.
  • 1 medium Lemon Juice of half used, lime can be an alternative.
  • 2 tablespoons Olive Oil Rich and smooth; avocado oil is a great substitute.
  • 1/4 cup Parmesan Freshly grated for a savory touch.
  • 1/4 cup Fresh Dill Bright herb; parsley or chives can substitute.
  • 1 teaspoon Salt Essential for flavor enhancement.
  • 1 teaspoon Black Pepper Essential for flavor enhancement.
For Extra Garnish
  • 1 tablespoon Lemon Zest Essential for a fresh burst of flavor!
  • 1 tablespoon Additional Parmesan For an extra savory punch to the presentation.
  • 1 teaspoon Cracked Black Pepper Adding spice and depth to your dish.

Equipment

  • Mixing Bowl
  • Knife
  • Cutting Board
  • Spatula
  • Plate

Method
 

Preparation Instructions
  1. Begin by rinsing the radishes under cold water to remove any dirt. Slice them evenly into about 1/8" thick rounds.
  2. In a mixing bowl, combine the sliced radishes with the juice of half a lemon and a generous pinch of sea salt. Gently massage the radishes for 1-2 minutes.
  3. Drizzle in two tablespoons of olive oil, fold in Parmesan cheese and torn dill, and combine without smashing the salad.
  4. Artfully arrange the radish slices on a large plate. Finish by sprinkling lemon zest, additional Parmesan, and cracked black pepper.
  5. Serve immediately for the best flavor and texture.

Nutrition

Serving: 1servingCalories: 120kcalCarbohydrates: 5gProtein: 3gFat: 10gSaturated Fat: 2gPolyunsaturated Fat: 1gMonounsaturated Fat: 7gCholesterol: 10mgSodium: 200mgPotassium: 200mgFiber: 2gSugar: 1gVitamin C: 20mgCalcium: 150mgIron: 1mg

Notes

Massage the radishes with lemon and salt to mellow their sharpness. Use fresh ingredients for the best flavor. Serve cold for optimal experience.

Tried this recipe?

Let us know how it was!

Zesty Lemon Parmesan Lettuce Salad Ready in 5 Minutes

February 23, 2026 by Grace Snow Leave a Comment

As the aroma of freshly grated parmesan mingles with the zing of citrus, I can't help but feel transported to a sunny Mediterranean terrace, where a refreshing salad is an everyday delight. This Quick & Zesty Lemon Parmesan Lettuce Salad is a breeze to whip up, taking just 5 minutes to elevate your meal with its creamy texture and vibrant flavor. Packed with the crispness of romaine lettuce and a slight kick from crushed red pepper flakes, it’s the ideal side dish for any protein and is easily customizable to suit your taste. Whether you’re rushing to prepare dinner or seeking a light lunch, this salad is a perfect solution that doesn’t compromise on satisfaction. Curious about how this summery dish can brighten your plate today? Let’s dive in!

Why is this Lemon Parmesan Salad Perfect?

Simplicity: This salad is a quick fix, ready in just 5 minutes, making it ideal for busy weeknights or impromptu gatherings.

Zesty Flavor: Combining fresh lemon juice and parmesan cheese creates a fresh, tangy taste that lifts your spirits with every bite.

Customizable: Swap in your favorite greens or try different cheeses like Pecorino Romano to make it uniquely yours.

Versatile Side: Pair it with grilled chicken, fish, or even serve it alongside hard-boiled eggs for a satisfying vegetarian option.

Crowd-Pleaser: With its bright flavors and appealing crunch, your family and friends will be asking for seconds! For more delightful salads, check out our Avocado Egg Salad or Buffalo Tofu with Caesar Salad.

Lemon Parmesan Lettuce Salad Ingredients

• You won't believe how simple this is!

For the Salad
• Romaine Lettuce – A crisp base; use pre-washed for quick prep.
• Red Onion – Adds crunch and a slight bite; substitute with green onions for a milder flavor.
• Parmesan Cheese – Brings creaminess and umami; swap for nutritional yeast for a vegan Lemon Parmesan Lettuce Salad.
• Crushed Red Pepper Flakes – Provides a hint of spice; adjust to your taste or omit for milder enjoyment.

For the Dressing
• Extra Virgin Olive Oil – Acts as a rich dressing base; consider avocado oil for a change.
• Lemon Juice and Zest – Brightens the salad with acidity and flavor vibrancy.
• Honey – Balances acidity with sweetness; agave syrup makes a great vegan substitute.
• Salt and Pepper – Enhance all flavors; season to your liking.

With these ingredients, you're just moments away from enjoying a bright, fresh Lemon Parmesan Lettuce Salad!

Step‑by‑Step Instructions for Lemon Parmesan Lettuce Salad

Step 1: Make the Dressing
In a small bowl, combine 1/4 cup extra virgin olive oil, the juice and zest of one lemon, 1 tablespoon honey, and salt and pepper to taste. Whisk together vigorously until the mixture is well emulsified and creamy, about 30 seconds. The dressing should have a smooth, velvety consistency that showcases the vibrant lemon color.

Step 2: Prepare the Salad Ingredients
While the dressing rests, chop 4 cups of romaine lettuce into bite-sized pieces. In a salad bowl, add 1/4 cup of thinly sliced red onion and 1/2 cup of freshly grated parmesan cheese. If you like a kick, sprinkle in 1/2 teaspoon of crushed red pepper flakes to add some zest and excitement to your Lemon Parmesan Lettuce Salad.

Step 3: Combine the Salad
Gently toss together the romaine lettuce, sliced red onion, and grated parmesan cheese in the salad bowl using salad tongs. Aim to combine the ingredients evenly, allowing the flavors to mingle beautifully. This process should take just a minute, ensuring a delightful textural contrast from the crispy lettuce and creamy cheese.

Step 4: Dress the Salad
Drizzle the prepared lemon dressing generously over the salad mix. Using your tongs, toss the salad thoroughly until every leaf is coated with the zesty dressing. This step is crucial as it brings out the vibrant flavors in your Lemon Parmesan Lettuce Salad, creating a dish that is both visually appealing and satisfying to the palate.

Step 5: Serve Immediately
To maintain the freshness of the lettuce, serve your salad immediately after dressing. This step is important to prevent any wilting. For added crunch, consider garnishing with extra parmesan or a few additional pepper flakes to make your Lemon Parmesan Lettuce Salad even more enticing for your guests. Enjoy the vibrant flavors and textures while they’re at their best!

Expert Tips for Lemon Parmesan Lettuce Salad

  • Fresh Ingredients: Always use fresh romaine lettuce and high-quality parmesan to enhance flavor. Wilted greens can spoil the salad's appealing crunch.

  • Adjust Seasoning: Taste the dressing before adding too much salt, as parmesan is already salty. This ensures a perfectly balanced Lemon Parmesan Lettuce Salad.

  • Mix Before Serving: Combine the salad only right before serving to keep the lettuce crispy and fresh, avoiding any sogginess.

  • Customize Wisely: Don’t hesitate to substitute ingredients, but remember to maintain the creamy texture and zesty flavor that define a great Lemon Parmesan Lettuce Salad.

  • Chill for Crunch: For extra crisp lettuce, wash and dry the greens, then refrigerate for a bit before assembly. This tip yields a refreshing bite!

What to Serve with Quick & Zesty Lemon Parmesan Lettuce Salad

Elevate your meal experience with these delightful pairings that perfectly complement the vibrant flavors and textures of this refreshing salad.

  • Grilled Chicken: Juicy and succulent, it adds a satisfying protein element that enhances the freshness of the salad.

  • Seared Salmon: The buttery richness of the fish harmonizes beautifully with the zesty citrus notes and creamy parmesan.

  • Quinoa Pilaf: Light yet filling, this nutty grain boosts the meal’s heartiness while providing a pleasing texture contrast.

  • Roasted Vegetables: Caramelized sweetness from seasonal veggies complements the bright flavors of the salad, creating a comforting balance.

  • Homemade Garlic Bread: The crispy exterior paired with its warm, soft inside is a lovely indulgence that adds texture and flavor.

  • Sparkling Water with Lemon: Refreshing and fizzy, this drink enhances the salad's zesty appeal without overwhelming its lightness.

A combination of these pairings will not only create a well-rounded plate but also make every bite of your Lemon Parmesan Lettuce Salad sing!

Make Ahead Options

These Lemon Parmesan Lettuce Salad preparations are perfect for busy cooks looking to save time during hectic weeknights! You can prepare the dressing by whisking together the olive oil, lemon juice, lemon zest, honey, salt, and pepper up to 3 days in advance; store it in an airtight container in the refrigerator. Also, chop your romaine lettuce and red onion 24 hours ahead, ensuring you keep them crisp – refrigerate them in a sealed bag with a paper towel to absorb excess moisture. When it's time to serve, simply combine the salad ingredients and dress them with your prepared dressing, tossing thoroughly to coat, and enjoy your refreshing Lemon Parmesan Lettuce Salad with minimal effort!

How to Store and Freeze Lemon Parmesan Lettuce Salad

Room Temperature: Enjoy your salad immediately for the best taste and texture; it should not be left out for more than 2 hours.

Fridge: Store any leftover salad in an airtight container in the refrigerator for up to 3 days; however, keep the dressing separate until ready to serve to prevent wilting.

Freezer: This Lemon Parmesan Lettuce Salad does not freeze well due to the texture of the lettuce; it’s best enjoyed fresh.

Reheating: No need to reheat this salad; simply toss it with freshly made dressing if it has sat in the fridge for a while before serving.

Lemon Parmesan Lettuce Salad Variations

Feel free to get creative with this recipe and make it your own with these delightful twists!

  • Greens Swap: Replace romaine with arugula, spinach, or mixed greens for a fresh flavor profile. Each green brings its unique bite, enhancing your salad experience.

  • Dairy-Free Delight: Use nutritional yeast in place of parmesan for a creamy, vegan-friendly alternative. It’ll still give that umami kick while keeping your salad guilt-free.

  • Nutty Crunch: Toss in toasted walnuts, almonds, or sunflower seeds for an extra layer of crunch. The nutty flavor pairs beautifully with the zesty dressing and adds a satisfying texture.

  • Herb Infusion: Add fresh herbs like basil, dill, or parsley to elevate the flavor. A handful of chopped herbs will give your salad a garden-fresh aroma and taste.

  • Spicy Kick: For those who love a bit of heat, incorporate jalapeños or add more crushed red pepper flakes. This fiery twist can make your salad sing!

  • Zesty Citrus: Incorporate orange or grapefruit segments for a burst of sweetness and additional acidity. The combination of citrus will brighten up the dish even more.

  • Sweet Touch: Drizzle with a touch of balsamic glaze or maple syrup to balance the acidity of the lemon. This subtle sweetness can create a harmonious flavor balance.

  • Savory Additions: Mix in cooked quinoa or chickpeas for added protein and heartiness. These ingredients turn your salad into a complete meal, great for lunch or dinner!

Feel free to complement your meal with other salads like German Potato Salad or our tasty Chicken Salad with Apples. There’s a world of flavor waiting to be explored in your kitchen!

Lemon Parmesan Lettuce Salad Recipe FAQs

How do I choose the right romaine lettuce?
Absolutely! Look for romaine that is crisp and vibrant green, avoiding heads with dark spots or wilting leaves. If possible, use pre-washed romaine for convenience and maximum freshness!

What is the best way to store leftovers of the Lemon Parmesan Lettuce Salad?
Very! To preserve the best texture, store any leftover salad in an airtight container in the refrigerator for up to 3 days. Remember to keep the dressing separate until you're ready to dig in to prevent wilting.

Can I freeze the Lemon Parmesan Lettuce Salad?
I recommend against freezing this salad! The texture of the lettuce will become mushy once thawed, making it less enjoyable. It's best experienced fresh, so aim to whip it up just before serving.

How can I troubleshoot if my dressing is too salty?
If your dressing turns out saltier than expected, simply whisk in a bit more olive oil or even a splash of lemon juice to balance it out. Taste as you go, and make adjustments until it suits your palate!

Are there any dietary considerations I should keep in mind?
Sure thing! For those with dairy allergies, you can easily substitute parmesan with nutritional yeast to maintain a cheesy flavor in your Lemon Parmesan Lettuce Salad. Additionally, if you're aiming for a vegan option, swap honey for agave syrup.

Lemon Parmesan Lettuce Salad

Zesty Lemon Parmesan Lettuce Salad Ready in 5 Minutes

This Lemon Parmesan Lettuce Salad is a quick and refreshing side dish that's ready in just 5 minutes.
Print Recipe Pin Recipe
Prep Time 5 minutes mins
Total Time 5 minutes mins
Servings: 4 servings
Course: Salads
Calories: 150
Ingredients Equipment Method Nutrition Notes

Ingredients
  

For the Salad
  • 4 cups Romaine Lettuce Chopped into bite-sized pieces
  • 1/4 cup Red Onion Thinly sliced; substitute with green onions if desired
  • 1/2 cup Parmesan Cheese Freshly grated
  • 1/2 teaspoon Crushed Red Pepper Flakes Optional, adjust to taste
For the Dressing
  • 1/4 cup Extra Virgin Olive Oil Can substitute with avocado oil
  • 1 each Lemon Juice and Zest From one lemon
  • 1 tablespoon Honey Can use agave syrup for a vegan version
  • Salt and Pepper To taste

Equipment

  • Bowl
  • Whisk
  • salad tongs

Method
 

Step-by-Step Instructions
  1. In a small bowl, combine extra virgin olive oil, lemon juice, lemon zest, honey, salt and pepper. Whisk until emulsified, about 30 seconds.
  2. Chop romaine lettuce into bite-sized pieces. In a salad bowl, add sliced red onion and grated parmesan cheese with crushed red pepper flakes.
  3. Toss the salad ingredients gently in the bowl to combine.
  4. Drizzle the lemon dressing over the salad and toss thoroughly until each leaf is coated.
  5. Serve immediately to maintain freshness. Garnish with extra parmesan or pepper flakes if desired.

Nutrition

Serving: 1servingCalories: 150kcalCarbohydrates: 8gProtein: 3gFat: 13gSaturated Fat: 3gMonounsaturated Fat: 9gCholesterol: 6mgSodium: 200mgPotassium: 200mgFiber: 2gSugar: 1gVitamin A: 120IUVitamin C: 20mgCalcium: 15mgIron: 1mg

Notes

Use fresh ingredients for the best flavor and keep the dressing separate until serving to avoid wilting of the lettuce.

Tried this recipe?

Let us know how it was!

Fresh Irish Flag Clementine Cucumber Salad for St. Patrick's Day

February 21, 2026 by Grace Snow Leave a Comment

As the sun dips lower on St. Patrick's Day, the vibrant colors of my Irish Flag Clementine Cucumber Salad radiate like a warm welcome at the table. This healthy, festive creation invites everyone to indulge in a delicious medley of fresh greens, sweet clementines, crispy cucumbers, and creamy avocado—all inspired by the hues of the Irish flag. What makes this salad truly special is not just its eye-catching presentation, but it's also a quick and simple recipe, perfect for busy home chefs looking to celebrate in style without sacrificing flavor. It’s versatile enough to accompany any meal or shine as a standalone dish, making it a go-to for gatherings of all sizes. Are you ready to elevate your holiday feasts with this delightful twist?

What makes this salad a festive favorite?

Vibrant Colors: The Irish Flag Clementine Cucumber Salad showcases a beautiful blend of greens, orange, and white, making it a perfect centerpiece for your St. Patrick's Day table.

Healthy Indulgence: Packed with nutrients from fresh ingredients, this salad is a guilt-free treat that satisfies both the heart and taste buds.

Easy to Prepare: With its straightforward steps, this recipe is ideal for home chefs at any skill level, allowing you to whip it up quickly without hassle.

Versatile Pairing: Whether served alongside grilled fish or enjoyed alone, it complements various dishes, making it a year-round staple.

Adaptable Ingredients: Feel free to swap in seasonal fruits or alternate nuts to personalize the flavors, making it perfect for any occasion. For a refreshing twist, also check out my Avocado Egg Salad or Tofu Caesar Salad.

Irish Flag Clementine Cucumber Salad Ingredients

• Note: Gather fresh ingredients for a delightful salad experience!

For the Greens

  • Clean Greens – A mix of spinach, arugula, or romaine adds freshness and texture.

For the Fruit

  • Clementines – Sweet and vibrant, they represent the 'orange' in the Irish flag; you can use oranges or seedless tangerines if needed.

For the Crunch

  • Mini Cucumbers – Crispy and hydrating, symbolizing the 'green,' thinly slice them for the best results.
  • Salted, Roasted Pistachios – Add a delightful crunch and a hint of saltiness, or substitute with almonds or pecans.

For the Creamy Element

  • Avocado – Creamy and rich, adding depth and representing green; ripe mango is a tasty alternative.
  • Goat Cheese – Tangy and creamy, this element elevates the dish; feta or ricotta salata can work well too.

For the Flavor Boost

  • White Onion – Provides a sharp contrast that represents the 'white' in the flag; use jicama or Asian pear for a milder taste.

For the Dressing

  • Honey White Balsamic Dressing – A tangy yet sweet dressing that enhances every ingredient; simply mix the components together in a jar.

Step‑by‑Step Instructions for Irish Flag Clementine Cucumber Salad

Step 1: Prepare the Greens
Begin by washing your fresh greens thoroughly under cold water. Choose a mix of spinach, arugula, or romaine for a delightful blend of textures. Once cleaned, pat them dry with a paper towel to remove excess water. Place the greens in a large bowl or elegantly spread them out on a serving platter, forming the vibrant base of your Irish Flag Clementine Cucumber Salad.

Step 2: Layer Ingredients
Next, slice your clementines in half, then into thin segments, and arrange them evenly over the greens, representing the 'orange' of the flag. Thinly slice the mini cucumbers and sprinkle them over the top for a refreshing crunch. Add generous slices of white onion for a zesty kick, and finally, cut the avocado into slices, ensuring its creamy goodness contributes to the 'green' hue.

Step 3: Dress the Salad
Drizzle 2-3 tablespoons of Honey White Balsamic Dressing evenly over the layered ingredients. To mix the flavors effectively, gently toss the salad with tongs or two large forks, making sure all components are coated. Aim for a vibrant presentation, allowing the bright colors to showcase the theme of the Irish Flag Clementine Cucumber Salad.

Step 4: Finish with Toppings
To elevate the dish, sprinkle crumbled goat cheese generously across the top, adding a creamy, tangy element that enhances each bite. Follow by scattering salted, roasted pistachios for added crunch and a pop of flavor. Finally, season with freshly ground black pepper to taste, completing your festive salad and readying it for serving alongside your favorite meal.

What to Serve with Irish Flag Clementine Cucumber Salad

As you gather around the table, let your taste buds dance with the vibrant and fresh flavors this salad brings, creating a delightful meal harmony.

  • Grilled Salmon: The rich, smoky flavor of grilled salmon complements the crispness of the salad, making for an elegant pairing.
  • Roasted Chicken: Juicy and savory roasted chicken adds a heartiness to the meal, balancing out the salad's freshness beautifully.
  • Quinoa Pilaf: Packed with protein and nutty flavors, quinoa pilaf enhances the meal's nutritional profile while adding texture contrast.
  • Crusty Bread: A warm, crusty baguette or artisan bread is perfect for mopping up the honey balsamic dressing, bringing everything together.
  • Sparkling Water with Lime: Crisp and refreshing, this drink maintains the light feel of the meal while cleansing the palate.
  • Lemon Tart: A zesty lemon tart for dessert provides a sweet yet tangy finish that echoes the bright, citrus notes of the salad.

Pair these options with the Irish Flag Clementine Cucumber Salad to elevate your meal, celebrating the vibrant flavors of the season!

Expert Tips for Irish Flag Clementine Cucumber Salad

  • Freshness Matters: Start with the freshest greens available; they’ll ensure your salad is crisp and flavorful. Avoid wilted leaves!
  • Dressing Wisely: Begin with less dressing to avoid sogginess; you can always add more to suit your taste.
  • Color Contrast: Slice clementines and cucumbers uniformly for an appealing presentation that highlights the festive colors of the Irish Flag Clementine Cucumber Salad.
  • Enjoy Variety: Don’t hesitate to switch out ingredients based on your preferences or what's in season; this salad is adaptable!
  • Serving Size: This salad is best served immediately to keep the greens crunchy; dress it just before serving for optimal texture.

Irish Flag Clementine Cucumber Salad Variations

Feel free to mix and match to create your perfect version of this refreshing salad!

  • Fruit Substitutes: Swap clementines for peaches or nectarines for a delightful summer twist. These alternatives add a juicy sweetness that complements fresh greens beautifully.

  • Herbal Additions: Incorporate fresh herbs like mint or basil for an herbaceous punch. These vibrant flavors not only elevate the experience but also add a refreshing aroma to every bite.

  • Nut Alternatives: Replace pistachios with sunflower seeds or pumpkin seeds for a nut-free crunch. This swap maintains texture while being considerate of allergies, ensuring everyone can enjoy the dish.

  • Creamy Twist: For a twist on creaminess, consider using burrata instead of goat cheese. Its luscious texture adds a luxurious touch that makes each bite irresistible.

  • Spicy Kick: Add a sprinkle of red pepper flakes or a dash of hot sauce for a little heat. This fiery addition brings an exciting contrast to the sweetness of the clementines and the creaminess of the avocado.

  • Dairy-Free Option: For a dairy-free salad, omit the goat cheese and use a sprinkle of nutritional yeast instead. You'll get a cheesy flavor without the dairy, keeping it light and vegan-friendly.

  • Crispy Croutons: Toss in some homemade or store-bought pita chips for an added crunch. The texture brings an engaging element that keeps every mouthful interesting and satisfying.

  • Vegan Dressing: For a vegan-friendly dressing, substitute honey with maple syrup in the Honey White Balsamic Dressing. This keeps the sweetness while ensuring it aligns with dietary preferences.

You might also enjoy refreshing sides like my German Potato Salad or a heartwarming Balsamic Steak Salad to complement your festive meals!

Storage Tips for Irish Flag Clementine Cucumber Salad

Fridge: Store any leftover salad in an airtight container for up to 1 day. The fresher, the better!

Dressing: Keep the Honey White Balsamic Dressing separate in the fridge for optimal taste; it can last up to a week.

Reheating: This salad is best enjoyed cold, so avoid reheating. Instead, enjoy it straight from the fridge for a refreshing treat.

Prepping Ahead: You can prepare the ingredients ahead of time and store them individually. Assemble the Irish Flag Clementine Cucumber Salad just before serving for maximum freshness.

Make Ahead Options

This Irish Flag Clementine Cucumber Salad is perfect for busy home cooks eager to simplify their meal prep! You can wash and chop the greens, slice the clementines, cucumbers, and onions, and prepare the Honey White Balsamic Dressing up to 24 hours in advance. Store each component separately in airtight containers to maintain freshness and prevent sogginess. Assemble the salad just before serving to keep the avocado creamy and the greens crisp. For the best flavor and texture, dress the salad right before it's time to eat, ensuring every bite is just as delicious as when freshly made. Enjoy the time-saving benefits while impressing your guests with this festive dish!

Irish Flag Clementine Cucumber Salad Recipe FAQs

What is the best way to select ripe clementines?
Absolutely! When selecting clementines, look for those that are firm to the touch and have a bright, vibrant skin. Avoid any with dark spots or blemishes, as these can indicate overripeness. Ripe clementines will have a sweet aroma and should feel slightly heavy for their size, indicating juiciness.

How should I store leftover Irish Flag Clementine Cucumber Salad?
Very! Store any leftover salad in an airtight container in the refrigerator for up to 1 day. To keep the greens crisp, keep the dressing separate and add it just before serving. Make sure to consume it quickly, as the ingredients may wilt or lose their freshness.

Can I freeze the Irish Flag Clementine Cucumber Salad?
Not ideal! Freezing this salad is not recommended due to the high water content in cucumbers and avocados, which can change their texture when thawed. Instead, prep the ingredients separately, and assemble the salad fresh to enjoy its delightful crunch.

What common issues might I face while preparing this salad?
You may encounter a few things! If your avocados aren’t ripening fast enough, place them in a paper bag with an apple or banana to speed up the process. Also, be cautious about over-dressing the salad; start with 2 tablespoons of dressing and adjust based on your preference to avoid sogginess.

Are there any dietary considerations for serving this salad to pets or those with allergies?
Yes! This salad contains ingredients like onions and nuts that can be harmful to pets, especially dogs, so keep this dish out of their reach. For guests with allergies, be sure to inform them about the inclusion of nuts and dairy, and consider offering substitutions like sunflower seeds or omitting the cheese entirely to make it dairy-free.

How can I adapt the ingredients for seasonal variations?
Here’s how! Swap clementines for seasonal fruits like peaches or nectarines during warmer months, and consider adding fresh herbs such as mint or basil for a bright, herbal note. You can also experiment with different types of nuts, like sunflower seeds or pumpkin seeds, to accommodate guests with nut allergies and to personalize the flavor profile. Enjoy the process of creativity!

Irish Flag Clementine Cucumber Salad

Fresh Irish Flag Clementine Cucumber Salad for St. Patrick's Day

Celebrate St. Patrick's Day with this vibrant Irish Flag Clementine Cucumber Salad, featuring fresh greens, sweet clementines, and creamy avocado.
Print Recipe Pin Recipe
Prep Time 15 minutes mins
Total Time 15 minutes mins
Servings: 4 servings
Course: Salads
Cuisine: Irish
Calories: 200
Ingredients Equipment Method Nutrition Notes

Ingredients
  

For the Greens
  • 4 cups Clean Greens (spinach, arugula, romaine)
For the Fruit
  • 4 pieces Clementines can substitute with oranges or seedless tangerines
For the Crunch
  • 2 pieces Mini Cucumbers thinly sliced
  • 1 cup Salted, Roasted Pistachios can substitute with almonds or pecans
For the Creamy Element
  • 1 piece Avocado ripe, can substitute with mango
  • 1 cup Goat Cheese can substitute with feta or ricotta salata
For the Flavor Boost
  • 1 small White Onion can substitute with jicama or Asian pear
For the Dressing
  • 2-3 tablespoons Honey White Balsamic Dressing mix components in a jar

Equipment

  • Bowl
  • Knife
  • Tongs
  • Cutting Board
  • jar

Method
 

Preparation Steps
  1. Begin by washing your fresh greens thoroughly under cold water. Choose a mix of spinach, arugula, or romaine for a delightful blend of textures. Once cleaned, pat them dry with a paper towel to remove excess water. Place the greens in a large bowl or elegantly spread them out on a serving platter, forming the vibrant base of your salad.
  2. Slice your clementines in half, then into thin segments, and arrange them evenly over the greens. Thinly slice the mini cucumbers and sprinkle them over the top. Add generous slices of white onion and cut the avocado into slices.
  3. Drizzle the Honey White Balsamic Dressing evenly over the layered ingredients. Gently toss the salad with tongs or large forks, making sure all components are coated.
  4. Sprinkle crumbled goat cheese across the top and scatter salted, roasted pistachios. Finally, season with freshly ground black pepper to taste.

Nutrition

Serving: 1servingCalories: 200kcalCarbohydrates: 22gProtein: 5gFat: 10gSaturated Fat: 2gPolyunsaturated Fat: 1gMonounsaturated Fat: 6gCholesterol: 5mgSodium: 200mgPotassium: 300mgFiber: 5gSugar: 8gVitamin A: 3000IUVitamin C: 50mgCalcium: 80mgIron: 1mg

Notes

This salad is best served immediately to keep the greens crunchy. Dress it just before serving for optimal texture.

Tried this recipe?

Let us know how it was!

Decadent Mint Chocolate Cheesecake with Oreo Crust Delight

February 21, 2026 by Grace Snow Leave a Comment

As the aroma of mint wafts through the kitchen, I can feel the excitement building for this special occasion. My Mint Chocolate Cheesecake with Oreo Crust is not just a dessert; it’s a showstopper that brings joy to every celebration. Crafted with a delectable Oreo base and a creamy mint-infused filling studded with Andes mints, this cheesecake delivers the perfect balance of flavors. What I love most about this recipe is its versatility—the stunning cake can be made ahead of time, ensuring you spend more moments with loved ones and less time in the kitchen. Plus, with a gluten-free option available, it’s a treat that all your guests can enjoy! Are you ready to dive into a slice of this heavenly dessert? Let’s get baking!

Why is this cheesecake a must-try?

Irresistible mint chocolate flavor: This cheesecake brings together the classic combination of mint and chocolate, perfectly balanced in every bite.
Decadent texture: With its creamy filling and luscious chocolate ganache, it offers a rich dessert experience that will impress your guests.
Versatile for any occasion: Perfect for birthdays, holidays, or simply a cozy evening at home, it’s a crowd-pleaser every time.
Gluten-free option: Easily adapted using gluten-free Oreos, making it inclusive for all dietary preferences.
Make-ahead friendly: Prepare this cheesecake ahead of time, giving you the freedom to relax and enjoy your special occasions, just like with my Homemade Hot Chocolate that warms the heart!

Mint Chocolate Cheesecake Ingredients

  • For the Crust
    • 30 Oreo cookies – Base for the crust, providing a sweet and chocolatey flavor; use gluten-free Oreos for a gluten-free version.
    • 1/4 cup unsalted butter, melted – Binds the crust ingredients together, adding richness; substitute with coconut oil for a dairy-free option.

  • For the Filling
    • 32 ounces cream cheese, room temperature – Main component of the cheesecake, providing a creamy texture; ensure it's at room temperature for smooth mixing.
    • 1 cup granulated sugar – Sweetness to balance the rich flavors of the cheesecake.
    • 2/3 cup sour cream, room temperature – Adds tang and creaminess to the batter.
    • 2 teaspoons vanilla extract – Enhances the overall flavor profile.
    • 1 1/2 teaspoons mint or peppermint extract – Provides the signature mint flavor; choose based on preference for flavor intensity.
    • 1/4 teaspoon salt – Balances sweetness and enhances flavors.
    • 4 large eggs, room temperature – Provides structure and stability; add eggs slowly to avoid overmixing.
    • Several drops of green food coloring – Optional for coloring the cheesecake; use gel food coloring for vibrant results.
    • 1 cup finely chopped Andes mints – Adds flavor and texture to the cheesecake; can substitute with mint chocolate chips.

  • For the Ganache
    • 1 cup chocolate chips or chopped chocolate – For ganache, providing a rich chocolate layer.
    • 3/4 cup heavy cream – Used for ganache, adds a creamy texture.

  • For the Whipped Cream
    • 2 tablespoons confectioners' sugar – Sweetens the whipped cream.
    • 2 to 3 drops green food coloring – Optional for whipped cream, to suit desired visual appeal.
    • Andes Chocolate Mints or Oreos for decorating – Optional garnish to enhance presentation.

This Mint Chocolate Cheesecake is not only delectable but perfect for any celebration that calls for a sweet, festive touch!

Step‑by‑Step Instructions for Mint Chocolate Cheesecake

Step 1: Make the crust
Preheat your oven to 350°F (175°C). In a food processor, blend 30 Oreo cookies into fine crumbs and mix them with 1/4 cup melted unsalted butter until well combined. Press this mixture firmly into the bottom and sides of a 9-inch springform pan to form a crust. Bake for 10 minutes, then reduce the oven temperature to 325°F (160°C) to prepare for the cheesecake.

Step 2: Prepare the cheesecake batter
In a large mixing bowl, beat 32 ounces of room temperature cream cheese and 1 cup granulated sugar together until creamy and smooth. Gradually add in 2/3 cup room temperature sour cream, 2 teaspoons vanilla extract, 1 1/2 teaspoons mint extract, and 1/4 teaspoon salt, mixing until fully incorporated. Add 4 room temperature eggs one at a time to avoid overmixing, then mix in several drops of green food coloring and fold in 1 cup chopped Andes mints.

Step 3: Prepare for baking
Wrap the outside of your springform pan in aluminum foil, ensuring it’s well sealed to prevent water from seeping in during baking. Alternatively, you can place the pan inside a larger baking dish. Pour the creamy cheesecake batter into the prepared Oreo crust smoothly, ensuring an even layer across the surface to enhance the final presentation.

Step 4: Bake
Place the springform pan in the larger pan and fill it with hot water, creating a water bath for even baking. Bake in the preheated oven at 325°F (160°C) for about 70 minutes. The edges should be set while the center remains slightly jiggly, indicating it's perfectly baked.

Step 5: Cool
After baking, turn off the oven and let the cheesecake cool inside for 30 minutes with the door slightly ajar. Then remove it from the oven and let it cool on the counter for 1 hour before transferring it to the refrigerator. Chill for at least 4 hours, or preferably overnight, to create a rich texture for your Mint Chocolate Cheesecake.

Step 6: Make the ganache
For the ganache, heat 3/4 cup heavy cream in a microwave-safe bowl until just steaming. Add 1 cup chocolate chips and let them sit for a couple of minutes before stirring until smooth and glossy. Once your cheesecake is fully chilled, pour the chocolate ganache evenly over the top, allowing it to cascade slightly down the sides.

Step 7: Make the whipped cream
In a mixing bowl, whip 1 cup heavy cream with 2 tablespoons confectioners' sugar and a few drops of mint extract until stiff peaks form. If desired, add 2 to 3 drops of green food coloring to enhance its festive look. Pipe or spread the whipped cream over the chilled ganache layer, finishing with a delightful presentation of Andes chocolate mints or Oreos on top for an extra touch.

Expert Tips for Mint Chocolate Cheesecake

  • Room Temperature Ingredients: Ensure your cream cheese, sour cream, and eggs are at room temperature to achieve a smooth and creamy cheesecake batter without lumps.

  • Careful Mixing: Avoid overmixing the batter after adding the eggs. Mix just enough to incorporate them in order to prevent cracks in your Mint Chocolate Cheesecake.

  • Water Bath Method: Using a water bath is crucial for even baking and helps prevent the cheesecake from cracking. Ensure the foil is tight around the springform pan to avoid water seepage.

  • Refrigeration Time: Patience is key! Let your cheesecake chill in the refrigerator for at least 4 hours, or overnight if possible, to develop the best flavor and texture.

  • Decorative Touches: For an impressive finish, add swirls of mint whipped cream and top with Andes mints or crumbled Oreos right before serving. This not only enhances the aesthetic but adds to the delightful taste!

  • Freezing Tips: If you decide to freeze your cheesecake, make sure to remove any garnishes and wrap it securely. It can last for up to 3 months in the freezer.

How to Store and Freeze Mint Chocolate Cheesecake

Fridge: Store your cheesecake in the refrigerator for up to 5 days. Cover it loosely with plastic wrap to prevent it from absorbing any odors while keeping it fresh.

Freezer: To freeze Mint Chocolate Cheesecake, remove any decorative toppings and wrap it securely in plastic wrap followed by aluminum foil. It can be frozen for up to 3 months.

Thawing: When ready to enjoy, transfer the cheesecake from the freezer to the fridge and allow it to thaw overnight. This helps retain its creamy texture.

Reheating: For the best experience, enjoy your cheesecake chilled! If you’d like to warm it slightly, do so in small increments in the microwave, but keep in mind it’s best served cold.

What to Serve with Mint Chocolate Cheesecake

Indulging in a slice of Mint Chocolate Cheesecake opens the door to a world of delightful pairings that elevate your dessert experience.

  • Fresh Berries: The tartness of raspberries or strawberries cuts through the richness, providing a refreshing contrast. Pairing them with a sprinkle of powdered sugar makes for a luxuriously sweet bite.

  • Chocolate Drizzle: A simple drizzle of warm chocolate sauce enhances the chocolate flavor, adding an extra layer of indulgence that chocolate lovers will adore.

  • Coffee or Espresso: A cup of freshly brewed coffee complements the sweet and minty flavors beautifully, while the bitterness of the coffee provides an exquisite balance to this decadent dessert.

  • Mint-Infused Tea: A light mint tea can cleanse the palate between bites, allowing the flavors of the cheesecake to shine, making your indulgence feel even more refreshing.

  • Chocolate Mint Cookies: Serving alongside a few mint-flavored cookies echoes the cheesecake’s flavors, creating a harmonious dessert theme. These delightful treats are sure to please every mint chocolate fan.

  • Vanilla Ice Cream: The creamy sweetness of vanilla ice cream adds a delightful touch. Letting it melt slightly against the cheesecake creates a perfect harmony of flavors and temperatures.

  • Whipped Cream: A dollop of freshly whipped cream on the side not only enhances the visual appeal but adds a rich, airy texture to every bite, making it an irresistible addition.

  • Fizzy Sparkling Water: For a light, refreshing option, serve chilled sparkling water infused with mint or citrus. It refreshes the palate and balances the rich sweetness, making it a perfect companion to this dessert.

  • Dark Chocolate Truffles: A few finely crafted dark chocolate truffles provide another layer of indulgence and sophistication that is utterly delightful alongside your Mint Chocolate Cheesecake.

Make Ahead Options

These Mint Chocolate Cheesecake preparations are ideal for busy home cooks looking to save time! You can prepare the crust and filling up to 24 hours in advance. Simply make the Oreo crust and pack it tightly in the springform pan, then cover it and refrigerate. The cheesecake batter can also be mixed ahead and stored in the fridge. When you’re ready to bake, pour the batter over the chilled crust and follow the baking instructions. After cooling, chill the entire cheesecake for at least 4 hours or overnight, allowing the flavors to meld beautifully. This way, you’ll have a delicious dessert ready whenever you need it, just as delightful as if you made it fresh!

Mint Chocolate Cheesecake Variations

Feel free to mix and match these delightful twists on your Mint Chocolate Cheesecake to make it uniquely yours!

  • Irish Cream: Substitute some heavy cream in the ganache and whipped cream with Irish cream for a festive touch. This adds a warm, cozy flavor perfect for chilly celebrations.
  • Mint Chocolate Chips: Replace Andes mints with mint chocolate chips for a delightful texture difference. The added crunch will build an enjoyable contrast in each creamy bite.
  • Mint Oreos: Use mint-flavored Oreos for an even more robust minty crust. Every slice will hold that delightful taste reminiscent of classic mint chocolate desserts.
  • Nut Crust: Swap the Oreo crust for a blend of ground almonds or pecans mixed with melted butter for a gluten-free and nutty twist. It's a fantastic way to elevate the flavor profile while maintaining a rich texture.
  • Boozy Delight: Add a splash of peppermint schnapps to the cheesecake batter for an exhilarating kick. Just a tiny bit can transform your cheesecake into a party favorite!
  • Dark Chocolate Layer: For those who love a richer flavor, use dark chocolate for the ganache. The deeper notes will beautifully contrast the sweetness of the cheesecake.
  • Fruity Flair: Incorporate a layer of raspberry or strawberry sauce atop the ganache before adding the whipped cream. The fruity acidity will brighten each bite, making it feel festive and fresh.
  • Customization Tip: If you have a favorite chocolate mint treat, consider incorporating it into the cheesecake. Swapping some ingredients for options like Thin Mints could yield a different, nostalgia-filled experience.

Don’t forget that making this cheesecake is about enjoying the process! For more sweet indulgences, check out my delicious German Chocolate Poke Cake that's sure to sweeten your day!

Mint Chocolate Cheesecake Recipe FAQs

How do I choose the right mint extract for this cheesecake?
Absolutely! Choosing between mint and peppermint extract can significantly impact your cheesecake's flavor. Peppermint extract has a stronger and more intense flavor compared to mint extract, which is milder and sweeter. I recommend starting with peppermint extract for that classic mint chocolate taste. If you prefer a subtle hint, you can blend both or stick to mint extract.

How should I store my Mint Chocolate Cheesecake?
Very! Store your cheesecake in the refrigerator for up to 5 days. I suggest covering it loosely with plastic wrap to protect it from absorbing any odors while staying fresh. If you're planning on enjoying it later, freezing is a great option too!

Can I freeze Mint Chocolate Cheesecake, and how should I do it?
Definitely! To freeze your cheesecake, start by removing any decorative toppings like whipped cream or Andes mints. Wrap the cheesecake tightly in plastic wrap followed by aluminum foil to keep it secure. It can last in the freezer for up to 3 months. When you're ready to enjoy, transfer it to the fridge and allow it to thaw overnight.

What can I do if my cheesecake cracks during baking?
Oh no, don’t fret! Cracks can be a common issue, but there are ways to prevent them. Make sure all your ingredients are at room temperature before mixing to create a smooth batter. Avoid overmixing after adding eggs, and remember to use a water bath for even baking. If cracks do appear, don't worry too much! You can always cover them with whipped cream or ganache to conceal any imperfections.

Are there any dietary considerations I should keep in mind with this recipe?
Absolutely! While this Mint Chocolate Cheesecake can be made gluten-free using gluten-free Oreos, it still contains dairy and may not suit vegan diets. If you’re accommodating guests with dietary restrictions, consider using dairy-free cream cheese and coconut yogurt to maintain a creamy texture, or provide alternative dessert options.

How do I know when the cheesecake is properly baked?
Great question! The edges of the cheesecake should be set and slightly puffy while the center remains a bit jiggly when you gently shake the pan. A good rule of thumb is about 70 minutes at 325°F (160°C) during baking. Once cooled, chilling the cheesecake for at least 4 hours or overnight ensures the best flavor and texture.

Mint Chocolate Cheesecake

Decadent Mint Chocolate Cheesecake with Oreo Crust Delight

Enjoy a rich and creamy Mint Chocolate Cheesecake with Oreo crust that delights every occasion.
Print Recipe Pin Recipe
Prep Time 30 minutes mins
Cook Time 1 hour hr 10 minutes mins
Chilling Time 4 hours hrs
Total Time 5 hours hrs 40 minutes mins
Servings: 12 slices
Course: Dessert
Cuisine: American
Calories: 450
Ingredients Equipment Method Nutrition Notes

Ingredients
  

For the Crust
  • 30 cookies Oreo cookies Use gluten-free Oreos for a gluten-free version.
  • 1/4 cup unsalted butter, melted Substitute with coconut oil for a dairy-free option.
For the Filling
  • 32 ounces cream cheese, room temperature Ensure it's at room temperature for smooth mixing.
  • 1 cup granulated sugar
  • 2/3 cup sour cream, room temperature
  • 2 teaspoons vanilla extract
  • 1 1/2 teaspoons mint or peppermint extract Choose based on preference for flavor intensity.
  • 1/4 teaspoon salt
  • 4 large eggs, room temperature Add eggs slowly to avoid overmixing.
  • green food coloring Optional for coloring the cheesecake.
  • 1 cup finely chopped Andes mints Can substitute with mint chocolate chips.
For the Ganache
  • 1 cup chocolate chips or chopped chocolate
  • 3/4 cup heavy cream
For the Whipped Cream
  • 2 tablespoons confectioners' sugar
  • green food coloring Optional for whipped cream.
  • Andes Chocolate Mints or Oreos for decorating Optional garnish.

Equipment

  • Food Processor
  • Mixing Bowl
  • Springform pan
  • Microwave

Method
 

Step‑by‑Step Instructions for Mint Chocolate Cheesecake
  1. Preheat your oven to 350°F (175°C). In a food processor, blend Oreo cookies into fine crumbs and mix with melted unsalted butter until well combined. Press this mixture firmly into the bottom and sides of a 9-inch springform pan. Bake for 10 minutes, then reduce oven temperature to 325°F (160°C).
  2. In a large mixing bowl, beat cream cheese and granulated sugar until creamy. Gradually add sour cream, vanilla extract, mint extract, and salt, mixing until incorporated. Add eggs one at a time, mixing gently. Add a few drops of green food coloring and fold in chopped Andes mints.
  3. Wrap the outside of the springform pan in aluminum foil to prevent water from seeping in. Pour cheesecake batter into the prepared crust.
  4. Place the springform pan in a larger pan filled with hot water for a water bath. Bake at 325°F (160°C) for about 70 minutes until edges are set.
  5. Turn off the oven and let cheesecake cool inside for 30 minutes with door ajar. Remove and cool on the counter for 1 hour before refrigerating. Chill for at least 4 hours or overnight.
  6. For ganache, heat heavy cream until steaming. Add chocolate chips, let sit, then stir until smooth. Pour ganache over the chilled cheesecake.
  7. Whip heavy cream with confectioners' sugar until stiff peaks form. Optionally add green food coloring. Spread whipped cream over ganache and top with Andes mints or Oreos.

Nutrition

Serving: 1sliceCalories: 450kcalCarbohydrates: 30gProtein: 6gFat: 35gSaturated Fat: 20gPolyunsaturated Fat: 1gMonounsaturated Fat: 6gCholesterol: 120mgSodium: 300mgPotassium: 120mgFiber: 2gSugar: 35gVitamin A: 500IUCalcium: 60mgIron: 1mg

Notes

Ensure all ingredients are at room temperature for the best results. Use a water bath for even baking.

Tried this recipe?

Let us know how it was!

Mango Coconut Bread Pudding: A Sweet Tropical Escape

February 20, 2026 by Grace Snow Leave a Comment

Recently, I found myself daydreaming about a sun-soaked beach, swaying palm trees, and, most importantly, the sweet tang of tropical fruit. That moment of bliss inspired me to whip up a comforting dish: Mango Coconut Bread Pudding. This easy-to-make dessert brilliantly marries the lushness of ripe mangoes with the creaminess of coconut milk, creating a delightful treat that transports you to paradise with every bite. Not only is it a crowd-pleaser that’s perfect for gatherings, but it’s also accommodating for various diets, being dairy-free and easily gluten-free. So, why not skip the fast food and treat your taste buds to a little island escape? Curious how to bring this luscious dessert to life? Let’s dive into the recipe!

Why is This Bread Pudding Irresistible?

Tropical Escape: This Mango Coconut Bread Pudding whisks you away to paradise with its vibrant flavors and creamy texture.
Easy to Prepare: Simplifying your dessert-making, it only requires basic ingredients and minimal effort for maximum impact!
Diet-Friendly: Accommodating various dietary needs, this recipe is dairy-free, nut-free, and can easily be made gluten-free—perfect for all your guests.
Impressive Presentation: The beautiful golden top with a sprinkle of shredded coconut makes it a stunning centerpiece for any gathering.
Make Ahead Convenience: Prepare it the night before and bake it fresh before serving—ideal for busy days! Pair it with Cheesy Garlic Bread for a full-on comfort food feast.

Mango Coconut Bread Pudding Ingredients

• Ready to whip up this tropical delight? Here’s what you need!

For the Pudding

  • Stale Bread – 6 cups cut into 1-inch cubes; ensure it’s stale for maximum custard absorption.
  • Ripe Mangoes – 2, peeled and diced; the riper, the sweeter for your Mango Coconut Bread Pudding.
  • Eggs – 4 large; they form the rich custard base for an indulgent texture.
  • Coconut Milk – 1 can (13.5 oz); provides a creamy coconut flavor, or use light coconut milk for a lower-cal option.
  • Granulated Sugar – 1/2 cup; adjust according to your sweetness preference.
  • Vanilla Extract – 1 tsp; pure vanilla is your best bet for a truly aromatic experience.
  • Shredded Coconut – 1/2 cup, plus extra for topping; adds delightful texture and coconut essence.

For Greasing the Dish

  • Butter or Cooking Spray – Use this to grease your baking dish, ensuring easy removal of the warm pudding.

Step‑by‑Step Instructions for Mango Coconut Bread Pudding

Step 1: Preheat & Prepare Dish
Begin by preheating your oven to 350°F (175°C). While the oven heats, take a 9x13-inch baking dish and generously grease it with butter or cooking spray to prevent the delicious Mango Coconut Bread Pudding from sticking. A well-prepared dish ensures an easy release after baking, leaving your pudding intact and ready to serve.

Step 2: Custard Mixture
In a large mixing bowl, crack 4 large eggs and whisk them vigorously until well beaten. Gradually add a can of coconut milk, ½ cup of granulated sugar, and 1 teaspoon of vanilla extract, mixing until the mixture is completely smooth and creamy. This custard base is essential for achieving that rich, velvety texture in your bread pudding.

Step 3: Combine Ingredients
Once your custard is ready, add 6 cups of stale bread cubes and 2 diced ripe mangoes to the bowl. Gently fold everything together, ensuring all the bread pieces are evenly coated with the custard mixture. Allow the mixture to sit for about 10 minutes, letting the bread absorb the delicious flavors and moisture, creating a wonderfully satisfying Mango Coconut Bread Pudding.

Step 4: Bake
Carefully pour the mixture into your prepared baking dish, spreading it out evenly. Sprinkle ½ cup of shredded coconut generously over the top to create a beautiful crust. Place the dish in the preheated oven and bake for 40-45 minutes, or until the top is golden brown and the center is set but still slightly jiggles when gently shaken, signaling that it's done.

Step 5: Cool & Serve
Once baked, remove the Mango Coconut Bread Pudding from the oven and let it cool for about 10 minutes on a wire rack. This cooling period helps it firm up a bit. Serve the pudding warm, optionally topped with a dollop of coconut cream or a scoop of vanilla ice cream for an extra tropical touch, ensuring everyone enjoys this delightful dessert.

Mango Coconut Bread Pudding Variations

Feel free to tweak and personalize this delightful Mango Coconut Bread Pudding to suit your taste buds!

  • Canned Mango: Substitute fresh mango with drained canned mango for convenience. It’s just as sweet and delicious!

  • Mixed Fruits: Add diced pineapple or berries for a burst of color and flavor. This combination elevates the tropical experience!

  • Bread Options: Use brioche or challah instead of regular bread. This twist enhances texture and flavor, making it even more indulgent.

  • Nutty Crunch: Toss in some chopped nuts like pecans or walnuts for a delightful crunch. They add texture and a hint of earthiness.

  • Spiced Up: Sprinkle in a dash of cinnamon or nutmeg to the custard for added warmth. These spices complement the mango and coconut beautifully.

  • Dairy-Free Cream: Swap out coconut milk for almond or cashew milk for a nutty take. This variation makes it a bit lighter yet still creamy.

  • Heat It Up: For an extra kick, add a pinch of cayenne pepper or fresh ginger to the custard mix. This unexpected heat balances the sweetness perfectly.

  • Tropical Topping: Top the pudding with a coconut syrup drizzle or passion fruit puree for a vibrant finishing touch. It’ll make your dessert sparkle with flavor!

Let your imagination run wild with these variations to make your Mango Coconut Bread Pudding uniquely yours! Try pairing it with Coconutty Beans Greens for a delightful meal that transports you straight to the tropics.

Make Ahead Options

These Mango Coconut Bread Pudding preparations are perfect for busy home cooks seeking to simplify their meal planning! You can assemble the entire pudding up to 24 hours in advance—just prepare the custard mixture and combine it with the stale bread and mangoes. Cover the dish tightly and refrigerate it overnight to allow the flavors to meld beautifully. When you're ready to serve, simply bake it straight from the fridge for 40-45 minutes until golden and set. This way, you’ll save precious time while ensuring your dessert is just as delicious as when freshly made. Enjoy the sweet bliss of tropical flavors without the hassle!

How to Store and Freeze Mango Coconut Bread Pudding

Fridge: Store leftovers in an airtight container for up to 3 days. Reheat in the microwave or oven until warmed through, ensuring the pudding remains deliciously soft.

Freezer: If you want to keep it longer, wrap portions tightly in plastic wrap and then in aluminum foil. It can be frozen for up to 3 months; defrost in the fridge overnight before reheating.

Reheating: After thawing, reheat in the oven at 350°F (175°C) for about 15-20 minutes or until warmed through. This will help restore its creamy texture for the best Mango Coconut Bread Pudding experience!

Serving Suggestions: Enjoy warmed, perhaps with a drizzle of coconut cream or a scoop of vanilla ice cream, for a tropical dessert treat any time.

Expert Tips for Mango Coconut Bread Pudding

  • Use Stale Bread: The best results come from stale bread, which soaks up the custard better. If using fresh bread, toast it lightly first.
  • Perfect Baking Time: Keep an eye out for a golden top with a center that jiggles slightly. Underbaking can result in a soggy pudding.
  • Chill Before Baking: For a make-ahead option, assemble the pudding the night before, cover, and refrigerate. Bake it fresh before serving!
  • Mix Bread Varieties: Experiment with different types of bread like brioche or challah for varied texture and flavor in your Mango Coconut Bread Pudding.
  • Add Flavor Enhancements: Consider adding spices like cinnamon or nutmeg to the custard for an extra layer of flavor that complements the mango wonderfully.

What to Serve with Mango Coconut Bread Pudding

Enjoying a delightful dessert is just the start; let's create a full, mouth-watering meal together!

  • Creamy Mashed Potatoes: Their buttery smoothness and comforting flavor provide the perfect contrast to the sweet and fruity notes of the pudding.
  • Grilled Pineapple Skewers: A tropical side that complements the mango perfectly, offering a sweet and smoky balance to every bite.
  • Coconut Cream Topping: Enhance the pudding even more with a dollop of whipped coconut cream; it amplifies the creamy texture and coconut flavor.
  • Tropical Salsa: A fresh mango and lime salsa offers an invigorating zing, perfectly brightening the rich pudding alongside.
  • Coconut Milk Rice: This subtly sweet side dish mirrors the flavors of the bread pudding while adding a lovely texture.
  • Spiced Rum Cocktail: A sip of this tropical drink elevates the meal, bringing a hint of warmth and adventure to each taste.
  • Fresh Fruit Salad: A colorful assortment of seasonal fruits provides a refreshing palate cleanser, enhancing the tropical experience.
  • Chocolate Coconut Macaroons: For those who crave a bit more sweetness, these chewy cookies are a perfect standout dessert.
  • Key Lime Pie: A zesty finish that balances the richness of the pudding, leaving everyone with a satisfied smile.
  • Mint-Infused Iced Tea: This refreshing drink keeps things light and complements the tropical theme of your meal seamlessly.

Mango Coconut Bread Pudding Recipe FAQs

How do I select the best ripe mangoes for this recipe?
Absolutely! When choosing mangoes, look for fruit that feels slightly soft to the touch and has a fragrant aroma. The skin should be mostly yellow with a bit of red blush. Avoid mangoes with dark spots all over, as they may be overripe.

What’s the best way to store leftover Mango Coconut Bread Pudding?
Very! Store any leftover pudding in an airtight container in the fridge for up to 3 days. When you're ready to enjoy it again, simply reheat in the microwave or oven until warmed through, ensuring you preserve its delightful texture.

Can I freeze Mango Coconut Bread Pudding, and if so, how?
Certainly! To freeze this heavenly dessert, wrap portions tightly in plastic wrap, then in aluminum foil to prevent freezer burn. It can be stored for up to 3 months. When you’re ready to indulge, let it thaw in the fridge overnight before reheating in the oven at 350°F (175°C) for about 15-20 minutes—this keeps it nice and creamy!

What can I do if my bread pudding doesn’t set properly after baking?
Don’t worry! If your Mango Coconut Bread Pudding turns out a bit soggy, it may be due to underbaking. Make sure to watch for a golden top and a slightly jiggly center as indicators that it's done. You can return it to the oven for a few additional minutes if it seems too wet; just cover it loosely with foil to prevent over-browning.

Is this recipe suitable for someone with nut allergies?
Absolutely! This Mango Coconut Bread Pudding is nut-free, making it a safe and delicious choice for those with nut allergies. However, always double-check that your ingredients, especially the coconut milk, are processed in a nut-free facility.

Can I make this dessert vegan?
Yes, very easily! To make a vegan version of this delicious pudding, replace the eggs with a mixture of flaxseed meal (1 tablespoon flaxseed meal + 2.5 tablespoons water per egg) and use a non-sweetened plant-based milk instead of coconut milk. Your dessert will still turn out rich and flavorful!

Mango Coconut Bread Pudding

Mango Coconut Bread Pudding: A Sweet Tropical Escape

Mango Coconut Bread Pudding is a delightful dessert that combines tropical flavors and creamy textures, making it perfect for gatherings.
Print Recipe Pin Recipe
Prep Time 10 minutes mins
Cook Time 45 minutes mins
Cooling Time 10 minutes mins
Total Time 1 hour hr 5 minutes mins
Servings: 8 slices
Course: Dessert
Cuisine: Tropical
Calories: 300
Ingredients Equipment Method Nutrition Notes

Ingredients
  

For the Pudding
  • 6 cups stale bread cut into 1-inch cubes
  • 2 ripe mangoes peeled and diced
  • 4 large eggs
  • 1 can (13.5 oz) coconut milk
  • 0.5 cup granulated sugar adjust according to sweetness preference
  • 1 tsp vanilla extract pure vanilla recommended
  • 0.5 cup shredded coconut plus extra for topping
For Greasing the Dish
  • butter or cooking spray to grease the baking dish

Equipment

  • 9x13-inch baking dish
  • Mixing Bowl
  • Whisk
  • Oven

Method
 

Step-by-Step Instructions
  1. Preheat your oven to 350°F (175°C) and grease a 9x13-inch baking dish.
  2. In a large mixing bowl, whisk 4 large eggs and then add coconut milk, sugar, and vanilla extract.
  3. Fold in stale bread cubes and diced mangoes, and let the mixture sit for 10 minutes.
  4. Pour the mixture into the prepared baking dish, sprinkle shredded coconut on top, and bake for 40-45 minutes.
  5. Let it cool for about 10 minutes before serving.

Nutrition

Serving: 1sliceCalories: 300kcalCarbohydrates: 45gProtein: 5gFat: 10gSaturated Fat: 2gCholesterol: 120mgSodium: 150mgPotassium: 250mgFiber: 2gSugar: 15gVitamin A: 600IUVitamin C: 15mgCalcium: 50mgIron: 1mg

Notes

Store leftovers in an airtight container for up to 3 days. Can be prepared the night before and baked fresh before serving.

Tried this recipe?

Let us know how it was!

Soft and Chewy Pistachio Cream Cookies to Satisfy Cravings

February 20, 2026 by Grace Snow Leave a Comment

A delightful aroma fills the kitchen as you mix together the magical ingredients for these Quick and Chewy Pistachio Cream Cookies. The moment you add the smooth pistachio cream, you're embarking on a flavor journey that effortlessly balances nutty richness with just the right touch of sweetness from gooey chocolate chunks. Ready in under 30 minutes, this recipe promises not only an indulgent treat but also a perfect solution for a last-minute gathering or a cozy night in. Plus, these cookies are undeniably soft and chewy, leaving everyone craving more with each delicious bite. Who can resist a cookie that’s both quick to make and a crowd-pleaser? Are you ready to discover your new favorite cookie recipe?

Why Are These Cookies a Must-Try?

Delightful flavors combine in each bite, thanks to the unique pairing of nutty pistachio cream and rich chocolate chunks. Quick and easy, you can whip up these cookies in under 30 minutes, making them ideal for spontaneous cravings or unexpected guests. Soft and chewy texture ensures these treats will fly off the plate, leaving everyone wanting more. Consider pairing with a warm cup of coffee for the ultimate indulgence, or check out our Eggnog Cookies Soft for another delicious option. Versatile enough to allow for nut substitutions, each baking session can result in a new flavor adventure. Perfect for gatherings, the delightful aroma will have friends and family rushing to the kitchen for a taste!

Pistachio Cream Cookies Ingredients

  • For the Batter

  • Pistachio Cream – Adds nutty flavor and moisture; substitute with any unsweetened nut cream or butter if unavailable.

  • Unsalted Butter – Provides richness and tenderness; ensure it's at room temperature for optimal mixing.

  • Granulated Sugar – Sweetens the cookies; adjust the amount based on personal sweetness preference.

  • All-Purpose Flour – Provides structure to the cookies; sift for a light and fluffy texture.

  • Baking Soda – Essential for leavening; ensures the cookies rise to a desirable height.

  • Sea Salt – Balances sweetness and enhances flavor; adjust according to the saltiness of the pistachios.

  • For the Mix-Ins

  • Roasted Pistachios – Adds crunch and enhances the pistachio flavor; use salted or unsalted based on your preference.

  • Chocolate Chunks – Provides sweetness and rich texture; can substitute with chocolate chips.

Step‑by‑Step Instructions for Pistachio Cream Cookies

Step 1: Prepare Dough
In a large mixing bowl, combine the smooth pistachio cream and softened unsalted butter. Using a hand mixer, beat the mixture on medium speed until creamy and well-blended, about 2 minutes. Gradually add the granulated sugar and continue mixing until the mixture is light and fluffy, approximately 3 minutes. The dough should look pale yellow and airy.

Step 2: Incorporate Dry Ingredients
In a separate bowl, sift together the all-purpose flour, baking soda, and sea salt. Slowly incorporate the dry mixture into the wet ingredients, folding gently with a spatula or wooden spoon. Be careful not to overmix; you want the dough to come together without lumps, which should take about 2-3 minutes. The final dough should feel slightly sticky yet cohesive.

Step 3: Add Mix-Ins
Now it’s time to elevate your Pistachio Cream Cookies! Gently fold in the roasted pistachios and chocolate chunks, ensuring they’re evenly distributed throughout the dough. This step should take only about 1-2 minutes. You’ll see bits of green and dark chocolate flecking the light dough, promising delight in every bite.

Step 4: Shape Cookies
Line a baking sheet with parchment paper, which will help prevent sticking. Use a cookie scoop or tablespoon to drop rounded portions of dough onto the baking sheet, spacing them about 2 inches apart. Lightly flatten each ball with the palm of your hand to ensure even baking. This step should take around 5 minutes.

Step 5: Bake
Preheat your oven to 350°F (175°C) while you finish shaping the cookies. Once preheated, bake the cookies for 10-12 minutes. Keep an eye on them; you’re looking for golden edges and soft centers that still appear slightly underbaked. This visual cue ensures that the final texture of your Pistachio Cream Cookies remains soft and chewy.

Step 6: Cool
Once the cookies are baked to perfection, remove them from the oven and allow them to cool on the baking sheet for about 5 minutes. This resting time helps them firm up slightly. After this, transfer the cookies to a wire rack to cool completely. The aroma of freshly baked Pistachio Cream Cookies will fill your kitchen!

Step 7: Serve & Store
After your delicious Pistachio Cream Cookies have cooled, they’re ready to be enjoyed! Pair them with a glass of milk or a warm cup of coffee for the ultimate treat. Store any leftovers in an airtight container, where they will stay fresh for up to a week, making it easy to savor these delightful cookies when cravings hit.

Make Ahead Options

These Pistachio Cream Cookies are perfect for meal prep enthusiasts! You can prepare the dough up to 24 hours in advance by mixing all ingredients and chilling it in the refrigerator. This not only saves time on busy nights but also enhances the flavors as they meld together overnight. Alternatively, you can shape the cookies and freeze unbaked dough balls for up to 3 months. When ready to bake, simply place them on a lined baking sheet and add a couple of extra minutes to the baking time. To maintain that soft and chewy texture, store baked cookies in an airtight container for up to a week. Enjoy the delightful taste of fresh Pistachio Cream Cookies with minimal effort!

What to Serve with Quick and Chewy Pistachio Cream Cookies

There's nothing quite like the experience of enjoying fresh-baked cookies, and pairing them perfectly can elevate your dessert moment to an unforgettable delight.

  • Creamy Vanilla Ice Cream: The velvety texture enhances the soft cookies while the coolness brings out the nutty flavors.
  • Espresso: The rich, bold flavor complements the sweetness of the cookies, creating a delightful balance that coffee lovers will cherish.
  • Fresh Berries: Juicy strawberries or raspberries add a refreshing contrast, cutting through the richness of the pistachios and chocolate.
  • Chocolate Milk: This comforting drink enhances the cookie experience, bringing out the sweet chocolate chunks in every bite.

For a heartwarming finish, consider serving a warm cup of herbal tea alongside your treats. The fragrant warmth wraps around the flavors of the cookies, making each bite even more delightful. After all, nothing says cozy like cookies and tea!

Pistachio Cream Cookies Variations

Feel free to customize these delightful cookies to suit your taste and dietary needs, creating a unique flavor profile!

  • Nut Free: Substitute pistachio cream with sunbutter for a nut-free version that’s equally creamy and delicious.
  • Gluten-Free: Use a 1:1 gluten-free flour blend in place of all-purpose flour for a gluten-free treat everyone can enjoy.
  • Dairy-Free: Replace unsalted butter with coconut oil or a plant-based butter for a dairy-free option that retains richness.
  • Extra Chewy: Add a tablespoon of corn syrup to the dough for an extra chewiness that enhances every bite.
  • Fruity Twist: Fold in dried cranberries or cherries alongside the pistachios for a fruity burst of flavor and a beautiful color contrast.
  • Zesty Kick: Mix in the zest of a lemon or lime to complement the nutty flavor, adding an exciting citrusy twist.
  • Chocolate Lovers: Swap in dark chocolate chunks or even white chocolate for a sweeter treat that satisfies every chocolate craving. Enjoy them alongside our delightful Thumbprint Cookies Melt for more delicious options!
  • Hearty Crunch: Use a combination of chopped dark chocolate and toffee bits for an irresistible caramel crunch in each cookie.

With these variations, you can make your own pistachio cookie masterpiece that perfectly fits your flavor and dietary preferences!

Expert Tips for Pistachio Cream Cookies

  • Mix Carefully: Avoid overmixing the dough; it can lead to dry cookies. Mix just until combined for that perfect soft and chewy texture.

  • Watch the Oven: Keep a close eye while baking. Remove cookies when the edges are golden and the centers are still soft; this ensures they maintain their chewiness.

  • Dough Chilling: If you prefer thicker cookies, chill the dough for at least 30 minutes before baking. This step can enhance their texture and shape.

  • Cookie Size Matters: Use a cookie scoop for uniform sizes. This ensures even baking and consistent softness in all your Pistachio Cream Cookies.

  • Storage Savvy: Store cookies in an airtight container to maintain freshness for up to a week. You can also freeze leftovers for future cravings!

How to Store and Freeze Pistachio Cream Cookies

Room Temperature: Store cookies in an airtight container at room temperature for up to 1 week, keeping them soft and chewy for every delightful bite.

Fridge: For extended freshness, these Pistachio Cream Cookies can be refrigerated in an airtight container for up to 2 weeks without losing their scrumptious flavor.

Freezer: Freeze cookies in a single layer, then transfer to a freezer-safe bag or container for up to 3 months. Thaw at room temperature when craving strikes.

Reheating: If you want that freshly baked taste, warm cookies in the microwave for about 10-15 seconds or in the oven at 350°F (175°C) for a few minutes.

Pistachio Cream Cookies Recipe FAQs

How do I know if my pistachios are ripe for use?
Absolutely! When choosing pistachios, look for those that are bright green and have a nutty aroma. If any shells are closed tightly or if you see dark spots all over the nuts, those may be stale. Fresh pistachios should have a slightly crunchy texture, making them perfect for your cookies.

What’s the best way to store leftover Pistachio Cream Cookies?
For optimal freshness, store your cookies at room temperature in an airtight container for up to 1 week. If you'd like to enjoy them for longer, refrigerate them for up to 2 weeks. Remember, preventing moisture is key to keeping your cookies soft and chewy!

Can I freeze these cookies? If so, how?
Yes, you can easily freeze your Pistachio Cream Cookies! First, allow them to cool completely. Then, place them in a single layer on a baking sheet and freeze until solid. Transfer the frozen cookies to a freezer-safe bag or container, ensuring you remove as much air as possible. They will be good for up to 3 months! To enjoy, simply thaw at room temperature, or warm them in the oven for a delightful, fresh-out-of-the-oven taste.

What should I do if my cookie dough seems too dry or crumbly?
If you find your dough dry, don't worry! This can happen sometimes. Simply add a teaspoon of milk or water to the dough and mix gently until it's just combined. Avoid overmixing, which can lead to drier cookies. It’s important to keep an eye on the texture while mixing to achieve that perfectly soft and chewy result.

Are there any dietary restrictions I should consider with this recipe?
Great question! If you're baking for someone with nut allergies, you can substitute pistachio cream with sunflower seed butter or any nut-free cream. Always check the labels of your ingredients to ensure they are safe for dietary restrictions. Additionally, for anyone avoiding gluten, using a gluten-free flour blend in place of all-purpose flour can work well!

What would you recommend if I want to add additional flavors or variations to the cookies?
The more the merrier! Consider incorporating 1 tablespoon of lemon or orange zest for a refreshing citrus twist. You can also swap out the roasted pistachios for hazelnuts for a different nutty flavor. Even adding a handful of dried cranberries or cherries can provide a delightful fruity contrast that pairs well with the cookie's nuttiness.

Pistachio Cream Cookies

Soft and Chewy Pistachio Cream Cookies to Satisfy Cravings

Indulge in delicious Soft and Chewy Pistachio Cream Cookies, blending nutty richness with chocolate chunks.
Print Recipe Pin Recipe
Prep Time 10 minutes mins
Cook Time 12 minutes mins
Cooling Time 5 minutes mins
Total Time 27 minutes mins
Servings: 12 cookies
Course: Dessert
Cuisine: American
Calories: 120
Ingredients Equipment Method Nutrition Notes

Ingredients
  

For the Batter
  • 1 cup Pistachio Cream Substitute with any unsweetened nut cream or butter if unavailable.
  • 1/2 cup Unsalted Butter Ensure it's at room temperature for optimal mixing.
  • 3/4 cup Granulated Sugar Adjust based on personal sweetness preference.
  • 1 cup All-Purpose Flour Sift for a light and fluffy texture.
  • 1 teaspoon Baking Soda Essential for leavening.
  • 1/4 teaspoon Sea Salt Adjust according to the saltiness of the pistachios.
For the Mix-Ins
  • 1/2 cup Roasted Pistachios Use salted or unsalted based on your preference.
  • 1 cup Chocolate Chunks Can substitute with chocolate chips.

Equipment

  • Mixing Bowl
  • hand mixer
  • Cookie Scoop
  • Baking Sheet
  • Parchment Paper

Method
 

Step-by-Step Instructions
  1. In a large mixing bowl, combine the pistachio cream and softened unsalted butter. Beat on medium speed until creamy and well-blended, about 2 minutes.
  2. Gradually add the granulated sugar and continue mixing until light and fluffy, approximately 3 minutes.
  3. In a separate bowl, sift together the all-purpose flour, baking soda, and sea salt. Slowly incorporate this dry mixture into the wet ingredients, folding gently.
  4. Gently fold in the roasted pistachios and chocolate chunks, ensuring they’re evenly distributed.
  5. Line a baking sheet with parchment paper. Use a cookie scoop to drop rounded portions of dough, spacing them about 2 inches apart.
  6. Preheat your oven to 350°F (175°C). Bake the cookies for 10-12 minutes until golden edges and soft centers visible.
  7. After baking, let the cookies cool on the baking sheet for about 5 minutes before transferring them to a wire rack.
  8. Once cooled, serve your cookies with milk or coffee. Store leftovers in an airtight container.

Nutrition

Serving: 1cookieCalories: 120kcalCarbohydrates: 15gProtein: 2gFat: 6gSaturated Fat: 3gPolyunsaturated Fat: 2gMonounsaturated Fat: 1gCholesterol: 15mgSodium: 50mgPotassium: 50mgFiber: 1gSugar: 8gVitamin A: 50IUCalcium: 10mgIron: 0.5mg

Notes

Avoid overmixing for a soft and chewy texture. Keep an eye on baking time for best results.

Tried this recipe?

Let us know how it was!
  • « Previous Page
  • 1
  • …
  • 81
  • 82
  • 83
  • 84
  • 85
  • …
  • 247
  • Next Page »

Welcome!

Hi, I’m Grace, a Sydney-based home cook with a passion for bold flavors and trending ingredients. Whether you’re a busy beginner or a seasoned foodie, you’ll find dishes here that are fresh, fun, and full of flavor.

More about me

Popular Recipes

  • Orange Sugar Cookies
    Deliciously Soft Orange Sugar Cookies Bursting with Flavor
  • Hot Fudge Sundae Cookies
    Chewy Hot Fudge Sundae Cookies That'll Brighten Your Day
  • Tennessee Peach Pudding
    Heavenly Tennessee Peach Pudding for Cozy Gatherings
  • Peaches and Cream Cake
    Irresistible Peaches and Cream Cake for Sweet Gatherings

Footer

↑ back to top

About

  • Privacy Policy
  • Disclaimer
  • Terms & Conditions

Newsletter

  • Sign Up! for emails and updates

Contact

  • About me
  • Contact me

Copyright © 2025 TastyTrendIngredients