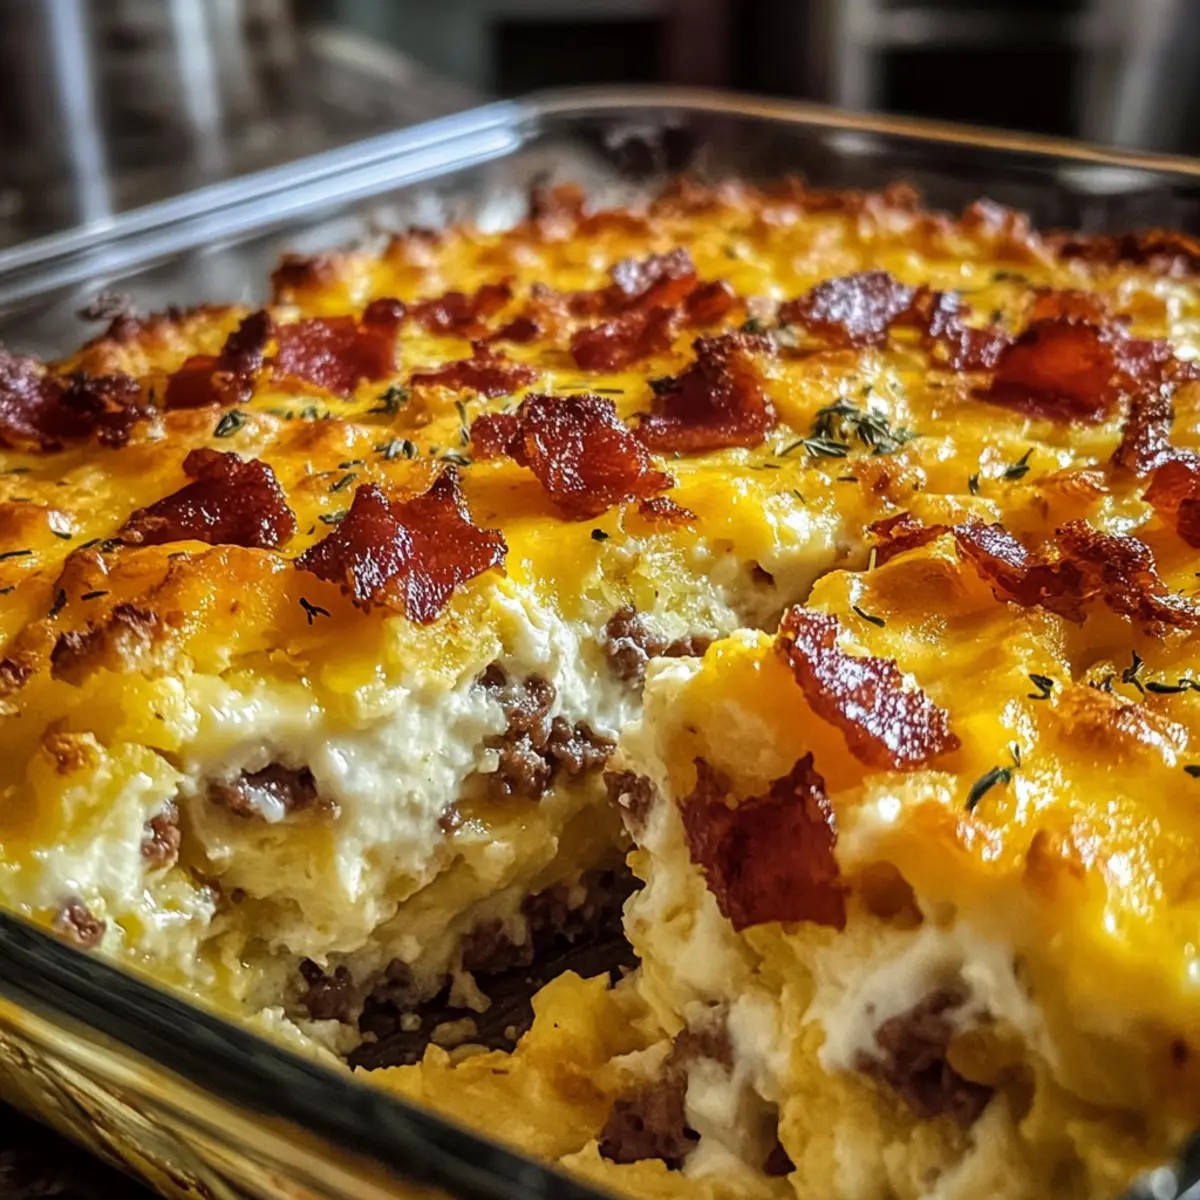
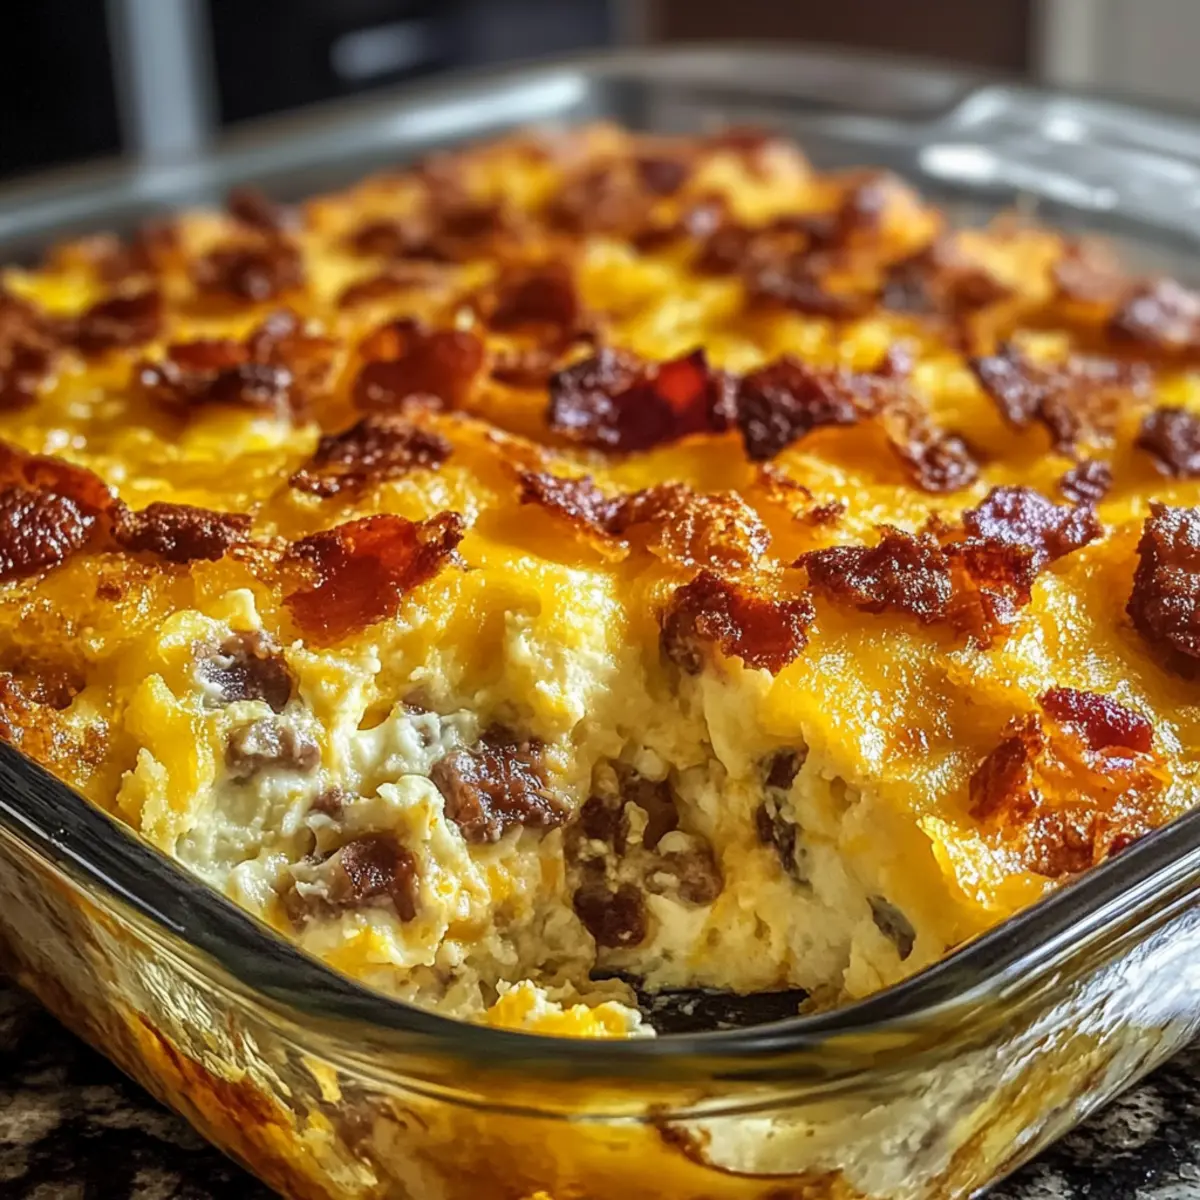
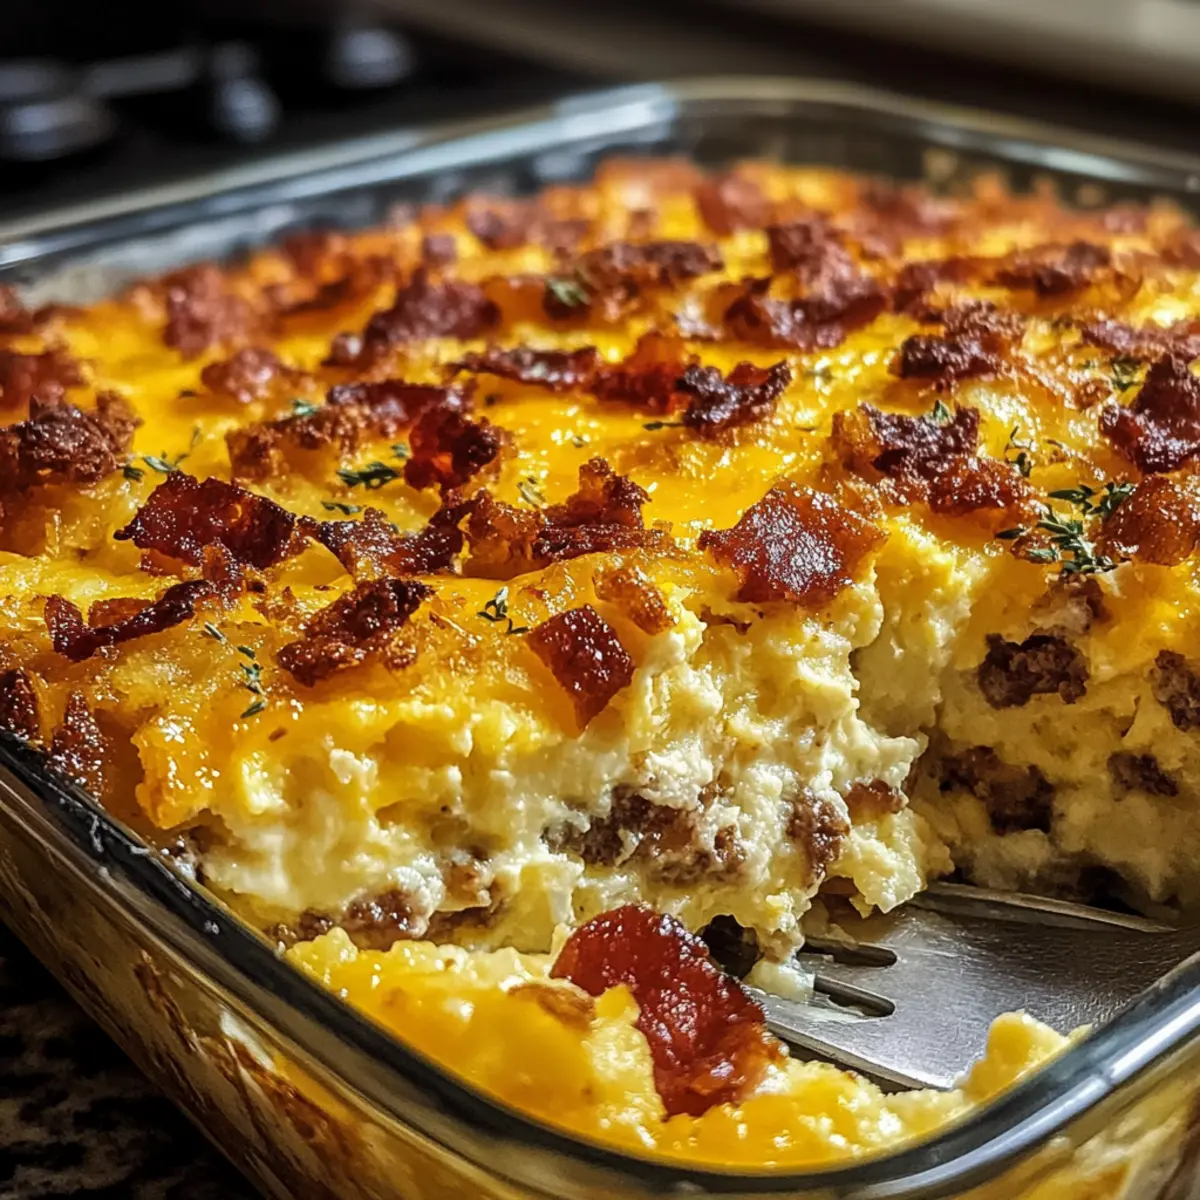
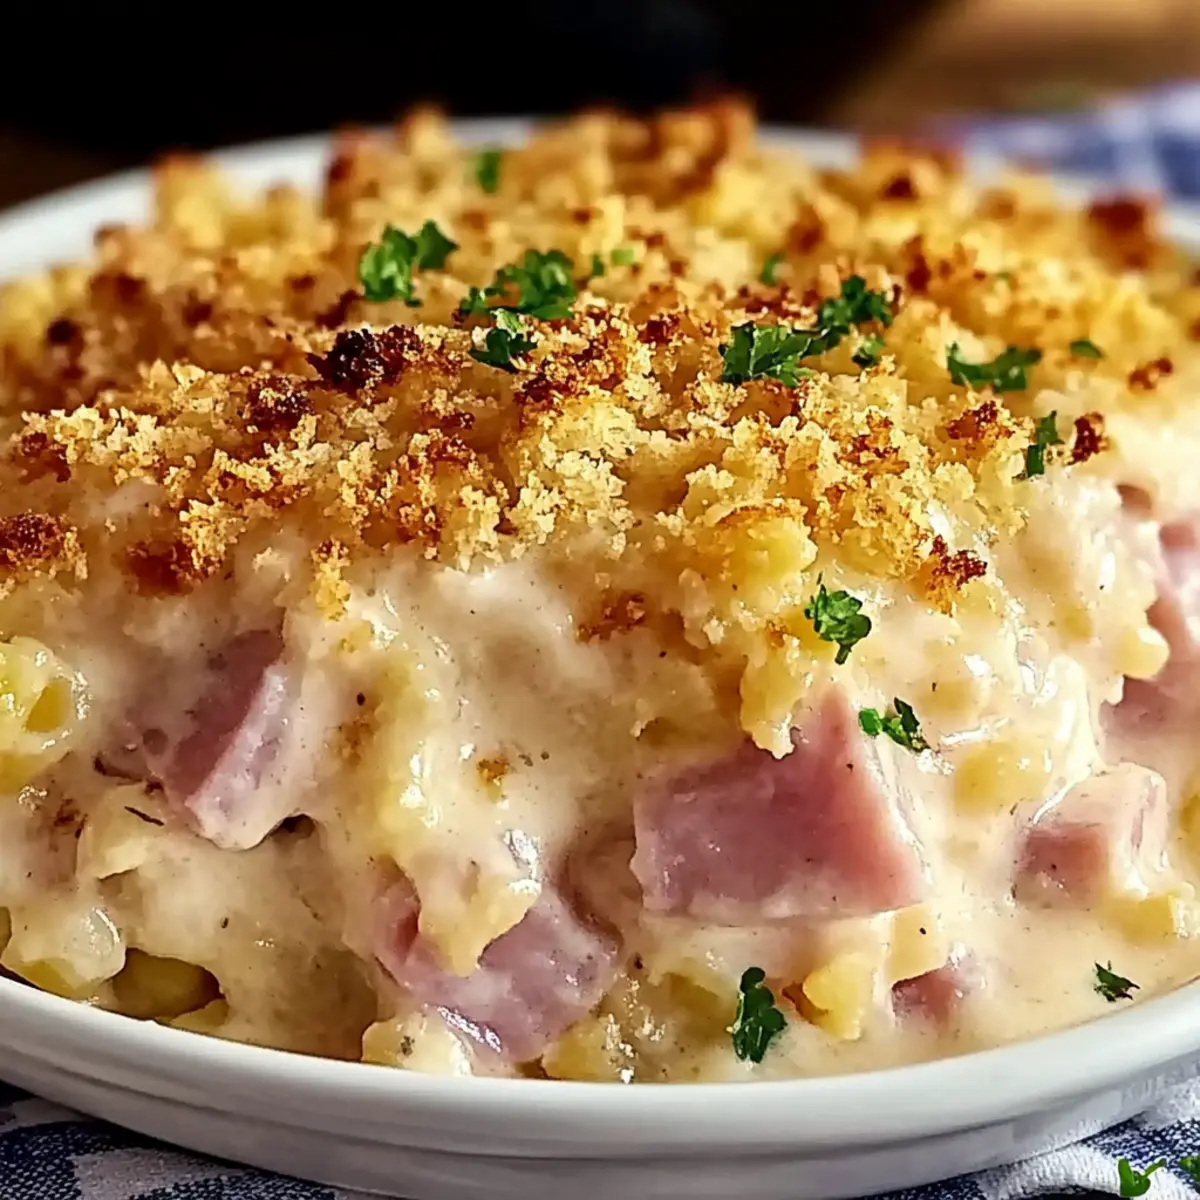
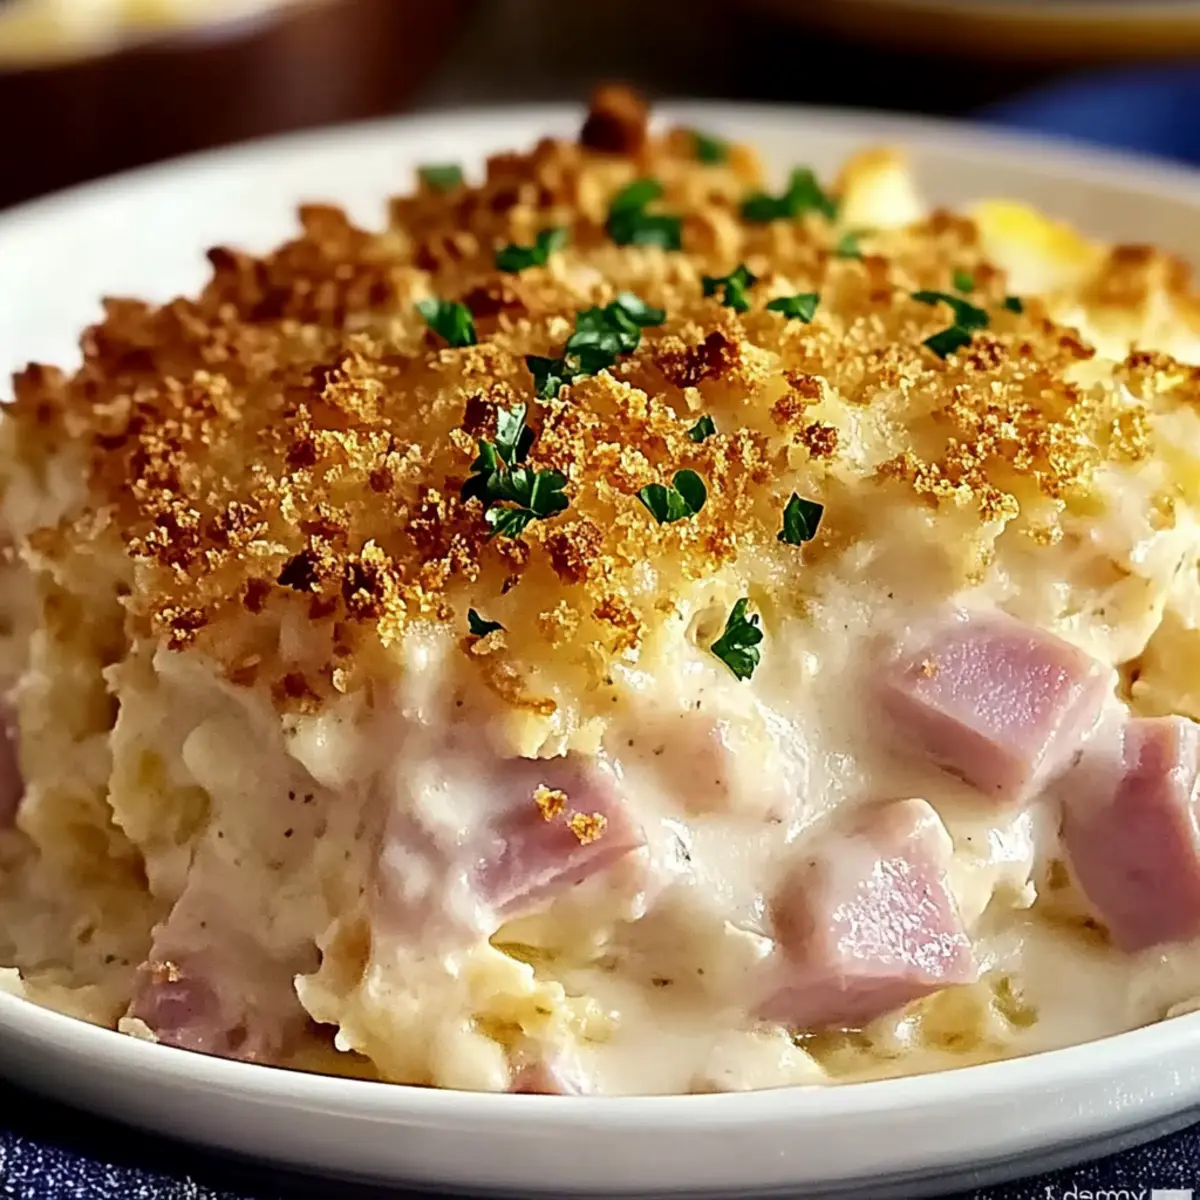
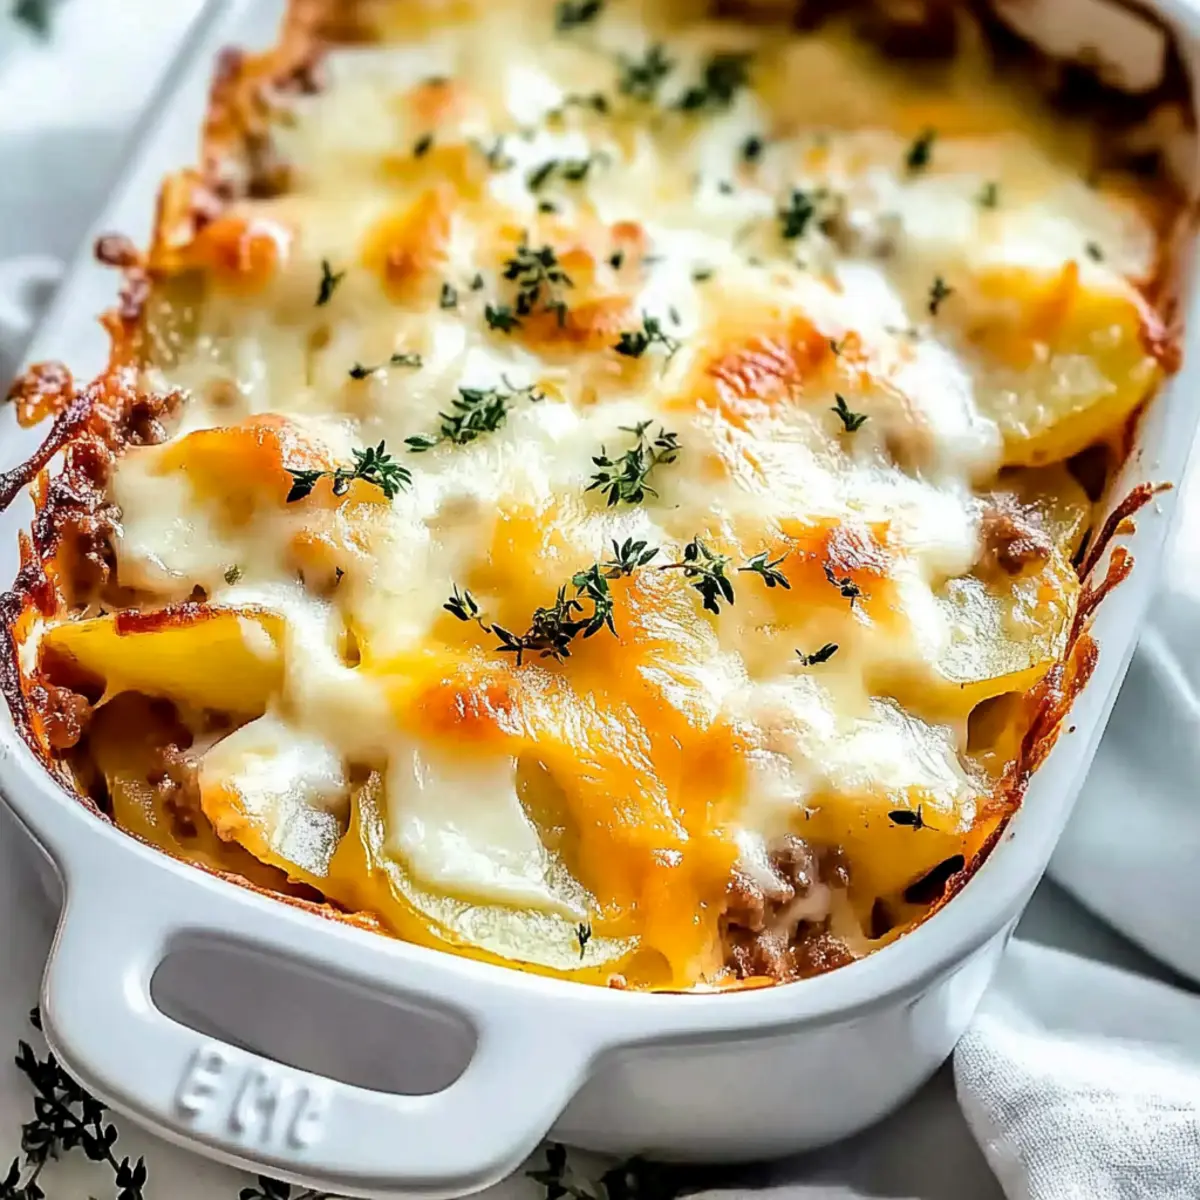
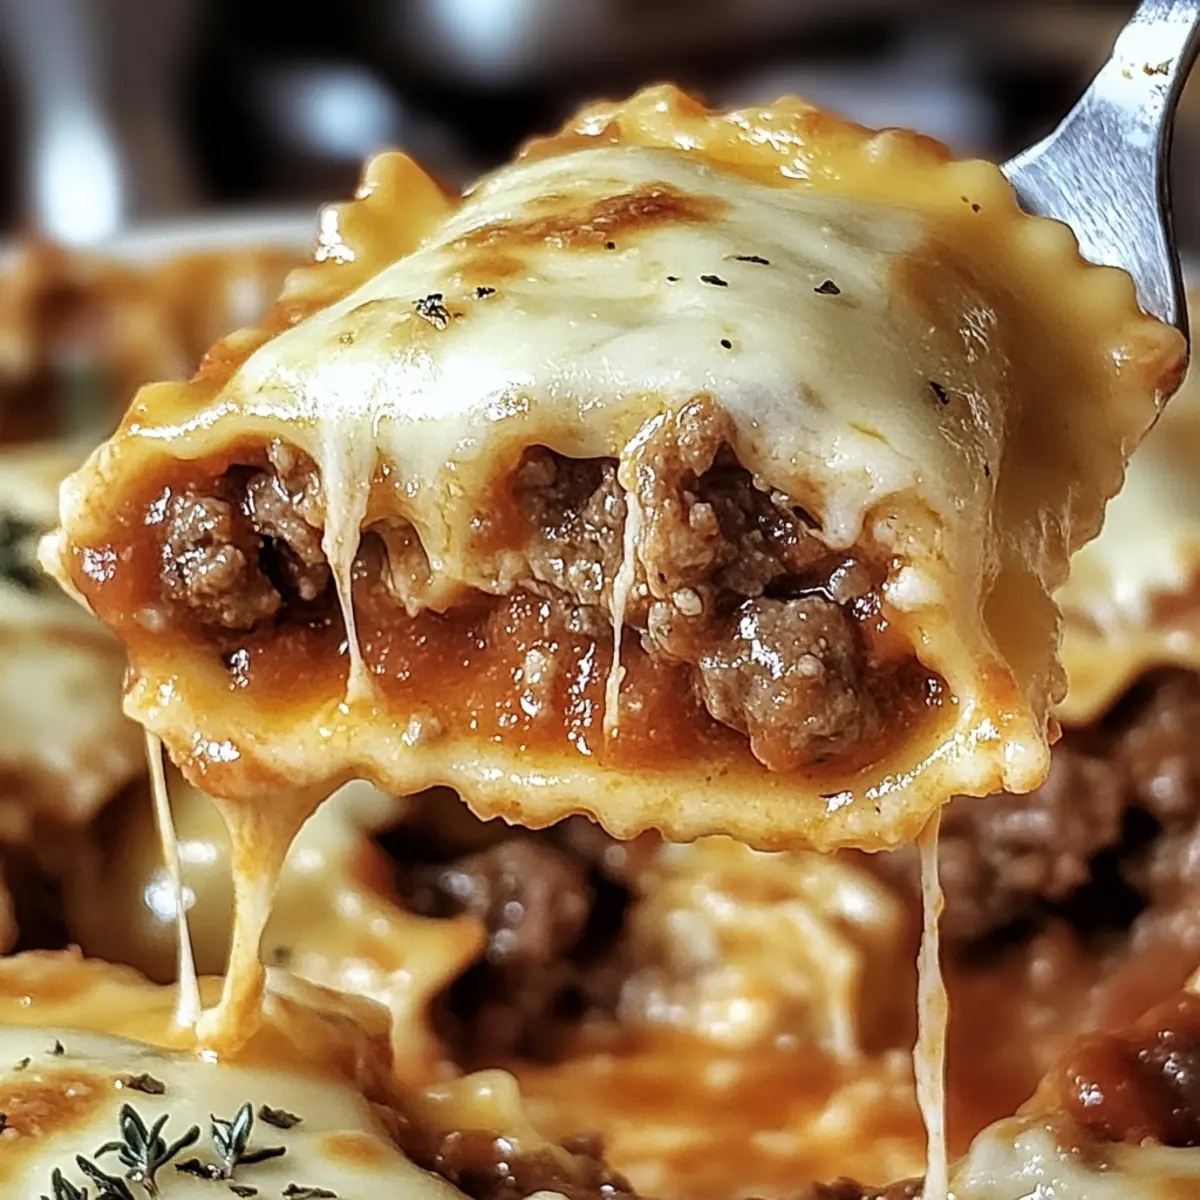
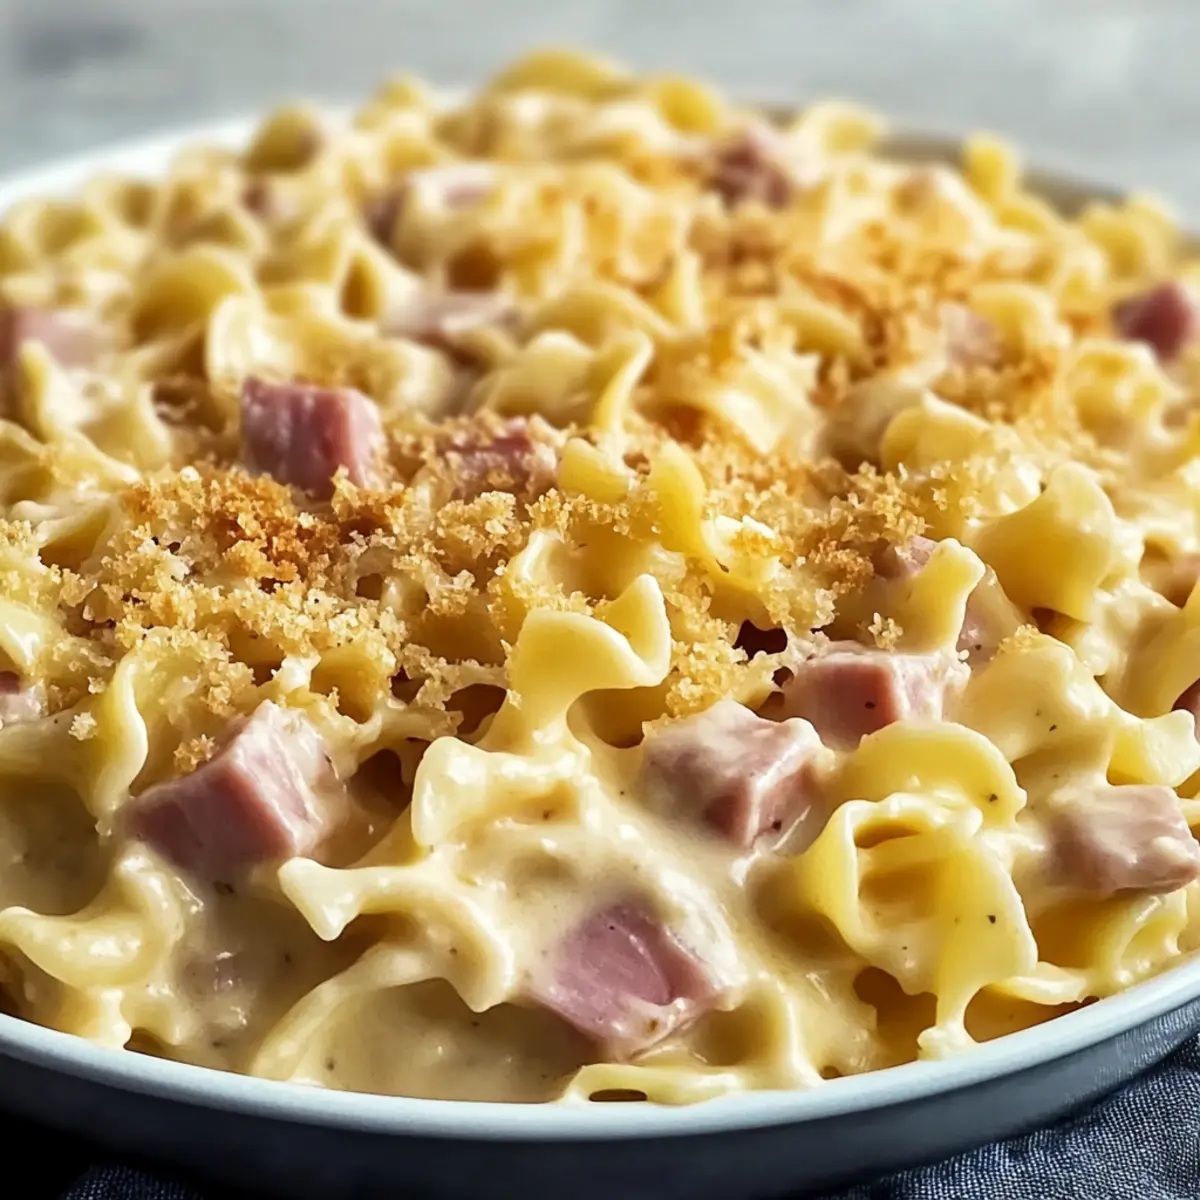
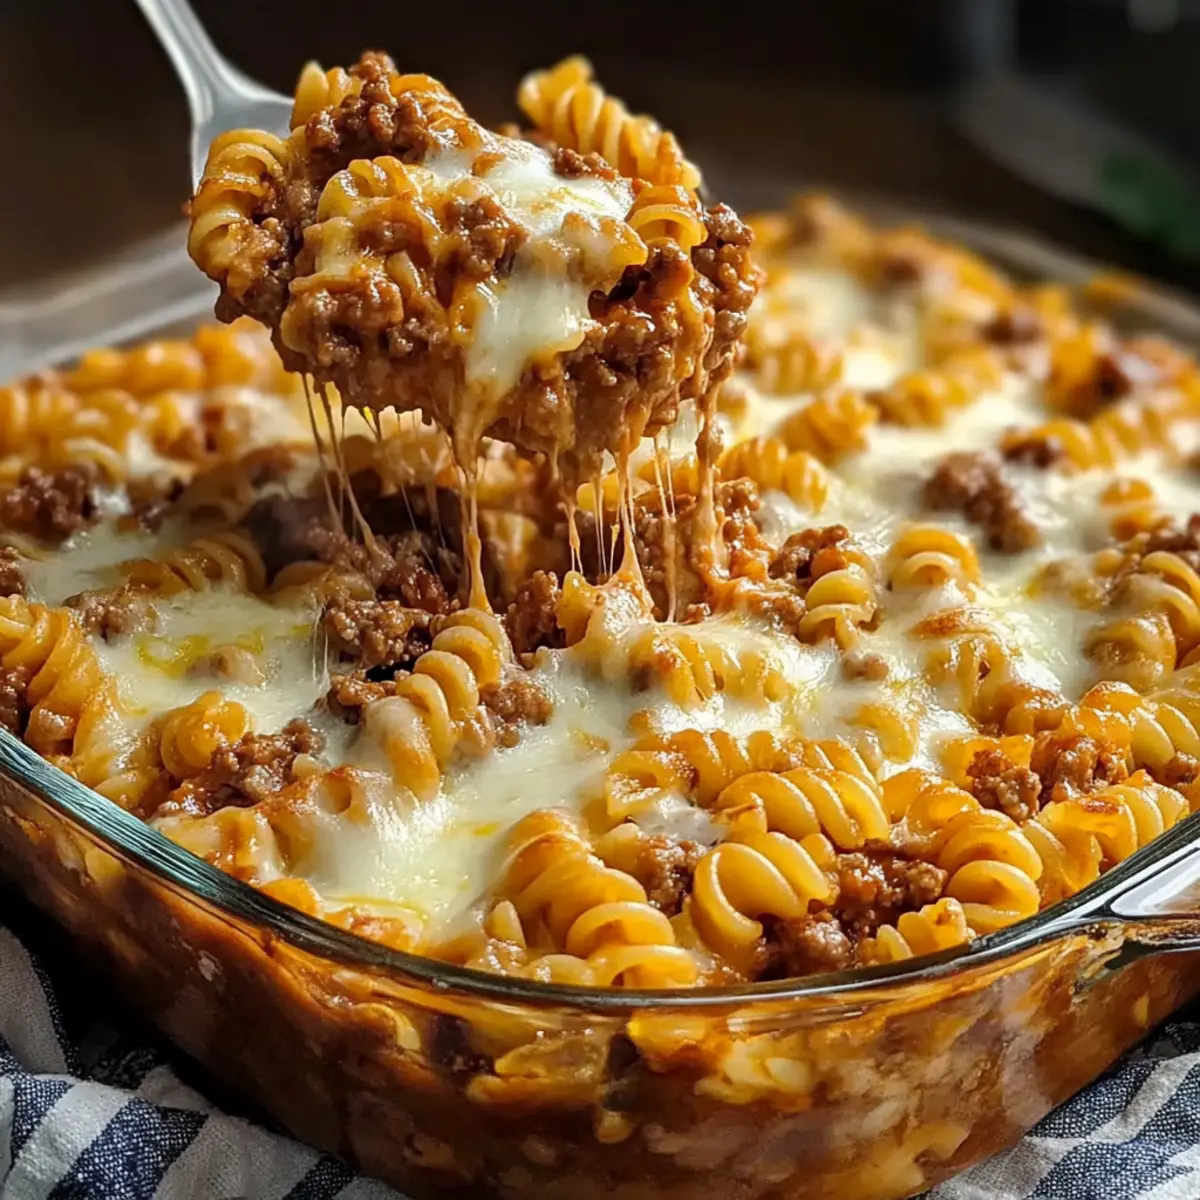
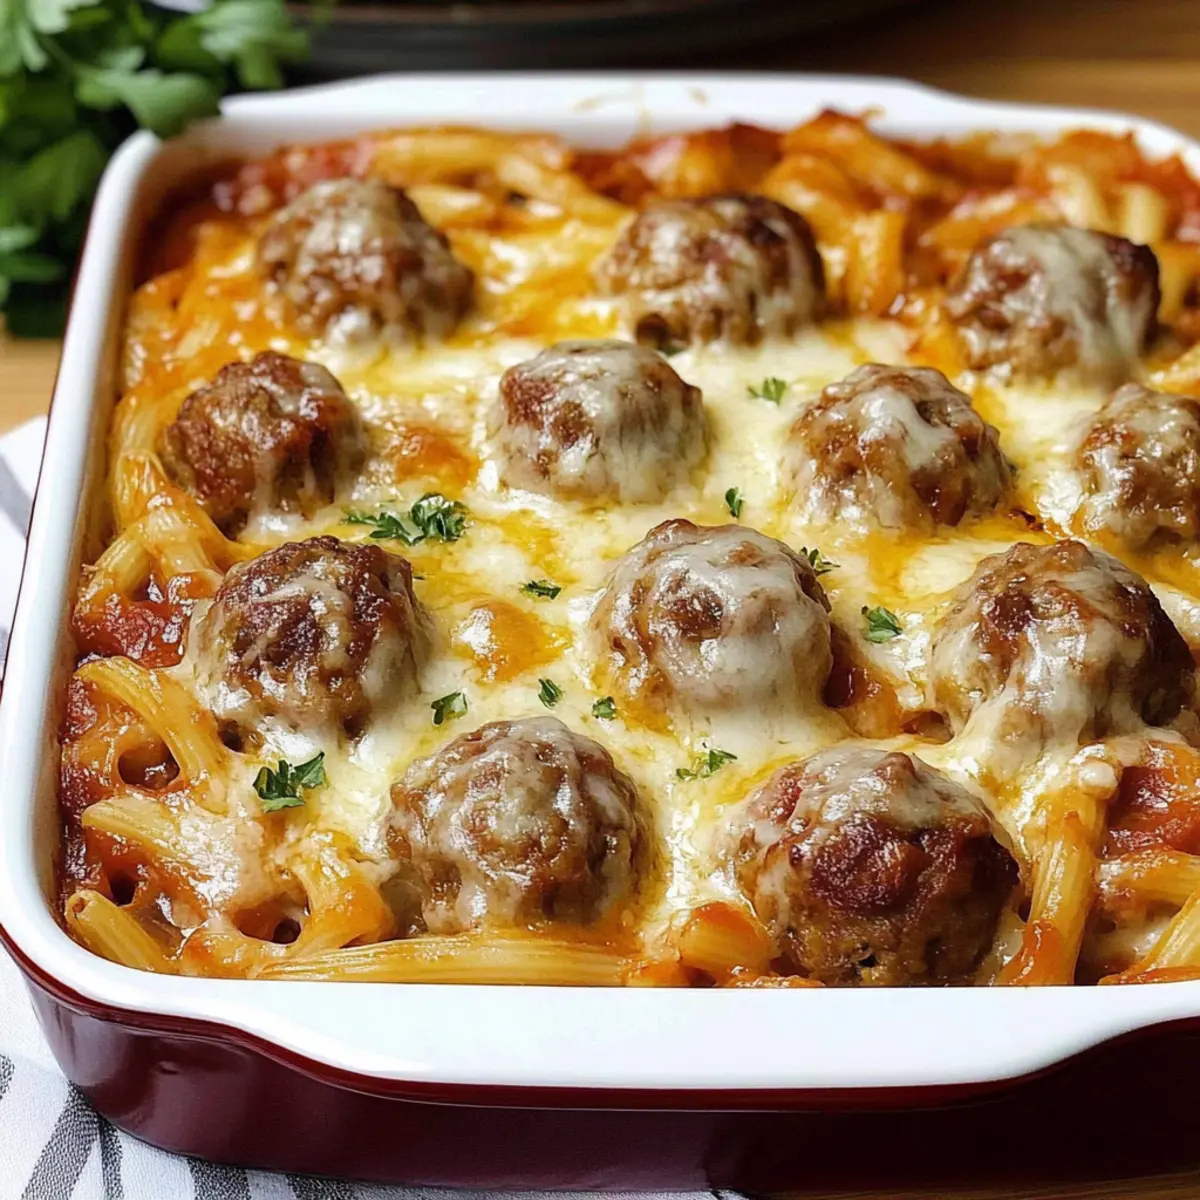
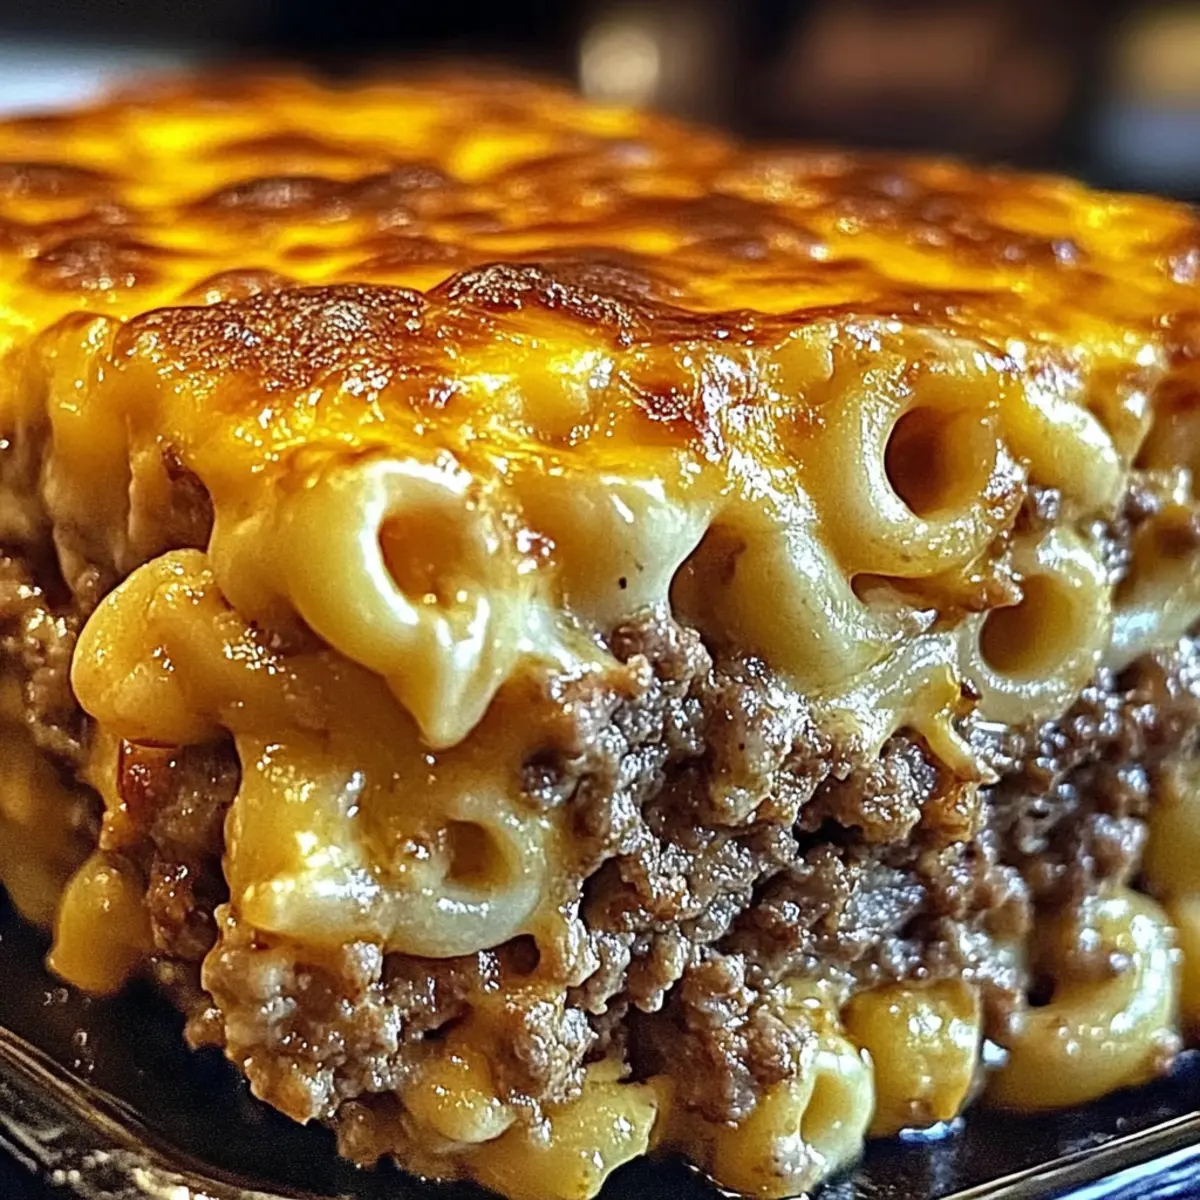
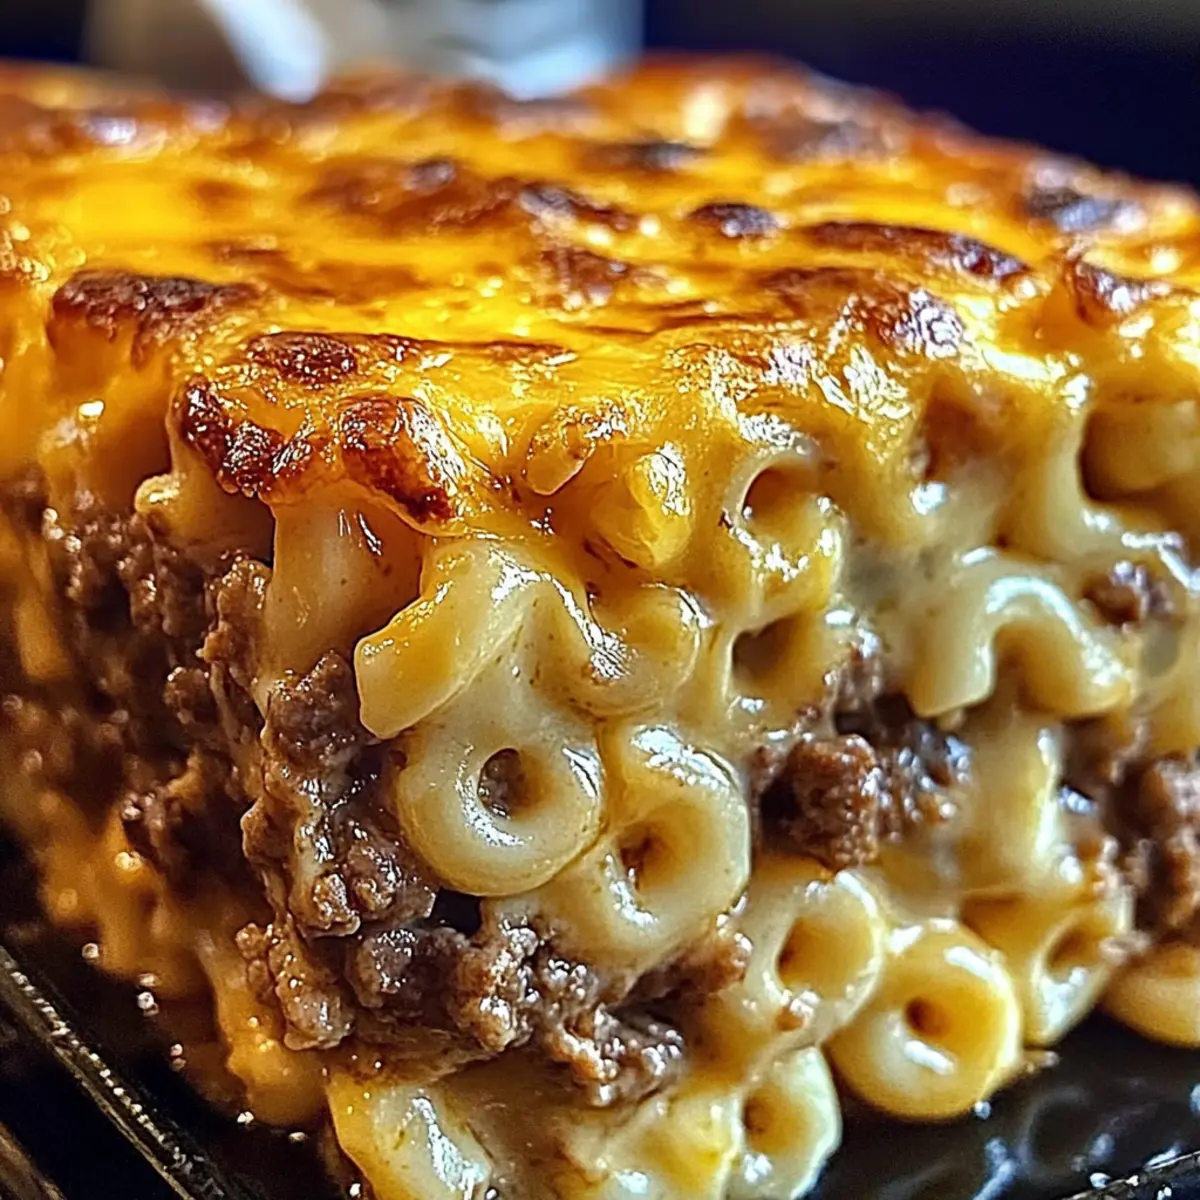
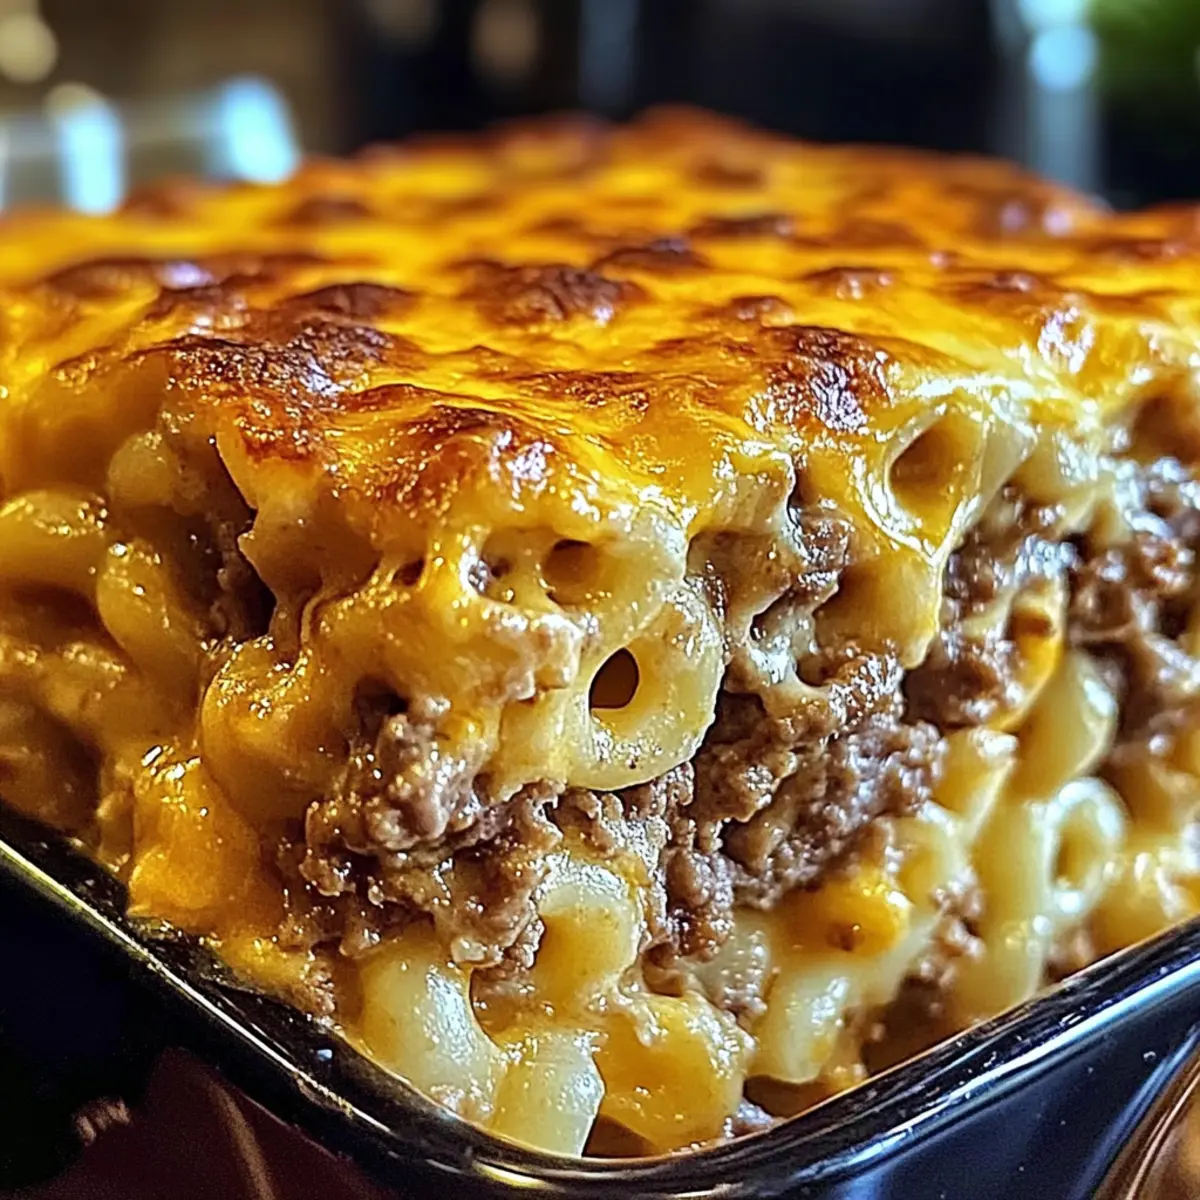
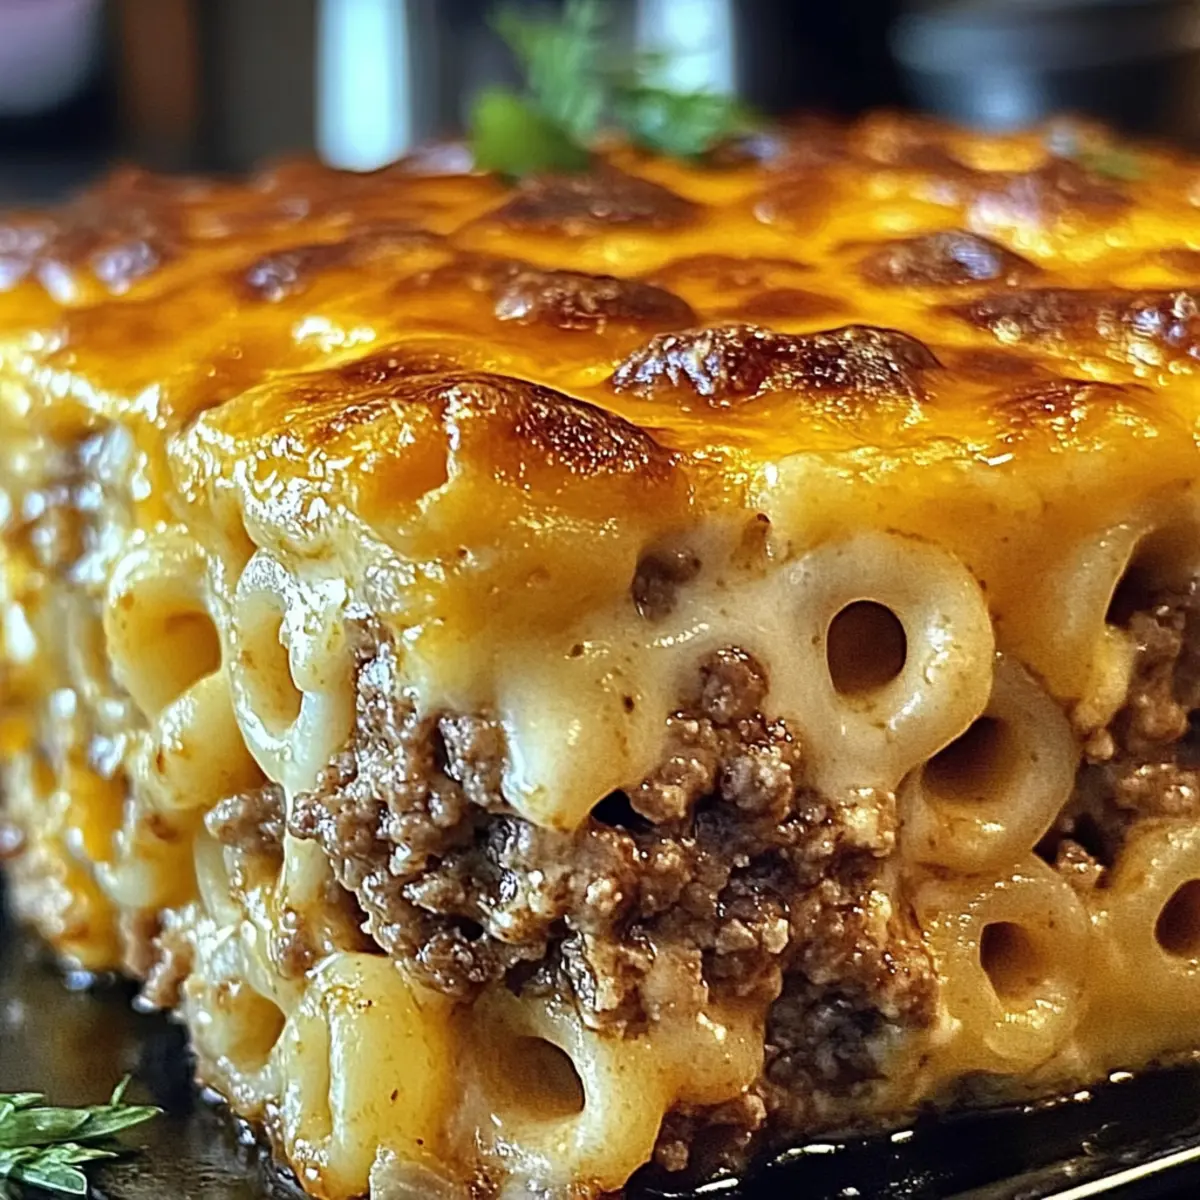
As I stood in my kitchen, the aroma of melting cheese and savory meatloaf wafted around me, instantly transporting me to warm family gatherings. This Mac and Cheese Meatloaf Casserole combines two beloved comfort foods into one irresistible dish that’s not only delicious but also incredibly versatile. With quick prep time and kid-friendly appeal, this casserole is a fantastic solution for busy weeknights or potlucks where everyone’s sure to dig in with a smile. Whether you choose to stick with classic ground beef or mix it up with turkey or even a vegetarian option, every bite promises a hearty experience that feels like a warm hug. Are you ready to dive into this flavorful mashup and make your own memories around the dinner table?
Why is this casserole a family favorite?
Heartwarming flavor: The blend of savory meatloaf and creamy mac and cheese creates an incredibly satisfying dish that brings comfort to the dinner table.
Customization galore: Tailor this casserole to your family's preferences by swapping out meats or cheeses! Whether you use ground turkey or experiment with different cheese blends, there's a combination for everyone.
Time-efficient delight: Quick to prepare and easy to bake, this recipe caters to your busy weeknights without sacrificing flavor or satisfaction.
Kid-approved meal: With its cheesy goodness and hearty nature, kids love diving into this dish, making it a surefire hit at family gatherings or potlucks.
Make-ahead option: Easily prepare this dish in advance, allowing for quick reheating on those hectic nights. Want more comforting ideas? You might also enjoy our Cornbread Breakfast Casserole or Sweet Potato Casserole!
Mac and Cheese Meatloaf Casserole Ingredients
For the Meatloaf
- Ground Beef – Provides a hearty base; substitute with ground turkey for a leaner option.
- Onion – Adds depth of flavor; finely chop for a milder taste.
- Breadcrumbs – Binds everything together; use gluten-free breadcrumbs for a gluten-free casserole.
- Egg – Acts as a binder; flaxseed meal can be used as a vegan alternative.
- Milk – Keeps the mixture moist; substitute with plant-based milk for a dairy-free delight.
- Salt & Pepper – Essential for seasoning; adjust to your family’s taste preference.
For the Macaroni and Cheese
- Macaroni – The foundation of this cheesy layer; opt for gluten-free pasta if needed.
- Butter – Adds richness to the cheese sauce; use dairy-free butter for a vegan version.
- Flour – Thickens the cheese sauce; cornstarch works well for gluten-free cooking.
- Cheese (shredded) – The star of the cheese sauce; experiment with mozzarella or gouda for varied flavors.
- Paprika & Dry Mustard – Enhances the cheese flavor; adjust according to your preference.
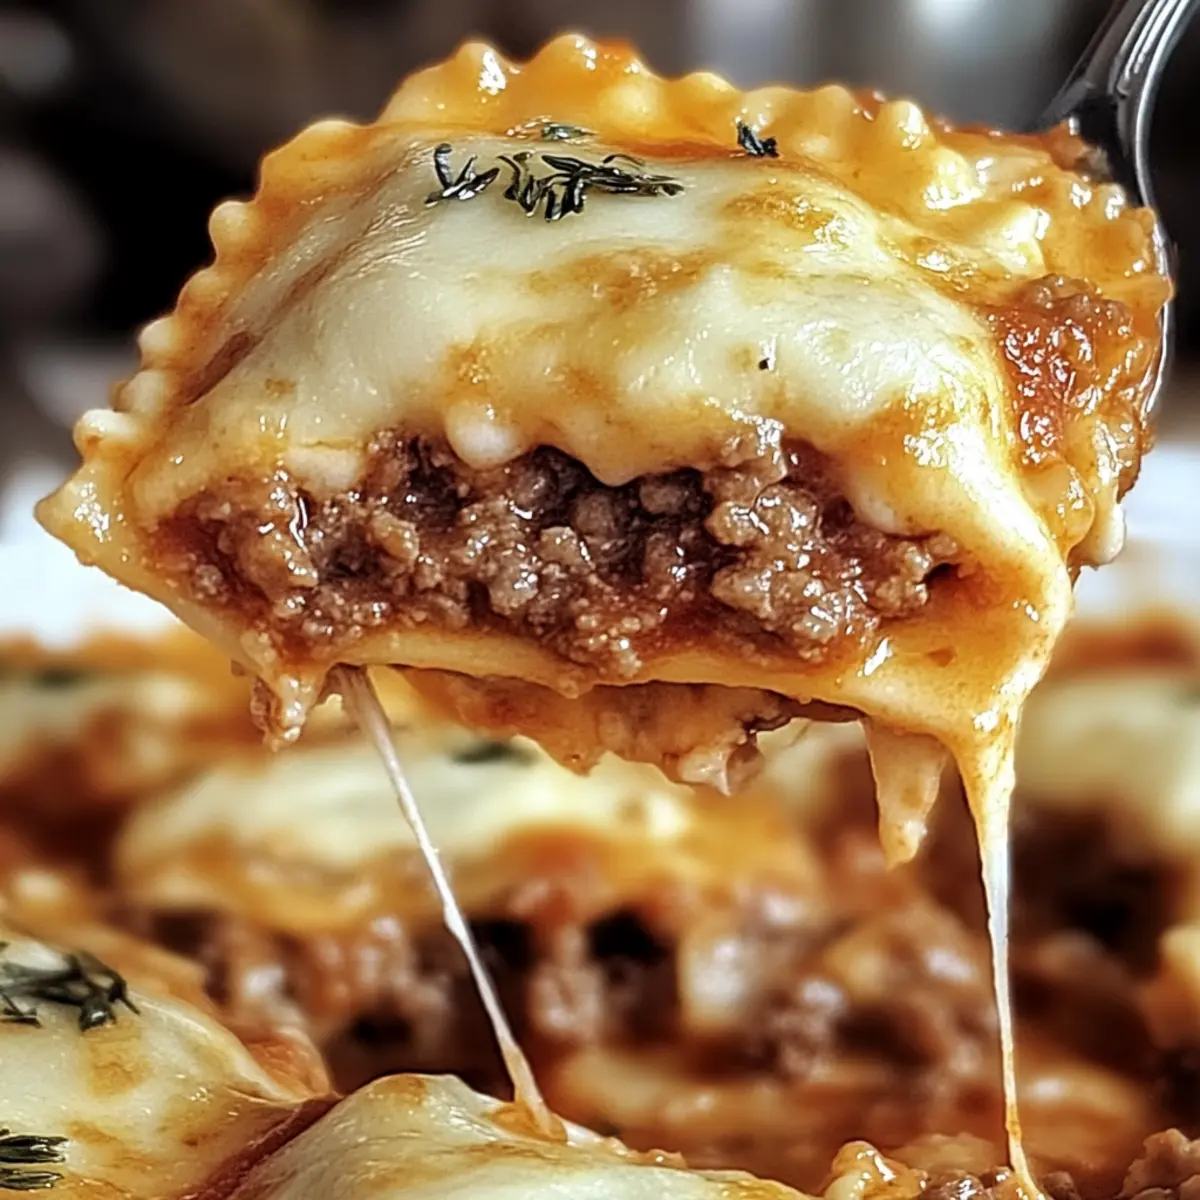
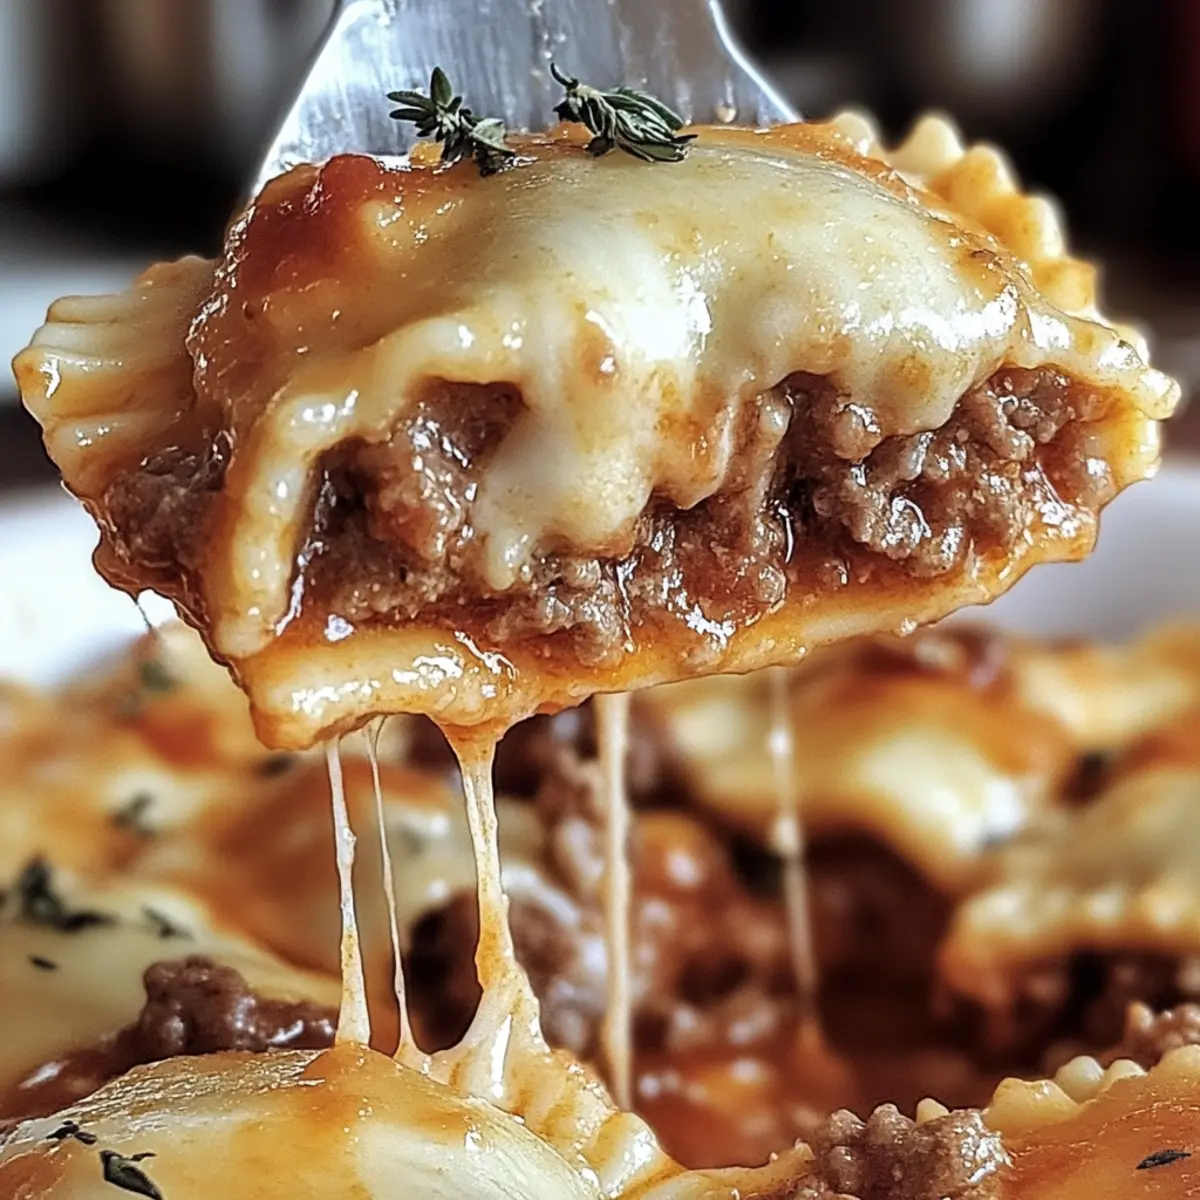
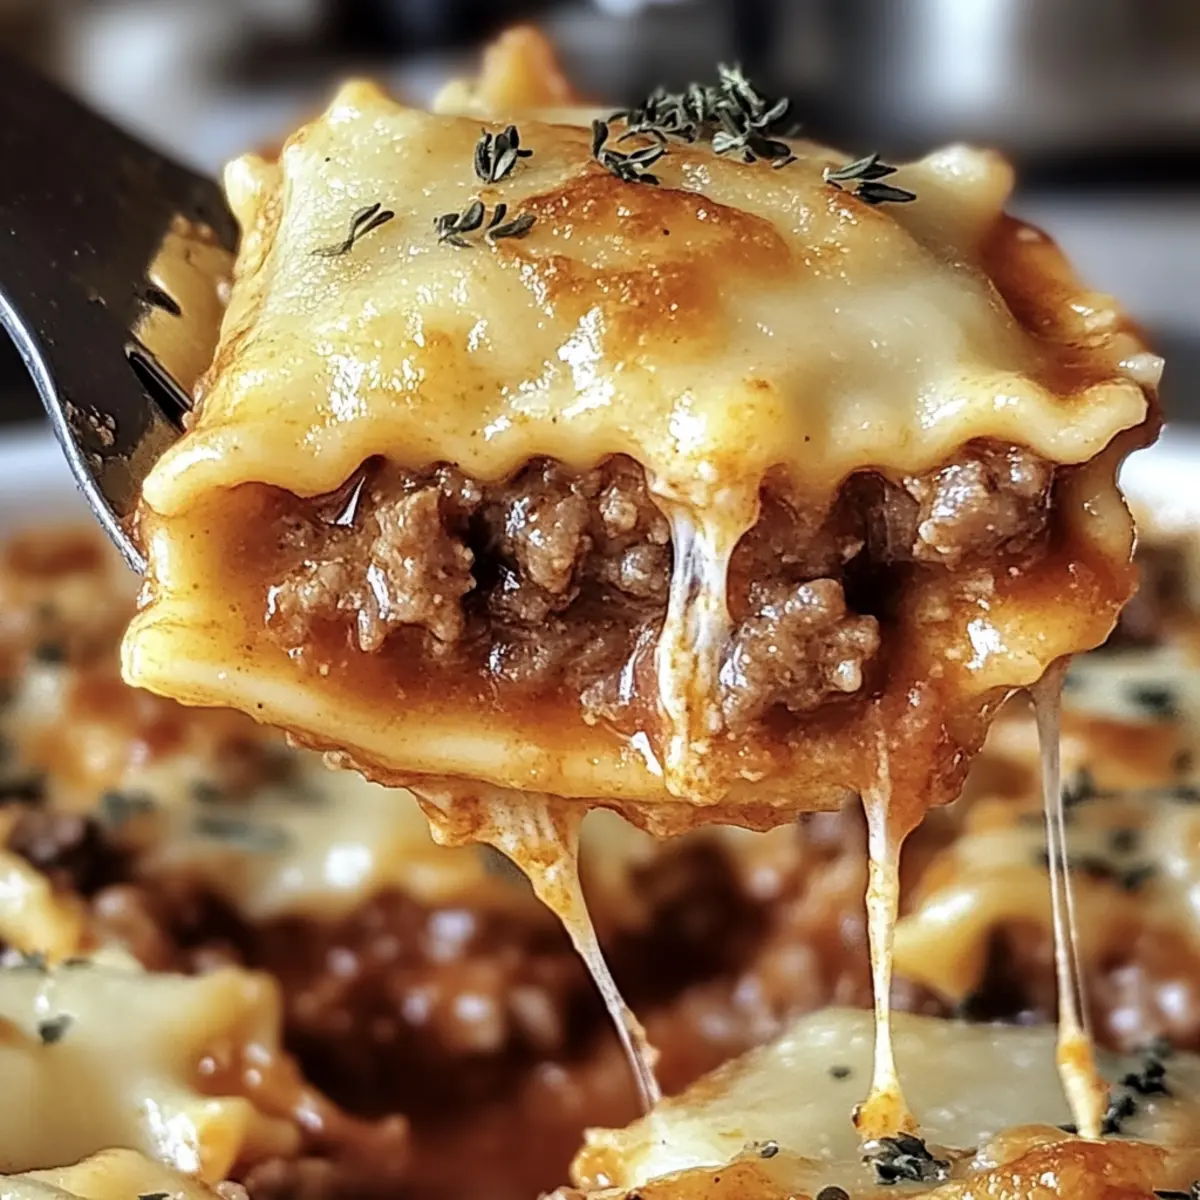
Every bite of the Mac and Cheese Meatloaf Casserole brings comfort and warmth, proving that this dish is perfect for any family gathering!
Step‑by‑Step Instructions for Mac and Cheese Meatloaf Casserole
Step 1: Prepare the Oven and Meatloaf Mixture
Preheat your oven to 350°F (175°C) while you assemble the meatloaf. In a large mixing bowl, combine ground beef, finely chopped onion, breadcrumbs, egg, milk, salt, and pepper. Mix the ingredients thoroughly until well combined, then transfer the mixture into a greased baking dish, pressing it down evenly.
Step 2: Bake the Meatloaf
Place the prepared meatloaf in the preheated oven and bake for 20 minutes. You’ll know it’s ready when the edges begin to firm up and a light golden color starts to form on top. This initial baking sets the foundation for your Mac and Cheese Meatloaf Casserole.
Step 3: Cook the Macaroni
While the meatloaf is baking, cook the macaroni according to the package directions until al dente. Drain the pasta and set it aside, allowing any excess moisture to escape. This step ensures that your macaroni holds its texture once mixed into the cheesy goodness.
Step 4: Make the Cheese Sauce
In a medium saucepan, melt 4 tablespoons of butter over medium heat. Once melted, whisk in ¼ cup of flour and cook for about 1 minute, stirring constantly. Gradually add in 2 cups of milk while continuing to stir until the mixture thickens and is smooth, around 3-5 minutes. Once thickened, mix in the shredded cheese, salt, pepper, paprika, and dry mustard, stirring until the cheese has completely melted.
Step 5: Combine Macaroni and Cheese Sauce
After your cheese sauce is ready, add the drained macaroni into the saucepan. Stir well to coat every piece of pasta in that creamy cheese sauce. This delightful mixture forms the cheesy layer of your Mac and Cheese Meatloaf Casserole, promising a wonderfully decadent bite.
Step 6: Layer and Bake the Casserole
Remove the meatloaf from the oven and carefully pour the macaroni and cheese mixture on top, spreading it evenly. Sprinkle any remaining shredded cheese over the macaroni layer. Place the dish back into the oven and bake for an additional 25 minutes, or until the cheese is melted and bubbly, and a golden crust starts to form.
Step 7: Rest and Serve
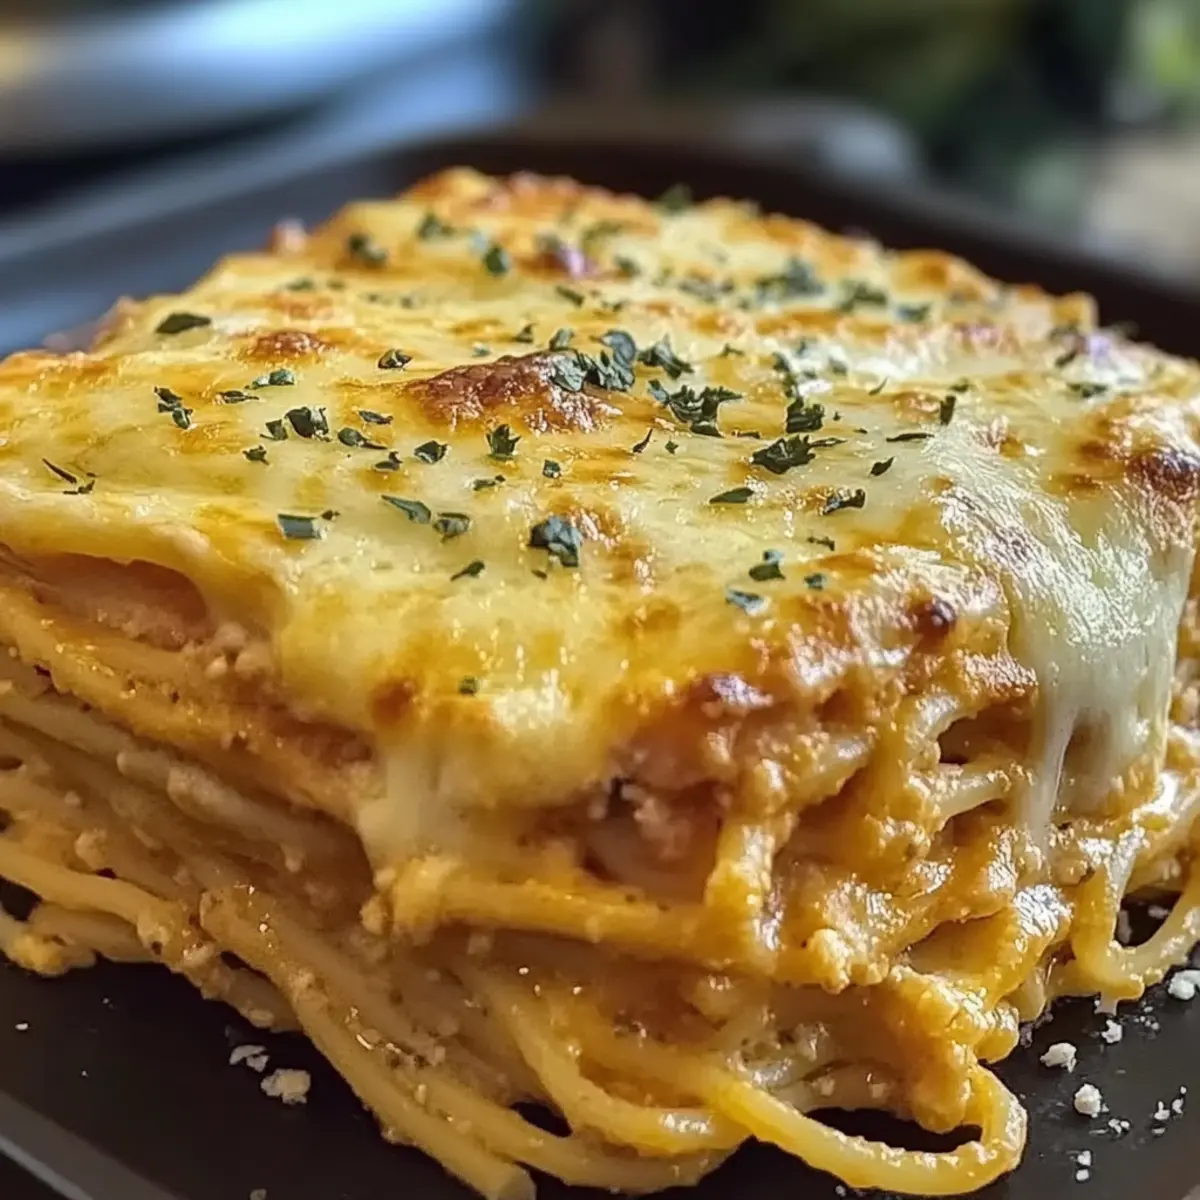
Once baked, let the Mac and Cheese Meatloaf Casserole rest for about 10 minutes before slicing. This resting period helps the layers firm up, making for cleaner, more satisfying slices. Serve warm, and enjoy the delightful layers of flavor!
How to Store and Freeze Mac and Cheese Meatloaf Casserole
Fridge: Store leftovers in an airtight container for up to 3 days. Reheat in the oven at 350°F (175°C) for 15–20 minutes or in the microwave until heated through.
Freezer: To freeze, cut into individual portions and wrap tightly in plastic wrap, then place in a freezer bag. It will keep for up to 3 months.
Thawing: When ready to enjoy, thaw overnight in the fridge. Reheat as mentioned above for best results.
Reheating: For leftover servings, microwave individual pieces for 2-3 minutes or bake in the oven until warm, ensuring that the Mac and Cheese Meatloaf Casserole remains deliciously creamy.
What to Serve with Mac and Cheese Meatloaf Casserole
Create the perfect meal experience around this delightful dish with these complementary sides and treats.
- Garlic Bread: The crunchy texture and buttery flavor make it an irresistible companion, perfect for soaking up cheesy goodness.
- Steamed Broccoli: A fresh and vibrant addition, it balances the richness of the casserole while adding a pop of color to the plate.
- Mixed Green Salad: A crisp salad with a tangy vinaigrette cuts through the heaviness, adding a refreshing contrast that brightens every bite. Toss in some cherry tomatoes for sweetness!
- Coleslaw: The cool, crunchy cabbage adds a satisfying texture that contrasts beautifully with the warmth of the casserole.
- Honey-Glazed Carrots: These sweet, tender treats offer a hint of sweetness that works beautifully with the savory notes of the meatloaf.
- Apple Sauce: This classic side brings a bit of sweetness and moisture to each bite, especially delightful for those family members who appreciate a touch of nostalgia.
- Homemade Lemonade: A refreshing beverage that serves to cleanse the palate, making every bite of the casserole more enjoyable!
- Chocolate Chip Cookies: To finish off the meal, serve warm cookies for a sweet treat that will delight both kids and adults alike.
Expert Tips for Mac and Cheese Meatloaf Casserole
- Quality Meat Matters: Choose high-quality ground beef to prevent dryness and enhance flavor. Avoid leaner cuts that may lead to a less juicy meatloaf.
- Perfect Pasta: Cook macaroni just until al dente to keep it from becoming mushy when baked. Remember, it will soften further in the oven!
- Season Generously: Make sure to season both the meatloaf and cheese sauce well. Taste as you go to ensure the casserole is full of flavor.
- Let It Rest: After baking, let your casserole rest for about 10 minutes to allow the layers to set. This will make slicing much easier and neater.
- Fresh Shredded Cheese: Use freshly shredded cheese for the best melting texture in your Mac and Cheese Meatloaf Casserole, avoiding pre-packaged varieties.
Make Ahead Options
These Mac and Cheese Meatloaf Casseroles are perfect for busy home cooks looking to save time without sacrificing flavor! You can prepare the meatloaf mixture and mac and cheese separately, then assemble everything up to 24 hours in advance. Just refrigerate the components in airtight containers until you’re ready to bake. To maintain quality, make sure the cheese sauce is well-cooled before mixing with the macaroni, preventing sogginess. When it’s time to serve, simply bake as instructed, adding an extra 10-15 minutes to the cooking time if taken straight from the fridge. Your family will enjoy a delicious, hearty meal with minimal effort!
Mac and Cheese Meatloaf Casserole Variations
Feel free to explore these fun personalized takes on the classic casserole that will have your taste buds dancing!
- Turkey Twist: Substitute ground turkey for a lighter meatloaf option while maintaining that delicious flavor you love.
- Veggie Delight: Swap in plant-based ground meat and vegetable broth for a scrumptious vegetarian version. It’s packed with flavor without sacrificing heartiness!
- Cheesy Variety: Use a blend of cheeses like cheddar, gouda, and mozzarella for a rich and creamy cheese sauce that elevates every bite.
- Spice It Up: Add diced jalapeños or a sprinkle of cayenne pepper to the cheese sauce for a delightful kick of heat that warms the soul.
- Veggie Boost: Incorporate finely chopped vegetables, such as spinach or bell peppers, into the meat mixture or cheese sauce for added nutrition and color.
- Gluten-Free Option: Substitute gluten-free breadcrumbs and pasta to create a deliciously inclusive dish the whole family can enjoy without worry.
- Herbaceous Twist: Fresh herbs like thyme or parsley can uplift the flavor profile, bringing in a burst of freshness that balances the richness.
- Creamy Alternative: Consider using cream cheese in your cheese sauce for an ultra-decadent and creamy texture worthy of family favorites.
Ready to make your own variation? For more comforting ideas, check out our scrumptious Pan Fried Mayo or give our decadent Potato Blue Cheese a try!
Mac and Cheese Meatloaf Casserole Recipe FAQs
What is the best way to select ripe ingredients for this casserole?
Absolutely! When selecting ground beef, look for a nice deep red color without any browning, which indicates freshness. For the onions, choose firm specimens with no soft spots or blemishes. And when it comes to cheese, freshly shredded varieties melt better and enhance the dish's flavor.
How should I store leftover Mac and Cheese Meatloaf Casserole?
You can store leftovers in an airtight container in the refrigerator for up to 3 days. Just be sure to cool it down first before sealing it to retain its deliciousness. Reheating in the oven at 350°F (175°C) takes about 15-20 minutes for best texture.
Can I freeze Mac and Cheese Meatloaf Casserole?
Yes, absolutely! I recommend cutting it into individual portions to make reheating easier. Wrap each piece tightly in plastic wrap, then place them in a freezer bag. This casserole can be frozen for up to 3 months. It's a fantastic meal prep option!
What should I do if my cheese sauce is too thick?
No worries! If your cheese sauce becomes too thick, simply add a little more milk, a tablespoon at a time, while stirring over low heat until you reach your desired consistency. This will keep your Mac and Cheese Meatloaf Casserole creamy and comforting.
Are there any dietary considerations for this recipe?
Very! You can easily make this dish gluten-free by using gluten-free breadcrumbs and pasta. There are also great plant-based ground meat alternatives available for those who prefer vegetarian options. Be sure to double-check the cheese for any allergens if you have specific dietary restrictions.
Mac and Cheese Meatloaf Casserole: Comfort Food Reimagined
Ingredients
Equipment
Method
- Preheat your oven to 350°F (175°C). In a large mixing bowl, combine ground beef, finely chopped onion, breadcrumbs, egg, milk, salt, and pepper. Mix thoroughly and transfer to a greased baking dish.
- Bake the meatloaf in the preheated oven for 20 minutes, until the edges firm up and a light golden color forms.
- While the meatloaf bakes, cook the macaroni according to package directions until al dente, then drain.
- In a medium saucepan, melt 4 tablespoons of butter over medium heat. Whisk in ¼ cup of flour and cook for about 1 minute. Gradually add in 2 cups of milk, stirring until thickened, about 3-5 minutes. Mix in shredded cheese, salt, pepper, paprika, and dry mustard until melted.
- Add the drained macaroni into the cheese sauce, stirring to coat well.
- Pour the macaroni and cheese mixture over the baked meatloaf, spreading evenly. Sprinkle any remaining cheese on top. Bake for an additional 25 minutes until the cheese is melted and bubbly.
- Let the casserole rest for about 10 minutes before slicing.