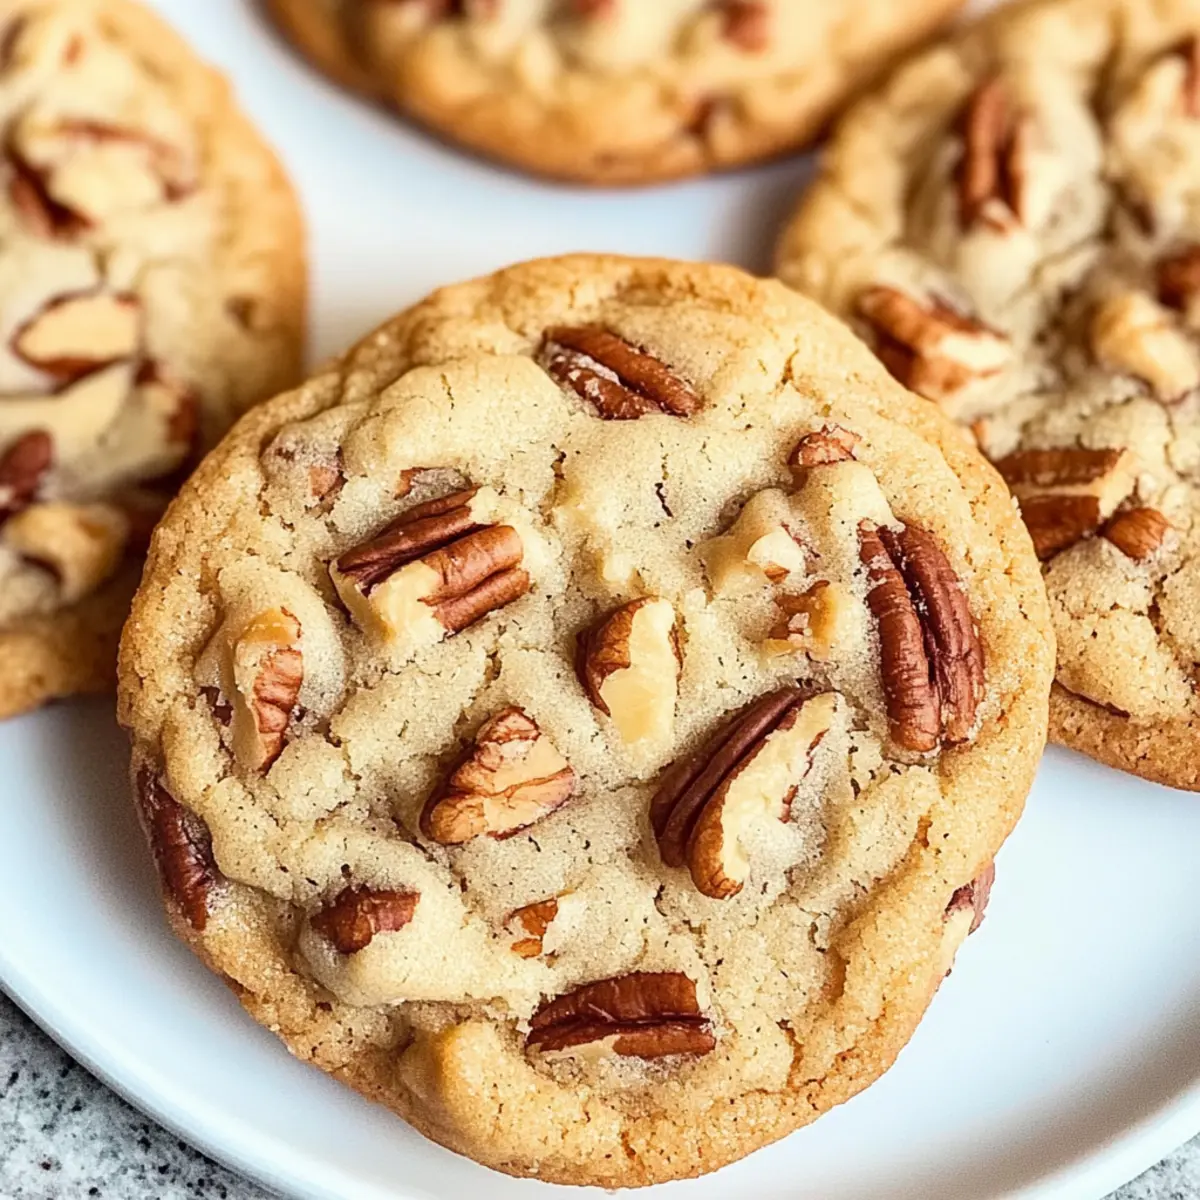
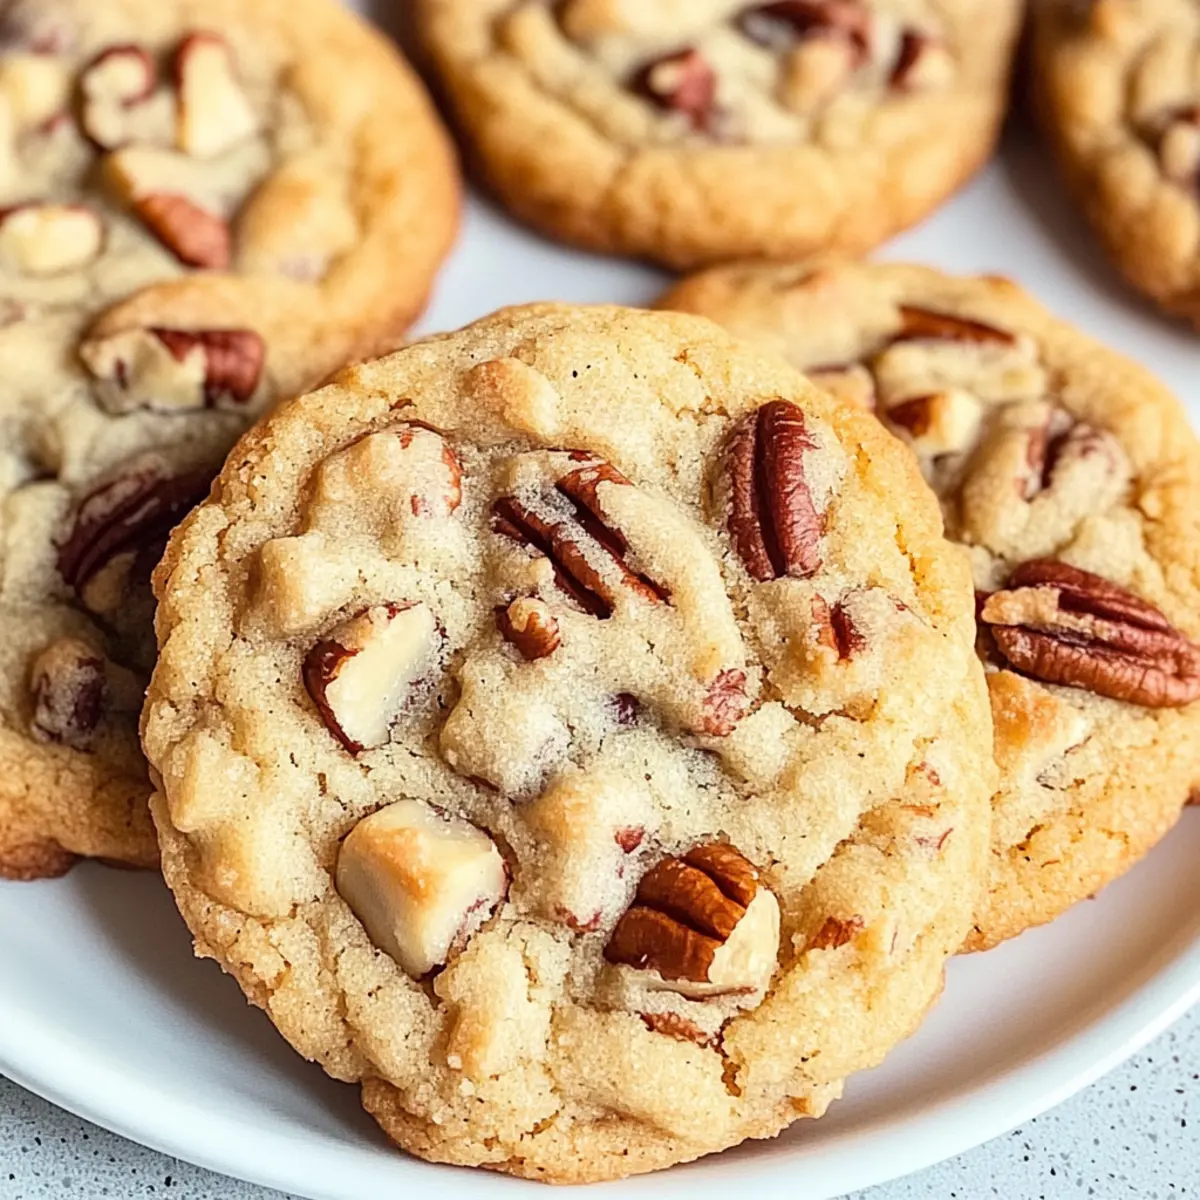
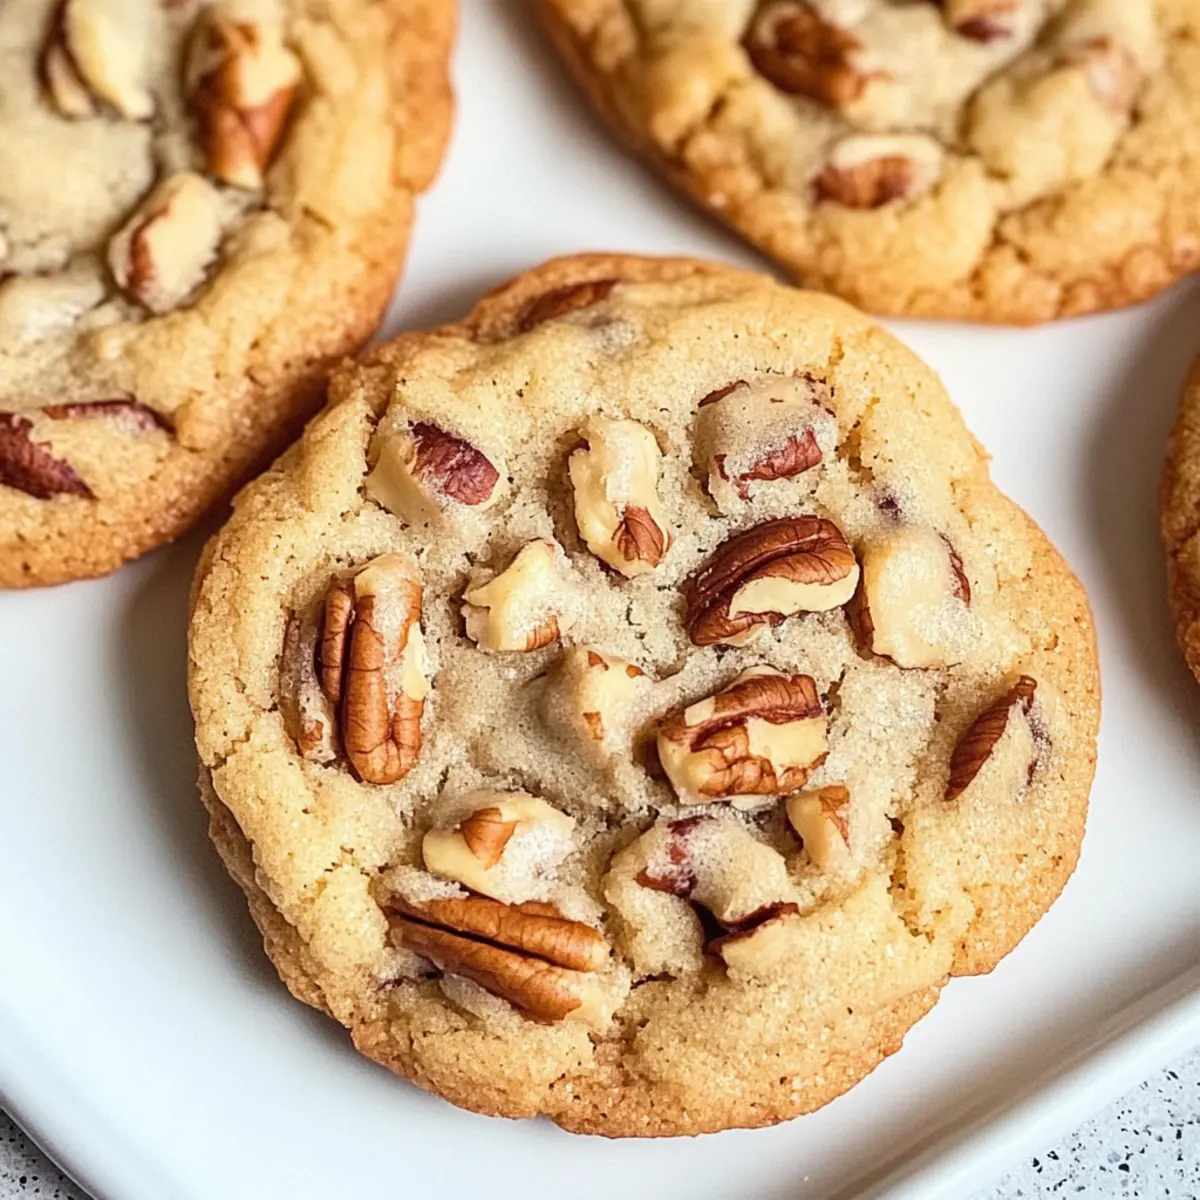
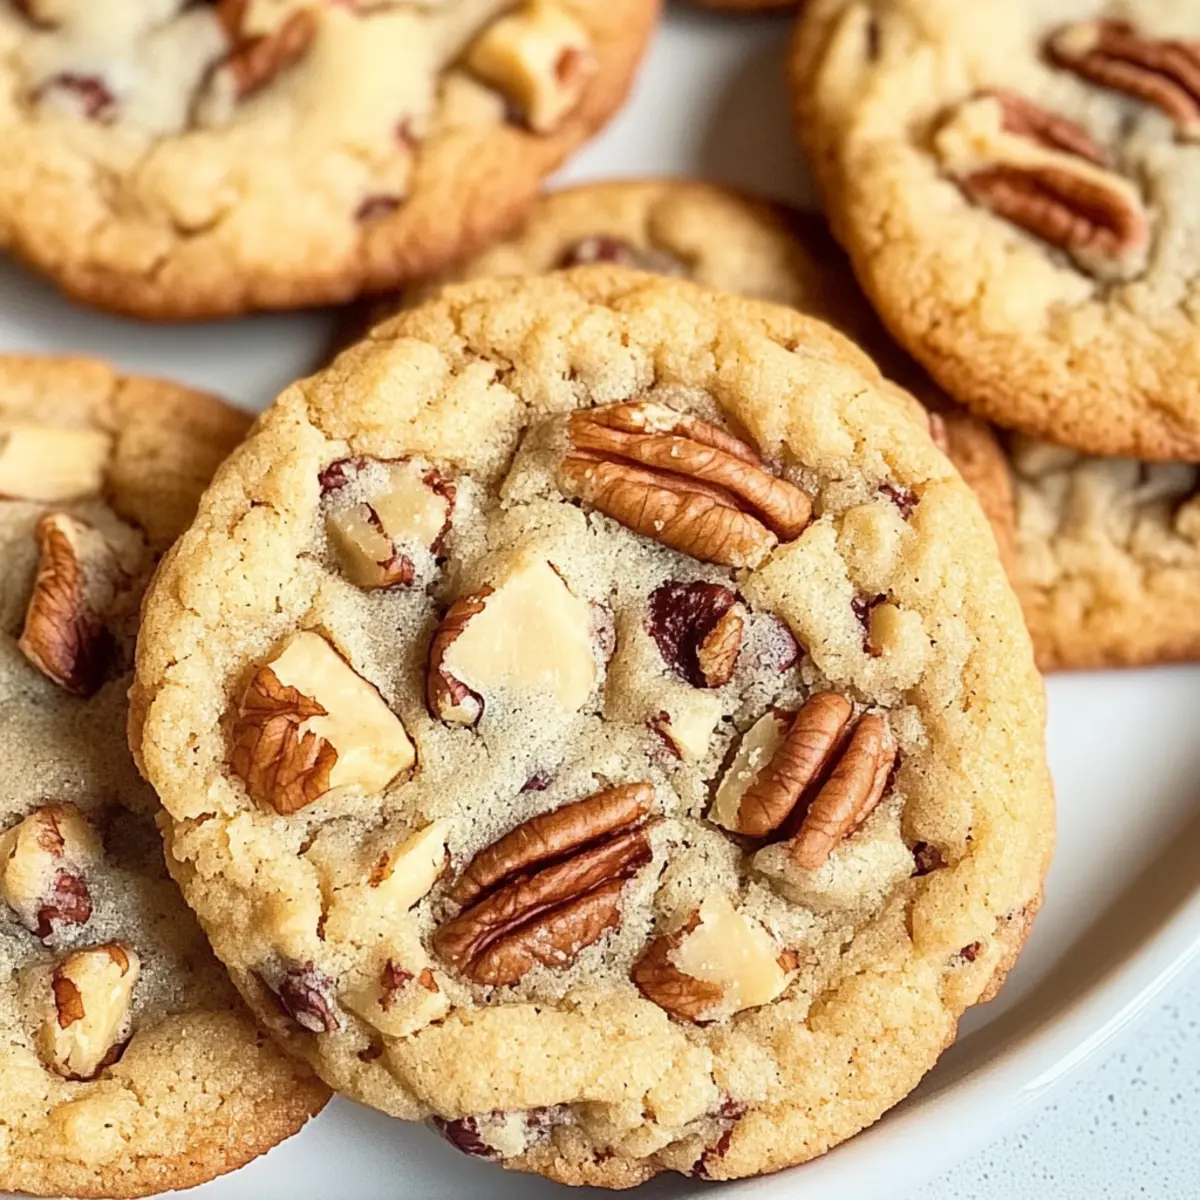
tastytrendingredients

  • Home
  • Recipes
    • Appetizers
    • Breakfast
    • Dessert
    • Dinner
    • Drinks
    • Salads
    • Snacks
    • Soups
  • About me
  • Contact me
menu icon
go to homepage
  • Home
  • Recipes
    • Appetizers
    • Breakfast
    • Dessert
    • Dinner
    • Drinks
    • Salads
    • Snacks
    • Soups
  • About me
  • Contact me
search icon
Homepage link
  • Home
  • Recipes
    • Appetizers
    • Breakfast
    • Dessert
    • Dinner
    • Drinks
    • Salads
    • Snacks
    • Soups
  • About me
  • Contact me
×

Flavorful Jailhouse Rice: Your New Go-To Comfort Meal

February 8, 2026 by Grace Snow Leave a Comment

The earthy aroma of spices mingles with the sizzle of sausage as I dive into making this Flavorful Jailhouse Rice, a budget-friendly one-pot wonder! Packed full of fluffy rice, vibrant bell peppers, and hearty beans, this dish is a comforting embrace after a long day. What I love most is how easily it adapts to my cravings — think of it as a culinary canvas where you can swap ingredients based on what’s in your pantry! Not only is it a crowd-pleaser that will delight your family and friends, but it also comes together in a snap, making dinner stress a thing of the past. Ready to fill your kitchen with warmth and deliciousness? Let's explore this easy-to-make recipe together!

Why is Jailhouse Rice a must-try?

Versatile and Customizable: This dish is your culinary playground, perfect for swapping in different proteins or veggies based on what you have on hand.

Hearty and Filling: A combination of rice, beans, and sausage ensures each serving provides a satisfying meal that will keep hunger at bay.

Budget-Friendly Delight: With affordable ingredients, this recipe proves that delicious home-cooked meals don’t have to strain your wallet.

One-Pot Convenience: Say goodbye to lengthy cleanups! Everything cooks together in one pot, making it easier than ever to create a comforting dinner.

Crowd-Pleaser: Whether it’s a family dinner or a cozy gathering, this Flavorful Jailhouse Rice will impress everyone at the table. Pair it with a refreshing side salad or some homemade cornbread for a complete meal!

Looking for more ideas? This easy-to-make dish is just as delightful as Furikake Fried Rice or Lime Chicken Rice.

Flavorful Jailhouse Rice Ingredients

For the Base

  • Smoked Sausage – Adds savory, rich flavor; substitute with chorizo or turkey sausage for a lighter option.
  • Olive Oil – Provides fats for cooking and flavor; can be swapped for vegetable oil if needed.
  • Onion – Adds sweetness and depth; yellow or white onion is preferred, or can be omitted for a milder taste.
  • Green Bell Pepper – Contributes freshness and texture; substitute with other colorful bell peppers or zucchini for variety.
  • Red Bell Pepper – Enhances sweetness and color; optional if unavailable.
  • Garlic – Infuses aroma and flavor; fresh garlic is best, but powdered garlic can be used in a pinch.
  • Diced Tomatoes (undrained) – Brings moisture and acidity; fresh tomatoes can be used, adjusting the liquid content accordingly.
  • Tomato Sauce – Adds a smooth texture and flavor; swap with marinara sauce for added herbs.
  • Kidney Beans – Provides protein and fiber; other canned beans, like black beans, can work as well.
  • Pinto Beans – Offers creaminess and flavor; any beans on hand can be used.
  • Long-Grain White Rice – The primary carbohydrate base; alternative with brown rice or quinoa but adjust cooking times.
  • Chicken Broth – Adds flavor; vegetable broth works well for a vegetarian option.

For Spice & Seasoning

  • Chili Powder – Adds warmth and spice; can be replaced with paprika for a milder flavor.
  • Smoked Paprika – Adds depth and smokiness; use regular paprika as a substitute if necessary.
  • Cayenne Pepper – Provides heat; adjust according to spice preference or replace with red pepper flakes.
  • Dried Oregano – Brings herbal notes; Italian seasoning can be a substitute.
  • Black Pepper & Salt – Essential for basic seasoning; adjust to taste.

Optional Garnishes

  • Hot Sauce – For additional heat, add to taste.
  • Chopped Green Onions – For a fresh garnish to brighten up the dish.

Enjoy crafting this Flavorful Jailhouse Rice, a dish that not only fills your kitchen with mouthwatering scents but also caters to your culinary creativity!

Step‑by‑Step Instructions for Flavorful Jailhouse Rice

Step 1: Sauté the Sausage
In a large pot, heat 2 tablespoons of olive oil over medium heat. Once hot, add the sliced smoked sausage and cook for about 5-7 minutes, stirring occasionally until browned and caramelized. This will infuse your kitchen with a savory aroma. Once browned, remove the sausage from the pot and set aside.

Step 2: Sauté the Vegetables
Using the same pot, add the diced onion and green bell peppers. Cook over medium heat for 5-7 minutes, stirring frequently until the vegetables are softened and the onion turns translucent. This step builds a flavorful base for your Flavorful Jailhouse Rice, enhancing the overall taste of the dish.

Step 3: Add Garlic
Next, stir in 3 minced garlic cloves and sauté for about 30 seconds until fragrant. Be careful not to let the garlic burn, as it can develop a bitter taste. This aromatic addition will elevate the flavor profile of your Jailhouse Rice beautifully.

Step 4: Incorporate Tomatoes
Mix in one can of undrained diced tomatoes and 8 ounces of tomato sauce, stirring well to combine. Allow the mixture to bubble gently for about 2 minutes. This will create a rich and tangy foundation for your dish, melding all those wonderful flavors together.

Step 5: Add Beans
Stir in one can each of rinsed kidney and pinto beans. Mix thoroughly to incorporate the beans into the tomato mixture. Cook for another 2-3 minutes to warm the beans through, adding texture and heartiness to your Flavorful Jailhouse Rice.

Step 6: Introduce Rice
Now, add 1½ cups of uncooked long-grain white rice to the pot, stirring to combine with the vegetables and beans. Cook for about 1 minute, allowing the rice to toast slightly. This helps to create a nutty flavor in the final dish.

Step 7: Pour in Broth
Slowly pour in 3 cups of chicken broth, ensuring that all ingredients are submerged. Increase the heat to high and bring the mixture to a boil. This step is crucial for cooking the rice evenly and allowing it to soak up all the delicious flavors of the Jailhouse Rice.

Step 8: Season
Once boiling, add 1 teaspoon each of chili powder, smoked paprika, dried oregano, and a pinch of cayenne pepper. Stir well to combine, tasting and adjusting the seasoning with salt and black pepper as needed. Seasoning is key for making this dish come alive!

Step 9: Return Sausage
Fold the browned sausage back into the pot, distributing it evenly among the rice mixture. Reduce the heat to low, cover the pot, and let it simmer gently for 20-25 minutes. This allows the flavors to meld beautifully, and the rice to absorb all the moisture.

Step 10: Check Doneness
After simmering, check the rice to ensure it's tender and the liquid has been absorbed. If it’s still too firm or chewy, cover and cook for an additional 5 minutes. This visual cue will let you know when your Flavorful Jailhouse Rice is perfectly cooked.

Step 11: Resting Period
Once the rice is fully cooked, remove the pot from the heat and let it sit covered for 5-10 minutes. This resting period allows the flavors to settle and the rice to fluff up nicely, enhancing the final texture of your dish.

Step 12: Fluff and Serve
Using a fork, gently fluff the rice to separate the grains. Serve the Flavorful Jailhouse Rice hot, garnished with chopped green onions and hot sauce if desired. This comforting one-pot meal is ready to be enjoyed!

How to Store and Freeze Flavorful Jailhouse Rice

Fridge: Store leftover Flavorful Jailhouse Rice in an airtight container for up to 3-4 days. Make sure to let it cool completely before sealing to preserve freshness.

Freezer: Freeze portions in airtight containers or freezer bags for up to 3 months. To avoid freezer burn, remove as much air as possible before sealing.

Reheating: Reheat in a microwave or on the stovetop. For even heating, add a splash of broth or water to restore moisture while reheating.

Make-Ahead: Prepare the dish in advance and store it in the fridge for quick meals during the week. Simply reheat when ready to enjoy!

Expert Tips for Flavorful Jailhouse Rice

  • Browning the Sausage: Ensure the sausage is browned well for maximum flavor. This caramelization adds depth to the entire dish.

  • Stir Occasionally: Stirring the mixture occasionally while it simmers will help prevent sticking and ensure even cooking of the rice.

  • Cook Time Adjustments: If you opt for brown rice or quinoa, remember to adjust the cooking time as these grains may require longer to cook through.

  • Avoid Garlic Bitterness: Be cautious not to overcook the garlic; it should be fragrant but not browned to avoid a bitter taste in your Flavorful Jailhouse Rice.

  • Taste as You Go: Always taste for seasoning! Adjust the spice levels to your preference, ensuring your dish has the flavor that suits your palate.

  • Let it Rest: Allow the dish to rest after cooking. This helps flavors meld and gives the rice a chance to fluff up for perfect texture.

What to Serve with Flavorful Jailhouse Rice

Transform your cozy dinner into a delightful feast by pairing your flavorful dish with these complementary sides.

  • Cornbread: This sweet and fluffy staple perfectly balances the savory flavors of the rice. Serve it warm, slathered with butter for extra comfort.

  • Coleslaw: A refreshing, crunchy slaw adds a crisp texture that enhances the hearty rice. Its tangy dressing cuts through the warmth, providing a delightful contrast.

  • Simple Green Salad: Toss together mixed greens, cucumber, and cherry tomatoes with a light vinaigrette. This bright, fresh dish lightens up the meal and brings color to your plate.

  • Fried Egg: Top your Jailhouse Rice with a perfectly fried egg for added protein and rich flavor. The runny yolk creates a luscious sauce that elevates the entire dish!

  • Roasted Vegetables: Assorted roasted vegetables add a touch of sweetness and vibrant color. Their caramelized edges create a tasty contrast with the rice's hearty texture.

  • Hot Sauce: A few dashes of your favorite hot sauce will introduce a spicy kick that will excite your taste buds and sent your dish soaring to new heights!

  • Garlic Bread: The crispy, buttery goodness of garlic bread is an irresistible companion. It's perfect for scooping up every last bit of that flavorful rice!

  • Creamy Avocado Dip: A scoop of creamy avocado dip provides a cool, rich element that balances the savory, spicy notes. Serve it alongside for a lovely flourish.

  • Iced Tea: For a soothing drink, pair this meal with a glass of iced tea; its refreshing qualities and slight sweetness are the perfect backdrop for the bold flavors of Jailhouse Rice.

These thoughtful pairings elevate your meal while allowing the Flavorful Jailhouse Rice to shine!

Flavorful Jailhouse Rice Variations

Personalize this dish with exciting twists that will take your Flavorful Jailhouse Rice to new heights!

  • Vegetarian Twist: Omit the sausage and add more veggies like zucchini, mushrooms, or spinach for a hearty, meat-free option. This vibrant variety will satisfy anyone seeking plant-based goodness.

  • Spicy Kick: For those who love heat, toss in sliced jalapeños or increase the cayenne pepper to intensify the flavors. This fiery twist will definitely elevate your entree!

  • Grain Swap: Use brown rice or quinoa instead of white rice for added fiber and a nuttier taste. The health benefits are plentiful, making your dish even more nourishing.

  • Protein Boost: Substitute smoked sausage with lean chicken or turkey, creating a lighter meal option that’s equally delicious. This swap doesn’t skimp on flavor and keeps it healthy!

  • Tomato Upgrade: Instead of plain tomato sauce, try using your favorite spicy marinara for an extra flavor infusion. This adds an Italian flair and enhances the zest of your Jailhouse Rice.

  • Creamy Delight: Mix in a dollop of cream cheese or sour cream at the end for a rich and creamy texture. It’ll take this dish to a comfort food level you won’t forget!

  • Herb Infusion: Replace dried oregano with fresh herbs like thyme or cilantro for a fresher taste. This simple change can change the whole flavor profile and add a delightful aroma.

  • Flavorful Add-ins: Experiment with tossing in corn or peas for extra sweetness and color. These additions make your dish visually appealing and even more delicious!

With these variations, you can customize your Jailhouse Rice with flavorful twists that suit your preferences. Whether it’s a cozy weeknight dinner or a gathering with friends, you can make this dish uniquely yours. Want more meal inspiration? Check out our One Pot Salmon and Shiitake Rice or BBQ Chicken Rice for delightful ideas!

Make Ahead Options

Preparing Flavorful Jailhouse Rice ahead of time is a fantastic way to save precious minutes on those busy weeknights! You can chop your vegetables and slice the sausage up to 24 hours in advance; just store them in airtight containers in the fridge to maintain their freshness. Additionally, you can cook the rice and the entire mixture, allowing it to cool before refrigerating for up to 3 days. When you're ready to serve, simply reheat the rice on the stovetop or microwave, adding a splash of broth to restore moisture. This way, you'll achieve just as delicious results with minimal effort, making mealtime a breeze!

Flavorful Jailhouse Rice Recipe FAQs

What type of sausage should I choose for optimal flavor?
Absolutely! I recommend using smoked sausage for its rich, savory flavor, but feel free to substitute with chorizo or turkey sausage for a lighter option. The key is to choose a sausage that you enjoy, as it will significantly influence the dish's overall taste.

How should I store my leftover Jailhouse Rice?
To keep your Flavorful Jailhouse Rice fresh, store it in an airtight container in the refrigerator for up to 3-4 days. Make sure to let it cool completely before sealing to maintain the best texture and flavor.

Can I freeze this dish?
Yes! You can freeze portions of your Flavorful Jailhouse Rice in airtight containers or freezer bags for up to 3 months. To avoid freezer burn, try to remove as much air as possible before sealing. When ready to enjoy, simply thaw in the fridge overnight and reheat with a splash of broth for best results.

What if my rice isn’t cooking properly?
No worries! If the rice is still firm or chewy after the initial simmering, cover the pot and cook for an additional 5 minutes, checking it regularly. It should be tender and the liquid fully absorbed by the end. Stir occasionally as well to ensure even cooking and prevent sticking.

Are there any dietary considerations I should be aware of?
Absolutely! If you’re cooking for someone with allergies, consider swapping kidney and pinto beans with other canned beans such as chickpeas or black beans. For a vegetarian option, use vegetable broth and omit the sausage, incorporating more veggies for a nutritious twist. Always check ingredient labels for hidden allergens!

Can I use brown rice instead of white rice?
Yes, you can substitute long-grain white rice with brown rice or quinoa. Just remember that brown rice generally requires a longer cooking time, about 40-45 minutes total, so adjust your simmering time accordingly. Keep an eye on the liquid levels as well since brown rice absorbs more.

Flavorful Jailhouse Rice

Flavorful Jailhouse Rice: Your New Go-To Comfort Meal

Flavorful Jailhouse Rice is a budget-friendly, one-pot meal bursting with spices, sausage, rice, and beans, perfect for a comforting dinner.
Print Recipe Pin Recipe
Prep Time 15 minutes mins
Cook Time 45 minutes mins
Resting Time 10 minutes mins
Total Time 1 hour hr 10 minutes mins
Servings: 6 servings
Course: Dinner
Cuisine: American
Calories: 450
Ingredients Equipment Method Nutrition Notes

Ingredients
  

For the Base
  • 12 ounces Smoked Sausage can be substituted with chorizo or turkey sausage
  • 2 tablespoons Olive Oil can be swapped for vegetable oil
  • 1 medium Onion yellow or white onion is preferred
  • 1 medium Green Bell Pepper or other colorful bell peppers or zucchini
  • 1 medium Red Bell Pepper optional
  • 3 cloves Garlic fresh is best, powdered can be used in a pinch
  • 1 can Diced Tomatoes (undrained) fresh tomatoes can be used, adjusting liquid
  • 8 ounces Tomato Sauce swap with marinara sauce for added herbs
  • 1 can Kidney Beans other beans like black beans can be used
  • 1 can Pinto Beans any beans on hand can be used
  • 1.5 cups Long-Grain White Rice or brown rice/quinoa with adjusted cooking times
  • 3 cups Chicken Broth vegetable broth works for vegetarian option
For Spice & Seasoning
  • 1 teaspoon Chili Powder can be replaced with paprika
  • 1 teaspoon Smoked Paprika regular paprika can be used
  • 1 pinch Cayenne Pepper adjust for spice preference
  • 1 teaspoon Dried Oregano Italian seasoning can be substituted
  • to taste Black Pepper adjust to taste
  • to taste Salt adjust to taste
Optional Garnishes
  • to taste Hot Sauce for additional heat
  • to taste Chopped Green Onions for garnish

Equipment

  • Large pot

Method
 

Step‑by‑Step Instructions for Flavorful Jailhouse Rice
  1. In a large pot, heat olive oil over medium heat. Add sliced smoked sausage and cook for 5-7 minutes until browned, then set aside.
  2. In the same pot, add diced onion and green bell peppers. Cook for 5-7 minutes until softened.
  3. Stir in minced garlic and sauté for 30 seconds until fragrant.
  4. Mix in diced tomatoes and tomato sauce, allowing to simmer for 2 minutes.
  5. Add rinsed kidney and pinto beans, mixing thoroughly and cooking for another 2-3 minutes.
  6. Add uncooked long-grain white rice to the pot, stirring to combine.
  7. Pour in chicken broth, increase heat to high, and bring to a boil.
  8. Once boiling, add chili powder, smoked paprika, oregano, cayenne pepper, salt, and black pepper.
  9. Fold the browned sausage back into the pot, reduce heat to low, cover, and let simmer for 20-25 minutes.
  10. Check the rice for doneness; if firm, cover and cook for an additional 5 minutes.
  11. Remove from heat and let sit covered for 5-10 minutes.
  12. Fluff the rice with a fork, serve hot, and garnish as desired.

Nutrition

Serving: 1cupCalories: 450kcalCarbohydrates: 60gProtein: 20gFat: 15gSaturated Fat: 5gPolyunsaturated Fat: 2gMonounsaturated Fat: 8gCholesterol: 50mgSodium: 900mgPotassium: 700mgFiber: 8gSugar: 5gVitamin A: 10IUVitamin C: 90mgCalcium: 5mgIron: 15mg

Notes

Allow flavors to meld by letting the dish rest after cooking. Adjust seasoning to personal preference for best results.

Tried this recipe?

Let us know how it was!

Savory Garlic Parmesan Chicken Meatloaf Everyone Will Love

February 8, 2026 by Grace Snow Leave a Comment

As I sliced into the warm, golden-hued Garlic Parmesan Chicken Meatloaf, the rich aromas wafted through my kitchen, creating a scene reminiscent of family gatherings and cherished recipes passed down through generations. This delightful twist on a classic comfort food is not only easy to prepare, making it perfect for those busy weeknights, but it doubles as a stunning centerpiece for dinner parties. Each bite is a perfect balance of savory roasted garlic and creamy Parmesan, bringing a sense of warmth and happiness to the table. Plus, with lean protein from ground chicken, this dish assures you can indulge without guilt. Ready to transform your mealtime routine? Let's dive into making this irresistible Garlic Parmesan Chicken Meatloaf together!

Why is Garlic Parmesan Chicken Meatloaf a Must-Try?

Flavor Explosion: Each slice boasts a harmonious blend of savory roasted garlic and creamy Parmesan, creating a taste sensation that will often have everyone going back for seconds.

Easy Prep: With just a few simple steps, you'll have a hearty meal ready in no time—perfect for busy weeknights!

Versatile Dish: This meatloaf pairs beautifully with classic sides like mashed potatoes or fresh salads, making it ideal for any occasion.

Family-Friendly: Packed with lean protein, this dish is both healthy and delicious, appealing to everyone from kids to adults.

Make-Ahead Magic: Prepare it in advance and reheat for a quick dinner option throughout the week, just like my Crock Pot Chicken for easy meals anytime.

Comfort Score: Nothing says comfort like a warm slice of meatloaf, evoking feelings of home and happiness at every gathering.

Garlic Parmesan Chicken Meatloaf Ingredients

For the Meatloaf
• Ground Chicken – This lean protein is the star of the dish, keeping it light yet satisfying; ground turkey can be used as a substitute.
• Garlic – Fresh garlic is key for that deep, aromatic flavor; garlic powder is an option if you're in a pinch.
• Grated Parmesan Cheese – Adds creaminess and a rich, savory taste; feel free to swap with Pecorino Romano for a different twist.
• Breadcrumbs – They provide structure and texture; opt for plain or Italian-seasoned versions, or use gluten-free breadcrumbs for a GF dish.
• Eggs – Work as a binder to hold everything together; a flax egg can replace them for a vegan version.
• Onion – Enhances flavor and moisture in the meatloaf; shallots or leeks make a lovely substitution if desired.
• Soy Sauce – Brings umami richness; choose low-sodium options to keep it healthier or use tamari for gluten-free needs.
• Salt & Pepper – Essential basic seasonings; adjust according to your taste preferences for optimal flavor.

Optional Topping
• Extra Parmesan Cheese – Sprinkling more cheese on top creates a delicious golden crust as it bakes; consider adding some herbs for freshness.

Step‑by‑Step Instructions for Garlic Parmesan Chicken Meatloaf

Step 1: Preheat the Oven
Begin by preheating your oven to 375°F (190°C). While the oven heats, grab a baking dish and lightly grease it with nonstick spray to ensure an easy release of the meatloaf later. This initial preparation step is crucial for achieving that beautifully golden crust on your Garlic Parmesan Chicken Meatloaf.

Step 2: Sauté the Onions
In a medium skillet over medium heat, add diced onions and sauté for about 5 minutes, or until they become soft and translucent. Stir occasionally to prevent sticking and ensure even cooking. The aromatic scent of sautéing onions will fill your kitchen, setting the stage for the flavorful meatloaf to come.

Step 3: Combine the Ingredients
In a large mixing bowl, combine the ground chicken, the sautéed onions, minced garlic, breadcrumbs, eggs, soy sauce, salt, pepper, and half of the grated Parmesan. Mix everything thoroughly until well combined, using your hands or a spatula. The mixture should be moist yet firm, preparing it for the next step in crafting your delicious Garlic Parmesan Chicken Meatloaf.

Step 4: Shape the Meatloaf
Transfer the meat mixture into the prepared baking dish, shaping it into a classic loaf shape. Use your hands to form a smooth surface and ensure it’s evenly compacted. This step is key for achieving a well-structured Garlic Parmesan Chicken Meatloaf that holds together beautifully during baking.

Step 5: Add the Topping
Sprinkle the remaining grated Parmesan cheese on top of the shaped meatloaf. For an extra flavor dimension, consider adding a dash of paprika or Italian seasoning to the cheese before baking. This topping will create a delightful golden crust as it bakes, enhancing both the flavor and presentation of your dish.

Step 6: Bake to Perfection
Place the baking dish in the preheated oven and bake for 45 to 50 minutes. The Garlic Parmesan Chicken Meatloaf is done when it reaches an internal temperature of 165°F (74°C) and is golden brown on top. Keep an eye on it during the last few minutes to ensure it doesn’t overcook, resulting in a moist and tender meatloaf.

Step 7: Rest and Slice
Once baked, remove the meatloaf from the oven and allow it to rest for at least 10 minutes before slicing. This resting period helps retain the juices within the meatloaf, leading to a succulent texture in each slice. As it cools, the enticing aroma will continue to waft through your kitchen, making it hard to resist.

Step 8: Serve Warm
Now that your Garlic Parmesan Chicken Meatloaf is rested and beautifully sliced, serve it warm with your favorite sides like mashed potatoes or a fresh salad. This easy and comforting dish is sure to impress your family and friends, making it a wonderful addition to any meal!

Expert Tips for Garlic Parmesan Chicken Meatloaf

  • Use Fresh Garlic: Fresh garlic significantly enhances flavor. Avoid garlic powder if possible, as it lacks the depth that fresh offers and may make your Garlic Parmesan Chicken Meatloaf taste flat.

  • Don't Overmix: Mix your ingredients just until combined to maintain a tender texture. Overmixing can lead to a dense meatloaf—nobody wants that!

  • Rest Before Slicing: Allow your meatloaf to rest for at least 10 minutes after baking. This crucial step ensures juices are retained, preventing dryness and enhancing flavor in your Garlic Parmesan Chicken Meatloaf.

  • Check Temperature: Always confirm the internal temperature reaches 165°F (74°C) to ensure safe consumption. An accurate thermometer is a helpful kitchen tool to prevent any food safety mishaps.

  • Variations Welcome: Feel free to add veggies like spinach or bell peppers to boost nutrition and flavor. It's a great way to customize your Garlic Parmesan Chicken Meatloaf to suit your family's taste!

How to Store and Freeze Garlic Parmesan Chicken Meatloaf

Fridge: Store leftover Garlic Parmesan Chicken Meatloaf in an airtight container for up to 3 days. This helps maintain its moisture and flavor, ready for your next meal.

Freezer: For longer storage, wrap the cooled meatloaf tightly in plastic wrap and aluminum foil, or place it in a freezer-safe container for up to 3 months. Label with the date for easy tracking.

Thawing: When you're ready to enjoy it again, thaw the frozen meatloaf in the refrigerator overnight. This ensures even thawing and preserves the texture.

Reheating: Reheat in an oven set to 350°F (175°C) for about 15-20 minutes, or until warmed through. This method helps restore its moist and tender qualities.

Garlic Parmesan Chicken Meatloaf Variations

Feel free to get creative with this delicious recipe and customize it to suit your taste buds!

  • Lean Turkey Substitute:
    Swap ground chicken for ground turkey for a similar flavor profile, maintaining the dish's lightness.

  • Veggie Boost:
    Add in chopped spinach or bell peppers to the meat mixture for added nutrition and vibrant color.

  • Cheese Alternatives:
    Try cheddar or Gouda instead of Parmesan for a different cheesy twist that adds rich flavor.

  • Herbal Infusion:
    Mix in fresh herbs like parsley or basil for a fragrant burst of freshness in every bite.

  • Zesty Kick:
    Incorporate red pepper flakes into the meat mixture to give your meatloaf a delightful kick of heat, perfect for spice lovers.

  • Onion Variation:
    Use shallots or leeks instead of traditional onions for a unique flavor twist that elevates the dish.

  • BBQ Sauce Glaze:
    Spread a layer of your favorite BBQ sauce over the meatloaf during the last 10 minutes of baking for a sweet and smoky flavor finale.

  • Make-Ahead Magic:
    Prepare and shape the meatloaf ahead of time, then refrigerate before baking—perfect for those busy weeknights!

Stir up your culinary adventures with these variations, and don’t forget to check out my delightful Honey Garlic Chicken or our version of Crock Pot Chicken for more family-friendly meals!

What to Serve with Garlic Parmesan Chicken Meatloaf

Elevate your mealtime experience by pairing delightful sides that harmonize with the comforting flavors of this dish.

  • Creamy Mashed Potatoes: The rich, buttery texture complements the savory meatloaf, making every bite feel indulgent and satisfying. Top with a sprinkle of chives for a pop of color!

  • Fresh Garden Salad: A crisp salad with mixed greens and a light vinaigrette adds a refreshing crunch, balancing out the heartiness of the meatloaf. The bright flavors also help cleanse the palate.

  • Roasted Vegetables: Seasoned with olive oil and herbs, roasted vegetables provide a sweet contrast to the savory meatloaf while adding nutritional punch. Carrots, zucchini, and bell peppers work wonderfully together.

  • Quinoa Pilaf: This nutty grain offers a delightful texture that contrasts well with the moist meatloaf. Toss in some fresh herbs and lemon zest for an extra layer of flavor.

  • Garlic Bread: Enhance the garlic journey with warm, buttery garlic bread. Its crispy texture adds crunch, making your meal feel cozy and complete.

  • Red Wine: A glass of smooth red wine, like Merlot or Pinot Noir, complements the meatloaf's rich flavors. This pair enriches the entire dining experience, perfect for special occasions.

  • Apple Crisp: For dessert, a warm apple crisp offers a sweet and slightly tart finish after the savory meal, leaving everyone with a comforting sense of home and nostalgia.

Make Ahead Options

These Garlic Parmesan Chicken Meatloaf is perfect for busy home cooks looking to save time during the week! You can prepare the meatloaf mixture up to 24 hours in advance; simply combine the ground chicken, sautéed onions, garlic, breadcrumbs, eggs, soy sauce, and seasonings in a bowl, then cover and refrigerate. To maintain quality, be sure to keep it airtight to prevent drying out. When ready to bake, shape it into a loaf in your greased baking dish, sprinkle with Parmesan, and pop it in the oven for about 45-50 minutes. You'll enjoy a delicious, home-cooked meal with minimal effort!

Garlic Parmesan Chicken Meatloaf Recipe FAQs

How do I choose the right garlic?
Absolutely! For the best flavor, opt for fresh garlic cloves. Look for firm, plump bulbs without any dark spots or sprouting. If you only have garlic powder, it can work in a pinch, but be sure to use less since it's more concentrated—about 1/8 teaspoon for each clove.

How should I store leftover Garlic Parmesan Chicken Meatloaf?
Very simple! Store any leftover meatloaf in an airtight container in the refrigerator for up to 3 days. Ensure it's fully cooled before sealing to retain moisture and flavor. It’s perfect for quick meals during the week!

Can I freeze Garlic Parmesan Chicken Meatloaf?
Absolutely! To freeze, first let the meatloaf cool completely. Then, tightly wrap it in plastic wrap followed by aluminum foil, or place it in a freezer-safe container. It will keep for up to 3 months. Don’t forget to label it with the date for future reference!

What’s the best way to reheat meatloaf?
Great question! For the best texture, preheat your oven to 350°F (175°C) and place the meatloaf in a baking dish covered with foil. Heat for about 15-20 minutes, or until warmed through. This method helps maintain its moisture and prevents it from drying out.

Are there any dietary considerations I should be aware of?
Yes! If you or someone in your household has allergies, be cautious of the ingredients used. For a gluten-free option, substitute regular breadcrumbs with gluten-free breadcrumbs. If making this dish for pets, avoid ingredients like onion and garlic, as they can be harmful to them.

What if my meatloaf is too dry?
No worries! If you find that your meatloaf is dry, it's likely due to overcooking or overmixing. To avoid this in the future, ensure your meatloaf reaches the correct internal temperature of 165°F (74°C) without exceeding it. Also, letting it rest for 10 minutes before slicing helps maintain moisture, so give that a try next time!

Garlic Parmesan Chicken Meatloaf

Savory Garlic Parmesan Chicken Meatloaf

Garlic Parmesan Chicken Meatloaf is a delicious and easy-to-prepare dish that balances savory garlic and creamy Parmesan.
Print Recipe Pin Recipe
Prep Time 15 minutes mins
Cook Time 50 minutes mins
Resting Time 10 minutes mins
Total Time 1 hour hr 15 minutes mins
Servings: 6 slices
Course: Dinner
Cuisine: American
Calories: 320
Ingredients Equipment Method Nutrition Notes

Ingredients
  

For the Meatloaf
  • 1 pound Ground Chicken Ground turkey can be used as a substitute.
  • 3 cloves Garlic Minced; fresh garlic is recommended.
  • 1 cup Grated Parmesan Cheese Consider Pecorino Romano for a variation.
  • 1 cup Breadcrumbs Plain or Italian-seasoned; gluten-free options available.
  • 2 large Eggs Can be replaced with a flax egg for a vegan version.
  • 1 medium Onion Diced; shallots or leeks are good substitutes.
  • 2 tablespoons Soy Sauce Opt for low-sodium for a healthier choice.
  • 1 teaspoon Salt Adjust to taste.
  • 1 teaspoon Pepper Adjust to taste.
Optional Topping
  • 1/2 cup Extra Parmesan Cheese For a delicious golden crust.

Equipment

  • Baking Dish
  • Skillet
  • Mixing Bowl

Method
 

Step-by-Step Instructions for Garlic Parmesan Chicken Meatloaf
  1. Preheat your oven to 375°F (190°C) and lightly grease a baking dish.
  2. In a medium skillet over medium heat, sauté diced onions for about 5 minutes until soft.
  3. In a large mixing bowl, combine ground chicken, sautéed onions, minced garlic, breadcrumbs, eggs, soy sauce, salt, pepper, and half of the grated Parmesan.
  4. Transfer the mixture into the prepared baking dish and shape it into a loaf.
  5. Sprinkle the remaining Parmesan cheese on top of the meatloaf.
  6. Bake for 45 to 50 minutes, until it reaches an internal temperature of 165°F (74°C).
  7. Allow the meatloaf to rest for at least 10 minutes before slicing.
  8. Serve warm with your favorite sides like mashed potatoes or a fresh salad.

Nutrition

Serving: 1sliceCalories: 320kcalCarbohydrates: 20gProtein: 27gFat: 15gSaturated Fat: 6gPolyunsaturated Fat: 2gMonounsaturated Fat: 7gCholesterol: 120mgSodium: 450mgPotassium: 500mgFiber: 1gSugar: 2gVitamin A: 5IUVitamin C: 2mgCalcium: 15mgIron: 10mg

Notes

For best flavor, use fresh garlic. Resting the meatloaf ensures juicy slices.

Tried this recipe?

Let us know how it was!

Savor the Flavor with Easy High-Protein Chicken Ranch Quesadilla

February 8, 2026 by Grace Snow Leave a Comment

There’s nothing quite like the satisfying crunch of a freshly made quesadilla—especially when it’s loaded with the delightful flavors of my Easy High-Protein Chicken Ranch Quesadilla. This quick and simple recipe is perfect for those hectic weeknights when you want something delicious without spending hours in the kitchen. Packed with protein and zesty ranch seasoning, it’s a meal that will leave both kids and adults asking for seconds. Plus, with options ranging from spicy to vegetarian, you can easily customize it to fit your family’s tastes. Don’t you just love meals that bring everyone together? Let’s dive into the delightful layers of flavor waiting for you!

Why Is This Quesadilla So Special?

Quick and Easy: This recipe is designed for busy individuals, requiring minimal prep and just a few simple steps to create a flavorful meal.

Protein-Packed Delight: Loaded with high-quality chicken and cheese, it's a nutritious choice that keeps you full and satisfied without sacrificing taste.

Customizable Variations: Whether you're craving something spicy, vegetarian, or a cheesy twist, this quesadilla adapts beautifully. Try making a Cheesy Garlic Chicken Quesadilla for a savory twist!

Family Appeal: The delightful ranch flavor makes it a sure hit with kids and adults alike, promoting family-style dinners that everyone will enjoy.

Perfect for Leftovers: Easy to prepare in bulk and great for meal prep, leftover quesadillas can be reheated for quick lunches, saving you time during the week.

Crispy Exterior, Gooey Inside: Achieve that perfect balance of textures that leaves everyone coming back for more!

Easy High-Protein Chicken Ranch Quesadilla Ingredients

For the Filling

  • Cooked Chicken Breast – Provides essential protein; opt for organic for the best flavor.
  • Shredded Cheese (Cheddar or Mozzarella) – Adds creamy richness; substitute with low-fat cheese for a lighter option.
  • Ranch Dressing – Enhances flavor with a zesty kick; use homemade for a healthier twist.
  • Diced Green Onions – Offers a fresh crunch; chives can be an excellent alternative.
  • Diced Bell Pepper – Adds vibrant color and sweetness; choose any variety you like.
  • Black Pepper – Boosts flavor; adjust according to your taste preference.

For the Tortilla

  • Flour Tortillas – Serves as the wrap for all delicious fillings; whole wheat tortillas are a nutritious choice.

For Cooking

  • Olive Oil – Ensures a golden crust; avocado oil can be used for a different flavor profile.

This Easy High-Protein Chicken Ranch Quesadilla is not just a delightful dish but also a fantastic way to satisfy your taste buds while packing in protein for a healthy meal!

Step‑by‑Step Instructions for Easy High-Protein Chicken Ranch Quesadilla

Step 1: Combine Ingredients
In a large mixing bowl, combine the cooked chicken breast, shredded cheese, ranch dressing, diced green onions, diced bell pepper, and black pepper. Mix well until all ingredients are evenly distributed and coated in ranch dressing. This flavorful filling will be the star of your Easy High-Protein Chicken Ranch Quesadilla, setting the foundation for a delicious meal.

Step 2: Heat Oil
Heat a non-stick pan over medium heat and add a tablespoon of olive oil. Swirl the oil around the pan to ensure it coats the bottom evenly. This step is crucial for achieving that perfectly crispy exterior on your quesadilla while keeping the insides warm and gooey. Wait until the oil shimmers before proceeding to the next step.

Step 3: Assemble Quesadilla
Place a flour tortilla into the preheated pan, letting it warm for about 30 seconds. Spoon a quarter of the chicken mixture onto one half of the tortilla, spreading it evenly. Carefully fold the tortilla over the filling, creating a half-moon shape. Ensure it's well-sealed to contain all that delicious stuffing as it cooks.

Step 4: Cook
Sear the quesadilla for 3-4 minutes until the bottom is golden brown and crispy. Use a spatula to gently lift the edge and check the color. Once it’s achieved that perfect hue, flip the quesadilla and cook for an additional 2-3 minutes. When both sides are golden and the cheese is melted, it’s time to take it off the heat.

Step 5: Rest & Slice
Remove the cooked quesadilla from the pan and let it rest for about 2 minutes on a cutting board. This brief rest allows the cheese to set slightly, preventing it from spilling out when sliced. Once ready, use a sharp knife to cut the quesadilla into wedges, making it easy to serve and enjoy.

Step 6: Serve
Serve your Easy High-Protein Chicken Ranch Quesadilla hot, optionally with extra ranch dressing on the side for dipping. Pair it with a fresh side salad or some tortilla chips for a complete meal. Transform your dining experience as you savor each crunchy bite filled with delicious flavors and protein-rich goodness!

Easy High-Protein Chicken Ranch Quesadilla Variations

Take your Easy High-Protein Chicken Ranch Quesadilla to the next level by exploring these delightful variations, tailored just for you!

  • Spicy Twist: Add diced jalapeños and a sprinkle of smoked paprika for a fiery kick. The heat balance will awaken your taste buds, making each bite a flavor-packed explosion.

  • Vegetarian Delight: Swap out the chicken for black beans and roasted vegetables such as zucchini and bell peppers. Not only will it cater to meatless preferences, but it'll also create a heartwarming dish full of color and flavor.

  • Cheesy Garlic Goodness: Mix minced garlic into your cheese blend before melting to add depth and aroma. This twist will have you dreaming of cheesy, garlicky goodness in every cheesy bite.

  • Breakfast Style: Substitute chicken with scrambled eggs, and toss in some diced tomatoes and spinach. Top it off with fresh salsa or avocado for a wonderful breakfast-for-dinner option that the whole family will appreciate.

  • Gluten-Free Option: Use corn tortillas instead of flour to accommodate gluten-free diets. They maintain the same crispy deliciousness while being a fantastic option for those avoiding gluten.

  • Herbed Quesadilla: Mix in fresh herbs like cilantro, basil, or even rosemary to the filling. This little addition provides a refreshing burst of flavor, whisking your taste buds away on a herbaceous adventure.

  • Crispy Bake: Instead of frying, bake the quesadilla in the oven for a healthier, hands-off approach. Spray both sides lightly with oil, place on a baking sheet, and bake at 400°F (200°C) for 15-20 minutes until golden.

  • Zesty Ranch Remix: Elevate your ranch dressing by adding a splash of hot sauce or lime juice for a zesty twist. This not only amps up the flavor but gives your quesadilla an extra zing that won’t go unnoticed.

Don’t forget, you can also pair these quesadillas with unique side dishes like a fresh salad or a creamy Honey Garlic Chicken for an extraordinary dinner that brings joy to the table. Whether you're choosing a Chipotle Lime Chicken option or a savory Crock Pot Chicken side, these recommendations will surely enhance your dining experience!

What to Serve with High-Protein Chicken Ranch Quesadilla

Elevate your dining experience by exploring delicious sides that perfectly complement this delightful dish.

  • Fresh Side Salad: A light, crunchy salad made with mixed greens and a tangy vinaigrette enhances the savory flavors of your quesadilla.
  • Creamy Guacamole: Rich, creamy guacamole adds creamy texture and a fresh taste, contrasting beautifully with the warm, cheesy quesadilla.
  • Chips and Salsa: Light and crispy tortilla chips paired with a zesty salsa provide a fun and festive experience alongside your meal.
  • Spicy Black Beans: A side of perfectly seasoned black beans brings a hearty protein boost and a flavorful punch that pairs well with the quesadilla.
  • Mexican Street Corn: Sweet and smoky street corn adds a delightful burst of flavor, making it a perfect savory complement to your main dish.
  • Cilantro Lime Rice: Fluffy cilantro lime rice adds lightness and zest, creating harmony with the savory ranch and chicken filling.
  • Pineapple Agua Fresca: Refreshing and slightly sweet, this drink pairs wonderfully to balance the savory and spicy flavors, enhancing the whole meal experience.
  • Chocolate Chip Cookies: For dessert, warm, gooey chocolate chip cookies offer a delightful sweet ending to contrast with the savory quesadilla.

Make Ahead Options

These Easy High-Protein Chicken Ranch Quesadillas are perfect for meal prep enthusiasts! You can prepare the filling—mixing the cooked chicken, cheese, ranch dressing, green onions, bell pepper, and black pepper—up to 3 days in advance. Simply store the mixture in an airtight container in the refrigerator to keep it fresh. When you're ready to serve, just assemble and cook as per the original instructions, ensuring a crispy exterior while keeping the insides gooey and delicious. To maintain that delightful texture, warm the tortillas briefly in a dry pan before filling; this helps prevent them from becoming soggy. With this make-ahead option, you’ll enjoy a fantastic meal with minimal effort, perfect for busy weeknights!

Helpful Tricks for Easy High-Protein Chicken Ranch Quesadilla

  • Prep Ahead: Prepare your filling in advance and store it in the fridge. This makes it quick and easy to whip up quesadillas on busy nights.

  • Avoid Soggy Tortillas: Briefly preheat the tortillas before adding the filling to create a moisture barrier and maintain that crispy texture in your Easy High-Protein Chicken Ranch Quesadilla.

  • Control the Heat: Cook on medium heat to ensure even cooking. Too high and the outside may burn while the inside remains cold; nobody wants that!

  • Customize with Ease: Don’t be afraid to swap in your favorite veggies or proteins! Use cooked beans for a vegetarian option or add some diced jalapeños for a spicy kick.

  • Storage Tips: Keep leftovers in an airtight container, layered with parchment paper. This prevents sticking and helps them stay fresh in the refrigerator for up to 3 days.

  • Crispy Finish: For an extra crispy quesadilla, after flipping, cover the pan briefly with a lid to help the cheese melt thoroughly while still achieving that golden exterior.

How to Store and Freeze Easy High-Protein Chicken Ranch Quesadilla

Room Temperature: Up to 2 hours is ideal for serving, as quesadillas are best enjoyed fresh and warm.

Fridge: Store in an airtight container for up to 3 days. Separate layers with parchment paper to prevent sticking and maintain crispness.

Freezer: Wrap tightly in foil or plastic wrap for up to 3 months. For best results, reheat directly from the freezer using a skillet for a crispy finish.

Reheating: Reheat in a non-stick skillet over medium heat for about 5 minutes on each side, ensuring the cheese melts and the exterior remains crispy. Enjoy your Easy High-Protein Chicken Ranch Quesadilla!

Easy High-Protein Chicken Ranch Quesadilla Recipe FAQs

What type of chicken is best for this quesadilla?
I recommend using cooked chicken breast, preferably organic or free-range, for the best flavor and quality. You can also use leftover roasted chicken or even store-bought rotisserie chicken to save time.

How should I store leftover quesadillas?
Store leftover quesadillas in an airtight container in the refrigerator for up to 3 days. To keep them fresh, it's important to separate layers with parchment paper to prevent them from sticking together.

Can I freeze the quesadillas?
Absolutely! To freeze, wrap each quesadilla tightly in foil or plastic wrap to prevent freezer burn. They can be stored for up to 3 months. For reheating, I suggest using a non-stick skillet over medium heat for about 5 minutes on each side to regain that crispy texture.

What if my quesadilla turns out soggy?
To avoid sogginess, try preheating the tortillas briefly before adding the filling; this creates a barrier against moisture. Also, keep cooking over medium heat to ensure that the exterior crisps without burning while the cheese melts evenly.

Are there any dietary considerations for allergies?
Yes, if you or anyone in your family has allergies, check the labels on your ranch dressing and tortillas, as they can sometimes contain gluten or dairy. For a gluten-free option, look for gluten-free tortillas and a dairy-free ranch dressing alternative to make this dish suitable for various dietary needs.

Can I customize the filling?
Certainly! Feel free to swap the chicken for black beans and grilled vegetables for a vegetarian option, or spice things up with diced jalapeños for a spicy twist. The beauty of this Easy High-Protein Chicken Ranch Quesadilla is in its versatility!

Easy High-Protein Chicken Ranch Quesadilla

Savor the Flavor with Easy High-Protein Chicken Ranch Quesadilla

Enjoy the Easy High-Protein Chicken Ranch Quesadilla packed with flavor and protein, perfect for quick weeknight dinners.
Print Recipe Pin Recipe
Prep Time 10 minutes mins
Cook Time 10 minutes mins
Resting Time 2 minutes mins
Total Time 22 minutes mins
Servings: 4 quesadillas
Course: Dinner
Cuisine: Mexican
Calories: 400
Ingredients Equipment Method Nutrition Notes

Ingredients
  

For the Filling
  • 2 cups Cooked Chicken Breast Provides essential protein; opt for organic for the best flavor.
  • 1 cup Shredded Cheese (Cheddar or Mozzarella) Adds creamy richness; substitute with low-fat cheese for a lighter option.
  • 1/2 cup Ranch Dressing Enhances flavor with a zesty kick; use homemade for a healthier twist.
  • 1/4 cup Diced Green Onions Offers a fresh crunch; chives can be an excellent alternative.
  • 1 medium Diced Bell Pepper Adds vibrant color and sweetness; choose any variety you like.
  • 1/2 teaspoon Black Pepper Boosts flavor; adjust according to your taste preference.
For the Tortilla
  • 4 pieces Flour Tortillas Serves as the wrap for all delicious fillings; whole wheat tortillas are a nutritious choice.
For Cooking
  • 1 tablespoon Olive Oil Ensures a golden crust; avocado oil can be used for a different flavor profile.

Equipment

  • Non-Stick Pan
  • Mixing Bowl
  • Spatula
  • Knife
  • Cutting Board

Method
 

Step-by-Step Instructions
  1. In a large mixing bowl, combine the cooked chicken breast, shredded cheese, ranch dressing, diced green onions, diced bell pepper, and black pepper. Mix well until all ingredients are evenly distributed and coated in ranch dressing.
  2. Heat a non-stick pan over medium heat and add a tablespoon of olive oil. Swirl the oil around the pan to ensure it coats the bottom evenly.
  3. Place a flour tortilla into the preheated pan, letting it warm for about 30 seconds. Spoon a quarter of the chicken mixture onto one half of the tortilla, spreading it evenly. Carefully fold the tortilla over the filling, creating a half-moon shape.
  4. Sear the quesadilla for 3-4 minutes until the bottom is golden brown and crispy. Flip the quesadilla and cook for an additional 2-3 minutes.
  5. Remove the cooked quesadilla from the pan and let it rest for about 2 minutes on a cutting board. Use a sharp knife to cut the quesadilla into wedges.
  6. Serve your Easy High-Protein Chicken Ranch Quesadilla hot, optionally with extra ranch dressing on the side for dipping.

Nutrition

Serving: 1quesadillaCalories: 400kcalCarbohydrates: 30gProtein: 30gFat: 20gSaturated Fat: 8gPolyunsaturated Fat: 2gMonounsaturated Fat: 8gCholesterol: 70mgSodium: 800mgPotassium: 300mgFiber: 2gSugar: 2gVitamin A: 500IUVitamin C: 30mgCalcium: 300mgIron: 2mg

Notes

Great for meal prep; can be stored in the fridge for up to 3 days.

Tried this recipe?

Let us know how it was!

Savory Chicken Pillows: Comforting Bites of Creamy Goodness

February 8, 2026 by Grace Snow Leave a Comment

As I stood in my kitchen, a wave of nostalgia washed over me when I thought of the comforting Chicken Pillows my mom used to make. These delightful bites are not only a family favorite, they also bring together creamy chicken filling and flaky crescent dough for the ultimate comfort food experience. Whipping up Chicken Pillows is a breeze, perfect for anyone looking to swap out fast food for something homemade and satisfying. Plus, you can customize them with your favorite toppings or even opt for brown or mushroom gravy for a fun twist. Are you ready to dive into this mouthwatering journey of flavor? Let’s get cooking!

Why are Chicken Pillows a must-try?

Comfort Food Reinvented: These Chicken Pillows redefine classic comfort food with their creamy filling and flaky exterior.

Simplicity Rules: The straightforward preparation makes them perfect for busy weeknights, showing that homemade doesn't have to mean complicated.

Customization Potential: With options for different cheeses or gravy types, these pillows can cater to various tastes, ensuring everyone at the table is satisfied, much like the flavors in Honey Garlic Chicken Thighs.

Crowd-Pleasing Delight: They make a fantastic addition to potluck gatherings or family dinners, offering a familiar taste that's hard to resist.

Quick and Freezable: Prepare a batch ahead of time and freeze them, making future meals even easier and more accessible. You can bake them straight from the freezer, which is a lifesaver on hectic days!

Chicken Pillows Ingredients

For the Filling
• Cooked, shredded chicken breast – The heart of the dish, providing a satisfying protein boost. Substitute with rotisserie chicken for an effortless option.
• Cream cheese – Adds creaminess and richness to the filling; can be replaced with Greek yogurt for a lighter alternative.
• Salted butter – Enhances flavor and contributes to a luscious filling; unsalted butter works just as well.
• Dried chives – Imparts a mild onion flavor and a pop of color; fresh chives elevate the taste even further.
• Dried minced onion – Adds savory depth; fresh minced onions are a great option but may require slight adjustments in cooking time.
• Salt and pepper – Essential for flavor; adjust to taste based on your preference.

For the Dough
• Refrigerated Pillsbury crescent roll dough – The perfect flaky outer layer that holds it all together; puff pastry is a great substitute if desired.
• Italian breadcrumbs – Creates a crispy texture; use panko breadcrumbs for an extra crunch.

For the Gravy
• Cream of chicken soup – Acts as a flavorful base for the gravy; consider cream of mushroom soup for a twist.
• Chicken gravy mix – A quick and tasty way to prepare gravy; homemade gravy options can enhance the flavor more personally.
• Water – Necessary for combining with the gravy mix and soup to achieve the right consistency.

These Chicken Pillows promise to bring comfort to your table, making every bite a delightful treat!

Step‑by‑Step Instructions for Chicken Pillows

Step 1: Preheat the Oven
Start by preheating your oven to 350°F (175°C). While the oven warms up, prepare a baking sheet by spraying it lightly with non-stick spray. This will ensure that your Chicken Pillows bake evenly and don't stick to the sheet, giving them that coveted golden-brown finish.

Step 2: Prepare the Filling
In a mixing bowl, combine softened cream cheese and salted butter, mixing until smooth and creamy. Next, gently fold in the shredded chicken, dried chives, minced onion, salt, and pepper until all ingredients are well incorporated. This flavorful mixture will create a delicious filling for your Chicken Pillows.

Step 3: Form the Dough Rectangles
Unroll the refrigerated Pillsbury crescent roll dough on a clean surface. Take two dough triangles and press them together to form a rectangle, making sure to seal the seams gently. Repeat this process until you have a total of four rectangles, which will house your creamy chicken filling.

Step 4: Fill the Dough
Divide the creamy chicken filling evenly among the prepared rectangles, placing the mixture in the center of each one. Carefully fold the corners of the dough over the filling, pinching the seams to ensure they are well sealed. This step is crucial for preventing any delicious filling from escaping while they bake.

Step 5: Coat with Butter and Breadcrumbs
Melt a small amount of butter in a microwave-safe dish. Dip each sealed Chicken Pillow in the melted butter, allowing excess to drip off. Then, roll each one in Italian breadcrumbs to coat thoroughly. This will add a wonderfully crispy texture to the outside of your Chicken Pillows.

Step 6: Bake the Chicken Pillows
Place the coated Chicken Pillows on the greased baking sheet, ensuring they are spaced appropriately apart. Bake them in the preheated oven for 22-25 minutes, or until they are golden brown and perfectly crisp. The aroma will fill your kitchen, signaling that your comfort food is nearly ready.

Step 7: Make the Gravy
While the Chicken Pillows are baking, prepare the savory gravy. In a saucepan, combine cream of chicken soup, chicken gravy mix, and water. Heat over medium-high heat, stirring until the mixture comes to a gentle boil. Once boiling, reduce the heat to low and let it simmer until you’re ready to serve.

Step 8: Serve with Gravy
Once the Chicken Pillows are golden brown and crisp, remove them from the oven. Allow them to rest for a few minutes before serving, which will help the fillings set. Drizzle the warm gravy generously over the Chicken Pillows for a final touch of flavor before serving these delightful bites to your family.

Make Ahead Options

These Chicken Pillows are fantastic for meal prep, allowing you to whip up a cozy dinner with minimal fuss during busy weeknights! You can prepare the creamy chicken filling and assemble the pillows up to 24 hours in advance; simply refrigerate them until you’re ready to bake. For longer storage, they can also be frozen before baking for up to 3 months. To maintain quality, ensure they are well-sealed in an airtight container or wrapped tightly to prevent freezer burn. When it's time to serve, bake them from frozen, adding an extra 5-10 minutes to the baking time, and you’ll have effortlessly delicious Chicken Pillows ready to delight your family!

Chicken Pillows: Customization Ideas

Enjoy expressing your culinary creativity with these delightful Chicken Pillows! Each twist brings something special to the table, making every bite an exciting new experience.

  • Cheese Variations: Swap out cream cheese for ranch or garlic herb spreads for a kick of flavor. Each brings a different creaminess that'll turn heads at your dinner table!

  • Veggie Boost: Incorporate spinach, diced bell peppers, or even some sautéed mushrooms into the filling. This not only enhances nutrition but offers a fresh crunch in each heavenly bite.

  • Gravy Lovers: Try using brown gravy or mushroom gravy instead of the traditional chicken gravy for a personalized touch. It’s a simple change that adds a delicious depth that you'll crave.

  • Protein Alternatives: If chicken isn’t your thing, consider using shredded turkey or even jackfruit for a vegetarian option. Both provide satisfying textures while keeping the spirit of these pillows intact.

  • Herb Infusion: Add fresh herbs like basil or thyme to your filling for an aromatic surprise. Fresh herbs elevate the classic flavors and make each pillow a fragrant delight.

  • Heat Factor: For those who enjoy a little spice, add diced jalapeños or a splash of your favorite hot sauce to the filling. This heat can bring your Chicken Pillows to a whole new level of excitement!

  • Crispy Coating: Want extra crunch? Try using crushed tortilla chips instead of breadcrumbs for a zesty twist. It adds an unexpected flavor that pairs beautifully with the creamy filling.

  • Homemade Gravy: Elevate your sauce game by whipping up a quick homemade gravy to pour over your pillows. A rich, savory gravy will enhance the flavors and make it feel like a special occasion.

These variations ensure that your Chicken Pillows never get boring! If you're craving more chicken inspiration, don't forget to check out Honey BBQ Chicken Rice or experience the tender flavors in Crock Pot Chicken for a comforting meal anytime.

Expert Tips for Chicken Pillows

  • Seal the Dough: Ensure all seams of the crescent dough are thoroughly sealed to prevent any delicious filling from leaking out during baking.

  • Rest Before Serving: Let the Chicken Pillows rest for a few minutes after baking. This allows the filling to settle, making them easier to serve and eat.

  • Breadcrumb Tip: For an even crunchier texture, feel free to swap the Italian breadcrumbs for panko breadcrumbs. This small change can elevate your Chicken Pillows.

  • Filling Customization: Don't hesitate to mix in some sautéed vegetables, like spinach or peppers, into the chicken filling for added flavor and nutrition.

  • Ideal Gravy Choices: While a classic cream of chicken soup is recommended for the gravy, consider trying a homemade version to enhance the taste profile of your Chicken Pillows.

How to Store and Freeze Chicken Pillows

Fridge: Store leftover Chicken Pillows in an airtight container for up to 3 days. This keeps them fresh while allowing you to enjoy them a second time.

Freezer: To freeze Chicken Pillows, place them uncooked in a single layer on a baking sheet, then transfer to a freezer-friendly container once frozen. They can last up to 3 months.

Reheating: To reheat, bake frozen Chicken Pillows straight from the freezer at 350°F (175°C) for 30-35 minutes, or until heated through and crispy. Perfect for a quick homemade meal!

Make-Ahead Tip: Prepare a batch of Chicken Pillows ahead of time and freeze them unbaked, so you can easily pull them out for a cozy, comforting dinner!

What to Serve with Chicken Pillows

Elevate your cozy dinner with delightful sides that bring out the flavors of these creamy, savory bites.

  • Steamed Vegetables: A vibrant medley of steamed broccoli, carrots, and snap peas adds color and nutrients, balancing the richness of the Chicken Pillows.
  • Garden Salad: A fresh garden salad with crisp greens and a light vinaigrette offers a refreshing contrast, making every bite that much more enjoyable.
  • Garlic Bread: Crunchy, buttery garlic bread provides additional texture and flavors that complement the creamy filling perfectly, perfect for sopping up any leftover gravy.
  • Mashed Potatoes: Creamy, buttery mashed potatoes are the classic comfort food pairing, adding extra warmth and heartiness to your meal.
  • Coleslaw: A tangy coleslaw brings a bit of crunch and zest, cutting through the richness of the Chicken Pillows to create a delightful contrast.
  • Brown Gravy or Mushroom Gravy: Enhance your dish with a generous drizzle of brown or mushroom gravy for an added layer of flavor that pairs beautifully with the chicken filling.
  • Apple Crisp: For dessert, an apple crisp with warm spices offers a sweet finish to your meal, rounding it off with cozy, comforting flavors.

With these delightful accompaniments, you’ll create a warm and inviting meal sure to please everyone at your table!

Chicken Pillows Recipe FAQs

How do I select the best chicken for the filling?
Absolutely! For the best results, use cooked, shredded chicken breast. You can opt for fresh, leftover roasted chicken or even grab a rotisserie chicken for convenience. Just make sure it's tender and juicy, as that will enhance the overall flavor of your Chicken Pillows.

How should I store leftover Chicken Pillows?
To maintain their taste and texture, store any leftover Chicken Pillows in an airtight container in the fridge for up to 3 days. When you're ready to indulge again, simply reheat them in your oven at 350°F (175°C) until warmed through.

Can I freeze Chicken Pillows?
Very! You can freeze Chicken Pillows before baking. Arrange them in a single layer on a baking sheet, freeze until solid, then transfer them to a freezer bag or container. They can last up to 3 months. When you're ready to eat, bake them from frozen at 350°F (175°C) for 30-35 minutes, until golden and crispy.

What if my Chicken Pillows leak during baking?
No worries! This can happen if the seams of the crescent dough aren't tightly sealed. Ensure you pinch the seams firmly and press the corners together well before baking. Should they still leak, don’t fret too much—just add a little extra gravy when serving!

Are Chicken Pillows suitable for people with dietary restrictions?
Definitely! For gluten-free options, you might consider using gluten-free crescent or puff pastry. If you're concerned about dairy, substitute cream cheese with a non-dairy cream cheese or Greek yogurt. Just keep an eye on allergies—you'll want to ensure no one at your table has an allergy to any of the ingredients like chicken or cream of chicken soup.

Can I add vegetables to the Chicken Pillows?
Absolutely! Incorporating sautéed vegetables, such as spinach or bell peppers, is an excellent way to enhance nutrition and add flavor to your Chicken Pillows. Just be cautious—you may need to adjust the filling consistency by reducing some of the cream cheese or butter to accommodate the additional moisture from the vegetables.

Chicken Pillows

Savory Chicken Pillows: Comforting Bites of Creamy Goodness

These Chicken Pillows redefine comfort food with creamy filling and flaky dough, perfect for homemade meals.
Print Recipe Pin Recipe
Prep Time 15 minutes mins
Cook Time 25 minutes mins
Resting Time 5 minutes mins
Total Time 45 minutes mins
Servings: 4 pillows
Course: Dinner
Cuisine: American
Calories: 320
Ingredients Equipment Method Nutrition Notes

Ingredients
  

For the Filling
  • 2 cups cooked, shredded chicken breast Substitute with rotisserie chicken for convenience.
  • 8 oz cream cheese Can be replaced with Greek yogurt for lighter version.
  • 2 tbsp salted butter Unsalted butter can be used.
  • 1 tbsp dried chives Fresh chives can enhance the flavor.
  • 1 tbsp dried minced onion Fresh minced onions can be used.
  • to taste salt and pepper Adjust according to preference.
For the Dough
  • 1 tube refrigerated Pillsbury crescent roll dough Puff pastry can be used as a substitute.
  • 1 cup Italian breadcrumbs Panko breadcrumbs can be used for extra crunch.
For the Gravy
  • 1 can cream of chicken soup Cream of mushroom soup can be used as an alternative.
  • 1 packet chicken gravy mix Homemade gravy option can enhance flavor.
  • 1 cup water

Equipment

  • Oven
  • Mixing Bowl
  • Baking Sheet
  • Saucepan
  • Microwave-safe dish

Method
 

Step-by-Step Instructions
  1. Preheat your oven to 350°F (175°C) and prepare a baking sheet by spraying lightly with non-stick spray.
  2. In a mixing bowl, combine softened cream cheese and salted butter until smooth. Fold in shredded chicken, dried chives, minced onion, salt, and pepper.
  3. Unroll the crescent roll dough and combine two dough triangles to form a rectangle, sealing seams. Repeat to create four rectangles.
  4. Divide the chicken filling evenly among the rectangles, fold corners of the dough over the filling, and pinch seams to seal.
  5. Melt a small amount of butter and dip each Chicken Pillow, then roll in Italian breadcrumbs until coated.
  6. Place Chicken Pillows on the baking sheet and bake for 22-25 minutes until golden brown and crisp.
  7. To prepare gravy, combine cream of chicken soup, gravy mix, and water in a saucepan. Heat until boiling and simmer until ready to serve.
  8. Let Chicken Pillows rest for a few minutes after baking. Serve drizzled with warm gravy.

Nutrition

Serving: 1pillowCalories: 320kcalCarbohydrates: 30gProtein: 15gFat: 18gSaturated Fat: 10gPolyunsaturated Fat: 1gMonounsaturated Fat: 6gTrans Fat: 0.5gCholesterol: 60mgSodium: 750mgPotassium: 300mgFiber: 1gSugar: 2gVitamin A: 500IUCalcium: 100mgIron: 1mg

Notes

For best results, seal all dough seams thoroughly before baking. Let rest for a few minutes after baking to set the filling.

Tried this recipe?

Let us know how it was!

Hidden Heart Chocolate Loaf Cake: A Sweet Surprise Inside

February 3, 2026 by Grace Snow Leave a Comment

As I preheat the oven and gather my ingredients, excitement builds for the Hidden Heart Chocolate Loaf Cake—a delightful showstopper perfect for Valentine’s Day. Each slice reveals a charming pink heart nestled within a rich chocolate exterior, transforming dessert into a heartfelt love note. This cake not only impresses with its striking appearance but also boasts a moist texture paired with silky dark chocolate buttercream, ensuring it’s a crowd-pleaser at any gathering. Plus, it offers the flexibility of gluten-free and dairy-free options, making it an inclusive treat for all. Ready to create a memorable moment with this lovely cake? Let’s get baking!

Why Is This Cake So Special?

Delightful Surprise: The Hidden Heart Chocolate Loaf Cake is more than just a dessert; it’s a heartfelt gesture that brings smiles with every slice.

Beautiful Presentation: Featuring a stunning pink heart hidden inside a rich chocolate exterior, it’s perfect for impressing loved ones or guests.

Versatile Options: Tailor it to your guests' needs with gluten-free or dairy-free variations, ensuring everyone can enjoy this sweet treat.

Easy to Make: With straightforward instructions and common ingredients, this recipe is accessible even for novice bakers.

Crowd Favorite: The combination of rich chocolate flavor and a charming hidden design makes it ideal for celebrations—think Valentine’s Day or anniversaries!

Consider pairing this lovely cake with fresh strawberries or whipped cream for an extra touch, and if you're looking for more chocolate delights, check out our Chocolate Pudding Cake for a classic finish to your meal!

Hidden Heart Chocolate Loaf Cake Ingredients

For the Pink Sponge

  • Baking spread (175g) – Provides fat and moisture; you can substitute with unsalted butter.
  • Caster sugar (175g) – Sweetens and contributes to the cake's texture; regular granulated sugar works too.
  • Eggs (3 large) – Binds ingredients while adding richness; ensure they're at room temperature.
  • Vanilla extract (1 tsp) – Adds flavor complexity; using pure vanilla extract will give the best results.
  • Self-raising flour (175g) – Gives structure and lightness; substitute with plain flour and add baking powder (2 tsp per 200g).
  • Pink food coloring – Creates the vibrant color for the heart; opt for professional-grade gel for best results.

For the Chocolate Sponge

  • Cocoa powder (35g) – Provides richness and deep chocolate flavor; make sure to use unsweetened cocoa powder.
  • Milk (1 ½ tbsp) – Adds moisture to the chocolate sponge; you can use dairy or non-dairy milk.
  • Baking powder (½ tsp) – Adds leavening when using plain flour.

For the Buttercream

  • Butter (100g, softened and unsalted) – The main fat for the buttercream; it’s best if at room temperature.
  • Icing sugar (200g) – Sweetens and thickens the buttercream; sift for a smoother finish.

For Decoration

  • Heart sprinkles – Optional decoration to enhance visual appeal and celebrate the hidden heart feature.

With these ingredients in hand, you're all set to create your very own Hidden Heart Chocolate Loaf Cake, a centerpiece sure to delight and surprise!

Step‑by‑Step Instructions for Hidden Heart Chocolate Loaf Cake

Step 1: Preheat the Oven
Begin by preheating your oven to 160°C fan/180°C/350°F/Gas Mark 4. While the oven warms up, prepare a 2lb loaf tin by greasing it or lining it with parchment paper to ensure easy removal later. This initial step sets the foundation for baking the perfect Hidden Heart Chocolate Loaf Cake, so make sure your oven reaches the desired temperature.

Step 2: Make the Pink Sponge
In a mixing bowl, cream together 175g of baking spread and 175g of caster sugar for about 3 minutes until the mixture is light and fluffy. Next, add 3 large room-temperature eggs and 1 teaspoon of vanilla extract, mixing well to incorporate. Gradually fold in 175g of self-raising flour and a few drops of pink food coloring until combined, achieving a smooth batter. Pour this into the prepared loaf tin and bake for approximately 50 minutes, or until a skewer inserted in the center comes out clean. Let it cool completely before trimming the ends, scoring the top, and cutting out hearts from the sponge.

Step 3: Create the Chocolate Sponge
Using the same mixing technique, cream another 175g of baking spread and 175g of caster sugar for about 3 minutes. Incorporate the 3 large eggs and 1 ½ tablespoons of milk, blending until fully combined. Gradually fold in 175g of self-raising flour, 35g of cocoa powder, and ½ teaspoon of baking powder, ensuring a smooth chocolate batter. Spread a layer of this delightful mixture into the bottom of the loaf tin, arrange the heart-shaped cutouts of pink sponge on top, and cover them with the remaining chocolate batter. Bake for another 50 minutes, and once cooled completely, remove it from the tin.

Step 4: Prepare the Buttercream
In a clean mixing bowl, beat 100g of softened unsalted butter until fluffy and light in color. Gradually add in 200g of sifted icing sugar along with 1 teaspoon of vanilla extract and 1 ½ tablespoons of milk, mixing until smooth. For an indulgent touch, mix in melted dark chocolate until the buttercream reaches a silky, spreadable consistency. This rich buttercream will perfectly complement your Hidden Heart Chocolate Loaf Cake.

Step 5: Frost and Decorate the Cake
Once the cake layers have cooled completely, generously frost the top and sides with the luscious buttercream. If desired, add heart sprinkles on top to enhance the visual appeal of your Hidden Heart Chocolate Loaf Cake. Slice into this enchanting dessert to reveal the charming pink heart inside; it's sure to delight everyone who gets a taste!

Hidden Heart Chocolate Loaf Cake Variations

Feel free to let your creativity shine by customizing your Hidden Heart Chocolate Loaf Cake—there’s a world of delightful twists and substitutions to explore!

  • Gluten-Free: Use a 1:1 gluten-free baking flour blend and ensure all other ingredients are gluten-free too.

  • Dairy-Free: Substitute the baking spread with a plant-based alternative and swap the milk for almond or oat milk.

  • Different Colors: For a vibrant twist, try using red food coloring instead of pink to match different celebrations or preferences.

  • Flavored Buttercream: Add a hint of almond or orange extract to the buttercream for an exciting flavor boost.

  • Additions: Stir in mini chocolate chips or nuts into the chocolate batter for extra texture and flavor.

  • Alternative Shapes: Instead of hearts, use cookie cutters to create different hidden shapes, such as stars or flowers.

  • Spiced Cake: Incorporate a teaspoon of cinnamon or even chili powder into the chocolate batter for a warm, spicy kick.

By trying out these variations, you can make this cake uniquely yours! If you’re craving more chocolatey goodness, consider checking out our Chocolate Pudding Cake for another delicious treat. Enjoy the baking journey!

Expert Tips for Hidden Heart Chocolate Loaf Cake

Room Temperature Ingredients: Use room temperature butter and eggs for a smoother batter and improved texture in your Hidden Heart Chocolate Loaf Cake.

Don’t Overmix: When incorporating flour into the batter, mix just until combined to maintain a light and airy texture.

Think Ahead: Refrigerate your cut-out hearts before baking the chocolate sponge; this helps them hold their shape better during baking.

Use Quality Cocoa: For a richer chocolate flavor, opt for high-quality unsweetened cocoa powder in your chocolate batter.

Proper Cooling: Allow the cake to cool completely before frosting, ensuring the buttercream doesn’t melt and the cake holds its shape beautifully.

What to Serve with Hidden Heart Chocolate Loaf Cake

Indulge your senses and create the ultimate dessert experience by pairing this delightful cake with these fabulous accompaniments.

  • Whipped Cream: A dollop of freshly whipped cream adds a light and creamy contrast, enhancing the cake's rich chocolate flavor.
  • Fresh Strawberries: Juicy, ripe strawberries bring a burst of freshness that perfectly complements the indulgent chocolate, making for a beautiful presentation.
  • Vanilla Ice Cream: Creamy vanilla ice cream melts into the warm cake, providing a delightful contrast in temperature and a luscious mouthfeel.
  • Chocolate Ganache: Drizzling smooth chocolate ganache over the top amplifies the chocolate experience, making it even more decadent.
  • Mint Leaves: A sprinkle of chopped fresh mint brightens the dish and adds a refreshing herbal note, creating a lovely balance with the sweetness.
  • Decadent Hot Chocolate: Pairing with a rich, creamy hot chocolate makes for an ultimate chocolate lover’s dream, perfect for cozy evenings.
  • Espresso or Coffee: A warm cup of espresso or coffee enhances and complements the chocolate flavor, perfect for rounding out a sweet indulgence.
  • Sparkling Wine: For celebrations, a bit of sparkling wine adds a festive touch, making every bite feel like a special occasion.
  • Chocolate-Covered Strawberries: As an extra treat, chocolate-covered strawberries mirror the flavors of the cake, making it a delightful addition to your dessert spread.

How to Store and Freeze Hidden Heart Chocolate Loaf Cake

Room Temperature: Keep the cake in an airtight container at room temperature for up to 3 days to maintain its moisture and flavor.

Fridge: If you need to store it longer, place the cake in the refrigerator for up to a week, ensuring it's well-wrapped to prevent drying out.

Freezer: For longer storage, freeze the cake, either decorated or undecorated, for up to 3 months. Make sure to wrap it tightly with plastic wrap and then with aluminum foil.

Reheating: When ready to enjoy, thaw the cake in the fridge overnight and allow it to come to room temperature before serving. Enjoy the delightful surprise of the Hidden Heart Chocolate Loaf Cake!

Make Ahead Options

Preparing the Hidden Heart Chocolate Loaf Cake in advance is a fantastic way to save time, especially for busy weeknights or special occasions. You can make the pink sponge and chocolate sponge up to 24 hours ahead; simply bake them, let them cool completely, and then wrap each layer tightly in plastic wrap to maintain moisture. The buttercream can also be made up to 3 days in advance and stored in an airtight container in the refrigerator. When you’re ready to serve, just frost the cake and add the heart sprinkles for that finishing touch. By prepping these components ahead, your cake will be just as delightful and fresh, allowing you to focus on enjoying the moment!

Hidden Heart Chocolate Loaf Cake Recipe FAQs

How do I select ripe and fresh ingredients for this cake?
Absolutely! For the best results, choose fresh eggs, ideally free-range, as they provide better flavor and richer color. Look for baking spreads and butter that are at room temperature for easy creaming with sugar. Be sure to check the expiry dates on the baking powder and flour so that they are still effective for leavening.

How should I store the Hidden Heart Chocolate Loaf Cake?
You can store your cake in an airtight container at room temperature for up to 3 days. If you want it to last longer, it can be refrigerated for up to a week. Just make sure it's well-wrapped to prevent it from drying out. It’s so lovely to take out a slice on a special occasion!

Can I freeze the cake, and how should I do it?
Absolutely! To freeze the Hidden Heart Chocolate Loaf Cake, wrap it tightly in plastic wrap and then in aluminum foil to prevent freezer burn. You can freeze it for up to 3 months. When you’re ready to enjoy, thaw it in the fridge overnight, then let it come to room temperature before serving. This way, the flavors will remain rich and delicious!

What should I do if the cake doesn't rise properly?
Very! If your cake doesn't rise, ensure that your baking powder is fresh and that you haven't overmixed the batter. Overmixing can create a dense cake by developing gluten in the flour. Also, remember to preheat your oven correctly to the temperature specified in the recipe to achieve that perfect rise.

Are there any dietary considerations for the Hidden Heart Chocolate Loaf Cake?
Absolutely! You can make a gluten-free version by substituting gluten-free self-raising flour. For a dairy-free option, simply swap out the butter for a plant-based spread and use dairy-free chocolate in the buttercream. Just make sure to double-check all ingredients for hidden allergens to cater to anyone with allergies!

Is this cake pet-friendly?
No! Chocolate is toxic to pets, especially dogs and cats, so it's best to keep it out of their reach. Always opt for pet-friendly treats for your furry friends to ensure their health and happiness!

Hidden Heart Chocolate Loaf Cake

Hidden Heart Chocolate Loaf Cake: A Sweet Surprise Inside

The Hidden Heart Chocolate Loaf Cake is a delightful dessert revealing a charming pink heart within a rich chocolate exterior, perfect for Valentine’s Day.
Print Recipe Pin Recipe
Prep Time 20 minutes mins
Cook Time 1 hour hr 40 minutes mins
Cooling Time 1 hour hr
Total Time 3 hours hrs
Servings: 8 slices
Course: Dessert
Cuisine: American
Calories: 320
Ingredients Equipment Method Nutrition Notes

Ingredients
  

For the Pink Sponge
  • 175 g baking spread Can substitute with unsalted butter.
  • 175 g caster sugar Regular granulated sugar works too.
  • 3 large eggs Ensure they're at room temperature.
  • 1 tsp vanilla extract Using pure vanilla extract is best.
  • 175 g self-raising flour Can substitute with plain flour and add baking powder (2 tsp per 200g).
  • pink food coloring Opt for professional-grade gel for best results.
For the Chocolate Sponge
  • 35 g cocoa powder Ensure to use unsweetened cocoa powder.
  • 1.5 tbsp milk Can use dairy or non-dairy milk.
  • 0.5 tsp baking powder Used when using plain flour.
For the Buttercream
  • 100 g butter Softened and unsalted, best at room temperature.
  • 200 g icing sugar Sift for a smoother finish.
For Decoration
  • heart sprinkles Optional decoration.

Equipment

  • loaf tin
  • Mixing Bowl
  • Silicone Spatula
  • Whisk

Method
 

Preparation Steps
  1. Step 1: Preheat the oven to 160°C fan/180°C/350°F/Gas Mark 4. Prepare a 2lb loaf tin by greasing it or lining it with parchment paper.
  2. Step 2: Make the pink sponge: Cream together baking spread and caster sugar, add eggs and vanilla, then fold in self-raising flour with pink food coloring. Bake for approx. 50 mins.
  3. Step 3: Create the chocolate sponge: Cream baking spread and caster sugar, add eggs and milk, then fold in self-raising flour, cocoa powder, and baking powder. Layer in the loaf tin and bake for another 50 mins.
  4. Step 4: Prepare the buttercream: Beat softened butter until fluffy, add icing sugar, vanilla, and milk to mix until smooth. Optionally mix in melted dark chocolate.
  5. Step 5: Frost and Decorate the Cake: Once cooled, frost the cake with buttercream and top with heart sprinkles if desired.

Nutrition

Serving: 1sliceCalories: 320kcalCarbohydrates: 45gProtein: 4gFat: 15gSaturated Fat: 9gCholesterol: 80mgSodium: 200mgPotassium: 150mgFiber: 1gSugar: 25gVitamin A: 500IUCalcium: 50mgIron: 2mg

Notes

Use room temperature ingredients for a smoother batter. Don’t overmix to maintain texture. Refrigerate heart cutouts before baking for better shape retention.

Tried this recipe?

Let us know how it was!

Delicious Heart Shaped Brownies for Your Sweetest Moments

February 3, 2026 by Grace Snow Leave a Comment

What is it about a heart-shaped treat that instantly brings a smile? As soon as I take a bite of these fudgy heart-shaped brownies, memories of cozy celebrations flood my mind. Perfectly rich and chewy, this easy one-bowl recipe makes baking a breeze, letting you whip up these delectable brownies in under an hour and fifteen minutes. With a shiny top and chewy edges, they're sure to impress your loved ones—especially on Valentine’s Day. Plus, cleanup is a snap, allowing you to focus on the sweetness of the moment rather than the mess. Wouldn’t you love to share a plate of these delightful brownies with someone special?

Why Are Heart Shaped Brownies So Special?

Simplicity at its Best: This easy one-bowl recipe is a game changer! You’ll love how quick it is to prepare these fudgy heart-shaped brownies—mix, bake, and enjoy.

Impressive & Festive: The heart shapes make them a standout choice for Valentine’s Day or any special occasion. They elevate your dessert game, bringing smiles to everyone at the table.

Rich, Decadent Flavor: The combination of unsweetened cocoa and chocolate chips delivers a deep chocolate flavor that satisfies any sweet tooth.

Versatile Treat: Feel free to swap in your favorite mix-ins or pair these brownies with ice cream or fresh strawberries for an even more delightful experience.

Crowd-Pleaser: These brownies are designed to charm—everyone will be asking for seconds! They’re the perfect way to show love and affection to friends and family.

For more sweet ideas, check out my delicious Pumpkin Brownies Decadent or the yummy Cinnamon Roll Muffins.

Heart Shaped Brownies Ingredients

Get ready to whip up something special with these easy heart-shaped brownies!

For the Brownie Batter

  • Unsalted Butter – Adds richness and moisture; you can substitute with salted butter but reduce additional salt.
  • Granulated Sugar – Provides sweetness for those fudgy heart shaped brownies; swap with brown sugar for a deeper flavor.
  • Large Eggs – Binds the ingredients for that chewy texture; no substitute recommended.
  • Vanilla Extract – Enhances flavor; for a twist, use almond extract!
  • Unsweetened Cocoa Powder – Gives the brownies their beloved chocolate flavor; consider dark cocoa for a richer treat.
  • All-Purpose Flour – Acts as the backbone of the brownies; gluten-free flour can easily be swapped in.
  • Salt – Enhances flavor and balances sweetness; reducing it may lessen the flavor complexity.
  • Baking Powder – Provides the lift needed for lighter brownies; ensure it's fresh for the best results.
  • Chocolate Chips – Boosts the chocolate flavor and texture; go for milk or dark chocolate based on your preference.

For Cutting

  • Heart-Shaped Cookie Cutter – Essential for creating charming heart shapes; feel free to use different shapes if you want to mix it up!

Step‑by‑Step Instructions for Heart Shaped Brownies

Step 1: Preheat and Prepare
Start by preheating your oven to 350°F (175°C). Next, grease an 8-inch square baking pan and line it with parchment paper, allowing some overhang on the sides. This will make it easy to lift the brownies out later. Set your prepared pan aside while you mix the batter.

Step 2: Melt the Butter
In a microwave-safe bowl, melt ½ cup of unsalted butter in the microwave for about 30 seconds to 1 minute, checking for a fully melted consistency. Stir it soft, then add 1 cup of granulated sugar, 2 large eggs, and 1 teaspoon of vanilla extract. Whisk everything together until the mixture is smooth and glossy, ensuring a rich foundation for your heart shaped brownies.

Step 3: Combine Dry Ingredients
Next, sift in ½ cup of unsweetened cocoa powder, ½ cup of all-purpose flour, ¼ teaspoon of salt, and ¼ teaspoon of baking powder to the wet mixture. Gently fold the dry ingredients into the wet ones using a spatula or wooden spoon. Mix until just combined; be careful not to overmix, as you want to keep the batter thick and fudgy.

Step 4: Add Chocolate Chips
Now it's time to enhance your heart shaped brownies! Fold in ½ cup of chocolate chips, distributing them evenly throughout the batter. This addition not only intensifies the chocolate flavor but also adds delightful pockets of melted chocolate in each bite.

Step 5: Spread the Batter
Pour the brownie batter into the prepared baking pan, using a spatula to evenly spread it out to the corners. Make sure the chocolate mixture is well-distributed so that each piece has that fudgy, chewy texture. The thickness of the batter will create the perfect structure when baked.

Step 6: Bake to Perfection
Place your baking pan in the preheated oven and bake for 20–25 minutes. To check for doneness, insert a toothpick into the center of the brownies; it should come out with a few moist crumbs. Avoid overbaking to keep your heart shaped brownies fudgy and soft.

Step 7: Cool and Cut
Once baked, allow the brownies to cool completely in the pan on a wire rack. This usually takes about 30 minutes. After cooling, use a heart-shaped cookie cutter to cut out the brownies into charming shapes. For cleaner edges, consider chilling the brownies briefly before cutting.

Step 8: Serve with a Smile
Your delightful heart shaped brownies are now ready to share! Dust them with powdered sugar or drizzle some melted chocolate for an elegant touch, perfect for a special occasion like Valentine’s Day. Enjoy serving these sweet treats to your loved ones!

Expert Tips for Heart Shaped Brownies

Chill Before Cutting: Chilling the brownies for about 30 minutes before using the cookie cutter helps achieve cleaner shapes and prevents crumbling.

Don’t Overbake: Keep an eye on the baking time; overbaking can lead to dry heart shaped brownies. Aim for moist crumbs on the toothpick test.

Flavor Enhancements: Consider adding a pinch of espresso powder to deepen the chocolate flavor or a splash of peppermint extract for a festive twist.

Diverse Toppings: Dust with powdered sugar, drizzle melted chocolate, or serve with ice cream to elevate your heart shaped brownies—perfect for impressing loved ones.

Quality Ingredients: Use high-quality cocoa powder and chocolate chips to truly savor those rich flavors; the difference is noticeable!

What to Serve with Fudgy Heart Shaped Brownies?

Indulge in a complete experience by pairing these delightful treats with complementary flavors and textures that enhance their richness.

  • Vanilla Ice Cream: Scoop this classic pairing alongside your brownies for a creamy, cool contrast that melts into yummier bites.

  • Fresh Strawberries: Slice up some juicy strawberries; their bright flavor and freshness perfectly balance the rich, fudgy brownies.

  • Whipped Cream: Light and fluffy, a dollop of whipped cream adds an airy touch that enhances the brownies’ decadence.

  • Chocolate Sauce: Drizzle warm chocolate sauce over your brownies for an extra layer of chocolatey goodness that will satisfy even the most intense cravings.

  • Espresso: A small cup of strong espresso offers a delightful contrast, enhancing the chocolate's depth while providing an energizing kick.

  • Dusting of Powdered Sugar: A simple garnish of powdered sugar lends a touch of elegance, making these brownies look as gorgeous as they taste.

  • Caramel Sauce: For a sweet and salty twist, add a drizzle of caramel sauce—its buttery richness elevates each bite to sheer bliss.

  • Chilled Milk: Nothing quite beats the nostalgic combination of brownies and a cold glass of milk, making it a comforting classic treat.

Sharing these pairings will elevate your dessert experience and create sweet memories that linger long after the last heart-shaped brownie is devoured.

Make Ahead Options

These fudgy heart shaped brownies are perfect for busy home cooks looking to save time without sacrificing flavor! You can prepare the brownie batter up to 24 hours in advance; simply mix the ingredients as instructed, then cover the bowl tightly and refrigerate it. This will not only enhance the chocolate flavor but also make for a smoother baking process when you're ready to bake. When it's time to bake, pour the chilled batter into your prepared pan and follow the original baking instructions. For even cleaner edges, consider chilling the brownies after baking before using your heart-shaped cookie cutter. Enjoy the ease of having a delightful dessert ready to impress at a moment's notice!

Heart Shaped Brownies Variations

Feel free to get creative with these fudgy heart-shaped brownies! Each twist can enhance the experience, allowing you to leave a lasting impression.

  • Nutty Add-Ins: Fold in chopped walnuts or pecans for a delightful crunch and added flavor depth.
    Incorporating nuts can elevate the texture, introducing a satisfying crunch to balance the fudginess.

  • Flavored Extracts: Experiment with different extracts like almond or hazelnut to change the flavor profile.
    This small adjustment can lead to uniquely flavored brownies that surprise and delight your taste buds.

  • Fruit Boost: Add fresh raspberries or cherries to the batter for a fruity twist that complements the chocolate.
    These juicy bursts of flavor create a lovely contrast with the rich chocolate, making each bite a celebration.

  • Dairy-Free: Swap butter with coconut oil or a dairy-free butter substitute for a delicious dairy-free version.
    This twist makes the recipe accessible while still yielding a rich and fudgy treat everyone can enjoy.

  • Gluten-Free: Use a 1-to-1 gluten-free flour blend instead of all-purpose flour for a gluten-free version.
    Enjoying brownies shouldn't be limited—this swap ensures everyone can revel in the fudgy goodness!

  • Decadent Toppings: Drizzle with salted caramel or chocolate ganache for an extra decadent treat.
    Toppings can elevate your brownies from simple to sensational, creating a truly indulgent dessert experience.

For even more sweet ideas, try my delicious Pumpkin Brownies Decadent or the delicious Crispy Parmesan Artichoke Hearts for some savory balance!

  • Spicy Delight: Add a pinch of cayenne pepper or chili powder for a surprising hit of heat.
    This unexpected addition can create a thrilling contrast to the sweetness, awakening your taste buds!

How to Store and Freeze Heart Shaped Brownies

Room Temperature: Keep your heart shaped brownies in an airtight container at room temperature for up to 3 days, allowing them to stay soft and fudgy.

Fridge: For longer freshness, store the brownies in the fridge for up to a week. Just remember to seal them well to prevent drying out.

Freezer: You can freeze brownies for up to 3 months. Wrap them individually in plastic wrap and place in a freezer-safe container for easy access to sweet treats later.

Reheating: To enjoy frozen heart shaped brownies, thaw in the fridge overnight and reheat in the microwave for 10-15 seconds, just until warm!

Heart Shaped Brownies Recipe FAQs

How do I choose the best ingredients for heart shaped brownies?
Absolutely! For the best results, pick high-quality unsweetened cocoa powder and chocolate chips; it makes a noticeable difference in flavor. Ensure eggs are fresh for the right binding texture, and use unsalted butter to control salt levels. For the perfect cocoa, look for a rich, dark color without any lumps—this ensures you’re getting that deep flavor in your brownies.

How should I store heart shaped brownies, and how long do they last?
For room temperature storage, place your heart shaped brownies in an airtight container where they’ll stay fresh for up to 3 days. If you want them to last longer, refrigerate them for up to a week, but make sure they're sealed well to prevent drying out. I often add a piece of parchment paper between layers to keep them from sticking together—works like a charm!

Can I freeze heart shaped brownies, and what’s the best method?
You sure can! To freeze your heart shaped brownies, wrap them individually in plastic wrap to prevent freezer burn, then place them in a freezer-safe container. They can be frozen for up to 3 months. When you’re ready to enjoy, simply thaw them overnight in the fridge. To warm them up, pop them in the microwave for 10-15 seconds—so delicious!

What should I do if my brownies turn out dry?
If your brownies end up a bit dry, it’s often due to overbaking. Always check for doneness with a toothpick; a few moist crumbs should stick to it. For a remedy, try serving the brownies with a scoop of vanilla ice cream or a drizzle of chocolate sauce. You might also add a splash of coffee in your next batch to boost moisture and flavor!

Are these brownies suitable for a gluten-free diet?
Yes, they can easily be adjusted! Substitute all-purpose flour with a gluten-free flour blend, making sure it includes xanthan gum for baking. However, always check your chocolate chip packaging, as some may contain gluten. But don’t worry—you can still whip up a batch of delicious heart shaped brownies that everyone can enjoy!

Can I use alternative sweeteners in heart shaped brownies?
Very! You can experiment with alternative sweeteners like coconut sugar or even stevia for a lower-calorie option. If you choose to use a liquid sweetener, like agave or honey, remember to adjust the flour slightly to maintain the right brownie texture. Just keep in mind that swapping sweeteners may slightly alter the flavor and texture!

Heart Shaped Brownies

Delicious Heart Shaped Brownies for Your Sweetest Moments

These heart shaped brownies are rich, chewy, and perfect for sweet moments on special occasions.
Print Recipe Pin Recipe
Prep Time 15 minutes mins
Cook Time 25 minutes mins
Cooling Time 30 minutes mins
Total Time 1 hour hr 10 minutes mins
Servings: 12 brownies
Course: Dessert
Cuisine: American
Calories: 200
Ingredients Equipment Method Nutrition Notes

Ingredients
  

For the Brownie Batter
  • 1/2 cup Unsalted Butter Melted
  • 1 cup Granulated Sugar
  • 2 large Large Eggs
  • 1 teaspoon Vanilla Extract
  • 1/2 cup Unsweetened Cocoa Powder
  • 1/2 cup All-Purpose Flour
  • 1/4 teaspoon Salt
  • 1/4 teaspoon Baking Powder
  • 1/2 cup Chocolate Chips
For Cutting
  • Heart-Shaped Cookie Cutter For cutting brownies into shapes

Equipment

  • Oven
  • 8-inch Square Baking Pan
  • Mixing Bowl
  • Whisk
  • Spatula
  • Heart-Shaped Cookie Cutter

Method
 

Step-by-Step Instructions for Heart Shaped Brownies
  1. Preheat your oven to 350°F (175°C) and grease an 8-inch square baking pan.
  2. Melt 1/2 cup of unsalted butter in the microwave, then whisk with 1 cup of granulated sugar, 2 eggs, and 1 teaspoon of vanilla extract until smooth.
  3. Sift in 1/2 cup of cocoa powder, 1/2 cup of flour, 1/4 teaspoon of salt, and 1/4 teaspoon of baking powder. Fold gently until just combined.
  4. Fold in 1/2 cup of chocolate chips evenly throughout the batter.
  5. Spread the brownie batter in the prepared baking pan.
  6. Bake for 20-25 minutes until toothpick comes out with a few moist crumbs.
  7. Allow the brownies to cool completely, then cut out using the heart-shaped cookie cutter.
  8. Dust with powdered sugar or drizzle melted chocolate before serving.

Nutrition

Serving: 1brownieCalories: 200kcalCarbohydrates: 28gProtein: 3gFat: 10gSaturated Fat: 6gPolyunsaturated Fat: 1gMonounsaturated Fat: 3gCholesterol: 50mgSodium: 120mgPotassium: 150mgFiber: 1gSugar: 15gVitamin A: 200IUCalcium: 20mgIron: 1mg

Notes

Chill brownies before cutting for cleaner shapes. Overbaking may lead to dryness, so monitor closely.

Tried this recipe?

Let us know how it was!

Homemade Little Debbie Valentine Cakes for a Sweet Surprise

February 3, 2026 by Grace Snow Leave a Comment

You might feel a rush of sweetness when you catch a whiff of nostalgia wafting through your kitchen, just like the blissful days of your childhood. This is exactly what you’ll experience as you whip up these delightful Homemade Copycat Little Debbie Valentine Cakes. With their tender, moist cake layered with fluffy marshmallow crème and coated in a cheerful pink chocolate, these treats are not just a feast for the eyes, but an easy way to celebrate love on Valentine’s Day. Each bite is reminiscent of those beloved snacks we devoured, but crafted with homemade warmth and care. Plus, they’re perfect for impressing guests or enjoying a sweet moment with someone special! Ready to create some heart-shaped magic that will take you back? Let’s dive in!

Why Love Little Debbie Valentine Cakes?

Nostalgic Treat: These cakes bring back fond childhood memories while adding a homemade touch to your Valentine’s Day festivities.

Simple Steps: With easy-to-follow instructions, even novice bakers can create these delightful desserts without stress.

Rich Marshmallow Filling: The fluffy, sweet marshmallow crème elevates each bite into a luxurious treat that’s sure to impress!

Fun for Any Occasion: Use different cookie cutter shapes to make these cakes perfect for birthdays or anniversaries, not just Valentine’s Day.

Shared Joy: These whimsical creations are perfect for gatherings, sparking smiles and sweet conversations with every slice. If you’re looking for more fun dessert ideas, check out my delicious Crab Cakes Forget and Ricotta Protein Pancakes!

Little Debbie Valentine Cakes Ingredients

For the Cake
• Boxed White Cake Mix – Provides the base structure and flavor. Substitution: Yellow box cake mix can also be used in a pinch.
• Granulated Sugar – Adds sweetness.
• Water – Hydrates the batter.
• Eggs (room temperature) – Contributes to the cake's structure and moisture.
• Vanilla Extract – Enhances flavor.
• Vegetable Oil – Keeps the cake moist and tender.
• All-purpose Flour – Aids in the cake’s structure.
• Kosher Salt – Balances sweetness.
• Full Fat Sour Cream – Adds moisture and richness. Note: Not to skip; it enriches flavor and texture.

For the Filling
• Marshmallow Crème – Used for the filling. Note: Can substitute with marshmallow fluff.
• Salted Butter (room temperature) – Provides creaminess for the filling.
• Powdered Sugar – Gives sweetness to the filling.
• Heavy Cream (room temperature) – Adjusts filling consistency to be spreadable.

For the Coating
• Almond Bark – Coating chocolate; easy to melt. Note: Real white chocolate can be used but may be more temperamental.
• Crisco – Used to adjust the consistency of melted chocolate.
• Pink Gel Food Dye – For coloring the coating chocolate; must be gel-based to avoid seizing.

Step‑by‑Step Instructions for Little Debbie Valentine Cakes

Step 1: Preheat Oven
Begin by preheating your oven to 350°F (175°C). While the oven heats, prepare two half sheet pans by lining them with parchment paper to ensure easy removal of the cake later. This foundation sets the stage for your Homemade Little Debbie Valentine Cakes, so be sure to have everything ready before moving on to the next step.

Step 2: Mix Cake Batter
In a large mixing bowl, combine the boxed white cake mix, granulated sugar, water, eggs, vanilla extract, and vegetable oil. Use a mixer on medium speed to blend these ingredients until smooth, about 2–3 minutes. Next, incorporate the all-purpose flour, kosher salt, and full-fat sour cream, mixing until you achieve a smooth batter that’s ready to be transformed into delightful cake layers.

Step 3: Divide & Bake
Carefully divide the cake batter evenly between the prepared pans, using a spatula to smooth the tops. Place them in the preheated oven and bake for 15-18 minutes, or until a toothpick inserted into the center comes out clean. Once baked, remove the cakes and allow them to cool for 30 minutes at room temperature before placing them in the refrigerator for an additional 30-60 minutes to firm up.

Step 4: Prepare Filling
In a mixing bowl, beat together the marshmallow crème and soft salted butter until fluffy and smooth, approximately 2-3 minutes. Gradually add the powdered sugar and a pinch of salt, then mix thoroughly. Next, incorporate enough heavy cream until you reach a spreadable consistency that will create a deliciously sweet layer for your Little Debbie Valentine Cakes.

Step 5: Cut Cake Hearts
Once cooled completely, remove the cakes from the pans and use a 3-inch heart-shaped cookie cutter to cut out 32 hearts from the cake layers. Gently press the cutter down, making sure you get clean edges. Gather any leftover cake scraps and save them for a fun decoration or snacking later.

Step 6: Assemble Cakes
Take half of the heart-shaped cake pieces and spread a generous layer of the marshmallow filling on top of each. Carefully place another heart on top of each frosted piece, creating a sandwich effect. Once assembled, place them in the freezer for 1 hour to firm up, allowing for easier handling when it’s time to dip them in chocolate.

Step 7: Melt Coating
In a heatproof bowl, melt the almond bark in the microwave or over a double boiler, heating in intervals of 30 seconds and stirring in between until fully melted and smooth. Once melted, mix in a small amount of Crisco to adjust the consistency for a perfect dipping glaze. This coating will beautifully cover your Homemade Little Debbie Valentine Cakes.

Step 8: Dip & Decorate
Remove the frozen cakes from the freezer and carefully dip each one into the melted pink chocolate coating. Allow any excess chocolate to drip off before placing them on a parchment-lined tray. After all the cakes are coated, drizzle any reserved white chocolate on top for a decorative finish. Let them set at room temperature until the coating hardens, and then they’re ready to share!

Make Ahead Options

These Homemade Little Debbie Valentine Cakes are fantastic for meal prep enthusiasts looking to save time during busy days! You can prepare the cake layers and filling up to 24 hours in advance; simply bake and cool the cakes, then wrap them tightly in plastic wrap and refrigerate. The filling can also be made ahead and stored in an airtight container for up to 3 days in the fridge. When you're ready to serve, cut out your heart shapes, assemble the cakes, and freeze briefly for easy dipping in chocolate. By prepping these components in advance, you’ll have a delightful dessert ready to impress with minimal effort on the day of serving!

How to Store and Freeze Little Debbie Valentine Cakes

Fridge: Keep assembled Little Debbie Valentine Cakes in an airtight container in the fridge for up to 1 week, preserving their freshness and flavor.

Freezer: Freeze uncoated, assembled cakes for up to 3 months. Wrap each cake in plastic wrap then foil to prevent freezer burn before dipping in chocolate.

Reheating: To enjoy, let frozen cakes thaw in the fridge overnight before dipping or serving, allowing for a delightful texture.

Room Temperature: If serving the cakes the same day, they can be kept at room temperature for 1-2 hours, ensuring they stay delightful for any gathering.

Little Debbie Valentine Cakes Variations

Feel free to get creative and make these delightful cakes uniquely yours with a few simple adjustments!

  • Cake Flavor: Swap the boxed white cake mix for a chocolate or strawberry cake mix to add a twist in flavor. Vanilla will always be classic, but chocolate will elevate the indulgence!

  • Filling Variety: Try using strawberry or raspberry jam for a fruity filling instead of marshmallow crème. The tartness will perfectly balance the sweetness, creating a delicious contrast!

  • Gluten-Free Option: Use a gluten-free cake mix for accommodating dietary needs without sacrificing taste. Both flavor and texture will still shine through in your creation.

  • Dairy-Free Delight: Substitute the full-fat sour cream and butter with dairy-free alternatives like coconut cream and plant-based butter. Your cakes will be just as rich and delicious!

  • Coating Alternatives: Instead of almond bark, feel free to use chocolate candy melts or dark chocolate for a different coating flavor. Dark chocolate adds a sophisticated touch to these sweet treats.

  • Decorative Shapes: Use cookie cutters to create festive shapes other than hearts, such as stars or flowers, to make these cakes perfect for any occasion or celebration.

  • Extra Crunch: Sprinkle finely chopped nuts or crushed cookies on top after dipping the cakes in chocolate for added texture and a satisfying crunch.

  • Creamy Center: For an added layer of richness, mix in a few spoonfuls of peanut butter or Nutella with the marshmallow filling. It introduces a delightful surprise in each bite!

These variations are just the beginning! Explore your special touches while keeping the nostalgia alive. For more inspiration, don’t miss my delightful Crab Cakes Forget or these tasty Ricotta Protein Pancakes.

What to Serve with Homemade Copycat Little Debbie Valentine Cakes

The perfect sweet companion elevates your celebration, making each bite even more delightful.

  • Fresh Berries: Bright, juicy strawberries and raspberries offer a refreshing contrast to the rich cakes, enhancing the overall sweetness while adding a hint of tartness. Serve them nestled alongside the cakes for an inviting, colorful display.

  • Vanilla Ice Cream: A scoop of creamy vanilla ice cream provides a dreamy, cold balance to the soft, fluffy cakes. The combination of warm and cold sensations will enchant your taste buds and make the moment extra special.

  • Rich Hot Chocolate: Warm, velvety hot chocolate brings a cozy beverage option to your dessert table and effortlessly pairs with the chocolate-coated cakes, inviting everyone to savor each indulgent bite.

  • Whipped Cream: A dollop of freshly whipped cream adds airy lightness, enhancing the sweetness without overwhelming flavors. It creates a charming presentation when piped onto cakes or served alongside.

  • Coffee or Espresso: A rich cup of coffee or a shot of espresso counterbalances the sweetness beautifully, making it an excellent choice for adults enjoying these treats after a romantic dinner.

  • Chocolate-Covered Strawberries: These sweet, decadent additions mirror the pink chocolate coating on the cakes while providing a familiar flavor profile that nods to love and affection. Perfect for sharing!

  • Sparkling Water with Lemon: A refreshing glass of sparkling water with a squeeze of fresh lemon invigorates the palate and cleanses the taste buds, ensuring every bite of cake feels just as special as the first.

  • Pink Champagne: Raise the celebratory flair with a glass of bubbly pink champagne. This effervescent drink adds a luxurious touch to any gathering and pairs beautifully with sweet treats, perfect for toasting to love!

Expert Tips for Little Debbie Valentine Cakes

• Room Temperature Ingredients: Always use room temperature ingredients for better mixing and a fluffy texture in your Little Debbie Valentine Cakes.

• Cool Before Frosting: Make sure your cakes are entirely cooled before adding the filling to prevent it from melting and sliding off.

• Freeze for Stability: Freezing the assembled cakes before dipping helps them maintain their shape and makes handling easier.

• Gel Food Dye: When coloring the coating, opt for gel-based dye to ensure it doesn’t seize, allowing for a smooth chocolate finish.

• Monitor Baking Time: Keep an eye on your cakes while baking; check at the lower end of the time range to avoid overbaking and maintain moisture.

Little Debbie Valentine Cakes Recipe FAQs

What kind of cake mix works best for this recipe?
Absolutely! A boxed white cake mix is preferred for its light and fluffy texture, but in a pinch, you can substitute it with a yellow box cake mix. Just ensure to adjust any other sweeteners as needed for balance!

How do I store my Little Debbie Valentine Cakes?
Keep your assembled cakes in an airtight container in the refrigerator for up to 1 week. This will help preserve their freshness and fluffy marshmallow filling. If you want to store them longer, see the next question!

Can I freeze these cakes?
Yes! To freeze your Little Debbie Valentine Cakes, I recommend wrapping each uncoated cake tightly in plastic wrap and then in foil to prevent freezer burn. They can be stored for up to 3 months. When you’re ready to enjoy them, simply thaw in the fridge overnight before dipping!

What should I do if my chocolate coating seizes during melting?
Oh no! If your chocolate becomes thick and clumpy, it sounds like it may have come into contact with moisture. To remedy this, add a teaspoon of vegetable oil or Crisco while gently reheating it in your microwave or over a double boiler. Stir continuously until smooth and shiny again.

Are there any dietary considerations I should be aware of?
Definitely! If you have guests with specific dietary restrictions, be sure to check for allergies to key ingredients like eggs, dairy, or nut products. You can also make these cakes gluten-free by opting for a gluten-free cake mix, which can still provide that delightful taste and texture!

How can I make these cakes truly special for Valentine’s Day?
Consider adding extra flair by making heart-shaped decorations from colored sprinkles or edible glitter on top of the pink chocolate. You can also experiment with flavored extracts in the cake batter or filling, such as almond or raspberry, to give your Little Debbie Valentine Cakes a unique and personal touch!

Little Debbie Valentine Cakes

Homemade Little Debbie Valentine Cakes for a Sweet Surprise

These Homemade Little Debbie Valentine Cakes are a nostalgic treat, perfect for celebrating love on Valentine’s Day.
Print Recipe Pin Recipe
Prep Time 30 minutes mins
Cook Time 18 minutes mins
Chilling Time 1 hour hr
Total Time 1 hour hr 48 minutes mins
Servings: 32 cakes
Course: Dessert
Cuisine: American
Calories: 210
Ingredients Equipment Method Nutrition Notes

Ingredients
  

For the Cake
  • 1 box White Cake Mix Substitution: Yellow box cake mix can also be used in a pinch.
  • 1 cup Granulated Sugar
  • 1 cup Water
  • 3 large Eggs room temperature
  • 1 teaspoon Vanilla Extract
  • 1/2 cup Vegetable Oil
  • 1 cup All-purpose Flour
  • 1/4 teaspoon Kosher Salt
  • 1 cup Full Fat Sour Cream Not to skip; it enriches flavor and texture.
For the Filling
  • 1 cup Marshmallow Crème Can substitute with marshmallow fluff.
  • 1/2 cup Salted Butter room temperature
  • 2 cup Powdered Sugar
  • 1/4 cup Heavy Cream room temperature
For the Coating
  • 1 lb Almond Bark Real white chocolate can be used but may be more temperamental.
  • 1 tablespoon Crisco
  • 3 drops Pink Gel Food Dye must be gel-based to avoid seizing.

Equipment

  • Mixer
  • Baking Pans
  • Parchment Paper
  • Cookie cutter
  • Heatproof bowl
  • Double Boiler

Method
 

Step-by-Step Instructions
  1. Preheat your oven to 350°F (175°C) and prepare two half sheet pans by lining them with parchment paper.
  2. In a large mixing bowl, combine the boxed white cake mix, granulated sugar, water, eggs, vanilla extract, and vegetable oil. Blend until smooth, about 2–3 minutes. Incorporate the all-purpose flour, kosher salt, and full-fat sour cream until smooth.
  3. Divide the batter evenly between the prepared pans and smooth the tops. Bake for 15-18 minutes until a toothpick inserted comes out clean. Cool the cakes for 30 minutes before refrigerating for 30-60 minutes.
  4. Beat together the marshmallow crème and salted butter until fluffy. Gradually add powdered sugar and mix thoroughly, then add heavy cream until you reach a spreadable consistency.
  5. Use a 3-inch heart-shaped cookie cutter to cut out 32 hearts from the cooled cake layers. Press down gently to ensure clean edges.
  6. Spread a generous layer of the marshmallow filling on half of the heart-shaped cake pieces. Place another heart on top, creating a sandwich. Freeze for 1 hour to firm up.
  7. Melt the almond bark in a heatproof bowl using the microwave or double boiler, mixing in Crisco for consistency. This coating will cover your cakes beautifully.
  8. Dip each frozen cake into the melted pink chocolate coating and allow excess chocolate to drip off. Let set until coating hardens.

Nutrition

Serving: 1cakeCalories: 210kcalCarbohydrates: 25gProtein: 2gFat: 10gSaturated Fat: 5gPolyunsaturated Fat: 1gMonounsaturated Fat: 3gCholesterol: 40mgSodium: 130mgPotassium: 110mgSugar: 15gVitamin A: 200IUCalcium: 20mgIron: 1mg

Notes

Room temperature ingredients ensure better mixing. Cool cakes before adding filling to prevent sliding off. Freeze assembled cakes for stability before dipping.

Tried this recipe?

Let us know how it was!

Red Velvet Cookie Cups: A Sweet Valentine's Day Delight

February 3, 2026 by Grace Snow Leave a Comment

With each tick of the clock, anticipation filled the air as I dove into a whirlwind of colors and flavors. The moment you take a bite of these Red Velvet Cookie Cups, you’re met with a scrumptious, soft crumb enveloped in the delightful tang of creamy cheese frosting. Not only are they an impeccable treat for special occasions like Valentine’s Day, but their charm as a cozy, homemade dessert will have everyone at the table swooning. Plus, they’re surprisingly quick to prepare, making them a go-to for any spontaneous get-together! So, whether you're crafting sweet moments for loved ones or indulging in a quiet evening treat, these cookie cups are here to elevate your dessert game. Ready to create a colorful masterpiece that tastes as good as it looks?

Why are Red Velvet Cookie Cups irresistible?

Irresistible sweetness: These Red Velvet Cookie Cups bring a delightful twist on a classic dessert, bursting with flavor and topped with creamy frosting.
Perfect for sharing: Ideal for Valentine’s Day or birthday parties, these cookie cups are sure to impress friends and family.
Quick and easy: With simple ingredients and a fast preparation time, you’ll have perfect treats ready in no time.
Versatile options: Feel free to mix up the frosting flavors or toppings, like sprinkles or chocolate, to match any occasion.
Homemade goodness: There's nothing like the satisfaction of enjoying a cozy, homemade dessert that elevates any gathering!

Red Velvet Cookie Cups Ingredients

For the Cookie Cups

  • All-Purpose Flour – Provides essential structure for the cookie cups.
  • Unsweetened Cocoa Powder – Adds a rich and decadent chocolate flavor that enhances the cookies.
  • Kosher Salt – Balances the sweetness and elevates the flavors in the cookie dough.
  • Baking Soda – Ensures the cookies rise beautifully, creating a light and fluffy texture.
  • Butter (softened) – Contributes a rich, buttery flavor and adds moisture to the mix.
  • Granulated Sugar – Sweetens the cookie cups and helps in achieving the desired structure.
  • Brown Sugar – Imparts depth and moisture, rounding out the sweetness.
  • Egg – Acts as a binder for all ingredients; consider using a flax egg for a vegan twist.
  • Red Food Coloring – Gives the cookie cups their iconic, vibrant red color; beet juice can be a natural substitute.
  • Vanilla Extract – Enhances the overall flavor profile of the cookie.
  • White Vinegar – Activates the baking soda, aiding in creating a tender crumb.

For the Cream Cheese Frosting

  • Cream Cheese (softened) – The star ingredient that provides a creamy and tangy flavor.
  • Butter (softened) – Adds richness to the frosting, ensuring a smooth texture.
  • Powdered Sugar – Sweetens and gives the frosting that silky smooth consistency.
  • Vanilla Extract – Infuses the frosting with a warm and inviting flavor.

Step‑by‑Step Instructions for Red Velvet Cookie Cups

Step 1: Preheat the Oven
Begin by preheating your oven to 350°F (175°C). This ensures an evenly baked batch of Red Velvet Cookie Cups that rise beautifully. Take a moment to familiarize yourself with your oven settings, and while you’re waiting, gather all your ingredients to keep the process smooth and enjoyable.

Step 2: Mix the Dry Ingredients
In a small mixing bowl, sift together the all-purpose flour, unsweetened cocoa powder, kosher salt, and baking soda. This combines the ingredients and removes any lumps, creating a light and airy texture for your cookie cups. Set this mixture aside as you prepare to work on the wet ingredients, making sure to use a whisk for even blending.

Step 3: Cream the Butter and Sugars
In a large mixing bowl, beat together the softened butter, granulated sugar, and brown sugar until the mixture is fluffy and pale, which usually takes about 3–5 minutes using an electric mixer. This step adds air to your dough, enhancing the overall texture of the Red Velvet Cookie Cups.

Step 4: Incorporate Wet Ingredients
Once your sugars are creamed, add in the egg, red food coloring, vanilla extract, and white vinegar. Mix on medium speed until everything is well combined, creating a vibrant, rich batter. The red food coloring is essential for that iconic look, so ensure it’s evenly distributed throughout the mixture.

Step 5: Combine the Mixtures
Gradually add your reserved dry ingredients to the wet mixture, gently mixing until just combined. Avoid overmixing to maintain the tenderness of the Red Velvet Cookie Cups. A few flour streaks are okay; you want the dough to retain some moisture for delightful cups.

Step 6: Prepare the Muffin Tins
Grease two 24-cup mini muffin tins with cooking spray or line them with paper liners. Make sure each cavity is well-coated to prevent sticking, setting the stage for easy removal of your beautifully baked Red Velvet Cookie Cups after they’re finished in the oven.

Step 7: Fill the Tins
Spoon the cookie dough into each muffin cup, filling them about ¾ full to allow room for rising. You should see a lovely red batter nestled in each cup, promising a delightful treat ahead. Ensure even distribution to ensure all cookies bake uniformly.

Step 8: Bake the Cookie Cups
Place the filled muffin tins in your preheated oven and bake for approximately 13 minutes. Keep an eye on them; the edges should appear set while the centers may still look slightly underbaked. This will ensure they stay soft and chewy once cooled.

Step 9: Create Indentations
Once baked, carefully remove the muffin tins from the oven. While they are still warm, use a spatula to gently press the center of each cookie to create a cup shape. This step is crucial for holding that luscious cream cheese frosting, so take care to shape them evenly.

Step 10: Cool Completely
Allow the cookie cups to cool in the tins for about 5 minutes before transferring them to a wire rack. This cooling process will help them firm up while maintaining a tender interior, making it easier to frost them later on.

Step 11: Make the Cream Cheese Frosting
In a large bowl, blend together the softened cream cheese, softened butter, powdered sugar, and vanilla extract. Use an electric mixer to whip until smooth and creamy, which usually takes about 2-3 minutes. The frosting should be light and fluffy, perfect for topping your Red Velvet Cookie Cups.

Step 12: Pipe the Frosting
Transfer the cream cheese frosting into a piping bag fitted with your preferred tip. Once the cookie cups are completely cooled, pipe a generous swirl of frosting onto each cup, creating a beautiful and inviting top. Your Red Velvet Cookie Cups are now ready for a delightful presentation!

What to Serve with Red Velvet Cookie Cups

Indulge in an unforgettable dessert experience by crafting a delightful spread to accompany these joyous treats!

  • Vanilla Ice Cream: The cool creaminess beautifully complements the rich, chocolatey flavor of the cookie cups, creating a heavenly contrast. A scoop beside your cookie adds a touch of indulgence that’s hard to resist.

  • Coffee or Espresso: This warm beverage enhances the dessert's chocolate notes while the robust flavor balances out the sweetness. A lovely sip of coffee while nibbling on these treats creates a comforting experience.

  • Fresh Berries: Strawberries or raspberries provide a refreshing burst of tartness that cuts through the richness of the frosting. Their juiciness pairs beautifully with the soft cookies, adding a lovely pop of color.

  • Chocolate Drizzle: A drizzle of melted chocolate over the frosted cookie cups creates an elegant presentation. This extra layer of chocolate not only enhances flavor but also makes them a visual delight for any gathering.

  • Sparkling Wine: Celebrate special moments with a bubbly toast! The effervescence of sparkling wine perfectly contrasts the creamy frosting, making every bite feel festive and joyous.

  • Chocolate-Covered Pretzels: The salty crunch of chocolate-covered pretzels adds texture and a surprise twist to your dessert table. Their sweetness plays nicely with the cookie cups’ frosting, providing a balanced snack that guests will enjoy.

  • Milkshakes: A classic pairing, vanilla or chocolate milkshakes bring nostalgia and joy to your dessert experience. Their creamy texture enhances the delightful flavors of the cookie cups, making them a nostalgic treat.

  • Caramel Sauce: A light drizzle of caramel adds a rich, buttery sweetness that elevates each bite. This luxurious addition pairs beautifully with the tangy cream cheese frosting for an indulgent experience.

Make Ahead Options

These Red Velvet Cookie Cups are a dream for busy home cooks looking to save time! You can prepare the cookie dough up to 24 hours in advance; simply mix the ingredients and refrigerate them in an airtight container. For even more convenience, the baked cookie cups can be stored at room temperature for up to 3 days without losing their delightful texture. Just ensure they cool completely before storing to maintain their soft interior. When you're ready to serve, frost them with the cream cheese frosting, which can also be made ahead and kept in the fridge for up to 3 days. Just let it sit at room temperature for about 30 minutes to soften before piping onto your beautiful cookies. This way, you can enjoy your sweet creations with minimal effort on the day of your event!

Red Velvet Cookie Cups Variations

Feel free to explore these delightful twists that will make your Red Velvet Cookie Cups even more special!

  • Frosting Flavors: Add flavors like almond extract or lemon zest for a unique twist on the cream cheese frosting. This is a brilliant way to personalize each cookie cup. Imagine the surprise of your guests when they bite into a zingy lemon treat!

  • Decorative Toppings: Top with festive sprinkles, shaved chocolate, or mini chocolate chips for added texture and visual appeal. A little color and crunch can elevate your cookies from homemade to showstopper!

  • Nutty Addition: Fold in chopped walnuts or pecans into the batter for a crunchy surprise in every bite. This nutty dimension will blend beautifully with the rich flavors, creating a delightful contrast.

  • Gluten-Free Option: Substitute all-purpose flour with a gluten-free blend for a safe alternative that everyone can enjoy. With a perfect texture, these cookies will satisfy gluten-free diners without compromising on flavor.

  • Vegan Swap: Replace the egg with a flax egg to make these cookie cups vegan-friendly. Combine 1 tablespoon of ground flaxseed with 3 tablespoons of water, let it sit to thicken, and mix it in as you would the egg.

  • Chocolate Drizzle: Enhance the cookie cups with a drizzle of melted chocolate over the frosting. The rich chocolate complements the creamy topping, creating an indulgent treat no one will resist!

  • Spicy Kick: Add a pinch of cayenne pepper or cinnamon to the cookie dough for a subtle, warming flavor that perfectly balances the sweetness. A hint of spice can surprise and delight!

Why not also check out my Matcha Cookies Soft or Peaches Cream Cookies for more baking inspiration?

Storage Tips for Red Velvet Cookie Cups

  • Room Temperature: Store leftover Red Velvet Cookie Cups in an airtight container at room temperature for up to 3 days to maintain their soft texture and flavor.
  • Fridge: If you prefer a firmer frosting, refrigerate the cookie cups in an airtight container for up to 5 days. Allow them to come to room temperature before serving for the best taste.
  • Freezer: For longer storage, freeze un-frosted cookie cups in a single layer on a baking sheet, then transfer to an airtight container for up to 2 months. Frost them after thawing for freshness.
  • Reheating: To enjoy them warm, microwave refrigerated or frozen cookie cups for about 10-15 seconds; this will revitalize their delightful, soft texture.

Expert Tips for Red Velvet Cookie Cups

  • Room Temperature Ingredients: Ensure butter and cream cheese are softened to room temperature for easy mixing and a smooth frosting texture, resulting in perfect Red Velvet Cookie Cups.
  • Avoid Overmixing: When combining dry and wet ingredients, mix just until combined to keep the texture tender; overmixing can lead to tough cookie cups.
  • Create Perfect Indentations: Use a spatula or the handle of a wooden spoon to gently press centers of the warm cookies to form cup shapes, ensuring they hold the frosting beautifully.
  • Monitor Baking Time: Keep an eye on your cookie cups as they bake — look for set edges and slightly underbaked centers for that perfect soft texture upon cooling.
  • Storage Advice: Store leftover cookie cups in an airtight container at room temperature for up to three days, ensuring their delightful taste lasts.
  • Experiment with Toppings: Feel free to mix frosting flavors or use decorative toppings like sprinkles, adding a personal touch to your Red Velvet Cookie Cups.

Red Velvet Cookie Cups Recipe FAQs

How do I select the best ingredients for my Red Velvet Cookie Cups?
Absolutely! For the best results, choose high-quality unsweetened cocoa powder to enhance the chocolate flavor and fresh eggs to ensure proper binding. Look for a vibrant food coloring, or opt for organic beet juice if you prefer a natural alternative. Using room temperature butter and cream cheese will make your mixing process smoother, creating the perfect texture for both the cookies and frosting.

How should I store leftover Red Velvet Cookie Cups?
Very! Store your leftover cookie cups in an airtight container at room temperature for up to 3 days. If you want to keep them fresher longer, you can refrigerate them for up to 5 days. Just let them come to room temperature before serving to ensure they maintain their delightful flavor and soft texture.

Can I freeze my Red Velvet Cookie Cups?
Absolutely! To freeze, first, allow the un-frosted cookie cups to cool completely. Place them in a single layer on a baking sheet and freeze for about 1-2 hours until firm. Then, transfer them to an airtight container or freezer bag, layering parchment paper between cups if needed, and store for up to 3 months. Frost them after thawing for the best taste and texture!

What should I do if my cookie cups don’t hold their shape after baking?
Oh no! If your cookie cups don’t keep their shape, there may have been a few factors at play. Make sure to press down gently in the center while they’re still warm to create those perfect cup shapes. Overmixing the batter can also cause them to spread too much, so remember to combine only until just mixed. Always keep an eye on the baking time, as underbaking can also lead to a softer structure.

Are Red Velvet Cookie Cups suitable for special diets?
Certainly! If you're looking for vegan options, simply substitute the egg with a flax egg (1 tablespoon of flaxseed meal mixed with 2.5 tablespoons of water, let sit for 5 minutes until it gels). For gluten-free Red Velvet Cookie Cups, replace the all-purpose flour with a gluten-free blend designed for baking. Always check for allergies related to dairy and nuts in your ingredients to ensure they’re safe for everyone!

Red Velvet Cookie Cups

Red Velvet Cookie Cups: A Sweet Valentine's Day Delight

Delight in the scrumptious flavors of Red Velvet Cookie Cups, the perfect Valentine's Day treat.
Print Recipe Pin Recipe
Prep Time 20 minutes mins
Cook Time 13 minutes mins
Cooling Time 5 minutes mins
Total Time 38 minutes mins
Servings: 24 cookie cups
Course: Dessert
Cuisine: American
Calories: 180
Ingredients Equipment Method Nutrition Notes

Ingredients
  

For the Cookie Cups
  • 2 cups All-Purpose Flour
  • 1 tablespoon Unsweetened Cocoa Powder
  • 1 teaspoon Kosher Salt
  • 1 teaspoon Baking Soda
  • 1 cup Butter (softened)
  • 1 cup Granulated Sugar
  • 1/2 cup Brown Sugar
  • 1 large Egg or flax egg for vegan
  • 1 tablespoon Red Food Coloring or beet juice
  • 1 teaspoon Vanilla Extract
  • 1 teaspoon White Vinegar
For the Cream Cheese Frosting
  • 8 oz Cream Cheese (softened)
  • 1/2 cup Butter (softened)
  • 4 cups Powdered Sugar
  • 1 teaspoon Vanilla Extract

Equipment

  • Mixing bowls
  • Electric mixer
  • Whisk
  • Spatula
  • piping bag
  • mini muffin tins

Method
 

Step-by-Step Instructions
  1. Preheat your oven to 350°F (175°C).
  2. Sift together flour, cocoa powder, salt, and baking soda in a mixing bowl.
  3. Beat together softened butter, granulated sugar, and brown sugar until fluffy.
  4. Add egg, red food coloring, vanilla extract, and vinegar; mix until combined.
  5. Gradually mix in dry ingredients until just combined.
  6. Grease or line 24-cup mini muffin tins.
  7. Fill muffin cups 3/4 full with cookie dough.
  8. Bake for approximately 13 minutes, watching for set edges.
  9. Press the center of each cookie to create a cup shape while warm.
  10. Cool in tins for about 5 minutes before transferring to a wire rack.
  11. Blend cream cheese, butter, powdered sugar, and vanilla until smooth.
  12. Pipe frosting onto cooled cookie cups.

Nutrition

Serving: 1cookie cupCalories: 180kcalCarbohydrates: 22gProtein: 2gFat: 9gSaturated Fat: 5gCholesterol: 25mgSodium: 150mgPotassium: 50mgFiber: 1gSugar: 10gVitamin A: 2IUCalcium: 2mgIron: 4mg

Notes

Ensure ingredients like butter and cream cheese are at room temperature for best results.

Tried this recipe?

Let us know how it was!

No-Bake Strawberry Cheesecake Bites for Effortless Indulgence

February 3, 2026 by Grace Snow Leave a Comment

As I walked through the vibrant farmers' market, the scent of fresh strawberries wafted through the air, igniting my craving for a sweet, no-bake delight. That's when I decided it was time to whip up some No-Bake Strawberry Cheesecake Bites. These little gems are not only a splendidly easy dessert, they also offer that perfect balance of creamy goodness and delightful crunch that will have both kids and adults reaching for seconds! With minimal prep time and no baking involved, this recipe quickly turns our favorite cheesecake into a playful treat. Plus, they’re versatile enough to be customized with whatever toppings you have on hand. Are you ready to dive into this fruity bliss and impress your loved ones? Let’s get started!

Why Make No-Bake Strawberry Cheesecake Bites?

Irresistibly Easy: You’ll love how effortlessly these bites come together with just a few simple ingredients!

Family-Friendly Fun: Kids can help, making these bites a great way to bond while creating a delicious treat.

Versatile Treat: Swap the strawberry cake mix for other flavors to suit your taste or the season—chocolate or vanilla would be delightful!

No-Bake Convenience: Perfect for warm weather when you want dessert without heating up the kitchen.

Crowd-Pleasing Delight: Whether it's a party or a casual family dinner, these bites are sure to impress and disappear quickly!

Enjoy your delightful creation paired with whipped cream or a side of chocolate-covered strawberries for an extra indulgent touch!

No-Bake Strawberry Cheesecake Bites Ingredients

For the Filling

  • Cream Cheese – provides a creamy texture and rich flavor; use full-fat for the best results.
  • Fine Sea Salt – enhances sweetness and balances flavors; regular salt can be a substitute.
  • Clear Vanilla Extract – adds depth of flavor; pure vanilla extract works as a great alternative.
  • Strawberry Cake Mix – this is the base of the dessert and gives that delightful strawberry flavor; remember to heat-treat if using for raw consumption.

For the Coating

  • Almond Bark or Pink Melting Wafers – used to create a crunchy, sweet exterior; chocolate chips can also be used as a substitute.
  • White Chocolate (optional) – drizzle over the bites for a decorative touch that adds sweetness.

With these ingredients, you're all set to create your No-Bake Strawberry Cheesecake Bites! Enjoy the ease of this quick dessert that everyone will adore.

Step‑by‑Step Instructions for No-Bake Strawberry Cheesecake Bites

Step 1: Prep the Filling
Start by taking your softened cream cheese and placing it in a mixing bowl. Using a hand mixer, beat it together with the salt and clear vanilla extract for about 2-3 minutes until smooth and creamy. This step is crucial as it sets the foundation for the rich filling of your No-Bake Strawberry Cheesecake Bites.

Step 2: Incorporate Cake Mix
Gradually add the heat-treated strawberry cake mix to your cream cheese mixture. Mix on low speed for about 1-2 minutes, or until a thick, crumbly dough forms. The dough should be soft yet hold its shape well, making it easy to scoop into balls later on.

Step 3: Chill
Once your dough is ready, cover the mixing bowl with plastic wrap and place it in the refrigerator. Chill for at least 2 hours, or overnight if you prefer a firmer texture. This chilling time is essential for allowing the flavors to meld and the dough to become easier to handle when shaping into bites.

Step 4: Melt Coating
While your dough chills, prepare the coating by melting almond bark or pink melting wafers. Chop the bark into smaller pieces for even melting and heat in a microwave-safe bowl in 30-second intervals, stirring in between, until fully smooth. Aim for a glossy consistency, as this will create a beautiful outer layer for your No-Bake Strawberry Cheesecake Bites.

Step 5: Shape the Bites
Once the dough is sufficiently chilled, take it out of the refrigerator. Using a cookie scoop or your hands, form small balls, about 1-1.5 inches in diameter. Roll each ball gently to ensure a smooth surface, making it easier to coat later.

Step 6: Dip and Set
Carefully dip each shaped bite into the melted almond bark or pink wafers, allowing excess coating to drip off. Place the coated bites onto a parchment-lined baking sheet. If desired, sprinkle with colorful sprinkles before the coating sets. Refrigerate again for about 30 minutes, or until the coating is firm and set.

Expert Tips for No-Bake Strawberry Cheesecake Bites

  • Softened Cream Cheese: Ensure your cream cheese is at room temperature for the smoothest filling. This makes mixing easier and avoids lumps.

  • Heat Treat Cake Mix: Don't forget to heat-treat your strawberry cake mix to eliminate raw flour risks. Spread it on a baking sheet and bake at 350°F for optimal safety.

  • Chill Time Matters: Allow the mixture to chill for at least 2 hours or overnight. This step ensures the bites hold their shape and flavors meld beautifully.

  • Coating Consistency: Melt the almond bark or pink wafers until glossy and smooth for the best coating. Stir frequently during melting to avoid burning.

  • Add a Personal Touch: Feel free to add toppings like crushed nuts or cookie crumbs before the coating sets. This will enhance texture and flavor!

No-Bake Strawberry Cheesecake Bites Variations

Feel free to get creative and personalize your No-Bake Strawberry Cheesecake Bites to suit your taste preferences or dietary needs!

  • Flavor Swap: Substitute strawberry cake mix with vanilla or chocolate for fun, flavorful twists that will delight everyone.
    Mixing up the cake flavors offers a world of possibilities. Vanilla has a classic charm, while chocolate brings a decadent richness.

  • Nutty Crunch: Add crushed almonds or walnuts to the coating for a delightful contrast and added crunch.
    The nuttiness beautifully complements the creamy filling, creating a delightful texture that enhances each bite.

  • Caramel Drizzle: Top your bites with a drizzle of caramel sauce for an indulgent, sweet finish.
    The combination of caramel and strawberry will make your taste buds dance with joy!

  • Coconut Bliss: Roll your bites in toasted coconut flakes instead of chocolate for a tropical twist.
    This adds a lovely chewiness while amplifying that sweet, fruity flavor everyone loves.

  • Spicy Kick: Toss in a pinch of cayenne pepper or chili powder to the filling for a surprising and delightful heat kick.
    This twist transforms the sweetness into a truly unique flavor experience, perfect for adventurous eaters!

  • Yogurt Dip: Serve these bites with a side of yogurt dip flavored with honey and lemon for an added layer of flavor.
    The creamy dip complements the bites perfectly, providing a lovely balance of sweetness and tang.

  • Fruit Infusion: Fold in some finely chopped fresh strawberries or raspberries for an extra fruit burst in the filling.
    This not only enhances the color but also adds a refreshing note to each bite of cheesecake.

  • Chocolate Coating: For chocolate lovers, dip the bites in milk or dark chocolate for an extra chocolatey treat.
    The richness of chocolate pairs beautifully with the creamy cheesecake interior, creating utter decadence!

With these variations, your No-Bake Strawberry Cheesecake Bites will always be a hit! They’re perfect for gatherings or simply indulging at home—with a touch of creativity, you can make them uniquely yours. Consider pairing them with a dollop of whipped cream for an extra touch of indulgence!

How to Store and Freeze No-Bake Strawberry Cheesecake Bites

  • Fridge: Store the bites in an airtight container in the refrigerator for up to 3-5 days. They’ll stay deliciously creamy if kept fully sealed.

  • Freezer: For longer storage, you can freeze the No-Bake Strawberry Cheesecake Bites in a freezer-safe container for up to 3 months. Just remember to separate layers with parchment paper to prevent sticking.

  • Thawing: To thaw, simply place them in the fridge overnight. This gentle method will help maintain their texture and flavor.

  • Serving After Freezing: Enjoy directly from the freezer for a refreshing treat, or let them sit at room temperature for a few minutes before savoring your delightful bites!

What to Serve with No-Bake Strawberry Cheesecake Bites

Delight in these charming treats while crafting a full meal experience that your family will cherish.

  • Whipped Cream: A dollop of fluffy whipped cream adds a light and airy touch, enhancing the creamy texture of the bites.

  • Fresh Berries: A medley of fresh strawberries, blueberries, or raspberries provides a juicy contrast and elevates the dessert's overall freshness.

  • Chocolate-Covered Strawberries: Pairing these bites with chocolate-covered strawberries gives a luxurious appeal, creating a dessert plate that’s both decadent and delightful.

  • Vanilla Ice Cream: The classic pairing of these bites with smooth vanilla ice cream adds an extra layer of creaminess, making every bite feel indulgent.

  • Mint Leaves: A sprinkle of fresh mint leaves can elevate presentation and provide a refreshing, aromatic note to balance the sweetness.

  • Iced Tea or Lemonade: Both beverages offer a refreshing, tart complement, cleansing the palate between bites of the rich cheesecake delight.

  • Coffee or Espresso: A warm beverage like coffee or espresso can contrast beautifully with the cold, sweet bites, adding a touch of sophistication to your dessert experience.

  • Chocolate Drizzle: A drizzle of melted chocolate over the cheesecake bites enhances their aesthetic appeal, adding both flavor and texture.

With these pairing ideas, you’re all set to create a beautiful, balanced dessert experience that will delight everyone around the table!

Make Ahead Options

These No-Bake Strawberry Cheesecake Bites are perfect for busy home cooks who want to simplify dessert prep! You can prepare the filling and chill it in the refrigerator up to 24 hours in advance, ensuring a firmer texture for easy shaping later. Simply cover the mixing bowl tightly with plastic wrap to prevent any drying out. With the filling ready, you can also roll the bites into balls, dip them in the coating, and refrigerate them again for about 30 minutes to set the outer layer. When you’re ready to serve, just take them out, and enjoy a delicious treat that tastes fresh and delightful, keeping your dessert game strong without the last-minute rush!

No-Bake Strawberry Cheesecake Bites Recipe FAQs

How do I choose ripe strawberries for this recipe?
Absolutely! When selecting strawberries, look for vibrant red, firm berries with no dark spots or bruises. Those with a bright green cap indicate freshness. You want strawberries that are sweet; if they have that fragrant aroma, they're likely perfect for your cheesecake bites!

What’s the best way to store No-Bake Strawberry Cheesecake Bites?
For the best storage, keep your bites in an airtight container in the refrigerator for up to 3-5 days. This will ensure they remain creamy and enjoyable. Just make sure they are fully sealed to avoid drying out – you want all that lovely flavor to stick around!

Can I freeze the No-Bake Strawberry Cheesecake Bites?
Absolutely! To freeze your bites, place them in a single layer in a freezer-safe container lined with parchment paper to prevent sticking. They can be stored in the freezer for up to 3 months. When you're ready to enjoy them, simply thaw in the refrigerator overnight to maintain their delightful texture.

What if the dough seems too crumbly?
If your dough appears crumbly and isn't holding together, I recommend adding a touch more softened cream cheese or a splash of milk to bring it together. Mix until well combined – this should help achieve that creamy consistency you're looking for!

Are these bites safe for children with allergies?
Great question! The No-Bake Strawberry Cheesecake Bites contain cream cheese and cake mix, which may have allergens such as dairy and gluten. If you're catering to someone with allergies, consider using gluten-free cake mix and dairy-free cream cheese alternatives. Always check packaging for allergen information!

Can I make these bites ahead of time?
Very! These bites actually taste even better after a day or two in the fridge as the flavors meld together beautifully. You can prepare them a day before your event, just remember to cover them securely to keep them fresh!

No-Bake Strawberry Cheesecake Bites

No-Bake Strawberry Cheesecake Bites for Effortless Indulgence

Indulge in No-Bake Strawberry Cheesecake Bites, a delightful dessert combining creamy and crunchy textures that everyone will love.
Print Recipe Pin Recipe
Prep Time 15 minutes mins
Chill Time 2 hours hrs
Total Time 2 hours hrs 15 minutes mins
Servings: 12 bites
Course: Dessert
Cuisine: American
Calories: 120
Ingredients Equipment Method Nutrition Notes

Ingredients
  

For the Filling
  • 8 oz Cream Cheese Softened, full-fat recommended
  • 1/4 tsp Fine Sea Salt Enhances sweetness
  • 1 tsp Clear Vanilla Extract Or use pure vanilla extract
  • 1 cup Strawberry Cake Mix Heat-treated if using for raw consumption
For the Coating
  • 12 oz Almond Bark or Pink Melting Wafers Chocolate chips can be used as a substitute
  • optional qty White Chocolate For drizzling on top

Equipment

  • Mixing Bowl
  • hand mixer
  • Microwave-safe bowl
  • Parchment Paper
  • Cookie Scoop

Method
 

Step-by-Step Instructions
  1. Prep the Filling: Beat softened cream cheese, salt, and clear vanilla extract until smooth and creamy.
  2. Incorporate Cake Mix: Gradually add the heat-treated strawberry cake mix, mixing on low until a thick dough forms.
  3. Chill: Cover the bowl with plastic wrap and refrigerate for at least 2 hours or overnight.
  4. Melt Coating: Melt almond bark or pink melting wafers in intervals until smooth.
  5. Shape the Bites: Form small balls from the chilled dough, about 1-1.5 inches in diameter.
  6. Dip and Set: Dip each ball in the melted coating, place on a lined baking sheet, and chill for 30 minutes.

Nutrition

Serving: 1biteCalories: 120kcalCarbohydrates: 15gProtein: 2gFat: 7gSaturated Fat: 4gCholesterol: 15mgSodium: 90mgPotassium: 50mgSugar: 8gVitamin A: 5IUVitamin C: 2mgCalcium: 3mgIron: 2mg

Notes

Store in an airtight container in the fridge for up to 3-5 days, or freeze for up to 3 months. Thaw in the fridge overnight.

Tried this recipe?

Let us know how it was!

Sugar Plum Fairy Shortbread Bites for Joyful Gifting

February 3, 2026 by Grace Snow Leave a Comment

As I was sifting through my pantry for joyful baking inspiration, I stumbled upon the perfect combination of flavors that whisked me away to enchanted holiday gatherings. Enter the delightful Sugar Plum Fairy Shortbread Bites, a recipe that brings together the comforting embrace of buttery dough and festive colors without the hassle of rolling or cutting. These easy-to-make bites are not just a treat for the taste buds; they’re a fabulous giftable dessert that will make anyone feel cherished during the season. Plus, their melt-in-your-mouth texture will have friends and family asking for seconds. Ready to sprinkle some magic into your kitchen? Let’s dive into this festive wonder.

Why Choose Sugar Plum Fairy Shortbread Bites?

Easy Preparation: No rolling or cutting makes these bites a hassle-free treat, perfect for busy bakers.

Irresistible Flavor: Buttery goodness combined with sweet almond and vanilla extracts ensures each bite is rich and delightful.

Gorgeous Presentation: Use festive food coloring and nonpareils to create a visually stunning gift that’s as beautiful as it is tasty.

Giftable Convenience: These shortbread bites make a thoughtful gift for any occasion, whether during the holidays or as a sweet surprise for someone special.

Crowd-Pleasing Treat: Their melt-in-your-mouth texture guarantees that everyone at your gathering will be coming back for more! You might also enjoy making a batch of Easy Festive Cookies to spread the joy even further!

Sugar Plum Fairy Shortbread Bites Ingredients

For the Dough
• Butter – Provides richness and a melt-in-your-mouth texture; ensure it's very soft for easy mixing.
• Granulated Sugar – Sweetens the shortbread; can be replaced with powdered sugar for a slightly different texture.
• Almond Extract – Adds a delightful nutty flavor; substitute with vanilla extract if desired.
• Vanilla Extract – Enhances the overall flavor profile of the cookies.
• Food Coloring (pink or red) – Optional for a festive touch; adds visual appeal to your Sugar Plum Fairy Shortbread Bites.
• All-Purpose Flour – The main structure of the cookies; no direct substitutes recommended, but gluten-free flour might work for a gluten-free version.
• Kosher Salt – Balances the sweetness and enhances flavor.

For the Topping/Glaze
• Multi-Colored Nonpareils – Provides visual appeal and a crunchy texture; can substitute with any sprinkles or omit altogether.
• Powdered Sugar – Key for the optional glaze, which adds sweetness and a beautiful finish.
• Half & Half – Used in the glaze for creamy consistency; can substitute with milk or a non-dairy alternative.

Step‑by‑Step Instructions for Sugar Plum Fairy Shortbread Bites

Step 1: Preheat and Prepare Your Pan
Begin by preheating your oven to 325°F (163°C). As the oven warms, line a 9-inch square baking pan with foil, ensuring it hangs over the edges for easy removal later. This will help your Sugar Plum Fairy Shortbread Bites lift out seamlessly once baked.

Step 2: Cream the Butter and Sugar
In a large mixing bowl, beat the very soft butter with granulated sugar, almond extract, and vanilla extract until the mixture is creamy and well blended, taking about 2-3 minutes. If you’re adding food coloring for a festive touch, incorporate a few drops at this point until you achieve your desired shade, creating a cheerful base for the cookie dough.

Step 3: Combine Dry Ingredients
Gradually sift in the all-purpose flour and kosher salt to the butter mixture, mixing on low speed until a crumbly texture forms, which should take about 1-2 minutes. This dough should just hold together when pressed. Now, fold in half of the multi-colored nonpareils with a spatula, leaving the rest for sprinkling later.

Step 4: Press the Dough into the Pan
Transfer the dough into the prepared baking pan, pressing it evenly into the bottom to create a smooth layer. Take a moment to sprinkle the reserved nonpareils on top for added color and visual appeal. Then, cover the pan with plastic wrap and refrigerate for about 10 minutes to firm up the dough slightly.

Step 5: Cut and Chill the Dough
After refrigerating, remove the pan and cut the dough into 1-inch squares with a sharp knife, taking care not to separate the pieces just yet. Place the squares onto ungreased cookie sheets, leaving a small gap between each square, then return them to the refrigerator for at least 30 minutes to chill.

Step 6: Bake the Shortbread Bites
Once chilled, pop the baking sheets into the preheated oven and bake the Sugar Plum Fairy Shortbread Bites for 13-18 minutes, or until the edges are just lightly golden. Keep an eye on them to prevent over-baking, as the centers should remain pale. Let them cool on racks for about 10 minutes before transferring them from the sheets.

Step 7: Prepare the Optional Glaze
If you want to add a glaze, whisk together powdered sugar, half & half, almond extract, and vanilla extract in a bowl until smooth and glossy. Make sure it’s not too runny; it should be pourable but thick enough to coat the bites without dripping too quickly.

Step 8: Glaze and Decorate
Using a spoon, drizzle the glaze over each cooled Sugar Plum Fairy Shortbread Bite, allowing it to slightly drip down the sides. Immediately sprinkle additional nonpareils atop the glazing for that extra festive flair. Once decorated, allow the bites to sit undisturbed for about 3-4 hours, giving the glaze ample time to set before serving or packaging.

Sugar Plum Fairy Shortbread Bites Variations

Feel free to sprinkle your own magic into these delightful bites with some fun twists and swaps!

  • Nutty Delight: Swap almond extract for peanut butter for a unique nutty flavor that takes these bites to another level. It's a fantastic way to create a rich, comforting taste that everyone will love.

  • Different Extracts: Try using flavored extracts like peppermint or orange instead of vanilla or almond. This subtle tweak can bring unexpected seasonal flavors that are perfectly delightful.

  • Gluten-Free Option: Use gluten-free flour in place of all-purpose flour for a gluten-free version. Your guests will appreciate the thoughtful consideration to include everyone at the table.

  • Dairy-Free Glaze: Switch half & half with coconut milk to create a lovely glaze that’s dairy-free. The subtle coconut flavor adds another layer of charm to your treats.

  • Explore Colors: Get creative with various food coloring options! Experiment with blues or greens for holiday parties, or perhaps pastels for a spring celebration. The visual appeal will match the taste!

  • Sweet Spice: Add a dash of cinnamon or nutmeg to the dough for a warm flavor twist that’s especially comforting during the colder months. It’s a simple change that makes a big impact.

  • Chocolate Chunk: Fold in a handful of mini chocolate chips into the dough for chocolate lovers! The combination of buttery shortbread with rich chocolate is absolutely irresistible.

  • Festive Sprinkles: Instead of multi-colored nonpareils, use seasonal themed sprinkles like snowflakes or holiday shapes. It’s a small change that can really amp up the festive spirit!

Enhance your baking experience, and should you wish to explore more festive delights, take a look at these Easy Festive Cookies for additional inspiration!

Expert Tips for Sugar Plum Fairy Shortbread Bites

• Perfect Butter Temperature: Ensure your butter is very soft to create a creamy mixture; if it's too cold, the dough won't come together properly.

• Mixing Dough: The dough should be crumbly yet hold together when pressed. Avoid over-mixing once you add the flour to keep it tender.

• Chill Before Baking: Refrigerate the dough squares for at least 30 minutes to help maintain their shape while baking.

• Glaze Setting Time: Allow the glaze to set for at least 3-4 hours before serving or packaging; this ensures a lovely finish without smudges.

• Storage Tips: Keep your Sugar Plum Fairy Shortbread Bites in an airtight container at room temperature to maintain freshness; they can also be frozen for later enjoyment.

What to Serve with Sugar Plum Fairy Shortbread Bites

As you delight in the buttery magic of these festive treats, consider pairing them with complementary flavors and textures for a full experience.

  • Creamy Hot Chocolate: Rich and velvety, this drink envelops your senses, making each sweet bite even more indulgent. A warm cup adds coziness to any occasion.

  • Festive Fruit Platter: Bright seasonal fruits like pomegranates and citrus not only refresh the palate but also elevate the vibrant colors of your shortbread bites, creating a stunning visual feast.

  • Chocolate Dipped Strawberries: Juicy strawberries coated in bittersweet chocolate provide a luscious contrast to the sweet shortbread, making for an irresistible combination that feels luxurious.

  • Spiced Chai Latte: The warm spices of chai enhance the sweetness of the shortbread, wrapping you in a comforting embrace. This aromatic drink is perfect for cozy winter evenings!

  • Whipped Cream and Berries: A dollop of fluffy whipped cream paired with fresh berries adds both decadence and a pop of tartness, balancing the sweetness of the bites beautifully.

  • Vanilla Ice Cream: Creamy vanilla ice cream offers a comforting, cold treat alongside your warm shortbread bites, creating a delightful textural contrast that indulgently melts in your mouth.

  • Sweet Almond Milk: A lovely, dairy-free option that mirrors the nutty flavor in the shortbread, sweet almond milk pairs harmoniously, emphasizing the festive spirit.

  • Lemon Sorbet: A refreshing, tangy sorbet cleanses the palate between treats and complements the buttery bites, making each subsequent mouthful even more delightful.

  • Peppermint Bark: For an extra festive touch, serve these bites alongside crunchy peppermint bark that adds a refreshing crunch, perfectly harmonizing with the shortbread’s subtle sweetness.

Embrace the season and create a magical atmosphere by offering these delightful pairings with your Sugar Plum Fairy Shortbread Bites!

Make Ahead Options

These delightful Sugar Plum Fairy Shortbread Bites are perfect for busy home cooks looking to save time during the hectic holiday season! You can prepare the dough and keep it refrigerated for up to 3 days before baking, ensuring a fresh-tasting treat when you're ready to serve. Simply follow the initial steps of mixing the ingredients and pressing the dough into the pan, then cover and chill. To maintain quality, make sure your dough is wrapped tightly to prevent drying out. When you're ready to bake, simply cut and chill the dough for an additional 30 minutes before placing it in the oven, and you'll have mouthwatering, festive bites that are just as delicious as if they were made fresh that day!

How to Store and Freeze Sugar Plum Fairy Shortbread Bites

Room Temperature: Store your shortbread bites in an airtight container at room temperature for up to 1 week to keep them fresh and tasty.

Fridge: For longer freshness, you can also refrigerate the sugar plum bites, where they will stay delicious for up to 2 weeks. Just allow them to come to room temperature before enjoying.

Freezer: To extend their shelf life, freeze the bites in a single layer on a baking sheet, then transfer them to an airtight container or freezer bag. They can be kept frozen for up to 3 months.

Reheating: When ready to enjoy, simply thaw at room temperature for a couple of hours or warm in a preheated oven at 250°F (120°C) for about 10 minutes. Enjoy your Sugar Plum Fairy Shortbread Bites fresh!

Sugar Plum Fairy Shortbread Bites Recipe FAQs

How do I choose ripe ingredients for the recipe?
Absolutely! For the best results, ensure your butter is very soft, ideally at room temperature, which allows for easy mixing and a creamy texture. The granulated sugar should be fresh, and when using almond extract, check for a strong, nutty aroma—this indicates quality. If you opt for food coloring, choose gel colors for vibrant hues that won’t alter the dough's consistency.

What is the best way to store Sugar Plum Fairy Shortbread Bites?
I recommend storing your Sugar Plum Fairy Shortbread Bites in an airtight container at room temperature, where they’ll stay fresh for about one week. If you want to keep them longer, refrigerating them can extend their lifespan up to 2 weeks. Just be sure to allow them to come back to room temperature before serving for the best flavor and texture.

Can I freeze Sugar Plum Fairy Shortbread Bites? How?
Definitely! Freezing is a great way to enjoy these delights later. First, place the bites in a single layer on a baking sheet and freeze until solid, about 1-2 hours. Then, transfer them to an airtight container or freezer bag, separating layers with parchment paper. They can be stored in the freezer for up to 3 months. When you're ready to enjoy them, just thaw at room temperature for a couple of hours, or warm them in a preheated oven at 250°F (120°C) for about 10 minutes.

What should I do if my dough is too crumbly?
Very common! If your dough is too crumbly and doesn’t hold together, it may need a touch of moisture. Try adding a teaspoon of milk or half & half gradually until the dough comes together without becoming sticky. Make sure your butter is soft enough before mixing, as this is crucial in achieving the right texture.

Are there any dietary considerations I should be aware of?
Absolutely! If you're concerned about allergies, these Sugar Plum Fairy Shortbread Bites can be made nut-free by substituting almond extract with vanilla extract. Be mindful of the food coloring and sprinkles you choose, as some may contain allergens like gluten or artificial dyes. Always check packaging for any dietary restrictions, particularly if you're baking for someone with food sensitivities.

Can I adjust the flavoring of these shortbread bites?
The more the merrier! You can easily swap the almond extract with another extract, such as lemon or coconut, for a unique twist. If you’re up for it, you could even mix in spices like cinnamon or nutmeg to give your bites a warm, seasonal flair. Feel free to experiment with different flavored extracts to customize your Sugar Plum Fairy Shortbread Bites!

Sugar Plum Fairy Shortbread Bites

Sugar Plum Fairy Shortbread Bites for Joyful Gifting

Delightful Sugar Plum Fairy Shortbread Bites, perfect for gifting and festive gatherings.
Print Recipe Pin Recipe
Prep Time 30 minutes mins
Cook Time 18 minutes mins
Chilling Time 30 minutes mins
Total Time 1 hour hr 18 minutes mins
Servings: 16 bites
Course: Dessert
Cuisine: American
Calories: 120
Ingredients Equipment Method Nutrition Notes

Ingredients
  

For the Dough
  • 1 cup Butter Very soft
  • 3/4 cup Granulated Sugar Can use powdered sugar
  • 1 teaspoon Almond Extract Substitute with vanilla if desired
  • 1 teaspoon Vanilla Extract
  • 1 teaspoon Food Coloring (pink or red) Optional
  • 2 cups All-Purpose Flour No direct substitutes recommended
  • 1/4 teaspoon Kosher Salt
For the Topping/Glaze
  • 1/4 cup Multi-Colored Nonpareils Or any sprinkles
  • 1 cup Powdered Sugar For the glaze
  • 1 tablespoon Half & Half Can use milk or non-dairy alternative

Equipment

  • 9-inch square baking pan
  • Mixing Bowl
  • Spatula
  • Sharp Knife
  • Electric mixer

Method
 

Preparation
  1. Preheat your oven to 325°F (163°C) and line a 9-inch square baking pan with foil.
  2. Beat the very soft butter with granulated sugar, almond extract, and vanilla extract until creamy, about 2-3 minutes. Add food coloring if desired.
  3. Sift in all-purpose flour and kosher salt, mixing until crumbly. Fold in half of the multi-colored nonpareils.
  4. Press the dough into the prepared pan and sprinkle the reserved nonpareils on top. Cover and refrigerate for about 10 minutes.
  5. Cut the chilled dough into 1-inch squares and place on ungreased cookie sheets. Refrigerate for at least 30 minutes.
  6. Bake for 13-18 minutes or until edges are lightly golden. Cool on racks for about 10 minutes.
  7. Whisk together powdered sugar, half & half, almond extract, and vanilla extract for the glaze until smooth.
  8. Drizzle the glaze over each cooled bite and sprinkle additional nonpareils on top. Let sit undisturbed for 3-4 hours to set.

Nutrition

Serving: 1biteCalories: 120kcalCarbohydrates: 15gProtein: 1gFat: 6gSaturated Fat: 4gMonounsaturated Fat: 2gCholesterol: 20mgSodium: 50mgPotassium: 30mgSugar: 6gVitamin A: 250IUCalcium: 10mgIron: 0.3mg

Notes

Store in an airtight container at room temperature for up to 1 week, or freeze for up to 3 months.

Tried this recipe?

Let us know how it was!
  • « Previous Page
  • 1
  • …
  • 66
  • 67
  • 68
  • 69
  • 70
  • …
  • 217
  • Next Page »

Welcome!

Hi, I’m Grace, a Sydney-based home cook with a passion for bold flavors and trending ingredients. Whether you’re a busy beginner or a seasoned foodie, you’ll find dishes here that are fresh, fun, and full of flavor.

More about me

Popular Recipes

  • Crispy Chicken Tacos
    Crispy Chicken Tacos for the Perfect Taco Tuesday Night
  • Slow Cooked Scottish Beef Stew
    Slow Cooked Scottish Beef Stew That Warms Your Soul
  • Cottage Cheese Banana Bread
    Cottage Cheese Banana Bread: Moist, Healthy Perfection Awaits
  • Layered Taco Bake
    Layered Taco Bake: A Cozy Weeknight Family Favorite

Footer

↑ back to top

About

  • Privacy Policy
  • Disclaimer
  • Terms & Conditions

Newsletter

  • Sign Up! for emails and updates

Contact

  • About me
  • Contact me

Copyright © 2025 TastyTrendIngredients