tastytrendingredients

  • Home
  • Recipes
    • Appetizers
    • Breakfast
    • Dessert
    • Dinner
    • Drinks
    • Salads
    • Snacks
    • Soups
  • About me
  • Contact me
menu icon
go to homepage
  • Home
  • Recipes
    • Appetizers
    • Breakfast
    • Dessert
    • Dinner
    • Drinks
    • Salads
    • Snacks
    • Soups
  • About me
  • Contact me
search icon
Homepage link
  • Home
  • Recipes
    • Appetizers
    • Breakfast
    • Dessert
    • Dinner
    • Drinks
    • Salads
    • Snacks
    • Soups
  • About me
  • Contact me
×

Savory Panda Express Chow Mein Copycat Ready in 20 Minutes

December 27, 2025 by Grace Snow Leave a Comment

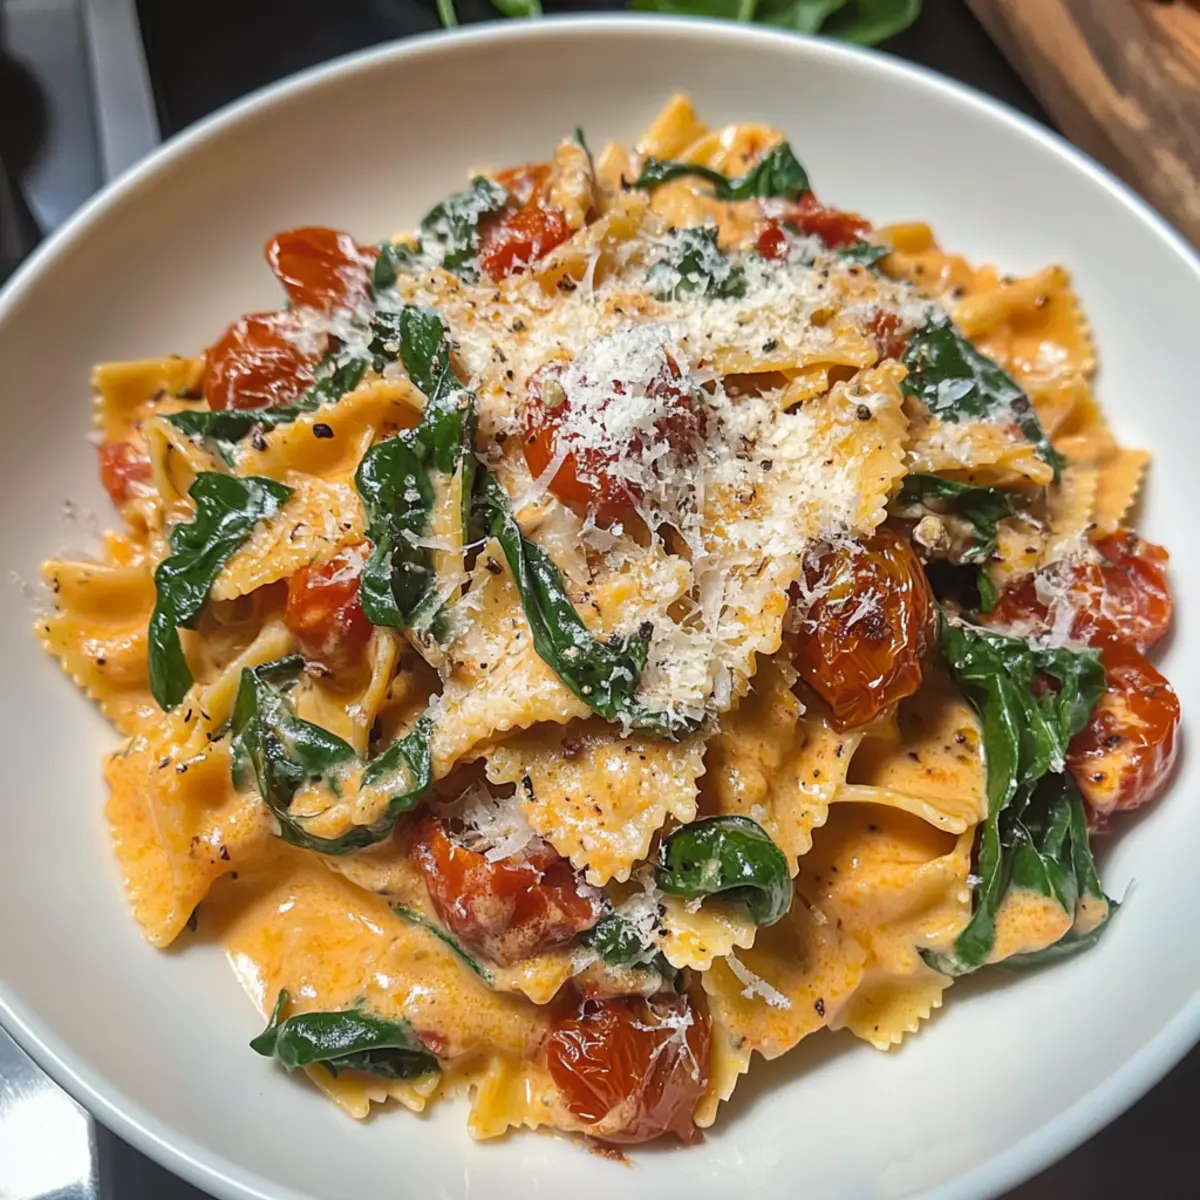
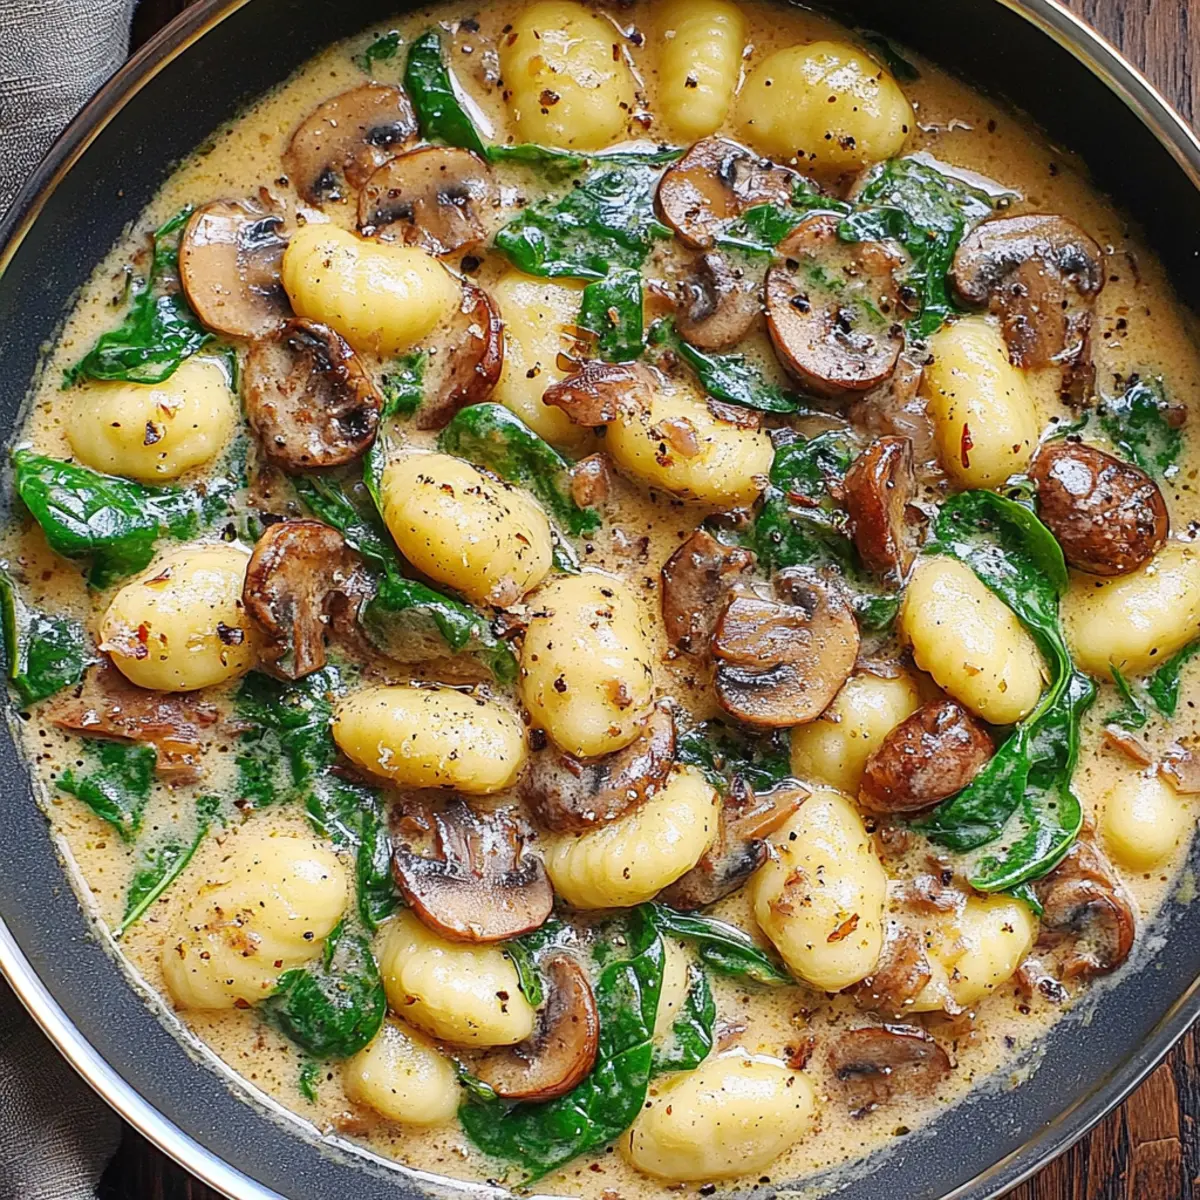
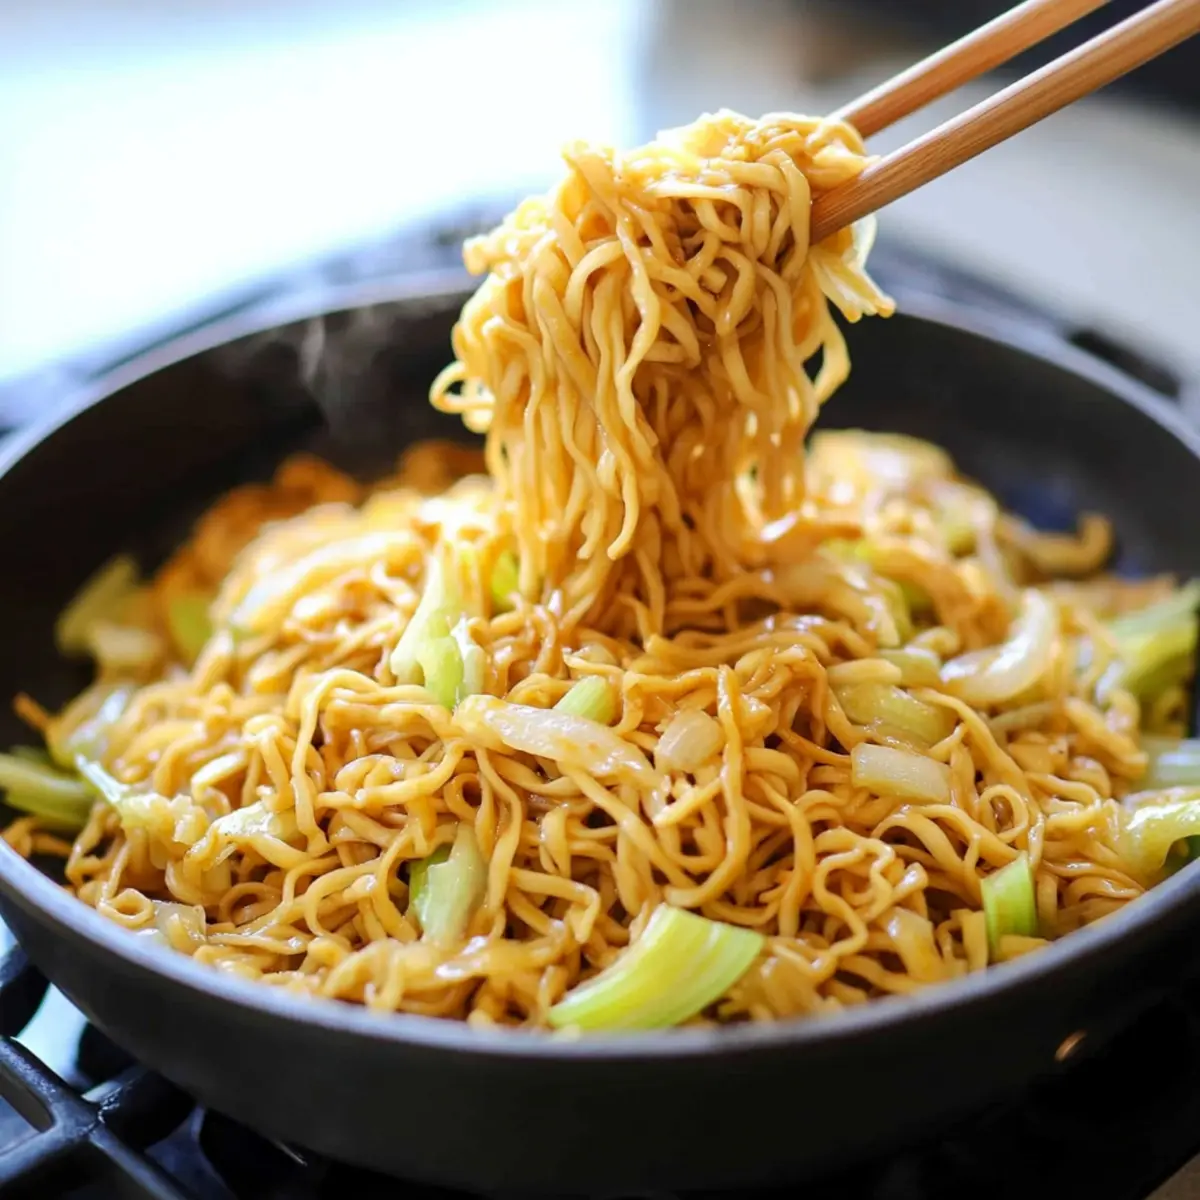
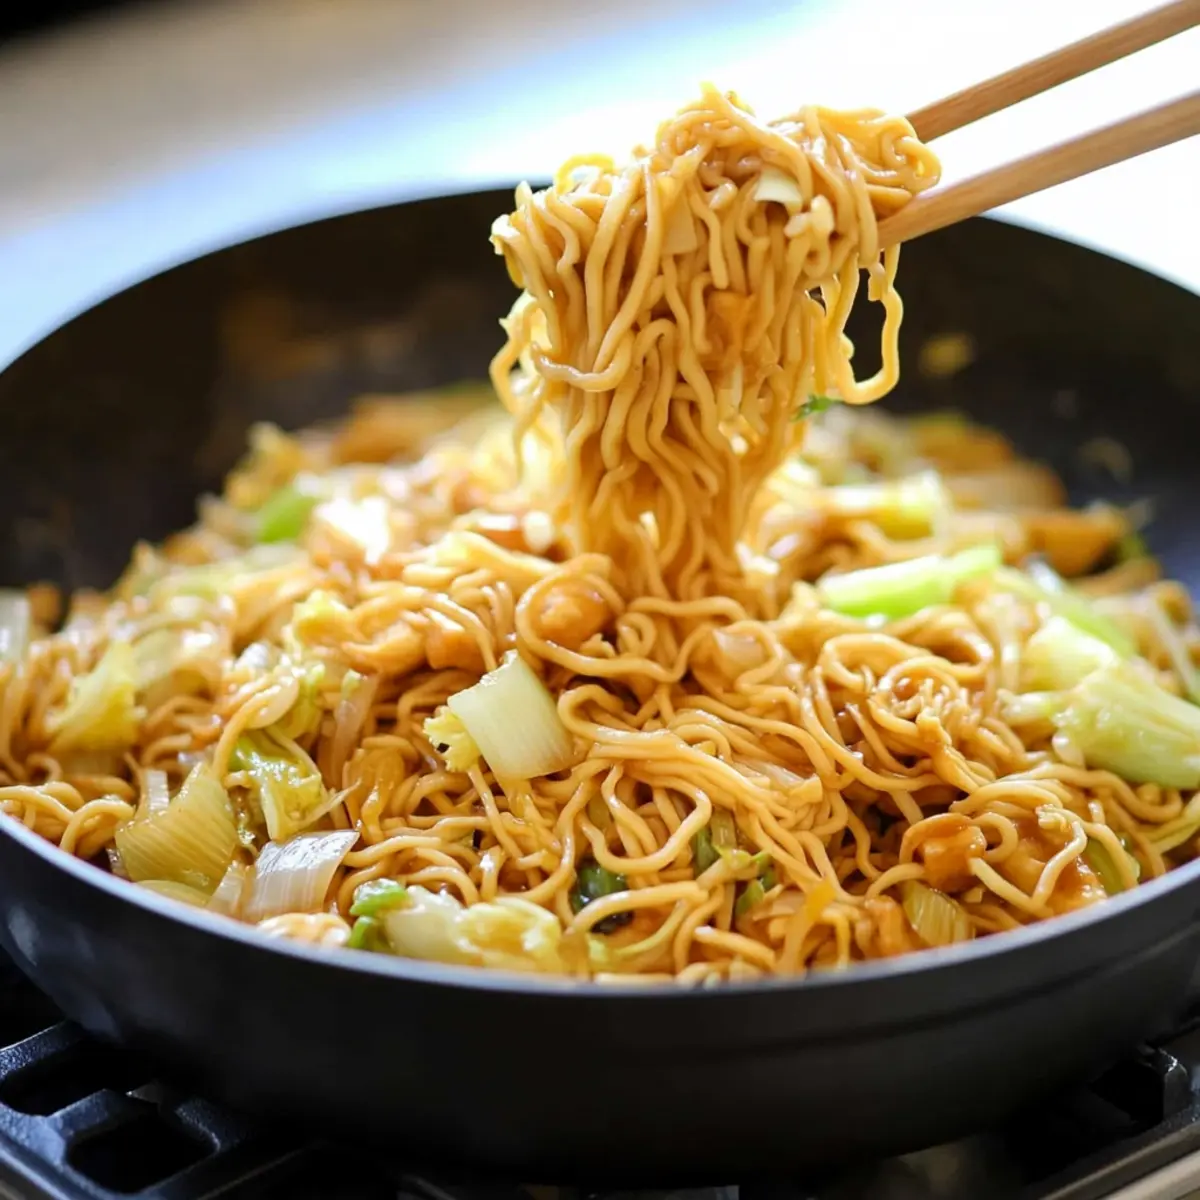
As I stood in my kitchen, a whirlwind of flavors filled the air, reminding me of those delightful evenings spent relishing takeout. Today, I'm thrilled to share my Easy Panda Express Chow Mein Copycat recipe, which captures the essence of that beloved dish in just 20 minutes. This homemade take on Asian-inspired comfort food is not only quick to prepare but also a sure-fire crowd-pleaser for those busy weeknights. With tender Yaki-Soba noodles, fresh vegetables, and a savory sauce, this dish strikes the perfect balance of taste and texture, making it a wonderful alternative to fast food. Ready to dive into a plate of deliciousness that pairs convenience with homemade goodness? Let’s get cooking!

Why is this Chow Mein a must-try?

Quick and Easy: Ready in just 20 minutes, this recipe is perfect for those hectic weeknights when time is short but flavor is a must!

Deliciously Authentic Taste: Enjoy the savory flavors reminiscent of your favorite takeout, creating a delightful eatery experience right at home.

A Healthier Choice: Packed with fresh vegetables, this dish is not only satisfying but also a nutritious alternative to greasy fast food.

Versatile Ingredients: Feel free to customize it with seasonal veggies or proteins like chicken or tofu, making it an adaptable favorite for everyone.

Family-Friendly: This Panda Express Chow Mein Copycat is a crowd-pleaser, appealing to both kids and adults alike. Perfect for family dinner!

Craving more homemade dishes? You’ll love this Taco Bell Copycat option that also delivers quick, delicious satisfaction!

Panda Express Chow Mein Copycat Ingredients

For the Noodles

  • Yaki-Soba Noodles – These are the base of the dish; discard any seasoning packets included.

For the Sauce

  • Reduced Sodium Soy Sauce – This adds umami flavor; substitute with tamari for a gluten-free option.
  • Garlic (3 cloves, minced) – Provides aromatic flavor; fresh garlic is highly recommended.
  • Brown Sugar (1 tablespoon, packed) – Adds sweetness; coconut sugar can be a good substitute.
  • Freshly Grated Ginger (2 teaspoons) – Offers a warm, spicy note; use ground ginger if fresh is unavailable.
  • White Pepper (¼ teaspoon) – Adds mild heat and depth; feel free to use black pepper as an alternative.

For the Stir-Fry

  • Olive Oil (2 tablespoons) – Used for sautéing the vegetables; vegetable or canola oil works well too.
  • Onion (1, diced) – Provides sweetness and texture; any variety of onion will do.
  • Celery (3 ribs, sliced diagonally) – Contributes crunch and freshness.
  • Shredded Cabbage (2 cups) – Adds bulk and texture; pre-shredded coleslaw mix can save time.

This Panda Express Chow Mein Copycat captures all the delightful flavors in a quick and homemade way, ensuring your meal is both satisfying and enjoyable!

Step‑by‑Step Instructions for Panda Express Chow Mein Copycat

Step 1: Prepare the Noodles
Bring a large pot of water to a boil over high heat. Once boiling, add the Yaki-Soba noodles and cook for 1-2 minutes until they are just loosened and slightly tender. Drain the noodles well in a colander, ensuring all excess water is removed to prevent a watery dish. Set the noodles aside as you prepare the flavorful stir-fry.

Step 2: Make the Sauce
In a small mixing bowl, whisk together the reduced sodium soy sauce, minced garlic, packed brown sugar, freshly grated ginger, and white pepper. This savory mixture will serve as the sauce for your Panda Express Chow Mein Copycat, enhancing the noodles and vegetables with its rich flavors. Set this bowl aside, allowing the ingredients to meld together as you sauté the vegetables.

Step 3: Sauté the Vegetables
Heat 2 tablespoons of olive oil in a large cast iron skillet over medium-high heat. Once the oil is shimmering, add the diced onion and sliced celery, stirring frequently. Sauté the vegetables for about 3-4 minutes until they become tender and translucent, releasing their natural sweetness. This aromatic base will elevate the dish's flavor, inviting you to continue cooking.

Step 4: Add Cabbage to the Stir-Fry
Next, stir in the 2 cups of shredded cabbage into the skillet, mixing thoroughly with the onions and celery. Cook this mixture for an additional 1 minute until the cabbage is heated through and just beginning to soften, maintaining some crunch. The colorful vegetables will create a beautiful, appetizing contrast against the noodles in your Chow Mein Copycat.

Step 5: Combine Noodles and Sauce
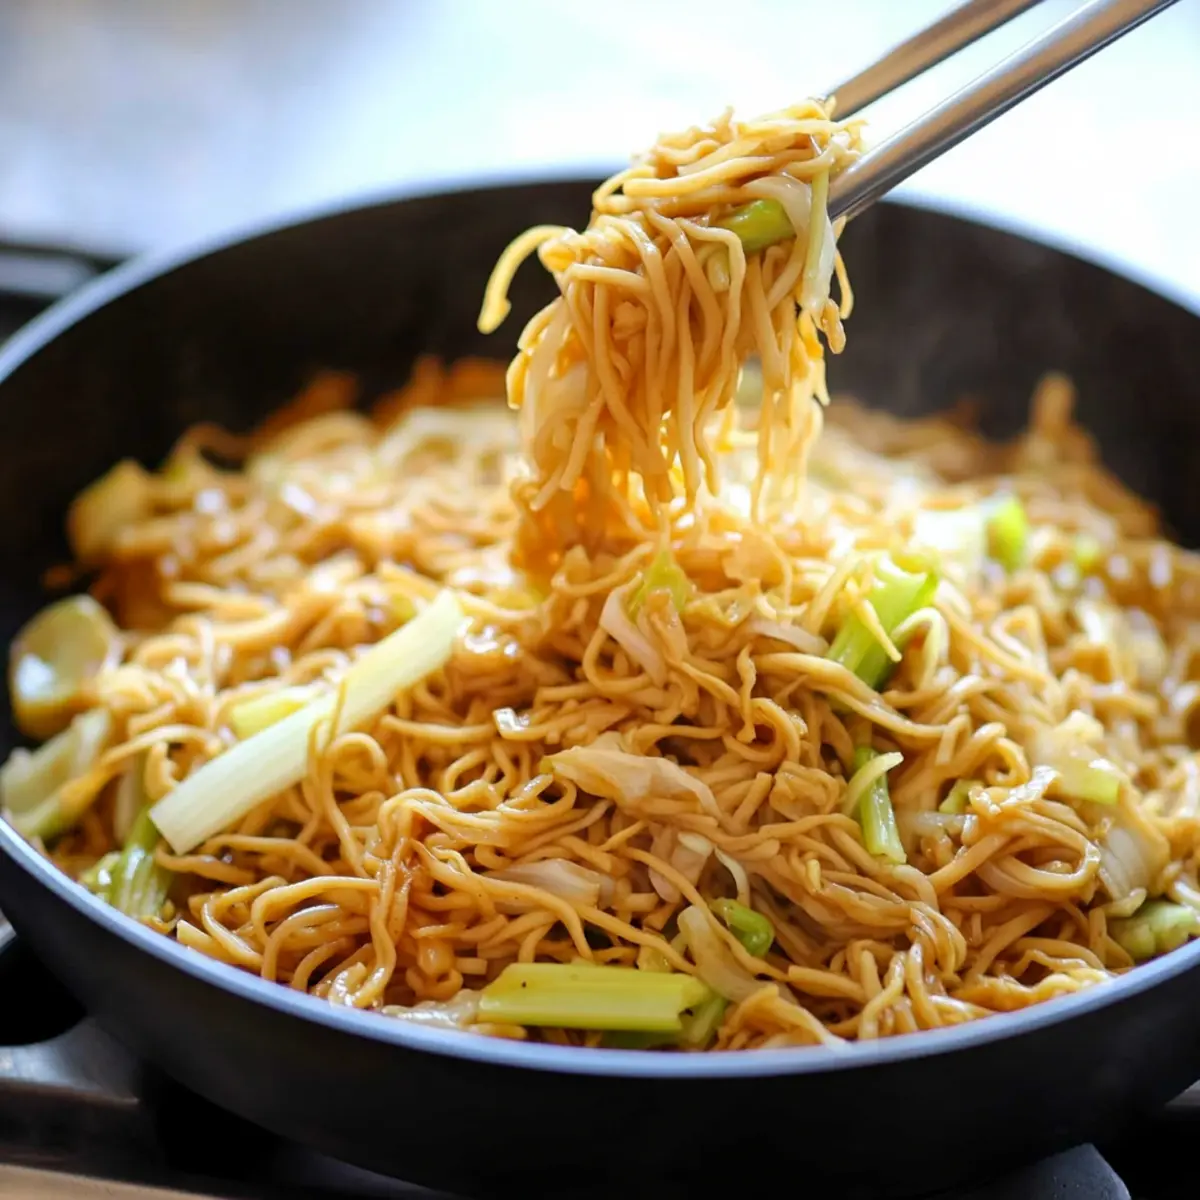
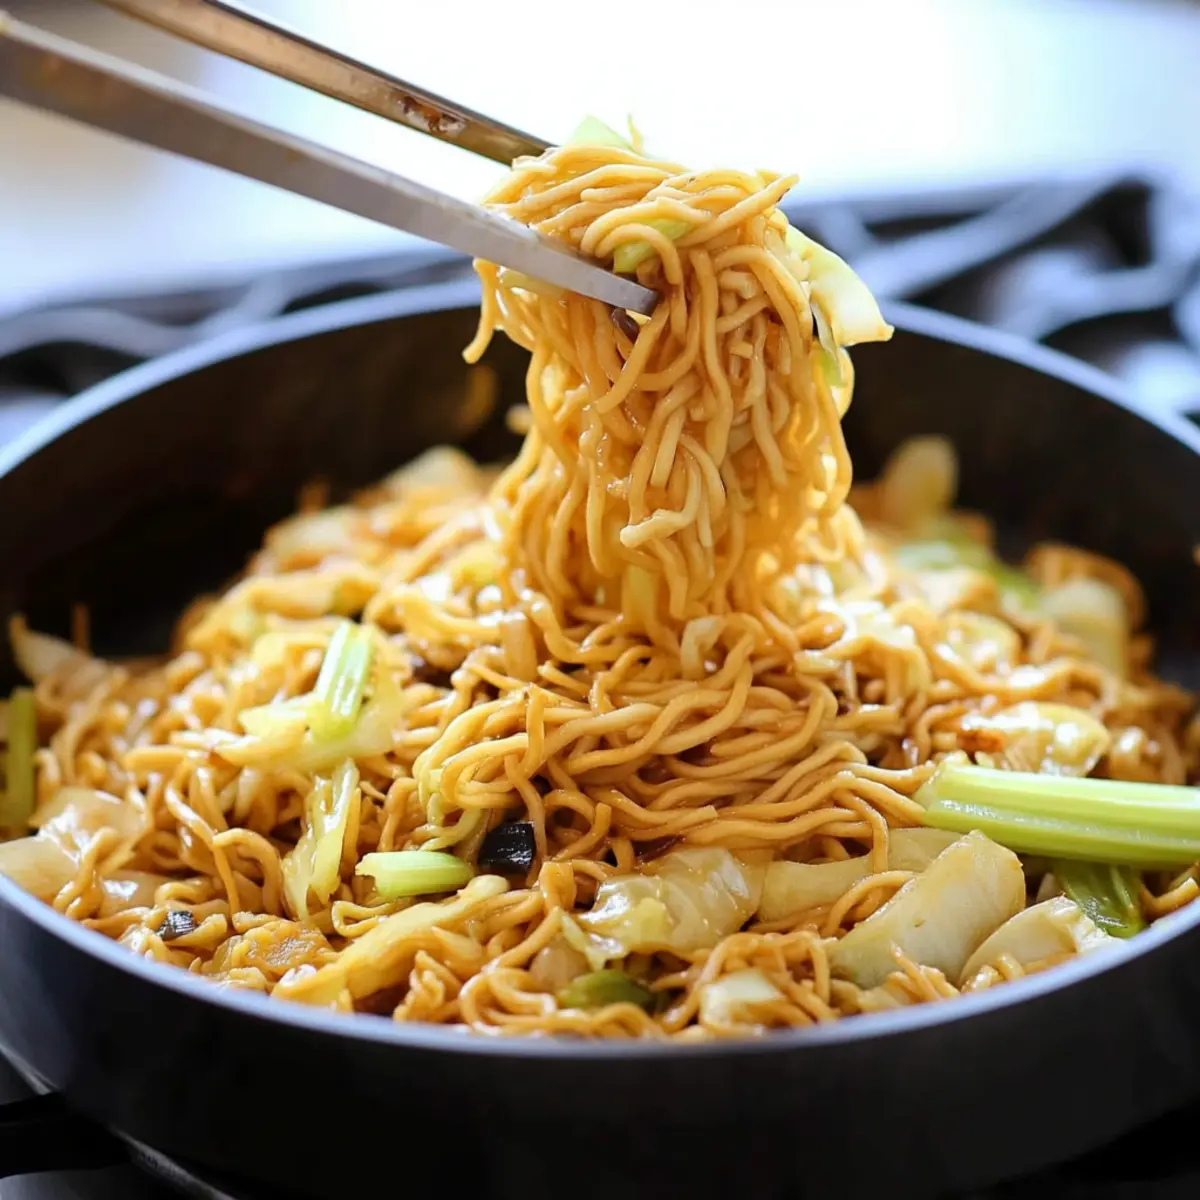
Add the well-drained Yaki-Soba noodles to the skillet, followed by the prepared sauce mixture. Toss everything together, stirring continuously for about 2 minutes, allowing the noodles to absorb the flavors of the sauce. The final result should be a glossy, harmonious blend of noodles and vegetables, capturing the essence of your favorite Panda Express dish.

Step 6: Serve and Enjoy
Once everything is heated through and well combined, remove the skillet from heat. Serve the cooked Panda Express Chow Mein Copycat hot, garnishing with chopped green onions or sesame seeds if desired. Enjoy immediately for the best texture and flavor, and relish the satisfaction of a homemade meal that brings comforting takeout right to your table!

What to Serve with Panda Express Chow Mein Copycat

When it comes to creating a heartwarming family meal, it’s all about complementing that delightful flavor with the right pairings.

  • Crispy Egg Rolls: Perfectly crispy on the outside and stuffed with savory goodness, these add a satisfying crunch alongside Chow Mein.

  • Steamed Broccoli: A simple yet vibrant side, its crisp texture and subtle flavor enhance the savory noodles beautifully.

  • Sweet and Sour Chicken: This tangy dish offers a delightful contrast to the savory noodles, creating a wonderfully balanced meal. The combination of sweet and savory is always a hit!

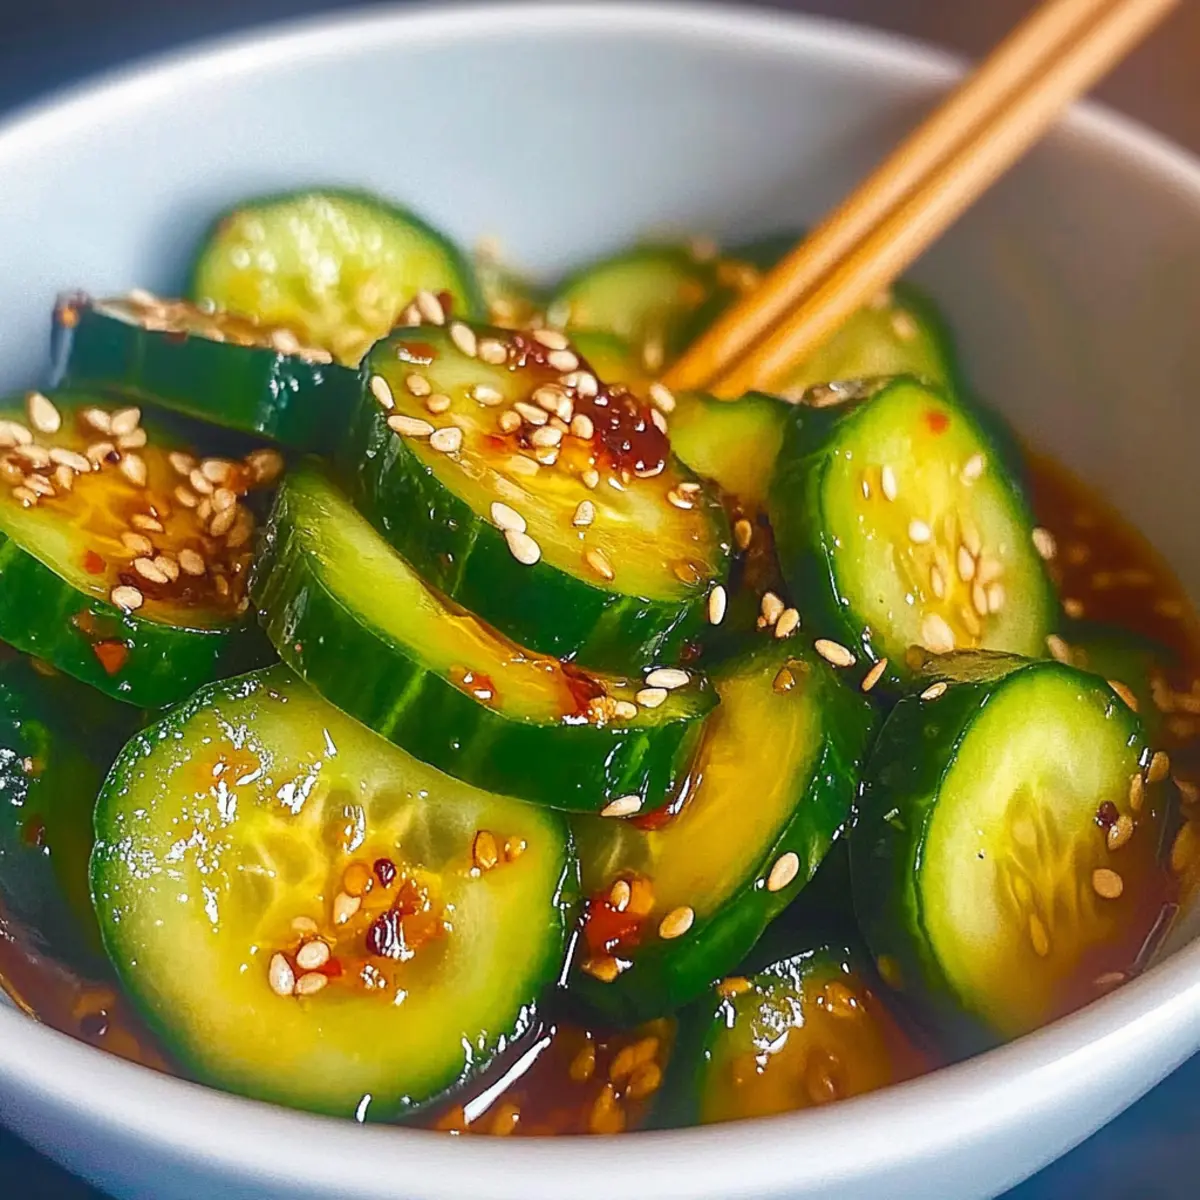
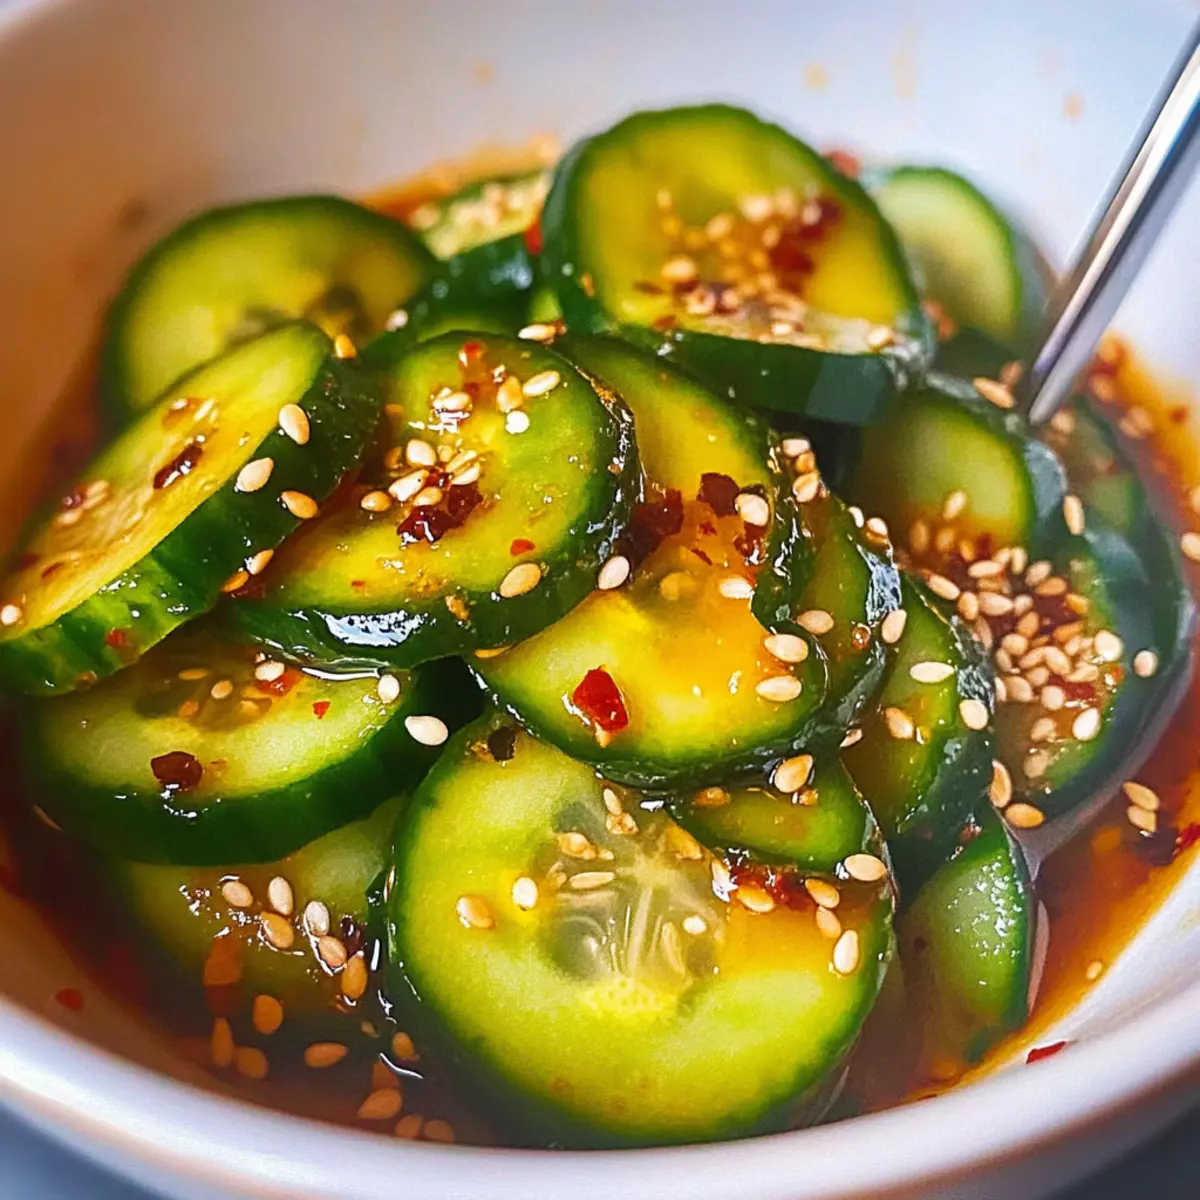
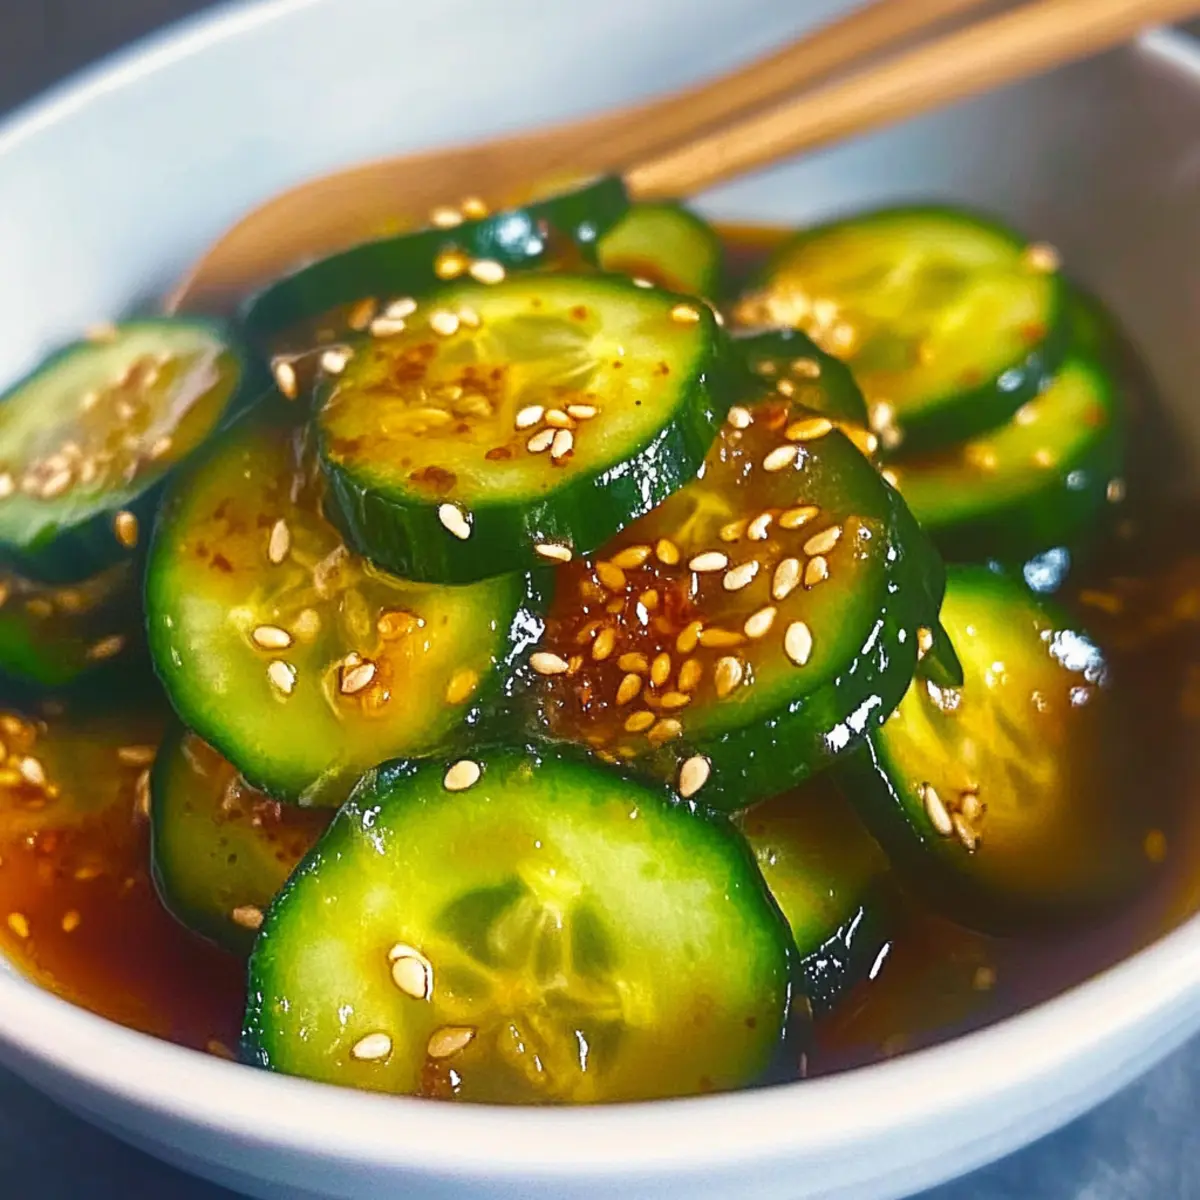
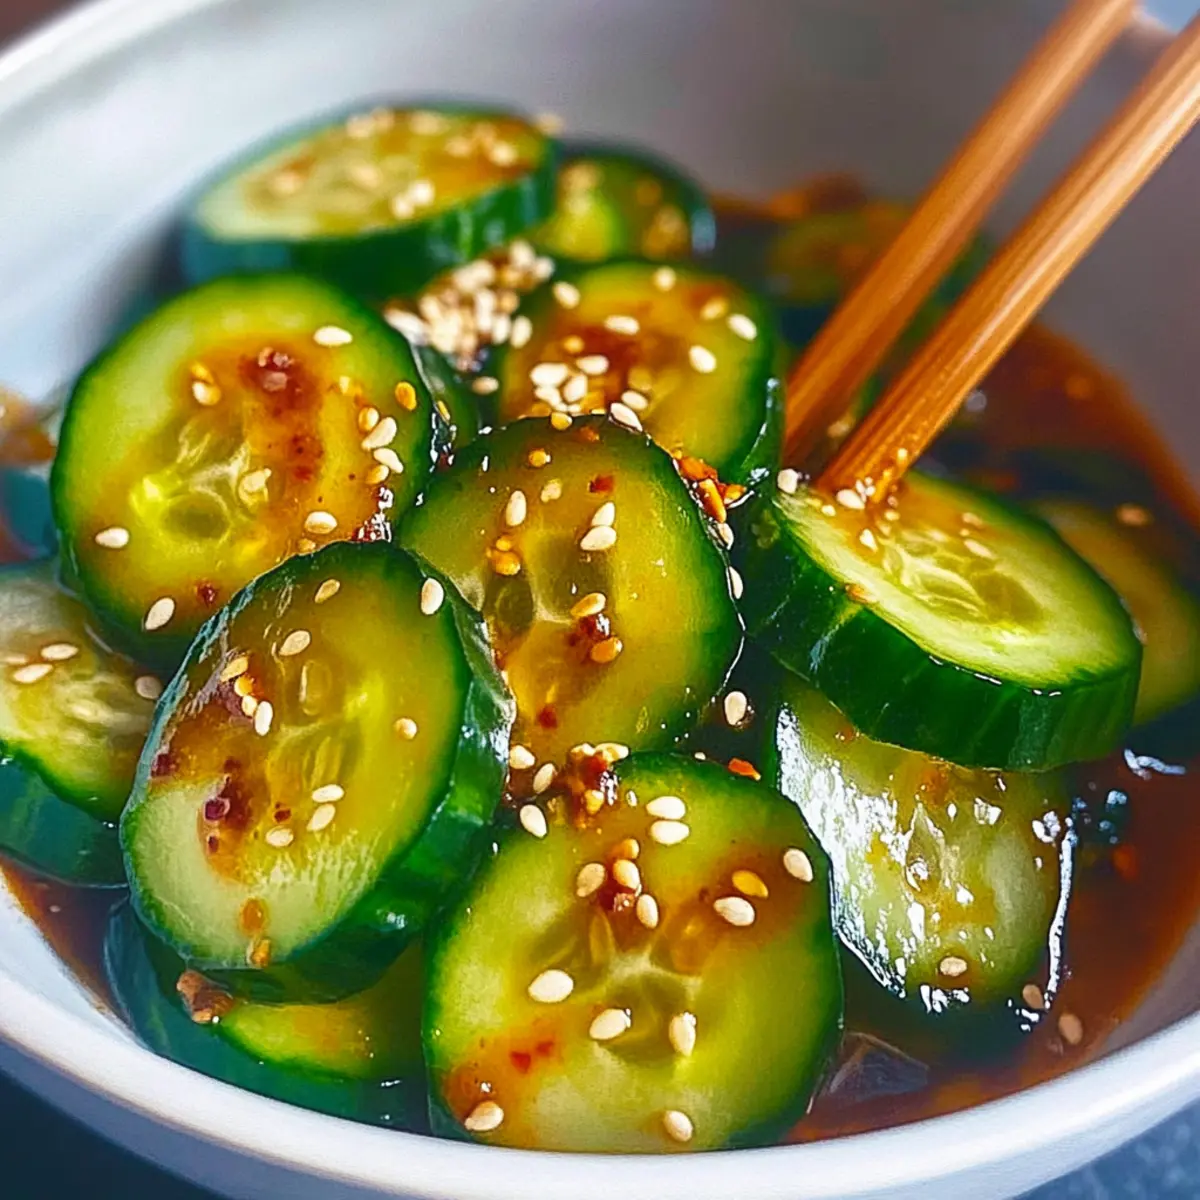
  • Japanese Pickled Vegetables: These add an intriguing freshness and acidity that balances the richness of the Chow Mein.

  • Sesame Green Beans: Tender green beans tossed in sesame oil provide a simple but flavorful side that ties everything together.

  • Fortune Cookies: End your meal with a fun twist; these crispy treats wrapped with a fortune add a nostalgic touch to your homemade feast!

  • Chilled Sake or Jasmine Tea: Pair with a refreshing drink to complement the flavors of your meal without overpowering the dish.

Let your Panda Express Chow Mein Copycat shine on the table with these delightful pairings that promise to create memorable dining experiences!

Make Ahead Options

These Panda Express Chow Mein Copycat noodles are perfect for meal prep enthusiasts looking to save time! You can prepare the sauce (combining soy sauce, garlic, brown sugar, ginger, and white pepper) and refrigerate it in an airtight container for up to 3 days in advance. Additionally, the Yaki-Soba noodles can be cooked and kept well-drained in the fridge for up to 24 hours. Simply reheat the noodles and sauté them with your fresh vegetables right before serving to ensure they remain tender and flavorful. This way, you can whip up a satisfying dinner in just minutes on those busy weeknights!

Storage Tips for Panda Express Chow Mein Copycat

Fridge: Store leftovers in an airtight container for up to 3 days. Make sure the Chow Mein is completely cooled before sealing to prevent condensation.

Freezer: If freezing, place the Chow Mein in a freezer-safe container or heavy-duty plastic bag. It can last for up to 2 months; just remember to label and date it for future use.

Reheating: When ready to eat, thaw overnight in the fridge. Reheat in a skillet over medium heat and add a splash of water or soy sauce to restore moisture and enhance flavor.

Serving Tip: For the best texture, avoid microwaving directly as it can make the noodles mushy; gently heat on the stove for a delicious revival of your Panda Express Chow Mein Copycat!

Expert Tips for Panda Express Chow Mein Copycat

  • Well-Drained Noodles: Ensure you drain the Yaki-Soba noodles thoroughly to avoid excess water, which can make your Panda Express Chow Mein Copycat soggy.

  • Protein Additions: For a heartier dish, toss in cooked chicken, shrimp, or tofu during the final mixing step. This adds flavor and makes it more filling.

  • Seasoning Control: Feel free to adjust the amount of garlic and ginger based on your taste preferences; add more for bolder flavors or less if you enjoy a milder dish.

  • Color and Texture: Mix colorful vegetables like bell peppers or snap peas with your cabbage to enhance both the visual appeal and texture of your Chow Mein.

  • Fresh Garnish: Don’t skip garnishing with green onions or sesame seeds before serving; they add a fresh flavor that elevates the dish's overall experience.

Panda Express Chow Mein Copycat Variations

Feel free to get creative with this recipe and make it truly your own!

  • Noodle Options: Substitute Yaki-Soba with ramen, lo mein, or even spaghetti if you’re in a pinch. Each noodle brings its own joy, adding a delightful texture twist to every bite.

  • Veggie Boost: Customize with bell peppers, carrots, or snap peas based on what’s fresh or what you love. A dash of color and crunch can perfect your Chow Mein!

  • Protein Power: Add cooked chicken, beef, shrimp, or tofu to transform this side dish into a hearty main course. This simple adjustment will delight meat lovers and vegans alike.

  • Heat Level: For a little kick, toss in some chili flakes or sriracha while mixing. It’s amazing how a little heat elevates the love in this noodle dish!

  • Swap the Sauce: Mix in a few tablespoons of oyster sauce or hoisin sauce for a sweeter, richer flavor. It’s a fantastic way to experiment with new tastes while staying true to the dish.

  • Dairy-Free: Use coconut aminos in place of soy sauce for a delicious, soy-free option that still delivers on flavor. It’s a wonderful choice for those avoiding soy or gluten.

  • Crunchy Top: Top with crushed peanuts or sesame seeds for an added crunch. This extra layer will not only enhance the flavor but also bring about that satisfying texture!

  • Mushroom Makeover: Sauté some shiitake or button mushrooms with your veggies for an earthy component that pairs beautifully with the savory sauce. This addition brings depth to your home-cooked feast.

Explore these variations and let your imagination run wild! If you’re intrigued by more delightful homemade flavors, check out this Taco Bell Copycat for another quick and delicious option!

Panda Express Chow Mein Copycat Recipe FAQs

What type of noodles should I use for this Chow Mein?
Absolutely! The best choice for this recipe is Yaki-Soba noodles, which provide that authentic chewy texture. If Yaki-Soba isn't available, you can substitute it with ramen, lo mein, or even spaghetti, just make sure to discard any seasoning packets that come with pre-packaged noodles.

How do I store leftovers from this Chow Mein?
You can easily store any leftovers in an airtight container in the fridge for up to 3 days. Just make sure the Chow Mein has cooled completely before sealing to avoid condensation that can lead to sogginess.

Can I freeze Panda Express Chow Mein Copycat?
Yes! For freezing, place the cooled Chow Mein in a freezer-safe container or a heavy-duty plastic bag, ensuring it's airtight to prevent freezer burn. You can keep it frozen for up to 2 months. Don’t forget to label and date your container!

What can I do if my Chow Mein turns out too soggy?
Very! If you find your Chow Mein is soggy, it might be due to excess moisture from the noodles. You can fix this by making sure the noodles are very well-drained before mixing them in. If it's too late, try sautéing it in a hot pan for a few extra minutes to evaporate some of the moisture while stirring gently.

Is this Chow Mein suitable for a gluten-free diet?
Yes! To make this Panda Express Chow Mein Copycat gluten-free, simply substitute reduced sodium soy sauce with tamari, which is a gluten-free alternative. Also, be sure to select gluten-free noodles if desired. It’s a delightful option for those with dietary restrictions!

How should I reheat the Chow Mein for the best texture?
To ensure your Chow Mein stays delicious, it's best to reheat it in a skillet over medium heat. Add a splash of water or soy sauce to rejuvenate moisture and flavor, stirring until heated through. This method preserves the noodles’ texture much better than microwaving.

Panda Express Chow Mein Copycat

Savory Panda Express Chow Mein Copycat Ready in 20 Minutes

This Panda Express Chow Mein Copycat captures the beloved dish's flavors in just 20 minutes, perfect for a quick and delicious dinner.
Print Recipe Pin Recipe
Prep Time 10 minutes mins
Cook Time 10 minutes mins
Total Time 20 minutes mins
Servings: 4 servings
Course: Dinner
Cuisine: Asian
Calories: 300
Ingredients Equipment Method Nutrition Notes

Ingredients
  

For the Noodles
  • 1 pack Yaki-Soba Noodles Discard any seasoning packets included.
For the Sauce
  • 3 tablespoons Reduced Sodium Soy Sauce Substitute with tamari for a gluten-free option.
  • 3 cloves Garlic, minced Fresh garlic is highly recommended.
  • 1 tablespoon Brown Sugar, packed Coconut sugar can be a good substitute.
  • 2 teaspoons Freshly Grated Ginger Use ground ginger if fresh is unavailable.
  • 0.25 teaspoon White Pepper Feel free to use black pepper as an alternative.
For the Stir-Fry
  • 2 tablespoons Olive Oil Vegetable or canola oil works well too.
  • 1 whole Onion, diced Any variety of onion will do.
  • 3 ribs Celery, sliced diagonally Contributes crunch and freshness.
  • 2 cups Shredded Cabbage Pre-shredded coleslaw mix can save time.

Equipment

  • Large pot
  • Colander
  • large cast iron skillet
  • small mixing bowl

Method
 

Step-by-Step Instructions
  1. Bring a large pot of water to a boil over high heat. Add the Yaki-Soba noodles and cook for 1-2 minutes until slightly tender. Drain the noodles well.
  2. In a small mixing bowl, whisk together the reduced sodium soy sauce, minced garlic, brown sugar, grated ginger, and white pepper.
  3. Heat olive oil in a large skillet over medium-high heat. Add diced onion and sliced celery. Sauté for 3-4 minutes until tender.
  4. Stir in shredded cabbage and cook for 1 minute until heated through.
  5. Add the drained Yaki-Soba noodles and the sauce mixture. Toss together for about 2 minutes until well combined.
  6. Remove from heat and serve hot, garnishing with chopped green onions or sesame seeds if desired.

Nutrition

Serving: 1servingCalories: 300kcalCarbohydrates: 45gProtein: 7gFat: 10gSaturated Fat: 1gPolyunsaturated Fat: 1gMonounsaturated Fat: 2gSodium: 600mgPotassium: 400mgFiber: 4gSugar: 6gVitamin A: 20IUVitamin C: 30mgCalcium: 4mgIron: 10mg

Notes

Ensure you drain the Yaki-Soba noodles thoroughly to avoid excess water. Customize with proteins if desired. Garnish adds freshness.

Tried this recipe?

Let us know how it was!

Creamy Tuscan Slow Roasted Tomato Pasta for Cozy Nights In

December 27, 2025 by Grace Snow Leave a Comment

As the aroma of slow-roasting tomatoes wafts through my kitchen, I can't help but feel a cozy sense of nostalgia. This is the moment I know that a plate of Creamy Tuscan Slow Roasted Tomato Pasta is waiting for me at the end of the day. This dish is more than just comfort food; it combines the sweetness of jammy tomatoes with a blissfully creamy sauce, all wrapped around tender pasta. Plus, it only takes a bit of prep time and offers a cheerful solution for busy weeknights or special gatherings alike. Whether you're looking to impress guests or simply savor a delightful dinner, this recipe is bound to become a staple in your home. Curious about how to bring this Tuscan delight to your table? Let’s dive in!

Why is this pasta so irresistible?

Comforting warmth: The combination of slow roasted tomatoes and creamy sauce makes this pasta a heartwarming choice for chilly evenings.

Easy to prepare: You only need minimal prep skills to create this dish. It's perfect for busy weeknights or when you have guests over.

Rich, bold flavors: The infusion of garlic, red pepper flakes, and Pecorino Romano brings a complex, savory depth to every bite, echoing the essence of Tuscany.

Versatile and customizable: Feel free to experiment with seasonal veggies or switch the protein to seared shrimp for a delightful twist.

Crowd-pleaser: Loved by all, this creamy pasta is sure to satisfy everyone at the table, just like my other favorites, like Tuscan White Bean or Seafood Pasta Savory.

Perfect for meal prep: Easily store leftovers and enjoy this delicious dish for days; it's just as good reheated!

Creamy Tuscan Slow Roasted Tomato Pasta Ingredients

For the Sauce

  • Oil (from sun-dried tomatoes) – Adds richness; substitute with olive oil for a different flavor.
  • Red onion (small) – Provides sweetness and depth; can be replaced with shallots for a milder taste.
  • Minced garlic (6-8 cloves) – For essential aroma and flavor; use garlic powder in a pinch, but fresh is preferred.
  • Sun-dried tomatoes (3-4 pieces) – Enhances tomato flavor; skip if unavailable, but they deepen the taste.
  • Tomato paste – Thickens the sauce and amplifies the tomato taste; omit if unavailable, as there's no direct substitute.
  • Red pepper flakes – Adds a touch of heat; adjust according to your spice tolerance.
  • Flour – Used as a thickening agent; can be omitted for a gluten-free version.
  • Chicken broth (1 chicken bouillon cube + 2 cups water) – Provides overall flavor; substitute vegetable broth for a vegetarian option.
  • Heavy cream – Adds creaminess; substitute with half-and-half or coconut cream for a lighter or dairy-free alternative.
  • Oregano – Adds herbal notes; substitute Italian seasoning if necessary.
  • Smoked paprika – Offers subtle smokiness; regular paprika can be used in its place.
  • Black pepper – For seasoning; adjust based on taste preference.
  • Salt (more to taste) – Essential for flavor enhancement.

For the Pasta

  • Slow roasted baby tomatoes – Key flavor component; they add sweetness and depth; use fresh tomatoes in a hurry.
  • Spinach – Adds freshness and nutrition; kale can serve as a hearty substitute.
  • Pasta (454 g) – Main carbohydrate; any pasta works, so adjust cooking time based on the type used.
  • Pecorino Romano (1/2 cup) – Complements sauce creaminess; Parmesan is a suitable alternative.
  • Lemon juice (1/4) – Balances flavors with brightness; omit if not preferred.
  • Fresh basil (large handful) – For garnish and a burst of fresh flavor.

Enjoy making this Creamy Tuscan Slow Roasted Tomato Pasta and let the comforting aromas fill your kitchen!

Step‑by‑Step Instructions for Creamy Tuscan Slow Roasted Tomato Pasta

Step 1: Slow Roast Tomatoes
Preheat your oven to 275°F (135°C). Slice the baby tomatoes in half and arrange them cut-side up on a lined baking tray. Sprinkle them generously with salt, and roast in the oven for 2-3 hours until they become jammy and burst with flavor, creating the perfect base for your Creamy Tuscan Slow Roasted Tomato Pasta.

Step 2: Prepare the Sauce
While the tomatoes are roasting, heat a tablespoon of oil from the sun-dried tomatoes in a large skillet over medium heat. Add the diced red onion and minced garlic, sautéing until translucent and fragrant, about 3-4 minutes. Stir in the chopped sun-dried tomatoes, tomato paste, and red pepper flakes, cooking for an additional 2-3 minutes to enhance the flavors.

Step 3: Thicken Sauce
Sprinkle 2 tablespoons of flour into the mixture, stirring it well to combine. Gradually add in the chicken broth, whisking continuously to prevent lumps. Once incorporated, stir in the heavy cream, oregano, smoked paprika, black pepper, and salt. Heat gently, allowing the sauce to thicken while you check on your slow roasted tomatoes.

Step 4: Combine
Once the sauce has thickened, add the delicious slow roasted tomatoes and fresh spinach to the skillet. Gently mix everything together over low heat until the spinach wilts and everything is heated through, creating a cohesive, creamy, and rich sauce for your pasta.

Step 5: Cook Pasta
Bring a large pot of salted water to a boil and cook the pasta according to package instructions, until 1 minute under al dente. Remember to reserve a cup of pasta water before draining. This step is crucial for ensuring your Creamy Tuscan Slow Roasted Tomato Pasta has the right consistency when combined.

Step 6: Finish
Return the drained pasta to the pot and pour the creamy sauce over it, stirring to coat the pasta evenly. Add reserved pasta water a little at a time if the sauce is too thick. Off the heat, mix in the grated Pecorino Romano and a splash of lemon juice, adjusting seasoning to taste before serving garnished with fresh basil.

Expert Tips for Creamy Tuscan Slow Roasted Tomato Pasta

  • Sauce Consistency: Start with a looser sauce; it thickens as the pasta absorbs liquids. This helps avoid a dry dish.
  • Perfect Pasta: Pull your pasta out 1 minute early; it will finish cooking in the sauce, enhancing flavor absorption for your Creamy Tuscan Slow Roasted Tomato Pasta.
  • Pasta Water is Key: Always reserve a cup of pasta water. This magic liquid adjusts the sauce's consistency and brings everything together beautifully.
  • Gentle Heat: Avoid boiling when mixing pasta and sauce. A gentle simmer keeps your sauce creamy and prevents separation or clumping.
  • Cheese Tips: Stir in the Pecorino Romano off heat to prevent clumping; it should melt beautifully into the sauce without lumps.
  • Custom Crunch: For an extra delightful crunch, serve alongside crispy chicken cutlets for a satisfying contrast to the creamy pasta.

How to Store and Freeze Creamy Tuscan Slow Roasted Tomato Pasta

Refrigerator: Store leftover Creamy Tuscan Slow Roasted Tomato Pasta in an airtight container for up to 3-5 days. When ready to enjoy, gently reheat on the stovetop with a splash of cream or pasta water to maintain creaminess.

Freezer: For longer storage, freeze the pasta in an airtight container for up to 2 months. Thaw overnight in the fridge before reheating to ensure even warming.

Reheating: Reheat gently in a skillet over low heat, adding a little pasta water or cream as needed to restore its creamy texture. Avoid microwave reheating to prevent uneven warmth.

Flavor Preservation: To keep the flavors fresh while stored, ensure the container is tightly sealed to prevent moisture from getting in, which could alter the creamy consistency.

Creamy Tuscan Slow Roasted Tomato Pasta Variations

Feel free to make this dish your own with these exciting twists that will tantalize your taste buds!

  • Seafood Twist: Replace chicken with seared shrimp or salmon to elevate the dish with a delightful oceanic flair.
    Indulge in the richness of the sea while enjoying those jammy tomatoes. Seafood adds a pop of freshness you’ll love!

  • Veggie-Packed Delight: Incorporate seasonal vegetables like zucchini or bell peppers to boost nutrition and add vibrant colors.
    The extra crunch and flavor in every bite will enhance the overall experience of your creamy pasta.

  • Cheesy Variation: Try different cheeses such as Gouda or Asiago for a unique flavor profile that surprises and delights.
    Experimenting with cheese can open a world of creamy, nutty flavors that will leave your guests asking for seconds!

  • Dairy-Free Option: Swap heavy cream for coconut cream to create a luscious, dairy-free version without losing creaminess.
    The coconut cream will add a subtle sweetness that beautifully complements the tomatoes, perfect for vegans or lactose-intolerant friends.

  • Heat Level Up: Add extra red pepper flakes or diced jalapeños for a fiery kick that level up your comfort food.
    This version will take your taste buds on a thrilling adventure, embracing the heat while keeping the creamy goodness intact.

  • Nutty Crunch: Sprinkle toasted pine nuts or walnuts over the top for an added crunch and nutritious boost.
    The nuttiness of the pine nuts adds an extra layer of depth and texture, making the dish even more comforting.

  • Pasta Alternative: Use gluten-free pasta or zucchini noodles to make a lighter, guilt-free version that retains the richness of the sauce.
    Deliciously filling yet lighter on the belly, this variation is perfect for those watching their gluten intake.

  • Savory Herbs: Swap dried oregano for fresh basil or thyme to brighten the dish with fresh, herbaceous flavors.
    Fresh herbs can elevate the entire experience of your creamy pasta, making each bite a fragrant escape to Tuscany.

Looking for more inspiration? For a delightful adventure with flavors, try my Skillet Pasta Sun or add some crunch with Maple Roasted Sweet. Enjoy customizing your creamy pasta journey!

Make Ahead Options

These delicious Creamy Tuscan Slow Roasted Tomato Pasta components are perfect for meal prep! You can slow roast the tomatoes up to 3 days in advance to intensify their sweet, jammy flavor, then store them in the refrigerator. Prepare the sauce (without the cream) and refrigerate it for up to 24 hours to save time on busy evenings. Simply reheat the sauce over medium-low heat, then stir in the heavy cream and spinach for a fresh, vibrant finish. When you're ready to serve, cook your pasta, combine it with the sauce, and garnish with Pecorino Romano and basil, ensuring every bite tastes just as delightful as if freshly made!

What to Serve with Creamy Tuscan Slow Roasted Tomato Pasta

Create a balanced meal that will delight your senses and complement every flavorful bite of pasta.

  • Garlic Bread:
    This crispy, buttery classic is perfect for soaking up the sauce and brings a delightful crunch to your meal.

  • Mixed Green Salad:
    A fresh salad dressed with lemon vinaigrette adds brightness and acidity, beautifully contrasting the richness of the pasta.

  • Grilled Chicken:
    Juicy, herb-seasoned grilled chicken offers a satisfying protein option that complements the creamy sauce while adding a smoky flavor.

  • Roasted Vegetables:
    Colorful roasted seasonal veggies enhance both presentation and nutrition, providing textural variation with their caramelized sweetness.

  • Crispy Brussels Sprouts:
    These savory bites have a satisfying crunch and a hint of bitterness that balances the dish's creaminess while bringing a hearty element.

  • Herbed Couscous:
    Fluffy couscous with fresh herbs introduces a light, nutty flavor that pairs wonderfully with the creamy pasta, making each bite unique.

  • Sauvignon Blanc:
    A glass of this crisp white wine offers refreshing acidity and herbal notes, which enhance the dish's tomato and cream dynamics beautifully.

  • Lemon Sorbet:
    End your meal on a refreshing note; this light dessert cleanses the palate and leaves you feeling rejuvenated after a rich pasta experience.

Creamy Tuscan Slow Roasted Tomato Pasta Recipe FAQs

What type of tomatoes should I use for this recipe?
Absolutely, slow roasted baby tomatoes are key for that rich depth of flavor! If you’re in a hurry, fresh tomatoes can be used, but they won't produce the same jammy texture. Look for tomatoes that are ripe but firm, avoiding any with dark spots or blemishes.

How do I store leftovers?
To keep your Creamy Tuscan Slow Roasted Tomato Pasta fresh, transfer it to an airtight container and store it in the refrigerator for up to 3-5 days. When reheating, I recommend adding a splash of cream or reserved pasta water to maintain that luscious creamy consistency.

Can I freeze this pasta dish?
Yes, you can freeze your pasta! Cool it completely and then place it in an airtight container or freezer bag. It can last up to 2 months in the freezer. For best results, thaw it overnight in the fridge before reheating gently on the stovetop, adding a bit of cream or pasta water to restore its creaminess.

What should I do if my sauce is too thick?
It’s quite common for sauces to thicken too much, especially as they sit. Simply stir in reserved pasta water gradually until you achieve your desired consistency. This helps maintain that lovely creamy texture without overpowering flavors.

Are there any dietary considerations I should keep in mind?
Absolutely! This recipe can be made vegetarian by substituting the chicken broth with vegetable broth and omitting any proteins. For those with gluten sensitivities, swap in gluten-free pasta or simply skip the flour in the sauce. Always check for allergies related to dairy if using cream and cheese.

How do I make this dish vegan?
To take this recipe vegan, you can substitute heavy cream with coconut cream or a vegan cream alternative, skip the Pecorino Romano cheese, or use nutritional yeast for a cheesy flavor. Switch out chicken broth for vegetable broth to ensure it’s completely plant-based. Enjoy the rich flavors without compromise!

Creamy Tuscan Slow Roasted Tomato Pasta

Creamy Tuscan Slow Roasted Tomato Pasta for Cozy Nights In

A comforting dish combining creamy sauce and roasted tomatoes, this Creamy Tuscan Slow Roasted Tomato Pasta is perfect for busy weeknights or special gatherings.
Print Recipe Pin Recipe
Prep Time 15 minutes mins
Cook Time 3 hours hrs
Total Time 3 hours hrs 15 minutes mins
Servings: 4 servings
Course: Dinner
Cuisine: Tuscan
Calories: 600
Ingredients Equipment Method Nutrition Notes

Ingredients
  

For the Sauce
  • 3-4 tablespoons Oil (from sun-dried tomatoes) Adds richness; substitute with olive oil for a different flavor.
  • 1 small Red onion Provides sweetness and depth; can be replaced with shallots for a milder taste.
  • 6-8 cloves Minced garlic For essential aroma and flavor; use garlic powder in a pinch, but fresh is preferred.
  • 3-4 pieces Sun-dried tomatoes Enhances tomato flavor; skip if unavailable, but they deepen the taste.
  • Tomato paste Thickens the sauce and amplifies the tomato taste; omit if unavailable.
  • 1 teaspoon Red pepper flakes Adds a touch of heat; adjust according to your spice tolerance.
  • 2 tablespoons Flour Used as a thickening agent; can be omitted for a gluten-free version.
  • 1 cube + 2 cups Chicken broth Provides overall flavor; substitute vegetable broth for a vegetarian option.
  • 1 cup Heavy cream Adds creaminess; substitute with half-and-half or coconut cream for lighter option.
  • 1 teaspoon Oregano Adds herbal notes; substitute Italian seasoning if necessary.
  • 1 teaspoon Smoked paprika Offers subtle smokiness; regular paprika can be used.
  • Black pepper For seasoning; adjust based on taste preference.
  • Salt Essential for flavor enhancement.
For the Pasta
  • 2 cups Slow roasted baby tomatoes Key flavor component; adds sweetness and depth.
  • 4 cups Spinach Adds freshness and nutrition; kale can serve as a substitute.
  • 454 g Pasta Main carbohydrate; any pasta works.
  • 1/2 cup Pecorino Romano Complements sauce creaminess; Parmesan is a suitable alternative.
  • 1/4 cup Lemon juice Balances flavors with brightness; omit if not preferred.
  • 1 handful Fresh basil For garnish and fresh flavor.

Equipment

  • Oven
  • Skillet
  • Baking tray
  • pot
  • Whisk

Method
 

Step‑by‑Step Instructions
  1. Preheat your oven to 275°F (135°C). Slice the baby tomatoes in half and arrange them cut-side up on a lined baking tray. Sprinkle generously with salt and roast in the oven for 2-3 hours until they become jammy and burst with flavor.
  2. While the tomatoes are roasting, heat a tablespoon of oil in a large skillet over medium heat. Add diced red onion and minced garlic, sautéing until translucent and fragrant, about 3-4 minutes.
  3. Stir in the chopped sun-dried tomatoes, tomato paste, and red pepper flakes, cooking for an additional 2-3 minutes.
  4. Sprinkle 2 tablespoons of flour into the mixture, stirring well to combine. Gradually add in the chicken broth, whisking continuously to prevent lumps, then stir in the heavy cream, oregano, smoked paprika, black pepper, and salt.
  5. Once the sauce has thickened, add the slow roasted tomatoes and fresh spinach to the skillet and mix everything together over low heat until heated through.
  6. Bring a large pot of salted water to a boil and cook the pasta until 1 minute under al dente. Reserve a cup of pasta water before draining.
  7. Return the drained pasta to the pot and pour the creamy sauce over it, stirring to coat the pasta evenly. Add reserved pasta water if the sauce is too thick before mixing in grated Pecorino Romano and a splash of lemon juice.

Nutrition

Serving: 1servingCalories: 600kcalCarbohydrates: 80gProtein: 15gFat: 25gSaturated Fat: 15gPolyunsaturated Fat: 2gMonounsaturated Fat: 5gCholesterol: 70mgSodium: 600mgPotassium: 800mgFiber: 5gSugar: 10gVitamin A: 1000IUVitamin C: 15mgCalcium: 150mgIron: 2mg

Notes

Store leftovers in an airtight container for up to 3-5 days. Reheat gently on the stovetop, adding cream or pasta water as needed.

Tried this recipe?

Let us know how it was!

Turkish Eggs: Delightfully Creamy Breakfast You’ll Love

December 27, 2025 by Grace Snow Leave a Comment

A delightful brunch experience awaits with every bite of Turkish Eggs, or Cilbir, serving up a heavenly blend of creamy yogurt and perfectly poached eggs cocooned in a rich, spiced butter sauce. This dish not only celebrates the best of Middle Eastern flavors but is also a quick and protein-packed breakfast that’ll impress even the busiest home chefs. As I whisk together fresh herbs and garlic into the yogurt, I can't help but smile at how easy it is to elevate my morning routine with this comforting, savory treat. Whether you’re indulging solo or sharing with loved ones, turmeric eggs promise a satisfying start to your day. Curious about how to make this sumptuous dish? Let’s dive into the simple steps that will transform your kitchen into a Turkish oasis!

Why Are Turkish Eggs So Irresistible?

Simplicity defines this recipe; with minimal ingredients and straightforward steps, even beginner cooks can excel. Rich, Creamy Yogurt provides the perfect base, balancing texture and flavor. Quick to Make, Turkish Eggs can be on your table in under 15 minutes—ideal for busy mornings! Versatile by nature, you can easily make it vegan or adapt the spices to suit your taste. And don’t forget, it’s a dish that’s bound to impress your brunch guests, showcasing a blend of cultures right in your own kitchen. For more amazing breakfast ideas, check out our post on Turkish Eggs Discover!

Turkish Eggs Ingredients

• Let’s gather the essentials to recreate this delightful dish!

For the Yogurt Base

  • Yogurt – Choose Turkish or Greek yogurt for a creamy texture; use any unsweetened yogurt as a substitute if needed.
  • Fresh Dill – Introduces a bright flavor; you can swap it for fresh mint or parsley if preferred.
  • Fresh Mint Leaves – Adds a refreshing touch; oregano can be a great alternative for a different herbaceous note.
  • Garlic (½ clove) – Enhances the yogurt with a subtle garlicky taste; reduce or omit for a milder flavor.

For the Poached Eggs

  • Eggs (2) – Fresh eggs are essential for achieving that perfect poach, providing the dish’s protein boost.
  • Vinegar (1 tablespoon) – Assists in keeping the egg whites from dispersing during cooking.

For the Spiced Butter Sauce

  • Butter (2 oz / 55g) – Creates a luxurious, rich sauce; unsalted butter is recommended, or use olive oil for a lighter touch.
  • Chili Flakes (1 teaspoon) – Adds heat and vibrant color to the sauce; swap with sweet paprika for less spice.
  • Smoked Paprika (½ teaspoon) – Infuses a lovely smokiness that elevates the overall flavor profile.

With these Turkish eggs ingredients on hand, you’re ready to embark on a flavorful culinary journey that’s both satisfying and comforting!

Step‑by‑Step Instructions for Turkish Eggs

Step 1: Prepare the Yogurt Base
In a medium bowl, combine 1 cup of Turkish or Greek yogurt with finely chopped fresh dill, mint leaves, and half a clove of minced garlic. Gently mix in salt and pepper to taste, ensuring the flavors meld beautifully. Once blended, set the yogurt aside, allowing the herbs to infuse their essence while you prepare the eggs.

Step 2: Poach the Eggs
Bring a deep pot of water to boil and add 1 tablespoon of vinegar. Stir the water vigorously to create a gentle vortex, then carefully crack in the first egg. Cook for 2-3 minutes until the white is set but the yolk remains runny. Using a slotted spoon, transfer the poached egg to a plate and repeat the process with the second egg, ensuring each one is perfect for your Turkish Eggs.

Step 3: Make the Spiced Butter Sauce
In a small saucepan, melt 2 oz (55g) of unsalted butter over medium heat until it starts to bubble. Add 1 teaspoon of chili flakes and ½ teaspoon of smoked paprika, stirring continuously for about 1-2 minutes. The butter should take on a golden color and a rich aroma, ready to elevate the flavors in your Turkish Eggs.

Step 4: Assemble the Dish
On a large plate, generously spread the prepared yogurt mixture as a luscious base. Nestle the perfectly poached eggs on top, allowing their warm, runny yolks to mingle with the creamy yogurt. Finally, drizzle the spiced butter sauce over everything, inviting vibrant colors and tantalizing aromas that beckon you to savor every bite.

Make Ahead Options

These Turkish Eggs are a delightful choice for meal prep, making your busy mornings stress-free! You can prepare the yogurt mixture (1 cup of Turkish or Greek yogurt combined with herbs and garlic) up to 2 days in advance; simply refrigerate it in an airtight container to maintain freshness. For an easier assembly, poach the eggs up to 24 hours ahead but store them in cold water in the fridge to keep them perfectly tender. When it’s time to enjoy, simply reheat the poached eggs in warm water before serving. Top with the spiced butter sauce you can whip up while the eggs warm; you'll have breakfast on the table in no time, just as delicious as if it were freshly made!

Turkish Eggs Variations and Substitutions

Feel free to personalize your Turkish Eggs with these delightful twists that elevate flavor and accommodate different diets!

  • Vegan Option: Swap yogurt for plant-based yogurt and use firm tofu instead of eggs to create a satisfying vegan feast.
  • Dairy-Free: Use coconut yogurt for a dairy-free alternative, providing a unique flavor that pairs well with the spices.
  • Herb Swaps: Fresh dill can be exchanged for cilantro or chives to introduce different herbaceous notes that brighten the dish.
  • Zesty Twist: Add a squeeze of lemon juice to the yogurt for a refreshing zing that enhances the overall flavor profile.
  • Spice It Up: If you love heat, try adding a touch of harissa or a drizzle of spice-infused olive oil for an extra kick.
  • Texture Variation: For added crunch, sprinkle toasted pine nuts or walnuts on top, creating a delightful contrast to the creamy yogurt.
  • Egg Substitute: Try using poached duck eggs for a richer flavor experience that brings a gourmet touch to your Turkish Eggs.
  • Cultural Flair: For a Middle Eastern vibe, incorporate some za’atar seasoning into the yogurt for an aromatic flavor boost.

As you experiment, you might enjoy the rich nuances found in dishes like Turkish Eggs Discover, or take a journey through other delicious Middle Eastern recipes!

How to Store and Freeze Turkish Eggs

Fridge: Store any leftover Turkish eggs in an airtight container for up to 2 days. Reheat gently in the microwave or on the stovetop, adding a little yogurt if needed to maintain creaminess.

Yogurt Base: You can prepare the yogurt mixture ahead of time and keep it in the refrigerator for up to 2 days. This allows you to streamline breakfast prep on busy mornings!

Freezer: While it’s not ideal to freeze the assembled dish, you can freeze the spiced butter sauce in an airtight container for up to 1 month. Thaw and reheat before drizzling over fresh poached eggs.

Reheating: When reheating, avoid overheating the yogurt to prevent separation. Warm on low heat and enjoy your delicious Turkish eggs with their vibrant flavors!

What to Serve with Turkish Eggs (Cilbir)

Elevate your breakfast experience with delightful sides that harmonize beautifully with the rich flavors of Turkish eggs.

  • Crusty Bread: Perfect for soaking up the creamy yogurt and rich butter sauce, enhancing every luscious bite.
  • Crispy Pita Chips: Their crunch adds a satisfying texture contrast, offering a delightful way to enjoy the creamy dish.
  • Fresh Tomato Salad: A refreshing counterpart, this salad brings in a burst of acidity to balance the richness of the eggs.
  • Avocado Slices: Creamy and nutritious, avocado adds a smooth texture, enhancing the heartiness of your breakfast.
  • Roasted Vegetables: Serve a medley of seasonal veggies to introduce earthy flavors and vibrant colors to your meal.
  • Feta Cheese Crumbles: Salty and crumbly, feta provides a flavorful punch that complements the poached eggs beautifully.
  • Mint-Infused Green Tea: A warm and aromatic beverage that not only refreshes but also ties in with the herbal notes of cilantro.
  • Honey-Drizzled Yogurt Parfait: For a touch of sweetness, pair with a parfait that brings creaminess and a hint of indulgence for dessert.
  • Sparkling Water with Lemon: A bubbly drink to cleanse the palate, it enhances the flavors without overpowering the dish’s simplicity.

Expert Tips for Turkish Eggs

Perfect Poached Eggs: Ensure the water is at a gentle boil before adding the eggs. This prevents the egg whites from spreading and keeps them intact.

Yogurt Consistency: Use full-fat Turkish or Greek yogurt for the best creaminess. If substituting, choose a high-quality unsweetened yogurt for similar results.

Flavor Boost: Add extra herbs like tarragon or cilantro for a fresh twist on the yogurt base. Experimenting can elevate your Turkish Eggs with delightful new flavors!

Butter Sauce Alternatives: If you’re looking for a lighter option, substitute unsalted butter with olive oil. It adds a unique flavor and cuts down on saturated fat.

Spice it Up: Don’t shy away from using Aleppo pepper instead of regular chili flakes for a distinct, flavorful kick in the butter sauce.

Turkish Eggs (Cilbir) Recipe FAQs

What kind of yogurt should I use for Turkish Eggs?
For the best texture and flavor in your Turkish Eggs, I recommend using Turkish or Greek yogurt. If those aren't available, go for any creamy unsweetened yogurt you can find. The creaminess truly enhances the dish!

How should I store leftover Turkish Eggs?
Store any leftover Turkish Eggs in an airtight container in the fridge for up to 2 days. When ready to enjoy, gently reheat them in the microwave or on the stovetop. You might want to add a bit more yogurt to maintain that delightful creaminess!

Can I freeze the Turkish Eggs?
Freezing the whole dish isn’t advisable due to the texture changes in the yogurt and eggs, but you can freeze the spiced butter sauce separately in an airtight container for up to 1 month. To use it, just thaw in the fridge overnight and reheat in a pan before drizzling over freshly poached eggs.

What if my poached eggs don't turn out perfectly?
No worries at all! If the egg whites spread too much, it could be due to the water not being hot enough. Ensure a gentle boil when you add the eggs. If at first you don't succeed, try again—practice makes perfect, and even imperfect poached eggs are delicious!

Are there any dietary considerations for Turkish Eggs?
Absolutely! If you need a vegan option, substitute the yogurt with plant-based yogurt and use firm tofu instead of eggs. You can also swap the butter for olive oil to keep it light. Always check for allergies with substitutions, especially regarding yogurt and eggs.

How can I enhance the flavors in my Turkish Eggs?
You can add a boost of flavor by including extra fresh herbs like tarragon or cilantro into the yogurt mix. For the butter sauce, try using Aleppo pepper instead of regular chili flakes for a unique twist that adds a pleasant warmth to the dish!

Turkish Eggs

Turkish Eggs: Delightfully Creamy Breakfast You’ll Love

Experience the comforting delight of Turkish Eggs, featuring creamy yogurt and poached eggs in a spiced butter sauce.
Print Recipe Pin Recipe
Prep Time 10 minutes mins
Cook Time 5 minutes mins
Total Time 15 minutes mins
Servings: 2 servings
Course: Breakfast
Cuisine: Middle Eastern
Calories: 350
Ingredients Equipment Method Nutrition Notes

Ingredients
  

For the Yogurt Base
  • 1 cup Turkish or Greek yogurt unsweetened yogurt as a substitute if needed
  • 1 tablespoon Fresh Dill can swap with fresh mint or parsley
  • 1 tablespoon Fresh Mint Leaves oregano can be an alternative
  • 0.5 clove Garlic minced; reduce or omit for milder flavor
For the Poached Eggs
  • 2 eggs Fresh Eggs essential for achieving perfect poach
  • 1 tablespoon Vinegar keeps egg whites from dispersing
For the Spiced Butter Sauce
  • 2 oz Butter unsalted recommended or use olive oil
  • 1 teaspoon Chili Flakes swap with sweet paprika for less spice
  • 0.5 teaspoon Smoked Paprika elevates overall flavor

Equipment

  • medium bowl
  • deep pot
  • slotted spoon
  • small saucepan

Method
 

Step-by-Step Instructions
  1. In a medium bowl, combine 1 cup of yogurt with chopped dill, mint leaves, and minced garlic. Mix in salt and pepper to taste. Set aside to infuse flavors.
  2. Boil water in a deep pot and add vinegar. Create a vortex and crack in the first egg. Cook for 2-3 minutes until white is set, yolk remains runny. Transfer with a slotted spoon and repeat.
  3. Melt butter in a small saucepan over medium heat until bubbling. Stir in chili flakes and smoked paprika for 1-2 minutes until the butter is golden.
  4. On a plate, spread the yogurt mixture. Place the poached eggs on top and drizzle with the spiced butter sauce.

Nutrition

Serving: 1servingCalories: 350kcalCarbohydrates: 5gProtein: 20gFat: 30gSaturated Fat: 16gCholesterol: 425mgSodium: 300mgPotassium: 300mgSugar: 3gVitamin A: 500IUVitamin C: 2mgCalcium: 120mgIron: 2mg

Notes

For best results, use full-fat yogurt for creaminess. Substitute olive oil for a lighter butter sauce.

Tried this recipe?

Let us know how it was!

Creamy Spinach and Mushroom Gnocchi for Cozy Nights In

December 27, 2025 by Grace Snow Leave a Comment

Amidst the chaos of a busy weeknight, a culinary breakthrough often emerges right in my kitchen. Enter the Creamy Spinach and Mushroom Gnocchi—a one-pan wonder that takes just 20 minutes from start to finish! This recipe is a blissful embrace of tender gnocchi swathed in a rich, creamy garlic sauce, complemented by the earthiness of sautéed mushrooms and the vibrant freshness of spinach. Not only is this dish wonderfully easy to prepare, but it also promises wholesome meal satisfaction without fuss, making it a fantastic option for anyone yearning to swap out fast food for something homemade and nourishing. Are you ready to elevate your dinner game and discover the joys of comfort cooking? Let’s dive into this delightful dish!

Why choose creamy spinach and mushroom gnocchi?

Simplicity: With just one pan needed, cleanup is a breeze, allowing you to savor your meal without the hassle.
Quick to prepare: In only 20 minutes, you can have a hearty dinner on the table, perfect for those busy weeknights.
Wholesome ingredients: Packed with fresh spinach and earthy mushrooms, this dish is not just delicious but also nourishing.
Versatility: Feel free to customize with your favorite veggies or protein additions, like chicken or roasted corn from Roasted Corn Tacos.
Comforting flavor: The creamy garlic sauce envelops the gnocchi, delivering a decadent experience that rivals restaurant-quality meals right at home.
Crowd-pleaser: Whether you're cooking for family or hosting friends, this dish is sure to impress with its rich flavors and satisfying textures.

Creamy Spinach and Mushroom Gnocchi Ingredients

• Here’s everything you need to whip up this comforting dish!

For the Base
• Olive Oil – A must for sautéing vegetables; any neutral oil works as a substitute.
• Potato Gnocchi (16 oz) – Tender bites that make up the heart of the dish; feel free to use fresh or frozen.
• Chicken Broth (½ cup) – Enhances the sauce’s depth; switch to vegetable broth for a vegetarian option.
• Heavy Cream (1 cup) – This is what makes the sauce luxuriously creamy; half-and-half is a lighter alternative.

For the Flavor
• Mushrooms (8 oz, crimini) – Adds an earthy flavor and texture; button mushrooms can be used instead.
• Garlic (4 cloves, minced) – Packs in essential flavor; garlic powder works too, but fresh is preferred for richness.
• Italian Seasoning (½ teaspoon) – Contributes an herby touch; you can omit this if using fresh herbs.
• Smoked Paprika (½ teaspoon) – Introduces a warm smokiness; regular paprika serves as a fine substitute.

For the Greens
• Fresh Spinach (5 oz) – Provides freshness and nutrients; kale or Swiss chard are excellent substitutes.

For Seasoning
• Salt and Pepper – Essential for enhancing overall flavor; adjust according to your taste preferences.
• Coarse Black Pepper and Red Pepper Flakes – Adds a touch of heat; modify quantities to your liking.

With these ingredients, you're just moments away from creating a delightful Creamy Spinach and Mushroom Gnocchi that's perfect for cozy nights!

Step‑by‑Step Instructions for Creamy Spinach and Mushroom Gnocchi

Step 1: Cook the Mushrooms
Start by heating 2 tablespoons of olive oil in a large skillet over medium heat. Once the oil is shimmering, add 8 ounces of sliced crimini mushrooms, seasoning them with salt and pepper. Sauté for 1–2 minutes until the mushrooms are nicely browned and their juices begin to release. Remove half of the cooked mushrooms from the skillet and set them aside for later use.

Step 2: Make the Creamy Sauce
In the same skillet with the remaining mushrooms, pour in 16 ounces of potato gnocchi, followed by ½ cup of chicken broth, 1 cup of heavy cream, and 4 cloves of minced garlic. Stir in ½ teaspoon of Italian seasoning and ½ teaspoon of smoked paprika. Increase the heat to medium-high and bring the mixture to a gentle boil, then reduce to a simmer for about 5 minutes, allowing the gnocchi to cook and absorb the flavors.

Step 3: Add Fresh Spinach
Once the gnocchi are tender, add 5 ounces of fresh spinach to the skillet. Stir gently until the spinach has wilted, which should take about 2–3 minutes. The vibrant green color and tender consistency of the spinach will enhance the dish, mixing beautifully with the creamy sauce and mushroom-infused gnocchi.

Step 4: Season and Serve
Finally, taste the creamy spinach and mushroom gnocchi and adjust the seasoning as needed with salt, pepper, and a pinch of red pepper flakes for a slight kick. Before serving, sprinkle the reserved sautéed mushrooms on top for added texture and a presentation boost. Serve the dish warm, and relish the comforting flavors!

Creamy Spinach and Mushroom Gnocchi Variations

Feel free to personalize this delightful dish to suit your taste buds and dietary preferences!

  • Protein Boost: Add cooked chicken or sausage for a heartier meal. Shredded rotisserie chicken can add a flavorful twist in no time!

  • Veggie Lovers: Mix in asparagus, zucchini, or cherry tomatoes for vibrant color and taste. Each addition enhances the dish’s freshness and nutritional profile.

  • Vegan Delight: Substitute heavy cream with coconut cream or a plant-based alternative, and use vegetable broth. You won’t miss the creaminess in this version!

  • Cheesy Goodness: Stir in some grated Parmesan or nutritional yeast for a cheesy flavor. This little touch can elevate your sauce to a new level of delicious.

  • Nutty Accents: Sprinkle in toasted pine nuts or walnuts before serving. The crunch and rich flavor will create a delightful contrast to the creamy sauce.

  • Heat Things Up: Add red pepper flakes or diced jalapeños for a spicy kick. Adjust the amount based on your heat tolerance for the perfect bite.

  • Herb Infusion: Swap out Italian seasoning for fresh herbs like basil or thyme. The aromatic profiles will bring a fresh, summery vibe to your gnocchi.

  • Citrus Zest: Finish the dish with a squeeze of lemon juice or a sprinkle of lemon zest. This adds brightness and balances the creaminess beautifully.

If you love rich, comforting flavors, this dish can be paired with a fresh salad, like arugula with nuts or cheese, much like what you might find in Spinach Pie Deliciously for an ideal meal. Enjoy your culinary exploration!

What to Serve with Creamy Spinach and Mushroom Gnocchi

Elevate your weekday dinner experience with delightful accompaniments to this comforting one-pan meal.

  • Arugula Salad: A crisp, peppery arugula salad provides a fresh contrast, balancing the creaminess while adding texture and vibrancy to your plate.

  • Garlic Bread: Golden, crunchy garlic bread is perfect for scooping up the creamy sauce, turning your meal into a delightful indulgence.

  • Roasted Tomatoes: The sweet, caramelized flavor of roasted tomatoes adds a burst of brightness, creating a lovely flavor combination with the earthy mushrooms.

  • Zucchini Noodles: Light and veggie-rich, zucchini noodles offer a refreshing side, bringing a crunch that contrasts beautifully with the creamy gnocchi.

  • Lemonade Spritzer: A sparkling lemonade spritzer serves as a refreshing drink option that cuts through the richness, complementing the dish with its zesty notes.

  • Chocolate Mousse: End your meal on a sweet note! A silky chocolate mousse will provide a delightful creamy finish, perfectly capping off this cozy dinner experience.

How to Store and Freeze Creamy Spinach and Mushroom Gnocchi

Fridge: Store any leftovers in an airtight container for up to 3 days. Gently reheat on the stove or in the microwave, adding a splash of broth or cream to revive its creamy texture.

Freezer: You can freeze the gnocchi dish for up to 2 months. Portion it into airtight freezer bags, removing as much air as possible before sealing.

Reheating: Thaw overnight in the refrigerator before reheating. Heat slowly in a skillet over low heat with a little extra cream, stirring gently to combine the flavors.

Quality Check: While it’s best enjoyed fresh, the refrigerated or frozen Creamy Spinach and Mushroom Gnocchi still packs delightful flavor and comfort!

Make Ahead Options

These Creamy Spinach and Mushroom Gnocchi are perfect for meal prep, allowing you to save time on busy weeknights! You can prepare the creamy sauce with the gnocchi and mushrooms up to 24 hours in advance; simply sauté the mushrooms and combine them with the other ingredients in an airtight container for refrigeration. To maintain quality, avoid adding the fresh spinach until you're ready to cook the dish, as this keeps it vibrant and fresh. When it's time to serve, just reheat the sauce gently on the stove, stir in the spinach, and cook until wilted. You'll enjoy restaurant-quality comfort food with minimal effort!

Expert Tips for Creamy Spinach and Mushroom Gnocchi

  • Cook Gnocchi in Sauce: This helps the starch thicken the cream, ensuring your sauce isn’t runny. It’s essential for achieving that creamy texture in your dish.

  • Adjust Cooking Time: If you prefer a thicker sauce, allow it to simmer a bit longer after adding the spinach. Keep an eye on it to get the perfect consistency.

  • Use Fresh Ingredients: Fresh spinach and garlic make a significant difference in flavor. If using alternatives like dried herbs or frozen spinach, adjust quantities accordingly for the best Creamy Spinach and Mushroom Gnocchi.

  • Don’t Skip the Seasoning: Always taste and adjust salt, pepper, and red pepper flakes as needed. This will enhance the overall flavor, making your dish truly unforgettable.

  • Scrape the Skillet: Use a wooden spoon to scrape up any bits left in the pan while making the sauce. This adds more depth and richness to your creamy sauce.

Creamy Spinach and Mushroom Gnocchi Recipe FAQs

What kind of mushrooms should I use for this dish?
I highly recommend using crimini mushrooms for their earthy flavor and texture. However, if you can't find them, button mushrooms work just as well! Both will bring a delightful taste to the Creamy Spinach and Mushroom Gnocchi.

How long can I store leftovers?
Store any leftover Creamy Spinach and Mushroom Gnocchi in an airtight container in the refrigerator for up to 3 days. I always suggest gently reheating it on the stove or in the microwave, adding a splash of broth or cream to bring back that luscious creamy texture!

Can I freeze this dish?
Absolutely! You can freeze the Creamy Spinach and Mushroom Gnocchi for up to 2 months. Just portion it into airtight freezer bags, squeezing out as much air as you can before sealing. To reheat, thaw it overnight in the refrigerator, then warm it slowly in a skillet over low heat with a bit of extra cream for the best results.

What if my sauce is too runny?
If you find your sauce is too runny, don't worry! Let it simmer a bit longer after adding the spinach. The longer you allow it to cook, the more the flavors will meld, and the starch from the gnocchi will help thicken the sauce. You can also sprinkle a little grated Parmesan cheese into the sauce for additional richness and thickness.

Are there any dietary considerations I should know?
Good question! This Creamy Spinach and Mushroom Gnocchi is vegetarian-friendly. However, if you have specific allergies, be cautious with the heavy cream and check for any allergies related to mushrooms. For a vegan alternative, replace the heavy cream with a plant-based cream and ensure your broth is vegetable-based.

What can I do if I don't have heavy cream?
If you don't have heavy cream on hand, no worries! You can substitute it with half-and-half for a lighter version, or even use coconut cream for a delicious, dairy-free option. Just keep in mind that the flavor will change slightly with those alternatives, but they will still create a creamy texture for your gnocchi!

Creamy Spinach and Mushroom Gnocchi

Creamy Spinach and Mushroom Gnocchi for Cozy Nights In

Creamy Spinach and Mushroom Gnocchi is a one-pan wonder that offers a rich, nourishing meal in just 20 minutes.
Print Recipe Pin Recipe
Prep Time 10 minutes mins
Cook Time 10 minutes mins
Total Time 20 minutes mins
Servings: 4 servings
Course: Dinner
Cuisine: Italian
Calories: 450
Ingredients Equipment Method Nutrition Notes

Ingredients
  

For the Base
  • 2 tablespoons Olive Oil Any neutral oil works as a substitute.
  • 16 oz Potato Gnocchi Use fresh or frozen.
  • ½ cup Chicken Broth Vegetable broth can be used for a vegetarian option.
  • 1 cup Heavy Cream Half-and-half is a lighter alternative.
For the Flavor
  • 8 oz Mushrooms Crimini; button mushrooms can be used instead.
  • 4 cloves Garlic Minced; garlic powder can be used, but fresh is preferred.
  • ½ teaspoon Italian Seasoning Can be omitted if using fresh herbs.
  • ½ teaspoon Smoked Paprika Regular paprika serves as a fine substitute.
For the Greens
  • 5 oz Fresh Spinach Kale or Swiss chard are excellent substitutes.
For Seasoning
  • Salt Adjust according to your taste preferences.
  • Coarse Black Pepper Adjust according to your taste preferences.
  • Red Pepper Flakes Adjust quantities to your liking.

Equipment

  • Large skillet

Method
 

Step-by-Step Instructions
  1. Heat 2 tablespoons of olive oil in a large skillet over medium heat. Add 8 ounces of sliced crimini mushrooms, seasoning with salt and pepper. Sauté for 1–2 minutes until browned and juices release. Remove half and set aside.
  2. In the same skillet, add 16 ounces of potato gnocchi, ½ cup of chicken broth, 1 cup of heavy cream, and 4 cloves of minced garlic. Stir in ½ teaspoon of Italian seasoning and ½ teaspoon of smoked paprika. Bring to a gentle boil, then reduce to a simmer for about 5 minutes.
  3. Once gnocchi are tender, add 5 ounces of fresh spinach. Stir gently until wilted, about 2–3 minutes.
  4. Taste and adjust seasoning as needed with salt, pepper, and a pinch of red pepper flakes. Sprinkle reserved mushrooms on top before serving.

Nutrition

Serving: 1servingCalories: 450kcalCarbohydrates: 40gProtein: 10gFat: 30gSaturated Fat: 18gPolyunsaturated Fat: 2gMonounsaturated Fat: 8gCholesterol: 90mgSodium: 600mgPotassium: 500mgFiber: 4gSugar: 2gVitamin A: 1000IUVitamin C: 15mgCalcium: 150mgIron: 2mg

Notes

Store leftovers in an airtight container for up to 3 days and gently reheat. You can freeze the dish for up to 2 months.

Tried this recipe?

Let us know how it was!

Refreshing Easy Asian Cucumber Salad for a Cool Summer Bite

December 27, 2025 by Grace Snow Leave a Comment

As the summer sun streams through the kitchen window, the crisp, cool scent of fresh cucumbers instantly lifts my spirits. Today, I'm whipping up an Easy Asian Cucumber Salad, and let me tell you, this dish is a refreshing oasis in the heat. Quickly prepped and packed with vibrant flavors, this salad serves as a perfect healthy appetizer or side dish that you can adapt to your taste. With a tangy dressing that balances vinegar, sugar, and a kick of chili oil, it invites you to play around with spice levels—going from mild and zesty to a fiery delight. No one will complain when this vibrant salad graces your table. Are you ready to brighten up your meals with a little crunch? Let's dive into this deliciously easy recipe!

Why will you love this cucumber salad?

Simplicity, this Easy Asian Cucumber Salad requires minimal effort, making it a breeze to whip up any day of the week. Fresh and Crunchy, the cucumbers provide a delightful bite, while the dressing adds a zesty twist that will invigorate your palate. Customizable Spice Levels allow you to adjust the heat to your preference—whether you're a spicy enthusiast or prefer a milder flavor, it's all up to you! Perfect for Pairs, serve this salad alongside grilled meats, rice dishes, or enjoy it alone as a refreshing snack. Make-Ahead Friendly, you can prepare it a few hours in advance, making it an ideal choice for gatherings. Looking for more tasty side options? Check out my Chicken Salad Apples or the vibrant Balsamic Steak Salad. This salad truly deserves a spot at your summer table!

Easy Asian Cucumber Salad Ingredients

For the Salad
• Persian Cucumbers – Crunchy and refreshing; substitute with English cucumbers for a similar texture.
• Salt – Helps draw moisture from cucumbers; ensure it's evenly sprinkled before refrigeration.
• Sesame Oil – Adds a rich, nutty flavor; can be replaced with olive oil for a different taste.
• Light Soy Sauce – Provides depth of flavor; use tamari for a gluten-free alternative.
• Sugar – Balances the acidity of the dressing; adjust to taste based on your preferred chili oil heat.
• Rice Vinegar – Offers a tangy kick; apple cider vinegar can work as a substitute.
• Chili Oil – Adds customizable heat; adjust quantity according to your spice preference or omit if desired.
• Sesame Seeds – For garnish and added crunch; can be left out if not on hand.
• Garlic (optional) – Enhances the overall flavor; consider fresh minced garlic or garlic powder for extra zest.

Step‑by‑Step Instructions for Easy Asian Cucumber Salad

Step 1: Prep Cucumbers
Begin by rinsing 2-3 Persian cucumbers under cool water to remove any dirt. Using a sharp knife, slice the cucumbers at an angle into oval shapes, about a quarter-inch thick. This technique enhances the presentation and texture of your Easy Asian Cucumber Salad. Place the sliced cucumbers in a large mixing bowl to prepare them for seasoning.

Step 2: Salt Cucumbers
To draw out excess moisture from the cucumbers, sprinkle about a teaspoon of salt evenly over the slices. Gently toss the cucumbers in the bowl, ensuring each piece is well coated. Let the salted cucumbers sit in the refrigerator for approximately 20 minutes. You’ll notice the cucumbers soften slightly and release water, enhancing their flavor.

Step 3: Rinse & Drain
After the 20-minute wait, carefully drain the excess liquid that has collected at the bottom of the bowl. Rinse the cucumbers under cold water to remove any excess salt, which will refresh their taste. Drain them once more in a colander and allow them to rest for a minute, ensuring your Easy Asian Cucumber Salad remains crisp and refreshing.

Step 4: Mix Dressing
In the same mixing bowl, combine 2 tablespoons of sesame oil, 2 tablespoons of light soy sauce, 1 teaspoon of sugar, and 3 tablespoons of rice vinegar. For an added kick, incorporate 1 teaspoon of chili oil, adjusting to your desired spice level. If you enjoy garlic, add minced fresh garlic or a pinch of garlic powder. Whisk the ingredients together until the mixture is well blended and smooth.

Step 5: Combine & Serve
Add the drained cucumbers back into the bowl with the dressing. Gently toss the cucumbers with the dressing, ensuring that each slice is coated evenly. For garnish, sprinkle a tablespoon of sesame seeds on top for added texture and flavor. Serve your Easy Asian Cucumber Salad immediately to enjoy its crispness, or chill it for a short time to let the flavors meld together.

Easy Asian Cucumber Salad Variations

Feel free to let your creativity shine as you explore these delightful twists on the classic recipe!

  • Veggie Boost: Add bell peppers or shredded carrots for a pop of color and added crunch.
    Mixed in, these veggies will not only brighten the dish visually, but they'll also contribute a little more sweetness and nutrition—perfect companions for those cucumbers!

  • Protein-Packed: Toss in cooked shrimp or grilled chicken for a heartier salad.
    This variation transforms your salad into a robust meal, making it satisfying enough to stand alone for lunch or dinner while keeping it light and fresh.

  • Spice Adjustments: Mix in fresh chopped chili peppers to elevate the heat levels.
    If you're feeling adventurous, why not try a variety of peppers? Each can bring a unique flavor, giving you a chance to tailor the spice experience just the way you like it!

  • Creamy Touch: Drizzle with a spoonful of creamy avocado dressing for a deliciously rich contrast.
    Avocado brings not only creaminess but a wonderful buttery flavor that harmonizes beautifully with the tangy dressing—perfect for those who enjoy a velvety finish!

  • Zesty Kick: Add a splash of lime juice for an extra layer of brightness.
    The citrus will cut through the richness of any added toppings and elevate the overall flavor profile. Fresh zesty delight awaits in each bite!

  • Herb Infusion: Incorporate fresh herbs like cilantro or mint for an aromatic touch.
    The herby notes will enliven your salad, making every forkful a burst of freshness that dances on the palate, particularly lovely on a hot summer day!

  • Crunchy Topping: Toast some nuts, like almonds or cashews, to sprinkle on top right before serving.
    Those added crunches create a delightful texture contrast, adding both flavor and whimsy—simply irresistible!

  • Fruit Surprise: Toss in diced mango or pineapple for a sweet and savory experience.
    When tropical fruit meets the refreshing cucumber, it offers an exciting explosion of flavors that will have your taste buds singing!

Looking for some inspiration as you make your very own Easy Asian Cucumber Salad? You can check out my delicious Jello Salad Cottage or the satisfying Tofu Caesar Salad for even more creative ideas to accompany this sensational salad!

What to Serve with Easy Asian Cucumber Salad

As the flavors of this delightful salad dance on your palate, you'll want to create a full meal experience that complements its refreshing crunch.

  • Grilled Chicken Skewers: The smoky flavor of grilled chicken enhances the salad's fresh taste, making for a perfect summer dinner pairing.

  • Steamed Jasmine Rice: Light and fluffy, jasmine rice absorbs any extra dressing, providing a beautiful balance to the salad’s flavors.

  • Sesame Noodles: The nutty tones of sesame noodles provide a heartier option while harmonizing with the Asian-inspired cucumber salad.

  • Spicy Tofu Fries: A delightful contrast, these crispy tofu bites bring a touch of heat and texture, echoing the salad's refreshing crunch.

  • Lightly Pickled Carrots: Their sweet-tart zing complements the salad perfectly, creating an irresistible flavor combination that invites another bite.

  • Chilled Green Tea: Crisp and refreshing, this soothing drink pairs beautifully, cleansing the palate between bites.

For dessert, consider Mango Sticky Rice as an exquisite finish to a warm summer meal. The sweet and creamy dessert balances the meal's freshness, leaving a delightful impression.

Expert Tips for Easy Asian Cucumber Salad

  • Choose the Right Cucumbers: Persian cucumbers are ideal for this salad due to their thin skin and crisp texture. Avoid overly ripe cucumbers, as they may become mushy.

  • Proper Salting: Be sure to sprinkle salt evenly over the cucumber slices to draw out moisture effectively. This step enhances the overall flavor of your Easy Asian Cucumber Salad.

  • Adjust Dressing to Taste: Since chili oil can vary in heat, taste the dressing before adding all of it. Start with less, and increase it based on your preference for spice.

  • Freshness is Key: Serve your salad immediately after mixing the dressing to maintain that delightful crunch. If needed, prepare components separately and combine just before serving.

  • Make It Your Own: Don’t hesitate to add your favorite vegetables or proteins, such as cherry tomatoes or grilled chicken, to make this invigorating Easy Asian Cucumber Salad even more delicious!

Make Ahead Options

These Easy Asian Cucumber Salad options are perfect for busy weeknights or gatherings! You can prepare the cucumbers by slicing them and salting them up to 24 hours in advance. Once salted, simply drain and rinse them, then store in an airtight container in the refrigerator to maintain their crispness. You can also mix the dressing (using sesame oil, soy sauce, sugar, vinegar, and chili oil) up to 3 days prior, keeping it sealed in a jar for easy access. When you’re ready to serve, combine the cucumbers with the dressing, toss gently, and garnish with sesame seeds for that fresh crunch. Your Easy Asian Cucumber Salad will be just as delicious as if you made it right before serving!

How to Store and Freeze Easy Asian Cucumber Salad

  • Fridge: Store your Easy Asian Cucumber Salad in an airtight container for up to 3 days. This way, you’ll keep the cucumbers crisp and the flavors fresh.

  • Make-Ahead Prep: You can prepare all components separately (cucumbers salted, dressing mixed) and combine just before serving to maintain freshness and crunch.

  • Freezer: It's not recommended to freeze this salad, as cucumbers lose their texture when thawed. Enjoy it fresh for the best experience!

  • Reheating: This salad is best served cold or at room temperature, so no reheating is necessary. Simply toss and enjoy at your leisure!

Easy Asian Cucumber Salad Recipe FAQs

What type of cucumbers should I use for this salad?
I recommend using Persian cucumbers for their crunchy texture and thin skin, which makes them perfect for this salad. If you can’t find them, English cucumbers work wonderfully as a substitute, maintaining a similar refreshing bite. Just be sure to slice them thinly!

How long can I store the Easy Asian Cucumber Salad?
You can store your salad in an airtight container in the refrigerator for up to 3 days. Just keep in mind that the longer it sits, the softer the cucumbers will become, so it's best enjoyed fresh for that perfect crunch!

Can I freeze the Easy Asian Cucumber Salad?
It’s not ideal to freeze this salad, as cucumbers lose their delightful crispness once thawed. Instead, focus on enjoying it fresh! If you have leftovers, you can keep them in the fridge for a couple of days without losing too much quality.

What should I do if my cucumbers turn out too salty?
If your cucumbers become too salty, rinse them again under cold water to remove some of the excess salt. After rinsing, drain them well and taste before mixing in your dressing. You can also add a touch of sugar or extra vinaigrette to balance out the flavor.

Is this recipe suitable for a gluten-free diet?
Absolutely! Just use tamari instead of light soy sauce for a gluten-free alternative. This way, you can still enjoy the umami flavor without the gluten, making the Easy Asian Cucumber Salad perfect for everyone at your table.

Can I make the salad ahead of time?
Yes, you can! Prep the cucumbers and dressing separately, and combine them just before serving. This method helps maintain the cucumbers' crunch while allowing the flavors to meld beautifully. If you’re short on time, you could even prepare them a few hours in advance!

Easy Asian Cucumber Salad

Refreshing Easy Asian Cucumber Salad for a Cool Summer Bite

This Easy Asian Cucumber Salad is a refreshing, quick appetizer that features crunchy cucumbers with a tangy dressing, perfect for summer meals.
Print Recipe Pin Recipe
Prep Time 30 minutes mins
Refrigeration Time 20 minutes mins
Total Time 50 minutes mins
Servings: 4 servings
Course: Salads
Cuisine: Asian
Calories: 80
Ingredients Equipment Method Nutrition Notes

Ingredients
  

For the Salad
  • 2-3 pieces Persian Cucumbers Can substitute with English cucumbers
  • 1 teaspoon Salt Evenly sprinkle before refrigeration
  • 2 tablespoons Sesame Oil Can be replaced with olive oil
  • 2 tablespoons Light Soy Sauce Use tamari for gluten-free
  • 1 teaspoon Sugar Adjust to taste
  • 3 tablespoons Rice Vinegar Apple cider vinegar can be used
  • 1 teaspoon Chili Oil Adjust according to spice preference
  • 1 tablespoon Sesame Seeds For garnish
  • 1 clove Garlic Optional; consider fresh or powder

Equipment

  • Mixing Bowl
  • Sharp Knife
  • Colander

Method
 

Preparation Steps
  1. Begin by rinsing the cucumbers under cool water and slice them at an angle into oval shapes, about a quarter-inch thick.
  2. Sprinkle salt evenly over the slices and toss gently; let them sit in the refrigerator for about 20 minutes.
  3. Carefully drain excess liquid and rinse cucumbers under cold water; drain again to keep them crispy.
  4. In a mixing bowl, combine sesame oil, soy sauce, sugar, rice vinegar, and chili oil; whisk until smooth.
  5. Add cucumbers back to the bowl with the dressing and toss gently to coat; garnish with sesame seeds.
  6. Serve immediately or chill briefly before serving to let flavors meld.

Nutrition

Serving: 1cupCalories: 80kcalCarbohydrates: 6gProtein: 2gFat: 6gSaturated Fat: 1gPolyunsaturated Fat: 2gMonounsaturated Fat: 2gSodium: 500mgPotassium: 200mgFiber: 1gSugar: 2gVitamin A: 100IUVitamin C: 5mgCalcium: 50mgIron: 1mg

Notes

Use Persian cucumbers for the best texture and flavor, and adjust the spice level according to your taste preferences. This salad is best served fresh for crunch.

Tried this recipe?

Let us know how it was!

Gordon Ramsay’s Scotch Eggs: Crispy, Herby Bites of Joy

December 27, 2025 by Grace Snow Leave a Comment

Standing in my kitchen, I was enveloped in the comforting aroma of sausage and herbs, instantly transported to a quaint British pub. These Gordon Ramsay-Inspired Scotch Eggs offer a delightful crunch with a soft, jammy yolk at the center—a beautiful balance of textures that will have your taste buds dancing. Not only are they a crowd-pleaser, but making these savory delights is also quicker and easier than you might think! Perfect for a gathering or a cozy night in, this recipe transforms a traditional appetizer into a homemade masterpiece that even novice cooks can tackle. Are you ready to impress with this delightful twist on an iconic dish? Let’s dive into the delicious world of Scotch Eggs!

Why Are These Scotch Eggs Irresistible?

Unique Twist: Inspired by Gordon Ramsay, this recipe updates the traditional Scotch egg with quality ingredients for depth of flavor.
Crispy Crunch: The panko breadcrumbs deliver an addictively crispy exterior that contrasts beautifully with the soft sausage and yolk inside.
Flavorful Herbs: Packed with fresh chives and parsley, each bite bursts with herby goodness, elevating the taste experience.
Quick & Easy: With straightforward steps, anyone can whip these up in no time, making them a perfect addition for parties or quick snacks.
Versatile Variations: Feel free to mix and match the sausage and herbs—try adding your favorite spices or even cheese for a delightful twist! If you're curious about unique variations, consider exploring Turkish Eggs Discover for inspiration!

Gordon Ramsay’s Scotch Eggs Ingredients

For the Filling

  • Eggs – Large, fresh eggs provide a rich, creamy center for the Scotch eggs.
  • Fresh Chives – Adds a mild onion flavor, enhancing the overall herbaceous notes.
  • Parsley – Offers a fresh, bright taste; you can substitute with dill or cilantro for a twist.
  • Breakfast Sausage – The heart of the filling; opt for high-quality sausage for maximum flavor.

For the Coating

  • All-Purpose Flour – Essential for the coating process, allowing breadcrumbs to adhere nicely.
  • Egg (beaten) – Helps the panko stick; use a vegan egg wash for a plant-based alternative.
  • Panko Breadcrumbs – Key for that signature crispy texture; standard breadcrumbs won't provide the same effect.

For Flavoring

  • Mustard – Dijon or whole grain adds a tangy depth to the sausage mixture.
  • Kosher Salt – Crucial for enhancing flavors; sea salt is also a great alternative.
  • Black Pepper – Freshly cracked gives a subtle warmth that brightens the dish.
  • Nutmeg – Offers warmth and complexity; omit if this flavor isn’t your preference.

For Frying

  • Vegetable Oil – Necessary for frying, creating that golden, crispy exterior; consider using peanut oil for a unique flavor.

Explore these ingredients to create your delicious Gordon Ramsay-style Scotch eggs, perfect for a delightful snack or appetizer that elevates your cooking game!

Step‑by‑Step Instructions for Gordon Ramsay’s Scotch Eggs

Step 1: Boil Eggs
Begin by placing 4 large eggs in a saucepan and covering them with cold water. Bring the water to a gentle boil over medium heat and allow the eggs to cook for about 6 minutes for a jammy yolk. Once done, quickly transfer the eggs to an ice bath to stop the cooking process and cool them completely, ensuring easy peeling.

Step 2: Prepare Sausage Mixture
In a mixing bowl, combine your favorite breakfast sausage with finely chopped fresh chives and parsley, a dollop of mustard, kosher salt, freshly cracked black pepper, and a pinch of nutmeg. Using your hands, mix thoroughly until all ingredients are well incorporated, creating a flavorful herb-infused sausage mixture that will embrace the eggs perfectly.

Step 3: Wrap Eggs
After peeling the cooled eggs carefully, divide the sausage mixture into four equal portions. Flatten each portion in your hand, then gently wrap it around each egg, ensuring it's completely encased. This will form a lovely layer of flavorful sausage around the egg and keep the yummy yolk tucked away inside!

Step 4: Coating Station Setup
Prepare your coating station by arranging three shallow bowls in a sequence: one with all-purpose flour, another with the beaten egg, and the third with panko breadcrumbs. This sets you up for a smooth and quick coating process, ensuring each Scotch egg gets that crispy outer layer.

Step 5: Coat Eggs
Taking each wrapped egg, first roll it in the flour until lightly coated, shaking off any excess. Next, dip it in the beaten egg, allowing any surplus to drip off, and finally roll it in the panko breadcrumbs for that signature crunch. For an extra layer of texture, repeat the egg and panko coating.

Step 6: Fry Eggs
In a deep frying pan or pot, heat vegetable oil to 325°F (165°C). Carefully add the coated Scotch eggs to the hot oil and fry them for about 4–6 minutes, turning occasionally until they are golden brown and crispy. Keep an eye on the temperature; maintaining it is key to achieving perfect texture.

Step 7: Rest and Serve
Once the Scotch eggs have reached that beautiful golden hue, removed them from the oil and let them rest on paper towels for a couple of minutes. This will help absorb excess oil. When ready, slice one open to reveal the glorious jammy yolk inside and serve with your favorite dipping sauce for maximum enjoyment!

Make Ahead Options

Preparing Gordon Ramsay’s Scotch Eggs in advance is a fantastic way to save time on busy weeknights or gatherings! You can boil the eggs and wrap them in the sausage mixture up to 24 hours in advance; just refrigerate them covered to maintain moisture and freshness. The coated Scotch eggs can also be made and then refrigerated for up to 3 days before frying; ensure they are stored in an airtight container to preserve their crunchiness. When you're ready to enjoy them, simply heat your oil and fry the Scotch eggs straight from the fridge, ensuring they are heated through for delightfully crispy and scrumptious results!

Variations & Substitutions for Gordon Ramsay’s Scotch Eggs

Tailor your Scotch Eggs to suit your taste buds—or dietary needs—with some fun, easy variations!

  • Sausage Swap: Use spiced lamb or chicken sausage for a unique twist on the classic flavors. This change adds depth and dimension to each bite.
  • Herb Changes: Experiment with different herbs like tarragon or thyme to create your signature Scotch egg flavor. Fresh herbs elevate these bites to new heights!
  • Cheesy Delight: Add shredded cheese, like cheddar or feta, into the sausage mixture for an extra flavor boost. The melted cheese will create a rich, sumptuous filling.
  • Vegan Option: Replace eggs with firm tofu and use a plant-based sausage alternative, plus a vegan egg wash for coating. Your vegan friends will rave about these!
  • Heat It Up: Incorporate diced jalapeños or crushed red pepper flakes into the sausage mixture if you enjoy a little heat. This twist adds an exciting kick!
  • Nutty Crunch: For added texture, mix in crushed nuts or seeds (like sunflower or pumpkin seeds) with your breadcrumbs. This gives a pleasant crunch and interesting flavor profile.
  • Pork-Free: Use turkey sausage for a leaner option; just keep in mind it may create a slightly different texture but equally tasty!
  • Sauce Pairings: Serve with a tangy tzatziki or spicy sriracha aioli dipping sauce. This perfect pairing elevates your Scotch Eggs to a whole new level!

For more variations on classic flavors, consider diving into the world of inspired dishes like Turkish Eggs Discover or explore other delightful twists!

How to Store and Freeze Gordon Ramsay’s Scotch Eggs

Fridge: Store cooked Scotch eggs in an airtight container for up to 3 days. Allow them to cool completely before refrigerating to maintain texture.

Freezer: For longer storage, wrap each Scotch egg tightly in plastic wrap and place them in a freezer-safe bag. They can be frozen for up to 2 months.

Reheating: To reheat, first thaw in the refrigerator overnight. Bake in a preheated oven at 375°F (190°C) for about 15-20 minutes to restore crispiness.

Make-Ahead: These delightful treats can be made ahead for gatherings, making them a convenient option that stays delicious!

What to Serve with Gordon Ramsay’s Scotch Eggs?

Creating a delightful spread to accompany these golden, crispy bites is the perfect way to elevate your meal!

  • Tangy Dipping Sauce: Pair with a zesty mustard or homemade aioli for a harmonious contrast to the rich sausage and egg. The vibrant flavors enhance each bite, making every mouthful more exciting.

  • Fresh Garden Salad: A light, crisp salad topped with seasonal greens and a tangy vinaigrette will balance the richness of the Scotch eggs nicely, adding texture and freshness to your plate.

  • Sweet Potato Fries: Crispy, sweet potato fries add a deliciously contrasting sweetness and are wonderfully colorful—perfect for dipping and pair wonderfully with the savory Scotch eggs.

  • Traditional Pickles: The crunch and acidity of pickles complement the richness of the Scotch eggs, rounding out the flavors on your plate while providing a satisfying crunch.

  • Cheesy Fondue: For a fun twist, serve with a pot of warm, gooey cheese fondue. The melted cheese offers a luxurious dip that's perfect for these crispy bites!

  • Fruity Cider or Beer: Pair these Scotch eggs with a fruity cider or a light, crisp beer. The carbonation and flavor enhance the experience, making these bites truly irresistible!

  • Herb-Infused Quinoa: A fluffy herb-infused quinoa dish can serve as a wholesome, earthy side, balancing the savory flavors of the Scotch eggs while adding a nutritious element to your meal.

  • Roasted Asparagus: Tender roasted asparagus drizzled with olive oil and lemon zest brings a vibrant, earthy flavor, harmonizing beautifully with the richness of the eggs.

Whether it’s a casual dinner or a festive gathering, each side brings a delightful flair that makes your Gordon Ramsay’s Scotch Eggs even more memorable.

Expert Tips for Gordon Ramsay’s Scotch Eggs

Perfectly Jammy Yolks: Ensure you boil the eggs for exactly 6 minutes for that ideal jammy center; too long can lead to overcooked yolks.

Herb Freshness: Always use fresh herbs like chives and parsley to truly elevate the flavors; dried herbs can dull the overall taste.

Oil Temperature Matters: Use a thermometer to maintain oil at 325°F (165°C); too hot and the outside burns before the inside cooks.

Avoid Overcrowding: Fry only a few Scotch eggs at a time; overcrowding lowers the oil temperature and makes for soggy results.

Double Coating Trick: For extra crunch, consider double-coating the eggs with both egg and panko breadcrumbs—this will give a delightful texture!

Storage Tip: If making ahead, refrigerate Scotch eggs for up to 3 days and reheat in an oven to restore their crispy texture.

Gordon Ramsay’s Scotch Eggs Recipe FAQs

How do I choose the right eggs for Scotch Eggs?
Absolutely! For the best results, opt for large, fresh eggs that are free from cracks. Using fresh eggs ensures a richer flavor and a better texture in your Scotch eggs. If possible, check for eggs that have a smooth shell and avoid any with dark spots or unusual blemishes.

What’s the best way to store leftover Scotch Eggs?
Very! You can store cooked Scotch eggs in an airtight container in the fridge for up to 3 days. Make sure to let them cool completely before placing them in the container to maintain their crispy texture. If you notice any condensation inside the container, it's best to pat them dry with a paper towel before sealing.

Can I freeze Scotch Eggs, and if so, how?
Absolutely! For freezing, wrap each Scotch egg individually in plastic wrap, and then place them in a freezer-safe bag. They can be frozen for up to 2 months. To reheat, first, thaw them in the refrigerator overnight, then bake in a preheated oven at 375°F (190°C) for about 15-20 minutes until crispy. This method helps retain that delightful crunch you love!

What can I do if my Scotch Eggs aren't cooking evenly?
If your Scotch eggs are cooking unevenly, ensure you maintain the oil temperature at 325°F (165°C). Using a thermometer is key to achieving this! Additionally, avoid overcrowding the frying pan, as this lowers the oil temperature and can lead to soggy eggs. Frying in small batches helps ensure they cook evenly and achieve that perfect golden color.

Are there any dietary considerations for this recipe?
Yes! If you or a loved one has dietary restrictions, consider substitutions: use turkey sausage for a lighter option or a vegan egg wash (like a flaxseed mix) to keep it plant-based. If you are making these for pets, it's best to keep them away from the spices and seasonings, as some can be harmful to animals. Always check ingredient labels to ensure they fit your dietary needs.

Gordon Ramsay’s Scotch Eggs

Gordon Ramsay’s Scotch Eggs: Crispy, Herby Bites of Joy

Gordon Ramsay’s Scotch Eggs are crispy, herby bites of joy with a soft, jammy yolk at the center.
Print Recipe Pin Recipe
Prep Time 20 minutes mins
Cook Time 10 minutes mins
Resting Time 5 minutes mins
Total Time 35 minutes mins
Servings: 4 eggs
Course: Appetizers
Cuisine: British
Calories: 300
Ingredients Equipment Method Nutrition Notes

Ingredients
  

For the Filling
  • 4 large Eggs Fresh eggs provide a rich, creamy center.
  • 1/4 cup Fresh Chives Adds mild onion flavor.
  • 1/4 cup Parsley Offers a fresh, bright taste.
  • 1 pound Breakfast Sausage Opt for high-quality sausage.
For the Coating
  • 1/2 cup All-Purpose Flour Essential for coating.
  • 1 large Egg (beaten) Helps the panko stick.
  • 1 cup Panko Breadcrumbs Key for crispy texture.
For Flavoring
  • 1 tablespoon Mustard Dijon or whole grain adds tang.
  • 1 teaspoon Kosher Salt Enhances flavors.
  • 1/2 teaspoon Black Pepper Freshly cracked preferred.
  • 1/4 teaspoon Nutmeg Omit if not preferred.
For Frying
  • 2 cups Vegetable Oil Necessary for frying.

Equipment

  • Saucepan
  • Mixing Bowl
  • Deep Frying Pan
  • Bowls for Coating

Method
 

Preparation Steps
  1. Boil 4 large eggs in a saucepan covered with cold water; bring to boil and cook for 6 minutes. Transfer to an ice bath after cooking.
  2. Combine breakfast sausage, chopped chives, parsley, mustard, salt, pepper, and nutmeg in a bowl; mix thoroughly.
  3. Peel the cooled eggs, divide sausage mixture into 4 portions, and wrap around each egg.
  4. Set up coating station with flour, beaten egg, and panko breadcrumbs in shallow bowls.
  5. Roll each wrapped egg in flour, dip in beaten egg, then coat with panko.
  6. Heat oil in a deep frying pan; fry Scotch eggs for 4-6 minutes until golden brown.
  7. Remove from oil, let rest on paper towels, then serve.

Nutrition

Serving: 1eggCalories: 300kcalCarbohydrates: 20gProtein: 16gFat: 18gSaturated Fat: 5gPolyunsaturated Fat: 2gMonounsaturated Fat: 3gCholesterol: 200mgSodium: 600mgPotassium: 300mgFiber: 1gSugar: 1gVitamin A: 400IUVitamin C: 2mgCalcium: 30mgIron: 2mg

Notes

Perfect for gatherings or a cozy night in, these Scotch eggs can elevate your cooking game!

Tried this recipe?

Let us know how it was!

Creamy Salmon Sushi Bake: Your New Easy Dinner Win

December 27, 2025 by Grace Snow Leave a Comment

As I stood by the kitchen counter, carefully measuring ingredients with soft jazz playing in the background, I couldn't help but feel a wave of excitement for the dinner ahead—a Creamy Salmon Sushi Bake. This one-pan meal delivers all the delightful flavors of sushi without the fuss of rolling each piece, making it the perfect solution for busy weeknights or casual gatherings. With layers of seasoned sushi rice, fresh salmon, and a creamy topping that sings with spices, this dish is bound to become a family favorite. Plus, it’s packed with comforting goodness and easy to prep, so you can spend more time enjoying the company of loved ones. Are you ready to make your next meal a sushi-inspired masterpiece?

Why is Salmon Sushi Bake a must-try?

Easy, one-pan meal: This recipe requires minimal clean-up, making it perfect for weeknight dinners or entertaining guests without the hassle.

Creamy and flavorful: The combination of Kewpie mayo and cream cheese creates a luscious topping that enhances the natural richness of the salmon, making every bite a taste sensation.

Versatile options: Whether you’re craving seafood or want a vegetarian twist, this dish can be customized to suit your preferences—try shrimp or tofu for a delightful variation.

Crowd-pleasing: Perfect for gatherings, this sushi bake is sure to impress guests, just like my Cheesy Zucchini Bake that always gets rave reviews!

Quick prep time: It takes just a few minutes to assemble, so you’ll spend less time cooking and more time enjoying the evening.

Comforting textures: The warm, layered experience mimics sushi but in a cozy casserole form, combining the best of both worlds for sushi lovers.

Salmon Sushi Bake Ingredients

• Create this delightful dish with simple ingredients.

For the Sushi Base

  • Sushi Rice – Rinsing removes excess starch for perfect texture.
  • Water – Essential for cooking rice to the right consistency.
  • Lite Seasoned Rice Vinegar – Provides acidity and flavor; substitute with regular vinegar mixed with sugar if needed.

For the Salmon Mixture

  • Salmon Filet – Offers richness; ensure skin is removed and cut into small pieces.
  • Imitation Crab Meat – Adds seafood flavor; can be omitted or replaced with shrimp.
  • Kewpie Mayo – Adds creaminess to the mix; regular mayo works in a pinch.
  • Cream Cheese – Enhances the dish’s creamy texture; use thick cream cheese for best results.
  • Sriracha – Adds a spicy kick; adjust to your spice preference.
  • Soy Sauce/Tamari – Delivers umami flavor; choose Tamari for a gluten-free option.
  • Green Onions – Brings freshness and crunch; substitute with chives if preferred.

For the Unagi Sauce

  • Soy Sauce – Serves as the base for sweetness in the sauce.
  • Mirin – Sweet rice wine enhances flavors; can be replaced with equal parts sugar and water.
  • Sake – Complements mirin; can be omitted if unavailable.
  • White Granulated Sugar – Sweetens the unagi sauce.

For the Spicy Mayo

  • Lime Juice – Adds tanginess to the spicy mayo.
  • Salt – Enhances the overall flavor.

For Toppings

  • Avocado – Adds creaminess and essential fats as a topping.
  • Sesame Seeds – Provide texture; feel free to use black, white, or both.
  • English Cucumber – Brings a crunchy freshness, perfect as a garnish.
  • Nori Sheets – Serve alongside for wrapping bites—great for that sushi experience!

With these ingredients, your Salmon Sushi Bake will shine as a comforting and enticing dish, ready to be enjoyed!

Step‑by‑Step Instructions for Salmon Sushi Bake

Step 1: Prepare and Cook Rice
Start by rinsing 1 cup of sushi rice under cold water until the water runs clear. Combine the rinsed rice with 1¼ cups of water in a rice cooker, and cook according to the manufacturer's instructions. Once cooked, let the rice sit covered for 10 minutes to steam, then fluff with a fork and add 2 tablespoons of lite seasoned rice vinegar, mixing gently until well combined.

Step 2: Make Salmon Mixture
While the rice cools, preheat your oven to 425°F (220°C). In a medium bowl, cube 8 ounces of salmon filet into ½ inch pieces. Combine the salmon with ¼ cup of Kewpie mayo, 4 ounces of cream cheese, 1 tablespoon of sriracha, and 2 tablespoons of soy sauce, mixing well. Stir in 2 chopped green onions, and refrigerate the mixture to let the flavors meld while you prepare the unagi sauce.

Step 3: Prepare Unagi Sauce
In a small saucepan over medium heat, combine ¼ cup of soy sauce, ¼ cup of mirin, 1 tablespoon of sake (if using), and 2 tablespoons of sugar. Bring to a gentle simmer, stirring constantly, until the mixture thickens slightly, about 5 minutes. Remove the sauce from heat and allow it to cool, as it will be drizzled over your Salmon Sushi Bake later.

Step 4: Prepare Spicy Mayo
In a small bowl, whisk together ¼ cup of mayo, 1 tablespoon of sriracha, the juice of half a lime, and a pinch of salt. Adjust the spice level to your preference by adding more sriracha if desired. Place the spicy mayo in the refrigerator to chill while you assemble the dish.

Step 5: Assemble Sushi Bake
In a greased 9x13 inch baking dish, layer the seasoned sushi rice evenly at the bottom. Spread the creamy salmon mixture on top of the rice, ensuring it's evenly distributed. Use a spatula to smooth out the surface, which creates a nice, even layer for the Salmon Sushi Bake.

Step 6: Bake
Place the assembled Salmon Sushi Bake in the preheated oven and bake for 10-15 minutes. Keep an eye on it as it bakes; you want the top to be golden and slightly bubbling, achieving a deliciously warm texture. If desired, broil for an additional 2-3 minutes to caramelize the top, ensuring it doesn't burn.

Step 7: Serve
Once baked, remove the dish from the oven and allow it to cool for a few minutes. Drizzle the prepared unagi sauce on top, followed by generous dollops of spicy mayo. Garnish with sliced avocado, diced cucumber, sesame seeds, and additional green onions before serving with nori sheets for wrapping. Enjoy your comforting and flavorful Salmon Sushi Bake!

Expert Tips for Salmon Sushi Bake

  • Rinse Rice Properly: Rinsing sushi rice is crucial to achieve the perfect texture. Make sure you rinse until the water runs clear, removing excess starch.

  • Cool Before Mixing: Allow the cooked rice to cool before adding the vinegar. This helps the rice absorb the flavor more efficiently, achieving that perfect sushi bake taste.

  • Watch the Broiler: If using the broiler at the end, stay close! It can quickly go from perfectly caramelized to burnt if not monitored closely.

  • Prep Toppings in Advance: To streamline your cooking process, prepare toppings like avocado, cucumber, and sauces ahead of time. This way, assembly is quick and easy during the final moments!

  • Swap Proteins Smoothly: If seafood isn't your preference, feel free to substitute salmon with shrimp, crab, or even tofu for a delicious vegetarian salmon sushi bake that still packs a flavorful punch!

  • Layer Evenly: When assembling, ensure the salmon mixture is spread evenly over the rice. This not only looks appealing but allows for even cooking and flavor distribution.

Salmon Sushi Bake Variations

Feel free to explore these delightful twists to make your Salmon Sushi Bake even more exciting and personalized!

  • Shrimp Swap: Replace salmon with shrimp for a delightful twist that brings a sweet, briny flavor to your dish.

  • Vegan Version: Use tofu instead of fish, mixing it with Kewpie mayo and spices for a rich, creamy texture without any animal products.

  • Crispy Topping: Add tempura bits on top for an extra crunch that contrasts beautifully with the creamy layers.

  • Flavorful Furikake: Experiment with different furikake blends like spicy wasabi or bonito flakes for a flavor bomb in every bite.

  • Extra Heat: Incorporate fresh diced jalapeños into the salmon mixture or top with a drizzle of spicy eel sauce if you love a little kick.

  • Creamier Gooeyness: For a richer topping, mix in some shredded mozzarella cheese or additional cream cheese for an even creamier outcome.

  • Sweet & Savory: Try adding a hint of pineapple or mango puree in the creamy mix for a touch of sweetness that contrasts with the savory flavors.

For even more inspiration, consider checking out our recipe for Vegan Sushi Indulge or feel free to incorporate elements from my Cheesy Zucchini Bake for a delightful side! Your Salmon Sushi Bake can be as versatile as your taste buds desire!

Make Ahead Options

These creamy Salmon Sushi Bake elements can easily be prepped ahead, saving you precious time during busy weeknights! You can prepare the sushi rice and let it cool to room temperature up to 24 hours in advance; just be sure to store it in an airtight container in the refrigerator to maintain freshness. The salmon mixture can also be made up to 3 days ahead—simply combine the diced salmon, mayo, cream cheese, and spices as instructed, then refrigerate until you're ready to assemble the dish. When it's time to enjoy your Salmon Sushi Bake, layer the rice and salmon mixture in your baking dish, then bake for 10-15 minutes, adding a quick broil for that delicious golden finish. This way, you’ll have a comforting, homemade dish with minimal effort!

How to Store and Freeze Salmon Sushi Bake

Room Temperature: Allow the dish to cool completely before leaving it at room temperature for no more than 2 hours to maintain freshness.

Fridge: Store leftover Salmon Sushi Bake in an airtight container for up to 3 days. Reheat in the oven for best results to restore creaminess without drying it out.

Freezer: If you want to extend its shelf life, freeze portions in airtight containers for up to 2 months. Thaw in the fridge overnight before reheating.

Reheating: For optimal taste and texture, reheat in the oven at 350°F (175°C) until warmed through. This method helps keep the creamy topping intact and delicious.

What to Serve with Creamy Salmon Sushi Bake

Indulging in a flavorful salmon sushi bake creates an opportunity to build a wholesome meal, enhancing the dining experience with delightful accompaniments.

  • Cucumber Salad: Light and refreshing, this salad balances the richness of the sushi bake with a crisp crunch—a classic pairing.
  • Miso Soup: Warm and comforting, miso soup adds a soothing element to your meal, bringing deep umami flavors to the table.
  • Edamame: These lightly salted soybeans add a nutritious, protein-packed side that offers a satisfying texture contrast. They also provide a joyful snacking option while you wait for the main dish to cool!
  • Tempura Vegetables: The light, crispy texture of tempura makes for an exciting contrast to the creamy sushi bake, adding both crunch and flavor depth.
  • Sake or Green Tea: Both beverages complement the dish beautifully; sake enhances the meal's Japanese roots, while green tea offers a refreshing, soothing finish.
  • Mango Sticky Rice: For dessert, indulge in mango sticky rice; the sweet, creamy coconut flavors will perfectly round out your harmonious sushi-inspired feast, leaving everyone with a smile.

Salmon Sushi Bake Recipe FAQs

What type of salmon should I use for the Salmon Sushi Bake?
Absolutely! Fresh salmon filet is ideal for the Salmon Sushi Bake, offering the richness and flavor that really stands out. Look for wild-caught salmon when possible, and make sure it's firm and bright in color. If you're unable to find fresh salmon, you can use frozen salmon, just ensure it’s completely thawed before cooking.

How should I store leftover Salmon Sushi Bake?
Very simple! Once your Salmon Sushi Bake has cooled completely, transfer leftovers to an airtight container. Store it in the refrigerator for up to 3 days. When it’s time to enjoy again, I recommend reheating it in the oven rather than the microwave to keep that creamy topping delightful.

Can I freeze the Salmon Sushi Bake?
Yes, you can! To freeze, let the bake cool completely and then portion it into airtight containers. It will keep well frozen for up to 2 months. When you’re ready to eat, simply thaw it in the refrigerator overnight. Reheat in the oven at 350°F (175°C) until warmed through to maintain the creamy consistency.

What should I do if my rice is too sticky?
Not to worry! If your sushi rice turns out too sticky, it may be due to not rinsing it enough before cooking. For next time, thoroughly rinse your sushi rice under cold water until the water runs clear. Another tip is to let the rice cool completely before mixing in the vinegar, which helps with texture as well.

Is there a gluten-free option for the Salmon Sushi Bake?
Definitely! To make your Salmon Sushi Bake gluten-free, simply use Tamari instead of regular soy sauce, which is made without wheat. Also, confirm that your cream cheese and any other packaged ingredients are certified gluten-free. This way, everyone can enjoy this dish without worry!

Salmon Sushi Bake

Creamy Salmon Sushi Bake

Enjoy a comforting Creamy Salmon Sushi Bake, a perfect fusion of sushi flavors without the rolling hassle.
Print Recipe Pin Recipe
Prep Time 15 minutes mins
Cook Time 15 minutes mins
Cooling Time 10 minutes mins
Total Time 40 minutes mins
Servings: 6 servings
Course: Dinner
Cuisine: Japanese
Calories: 500
Ingredients Equipment Method Nutrition Notes

Ingredients
  

For the Sushi Base
  • 1 cup Sushi Rice Rinsed
  • 1.25 cups Water
  • 2 tablespoons Lite Seasoned Rice Vinegar Can substitute with regular vinegar mixed with sugar
For the Salmon Mixture
  • 8 ounces Salmon Filet Skin removed and cut into small pieces
  • 0.25 cups Imitation Crab Meat Can be omitted or replaced with shrimp
  • 0.25 cups Kewpie Mayo Regular mayo works in a pinch
  • 4 ounces Cream Cheese Thick for best results
  • 1 tablespoon Sriracha Adjust to spice preference
  • 2 tablespoons Soy Sauce/Tamari Tamari for gluten-free
  • 2 tablespoons Chopped Green Onions Can substitute with chives
For the Unagi Sauce
  • 0.25 cups Soy Sauce
  • 0.25 cups Mirin Can be replaced with equal parts sugar and water
  • 1 tablespoon Sake Can be omitted
  • 2 tablespoons White Granulated Sugar
For the Spicy Mayo
  • 0.25 cups Mayo
  • 1 tablespoon Sriracha
  • 0.5 units Lime Juice Juice of half a lime
  • 1 pinch Salt
For Toppings
  • 1 medium Avocado Sliced
  • 2 tablespoons Sesame Seeds Use black, white, or both
  • 1 medium English Cucumber Diced for garnish
  • 4 sheets Nori Sheets For wrapping bites

Equipment

  • Rice cooker
  • Baking Dish
  • Saucepan
  • Mixing Bowl

Method
 

Step-by-Step Instructions
  1. Rinse sushi rice under cold water until the water runs clear. Combine with water in a rice cooker and cook according to instructions. Let sit covered for 10 minutes, fluff and mix in seasoned rice vinegar.
  2. Preheat oven to 425°F (220°C). Cube salmon and mix with Kewpie mayo, cream cheese, sriracha, and soy sauce. Stir in chopped green onions and refrigerate.
  3. Combine soy sauce, mirin, sake, and sugar in a saucepan over medium heat. Simmer until slightly thickened. Remove from heat and cool.
  4. Whisk mayo, sriracha, lime juice, and salt in a bowl. Adjust spice level if desired. Chill in the refrigerator.
  5. In a greased 9x13 inch baking dish, layer seasoned sushi rice evenly, then spread salmon mixture on top.
  6. Bake in preheated oven for 10-15 minutes until golden. Broil for an additional 2-3 minutes if desired.
  7. Drizzle unagi sauce and spicy mayo over baked dish. Garnish with avocado, cucumber, sesame seeds, and extra green onions. Serve with nori sheets.

Nutrition

Serving: 1servingCalories: 500kcalCarbohydrates: 40gProtein: 25gFat: 30gSaturated Fat: 10gPolyunsaturated Fat: 2gMonounsaturated Fat: 5gCholesterol: 70mgSodium: 800mgPotassium: 600mgFiber: 2gSugar: 5gVitamin A: 1000IUVitamin C: 5mgCalcium: 50mgIron: 2mg

Notes

Rinsing rice properly is crucial for the best texture. Allow rice to cool before adding vinegar. Watch closely if using the broiler.

Tried this recipe?

Let us know how it was!

Cozy Dumpling Bake in Creamy Red Curry Bliss

December 27, 2025 by Grace Snow Leave a Comment

The scent of creamy coconut and warm spices enveloped my kitchen as I took my first look at the bubbling One Pan Dumpling Bake. This dish is not just a meal; it’s an embrace on a plate, perfect for those evenings when you crave something comforting yet effortlessly simple. With its easy "dump and bake" method, the Dumpling Bake not only saves you precious time but also delivers a hearty, flavorful dinner that can get the whole family gathering around the table. Imagine your weeknights transformed, allowing you to serve up this bright and satisfying dish with minimal fuss and maximum delight. Are you ready to dive into a bowl of cozy goodness?

Why Is This Dumpling Bake Irresistible?

Low Effort: The "dump and bake" technique means less prep and cleanup.
Flavor Explosion: Infused with creamy coconut and aromatic red curry, this dish elevates your dinner experience.
Comfort Food Upgrade: Enjoy the irresistible combination of tender dumplings and vibrant veggies.
Customizable: Easily swap ingredients based on what you have; tofu or fresh vegetables work beautifully!
Family Favorite: It’s a dish that unites everyone at the table; watch them come back for seconds!
Elevate your weeknight meal plans with this delicious Dumpling Bake that blends ease and flavor in one creamy dish. Perfectly paired with jasmine rice, it's not just dinner—it's a cozy gathering moment!

Dumpling Bake Ingredients

For the Broth
• Coconut Milk – Provides a creamy base for the broth; substitute with almond milk for a dairy-free version.
• Red Curry Paste – Adds spice and depth; adjust quantity to suit your heat preference.
• Soy Sauce – Enhances umami flavor; opt for low sodium for a healthier twist.
• Rice Vinegar – Balances the richness; apple cider vinegar can work in a pinch.
• Honey or Sugar – Sweetens the broth to counter the spice; maple syrup is a great vegan alternative.
• Sesame Oil – Offers a delightful nutty aroma; can be swapped with olive oil for a milder flavor.

For the Aromatics
• Garlic – Adds savory depth; fresh garlic is ideal, but garlic powder works too.
• Ginger – Provides warmth and zing; fresh is preferred, but reduce ground ginger if substituting.

For the Dumplings & Vegetables
• Dumplings – Use frozen dumplings for convenience; fresh dumplings may require reduced cooking time.
• Bok Choy – Gives a crunchy texture and nutritional boost; can replace with spinach or Swiss chard.
• Zucchini – Adds lightness and extra veggies; feel free to use any similar vegetable you have on hand.

For Garnishing (optional)
• Sesame Seeds – Sprinkle on top for added crunch and flavor.
• Sliced Green Onions – Freshness and a pop of color finish the dish beautifully.
• Cilantro – Adds a burst of freshness; can be omitted if not a fan.
• Chili Crisp Oil – For those who love an extra kick in their meals.

This Dumpling Bake is not only simple to prepare but also versatile, allowing you to adjust ingredients based on your pantry staples and personal preferences. Enjoy the delightful flavors while soaking up this lovely, creamy dish!

Step‑by‑Step Instructions for Dumpling Bake

Step 1: Preheat Your Oven
Begin by preheating your oven to 400°F (200°C) to ensure it’s hot and ready to bring your Dumpling Bake to life. This initial step is crucial for achieving that golden crisp on the dumplings while the flavors marry beautifully together in the creamy red curry broth.

Step 2: Mix the Broth
In a large 12 x 8 inch baking dish, combine the coconut milk, red curry paste, soy sauce, rice vinegar, honey, and sesame oil. Whisk the mixture until it’s smooth and well-blended, creating a fragrant and creamy base for your Dumpling Bake. This should take about 2-3 minutes, ensuring all flavors are thoroughly mixed.

Step 3: Add Aromatics
Next, grate in the garlic and ginger into the broth mixture, stirring them in to release their delightful aromas. If you prefer a brothier consistency, feel free to add ¼ cup of water at this point. This enriching step ensures your Dumpling Bake is packed with flavor and has just the right texture.

Step 4: Incorporate Vegetables
Chop the bok choy and zucchini into bite-sized pieces. Fold them into the broth, stirring until the vegetables are fully coated in the creamy mixture. This step adds vibrant colors and nutritional benefits to your Dumpling Bake, making it not just delicious but visually appealing as well.

Step 5: Arrange the Dumplings
Take your frozen dumplings and arrange them in a single layer over the veggie-broth mixture, gently pressing them into the liquid to ensure they soak up all the flavors. Cover the baking dish tightly with foil to retain moisture, which is vital for achieving that tender texture throughout your Dumpling Bake.

Step 6: Bake to Perfection
Place the covered baking dish in the preheated oven and bake for 20 minutes. This allows the dumplings to steam and absorb the broth's flavors. After 20 minutes, remove the foil and bake for an additional 5-10 minutes until the dumplings start to bubble and develop a slightly crispy top, signaling they’re ready to serve.

Step 7: Garnish and Serve
Once baked, take your Dumpling Bake out of the oven and let it cool for a minute. Garnish generously with sesame seeds, chopped green onions, and cilantro for that fresh touch. Serve your delicious creation over jasmine rice or noodles to fully embrace the creamy sauce, turning dinner into a delightful experience!

Dumpling Bake Variations & Substitutions

Explore these delightful twists on the classic Dumpling Bake and let your creativity shine in the kitchen!

  • Meat Lovers: Substitute frozen dumplings with cubed chicken, shrimp, or beef for a protein-packed meal. Varieties can add richness and depth; just be sure to adjust cooking times as needed.

  • Vegetarian Delight: Swap in cubed tofu for a hearty yet meat-free option, soaking up the flavorful broth perfectly. Whether you fry the tofu for added texture or use it as is, it’s a delicious way to keep things light.

  • Heat It Up: For those who crave a kick, sprinkle in chili flakes or a dash of sriracha to the broth. This fiery addition elevates the dish, adding layers of warmth that make each bite exciting.

  • Mix Up the Veggies: Use any vegetables you have on hand, such as bell peppers, carrots, or snap peas, instead of bok choy and zucchini. Experimenting with colors and textures brings your Dumpling Bake to life and ensures it’s always a little different!

  • Coconut-Free Option: Replace coconut milk with almond or oat milk for a lighter alternative that still provides creaminess. Consider adding a bit of nut butter for a hint of richness without the coconut flavor.

  • Unique Garnishes: Try garnishing with radish slices or a sprinkle of crushed peanuts for an unexpected crunch and zest. These additions enhance both taste and presentation, making your Dumpling Bake a visual treat.

  • Asian Twist: Add a splash of fish sauce or hoisin sauce for an extra umami flavor that complements the existing ingredients beautifully. This can give your dish a delightful traditional touch reminiscent of beloved Asian favorites.

Feel free to explore and enjoy as you create your unique version of this delicious Dumpling Bake! If you're looking for more inspiration alongside your dumplings, check out this Cheesy Zucchini Bake or try some comforting Chicken Dumplings Cozy for a delightful experience.

Expert Tips for the Best Dumpling Bake

Avoid Overcrowding: Ensure there’s enough space between the dumplings in the baking dish to allow for even cooking and a crispy texture.

Foil Removal: For perfectly crisp dumplings, remove the foil during the last 5-10 minutes of baking. This helps achieve that desirable golden finish!

Adjust Fresh Dumpling Time: If you're using fresh dumplings instead of frozen, remember to reduce the baking time by about ten minutes to prevent overcooking.

Customize Veggies: Feel free to swap out the bok choy and zucchini for other quick-cooking vegetables like bell peppers or snap peas for added flavor and nutrition in your Dumpling Bake.

Broth Consistency: If you prefer a brothier dish, add a little extra water or broth to your mix before baking. This can elevate the flavor and make it a heartier option!

Make Ahead Options

Preparing your One Pan Dumpling Bake in advance not only saves time but also allows the flavors to meld beautifully! You can mix the creamy red curry broth and add in chopped vegetables like bok choy and zucchini up to 24 hours before baking. Just cover the dish tightly with foil and refrigerate it to maintain freshness. When you're ready to serve, simply arrange the frozen dumplings on top, cover again with foil, and bake as instructed. This ensures your dumplings come out just as tender and delicious, making it perfect for busy weeknights. Enjoy the ease of a wholesome, flavorful meal at your fingertips!

Storage Tips for Dumpling Bake

Fridge: Store leftovers in an airtight container for up to 3 days. This keeps your delicious Dumpling Bake fresh and ready to reheat.

Freezer: If you have extra portions, freeze them in a sealed container for up to 2 months. Thaw in the fridge overnight before reheating.

Reheating: Gently reheat your Dumpling Bake in the oven at 350°F (175°C) for about 15-20 minutes. Add a splash of broth or water to prevent drying out.

Airtight Storage: Ensure it's stored properly to maintain flavor and texture, keeping that creamy goodness intact for your next meal!

What to Serve with One Pan Dumpling Bake

Imagine the comforting aroma of your Dumpling Bake wafting through the air as you create the perfect meal experience.

  • Jasmine Rice: This fragrant rice is perfect for soaking up the creamy red curry broth, enhancing each delightful bite.
  • Thai Spring Rolls: Crisp and light, these rolls paired with tangy dipping sauce add a refreshing crunch that complements the warm dumplings beautifully.
  • Crispy Salad: A mix of greens with a zesty vinaigrette provides a refreshing contrast, balancing the richness of the Dumpling Bake perfectly.
  • Steamed Broccoli: Tender yet crunchy, steamed broccoli adds a nutrient boost and complements the dish’s vibrant flavors with its green freshness.
  • Sesame Noodles: These noodles, tossed in a savory sesame dressing, echo the Asian influence of the Dumpling Bake and provide a delightful textural contrast.
  • Coconut Chia Pudding: For dessert, this creamy, subtly sweet treat pairs wonderfully with the rich, spicy flavors of your meal, making it a lovely finish to your dinner.
  • Mango Lassi: This chilled, sweet yogurt drink is refreshing and can help temper the spice, providing a creamy beverage that enhances the overall dining experience.

Transform your dinner table into a cozy haven with these delightful pairings, creating memorable moments around your delicious Dumpling Bake!

Dumpling Bake Recipe FAQs

What type of dumplings should I use?
Absolutely! You can use any frozen dumplings you prefer, whether they are pork, chicken, or vegetable. If you’re using fresh dumplings instead, just remember to reduce the baking time by about 10 minutes to prevent them from becoming overcooked and mushy.

How do I store leftovers?
Very easy! Store your leftovers in an airtight container in the fridge for up to 3 days. Make sure to let it cool to room temperature before sealing it to prevent condensation, which can make the dumplings soggy.

Can I freeze the Dumpling Bake?
Certainly! If you have extra portions or want to meal prep, you can freeze your Dumpling Bake. Allow it to cool down, and then transfer it to a sealed container. It can be stored in the freezer for up to 2 months. When you're ready to enjoy it, thaw it overnight in the fridge before reheating.

What should I do if my dumplings aren’t crispy?
If you’re finding that your dumplings aren’t achieving that delightful crispiness, make sure you remove the foil during the last 5-10 minutes of baking. This allows the moisture to escape and helps the dumplings to brown up nicely. Additionally, ensure there’s enough space between the dumplings in the dish for even cooking!

Can I make this dish gluten-free?
Absolutely! To make this Dumpling Bake gluten-free, simply use gluten-free dumplings and tamari instead of soy sauce. Many brands offer good gluten-free options, making it easy to enjoy this dish without compromising flavor.

Is this recipe suitable for a vegan diet?
Yes! For a vegan version, use plant-based dumplings and replace honey with maple syrup or agave. The coconut milk and vegetable broth make it creamy and delicious without any animal products. Enjoy this comforting dish with peace of mind!

Dumpling Bake

Cozy Dumpling Bake in Creamy Red Curry Bliss

Experience the comforting flavors of Dumpling Bake with creamy coconut and aromatic spices, perfect for family dinners.
Print Recipe Pin Recipe
Prep Time 10 minutes mins
Cook Time 30 minutes mins
Total Time 40 minutes mins
Servings: 4 servings
Course: Dinner
Cuisine: Asian
Calories: 350
Ingredients Equipment Method Nutrition Notes

Ingredients
  

For the Broth
  • 1 can Coconut Milk Substitute with almond milk for a dairy-free version.
  • 2 tablespoons Red Curry Paste Adjust quantity to suit your heat preference.
  • 2 tablespoons Soy Sauce Opt for low sodium for a healthier twist.
  • 1 tablespoon Rice Vinegar Apple cider vinegar can work in a pinch.
  • 1 tablespoon Honey or Sugar Maple syrup is a great vegan alternative.
  • 1 tablespoon Sesame Oil Can be swapped with olive oil for a milder flavor.
For the Aromatics
  • 2 cloves Garlic Fresh garlic is ideal, but garlic powder works too.
  • 1 inch Ginger Fresh is preferred, reduce ground ginger if substituting.
For the Dumplings & Vegetables
  • 16 ounces Dumplings Use frozen dumplings for convenience.
  • 2 cups Bok Choy Can replace with spinach or Swiss chard.
  • 1 medium Zucchini Feel free to use any similar vegetable on hand.
For Garnishing (optional)
  • 2 tablespoons Sesame Seeds Sprinkle on top for added crunch and flavor.
  • 2 stalks Sliced Green Onions Freshness and a pop of color.
  • 2 tablespoons Cilantro Can be omitted if not a fan.
  • 1 tablespoon Chili Crisp Oil For those who love an extra kick.

Equipment

  • 12 x 8 inch baking dish
  • Whisk

Method
 

Step-by-Step Instructions for Dumpling Bake
  1. Preheat your oven to 400°F (200°C) to ensure it’s hot and ready.
  2. In a large baking dish, combine the coconut milk, red curry paste, soy sauce, rice vinegar, honey, and sesame oil. Whisk until smooth.
  3. Grate in the garlic and ginger into the broth mixture, stirring them in.
  4. Chop the bok choy and zucchini into bite-sized pieces and fold them into the broth.
  5. Arrange the frozen dumplings in a single layer over the veggie-broth mixture and cover the dish tightly with foil.
  6. Bake in the preheated oven for 20 minutes, then remove the foil and bake for an additional 5-10 minutes until bubbly and crispy.
  7. Garnish with sesame seeds, green onions, and cilantro, then serve over jasmine rice or noodles.

Nutrition

Serving: 1servingCalories: 350kcalCarbohydrates: 40gProtein: 10gFat: 15gSaturated Fat: 9gPolyunsaturated Fat: 2gMonounsaturated Fat: 3gSodium: 800mgPotassium: 500mgFiber: 5gSugar: 5gVitamin A: 20IUVitamin C: 25mgCalcium: 8mgIron: 15mg

Notes

This Dumpling Bake is versatile; adjust ingredients based on your pantry staples and preferences.

Tried this recipe?

Let us know how it was!

Cheesesteak Tortellini in Creamy Provolone Sauce Bliss

December 26, 2025 by Grace Snow Leave a Comment

As I was stirring up memories of cozy family dinners, a delightful thought came to mind: what if I could combine the comforting essence of a classic Philly cheesesteak with the delightful texture of cheese-filled tortellini? Enter my creation: Cheesesteak Tortellini in Creamy Provolone Sauce. This dish is not only a time-saver—taking just 15 minutes of prep and 30 minutes of cooking—but it’s also a taste explosion that brings together tender beef, sautéed veggies, and a velvety, homemade sauce that warms the soul. Perfect for busy weeknights, this easy pasta recipe will remind you just how rewarding cooking can be. Are you ready to experience a modern twist on comfort food? Let’s dive in!

Why is this recipe a must-try?

Comforting Fusion: The Cheesesteak Tortellini in Creamy Provolone Sauce brings together two beloved dishes in a way that creates a warm, comforting experience.

Quick and Easy: With just 15 minutes of prep and 30 minutes in the kitchen, you can whip this up effortlessly—perfect for busy weeknights.

Flavor Explosion: Tender beef, sautéed veggies, and a luxurious sauce come together for a delightful taste sensation that will have everyone asking for seconds.

Versatile Ingredients: Customize this dish by swapping cheese tortellini for other pasta types like penne or fusilli, easily accommodating dietary preferences.

Family Pleaser: The creamy texture and savory taste make it a hit with both kids and adults—goodbye, fast food cravings!

Perfect Pairings: Serve alongside a fresh salad or some crusty artisan bread for a complete meal that feels indulgent yet satisfying.

Cheesesteak Tortellini in Creamy Provolone Sauce Ingredients

For the Tortellini

  • Cheese Tortellini – The star of the dish; you can also use penne or fusilli for variety.

For the Steak

  • Thinly Sliced Steak (1 lb, e.g., ribeye or sirloin) – Adds rich, beefy flavor; cut into bite-sized pieces for even cooking.

For Cooking

  • Olive Oil (1 tablespoon) – Perfect for searing the steak and sautéing veggies; adds a touch of fruitiness.
  • Onion (1 medium, thinly sliced) – Brings sweetness and aroma; ensures a savory base for the sauce.
  • Green Bell Pepper (1, thinly sliced) – Offers color and crunch; provides a fresh contrast to the creaminess.
  • Garlic (2 cloves, minced) – Enhances the overall flavor profile with its aromatic warmth.

For the Sauce

  • Beef Broth (1 cup) – Essential for deglazing the pan and building a robust flavor foundation for the sauce.
  • Heavy Cream (1 cup) – Transforms the broth into a luxurious, creamy sauce that envelops the tortellini beautifully.
  • Provolone Cheese (8 oz, shredded) – Melts into the sauce, adding tangy richness and a delightful creaminess.

For Seasoning

  • Salt and Pepper – Essential for balancing flavors; adjust to taste.

For Garnish

  • Fresh Parsley – Adds a pop of color and a touch of freshness to the final dish.

This delightful Cheesesteak Tortellini in Creamy Provolone Sauce is not only a feast for the taste buds but also incredibly easy to make, ensuring that you can enjoy a heartwarming dish without the hassle!

Step‑by‑Step Instructions for Cheesesteak Tortellini in Creamy Provolone Sauce

Step 1: Cook the Tortellini
Begin by bringing a large pot of salted water to a boil. Add the cheese tortellini and cook according to the package instructions, usually around 3-5 minutes until tender but al dente. Once cooked, drain the tortellini and set it aside, ensuring a little cooking water clings to it for added moisture.

Step 2: Sear the Steak
In a large skillet, heat 1 tablespoon of olive oil over medium-high heat until shimmering. Add the thinly sliced steak to the pan, searing for about 3-4 minutes on each side until browned and cooked through. Once done, transfer the steak to a plate and cover it loosely with foil to keep warm while you prepare the vegetables.

Step 3: Sauté the Vegetables
In the same skillet, reduce the heat to medium and add the thinly sliced onion, green bell pepper, and minced garlic. Sauté for about 5-6 minutes, stirring frequently, until the vegetables are tender and fragrant. They'll soften and become slightly caramelized, enhancing the flavor of your Cheesesteak Tortellini in Creamy Provolone Sauce.

Step 4: Deglaze with Broth
Pour 1 cup of beef broth into the skillet, stirring well to scrape up any browned bits from the bottom of the pan. This deglazing process will take about 2-3 minutes, allowing the broth to simmer and combine with the sautéed veggies, enriching the base for your creamy sauce.

Step 5: Create the Creamy Sauce
Stir in 1 cup of heavy cream and allow the mixture to simmer for about 4-5 minutes, stirring occasionally until it thickens slightly. Watch for the sauce to become velvety and coat the back of a spoon, indicating that it's ready for the provolone cheese.

Step 6: Add the Provolone Cheese
Gradually mix in 8 ounces of shredded provolone cheese, stirring continuously until it melts smoothly into the sauce. This will enhance the richness of your Cheesesteak Tortellini in Creamy Provolone Sauce. Keep the heat on low to maintain a gentle simmer while you finish preparing the dish.

Step 7: Return the Steak to the Sauce
Add the cooked steak back into the sauce, seasoning with salt and pepper to taste. Gently fold the mixture until the beef is well coated in the creamy sauce. Allow it to warm through for about 2 minutes, ensuring every bite is packed with flavor.

Step 8: Combine with Tortellini
Carefully add the cooked tortellini to the skillet, gently folding it into the creamy steak and vegetable mixture. Stir until the pasta is thoroughly coated with the heavenly provolone sauce, taking care not to break the delicate tortellini.

Step 9: Serve and Garnish
Once everything is well combined, transfer your Cheesesteak Tortellini in Creamy Provolone Sauce to plates or a serving dish. Garnish with freshly chopped parsley for a delightful pop of color and freshness. Serve immediately while the dish is warm and creamy for a truly comforting experience.

Make Ahead Options

These Cheesesteak Tortellini in Creamy Provolone Sauce are perfect for meal prep! You can cook the tortellini and sauté the steak and vegetables up to 24 hours in advance; just refrigerate them separately to maintain their textures. For best results, allow the sauce to cool completely before covering and refrigerating it for up to 3 days. When you’re ready to serve, simply reheat the sauce over low heat to maintain its creaminess, add the previously cooked steak and tortellini, and warm through until everything is heated evenly. This way, you’ll enjoy a comforting meal that feels freshly made without the last-minute rush!

How to Store and Freeze Cheesesteak Tortellini in Creamy Provolone Sauce

Fridge: Store leftovers in airtight containers for up to 3 days. This will keep your Cheesesteak Tortellini in Creamy Provolone Sauce fresh and delicious.

Freezer: For longer storage, freeze in portioned bags for up to 1 month. To maintain the best texture, separate the sauce and tortellini before freezing.

Thawing: When ready to enjoy, thaw overnight in the fridge. This ensures a gradual defrost, keeping flavors intact.

Reheating: Gently reheat on the stove over low heat, stirring occasionally. This helps retain the creamy consistency without making the sauce grainy.

Expert Tips for Cheesesteak Tortellini

  • Cheese Gradually: Stir in provolone cheese slowly for a smooth sauce; adding it too quickly can lead to clumpy texture.

  • Avoid Overcooking: Be cautious not to overcook the steak; it should be tender but not tough. Aim for a light sear on each side.

  • Reheat Gently: When reheating leftovers, do so over low heat to maintain the creamy consistency without making it grainy.

  • Taste as You Go: Regularly taste your dish as you cook; this helps ensure that your Cheesesteak Tortellini in Creamy Provolone Sauce is well-seasoned and delicious.

  • Vegetable Variations: Feel free to swap in your favorite veggies or use what you have on hand, such as mushrooms or spinach, to personalize this dish.

What to Serve with Cheesesteak Tortellini in Creamy Provolone Sauce

A comforting meal like this deserves delightful companions to elevate your dining experience.

  • Crusty Artisan Bread: Perfect for soaking up the creamy sauce, this warm, crusty bread brings heartiness to each bite.

  • Fresh Garden Salad: A light salad with mixed greens and a tangy vinaigrette adds a refreshing crunch that balances the rich flavors.

  • Garlic Roasted Vegetables: Roasted carrots, zucchini, and bell peppers offer a hint of sweetness, complementing the savory steak and cheese sauce beautifully.

  • Sautéed Garlic Spinach: This simple side dish provides a pop of green and a garlicky kick that pairs wonderfully with the heavy creaminess of the pasta.

  • Creamy Coleslaw: Adding a cool, creamy coleslaw offers a delightful contrast in texture and temperature, enhancing your comfort-food experience.

  • Chilled White Wine: A crisp Sauvignon Blanc will cut through the richness of the sauce, making every sip refreshing and vibrant.

  • Chocolate Mousse: For dessert, this light and airy treat is a delightful way to finish your meal, leaving a sweet note after the savory cheesesteak delight.

Cheesesteak Tortellini in Creamy Provolone Sauce Variations

Feel free to make this comforting dish your own with these fun swaps and additions that will tickle your tastebuds!

  • Gluten-Free: Swap cheese tortellini for gluten-free pasta for a satisfying dish that everyone can enjoy. Whether you choose gluten-free penne or fusilli, the flavors will remain deliciously the same!

  • Low-Calorie Cream: Substitute heavy cream with half-and-half or cashew cream to lighten up the dish. This keeps it creamy while reducing calories, perfect for those watching their intake without sacrificing taste.

  • Spicy Kick: Add a pinch of red pepper flakes to the sautéed veggies for an extra layer of heat. It elevates the dish and introduces a zing that tantalizes the palate!

  • Extra Veggies: Toss in some chopped spinach or mushrooms while sautéing for added nutrients and flavor. This not only enhances texture but also brings a fresh vibrancy to your Cheesesteak Tortellini.

  • Different Cheeses: Experiment with different cheeses like Asiago or mozzarella for a unique twist. Each brings its own flavor profile, allowing you to vary the dish each time you make it.

  • Herb Infusion: Add fresh thyme or oregano to the creamy sauce to deepen the flavor. These herbs create an aromatic experience that complements the richness beautifully—perfect for homemade comfort food.

  • Protein Swap: Change up the protein by using grilled chicken or sautéed shrimp instead of steak. This variation caters to different preferences and creates delightful new taste experiences.

Looking for other comforting pasta ideas? Try our delightful Tagliatelle with Asparagus and Peas or indulge in the fresh flavors of Shrimp Tacos Zesty. Each can be customized to fit your family's taste just like our Cheesesteak Tortellini in Creamy Provolone Sauce!

Cheesesteak Tortellini in Creamy Provolone Sauce Recipe FAQs

What type of cheese tortellini should I use?
You can use any type of cheese tortellini, though I recommend fresh or frozen varieties for the best texture. If you're looking for alternatives, penne or fusilli can work just as well for a different twist!

How should I store leftovers of Cheesesteak Tortellini in Creamy Provolone Sauce?
Store any leftovers in airtight containers in the refrigerator for up to 3 days. To maintain the freshness and ensure the best flavor, let them cool completely before sealing.

Can I freeze Cheesesteak Tortellini in Creamy Provolone Sauce?
Absolutely! For freezing, separate the sauce from the tortellini to prevent it from becoming mushy. Portion the sauce and pasta into plastic freezer bags or airtight containers, and freeze for up to 1 month. When you're ready to enjoy, thaw overnight in the fridge.

What do I do if the sauce becomes too thick?
If your sauce thickens more than you'd like, don't worry! Just add a splash of beef broth or some milk over low heat while stirring until it reaches your desired consistency. This step helps bring back its creamy texture.

Is this dish appropriate for children with allergies?
Always check ingredient labels, especially for cheese and broth, to ensure there are no allergens like gluten or lactose. For a dairy-free version, try using vegan cheese and substitute the heavy cream with a plant-based alternative.

How can I adjust the spice level in this recipe?
If you prefer a little heat, consider adding red pepper flakes or diced jalapeños during the sautéing step of the vegetables. This adds a nice kick without overwhelming the dish!

Cheesesteak Tortellini in Creamy Provolone Sauce

Cheesesteak Tortellini in Creamy Provolone Sauce Bliss

Experience the delightful Cheesesteak Tortellini in Creamy Provolone Sauce, a comforting fusion of classic flavors.
Print Recipe Pin Recipe
Prep Time 15 minutes mins
Cook Time 30 minutes mins
Total Time 45 minutes mins
Servings: 4 servings
Course: Dinner
Cuisine: American
Calories: 600
Ingredients Equipment Method Nutrition Notes

Ingredients
  

For the Tortellini
  • 9 oz Cheese Tortellini or penne/fusilli for variety
For the Steak
  • 1 lb Thinly Sliced Steak e.g., ribeye or sirloin, cut into bite-sized pieces
For Cooking
  • 1 tbsp Olive Oil for searing steak and sautéing veggies
  • 1 medium Onion thinly sliced
  • 1 whole Green Bell Pepper thinly sliced
  • 2 cloves Garlic minced
For the Sauce
  • 1 cup Beef Broth for deglazing the pan
  • 1 cup Heavy Cream for a creamy texture
  • 8 oz Provolone Cheese shredded
For Seasoning
  • Salt to taste
  • Pepper to taste
For Garnish
  • Fresh Parsley chopped

Equipment

  • Large pot
  • Large skillet

Method
 

Step-by-Step Instructions
  1. Cook the Tortellini: Bring a large pot of salted water to a boil. Add cheese tortellini and cook according to package instructions, about 3-5 minutes. Drain and set aside.
  2. Sear the Steak: In a skillet, heat olive oil over medium-high heat. Add steak, searing for 3-4 minutes on each side until browned. Transfer to a plate and cover with foil.
  3. Sauté the Vegetables: In the same skillet, reduce heat to medium, add onion, green bell pepper, and garlic. Sauté for 5-6 minutes until tender.
  4. Deglaze with Broth: Pour beef broth into the skillet, stir to scrape up browned bits. Simmer for 2-3 minutes.
  5. Create the Creamy Sauce: Stir in heavy cream and simmer for 4-5 minutes until slightly thickened.
  6. Add the Provolone Cheese: Gradually mix in provolone cheese, stirring until melted into the sauce.
  7. Return the Steak to the Sauce: Add cooked steak into the sauce, season with salt and pepper. Warm through for 2 minutes.
  8. Combine with Tortellini: Add cooked tortellini to the skillet, gently fold until well coated.
  9. Serve and Garnish: Transfer to a serving dish and garnish with parsley. Serve warm.

Nutrition

Serving: 1servingCalories: 600kcalCarbohydrates: 50gProtein: 35gFat: 30gSaturated Fat: 15gPolyunsaturated Fat: 1gMonounsaturated Fat: 5gCholesterol: 100mgSodium: 800mgPotassium: 600mgFiber: 3gSugar: 4gVitamin A: 800IUVitamin C: 20mgCalcium: 300mgIron: 3mg

Notes

Stir in provolone cheese slowly to avoid a clumpy texture. Do not overcook the steak for best results.

Tried this recipe?

Let us know how it was!

Classic Beef Bourguignon: A Cozy French Delight at Home

December 26, 2025 by Grace Snow Leave a Comment

As I stirred the pot, a fragrant wave enveloped my kitchen, instantly transporting me to the charming bistros of France. The heart of this Classic Beef Bourguignon simmers beautifully, with tender chunks of beef soaking in a rich, luscious red wine sauce. This comforting one-pot meal not only promises a flavorful journey but also simplifies a traditionally complex dish—making it a breeze for both busy weeknights and celebratory feasts. Whether you’re a seasoned home chef or just starting out, this easy adaptation allows you to enjoy gourmet results without the fuss. Ready to elevate your dinner game? Let's dive into the magic of braised beef!

Why is Beef Bourguignon a Must-Try?

Comforting, Hearty Meal: The depth of flavors in this dish will wrap you in warmth, making it perfect for cozy dinners.
One-Pot Wonder: Simplify your cooking with minimal cleanup while enjoying a dish that feels gourmet.
Flexible Ingredients: Customize with different veggies or meats, such as swapping in brisket for beef chuck or using Quinoa Tabbouleh for a fresh twist.
Impressive Presentation: Serve it alongside crusty bread or creamy mashed potatoes for a stunning and satisfying meal.
Make-Ahead Friendly: Create a flavor-packed dish that tastes even better the next day, ideal for busy schedules.
Prepare to impress family and friends with your culinary skills, while indulging in this classic French delight!

Classic Beef Bourguignon Ingredients

For the Base

  • Bacon – Adds smokiness and depth. Use pancetta for a different flavor profile.
  • Beef Chuck – Provides rich flavor and tenderness through slow cooking. Brisket can be used for a fattier alternative.
  • Unsalted Butter – Used for sautéing vegetables and making a roux. Olive oil can be a substitute for a lighter option.
  • Yellow Onion – Delivers sweetness and base flavor. Shallots can be used for a milder taste.
  • Carrots – Adds sweetness and texture. Parsnips can be substituted for a different flavor.
  • Garlic – Enhances aroma and depth. Garlic powder can be used in a pinch, but fresh is recommended.
  • Tomato Paste – Contributes umami and richness. Fresh tomatoes can be substituted, though adjustments to cooking time may be required.
  • All-Purpose Flour – Thickens the sauce. Can be omitted for gluten-free preparation; use cornstarch instead.
  • Burgundy Wine – Offers depth and character. A quality dry red wine may be used in place of Burgundy.
  • Beef Stock – Provides the needed liquid base. Vegetable stock can be used for a lighter, non-meat alternative.

For Flavor Enhancement

  • Better than Bouillon – Enhances beef flavor intensity. Regular beef bouillon cubes can serve as a substitute.
  • Fresh Thyme – Adds herbal notes. Dried thyme can be swapped at a ratio of 1:3.
  • Bay Leaves – Contributes aromatic flavor during simmering. Omit if unavailable; adjust other herbs to compensate.

For Texture

  • Frozen Pearl Onions – Offers sweet flavor and texture. Fresh pearl onions or chopped regular onions work in a pinch.
  • Cremini Mushrooms – Provides umami and texture. Button mushrooms can be used as an alternative.

Get ready to savor your homemade Classic Beef Bourguignon, a dish that's not just a meal, but a soulful experience!

Step‑by‑Step Instructions for Classic Beef Bourguignon

Step 1: Preheat the Oven
Begin by preheating your oven to 350°F (175°C). This initial step sets the stage for your Classic Beef Bourguignon, ensuring the cooking environment is just right for braising the beef. While the oven warms up, gather your ingredients and equipment to streamline the process.

Step 2: Render the Bacon
In a large Dutch oven, place chopped bacon over medium-low heat. Allow it to cook gently for about 8-10 minutes, stirring occasionally until it turns golden brown and crispy. Once done, use a slotted spoon to transfer the bacon to a plate, leaving the rendered fat in the pot to enhance flavor for the next steps.

Step 3: Sear the Beef
Season 2-3 pounds of beef chuck cubes generously with salt and pepper. Increase the Dutch oven's heat to medium-high and add the beef in batches, browning each side for about 3-4 minutes until a nice crust forms. Remove the meat once it’s well-browned, as this adds depth to your Classic Beef Bourguignon.

Step 4: Sauté the Vegetables
In the same pot, melt 2 tablespoons of unsalted butter and add diced yellow onions and sliced carrots. Sauté for 5-7 minutes until the onions become translucent and the carrots soften. Incorporate minced garlic and tomato paste, cooking for an additional 1-2 minutes until the tomato paste darkens slightly, releasing its rich flavors.

Step 5: Create the Sauce
Sprinkle in 2 tablespoons of all-purpose flour to the sautéed vegetables, stirring to combine. Gradually pour in 1 bottle of Burgundy wine, followed by 2 cups of beef stock and a spoonful of Better than Bouillon. Return the seared beef and rendered bacon to the pot, stirring in fresh thyme and a couple of bay leaves to infuse the Classic Beef Bourguignon with aromatic goodness.

Step 6: Bake
Cover the Dutch oven tightly and transfer it to your preheated oven. Allow it to bake for 2.5 hours, during which time the beef will become tender and absorb the deep flavors of the sauce. Peak occasionally to make sure it’s simmering gently.

Step 7: Add Mushrooms and Onions
About 30 minutes before the cooking time is up, heat the remaining butter in a skillet and sauté frozen pearl onions and sliced cremini mushrooms for 5 minutes until they soften. Once sautéed, add them to the pot, cover again, and bake for another 45-60 minutes. This step rounds out the flavors in your Classic Beef Bourguignon.

Step 8: Rest Before Serving
Once fully cooked, carefully remove the Dutch oven from the oven. Let the Classic Beef Bourguignon sit, covered, for about 30 minutes. This resting period allows the flavors to meld beautifully, ensuring every bite is rich and satisfying when it’s time to serve.

Expert Tips for Classic Beef Bourguignon

  • Perfectly Brown the Beef: Make sure to sear the beef cubes in batches to develop a rich crust. This step adds amazing depth to your Classic Beef Bourguignon.

  • Veggie Integrity: Avoid overcooking the vegetables by monitoring their tenderness. Aim for them to be soft but still holding their shape in the sauce.

  • Wine Choice Matters: Use a quality Burgundy or a bold dry red wine that you enjoy drinking. The flavor of the wine will enhance your Classic Beef Bourguignon significantly.

  • Resting Time is Key: Don’t skip the resting period after baking. Allowing it to rest for 30 minutes will deepen the flavors and improve the dish’s overall enjoyment.

  • Make-Ahead Magic: Consider making this dish a day in advance. The flavors intensify overnight, making for an even tastier experience the next day.

Make Ahead Options

Preparing your Classic Beef Bourguignon in advance can save you precious time on busy weeknights! You can chop all the vegetables and store them in the refrigerator for up to 3 days, keeping them fresh and ready to cook. Additionally, searing the beef and cooking the bacon can be done up to 24 hours in advance; simply refrigerate them separately in airtight containers. When it’s time to enjoy your dish, combine the prepped ingredients and proceed with the recipe as if you just started. This ensures that your Classic Beef Bourguignon remains just as delicious, while also allowing flavors to develop even further! Enjoy the convenience of meal prep while serving an unforgettable meal.

Classic Beef Bourguignon Variations

Feel free to make this dish your own with delectable twists that cater to your tastes!

  • Vegetarian Option: Substitute vegetable stock for beef stock and use mushrooms or lentils for protein. This creates a hearty, comforting meal without meat.
  • Short Ribs: For richer flavor, swap beef chuck with short ribs. The extra marbling adds depth and tenderness, elevating your dish further.
  • Cornstarch Substitute: Omit gluten by replacing all-purpose flour with cornstarch as a thickener. It’ll provide that delightful sauce texture while being friendly to gluten-free diets.
  • Herb Variations: Consider adding fresh rosemary or sage along with thyme for a different herbaceous twist. This will elevate the aroma and flavor beautifully!
  • Spicy Kick: Add a pinch of crushed red pepper flakes or a dash of cayenne pepper for a surprising heat that complements the rich sauce.
  • Wine Swap: If you’re low on Burgundy, use a full-bodied dry red like Merlot or Cabernet Sauvignon for a delicious alternative. The flavor will still shine through!
  • Mushroom Medley: Experiment with different mushrooms such as shiitake or porcini for varied textures and earthiness that add complexity to your Classic Beef Bourguignon.
  • Dairy Options: For a creamier finish, stir in a dollop of sour cream or crème fraîche before serving. This luscious addition balances the rich flavors beautifully.

With these variations, your Classic Beef Bourguignon can cater to any preference. For complementary sides, I recommend serving it with creamy mashed potatoes or a delightful Quinoa Tabbouleh to add a fresh touch to your meal. Happy cooking!

What to Serve with Classic Beef Bourguignon?

Elevate your dining experience with perfect pairings that enhance this rich and hearty French delight.

  • Crusty Baguette: Freshly baked bread is perfect for soaking up the flavorful sauce, providing a comforting crunch alongside tender beef.

  • Creamy Mashed Potatoes: Smooth and buttery, they deliver a luxurious texture that complements the rich sauce while offering a satisfying contrast.

  • Garlic Roasted Green Beans: Crisp-tender green beans with a hint of garlic add a refreshing crunch that balances the richness of the dish.

  • Herbed Rice Pilaf: Light and fragrant, rice pilaf garnished with fresh herbs captures the essence of the meal while adding a lovely visual appeal.

  • Sauteed Brussels Sprouts: The slight bitterness of Brussels sprouts provides a wonderful contrast to the sweet and savory notes of the bourguignon.

  • Savory Mushroom Risotto: This creamy, umami-packed dish mirrors the earthiness of the beef and mushrooms, creating a harmonious plate.

  • Red Wine: Pair with a good-quality Burgundy or any full-bodied red wine to enhance the flavors and echo the wine used in the dish.

  • Chocolate Soufflé: End on a sweet note! A light and airy chocolate soufflé offers a delightful finish, echoing the luxurious indulgence of French cuisine.

How to Store and Freeze Classic Beef Bourguignon

  • Fridge: Cool the beef bourguignon completely before transferring it to an airtight container. It can be stored in the refrigerator for up to 6 days, allowing flavors to deepen.

  • Freezer: For longer storage, portion the dish into freezer-safe containers. Classic Beef Bourguignon can be frozen for up to 3 months. Make sure to leave some space in the container for expansion.

  • Reheating: Thaw in the fridge overnight if frozen. Reheat gently on the stovetop over low heat, adding a splash of beef stock or water to restore its rich sauce. Enjoy warm!

Classic Beef Bourguignon Recipe FAQs

What type of beef should I use for Classic Beef Bourguignon?
For the best flavor and tenderness, I recommend using beef chuck, which becomes wonderfully tender through slow cooking. If you prefer a fattier option, brisket is a great alternative. Just ensure the meat is well-marbled for the richest flavor.

How should I store leftover Classic Beef Bourguignon?
After allowing it to cool completely, transfer your Classic Beef Bourguignon into an airtight container. It will keep well in the refrigerator for up to 6 days. This dish actually tastes better the next day as the flavors meld together, inviting you for a delicious second serving!

Can I freeze Classic Beef Bourguignon?
Absolutely! To freeze, portion it into sturdy, freezer-safe containers, leaving a little space at the top for expansion. Your Classic Beef Bourguignon can be frozen for up to 3 months. When you’re ready to enjoy it again, thaw it in the fridge overnight and gently reheat on the stovetop with a splash of beef stock if needed.

What if my beef isn’t tender after cooking?
If your beef isn’t tender after the recommended cooking time, it may need more time to braise. Every oven varies, so continue cooking it covered for an additional 30 minutes to 1 hour until the beef is fork-tender. Just be sure to check on the liquid levels to avoid drying out the dish.

Is it possible to make Classic Beef Bourguignon gluten-free?
Yes! To make this recipe gluten-free, simply omit the all-purpose flour or substitute it with cornstarch for thickening. You’ll achieve a deliciously rich sauce without the gluten, ensuring everyone at the table can enjoy this classic French meal.

What’s the best way to enhance the flavors of Classic Beef Bourguignon?
For even more depth, consider marinating the beef in red wine before cooking. This step allows the meat to soak up all those beautiful flavors. Additionally, using a quality Burgundy or another dry red wine you love to drink will greatly enhance the overall taste.

Classic Beef Bourguignon

Classic Beef Bourguignon: A Cozy French Delight at Home

Experience the rich flavors of Classic Beef Bourguignon, a comforting one-pot meal perfect for any occasion.
Print Recipe Pin Recipe
Prep Time 30 minutes mins
Cook Time 2 hours hrs 30 minutes mins
Resting Time 30 minutes mins
Total Time 3 hours hrs 30 minutes mins
Servings: 6 servings
Course: Dinner
Cuisine: French
Calories: 420
Ingredients Equipment Method Nutrition Notes

Ingredients
  

For the Base
  • 8 oz Bacon Use pancetta for a different flavor profile.
  • 2-3 lbs Beef Chuck Brisket can be used for a fattier alternative.
  • 2 tbsp Unsalted Butter Olive oil can be a substitute for a lighter option.
  • 1 cup Yellow Onion Shallots can be used for a milder taste.
  • 2 medium Carrots Parsnips can be substituted for a different flavor.
  • 4 cloves Garlic Fresh is recommended.
  • 2 tbsp Tomato Paste Fresh tomatoes can be substituted.
  • 2 tbsp All-Purpose Flour Can be omitted for gluten-free preparation.
  • 1 bottle Burgundy Wine A quality dry red wine may be used.
  • 2 cups Beef Stock Vegetable stock can be used for a non-meat alternative.
For Flavor Enhancement
  • 1 tbsp Better than Bouillon Regular beef bouillon cubes can serve as a substitute.
  • 2 sprigs Fresh Thyme Dried thyme can be swapped at a ratio of 1:3.
  • 2 leaves Bay Leaves Omit if unavailable.
For Texture
  • 1 cup Frozen Pearl Onions Fresh pearl onions or chopped regular onions work.
  • 8 oz Cremini Mushrooms Button mushrooms can be used as an alternative.

Equipment

  • Dutch oven

Method
 

Step-by-Step Instructions for Classic Beef Bourguignon
  1. Preheat your oven to 350°F (175°C). Gather your ingredients and equipment.
  2. In a large Dutch oven, cook chopped bacon over medium-low heat for 8-10 minutes until golden brown.
  3. Season beef chuck cubes with salt and pepper, then brown in batches for 3-4 minutes each side.
  4. Melt butter in the pot, sauté onions and carrots for 5-7 minutes, then add garlic and tomato paste.
  5. Sprinkle flour, then gradually add wine, beef stock, and Better than Bouillon. Add the beef and bacon back to the pot with thyme and bay leaves.
  6. Cover and bake for 2.5 hours, checking occasionally for simmering.
  7. Sauté pearl onions and mushrooms in remaining butter for 5 minutes; add to pot for the last 45-60 minutes of baking.
  8. Let the dish rest covered for 30 minutes after removing from the oven before serving.

Nutrition

Serving: 1servingCalories: 420kcalCarbohydrates: 17gProtein: 35gFat: 24gSaturated Fat: 10gPolyunsaturated Fat: 2gMonounsaturated Fat: 9gTrans Fat: 1gCholesterol: 90mgSodium: 950mgPotassium: 850mgFiber: 3gSugar: 4gVitamin A: 120IUVitamin C: 8mgCalcium: 30mgIron: 4mg

Notes

Serve alongside crusty bread or creamy mashed potatoes for a complete meal. This dish is perfect for make-ahead and deep flavor enhancement.

Tried this recipe?

Let us know how it was!
  • « Previous Page
  • 1
  • …
  • 64
  • 65
  • 66
  • 67
  • 68
  • …
  • 180
  • Next Page »

Welcome!

Hi, I’m Grace, a Sydney-based home cook with a passion for bold flavors and trending ingredients. Whether you’re a busy beginner or a seasoned foodie, you’ll find dishes here that are fresh, fun, and full of flavor.

More about me

Popular Recipes

  • Butter Pecan Cookies
    Irresistibly Soft Butter Pecan Cookies for Cozy Moments
  • Decadent Turtle Bars
    Decadent Turtle Bars: Indulge in Sweet Gooey Perfection
  • Salted Caramel Butter Bars
    Decadent Salted Caramel Butter Bars You Can't Resist
  • Easy Italian Pasta Salad
    Easy Italian Pasta Salad: A Summer Delight to Share

Footer

↑ back to top

About

  • Privacy Policy
  • Disclaimer
  • Terms & Conditions

Newsletter

  • Sign Up! for emails and updates

Contact

  • About me
  • Contact me

Copyright © 2025 TastyTrendIngredients