Just a hint of sweet, savory aroma wafting through my kitchen, and it's hard not to smile. There’s something truly heartwarming about making a Korean Ground Beef Bowl, especially when it transforms a busy weeknight dinner into a deliciously satisfying experience. This recipe combines fragrant garlic, ginger, and soy sauce, creating a tapestry of flavors that captivates every sense. Not only is this dish a quick and easy meal to whip up, perfect for those hectic days, but it’s also a great way to introduce a fun twist to your family’s dinner routine. Trust me—after just one bite, you'll crave this irresistible comfort food again and again! Are you ready to create a cozy meal that feels like a warm hug on a plate? Let's dive in!
Why You'll Love This Korean Bowl?
Flavor-packed goodness: The marriage of garlic, ginger, and soy sauce creates an aromatic symphony that will have your taste buds dancing.
Quick and easy: This one-pan dish is perfect for busy weeknights, taking less than 30 minutes from start to finish.
Customizable: Add your favorite veggies or rice variants for endless personalizations. Why not try it with a side of Fish Taco Bowls for a vibrant twist?
Crowd pleaser: Family-friendly and full of flavor, it's an excellent way to shake up the routine with something satisfying.
Nourishment on a plate: With wholesome ingredients, this dish offers comfort without the guilt, making it a nourishing addition to your weeknight repertoire.
Korean Ground Beef Bowl Ingredients
• For the Beef Mixture
- Ground Beef – The star of the dish; choose lean ground beef for a healthier option.
- Soy Sauce – Adds savory depth; consider low-sodium varieties to control saltiness.
- Brown Sugar – Infuses a hint of sweetness to balance the savory flavors.
- Garlic – Freshly minced for optimal flavor; can be substituted with garlic powder in a pinch.
- Ginger – Freshly grated gives a lovely warmth; use ground ginger if that's what you have.
- Sesame Oil – Adds a nutty aroma that enhances the overall taste experience.
- Scallions – Chopped for garnish; ensures freshness and a pop of color.
• For Serving
- Cooked Rice – A fluffy base; opt for jasmine or brown rice to suit your preference.
- Vegetables – Choose your favorites (like bell peppers and broccoli) to make it colorful and nutritious.
- Sesame Seeds – A sprinkle adds both texture and a nice presentation touch.
Feel free to mix and match your favorite veggies with this Korean Ground Beef Bowl for endless variations!
Step‑by‑Step Instructions for Korean Ground Beef Bowl
Step 1: Preheat and Prepare
Start by heating a large skillet over medium-high heat. As the skillet warms up, gather your ingredients, ensuring your ground beef is ready to go. This initial step sets the stage for a flavorful Korean Ground Beef Bowl, and a hot skillet will help achieve a nice sear on the beef.
Step 2: Brown the Beef
Add the ground beef to the skillet and break it apart with a spatula. Cook for about 5-7 minutes, stirring occasionally, until the meat is nicely browned and no longer pink. Ensure you’re getting the right texture; a good browning contributes to the savory depth of flavor in your Korean Ground Beef Bowl.
Step 3: Add Aromatics
Once the beef is browned, lower the heat to medium. Stir in the minced garlic and grated ginger, cooking for another 1-2 minutes until fragrant. This step is crucial as the aromas from garlic and ginger create a delightful base for your dish. Be careful not to burn the garlic!
Step 4: Flavor it Up
With the aromatics in play, add the soy sauce and brown sugar to the beef mixture. Stir well and let it simmer for about 3-4 minutes. The sugar will melt and combine, creating a savory-sweet sauce that infuses the beef with rich flavor. The sauce should thicken slightly, coating the meat beautifully.
Step 5: Combine with Vegetables
If you’re adding veggies, toss them in now. Stir in chopped bell peppers or broccoli and cook for an additional 3-5 minutes until the vegetables are tender but still vibrant. This not only adds color to your Korean Ground Beef Bowl but also boosts its nutritional value, making it a wholesome meal.
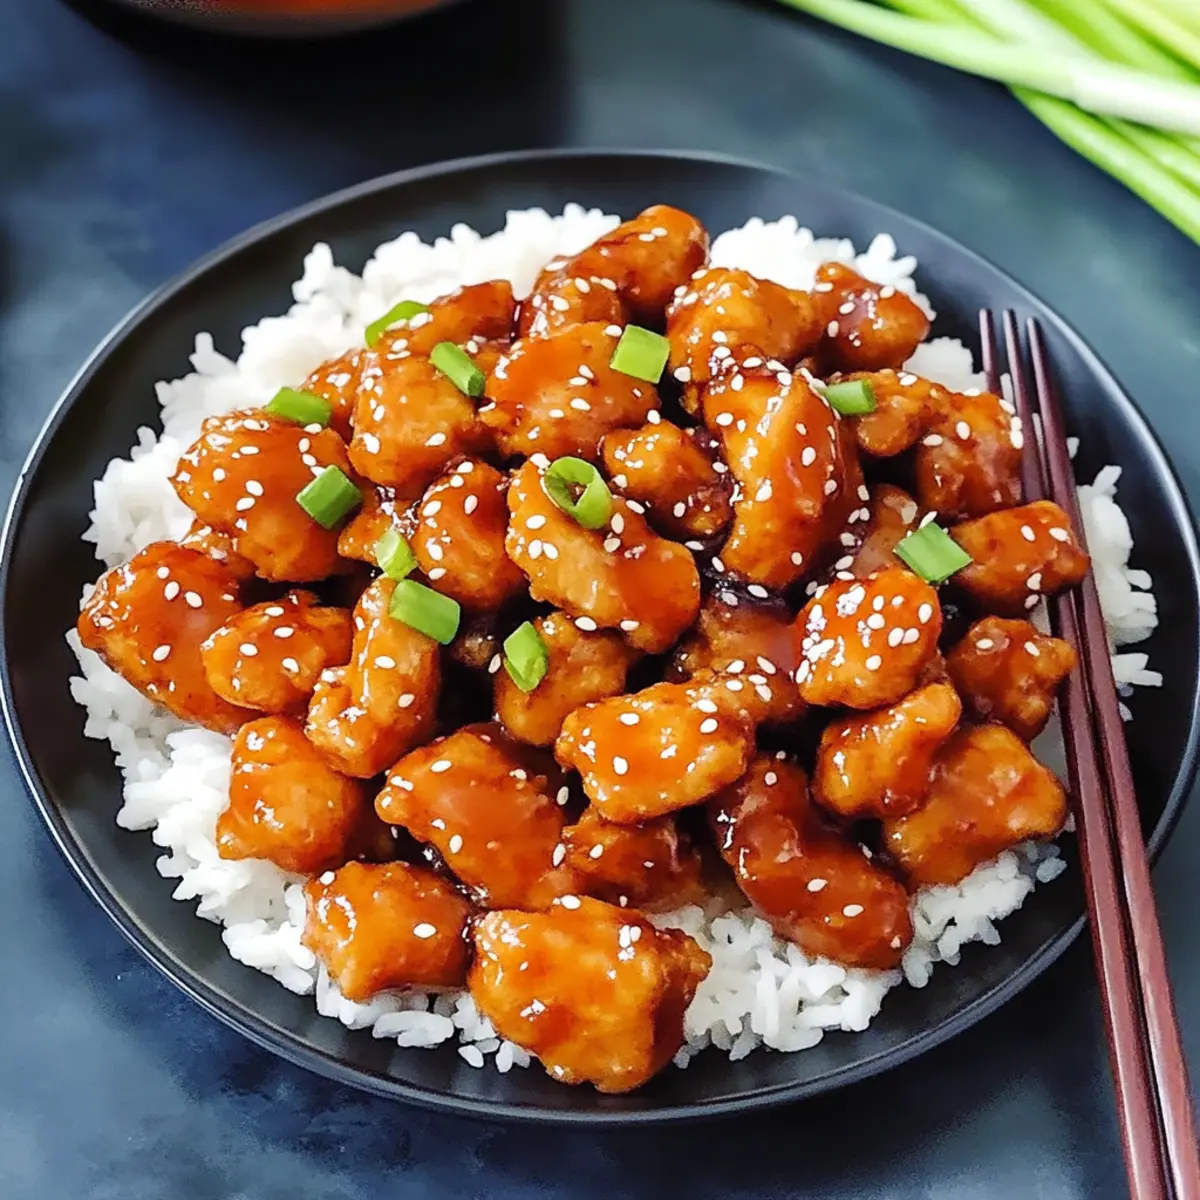
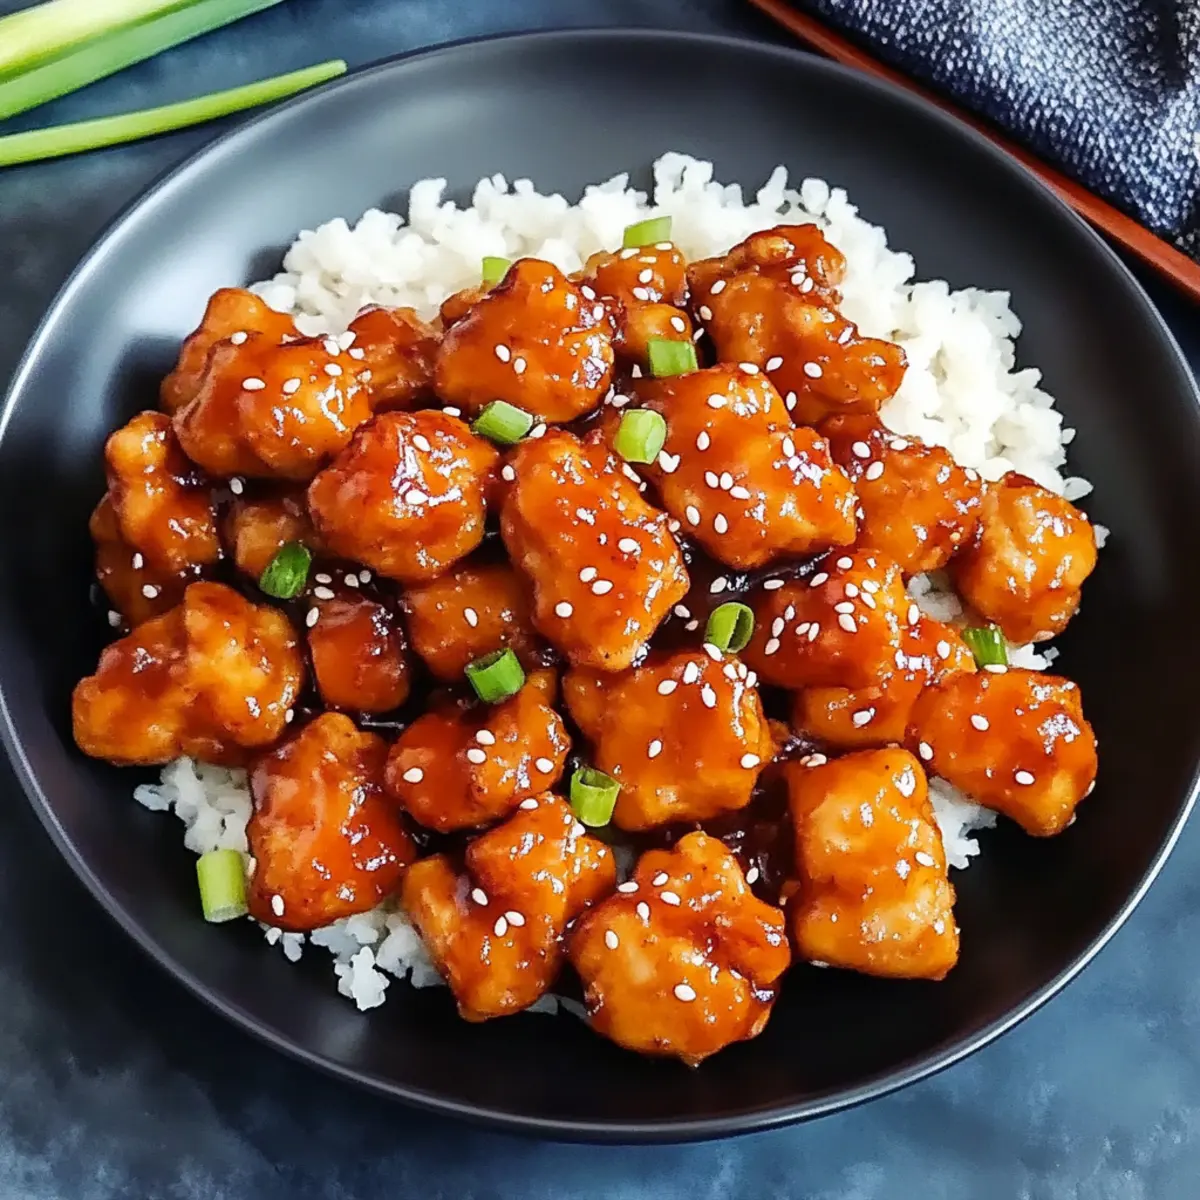
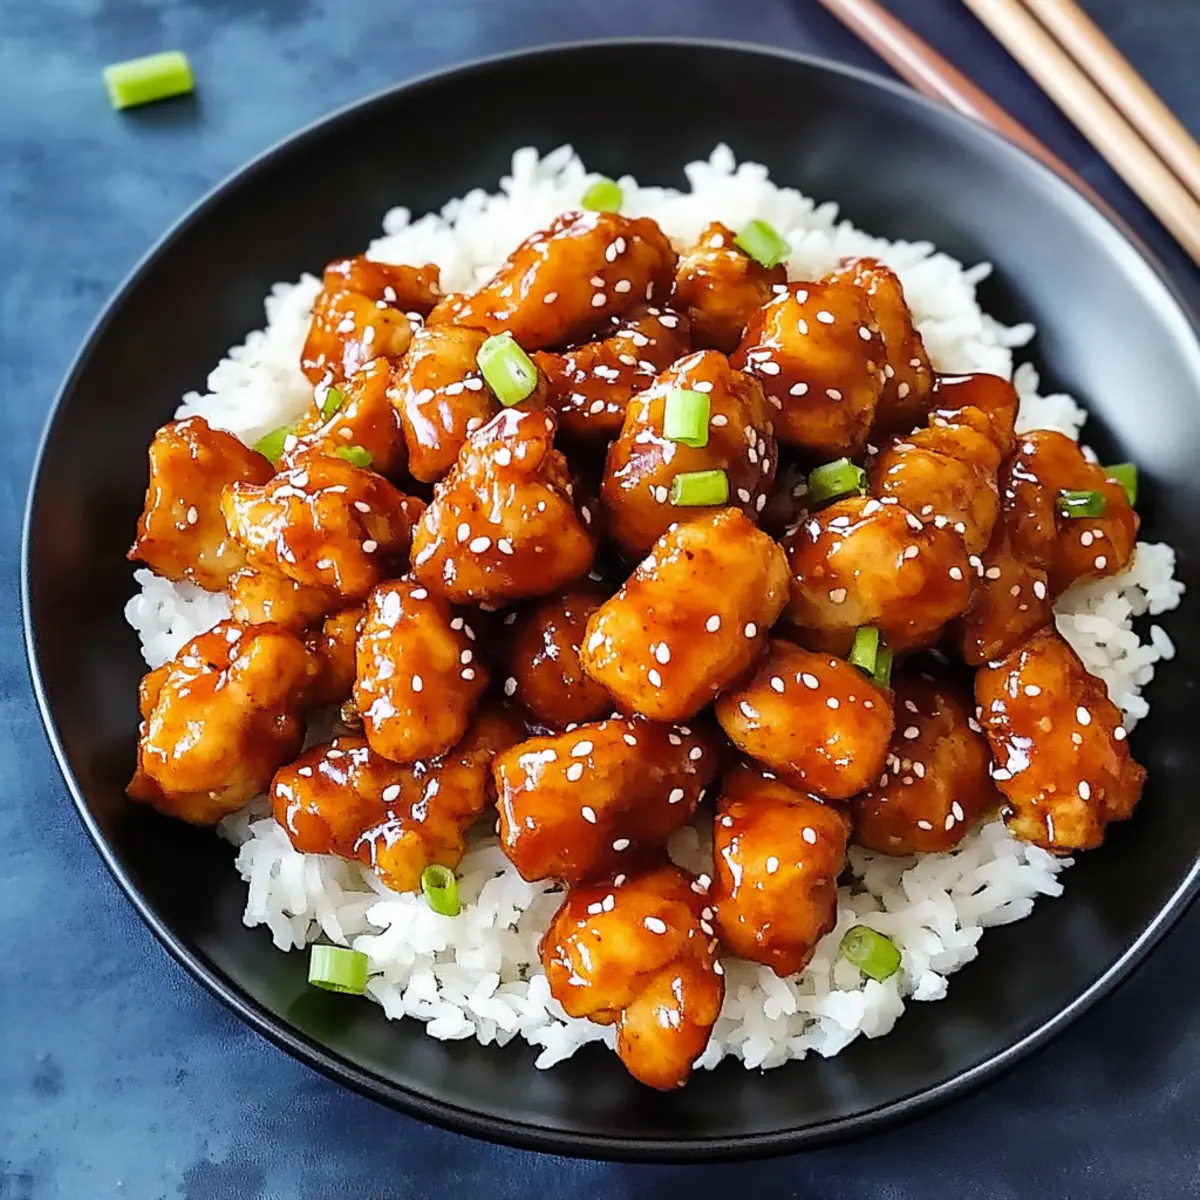
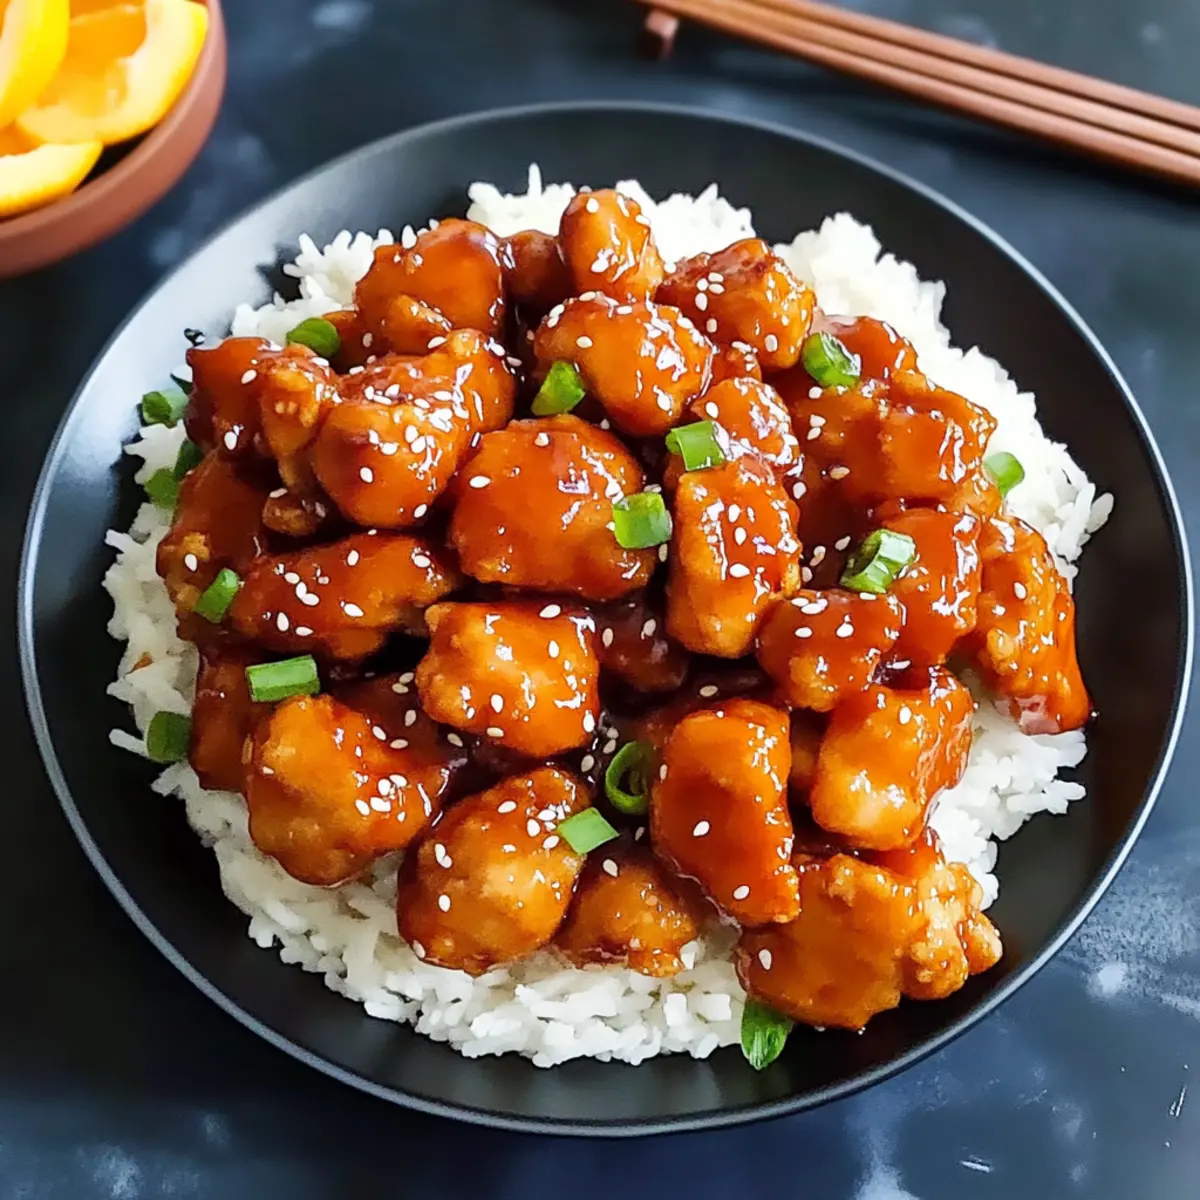
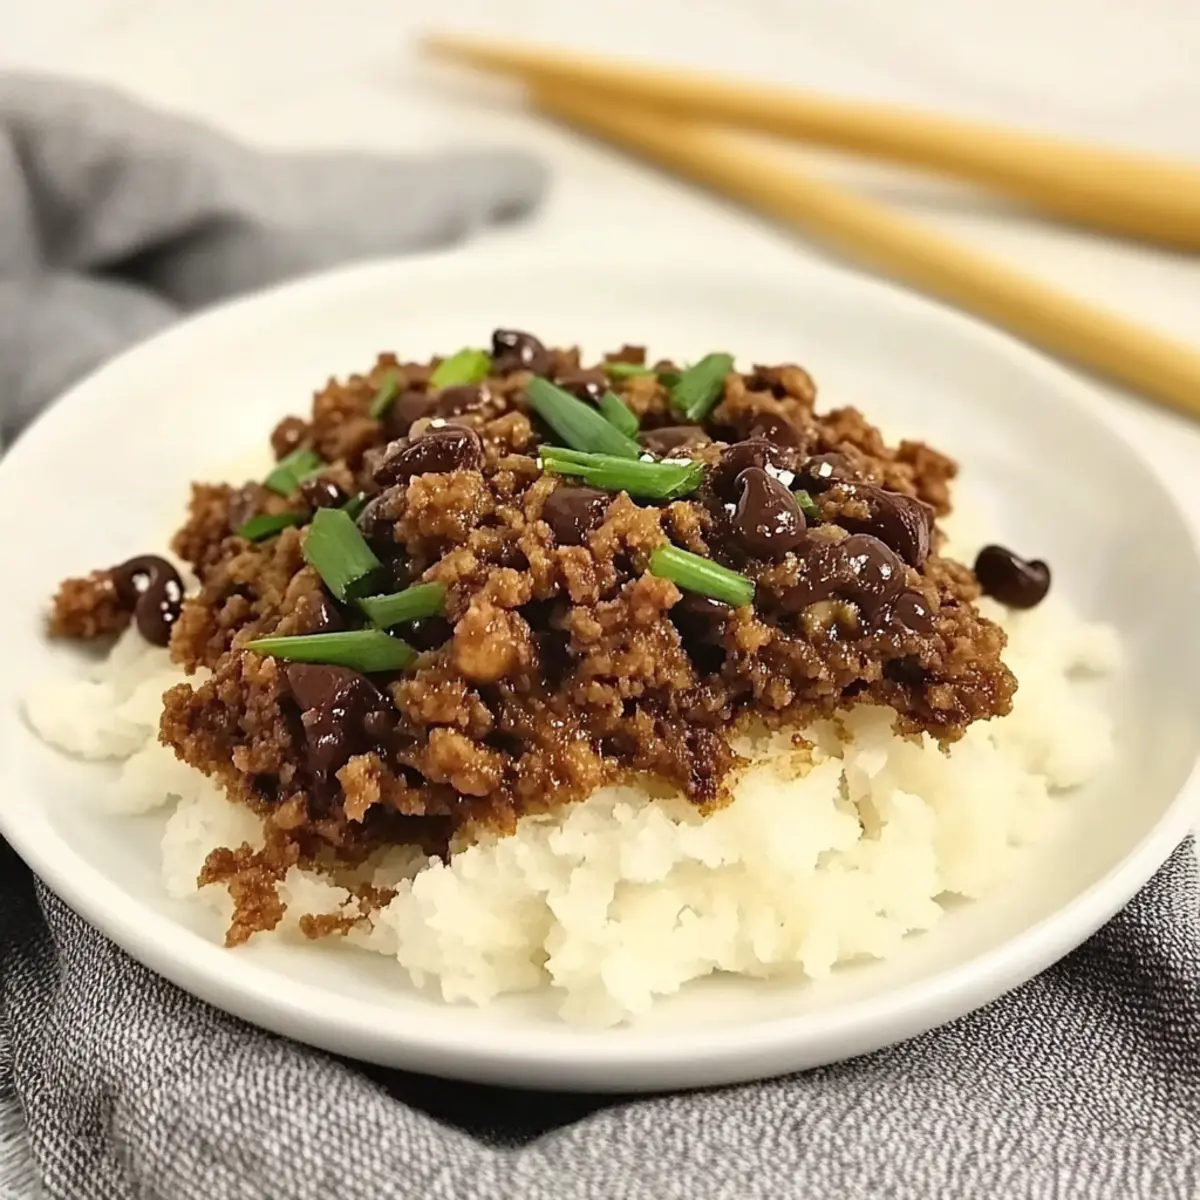
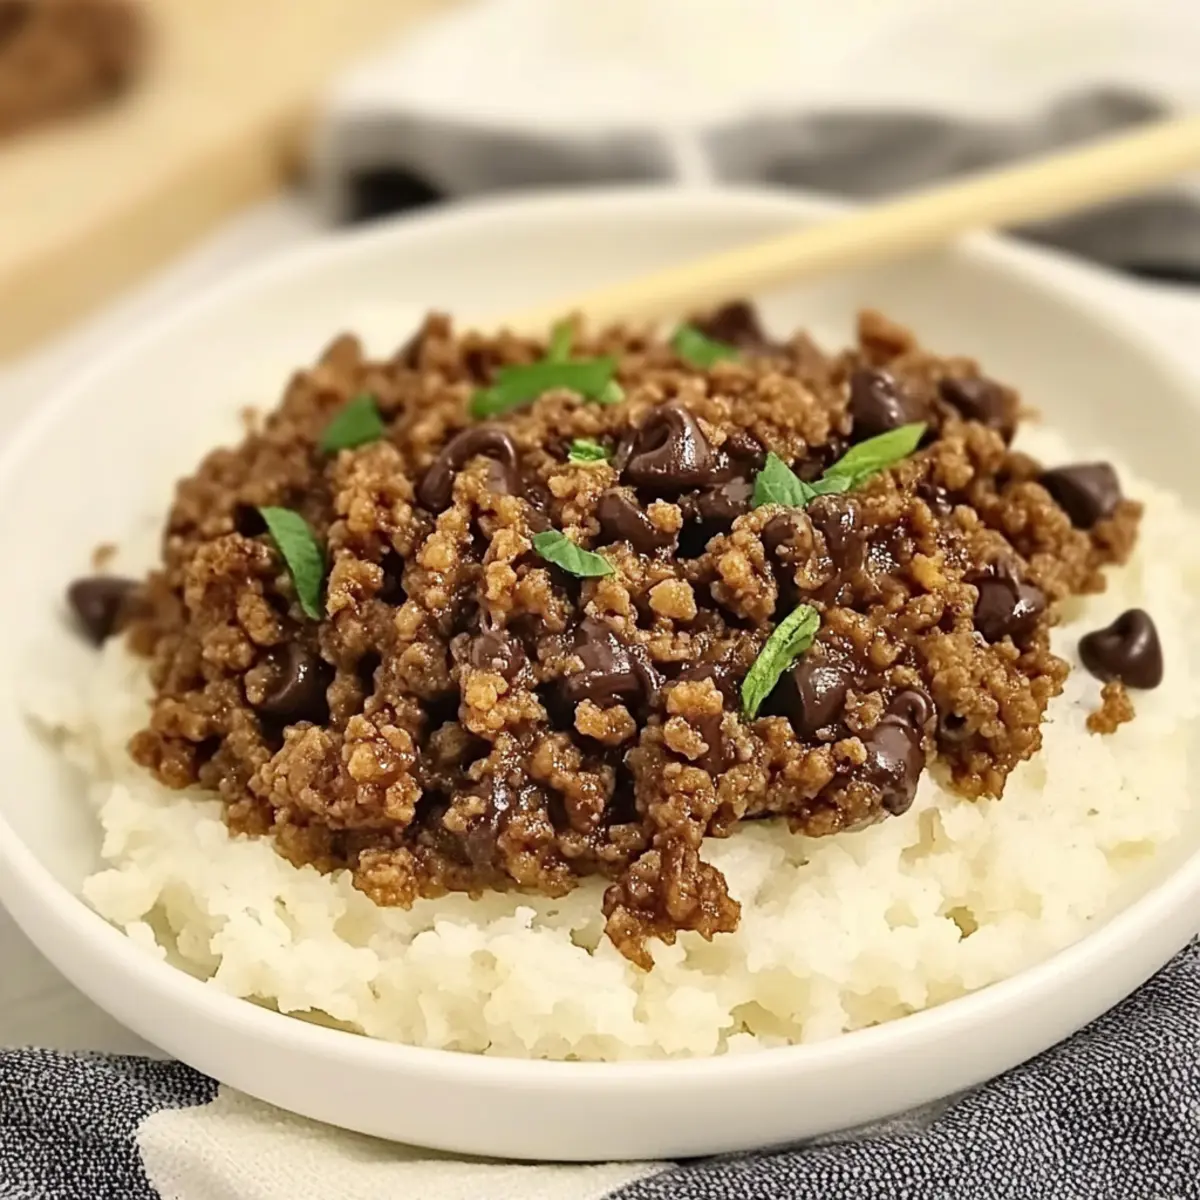
Step 6: Serve Over Rice
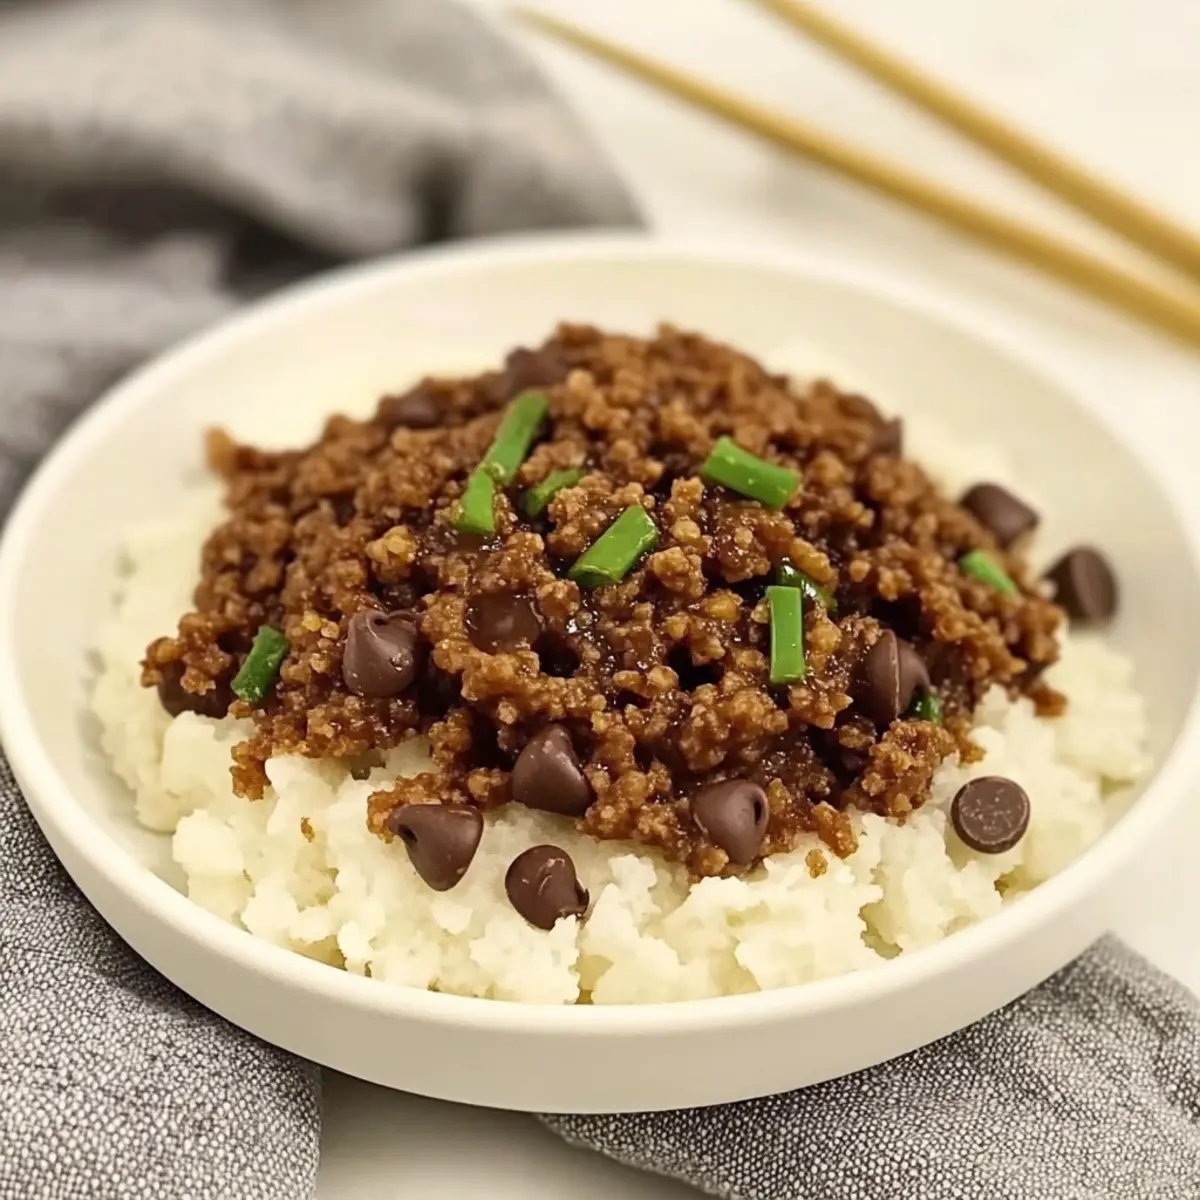
Once everything is cooked and combined, it's time to serve! Place a generous scoop of your cooked rice in bowls, then top it with the flavorful beef and vegetable mixture. This layering creates a comforting foundation for your Korean Ground Beef Bowl, making it a satisfying dish.
Step 7: Garnish and Enjoy
Finally, sprinkle chopped scallions and sesame seeds over each bowl for that final touch. This not only enhances presentation but adds fresh flavor. Serve immediately and watch as everyone enjoys this hearty, quick, and delicious Korean Ground Beef Bowl, perfect for those busy weeknight dinners!
Make Ahead Options
These Savory Korean Ground Beef Bowls are perfect for meal prep! You can cook the ground beef mixture up to 3 days in advance and store it in an airtight container in the refrigerator. To maintain the flavors, be sure to let the beef cool completely before refrigerating. When you're ready to serve, simply reheat the mixture in a skillet over medium heat until warmed through. Prepare your rice in advance as well—cooked rice can last up to 5 days in the fridge, so just reheat it when it’s time for dinner. This way, you’ll have a delicious, home-cooked meal with minimal effort on busy weeknights!
Variations & Substitutions for Korean Ground Beef Bowl
Feel free to unleash your creativity with this Korean Ground Beef Bowl, inviting a burst of flavors that will delight your taste buds.
- Vegetarian: Swap ground beef for lentils or crumbled tempeh for a plant-based option that’s just as satisfying.
- Spicy Kick: Add gochujang or sliced red chili for a vibrant heat that elevates your meal to a new level of excitement.
- Garlic & Ginger Boost: Increase the amounts of garlic and ginger for an even more aromatic experience that fills your kitchen with irresistible scents.
- Seasonal Veggies: Incorporate seasonal vegetables like zucchini or snap peas to bring freshness and nutritious crunch to your bowl.
- Rice Alternatives: Try quinoa or cauliflower rice instead of traditional rice for a lighter, healthier base that complements the flavors beautifully.
- Savory Toppings: Add a fried egg on top for an indulgent touch that lends creaminess and richness to your dish. It’s a game-changer!
- Nutty Flavor: Sprinkle toasted sesame seeds or chopped peanuts to introduce a delightful crunch and nutty flavor that enhances each bite.
- Flavored Rice: Cook your rice with a sprinkle of rice vinegar and a touch of sugar for an added tang that complements the savory notes of the beef.
No matter how you choose to customize your Korean Ground Beef Bowl, the possibilities are endless! If you’re looking for more tasty options, why not serve this bowl alongside some delicious Fish Taco Bowls or explore the vibrant layers of an Acai Bowl Nutritious? Enjoy your culinary adventure!
What to Serve with Korean Ground Beef Bowl?
Warm, fragrant aromas fill your kitchen, inviting you to create a delightful meal that balances flavors and textures perfectly.
-
Steamed Broccoli: A crisp, vibrant addition that offers a fresh contrast to the savory beef, enhancing both nutrition and color on your plate. A sprinkle of sesame seeds on the broccoli ties it together beautifully.
-
Jasmine Rice: Fluffy and fragrant, this soft rice absorbs the delicious sauce, creating an irresistible harmony that complements the Korean Ground Beef Bowl effortlessly.
-
Kimchi: Spicy and tangy, this fermented vegetable dish introduces an exciting zing and probiotic benefits, perfecting the overall flavor profile of your meal.
-
Cucumber Salad: Light and refreshing, a simple salad of sliced cucumbers in rice vinegar adds a crisp texture and balances the richness of the beef.
-
Egg Fried Rice: Complement the bowl with egg fried rice for a twist, infusing each bite with nutty flavors and a satisfying chew. It turns the meal into a filling feast!
-
Gyoza or Dumplings: Add a side of dumplings for a delightful textural contrast, their crispy exterior filled with a savory filling complementing the Korean flavors seamlessly.
-
Sesame Ginger Dressing Salad: A crunchy salad drizzled with a zesty sesame ginger dressing adds a lively crunch, enhancing the flavors of your Korean Ground Beef Bowl while keeping it bright and fresh.
Expert Tips for Korean Ground Beef Bowl
-
Meat Choice: Use lean ground beef for a healthier option that still delivers rich flavor in your Korean Ground Beef Bowl.
-
Flavor Depth: Don't skip the ginger and garlic; these aromatics are essential for the savory base. Ensure they're freshly minced for optimal flavor!
-
Vegetable Options: Feel free to incorporate a variety of vegetables to increase the nutritional value and add vibrant colors to your dish.
-
Cooked Rice: Use fluffy jasmine or brown rice as your base; it soaks up all the delicious sauce and balances the meal perfectly.
-
Sauce Consistency: Allow the sauce to simmer until it's slightly thickened to ensure every bite of your Korean Ground Beef Bowl is packed with flavor.
How to Store and Freeze Korean Ground Beef Bowl
Fridge: Store leftovers in an airtight container in the refrigerator for up to 3 days. Reheat in the microwave or a skillet until warmed through for easy meals.
Freezer: Freeze the cooked beef mixture separately from the rice in airtight containers for up to 3 months. Thaw overnight in the refrigerator before reheating for quick weeknight dinners.
Reheating: When you’re ready to enjoy your Korean Ground Beef Bowl, reheat on the stovetop for better texture, or use the microwave in 1-minute intervals until hot.
Airtight Storage: Ensure all components are sealed well to prevent freezer burn and to maintain the delicious flavors of your Korean Ground Beef Bowl.

Korean Ground Beef Bowl Recipe FAQs
What kind of ground beef should I use for this recipe?
Absolutely! I recommend using lean ground beef, as it gives you the rich flavor without the extra fat. If you're looking for a healthier option, ground turkey or chicken can also work well. Just keep in mind that the texture and flavor will differ slightly with these alternatives.
How do I store leftovers of the Korean Ground Beef Bowl?
Very simply! Store any leftovers in an airtight container in the refrigerator for up to 3 days. Make sure to keep the beef mixture and rice separate if possible, as this helps maintain the texture and flavor of both components. If you're reheating, just use a microwave or skillet until warmed thoroughly.
Can I freeze the Korean Ground Beef Bowl?
Definitely! This dish freezes beautifully. I suggest freezing the cooked beef mixture separately from the rice to prevent it from getting mushy. Place the beef in airtight containers and it can last in the freezer for up to 3 months. Just remember to thaw it overnight in the refrigerator before reheating!
What vegetables can I add to my Korean Ground Beef Bowl?
Get creative! You can add any veggies you like—bell peppers, broccoli, carrots, or snap peas are all wonderful options. Simply toss them in the skillet during the cooking process with ample time to soften but still retain some crunch. This not only makes the bowl more nutritious but also adds a lovely pop of color!
How can I adjust the sweetness of the dish?
You can easily control the sweetness to your liking by adjusting the amount of brown sugar. If you prefer a more savory profile, start with a smaller amount and taste as you cook, adding more if needed. Additionally, feel free to swap out the brown sugar with honey or maple syrup for a different flavor twist!
Is this recipe suitable for dietary restrictions?
Very much so! If you're concerned about gluten, simply use a gluten-free soy sauce option for the same delicious flavor. For a dairy-free version, there are no dairy products in the recipe. If you have nut allergies, just be sure to omit the sesame oil. Always feel free to tweak the recipe to fit your dietary needs!
Savory Korean Ground Beef Bowl for Quick Weeknight Dinners
Ingredients
Equipment
Method
- Start by heating a large skillet over medium-high heat. Gather your ingredients, ensuring your ground beef is ready to go.
- Add the ground beef to the skillet and break it apart with a spatula. Cook for about 5-7 minutes until browned.
- Lower the heat to medium. Stir in minced garlic and grated ginger, cooking for another 1-2 minutes until fragrant.
- Add soy sauce and brown sugar to the beef mixture. Stir well and let it simmer for about 3-4 minutes.
- If adding veggies, toss them in now and cook for an additional 3-5 minutes until tender.
- Serve by placing a scoop of cooked rice in bowls and topping with the beef and vegetable mixture.
- Finally, sprinkle chopped scallions and sesame seeds over each bowl and serve.