tastytrendingredients

  • Home
  • Recipes
    • Appetizers
    • Breakfast
    • Dessert
    • Dinner
    • Drinks
    • Salads
    • Snacks
    • Soups
  • About me
  • Contact me
menu icon
go to homepage
  • Home
  • Recipes
    • Appetizers
    • Breakfast
    • Dessert
    • Dinner
    • Drinks
    • Salads
    • Snacks
    • Soups
  • About me
  • Contact me
search icon
Homepage link
  • Home
  • Recipes
    • Appetizers
    • Breakfast
    • Dessert
    • Dinner
    • Drinks
    • Salads
    • Snacks
    • Soups
  • About me
  • Contact me
×

Lemon Butter Salmon: A Quick and Luxurious Weeknight Delight

January 27, 2026 by Grace Snow Leave a Comment

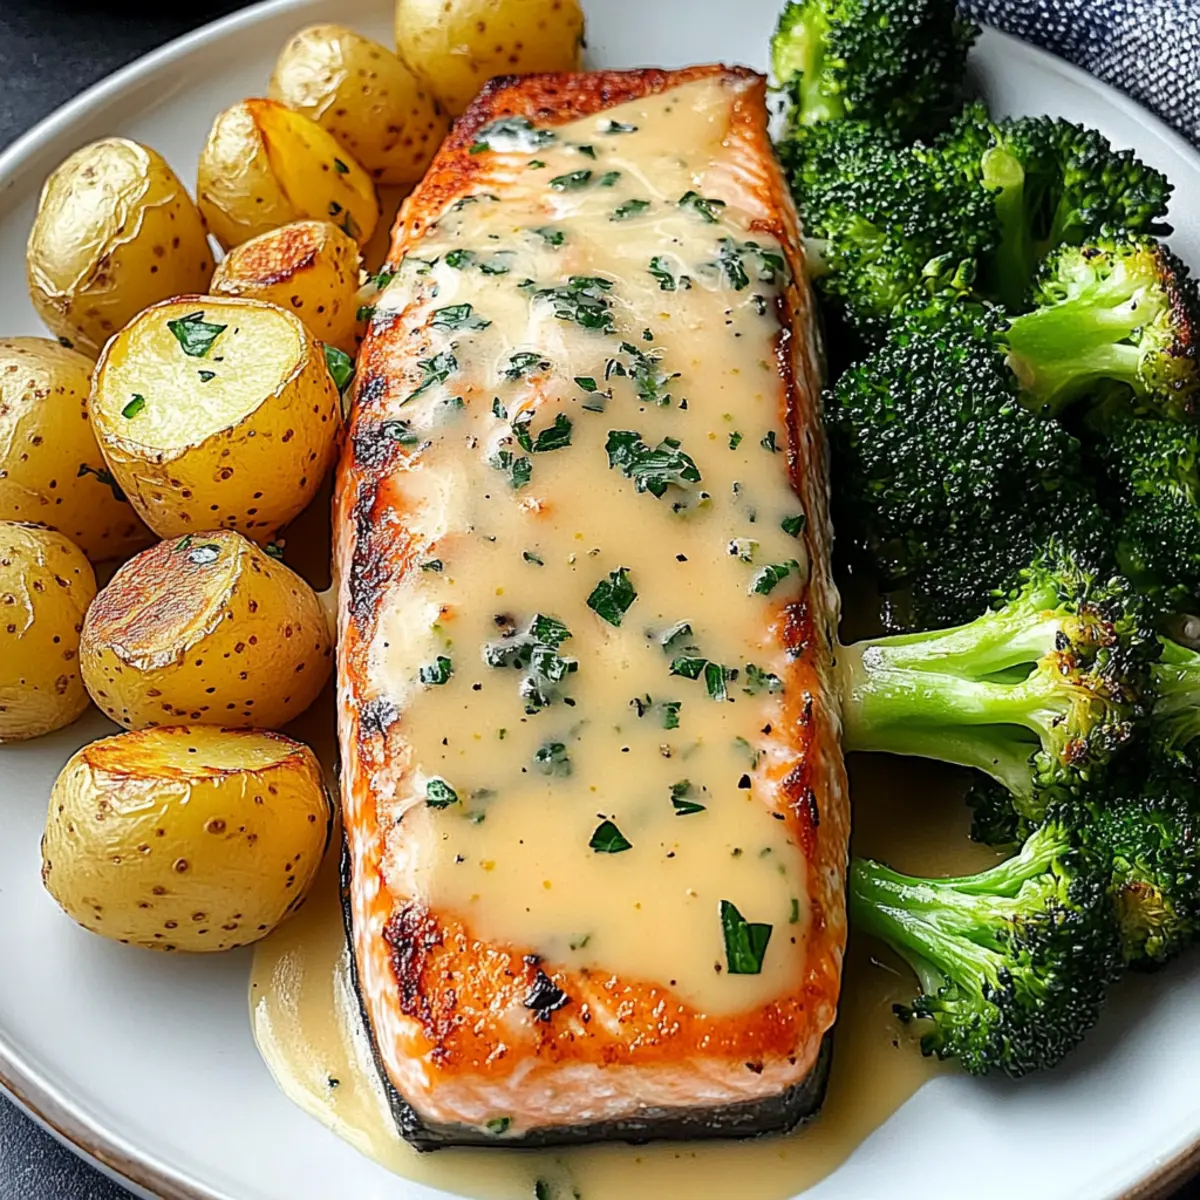
As I pulled the perfectly golden-crisped potatoes from the oven, the tantalizing aroma of lemon butter salmon began to fill the kitchen. This Lemon Butter Salmon with Crispy Potatoes and Broccoli is my go-to weeknight dinner, transforming a hectic evening into a moment of pure culinary bliss. Not only does this dish come together in under an hour, making it a lifesaver for busy schedules, but it also offers a deliciously healthy alternative to fast food cravings. The delicate balance of flaky salmon drizzled with zesty lemon butter, paired with vibrant broccoli and crispy potatoes, creates a meal that's not just visually stunning but also satisfying. Curious to learn how to whip up this delightful dish? Let’s dive in!

Why is Lemon Butter Salmon a must-try?

Quick, Delicious Delight: This recipe combines convenience with gourmet appeal, perfect for busy weeknights yet fancy enough to impress.
Health Benefits: Packed with omega-3 rich salmon, it's a nutritious option that satisfies without guilt.
Flavor Explosion: The zesty lemon butter sauce elevates the dish, offering a bright, savory experience.
Versatile Side Options: Pair it with various veggies or grains—try it alongside a light salad or even some whole grain rice for a complete meal.
Crowd-Pleaser: Whether cooking for yourself or a family gathering, this Lemon Butter Salmon will surely win hearts with its vibrant colors and mouthwatering aroma.
Explore other easy recipes like Crockpot Butter Chicken or enjoy a delightful breakfast with Lemon Ricotta Protein Pancakes to keep mealtime exciting!

Lemon Butter Salmon Ingredients

• Curious about the key components that make this dish shine?

For the Salmon

  • Salmon fillets – The star of the dish, rich in omega-3 fatty acids for heart health.
  • Unsalted butter – Adds creamy richness to the lemon sauce; can use coconut oil for a dairy-free option.
  • Fresh lemon juice – Brightens the dish and balances the butter; fresh juice packs the most flavor.
  • Garlic (minced) – Infuses the sauce with aromatic depth; substitute with garlic powder in a pinch.
  • Salt and pepper – Essential for seasoning to bring out all the flavors; adjust to your taste.
  • Lemon slices – For garnishing, adding a fresh and vibrant touch.
  • Fresh parsley (chopped) – Enhances flavor and presentation; feel free to skip if not on hand.

For the Potatoes

  • Baby potatoes (halved) – Hearty side dish; regular potatoes work just as well if preferred.
  • Olive oil – Helps roast the potatoes and broccoli for a crispy finish; avocado oil is a great substitute.
  • Garlic powder – Optional seasoning that adds an extra layer of flavor to the potatoes.
  • Paprika – Provides color and subtle smokiness; cayenne can be used for heat if desired.

For the Broccoli

  • Broccoli florets – A nutritious and colorful veggie option; asparagus, green beans, or Brussels sprouts are tasty alternatives.
  • Salt and pepper – Necessary for seasoning; adjust based on your flavor preference.
  • Lemon zest (optional) – Boosts the lemon flavor; a small addition for an extra burst of zest if you choose.

Step‑by‑Step Instructions for Lemon Butter Salmon

Step 1: Preheat the Oven
Set your oven to 425°F (220°C) and let it preheat while you prepare the ingredients. This high temperature will ensure that your potatoes get wonderfully crispy once they are in the oven. Preheating is crucial to achieving that optimal golden-brown color and texture for your crispy potatoes.

Step 2: Prepare the Potatoes
In a mixing bowl, toss the halved baby potatoes with olive oil, garlic powder, paprika, salt, and pepper until they are evenly coated. Spread the seasoned potatoes in a single layer on a baking sheet, ensuring there’s enough space between them for even cooking. The visual cue here is the vibrant colors of the spices on the potatoes, hinting at the deliciousness to come.

Step 3: Roast the Potatoes
Place the baking sheet in the preheated oven and roast the potatoes for 20 minutes. You’re looking for them to start turning a light golden color. This initial baking time allows the potatoes to soften on the inside while the edges begin to crisp up beautifully, creating that satisfying texture.

Step 4: Prepare the Broccoli
While the potatoes are roasting, toss the broccoli florets in a bowl with olive oil, salt, and pepper. After the potatoes have roasted for 20 minutes, carefully add the broccoli to the same baking sheet. This allows the broccoli to pick up the flavors of the potatoes while roasting, contributing to a vibrant color combination on your plate.

Step 5: Continue Roasting
Return the baking sheet to the oven and roast the potatoes and broccoli together for an additional 15-20 minutes. You’ll know they’re done when the potatoes are crispy on the outside and the broccoli is tender yet still bright green. This step brings out the natural sweetness in the veggies and enhances the overall taste.

Step 6: Make the Lemon Butter Sauce
In a skillet over medium heat, melt the unsalted butter until foamy. Add the minced garlic and sauté for about 1 minute, or until fragrant and golden, ensuring it does not burn. Then, mix in the fresh lemon juice, salt, and pepper. This lemon butter sauce is the star of the show for your Lemon Butter Salmon, enriching the dish with its delightful flavor.

Step 7: Cook the Salmon
Push the sautéed garlic to the side of the skillet and place the salmon fillets skin-side down. Cook the fillets for 4-5 minutes on the first side until they are golden and release easily from the pan. Flip the fillets and cook for another 3-4 minutes, aiming for an internal temperature of 145°F (63°C). You’ll know the salmon is done when it flakes easily with a fork.

Step 8: Serve the Dish
To plate your Lemon Butter Salmon, place the crispy potatoes and roasted broccoli on a serving dish. Drizzle the delectable lemon butter sauce over the salmon fillets and garnish with lemon slices and a sprinkle of fresh parsley. The vibrant colors and aromatic smells will surely make this meal a highlight of your dinner!

How to Store and Freeze Lemon Butter Salmon

Fridge: Store leftover Lemon Butter Salmon in an airtight container for up to 3 days. Keep the sauce separate if possible to maintain freshness and texture.

Freezer: For longer storage, freeze the cooked salmon in a freezer-safe container or heavy-duty freezer bag for up to 3 months. Thaw overnight in the fridge before reheating.

Reheating: Gently reheat in the microwave or in a skillet over low heat until warmed through, ensuring the salmon remains moist and flaky. Avoid overheating to preserve flavor.

Room Temperature: If you have leftovers, don't leave Lemon Butter Salmon out at room temperature for more than 2 hours to ensure food safety.

Lemon Butter Salmon Variations

Feel free to explore these creative twists to make this recipe even more delightful!

  • Vegetable Swap: Replace broccoli with asparagus, green beans, or Brussels sprouts for a new take. Each veggie brings its own flavor profile that complements the dish beautifully.
  • Herb Infusion: Introduce dill or tarragon into your lemon butter sauce for an elevated aromatic touch. Fresh herbs add a burst of flavor that makes your dish feel that much more special.
  • Dairy-Free Option: Use coconut oil in place of butter to create a dairy-free version while still enjoying that rich flavor. It’s a fantastic way to keep the dish creamy without compromising on taste.
  • Zesty Kick: Add a pinch of red pepper flakes or cayenne to the lemon butter sauce for a spicy twist. It can transform the flavor profile into something exciting and unexpected.
  • Crispier Potatoes: Toss the baby potatoes in nutritional yeast or parmesan before roasting for an added cheesy, umami flavor and an irresistible crunch!
  • Extra Citrus: Incorporate lemon zest not just in the sauce but also over the finished dish for a refreshing pop of citrus. It enhances the aroma and taste significantly.
  • Coconut Rice Side: Serve alongside a bed of coconut rice instead of potatoes for a tropical flair. The coconut sweetness balances the tangy lemon perfectly!
  • Garlic Lovers: If you're a garlic fan, up the ante by adding roasted garlic to the lemon butter sauce for an even deeper flavor experience. The rich, caramelized garlic will elevate the dish to new heights!

If you're in the mood for another quick and fabulous meal, check out my recipe for One Pot Salmon or savor a cozy evening with Lemon Chicken Soup!

What to Serve with Lemon Butter Salmon

Pair your meal with wholesome sides and delightful drinks to create a memorable dining experience.

  • Garlic Mashed Potatoes: Silky and creamy, these mashed potatoes complement the flaky salmon and soak up the zesty lemon butter sauce beautifully. Imagine each bite melting in your mouth.

  • Quinoa Salad: Light yet filling, this salad adds a nutty flavor and extra texture, making it a flavorful counterpoint to the buttery salmon. Toss in cherry tomatoes and cucumbers for a crisp bite.

  • Roasted Asparagus: Seasoned and roasted until tender, asparagus will bring a vibrant green element to your plate, perfectly balancing the richness of the salmon. Drizzle with lemon for a cohesive flavor.

  • Herbed Rice: Aromatic and fluffy, herbed rice infuses a subtle freshness that complements the zesty dish. Add parsley or dill for added brightness and a pop of color.

  • Crisp Green Salad: Toss crisp greens with a light vinaigrette for a refreshing contrast to the savory salmon. The crunch of fresh veggies brings additional texture that enhances every bite.

  • Chilled White Wine: Opt for a chilled Sauvignon Blanc; its acidity and freshness will beautifully enhance the dish's citrusy tones, making it a perfect pairing for your weeknight delight.

  • Dark Chocolate Mousse: For a sweet finish, indulge in a light and airy chocolate mousse. Its richness pairs luxuriously with the meal, leaving you with a warm, satisfied glow after dinner.

  • Lemon Sorbet: A light and refreshing palate cleanser, lemon sorbet echoing the dish's flavors offers a delightful finish that leaves a zesty aftertaste, beautifully winding down your meal.

Make Ahead Options

These Lemon Butter Salmon with Crispy Potatoes and Broccoli are perfect for meal prep enthusiasts! You can prepare the crispy potatoes and broccoli up to 24 hours in advance; simply roast them, let them cool, and store them in airtight containers in the refrigerator. For the salmon, consider marinating it in lemon juice and garlic for up to 3 hours before cooking to infuse extra flavor. When you’re ready to serve, simply reheat the potatoes and broccoli in the oven at 375°F (190°C) for about 10-15 minutes until heated through. Cook the marinated salmon fresh for the best results; it will still be just as delicious and save you time on busy weeknights!

Expert Tips for Lemon Butter Salmon

  • Marinate for Flavor: Marinating the salmon in lemon juice and garlic for about 30 minutes can intensify its flavor. Make sure to keep it in the fridge while marinating.
  • Check for Doneness: The salmon is perfectly cooked when it flakes easily with a fork. Use a fork to test gently without overcooking.
  • Veggie Timing: To avoid overcooked broccoli, add it to the baking sheet only after the potatoes have roasted for 20 minutes. This keeps your greens vibrant and tender.
  • Crispy Potatoes: Ensure the potatoes are spread out in a single layer on the baking sheet; overcrowding can lead to steaming rather than crisping.
  • Butter Alternatives: For a dairy-free version of your lemon butter sauce, consider substituting unsalted butter with coconut oil to keep the recipe healthy.
  • Serving Suggestions: Pair your Lemon Butter Salmon with a light salad or whole grain side for a complete and balanced meal that pleases everyone!

Lemon Butter Salmon with Crispy Potatoes and Broccoli Recipe FAQs

How do I choose the best salmon fillets?
Absolutely! Fresh salmon should have a moist appearance and a bright color without any dullness. Look for fillets with minimal dark spots or browning. If buying skin-on, the skin should be shiny and tightly adhered to the fish. If possible, ask your fishmonger about the source to ensure quality.

What’s the best way to store leftover Lemon Butter Salmon?
Store your leftover Lemon Butter Salmon in an airtight container for up to 3 days in the fridge. If you want to keep the crispy potatoes and broccoli fresh, store them separately to prevent sogginess. When reheating, you can use a skillet on low heat for the best texture rather than a microwave, which can make the fish dry.

Can I freeze Lemon Butter Salmon?
Yes, indeed! To freeze your Lemon Butter Salmon, allow it to cool completely first. Then wrap the cooked salmon tightly in plastic wrap and place it in a freezer-safe container or a heavy-duty freezer bag. It can be frozen for up to 3 months. When ready to eat, thaw it overnight in the fridge and reheat gently.

What should I do if my salmon is overcooked?
If you find that your salmon has been overcooked, try serving it with a more generous drizzle of the lemon butter sauce, which can help mask the dryness. You could also flake the salmon apart and mix it with some Greek yogurt or sour cream to add moisture back. Cooked salmon is done when it flakes easily with a fork, which hints at the perfect doneness.

Are there any dietary considerations for this recipe?
Certainly! This Lemon Butter Salmon is an excellent choice for those seeking a healthy meal with heart-healthy omega-3 fatty acids. For dairy-free options, you can substitute the unsalted butter with coconut oil. Just be sure to check for allergies, especially related to fish, and use fresh ingredients to avoid any cross-contamination.

Lemon Butter Salmon

Lemon Butter Salmon: A Quick and Luxurious Weeknight Delight

Lemon Butter Salmon is a quick, healthy dinner that transforms hectic evenings into a moment of culinary bliss.
Print Recipe Pin Recipe
Prep Time 10 minutes mins
Cook Time 30 minutes mins
Total Time 40 minutes mins
Servings: 2 fillets
Course: Dinner
Cuisine: American
Calories: 400
Ingredients Equipment Method Nutrition Notes

Ingredients
  

For the Salmon
  • 2 fillets Salmon rich in omega-3 fatty acids
  • 4 tablespoons Unsalted butter can use coconut oil as substitute
  • 3 tablespoons Fresh lemon juice use fresh juice for best flavor
  • 2 cloves Garlic (minced) or substitute with garlic powder
  • to taste Salt
  • to taste Pepper
  • 2 slices Lemon for garnishing
  • 2 tablespoons Fresh parsley (chopped) optional
For the Potatoes
  • 1 pound Baby potatoes (halved) regular potatoes work as well
  • 2 tablespoons Olive oil or use avocado oil
  • 1 teaspoon Garlic powder optional
  • 1 teaspoon Paprika or cayenne for heat
For the Broccoli
  • 2 cups Broccoli florets or use asparagus, green beans, or Brussels sprouts
  • to taste Salt
  • to taste Pepper
  • 1 teaspoon Lemon zest optional

Equipment

  • Oven
  • Baking Sheet
  • Skillet
  • Mixing Bowl

Method
 

Step-by-Step Instructions
  1. Preheat the oven to 425°F (220°C) to ensure crispy potatoes.
  2. Toss halved potatoes with olive oil, garlic powder, paprika, salt, and pepper. Spread on a baking sheet.
  3. Roast potatoes for 20 minutes until lightly golden.
  4. While potatoes roast, toss broccoli with olive oil, salt, and pepper. Add to the baking sheet after 20 minutes.
  5. Continue roasting potatoes and broccoli for an additional 15-20 minutes until crispy and tender.
  6. In a skillet over medium heat, melt butter, add garlic, then lemon juice, salt, and pepper.
  7. Cook salmon fillets skin-side down for 4-5 minutes, then flip and cook for another 3-4 minutes.
  8. Serve salmon with potatoes and broccoli, drizzling lemon butter sauce on top and garnishing.

Nutrition

Serving: 1filletCalories: 400kcalCarbohydrates: 30gProtein: 30gFat: 20gSaturated Fat: 8gPolyunsaturated Fat: 2gMonounsaturated Fat: 8gCholesterol: 60mgSodium: 300mgPotassium: 700mgFiber: 4gSugar: 2gVitamin A: 100IUVitamin C: 70mgCalcium: 50mgIron: 2mg

Notes

Marinate salmon for enhanced flavor, check doneness carefully, and use olive oil for roasting veggies.

Tried this recipe?

Let us know how it was!

Savor Easy Thai Basil Chicken for a Flavorful Weeknight Dinner

January 27, 2026 by Grace Snow Leave a Comment

As the sun dips below the horizon, casting a warm glow in my kitchen, I find myself whisked away to the bustling streets of Thailand, where the fragrance of sizzling dishes fills the air. Amongst them is Thai Basil Chicken, or Pad Krapow Gai, a delightful symphony of tender chicken thighs, fresh veggies, and aromatic basil dancing in a savory-sweet sauce. This dish promises to be a quick and beginner-friendly option, ready in just 30 minutes and clocking in at around 400 calories per serving. Not only is it a feast for the senses, but it’s also a satisfying answer to those busy weeknights when you crave homemade goodness without the fuss. Curious how to bring this vibrant dish to your table? Let’s dive into this irresistible recipe!

Why is Thai Basil Chicken a Must-Try?

Bold flavors abound in this dish, taking your taste buds on a trip to Thailand. Quick prep means you're just 30 minutes away from a mouthwatering meal that satisfies without the hassle. Guilt-free delight, with just 400 calories per serving, it’s a perfect choice for those mindful of their diet. Versatile options allow you to customize with tofu or extra veggies, so everyone at the table finds something to love. Whether you're enjoying a weeknight dinner or impressing guests, this Thai Basil Chicken is sure to be a hit! Pair it with Crock Pot Chicken for an easy meal rotation!

Thai Basil Chicken Ingredients

For the Chicken Base
• Chicken Thighs – Juicy, tender meat that absorbs the savory sauce beautifully; can substitute with boneless, skinless chicken breasts, adjusting cooking time.
• Vegetable Oil – High smoke point oil for searing without burning; can use any neutral oil.

For the Aromatics
• Garlic – Adds depth and pungency to the dish; always mince to release the oils for maximum flavor.
• Shallots – Provide a mild onion flavor, offering a sweet balancing note that enhances the overall dish.

For the Heat
• Red Chili – Provides customizable heat; use more for spice, or remove seeds for a milder dish, making your Thai Basil Chicken just the way you like it.

For the Vegetables
• Bell Peppers – Crisp and juicy, adding sweetness and color; use various colors for a more vibrant presentation.

For the Sauces
• Thai Basil – The signature herb that gives the dish its identity; can substitute with sweet basil but will alter the flavor.
• Oyster Sauce – Rich umami flavor making the dish robust; substitute with vegetarian stir-fry or mushroom sauce for a plant-based option.
• Soy Sauce – Adds saltiness and complexity to the dish, enhancing the savory profile.
• Fish Sauce – Provides a salty depth with a hint of oceanic flavor; can substitute with soy sauce for a vegetarian option.
• Sugar – Balances the savory notes and enhances the sauce's richness, creating that irresistible glaze.
• Chicken Broth – Aids in thinning the sauce for better coating of chicken and veggies.

Step-by-Step Instructions for Thai Basil Chicken

Step 1: Heat the Oil
Begin by heating 2 tablespoons of vegetable oil in a large pan or wok over medium-high heat. Allow the oil to shimmer, indicating it's ready for sautéing. This step is crucial for achieving a nice sear on your chicken thighs, which is essential for the flavor profile of the Thai Basil Chicken.

Step 2: Sauté Aromatics
Add 4 minced garlic cloves and 2 thinly sliced shallots to the hot oil. Sauté for about 1 minute, stirring constantly until they become fragrant and turn a light golden color. Be careful not to burn them, as this can negatively impact the dish's overall flavor. This aromatic base will elevate your Thai Basil Chicken.

Step 3: Cook the Chicken
Introduce 1 pound of chicken thighs to the pan in a single layer. Cook them for 5-7 minutes, turning occasionally, until they are browned on both sides and cooked through. The chicken should be opaque and no longer pink in the center. This step infuses the dish with savory goodness, setting the stage for the vibrant flavors to come.

Step 4: Add Vegetables
Incorporate 1 sliced red chili and 1 cup of sliced bell peppers into the pan. Cook for an additional 2-3 minutes until the peppers soften slightly, brightening the dish with their color and adding a sweet crunch. The aromatic heat from the chili will begin to permeate the dish, enhancing the spiciness of your Thai Basil Chicken.

Step 5: Mix the Sauces
In a small bowl, whisk together 2 tablespoons of oyster sauce, 1 tablespoon of soy sauce, 1 tablespoon of fish sauce, 1 teaspoon of sugar, and 2 tablespoons of chicken broth. Pour this sauce mixture over the chicken and vegetables in the pan. Stir to ensure everything is evenly coated, allowing the sauce to work its magic in bringing all the flavors together.

Step 6: Simmer Together
Allow the mix to simmer gently for 2-3 minutes, stirring occasionally. Watch as the sauce thickens slightly, enveloping the chicken and vegetables in a glossy, savory glaze. This simmering step is key in melding the flavors of your Thai Basil Chicken while ensuring the chicken remains tender and juicy.

Step 7: Add the Basil
Remove the pan from the heat and toss in 1 cup of fresh Thai basil leaves. Fold the basil into the mix until just wilted, which should only take about 30 seconds. The vibrant aroma of the basil will infuse the dish, providing that signature herbaceous flavor essential to authentic Thai Basil Chicken.

Step 8: Final Seasoning
Taste your dish and adjust the seasoning with salt and pepper as needed. Serve your finished Thai Basil Chicken hot, ideally over a bed of fluffy jasmine rice. This step will finalize your dish, ensuring every bite is a perfect balance of flavor and satisfaction.

Expert Tips for Thai Basil Chicken

Watch the Garlic: Avoid burning the garlic by keeping the heat at medium-high and stirring constantly. Burnt garlic can ruin the sauce's flavor.

Use a Wok: Cooking in a wok helps achieve a perfect sear on the chicken while allowing for high-heat stir-frying, which enhances the flavor of the Thai Basil Chicken.

Prep Ahead: Chop your vegetables and mince the garlic and shallots before you start cooking to ensure a smooth cooking process without any delays.

Adjust Spice Level: For personalised heat in your Thai Basil Chicken, start with one chili and taste. You can always add more if you like it spicier!

Store Separately: To maintain freshness, keep the sauces and herbs separate when storing leftovers. This will ensure the basil retains its vibrant flavor and aroma.

Enhance the Rice: Elevate your jasmine rice by cooking it in chicken broth instead of water for an extra layer of flavor when serving with your Thai Basil Chicken.

Make Ahead Options

Busy home cooks will love the convenience of prepping this Thai Basil Chicken ahead of time! You can marinate the chicken thighs in the oyster sauce mixture and store them in the refrigerator for up to 24 hours; this will allow the flavors to meld beautifully, enhancing the final taste. Additionally, chop the vegetables a day in advance and keep them in an airtight container to save time during cooking. When you're ready to serve, simply heat up your wok, sauté the aromatics as directed, and finish cooking the chicken and veggies as stated in the recipe. This method ensures your Thai Basil Chicken remains just as delicious while cutting down on last-minute meal prep!

Thai Basil Chicken Variations

Feel free to let your creativity shine as you customize this Thai Basil Chicken to fit your taste and dietary preferences!

  • Vegetarian: Swap chicken for tofu or tempeh, marinating them in the sauce for added flavor—perfect for plant-based diners.

  • Extra Crunch: Toss in snap peas or julienned carrots for a delightful added texture that complements the tender chicken.

  • Spicy Kick: Adjust the amount of red chili for your preferred heat level; a little more will give you an exhilarating punch in every bite!

  • Colorful Mix: Use an array of bell peppers—red, yellow, and green—to create a vibrant dish that brightens up your table.

  • Herb Boost: Add cilantro or mint along with Thai basil for a refreshing twist that elevates the dish’s aromatic experience.

  • Nutty Flavor: Sprinkle chopped peanuts or cashews on top before serving for a crunchy contrast and a nutty flavor boost—absolutely irresistible!

  • Sauce Swap: For those who want to experiment with flavors, try using a combination of hoisin sauce and soy sauce for a sweeter, less salty twist.

Last but not least, if you love how this dish complements jasmine rice, consider pairing it with my delightful Honey Garlic Chicken Thighs for an excellent meal rotation! Enjoy cooking!

What to Serve with Quick and Flavorful Thai Basil Chicken?

Enhance your dining experience with delightful pairings that elevate the flavors of this aromatic dish.

  • Jasmine Rice: A fragrant staple that soaks up the savory sauce beautifully, making every bite a comforting delight.
  • Thai Cucumber Salad: Crisp and cool, this salad adds a refreshing contrast that complements the heat of the Thai Basil Chicken perfectly.
  • Steamed Broccoli: Lightly steamed for a nutritious crunch; its subtle bitterness balances the dish's sweetness.
  • Egg Fried Rice: Elevate your meal by adding this flavor-packed rice that harmonizes wonderfully with the main dish.
  • Egg Drop Soup: The warm, soothing broth adds a light and fluffy texture, creating a cozy atmosphere.
  • Mango Sticky Rice: For dessert, this sweet treat brings a sweet finish with its luscious mango slices and creamy coconut rice.

Sharing these dishes creates a symphony of textures and flavors, assuring your meal is both satisfying and memorable.

How to Store and Freeze Thai Basil Chicken

Fridge: Store leftovers in an airtight container for up to 3 days to keep the flavors fresh and vibrant.

Freezer: If you want to keep your Thai Basil Chicken longer, freeze it in a tightly sealed container for up to 2 months.

Reheating: Reheat in a hot pan over medium heat for best texture and flavor, ensuring the chicken is heated through without becoming rubbery.

Serving Reminder: Add fresh basil after reheating to bring back that bright flavor and aromatic touch that makes the dish irresistible.

Thai Basil Chicken (Pad Krapow Gai) Recipe FAQs

How do I choose ripe ingredients for this dish?
Absolutely! For the best flavor in your Thai Basil Chicken, select vibrant and fresh basil with no dark spots or wilting leaves. The bell peppers should be firm and crisp, avoiding any that are soft or have blemishes. When picking chilies, choose ones that are shiny and firm for the spiciest kick.

What’s the best way to store leftover Thai Basil Chicken?
Very! Store your Thai Basil Chicken in an airtight container for up to 3 days in the refrigerator. Make sure it cools down to room temperature before sealing to avoid condensation, which can make it soggy. This method keeps the flavors vibrant and maintains the dish's inviting look!

Can I freeze Thai Basil Chicken?
Absolutely! To freeze, allow the dish to cool completely, then portion it into airtight freezer-safe containers. Label them with the date and consume within 2 months for the best taste. When ready to enjoy, thaw in the refrigerator overnight, then reheat gently in a hot pan for best texture. Add fresh basil at the end to revive its vibrant flavor!

How can I troubleshoot if my sauce is too salty?
If you find your Thai Basil Chicken a bit too salty, don't worry! To balance it out, you can add a touch more sugar or a splash of chicken broth. If the sauce is too thick, adding a bit of water can help dilute the flavors. Taste as you go, allowing the flavors to harmonize perfectly!

Are there any dietary considerations for this recipe?
Very! This Thai Basil Chicken can be easily modified to suit various dietary needs. For a vegetarian option, substitute chicken with tofu or tempeh, and use vegetarian oyster sauce. If you have fish allergies, simply omit fish sauce or replace it with additional soy sauce for depth. Always check sauce labels for hidden allergens, particularly gluten and soy for some dietary restrictions.

Thai Basil Chicken

Savor Easy Thai Basil Chicken for a Flavorful Weeknight Dinner

Experience the bold flavors of Thai Basil Chicken, a quick and satisfying dish perfect for weeknight dinner.
Print Recipe Pin Recipe
Prep Time 15 minutes mins
Cook Time 15 minutes mins
Total Time 30 minutes mins
Servings: 4 servings
Course: Dinner
Cuisine: Thai
Calories: 400
Ingredients Equipment Method Nutrition Notes

Ingredients
  

For the Chicken Base
  • 1 pound chicken thighs can substitute with boneless, skinless chicken breasts
  • 2 tablespoons vegetable oil any neutral oil can be used
For the Aromatics
  • 4 cloves garlic minced
  • 2 medium shallots thinly sliced
For the Heat
  • 1 medium red chili use more for spice or remove seeds for milder
For the Vegetables
  • 1 cup bell peppers sliced, can use various colors
For the Sauces
  • 1 cup Thai basil can substitute with sweet basil
  • 2 tablespoons oyster sauce can substitute with vegetarian options
  • 1 tablespoon soy sauce
  • 1 tablespoon fish sauce can substitute with soy sauce for vegetarian option
  • 1 teaspoon sugar
  • 2 tablespoons chicken broth

Equipment

  • large pan or wok

Method
 

Step-by-Step Instructions for Thai Basil Chicken
  1. Begin by heating 2 tablespoons of vegetable oil in a large pan or wok over medium-high heat.
  2. Add 4 minced garlic cloves and 2 thinly sliced shallots to the hot oil. Sauté for about 1 minute until fragrant and golden.
  3. Introduce 1 pound of chicken thighs to the pan in a single layer. Cook for 5-7 minutes until browned and cooked through.
  4. Incorporate 1 sliced red chili and 1 cup of sliced bell peppers. Cook for an additional 2-3 minutes until the peppers soften.
  5. In a small bowl, whisk together 2 tablespoons of oyster sauce, 1 tablespoon of soy sauce, 1 tablespoon of fish sauce, 1 teaspoon of sugar, and 2 tablespoons of chicken broth. Pour this over the chicken and vegetables.
  6. Allow the mix to simmer gently for 2-3 minutes, stirring occasionally, until sauce thickens slightly.
  7. Remove the pan from heat and toss in 1 cup of fresh Thai basil leaves. Fold in until just wilted, about 30 seconds.
  8. Taste and adjust seasoning with salt and pepper. Serve hot, ideally over fluffy jasmine rice.

Nutrition

Serving: 1servingCalories: 400kcal

Notes

Watch the garlic to avoid burning. Use a wok for a perfect sear and high-heat stir-frying.

Tried this recipe?

Let us know how it was!

One Pan Greek Vegetables: Easy, Colorful, and Flavorful Delight

January 27, 2026 by Grace Snow Leave a Comment

Walking through a bustling market in Greece, the air thick with the aroma of sun-ripened vegetables and fragrant herbs, I stumbled upon a gem of inspiration: One Pan Greek Vegetables. This vibrant dish brings the Mediterranean spirit right to your kitchen, transforming simple ingredients into a feast of flavors. The best part? It’s an easy and healthy side dish that makes weeknight dinners a breeze, with minimal cleanup required! Whether you're cooking for a crowd or just trying to jazz up a cozy meal at home, this recipe is incredibly versatile—swap out your favorite veggies as you please. Ready to try a delightful twist on your dinner plate? Let’s dive into creating this colorful dish together!

Why You’ll Love One Pan Greek Vegetables

Simplicity: This dish comes together in just one pan, making cleanup a breeze while ensuring you spend less time in the kitchen and more time enjoying your meal.

Versatile: Customize with your favorite veggies! From bell peppers to mushrooms, feel free to swap ingredients based on what’s in your fridge or what you love.

Vibrant Flavors: The combination of fresh vegetables, olive oil, and aromatic oregano creates a medley of Mediterranean taste that will excite your palate.

Healthy Twist: Packed with nutrients, this recipe provides healthy fats and fiber without skimping on flavor, making it a great option for weeknight dinners.

Crowd-Pleaser: Perfectly fits dinner parties or family meals; even picky eaters can't resist these tasty roasted veggies.

For a fulfilling meal idea, consider serving this alongside Honey BBQ Chicken or tossing them into a salad like our vibrant One Pot Salmon. Enjoy!

One Pan Greek Vegetables Ingredients

Get ready to elevate your dinner game with these vibrant One Pan Greek Vegetables!

For the Vegetables

  • Olive Oil – Adds richness and helps vegetables caramelize, ensuring a delightful flavor.
  • Oregano – A key seasoning that offers an authentic Mediterranean flavor to every bite.
  • Red Onion – Provides sweetness and depth; you can substitute with yellow onion if desired.
  • Tomatoes – Bursting with flavor when roasted, they enhance the dish's overall sweetness.
  • Zucchini – Offers a mild, tender texture; can be swapped with eggplant or sweet potatoes for variety.
  • Feta Cheese – Adds creaminess and tang; feel free to use vegan cheese as a substitute if needed.
  • Olives – Contributes a briny flavor; you can replace them with capers if you prefer a different taste.

This easy, healthy side dish is sure to bring the essence of Greece right to your table!

Step‑by‑Step Instructions for One Pan Greek Vegetables

Step 1: Preheat the Oven
Begin your culinary journey by preheating your oven to 425°F (220°C). As the oven warms up, the anticipation for those delicious One Pan Greek Vegetables builds. This high temperature is essential for achieving that perfect caramelization and tenderness in your roasted veggies.

Step 2: Prepare the Vegetables
While the oven heats, take a moment to wash and cut your red onion, tomatoes, and zucchini into uniform sizes—this ensures even cooking. Aim for bite-sized pieces, which will roast beautifully and create an appealing presentation. Place the cut vegetables into a large mixing bowl.

Step 3: Toss with Seasoning
Drizzle a generous amount of olive oil over the chopped vegetables in the bowl, followed by a sprinkle of oregano, salt, and pepper. Use your hands to thoroughly toss everything together until the veggies are evenly coated and glistening. This step enhances the flavor of your One Pan Greek Vegetables, ensuring every bite is infused with Mediterranean goodness.

Step 4: Spread on Baking Sheet
Now, grab a large baking sheet and spread the seasoned vegetables in a single layer. Be sure to leave some space between the pieces to avoid overcrowding, which helps in achieving that lovely, crispy texture. You should see vibrant colors and plenty of olive oil glistening—the perfect prep for roasting!

Step 5: Roast to Perfection
Once your oven is preheated, slide the baking sheet inside and roast the vegetables for about 30 minutes. Keep an eye on them; they should become tender and caramelized, with edges that are slightly browned and crispy. The aroma wafting through your kitchen will be irresistible!

Step 6: Finish with Feta
After 30 minutes, carefully remove the baking sheet from the oven. Immediately crumble the feta cheese over the hot vegetables, allowing its creaminess to meld with the warmth of the dish. Let it sit for a few minutes to cool slightly and allow the flavors to marry, creating the perfect finish for your One Pan Greek Vegetables.

Expert Tips for One Pan Greek Vegetables

  • Don’t Overcrowd: Ensure vegetables are spread out in a single layer on the baking sheet. Overcrowding can lead to steaming instead of roasting, preventing that delicious caramelization.

  • Use Fresh Produce: Opt for fresh vegetables instead of frozen. Frozen veggies may release excess moisture, leading to a less appealing texture in your One Pan Greek Vegetables.

  • Perfect Feta: To maintain feta's desirable texture, crumble it on top after roasting rather than mixing it in before cooking. This way, it melts slightly without losing its structure.

  • Customize Freely: Feel free to swap out vegetables based on your preferences or seasonality, such as using bell peppers or mushrooms for added variety in flavor and texture.

  • Flavor Boosters: If you enjoy a bit of a kick, add crushed red pepper flakes to the olive oil mix for a zesty twist in your One Pan Greek Vegetables.

How to Store and Freeze One Pan Greek Vegetables

Fridge: Store any leftovers in an airtight container in the refrigerator for up to 5 days. Make sure the container is well-sealed to maintain freshness.

Freezer: For longer preservation, you can freeze One Pan Greek Vegetables. Place cooled veggies in a freezer-safe container or bag, ensuring all air is removed, and freeze for up to 3 months.

Reheating: When ready to enjoy, thaw overnight in the fridge and reheat under the broiler for a few minutes. This restores their crispiness, making them just as delicious as when freshly made. Avoid microwaving, as it may turn the veggies soggy.

Serving Tip: Serve your reheated One Pan Greek Vegetables as a vibrant side dish, enhancing any main course with Mediterranean flair!

Make Ahead Options

These One Pan Greek Vegetables are perfect for meal prep enthusiasts! You can chop the vegetables and toss them with olive oil and oregano up to 24 hours in advance, allowing their flavors to meld. Store the seasoned veggies in an airtight container in the refrigerator to keep them fresh. When you're ready to enjoy this vibrant dish, simply spread the prepped vegetables on a baking sheet and roast them for about 30 minutes at 425°F (220°C). For the best texture, add the feta just after roasting to keep it creamy. This way, you'll have delicious, Mediterranean-inspired veggies ready in a flash, making your busy weeknights a breeze!

One Pan Greek Vegetables Variations & Substitutions

Feel free to mix and match ingredients to personalize your One Pan Greek Vegetables dish!

  • Vegetable Swap: Replace zucchini with eggplant or sweet potatoes for a different texture and flavor.
  • Herbal Upgrade: Add fresh basil or thyme alongside oregano for an aromatic twist that brightens the dish.
  • Cheese Choice: Substitute feta with goat cheese for a tangy taste, or use nutritional yeast for a vegan cheese flavor.
  • Add a Kick: Incorporate red pepper flakes for a bit of heat; this simple addition will elevate the flavor profile beautifully.
  • Protein Boost: Toss in cooked chickpeas or lentils before roasting for added protein and heartiness, making this a complete meal.
  • Citrus Zing: Squeeze fresh lemon juice over the veggies just before serving to enhance brightness and add a refreshing zing.
  • Pasta Upgrade: Combine roasted vegetables with cooked orzo or pasta for a fulfilling Mediterranean-inspired dish that’s perfect for leftovers.

For more delightful mixes, try these alongside your One Pan Greek Vegetables: serve with our flavorful Honey BBQ Chicken or incorporate them into a hearty pasta salad featuring One Pot Salmon. Enjoy customizing your dish!

What to Serve with One Pan Greek Vegetables

There's nothing like a colorful dish to bring your table to life, and these roasted delights perfectly complement countless meals.

  • Creamy Mashed Potatoes: The smooth richness of mashed potatoes balances the crisp texture of the veggies, offering a comforting side that everyone loves.

  • Grilled Chicken Skewers: Savory and succulent, chicken skewers pair wonderfully, bringing a hearty protein that enhances the Mediterranean essence of the vegetables.

  • Greek Tzatziki Sauce: A refreshing addition, tzatziki cools the palate and complements the flavors of the roasted veggies with its tangy yogurt base.

  • Quinoa Salad: Light and nutritious, a fresh quinoa salad mixed with cucumbers and herbs creates a lively, satisfying pairing that enhances the dish's brightness.

  • Pita Bread: Soft, warm pita serves as the perfect vessel for scooping up the veggies, adding a fun, interactive touch to your meal experience.

  • Feta-Stuffed Peppers: Echoing the feta in the dish, these stuffed beauties not only enhance flavors but also add vibrant color to your plate.

  • Lemonade or Sparkling Water: Refreshing drinks like lemonade or sparkling water with a splash of mint keep the meal light, enhancing those sunny Mediterranean flavors.

  • Chocolate Avocado Mousse: For dessert, a rich yet healthy chocolate avocado mousse rounds off the meal beautifully, inviting a sweet ending without the guilt.

One Pan Greek Vegetables Recipe FAQs

What kind of vegetables should I use for One Pan Greek Vegetables?
Absolutely go for fresh, seasonal vegetables! I personally love red onions, tomatoes, and zucchini, but feel free to swap in bell peppers, mushrooms, or eggplant based on what you have on hand. Each vegetable brings its own unique flavor and texture to the dish!

How can I store leftovers of One Pan Greek Vegetables?
To store your delicious leftovers, cool them completely and transfer them into an airtight container. These can be kept in the fridge for up to 5 days. Make sure the container is sealed well to keep them fresh and flavorful!

Can I freeze One Pan Greek Vegetables?
Yes, you can! To freeze, ensure the veggies have cooled completely. Place them in a freezer-safe bag or container, removing as much air as possible, and freeze for up to 3 months. When you’re ready to enjoy, simply thaw overnight in the fridge and reheat under the broiler for a few minutes to bring back that crispy texture.

How can I prevent the vegetables from getting soggy during roasting?
Great question! To avoid sogginess, don’t overcrowd the pan; spread your vegetables in a single layer with some space in between them. This allows for proper air circulation, promoting caramelization instead of steaming. Trust me, it makes a world of difference!

Are there any dietary considerations with this dish?
Absolutely! For those who are lactose intolerant or prefer a vegan option, you can easily replace feta cheese with a plant-based cheese alternative or simply omit it. Additionally, if anyone is allergic to olives, you can substitute them with capers for a similar briny flavor.

What's the best way to reheat One Pan Greek Vegetables?
I recommend reheating them under the broiler for a few minutes. This method helps restore their crispiness and enhances the flavors. Avoid the microwave as it can make the vegetables lose their delightful texture, turning them mushy. Enjoy each bite as if they were just freshly cooked!

One Pan Greek Vegetables

One Pan Greek Vegetables: Easy, Colorful, and Flavorful Delight

One Pan Greek Vegetables is a vibrant and healthy side dish that transforms simple ingredients into a flavorful Mediterranean delight.
Print Recipe Pin Recipe
Prep Time 15 minutes mins
Cook Time 30 minutes mins
Total Time 45 minutes mins
Servings: 4 servings
Course: Dinner
Cuisine: Mediterranean
Calories: 220
Ingredients Equipment Method Nutrition Notes

Ingredients
  

For the Vegetables
  • 3 Tbsp Olive Oil Adds richness and flavor
  • 1 Tbsp Oregano Key seasoning for Mediterranean flavor
  • 1 medium Red Onion Substitute with yellow onion if desired
  • 2 medium Tomatoes Bursting with flavor when roasted
  • 2 medium Zucchini Can be swapped with eggplant or sweet potatoes
  • 1 cup Feta Cheese Feel free to use vegan cheese as a substitute
  • 1/2 cup Olives Can replace with capers if preferred

Equipment

  • Oven
  • large mixing bowl
  • Baking Sheet
  • Knife
  • Cutting Board

Method
 

  1. Preheat the oven to 425°F (220°C).
  2. Wash and cut red onion, tomatoes, and zucchini into uniform sizes.
  3. Drizzle olive oil over vegetables and sprinkle with oregano, salt, and pepper. Toss to coat.
  4. Spread seasoned vegetables in a single layer on a baking sheet.
  5. Roast for about 30 minutes, or until tender and caramelized.
  6. Remove from oven and crumble feta cheese over hot vegetables.

Nutrition

Serving: 1servingCalories: 220kcalCarbohydrates: 15gProtein: 6gFat: 16gSaturated Fat: 5gPolyunsaturated Fat: 2gMonounsaturated Fat: 9gCholesterol: 20mgSodium: 400mgPotassium: 400mgFiber: 4gSugar: 3gVitamin A: 600IUVitamin C: 30mgCalcium: 150mgIron: 1mg

Notes

Store leftovers in an airtight container in the fridge for up to 5 days. Freeze for up to 3 months.

Tried this recipe?

Let us know how it was!

Delicious Turkish Potato Salad with Zesty Sumac Twist

January 27, 2026 by Grace Snow Leave a Comment

As I stood in my kitchen, the aroma of sun-ripened tomatoes and fresh herbs began to beckon me back to my travels through the heart of Turkey. This Turkish Potato Salad with Sumac and Feta captures that vivid culinary experience in every bite. With tender, golden potato cubes tossed with vibrant summer vegetables and elevated by a zesty dressing, this dish is not just a salad; it’s a celebration of Mediterranean flavors. Perfect for those casual lunches or elegant dinners, this beginner-friendly recipe comes together in a mere 25 minutes. Plus, it’s the ideal dish to impress guests without spending hours in the kitchen. Are you ready to step into a world of fresh ingredients and simple preparation? Let’s dive into this bright and delicious salad that might just become a staple in your home!

Why is Turkish Potato Salad so delightful?

Vibrant Flavors: This salad bursts with colors and tastes, thanks to sun-ripened tomatoes, crisp cucumbers, and fresh herbs that bring every bite to life.

Quick and Easy: With just 25 minutes of prep, it's perfect for a busy lifestyle—ideal for both weekday lunches and fancy gatherings.

Uniquely Tangy: The addition of sumac offers a citrusy zing that sets it apart from ordinary potato salads.

Crowd-Pleaser: Whether served as a side or main dish, it’s sure to impress your guests and tantalize their taste buds.

Versatile: Feel free to customize with extra proteins like grilled chicken or beans to keep everyone satisfied. If you love more Mediterranean flair, check out Jello Salad Cottage for another vibrant dish!

Turkish Potato Salad Ingredients

• Get ready to create a zesty delight!

For the Salad

  • Yukon Gold or Red-Skinned Potatoes – The foundation of the salad, offering a creamy texture; leave the skins on for added nutrients.
  • Diced Red Onion – Adds a sharp crunch that beautifully contrasts the soft potatoes.
  • Cucumber Slices – Provides a refreshing crunch; the coolness balances the heartiness of the potatoes.
  • Diced Tomatoes – Bring sweetness and acidity to the mix, complementing the potato's earthiness.
  • Pitted Black Olives – Adds briny depth; feel free to swap with green olives for a different twist.
  • Chopped Fresh Parsley – This herb introduces a burst of freshness and color, essential for a vibrant look.
  • Crumbled Feta Cheese – Gives a creamy and salty finish; omit for a vegan version or use a plant-based alternative.

For the Dressing

  • Extra-Virgin Olive Oil – Richness that coats the other ingredients; always opt for high-quality to enhance flavor.
  • Fresh Lemon Juice – Essential for balancing the flavors with a tangy lift; it brightens the entire salad.
  • Sumac – This unique spice provides a tangy note; if you can’t find it, substitute with lemon zest for a similar zing.
  • Salt – Elevates the natural sweetness of the potatoes, enhancing overall flavor.
  • Freshly Ground Black Pepper – Adds warmth; use to taste for a flavor pick-me-up.

With these vibrant ingredients, your Turkish Potato Salad is bound to be a sensational hit at your next meal!

Step‑by‑Step Instructions for Turkish Potato Salad

Step 1: Prepare the Potatoes
Start by washing and scrubbing your Yukon Gold or red-skinned potatoes under cold water to remove any dirt. In a large pot, place the cleaned potatoes and cover them with cold water. Sprinkle in a pinch of salt, then bring the pot to a boil over medium-high heat while keeping a close eye on it.

Step 2: Cook the Potatoes
Once the water reaches a rolling boil, lower the heat and let the potatoes simmer gently for 15-20 minutes. You’ll know they’re ready when you can easily pierce them with a fork. Once cooked to fork-tender perfection, drain the potatoes in a colander and let them cool slightly to prepare for cutting.

Step 3: Make the Dressing
While the potatoes are cooling, grab a bowl and whisk together 1/4 cup of extra-virgin olive oil, the juice of one fresh lemon, 1 tablespoon of sumac, and a pinch of salt and freshly ground black pepper. This zesty dressing will bring the Turkish Potato Salad to life, adding depth and flavor.

Step 4: Cut the Potatoes
Once the potatoes have cooled enough to handle, cut them into bite-sized cubes for easy mixing. Aim for uniform sizes to ensure that they cook evenly and create a harmonious texture throughout your Turkish Potato Salad. Set them aside in a large mixing bowl.

Step 5: Combine the Ingredients
To your potatoes, add in the chopped fresh parsley, diced red onion, cucumber slices, diced tomatoes, pitted black olives, and crumbled feta. The vibrant colors from these fresh ingredients will not only enhance the flavor but also make your salad visually stunning.

Step 6: Toss with Dressing
Pour your previously whisked dressing over the combined ingredients in the bowl. Gently toss everything together with a large spoon, being careful not to mash the potatoes. You want to ensure every piece is lightly coated with that delightful sumac-infused dressing.

Step 7: Adjust Seasoning
After giving your Turkish Potato Salad a good mix, taste it and adjust the seasoning as necessary. You may want to add more salt, pepper, or lemon juice depending on your personal taste preferences. This final step is crucial for perfecting the overall flavor.

Step 8: Serve and Enjoy
Now it’s time to let your Turkish Potato Salad rest for at least one hour in the refrigerator. This allows the flavors to meld beautifully. Serve the salad chilled or at room temperature, either as a side dish or a light main, and delight your family or guests with a refreshing taste of Turkey!

Expert Tips for Turkish Potato Salad

  • Let It Rest: Allow the salad to chill for at least one hour before serving. This resting time helps the flavors in your Turkish Potato Salad meld together for a more delicious outcome.

  • Texture Matters: For the best texture, consider making the salad 2-3 hours in advance. This not only enhances the flavor but also allows the ingredients to soak up the dressing.

  • Customize Wisely: Feel free to add proteins like grilled chicken or chickpeas. Just remember that adding extra ingredients may require slight adjustments in seasoning to keep your Turkish Potato Salad balanced.

  • Preservation Technique: Store any leftovers in an airtight container for up to 2 days. Refresh the flavors by stirring gently and adjusting the seasoning before serving again.

  • Mind the Mash: When mixing the salad, toss gently. Over-mixing can lead to mushy potatoes, so aim to keep those beautiful cubes intact for a delightful crunch.

How to Store and Freeze Turkish Potato Salad

Fridge: Store your Turkish Potato Salad in an airtight container for up to 2 days. This keeps it fresh and lets the flavors meld.

Freezer: It’s not recommended to freeze this salad, as the potatoes can become mushy upon thawing. Enjoy it fresh for the best texture!

Reheating: If you have any leftovers, simply stir gently and adjust seasoning before serving. Enjoy it chilled or at room temperature for the best experience.

Make Ahead Options

These Turkish Potato Salad preparations are a lifesaver for busy cooks! You can make the dressing (olive oil, lemon juice, sumac, salt, and pepper) up to 3 days in advance and store it in an airtight container in the refrigerator. Additionally, diced vegetables like onions, cucumbers, and tomatoes can be chopped and refrigerated for 1-2 days before serving; this keeps them fresh while also saving you time. When it’s time to enjoy your salad, simply cook the potatoes, combine everything together, and pour the dressing over. Toss gently, let it rest for at least one hour for flavors to meld, and you'll have a delightful dish that's just as delicious as if it were freshly made!

Turkish Potato Salad Variations & Substitutions

Discover delightful ways to make this Turkish Potato Salad truly your own!

  • Vegan Twist: Substitute crumbled feta cheese with dairy-free cheese to enjoy a completely plant-based dish. It still brings that creamy goodness to the plate!
  • Protein Booster: Add sliced hard-boiled eggs or grilled chicken to elevate the protein content, turning this side salad into a satisfying main course. Your family will thank you!
  • Hearty Addition: Toss in canned beans or chickpeas for a heartier texture and flavor, making your salad a filling meal. This will not only enhance nutrition but also add a lovely chewiness.
  • Herb Infusion: Experiment with fresh herbs like dill or mint alongside parsley for a fragrant twist. These herbs will transport your taste buds straight to the Mediterranean!
  • Citrus Variation: Swap out lemon juice with fresh lime juice for a zesty twist that adds a unique flavor to the dressing, giving your salad a refreshing kick.
  • Nutty Crunch: Introduce toasted pine nuts or slivered almonds for an extra layer of crunch and richness. The nutty flavor pairs beautifully with the other ingredients.
  • Spice Up the Heat: For those who enjoy some spice, add finely chopped jalapeños or a sprinkle of red pepper flakes into the dressing. This will create a delightful contrast for your taste buds.
  • Mediterranean Medley: Incorporate roasted red peppers or artichoke hearts to enhance the Mediterranean flavors. These add bursts of sweetness and tang that elevate the entire dish.

By trying these variations, you can craft a Turkish Potato Salad that's uniquely yours! For some other mouthwatering ideas, why not explore German Potato Salad or check out Avocado Egg Salad for even more inspiration?

What to Serve with Turkish Potato Salad

The delightful combination of flavors and textures in this dish opens up a world of pairing possibilities that will transform your meal into a true Mediterranean experience.

  • Grilled Chicken Skewers: These juicy, smoky delights pair perfectly with the tangy potato salad, balancing meatiness with refreshing flavors.
  • Roasted Vegetables: A medley of seasonal veggies adds warm, earthy notes that complement the salad’s brightness, creating a colorful side.
  • Pita Bread: Soft and warm, pita is perfect for scooping up bite-sized portions of your Turkish Potato Salad, enhancing that communal dining experience.
  • Hummus: A creamy chickpea dip adds a luscious richness to the table, making it a delightful contrast to the crisp salad.
  • Greek Yogurt Sauce: A cool, herby dressing serves as an excellent dip and adds a tangy layer of flavor to every bite.
  • Lemonade or Iced Tea: These refreshing beverages with a hint of sweetness contrast beautifully with the salad's zesty notes, pleasing the palate.
  • Baklava: To finish your Mediterranean meal, this sweet, flaky pastry is a decadent treat that offers a memorable end to your culinary journey.
  • Feta-Stuffed Peppers: These can bring more of that savory feta goodness to your table, bridging flavors while keeping everything light and fresh.
  • Stuffed Grape Leaves: With their tender rice filling, these provide a unique texture and add an authentic Mediterranean element to your meal.
  • Sparkling Water: The bubbles and freshness of sparkling water cleanse the palate between bites, elevating the overall dining experience.

Turkish Potato Salad with Sumac and Feta Recipe FAQs

What type of potatoes should I use for the best flavor?
Absolutely! Yukon Gold or red-skinned potatoes are the best choices for this salad. They provide a creamy texture and hold their shape well. For even more nutrients, you can opt to leave the skins on!

How do I store leftovers of Turkish Potato Salad?
I recommend placing your Turkish Potato Salad in an airtight container. It will stay fresh in the fridge for up to 2 days. Just give it a gentle stir and taste it before serving, as the flavors may need a little boost from more lemon juice or seasoning.

Can I freeze Turkish Potato Salad?
It’s best to avoid freezing this salad, as the potatoes will likely become mushy when thawed. Enjoy it fresh for the best texture! If you absolutely must freeze it, try to only freeze any ingredients you feel can withstand freezing, like olives or the vinaigrette, separately.

How can I ensure the potatoes don’t turn mushy while cooking?
Very good question! To prevent mushiness, make sure you don’t overcook the potatoes—stick to the 15-20 minutes simmering time until fork-tender. Cooking them in cold water and bringing it to a boil gradually helps maintain their structure. Drain right away and let them cool slightly before cutting.

What can I substitute for sumac if I can’t find it?
If you can't find sumac, no worries! You can substitute it with lemon zest for a similar citrusy flavor. Mix about 1 teaspoon of lemon zest into the dressing to achieve that fresh tang.

Is this salad suitable for people with dietary restrictions?
Yes! This Turkish Potato Salad can easily be made vegan by omitting the feta cheese or substituting it with a plant-based cheese. It's vegetarian-friendly and suitable for most diets, but do check for specific allergies regarding the olives or any dressing components!

Turkish Potato Salad

Delicious Turkish Potato Salad with Zesty Sumac Twist

A refreshing Turkish Potato Salad bursting with flavors, featuring sumac and feta for a delightful culinary experience.
Print Recipe Pin Recipe
Prep Time 25 minutes mins
Cook Time 20 minutes mins
Chilling Time 1 hour hr
Total Time 1 hour hr 45 minutes mins
Servings: 4 servings
Course: Salads
Cuisine: Turkish
Calories: 250
Ingredients Equipment Method Nutrition Notes

Ingredients
  

For the Salad
  • 4-5 medium Yukon Gold or Red-Skinned Potatoes Leave skins on for added nutrients.
  • 1 cup Diced Red Onion Adds a sharp crunch.
  • 1 cup Cucumber Slices Provides a refreshing crunch.
  • 1 cup Diced Tomatoes Brings sweetness and acidity.
  • 1/2 cup Pitted Black Olives Adds briny depth.
  • 1/4 cup Chopped Fresh Parsley Introduces freshness and color.
  • 1/2 cup Crumbled Feta Cheese Omit for vegan version.
For the Dressing
  • 1/4 cup Extra-Virgin Olive Oil Use high quality.
  • 1 large Fresh Lemon Juice Essential for balancing flavors.
  • 1 tablespoon Sumac Offers a tangy note.
  • 1 teaspoon Salt Elevates sweetness.
  • 1/2 teaspoon Freshly Ground Black Pepper Adds warmth.

Equipment

  • Large pot
  • Colander
  • Mixing Bowl
  • Whisk
  • Cutting Board
  • Knife

Method
 

Preparation Steps
  1. Wash and scrub the potatoes under cold water. Place in a pot, cover with cold water, and add a pinch of salt.
  2. Bring the pot to a boil, then lower heat and let simmer for 15-20 minutes until fork-tender. Drain and let cool.
  3. In a bowl, whisk together olive oil, lemon juice, sumac, salt, and pepper to prepare the dressing.
  4. Cut the cooled potatoes into bite-sized cubes and set aside in a large mixing bowl.
  5. Add parsley, red onion, cucumber, tomatoes, olives, and feta to the bowl with potatoes.
  6. Pour dressing over the salad and gently toss to combine, being careful not to mash the potatoes.
  7. Taste and adjust seasoning if necessary.
  8. Let the salad rest in the refrigerator for at least one hour before serving.

Nutrition

Serving: 1cupCalories: 250kcalCarbohydrates: 35gProtein: 6gFat: 10gSaturated Fat: 3gPolyunsaturated Fat: 1gMonounsaturated Fat: 6gCholesterol: 15mgSodium: 400mgPotassium: 600mgFiber: 4gSugar: 2gVitamin A: 500IUVitamin C: 20mgCalcium: 100mgIron: 2mg

Notes

Allow the salad to chill for enhanced flavor. Store leftovers in an airtight container for up to 2 days. Adjust seasoning before serving again.

Tried this recipe?

Let us know how it was!

Perfectly Fluffy English Muffins for Your Cozy Breakfasts

January 26, 2026 by Grace Snow Leave a Comment

The warm, buttery aroma wafting through the kitchen has a magical way of bringing everyone together, doesn’t it? As I flipped the last batch of homemade English muffins, memories of lazy Sunday breakfasts flooded my mind—each muffin boasting a perfectly crunchy exterior and a fluffy center just waiting to be toasted. This English muffin recipe is not just about deliciousness; it’s an effortless way to elevate your breakfast game. With simple ingredients and straightforward techniques, you can enjoy the satisfaction of creating something that’s both versatile and crowd-pleasing. Whether you enjoy them with jam and butter or piled high with eggs and bacon, these muffins are sure to become a new family favorite. So, ready to discover just how easy it is to make your own? Let’s dive in!

Why Make Your Own English Muffins?

Homemade goodness: There's nothing quite like the taste of homemade English muffins, warm and fresh from your kitchen. Versatile options: Whether you enjoy them with sweet jams or savory toppings, this recipe adapts effortlessly to your preferences. Simple process: With just a handful of ingredients, you can whip up a batch without the fuss. Family favorite: They’re perfect for cozy family breakfasts or brunches with friends, and you’ll impress everyone with your baking skills! For a delightful pairing, try serving them alongside homemade Cinnamon Roll Muffins. Get ready to elevate your breakfast game!

English Muffin Ingredients

For the Muffins

  • All-Purpose Flour – Structure and texture; substitute with whole wheat flour for a denser muffin.
  • Active Dry Yeast – The leavening agent that helps the muffins rise; ensure it's fresh for best results.
  • Whole Milk – Adds richness and flavor; can be replaced with half & half for a creamier texture.
  • Warm Water – Activates yeast; water should be between 105°F to 115°F.
  • Shortening – Provides moisture and tender texture; substitute with additional melted butter if desired.
  • Melted Butter – Enhances flavor and richness; can use vegetable oil as a substitution.
  • Salt – Balances flavor; essential for enhancing the taste of the other ingredients.
  • Sugar – Adds slight sweetness to the dough; a small amount of honey can be used as an alternative.
  • Cornmeal – For dusting and prevents sticking; may be omitted but adds texture.

Get ready to make those delightful English muffins!

Step‑by‑Step Instructions for Homemade English Muffins

Step 1: Dough Preparation
In a large mixing bowl or stand mixer, dissolve 2 teaspoons of active dry yeast in ¾ cup of warm water (105°F to 115°F) and let it sit for about 5 minutes until frothy. Next, add ¾ cup of warm milk, 2 tablespoons of melted butter, 2 tablespoons of shortening, 1 teaspoon of salt, and 1 tablespoon of sugar. Mix these ingredients until combined to form a cohesive mixture.

Step 2: Kneading
Gradually add 3 cups of all-purpose flour to the mixing bowl while kneading the dough. Continue until you achieve a soft, round dough ball, approximately 8-10 minutes of kneading. Place the dough into a lightly oiled bowl, cover it with a clean kitchen towel, and let it rise in a warm area for 1½ to 2 hours, or until it has doubled in size and feels light and airy.

Step 3: Shaping
Once the dough has risen, roll it out onto a lightly floured surface, pressing it to about ½ inch thickness. Use muffin rings or a round cutter to cut out the muffins, placing each onto a surface dusted with cornmeal to prevent sticking. Make sure to cover the cut muffins with a kitchen towel, allowing them to rise for an additional hour until they feel puffy and slightly increased in size.

Step 4: Cooking
Heat a large skillet over medium-high heat and add 1 tablespoon of melted butter. Cook the muffins in batches, about 5-6 minutes on each side, until they are golden brown and have a slightly airy texture. Keep an eye on them to achieve that perfectly crisp exterior while ensuring they are cooked through. Once ready, transfer them to a cooling rack to rest for a few minutes and enjoy!

English Muffin Variations & Substitutions

Feel free to get creative with these delicious English muffins! There are endless ways to tweak this recipe for even more delightful mornings.

  • Whole Wheat: Swap all-purpose flour for whole wheat for a heartier, nutritious muffin. It brings a nutty flavor that pairs beautifully with honey or jam.
  • Herb-Infused: Add fresh herbs like rosemary or thyme to the dough for a fragrant, savory twist. These muffins make fantastic mini sandwiches for brunch!
  • Cheese Boost: Fold in shredded cheese such as cheddar or feta for an extra cheesy delight. The melted cheese inside will create a savory surprise your family will love!
  • Gluten-Free: Use a gluten-free all-purpose flour blend to cater to gluten-sensitive folks. The result will still yield a lovely muffin, just a tad different in texture.
  • Sweet Surprise: Mix in dried fruits such as raisins or cranberries for a hint of sweetness. This makes for a delightful breakfast treat that pairs perfectly with creamy butter.
  • Spicy Kick: Add crushed red pepper flakes to the dough for a little heat. This variation elevates these muffins to new, exciting levels—perfect for those who love a bit of spice in their life!
  • Chia or Flaxseed: Mix in chia seeds or ground flaxseeds for added nutritional benefits. They offer a delightful crunch and can make your breakfast more wholesome.
  • Pumpkin Spice: Stir in a few tablespoons of pumpkin puree along with some cinnamon for an autumnal twist. For even more seasonal fun, serve them with a spicy pumpkin spread!

Whichever variation you choose, these muffins are sure to delight at any breakfast table! And if you’re seeking more breakfast inspiration, check out these homemade Breakfast Egg Muffins that will pair perfectly with your English muffins.

Make Ahead Options

These English muffins are perfect for meal prep enthusiasts! You can prepare the dough up to 24 hours in advance. Just follow the initial steps up to shaping, then place the cut muffins on a baking sheet, cover them with plastic wrap, and refrigerate. This will keep them fresh and puffed overnight. When you're ready to cook, simply take them out and let them sit at room temperature for about 30 minutes before cooking. To maintain that delightful texture, ensure your skillet is hot enough when cooking. You'll have freshly baked English muffins ready to serve with minimal effort, making your breakfast routine a breeze!

Storage Tips for English Muffins

  • Room Temperature: Store your English muffins in an airtight container at room temperature for up to 48 hours to maintain their freshness and soft texture.

  • Fridge: If you prefer, you can keep them in the fridge for up to 5 days. Just be sure to wrap them tightly to prevent drying out.

  • Freezer: For longer storage, freeze the muffins in a resealable freezer bag for up to three months. Make sure to remove as much air as possible.

  • Reheating: To enjoy your muffins again, simply toast them directly from the freezer, or let them thaw in the fridge overnight before lightly toasting. Enjoy your delicious English muffins!

Expert Tips for Homemade English Muffins

  • Fresh Yeast Check: Always confirm your active dry yeast is fresh by ensuring it bubbles when mixed with warm water. This guarantees a great rise!

  • Avoid Over-Kneading: Knead the dough just enough to achieve a soft, round ball. Over-kneading can lead to tough muffins instead of light, fluffy English muffins.

  • Temperature Matters: Make sure your skillet is preheated properly before cooking. This ensures even cooking and that delightful golden exterior.

  • Use Cornmeal Wisely: Dusting with cornmeal is key—it prevents sticking and adds a nice texture. Don’t skip this step for optimal results!

  • Cooling Time: Allow muffins to cool on a rack after cooking. This prevents sogginess and helps maintain that perfect texture inside.

What to Serve with Homemade English Muffins

The warm embrace of freshly baked English muffins invites a delightful breakfast spread, filled with contrasts and flavors that will awaken your senses.

  • Creamy Scrambled Eggs: Ready in minutes, they’re rich and fluffy, making a perfect contrast to the muffins’ airy texture.
  • Bacon or Sausage: Crispy or savory patties can add a hearty element, creating the ideal breakfast sandwich when paired together.
  • Avocado Slices: Fresh, creamy avocado on toasted muffins adds a nutritious element, enhancing flavor with a luscious, buttery texture.
  • Homemade Jam or Honey: Sweet spreads create a delightful balance with your English muffins, elevating a simple bite into a sweet indulgence.
  • Fresh Fruit Salad: A refreshing mix of seasonal fruits can offer a burst of color and sweetness, adding a fresh touch to your meal.
  • Greek Yogurt Parfait: Layered with granola and berries, it complements the muffins well while providing a delightful crunch and tangy flavor.
  • Freshly Brewed Coffee: The aromatic richness pairs beautifully with the warm muffins, enhancing the comforting breakfast experience.
  • Herb-Infused Butter: Mixing herbs into butter can elevate each bite, creating a fragrant spread that meshes well with the English muffins' texture.
  • Chai Latte: The spiced warmth of a chai latte can bring a cozy feel, perfect for slow mornings spent enjoying homemade muffins.

Transform your breakfast experience by discovering how each of these ideas balances perfectly with your homemade English muffins!

English Muffins Recipe FAQs

What should I look for when selecting ingredients for English muffins?
Absolutely! When selecting your ingredients, ensure your active dry yeast is fresh and bubbly, as this is crucial for a good rise. Choose all-purpose flour for a fluffy texture, but if you're after a denser muffin, whole wheat flour is a fantastic substitute. Look for whole milk with a rich flavor, or opt for half & half if you prefer added creaminess.

How long can I store homemade English muffins?
Very! You can store your English muffins at room temperature in an airtight container for up to 48 hours. If you want to keep them longer, consider refrigerating them; they can last for up to 5 days in the fridge if wrapped tightly.

Can I freeze English muffins for later use?
Absolutely! For freezing, allow the muffins to cool completely, then wrap each muffin tightly in plastic wrap. Place them in a resealable freezer bag, squeezing out as much air as possible, and they can be frozen for up to 3 months. When you're ready to enjoy them, you can toast them straight from frozen.

What should I do if my muffins don't rise enough?
The more the merrier! If your muffins don’t rise adequately, check if your yeast was active enough or if the dough was too cold during the rising process. Make sure to let the dough rise in a warm area, ideally around 75°F to 85°F. If the dough feels too sticky, you can gradually add small amounts of flour while kneading until you get a soft and pliable ball.

Can pets eat English muffins?
Very! While a small piece of plain English muffin is generally safe for dogs, avoid giving them muffins with butter or sweeteners, like sugar or honey, which can be harmful. Always consult your veterinarian if you're unsure about introducing any new foods to your pet's diet!

Is it possible to make gluten-free English muffins?
I often make gluten-free variations! To create gluten-free English muffins, you can use a 1:1 gluten-free flour blend that includes xanthan gum. Just follow the same instructions but keep an eye on their texture; you may need to adjust the amount of liquid used to achieve the desired dough consistency.

English Muffins

Perfectly Fluffy English Muffins for Your Cozy Breakfasts

Enjoy the magical warmth of homemade English muffins for breakfast, combining a crunchy exterior and a fluffy center. Perfect for jam, butter, or savory toppings.
Print Recipe Pin Recipe
Prep Time 10 minutes mins
Cook Time 12 minutes mins
Rising Time 1 hour hr 30 minutes mins
Total Time 1 hour hr 52 minutes mins
Servings: 12 muffins
Course: Breakfast
Cuisine: Baked Goods
Calories: 120
Ingredients Equipment Method Nutrition Notes

Ingredients
  

For the Muffins
  • 3 cups All-Purpose Flour Substitute with whole wheat flour for denser muffins.
  • 2 teaspoons Active Dry Yeast Ensure it's fresh for best results.
  • 3/4 cup Whole Milk Can be replaced with half & half for creamier texture.
  • 3/4 cup Warm Water Water should be between 105°F to 115°F.
  • 2 tablespoons Shortening Substitute with additional melted butter if desired.
  • 2 tablespoons Melted Butter Can use vegetable oil as a substitution.
  • 1 teaspoon Salt Essential for enhancing the taste of the other ingredients.
  • 1 tablespoon Sugar Small amount of honey can be used as alternative.
  • as needed Cornmeal For dusting, prevents sticking.

Equipment

  • Mixing Bowl
  • Stand Mixer
  • Skillet
  • Muffin Rings

Method
 

Step-by-Step Instructions for Homemade English Muffins
  1. Dissolve 2 teaspoons of active dry yeast in 3/4 cup of warm water (105°F to 115°F) and let it sit for 5 minutes until frothy. Add 3/4 cup of warm milk, 2 tablespoons of melted butter, 2 tablespoons of shortening, 1 teaspoon of salt, and 1 tablespoon of sugar. Mix until combined.
  2. Gradually add 3 cups of all-purpose flour while kneading the dough for about 8-10 minutes until a soft, round dough ball forms. Let it rise in a lightly oiled bowl for 1½ to 2 hours until doubled in size.
  3. Roll the dough onto a floured surface to about ½ inch thickness. Cut out muffins and place on cornmeal dusted surface. Cover and let rise for an additional hour.
  4. Heat a skillet over medium-high heat, add 1 tablespoon of melted butter, and cook muffins for about 5-6 minutes on each side until golden brown. Transfer to a cooling rack.

Nutrition

Serving: 1muffinCalories: 120kcalCarbohydrates: 24gProtein: 4gFat: 2gSaturated Fat: 1gMonounsaturated Fat: 1gCholesterol: 10mgSodium: 200mgPotassium: 100mgFiber: 1gSugar: 1gVitamin A: 100IUCalcium: 20mgIron: 0.5mg

Notes

Allow muffins to cool for a few minutes after cooking to maintain texture. Store properly to keep freshness.

Tried this recipe?

Let us know how it was!

Delicious Pizza Style Cottage Cheese Bake in Just 10 Minutes

January 26, 2026 by Grace Snow Leave a Comment

As the aroma of melting cheese and zesty Italian herbs fills the kitchen, the anticipation for my Pizza Style Cottage Cheese Bake grows. This comforting dish combines the familiar flavors of pizza with the delightful textures of a hearty bake, resulting in a delicious family meal that even the pickiest eaters will love. What makes this recipe even more appealing is that it can be whipped up in just 10 minutes before popping it in the oven—perfect for those busy weeknights when you crave something fulfilling yet hassle-free. Gluten-free and packed with protein, this dish not only satisfies your hunger but also brings everyone together around the table. What toppings will you choose to personalize your cottage cheese bake?

Why will you adore this bake?

Quick to Prepare: In just 10 minutes, you can prepare this delicious dish, making it a lifesaver for busy weeknights.

Kid-Friendly: With its cheesy goodness and savory flavors, this bake is sure to win over even the pickiest eaters in your family.

Versatile Ingredients: Feel free to swap in your favorite toppings or even substitute cottage cheese with ricotta for a different twist!

Comforting Flavor: The combination of hearty mozzarella and pepperoni brings that beloved pizza flavor right into your home.

Gluten-Free Goodness: This dish fits seamlessly into a gluten-free diet while providing a satisfying, protein-packed meal. Pair it with a fresh side salad or some warm garlic bread for an unforgettable family dinner!

Pizza Style Cottage Cheese Bake Ingredients

Explore the simple and satisfying ingredients that make this dish a family favorite!

For the Base

  • Cottage Cheese – The creamy foundation packs protein; substitute with ricotta for a unique flavor twist.
  • Eggs – They bind the mixture beautifully; be sure to beat them well for a smooth texture.

For the Cheese Layer

  • Shredded Mozzarella Cheese – This cheese adds that gooey, melty goodness; use part-skim for a lighter version.
  • Grated Parmesan Cheese – Provides a crispy, flavorful topping; skip it if you're dairy-free.

For the Flavor

  • Italian Seasoning – A blend of herbs that captures that classic pizza taste; fresh herbs can elevate the flavor even more.
  • Garlic Powder – This adds aromatic depth; fresh garlic can offer a bolder punch.
  • Salt and Pepper – Essential seasonings that enhance and balance overall flavors.

For the Toppings

  • Mini Turkey Pepperoni – Adds savory bites and pizza-style goodness; swap for bell peppers or olives for a vegetarian version.

With these delicious ingredients, your Pizza Style Cottage Cheese Bake is bound to be a hit—quick, comforting, and gluten-free to boot!

Step‑by‑Step Instructions for Pizza Style Cottage Cheese Bake

Step 1: Preheat and Prepare
Begin by preheating your oven to 375°F (190°C). While the oven warms up, grab a 9x9-inch baking dish and generously grease it with cooking spray or olive oil. This will help prevent the Pizza Style Cottage Cheese Bake from sticking, ensuring that it comes out perfectly golden and intact once it's ready.

Step 2: Whisk the Base
In a large mixing bowl, combine the cottage cheese and eggs. Use a whisk to beat them together until the mixture is smooth and well combined, which should take about 2–3 minutes. This creamy base is essential for the Pizza Style Cottage Cheese Bake, providing a delicious texture and flavor that will hold everything together.

Step 3: Combine Ingredients
Next, stir in shredded mozzarella, most of the mini turkey pepperoni (saving some for the top), grated Parmesan, Italian seasoning, garlic powder, salt, and pepper. Mix everything well until fully incorporated, ensuring that each ingredient is evenly distributed for flavor in every bite. This savory combination will make your bake truly irresistible!

Step 4: Transfer to Baking Dish
Pour the cottage cheese mixture into your prepared baking dish, spreading it evenly with a spatula. Make sure to smooth the top, then sprinkle the remaining mini turkey pepperoni over the surface. This final touch adds an appetizing look and enhances the flavor of your Pizza Style Cottage Cheese Bake as it bakes.

Step 5: Bake to Perfection
Place the baking dish in the preheated oven and bake for 30–35 minutes. You'll know it's done when the edges are set, and the top is golden and bubbly. Keep an eye on it towards the end of the baking time to achieve that perfect, delicious crust that makes this bake so comforting.

Step 6: Cool and Serve
Once baked, remove the dish from the oven and let it sit for about 5–10 minutes. This cooling period allows the Pizza Style Cottage Cheese Bake to firm up for easier slicing. When ready, cut into squares and serve warm, letting the cheesy goodness shine as the star of your meal!

Expert Tips for Pizza Style Cottage Cheese Bake

  • Preheat Correctly: Always preheat your oven to ensure even cooking. This vital step helps achieve the perfect golden and bubbly top for your bake.

  • Texture is Key: Beat the eggs well for a smoother texture. This ensures that your Pizza Style Cottage Cheese Bake has a cohesive and pleasing consistency.

  • Don’t Rush Cooling: Let the bake cool for 5–10 minutes after taking it out of the oven. This helps it set properly, making slicing easier and preventing it from falling apart.

  • Top It Off: Experiment with different toppings like fresh spinach or diced bell peppers. Ensure you balance flavors without overwhelming the rich, cheesy goodness of the base.

  • Meal Prep Magic: Prepare the mixture a day ahead. Simply cover it and refrigerate until you’re ready to bake, saving time on busy weeknights.

What to Serve with Pizza Style Cottage Cheese Bake

Imagine the comforting aromas of this dish wafting through your kitchen as you create a delightful meal that everyone will love.

  • Fresh Side Salad: A crisp salad filled with mixed greens, cucumbers, and cherry tomatoes adds a refreshing contrast and a burst of color to your plate. Drizzle with a light vinaigrette for a tangy bite that balances the bake's richness.

  • Garlic Bread Sticks: Warm, buttery garlic bread sticks offer a perfect dip for any extra cheesy goodness that might fall from your slices. The crunchy exterior and soft interior provide a delightful texture contrast.

  • Steamed Vegetables: Lightly steamed broccoli or green beans offer a nutritious crunch and enhance the meal's visual appeal. They also add a healthy dose of fiber alongside the cheesy decadent bake.

  • Roasted Red Peppers: Sweet, roasted red peppers bring a caramelized flavor that complements the savory profile of the bake. Their slight smokiness adds depth and complements the Italian seasoning beautifully.

  • Sliced Avocado: Creamy avocado slices drizzled with lemon juice lend a fresh note and creaminess to counterbalance the bake's hearty nature. It’s a simple, wholesome addition!

  • Sparkling Water with Lemon: For drinks, consider fizzy sparkling water with a hint of lemon for a refreshing palate cleanser. It keeps the meal light while adding a zesty finish.

  • Brownie Sundae: End your meal on a sweet note with a rich brownie sundae topped with vanilla ice cream and chocolate sauce. The warm, gooey dessert provides a delightful contrast to the savory flavors of your Pizza Style Cottage Cheese Bake.

Storage Tips for Pizza Style Cottage Cheese Bake

Room Temperature: Allow the Pizza Style Cottage Cheese Bake to cool completely before leaving it out. It can be stored at room temperature for up to 2 hours to maintain food safety.

Fridge: Leftovers can be kept in an airtight container inside the fridge for up to 3 days. Make sure the bake is fully cooled before sealing to preserve its texture.

Freezer: For longer storage, freeze the bake in an airtight container or tightly wrapped in plastic wrap for up to 3 months. Make sure it’s completely cooled before freezing to avoid freezer burn.

Reheating: To enjoy leftovers, reheat individual portions in the microwave or oven. If using the oven, cover with foil and heat at 350°F (175°C) until warmed through, about 20 minutes.

Pizza Style Cottage Cheese Bake Variations

Feel free to get creative with this comforting bake—your taste buds will thank you!

  • Cheese Mix: Combine different cheeses like cheddar or provolone for a nuanced flavor addition.
    Cheese enthusiasts will delight in a blend that offers varying textures, enhancing each slice.

  • Veggie Boost: Add spinach or mushrooms to amp up the nutritional content and add a savory twist.
    Not only will it make your bake more colorful, but it also enriches the dish’s flavor profile beautifully.

  • Spice It Up: Incorporate a pinch of red pepper flakes or chili powder for some heat.
    This simple adjustment transforms the bake into a satisfying, spicy treat that warms the soul!

  • Herb Variations: Swap Italian seasoning for fresh basil or oregano for a fragrant touch.
    Fresh herbs can elevate the dish, giving it a garden-fresh taste that’s irresistible.

  • Meat Substitutes: Replace turkey pepperoni with diced chicken or sausage for a meaty alternative.
    Each protein option can bring a new dish dynamic, catering to different flavor preferences in your home.

  • Grain-Free Base: Use chickpea flour instead of cottage cheese for a gluten-free twist.
    This unique swap creates a fluffy texture while keeping the nutritional benefits intact.

  • Gourmet Touch: Add sun-dried tomatoes or olives for a Mediterranean-inspired flavor explosion.
    These ingredients introduce a tangy richness that elevates your cottage cheese bake to gourmet status.

Consider pairing this tempting bake with a fresh side salad or some warm garlic bread to create a wonderful dining experience. If you're looking for more inspiration, try experimenting with a Cheesy Zucchini Bake or indulge in some delicious Matcha Baked Doughnuts. Your family will be delighted with whatever variations you create!

Make Ahead Options

These Pizza Style Cottage Cheese Bake preparations are a true time-saver for busy home cooks! You can whisk together the cottage cheese and eggs and mix in the other ingredients up to 24 hours in advance. Simply cover the mixture tightly with plastic wrap and refrigerate it until you’re ready to bake. If you prefer, you can also portion out leftovers and store them in an airtight container for up to 3 days. Just reheat in the oven before serving for that freshly baked taste. When ready to enjoy your Pizza Style Cottage Cheese Bake, spread it into the greased dish, top with the remaining pepperoni, and bake as directed for quick and satisfying comfort food!

Pizza Style Cottage Cheese Bake Recipe FAQs

What kind of cottage cheese should I use for this bake?
Absolutely! I recommend using a full-fat or low-fat cottage cheese for creaminess and flavor. If you prefer a smoother texture, you can even blend the cottage cheese before mixing it with the eggs. If you're looking for a different flavor profile, ricotta cheese makes a great substitute!

How should I store leftovers of my Pizza Style Cottage Cheese Bake?
For best results, store any leftovers in an airtight container in the refrigerator. They will stay fresh for up to 3 days. Just make sure the bake is completely cooled before sealing it, as this helps maintain its texture.

Can I freeze the Pizza Style Cottage Cheese Bake?
Yes, you can freeze this bake! Allow it to cool completely, then wrap it tightly in plastic wrap and place it in an airtight container or a freezer bag. It can be frozen for up to 3 months. When you're ready to enjoy it, simply thaw it in the refrigerator overnight and reheat it in the oven or microwave when desired.

What should I do if my Pizza Style Cottage Cheese Bake is too watery?
Very! If you find your bake is too watery, it could be due to excess moisture in the cottage cheese. To troubleshoot for next time, consider using a thicker cottage cheese or even draining some liquid before mixing it. Also, letting it sit for a few minutes after baking can help firm up the texture, making it easier to slice.

Is this dish safe for those with dairy allergies?
Not really! This particular recipe includes several dairy ingredients. If you need a dairy-free option, consider using non-dairy cheese alternatives and egg substitutes like flaxseed meal mixed with water to maintain the binding texture. Always check the labels for allergens if you're feeding guests or family with specific dietary needs!

Can I customize the toppings in my Pizza Style Cottage Cheese Bake?
Absolutely! One of the joys of this recipe is its flexibility. Feel free to mix in or substitute toppings like spinach, mushrooms, or even different meats like chicken or sausage. Just be mindful of how these might affect cooking time or overall moisture in the dish. Enjoy experimenting!

Pizza Style Cottage Cheese Bake

Delicious Pizza Style Cottage Cheese Bake in Just 10 Minutes

Enjoy a quick and gluten-free Pizza Style Cottage Cheese Bake that's perfect for busy weeknights. Packed with protein and comforting flavors, it's a family favorite.
Print Recipe Pin Recipe
Prep Time 10 minutes mins
Cook Time 30 minutes mins
Cooling Time 10 minutes mins
Total Time 50 minutes mins
Servings: 4 slices
Course: Dinner
Cuisine: Italian
Calories: 250
Ingredients Equipment Method Nutrition Notes

Ingredients
  

For the Base
  • 2 cups Cottage Cheese Can be substituted with ricotta.
  • 2 Eggs Beat well for smooth texture.
For the Cheese Layer
  • 2 cups Shredded Mozzarella Cheese Use part-skim for a lighter version.
  • 1/4 cup Grated Parmesan Cheese Skip if dairy-free.
For the Flavor
  • 1 tablespoon Italian Seasoning Fresh herbs can elevate the flavor.
  • 1 teaspoon Garlic Powder Fresh garlic can offer bolder flavor.
  • 1 teaspoon Salt
  • 1 teaspoon Pepper
For the Toppings
  • 1 cup Mini Turkey Pepperoni Can swap for bell peppers or olives.

Equipment

  • 9x9-inch baking dish
  • Mixing Bowl
  • Whisk
  • Spatula

Method
 

Step-by-Step Instructions
  1. Preheat your oven to 375°F (190°C) and grease a 9x9-inch baking dish.
  2. In a large mixing bowl, combine the cottage cheese and eggs, whisking until smooth.
  3. Stir in mozzarella, mini turkey pepperoni, Parmesan, Italian seasoning, garlic powder, salt, and pepper.
  4. Pour the mixture into the baking dish, smooth the top, and sprinkle remaining turkey pepperoni on top.
  5. Bake for 30–35 minutes until edges are set and top is golden.
  6. Let it cool for 5–10 minutes before slicing and serving warm.

Nutrition

Serving: 1sliceCalories: 250kcalCarbohydrates: 15gProtein: 20gFat: 10gSaturated Fat: 4gPolyunsaturated Fat: 0.5gMonounsaturated Fat: 4gCholesterol: 100mgSodium: 600mgPotassium: 300mgFiber: 1gSugar: 3gVitamin A: 10IUCalcium: 25mgIron: 4mg

Notes

Experiment with different toppings like fresh spinach or diced bell peppers. Prepare the mixture a day ahead to save time.

Tried this recipe?

Let us know how it was!

Savory Ham Potato Casserole for Cozy Weeknight Comfort

January 26, 2026 by Grace Snow Leave a Comment

The aroma of buttery potatoes mingling with smoky ham filled the kitchen, instantly bringing back to life my fondest family dinners. Today, I’m excited to share my Creamy Leftover Ham and Potato Casserole—a hearty dish that turns yesterday's leftovers into a crowd-pleasing meal everyone will love. With its quick prep time and delightful creamy texture, this comfort food masterpiece is perfect for busy weeknights when you want something satisfying without the fuss. The combination of tender potato slices, savory ham, and a rich sauce topped with melted cheddar is sure to warm your heart and fill your home with the kind of warmth only homemade cooking can bring. Curious about how this dish can brighten up your next dinner? Let’s dive into the recipe!

Why is This Casserole a Must-Try?

Comforting, Simple Prep: This Ham Potato Casserole comes together effortlessly, making it ideal for those busy nights when you crave a hearty meal without the stress.

Flavorful Combination: The savory ham mingles beautifully with the creamy potatoes, elevating classic comfort food to the next level.

Family-Friendly Delight: Kids and adults alike will adore this dish, making it a sure winner for family dinners or gatherings.

Versatile Ingredient Use: Great for utilizing extra ingredients, you can also adapt this by adding veggies like spinach or even other proteins, such as shredded turkey.

Make-Ahead Convenience: Prep this casserole ahead of time and simply pop it in the oven when you're ready to enjoy it. For more delicious casserole ideas, check out my Sweet Potato Casserole and Cornbread Breakfast Casserole.

Satisfying Leftover Solution: Transforming yesterday’s meals into a fresh feast means fewer food waste and a good sense of accomplishment.

Ham Potato Casserole Ingredients

For the Casserole Base

  • Unsalted Butter – Adds richness and helps form the creamy sauce that binds everything together.
  • Chopped Onion – Provides flavor; sauté until translucent for the best results in taste.
  • Cubed Leftover Ham (3 cups) – The star of the dish; cut into 1-inch pieces for even heating.
  • Russet or Yukon Gold Potatoes (2½ lbs) – Their starchiness creates a creamy texture; ensure uniform-sized cubes for consistent cooking.

For the Sauce

  • All-Purpose Flour (3 tablespoons) – Essential for thickening the cream sauce and providing a sturdy base for the casserole.
  • Whole Milk (2 cups) – Creates that rich, creamy sauce; whisk in gradually to prevent lumps.
  • Salt (1 teaspoon), Black Pepper (½ teaspoon), Ground Mustard (½ teaspoon), Garlic Powder (½ teaspoon) – These seasonings add depth and enhance the flavor of the whole Ham Potato Casserole.

For the Topping

  • Shredded Cheddar Cheese (8 oz) – Adds creaminess and a wonderful flavor; save some for topping just before baking.

With these simple yet quality ingredients, you'll whip up a delicious casserole that can transform your leftovers into a delightful meal, perfect for cozy weeknight dinners!

Step‑by‑Step Instructions for Creamy Leftover Ham and Potato Casserole

Step 1: Preheat the Oven
Begin your Ham Potato Casserole by preheating the oven to 350°F (175°C). This temperature is perfect for achieving that golden, bubbly top while ensuring the casserole heats through evenly. While the oven warms up, get your baking dish ready by greasing it lightly with butter or cooking spray.

Step 2: Sauté the Onions
In a medium saucepan, melt 3 tablespoons of unsalted butter over medium heat. Once the butter is foaming, add in the chopped onion and sauté until they turn translucent, about 4–5 minutes. Stir occasionally to avoid burning and enhance the sweetness of the onions, which will elevate the flavor of your ham and potato casserole.

Step 3: Prepare the Ham and Potatoes
Cut your leftover ham into 1-inch cubes and set aside. Then, peel and cube 2½ lbs of russet or Yukon Gold potatoes, ensuring even-sized pieces for consistent cooking. Bring a pot of water to a boil, add the potato cubes, and parboil them for 5 minutes before draining well. This step helps achieve that perfect creamy texture in your casserole.

Step 4: Make the Cream Sauce
With the sautéed onions ready, sprinkle in 3 tablespoons of all-purpose flour and stir for about 1 minute to cook the flour. Gradually whisk in 2 cups of whole milk, cooking until the sauce thickens—around 5–7 minutes. Season your sauce with 1 teaspoon of salt, ½ teaspoon each of black pepper, ground mustard, and garlic powder for added depth before removing it from heat.

Step 5: Combine the Casserole Ingredients
In a large mixing bowl, combine the cubed ham, parboiled potatoes, and 8 oz of shredded cheddar cheese. Carefully pour the creamy sauce over the mixture and stir until everything is evenly coated. This will ensure that every bite of your Ham Potato Casserole is packed with flavor and creaminess.

Step 6: Bake the Casserole
Transfer the combined mixture to your greased baking dish, spreading it out evenly. Top with any reserved cheese to create a glorious cheesy crust. Place in the preheated oven and bake for 45 minutes, or until the top is golden brown and bubbly. This aromatic dish will fill your kitchen with warmth as it cooks.

Step 7: Let It Rest
Once baked, remove the Ham Potato Casserole from the oven and allow it to rest for 10–15 minutes. This resting period helps the casserole set, making it easier to serve and enhancing its consistency. The aroma wafting through your home will surely tempt everyone to gather around the table for this comforting meal.

Storage Tips for Ham Potato Casserole

Fridge: Store leftovers in an airtight container for up to 4 days to maintain freshness and flavor.

Freezer: For longer storage, freeze in portions for up to 3 months. Make sure to wrap tightly to prevent freezer burn.

Reheating: Reheat in an oven at 350°F for 20-25 minutes if refrigerated, or 35-40 minutes if frozen. Cover with foil to keep it moist and prevent drying out.

Serving Suggestion: When reheating, you can sprinkle a bit of extra cheese on top before baking for a delightful, melty finish to your Ham Potato Casserole.

Make Ahead Options

These Ham Potato Casserole preps beautifully for those hectic weeknights! You can chop your onions, cube the ham, and prepare the potatoes up to 24 hours ahead—just remember to store the potatoes in cold water to prevent browning. Additionally, you can make the creamy sauce and refrigerate it for up to 3 days to save time. When you're ready to serve, simply combine the ham, potatoes, and cheese with the sauce, transfer to your baking dish, and bake in a preheated oven. This not only saves you precious prep time but also ensures a delicious, hearty meal is on the table with minimal effort when it matters most!

Ham Potato Casserole Variations

Feel free to get creative with this Ham Potato Casserole and make it your own delightfully unique version!

  • Cheese Swap: Replace cheddar with Monterey Jack for a milder, creamy flavor that melts beautifully and adds a different dimension.

  • Veggie Boost: Add broccoli or spinach for a nutritious pop of color and added texture, making your casserole not just hearty but also wholesome.

  • Turkey Twist: Use shredded leftover turkey instead of ham when transforming holiday remnants into a comforting dish that's equally satisfying.

  • Spicy Kick: Mix in some jalapeños or a dash of cayenne into the sauce for those who love a little heat in their comfort food.

  • Crispy Top: Top the casserole with panko breadcrumbs mixed with melted butter before baking, achieving a flaky, crispy layer that contrasts delightfully with the creamy filling.

  • Dairy-Free: Swap whole milk for almond milk and use a dairy-free cheese alternative for a lighter, dairy-free version without sacrificing creaminess.

  • Herb Infusion: Add some fresh thyme or rosemary into the mixture for a fragrant, herbal note that elevates the dish, adding a little earthiness that complements the ham beautifully.

  • Smoking it Up: If you enjoy a smoky flavor profile, incorporate a bit of smoked paprika into the sauce, enhancing the depth and comfort of this classic recipe.

By experimenting with these variations, you can customize your casserole to fit any palate or occasion. For more delicious inspirations, check out my Potato Blue Cheese or the fragrant Smoky Sweet Potatoes for additional tasty twists!

What to Serve with Creamy Leftover Ham and Potato Casserole

Elevate your dining experience with these delightful pairings that complement the flavors and textures of your hearty casserole.

  • Fresh Green Salad: A light and crisp salad with a tangy vinaigrette balances the richness, providing a refreshing contrast.

  • Roasted Broccoli: The garnish of caramelized edges adds a nutty flavor that pairs perfectly with the creamy casserole's texture.

  • Glazed Carrots: These naturally sweet, tender carrots bring a lovely taste, harmonizing beautifully with the savory ham.

  • Garlic Bread: Crunchy and buttery, garlic bread is perfect for soaking up the lovely creamy sauce left on your plate.

  • Steamed Asparagus: The slightly crunchy and fresh green spears offer a lightness that wonderfully complements the dish.

  • Sparkling Water with Lemon: This refreshing drink cleanses the palate, making every bite of your casserole even more enjoyable.

Imagine sitting down with these delightful sides at the table, creating a meal filled with love, laughter, and the comforting essence of home-cooked goodness.

Expert Tips for Ham Potato Casserole

  • Uniform Cuts: Ensure potato pieces are uniformly cut for even cooking. Test with a fork before adding cheese to avoid any undercooked bites.

  • Lump-Free Sauce: Cook the flour with butter properly to avoid lumpy sauce. Gradually whisk in the milk, letting it thicken slowly for a smooth finish.

  • Moisture Control: Avoid overcrowding the casserole dish, as it can lead to a watery texture. If the ham is moist, pat it dry before mixing.

  • Rest for Success: Let the casserole rest after baking for 10-15 minutes. This crucial step enhances the serving consistency of your Ham Potato Casserole.

  • Grease the Dish: To prevent sticking, ensure your baking dish is well-greased before adding the mixture. This will make cleanup much easier.

Ham Potato Casserole Recipe FAQs

What type of potatoes should I use for this casserole?
I recommend using russet or Yukon Gold potatoes. Russets provide a creamy texture, while Yukon Golds offer a lovely buttery flavor. Just be sure to cut them into uniform-sized cubes for even cooking.

How can I store leftovers from the Ham Potato Casserole?
You can refrigerate leftovers in an airtight container for up to 4 days. This will keep the casserole fresh and tasty. For longer storage, freeze it in portions for up to 3 months. Just make sure to wrap it tightly to prevent freezer burn!

Can I freeze the Ham Potato Casserole?
Absolutely! To freeze, let the casserole cool completely after baking, then portion it out into freezer-safe containers. Wrap each portion tightly with plastic wrap, then place it in a freezer bag. Label it with the date and it will be good for up to 3 months. When ready to enjoy, thaw it overnight in the fridge and reheat in the oven.

What should I do if my casserole turns out too watery?
If your Ham Potato Casserole is too watery, check if you're overcrowding the baking dish. This can happen if you add too many ingredients. Also, if your ham was overly moist, pat it dry before adding it to the casserole. Next time, try parboiling the potatoes a little less or ensuring they’re dry before combining.

Can I use vegetable substitutes in the casserole?
Very! You can definitely swap out ingredients to suit your tastes or dietary needs. For example, consider adding vegetables such as broccoli or spinach to boost nutrition. You could also substitute the ham with shredded turkey or even a mix of different meats!

Is this casserole suitable for specific dietary needs?
If you're cooking for someone with dietary restrictions, consider using gluten-free flour to thicken the sauce and lactose-free milk for a dairy-free version. Always double-check ingredient labels to ensure all components fit your guests' needs, especially with respect to allergies.

Ham Potato Casserole

Savory Ham Potato Casserole for Cozy Weeknight Comfort

This Ham Potato Casserole is a hearty comfort food that transforms leftovers into a crowd-pleasing meal.
Print Recipe Pin Recipe
Prep Time 15 minutes mins
Cook Time 45 minutes mins
Resting Time 15 minutes mins
Total Time 1 hour hr 15 minutes mins
Servings: 6 servings
Course: Dinner
Cuisine: American
Calories: 450
Ingredients Equipment Method Nutrition Notes

Ingredients
  

Casserole Base
  • 3 tablespoons Unsalted Butter Adds richness
  • 1 medium Chopped Onion Sauté until translucent
  • 3 cups Cubed Leftover Ham Cut into 1-inch pieces
  • 2.5 pounds Russet or Yukon Gold Potatoes Ensure uniform cubes
Sauce
  • 3 tablespoons All-Purpose Flour For thickening the sauce
  • 2 cups Whole Milk Whisk in gradually
  • 1 teaspoon Salt
  • 0.5 teaspoon Black Pepper
  • 0.5 teaspoon Ground Mustard
  • 0.5 teaspoon Garlic Powder
Topping
  • 8 ounces Shredded Cheddar Cheese Reserve some for topping

Equipment

  • Oven
  • Medium saucepan
  • large mixing bowl
  • Baking Dish
  • Knife
  • Cutting Board

Method
 

Instructions
  1. Preheat the oven to 350°F (175°C). Grease the baking dish with butter or cooking spray.
  2. Melt the butter in a medium saucepan over medium heat, then sauté the chopped onion until translucent (4-5 minutes).
  3. Cut the leftover ham into 1-inch cubes. Peel and cube the potatoes, then parboil them in boiling water for 5 minutes before draining.
  4. Sprinkle the flour over the sautéed onions and stir for 1 minute. Gradually whisk in the milk, cooking until thickened (5-7 minutes). Season with salt, pepper, mustard, and garlic powder.
  5. In a bowl, combine the ham, parboiled potatoes, and cheddar cheese. Pour the sauce over and stir to coat.
  6. Transfer the mixture to the baking dish, top with reserved cheese, and bake for 45 minutes until golden brown and bubbly.
  7. Let the casserole rest for 10-15 minutes before serving.

Nutrition

Serving: 1servingCalories: 450kcalCarbohydrates: 45gProtein: 30gFat: 20gSaturated Fat: 10gPolyunsaturated Fat: 1gMonounsaturated Fat: 1gCholesterol: 80mgSodium: 900mgPotassium: 800mgFiber: 4gSugar: 2gVitamin A: 500IUVitamin C: 20mgCalcium: 300mgIron: 3mg

Notes

Ensure potato pieces are uniformly cut for even cooking. Cover with foil while reheating to maintain moisture.

Tried this recipe?

Let us know how it was!

Savory Sourdough Discard Breakfast Pockets for Quick Mornings

January 26, 2026 by Grace Snow Leave a Comment

As I wandered through my kitchen one sunny morning, a delightful project sparked my imagination: Sourdough Discard Breakfast Pockets. These little pastries are the perfect way to turn kitchen scraps into a satisfying breakfast, reducing waste while treating yourself to a delicious morning meal. With a flaky crust cradling creamy cheese, fluffy scrambled eggs, and the option for crispy bacon or sausage, they’re not only quick to make but also a guaranteed crowd-pleaser. Plus, they can easily adapt to a gluten-free or vegetarian lifestyle! Are you ready to transform your morning routine with these savory pockets of goodness? Let’s dive in!

Why are Sourdough Discard Breakfast Pockets amazing?

Delightfully Quick: These breakfast pockets come together in no time, making them perfect for busy mornings. Waste Not, Want Not: Using sourdough discard creatively reduces kitchen waste while elevating your breakfast game. Savory Filling Options: With customizable fillings like cheese and bacon, there's something for everyone’s taste buds. Perfectly Portable: Enjoy them on-the-go or at home, serving as a versatile meal any time of day. Gluten-Free Friendly: Easy substitutions mean everyone can savor this delight, with options for gluten-free flour. Add a side of salsa or fresh fruit, and you have a breakfast that’s satisfying, quick, and delicious! For more breakfast inspiration, check out my delicious Cornbread Breakfast Casserole and Breakfast Egg Muffins.

Sourdough Discard Breakfast Pockets Ingredients

For the Dough

  • Sourdough Discard – This is the key ingredient that gives these pockets their unique flavor; make sure it’s not from an active starter for optimal texture.
  • All-Purpose Flour – Provides structure; for a gluten-free option, substitute with a gluten-free 1:1 flour blend while adjusting moisture as needed.
  • Salt – Enhances the overall flavor; use to taste.

For the Filling

  • Eggs – Essential for binding and protein; choose free-range for a richer taste.
  • Cheddar Cheese – Adds creaminess and flavor; swap it out for mozzarella or spicy pepper jack for a different experience.
  • Bacon or Sausage (optional) – Introduces savory depth; for a vegetarian version, use crumbled, cooked tofu instead.

Dive into making these delightful Sourdough Discard Breakfast Pockets, where every bite is bursting with flavor and purpose!

Step‑by‑Step Instructions for Sourdough Discard Breakfast Pockets

Step 1: Preheat the Oven
Begin by preheating your oven to 350°F (175°C). This ensures it’s hot enough to create that perfect golden crust on your Sourdough Discard Breakfast Pockets. While the oven warms up, gather your mixing bowls and a baking sheet lined with parchment paper to catch any drips and make cleanup easier.

Step 2: Prepare the Dough
In a large mixing bowl, combine your sourdough discard, all-purpose flour, and a pinch of salt. Stir until the mixture comes together, forming a soft dough. If the dough feels too sticky, add a bit more flour, ensuring it achieves a smooth, pliable texture that you can work with easily. This dough should not be overly wet.

Step 3: Roll Out the Dough
Lightly flour a clean surface or a silicone mat, then turn out your dough onto it. Using a rolling pin, roll the dough into a thickness of about ¼ inch. Aim for an even surface to ensure uniform cooking. Once rolled, use a sharp knife or a round cutter to slice it into squares or circles, depending on your preference for the Sourdough Discard Breakfast Pockets.

Step 4: Prepare the Filling
In a separate bowl, whisk together your eggs until combined, then scramble them in a hot skillet for about 2-3 minutes until just set but still soft. In the same bowl, mix in your cheese and any optional cooked bacon or sausage until everything is well combined. This mixture should look creamy and inviting, ready to be enveloped by the dough.

Step 5: Fill the Dough Pieces
Take each piece of your rolled dough and place a spoonful of the filling mixture in the center. Be careful not to overfill, or the pockets may burst while baking. Gently fold the dough over the filling, creating a half-moon shape if using circles, or fold the corners toward the center for squares.

Step 6: Seal the Edges
Using your fingers or a fork, pinch the edges of the dough firmly to seal them. This step is crucial for ensuring no filling escapes while baking your Sourdough Discard Breakfast Pockets. Take a moment to check that each pocket is securely closed, creating beautifully compact pastries.

Step 7: Bake Until Golden Brown
Place the filled pockets on your prepared baking sheet, ensuring they have a little space between them. Slide the tray into your preheated oven and bake for 20-25 minutes, or until they turn a lovely golden brown. Keep an eye on them toward the end of baking to avoid over-browning, as you want a crispy exterior.

Step 8: Cool and Serve
Once baked to perfection, remove the Sourdough Discard Breakfast Pockets from the oven and let them cool slightly on the baking sheet. This cooling period helps the filling settle and reduces the risk of burns. Serve warm, perhaps with a side of salsa or fresh fruit for a delightful breakfast experience.

Sourdough Discard Breakfast Pockets: Variations

Feel free to add your personal touch to these breakfast pockets, creating a delightful experience tailored just for you.

  • Cheese Swap: Replace cheddar with mozzarella or pepper jack for a cheesy twist. Each cheese brings a unique flavor, elevating your morning treat.

  • Veggie Boost: Incorporate diced vegetables like spinach, bell peppers, or even sautéed mushrooms for added nutrition and color. Your pockets will burst with flavors that are refreshing and comforting!

  • Vegetarian Delight: Omit bacon or sausage entirely, embracing a vegetarian option of just eggs and cheese. This clean, simple filling allows the sourdough flavor to shine through.

  • Bold Spices: Sprinkle in some spices like smoked paprika or chili flakes into your filling for a kick of heat. The warmth of spices can awaken your taste buds and energize your morning.

  • Herbed Goodness: Add fresh herbs like chives, parsley, or cilantro to your filling mix. Fresh herbs can elevate the overall taste with an aromatic flair that feels like a garden in your mouth.

  • Gluten-Free Option: Opt for a gluten-free 1:1 flour blend in place of all-purpose flour. Keep an eye on moisture levels, as they might vary. This way, everyone can savor the deliciousness!

  • Sweet Variation: Consider a sweet version by filling the pockets with cream cheese, fruit preserves, or even Nutella. Perfect for a breakfast treat or brunch.

  • Delicious Dipping: Serve with a side of spicy salsa or a zesty avocado sauce for dunking. The added layer of flavor will have everyone reaching for seconds!

If you are still looking for breakfast ideas, don’t forget to explore my delightful Breakfast Egg Muffins or try a fun twist with a Breakfast Banana Split. Enjoy your culinary adventure!

Make Ahead Options

These Sourdough Discard Breakfast Pockets are a perfect candidate for meal prep, allowing you to enjoy a delicious breakfast with minimal morning fuss! You can prepare the dough up to 24 hours in advance; simply wrap it tightly and refrigerate to keep it fresh and pliable. Additionally, you can mix the filling (eggs, cheese, and bacon or sausage) up to 3 days ahead. Store it in an airtight container in the fridge to maintain its creamy texture and prevent dryness. When you’re ready to eat, simply assemble the pockets and bake as directed for just as delicious results, saving you time on busy mornings!

What to Serve with Savory Sourdough Discard Breakfast Pockets

Start your day right by complementing these delicious breakfast pockets with delightful sides and drinks that elevate your morning experience.

  • Fresh Fruit Salad: A refreshing mix of seasonal fruits adds sweetness and brightness, balancing the savory pockets beautifully.

  • Creamy Avocado Toast: The rich creaminess of avocado pairs well with the crispy pockets, offering a satisfying contrast of textures.

  • Zesty Salsa: A side of homemade or store-bought salsa provides a tangy kick that enhances the flavors in every bite.

  • Crispy Hash Browns: These give a delightful crunch and are a classic morning staple that everyone loves, rounding out the meal perfectly.

  • Herbed Yogurt Dip: A dollop of seasoned Greek yogurt adds creaminess and a herby flavor that complements the savory filling beautifully.

  • Hot Coffee or Tea: Pair your breakfast pockets with a warm beverage to start your day energized and full of flavor, setting the mood for a cozy morning.

  • Peach or Mango Smoothie: For a fruity drink option, blend up a smoothie for a refreshing, nutritious boost alongside your savory pockets.

  • Homemade Granola Bars: An easy, sweet treat to enjoy later, granola bars add a wholesome touch to your breakfast spread.

Elevate your breakfast experience and please your palate with these delightful pairings!

Expert Tips for Sourdough Discard Breakfast Pockets

  • Dough Consistency: Use sourdough discard that’s not from an active starter; this ensures proper texture. Active starter may require additional flour for balance.

  • Filling Balance: Avoid overfilling your pockets; excess filling can cause them to burst during baking. A generous spoonful is just right!

  • Cooling Time: Allow the pockets to cool for a few minutes before serving. This prevents burns and helps the flavors settle nicely.

  • Gluten-Free Tips: If using gluten-free flour, remember that the texture may differ. Adjust moisture as needed to achieve a similar consistency.

  • Flavor Variations: Experiment with different cheeses or add vegetables like spinach for extra nutrition. Customizing can keep the Sourdough Discard Breakfast Pockets exciting!

Storage Tips for Sourdough Discard Breakfast Pockets

  • Room Temperature: Enjoy freshly baked breakfast pockets at room temperature for up to 2 hours. Make sure they don’t sit out longer to maintain their quality.

  • Fridge: Store any leftovers in an airtight container in the refrigerator for up to 3 days. This keeps them fresh and ready for a quick breakfast!

  • Freezer: For longer storage, freeze the unbaked breakfast pockets on a baking sheet, then transfer to a freezer bag for up to 3 months. Thaw overnight in the fridge before baking.

  • Reheating: Reheat baked pockets in the oven at 350°F (175°C) for about 10-15 minutes until warmed through. They’ll taste just as delicious as the day they were made!

Sourdough Discard Breakfast Pockets Recipe FAQs

What is the best way to select sourdough discard for this recipe?
Absolutely! The best sourdough discard for your breakfast pockets should be from a non-active starter. Look for a thicker, pasty consistency without any rising bubbles. If it has dark spots or an off smell, it’s best to discard it and start fresh. This helps achieve the right dough texture and flavor for your breakfast pockets.

How should I store leftover Sourdough Discard Breakfast Pockets?
For sure! Store any leftover breakfast pockets in an airtight container in the refrigerator for up to 3 days. They’ll remain fresh and ready for a quick meal. Make sure to let them cool completely before sealing to prevent moisture buildup, which can lead to sogginess!

Can I freeze Sourdough Discard Breakfast Pockets?
Yes, you can! For optimal freezing, prepare your pockets but do not bake them. Place them on a baking sheet in the freezer until firm, then transfer them to a freezer-safe bag for up to 3 months. When you’re ready to enjoy, simply thaw them overnight in the fridge and bake as directed for that fresh, crispy goodness.

What should I do if my dough is too sticky or dry?
Very good question! If your dough feels too sticky, add a tablespoon of flour at a time until it reaches a smooth, workable consistency. On the other hand, if it's too dry, you can add a teaspoon of water or an additional egg, mixing well until the dough becomes pliable. It's all about finding that perfect balance, so don’t hesitate to adjust as needed!

Are there any specific dietary considerations for this recipe?
Absolutely! This recipe can easily be adapted for different dietary needs. For a gluten-free option, simply substitute the all-purpose flour with a gluten-free 1:1 baking blend, making sure to adjust moisture based on the flour type. If allergies are a concern, use dairy-free cheese and omit meat fillings to accommodate vegetarians or those with dietary restrictions. Make these pockets your own!

Can I use other vegetables or fillings besides cheese and bacon?
The more the merrier! You can certainly customize the fillings to suit your tastes. Try adding sautéed vegetables like spinach, bell peppers, or mushrooms for extra nutrition. If you're feeling adventurous, consider using different cheeses for diverse flavor profiles, or even adding herbs for that fresh taste. The sky's the limit—make it your breakfast adventure!

Sourdough Discard Breakfast Pockets

Savory Sourdough Discard Breakfast Pockets for Quick Mornings

Transform kitchen scraps into delicious Sourdough Discard Breakfast Pockets for a quick and satisfying breakfast.
Print Recipe Pin Recipe
Prep Time 10 minutes mins
Cook Time 25 minutes mins
Cooling Time 5 minutes mins
Total Time 40 minutes mins
Servings: 4 pockets
Course: Breakfast
Cuisine: American
Calories: 250
Ingredients Equipment Method Nutrition Notes

Ingredients
  

For the Dough
  • 1 cup Sourdough Discard Not from an active starter
  • 2 cups All-Purpose Flour Substitute with gluten-free flour for a gluten-free option
  • 1 tsp Salt Use to taste
For the Filling
  • 4 large Eggs Free-range recommended
  • 1 cup Cheddar Cheese Can substitute with mozzarella or pepper jack
  • 1 cup Bacon or Sausage Optional, substitute with cooked tofu for vegetarian

Equipment

  • Mixing bowls
  • Baking Sheet
  • Rolling Pin
  • Skillet
  • Sharp Knife

Method
 

Step-by-Step Instructions
  1. Preheat your oven to 350°F (175°C).
  2. Combine sourdough discard, all-purpose flour, and salt in a large bowl to form a soft dough.
  3. Roll out the dough to about ¼ inch thick and cut into squares or circles.
  4. Scramble the eggs in a skillet and mix in the cheese and optional meat.
  5. Place a spoonful of filling in the center of each dough piece and fold to seal.
  6. Bake the filled pockets on a baking sheet for 20-25 minutes until golden brown.
  7. Cool slightly before serving with salsa or fresh fruit.

Nutrition

Serving: 1pocketCalories: 250kcalCarbohydrates: 28gProtein: 10gFat: 12gSaturated Fat: 6gPolyunsaturated Fat: 1gMonounsaturated Fat: 5gCholesterol: 90mgSodium: 450mgPotassium: 150mgFiber: 1gSugar: 1gVitamin A: 500IUCalcium: 200mgIron: 1mg

Notes

Customize with different fillings or adjust for gluten-free options. Ensure not to overfill the pockets to prevent bursting.

Tried this recipe?

Let us know how it was!

Savory Easy Spinach Cottage Cheese Flagels for Wholesome Snacking

January 26, 2026 by Grace Snow Leave a Comment

As I pulled a batch of Easy Spinach Cottage Cheese Flagels from the oven, the cozy, savory scent danced through my kitchen, instantly making my mouth water. These delightful treats are a fantastic blend of creamy cottage cheese and fresh baby spinach, and they come together in no time—a perfect solution for anyone seeking a quick and nutritious breakfast or snack. What I love most is their versatility; whether served warm smothered in cream cheese or enjoyed alongside a hearty salad, they’re packed with protein and cater to a vegetarian lifestyle. Plus, with options for gluten-free substitutes, these flagels are an inclusive delight. Curiosity piqued? Let’s dive into how to make these scrumptious morsels that will elevate your homemade snack game!

Why are Easy Spinach Cottage Cheese Flagels a Must-Try?

Wholesome and nutritious, these flagels pack a protein punch, making them a fulfilling snack or breakfast option. Flexible in flavor, you can easily swap ingredients like mozzarella for feta or try gluten-free flour variations for your dietary needs. Quick to prepare, you'll have fresh, warm flagels ready in just about 30 minutes. Crowd-pleasing at any gathering, pair them with your favorite dips for a fantastic treat. If you're looking for more unique recipes, try my Chickpea Spinach Curry or a refreshing Jello Salad Cottage!

Easy Spinach Cottage Cheese Flagels Ingredients

Get ready to whip up these delightful flagels with this essentials list!

For the Dough
• Cottage Cheese – Provides creaminess and protein; use full-fat for a richer flavor.
• Olive Oil – Adds moisture and richness; can be substituted with avocado oil for healthier fats.
• Egg – Binds the ingredients together, adding structure; for a vegan option, use ground flaxseed mixed with water.
• All-Purpose Flour – Gives structure to the flagels; substitute with almond flour for a gluten-free version.
• Baking Powder – Ensures the dough rises properly; make sure it’s fresh for optimal results.
• Salt – Enhances the flavors; opt for sea salt for better taste.

For the Flavor
• Baby Spinach – Offers nutrition and a mild flavor; can be substituted with finely chopped kale for variety.
• Shredded Mozzarella Cheese – Adds gooey texture; substitute with feta for a tangier flavor.

These Easy Spinach Cottage Cheese Flagels are perfect for a satisfying snack at any time of the day!

Step‑by‑Step Instructions for Easy Spinach Cottage Cheese Flagels

Step 1: Prep Dough
In a large mixing bowl, combine 1 cup of creamy cottage cheese, 2 tablespoons of olive oil, and 1 egg. Using a fork or whisk, blend the ingredients until just smooth and fully incorporated. This mixture should be creamy without any lumps. Set aside while you prepare the dry ingredients, ensuring it remains creamier than thick.

Step 2: Combine Dry Ingredients
In a separate bowl, whisk together 1 cup of all-purpose flour, 1 tablespoon of baking powder, and half a teaspoon of salt. This step is crucial as it allows for even distribution of the leavening agent and flavoring. Make sure there are no clumps and that the mixture feels light and fluffy. Having a well-mixed blend sets the foundation for your Easy Spinach Cottage Cheese Flagels.

Step 3: Mix Ingredients
Gradually add the dry mixture into the wet cottage cheese blend. Stir gently until just combined to form a soft, cohesive dough. Be careful not to overmix, as this can lead to denser flagels. Aim for a soft, slightly sticky texture that still holds its shape; you can use a spatula or your hands for a better feel.

Step 4: Fold in Spinach and Cheese
Gently fold in 1 cup of chopped baby spinach and 1 cup of shredded mozzarella cheese into the dough mixture. Use a spatula or your hands to ensure the greens and cheese are evenly distributed throughout. The vibrant spinach should be visible within the dough, and the cheese will add delightful gooeyness to each bite.

Step 5: Shape Flagels
Preheat your oven to 400°F (200°C). On a parchment-lined baking sheet, take portions of dough and shape them into bagel-like rounds, creating a hole in the center of each. Make sure they're about 2 inches thick for a fluffy texture. Place them evenly spaced on the sheet, as they will expand slightly while baking.

Step 6: Bake
Place the baking sheet in your preheated oven and bake the flagels for about 15 minutes, or until they turn a lovely golden brown on the top. Keep an eye on them towards the end, as the perfect flagels will be crisp on the outside yet fluffy on the inside. The delicious aroma will fill your kitchen as they cook.

Step 7: Cool
Once baked, remove the flagels from the oven and allow them to cool slightly on a wire rack for 5 minutes. This will help them firm up a bit, making them easier to handle. Enjoy these warm with your favorite spreads, as the Easy Spinach Cottage Cheese Flagels are best served fresh.

Expert Tips for Easy Spinach Cottage Cheese Flagels

  • Fresh Ingredients Matter: Always use fresh spinach and baking powder for the best flavor and rise. Stale ingredients can lead to disappointing results.

  • Dough Consistency: If your dough feels too sticky, sprinkle in a bit more flour gradually. Avoid overworking the dough to keep your flagels fluffy.

  • Baking Time Awareness: Keep a close eye on baking time; overbaking can result in dry flagels. Look for a golden-brown color to achieve the perfect texture.

  • Cool Properly: Allow the flagels to rest on a wire rack to avoid steamy bottoms, ensuring they maintain their delightful crunch when cooled.

  • Storage Tips: Store your Easy Spinach Cottage Cheese Flagels in an airtight container in the fridge for up to 3 days. Reheat in the oven for best results.

Make Ahead Options

These Easy Spinach Cottage Cheese Flagels are a fantastic choice for busy home cooks looking to save time! You can prepare the dough up to 24 hours in advance by mixing the wet and dry ingredients and then refrigerating it in an airtight container. When ready to bake, allow the dough to sit at room temperature for about 15 minutes before shaping and baking. Additionally, you can shape the flagels and place them on a parchment-lined baking sheet, cover with plastic wrap, and refrigerate for up to 3 days. When you’re ready to enjoy, just pop them in the oven straight from the fridge (adjusting the baking time slightly if needed) for those same delightful, restaurant-quality results!

Storage Tips for Easy Spinach Cottage Cheese Flagels

  • Fridge: Store your flagels in an airtight container for up to 3 days. They will remain tasty and ready for snacking or breakfast!

  • Freezer: To freeze, tightly wrap each flagel in plastic wrap, then place them in a freezer-safe bag. They can be stored for up to 3 months.

  • Reheating: When you're ready to enjoy them, reheat in the oven at 350°F (175°C) for about 10 minutes, ensuring they regain their lovely crispiness.

  • Room Temperature: While not recommended for long-term storage, these flagels can be left out for a few hours during gatherings. Just be sure they’re covered to maintain freshness.

Easy Spinach Cottage Cheese Flagels Variations

Let your creativity shine in the kitchen by personalizing your flagels with these delicious twists!

  • Cheese Swap: Substitute mozzarella with sharp cheddar or tangy goat cheese for a new flavor profile. The choice of cheese can significantly alter the taste, so don’t hesitate to experiment!

  • Herb Infusion: Add fresh herbs like dill or chives to the dough for a fragrant enhancement. The herbal notes will elevate the flavors and bring freshness to each bite.

  • Mediterranean Style: Mix in sun-dried tomatoes or olives for a delightful Mediterranean twist. This adds a burst of flavor and transforms your flagels into a more exotic snack.

  • Sweet Brunch Treat: Turn these savory bites into a sweet option by adding honey and apple slices. This variation works beautifully for brunch and pairs perfectly with a warm cup of tea.

  • Green Variety: Experiment with greens by substituting baby spinach with finely chopped kale or Swiss chard. Each green will bring its unique taste and texture to the flagels, keeping things exciting!

  • Gluten-Free Option: For those avoiding gluten, replace all-purpose flour with almond flour. You’ll enjoy a nutty flavor and a lovely texture suitable for gluten-sensitive diets.

  • Spicy Kick: Add a pinch of cayenne pepper or red pepper flakes for some heat. This variation brings a warming spice that plays well with the creamy cheese.

  • Savory Veggie Add-ins: Why not incorporate finely diced bell peppers or sautéed mushrooms? They’ll add moisture and depth, making your flagels even heartier.

Each of these variations helps to create a unique dish that reflects your personal taste—even pairing beautifully with a refreshing Jello Salad Cottage for a delightful meal! Enjoy experimenting!

What to Serve with Easy Spinach Cottage Cheese Flagels

There’s nothing quite like finding the perfect accompaniments to elevate your homemade flagels into an unforgettable meal experience.

  • Creamy Hummus: This dip adds a layer of rich flavor, perfectly complementing the cheesy notes of the flagels without overwhelming them.
  • Fresh Garden Salad: A medley of crisp greens and vibrant veggies balances the dense texture of the flagels while adding a fresh crunch.
  • Tzatziki Sauce: The cool, creamy yogurt-based sauce makes for an ideal dip, bringing a refreshing burst that harmonizes beautifully with each bite.
  • Roasted Vegetables: Seasoned and caramelized veggies provide an earthy contrast that enhances the flagels' cheesy goodness while adding nutrients.
  • Fruit Smoothie: A deliciously fruity beverage can brighten your meal; consider a berry smoothie for a sweet contrast that complements the savory flavors.
  • Soft Scrambled Eggs: Adding fluffy eggs makes for a satisfying breakfast option, ensuring your plate is packed with protein for a hearty start to the day.

Pairing your Easy Spinach Cottage Cheese Flagels with these delightful options not only enhances their flavor but also creates a fulfilling, well-rounded meal that brings warmth and joy to your dining table.

Easy Spinach Cottage Cheese Flagels Recipe FAQs

How do I choose the best spinach for my flagels?
Absolutely! When selecting spinach, look for vibrant, crisp leaves with no dark spots or wilting. Baby spinach is ideal for its mild flavor and tenderness, but if you can find it, young greens can really make your flagels shine. Avoid any bags that show signs of sliminess; freshness is key!

What’s the best way to store leftover flagels?
You can store your Easy Spinach Cottage Cheese Flagels in an airtight container in the fridge for up to 3 days. Make sure they’re completely cooled before sealing! For a quick reheating, pop them in your oven at 350°F (175°C) for about 10 minutes to get that delightful crunch back.

Can I freeze the flagels for later enjoyment?
Absolutely! To freeze, wrap each flagel tightly in plastic wrap and place them in a freezer-safe bag. They’ll stay fresh for up to 3 months! When you’re ready to enjoy, simply reheat them from frozen at 350°F (175°C) for about 10-15 minutes, allowing them to regain their crispy exterior.

What if my dough is too sticky while mixing?
If your dough feels too sticky, no worries! Just sprinkle in more flour, a tablespoon at a time, until the dough becomes manageable. Be careful not to overwork it, as this can lead to denser flagels. You want a soft, slightly sticky consistency that still holds its shape beautifully!

Are the flagels suitable for those with dietary restrictions?
Yes, indeed! These Easy Spinach Cottage Cheese Flagels can be tailored for various dietary needs. For a gluten-free option, substitute all-purpose flour with almond flour or a gluten-free blend. If you're avoiding eggs, replace the egg with 1 tablespoon of ground flaxseed mixed with 2.5 tablespoons of water and allow it to sit for a few minutes until it thickens.

Can I use different types of cheese in my flagels?
Very much so! If you're looking to switch things up, you can replace mozzarella with sharp cheddar for a different zest or crumbled feta for that tangy twist. Feel free to experiment—this recipe is incredibly flexible to your taste preferences!

Easy Spinach Cottage Cheese Flagels

Savory Easy Spinach Cottage Cheese Flagels for Wholesome Snacking

Easy Spinach Cottage Cheese Flagels are a delicious, nutritious snack packed with protein and flavor.
Print Recipe Pin Recipe
Prep Time 15 minutes mins
Cook Time 15 minutes mins
Cooling Time 5 minutes mins
Total Time 35 minutes mins
Servings: 4 flagels
Course: Breakfast
Cuisine: Vegetarian
Calories: 200
Ingredients Equipment Method Nutrition Notes

Ingredients
  

For the Dough
  • 1 cup Cottage Cheese Use full-fat for richer flavor.
  • 2 tablespoons Olive Oil Can be substituted with avocado oil.
  • 1 large Egg For a vegan option, use ground flaxseed mixed with water.
  • 1 cup All-Purpose Flour Substitute with almond flour for gluten-free.
  • 1 tablespoon Baking Powder Ensure it’s fresh for optimal results.
  • 0.5 teaspoon Salt Opt for sea salt for better taste.
For the Flavor
  • 1 cup Baby Spinach Can be substituted with finely chopped kale.
  • 1 cup Shredded Mozzarella Cheese Substitute with feta for a tangier flavor.

Equipment

  • Mixing Bowl
  • Whisk
  • Parchment Paper
  • Baking Sheet

Method
 

Step-by-Step Instructions
  1. In a large mixing bowl, combine cottage cheese, olive oil, and egg. Mix until smooth.
  2. In a separate bowl, whisk together all-purpose flour, baking powder, and salt.
  3. Gradually add the dry mixture into the wet ingredients, stirring until just combined.
  4. Fold in baby spinach and shredded mozzarella until evenly distributed.
  5. Preheat oven to 400°F (200°C). Shape the dough into bagel-like rounds with a hole in the center.
  6. Bake for about 15 minutes or until golden brown on top.
  7. Cool slightly on a wire rack for 5 minutes before serving.

Nutrition

Serving: 1flagelCalories: 200kcalCarbohydrates: 20gProtein: 10gFat: 8gSaturated Fat: 3gPolyunsaturated Fat: 1gMonounsaturated Fat: 4gCholesterol: 40mgSodium: 300mgPotassium: 200mgFiber: 2gSugar: 1gVitamin A: 500IUVitamin C: 10mgCalcium: 150mgIron: 1mg

Notes

Store in an airtight container in the fridge for up to 3 days. Reheat in the oven for best results.

Tried this recipe?

Let us know how it was!

Biscuits and Gravy Breakfast Casserole: Comfort in Every Bite

January 26, 2026 by Grace Snow Leave a Comment

Every Sunday morning, the comforting scent of sausage sizzling in the skillet fills my kitchen, hinting at the deliciousness to come. Today, I'm excited to share my Biscuits and Gravy Breakfast Casserole, a perfect blend of flaky buttermilk biscuits, savory sausage, and creamy gravy that will transport your taste buds straight to the South! This crowd-pleaser not only offers an effortless, make-ahead solution for busy mornings, but it’s also perfect for gathering friends and family around the table for a cozy brunch. Imagine serving this golden, bubbly casserole that’s as fulfilling to make as it is to enjoy. Are you ready to whip up a dish that brings everyone together?

Why is this casserole a must-try?

Comforting, homestyle flavors: This Biscuits and Gravy Breakfast Casserole wraps you in a warm embrace of Southern goodness.
Make-ahead convenience: Prepare this dish the night before, saving time on busy mornings with a quick bake!
Crowd-pleaser: Ideal for brunch gatherings, it'll have everyone asking for seconds—perfect for large families or friends.
Versatile options: Customize with your favorite proteins or add veggies for a nutritious twist. You might also enjoy serving it alongside Breakfast Egg Muffins for an even more delightful brunch spread!
Easy to follow: The straightforward instructions make it a cinch to prepare—no gourmet skills required!

Biscuits and Gravy Breakfast Casserole Ingredients

• Get ready to create a comforting masterpiece!

For the Casserole

  • Refrigerated Buttermilk Biscuits – These form the buttery, flaky base of your casserole. Substitution: Homemade biscuits can work if you pre-bake them slightly.
  • Ground Breakfast Sausage – Adds a savory, hearty flavor; choose regular or spicy for an extra kick. Substitution: Try turkey sausage for a lighter take.
  • All-Purpose Flour – Essential for thickening the gravy to a creamy consistency. Note: A must for achieving that perfect gravy texture.
  • Whole Milk – This enriches the gravy; low-fat versions can be substituted for a lighter dish. Note: Vital for the dish’s overall flavor and texture.
  • Large Eggs – Provide structure and a lovely fluffiness throughout the casserole. Usage note: Remember to whisk well for even egg distribution.
  • Shredded Cheddar Cheese (optional) – Adds extra richness and flavor to the dish. Substitution: Switch to pepper jack cheese for a spicy kick.
  • Salt and Pepper – Essential seasonings that enhance every bite; adjust according to your taste preferences.

For the Gravy

  • Cooking Oil – Use in the skillet for cooking sausage and preventing sticking. Alternative: Butter can be used for a richer flavor.
  • Seasonings (Optional) – Additional spices such as garlic powder or crushed red pepper can provide a delightful twist to the gravy.

Step‑by‑Step Instructions for Biscuits and Gravy Breakfast Casserole

Step 1: Preheat Oven
Begin by preheating your oven to 350°F (175°C). While the oven warms up, prepare a 9x13-inch baking dish by spraying it generously with nonstick spray to ensure easy removal of the casserole later.

Step 2: Cook Sausage
In a large skillet over medium heat, crumble and brown the ground breakfast sausage. Allow it to cook for about 5–7 minutes until fully browned and no pink remains, stirring occasionally to ensure even cooking. The savory aroma will start to fill your kitchen.

Step 3: Make Gravy
Sprinkle the all-purpose flour over the cooked sausage and stir well for about a minute to incorporate. Gradually whisk in the whole milk, allowing the mixture to simmer on low heat. Keep stirring until the gravy thickens, about 3–5 minutes, seasoning with salt and pepper to taste for that perfect savory balance.

Step 4: Prepare Biscuits
While the gravy simmers, take the refrigerated buttermilk biscuits and cut them into quarters. Arrange the biscuit pieces evenly across the prepared baking dish, creating a cozy base for your Biscuits and Gravy Breakfast Casserole.

Step 5: Assemble Casserole
Pour the thickened sausage gravy evenly over the biscuit pieces, ensuring each one gets a generous share. In a separate bowl, whisk together the large eggs and a splash of milk, seasoning the mixture with salt and pepper. Pour this egg mixture over the top, allowing it to seep into the gaps.

Step 6: Bake
Slide the assembled casserole into the preheated oven. Bake uncovered for about 35–40 minutes until the egg is set and the top is beautifully golden and bubbly. Keep an eye on it during the last few minutes for that perfect visual cue of doneness.

Step 7: Cool and Serve
Once out of the oven, let the Biscuits and Gravy Breakfast Casserole cool for 5–10 minutes. This resting period allows the flavors to meld beautifully. Slice into squares and serve warm, sharing this delicious comfort food with your loved ones.

Biscuits and Gravy Breakfast Casserole Variations

Feel free to unleash your creativity in the kitchen with these delightful twists that add a personal touch to your dish!

  • Veggie-Packed: Add sautéed mushrooms, bell peppers, or spinach for a nutritious boost. They bring a fresh essence that beautifully complements the casserole's richness.

  • Dairy-Free Delight: Substitute whole milk with almond or oat milk to cater to dairy sensitivities. This swap maintains creaminess while accommodating a wider audience.

  • Spicy Kick: Incorporate diced jalapeños or a splash of hot sauce for those who enjoy extra heat. This can transform your dish into a fiery feast that sparks joy in each bite!

  • Gluten-Free: Use gluten-free biscuits and a gluten-free all-purpose flour blend for a fabulous gluten-free option. Your guests won’t even miss the traditional ingredients with such great flavor in every mouthful!

  • Cheesy Variations: Swap cheddar cheese for pepper jack for a spicy twist or try feta for a Mediterranean vibe. Each cheese will offer a unique flavor profile, making every serving a new adventure.

  • Herb Infusion: Fresh herbs such as chives, thyme, or parsley can elevate the flavors of the casserole. Their aromatic delight makes each bite more vibrant and comforting.

  • Savory Add-Ins: Consider using bacon or ham for a hearty touch. The additional savory elements bring a depth of flavor that transforms your casserole into a sumptuous experience.

  • Breakfast Protein: Incorporate cooked and crumbled breakfast sausage with turkey sausage for a lighter option. This slight change can cater to different dietary preferences without compromising taste.

These variations invite you to explore the versatility of your Biscuits and Gravy Breakfast Casserole. If you’re looking to pair it with something else, why not try it alongside some Breakfast Banana Split for a sweet finish, or Sweet Potato Casserole for a wholesome contrast? Let your culinary imagination soar!

Make Ahead Options

These Biscuits and Gravy Breakfast Casserole are perfect for meal prep enthusiasts! You can prepare the entire casserole up to 24 hours in advance, making your busy mornings a breeze. Simply follow the assembly instructions, cover the dish tightly with plastic wrap, and refrigerate overnight. This way, the biscuits will soak up the savory gravy flavors, enhancing the final dish. When you're ready to serve, simply bake it straight from the fridge, adding an extra 5-10 minutes to the cooking time to ensure it’s heated through. By prepping this cozy meal ahead, you'll ensure that breakfast is just as delicious, all while saving precious time during your hectic mornings!

Storage Tips for Biscuits and Gravy Breakfast Casserole

Fridge: Store leftovers in an airtight container for up to 4 days. Make sure it cools completely before sealing to maintain its freshness.

Freezer: Freeze individual portions in airtight containers or freezer-safe bags for up to 3 months. Thaw overnight in the fridge before reheating.

Reheating: To reheat, place the casserole in the oven at 350°F (175°C) until warmed through, about 15–20 minutes. Add a splash of milk before warming for extra creaminess.

Make-Ahead: This Biscuits and Gravy Breakfast Casserole can be assembled the night before. Keep it covered and in the refrigerator, and simply bake it fresh in the morning!

Expert Tips for Biscuits and Gravy Breakfast Casserole

  • Keep It Fluffy: Avoid overbaking the casserole; check for doneness at 35 minutes to ensure that the eggs remain soft and fluffy.
  • Add Flavorful Veggies: Consider adding sautéed vegetables like bell peppers or onions to enhance both nutrition and flavor in your Biscuits and Gravy Breakfast Casserole.
  • Cold Gravy Trick: If making ahead, let the gravy cool before pouring it over the biscuits. This will help it distribute evenly, preventing soggy spots.
  • Don’t Rush the Cool: Allow the casserole to stand for 5–10 minutes post-baking. This will ensure cleaner slices and allow flavors to meld beautifully.
  • Experiment with Cheese: For an extra kick of flavor, try substituting cheddar with pepper jack cheese, introducing a delightful spice to your dish!

What to Serve with Biscuits and Gravy Breakfast Casserole

Imagine welcoming the day with deliciously warm plates perfectly paired with your casserole masterpiece.

  • Fresh Fruit Salad: A light and refreshing side that adds a vibrant contrast to rich flavors, lifting the overall meal experience.

  • Crispy Bacon: Salty and savory, crispy bacon brings an irresistible crunch that beautifully complements the soft textures of the casserole.

  • Sautéed Spinach: Vibrant green sautéed spinach enhances nutrition while its earthy flavor balances the dish’s richness, making each bite more wholesome.

  • Homefries: These crispy, seasoned potatoes add a hearty element to your brunch spread, rounding out the meal with satisfying crunch.

  • Homemade Biscuits: Serve alongside extra biscuits, inviting guests to indulge in seconds and soak up the savory gravy.

  • Orange Juice Mimosa: A bubbly citrus drink that adds a touch of elegance to your brunch, its refreshing notes brighten the rich flavors of the casserole.

  • Maple Syrup Drizzle: For an unexpected hint of sweetness, a drizzle of maple syrup across a slice brings delightful balance to every savory bite.

  • Coffee or Tea: Pairing your meal with a hot cup of coffee or herbal tea offers a cozy finishing touch, enhancing the warmth of your gathering.

Biscuits and Gravy Breakfast Casserole Recipe FAQs

How do I choose the right biscuits for the casserole?
For the best results, opt for refrigerated buttermilk biscuits as they are buttery and flaky, providing a strong base. If you're feeling adventurous, homemade biscuits work wonderfully too—just make sure to pre-bake or par-bake them slightly for perfect texture.

How should I store leftover Biscuits and Gravy Breakfast Casserole?
Store any leftovers in an airtight container in the fridge, where they’ll keep well for up to 4 days. Make sure the casserole has cooled completely before sealing it. You can also add a splash of milk while reheating to ensure it stays creamy!

Can I freeze this casserole, and if so, how?
Absolutely! To freeze your Biscuits and Gravy Breakfast Casserole, cut it into individual portions and place them in airtight containers or freezer-safe bags. It’s best to freeze it as soon as it cools. For the best flavor, consume within 3 months. Thaw overnight in the fridge when you're ready to enjoy a slice!

What should I do if my gravy is too thick?
If you find your gravy has turned out too thick, don’t fret! Simply whisk in a bit more milk over low heat until it reaches your desired consistency. You can also add a dash of chicken broth for an extra flavor boost. Just remember to adjust the seasoning accordingly.

Are there any dietary considerations I should keep in mind?
Yes, when making the Biscuits and Gravy Breakfast Casserole, consider dietary restrictions by offering alternatives like turkey sausage for a leaner option or swapping regular milk with almond milk for a dairy-free variation. Always check labels for allergens if serving to guests with food sensitivities.

Biscuits and Gravy Breakfast Casserole

Biscuits and Gravy Breakfast Casserole: Comfort in Every Bite

A delightful Biscuits and Gravy Breakfast Casserole that combines flaky biscuits, savory sausage, and creamy gravy for a perfect brunch.
Print Recipe Pin Recipe
Prep Time 15 minutes mins
Cook Time 40 minutes mins
Cooling Time 10 minutes mins
Total Time 1 hour hr 5 minutes mins
Servings: 8 slices
Course: Breakfast
Cuisine: Southern
Calories: 360
Ingredients Equipment Method Nutrition Notes

Ingredients
  

For the Casserole
  • 1 can Refrigerated Buttermilk Biscuits Substitution: Homemade biscuits can work if you pre-bake them slightly.
  • 1 lb Ground Breakfast Sausage Choose regular or spicy for an extra kick. Substitution: Try turkey sausage for a lighter take.
  • 1/4 cup All-Purpose Flour A must for achieving that perfect gravy texture.
  • 2 cups Whole Milk Vital for the dish’s overall flavor and texture.
  • 4 large Large Eggs Remember to whisk well for even egg distribution.
  • 1 cup Shredded Cheddar Cheese Substitution: Switch to pepper jack cheese for a spicy kick.
  • to taste Salt Essential seasonings that enhance every bite.
  • to taste Pepper Essential seasonings that enhance every bite.
For the Gravy
  • 2 tbsp Cooking Oil Alternative: Butter can be used for a richer flavor.
  • to taste Seasonings (Optional) Additional spices such as garlic powder or crushed red pepper can provide a delightful twist to the gravy.

Equipment

  • 9x13-inch baking dish
  • Large skillet

Method
 

Step-by-Step Instructions
  1. Preheat your oven to 350°F (175°C). Prepare a 9x13-inch baking dish by spraying it with nonstick spray.
  2. In a large skillet over medium heat, crumble and brown the ground breakfast sausage for about 5–7 minutes until fully cooked.
  3. Sprinkle the all-purpose flour over the cooked sausage and stir well for about a minute. Gradually whisk in the whole milk and simmer until the gravy thickens, about 3–5 minutes.
  4. Cut the refrigerated buttermilk biscuits into quarters and arrange them evenly across the prepared baking dish.
  5. Pour the thickened sausage gravy over the biscuit pieces. Whisk together the eggs and a splash of milk, season it, and pour over the top.
  6. Bake uncovered for about 35–40 minutes until the egg is set and the top is golden and bubbly.
  7. Let the casserole cool for 5–10 minutes before serving. Slice into squares and serve warm.

Nutrition

Serving: 1sliceCalories: 360kcalCarbohydrates: 22gProtein: 15gFat: 25gSaturated Fat: 10gPolyunsaturated Fat: 1gMonounsaturated Fat: 2gCholesterol: 150mgSodium: 800mgPotassium: 280mgFiber: 1gSugar: 2gVitamin A: 800IUCalcium: 300mgIron: 2mg

Notes

This casserole can be assembled the night before and baked fresh in the morning.

Tried this recipe?

Let us know how it was!
  • « Previous Page
  • 1
  • …
  • 37
  • 38
  • 39
  • 40
  • 41
  • …
  • 179
  • Next Page »

Welcome!

Hi, I’m Grace, a Sydney-based home cook with a passion for bold flavors and trending ingredients. Whether you’re a busy beginner or a seasoned foodie, you’ll find dishes here that are fresh, fun, and full of flavor.

More about me

Popular Recipes

  • Cheesy Chicken Garlic Bread Sandwich
    Cheesy Chicken Garlic Bread Sandwich for Cozy Family Moments
  • Easy Chicken Ranch Wraps
    Easy Chicken Ranch Wraps: Quick, Creamy & Totally Satisfying
  • Chicken Caesar Sandwiches
    Delicious Chicken Caesar Sandwiches for Quick Comfort Food
  • best Cuban sandwich
    The Best Cuban Sandwich You’ll Want Every Weeknight!

Footer

↑ back to top

About

  • Privacy Policy
  • Disclaimer
  • Terms & Conditions

Newsletter

  • Sign Up! for emails and updates

Contact

  • About me
  • Contact me

Copyright © 2025 TastyTrendIngredients