tastytrendingredients

  • Home
  • Recipes
    • Appetizers
    • Breakfast
    • Dessert
    • Dinner
    • Drinks
    • Salads
    • Snacks
    • Soups
  • About me
  • Contact me
menu icon
go to homepage
  • Home
  • Recipes
    • Appetizers
    • Breakfast
    • Dessert
    • Dinner
    • Drinks
    • Salads
    • Snacks
    • Soups
  • About me
  • Contact me
search icon
Homepage link
  • Home
  • Recipes
    • Appetizers
    • Breakfast
    • Dessert
    • Dinner
    • Drinks
    • Salads
    • Snacks
    • Soups
  • About me
  • Contact me
×

Cinnamon Swirl Protein Cake for a Guilt-Free Breakfast Delight

February 1, 2026 by Grace Snow Leave a Comment

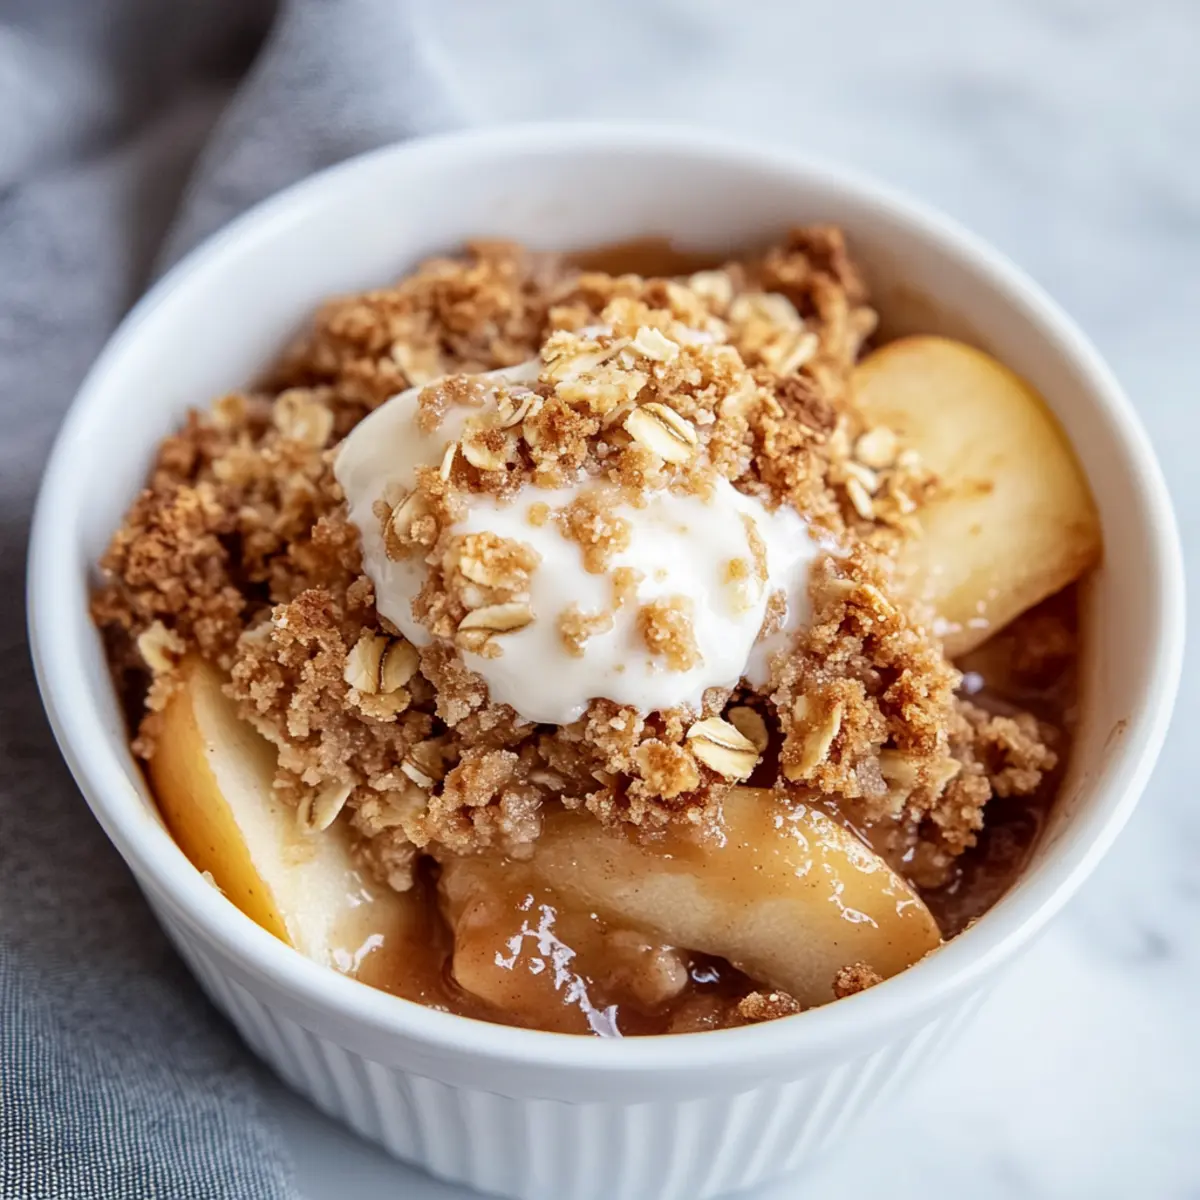
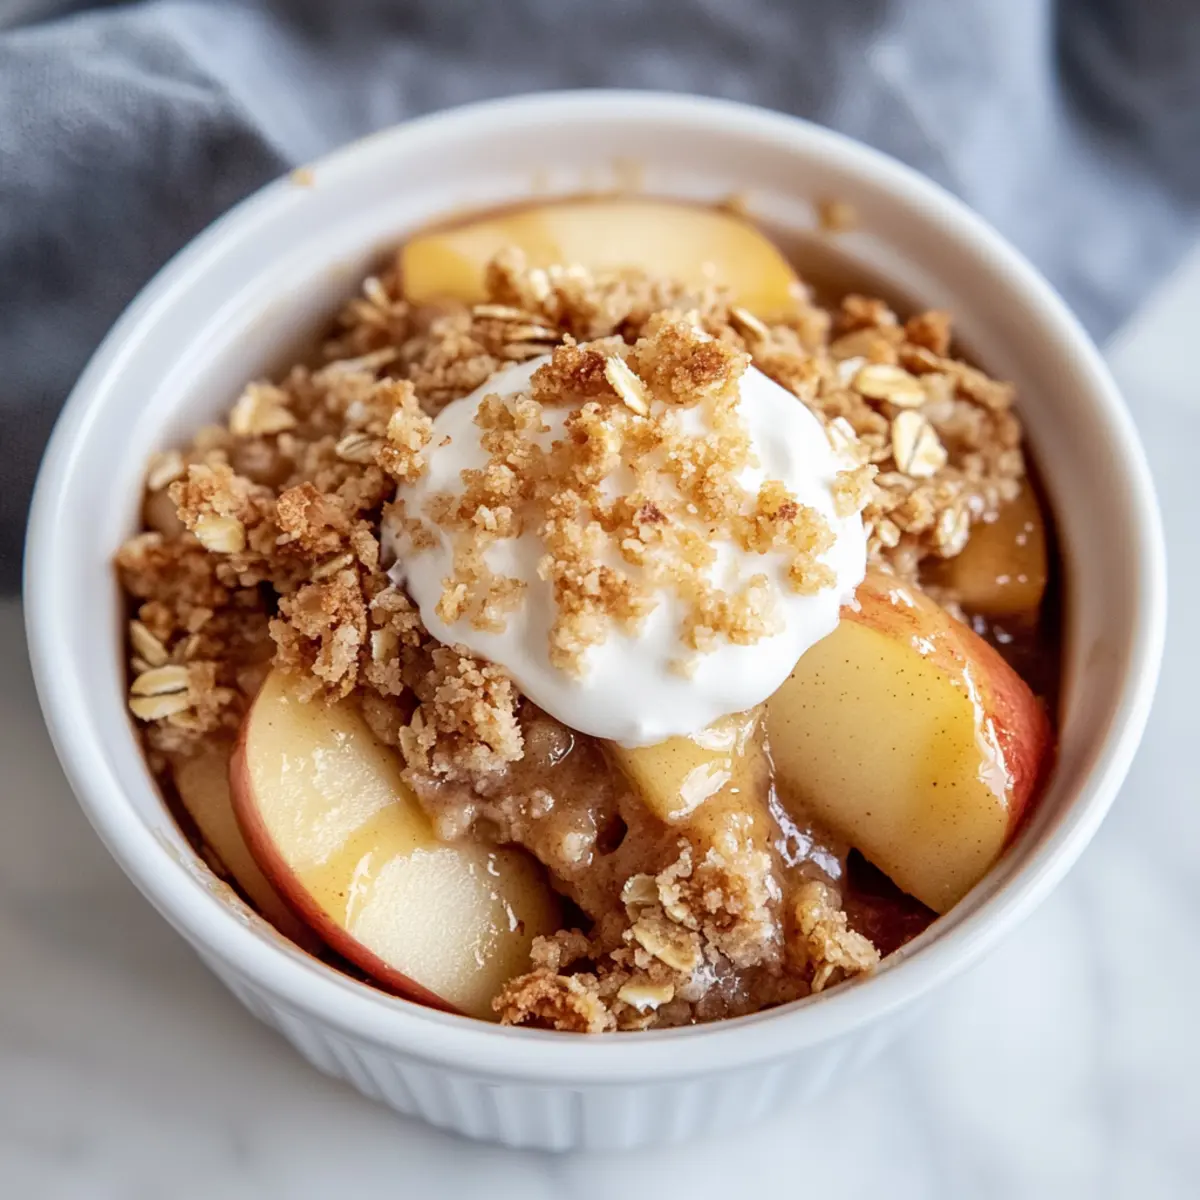
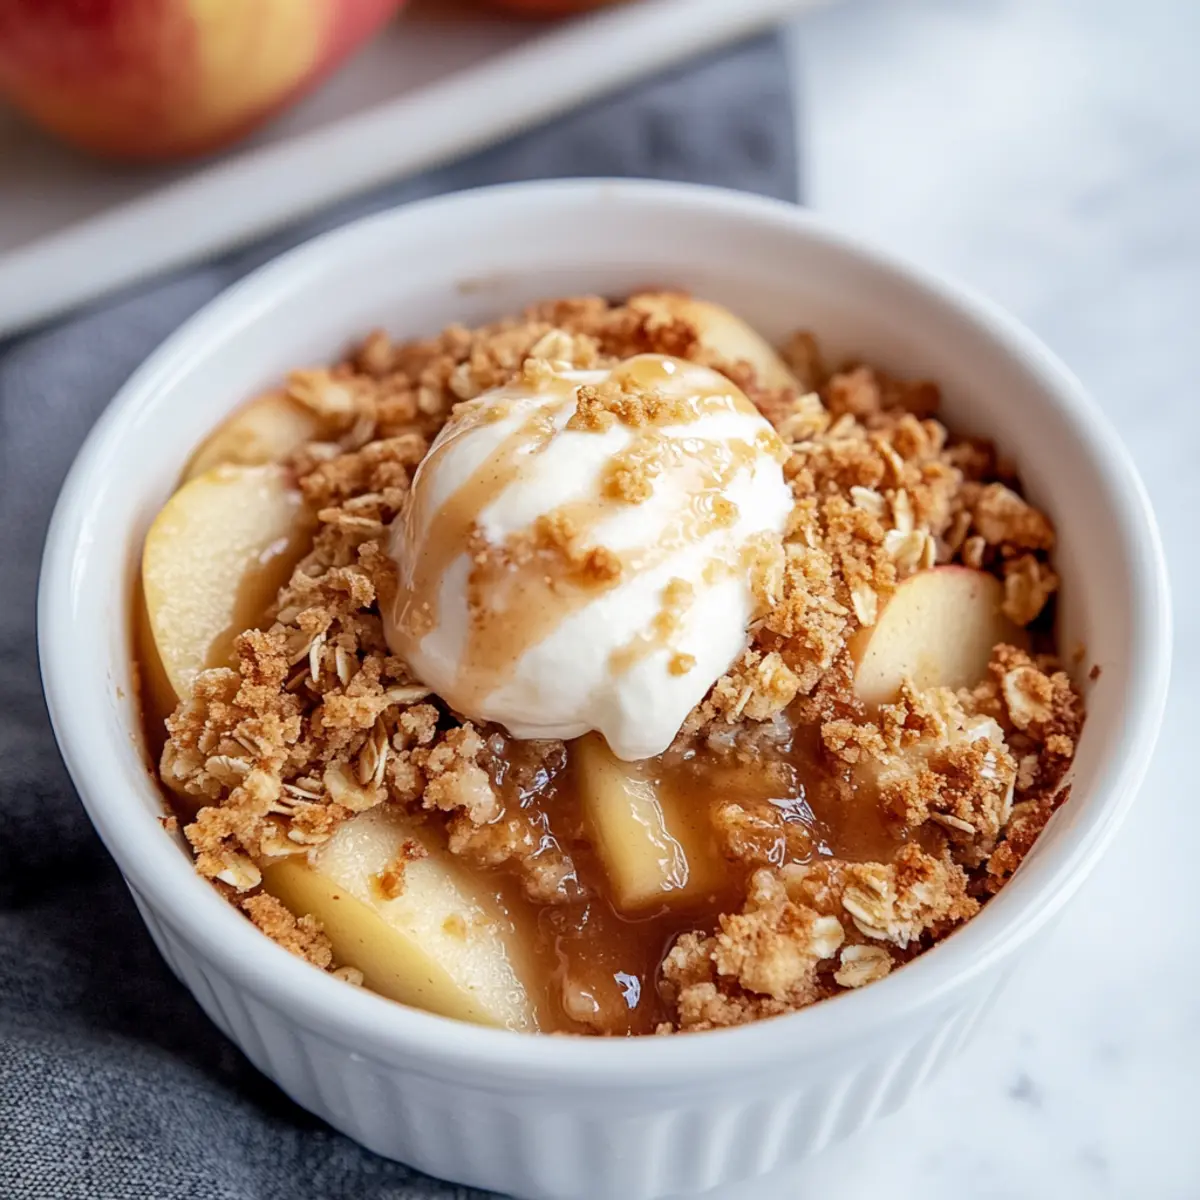
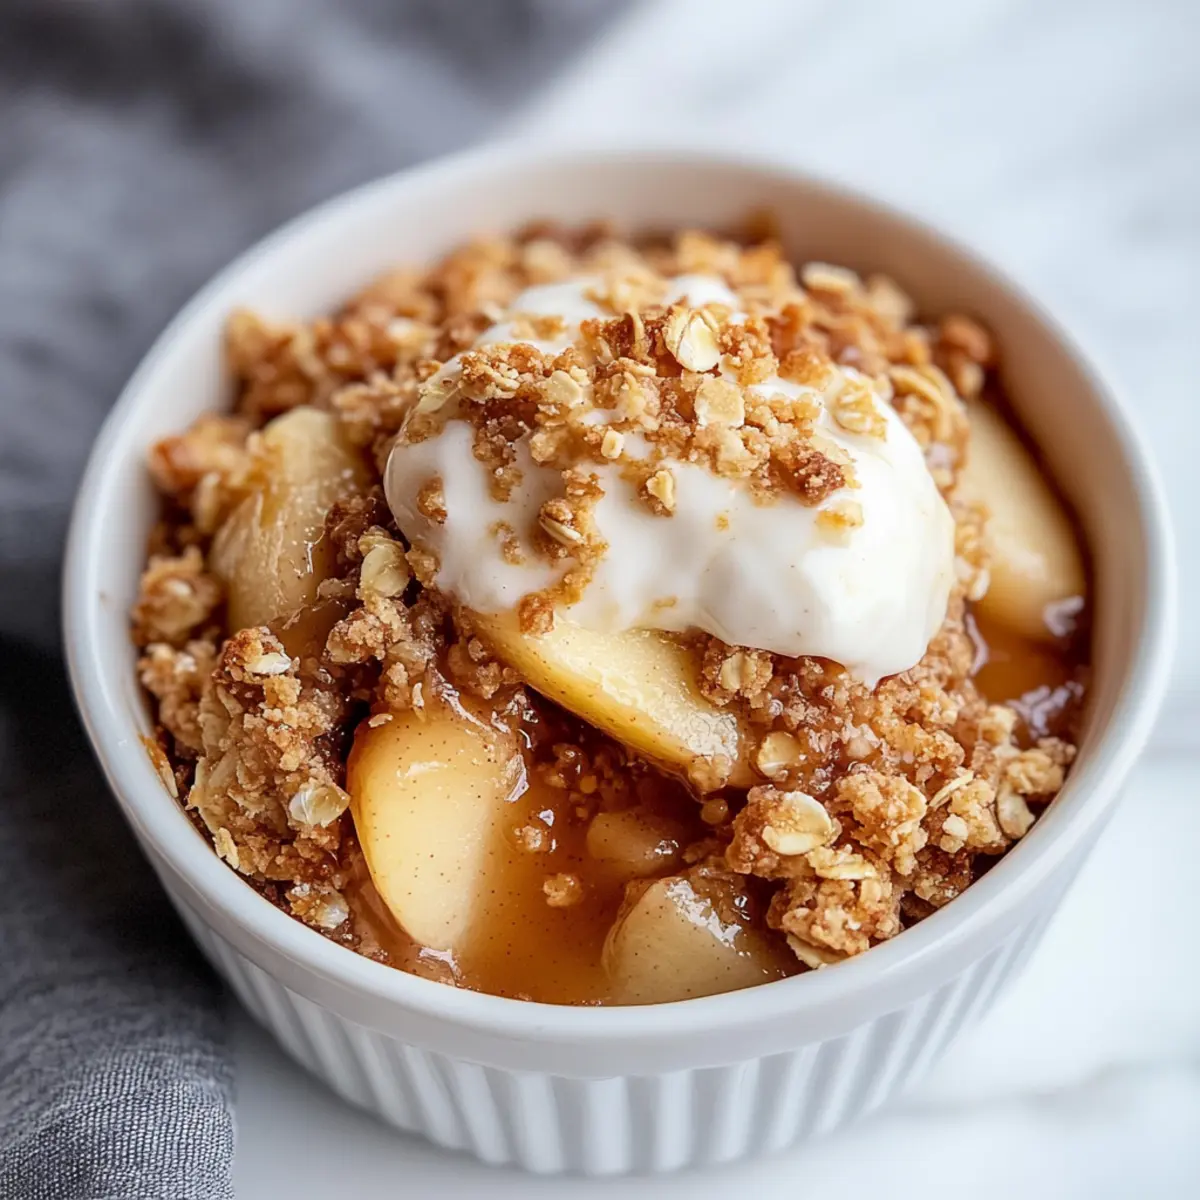
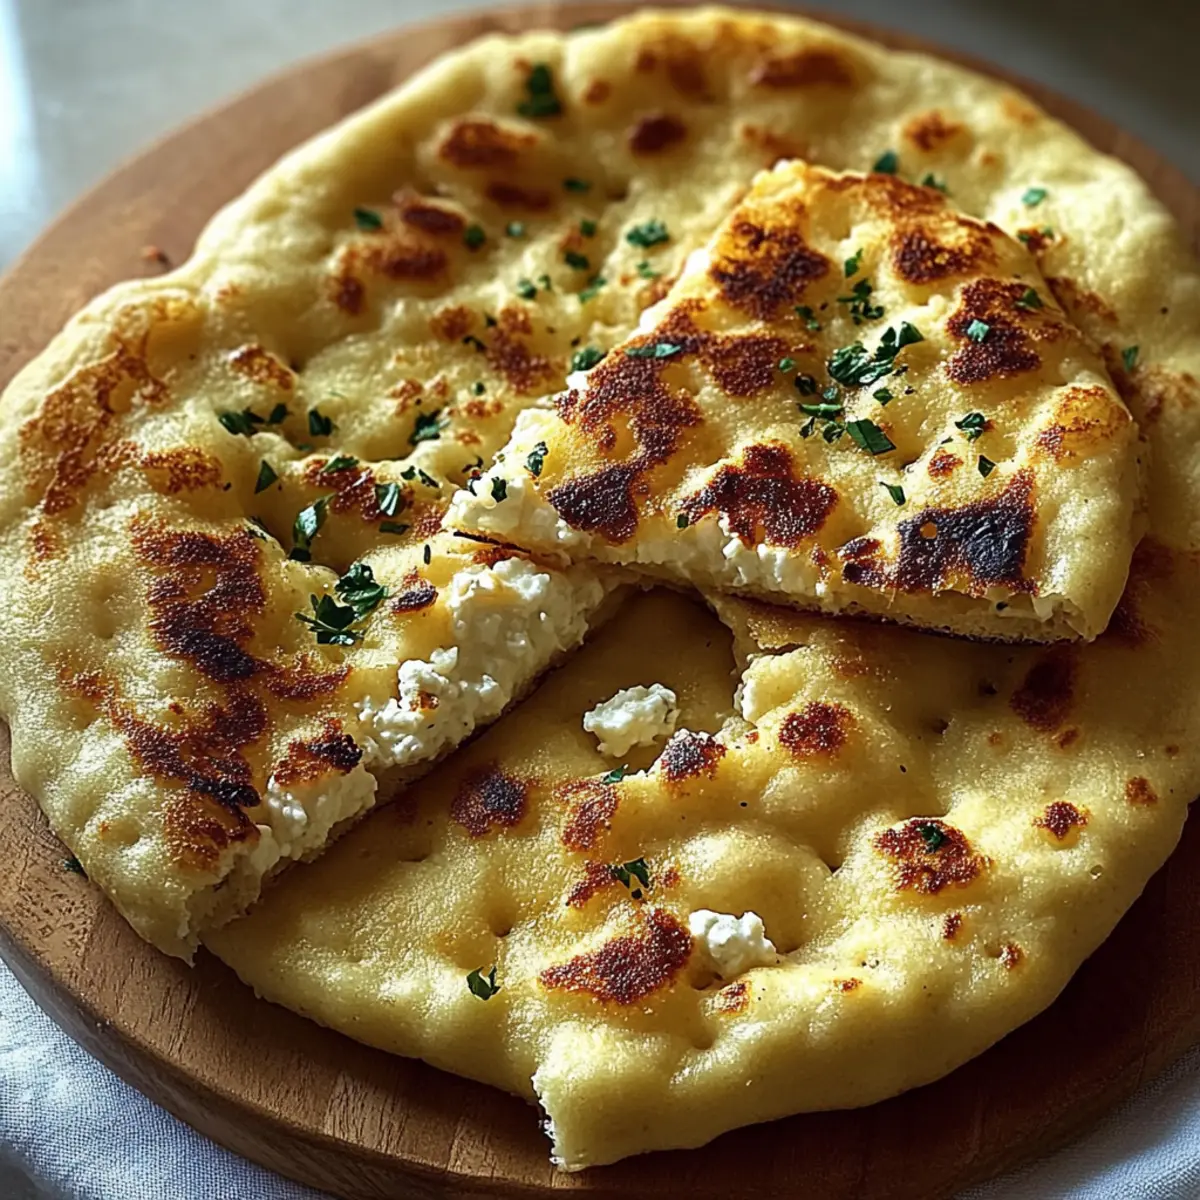
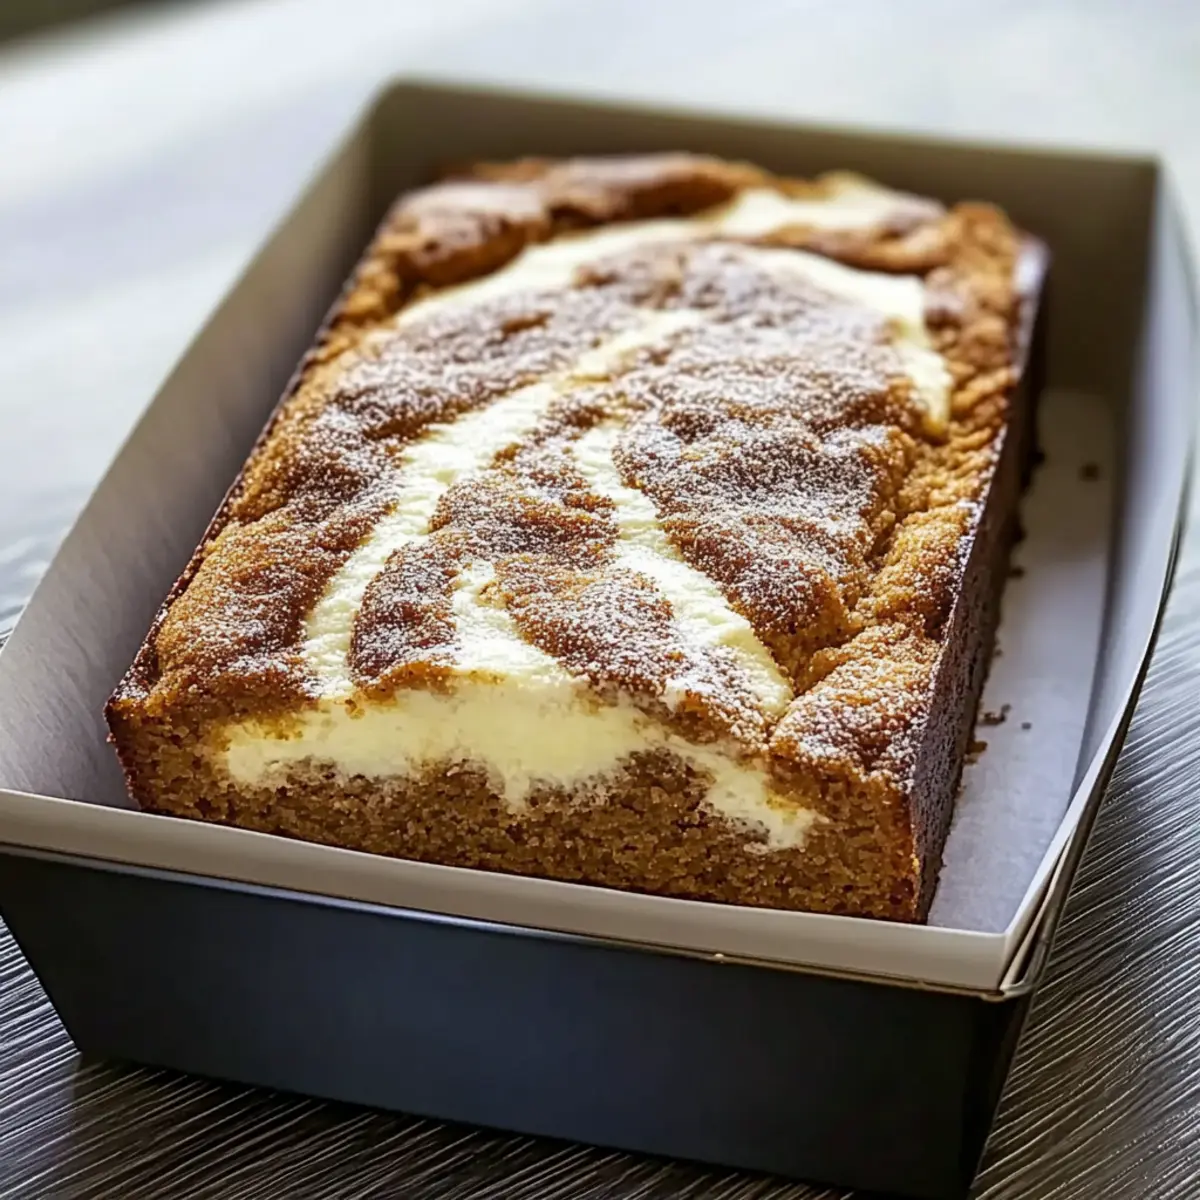
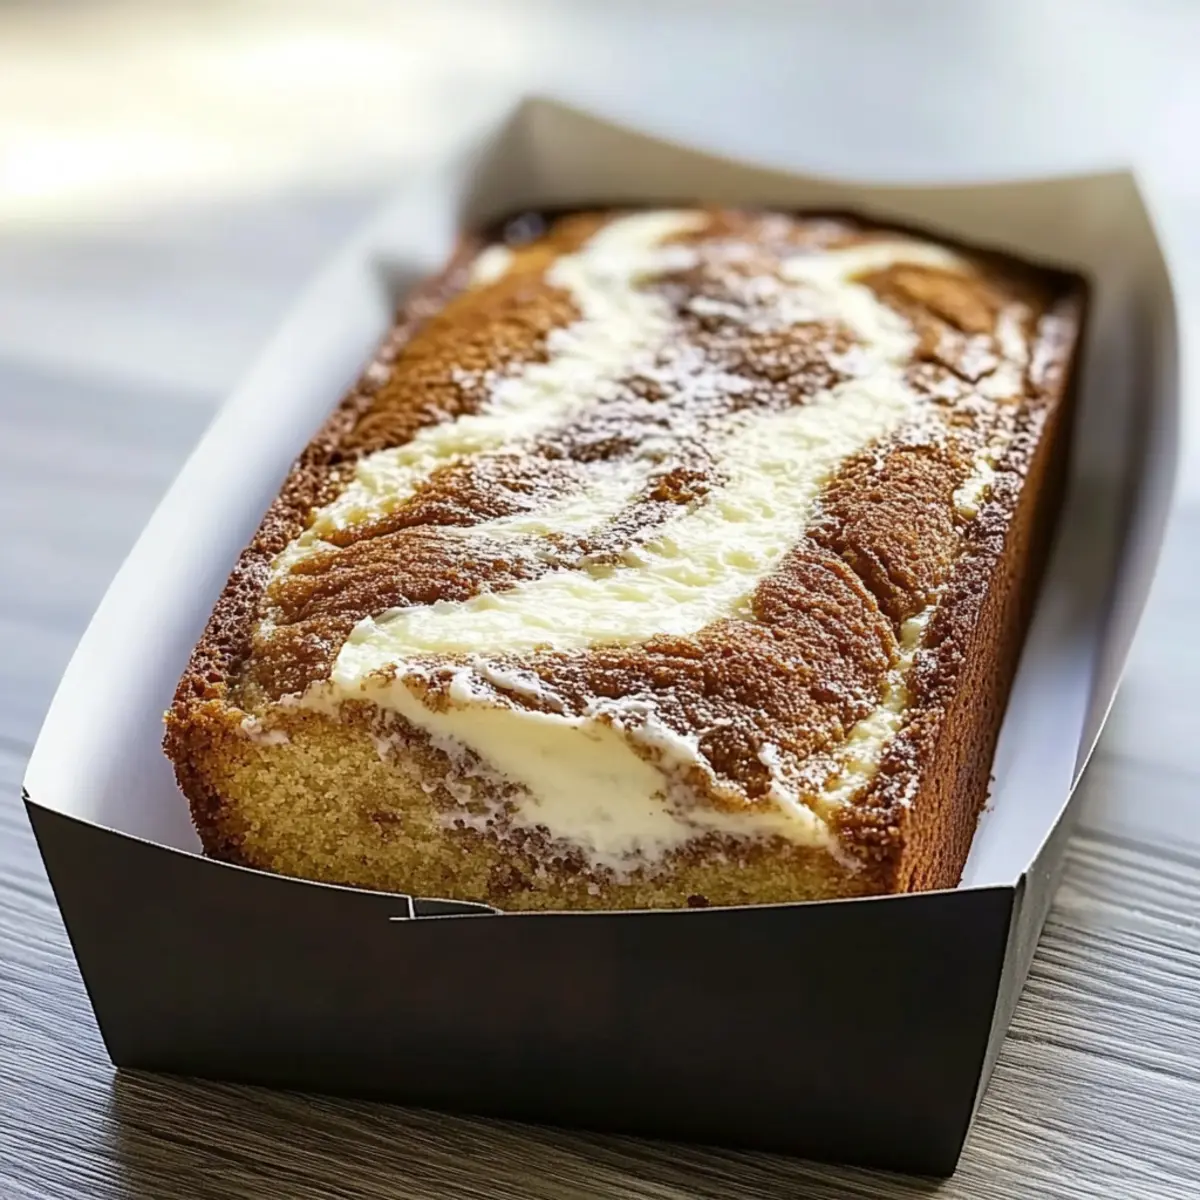
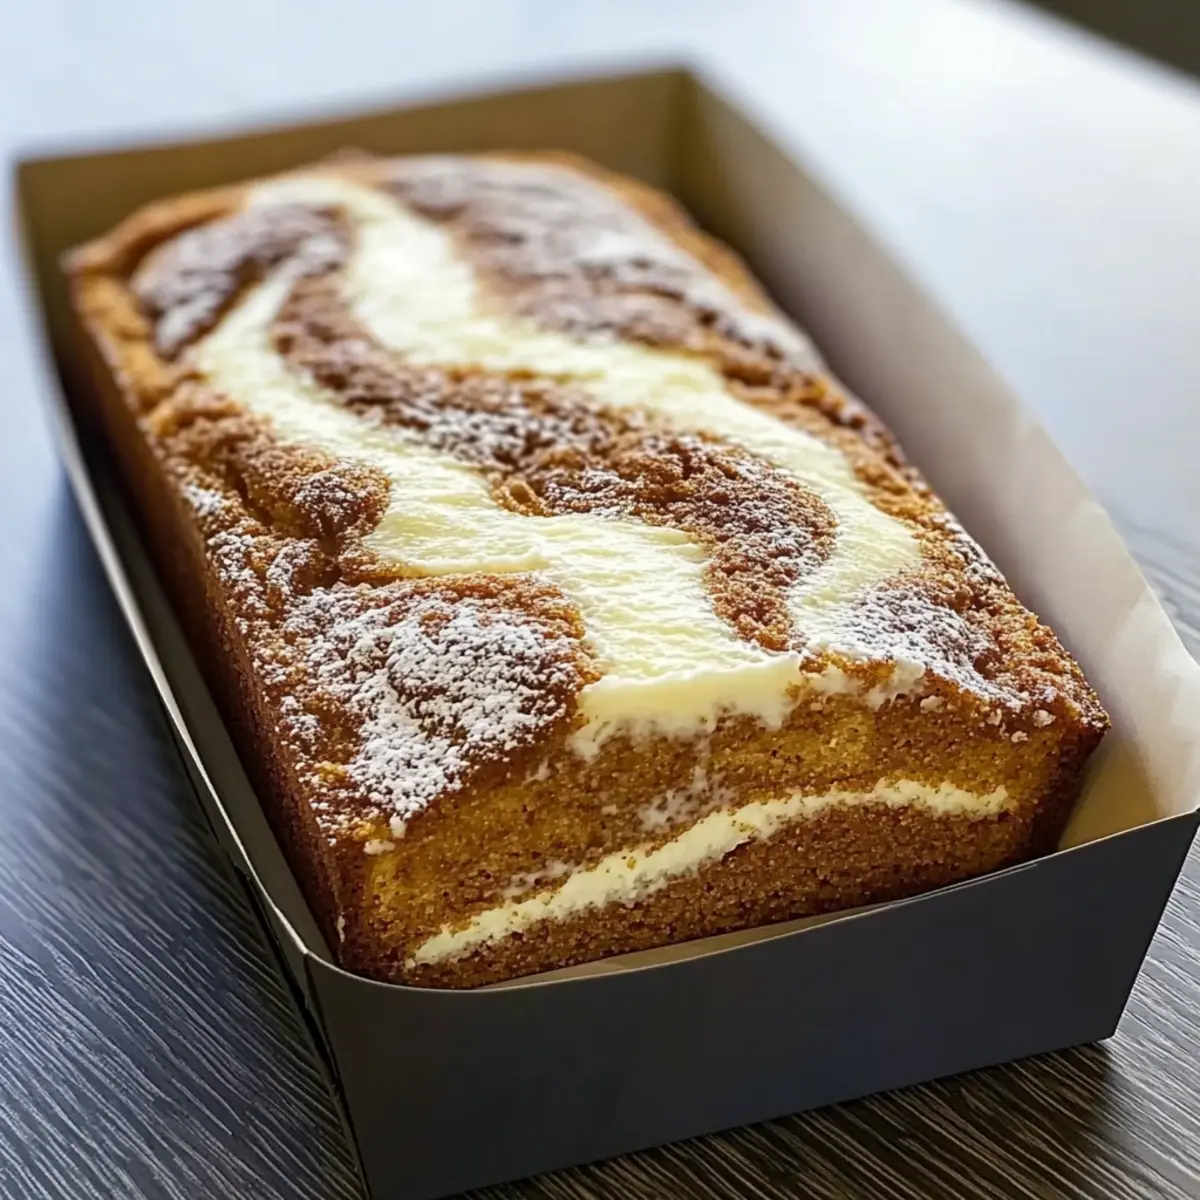
As I stood in my kitchen, a tantalizing aroma wafted through the air, instantly transporting me to my favorite coffee shop—only this time, I was the one crafting the treat! Enter my Cinnamon Swirl Protein Cake, a harmonious fusion of sweet cinnamon goodness wrapped in a high-protein package. Perfect for anyone wanting to kick fast food to the curb, this quick-prep delight takes just five minutes to whip up, making it a crowd-pleaser for busy mornings. Not only is it low in calories, but it also fuels your body with quality protein, ensuring you feel energized and satisfied without the dreaded sugar crash. Curious about how to make this warm, comforting cake that redefines breakfast? Let’s dive into the recipe and bring a little sweetness to your day!

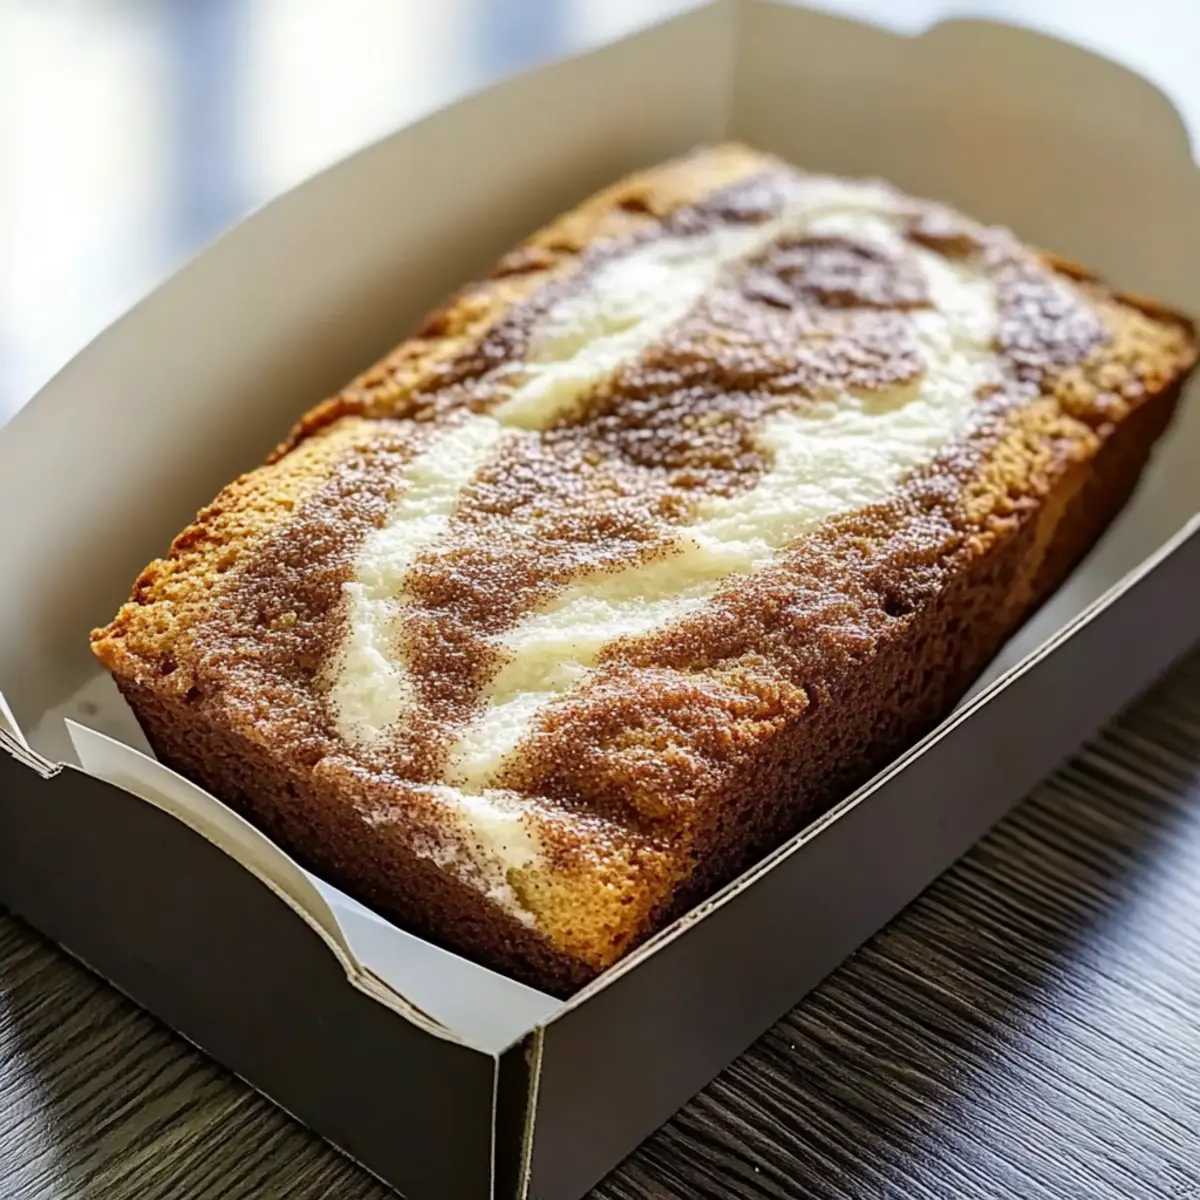
Why Choose Cinnamon Swirl Protein Cake?

Deliciously Comforting: This protein cake brings the flavors of a classic cinnamon roll to your breakfast table, making it a delightful alternative to mundane morning meals.
Quick and Easy: Whip it up in just 5 minutes, perfect for those busy mornings when you need something nutritious without the wait.
Macro-Friendly: With 34 grams of protein and low carbs, it’s an ideal option for anyone watching their macros, whether you’re into fitness or just looking for healthier eats.
Versatile for All: Feel free to customize with your favorite toppings or variations, like using regular milk or adding nuts, to suit your preferences.
Satiating Yet Light: Enjoy this guilt-free treat without the sugar crash, keeping you energized throughout the day! Looking for more breakfast ideas? Check out these Ricotta Protein Pancakes for a wholesome twist!

Cinnamon Swirl Protein Cake Ingredients

For the Batter
• Protein Powder – A must for that essential protein base; opt for a vanilla-flavored variety to enhance sweetness.
• Almond Milk – Keeps the cake low in carbs; feel free to substitute with whole milk for richer flavor.
• Eggs – Adds a protein boost and structure; consider reducing other liquids if using extra eggs.
• Cinnamon – Brings that comforting, sweet spice; don’t skimp on this for a true cinnamon roll experience!
• Sweetener – Balances the sweetness while keeping it low-cal; tailor to your taste preference.
• Baking Powder – Ensures the cake rises beautifully; essential for achieving that perfect fluffy texture.

Optional Toppings
• Nuts or Dried Fruits – Add for extra crunch and nutrition; just be mindful of carb counts.
• Chocolate Chips – For a touch of indulgence; a great way to savor every bite without straying too far from your goals.

Note: This Cinnamon Swirl Protein Cake is bound to become a breakfast favorite that satisfies both cravings and dietary goals!

Step‑by‑Step Instructions for Cinnamon Swirl Protein Cake

Step 1: Preheat the Oven
Begin by preheating your oven to 350°F (175°C), ensuring it's ready for the perfect bake. This temperature is ideal for small cakes and will help your Cinnamon Swirl Protein Cake rise beautifully. Prepare a small baking pan by greasing it lightly with cooking spray or lining it with parchment paper for easy removal later.

Step 2: Mix Dry Ingredients
In a mixing bowl, combine protein powder, sweetener, baking powder, and cinnamon. Use a whisk to blend these dry ingredients thoroughly, ensuring there are no clumps. The cinnamon's aroma should start filling the air as you mix, promising the comforting flavors that await in this delicious protein cake.

Step 3: Add Wet Ingredients
Crack in the eggs and pour in the almond milk, adding moisture to the dry mixture. Using a spatula or a hand mixer, blend until you achieve a smooth, consistent batter, free of lumps. This step is crucial; the texture of your Cinnamon Swirl Protein Cake depends on a well-mixed batter, so take your time!

Step 4: Pour the Batter
Carefully pour half of the batter into your prepared baking pan, spreading it evenly across the bottom. Use a spatula to smooth the surface, ensuring it covers the entire base for uniform baking. This layer will serve as the foundation for your cinnamon swirl and help hold the entire cake together.

Step 5: Create the Cinnamon Swirl
Sprinkle a generous layer of cinnamon on top of the batter in the pan, distributing it evenly. This will create those delightful swirls that give the Cinnamon Swirl Protein Cake its signature flavor. Once spread, pour the remaining batter over the cinnamon layer, covering it completely and sealing in the sweetness.

Step 6: Swirl the Cinnamon
Take a knife and gently swirl it through the batter, creating a delightful marbled effect. Aim for an intricate pattern, moving the knife back and forth to blend the cinnamon into the batter without mixing it completely. This step is essential for that classic cinnamon swirl look and taste you desire.

Step 7: Bake the Cake
Place your baking pan in the preheated oven and bake for approximately 12 minutes. Keep an eye on it; you'll know it's done when a toothpick inserted into the center comes out clean. The cake should be puffed up and slightly golden on the edges, tempting you with its warm scent as it bakes.

Step 8: Let It Cool
Once baked, remove the Cinnamon Swirl Protein Cake from the oven and let it cool in the pan for a few minutes. This will make slicing easier while ensuring the structure holds together. Letting it cool slightly is key to enjoying the moist texture and avoiding any crumbles when you slice into it.

Expert Tips

  • Portion Control: Keep the servings small. Baking a larger loaf may result in uneven cooking and texture issues, so stick to smaller pans for the Cinnamon Swirl Protein Cake.

  • Choose Wisely: Use a well-rated protein powder known for solubility and flavor to avoid a chalky or gritty texture in your cake.

  • Cool Before Slicing: Allow the cake to cool slightly before cutting. This helps maintain its structure and prevents crumbling when you slice.

  • Perfect Swirls: Don’t overdo the swirling! Just a gentle motion with the knife creates beautiful patterns without losing the batter’s integrity.

  • Customizable Flavor: Feel free to mix things up! Adding nuts or varying the sweetener can enhance the flavor while keeping the recipe aligned with your dietary goals.

Make Ahead Options

These Cinnamon Swirl Protein Cakes are perfect for meal prep enthusiasts! You can mix your dry ingredients (protein powder, sweetener, baking powder, and cinnamon) and store them in an airtight container for up to 3 days in advance, maintaining their freshness. Additionally, you can prepare your wet ingredients (eggs and almond milk) and refrigerate them up to 24 hours prior to baking. When you’re ready to enjoy the cake, simply combine the wet and dry ingredients, pour the batter into the pan, and bake as instructed. This prep-ahead technique not only saves time on busy mornings but ensures your protein cake is just as delicious and satisfying!

How to Store and Freeze Cinnamon Swirl Protein Cake

Fridge: Store the cake in an airtight container for up to 1 week. Enjoy it cold or microwave a slice for a warm treat.

Freezer: Wrap individual slices or the whole cake tightly in plastic wrap, then place in a freezer-safe bag. It lasts for up to 3 months; thaw overnight in the fridge when ready to enjoy.

Reheating: To reheat, pop a cold slice in the microwave for about 20-30 seconds. This will soften it up and bring back that fresh-baked goodness!

Room Temperature: If you plan to eat the cake within a couple of days, you can keep it at room temperature in a sealed container. Enjoy the convenience without sacrificing flavor!

What to Serve with Cinnamon Swirl Protein Cake?

Elevate your breakfast experience with these delightful pairings that will complement your warm slice of cinnamon goodness.

  • Creamy Greek Yogurt: A dollop adds a tangy contrast that enhances the cake’s sweetness, making each bite even more satisfying.
  • Fresh Berries: Raspberries or blueberries bring a burst of freshness and a hint of acidity that balances the rich flavors beautifully. Pair them for a vibrant, nutritious boost!
  • Nut Butter Drizzle: A swirl of almond or peanut butter adds healthy fats and creaminess, turning your protein cake into a more indulgent treat without sacrificing health.
  • Sliced Bananas: Sweet, ripe bananas create a lovely texture that pairs perfectly, making the overall breakfast not just filling but exceptionally delicious. This is a favorite for a reason!
  • Nutty Granola: Add a sprinkle of granola on top for crunch. Its texture complements the moist cake while providing a satisfying crunch that enhances each bite.
  • Chai Tea: A spiced chai tea brings warmth and complements the cinnamon flavor, creating a cozy morning ritual perfect for welcoming the day.
  • Honey Drizzle: A light drizzle of honey amplifies sweetness naturally, making it a simple yet delightful way to elevate your cake to new heights.
  • Dark Chocolate Shavings: For a touch of indulgence, sprinkle some dark chocolate on top. The bitterness beautifully complements the sweet cake, transforming every bite into a delightful experience!
  • Coconut Flakes: Toasted coconut adds a tropical twist along with texture that perfectly contrasts against the soft cake, enticing your taste buds even further.
  • Coffee: Pair with a bold cup of coffee to enhance the cake's warmth and flavors, creating a balanced, comforting breakfast that feels like a hug in a mug.

Cinnamon Swirl Protein Cake Variations

Feel free to get creative and customize this delightful cake to suit your taste buds and dietary needs!

  • Dairy-Free: Substitute almond milk with oat milk or soy milk for a creamy, dairy-free option that doesn’t sacrifice flavor.

  • Nut-Free: Instead of almond milk, use coconut milk to keep it nut-free while still retaining that rich texture.

  • Low-Sugar: Use a natural sweetener like stevia or monk fruit to reduce sugar levels, allowing guilt-free indulgence in every slice.

  • Flavor Explosion: Try flavored protein powders like chocolate or caramel for a unique twist that adds a delightful dimension to each bite.

  • Add Crunch: Mix in chopped walnuts or pecans for a satisfying crunch and an excellent source of healthy fats. Remember to adjust the macros accordingly!

  • Spiced Up: Incorporate a pinch of nutmeg or pumpkin spice for an autumn-inspired flavor boost that enhances the cozy aroma as it bakes.

  • Chocolate Swirl: For chocolate lovers, add cocoa powder to half the batter for a delightful chocolate swirl that pairs beautifully with cinnamon.

  • Extra Protein: Toss in a tablespoon of Greek yogurt into the batter for a creamier texture and an additional protein boost. It makes it even more decadent!

If you're looking for more delicious breakfast ideas, why not give my Pumpkin Cinnamon Roll Muffins a try? They’re packed with flavor and oh-so-fun to bake!

Cinnamon Swirl Protein Cake Recipe FAQs

How do I choose the right protein powder for the Cinnamon Swirl Protein Cake?
Absolutely! When selecting a protein powder, look for one that is known for its solubility and taste. A vanilla-flavored protein powder works best, as it enhances the overall sweetness of the cake without overpowering it. Whey protein is a great option for its smooth texture, while plant-based powders can also be used for those maintaining a vegan diet. Avoid powders that contain sugar alcohols, which can affect the texture.

How should I store my Cinnamon Swirl Protein Cake?
You can store your cake in an airtight container in the fridge for up to 1 week. This is perfect if you want to enjoy it over a few days without losing freshness. If you're keeping it longer, wrap it tightly in plastic wrap and place it in a freezer-safe bag. This way, it can last for up to 3 months in the freezer! When you’re ready to enjoy it, simply thaw it in the fridge overnight.

Can I freeze the Cinnamon Swirl Protein Cake?
Definitely! Freezing is a fantastic option, especially if you want to make it ahead of time. To do so, wrap either individual slices or the whole cake tightly in plastic wrap. Then, place it in a freezer-safe bag. When you're ready to enjoy, just let it thaw in the fridge overnight. Reheat in the microwave for about 20-30 seconds to get that fresh-baked texture back!

What should I do if my cake comes out too dry?
Very! If your cake is dry, consider adding a little more moisture next time. You can try increasing the almond milk slightly or incorporating an extra egg. Be mindful of the baking time as well; even a minute can make a difference! Checking for doneness with a toothpick can also help ensure your cake is perfectly cooked through, so it’s not overbaked.

Are there any dietary considerations for the Cinnamon Swirl Protein Cake?
Yes! If you have dietary restrictions, this protein cake can be easily adjusted. For those allergic to eggs, consider using a flaxseed meal as an egg replacement (1 tablespoon of flaxseed meal mixed with 2.5 tablespoons of water equals one egg). To keep it dairy-free, stick with almond milk or use oat milk. It's always a good idea to double-check ingredient labels for potential allergens if you're serving it to guests!

Cinnamon Swirl Protein Cake

Cinnamon Swirl Protein Cake for a Guilt-Free Breakfast Delight

Enjoy this Cinnamon Swirl Protein Cake, a guilt-free breakfast delight packed with protein and low in calories.
Print Recipe Pin Recipe
Prep Time 5 minutes mins
Cook Time 12 minutes mins
Cooling Time 5 minutes mins
Total Time 22 minutes mins
Servings: 4 slices
Course: Breakfast
Cuisine: American
Calories: 150
Ingredients Equipment Method Nutrition Notes

Ingredients
  

Batter Ingredients
  • 1 cup Protein Powder Vanilla-flavored variety recommended
  • 1/2 cup Almond Milk Substitute with whole milk for richer flavor
  • 2 large Eggs Consider reducing other liquids if using extra eggs
  • 1 tablespoon Cinnamon Don’t skimp on this for a true cinnamon roll experience
  • 1 tablespoon Sweetener Tailor to your taste preference
  • 1 teaspoon Baking Powder Essential for achieving that perfect fluffy texture
Optional Toppings
  • 1/4 cup Nuts or Dried Fruits Add for extra crunch and nutrition
  • 1/4 cup Chocolate Chips For a touch of indulgence

Equipment

  • Oven
  • Mixing Bowl
  • Whisk
  • Spatula
  • Baking pan

Method
 

Preparation Steps
  1. Preheat your oven to 350°F (175°C) and prepare a small baking pan by greasing it lightly or lining it with parchment paper.
  2. In a mixing bowl, combine protein powder, sweetener, baking powder, and cinnamon. Whisk until thoroughly blended.
  3. Crack in the eggs and pour in the almond milk, then mix until smooth and free of lumps.
  4. Pour half of the batter into the prepared pan and smooth the surface.
  5. Sprinkle a generous layer of cinnamon on top and add the remaining batter over it.
  6. Use a knife to swirl the batter gently for a marbled effect.
  7. Bake for approximately 12 minutes, until a toothpick comes out clean.
  8. Let the cake cool in the pan for a few minutes before slicing.

Nutrition

Serving: 1sliceCalories: 150kcalCarbohydrates: 15gProtein: 34gFat: 3gSaturated Fat: 0.5gMonounsaturated Fat: 1gCholesterol: 70mgSodium: 150mgPotassium: 300mgFiber: 2gSugar: 1gVitamin A: 250IUCalcium: 80mgIron: 1.5mg

Notes

Feel free to customize with your favorite toppings or variations, like using regular milk or adding nuts, to suit your preferences.

Tried this recipe?

Let us know how it was!

Healthy High Protein Apple Crisp for Guilt-Free Indulgence

February 1, 2026 by Grace Snow Leave a Comment

As I stood in my kitchen, the enticing aroma of baked apples mingling with cinnamon brought a wave of nostalgia, whisking me back to family gatherings filled with laughter. This Healthy High Protein Apple Crisp is not just a dessert; it’s a warm hug after a long day. With tender baked apples enveloped in a crunchy oat topping, this delicious treat offers a guilt-free way to enjoy one of our favorite classics. What’s even better? It packs a protein punch, making it perfect for satisfying cravings while keeping your health goals on track. Plus, it’s incredibly adaptable; you can easily swap in your favorite nuts or fruits. Curious about how to create this wholesome delight in your own kitchen? Let’s dive in!

Why is this apple crisp so special?

Healthy, High Protein Content: This apple crisp uniquely combines flavors and nutrition, offering a delightful dessert without the guilt. Quick and Easy: With just a few simple steps, you can whip this up in no time—perfect for busy weeknights or last-minute guests. Versatile Ingredients: Customizing flavors and textures is a breeze, whether you prefer almond butter or a mix of fruits like pears or berries. Warm Comfort: The scent of cinnamon and tender apples will fill your kitchen, creating a cozy atmosphere. Perfect Pairing: Serve it alongside Greek yogurt for an extra protein boost or a drizzle of nut butter to enhance the taste—making it an excellent choice for any meal.

Healthy High Protein Apple Crisp Ingredients

• Here’s everything you need to create this delicious dessert!

For the Filling

  • Chopped Apple – Provides natural sweetness and moisture; use Granny Smith for tartness or Honeycrisp for sweetness.
  • Cinnamon – Adds warmth and depth; adjust according to taste for your perfect flavor blend.
  • Lemon Juice – A drop enhances flavor and prevents browning; fresh juice works beautifully, but bottled is fine too.

For the Topping

  • Vanilla Protein Powder (2 tbsp total) – Boosts protein content for a healthy dessert; plant-based or whey protein is excellent.
  • Nut Butter (1 tbsp) – Adds healthy fats and binds the topping; almond or peanut butter works well based on your preference.
  • Rolled Oats (1/4 cup) – Forms the base of the crumble; make sure to use rolled oats for the best topping texture.
  • Milk or Water (1 tsp) – Moistens the topping mixture; almond milk, cow's milk, or even water are suitable choices.

Step‑by‑Step Instructions for Healthy High Protein Apple Crisp

Step 1: Preheat the Oven
Begin by preheating your oven to 350°F (175°C). This temperature is essential for ensuring that the Healthy High Protein Apple Crisp bakes evenly, allowing the flavors to meld beautifully. While the oven is warming up, take a moment to gather your ingredients and equipment, ensuring a smooth cooking experience.

Step 2: Prepare the Apples
In a medium bowl, combine the chopped apples with cinnamon, lemon juice, and 1 tablespoon of vanilla protein powder. Mix thoroughly until the apples are evenly coated with the flavorful ingredients. Once well combined, transfer the apple mixture to a small ramekin, ensuring the apples are arranged evenly for even cooking.

Step 3: Make the Topping
In another bowl, mix together the rolled oats, remaining vanilla protein powder, nut butter, and milk or water. Use a fork or your fingers to blend until the mixture is crumbly and resembles coarse sand. If the mixture appears too dry, add a touch more liquid, ensuring it binds well to create a satisfying topping for your apple crisp.

Step 4: Assemble the Crisp
With your prepared apple filling in the ramekin, evenly sprinkle the crust mixture over the apples. Be sure to cover the apple layer completely, creating a delicious, crunchy topping that will bake to a golden brown. This perfect assembly is key to achieving a delightful contrast in textures for your Healthy High Protein Apple Crisp.

Step 5: Bake the Crisp
Carefully place the ramekin in the preheated oven and bake for about 20 minutes. Keep a close eye on the crisp, looking for the topping to turn golden and the apples to bubble enticingly around the edges. The aroma of cinnamon and baked apples will fill your kitchen and signal that it’s nearly ready.

Step 6: Cool Before Serving
Once baked to perfection, remove the Healthy High Protein Apple Crisp from the oven and let it cool for about 5 minutes. This brief cooling time allows the topping to firm up slightly, making it easier to serve. The charming combination of tender apples and crunchy oat topping awaits you!

Expert Tips for Healthy High Protein Apple Crisp

  • Apple Selection: Choose firm apples like Granny Smith or Honeycrisp for best results; they hold up during baking, providing the ideal texture.

  • Slice Evenly: Cut your apples into thin, even slices (about 1/4 inch thick) to ensure they cook uniformly, enhancing the overall dish.

  • Customizable Topping: Adjust the nut butter and liquid amounts for the topping based on your preference; it should be crumbly but bind together when pressed.

  • Keep an Eye on Baking: Baking time may vary; check at 15 minutes to prevent over-browning. Remove when the topping is golden and the apples are bubbling.

  • Serving Suggestions: Enjoy your Healthy High Protein Apple Crisp warm, topped with Greek yogurt or a drizzle of nut butter for an extra layer of flavor and nutrition.

  • Make-Ahead Options: Prepare the topping in advance and store it in the fridge; this allows for quick assembly when you're ready to bake!

How to Store and Freeze Healthy High Protein Apple Crisp

Airtight Container: Store leftover apple crisp in an airtight container in the fridge for up to 3 days to keep it fresh. The apples may soften, but the flavor will remain delightful.

Freezing: To freeze, place the cooled apple crisp in a freezer-safe container for up to 2 months. For the best results, consider freezing the topping separately to maintain its crunch.

Reheating: When you're ready to enjoy, reheat in the microwave for 30-45 seconds or bake in the oven at 350°F for 5-7 minutes until warm. This helps revive the lovely texture of your Healthy High Protein Apple Crisp.

Make-Ahead Topping: Prepare the topping ahead of time and store in the fridge for up to 5 days, making it quick to assemble whenever you have a craving!

Healthy High Protein Apple Crisp Variations

Feel free to personalize this delicious dessert with a few easy twists and substitutions that honor your taste and dietary preferences!

  • Nut-Free: Swap the nut butter for sunflower seed butter to create a delightful, nut-free version that still maintains the creamy goodness.

  • Plant-Based: Use coconut yogurt instead of Greek yogurt as a topping to keep it vegan while adding a tropical twist.

  • Berry Boost: Replace half of the apples with fresh berries like blueberries or raspberries for a vibrant flavor pop and added nutrition.

  • Natural Sweetness: Experiment by adding a bit of maple syrup or honey to the filling for an extra touch of sweetness without refined sugars.

  • Crunchy Topping: Mix in some chopped nuts or seeds to the crumble topping for added texture and crunch—walnuts pair beautifully with the flavors!

  • Spice It Up: Try adding a pinch of nutmeg or ginger to your cinnamon spice mix for a warming depth that will take your crisp to the next level.

  • Crispy Layer: For an extra crunchy topping, toss a tablespoon of shredded coconut or crushed graham crackers into the oat mixture.

  • Citrus Zing: A few drops of orange or lemon zest in the filling can brighten the flavor and bring a refreshing touch to your Healthy High Protein Apple Crisp.

These ideas can easily take your dessert from delightful to extraordinary, so have fun experimenting! And if you find yourself inspired, consider pairing this crisp with a delightful Blackberry Crisp Amp for another twist on a classic favorite!

What to Serve with Healthy High Protein Apple Crisp

Warm your heart and satisfy your cravings with delightful pairings that elevate your homemade dessert experience.

  • Greek Yogurt: A perfect creamy counterpart that adds protein and a tangy contrast to the sweet apple crisp.
  • Vanilla Ice Cream: The classic choice; it melts into the warm crisp, creating a luscious blend of flavors.
  • Chai Tea: Infused with spices, this warm beverage complements the cinnamon notes while offering a soothing experience.
  • Fresh Berries: The brightness of blueberries or raspberries can add a fresh burst of tartness alongside the sweet apples.
  • Nut Butter Drizzle: A drizzle of almond or peanut butter not only enhances flavors but also adds additional healthy fats.
  • Oatmeal: Serve with a side of oatmeal for a hearty breakfast twist, nourishing and comforting to start your day.
  • Coconut Whipped Cream: Light and airy, this topping adds a dreamy texture and a hint of coconut flavor to your dessert.
  • Coffee: A comforting cup of rich coffee balances the sweetness of the crisp, making it a fantastic afternoon treat.
  • Dark Chocolate Shavings: Sprinkling some dark chocolate can elevate the experience with a touch of decadence without compromising on health.
  • Homemade Granola: A crunchy side of homemade granola can complement the softness of the baked apples, introducing varied textures in every bite.

Make Ahead Options

These Healthy High Protein Apple Crisp preparations are perfect for busy cooks looking to save time! You can chop and mix the apples with cinnamon, lemon juice, and 1 tablespoon of protein powder up to 24 hours in advance, ensuring they don’t brown by refrigerating in an airtight container. Additionally, you can prepare the oat topping and store it separately in the fridge for 3 days, helping you maintain that delightful crunch. When you’re ready to enjoy, simply assemble the apple filling in a ramekin, sprinkle the topping over it, and bake it at 350°F (175°C) for about 20 minutes. This way, you can savor a delicious dessert with minimal effort!

Healthy High Protein Apple Crisp Recipe FAQs

What type of apples should I use for this recipe?
Absolutely! For the best results, I recommend using firm varieties like Granny Smith for a tart flavor or Honeycrisp for natural sweetness. These apples hold their shape during baking, providing a perfect tender bite.

How do I store leftover apple crisp?
To keep your Healthy High Protein Apple Crisp fresh, store it in an airtight container in the refrigerator for up to 3 days. While the apples may soften slightly, the delicious flavors will still shine, making it a delightful treat even after a day or two!

Can I freeze the apple crisp, and how should I do it?
Yes, you can freeze the Healthy High Protein Apple Crisp! After cooling, transfer it to a freezer-safe container for up to 2 months. To maintain the topping's crunch, consider freezing the apple filling and topping separately. When you're ready to enjoy, thaw overnight in the fridge and reheat in the oven at 350°F for 5-7 minutes.

What should I do if my topping is too crumbly?
Very good question! If your topping crumbles too much, simply add a little more nut butter or liquid (like water or milk), mixing until it holds together better. A crumbly but cohesive texture is key; press it slightly to ensure it binds well for that perfect crunch on top.

Are there any dietary considerations I should be aware of?
Absolutely! If you're cooking for someone with nut allergies, consider substituting the nut butter with sunflower seed butter or a seed-based option. Also, ensure the protein powder you use does not contain allergens like gluten or dairy if that’s a concern. Always check labels to accommodate various dietary needs while enjoying this delicious dessert!

Healthy High Protein Apple Crisp

Healthy High Protein Apple Crisp for Guilt-Free Indulgence

This Healthy High Protein Apple Crisp offers a delicious and nutritious dessert option that's high in protein and perfect for cravings.
Print Recipe Pin Recipe
Prep Time 10 minutes mins
Cook Time 20 minutes mins
Cooling Time 5 minutes mins
Total Time 35 minutes mins
Servings: 4 servings
Course: Dessert
Cuisine: American
Calories: 200
Ingredients Equipment Method Nutrition Notes

Ingredients
  

For the Filling
  • 2 cups Chopped Apple Granny Smith or Honeycrisp
  • 1 teaspoon Cinnamon Adjust according to taste
  • 1 tablespoon Lemon Juice Fresh or bottled
For the Topping
  • 2 tablespoons Vanilla Protein Powder Plant-based or whey
  • 1 tablespoon Nut Butter Almond or peanut butter
  • 1/4 cup Rolled Oats Use rolled oats for best texture
  • 1 teaspoon Milk or Water Almond milk or cow's milk fine

Equipment

  • Oven
  • medium bowl
  • small ramekin
  • another bowl
  • Fork

Method
 

Preparation Steps
  1. Preheat your oven to 350°F (175°C).
  2. In a medium bowl, combine the chopped apples with cinnamon, lemon juice, and 1 tablespoon of vanilla protein powder.
  3. Mix thoroughly and transfer the apple mixture to a small ramekin.
  4. In another bowl, mix rolled oats, remaining vanilla protein powder, nut butter, and milk or water.
  5. Blend until crumbly, adding more liquid if needed.
  6. Sprinkle the topping over the apples, covering evenly.
  7. Bake for about 20 minutes or until topping turns golden and apples bubble.
  8. Let cool for about 5 minutes before serving.

Nutrition

Serving: 1servingCalories: 200kcalCarbohydrates: 30gProtein: 6gFat: 8gSaturated Fat: 1gPolyunsaturated Fat: 2gMonounsaturated Fat: 4gSodium: 100mgPotassium: 200mgFiber: 4gSugar: 10gVitamin A: 200IUVitamin C: 5mgCalcium: 30mgIron: 1mg

Notes

Enjoy warm, topped with Greek yogurt or nut butter for added flavor and nutrition.

Tried this recipe?

Let us know how it was!

Cottage Cheese Flatbread: Light, Chewy, and So Easy to Make

February 1, 2026 by Grace Snow Leave a Comment

As I rummaged through my fridge in search of a quick, healthy snack, I stumbled upon a tub of cottage cheese, and inspiration struck. This would be the magic ingredient for my Easy High-Protein Cottage Cheese Flatbread. With just two main components, I was excited to whip up a gluten-free, low-carb delight that not only satisfies my cravings but also leaves me energized. In about 30 minutes, I could transform simple ingredients into a chewy, golden flatbread perfect for wraps, mini pizzas, or even just to enjoy on its own! This recipe isn’t just a crowd-pleaser; it also offers a nutritious boost to any meal. Are you ready to dive into a world of flavor and versatility with this cottage cheese wonder?

Why is Cottage Cheese Flatbread a Must-Try?

Simplicity: With only two main ingredients, this flatbread is a breeze to make, perfect for those busy days.
Versatility: Use it as a base for everything from savory wraps to sweet treats—the possibilities are endless!
Health-Packed: High in protein and low in carbs, it's an excellent choice for a nutritious snack or meal.
Quick Cooking Time: Ready to enjoy in just 30 minutes, it’s a time-saver for home cooks.
Crowd-Pleasing: Ideal for sharing, it’s sure to impress friends and family at your next gathering.

If you love flavorful recipes that also prioritize health, you might want to check out our Jello Salad Cottage for a fun side dish idea! Or if you're in the mood for something cheesy, try the Potato Blue Cheese for a delicious pairing. Enjoy!

Cottage Cheese Flatbread Ingredients

• Dive into the world of homemade goodness with these simple ingredients!

For the Flatbread

  • Full-Fat Cottage Cheese – Provides creaminess and structure; you can substitute with lactose-free cottage cheese if dairy is a concern.
  • Large Eggs – Acts as a binding agent to hold the flatbread together; fresh is best for optimal texture.

For Flavor Enhancement

  • Garlic Powder – Adds savory flavor and can be adjusted based on personal taste; feel free to omit if preferred.
  • Fresh/Dried Herbs (e.g., Basil or Oregano) – Enhances flavor profile and allows for creativity with different variations; use your favorites!
  • Salt – Balances and enhances flavors; adjust to taste for the perfect bite.

Remember, making this Cottage Cheese Flatbread can unleash your culinary creativity, so don’t hesitate to experiment with variations!

Step‑by‑Step Instructions for Cottage Cheese Flatbread:

Step 1: Preheat the Oven
Begin by preheating your oven to 375°F (190°C). This will ensure that your Cottage Cheese Flatbread bakes evenly and reaches that perfect golden-brown finish. While the oven heats up, you can gather your ingredients and equipment, which includes a blender and a baking sheet lined with parchment paper.

Step 2: Blend the Ingredients
In your blender, combine 1 cup of full-fat cottage cheese with 2 large eggs. Blend until the mixture is completely smooth and creamy, which should take about 30-60 seconds. This smooth batter will serve as the base for your flatbread, giving it the tender yet chewy texture we all love.

Step 3: Prepare the Baking Sheet
Line a baking sheet with parchment paper to prevent your flatbread from sticking. Lightly grease the parchment with a small amount of oil or cooking spray for extra assurance. This preparation will make it easy to lift your Cottage Cheese Flatbread off the sheet once it's baked, ensuring a clean and beautiful presentation.

Step 4: Spread the Mixture
Pour your blended mixture onto the prepared baking sheet, using a spatula to spread it into an even layer. Aim for a thickness of about ¼ inch, shaping it into either rounds or a rectangle, depending on your preference. This thickness will create a lovely texture once baked, helping your flatbread become golden and chewy.

Step 5: Bake the Flatbread
Place your baking sheet in the preheated oven and let it bake for 20-25 minutes. Keep an eye on it, and look for the edges to turn golden brown while the center firms up. This is when your Cottage Cheese Flatbread is perfectly cooked and ready to be enjoyed!

Step 6: Cool the Flatbread
Once baking is complete, carefully remove the flatbread from the oven and allow it to cool slightly on the baking sheet. This cooling process will help it firm up, making it easier to lift off the parchment without it breaking apart. Let it sit for about 5-10 minutes.

Step 7: Serve or Store
Once cooled, carefully lift your Cottage Cheese Flatbread off the parchment using a spatula. You can enjoy it warm right away or store it in an airtight container in the refrigerator for up to 3 days. This versatile flatbread pairs wonderfully with various toppings or can be savored on its own!

Cottage Cheese Flatbread Variations

Feel free to explore these delicious twists on the standard Cottage Cheese Flatbread recipe, and let your creativity shine in the kitchen!

  • Herbed Delight: Stir in a tablespoon of dried herbs like basil or oregano for added flavor and aroma. Your flatbread will bloom with enticing scents as it bakes!

  • Cheesy Infusion: Mix in a cup of shredded cheese such as mozzarella or cheddar for a gooey, melty texture. Imagine biting into a flatbread that’s both chewy and indulgently cheesy.

  • Spicy Kick: Add red pepper flakes or diced jalapeños to the mix for a delightful heat. A little spice can elevate your flatbread and awaken your taste buds for a flavorful adventure.

  • Veggie Boost: Fold in finely chopped spinach, kale, or bell peppers before baking for a nutritious twist. This not only enhances the texture but also adds a pop of color that’s visually appealing.

  • Sweet Version: Serve with a sprinkle of cinnamon or nutmeg, and drizzle with honey after baking for a unique dessert option. Just picture enjoying a warm, sweet flatbread that can double as breakfast or a snack!

  • Nutty Addition: Incorporate a tablespoon of ground flaxseed or chia seeds for a nutritional boost. Not only will this add fiber, but it will also give your flatbread a delightful crunch.

  • Smoky Flavor: Add smoked paprika or a touch of liquid smoke for a savory depth. This simple addition can remind you of a backyard BBQ, bringing warmth and comfort.

  • Mediterranean Twist: Mix in sun-dried tomatoes and olives for a flavorful, earthy experience. As you take a bite, you'll be transported to sun-kissed Mediterranean shores.

If you're curious about more flavorful inspirations, don't forget to check out our delightful Jello Salad Cottage recipe for a colorful side, or add some zest to your meal with our yummy Potato Blue Cheese dish. Enjoy your culinary journey!

How to Store and Freeze Cottage Cheese Flatbread

Fridge: Store your Cottage Cheese Flatbread in an airtight container in the refrigerator for up to 3 days. Place parchment paper between layers to prevent sticking.

Freezer: Wrap the flatbread tightly in plastic wrap and then in aluminum foil to freeze for up to 2 months. Thaw in the fridge before reheating.

Reheating: To maintain the delicious chewy texture, reheat using a skillet or toaster oven. Avoid the microwave, as it may make the flatbread soggy.

Room Temperature: If you plan to enjoy the flatbread the same day it's baked, it can be left out at room temperature for a few hours.

Make Ahead Options

These Cottage Cheese Flatbreads are a fantastic choice for anyone looking to save time on busy weeknights. You can prepare the flatbread batter, blending 1 cup of cottage cheese with 2 large eggs, and store it in the refrigerator for up to 24 hours in an airtight container. Alternatively, you can bake the flatbreads ahead of time and keep the finished product in the fridge for up to 3 days. Allow the flatbreads to cool completely, then store them layered with parchment paper to prevent sticking. When ready to serve, simply reheat them in a skillet or toaster oven to retain their delightful chewy texture. Enjoy a quick, nutritious meal with minimal fuss!

Expert Tips for Cottage Cheese Flatbread

  • Smooth Mixture: Blend until completely smooth to ensure your Cottage Cheese Flatbread doesn’t crumble after baking. A few lumps will result in uneven texture.
  • Monitor Baking: Check the flatbread at 20 minutes to avoid overbaking; you want golden edges and a firm center. It should not have dark spots.
  • Cooling Time: Let the flatbread cool on the baking sheet for about 5-10 minutes. This helps it firm up for easier handling.
  • Storage Tips: Store in an airtight container with parchment between layers to keep it fresh for up to 3 days. Freezing works too—just wrap tightly!
  • Reheating Method: Reheat using a skillet or toaster oven rather than a microwave to maintain that chewy texture you love.

What to Serve with Easy High-Protein Cottage Cheese Flatbread

There’s nothing quite like the warm aroma of freshly baked flatbreads filling your kitchen, inviting everyone to the table for a comforting meal.

  • Scrambled Eggs: These fluffy eggs provide a great protein boost, perfectly pairing with the chewy texture of the flatbread for a hearty breakfast.

  • Sautéed Vegetables: A colorful mix of sautéed peppers, onions, and spinach adds a burst of flavor and nutrition, creating a satisfying, wholesome meal.

  • Grilled Chicken: Tender, juicy chicken is a fantastic option for protein lovers. The flatbread makes a wonderful wrap to encase your favorite grilled chicken, complementing its savory taste.

  • Mini Pizzas: Top the flatbread with tomato sauce, cheese, and your choice of toppings for a quick and delicious pizza night. This playful twist is sure to please the entire family!

  • Fresh Salad: A crisp, vibrant green salad with tangy dressing brightens up the meal and provides a refreshing contrast to the soft flatbread.

  • Hummus Dip: Pair your flatbread with a smooth, creamy hummus for a delightful snack. This combination offers both flavor and texture, making it an irresistible choice.

  • Yogurt Parfait: For something sweet, layer yogurt with fruits and a drizzle of honey over the flatbread for an indulgent dessert that balances the nutty, savory notes.

  • Herbal Tea: Soft, aromatic tea can be the perfect beverage to wash down your meal or snack. Choose a mint or chamomile blend to enhance your overall experience.

  • Dark Chocolate: For a decadent finish, enjoy a piece of rich dark chocolate post-meal. It complements the flatbread's flavors and satisfies sweet cravings beautifully.

Cottage Cheese Flatbread Recipe FAQs

What type of cottage cheese should I use for the flatbread?
I recommend using full-fat cottage cheese for the best creaminess and structure. However, if dairy is a concern, you can easily substitute it with lactose-free cottage cheese without losing the delightful flavor and texture of the flatbread.

How should I store the leftover flatbread?
To keep your Cottage Cheese Flatbread fresh, store it in an airtight container in the refrigerator for up to 3 days. I like to place parchment paper between layers to prevent them from sticking together, ensuring each piece holds onto its perfect chewy texture!

Can I freeze Cottage Cheese Flatbread?
Absolutely! To freeze your flatbread, wrap it tightly in plastic wrap and then in aluminum foil. This helps prevent freezer burn and keeps it fresh for up to 2 months. When you're ready to enjoy it, simply thaw in the fridge overnight before reheating it.

What toppings or variations can I add to the flatbread?
The possibilities are endless! You can enhance your Cottage Cheese Flatbread by stirring in garlic powder, fresh herbs, or even adding shredded cheese for a tiny burst of flavor. Alternatively, sprinkle some cinnamon and honey for a sweet treat—it's a recipe that really welcomes creativity!

Why is my flatbread not sticking together?
If your flatbread crumbles or doesn’t hold together, it could be due to an uneven mixture. Make sure you blend the cottage cheese and eggs until completely smooth. Additionally, if your baking time was too short, the center may not have had enough time to firm up. Always check for that golden edge and firm center!

Is this flatbread suitable for pets?
While the ingredients in Cottage Cheese Flatbread are safe for most humans, keep in mind that eggs and dairy are not ideal for some pets, especially if they have sensitivities. It's best to enjoy this tasty treat yourself and avoid sharing it with furry companions.

Cottage Cheese Flatbread:

Cottage Cheese Flatbread: Light, Chewy, and So Easy to Make

This Cottage Cheese Flatbread is a quick, healthy snack, high in protein and low in carbs, perfect for wraps or on its own.
Print Recipe Pin Recipe
Prep Time 10 minutes mins
Cook Time 25 minutes mins
Cooling Time 10 minutes mins
Total Time 45 minutes mins
Servings: 4 flatbreads
Course: Snacks
Calories: 120
Ingredients Equipment Method Nutrition Notes

Ingredients
  

For the Flatbread
  • 1 cup Full-Fat Cottage Cheese or lactose-free if dairy is a concern
  • 2 large Eggs fresh is best for optimal texture
For Flavor Enhancement
  • 1 teaspoon Garlic Powder adjust based on taste
  • 1 teaspoon Fresh/Dried Herbs (e.g., Basil or Oregano) use your favorites
  • to taste Salt adjust to taste for the perfect bite

Equipment

  • Blender
  • Baking Sheet
  • Parchment Paper

Method
 

Step-by-Step Instructions for Cottage Cheese Flatbread
  1. Preheat your oven to 375°F (190°C). Gather your ingredients and equipment.
  2. Blend 1 cup of cottage cheese with 2 large eggs until smooth (30-60 seconds).
  3. Line a baking sheet with parchment paper, lightly greased with oil or cooking spray.
  4. Pour the mixture onto the baking sheet and spread into an even layer, about ¼ inch thick.
  5. Bake for 20-25 minutes until edges are golden brown and center is firm.
  6. Allow the flatbread to cool on the baking sheet for 5-10 minutes.
  7. Lift the flatbread off the parchment and serve warm or store in an airtight container.

Nutrition

Serving: 1flatbreadCalories: 120kcalCarbohydrates: 5gProtein: 10gFat: 7gSaturated Fat: 3gPolyunsaturated Fat: 1gMonounsaturated Fat: 3gCholesterol: 110mgSodium: 200mgPotassium: 150mgFiber: 1gSugar: 1gVitamin A: 10IUCalcium: 150mg

Notes

Store in an airtight container with parchment between layers to keep fresh for up to 3 days. Freezing is also an option.

Tried this recipe?

Let us know how it was!

No-Bake Lemon Poppyseed Protein Balls for a Refreshing Boost

February 1, 2026 by Grace Snow Leave a Comment

As I mixed a zesty blend of fresh lemons and crunchy poppy seeds the other day, I stumbled upon a delightful solution for snack time: No-Bake Lemon Poppyseed Protein Balls. These little gems pack a nutritious punch while feeling like an indulgent treat, making them the perfect pick-me-up for busy afternoons. Best of all, they’re incredibly quick to whip up, so even on the most hectic days, you can enjoy a healthy snack without the hassle of turning on the oven. With gluten-free options and the ability to customize ingredients, these protein balls are not only versatile but also a fun way to stay energized. Ready to elevate your snacking game? Let’s dive into this refreshing recipe together!

Why Are These Protein Balls So Special?

Quick and Easy: These no-bake protein balls require minimal effort and time, making them a go-to snack for even the busiest of days.

Bright, Invigorating Flavor: The zesty lemon combined with crunchy poppy seeds creates a refreshing flavor explosion that tantalizes your taste buds, making snack time truly enjoyable.

Healthy Indulgence: Guilt-free and nutritious, these treats don’t compromise on taste, satisfying your sweet cravings while offering healthy benefits.

Versatile and Customizable: Feel free to swap out flavors or ingredients, like using Lemon Ricotta Protein or adding in your favorite nuts for some extra texture and flavor!

Crowd-Pleaser: These little gems are perfect for sharing, whether at brunch, a playdate, or a quick snack for friends.

Meal Prep-Friendly: Ideal for prepping ahead of time, you can make a batch and store it in your fridge, ensuring you always have a healthy snack on hand.

No-Bake Lemon Poppyseed Protein Balls Ingredients

For the Protein Balls
• Vanilla Whey Protein Powder – Provides a protein boost and good texture; feel free to swap it with plant-based protein powders if you need a vegan option, though this may change the consistency.
• Oats – Acts as the base for structure and helps bind ingredients; rolled oats work best for a chewy texture.
• Poppy Seeds – Adds a delightful crunch and nutty flavor; while no direct substitutes are needed, you can omit them if you wish.
• Truvia (or other sweetener) – A great way to sweeten without extra calories; adjust usage based on the sweetness of your protein powder.
• Lemon Zest – Packs in vibrant flavor and aroma; make sure to use fresh zest and avoid the bitter white pith.
• Lemon Juice – Delivers bright acidity; freshly squeezed juice gives the best flavor punch.
• Water – Helps achieve the right consistency; start with a small amount and add more as needed to create a cohesive dough.

Now that you have the ingredients, you’re just steps away from creating your own delightful No-Bake Lemon Poppyseed Protein Balls!

Step‑by‑Step Instructions for No-Bake Lemon Poppyseed Protein Balls

Step 1: Combine Dry Ingredients
In a large mixing bowl, start by adding the vanilla whey protein powder, rolled oats, poppy seeds, Truvia, and fresh lemon zest. Use a whisk or spatula to mix everything together until well-combined. This dry mixture serves as the base for your No-Bake Lemon Poppyseed Protein Balls, ensuring an even distribution of flavors.

Step 2: Add Wet Ingredients
Next, pour in the freshly squeezed lemon juice and a small amount of water into the dry mixture. Stir vigorously using a spatula until the ingredients start to stick together and form a cohesive dough. If the mixture is crumbly, don’t worry; this is a crucial step in creating the delightful texture of your protein balls.

Step 3: Adjust Consistency
Check the consistency of your mixture; it should hold together without being sticky. If the dough feels too dry, gradually add a little more water, about a teaspoon at a time, mixing thoroughly after each addition until you achieve the desired texture. This may take a couple of minutes, but it's essential for the perfect No-Bake Lemon Poppyseed Protein Balls.

Step 4: Shape the Balls
Once your dough is ready, dampen your hands slightly to prevent sticking, and begin shaping the mixture into evenly-sized balls, about 1 inch in diameter. This process should yield around 28 balls, each bursting with zesty flavor and healthy goodness. Make sure each ball is compact to ensure they hold together well.

Step 5: Store the Balls
Take a Tupperware container and place the formed protein balls inside, ensuring they have enough space between them to avoid sticking together. Ideally, you want to keep them in a single layer. This storage method will help maintain their shape and freshness as they chill in the refrigerator.

Step 6: Chill and Set
Seal the Tupperware container with a lid and place it in the refrigerator for at least 30 minutes. This chilling time is crucial for your No-Bake Lemon Poppyseed Protein Balls to firm up properly, allowing the flavors to meld and intensify, making for a refreshing snack option.

Expert Tips for No-Bake Lemon Poppyseed Protein Balls

  • Measure Accurately: Use level scoops of protein powder to avoid a dry texture. Heaping scoops can make your protein balls chalky and unappetizing.

  • Chill Time Matters: Allow your protein balls to chill for at least 30 minutes. This step is essential for achieving the right firmness and flavor.

  • Zest Wisely: For a vibrant lemon flavor, only zest the yellow part of the lemon. The white pith can lend a bitter taste that detracts from your delightful protein balls.

  • Adjust Sweetness: If your protein powder is sweetened, reduce the Truvia accordingly. Everyone’s taste is different, so taste as you go!

  • Experiment with Add-ins: Feel free to add your favorite mix-ins like nuts or dried fruits. Just remember to keep the balance of wet ingredients steady to ensure the protein balls hold together perfectly.

What to Serve with No-Bake Lemon Poppyseed Protein Balls

Elevate your snacking experience by pairing these zesty protein balls with complementary flavors and textures that will delight your palate.

  • Fresh Berries: Serve with strawberries and blueberries for a burst of sweetness and vibrant color that enhances the lemon flavor.

  • Greek Yogurt: A silky and creamy addition that adds protein to your snack; plus, the tang balances beautifully with the citrusy notes.

  • Coconut Chia Pudding: This lightly sweet and creamy pudding offers a wonderful contrast in texture while adding healthy fats to your snack.

  • Nutty Granola: For added crunch, sprinkle some granola over yogurt alongside the protein balls. The chewiness of oats pairs well with the chewy texture of the protein balls.

  • Cucumber Slices: Their refreshing crispness acts as a delightful palate cleanser between bites of the protein balls.

  • Iced Herbal Tea: A cool, herbal beverage like mint or chamomile brings a soothing element to snack time, enhancing the bright lemon notes.

  • Chocolate Drizzle: Looking for a sweet touch? A drizzle of dark chocolate over the protein balls adds richness and indulgence without compromising health.

No-Bake Lemon Poppyseed Protein Balls Variations

Feel free to make these delightful protein balls uniquely yours with simple tweaks and substitutions!

  • Citrus Swap: Replace lemon with lime for a zesty twist that still offers a refreshing taste.

  • Nutty Option: Add chopped almonds or walnuts for a delightful crunch and an extra protein boost. A handful of nuts can truly elevate the texture and flavor experience!

  • Dried Fruit: Toss in some chopped dried cranberries or apricots for a sweet chewiness that pairs beautifully with the lemon.

  • Vegan Version: Use a plant-based protein powder and almond butter instead of whey to keep it vegan-friendly while still packed with protein.

  • Heat It Up: Add a pinch of cayenne pepper or chili flakes for a surprising kick that beautifully complements the lemon’s brightness.

  • Chocolate Drizzle: Top your protein balls with a drizzle of dark chocolate for a decadent finish that feels indulgent yet healthy.

  • Get Creamy: For an added richness, mix in a tablespoon of coconut cream; it's a luscious way to enhance the flavor!

If you're interested in maximizing lemon flavor, try enjoying them alongside a warm bowl of Lemon Chicken Soup for a complete and satisfying meal! Each variation can bring something new to your snacking experience, so don’t be afraid to experiment!

Storage Tips for No-Bake Lemon Poppyseed Protein Balls

Fridge: Keep your protein balls in an airtight container for up to a week. This helps maintain their freshness and delicious lemon flavor.

Freezer: For longer storage, freeze the protein balls for up to 3 months. Layer them between parchment paper to prevent sticking.

Thawing: When you're ready to enjoy, thaw them by refrigerating overnight or letting them sit at room temperature for about 30 minutes for the best texture.

Reheating: These No-Bake Lemon Poppyseed Protein Balls don't require reheating; simply grab one from the fridge or freezer and savor the delightful taste as a refreshing snack!

Make Ahead Options

These No-Bake Lemon Poppyseed Protein Balls are perfect for meal prep enthusiasts! You can prepare the protein ball mixture up to 24 hours in advance. Simply follow the initial steps to combine the dry ingredients and add the wet ingredients. Once your dough is formed, shape it into balls and store them in an airtight container in the refrigerator. This helps maintain their delightful flavor and chewy texture. When you’re ready to enjoy, just take them out and allow them to set at room temperature for a few minutes before indulging in a refreshing, healthy snack. With these make-ahead options, you'll save time and always have a nutritious treat on hand!

No-Bake Lemon Poppyseed Protein Balls Recipe FAQs

How do I select the best ingredients for my protein balls?
Absolutely! For the freshest flavor, choose ripe lemons without any dark spots or blemishes. Look for organic lemons if possible, as they’re less likely to have pesticides. When selecting oats, rolled oats are preferred for their texture. For protein powder, use a brand that you enjoy, keeping an eye out for added sugars or fillers.

How should I store my No-Bake Lemon Poppyseed Protein Balls?
To keep your protein balls fresh, store them in an airtight container in the refrigerator for up to a week. I often make a batch and keep them handy for a quick snack! If you’d like to store them longer, they freeze beautifully for up to 3 months. Just layer them between pieces of parchment paper to prevent any sticking.

Can I freeze my protein balls? If so, how?
Definitely! To freeze your No-Bake Lemon Poppyseed Protein Balls, first, allow them to chill in the fridge for at least 30 minutes. Then, place them in a single layer on a baking sheet and freeze until solid. Once frozen, transfer them to a zip-top freezer bag or an airtight container with parchment paper between layers. This helps maintain their shape and keeps them from sticking together.

What should I do if my mixture is too dry?
If your dough feels crumbly, don’t worry—this happens sometimes! Simply add a teaspoon of water at a time, mixing thoroughly after each addition. Continue this process until the mixture holds together but isn’t sticky. It’s essential to get the right consistency for perfect protein balls, so be patient and adjust as needed.

Are there any common dietary concerns I should consider?
Very much so! If you have allergies, be mindful of the ingredients in your protein powder, as they can contain traces of dairy or nuts. For those following a gluten-free diet, ensure you use certified gluten-free oats. Additionally, it's best to consult with a vet before sharing these protein balls with pets, as they may not be suitable for all animals.

No-Bake Lemon Poppyseed Protein Balls

No-Bake Lemon Poppyseed Protein Balls for a Refreshing Boost

No-Bake Lemon Poppyseed Protein Balls are a quick and healthy snack packed with flavor and nutrients.
Print Recipe Pin Recipe
Prep Time 10 minutes mins
Chilling Time 30 minutes mins
Total Time 40 minutes mins
Servings: 28 balls
Course: Snacks
Cuisine: American
Calories: 100
Ingredients Equipment Method Nutrition Notes

Ingredients
  

For the Protein Balls
  • 1 cup Vanilla Whey Protein Powder can substitute with plant-based protein powder
  • 2 cups Oats rolled oats work best
  • 2 tablespoons Poppy Seeds
  • 2 tablespoons Truvia (or other sweetener) adjust based on protein powder sweetness
  • 1 tablespoon Lemon Zest use fresh zest
  • 1/4 cup Lemon Juice freshly squeezed for best flavor
  • 2 tablespoons Water add more as needed to achieve consistency

Equipment

  • Mixing Bowl
  • Whisk
  • Spatula
  • Tupperware container

Method
 

Step-by-Step Instructions
  1. In a large mixing bowl, combine the vanilla whey protein powder, rolled oats, poppy seeds, Truvia, and fresh lemon zest. Mix well.
  2. Pour in the freshly squeezed lemon juice and a small amount of water. Stir vigorously until the ingredients start to stick together.
  3. Check the consistency; adjust with more water if too dry, mixing thoroughly after each addition.
  4. Dampen your hands slightly and shape the mixture into balls about 1 inch in diameter.
  5. Place the formed protein balls in a Tupperware container, keeping them in a single layer.
  6. Seal the container and refrigerate for at least 30 minutes to firm up the protein balls.

Nutrition

Serving: 1ballCalories: 100kcalCarbohydrates: 12gProtein: 6gFat: 2gSaturated Fat: 0.5gPolyunsaturated Fat: 0.5gMonounsaturated Fat: 0.5gCholesterol: 5mgSodium: 50mgPotassium: 50mgFiber: 2gSugar: 2gVitamin C: 5mgCalcium: 50mgIron: 0.5mg

Notes

These protein balls can be customized with different nuts or add-ins while maintaining a good balance of wet ingredients.

Tried this recipe?

Let us know how it was!

Birthday Cake Batter Protein Balls for Sweet, Guilt-Free Snacking

February 1, 2026 by Grace Snow Leave a Comment

In a world where convenience often overshadows quality, I found myself facing a dilemma: how to satisfy my sweet tooth without compromising health. That’s when I stumbled upon the magic of Birthday Cake Batter Protein Balls. Imagine indulging in that nostalgic, blissful taste of cake batter, but in a no-bake, protein-packed form! Yes, you read that right—these chewy, colorful bites are not only a treat for your taste buds but also a booster for your energy levels. Whipping these up takes less than 15 minutes, making them the perfect snack for busy days or a fun addition to any celebration. With options for nut-free and vegan diets, everyone can join in on the fun. Do you dare to give them a try?

Why are Birthday Cake Batter Protein Balls a must-try?

Quick to Make: In just under 15 minutes, you can whip up a delightful batch that’s ideal for any occasion.

Guilt-Free Indulgence: Satisfy your sweet cravings with these delicious bites, packed with protein and no baking required!

Nut-Free & Vegan Options: Easily cater to dietary preferences by swapping out ingredients, ensuring everyone can enjoy them.

Fun and Colorful: Infused with rainbow sprinkles, they bring a festive touch to your snack time or celebrations, making them visually appealing for parties.

Perfect Snack for All: Great as pre-workout fuel or a guilt-free dessert, these protein balls appeal to both the health-conscious and those just looking for a tasty treat!

Birthday Cake Batter Protein Balls Ingredients

For the Batter

  • Peanut Butter – Provides creaminess and healthy fats; substitute with sunflower seed butter for a nut-free option.
  • Honey – Adds natural sweetness and binds the mixture together; use maple syrup for a vegan option.
  • Vanilla Protein Powder – Boosts protein content for a satisfying snack; plant-based protein powder works as an excellent substitute.

For the Mix-Ins

  • Rainbow Sprinkles – Add festive flair and fun; feel free to omit or swap with dark chocolate chips for a chocolatey twist.
  • Milk or Water – Adjusts dough consistency; use as needed to achieve the perfect texture.

These Birthday Cake Batter Protein Balls come together effortlessly for a festive, protein-packed treat that everyone can enjoy!

Step-by-Step Instructions for Birthday Cake Batter Protein Balls

Step 1: Melt the Base
In a microwave-safe bowl, combine 1/2 cup peanut butter and 1/4 cup honey or maple syrup. Microwave on high for 20-30 seconds, until the mixture is warm and smooth. Stir it well to ensure a uniform, creamy consistency, which will help bind the Birthday Cake Batter Protein Balls together beautifully.

Step 2: Mix in Protein Powder
Add 1 cup vanilla protein powder to the melted mixture. Use a sturdy spatula to fold it in until a dough starts to form. If the mixture feels too dry and crumbly, gradually stir in a tablespoon of milk or water. Aim for a dough that holds together but isn’t overly sticky, giving you the perfect base for these protein-packed bites.

Step 3: Add Fun Sprinkles
Gently fold in 1/4 cup rainbow sprinkles into the dough, making sure to do this carefully to avoid bleeding colors. The vibrant sprinkles will add a festive touch, making your Birthday Cake Batter Protein Balls both delicious and visually appealing. Mix until just incorporated, keeping an eye on maintaining the integrity of the sprinkles.

Step 4: Shape the Bites
Using a tablespoon or a cookie scoop, portion out the dough and roll it into bite-sized balls—you should achieve about 12-15 balls, depending on size. If desired, roll them in additional sprinkles to enhance their festive look. This step is where the fun really begins, as you shape your tasty energy bites!

Step 5: Chill for Firmness
Place the rolled balls onto a parchment-lined tray, ensuring they’re spaced out. Refrigerate them for at least 20 minutes to allow the Birthday Cake Batter Protein Balls to firm up. This chilling time is crucial, as it helps the flavors meld and the texture set, creating a delightful, chewy snack.

Step 6: Serve and Store
Once chilled, your Birthday Cake Batter Protein Balls are ready to enjoy! For optimal freshness, store them in an airtight container in the fridge for up to one week, or freeze them for up to three months. These protein-packed bites are perfect for snacks, pre-workout energy, or a fun dessert option!

Expert Tips for Birthday Cake Batter Protein Balls

  • Creamy Consistency: Ensure that the peanut butter and honey are well-mixed after microwaving to prevent clumps in your Birthday Cake Batter Protein Balls.

  • Dough Texture Check: If your mixture appears too dry, gradually add milk or water until you reach a dough consistency that holds together well but isn't sticky.

  • Sprinkle Caution: When folding in sprinkles, do it gently to avoid color bleeding. This ensures your protein balls look as fun as they taste!

  • Portion Uniformity: Use a cookie scoop for consistent sizing; this way, each Birthday Cake Batter Protein Ball will offer the same delightful bite every time.

  • Storage Best Practices: For peak freshness, store the balls in an airtight container in the fridge or freeze them. This way, you can enjoy them for longer!

Make Ahead Options

These Birthday Cake Batter Protein Balls are fantastic for busy home cooks looking to streamline their meal prep! You can prepare the dough up to 24 hours in advance; just store it in an airtight container in the refrigerator after mixing. For even easier assembly, roll the balls and refrigerate them for up to 3 days before serving. To keep them from becoming too soft, ensure they are chilled properly in between preparations. When you're ready to enjoy, simply take them out and let them sit for a few minutes at room temperature. With just a little foresight, you can have delicious, protein-packed snacks ready to go, saving you time and effort on busy days!

What to Serve with Birthday Cake Batter Protein Balls

Elevate your snacking experience by pairing these delightful bites with complementary sides and treats that enhance their fun, festive nature.

  • Creamy Greek Yogurt: A dollop of Greek yogurt adds a tangy creaminess that perfectly balances the sweet, chewy protein balls. It's a wholesome touch that transforms your snack into a delightful mini dessert.

  • Fresh Berries: Juicy strawberries, blueberries, or raspberries provide a burst of freshness that complements the sweetness of the protein balls. Their natural tartness creates a delightful contrast that keeps each bite exciting.

  • Crunchy Apple Slices: The crispness of sliced apples pairs wonderfully with the soft texture of the protein balls. Drizzle them with a bit of almond butter for an added layer of flavor and fun!

  • Nutty Granola: A handful of granola brings an invigorating crunch that contrasts beautifully with the soft bites. Choose a nut-free variety to keep it inclusive for all dietary preferences.

  • Oatmeal Cookies: For a cozy combo, serve with oatmeal cookies. Their wholesome ingredients enhance the theme of indulgence without the guilt.

  • Almond Milk Shake: A chilled almond milk shake can satisfy your sweet tooth while maintaining a light feel. Blend with vanilla or chocolate for an extra flavor boost that kids will love!

  • Chocolate-Covered Pretzels: The combination of sweet and salty in chocolate-covered pretzels pairs fabulously with the Birthday Cake Batter Protein Balls, adding a fun crunch that everyone can enjoy.

  • Iced Tea or Lemonade: Refresh drinks like iced tea or freshly squeezed lemonade enhance the festive spirit of your snack table, making it a perfect gathering option.

  • Mini Fruit Skewers: Colorful fruit skewers add a playful touch and visual appeal to your snack time, making the occasion feel more celebratory.

Feel free to mix and match these suggestions to create a memorable snacking experience centered around your Birthday Cake Batter Protein Balls!

Birthday Cake Batter Protein Balls Variations

Feel free to mix things up and make these protein balls uniquely yours!

  • Nut-Free: Substitute peanut butter with sunflower seed butter for a delicious nut-free option. It's just as creamy and satisfying.

  • Vegan: Replace honey with maple syrup to keep these treats completely vegan-friendly without sacrificing sweetness.

  • Extra Crunch: Add 1/4 cup of chopped nuts or seeds for a delightful texture variation. The crunchiness complements the chewiness perfectly.

  • Flavor Boost: A dash of almond extract can elevate the flavor, adding a sweet, nutty essence to your protein balls. You might just love the twist!

  • Protein Punch: Try using chocolate protein powder instead of vanilla for a richer, cocoa-infused flavor that pairs beautifully with chocolate chips.

  • Gluten-Free: Ensure your sprinkles are gluten-free, and you can enjoy these guilt-free snacks without worry.

  • Fruity Twist: Incorporate dried fruits like cranberries or chopped apricots for a burst of natural sweetness and added nutrients.

  • Chilled Treat: Serve these protein balls straight from the freezer during hot days for a refreshing, cool snack! You’ll love this new way to enjoy them.

For more delightful conditioning options, why not try pairing your energy bites with a refreshing smoothie? A delicious option is the icy blend from my Chocolate Pudding Cake, which balances flavors perfectly!

How to Store and Freeze Birthday Cake Batter Protein Balls

Fridge: Keep your Birthday Cake Batter Protein Balls in an airtight container in the refrigerator for up to one week. This helps maintain their chewy texture and vibrant flavors.

Freezer: For longer storage, freeze the protein balls in a single layer on a baking sheet. Once firm, transfer them to a freezer-safe bag or container for up to three months, ensuring they remain fresh.

Thawing: When ready to enjoy, simply take out the desired amount and let them thaw in the fridge for a couple of hours, or enjoy them straight from the freezer for a cool treat!

Reheating Advice: No need to heat these no-bake treats! Enjoy them as they are for a quick, nutritious snack on the go.

Birthday Cake Batter Protein Balls Recipe FAQs

How do I choose the right peanut butter for this recipe?
Absolutely! Opt for a natural peanut butter that is creamy and free from added sugars or oils. This will give your Birthday Cake Batter Protein Balls a smooth texture. If you prefer a nut-free option, sunflower seed butter is a fantastic substitute, providing similar creaminess without the allergens.

What’s the best way to store Birthday Cake Batter Protein Balls?
For optimum freshness, store your Birthday Cake Batter Protein Balls in an airtight container in the refrigerator for up to one week. They’ll stay chewy and delicious this way. If you wish to keep them longer, they can be frozen for up to three months. Just place them on a baking sheet to freeze individually before transferring to a freezer-safe container.

Can I freeze these protein balls effectively?
Yes, indeed! To freeze your Birthday Cake Batter Protein Balls, first lay them out on a parchment-lined tray, ensuring they’re not touching. Freeze them for 1-2 hours until firm, then transfer to a freezer-safe bag. This method prevents them from sticking together, and they’ll stay fresh for up to three months!

What if my mixture seems too dry or crumbly?
If you find the mixture isn’t coming together well, gradually add a tablespoon of milk or water. Mix well after each addition, and stop when you achieve a dough-like consistency that isn't overly sticky. This will help you mold your Birthday Cake Batter Protein Balls effectively and ensure they hold their shape.

Are there any dietary considerations when making these protein balls?
Very! You can easily adapt these balls for different diets. To make them vegan, simply substitute honey with maple syrup. Additionally, if anyone in your household has nut allergies, swapping out peanut butter for sunflower seed butter is a great nut-free alternative. Enjoy your tasty treats with peace of mind!

Birthday Cake Batter Protein Balls

Birthday Cake Batter Protein Balls for Sweet, Guilt-Free Snacking

Enjoy these Birthday Cake Batter Protein Balls for a sweet, guilt-free snack packed with protein and bursting with flavor.
Print Recipe Pin Recipe
Prep Time 15 minutes mins
Chilling Time 20 minutes mins
Total Time 35 minutes mins
Servings: 12 balls
Course: Snacks
Cuisine: American
Calories: 150
Ingredients Equipment Method Nutrition Notes

Ingredients
  

For the Batter
  • 1/2 cup Peanut Butter Substitute with sunflower seed butter for nut-free option.
  • 1/4 cup Honey Use maple syrup for a vegan option.
  • 1 cup Vanilla Protein Powder Plant-based protein powder works well as a substitute.
For the Mix-Ins
  • 1/4 cup Rainbow Sprinkles Feel free to omit or swap with dark chocolate chips.
  • Milk or Water Use as needed to adjust dough consistency.

Equipment

  • Microwave-safe bowl
  • Spatula
  • Cookie Scoop
  • Parchment Paper

Method
 

Step-by-Step Instructions
  1. In a microwave-safe bowl, combine 1/2 cup peanut butter and 1/4 cup honey or maple syrup. Microwave on high for 20-30 seconds until warm and smooth.
  2. Add 1 cup vanilla protein powder to the melted mixture and fold it in until a dough starts to form. Gradually stir in a tablespoon of milk or water if the mixture is too dry.
  3. Fold in 1/4 cup rainbow sprinkles gently to avoid bleeding colors. Mix until just incorporated.
  4. Using a tablespoon or cookie scoop, portion out the dough and roll it into balls; expect about 12-15 balls.
  5. Place the rolled balls onto a parchment-lined tray and refrigerate for at least 20 minutes.
  6. Once chilled, your Birthday Cake Batter Protein Balls are ready to enjoy or store in an airtight container.

Nutrition

Serving: 1ballCalories: 150kcalCarbohydrates: 15gProtein: 5gFat: 7gSaturated Fat: 1gPolyunsaturated Fat: 2gMonounsaturated Fat: 4gSodium: 50mgPotassium: 120mgFiber: 1gSugar: 8gCalcium: 2mgIron: 4mg

Notes

For best results, use a cookie scoop for consistent sizing and ensure that the peanut butter and honey are well-mixed to avoid clumps.

Tried this recipe?

Let us know how it was!

No-Bake Protein Balls: Chewy, Delicious Energy for Your Day

February 1, 2026 by Grace Snow Leave a Comment

Stepping into the kitchen after a long day often feels like a mini-crisis, where the battle between convenience and nutrition unfolds. If you’re anything like me, you’ve probably looked for quick and easy solutions that don’t sacrifice taste or quality. Enter the No-Bake Protein Balls: a delightful snack that marries the best of both worlds! These chewy, protein-packed bites are not just perfect for meal prep—they're also a hit with kids and adults alike. In just a few simple steps, you’ll create a snack that offers a nutritious punch while effortlessly fitting into your busy schedule. Ready to discover how to whip up these delicious energy balls and make your snacking a little more exciting? Let’s dive in!

Why Are No-Bake Protein Balls So Great?

Simplicity at Its Best: With just a few wholesome ingredients, you can master this quick and easy snack in no time.

Chewy, Nutritious Delight: The chewy texture and irresistible flavor make these protein balls a crowd-pleaser for both kids and adults, perfect for any occasion.

Protein-Packed Power: Each bite is loaded with protein, making them an excellent post-workout recovery option or a nutritious snack throughout the day.

Versatile Enjoyment: Customize your protein balls with different nut butters, sweeteners, or add-ins like dried fruit or coconut flakes for a unique twist. For more delicious flavor ideas, explore my Lemon Ricotta Protein recipe!

Meal Prep Friendly: These energy bites are perfect for meal prep, so you can whip up a batch and have nutritious snacks ready for busy days ahead.

No-Bake Protein Balls Ingredients

• Here’s everything you need to create these delightful snacks!

For the Base

  • Rolled Oats – Provides structure and fiber; substitute with gluten-free oats for a gluten-free version.
  • Natural Peanut Butter – Adds creaminess and protein; can be replaced with almond butter for nut-free options.
  • Honey or Maple Syrup – Sweetens the mixture naturally; maple syrup acts as a vegan alternative.
  • Vanilla Protein Powder – Increases protein content; use any protein powder flavor to customize.

For the Flavor

  • Mini Chocolate Chips – Adds sweetness and liveliness; swap for dried fruit or nuts for a healthier alternative.
  • Chia Seeds – Boosts fiber and provides Omega-3 fatty acids; flax seeds can be used in place of chia.
  • Vanilla Extract – Enhances flavor; leave out if you prefer a more neutral taste.
  • Pinch of Salt – Balances flavors and enhances the overall taste; optional, but definitely recommended.

With these ingredients, you’ll be ready to enjoy your homemade No-Bake Protein Balls in no time!

Step‑by‑Step Instructions for No-Bake Protein Balls

Step 1: Combine Dry Ingredients
In a large mixing bowl, add 1 cup of rolled oats, 1/2 cup of vanilla protein powder, 2 tablespoons of chia seeds, and a pinch of salt. Use a rubber spatula to mix these dry ingredients thoroughly until well combined; aim for an even distribution of the chia seeds. This blend will form the nutritious base for your No-Bake Protein Balls.

Step 2: Add Wet Ingredients
Next, scoop in 1/2 cup of natural peanut butter and 1/4 cup of honey (or maple syrup) into the bowl. Pour in 1 teaspoon of vanilla extract for extra flavor. Mix everything together vigorously with your spatula until a thick dough starts to form, about 2-3 minutes. The mixture should be sticky and come together nicely without any dry patches.

Step 3: Incorporate Chocolate Chips
Gently fold in 1/3 cup of mini chocolate chips into your protein ball mixture. Use a spatula to ensure the chocolate chips are evenly distributed throughout the dough without breaking them. This will add delightful sweetness and a fun texture to your No-Bake Protein Balls.

Step 4: Shape the Dough
Now it’s time to shape your protein ball mixture. Take about 1 tablespoon of the dough and roll it into a 1-inch ball using your hands. Place each ball onto a parchment-lined tray, making sure to space them out nicely to prevent sticking. Continue shaping until all the mixture is formed into balls; you should get about 12-15 protein balls.

Step 5: Chill in the Refrigerator
After shaping your No-Bake Protein Balls, place the tray in the refrigerator. Let them chill for at least 30 minutes, allowing them to firm up. This step is essential as it helps the protein balls maintain their shape and improves their overall texture, making them a perfect grab-and-go snack.

Step 6: Store and Enjoy
Once chilled, your No-Bake Protein Balls are ready to enjoy! You can eat them straight from the fridge or let them sit at room temperature for a few minutes. Store any leftover protein balls in an airtight container in the refrigerator for up to 1 week, or freeze them for future enjoyment.

What to Serve with No-Bake Protein Balls

Elevate your snacking experience by pairing these delicious bites with complementary flavors and textures.

  • Creamy Yogurt: A dollop of yogurt adds a luscious creaminess and a refreshing contrast to the chewy protein balls, making it perfect for breakfast or snacks.

  • Fresh Fruit Skewers: Colorful fruit skewers bring brightness and sweetness. Paired together, you'll have a wholesome and vibrant snack plate that pleases both kids and adults.

  • Nutty Granola: A handful of granola can introduce a satisfying crunch that enhances the texture of the protein balls, creating a delightful munching experience.

  • Dark Chocolate Dipped Strawberries: For a sweet indulgence, the rich flavor of dark chocolate with fresh strawberries pairs beautifully with the protein balls, creating a luxurious treat.

  • Nut Butter Drizzle: A light drizzle of your favorite nut butter over the protein balls adds not only a delectable flavor but also an extra dose of protein that keeps you fueled.

  • Cold Almond Milk: A glass of cold almond milk offers a refreshing contrast to the sweet protein balls and is a perfect drink pairing for a nourishing snack.

  • Coconut Flakes: Experience a tropical twist by sprinkling unsweetened coconut flakes over the top for a little texture and natural sweetness that complements each bite.

  • Matcha Latte: Enjoy a soothing matcha latte alongside your protein balls for a calming yet energizing treat; the earthy flavors of matcha harmonize beautifully with the sweet notes.

By pairing these options with your No-Bake Protein Balls, you’ll create a deliciously balanced snack spread that nourishes and delights!

Make Ahead Options

These No-Bake Protein Balls are an ideal solution for busy home cooks looking to streamline their meal prep! You can prepare the mixture up to 24 hours in advance by combining all the dry ingredients (oats, protein powder, chia seeds, and salt) and storing them in an airtight container. You can also mix the wet ingredients (peanut butter and honey) separately. Just be sure to refrigerate both components to maintain their quality. When you’re ready to enjoy, simply combine the two mixtures, fold in the chocolate chips, and roll into balls before chilling for another 30 minutes. This not only saves time, but ensures your snacks are just as delicious when you're ready to savor them!

Expert Tips for No-Bake Protein Balls

  • Stickiness is Key: Ensure the dough is sticky enough to hold together. If it's too dry, gradually add more honey or nut butter until it binds.

  • Easier Mixing: Use a rubber spatula for mixing the thick ingredients like peanut butter. This helps incorporate everything without a mess.

  • Chill for Best Texture: Refrigerate the protein balls for at least 30 minutes. This firms them up, making them easier to shape and enhancing the overall texture.

  • Customizable Flavors: Feel free to swap ingredients! Substitute almond butter for peanut butter or use dried fruit instead of chocolate chips for a nutritious twist.

  • Batch Storage: Keep your No-Bake Protein Balls in an airtight container in the fridge for up to a week. For longer storage, freeze them for a quick snack anytime!

How to Store and Freeze No-Bake Protein Balls

Fridge: Keep your No-Bake Protein Balls in an airtight container in the refrigerator for up to 1 week. This ensures they stay fresh and ready for snacking anytime!

Freezer: For longer storage, freeze the protein balls for up to 3 months. Place them in a freezer-safe container or a zip-top bag, ensuring to squeeze out excess air.

Thawing: When you’re ready to enjoy, simply transfer the desired amount to the fridge to thaw overnight. They will regain their delicious chewy texture and flavor!

On-the-Go: Perfect for grab-and-go snacks, these protein balls can be enjoyed directly from the fridge, at room temperature, or even a little chilled for a refreshing treat.

No-Bake Protein Balls Variations

Feel free to explore these delightful variations to make your No-Bake Protein Balls even more exciting!

  • Nut-Free: Swap peanut butter for sunflower seed butter to keep it nut-free without sacrificing creaminess.
    Use this twist to accommodate those with nut allergies while ensuring the same delicious taste!

  • Vegan-Friendly: Replace honey with agave syrup or maple syrup to keep it completely plant-based.
    This simple change keeps the sweetness while catering to your vegan friends or lifestyle.

  • Cocoa Boost: Stir in 2 tablespoons of unsweetened cocoa powder for a chocolatey flavor adventure.
    Chocolate lovers will rejoice at how this addition elevates the taste, bringing indulgence without guilt.

  • Spiced Delight: Add 1 teaspoon of cinnamon or pumpkin spice to the dry ingredients for warmth and flavor.
    This warming twist is perfect for cozying up on chilly days, lending your protein balls a seasonal flair.

  • Fruit-Filled: Swap mini chocolate chips for 1/2 cup of dried cranberries or raisins for a fruity twist.
    This option provides a juicy burst in each bite, making these energy balls even more enjoyable for everyone.

  • Coconut Lover: Mix in 1/4 cup of unsweetened shredded coconut for a tropical flair.
    Coconut brings a subtle sweetness and chewy texture, transporting your snack time to a sunny paradise.

  • Protein Punch: Use flavored protein powders, such as chocolate or vanilla, to emphasize the taste even more.
    This is a fun way to tailor the flavor profile and keep your nutrition goals in check.

Feeling adventurous? Try any of these variations to truly make your No-Bake Protein Balls shine! And for more healthful treats, consider my Lemon Ricotta Protein recipe that adds a burst of citrus to your snacking!

No-Bake Protein Balls Recipe FAQs

How do I select ripe ingredients for my No-Bake Protein Balls?
Absolutely! For the best flavor in your No-Bake Protein Balls, use fresh ingredients. Make sure your rolled oats are whole and not stale, while natural peanut butter should be free from added sugars or preservatives. If you’re opting for alternatives, check that almond butter is creamy and not overly dry.

What’s the best way to store No-Bake Protein Balls, and how long do they last?
These delightful No-Bake Protein Balls can be stored in an airtight container in the refrigerator for up to 1 week. If you want them to last longer, you can freeze them for up to 3 months! Just make sure to place them in a freezer-safe container or a zip-top bag, squeezing out any excess air to avoid freezer burn.

Can I freeze No-Bake Protein Balls, and what’s the best way to do it?
Certainly! To freeze your No-Bake Protein Balls, start by placing them on a parchment-lined baking sheet in a single layer. Freeze for about 1-2 hours until firm. Then, transfer the frozen balls to a freezer-safe container or zip-top bag, ensuring to remove excess air. When you're ready to enjoy them, simply thaw in the refrigerator overnight.

What should I do if my No-Bake Protein Balls are too dry?
If you find your dough is too dry and crumbly, don't worry! Gradually add more honey or peanut butter, a tablespoon at a time, mixing until the desired sticky texture is achieved. You can also add a splash of almond milk or a tiny bit of water to moisten the mixture further, but do so in small increments.

Are there any dietary considerations for these No-Bake Protein Balls?
Very! These protein balls can be easily adapted for various dietary needs. For a nut-free version, use sunflower seed butter instead of nut butter, and for vegan options, substitute honey with maple syrup. Always check labels for allergens if you're serving them to guests, especially if they have nut allergies.

Can my children help make No-Bake Protein Balls?
Absolutely! Making No-Bake Protein Balls is a fun and engaging kitchen activity for kids. They can help mix and shape the balls, making it a wonderful bonding experience. Plus, they’ll love customizing their snacks by adding their favorite ingredients, transforming it into a family favorite!

No-Bake Protein Balls

No-Bake Protein Balls: Chewy, Delicious Energy for Your Day

No-Bake Protein Balls are a chewy, delicious snack packed with nutrition, perfect for meal prep and busy lifestyles.
Print Recipe Pin Recipe
Prep Time 15 minutes mins
Chilling Time 30 minutes mins
Total Time 45 minutes mins
Servings: 12 balls
Course: Snacks
Calories: 100
Ingredients Equipment Method Nutrition Notes

Ingredients
  

For the Base
  • 1 cup rolled oats substitute with gluten-free oats for a gluten-free version
  • 1/2 cup natural peanut butter can be replaced with almond butter for nut-free options
  • 1/4 cup honey or maple syrup maple syrup acts as a vegan alternative
  • 1/2 cup vanilla protein powder use any protein powder flavor to customize
For the Flavor
  • 1/3 cup mini chocolate chips swap for dried fruit or nuts for a healthier alternative
  • 2 tablespoons chia seeds flax seeds can be used in place of chia
  • 1 teaspoon vanilla extract leave out if you prefer a more neutral taste
  • pinch salt optional, but definitely recommended

Equipment

  • Mixing Bowl
  • rubber spatula
  • Parchment Paper
  • measuring cups
  • Measuring Spoons

Method
 

  1. In a large mixing bowl, add rolled oats, vanilla protein powder, chia seeds, and a pinch of salt. Mix these dry ingredients thoroughly until well combined.
  2. Scoop in natural peanut butter and honey (or maple syrup) into the bowl. Pour in vanilla extract and mix everything together until a thick dough forms, about 2-3 minutes.
  3. Gently fold in mini chocolate chips into the mixture using a spatula to ensure an even distribution.
  4. Take about 1 tablespoon of the dough and roll it into a 1-inch ball. Place each ball onto a parchment-lined tray, spacing them out to prevent sticking.
  5. Chill the tray in the refrigerator for at least 30 minutes to allow the protein balls to firm up.
  6. Once chilled, your No-Bake Protein Balls are ready to enjoy! Store leftovers in an airtight container in the refrigerator for up to 1 week.

Nutrition

Serving: 1ballCalories: 100kcalCarbohydrates: 12gProtein: 4gFat: 4gSaturated Fat: 1gPolyunsaturated Fat: 0.5gMonounsaturated Fat: 2gSodium: 50mgPotassium: 100mgFiber: 2gSugar: 4gCalcium: 30mgIron: 1mg

Notes

Stickiness is key; ensure the dough is sticky enough. You can customize flavors by swapping ingredients as desired.

Tried this recipe?

Let us know how it was!

Ginger Onion Fried Sea Bass: Quick, Flavorful Family Delight

January 29, 2026 by Grace Snow Leave a Comment

As the sizzle of the frying pan fills the kitchen, the enticing scent of Ginger Onion Fried Sea Bass wafts through the air, beckoning me closer. This dish is not just a quick dinner solution; it's a heartwarming way to bond with family over something delicious and homemade. With its beautifully flaky fish and fragrant ginger-onion sauce, it’s a perfect balance of simplicity and flavor that even the busiest home-chefs can whip up on a weeknight. Plus, this recipe is a true crowd-pleaser that offers flexibility—feel free to substitute sea bass with whatever firm fish you have on hand. Are you ready to bring the vibrant tastes of Asian cuisine to your dinner table tonight?

Why is Ginger Onion Fried Sea Bass a Must-Try?

Simplicity at Its Best: This quick and easy recipe requires minimal ingredients, making it perfect for busy weeknights.

Incredible Flavor: The combination of ginger and onion creates a fragrant, mouthwatering sauce that perfectly enhances the delicate flavor of the fish.

Versatile Options: While sea bass is a star, feel free to switch it out for cod or tilapia, accommodating whatever you have in your fridge.

Family-Friendly Delight: A generally well-received dish, kids and adults alike will savor every bite, making family dinner a joyous occasion.

Quick Cooking Time: In just 20 minutes, you can have a delicious meal ready to serve, allowing you to enjoy more time with your loved ones.

Get creative and try serving this dish alongside some stir-fried vegetables or pair it with steamed rice for a complete meal that’s as satisfying as it is tasty!

Ginger Onion Fried Sea Bass Ingredients

For the Fish
• Sea Bass – A tender and flaky white fish that pairs beautifully with the ginger and onion flavors.
• Cornstarch – Helps create a crispy exterior when frying; you can substitute it with arrowroot powder for a gluten-free option.

For the Sauce
• Ginger – Fresh ginger provides an aromatic and slightly spicy note that enhances the dish.
• Onion – Adds sweetness and depth; yellow onions are common, but other varieties work as well.
• Soy Sauce – An umami enhancer that gives the dish a savory depth; opt for low-sodium soy sauce for a healthier choice.
• Salt & Pepper – Essential for enhancing the overall flavor; adjust to your taste preference.

For Frying
• Vegetable Oil – This is the cooking fat used for frying, contributing to the dish's crispiness; you can substitute it with canola or peanut oil.

Step‑by‑Step Instructions for Ginger Onion Fried Sea Bass

Step 1: Prepare the Sauce
In a medium bowl, combine thinly sliced ginger and onions with soy sauce, salt, and pepper to taste. Mix gently until the ingredients are well coated. Let this mixture sit while you prepare the sea bass, allowing the flavors to meld beautifully, ensuring the Ginger Onion Fried Sea Bass will be bursting with flavor.

Step 2: Coat the Fish
Pat the sea bass fillets dry using paper towels to remove excess moisture. Lightly coat each side with cornstarch, ensuring an even layer for a crispy texture when frying. This step is crucial for achieving that perfect crunch, so take your time to cover the fish thoroughly before moving on to cooking.

Step 3: Heat the Oil
In a large skillet, pour in enough vegetable oil to cover the bottom of the pan and heat it over medium-high heat until shimmering, about 3–4 minutes. To test if the oil is ready, drop a tiny bit of cornstarch into it; if it sizzles, you’re good to go! Properly heated oil is key for the best Ginger Onion Fried Sea Bass.

Step 4: Fry the Fish
Carefully place the coated sea bass fillets in the hot oil, ensuring not to overcrowd the pan. Fry for about 3–4 minutes on each side or until golden brown and the fish flakes easily with a fork. Observe the color change as it cooks; a perfect fillet will have a crispy exterior and tender interior.

Step 5: Add the Sauce
Once the sea bass is beautifully fried, pour the prepared ginger onion sauce over the fish in the skillet. Reduce the heat to low and let it simmer for about 1–2 minutes. This allows the flavors to infuse the fish, creating a delicious and aromatic profile that makes the Ginger Onion Fried Sea Bass truly appealing.

Step 6: Serve the Dish
Carefully transfer the sea bass to a serving platter, ensuring to drizzle any remaining sauce from the pan over the top. Garnish with additional slices of ginger and onion if desired, adding a beautiful touch. Serve the Ginger Onion Fried Sea Bass immediately, paired with steamed rice or stir-fried vegetables for a complete meal.

What to Serve with Ginger Onion Fried Sea Bass

As you savor the delightful flavors of ginger and onion mingling with your perfectly fried fish, it's essential to complement your meal with tasty sides that elevate the experience.

  • Steamed Jasmine Rice: Its fluffy texture is the ideal canvas for soaking up the savory ginger-onion sauce, providing a comforting balance to the dish.

  • Stir-Fried Bok Choy: The vibrant greens add a fresh, crunchy contrast, while their slight bitterness beautifully complements the sweetness of the sauce.

  • Crispy Spring Rolls: These bite-sized delights offer a satisfying crunch, filled with fresh vegetables to enhance the meal's overall flavor profile.

  • Sesame Cucumber Salad: This refreshing salad adds a touch of coolness with its crisp cucumbers and zesty dressing, making each bite vibrant and refreshing.

  • Hot Green Tea: A warm cup not only cleanses the palate but also enhances the meal with its aromatic notes, bringing a soothing end to your dining experience.

  • Mango Sticky Rice: For dessert lovers, this sweet treat wraps up dinner beautifully, balancing the savory flavors with its sweetness and creamy coconut finish.

Create a truly memorable dining experience by mixing and matching these pairings, ensuring every bite is as delicious as the Ginger Onion Fried Sea Bass itself!

Make Ahead Options

These Ginger Onion Fried Sea Bass are perfect for meal prep enthusiasts looking to save time on busy weeknights! You can prepare the vibrant ginger onion sauce up to 3 days in advance; just refrigerate it in an airtight container to keep flavors fresh. Additionally, you can coat the sea bass fillets in cornstarch and store them in the fridge for up to 24 hours. When you're ready to serve, simply fry the fish until golden brown and then pour the prepared sauce over the top, allowing it to simmer for a couple of minutes. This way, you'll achieve just as delicious results with minimal effort, making mealtime a breeze!

How to Store and Freeze Ginger Onion Fried Sea Bass

  • Fridge: Store leftover Ginger Onion Fried Sea Bass in an airtight container in the fridge for up to 3 days. This preserves its freshness and flavor for future meals.

  • Freezer: Wrap the cooled fish tightly in plastic wrap and place it in a freezer-safe bag for up to 2 months. Ensure you remove as much air as possible to prevent freezer burn.

  • Reheating: For best results, reheat the fish in a skillet over medium heat until warmed through, about 5 minutes. This method helps to restore its crispiness while keeping it moist.

  • Storage Tips for Sauce: Prepare the ginger onion sauce ahead of time and store it in the fridge for up to 3 days. Reheat before serving to elevate the flavors of your dish.

Expert Tips for Ginger Onion Fried Sea Bass

  • Hot Oil is Key: Ensure your oil is hot enough before adding the fish; a sizzling sound means it’s ready for frying to achieve that perfect crispiness.

  • Don't Overcrowd: Avoid overcrowding the pan when frying; doing so can lower the oil temperature and lead to soggy fish. Fry in batches if needed.

  • Marinate for Flavor: For an added flavor boost, consider marinating the sea bass in soy sauce and ginger for about 30 minutes prior to cooking.

  • Coat Evenly: Make sure to coat the fish evenly with cornstarch for optimal crispiness; uneven coverage can cause parts to remain soggy.

  • Monitor Cooking Time: Keep an eye on the frying time—about 3-4 minutes per side should suffice, but adjust based on the thickness of your fillets.

  • Perfect Pairings: This Ginger Onion Fried Sea Bass pairs wonderfully with steamed rice or stir-fried vegetables, making your meal feel complete and satisfying.

Ginger Onion Fried Sea Bass Variations

Feel free to let your culinary creativity shine with these delightful twists on Ginger Onion Fried Sea Bass!

  • Fish Options: Substitute sea bass with firm white fish like cod, snapper, or tilapia for varied textures and flavors. Each fish brings its unique nuances to the dish, ensuring that every meal feels fresh and exciting!

  • Vegetarian Delight: For a vegetarian version, swap in tofu or tempeh seasoned similarly to the fish. The crispy edges of the tofu paired with the savory sauce will be a satisfying replacement.

  • Heat Level Up: Add diced fresh chilies or a pinch of chili flakes to the sauce to give the dish an extra kick. Adjust the heat based on your family’s preference, making it a fun addition for those who love a spicy comfort.

  • Herb Infusion: Enhance the flavor by adding fresh herbs such as cilantro or green onions as a garnish just before serving. This adds a bright color and fresh taste that complements the warmer tones of ginger and onion beautifully!

  • Veggie Boost: Stir in bell peppers, bok choy, or snow peas with the sauce for added color and nutrition. These veggies not only add crunch but also boost the meal’s overall health factor, making your dish fulfilling and vibrant!

  • Crispy Almonds: Top the finished dish with slivered, toasted almonds for an amazing crunch and nutty flavor profile. The contrast of textures will elevate your dining experience, making every bite an adventure.

  • Zesty Citrus: Drizzle the Ginger Onion Fried Sea Bass with a squeeze of lime or lemon juice before serving. This aromatic citrus touch brightens the dish, bringing the flavors to life and balancing the rich ginger-onion sauce.

  • Asian Twist: Incorporate a dash of sesame oil into the sauce for a deeper, nuttier flavor. This subtle adjustment adds an authentic Asian flair that complements the essence of the dish beautifully.

As you explore these variations, remember that making cooking personal can turn any meal into a cherished experience. For something extra special, consider pairing your plate with dishes like Pan Fried Shrimp or Roasted Corn Fried rice to create a fabulous feast!

Ginger Onion Fried Sea Bass Recipe FAQs

What type of sea bass is best for this recipe?
Absolutely! For this Ginger Onion Fried Sea Bass, I recommend using fresh sea bass, as it has a delicious flaky texture that cooks beautifully. If you can’t find sea bass, feel free to substitute with other firm, white fish like snapper, cod, or tilapia. Just keep an eye on cooking times, as thinner fillets may require less time.

How should I store leftovers of Ginger Onion Fried Sea Bass?
You can store leftover Ginger Onion Fried Sea Bass in an airtight container in the fridge for up to 3 days. To maintain its quality, I suggest reheating it in a skillet over medium heat for about 5 minutes. This method helps restore the fish’s crispiness while keeping it moist, ensuring a delightful meal even after it's been saved!

Can I freeze Ginger Onion Fried Sea Bass?
Yes! To freeze the Ginger Onion Fried Sea Bass, let the fish cool completely after cooking. Then, wrap it tightly in plastic wrap and place it in a freezer-safe bag, removing as much air as possible to prevent freezer burn. It can be stored for up to 2 months. When you're ready to eat, thaw in the fridge overnight and reheat in a skillet for a crispy finish!

Is it safe to serve Ginger Onion Fried Sea Bass to children with allergies?
Very! While the dish is a family-friendly delight, it's crucial to take allergy concerns into account. Ensure that none of the ingredients, particularly soy sauce (which contains wheat), cause issues for your children. You can also use gluten-free soy sauce if needed. Always double-check with family members to keep everyone safe while enjoying a homemade feast!

What should I do if my fish isn't getting crispy while frying?
If your Ginger Onion Fried Sea Bass isn't getting that desirable crispiness, check a couple of things. Make sure your oil is hot enough—it's crucial for achieving that perfect crunch. If the oil isn't hot, the coating will soak in too much oil, leading to soggy fish. Also, be careful not to overcrowd the pan; frying in batches can help maintain the oil temperature and achieve that perfect golden-brown finish.

Can I make the ginger onion sauce ahead of time?
You absolutely can! Preparing the ginger onion sauce ahead of time is a great idea. You can store it in an airtight container in the fridge for up to 3 days. Just give it a quick reheat before adding it to the fried fish, as this will intensify the flavors and ensure it’s warm and ready to complement the dish!

Ginger Onion Fried Sea Bass

Ginger Onion Fried Sea Bass: Quick, Flavorful Family Delight

Ginger Onion Fried Sea Bass is a quick and flavorful dish perfect for family dinners.
Print Recipe Pin Recipe
Prep Time 10 minutes mins
Cook Time 10 minutes mins
Marinating Time 30 minutes mins
Total Time 50 minutes mins
Servings: 4 servings
Course: Dinner
Cuisine: Asian
Calories: 250
Ingredients Equipment Method Nutrition Notes

Ingredients
  

For the Fish
  • 4 fillets Sea Bass Tender and flaky white fish
  • 1/4 cup Cornstarch Can substitute with arrowroot powder for gluten-free
For the Sauce
  • 2 tablespoons Ginger Fresh, thinly sliced
  • 1 medium Onion Thinly sliced, yellow onion preferred
  • 3 tablespoons Soy Sauce Low-sodium recommended
  • to taste Salt
  • to taste Pepper
For Frying
  • 1/2 cup Vegetable Oil Can substitute with canola or peanut oil

Equipment

  • Skillet
  • medium bowl
  • Paper towels
  • Cooking spatula

Method
 

Preparation Steps
  1. Combine ginger, onion, soy sauce, salt, and pepper in a medium bowl. Let sit while preparing the fish.
  2. Pat the sea bass dry and coat each side with cornstarch.
  3. Heat vegetable oil in a skillet over medium-high heat until shimmering.
  4. Fry sea bass for 3–4 minutes on each side until golden brown.
  5. Pour sauce over the fried fish and let simmer on low for 1–2 minutes.
  6. Transfer to a platter and drizzle with remaining sauce; serve immediately.

Nutrition

Serving: 1filletCalories: 250kcalCarbohydrates: 20gProtein: 30gFat: 10gSaturated Fat: 1.5gPolyunsaturated Fat: 3gMonounsaturated Fat: 3gCholesterol: 70mgSodium: 600mgPotassium: 500mgSugar: 1gCalcium: 2mgIron: 2mg

Notes

Ensure the oil is hot before frying for a crispy texture; do not overcrowd the pan.

Tried this recipe?

Let us know how it was!

Savory Baked Salmon with Spinach for a Cozy Dinner Night

January 29, 2026 by Grace Snow Leave a Comment

The kitchen buzzed with excitement as the aroma of sautéed garlic and onions filled the air—what a joyful moment! Today, I'm sharing a delightful recipe for Baked Salmon with Spinach, topped with a creamy, bubbly mozzarella crust that elevates weeknight dinners to a gourmet experience. Within just 40 minutes, you can whip up this healthy, low-carb dish that not only caters to your taste buds but also brings heart-healthy omega-3s to your table. It's perfect for impressing loved ones without the fuss of fussy prep. Trust me, once you taste this comforting meal, you'll want to make it a weekly staple. Are you ready to discover your new favorite dinner recipe?

Why Is This Baked Salmon So Irresistible?

Simplicity at Its Best: With just a handful of ingredients, this recipe comes together effortlessly, making it a go-to for busy weekdays.

Flavor Explosion: The rich taste of salmon combined with the creamy spinach and gooey mozzarella creates a comforting blend that delights the palate.

Heart-Healthy Choice: Packed with omega-3 fatty acids, this dish supports both your taste and well-being.

Perfectly Versatile: Feel free to swap spinach for kale or try different cheeses like Gouda for a fresh twist!

Crowd-Pleasing Appeal: Impress family and friends with a gourmet-style dinner that’s quick and easy—ideal for any occasion.

Make-Ahead Potential: Prep the spinach mixture in advance to save time during the week, similar to how you would for a delicious Chickpea Spinach Curry.

Baked Salmon with Spinach Ingredients

For the Salmon
• Salmon Fillet – The star of this dish, ensure it has a vibrant pink hue for optimal freshness.

For the Creamy Spinach Mixture
• Spinach (Thawed and Drained) – This provides a silky texture and is full of nutrients; frozen spinach is a perfect shortcut.
• Sour Cream – It adds creaminess to the dish; substitute with Greek yogurt for a healthier twist.
• Onion (Sliced) – When sautéed, it enhances the overall flavor profile; use yellow or white onions for a balanced taste.
• Garlic (Minced) – Freshly minced gives a punch of flavor to the spinach; you can use garlic powder in a pinch.

For the Topping
• Mozzarella (Shredded) – This cheese creates a delicious, gooey crust; feel free to experiment with Gouda for a smoky twist.

For Flavoring
• Salt and Pepper – These staples elevate every dish; adjust for your taste preference to enhance the salmon's natural flavors.
• Olive Oil – Perfect for sautéing aromatics; canola oil works well too if you’re looking for a neutral option.

Each bite of this Baked Salmon with Spinach is sure to provide a delightful experience that will leave you and your guests craving more!

Step‑by‑Step Instructions for Irresistible Baked Salmon with Spinach

Step 1: Sauté Aromatics
Begin by heating 2 tablespoons of olive oil in a skillet over medium heat. Once shimmering, add 1 sliced onion and sauté for about 3-4 minutes, or until it turns translucent. Then, stir in 2 minced garlic cloves and continue cooking for an additional 30 seconds, until fragrant, filling your kitchen with a comforting aroma.

Step 2: Add Spinach
Next, incorporate 1 cup of thawed and drained spinach into the skillet, gently stirring for 2-3 minutes until heated through and any remaining moisture evaporates. Season this mixture with salt and pepper to taste, then blend in ½ cup of sour cream until everything is beautifully creamy and combined, forming the delicious filling for your Baked Salmon with Spinach.

Step 3: Prepare Salmon
Preheat your oven to 175°C (347°F). While it's heating, season two salmon fillets generously with salt and pepper. In a separate pan, sear each side of the fillets for about 2 minutes over medium-high heat. This step helps lock in moisture, creating a succulent base for your entré, making the dish truly irresistible.

Step 4: Assemble Dish
Grease a baking dish with a bit of olive oil. Lay the seared salmon skin-side down in the dish, ensuring they're well spaced. Generously spread the creamy spinach mixture over the top of each fillet. Finally, sprinkle with 1 cup of shredded mozzarella, creating a delightful, cheesy crust that will bubble and brown beautifully while baking.

Step 5: Bake
Transfer the assembled dish to your preheated oven and bake for 15-20 minutes. Keep an eye on it; it’s done when the salmon turns opaque and flakes easily with a fork, while the cheese should be golden and bubbly. Use a meat thermometer to check that the internal temperature reaches 63°C (145°F) for perfect doneness.

Step 6: Serve
Once baked, allow the salmon to rest for a few minutes before serving. This helps the flavors settle beautifully. Plate the salmon alongside some of the remaining creamy spinach mixture for a stunning visual presentation, ensuring each bite of your Baked Salmon with Spinach is rich and fulfilling.

Storage Tips for Baked Salmon with Spinach

Fridge: Store any leftover baked salmon in an airtight container for up to 2 days. Be sure to keep the creamy spinach topping to retain moisture.

Freezer: For longer storage, wrap individual portions tightly in plastic wrap, then place them in a freezer-safe bag. Baked salmon with spinach can be frozen for up to 3 months.

Reheating: To enjoy your leftovers, gently reheat in the oven at 175°C (347°F) until warmed through, about 10-15 minutes, to keep the salmon moist and the topping bubbly.

Meal Prep: Consider prepping the spinach mixture in advance for quick assembly and freezing, allowing you to easily whip up this delightful baked salmon with spinach on a busy weeknight.

Expert Tips for Baked Salmon with Spinach

  • Fresh Ingredients Matter: Use fresh salmon for the best flavor and texture. Look for fillets with a vibrant pink hue, avoiding any browning or dryness.

  • Don’t Overcrowd the Pan: When searing salmon, give each fillet enough space in the pan to ensure even cooking. Crowding can lead to steaming instead of a nice sear.

  • Use a Meat Thermometer: Investing in a meat thermometer can prevent overcooking. Aim for an internal temperature of 63°C (145°F) to achieve moist, flavorful baked salmon.

  • Prep Ahead: Save time by preparing the creamy spinach mixture in advance. Store it in the refrigerator for up to a day and assemble the dish right before baking.

  • Experiment with Cheese: Feel free to vary the type of cheese used for the topping! While mozzarella gives a delightful crust, mixing in Gouda can create a unique flavor profile.

  • Pairing Options: Serve with a side salad or roasted vegetables to elevate your meal. These complements not only enhance the presentation but also add nutritional value to your Baked Salmon with Spinach.

What to Serve with Irresistible Baked Salmon with Spinach?

Delight your loved ones by transforming your delicious salmon dish into a full-bodied meal that sings with flavor and texture.

  • Creamy Mashed Potatoes: Indulgent and velvety, they pair beautifully with the salmon, providing a comforting contrast to the bubbly topping.

  • Crisp Garden Salad: A refreshing medley of greens and vibrant veggies brings a light crunch that balances the richness of the salmon.

  • Roasted Asparagus: With a slight char and tender bite, asparagus offers a nutty flavor that complements the buttery salmon perfectly.

  • Herbed Couscous: Fluffy and aromatic, couscous brings a delightful texture while soaking up the creaminess of the spinach topping.

  • Grilled Zucchini: Sweet and tender yet smoky, grilled zucchini can introduce a refreshing taste that enhances every bite of the baked salmon.

  • Lemon Garlic Quinoa: Nutty and nutritious, quinoa tossed with lemon elevates the dish, offering brightness to the salmon’s richness.

  • White Wine: A chilled glass of Pinot Grigio or Sauvignon Blanc can elevate the experience, cutting through the creaminess while harmonizing with the fish's flavors.

  • Dark Chocolate Mousse: For dessert, a light and airy chocolate mousse can provide a sweet finish, balancing the savory elements of your meal.

By blending these culinary elements, you'll create a memorable dinner that leaves your guests feeling cherished and satisfied.

Make Ahead Options

These Baked Salmon with Spinach are ideal for busy home cooks looking to streamline their meal prep! You can prepare the creamy spinach mixture up to 24 hours in advance. Simply sauté the onions, garlic, and spinach, then mix in sour cream and season to taste. Store this filling in an airtight container in the fridge to keep it fresh and flavorful. Additionally, you can season the salmon fillets ahead of time and refrigerate them. When you’re ready to serve, simply assemble the dish by spreading the spinach mixture on the seared salmon and topping it with mozzarella, then bake for 15-20 minutes. This ensures you’ll enjoy a delicious, restaurant-quality meal with minimal effort on busy weeknights!

Baked Salmon with Spinach Variations

Customize this comforting dish to match your tastes and dietary needs while keeping the deliciousness intact!

  • Kale Swap: Replace spinach with kale for an earthy twist, adding a unique texture and flavor.

  • Creamy Alternative: Use Greek yogurt instead of sour cream for a lighter option that retains creaminess and zest.

  • Cheese Choices: Experiment with Gouda or Jarlsberg cheese for a smokier profile; blue cheese also adds a delightful tang!

  • Spice It Up: Add red pepper flakes or a dash of hot sauce to the spinach mixture for a warm kick that elevates the dish.

  • Citrus Boost: Incorporate lemon zest or a squeeze of fresh lemon juice into the creamy spinach for a bright, refreshing note.

  • Nuts for Crunch: Sprinkle toasted pine nuts or slivered almonds atop the cheesy crust for a satisfying crunch and added healthy fats.

  • Vegetable Medley: Mix in sautéed mushrooms or bell peppers with the spinach for an extra burst of color and flavor, much like in a hearty Tagliatelle with Asparagus & Peas.

  • Herbs Galore: Toss in fresh herbs like dill, basil, or parsley to elevate the dish and bring in herby freshness, reminiscent of a delightful Spinach Pie!

With these variations, you can create a Baked Salmon with Spinach that's truly one-of-a-kind, engaging all your senses for a delightful dining experience.

Baked Salmon with Spinach Recipe FAQs

How do I choose the best salmon fillet?
Absolutely! When selecting salmon, look for fillets that are vibrant pink with a moist texture. Avoid any that have dark spots or a fishy odor. Fresh salmon should have a clean smell, reminiscent of the ocean, and the flesh should spring back when gently pressed.

What’s the best way to store leftover baked salmon?
Store any leftover baked salmon in an airtight container in the refrigerator for up to 2 days. This keeps it fresh and easy to reheat. Make sure to include the creamy spinach topping to help retain moisture, ensuring each bite remains delicious!

Can I freeze baked salmon with spinach?
Very much so! To freeze, wrap individual portions of the baked salmon tightly in plastic wrap, then place them in a freezer-safe bag. This method allows the dish to be preserved for up to 3 months. Just remember to label your bags with the date so you know when to enjoy them!

What if my spinach mixture turns out too watery?
If your creamy spinach mixture ends up watery, don’t worry! First, ensure you thoroughly drain and thaw the spinach before mixing. If it’s still too wet, you can gently simmer the spinach mixture on low heat until most of the excess moisture has evaporated, stirring often to prevent sticking.

Is this dish suitable for those with dairy allergies?
Absolutely! For a dairy-free version of Baked Salmon with Spinach, substitute the sour cream and mozzarella with dairy-free alternatives like coconut cream and cashew-based cheese. These options provide a similarly creamy texture without the dairy, making it friendly for those with allergies.

How can I prepare this dish ahead of time?
You can easily prep the creamy spinach mixture in advance! Simply cook the spinach and garlic, mix in the sour cream, and store it in the refrigerator for up to a day prior to assembling your dish. This saves time and lets you whip up your Baked Salmon with Spinach quickly on a busy evening!

Baked Salmon with Spinach

Savory Baked Salmon with Spinach for a Cozy Dinner Night

Enjoy a delightful Baked Salmon with Spinach; a healthy, low-carb dish that’s quick and perfect for cozy dinners.
Print Recipe Pin Recipe
Prep Time 10 minutes mins
Cook Time 20 minutes mins
Resting Time 5 minutes mins
Total Time 40 minutes mins
Servings: 2 fillets
Course: Dinner
Cuisine: American
Calories: 300
Ingredients Equipment Method Nutrition Notes

Ingredients
  

For the Salmon
  • 2 fillets Salmon Fillet Ensure it has a vibrant pink hue for optimal freshness.
For the Creamy Spinach Mixture
  • 1 cup Spinach (Thawed and Drained) Frozen spinach is a perfect shortcut.
  • 1/2 cup Sour Cream Substitute with Greek yogurt for a healthier twist.
  • 1 medium Onion (Sliced) Use yellow or white onions for a balanced taste.
  • 2 cloves Garlic (Minced) Freshly minced gives a punch of flavor.
For the Topping
  • 1 cup Mozzarella (Shredded) Feel free to experiment with Gouda for a smoky twist.
For Flavoring
  • 1 teaspoon Salt Adjust for your taste preference.
  • 1 teaspoon Pepper Adjust for your taste preference.
  • 2 tablespoons Olive Oil Canola oil works well too.

Equipment

  • Skillet
  • Baking Dish
  • Oven

Method
 

Step-by-Step Instructions
  1. Heat 2 tablespoons of olive oil in a skillet over medium heat. Add 1 sliced onion and sauté for about 3-4 minutes until translucent.
  2. Stir in 2 minced garlic cloves and cook for an additional 30 seconds until fragrant.
  3. Incorporate 1 cup of thawed and drained spinach, stirring for 2-3 minutes until heated through.
  4. Season the mixture with salt and pepper, then blend in ½ cup of sour cream until creamy.
  5. Preheat your oven to 175°C (347°F) and season two salmon fillets with salt and pepper.
  6. Sear each side of the salmon fillets for about 2 minutes over medium-high heat.
  7. Grease a baking dish, lay the seared salmon skin-side down, and spread the creamy spinach mixture over each fillet.
  8. Sprinkle with 1 cup of shredded mozzarella, creating a cheesy crust.
  9. Bake for 15-20 minutes until the salmon turns opaque and flakes easily.
  10. Allow to rest for a few minutes before serving with the remaining creamy spinach mixture.

Nutrition

Serving: 1filletCalories: 300kcalCarbohydrates: 6gProtein: 30gFat: 18gSaturated Fat: 8gPolyunsaturated Fat: 4gMonounsaturated Fat: 6gCholesterol: 70mgSodium: 600mgPotassium: 800mgFiber: 2gSugar: 2gVitamin A: 2500IUVitamin C: 10mgCalcium: 250mgIron: 2mg

Notes

Use fresh salmon for the best flavor, and do not overcrowd the pan when searing. If making ahead, store the spinach mixture in the refrigerator for up to a day.

Tried this recipe?

Let us know how it was!

Crispy Pan-fried Sardines to Brighten Your Dinner Time

January 29, 2026 by Grace Snow Leave a Comment

A delightful aroma wafts through the kitchen, transporting me straight to a vibrant Spanish tapas bar. Today, I’m sharing my recipe for Quick and Easy Pan-fried Sardines (Sardinas Fritas), a dish that marries crispy indulgence with simple preparation. In just minutes, you can recreate this authentic experience, making it a perfect choice for those busy weeknights or casual gatherings. Besides being a crowd-pleaser, these pan-fried sardines are also budget-friendly, ensuring that you can savor tasty seafood without breaking the bank. Pair them with a refreshing drink and watch as your loved ones dive into this tasty dish. Curious about how to bring the spirit of Spain to your dinner table? Let’s dive into the details!

Why Choose Pan-fried Sardines?

Quick and Easy: This recipe requires minimal preparation time, making it perfect for busy weeknights when you crave something delicious but don't want to spend hours in the kitchen.

Fresh, Flavorful Experience: The delightful combination of crispy skin and tender meat delivers an authentic taste that will whisk you away to a lively Spanish tapas bar.

Budget-Friendly: Using inexpensive yet flavorful sardines, this dish ensures you can enjoy restaurant-quality seafood without straining your wallet. For more creative ways to enjoy seafood, don't miss out on this delightful Pan Fried Mayo combo!

A Crowd-Pleaser: Serve these pan-fried sardines at your next gathering, and watch your friends and family relish each bite.

Versatile Pairing: They taste incredible with a crisp beer or a chilled white wine, elevating any casual meal into a festive occasion.

Nutritional Powerhouse: Packed with omega-3 fatty acids and essential vitamins, these sardines are not just delicious but also a healthy seafood option!

Pan-fried Sardines Ingredients

• Get ready to savor the flavors!

For the Coating
• Plain Flour – Coats sardines for a crispy texture during frying. Substitution: Can use gluten-free flour for a gluten-free version.
• Rock Salt and Toasted Garlic Salt – Enhances flavor with a savory touch. Substitution: Regular salt can be used if special salts are unavailable.
• Smoked Paprika – Adds depth and a slight smokiness to the dish.
• Pepper – Provides a bit of heat; adjust to personal preference.

For the Sardines
• Sardines (Split open, Butterflied) – Main protein of the dish, offering richness and flavor; choose fresh or high-quality canned sardines.

For Frying
• Extra Virgin Olive Oil – Essential for frying, ensuring a crisp exterior.

For Garnishing
• Lemon Wedges – Freshness and acidity to brighten the dish.
• Parsley – Garnish for added color and flavor.

This Pan-fried Sardines recipe promises to fill your kitchen with delightful aromas and your plate with incredible flavors!

Step‑by‑Step Instructions for Quick and Easy Pan-fried Sardines

Step 1: Prepare the Coating
In a plastic bag or shallow box, combine a generous amount of plain flour, rock salt, toasted garlic salt, and smoked paprika. Shake the bag to mix thoroughly. This seasoned flour blend enhances the pan-fried sardines' flavor and creates a crispy coating.

Step 2: Coat the Sardines
Take a few butterflied sardines and add them to the flour mixture, coating both sides evenly. Shake off any excess flour to ensure a light, crispy crust. Repeat this with the remaining sardines, preparing them for frying.

Step 3: Heat the Oil
In a large frying pan, pour in enough extra virgin olive oil to cover the bottom and heat over medium. Allow the oil to warm for about 2-3 minutes until shimmering—this indicates it's ready for frying. A properly heated oil ensures golden, crispy sardines.

Step 4: Fry the Sardines
Carefully place the coated sardines skin-side down in the hot oil. Fry them for 1-2 minutes until the skin turns a beautiful golden brown. Then, gently flip each sardine using a spatula, cooking for an additional 1-2 minutes until both sides are crisp and flaky.

Step 5: Drain the Sardines
Once cooked, transfer the fried sardines to a plate lined with paper towels to absorb excess oil. This step is crucial for retaining that delightful crunch of the pan-fried sardines, ensuring they don’t become soggy.

Step 6: Garnish and Serve
To serve, arrange your crispy pan-fried sardines on a platter, garnishing with chopped parsley for a pop of color and freshness. Squeeze fresh lemon wedges over them to enhance the flavors. These delightful bites are best enjoyed hot, paired with your favorite drink!

How to Store and Freeze Pan-fried Sardines

Fridge: Store leftover pan-fried sardines in an airtight container in the fridge for up to 1 day. This will help retain their flavor, but they're best enjoyed fresh.

Reheating: When ready to enjoy leftovers, gently reheat sardines in a frying pan over low heat for 2-3 minutes or until warmed through to regain their crispiness.

Freezer: Freezing is not recommended for cooked sardines, as it can compromise their texture. Enjoy freshly made sardines for the best experience!

Batch Cooking: If you plan to make a larger batch, it’s wise to only coat and fry what you’ll consume immediately. The uncoated sardines can be refrigerated for a day before preparation.

Expert Tips for Pan-fried Sardines

• Hot Oil Is Key: Ensure the oil is thoroughly heated before adding sardines to achieve that coveted crispy crust.

• Don’t Overcrowd: Fry in batches if necessary; overcrowding the pan can cause uneven cooking and sogginess.

• Flavor Boost: For extra flavor, consider marinating sardines in lemon juice, garlic, and spices for about 30 minutes before coating.

• Perfect Flour Ratio: Ensure to shake off excess coating to keep the pan-fried sardines light and crispy, avoiding clumping.

• Fresh vs. Canned: If using canned sardines, opt for high-quality ones in olive oil for the best flavor and texture.

What to Serve with Quick and Easy Pan-fried Sardines?

When you’re ready to elevate your delightful sardine dish, consider these enticing options that will create a memorable dining experience.

  • Crispy Garlic Bread: Perfect for soaking up any leftover juices and adds a delightful crunch to your meal. Serve it warm and watch it disappear!

  • Zesty Salad: A fresh arugula or mixed green salad with lemon vinaigrette adds a refreshing contrast to the richness of the sardines.

  • Chilled White Wine: A crisp, chilled Sauvignon Blanc or Albariño beautifully complements the savory flavors, enhancing the overall experience.

  • Patatas Bravas: These spicy, crispy potatoes offer a delightful texture and a dash of heat, pairing wonderfully with the slightly smoky sardines.

  • Mediterranean Olives: A small bowl of marinated olives provides a salty bite that contrasts nicely with the sardines, enhancing your tapas-inspired meal.

  • Garlicky Aioli: This creamy dip adds richness and flavor variety to the table. A dip of aioli elevates every bite and is oh-so-delicious!

  • Refreshing Gazpacho: Serve a chilled soup to cleanse your palate with every bite, offering a vibrant burst of flavors.

Each of these sides harmonizes beautifully, ensuring your Quick and Easy Pan-fried Sardines shine in a delightful feast!

Make Ahead Options

These Quick and Easy Pan-fried Sardines are fantastic for meal prep! You can coat the sardines in the seasoned flour mixture and refrigerate them for up to 24 hours before frying. This not only saves you time during busy weeknights but also allows the flavors to meld beautifully. To maintain their quality, ensure the coated sardines are placed in a single layer on a plate, covered with plastic wrap, to prevent moisture buildup. When you’re ready to serve, simply heat olive oil in your pan and fry them as directed, and you'll enjoy that deliciously crispy exterior just as if they were freshly made!

Pan-fried Sardines Variations

Feel free to get creative and adapt this recipe to your taste buds and dietary needs!

  • Spicy Twist: Add cayenne pepper to the flour mix to give your sardines an exciting kick!
    A little heat can transform this dish into a zesty sensation, perfect for adventurous eaters.

  • Herbal Upgrade: Experiment with fresh herbs like cilantro or chives for a fresh flavor lift.
    Chopped herbs can add a vibrant visual appeal and freshness that pairs perfectly with fried fish.

  • Gluten-Free: Substitute regular flour with a gluten-free flour blend for a celiac-safe version.
    This way, everyone can enjoy these delicious bites without worry, maintaining that crispy texture!

  • Alternative Proteins: Swap out sardines for small mackerel or anchovies for a different coastal experience.
    Each fish offers its distinct flavor profile, giving you the chance to explore new taste dimensions!

  • Smoky Variation: Infuse your coating with additional smoked paprika or a touch of liquid smoke for depth.
    This enhancement accentuates the seafood's natural richness, making each bite unforgettable!

  • Citrus Zing: Toss in some lemon zest to the flour mixture for an extra citrusy punch.
    It adds a cheerful brightness that balances well with the bold flavors of the fish.

  • Creamy Dip: Pair your sardines with a dollop of Pan Fried Mayo for a creamy contrast.
    This adds a luscious texture that complements the crispy skin beautifully!

  • Breading Variations: For a crunchier bite, try panko breadcrumbs mixed with the flour instead of plain flour.
    Panko provides an airy texture that brings delightful crunch with every delicious bite!

Try these variations to discover your favorite twist on this classic dish, inviting new flavors to your kitchen table!

Pan-fried Sardines Recipe FAQs

What’s the best way to select fresh sardines?
When selecting fresh sardines, look for those with shiny, metallic skin, bright eyes, and a seawater-like scent. The flesh should feel firm and spring back when pressed. Avoid any with dark spots or a sour smell, as these indicate they may be past their prime.

How long can I store leftover pan-fried sardines in the refrigerator?
Store any leftover pan-fried sardines in an airtight container in the fridge for up to 1 day. While they can be kept for this short period, be aware that their crispiness will diminish over time. To enjoy them at their best, I recommend consuming them fresh!

Can I freeze pan-fried sardines?
Freezing cooked sardines is not recommended, as it can change their texture and lead to a less enjoyable experience. However, if you must freeze them, wrap the sardines securely in plastic wrap or place them in airtight containers. You can store them in the freezer for up to 1 month but expect some degradation in quality when reheating.

What’s the best way to reheat leftover sardines?
To regain some of the crispiness of your leftovers, gently reheat sardines in a frying pan over low heat for about 2-3 minutes. This method helps to maintain their delicious crust. Avoid using the microwave, as it will likely result in a soggy texture.

Are pan-fried sardines safe for pets?
Sardines can be a healthy treat for pets in moderation, but you should ensure they are plain, cooked, and free from added spices. Always consult your veterinarian before adding new foods to your pet's diet.

Can I use other types of fish for this recipe?
Absolutely! While this recipe is for pan-fried sardines, feel free to experiment with similar options like small mackerel or anchovies. Just adjust the cooking time slightly, as different fish may cook at varying rates. Enjoy the exploration!

Pan-fried Sardines

Crispy Pan-fried Sardines to Brighten Your Dinner Time

Quick and easy Pan-fried Sardines, bringing together crispy texture and authentic flavors for a delightful meal.
Print Recipe Pin Recipe
Prep Time 10 minutes mins
Cook Time 6 minutes mins
Total Time 16 minutes mins
Servings: 4 sardines
Course: Appetizers
Cuisine: Spanish
Calories: 220
Ingredients Equipment Method Nutrition Notes

Ingredients
  

For the Coating
  • 1 cup plain flour Substitution: Can use gluten-free flour for a gluten-free version.
  • 1 teaspoon rock salt
  • 1 teaspoon toasted garlic salt Substitution: Regular salt can be used if special salts are unavailable.
  • 1 teaspoon smoked paprika
  • to taste pepper Provides a bit of heat.
For the Sardines
  • 8 pieces sardines (split open, butterflied) Choose fresh or high-quality canned sardines.
For Frying
  • 1/2 cup extra virgin olive oil Essential for frying.
For Garnishing
  • 2 pieces lemon wedges Adds freshness and acidity.
  • 2 tablespoons parsley For garnish.

Equipment

  • frying pan

Method
 

Step-by-Step Instructions for Quick and Easy Pan-fried Sardines
  1. Prepare the Coating: In a plastic bag or shallow box, combine a generous amount of plain flour, rock salt, toasted garlic salt, and smoked paprika. Shake to mix thoroughly.
  2. Coat the Sardines: Take a few butterflied sardines and add them to the flour mixture, coating both sides evenly. Shake off any excess flour.
  3. Heat the Oil: In a large frying pan, pour in enough extra virgin olive oil to cover the bottom and heat over medium for about 2-3 minutes until shimmering.
  4. Fry the Sardines: Carefully place the coated sardines skin-side down in the hot oil. Fry for 1-2 minutes until golden brown, then flip each sardine and cook for an additional 1-2 minutes.
  5. Drain the Sardines: Transfer the fried sardines to a paper towel-lined plate to absorb excess oil.
  6. Garnish and Serve: Arrange the sardines on a platter, garnishing with parsley and squeezing lemon wedges over them.

Nutrition

Serving: 2sardinesCalories: 220kcalCarbohydrates: 20gProtein: 15gFat: 10gSaturated Fat: 1.5gPolyunsaturated Fat: 2gMonounsaturated Fat: 6gCholesterol: 40mgSodium: 480mgPotassium: 300mgVitamin A: 500IUVitamin C: 10mgCalcium: 50mgIron: 2mg

Notes

These pan-fried sardines are best enjoyed freshly made, paired with a drink of your choice. Store leftovers in an airtight container in the fridge for up to 1 day, reheating gently before serving.

Tried this recipe?

Let us know how it was!

Savor the Flavor of Mediterranean Baked Fish Tonight

January 29, 2026 by Grace Snow Leave a Comment

The aroma of sun-ripened tomatoes and fragrant herbs wafting through my kitchen is reminiscent of a delightful Mediterranean escape. When I crave something wholesome yet effortless, I turn to my go-to dish: Mediterranean Baked Fish. Not only is this healthy and gluten-free one-pan wonder a breeze to prepare, but it's also a vibrant crowd-pleaser that celebrates the beauty of fresh ingredients. From flaky fish to a medley of colorful veggies, each bite is a joyful reminder that cooking can refresh our spirits and nourish our bodies. Plus, with its omega-3 richness, this dish supports heart health while still satisfying my taste buds. Are you ready to dive into this delicious adventure? Let’s get cooking!

Why Choose Mediterranean Baked Fish?

Health Benefits: This dish is not only gluten-free but also loaded with omega-3 fatty acids, making it a heart-friendly choice you can feel good about.

Flexibility: Use white fish or even substitute with salmon or trout — the adaptability keeps it exciting every time you cook.

Easy Preparation: With just one pan required, you’ll save time on both cooking and cleanup, which is perfect for busy evenings.

Flavor Explosion: The combination of fresh veggies, aromatic herbs, and zesty lemon creates a burst of Mediterranean flavor in every bite.

Crowd-Pleaser: Impress your family or guests with this vibrant meal that’s as visually appealing as it is delicious. Why not pair it with some fresh couscous or a crispy salad for the perfect accompaniment?

Feel free to explore other delightful options like Air Fryer Fish for extra inspiration!

Mediterranean Baked Fish Ingredients

For the Fish
• White Fish Fillets – the main protein source providing flakiness; try substituting with salmon or trout for a richer taste.

For the Veggies
• Tomatoes – add freshness and moisture; using seasonal tomatoes enhances the flavor.
• Onion – offers sweetness and depth; slice thinly for even cooking.
• Bell Pepper – contributes color and crunch; zucchini or asparagus can be substituted for a fun twist.

For the Flavoring
• Garlic – boosts the dish’s aroma and flavor; shallots can replace it for a milder touch.
• Lemon – elevates the dish with zesty brightness; fresh lemon gives the best flavor.
• Olive Oil – provides healthy fats and aids in cooking the fish; canola oil is an alternative but may change the flavor.
• Dried Oregano & Thyme – classic Mediterranean herbs adding depth; fresh herbs can intensify flavors even more.
• Salt and Pepper – essential for seasoning; adjust to your taste preference.

For Garnish
• Fresh Parsley – optional garnish for an added pop of color and freshness.

With these simple ingredients, your Mediterranean Baked Fish dish is just around the corner!

Step‑by‑Step Instructions for Mediterranean Baked Fish

Step 1: Preheat the Oven
Begin by preheating your oven to 400°F (200°C). This temperature will ensure your Mediterranean Baked Fish cooks evenly, helping the fish to flake perfectly and the vegetables to roast beautifully. While the oven warms up, gather your ingredients and prepare your baking dish.

Step 2: Prepare the Baking Dish
Lightly grease a 9×13-inch baking dish with a drizzle of olive oil. Make sure to cover the bottom so that the vegetables don’t stick during cooking. This step will also infuse the dish with rich flavor as everything bakes together, setting the stage for a delightful Mediterranean Baked Fish.

Step 3: Arrange the Vegetables
Evenly layer sliced tomatoes, thinly sliced onion, and colorful bell pepper in the prepared baking dish. Make sure to spread them out, creating a vibrant base that will complement the fish. The fresh aromas mingling already hint at the deliciousness to come as you prepare for the next step.

Step 4: Season the Fish
Gently pat your fish fillets dry with paper towels to remove excess moisture. Next, season the fillets with salt, pepper, dried oregano, and thyme. A sprinkle of each herb will deliver classic Mediterranean flavors. Arrange the seasoned fish over the bed of vegetables, ensuring they’re nestled snugly.

Step 5: Add Garlic
Sprinkle minced garlic evenly over the fish fillets. The aroma of the garlic blending with the fish and veggies will transport you straight to a Mediterranean kitchen. This step is crucial as it enhances the overall flavor profile of your Mediterranean Baked Fish.

Step 6: Drizzle with Olive Oil
Generously drizzle more olive oil over the entire dish, ensuring both the fish and vegetables are coated. This not only adds flavor but also helps to keep the fish moist while it bakes. Feel free to be liberal with the olive oil; it’s a key player in creating that luscious texture.

Step 7: Layer with Lemon
Top the fish with thin slices of fresh lemon, distributing them evenly. The citrus will impart bright acidity during cooking, elevating each bite of your Mediterranean Baked Fish. This addition adds a beautiful visual appeal and a zesty taste that ties the dish together.

Step 8: Cover and Bake
Cover the baking dish with aluminum foil and place it in the preheated oven. Bake for 20 minutes to allow the fish to steam and soak up the flavor from the vegetables beneath. This step ensures the fish cooks evenly and remains tender throughout.

Step 9: Uncover and Finish Baking
After 20 minutes, carefully remove the foil and continue baking for an additional 5-10 minutes. Keep an eye on the fish; it’s done when it flakes easily with a fork and the vegetables have caramelized slightly. The golden edges signify a delightful culmination of your efforts.

Step 10: Rest and Garnish
Once out of the oven, let the dish rest for a few minutes before serving. This will help the flavors to settle. Garnish with fresh parsley for an inviting touch and extra color. Your Mediterranean Baked Fish is now ready to serve, promising to impress with its vibrant look and delicious taste.

Make Ahead Options

Mediterranean Baked Fish is perfect for meal prep, allowing busy home cooks to save time during hectic weeknights! You can slice the tomatoes, onion, and bell pepper up to 24 hours in advance and store them in an airtight container in the refrigerator to keep them fresh. For the fish, season the fillets and wrap them tightly in plastic wrap; they can be kept in the fridge for up to 3 days. When you're ready to serve, simply layer the prepped veggies in a baking dish, place the seasoned fish on top, and continue with the baking instructions. This approach ensures a quick assembly while maintaining the dish's delightful flavors and textures, offering delicious results with minimal effort!

How to Store and Freeze Mediterranean Baked Fish

Fridge: Store leftovers in an airtight container for up to 3 days. Allow the dish to cool completely before sealing to maintain freshness and flavor.

Freezer: If you’re looking to keep your dish longer, freeze the Mediterranean Baked Fish in a tightly sealed container for up to 2 months. For best texture, consider freezing only the fish and vegetables separately.

Reheating: To reheat, place the dish in the oven at 350°F (175°C) for about 20 minutes, covered with foil to prevent drying out. Ensure the fish is heated through and flakes easily before serving.

Room Temperature: Avoid leaving out at room temperature for more than 2 hours to ensure food safety and preserve the quality of your Mediterranean Baked Fish.

What to Serve with Mediterranean Baked Fish

Enhance your dining experience by pairing this vibrant dish with complementary sides and drinks that elevate its Mediterranean charm.

  • Creamy Couscous: A soft, fluffy base that absorbs the flavorful juices beautifully, making every bite heavenly. Serve warm for a comforting side.

  • Quinoa Salad: This nutty, protein-rich salad adds texture and freshness. Incorporate cherry tomatoes and cucumber for extra crunch that contrasts the fish's tenderness.

  • Garlic Bread: A crunchy, buttery staple that’s perfect for savoring every drop of the baked fish’s sauce. The aromatic garlic brings a delightful zing to the meal.

  • Roasted Asparagus: Tender and slightly caramelized, asparagus provides a fresh, crunchy element that balances the flakiness of the fish.

  • Greek Tzatziki: This cooling yogurt dip with fresh cucumber and herbs offers a refreshing contrast to the flavors of the baked fish, enhancing your Mediterranean experience.

  • Chilled White Wine: A crisp Sauvignon Blanc or dry Pinot Grigio complements the dish with a refreshing acidity, enhancing the rich flavors of fish and vegetables.

  • Lemon Sorbet: As a light, tart dessert, it cleanses the palate after a savory meal, perfectly rounding off your Mediterranean feast.

  • Fresh Green Salad: A simple mix of baby greens, olives, and feta can lighten the meal, providing a crunchy contrast and a burst of Mediterranean flavor.

Embrace these pairings to create a delightful and harmonious dining experience that will leave your guests raving!

Mediterranean Baked Fish Variations

Feel free to get creative with this recipe by making it your own and exploring new flavors that will ignite your taste buds!

  • Salmon Twist: Replace white fish with salmon for a richer, buttery flavor that pairs beautifully with the herbs.

  • Veggie Boost: Add olives or artichokes for a briny punch and extra Mediterranean flair, enhancing the dish's depth.

  • Heat It Up: Sprinkle in red pepper flakes or drizzle with sriracha before baking for a spicy kick that will wake up your palate.

  • Cheesy Delight: Top the fish with crumbled feta or goat cheese during the last few minutes of baking for a creamy, tangy finish that brings everything together.

  • Citrus Medley: Experiment with slices of orange or lime in addition to lemon for a unique and refreshing twist you won't forget.

  • Herb Variations: Try swapping dried oregano and thyme with fresh dill or basil for a different herbal flavor profile. Fresh herbs can elevate the dish remarkably!

  • Whole Grains Side: Serve your Mediterranean Baked Fish alongside a flavorful quinoa or couscous pilaf for a heartier, wholesome meal—a combination that’s not only satisfying but good for you too!

  • Roasted Vegetable Variation: Mix in zucchini or asparagus for a textural change and an extra burst of flavor, making every bite exciting.

With these variations, you’ll never tire of a delightful meal, and if you’re looking for more inspiration, consider preparing Fish Taco Bowls or baking some Matcha Baked Doughnuts for a sweet treat later!

Expert Tips for Mediterranean Baked Fish

• Fresh Ingredients: Always opt for the freshest fish and vegetables; this enhances the flavors and overall taste of your Mediterranean Baked Fish dish.

• Cooking Time Awareness: Keep an eye on the baking time, as ovens can vary. The fish is perfectly done when it flakes easily with a fork.

• Seasoning Balance: Don’t skimp on salt and pepper! Adjust these to your taste to ensure the dish is well-seasoned, complementing the primary ingredients beautifully.

• Lemon Addition: For a zingy kick, consider squeezing fresh lemon juice over the dish just before serving; it brightens the flavors of the Mediterranean Baked Fish wonderfully.

• Additional Sauces: For an extra flavor boost, drizzle a lemon-garlic sauce over the fish right before serving; the added richness makes a delightful difference.

Mediterranean Baked Fish Recipe FAQs

How do I select the best fish for this recipe?
Absolutely! When choosing fish for your Mediterranean Baked Fish, look for fresh, firm fillets with a clean ocean scent. The flesh should be translucent and moist, without dark spots or signs of browning. This ensures you get flaky fish that holds up well during cooking. If you're opting for a different type, salmon or trout also work wonderfully due to their rich flavor and healthy omega-3 content.

How should I store leftovers?
Very! You can store leftovers of your Mediterranean Baked Fish in an airtight container in the refrigerator for up to 3 days. Make sure to let it cool completely before sealing to maintain its delicious flavor and texture. When you're ready to enjoy it again, reheating it gently in the oven will keep it flaky and moist.

Can I freeze Mediterranean Baked Fish?
Absolutely! To freeze your Mediterranean Baked Fish, wrap it tightly in plastic wrap or foil, and store it in a hermetically sealed container or freezer bag. It’ll keep well for up to 2 months. For best results, consider freezing the fish and vegetables separately to preserve texture and flavor. When you're ready to eat, thaw in the refrigerator overnight before reheating.

What if my fish is overcooked?
Very! If your Mediterranean Baked Fish ends up overcooked, fear not! While it might be a bit dry, you can revitalize it by serving with a drizzle of lemon-garlic sauce or a squeeze of fresh lemon juice. This will add moisture and brightness back into the dish, helping to enhance those beautiful Mediterranean flavors.

Is this dish suitable for people with allergies?
Absolutely! This Mediterranean Baked Fish can be customized to accommodate dietary restrictions. If you have a seafood allergy, consider using a plant-based alternative like marinated tofu or tempeh for a similar flakiness. Always check the specific ingredients for potential allergens, especially when it comes to dried herbs or oils. If you have any concerns about specific ingredients, feel free to swap or leave them out!

How should I ensure the vegetables are cooked properly?
Very! To ensure your vegetables cook perfectly in your Mediterranean Baked Fish, slice them thinly and arrange them in an even layer in the baking dish. This promotes even cooking. Keep an eye on them as they roast; they should be tender but still retain some crunch. If you prefer softer vegetables, you can give them a head start by baking them for a few minutes before placing the fish on top!

Mediterranean Baked Fish

Savor the Flavor of Mediterranean Baked Fish Tonight

Mediterranean Baked Fish is a healthy, gluten-free dish filled with fresh ingredients and omega-3s.
Print Recipe Pin Recipe
Prep Time 10 minutes mins
Cook Time 30 minutes mins
Resting Time 5 minutes mins
Total Time 45 minutes mins
Servings: 4 servings
Course: Dinner
Cuisine: Mediterranean
Calories: 300
Ingredients Equipment Method Nutrition Notes

Ingredients
  

For the Fish
  • 4 fillets White Fish substitute with salmon or trout if desired
For the Veggies
  • 2 cups Tomatoes seasonal enhances flavor
  • 1 medium Onion thinly sliced
  • 1 medium Bell Pepper can substitute zucchini or asparagus
For the Flavoring
  • 3 cloves Garlic minced
  • 1 whole Lemon sliced
  • 3 tablespoons Olive Oil can substitute with canola oil
  • 1 teaspoon Dried Oregano
  • 1 teaspoon Dried Thyme
  • to taste Salt
  • to taste Pepper
For Garnish
  • 1/4 cup Fresh Parsley optional

Equipment

  • 9x13-inch baking dish

Method
 

Preparation Steps
  1. Preheat your oven to 400°F (200°C).
  2. Lightly grease a 9×13-inch baking dish with olive oil.
  3. Layer sliced tomatoes, onion, and bell pepper in the baking dish.
  4. Pat the fish fillets dry and season with salt, pepper, oregano, and thyme. Place them over the vegetables.
  5. Sprinkle minced garlic over the fish.
  6. Drizzle olive oil over the dish.
  7. Top with fresh lemon slices.
  8. Cover the dish with aluminum foil and bake for 20 minutes.
  9. Uncover and bake for an additional 5-10 minutes until the fish flakes easily.
  10. Let the dish rest for a few minutes and garnish with fresh parsley before serving.

Nutrition

Serving: 1fillet with veggiesCalories: 300kcalCarbohydrates: 10gProtein: 25gFat: 15gSaturated Fat: 2gPolyunsaturated Fat: 3gMonounsaturated Fat: 10gCholesterol: 70mgSodium: 300mgPotassium: 800mgFiber: 2gSugar: 4gVitamin A: 10IUVitamin C: 30mgCalcium: 4mgIron: 6mg

Notes

Use fresh ingredients for the best flavor. Adjust seasoning to taste.

Tried this recipe?

Let us know how it was!
  • « Previous Page
  • 1
  • …
  • 33
  • 34
  • 35
  • 36
  • 37
  • …
  • 179
  • Next Page »

Welcome!

Hi, I’m Grace, a Sydney-based home cook with a passion for bold flavors and trending ingredients. Whether you’re a busy beginner or a seasoned foodie, you’ll find dishes here that are fresh, fun, and full of flavor.

More about me

Popular Recipes

  • Cheesy Chicken Garlic Bread Sandwich
    Cheesy Chicken Garlic Bread Sandwich for Cozy Family Moments
  • Easy Chicken Ranch Wraps
    Easy Chicken Ranch Wraps: Quick, Creamy & Totally Satisfying
  • Chicken Caesar Sandwiches
    Delicious Chicken Caesar Sandwiches for Quick Comfort Food
  • best Cuban sandwich
    The Best Cuban Sandwich You’ll Want Every Weeknight!

Footer

↑ back to top

About

  • Privacy Policy
  • Disclaimer
  • Terms & Conditions

Newsletter

  • Sign Up! for emails and updates

Contact

  • About me
  • Contact me

Copyright © 2025 TastyTrendIngredients