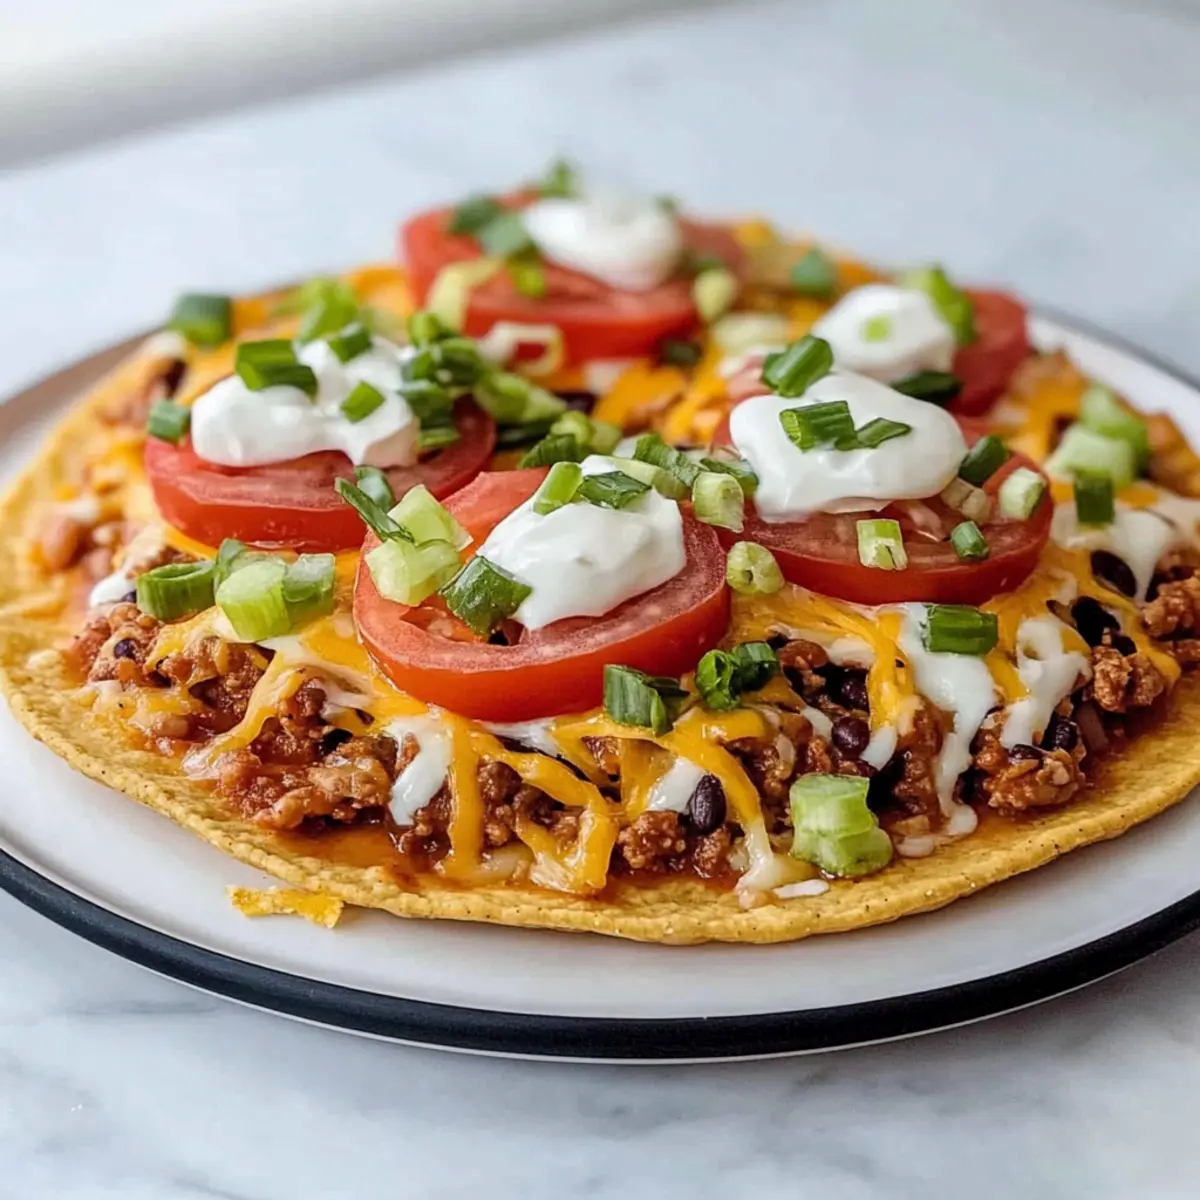
tastytrendingredients

  • Home
  • Recipes
    • Appetizers
    • Breakfast
    • Dessert
    • Dinner
    • Drinks
    • Salads
    • Snacks
    • Soups
  • About me
  • Contact me
menu icon
go to homepage
  • Home
  • Recipes
    • Appetizers
    • Breakfast
    • Dessert
    • Dinner
    • Drinks
    • Salads
    • Snacks
    • Soups
  • About me
  • Contact me
search icon
Homepage link
  • Home
  • Recipes
    • Appetizers
    • Breakfast
    • Dessert
    • Dinner
    • Drinks
    • Salads
    • Snacks
    • Soups
  • About me
  • Contact me
×

Creamy Coconut Chicken Rice Bowls for Cozy Nights In

May 2, 2026 by Grace Snow Leave a Comment

Cooking is often my emotional compass, pointing me toward comfort food that feels like a warm embrace. These Coconut Chicken Rice Bowls are my go-to recipe for those busy weeknights when I crave something soothing yet packed with flavor. The creamy coconut milk enveloping tender chicken and fragrant rice transforms a simple meal into a culinary escape. Not only is this dish incredibly easy to whip up, but it’s also versatile enough to accommodate any protein or rice substitution you might prefer. Think shrimp or tofu for a twist on the classic! As you gather around the table, sharing stories and laughter, these bowls will surely become a beloved staple in your recipe book. What flavors will you explore as you make this dish your own?

Why are Coconut Chicken Rice Bowls unforgettable?

Comforting, hearty dish: These bowls provide the perfect hug in a bowl, making them ideal for any cozy night in.

Endless adaptability: Whether you want to switch up the protein with shrimp or tofu or experiment with various rice types, this recipe is all about flexibility.

Quick and easy: With minimal prep and a simple cooking process, you’ll have a delicious dinner on the table in no time—perfect for busy evenings.

Flavor-packed goodness: The combination of fragrant rice and creamy coconut milk creates an irresistible balance that will keep everyone coming back for seconds.

Simply add a dash of lime for freshness, and serve alongside your favorite sides to elevate this meal even more! Enjoy it tonight or save time by prepping ingredients for an easy, make-ahead option.

Coconut Chicken Rice Bowls Ingredients

For the Chicken

  • Chicken – A great source of protein that brings a savory richness to the dish; feel free to substitute with shrimp or tofu for a different flavor.

For the Coconut Sauce

  • Coconut Milk – Adds a luscious creaminess and delightful tropical flavor; opting for full-fat coconut milk will enhance the dish's richness.

For the Rice

  • Rice – Acts as the heart of these Coconut Chicken Rice Bowls, providing a fluffy base; you may use any rice type you prefer, including brown or jasmine rice.

For the Seasonings

  • Garlic – Elevates the flavor profile with its aromatic essence; fresh cloves provide the best taste, but dried garlic works in a pinch.
  • Ginger – Infuses warmth and depth into the dish; use fresh ginger for vibrant flavor or ground ginger for convenience.

For the Vegetables

  • Bell Peppers – Add color, crunch, and a touch of sweetness; seasonal vegetables can enhance freshness and variety.
  • Peas – Contribute sweetness and a pop of color; feel free to swap in your favorite veggies for a personal touch.

Step‑by‑Step Instructions for Coconut Chicken Rice Bowls

Step 1: Prepare Ingredients
Begin by chopping the chicken into bite-sized pieces and dicing your choice of vibrant vegetables, such as bell peppers and peas. Measure out the rice and coconut milk, ensuring you have everything ready for a smooth cooking process. This prep step will make the execution of your Coconut Chicken Rice Bowls seamless and enjoyable.

Step 2: Cook Chicken
Heat a large skillet over medium-high heat and add a splash of oil. Once the oil is shimmering, add the chicken pieces, cooking for about 7-10 minutes until golden brown and cooked through. Stir occasionally to ensure even browning, and look for the chicken to be tender and no longer pink in the center, adding a savory base for your rice bowls.

Step 3: Add Aromatics
Reduce the heat to medium and incorporate minced garlic and ginger to the skillet. Sauté these aromatics for 1-2 minutes, stirring frequently, until they become fragrant and golden. This step will infuse your Coconut Chicken Rice Bowls with warmth and flavor, creating a delightful aroma in your kitchen.

Step 4: Combine Ingredients
To the skillet, add the rinsed rice and pour in the coconut milk, stirring well to combine all the elements. Bring the mixture to a gentle simmer over medium heat, ensuring everything is well mixed and fragrant. This is the moment where the creamy essence of coconut merges with the savory chicken.

Step 5: Simmer
Cover the skillet with a lid, reduce the heat to low, and allow the mixture to simmer for approximately 15-20 minutes. The goal is for the rice to absorb the coconut milk and soften, transforming into a rich and fluffy foundation for your Coconut Chicken Rice Bowls. Keep an eye on it, gently stirring occasionally to prevent sticking.

Step 6: Finish & Serve
Once the rice is tender and the coconut mixture has thickened, fluff your Coconut Chicken Rice Bowls with a fork. Serve hot, garnished with fresh herbs or a squeeze of lime for a delightful touch of brightness. This final step elevates the dish, readying it for your loved ones to enjoy a cozy and comforting meal together.

How to Store and Freeze Coconut Chicken Rice Bowls

Fridge: Store leftover Coconut Chicken Rice Bowls in an airtight container for up to 3 days. Allow the dish to cool completely before refrigerating to maintain freshness.

Freezer: If you want to enjoy this dish later, freeze it in a freezer-safe container for up to 3 months. To prevent freezer burn, ensure it’s tightly sealed.

Reheating: When ready to eat, thaw Overnight in the fridge, then reheat on the stove over low heat, adding a splash of coconut milk to keep it creamy and delightful.

Make-Ahead Tip: You can prepare the chicken mixture a day in advance; simply refrigerate it and reheat when you're ready to serve.

Make Ahead Options

These Coconut Chicken Rice Bowls are perfect for meal prep enthusiasts! You can chop the chicken, vegetables, and measure the rice and coconut milk up to 24 hours in advance, storing them in airtight containers in the refrigerator. Additionally, you can fully prepare the chicken mixture (steps 1-4) and refrigerate it for up to 3 days before serving, ensuring the flavors remain vibrant and cohesive. When you're ready to enjoy your bowls, simply reheat the mixture in a skillet over medium heat, add the rice and coconut milk, and simmer until everything is warmed through. With this make-ahead strategy, you'll enjoy restaurant-quality Coconut Chicken Rice Bowls with minimal effort during your busy weeknights!

Expert Tips for Coconut Chicken Rice Bowls

  • Perfect Protein: Ensure chicken is cooked through but not overdone. Use a meat thermometer; the internal temperature should reach 165°F for juicy results.
  • Creamy Texture: For the best texture, use full-fat coconut milk. This will enrich your Coconut Chicken Rice Bowls with a luxurious creaminess.
  • Flavor Boost: Fresh ginger and garlic make a noticeable difference over dried options. Always opt for fresh herbs when possible to elevate the dish.
  • Stir Gently: When combining rice and coconut milk, stir gently to avoid breaking up the rice grains too much—preserving fluffiness is key!
  • Veggie Variety: Feel free to use seasonal veggies for freshness; bell peppers and peas work well, but don’t hesitate to mix in your favorites!

What to Serve with Coconut Chicken Rice Bowls

Cozy up your dinner experience with delightful sides that bring out the flavors of these creamy rice bowls.

  • Crispy Garlic Green Beans: Their tender crunch balances the creamy coconut sauce, adding a fresh, vibrant element to your meal.

  • Mango Salsa: This sweet and tangy condiment perfectly complements the coconut and chicken, offering a refreshing burst of flavor. Try it as a topping for a tropical twist!

  • Coconut Lime Rice: Enhance the coconut theme with fragrant rice seasoned with a hint of lime, creating a harmonious flavor profile that accentuates the main dish.

  • Avocado Salad: Creamy avocado slices mixed with fresh greens and a light vinaigrette provide a cooling, nutritious contrast to the warm bowls.

  • Chili-Lime Corn on the Cob: Grilled corn drizzled with chili-lime seasoning adds a zesty kick that pairs beautifully with the multi-dimensional flavors of the rice bowls.

  • Pineapple Coconut Smoothie: For a sweet finish, blend tropical flavors into a creamy smoothie, delighting your palate with a refreshing drink that echoes your meal's essence.

  • Spiced Roasted Cauliflower: This dish’s earthy flavors and crispy texture serve as a fantastic counterpart to the bowls, making for a delightful mix of tastes and textures.

  • Chilled Cucumber Soup: Light and soothing, this cool soup provides a refreshing counterpoint to the warmth and richness of the Coconut Chicken Rice Bowls.

  • Lime-infused Sparkling Water: A bubbly drink with a squeeze of lime keeps the meal light and offers a refreshing palate cleanser with each bite.

Every bite of your Coconut Chicken Rice Bowls deserves to be complemented by dishes that enhance its warm and comforting essence. Enjoy!

Variations on Coconut Chicken Rice Bowls

Customize your Coconut Chicken Rice Bowls to match your cravings and dietary needs! The possibilities are endless and delicious.

  • Shrimp Substitute: Swap chicken for shrimp for a quick seafood twist, cooking them just until pink to preserve tenderness.
  • Vegan Option: Use tofu instead of chicken for a plant-based delight; press and marinate the tofu for extra flavor before cooking.
  • Brown Rice: Substitute white rice with brown rice for added nutty flavor and a healthier profile; simply adjust cooking time to ensure it's tender.
  • Spice it Up: Add a pinch of red pepper flakes or chopped jalapeños to kick up the heat and delight spice lovers. Just keep an eye on the heat, adjusting to your taste!
  • Coconut Curry: Mix in a tablespoon of curry paste for a richer, spiced flavor; this adds depth and complexity that enhances the creamy coconut.
  • Herb Boost: Toss in fresh herbs like basil or cilantro during the final moments of cooking to brighten up the dish with vibrant flavors! The fresh greens beautifully contrast against the creamy base.
  • Frozen Veggies: If fresh veggies are scarce, use frozen mixed vegetables instead for convenience without sacrificing flavor; they’ll add color and nutrition easily.
  • Lime Zing: Finish with a squeeze of fresh lime juice right before serving to elevate the dish with a burst of freshness that complements the coconut.

Looking for more inspiration? Don't forget to check out the flavors of Bbq Chicken Rice or for something cozy, try making some Crock Pot Chicken. The beauty of these variations is that you can confidently explore flavors while keeping the heart of the dish intact!

Coconut Chicken Rice Bowls Recipe FAQs

How do I select ripe ingredients for Coconut Chicken Rice Bowls?
Absolutely! When choosing vegetables, look for vibrant bell peppers without any dark spots or wrinkles. Fresh garlic should be firm and unblemished, and ginger should feel heavy and smooth. Opt for chicken that is fresh and has a pink hue without any strange odor.

What is the best way to store leftovers from Coconut Chicken Rice Bowls?
You can store any leftover Coconut Chicken Rice Bowls in an airtight container in the refrigerator for up to 3 days. Make sure the dish cools completely before sealing to maintain freshness, and when you're ready to enjoy it again, simply reheat on the stove or microwave!

Can I freeze Coconut Chicken Rice Bowls?
Yes! To freeze, place the cooled Coconut Chicken Rice Bowls in a freezer-safe container, ensuring it’s sealed tightly. They can last up to 3 months. When you’re ready to eat, thaw in the refrigerator overnight, and then reheat on the stove, adding a little extra coconut milk if it looks too dry.

What should I do if my rice is undercooked in the Coconut Chicken Rice Bowls?
No worries! If you find that your rice is undercooked, you can add a splash of water or coconut milk to the skillet and cover it again. Let it simmer on low heat for an additional 5-10 minutes. Stir gently to help it cook through, and keep an eye on the liquid level to prevent sticking.

Are there any dietary considerations for Coconut Chicken Rice Bowls?
If you're concerned about allergies, note that coconut milk is a common allergen. You can substitute it with a hypoallergenic milk alternative. For those with a gluten allergy, check your spices to ensure they’re gluten-free. If you have pets, avoid sharing any dishes containing garlic and onions, as they can be harmful to them.

Can I customize the protein in Coconut Chicken Rice Bowls?
Very! Feel free to swap out the chicken for shrimp or tofu if you prefer. For shrimp, simply cook until they turn pink and opaque, about 3-4 minutes. For tofu, try pressing to remove moisture, then sauté until golden. This recipe shines in its adaptability, making it perfect for what you have on hand!

Coconut Chicken Rice Bowls

Creamy Coconut Chicken Rice Bowls for Cozy Nights In

Coconut Chicken Rice Bowls are comforting and easy to make, perfect for busy weeknights filled with flavor and versatility.
Print Recipe Pin Recipe
Prep Time 10 minutes mins
Cook Time 25 minutes mins
Total Time 35 minutes mins
Servings: 4 bowls
Course: Dinner
Cuisine: Asian
Calories: 550
Ingredients Equipment Method Nutrition Notes

Ingredients
  

For the Chicken
  • 1 lb Chicken Great source of protein; can substitute with shrimp or tofu.
For the Coconut Sauce
  • 1 can Coconut Milk Full-fat will enhance richness.
For the Rice
  • 2 cups Rice Any type preferred, including brown or jasmine.
For the Seasonings
  • 3 cloves Garlic Fresh preferred, but dried works in a pinch.
  • 1 tbsp Ginger Fresh for vibrant flavor or ground for convenience.
For the Vegetables
  • 1 cup Bell Peppers Add color and sweetness.
  • 1 cup Peas Can swap for your favorite veggies.

Equipment

  • Large skillet

Method
 

Step‑by‑Step Instructions
  1. Begin by chopping the chicken into bite-sized pieces and dicing your choice of vibrant vegetables, such as bell peppers and peas. Measure out the rice and coconut milk, ensuring you have everything ready for a smooth cooking process.
  2. Heat a large skillet over medium-high heat and add a splash of oil. Once the oil is shimmering, add the chicken pieces, cooking for about 7-10 minutes until golden brown and cooked through.
  3. Reduce the heat to medium and incorporate minced garlic and ginger to the skillet. Sauté for 1-2 minutes until fragrant and golden.
  4. Add the rinsed rice and pour in the coconut milk, stirring well to combine. Bring to a gentle simmer.
  5. Cover with a lid, reduce heat to low, and simmer for approximately 15-20 minutes, stirring occasionally.
  6. Once the rice is tender and the mixture has thickened, fluff the rice with a fork, and serve hot, garnished with fresh herbs or a squeeze of lime.

Nutrition

Serving: 1bowlCalories: 550kcalCarbohydrates: 60gProtein: 30gFat: 25gSaturated Fat: 15gPolyunsaturated Fat: 5gMonounsaturated Fat: 5gCholesterol: 100mgSodium: 600mgPotassium: 800mgFiber: 4gSugar: 2gVitamin A: 500IUVitamin C: 30mgCalcium: 40mgIron: 2mg

Notes

Great dish to share with loved ones. Can be made ahead by prepping the chicken mixture a day in advance.

Tried this recipe?

Let us know how it was!

Creamy Smothered Chicken and Rice for Ultimate Comfort Tonight

May 2, 2026 by Grace Snow Leave a Comment

As I watched the sun dip below the horizon, filling the kitchen with warm light, I couldn’t resist the alluring aroma of my bubbling creation—Creamy Smothered Chicken and Rice. This dish is a beloved comfort food, effortlessly combining succulent seared chicken with a rich, cheesy sauce over fluffy rice. Not only is it an easy weeknight meal, but it’s also incredibly customizable, allowing for your choice of vegetables or spices to suit your family’s collective palate. Plus, it provides a delightful sense of coziness that turns any dinner into a special occasion. Ever thought of how one comforting bite of food can evoke the happiest memories? Keep reading—this recipe might just become your new favorite!

Why is Comfort Food So Special?

Comforting Taste: The blend of creamy sauce and tender chicken creates a cozy, nostalgic experience that’s hard to resist.
Quick to Make: With simple steps and minimal prep, you’ll have this delicious dish on your table in no time—perfect for busy weeknights!
Customizable Delights: Feel free to tailor this dish by including your favorite veggies or spices, making it a family favorite for all tastes. If you're in the mood for more chicken options, consider checking out my tasty Bbq Chicken Rice or Chicken Adobo Again.
Nutritious and Satisfying: Packed with proteins and healthy fats, you can enjoy the creamy indulgence without the guilt.
Crowd-Pleaser: Whether it’s a family dinner or a gathering with friends, this dish is sure to impress everyone at the table!

Creamy Smothered Chicken and Rice Ingredients

For the Chicken
• Chicken Breasts – Boneless, skinless chicken ensures tenderness and quick cooking.

For the Seasoning
• Garlic Powder – Adds a savory depth; fresh garlic can be used for a stronger flavor.
• Onion Powder – Provides a solid flavor base; fresh onions can substitute if diced finely.
• Smoked Paprika – Infuses the dish with a smoky essence; regular paprika works but lacks the depth.
• Salt and Black Pepper – Essential for seasoning; adjust according to your taste preference.

For Cooking
• Olive Oil – Ideal for searing the chicken; can be replaced with vegetable or canola oil if needed.

For the Rice
• Long-Grain White Rice – A fluffy base; substitute with brown rice for a healthier option but increase cooking time.
• Chicken Broth – Enhances the flavor of both the rice and sauce; use vegetable broth for a vegetarian alternative.

For the Sauce
• Unsalted Butter – Provides creaminess to the sauce; margarine may work as a substitute in a pinch.
• All-Purpose Flour – Thickens the sauce for a creamy consistency; gluten-free flour can be used if necessary.
• Whole Milk – Creates a rich, creamy sauce; almond or oat milk are excellent choices for a dairy-free option.
• Grated Cheddar & Parmesan Cheeses – Add richness and flavor; consider nutritional yeast for a non-dairy alternative.
• Thyme – Elevates the flavor profile; basil or oregano can be used as substitutions.

For Garnish
• Fresh Parsley – Adds a pop of freshness; can be omitted if it's not on hand.

Step‑by‑Step Instructions for Creamy Smothered Chicken and Rice

Step 1: Prepare Chicken
Start by seasoning the boneless, skinless chicken breasts with garlic powder, onion powder, smoked paprika, salt, and black pepper. In a large skillet, heat 2 tablespoons of olive oil over medium-high heat. Sear the chicken for about 4-5 minutes on each side until golden brown and cooked through. Once completed, remove the chicken from the skillet and set it aside on a plate.

Step 2: Cook Rice
In a saucepan, combine 1 cup of chicken broth and a pinch of salt, bringing it to a boil over medium heat. Carefully add in 1 cup of long-grain white rice, stirring briefly. Cover the saucepan with a lid, reduce the heat to low, and let it simmer for 15-18 minutes until the rice is tender and has absorbed all the liquid. Once done, remove from heat and keep it covered to stay warm.

Step 3: Make Sauce
Using the same skillet, melt 3 tablespoons of unsalted butter over medium heat. As the butter melts, whisk in 3 tablespoons of all-purpose flour, cooking it for about 1-2 minutes until it turns a light golden color. Gradually stir in 1 cup of whole milk and ½ cup of chicken broth, whisking continuously until the mixture is smooth and thickens, which should take about 3-4 minutes.

Step 4: Add Cheeses and Seasoning
Next, reduce the heat to low and stir in 1 cup of grated cheddar cheese and ½ cup of grated Parmesan cheese into the creamy sauce. Allow the cheese to melt fully, creating a velvety consistency. To enhance the flavor, add 1 teaspoon of dried thyme and stir until combined, ensuring the sauce is well seasoned.

Step 5: Combine Chicken and Sauce
Return the seared chicken breasts to the skillet, coating them in the creamy sauce you just prepared. Let everything simmer together over low heat for about 10 minutes, allowing the flavors to meld and ensuring the chicken is heated through completely. The sauce should be thick and bubbling gently, creating a delightful aroma.

Step 6: Serve
To serve your Creamy Smothered Chicken and Rice, spoon a generous helping of the fluffy rice onto each plate. Place the chicken on top and ladle additional sauce over it for extra creaminess. If you have fresh parsley, sprinkle it on as a garnish to add a pop of color before diving in. Enjoy the comfort food experience with your loved ones!

What to Serve with Creamy Smothered Chicken and Rice

Creating the perfect meal involves pairing flavors and textures that enhance each dish's charm. Let’s explore some delightful companions for this comforting dish.

  • Garlic Bread: The crispy, buttery goodness of garlic bread makes it an excellent side, perfect for soaking up the creamy sauce.

  • Steamed Broccoli: Tender, vibrant broccoli not only adds a pop of color but also brings a healthy crunch to balance the creamy dish. Pairing these two can turn a simple dinner into a wholesome feast.

  • Caesar Salad: Crisp romaine lettuce drizzled with tangy dressing and topped with crunchy croutons complements the richness of the chicken perfectly. This refreshing salad provides a wonderful contrast to the creamy texture.

  • Honey Glazed Carrots: Sweet, roasted carrots add a touch of sweetness that beautifully offsets the savory chicken and rice. Their tender bite alongside the dish creates a comforting harmony.

  • Corn on the Cob: The bright sweetness of summer corn offers a fun, juicy contrast. The vibrant flavors of the corn celebrate the dish's comforting spirit.

  • Chardonnay: A chilled glass of Chardonnay enriches the experience, with its buttery notes enhancing the cheese sauce. It’s a lovely accompaniment for a special dinner.

  • Apple Crisp: For dessert, a delicious apple crisp that’s warm and slightly spiced makes for a comforting finish. The sweetness of apples contrasts warmly with the savory flavors of the meal.

Mixing and matching these options with your Creamy Smothered Chicken and Rice will surely turn dinner into a heartwarming occasion. Enjoy!

How to Store and Freeze Creamy Smothered Chicken and Rice

Fridge: Store your Creamy Smothered Chicken and Rice in an airtight container for up to 3 days. This keeps the flavors intact and maintains its creamy texture.

Freezer: For longer storage, freeze the dish for up to 2 months. Ensure it’s in a freezer-safe container, leaving some space for expansion.

Reheating: To reheat, thaw overnight in the fridge, then warm in a skillet over low heat. Add a splash of broth or milk to restore creaminess, stirring gently until heated through.

Avoiding Spoilage: Always make sure to cool the dish down to room temperature before refrigerating or freezing to prevent moisture buildup, which can alter the texture.

Make Ahead Options

These Creamy Smothered Chicken and Rice are perfect for busy home cooks who want to save time during hectic weekdays! You can prepare the chicken and rice up to 24 hours in advance; simply season and sear the chicken, then store it in an airtight container in the fridge. Cook the rice and allow it to cool before refrigerating it as well. For the creamy sauce, you can whisk together the flour, milk, and cheese, but hold off on combining it with the chicken until you're ready to serve. When the time comes, simply combine everything in a skillet and heat it through until bubbling for delicious, ready-to-enjoy comfort food!

Creamy Smothered Chicken and Rice Variations

Get ready to elevate your Creamy Smothered Chicken and Rice by mixing up flavors and textures in delightful ways!

  • Vegetarian Option: Swap chicken for hearty mushrooms or cauliflower. Sauté them until golden before adding them to your creamy sauce for a filling twist!
  • Spice it Up: Add cayenne pepper or chili flakes for a touch of heat. A little spice makes every bite exciting and gives it a whole new personality!
  • Different Rice: Try jasmine rice or brown rice instead of long-grain white rice. Each type brings its own flavor and texture, making your dish uniquely satisfying.
  • Dairy-Free Delight: Replace whole milk and cheeses with almond milk and nutritional yeast. Enjoy the same creamy consistency and flavor without the dairy.
  • Flavor Boosts: Stir in fresh herbs like basil or oregano to really enhance the flavor profile. They add a garden-fresh touch that elevates the dish beautifully.
  • Creamy Dream: For an ultra-creamy sauce, add a dollop of cream cheese while whisking the sauce together. This will give your dish a stunning richness that’s simply irresistible!
  • Add Greens: Incorporate spinach or kale into your dish for added nutrition and color. Sauté them briefly before mixing into your creamy sauce—healthy and delicious!
  • Lemon Zest: Fresh lemon zest or juice can brighten the dish. Just a touch can balance the richness and add a burst of flavor that will have everyone reaching for seconds!

With these variations, you can keep your dinners exciting and tailored to your family's tastes! And if you're still looking for inspiration, check out my One Pot Rice or Chicken Dumplings Cozy recipes to satisfy your comfort food cravings!

Expert Tips for Creamy Smothered Chicken and Rice

  • Rest the Chicken: Allowing the chicken to rest for a few minutes post-cooking enhances juiciness, preventing it from drying out during cooking.
  • Adjust Sauce Thickness: If you find your creamy sauce too thick, simply add a splash of chicken broth or milk while stirring to reach your desired consistency.
  • Veggie Boost: Incorporate sautéed vegetables like spinach or mushrooms into your Creamy Smothered Chicken and Rice for added nutrition and flavor.
  • Even Cooking: Ensure chicken breasts are similar in size for even cooking; thicker pieces may require additional cooking time to ensure tenderness.
  • Flavor Variations: Experiment with adding spices like cayenne pepper or chili flakes to give your dish a delightful kick while personalizing the flavors to suit your family's taste.

Creamy Smothered Chicken and Rice Recipe FAQs

How do I know if my chicken is ripe for use?
Absolutely! When selecting chicken breasts, look for a bright pink color and no dark spots or off-putting odors. Fresh chicken should feel moist but not slimy, ensuring optimal tenderness in your dish. For the best results, make sure to purchase chicken from a reputable source.

What is the best way to store leftover Creamy Smothered Chicken and Rice?
You can store your Creamy Smothered Chicken and Rice in an airtight container in the fridge for up to 3 days. This helps maintain its creamy texture and flavor. Just ensure they are completely cooled before sealing to avoid moisture buildup that could affect the dish's quality.

Can I freeze Creamy Smothered Chicken and Rice?
Absolutely! To freeze, transfer the cooled dish into a freezer-safe container, leaving some space at the top for expansion, and seal tightly. It can be frozen for up to 2 months. When ready to enjoy, thaw it overnight in the fridge and reheat gently on the stovetop, adding a splash of chicken broth or milk for creaminess.

What should I do if my sauce is too thick?
If you find your creamy sauce has thickened too much, no need to worry! Start by adding a splash of chicken broth or whole milk while stirring over low heat. Continue to stir until the sauce reaches your desired consistency. This way, you won’t lose all that delicious flavor you’ve worked so hard to create!

Is this recipe suitable for someone with dairy allergies?
Yes! For a dairy-free version of Creamy Smothered Chicken and Rice, simply substitute the whole milk with almond or oat milk, and skip the cheese or use nutritional yeast for a cheesy flavor. Always double-check labels while shopping to ensure the products meet your dietary needs.

Can I add vegetables to the dish?
Very much so! I often recommend adding sautéed vegetables like spinach, mushrooms, or bell peppers to amp up both nutrition and taste. Simply sauté the veggies in the skillet before adding the sauce, allowing their flavors to meld beautifully with the chicken and rice for a comforting, veggie-packed meal.

Creamy Smothered Chicken and Rice

Creamy Smothered Chicken and Rice for Ultimate Comfort Tonight

Creamy Smothered Chicken and Rice is a comforting dish combining succulent chicken with a rich sauce over fluffy rice.
Print Recipe Pin Recipe
Prep Time 10 minutes mins
Cook Time 30 minutes mins
Total Time 40 minutes mins
Servings: 4 servings
Course: Dinner
Cuisine: American
Calories: 580
Ingredients Equipment Method Nutrition Notes

Ingredients
  

For the Chicken
  • 4 pieces Boneless, skinless chicken breasts
For the Seasoning
  • 1 teaspoon Garlic Powder
  • 1 teaspoon Onion Powder
  • 1 teaspoon Smoked Paprika
  • 1 teaspoon Salt
  • 1 teaspoon Black Pepper
For Cooking
  • 2 tablespoons Olive Oil Can substitute with vegetable or canola oil.
For the Rice
  • 1 cup Long-Grain White Rice Can substitute with brown rice.
  • 1 cup Chicken Broth Vegetable broth can be used for vegetarian option.
For the Sauce
  • 3 tablespoons Unsalted Butter Margarine can substitute.
  • 3 tablespoons All-Purpose Flour Gluten-free flour can be used.
  • 1 cup Whole Milk Almond or oat milk are alternatives.
  • 1 cup Grated Cheddar Cheese Nutritional yeast can be a non-dairy alternative.
  • ½ cup Grated Parmesan Cheese
  • 1 teaspoon Thyme Basil or oregano can be used.
For Garnish
  • 2 tablespoons Fresh Parsley Can be omitted if unavailable.

Equipment

  • Skillet
  • Saucepan
  • Whisk
  • measuring cups
  • Measuring Spoons

Method
 

Step-by-Step Instructions
  1. Season the chicken breasts with garlic powder, onion powder, smoked paprika, salt, and black pepper. Heat olive oil in a skillet over medium-high heat and sear the chicken for 4-5 minutes on each side until golden brown. Remove from skillet and set aside.
  2. In a saucepan, bring chicken broth and a pinch of salt to a boil. Add long-grain white rice, cover, reduce heat, and let simmer for 15-18 minutes until tender.
  3. Melt butter in the same skillet, whisk in flour, and cook until light golden. Gradually stir in milk and chicken broth, whisking until the mixture thickens, about 3-4 minutes.
  4. Reduce heat to low and stir in cheddar and parmesan cheeses until melted. Add thyme and stir until well combined.
  5. Return the chicken to the skillet and coat with the sauce. Simmer for 10 minutes to meld flavors and ensure chicken is heated through.
  6. Serve the chicken over a generous helping of rice and ladle extra sauce over the top. Garnish with fresh parsley if desired.

Nutrition

Serving: 1servingCalories: 580kcalCarbohydrates: 45gProtein: 37gFat: 25gSaturated Fat: 12gPolyunsaturated Fat: 2gMonounsaturated Fat: 8gCholesterol: 150mgSodium: 900mgPotassium: 600mgFiber: 1gSugar: 3gVitamin A: 600IUVitamin C: 2mgCalcium: 250mgIron: 2mg

Notes

Let chicken rest after cooking to enhance juiciness. Adjust sauce thickness by adding broth or milk. Incorporate sautéed vegetables for added nutrition. Ensure even cooking by using similarly sized chicken breasts. Experiment with spices for flavor variations.

Tried this recipe?

Let us know how it was!

Best Oven Baked Meatballs – Juicy, Easy, Family-Favorite Treats

May 1, 2026 by Grace Snow Leave a Comment

As the oven hums and fills the kitchen with warmth, the anticipation builds—could these possibly be the Best Oven Baked Meatballs? This recipe is a beloved staple in my home, blending juicy flavors with an easy approach that’s perfect for weeknight dinners. Not only do these meatballs come together without a hassle, but they’re family-friendly and versatile enough to shine in any meal, whether paired with pasta, stuffed in a sub, or savored as appetizers at a gathering. There's something incredibly satisfying about knowing you're serving up something homemade without spending all day in the kitchen. Ready to discover the secret to this comforting dish that the whole family will love? Let’s dive into the details!

Why Are These Meatballs So Special?

Juicy, Tender Perfection: The secret lies in the combination of quality ground beef and moist ingredients that create a melt-in-your-mouth texture.

Family-Favorite Appeal: These meatballs bring everyone to the table, pleasing both kids and adults alike. They’re perfect for quick weeknight meals or a cozy family gathering.

Easy to Make: With just a few simple steps and ingredients, you can have a batch of delicious oven-baked meatballs ready in no time.

Versatile Delight: Enjoy them with spaghetti, as meatball subs, or even as a party appetizer. The possibilities are endless! If you're looking for a unique twist, check out these Matcha Baked Doughnuts for dessert.

Meal Prep Champion: Make a big batch and store extras in the fridge or freezer for a convenient go-to meal. The flavor only gets better with time!

Best Oven Baked Meatballs Ingredients

• To create the perfect meatballs, gather these mouthwatering basics:

For the Meatballs

  • Ground Beef – Provides a rich, meaty base; substitute with ground turkey or chicken for a leaner option.
  • Breadcrumbs – Adds texture and helps bind the meatballs; opt for panko for extra crunch or gluten-free breadcrumbs for a gluten-free option.
  • Parmesan Cheese – Enhances flavor with salty depth; can be substituted with Pecorino Romano for a sharper taste.
  • Milk – Keeps meatballs moist; use almond milk or oat milk for a dairy-free alternative.
  • Egg – Acts as a binder to hold the meat together; a flax egg can be used for a vegan alternative.
  • Garlic – Adds aromatic flavor; you can substitute garlic powder if fresh isn't available.

Enjoy crafting your Best Oven Baked Meatballs with these simple yet essential ingredients!

Step‑by‑Step Instructions for Best Oven Baked Meatballs

Step 1: Preheat the Oven
Begin your journey to the Best Oven Baked Meatballs by preheating your oven to 400°F (200°C). While the oven warms, grab a baking sheet and line it with parchment paper. This ensures easy cleanup and prevents the meatballs from sticking. Once your oven reaches the desired temperature, the aroma of homemade goodness will soon fill your kitchen.

Step 2: Prepare the Breadcrumb Mixture
In a mixing bowl, combine the breadcrumbs with milk, allowing the mixture to sit for about 5 minutes. This soaking process helps the breadcrumbs absorb moisture, ensuring your meatballs remain tender and juicy. After a brief pause, you’ll see that the breadcrumbs have softened, ready to blend seamlessly with the other ingredients.

Step 3: Combine the Ingredients
Once the breadcrumb mixture is ready, add the ground beef, Parmesan cheese, egg, minced garlic, and your choice of seasonings into the bowl. Mix gently with your hands or a spoon until just combined; be careful not to overmix, which could make the meatballs tough. You want all the flavors to meld harmoniously while retaining a light texture.

Step 4: Form the Meatballs
Now it’s time to shape those delightful meatballs! Wet your hands slightly to prevent sticking, then scoop out portions of the mixture and roll them into balls about 1 to 1.5 inches in diameter. Carefully place each meatball onto the prepared baking sheet, ensuring they are evenly spaced. This allows for optimal heat circulation, leading to perfectly cooked meatballs.

Step 5: Bake to Perfection
Slide the baking sheet into your preheated oven and bake the meatballs for approximately 20 minutes. Watch for a beautiful golden-brown color to develop on the outside, which signals they're ready. To ensure perfect doneness, use a meat thermometer to check that the internal temperature has reached 165°F (74°C).

Step 6: Rest Before Serving
Once baked, remove the meatballs from the oven and allow them to rest for about 5 minutes. This resting period is essential for letting the juices redistribute, ensuring that your Best Oven Baked Meatballs are as juicy and tender as possible when served. After this wait, they’re ready to be enjoyed with pasta, on a sub, or as a tempting appetizer!

Storage Tips for Best Oven Baked Meatballs

  • Fridge: Store leftover cooked meatballs in an airtight container for up to 4 days. This keeps them fresh and ready for quick meals throughout the week.

  • Freezer: For longer storage, freeze the meatballs (cooked or uncooked) in a single layer on a baking sheet. Once frozen, transfer to a freezer bag for up to 3 months.

  • Reheating: When ready to enjoy, reheat cooked meatballs in the oven at 350°F (175°C) for about 15 minutes or until warmed through. You can also microwave them for a quick meal, adding a splash of water to keep them moist.

  • Serving: Consider pairing them with your favorite sauce for a delightful meal. The flavors of the Best Oven Baked Meatballs develop even further after resting, making them perfect for any last-minute dinner plan!

What to Serve With Best Oven Baked Meatballs?

Transform your meal into a delightful feast by pairing these juicy meatballs with savory sides and delicious drinks!

  • Spaghetti with Marinara: Classic choice that beautifully complements the meatballs’ rich flavors while providing a hearty, comforting texture.

  • Garlic Bread: Crispy on the outside and soft on the inside, garlic bread brings a wonderful crunch and aromatic flavor to every bite. Serve it with marinara for dipping!

  • Creamy Mashed Potatoes: Smooth and buttery, these mashed potatoes add a luxurious feel to the meal, softening the meatballs' robust taste.

  • Fresh Green Salad: A vibrant mix of greens with a zesty vinaigrette brightens up the plate, balancing the meatballs' savory depth. It’s a refreshing contrast everyone will enjoy!

  • Roasted Vegetables: Seasonal veggies roasted to perfection add a touch of sweetness and earthiness, enhancing the overall flavors of your dinner table.

  • Homemade Coleslaw: This crunchy, tangy side dish provides a delightful crunch that pairs perfectly with the juicy meatballs, adding a refreshing dimension to your meal.

  • Cheesy Garlic Rice: Fluffy rice infused with garlic and cheese brings a wonderful creaminess, making each bite a comforting indulgence.

  • Fruit Salad: A light dessert option that provides a natural sweetness to cleanse the palate after enjoying hearty meatballs.

  • Red Wine: A glass of bold red wine enhances the flavors of the meatballs, creating a cozy and indulgent dining experience.

  • Chocolate Brownies: End on a sweet note with fudgy brownies for dessert. Their rich chocolate flavor is a perfect way to conclude a comforting meal!

Best Oven Baked Meatballs Customizations

Feel free to make these meatballs your own with a few simple tweaks that can elevate their flavor and cater to your preferences!

  • Dairy-Free: Swap out regular milk with almond or oat milk to keep your meatballs moist without any dairy.

  • Lean Alternative: Use ground turkey or chicken instead of beef for a lighter meal option. These meats can be just as juicy and flavorful.

  • Breadcrumb Options: Experiment with panko for extra crunch or gluten-free breadcrumbs if you need to cater to dietary restrictions.

  • Herb-Infused: Add freshly chopped parsley, thyme, or basil into the mixture to brighten the overall flavor and introduce a delightful aromatic element.

  • Zesty Variants: Mix in some red pepper flakes or chopped jalapeños for a spicy kick that warms the soul. These extra touches can make your meal truly special.

  • Sauce Innovations: Besides classic marinara, try BBQ or teriyaki sauce to give a new twist to your serving style. Each sauce brings out different flavors, making your meatballs shine in new ways.

  • Mini Meatballs: Consider rolling smaller 1-inch meatballs for a fun appetizer option. They’re perfect for dipping and can be a great surprise at gatherings!

  • Flavorful Add-Ins: Finely dice and mix in sautéed onions or mushrooms for added moisture and an extra layer of savory indulgence.

There's no limit to the delicious possibilities! For a delightful dessert to follow your tasty meatballs, why not prepare some Matcha Baked Doughnuts? They make a sweet ending to a comforting meal.

Expert Tips for Best Oven Baked Meatballs

  • Mix Gently: Avoid overmixing your meatball mixture to ensure they remain tender. Overmixing can lead to a tough texture, robbing your meatballs of that juicy goodness.

  • Temperature Matters: Use a meat thermometer to check for doneness. Your Best Oven Baked Meatballs should reach an internal temperature of 165°F (74°C) for safe and delicious eating.

  • Let Them Rest: Allow the cooked meatballs to rest for a few minutes before serving. This helps the juices redistribute, enhancing their juiciness and flavor.

  • Space is Key: When placing the meatballs on the baking sheet, ensure they are evenly spaced. This promotes even cooking and prevents them from steaming.

  • Flavor Boost: Feel free to add herbs or spices to the mixture, such as oregano or basil, to elevate the taste of your meatballs and make them even more scrumptious!

Make Ahead Options

These Best Oven Baked Meatballs are perfect for meal prep enthusiasts! You can mix and form the meatballs and refrigerate them for up to 24 hours before baking, allowing the flavors to meld beautifully. Make sure to cover them tightly with plastic wrap or place them in an airtight container to maintain their quality. Alternatively, you can freeze uncooked meatballs for up to 3 months; just lay them flat on a baking sheet to freeze individually before transferring to a freezer bag. When you’re ready to enjoy, bake them straight from the fridge for about 25 minutes, or from frozen for 30–35 minutes, ensuring they reach an internal temperature of 165°F (74°C). With these make-ahead options, you'll have comforting, homemade meals ready with minimal effort!

Best Oven Baked Meatballs Recipe FAQs

How should I select ripe ingredients for my meatballs?
Absolutely! When picking ground beef, opt for a fresh batch with a bright red color and minimal brown spots, indicating it’s fresh. If you choose to use breadcrumbs, ensuring they are dry will help maintain the right texture in your meatballs. For cheese, go with a block of Parmesan instead of pre-grated, as it tends to have better flavor and quality.

What’s the best way to store leftover meatballs, and how long will they last?
Very! Store leftover cooked meatballs in an airtight container in the refrigerator for up to 4 days. Ensure they’re cooled completely before storing to maintain freshness. If you’d like to keep them longer, place them in a freezer bag and freeze for up to 3 months. Just remember to label your bags with the date to keep track of freshness!

Can I freeze the Best Oven Baked Meatballs? If so, how?
Of course! To freeze, lay the uncooked meatballs on a baking sheet lined with parchment paper, ensuring they’re spaced apart. Freeze them for about 1-2 hours until they are firm, then transfer the frozen meatballs into a freezer bag. Squeeze out as much air as possible before sealing to prevent freezer burn. They can be cooked directly from the freezer; just add an extra 5-10 minutes to the baking time.

What if my meatballs turn out dry or tough?
No worries! If your meatballs are dry, it may be due to overmixing or cooking them too long. Be sure to mix just until ingredients are combined and monitor their internal temperature closely, aiming for 165°F (74°C). If they happen to be tough, I recommend making sure you’re adding enough moisture through ingredients like milk and ensuring not to pack them too tightly when forming. Keeping these factors in mind should help create perfectly flavorful, tender meatballs every time!

Are there any dietary considerations with these meatballs for allergies or pets?
Absolutely! Since the Best Oven Baked Meatballs contain common allergens like dairy (Parmesan cheese) and eggs, those with lactose intolerance or egg allergies should consider substituting with dairy-free cheese and a flax egg respectively. As for pets, while meatballs can be a delicious treat for dogs, please ensure they don’t contain any ingredients harmful to them, such as onions or excessive garlic.

Can I add veggies or other ingredients for extra flavor?
Definitely! Adding finely chopped onions, bell peppers, or herbs like parsley or basil can enhance the flavor profile of your meatballs. Just be mindful not to add too much moisture, as this can affect the texture. If you're experimenting with flavors, feel free to infuse the meat mixture with other spices or sauces that your family enjoys!

Best Oven Baked Meatballs

Best Oven Baked Meatballs – Juicy, Easy, Family-Favorite Treats

Discover the Best Oven Baked Meatballs recipe, a juicy, easy, and family-favorite treat perfect for any meal.
Print Recipe Pin Recipe
Prep Time 10 minutes mins
Cook Time 20 minutes mins
Resting Time 5 minutes mins
Total Time 35 minutes mins
Servings: 4 meatballs
Course: Dinner
Cuisine: American
Calories: 150
Ingredients Equipment Method Nutrition Notes

Ingredients
  

For the Meatballs
  • 1 pound Ground Beef Can substitute with ground turkey or chicken.
  • 1 cup Breadcrumbs Panko adds extra crunch.
  • 1/2 cup Parmesan Cheese Can substitute with Pecorino Romano.
  • 1/4 cup Milk Use almond milk or oat milk for dairy-free.
  • 1 large Egg A flax egg can be used for a vegan alternative.
  • 2 cloves Garlic Can substitute with garlic powder.

Equipment

  • Oven
  • Baking Sheet
  • Mixing Bowl
  • Parchment Paper

Method
 

Step-by-Step Instructions
  1. Preheat your oven to 400°F (200°C) and line a baking sheet with parchment paper.
  2. Combine breadcrumbs with milk in a mixing bowl and let sit for about 5 minutes.
  3. Add ground beef, Parmesan cheese, egg, and minced garlic to the breadcrumb mixture and mix gently.
  4. Wet your hands slightly, scoop and shape the mixture into 1 to 1.5 inch meatballs and place on the baking sheet.
  5. Bake the meatballs in the preheated oven for approximately 20 minutes, checking for a golden-brown color.
  6. Remove from oven and let the meatballs rest for about 5 minutes before serving.

Nutrition

Serving: 1meatballCalories: 150kcalCarbohydrates: 10gProtein: 12gFat: 8gSaturated Fat: 3gPolyunsaturated Fat: 1gMonounsaturated Fat: 3gCholesterol: 50mgSodium: 300mgPotassium: 200mgFiber: 1gVitamin A: 150IUCalcium: 100mgIron: 2mg

Notes

These meatballs can be enjoyed in a variety of dishes, including pasta or meatball subs, and make a great appetizer.

Tried this recipe?

Let us know how it was!

Crispy Chicken Bacon Ranch Wrap: Your New Favorite Comfort Bite

May 1, 2026 by Grace Snow Leave a Comment

The first sizzling sound of chicken hitting the hot oil transports me back to my kitchen's joyful chaos. Today, I'm excited to share my recipe for a Crispy Chicken Bacon Ranch Wrap that perfectly balances comfort and flavor. This wrap brings together crunchy chicken strips, smoky bacon, and fresh veggies, all embraced by a warm tortilla, making it an ideal choice for lunch or a quick dinner. Not only is this dish customizable—swap in grilled chicken or even crispy tofu for a vegetarian option—but it’s also beginner-friendly, taking just about 55 minutes to whip up! Whether you’re feeding a crowd or enjoying a cozy meal at home, this wrap is sure to become a favorite. Curious about how to create this delicious harmony of flavors? Let’s dive into the recipe!

Why is this wrap your new favorite?

Crispy Texture: The combination of panko breadcrumbs and frying delivers a satisfyingly crunchy bite that will have you reaching for more!

Flavor Explosion: Juicy chicken, savory bacon, fresh veggies, and creamy ranch create a deliciously complex flavor profile that makes each bite a delight.

Customizable: This wrap is adaptable to your taste—try it with grilled chicken or even crispy tofu for a fun vegetarian twist! Don’t forget, if you’re in the mood for more chicken options, check out our Honey Garlic Chicken Thighs or Spatchcock Chicken Flavor for delicious alternatives.

Quick Prep: With a cooking time of around 55 minutes, you can easily whip this up for a weekday meal or a weekend gathering that will impress your guests.

Crowd-Pleaser: Perfect for casual family dinners or gatherings with friends, this wrap will surely satisfy all in attendance!

Crispy Chicken Bacon Ranch Wrap Ingredients

For the Chicken
• Boneless, Skinless Chicken Breasts – A juicy foundation protein; can substitute with chicken thighs for juiciness.
• All-Purpose Flour – Essential for dredging the chicken; gluten-free flour is a good alternative.
• Buttermilk – Helps tenderize the chicken; substitute with milk mixed with vinegar or lemon juice.
• Garlic Powder – Adds aromatic flavor depth; fresh garlic can be used for a stronger taste.
• Onion Powder – Rounds out flavors; optional if you prefer a simpler profile.
• Paprika – Gives color and warmth; try smoked paprika for a richer flavor.
• Salt and Black Pepper – Essential for seasoning; adjust to your taste preference.
• Panko Breadcrumbs – Creates a super crispy coating; regular breadcrumbs can be used if needed.
• Vegetable Oil – Used for frying; ensure it’s hot enough for optimal crispiness.

For the Wrap
• Flour Tortillas – The perfect vessel for all fillings; corn tortillas are a gluten-free option.
• Shredded Lettuce – Adds freshness and crunch; substitute with spinach or kale if desired.
• Diced Tomatoes – Offers juiciness and color; swap with avocado or other fresh veggies.
• Shredded Cheddar Cheese – Melts beautifully; feel free to use any cheese you like.
• Ranch Dressing – The creamy tie-in for all flavors; opt for a yogurt-based dressing for a lighter twist.

This Crispy Chicken Bacon Ranch Wrap is not just a meal; it's an experience laden with delightful contrasts and customizable options!

Step‑by‑Step Instructions for Crispy Chicken Bacon Ranch Wrap

Step 1: Prepare Chicken
Begin by slicing the boneless, skinless chicken breasts into strips about 1 inch wide. In a bowl, season the chicken strips with garlic powder, onion powder, paprika, salt, and black pepper, ensuring each piece is evenly coated. Allow the seasoned chicken to sit for 10 minutes, allowing the flavors to meld while you set up the dredging station.

Step 2: Set Dredging Station
Follow up by arranging your dredging station with three shallow dishes. Fill one with all-purpose flour, the second with buttermilk, and the third with panko breadcrumbs. This setup streamlines the coating process for your Crispy Chicken Bacon Ranch Wrap, keeping everything organized and making it easier to coat the chicken to achieve that perfect crunchy texture.

Step 3: Coat Chicken
Now it’s time to coat the chicken strips. Take each seasoned strip and dredge it first in the flour, shaking off any excess. Then, dip it into the buttermilk, letting any drips fall back into the dish before finally rolling it in the panko breadcrumbs. This three-step coating will create a beautifully crispy exterior when fried, ensuring each wrap delivers the crunch you crave.

Step 4: Fry Chicken
In a large skillet, heat vegetable oil over medium-high heat until it reaches about 350°F. Carefully add the coated chicken strips in batches, avoiding overcrowding the pan. Fry for 5-7 minutes or until the strips are golden brown and crispy, flipping them halfway through for even cooking. Remove the cooked chicken and let it drain on paper towels to absorb any excess oil.

Step 5: Cook Bacon
While the chicken is frying, take a separate pan and cook the bacon over medium heat until it's crispy, about 6-8 minutes. Once cooked, transfer the bacon to a plate lined with paper towels to drain and cool slightly. Crumble the crispy bacon into bite-sized pieces that will add that delicious smoky flavor to your Crispy Chicken Bacon Ranch Wrap.

Step 6: Assemble Wrap
To create your wrap, start by spreading a generous layer of ranch dressing over each flour tortilla. Layer with shredded lettuce, diced tomatoes, shredded cheddar cheese, and the crispy chicken strips. Finally, sprinkle the crumbled bacon on top, ensuring you fill the wrap with vibrant flavors and textures that balance beautifully together.

Step 7: Roll Wrap
Begin rolling the tortilla by folding in the sides and then rolling tightly from the bottom up to secure all the fillings inside. It’s crucial to roll tightly but gently so that all of your delicious ingredients are held snugly within the tortilla. Your Crispy Chicken Bacon Ranch Wrap is taking shape beautifully!

Step 8: Slice and Serve
Once your wraps are rolled, carefully cut each one in half at an angle to expose the colorful fillings inside. Arrange them on a plate and serve warm, perhaps with some extra ranch dressing on the side for dipping. You’re all set to enjoy a delightful meal that’s bursting with flavors and textures!

Crispy Chicken Bacon Ranch Wrap Variations

Feel free to put your own spin on this delightful wrap with these easy swaps and adaptations!

  • Grilled Chicken: Swap out fried chicken for marinated grilled chicken for a lighter, healthier option. Pair with a zesty herb marinade for added freshness.

  • Vegetarian Delight: Use crispy fried tofu or tempeh instead of chicken for a delicious vegetarian twist that still satisfies those cravings.

  • Spicy Kick: Add jalapeños or a sprinkle of red pepper flakes for a spicy dimension that can elevate your Crispy Chicken Bacon Ranch Wrap to new flavor heights.

  • Herbed Ranch: Mix fresh herbs like dill or parsley into your ranch dressing for a delightful flavor boost that can enhance the overall taste profile.

  • Different Cheeses: Experiment with cheeses such as pepper jack for a spicy kick, or feta for a tangy surprise that complements the other flavors beautifully.

  • Shell Swap: Use lettuce leaves instead of tortillas for a low-carb option that’s just as tasty, allowing the flavors to shine through in a fresh, crisp way.

  • Sautéed Veggies: Add sautéed bell peppers and onions for extra texture and sweetness, which can make each bite even more satisfying.

  • Crispy Potato Addition: For an indulgent twist, layer in some crispy potato strips or fries for extra crunch and a hearty touch!

With these creative variations, your Crispy Chicken Bacon Ranch Wrap will never feel boring. Grab your family’s favorite ingredients and enjoy customizing your meal! And if you're looking for more chicken inspiration, check out our Honey Bbq Chicken or delve into the bold flavors of Chicken Adobo Again!

How to Store and Freeze Crispy Chicken Bacon Ranch Wrap

Refrigerate: Store fully assembled wraps tightly wrapped in plastic wrap or in an airtight container for up to 2 days to keep the flavors fresh.

Freeze: For longer storage, freeze individual unassembled components (chicken, bacon, and fresh veggies) separately in airtight bags for up to 3 months. Avoid assembling wraps before freezing for best results.

Reheat: When ready to enjoy, bake the chicken strips in a preheated oven at 350°F for 10-15 minutes until crispy again. Assemble with fresh ingredients before serving to maintain texture and taste.

Tip: Always let any cooked chicken cool completely before wrapping or storing to ensure it doesn’t create excess moisture, which can affect the quality of your Crispy Chicken Bacon Ranch Wrap.

Make Ahead Options

These Crispy Chicken Bacon Ranch Wraps are a fantastic choice for busy home cooks looking to save time! You can prepare the chicken strips by seasoning and dredging them up to 24 hours in advance before frying. Simply coat the chicken and store it in an airtight container in the refrigerator. You can also chop the veggies and crumble the bacon up to 3 days ahead of time, keeping them fresh in separate containers. When you're ready to serve, fry the chicken strips and assemble the wraps with all your prepped ingredients for a hassle-free meal. This way, you’ll maintain quality while getting dinner on the table in no time!

What to Serve with Crispy Chicken Bacon Ranch Wrap

Nothing beats a satisfying meal after making a crispy chicken wrap filled with flavor; let’s elevate your dining experience!

  • Sweet Potato Fries: The natural sweetness and crispy texture of these fries beautifully complement the savory flavors in your wrap.

  • Coleslaw: A crunchy slaw adds a fresh and tangy bite, balancing the richness of the chicken and bacon perfectly.

  • Pickled Veggies: Their acidity cuts through the creaminess of the ranch sauce, adding a zesty twist that enhances every bite.

  • Garden Salad: A light salad with mixed greens, cherry tomatoes, and a vinaigrette dressing provides a refreshing contrast to the warm wrap.

  • Corn on the Cob: Grilled or boiled, the sweetness of corn pairs nicely with the hearty elements, making for a delightful summer meal.

  • Fruit Salad: A bowl of mixed fresh fruits adds a sweet and juicy element, making it a great, refreshing side during warm months.

  • Iced Tea: A glass of sweetened or unsweetened iced tea is a classic choice to accompany your savory wrap, offering a refreshing balance.

  • Chocolate Chip Cookies: For a sweet finish, a warm chocolate chip cookie brings a comforting end to your meal, making it truly complete.

Expert Tips for Crispy Chicken Bacon Ranch Wrap

Preparation Is Key: Ensure you set up your dredging station before seasoning the chicken—this keeps the process smooth and efficient.

Oil Temperature Matters: Use a thermometer to maintain oil at 350°F when frying; too cool and the chicken will absorb oil, leading to sogginess.

Don’t Rush the Coating: Make sure each chicken strip is completely coated in flour, buttermilk, and panko. This triple coating is essential for that signature crispy texture in your Crispy Chicken Bacon Ranch Wrap.

Leftover Handling: If you're saving leftovers, store the chicken and toppings separately. Reheat chicken in the oven to maintain crispiness rather than microwaving.

Customize Wisely: Feel free to adapt ingredients for dietary needs—like using turkey bacon or gluten-free tortillas. Just remember to keep the base flavors balanced for the best wrap experience!

Crispy Chicken Bacon Ranch Wrap Recipe FAQs

What type of chicken should I use for the wrap?
Absolutely! Boneless, skinless chicken breasts are ideal for this crispy delight. However, if you prefer a juicier alternative, chicken thighs work beautifully too. The key is ensuring they are cut into even strips for consistent cooking.

How should I store leftover wraps?
For the best preservation of flavors, wrap any fully assembled wraps tightly in plastic wrap or store them in an airtight container in the fridge. They’ll stay fresh for about 2 days. Remember, to keep that delicious crunch, it’s best not to heat them in the microwave.

Can I freeze the components of this wrap?
Yes! For longer storage, freeze the chicken strips and other fillings separately. Place them in airtight bags, and they can last up to 3 months. Remember not to assemble the wraps before freezing—this keeps the textures perfect! When you're ready to eat, simply reheat the chicken in the oven at 350°F for about 10-15 minutes, and then assemble with fresh ingredients.

What if my chicken coating isn’t crispy enough?
Very common—make sure your oil is hot enough! Using a thermometer, ensure the oil reaches about 350°F before frying. If the temperature is too low, the chicken will absorb oil and turn soggy. Also, ensure each piece is thoroughly coated in the flour, buttermilk, and panko; this three-step process is crucial for that ultimate crispiness.

Is there a vegetarian option for this wrap?
Definitely! For a vegetarian adaptation, consider using crispy fried tofu or tempeh instead of chicken. You can follow the same coating technique to achieve that satisfying crunch. Just remember to keep the ranch dressing or a yogurt-based alternative to tie all those vibrant flavors together!

What about storage for my pets?
As for pets, avoid sharing any part of this recipe with them, especially the bacon and ranch dressing, as they can be harmful to dogs and cats. Stick to pet-friendly snacks to keep your furry friends safe while you enjoy your Crispy Chicken Bacon Ranch Wrap!

Crispy Chicken Bacon Ranch Wrap

Crispy Chicken Bacon Ranch Wrap: Your New Favorite Comfort Bite

Delight in the Crispy Chicken Bacon Ranch Wrap, blending tender chicken, crisp bacon, and fresh veggies for a perfect comfort meal.
Print Recipe Pin Recipe
Prep Time 25 minutes mins
Cook Time 30 minutes mins
Total Time 55 minutes mins
Servings: 4 wraps
Course: Dinner
Cuisine: American
Calories: 450
Ingredients Equipment Method Nutrition Notes

Ingredients
  

For the Chicken
  • 2 pieces Boneless, Skinless Chicken Breasts Can substitute with chicken thighs
  • 1 cup All-Purpose Flour Gluten-free flour is a good alternative
  • 1 cup Buttermilk Substitute with milk mixed with vinegar or lemon juice
  • 1 teaspoon Garlic Powder Fresh garlic can be used for a stronger taste
  • 1 teaspoon Onion Powder Optional if you prefer a simpler profile
  • 1 teaspoon Paprika Try smoked paprika for a richer flavor
  • 1 teaspoon Salt Adjust to taste
  • 1 teaspoon Black Pepper Adjust to taste
  • 1 cup Panko Breadcrumbs Regular breadcrumbs can be used if needed
  • 2 cups Vegetable Oil Used for frying
For the Wrap
  • 4 pieces Flour Tortillas Corn tortillas are a gluten-free option
  • 2 cups Shredded Lettuce Substitute with spinach or kale if desired
  • 1 cup Diced Tomatoes Swap with avocado or other fresh veggies
  • 1 cup Shredded Cheddar Cheese Feel free to use any cheese you like
  • 1/2 cup Ranch Dressing Opt for a yogurt-based dressing for a lighter twist

Equipment

  • Large skillet
  • Shallow dishes for dredging

Method
 

Step-by-Step Instructions
  1. Prepare Chicken: Slice the boneless, skinless chicken breasts into strips about 1 inch wide. Season the chicken strips with garlic powder, onion powder, paprika, salt, and black pepper. Let the seasoned chicken sit for 10 minutes.
  2. Set Dredging Station: Arrange three shallow dishes with flour in one, buttermilk in the second, and panko breadcrumbs in the third.
  3. Coat Chicken: Dredge each seasoned chicken strip in flour, dip it in buttermilk, then roll it in panko breadcrumbs. Ensure each piece is well coated.
  4. Fry Chicken: Heat vegetable oil in a skillet to 350°F. Add coated chicken strips in batches and fry for 5-7 minutes until golden brown. Drain on paper towels.
  5. Cook Bacon: In a separate pan, cook the bacon over medium heat until crispy. Cool and crumble into bite-sized pieces.
  6. Assemble Wrap: Spread ranch dressing on tortillas. Layer with shredded lettuce, diced tomatoes, shredded cheddar cheese, crispy chicken strips, and crumbled bacon.
  7. Roll Wrap: Fold in the sides of the tortilla and roll tightly from the bottom to secure the fillings.
  8. Slice and Serve: Cut each wrap in half at an angle, arrange on a plate, and serve warm with extra ranch dressing for dipping.

Nutrition

Serving: 1wrapCalories: 450kcalCarbohydrates: 35gProtein: 25gFat: 25gSaturated Fat: 10gPolyunsaturated Fat: 3gMonounsaturated Fat: 7gCholesterol: 70mgSodium: 900mgPotassium: 600mgFiber: 3gSugar: 2gVitamin A: 2000IUVitamin C: 15mgCalcium: 250mgIron: 2mg

Notes

Ensure proper frying technique for optimal crispiness and customize ingredients to suit dietary needs.

Tried this recipe?

Let us know how it was!

Zesty Lemon Garlic Shrimp and Asparagus in 30 Minutes

May 1, 2026 by Grace Snow Leave a Comment

If you’ve ever found yourself craving something sweet yet refreshing, let me introduce you to my Easy No-Bake Cheesecake! This delightful dessert requires no oven, making it perfect for hot summer days when spending time by a hot stove is the last thing on your mind. With its creamy texture and customizable flavor variations—like strawberry or chocolate—this cheesecake is a guaranteed crowd-pleaser. Plus, it's gluten-free friendly for those avoiding wheat! It is easy to prepare and will impress your family and friends, whether you’re hosting a summer BBQ or a cozy dinner party. Ready to indulge in something that feels as good as it tastes? Let’s dive into this delectable recipe!

Why is this cheesecake a must-try?

Simplicity: This no-bake cheesecake is incredibly easy to whip up and requires no fancy equipment or baking skills.
Endless Variations: With options like strawberry, chocolate, or caramel, there’s a flavor for everyone—perfect for any occasion!
Crowd-Pleaser: Impress your family and friends with a dessert that screams indulgence but is a breeze to make.
Customizable Toppings: Add fresh fruits or a drizzle of chocolate for an extra touch of luxury. Want something else delicious and quick? Check out my Honey Garlic Chicken for a savory balance!
Light and Refreshing: Perfect for warm summer days, this cheesecake allows you to enjoy dessert without the heaviness of baked goods.
Gluten-Free Option: Easily adaptable for gluten-free diets, making it approachable for a wider audience.

Easy No-Bake Cheesecake Ingredients

For the Filling
• Cream Cheese – Provides rich flavor and creamy texture; soften before use for easier mixing.
• Sugar – Sweetens the cheesecake; can be adjusted to taste or replaced with a sugar substitute.
• Heavy Whipping Cream – Adds lightness and fluffiness; ensure it's cold for the best volume when whipped.
• Vanilla Extract – Enhances overall flavor; use pure vanilla for more depth.

For the Crust
• Graham Cracker Crumbs – Forms the crust base, providing crunch; can substitute with gluten-free crackers.
• Unsalted Butter – Binds crust ingredients together; melt before mixing with crumbs.

Optional Flavorings/Toppings
• Fresh Fruits – Strawberries or blueberries can add a fresh burst of flavor; ensure they are dry to prevent sogginess.
• Chocolate or Caramel Sauce – Drizzle for a rich finish; they complement the creamy cheesecake perfectly.

This easy no-bake cheesecake is not only super simple to create but also allows for a delightful twist with various toppings and flavors!

Step‑by‑Step Instructions for Easy No-Bake Cheesecake

Step 1: Prepare the Crust
In a mixing bowl, combine the graham cracker crumbs with melted unsalted butter, stirring until well mixed. Press this mixture evenly into the bottom of a 9-inch springform pan, creating a firm base. To enhance the crust’s flavor and texture, ensure it’s packed tightly. Now, place the pan in the refrigerator to chill while you prepare the cheesecake filling, letting it set for about 10 minutes.

Step 2: Mix the Filling
In a large mixing bowl, beat the softened cream cheese and granulated sugar together using an electric mixer until the mixture is smooth and creamy, about 2-3 minutes. Scrape down the sides of the bowl occasionally to ensure everything is well combined. Once smooth, add in pure vanilla extract and mix until fully integrated, resulting in a light and velvety cream cheese base for your no-bake cheesecake.

Step 3: Whip the Cream
In a separate, chilled bowl, pour in the heavy whipping cream. Using an electric mixer, whip the cream on medium-high speed until stiff peaks form, which should take about 4-5 minutes. This step is crucial, as the whipped cream will add a light and airy texture to your Easy No-Bake Cheesecake. Carefully fold the whipped cream into the cream cheese mixture using a spatula, ensuring you maintain that fluffy texture.

Step 4: Combine and Set
After folding, gently pour the cream cheese filling into the chilled crust, smoothing the top with a spatula for an even finish. Cover the cheesecake with plastic wrap and place it back in the refrigerator. Allow it to chill and set for at least 4 hours, or overnight, to achieve the perfect texture for your Easy No-Bake Cheesecake.

Step 5: Serve
Once chilled and set, carefully run a knife around the edges of the springform pan to loosen the cheesecake. Release the springform and remove the sides, revealing a beautifully set cheesecake. Top it with your favorite fresh fruits, chocolate, or caramel sauce before slicing into individual pieces to serve. Each slice promises a creamy delight ready to impress your friends and family!

No-Bake Cheesecake Variations

Feel free to explore these creative twists that will make your no-bake cheesecake uniquely delicious!

  • Fruit-Infused: Incorporate pureed fruits like strawberries or raspberries into the filling for a refreshing burst of flavor. This adds a beautiful color and a natural sweetness that will elevate your dessert!

  • Chocolate Delight: Stir in melted chocolate or cocoa powder into the filling for a rich chocolate version. You can also add chocolate shavings on top for an elegant touch.

  • Nutty Crunch: Add crushed nuts such as almonds or pecans to the crust for an extra layer of texture. This delightful crunch will contrast beautifully with the creamy filling.

  • Caramel Swirl: Drizzle homemade or store-bought caramel sauce into the filling just before setting in the refrigerator. The caramel adds a sweet, gooey surprise with every slice that’s simply irresistible!

  • Almond Twist: Substitute vanilla extract with almond extract for a delightful nutty flavor. Almond pairs beautifully with the creamy filling, giving it a unique twist.

  • Citrusy Zing: Add lemon or lime juice and zest to the filling for a refreshing citrus flavor. The bright acidity balances the richness of the cream for a well-rounded dessert.

  • Seasonal Spices: During the fall, consider adding cinnamon or pumpkin spice to create a cozy, autumn-inspired cheesecake. Just a pinch will transform the flavor profile!

  • Vegan Version: Swap cream cheese with a vegan cream cheese alternative and use coconut cream in place of heavy whipping cream for a plant-based twist. This way, everyone can enjoy the creamy decadence!

For more tasty treat options, you might enjoy these zesty Shrimp Tacos or dive into a comforting bowl of Asparagus Soup for a delightful meal balance!

How to Store and Freeze No-Bake Cheesecake

Refrigerator: Store the cheesecake in an airtight container for up to 5 days. This keeps it fresh while allowing the flavors to mellow beautifully.

Freezer: You can freeze the no-bake cheesecake for up to 2 months. Wrap it tightly in plastic wrap and then in aluminum foil to preserve its taste and texture.

Thawing: To serve a frozen cheesecake, thaw it overnight in the refrigerator before slicing. This helps maintain its creamy consistency without compromising on flavor.

Serving After Freezing: Ensure your chilled cheesecake is topped with fresh fruits or chocolate right before serving for an inviting touch that elevates each slice!

Make Ahead Options

These Easy No-Bake Cheesecakes are perfect for meal prep enthusiasts seeking a sweet treat without the hassle! You can prepare the crust and filling up to 24 hours in advance; simply store the crust in an airtight container and refrigerate the filling separately to maintain its creamy texture. When you're ready to serve, just pour the filling into the crust, smooth the top, and let it set in the fridge for at least 4 hours or overnight. For optimal quality, avoid adding fresh fruits or toppings until just before serving, preventing any moisture from making the crust soggy. Enjoy the convenience of having a delicious dessert ready to impress at a moment's notice!

Expert Tips for No-Bake Cheesecake

  • Chill Time Matters: Ensure you chill the cheesecake for at least 4 hours. Cutting it too early may result in a runny filling, so be patient!
  • Whip It Right: For the best light and airy texture, whip the heavy cream until stiff peaks form, and fold it gently into the cream cheese mixture.
  • Avoid Sogginess: If using fresh fruit as a topping, make sure it's dry to prevent excess moisture from affecting the cheesecake's texture.
  • Flavor Variations: Feel free to experiment with flavors! Adding cocoa powder or melted chocolate into the filling can create a decadent chocolate variation you’ll love.
  • Gluten-Free Friendly: If catering to gluten-free diets, swap out the graham cracker crumbs with gluten-free alternatives for a delicious crust everyone can enjoy.

What to Serve with Easy No-Bake Cheesecake

Prepare to tantalize your taste buds as you create the perfect meal to complement this heavenly dessert!

  • Refreshing Fruit Salad: A mix of seasonal fruits like strawberries, blueberries, and melons balances the richness of the cheesecake, adding a burst of freshness.
  • Rich Chocolate Drizzle: Pouring some warm chocolate sauce over each slice turns your cheesecake into a decadent experience that chocolate lovers will adore.
  • Crispy Biscotti: These crunchy cookies provide a delightful contrast in texture, perfect for dipping in a cup of coffee or tea after enjoying your cheesecake.
  • Sweet Whipped Cream: A dollop of freshly whipped cream brings an airy touch to every slice of cheesecake, making each bite feel indulgent and light.
  • Syrupy Caramel Sauce: Drizzling caramel adds a luscious sweetness that pairs beautifully with the creamy cheesecake, elevating the flavor profile instantly.

An amazing dessert deserves some equally delightful companions, so why not indulge a little? Create a spread that guests will remember!

Easy No-Bake Cheesecake Recipe FAQs

How do I choose ripe ingredients, especially for the toppings?
Absolutely! When selecting fruits for your cheesecake, look for vibrant colors and a firm yet slightly yielding texture. Strawberries should be deep red with their green tops still fresh, whereas blueberries should be plump and free from mold. If you're opting for bananas, choose ones that are ripe but not overly brown, as they can be too mushy.

How should I store the cheesecake, and how long does it last?
The no-bake cheesecake can be stored in an airtight container in the refrigerator for up to 5 days. Just remember to cover the cheesecake well to prevent it from absorbing any odors from the fridge. If you’re not planning to enjoy it soon, you can keep it in the freezer for up to 2 months. Thaw the cheesecake overnight in the refrigerator before serving for optimal taste and texture.

Can I freeze the cheesecake, and how do I do it properly?
Yes, you can freeze your no-bake cheesecake for future enjoyment! To do this, wrap the cheesecake tightly in plastic wrap, then cover it with aluminum foil to prevent freezer burn. This careful wrapping helps maintain its creamy texture. When you're ready to indulge, simply thaw it overnight in the refrigerator—it’ll be just as delicious as the day you made it!

What should I do if my cheesecake doesn’t set properly?
Very! If your cheesecake isn’t setting as it should, don’t worry; there are a few troubleshooting tips. First, make sure you’ve allowed enough chill time—at least 4 hours is ideal. If you’re after an even firmer texture next time, consider adding gelatine to your filling. Dissolve 1 tablespoon of gelatine in 3 tablespoons of water, then let it cool slightly before mixing it into the cream cheese filling. This will give your cheesecake that perfect firmness.

Are there any dietary considerations I should keep in mind?
Of course! If you have guests with allergies or dietary preferences, this no-bake cheesecake can easily cater to them. For a gluten-free option, substitute traditional graham cracker crumbs with gluten-free crackers. Additionally, if anyone is avoiding dairy, try using a dairy-free cream cheese alternative and coconut cream in place of heavy whipping cream. Always check labels, especially on sugar substitutes, to ensure they are compatible with different diets.

Can I customize the flavors of the no-bake cheesecake?
The more the merrier! Feel free to mix and match flavors to suit your taste buds. For a strawberry cheesecake, simply fold in fresh pureed strawberries into the cream cheese filling. For a chocolate version, mix in cocoa powder or some melted chocolate before folding in the whipped cream. Don’t hesitate to get creative—these little variations are what make this cheesecake a delightful experience!

Lemon Garlic Shrimp and Asparagus

Zesty Lemon Garlic Shrimp and Asparagus in 30 Minutes

This Lemon Garlic Shrimp and Asparagus recipe is a quick, refreshing dish perfect for any dinner.
Print Recipe Pin Recipe
Prep Time 10 minutes mins
Cook Time 20 minutes mins
Total Time 30 minutes mins
Servings: 4 servings
Course: Dinner
Cuisine: American
Calories: 300
Ingredients Equipment Method Nutrition Notes

Ingredients
  

For the Filling
  • 16 oz Cream Cheese soften before use
  • 3/4 cup Sugar adjust to taste
  • 2 cups Heavy Whipping Cream ensure cold
  • 1 tbsp Vanilla Extract use pure for depth
For the Crust
  • 1 cup Graham Cracker Crumbs or gluten-free crackers
  • 1/2 cup Unsalted Butter melt before mixing
Optional Flavorings/Toppings
  • 1 cup Fresh Fruits ensure dry for topping
  • 1/2 cup Chocolate or Caramel Sauce for drizzling

Equipment

  • Mixing Bowl
  • Electric mixer
  • Spatula
  • Springform pan
  • Refrigerator

Method
 

Step-by-Step Instructions
  1. Prepare the crust by mixing graham cracker crumbs with melted butter, press into a springform pan and chill for 10 minutes.
  2. Mix the filling by beating cream cheese and sugar until smooth, then add vanilla.
  3. Whip the heavy cream until stiff peaks form and fold into cream cheese mixture.
  4. Combine cream cheese filling with crust, smooth top, cover, and refrigerate for at least 4 hours.
  5. Serve with fresh fruits or sauces when set.

Nutrition

Serving: 1sliceCalories: 300kcalCarbohydrates: 25gProtein: 4gFat: 22gSaturated Fat: 13gPolyunsaturated Fat: 1gMonounsaturated Fat: 9gCholesterol: 70mgSodium: 200mgPotassium: 100mgSugar: 18gVitamin A: 600IUVitamin C: 1mgCalcium: 50mgIron: 1mg

Notes

Chill the cheesecake for at least 4 hours to set properly.

Tried this recipe?

Let us know how it was!

Irresistibly Creamy No Bake Pistachio Cheesecake Delight

May 1, 2026 by Grace Snow Leave a Comment

Standing in my kitchen, I couldn't help but smile as the vibrant green of pistachios caught my eye. That’s when inspiration struck for this delightful No Bake Pistachio Cheesecake, a dessert that’s not only visually stunning but also incredibly easy to make. With creamy layers of pistachio pudding whipped to perfection, all nestled in a sweet vanilla wafer crust, this cheesecake is the ultimate quick treat. Perfect for those who long for something homemade yet don’t have the time to bake, it offers a light and fluffy texture that’s utterly irresistible. Whether you’re hosting friends or just treating yourself on a quiet evening, this dessert is both a crowd-pleaser and a personal indulgence. Curiosity piqued? Let’s dive into the recipe and uncover how to create this dreamy no-bake delight!

Why is this cheesecake a must-try?

Simplicity: This No Bake Pistachio Cheesecake is effortlessly easy to whip up, perfect for those busy days when you crave something homemade without the hassle of baking.

Creamy Indulgence: With a rich filling of pistachio pudding and whipped cream, each bite offers a cloud-like texture that melts in your mouth.

Versatile Flavor Profile: Not just for pistachio lovers, you can easily switch up the flavor with vanilla or chocolate variations, catering to different tastes.

Crowd-Pleasing Dessert: Its stunning appearance and unique flavor make it an impressive addition to potlucks or dinner parties.

Quick Chill: Prepare it in advance and let the fridge do the work! Just a few hours chilling time, and you have a stunning dessert ready to serve.

For more easy and delightful recipes, check out my Cheesy Zucchini Bake or try these scrumptious Matcha Baked Doughnuts.

No Bake Pistachio Cheesecake Ingredients

For the Crust
• Vanilla Wafer Crumbs – Provides sweetness and texture; can substitute with Graham cracker crumbs for a different flavor.
• Granulated Sugar – Sweetens the crust.
• Salt – Enhances flavors in the crust.
• Unsalted Butter (melted) – Binds the crust ingredients, ensuring a sturdy base.

For the Filling
• Cream Cheese – Base of the filling, adds a rich and creamy texture; ensure it's at room temperature for best results.
• Instant Pistachio Pudding Mix – Adds delightful flavor while thickening the filling; vanilla pudding can be a tasty alternative.
• Vanilla Extract – Enhances the overall flavor profile beautifully.
• Pistachio Extract – Provides an extra burst of pistachio flavor; can swap with vanilla extract if needed.
• Powdered Sugar – Sweetens and stabilizes the filling mixture.
• Heavy Cream – Adds lightness and volume when whipped; use cold for best results.

For the Topping
• Chopped Pistachios – Optional garnish; adds texture and a pop of color for presentation.
• Whipped Cream – Light topping that can be flavored or served plain, ideal right before serving to maintain structure.

Step‑by‑Step Instructions for No Bake Pistachio Cheesecake

Step 1: Prepare the Crust
In a mixing bowl, combine the vanilla wafer crumbs, granulated sugar, and salt. Pour in the melted unsalted butter and mix until well combined. Press this mixture firmly into the bottom of an 8-inch or 9-inch springform pan lined with parchment paper, creating an even layer. Chill the crust in the refrigerator for 30 minutes to set.

Step 2: Make the Cheesecake Filling
Bring the cream cheese to room temperature for easier mixing, then beat it in a large bowl until smooth and creamy. Gradually mix in the instant pistachio pudding mix, vanilla extract, pistachio extract, and powdered sugar until fully combined. Slowly incorporate the heavy cream, whipping until the mixture is fluffy and holds soft peaks. Carefully spoon this delightful No Bake Pistachio Cheesecake filling into the chilled crust, spreading it evenly.

Step 3: Chill the Cheesecake
Cover the cheesecake with plastic wrap or a lid and refrigerate for at least 6 hours, preferably overnight. This chilling time allows the flavors to meld and the filling to firm up to the perfect creamy consistency. You’ll know it’s ready when it’s set and holds its shape when sliced.

Step 4: Prepare the Whipped Cream
When you’re ready to serve, whip the cold heavy cream with powdered sugar and vanilla extract in a clean bowl. Start at low speed to avoid splatters, then increase to medium-high until stiff peaks form. This fluffy whipped cream will add a light and airy touch to your No Bake Pistachio Cheesecake.

Step 5: Assemble and Serve
Carefully remove the cheesecake from the springform pan and place it on a serving dish. Spread the freshly whipped cream generously over the top, creating an enticing layer. For the final touch, sprinkle chopped pistachios on top for added texture and a burst of color. Slice, serve cold, and enjoy this creamy pistachio delight!

How to Store and Freeze No Bake Pistachio Cheesecake

Fridge: Store your cheesecake covered in the refrigerator for up to 5 days. This keeps it fresh and maintains its creamy texture.

Freezer: For longer storage, freeze the cheesecake for up to 2 months. Wrap it tightly in plastic wrap and foil to prevent freezer burn.

Thawing: When ready to enjoy, thaw the cheesecake in the refrigerator overnight for the best results. This will ensure it's soft and creamy again.

Reheating: There’s no need to reheat this cheesecake; simply serve it cold for the perfect creamy dessert experience!

Make Ahead Options

These No Bake Pistachio Cheesecake delights are an absolute dream for meal prep! You can prepare the crust and filling up to 24 hours in advance, allowing the flavors to meld even more beautifully. Simply follow the crust instructions and chill it, then make the filling and pour it over the set crust. Cover tightly with plastic wrap and refrigerate to maintain that creamy texture. When you're ready to serve, whip up the fresh cream and layer it on top, garnishing with chopped pistachios just before presenting. This way, you can enjoy a stunning dessert while saving time during busy days!

Expert Tips for No Bake Pistachio Cheesecake

  • Room Temperature Cream Cheese: Ensure your cream cheese is at room temperature for smooth mixing; cold cream cheese can result in a lumpy filling.

  • Whip Wisely: Start whipping heavy cream at low speed to avoid splatter, then increase to medium-high for best volume and texture in your filling.

  • Timing is Key: Chill the cheesecake for at least 6 hours or overnight; this sets the filling for a slice that holds its shape beautifully.

  • Perfect Crust: When making the crust, press firmly for an even base. A well-bound crust supports the filling perfectly and adds great texture.

  • Fresh Whipped Cream: For an optimal light topping, whip the cream just before serving; this ensures it maintains its structure and is irresistibly fluffy.

No Bake Pistachio Cheesecake Variations

Feel free to explore these delightful twists that can transform your cheesecake experience!

  • Gluten-Free: Use gluten-free cookies or nut-based crust for a deliciously allergen-friendly dessert. You'll still achieve that satisfying crunch without the gluten!

  • Chocolaty Delight: Add a tablespoon of cocoa powder to the whipped cream or drizzle melted chocolate over the cheesecake. It will create a rich, decadent flavor that chocolate lovers will adore.

  • Nut-Free: Substitute the pistachio pudding mix with vanilla pudding for a neutral, creamy cheesecake. It's equally delicious and perfect for anyone with nut allergies.

  • Fruity Flair: Layer fresh berries or fruit compote on top before serving. The tangy fruit complements the creamy cheesecake beautifully!

  • Add Some Heat: Mixing in a pinch of cayenne pepper or chili powder to the whipped cream can add a light spicy kick. It offers an interesting contrast to the sweet creaminess.

  • Vegan Twist: Replace cream cheese with a vegan cream cheese alternative; use coconut cream for the whipped topping. Your friends won’t even realize it’s plant-based!

  • Layered Magic: Create a layered dessert by alternating layers of cheesecake filling and crushed cookies in individual glasses. Such a cute presentation for gatherings!

For more delightful treats, don’t miss out on trying my Cheesy Zucchini Bake or indulge in some Matcha Baked Doughnuts.

What to Serve with No Bake Pistachio Cheesecake

Creating the perfect meal doesn't just stop at dessert; pairing is key for a delightful experience.

  • Fresh Berries: A bowl of mixed berries adds a tartness that beautifully contrasts the creamy cheesecake. Their vibrant colors also enhance presentation.

  • Mint Tea: A warm cup of mint tea acts as a refreshing palate cleanser while complementing the flavors of pistachios. It's the perfect end to a sweet course.

  • Chocolate Drizzle: Warmed chocolate sauce drizzled over the cheesecake adds a rich, indulgent touch that melty chocolate enthusiasts will adore.

  • Coconut Macaroons: These chewy treats complement the nutty flavor of the cheesecake while offering a delightful textural contrast.

  • Whipped Cream: Serve with additional whipped cream on the side for those who want that extra puffy touch. It's effortlessly creamy and takes indulgence to the next level.

  • Iced Coffee: A glass of chilled iced coffee pairs beautifully, balancing the sweetness of the cheesecake with a rich, robust flavor.

  • Pistachio Ice Cream: For the ultimate pistachio experience, a scoop of pistachio ice cream alongside echoes the nutty flavors, making for a double treat.

  • Chocolate Mint Cookies: As a crunchy companion to the cheesecake, these cookies bring an exciting flavor to every bite. They add a fun twist to your dessert spread.

No Bake Pistachio Cheesecake Recipe FAQs

How do I select ripe pistachios for this recipe?
Absolutely! Choose unsalted pistachios with a bright green color and a firm texture. Avoid any that have dark spots or appear shriveled, as these may be stale or bitter. Fresh pistachios should have a slight crunch when you bite into them.

What’s the best way to store leftover No Bake Pistachio Cheesecake?
Store your cheesecake covered in the refrigerator for up to 5 days. Make sure to use plastic wrap or an airtight container to maintain its creamy texture and prevent it from absorbing other flavors in your fridge.

Can I freeze No Bake Pistachio Cheesecake? If so, how?
Yes, you can freeze this cheesecake! To do this, wrap it tightly in plastic wrap, followed by aluminum foil to avoid freezer burn. It’ll stay fresh for up to 2 months. When you’re ready to enjoy it, thaw it in the refrigerator overnight for the best flavor and texture.

What should I do if my filling is too runny?
If your cheesecake filling turns out runny, don’t worry! First, make sure your cream cheese was at room temperature for smooth mixing. You can also add a bit more instant pistachio pudding mix to thicken it up. Make sure to mix well and allow it to chill longer, as chilling firms up the filling.

Are there any dietary considerations I should keep in mind?
Very! If you're serving this dessert to guests, consider any allergies or dietary restrictions. This recipe contains dairy, including cream cheese and heavy cream, so it’s not suitable for those with lactose intolerance. For vegan options, look for plant-based cream cheese and whipped cream substitutes. Additionally, always check for nut allergies since pistachios are a key ingredient.

How do I know when the cheesecake is fully set?
The cheesecake is ready when it no longer wobbles in the center and holds its shape when sliced. After chilling for at least 6 hours (or overnight for the best results), gently press the top with your finger—if it feels firm and spongy, it’s perfectly set and ready to serve!

No Bake Pistachio Cheesecake

Irresistibly Creamy No Bake Pistachio Cheesecake Delight

Enjoy a No Bake Pistachio Cheesecake that's easy to make and irresistibly creamy for dessert lovers.
Print Recipe Pin Recipe
Prep Time 30 minutes mins
Chilling Time 6 hours hrs
Total Time 6 hours hrs 30 minutes mins
Servings: 8 slices
Course: Dessert
Cuisine: American
Calories: 350
Ingredients Equipment Method Nutrition Notes

Ingredients
  

For the Crust
  • 1.5 cups Vanilla Wafer Crumbs can substitute with Graham cracker crumbs
  • 0.5 cups Granulated Sugar
  • 0.25 teaspoons Salt
  • 0.5 cups Unsalted Butter (melted)
For the Filling
  • 8 oz Cream Cheese at room temperature
  • 1 box Instant Pistachio Pudding Mix
  • 1 teaspoons Vanilla Extract
  • 0.5 teaspoons Pistachio Extract
  • 0.5 cups Powdered Sugar
  • 1 cups Heavy Cream cold
For the Topping
  • 0.5 cups Chopped Pistachios optional
  • 1 cups Whipped Cream can be flavored or served plain

Equipment

  • Mixing Bowl
  • Springform pan
  • Whisk

Method
 

Prepare the Crust
  1. In a mixing bowl, combine the vanilla wafer crumbs, granulated sugar, and salt. Pour in the melted unsalted butter and mix until well combined. Press mixture into the bottom of an 8-inch or 9-inch springform pan lined with parchment paper. Chill for 30 minutes.
Make the Cheesecake Filling
  1. Bring cream cheese to room temperature and beat until smooth. Gradually mix in pudding mix, vanilla and pistachio extracts, and powdered sugar. Slowly incorporate heavy cream, whipping until fluffy.
Chill the Cheesecake
  1. Cover the cheesecake with plastic wrap and refrigerate for at least 6 hours or overnight.
Prepare the Whipped Cream
  1. Whip cold heavy cream with powdered sugar and vanilla extract until stiff peaks form.
Assemble and Serve
  1. Remove cheesecake from pan, spread whipped cream over the top, and sprinkle chopped pistachios. Slice, serve cold, and enjoy.

Nutrition

Serving: 1sliceCalories: 350kcalCarbohydrates: 35gProtein: 4gFat: 22gSaturated Fat: 12gPolyunsaturated Fat: 2gMonounsaturated Fat: 8gCholesterol: 60mgSodium: 200mgPotassium: 100mgFiber: 1gSugar: 20gVitamin A: 800IUCalcium: 60mgIron: 1mg

Notes

Ensure cream cheese is at room temperature for smooth mixing and whip heavy cream at low speed to avoid splatter.

Tried this recipe?

Let us know how it was!

Sticky Hoisin Meatballs with Scallion Sauce You'll Crave

May 1, 2026 by Grace Snow Leave a Comment

It’s amazing how a single bite can transport you across the globe, isn’t it? These Sticky Hoisin Meatballs with Scallion Sauce do just that, blending sweet and savory notes that are quintessential in Asian cuisine. Made with juicy ground pork or beef, each meatball is coated in a glossy hoisin glaze that not only satisfies your palate but also looks stunning on any serving platter. The best part? They’re incredibly easy to whip up, making them a stress-free option for gatherings or a cozy night in. Plus, they’re perfect for finger-food lovers, so everyone can enjoy them without fuss. Ready to impress your friends and family with a dish that’s as delightful to eat as it is to share? Let’s dive into this recipe together!

Why are these meatballs so irresistible?

Succulent, Flavor-Packed Bites: Each meatball is generously infused with a delightful combination of hoisin sauce, garlic, and ginger, creating a mouthwatering flavor explosion.

Easy Meal Prep: Whip up a batch quickly, making these Sticky Hoisin Meatballs perfect for busy weeknights or last-minute gatherings.

Great for Sharing: They're the ultimate crowd-pleaser, ideal for parties or family dinners. Pair them with a refreshing cucumber salad for an extra touch!

Versatile Options: Swap in ground turkey for a lighter option or experiment with unique dipping sauces to tailor them to your taste.

Gluten-Free Friendly: With simple substitutions, these flavorful meatballs cater to various dietary needs, ensuring everyone can enjoy this tasty dish.

Sticky Hoisin Meatballs Ingredients

For the Meatballs

  • Ground pork or beef – The primary protein source, contributing rich moisture; substitution: use ground turkey for a leaner option.
  • Breadcrumbs – Provides structure and holds the meatballs together; substitution: use ground oats for a gluten-free version.
  • Hoisin sauce – Essential for the glaze, adding sweetness and a unique Asian taste; it’s crucial for that sticky coating.
  • Soy sauce – Enhances umami and saltiness; substitution: use tamari for a gluten-free option.
  • Minced garlic – Adds aromatic flavor; freshly minced delivers the best taste.
  • Minced ginger – Adds warmth and spice; fresh is preferable for a more robust flavor.
  • Egg – Acts as a binder to help hold the meatballs together; important for maintaining texture.
  • Sesame oil – Introduces a nutty aroma; it helps balance the other flavors.
  • Salt and pepper – Enhances overall flavor; adjust according to your taste preferences.

For the Glaze

  • Rice vinegar – Adds acidity to balance the sweetness of hoisin; essential for achieving the perfect glaze consistency.
  • Water – Adjusts the consistency of the glaze; use as needed to reach desired thickness.

For the Scallion Sauce

  • Scallions – Provides freshness and a sharp bite; best when finely chopped for maximum flavor.

These Sticky Hoisin Meatballs with Scallion Sauce are sure to be a hit, tantalizing your guests while catering to a variety of dietary needs!

Step‑by‑Step Instructions for Sticky Hoisin Meatballs with Scallion Sauce

Step 1: Prepare the Meatball Mixture
In a large bowl, combine the ground pork or beef, breadcrumbs, hoisin sauce, soy sauce, minced garlic, minced ginger, egg, sesame oil, salt, and pepper. Use your hands to mix gently until all ingredients are well blended but don’t overdo it; this will keep your meatballs tender. Once mixed, mold into 16-20 golf-ball-sized meatballs, about 1 to 1.5 inches in diameter.

Step 2: Brown the Meatballs
Heat a large skillet over medium-high heat and add a splash of oil. Once the oil is shimmering, carefully add the meatballs in batches, ensuring they are not overcrowded. Cook for about 5-7 minutes, turning occasionally, until they are caramelized on all sides and have that beautiful golden-brown exterior. Remove the browned meatballs and set them aside on a plate.

Step 3: Make the Glaze
In the same skillet, reduce the heat to medium and add hoisin sauce, soy sauce, rice vinegar, sesame oil, and water. Whisk together until the mixture is smooth and glossy. Cook for about 2-3 minutes until it starts to bubble slightly and thicken, creating a luscious glaze that will coat your Sticky Hoisin Meatballs.

Step 4: Coat the Meatballs
Return the browned meatballs to the skillet and carefully toss them in the glaze, ensuring they are evenly coated. Cover the skillet with a lid and let the meatballs simmer in the glaze for about 4-6 minutes, allowing them to absorb the flavors and heat through until they reach an internal temperature of at least 160°F for pork or 165°F for beef.

Step 5: Prepare the Scallion Sauce
While the meatballs are simmering, in a small bowl, whisk together the chopped scallions with a dash of soy sauce or sesame oil, adjusting to taste. This scallion sauce will offer a refreshing contrast to the sticky sweetness of the meatballs, enhancing the overall flavor profile of the dish.

Step 6: Serve and Enjoy
Once the meatballs are cooked through and beautifully glazed, transfer them to a serving platter. Drizzle the fresh scallion sauce over the meatballs and garnish with extra chopped scallions if desired. Serve them hot as delightful finger food that’s perfect for sharing, showcasing the irresistible Sticky Hoisin Meatballs with Scallion Sauce.

Expert Tips for Sticky Hoisin Meatballs

  • Mix Gently: Avoid overmixing the meat mixture to ensure tender and juicy meatballs. A light hand helps maintain their delicate texture.

  • Batch Cooking: Brown meatballs in batches rather than overcrowding the skillet. This prevents steaming and allows for that delicious caramelization.

  • Check Temperature: Use a meat thermometer to ensure meatballs reach the proper internal temperature (160°F for pork; 165°F for beef) for safety and flavor.

  • Perfect Glaze: Adjust the water in the glaze to achieve your desired consistency; it should be sticky but not runny.

  • Storage Tips: Store any leftovers in an airtight container, refrigerating for up to 3 days or freezing for up to 2 months. Reheat gently to maintain moisture in the Sticky Hoisin Meatballs.

Sticky Hoisin Meatballs Variations

Feel free to take this recipe and make it your own—there are countless delicious ways to personalize your meatballs!

  • Ground Turkey: Substitute ground turkey for a lighter, leaner meatball while still keeping all the flavor intact.

  • Spicy Kick: Add your favorite chili sauce or red pepper flakes to the glaze for an exciting heat that complements the sweetness beautifully. Just a pinch can elevate your dish!

  • Herb Infusion: Mix in finely chopped herbs like cilantro or basil to the meatball mixture for a fresh twist. These bright notes create a fusion with a delightful aroma.

  • Alternative Dips: Try serving the meatballs with different dipping sauces such as peanut sauce or sweet chili sauce for an unexpected flavor contrast.

  • Veggie-Loaded: Incorporate finely chopped vegetables like mushrooms, zucchini, or carrots into the meatball mixture for added moisture and a veggie boost. They’re sure to blend right in!

  • Coconut Aminos: Swap soy sauce for coconut aminos for a gluten-free and slightly sweeter option, keeping it tasty for all dietary needs.

  • Fried Rice Side: Instead of serving with scallion sauce, place your meatballs on a bed of fried rice, served alongside steamed broccoli, just like in takeaway restaurants.

For more vibrant meal ideas, consider pairing these meatballs with a refreshing cucumber salad or exploring the delicious options in our Buffalo Tofu Caesar recipe as a satisfying side! Dive into your culinary creativity and have fun experimenting with flavors and textures!

Make Ahead Options

These Sticky Hoisin Meatballs with Scallion Sauce are perfect for meal prep, allowing you to enjoy a restaurant-quality dish any night of the week! You can prepare the meatballs up to 24 hours in advance by mixing all the ingredients and forming them into balls; store them in an airtight container in the refrigerator to maintain their freshness. For added convenience, you can also prepare the scallion sauce ahead of time and refrigerate it for up to 3 days. When you’re ready to serve, simply brown the meatballs as directed and coat them in the glaze. This prep in advance method ensures quick assembly, making busy weeknights a breeze without sacrificing on flavor or quality!

What to Serve with Sticky Hoisin Meatballs with Scallion Sauce

Elevate your meal and delight your guests by pairing these vibrant meatballs with equally delicious sides and drinks.

  • Steamed Jasmine Rice: This fragrant rice absorbs the hoisin glaze beautifully, providing a perfect balance of flavors. Its fluffy texture complements the juicy meatballs wonderfully.

  • Crispy Brussels Sprouts: The slight bitterness of Brussels sprouts, when roasted to crispy perfection, contrasts the meatballs' sweetness while adding a delightful crunch to your plate.

  • Cucumber Salad: A refreshing cucumber salad with sesame oil and rice vinegar not only brightens the meal but also offers a cool crunch that pairs beautifully with the rich meatballs.

  • Asian Slaw: This colorful medley of cabbage, carrots, and a tangy dressing adds a zesty, crunchy element to your meal, enhancing the overall flavor profile.

  • Sichuan Noodles: For those craving something heartier, toss noodles with soy sauce, sesame oil, and chili for an exciting flavor complement that's both satisfying and spicy.

  • Chilled Sake or Green Tea: Sip on chilled sake or green tea to cleanse your palate between bites, enhancing the overall dining experience. Their subtle flavors perfectly complement the tasting notes of the dish.

  • Mango Sticky Rice: As a sweet finish, this classic dessert adds a delightful sweetness to your meal, making it a well-rounded dining experience.

  • Hot-and-Sour Soup: A warm bowl of hot-and-sour soup is a wonderful starter, merging well with the meatballs and adding an extra layer of comforting flavors to your meal.

How to Store and Freeze Sticky Hoisin Meatballs

Fridge: Store leftover Sticky Hoisin Meatballs in an airtight container for up to 3 days to keep them fresh and flavorful.

Freezer: These meatballs freeze beautifully! Place them in a single layer on a baking sheet until frozen, then transfer to a freezer-safe bag for up to 2 months.

Reheating: To reheat, thaw in the fridge overnight and warm gently in a skillet over medium heat, adding a splash of water to maintain moisture.

Serving Tip: Serve the reheated meatballs with fresh scallion sauce drizzled on top for an extra burst of flavor!

Sticky Hoisin Meatballs with Scallion Sauce Recipe FAQs

What type of meat should I use for the meatballs?
Absolutely! You can use ground pork or beef for rich flavor and juiciness. If you're looking for a leaner option, ground turkey works beautifully as a substitute, keeping the meatballs light yet flavorful.

How do I store leftover meatballs?
Very easily! Store your leftover Sticky Hoisin Meatballs in an airtight container in the fridge for up to 3 days. Just make sure they cool down to room temperature first before sealing them up.

Can I freeze Sticky Hoisin Meatballs?
Definitely! To freeze, place the cooked meatballs in a single layer on a baking sheet until they are frozen solid. Then, transfer them to a freezer-safe bag and store for up to 2 months. This method prevents them from sticking together and makes reheating a breeze.

What should I do if my meatballs fall apart while cooking?
No worries! If your meatballs are falling apart, it typically means the mixture is too wet. To fix this, add a little more breadcrumbs or ground oats to help bind them together. Mixing gently and not overhandling the meat is also crucial for keeping them intact.

Are these meatballs suitable for gluten-free diets?
Absolutely! You can make these Sticky Hoisin Meatballs gluten-free by substituting breadcrumbs with ground oats and using tamari sauce instead of regular soy sauce. This makes the dish accessible to those with gluten sensitivities while keeping all the beloved flavors intact!

How do I know when the meatballs are cooked through?
To ensure perfect cooking, use a meat thermometer. For pork meatballs, look for an internal temperature of at least 160°F; for beef, 165°F. Alternatively, you can cut one open—the inside should be no longer pink, and juices should run clear.

Sticky Hoisin Meatballs with Scallion Sauce

Sticky Hoisin Meatballs with Scallion Sauce You'll Crave

Experience a taste of Asia with these Sticky Hoisin Meatballs with Scallion Sauce, blending sweet and savory flavors in every bite.
Print Recipe Pin Recipe
Prep Time 15 minutes mins
Cook Time 20 minutes mins
Total Time 35 minutes mins
Servings: 4 meatballs
Course: Appetizers
Cuisine: Asian
Calories: 250
Ingredients Equipment Method Nutrition Notes

Ingredients
  

For the Meatballs
  • 1 pound ground pork or beef substitution: use ground turkey for a leaner option
  • 1 cup breadcrumbs substitution: use ground oats for a gluten-free version
  • 1/2 cup hoisin sauce crucial for that sticky coating
  • 2 tablespoons soy sauce substitution: use tamari for a gluten-free option
  • 4 cloves minced garlic freshly minced delivers the best taste
  • 1 tablespoon minced ginger fresh is preferable for a more robust flavor
  • 1 large egg important for maintaining texture
  • 1 tablespoon sesame oil helps balance the other flavors
  • to taste salt and pepper adjust according to your taste preferences
For the Glaze
  • 2 tablespoons rice vinegar essential for achieving the perfect glaze consistency
  • 1/4 cup water use as needed to reach desired thickness
For the Scallion Sauce
  • 1/4 cup scallions best when finely chopped for maximum flavor

Equipment

  • large bowl
  • Large skillet

Method
 

Step‑by‑Step Instructions
  1. In a large bowl, combine the ground pork or beef, breadcrumbs, hoisin sauce, soy sauce, minced garlic, minced ginger, egg, sesame oil, salt, and pepper. Mix gently until well blended, then mold into 16-20 meatballs, about 1 to 1.5 inches in diameter.
  2. Heat a large skillet over medium-high heat and add a splash of oil. Add the meatballs in batches and cook for about 5-7 minutes until caramelized on all sides. Remove and set aside.
  3. In the same skillet, reduce heat to medium and add hoisin sauce, soy sauce, rice vinegar, sesame oil, and water. Whisk until smooth and cook for about 2-3 minutes until it starts to thicken.
  4. Return the meatballs to the skillet and toss in the glaze. Cover and let simmer for about 4-6 minutes until heated through.
  5. In a small bowl, whisk together the chopped scallions with a dash of soy sauce or sesame oil to taste.
  6. Transfer the glazed meatballs to a serving platter, drizzle with scallion sauce, and garnish with extra scallions if desired. Serve hot.

Nutrition

Serving: 4meatballsCalories: 250kcalCarbohydrates: 12gProtein: 16gFat: 18gSaturated Fat: 5gCholesterol: 70mgSodium: 600mgPotassium: 300mgFiber: 1gSugar: 5gVitamin A: 500IUVitamin C: 3mgCalcium: 20mgIron: 2mg

Notes

These meatballs are perfect for gatherings or a cozy night in. Store leftovers in an airtight container for up to 3 days or freeze for up to 2 months.

Tried this recipe?

Let us know how it was!

Loaded Potato Taco Bowl: A Crispy Comfort Food Delight

May 1, 2026 by Grace Snow Leave a Comment

Have you ever had one of those evenings where the mere thought of fast food makes your stomach groan? That’s when I turn to my comforting High-Protein Loaded Potato Taco Bowl. Picture this: crispy roasted potatoes served as a hearty base, piled high with flavorful, seasoned meat, black beans, and a colorful array of fresh toppings. This recipe doesn't just come together in a snap; it’s also packed with about 38 grams of protein per serving, making it both satisfying and nutritious for your family dinner. Plus, it's endlessly customizable, inviting everyone to pile on their favorite toppings. Ready to transform your dinner routine into a fiesta of flavor? Let’s dive into this delicious creation!

Why Choose Loaded Potato Taco Bowls?

Flavorful Foundations: The base of crispy roasted potatoes gives these bowls a delightful crunch, making each bite satisfying and delicious.

Protein Power: With 38 grams of protein per serving, this recipe ensures a hearty meal that fuels your day.

Customizable Options: Whether you prefer ground beef, turkey, or extra beans, you can easily personalize your bowl to fit your tastes.

Family-Friendly Fun: Perfect for busy evenings, this dish will please both kids and adults alike, much like our Fish Taco Bowls or Taco Spaghetti Cheesy.

Meal Prep Magic: Ideal for cooking ahead, you can prepare components in advance for quick weeknight dinners, allowing you to skip the fast food and enjoy home-cooked goodness!

Loaded Potato Taco Bowl Ingredients

• Dive into these delicious flavors with this Loaded Potato Taco Bowl ingredient list!

For the Crispy Potatoes

  • Russet Potatoes – The key to a crunchy yet fluffy base; sweet potatoes can be used for a sweeter taste.
  • Olive Oil – Essential for achieving that perfect crispy texture during roasting.
  • Garlic Powder – Adds a rich depth of flavor to the potatoes.
  • Onion Powder – A subtle enhancer that rounds out the taste.
  • Smoked Paprika – Introduces a lovely smokiness to the roasted potatoes.
  • Salt and Black Pepper – Must-haves for seasoning and flavor boosts.

For the Protein Filling

  • Ground Beef or Turkey (93/7 recommended) – Your main protein choice; opt for turkey for a lighter version or beef for richer flavor.
  • Chili Powder – Provides warmth and a delightful kick to the meat mixture.
  • Cumin – A classic taco seasoning that enhances the flavor profile.
  • Red Onion – Adds sweetness and moisture, making the meat even tastier.

For Additional Texture and Nutrition

  • Black Beans – Increase protein and fiber in the dish; they also add a great texture.
  • Corn Kernels – Bring in a natural sweetness; fresh, canned, or frozen work perfectly.

For Topping

  • Shredded Cheddar Cheese – Melts beautifully over the meat and adds creaminess.
  • Cherry Tomatoes – Brighten up the bowl with freshness when served.
  • Avocado – Contributes creaminess and healthy fats.
  • Fresh Cilantro – A burst of fresh flavor that elevates the dish.
  • Lime Wedges – Essential for a splash of acidity and brightness.
  • Sour Cream – An optional topping that adds richness and indulgence.

Keep these ingredients handy to create your very own Loaded Potato Taco Bowl that keeps the fast food chains at bay!

Step‑by‑Step Instructions for Loaded Potato Taco Bowl

Step 1: Preheat and Prepare the Potatoes
Begin by preheating your oven to 425°F (220°C). While the oven heats up, wash and dice the russet potatoes into bite-sized cubes. Place them on a baking sheet, then drizzle with olive oil and sprinkle garlic powder, onion powder, smoked paprika, salt, and black pepper. Toss everything until the potatoes are evenly coated. Spread them out in a single layer for optimal crispiness.

Step 2: Roast the Potatoes
Once the oven is ready, let the potatoes roast for 30–35 minutes. Be sure to flip them halfway through the cooking time to ensure they achieve a golden-brown color and crispy edges. Keep an eye on them as they roast and look for that satisfying crunch, which is essential for the Loaded Potato Taco Bowl.

Step 3: Cook the Protein
While the potatoes are roasting, heat a skillet over medium heat and add your choice of ground beef or turkey. Cook for 7–8 minutes, breaking the meat apart as it cooks until it's browned and fully cooked through. If any fat renders, drain it off to keep the dish lighter and healthier.

Step 4: Season the Meat
Add chili powder, cumin, and chopped red onion to the skillet with the cooked meat. Continue to cook for another 5 minutes, stirring regularly until the onions soften and the spices meld beautifully with the meat. This seasoning step sets the stage for the flavor-packed base of your Loaded Potato Taco Bowl.

Step 5: Incorporate Beans and Corn
Stir in the black beans and corn kernels into the seasoned meat mixture, cooking for an additional 3–4 minutes. Ensure everything is heated through, giving it a good stir to combine the flavors. Taste and adjust seasoning as needed, making sure the filling is flavorful and delicious for your taco bowl.

Step 6: Assemble the Bowls
In a serving bowl, create a hearty layer with the crispy roasted potatoes as the base. Generously top them with the warm meat, bean, and corn mixture, allowing the warmth to slightly melt the shredded cheddar cheese on top. Let the cheese sit for about 30 seconds for that extra gooey indulgence.

Step 7: Add Fresh Toppings
Now it’s time to finish your Loaded Potato Taco Bowl! Top with halved cherry tomatoes, diced avocado, and fresh cilantro. Serve immediately with lime wedges on the side for a citrusy kick and a dollop of sour cream if desired. Enjoy the bright, fresh flavors that beautifully complement the hearty layers below.

Expert Tips for the Best Loaded Potato Taco Bowl

  • Crispier Potatoes: Spread diced potatoes in a single layer on the baking sheet to ensure they roast evenly and get perfectly crispy edges for your Loaded Potato Taco Bowl.

  • Flavor Boost: Don't be shy with the seasonings! Taste the meat mixture before serving to adjust spices, allowing you to create a flavor-packed filling that everyone will love.

  • Meal Prep Efficiently: For easy meal prep, store roasted potatoes and the meat filling separately in airtight containers. Reheat potatoes in the oven for a satisfying crisp rather than the microwave.

  • Protein Alternatives: If you're looking for lighter options, substitute ground turkey or chicken. You can also add extra black beans for a vegetarian protein boost without sacrificing taste.

  • Toppings Galore: Encourage creativity with toppings! Offer a variety of options like jalapeños, diced bell peppers, or different types of cheese to make each bowl personal and enjoyable for every family member.

Make Ahead Options

These Loaded Potato Taco Bowls are perfect for meal prep enthusiasts! You can roast your potatoes up to 24 hours in advance; just let them cool completely before transferring them to an airtight container in the refrigerator to maintain their crispiness. Additionally, you can prepare the meat mixture (with black beans and corn) and refrigerate it for up to 3 days. To finish, simply reheat the potatoes in the oven (instead of the microwave for optimal texture), warm the meat mixture on the stove, and assemble them in bowls with your favorite toppings right before serving. This makes weeknight dinners a breeze while ensuring everything tastes just as delicious!

Loaded Potato Taco Bowl Variations

Feel free to get creative with your Loaded Potato Taco Bowl! Each twist allows you to savor new flavors and textures.

  • Sweet Potato Swap: Substitute sweet potatoes for a naturally sweeter base that adds a lovely contrast to the savory toppings.

  • Lean Chicken Option: Use ground chicken instead of beef or turkey for a lighter, yet equally flavorful, filling. It’s an easy switch that doesn’t compromise taste.

  • Vegetarian Boost: Add an extra can of black beans or chickpeas for a hearty veggie alternative, supplying even more protein and fiber while keeping it meat-free.

  • Spicy Kick: Mix in diced jalapeños or a splash of hot sauce to the meat mixture for a spicy version that’ll liven up your taco bowl!

  • Cheesy Delight: Try different cheeses like pepper jack or crumbled queso fresco for a delightful flavor variation that melts beautifully over the toppings.

  • Layered Sides: Serve with a zesty Mexican street corn or a side of cilantro lime rice—both elevate your bowl and enhance the experience.

  • Guacamole Goodness: Top it off with a dollop of homemade guacamole for an extra layer of creaminess that pairs perfectly with the crunchy potatoes.

  • Herb Infusion: Experiment with fresh herbs like dill or mint in addition to cilantro for a unique take that refreshes the flavor profile of your Loaded Potato Taco Bowl.

Now that you have these variations at your fingertips, feel free to explore them during your next family dinner—just like our Acai Bowl Nutritious or Taco Bell Crunchwrap!

How to Store and Freeze Loaded Potato Taco Bowl

Fridge: Store the components separately in airtight containers for up to 4 days to maintain freshness and texture.

Freezer: For longer storage, freeze the roasted potatoes and meat mixture in separate freezer-safe bags for up to 3 months.

Reheating: When ready to enjoy, reheat the potatoes in the oven for optimal crispiness while microwaving the meat mixture until warmed through.

Assembly Tip: For best results, avoid freezing the assembled Loaded Potato Taco Bowl; instead, prepare fresh toppings just before serving to experience full flavor and texture.

What to Serve with Loaded Potato Taco Bowl

Transform your cooking experience as you create an inviting, well-rounded meal alongside this delicious taco bowl.

  • Mixed Green Salad: A light, crisp salad adds freshness to balance the hearty flavors of the taco bowl, enhancing the meal.
  • Tortilla Chips & Guacamole: Crunchy chips paired with creamy guacamole provide satisfying textures that complement each bite of the bowl.
  • Cilantro Lime Rice: This fragrant side introduces zesty notes that unite beautifully with the savory elements of the Loaded Potato Taco Bowl.
  • Mexican Street Corn: Sweet and smoky grilled corn on the cob brings vibrant flavors, echoing the dish's warm and comforting essence.
  • Spicy Black Bean Soup: A bowl of spicy black bean soup acts as a warm starter, deepening the meal's protein-rich profile.
  • Margaritas: Refreshing margaritas serve as a delightful pairing, adding a celebratory vibe to your taco night.
  • Churros with Chocolate Sauce: For dessert, churros provide a sweet, crispy finish that is sure to please everyone after the savory feast.
  • Fruit Agua Fresca: This refreshing drink made with fruits and spices complements the rich flavors, washing down every bite with a pleasant sweetness.
  • Homemade Pickled Veggies: Tangy pickled vegetables add a delightful crunch and acidity, enhancing the layered flavors in the Loaded Potato Taco Bowl.

Loaded Potato Taco Bowl Recipe FAQs

What type of potatoes should I use for the Loaded Potato Taco Bowl?
For the best results, I recommend using russet potatoes! They become incredibly crispy on the outside while remaining fluffy inside. If you prefer a slightly sweeter taste, sweet potatoes can work, but keep in mind they will have a different texture.

How should I store leftovers from the Loaded Potato Taco Bowl?
Absolutely! To keep everything fresh, store the components separately in airtight containers in the fridge for up to 4 days. This way, the crispy potatoes will stay crunchy, and the meat will remain flavorful.

Can I freeze the Loaded Potato Taco Bowl?
Yes, you can! For longer storage, place the roasted potatoes and meat mixture into separate freezer-safe bags and freeze them for up to 3 months. When you’re ready to enjoy, simply reheat the potatoes in the oven to regain their crispiness and microwave the meat until heated through.

What should I do if my potatoes aren't crispy after roasting?
If your potatoes aren’t crispy, ensure that they are spread out in a single layer on the baking sheet without overcrowding. If they’re too close together, they’ll steam instead of roast. You can also try increasing the oven temperature slightly or cooking them for a bit longer, checking frequently until you achieve that golden brown perfection!

Are there any dietary considerations for pets or allergies with this recipe?
Definitely! If you're considering dietary restrictions, be mindful of any food allergies in your household. For pets, avoid sharing the Loaded Potato Taco Bowl as ingredients like onions and garlic can be harmful to them. If someone in your family is allergic to specific ingredients, feel free to customize the recipe by substituting or omitting those items.

Can I make this dish vegetarian?
Of course! To create a vegetarian version of the Loaded Potato Taco Bowl, simply substitute the ground meat with extra black beans or your favorite plant-based protein. This adjustment not only keeps the dish satisfying but also maintains the delightful flavors everyone loves!

Loaded Potato Taco Bowl

Loaded Potato Taco Bowl: A Crispy Comfort Food Delight

Enjoy a satisfying Loaded Potato Taco Bowl packed with protein and customizable toppings for a delightful family dinner.
Print Recipe Pin Recipe
Prep Time 15 minutes mins
Cook Time 35 minutes mins
Total Time 50 minutes mins
Servings: 4 bowls
Course: Dinner
Cuisine: Mexican
Calories: 550
Ingredients Equipment Method Nutrition Notes

Ingredients
  

For the Crispy Potatoes
  • 4 medium Russet Potatoes Can substitute with sweet potatoes
  • 3 tablespoons Olive Oil For roasting
  • 1 teaspoon Garlic Powder
  • 1 teaspoon Onion Powder
  • 1 teaspoon Smoked Paprika
  • 1 teaspoon Salt To taste
  • 1/2 teaspoon Black Pepper To taste
For the Protein Filling
  • 1 pound Ground Beef or Turkey (93/7 recommended) Choose turkey for a lighter version
  • 2 tablespoons Chili Powder For seasoning
  • 1 teaspoon Cumin For seasoning
  • 1 medium Red Onion Chopped
For Additional Texture and Nutrition
  • 1 can Black Beans Drained and rinsed
  • 1 cup Corn Kernels Fresh, canned, or frozen
For Topping
  • 1 cup Shredded Cheddar Cheese For melting
  • 1 cup Cherry Tomatoes Halved
  • 1 medium Avocado Diced
  • 1/4 cup Fresh Cilantro Chopped
  • 2 pieces Lime Wedges For serving
  • 1/2 cup Sour Cream Optional

Equipment

  • Oven
  • Baking Sheet
  • Skillet
  • measuring cups
  • Measuring Spoons
  • Knife
  • Cutting Board

Method
 

Preparation and Cooking
  1. Preheat your oven to 425°F (220°C). Wash and dice the russet potatoes into bite-sized cubes. Place on a baking sheet, drizzle with olive oil, and sprinkle with garlic powder, onion powder, smoked paprika, salt, and black pepper. Toss until evenly coated.
  2. Roast the potatoes for 30–35 minutes, flipping halfway through until golden-brown and crispy.
  3. While the potatoes roast, heat a skillet over medium heat and add ground beef or turkey. Cook for 7–8 minutes until browned, breaking apart as it cooks.
  4. Add chili powder, cumin, and chopped red onion to the cooked meat. Cook for an additional 5 minutes until onions soften.
  5. Stir in black beans and corn, cooking for another 3–4 minutes until heated through. Adjust seasoning as needed.
  6. In a serving bowl, layer crispy roasted potatoes as the base and top with the meat mixture allowing the heat to melt the cheese on top.
  7. Finish the bowl with halved cherry tomatoes, diced avocado, and fresh cilantro. Serve with lime wedges and sour cream if desired.

Nutrition

Serving: 1bowlCalories: 550kcalCarbohydrates: 65gProtein: 38gFat: 22gSaturated Fat: 10gPolyunsaturated Fat: 2gMonounsaturated Fat: 10gCholesterol: 80mgSodium: 800mgPotassium: 1000mgFiber: 12gSugar: 4gVitamin A: 500IUVitamin C: 30mgCalcium: 250mgIron: 4mg

Notes

Store components separately for freshness. Enjoy with various toppings for added flavor.

Tried this recipe?

Let us know how it was!

Mouthwatering BBQ Chicken Flatbread for a Cozy Night In

May 1, 2026 by Grace Snow Leave a Comment

Every once in a while, a dish comes along that instantly transforms an ordinary meal into a celebration. This deliciously creamy sweet potato casserole is that dish, bringing warmth and nostalgia to our holiday gatherings. Infused with a hint of cinnamon and finished off with either gooey marshmallows or crunchy pecans, this recipe strikes a perfect balance between sweet and savory. Not only is it simple to prepare, but it’s also a nutritious side that complements any festive spread. Whether you’re a seasoned home chef or just someone looking to create lasting memories around the dinner table, this sweet potato casserole is bound to delight your family and friends. So, are you ready to get your hands on a dish that will have everyone asking for seconds?

Why is Sweet Potato Casserole a Must-Try?

Comforting, Nostalgic Flavors: This casserole evokes memories of family gatherings, offering warmth and joy with every bite. Simple Preparation: Even if you’re a novice cook, this dish is easy to whip up, requiring minimal ingredients and skills. Versatile Variations: Whether you prefer the classic marshmallow topping or a crunchy pecan streusel, there’s a version for everyone! Nutritious Choice: Packed with vitamins A and C, sweet potatoes make this casserole a healthier option compared to other holiday sides. It pairs beautifully with dishes like Honey Garlic Chicken or Crock Pot Chicken. Enjoy it at Thanksgiving or any time you crave something special!

Sweet Potato Casserole Ingredients

• Get ready to create magic in the kitchen!

For the Casserole

  • Sweet Potatoes – The star ingredient that gives this dish its creamy texture and natural sweetness; fresh or canned work wonderfully!
  • Butter – Adds richness and flavor to the casserole; you may substitute with coconut oil for a dairy-free option.
  • Brown Sugar – Enhances sweetness and adds depth; consider maple syrup for a healthier alternative.
  • Cinnamon – Provides warm spice notes; nutmeg or ginger can be a delightful substitute for a flavor twist.
  • Milk – Helps achieve that creamy goodness; try almond or oat milk for a dairy-free variation.

For the Topping

  • Marshmallows – Traditionally used for a sweet, gooey finish; omit for a healthier take or swap with crushed pecans.
  • Pecans – Great for adding a crunchy texture and nutty flavor; walnuts or almonds are good alternatives if you prefer.

With these ingredients, you're ready to make a comforting sweet potato casserole that will warm everyone's hearts!

Step‑by‑Step Instructions for Deliciously Creamy Sweet Potato Casserole with Marshmallows and Pecans

Step 1: Preheat the Oven
Begin by preheating your oven to 350°F (175°C). This temperature creates the perfect baking environment for your sweet potato casserole, allowing it to develop a creamy texture while achieving a beautiful golden-brown top. Gather your baking dish, preferably a 9x13 inch, to prepare for the casserole.

Step 2: Prepare the Sweet Potatoes
Next, peel and chop your sweet potatoes into evenly sized chunks before placing them in a large pot. Cover the sweet potatoes with water, bring to a boil, and cook for 15-20 minutes or until they are fork-tender. Once cooked, drain the water, and allow the sweet potatoes to cool slightly before mashing them until smooth.

Step 3: Mix the Casserole Ingredients
In a large mixing bowl, add the mashed sweet potatoes, ½ cup of butter, ¾ cup of brown sugar, ½ cup of milk, and a teaspoon of cinnamon. Use a hand mixer or a whisk to blend these ingredients together until the mixture is creamy and well combined. This step ensures the sweet potato casserole is rich and flavorful, ready for the baking dish.

Step 4: Transfer to Baking Dish
Spoon the creamy sweet potato mixture into your pre-greased baking dish, spreading it evenly with a spatula. Make sure the mixture covers the bottom of the dish thoroughly to ensure even baking. Your sweet potato casserole should now look smooth and inviting, ready for its topping.

Step 5: Add the Topping
For a classic sweet potato casserole, sprinkle a generous layer of marshmallows evenly over the top of the sweet potato mixture. Alternatively, if you're using pecans, mix chopped pecans with a tablespoon of brown sugar and scatter this over the casserole for a delightful crunch. Both options will enhance the flavor and texture beautifully.

Step 6: Bake the Casserole
Place the baking dish in your preheated oven and bake for 25-30 minutes. Keep an eye on the casserole as it bakes; look for the marshmallows to turn golden brown and the pecans to become toasted. The aroma will fill your kitchen, signaling that your sweet potato casserole is nearly ready to serve.

Step 7: Cool and Serve
Once baked, remove the sweet potato casserole from the oven and let it sit for 5-10 minutes before serving. This resting time helps the casserole firm up slightly, making it easier to scoop out portions. As you serve this comforting dish, watch everyone’s eyes light up with delight at this cozy, nostalgic treat!

How to Store and Freeze Sweet Potato Casserole

Fridge: Store leftover sweet potato casserole in an airtight container in the refrigerator for up to 3 days. Reheat individual portions in the microwave or the entire dish in the oven until warmed through.

Freezer: This casserole freezes beautifully! To freeze, wrap tightly in plastic wrap and then aluminum foil, and store for up to 2 months. Thaw overnight in the fridge before reheating.

Reheating: When ready to enjoy, place the casserole in a preheated oven at 350°F (175°C) for about 20-25 minutes until heated through. You might want to refresh the topping with some extra marshmallows or pecans for that fresh, golden look.

Make-Ahead: Feel free to prepare the sweet potato casserole a day before your gathering. Just cover tightly and refrigerate, then bake before serving for an easy, joyful meal!

Make Ahead Options

These deliciously creamy sweet potato casseroles are perfect for meal prep enthusiasts! You can prepare the sweet potato mixture up to 24 hours in advance; simply mash the sweet potatoes and mix in butter, brown sugar, milk, and cinnamon, then cover tightly with plastic wrap or transfer into an airtight container to refrigerate. The marshmallow or pecan topping can also be added right before baking to ensure they remain fresh and crispy. When you're ready to serve, simply preheat your oven and bake the casserole for 25-30 minutes until golden brown. By prepping ahead, you save valuable time—allowing you to enjoy festive moments with your loved ones!

What to Serve with Deliciously Creamy Sweet Potato Casserole?

Experience a festive feast by pairing this creamy dish with sides that enhance its warm flavors and textures.

  • Roasted Turkey: Juicy turkey perfectly complements the sweetness of the casserole, creating a satisfying contrast that’s quintessential for holiday meals.
  • Green Bean Almondine: Fresh green beans sautéed with almonds offer a crunchy texture and a nutty flavor, balancing the creaminess of the casserole beautifully.
  • Cranberry Sauce: The tartness of cranberry sauce cuts through the richness, invigorating each bite and enhancing the festive spirit of your meal.
  • Cornbread Muffins: Soft, sweet cornbread muffins echo the southern charm of the casserole while adding a delightful contrast in texture and flavor.
  • Garlic Mashed Potatoes: Creamy and buttery, garlic mashed potatoes create a comforting duo with sweet potato casserole, making every forkful irresistible.
  • Honey Glazed Carrots: The natural sweetness and slight crunch of honey-glazed carrots harmonize with the casserole and provide visual appeal to your plate.
  • Sparkling Apple Cider: A refreshing drink, sparkling apple cider adds a festive fizz that pairs perfectly with the rich flavors of sweet potato casserole.
  • Pumpkin Pie: For dessert, classic pumpkin pie captures the essence of fall while its spiced flavors resonate with the warmth of the casserole.

Embrace the joyful ambiance of a cozy gathering with these delightful pairings, creating an inviting and memorable dining experience!

Expert Tips for Sweet Potato Casserole

  • Perfectly Mashed: Ensure sweet potatoes are well-mashed with no lumps. Creamier texture makes for a more delightful sweet potato casserole.

  • Watch the Topping: If using marshmallows, keep a close eye as they can burn easily. Broil the last minute for a gorgeous golden finish.

  • Resting Time: Allow the casserole to sit for 5-10 minutes after baking. This resting period helps it set, making serving easier.

  • Flavor Variations: Don’t hesitate to experiment with spices. Nutmeg or ginger can elevate the flavor profile and add a unique twist to your sweet potato casserole.

  • Storage Solutions: Prepare in advance! Make the casserole a day early, cover it tightly, and refrigerate. Reheating it in the oven brings back that fresh-baked touch.

BBQ Chicken Flatbread Variations

Get ready to unleash your creativity with this recipe and make it your own!

  • Gluten-Free: Use gluten-free flatbread or cauliflower crust to enjoy a delicious meal without the gluten.
  • Spicy Kick: Add sliced jalapeños or a drizzle of hot sauce to give your flatbread a fiery flavor boost. Spicing things up brings a whole new dimension to this dish!
  • Veggie Packed: Incorporate roasted vegetables like bell peppers, onions, or zucchini for added nutrition and flavor. Each bite will surprise you with a delightful crunch!
  • Creamy Avocado: Top with sliced avocado to add a creamy texture that beautifully compliments the BBQ sauce. It’s a tasty contrast that makes every mouthful simply irresistible!
  • Pulled Pork Alternative: Swap the chicken for pulled pork for a different take on this beloved classic. The smoky goodness will be a hit at your next gathering!
  • Herb Infusion: Sprinkle fresh herbs like cilantro or basil on top just before serving for a burst of freshness. This little touch makes such a difference in flavor!
  • Cheesy Delight: Add a blend of mozzarella and cheddar cheese for an extra cheesy experience that elevates your flatbread. Who doesn’t love an ooey-gooey texture?
  • Sweet Pineapple: Include diced pineapple for a sweet twist that contrasts beautifully with the savory BBQ chicken. This tropical addition will make your taste buds dance!

Feel free to mix and match these variations to create a BBQ chicken flatbread that suits your taste. You can even serve it alongside some delightful dishes like Chipotle Lime Chicken and Rice for a complete meal experience! Enjoy exploring the delicious possibilities!

Sweet Potato Casserole Recipe FAQs

What type of sweet potatoes should I use?
Absolutely! Fresh sweet potatoes are ideal for this recipe, as they provide a wonderfully creamy texture and natural sweetness. You can also use canned sweet potatoes if you're looking for convenience. Just be sure to drain and rinse them well before mashing!

How should I store leftover sweet potato casserole?
Very easy! Store any leftover casserole in an airtight container in your refrigerator for up to 3 days. To reheat, you can pop individual servings in the microwave or warm the entire dish in a preheated oven at 350°F (175°C) until heated through.

Can I freeze sweet potato casserole?
Yes, you can! To freeze, first allow the casserole to cool completely. Then tightly wrap it in plastic wrap followed by aluminum foil to prevent freezer burn. It can be frozen for up to 2 months. When you’re ready to enjoy it, thaw it overnight in the fridge and then reheat in the oven.

What should I do if my casserole is too watery?
If you find your sweet potato casserole is too watery, don't worry! You can add a tablespoon of cornstarch or flour to the mixture before baking to help thicken it up. Additionally, you could bake it a little longer, uncovered, to allow some moisture to evaporate and achieve that perfect creamy consistency.

Are there any dietary considerations I should keep in mind?
Absolutely! If you're considering allergies or dietary restrictions, this sweet potato casserole can be easily modified. Use dairy-free butter and milk alternatives like almond or oat milk for a dairy-free version. And skip the marshmallows if you prefer a healthier take, or swap in crushed nuts instead. Always check labels for gluten content for those following a gluten-free diet.

Can I prepare sweet potato casserole ahead of time?
Yes, you can! Make the casserole a day before your gathering, cover it tightly with plastic wrap, and store it in the refrigerator. Just bake it right before serving to maintain that freshly baked goodness. For the topping, you might want to add marshmallows or pecans just before baking for that delightful crunch and golden finish!

BBQ Chicken Flatbread

Mouthwatering BBQ Chicken Flatbread for a Cozy Night In

This BBQ Chicken Flatbread is a delicious treat perfect for gatherings and cozy nights in.
Print Recipe Pin Recipe
Prep Time 15 minutes mins
Cook Time 30 minutes mins
Resting Time 10 minutes mins
Total Time 55 minutes mins
Servings: 4 flatbreads
Course: Dinner
Cuisine: American
Calories: 450
Ingredients Equipment Method Nutrition Notes

Ingredients
  

For the Casserole
  • 2 cups Sweet Potatoes Fresh or canned work wonderfully.
  • ½ cup Butter Can substitute with coconut oil for dairy-free.
  • ¾ cup Brown Sugar Consider maple syrup as a healthier alternative.
  • 1 teaspoon Cinnamon Nutmeg or ginger can be substitutes.
  • ½ cup Milk Almond or oat milk for dairy-free.
For the Topping
  • 2 cups Marshmallows Omit for a healthier option.
  • 1 cup Pecans Can use walnuts or almonds as alternatives.

Equipment

  • Oven
  • Mixing Bowl
  • Baking Dish
  • pot
  • Spatula

Method
 

Step-by-Step Instructions
  1. Preheat your oven to 350°F (175°C). Gather your baking dish.
  2. Peel and chop sweet potatoes, boil until fork-tender, then mash.
  3. Mix mashed sweet potatoes, butter, brown sugar, milk, and cinnamon in a bowl until creamy.
  4. Transfer the mixture to a greased baking dish, spreading evenly.
  5. Add marshmallows or a pecan topping mixed with brown sugar.
  6. Bake for 25-30 minutes until golden brown.
  7. Let it cool for 5-10 minutes before serving.

Nutrition

Serving: 1flatbreadCalories: 450kcalCarbohydrates: 65gProtein: 8gFat: 20gSaturated Fat: 10gPolyunsaturated Fat: 2gMonounsaturated Fat: 7gCholesterol: 30mgSodium: 300mgPotassium: 450mgFiber: 5gSugar: 20gVitamin A: 12000IUVitamin C: 20mgCalcium: 80mgIron: 2mg

Notes

Ensure sweet potatoes are well-mashed for a creamy texture. Monitor topping to prevent burning.

Tried this recipe?

Let us know how it was!

Crispy Rice Paper Crab Rangoons: A Healthy Twist on a Classic

May 1, 2026 by Grace Snow Leave a Comment

The aroma of sizzling appetizers wafted through the air as I ventured out on a quest to reinvent a classic favorite. Enter the Rice Paper Crab Rangoons—a delightful twist on the traditional recipe that swapped out those heavy wonton wrappers for a lighter, healthier alternative. These baked sensations not only cut down on the calories but also maintain that irresistible crunch that’s perfect for snacking or entertaining guests. Easy to whip up with simple, fresh ingredients, they’re a crowd-pleaser that keeps you away from the crowded fast-food scene. Imagine the joy on your friends’ faces as they bite into a creamy, savory filling encased in a golden-brown rice paper wrapper. Ready to impress? Let’s dive into this fusion delight that’s bound to elevate your appetizer game!

Why are Rice Paper Rangoons a must-try?

Crispy, Golden-Brown Perfection: Experience the satisfying crunch paired with a creamy filling that will have everyone reaching for seconds!
Healthy Twist: Enjoy a guilt-free indulgence with baked rice paper instead of traditional fried wrappers—perfect for health-conscious diners.
Endless Versatility: Feel free to experiment! Switch out crab meat for shredded chicken or tofu, or spice things up with some cayenne for extra heat.
Quick Preparation: Whip these up in no time—ideal for both casual get-togethers and festive occasions alike. Plus, if you love easy prep, try these alongside Furikake Fried Rice for a complete meal!
Crowd-Pleaser: Your friends and family will rave about this fusion-inspired dish, making it a staple for your recipe collection.

Rice Paper Crab Rangoons Ingredients

For the Filling
• Cream Cheese – serves as a creamy binder for the filling; ensure it’s softened for easier mixing.
• Crab Meat – this main protein delivers the signature flavor; fresh crab is preferred for taste, but imitation crab works too.
• Green Onions – adds a fresh, mild onion flavor; chop finely for even distribution.
• Soy Sauce – enhances umami depth; tamari can be used for a gluten-free option.

For the Wrappers
• Rice Paper Wrappers – provide a crispy exterior; soak briefly in warm water for pliability before using.

For Baking
• Oil Spray – lightly coat the rangoons to achieve that golden-brown crispiness without excess oil.

Step‑by‑Step Instructions for Rice Paper Crab Rangoons

Step 1: Prep Workstation
Begin by gathering all your ingredients and tools needed for the Rice Paper Crab Rangoons. Clear off a clean countertop and arrange items such as mixing bowls, a baking sheet, and a brush for oil. This will set you up for an organized and enjoyable cooking experience, making the assembly process smooth and efficient.

Step 2: Make the Filling
In a large mixing bowl, combine softened cream cheese, drained crab meat, finely chopped green onions, and soy sauce. Use a fork or spatula to mix these ingredients until thoroughly blended, achieving a smooth, creamy texture. This filling is the star of your rangoons, so take a moment to ensure it’s well combined and full of flavor.

Step 3: Soak Rice Papers
Fill a shallow dish with warm water and carefully dip each rice paper wrapper for 10-15 seconds. Gently coax the wrapper from the water, allowing it to soften yet remain slightly firm to avoid tearing. You want a pliable wrapper that will hold your filling, so keep an eye on the texture as you soak each piece.

Step 4: Assemble Rangoons
Place a soaked rice paper wrapper flat on your clean surface, and add about one tablespoon of the creamy filling right in the center. Fold the wrapper over the filling, pressing the edges together firmly to seal the rangoon shut. Repeat this process, ensuring each filled wrapper is tightly sealed to maintain shape during baking.

Step 5: Bake Rangoons
Preheat your oven to 400°F (200°C) while you arrange the assembled rangoons on a parchment-lined baking sheet. Make sure to leave space between each rangoon to allow for even cooking. Lightly spray or brush the tops with oil to enhance the crispiness. Bake for 15-20 minutes, or until they reach a golden-brown hue and the edges are crispy.

Step 6: Serve
Once baked, remove the Rice Paper Crab Rangoons from the oven and let them cool slightly before transferring to serving plates. These crispy treats are best enjoyed warm, so consider complementing them with your favorite dipping sauce, like sweet and sour or spicy mayo, to elevate your appetizer experience.

Storage Tips for Rice Paper Crab Rangoons

Fridge: Store cooled leftover rangoons in an airtight container for up to 3 days. To keep them crispy, separate layers with parchment paper.

Freezer: Assemble uncooked rangoons and freeze on a baking sheet. Once solid, transfer to freezer-safe bags. Cook from frozen without thawing when you’re ready to enjoy!

Reheating: To regain their crispiness, reheat leftover rangoons in an air fryer or an oven at 375°F (190°C) for about 10 minutes until heated through and crispy.

Room Temperature: It's best to serve Rice Paper Crab Rangoons warm. If left out for more than 2 hours, it's advisable to refrigerate leftovers to maintain freshness.

What to Serve with Healthy Baked Rice Paper Crab Rangoons

Create a delightful spread with dishes that elevate the flavors of this crispy appetizer.

  • Crispy Asian Slaw: A vibrant blend of cabbage, carrots, and a tangy vinaigrette adds crunch and freshness that perfectly balances the rich rangoons.
  • Sweet and Sour Sauce: This classic dipping sauce complements the creamy filling with a burst of tanginess, enhancing every bite.
  • Spicy Mayo: A drizzle of spicy mayo not only amps up the heat but also introduces a silky texture that contrasts the crispy exterior.
  • Coconut Jasmine Rice: Fragrant and slightly sweet, this rice pairs beautifully, allowing the savory crab flavor to shine and rounding out the meal.
  • Grilled Vegetable Skewers: Lightly charred veggies add a smoky flavor and a pop of color to your plate, creating a feast for the eyes as well as the palate.
  • Soda or Iced Tea: Refreshing drinks like ginger ale or lemon iced tea cleanse the palate, ensuring your taste buds are ready for the next bite of the rangoons.
  • Mango Salad: A sweet and tangy mango salad brings brightness, while its juiciness pairs wonderfully with the comforting crunch of the rangoons.
  • Philly Cream Cheese Dip: This creamy dip delivers a rich flavor, making it an inviting companion that complements the crab filling's creaminess in a whole new way.
  • Chocolate Spring Rolls: To finish off the meal on a sweet note, these light desserts echo the crispy theme and provide a satisfying contrast to the savory appetizer.

Expert Tips for Rice Paper Crab Rangoons

• Soaking Time Matters: Ensure rice papers are soaked for just 10-15 seconds. Over-soaking makes them too fragile and hard to work with.

• Fill Smartly: Use only about one tablespoon of filling per rangoon. Overfilling can cause them to burst during baking, leading to a messy result.

• Experiment with Flavors: Don’t hesitate to add spices like garlic powder or herbs for enhanced flavor in your filling. This can elevate the taste of your Rice Paper Crab Rangoons.

• Seal Tightly: Carefully press and seal the edges of the rice paper to prevent any leakage while baking. A well-sealed rangoon will hold its shape beautifully.

• Baking Tips: For extra crispiness, consider lightly spraying the tops of the assembled rangoons with oil before baking. This helps achieve that golden-brown perfection!

Rice Paper Crab Rangoons Variations

Feel free to get creative and customize these lovely rangoons to suit your taste buds!

  • Protein Swap: Replace crab meat with shredded chicken or tofu for a different protein source that still delivers on flavor.

  • Spicy Kick: Add a dash of cayenne pepper or sriracha to the filling for those who love a bit of heat in their appetizers.

  • Veggie Boost: Incorporate finely chopped bell peppers or mushrooms into the filling for added texture and a healthy twist.

  • Herbal Delight: Mix in fresh herbs like cilantro or basil to elevate the freshness and add a fragrant touch to your rangoons.

  • Cheesy Variation: Add a bit of shredded cheese like mozzarella or cheddar to the filling for creaminess and extra flavor. Imagine how gooey and delightful they will be!

  • Asian Flare: Enhance the taste with a splash of sesame oil in the filling, bringing a deeper umami experience to each bite. You could also think about pairing them with Lime Chicken Rice for a lovely meal!

  • Crunchy Texture: Include finely chopped nuts like water chestnuts or cashews to give the filling a delightful crunch, making every bite more exciting.

  • Sweet Twist: Add a sweet element by mixing in some cream cheese with a hint of honey or sugar for a contrast in flavors that’s simply mouthwatering.

With these variations, you can easily elevate your Rice Paper Crab Rangoons to fit any gathering or personal preference!

Make Ahead Options

These delicious Rice Paper Crab Rangoons are perfect for meal prep enthusiasts! You can assemble them up to 24 hours in advance and refrigerate them to save time during busy weeknights. Simply prepare the filling and wrap each rangoon, then store them in an airtight container. For even longer storage, consider freezing them; lay the assembled rangoons on a baking sheet until solid, then transfer them to freezer-safe bags for up to 3 months. To maintain their wonderful crispiness, bake them directly from the freezer—just add an extra 5-7 minutes to the cooking time. When you're ready to serve, bake as instructed, and you’ll have restaurant-quality appetizers waiting at your fingertips!

Rice Paper Crab Rangoons Recipe FAQs

How do I choose the best crab meat for my rangoons?
Absolutely! For the best flavor, I recommend using fresh crab meat as it adds a lovely sweetness and richness to your filling. If fresh is hard to find, you can opt for high-quality canned crab meat or imitation crab as a substitute. Just make sure to drain the meat well to avoid excess moisture in your filling.

How should I store leftover Rice Paper Crab Rangoons?
You’ll want to store your cooled rangoons in an airtight container in the fridge, where they’ll stay fresh for up to 3 days. To maintain some crispiness, consider layering them with parchment paper as a separator. If you're a fan of meal prep, you can assemble uncooked rangoons and freeze them on a baking sheet. Once they are solid, transfer them to freezer-safe bags, and you can cook them directly from frozen when the craving hits!

Can I freeze the assembled rangoons?
Very! Freezing is super easy—after assembling your rangoons, place them on a lined baking sheet and freeze until solid. This usually takes about an hour. From there, pop them in freezer-safe bags for up to 3 months. When you’re ready to bake, just cook them from frozen; there’s no need to thaw beforehand. They’ll turn out just as crispy and delicious!

What can I do if my rice paper wrappers keep tearing?
Don't worry—this happens sometimes! If you find your wrappers tearing, it could be due to over-soaking. Ideally, you should dip them in warm water for only 10-15 seconds until they’re pliable but not too soft. If they’re still fragile, try holding them in the water a little less next time. Additionally, be gentle when handling the wrappers; excessive force can lead to tears. Practicing will give you better control!

Are there any dietary considerations for these rangoons?
Absolutely! These Rice Paper Crab Rangoons can be made gluten-free by using tamari instead of regular soy sauce. If you’re cooking for someone with seafood allergies, you can easily substitute the crab meat with shredded chicken or tofu, making this dish adaptable for various dietary needs. Just ensure all ingredients used are allergy-friendly for your guests!

How long will the rangoons stay crispy after baking?
The first bite is always the best! For optimal crispiness, it’s best to enjoy your Rice Paper Crab Rangoons fresh out of the oven. If you have leftovers, they may lose some crunch, but you can revive them! Reheat in an air fryer at 375°F (190°C) for about 10 minutes, and they should regain some of that delightful crisp texture.

Rice Paper Crab Rangoons

Crispy Rice Paper Crab Rangoons: A Healthy Twist on a Classic

Rice Paper Crab Rangoons are a healthier alternative to traditional appetizers, combining crispy rice paper with a creamy crab filling.
Print Recipe Pin Recipe
Prep Time 30 minutes mins
Cook Time 20 minutes mins
Total Time 50 minutes mins
Servings: 4 rangoons
Course: Appetizers
Cuisine: Fusion
Calories: 150
Ingredients Equipment Method Nutrition Notes

Ingredients
  

Filling Ingredients
  • 8 oz Cream Cheese softened
  • 1 cup Crab Meat fresh or imitation
  • 2 pcs Green Onions finely chopped
  • 1 tbsp Soy Sauce
Wrapper Ingredients
  • 12 pcs Rice Paper Wrappers soaked in warm water
Baking Ingredients
  • 1 tbsp Oil Spray for coating

Equipment

  • Mixing bowls
  • Baking Sheet
  • Brush for oil

Method
 

Preparation Steps
  1. Gather all your ingredients and tools needed for the Rice Paper Crab Rangoons.
  2. In a large mixing bowl, combine softened cream cheese, drained crab meat, finely chopped green onions, and soy sauce.
  3. Fill a shallow dish with warm water and carefully dip each rice paper wrapper for 10-15 seconds.
  4. Place a soaked rice paper wrapper flat on your clean surface, and add about one tablespoon of the creamy filling right in the center.
  5. Preheat your oven to 400°F (200°C) and arrange the assembled rangoons on a parchment-lined baking sheet.
  6. Bake for 15-20 minutes, or until they reach a golden-brown hue and the edges are crispy.
  7. Once baked, let the Rice Paper Crab Rangoons cool slightly before transferring to serving plates.

Nutrition

Serving: 1rangoonCalories: 150kcalCarbohydrates: 15gProtein: 6gFat: 8gSaturated Fat: 4gPolyunsaturated Fat: 1gMonounsaturated Fat: 2gCholesterol: 30mgSodium: 250mgPotassium: 120mgFiber: 1gSugar: 1gVitamin A: 500IUVitamin C: 1mgCalcium: 30mgIron: 1mg

Notes

These crispy treats are best enjoyed warm, complemented with your favorite dipping sauce like sweet and sour or spicy mayo.

Tried this recipe?

Let us know how it was!
  • « Previous Page
  • 1
  • 2
  • 3
  • 4
  • 5
  • …
  • 215
  • Next Page »

Welcome!

Hi, I’m Grace, a Sydney-based home cook with a passion for bold flavors and trending ingredients. Whether you’re a busy beginner or a seasoned foodie, you’ll find dishes here that are fresh, fun, and full of flavor.

More about me

Popular Recipes

  • Mediterranean Chicken Zucchini Bake
    Mediterranean Chicken Zucchini Bake: Flavorful & Easy One-Dish Delight
  • Mediterranean Chicken Zucchini Bake That's Bursting with Flavor
  • Tomato Zucchini Pasta
    Tomato Zucchini Pasta: A Vibrant Summer Classic You’ll Love
  • Cheesy Zucchini Breadsticks
    Cheesy Zucchini Breadsticks That Won’t Ruin Your Diet

Footer

↑ back to top

About

  • Privacy Policy
  • Disclaimer
  • Terms & Conditions

Newsletter

  • Sign Up! for emails and updates

Contact

  • About me
  • Contact me

Copyright © 2025 TastyTrendIngredients