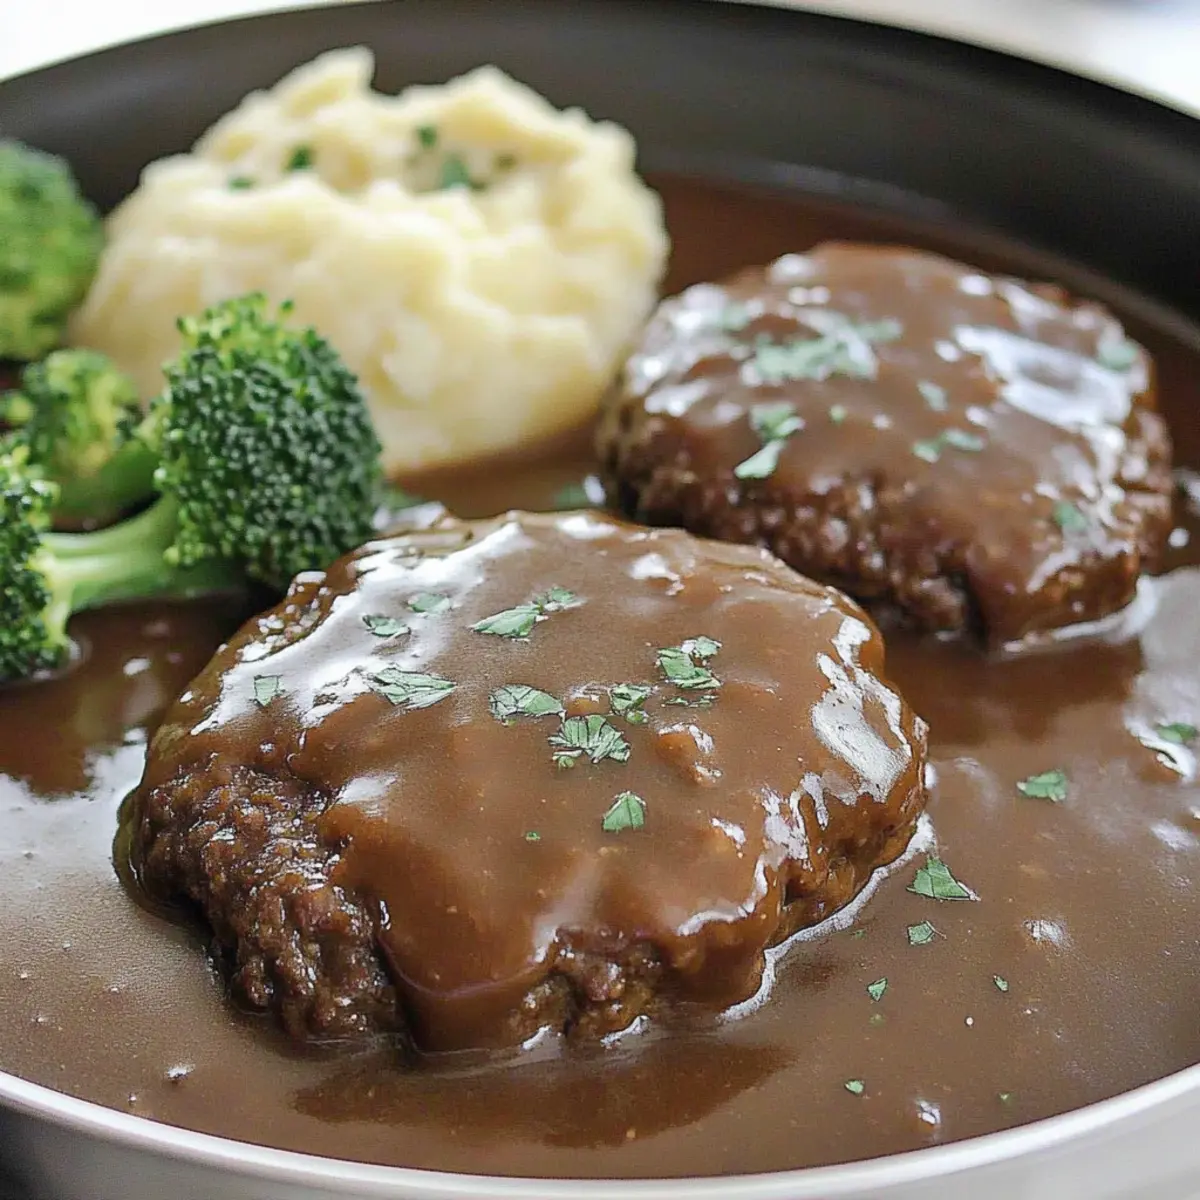
tastytrendingredients

  • Home
  • Recipes
    • Appetizers
    • Breakfast
    • Dessert
    • Dinner
    • Drinks
    • Salads
    • Snacks
    • Soups
  • About me
  • Contact me
menu icon
go to homepage
  • Home
  • Recipes
    • Appetizers
    • Breakfast
    • Dessert
    • Dinner
    • Drinks
    • Salads
    • Snacks
    • Soups
  • About me
  • Contact me
search icon
Homepage link
  • Home
  • Recipes
    • Appetizers
    • Breakfast
    • Dessert
    • Dinner
    • Drinks
    • Salads
    • Snacks
    • Soups
  • About me
  • Contact me
×

Fluffy Japanese Strawberry Cake for Effortless Delight

December 19, 2025 by Grace Snow Leave a Comment

As I stood in my kitchen, the sweet smell of strawberries greeted me like an old friend. Today, I’m excited to share a delightful recipe for Japanese Strawberry Cake, a dessert that perfectly balances lightness and sweetness without overwhelming your palate. This cake is not only a feast for the senses, but it also offers a fun twist on traditional cakes, making it ideal for any occasion. With its fluffy texture and vibrant strawberry layers, it’s just the comfort food you need to impress family and friends, or to simply treat yourself. Trust me; you won’t want to miss out on this light and airy creation! Curious about how to make this crowd-pleaser? Let’s dive into the recipe!

Why is this cake a must-try?

Light and Fluffy: This Japanese Strawberry Cake is all about airy delight, making every bite feel like a hug.

Subtly Sweet: It strikes the perfect balance, so you can enjoy the fresh strawberry flavor without being overwhelmed by sugar.

Versatile Options: Whether you stick with classic strawberries or switch it up with seasonal fruits, this cake adapts beautifully!

Perfect for Any Occasion: Impress your guests at gatherings or indulge yourself for a cozy night in—it suits every mood!

To elevate your dessert game even further, consider trying variations like an Ice Cream Cake or a Chocolate Pudding Cake for a delightful twist!

Japanese Strawberry Cake Ingredients

• To craft this light and fluffy delight, here’s what you’ll need:

For the Cake

  • Whole Milk – Provides moisture and richness; substitute with low-fat milk for a lighter version.
  • Unsalted Butter – Adds fat for tenderness; can use salted butter, but reduce added salt.
  • Cake Flour – Ensures a light, tender crumb; substitute with all-purpose flour (reduce by 2 tbsp for every cup).
  • Egg Yolks – Contributes richness and moisture; no direct substitute, but flax can work for a vegan option.
  • Egg Whites – Essential for aeration and lightness; do not substitute without knowing the impact on texture.
  • Sugar (Caster Sugar) – Sweetens the cake and helps in aeration when whipped with egg whites; use granulated sugar, but grind it for better aeration.
  • Strawberries – Provide fresh flavor and decoration; opt for seasonal strawberries for the best results.

For the Frosting

  • Heavy Whipping Cream – Base for frosting, creating a rich texture; light cream is a substitute but won't whip as well.
  • Confectioners Sugar – Sweetens and stabilizes the whipped cream; granulated sugar can also be used if needed.
  • Gelatin – Stabilizes the whipped cream; optional for a vegetarian version, skip if using regular heavy cream.
  • Cold Water – Activates gelatin; filtered water is recommended for the best quality.

For the Syrup

  • Sugar (for Syrup) – Sweetens and moistens the cake layers; can be replaced with honey or agave syrup for a different flavor.
  • Hot Water – Used to dissolve cake syrup quickly.

Step‑by‑Step Instructions for Japanese Strawberry Cake

Step 1: Prepare the Cake Pan and Preheat the Oven
Begin by lining a 9-inch round cake pan with parchment paper to prevent sticking. Preheat your oven to 325°F (160°C), ensuring it reaches the desired temperature before placing the cake inside. This step is crucial for achieving an evenly baked Japanese Strawberry Cake, keeping the texture light and fluffy.

Step 2: Combine Milk and Butter
In a microwave-safe bowl, combine whole milk and unsalted butter. Microwave the mixture for about 30 seconds, or until the butter is melted and the milk is warm. Next, sift in the cake flour, gently mixing until no lumps remain. This will create a smooth batter, setting the foundation for your light and airy Japanese Strawberry Cake.

Step 3: Whip the Egg Whites
In a separate bowl, beat the egg whites with an electric mixer on medium speed until foamy. Gradually add caster sugar, continuing to beat until medium peaks form, which should take about 3 to 5 minutes. The egg whites should be glossy and hold their shape well. This aeration is key to the cake’s fluffiness.

Step 4: Mix in Egg Yolks
In another bowl, whisk the egg yolks until they are light in color. Carefully fold this mixture into the whipped egg whites using a spatula, ensuring to maintain the fluffy texture. Be gentle during this step—mix just until combined. Overmixing can deflate the whipped egg whites, compromising the cake's lightness.

Step 5: Bake the Cake
Pour the batter into the prepared cake pan, smoothing the top with a spatula. Place the cake pan in a larger roasting pan filled with hot water, which will create a steamy environment in the oven. Bake for approximately 1 hour and 30 minutes, or until a toothpick inserted in the center comes out clean. This method contributes to the soft texture of the Japanese Strawberry Cake.

Step 6: Cool and Prepare Strawberries
Once baked, remove the cake from the oven and allow it to cool in the pan for about 10 minutes before transferring it to a wire rack. As the cake cools completely, prepare the strawberries by tossing sliced strawberries with sugar in a bowl. Let them sit for at least 15 minutes, allowing the sugar to draw out their natural juices.

Step 7: Make the Whipped Cream
In a cold mixing bowl, beat the heavy whipping cream until soft peaks form, then gradually add confectioners' sugar for sweetness. If using gelatin for stabilization, melt it in cold water and mix it into the whipped cream at this stage. This creates a rich, creamy frosting that will beautifully complement your Japanese Strawberry Cake.

Step 8: Slice and Stack the Cake Layers
Carefully slice the cooled cake into two horizontal layers. Brush each layer lightly with the syrup made from sugar and hot water to keep the cake moist. Layer one piece on a serving platter, spread half of the whipped cream over it, and top with a generous amount of macerated strawberries.

Step 9: Frost and Decorate the Cake
Place the second cake layer on top, pressing gently to adhere. Frost the entire cake with the remaining whipped cream, smoothing the surface with a spatula. Decorate the top and sides with any leftover strawberries to add a beautiful finishing touch to your Japanese Strawberry Cake.

Step 10: Chill Before Serving
Refrigerate the completed cake for at least 30 minutes before slicing, allowing the whipped cream to set. For those looking to serve immediately, feel free to do so, but note that stabilizing the cream provides better structure during serving. Enjoy this delightful dessert at your next gathering!

Expert Tips for Japanese Strawberry Cake

  • Precise Measurements: Use a kitchen scale for exact ingredient weights; even small discrepancies can affect the cake's fluffiness.

  • Check Oven Temperatures: Use an oven thermometer; many home ovens can be off by as much as 25°F, which impacts baking times.

  • Whipping Egg Whites: Beat egg whites to medium peaks only; over-whipping can lead to a denser cake and loss of the desired airy texture.

  • Baking Environment: Bake the cake in a water bath to help maintain a moist environment, contributing to its lightness.

  • Cooling Period: Allow the cake to cool in the pan for just 10 minutes; this is crucial for easy removal without damage.

  • Beautiful Presentation: Refrigerate the cake before serving; this helps the whipped cream to set firmly, ensuring a lovely, stable finish.

Variations & Substitutions for Japanese Strawberry Cake

Feel free to make this delightful Japanese strawberry cake your own with these fun and delectable twists!

  • Fruit Swap: Substitute strawberries with seasonal fruits like raspberries, peaches, or even mangoes for a fresh take. Each fruit brings its unique flavor and sweetness, inviting a vibrant palette of tastes.

  • Flavored Extracts: Vanilla or Almond: Add a splash of vanilla or almond extract to the whipped cream for an enhanced, aromatic layer that beautifully complements the strawberries. The subtle hint of flavor will elevate each bite, making it extra special.

  • Chocolate Lovers: Cocoa Powder: For a rich chocolate version, replace ¼ cup of cake flour with cocoa powder. This introduces a delightful chocolatey depth to the cake, paired perfectly with the sweetness of strawberries.

  • Dairy-Free Option: Non-Dairy Milk: Use almond or coconut milk and coconut cream in place of dairy for a deliciously light and fluffy dairy-free cake. You can savor the same airy delight without sacrificing flavor.

  • Heat It Up: Chili Flakes: If you love a hint of spice, add a pinch of chili flakes to the whipped cream. This surprise element can create a beautiful contrast with the tangy sweetness of the strawberries.

  • Nutty Crunch: Almonds or Walnuts: Toss in chopped almonds or walnuts to the cake batter for added texture and a nutty flavor. This contrast of softness and crunch can create a delightful variance in every bite.

  • Herb Infusion: Mint or Basil: Try incorporating fresh mint or basil into the whipped cream for a refreshing herbal note. Not only does this brighten the cake, but it also adds a sophisticated edge that's sure to impress.

  • Vegan Delight: Flax Eggs: Replace the egg yolks with flaxseed meal mixed with water (1 tablespoon of flaxseed meal + 2.5 tablespoons of water = 1 egg). This makes the cake fully vegan while retaining that delightful light texture.

For even more baking inspiration, consider trying an Ice Cream Cake or a delightful Chocolate Pudding Cake. Each variation adds a unique twist to your dessert repertoire!

What to Serve with Light and Fluffy Japanese Bakery-Style Strawberry Cake

Elevate your dining experience with delightful pairings that enhance the sweet and airy indulgence of this beautiful cake.

  • Vanilla Ice Cream: The creamy richness of vanilla ice cream contrasts beautifully with the lightness of the cake, creating a delightful melt-in-your-mouth experience. Think of how the temperatures and textures dance together!

  • Fresh Mint Sprigs: A sprinkle of fresh mint adds a refreshing burst that balances the sweetness of the strawberries. It’s like a breath of fresh air that brightens each bite, making it an elegant touch on your dessert plate.

  • Matcha Green Tea: The earthy notes of matcha complement the cake's sweetness while offering a beautiful color contrast. Enjoying a cup of this tea can create a serene moment, amplifying the Japanese culinary experience.

  • Whipped Cream with a Twist: Consider flavoring your whipped cream with a hint of lemon zest or almond extract to add complexity. This elevates the cake further, making each slice even more memorable and charming.

  • Chocolate Drizzle: A light drizzle of dark chocolate adds a luscious finish that deepens the overall flavor profile. This pairing brings an extra layer of indulgence while still allowing the cake to shine.

  • Fruit Salad: A colorful mix of seasonal fruits can serve as a refreshing side that enhances the strawberry flavors. It’s the kind of bright addition that adds visual appeal and complements the cake’s festive spirit.

  • Sparkling Water with Lemon: Refreshing beverages like sparkling water with a lemon slice cleanse the palate and elevate the dining experience. It’s the perfect accompaniment to round out your dessert with class and style.

Make Ahead Options

These Japanese Strawberry Cake preparations are a lifesaver for busy home cooks! You can prepare the cake layers up to 24 hours in advance; simply cool them completely, wrap them tightly in plastic wrap, and refrigerate to maintain moisture. The macerated strawberries can also be prepped up to 3 days ahead—just store them in an airtight container in the fridge to prevent them from becoming too mushy. For the whipped cream, whip it up no more than 12 hours beforehand and keep it covered in the refrigerator. When it’s time to serve, layer your cake with the strawberries and whipped cream, and enjoy a delightful dessert that’s just as delicious as if you made it all fresh today!

How to Store and Freeze Japanese Strawberry Cake

Fridge: Keep the cake in an airtight container in the refrigerator for up to 3 days. This helps maintain its light and fluffy texture, while the strawberries stay fresh.

Freezer: For longer storage, wrap individual slices in plastic wrap and aluminum foil, then freeze for up to 2 months. This way, you can enjoy the delightful Japanese Strawberry Cake whenever you crave it!

Reheating: When ready to serve, thaw slices in the fridge overnight. You can also let them sit at room temperature for about 30 minutes before enjoying for the best texture and flavor.

Assembly Tips: If freezing an assembled cake, consider adding the whipped cream and strawberries after thawing to keep them fresh and vibrant.

Japanese Bakery-Style Strawberry Cake Recipe FAQs

How do I choose ripe strawberries for my cake?
Absolutely! When selecting strawberries, look for ones that are bright red, firm, and have a fragrant aroma. Avoid berries that have dark spots or are overly soft, as these can impact the flavor and texture of your cake.

How should I store leftover Japanese Strawberry Cake?
Very! Store your cake in an airtight container in the refrigerator for up to 3 days. This will help maintain its light and fluffy texture. If you're storing individual slices, wrapping them in plastic wrap will keep them fresh.

Can I freeze Japanese Strawberry Cake?
Yes! To freeze your cake, wrap each slice in plastic wrap and aluminum foil to prevent freezer burn. It can be stored for up to 2 months. When you're ready to enjoy, simply thaw them in the fridge overnight or let them sit at room temperature for about 30 minutes.

What should I do if my cake is dense instead of fluffy?
If you find your cake is denser than expected, check if you over-whipped the egg whites, as this can lead to heavy texture. Additionally, ensure you're folding the egg yolk mixture gently into the egg whites to keep that airy lift.

Are there any dietary considerations with this cake?
Definitely! This cake can be made vegetarian by omitting gelatin from the frosting. If you or your guests have allergies, double-check that your milk and butter do not contain any allergens. Always opt for fresh, high-quality ingredients to avoid cross-contamination.

Can I use a different type of flour?
Of course! You can substitute cake flour with all-purpose flour, but reduce the measurement by 2 tablespoons for every cup to maintain that light texture. Just keep in mind that the cake might not be as tender as with cake flour.

Japanese Strawberry Cake

Fluffy Japanese Strawberry Cake for Effortless Delight

Experience the light and airy delight of Japanese Strawberry Cake, a dessert that perfectly balances sweetness with fresh strawberries.
Print Recipe Pin Recipe
Prep Time 30 minutes mins
Cook Time 1 hour hr 30 minutes mins
Cooling Time 10 minutes mins
Total Time 2 hours hrs 10 minutes mins
Servings: 8 slices
Course: Dessert
Cuisine: Japanese
Calories: 320
Ingredients Equipment Method Nutrition Notes

Ingredients
  

For the Cake
  • 1 cup Whole Milk Provides moisture and richness; substitute with low-fat milk for a lighter version.
  • 1/2 cup Unsalted Butter Adds fat for tenderness; can use salted butter but reduce added salt.
  • 1 cup Cake Flour Ensures a light, tender crumb; substitute with all-purpose flour (reduce by 2 tbsp for every cup).
  • 4 large Egg Yolks Contributes richness and moisture; no direct substitute, but flax can work for a vegan option.
  • 4 large Egg Whites Essential for aeration and lightness; do not substitute without knowing the impact on texture.
  • 3/4 cup Sugar (Caster Sugar) Sweetens the cake and helps in aeration when whipped with egg whites; use granulated sugar, grind it for better aeration.
  • 2 cups Strawberries Provide fresh flavor and decoration; opt for seasonal strawberries for the best results.
For the Frosting
  • 2 cups Heavy Whipping Cream Base for frosting, creating a rich texture; light cream is a substitute but won't whip as well.
  • 1/2 cup Confectioners Sugar Sweetens and stabilizes the whipped cream; granulated sugar can also be used if needed.
  • 1 tbsp Gelatin Stabilizes the whipped cream; optional for a vegetarian version, skip if using regular heavy cream.
  • 2 tbsp Cold Water Activates gelatin; use filtered water for best quality.
For the Syrup
  • 1/4 cup Sugar (for Syrup) Sweetens and moistens the cake layers; can be replaced with honey or agave syrup for a different flavor.
  • 1/4 cup Hot Water Used to dissolve cake syrup quickly.

Equipment

  • 9-inch round cake pan
  • Microwave-safe bowl
  • Electric mixer
  • Spatula
  • wire rack

Method
 

Preparation
  1. Line a 9-inch round cake pan with parchment paper and preheat your oven to 325°F (160°C).
  2. In a microwave-safe bowl, combine whole milk and unsalted butter. Microwave for about 30 seconds until the butter is melted and milk is warm, then sift in the cake flour and mix until smooth.
  3. Beat egg whites on medium speed until foamy, gradually add caster sugar and continue until medium peaks form, about 3 to 5 minutes.
  4. Whisk egg yolks until light in color and fold into the whipped egg whites using a spatula until just combined.
  5. Pour the batter into the prepared pan, place the pan in a larger roasting pan filled with hot water, and bake for about 1 hour and 30 minutes, or until a toothpick comes out clean.
  6. Cool the cake in the pan for 10 minutes, then transfer to a wire rack. Toss sliced strawberries with sugar and let them sit for at least 15 minutes.
  7. In a cold mixing bowl, beat heavy whipping cream until soft peaks form, gradually add confectioners' sugar, and if using, mix in melted gelatin for stabilization.
  8. Slice the cooled cake into two horizontal layers. Brush each layer with the syrup, place one layer on a serving platter, spread half of the whipped cream over it, and top with macerated strawberries.
  9. Place the second cake layer on top, frost the entire cake with the remaining whipped cream, and decorate with leftover strawberries.
  10. Refrigerate for at least 30 minutes before slicing and serving.

Nutrition

Serving: 1sliceCalories: 320kcalCarbohydrates: 35gProtein: 4gFat: 17gSaturated Fat: 11gPolyunsaturated Fat: 0.5gMonounsaturated Fat: 5.5gCholesterol: 90mgSodium: 150mgPotassium: 190mgFiber: 1gSugar: 15gVitamin A: 500IUVitamin C: 30mgCalcium: 100mgIron: 1mg

Notes

For best results, use precise measurements, check oven temperatures, and refrigerate the cake before serving to help the whipped cream set properly.

Tried this recipe?

Let us know how it was!

Decadent Chocolate Maritozzi: Soft Italian Delights Await

December 19, 2025 by Grace Snow Leave a Comment

Walking through the charming streets of Rome, I stumbled upon a little café that promised an explosion of joy in every bite. What caught my eye? The warm glow of Chocolate Maritozzi nestled in a display window, their soft, chocolate-hued dough inviting me to indulge. These delightful Italian pastries are not only a feast for the eyes but also incredibly simple and quick to make at home. With their airy, whipped cream filling, you’ll experience a heavenly combination of textures that’s simply irresistible. Perfect for a special brunch or a sweet treat any day of the week, Chocolate Maritozzi bring an indulgent twist to your dessert repertoire without all the fuss. Curious about recreating this Italian masterpiece in your kitchen? Let's dive into the recipe!

Why are Chocolate Maritozzi so adored?

Irresistible Softness: Experience the tenderness of these delightful pastries, providing a melt-in-your-mouth sensation with every bite.
Decadent Filling: The luscious chocolate whipped cream adds a rich, sweet depth that makes these treats utterly satisfying.
Quick and Easy: With simple ingredients and straightforward steps, you can whip up a batch in no time, perfect for spontaneous cravings.
Versatile Treat: Serve them for brunch, dessert, or an afternoon snack—Chocolate Maritozzi adapt to any occasion.
Crowd-Pleasing Dessert: Impress friends and family with a taste of Italy; these pastries are sure to be a hit at any gathering. Pair them with a cozy cup of Homemade Hot Chocolate for an ultimate indulgence!

Chocolate Maritozzi Ingredients

For the Dough

  • All-Purpose Flour – Primary structure; contributes to the dough texture. Substitute with bread flour for a chewier bite.
  • Bread Flour – Adds additional protein for structure. No direct substitution recommended for desired texture.
  • Instant Yeast – Leavening agent; provides fluffiness. Active dry yeast can be used if proofed first.
  • Granulated Sugar – Sweetness and tenderizes the dough. Can substitute with coconut or brown sugar for different flavors.
  • Salt – Enhances flavors; balances sweetness. Essential and should not be skipped.
  • Vanilla – Flavor enhancer; use pure vanilla extract for best results.
  • Eggs – Adds richness and moisture; helps with structure. Can substitute with flax eggs for a vegan option.
  • Milk (Whole or 2%) – Hydrates the dough; aids in yeast activation. Any non-dairy milk can work as a substitute.
  • Neutral Oil (Vegetable or Canola) – Moisture and softness; maintains tenderness. Any neutral oil can be used.
  • Cocoa Powder (Dutch Process) – Provides chocolate flavor and color. Regular cocoa powder can be used but will alter the taste slightly.
  • Egg (for Wash) – Glossy finish on baked buns. Can omit for a matte appearance.

For the Whipped Cream Filling

  • Heavy Whipping Cream – Main component of the filling; creates a rich, creamy texture. Coconut cream can be substituted for a dairy-free option.
  • Powdered Sugar – Sweetens and stabilizes the whipped cream. Can use less for a lower-sugar option.
  • Salt (for Whipped Cream) – Balances the sweetness. Essential for flavor depth.

Indulge your senses with these delightful Chocolate Maritozzi—a captivating blend of flavors awaits!

Step‑by‑Step Instructions for Chocolate Maritozzi

Step 1: Mix the Dough
In a stand mixer, combine all the dough ingredients: all-purpose flour, bread flour, instant yeast, granulated sugar, salt, vanilla extract, eggs, milk, neutral oil, and cocoa powder. Use the dough hook attachment to knead on medium speed for about 8-10 minutes until the dough is smooth and slightly sticky. You may need to scrape down the sides periodically to ensure all ingredients are well combined.

Step 2: First Rise
Once your dough is ready, transfer it to a greased bowl, covering it with a clean kitchen towel or plastic wrap. Place it in a warm area and let it rise for 1-2 hours, or until it has doubled in size. You’ll know it’s risen when it feels light and airy—this is crucial for achieving perfectly soft Chocolate Maritozzi.

Step 3: Preheat and Prepare
With the dough finished rising, preheat your oven to 350°F (175°C) and line a baking sheet with parchment paper. This will prevent sticking and ensure even cooking. Measuring out your ingredients now will help streamline the process for the next steps as you prepare to form the pastries.

Step 4: Shape the Dough
After the dough has risen, gently punch it down to release excess air. Divide it into 8-12 equal pieces, shaping each into smooth balls. Place the shaped balls on the prepared baking sheet, leaving enough space between each for further rising. Cover them lightly with a towel and let rise again for 30-60 minutes until expanded and puffy.

Step 5: Egg Wash and Bake
Before baking, brush each bun with an egg wash made from a beaten egg, which helps achieve a golden, glossy finish. Bake the Chocolate Maritozzi in the preheated oven for 16-18 minutes, or until they sound hollow when tapped. They should look beautifully golden brown, perfect for cooling before the filling.

Step 6: Whip the Cream
While the buns cool, prepare the decadent chocolate whipped cream filling. In a mixing bowl, combine heavy whipping cream, cocoa powder, powdered sugar, and a pinch of salt. Use an electric mixer to whip on medium-high speed for about 3-5 minutes until stiff peaks form. The cream should be light and fluffy, ready to envelop your Chocolate Maritozzi.

Step 7: Fill and Serve
Once the buns have cooled completely, slice each one partially open, creating a pocket for the luscious whipped cream. Use a piping bag or a spoon to generously fill each bun with the whipped cream, smoothing it down flush with the surface. For an extra touch, dust with powdered sugar before serving to make these Chocolate Maritozzi a sight to behold!

What to Serve with Soft Chocolate Maritozzi

Indulge in a complete experience by pairing these heavenly treats with delightful accompaniments that enhance their rich flavors.

  • Espresso: The bold, robust flavor of a shot of espresso harmonizes beautifully with the sweet creaminess of the Chocolate Maritozzi.
  • Berry Compote: A fresh and tangy berry compote cuts through the richness, providing a refreshing contrast that elevates each bite.
  • Vanilla Gelato: Creamy vanilla gelato adds a delightful creaminess, making every mouthful of Maritozzi feel even more indulgent.
  • Hazelnut Croissant: Pair with a flaky hazelnut croissant for a delectable brunch spread, complementing the chocolate richness with nutty notes.
  • Cheese Platter: A selection of soft cheeses, like mascarpone or ricotta, offers a savory balance, enhancing the overall dessert experience.
  • Sweet Red Wine: A glass of sweet red wine brings a layer of depth to the flavors, making your dessert moment feel exquisite.
  • Pistachio Butter: Spread a little pistachio butter on your Maritozzi for an extra layer of flavor and delightful crunch, elevating the sweet treat.
  • Mini Fruit Tarts: Serve with mini fruit tarts for a colorful dessert table, presenting a beautiful contrast to the chocolate richness.

Storage Tips for Chocolate Maritozzi

Room Temperature: Unfilled Chocolate Maritozzi can be kept at room temperature for up to 3 days in an airtight container to maintain their softness.

Fridge: If you've filled the pastries with whipped cream, they should be refrigerated and enjoyed within 2 days to ensure freshness and optimal texture.

Freezer: For longer storage, you can freeze unfilled buns for up to 3 months. Just wrap them tightly in plastic wrap and then in aluminum foil before placing them in a freezer bag.

Reheating: To reheat, thaw at room temperature, then gently warm in a preheated oven at 350°F for about 5 minutes to restore softness before adding the filling.

Chocolate Maritozzi Variations & Substitutions

Feel free to explore the endless possibilities of flavor and texture with these fun tweaks!

  • Dairy-Free: Replace heavy whipping cream with coconut cream to make a delicious vegan filling. It’s rich and creamy, without any dairy!
  • Flavored Whipped Cream: Stir in a splash of almond or hazelnut extract to the whipped cream for a delightful twist. Each bite will carry a hint of nutty warmth.
  • Chocolate Chips: Fold in mini chocolate chips into the whipped cream filling for an extra decadent surprise. The little bursts of sweetness will take your Chocolate Maritozzi to the next level.
  • Fruit Jam: Add a layer of your favorite fruit jam, like raspberry or apricot, before filling with whipped cream. This adds a lovely fruity tartness that balances beautifully with the chocolate.
  • Nutty Touch: Sprinkle crushed nuts, like hazelnuts or almonds, into the filling for added texture and crunch. The combination of flavors will bring a delightful contrast.
  • Cocoa Dusting: Instead of powdered sugar, dust the tops with cocoa powder for an intensified chocolate experience. It’s a subtle change that enhances the chocolate goodness!
  • Spicy Kick: For those who enjoy a bit of heat, sprinkle some cayenne pepper into the whipped cream filling to create a spicy chocolate flavor. It’s daring but delightful!
  • Mini Maritozzi: Shape smaller buns for bite-sized treats perfect for a party platter. They’ll be irresistible and disappear quickly!

For an exquisite dessert pairing, serve your Chocolate Maritozzi alongside a cup of rich Homemade Hot Chocolate or even go Italian with a sumptuous German Chocolate Poke! Each variation is a new adventure waiting to unfold in your kitchen.

Make Ahead Options

These Chocolate Maritozzi are perfect for busy home cooks looking to save time without sacrificing flavor! You can prepare the dough up to 24 hours in advance by mixing it and letting it rise, then refrigerate it in a greased bowl. When you're ready to bake, simply let the dough come to room temperature for about 30 minutes before shaping and completing the second rise. Additionally, you can whip the chocolate filling and store it in the refrigerator for up to 3 days in an airtight container. This way, when your Chocolate Maritozzi are baked and cooled, you can fill them quickly before serving, ensuring they are just as delicious as if made fresh.

Expert Tips for Chocolate Maritozzi

  • Dough Consistency: Ensure the dough is slightly sticky while kneading to achieve that soft texture in your Chocolate Maritozzi. Too dry, and they’ll be dense!
  • Proper Rising: Find a warm spot for the dough to rise; a too-cool environment can slow fermentation and affect fluffiness.
  • Perfect Egg Wash: For a glossy finish, brush on the egg wash thoroughly. Omit it if you prefer a more rustic look, but this adds visual appeal!
  • Cool Completely: Allow the buns to cool completely before filling them with whipped cream to prevent the cream from melting.
  • Stabilize Whipped Cream: If making ahead, stabilize your whipped cream with gelatin to keep it fluffy longer; otherwise, fill just before serving for the best texture.

Chocolate Maritozzi Recipe FAQs

What’s the best way to select ripe ingredients for the Chocolate Maritozzi?
Absolutely! For the freshest results, pick eggs that feel heavy and have smooth, uncracked shells. Choose all-purpose flour that's finely milled, and always check the expiration date on your baking powder and yeast. For the cream, look for heavy whipping cream with at least 36% milk fat for the best texture in your filling.

How should I store my Chocolate Maritozzi?
I recommend storing unfilled buns at room temperature in an airtight container for up to 3 days. If any buns are left filled with whipped cream, pop them in the fridge and enjoy them within 2 days to maintain that delicious softness. This way, they’ll stay fresh and ready to indulge at any time!

Can I freeze Chocolate Maritozzi and if so, how?
Yes, you can absolutely freeze the unfilled Chocolate Maritozzi! Wrap each bun tightly in plastic wrap, then in aluminum foil to prevent freezer burn. Place them in a freezer bag for extra protection. They can be stored for up to 3 months. To enjoy, just thaw at room temperature, and if desired, warm them briefly in the oven before filling them.

What common issues should I watch out for when making Chocolate Maritozzi?
Very good question! If your dough is dense and doesn’t rise, it could be due to expired yeast or an environment that’s too cool. Ensure your yeast is active by proofing it in warm water with a bit of sugar before adding it to your dry ingredients. If the whipped cream seems too runny, try whipping it longer and ensure your bowl and beaters are cold. Adding a stabilizer like gelatin can also help maintain its structure.

Can I make Chocolate Maritozzi vegan or allergen-friendly?
Absolutely! You can replace eggs with flax eggs (1 tablespoon ground flaxseed mixed with 3 tablespoons water for each egg). Use coconut cream instead of heavy cream for the filling which keeps it dairy-free. For flour, look for a gluten-free blend if needed, but keep in mind it may alter the texture. These adaptations ensure everyone can enjoy this delightful treat!

How can I enhance the flavor profile of my Chocolate Maritozzi?
Very! You can experiment with flavored extracts, like almond or hazelnut, added to the whipped cream. Also, consider folding in fruit preserves or chocolate chips into the filling for a delightful surprise. A light dusting of cocoa powder instead of powdered sugar can also enhance the chocolate experience beautifully!

Chocolate Maritozzi

Decadent Chocolate Maritozzi: Soft Italian Delights Await

Chocolate Maritozzi are soft Italian pastries filled with luscious chocolate whipped cream, perfect for brunch or dessert.
Print Recipe Pin Recipe
Prep Time 30 minutes mins
Cook Time 18 minutes mins
Rising Time 2 hours hrs
Total Time 2 hours hrs 48 minutes mins
Servings: 12 pastries
Course: Dessert
Cuisine: Italian
Calories: 250
Ingredients Equipment Method Nutrition Notes

Ingredients
  

For the Dough
  • 2 cups All-Purpose Flour Substitute with bread flour for a chewier bite.
  • 1 cup Bread Flour No direct substitution recommended for desired texture.
  • 2 teaspoons Instant Yeast Active dry yeast can be used if proofed first.
  • 1 tablespoon Granulated Sugar Can substitute with coconut or brown sugar for different flavors.
  • 1 teaspoon Salt Essential and should not be skipped.
  • 1 teaspoon Vanilla Use pure vanilla extract for best results.
  • 2 large Eggs Can substitute with flax eggs for a vegan option.
  • 1 cup Milk (Whole or 2%) Any non-dairy milk can work as a substitute.
  • 1/4 cup Neutral Oil (Vegetable or Canola) Any neutral oil can be used.
  • 1/4 cup Cocoa Powder (Dutch Process) Regular cocoa powder can be used but will alter the taste slightly.
  • 1 large Egg (for Wash) Can omit for a matte appearance.
For the Whipped Cream Filling
  • 1 cup Heavy Whipping Cream Coconut cream can be substituted for a dairy-free option.
  • 2 tablespoons Powdered Sugar Can use less for a lower-sugar option.
  • 1/4 teaspoon Salt (for Whipped Cream) Essential for flavor depth.

Equipment

  • Stand Mixer
  • Baking Sheet
  • piping bag
  • Mixing Bowl

Method
 

Step-by-Step Instructions for Chocolate Maritozzi
  1. In a stand mixer, combine all the dough ingredients and knead on medium speed for about 8-10 minutes until smooth and slightly sticky.
  2. Transfer the dough to a greased bowl, cover with a towel, and let rise for 1-2 hours until doubled in size.
  3. Preheat the oven to 350°F (175°C) and line a baking sheet with parchment paper.
  4. Punch down the dough, divide into 8-12 pieces, shape them into balls, and let rise again for 30-60 minutes.
  5. Brush each bun with egg wash and bake for 16-18 minutes until golden brown.
  6. Prepare the chocolate whipped cream by whipping heavy cream with cocoa powder, powdered sugar, and salt until stiff peaks form.
  7. Slice each cooled bun partially open, fill with whipped cream, and dust with powdered sugar before serving.

Nutrition

Serving: 1pastryCalories: 250kcalCarbohydrates: 30gProtein: 4gFat: 13gSaturated Fat: 7gPolyunsaturated Fat: 0.5gMonounsaturated Fat: 5gCholesterol: 70mgSodium: 150mgPotassium: 100mgFiber: 1gSugar: 10gVitamin A: 300IUCalcium: 50mgIron: 1.5mg

Notes

Store unfilled Chocolate Maritozzi at room temperature for up to 3 days; filled pastries should be refrigerated and eaten within 2 days.

Tried this recipe?

Let us know how it was!

Delicious Almond Sweet Rolls Perfect for a Cozy Morning

December 19, 2025 by Grace Snow Leave a Comment

As I pulled my almond sweet rolls from the oven, the inviting fragrance of warm dough and toasted almonds filled my kitchen, wrapping me in a comforting embrace. These delightful gooey rolls aren’t just another breakfast option; they’re a homemade sensation that takes your morning routine to a whole new level! Each soft, fluffy roll is filled with a luscious almond paste and topped with a creamy cream cheese frosting, making them a truly special treat for any occasion. Not only are they incredibly easy to whip up, but they also make for a stunning crowd-pleaser at brunch gatherings or cozy family breakfasts. So, are you ready to channel your inner baker and create a batch of these tempting almond sweet rolls? Let’s dive in and make your mornings a little sweeter!

Why Are Almond Sweet Rolls Irresistible?

Homemade Delight: These almond sweet rolls are made with love, offering a delightful alternative to store-bought options.

Unique Flavor: The rich almond paste filling distinguishes them from traditional cinnamon rolls, providing a cozy and flavorful experience.

Ultimate Comfort Food: Fluffy, warm, and topped with cream cheese frosting, they bring comfort to your mornings like no other.

Make-Ahead Magic: Prepare them the night before for a quick and delicious breakfast, allowing you to impress guests effortlessly.

Perfect for Sharing: Ideal for brunch gatherings or cozy family breakfasts, everyone will appreciate this delightful treat, elevating your morning routine!

If you're also a fan of unique sweet potato dishes, check out my Smoky Sweet Potatoes recipe!

Almond Sweet Rolls Ingredients

• Create these flavorful almond sweet rolls with easy-to-find ingredients that produce a delightful breakfast experience.

For the Dough

  • All-Purpose Flour – Provides structure to the rolls; substitute with a gluten-free flour blend for a gluten-free version.
  • Granulated Sugar – Adds sweetness and helps in browning; use coconut sugar for a lower glycemic index option.
  • Rapid Rise Instant Yeast – Leavens the dough quickly; other instant yeast types can be used, but adjust proofing time.
  • Salt – Enhances flavor and controls yeast activity; sea salt is a suitable alternative.
  • Milk – Hydrates the dough and contributes to richness; almond milk can be used for a dairy-free option.
  • Butter – Provides moisture and flavor; substitute with a dairy-free margarine for a vegan option.
  • Egg – Binds ingredients together and provides richness; use a flax egg for a plant-based substitute.

For the Almond Filling

  • Unsalted Butter – Adds creaminess to the almond paste; for a healthier option, consider using a nut butter.
  • Almond Meal – Key ingredient for the filling, offering a distinct almond flavor; substitute with finely ground almonds if unavailable.
  • Large Egg – Binds the almond filling; you can also use a flax egg here.
  • Almond Extract – Intensifies the almond flavor; if preferred, vanilla extract can be substituted.
  • Vanilla Extract – Adds depth to the flavor profile; it can be omitted for a purer almond taste.

For the Frosting

  • Cream Cheese – Base for the frosting, providing creaminess and tang; vegan cream cheese is an option for a dairy-free frosting.
  • Powdered Sugar – Sweetens the frosting; adjust the quantity to taste or try a sugar alternative if needed.
  • Slivered Almonds – For garnish, providing crunch and decoration.

Step‑by‑Step Instructions for Almond Sweet Rolls

Step 1: Make the Dough
In a stand mixer, combine 2 cups of all-purpose flour, granulated sugar, rapid-rise instant yeast, and salt. Heat 1 cup of milk and 4 tablespoons of butter until the butter melts. Gradually mix the warm milk and melted butter into the dry ingredients. Beat in 1 large egg along with the almond and vanilla extracts. Slowly add the remaining flour, kneading the dough until it becomes smooth and elastic, about 5–8 minutes. Let it rise in a warm place for 1 hour or until doubled in size.

Step 2: Prepare Almond Filling
While the dough rises, prepare the almond filling. In a mixing bowl, combine 4 tablespoons of softened unsalted butter, 1 cup of almond meal, ½ cup of granulated sugar, 1 large egg, along with 1 teaspoon each of almond and vanilla extract. Mix until a smooth paste forms, ensuring all ingredients are well incorporated. Set this delightful almond filling aside as you wait for the dough to finish rising.

Step 3: Assemble Rolls
Once the dough has doubled in size, gently punch it down and roll it out on a lightly floured surface into a rectangle, about ¼ inch thick. Spread the almond filling evenly over the surface, leaving a small border around the edges. Roll the dough tightly from one long side to another, forming a log. Cut the log into 12 equal pieces using a sharp knife or dental floss. Arrange the rolls in a greased baking dish, cover, and let them rise for another hour until puffy.

Step 4: Bake
Preheat your oven to 350°F (175°C). Once the rolls have risen, place them in the oven and bake for about 30 minutes or until they are golden brown and have a lovely aroma wafting through your kitchen. Keep an eye on them towards the end to prevent over-baking. When done, remove them from the oven and allow them to cool slightly in the pan while you prepare the frosting.

Step 5: Make Cream Cheese Frosting
In a mixing bowl, beat together 4 ounces of softened cream cheese and 4 tablespoons of softened butter until creamy and well combined. Gradually add 2 cups of powdered sugar, mixing until smooth. Stir in 1 teaspoon of almond extract and a dash of vanilla extract to enhance the frosting's flavor. Once the rolls have cooled for a few minutes, spread the icing generously over the warm almond sweet rolls and top with slivered almonds for an extra crunch.

Step 6: Serve and Enjoy
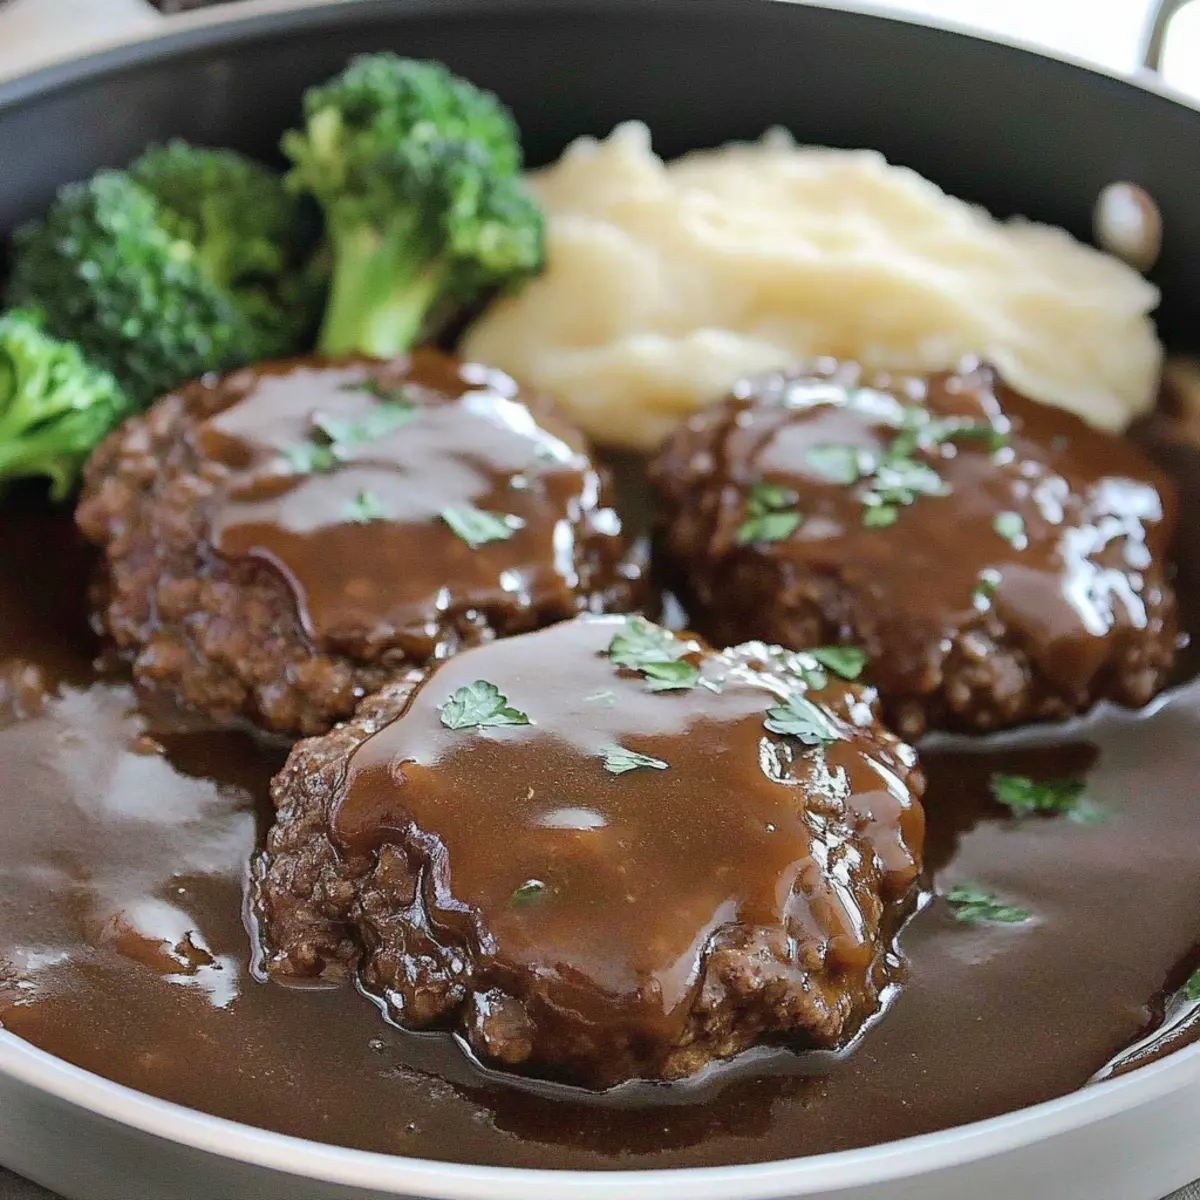
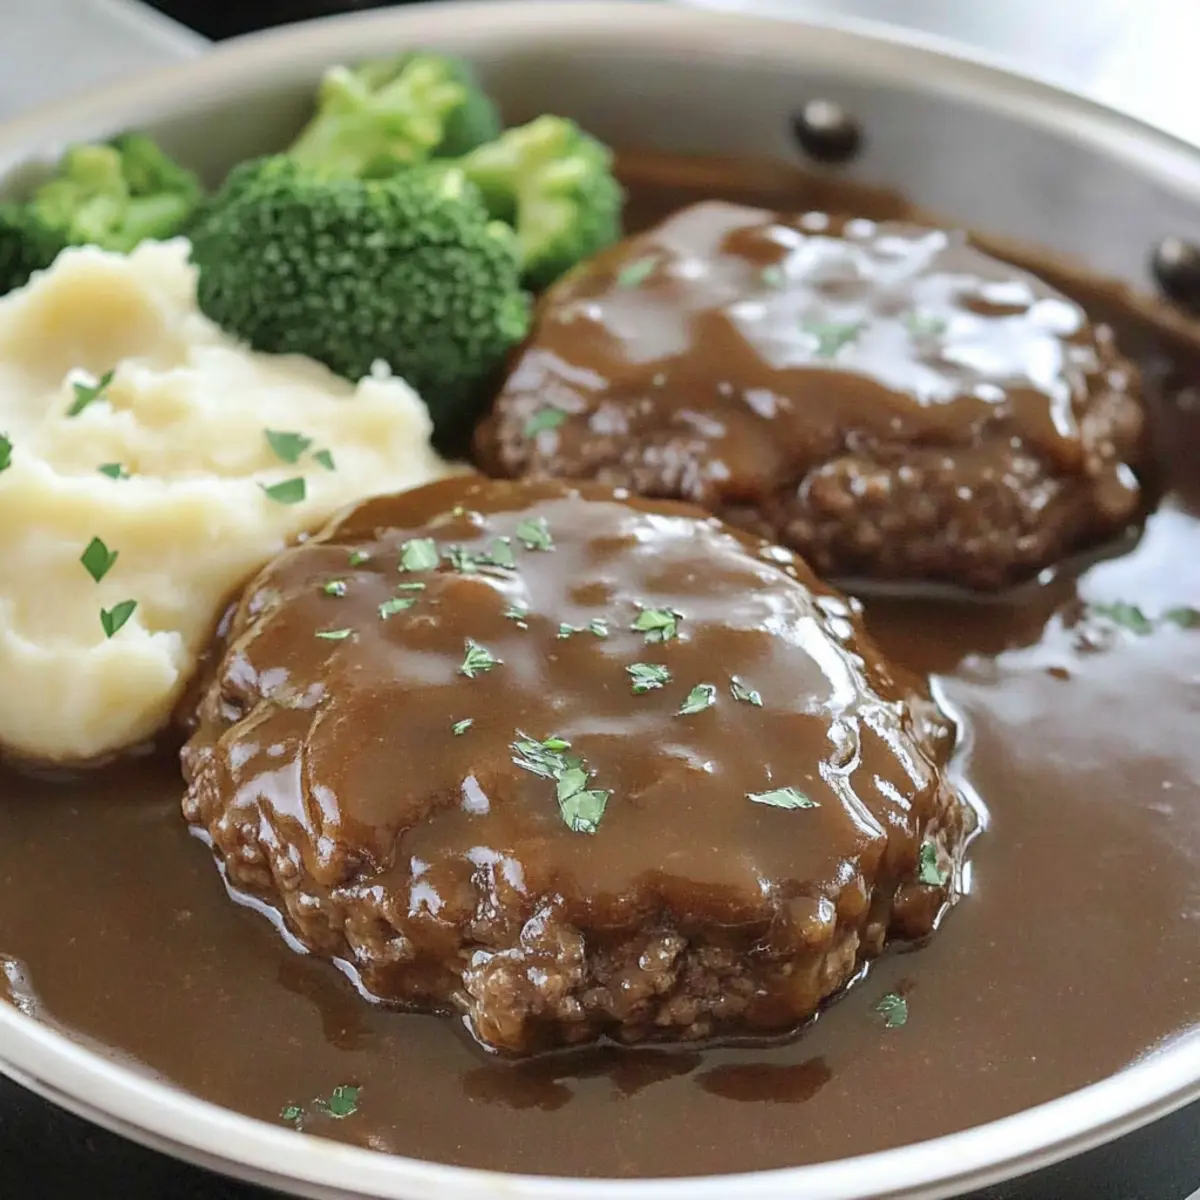
Your aromatic Almond Sweet Rolls are now ready to be savored! Serve them warm, perhaps alongside a steaming cup of coffee or tea for a cozy breakfast experience. Feel free to drizzle more frosting on top or sprinkle additional slivered almonds as a delightful finishing touch.

Make Ahead Options

These gooey almond sweet rolls are perfect for meal prep enthusiasts! You can prepare the dough and almond filling up to 24 hours in advance, allowing you to save precious time on busy mornings. Simply complete steps 1 and 2, then cover the dough and filling separately and refrigerate. When you're ready to enjoy them, let the dough sit at room temperature for about 30 minutes before proceeding with step 3 to ensure it rises beautifully. Assemble and let the rolls rise again before baking. This way, you’ll have freshly baked almond sweet rolls, just as delicious and warm, without the morning rush!

What to Serve with Gooey Almond Sweet Rolls

Serve these warm almond sweet rolls with delightful pairings that elevate your breakfast experience to a new level.

  • Fresh Berries: Enjoy a colorful medley of strawberries, blueberries, and raspberries. The tartness of the berries balances the sweetness of the rolls beautifully.

  • Creamy Yogurt: A dollop of Greek yogurt adds a creamy contrast and a tangy flavor that complements the rich almond filling, enhancing each bite.

  • Rich Coffee: Sipping on a freshly brewed cup of coffee heightens the morning indulgence. The warm, bold flavors create a comforting atmosphere perfect for enjoying your rolls.

  • Citrus Salad: A light citrus salad with oranges and grapefruit introduces a refreshing twist, balancing the sweetness of the almond rolls and brightening your plate.

  • Spiced Chai Tea: The aromatic spices in chai tea harmonize with the almond flavor, creating a cozy, inviting experience that warms the soul.

  • Maple Bacon: The salty, savory crisp of bacon pairs wonderfully with the sweet rolls, providing a delightful contrast that makes breakfast feel indulgent yet balanced.

Each of these pairings enhances your almond sweet rolls, providing contrasting flavors and textures that make every bite an experience to savor. Enjoy!

Almond Sweet Rolls Variations

Feel free to explore these delightful twists and adjustments to customize your almond sweet rolls experience!

  • Gluten-Free: Swap all-purpose flour with a gluten-free flour blend for a celiac-friendly treat that everyone can enjoy.
  • Nut-Free: Replace almond meal with sunflower seed meal to create a nut-free version without sacrificing flavor.
  • Different Nuts: Experiment with hazelnuts or walnuts for the filling or toppings, offering a unique crunch and taste.
  • Frosting Fun: Switch up the cream cheese frosting to a maple glaze for a sweet, earthy flavor; just mix powdered sugar with maple syrup.
  • Flavor Boost: Mix in cocoa powder to the almond filling for a sumptuous chocolate-almond swirl that’s simply irresistible.
  • Dairy-Free: Use almond milk and vegan cream cheese in the frosting for a vegan-friendly alternative that doesn’t skimp on creaminess.
  • Fruit Filling: For a fresh twist, add mashed bananas or unsweetened applesauce to the almond filling for a fruity surprise.
  • Spicy Kick: Add a dash of cinnamon or nutmeg to the almond mixture for an aromatic and cozy flavor experience.

If you adored these variations, you might also like trying my Maple Roasted Sweet recipe for something equally delicious!

Expert Tips for Almond Sweet Rolls

  • Perfectly Warm Milk: Ensure the milk mixture is warm yet not hot; overheating can kill the yeast, preventing your almond sweet rolls from rising properly.

  • Watch the Dough Rise: Keep an eye on the dough during the second rise; it should double in size. If it doesn't, your yeast might be inactive; consider checking its freshness.

  • Clean Cuts: Use dental floss to cut the rolls for cleaner edges and less squishing of the filling. It’s a great trick that makes a big difference in presentation!

  • Make Ahead Convenience: For a flavorful breakfast, consider refrigerating the rolls overnight after cutting. Allow them to sit at room temperature for an hour before baking.

  • Flavor Variations: Experiment with different fillings or frostings to keep things exciting. Adding spices like cinnamon can create a delightful twist on your classic almond sweet rolls!

How to Store and Freeze Almond Sweet Rolls

Room Temperature: Store leftover almond sweet rolls in an airtight container at room temperature for up to 2 days for optimal freshness.

Fridge: If you need extra time, refrigerate the rolls in a sealed container for up to 1 week. To enjoy, let them come to room temperature or warm them gently.

Freezer: For long-term storage, freeze the cooled almond sweet rolls wrapped tightly in plastic wrap and then in aluminum foil for up to 3 months.

Reheating: To reheat, simply thaw overnight in the fridge and warm them in the oven at 350°F for about 10 minutes, ensuring that they regain their gooey deliciousness.

Almond Sweet Rolls Recipe FAQs

How do I choose the right almonds for the filling?
Absolutely! Look for blanched, slivered, or whole almonds that are fresh and have no dark spots. Almonds should have a pleasant, nutty aroma; avoid those that smell rancid as this could affect the flavor of your almond sweet rolls.

What is the best way to store leftover almond sweet rolls?
You can store leftover rolls in an airtight container at room temperature for up to 2 days. For extended freshness, refrigerate them for up to a week. Just be sure to let them come to room temperature or warm them up gently before serving for that fresh-baked taste!

Can I freeze almond sweet rolls, and if so, how?
Very! To freeze, allow the rolls to cool completely, then wrap each one tightly in plastic wrap and place them in a freezer-safe bag. They can last up to 3 months in the freezer. When you’re ready to enjoy them, thaw in the fridge overnight and warm them in the oven at 350°F for about 10 minutes to revive their gooey texture.

What should I do if my dough doesn’t rise properly?
If your dough isn’t rising, it could be that your yeast is no longer active. Make sure to check the expiration date on the yeast package. Ensure you’re using warm milk—not hot—since high temperatures can kill the yeast. You can reactivate the dough by letting it rise in a warmer area or making a new yeast mixture and incorporating it gently.

Are these almond sweet rolls safe for those with nut allergies?
Unfortunately, the almond sweet rolls contain almonds and other nut products, making them unsafe for individuals with nut allergies. However, you can experiment with different fillings, like a cream cheese filling or fruit preserves, to create a nut-free version that still retains a tasty sweet roll experience!

Almond Sweet Rolls

Delicious Almond Sweet Rolls Perfect for a Cozy Morning

Indulge in these delicious almond sweet rolls, featuring a comforting almond paste filling and creamy frosting, perfect for breakfast.
Print Recipe Pin Recipe
Prep Time 1 hour hr
Cook Time 30 minutes mins
Rising Time 1 hour hr
Total Time 2 hours hrs 30 minutes mins
Servings: 12 rolls
Course: Breakfast
Cuisine: American
Calories: 250
Ingredients Equipment Method Nutrition Notes

Ingredients
  

For the Dough
  • 2 cups All-Purpose Flour Substitute with gluten-free flour blend if needed.
  • 1 cup Granulated Sugar Use coconut sugar for lower glycemic index.
  • 2 teaspoons Rapid Rise Instant Yeast Other instant yeast types can be used.
  • 1 teaspoon Salt Sea salt is a suitable alternative.
  • 1 cup Milk Almond milk for dairy-free option.
  • 4 tablespoons Butter Dairy-free margarine is a substitute.
  • 1 large Egg Flax egg can be used as a plant-based substitute.
For the Almond Filling
  • 4 tablespoons Unsalted Butter Nut butter can be a healthier option.
  • 1 cup Almond Meal Substitute with finely ground almonds if unavailable.
  • 1 large Egg Flax egg can be used here as well.
  • 1 teaspoon Almond Extract Substitute with vanilla extract if preferred.
  • 1 teaspoon Vanilla Extract Can be omitted for a purer almond taste.
For the Frosting
  • 4 ounces Cream Cheese Vegan cream cheese is an option for dairy-free.
  • 2 cups Powdered Sugar Adjust quantity to taste.
  • 1 teaspoon Almond Extract
  • 1 dash Vanilla Extract Optional to enhance flavor.
  • 1 cup Slivered Almonds For garnish.

Equipment

  • Stand Mixer
  • Baking Dish
  • Mixing Bowl

Method
 

Step-by-Step Instructions for Almond Sweet Rolls
  1. In a stand mixer, combine 2 cups of flour, granulated sugar, yeast, and salt. Heat 1 cup of milk and 4 tablespoons of butter until melted. Gradually mix warm milk and melted butter into dry ingredients. Beat in 1 large egg and extracts. Slowly add remaining flour, kneading until smooth and elastic, about 5–8 minutes. Let rise for 1 hour or until doubled.
  2. Prepare almond filling by combining 4 tablespoons of softened butter, 1 cup of almond meal, ½ cup of granulated sugar, 1 large egg, and extracts in a mixing bowl. Mix until smooth and set aside.
  3. Once dough has risen, punch down and roll out on a floured surface into a rectangle, about ¼ inch thick. Spread almond filling evenly, leaving a border. Roll tightly and cut into 12 pieces. Arrange in greased baking dish, cover, and rise for another hour.
  4. Preheat oven to 350°F (175°C). Bake rolls for about 30 minutes or until golden brown. Allow to cool slightly in the pan.
  5. Beat together 4 ounces of softened cream cheese and 4 tablespoons of softened butter until creamy. Gradually add 2 cups of powdered sugar, mixing until smooth. Stir in almond extract and vanilla extract. Spread frosting over warm rolls and garnish with slivered almonds.
  6. Serve warm alongside coffee or tea. Enjoy your almond sweet rolls!

Nutrition

Serving: 1rollCalories: 250kcalCarbohydrates: 34gProtein: 4gFat: 10gSaturated Fat: 5gPolyunsaturated Fat: 1gMonounsaturated Fat: 3gCholesterol: 35mgSodium: 150mgPotassium: 90mgFiber: 1gSugar: 10gVitamin A: 300IUCalcium: 50mgIron: 1mg

Notes

Store leftovers in an airtight container at room temperature for up to 2 days, in the fridge for up to a week, or freeze for up to 3 months. Reheat gently in the oven for best results.

Tried this recipe?

Let us know how it was!

Heavenly Puff Pastry Nutella Twists You’ll Want to Share

December 19, 2025 by Grace Snow Leave a Comment

As I unwrapped the golden sheets of puff pastry, a wave of nostalgia flooded over me—those delightful afternoons spent baking with my family, crafting sweet treats that brought everyone together. Today, I’m excited to share my easy Puff Pastry Nutella Twists, an irresistible recipe that marries flaky pastry with rich, gooey Nutella. Perfect for when you need a quick, crowd-pleasing dessert, these twists are not only simple to whip up but also a playful twist on traditional pastry. Imagine pulling these warm, chocolate-filled spirals from the oven and watching as everyone's eyes light up with joy! Whether you're serving them at a festive gathering or just want to treat yourself (because why not?), these delightful bites are sure to bring smiles all around. So, ready to get your hands doughy and delve into some deliciousness?

Why are Puff Pastry Nutella Twists irresistible?

Simplicity at Its Finest: With just a few ingredients, these twists come together quickly, making them perfect for novice bakers or last-minute cravings.

Indulgent Flavor: The warm, luscious Nutella nestled within the flaky pastry creates a heavenly combination that's hard to resist.

Perfect for Sharing: Friends and family will love gathering around these delightful treats, whether for a cozy snack or festive celebrations.

Versatile Variations: Get creative by adding citrus zest or trying other spreads like almond butter for unique flavors that everyone will enjoy!

Kid-Friendly Fun: Involve the kiddos in preparing this sweet treat for a fun-filled family activity.

Experience the joy of baking with these Puff Pastry Nutella Twists, and bring a little sweetness into your home!

Puff Pastry Nutella Twists Ingredients

• Get ready to indulge in these sweet delights!

For the Twists

  • Puff Pastry – Requires thawing; keep it cold for the best flaky texture.
  • Nutella – The star of the show; warm slightly for easy spreading.
  • Egg (optional) – Use it as a wash for a golden crust; melted butter works too for more richness.

For Serving

  • Powdered Sugar – A light dusting adds an elegant touch; it also enhances sweetness.
  • Vanilla Ice Cream – A scoop on the side transforms your treat into a gourmet dessert experience!

Whip up these Puff Pastry Nutella Twists and watch as they become a household favorite!

Step‑by‑Step Instructions for Puff Pastry Nutella Twists

Step 1: Preheat Your Oven
Begin by preheating your oven to 415°F (213°C). This high temperature will ensure the Puff Pastry Nutella Twists turn out beautifully golden and flaky. While the oven is heating, prepare your baking sheet by lining it with parchment paper, making it ready for the twists once they are shaped.

Step 2: Prepare the Puff Pastry
Roll out and cut the thawed puff pastry sheets into two equal rectangles. If you find the pastry difficult to manage, let it sit for a couple of minutes at room temperature until it's slightly more pliable. This step is crucial for the best texture, so avoid waiting too long, as you want to work with cold pastry for those flaky layers.

Step 3: Warm the Nutella
To make spreading easier, warm your Nutella in the microwave for about 15 seconds. Make sure to check it; you want it soft but not hot. This silky texture will allow for a smooth application across the pastry, ensuring each bite of the Puff Pastry Nutella Twists is filled with that rich, chocolatey goodness.

Step 4: Spread the Nutella
Evenly spread the warm Nutella over one half of each puff pastry sheet, leaving a small border around the edges. The warm Nutella is inviting, so be generous but careful not to overdo it. Take a moment to appreciate how delicious these Puff Pastry Nutella Twists are already beginning to look!

Step 5: Create the Twists
Place the second pastry sheet on top of the nutella-covered half, gently pressing down to seal. Use a sharp knife or pizza cutter to slice the layered pastry into 1.5-inch wide strips. As you cut, visualize the delightful twists you are about to create, making sure to keep the strips uniform for even baking.

Step 6: Twist and Arrange
Grab each strip and twist it a few times, creating a beautiful spiral effect. Carefully place each twisted strip onto the lined baking sheet, ensuring to leave enough space between them for expansion during baking. This arrangement will give each Puff Pastry Nutella Twist room to puff up and develop that flaky texture.

Step 7: Brush for Golden Brown Color
If desired, whisk an egg and brush it lightly over the tops of the twists. This optional egg wash will contribute to a gorgeous golden color when baked. If you're looking for a richer taste, melted butter makes an excellent substitute. Gently apply it without drenching the pastry, so it retains its flakiness.

Step 8: Bake to Perfection
Place the baking sheet in the preheated oven and bake the Puff Pastry Nutella Twists for 15-18 minutes. Keep an eye on them toward the end of the baking time; you want them perfectly golden brown and puffed. The tempting aroma will fill your kitchen as these treats bake to perfection, making the wait worthwhile.

Make Ahead Options

These Puff Pastry Nutella Twists are a fantastic option for meal prep, allowing you to enjoy their sweet indulgence without last-minute stress. You can prepare the twists up to 24 hours in advance by assembling them and storing the unbaked twists in the refrigerator. Simply arrange them on a lined baking sheet, cover with plastic wrap, and refrigerate to maintain their freshness. When you’re ready to bake, just preheat your oven and pop them in; no additional preparation needed! If you have leftovers, they can be stored in an airtight container for up to 2 days, but I recommend enjoying them fresh for optimal flakiness and flavor. With these make-ahead tips, you’ll have delightful Puff Pastry Nutella Twists ready to charm your family or guests!

Expert Tips for Puff Pastry Nutella Twists

  • Chill the Pastry: Keep the puff pastry cold before handling to maintain its flaky layers. Room temperature pastry can become tough and lose its integrity.

  • Slice with Care: Use a sharp knife or pizza cutter to cut the pastry. This prevents crushing the layers and ensures clean edges for beautiful twists.

  • Watch the Bake Time: Ovens vary, so check your twists a couple of minutes early. You want them golden brown, not burned—treats should charm, not alarm!

  • Use Quality Nutella: Opt for genuine Nutella or high-quality chocolate hazelnut spread. The flavor depth makes a significant impact on your Puff Pastry Nutella Twists.

  • Experiment with Fillings: Don’t hesitate to swap out Nutella for other delightful spreads. Try almond butter or even a light cream cheese for a unique twist!

Puff Pastry Nutella Twists Variations

Get creative and personalize your Puff Pastry Nutella Twists with these delightful twists!

  • Citrus Zest: Add a sprinkle of lemon or orange zest to the Nutella for a refreshing, tangy flavor that perfectly complements the sweetness. This vibrant twist brightens every bite!

  • Nutty Spread: Substitute Nutella with almond or peanut butter for a nutty variation. Each option offers a unique character, turning your twists into a whole new dessert adventure.

  • Chocolate lovers: Mix in mini chocolate chips alongside Nutella for an extra dose of chocolate bliss. Each bite will be a delightful surprise under a flaky crust!

  • Spicy Kick: Add a pinch of ground cinnamon or cayenne pepper to the Nutella for a hint of warmth and spice. This unexpected flavor twist will make your taste buds dance!

  • Dulce de Leche: Swap Nutella with dulce de leche for a rich, caramel-y alternative. The sweet layers will have everyone coming back for more.

  • Vegan Option: Use vegan puff pastry and substitute Nutella with a plant-based chocolate spread. You can still indulge while accommodating dietary preferences!

For fun serving ideas, try pairing your warm twists with a scoop of vanilla ice cream or a drizzle of chocolate sauce—a delightful indulgence for all! Enjoy customizing your Puff Pastry Nutella Twists to create a treat everyone will adore.

What to Serve with Puff Pastry Nutella Twists

Elevate your dessert experience with delightful pairings that enhance the indulgence of these golden treats.

  • Creamy Vanilla Ice Cream: The cold, creamy texture contrasts beautifully with the warm, gooey Nutella, creating a delightful experience with each bite. A scoop on the side makes every twist feel like a gourmet dessert!

  • Fresh Fruit Salad: Juicy strawberries, bananas, and blueberries add a refreshing touch that balances the richness of the twists. The natural sweetness of the fruit complements the Nutella, keeping your palate excited.

  • Rich Hot Chocolate: A mug of velvety hot chocolate makes for a cozy pairing, especially on chilly days. The warm, chocolaty beverage mirrors the Nutella inside the pastry, amplifying the chocolate experience.

  • Powdered Sugar Dusting: A light sprinkle of powdered sugar not only adds elegance but enhances the sweetness. This simple touch elevates the presentation and makes the twists even more appealing.

  • Citrus Zest: Adding lemon or orange zest, either in the filling or as a garnish, brings a zesty brightness that cuts through the richness. It offers a vibrant contrast that excites the taste buds.

  • Espresso Shot: For coffee lovers, pairing these twists with a strong espresso creates a perfect balance. The boldness of the espresso pairs wonderfully with the sweet and flaky pastry.

  • Chocolate Drizzle: A warm drizzle of melted chocolate over the top of each twist intensifies the chocolate flavor and adds a luxurious finish. It's a simple way to make this treat feel even more special.

  • Chilled Sparkling Water: For a light and refreshing drink, serve sparkling water alongside the twists. The effervescence cleanses the palate, making each bite of Nutella swirl even more enjoyable.

How to Store and Freeze Puff Pastry Nutella Twists

Room Temperature: Enjoy these twists fresh for the best taste, but if necessary, they can be stored at room temperature for up to 1 day in a cool place, covered lightly.

Fridge: If you've made a batch and want to keep them longer, store leftover Puff Pastry Nutella Twists in an airtight container in the fridge for up to 2 days to maintain quality.

Freezer: For longer storage, freeze the unbaked twists on a baking sheet, then transfer them to a freezer-safe bag or container for up to 2 months. Bake from frozen, adding a few extra minutes to the baking time.

Reheating: To revive any leftovers, reheat in the oven at 350°F (175°C) for about 5-7 minutes until warm and crispy, bringing back that indulgent quality.

Puff Pastry Nutella Twists Recipe FAQs

What type of puff pastry should I use?
I recommend using high-quality frozen puff pastry that you can find at your local store. It’s usually sold in sheets; just be sure to thaw it according to the package instructions for the best results!

How long can I store the cooked Puff Pastry Nutella Twists?
These delightful twists are best enjoyed fresh, but you can store them in an airtight container at room temperature for up to 1 day. If you’re looking to keep them longer, refrigerate them for up to 2 days.

Can I freeze Puff Pastry Nutella Twists?
Absolutely! To freeze unbaked twists, place them on a baking sheet lined with parchment paper and freeze until solid. Once frozen, transfer them to a freezer-safe bag or container for up to 2 months. When you're ready to bake, there’s no need to thaw—just pop them in the oven and add an extra few minutes to the bake time.

What should I do if my puff pastry is too warm to work with?
If you find that your puff pastry is too soft and difficult to handle, simply pop it back into the refrigerator for about 10-15 minutes. This will help it cool down again and make it easier to slice and shape into those lovely twists.

Are these Puff Pastry Nutella Twists suitable for kids?
Very! These twists are not only kid-friendly due to their sweet taste and fun shape, but they are also a fantastic activity to involve kids in the kitchen. Allow them to help spread the Nutella and twist the pastry—it's a creative way to spend time together!

Can I use other spreads instead of Nutella?
Certainly! If you’re looking to mix things up, try using almond butter, peanut butter, or even a fruit spread. Adding zest of lemon or orange can give it an exciting twist too! Your family can have fun experimenting with different combinations for a sweet treat everyone will enjoy!

Puff Pastry Nutella Twists

Heavenly Puff Pastry Nutella Twists You’ll Want to Share

These Puff Pastry Nutella Twists are irresistible with flaky pastry and rich Nutella, perfect for sharing at any gathering.
Print Recipe Pin Recipe
Prep Time 20 minutes mins
Cook Time 18 minutes mins
Total Time 38 minutes mins
Servings: 12 twists
Course: Dessert
Cuisine: Baking
Calories: 200
Ingredients Equipment Method Nutrition Notes

Ingredients
  

For the Twists
  • 1 sheet Puff Pastry Requires thawing; keep it cold for the best flaky texture.
  • 1/2 cup Nutella The star of the show; warm slightly for easy spreading.
  • 1 each Egg Optional; use it as a wash for a golden crust.
For Serving
  • 1 cup Powdered Sugar A light dusting adds an elegant touch.
  • 1 scoop Vanilla Ice Cream Transforms your treat into a gourmet dessert.

Equipment

  • Oven
  • Baking Sheet
  • Parchment Paper
  • Knife or pizza cutter

Method
 

Step-by-Step Instructions
  1. Preheat your oven to 415°F (213°C). Line a baking sheet with parchment paper.
  2. Roll out and cut the thawed puff pastry sheets into two equal rectangles.
  3. Warm your Nutella in the microwave for about 15 seconds for easier spreading.
  4. Spread the warm Nutella over one half of each puff pastry sheet, leaving a border.
  5. Place the second pastry sheet on top, pressing down to seal, then slice into 1.5-inch wide strips.
  6. Twist each strip a few times and place them on the lined baking sheet.
  7. Brush the tops with the whisked egg or melted butter if desired.
  8. Bake for 15-18 minutes until golden brown and puffed.

Nutrition

Serving: 1twistCalories: 200kcalCarbohydrates: 25gProtein: 2gFat: 10gSaturated Fat: 5gPolyunsaturated Fat: 1gMonounsaturated Fat: 4gCholesterol: 30mgSodium: 50mgPotassium: 100mgFiber: 1gSugar: 7gVitamin A: 200IUCalcium: 10mgIron: 1mg

Notes

Enjoy these twists fresh for the best taste. They can be stored at room temperature for up to 1 day or in the fridge for up to 2 days.

Tried this recipe?

Let us know how it was!

Irresistible Pastel de Nata Recipe for Perfectly Creamy Tarts

December 19, 2025 by Grace Snow Leave a Comment

As I stepped into a bustling Lisbon bakery, the warm air was thick with the sweet scent of baked goods, and the sight of pastel de nata cooling by the window caught my eye, beckoning me closer. This classic pastel de nata recipe captures that charming experience right in your kitchen, blending flaky pastry with a silky, creamy custard that leaves your taste buds dancing. Not only are these delightful tarts an impressive homemade treat, but they also make for an irresistible crowd-pleaser, whether at brunch or a cozy evening gathering. Ready to fill your home with the enticing aroma of cinnamon and lemon zest? Let's dive into making these authentic Portuguese custard tarts that are sure to become a favorite!

Why is Pastel de Nata a Must-Try?

Delightful Experience: Savor the melt-in-your-mouth bliss of silky custard enveloped in crispy pastry that creates a fantastic contrast.

Impressive and Authentic: This recipe delivers an authentic taste of Portugal right in your kitchen, impressing friends and family alike.

Versatile Enjoyment: Perfect for any occasion, from brunch to dessert, pastel de nata is a versatile treat that everyone will adore.

Time-Saving Simplicity: Despite its gourmet look, the baking process is simple and manageable, making it accessible for home cooks of all levels.

Warm Indulgence: Serve them warm with a dusting of cinnamon, and you'll be transported to a charming Lisbon bakery. For more delightful flavors, check out my Chicken Adobo Again for another crowd-pleaser recipe!

Pastel de Nata Ingredients

For the Pastry

  • Frozen Puff Pastry – Provides a flaky and airy texture; consider making homemade pastry for an extra touch of authenticity.

For the Custard

  • Granulated Sugar – Adds sweetness to the custard filling; you can substitute with alternative sweeteners if preferred.
  • All-Purpose Flour – Acts as a thickening agent in the custard; cornstarch can be a gluten-free substitute.
  • Whole Milk – Creates a creamy base for the custard; low-fat milk can work for a lighter option.
  • Cinnamon Stick – Infuses warmth into the custard; ground cinnamon is a convenient alternative if the stick isn’t on hand.
  • Lemon Peel – Offers brightness and zest; orange peel can be an interesting substitute.
  • Egg Yolks – Essential for richness and structure in the custard; whole eggs may be used, though texture will differ.

Get ready to whip up this delectable pastel de nata recipe, and savor every delightful bite of these tarts!

Step‑by‑Step Instructions for Pastel de Nata Recipe

Step 1: Prepare Puff Pastry
On a floured surface, roll out the thawed frozen puff pastry into a thin rectangle, ensuring it's about 1/8 inch thick. Carefully roll the pastry tightly from one short end to the other, forming a long cylinder. Once completed, slice the cylinder into 12 equal pieces, showcasing the pastry's flaky layers, and set them aside.

Step 2: Form Tart Shells
Taking each piece of pastry, place them cut-side down into a greased muffin tin. Gently press down to distribute the dough along the base and up the sides of each muffin cavity, ensuring an even thickness. Once all pieces are in place, refrigerate the tin for about 30 minutes to firm up the pastry before filling.

Step 3: Make Custard Filling
In a medium saucepan over low heat, whisk together granulated sugar, flour, and a small scout of milk to create a smooth paste. Gradually stir in the remaining whole milk while combining with the paste, then add a cinnamon stick and lemon peel. Heat the mixture, whisking constantly for about 5-7 minutes until it thickens to a custard-like consistency. Remove from heat and let steep for 10 minutes.

Step 4: Combine with Egg Yolks
In a separate bowl, vigorously whisk the egg yolks until they are a pale yellow color. Strain the cinnamon stick and lemon peel out of the warm milk mixture, and slowly pour it into the egg yolks while whisking continuously to temper them. This process ensures a smooth custard base, which you'll then strain through a fine sieve into another bowl for the perfect consistency.

Step 5: Bake Tarts
Preheat your oven to a scorching 500°F (260°C) to create that envied crispy crust. Pour the silky custard into each pastry shell, filling each about 3/4 full to allow for expansion while baking. Place the muffin tin in the oven and bake for 12-15 minutes, until the tops become puffy and develop a beautiful golden color with slight blistering.

Step 6: Cool and Serve
Once baked, remove the muffin tin from the oven and allow the pastel de nata to cool in the tin for about 5 minutes. This allows them to set properly before transferring onto a wire rack. For an authentic experience, serve these delightful tarts warm, optionally dusted with powdered sugar and a sprinkle of ground cinnamon.

How to Store and Freeze Pastel de Nata

Room Temperature: Enjoy your pastel de nata fresh; if left out, they can sit at room temperature for up to 2 hours before needing to be refrigerated.

Fridge: Store leftover pastel de nata in an airtight container in the fridge for up to 2-3 days. Reheat in a 350°F (175°C) oven for 5-7 minutes to restore their delightful crispness.

Freezer: For longer storage, freeze the unbaked pastry shells or filled tarts. Wrap each tart individually in plastic wrap and place in a freezer bag. They can last for up to 2 months.

Reheating: When ready to enjoy, bake frozen tarts directly from the freezer at 400°F (200°C) for about 15-20 minutes until warmed through and the pastry is crisp, making this pastel de nata recipe an easy treat to have on hand!

Pastel de Nata Recipe Variations

Feel free to let your creativity shine and personalize these delicious tarts for your own unique twist!

  • Vanilla Infusion: Add a splash of vanilla extract to the custard for a warm, aromatic flavor boost.

  • Almond Essence: Substitute almond extract for vanilla to create a nutty depth that complements the custard beautifully.

  • Coconut Cream: Fold in shredded coconut into the custard for a tropical flair that adds texture and sweetness. The creamy custard pairs wonderfully with the coconut's chewy texture, creating a delightful island-inspired treat.

  • Gluten-Free Option: Use cornstarch instead of all-purpose flour for a gluten-free custard while keeping the same delightful richness.

  • Spicy Kick: For a unique twist, add a pinch of nutmeg or cardamom to the custard for a hint of warmth and spiciness that surprises the palate.

  • Chocolate Drizzle: Drizzle melted dark chocolate over the cooled tarts for a luxurious chocolatey finish, turning these delights into an elevated dessert experience.

  • Fresh Berries: Top each tart with a mix of fresh berries for both visual appeal and a refreshing tartness, making them even more irresistible.

  • Citrus Zing: Swap lemon peel for orange or lime for a zesty brightness that perfectly complements the rich custard.

Exploring these variations makes the pastel de nata recipe even more delightful. Try pairing them with a warm cup of bica for an authentic taste of Portugal, or explore the rich flavors in my Chicken Adobo Again, perfect for a full Portuguese feast!

Tips for the Best Pastel de Nata

Chill the Pastry: Ensure to refrigerate the pastry shells for at least 30 minutes; this helps maintain their shape while baking and enhances flakiness.

Watch the Oven: Keep a close eye on the tarts as they bake; they should puff and blister without burning, so adjust your time accordingly.

Smooth Custard: Strain the custard mixture through a fine sieve to eliminate lumps and ensure a silky texture, vital for this pastel de nata recipe.

Serve Warm: Enjoy pastel de nata fresh from the oven for the best experience; reheating can help restore crispness if stored.

Experiment with Flavor: Feel free to add a dash of vanilla or almond extract to the custard for a personal twist on this beloved treat.

What to Serve with Classic Pastel de Nata?

Indulge in a delightful culinary experience by pairing these exquisite tarts with complementary dishes and beverages that elevate your dessert moments.

  • Rich Coffee: The bold flavors of a robust espresso or coffee balance the sweetness of the tarts, making each bite even more enjoyable.
  • Fresh Berries: Juicy strawberries or raspberries add a refreshing burst of tartness that contrasts beautifully with the creamy custard.
  • Vanilla Ice Cream: A scoop of smooth vanilla ice cream provides a delightful creaminess that blends harmoniously with the warm tart.
  • Zesty Fruit Salad: A bright medley of seasonal fruits sprinkled with a hint of lime juice offers a refreshing finish and a splash of color on your plate.
  • Creamy Whipped Cream: A dollop of lightly sweetened whipped cream can enhance the experience, creating a luxurious fusion of textures.
  • Mint Leaves: Fresh mint leaves bring an unexpected, lively freshness that cuts through the richness of the tarts and adds a vibrant touch.
  • Chilled White Wine: A glass of dessert wine or a sparkling white complements the custard’s sweetness, creating a sophisticated pairing for special occasions.
  • Chocolate Sauce: Drizzling a chocolate sauce over the pastel de nata introduces a rich flavor that takes the dessert to another level of indulgence.
  • Decadent Chocolate Mousse: A side of airy chocolate mousse provides a rich, contrasting dessert experience, offering a nice balance with the custard tarts.
  • Lemon Sorbet: A scoop of tangy lemon sorbet can cleanse the palate after enjoying the desserts, offering a refreshing and zesty finish.

Make Ahead Options

These Pastel de Nata are perfect for meal prep enthusiasts looking to save time! You can prepare the pastry shells up to 24 hours in advance; simply assemble them in the muffin tin and refrigerate. The custard mixture can be made ahead as well; refrigerate it for up to 3 days in a sealed container. When you're ready to bake, pour the chilled custard into the pastry shells and bake them at 500°F (260°C) for 12-15 minutes until golden and puffed. This way, you'll enjoy the delightful freshness of homemade custards that are just as delicious, with minimal hassle on busy weeknights!

Pastel de Nata Recipe FAQs

How do I choose ripe ingredients for my pastel de nata?
Absolutely! For the best results, make sure your whole milk is fresh and free from any sour odors. Choose large, fresh egg yolks for a richer custard; check for any discoloration or unusual textures. The flour should be fresh and free from any clumps. If you opt for zest from lemons or oranges, aim for firm, brightly colored fruit with an aromatic scent.

How should I store leftover pastel de nata?
Very well! Allow them to cool completely before transferring to an airtight container. Store in the fridge for up to 2-3 days. When you're ready to enjoy, preheat your oven to 350°F (175°C) and reheat for 5-7 minutes to refresh their delightful crispness.

Can I freeze pastel de nata?
Absolutely! For longer storage, you can freeze the unbaked pastry shells or filled tarts. Wrap each tart individually in plastic wrap, then place them in a freezer bag. They can be frozen for up to 2 months. When ready to enjoy, bake them directly from the freezer at 400°F (200°C) for about 15-20 minutes until warm and crispy.

What if my custard filling is lumpy?
If you find lumps in your custard, don’t worry! Simply strain it through a fine sieve after cooking to remove any clumps. This process ensures a silky-smooth custard, which is essential for achieving that classic pastel de nata texture. Always whisk well while cooking to prevent any curdling and keep those lumps at bay!

Are pastel de nata safe for pets or people with allergies?
Very! However, since pastel de nata contain sugar, eggs, and dairy, they are not suitable for pets, particularly dogs and cats. For those with egg or dairy allergies, consider alternatives like using egg replacers or plant-based milk to attempt a similar creamy texture, though results may vary. Always check ingredient labels and consult with your healthcare provider.

Can I make these in advance for a gathering?
Absolutely! You can prepare the pastry shells and custard filling ahead of time. Store the unbaked pastry in the fridge for up to a day, or freeze as mentioned earlier. Bake them fresh right before serving to capture that flaky crust and creamy filling—your guests will be impressed with the warmth and freshness of your pastel de nata!

Pastel de Nata Recipe

Irresistible Pastel de Nata Recipe for Perfectly Creamy Tarts

This Pastel de Nata recipe captures the essence of Lisbon with flaky pastry and creamy custard.
Print Recipe Pin Recipe
Prep Time 30 minutes mins
Cook Time 15 minutes mins
Chilling Time 30 minutes mins
Total Time 1 hour hr 15 minutes mins
Servings: 12 tarts
Course: Dessert
Cuisine: Portuguese
Calories: 250
Ingredients Equipment Method Nutrition Notes

Ingredients
  

For the Pastry
  • 1 package Frozen Puff Pastry Consider making homemade pastry for an extra touch of authenticity.
For the Custard
  • 1/2 cup Granulated Sugar You can substitute with alternative sweeteners if preferred.
  • 3 tablespoons All-Purpose Flour Cornstarch can be a gluten-free substitute.
  • 2 cups Whole Milk Low-fat milk can work for a lighter option.
  • 1 stick Cinnamon Stick Ground cinnamon is a convenient alternative if the stick isn’t on hand.
  • 1 strip Lemon Peel Orange peel can be an interesting substitute.
  • 6 pieces Egg Yolks Whole eggs may be used, though texture will differ.

Equipment

  • Muffin tin
  • Saucepan
  • Whisk
  • fine sieve
  • Rolling Pin

Method
 

Step-by-Step Instructions for Pastel de Nata Recipe
  1. On a floured surface, roll out the thawed frozen puff pastry into a thin rectangle, about 1/8 inch thick. Roll tightly from one short end to the other, forming a cylinder, and slice into 12 equal pieces.
  2. Place each piece cut-side down into a greased muffin tin and press down to distribute along the base and up the sides. Refrigerate for 30 minutes.
  3. In a medium saucepan over low heat, whisk together sugar, flour, and a small scout of milk to create a smooth paste. Gradually add remaining milk, cinnamon stick, and lemon peel. Heat while whisking for 5-7 minutes until thickened, then let steep for 10 minutes.
  4. Whisk egg yolks until pale yellow. Strain the warm milk mixture to remove cinnamon stick and lemon peel, then slowly pour into egg yolks while whisking continuously. Strain again through a fine sieve.
  5. Preheat oven to 500°F (260°C). Pour custard into pastry shells, filling about 3/4 full. Bake for 12-15 minutes until tops are puffy and golden.
  6. Cool the tarts in the tin for 5 minutes, then transfer to a wire rack. Serve warm, optionally dusted with powdered sugar and ground cinnamon.

Nutrition

Serving: 1tartCalories: 250kcalCarbohydrates: 28gProtein: 3gFat: 14gSaturated Fat: 7gPolyunsaturated Fat: 1gMonounsaturated Fat: 5gCholesterol: 100mgSodium: 150mgPotassium: 100mgFiber: 1gSugar: 10gVitamin A: 400IUCalcium: 100mgIron: 1mg

Notes

Refrigerate the pastry shells for at least 30 minutes for best shape and texture. Watch tarts closely as they bake to prevent burning. Enjoy fresh for the best experience; reheating can help restore crispness if stored.

Tried this recipe?

Let us know how it was!

Delicious Raspberry Danish with Creamy Filling You’ll Love

December 19, 2025 by Grace Snow Leave a Comment

Amid the sweetness of a lazy Sunday morning, there's nothing quite like the comforting aroma of fresh pastries wafting through the kitchen. I'm thrilled to share my easy Raspberry Danish with Cream Cheese Filling, a delightful fusion of flaky puff pastry, tart raspberries, and a velvety cream cheese blend. This recipe not only makes for an impressive brunch centerpiece but also boasts quick prep with just six ingredients! Whether you’re treating yourself to a cozy breakfast or planning to wow guests at a gathering, these danishes are sure to steal the show. Plus, with the option to switch up the berries, you can tailor each batch to your guest’s taste! Are you ready to fill your home with that irresistible scent and indulge in this light, fruity delight?

Why Choose This Raspberry Danish Recipe?

Deliciously Easy: The simplicity of this recipe means you don’t need to be a pro baker to create a stunning pastry at home.

Fruity Bliss: The balance of fresh raspberries and creamy filling creates a tantalizing taste explosion with every bite.

Make It Your Own: This recipe is versatile; you can easily swap in your favorite fruits like blueberries or cherries, letting creativity shine.

Perfect for Any Occasion: Whether it’s a lazy breakfast or a gathering, these danishes impress and delight, ensuring you’ll be the star of any brunch table.

Quick and Convenient: With just six ingredients and a straightforward method, you’ll have warm, flaky pastries ready in no time! Plus, check out more tips in our expert tips for perfect results.

Raspberry Danish Ingredients

For the Pastry

  • Frozen Puff Pastry – Provides a flaky, buttery texture; make sure it's thawed and refrigerated before use.

For the Filling

  • Fresh Raspberries – Adds vibrant flavor and tartness; choose ripe berries for optimal sweetness.
  • Cream Cheese – A rich base for the filling; ensure it’s softened for easy mixing.
  • Powdered Sugar – Sweetens the cream cheese filling; adjust to balance the tartness of the raspberries.
  • Vanilla Extract – Enhances the overall flavor of the filling; use pure vanilla for the best taste.

For the Assembly

  • Egg – Creates a shiny, golden finish when brushed on top; a necessary step for that bakery-like appearance.
  • Flour – Dust your surface to prevent sticking while rolling out the dough; vital for smooth assembly.

Now that you have the ingredients ready, let’s dive deeper into the joyful journey of making your very own Raspberry Danish!

Step‑by‑Step Instructions for Raspberry Danish

Step 1: Prepare Cream Cheese Mixture
In a medium bowl, combine the softened cream cheese, powdered sugar, and vanilla extract. Use a hand mixer or a spatula to blend the ingredients until the mixture is smooth and creamy, about 2-3 minutes. This filling will provide a rich, luscious center for your Raspberry Danish, so ensure there are no lumps.

Step 2: Whisk Egg Wash
In a small bowl, crack one egg and whisk it together with a tablespoon of water and a pinch of salt. This egg wash will give your pastries a beautiful golden glaze. Set the egg wash aside, as you’ll brush it on the pastries right before baking, providing that perfect finish.

Step 3: Roll Out Dough
Lightly dust a clean surface with flour to prevent sticking. Unfold the thawed puff pastry and roll it out into a square approximately 10.5 inches on each side. Using a sharp knife or pizza cutter, carefully cut the dough into 9 equal squares, each about 3.5 inches. These will form the base of your Raspberry Danish.

Step 4: Assemble Pastries
Take each pastry square and place about 1 tablespoon of the cream cheese mixture in the center. Add approximately 4 fresh raspberries on top of the filling. Gently fold the corners of each pastry square towards the center, pinching and sealing them together to form a triangle shape, ensuring the filling is well-contained inside.

Step 5: Chill Pastries
Place the assembled pastries on a parchment-lined tray, spaced apart for even baking. To maintain their shape and achieve a perfectly flaky texture, freeze them for at least 30 minutes. This chilling step is crucial for your Raspberry Danish to rise beautifully in the oven.

Step 6: Preheat Oven
While the pastries are chilling, preheat your oven to 400°F (204°C). Allow your oven sufficient time to reach the desired temperature, which will help create that delightful puff as the pastries bake. Make sure the oven rack is positioned in the center for even baking.

Step 7: Bake
Once chilled, carefully place the pastries on a lined baking sheet, leaving space between them. Brush the tops with the prepared egg wash for that shiny, golden finish. Bake in the preheated oven for 25-30 minutes, or until they are puffed and golden brown. Keep an eye on them towards the end for that perfect, crispy texture.

Step 8: Serve and Garnish
After baking, remove the Raspberry Danish from the oven and let them cool slightly on a wire rack. If desired, sprinkle with a dusting of powdered sugar for an extra touch of sweetness and presentation. Serve warm to savor the combination of flaky pastry and creamy filling, a delightful treat perfect for any occasion!

Expert Tips for Raspberry Danish

Keep Dough Cold: Ensure your puff pastry stays chilled during preparation; warm dough won’t puff as beautifully. Refreeze briefly if necessary.

Use Ripe Raspberries: Select fresh, ripe raspberries for optimal sweetness; adjust powdered sugar in the filling to balance their tartness.

Seal Well: When folding the pastries, pinch edges tightly to prevent any filling from leaking during baking.

Chill Before Baking: Don't skip the chilling step! This helps maintain the shape and ensures your Raspberry Danish rises perfectly in the oven.

Watch the Bake: Keep an eye on the pastries in the oven; baking times can vary, and you want them golden and flaky, not burnt.

Raspberry Danish: Variations & Substitutions

Feel free to play with this recipe and make it truly yours—your kitchen, your rules!

  • Berry Swap: Substitute fresh raspberries with blueberries, blackberries, or strawberries for an entirely different flavor dynamic. Each fruit brings its own sweetness and essence.
  • Dairy-Free Delight: Use a dairy-free cream cheese alternative to cater to lactose-intolerant friends while still enjoying that creamy texture. It’s just as delicious!
  • Citrus Zing: Add zest from a lemon or orange to the cream cheese mixture for a refreshing twist. This vibrant flavor cuts through the sweetness beautifully.
  • Nutty Crunch: Incorporate chopped nuts like almonds or hazelnuts into the filling for an added crunch and depth of flavor. This little change creates a delightful contrast!
  • Herbal Infusion: Blend a teaspoon of finely chopped fresh mint or basil into the cream cheese for a unique herbal note that elevates your raspberry filling to new heights.
  • Sweet Heat: Sprinkle a pinch of cayenne pepper or red pepper flakes into the cream cheese mixture for a subtle heat that pairs wonderfully with the raspberries—perfect for those who love a kick!
  • Jammy Elevation: Replace fresh raspberries with your favorite fruit preserves or jams for a quicker, sweeter filling option—ideal when fresh fruit is not available! This shortcut is a time-saver without sacrificing flavor.
  • Bite-Sized Treats: Cut puff pastry into smaller squares to create mini Danish bites, excellent for gatherings and sharing. Everyone loves these perfectly poppable pastries!

As you experiment, remember that the magic of cooking lies in creativity. Don't be afraid to mix and match, and for more fantastic ideas, check out expert tips for perfect results!

How to Store and Freeze Raspberry Danish

Fridge: Store baked Raspberry Danish in an airtight container for up to 3-4 days to keep them fresh and delicious.

Freezer: For longer storage, freeze the pastries for up to 2 months. Wrap each Danish in plastic wrap and place them in a freezer-safe bag or container.

Reheating: To enjoy your Raspberry Danish, reheat in a preheated oven at 375°F (190°C) for about 10-15 minutes until warmed through and crispy again.

Make-Ahead: You can also assemble the pastries and freeze them before baking. Just add an extra 5-10 minutes to baking time if baking from frozen.

Make Ahead Options

These delightful Raspberry Danish are perfect for busy home cooks looking to save time! You can prepare the cream cheese filling and assemble the pastries up to 24 hours in advance; just cover them tightly and refrigerate to maintain freshness. Additionally, you can freeze the assembled pastries for up to 2 months; this will help retain their shape and flaky texture. When ready to bake, simply preheat your oven and bake straight from the freezer, adding an extra minute or two to the baking time. By meal prepping these Raspberry Danish ahead of time, you'll enjoy effortless mornings with restaurant-quality pastries that are just as delicious!

What to Serve with Flaky Raspberry Danish with Cream Cheese Filling?

Delightful pastries are just the beginning; consider complementing your Raspberry Danish with a variety of appealing side dishes and drinks for a full experience.

  • Fresh Fruit Salad: A mix of seasonal fruits adds brightness and balance to the rich, creamy Danish, creating a colorful presentation.

  • Greek Yogurt Parfait: Layered with honey and granola, yogurt provides a creamy tang that pairs beautifully with the fruity sweetness of the Danish.

  • Coffee or Espresso: The robust flavors of coffee or a shot of espresso help to enhance the sweet and tart notes of the Raspberry Danish, making for a cozy morning.

  • Herbal Tea: A soothing cup of chamomile or mint tea brings a calming element that complements the pastry's sweetness effortlessly.

  • Whipped Cream: A dollop of lightly sweetened whipped cream adds extra creaminess, enhancing the already indulgent cream cheese filling.

  • Chocolate Drizzle: Drizzling rich chocolate over the Danish can elevate this treat to a new level of indulgence, merging fruity and chocolatey flavors delightfully.

  • Almond Scones: These nutty scones provide a contrasting texture while echoing the Danish's sweetness, perfect for brunch gatherings.

Pairing your Danish with these accompaniments not only creates a delightful spread but also ensures every bite is a harmonious experience!

Raspberry Danish Recipe FAQs

How do I select ripe and fresh raspberries for my Danish?
Absolutely! When choosing raspberries, look for firm, plump berries with a vibrant color. Avoid those with dark spots or signs of mold. Sweetness can vary, so taste one to gauge if you might need to adjust the sugar in your filling based on their tartness.

How should I store leftover Raspberry Danish?
For sure! You can store your baked Raspberry Danish in an airtight container at room temperature for up to 3-4 days. If you’d like to keep them fresher longer, consider refrigerating them. Just remember to allow them to cool completely before putting them in the container to avoid condensation.

Can I freeze Raspberry Danish after baking?
Yes, you can! To freeze your Raspberry Danish, let them cool completely, then wrap each one tightly in plastic wrap and place them in a freezer-safe bag. They can be frozen for up to 2 months. When you’re ready to enjoy, simply reheat them in a preheated oven at 375°F (190°C) for about 10-15 minutes until they’re warm and crispy again.

What should I do if my pastry edges unseal while baking?
Very common! If the edges of your pastries unseal during baking, don’t worry. This can happen with moist fillings like cream cheese and fruit. To avoid this in the future, ensure that you firmly pinch the edges closed and possibly chill them longer before baking to help maintain their shape.

Are there any dietary considerations I should be aware of with this recipe?
Definitely! If you're making these for a gathering, it’s always a good idea to ask about allergies. Cream cheese contains dairy, and raspberries are generally safe for most; however, always double-check for specific dietary needs. If you need a dairy-free option, consider using a dairy-free cream cheese alternative!

What’s the best way to prepare Raspberry Danish ahead of time?
Great question! You can assemble your Raspberry Danish up to the chilling step and then freeze them. Before baking, take them out and allow them to thaw in the fridge overnight. Extend the baking time by an additional 5-10 minutes when you bake them from frozen. This ensures a beautiful rise and flaky texture!

Raspberry Danish

Delicious Raspberry Danish with Creamy Filling You’ll Love

This Raspberry Danish recipe features flaky pastry, tart raspberries, and a creamy filling, perfect for brunch or cozy breakfasts.
Print Recipe Pin Recipe
Prep Time 30 minutes mins
Cook Time 30 minutes mins
Chilling Time 30 minutes mins
Total Time 1 hour hr 30 minutes mins
Servings: 9 danishes
Course: Dessert
Cuisine: American
Calories: 250
Ingredients Equipment Method Nutrition Notes

Ingredients
  

For the Pastry
  • 1 sheet Frozen Puff Pastry Thawed and refrigerated before use.
For the Filling
  • 1 cup Fresh Raspberries Choose ripe berries for optimal sweetness.
  • 8 oz Cream Cheese Ensure it’s softened for easy mixing.
  • 1/2 cup Powdered Sugar Adjust to balance the tartness of the raspberries.
  • 1 tsp Vanilla Extract Use pure vanilla for the best taste.
For the Assembly
  • 1 large Egg For egg wash.
  • 1 tbsp Water For egg wash.
  • 1 pinch Salt For egg wash.
  • 1 tbsp Flour Dust for rolling out the dough.

Equipment

  • Oven
  • Mixing Bowl
  • Whisk
  • Baking Sheet
  • Parchment Paper
  • Rolling Pin

Method
 

Step-by-Step Instructions
  1. In a medium bowl, combine softened cream cheese, powdered sugar, and vanilla extract. Blend until smooth and creamy, about 2-3 minutes.
  2. In a small bowl, crack one egg and whisk with water and a pinch of salt to create an egg wash. Set aside.
  3. Dust a surface with flour and roll out the thawed puff pastry into a square about 10.5 inches. Cut the dough into 9 equal squares, each about 3.5 inches.
  4. Place about 1 tablespoon of the cream cheese mixture in the center of each pastry square. Add approximately 4 fresh raspberries. Fold corners of each square towards the center and pinch to seal.
  5. Place pastries on a parchment-lined tray and freeze for at least 30 minutes.
  6. Preheat your oven to 400°F (204°C). Position the oven rack in the center.
  7. Brush tops of pastries with the egg wash. Bake in the preheated oven for 25-30 minutes until puffed and golden brown.
  8. Cool slightly on a wire rack. Optionally sprinkle with powdered sugar before serving.

Nutrition

Serving: 1danishCalories: 250kcalCarbohydrates: 30gProtein: 3gFat: 13gSaturated Fat: 7gPolyunsaturated Fat: 0.5gMonounsaturated Fat: 4gCholesterol: 50mgSodium: 200mgPotassium: 150mgFiber: 1gSugar: 5gVitamin A: 300IUVitamin C: 10mgCalcium: 50mgIron: 1mg

Notes

Ensure puff pastry remains cold for best results. Adjust sweetness based on raspberry tartness. Freeze assembled pastries for longer storage.

Tried this recipe?

Let us know how it was!

Delicious Hong Kong Egg Tart: Flaky Pastry, Creamy Delight

December 19, 2025 by Grace Snow Leave a Comment

As I took my first bite of a Hong Kong egg tart, a delightful memory flooded back—the sweet, creamy custard enveloped in a flaky, warm pastry took me straight to bustling tea houses in Hong Kong. This authentic Chinese dessert is not only utterly satisfying but also incredibly versatile, perfect for snacking, brunch, or special occasions. The magic lies in its contrast; the tender crust crumbles beautifully at the touch while the custard delivers a velvety richness that beckons for one more bite. Best of all, this recipe comes together with surprisingly quick prep time, making it an achievable treat for home chefs and food lovers alike. Are you ready to impress friends and family with this classic delight? Let’s dive into creating these luscious tarts!

Why is this Hong Kong Egg Tart unforgettable?

Unique Experience: The combination of flaky pastry and creamy custard creates a meltingly tender tart that transports you straight to Hong Kong's bustling tea houses.

Quick Prep Time: You’ll be pleasantly surprised at how easily this recipe comes together—perfect for home chefs of all skill levels!

Versatile Delight: Whether as a sweet snack or a show-stopping brunch dish, these tarts are bound to impress your guests.

Crowd-Pleasing Flavor: With their rich yet delicate flavors, these tarts are ideal for any occasion—perhaps paired with a cup of tea or coffee, similar to Breakfast Egg Muffins or a refreshing Avocado Egg Salad.

Customization Potential: Feel free to experiment with flavors; a hint of vanilla or citrus zest in the custard can elevate your tarts to a new level.

Your taste buds are in for a real treat—get ready to enjoy this delightful culinary adventure!

Hong Kong Egg Tart Ingredients

For the Water Dough
• All-purpose flour – A vital ingredient that provides the structure for the tart.
• Chilled unsalted butter – Ensures a flaky texture that crumbles beautifully.
• Sugar – Adds just the right amount of sweetness to the crust.
• Pinch of salt – Enhances the flavors throughout.
• One egg – Contributes richness to the dough.
• Ice water – Helps bring the dough together; ensure it’s very cold for best results. Substitution Note: Use gluten-free flour for a gluten-free variant, but texture may vary.

For the Oil Dough
• All-purpose flour – Forms the base layer of the dough.
• Shortening – Adds flakiness, although its flavor is mild.
• Softened unsalted butter – Enhances the overall flavor and texture. Substitution Note: Use all butter instead of shortening for a rich taste, though it may affect texture.

For the Filling
• Hot water – Helps dissolve sugar for an even sweetness throughout.
• Large eggs – Provide structure and stability to the custard.
• Pinch of salt – A small addition that boosts the overall flavor.
• Evaporated milk – Lends a luxurious creaminess to the custard. Substitution Note: Fresh milk can replace evaporated milk for a lighter filling.

Get ready to bake, as these Hong Kong egg tart ingredients are perfect for a delightful culinary experience!

Step‑by‑Step Instructions for Hong Kong Egg Tart

Step 1: Prepare Water Dough
In a mixing bowl, combine all-purpose flour and chilled, cubed unsalted butter. Use your fingertips to rub the butter into the flour until it resembles coarse sand. Add sugar, salt, the egg, and a splash of ice water, kneading gently until the dough is smooth and elastic. Wrap it in plastic wrap and let it rest for 15 minutes at room temperature.

Step 2: Prepare Oil Dough
In another bowl, mix all-purpose flour with shortening and softened unsalted butter until you create a smooth, cohesive paste. This oil dough will add flakiness to your Hong Kong egg tart crust. Cover it with plastic wrap and let it rest for 10 minutes, allowing the fats to soften and meld together well.

Step 3: Assemble Doughs
Take the rested water dough and shape it into a cross on a lightly floured surface. Place the oil dough in the center, folding the ends of the water dough around it to encase it completely. Seal the edges well, then roll the dough out gently to flatten it. Fold it into thirds like a letter, then roll it out again to create multiple layers. Allow it to rest for 15-30 minutes.

Step 4: Make Filling
In a bowl, combine hot water and sugar, stirring until completely dissolved for the custard mixture. In a separate bowl, gently beat the eggs and then fold in the evaporated milk along with a pinch of salt. Strain this mixture through a fine sieve to ensure a smooth custard without any air bubbles, which will give your Hong Kong egg tart a lovely finish.

Step 5: Shape Tarts
Preheat your oven to 325°F (162°C). Take the prepared dough and roll it out into thin circles, about ¼ inch thick. Place each circle into tart molds, pressing gently to conform to their shapes. Fill each shell with the custard mixture, being careful to leave a little space at the top for expansion during baking.

Step 6: Bake
Place the tart molds in the preheated oven, baking the Hong Kong egg tarts for approximately 25-35 minutes, or until the custard is set and the crust is golden brown. Once baked, remove them from the oven and let them cool slightly on a wire rack, as this will enhance their flaky texture and allow the custard to firm up before serving.

What to Serve with Hong Kong Egg Tart?

Indulging in the sweet, creamy custard of a Hong Kong egg tart is a moment best enjoyed with complementary flavors and textures. Here are some delightful pairings that will elevate your experience.

  • Creamy Mashed Potatoes: The rich, buttery flavor of mashed potatoes pairs surprisingly well with the sweet tart, offering a comfort-food balance.

  • Steamed Bok Choy: This fresh, crisp vegetable adds a lightness and earthy flavor that wonderfully contrasts the richness of the tart.

  • Fluffy Coconut Rice: The subtle sweetness and creaminess of coconut rice create a delightful harmony, making each bite even more satisfying.

  • Milk Tea: A classic pairing, the creamy and slightly sweet profiles of milk tea elevate the flavors, making for a comforting beverage.

  • Mango Pudding: Bring a tropical flair to your table with this fruity dessert; its texture and sweetness mirror the Hong Kong egg tart beautifully.

  • Vietnamese Iced Coffee: The bold, sweet coffee adds a refreshing kick, offering a perfect contrast to the milky custard tart.

  • Chilled Lychee: Bright and juicy lychee complements the flavors of the tart, providing a light, refreshing element between each bite.

  • Sesame Balls: These sweet, chewy treats enhance the dessert experience with their nuttiness and slightly crisp exterior, balancing the tarts' texture.

  • Vanilla Ice Cream: A scoop of creamy vanilla ice cream on the side makes for a decadent combination, allowing the tart's flavors to shine through.

  • Herbal Tea: A soothing herbal tea acts as a gentle palate cleanser and adds a fragrant note to the indulgent experience of enjoying Hong Kong egg tarts.

How to Store and Freeze Hong Kong Egg Tart

Room Temperature: Best enjoyed fresh, but if needed, tarts can be left out for up to 2 hours. After that, store them in the fridge to maintain quality.

Fridge: To keep your Hong Kong egg tarts fresh, store them in an airtight container in the fridge for up to 2-3 days. However, note that the crust may lose its crispiness after two days.

Freezer: For longer storage, freeze baked tarts for up to 3 months. Wrap individually in plastic wrap and place them in a freezer-safe bag.

Reheating: When ready to enjoy, thaw in the fridge overnight, then reheat in a preheated oven at 350°F (175°C) for about 10 minutes to restore the crust's flaky texture.

Hong Kong Egg Tart Variations & Substitutions

Feel free to explore different flavors and ingredients to make this classic recipe your own!

  • Dairy-Free: Substitute evaporated milk with coconut milk for a creamy, tropical twist.

  • Flavor Boost: Add a splash of vanilla extract or a hint of almond flavor to the custard for a fragrant aroma.

  • Citrus Zest: Incorporate orange or lemon zest into the filling for a refreshing citrus note that brightens every bite.

  • Matcha Infusion: Mix in matcha powder to the custard for a beautiful green hue and a unique earthy flavor.

  • Sweetener Alternative: Use honey or maple syrup instead of granulated sugar for a slightly different sweetness profile.

  • Nutty Texture: Sprinkle chopped nuts on top before baking for a delightful crunch and added flavor depth—consider almonds or pistachios.

  • Spicy Kick: For the adventurous, a dash of cayenne pepper or chili powder can introduce an unexpected warmth to each tart.

  • Mini Tarts: Create bite-sized versions using smaller tart molds for fun, shareable treats—perfect for parties or snacking.

With so many delightful variations available, your Hong Kong egg tarts can become a new family favorite or a surprising signature dish to share with friends. For more delightful recipes, try out these Corn Fried Egg tacos or an easy Egg Drop Soup as accompanying dishes!

Expert Tips for Perfect Hong Kong Egg Tart

  • Smooth Custard: Ensure the egg mixture is fully blended and free of froth. This prevents any bubbles in your custard and achieves a silky finish.

  • Measuring Accurately: Use a kitchen scale for precision when measuring your ingredients. Even slight variations can impact the texture of the Hong Kong egg tart.

  • Dough Resting Time: Don’t rush the resting periods for the doughs—they're crucial for creating those tender, flaky layers. Proper resting allows for better gluten development.

  • Keep Tart Shells Covered: Before filling, cover the tart shells with a damp cloth to prevent them from drying out. This keeps them tender and mold-ready!

  • Baking Time: Keep a close eye on the tarts as they bake. Every oven is different, so check for that golden crust and set custard.

  • Cool Properly: Allow the tarts to cool slightly on a wire rack after baking. This ensures they maintain their flaky texture and prevents sogginess on the bottom.

Make Ahead Options

These Hong Kong Egg Tarts are perfect for meal prep, allowing you to enjoy a delightful treat without the last-minute rush! You can prepare the water and oil dough up to 24 hours in advance; simply wrap them tightly in plastic wrap and refrigerate to keep them fresh and prevent drying. The custard filling can also be made a day ahead—just store it in an airtight container to avoid forming a skin on the surface. When you’re ready to bake, roll out the chilled dough, fill the tart shells with the custard, and pop them into the oven. This preparation will save you valuable time during busy weeknights while ensuring that your Hong Kong Egg Tarts are just as delicious as if they were freshly made!

Hong Kong Egg Tart Recipe FAQs

What type of flour should I use for the dough?
You should use all-purpose flour for both the water and oil dough. All-purpose flour provides the necessary structure for the crust. If you're looking for a gluten-free option, you can try substituting with gluten-free flour, but keep in mind that the texture may vary slightly from the traditional recipe.

How long can I store leftover tarts?
To maintain freshness, store your Hong Kong egg tarts in an airtight container in the fridge. They will stay good for about 2-3 days, although the crust may lose its crispiness after two days. For best results, consume them while they’re still fresh!

Can I freeze Hong Kong egg tarts?
Absolutely! You can freeze baked tarts for up to 3 months. Wrap each tart individually in plastic wrap, then place them in a freezer-safe bag. When you’re ready to enjoy them, thaw overnight in the fridge, then reheat in a preheated oven at 350°F (175°C) for around 10 minutes to regain their flaky texture.

What should I do if my custard filling has bubbles?
If your custard has bubbles, it means that the egg mixture was over-beaten. To avoid this, gently beat the eggs just enough to combine, and be sure to strain the filling through a fine sieve before pouring it into the tart shells. This will help eliminate any air bubbles and ensure a smooth, silky custard.

Are there any common allergens in this recipe?
Yes, this recipe contains eggs and dairy, which are common allergens. Additionally, if you choose to use shortening in the oil dough, ensure that it is free from trans fats. If you're preparing for someone with allergies, consider substitutions with egg replacers and non-dairy milk, though this may alter the final texture and flavor of your Hong Kong egg tarts.

What's the best way to enhance the flavor of the custard?
To elevate the custard filling, feel free to add flavorings like a teaspoon of vanilla extract, matcha powder, or citrus zest (like orange or lemon). These additions introduce delightful undertones that complement the sweetness of the custard beautifully, making your Hong Kong egg tarts even more delicious!

Hong Kong Egg Tart

Delicious Hong Kong Egg Tart: Flaky Pastry, Creamy Delight

Enjoy a delightful Hong Kong egg tart with flaky pastry and creamy custard, a classic Chinese dessert that promises satisfaction.
Print Recipe Pin Recipe
Prep Time 45 minutes mins
Cook Time 30 minutes mins
Resting Time 30 minutes mins
Total Time 1 hour hr 45 minutes mins
Servings: 12 tarts
Course: Dessert
Cuisine: Chinese
Calories: 150
Ingredients Equipment Method Nutrition Notes

Ingredients
  

For the Water Dough
  • 2 cups all-purpose flour A vital ingredient that provides the structure for the tart.
  • 1/2 cup chilled unsalted butter Ensures a flaky texture that crumbles beautifully.
  • 2 tablespoons sugar Adds just the right amount of sweetness to the crust.
  • 1 pinch salt Enhances the flavors throughout.
  • 1 large egg Contributes richness to the dough.
  • 1/4 cup ice water Helps bring the dough together; ensure it’s very cold for best results.
For the Oil Dough
  • 1 cup all-purpose flour Forms the base layer of the dough.
  • 1/4 cup shortening Adds flakiness, although its flavor is mild.
  • 1/4 cup softened unsalted butter Enhances the overall flavor and texture.
For the Filling
  • 1/2 cup hot water Helps dissolve sugar for an even sweetness throughout.
  • 4 large large eggs Provide structure and stability to the custard.
  • 1 pinch salt A small addition that boosts the overall flavor.
  • 1 cup evaporated milk Lends a luxurious creaminess to the custard.

Equipment

  • Mixing bowls
  • tart molds
  • fine sieve
  • wire rack
  • Rolling Pin

Method
 

Step-by-Step Instructions
  1. Prepare Water Dough: In a mixing bowl, combine all-purpose flour and chilled, cubed unsalted butter. Use your fingertips to rub the butter into the flour until it resembles coarse sand. Add sugar, salt, the egg, and a splash of ice water, kneading gently until the dough is smooth and elastic. Wrap it in plastic wrap and let it rest for 15 minutes at room temperature.
  2. Prepare Oil Dough: In another bowl, mix all-purpose flour with shortening and softened unsalted butter until you create a smooth, cohesive paste. Cover it with plastic wrap and let it rest for 10 minutes.
  3. Assemble Doughs: Take the rested water dough and shape it into a cross on a lightly floured surface. Place the oil dough in the center and fold the ends of the water dough around it to encase it completely. Roll the dough out gently to flatten it, fold it into thirds like a letter, then roll it out again. Allow it to rest for 15-30 minutes.
  4. Make Filling: In a bowl, combine hot water and sugar, stirring until dissolved. In a separate bowl, gently beat the eggs and then fold in the evaporated milk with a pinch of salt. Strain this mixture through a fine sieve to ensure a smooth custard.
  5. Shape Tarts: Preheat your oven to 325°F (162°C). Roll out the prepared dough into thin circles, about ¼ inch thick, and place each into tart molds. Fill each shell with the custard mixture.
  6. Bake: Bake the Hong Kong egg tarts for approximately 25-35 minutes, or until the custard is set and the crust is golden brown. Let them cool slightly on a wire rack before serving.

Nutrition

Serving: 1tartCalories: 150kcalCarbohydrates: 20gProtein: 3gFat: 6gSaturated Fat: 4gPolyunsaturated Fat: 0.5gMonounsaturated Fat: 1.5gCholesterol: 70mgSodium: 150mgPotassium: 50mgSugar: 5gVitamin A: 200IUCalcium: 30mgIron: 1mg

Notes

Best enjoyed fresh, but may be stored in an airtight container.

Tried this recipe?

Let us know how it was!

Mom’s Cream Horns: A Whimsical Dessert You’ll Adore

December 18, 2025 by Grace Snow Leave a Comment

As I whipped up a batch of Mom's Cream Horns recently, I was transported back to my childhood kitchen, where the air was filled with the sweet scent of baking and laughter. These delightful pastries, with their flaky puff pastry and velvety cream filling, are a true testament to homemade comfort. What I love most is how easy these cream horns are to make, and the best part? They’re fully customizable, allowing everyone to create their perfect treat, whether they opt for rich heavy cream or light Cool Whip. These creamy, dreamy delights not only make for an impressive dessert at gatherings but also serve as a nostalgic indulgence you can enjoy right at home. Are you ready to fill your kitchen with warmth and sweetness? Let’s dive into this recipe!

Why Are Mom’s Cream Horns Irresistible?

Easy to Make: This recipe is perfect for bakers of all skill levels, allowing you to whip up delightful treats without fuss.

Customizable Fillings: Choose between rich heavy cream for indulgence or light Cool Whip for a lighter touch, ensuring everyone’s preferences are satisfied.

Nostalgic Comfort: Each bite brings back childhood memories, making them a perfect dessert for family gatherings or cozy nights in.

Versatile Options: With possibilities like gluten-free and dairy-free variations, everyone can enjoy these creamy delights.

So, whether you’re exploring flavors with Peaches Cream Cookies or creating a cooling dessert with Vegan Cacao Cream, Mom's Cream Horns will quickly become a favorite in your recipe collection!

Mom’s Cream Horns Ingredients

For the Puff Pastry

  • Puff Pastry Sheets – Provides flaky structure; ready-made saves you time in the kitchen.

For the Cream Filling

  • Cream Cheese – Offers a creamy flavor essential for the filling; ensure it's softened for easy mixing.
  • Cold Heavy Cream – Adds lightness and fluffiness to the filling; crucial for achieving that dreamy texture.
  • Powdered Sugar – Sweetens the cream filling, ensuring smoothness; regular granulated sugar can work in a pinch.
  • Vanilla Extract – Enhances the overall flavor profile of the filling with a hint of warmth.
  • Sea Salt – Balances the sweetness, bringing out all the delicious flavors.

For the Light Filling Option

  • Cool Whip – Use if seeking a lighter filling texture; perfect for those who prefer a fluffier cream.

Remember, the perfect Mom's Cream Horns come down to the quality of your ingredients and the love you put into making them!

Step‑by‑Step Instructions for Mom’s Cream Horns

Step 1: Preheat and Prepare
Begin by preheating your oven to 400°F (204°C). While the oven heats, take your thawed puff pastry sheets and roll them out on a lightly floured surface. You want the pastry to be smooth and even, so use a rolling pin for best results. Once rolled, cut the pastry into ¾ inch wide strips, ensuring they are uniform for even baking.

Step 2: Shape the Pastry
Take the strips of puff pastry and carefully wrap each one around a horn mold, slightly overlapping the edges as you go. This will create a cone shape essential for forming your Mom’s Cream Horns. Ensure that the pastry clings well to the mold to maintain its form during baking. Once all strips are wrapped, you're ready for the oven.

Step 3: Bake the Shells
Place the prepared cream horn molds on a baking sheet lined with parchment paper. Bake in the preheated oven for approximately 18 minutes or until the pastry is a light golden brown, puffed up beautifully. Keep an eye on them towards the end of the baking time, as they may brown quickly.

Step 4: Cool and Prepare
Once baked, remove the cream horn molds from the oven and let them cool for a couple of minutes. While they're still warm, carefully remove the pastry from the molds and transfer them to a wire rack. Allow your buttery shells to cool completely, which is essential before filling them with the luscious cream.

Step 5: Make the Cream Filling
In a mixing bowl, beat the softened cream cheese until it's smooth and creamy. Gradually add the powdered sugar, mixing well between additions to achieve a silky texture. Once combined, add a splash of vanilla extract and a pinch of sea salt to enhance the flavor profile of your filling for Mom’s Cream Horns.

Step 6: Incorporate Heavy Cream
Next, pour in the cold heavy cream to the cream cheese mixture. Using a handheld mixer or a whisk, beat the mixture until it thickens and achieves a light, fluffy texture akin to soft peaks. If you prefer a lighter filling, you can fold in Cool Whip instead of heavy cream for a delightful alternative.

Step 7: Fill the Pastry Horns
Once your pastry shells are entirely cool, take your cream filling and transfer it into a piping bag fitted with a star tip. Pipe the delicious cream into each horn, starting from the base and filling to the tip to ensure they’re generously packed. Make sure to fill them evenly for the best presentation and taste.

Step 8: Chill Before Serving
After filling each of the cream horns, place them in the refrigerator and let them chill for at least 8 hours. This step not only melds the flavors together but also helps the filling set properly. Just before serving, dust the tops lightly with powdered sugar for an elegant finish.

Mom’s Cream Horns Customization Ideas

Unleash your inner chef and create personalized flavors with these delightful twists!

  • Gluten-Free: Substitute with gluten-free puff pastry, allowing everyone to join in on the fun. This ensures a similar, flaky texture that’s just as enjoyable.
  • Dairy-Free: Opt for non-dairy cream cheese and coconut cream for a delicious vegan-friendly filling, perfect for those who are lactose intolerant.
  • Flavor Boost: Add a teaspoon of almond extract or lemon zest into the filling for an extra burst of delightful flavor. Imagine the refreshing touch it gives!
  • Chocolate Lovers: Fold in mini chocolate chips or cacao nibs to the cream mixture for a decadently rich twist sure to impress chocolate enthusiasts.
  • Fruit-Filled: Mix in fruit purees like raspberry or strawberry to the cream filling for a fresh, fruity surprise that brightens every bite.
  • Nutty Crunch: Sprinkle crushed nuts or cookie crumbs on top of your filled cream horns for an added layer of texture. It’s a delightful contrast that jazzes up the dessert!
  • Spiced Delight: Incorporate a dash of cinnamon or nutmeg for a warm and comforting flavor that enhances the sweetness of the cream.
  • Savory Twist: Experiment with adding a touch of goat cheese for a unique savory filling that surprises and delights your taste buds.

And if you're in the mood for more creamy goodness, why not explore making some Cajeta Ice Cream or indulge in a luscious Ice Cream Cake? There are countless ways to keep your dessert game exciting!

How to Store and Freeze Mom’s Cream Horns

  • Fridge: Store filled Mom’s Cream Horns in an airtight container for up to 3 days. This keeps the pastry soft and ensures the creamy filling stays fresh.

  • Freezer: Unfilled pastry shells can be frozen for up to 3 months. Wrap them tightly in plastic wrap to prevent freezer burn for a future treat.

  • Reheating: If you prefer the pastry warm, gently reheat unfilled shells in a 350°F (175°C) oven for about 5 minutes. Avoid reheating filled horns, as this can melt the cream.

  • Make-Ahead Tips: Prepare and freeze unfilled shells ahead of time, then whip up the filling fresh before serving for an irresistible dessert at a moment's notice!

Expert Tips for Mom’s Cream Horns

  • Bake in Batches: Avoid overcrowding the oven by baking the pastry horns in batches. This ensures even baking and a perfect golden crust.

  • Use a Piping Bag: For a professional and neat filling, use a piping bag fitted with a star tip. This allows for even distribution of the creamy filling in each Mom’s Cream Horn.

  • Cool Completely: It's crucial to let your baked pastry shells cool completely before filling. This prevents the cream from melting and ensures a delightful contrast in textures.

  • Adjust Sweetness: Taste your cream filling before piping. If you desire a sweeter touch, fold in a bit more powdered sugar to meet your preference.

  • Experiment with Flavors: Feel free to customize the filling by adding extracts, fruits, or chocolate for a delicious twist on the classic Mom’s Cream Horns.

Make Ahead Options

These Mom's Cream Horns are perfect for meal prep, making them a delightful choice for busy home cooks! You can prepare the puff pastry shells up to 24 hours in advance. Simply bake and cool the horns, then store them in an airtight container at room temperature to maintain their crispy texture. Additionally, the cream filling can be made up to 3 days ahead; just refrigerate tightly covered to keep it fresh and fluffy. When you're ready to serve, fill the cooled pastry shells with the cream and allow to chill in the refrigerator for at least 8 hours before enjoying—this way, they remain just as delicious and impressive, with minimal effort on your part!

What to Serve with Mom's Cream Horns

Looking to create a delightful meal that pairs beautifully with these creamy pastries?

  • Fresh Berries: Adding fresh strawberries, blueberries, or raspberries provides a burst of tartness that complements the sweetness of the cream horns. Their juicy freshness brings a vibrant touch to every bite.

  • Rich Hot Chocolate: A steaming cup of hot chocolate adds warmth and indulgence. The rich flavor of chocolate balances the sweetness, making it the perfect sipping companion alongside your cream horns.

  • Vanilla Ice Cream: The creamy texture of vanilla ice cream contrasts nicely with the light and crispy pastry. It melts beautifully with each bite, creating a delightful harmony of flavors.

  • Coffee or Espresso: A robust coffee or shot of espresso enhances the experience. The bitterness cuts through the sweetness and elevates the taste, proving to be the perfect after-dinner drink.

  • Lemon Sorbet: For a refreshing palate cleanser, lemon sorbet offers a zesty contrast. Its bright, citrusy flavor refreshes your taste buds after the rich cream filling.

  • Chocolate Drizzle: A light drizzle of melted chocolate over the cream horns adds a touch of elegance and enhances their decadence. It’s a fun and delicious way to accommodate chocolate lovers.

  • Fruit Salad: A medley of seasonal fruits brings a refreshing crunch to the table. The natural sweetness of the fruits complements the creamy dessert without overwhelming it.

  • Champagne: For a celebratory touch, pair with a glass of sparkling champagne. The bubbles create a lovely nod to special occasions while cutting through the richness of the cream horns.

  • Matcha Tea: Try serving a warm cup of matcha tea for an earthy balance. Its subtle flavor enhances the overall experience without overshadowing the sweetness of your Mom's Cream Horns.

Mom's Cream Horns Recipe FAQs

How do I choose ripe ingredients for my Mom's Cream Horns?
Absolutely! When selecting ingredients, ensure your cream cheese is fresh and at room temperature for easy mixing. If using heavy cream, look for a carton marked "heavy whipping cream" with a fat content of at least 36%. For the puff pastry, ensure it's kept frozen until you’re ready to use it, but it should be perfectly thawed and pliable during assembly.

What’s the best way to store Mom's Cream Horns?
You’ll want to store filled Mom's Cream Horns in an airtight container in the refrigerator for up to 3 days. This method keeps the pastry soft and the filling fresh. If you’re not filling them right away, unfilled shells can be frozen for up to 3 months—just wrap them tightly in plastic wrap to prevent freezer burn!

Can I freeze the filled Mom's Cream Horns?
I don't recommend freezing filled cream horns as the cream filling can become watery upon thawing, altering their delightful texture. Instead, I suggest preparing the pastry shells in advance and freezing them, then whip up the filling fresh before serving. This keeps everything tasting creamy and delicious!

What should I do if my pastry shells are soggy?
Very! If your pastry shells end up soggy, it may be due to excess moisture. Ensure that you let the shells cool completely to room temperature before filling them. For a crispier shell, you can also bake them a few extra minutes until they are golden brown, checking often to prevent burning. If they're still soggy, next time you can sprinkle a light layer of powdered sugar inside the hollow to absorb moisture.

Are there any dietary considerations for Mom's Cream Horns?
Yes, absolutely! For those looking for gluten-free options, simply substitute with gluten-free puff pastry. If you're catering to a dairy-free or vegan audience, you can use non-dairy cream cheese and coconut cream for the filling. You can even get creative and add fun flavorings like almond extract or lemon zest!

How long should I chill the filled Mom's Cream Horns before serving?
For the best flavor and texture, chill your filled Mom's Cream Horns in the refrigerator for at least 8 hours before serving. This helps the filling set beautifully and allows the flavors to meld together, resulting in an unforgettable treat, reminiscent of warm childhood memories!

Mom’s Cream Horns

Mom’s Cream Horns: A Whimsical Dessert You’ll Adore

Mom’s Cream Horns are delightful pastries filled with creamy goodness that evoke childhood memories.
Print Recipe Pin Recipe
Prep Time 30 minutes mins
Cook Time 18 minutes mins
Chill Time 8 hours hrs
Total Time 8 hours hrs 48 minutes mins
Servings: 12 horns
Course: Dessert
Cuisine: American
Calories: 180
Ingredients Equipment Method Nutrition Notes

Ingredients
  

For the Puff Pastry
  • 2 sheets Puff Pastry Sheets ready-made saves you time in the kitchen
For the Cream Filling
  • 8 oz Cream Cheese ensure it's softened for easy mixing
  • 1 cup Cold Heavy Cream crucial for achieving a dreamy texture
  • 1/2 cup Powdered Sugar regular granulated sugar can work in a pinch
  • 1 teaspoon Vanilla Extract enhances the overall flavor
  • 1/4 teaspoon Sea Salt balances the sweetness
For the Light Filling Option
  • 1 cup Cool Whip perfect for those who prefer a fluffier cream

Equipment

  • Oven
  • Baking Sheet
  • Parchment Paper
  • horn molds
  • Mixing Bowl
  • handheld mixer
  • piping bag

Method
 

Step‑by‑Step Instructions for Mom’s Cream Horns
  1. Preheat your oven to 400°F (204°C) and roll out puff pastry sheets on a floured surface. Cut into ¾ inch wide strips.
  2. Wrap each strip around a horn mold, overlapping edges slightly to create a cone shape.
  3. Bake molds on a lined baking sheet for approximately 18 minutes or until golden brown.
  4. Remove from the oven, let cool for a few minutes, then transfer to a wire rack to cool completely.
  5. Beat softened cream cheese in a bowl until smooth, gradually mixing in powdered sugar, vanilla, and sea salt.
  6. Add cold heavy cream to the mixture and beat until fluffy; alternatively, fold in Cool Whip for a lighter filling.
  7. Once cooled, fill a piping bag with cream and pipe into each horn, starting from the base.
  8. Chill the filled horns in the refrigerator for at least 8 hours before serving, dusting with powdered sugar before serving.

Nutrition

Serving: 1hornCalories: 180kcalCarbohydrates: 20gProtein: 2gFat: 10gSaturated Fat: 6gCholesterol: 30mgSodium: 150mgPotassium: 100mgSugar: 8gVitamin A: 200IUCalcium: 50mg

Notes

Mom’s Cream Horns can be customized with different fillings and can also be made gluten-free and dairy-free.

Tried this recipe?

Let us know how it was!

Decadent French Butter Cake Recipe for Ultimate Indulgence

December 18, 2025 by Grace Snow Leave a Comment

As the warm aroma of brown butter wafted through my kitchen, I couldn’t help but smile, recalling the joy this rich French Butter Cake brings to any gathering. With its golden, caramelized crust and tender, melt-in-your-mouth texture, this cake is my secret weapon for turning ordinary moments into unforgettable celebrations. Made with simple pantry staples, this indulgent dessert not only showcases the beautiful harmony of nutty butter and sweet vanilla but also promises quick prep and effortless elegance. Perfect for impressing guests or savoring a quiet evening at home, it’s a delightful way to elevate your baking game. Curious to uncover the magic behind this classic recipe?

What makes this cake truly special?

Irresistible Flavor: The rich, nutty undertones of brown butter combined with a hint of vanilla deliver a decadent taste that elevates any dessert table.

Easy Preparation: Who knew an indulgent dessert could be so simple? With just a few pantry staples and minimal effort, you can whip up this cake in no time.

Versatile Serving: Whether served warm with a scoop of vanilla ice cream or accompanied by fresh berries, this cake adapts beautifully to any occasion.

Crowd-Pleasing Delight: Impress family and friends with your baking prowess; this French Butter Cake will undoubtedly become a favorite at gatherings.

For more delightful creations, don’t miss my Chocolate Pudding Cake or explore the flavorful layers of Crockpot Butter Chicken.

French Butter Cake Ingredients

For the Cake
• Unsalted Butter – Essential for richness and flavor; browning it adds depth!
• Sugar – Granulated sugar brings sweetness; coconut sugar can be used for a deeper taste.
• Eggs – These are crucial for binding; be sure they’re room temperature for better mixing.
• Cake Flour – Offers a light, delicate crumb; all-purpose flour is a viable substitute, though the cake may be denser.
• Baking Powder – A leavening agent that provides a light lift; gluten-free alternatives can work too.
• Salt – While optional, a pinch enhances the flavor and balances sweetness.
• Sour Cream – Adds moisture and tang; swap for dairy-free sour cream if needed.
• Milk – Contributes moisture; any non-dairy milk serves as a suitable alternative.

This French Butter Cake recipe is crafted with simple ingredients that work harmoniously to create a dessert that promises to impress.

Step‑by‑Step Instructions for French Butter Cake Recipe

Step 1: Brown the Butter
In a medium saucepan over medium heat, melt 1 cup of unsalted butter, stirring occasionally. Continue cooking for about 5 minutes until the butter becomes foamy and turns a beautiful golden brown, releasing a nutty aroma. Remove the pan from the heat and let the brown butter cool for about 10 minutes to ensure it doesn’t cook the eggs when mixed.

Step 2: Mix Wet Ingredients
In a large mixing bowl, combine the cooled brown butter with 1 cup of granulated sugar. Whisk together until the mixture is smooth and creamy. Add three room temperature eggs one at a time, beating well after each addition to ensure they are well incorporated. Stir in 1 tablespoon of pure vanilla extract, combining all ingredients thoroughly.

Step 3: Combine Dry Ingredients
In a separate bowl, sift together 1 ½ cups of cake flour, 1 teaspoon of baking powder, and a pinch of salt. Gently fold the dry ingredients into the wet mixture, being careful not to overmix. Once just combined, add in ½ cup of sour cream and ¼ cup of milk, mixing until the batter is smooth and creamy, ensuring that no lumps remain.

Step 4: Prepare for Baking
Grease and flour a 9-inch round cake pan, ensuring an even coating that will help your cake release easily. Pour the batter into the prepared pan, smoothing the top with a spatula. For an extra treat, sprinkle a tablespoon of sugar over the top; this will create a delightful caramelized crust during baking.

Step 5: Bake the Cake
Preheat your oven to 350°F (175°C) and place the cake pan in the center of the oven. Bake for 35-40 minutes, rotating the pan halfway through. The cake is done when the top is golden brown and a toothpick inserted in the center comes out with just a few moist crumbs attached.

Step 6: Cool and Serve
Once baked, remove the French butter cake from the oven and let it cool in the pan for about 10 minutes. Then, carefully transfer it to a wire rack to cool completely. Serve your cake warm or at room temperature, paired with fresh berries and whipped cream for an indulgent treat.

What to Serve with French Butter Cake

Enhance the indulgent experience of this rich dessert with delightful accompaniments that bring out its warm, buttery notes.

  • Fresh Berries: Juicy strawberries or raspberries provide a tart contrast, cutting through the cake’s richness and adding a refreshing touch.

  • Vanilla Ice Cream: Creamy, smooth ice cream melts perfectly alongside the warm cake, creating a delightful harmony of flavors and texture.

  • Whipped Cream: Light, airy whipped cream adds a cloud-like fluffiness, enhancing the cake's moistness while providing a delightful visual appeal.

  • Chocolate Sauce: Drizzling rich chocolate sauce over each slice introduces a sweet, luxurious touch, making every bite an indulgent treat.

  • Caramel Sauce: A rich, buttery caramel complements the cake's flavor, enhancing the sweet notes while adding a delightful sticky texture.

  • Coffee or Espresso: Pairing with hot, brewed coffee or a strong espresso brings out the cake's warm tones and adds a cozy café vibe.

  • Tea: A fragrant cup of Earl Grey or English Breakfast balances the cake's sweetness and is perfect for afternoon gatherings or tea parties.

Imagine savoring a slice with a glass of sweet dessert wine—an undeniably elegant experience that adds warmth to any gathering!

Make Ahead Options

These French Butter Cake preparations are perfect for busy home cooks seeking to save time without sacrificing flavor! You can prepare the batter up to 24 hours in advance by mixing all the wet and dry ingredients and storing it in an airtight container in the fridge. Just remember to let the mixture come to room temperature before baking to ensure even consistency. Alternatively, you can bake the cake ahead of time and store it covered at room temperature for up to 3 days. To maintain its deliciousness, simply reheat in the oven briefly before serving. This way, you'll have an indulgent French Butter Cake ready for any occasion with minimal effort!

French Butter Cake Recipe Variations

Feel free to explore these delightful twists on the classic French Butter Cake to make it your own!

  • Dairy-Free: Substitute unsalted butter with vegan butter and replace sour cream with dairy-free yogurt for a rich, creamy finish without dairy.

  • Gluten-Free: Use a 1:1 gluten-free flour blend in place of regular cake flour for a deliciously light texture suitable for everyone.

  • Citrus Zest: Incorporate a teaspoon of lemon or orange zest into the batter to brighten and enhance the flavor profile with a refreshing twist.

  • Nutty Delight: Add chopped walnuts or pecans into the batter for an unexpected crunch that perfectly complements the cake’s buttery richness.

  • Chocolate Lovers: Fold in chocolate chips or cacao nibs for a decadent chocolate surprise that blends beautifully with the sweetness.

  • Fortified Flavor: Drizzle a bit of rum or bourbon into the batter or sprinkle a few teaspoons over the cooled cake for an adult indulgence.

  • Jam Swirl: Before baking, pour half the batter into the pan, swirl in your favorite jam, and top with the remaining batter for a fruity surprise.

  • Spiced-Up: Add a teaspoon of cinnamon or a pinch of nutmeg to introduce warm spices that create a cozy aroma and depth to the flavor profile.

This cake is versatile, and these variations can transform your French Butter Cake recipe into something truly unique. Once you've mastered this cake, you might enjoy creating delightful pairings with a Chocolate Pudding Cake as a celebratory dessert, or savor the layered goodness of a Crockpot Butter Chicken for a hearty meal. Happy baking!

How to Store and Freeze French Butter Cake

Room Temperature: Keep the cake covered at room temperature for up to 3 days to maintain its moist texture; use a cake dome or wrap in plastic wrap.

Fridge: If you prefer a chilled option, store the cake in the fridge, but consume within 5 days for the best flavor and texture.

Freezer: For longer storage, wrap individual slices in plastic wrap then foil, keeping them in the freezer for up to 3 months; thaw at room temperature before enjoying.

Reheating: Warm slices in the microwave for 10-15 seconds or enjoy at room temperature for a delightful treat, still full of that rich French butter cake flavor.

Expert Tips for French Butter Cake

  • Cool the Butter: Let your brown butter cool before adding the eggs; this prevents any scrambling, ensuring a smooth batter.

  • Use Room Temperature Ingredients: For the best mixing, ensure your eggs and sour cream are at room temperature; this promotes a light, fluffy cake.

  • Don’t Rush Browning: Take your time with the butter; the nutty flavor developed during this step is the heart of this French Butter Cake recipe.

  • Check for Doneness: Insert a toothpick in the center; it should come out with a few moist crumbs, not wet batter, for the perfect texture.

  • Pan Prep Matters: Properly grease and flour your cake pan to avoid sticking, ensuring an easy release and beautiful presentation.

French Butter Cake Recipe FAQs

How do I choose the best butter for this cake?
Absolutely! For this French Butter Cake, using unsalted butter is crucial as it allows you to control the saltiness of the cake. I recommend selecting high-quality butter for the best flavor. Look for a product with a rich, creamy taste, and if you want to elevate the cake even further, try browning the butter for a nutty flavor that takes the cake to new heights.

How should I store leftover cake and how long will it last?
After baking, keep your French Butter Cake covered at room temperature for up to 3 days. It’s best to use a cake dome or wrap it in plastic wrap to maintain its moisture. If you choose to refrigerate it, be sure to enjoy it within 5 days, as refrigeration can alter the texture a bit.

Can I freeze leftover cake, and if so, how?
Definitely! Freezing is a fantastic way to extend the life of your French Butter Cake. First, slice the cake into individual portions. Wrap each slice tightly in plastic wrap and then in aluminum foil to protect from freezer burn. You can freeze these slices for up to 3 months. When you're ready to enjoy, simply thaw them at room temperature for a few hours, or pop them in the microwave for about 10-15 seconds for a warm treat!

What do I do if my cake doesn't rise properly?
If your French Butter Cake doesn’t rise adequately, there might be a few culprits. First, ensure your baking powder is fresh as it loses potency over time; you can test it by adding a bit to hot water—if it bubbles vigorously, it's still good! Also, be careful not to overmix the batter as this can lead to a dense cake. Finally, make sure your oven is preheated to 350°F and avoid opening the oven door during baking, as this can disrupt the rising process.

Are there dietary considerations I should keep in mind with this recipe?
Very! If you're baking for someone with allergies, feel free to substitute dairy ingredients. You can use vegan butter in place of unsalted butter, and dairy-free sour cream works perfectly without sacrificing texture. Additionally, if gluten is a concern, consider using a gluten-free flour blend as a substitute for cake flour, ensuring that all other ingredients you use are certified gluten-free as well.

French Butter Cake Recipe

Decadent French Butter Cake Recipe for Ultimate Indulgence

This French Butter Cake Recipe offers an indulgent dessert featuring a rich, nutty flavor and a melt-in-your-mouth texture, perfect for elevating any gathering.
Print Recipe Pin Recipe
Prep Time 15 minutes mins
Cook Time 40 minutes mins
Cooling Time 10 minutes mins
Total Time 1 hour hr 5 minutes mins
Servings: 8 slices
Course: Dessert
Cuisine: French
Calories: 350
Ingredients Equipment Method Nutrition Notes

Ingredients
  

For the Cake
  • 1 cup unsalted butter Browning it adds depth
  • 1 cup granulated sugar Coconut sugar can be used for a deeper taste
  • 3 large eggs Room temperature for better mixing
  • 1.5 cups cake flour All-purpose flour is a viable substitute
  • 1 teaspoon baking powder A leavening agent for a light lift
  • 1 pinch salt Optional, enhances flavor
  • 0.5 cup sour cream Swap for dairy-free if needed
  • 0.25 cup milk Any non-dairy milk serves as a suitable alternative

Equipment

  • Medium saucepan
  • large mixing bowl
  • 9-inch round cake pan

Method
 

Step‑by‑Step Instructions
  1. Brown the Butter: In a medium saucepan over medium heat, melt unsalted butter, stirring occasionally. Cook until golden brown and nutty aroma is released, about 5 minutes. Cool for 10 minutes.
  2. Mix Wet Ingredients: In a large mixing bowl, combine cooled brown butter and granulated sugar. Whisk until smooth. Add eggs one at a time, beating well. Stir in vanilla extract.
  3. Combine Dry Ingredients: Sift cake flour, baking powder, and salt in a separate bowl. Fold into wet ingredients until just combined. Add sour cream and milk, mixing until smooth.
  4. Prepare for Baking: Grease and flour a 9-inch round cake pan. Pour batter into the pan, smoothing the top. Optionally, sprinkle sugar on top for a caramelized crust.
  5. Bake the Cake: Preheat oven to 350°F (175°C). Bake for 35-40 minutes until the top is golden brown and a toothpick comes out with a few moist crumbs.
  6. Cool and Serve: Let the cake cool in the pan for 10 minutes, then transfer to a wire rack. Serve warm or at room temperature with fresh berries and whipped cream.

Nutrition

Serving: 1sliceCalories: 350kcalCarbohydrates: 40gProtein: 4gFat: 20gSaturated Fat: 12gPolyunsaturated Fat: 1gMonounsaturated Fat: 6gCholesterol: 100mgSodium: 150mgPotassium: 100mgFiber: 1gSugar: 20gVitamin A: 500IUCalcium: 50mgIron: 1mg

Notes

For best results, cool the brown butter before adding eggs to prevent scrambling. Ensure all ingredients are at room temperature for a light texture.

Tried this recipe?

Let us know how it was!

Irresistible Blackberry Cream Cheese Danish for Sweet Moments

December 18, 2025 by Grace Snow Leave a Comment

As I pulled open the oven door, a warm wave of sweet, buttery aroma enveloped the kitchen, instantly transforming it into a cozy haven. These Blackberry Cream Cheese Danishes are more than just pastries; they’re a delightful union of flaky goodness and creamy indulgence that will have your taste buds dancing. Crafted with a luscious homemade blackberry curd and a velvety cream cheese filling, this easy dessert is the perfect way to impress guests or add a touch of elegance to your afternoon treat. Not only do they look gorgeous on a plate, but they're also incredibly satisfying to make—especially since they embrace the convenience of store-bought puff pastry. Curious about how to elevate your baking game with this delightful recipe? Let's dive in!

Why Are Blackberry Cream Cheese Danishes Irresistible?

Flaky Perfection: The combination of store-bought puff pastry and homemade blackberry curd creates an irresistible flaky texture that melts in your mouth.

Bursting with Flavor: Each bite presents a delightful balance of sweet-tart blackberry and creamy vanilla, making these pastries perfect for any occasion.

Easy to Make: With straightforward steps, even novice bakers can achieve stunning results—ideal for impressing friends or family without stress!

Versatile Treat: Swap out blackberries for your favorite fruits like raspberries or peaches, allowing you to customize this delicious dessert to suit your taste.

Ideal for Sharing: Perfect for brunch or afternoon tea, these danishes are a crowd-pleaser that will have everyone asking for seconds—pair them with a steaming cup and enjoy!

Make Ahead: Prepare the curd and filling the day before for an effortless assembly, just in time to serve up these gorgeous pastries. If you're a fan of fruity desserts, you’ll also love my Blackberry Crisp Amp!

Blackberry Cream Cheese Danish Ingredients

• Dive into creating these delectable pastries with this handy ingredient list!

For the Blackberry Curd

  • Blackberries – Fresh or frozen; provides the core flavor in curd. Substitutions: Use other berries for different flavored curds.
  • Granulated Sugar – Sweetens blackberry curd and cream cheese filling. Notes: Adjust sweetness based on fruit ripeness.
  • Egg – Essential for thickening the blackberry curd. Note: Use a large egg for the best results.
  • Egg Yolks (2) – Adds richness and helps in curd thickening. Note: Ensure they are well incorporated for smooth curd.
  • Lemon Juice – Adds brightness and acidity to the curd. Substitution: Lime juice can be used for a different flavor profile.
  • Butter – Provides richness and creaminess to the curd. Note: Use unsalted butter for better control of salt levels.

For the Cream Cheese Filling

  • Cream Cheese – Forms the base of the filling, giving it a rich texture. Prep Note: Ensure it is softened to room temperature for easy mixing.
  • Granulated Sugar – Sweetens the cream cheese filling. Note: Adjust sweetness as desired.
  • Egg Yolk – Adds richness to the filling. Note: A single yolk is sufficient for smooth creaminess.
  • Vanilla Extract – Enhances flavor of the cream cheese filling. Substitutions: Almond extract can offer a different flavor twist.

For the Pastry and Topping

  • Puff Pastry – The pastry base that holds the filling and curd. Notes: Can substitute with crescent dough but textures will differ.
  • Turbinado Sugar – Provides a crunchy topping on the edges for texture. Note: Plain granulated sugar can be used if unavailable.
  • Fresh Blackberries (for garnish) – Adds freshness and beautiful color. Notes: Can be replaced with any seasonal fruit.
  • Powdered Sugar – For dusting before serving. Note: Optional for a final decorative touch.

With all these ingredients in hand, get ready to create an unforgettable Blackberry Cream Cheese Danish that'll leave everyone craving more!

Step‑by‑Step Instructions for Blackberry Cream Cheese Danish

Step 1: Make the Blackberry Curd
Begin by pureeing 2 cups of blackberries in a blender until smooth, then strain the mixture through a fine mesh sieve to remove the seeds. In a saucepan, combine the strained puree with ¾ cup of granulated sugar, 1 whole egg, 2 egg yolks, and 2 tablespoons of lemon juice. Cook over medium heat for about 8-10 minutes, stirring constantly, until the mixture thickens and coats the back of a spoon. Stir in 4 tablespoons of unsalted butter until melted and silky, then strain again to ensure smoothness.

Step 2: Prepare the Cream Cheese Filling
In a mixing bowl, use an electric mixer to beat 8 ounces of softened cream cheese, ¼ cup of granulated sugar, 1 egg yolk, and 1 teaspoon of vanilla extract until smooth and creamy. This mixture should be well combined with no lumps remaining, which will ensure a velvety filling in your Blackberry Cream Cheese Danish. Set aside the filling while you prepare the puff pastry.

Step 3: Prepare the Puff Pastry
Roll out 1 sheet of thawed puff pastry on a lightly floured surface until it’s about ¼ inch thick. Use a 3½-inch round cutter to cut out circles, gathering and re-rolling the dough as necessary. Carefully prick the center of each circle with a fork, leaving about a ½-inch border. This will allow the edges to rise beautifully while keeping the center ready for the luscious cream cheese filling.

Step 4: Fill and Assemble the Pastries
Spoon about a tablespoon of the cream cheese filling into the center of each pastry circle, ensuring not to overfill to prevent spilling during baking. Once filled, gently fold the edges of the dough up around the filling, creating a lovely border. Brush the edges lightly with an egg wash (1 beaten egg) for a golden finish, then sprinkle each with turbinado sugar for that delightful crunch.

Step 5: Bake the Danishes
Preheat your oven to 400°F (200°C). Place the assembled pastries on a baking sheet lined with parchment paper and bake for 15-18 minutes, or until the edges are golden brown and flaky. Keep an eye on them, as you want to be greeted with a tempting aroma and a beautifully risen, golden pastry when they’re done.

Step 6: Assemble and Serve
Once the Blackberry Cream Cheese Danishes have cooled completely, fill each with a generous dollop of the homemade blackberry curd. Crown each pastry with fresh blackberries for a pop of color and added freshness. Optionally, dust with powdered sugar before serving for an elegant touch that enhances the sweet-tart contrast of these delightful treats.

How to Store and Freeze Blackberry Cream Cheese Danish

Fridge: Store the danishes in an airtight container for up to 3 days to maintain their flaky texture and creaminess.

Freezer: For longer storage, freeze the assembled danishes before baking. Wrap each pastry tightly in plastic wrap and then in aluminum foil, keeping them fresh for up to 2 months.

Reheating: Bake frozen pastries straight from the freezer at 400°F (200°C) for about 20-25 minutes until golden and warmed through. This ensures your Blackberry Cream Cheese Danish is just as delightful as when freshly made!

Make-Ahead Tip: You can prepare the blackberry curd and cream cheese filling a day ahead, storing them in the fridge. Assemble the pastries just before baking for a fresh experience.

What to Serve with Blackberry Cream Cheese Danish

These delightful pastries are perfect for building a delightful brunch or afternoon tea experience.

  • Fresh Fruit Salad: A medley of seasonal fruits adds a refreshing contrast to the creamy danish, making each bite a burst of flavor.
  • Crispy Bacon: The savory saltiness of crispy bacon perfectly balances out the sweet and creamy elements of the danish.
  • Rich Coffee: A warm cup of freshly brewed coffee enhances the pastries' buttery flavors, creating a comforting morning ritual.
  • Herbal Tea: A soothing herbal tea brings a lightness to the table, allowing the sweet-tart blackberry flavors to shine through beautifully.
  • Vanilla Ice Cream: Pairing with a scoop of vanilla ice cream creates a luxurious dessert experience, melting into the warm pastry.
  • Whipped Cream: Light and airy whipped cream softens the richness of the filling, adding fluffiness without overshadowing the flavors.

These pairings will elevate your Blackberry Cream Cheese Danishes, turning them into an unforgettable treat for any occasion!

Blackberry Cream Cheese Danish Variations

Feel free to get creative with these delightful danishes and make them your own!

  • Berry Medley: Swap blackberries for mixed berries like raspberries and blueberries for a colorful, tangy twist.
    Each bite becomes a burst of different berry flavors that will impress your guests!

  • Citrus Zest: Add lime or orange zest to your cream cheese filling for a refreshing citrus kick.
    The bright notes elevate the creamy texture and add a delightful surprise in every bite.

  • Gluten-Free: Use gluten-free puff pastry for a completely gluten-free version.
    It’s a great way to cater to dietary restrictions while still enjoying flaky deliciousness.

  • Sweetened Cream Cheese: Mix in a tablespoon of honey or maple syrup into your cream cheese filling for extra sweetness.
    This creates a parallel sweetness that pairs beautifully with the tart blackberry curd.

  • Spicy Kick: Add a pinch of cayenne pepper or crushed red pepper flakes to the stirring mixture of blackberry curd for a warm surprise.
    A touch of heat provides an exciting contrast to the sweetness.

  • Nutty Flavor: Introduce a handful of chopped pecans or walnuts into the cream cheese filling for added crunch and flavor.
    The nuttiness adds another layer of richness that balances flawlessly with the fruity curd.

While you're experimenting with these variations, you might also enjoy Vegan Cacao Cream or incorporate seasonal fruits like peaches into your pastries—like with the Peaches Cream Cookies. Let your creativity shine and make every batch unique!

Expert Tips for Blackberry Cream Cheese Danish

  • Perfect Puff Pastry: Ensure your puff pastry is fully thawed before rolling out; this allows for optimal flakiness in your Blackberry Cream Cheese Danish.

  • Avoid Spills: Leave enough border when filling with cream cheese to prevent overflow. A well-defined edge helps the pastry rise beautifully during baking.

  • Smooth Curd: For a silky blackberry curd, strain it after cooking to remove seeds and lumps. This ensures a luxurious texture in your danishes.

  • Egg Wash for Shine: Brush the pastry edges with the egg wash just before baking. This creates a glossy, golden exterior that’s visually appealing.

  • Serve Fresh: These pastries are best enjoyed fresh out of the oven. If making ahead, store the curd and filling separately and assemble just before baking.

  • Flavor Variations: Don’t hesitate to experiment with different fruits for your curd! Raspberry or peach can create delightful twists on classic flavors.

Make Ahead Options

These Blackberry Cream Cheese Danishes are a fantastic option for meal prep! You can prep the blackberry curd and cream cheese filling up to 24 hours in advance; simply store them in airtight containers in the refrigerator to maintain their freshness. The pastry circles can also be cut and kept in the fridge for a few hours before assembling. When you're ready to serve, fill the pastries with the prepared cream cheese mixture and bake as directed. Just remember to keep the pastries covered to prevent drying out, ensuring they bake up just as flaky and delicious as if made fresh! This makes for a delightful dessert that saves you time without sacrificing flavor.

Blackberry Cream Cheese Danish Recipe FAQs

What type of blackberries should I use for the curd?
Absolutely! Fresh blackberries work wonderfully, but if they're out of season or not available, you can use frozen ones. Just make sure to thaw them and drain any excess liquid, as this will give you a richer flavor for your homemade blackberry curd.

How should I store leftover Blackberry Cream Cheese Danishes?
To maintain their flaky texture, store the danishes in an airtight container in the refrigerator for up to 3 days. It’s best to enjoy them fresh, but if you have leftovers, this will help keep them tasty without getting soggy.

Can I freeze the assembled danishes?
Yes, you can! To freeze, wrap each uncooked pastry tightly in plastic wrap and then in aluminum foil. They can be stored in the freezer for up to 2 months. When you're ready to bake, just pop them straight from the freezer into a preheated oven at 400°F (200°C) for about 20-25 minutes.

Why did my cream cheese filling turn out lumpy?
It happens sometimes! Make sure your cream cheese is at room temperature before mixing—this helps achieve that smooth and creamy texture you want. If lumpy filling is a concern, you can blend it again until smooth before using it in your pastries.

Are these danishes suitable for people with dietary restrictions?
For those with allergies, this recipe contains dairy and eggs, which are commonly known allergens. If you're looking for alternatives, consider using dairy-free cream cheese and a flax egg instead of the regular egg for the cream cheese filling; this can cater to certain dietary needs while still keeping the indulgent flavor.

How long does the homemade blackberry curd last?
You can keep the blackberry curd in the refrigerator for up to a week in an airtight container. This delicious topping is not just great for danishes; it can also be drizzled over ice cream or used in yogurt for a refreshing treat.

Blackberry Cream Cheese Danish

Irresistible Blackberry Cream Cheese Danish for Sweet Moments

These Blackberry Cream Cheese Danishes are an irresistible combination of flaky pastry and creamy filling, ideal for sweet moments.
Print Recipe Pin Recipe
Prep Time 30 minutes mins
Cook Time 18 minutes mins
Total Time 48 minutes mins
Servings: 12 danishes
Course: Dessert
Cuisine: American
Calories: 250
Ingredients Equipment Method Nutrition Notes

Ingredients
  

For the Blackberry Curd
  • 2 cups Blackberries Fresh or frozen; provides the core flavor in curd.
  • ¾ cup Granulated Sugar Sweetens blackberry curd and cream cheese filling.
  • 1 whole Egg Essential for thickening the blackberry curd.
  • 2 large Egg Yolks Adds richness and helps in curd thickening.
  • 2 tablespoons Lemon Juice Adds brightness and acidity to the curd.
  • 4 tablespoons Butter Provides richness and creaminess to the curd.
For the Cream Cheese Filling
  • 8 ounces Cream Cheese Forms the base of the filling, giving it a rich texture.
  • ¼ cup Granulated Sugar Sweetens the cream cheese filling.
  • 1 large Egg Yolk Adds richness to the filling.
  • 1 teaspoon Vanilla Extract Enhances flavor of the cream cheese filling.
For the Pastry and Topping
  • 1 sheet Puff Pastry The pastry base that holds the filling and curd.
  • 2 tablespoons Turbinado Sugar Provides a crunchy topping on the edges for texture.
  • 1 cup Fresh Blackberries Adds freshness and beautiful color for garnish.
  • Powdered Sugar for dusting Optional for a final decorative touch.

Equipment

  • Blender
  • Saucepan
  • Mixing Bowl
  • Electric mixer
  • Rolling Pin
  • Baking Sheet
  • Parchment Paper
  • 3½-inch Round Cutter

Method
 

Step-by-Step Instructions
  1. Make the Blackberry Curd: Puree 2 cups of blackberries in a blender until smooth, then strain through a fine mesh sieve. Combine strained puree, ¾ cup sugar, 1 egg, 2 yolks, and 2 tbsp lemon juice in a saucepan. Cook over medium heat for 8-10 minutes, stirring constantly. Stir in 4 tbsp butter until melted, then strain again to ensure smoothness.
  2. Prepare the Cream Cheese Filling: Beat 8 ounces of softened cream cheese, ¼ cup sugar, 1 egg yolk, and 1 tsp vanilla extract in a mixing bowl until smooth. Set aside.
  3. Prepare the Puff Pastry: Roll out 1 sheet of thawed puff pastry on a floured surface to about ¼ inch thick. Cut out circles with a 3½-inch cutter and prick the center of each with a fork.
  4. Fill and Assemble the Pastries: Spoon about a tablespoon of cream cheese filling into each circle. Fold edges around filling, brush lightly with an egg wash, and sprinkle with turbinado sugar.
  5. Bake the Danishes: Preheat oven to 400°F (200°C). Bake assembled pastries on a parchment-lined sheet for 15-18 minutes until golden brown.
  6. Assemble and Serve: Once cooled, fill with blackberry curd and top with fresh blackberries. Dust with powdered sugar if desired.

Nutrition

Serving: 1danishCalories: 250kcalCarbohydrates: 30gProtein: 3gFat: 12gSaturated Fat: 7gPolyunsaturated Fat: 0.5gMonounsaturated Fat: 4gCholesterol: 75mgSodium: 150mgPotassium: 100mgFiber: 1gSugar: 10gVitamin A: 200IUVitamin C: 5mgCalcium: 30mgIron: 1mg

Notes

These pastries are best enjoyed fresh but can be prepared in advance. Store the curd and filling separately for effortless assembly just before baking.

Tried this recipe?

Let us know how it was!
  • « Previous Page
  • 1
  • …
  • 27
  • 28
  • 29
  • 30
  • 31
  • …
  • 134
  • Next Page »

Welcome!

Hi, I’m Grace, a Sydney-based home cook with a passion for bold flavors and trending ingredients. Whether you’re a busy beginner or a seasoned foodie, you’ll find dishes here that are fresh, fun, and full of flavor.

More about me

Popular Recipes

  • Lemon Cookies Raspberry Frosting
    Lemon Cookies with Raspberry Frosting – A Zesty Delight!
  • Brookies Cookies
    Brookies Cookies: The Ultimate Fudgy-Sweet Delight
  • Peanut Butter Pretzel Cookies
    Peanut Butter Pretzel Cookies: Sweet & Salty Magic!
  • Traditional Greek Honey Cookies
    Delicious Traditional Greek Honey Cookies to Sweeten Your Holidays

Footer

↑ back to top

About

  • Privacy Policy
  • Disclaimer
  • Terms & Conditions

Newsletter

  • Sign Up! for emails and updates

Contact

  • About me
  • Contact me

Copyright © 2025 TastyTrendIngredients