tastytrendingredients

  • Home
  • Recipes
    • Appetizers
    • Breakfast
    • Dessert
    • Dinner
    • Drinks
    • Salads
    • Snacks
    • Soups
  • About me
  • Contact me
menu icon
go to homepage
  • Home
  • Recipes
    • Appetizers
    • Breakfast
    • Dessert
    • Dinner
    • Drinks
    • Salads
    • Snacks
    • Soups
  • About me
  • Contact me
search icon
Homepage link
  • Home
  • Recipes
    • Appetizers
    • Breakfast
    • Dessert
    • Dinner
    • Drinks
    • Salads
    • Snacks
    • Soups
  • About me
  • Contact me
×

Mini Funfetti Yogurt Muffins for a Fun, Wholesome Treat

November 17, 2025 by Grace Snow Leave a Comment

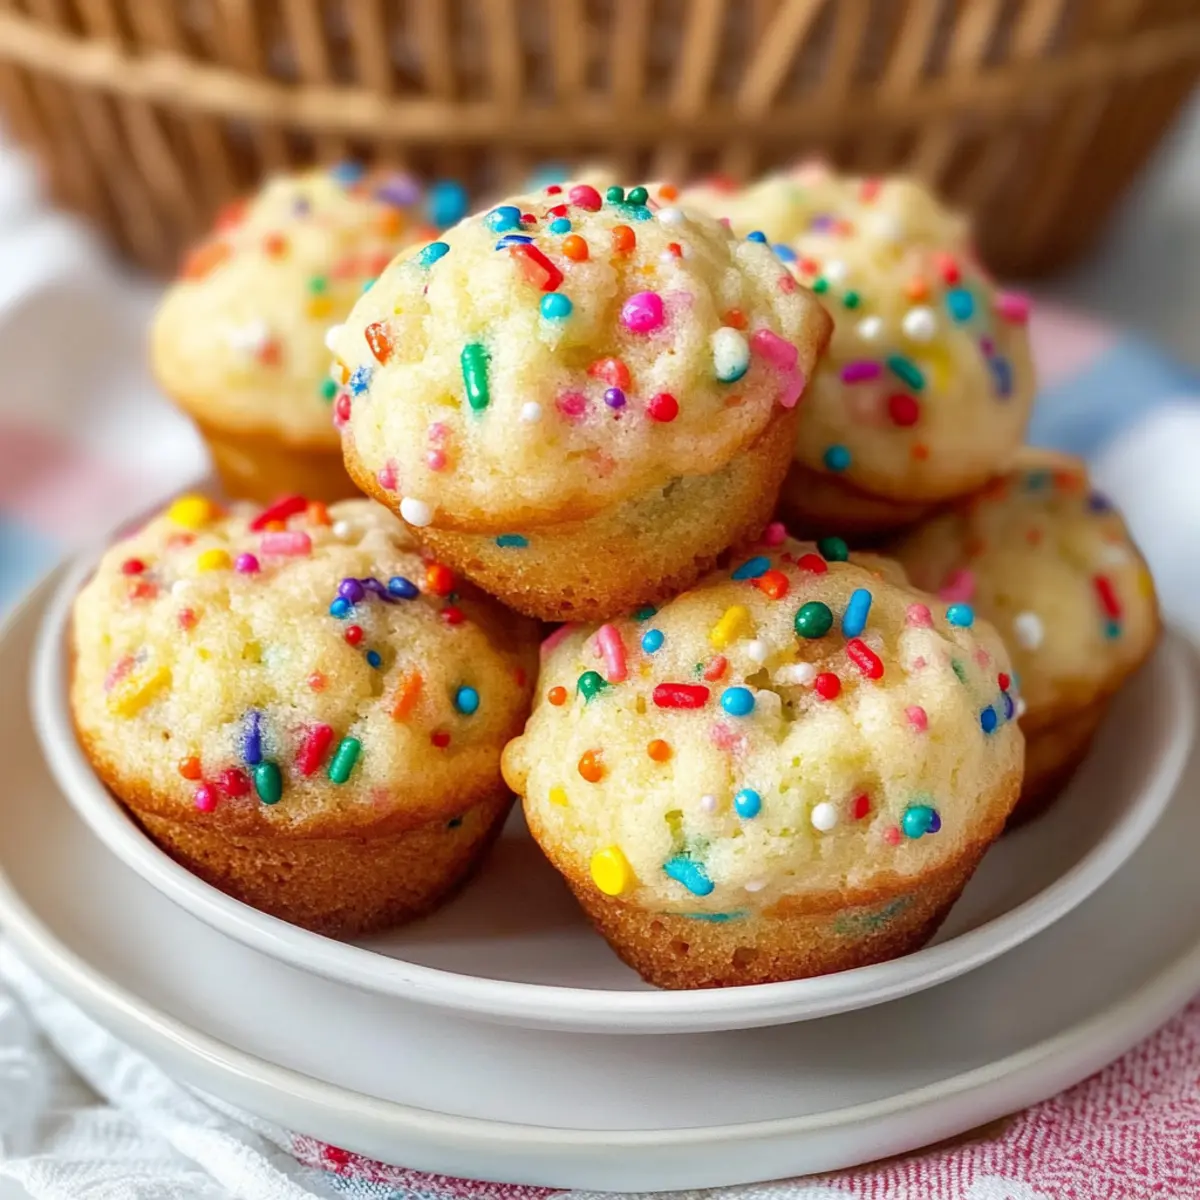
As I stood in my kitchen, the unmistakable smell of baking muffins filled the air, and I couldn’t help but feel a wave of nostalgia wash over me. The exciting part? Today, I’m whipping up Mini Funfetti Yogurt Muffins—little delights that are not only fun and colorful but also packed with wholesome goodness. With the combination of creamy yogurt and light brown sugar, these muffins are a healthier twist on traditional treats, making them the perfect snack for both kids and adults alike. Plus, they’re incredibly versatile; you can easily customize them with chocolate chips or fresh fruit, catering to each taste preference. Best of all, they freeze beautifully, ensuring you always have a delicious, protein-rich option ready to go. What’s your favorite way to customize a muffin recipe? Let’s find out how to make these delightful bites!

Why Are Mini Funfetti Yogurt Muffins Great?

Healthy Twist: These muffins are made with yogurt, adding a protein boost without compromising on taste.

Kid-Friendly: Fun and colorful, they’re sure to delight little ones and adults alike!

Versatile Options: Customize with your favorite add-ins—chocolate chips or blueberries make them even more exciting. Consider exploring other delicious options like Breakfast Egg Muffins.

Quick & Easy: Whip them up in under 30 minutes, perfect for busy mornings.

Make-Ahead Perfection: Freeze leftovers to enjoy anytime; they stay moist and flavorful.

So why wait? Dive into this simple recipe that brings joy to every bite!

Mini Funfetti Yogurt Muffins Ingredients

For the Batter

  • Plain Yogurt – Adds moisture and a protein boost; substitute with Greek yogurt for an even higher protein option.
  • Milk – Provides the necessary liquid; consider using non-dairy alternatives like almond or soy milk for lactose-free muffins.
  • Mild Flavored Oil / Melted Butter – Offers richness and moisture; swap with coconut oil for a dairy-free delight.
  • Eggs – Bind the ingredients together and add moisture; for a vegan option, use flax eggs (note that the texture may vary).
  • Vanilla Extract – Enhances the overall flavor; opt for pure vanilla extract over imitation for the best taste.
  • All-Purpose Flour – Provides structure to the muffins; substitute with whole wheat flour for a fiber boost.
  • Light Brown Sugar – Contributes wonderful sweetness and moisture; try coconut sugar for a healthier alternative.
  • Baking Soda – Acts as a leavening agent for that perfect rise; ensure it’s fresh for best results.
  • Salt – Balances the sweetness and heightens flavor.
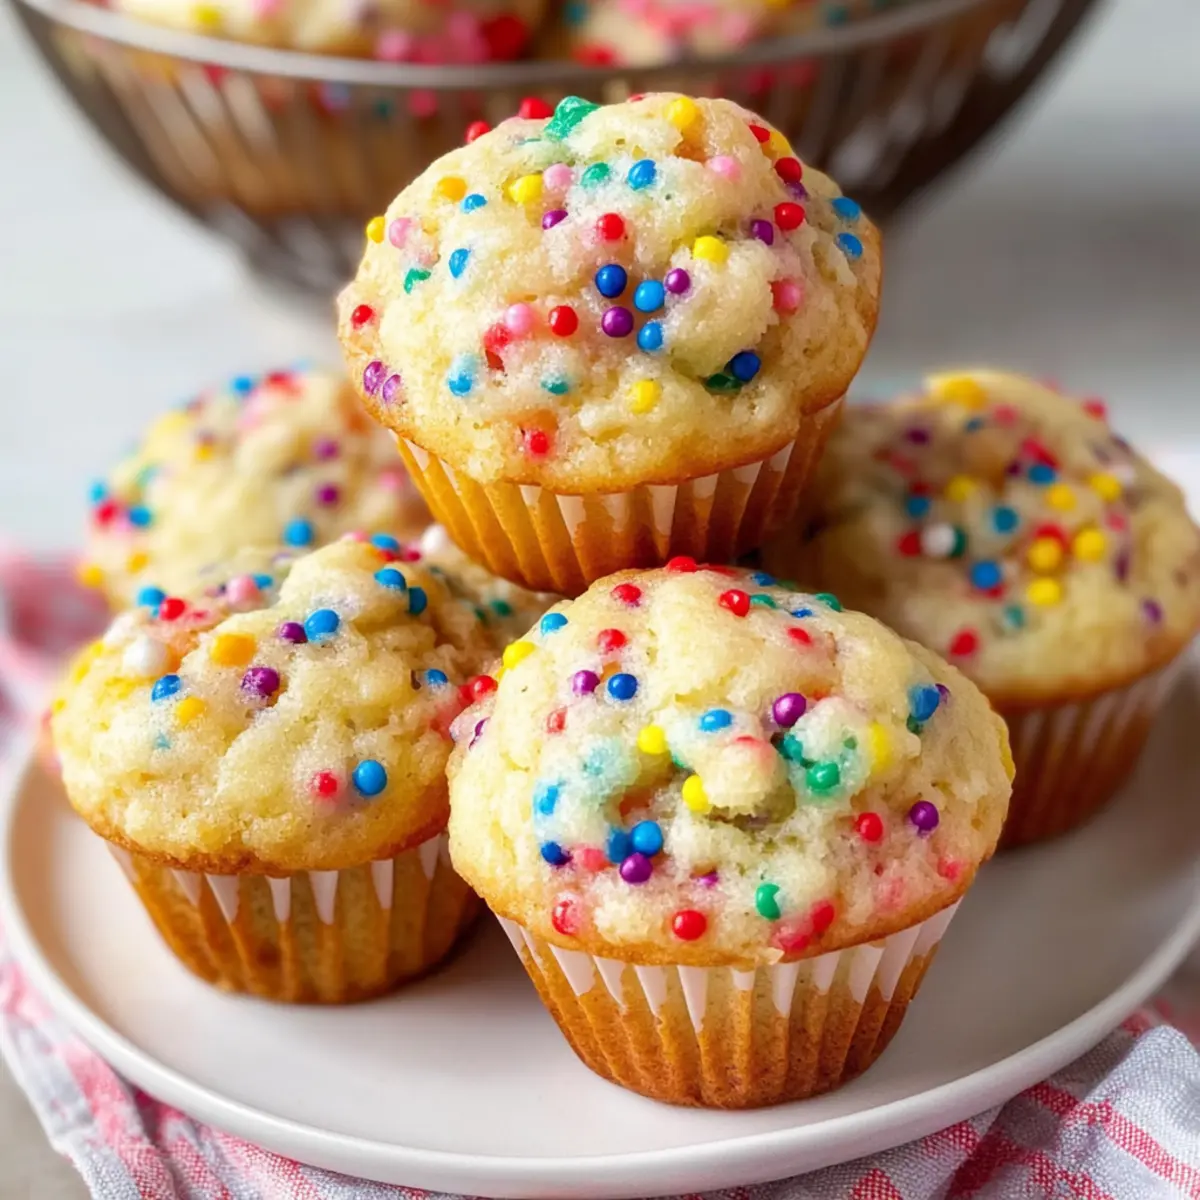
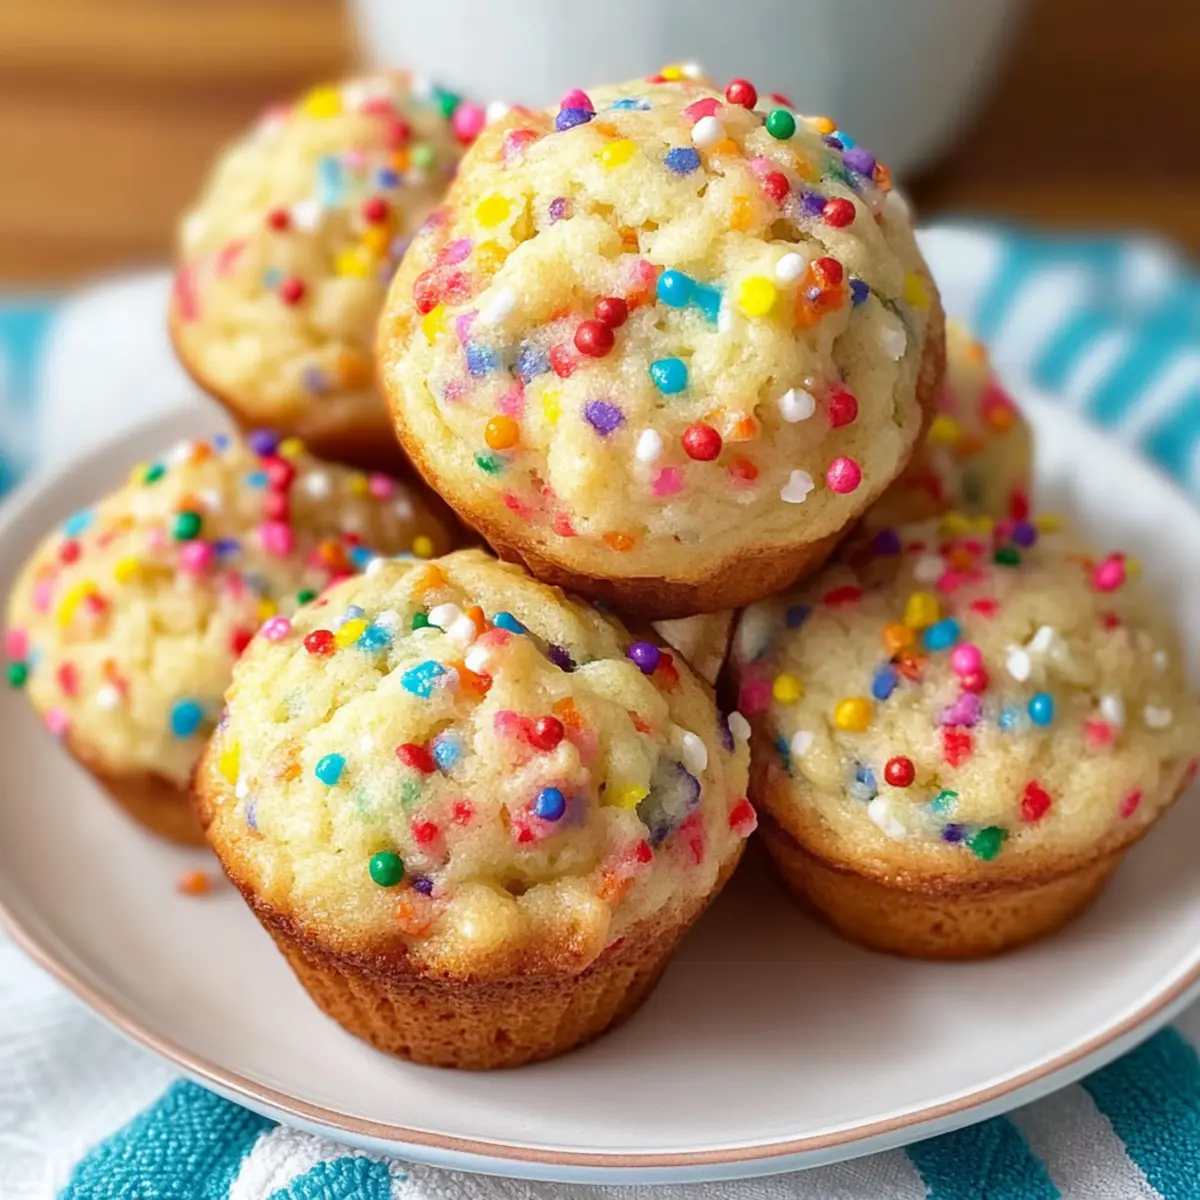
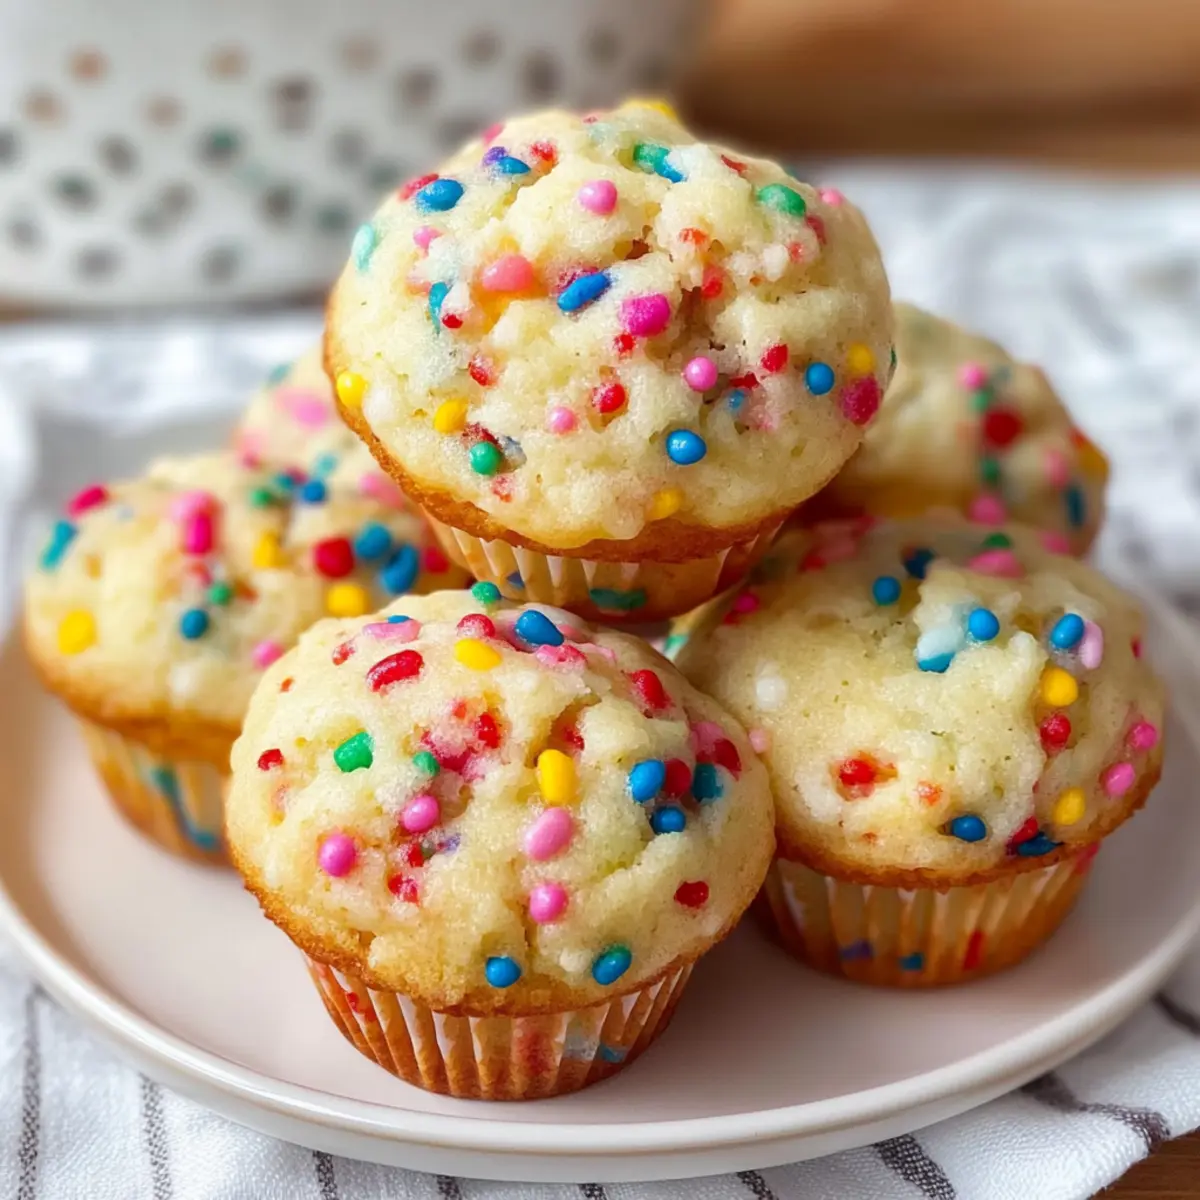
  • Rainbow Sprinkles – Bring color and fun to the muffins; for a healthier twist, use natural, dye-free sprinkles.

Now that you have your ingredients ready, let’s get baking those delicious Mini Funfetti Yogurt Muffins!

Step‑by‑Step Instructions for Mini Funfetti Yogurt Muffins

Step 1: Preheat the Oven
Begin by preheating your oven to 400°F (200°C). While your oven warms up, prepare a mini muffin tin by spraying it with nonstick spray or lining it with cute mini muffin liners. This ensures your Mini Funfetti Yogurt Muffins won’t stick, making them easy to remove after baking.

Step 2: Mix Wet Ingredients
In a large mixing bowl, combine the plain yogurt, milk, mild flavored oil or melted butter, eggs, and vanilla extract. Use a whisk to blend these ingredients until just combined and smooth. You should see a creamy mixture without any lumps, ready to welcome the dry ingredients that will transform this batter into delightful muffins.

Step 3: Incorporate Dry Ingredients
Now, gradually add the all-purpose flour, light brown sugar, baking soda, and salt into your wet mixture. Gently fold the dry ingredients into the wet using a spatula or wooden spoon, being careful not to overmix. The goal is to have a slightly lumpy batter, which will help keep your Mini Funfetti Yogurt Muffins fluffy and tender.

Step 4: Add the Sprinkles
Next, it’s time to add the magic! Gently fold in the rainbow sprinkles, taking care not to overwork the batter. You want to maintain the vibrant colors of the sprinkles without letting the colors bleed into the batter. The excitement of the sprinkles will give your muffins that funfetti flair everyone loves.

Step 5: Fill the Muffin Cups
Using a cookie scoop or spoon, fill each muffin cup in the tin about ¾ full with the batter. This allows room for the muffins to rise during baking. Ensure that the batter is evenly distributed across the cups for a uniform bake, leading to beautifully rounded Mini Funfetti Yogurt Muffins.

Step 6: Bake to Perfection
Place the muffin tin into the preheated oven and bake for 9 to 11 minutes. Keep a close eye as they bake; you’ll know they’re ready when a toothpick inserted in the center comes out clean, and the tops are lightly golden. The delightful aroma wafting through your kitchen will be a sure sign of deliciousness ahead!

Step 7: Cool and Enjoy
Once baked, remove the muffin tin from the oven and let it cool for about 10 minutes. This cooling period allows the Mini Funfetti Yogurt Muffins to firm up a bit. Afterward, transfer them to a wire rack to cool completely. This way, they’ll be ready for munching or packing in lunchboxes for a delightful treat!

How to Store and Freeze Mini Funfetti Yogurt Muffins

Room Temperature: Store muffins in an airtight container at room temperature for up to 3 days to maintain their freshness and flavor.

Fridge: For extended freshness, refrigerate your Mini Funfetti Yogurt Muffins for up to 4 days. Make sure they’re stored in a sealed container.

Freezer: Freeze completely cooled muffins in a single layer and then transfer to an airtight container or freezer bag for up to 3 months.

Reheating: Thaw muffins at room temperature or warm them in the oven for a few minutes for that fresh-baked taste. Enjoy them whenever you need a delightful snack!

What to Serve with Mini Funfetti Yogurt Muffins

When enjoying these vibrant little bites, consider pairing them with fresh options that elevate your meal experience.

  • Fresh Fruit Salad:
    Bright and colorful, a mix of seasonal fruits complements the sweetness of the muffins, adding freshness to each bite.

  • Creamy Greek Yogurt:
    Serve alongside a dollop of Greek yogurt for a protein boost that balances the sweetness, turning it into a satisfying breakfast.

  • Nut Butter Spread:
    Spread almond or peanut butter on the muffins for a nutty flavor that adds richness and extra protein.

  • Classic Milk:
    A cold glass of milk enhances the muffin experience, creating a classic pairing that both kids and adults adore.

  • Herbal Tea:
    Savor with a warm cup of herbal tea, providing a soothing contrast to the muffins' playful sweetness, perfect for a cozy afternoon snack.

  • Vanilla Ice Cream:
    Transform these muffins into an indulgent dessert by serving warm with a scoop of vanilla ice cream, inviting delightful creamy decadence.

  • Honey Drizzle:
    A drizzle of honey on top adds a touch of natural sweetness, enhancing the flavor without overpowering the funfetti vibe.

  • Smoothie Bowl:
    Pair with a colorful smoothie bowl, adding nutrition, flavor, and a visually stunning element to your meal.

These delightful sides will create a cheerful spread, making every muffin moment even more special!

Expert Tips for Mini Funfetti Yogurt Muffins

  • Avoid Overmixing: Gently fold the ingredients until just combined to keep the muffins fluffy and tender. Overmixing can lead to dense muffins.

  • Add Extra Sprinkles: Let the kids sprinkle additional rainbow sprinkles on top before baking for extra fun without risking color bleeding in the batter.

  • Storage Tips: Store your Mini Funfetti Yogurt Muffins in an airtight container at room temperature for up to 3 days. Refrigerate for up to 4 days for freshness.

  • Freezing Guidance: Freeze muffins after cooling completely. They can be stored for up to 3 months; just thaw them at room temperature or warm them in the oven.

  • Customize Flavor: Try adding mini chocolate chips or dried blueberries for a delightful twist on the original recipe, catering to your family's taste preferences.

Make Ahead Options

These Mini Funfetti Yogurt Muffins are perfect for meal prep enthusiasts! You can prepare the batter up to 24 hours in advance by mixing all the wet and dry ingredients separately, then combining them just before baking to keep the muffins light and fluffy. Alternatively, you can bake the muffins ahead of time and store them in an airtight container at room temperature for up to 3 days or refrigerate for 4 days. For long-term storage, freeze the muffins; they’ll stay just as delicious and moist. Simply reheat in the microwave before serving for a quick, wholesome treat anytime. This approach ensures you always have a delightful snack ready to go!

Mini Funfetti Yogurt Muffins Variations

Feel free to let your creativity soar while preparing these delightful muffins—there are countless ways to make them your own!

  • Chocolate Lovers: Add mini chocolate chips to the batter for a sweet and chocolatey twist that everyone will love.

  • Berry Bliss: Incorporate fresh or freeze-dried blueberries for a burst of fruity flavor that pairs wonderfully with the yogurt.

  • Citrus Zing: Mix in lemon zest and a sprinkle of poppy seeds for a refreshing springtime muffin that’s bright and cheerful.

  • Spiced Delight: Add a dash of cinnamon and nutmeg for warm, cozy flavors perfect for chilly mornings or fall gatherings.

  • Fruit Fusion: Substitute chopped strawberries or ripe mashed bananas for natural sweetness that brings a delightful twist to the table.

  • Nutty Crunch: Fold in some chopped nuts, like walnuts or pecans, for added texture and a satisfying crunch in every bite.

  • Healthy Option: Swap out all-purpose flour for whole wheat flour for an extra fiber boost and a heartier muffin that’s still light and delicious.

  • Fun Frosting: Turn these muffins into mini cakes by topping them with a light cream cheese or yogurt frosting. Perfect for parties or special occasions!

As you explore these variations, why not check out this delightful Cinnamon Roll Muffins recipe for another spin on muffins? You’ll have a whole arsenal of delicious baked goods to impress your family and friends!

Mini Funfetti Yogurt Muffins Recipe FAQs

How should I select ripe ingredients for this recipe?
Absolutely! When choosing ingredients, ensure your plain yogurt is fresh and creamy for the best moisture. If using fruit, like blueberries, pick those that are firm and plump. For eggs, look for those that are uncracked and stored in the fridge for optimal freshness.

What’s the best way to store Mini Funfetti Yogurt Muffins?
I recommend storing your muffins in an airtight container at room temperature for up to 3 days. If you want them to last longer, refrigerate them for up to 4 days. Just make sure they’re sealed well to keep them from drying out!

Can I freeze Mini Funfetti Yogurt Muffins, and how?
Sure thing! To freeze, start by letting the muffins cool completely. Then, place them in a single layer on a baking sheet and freeze for about 1-2 hours. Once solid, transfer them to an airtight container or freezer bag, where they can be stored for up to 3 months. When ready to enjoy, thaw at room temperature or heat them in the oven for that fresh-baked taste.

What should I do if my muffins come out dense or dry?
Very! If your muffins are dense, it’s often due to overmixing the batter—remember, a few lumps are okay! If they’re dry, ensure your oven temperature is accurate and avoid baking them for too long. Always check for doneness a few minutes before the suggested time.

Can I make these muffins allergy-friendly?
Absolutely! For dairy-free options, use almond or soy milk along with coconut oil instead of butter. To replace eggs, use a flax egg by mixing one tablespoon of ground flaxseed with two and a half tablespoons of water, letting it sit to thicken before adding to your batter. They can be just as delicious with these adaptations!

Mini Funfetti Yogurt Muffins

Mini Funfetti Yogurt Muffins for a Fun, Wholesome Treat

Mini Funfetti Yogurt Muffins are fun, colorful, and packed with wholesome goodness, perfect for kids and adults alike.
Print Recipe Pin Recipe
Prep Time 10 minutes mins
Cook Time 11 minutes mins
Cooling Time 10 minutes mins
Total Time 31 minutes mins
Servings: 12 muffins
Course: Breakfast
Cuisine: American
Calories: 120
Ingredients Equipment Method Nutrition Notes

Ingredients
  

For the Batter
  • 1 cup Plain Yogurt or Greek yogurt for higher protein
  • 1/4 cup Milk can use non-dairy alternatives
  • 1/4 cup Mild Flavored Oil or Melted Butter coconut oil for dairy-free
  • 2 large Eggs or flax eggs for vegan
  • 1 teaspoon Vanilla Extract preferably pure
  • 1 cup All-Purpose Flour or whole wheat flour for fiber
  • 1/2 cup Light Brown Sugar coconut sugar for healthier option
  • 1 teaspoon Baking Soda ensure it’s fresh
  • 1/4 teaspoon Salt
  • 1/4 cup Rainbow Sprinkles can use natural, dye-free sprinkles

Equipment

  • mini muffin tin
  • Mixing Bowl
  • Whisk
  • Spatula
  • Cookie Scoop

Method
 

Step‑by‑Step Instructions
  1. Preheat your oven to 400°F (200°C) and prepare a mini muffin tin with nonstick spray or liners.
  2. In a large mixing bowl, combine yogurt, milk, oil or melted butter, eggs, and vanilla extract until smooth.
  3. Gradually add flour, brown sugar, baking soda, and salt, gently folding in to avoid overmixing.
  4. Fold in rainbow sprinkles carefully, maintaining their vibrant colors.
  5. Fill muffin cups about ¾ full with batter, ensuring even distribution for uniform baking.
  6. Bake for 9 to 11 minutes, checking for a clean toothpick to ensure they are done.
  7. Let muffins cool in the tin for 10 minutes before transferring to a wire rack to cool completely.

Nutrition

Serving: 1muffinCalories: 120kcalCarbohydrates: 20gProtein: 3gFat: 4gSaturated Fat: 1gMonounsaturated Fat: 2gCholesterol: 30mgSodium: 150mgPotassium: 100mgFiber: 1gSugar: 8gVitamin A: 2IUCalcium: 5mgIron: 4mg

Notes

These muffins can be customized with chocolate chips or fruit, and they freeze well for later enjoyment.

Tried this recipe?

Let us know how it was!

Crispy Baked Cream Cheese Rangoon Rolls for Any Occasion

November 17, 2025 by Grace Snow Leave a Comment

As I opened the oven door, the tantalizing aroma of golden-brown pastries enveloped my kitchen, teasing my senses with a promise of deliciousness. These Easy Baked Cream Cheese Rangoon Rolls are my secret weapon when it comes to impressing guests or satisfying late-night cravings. Unlike their fried counterparts, these rolls offer a crispy exterior that’s perfect for snacking or serving at parties, while the creamy filling steals the spotlight with its rich, dreamy texture. What I love most is how easy they are to make, meaning I can whip them up on a whim or customize them with fun ingredients like buffalo chicken for a spicy twist. Ready to create your new favorite appetizer? Let’s dive into this irresistible recipe!

Why are these Rangoon Rolls a must-try?

Deliciously Crispy: With their golden-brown exterior, these rolls deliver a satisfying crunch that everyone loves.
Incredibly Versatile: Feel free to get creative! Add buffalo chicken or crab meat to the creamy filling for a flavorful twist.
Effortless Preparation: Just a few simple steps and basic ingredients yield stunning results, making this an ideal choice for busy days.
Perfect for Any Gathering: Whether it's a party appetizer or a cozy movie night snack, these rolls are sure to please a crowd! Want more delicious twists on snacks? Check out my Vegan Cacao Cream or Peaches Cream Cookies!

Baked Cream Cheese Rangoon Rolls Ingredients

For the Filling

  • Cream Cheese – Provides a rich, creamy filling; full-fat yields the best texture.
  • Garlic Salt – Enhances the flavor profile; regular salt can be used in a pinch.
  • Green Onions – Adds freshness and a mild onion flavor; chives can be used as a substitute.

For the Wrappers

  • Egg Roll Wraps – Creates a crispy exterior; spring roll wrappers are a great alternative.

For Coating and Baking

  • Vegetable or Canola Oil – Adds crispiness and helps with browning; olive oil is a healthier choice.

For Dipping

  • Sweet and Sour Sauce – A classic for dipping; buffalo sauce can provide a fun spicy kick for your Baked Cream Cheese Rangoon Rolls.

Step‑by‑Step Instructions for Baked Cream Cheese Rangoon Rolls

Step 1: Prep Cream Cheese
Begin by allowing the cream cheese to soften at room temperature for 30 minutes. Alternatively, you can microwave it on the defrost setting for about 15 seconds, making sure it's soft but not melted. Softened cream cheese is easier to mix and will yield a smoother filling for your Baked Cream Cheese Rangoon Rolls.

Step 2: Preheat Oven
Preheat your oven to 375°F (190°C) and prepare a baking sheet by lining it with parchment paper. This will prevent the rolls from sticking and ensure they bake evenly. Take this time to set out all your ingredients, making the next steps smoother and more enjoyable.

Step 3: Mix Filling
In a medium-sized bowl, combine the softened cream cheese, garlic salt, and finely chopped green onions. Stir until the mixture is smooth and well-blended, ensuring all ingredients are thoroughly incorporated. This creamy filling will bring delightful flavor inside your Baked Cream Cheese Rangoon Rolls, making them irresistible.

Step 4: Prepare Wrappers
Lay out the egg roll wraps on a clean, flat surface, like a cutting board. Using a spoon, place about 2 tablespoons of the cream cheese mixture at the bottom of each wrap. This will be the tasty filling that provides a delicious contrast to the crispy exterior, setting the stage for a delightful snack.

Step 5: Seal Rolls
To seal the rolls, moisten the top edge of each wrap with a little water using your fingers or a pastry brush. Carefully roll each wrap tightly around the filling and press down the edges firmly to secure them closed. This step is crucial to prevent the cream cheese filling from leaking during baking.

Step 6: Oil Coating
Once all the rolls are sealed, lightly brush or dip each one in vegetable oil, ensuring the edges are coated well. This step enhances the crispiness of your Baked Cream Cheese Rangoon Rolls. For a healthier alternative, you can use olive oil, which adds flavor while giving that perfect golden-brown finish.

Step 7: Bake
Arrange the oil-coated rolls on the prepared baking sheet, ensuring they are spaced out to allow for even baking. Place them in the preheated oven and bake for 12-15 minutes. Flip the rolls halfway through the baking time to ensure they turn golden brown and crispy on all sides, creating the perfect party appetizer.

Step 8: Cool and Serve
Once golden and crispy, remove the Baked Cream Cheese Rangoon Rolls from the oven and let them cool for a couple of minutes. Serve warm, paired with sweet and sour or buffalo sauce for dips. The warm, creamy filling against the crisp exterior makes for a delightful treat that everyone will adore!

What to Serve with Easy Baked Cream Cheese Rangoon Rolls

Create a delightful meal around these crispy, creamy indulgences, perfect for any occasion!

  • Sweet and Sour Sauce: A classic pairing that complements the richness of the cream cheese filling, adding a tangy contrast.
  • Spicy Buffalo Sauce: For those who crave heat, this sauce heightens the flavor profile of the rolls and adds a kick.
  • Crispy Asian Slaw: A fresh, crunchy salad that balances the creamy texture of the Rangoon rolls, adding vibrant flavors and colors.
  • Garlic Butter Noodles: Satisfying and flavorful, these noodles provide a cozy complement, drawing out the savory elements in the rolls.
  • Roasted Veggies: Lightly seasoned and caramelized, they bring a wholesome touch that enhances the overall meal experience.
  • Mini Egg Rolls: For added variety, serve these as another crispy appetizer that pairs wonderfully with the dipping sauces.
  • Chilled White Wine: A refreshing drink that cuts through the creaminess while enhancing your dining experience.
  • Coconut Milk Tapioca Pudding: A creamy dessert that ties into the smoothness of the rolls, rounding off the meal perfectly.
  • Homemade Spring Rolls: Keep up the Asian theme with these fresh, veggie-packed delights—a light and refreshing option alongside your Rangoon rolls.
  • Pineapple Salsa: Sweet and tangy, this delightful topping adds a burst of tropical brightness that pairs beautifully with the Rangoon rolls.

Helpful Tricks for Baked Cream Cheese Rangoon Rolls

  • Seal Securely: Ensure the edges of your rolls are well-sealed to avoid any filling leakage during baking. A little water works wonders!

  • Oil Generously: Use a good amount of oil for a crispy exterior; brushing them ensures even distribution. Too little oil can lead to soggy rolls.

  • Bake Right: Flip the rolls halfway through baking to achieve that perfect golden-brown color all around. This not only enhances appearance but texture too.

  • Serve Warm: Enjoy your Baked Cream Cheese Rangoon Rolls fresh out of the oven. They’re at their best when warm and crispy!

  • Experiment with Fillings: Don’t hesitate to get creative! Spice things up by incorporating proteins like buffalo chicken or even veggies for a delightful twist.

Storage Tips for Baked Cream Cheese Rangoon Rolls

Fridge: Store leftover rolls in an airtight container for up to 3 days. Make sure they are completely cooled to prevent condensation.

Freezer: For longer storage, freeze unbaked rolls on a baking sheet until solid, then transfer to a freezer bag. They can be kept for up to 2 months.

Reheating: To reheat, place rolls in a preheated oven at 375°F (190°C) for about 10 minutes, ensuring they stay crispy on the outside. Avoid microwaving to maintain crunchiness.

Dipping Sauce: If you have leftover sweet and sour or buffalo sauce, store it in the fridge for up to 1 week, ready to enjoy with your Baked Cream Cheese Rangoon Rolls!

Make Ahead Options

These Easy Baked Cream Cheese Rangoon Rolls are perfect for meal prep enthusiasts looking to save time on busy weeknights! You can make the filling (cream cheese, garlic salt, and green onions) up to 3 days in advance and store it in an airtight container in the refrigerator. Additionally, you can assemble the rolls and keep them tightly wrapped on a baking sheet in the fridge for up to 24 hours before baking. To maintain the crispiness of your rangoon rolls, make sure to light-coat them with oil just before baking. When you’re ready to serve, simply pop them in the preheated oven and bake as directed, enjoying delicious, freshly baked rolls with minimal effort!

Baked Cream Cheese Rangoon Rolls Variations

Feel free to spice things up! Customize your rolls with these fun and flavorful twists.

  • Buffalo Chicken: Add shredded buffalo chicken to the cream cheese filling for a spicy flavor bomb. Perfect for those who enjoy a little heat!
  • Crab Meat: Introducing crab meat into the filling brings a touch of elegance and a delightful seafood twist to your rolls.
  • Vegan Version: Swap cream cheese for a cashew or tofu-based alternative for a plant-based treat that everyone can enjoy!
  • Herbed Cream Cheese: Flavor the filling with fresh herbs like dill or basil to elevate the richness of the cream cheese.
  • Spicy Garlic Sauce: Mix in some spicy garlic sauce to give your rolls an extra kick; it pairs beautifully with a cool ranch dip.
  • Crispy Veggie Version: Add diced bell peppers and carrots to bring a crunch and vibrant color to the filling without any meat.
  • Cheesy Explosion: Incorporate shredded cheddar or mozzarella cheese for a gooey, cheesy surprise inside your rolls.
  • Different Wrappers: Try using phyllo dough instead of egg roll wraps for an ultra-flaky, delicate texture that complements the creamy filling beautifully.

These variations allow everyone to find their perfect match! If you're in the mood for more scrumptious ideas, don’t miss out on my Matcha Baked Doughnuts or an indulgent Ice Cream Cake.

Baked Cream Cheese Rangoon Rolls Recipe FAQs

What type of cream cheese is best for these rolls?
I highly recommend using full-fat cream cheese for the richest and creamiest filling. This ensures that your Baked Cream Cheese Rangoon Rolls have that indulgent texture that everyone loves. If you’re looking for a lighter option, you can try reduced-fat cream cheese, but the texture may be slightly different.

How should I store leftover Baked Cream Cheese Rangoon Rolls?
Store leftover rolls in an airtight container in the fridge for up to 3 days. Make sure they are completely cooled before sealing. To maintain their crispiness, I suggest reheating them in the oven instead of the microwave, allowing them to regain that delightful crunch.

Can I freeze Baked Cream Cheese Rangoon Rolls?
Absolutely! You can freeze unbaked rolls for up to 2 months. Just arrange them on a baking sheet to freeze individually until solid, then transfer them to a freezer bag. When you're ready to bake, there's no need to thaw—just add a few extra minutes to the baking time!

What should I do if my rolls are leaking filling while baking?
To prevent leaking, make sure the edges are well-sealed before baking. A little water on the edge of the wrap can help. If you see some filling escaping, don’t worry too much—it happens! Make sure to check that each roll is tightly sealed next time to keep all that creamy goodness inside.

Can I use different ingredients for the filling?
Very much so! Feel free to customize your filling by adding shredded buffalo chicken, crab meat, or even finely chopped vegetables for a vegetarian option. The possibilities are endless, and it’s a great way to make it your own!

Baked Cream Cheese Rangoon Rolls

Crispy Baked Cream Cheese Rangoon Rolls for Any Occasion

Baked Cream Cheese Rangoon Rolls are an easy, crispy delight perfect for impressing guests and satisfying cravings.
Print Recipe Pin Recipe
Prep Time 30 minutes mins
Cook Time 15 minutes mins
Cooling Time 2 minutes mins
Total Time 47 minutes mins
Servings: 12 rolls
Course: Snacks
Cuisine: American
Calories: 150
Ingredients Equipment Method Nutrition Notes

Ingredients
  

For the Filling
  • 8 oz Cream Cheese full-fat yields the best texture
  • 1 teaspoon Garlic Salt regular salt can be used in a pinch
  • 2 stalks Green Onions finely chopped; chives can be used as a substitute
For the Wrappers
  • 1 pack Egg Roll Wraps spring roll wrappers are a great alternative
For Coating and Baking
  • 2 tablespoons Vegetable or Canola Oil olive oil is a healthier choice
For Dipping
  • 1 cup Sweet and Sour Sauce buffalo sauce can provide a fun spicy kick

Equipment

  • Oven
  • Baking Sheet
  • Parchment Paper
  • Mixing Bowl
  • Spoon
  • Pastry brush

Method
 

Step-by-Step Instructions
  1. Begin by allowing the cream cheese to soften at room temperature for 30 minutes or microwave it on the defrost setting for about 15 seconds.
  2. Preheat your oven to 375°F (190°C) and prepare a baking sheet by lining it with parchment paper.
  3. In a medium-sized bowl, combine the softened cream cheese, garlic salt, and finely chopped green onions. Stir until smooth.
  4. Lay out the egg roll wraps and place about 2 tablespoons of the cream cheese mixture at the bottom of each wrap.
  5. Moisten the top edge of each wrap with water and roll tightly around the filling, pressing down the edges to seal.
  6. Lightly brush or dip each roll in vegetable oil, ensuring the edges are coated well.
  7. Arrange the oil-coated rolls on the prepared baking sheet and bake for 12-15 minutes, flipping halfway through.
  8. Once golden and crispy, remove from the oven and let them cool for a couple of minutes before serving.

Nutrition

Serving: 1rollCalories: 150kcalCarbohydrates: 10gProtein: 3gFat: 10gSaturated Fat: 3gPolyunsaturated Fat: 2gMonounsaturated Fat: 4gCholesterol: 20mgSodium: 300mgPotassium: 50mgFiber: 1gVitamin A: 500IUVitamin C: 1mgCalcium: 30mgIron: 1mg

Notes

Ensure the edges of your rolls are well-sealed to prevent leakage during baking. Use a good amount of oil for a crispy exterior.

Tried this recipe?

Let us know how it was!

Creamy Milk Mochi Recipe: Chewy Delight Made Easy

November 17, 2025 by Grace Snow Leave a Comment

As I stood in my kitchen, the sweet scent of freshly mixed ingredients engulfed me, reminding me of childhood desserts. The day’s mission? To create the perfect milk mochi recipe—a Japanese delight that seamlessly blends simplicity with deliciousness. This recipe promises a soft, chewy texture and a rich, creamy flavor that will make any dessert lover swoon. Not only is it quick to whip up, but it’s also a fun activity to share with friends and family, bringing everyone together to relish a taste of Japan. Plus, with easy tips to make this treat dairy-free, you can delight both your traditional and modern culinary friends. Ready to dive into this delightful dessert adventure? Let’s embark on this journey together, and I can’t wait to hear how yours turns out!

Why is Milk Mochi So Special?

Simplicity at Its Best: This milk mochi recipe requires minimal ingredients and straightforward steps, making it perfect for home cooks of any level.

Chewy Perfection: The unique texture of milk mochi offers a delightful chewiness that will wow dessert lovers everywhere.

Rich, Creamy Flavor: Incorporating whole milk adds a luscious taste that sets it apart from other desserts.

Dairy-Free Option: Easily adaptable with almond or oat milk, this recipe accommodates different dietary preferences without sacrificing flavor.

Fun to Make: It's an enjoyable activity to create with friends or family, bringing everyone together to experience a bit of Japanese cuisine.

Versatile Coatings: Roll your mochi in roasted soybean flour, coconut, or nuts for a personal touch—it's all about your taste! So why not explore this milk mochi recipe today?

Milk Mochi Recipe Ingredients

For the Mochi

  • Glutinous Rice Flour – This ingredient is essential for the traditional chewy texture of milk mochi.
  • Cornstarch – It aids in smoothness and prevents stickiness; feel free to substitute with more glutinous rice flour if needed.
  • Sugar – This sweetens the mochi; you can adjust the amount based on your sweetness preference.
  • Corn Oil – Adds moisture and richness; a neutral oil can easily replace it if preferred.
  • Whole Milk – Provides creaminess and flavor, but you can use dairy-free alternatives like almond or oat milk for a different twist.

For Coating

  • Roasted Soybean Flour – This adds a nutty flavor and texture that complements the creamy milk mochi beautifully.
  • Shredded Coconut – If you're feeling adventurous, this can add a delicious tropical twist.
  • Crushed Nuts – A crunchy coating option that enhances the mochi, making each bite interesting.

Enjoy creating this Milk Mochi recipe that's bound to become a household favorite!

Step‑by‑Step Instructions for Milk Mochi Recipe

Step 1: Combine Ingredients
In a large mixing bowl, combine 1 cup of glutinous rice flour, 2 tablespoons of cornstarch, and ¼ cup of sugar. Pour in 1 cup of whole milk and 1 tablespoon of corn oil, then whisk until the mixture is smooth and free of lumps. This mixture should be creamy and slightly thick—set aside as you prepare to cook it.

Step 2: Optional Strain for Smoothness
For an ultra-smooth texture, consider straining the combined mixture through a fine sieve into another bowl. This step helps remove any tiny lumps, ensuring your milk mochi has the perfect velvety consistency. A well-strained mixture will feel luxurious as it pours; this is a key step in creating a delightful dessert experience.

Step 3: Cook the Mixture
Pour the smooth milk mochi mixture into a non-stick pan over low heat. Stir gently and continuously with a spatula for about 8-10 minutes, until the mixture thickens and becomes a cohesive mass. It should start to pull away from the sides of the pan and resemble a thick, sticky dough. Visual cues include a shiny surface and a stretchy texture.

Step 4: Cool and Knead the Dough
Once fully cooked, remove the pan from heat and allow the mixture to cool for a few minutes. When it's still warm but manageable, wear gloves and knead the dough for about 5 minutes. This kneading step enhances elasticity, making the milk mochi pleasingly chewy. Your dough should be soft, smooth, and slightly sticky to the touch.

Step 5: Shape the Mochi
Dust a clean surface lightly with cooked glutinous rice flour to prevent sticking. Roll the kneaded dough into a long strip, approximately 1 inch in diameter. Use a sharp knife to cut the dough into bite-sized pieces, about 1-2 inches long. As you shape the pieces, keep them dusted with flour to avoid any stickiness during handling.

Step 6: Add the Finishing Touch
For a delightful finish, roll each piece of milk mochi in roasted soybean flour to coat them evenly. This step adds a nutty flavor and a unique texture, elevating your dessert. You can also experiment with coatings like shredded coconut or crushed nuts for additional delicious variations, perfect for your version of the milk mochi recipe.

Make Ahead Options

These milk mochi treats are perfect for busy cooks looking to save time during the week! You can prepare the mochi dough up to 24 hours in advance. Simply follow the initial steps, then let the dough cool completely before wrapping it tightly in plastic wrap and refrigerating. When you're ready to serve, take the dough out, knead it again for a couple of minutes to regain its texture, and then shape it as directed. Another great option is to cut the shaped mochi pieces and coat them before storing; just make sure to refrigerate them in an airtight container for up to 3 days to maintain their freshness and chewiness. Enjoy delicious homemade milk mochi with minimal effort whenever you're craving a comforting dessert!

What to Serve with Easy Milk Mochi?

Treat your senses to a delightful meal by balancing flavors and textures with these perfect pairings!

  • Creamy Matcha Ice Cream: The rich, earthy taste of matcha ice cream offers a delightful contrast to the sweet and chewy mochi. It’s a cooling treat that pairs beautifully with warm tea after dinner.

  • Fresh Mango Slices: These juicy slices bring a burst of tropical sweetness that complements the subtle flavors of milk mochi. Enjoy the contrast of textures with each bite.

  • Chilled Green Tea: A refreshing beverage that cleanses the palate, enhancing the creamy richness of the mochi. This light drink is perfect for any season and adds a cultural flair to the experience.

  • Red Bean Paste: For an added layer of sweetness, consider serving your milk mochi with a dollop of smooth red bean paste. This traditional Japanese treat brings a lovely contrast in texture while enhancing the mochi's rich flavor.

  • Coconut Milk Sauce: Drizzle a sweet coconut milk sauce over the milk mochi for a tropical twist. The creamy elements harmonize wonderfully, making each bite even more luxurious.

  • Crunchy Almonds: A side of crushed almonds adds a delightful crunch, enhancing the mochi with a nutty richness and providing an interesting textural combination.

  • Black Sesame Seeds: These sprinkle beautifully over the milk mochi, providing a distinctive nutty flavor and a striking visual element to your dessert presentation.

Explore these pairings to transform your milk mochi into a memorable feast for the senses!

Milk Mochi Recipe Variations

Feel free to get creative with this milk mochi recipe! Each twist adds a new layer of flavor and excitement.

  • Dairy-Free: Substitute whole milk with almond or oat milk for a creamy yet dairy-free version. Enjoy the same delightful texture without the dairy!
  • Matcha Magic: Add 2 tablespoons of matcha powder to the dry ingredients for a vibrant green tea flavor. This not only tastes wonderful but also looks stunning!
  • Sweet Red Bean Paste: Fill the mochi with sweet red bean paste before rolling for an authentic Japanese experience. The bean's sweetness perfectly complements the creamy texture.
  • Coconut Crunch: Roll the mochi pieces in shredded coconut instead of roasted soybean flour. This tropical twist adds delightful sweetness and a chewier texture.
  • Nutty Surprise: Coating the mochi in crushed nuts, such as almonds or pistachios, introduces an added crunch and nuttiness that perfectly contrasts the soft chewiness.
  • Fruity Fusion: Incorporate fruit puree, like mango or strawberry, into the milk mixture for a burst of fruity flavor. It’s a refreshing touch that makes every bite feel special.
  • Spicy Sweetness: For those who enjoy a kick, add a pinch of cayenne or chili powder to the sugar. It creates a surprising and delicious balance of sweet and spicy!
  • Flavor Infusion: Consider infusing the milk with a few drops of vanilla extract or almond extract before mixing. This simple addition elevates the flavor profile beautifully.

Don’t forget to check out variations like Spatchcock Chicken or Chicken Adobo Again for more culinary inspiration. Let your imagination run wild and enjoy the process of making this delightful milk mochi!

How to Store and Freeze Milk Mochi

Room Temperature: Store milk mochi in an airtight container for up to 3 days; keep away from direct sunlight to maintain flavor and texture.

Fridge: If you want to extend freshness, refrigerate for up to 5 days. Ensure they're in an airtight container to prevent drying out.

Freezer: For longer storage, freeze pieces wrapped in plastic wrap, then placed in a zip-top bag for up to 2 months. Thaw in the fridge before serving.

Reheating: Reheat gently in the microwave for about 15-20 seconds when enjoying leftovers; this restores their delightful chewy texture and rich flavor.

Expert Tips for Milk Mochi Recipe

  • Cook Thoroughly: Ensure you cook the mixture until it's thick and pulls away from pan sides; undercooking can lead to an undesirable texture in your milk mochi.

  • Use Gloves: When kneading the warm dough, gloves make handling easier and prevent burns, allowing you to achieve the perfect chewy texture.

  • Dust Generously: Always sprinkle cooked glutinous rice flour while shaping to prevent sticking; skipping this can lead to a messy experience with your milk mochi.

  • Experiment with Flavors: Don’t hesitate to play with coatings and fillings, like matcha or sweet red bean paste, to personalize your milk mochi recipe to your taste!

  • Cooling Time: Allow the mochi to cool enough to handle before kneading; this will improve the elasticity and final texture.

  • Storage Matters: Store leftover milk mochi in an airtight container; they stay fresh for a few days at room temperature or longer in the fridge.

Milk Mochi Recipe FAQs

What type of glutinous rice flour should I use?
For the best results, make sure you're using sweet glutinous rice flour or mochi flour, which gives milk mochi its chewy texture. Avoid using regular rice flour, as it won't provide the same consistency. You can find this flour in Asian markets or online.

How long does milk mochi stay fresh?
Store milk mochi in an airtight container at room temperature for up to 3 days. To keep it fresh for longer, refrigerate it for about 5 days. Remember that the longer it stays, the more it may lose its delightful texture, so it's best to enjoy it while it's at its freshest!

Can I freeze milk mochi? How do I do it?
Absolutely! For freezing, wrap individual pieces of milk mochi tightly in plastic wrap, then place them in a zip-top freezer bag. This method avoids freezer burn and keeps them fresh for up to 2 months. When you're ready to enjoy, simply thaw them in the fridge overnight. You can reheat them in the microwave for 15-20 seconds for that chewy texture you love!

What can I do if my mochi mixture turns out too sticky?
If your milk mochi is too sticky during preparation, it’s likely due to undercooking or not enough cornstarch. Make sure to cook it thoroughly until it pulls away from the pan’s sides, and consider adding a bit more cornstarch to the mixture for better structure. If it’s too late and it’s already sticky, dusting with cooked glutinous rice flour can help during shaping.

Is there a dairy-free alternative for this recipe?
Yes! You can easily substitute whole milk with almond milk, oat milk, or any other non-dairy milk. Just ensure that the alternative is unsweetened and unflavored to maintain the recipe's integrity. This way, you can cater to both dairy lovers and those with dietary restrictions!

Can I add flavors or fillings to my milk mochi?
The more the merrier! You can definitely add flavors like matcha powder for a green tea taste or fill your mochi with sweet red bean paste for added sweetness. Experiment with different coatings like shredded coconut or crushed nuts to get creative with your milk mochi recipe!

Milk Mochi Recipe

Creamy Milk Mochi Recipe: Chewy Delight Made Easy

Discover a delightful Milk Mochi Recipe that blends simplicity with deliciousness for a chewy, creamy dessert everyone will love.
Print Recipe Pin Recipe
Prep Time 10 minutes mins
Cook Time 10 minutes mins
Cooling Time 5 minutes mins
Total Time 25 minutes mins
Servings: 4 pieces
Course: Dessert
Cuisine: Japanese
Calories: 150
Ingredients Equipment Method Nutrition Notes

Ingredients
  

For the Mochi
  • 1 cup glutinous rice flour Essential for the chewy texture.
  • 2 tablespoons cornstarch Prevents stickiness.
  • 1/4 cup sugar Adjust based on sweetness preference.
  • 1 tablespoon corn oil Adds moisture and richness.
  • 1 cup whole milk Can use dairy-free alternatives.
For Coating
  • 1/4 cup roasted soybean flour Adds nutty flavor.
  • 1/4 cup shredded coconut Optional for a tropical twist.
  • 1/4 cup crushed nuts Enhances texture.

Equipment

  • Mixing Bowl
  • Whisk
  • Non-Stick Pan
  • Spatula
  • sieve
  • gloves
  • Knife

Method
 

Step-by-Step Instructions
  1. In a large mixing bowl, combine glutinous rice flour, cornstarch, and sugar. Pour in whole milk and corn oil, then whisk until smooth.
  2. Optionally strain the mixture through a fine sieve into another bowl for a smooth texture.
  3. Pour the mixture into a non-stick pan over low heat. Stir continuously for about 8-10 minutes until thickened.
  4. Remove from heat, let cool slightly, then knead the warm dough for about 5 minutes.
  5. Dust with rice flour, roll the dough into a strip, and cut into bite-sized pieces.
  6. Roll each piece in roasted soybean flour to coat evenly.

Nutrition

Serving: 1pieceCalories: 150kcalCarbohydrates: 32gProtein: 3gFat: 2gPolyunsaturated Fat: 1gMonounsaturated Fat: 1gCholesterol: 5mgSodium: 10mgPotassium: 150mgSugar: 10gVitamin A: 2IUCalcium: 4mgIron: 2mg

Notes

Ensure to cook the mixture thoroughly for the right texture. Use gloves while handling warm dough for safety.

Tried this recipe?

Let us know how it was!

Savory Short Rib Ragu: Ultimate Comfort for Cozy Nights

November 15, 2025 by Grace Snow Leave a Comment

As the savory aroma of red wine and herbs wafts through your kitchen, you may find yourself reminiscing about cozy evenings spent around the dinner table with loved ones. My Slow-Cooked Short Rib Ragu is here to rekindle that warmth. This comforting dish is not only a hearty pasta delight but also perfect for beginner cooks seeking to impress. The best part? While it simmers for about three hours, most of that time is yours to unwind or take care of other things. Imagine tender, melt-in-your-mouth beef enveloped in a rich, luscious sauce, making every bite a satisfying experience. Are you ready to dive into a world of flavor where homemade beats fast food every time?

Why is Short Rib Ragu a Must-Try?

Hearty Comfort: This Short Rib Ragu offers a warm embrace with every forkful, perfect for chilly nights.
Melt-in-Your-Mouth Goodness: The slow cooking transforms the beef into tender, mouthwatering shreds that you'll crave again and again.
Easy Preparation: Ideal for beginner cooks, most of the time is hands-off, allowing you to relax or prepare sides like Spicy Potatoes (Batata Harra) with ease.
Flavorful Depth: The combination of red wine, herbs, and vegetables creates a rich, complex sauce that elevates your meal.
Versatile Use: Pair it with tagliatelle, creamy polenta, or even layer it in a lasagna for varying tastes. This is comfort food reimagined!
Ready to impress your family? This ragu is surely a showstopper, making any weeknight feel special!

Short Rib Ragu Ingredients

• Nourishing flavors await you!

For the Ragu

  • Beef Short Ribs – the star of the dish, offering rich, melt-in-your-mouth flavor; consider using de-boned for easier handling.
  • Light Olive Oil – perfect for searing; feel free to substitute with vegetable or avocado oil if needed.
  • Kosher Salt – generously season the meat and vegetables to enhance their natural flavors.
  • White Onion – provides a sweet depth to the sauce; choose a fresh one for the best results.
  • Celery – adds earthy notes and balances the dish; finely chop for even cooking.
  • Carrot – introduces natural sweetness and vibrant color to the mix; a fresh option will yield the best results.
  • Garlic – finely minced for that aromatic punch; can be adjusted based on your preference.
  • Tomato Paste – intensifies the flavor of the sauce; sautéing it helps to deepen its richness.
  • Red Wine – deglazes the pot and brings acidity that balances the dish; always choose a wine you’d enjoy drinking.
  • Broth (beef or chicken) – contributes liquid and flavor for a luscious sauce base; homemade is always a great choice!
  • Crushed Tomatoes – forms the main body of the sauce, ensuring a cohesive texture; look for quality canned options.
  • Herb Bundle – rosemary, thyme, and parsley leaves lend aromatic complexity to the ragu; feel free to adjust based on what's fresh.
  • Bay Leaves – infuses the sauce with fragrant depth; remember to remove them before serving.
  • Sherry or Red Wine Vinegar – brightens and balances the flavors beautifully; a small splash goes a long way!
  • Pasta (Tagliatelle or Pappardelle) – sturdy pasta shapes are ideal for holding the flavors of the ragu; orecchiette also works wonderfully.
  • Chopped Parsley & Grated Parmigiano Reggiano – fresh garnishes that add a burst of flavor and elegance to your dish.

Get ready to indulge in this comforting Short Rib Ragu that brings the essence of home-cooked meals right to your table!

Step‑by‑Step Instructions for Short Rib Ragu

Step 1: Season Ribs
Begin by generously seasoning the beef short ribs with kosher salt, ensuring they are evenly coated on all sides. This step is crucial for flavor, so take your time to really cover the meat well. Allow the ribs to sit for about 10 minutes, which will help the salt penetrate and enhance the overall taste of your Short Rib Ragu.

Step 2: Sear Ribs
In a large braiser or Dutch oven, heat two tablespoons of light olive oil over medium-high heat until shimmering. Carefully place the seasoned short ribs into the pot, searing them for about 4-5 minutes on each side until they form a deep, golden-brown crust. This caramelization adds a rich flavor to your ragu. Once done, transfer the seared ribs to a plate and set aside.

Step 3: Cook Vegetables
Lower the heat to medium, and in the same pot, add a finely chopped white onion, one diced celery stalk, and a diced carrot. Sauté for 3-4 minutes, stirring frequently, until the vegetables are softened and fragrant. The gentle sizzling combined with their sweet aroma will signal that they are ready for the next step in your Short Rib Ragu.

Step 4: Add Tomato Paste
Now stir in a generous tablespoon of tomato paste, mixing it thoroughly with the vegetables. Sauté the mixture for an additional 2-3 minutes, allowing the paste to cook down and deepen in color while infusing the vegetables with its rich flavor. This caramelized tomato paste is key to achieving a robust taste in your ragu.

Step 5: Deglaze
Next, pour in one cup of red wine, using a wooden spoon to scrape up any flavorful brown bits stuck to the bottom of the pot. This deglazing process, which should take about 2 minutes, is essential for building depth in your Short Rib Ragu. As the wine reduces, the aroma will fill your kitchen, creating a mouthwatering anticipation.

Step 6: Combine Ingredients
Return the seared short ribs to the pot carefully. Add two cups of broth (beef or chicken), one can of crushed tomatoes, an herb bundle containing rosemary, thyme, and parsley stems, along with two bay leaves. Stir everything together until well combined, ensuring that all the ingredients are nestled into the liquid for an even cook.

Step 7: Slow Cook
Cover the pot slightly ajar and reduce the heat to low. Allow your Short Rib Ragu to simmer for 2 to 2.5 hours, stirring occasionally. Watch for the sauce to thicken and the ribs to become fork-tender, creating an inviting, hearty smell in your home. If the sauce appears to dry out, add a splash of broth to maintain moisture.

Step 8: Shred & Serve
Once the ribs are perfectly tender, remove the pot from heat and discard the herb bundle and bay leaves. Using tongs or a fork, shred the beef directly in the pot, mixing it back into the sauce. Adjust the flavors with a splash of sherry or red wine vinegar, then serve your luscious Short Rib Ragu over cooked tagliatelle or pappardelle pasta, garnished with chopped parsley and grated Parmigiano Reggiano for a delightful finish.

Make Ahead Options

Prepare your Short Rib Ragu ahead of time to save precious moments during busy weeknights! You can easily make the ragu up to 24 hours in advance; simply allow it to cool completely before transferring it to an airtight container and refrigerate. For even better flavor, consider letting it rest overnight, as this will enhance the rich, savory taste. When you’re ready to serve, gently reheat the ragu on the stove over low heat, stirring occasionally, and serve it over freshly cooked pasta. This method not only saves time but also ensures that your Short Rib Ragu remains just as delicious and comforting on serving day!

Short Rib Ragu Variations

Explore these delightful twists to create your own unique version of short rib ragu!

  • Stewing Beef: Substitute short ribs with stewing beef for an economical alternative that still delivers rich flavor. It’s a great way to enjoy this hearty dish without breaking the bank.

  • Pasta Swap: Choose alternative pasta shapes like orecchiette or cavatelli for a fun twist on the traditional tagliatelle or pappardelle. Each shape showcases the ragu in a different way, creating a new culinary experience.

  • Vegetable Medley: Add chopped mushrooms, bell peppers, or zucchini to the vegetable mix for extra texture and flavor. These additions complement the ragu beautifully, enhancing its heartiness.

  • Heat It Up: For a spicy kick, include crushed red pepper flakes or diced jalapeños. A little heat balances the richness of the sauce, making every bite a flavorful adventure.

  • Herb Infusion: Experiment by switching the herb bundle to include fresh basil or oregano. This gives the ragu a fresh finish and elevates the aromatic quality, especially during warmer months.

  • Red Wine Variety: Try using different types of red wine, such as a deep Chianti or Merlot, to see how it changes the ragu's flavor profile. Each wine offers a unique depth, enriching the overall dish.

  • Stuffed Delights: Use the ragu as a delicious filling for homemade ravioli or as a layer in lasagna for a comforting take on these classic Italian dishes. This opens up a world of possibilities to savor every bite.

  • Savory Cheeses: Top with crumbled blue cheese or feta for a tangy kick that contrasts beautifully with the rich ragu. This unique flourish brings out a new dimension in flavor you won’t want to miss.

As you venture into your kitchen, remember to check out Asparagus Soup Healthy or delight in a plate of Tagliatelle Asparagus Peas for side dish ideas that complement your ragu splendidly!

Expert Tips for Short Rib Ragu

  • Use a Dutch Oven: This pot ensures even heat distribution, preventing burning and allowing for a perfect slow cook of your Short Rib Ragu.

  • Properly Sear Ribs: Take your time during searing to achieve a rich, caramelized crust. Skipping this step may result in less flavor in your sauce.

  • Avoid Overcrowding Vegetables: Sauté vegetables without crowding the pot to promote even cooking. This balances their sweetness and ensures optimal flavor development.

  • Adjust Consistency: If the ragu becomes too thick while cooking, simply add a splash of broth to maintain a luscious, rich texture.

  • Make Ahead for Flavor: Prepare your Short Rib Ragu a day in advance. It tastes even better the next day, allowing flavors to fully develop.

  • Experiment with Meats: While beef short ribs are exceptional, consider using stewing beef or other meats for a delightful twist on this comforting dish.

What to Serve with Short Rib Ragu

As the rich aroma of your slow-cooked creation fills the space, you'll want to complement this comforting dish with delightful pairings that envelope your senses.

  • Creamy Polenta: This smooth base absorbs the ragu’s delicious sauce, creating a luxurious, hearty dish everyone will love.
  • Garlic Bread: A crunchy side that welcomes the sauce and balances the rich flavors with its buttery bite. Perfect for soaking up every morsel!
  • Roasted Vegetables: Opt for seasonal veggies like carrots or Brussels sprouts; their sweetness contrasts beautifully with the savory ragu.
  • Herb Salad: A fresh herb salad mixed with olive oil and lemon brightens the meal, cleansing the palate between bites of the hearty ragu.
  • Parmesan Risotto: The creamy, cheesy texture of risotto pairs seamlessly, making for an indulgent dining experience worth sharing.
  • Red Wine: A glass of the same robust red wine used for cooking beautifully enhances the flavors, creating a harmonious dining atmosphere.
  • Chocolate Mousse: End on a sweet note—this light, airy dessert makes a perfect finish after the savory experience of the ragu.
  • Homemade Pasta: For a hearty touch, serve on fresh fettuccine, as the ragu clings to the strands, ensuring each bite is utterly satisfying!
  • Fresh Focaccia: Offered warm with olive oil for dipping, this bread adds a delightful crunch and pairs perfectly with the meal’s textures.
  • Crusty Multigrain Bread: A nutritious option to bring to the table, allowing everyone to enjoy the robust sauce in a wholesome way.

How to Store and Freeze Short Rib Ragu

Fridge: Store any leftover Short Rib Ragu in an airtight container for up to 4 days. This helps retain its deep flavor and luscious texture for your next meal.

Freezer: If you want to enjoy the ragu later, freeze it in an airtight container for up to 3 months. Be sure to cool it completely before placing it in the freezer.

Reheating: When ready to enjoy, thaw overnight in the fridge and reheat gently on the stovetop over low heat until warmed through, adding a splash of broth if needed to restore moisture.

Separation Tip: For optimal taste and texture, store the ragu separately from any pasta if you plan to have leftovers. This prevents the pasta from becoming soggy.

Short Rib Ragu Recipe FAQs

What kind of short ribs should I use for this ragu?
I recommend using beef short ribs, as they provide a rich, melt-in-your-mouth flavor that is perfect for ragu. If you want to lighten the load on your wallet, you can also opt for stewing beef, which will still yield a delicious result but at a more affordable price.

How do I know when my short ribs are properly seared?
Properly seared short ribs should have a deep, golden-brown crust that adds flavor to your ragu. Aim for about 4-5 minutes on each side over medium-high heat until they form a nice crust. Don’t rush this step, as it enhances the overall richness of the dish!

What's the best way to store leftover short rib ragu?
To store leftovers, simply place them in an airtight container in the fridge, where they will last for up to 4 days. For longer storage, freeze your ragu in an airtight container for up to 3 months. Just remember, it’s best to cool it completely before freezing to maintain texture.

Can I freeze short rib ragu, and how should I do it?
Absolutely! Allow your short rib ragu to cool completely, then transfer it to an airtight container or freezer-safe bag. It will maintain its quality for up to 3 months. When you’re ready to enjoy it again, thaw it overnight in the fridge and reheat it gently on the stovetop over low heat. A splash of broth may help restore moisture as it reheats.

Are there any dietary considerations I should keep in mind?
If you have allergies, be sure to check the labels on your broth and any canned products, as they can sometimes contain hidden allergens. If you have pets, avoid sharing any food that contains onions or garlic, as they are harmful to dogs and cats. If you're cooking for someone with a gluten sensitivity, simply serve the ragu over gluten-free pasta or polenta for an inclusive meal!

Short Rib Ragu

Savory Short Rib Ragu: Ultimate Comfort for Cozy Nights

Enjoy the rich flavors of Short Rib Ragu, a comforting dish ideal for cozy nights with loved ones.
Print Recipe Pin Recipe
Prep Time 20 minutes mins
Cook Time 2 hours hrs 30 minutes mins
Total Time 2 hours hrs 50 minutes mins
Servings: 4 servings
Course: Dinner
Cuisine: Italian
Calories: 600
Ingredients Equipment Method Nutrition Notes

Ingredients
  

For the Ragu
  • 2 pounds Beef Short Ribs consider using de-boned for easier handling
  • 2 tablespoons Light Olive Oil or substitute with vegetable or avocado oil
  • 1 tablespoon Kosher Salt for seasoning
  • 1 medium White Onion finely chopped for the sauce
  • 1 stalk Celery finely chopped
  • 1 medium Carrot diced, fresh
  • 4 cloves Garlic minced
  • 1 tablespoon Tomato Paste sauté to deepen richness
  • 1 cup Red Wine a wine you’d enjoy drinking
  • 2 cups Broth beef or chicken
  • 28 ounces Crushed Tomatoes use quality canned options
  • 1 bunch Herb Bundle includes rosemary, thyme, and parsley
  • 2 leaves Bay Leaves remove before serving
  • 1 tablespoon Sherry or Red Wine Vinegar adjust to taste
  • 12 ounces Pasta Tagliatelle or Pappardelle
  • 1/4 cup Chopped Parsley for garnish
  • 1/2 cup Grated Parmigiano Reggiano for serving

Equipment

  • Dutch oven

Method
 

Step-by-Step Instructions
  1. Season the beef short ribs with kosher salt, ensuring they are coated on all sides. Let them sit for 10 minutes.
  2. In a Dutch oven, heat two tablespoons of olive oil. Sear the short ribs for 4-5 minutes on each side until golden brown. Transfer to a plate.
  3. Add chopped onion, celery, and carrot to the pot. Sauté for 3-4 minutes until softened and fragrant.
  4. Stir in the tomato paste and sauté for an additional 2-3 minutes until it deepens in color.
  5. Deglaze the pot with the red wine, scraping up brown bits for 2 minutes.
  6. Return the ribs to the pot, add broth, crushed tomatoes, the herb bundle, and bay leaves. Stir well.
  7. Cover the pot slightly ajar, reduce heat to low, and simmer for 2 to 2.5 hours until the ribs are fork-tender.
  8. After cooking, discard the herb bundle and bay leaves. Shred the beef in the pot and adjust flavors with vinegar. Serve over pasta garnished with parsley and cheese.

Nutrition

Serving: 1plateCalories: 600kcalCarbohydrates: 45gProtein: 30gFat: 30gSaturated Fat: 10gPolyunsaturated Fat: 4gMonounsaturated Fat: 12gCholesterol: 100mgSodium: 900mgPotassium: 800mgFiber: 5gSugar: 6gVitamin A: 20IUVitamin C: 6mgCalcium: 100mgIron: 5mg

Notes

Ideal to prepare a day in advance for enhanced flavor. Store leftovers properly to maintain texture.

Tried this recipe?

Let us know how it was!

Wholesome Crockpot Beef Stew for Cozy Nights In

November 15, 2025 by Grace Snow Leave a Comment

As I plopped down after a long day, the comforting aroma dancing from the kitchen not only drew me in but also promised warmth and satisfaction. This is what happens when you whip up a Wholesome Crockpot Beef Stew—lovingly crafted to embrace your senses with its tender chunks of beef simmered in a rich, savory broth. The glorious mix of vegetables adds just the right touch, turning this into a meal even the pickiest eaters can’t resist. It’s perfect for busy weeknights—prep it in the morning and return home to a hearty feast that feels like a hug in a bowl. Plus, it’s make-ahead and freezer-friendly, making dinner planning a breeze! Are you ready to dive into the cozy world of slow-cooked goodness?

Why Is This Beef Stew So Special?

Unmatched Convenience: This Wholesome Crockpot Beef Stew allows you to prep in minutes, leaving it to slowly cook while you go about your day.

Rich, Deep Flavors: The blend of red wine and fresh herbs creates a savoriness that fills your kitchen with irresistible scents.

Versatile Variations: Whether you stick with beef or opt for portobello mushrooms, this stew happily adapts to your dietary needs.

Family-Friendly Fare: Even picky eaters will enjoy this comforting dish, making it a wonderful choice for family dinners.

Make-Ahead Magic: Leftovers can be easily stored for up to three days or frozen for later, ensuring you always have a hearty meal ready to go. Check out recipes like Crockpot Butter Chicken or Ground Beef Enchiladas for more crowd-pleasers!

Wholesome Crockpot Beef Stew Ingredients

For the Beef Stew
• Stew Meat – The main protein; chuck roast is ideal for tenderness. Substitute bottom round or portobello mushrooms for a vegetarian version.
• Olive Oil – Perfect for browning meat and adding a touch of flavor.
• Butter – Enhances richness when sautéing onions and other aromatics.
• Onion – Provides sweetness and elevates the stew's depth.
• Garlic – Infuses delicious aromatic flavor throughout the dish.
• Red Wine – Contributes to the broth’s complexity; swap with beef stock or grape juice for alcohol-free.
• Beef Stock – Essential for creating a rich stew base; choose high-quality for the best flavor.
• Carrots – Add natural sweetness and essential nutrients.
• Potatoes – Offer heartiness and help thicken the stew as they cook.
• Frozen Peas – Added at the end for a pop of color and a hint of sweetness.
• Flour – Thickens the stew beautifully; cornstarch is a gluten-free option.
• Fresh Herbs (e.g., rosemary, thyme) – Infuse fresh notes and aroma into the dish.
• Seasonings (salt, black pepper, garlic salt, celery salt) – Key enhancers for overall flavor.

This Wholesome Crockpot Beef Stew is as much about the ingredients as it is about the time you put into making it—each one plays a vital role in creating a cozy and delicious meal!

Step‑by‑Step Instructions for Wholesome Crockpot Beef Stew

Step 1: Prepare the Beef
Start by cutting the chuck roast into 1½-inch cubes, carefully trimming away any excess fat. Season the beef generously with black pepper, garlic salt, and celery salt, ensuring every piece is coated. This step enhances the flavor profile of your Wholesome Crockpot Beef Stew right from the start.

Step 2: Browning the Meat
Toss the seasoned beef cubes with flour in a bowl, making sure they're evenly coated. In a large skillet, heat olive oil over medium-high heat. Add the beef in batches and sauté for about 3–4 minutes, or until each piece is browned on all sides. This not only locks in flavor but also gives the stew a rich base.

Step 3: Sauté the Aromatics
In the same skillet, melt butter over medium heat and add diced onion, cooking until softened and translucent, about 5 minutes. Stir in minced garlic and sauté for an additional minute until fragrant. Deglaze the skillet with a splash of red wine, scraping up the browned bits, then transfer this mixture to the slow cooker for your stew.

Step 4: Combine Remaining Ingredients
Add the browned beef, sautéed onion, and garlic to the slow cooker. Then, pour in the beef stock, followed by chopped carrots, diced potatoes, and fresh herbs like rosemary and thyme. Stir everything together thoroughly, ensuring the ingredients are well-mixed for a balanced flavor in your Wholesome Crockpot Beef Stew.

Step 5: Cook the Stew
Cover your slow cooker with the lid and select the low setting. Allow the stew to cook for 7½ to 8 hours, or on high for 3½ to 4 hours. The stew is ready when the beef is tender and easily shreds with a fork, and the vegetables are cooked through and soft.

Step 6: Finishing Touches
In the last 15 minutes of cooking, stir in the frozen peas to add vibrant color and sweetness. If you want to thicken the stew further, mix cornstarch with cold water to create a slurry, and add it while stirring. This step will give your Wholesome Crockpot Beef Stew a satisfying, hearty texture.

Step 7: Final Seasoning and Serve
Once the cooking time is up, taste the stew for seasoning and adjust with salt, pepper, or additional herbs as desired. Serve this comforting dish hot, ideally with crusty bread or a fresh salad on the side, making it a delightful meal for your family or guests.

Storage Tips for Wholesome Crockpot Beef Stew

  • Fridge: Store leftover Wholesome Crockpot Beef Stew in an airtight container for up to 3 days. Reheat gently on the stovetop or in the microwave, adding a splash of stock or water if needed.
  • Freezer: Freeze the stew in portioned airtight containers for up to 3 months. Label with the date and use within the recommended timeframe for best quality.
  • Reheating: To reheat, thaw overnight in the fridge if frozen, then warm on the stovetop over low heat, stirring occasionally. Add a little broth to ensure it stays moist.
  • Serving: Consider adding a fresh herb garnish when serving again for an extra boost of flavor, making each reheated portion feel like a warm, comforting meal.

Helpful Tricks for Wholesome Crockpot Beef Stew

  • Choose Quality Meat: Always select well-marbled beef for tenderness. Lean cuts can result in tougher pieces, ruining your Wholesome Crockpot Beef Stew.

  • Don’t Skip Browning: Browning the beef in olive oil builds depth. Skipping this step can result in a flat flavor profile.

  • Correct Cooking Time: Cook on low for 7½ to 8 hours or high for 3½ to 4 hours. Pull the meat apart easily to test if it’s done; overcooking will dry it out.

  • Adjust to Taste: Don’t hesitate to tweak seasonings before serving. A pinch of salt or a splash of vinegar at the end can elevate your stew dramatically.

  • Freeze for Later: Make a double batch and freeze leftovers in portions up to 3 months. Just remember to add a little liquid when reheating to keep it moist!

What to Serve with Hearty Crockpot Beef Stew

As you gather around the table, the warm aroma of slow-cooked beef will invite your family to enjoy a full-bodied meal filled with love and comfort.

  • Crusty Bread: Perfect for dipping, a warm slice will soak up the luscious broth and add a delightful crunch.

  • Simple Green Salad: A light salad with a tangy vinaigrette balances the richness of the stew, providing a refreshing contrast to the hearty flavors.

  • Garlic Mashed Potatoes: Ultra-creamy potatoes are a classic pairing that complement the stew’s textures while delivering an extra dose of comfort.

  • Roasted Root Vegetables: Carrots, parsnips, and sweet potatoes enhance the wholesome taste and add a delightful sweetness to your meal.

  • Buttered Corn on the Cob: This simple side brings a pop of sweetness and a fun, summery feel, countering the hearty beef stew perfectly.

  • Rich Red Wine: A glass of red wine, like a Cabernet Sauvignon, enhances the deep flavors of your stew while making the dining experience even more special.

  • Chocolate Lava Cake: For dessert, a warm chocolate lava cake offers a decadent finish, creating a cozy end to your flavorful meal.

  • Apple Crisp: This warm, spiced dessert echoes the comfort of the stew and adds a delightful fruity touch that everyone will love.

Make Ahead Options

These Wholesome Crockpot Beef Stew components are perfect for meal prep, saving you time during those busy weeknights! You can chop the vegetables (carrots, potatoes, onions, and garlic) and marinate the beef in seasoning up to 24 hours in advance, storing them in separate airtight containers in the fridge. For best results, keep the beef and vegetables separate until you're ready to cook, preventing excess moisture. When you're set to enjoy your hearty stew, simply combine everything in the slow cooker and follow the usual cooking instructions. This way, you'll have a delicious, comforting meal waiting for you with minimal effort!

Wholesome Crockpot Beef Stew Variations

Feel free to play around with this recipe, adding your personal touch to create the perfect dish for cozy nights.

  • Vegetarian: Substitute the beef with portobello mushrooms, sautéed to bring out their rich flavor. This twist offers a hearty alternative without sacrificing satisfaction.

  • Gluten-Free: Use cornstarch instead of flour to thicken the stew, making it friendly for gluten sensitivities while maintaining that thick, luscious texture.

  • Root Vegetable Boost: Swap in parsnips or sweet potatoes for a twist on traditional carrots and potatoes. Their unique flavors and textures will elevate your stew to new heights.

  • Spicy Kick: Add diced jalapeños or a dash of cayenne pepper for a little heat. This will awaken the flavor and bring an exciting zing to your hearty stew.

  • Herb Variations: Experiment with different herbs such as sage or oregano based on what you have on hand. This can completely alter the flavor profile of the stew, making it a culinary adventure.

  • Savory Stock Swap: Use a mixture of beef stock and a splash of balsamic vinegar instead of red wine for depth. This combo adds a special richness that will make your stew stand out.

  • Green Goodness: Toss in chopped green beans or spinach in the last 10 minutes of cooking for added nutrients and a pop of color. It's an excellent way to sneak in some extra veggies!

  • Slow-Cooker Alternatives: Don't forget that this stew can also be made on the stove or in an Instant Pot, just adjust cooking times accordingly. Each method brings a different flavor and texture, giving you options for easy cooking.

If you're looking for more cozy meal inspiration, check out Lamb Stew Hearty or Coconutty Beans and Greens Stew for another level of comfort food!

Wholesome Crockpot Beef Stew Recipe FAQs

What type of beef is best for stew?
For the best results in your Wholesome Crockpot Beef Stew, I recommend using chuck roast. This cut is well-marbled, which means it has a good amount of fat that keeps the meat tender during long, slow cooking. If you’re looking for alternatives, bottom round is a decent substitute, or for a vegetarian option, try portobello mushrooms.

How do I store leftover beef stew?
Absolutely! Store your leftover Wholesome Crockpot Beef Stew in an airtight container in the fridge for up to 3 days. When reheating, add a splash of broth or water to keep it moist. If you find you have more than you can eat, consider freezing it for later.

Can I freeze this stew?
Very! You can freeze portions of your Wholesome Crockpot Beef Stew in airtight containers for up to 3 months. Just label them with the date. To reheat, take it out the night before and let it thaw in the fridge, then warm it gently on the stovetop, stirring occasionally. A little added broth will help it stay juicy!

What should I do if my stew is too thin?
If your Wholesome Crockpot Beef Stew is too thin after cooking, don't worry! You can mix a tablespoon of cornstarch with cold water to create a slurry. Stir this mixture into the stew during the last 15 minutes of cooking while it's still bubbling. This will help thicken the broth, giving you that hearty texture you’re looking for!

Is this stew suitable for gluten-free diets?
Yes, indeed! To make your Wholesome Crockpot Beef Stew gluten-free, simply substitute the flour used for browning the meat with cornstarch. This adjustment ensures that everyone can enjoy this comforting meal without worrying about gluten sensitivities. Just remember to use gluten-free beef stock as well.

How do I pick ripe vegetables for the stew?
Selecting the right vegetables is crucial! Choose carrots that are firm with a smooth surface, avoiding those with dark spots or soft spots. For potatoes, look for ones that are free of blemishes and sprouts. Aim for fresh herbs with vibrant color and a fragrant aroma to enhance the flavors in your Wholesome Crockpot Beef Stew. Always remember, fresh ingredients make the dish sing!

Wholesome Crockpot Beef Stew

Wholesome Crockpot Beef Stew for Cozy Nights In

A deliciously hearty Wholesome Crockpot Beef Stew, perfect for cozy nights, featuring tender beef and a rich, savory broth.
Print Recipe Pin Recipe
Prep Time 20 minutes mins
Cook Time 7 hours hrs 30 minutes mins
Total Time 7 hours hrs 50 minutes mins
Servings: 4 bowls
Course: Dinner
Cuisine: American
Calories: 350
Ingredients Equipment Method Nutrition Notes

Ingredients
  

For the Beef Stew
  • 2 pounds Stew meat (chuck roast) Can substitute bottom round or portobello mushrooms for vegetarian version.
  • 2 tablespoons Olive oil For browning meat.
  • 2 tablespoons Butter Enhances richness.
  • 1 medium Onion Diced.
  • 4 cloves Garlic Minced.
  • 1 cup Red wine Can substitute with beef stock or grape juice.
  • 4 cups Beef stock Use high-quality stock.
  • 3 medium Carrots Chopped.
  • 2 medium Potatoes Diced.
  • 1 cup Frozen peas Added at the end.
  • 1/3 cup Flour Use cornstarch for gluten-free.
  • 2 sprigs Fresh herbs (e.g., rosemary, thyme)
  • to taste Seasonings (salt, black pepper, garlic salt, celery salt)

Equipment

  • Slow Cooker
  • Skillet
  • Cutting Board
  • Chef’s Knife
  • measuring cups
  • Measuring Spoons

Method
 

Step-by-Step Instructions
  1. Start by cutting the chuck roast into 1½-inch cubes, trimming excess fat. Season generously with black pepper, garlic salt, and celery salt.
  2. Toss seasoned beef cubes with flour. In a skillet, heat olive oil and brown beef in batches for about 3-4 minutes.
  3. Melt butter in the skillet, add diced onion, and cook until softened. Stir in garlic and sauté for a minute. Deglaze with red wine, then transfer to slow cooker.
  4. Add browned beef, sautéed onion, garlic, beef stock, chopped carrots, diced potatoes, and fresh herbs to the slow cooker. Stir well.
  5. Cover and cook on low for 7½ to 8 hours or high for 3½ to 4 hours until beef is tender.
  6. In the last 15 minutes, stir in frozen peas. For thickening, mix cornstarch with cold water and add while stirring.
  7. Taste and adjust seasoning before serving hot with crusty bread or salad.

Nutrition

Serving: 1bowlCalories: 350kcalCarbohydrates: 45gProtein: 25gFat: 10gSaturated Fat: 4gPolyunsaturated Fat: 1gMonounsaturated Fat: 4gCholesterol: 80mgSodium: 600mgPotassium: 800mgFiber: 5gSugar: 5gVitamin A: 500IUVitamin C: 15mgCalcium: 50mgIron: 3mg

Notes

Store leftovers in an airtight container for up to 3 days. Can be frozen for up to 3 months. Reheat gently on the stovetop, adding a splash of liquid if needed.

Tried this recipe?

Let us know how it was!

Crispy Chilli Beef: Easy Takeout Flavor at Home

November 15, 2025 by Grace Snow Leave a Comment

“Did you hear that crunch?” is what you’ll hear echoing through your kitchen as you take that first bite of my Crispy Chilli Beef. This dish captures the joy of restaurant-style Chinese cuisine, delivering the satisfying bite of tender beef coated in a sweet and spicy sauce, all from the comfort of your home. This quick and easy recipe isn’t just a crowd-pleaser; it’s a delightful escape from takeout that leaves your kitchen smelling irresistible. Not only does it come together fast, but you can also whip up a gluten-free option using corn or potato starch for the coating. Are you ready to impress your family with a dinner that’s both stylish and comforting? Let’s dive into this culinary adventure!

Why is Crispy Chilli Beef a Must-Try?

Crunchy Texture: The moment you bite into this dish, the crispy coating gives way to tender beef, creating an irresistible combination of textures.

Quick and Easy: With just a handful of ingredients and simple steps, this recipe is perfect for busy weeknights yet impressive enough for special occasions.

Flavor Explosion: The harmonious blend of sweet and spicy takes your taste buds on a flavor journey, making it feel like authentic takeout.

Versatile Dish: Pair it with fluffy rice, stir-fried noodles, or enjoy it alone as a savory snack—there's no wrong way to savor this delight!

Gluten-Free Option: Easily adjust this recipe for gluten-sensitive diners by using corn or potato starch for a deliciously crispy finish.

Once you’ve tried this scrumptious Crispy Chilli Beef, you might also want to explore options like Ground Beef Enchiladas for a Mexican twist or serve up some Crispy Parmesan Artichoke Hearts as a perfect starter!

Crispy Chilli Beef Ingredients

For the Beef
• Rump/Sirloin Steak – Tender cuts create a rich flavor; flank steak works as a satisfying substitute.
• Egg – Helps bind the coating for that perfect crisp; consider a flax egg for a plant-based option.

For the Coating
• Corn/Potato Starch – Forms a glorious, crispy layer on the beef; alternative flours may alter texture.

For the Vegetables
• Sweet Onion – Brings sweetness and depth to the dish; red onion can replace it if desired.
• Bell Pepper – Adds vibrant color and crunch; any variety suits this dish.
• Spring Onions – Fresh garnish that introduces a zing; green onions can be used instead.
• Chilies (Birdseye/Hot) – Adds necessary heat; adjust quantity based on your spice preference.

For the Marinade
• Light Soy Sauce – Infuses umami into the beef; tamari is perfect for a gluten-free substitute.
• Ginger Garlic Paste – Elevates the dish with aromatic flavor; fresh minced ginger and garlic can be substituted.
• Sesame Oil – Adds a nutty richness, but it can be omitted if you don't have it on hand.

For the Sauce
• Sugar – Balances the sweet and spicy notes; honey or a sugar substitute works well too.
• White Pepper – Provides a mild heat; black pepper is an acceptable alternative.
• Stir Fry Sauce Ingredients (Sweet Chilli Sauce, Ketchup, Soy Sauce, Vinegar, Sugar, Salt) – These create the signature sauce; feel free to tinker with ratios for sweetness and spice.

Let this delightful blend of ingredients inspire you to create the best Crispy Chilli Beef right in your kitchen!

Step‑by‑Step Instructions for Crispy Chilli Beef

Step 1: Prepare the Beef
Begin by trimming any fat from the rump or sirloin steak, then slice it against the grain into thin strips, about 1/4 inch thick. This ensures tenderness in your Crispy Chilli Beef. Aim for uniformity for even cooking. Set the beef aside while you prepare the marinade, which will infuse the meat with rich flavors.

Step 2: Marinate the Beef
In a mixing bowl, combine light soy sauce, ginger garlic paste, and a splash of sesame oil to create the marinade. Add the thin beef strips and toss well to ensure each piece is coated. Cover the bowl and let the beef marinate for about 15 minutes. This process enhances the flavor and prepares the meat for that perfect crispy texture.

Step 3: Mix the Sauce
While the beef marinates, prepare the sauce by combining sweet chili sauce, ketchup, additional soy sauce, vinegar, sugar, and a sprinkle of salt in a separate bowl. Whisk the ingredients together until well blended—this will be the delightful glaze that gives your Crispy Chilli Beef its signature sweet and spicy flavor. Set this sauce aside for later use.

Step 4: Add the Egg
Once the beef has marinated, crack an egg directly into the bowl with the beef. Mix well to ensure the egg binds to the meat, promoting a crispy coating. This step is essential for giving your Crispy Chilli Beef its crunchy texture during frying. Make sure every strip is evenly coated with the egg.

Step 5: Coat the Beef
Transfer the marinated beef strips to a shallow dish filled with corn or potato starch. Toss the meat in the starch until each piece is thoroughly coated, ensuring no clumps. This coating will create that irresistible crunch once fried. After coating, gently shake off any excess starch and arrange the strips on a plate, ensuring they do not stick together.

Step 6: Heat the Oil
In a deep skillet or wok, pour enough oil to immerse the beef strips, about 2-3 inches deep. Heat the oil to 350°F (175°C) over medium-high heat. A frying thermometer is handy for accuracy. To test if the oil is ready, drop a small piece of coated beef in; it should sizzle upon contact. This step is crucial for achieving a golden, crispy finish.

Step 7: Fry the Beef
Carefully add the beef strips to the hot oil in small batches, frying for about 1-2 minutes until they are golden brown and crispy. Use a slotted spoon to stir occasionally to ensure even cooking. Once done, transfer the fried beef to a plate lined with paper towels to drain excess oil, keeping them warm while you finish cooking the remaining strips.

Step 8: Stir-Fry the Vegetables
In the same skillet or wok, remove excess oil, leaving about a tablespoon. Preheat it over medium-high heat, then add the sliced sweet onions and bell peppers. Stir-fry them for 2-3 minutes until they become slightly tender yet retain some crunch, adding vibrant color to your Crispy Chilli Beef. This step brings freshness to the dish.

Step 9: Combine Everything
Add the crispy beef back into the wok along with the prepared sauce, spring onions, and chopped chilies. Quickly toss everything together for about 1-2 minutes over high heat, ensuring every piece is evenly coated in the sauce and heated through. This final step melds the flavors and keeps the beef crispy while enhancing the overall taste.

Step 10: Serve and Enjoy
Transfer your steaming hot Crispy Chilli Beef to a serving plate, garnishing with extra spring onions if desired. Serve immediately alongside fluffy steamed rice or stir-fried noodles for a delightful meal. The visual appeal of the glossy sauce coating the crispy beef will surely impress your family and guests.

Expert Tips for Crispy Chilli Beef

  • Perfect Oil Temperature: Ensure your oil is at 350°F (175°C) before adding the beef. Too cool, and it won’t crisp; too hot, and it'll burn.

  • Even Coating: Make sure the beef strips are evenly coated with corn or potato starch. This prevents clumping and allows for that delightful crispy finish in your Crispy Chilli Beef.

  • Fry in Batches: Avoid overcrowding the pan when frying. This helps maintain the oil temperature and ensures each piece gets evenly crispy without steaming.

  • Double Frying: For an extra crispy texture, let the fried beef rest for a minute after the first fry, then return it to the hot oil for a brief second fry.

  • Veggie Variations: Feel free to toss in additional vegetables like broccoli or snap peas for added color and nutrition, making your Crispy Chilli Beef a more complete meal.

Make Ahead Options

These Crispy Chilli Beef strips are perfect for meal prep enthusiasts! You can marinate and coat the beef up to 24 hours in advance, ensuring the flavors deeply infuse while keeping that crispy texture. Simply store the coated beef strips in an airtight container in the refrigerator to maintain their quality. On cooking day, all you need to do is heat the oil and fry the beef for 1-2 minutes until golden crisp. For even more convenience, consider prepping the sauce ahead of time; it keeps well for up to 3 days in the fridge. Just mix it in when you're ready to stir-fry, and you'll achieve restaurant-quality results with minimal effort, making busy weeknights a breeze!

Storage Tips for Crispy Chilli Beef

Fridge: Store leftover Crispy Chilli Beef in an airtight container for up to 3 days. You'll want to keep that delicious crunch, so reheat in a pan for best results.

Freezer: For longer storage, freeze the fried beef strips for up to 2 months. Seal them in a freezer bag, and when ready, thaw and quickly reheat in a hot pan to restore crispiness.

Reheating: When reheating, avoid the microwave as it can make the beef soggy. Instead, heat in a skillet over medium heat for 4-5 minutes, allowing it to regain its delightful crunch.

Make-Ahead Tips: You can prepare and freeze the beef strips before frying. Just remember to coat them well; later, simply fry them and toss with sauce for a quick meal!

What to Serve with Crispy Chilli Beef

Nothing elevates the delightful experience of homemade Crispy Chilli Beef like the perfect side dishes to complement its bold flavors.

  • Fluffy Steamed Rice:
    A classic pairing that absorbs the savory sauce, balancing out the sweetness and spice of the beef beautifully.

  • Stir-Fried Noodles:
    Tender noodles tossed with fresh vegetables create a satisfying contrast in texture, enhancing the meal's overall appeal.

  • Crispy Spring Rolls:
    A crunchy starter or side, these are perfect for dipping, adding another layer of flavor that ties in well with Asian cuisine.

  • Garlic Bok Choy:
    Lightly sautéed, this vibrant green adds a fresh, crisp element, providing a light contrast to the richness of the beef.

  • Sesame Cucumber Salad:
    Refreshing and crunchy, this salad tempers the spice of the Crispy Chilli Beef while offering a revitalizing bite.

  • Chilled Asian Beer:
    An ice-cold brew complements the dish, enhancing the overall experience with its light carbonation refreshing the palate.

With these delightful pairings, your Crispy Chilli Beef will transform into a masterful meal that everyone will rave about!

Crispy Chilli Beef Variations & Substitutions

Let your creative cooking spirit shine as you customize your Crispy Chilli Beef to suit your taste and dietary needs.

  • Vegetable Boost: Add broccoli or snap peas for extra nutrition and color. They add a delightful crunch that complements the beef beautifully.

  • Protein Swap: Substitute the beef with chicken or firm tofu for a lighter option. Both alternatives will soak up the marinade flavors perfectly.

  • Gluten-Free Option: Use tamari instead of light soy sauce and maintain the crunch with corn or potato starch; your dish will still deliver the same satisfaction!

  • Heat Adjustments: Vary the number of chilies according to your spice tolerance. For a milder version, try sweet bell peppers or a sprinkle of chili flakes instead.

  • Hoisin Twist: Swap out the sweet chili sauce for hoisin or teriyaki sauce to introduce a unique, savory sweetness that elevates the flavor profile.

  • Extra Crunch: For that unbeatable crispy texture, toss in a handful of crushed peanuts or sesame seeds just before serving; they add a beautiful crunch and a nutty flavor.

  • Zingy Freshness: Add some lime juice or zest before serving to enhance the dish with a fresh, zesty finish that balances out the sweetness.

Feel free to explore these variations to suit your family's preferences and create an unforgettable meal. Once you've mastered this Crispy Chilli Beef, you might want to try making Fish Taco Bowls or Crispy Parmesan Artichoke Hearts for more delicious options!

Crispy Chilli Beef Recipe FAQs

What type of beef should I use for Crispy Chilli Beef?
For the best results, I recommend using rump or sirloin steak, as they are tender and flavorful. If you're looking for a different texture, flank steak is a fantastic substitute. Just make sure to slice the beef against the grain to ensure it's tender!

How should I store leftover Crispy Chilli Beef?
To keep your delicious Crispy Chilli Beef fresh, store leftover portions in an airtight container in the refrigerator for up to 3 days. When you're ready to enjoy it again, I suggest reheating it in a skillet rather than the microwave to maintain that delightful crunch.

Can I freeze Crispy Chilli Beef?
Absolutely! To freeze, place the fried beef strips in a freezer-safe bag or container, ensuring they're sealed tightly. You can freeze them for up to 2 months. When you're ready to enjoy, simply thaw in the fridge overnight and reheat in a hot pan for about 4-5 minutes to regain their crispy texture.

What can I do if my beef isn't crispy enough?
If you find your beef isn't as crispy as you'd like, don't worry! Make sure your oil temperature is around 350°F (175°C) before frying. Fry in small batches to avoid overcrowding the pan, which can lead to steaming rather than frying. For extra crunch, consider double frying the beef—just allow it to rest briefly after the first fry, then return it to the hot oil for a second fry.

Is Crispy Chilli Beef gluten-free?
Yes, you can easily make this dish gluten-free! Simply substitute the light soy sauce with tamari, and use corn or potato starch for the coating instead of regular flour. This way, you can enjoy all the wonderful flavors without any gluten concerns!

How do I adjust the spiciness of Crispy Chilli Beef?
If you prefer a milder dish, reduce the number of chilies or opt for milder varieties instead of Birdseye chilies. Conversely, if you're looking for more heat, feel free to add extra chilies. Just remember that it’s easier to add spice than to take it away, so add gradually and taste as you go!

Crispy Chilli Beef

Crispy Chilli Beef: Easy Takeout Flavor at Home

Enjoy the crunch of my Crispy Chilli Beef, a delightful escape from takeout with sweet and spicy sauce.
Print Recipe Pin Recipe
Prep Time 15 minutes mins
Cook Time 15 minutes mins
Total Time 30 minutes mins
Servings: 4 servings
Course: Dinner
Cuisine: Chinese
Calories: 550
Ingredients Equipment Method Nutrition Notes

Ingredients
  

For the Beef
  • 1 pound Rump/Sirloin Steak Tender cuts for rich flavor
  • 1 large Egg Consider a flax egg for plant-based option
For the Coating
  • 1 cup Corn/Potato Starch Forms a crispy layer
For the Vegetables
  • 1 medium Sweet Onion Red onion can replace if desired
  • 1 large Bell Pepper Any variety suits this dish
  • 2 stalks Spring Onions Fresh garnish
  • 2 pieces Chilies (Birdseye/Hot) Adjust for spice preference
For the Marinade
  • 3 tablespoons Light Soy Sauce Tamari for gluten-free substitute
  • 1 tablespoon Ginger Garlic Paste Fresh minced ginger and garlic can substitute
  • 1 tablespoon Sesame Oil Optional, can be omitted
For the Sauce
  • 2 tablespoons Sugar Honey or a sugar substitute works
  • 1 teaspoon White Pepper Black pepper is an acceptable alternative
  • 1 cup Stir Fry Sauce Mix of sweet chilli sauce, ketchup, soy sauce, vinegar, sugar, salt

Equipment

  • Skillet
  • Mixing Bowl
  • frying thermometer

Method
 

Cooking Instructions
  1. Trim any fat from the ribeye or sirloin and slice into thin strips, about 1/4 inch thick.
  2. In a bowl, mix light soy sauce, ginger garlic paste, and sesame oil. Add beef strips, toss to coat, and marinate for 15 minutes.
  3. Prepare the sauce by mixing sweet chili sauce, ketchup, soy sauce, vinegar, sugar, and salt.
  4. Add egg to the marinated beef, mix to ensure even coating.
  5. Coat beef strips in corn or potato starch until thoroughly coated.
  6. Heat oil in a skillet to 350°F. Test with a small piece of beef to ensure it's ready.
  7. Fry beef strips in small batches for 1-2 minutes until golden and crispy. Drain on paper towels.
  8. Stir-fry sliced sweet onions and bell peppers for 2-3 minutes.
  9. Add crispy beef, prepared sauce, spring onions, and chilies. Toss for 1-2 minutes.
  10. Serve immediately, garnished with extra spring onions if desired.

Nutrition

Serving: 1plateCalories: 550kcalCarbohydrates: 40gProtein: 30gFat: 30gSaturated Fat: 10gPolyunsaturated Fat: 5gMonounsaturated Fat: 10gCholesterol: 150mgSodium: 800mgPotassium: 600mgFiber: 3gSugar: 12gVitamin A: 10IUVitamin C: 15mgCalcium: 6mgIron: 15mg

Notes

For extra crispiness, double fry the beef after initial frying. Store leftovers in an airtight container for up to 3 days.

Tried this recipe?

Let us know how it was!

Gordon Ramsay Ground Turkey Pasta: A Cozy Weeknight Delight

November 15, 2025 by Grace Snow Leave a Comment

As I stood by the stove, I felt like a culinary magician, ready to transform humble ingredients into something extraordinary. Let me introduce you to Gordon Ramsay's Creamy Ground Turkey Pasta, a quick and easy dinner that elevates your weeknight routine in a matter of minutes. Not only is this dish packed with lean protein and rich flavors, it's also incredibly customizable—meaning it can easily adapt to whatever your pantry holds. Imagine a creamy sauce enveloping perfectly cooked pasta, making it a satisfying feast that even picky eaters will love. Double win! Are you curious to see how this delightful meal comes together? Let's dive in!

Why is This Pasta Recipe a Game Changer?

Quick and Easy: This dish comes together in under 30 minutes, perfect for busy weeknights when you crave something comforting yet nutritious.

Healthy Twist: Made with lean ground turkey, it's a guilt-free choice that keeps you feeling your best.

Customizable: Switch up the ingredients! Use your favorite pasta shape or add seasonal vegetables for extra nutrition—like in this Seafood Pasta variation.

Crowd-Pleaser: With its creamy flavors and cheesy goodness, it appeals to kids and adults alike, making it the ideal family meal.

One-Pan Wonder: Reducing cleanup time, it’s a simple, satisfying dish that doesn't require fussing around with multiple pots—just like my go-to Ground Beef Enchiladas.

Get ready to love this deliciously simple recipe!

Gordon Ramsay Ground Turkey Pasta Ingredients

Here’s what you’ll need to create this creamy delight.

For the Pasta
• Penne Pasta – Provides structure for the dish; substitute with any preferred pasta shape.

For the Sauce
• Olive Oil – Essential for sautéing aromatics; canola or vegetable oil can be used instead.
• Yellow Onion – Adds sweetness and depth; red onion can offer a sharper taste if desired.
• Ground Turkey – A lean protein source; can substitute with ground chicken or beef for variety.
• Salt – Enhances flavor; adjust to dietary needs.
• Black Pepper – Freshly cracked is recommended for maximum flavor.
• Italian Seasoning – Adds herby notes; can be substituted with dried oregano, basil, or thyme.
• Garlic – Vital for flavor; garlic powder may work in a pinch.
• All-Purpose Flour – Used for thickening the sauce; gluten-free flour is an alternative.
• Chicken Broth – Adds richness to the sauce; swap for vegetable broth for a vegetarian option.
• Tomato Sauce – Provides tangy acidity; canned diced tomatoes can give a chunkier texture.
• Half-and-Half – For creaminess; can be replaced with heavy cream or non-dairy milk.

For the Cheese
• Mozzarella Cheese – Melts beautifully; may substitute with provolone or dairy-free cheese.
• Cheddar Cheese – Adds sharp flavor; any melty cheese can be used.

For Garnish
• Fresh Parsley – Adds a pop of color and freshness.
• Red Chili Flakes – Optional for a bit of heat; can be omitted or replaced with fresh chili.

Now you’re ready to make Gordon Ramsay’s Ground Turkey Pasta!

Step‑by‑Step Instructions for Gordon Ramsay Ground Turkey Pasta

Step 1: Cook Pasta
Begin by bringing a large pot of salted water to a vigorous boil over high heat. Once boiling, add the penne pasta and cook for about 8-10 minutes until it's just shy of al dente. Reserve 1 cup of the pasta water, then carefully drain the pasta in a colander and set it aside while you prepare the sauce.

Step 2: Sauté Aromatics
In a spacious skillet, heat 2 tablespoons of olive oil over medium heat until shimmering. Add the diced yellow onion and sauté for around 5 minutes until it turns soft and translucent, stirring occasionally. This step helps to build a flavorful base for your Gordon Ramsay Ground Turkey Pasta.

Step 3: Brown Turkey
Once the onions are ready, increase the heat slightly and add the ground turkey to the skillet. Use a wooden spoon to break it apart and cook for 6-8 minutes until it's beautifully browned. Season the turkey with salt, pepper, and Italian seasoning, then stir in the minced garlic, cooking for an additional minute to release its delicious aroma.

Step 4: Build Sauce
Sprinkle all-purpose flour evenly over the turkey mixture, stirring it in for about 1 minute to eliminate raw flour taste. Gradually pour in the chicken broth and tomato sauce, stirring continuously until the mixture begins to thicken, which should take about 3-5 minutes. The sauce will become silky, perfect for coating your pasta.

Step 5: Combine Ingredients
Gently fold the cooked penne pasta into the turkey sauce, ensuring every piece is well-coated. Pour in the half-and-half for an extra creamy texture, and season the mixture as needed with additional salt and pepper. If the sauce is too thick, adjust the consistency by adding some reserved pasta water until you reach your preferred creaminess.

Step 6: Add Cheese
Reduce the skillet heat to low and sprinkle half of the mozzarella and cheddar cheese into the pasta mixture. Stir well until the cheese melts and incorporates fully into the sauce, creating a creamy, cheesy blend. Top with the remaining cheese and cover the skillet for a minute to melt everything perfectly.

Step 7: Serve
Remove the skillet from heat and garnish your Gordon Ramsay Ground Turkey Pasta with freshly chopped parsley and a sprinkle of red chili flakes for an optional kick. Serve immediately while hot, and watch as your family and friends enjoy this cozy weeknight delight, feeling utterly satisfied.

Gordon Ramsay Ground Turkey Pasta Variations

Feel free to personalize this dish to your taste and make it uniquely yours. Your kitchen is your canvas!

  • Gluten-Free: Substitute regular pasta with gluten-free alternatives for a lighter option.
  • Vegetable Boost: Toss in spinach, bell peppers, or broccoli for added nutrients and vibrant color. This makes the dish more filling and healthful.
  • Extra Creamy: For an indulgent twist, replace half-and-half with heavy cream or a rich non-dairy milk. This will amp up the creamy texture everyone loves!
  • Cheese Lovers: Incorporate ricotta or cream cheese for a rich layer of flavor and creaminess. Use this variation on a cozy night in!
  • Spicy Kick: Add red chili flakes, jalapeños, or a dash of hot sauce for a zingy twist. It’s a great way to spice things up!
  • Baked Pasta: Layer any leftovers with breadcrumbs and additional cheese, broil until bubbly and golden for a delightful crispy topping. Think of it like turning a simple meal into a gourmet dish!
  • Italian Twist: Introduce a splash of white wine during sauce preparation for depth and flavor. Pairing it with a glass of wine while cooking makes for the perfect evening!
  • Swap Meats: Use ground chicken or beef for a different but equally delicious flavor profile. Each option brings its own flair to the dish!

Explore these delicious variations to see what resonates with you and your family. And while you’re at it, check out my Skillet Pasta Sun recipe for even more inspiration!

What to Serve with Gordon Ramsay's Creamy Ground Turkey Pasta

To create a delightful dining experience, complement your creamy pasta with dishes that enhance its comforting flavors.

  • Garlic Bread: The warm, aromatic crunch of garlic bread is the perfect sidekick to this creamy dish, perfect for scraping up every last bit of sauce.

  • Fresh Green Salad: Crisp romaine or mixed greens provide a refreshing contrast to the rich pasta, while a light vinaigrette balances the meal beautifully.

  • Roasted Vegetables: Seasonal veggies like zucchini, bell peppers, and asparagus, roasted to perfection, add texture and a sweet earthiness that complements the pasta.

  • Steamed Broccoli: This vibrant green side not only offers a satisfying crunch but also brings a pop of color and nutrients to your plate.

  • Caesar Salad: The creamy dressing pairs perfectly with the flavors of the pasta, making this classic side fit right in with your cozy dinner.

  • A Light White Wine: A glass of chilled Chardonnay or Pinot Grigio elevates the meal, enhancing the flavors of the ground turkey and creamy sauce with every sip.

How to Store and Freeze Gordon Ramsay Ground Turkey Pasta

Fridge: Store leftovers in an airtight container in the refrigerator for up to 3 days. Allow to cool before sealing to maintain texture.

Freezer: For longer storage, freeze portions of the pasta in airtight containers for up to 3 months. Label with the date to keep track.

Reheating: When ready to enjoy, thaw overnight in the fridge if frozen. Reheat slowly on the stove over low heat, adding a splash of water or broth to restore creaminess.

Avoid Clumping: Stir well during reheating to prevent the cheese from clumping, ensuring a smooth and delightful Gordon Ramsay Ground Turkey Pasta experience.

Make Ahead Options

Gordon Ramsay's Creamy Ground Turkey Pasta is perfect for make ahead meal prep, allowing you to enjoy a comforting dinner with minimal effort during busy weeknights. You can prepare the turkey sauce (steps 2 through 4) up to 3 days in advance; simply refrigerate it in an airtight container. The cooked pasta can also be made up to 24 hours ahead and stored separately, as combining them too early can lead to sogginess. When you're ready to serve, gently reheat the sauce on the stovetop, adding a splash of broth to maintain its creamy texture, then toss in the cooked pasta and cheese just before serving. This way, you'll have a warm, delicious meal that tastes just as freshly made!

Expert Tips for Gordon Ramsay Ground Turkey Pasta

• Flavor Boost: Season generously: Don't be shy with salt and spices; they elevate the overall flavor and enhance the turkey's rich taste.

• Perfect Pasta: Cook al dente: Aim for pasta that's just shy of fully cooked to avoid any mushiness when combined with the sauce later.

• Smooth Sauce: Mix well: Ensure flour is fully incorporated into the turkey mixture to prevent clumps in your creamy sauce.

• Cheesy Goodness: Low heat: When adding cheese, keep the heat low to achieve a creamy melt without separating or curdling.

• Ingredient Substitution: Get creative: This Gordon Ramsay Ground Turkey Pasta is flexible—feel free to swap ingredients for whatever you have on hand!

Gordon Ramsay Ground Turkey Pasta Recipe FAQs

How do I choose the right pasta for this recipe?
It's absolutely your choice! I recommend using penne pasta as it holds onto the creamy sauce well, but feel free to experiment with any pasta shape you like. Just ensure it’s cooked al dente to prevent mushiness once mixed with the sauce.

How should I store leftovers of Gordon Ramsay Ground Turkey Pasta?
Store any leftovers in an airtight container in the fridge for up to 3 days. Be sure to let it cool to room temperature before sealing it to maintain the best texture when reheating.

Can I freeze Gordon Ramsay Ground Turkey Pasta?
Yes! You can freeze this dish for up to 3 months. Just portion it into airtight containers, and label them with the date. To reheat, thaw overnight in the fridge, then warm it gently on the stovetop, adding a splash of water or broth to keep it creamy.

What if the sauce turns out too thick?
No worries! If your sauce ends up thicker than desired, gently stir in a little of the reserved pasta water, one tablespoon at a time, until you reach your preferred consistency. This will help keep the sauce creamy without losing that rich flavor.

Can I make this recipe gluten-free?
Absolutely! To make this Gordon Ramsay Ground Turkey Pasta gluten-free, simply substitute regular pasta with a gluten-free alternative. You can also use gluten-free flour to thicken the sauce without compromising its deliciousness.

What about dietary concerns?
If you're concerned about allergies, be sure to check labels on your ingredients, especially on sauces and cheese. For dairy-free options, swap the mozzarella and cheddar for dairy-free cheese alternatives and use non-dairy milk or broth in place of half-and-half. Enjoy the adaptability of this dish!

Gordon Ramsay Ground Turkey Pasta

Gordon Ramsay Ground Turkey Pasta: A Cozy Weeknight Delight

Experience the comfort of Gordon Ramsay's Ground Turkey Pasta, a creamy, customizable dish packed with lean protein perfect for weeknights.
Print Recipe Pin Recipe
Prep Time 10 minutes mins
Cook Time 20 minutes mins
Total Time 30 minutes mins
Servings: 4 servings
Course: Dinner
Cuisine: American
Calories: 650
Ingredients Equipment Method Nutrition Notes

Ingredients
  

For the Pasta
  • 8 ounces Penne Pasta Substitute with any preferred pasta shape.
For the Sauce
  • 2 tablespoons Olive Oil Can substitute with canola or vegetable oil.
  • 1 medium Yellow Onion Red onion can be used for a sharper taste.
  • 1 pound Ground Turkey Can substitute with ground chicken or beef.
  • 1 teaspoon Salt Adjust to dietary needs.
  • 1 teaspoon Black Pepper Freshly cracked is recommended.
  • 1 teaspoon Italian Seasoning Can substitute with dried oregano, basil, or thyme.
  • 3 cloves Garlic Minced; garlic powder may work in a pinch.
  • 2 tablespoons All-Purpose Flour Gluten-free flour is an alternative.
  • 1 cup Chicken Broth Swap for vegetable broth for a vegetarian option.
  • 1 cup Tomato Sauce Canned diced tomatoes can be used for a chunkier texture.
  • 1 cup Half-and-Half Can be replaced with heavy cream or non-dairy milk.
For the Cheese
  • 1 cup Mozzarella Cheese May substitute with provolone or dairy-free cheese.
  • 1 cup Cheddar Cheese Any melty cheese can be used.
For Garnish
  • 2 tablespoons Fresh Parsley Chopped, for garnish.
  • 1/2 teaspoon Red Chili Flakes Optional for heat; can be omitted.

Equipment

  • Large pot
  • Skillet
  • Colander

Method
 

Cooking Steps
  1. Begin by bringing a large pot of salted water to a vigorous boil over high heat. Once boiling, add the penne pasta and cook for about 8-10 minutes until it's just shy of al dente. Reserve 1 cup of the pasta water, then carefully drain the pasta in a colander and set it aside while you prepare the sauce.
  2. In a spacious skillet, heat 2 tablespoons of olive oil over medium heat until shimmering. Add the diced yellow onion and sauté for around 5 minutes until it turns soft and translucent, stirring occasionally.
  3. Once the onions are ready, increase the heat slightly and add the ground turkey to the skillet. Use a wooden spoon to break it apart and cook for 6-8 minutes until it's beautifully browned. Season the turkey with salt, pepper, and Italian seasoning, then stir in the minced garlic, cooking for an additional minute.
  4. Sprinkle all-purpose flour evenly over the turkey mixture, stirring it in for about 1 minute. Gradually pour in the chicken broth and tomato sauce, stirring continuously until the mixture begins to thicken, which should take about 3-5 minutes.
  5. Gently fold the cooked penne pasta into the turkey sauce, ensuring every piece is well-coated. Pour in the half-and-half for an extra creamy texture, and season as needed with additional salt and pepper.
  6. Reduce the skillet heat to low and sprinkle half of the mozzarella and cheddar cheese into the pasta mixture. Stir well until the cheese melts and incorporates into the sauce, then top with the remaining cheese and cover the skillet for a minute.
  7. Remove the skillet from heat and garnish your Gordon Ramsay Ground Turkey Pasta with freshly chopped parsley and a sprinkle of red chili flakes for an optional kick. Serve immediately while hot.

Nutrition

Serving: 1servingCalories: 650kcalCarbohydrates: 50gProtein: 40gFat: 30gSaturated Fat: 15gPolyunsaturated Fat: 5gMonounsaturated Fat: 5gCholesterol: 100mgSodium: 800mgPotassium: 600mgFiber: 3gSugar: 5gVitamin A: 10IUVitamin C: 4mgCalcium: 30mgIron: 15mg

Notes

Store leftovers in an airtight container in the refrigerator for up to 3 days or freeze portions for up to 3 months. Reheat slowly on the stove to restore creaminess.

Tried this recipe?

Let us know how it was!

Savor Anthony Bourdain’s Beef Bourguignon: A French Classic

November 15, 2025 by Grace Snow Leave a Comment

Stepping into the world of French cuisine can feel like a transformative journey, and there’s no better destination than Anthony Bourdain's Beef Bourguignon. This rich beef stew invites you to savor the depth of tender beef simmered in a luxurious red wine sauce, kissed with herbs and adorned with caramelized onions. It’s not just comfort food; it’s a gourmet experience that turns an ordinary dinner into a remarkable feast. Plus, the beauty of this recipe lies in its simplicity and ability to please even the fussiest eaters. It takes a bit of time but the reward is a heavenly aroma wafting through your kitchen that’s sure to draw everyone in. Are you ready to take your taste buds on an adventure?

Why is Beef Bourguignon so special?

Unforgettable Flavor: This recipe is a celebration of rich, savory tastes, featuring tender beef that melts in your mouth, harmonized with the sweetness of caramelized onions and the depth of red wine.

Gourmet Comfort: Elevate your dining experience at home with this classic French dish that combines the warmth of comfort food with gourmet flair.

Crowd-Pleaser: Perfect for gatherings, this Beef Bourguignon is sure to impress your guests, making it a staple for any dinner party or family meal.

Make-Ahead Magic: The flavors deepen when made in advance, allowing you to prepare it the day before and enjoy more time with your guests. Reheat gently and serve it over creamy mashed potatoes or alongside crusty bread for a complete meal.

Easy Yet Elegant: Despite its gourmet appearance, the steps are manageable, making it accessible for both beginners and seasoned cooks alike. For more delectable home-cooked ideas, check out my post on Ground Beef Enchiladas for a twist on classic flavors.

Anthony Bourdain's Beef Bourguignon Ingredients

For the Stew

  • Boneless beef shoulder or chuck – This primary protein provides the richness and substance essential for a satisfying stew.
  • Kosher salt – Enhances the flavor and tenderness of the beef, giving it that melt-in-your-mouth quality.
  • Freshly ground black pepper – Adds seasoning and a touch of heat; fresh is always best for a bolder flavor.
  • Olive oil – Perfect for searing the beef and sautéing the onions, infusing the dish with its distinct taste.
  • Medium onions – Forms the base of the sauce, adding necessary sweetness and depth to the dish.
  • All-purpose flour – Helps to thicken the sauce for that rich, comforting texture.
  • Red burgundy wine (e.g., Pinot Noir) – Infuses the stew with complexity—opt for a good quality dry red for the best results.
  • Medium carrots – Adds a hint of sweetness and texture, balancing the dish beautifully.
  • Garlic – Introduces aromatic flavors that elevate the overall taste of the stew.
  • Bouquet garni (thyme, bay, parsley) – Infuses the stew with herby notes, lending freshness and depth.
  • Water – Adjusts the cooking liquid, but consider using low-sodium beef broth for added flavor.
  • Demi-glace (optional) – Intensifies the flavor and enriches the sauce, making it extra luxurious.
  • Chopped fresh flat-leaf parsley – For garnish, it adds a pop of color and freshness to the dish.

Planning to embark on this culinary adventure? Each bite of Anthony Bourdain's Beef Bourguignon promises to be a delightful revelation!

Step‑by‑Step Instructions for Anthony Bourdain’s Beef Bourguignon

Step 1: Prepare the Beef
Begin by patting the boneless beef shoulder or chuck dry with paper towels, ensuring an excellent sear. Generously season the beef chunks with kosher salt and freshly ground black pepper, creating a flavorful crust that will enhance the richness of Anthony Bourdain's Beef Bourguignon.

Step 2: Sear the Beef
In a heavy Dutch oven, heat half of the olive oil over high heat until shimmering. In batches, sear the seasoned beef for about 3-4 minutes on each side, allowing a deep brown crust to develop. Once browned on all sides, transfer the beef to a plate and reduce the heat to medium-high.

Step 3: Sauté the Onions
Add the remaining olive oil to the Dutch oven, letting it heat for a moment. Stir in the medium onions and cook for approximately 10 minutes until they soften and turn golden brown. This step is crucial, as the caramelized onions will contribute to the depth of flavor in your Beef Bourguignon.

Step 4: Thicken the Sauce
Sprinkle in the all-purpose flour while stirring continuously, allowing it to cook for 4-5 minutes. This process creates a roux that will thicken your stew and enhance its texture. You are looking for a slightly darkened color and a nutty aroma before moving on.

Step 5: Deglaze with Wine
Pour in the red burgundy wine, using a wooden spoon to scrape the flavorful bits stuck to the bottom of the pot. Bring the mixture to a rolling boil, which will concentrate flavors and add complexity. This step is essential for crafting the luxurious sauce that defines Anthony Bourdain's Beef Bourguignon.

Step 6: Combine Ingredients
Return the seared beef along with any juices back into the pot. Add in the medium carrots, minced garlic, bouquet garni, and enough water to cover the ingredients—consider using low-sodium beef broth for added richness. Bring the pot to a boil, then immediately reduce the heat to a gentle simmer.

Step 7: Simmer to Perfection
Allow the stew to simmer uncovered for 2 to 2.5 hours, stirring every 15-20 minutes. Keep an eye on the liquid level, adding water as necessary to maintain a sauce-like consistency. The beef should become fork-tender and fully absorb the aromatic flavors of the stew.

Step 8: Final Touches
Once the simmering time is complete, remove the bouquet garni from the pot. Taste the stew and adjust the seasoning with additional salt and pepper as needed. To finish, garnish your Beef Bourguignon with freshly chopped flat-leaf parsley, adding a vibrant touch before serving.

Anthony Bourdain's Beef Bourguignon Variations

Feel free to explore these delicious twists on the classic beef stew, each adding a unique touch to your culinary adventure.

  • Mushroom Medley: Add sautéed mushrooms with the onions for a richer, umami flavor. This will enhance the overall depth and balance of the dish.

  • Root Veggie Delight: Swap the carrots for parsnips or add potatoes for heartier fare. You can play with the flavors and textures, giving a comforting twist to your stew.

  • Brandy Boost: Incorporate a splash of brandy along with the red wine for an extra layer of complexity. A luxurious enhancement that’ll make everyone ask for seconds!

  • Herb Infusion: Experiment with fresh herbs like rosemary or oregano in place of the bouquet garni. This will give your stew a distinctive aroma and taste.

  • Sweet Potato Swirl: Substitute regular potatoes with sweet potatoes to add a hint of sweetness that pairs beautifully with the savory meat.

  • Heat it Up: Toss in some chili flakes or a diced jalapeño for a spicy kick, adding an exhilarating twist to the traditional flavor profile.

  • Dairy-Free Dream: For a dairy-free option, simply skip the demi-glace; it’s optional and won’t sacrifice the essential taste. This allows more people to enjoy this heartwarming dish.

  • Wine’s Wonders: If you want a non-alcoholic twist, use grape juice simmered with some vinegar instead of wine. It keeps the sweetness and depth without the alcohol.

No matter how you choose to customize, these variations are sure to make Anthony Bourdain’s Beef Bourguignon your own delicious masterpiece. Looking for a different flavor profile for your weeknight dinner? Check out my Ground Beef Enchiladas, a perfect alternative when you're craving something quick yet satisfying!

Make Ahead Options

Preparing Anthony Bourdain's Beef Bourguignon in advance is a fantastic way to simplify your meal planning and save time during busy weeknights. You can prepare the entire stew up to 24 hours ahead by cooking it completely, allowing it to cool, and then transferring it to an airtight container. Once refrigerated, the flavors will deepen, making it just as delicious when reheated. When you're ready to serve, gently reheat the stew on the stovetop over low heat, stirring occasionally to maintain a consistent texture. If the sauce thickens too much, feel free to add a splash of water or broth. These make-ahead options ensure a gourmet meal awaits you with minimal effort!

How to Store and Freeze Anthony Bourdain's Beef Bourguignon

Fridge: Store leftover Beef Bourguignon in an airtight container for up to 3 days. Allow it to cool down before refrigerating to preserve its rich flavors.

Freezer: For longer storage, transfer cooled Beef Bourguignon to freezer-safe containers. It can be kept for up to 3 months. Make sure to leave some space for expansion.

Reheating: Thaw overnight in the fridge before reheating gently on the stove or in the microwave with a splash of broth to restore consistency. Never rush the reheating process to maintain the stew's luxurious texture.

Make-Ahead Tip: Preparing this delightful dish in advance can enhance its flavors; enjoy the ease of having a gourmet meal ready to go!

Expert Tips for Anthony Bourdain's Beef Bourguignon

  • Sear in Batches: Always sizzle the beef in batches; overcrowding will lead to steaming instead of that delicious browning, which is essential for flavor.

  • Monitor the Liquid: Check the stew regularly to ensure it doesn’t stick to the pot; add water if it starts to thicken too much to maintain that luscious sauce consistency.

  • Season Generously: Don’t be shy about seasoning; adding salt and pepper at various stages enhances the depth of flavors in your Anthony Bourdain's Beef Bourguignon.

  • Use Quality Wine: Opt for a good quality dry red wine, like Pinot Noir, as it significantly impacts the flavor profile of the stew—your taste buds will thank you!

  • Fresh Herbs Matter: Whenever possible, utilize fresh herbs in the bouquet garni for a more robust flavor in the stew, elevating your culinary creation.

  • Let it Rest: For the best results, consider making it a day ahead; the flavors deepen overnight, making it even more satisfying when served.

What to Serve with Anthony Bourdain's Beef Bourguignon?

Creating a memorable meal is all about harmonious pairings, and this French classic opens the door to endless delicious possibilities.

  • Creamy Mashed Potatoes: This velvety dish soaks up the rich sauce beautifully, giving you a comforting bite in every forkful.
  • Crusty French Bread: Perfect for sopping up the delicious stew, its crispy outside complements the tender beef, creating a delightful textural contrast.
  • Buttered Noodles: Tossed in a light butter sauce, these noodles provide a soft, subtle base that enhances the stew's robust flavors.
  • Garlic Roasted Green Beans: Crisp and vibrant, these green beans add a burst of freshness to the meal, balancing the richness of the stew.
  • Caesar Salad: With its tangy dressing and crunchy croutons, this salad offers a refreshing side, creating a beautiful contrast to the warm beef.
  • Red Wine (Pinot Noir): Pairing a glass of the same wine used to cook enhances the flavor experience and elevates your dining atmosphere.
  • Chocolate Mousse: For dessert, this lightweight, rich treat completes the meal, providing a decadent finish to your French feast.
  • Herb and Cheese Quiche: As a savory alternative, this quiche complements the stew's depth while also serving as a delightful brunch option.
  • Apple Tart: A warm, spiced apple tart brings a cozy sweetness, rounding out the meal with an inviting dessert option.
  • Sparkling Water with Lemon: To cleanse the palate, this refreshing drink offers a crisp finish that pairs nicely with the hearty stew.

Anthony Bourdain's Beef Bourguignon Recipe FAQs

What is the best way to select beef for this recipe?
Absolutely! For the best flavor and tenderness in your Beef Bourguignon, I recommend using boneless beef shoulder or chuck. Look for meat with good marbling, which indicates flavor and juiciness. Avoid cuts that are overly lean, as they won’t develop that delicious richness during cooking.

How should I store leftover Beef Bourguignon?
You can keep your leftover Beef Bourguignon in an airtight container in the refrigerator for up to 3 days. Make sure it has cooled down completely before placing it in the fridge. For reheating, simply gently warm it on the stove or in the microwave. Remember to add a splash of broth or water if it seems too thick when reheating.

Can I freeze Beef Bourguignon? If so, how?
Yes, you can freeze Beef Bourguignon! To do this, let it cool completely before transferring it to freezer-safe containers. Be sure to leave some space at the top, as the stew will expand when frozen. It can be kept in the freezer for up to 3 months. When ready to enjoy, thaw it overnight in the fridge and reheat gently to preserve its rich texture.

What if my stew turns out too thick?
If your Beef Bourguignon is too thick after cooking, don’t worry! Just add a little more water or low-sodium beef broth, stirring it in while heating on low. If it's too thin, continue cooking uncovered for a bit longer to allow some liquid to evaporate, thickening the sauce naturally.

Are there any dietary considerations I should keep in mind?
When making Beef Bourguignon, keep in mind that it contains beef, wine, and gluten (from flour). If you need a gluten-free option, simply substitute the all-purpose flour with a gluten-free flour blend. As always, check for any personal allergies or dietary restrictions when serving to guests or family members.

Can I use different types of wine in this recipe?
Very much! While a good quality red burgundy wine like Pinot Noir is ideal for this Beef Bourguignon, you can substitute with any other dry red wine that you enjoy drinking. Just remember that the better the wine, the better the flavor of your stew. If you have any leftover wine, it makes for an excellent pairing!

Anthony Bourdain’s Beef Bourguignon

Savor Anthony Bourdain’s Beef Bourguignon: A French Classic

Experience the rich flavors of Anthony Bourdain’s Beef Bourguignon, a classic French dish that's perfect for any dinner.
Print Recipe Pin Recipe
Prep Time 30 minutes mins
Cook Time 2 hours hrs 30 minutes mins
Total Time 3 hours hrs
Servings: 6 servings
Course: Dinner
Cuisine: French
Calories: 350
Ingredients Equipment Method Nutrition Notes

Ingredients
  

For the Stew
  • 2 pounds boneless beef shoulder or chuck primary protein
  • 2 teaspoons kosher salt for seasoning
  • 1 teaspoon freshly ground black pepper for seasoning
  • 2 tablespoons olive oil for searing
  • 2 medium onions chopped
  • 2 tablespoons all-purpose flour for thickening
  • 1 bottle red burgundy wine (e.g., Pinot Noir) for flavor
  • 2 medium carrots chopped
  • 4 cloves garlic minced
  • 1 bunch bouquet garni (thyme, bay, parsley) for flavor
  • 3 cups water or low-sodium beef broth
  • 1 cup demi-glace optional for richness
  • 2 tablespoons chopped fresh flat-leaf parsley for garnish

Equipment

  • Dutch oven

Method
 

Step-by-Step Instructions
  1. Pat the beef dry with paper towels and season generously with kosher salt and black pepper.
  2. Heat half the olive oil in a Dutch oven over high heat, sear the beef in batches until browned on all sides.
  3. Add remaining olive oil, sauté onions until soft and golden brown, about 10 minutes.
  4. Stir in flour, cook for 4-5 minutes to create a roux.
  5. Deglaze with red wine, scraping any browned bits from the bottom, and bring to a boil.
  6. Return beef to pot with carrots, garlic, bouquet garni, and enough water to cover.
  7. Bring to a boil, then reduce heat to a gentle simmer and cover partially.
  8. Simmer uncovered for 2 to 2.5 hours, stirring occasionally, until beef is fork-tender.
  9. Remove bouquet garni, adjust seasoning with salt and pepper, garnish with parsley before serving.

Nutrition

Serving: 1servingCalories: 350kcalCarbohydrates: 15gProtein: 25gFat: 20gSaturated Fat: 8gPolyunsaturated Fat: 2gMonounsaturated Fat: 10gCholesterol: 70mgSodium: 800mgPotassium: 600mgFiber: 2gSugar: 3gVitamin A: 150IUVitamin C: 10mgCalcium: 40mgIron: 4mg

Notes

Serve with creamy mashed potatoes or crusty bread for a perfect meal.

Tried this recipe?

Let us know how it was!

Crock Pot Shipwreck Stew: Hearty Comfort in Every Bite

November 15, 2025 by Grace Snow Leave a Comment

On those chilly evenings when the wind howls outside, there's nothing more comforting than a warm bowl of stew. That’s where my Crock Pot Shipwreck Stew truly shines! This hearty, slow-cooked delight is packed with tender potatoes, vibrant carrots, and savory ground beef simmering in a rich tomato broth. Not only is it a crowd-pleaser, but it’s also incredibly budget-friendly—perfect for bringing family and friends together without breaking the bank. Plus, with minimal hands-on prep, you can set it and forget it while you tackle your evening plans or simply unwind. Ready to elevate your comfort food game? Join me in discovering how to make this cozy dish, and I promise you'll be coming back to it time and again! What unique twist will you add to your Shipwreck Stew?

What's so special about Shipwreck Stew?

Comforting Warmth: This Crock Pot Shipwreck Stew is like a hug in a bowl, perfect for chilly nights.

Budget-Friendly: With simple ingredients, it won’t break the bank while filling your family’s bellies.

Easy Prep: Just toss everything in the slow cooker and let it do the work for you.

Crowd-Pleaser: It’s perfect for game days or family gatherings, ensuring everyone leaves happy and satisfied.

Versatile Ingredients: Customize it with whatever veggies or beans you have on hand, like a heartwarming Beans Greens Stew.

Make-Ahead Friendly: Prep it ahead of time; it tastes even better the next day, just like my delicious Crock Pot Chicken!

Crock Pot Shipwreck Stew Ingredients

• Dive into making your own Crock Pot Shipwreck Stew with these essential ingredients!

For the Base

  • Ground Beef – A hearty protein that can be swapped for ground turkey, chicken, or plant-based crumbles for a lighter option.
  • Russet Potatoes – Break down slightly to thicken the stew; Yukon gold or red potatoes work well if you don’t have russets.
  • Carrots & Celery – These fresh aromatics add sweetness and texture to the stew; consider using a pinch of celery seed if celery is out of reach.
  • Yellow Onion & Garlic – Essential for depth of flavor; feel free to substitute with sweet onion or shallots as needed.

For the Broth

  • Diced Tomatoes + Tomato Sauce – The flavorful backbone of the stew; crushed tomatoes can also be used as an alternative.
  • Kidney Beans – Packed with protein and fiber; opt for pinto or black beans if you prefer, making sure to rinse canned beans.
  • Beef Broth – Adds richness; vegetable or chicken broth can be used if you want a different flavor profile.

For the Flavor

  • Worcestershire Sauce & Spices (Paprika, Bay Leaf, Thyme) – These enhance umami and flavor depth; soy sauce can substitute Worcestershire if necessary.

With these ingredients, you’re on your way to a delicious, comforting homestyle meal that’s bound to warm your heart and feed your soul!

Step‑by‑Step Instructions for Crock Pot Shipwreck Stew

Step 1: Brown the Ground Beef
In a large skillet, heat a drizzle of olive oil over medium heat. Add the ground beef and cook for about 4–5 minutes, breaking it apart with a wooden spoon. You want it nicely browned, with no pink remaining. This step adds rich flavor to your Crock Pot Shipwreck Stew.

Step 2: Sauté the Aromatics
Once the beef is browned, stir in the diced yellow onion and continue cooking for 3 minutes until the onions become translucent. Add minced garlic and sauté for an additional 30 seconds until fragrant. This fragrant mixture builds the foundation of flavor for your hearty stew.

Step 3: Combine Ingredients in the Slow Cooker
Transfer the beef and onion mixture to your slow cooker. Then, add in the diced russet potatoes, sweet carrots, and chopped celery. Sprinkle in the kidney beans, diced tomatoes, tomato sauce, beef broth, and Worcestershire sauce. Gently stir to combine everything, ensuring the ingredients are well-distributed in your Crock Pot Shipwreck Stew.

Step 4: Season the Stew
Next, add the spices: paprika, thyme, bay leaf, salt, and pepper, enhancing the savory depth of your stew. Stir one more time to blend the flavors. It’s important to tune the seasoning to your taste, as this will really elevate the comfort food experience.

Step 5: Set the Slow Cooker
Cover the slow cooker with its lid and set it to cook on LOW for 7–8 hours or on HIGH for 3–4 hours. Choose the low setting for a deeper flavor development. During this time, the vegetables will become fork-tender, and the broth will thicken to a comforting consistency.

Step 6: Final Touches and Serve
After cooking, carefully remove the bay leaf. Taste your Crock Pot Shipwreck Stew and adjust any seasoning if necessary. Serve hot, garnished with freshly chopped parsley, a dollop of sour cream, or sprinkle of shredded cheddar cheese for an extra layer of comfort in every bowl.

What to Serve with Crock Pot Shipwreck Stew?

Warm up your evening with perfect pairings that enhance the hearty goodness of your favorite stew.

  • Creamy Mashed Potatoes: The buttery creaminess complements the rich broth, making each bite a dreamy experience.
  • Crusty Bread: A fresh-baked loaf or breadsticks adds texture, perfect for soaking up the flavorful stew.
  • Garden Salad: A refreshing mix of greens and light vinaigrette balances the richness of the stew, adding a crisp, fresh element.
  • Cornbread Muffins: Sweet and crumbly, cornbread muffins bring a touch of sweetness that juxtaposes the savory stew beautifully.
  • Steamed Broccoli: The bright green color and mild crunch of steamed broccoli offer a nutritious contrast that rounds out the meal.
  • Pickle Chips: For a tangy kick, serve pickles on the side. Their acidity cuts through the stew's richness while adding flavor complexity.
  • Iced Tea or Lemonade: These refreshing drinks offer a sweet, tart balance, making each sip delightful against the hearty flavors of the meal.
  • Chocolate Chip Cookies: Complete your comforting feast with warm, gooey cookies. Their sweetness is the perfect finish after a savory stew meal.
  • Crispy Roasted Brussels Sprouts: The crispy texture and slightly nutty flavor provide a delightful contrast to the soft vegetables in your stew.
  • Classic Apple Pie: A slice of warm apple pie serves as a sweet conclusion, with its spicy notes connecting beautifully with the hearty stew.

Expert Tips for the Best Crock Pot Shipwreck Stew

  • Prep Ahead: Prepare and chop your ingredients up to 24 hours in advance. This makes assembling your Crock Pot Shipwreck Stew a breeze!
  • Avoid Peeking: Resist the urge to lift the lid during cooking. This helps maintain the cooking temperature and prevents extended cooking times.
  • Flavor Boost: To enhance richness, consider adding a splash of red wine along with the broth, elevating the flavors of your stew.
  • Taste & Adjust: Always taste before serving! Adjust salt and pepper or add a dash of hot sauce for a spicy kick.
  • Bean Choices: If using canned beans, rinse them first to reduce sodium content; this small step can greatly improve the health of your stew.

Crock Pot Shipwreck Stew Variations

Feel free to play with your ingredients and make this cozy stew truly your own!

  • Dairy-Free: Omit sour cream and cheese toppings for a lightened option, or use dairy-free alternatives like cashew cream.

  • Gluten-Free: Ensure all ingredients, especially Worcestershire sauce and broth, are marked gluten-free for a safe, delicious meal.

  • Spicy Kick: Add diced jalapeños or a dash of cayenne pepper to ignite your taste buds. Adjust to your preferred spice level!

For flavor-loving fans, the heat can transform your dish from cozy to exciting in no time.

  • Vegetarian: Swap ground beef for lentils or mushroom crumbles, combining with vegetable broth for a robust flavor without meat.

  • Bean Bliss: Experiment with different beans, such as black beans or chickpeas, for varied flavors and textures. Each type brings a unique twist to the stew.

  • Herbaceous Take: Incorporate fresh herbs like parsley, basil, or rosemary toward the end of cooking to brighten up the flavors of the stew.

If you’re inspired by these variations, you might also want to explore a comforting Crockpot Butter Chicken or my hearty Lamb Stew Hearty for more delicious options!

  • International Flair: Try adding a touch of curry powder or Italian seasoning for an unexpected, global twist that complements the tomato base beautifully.

Make Ahead Options

Planning ahead makes enjoying a hearty bowl of Crock Pot Shipwreck Stew even easier! You can brown the ground beef and sauté the onions and garlic up to 24 hours in advance, storing these components in an airtight container in the refrigerator. Additionally, chop your potatoes, carrots, and celery, and store them separately to maintain their freshness. When you're ready to cook, simply combine these prepped ingredients in your slow cooker with the remaining items and set it to low heat. This not only saves you time on busy weeknights but also enhances the flavors as they meld together throughout the cooking process. You'll have a comforting, delicious meal waiting for you with minimal effort!

Storage Tips for Crock Pot Shipwreck Stew

Fridge: Store cooled Crock Pot Shipwreck Stew in airtight containers for up to 4 days, ensuring to cool it completely before refrigerating to maintain freshness.

Freezer: For longer storage, freeze the stew in individual portions in freezer-safe containers for up to 3 months. Make sure to leave some space at the top for expansion.

Reheating: Thaw overnight in the fridge before reheating. Reheat gently on the stovetop or in the microwave, adding a splash of broth if needed to restore consistency.

Make-Ahead: This stew actually tastes even better the next day, so feel free to prepare it ahead of time for a delicious, hassle-free meal!

Crock Pot Shipwreck Stew Recipe FAQs

How do I choose the right ground beef for the stew?
Absolutely! When selecting ground beef, look for a higher fat content (around 80/20) for a juicy flavor. Avoid ground beef that's overly lean as it can lead to a dry stew. If you're opting for a healthier choice, consider ground turkey or chicken, which can be just as tasty in this dish!

How should I store leftovers of Crock Pot Shipwreck Stew?
You can refrigerate your cooled Crock Pot Shipwreck Stew in airtight containers for up to 4 days. Make sure to allow it to cool down before storing to keep it fresh. I often portion it out for easy reheating during the week!

Can I freeze this stew for later?
Yes, you can! Simply pour your cooled stew into freezer-safe containers, leaving a little space at the top for expansion, and freeze it for up to 3 months. To reheat, let it thaw overnight in the fridge, then warm gently on the stovetop or microwave, adding broth for the desired consistency.

What if the stew is too thick or too salty?
If your stew turns out too thick, simply add a splash of broth or water while reheating. For a salty flavor, you can balance it by adding a splash of vinegar or a small amount of sugar. Make sure to taste and adjust until you achieve the perfect balance!

Is this recipe suitable for gluten-free diets?
Very! Just ensure you use certified gluten-free Worcestershire sauce and broth. This Crock Pot Shipwreck Stew is naturally gluten-free when you follow these substitutions, allowing everyone to enjoy a warm, comforting meal together.

Can I substitute the vegetables in the stew?
Definitely! The beauty of this stew lies in its versatility. Feel free to mix in whatever vegetables you have on hand—peppers, green beans, or zucchini work beautifully. Just keep the balance of flavors in mind to maintain the comforting essence of the dish.

Crock Pot Shipwreck Stew

Crock Pot Shipwreck Stew: Hearty Comfort in Every Bite

Enjoy the comforting warmth of Crock Pot Shipwreck Stew, a budget-friendly, hearty dish perfect for chilly evenings.
Print Recipe Pin Recipe
Prep Time 15 minutes mins
Cook Time 8 hours hrs
Total Time 8 hours hrs 15 minutes mins
Servings: 6 servings
Course: Dinner
Cuisine: American
Calories: 350
Ingredients Equipment Method Nutrition Notes

Ingredients
  

For the Base
  • 1 lb Ground Beef can be substituted for ground turkey, chicken, or plant-based crumbles.
  • 2 large Russet Potatoes can replace with Yukon gold or red potatoes if needed.
  • 2 medium Carrots
  • 2 stalks Celery consider celery seed as a substitute.
  • 1 medium Yellow Onion can substitute with sweet onion or shallots.
  • 3 cloves Garlic minced.
For the Broth
  • 14.5 oz Diced Tomatoes or crushed tomatoes.
  • 8 oz Tomato Sauce
  • 2 cups Beef Broth or vegetable/chicken broth for variation.
  • 15 oz Kidney Beans drained and rinsed.
For the Flavor
  • 2 tbsp Worcestershire Sauce can substitute with soy sauce.
  • 1 tbsp Paprika
  • 1 leaf Bay Leaf
  • 1 tsp Thyme
  • to taste Salt
  • to taste Pepper

Equipment

  • Slow Cooker

Method
 

Cooking Steps
  1. In a large skillet, heat a drizzle of olive oil over medium heat. Add the ground beef and cook for about 4–5 minutes, breaking it apart with a wooden spoon until nicely browned with no pink remaining.
  2. Stir in the diced yellow onion and continue cooking for 3 minutes until the onions become translucent. Add minced garlic and sauté for an additional 30 seconds until fragrant.
  3. Transfer the beef and onion mixture to your slow cooker. Add in the diced russet potatoes, carrots, and chopped celery. Sprinkle in the kidney beans, diced tomatoes, tomato sauce, beef broth, and Worcestershire sauce. Gently stir to combine.
  4. Add the spices: paprika, thyme, bay leaf, salt, and pepper. Stir one more time to blend the flavors.
  5. Cover the slow cooker with its lid and set it to cook on LOW for 7–8 hours or on HIGH for 3–4 hours.
  6. After cooking, carefully remove the bay leaf. Taste and adjust seasoning if necessary. Serve hot, garnished with parsley, sour cream, or cheddar cheese.

Nutrition

Serving: 1bowlCalories: 350kcalCarbohydrates: 40gProtein: 25gFat: 12gSaturated Fat: 5gPolyunsaturated Fat: 1gMonounsaturated Fat: 4gCholesterol: 80mgSodium: 800mgPotassium: 800mgFiber: 10gSugar: 6gVitamin A: 900IUVitamin C: 15mgCalcium: 40mgIron: 3mg

Notes

This stew can actually taste better the next day, making it great for make-ahead meals. Avoid peeking while cooking to maintain heat.

Tried this recipe?

Let us know how it was!

Native American Three Sisters Stew: Comfort in a Bowl

November 15, 2025 by Grace Snow Leave a Comment

As the leaves begin to change and a crispness fills the air, I find myself reaching for my pot and the comforting embrace of a hearty Native American Three Sisters Stew. This nutritious vegetarian dish harmoniously blends the sweetness of corn, the creaminess of beans, and the earthiness of squash, simmering together into a warm, satisfying meal. It’s not just quick to prepare, but it also embraces seasonal ingredients, making it a perfect way to celebrate autumn. Plus, it’s wonderfully adaptable—your family will love it regardless of dietary needs. Are you ready to dive into a dish that nourishes both body and spirit? Let’s get started!

Why Is This Stew So Special?

Comforting, nourishing dish: The Native American Three Sisters Stew embraces cultural heritage while delivering a warm, heartening meal for chilly days.

Adaptable for everyone: Perfect for vegetarians, you can easily switch up ingredients to meet various dietary needs.

Easy preparation: With straightforward steps, even novice cooks can create this delightful stew without stress.

Vibrant flavors: The combination of sweet corn, creamy beans, and earthy squash creates a symphony of taste that will have everyone coming back for seconds!

Make-ahead magic: This stew stores well in the fridge or freezer; it’s a life-saver for busy weeknights or meal planning!

Pair it with crusty bread or a fresh salad for a complete meal inspired by traditions. If you’re interested in more hearty options, check out my Lamb Stew Hearty or Pot Chicken Stew!

Native American Three Sisters Stew Ingredients

For the Stew
• Corn – Adds sweetness and structure; best fresh, but frozen or canned can work in a pinch.
• Beans – Provides essential amino acids and protein; opt for dried beans for richer flavor, though canned are convenient.
• Squash (Butternut or other winter varieties) – Offers creaminess and nutrients; you can also use acorn or pumpkin squash as substitutes.
• Vegetable Broth – Acts as a flavorful base; homemade is preferred, but store-bought options are just fine.
• Onion – Adds depth of flavor; shallots can be used for a milder taste.
• Garlic – Imparts a fragrant aroma; fresh garlic is best for maximum flavor.
• Spices (e.g., cumin, chili powder) – Enhance the dish without overpowering; adjust based on your spice preference.
• Oil (olive or vegetable) – Used for sautéing the base ingredients; any neutral oil will work as a substitute.

This Native American Three Sisters Stew is not just a wholesome dish; it embodies a rich cultural history that will fill both your belly and your heart. Happy cooking!

Step‑by‑Step Instructions for Native American Three Sisters Stew

Step 1: Prep the Ingredients
Start by chopping one medium onion, mincing two cloves of garlic, and peeling and dicing your choice of squash (about 2 cups). If using dried beans, soak them overnight and cook until tender according to package instructions. Rinse any canned beans under cold water and drain. This preparation will ensure everything is ready for a smooth cooking process.

Step 2: Sauté the Base
In a large pot, heat 2 tablespoons of olive oil over medium heat. Once the oil shimmers (about 1-2 minutes), add the chopped onion and minced garlic. Sauté them for 4-5 minutes until the onion becomes translucent and fragrant. This step builds the aromatic foundation of your Native American Three Sisters Stew, creating a welcoming base for the other ingredients.

Step 3: Cook the Squash
Add the diced squash to the pot and sauté for an additional 5-7 minutes, stirring occasionally. The squash should start to soften but not completely break down. This step enhances the stew's rustic texture and ensures that the natural sweetness of the squash integrates beautifully with the onion and garlic.

Step 4: Add Beans and Corn
Stir in the rinsed beans and 1 cup of corn (fresh, frozen, or canned) into the pot. Mix everything thoroughly so that the ingredients are well distributed and colorful. Allow this mixture to cook together for about 2-3 minutes, letting the flavors meld and infusing richness into the Native American Three Sisters Stew.

Step 5: Pour in Broth and Season
Pour in 4 cups of vegetable broth and season with your chosen spices, such as 1 teaspoon of cumin and 1 teaspoon of chili powder. Stir to combine all ingredients well, ensuring the spices coat everything evenly. This adds deeply layered flavor and a delightful warmth to the stew as it cooks.

Step 6: Simmer the Stew
Bring the mixture to a rolling boil over high heat. Once boiling, reduce the heat to low and cover the pot. Allow the stew to simmer gently for at least 30 minutes, stirring occasionally. During this time, the flavors will develop, and the stew will thicken, transforming into a comforting dish that embodies the essence of Native American Three Sisters Stew.

Step 7: Adjust and Serve
After simmering, taste the stew to adjust the seasoning, adding salt or additional spices as needed. If desired, let it sit for a couple of minutes to cool slightly before serving. Serve hot, accompanied by crusty bread or a fresh salad, and enjoy this hearty, nourishing meal that celebrates cultural tradition and seasonal flavors.

Expert Tips for Native American Three Sisters Stew

  • Prep Ahead: Prepare your ingredients the day before to save time during cooking—chopped veggies and soaked beans are ready to go!

  • Flavor Development: For richer flavors, make the stew a day in advance. Letting it sit allows the ingredients to meld beautifully.

  • Adjust Spices: Always taste before serving; some batches may need a touch more salt or spices to enhance the savory notes of your Native American Three Sisters Stew.

  • Sauté Patience: Don’t rush the sautéing of onion and garlic; proper caramelization deepens their flavor and elevates the stew.

  • Freezer-Friendly: Portion leftovers into airtight containers and freeze for up to three months—perfect for quick meals on busy days!

Make Ahead Options

Making your Native American Three Sisters Stew ahead of time is a fantastic way to save time during your busy weeknights! You can chop the onion, garlic, and squash, and even prepare the dried beans (by soaking them overnight) up to 24 hours in advance. Simply refrigerate these prepped ingredients in airtight containers to maintain their freshness. When you're ready to cook, sauté the onion and garlic, then add the squash, beans, and corn as per the usual steps. This stew also holds well in the fridge for up to 4 days and can be frozen for up to 3 months—just let it cool completely before transferring to freezer-safe containers. Reheat gently on the stove or in the microwave, and you’ll enjoy a comforting meal that feels just as delicious as the day it was made!

What to Serve with Native American Three Sisters Stew?

Enhance your dining experience with delightful pairings that complement the rich and vibrant flavors of this nourishing stew.

  • Crusty Bread: Perfect for scooping up every last bite, its crispy texture contrasts beautifully with the stew’s hearty ingredients.

  • Cornbread: This sweet and fluffy bread adds a comforting touch, echoing the corn in the stew while offering a delightful balance.

  • Fresh Garden Salad: A light salad with seasonal greens brightens the meal, adding a refreshing crunch that pairs well with the stew's warmth.

  • Roasted Vegetables: Seasonal roasted veggies, like carrots and bell peppers, add caramelized sweetness, enriching the dish and providing varied textures.

  • Herbed Quinoa: This nutty, fluffy side dish complements the savory stew while adding a protein punch. Toss in some herbs for extra freshness!

  • Herbal Tea: A warm cup of chamomile or mint tea captivates the senses, providing a soothing end to your meal while enhancing the comforting vibe.

  • Chocolate Chip Cookies: For dessert, soft and chewy cookies offer a sweet finale that everyone will adore, creating a lovely contrast to the hearty stew.

  • Apple Crisp: This warm, spiced dessert with a crunchy topping rounds off the meal with a taste of autumn that harmonizes beautifully with the stew.

  • Sangria: A fruity, refreshing sangria adds color and a delightful burst of flavor, making it an enchanting drink choice to pair with your meal.

Native American Three Sisters Stew Variations

Customize this stew to make it uniquely yours by playing with flavors and textures that excite your senses!

  • Spicy Kick: Add a pinch of cayenne pepper or diced jalapeños for a bold, fiery flavor. You can easily increase or decrease the spice level to suit your family's preference. Just remember, a little heat goes a long way!

  • Extra Veggies: Toss in additional vegetables, like bell peppers or carrots, to amplify the color and texture. These not only boost the dish’s nutritional value but also introduce new flavors that blend beautifully with the base ingredients.

  • Protein Packed: For those who enjoy meat, consider adding cooked chicken or turkey for a hearty, protein-rich version. Simply stir in shredded or diced cooked meat when you add the beans and corn. It will transform your stew into a filling meal that meat-lovers will eagerly devour!

  • Herb Infusion: Experiment with fresh herbs like thyme or cilantro to brighten the flavor profile. A sprig of fresh herb can elevate the dish to a whole new level, providing a refreshing contrast to the rich base.

  • Creamy Twist: For a luscious addition, stir in a splash of coconut milk or cream towards the end of cooking. This will create a delightful creaminess that complements the earthiness of the squash and beans.

  • Seasonal Swaps: Like many great dishes, feel free to use seasonal vegetables based on availability, such as zucchini or sweet potatoes. It’s a fantastic way to keep the recipe versatile and exciting throughout the year!

  • Flavor Variants: Swap the spices for smoked paprika and herbs de Provence for a unique twist. It’ll deliver a captivating aroma and gentle warmth that enchants the palate.

  • Reinvent as Chili: Use the same base but transform it into a hearty chili by adding diced tomatoes and/or a can of tomato paste. Serve with your favorite toppings, like avocado or shredded cheese for a delectable blend of flavors.

Feeling inspired? Check out my quick and nourishing Beans Greens Stew or try the comforting Crock Pot Chicken Stew for more delightful ideas!

How to Store and Freeze Native American Three Sisters Stew

Fridge: Store your stew in an airtight container for up to 4 days. Make sure it cools down to room temperature before sealing to maintain freshness.

Freezer: Portion the stew into freezer-safe containers, ensuring there’s space for expansion, and freeze for up to 3 months. Thaw in the fridge overnight before reheating.

Reheating: Gently reheat on the stove over medium heat until warmed through, adding a splash of broth or water if needed to achieve desired consistency.

Make-Ahead Tip: This Native American Three Sisters Stew is even more flavorful the next day, making it a perfect make-ahead meal for busy weeknights!

Native American Three Sisters Stew Recipe FAQs

How do I choose the best corn for this stew?
Absolutely! Fresh corn is ideal because it adds sweetness and texture; look for ears with bright green husks and plump kernels. If fresh isn't available, frozen corn can be a great alternative, yielding similar sweetness and structure.

How should I store leftover Three Sisters Stew?
For optimum freshness, store your stew in an airtight container in the fridge for up to 4 days. Allow it to cool to room temperature before sealing, which helps preserve its delicious flavor and prevents excess condensation.

Can I freeze the Three Sisters Stew?
Very! Portion your cooled stew into freezer-safe containers, leaving some space at the top for expansion. It can be frozen for up to 3 months. To enjoy later, simply thaw in the fridge overnight before reheating gently on the stove.

What should I do if my stew is too thick?
If your stew has thickened beyond your liking, don't worry! Just add a splash of vegetable broth or water, mixing it in slowly until you reach your desired consistency. Stir gently over low heat to warm through, and taste-test before serving.

Are there any dietary concerns I should consider?
This Native American Three Sisters Stew is vegetarian-friendly! For those with allergies, it's usually free from common allergens when using just the base ingredients. However, always check the labels of canned beans and broth for hidden allergens, especially if cooking for guests.

How can I adapt this stew for a spicier flavor?
If you're craving heat, consider adding a pinch of cayenne pepper or a diced jalapeño during the sautéing step. You can also sprinkle in some red pepper flakes just before serving for an extra kick. The more the merrier!

Native American Three Sisters Stew

Native American Three Sisters Stew: Comfort in a Bowl

A nutritious vegetarian Native American Three Sisters Stew combining corn, beans, and squash for a warm, comforting meal.
Print Recipe Pin Recipe
Prep Time 15 minutes mins
Cook Time 30 minutes mins
Total Time 45 minutes mins
Servings: 4 bowls
Course: Soups
Cuisine: Native American
Calories: 250
Ingredients Equipment Method Nutrition Notes

Ingredients
  

For the Stew
  • 1 medium onion chopped
  • 2 cloves garlic minced
  • 2 cups squash peeled and diced, any winter variety
  • 1 cup corn fresh, frozen, or canned
  • 4 cups vegetable broth homemade preferred
  • 1 cup beans dried preferred or canned, rinsed
  • 2 tablespoons olive oil for sautéing
  • 1 teaspoon cumin
  • 1 teaspoon chili powder

Equipment

  • Large pot

Method
 

Step-by-Step Instructions
  1. Start by chopping the onion, mincing the garlic, and peeling and dicing the squash. Soak dried beans overnight and cook until tender, or rinse canned beans.
  2. In a large pot, heat the olive oil over medium heat. Add the chopped onion and minced garlic, and sauté for 4-5 minutes until the onion is translucent.
  3. Add the diced squash to the pot and sauté for an additional 5-7 minutes until it starts to soften.
  4. Stir in the rinsed beans and corn, mixing everything thoroughly. Cook for 2-3 minutes.
  5. Pour in the vegetable broth and season with cumin and chili powder. Stir to combine everything well.
  6. Bring to a boil, then reduce the heat to low and cover the pot. Allow the stew to simmer for at least 30 minutes.
  7. Taste and adjust the seasoning as needed. Serve hot with crusty bread or salad.

Nutrition

Serving: 1bowlCalories: 250kcalCarbohydrates: 45gProtein: 10gFat: 6gSaturated Fat: 1gPolyunsaturated Fat: 2gMonounsaturated Fat: 3gSodium: 500mgPotassium: 600mgFiber: 10gSugar: 5gVitamin A: 3000IUVitamin C: 20mgCalcium: 60mgIron: 3mg

Notes

This stew is adaptable and can be stored in the fridge for up to 4 days or frozen for up to 3 months. It tastes even better the next day!

Tried this recipe?

Let us know how it was!
  • « Previous Page
  • 1
  • …
  • 104
  • 105
  • 106
  • 107
  • 108
  • …
  • 180
  • Next Page »

Welcome!

Hi, I’m Grace, a Sydney-based home cook with a passion for bold flavors and trending ingredients. Whether you’re a busy beginner or a seasoned foodie, you’ll find dishes here that are fresh, fun, and full of flavor.

More about me

Popular Recipes

  • Butter Pecan Cookies
    Irresistibly Soft Butter Pecan Cookies for Cozy Moments
  • Decadent Turtle Bars
    Decadent Turtle Bars: Indulge in Sweet Gooey Perfection
  • Salted Caramel Butter Bars
    Decadent Salted Caramel Butter Bars You Can't Resist
  • Easy Italian Pasta Salad
    Easy Italian Pasta Salad: A Summer Delight to Share

Footer

↑ back to top

About

  • Privacy Policy
  • Disclaimer
  • Terms & Conditions

Newsletter

  • Sign Up! for emails and updates

Contact

  • About me
  • Contact me

Copyright © 2025 TastyTrendIngredients