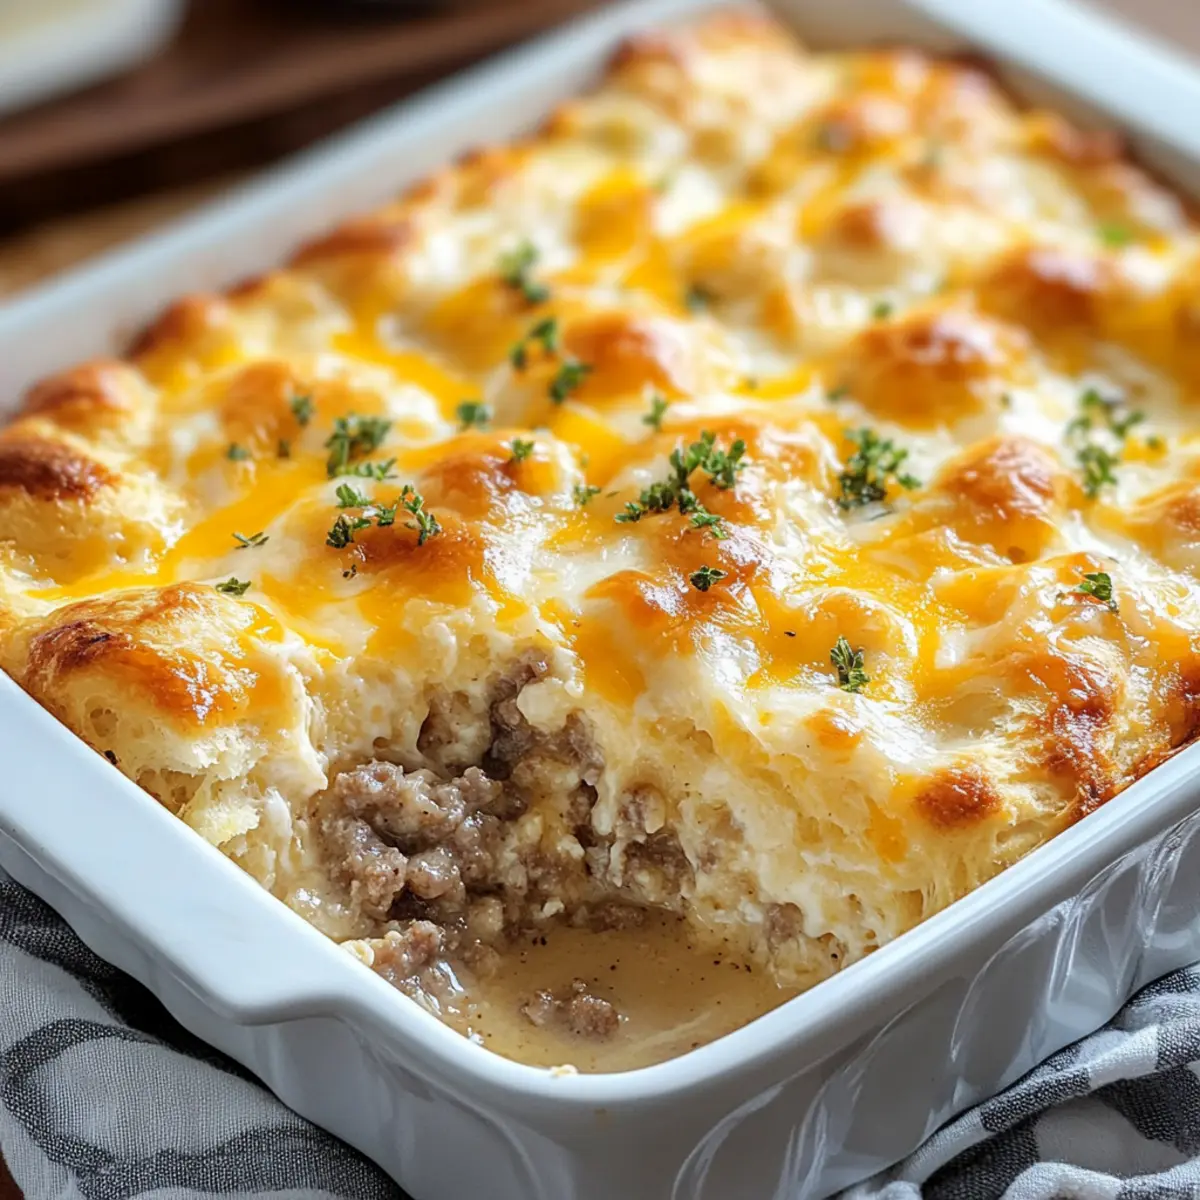
tastytrendingredients

  • Home
  • Recipes
    • Appetizers
    • Breakfast
    • Dessert
    • Dinner
    • Drinks
    • Salads
    • Snacks
    • Soups
  • About me
  • Contact me
menu icon
go to homepage
  • Home
  • Recipes
    • Appetizers
    • Breakfast
    • Dessert
    • Dinner
    • Drinks
    • Salads
    • Snacks
    • Soups
  • About me
  • Contact me
search icon
Homepage link
  • Home
  • Recipes
    • Appetizers
    • Breakfast
    • Dessert
    • Dinner
    • Drinks
    • Salads
    • Snacks
    • Soups
  • About me
  • Contact me
×

Aromatic Ginger Scallion Chicken Noodle Soup Bliss

December 23, 2025 by Grace Snow Leave a Comment

On a chilly evening, the aroma wafting from my kitchen held the promise of comfort — a steaming pot of Ginger Scallion Chicken Noodle Soup was on the horizon. This recipe elevates the classic chicken noodle soup into an aromatic masterpiece, blending the warm notes of fresh ginger and garlic to create a broth bursting with depth. It’s not just quick and easy to whip up; it’s also wonderfully adaptable, inviting you to toss in extra veggies or proteins to suit your family's preferences. With tender chicken and nestled noodles embraced by a savory hug of spices, this dish becomes the ultimate weeknight pick-me-up that feels special. Are you ready to discover the magic behind this delicious bowl of joy?

Why is this soup a must-try?

Comforting warmth: This soup embodies the essence of home-cooked comfort food, perfect for cozy nights.
Simple & quick: With just a few ingredients, you can whip up this delicious soup in no time, ideal for busy weeknights.
Flavor explosion: The bold flavors of ginger and garlic create a broth that tantalizes your taste buds, making each spoonful a delight.
Versatile base: Feel free to customize your soup by adding your favorite vegetables or proteins, just like with our Chicken Teriyaki Noodles or Crock Pot Chicken.
Great for sharing: Perfect for family dinners or gatherings, everyone will love this heartwarming dish!
Healthy goodness: Packed with fresh ingredients, it’s a nourishing choice for any meal.

Ginger Scallion Chicken Noodle Soup Ingredients

• The comforting blend of flavors awaits!

For the Soup

  • Boneless Skinless Chicken Thighs – Best for a tender, juicy texture; can substitute chicken breasts but must monitor for overcooking.
  • Garlic (6 cloves, thinly sliced) – Adds depth and aroma; essential to the flavor profile and cannot substitute without losing characteristic taste.
  • Ginger (3 inches, peeled and finely chopped) – Provides warmth and tang; fresh ginger is preferred but powdered can be used, altering flavor.
  • Scallions (1 bundle, divided) – Introduces freshness; divide between white parts for cooking and green parts for garnish.
  • Kosher Salt (4 tsp) – Enhances all flavors; adjust according to taste, especially if using broth that is already salted.
  • Black or White Pepper – Adds mild heat; to taste based on preference.
  • Water (10 cups) – Forms the soup base; can use chicken broth for extra flavor.
  • Dried Ramen or Curly Noodles (8 oz) – Provides carbohydrate base; other noodles can be used, adjust cook time based on package instructions.
  • Carrot (1 cup, cut into thin matchsticks) – Offers sweetness and texture; can substitute with other vegetables like bok choy for added nutrition.
  • Black Rice Vinegar (1/4 cup) – Adds tartness; substitute with rice vinegar or white wine vinegar, adjusting to taste.
  • Soy Sauce (1/4 cup) – Provides umami and seasoning; opt for low-sodium if desired.
  • Toasted Sesame Oil (2 tbsp) – Adds a nutty flavor; optional but highly recommended for depth.
  • Crispy Chili Oil – Enhances heat and flavor; add to taste for spice lovers, or omit for a milder soup.

Enjoy each delightful ingredient in your Ginger Scallion Chicken Noodle Soup experience!

Step‑by‑Step Instructions for Ginger Scallion Chicken Noodle Soup

Step 1: Prepare the Base
In a large pot, combine boneless skinless chicken thighs, thinly sliced garlic, finely chopped ginger, white parts of the scallions, kosher salt, black or white pepper, and 10 cups of water. Heat the mixture over high heat until it reaches a rolling boil, then reduce the heat to medium-low. Allow the soup to simmer uncovered for about 15 minutes, until the chicken is tender and the broth is fragrant.

Step 2: Make the Sauce
While the soup is simmering, take a small bowl and whisk together 1/4 cup of black rice vinegar, 1/4 cup of soy sauce, and 2 tablespoons of toasted sesame oil. This flavorful sauce will add depth to your Ginger Scallion Chicken Noodle Soup. Set aside, allowing the flavors to blend while the chicken continues to cook.

Step 3: Shred the Chicken
Once the chicken is cooked through and tender, carefully remove it from the pot using tongs or a slotted spoon. Place the chicken on a cutting board and allow it to cool slightly. After a few minutes, shred the chicken into bite-sized pieces using two forks, ensuring it remains saucy and flavorful for the soup.

Step 4: Cook the Noodles
Bring the soup back up to a gentle boil on medium-high heat, then add 8 ounces of dried ramen or curly noodles along with 1 cup of thin matchstick-cut carrots. Cook according to the noodle package instructions, generally about 3-4 minutes, until the noodles are tender but still firm, adding a colorful sweetness to your Ginger Scallion Chicken Noodle Soup.

Step 5: Combine and Heat
After the noodles have finished cooking, stir the shredded chicken back into the pot. Mix everything together thoroughly, ensuring the chicken is heated through. Allow it to warm for an additional minute, ensuring the flavors meld beautifully, creating the ultimate comforting bowl of soup.

Step 6: Serve and Garnish
Ladle the warm soup into bowls, then finish with a sprinkle of the reserved green parts of the scallions for a fresh, vibrant touch. Drizzle the prepared sauce over each serving, allowing the flavors to shine through, and personalize with crispy chili oil to taste for an extra kick in your Ginger Scallion Chicken Noodle Soup.

Storage Tips for Ginger Scallion Chicken Noodle Soup

Fridge: Store leftover soup in an airtight container for up to 4 days. To maintain the best noodle texture, keep noodles separate until you're ready to reheat.

Freezer: Freeze the broth and shredded chicken in airtight containers for up to 3 months. Cook fresh noodles when you're ready to enjoy the soup again.

Reheating: To reheat, thaw frozen broth and chicken overnight in the refrigerator. Heat in a pot over medium heat, adding fresh noodles and any additional veggies until warmed through.

Expert Tips for Ginger Scallion Chicken Noodle Soup

  • Don’t Rush the Chicken: Ensure the chicken is cooked through but not overdone; check for doneness early to maintain tenderness.

  • Noodle Timing: Avoid mushy noodles by adding them only when the broth is boiling; consider cooking noodles separately if you prefer a firmer texture.

  • Aromatic Boost: Sauté garlic and ginger briefly before adding liquid to achieve a depth of flavor; be careful not to let garlic burn, as it can turn bitter.

  • Fresh Scallion Finish: Reserve the green parts of the scallions until serving to keep their crunch and vibrant color in your Ginger Scallion Chicken Noodle Soup.

  • Customize Wisely: Feel free to add more vegetables or proteins; just remember to adjust the cooking times based on what you choose for best results.

  • Spice Control: Start with a small amount of crispy chili oil for heat; you can always add more if you desire a spicier kick in your soup!

Make Ahead Options

These Aromatic Ginger Scallion Chicken Noodle Soup meal prep tips will save you valuable time during your busy week! You can prepare the soup base (chicken, garlic, ginger, scallion whites, and broth) up to 24 hours in advance and refrigerate it in an airtight container to maintain its flavor. To prevent the noodles from becoming soggy, cook them separately right before serving. Simply reheat the soup on the stove, add freshly cooked noodles and carrot matchsticks, and stir in the shredded chicken. For the best quality, reserve the scallion greens and crispy chili oil to sprinkle on top just before serving. Enjoy a warm bowl of comfort, effortlessly!

Variations & Substitutions for Ginger Scallion Chicken Noodle Soup

Feel free to let your creativity shine by customizing this delightful soup to suit your tastes!

  • Extra Greens: Add baby bok choy for additional greens. This not only boosts nutrition but also enhances the texture.

  • Protein Swap: Substitute frozen shrimp or firm tofu for the chicken. This opens up a world of flavor while keeping it family-friendly.

  • Spicy Twist: Increase the amount of crispy chili oil for that extra heat. A little goes a long way, but adjust to your spice tolerance!

  • Vegetable Medley: Incorporate other veggies like Napa cabbage or snap peas for extra nutrition. Each bite becomes a colorful adventure!

  • Noodle Variety: Instead of ramen, try soba or udon noodles for a different texture. Each noodle type brings its own unique personality to the soup.

  • Vinegar Options: Use rice vinegar or apple cider vinegar in place of black rice vinegar. Each will lend a distinct flavor while keeping the essence intact.

  • Herbal Boost: Fresh herbs like cilantro or basil can be added just before serving for an aromatic lift. A sprinkle of green can brighten an already flavorful dish!

  • Umami Enhancement: If you love umami, try adding a tablespoon of miso paste into your broth. This can deepen the flavor, making every spoonful rich and satisfying.

Get inspired and mix and match these ideas! And when you’re ready to explore more comforting chicken dishes, don’t forget to check out my Chicken Adobo Again or Spatchcock Chicken Flavor. Happy cooking!

What to Serve with Aromatic Ginger Scallion Chicken Noodle Soup

Set the stage for a comforting meal that highlights the rich, aromatic flavors of your soup while adding delightful contrasts.

  • Steamed Dumplings: Their soft, pillowy texture and savory filling complement the warmth of the soup beautifully.

  • Crispy Spring Rolls: The crunch of crispy vegetables contrasts perfectly with the tender noodles, adding an enjoyable texture balance.

  • Fresh Cucumber Salad: A bright and refreshing side that cuts through the richness of the broth, making each bite feel light and vibrant.

  • Garlic Bread: The buttery, toasted notes of garlic and herbs create a delicious pairing with the soup's savory elements.

  • Pickled Vegetables: Adding a tangy crunch, these are perfect for those who crave additional flavors and textures in each bite.

  • Chili Oil Drizzle: Elevate your soup by serving a small bowl of spicy chili oil on the side for those who like an extra kick.

Don’t shy away from blending these options together — they harmonize beautifully with the cozy embrace of your Ginger Scallion Chicken Noodle Soup!

Ginger Scallion Chicken Noodle Soup Recipe FAQs

What is the best way to choose fresh ginger for this recipe?
Absolutely! When selecting ginger, look for firm roots with smooth, unblemished skin. Avoid any that have dark spots or are shriveled. Fresh ginger should smell fragrant and spicy. You can even lightly press the skin; it should feel solid and not easily indented.

How should I store leftover Ginger Scallion Chicken Noodle Soup?
Leftovers should be stored in an airtight container in the fridge, where they can stay fresh for up to 4 days. To keep the noodles from absorbing too much broth and becoming mushy, it's best to store them separately. Simply reheat your soup on the stove over medium heat until warmed through, adding the noodles back in freshly cooked if needed.

Can I freeze this soup, and if so, how?
Yes! You can freeze the broth and shredded chicken separately for up to 3 months in airtight containers. When you're ready to enjoy the soup again, thaw the containers in the fridge overnight. To reheat, place the broth in a pot over medium heat, bring to a simmer, and add fresh noodles along with any vegetables you choose! This way, your noodles will retain their perfect texture.

What if my chicken turns out dry when cooking?
To ensure your chicken stays juicy, be sure not to overcook it, as this can lead to dryness. Check for doneness early, especially if you're using thin pieces. The ideal internal temperature for fully cooked chicken thighs is 165°F (75°C). If you do find yourself with overcooked chicken, consider shredding it finely and stirring it back into the broth to help it reabsorb some moisture.

Are there any dietary considerations for this soup?
Yes, if you or anyone you're serving has allergies, it’s essential to keep an eye on the ingredients. For a gluten-free option, use gluten-free soy sauce, and substitute the noodles with a gluten-free alternative, such as rice noodles. Additionally, if preparing for pets, always take out any onions and garlic, as they're not safe for most pets.

Can I customize the vegetables in this soup? What are some suggestions?
Very much so! This recipe is wonderfully adaptable. You can add vegetables like bok choy, bell peppers, or even baby spinach for added nutrition. To incorporate these, simply add them during the last few minutes of cooking to keep them vibrant and crisp. Enjoy experimenting with different textures and flavors!

Ginger Scallion Chicken Noodle Soup

Aromatic Ginger Scallion Chicken Noodle Soup Bliss

This Ginger Scallion Chicken Noodle Soup elevates comfort food with its aromatic blend of ginger and garlic, creating a nourishing dish perfect for any family meal.
Print Recipe Pin Recipe
Prep Time 10 minutes mins
Cook Time 30 minutes mins
Total Time 40 minutes mins
Servings: 4 bowls
Course: Soups
Cuisine: Asian
Calories: 350
Ingredients Equipment Method Nutrition Notes

Ingredients
  

For the Soup
  • 1 lbs Boneless Skinless Chicken Thighs Best for a tender, juicy texture.
  • 6 cloves Garlic Thinly sliced; essential for flavor.
  • 3 inches Ginger Peeled and finely chopped; fresh preferred.
  • 1 bundle Scallions Divided; use white parts for cooking.
  • 4 tsp Kosher Salt Enhances all flavors; adjust to taste.
  • Black or White Pepper Add to taste based on preference.
  • 10 cups Water Forms the soup base.
  • 8 oz Dried Ramen or Curly Noodles Other noodles can be used.
  • 1 cup Carrot Cut into thin matchsticks; offers sweetness.
  • 1/4 cup Black Rice Vinegar Adds tartness; adjust to taste.
  • 1/4 cup Soy Sauce Provides umami; low-sodium optional.
  • 2 tbsp Toasted Sesame Oil Adds nutty flavor; highly recommended.
  • Crispy Chili Oil To taste for extra heat; optional.

Equipment

  • Large pot

Method
 

Step-by-Step Instructions
  1. In a large pot, combine chicken thighs, garlic, ginger, white scallion parts, salt, pepper, and water. Bring to a boil, then simmer for about 15 minutes until chicken is tender.
  2. While simmering, whisk together black rice vinegar, soy sauce, and sesame oil in a small bowl. Set aside.
  3. Remove cooked chicken from pot, shred into bite-sized pieces, and set aside.
  4. Bring soup back to a boil, add noodles and carrots. Cook according to package instructions, about 3-4 minutes.
  5. Stir shredded chicken back into the pot and warm through for an additional minute.
  6. Ladle soup into bowls, garnish with the reserved green scallion parts, drizzle with sauce, and add crispy chili oil if desired.

Nutrition

Serving: 1bowlCalories: 350kcalCarbohydrates: 40gProtein: 30gFat: 10gSaturated Fat: 1gPolyunsaturated Fat: 0.5gMonounsaturated Fat: 2gCholesterol: 80mgSodium: 1200mgPotassium: 600mgFiber: 3gSugar: 2gVitamin A: 2000IUVitamin C: 5mgCalcium: 50mgIron: 2mg

Notes

Customize by adding extra vegetables or proteins as desired. Store leftovers in an airtight container for up to 4 days.

Tried this recipe?

Let us know how it was!

Hangover Cure Garlic Potato Soup That's Pure Comfort

December 23, 2025 by Grace Snow Leave a Comment

As I stirred the pot, the heavenly aroma of roasted garlic filled my kitchen, wrapping around me like a cozy blanket. This Healing Garlic Potato Soup is my go-to remedy for those days when I want something soulful and comforting. It’s perfect for anyone who’s recovering from a night out or simply needs a warm hug in a bowl. Packed with creamy potatoes and a delightful garlic punch, this soup comes together in just under 30 minutes, making it not only a breeze to prepare but also a hearty feast that’s vegetarian-friendly. Whether you're fighting off a hangover or feeling a bit under the weather, this dish promises to soothe and nourish. What’s your favorite way to enjoy comforting soups?

Why is Garlic Potato Soup a Must-Try?

Comforting Warmth: This soothing soup envelops you in a cozy embrace with its thick, creamy texture, perfect for chilly nights or recovery days.

Quick & Easy: In under 30 minutes, you’ll have a nourishing dish that’s simple enough for any home cook to master.

Loaded with Flavor: The robust garlic adds a punch, balancing beautifully with the creamy potatoes for a delightful taste experience.

Vegetarian-Friendly: It caters to everyone, making it a fantastic option for those avoiding meat but still craving comfort.

Pair it with warm crusty bread or a light salad to elevate your meal. You might also love serving it alongside a hearty dish like Honey Garlic Chicken for a delightful dinner.

Hangover Cure Garlic Potato Soup Ingredients

For the Soup Base

  • Starchy Potatoes (Russets or Idaho) – These provide the creamy texture you crave in a comforting soup; avoid waxy potatoes for best results.
  • Onion – Adds a natural sweetness and depth of flavor; you can swap in shallots for a milder note.
  • Fresh Garlic – The star of this recipe! Roast it for a deeper, sweeter flavor; garlic powder works in a pinch if fresh isn’t available.
  • Vegetable Broth – Serves as the nourishing liquid base; feel free to use chicken broth for a non-vegetarian twist.

For Cooking and Flavor

  • Olive Oil – Perfect for sautéing and adding richness; butter can be used for a different and delightful flavor profile.
  • Salt & Pepper – Essential for enhancing the soup's flavor; season to your taste.

For the Finishing Touch

  • Fresh Parsley – Adds a pop of color and brightness to your soup; chives can also provide a lovely alternative garnish.

With these ingredients, this Hangover Cure Garlic Potato Soup is just a delicious whisk away from your kitchen! Now, let’s dive into the bliss of preparation and experience the joy of home-cooked comfort food.

Step‑by‑Step Instructions for Hangover Cure Garlic Potato Soup

Step 1: Prepare Ingredients
Begin by peeling and cutting the starchy potatoes into 1-inch chunks, ensuring uniformity for even cooking. Next, dice one onion into small pieces and mince several cloves of fresh garlic. Lay everything out on your countertop, as having your ingredients prepped will streamline the process of making your Hangover Cure Garlic Potato Soup.

Step 2: Sauté Aromatics
In a large pot, heat a tablespoon of olive oil over medium heat. Once the oil glistens, add the diced onion and cook for about 8 minutes until it softens and becomes translucent, stirring occasionally to prevent burning. Then, add the minced garlic along with ½ teaspoon of salt, and sauté for an additional minute until fragrant, creating a flavorful base for your soup.

Step 3: Cook Potatoes
Pour in about 4 cups of vegetable broth and add the prepared potato chunks to the pot. Increase the heat and bring the mixture to a rolling boil, then reduce the heat to a simmer. Cover the pot and let it cook for approximately 15-20 minutes, or until the potatoes are tender and can be easily pierced with a fork, adding a comforting heartiness to your Hangover Cure Garlic Potato Soup.

Step 4: Incorporate Roasted Garlic
If you've roasted garlic in advance, it’s time to fold it into the mixture! Gently add the roasted garlic cloves to the pot, making sure to mash some of the soft potatoes against the side of the pot for added creaminess. For a smoother texture, consider blending half of the soup with an immersion blender, creating balance in your soup’s consistency.

Step 5: Season & Serve
Taste your Hangover Cure Garlic Potato Soup and adjust the seasoning with additional salt and pepper based on your preference. Once it’s perfectly seasoned, ladle the soup into warm bowls and garnish with fresh parsley, which adds a vibrant touch. Serve immediately, perhaps alongside crusty bread, for an extra comforting experience that’s sure to lift your spirits.

Expert Tips for Hangover Cure Garlic Potato Soup

  • Uniform Cuts: Ensure you cut the potatoes into even 1-inch chunks to avoid uneven cooking and achieve that perfect creamy texture in your soup.

  • Low and Slow: Sauté the onion and garlic over low heat. This prevents bitterness and allows their natural sweetness to develop, creating a more flavorful Hangover Cure Garlic Potato Soup.

  • Roasted Garlic Magic: If you roast your garlic ahead of time, it adds an incredible depth of flavor. Consider making extra to keep on hand for future recipes!

  • Blend Wisely: Decide between a chunky or smooth texture before blending. Puréeing all the soup creates a creamy consistency, while leaving some potatoes whole provides heartiness.

  • Taste Test: Always taste and adjust the seasoning near the end. A bit more salt or pepper can elevate flavors, ensuring your Hangover Cure Garlic Potato Soup is perfectly balanced.

Storage Tips for Hangover Cure Garlic Potato Soup

  • Fridge: Store the soup in an airtight container for up to 5 days. The flavors deepen over time, making it a perfect option for meal prep.

  • Freezer: You can freeze portions of the soup for up to 3 months. Be sure to leave some space in the container for expansion and add a splash of broth or water when reheating to maintain the creamy consistency.

  • Reheating: When ready to enjoy, gently reheat on the stove over low heat, stirring frequently. If it has thickened, add a little water or broth to reach your desired consistency.

  • Serving Suggestions: Revive the soup with fresh parsley or a sprinkle of cheese when serving, making your Hangover Cure Garlic Potato Soup feel like a freshly made dish every time.

Hangover Cure Garlic Potato Soup Variations

Feel free to tweak this comforting recipe to suit your taste buds and dietary needs!

  • Chicken Broth: Swap out vegetable broth for chicken broth for a heartier, non-vegetarian option that enhances the flavor.

  • Creamy Addition: Stir in a splash of heavy cream or coconut milk for extra richness and a silky texture that elevates this cozy dish.

  • Herb Infusion: Add thyme or rosemary while cooking for a fragrant twist that complements the garlic beautifully.

  • Vegetable Boost: Toss in diced carrots, celery, or spinach for added nutrition and color; they'll blend seamlessly into the comforting base.

  • Spicy Kick: Add a pinch of red pepper flakes for a gentle heat that awakens the palate, perfect for those who enjoy a bit of spice.

  • Extra Garlic: If you’re a garlic lover, don't be shy! Stir in more roasted garlic or a hint of garlic powder to amplify that savory goodness.

  • Creamy Vegan Twist: Use almond or cashew cream for a vegan-friendly version that’s just as indulgent without sacrificing flavor.

  • Garnish Galore: Top with croutons for a satisfying crunch or a dollop of Greek yogurt for creaminess and a touch of tartness to balance the flavors.

Whatever variations you choose, you're bound to create a dish that's every bit as comforting as a hug! And while you're getting creative, consider pairing it with a side of Asparagus Soup Healthy or even a hearty German Potato Salad to truly savor the flavors of home cooking.

What to Serve with Hangover Cure Garlic Potato Soup

Pair this nourishing soup with delightful accompaniments that will elevate your comforting experience.

  • Crusty Bread: The perfect vehicle for dipping; its texture contrasts beautifully with the creamy soup. Soak up every last drop for a satisfying meal.
  • Mixed Greens Salad: A fresh, crisp salad offers a light balance to the richness of the soup, adding color and nutritional value. Toss with a simple vinaigrette for brightness.
  • Grilled Cheese Sandwich: The melty cheese and crispy bread duo pairs wonderfully, adding indulgence to the simplicity of your garlic potato soup. It’s a match made in comfort food heaven!
  • Garlic Bread: Double the garlic goodness! This crunchy, buttery treat echoes the flavors in the soup and makes for an irresistible combo.
  • Roasted Vegetables: Adding a medley of roasted seasonal vegetables introduces additional textures and flavors, enriching your meal while keeping it wholesome.
  • Crispy Kale Chips: The freshness and crunch of these chips contrast nicely with the creamy soup, providing a fun and healthy side. Try sprinkling some seasoning for an extra kick!
  • Red Wine: A glass of light-bodied red wine complements the soup and creates a warm atmosphere for your meal, enhancing the flavors of both.
  • Light Dessert: A fruit sorbet or a gentle panna cotta can provide a refreshing finish, cleansing the palate after the savory garlic-infused flavors.

Make Ahead Options

These Hangover Cure Garlic Potato Soup is perfect for busy home cooks looking to simplify their meal prep! You can chop the starchy potatoes, onion, and garlic up to 24 hours in advance, keeping them stored in the refrigerator to maintain freshness. If you’d like to prep further, the soup can also be made entirely ahead and refrigerated for up to 3 days, just give it a quick stir before serving. When it’s time to enjoy, simply reheat the soup over medium heat, adding a splash of broth if the consistency thickens. Trust me, it’ll warm your heart just as deliciously on the second day!

Hangover Cure Garlic Potato Soup Recipe FAQs

What kind of potatoes should I use for the soup?
Absolutely! For the best creamy texture, go with starchy potatoes like Russets or Idaho. Avoid waxy varieties, as they can make the soup feel gluey rather than velvety.

How should I store leftover garlic potato soup?
You can store your Hangover Cure Garlic Potato Soup in an airtight container in the refrigerator for up to 5 days. The flavors will actually deepen and get even better over time!

Can I freeze this soup?
Very! To freeze, pour the cooled soup into freezer-safe containers, leaving some space for expansion; it can be kept for up to 3 months. When you're ready to enjoy, simply reheat on the stove, adding a splash of broth or water to restore its creamy consistency if needed.

What if I don't have fresh garlic?
No problem! If you don’t have fresh garlic, you can use garlic powder instead. A general rule of thumb is to use 1/8 teaspoon of garlic powder for each clove of fresh garlic called for in the recipe. It might not be quite the same, but it will still add delicious flavor!

Is this soup suitable for vegetarians?
Absolutely! This Hangover Cure Garlic Potato Soup is vegetarian-friendly since it's made with vegetable broth. If you're catering to omnivores, feel free to swap in chicken broth without sacrificing much in the flavor department.

Can I add vegetables to the soup?
Of course! You can enhance the soup's flavor and nutrition by adding other vegetables, like carrots or celery. Simply chop them and add them in with the potatoes, cooking until they’re tender. This will not only create a more vibrant dish but also add more depth to the comforting experience!

Hangover Cure Garlic Potato Soup

Hangover Cure Garlic Potato Soup That's Pure Comfort

This Hangover Cure Garlic Potato Soup is a soothing, vegetarian-friendly dish that's perfect for recovery days or chilly nights.
Print Recipe Pin Recipe
Prep Time 10 minutes mins
Cook Time 20 minutes mins
Total Time 30 minutes mins
Servings: 4 cups
Course: Soups
Cuisine: Vegetarian
Calories: 250
Ingredients Equipment Method Nutrition Notes

Ingredients
  

For the Soup Base
  • 4 cups Vegetable Broth
  • 2 large Starchy Potatoes (Russets or Idaho) peeled and cut into 1-inch chunks
  • 1 Onion diced
  • 5 cloves Fresh Garlic minced
For Cooking and Flavor
  • 1 tablespoon Olive Oil
  • 0.5 teaspoon Salt to taste
  • 0.5 teaspoon Pepper to taste
For the Finishing Touch
  • 2 tablespoons Fresh Parsley chopped

Equipment

  • Large pot

Method
 

Step-by-Step Instructions
  1. Begin by peeling and cutting the starchy potatoes into 1-inch chunks, ensuring uniformity for even cooking. Dice the onion and mince the garlic.
  2. In a large pot, heat olive oil over medium heat. Add diced onion and cook for about 8 minutes until it softens. Then, add minced garlic and sauté for an additional minute.
  3. Pour in vegetable broth and add potato chunks. Bring to a boil, then reduce to a simmer and cover, cooking for 15-20 minutes until the potatoes are tender.
  4. Fold in roasted garlic and mash some potatoes for creaminess. Blend if desired for a smoother texture.
  5. Adjust seasoning with salt and pepper, serve in bowls, and garnish with fresh parsley.

Nutrition

Serving: 1cupCalories: 250kcalCarbohydrates: 35gProtein: 5gFat: 10gSaturated Fat: 1.5gPolyunsaturated Fat: 1gMonounsaturated Fat: 5gSodium: 500mgPotassium: 600mgFiber: 4gSugar: 2gVitamin A: 5IUVitamin C: 40mgCalcium: 2mgIron: 10mg

Notes

Pair with warm crusty bread or a light salad for a complete meal.

Tried this recipe?

Let us know how it was!

Spinach Soup Bliss: A Cozy Bowl of Comfort and Health

December 23, 2025 by Grace Snow Leave a Comment

As the evening chill settles in, there's nothing quite like the rich aroma of a simmering soup to warm the heart and lift the spirit. This Bulgarian Spinach Soup, or Spanachena Supa, has been a beloved family favorite for generations, cherished not only for its comforting flavors but also for its simplicity. In just a few easy steps, you can create a nutritious and heartening meal that’s both vegetarian and gluten-free. It’s perfect for those cozy nights when you crave something wholesome yet effortless to whip up. Plus, whether you stick to frozen spinach or opt for fresh, this soup is also wonderfully adaptable for various dietary needs. Ready to explore the warm embrace of Eastern European comfort food? Let’s dive into this delightful recipe together!

Why is Spinach Soup So Loved?

Comforting Warmth: This Bulgarian Spinach Soup offers a heartwarming embrace on chilly evenings. Its rich, creamy texture is perfect for warming up after a long day.
Easy to Prepare: With just a few simple ingredients and straightforward steps, anyone can craft this delicious dish in no time!
Versatile Base: Whether using fresh or frozen spinach, this soup adapts well to your pantry staples. Try it vegan by swapping cream for coconut milk!
Nutrition Packed: Loaded with vitamins A and C, this soup is not only delicious but a healthy choice as well. Pair it with Spinach Pie Deliciously for a meal that’s both nourishing and flavorful!
Family Tradition: Spanachena Supa has been a beloved dish for generations, making it a perfect choice for bringing people together around the dinner table.

Spinach Soup Ingredients

For the Soup Base

  • Olive Oil – Provides richness and helps sauté the base vegetables; feel free to substitute with any neutral oil if desired.
  • Onion – Adds flavor and sweetness to the soup; shallots are a great alternative for a milder taste.
  • Celery – Contributes depth and aroma; can be omitted if it's not available in your pantry.
  • Carrots – Bring sweetness and vibrant color; consider using parsnips for a delightful twist.
  • Garlic – Offers a savory kick; fresh garlic is preferred, but garlic powder can work in a pinch.
  • Tomato Paste – Enhances acidity and depth; fresh tomatoes can be used if you prefer.

Main Ingredients

  • Frozen Spinach – The star of the spinach soup, thawed before use; you can swap in fresh spinach by wilting it down first.
  • Salt – Essential for flavor enhancement; adjust according to the saltiness of your broth.
  • Jasmine Rice – Adds heartiness to the soup; feel free to substitute with any short or long-grain rice you have.
  • Tomato Sauce – Provides a rich tomato flavor; either homemade or store-bought works well.
  • Vegetable Broth – The soul of the soup; for best results, use low-sodium or homemade broth.
  • Cream (optional) – Introduces creaminess; coconut cream is a fantastic dairy-free substitute or simply omit it for a lighter soup.

Every ingredient in this spinach soup contributes to the comforting and nourishing experience of Spanachena Supa!

Step‑by‑Step Instructions for Spinach Soup

Step 1: Thaw the Spinach
Begin by thawing your frozen spinach, ideally in the fridge overnight or on the counter for about an hour until it’s soft and pliable. This step is crucial because it ensures even cooking later on. If using fresh spinach, simply wash and wilt it down in a pot, then set it aside for later use.

Step 2: Sauté the Vegetables
In a large pot, heat 2 tablespoons of olive oil over medium-high heat. Once the oil is shimmering, add in diced onion, carrots, and celery. Sauté these vegetables for about 5 minutes until they become tender and the onions turn translucent, filling your kitchen with a delightful aroma.

Step 3: Add Garlic and Tomato Paste
Next, stir in 2 minced garlic cloves and 2 tablespoons of tomato paste into the pot. Cook for an additional 2-3 minutes, allowing the garlic to release its flavorful oils and the tomato paste to caramelize slightly, creating a rich base for your spinach soup.

Step 4: Incorporate the Spinach
Add your thawed spinach into the pot, mixing it with the sautéed vegetables. Cook for about 3-4 minutes, allowing the spinach to heat through and blend well with the other ingredients. Season the mixture with salt to taste, enhancing the overall flavors of the spinach soup.

Step 5: Mix in Rice and Liquids
Now, add 1 cup of rinsed jasmine rice, 1 cup of tomato sauce, and 4 cups of vegetable broth to your pot. Stir everything together, bringing the mixture to a gentle boil. This combination will create a hearty texture, making your spinach soup even more satisfying.

Step 6: Simmer the Soup
Once boiling, reduce the heat to medium-low and partially cover the pot. Allow the soup to simmer for about 20 minutes, or until the rice is tender and has absorbed the flavors. Stir occasionally to prevent the rice from sticking to the bottom of the pot.

Step 7: Finish with Cream
After the rice is cooked, take the soup off the heat and stir in a splash of cream, if desired. This optional addition gives your spinach soup a velvety finish that enhances its creaminess. Be careful not to boil the soup again after adding the cream to prevent curdling.

Step 8: Serve and Enjoy
Ladle the comforting spinach soup into bowls and serve hot. For a traditional touch, consider tempering an egg yolk with a bit of broth and adding it to enrich the soup. Garnish with fresh herbs if available, and enjoy your delightful bowl of Bulgarian Spinach Soup!

How to Store and Freeze Spinach Soup

Fridge: Store leftover spinach soup in an airtight container for up to 3 days. Allow it to cool completely before sealing to maintain its creamy texture.

Freezer: For longer storage, freeze the soup in individual portions for up to 2-3 months. It's best to omit cream before freezing; add it upon reheating for optimal taste.

Reheating: Thaw frozen soup in the fridge overnight and reheat on the stovetop over medium heat, adding a splash of broth or water to loosen the texture if necessary.

Airtight Storage: For best results, use freezer bags or containers to prevent freezer burn and preserve the flavor of your comforting spinach soup.

Spinach Soup Variations to Try

Feel free to get creative with this recipe by incorporating delightful twists that cater to your taste buds and dietary preferences!

  • Fresh Spinach: Use fresh spinach instead of frozen for a brighter, more vibrant flavor. Simply wilt it in the pot for a lighter texture.
  • Quinoa Substitute: Swap jasmine rice with quinoa for a high-protein option that's gluten-free and adds a lovely nutty taste.
  • Vegan Version: For a dairy-free delight, replace the cream with coconut cream and ensure your vegetable broth is vegan-friendly. This switch maintains creaminess without the dairy.
  • Protein Boost: Add cooked chicken or chickpeas to the soup for a protein-packed twist that transforms this dish into a heartier meal.
  • Herb Infusion: Incorporate fresh herbs like dill or parsley at the end for a burst of flavor and freshness. These herbs will elevate your spinach soup beautifully!
  • Heat It Up: Add crushed red pepper or a dash of cayenne for a spicy kick that adds depth and warmth, perfect for those chilly nights.
  • Tomato Variations: Replace the tomato paste with roasted tomatoes for a richer, sweeter flavor profile. This change deepens the overall taste experience.
  • Nutty Crunch: Top your soup with toasted pumpkin seeds or croutons for an added crunch that creates a delightful texture contrast.

As you explore these variations, consider pairing your soup with some tasty sides, like a fresh salad or a slice of homemade bread. If you enjoy vibrant dishes, check out my recipe for Asparagus Soup Healthy or indulge in a delicious Chickpea Spinach Curry. Enjoy the journey of flavor!

Make Ahead Options

Preparing this Bulgarian Spinach Soup ahead of time is a fantastic way to save precious minutes on busy weekdays! You can chop and sauté the base vegetables (onion, carrots, and celery) up to 3 days in advance, refrigerating them in an airtight container until needed. The spinach can also be thawed ahead and stored for up to 24 hours in the fridge. When it's time to serve, simply add the prepared vegetables and spinach into the pot with the other ingredients, bring to a boil, and simmer until the rice is cooked. Remember, to maintain the soup's creamy quality, stir in the cream just before serving, ensuring a delightfully luxurious finish every time!

Helpful Tricks for Spinach Soup

  • Thaw Thoroughly: Ensure your frozen spinach is completely thawed for even cooking—this prevents any cold clumps in your soup.
  • Prevent Blandness: Taste as you cook and adjust salt levels based on your broth's saltiness to avoid a bland spinach soup.
  • Avoid Curdling: When adding cream, avoid boiling the soup afterward to prevent it from curdling; gently stir in off the heat.
  • Adjust Thickness: If you prefer a thicker soup, reduce the rice or add more broth gradually until you reach your desired consistency.
  • Make Ahead Magic: Consider making the soup a day in advance to deepen the flavors; simply reheat gently before serving.

What to Serve with Bulgarian Spinach Soup

Imagine a cozy evening where every bite of your comforting soup is complemented by delightful sides that enhance its flavors and textures.

  • Crusty Bread: A warm, artisanal loaf is perfect for dipping. The crunchy exterior and soft interior create a satisfying contrast to the creamy soup.

  • Mixed Green Salad: A light salad offers freshness and a burst of color. Toss in some cherry tomatoes and tangy vinaigrette for a bright complement.

  • Roasted Veggies: Serve a side of roasted carrots and zucchini to add a sweet, caramelized note to your meal. The earthy flavors meld beautifully with spinach.

  • Cheese Flatbread: Warm flatbreads sprinkled with feta or mozzarella provide a savory richness and a delightful hand-held addition to your bowl of soup.

  • Yogurt Sauce: A cool, tangy yogurt sauce drizzled on top adds an extra layer of creaminess and balance, making each spoonful even more delicious.

  • Herbal Tea: Sipping on a fragrant herbal tea while enjoying your meal enhances the comforting experience. Choose chamomile or mint for a soothing finish.

  • Fruit Tart: For a sweet closure, serve a light fruit tart. The tartness of fresh fruits contrasts nicely with the savory flavors of the spinach soup.

Spinach Soup Recipe FAQs

What type of spinach should I use for this soup?
Absolutely! You can use either fresh or frozen spinach for this spinach soup. If using frozen, thaw it first to ensure even cooking. If you prefer fresh, simply wash and wilt it down in a pot before adding it to the soup.

How should I store leftover spinach soup?
To keep your delicious spinach soup fresh, store it in an airtight container in the fridge for up to 3 days. Make sure to let it cool completely before sealing it—this helps maintain its creamy texture.

Can I freeze spinach soup?
Very! For longer storage, freeze the soup in portions for up to 2-3 months. Just a tip: it's best to omit the cream before freezing; you can add it back in when you reheat for the best flavor and texture.

What should I do if my soup is too thick?
If your spinach soup ends up too thick, don't worry! Simply add a bit more vegetable broth or water and gently stir until it reaches your desired consistency. This way, you can easily adjust it to your liking.

Are there any dietary considerations I should keep in mind?
Certainly! This spinach soup is vegetarian and gluten-free, making it suitable for various dietary needs. If you're making it for someone with allergies, be sure to check all ingredient labels—particularly the broth and any extras you might add, like cream.

How can I enhance the flavors of the soup while cooking?
To elevate the flavors, always taste as you go. Adjust the salt levels based on the saltiness of your broth, and consider adding herbs or spices like dill or nutmeg—these can really bring your spinach soup to life!

Spinach Soup

Spinach Soup Bliss: A Cozy Bowl of Comfort and Health

Spinach Soup is a rich, creamy, and nutritious bowl of comfort perfect for chilly evenings.
Print Recipe Pin Recipe
Prep Time 15 minutes mins
Cook Time 30 minutes mins
Total Time 45 minutes mins
Servings: 4 bowls
Course: Soups
Cuisine: Bulgarian
Calories: 250
Ingredients Equipment Method Nutrition Notes

Ingredients
  

For the Soup Base
  • 2 tablespoons Olive Oil Can substitute with any neutral oil.
  • 1 medium Onion Diced.
  • 1 stalk Celery Optional.
  • 2 medium Carrots Diced.
  • 2 cloves Garlic Minced.
  • 2 tablespoons Tomato Paste
Main Ingredients
  • 10 ounces Frozen Spinach Thawed.
  • 1 teaspoon Salt Adjust to taste.
  • 1 cup Jasmine Rice Rinsed.
  • 1 cup Tomato Sauce Homemade or store-bought.
  • 4 cups Vegetable Broth Low-sodium or homemade.
  • 1/4 cup Cream Optional, can use coconut cream as a substitute.

Equipment

  • Large pot

Method
 

Preparation Steps
  1. Thaw the spinach in the fridge overnight or on the counter for about an hour until soft.
  2. Heat olive oil in a large pot over medium-high heat. Add diced onion, carrots, and celery, sautéing for about 5 minutes until tender.
  3. Add minced garlic and tomato paste to the pot, cooking for an additional 2-3 minutes.
  4. Incorporate thawed spinach, cooking for 3-4 minutes. Season with salt to taste.
  5. Mix in rinsed jasmine rice, tomato sauce, and vegetable broth. Bring to a gentle boil.
  6. Reduce heat to medium-low, partially cover, and simmer for about 20 minutes until rice is tender.
  7. Stir in a splash of cream after cooking; do not boil again to avoid curdling.
  8. Serve hot, garnished with fresh herbs and enjoy!

Nutrition

Serving: 1bowlCalories: 250kcalCarbohydrates: 35gProtein: 8gFat: 10gSaturated Fat: 2gPolyunsaturated Fat: 1gMonounsaturated Fat: 5gCholesterol: 5mgSodium: 500mgPotassium: 600mgFiber: 5gSugar: 6gVitamin A: 50IUVitamin C: 40mgCalcium: 8mgIron: 15mg

Notes

Ensure to thaw spinach thoroughly for even cooking and taste as you cook to avoid blandness.

Tried this recipe?

Let us know how it was!

Hearty Chicken Pozole Verde: A Comforting One-Pot Delight

December 23, 2025 by Grace Snow Leave a Comment

As the aroma of simmering tomatillos fills the kitchen, I can’t help but feel transported to the bustling streets of Mexico, where each bowl of Chicken Pozole Verde whispers tales of family gatherings and joyous celebrations. This vibrant, gluten-free soup beautifully combines tender chicken and hearty hominy in a zesty green broth enriched with poblanos and cilantro. Not only is this Chicken Pozole Verde a delightful twist on a traditional favorite, but it's also a quick one-pot meal that caters to a busy lifestyle without sacrificing flavor or health. Whether you're seeking comfort on a chilly evening or a nutritious option to impress guests, this recipe delivers on all fronts. Are you ready to dive into this culinary experience and fill your home with warmth and joy?

Why will you love Chicken Pozole Verde?

Vibrant, Comforting Flavors: This Chicken Pozole Verde is a delightful blend of zesty ingredients that create a rich, comforting taste reminiscent of authentic Mexican cuisine.

One-Pot Wonder: Whip up this quick and easy dish with minimal cleanup, making it perfect for busy weeknights when you crave something hearty yet healthy.

Customizable Toppings: Elevate each bowl with your favorite toppings like creamy avocado, crunchy radishes, or zesty lime wedges to create your personalized flavor explosion.

Nutrient-Packed Goodness: Packed with healthy ingredients, this gluten-free recipe is low in carbs and full of protein, letting you indulge without guilt.

Family-Friendly Appeal: Whether you're hosting a gathering or sharing with loved ones, this pozole is sure to impress even the pickiest eaters. Don’t forget to check out my Honey Garlic Chicken Thighs for another easy, delicious meal option!

Chicken Pozole Verde Ingredients

For the Soup Base
• Olive Oil – Provides a cooking fat to sauté vegetables for added flavor.
• Onion – Adds sweetness and depth to the flavor base.
• Jalapeño Pepper – Offers mild heat and can be adjusted for spiciness.
• Poblano Peppers – Contributes a slightly smoky note to the broth.
• Garlic Cloves – Enhances overall flavor; fresh garlic works best.
• Tomatillos – Key to the green broth; husk and rinse before use.
• Chicken Broth – The liquid base for the soup; low-sodium is a healthier choice.
• Dried Oregano – Adds herbal notes to the soup; use Mexican oregano for authenticity.
• Ground Cumin & Coriander – Provide warmth and earthiness to the dish.
• Bay Leaf – Infuses the broth with aromatic flavor during cooking.
• Salt – Essential for enhancing flavor; adjust to taste.
• Black Pepper – For seasoning to taste.

For the Protein
• Boneless Skinless Chicken Thighs/Breasts – The primary protein source; thighs add more flavor.

For the Texture
• Hominy – Adds this beloved ingredient for heartiness; drain and rinse canned hominy before use.
• Chicken Bouillon (optional) – Enhances depth of flavor; add according to taste.

Toppings (optional)
• Radishes – Provides a crunchy, fresh element.
• Avocado – Adds creaminess and richness to each bowl.
• Lime Wedges – Offers a burst of zesty freshness.
• Cilantro – Brightens up the dish with fresh herbal notes.
• Shredded Cabbage – Adds crunch and color.
• Tortilla Chips – Perfect for a delightful crunch in every bite.

This Chicken Pozole Verde is not only a treat for your taste buds but also a wonderful way to embrace healthy eating!

Step‑by‑Step Instructions for Chicken Pozole Verde

Step 1: Sauté the Vegetables
In a large pot, heat 2 tablespoons of olive oil over medium-high heat. Once shimmering, add 1 diced onion, 1 chopped jalapeño, and 2 diced poblano peppers. Sauté them for 3-4 minutes until the onion turns translucent and fragrant, stirring occasionally. This flavor base is essential for your Chicken Pozole Verde.

Step 2: Add Garlic and Tomatillos
Stir in 3 minced garlic cloves and 6 husked, rinsed tomatillos, sautéing for another 4-5 minutes. Cook until the tomatillos become soft and start to release their juices. This mixture will create the vibrant green broth that makes Chicken Pozole Verde so special.

Step 3: Blend the Mixture
Transfer the sautéed mixture to a blender, adding 1 cup of chicken broth and a handful of fresh cilantro. Blend until the mixture is smooth and creamy. This step will create a rich, flavorful base for your pozole that will infuse the entire dish with freshness.

Step 4: Combine in the Pot
Return the blended mixture to the pot over medium heat. Add the remaining 5 cups of chicken broth, along with 2 teaspoons of dried oregano, 1 teaspoon each of ground cumin and coriander, and 1 bay leaf. Stir everything together until combined, allowing the flavors to meld into the essence of Chicken Pozole Verde.

Step 5: Cook the Chicken
Add 1.5 pounds of boneless skinless chicken thighs or breasts to the pot, bringing the mixture to a boil. Once boiling, reduce the heat to low and cover the pot, letting it simmer for about 30 minutes. You’ll know it’s ready when the chicken is tender and can be easily shredded with a fork.

Step 6: Shred the Chicken
Carefully transfer the chicken to a plate and shred it with two forks. Once shredded, return the chicken to the pot, along with 2 cups of drained and rinsed hominy. Stir gently to mix everything, infusing your pozole with hearty texture and flavor.

Step 7: Final Simmer and Seasoning
Allow the soup to simmer uncovered for an additional 10 minutes, allowing the hominy to heat through. Taste the Chicken Pozole Verde and adjust the seasoning as needed with salt, pepper, or chicken bouillon, awakening those vibrant flavors to perfection.

Step 8: Serve with Toppings
Ladle the Chicken Pozole Verde into bowls, inviting everyone to customize their servings. Provide optional toppings such as sliced radishes, creamy avocado, zesty lime wedges, fresh cilantro, and crunchy tortilla chips. Each topping adds a delightful twist to your comforting bowl of soup!

Make Ahead Options

These Chicken Pozole Verde delights are perfect for meal prep! You can prepare the soup base, including the sautéed vegetables and blended tomatillo mixture, up to 24 hours in advance. Simply store this mixture in an airtight container in the refrigerator. The shredded chicken and hominy can also be blended into the soup right before serving for a fresh finish. To ensure your pozole remains just as delicious, add a splash of broth when reheating to maintain its vibrant consistency. When you're ready to enjoy your comforting bowl, just simmer everything together for about 10 minutes and serve with your favorite toppings for a quick, satisfying meal!

What to Serve with Healthy Chicken Pozole Verde

As you savor each comforting spoonful of this vibrant soup, the perfect pairings will enhance your meal experience, creating a delightful feast.

  • Warm Tortilla Chips: These crispy chips add a satisfying crunch and are perfect for dipping into the delicious broth, enhancing the dish's textures.

  • Creamy Avocado: Sliced or diced avocado provides a rich creaminess that complements the zesty flavors of the pozole, providing a luxurious mouthfeel.

  • Crisp Radish Salad: A quick salad of sliced radishes, lime juice, and salt adds a refreshing, peppery bite that balances the richness of the soup.

  • Zesty Lime Wedges: A squeeze of fresh lime juice brightens each bite, enhancing the soup's flavors with a tangy freshness that brings the dish to life.

  • Shredded Cabbage: This crunchy topping adds a fresh, crunchy texture, making each bowl more vibrant and visually appealing.

  • Chilled Corn Salad: A side of sweet corn salad tossed with cilantro and lime is a sweet, crunchy counterpoint to the warming soup.

  • Refreshing Cucumber Agua Fresca: For a drink, this light, refreshing beverage complements the meal beautifully while keeping things vibrant and zesty.

  • Fluffy Cornbread: This subtly sweet and soft bread is perfect for soaking up the flavorful broth, making each bite of pozole even more enjoyable.

  • Churros for Dessert: End on a sweet note with fluffy churros sprinkled with cinnamon sugar, providing a lovely contrast to the savory soup.

How to Store and Freeze Chicken Pozole Verde

Fridge: Store leftover Chicken Pozole Verde in an airtight container for up to 3-4 days. This allows you to enjoy the flavors over several days while keeping it fresh.

Freezer: For extended storage, freeze the soup in portions for up to 3 months. Ensure it’s in airtight containers or freezer bags, removing as much air as possible to prevent freezer burn.

Reheating: When ready to enjoy, thaw the frozen pozole in the fridge overnight. Reheat on the stove over medium heat, adding a splash of broth if needed to restore the perfect consistency.

Note: The soup retains its hearty texture and vibrant flavors, making it a delightful option for busy weeknights even after freezing!

Chicken Pozole Verde Variations

Feel free to explore these scrumptious alternatives and make this recipe uniquely yours!

  • Pork Swap: Use tender shredded pork for a different yet delightful protein option that adds a savory depth.
  • Creamy Addition: Stir in cream cheese or sour cream for a rich, creamy twist that enhances the flavor and texture.
  • Vegetarian Delight: Swap chicken for black beans or pinto beans and replace broth with vegetable broth, while keeping the hominy for heartiness.
  • Extra Heat: Boost the spiciness by including serrano peppers alongside jalapeños, perfect for those who crave a fiery punch in their soup.
  • Herb Boost: Fresh herbs like basil or mint can be added for a refreshing twist to the traditional flavor profile.
  • Citrus Kick: Add a squeeze of fresh lime juice at the end to brighten up the flavors, making every bite even more vibrant.
  • Smoky Flavor: Incorporate smoked paprika or chipotle powder for a smoky depth that elevates the overall taste experience.
  • No Hominy? If you're out of hominy, try substituting with cooked quinoa or farro for an exciting twist and added texture.

With so many creative options, you can enjoy Chicken Pozole Verde in various delicious ways! For more inspiring ideas, check out my recipes for Spatchcock Chicken Flavor and Honey BBQ Chicken.

Expert Tips for Chicken Pozole Verde

  • Rinse Tomatillos: Always rinse tomatillos thoroughly to remove the sticky residue from their husks, ensuring a clean and vibrant broth.

  • Adjust Spice Level: Keep seeds in the jalapeño for additional heat or swap it for milder peppers if your family prefers less spice in this Chicken Pozole Verde.

  • Mind Your Broth: If using low-sodium chicken broth, taste and adjust seasoning at the end to avoid an overly salty soup.

  • Don't Overcook Chicken: Chicken thighs and breasts should simmer just enough to be tender; overcooking can result in dry pieces that detract from your pozole's texture.

  • Customize Leftovers: When reheating, you may need to add more broth for the best flavor and consistency, as the hominy tends to absorb liquid.

Chicken Pozole Verde Recipe FAQs

How do I select the best tomatillos for Chicken Pozole Verde?
Absolutely! Look for tomatillos that have firm, slightly wrinkled skin and a bright green color. Avoid any that have dark spots all over or feel too soft, as these indicate overripeness or spoilage. Fresh tomatillos will enhance the vibrant green broth of your pozole.

How should I store leftovers of Chicken Pozole Verde?
For best results, store any leftover Chicken Pozole Verde in an airtight container in the refrigerator for up to 3-4 days. When you're ready to enjoy it again, I recommend adding a splash of chicken broth while reheating on the stove to restore its creamy consistency and flavor.

Can I freeze Chicken Pozole Verde?
Very! To freeze, portion the soup into airtight containers or freezer bags, making sure to remove as much air as possible to prevent freezer burn. It can be stored for up to 3 months. When ready to eat, thaw it in the fridge overnight and reheat gently on the stove, adding a bit of broth if necessary for the perfect texture.

What if my Chicken Pozole Verde turns out too thick?
If your pozole is thicker than you'd like, don’t worry! Simply stir in a bit of additional chicken broth or water until it reaches your preferred consistency. Always taste and adjust seasonings, too, because adding liquid can dilute flavors.

Are there any dietary considerations I should keep in mind?
Definitely! This Chicken Pozole Verde is gluten-free and can easily be made dairy-free. Ensure to check the labels on your chicken broth and hominy for any hidden gluten, and feel free to customize toppings to accommodate allergies – like skipping cheese or using avocado instead for creaminess!

Can I make this Chicken Pozole Verde vegetarian?
Yes! If you'd like a vegetarian version, you can substitute chicken with beans and use vegetable broth instead, while still including the hominy. This keeps the integrity of the dish while making it suitable for a vegetarian diet.

Chicken Pozole Verde

Hearty Chicken Pozole Verde: A Comforting One-Pot Delight

A flavorful and nutritious twist on traditional Chicken Pozole Verde, this one-pot soup is perfect for busy nights.
Print Recipe Pin Recipe
Prep Time 15 minutes mins
Cook Time 45 minutes mins
Total Time 1 hour hr
Servings: 6 bowls
Course: Soups
Cuisine: Mexican
Calories: 350
Ingredients Equipment Method Nutrition Notes

Ingredients
  

For the Soup Base
  • 2 tablespoons Olive Oil Provides a cooking fat to sauté vegetables for added flavor.
  • 1 medium Onion Adds sweetness and depth to the flavor base.
  • 1 medium Jalapeño Pepper Offers mild heat; can be adjusted for spiciness.
  • 2 medium Poblano Peppers Contributes a slightly smoky note to the broth.
  • 3 cloves Garlic Enhances overall flavor; fresh garlic works best.
  • 6 medium Tomatillos Key to the green broth; husk and rinse before use.
  • 6 cups Chicken Broth Low-sodium is a healthier choice.
  • 2 teaspoons Dried Oregano Adds herbal notes to the soup.
  • 1 teaspoon Ground Cumin Provides warmth and earthiness.
  • 1 teaspoon Ground Coriander Provides warmth and earthiness.
  • 1 leaf Bay Leaf Infuses the broth with aromatic flavor.
  • to taste Salt Essential for enhancing flavor.
  • to taste Black Pepper For seasoning.
For the Protein
  • 1.5 pounds Boneless Skinless Chicken Thighs/Breasts Thighs add more flavor.
For the Texture
  • 2 cups Hominy Drain and rinse before use.
  • optional Chicken Bouillon Enhances depth of flavor.
Toppings (optional)
  • 1 cup Radishes Provides a crunchy, fresh element.
  • 1 medium Avocado Adds creaminess and richness.
  • 2 wedges Lime Offers zesty freshness.
  • 1 cup Cilantro Brightens up the dish.
  • 1 cup Shredded Cabbage Adds crunch and color.
  • 1 cup Tortilla Chips Perfect for a delightful crunch.

Equipment

  • Large pot
  • Blender

Method
 

Step-by-Step Instructions
  1. In a large pot, heat 2 tablespoons of olive oil over medium-high heat. Once shimmering, add 1 diced onion, 1 chopped jalapeño, and 2 diced poblano peppers. Sauté for 3-4 minutes until the onion turns translucent.
  2. Stir in 3 minced garlic cloves and 6 husked, rinsed tomatillos, sautéing for another 4-5 minutes until the tomatillos become soft.
  3. Transfer the sautéed mixture to a blender, adding 6 cups of chicken broth and a handful of cilantro. Blend until smooth.
  4. Return the blended mixture to the pot over medium heat. Add 5 more cups of chicken broth, 2 teaspoons of oregano, 1 teaspoon each of cumin and coriander, and 1 bay leaf. Stir to combine.
  5. Add 1.5 pounds of chicken, bring to a boil, reduce heat to low and simmer for about 30 minutes.
  6. Transfer the chicken to a plate and shred it with two forks. Return the shredded chicken to the pot along with 2 cups of hominy. Stir gently.
  7. Allow to simmer uncovered for an additional 10 minutes, tasting and adjusting seasoning as needed.
  8. Ladle into bowls and serve with toppings like radishes, avocado, lime wedges, cilantro, and tortilla chips.

Nutrition

Serving: 1bowlCalories: 350kcalCarbohydrates: 30gProtein: 25gFat: 15gSaturated Fat: 3gPolyunsaturated Fat: 2gMonounsaturated Fat: 8gCholesterol: 70mgSodium: 800mgPotassium: 700mgFiber: 6gSugar: 5gVitamin A: 500IUVitamin C: 25mgCalcium: 50mgIron: 6mg

Notes

Store leftovers in an airtight container for 3-4 days or freeze for up to 3 months. Reheat on the stove, adding broth if needed.

Tried this recipe?

Let us know how it was!

Cozy Up with Quick Wonton Soup: Your New Comfort Food

December 23, 2025 by Grace Snow Leave a Comment

As I stood in my kitchen, the cozy aroma of ginger and garlic danced through the air, instantly transporting me to a bustling street market in Asia. This Quick & Easy Wonton Soup is more than just a recipe; it's a comforting, customizable hug in a bowl, perfect for those chilly evenings when all you want is something warm and delicious. With just 25 minutes of prep time, you can whip up this delightful dish that pleases everyone at the table—whether you're cooking for a solo self-care night or a cozy gathering with friends. Plus, it’s simple to make, inviting you to unleash your creativity by swapping in your favorite proteins or veggies. What comforting twist will you add to your wonton soup?

Why is Wonton Soup a Must-Try?

Simplicity at Its Best: This Quick & Easy Wonton Soup takes just 25 minutes, making it perfect for busy weeknights.
Customizable Deliciousness: Feel free to swap proteins like chicken or tofu and add your favorite veggies for a personal touch.
Warmth in Every Bite: Envelop yourself in the savory broth, where ginger and garlic create a heartwarming flavor that's simply irresistible.
Impressive Appeal: This dish is not only comforting but also visually delightful, making it a true crowd-pleaser—even for gatherings! Pair it with a refreshing cucumber pepper salad for a complete meal.
Versatile Meal Prep: Easily freeze wontons ahead for a quick meal option later; just boil them in the broth and enjoy.

Wonton Soup Ingredients

For the Wontons

  • Wonton Wrappers – Form the dumplings; homemade wrappers can elevate freshness and texture.
  • Ground Pork or Shrimp – The main protein source for the dumplings; feel free to substitute chicken or tofu for a different flavor profile.

For the Broth

  • Chicken Broth – The base liquid that adds richness to your soup; vegetable broth works well for a vegetarian option.
  • Garlic – Enhances the broth's aromatic flavor; garlic powder may be used if fresh isn't available.
  • Ginger – Offers a warm, spicy note to the broth; ground ginger can serve as a good substitute in a pinch.
  • Soy Sauce – Delivers umami to the broth; a low-sodium version is perfect for a healthier choice.
  • Sesame Oil – Adds depth and richness; if unavailable, olive oil is a great alternative.

For Garnishing

  • Green Onions – Provides freshness and a pop of color; chives can work as a substitute or simply be omitted if needed.

This Wonton Soup combines comforting elements into a delightful bowl of flavors!

Step‑by‑Step Instructions for Quick & Easy Wonton Soup

Step 1: Prepare the Broth
In a large pot over medium heat, pour in 6 cups of chicken broth, then add 1 tablespoon of grated ginger and 3 minced garlic cloves. Bring the mixture to a gentle simmer, stirring occasionally, until it begins to bubble, which should take about 5 minutes. The inviting aroma of ginger and garlic will fill your kitchen, setting the stage for your comforting wonton soup.

Step 2: Add Wontons
Once the broth is boiling, carefully place 20 to 25 wonton wrappers into the pot. Allow them to cook according to the package directions, typically around 3 to 5 minutes, until they begin to float to the surface. This visual cue indicates that the dumplings are perfectly tender and ready to become part of your savory soup.

Step 3: Season the Soup
With the cooked wontons now in the pot, stir in 2 tablespoons of soy sauce and 1 tablespoon of sesame oil, enhancing the broth’s flavor. Taste and adjust the seasoning as desired, adding more soy sauce for saltiness or a dash of sesame oil for richness. Give the broth a gentle stir to fully incorporate these delicious elements into your wonton soup.

Step 4: Garnish
Just before serving, slice 2 green onions and sprinkle them into the pot for a fresh finish. The bright green color will add a delightful contrast to your warm broth, enhancing both flavor and visual appeal. Let them sit for a minute to impart their fresh aroma, making your wonton soup even more inviting.

Step 5: Serve
Ladle the hot wonton soup into bowls, ensuring each has a generous portion of dumplings and aromatic broth. For an extra touch, feel free to add additional sliced green onions on top. Enjoy serving this comforting and customizable dish to friends and family, or savor a bowl all for yourself.

How to Store and Freeze Wonton Soup

Fridge: Store leftover wonton soup in an airtight container for up to 3 days. To maintain flavor and texture, consume within this timeframe.

Freezer: If freezing, separate cooked wontons from the broth. Freeze wontons on a baking sheet until solid, then transfer to a freezer bag for up to 3 months.

Reheating: When ready to enjoy, boil the frozen wontons in broth until cooked; it'll magically bring the comforting flavors back to life!

Soups Together: If you've frozen broth, thaw and reheat it gently on the stovetop before adding the cooked wontons for a delicious, quick meal any night.

Expert Tips for Quick Wonton Soup

  • Timing Matters: Cook wontons separately for optimal tenderness; overcooking can make them mushy and less enjoyable in your wonton soup.
  • Uniform Cuts: Slice ingredients like green onions evenly for consistent cooking and presentation, enhancing the overall look of your soup.
  • Broth Flavor Boost: Don’t hesitate to taste and adjust your broth; a pinch more soy sauce or ginger can elevate the comforting experience.
  • Storage Solutions: Store any leftovers in an airtight container for up to three days; when reheating, add a splash of water to maintain texture.
  • Customize Wisely: Swap proteins or veggies easily, but remember to balance flavors; adding spicy elements can create a delightful kick to your wonton soup.

What to Serve with Quick & Easy Wonton Soup

Elevate your dining experience with side dishes that perfectly complement the warmth and flavor of this delightful soup.

  • Cucumber Pepper Salad: A refreshing mix of crunchy cucumbers and bell peppers enhances the soup’s comforting warmth, balancing flavors perfectly.

  • Steamed Broccoli: Lightly steamed broccoli adds a vibrant green touch, bringing both texture and nutrition to your meal, making each bite satisfying.

  • Fried Rice: Flavorful fried rice with peas and carrots makes a hearty pairing, kindling the Asian-inspired essence while providing a delightful contrast in texture.

  • Egg Rolls: Crispy egg rolls deliver an extra layer of crunch and flavor, making for a delightful pairing with the tender dumplings of wonton soup.

  • Sesame Noodles: These noodles offer a rich, nutty taste that complements the broth's savory notes perfectly, bringing a delightful harmony to your table.

  • Hot Tea: A subtle jasmine or green tea serves as a delightful beverage accompaniment, cleansing the palate and enhancing the overall dining experience.

  • Mochi Ice Cream: For dessert, the chewy texture of mochi ice cream provides a sweet finish that contrasts beautifully with the savory soup.

Wonton Soup Variations & Substitutions

Feel free to explore these exciting variations that let you personalize your Quick & Easy Wonton Soup with flavors that resonate with you!

  • Dairy-Free: Use coconut aminos instead of soy sauce for a delightful sweetness without the dairy.
  • Vegetarian: Substitute ground meat with finely chopped mushrooms or crumbled tofu, keeping those savory textures intact.
  • Spicy Kick: Add a drizzle of chili oil or a few slices of fresh jalapeño for a fiery twist that elevates the entire soup.
  • Herb-Infused: Introduce fresh herbs like cilantro or basil right before serving for a fragrant finish that enlivens every spoonful.
  • Extra Veggies: Toss in bok choy, spinach, or carrots during the broth simmer for a heartier, nutrient-packed soup.
  • Rich Broth: Swap chicken broth for homemade stock to deepen the flavor, enriching the comfort of your soup.
  • Gluten-Free: Opt for gluten-free soy sauce or tamari, ensuring that every ingredient aligns with your dietary needs while maintaining taste.
  • Asian Fusion: Infuse your soup with a hint of miso paste for an unconventional twist that brings layers of umami flavor to your bowl.

These variations are not just substitutions; they are opportunities to make the soup uniquely yours. And if you're in the mood for something different, why not try my delightful Lemon Chicken Soup or a nourishing Zuppa Toscana Soup?

Make Ahead Options

These Quick & Easy Wonton Soup preparations are perfect for busy home cooks looking to save time without sacrificing flavor! You can prepare the wontons up to 24 hours in advance; just assemble them and place them on a parchment-lined baking sheet until you're ready to cook. For optimal flavor, simmer the broth (without the wontons) up to 3 days ahead and refrigerate it. When you're ready to enjoy your soup, simply reheat the broth in a pot, add the wontons directly from the fridge (or frozen), and cook until they float—this will ensure they are tender and just as delicious. By prepping ahead, you'll have a comforting bowl ready in no time, perfect for any weeknight!

Quick & Easy Wonton Soup Recipe FAQs

What type of wonton wrappers should I use?
You can use pre-made wonton wrappers, which are readily available in grocery stores, or make your own for a fresher taste. Homemade wrappers are usually a bit thicker, providing a delightful chewiness to your dumplings.

How should I store leftover wonton soup?
Leftover wonton soup can be stored in an airtight container in the fridge for up to 3 days. To keep the broth flavorful and the wontons tender, reheat gently on the stovetop, adding a splash of water if needed to restore the broth’s consistency.

Can I freeze wonton soup?
Absolutely! For the best results, separate the cooked wontons from the broth before freezing. Spread the wontons on a baking sheet to freeze individually for about 1-2 hours, then transfer them to a freezer bag. They can be safely frozen for up to 3 months. To enjoy, simply boil the frozen wontons in the broth until cooked through.

How can I make the broth more flavorful?
To boost the flavor of your broth, consider adding more ginger or garlic for a zingy kick. Additionally, incorporating a splash of oyster sauce or chili oil can add depth and a hint of heat. Always taste and adjust seasonings before serving to ensure a well-rounded flavor.

Are there any dietary considerations for wonton soup?
Yes! If you have any allergies, be mindful of the ingredients. Wonton wrappers often contain wheat, which can be problematic for those with gluten sensitivities. For a gluten-free option, look for rice-based wonton wrappers or make your own with gluten-free flour. Using vegetable broth and tofu instead of meat makes it vegetarian-friendly, too!

What can I do if my wontons are falling apart in the broth?
If your wontons are falling apart, they may need more time to cook or might not have been sealed properly. Make sure to press down on the edges of the wrappers firmly to create a good seal. If you're using frozen wontons, boil them straight from the freezer for optimal texture. Adjust the cooking time if needed!

Wonton Soup

Cozy Up with Quick Wonton Soup: Your New Comfort Food

Quick Wonton Soup is a delightful comfort dish that combines ginger and garlic flavors in a warm broth.
Print Recipe Pin Recipe
Prep Time 25 minutes mins
Cook Time 10 minutes mins
Total Time 35 minutes mins
Servings: 4 bowls
Course: Soups
Cuisine: Asian
Calories: 300
Ingredients Equipment Method Nutrition Notes

Ingredients
  

For the Wontons
  • 20-25 pieces Wonton Wrappers Use homemade for best results.
  • 1 cup Ground Pork or Shrimp Substitute with chicken or tofu if desired.
For the Broth
  • 6 cups Chicken Broth Vegetable broth can be used for a vegetarian option.
  • 3 cloves Garlic Minced, garlic powder can be used if fresh isn't available.
  • 1 tablespoon Grated Ginger Ground ginger can be a substitute.
  • 2 tablespoons Soy Sauce Low-sodium version is recommended.
  • 1 tablespoon Sesame Oil Olive oil can be used if unavailable.
For Garnishing
  • 2 pieces Green Onions Chives can be substituted or omitted.

Equipment

  • Large pot

Method
 

Step‑by‑Step Instructions for Quick & Easy Wonton Soup
  1. In a large pot over medium heat, pour in 6 cups of chicken broth, then add 1 tablespoon of grated ginger and 3 minced garlic cloves. Bring to a gentle simmer for about 5 minutes.
  2. Once the broth is boiling, carefully place 20 to 25 wonton wrappers into the pot and cook for 3 to 5 minutes until they begin to float.
  3. Stir in 2 tablespoons of soy sauce and 1 tablespoon of sesame oil to enhance flavor. Adjust seasoning as necessary.
  4. Slice 2 green onions and sprinkle them into the pot. Allow them to sit for a minute before serving.
  5. Ladle the soup into bowls, topping with extra sliced green onions if desired.

Nutrition

Serving: 1bowlCalories: 300kcalCarbohydrates: 30gProtein: 15gFat: 10gSaturated Fat: 2gPolyunsaturated Fat: 3gMonounsaturated Fat: 5gCholesterol: 50mgSodium: 800mgPotassium: 600mgFiber: 1gSugar: 1gVitamin A: 500IUVitamin C: 2mgCalcium: 40mgIron: 1mg

Notes

This soup is customizable with various proteins or vegetables as you prefer. Enjoy warm.

Tried this recipe?

Let us know how it was!

Hearty Tomato Enoki Mushroom Soup for Cozy Nights

December 23, 2025 by Grace Snow Leave a Comment

As I stood over the stove, the familiar aroma of sizzling garlic and ginger quickly transported me back to cozy dinners shared with friends and family. Today, I’m excited to share my Quick and Tasty Enoki Mushroom Soup with Tomato Broth, a dish that effortlessly captures the heart of Chinese cuisine. This comforting soup not only brings the warmth and richness of umami flavors but also promises a quick prep time, making it ideal for any weeknight meal. The delicate enoki mushrooms add a unique texture that complements the hearty ground beef, creating a satisfying bowl that feels like a warm hug. Ready to dive into a bowl of soul-nourishing goodness? Let's get cooking!

Why Is This Soup a Must-Try?

Comforting warmth: This soup delivers a heartwarming essence that brings families together. Quick preparation: In just 45 minutes, you can enjoy a rich, umami-packed meal without the fast-food fuss. Unique flavor: The combination of enoki mushrooms and tomato broth creates a delightful taste sensation. Versatile ingredients: Easily customize by substituting ground beef with turkey or exploring different mushrooms. Perfect for cozy nights: Serve with steamed rice or noodles for a complete meal, elevating your dinner experience. Dive into this bowl of goodness and enjoy a comforting staple that rivals takeout!

Tomato Enoki Mushroom Soup Ingredients

• Here’s what you need to create this delightful Tomato Enoki Mushroom Soup!

For the Soup Base

  • Vegetable oil – Adds richness and helps sauté aromatics; use a neutral flavor oil.
  • Ginger (2 slices) – Provides warmth and spice; can substitute with ground ginger if fresh is unavailable.
  • Garlic (3 cloves, smashed) – Enhances flavor with pungency; omit if garlic is not preferred.
  • Lean ground beef (½ pound) – Adds protein and substance; substitute with ground turkey for a leaner option.
  • Tomato paste (1 (6-ounce) can) – Forms the soup base; enriches flavor; can substitute with a 28-ounce can of diced tomatoes.
  • Low-sodium chicken stock (6 cups) – Keeps the soup flavorful while controlling sodium levels; vegetable stock can be used for a vegetarian version.
  • Sugar (2 teaspoons) – Balances acidity from the tomatoes; maple syrup can be a substitute.
  • Salt (1 teaspoon) – Enhances overall taste; adjust based on personal preference.
  • Ground white pepper (⅛ teaspoon) – Adds subtle heat; black pepper can be used instead.
  • White vinegar (1 tablespoon) – Brightens flavor and adds acidity; lemon juice can be an alternative.

For the Garnish

  • Scallions (2, separated into whites and greens) – Adds freshness and onion flavor; red onions can be used instead.
  • Enoki mushrooms (3 packs) – Provides distinctive texture and flavor; substitute with shiitake or button mushrooms for variations.

This Tomato Enoki Mushroom Soup is rich in umami, packing a flavorful punch that warms the soul. Enjoy the simplicity and comfort of homemade goodness tonight!

Step‑by‑Step Instructions for Tomato Enoki Mushroom Soup

Step 1: Sauté Aromatics
Heat 2 tablespoons of vegetable oil in a medium pot over medium heat until it shimmers. Add 2 slices of ginger and 3 smashed garlic cloves, cooking them for about 2 minutes until they become fragrant and golden. This will create a lovely aromatic base for your Tomato Enoki Mushroom Soup.

Step 2: Brown the Beef
Increase the heat to medium-high and add ½ pound of lean ground beef to the pot. Cook the beef for approximately 5 minutes, stirring occasionally until it’s browned and slightly crispy, ensuring it develops a rich flavor. This step sets the foundation for the hearty taste of your soup.

Step 3: Incorporate Tomato Paste
Stir in 1 can of tomato paste, cooking it for an additional 2 minutes. As it caramelizes, you’ll notice a deepening of flavor, which enhances the overall richness of the broth in your Tomato Enoki Mushroom Soup. Keep an eye on it to prevent burning.

Step 4: Add Stock and Seasonings
Pour in 6 cups of low-sodium chicken stock and add 2 teaspoons of sugar, 1 teaspoon of salt, ⅛ teaspoon of ground white pepper, and 1 tablespoon of white vinegar. Stir well to combine all the ingredients, bringing it to a simmer over medium heat. This mixture will form the flavorful broth of your soup.

Step 5: Cook the Mushrooms
Once simmering, add 3 packs of enoki mushrooms and the whites of 2 scallions to the pot. Let it simmer gently for about 15 minutes until the mushrooms are tender and infused with the savory flavors. Keep checking to ensure everything is cooked evenly—this is where the magic happens in your Tomato Enoki Mushroom Soup.

Step 6: Garnish and Serve
After simmering, ladle the soup into bowls and garnish with the green parts of the scallions for a touch of freshness. This final step adds a beautiful pop of color and elevates the presentation. Enjoy this delicious and comforting Tomato Enoki Mushroom Soup warm, perfect for cozy nights!

What to Serve with Quick and Tasty Enoki Mushroom Soup with Tomato Broth

Create a comforting meal that warms your heart and soul with these delicious pairings.

  • Steamed Jasmine Rice: The fluffy grains soak up the rich broth, complementing the umami flavors while adding a satisfying texture.

  • Garlicky Green Beans: Crisp-tender green beans sautéed in garlic provide a fresh, crunchy contrast that beautifully balances the soup's warmth.

  • Crispy Spring Rolls: These delightful bites add a crunchy texture and savory filling, making for a perfect accompaniment that captures the essence of Asian cuisine.

  • Soft Noodles: Serve up some noodles, allowing each slurp to carry the soup’s robust broth and enhance your dining experience. A splash of soy sauce takes it to the next level!

  • Chili Oil Drizzle: For an added kick, a drizzle of chili oil on top of the soup will elevate its flavor profile, providing warmth and depth to every bite.

  • Fresh Cilantro Garnish: Brighten your soup with chopped cilantro. Its fresh taste invigorates each spoonful and can enhance the overall flavor experience.

  • Lightly Pickled Cucumbers: These refreshing bites cut through the richness of the soup, offering a tangy contrast that refreshes the palate.

  • Light White Wine: A crisp Sauvignon Blanc pairs well with the tomato-based soup, enhancing the meal with added flavor without overpowering it.

Make Ahead Options

This Tomato Enoki Mushroom Soup is perfect for meal prep, making busy weeknights stress-free! You can prepare the soup base (steps 1-4) up to 24 hours in advance by storing it in an airtight container in the refrigerator. To maintain quality, be sure to cool the soup to room temperature before refrigerating. When you're ready to enjoy the soup, simply bring it back to a gentle simmer and add the enoki mushrooms and scallion whites (step 5), allowing them to cook for about 15 minutes. This way, you’ll have a comforting, umami-rich tomato enoki mushroom soup that tastes just as delightful as when freshly made, while saving valuable time on busy evenings!

Expert Tips for Tomato Enoki Mushroom Soup

  • Caramelize the Paste: Cook the tomato paste until caramelized to develop rich, deep flavors that elevate the umami taste of your soup.

  • Grease Control: Use lean ground beef to minimize excess grease. If you choose regular ground beef, drain it before adding other ingredients.

  • Monitor Seasoning: Adjust chicken bouillon powder based on the desired saltiness to avoid overly salty soup. Start with less if you're unsure.

  • Mushroom Choice: Experiment with different mushrooms like shiitake or oyster for assorted textures and flavors in your Tomato Enoki Mushroom Soup.

  • Fresh Herbs Garnish: Elevate the presentation and flavor by garnishing with fresh herbs or additional scallions before serving.

Tomato Enoki Mushroom Soup Variations

Feel free to make this comforting soup your own with some delightful twists!

  • Dairy-Free: Substitute the chicken stock with vegetable broth for a fully dairy-free version that’s equally satisfying.
  • Spicy Kick: Add a teaspoon of chili paste or fresh sliced jalapeños while sautéing for a delightful kick of heat. Adjust based on your spice preference!
  • Mushroom Medley: Experiment with a mix of mushrooms like shiitake or oyster for a richer texture and depth of flavor. Each variety adds its unique character to the soup.
  • Additional Veggies: Toss in diced carrots or bell peppers alongside the mushrooms for added nutrition and vibrant color. They’ll create a beautiful medley and enhance the overall mouthfeel.
  • Herb Boost: Fresh basil or cilantro can elevate the flavor profile; add them just before serving for a refreshing touch that beautifully complements the tomato base.
  • Ground Protein Swap: Swap ground beef for ground turkey or chicken for a lighter option without sacrificing flavor. It’s a fantastic way to embrace healthier choices!
  • Umami Enhancement: Stir in a splash of soy sauce or a teaspoon of miso paste for an extra umami kick that elevates the soup to new heights.

For an equally cozy experience, don't forget to check out my Lemon Chicken Soup or try a comforting Zuppa Toscana Soup. Each recipe offers a unique taste adventure!

How to Store and Freeze Tomato Enoki Mushroom Soup

Fridge: Store leftover tomato enoki mushroom soup in an airtight container for up to 3 days. Make sure it cools completely before sealing.

Freezer: For long-term storage, freeze the soup in sealed freezer-safe bags or containers for up to 3 months. Portion it out for easy reheating.

Reheating: Thaw overnight in the fridge before reheating. Warm gently on the stovetop over low heat, stirring occasionally to maintain texture.

Serving: Reheat individual servings in the microwave if you're short on time, ensuring they’re heated through for a delicious bowl of warmth.

Tomato Enoki Mushroom Soup Recipe FAQs

What type of enoki mushrooms should I use?
I recommend using fresh enoki mushrooms, as they provide a delicate crunch that elevates the soup's texture. Look for firm, smooth mushrooms without dark spots. If fresh enoki isn't available, shiitake or button mushrooms are great substitutes, each bringing their own unique flavor profile to the dish.

How should I store leftover soup?
Absolutely! Store any leftover tomato enoki mushroom soup in an airtight container in the refrigerator. It will stay fresh for up to 3 days. Make sure to let it cool completely before sealing to maintain optimal flavor and texture.

Can I freeze the soup?
Yes, you can! For long-term storage, freeze your tomato enoki mushroom soup in sealed freezer-safe bags or containers. It can last for up to 3 months. I recommend portioning it out for easy reheating later, making weeknight meals a breeze.

What if the soup is too salty?
No worries! If you find your soup to be overly salty, an easy fix is to add a dash of sugar or a squeeze of lemon juice to balance the flavors. You can also add additional water or stock to dilute it—just remember to adjust seasonings as needed.

Are there any dietary considerations for this recipe?
Very! This soup can be made gluten-free by ensuring that your chicken stock is certified gluten-free. If cooking for vegetarians, simply replace the ground beef with extra mushrooms or tofu, and use vegetable stock instead of chicken stock. Always check your ingredients for any allergens, especially if serving to guests.

Can I use cooked ground beef instead of raw?
Absolutely! If you have cooked ground beef on hand, simply skip the browning step. Add the cooked meat when you pour in the chicken stock. Let it simmer with the other ingredients for a few minutes to let all the flavors meld beautifully. Enjoy!

Tomato Enoki Mushroom Soup

Hearty Tomato Enoki Mushroom Soup for Cozy Nights

A comforting Tomato Enoki Mushroom Soup that brings warmth and umami flavors, perfect for cozy nights.
Print Recipe Pin Recipe
Prep Time 15 minutes mins
Cook Time 30 minutes mins
Total Time 45 minutes mins
Servings: 4 bowls
Course: Soups
Cuisine: Chinese
Calories: 300
Ingredients Equipment Method Nutrition Notes

Ingredients
  

Soup Base
  • 2 tablespoons vegetable oil neutral flavor oil
  • 2 slices ginger can substitute with ground ginger if fresh is unavailable
  • 3 cloves garlic smashed; omit if not preferred
  • ½ pound lean ground beef can substitute with ground turkey
  • 1 can (6-ounce) tomato paste can substitute with a 28-ounce can of diced tomatoes
  • 6 cups low-sodium chicken stock can use vegetable stock for vegetarian version
  • 2 teaspoons sugar can substitute with maple syrup
  • 1 teaspoon salt adjust based on personal preference
  • ⅛ teaspoon ground white pepper can use black pepper instead
  • 1 tablespoon white vinegar can substitute with lemon juice
Garnish
  • 2 scallions separated into whites and greens; red onions can be used
  • 3 packs enoki mushrooms can substitute with shiitake or button mushrooms

Equipment

  • Medium pot

Method
 

Step-by-Step Instructions
  1. Heat 2 tablespoons of vegetable oil in a medium pot over medium heat until it shimmers. Add 2 slices of ginger and 3 smashed garlic cloves, cooking them for about 2 minutes until fragrant.
  2. Increase the heat to medium-high and add ½ pound of lean ground beef to the pot. Cook for approximately 5 minutes, stirring occasionally until browned.
  3. Stir in 1 can of tomato paste and cook for an additional 2 minutes until it caramelizes.
  4. Pour in 6 cups of low-sodium chicken stock and add 2 teaspoons of sugar, 1 teaspoon of salt, ⅛ teaspoon of ground white pepper, and 1 tablespoon of white vinegar. Stir well and bring to a simmer.
  5. Add 3 packs of enoki mushrooms and the whites of 2 scallions. Let it simmer gently for about 15 minutes until the mushrooms are tender.
  6. Ladle the soup into bowls and garnish with the green parts of the scallions.

Nutrition

Serving: 1bowlCalories: 300kcalCarbohydrates: 20gProtein: 25gFat: 15gSaturated Fat: 5gPolyunsaturated Fat: 2gMonounsaturated Fat: 8gCholesterol: 60mgSodium: 800mgPotassium: 600mgFiber: 2gSugar: 4gVitamin A: 800IUVitamin C: 10mgCalcium: 50mgIron: 3mg

Notes

This soup is rich in umami flavors, perfect for cozy nights. Customize by using different mushrooms or ground meat alternatives.

Tried this recipe?

Let us know how it was!

Creamy Salmon Spinach Pasta Ready in Just 20 Minutes

December 22, 2025 by Grace Snow Leave a Comment

The aroma of lemon and dill dancing through my kitchen is a welcome reminder that quick meals can be both healthy and delicious. This Creamy Salmon Spinach Pasta showcases perfectly cooked salmon and vibrant spinach, all tossed with al dente pasta in a light yet luxuriously creamy Greek yogurt sauce. In just 20 minutes, this dish transforms pantry staples into a wholesome family favorite, proving that convenience doesn’t have to sacrifice flavor or nutrition. Whether you're seeking a hearty weeknight dinner or a dish to impress friends, you'll find that this recipe is a delightful blend of textures and tastes. Curious about how to make this nutritious pasta dish in a flash? Let's dive in!

Why is Salmon Spinach Pasta a Must-Try?

Quick and easy to whip up, this dish is perfect for busy evenings without skimping on flavor. Nutritious ingredients like salmon and spinach boost your protein intake while keeping it light with Greek yogurt. Versatile in nature, you can swap in your favorite pasta or protein to customize it. Elevated flavors from lemon and dill make every bite a delight. Plus, it’s ready in just 20 minutes—ideal for decadent weeknight meals or impressing guests. For a twist, consider pairing it with a fresh salad like Chickpea Spinach Curry for a complete meal experience!

Salmon Spinach Pasta Ingredients

• Ready to create your delicious Salmon Spinach Pasta? Here’s what you need!

For the Pasta
• Rigatoni (or preferred pasta) – This hearty pasta offers a robust base; gluten-free options work well too.

For the Salmon
• Salmon fillet – A rich, flavorful protein; feel free to substitute with trout or chicken for variety.
• Dried dill – Elevates the taste with a fragrant touch; fresh dill is recommended for an extra burst of flavor.
• Lemon zest – Adds refreshing citrus notes; lime zest can be used for a unique twist.
• Salt – Balances out the flavors; adjust to fit your taste preferences.
• Black pepper – Introduces a bit of warmth; switch to white pepper for a milder option.

For the Sauce
• Greek yogurt – Keeps the sauce creamy yet light; plain yogurt is a substitute but may change the flavor slightly.
• Fresh lemon juice – Provides acidity that brightens the dish; fresh is best for flavor over bottled.
• Red pepper flakes – Offers a hint of heat; omit for a milder outcome.

For the Greens
• Baby spinach leaves – Bursting with vitamins, this leafy green adds nutrition and color; swap with kale or Swiss chard if desired.

Now that you have the essential ingredients, let’s get cooking and savor the delightful symphony of flavors in your Salmon Spinach Pasta!

Step‑by‑Step Instructions for Creamy Salmon Spinach Pasta

Step 1: Preheat and Prepare
Begin by preheating your oven to 400°F (200°C). While the oven heats up, line a baking sheet with parchment paper. Place the salmon fillet skin-side down on the sheet, then generously season it with dried dill, lemon zest, salt, and freshly cracked black pepper. This will enhance the flavor of your Creamy Salmon Spinach Pasta!

Step 2: Bake the Salmon
Transfer the prepared salmon to your preheated oven and bake for 7-10 minutes, or until the fish appears opaque and flakes easily with a fork. Once it's done, remove it from the oven, discard the skin, and break the salmon into bite-sized chunks for easy incorporation into your pasta dish.

Step 3: Cook the Pasta
In a large pot, bring salted water to a boil and cook your rigatoni according to package instructions, typically 8-10 minutes for al dente texture. Before draining, be sure to reserve about 1 cup of pasta water, as this starchy water will help adjust the sauce's consistency later in the process.

Step 4: Wilt the Spinach
After draining the pasta, return it to the pot over low heat. Toss in the fresh baby spinach leaves, stirring gently for about 2-3 minutes until the spinach is wilted and bright green. The warmth from the pasta will help soften the spinach without overcooking it, adding a vibrant touch to your Creamy Salmon Spinach Pasta.

Step 5: Create the Sauce
Now, mix in the creamy Greek yogurt, fresh lemon juice, and a pinch of red pepper flakes into the warm pasta and spinach mixture. Stir well, allowing the flavors to meld together. If the sauce seems too thick, gradually add reserved pasta water until you reach your desired creaminess—perfectly coating your pasta without being heavy!

Step 6: Combine the Salmon
Gently fold the flaked salmon into the pasta mixture, ensuring each piece is coated with the creamy sauce. This step integrates the salmon's rich flavor throughout the dish, enhancing the overall taste of your Creamy Salmon Spinach Pasta. Once well combined, remove the pot from the heat.

Step 7: Serve and Enjoy
Spoon generous portions of your creamy salmon spinach pasta into bowls and consider adding a sprinkle of additional dill or a squeeze of fresh lemon juice on top for extra flavor. Serve immediately while the dish is warm and creamy, making it a delightful meal ready to impress your family or guests!

What to Serve with Creamy Salmon Spinach Pasta

Looking for the perfect companions to elevate your dinner experience? These delightful side dishes and drinks will round out your meal beautifully.

  • Mixed Green Salad: A light salad with a zesty vinaigrette contrasts the creamy pasta and adds a refreshing crunch. Toss in cherry tomatoes and cucumber for a burst of color.

  • Garlic Bread: Crispy, buttery bread is perfect for soaking up any leftover sauce, creating a heartwarming bite. It’s a comforting classic that pairs seamlessly with the richness of the pasta.

  • Steamed Asparagus: Tender, bright green asparagus complements the dish’s flavors while offering a lovely crunch. Lightly seasoned with lemon zest, it enhances the overall freshness.

  • Roasted Vegetables: A medley of roasted seasonal vegetables provides earthy tones and a caramelized sweetness, making your meal wholesome and vibrant. Think zucchini, bell peppers, and red onions for variety!

  • Lemonade or Sparkling Water: Refreshing beverages such as homemade lemonade or fizzy sparkling water with a hint of lemon enhance the dish's zesty notes, keeping your palate alive.

  • Cheesecake for Dessert: End on a sweet note with a slice of rich cheesecake. Its creamy texture ties back to the pasta, creating a delightful culinary echo, and offers a lovely finish to your meal.

  • Herbed Quinoa: Nutty quinoa seasoned with herbs is a great protein-rich side that adds texture and keeps the meal light and nutritious. Plus, it absorbs any extra sauce beautifully.

Make Ahead Options

These Creamy Salmon Spinach Pasta are perfect for meal prep enthusiasts! You can bake the salmon and cook the pasta up to 24 hours in advance, storing them separately in the refrigerator to maintain their textures. When you're ready to serve, simply reheat the salmon in the oven or microwave and warm the pasta gently in a pan. To keep the sauce creamy without breaking, add a splash of reserved pasta water if needed. The spinach can be wilted fresh at the time of serving for the best flavor and color. With these simple make-ahead strategies, you’ll enjoy a delicious homemade meal with minimal effort on busy weeknights!

How to Store and Freeze Salmon Spinach Pasta

Fridge: Store leftover Salmon Spinach Pasta in an airtight container for up to 2 days. When ready to enjoy, add a splash of water to help restore the creamy texture while reheating.

Freezer: For longer storage, freeze the pasta in a freezer-safe container for up to 3 months. Make sure to leave some space for expansion and thaw in the refrigerator before reheating.

Reheating: To reheat, warm gently on the stove over low heat, adding reserved pasta water or a splash of fresh lemon juice to revive its creaminess. Avoid high heat to prevent sauce separation.

Assembling Fresh: If making ahead, store components separately (salmon, pasta, and sauce) to maintain texture and freshness, combining them just before serving.

Salmon Spinach Pasta Customizations

Feel free to embrace your creativity and tailor this recipe to fit your taste buds and dietary needs!

  • Protein Swap: Replace salmon with grilled chicken or shrimp for a delightful twist. Both options add unique flavors, ensuring every bite remains exciting.
  • Pasta Options: Choose whole grain or vegetable-based pasta for added nutrition. For those watching their carbs, try using zucchini noodles for a fresh and crunchy alternative.
  • Dairy-Free: Switch Greek yogurt with a dairy-free alternative for a lactose-free version. Creamy oat-based yogurt works wonders without sacrificing texture.
  • Extra Greens: Toss in some kale or Swiss chard instead of spinach for a different leafy green. You’ll enjoy the same vibrant colors with a slightly different flavor profile.
  • Flavor Boost: Add a tablespoon of capers or olives to elevate the dish's saltiness and briny notes. This small tweak can transport your taste buds to the Mediterranean!
  • Herb Variations: Swap dried dill with fresh basil or parsley for aromatic freshness. You can even try adding a pinch of Italian seasoning for a warm, complex flavor.
  • Heat Level: Ensure your dish is just right by adjusting the red pepper flakes; add more for a spicier kick or omit completely for a milder experience.
  • Zesty Lemon: Switch out the lemon juice for lime juice for a tangy twist that brightens the dish in an unexpected way.

Whether you’re trying to make the dish a little healthier or simply want to switch things up, these variations will keep your Salmon Spinach Pasta fresh and exciting every time you whip it up. For a delightful side, consider pairing it with a refreshing mixed green salad or maybe even a serving of One Pot Salmon for some extra deliciousness!

Expert Tips for Salmon Spinach Pasta

  • Temperature Control: Avoid sauce separation by allowing the pasta to cool slightly before adding Greek yogurt. This keeps your Salmon Spinach Pasta creamy and smooth.

  • Meal Prep Magic: For busy weeknights, cook the salmon and pasta in advance, storing them separately. Reheat before serving for a quick, delicious meal.

  • Pasta Water Is Gold: Always reserve some pasta water to adjust sauce consistency without breaking. This simple step can elevate your Salmon Spinach Pasta!

  • Flavor Enhancements: Experiment with spices! Fresh herbs like basil or parsley can add a lovely twist while maintaining the dish's light and flavorful essence.

  • Swap Smartly: Don't hesitate to swap proteins or greens based on what you have. Grilled chicken or shrimp works beautifully in place of salmon!

Creamy Salmon Spinach Pasta Recipe FAQs

What type of salmon should I use for the pasta?
Absolutely! For a delicious Creamy Salmon Spinach Pasta, fresh salmon fillets are ideal due to their rich flavor and texture. However, you can use other fish like trout or even grilled chicken for a delightful twist!

How should I store leftover salmon spinach pasta?
To keep your Creamy Salmon Spinach Pasta fresh, store it in an airtight container in the refrigerator for up to 2 days. When you’re ready to enjoy it again, simply add a splash of water when reheating to maintain that creamy texture—delightful!

Can I freeze creamy salmon spinach pasta?
Yes, you can freeze it! Place the salmon spinach pasta in a freezer-safe container, leaving a bit of space for expansion, and it will stay fresh for up to 3 months. For best results, thaw overnight in the refrigerator before reheating gently on the stove.

What if my sauce is too thick?
Very! If your sauce ends up too thick, don't worry! Gradually add reserved pasta water, stirring gently until you achieve your desired creaminess. This starchy water is key to reviving the lovely, light sauce of your Creamy Salmon Spinach Pasta.

Can I substitute Greek yogurt in this recipe?
Absolutely! If you're looking for a dairy-free option, you can switch Greek yogurt with a dairy-free alternative like coconut yogurt. It might alter the flavor, but it will still keep that creamy texture you love in your salmon spinach pasta!

What should I pair my creamy salmon spinach pasta with?
For an ideal meal, pair your creamy salmon spinach pasta with a fresh mixed green salad and a light vinaigrette. This combination not only complements the flavors but also adds a nutritious and colorful touch to your dining experience!

Salmon Spinach Pasta

Creamy Salmon Spinach Pasta Ready in Just 20 Minutes

This Creamy Salmon Spinach Pasta is a quick, nutritious, and flavorful dish that combines salmon, spinach, and pasta in a creamy sauce. Perfect for busy nights!
Print Recipe Pin Recipe
Prep Time 10 minutes mins
Cook Time 10 minutes mins
Total Time 20 minutes mins
Servings: 4 servings
Course: Dinner
Cuisine: Italian
Calories: 450
Ingredients Equipment Method Nutrition Notes

Ingredients
  

For the Pasta
  • 12 oz Rigatoni (or preferred pasta) Gluten-free options work well too.
For the Salmon
  • 1 lb Salmon fillet Substitute with trout or chicken if desired.
  • 1 tbsp Dried dill Fresh dill recommended for extra flavor.
  • 1 tbsp Lemon zest Lime zest can be used for variation.
  • to taste Salt Adjust to fit your taste preferences.
  • to taste Black pepper White pepper can be used for milder flavor.
For the Sauce
  • 1 cup Greek yogurt Plain yogurt is a substitute but may alter flavor.
  • 2 tbsp Fresh lemon juice Fresh is best for flavor.
  • 1 pinch Red pepper flakes Omit for a milder outcome.
For the Greens
  • 5 oz Baby spinach leaves Kale or Swiss chard can be substituted.

Equipment

  • Baking Sheet
  • Pasta pot
  • Mixing Bowl

Method
 

Step-by-Step Instructions
  1. Preheat your oven to 400°F (200°C) and line a baking sheet with parchment paper. Place the salmon fillet skin-side down on the sheet and season with dried dill, lemon zest, salt, and black pepper.
  2. Transfer the salmon to the preheated oven and bake for 7-10 minutes, until opaque and flakes easily. Remove from the oven, discard the skin, and break into chunks.
  3. In a large pot, boil salted water and cook rigatoni according to package instructions (8-10 minutes for al dente). Reserve about 1 cup of pasta water before draining.
  4. Return the drained pasta to the pot on low heat, and add the baby spinach, stirring for 2-3 minutes until wilted.
  5. Mix in Greek yogurt, fresh lemon juice, and red pepper flakes into the pasta and spinach, adding reserved pasta water as needed to adjust consistency.
  6. Gently fold in the flaked salmon until evenly incorporated and remove from heat.
  7. Serve warm, optionally garnished with additional dill or lemon juice.

Nutrition

Serving: 1servingCalories: 450kcalCarbohydrates: 50gProtein: 30gFat: 15gSaturated Fat: 4gPolyunsaturated Fat: 2gMonounsaturated Fat: 8gCholesterol: 70mgSodium: 500mgPotassium: 600mgFiber: 3gSugar: 2gVitamin A: 1500IUVitamin C: 20mgCalcium: 100mgIron: 2mg

Notes

For best results, allow the pasta to cool slightly before adding Greek yogurt to prevent separation. Meal prep by cooking salmon and pasta in advance and storing them separately.

Tried this recipe?

Let us know how it was!

Creamy Spaghetti & Spinach with Sun-Dried Tomato Sauce Bliss

December 22, 2025 by Grace Snow Leave a Comment

As I stirred the pot, the rich aroma of garlic and creamy sun-dried tomato sauce began to fill my kitchen, instantly transporting me to an elegant Italian bistro. My Spaghetti & Spinach with Sun-Dried Tomato Cream Sauce is everything comfort food should be: indulgent and satisfying without the fuss. This dish combines fresh spinach's gentle crunch with the tangy punch of sun-dried tomatoes, all enveloped in a luxurious cream sauce that’s simply heavenly. With a quick prep time, it’s perfect for busy weeknights or when you want to impress at gatherings—your friends will think you spent hours crafting this masterpiece! Curious to learn how to whip up this delightful dish? Let’s dive in!

Why is this spaghetti recipe a must-try?

Simplicity at its core: Whipping up this dish requires minimal culinary skills—perfect for home cooks of all levels!
Bursting with flavor: The combination of creamy sun-dried tomato sauce and fresh spinach creates a crowd-pleasing taste experience that's hard to resist.
Flexible ingredients: Customize this recipe to fit your pantry! Consider adding cooked chicken or shrimp for extra protein, or try it with a side of garlic bread for a complete meal.
Quick and satisfying: In just about 30 minutes, you can serve up a restaurant-quality dish that’s perfect for weeknight dinners or elegant gatherings.
Vegetarian-friendly: This recipe delivers a hearty meal without meat, proving that comfort food can be both delicious and wholesome! For an extra delightful spin, check out our Chickpea Spinach Curry as another vegetarian option.

Spaghetti & Spinach with Sun-Dried Tomato Cream Sauce Ingredients

For the Pasta

  • Spaghetti – the foundation of the dish; cook until al dente to ensure it holds the creamy sauce well.
  • Salt – enhances flavor; use generously while boiling the pasta.

For the Sauce

  • Heavy Cream – creates a luscious, creamy base; substitute with half-and-half for a lighter sauce if desired.
  • Garlic – infuses the sauce with aromatic richness; fresh cloves yield the best flavor.
  • Olive Oil – used for sautéing; choose extra-virgin for a fruity note that complements the dish.
  • Sun-Dried Tomatoes – provide tangy bursts of flavor; ensure they’re well-drained for optimal taste.
  • Parmesan Cheese – adds depth; freshly grated will melt beautifully in the sauce for a richer experience.
  • Fresh Spinach – contributes freshness and a vibrant green hue; opt for fresh rather than frozen for the best texture.
  • Pepper – essential for seasoning; adjust according to your taste preference.

To Garnish

  • Additional Parmesan – sprinkle on top just before serving for that extra touch of indulgence.
  • Fresh Basil (optional) – brightens the dish with a hint of aromatic freshness; use leaves as a garnish for added appeal.

This Spaghetti & Spinach with Sun-Dried Tomato Cream Sauce is indeed a delightful comfort food that will charm both your palate and your loved ones. Enjoy your cooking adventure!

Step‑by‑Step Instructions for Spaghetti & Spinach with Sun-Dried Tomato Cream Sauce

Step 1: Cook the Spaghetti
Start by filling a large pot with water, adding a generous pinch of salt, and bringing it to a rolling boil over high heat. Once boiling, add the spaghetti and cook it according to the package instructions, typically around 8-10 minutes, until it’s al dente—firm but cooked through. Drain the pasta in a colander and set it aside, while you prepare the sauce.

Step 2: Sauté the Spinach
In a large skillet, heat about 2 tablespoons of extra-virgin olive oil over medium heat. Once the oil is shimmering, add 2-3 minced garlic cloves, sautéing them for about 1 minute until fragrant, ensuring they don’t burn. Next, toss in the fresh spinach, stirring frequently until it wilts down, which should take about 2-3 minutes. This fresh addition will brighten your Spaghetti & Spinach with Sun-Dried Tomato Cream Sauce.

Step 3: Prepare the Cream Sauce
With the spinach nicely wilted, pour in 1 cup of heavy cream, stirring well to combine. Bring the mixture to a gentle simmer over medium-low heat, allowing it to thicken slightly, which takes about 3-4 minutes. Now is the time to add in ½ cup of drained sun-dried tomatoes and ½ cup of freshly grated Parmesan cheese. Stir continuously until the cheese melts into the sauce, creating a creamy bliss.

Step 4: Combine Pasta and Sauce
Once your sun-dried tomato cream sauce has reached a luscious consistency, it’s time to finish your dish. Add the cooked spaghetti directly into the skillet, tossing gently to coat every strand in that beautiful creamy sauce. This is where the magic happens—each bite will be enveloped in the delightful flavors of the Spaghetti & Spinach with Sun-Dried Tomato Cream Sauce.

Step 5: Season and Serve
Taste your pasta and adjust the seasoning with salt and freshly cracked pepper to your liking. Serve your Spaghetti & Spinach with Sun-Dried Tomato Cream Sauce immediately, garnished with additional Parmesan cheese if desired for an extra touch of indulgence. Enjoy this comforting dish warm, perhaps paired with garlic bread and a fresh salad!

What to Serve with Spaghetti & Spinach with Sun-Dried Tomato Cream Sauce

Transform your comforting pasta dish into a delightful meal with these perfect pairings.

  • Garlic Bread: The crispy, buttery goodness complements the creamy sauce, adding a satisfying crunch and perfect for mopping up every last bit.

  • Caesar Salad: Crisp romaine and tangy dressing create a refreshing contrast to the rich pasta, offering a burst of fresh flavors on your plate.

  • Roasted Asparagus: This tender, earthy vegetable pairs beautifully with the creamy sauce, enhancing the meal with its own subtle, savory notes.

  • Wine Pairing - Chardonnay: A chilled glass of oaked Chardonnay enhances the richness of the cream sauce while balancing the dish’s acidity.

  • Lemon Sorbet: Start or end your meal on a bright, refreshing note, providing a delightful palate cleanser between bites of luxurious pasta.

  • Stuffed Mushrooms: For an elegant touch, these savory bites packed with cheese and herbs add a delicious depth, making the meal feel like a true feast.

  • Pesto Bruschetta: Fresh tomatoes atop toasted bread drizzled with basil pesto elevate the meal, offering vibrant flavors that complement the pasta beautifully.

Expert Tips for Spaghetti & Spinach

  • Use Fresh Ingredients: Always choose fresh spinach and garlic for the best flavor. Dried or wilted spinach won't provide the same vibrancy in your Spaghetti & Spinach with Sun-Dried Tomato Cream Sauce.

  • Watch the Heat: When sautéing garlic, keep an eye on it! Burnt garlic can turn bitter, compromising the creamy sauce's deliciousness.

  • Adjusting Thickness: If your cream sauce gets too thick, add a splash of pasta cooking water to help achieve the perfect consistency for your Spaghetti & Spinach with Sun-Dried Tomato Cream Sauce.

  • Right Pasta Choice: Make sure to cook the spaghetti until al dente. Overcooking the pasta means a mushy dish that won't hold up well with the creamy sauce.

  • Season to Taste: Always taste your sauce before serving. Adjust seasoning with salt and pepper as necessary to ensure your dish is flavorful and inviting.

Make Ahead Options

These Spaghetti & Spinach with Sun-Dried Tomato Cream Sauce are perfect for busy weeknights and meal prep enthusiasts! You can prepare the sun-dried tomato cream sauce up to 3 days in advance—just refrigerate it in an airtight container to maintain its creamy texture. On the day you’re ready to serve, simply reheat the sauce gently on the stovetop before adding the freshly cooked spaghetti. Additionally, you can also sauté the spinach and garlic a day ahead; just store them separately in the fridge to keep their flavors vibrant. By prepping ahead, you’ll save valuable time without sacrificing the dish's deliciousness!

How to Store and Freeze Spaghetti & Spinach with Sun-Dried Tomato Cream Sauce

  • Fridge: Store leftovers in an airtight container for up to 3 days. This keeps the flavors fresh while preventing drying out.
  • Freezer: You can freeze portions in airtight containers or freezer bags for up to 2 months. Defrost in the refrigerator before reheating.
  • Reheating: Gently reheat on the stove over low heat, adding a splash of cream or water to maintain the sauce's creamy texture.
  • Serving Tip: Once reheated, sprinkle with fresh Parmesan and enjoy your Spaghetti & Spinach with Sun-Dried Tomato Cream Sauce as if it were just made!

Variations & Substitutions for Spaghetti & Spinach with Sun-Dried Tomato Cream Sauce

Feel free to tailor this dish to suit your taste buds and dietary preferences—let your culinary creativity shine!

  • Light Cream: Substitute heavy cream with half-and-half or coconut milk for a lighter, dairy-free option.
  • Veggie Boost: Enhance nutrition by tossing in additional vegetables like roasted bell peppers or artichokes.
  • Protein Power: Add cooked chicken, shrimp, or even chickpeas for a protein-packed twist that keeps everyone satisfied.
  • Nutty Flavor: Sprinkle in toasted pine nuts or walnuts for a delightful crunch and added depth.
  • Herb Infusion: Fresh basil or parsley will brighten the dish—just stir in chopped herbs before serving for a pop of freshness.
  • Spice it Up: If you're craving heat, a dash of crushed red pepper flakes or a splash of hot sauce will elevate the flavor profile.
  • Cheese Variations: Experiment with cheeses! Swap Parmesan for pecorino or a dairy-free alternative to meet different preferences.
  • Different Pasta: Use whole wheat or gluten-free pasta to cater to specific dietary requirements; the creamy sauce pairs well with various pasta shapes!

Explore your options and make this creamy spaghetti dish uniquely yours. And if you're looking for more delicious vegetarian dishes, you might enjoy our Chickpea Spinach Curry or try something pasta-inspired with Pasta Sun Dried for a delightful twist!

Spaghetti & Spinach with Sun-Dried Tomato Cream Sauce Recipe FAQs

How do I select the best spinach for this recipe?
Absolutely! For the best flavor and texture, always go for fresh spinach with vibrant green leaves. Avoid any that appears wilted or has dark spots—these indicators suggest the spinach is past its prime. If you can, choose organic options to enjoy an even fresher taste!

What is the best way to store leftovers of Spaghetti & Spinach with Sun-Dried Tomato Cream Sauce?
You can store any leftovers in an airtight container in the refrigerator for up to 3 days. Just make sure it’s sealed tight to keep the creamy sauce from drying out, which can sometimes happen. When you’re ready to enjoy it again, gently reheat on the stove, adding a splash of cream or water to restore its creamy consistency.

Can I freeze the Spaghetti & Spinach with Sun-Dried Tomato Cream Sauce?
Yes, you can freeze this delicious dish! Transfer portions to airtight containers or resealable freezer bags, and it will hold up well in the freezer for up to 2 months. It's best to defrost in the refrigerator overnight before reheating. Just be aware that the cream sauce may need a little coaxing back to its former glory—simply add a bit of cream as you gently warm it up!

What should I do if my sauce is too thick?
If your creamy sauce ends up a bit too thick, no worries! Just stir in a splash of reserved pasta water, or a bit of cream, a little at a time while stirring on low heat until you achieve your desired consistency. This not only helps bring that luscious creaminess back but also prevents you from losing any of that wonderful flavor.

Are there any dietary considerations for this dish?
Very! This recipe is vegetarian-friendly, making it a fantastic option for anyone looking to enjoy a delicious meal without meat. However, if you're serving this dish to guests with food allergies, keep in mind that it contains dairy (heavy cream and Parmesan cheese), which some might need to avoid. For a dairy-free version, consider swapping heavy cream for coconut milk and using nutritional yeast instead of cheese!

Spaghetti & Spinach with Sun-Dried Tomato Cream Sauce

Creamy Spaghetti & Spinach with Sun-Dried Tomato Sauce Bliss

This Spaghetti & Spinach with Sun-Dried Tomato Cream Sauce is a comforting, indulgent dish that is perfect for busy weeknights.
Print Recipe Pin Recipe
Prep Time 10 minutes mins
Cook Time 20 minutes mins
Total Time 30 minutes mins
Servings: 4 servings
Course: Dinner
Cuisine: Italian
Calories: 530
Ingredients Equipment Method Nutrition Notes

Ingredients
  

For the Pasta
  • 8 oz Spaghetti cook until al dente
  • 1 tbsp Salt use while boiling pasta
For the Sauce
  • 1 cup Heavy Cream substitute with half-and-half for lighter sauce
  • 2-3 cloves Garlic minced, fresh is best
  • 2 tbsp Olive Oil extra-virgin for best flavor
  • ½ cup Sun-Dried Tomatoes drained
  • ½ cup Parmesan Cheese freshly grated
  • 4 cups Fresh Spinach opt for fresh for best texture
  • to taste Pepper
To Garnish
  • ¼ cup Additional Parmesan sprinkle on top
  • Fresh Basil optional, for garnish

Equipment

  • Large pot
  • Colander
  • Large skillet

Method
 

Step-by-Step Instructions
  1. Start by filling a large pot with water, adding a generous pinch of salt, and boiling over high heat. Once boiling, add the spaghetti and cook according to package instructions until al dente. Drain and set aside.
  2. In a large skillet, heat about 2 tablespoons of extra-virgin olive oil over medium heat. Add minced garlic and sauté for about 1 minute until fragrant. Then, add fresh spinach and stir until wilted, about 2-3 minutes.
  3. Pour in 1 cup of heavy cream and bring to a gentle simmer over medium-low heat for about 3-4 minutes. Stir in ½ cup of drained sun-dried tomatoes and ½ cup of grated Parmesan until melted together.
  4. Add the cooked spaghetti into the skillet and toss gently to coat with the creamy sauce. Each strand should be enveloped in the sauce's flavor.
  5. Taste and adjust seasoning with salt and freshly cracked pepper. Serve immediately, garnished with additional Parmesan cheese if desired.

Nutrition

Serving: 1servingCalories: 530kcalCarbohydrates: 50gProtein: 15gFat: 30gSaturated Fat: 18gCholesterol: 80mgSodium: 600mgPotassium: 450mgFiber: 3gSugar: 3gVitamin A: 1200IUVitamin C: 20mgCalcium: 250mgIron: 3mg

Notes

Use fresh ingredients for the best flavor and always taste before serving to adjust the seasoning.

Tried this recipe?

Let us know how it was!

Savory Pasta Napoletana for Quick and Easy Family Dinners

December 22, 2025 by Grace Snow Leave a Comment

The aroma of sautéed onions mingling with juicy tomatoes takes me back to sunlit Italian kitchens where every meal is a work of art. This Quick and Easy Pasta Napoletana captures that magic in just 30 minutes, making it perfect for those hectic weeknights when you crave something homemade without the hassle. Rich in flavor yet wonderfully simple, this dish is a delicious way to gather your loved ones around the table. With vegetarian-friendly options and the versatility to add extras, you'll find it a cherished go-to for family meals. Curious how to whip up this comforting Italian classic? Let’s dive into the details!

Why Choose Pasta Napoletana Tonight?

Quick and Easy: This wonderfully simple recipe comes together in under 30 minutes, perfect for busy weeknights when time is short.

Flavor Explosion: The juicy tomatoes and sweet onions create a sauce that's bursting with authentic Italian flavors that will satisfy your cravings!

Vegetarian-Friendly: This dish offers versatile options to cater to everyone's preferences, whether you stick to the classic recipe or add veggies like zucchini or spinach.

Family Favorite: With its comforting appeal, Pasta Napoletana ensures happy faces around the dinner table, making it a go-to meal for family gatherings.

Crowd-Pleasing: Serve it up alongside a fresh salad or garlic bread for a complete meal that everyone loves! Don't forget to check out Skillet Pasta Sun for another delightful pasta idea!

Pasta Napoletana Ingredients

• Elevate your dish with these must-have components!

For the Pasta

  • Spaghetti or Bucatini – 8 oz (220 grams); provides the main structure of the dish. Substitute any short pasta if preferred.

For the Sauce

  • Extra Virgin Olive Oil – 1 Tbsp; used for sautéing and flavor, ensuring a rich taste. Any good-quality olive oil can be a substitute.
  • Onion – 1 medium, finely chopped; base flavor enhances sweetness when sautéed. Use yellow, white, or red onions interchangeably.
  • Garlic – 2-3 cloves, minced; adds aromatic flavor; adjust to taste for more savoriness.
  • Canned Tomatoes – 1 can (14 oz/400 grams), whole, diced, or cherry; forms the sauce base and provides juiciness. Fresh tomatoes can be substituted, especially cherry tomatoes.
  • Fine Salt – ½ tsp plus more to taste; balances flavors and is crucial for seasoning while cooking.
  • Black Pepper – ⅛ tsp; adds warmth and spice; adjust to personal preference.

For Garnishing

  • Fresh Basil – A handful of leaves, chopped or torn; introduces freshness and depth. Substitute with fresh parsley if desired.
  • Parmesan Cheese – 3 Tbsp, grated for serving; adds richness and umami. For a vegan option, omit or substitute with nutritional yeast.

Enjoy crafting your Pasta Napoletana with these essential ingredients that come together to create a lovely family meal!

Step‑by‑Step Instructions for Pasta Napoletana

Step 1: Cook Pasta
Begin by bringing a large pot of salted water to a rolling boil over high heat. Add the 8 oz of spaghetti or bucatini and cook according to the package instructions for about 8-10 minutes until al dente. Once cooked, reserve ½ cup of the pasta water, then carefully drain the rest and set aside.

Step 2: Prepare Sauce
While the pasta cooks, heat 1 tablespoon of extra virgin olive oil in a large skillet over medium heat. Once shimmering, add the finely chopped onion and sauté for 5-6 minutes until it becomes soft and translucent, filling your kitchen with a delicious aroma. This is the perfect time to create a rich flavor base for your Pasta Napoletana.

Step 3: Add Garlic
Next, stir in 2-3 minced garlic cloves, continuing to sauté for about 2 minutes until fragrant. Be careful not to let the garlic brown; you want it to release its lovely aroma without burning. This will enhance the overall depth of flavor in the sauce.

Step 4: Combine Tomatoes
Now it’s time to bring it all together! Add the canned tomatoes (14 oz), ½ teaspoon of fine salt, and ⅛ teaspoon of black pepper to the skillet. Stir well, allowing the mixture to come to a gentle simmer. Cook for about 15 minutes, stirring occasionally, until the sauce slightly reduces and thickens, enveloping the tomatoes in rich flavors.

Step 5: Mix Together
Once your sauce is ready, add the drained pasta and a handful of fresh basil leaves to the skillet. Toss everything together, ensuring the pasta is well coated. If the sauce appears too thick, gradually stir in a little of the reserved pasta water to achieve your desired sauciness, making the dish beautifully cohesive.

Step 6: Serve
Finally, plate your delicious Pasta Napoletana, garnishing with 3 tablespoons of grated Parmesan cheese and a sprinkle of additional basil if desired. A drizzle of olive oil and an extra dash of black pepper can enhance the flavors further. Serve warm and watch your loved ones gather around the table!

Make Ahead Options

Preparing your delicious Pasta Napoletana ahead of time is a fantastic way to save time on busy weeknights! You can cook the pasta and store it in an airtight container in the refrigerator for up to 3 days. For the sauce, sauté the onions and garlic, then add the canned tomatoes, salt, and pepper—cook as directed but stop just before adding the pasta. This sauce can also be refrigerated for up to 3 days. When you’re ready to serve, simply reheat the sauce in a skillet, add the cooked pasta, and toss in fresh basil for that bright flavor. This way, you’ll have a delicious, hassle-free meal that's just as delightful as if you had made it fresh!

Variations & Substitutions for Pasta Napoletana

Feel free to customize this lovely Pasta Napoletana to suit your taste and dietary needs, making it truly your own!

  • Short Pasta: Swap bucatini or spaghetti for any short pasta like penne or fusilli for a fun texture twist. The sauce clings beautifully to the crevices of short pasta, ensuring every bite is packed with flavor.

  • Add Vegetables: Boost nutrition by incorporating sautéed zucchini or fresh spinach. They not only add color but also a fresh, vibrant flavor that complements the rich tomato sauce beautifully.

  • Protein Punch: Stir in cooked Italian sausage or ground meat for an extra protein boost. This transforms your dish into a hearty meal that’s perfect for satisfying hungry family members.

  • Dairy-Free: For a vegan-friendly version, simply omit the Parmesan cheese or replace it with nutritional yeast. You’ll still get a delightful umami flavor without any dairy.

  • Herb Variations: Experiment with different herbs like oregano or thyme if you’re running low on basil. Fresh or dried, these can add an aromatic quality that diversifies the flavor profile.

  • Spice it Up: If you enjoy heat, add a pinch of red pepper flakes to the sauce while it simmers. This brings a delightful kick that complements the sweetness of the tomatoes beautifully.

  • Seafood Twist: For a gourmet flair, consider adding shrimp or scallops as a seafood option, which pair well with the tomato sauce. The result is a luxurious dish that’s perfect for impressing guests.

  • Creamy Addition: For a creamy texture, mix in a splash of heavy cream or a dollop of cream cheese after combining the pasta and sauce. This will create a rich, decadent sauce that’s sure to please!

And if you're looking for more delightful ideas, check out these Skillet Pasta Sun or explore the delightful possibilities of Seafood Pasta Savory.

What to Serve with Pasta Napoletana

Elevate your mealtime experience with delightful pairings that complement the vibrant flavors of this Italian classic.

  • Garlic Bread: A crunchy, buttery delight that's perfect for scooping up the luscious sauce, adding a comforting touch to your dinner. The aroma of freshly toasted bread with garlic butter will weave through your kitchen, enticing everyone to the table.

  • Fresh Green Salad: Crisp greens topped with a zesty vinaigrette provide a refreshing contrast to the warm, hearty pasta. The vibrant flavors and textures of seasonal veggies can enhance your overall dining experience, offering a burst of freshness.

  • Roasted Vegetables: A medley of seasonal veggies, lightly seasoned and caramelized, adds earthiness and color to your plate. This balance of textures and flavors will satisfy even the pickiest eaters.

  • Caprese Salad: This classic Italian salad featuring fresh mozzarella, ripe tomatoes, and basil adds a fragrant, cool element that pairs beautifully with the rich pasta sauce. The layers of flavor echo the main dish, enhancing your meal's cohesion.

  • Olive Oil Drizzle: A simple but elegant enhancement, drizzle high-quality extra virgin olive oil over the finished dish for an added layer of flavor and richness. It enriches the flavor experience while maintaining the Italian essence.

  • Wine Pairing: A light Chianti or crisp Pinot Grigio beautifully complements the tomato-based sauce, enhancing each bite's experience. Sharing a glass elevates dinner to a lovely evening escape, full of warmth and chatter.

  • Tiramisu: End your meal on a sweet note with this creamy coffee-flavored dessert that brings an indulgent, satisfying finish to your dining experience. The rich flavors and textures will leave everyone wanting just a taste more.

Expert Tips for Pasta Napoletana

  • Choose Quality Ingredients: Using high-quality canned tomatoes ensures a flavor-packed sauce; look for whole or cherry tomatoes for added sweetness.

  • Mind the Cook Time: Avoid overcooking the pasta; it should be al dente to absorb the sauce's flavors and maintain a pleasing texture.

  • Sauté Gently: When cooking the onions and garlic, keep the heat moderate to enhance their natural sweetness without burning.

  • Add Freshness: Enhance your Pasta Napoletana by adding fresh vegetables, like zucchini or spinach, during the sauce preparation for extra nutrition.

  • Experiment with Proteins: For a heartier dish, consider stirring in cooked Italian sausage or chickpeas for a delightful twist to your vegetarian-friendly options.

  • Save Some Pasta Water: Always reserve a bit of the cooking water! It's perfect for adjusting the sauce’s consistency while ensuring it clings beautifully to the pasta.

Storage Tips for Pasta Napoletana

Fridge: Store leftovers in an airtight container for up to 2 days. This keeps the flavors fresh while preventing the pasta from drying out.

Freezer: For longer storage, freeze Pasta Napoletana in a freezer-safe container for up to 3 months. Defrost in the fridge before reheating.

Reheating: Reheat in the microwave or skillet over low heat, adding a splash of reserved pasta water or olive oil to enhance moisture and flavor. Enjoy your delicious Pasta Napoletana again!

Room Temperature: If left out, consume within 2 hours. To maintain optimal flavor and safety, avoid leaving it at room temperature for longer.

Pasta Napoletana Recipe FAQs

How do I choose the right tomatoes for Pasta Napoletana?
Absolutely! For the best flavor, opt for high-quality canned tomatoes, like San Marzano, as they provide natural sweetness and cooking consistency. Whole or cherry tomatoes are fantastic choices, but if you have fresh tomatoes on hand, those work beautifully—especially ripe cherry tomatoes!

How should I store leftover Pasta Napoletana?
Very! To keep your leftovers fresh, store them in an airtight container in the refrigerator for up to 2 days. This method helps retain the flavors and prevents the pasta from drying out. When ready to enjoy, simply reheat in the microwave or on the stovetop, adding a splash of reserved pasta water for moisture.

Can I freeze Pasta Napoletana?
Of course! To freeze, allow the Pasta Napoletana to cool completely, then transfer it to a freezer-safe container. It can be stored for up to 3 months. When you're ready to eat, just defrost it in the fridge overnight, and reheat gently over low heat in a skillet, adding a splash of olive oil or reserved pasta water for the best consistency.

What can I do if my sauce is too thick?
No worries! If you find that your sauce has become too thick, simply add a little reserved pasta water—start with a couple of tablespoons. This will help loosen it up and create a beautiful, silky sauce that clings to your pasta perfectly. You can also add a drizzle of olive oil for added richness.

Are there any dietary considerations for Pasta Napoletana?
Absolutely! This recipe is vegetarian-friendly and can easily be made vegan by omitting the Parmesan cheese or substituting it with nutritional yeast. It's advisable to check the ingredient labels if anyone has food allergies, particularly with canned goods. Additionally, if you plan to serve it to pets, be cautious, as garlic and onions can be harmful to them.

Pasta Napoletana

Savory Pasta Napoletana for Quick and Easy Family Dinners

Enjoy a quick and easy Pasta Napoletana that captures the essence of Italian cooking in just 30 minutes, perfect for family dinners.
Print Recipe Pin Recipe
Prep Time 10 minutes mins
Cook Time 20 minutes mins
Total Time 30 minutes mins
Servings: 4 servings
Course: Dinner
Cuisine: Italian
Calories: 450
Ingredients Equipment Method Nutrition Notes

Ingredients
  

For the Pasta
  • 8 oz Spaghetti or Bucatini Substitute any short pasta if preferred.
For the Sauce
  • 1 Tbsp Extra Virgin Olive Oil Used for sautéing and flavor.
  • 1 medium Onion, finely chopped Use yellow, white, or red onions.
  • 2-3 cloves Garlic, minced Adjust to taste for more savoriness.
  • 1 can (14 oz) Canned Tomatoes Whole, diced, or cherry; fresh can be substituted.
  • ½ tsp Fine Salt Balances flavors and is crucial for seasoning.
  • ⅛ tsp Black Pepper Adjust to personal preference.
For Garnishing
  • a handful Fresh Basil, chopped or torn Substitute with fresh parsley if desired.
  • 3 Tbsp Parmesan Cheese, grated For vegan option, omit or substitute with nutritional yeast.

Equipment

  • Large pot
  • Large skillet
  • Colander

Method
 

Step-by-Step Instructions
  1. Begin by bringing a large pot of salted water to a rolling boil over high heat. Add the 8 oz of spaghetti or bucatini and cook according to the package instructions for about 8-10 minutes until al dente. Once cooked, reserve ½ cup of the pasta water, then carefully drain the rest and set aside.
  2. While the pasta cooks, heat 1 tablespoon of extra virgin olive oil in a large skillet over medium heat. Once shimmering, add the finely chopped onion and sauté for 5-6 minutes until it becomes soft and translucent.
  3. Next, stir in 2-3 minced garlic cloves, continuing to sauté for about 2 minutes until fragrant.
  4. Add the canned tomatoes, ½ teaspoon of fine salt, and ⅛ teaspoon of black pepper to the skillet. Stir well, allowing the mixture to come to a gentle simmer. Cook for about 15 minutes, stirring occasionally.
  5. Once your sauce is ready, add the drained pasta and a handful of fresh basil leaves to the skillet. Toss everything together, ensuring the pasta is well coated.
  6. Finally, plate your Pasta Napoletana, garnishing with 3 tablespoons of grated Parmesan cheese and a sprinkle of additional basil if desired.

Nutrition

Serving: 1servingCalories: 450kcalCarbohydrates: 70gProtein: 12gFat: 15gSaturated Fat: 3gMonounsaturated Fat: 10gCholesterol: 10mgSodium: 400mgPotassium: 650mgFiber: 4gSugar: 6gVitamin A: 800IUVitamin C: 15mgCalcium: 100mgIron: 2mg

Notes

Using high-quality canned tomatoes enhances the flavor of the sauce. Reserve pasta water for adjusting the sauce consistency.

Tried this recipe?

Let us know how it was!

Creamy Pesto Sauce Pasta to Elevate Your Weeknight Dinners

December 22, 2025 by Grace Snow Leave a Comment

As I stirred the vibrant green sauce into a pot of steaming penne, the kitchen filled with the mouthwatering aroma of basil and garlic. This Creamy Pesto Sauce Pasta is the kind of dish that turns weeknight dinners into delightful feasts. It’s a simple, one-pot recipe that packs a creamy, luscious punch while allowing you to savor each moment without the chaos of multiple pans. Within just 30 minutes, you’ll be serving up a restaurant-quality meal that’s also a crowd-pleaser. The best part? Its versatility makes it a fantastic base for tossing in grilled chicken or seasonal veggies. So, are you ready to elevate your pasta game? Let’s dive into this deliciously quick adventure!

Why is Creamy Pesto Sauce Pasta a Must-Try?

Speedy Cooking: This one-pot wonder allows you to whip up a satisfying meal in just 30 minutes, perfect for busy weeknights.
Rich, Creamy Sauce: The blend of heavy cream, pesto, and sautéed veggies creates a dreamily smooth sauce that clings to every bite of pasta.
Versatile Base: Feel free to customize by adding proteins like grilled chicken or protein-packed chickpeas, making it as hearty as you'd like.
Colorful & Flavorful: Vibrant bell peppers and fresh parsley not only brighten the dish but also enhance flavor, turning ordinary meals into extraordinary ones.
For more quick and delicious meals, check out Seafood Pasta Savory or Cauliflower Pasta Ready.

Creamy Pesto Sauce Pasta Ingredients

For the Pasta
• Penne Pasta – Forms the base of this dish; consider gluten-free pasta for a delightful alternative.
• Salt – Enhances the overall flavor; reserve some for the boiling water and others for the sauce.

For the Vegetables
• Green Bell Pepper – Adds sweetness and crunch; feel free to substitute with any seasonal bell pepper.
• Red Onion – Brings depth and sweetness; yellow onion is a fine alternative for this creamy pesto sauce pasta.

For the Sauce
• Pesto Sauce – Essential for the dish's flavor; homemade or store-bought works wonderfully.
• Reserved Pasta Water – Use to adjust the sauce consistency; it boosts the overall flavor!
• Heavy Cream (35%) – Creates the rich, creamy element of the sauce; substitute half with milk for fewer calories.
• All-Purpose Flour – Serves as the thickening agent; cornstarch can be a gluten-free alternative.
• Garlic Powder – Adds flavor without fresh garlic hassle; fresh garlic can substitute this for a punchy kick.
• Dried Oregano – Introduces earthy notes; it's optional, but I highly recommend it!
• Black Pepper – Provides a mild heat; prefer freshly cracked for the best flavor.

For the Garnish
• Freshly Chopped Parsley – Adds a refreshing touch; swap with basil for an herby enhancement.
• Grated Parmesan (optional) – Boosts savoriness upon serving; you can skip for a dairy-free version.

Embrace the delightful steps of preparing this creamy pesto sauce pasta that will tantalize your taste buds and elevate your dining experience!

Step‑by‑Step Instructions for Creamy Pesto Sauce Pasta

Step 1: Sauté the Vegetables
Heat a large skillet over medium heat and add diced green bell pepper and red onion with 1 teaspoon of salt. Sauté the vegetables for about 10 minutes, stirring occasionally, until they soften and turn golden brown, creating a delightful aroma that fills your kitchen.

Step 2: Prepare the Pesto Sauce
Once the vegetables are beautifully caramelized, stir in your pesto sauce along with a splash of the reserved pasta water. Allow this mixture to simmer gently for 5 minutes, thickening up and letting those vibrant flavors meld together, ensuring each bite of your creamy pesto sauce pasta is infused with taste.

Step 3: Create the Creamy Base
In a small bowl, combine all-purpose flour with warm water to form a smooth slurry. Gradually mix this into the simmering sauce, then slowly add the heavy cream while stirring constantly. Let the sauce simmer for an additional 5 to 10 minutes until it thickens to a luxurious consistency, ready to coat the pasta beautifully.

Step 4: Season the Sauce
Now it's time to season! Add garlic powder, dried oregano, freshly chopped parsley, and black pepper to your creamy pesto sauce. Stir well to blend the flavors, and taste for balance, adjusting the seasoning according to your preference for that perfect finishing touch.

Step 5: Combine Pasta and Sauce
Toss in the cooked penne pasta, stirring gently to coat every piece evenly with the rich creamy pesto sauce. Let it simmer together for about 5 minutes, allowing the pasta to soak up the sauce and become deliciously intertwined with the vibrant flavors of your creamy pesto sauce pasta.

Step 6: Serve
Plate your creamy pesto sauce pasta generously, garnishing it with freshly grated Parmesan and a sprinkle of extra parsley if desired. This dish not only looks inviting but is also a delectable feast for your taste buds, perfect for elevating your weeknight dinners!

What to Serve with Creamy Pesto Sauce Pasta

As you savor every creamy bite of this pasta dish, imagine creating a delightful meal ensemble that will leave everyone asking for seconds.

  • Garlic Bread: A warm, buttery garlic bread is perfect for mopping up the luscious sauce, offering a crunchy contrast to the creaminess.
  • Mixed Green Salad: A bright salad with balsamic vinaigrette adds a refreshing bite, balancing the richness of the pasta while boosting the meal’s healthiness.
  • Grilled Chicken: Tender grilled chicken adds a protein boost and a smoky flavor that complements the sauce's herby notes beautifully.
  • Roasted Vegetables: A medley of roasted seasonal veggies introduces earthy flavors and additional textures, enriching the dish's overall appeal.
  • Chilled White Wine: A crisp Chardonnay perfectly pairs with this creamy pesto sauce pasta by enhancing its vibrant flavors while refreshing your palate.
  • Lemon Sorbet: Finish on a sweet note with a refreshing lemon sorbet, cleansing your palate and leaving a bright, zesty aftertaste.
  • Caprese Skewers: Juicy tomatoes, fresh mozzarella, and basil drizzled with balsamic glaze add an Italian flair, complementing the dish’s flavors while introducing delightful freshness.
  • Parmesan Crusted Asparagus: Lightly crisped asparagus with a sprinkle of Parmesan brings an elegant touch, enhancing the creamy pasta while incorporating a lovely crunch.

How to Store and Freeze Creamy Pesto Sauce Pasta

Fridge: Store leftovers in an airtight container for up to 3 days. Be sure the pasta is completely cooled before sealing to avoid condensation.

Freezer: If you want to keep it longer, the creamy pesto sauce pasta can be frozen for up to 3 months. Separate the sauce and pasta before freezing to maintain texture.

Reheating: When ready to enjoy, thaw the pasta and sauce in the fridge overnight, then reheat gently on the stovetop. Add a splash of cream or reserved pasta water to restore the creamy consistency.

Tip: Always store sauced pasta separately if prepping in advance to prevent it from becoming soggy.

Expert Tips for Creamy Pesto Sauce Pasta

  • Perfectly Caramelized Veggies: Allow the green bell peppers and onions to reach a golden hue for enhanced flavor. Rushing this step will result in a bland sauce.

  • Avoid Lumps: When mixing flour into the sauce, ensure it’s well dissolved to prevent any lumps. A smooth sauce is key for your creamy pesto sauce pasta.

  • Consistent Sauce Texture: Use reserved pasta water gradually to adjust the sauce's thickness. This also helps incorporate the pasta flavor, enriching your overall dish.

  • Season Smartly: Taste your sauce after adding spices. Adjusting the seasonings at this stage ensures that your creamy pesto sauce pasta is perfectly balanced.

  • Storage Tip: If prepping ahead, store the sauce and pasta separately to avoid sogginess. Combine them just before serving for the freshest flavor.

Make Ahead Options

These Creamy Pesto Sauce Pasta preparations are ideal for busy home cooks looking to save time! You can prep the sautéed vegetables (green bell pepper and red onion) up to 3 days ahead; simply refrigerate them in an airtight container. The creamy pesto sauce can also be made ahead and stored for up to 24 hours. To maintain quality, reheat gently on the stovetop, adding a splash of reserved pasta water if it thickens too much. When ready to serve, cook the penne pasta, combine with the reheated sauce and sautéed vegetables, and enjoy a restaurant-quality meal that’s just as delicious with minimal effort!

Creamy Pesto Sauce Pasta Variations

Feel free to let your culinary creativity shine by customizing this recipe to suit your taste and pantry!

  • Gluten-Free: Swap penne for gluten-free pasta, ensuring everyone can enjoy a deliciously creamy dish.
  • Pasta Shape: Use other pasta shapes, like fusilli or farfalle, for fun textures that enhance the eating experience.
  • Protein Power: Add grilled chicken or shrimp for a heartier meal; chickpeas work great for a vegetarian protein boost.
  • Veggie Boost: Toss in fresh spinach or sun-dried tomatoes to infuse extra nutrients and vibrant flavors into your creamy pesto sauce pasta.
  • Spice It Up: For a kick, add crushed red pepper flakes or sauté some jalapeños alongside your peppers.
  • Herb Variations: Swap parsley for basil or try some fresh arugula for a peppery twist; it brightens the dish even further!
  • Lighter Option: Replace half of the heavy cream with milk or use a vegan cream substitute for a lighter, dairy-free version without sacrificing flavor.
  • Nutty Addition: Incorporate toasted pine nuts or walnuts for extra texture; they provide a wonderful crunch that contrasts perfectly with the creaminess.

If you're looking for more pasta inspiration, be sure to check out my delightful Tagliatelle Asparagus Peas or savor the taste of Skillet Pasta Sun. Feel free to mix and match, and make this creamy pesto sauce pasta your own!

Creamy Pesto Sauce Pasta Recipe FAQs

How do I choose the right bell peppers for my dish?
Absolutely! Look for bell peppers that are firm to the touch and have smooth, shiny skin. Avoid those with dark spots or wrinkles, as these can indicate age or spoilage. For a sweet crunch, choose peppers in vibrant colors, like red or yellow, along with green, as they add both flavor and visual appeal to your creamy pesto sauce pasta.

What is the best way to store leftover creamy pesto sauce pasta?
You can store leftovers in an airtight container in the fridge for up to 3 days. Make sure the pasta has cooled completely before sealing to prevent condensation, which can lead to sogginess. When reheating, a splash of cream or reserved pasta water can help restore that creamy texture!

Can I freeze creamy pesto sauce pasta? If so, how?
Yes, you can freeze creamy pesto sauce pasta for up to 3 months! To maintain quality, it's best to freeze the sauce and pasta separately. First, allow them to cool completely. Then, place them in freezer-safe containers or bags, ensuring as much air as possible is squeezed out before sealing. When you're ready to enjoy, thaw them overnight in the refrigerator and reheat on the stovetop with a bit of cream or reserved pasta water.

What if my sauce turns out too thick or too thin?
No worries! If your sauce becomes too thick, gradually stir in a bit of reserved pasta water or more cream until it reaches your desired consistency. If it's too thin, create a slurry with a little extra flour and water in a separate bowl, then mix it into the sauce, letting it simmer for a few minutes to thicken. Adjusting the texture is part of the fun of making this creamy pesto sauce pasta!

Can I make this creamy pesto sauce pasta dairy-free?
Certainly! For a dairy-free version, you can substitute the heavy cream with coconut milk or a dairy-free cream alternative. Additionally, skip the Parmesan cheese or opt for a vegan cheese alternative. Just keep in mind that this may alter the overall flavor slightly, but it will still be deliciously creamy!

Is this dish suitable for a gluten-free diet?
Yes! Simply use gluten-free pasta in place of the traditional penne. Many gluten-free pasta options are available on the market today that hold up beautifully in this creamy pesto sauce pasta recipe, allowing everyone to enjoy this delightful dish.

Creamy Pesto Sauce Pasta

Creamy Pesto Sauce Pasta to Elevate Your Weeknight Dinners

This Creamy Pesto Sauce Pasta is a quick, delicious dish that transforms weeknight dinners into delightful feasts with its rich flavor.
Print Recipe Pin Recipe
Prep Time 10 minutes mins
Cook Time 20 minutes mins
Total Time 30 minutes mins
Servings: 4 servings
Course: Dinner
Cuisine: Italian
Calories: 450
Ingredients Equipment Method Nutrition Notes

Ingredients
  

For the Pasta
  • 8 ounces Penne Pasta Consider gluten-free pasta for an alternative.
  • 1 teaspoon Salt Reserve some for boiling water and others for the sauce.
For the Vegetables
  • 1 cup Green Bell Pepper Feel free to substitute with seasonal bell pepper.
  • 1 medium Red Onion Yellow onion is a fine alternative.
For the Sauce
  • 1 cup Pesto Sauce Homemade or store-bought works well.
  • 1/2 cup Reserved Pasta Water Use to adjust sauce consistency.
  • 1 cup Heavy Cream (35%) Substitute half with milk for fewer calories.
  • 2 tablespoons All-Purpose Flour Cornstarch can be a gluten-free alternative.
  • 1 teaspoon Garlic Powder Fresh garlic can substitute this for more flavor.
  • 1 teaspoon Dried Oregano Optional but recommended.
  • 1/2 teaspoon Black Pepper Prefer freshly cracked for best flavor.
For the Garnish
  • 1/4 cup Freshly Chopped Parsley Can swap with basil.
  • 1/4 cup Grated Parmesan Optional for garnish; skip for dairy-free.

Equipment

  • Large skillet
  • small bowl
  • pot

Method
 

Step‑by‑Step Instructions for Creamy Pesto Sauce Pasta
  1. Heat a large skillet over medium heat and add diced green bell pepper and red onion with salt. Sauté for about 10 minutes until softened.
  2. Stir in pesto sauce and a splash of reserved pasta water. Simmer gently for 5 minutes.
  3. Combine flour with warm water to form a slurry. Mix into the sauce, then add heavy cream while stirring. Let it simmer for 5 to 10 minutes.
  4. Add garlic powder, oregano, parsley, and black pepper. Stir well and adjust seasoning to taste.
  5. Toss in the cooked penne pasta and simmer together for about 5 minutes.
  6. Plate generously, garnishing with Parmesan and extra parsley.

Nutrition

Serving: 1servingCalories: 450kcalCarbohydrates: 60gProtein: 10gFat: 20gSaturated Fat: 10gCholesterol: 50mgSodium: 600mgPotassium: 300mgFiber: 3gSugar: 2gVitamin A: 500IUVitamin C: 30mgCalcium: 100mgIron: 2mg

Notes

Store leftovers in an airtight container for up to 3 days. Freeze sauce and pasta separately for longevity.

Tried this recipe?

Let us know how it was!
  • « Previous Page
  • 1
  • …
  • 106
  • 107
  • 108
  • 109
  • 110
  • …
  • 217
  • Next Page »

Welcome!

Hi, I’m Grace, a Sydney-based home cook with a passion for bold flavors and trending ingredients. Whether you’re a busy beginner or a seasoned foodie, you’ll find dishes here that are fresh, fun, and full of flavor.

More about me

Popular Recipes

  • Chocolate Cake Pops
    Delicious Chocolate Cake Pops That Wow Every Dessert Lover
  • Caribbean-Style Beef Stew with Rice
    Caribbean-Style Beef Stew with Rice That Warms Your Soul
  • Healthy Crockpot Beef Stew
    Healthy Crockpot Beef Stew for Cozy Weeknight Dinners
  • Crispy Chicken Tacos
    Crispy Chicken Tacos for the Perfect Taco Tuesday Night

Footer

↑ back to top

About

  • Privacy Policy
  • Disclaimer
  • Terms & Conditions

Newsletter

  • Sign Up! for emails and updates

Contact

  • About me
  • Contact me

Copyright © 2025 TastyTrendIngredients