tastytrendingredients

  • Home
  • Recipes
    • Appetizers
    • Breakfast
    • Dessert
    • Dinner
    • Drinks
    • Salads
    • Snacks
    • Soups
  • About me
  • Contact
menu icon
go to homepage
  • Home
  • Recipes
    • Appetizers
    • Breakfast
    • Dessert
    • Dinner
    • Drinks
    • Salads
    • Snacks
    • Soups
  • About me
  • Contact
search icon
Homepage link
  • Home
  • Recipes
    • Appetizers
    • Breakfast
    • Dessert
    • Dinner
    • Drinks
    • Salads
    • Snacks
    • Soups
  • About me
  • Contact
×

Turkey Pumpkin Curry Soup with Rice for Cozy Fall Nights

October 23, 2025 by Grace Snow Leave a Comment

As autumn settles in, the aroma of warm spices and creamy soups fills the air, and my kitchen is no exception. I'm eager to share my Turkey Pumpkin Curry Soup with Rice, a delightful dish that combines savory turkey, the comforting sweetness of pumpkin, and aromatic curry spices, all in a bowl ready in just 20 minutes! This cozy recipe not only makes the most of your leftover turkey but also redefines your idea of quick meals, proving that healthy and delicious can indeed go hand in hand. Plus, it’s gluten-free, so everyone can enjoy it! Are you ready to delve into this rich and hearty fall favorite? Let’s get cooking!

What makes this soup a fall favorite?

Simplicity: This Turkey Pumpkin Curry Soup is incredibly easy to whip up, making it perfect for busy weeknights or a cozy weekend get-together.

Flavorful Twist: The blend of pumpkin and curry spices offers a unique, comforting flavor profile that will have everyone coming back for seconds.

Quick Cooking: Ready in just 20 minutes, it's an excellent way to utilize leftover turkey while still keeping dinner quick and satisfying.

Versatile Variations: Feel free to swap the turkey for chicken or add extra veggies like spinach for added nutrition, just like in my Chickpea Spinach Curry recipe!

Health-Conscious: Being gluten-free and nutritious, this soup is a wholesome choice for all dietary preferences.

Crowd-Pleaser: This dish is sure to impress guests and family alike, making it a delightful addition to any fall gathering.

Turkey Pumpkin Curry Soup Ingredients

For the Soup Base
• Turkey Broth – Provides a savory base for the soup; opt for low-sodium to manage salt levels.
• Pumpkin Puree – Adds natural sweetness and a creamy texture; can substitute with butternut squash puree if needed.
• Curry Powder – Introduces warm, aromatic flavors; adjust the quantity based on your spice preference.
• Cayenne Powder – Gives a spicy kick; omit for a milder flavor.
• Fresh Grated Ginger – Enhances the soup’s aroma and warmth; fresh is preferred, but ground ginger can work in a pinch.
• Pumpkin Pie Spice – Reinforces the seasonal theme with flavors of cinnamon and nutmeg.
• Salt – Essential for seasoning; use to taste, especially if the broth is already salted.
• Water – Dilutes the mixture to your desired consistency.

For the Protein and Creaminess
• Shredded Cooked Turkey – Adds protein and makes this recipe a fantastic way to use leftovers; any cooked poultry can suffice.
• Coconut Milk – Contributes creaminess and depth of flavor; light coconut milk can reduce calories, or almond milk can serve as a base.

For the Hearty Texture
• Minute Instant White Rice – This quick-cooking component thickens the soup and adds heartiness; swap for quinoa or brown rice for a healthier option.

This Turkey Pumpkin Curry Soup with Rice is not only comforting, but also a quick and delicious way to celebrate the wonderful flavors of fall!

Step‑by‑Step Instructions for Turkey Pumpkin Curry Soup with Rice

Step 1: Prepare the Soup Base
In a large saucepan, combine 4 cups of turkey broth, 1 can of pumpkin puree, 2 tablespoons of curry powder, ½ teaspoon of cayenne powder, 1 tablespoon of fresh grated ginger, 1 teaspoon of pumpkin pie spice, and salt to taste. Add 1 cup of water for the desired consistency. Bring this mixture to a gentle boil over medium-high heat, stirring occasionally until the ingredients are well-blended and aromatic, about 5 minutes.

Step 2: Add Turkey and Coconut Milk
Once the soup base is bubbling, reduce the heat to medium and stir in 2 cups of shredded cooked turkey and 1 cup of coconut milk. As the turkey warms through, let the soup return to a boil, allowing it to simmer for an additional 3-4 minutes. This step will create a creamy and rich texture, making your Turkey Pumpkin Curry Soup even more comforting.

Step 3: Cook the Rice
Lower the heat to medium-low, letting the soup cook for 5-8 minutes until the turkey is heated to your desired temperature. Make sure to occasionally stir to prevent sticking. The soup will deepen in flavor, and the kitchen will be filled with a delightful fragrance that signals it's nearly time to enjoy this hearty dish.

Step 4: Incorporate the Rice
Now, stir in 1 cup of Minute instant white rice, ensuring it's evenly distributed throughout the soup. Cover the saucepan and remove it from heat, allowing it to rest for about 5 minutes. During this time, the rice will absorb moisture and soften, creating a heartier texture in your Turkey Pumpkin Curry Soup.

Step 5: Final Touches and Serve
After the rice has settled, check the seasoning of your Turkey Pumpkin Curry Soup and adjust as necessary. Serve hot, garnished with fresh herbs like cilantro or parsley. This adds a lovely pop of color and freshness to your comforting fall dish, perfect for cozy nights!

What to Serve with Turkey Pumpkin Curry Soup with Rice

As the seasons shift and the air gets crisp, it's time to create a comforting meal that warms both the heart and the belly.

  • Crusty Bread: Perfect for dipping, its crunchy exterior contrasts beautifully with the creamy soup. A fresh baguette works wonders to soak up every delightful drop.

  • Side Salad: A crisp salad with mixed greens, avocado, and light vinaigrette adds a refreshing contrast to the warm, spiced soup. This balance of flavors enhances the overall dining experience.

  • Roasted Vegetables: Roasting seasonal veggies like Brussels sprouts or carrots brings out their natural sweetness, complementing the pumpkin and spice tones in your soup. Plus, the caramelization adds depth and texture.

  • Garnished Rice: Serve the soup with some extra fluffy rice on the side, perhaps seasoned with a hint of lime or cilantro to bring extra life to your dish. It ensures each spoonful is satisfyingly hearty.

  • Chai Tea: This warm, spiced beverage brings a gentle sweetness and flavor harmony that echoes the fall spices in your soup. It creates a cozy atmosphere for your meal.

  • Pumpkin Spice Muffins: For a sweet finish, these muffins echo the flavors of your soup, making for a delightful dessert pairing that's perfect for autumn evenings.

Turkey Pumpkin Curry Soup Variations

Feel free to get creative with this recipe, enhancing flavors and textures to match your family's tastes!

  • Shredded Chicken: Substitute turkey with shredded chicken for a tasty alternate version. It's a great way to use up last night’s roast!

  • Vegetarian Delight: Use vegetable broth and omit the turkey for a flavorful vegetarian option. Pack in more veggies like carrots and bell peppers for added nutrition!

  • Spicy Kick: Increase the cayenne powder or add diced jalapeños for a spicy twist. Just a little heat can elevate the entire dish!

  • Herb Infusion: Toss in fresh herbs like cilantro or basil just before serving for a burst of freshness. This simple addition will bring a delightful aroma to your kitchen!

  • Creamy Alternatives: Replace coconut milk with almond milk or cashew cream for a different flavor profile. This keeps the soup creamy while altering the base.

  • Nutty Texture: Add a handful of toasted nuts like cashews or almonds for added crunch and richness. Their texture will contrast beautifully with the smooth soup!

  • Extra Veggies: Stir in some leafy greens such as spinach or kale towards the end of cooking. It adds color, nutrition, and an appealing visual element to your soup.

  • Quinoa Upgrade: Swap out the white rice for quinoa for a gluten-free, protein-packed alternative. This will make your soup even heartier and more satisfying!

If you're looking for inspiration, why not try this twist while also exploring my Pumpkin Brownies Decadent? It’s a delicious treat that embraces the spirit of fall!

Make Ahead Options

This Turkey Pumpkin Curry Soup with Rice is an excellent choice for busy weeknights, as it can be easily prepared in advance. You can make the soup base (broth, pumpkin puree, spices, and turkey) up to 24 hours ahead. Store it in an airtight container in the refrigerator to maintain its delightful flavors and prevent spoilage. The rice should be added just before serving to keep it fluffy and prevent overcooking. When you're ready to enjoy your soup, simply heat the prepped soup base on the stove, stir in the coconut milk, and add the rice. Allow it to simmer until warm, giving you a delicious, homemade meal with minimal effort!

How to Store and Freeze Turkey Pumpkin Curry Soup

Fridge: Store your Turkey Pumpkin Curry Soup in an airtight container for up to 3 days. Be sure to let it cool completely before sealing.

Freezer: For longer storage, freeze the soup for up to 3 months. Portion it into freezer-safe containers or bags, removing as much air as possible to prevent freezer burn.

Reheating: When ready to enjoy again, thaw in the fridge overnight. Reheat gently on the stove or in the microwave until heated through, adding a splash of water or broth if the soup has thickened.

Leftover Tips: If you used leftover turkey, try to consume the soup within a week for optimal flavor, ensuring your Turkey Pumpkin Curry Soup remains deliciously satisfying!

Expert Tips for Turkey Pumpkin Curry Soup

  • Broth Choice: Always opt for low-sodium turkey broth to control salt levels and highlight the flavor of the soup without overpowering it.

  • Fresh Ingredients: Don’t skip the fresh ginger! It offers a vibrant kick that truly enhances the soup’s overall warmth and aroma.

  • Rice Distribution: Make sure to stir the Minute Rice thoroughly into the soup to prevent clumping and ensure every spoonful is perfectly hearty.

  • Taste Adjustment: Before serving, taste your Turkey Pumpkin Curry Soup and adjust the seasoning. Each broth varies in saltiness, so personalize it to your preference.

  • Substitutions: Feel free to play with ingredients! You can swap turkey for chicken and boost nutrition with extra vegetables like spinach or carrots.

Turkey Pumpkin Curry Soup with Rice Recipe FAQs

How do I choose the best pumpkin for this recipe?
Absolutely! When selecting a pumpkin, look for one that feels heavy for its size with a hard, smooth skin. Ideal pumpkins will often have a deep orange color with minimal or no blemishes. Small sugar pumpkins or "pie" pumpkins are better suited for cooking than larger decorative pumpkins, as they are sweeter and have a creamier texture.

How should I store leftovers of Turkey Pumpkin Curry Soup?
To store your Turkey Pumpkin Curry Soup, simply place it in an airtight container and refrigerate for up to 3 days. Make sure the soup is completely cooled before sealing to maintain freshness. When you're ready to reheat, do so on the stove or in the microwave, gently warming until hot throughout.

Can I freeze Turkey Pumpkin Curry Soup?
Yes! You can freeze this delicious soup for up to 3 months. Portion the cooled soup into freezer-safe containers or bags. Be sure to remove as much air as possible to prevent freezer burn. When you're ready to enjoy it again, thaw the soup overnight in the refrigerator and reheat it on the stove, adding a little water or broth if it has thickened.

What if my soup becomes too thick?
Very much a common concern! If you find your Turkey Pumpkin Curry Soup is too thick after refrigeration or freezing, just add a splash of water or turkey broth while reheating. Stir well until you reach your desired consistency, ensuring it's just as creamy and delightful as when you first made it!

Are there any dietary considerations for this recipe?
Certainly! This Turkey Pumpkin Curry Soup is gluten-free, making it suitable for those with gluten sensitivities. However, if you have any allergies—particularly to coconut or turkey—consider substituting with almond milk and using vegetable broth or shredded chicken instead. Always check ingredient labels to ensure everything meets your dietary needs.

How long can I keep this soup in the fridge?
You can safely keep your Turkey Pumpkin Curry Soup in the refrigerator for up to 3 days. Ensure it’s stored in an airtight container to maintain flavor and freshness. Always trust your senses—if you notice any off-smells or changes in texture, it’s best to err on the side of caution and discard.

Turkey Pumpkin Curry Soup with Rice

Turkey Pumpkin Curry Soup with Rice for Cozy Fall Nights

This Turkey Pumpkin Curry Soup with Rice is a flavorful autumn dish that combines savory turkey, pumpkin, and curry spices, perfect for quick meals.
Print Recipe Pin Recipe
Prep Time 10 minutes mins
Cook Time 20 minutes mins
Resting Time 5 minutes mins
Total Time 35 minutes mins
Servings: 4 bowls
Course: Soups
Cuisine: American
Calories: 350
Ingredients Equipment Method Nutrition Notes

Ingredients
  

For the Soup Base
  • 4 cups turkey broth opt for low-sodium
  • 1 can pumpkin puree can substitute with butternut squash puree
  • 2 tablespoons curry powder adjust based on spice preference
  • 0.5 teaspoon cayenne powder omit for milder flavor
  • 1 tablespoon fresh grated ginger fresh is preferred
  • 1 teaspoon pumpkin pie spice
  • salt to taste
  • 1 cup water to adjust consistency
For the Protein and Creaminess
  • 2 cups shredded cooked turkey any cooked poultry can suffice
  • 1 cup coconut milk light coconut milk can reduce calories
For the Hearty Texture
  • 1 cup Minute instant white rice swap for quinoa or brown rice for healthier option

Equipment

  • Large saucepan

Method
 

Step-by-Step Instructions
  1. In a large saucepan, combine turkey broth, pumpkin puree, curry powder, cayenne powder, fresh grated ginger, pumpkin pie spice, and salt. Add water for desired consistency. Bring to a gentle boil over medium-high heat, stirring occasionally for about 5 minutes.
  2. Once the soup base is bubbling, reduce heat to medium and stir in shredded cooked turkey and coconut milk. Let the soup return to a boil and simmer for an additional 3-4 minutes.
  3. Lower heat to medium-low, letting the soup cook for 5-8 minutes until the turkey is heated to desired temperature. Stir occasionally.
  4. Stir in Minute instant white rice, ensuring even distribution. Cover and remove from heat, letting it rest for about 5 minutes.
  5. After the rice has settled, check seasoning and adjust as necessary. Serve hot, garnished with fresh herbs like cilantro or parsley.

Nutrition

Serving: 1bowlCalories: 350kcalCarbohydrates: 30gProtein: 25gFat: 15gSaturated Fat: 10gPolyunsaturated Fat: 2gMonounsaturated Fat: 3gCholesterol: 60mgSodium: 800mgPotassium: 600mgFiber: 5gSugar: 4gVitamin A: 200IUVitamin C: 15mgCalcium: 4mgIron: 10mg

Notes

This soup is gluten-free and can be adapted to various dietary preferences by substituting ingredients.

Tried this recipe?

Let us know how it was!

Creamy Mushroom Kale Turkey Soup for Cozy Nights In

October 23, 2025 by Grace Snow Leave a Comment

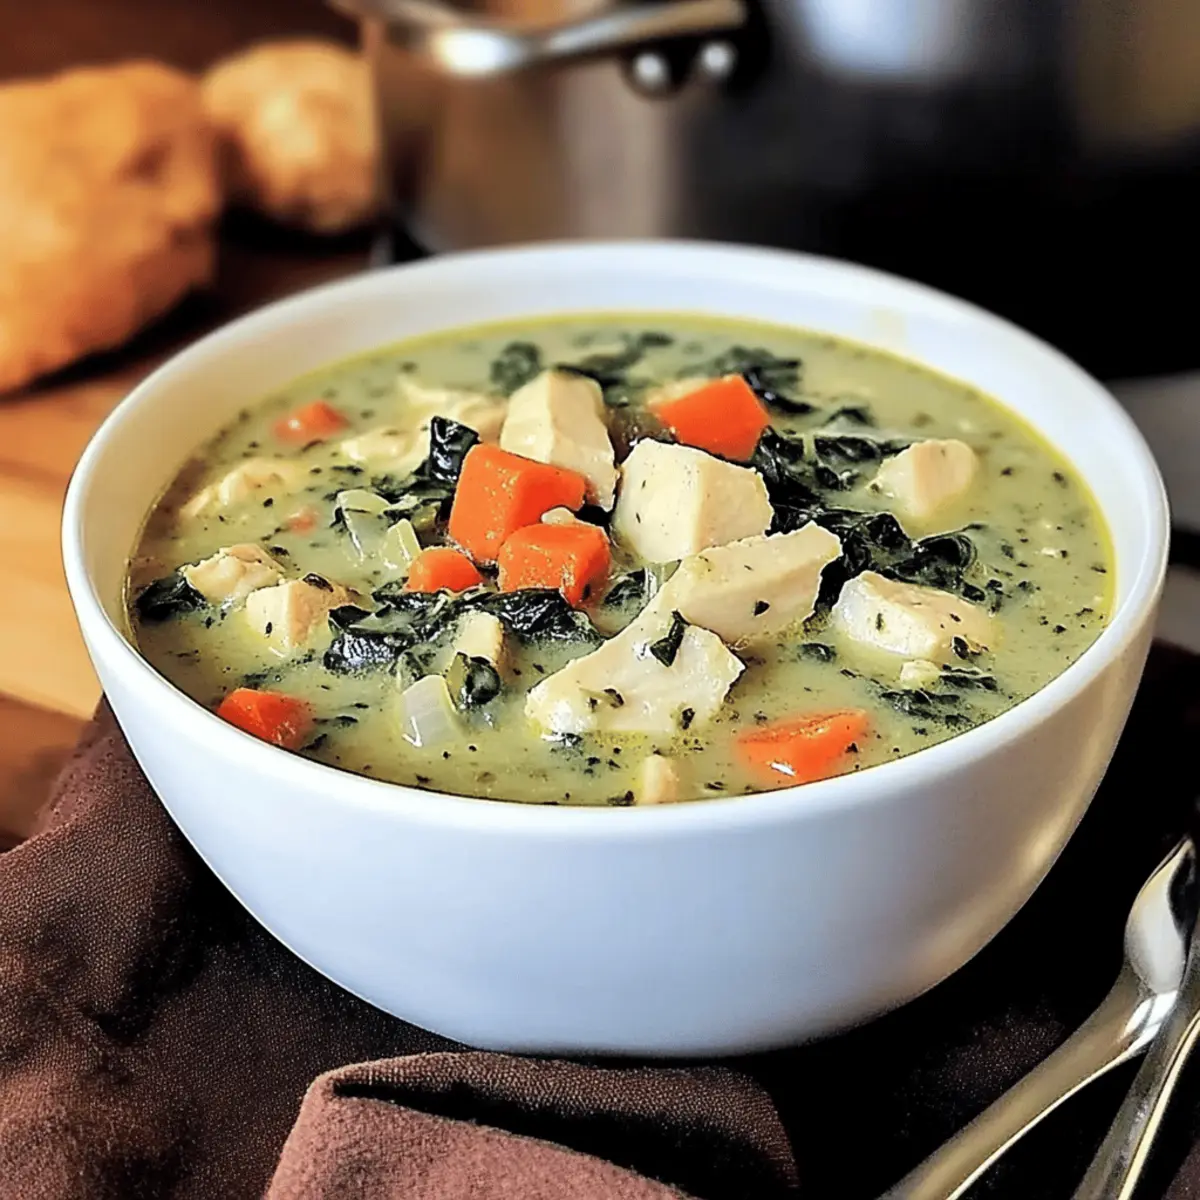
The delightful aroma of sautéed garlic and earthy mushrooms wafting through my kitchen whisked me back to cozy evenings spent with loved ones, wrapped in laughter over bowls of warm soup. Today, I’m excited to share my Creamy Mushroom Kale Turkey Soup, a perfect remedy for those chilly nights when comfort food calls. Not only does this dish turn leftover turkey into something special, but it also packs a nutritious punch with vibrant kale and creamy goodness. With its simple preparation and hearty flavors, this soup is sure to become a favored meal prep option in your home. Are you ready to transform your leftovers into a cozy culinary hug? Let’s dive into the recipe!

Why is this soup perfect for dinner?

Rich, Creamy Texture: This Creamy Mushroom Kale Turkey Soup is incredibly satisfying, with a velvety finish that’s perfect for warming your soul.
Nutrient-Packed: Featuring tender turkey and nutrient-dense kale, it’s a wholesome choice that doesn’t compromise on flavor.
Quick & Simple: With straightforward steps, this recipe is perfect for busy weeknights, making it easy to whip up a delicious dinner in no time.
Crowd-Pleaser: Loved by both kids and adults, this soup is a delightful family favorite that everyone can enjoy together.
Versatile Recipe: Feel free to customize it by adding your favorite vegetables or opting for chicken instead of turkey—whatever fits your pantry!
Ready to savor a comforting bowl? Don’t forget to enjoy it alongside a slice of homemade bread or shaved asparagus salad for a complete meal experience!

Creamy Mushroom Kale Turkey Soup Ingredients

For the Soup Base

  • Olive Oil – Used for sautéing vegetables; can substitute with butter for a richer flavor.
  • Onion – Adds sweetness and depth; use red or yellow onion based on preference.
  • Carrots – Provide natural sweetness and color; no substitutes necessary.
  • Garlic – Offers aromatic flavor; fresh is preferred over powdered garlic.
  • Celery – Adds a savory base; can use leeks as a substitute.
  • Mushrooms – Baby bella mushrooms are ideal for earthy flavor; substitute with cremini or shiitake if desired.
  • White Wine – Adds complexity to the broth; for a non-alcoholic version, use extra broth or alcohol-free wine.
  • Turkey Broth or Chicken Broth – Forms the soup base; a rich broth enhances flavor.

For the Main Ingredients

  • Cooked Turkey – Provides protein; leftover turkey is perfect here. Substitute with chicken if necessary.
  • Kale – Adds nutrients and color; baby kale is milder; spinach or Swiss chard can be used as alternatives.
  • Cream Cheese – Integrates creaminess and richness; for dairy-free, substitute with coconut milk or plant-based cream.

For Seasoning & Thickening

  • Thyme – Fresh thyme enhances flavor; can be replaced with dried thyme, adjusting the quantity.
  • Flour – Used as a thickening agent; gluten-free alternatives like cornstarch can work.
  • Salt/Pepper – Essential for seasoning; always adjust according to preference.

This Creamy Mushroom Kale Turkey Soup will be a heartwarming dish to cherish, especially on cold evenings!

Step‑by‑Step Instructions for Creamy Mushroom Kale Turkey Soup

Step 1: Sauté Vegetables
In a large Dutch oven, heat 2 tablespoons of olive oil over medium heat. Add one diced onion, two diced celery stalks, and three minced garlic cloves. Sauté for about 5 minutes, stirring frequently, until the onion becomes translucent and fragrant, creating a savory base for your creamy mushroom kale turkey soup.

Step 2: Cook Mushrooms
Next, add 8 ounces of sliced baby bella mushrooms to the pot. Sauté for an additional 5 minutes until the mushrooms release their moisture and become tender. You should notice a rich aroma filling your kitchen. If there’s excess liquid, carefully drain some to ensure the soup doesn’t become too watery.

Step 3: Combine Cream Cheese
Now, stir in 4 ounces of cream cheese, mixing until it melts and fully incorporates with the sautéed vegetables. This will create a creamy texture in your soup base. Continue stirring for a couple of minutes until the mixture is smooth and creamy, serving as the heart of your creamy mushroom kale turkey soup.

Step 4: Prepare Broth Mixture
In a separate bowl, whisk together 4 cups of turkey or chicken broth, ¼ cup of flour, and your preferred seasonings of salt and pepper. Pour this mixture into the pot, stirring continuously to prevent lumps. Bring to a gentle simmer over medium heat, allowing the flavors to meld beautifully.

Step 5: Simmer Soup
Add 2 cups of diced leftover turkey and ½ cup of white wine to the pot, stirring thoroughly. Cover the Dutch oven and let the soup simmer on low heat for 20 minutes. This simmering stage helps deepen the flavors, transforming your creamy mushroom kale turkey soup into a hearty delight.

Step 6: Add Greens
Carefully fold in 2 cups of chopped kale and 1 teaspoon of fresh thyme. Cook uncovered for another 10 minutes, allowing the kale to soften and turn vibrant green. Stir occasionally, ensuring the kale wilts perfectly without losing its nutrient-rich goodness, adding a nutritional boost to your comforting soup.

Step 7: Serve
Once your soup is ready, ladle it into warm bowls. For an extra touch, garnish with freshly cracked pepper and a sprinkle of thyme. This creamy mushroom kale turkey soup is now ready to be enjoyed, bringing warmth and comfort to your dining table.

Creamy Mushroom Kale Turkey Soup Variations

Feel free to put your personal spin on this delightful soup and make it your own!

  • Substitute Turkey: Swap leftover turkey with cooked chicken for a different twist on flavor. It's a simple and delicious alternative!

  • Change Greens: Use spinach or Swiss chard instead of kale for a milder taste and different textures. Both options offer great nutritional benefits and pair wonderfully with creamy soups.

  • Extra Veggies: Consider adding peas or green beans for added heartiness. These vibrant touches bring in color and nutrition, transforming it into a more robust dish.

  • Enhance Creaminess: Drizzle in a splash of heavy cream just before serving for a velvety finish. This simple step elevates the richness of your creamy mushroom kale turkey soup!

  • Herb Variations: Experiment with different herbs like rosemary or parsley instead of thyme. Each herb offers a unique flavor profile that can harmonize beautifully with the ingredients.

  • Spice It Up: Add a pinch of red pepper flakes or a dimple of hot sauce to infuse some heat. Perfect for those who enjoy a little kick in their comforting soups!

  • Dairy-Free Option: Replace cream cheese with coconut milk or a plant-based cream for a silky texture that’s dairy-free. It keeps the soup creamy without compromising on richness.

  • Stir in Quinoa: For a heartier soup, add cooked quinoa right before serving. This protein-packed addition brings a delightful texture to your creamy mushroom kale turkey soup, making it even more filling.

By tweaking your recipe with these suggestions, you can discover new favorites and keep the family excited at mealtime! And if you're in the mood for something different, check out my Asparagus Soup Healthy or Zuppa Toscana Soup recipes for a comforting dinner option!

Expert Tips for Creamy Mushroom Kale Turkey Soup

  • Quality Broth Matters: Use a high-quality turkey or chicken broth for a deeper flavor. Avoid low-sodium varieties as they may lack richness.
  • Don’t Overcook Kale: Add kale towards the end of cooking to maintain its vibrant color and nutrients—overcooking can lead to a mushy texture.
  • Chop Uniformly: Ensure all vegetables are chopped evenly for consistent cooking. This helps avoid any crunchy bites among the tender ingredients.
  • Reheat Gently: If making ahead, gently reheat the soup to prevent cream cheese from curdling. Low heat works best to keep it creamy.
  • Adjust Thickness: If the soup is too thick, add a splash of additional broth or water until you achieve your desired consistency. This soup should be hearty but not overly heavy!

Make Ahead Options

This Creamy Mushroom Kale Turkey Soup is a fantastic option for meal prep, saving you time on hectic weeknights! You can chop all your vegetables (onion, celery, carrots, and garlic) up to 24 hours in advance and store them in an airtight container in the refrigerator. The mushrooms can also be sliced ahead, but be sure to sauté them just before adding to the soup to maintain their texture. Moreover, this soup can be cooked and stored for up to 3 days in the fridge, allowing the flavors to deepen. When you're ready to enjoy, simply reheat on the stove over low heat until warmed through, ensuring you stir gently to prevent curdling with the cream cheese. Enjoy the convenience of a wholesome meal that tastes just as delicious!

How to Store and Freeze Creamy Mushroom Kale Turkey Soup

  • Room Temperature: The soup should not be left out for more than 2 hours to prevent bacterial growth. Always serve hot and enjoy fresh!
  • Fridge: Store leftovers in an airtight container in the refrigerator for up to 3 days. Reheat gently on the stove or in the microwave until steaming hot.
  • Freezer: While this creamy soup is best served fresh, you can freeze it for up to 2 months. Allow it to cool completely before transferring it to a freezer-safe container.
  • Reheating: If previously frozen, thaw in the refrigerator overnight. When reheating, do so over low heat, stirring frequently to maintain its creamy texture without curdling.

What to Serve with Creamy Mushroom Kale Turkey Soup

Nothing enhances a cozy bowl of soup quite like the perfect accompaniment to elevate the meal experience.

  • Crusty Bread: Freshly baked bread slathered with butter is a must! Its warm texture pairs perfectly with the creamy soup, making each bite delightful.
  • Garlic Bread: The buttery, garlicky flavors complement the earthy notes of the soup, ensuring you won’t miss a single drop. It's the ultimate comfort combination!
  • Shaved Asparagus Salad: A refreshing side with lightly dressed asparagus adds a bright contrast to the creamy texture, balancing the flavors beautifully.
  • Cheesy Biscuits: Fluffy, cheesy biscuits offer a wonderful texture contrast, perfect for dipping in your soup. They’re so irresistible, you might end up making extra!
  • Roasted Root Vegetables: Sweet and savory roasted carrots, parsnips, and potatoes bring a hearty, earthy element that harmonizes beautifully with the turkey, mushrooms, and kale.
  • Sparkling Apple Cider: This non-alcoholic beverage’s crispness refreshes the palate and elevates your cozy dinner experience. It’s a festive touch, perfect for the season!
  • Warm Spinach Salad: Lightly wilted spinach with a tangy vinaigrette adds a layer of vibrant flavor and a lovely visual element to your meal.
  • Pumpkin Pie: For dessert lovers, a slice of spiced pumpkin pie ties in seasonal flavors, providing a sweet end to a heartwarming meal.
  • Cheese Platter: A selection of creamy cheeses offers a sophisticated touch, inviting guests to nibble between bites of rich soup for an elegant dining experience.

Creamy Mushroom Kale Turkey Soup Recipe FAQs

What type of mushrooms should I use for this soup?
You’ll want to use baby bella mushrooms for their earthy flavor, but you can certainly substitute with cremini or shiitake mushrooms if you prefer. Just ensure they’re fresh—look for ones that are firm and free from dark spots!

How should I store leftover soup?
Store your creamy mushroom kale turkey soup in an airtight container in the refrigerator for up to 3 days. When reheating, heat it gently on the stove or in the microwave until it’s steaming hot, as this will help maintain its creamy consistency.

Can I freeze this soup?
Yes, you can freeze the soup, but it’s important to note that freezing may affect the creaminess. To do this, allow the soup to cool completely, then transfer it to a freezer-safe container. It will keep well for up to 2 months. When you're ready to enjoy it, thaw it in the refrigerator overnight, and reheat it over low heat, stirring frequently to restore its creamy texture.

What if my soup is too thick after cooking?
If your creamy mushroom kale turkey soup turns out too thick, don't fret! Simply add a splash of additional broth or water until you reach your desired consistency. Make sure to stir well to incorporate the liquid and maintain that delicious, creamy feel.

Are there any dietary considerations for this soup?
Absolutely! This soup can easily accommodate various dietary preferences. For a dairy-free version, swap the cream cheese for coconut milk or a plant-based cream. Also, if you have gluten allergies, use cornstarch instead of flour as a thickening agent. It’s always a great idea to customize based on your personal needs!

Creamy Mushroom Kale Turkey Soup

Creamy Mushroom Kale Turkey Soup for Cozy Nights In

A comforting and nutritious Creamy Mushroom Kale Turkey Soup, perfect for chilly nights.
Print Recipe Pin Recipe
Prep Time 15 minutes mins
Cook Time 45 minutes mins
Total Time 1 hour hr
Servings: 4 bowls
Course: Soups
Cuisine: American
Calories: 350
Ingredients Equipment Method Nutrition Notes

Ingredients
  

For the Soup Base
  • 2 tablespoons Olive Oil Can substitute with butter.
  • 1 medium Onion Diced, choose red or yellow.
  • 2 medium Carrots Diced.
  • 3 cloves Garlic Minced, fresh preferred.
  • 2 stalks Celery Diced, can substitute leeks.
  • 8 ounces Baby Bella Mushrooms Sliced, can substitute with cremini or shiitake.
  • 1/4 cup White Wine For non-alcoholic, use extra broth.
  • 4 cups Turkey or Chicken Broth Rich broth enhances flavor.
For the Main Ingredients
  • 2 cups Cooked Turkey Diced, leftover turkey works well.
  • 2 cups Kale Chopped, can substitute spinach or Swiss chard.
  • 4 ounces Cream Cheese For dairy-free, substitute with coconut milk.
For Seasoning & Thickening
  • 1 teaspoon Thyme Fresh preferred, can substitute dried thyme.
  • 1/4 cup Flour Used as a thickening agent, gluten-free alternatives available.
  • to taste Salt
  • to taste Pepper

Equipment

  • Dutch oven

Method
 

Cooking Steps
  1. Heat olive oil in a large Dutch oven over medium heat. Add diced onion, diced celery, and minced garlic. Sauté for about 5 minutes until the onion is translucent.
  2. Add sliced baby bella mushrooms to the pot. Sauté for an additional 5 minutes until they release their moisture.
  3. Stir in cream cheese until it melts and mixes with the sautéed vegetables.
  4. In a separate bowl, whisk together turkey broth, flour, salt, and pepper. Pour into the pot and stir continuously to prevent lumps. Bring to a gentle simmer.
  5. Add diced leftover turkey and white wine, stir well. Cover and let simmer on low heat for 20 minutes.
  6. Fold in chopped kale and fresh thyme. Cook uncovered for another 10 minutes, stirring occasionally.
  7. Ladle soup into warm bowls, garnish with cracked pepper and thyme. Serve hot.

Nutrition

Serving: 1bowlCalories: 350kcalCarbohydrates: 30gProtein: 25gFat: 15gSaturated Fat: 5gPolyunsaturated Fat: 0.5gMonounsaturated Fat: 9gCholesterol: 70mgSodium: 800mgPotassium: 800mgFiber: 4gSugar: 5gVitamin A: 2000IUVitamin C: 30mgCalcium: 80mgIron: 2mg

Notes

This soup is perfect for using up leftover turkey and is best served fresh.

Tried this recipe?

Let us know how it was!

Eye of Newt Stew: Hauntingly Delicious for Halloween Nights

October 15, 2025 by Grace Snow Leave a Comment

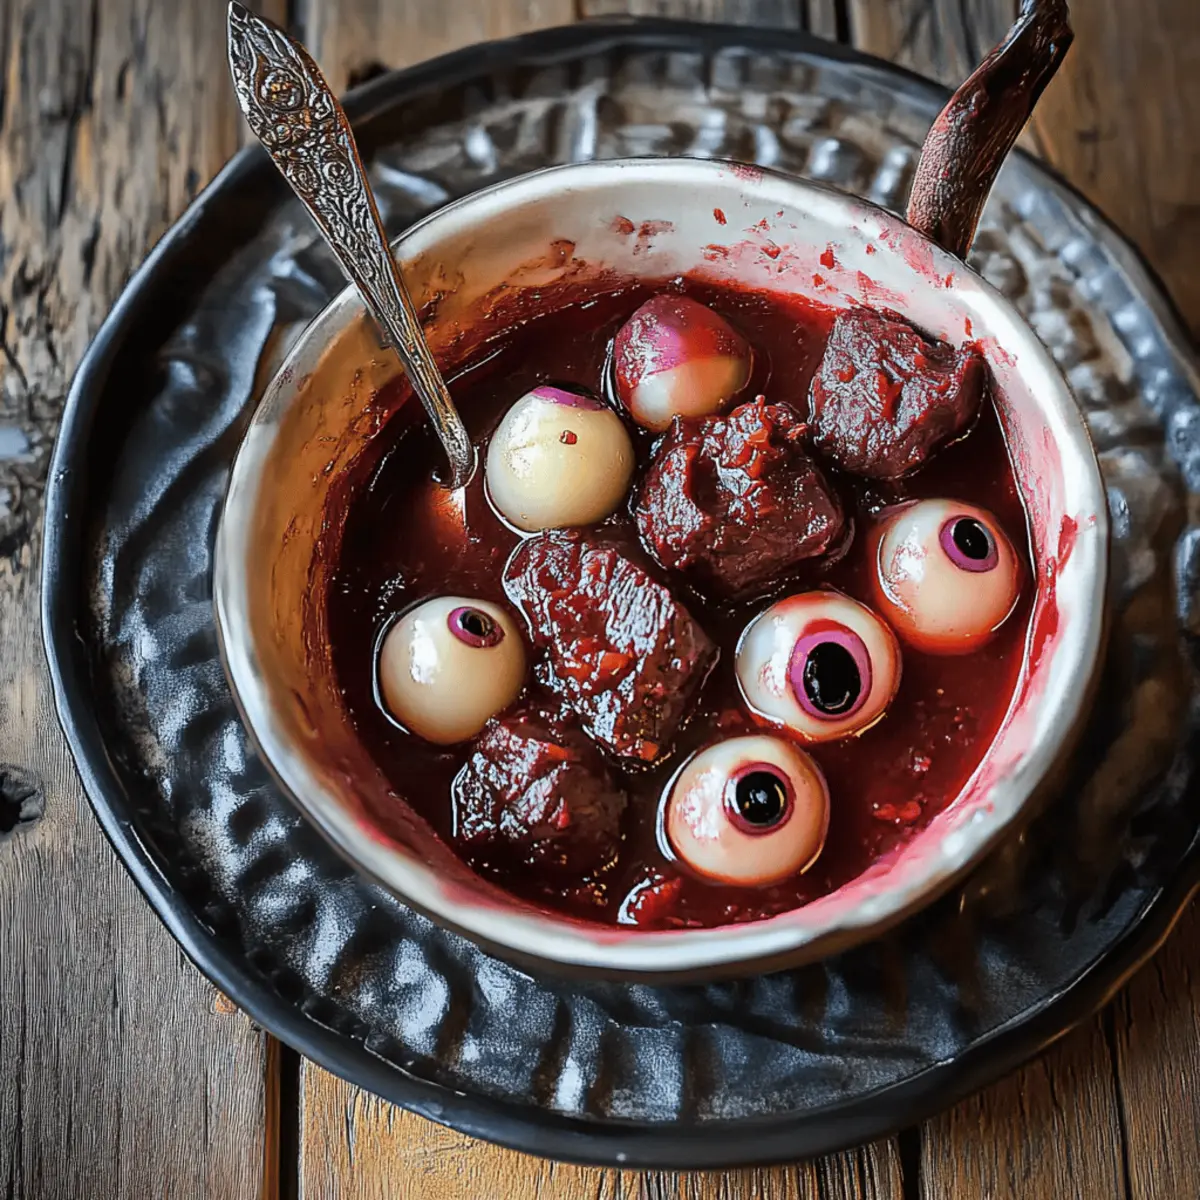
As the chill of autumn settles in, the kitchen beckons with the scent of something enchanting cooking on the stove. I recently stumbled upon a recipe that transforms traditional beef stew into a whimsical feast—introducing my Eye of Newt Stew. This captivating dish features tender beef braised in bold red wine, complemented by the earthy sweetness of onions and the surprising burst of pomegranate. Perfect for Halloween, this stew not only impresses with its hauntingly beautiful pearl onion "eyeballs," but it can be prepared ahead of time, making it ideal for gatherings. Plus, it's a comforting meal that allows for delicious variations, ensuring everyone at your table can indulge. Are you ready to take a bold culinary leap this season?

Why Is Eye of Newt Stew Unique?

Irresistible Flavor: The blend of tender beef, rich red wine, and earthy onions creates a taste sensation you're sure to love.

Perfect for Halloween: The “eyeball” pearl onions not only elevate the dish visually but also add a delightful surprise!

Time-Saving Meal: Easily make this stew ahead of time, allowing the flavors to deepen and impress your guests without last-minute fuss.

Versatile Options: With simple substitutions like omitting tomato paste, you can cater to nightshade-free diets or add fish sauce for an umami boost.

Crowd Pleaser: This dish is a showstopper that brings everyone together—serve with crusty bread or over mashed potatoes for a heartwarming experience. Make sure to check out my Lamb Stew Hearty for another comforting yet impressive option!

Eye of Newt Stew Ingredients

For the Stew

• Beef Chuck-Eye Roast – This cut offers rich flavor and tenderness, perfect for a hearty stew.
• Bacon Grease or Avocado Oil – Used for sautéing; helps boost flavor, but vegetable oil works as a dairy-free alternative.
• Yellow Onion – Provides a sweet base; slice thinly to ensure even cooking.
• Carrot – Adds a natural sweetness; diced, and you can use purple carrots for a spooky flair.
• Celery – Diced for adding depth to the flavor of the stew.
• Mushrooms – Brings umami and texture; consider high vitamin D varieties for added health benefits.
• Garlic Cloves – Enhances the stew with a fragrant aroma; mince for maximum flavor.
• Tomato Paste – Thickens the stew and adds depth; omit for a comforting nightshade-free Eye of Newt Stew.
• Fish Sauce – Optional for an umami boost; doesn't impart a fishy taste.
• Red Wine – Use a robust type like Cabernet Sauvignon to enrich the flavor profile.
• Chicken Stock – The base for braising; feel free to substitute with vegetable stock for a lighter taste.
• Unflavored Gelatin – Improves mouthfeel and thickness, adding luxurious texture.
• Gluten-Free Worcestershire Sauce – Ensures your stew remains gluten-free while enhancing the flavor profile.
• Thyme and Bay Leaves – These herbs provide aromatic flavor depth; fresh is always best!

For the Eyeballs

• Frozen Pearl Onions – Thawed and simmered; they make perfect "eyeballs" for this spooky stew.
• Butter or Dairy-Free Alternative – Use for sautéing pearl onions until tender.
• Caper Berries or Small Black Olives – Fill the hollowed-out onions for a briny burst of flavor.

For the Sauce

• Pomegranate Juice – Adds a sweet yet tangy element to the dish, blending beautifully with the other flavors.
• Glucomann Powder – An optional ingredient to improve sauce texture, giving a luxurious finish.

With these carefully selected ingredients, you’re just steps away from creating an unforgettable Eye of Newt Stew that’s sure to delight your taste buds and charm your guests!

Step‑by‑Step Instructions for Eye of Newt Stew

Step 1: Preheat the Oven
Begin by preheating your oven to 325ºF (163ºC). This temperature is perfect for slow-cooking your Eye of Newt Stew, allowing the beef to become incredibly tender. While the oven warms up, gather your ingredients and equipment, including a Dutch oven for the stovetop and oven cooking.

Step 2: Sauté the Vegetables
In a large Dutch oven, heat about 2 tablespoons of bacon grease or avocado oil over medium heat. Once hot, add sliced yellow onions, diced carrots, diced celery, and mushrooms. Sauté the mixture for about 10 minutes until the onions turn golden brown and fragrant, stirring occasionally to ensure even cooking and prevent burning.

Step 3: Add Garlic and Tomato Paste
Add minced garlic to your sautéed vegetables and stir for an additional minute until fragrant. Next, incorporate 2 tablespoons of tomato paste into the mixture and cook for 2 minutes, allowing the tomato paste to darken slightly and develop its flavor, which will enrich the Eye of Newt Stew.

Step 4: Deglaze with Red Wine
Pour in 1 cup of robust red wine, such as Cabernet Sauvignon, and use a wooden spoon to scrape any browned bits from the bottom of the pot. This deglazing method enhances the stew’s flavor. Next, add 1 cup of chicken stock, fish sauce (if using), gelatin, thyme sprigs, bay leaves, and gluten-free Worcestershire sauce to the pot.

Step 5: Add the Beef
Bring the contents of the pot to a gentle boil, then carefully add the 2-inch beef chuck-eye chunks, ensuring the meat is fully submerged in the liquid. If necessary, add more chicken stock to cover the beef. The submersion is crucial for evenly cooked, tender beef in your Eye of Newt Stew.

Step 6: Bake the Stew
Once the beef is added, cover the Dutch oven with its lid and transfer it to the preheated oven. Allow the stew to bake for 3 to 4 hours. Check occasionally for tenderness, ensuring the beef is fork-tender and the flavors have melded beautifully by the time the cooking is completed.

Step 7: Skim Excess Fat
After the cooking time has elapsed, remove the Dutch oven from the oven and let it cool slightly. Skim off any excess fat that has risen to the surface of the stew. For easier fat removal, refrigerate the stew overnight and skim off the solidified fat before reheating, but feel free to proceed immediately if serving guests!

Step 8: Prepare the “Eyeballs”
While the stew cools, prepare the “eyeball” garnish. In a separate saucepan, simmer thawed pearl onions in a bit of butter or a dairy-free alternative over medium heat for about 20 minutes until they are tender. Season with salt and pepper, then set them aside on a plate while you fill them.

Step 9: Make the Pomegranate Sauce
For the special touch that brings your Eye of Newt Stew together, prepare the pomegranate sauce. In a small saucepan, reduce 1 cup of pomegranate juice over medium heat until it becomes syrupy, which should take about 10 minutes. If desired, whisk in glucomann powder for added thickness.

Step 10: Assemble the Dish
Finally, hollow out the cooked pearl onions gently, filling them with caper berries or small black olives for a fun “eyeball” effect. To serve, ladle the Eye of Newt Stew into bowls, artistically arrange the pearl onion “eyeballs” on top, and drizzle with the luscious pomegranate sauce for an irresistible feast that dazzles!

Make Ahead Options

These Eye of Newt Stew preparations are perfect for busy home cooks looking to save time! You can sauté the vegetables and prepare the braising liquid up to 24 hours in advance, storing them in the refrigerator to maintain freshness. Additionally, the beef can be cut into chunks and marinated overnight in the braising liquid to enhance flavor. When you're ready to serve, simply combine the prepped ingredients in the Dutch oven and bake as directed—this ensures a hearty and delicious stew, just as rich and tender as if cooked on the same day. For optimum quality, refrigerate leftovers in an airtight container for up to 3 days or freeze for longer storage.

What to Serve with Eye of Newt Stew?

Indulging in this enchanting stew opens the door to a world of mouthwatering side dishes that will enhance your dining experience.

  • Crusty Bread: Perfect for dipping, the warm, crunchy texture complements the rich stew and soaks up every drop of the delicious sauce.
  • Garlic Mashed Potatoes: Creamy and flavorful, these mashed potatoes offer a comforting pairing that balances the boldness of the stew's flavors.
  • Roasted Brussels Sprouts: Crispy, caramelized exteriors paired with a tender interior add a healthy crunch, grounding the dish with earthy notes.
  • Autumn Salad: Fresh greens with pomegranate seeds, walnuts, and a light vinaigrette introduce a bright, crisp contrast to the hearty stew.
  • Buttery Cornbread: This sweet and fluffy bread provides a delightful texture and balances the savory richness of the stew, making every bite heavenly.
  • Red Wine: A glass of the same bold red wine used in your stew will harmonize flavors beautifully, creating a festive and cozy atmosphere.
  • Pumpkin Pie: For a seasonal dessert, this spiced pie captures the essence of fall, leading your meal toward a sweet, warming finish.
  • Spicy Roasted Chickpeas: These crunchy bites add a zesty twist to your table, enhancing the overall experience with a satisfying snack element.
  • Creamy Polenta: Smooth and comforting, polenta creates a lovely base that pairs wonderfully with the rich texture of the Eye of Newt Stew.

Eye of Newt Stew Variations & Substitutions

Feel free to unleash your creativity in the kitchen and tailor this delectable stew to your taste and dietary needs!

  • Vegetarian Option: Swap beef for plant-based proteins like mushrooms or jackfruit for a hearty vegetarian stew that still packs a flavor punch.
  • Nightshade-Free: Omit the tomato paste and enjoy this stew free from nightshade vegetables while maintaining its richness.
  • Alternative Sauces: Substitute pomegranate sauce with a delicious blackberry or raspberry sauce to add a sweet and tangy twist.
  • Herb Boost: Use fragrant fresh herbs such as rosemary or parsley instead of dried for a vibrant flavor infusion right before serving.
  • Spicy Kick: Add a dash of smoked paprika or crushed red pepper flakes to kick up the heat level—perfect for those who enjoy a little spice!
  • Richness Upgrade: Incorporate a splash of balsamic vinegar or soy sauce for an umami boost that deepens the overall taste of the stew.
  • Different Stocks: Use vegetable stock instead of chicken stock for more plant-based options without compromising on flavor—ideal for vegetarian diners.
  • Texture Variants: Add barley or farro to increase the heartiness of your Eye of Newt Stew, introducing a delightful chewiness.

These inventive variations allow you to craft a unique Eye of Newt Stew suited to everyone around your dinner table. Looking for more comforting stews? Check out my Crock Pot Chicken Stew or try the delightful Beans Greens Stew for a hearty meal!

Storage Tips for Eye of Newt Stew

  • Fridge: Store your Eye of Newt Stew in an airtight container for up to 3 days. Allow it to cool completely before refrigerating to maintain its delicious flavors.

  • Freezer: For longer storage, freeze the stew in a freezer-safe container for up to 3 months. To prevent freezer burn, ensure the container is tightly sealed.

  • Reheating: When ready to enjoy, reheat on the stovetop over medium heat. Add a splash of stock or water if needed to rejuvenate the sauce's consistency.

  • Fat Removal: For a lighter dish, consider cooling the stew overnight in the fridge, allowing the fat to solidify for easy removal before reheating.

Expert Tips for Eye of Newt Stew

  • Choose Quality Meat: Select a good quality beef chuck-eye roast for maximum tenderness and flavor; this cut stands up beautifully to slow braising.

  • Control Liquid Levels: Ensure the beef is fully submerged in liquid during cooking; dry spots lead to tough meat. Add stock as needed!

  • Fresh Herbs Matter: Use fresh thyme and bay leaves to enhance your stew’s aromatic profile; dried can’t compare to the depth that fresh provides.

  • Let It Rest: Refrigerate overnight after cooking for more balanced flavors and easier fat removal; the next day, simply reheat before serving.

  • Whimsical Presentation: Take the time to prepare the pearl onion "eyeballs"; they not only elevate the visual appeal but also surprise your guests with delightful flavor!

  • Adjust for Preferences: Feel free to substitute or omit ingredients like tomato paste for a nightshade-free Eye of Newt Stew; versatility keeps meal prep exciting!

Eye of Newt Stew Recipe FAQs

How do I select the best beef for Eye of Newt Stew?
Absolutely! For the best flavor and tenderness, I recommend using a quality beef chuck-eye roast. Look for marbling throughout the meat, which indicates juiciness and richness. The cut should be bright red without excessive dark spots. Cutting it into 2-inch chunks ensures even cooking and melting tenderness in your stew!

What’s the best way to store leftover Eye of Newt Stew?
After cooking, allow your stew to cool completely before transferring it to an airtight container. It can be stored in the fridge for up to 3 days. For longer storage, freeze it in a freezer-safe container for up to 3 months. Just make sure it's tightly sealed to prevent freezer burn!

Can I freeze Eye of Newt Stew?
Very! To freeze, let the stew cool entirely, then ladle it into freezer-safe containers. Make sure to leave some space for expansion. When you're ready to enjoy it again, simply thaw it in the fridge overnight and heat it on the stovetop. If the sauce appears too thick, add a little stock or water while reheating to get the right consistency.

What if my stew is too thick after cooking?
No worries at all! If your Eye of Newt Stew ends up thicker than you like, just add a splash of chicken stock or even water during the reheating process. Stir continuously while it warms to integrate the liquid evenly, and soon you'll have that perfect, luscious sauce again!

Is Eye of Newt Stew suitable for dietary restrictions?
Yes, indeed! This dish can be made nightshade-free by omitting the tomato paste. Additionally, by selecting gluten-free Worcestershire sauce and using bacon grease or avocado oil, you can keep it suitable for gluten-free diets as well. For vegetarian options, consider substituting beef with mushrooms or jackfruit! Always check that your other ingredients meet your specific dietary needs, particularly if allergies are a concern.

Can pets safely consume leftovers from Eye of Newt Stew?
While the ingredients might seem tempting, it's best to avoid giving your furry friends any stew, especially due to possible onions, garlic, and seasonings like fish sauce that may not be safe for them. Instead, stick to dog-friendly treats or veggies when sharing with your pets!

Eye of Newt Stew

Eye of Newt Stew: Hauntingly Delicious for Halloween Nights

Eye of Newt Stew is a comforting and whimsical beef stew, featuring pearl onion 'eyeballs' and rich flavors perfect for Halloween gatherings.
Print Recipe Pin Recipe
Prep Time 30 minutes mins
Cook Time 3 hours hrs 30 minutes mins
Cooling Time 30 minutes mins
Total Time 4 hours hrs 30 minutes mins
Servings: 6 servings
Course: Soups
Cuisine: Halloween
Calories: 550
Ingredients Equipment Method Nutrition Notes

Ingredients
  

For the Stew
  • 2 pounds Beef Chuck-Eye Roast cut into 2-inch chunks
  • 2 tablespoons Bacon Grease or Avocado Oil for sautéing
  • 1 large Yellow Onion sliced thinly
  • 1 cup Carrot diced
  • 1 cup Celery diced
  • 8 ounces Mushrooms high vitamin D varieties recommended
  • 4 cloves Garlic minced
  • 2 tablespoons Tomato Paste optional
  • 1 tablespoon Fish Sauce optional
  • 1 cup Red Wine robust variety like Cabernet Sauvignon
  • 1 cup Chicken Stock or vegetable stock
  • 1 tablespoon Unflavored Gelatin optional
  • 2 tablespoons Gluten-Free Worcestershire Sauce
  • 2 sprigs Thyme fresh preferred
  • 2 leaves Bay Leaves fresh preferred
For the Eyeballs
  • 1 cup Frozen Pearl Onions thawed
  • 2 tablespoons Butter or Dairy-Free Alternative for sautéing
  • 1/4 cup Caper Berries or Small Black Olives
For the Sauce
  • 1 cup Pomegranate Juice
  • 1 tablespoon Glucomann Powder optional

Equipment

  • Dutch oven

Method
 

Cooking Steps
  1. Preheat your oven to 325ºF (163ºC).
  2. In a large Dutch oven, heat about 2 tablespoons of bacon grease or avocado oil over medium heat. Add sliced yellow onions, diced carrots, diced celery, and mushrooms. Sauté for about 10 minutes until golden brown and fragrant.
  3. Add minced garlic and stir for an additional minute. Incorporate 2 tablespoons of tomato paste and cook for 2 minutes.
  4. Pour in 1 cup of red wine and scrape browned bits. Then add 1 cup of chicken stock, fish sauce (if using), gelatin, thyme, bay leaves, and Worcestershire sauce.
  5. Bring to a gentle boil, add beef chunks, ensuring meat is submerged in the liquid. Add more chicken stock if necessary.
  6. Cover and bake for 3 to 4 hours, checking occasionally for tenderness.
  7. Skim off excess fat after cooking. Refrigerate overnight for easier fat removal if desired.
  8. In a separate saucepan, simmer thawed pearl onions in butter or dairy-free alternative for about 20 minutes until tender. Season and set aside.
  9. Reduce 1 cup of pomegranate juice over medium heat for about 10 minutes until syrupy. Whisk in glucomann powder for thickness if desired.
  10. Hollow out cooked pearl onions and fill with caper berries or olives. Serve the stew, topping with pearl onions and drizzling with pomegranate sauce.

Nutrition

Serving: 1bowlCalories: 550kcalCarbohydrates: 35gProtein: 40gFat: 25gSaturated Fat: 10gPolyunsaturated Fat: 3gMonounsaturated Fat: 10gTrans Fat: 1gCholesterol: 100mgSodium: 800mgPotassium: 900mgFiber: 4gSugar: 6gVitamin A: 120IUVitamin C: 15mgCalcium: 40mgIron: 5mg

Notes

This stew can be stored for up to 3 days in the fridge or frozen for up to 3 months. Reheat on the stovetop, adding stock as needed.

Tried this recipe?

Let us know how it was!

Eye of Newt Stew: Hauntingly Delicious for Halloween Nights

October 15, 2025 by Grace Snow Leave a Comment

As the chill of autumn settles in, the kitchen beckons with the scent of something enchanting cooking on the stove. I recently stumbled upon a recipe that transforms traditional beef stew into a whimsical feast—introducing my Eye of Newt Stew. This captivating dish features tender beef braised in bold red wine, complemented by the earthy sweetness of onions and the surprising burst of pomegranate. Perfect for Halloween, this stew not only impresses with its hauntingly beautiful pearl onion "eyeballs," but it can be prepared ahead of time, making it ideal for gatherings. Plus, it's a comforting meal that allows for delicious variations, ensuring everyone at your table can indulge. Are you ready to take a bold culinary leap this season?

Why Is Eye of Newt Stew Unique?

Irresistible Flavor: The blend of tender beef, rich red wine, and earthy onions creates a taste sensation you're sure to love.

Perfect for Halloween: The “eyeball” pearl onions not only elevate the dish visually but also add a delightful surprise!

Time-Saving Meal: Easily make this stew ahead of time, allowing the flavors to deepen and impress your guests without last-minute fuss.

Versatile Options: With simple substitutions like omitting tomato paste, you can cater to nightshade-free diets or add fish sauce for an umami boost.

Crowd Pleaser: This dish is a showstopper that brings everyone together—serve with crusty bread or over mashed potatoes for a heartwarming experience. Make sure to check out my Lamb Stew Hearty for another comforting yet impressive option!

Eye of Newt Stew Ingredients

For the Stew

• Beef Chuck-Eye Roast – This cut offers rich flavor and tenderness, perfect for a hearty stew.
• Bacon Grease or Avocado Oil – Used for sautéing; helps boost flavor, but vegetable oil works as a dairy-free alternative.
• Yellow Onion – Provides a sweet base; slice thinly to ensure even cooking.
• Carrot – Adds a natural sweetness; diced, and you can use purple carrots for a spooky flair.
• Celery – Diced for adding depth to the flavor of the stew.
• Mushrooms – Brings umami and texture; consider high vitamin D varieties for added health benefits.
• Garlic Cloves – Enhances the stew with a fragrant aroma; mince for maximum flavor.
• Tomato Paste – Thickens the stew and adds depth; omit for a comforting nightshade-free Eye of Newt Stew.
• Fish Sauce – Optional for an umami boost; doesn't impart a fishy taste.
• Red Wine – Use a robust type like Cabernet Sauvignon to enrich the flavor profile.
• Chicken Stock – The base for braising; feel free to substitute with vegetable stock for a lighter taste.
• Unflavored Gelatin – Improves mouthfeel and thickness, adding luxurious texture.
• Gluten-Free Worcestershire Sauce – Ensures your stew remains gluten-free while enhancing the flavor profile.
• Thyme and Bay Leaves – These herbs provide aromatic flavor depth; fresh is always best!

For the Eyeballs

• Frozen Pearl Onions – Thawed and simmered; they make perfect "eyeballs" for this spooky stew.
• Butter or Dairy-Free Alternative – Use for sautéing pearl onions until tender.
• Caper Berries or Small Black Olives – Fill the hollowed-out onions for a briny burst of flavor.

For the Sauce

• Pomegranate Juice – Adds a sweet yet tangy element to the dish, blending beautifully with the other flavors.
• Glucomann Powder – An optional ingredient to improve sauce texture, giving a luxurious finish.

With these carefully selected ingredients, you’re just steps away from creating an unforgettable Eye of Newt Stew that’s sure to delight your taste buds and charm your guests!

Step‑by‑Step Instructions for Eye of Newt Stew

Step 1: Preheat the Oven
Begin by preheating your oven to 325ºF (163ºC). This temperature is perfect for slow-cooking your Eye of Newt Stew, allowing the beef to become incredibly tender. While the oven warms up, gather your ingredients and equipment, including a Dutch oven for the stovetop and oven cooking.

Step 2: Sauté the Vegetables
In a large Dutch oven, heat about 2 tablespoons of bacon grease or avocado oil over medium heat. Once hot, add sliced yellow onions, diced carrots, diced celery, and mushrooms. Sauté the mixture for about 10 minutes until the onions turn golden brown and fragrant, stirring occasionally to ensure even cooking and prevent burning.

Step 3: Add Garlic and Tomato Paste
Add minced garlic to your sautéed vegetables and stir for an additional minute until fragrant. Next, incorporate 2 tablespoons of tomato paste into the mixture and cook for 2 minutes, allowing the tomato paste to darken slightly and develop its flavor, which will enrich the Eye of Newt Stew.

Step 4: Deglaze with Red Wine
Pour in 1 cup of robust red wine, such as Cabernet Sauvignon, and use a wooden spoon to scrape any browned bits from the bottom of the pot. This deglazing method enhances the stew’s flavor. Next, add 1 cup of chicken stock, fish sauce (if using), gelatin, thyme sprigs, bay leaves, and gluten-free Worcestershire sauce to the pot.

Step 5: Add the Beef
Bring the contents of the pot to a gentle boil, then carefully add the 2-inch beef chuck-eye chunks, ensuring the meat is fully submerged in the liquid. If necessary, add more chicken stock to cover the beef. The submersion is crucial for evenly cooked, tender beef in your Eye of Newt Stew.

Step 6: Bake the Stew
Once the beef is added, cover the Dutch oven with its lid and transfer it to the preheated oven. Allow the stew to bake for 3 to 4 hours. Check occasionally for tenderness, ensuring the beef is fork-tender and the flavors have melded beautifully by the time the cooking is completed.

Step 7: Skim Excess Fat
After the cooking time has elapsed, remove the Dutch oven from the oven and let it cool slightly. Skim off any excess fat that has risen to the surface of the stew. For easier fat removal, refrigerate the stew overnight and skim off the solidified fat before reheating, but feel free to proceed immediately if serving guests!

Step 8: Prepare the “Eyeballs”
While the stew cools, prepare the “eyeball” garnish. In a separate saucepan, simmer thawed pearl onions in a bit of butter or a dairy-free alternative over medium heat for about 20 minutes until they are tender. Season with salt and pepper, then set them aside on a plate while you fill them.

Step 9: Make the Pomegranate Sauce
For the special touch that brings your Eye of Newt Stew together, prepare the pomegranate sauce. In a small saucepan, reduce 1 cup of pomegranate juice over medium heat until it becomes syrupy, which should take about 10 minutes. If desired, whisk in glucomann powder for added thickness.

Step 10: Assemble the Dish
Finally, hollow out the cooked pearl onions gently, filling them with caper berries or small black olives for a fun “eyeball” effect. To serve, ladle the Eye of Newt Stew into bowls, artistically arrange the pearl onion “eyeballs” on top, and drizzle with the luscious pomegranate sauce for an irresistible feast that dazzles!

Eye of Newt Stew Variations & Substitutions

Feel free to unleash your creativity in the kitchen and tailor this delectable stew to your taste and dietary needs!

  • Vegetarian Option: Swap beef for plant-based proteins like mushrooms or jackfruit for a hearty vegetarian stew that still packs a flavor punch.
  • Nightshade-Free: Omit the tomato paste and enjoy this stew free from nightshade vegetables while maintaining its richness.
  • Alternative Sauces: Substitute pomegranate sauce with a delicious blackberry or raspberry sauce to add a sweet and tangy twist.
  • Herb Boost: Use fragrant fresh herbs such as rosemary or parsley instead of dried for a vibrant flavor infusion right before serving.
  • Spicy Kick: Add a dash of smoked paprika or crushed red pepper flakes to kick up the heat level—perfect for those who enjoy a little spice!
  • Richness Upgrade: Incorporate a splash of balsamic vinegar or soy sauce for an umami boost that deepens the overall taste of the stew.
  • Different Stocks: Use vegetable stock instead of chicken stock for more plant-based options without compromising on flavor—ideal for vegetarian diners.
  • Texture Variants: Add barley or farro to increase the heartiness of your Eye of Newt Stew, introducing a delightful chewiness.

These inventive variations allow you to craft a unique Eye of Newt Stew suited to everyone around your dinner table. Looking for more comforting stews? Check out my Crock Pot Chicken Stew or try the delightful Beans Greens Stew for a hearty meal!

Storage Tips for Eye of Newt Stew

  • Fridge: Store your Eye of Newt Stew in an airtight container for up to 3 days. Allow it to cool completely before refrigerating to maintain its delicious flavors.

  • Freezer: For longer storage, freeze the stew in a freezer-safe container for up to 3 months. To prevent freezer burn, ensure the container is tightly sealed.

  • Reheating: When ready to enjoy, reheat on the stovetop over medium heat. Add a splash of stock or water if needed to rejuvenate the sauce's consistency.

  • Fat Removal: For a lighter dish, consider cooling the stew overnight in the fridge, allowing the fat to solidify for easy removal before reheating.

Expert Tips for Eye of Newt Stew

  • Choose Quality Meat: Select a good quality beef chuck-eye roast for maximum tenderness and flavor; this cut stands up beautifully to slow braising.

  • Control Liquid Levels: Ensure the beef is fully submerged in liquid during cooking; dry spots lead to tough meat. Add stock as needed!

  • Fresh Herbs Matter: Use fresh thyme and bay leaves to enhance your stew’s aromatic profile; dried can’t compare to the depth that fresh provides.

  • Let It Rest: Refrigerate overnight after cooking for more balanced flavors and easier fat removal; the next day, simply reheat before serving.

  • Whimsical Presentation: Take the time to prepare the pearl onion "eyeballs"; they not only elevate the visual appeal but also surprise your guests with delightful flavor!

  • Adjust for Preferences: Feel free to substitute or omit ingredients like tomato paste for a nightshade-free Eye of Newt Stew; versatility keeps meal prep exciting!

Make Ahead Options

These Eye of Newt Stew preparations are perfect for busy nights when you want to simplify meal planning! You can sauté the vegetables and even sear the beef up to 24 hours in advance, storing them in airtight containers in the refrigerator to maintain freshness. Additionally, the stew can be fully prepared and refrigerated for up to 3 days, allowing the flavors to develop beautifully. When you're ready to enjoy it, simply reheat on the stovetop until simmering, then proceed with the final steps—adding the colourful "eyeballs" and pomegranate sauce before serving. This ensures you'll have a delicious, home-cooked meal with minimal effort on the day of serving!

What to Serve with Eye of Newt Stew?

Indulging in this enchanting stew opens the door to a world of mouthwatering side dishes that will enhance your dining experience.

  • Crusty Bread: Perfect for dipping, the warm, crunchy texture complements the rich stew and soaks up every drop of the delicious sauce.
  • Garlic Mashed Potatoes: Creamy and flavorful, these mashed potatoes offer a comforting pairing that balances the boldness of the stew's flavors.
  • Roasted Brussels Sprouts: Crispy, caramelized exteriors paired with a tender interior add a healthy crunch, grounding the dish with earthy notes.
  • Autumn Salad: Fresh greens with pomegranate seeds, walnuts, and a light vinaigrette introduce a bright, crisp contrast to the hearty stew.
  • Buttery Cornbread: This sweet and fluffy bread provides a delightful texture and balances the savory richness of the stew, making every bite heavenly.
  • Red Wine: A glass of the same bold red wine used in your stew will harmonize flavors beautifully, creating a festive and cozy atmosphere.
  • Pumpkin Pie: For a seasonal dessert, this spiced pie captures the essence of fall, leading your meal toward a sweet, warming finish.
  • Spicy Roasted Chickpeas: These crunchy bites add a zesty twist to your table, enhancing the overall experience with a satisfying snack element.
  • Creamy Polenta: Smooth and comforting, polenta creates a lovely base that pairs wonderfully with the rich texture of the Eye of Newt Stew.

Eye of Newt Stew Recipe FAQs

How should I select my beef for Eye of Newt Stew?
When choosing your beef, I recommend using a Chuck-Eye Roast, which is incredibly flavorful and tender when braised. Look for meat that is bright red with good marbling, as the fat content adds richness to your stew. Avoid any packages with dark spots or discoloration.

What’s the best way to store leftover Eye of Newt Stew?
Absolutely! Store your Eye of Newt Stew in an airtight container in the fridge for up to 3 days. Make sure it cools completely before sealing to lock in its flavors and freshness. When you're ready to enjoy it again, simply reheat it on the stove over low heat, stirring occasionally.

Can I freeze Eye of Newt Stew, and if so, how?
Yes! You can freeze the Eye of Newt Stew for up to 3 months. To do so, allow the stew to cool completely, then transfer it to a freezer-safe container. Be sure to leave some space at the top for expansion as it freezes. When ready to enjoy, thaw it overnight in the fridge and reheat gently on the stove.

What if my stew is too thick after cooking?
If you find your Eye of Newt Stew is too thick, don’t fret! Simply add a bit of broth or water—about a quarter cup at a time—while gently heating it on the stove. Stir well until you reach your desired consistency. Remember, a delicious stew should flow like a charm, even if it’s hearty!

Is there a nightshade-free version of Eye of Newt Stew?
Yes, indeed! To make a nightshade-free Eye of Newt Stew, simply omit the tomato paste. You can also substitute the pomegranate sauce with a fruity reduction from berries like blackberries or raspberries that provide a similar sweet-tart flavor without the nightshades. Enjoy the spooky experience without compromise!

Can my pets eat any of the ingredients in Eye of Newt Stew?
Be cautious with what you share with your furry friends! While the cooked beef is a tasty treat for dogs, avoid giving them stew with garlic, onion, or seasonings, as these can be harmful. It’s best to keep the stew to yourself, but you can offer them plain, cooked beef as a special snack!

Eye of Newt Stew

Eye of Newt Stew: Hauntingly Delicious for Halloween Nights

Eye of Newt Stew is a whimsical, comforting dish featuring tender beef, bold wine, and 'eyeball' pearl onions, perfect for Halloween gatherings.
Print Recipe Pin Recipe
Prep Time 30 minutes mins
Cook Time 4 hours hrs
Cooling Time 30 minutes mins
Total Time 5 hours hrs
Servings: 6 servings
Course: Soups
Cuisine: American
Calories: 450
Ingredients Equipment Method Nutrition Notes

Ingredients
  

For the Stew
  • 2 pounds Beef Chuck-Eye Roast cut into 2-inch chunks
  • 2 tablespoons Bacon Grease or Avocado Oil for sautéing
  • 1 large Yellow Onion sliced thinly
  • 1 cup Carrot diced, purple for flair optional
  • 1 cup Celery diced
  • 8 ounces Mushrooms high vitamin D varieties recommended
  • 4 cloves Garlic minced
  • 2 tablespoons Tomato Paste optional
  • 1 tablespoon Fish Sauce optional for umami
  • 1 cup Red Wine robust type like Cabernet Sauvignon
  • 1 cup Chicken Stock or vegetable stock
  • 1 tablespoon Unflavored Gelatin optional for thickness
  • 1 tablespoon Gluten-Free Worcestershire Sauce for flavor
  • 3 sprigs Thyme fresh
  • 2 leaves Bay Leaves fresh
For the Eyeballs
  • 1 cup Frozen Pearl Onions thawed
  • 1 tablespoon Butter or Dairy-Free Alternative for sautéing
  • 1/4 cup Caper Berries or Small Black Olives for filling
For the Sauce
  • 1 cup Pomegranate Juice reduces for sauce
  • 1 tablespoon Glucomann Powder optional for thickness

Equipment

  • Dutch oven

Method
 

Cooking Steps
  1. Preheat your oven to 325ºF (163ºC). Gather ingredients and equipment including a Dutch oven.
  2. Heat bacon grease or avocado oil in a large Dutch oven over medium heat. Sauté onions, carrots, celery, and mushrooms for about 10 minutes.
  3. Add minced garlic and stir for 1 minute. Then incorporate tomato paste and cook for 2 minutes.
  4. Deglaze the pot with red wine, scraping browned bits. Add chicken stock, fish sauce (if using), gelatin, thyme, bay leaves, and Worcestershire sauce.
  5. Add beef chunks, ensuring they are submerged. Add more stock if necessary.
  6. Cover the Dutch oven and transfer it to the oven. Bake for 3 to 4 hours until beef is fork-tender.
  7. Skim excess fat from the surface after cooking. Refrigerate overnight for easier fat removal if possible.
  8. Simmer thawed pearl onions in butter for about 20 minutes until tender. Season with salt and pepper.
  9. Reduce pomegranate juice in a saucepan until syrupy, about 10 minutes. Optionally whisk in glucomann powder.
  10. Hollow out pearl onions and fill with caper berries or olives. Serve the stew with the pearl onion 'eyeballs' and drizzle with pomegranate sauce.

Nutrition

Serving: 1bowlCalories: 450kcalCarbohydrates: 20gProtein: 30gFat: 25gSaturated Fat: 10gPolyunsaturated Fat: 3gMonounsaturated Fat: 7gCholesterol: 100mgSodium: 800mgPotassium: 600mgFiber: 2gSugar: 5gVitamin A: 15IUVitamin C: 20mgCalcium: 4mgIron: 15mg

Notes

Ensure beef is submerged in liquid to avoid dryness during cooking. Choose quality ingredients, especially for wine, to enhance flavors.

Tried this recipe?

Let us know how it was!

Eye of Newt Stew: Hauntingly Delicious for Halloween Nights

October 15, 2025 by Grace Snow Leave a Comment

As the chill of autumn settles in, the kitchen beckons with the scent of something enchanting cooking on the stove. I recently stumbled upon a recipe that transforms traditional beef stew into a whimsical feast—introducing my Eye of Newt Stew. This captivating dish features tender beef braised in bold red wine, complemented by the earthy sweetness of onions and the surprising burst of pomegranate. Perfect for Halloween, this stew not only impresses with its hauntingly beautiful pearl onion "eyeballs," but it can be prepared ahead of time, making it ideal for gatherings. Plus, it's a comforting meal that allows for delicious variations, ensuring everyone at your table can indulge. Are you ready to take a bold culinary leap this season?

Why Is Eye of Newt Stew Unique?

Irresistible Flavor: The blend of tender beef, rich red wine, and earthy onions creates a taste sensation you're sure to love.

Perfect for Halloween: The “eyeball” pearl onions not only elevate the dish visually but also add a delightful surprise!

Time-Saving Meal: Easily make this stew ahead of time, allowing the flavors to deepen and impress your guests without last-minute fuss.

Versatile Options: With simple substitutions like omitting tomato paste, you can cater to nightshade-free diets or add fish sauce for an umami boost.

Crowd Pleaser: This dish is a showstopper that brings everyone together—serve with crusty bread or over mashed potatoes for a heartwarming experience. Make sure to check out my Lamb Stew Hearty for another comforting yet impressive option!

Eye of Newt Stew Ingredients

For the Stew

• Beef Chuck-Eye Roast – This cut offers rich flavor and tenderness, perfect for a hearty stew.
• Bacon Grease or Avocado Oil – Used for sautéing; helps boost flavor, but vegetable oil works as a dairy-free alternative.
• Yellow Onion – Provides a sweet base; slice thinly to ensure even cooking.
• Carrot – Adds a natural sweetness; diced, and you can use purple carrots for a spooky flair.
• Celery – Diced for adding depth to the flavor of the stew.
• Mushrooms – Brings umami and texture; consider high vitamin D varieties for added health benefits.
• Garlic Cloves – Enhances the stew with a fragrant aroma; mince for maximum flavor.
• Tomato Paste – Thickens the stew and adds depth; omit for a comforting nightshade-free Eye of Newt Stew.
• Fish Sauce – Optional for an umami boost; doesn't impart a fishy taste.
• Red Wine – Use a robust type like Cabernet Sauvignon to enrich the flavor profile.
• Chicken Stock – The base for braising; feel free to substitute with vegetable stock for a lighter taste.
• Unflavored Gelatin – Improves mouthfeel and thickness, adding luxurious texture.
• Gluten-Free Worcestershire Sauce – Ensures your stew remains gluten-free while enhancing the flavor profile.
• Thyme and Bay Leaves – These herbs provide aromatic flavor depth; fresh is always best!

For the Eyeballs

• Frozen Pearl Onions – Thawed and simmered; they make perfect "eyeballs" for this spooky stew.
• Butter or Dairy-Free Alternative – Use for sautéing pearl onions until tender.
• Caper Berries or Small Black Olives – Fill the hollowed-out onions for a briny burst of flavor.

For the Sauce

• Pomegranate Juice – Adds a sweet yet tangy element to the dish, blending beautifully with the other flavors.
• Glucomann Powder – An optional ingredient to improve sauce texture, giving a luxurious finish.

With these carefully selected ingredients, you’re just steps away from creating an unforgettable Eye of Newt Stew that’s sure to delight your taste buds and charm your guests!

Step‑by‑Step Instructions for Eye of Newt Stew

Step 1: Preheat the Oven
Begin by preheating your oven to 325ºF (163ºC). This temperature is perfect for slow-cooking your Eye of Newt Stew, allowing the beef to become incredibly tender. While the oven warms up, gather your ingredients and equipment, including a Dutch oven for the stovetop and oven cooking.

Step 2: Sauté the Vegetables
In a large Dutch oven, heat about 2 tablespoons of bacon grease or avocado oil over medium heat. Once hot, add sliced yellow onions, diced carrots, diced celery, and mushrooms. Sauté the mixture for about 10 minutes until the onions turn golden brown and fragrant, stirring occasionally to ensure even cooking and prevent burning.

Step 3: Add Garlic and Tomato Paste
Add minced garlic to your sautéed vegetables and stir for an additional minute until fragrant. Next, incorporate 2 tablespoons of tomato paste into the mixture and cook for 2 minutes, allowing the tomato paste to darken slightly and develop its flavor, which will enrich the Eye of Newt Stew.

Step 4: Deglaze with Red Wine
Pour in 1 cup of robust red wine, such as Cabernet Sauvignon, and use a wooden spoon to scrape any browned bits from the bottom of the pot. This deglazing method enhances the stew’s flavor. Next, add 1 cup of chicken stock, fish sauce (if using), gelatin, thyme sprigs, bay leaves, and gluten-free Worcestershire sauce to the pot.

Step 5: Add the Beef
Bring the contents of the pot to a gentle boil, then carefully add the 2-inch beef chuck-eye chunks, ensuring the meat is fully submerged in the liquid. If necessary, add more chicken stock to cover the beef. The submersion is crucial for evenly cooked, tender beef in your Eye of Newt Stew.

Step 6: Bake the Stew
Once the beef is added, cover the Dutch oven with its lid and transfer it to the preheated oven. Allow the stew to bake for 3 to 4 hours. Check occasionally for tenderness, ensuring the beef is fork-tender and the flavors have melded beautifully by the time the cooking is completed.

Step 7: Skim Excess Fat
After the cooking time has elapsed, remove the Dutch oven from the oven and let it cool slightly. Skim off any excess fat that has risen to the surface of the stew. For easier fat removal, refrigerate the stew overnight and skim off the solidified fat before reheating, but feel free to proceed immediately if serving guests!

Step 8: Prepare the “Eyeballs”
While the stew cools, prepare the “eyeball” garnish. In a separate saucepan, simmer thawed pearl onions in a bit of butter or a dairy-free alternative over medium heat for about 20 minutes until they are tender. Season with salt and pepper, then set them aside on a plate while you fill them.

Step 9: Make the Pomegranate Sauce
For the special touch that brings your Eye of Newt Stew together, prepare the pomegranate sauce. In a small saucepan, reduce 1 cup of pomegranate juice over medium heat until it becomes syrupy, which should take about 10 minutes. If desired, whisk in glucomann powder for added thickness.

Step 10: Assemble the Dish
Finally, hollow out the cooked pearl onions gently, filling them with caper berries or small black olives for a fun “eyeball” effect. To serve, ladle the Eye of Newt Stew into bowls, artistically arrange the pearl onion “eyeballs” on top, and drizzle with the luscious pomegranate sauce for an irresistible feast that dazzles!

What to Serve with Eye of Newt Stew

As you prepare to unveil the magic of your Eye of Newt Stew, consider these delightful pairings that will elevate your meal to haunting heights.

  • Crusty Bread:
    A warm, rustic loaf is perfect for soaking up the rich, savory stew. Its chewy exterior and soft interior are incredibly comforting!

  • Garlic Mashed Potatoes:
    Creamy and buttery, these mashed potatoes add a dreamy texture that complements the hearty beef and pomegranate sauce beautifully.

  • Roasted Vegetables:
    Seasonal veggies like Brussels sprouts and carrots bring brightness and crunch, offering a unique contrast to the richness of the stew.

  • Spooky Salad:
    A vibrant mixed salad with caramelized pecans and goat cheese provides freshness, counterbalancing the stew's deep flavors while adding a festive touch.

  • Herbed Rice Pilaf:
    Fluffy and fragrant, a pilaf infused with thyme and parsley provides a lovely base that soaks up the flavorful broth delightfully.

  • Mulled Wine:
    Warm spiced mulled wine ties in perfectly with the cozy feel of the stew while enhancing the rich, red wine flavors.

  • Pumpkin Pie:
    Finish the meal with a slice of spiced pumpkin pie to embrace the essence of fall and create a sweet ending to your Halloween feast.

Enjoy these perfect accompaniments that will transform your dinner into a magical occasion!

Make Ahead Options

These Eye of Newt Stew preparations are perfect for busy nights when you want to simplify meal planning! You can sauté the vegetables and even sear the beef up to 24 hours in advance, storing them in airtight containers in the refrigerator to maintain freshness. Additionally, the stew can be fully prepared and refrigerated for up to 3 days, allowing the flavors to develop beautifully. When you're ready to enjoy it, simply reheat on the stovetop until simmering, then proceed with the final steps—adding the colourful "eyeballs" and pomegranate sauce before serving. This ensures you'll have a delicious, home-cooked meal with minimal effort on the day of serving!

Eye of Newt Stew Variations & Substitutions

Get ready to tailor your Eye of Newt Stew experience! Let your creativity run wild as you explore these delightful variations that add a personal touch to this captivating dish.

  • Vegetarian Option: Substitute beef with plant-based proteins like mushrooms or jackfruit. This variation provides a hearty yet meatless alternative that's just as satisfying.

  • Nightshade-Free Stew: Omit the tomato paste entirely and add more carrots and celery for sweetness. You'll create a delicious nightshade-free stew without sacrificing flavor.

  • Spicy Kick: Spice things up by adding a pinch of cayenne pepper or crushed red pepper flakes. This will introduce a gentle heat to balance the richness of the stew.

  • Herb Boost: Experiment with fresh herbs like rosemary or sage in addition to thyme. These additions will elevate the aroma and offer a delightful twist in flavor.

  • Asian Twist: Replace red wine with a bold cooking wine and add ginger and scallions for an Asian-inspired take. Pair this with a drizzle of sesame oil before serving for extra depth.

  • Fruity Variation: Swap out pomegranate juice with a berry sauce—like blackberry or raspberry—for a fruity twist. The sweetness from the berries will add a beautiful contrast to the savory beef.

  • Glucomann Free: If glucomann powder isn’t available, you can thicken the sauce by simmering it longer until it reaches your desired consistency.

  • Saucy Delight: Use beef broth instead of chicken stock for a richer taste or try adding a splash of balsamic vinegar to enhance the stew’s acidity. A touch of depth to your dish makes for a more complex flavor profile.

Make sure to explore other hearty options like my Lamb Stew Hearty or the comforting Pot Chicken Stew, which also allow for creativity in the kitchen!

How to Store and Freeze Eye of Newt Stew

Fridge: Store your Eye of Newt Stew in an airtight container for up to 3 days. Let it cool completely before sealing to maintain freshness.

Freezer: For longer storage, freeze the stew in a freezer-safe container for up to 3 months. Ensure it's completely cooled before transferring to avoid ice crystals.

Reheating: To reheat, thaw overnight in the fridge, then warm gently on the stove over low heat. Stir occasionally, adding a splash of broth or water if needed to restore moisture.

Serving Tip: Enhance the texture and flavor as you reheat, allowing the stew to come back to life with its cozy, delicious essence.

Helpful Tricks for Eye of Newt Stew

  • Submerge the Beef: Ensure the beef is completely submerged in liquid to avoid dryness during cooking; add more stock if necessary.
  • Quality Ingredients: Choose a robust red wine like Cabernet Sauvignon to enhance flavors; your stew's depth will greatly depend on it!
  • Colorful Carrots: Opt for purple carrots if available; they add a spooky effect to your Eye of Newt Stew and make it visually striking.
  • Skimming Fat: Skimming excess fat before serving lightens the dish; consider refrigerating overnight for easier removal.
  • Don't Rush Simmering: Allow the stew to simmer slowly in the oven; this melds the flavors beautifully, creating a deep, comforting taste.

Eye of Newt Stew Recipe FAQs

How should I select my beef for Eye of Newt Stew?
When choosing your beef, I recommend using a Chuck-Eye Roast, which is incredibly flavorful and tender when braised. Look for meat that is bright red with good marbling, as the fat content adds richness to your stew. Avoid any packages with dark spots or discoloration.

What’s the best way to store leftover Eye of Newt Stew?
Absolutely! Store your Eye of Newt Stew in an airtight container in the fridge for up to 3 days. Make sure it cools completely before sealing to lock in its flavors and freshness. When you're ready to enjoy it again, simply reheat it on the stove over low heat, stirring occasionally.

Can I freeze Eye of Newt Stew, and if so, how?
Yes! You can freeze the Eye of Newt Stew for up to 3 months. To do so, allow the stew to cool completely, then transfer it to a freezer-safe container. Be sure to leave some space at the top for expansion as it freezes. When ready to enjoy, thaw it overnight in the fridge and reheat gently on the stove.

What if my stew is too thick after cooking?
If you find your Eye of Newt Stew is too thick, don’t fret! Simply add a bit of broth or water—about a quarter cup at a time—while gently heating it on the stove. Stir well until you reach your desired consistency. Remember, a delicious stew should flow like a charm, even if it’s hearty!

Is there a nightshade-free version of Eye of Newt Stew?
Yes, indeed! To make a nightshade-free Eye of Newt Stew, simply omit the tomato paste. You can also substitute the pomegranate sauce with a fruity reduction from berries like blackberries or raspberries that provide a similar sweet-tart flavor without the nightshades. Enjoy the spooky experience without compromise!

Can my pets eat any of the ingredients in Eye of Newt Stew?
Be cautious with what you share with your furry friends! While the cooked beef is a tasty treat for dogs, avoid giving them stew with garlic, onion, or seasonings, as these can be harmful. It’s best to keep the stew to yourself, but you can offer them plain, cooked beef as a special snack!

Eye of Newt Stew

Eye of Newt Stew: Hauntingly Delicious for Halloween Nights

Eye of Newt Stew, a playful yet sophisticated dish, combines tender beef and earthy flavors, perfect for Halloween festivities.
Print Recipe Pin Recipe
Prep Time 30 minutes mins
Cook Time 4 hours hrs
Total Time 4 hours hrs 30 minutes mins
Servings: 6 servings
Course: Soups
Cuisine: Halloween
Calories: 350
Ingredients Equipment Method Nutrition Notes

Ingredients
  

For the Stew
  • 3 pounds Beef Chuck-Eye Roast Cut into 2-inch chunks
  • 2 tablespoons Bacon Grease or Avocado Oil For sautéing
  • 1 large Yellow Onion Sliced thin
  • 2 medium Carrot Diced, preferably purple
  • 2 stalks Celery Diced
  • 8 ounces Mushrooms Look for high vitamin D mushrooms
  • 4 cloves Garlic Minced
  • 1 tablespoon Tomato Paste Omit for nightshade-free
  • 1 teaspoon Fish Sauce Optional
  • 1 bottle Red Wine Robust variety like Cabernet Sauvignon
  • 4 cups Chicken Stock Substitute with vegetable stock for a lighter flavor
  • 1 packet Unflavored Gelatin Optional
  • 2 tablespoons Gluten-Free Worcestershire Sauce Ensure gluten-free
  • 2 teaspoons Thyme Fresh or dried
  • 2 leaves Bay Leaves
  • 1 cup Frozen Pearl Onions Thawed
  • 2 tablespoons Butter or Dairy-Free Alternative For sautéing
  • 1/2 cup Caper Berries or Small Black Olives For filling
  • 1 cup Pomegranate Juice
  • 1 teaspoon Glucomann Powder Optional

Equipment

  • Dutch oven

Method
 

Step-by-Step Instructions
  1. Preheat the oven to 325ºF (163ºC).
  2. In a large Dutch oven, heat bacon grease or avocado oil over medium heat. Add sliced yellow onions, diced carrots, diced celery, and mushrooms. Sauté for about 10 minutes until the onions are soft and caramelized.
  3. Stir in minced garlic and cook for an additional minute. Then, add tomato paste and cook for 2 minutes.
  4. Deglaze the pot with red wine, scrape the bottom, and add chicken stock, fish sauce, gelatin, thyme, bay leaves, and Worcestershire sauce.
  5. Bring to a boil, then reduce to a simmer. Add beef chunks ensuring they are submerged. Add more stock if necessary.
  6. Cover and bake in the oven for 3 to 4 hours until the beef is fork-tender.
  7. Skim excess fat from the surface after removing from the oven.
  8. Simmer thawed pearl onions in butter over medium heat for about 20 minutes until tender.
  9. Reduce pomegranate juice in a separate pan until syrupy, optionally adding glucomann powder.
  10. Hollow out the pearl onions and fill them with caper berries or olives. Plate the stew, drizzle with pomegranate sauce and place the 'eyeballs' on top.

Nutrition

Serving: 1cupCalories: 350kcalCarbohydrates: 18gProtein: 28gFat: 20gSaturated Fat: 8gPolyunsaturated Fat: 1gMonounsaturated Fat: 8gCholesterol: 70mgSodium: 800mgPotassium: 700mgFiber: 2gSugar: 3gVitamin A: 700IUVitamin C: 10mgCalcium: 50mgIron: 3mg

Notes

Refrigerating overnight deepens flavors and makes fat removal easier. Use fresh herbs for best flavor.

Tried this recipe?

Let us know how it was!

Chill Out with Refreshing Watermelon Gazpacho Delight

October 7, 2025 by Grace Snow Leave a Comment

As the sun warms up the days and nature bursts with colors, there’s nothing quite like celebrating summer with a bowl of Refreshing Watermelon Gazpacho. This chilled soup marries the sweetness of ripe watermelon and juicy strawberries with the savory richness of fresh tomatoes, making it an ideal choice for a light meal or an impressive appetizer at gatherings. Best of all, it’s a breeze to whip up, requiring minimal prep while delivering a nutritious punch that’s both low-calorie and naturally vegetarian. Imagine serving this delightful dish on a hot afternoon, the cool flavors dancing on your palate as a refreshing break from the usual fare. Ready to dive into this vibrant twist on traditional gazpacho?

Why is Watermelon Gazpacho So Refreshing?

Vibrant and summery, this Watermelon Gazpacho delights the senses with its colorful ingredients. Effortless to prepare, you'll find that the simple blending process takes mere minutes, making it perfect for quick meals. Nutrient-rich, it’s low in calories and filled with vitamins A and C, offering both health and taste. Customizable to your liking, swap strawberries for peaches or add herbs like mint for an aromatic twist! For a delightful pairing, serve it alongside a crusty bread or a light salad, creating a perfect summer spread. Don't forget to check out our Watermelon Popsicles Blissful for a complementary treat!

Refreshing Watermelon Gazpacho Ingredients

For the Base
• Ripe Red Tomatoes – Essential for the base; use fresh varieties for best flavor.
• Watermelon – Provides natural sweetness and hydration; aim for a ripe specimen with a uniform shape.
• Ripe Strawberries – Adds sweetness and acidity to balance flavors.

For the Heat
• Red Jalapeno – Introduces a mild heat; substitute with bell pepper for a milder flavor.

For Texture
• Garlic Cloves – Enhances depth of flavor; fresh garlic is preferred for its potency.
• White Bread – Contributes to a smooth texture; can use gluten-free bread for a gluten-free option.

For Flavor
• Extra Virgin Olive Oil – Provides healthy fats and adds creaminess.
• Lime Juice – Brightens and adds zing; can be substituted with lemon juice.
• Red Wine Vinegar – Balances the sweetness; substitute with apple cider vinegar for a fruitier note.
• Kosher Salt – Elevates and balances flavors; regular table salt can also be used.

For Garnish
• Pink Peppercorns – Adds a visually appealing garnish and subtle flavor enhancement.

Dive into this refreshing watermelon gazpacho today!

Step‑by‑Step Instructions for Refreshing Watermelon Gazpacho

Step 1: Prepare the Ingredients
Begin by coarsely chopping ripe red tomatoes, juicy watermelon, ripe strawberries, a red jalapeno, and fresh garlic cloves. Aim for uniform pieces that make blending smoother. This process should take you about 10 minutes. Gather your ingredients and place them within easy reach of your blender for a seamless cooking experience.

Step 2: Blend the Base
Transfer the chopped tomatoes, watermelon, strawberries, jalapeno, and garlic into a high-powered blender. Blend until the mixture is completely smooth and vibrant, which should take around 1-2 minutes. Ensure there are no visible chunks remaining, as you want a silky consistency for your refreshing watermelon gazpacho.

Step 3: Incorporate Olive Oil
With the blender running, slowly drizzle in extra virgin olive oil. Blend for an additional 2-3 minutes until the gazpacho achieves a creamy, cohesive texture. The olive oil not only adds healthy fats but also enhances the richness of the refreshing watermelon gazpacho.

Step 4: Season to Taste
Pause the blender and taste your creation. Gradually adjust the seasoning by adding kosher salt, lime juice, and a splash of red wine vinegar. Blend briefly to combine, ensuring the flavor is balanced and delightful. Feel free to tweak the ingredients to suit your palate, enhancing the refreshing watermelon gazpacho.

Step 5: Chill the Gazpacho
Cover the blended gazpacho with plastic wrap or transfer it to an airtight container. Refrigerate for at least 2 hours to allow the flavors to meld together beautifully. This chilling process is essential for creating a refreshing watermelon gazpacho that’s perfect for warmer days.

Step 6: Serve and Garnish
Once chilled, ladle the gazpacho into bowls for serving. Consider garnishing each bowl with fresh corn, diced cucumber, or additional watermelon and strawberries for a pop of color and flavor. This finishing touch will elevate your refreshing watermelon gazpacho, providing a beautiful presentation that invites enjoyment.

Expert Tips for Refreshing Watermelon Gazpacho

• Chill Properly: Make sure to refrigerate the gazpacho for at least 2 hours to enhance its refreshing nature and meld the flavors beautifully.

• Quality Ingredients: Use the ripest tomatoes and watermelon available. Their natural sweetness will elevate the taste of your refreshing watermelon gazpacho.

• Smooth Consistency: A high-powered blender is essential for achieving that silky texture; avoid the temptation to rush through blending.

• Taste as You Go: Always taste the gazpacho before serving. Adjust the seasoning with salt, lime juice, or vinegar to ensure a balanced flavor profile.

• Flexible Variations: Don’t hesitate to experiment! Substitute strawberries with peaches or add fresh herbs like basil or mint to personalize your refreshing watermelon gazpacho.

Make Ahead Options

These Refreshing Watermelon Gazpacho bowls are a fantastic option for meal prep enthusiasts! You can chop all your ingredients—ripe tomatoes, watermelon, strawberries, jalapeno, and garlic—up to 24 hours in advance. Just store the chopped veggies in an airtight container in the refrigerator to prevent browning and maintain freshness. When you're ready to enjoy, blend the prepped ingredients and add olive oil, then refrigerate the gazpacho for at least 2 hours to allow the flavors to meld beautifully. This way, you’ll have a delightful, chilled gazpacho waiting for you on busy weeknights, offering the same vibrant taste and refreshing vibe with minimal effort!

Storage Tips for Refreshing Watermelon Gazpacho

Fridge: Refrigerate in an airtight container for up to 3 days; this keeps the flavors fresh and vibrant.

Freezer: Can be frozen in freezer-safe containers for up to 2 months. Thaw in the fridge overnight, and taste before serving to adjust seasoning if needed.

Reheating: Though typically enjoyed chilled, you may gently warm it on the stove over low heat if desired, stirring frequently to maintain the creamy texture. Enjoy your refreshing watermelon gazpacho at any temperature!

What to Serve with Refreshing Watermelon Gazpacho

As summer embraces us, consider delightful accompaniments that elevate your chilled soup experience and make every bite memorable.

  • Crusty Bread: Perfect for dipping, fresh, crunchy bread adds texture while enhancing the gazpacho's flavors. Try a slice of sourdough for a delightful contrast.

  • Light Garden Salad: A crisp salad with mixed greens, cucumbers, and a tangy vinaigrette complements the gazpacho's sweetness, creating balance on your plate.

  • Grilled Shrimp Skewers: The smoky flavors from the shrimp contrast beautifully with the freshness of your gazpacho, adding a lovely protein boost.

  • Feta Cheese Crumbles: Sprinkling crumbly feta over the soup adds a salty creaminess that harmonizes perfectly with the sweet watermelon.

  • Avocado Toast: Rich, creamy avocado on whole grain toast combines wonderfully with the lightness of the gazpacho, creating a satisfying and nutritious meal.

  • Mint Lemonade: Refreshing and zesty, this drink pairs beautifully, keeping the summer vibe alive and complementing the gazpacho's flavors.

  • Lemon Sorbet: For dessert, this light, fruity sorbet provides a refreshing and delightful way to end your meal while echoing the flavors of summer.

Refreshing Watermelon Gazpacho Variations

Feel free to get creative with your Watermelon Gazpacho and make it truly your own!

  • Tropical Twist: Substitute strawberries with peaches or mangoes for a sweet, fruity flavor explosion.
  • Herb Infusion: Incorporate fresh basil or mint to heighten the refreshing essence and add aromatic depth.
  • Creamy Dream: Blend in half an avocado for a silky, creamy texture that pairs beautifully with the sweetness of watermelon.
  • Milder Heat: Use green bell pepper in place of red jalapeno for a gentler kick, perfect for those who prefer less spice.
  • Vinegar Variety: Try using apple cider vinegar instead of red wine vinegar for a unique fruitier note that brightens the dish.
  • Chill with Corn: Add sweet corn kernels for a delightful crunch that complements the smooth gazpacho.
  • Nutty Crunch: Sprinkle some toasted pumpkin seeds or almonds on top for a satisfying texture contrast and nutty richness.
  • Citrus Burst: Replace lime juice with fresh grapefruit juice for a zesty twist that adds tanginess.

For more summer-inspired delights, don’t miss trying our Mini Tropical Pavlovas or snagging a taste of the ocean with our Shrimp Ceviche Zesty. Each adds their unique flair to your sunny day menu!

Refreshing Watermelon Gazpacho Recipe FAQs

How do I select the best watermelon for gazpacho?
Absolutely! When picking a watermelon, look for one that feels heavy for its size and has a uniform shape. A ripe watermelon will have a creamy yellow spot on the bottom where it rested on the ground. Avoid any that show dark spots all over, as these can indicate overripeness or spoilage.

How long can I store leftover watermelon gazpacho in the fridge?
Very! You can refrigerate your refreshing watermelon gazpacho in an airtight container for up to 3 days. This helps maintain its bright flavors and refreshing quality. Just be sure to give it a little stir before serving, as some separation can occur.

Can I freeze watermelon gazpacho, and how should I do it?
Absolutely! Freezing your gazpacho is a great way to preserve it. Pour the cooled gazpacho into freezer-safe containers, leaving a little space at the top for expansion. It can be frozen for up to 2 months. To enjoy it later, thaw it in the fridge overnight, and make sure to taste and adjust the seasoning, as some flavors may dull during freezing.

What should I do if my gazpacho tastes too sweet?
Very! If you find your refreshing watermelon gazpacho is a bit on the sweet side, try adding a splash of vinegar (like apple cider or red wine vinegar) or an extra squeeze of lime juice. This can help balance the sweetness. Additionally, incorporating more tomatoes can enhance the savory component of the flavor.

Is this gazpacho safe for pets or those with allergies?
Absolutely! This watermelon gazpacho is naturally vegetarian and gluten-free, making it a great option for different diets. However, it's important to note that garlic can be toxic to dogs, so if you plan to share with furry friends, skip the garlic or set aside a portion without it before adding. Always check ingredient labels for any allergens specific to your household.

Refreshing Watermelon Gazpacho

Chill Out with Refreshing Watermelon Gazpacho Delight

Experience the joy of summer with this Refreshing Watermelon Gazpacho, a delicious blend of watermelon, strawberries, and tomatoes.
Print Recipe Pin Recipe
Prep Time 10 minutes mins
Chilling Time 2 hours hrs
Total Time 2 hours hrs 10 minutes mins
Servings: 4 bowls
Course: Soups
Cuisine: Mexican
Calories: 100
Ingredients Equipment Method Nutrition Notes

Ingredients
  

For the Base
  • 4 cups Ripe Red Tomatoes Essential for the base; use fresh varieties for best flavor.
  • 3 cups Watermelon Provides natural sweetness and hydration; aim for a ripe specimen.
  • 1 cup Ripe Strawberries Adds sweetness and acidity to balance flavors.
For the Heat
  • 1 unit Red Jalapeno Introduces mild heat; substitute with bell pepper for milder flavor.
For Texture
  • 2 cloves Garlic Cloves Enhances depth of flavor; fresh garlic is preferred.
  • 1 slice White Bread Contributes to a smooth texture; can use gluten-free bread.
For Flavor
  • 2 tablespoons Extra Virgin Olive Oil Provides healthy fats and adds creaminess.
  • 2 tablespoons Lime Juice Brightens and adds zing; can substitute with lemon juice.
  • 1 tablespoon Red Wine Vinegar Balances the sweetness; substitute with apple cider vinegar.
  • 1 teaspoon Kosher Salt Elevates and balances flavors.
For Garnish
  • 1 teaspoon Pink Peppercorns Adds a visually appealing garnish.

Equipment

  • Blender

Method
 

Preparation Steps
  1. Coarsely chop ripe tomatoes, watermelon, strawberries, jalapeno, and garlic cloves. Aim for uniform pieces for smooth blending.
  2. Transfer the chopped ingredients into a high-powered blender. Blend until completely smooth and vibrant, around 1-2 minutes.
  3. With the blender running, slowly drizzle in olive oil and blend for an additional 2-3 minutes until creamy.
  4. Taste and adjust seasoning with salt, lime juice, and red wine vinegar, then blend briefly to combine.
  5. Cover the gazpacho and refrigerate for at least 2 hours to meld flavors.
  6. Ladle into bowls and garnish with fresh corn, diced cucumber, or additional watermelon and strawberries.

Nutrition

Serving: 1bowlCalories: 100kcalCarbohydrates: 25gProtein: 2gFat: 3gPolyunsaturated Fat: 1gMonounsaturated Fat: 2gSodium: 200mgPotassium: 300mgFiber: 3gSugar: 14gVitamin A: 1500IUVitamin C: 50mgCalcium: 30mgIron: 1mg

Notes

Chill properly for best flavor and texture. Use high-quality ingredients for optimal taste.

Tried this recipe?

Let us know how it was!

Cemetery Soup: A Cozy Halloween Bowl of Comfort

October 7, 2025 by Grace Snow Leave a Comment

As the leaves turn and a crisp breeze sweeps through the air, my thoughts drift to cozy evenings spent stirring up something special in the kitchen. This Halloween, I'm excited to share my Spooky Cemetery Soup! Inspired by the classic tales from Scary Stories to Tell in the Dark, this hearty dish brings a delightful touch to your fall gatherings. Packed with fresh vegetables and aromatic herbs, it's not only a warm comfort food but also quick to prepare—ready in just over an hour! Whether you’re hosting a party or simply embracing the season, this uniquely themed recipe offers a fun way to celebrate Halloween while satisfying your taste buds. So, are you ready to conjure up some culinary magic? Let's dive into this frightfully delicious adventure!

What Makes Cemetery Soup So Special?

Unique Theme: Inspired by Scary Stories to Tell in the Dark, this soup adds a whimsical touch to your Halloween festivities.

Comforting Flavors: A savory blend of vegetables and herbs creates a warm, inviting bowl that’s perfect for chilling autumn nights.

Quick Prep: With just over an hour from start to finish, you can whip this up and enjoy it without hassle.

Customizable: Add your favorite veggies or go meatless by swapping beef for lentils or chickpeas, allowing everyone to savor it.

Crowd-Pleasing: This hearty dish not only fills bellies but also sparks conversations, making it ideal for gatherings. Embrace the cozy vibes and serve it with crusty bread for a delightful dipping experience!

Cemetery Soup Ingredients

• This hearty blend captures the essence of comfort food while celebrating the spirit of Halloween!

For the Base

  • Water – Use chicken or vegetable broth for enhanced flavor.
  • Onions – Yellow or white onions work best for a rich aromatic base.

For the Vegetables

  • Carrots – Adds sweetness and crunch; substitute with parsnips for a different twist.
  • Green Beans – Provides texture and vibrant color; fresh or frozen can be used.
  • Corn – Brings sweetness; you can use canned or frozen corn based on preference.
  • Potatoes – Use Yukon gold or red potatoes for creaminess and body.

For Texture

  • Barley – Adds heartiness to the soup; substitute with rice or quinoa for a gluten-free option.

For Protein

  • Beef – Introduces depth of flavor; can be omitted for a vegetarian Cemetery Soup.

Seasonings

  • Salt & Pepper – Essential for enhancing taste; adjust according to your liking.
  • Thyme – Fresh or dried, this herb adds aromatic flavor.
  • Bay Leaves – Enriches the depth of the soup; don't forget to remove them before serving.

Step‑by‑Step Instructions for Cemetery Soup

Step 1: Prepare the Base
In a large pot, pour in approximately 8 cups of water or chicken broth, then bring it to a rolling boil over medium-high heat. As the liquid heats, gather your vegetables and chop the onions, carrots, and potatoes into bite-sized pieces, ready to enhance the base of your Cemetery Soup.

Step 2: Add the Vegetables
Once boiling, carefully add the chopped carrots, green beans, corn, barley, onions, and potatoes into the bubbling pot. Stir well to ensure all the ingredients are mixed, and allow it to return to a boil—this should take about 5 minutes—before reducing the heat to a simmer.

Step 3: Season the Soup
With the vegetables in place, season your Cemetery Soup with salt, pepper, thyme, and the bay leaves. Stir the mixture gently to combine the flavors thoroughly. Let it simmer on low heat for approximately 55 minutes, allowing the vegetables and barley to become tender and release their delightful aromas.

Step 4: Incorporate the Protein
After the veggies are tender, stir in the beef if using, ensuring it gets submerged in the warm broth. Increase the heat slightly to bring the soup back to a gentle simmer. Cook for an additional 15-20 minutes, monitoring until the beef is cooked through and the flavors meld beautifully.

Step 5: Final Adjustments
Once the Cemetery Soup is bubbling and thickened, taste it and adjust seasoning as needed, adding extra salt or pepper if desired. Remember to remove the bay leaves before serving. The soup should look hearty and inviting, with vibrant colors from the fresh veggies.

Step 6: Serve and Enjoy
Ladle the Cemetery Soup into warm bowls, accompanied by crusty bread for dipping. This comforting dish is perfect for sharing with family or friends during your Halloween festivities, ready to warm hearts and spark delightful conversations!

What to Serve with Cemetery Soup

Warm, comforting, and bursting with seasonal flavors, this delightful dish pairs beautifully with a variety of sides that enhance your Halloween dining experience.

  • Crusty Bread: Perfect for dipping, a nice loaf offers a chewy texture that contrasts with the smooth soup.

  • Autumn Salad: A fresh salad with mixed greens, apples, and candied nuts provides a crisp, refreshing balance to the hearty soup.

  • Garlic Breadsticks: Soft and buttery, these breadsticks are ideal for sopping up every last drop of your Cemetery Soup.

Combine your soup with this delightful salad to create a meal that sings of the season!

  • Spiced Cider: A warm spiced apple cider brings a cozy fall atmosphere, complementing the savory flavors of the soup.

  • Pumpkin Pie: For a sweet finish, serve slices of pumpkin pie, a classic fall dessert that adds a touch of sweetness to your meal.

  • Roasted Vegetables: Roasted Brussels sprouts or root vegetables add depth and sophistication, making your meal a true seasonal celebration.

Cemetery Soup: Creative Variations Await

Embrace your culinary creativity as you explore delightful twists on this Halloween-inspired dish!

  • Vegetarian Delight: Replace beef with chickpeas or lentils for a hearty, plant-based version that still packs a punch.

  • Hearty Grains: Swap out barley for quinoa or wild rice to elevate the texture while making this soup gluten-free.

  • Spicy Kick: Add a pinch of cayenne pepper or diced jalapeños to give your soup an exciting heat that warms your soul.

  • Flavor Boost: Stir in a tablespoon of Worcestershire sauce or soy sauce for a deep umami flavor that complements the vegetables beautifully.

  • Extra Veggies: Don't hesitate to toss in other vegetables like bell peppers, zucchini, or celery to enhance nutritional value and texture.

For even more cozy soup options, try making this Lemon Chicken Soup or savor the flavors of a Zuppa Toscana Soup. They both make wonderful additions to any fall gathering.

  • Herb Infusion: Experiment with fresh herbs like parsley, dill, or rosemary for a fragrant twist that elevates your soup to gourmet status.

  • Creamy Touch: For a luxuriously creamy version, add a splash of cream or a dollop of sour cream right before serving.

Each variation invites you to craft the perfect Cemetery Soup that tantalizes your taste buds while enhancing the Halloween spirit!

How to Store and Freeze Cemetery Soup

Fridge: Store leftover Cemetery Soup in an airtight container; it will keep well for up to 3 days in the refrigerator.

Freezer: Freeze Cemetery Soup in individual portions in freezer-safe containers for up to 3 months. Thaw overnight in the fridge before reheating.

Reheating: To enjoy your frozen Cemetery Soup, reheat it on the stove over low heat or in the microwave, stirring occasionally until heated through.

Airtight Care: Ensure the containers are airtight to prevent freezer burn and maintain the rich flavors of the soup when stored.

Make Ahead Options

These Cemetery Soup preparations are perfect for busy home cooks seeking a time-saving solution for Halloween festivities! You can chop all your vegetables (carrots, green beans, potatoes, and onions) up to 24 hours in advance and store them in an airtight container in the refrigerator to keep them fresh and vibrant. You can also cook the soup completely and refrigerate it for up to 3 days, just remember to let it cool before sealing it. When ready to serve, simply reheat the soup on the stove, adjusting the seasoning as needed and allowing it to simmer gently until heated through. This way, you’ll have a delightful, heartwarming bowl ready with minimal effort, ensuring your Halloween is both fun and flavorful!

Expert Tips for Cemetery Soup

  • Broth Upgrade: Use chicken or vegetable broth instead of water for a richer, more flavorful Cemetery Soup that enhances the overall taste.

  • Veggie Prep: Cut vegetables into even-sized pieces to ensure they cook uniformly. This prevents some from being overcooked while others remain crunchy.

  • Seasoning Balance: Start with less salt and pepper; you can always add more later. Adjust the seasoning during the final step for best results.

  • Vegetable Substitutes: Experiment with seasonal vegetables like squash or zucchini for added variety and freshness in your Cemetery Soup.

  • Simmer Time: Don’t rush the simmering process. Allowing more time to cook melds the flavors beautifully while making the vegetables tender but not mushy.

Cemetery Soup Recipe FAQs

How do I select ripe ingredients for Cemetery Soup?
Absolutely! When choosing carrots, look for firm ones without dark spots. For potatoes, pick those that are smooth and free of blemishes. Fresh herbs should be vibrant and fragrant. Meanwhile, for green beans, choose those that snap easily; if they bend, they may be past their prime.

What are the best storage methods for leftover Cemetery Soup?
Very important! Store your leftover Cemetery Soup in an airtight container in the refrigerator for up to 3 days. If you're not planning to enjoy it within that time, consider freezing. Make sure to let it cool completely before sealing for storage.

Can I freeze Cemetery Soup, and how?
Absolutely! To freeze your Cemetery Soup, let it cool completely. Then, ladle it into freezer-safe containers or heavy-duty freezer bags, leaving about an inch of space at the top for expansion. Seal tightly and label with the date; it will keep well for up to 3 months. When you're ready to enjoy it again, thaw in the fridge overnight and reheat on the stove or in the microwave.

What should I do if my soup is too salty?
If you find your Cemetery Soup has become too salty, don't worry! You can add a diced potato while it simmers to absorb some of the extra salt. Alternatively, add more water or broth to dilute it. Let it simmer for a bit longer to meld the flavors back together.

Are there any dietary considerations I should keep in mind for Cemetery Soup?
Of course! If you're cooking for others, it's a good idea to check for allergies. For instance, if someone is allergic to gluten, you can easily substitute the barley with quinoa or rice. Additionally, if you're preparing this for vegetarians, simply omit the beef and up the vegetable content for a satisfying dish.

Can I make Cemetery Soup vegetarian?
Certainly! Simply omit the beef and use vegetable broth instead of water. You can enhance the flavor profile by incorporating lentils or chickpeas for protein, making it a hearty, meat-free option. Feel free to add more seasonal vegetables to elevate the taste!

Cemetery Soup

Cemetery Soup: A Cozy Halloween Bowl of Comfort

This Cemetery Soup is a warm and comforting dish, perfect for Halloween gatherings packed with fresh vegetables and aromatic herbs.
Print Recipe Pin Recipe
Prep Time 15 minutes mins
Cook Time 55 minutes mins
Total Time 1 hour hr 10 minutes mins
Servings: 6 cups
Course: Soups
Cuisine: American
Calories: 220
Ingredients Equipment Method Nutrition Notes

Ingredients
  

For the Base
  • 8 cups Water or chicken broth Use chicken or vegetable broth for enhanced flavor
  • 2 medium Onions Yellow or white onions work best
For the Vegetables
  • 2 medium Carrots Adds sweetness and crunch; substitute with parsnips if desired
  • 1 cup Green beans Fresh or frozen can be used
  • 1 cup Corn Canned or frozen corn based on preference
  • 2 medium Potatoes Yukon gold or red potatoes for creaminess
For Texture
  • 1 cup Barley Substitute with rice or quinoa for gluten-free option
For Protein
  • 1 pound Beef Can be omitted for a vegetarian version
Seasonings
  • 1 teaspoon Salt Essential for enhancing taste
  • 1 teaspoon Pepper Adjust according to your liking
  • 1 teaspoon Thyme Fresh or dried adds aromatic flavor
  • 2 leaves Bay leaves Remove before serving

Equipment

  • Large pot

Method
 

Step-by-Step Instructions
  1. In a large pot, pour in approximately 8 cups of water or chicken broth, then bring it to a rolling boil over medium-high heat.
  2. Once boiling, carefully add the chopped carrots, green beans, corn, barley, onions, and potatoes. Stir well and let it return to a boil before reducing the heat to a simmer.
  3. Season your Cemetery Soup with salt, pepper, thyme, and the bay leaves. Let it simmer on low heat for approximately 55 minutes.
  4. After the veggies are tender, stir in the beef if using, and cook for an additional 15-20 minutes.
  5. Taste and adjust seasoning as needed, removing the bay leaves before serving.
  6. Ladle the Cemetery Soup into warm bowls, accompanied by crusty bread for dipping.

Nutrition

Serving: 1cupCalories: 220kcalCarbohydrates: 30gProtein: 15gFat: 5gSaturated Fat: 2gPolyunsaturated Fat: 1gMonounsaturated Fat: 2gCholesterol: 30mgSodium: 500mgPotassium: 600mgFiber: 6gSugar: 4gVitamin A: 300IUVitamin C: 25mgCalcium: 10mgIron: 15mg

Notes

Store leftover soup in an airtight container for up to 3 days in the refrigerator, or freeze in individual portions for up to 3 months.

Tried this recipe?

Let us know how it was!

Cemetery Soup: A Cozy Horror-Inspired Autumn Delight

October 7, 2025 by Grace Snow Leave a Comment

As the leaves crunch underfoot and daylight starts to fade, there's a certain thrill that ignites my kitchen. Enter Cemetery Soup, a dish that merges savory comfort with a touch of Halloween whimsy. Inspired by the chilling tales of Scary Stories to Tell in the Dark, this recipe captures the spirit of the season with its hearty blend of fresh vegetables and aromatic herbs. The best part? It’s not just delicious; it’s quick to prepare, taking just over an hour to embrace that cozy fall vibe. This soup isn’t only a feast for the senses; it's also a delightful addition to your Halloween festivities, certain to charm both family and friends. So, are you ready to stir up some spooky culinary fun?

Why is Cemetery Soup a Halloween Must?

Perfectly Themed: This dish transforms your dinner table into a spooky, literary wonderland, perfect for your Halloween gatherings.

Heartwarming Comfort: Each bowl serves a robust, hearty flavor that warms the soul, making it ideal for chilly autumn nights.

Quick Preparation: The soup comes together in just over an hour, allowing you to host or enjoy your festivity without the fuss.

Versatile Recipe: Feel free to adjust ingredients, substituting beef with chickpeas for a vegetarian twist or adding seasonal veggies like bell peppers.

Nostalgic Charm: Inspired by the beloved Scary Stories to Tell in the Dark, it brings delightful nostalgia, perfect for sharing stories around the dinner table.

Serve it alongside some crusty bread and watch it disappear! For more warming soups, you might enjoy our Lemon Chicken Soup or Zuppa Toscana Soup for a comforting meal.

Cemetery Soup Ingredients

For the Base

  • Water – Use chicken or vegetable broth for extra flavor.
  • Onions – Yellow or white onions work best for a savory foundation.

For the Vegetables

  • Carrots – Adds sweetness and crunch; consider parsnips for a lovely twist.
  • Green Beans – Provides texture and color; both fresh or frozen work beautifully.
  • Corn – Brings sweetness and texture; feel free to opt for canned or frozen.
  • Potatoes – Yukon gold or red potatoes add creaminess and body to the mix.

For the Heartiness

  • Barley – Adds a lovely heartiness; replace with rice or quinoa for a gluten-free option.
  • Beef – Offers depth of flavor; you can omit it for a vegetarian version.

For Seasoning

  • Salt & Pepper – Essential seasonings to elevate taste; adjust to your liking.
  • Thyme – Fresh or dried thyme adds herbal notes to the soup.
  • Bay Leaves – Enhance the depth of flavor, but remember to remove them before serving.

This Cemetery Soup is not just a dish; it’s an invitation to embrace the fall spirit while stirring up some spooky fun!

Step‑by‑Step Instructions for Cemetery Soup

Step 1: Prepare the Base
In a large pot, add 8 cups of water or chicken broth and bring it to a boil over high heat. This aromatic foundation will set the stage for your Cemetery Soup. As the liquid heats up, gather your ingredients and chop the onions, carrots, and potatoes, ensuring you have everything ready for the next steps.

Step 2: Add the Vegetables
Once the water is boiling, carefully add the chopped carrots, green beans, corn, barley, onions, and potatoes to the pot. Stir them together gently and allow the mixture to return to a rolling boil. This vibrant medley will cook down, softening and releasing their flavors into the soup.

Step 3: Season the Soup
Sprinkle in salt, pepper, thyme, and add the bay leaves to the bubbling pot. Stir well to ensure the seasonings are evenly distributed throughout the Cemetery Soup. Allow the soup to simmer gently, reducing the heat to low once it reaches a boil, enhancing the flavor profiles as they meld together.

Step 4: Incorporate the Beef
Next, add the diced beef into the simmering mixture, stirring to combine. Let the soup simmer uncovered for about 55 minutes, stirring occasionally. Watch as the vegetables become tender and the barley cooks through, creating a thick, hearty broth filled with comforting goodness.

Step 5: Final Touches
After simmering, taste your Cemetery Soup and adjust the seasoning with additional salt and pepper if needed. Remove the bay leaves carefully, as they’ve done their job infusing the dish with flavor. Serve hot, and enjoy the warm, comforting essence of this spooky seasonal delight!

Expert Tips for Cemetery Soup

  • Flavor Boost: Use bone broth instead of water for a richer, deeper flavor in your Cemetery Soup. It adds a wonderful complexity you’ll love!

  • Texture Check: Be cautious with long cooking times; while flavors develop, overcooking can mush the vegetables. Aim for tender yet firm textures.

  • Ingredient Substitutions: Feel free to swap beef with chickpeas or lentils for a vegetarian Cemetery Soup. This offers both nutrition and an earthy taste.

  • Seasoning Balance: Taste your soup during cooking! Adjust salt and pepper as necessary to make the flavors pop without overpowering them.

  • Storage Tips: Leftovers can be refrigerated for up to three days. Reheat gently on the stove to maintain the soup's comforting texture.

What to Serve with Cemetery Soup

As you gather around the table with loved ones, consider these delightful pairings that elevate the warmth and charm of your Halloween feast.

  • Crusty Bread: The perfect companion for dipping, its chewy texture enhances every savory spoonful of soup.
  • Garlic Bread: A fragrant twist that brings an irresistible aroma to the table, making each bite a little more scrumptious.
  • Autumn Salad: A mix of greens, apples, and nuts for a refreshing crunch, balancing the soup's hearty nature.
  • Roasted Pumpkin Seeds: Add a nutty crunch that plays beautifully against the smooth broth, offering an unexpected textural element.
  • Spiced Apple Cider: Warm and comforting, this sweet drink complements the flavors of the soup while embodying the essence of fall.
  • Cheesy Scarecrow Nachos: Layered with melted cheese and spicy toppings, these nachos provide a fun, festive element to your spread.
  • Chocolate-Covered Pretzels: A sweet and salty snack, perfect for indulging as you share spooky stories around the table.
  • Pumpkin Pie: A classic dessert to conclude a cozy meal, offering a sweet note that perfectly contrasts the savory soup.
  • Cranberry Juice: Its tartness brightens up the meal while embodying the flavors of the season.

Cemetery Soup: Customize Your Way

Start your culinary adventure with Cemetery Soup by adding your personal touch to this delightful dish!

  • Vegetarian Swap: Replace beef with chickpeas or lentils for a hearty twist that maintains all the comforting flavors. You'll be amazed by the nutty aroma this change brings!

  • Gluten-Free Alternative: Substitute barley with quinoa or rice for a gluten-free version. Both options will lend a unique texture while keeping the soup hearty and satisfying.

  • Veggie Variety: Toss in extra vegetables such as bell peppers or peas for a splash of color and flavor. Feel free to get creative—zucchini or kale would also be fantastic!

  • Herb Infusion: Enhance the flavor profile by adding fresh herbs like parsley or basil just before serving. These aromatic garnishes will brighten the dish and add freshness.

  • Spice It Up: If you crave heat, sprinkle in some red pepper flakes or diced jalapeños. Adjust according to your spice preference for a warming kick that's perfect for chilly nights!

  • Savory Alternative: Use chicken or vegetable broth instead of water to deepen the soup's savory foundation. This simple swap makes a world of difference!

  • Creamy Touch: Stir in a splash of heavy cream or a dollop of sour cream just before serving for a velvety finish that enriches every spoonful.

  • Smoked Flavor: Add a few drops of liquid smoke for a unique, smoky flavor that enhances the overall depth of your Cemetery Soup. It’s a fun way to intrigue your taste buds!

Embrace the spirit of Halloween with these variations, and don’t forget to pair your soup with warm bread or a delightful side like Santa Soup Savory for a perfect meal!

Make Ahead Options

These Cemetery Soup preparations are perfect for busy home cooks looking to save time during the hectic Halloween season! You can chop and store the vegetables (carrots, green beans, corn, and potatoes) in an airtight container in the refrigerator up to 3 days prior to cooking. Additionally, you can pre-cook the barley and store it separately, which helps maintain its texture. On the day you plan to serve the soup, simply bring your water or broth to a boil, add the prepped vegetables and cooked barley, and follow the final steps, adding the seasoned beef to simmer. This way, you'll enjoy the same delightful flavors of Cemetery Soup with minimal effort.

Storage Tips for Cemetery Soup

Fridge: Store leftovers in an airtight container for up to 3 days. Always let the soup cool to room temperature before sealing to prevent moisture buildup.

Freezer: Cemetery Soup can be frozen in freezer-safe containers for up to 3 months. Ensure it’s cooled completely before transferring to maintain texture.

Reheating: Reheat on the stove over low to medium heat until warmed through. If the soup thickens, add a splash of broth or water to reach your desired consistency.

Temperature Check: Always check the soup’s internal temperature, aiming for 165°F (74°C) before serving to ensure it’s hot and safe to eat.

Cemetery Soup Recipe FAQs

How do I select the right ingredients for Cemetery Soup?
Absolutely! For best flavor, choose fresh, vibrant vegetables. Look for firm, unblemished carrots and green beans, avoiding those with dark spots or wilting. For onions, yellow onions offer a mild sweetness, whereas white ones provide a sharper taste. Starchy potatoes like Yukon gold or red make for a creamy texture, layering delightful flavors into your soup.

How should I store leftovers of Cemetery Soup?
You can store your Cemetery Soup effortlessly! Let it cool to room temperature, then transfer it into an airtight container in the refrigerator. It will stay fresh for up to 3 days. Always remember, when it's time to reheat, do so on low heat to preserve that wonderful comfort texture.

Can I freeze Cemetery Soup for later?
Very! To freeze your Cemetery Soup, allow it to cool completely first. Then, pour it into freezer-safe containers, leaving a little space at the top for expansion during freezing. This soup can be stored in the freezer for up to 3 months. When you’re ready to enjoy it again, simply thaw overnight in the refrigerator and reheat on the stove for a warm, hearty meal.

What should I do if my Cemetery Soup is too thick?
No worries at all! If your soup turns out thicker than desired, simply add a splash of broth or water while reheating. Stir the mixture well to ensure a smooth consistency. Bring it to a gentle simmer and allow it to heat through until you reach your preferred texture.

Is Cemetery Soup suitable for vegetarians?
Absolutely! You can make a delicious vegetarian version by simply omitting the beef and substituting it with protein-rich ingredients like chickpeas or lentils. You can also tweak the vegetable selection, adding in your favorites to personalize the flavors even more, while still keeping all that cozy, hearty goodness!

How long does Cemetery Soup last in the fridge?
It’s best to savor your Cemetery Soup within 3 days when stored properly in the refrigerator. Always ensure it's in an airtight container, and feel free to enjoy it with a splash of excitement stirred in, as you share it with family and friends during your charming fall evenings!

Cemetery Soup

Cemetery Soup: A Cozy Horror-Inspired Autumn Delight

Cemetery Soup is a savory comfort dish blending fresh vegetables and herbs, perfect for Halloween gatherings.
Print Recipe Pin Recipe
Prep Time 15 minutes mins
Cook Time 1 hour hr
Total Time 1 hour hr 15 minutes mins
Servings: 6 servings
Course: Soups
Cuisine: American
Calories: 300
Ingredients Equipment Method Nutrition Notes

Ingredients
  

For the Base
  • 8 cups water or chicken broth Use chicken or vegetable broth for extra flavor.
  • 2 medium onions Yellow or white onions work best.
For the Vegetables
  • 3 medium carrots Adds sweetness and crunch.
  • 2 cups green beans Fresh or frozen work beautifully.
  • 1 cup corn Canned or frozen is acceptable.
  • 2 medium potatoes Yukon gold or red potatoes add creaminess.
For the Heartiness
  • 1 cup barley Replace with rice or quinoa for gluten-free.
  • 1 pound beef Optional for vegetarian version.
For Seasoning
  • 1 teaspoon salt Adjust to taste.
  • 1 teaspoon pepper Adjust to taste.
  • 1 teaspoon thyme Fresh or dried.
  • 2 leaves bay leaves Remove before serving.

Equipment

  • Large pot

Method
 

Step-by-Step Instructions
  1. In a large pot, add 8 cups of water or chicken broth and bring it to a boil over high heat.
  2. Once boiling, add the chopped carrots, green beans, corn, barley, onions, and potatoes.
  3. Sprinkle salt, pepper, thyme, and bay leaves into the pot.
  4. Add the diced beef into the mixture and let it simmer uncovered for about 55 minutes.
  5. Taste and adjust seasoning, then remove bay leaves before serving.

Nutrition

Serving: 1bowlCalories: 300kcalCarbohydrates: 50gProtein: 20gFat: 8gSaturated Fat: 3gPolyunsaturated Fat: 1gMonounsaturated Fat: 2gCholesterol: 40mgSodium: 800mgPotassium: 600mgFiber: 10gSugar: 5gVitamin A: 100IUVitamin C: 25mgCalcium: 4mgIron: 15mg

Notes

For a richer flavor, use bone broth. Leftovers can be refrigerated for up to three days.

Tried this recipe?

Let us know how it was!

Witches Brew Green Pea Soup: A Spooktacular Comfort Bowl

October 4, 2025 by Grace Snow Leave a Comment

As the leaves begin to turn and the air fills with crispness, I find myself craving comfort in a bowl. That’s when my Witches Brew Green Pea Soup comes to the rescue! This vibrant, Halloween-themed delight is not just a feast for the eyes; it offers an easy, customizable way to warm up your gatherings. Packed with the earthy goodness of peas and spinach, it’s vegetarian-friendly and even has dairy-free options, making it a crowd-pleaser for all ages. Plus, it's a breeze to whip together, allowing you to spend more time enjoying the festivities and less time slaving in the kitchen. Are you ready to brew up some magic this Halloween?

Why is Witches Brew Green Pea Soup Special?

Festive Appeal: This soup isn’t just a meal; it’s a seasonal celebration, perfect for Halloween gatherings!

Colorful Presentation: The vibrant green hue makes it visually striking, captivating both children and adults alike.

Customizable Deliciousness: Add your favorite toppings like sautéed mushrooms or toasted pumpkin seeds for a personalized touch.

Easy to Make: With simple ingredients and straightforward steps, you’ll have a comforting dish ready in no time—ideal for busy cooks!

Nutritional Value: Packed with veggies like peas and spinach, it’s a nutritious option that warms both the heart and the stomach.

Consider pairing it with homemade pumpkin spice muffins or serving alongside warm apple cider for a complete, festive meal!

Witches Brew Green Pea Soup Ingredients

Get ready to brew a magical cauldron of flavor!

For the Soup

  • Olive Oil – Adds moisture and richness to the soup; can substitute with avocado oil.
  • Onion – Provides sweetness and depth of flavor; any variety works beautifully.
  • Garlic – Enhances flavor with aromatic qualities; fresh or 1/4 tsp garlic powder works fine.
  • Potatoes – Contributes to a creamy texture when blended; Yukon Gold is preferred.
  • Frozen Green Peas – Main ingredient for sweetness and vibrant color; fresh peas can be used if in season.
  • Baby Spinach – Adds nutritional value and a pop of green; kale is a good substitute.
  • Ground Pepper – To taste; enhances the overall flavor profile.
  • Salt – Essential for savoriness; sea salt or kosher salt is recommended.
  • Vegetable Stock – Provides a flavorful liquid base; can be homemade or store-bought.

For the Garnish

  • Mushrooms – Adds umami and texture; experiment with shiitake or cremini varieties.
  • Heavy Cream or Coconut Milk – For richness in garnish; almond milk can be a lighter alternative.
  • Micro Greens – A lovely aesthetic garnish to elevate presentation.
  • Ground Black Pepper & Crushed Red Pepper – For finishing touches and flavorful enhancement.

Brew up this Witches Brew Green Pea Soup and let the cozy vibes enchant your Halloween gathering!

Step‑by‑Step Instructions for Witches Brew Green Pea Soup

Step 1: Heat Olive Oil
Begin by warming 2 tablespoons of olive oil in a large pot over medium heat. Allow the oil to shimmer, indicating it’s ready for the next step. The beautiful golden hue will impart rich flavor to your Witches Brew Green Pea Soup.

Step 2: Sauté Aromatics
Add 1 chopped onion and 2 minced garlic cloves to the pot, stirring frequently. Cook for about 5 minutes until the onion becomes translucent and fragrant, filling your kitchen with a comforting aroma. This aromatic base is essential for a delicious soup.

Step 3: Cook Potatoes
Incorporate 2 diced Yukon Gold potatoes into the pot, stirring occasionally. Let them sauté for approximately 5 minutes until they become semi-soft, resulting in a creamy texture for your Witches Brew Green Pea Soup once blended.

Step 4: Mix the Greens
Next, stir in 4 cups of frozen green peas and 2 cups of baby spinach. Allow the mixture to cook for just 1 minute, ensuring the vivid green color brightens up. This step adds a nutritional boost and enhances the vibrant look of your soup.

Step 5: Add Stock
Pour in 4 cups of vegetable stock, and increase the heat to bring the mixture to a gentle boil. Once boiling, reduce the heat to a low simmer and let it cook for 10-15 minutes, or until the potatoes are tender. This simmering melds all the flavors beautifully.

Step 6: Blend Soup
Carefully transfer the mixture to a blender, blending until smooth and creamy. If needed, work in batches to avoid overflow. Return the blended soup to the pot, heating it briefly to warm through. This will ensure a velvety texture in your Witches Brew Green Pea Soup.

Step 7: Sauté Mushrooms
In a separate pan, heat 1 tablespoon of olive oil over medium heat. Add 1 cup of sliced mushrooms and sauté for about 1 minute, adding a dash of stock for moisture, until they're tender. This deliciously enhances the garnish for your soup.

Step 8: Serve
Ladle the Witches Brew Green Pea Soup into bowls and adorn with a swirl of heavy cream or coconut milk. Top with the sautéed mushrooms and a sprinkle of microgreens for presentation. This final touch transforms your soup into a stunning Halloween feast!

What to Serve with Witches Brew Green Pea Soup?

Indulging in a bowl of vibrant green comfort will have you dreaming of delightful pairings that elevate your Halloween feast.

  • Crusty Bread: Perfect for dipping and soaking up the soup, its rustic texture adds a heartiness that complements the smoothness of the soup.
  • Pumpkin Spice Muffins: These sweet treats bring a festive fall flavor, making your meal cozy and inviting. A lovely contrast to the savory notes of the soup.
  • Garlic Breadsticks: Crispy on the outside and soft on the inside, they provide a satisfying crunch that balances the velvety soup perfectly.
  • Sautéed Greens: A side of sautéed kale or Swiss chard enhances the meal's nutritional value while offering a fresh, earthy flavor that marries well with the soup’s sweetness.
  • Cheese Platter: Offer a variety of cheeses like sharp cheddar and creamy brie, which provide rich, contrasting flavors that enhance the experience of the Witches Brew Green Pea Soup.
  • Apple Cider: A warm mug of spiced apple cider beautifully complements the soup, adding a seasonal touch that invokes the spirit of autumn.

With these delightful options by your side, your Halloween gathering will surely be enchanting and memorable!

Make Ahead Options

These Witches Brew Green Pea Soup is perfect for busy home cooks who love to meal prep! You can prepare the soup base—completing steps 1 through 6—up to 24 hours in advance. Simply blend and store the soup in an airtight container in the refrigerator. When you're ready to serve, just reheat the soup over medium heat, stirring occasionally, and prepare your sautéed mushrooms (step 7) fresh to maintain their texture and flavor. If you want to enjoy the soup later, it can also be frozen for up to 3 months; just be sure to cool it completely before freezing. This preparation allows you to enjoy a delicious, comforting bowl without the fuss on the day of your gathering!

Expert Tips for Witches Brew Green Pea Soup

  • Perfectly Textured Soup: Blend until fully smooth to ensure a creaminess that delights every spoonful; no chunks should remain to maintain the luxurious feel.

  • Seasoning Wisdom: Always taste before serving! Adjust the salt and pepper as needed; often, a pinch more can elevate the flavors of your Witches Brew Green Pea Soup.

  • Mushroom Magic: Avoid overcooking the mushrooms; sauté just until tender for optimal texture. This step ensures every bite is a delightful experience.

  • Storage Savvy: Store any leftovers in an airtight container in the fridge for up to 3 days. Reheat gently to keep that comforting warmth!

  • Customize with Care: Feel free to add your favorite toppings, but ensure they complement the soup's flavors. Experiment with textures like crispy pumpkin seeds or creamy coconut milk.

How to Store and Freeze Witches Brew Green Pea Soup

Fridge: Store your Witches Brew Green Pea Soup in an airtight container for up to 3 days. Be sure to let it cool before sealing to maintain freshness.

Freezer: If you want to keep it longer, freeze the soup in freezer-safe containers for up to 1 month. Label containers with the date for easy tracking.

Reheating: Reheat the soup gently on the stove over medium heat, stirring occasionally. Add a splash of vegetable stock or water if it seems too thick after thawing, ensuring a smooth consistency.

Witches Brew Green Pea Soup Variations

Customize your Witches Brew Green Pea Soup for a unique twist that tantalizes the taste buds!

  • Dairy-Free: Substitute heavy cream with coconut milk for a creamy, plant-based option that still delivers on richness.

  • Nutritious Greens: Add in chopped broccoli or kale for an extra layer of nutrition and a delightful burst of color.

  • Spicy Kick: Spice things up by adding diced jalapeños or a dash of cayenne pepper for those who love a bit of heat!

  • Mushroom Medley: Experiment with different mushroom varieties like shiitake or oyster for a deliciously rich umami flavor.

  • Protein Boost: Toss in some cooked lentils or chickpeas for heartiness and a protein-packed finish that makes this soup more filling.

  • Crunch Factor: Add toasted pumpkin seeds or a sprinkle of crispy shallots on top for delightful crunch and extra flavor layers.

  • Smoky Essence: For a depth of flavor, sprinkle some smoked paprika as a finishing touch; it complements the sweetness of the peas beautifully.

Why not serve this spooktacular delight alongside some tasty sides like Zuppa Toscana Soup or a warming bowl of Lemon Chicken Soup? Your Halloween gathering will be truly unforgettable!

Witches Brew Green Pea Soup Recipe FAQs

What type of peas should I use for the soup?
Absolutely! Frozen green peas are perfect for this recipe, providing sweetness and vibrant color. If you have access to fresh peas during their season, feel free to use them for an even fresher taste. Just make sure to shell them before adding!

How should I store leftover Witches Brew Green Pea Soup?
Store your Witches Brew Green Pea Soup in an airtight container in the refrigerator for up to 3 days. Make sure it cools down before sealing to maintain its delicious flavor and freshness.

Can I freeze Witches Brew Green Pea Soup?
Yes, you can freeze it! To store, pour the cooled soup into freezer-safe containers, leaving about an inch of space at the top for expansion. Label with the date, and it should be good for up to 1 month. When you’re ready to enjoy it again, just thaw in the refrigerator overnight and reheat gently on the stove.

What if my soup is too thick after freezing?
No worries! If your Witches Brew Green Pea Soup seems too thick after thawing, just add a splash of vegetable stock or water and give it a good stir. Heat it gently on medium, and you’ll have that velvety texture back in no time!

Is this soup suitable for people with dietary restrictions?
Definitely! This soup is vegetarian and can easily be made dairy-free by substituting heavy cream with coconut milk or almond milk. Always check ingredient labels for possible allergens, especially with stock and garnishes, to ensure it aligns with your dietary needs.

What toppings work best for the soup?
The more, the merrier! Try adding sautéed mushrooms for a savory touch, or toasted pumpkin seeds for crunch. Microgreens add a beautiful presentation, while a pinch of smoked paprika will elevate the flavor profile beautifully. Enjoy customizing it to fit your taste!

Witches Brew Green Pea Soup

Witches Brew Green Pea Soup: A Spooktacular Comfort Bowl

Witches Brew Green Pea Soup is a vibrant, Halloween-themed delight that combines peas and spinach in a quick, customizable recipe.
Print Recipe Pin Recipe
Prep Time 15 minutes mins
Cook Time 30 minutes mins
Total Time 45 minutes mins
Servings: 4 bowls
Course: Soups
Cuisine: Vegetarian
Calories: 250
Ingredients Equipment Method Nutrition Notes

Ingredients
  

For the Soup
  • 2 tablespoons Olive Oil Can substitute with avocado oil
  • 1 medium Onion Any variety works beautifully
  • 2 cloves Garlic Fresh or 1/4 tsp garlic powder works fine
  • 2 medium Yukon Gold Potatoes Diced
  • 4 cups Frozen Green Peas Fresh peas can be used if in season
  • 2 cups Baby Spinach Kale is a good substitute
  • to taste Ground Pepper
  • to taste Salt Sea salt or kosher salt is recommended
  • 4 cups Vegetable Stock Can be homemade or store-bought
For the Garnish
  • 1 cup Mushrooms Sliced, shiitake or cremini recommended
  • to taste Heavy Cream or Coconut Milk Almond milk can be a lighter alternative
  • to taste Micro Greens For garnish
  • to taste Ground Black Pepper For finishing touches
  • to taste Crushed Red Pepper For finishing touches

Equipment

  • Large pot
  • Blender
  • Skillet

Method
 

Instructions
  1. Heat 2 tablespoons of olive oil in a large pot over medium heat.
  2. Add 1 chopped onion and 2 minced garlic cloves to the pot, stirring frequently until translucent.
  3. Incorporate 2 diced Yukon Gold potatoes, sautéing for approximately 5 minutes.
  4. Stir in 4 cups of frozen green peas and 2 cups of baby spinach, cooking for just 1 minute.
  5. Pour in 4 cups of vegetable stock and bring to a gentle boil, then reduce to a low simmer for 10-15 minutes.
  6. Blend the mixture until smooth and creamy, then heat briefly if needed.
  7. In a separate pan, heat 1 tablespoon of olive oil, add 1 cup of sliced mushrooms and sauté until tender.
  8. Ladle the soup into bowls, top with heavy cream or coconut milk, sautéed mushrooms, and microgreens.

Nutrition

Serving: 1bowlCalories: 250kcalCarbohydrates: 35gProtein: 7gFat: 10gSaturated Fat: 2gPolyunsaturated Fat: 2gMonounsaturated Fat: 5gSodium: 600mgPotassium: 700mgFiber: 8gSugar: 5gVitamin A: 3000IUVitamin C: 20mgCalcium: 80mgIron: 3.5mg

Notes

Perfectly textured soup, always taste and adjust seasoning before serving, avoid overcooking mushrooms, store leftovers in the fridge for up to 3 days.

Tried this recipe?

Let us know how it was!

Creamy Spicy Chorizo Pumpkin Soup for Cozy Fall Nights

October 2, 2025 by Grace Snow Leave a Comment

As the leaves turn and the air grows crisp, I find myself craving warmth and comfort in every spoonful. This is where my creamy spicy chorizo pumpkin soup comes to the rescue! With a delightful interplay of piquant chorizo and velvety pumpkin puree, this dish sings the flavors of fall in under 30 minutes. Not only is this soup extraordinarily satisfying, but it also allows for endless customization—I love that I can switch up the spice levels and add my favorite veggies! Whether you're hosting a cozy gathering or simply seeking a comforting bowl for a quiet evening, this chorizo pumpkin soup is sure to delight. Curious about how this hearty meal can steal the spotlight at your table? Let’s dive in!

Why is this soup a must-try?

Quick preparation: This creamy spicy chorizo pumpkin soup can be made in under 30 minutes, making it perfect for busy weeknights or spontaneous gatherings.

Flavor explosion: With the zesty kick of chorizo and the sweetness of pumpkin, this soup blends bold flavors for an unforgettable taste experience.

Versatile ingredients: Customize it to suit your palate by swapping out chorizo for smoked sausage, tofu, or even adding extra veggies like bell peppers for added nutrition.

Comforting warmth: As the fall chill sets in, there's nothing like a steaming bowl of this soup to warm your soul.

Crowd-pleaser: Serve it at gatherings and watch it disappear—its rich and hearty flavor appeals to everyone, whether you’re vegan or a meat-lover!

For more comforting fall dishes, check out my recipe for Santa Soup Savory or indulge in some delicious Pumpkin Brownies Decadent!

Chorizo Pumpkin Soup Ingredients

For the Soup Base
• Chorizo – Adds rich and spicy flavor; substitute pork, beef, or tofu chorizo for a vegetarian option.
• Onion – Provides sweetness and depth; use yellow or white onion, as there's no direct substitute.
• Garlic – Introduces aromatic flavor; can be substituted with garlic powder (1/4 tsp per clove).
• Cumin – Infuses warmth and earthiness; there’s no substitute, but coriander can complement it.
• Salt – Enhances overall flavors; adjust to taste, especially when using pre-seasoned broth.
• Black Pepper – Adds seasoning; freshly ground offers the best flavor.
• Broth (chicken or beef) – Provides the soup base; vegetable broth is a good vegetarian alternative.

For the Flavor Kick
• Chipotle Peppers – Contributes smoky heat; adjust quantity based on spice tolerance or swap for jalapeños for variety.
• Pumpkin Puree – Gives creaminess and sweetness; ensure it's pure pumpkin puree, not pie filling.

For a Creamy Finish
• Cream – Adds a rich, velvety texture; substitute with coconut cream for a dairy-free option or use half-and-half.

Embrace the essence of fall with this chorizo pumpkin soup — you'll savor every comforting spoonful!

Step‑by‑Step Instructions for Creamy Spicy Chorizo Pumpkin Soup

Step 1: Cook the Chorizo
In a heavy pot, heat over medium heat, adding your crumbled chorizo. Sauté for about 5 minutes or until the chorizo is browned and cooked through, stirring frequently to break apart larger pieces. Once cooked, drain any excess fat from the pot to ensure a rich, velvety texture for your spicy chorizo pumpkin soup.

Step 2: Sauté the Aromatics
Add chopped onions to the pot with the chorizo and sauté for about 3 minutes, allowing them to soften and become fragrant. Next, stir in minced garlic and finely chopped chipotle peppers, cooking for an additional 2 minutes until the garlic is lightly golden and aromatic. This step will deepen the flavor of your creamy spicy chorizo pumpkin soup.

Step 3: Combine the Base Ingredients
Pour in your choice of broth, followed by pumpkin puree, cumin, salt, and freshly ground black pepper. Stir well to combine all ingredients, ensuring the pumpkin puree blends seamlessly. Bring the mixture to a gentle simmer over low heat, allowing it to cook for about 10 minutes. This will let the flavors meld into a harmonious base for your soup.

Step 4: Incorporate the Cream
After simmering, remove the pot from the heat and slowly stir in the cream. This will transform your spicy chorizo pumpkin soup into a creamy delight. For a richer texture, you can use an immersion blender to blend part of the soup until smooth. Ensure everything is well mixed and let it rest for a minute before serving.

Step 5: Serve and Garnish
Ladle the creamy spicy chorizo pumpkin soup into bowls, topping each serving with a sprinkle of roasted pumpkin seeds and sliced green onions for a fresh crunch. Enjoy this comforting dish warm, allowing the robust flavors to shine through. This delightful fall soup is perfect for cozy evenings or gatherings with loved ones.

Expert Tips for Spicy Chorizo Pumpkin Soup

  • Drain Fat: Make sure to drain excess fat from the chorizo after cooking to avoid a greasy soup, which can dull the flavors in your chorizo pumpkin soup.

  • Adjust Spice Levels: Use caution when adding chipotle peppers. Start with a small amount and gradually increase to avoid overwhelming heat, ensuring balance in the soup.

  • Soup Thickness: For a thicker consistency, use an immersion blender to partially blend the soup. This will create a rich texture while still keeping some chunks of chorizo.

  • Fresh Ingredients: Whenever possible, opt for fresh garlic and onion instead of powdered substitutes for an aromatic, vibrant flavor in your soup.

  • Flavor Enhancers: Experiment with spices like smoked paprika or chili powder for an extra depth of flavor, enhancing your chorizo pumpkin soup.

  • Storing Leftovers: Store any leftovers in an airtight container in the refrigerator for up to 3 days. Reheat gently on the stovetop to maintain its creamy texture.

Make Ahead Options

These creamy spicy chorizo pumpkin soup preparations are a lifesaver for busy weeknights! You can prepare the soup base (chorizo, onions, garlic, and spices) up to 24 hours in advance—simply sauté and combine all ingredients, then refrigerate. To maintain quality, store in an airtight container and wait to stir in the cream until you’re ready to serve. When you're ready for that warming bowl of comfort, just reheat the soup gently on the stovetop, then add the cream, stirring until creamy and well-blended. With this make-ahead option, you’ll have a delightful homemade soup ready to enjoy, saving you precious time without sacrificing flavor!

How to Store and Freeze Spicy Chorizo Pumpkin Soup

Fridge: Store leftovers in an airtight container in the refrigerator for up to 3 days. Reheat gently on the stovetop to maintain creaminess.

Freezer: This soup can be frozen for up to 3 months. Allow it to cool completely, then transfer to freezer-safe containers, leaving space for expansion.

Thawing: To enjoy frozen spicy chorizo pumpkin soup, thaw overnight in the fridge before reheating on the stovetop until warmed through.

Reheating: When reheating, if the soup appears thick, add a splash of broth or water to reach your desired consistency. Enjoy cozy warmth in every spoonful!

Chorizo Pumpkin Soup Variations

Feel free to explore exciting twists and swaps for this delightful recipe, ensuring it perfectly suits your palate!

  • Dairy-Free: Substitute cream with coconut cream for a rich, dairy-free alternative. This adds a subtle sweetness that complements the pumpkin beautifully.

  • Vegetarian: Use tofu chorizo or mushrooms in place of traditional chorizo. Not only does this make the soup vegetarian, but it also adds a hearty texture that soaks up the flavors.

  • Extra Veggies: Enhance nutrition by adding chopped bell peppers or carrots. These will introduce a lovely crunch and natural sweetness to the soup.

  • Spice Level: Adjust the heat by increasing or decreasing chipotle pepper amounts. For a milder version, swap chipotle for jalapeños or even bell peppers.

  • Flavor Fusion: Experiment by adding some smoked paprika or chili powder for a new layer of smokiness and warmth. These will elevate the soup’s flavor profile even further.

  • Chunky Texture: For a thicker consistency, blend half the soup with an immersion blender, then stir back into the pot. It’s a delightful way to maintain some chorizo chunks while achieving creaminess.

  • Garnish Galore: Top your bowls with fried shallots or fresh cilantro for added crunch and a burst of freshness. This will brighten up the dish, making each bite even more enjoyable!

For more delicious ideas, you can try my recipe for Asparagus Soup Healthy or indulge in a delightful twist with Pumpkin Cinnamon Roll.

What to Serve with Creamy Spicy Chorizo Pumpkin Soup

Cozy up your meal with delightful sides that elevate the flavors of this luscious soup.

  • Crunchy Garlic Bread: A must-have for dipping, it perfectly complements the creamy texture of the soup while adding a delightful crunch.

  • Fresh Green Salad: Toss together mixed greens with a tangy vinaigrette for a refreshing counterpoint, balancing the rich flavors of the soup.

  • Savory Cornbread Muffins: Their slightly sweet and tender crumb pairs beautifully with the spicy warmth, offering a comforting bite to accompany your soup.

  • Roasted Brussels Sprouts: The crispy edges of these veggies bring a hearty texture that enhances the overall meal experience.

  • Spiced Apple Cider: A warm glass of this aromatic drink provides a fruity sweetness that echoes the soup's pumpkin base, delivering cozy fall vibes.

  • Dark Chocolate Brownies: Indulge your sweet tooth with fudgy brownies; the richness will elevate the comforting experience of the chorizo pumpkin soup, leaving you utterly satisfied.

Whether it's a comforting side or a delightful drink, these pairings will transform your meal into a warm celebration of fall!

Creamy Spicy Chorizo Pumpkin Soup Recipe FAQs

How do I select the best chorizo for this soup?
Absolutely! Look for fresh, high-quality chorizo that is bright red with a good amount of fat for flavor. You want it to be slightly moist but not overly greasy. If you're vegetarian, tofu chorizo is a wonderful alternative that retains the dish’s delicious flavor.

How should I store leftover chorizo pumpkin soup?
For optimal freshness, store your creamy spicy chorizo pumpkin soup in an airtight container in the refrigerator for up to 3 days. Reheat it gently on the stovetop over low heat, stirring occasionally to help maintain that lovely creamy texture.

Can I freeze spicy chorizo pumpkin soup?
Yes, you can freeze this soup for up to 3 months! To freeze, let it cool completely, then transfer to freezer-safe containers, leaving some space for expansion. When ready to enjoy, thaw overnight in the fridge and gently reheat on the stovetop until warmed through.

What if my soup turned out too thick?
If your soup is thicker than you’d like, no worries! Simply add a splash of broth or water as you reheat it on the stovetop. Stirring continuously will help achieve your preferred consistency while keeping the flavors intact. It's so easy to customize as you go!

Are there any allergies I should consider for this recipe?
The chorizo pumpkin soup contains common allergens like dairy (if using cream) and specific spices. If you're cooking for someone with food allergies, you can easily substitute cream with coconut cream for a dairy-free option. Double-check all ingredients, especially broths, which may contain hidden allergens.

What's the best way to ensure my spices are fresh?
To really enhance the flavor of your creamy spicy chorizo pumpkin soup, always use fresh spices. Ground spices lose potency over time, so check the expiration dates on your cumin and black pepper. If your spices smell weak or stale, it’s time to refresh your spice cabinet for the best flavor in your soup!

Spicy chorizo pumpkin soup

Creamy Spicy Chorizo Pumpkin Soup for Cozy Fall Nights

This creamy spicy chorizo pumpkin soup is a delightful blend of flavors perfect for fall, ready in under 30 minutes.
Print Recipe Pin Recipe
Prep Time 10 minutes mins
Cook Time 20 minutes mins
Total Time 30 minutes mins
Servings: 4 bowls
Course: Soups
Cuisine: American
Calories: 350
Ingredients Equipment Method Nutrition Notes

Ingredients
  

For the Soup Base
  • 1 lb Chorizo Add rich and spicy flavor; substitute pork, beef, or tofu chorizo for a vegetarian option.
  • 1 medium Onion Provides sweetness and depth; use yellow or white onion.
  • 3 cloves Garlic Introduce aromatic flavor; can be substituted with garlic powder (1/4 tsp per clove).
  • 1 tsp Cumin Infuses warmth and earthiness; there’s no substitute.
  • 1 tsp Salt Enhances overall flavors; adjust to taste.
  • 1/2 tsp Black Pepper Adds seasoning; freshly ground offers the best flavor.
  • 4 cups Broth (chicken or beef) Provides the soup base; vegetable broth is a good vegetarian alternative.
For the Flavor Kick
  • 2 pcs Chipotle Peppers Contributes smoky heat; adjust quantity based on spice tolerance.
  • 1 cup Pumpkin Puree Gives creaminess and sweetness; ensure it's pure pumpkin puree.
For a Creamy Finish
  • 1 cup Cream Adds a rich, velvety texture; substitute with coconut cream for a dairy-free option.

Equipment

  • Heavy pot

Method
 

Cooking Steps
  1. In a heavy pot, heat over medium heat, adding your crumbled chorizo. Sauté for about 5 minutes or until browned, then drain excess fat.
  2. Add chopped onions to the pot with the chorizo and sauté for about 3 minutes. Stir in minced garlic and chipotle peppers, cooking for 2 more minutes.
  3. Pour in your choice of broth, followed by pumpkin puree, cumin, salt, and pepper. Stir to combine and bring to a gentle simmer for 10 minutes.
  4. Remove from heat and slowly stir in the cream. Blend part of the soup with an immersion blender if a smoother texture is desired.
  5. Ladle the soup into bowls, topping with roasted pumpkin seeds and sliced green onions.

Nutrition

Serving: 1bowlCalories: 350kcalCarbohydrates: 28gProtein: 15gFat: 24gSaturated Fat: 12gPolyunsaturated Fat: 2gMonounsaturated Fat: 6gCholesterol: 85mgSodium: 800mgPotassium: 600mgFiber: 4gSugar: 3gVitamin A: 8000IUVitamin C: 10mgCalcium: 100mgIron: 3mg

Notes

For best results, use fresh ingredients like garlic and onion for greater flavor. Adjust the spice levels to your preference.

Tried this recipe?

Let us know how it was!
  • « Previous Page
  • 1
  • …
  • 8
  • 9
  • 10
  • 11
  • 12
  • …
  • 14
  • Next Page »

Welcome!

Hi, I’m Grace, a Sydney-based home cook with a passion for bold flavors and trending ingredients. Whether you’re a busy beginner or a seasoned foodie, you’ll find dishes here that are fresh, fun, and full of flavor.

More about me

Popular Recipes

  • Honey Lime Chicken & Avocado Rice Bowl
    Honey Lime Chicken & Avocado Rice Bowl for a Flavor Burst
  • Tasty Italian Pasta Salad
    Delight in this Easy Tasty Italian Pasta Salad for Summer Fun
  • Garlic Butter Chicken Pasta
    Garlic Butter Chicken Pasta That’ll Wow Your Family Tonight
  • Creamy, Spicy Chicken Pasta
    Creamy, Spicy Chicken Pasta with Fresh Summer Veggies

Footer

↑ back to top

About

  • Privacy Policy
  • Disclaimer
  • Terms & Conditions

Newsletter

  • Sign Up! for emails and updates

Contact

  • About me
  • Contact me

Copyright © 2025 TastyTrendIngredients