tastytrendingredients

  • Home
  • Recipes
    • Appetizers
    • Breakfast
    • Dessert
    • Dinner
    • Drinks
    • Salads
    • Snacks
    • Soups
  • About me
  • Contact me
menu icon
go to homepage
  • Home
  • Recipes
    • Appetizers
    • Breakfast
    • Dessert
    • Dinner
    • Drinks
    • Salads
    • Snacks
    • Soups
  • About me
  • Contact me
search icon
Homepage link
  • Home
  • Recipes
    • Appetizers
    • Breakfast
    • Dessert
    • Dinner
    • Drinks
    • Salads
    • Snacks
    • Soups
  • About me
  • Contact me
×

Gordon Ramsay Macaroni Salad: A Creamy Summer Delight

January 11, 2026 by Grace Snow Leave a Comment

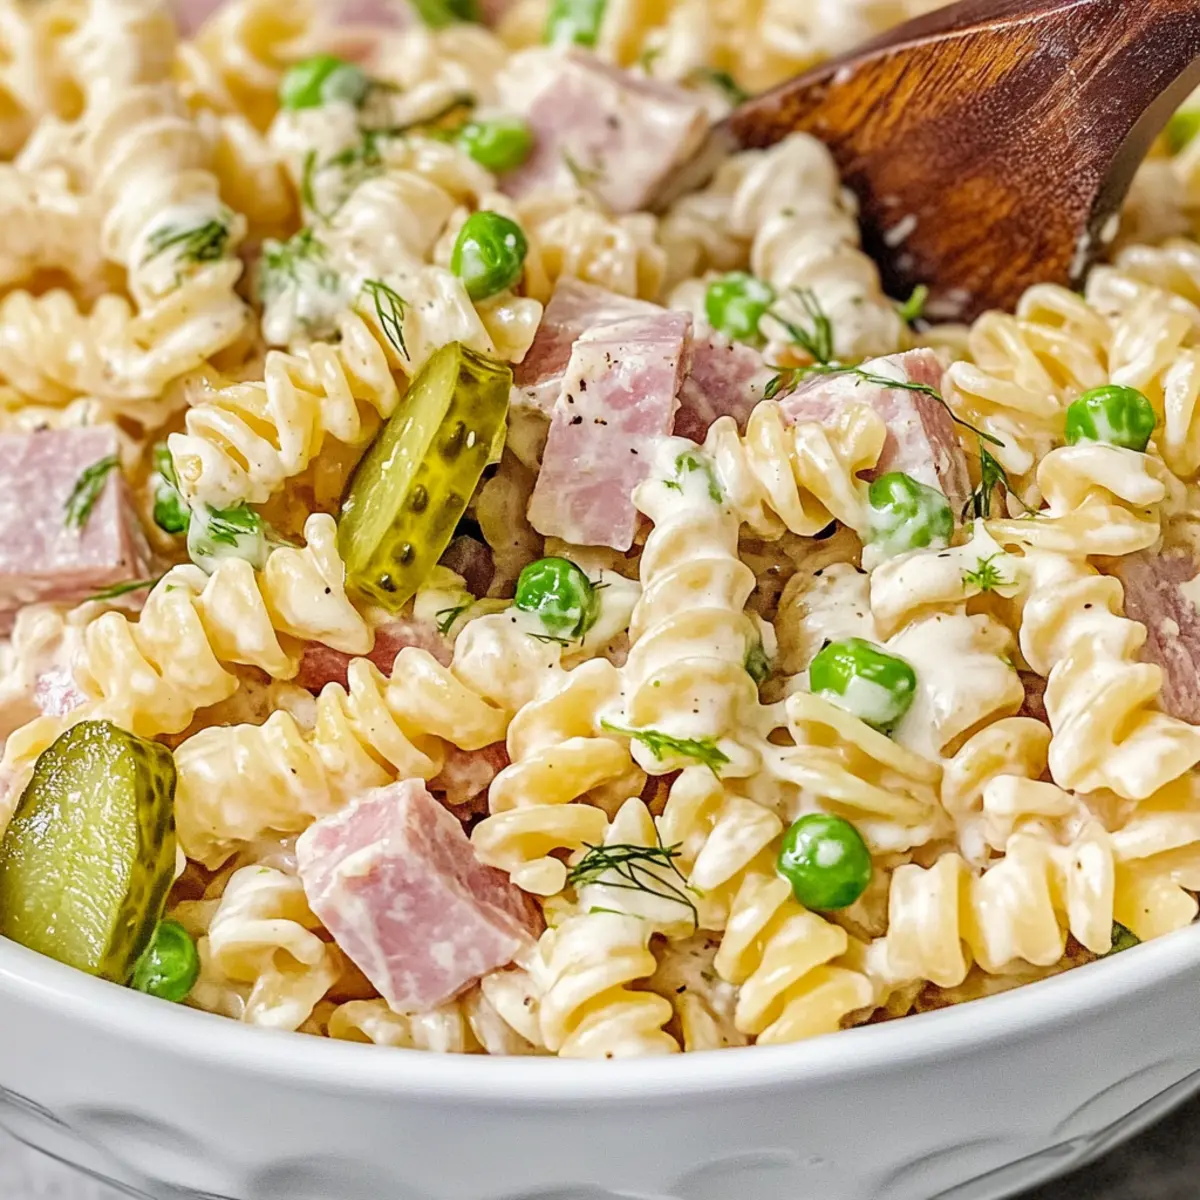
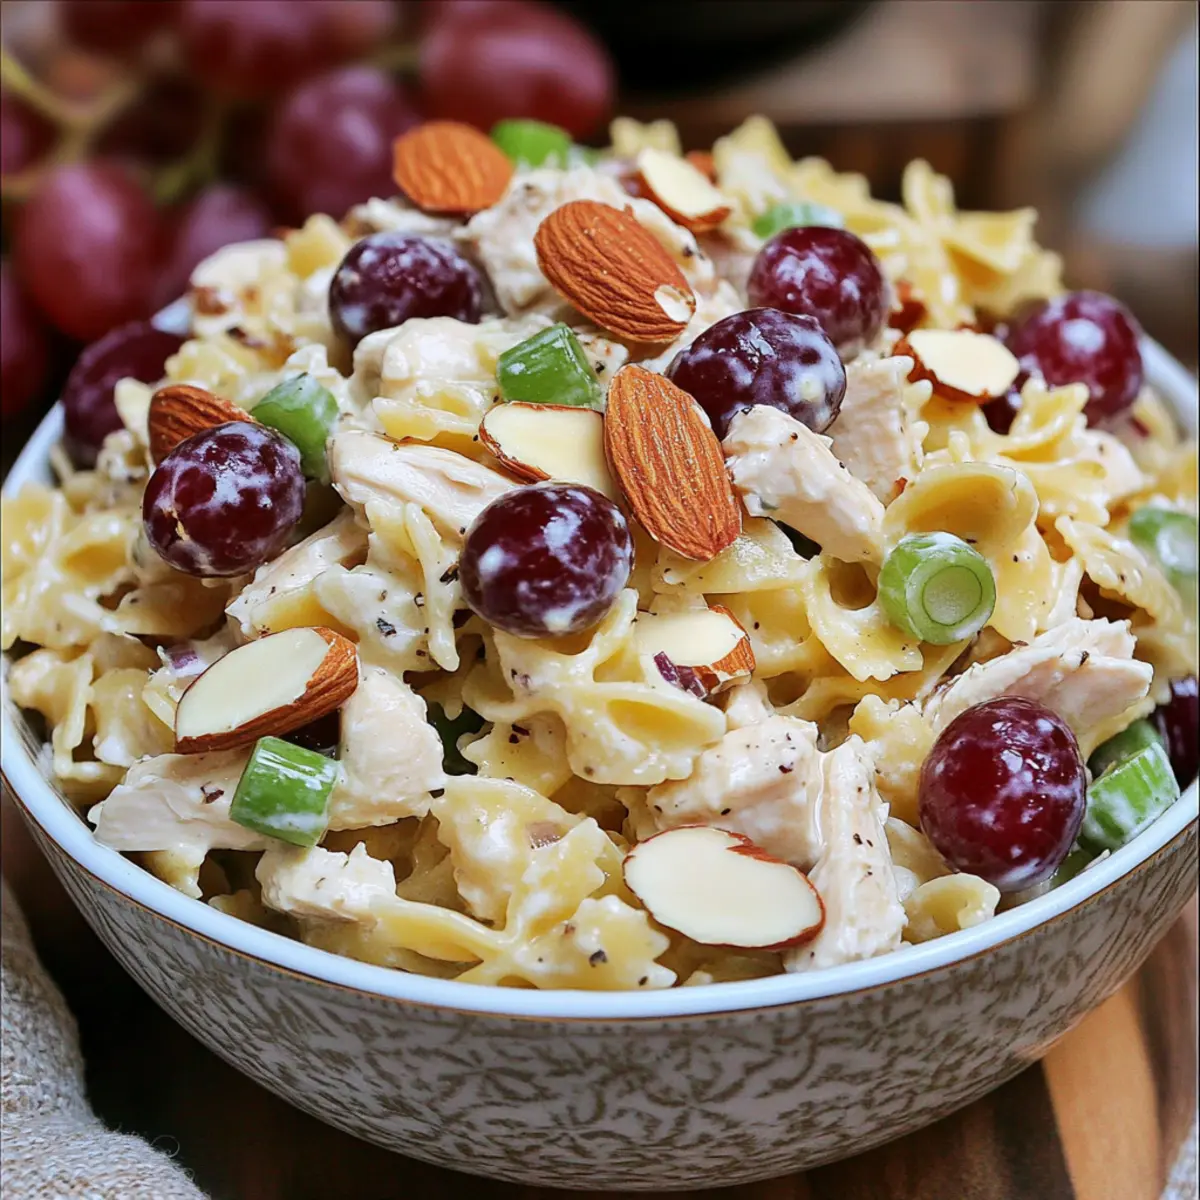
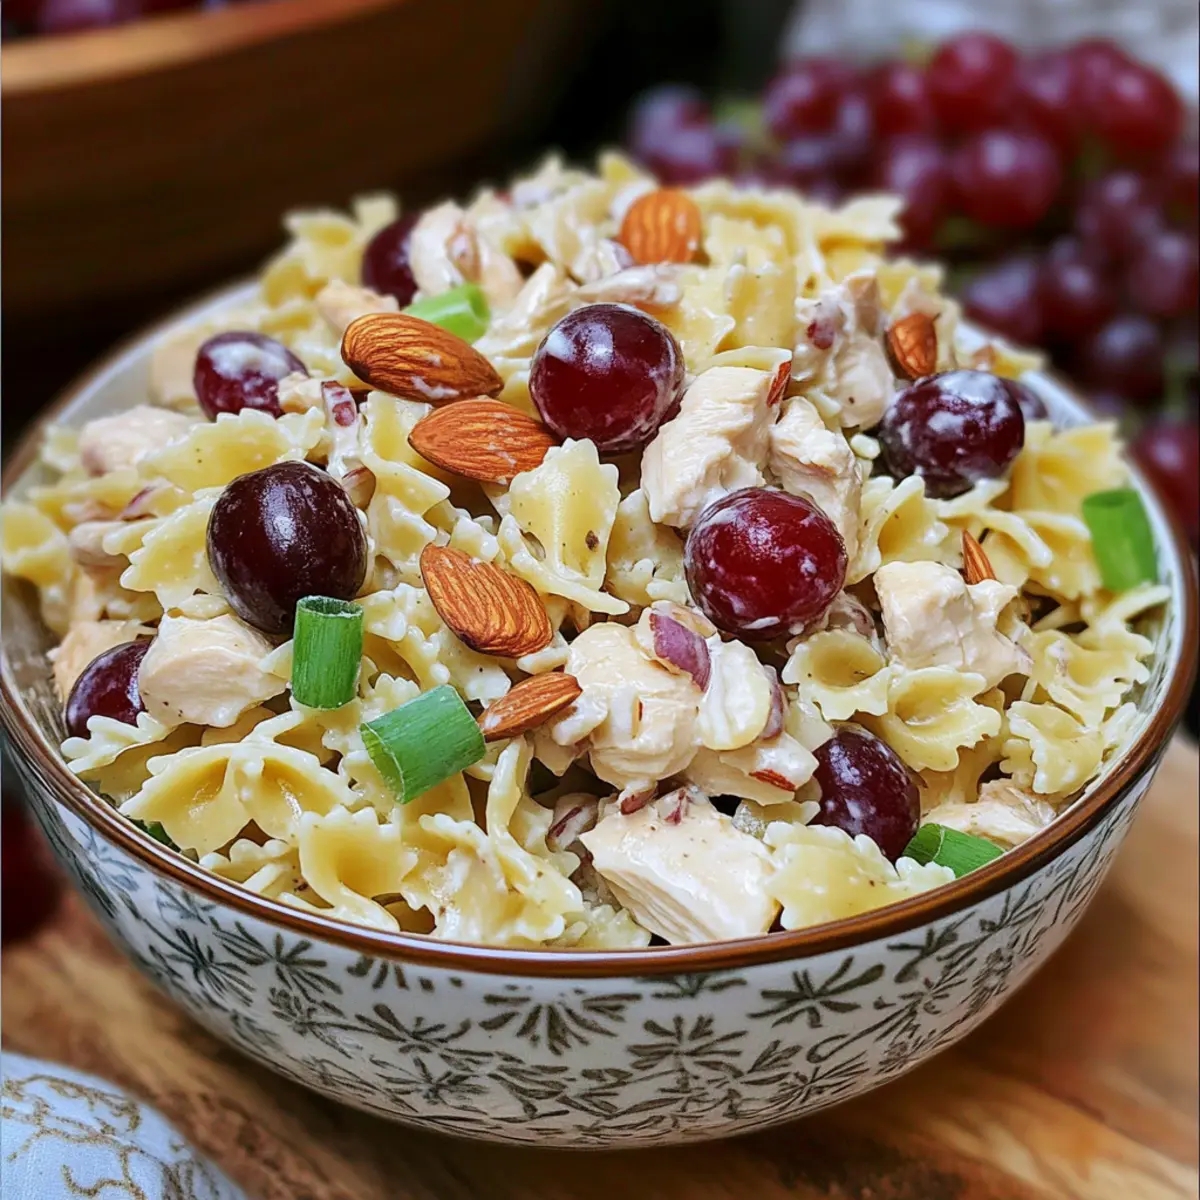
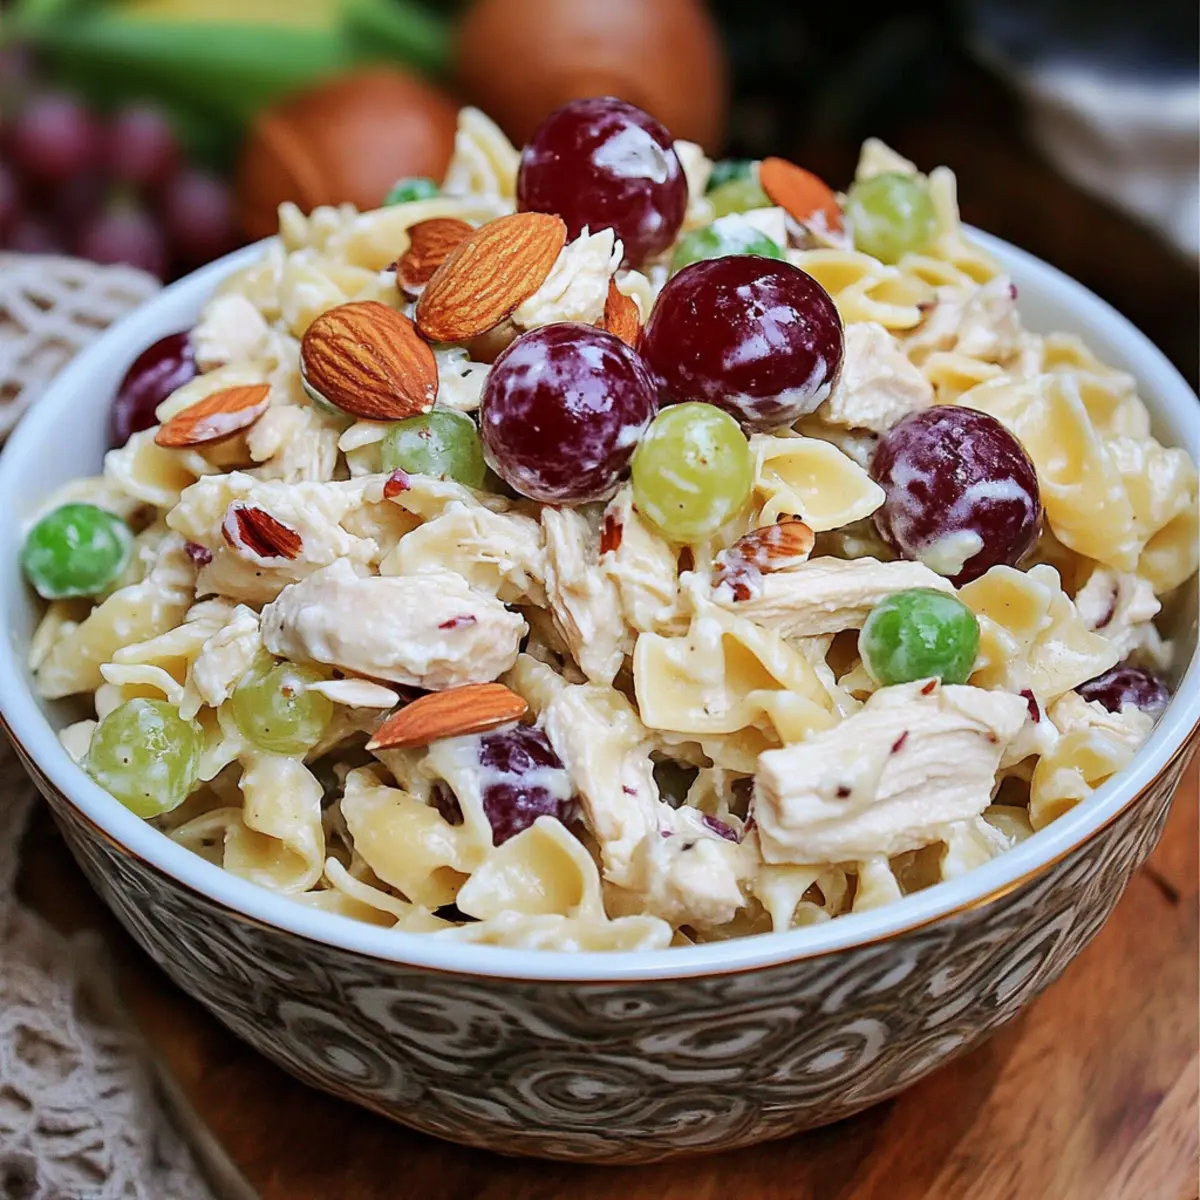
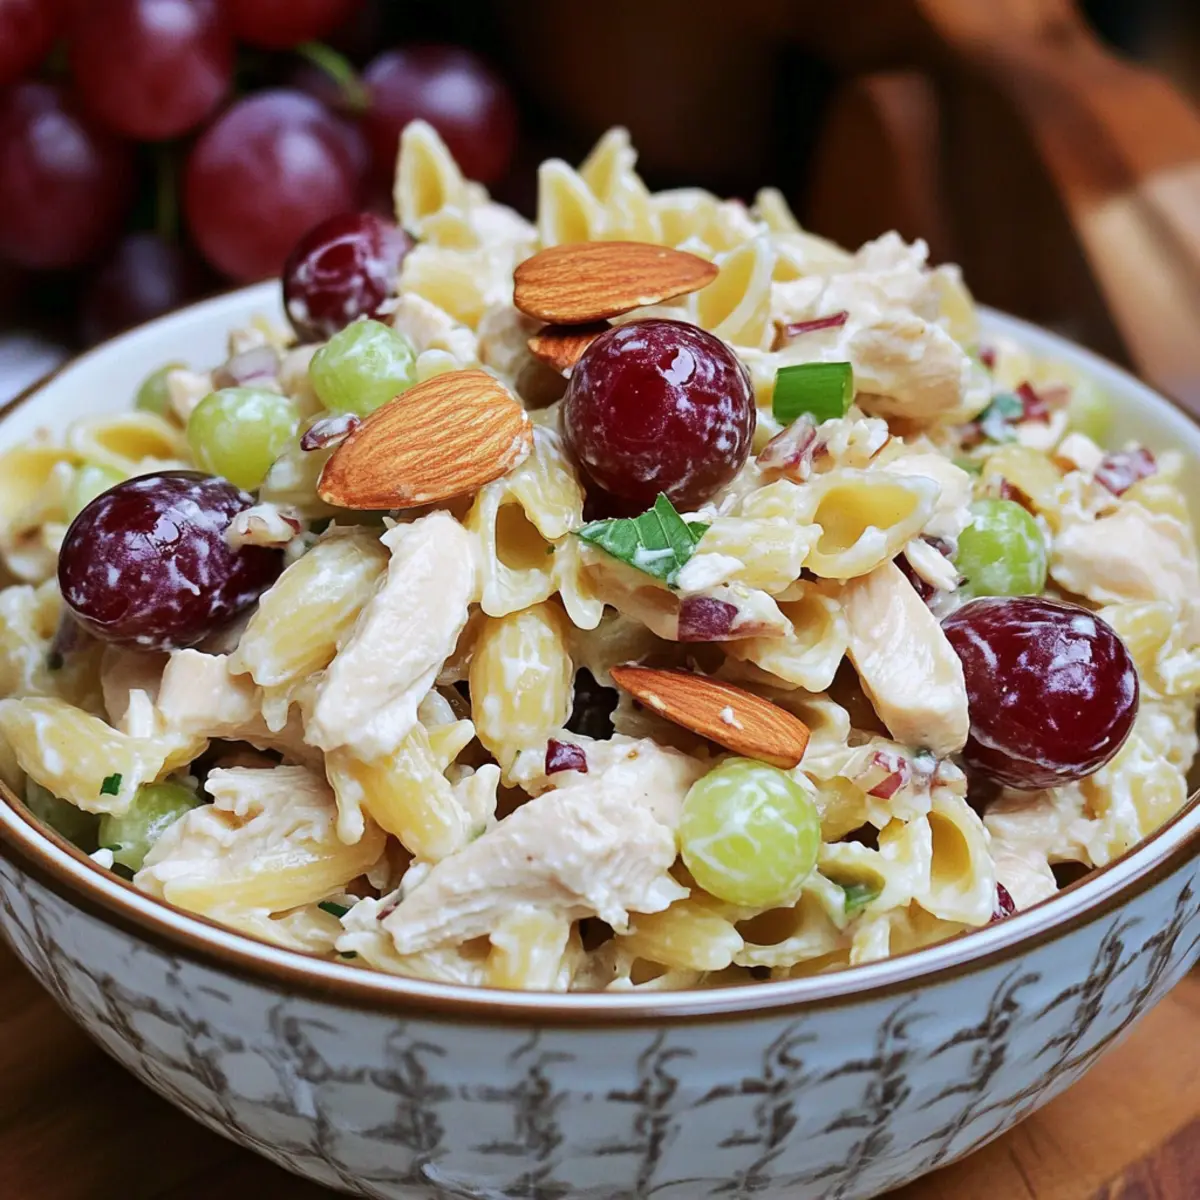
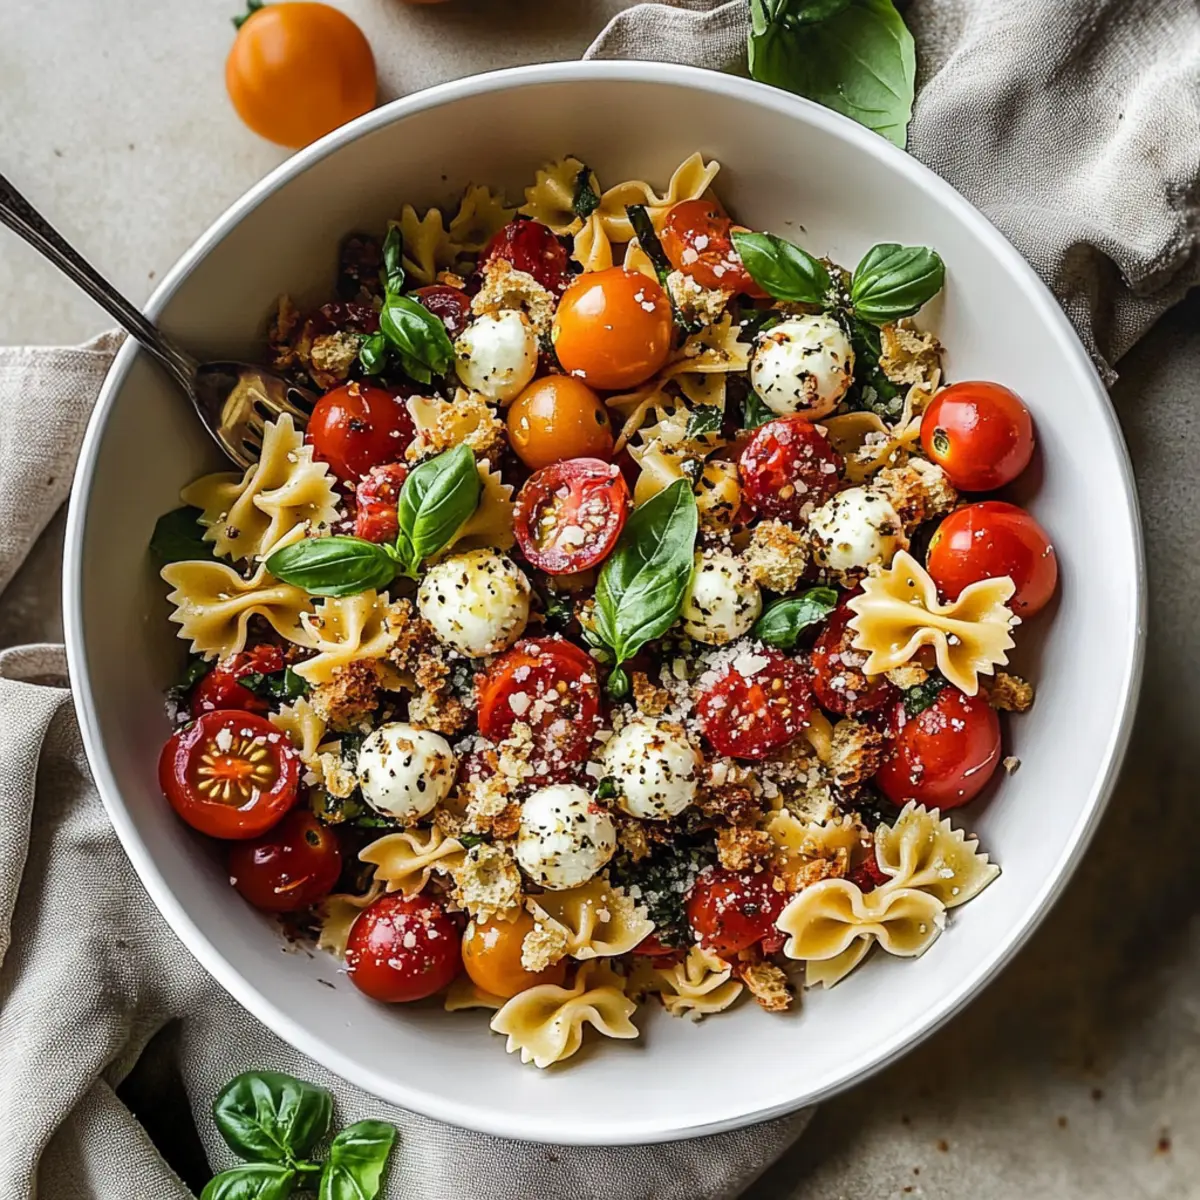
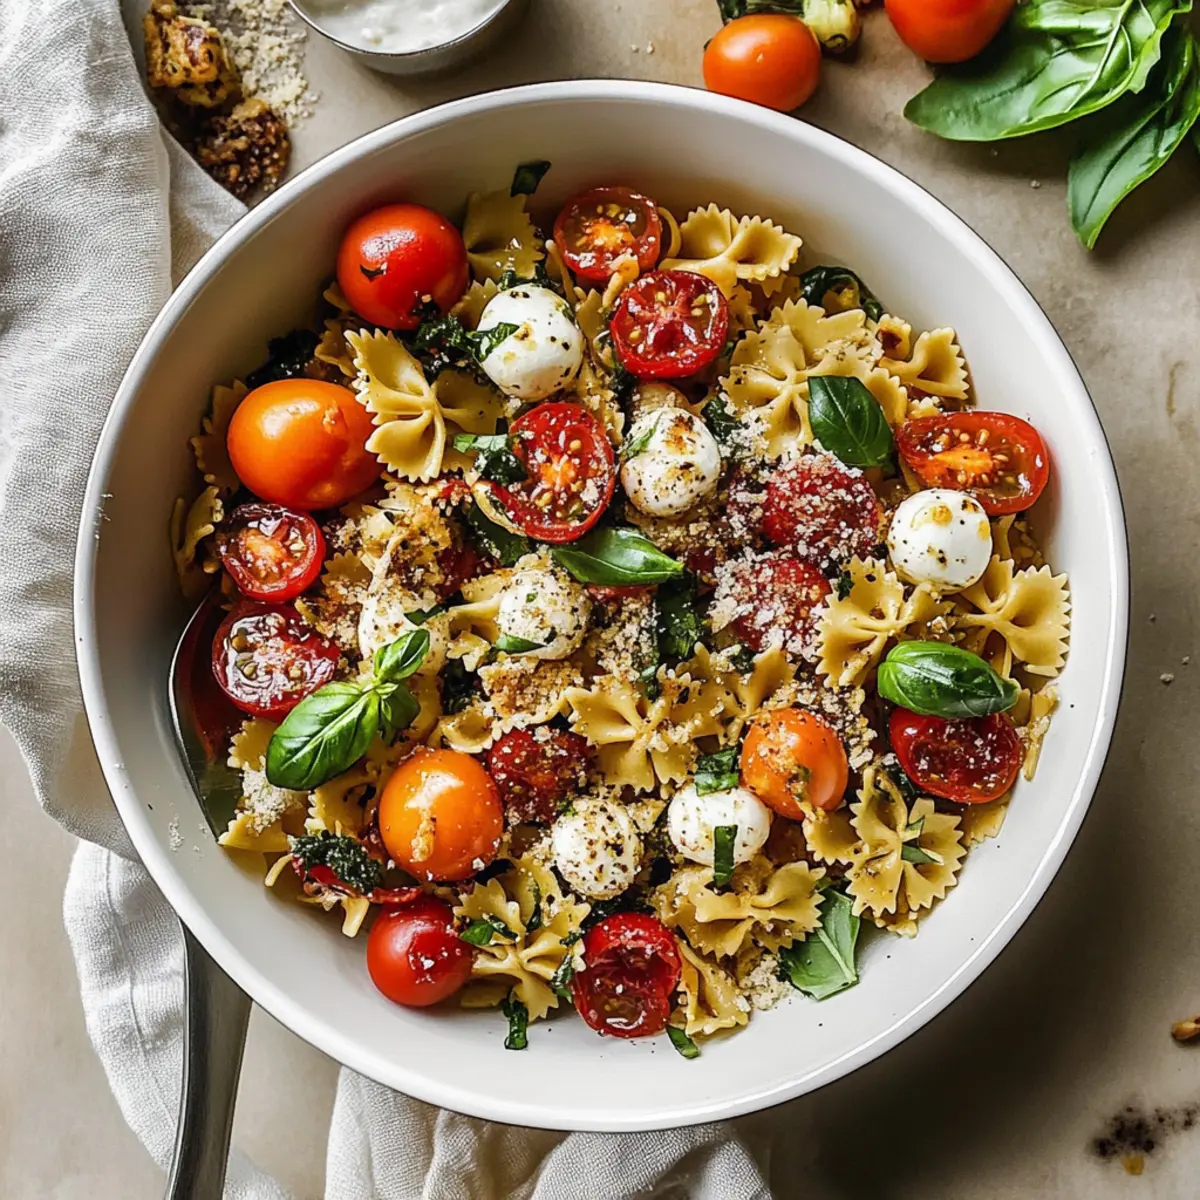
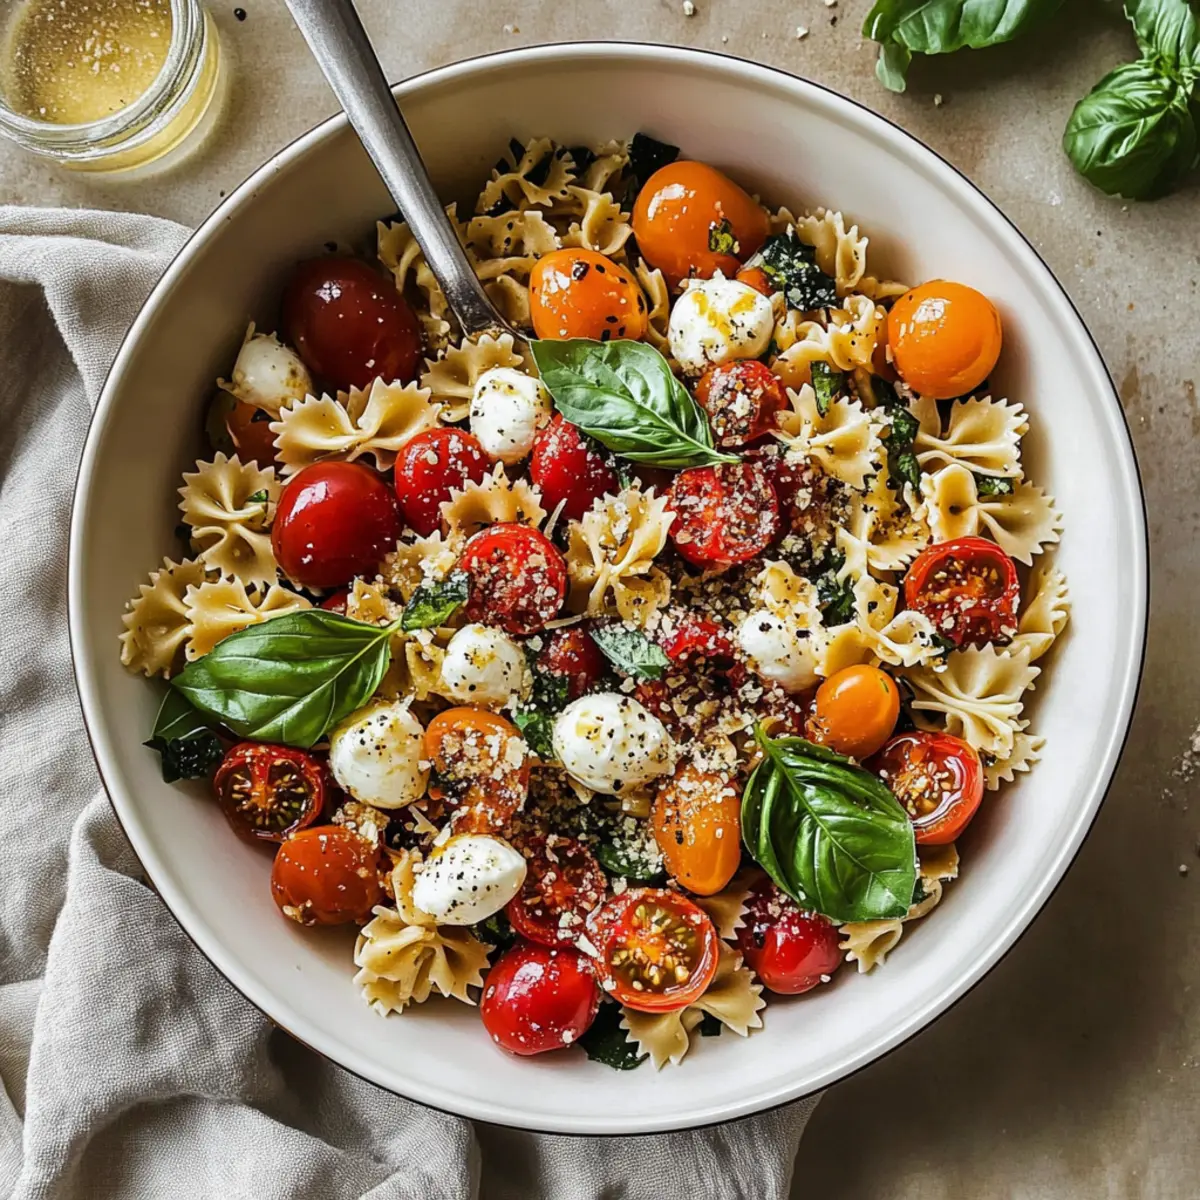
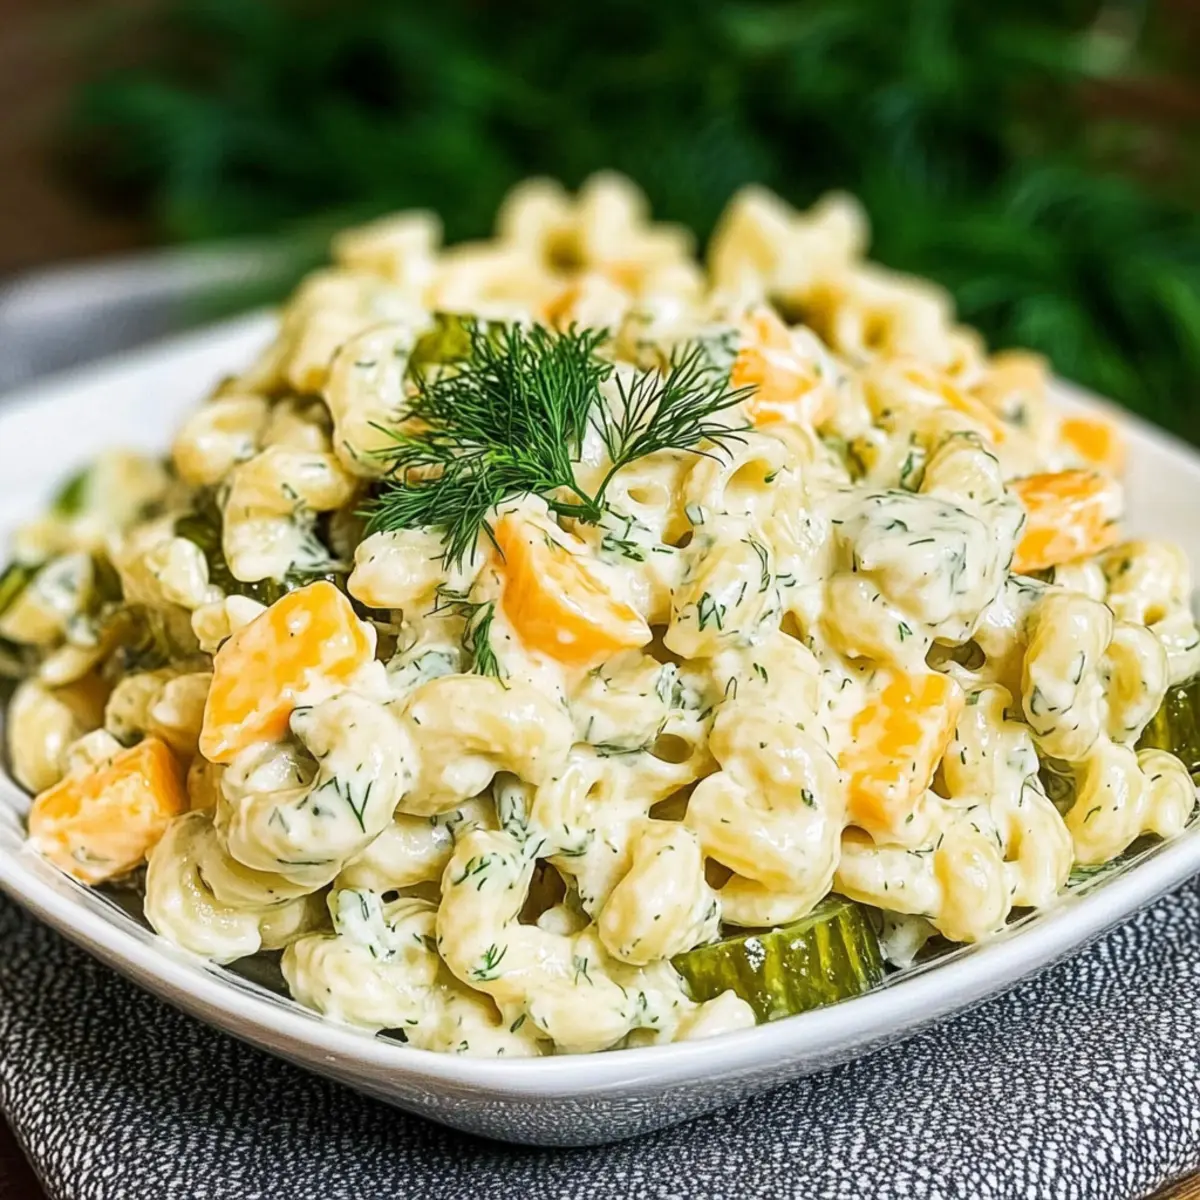
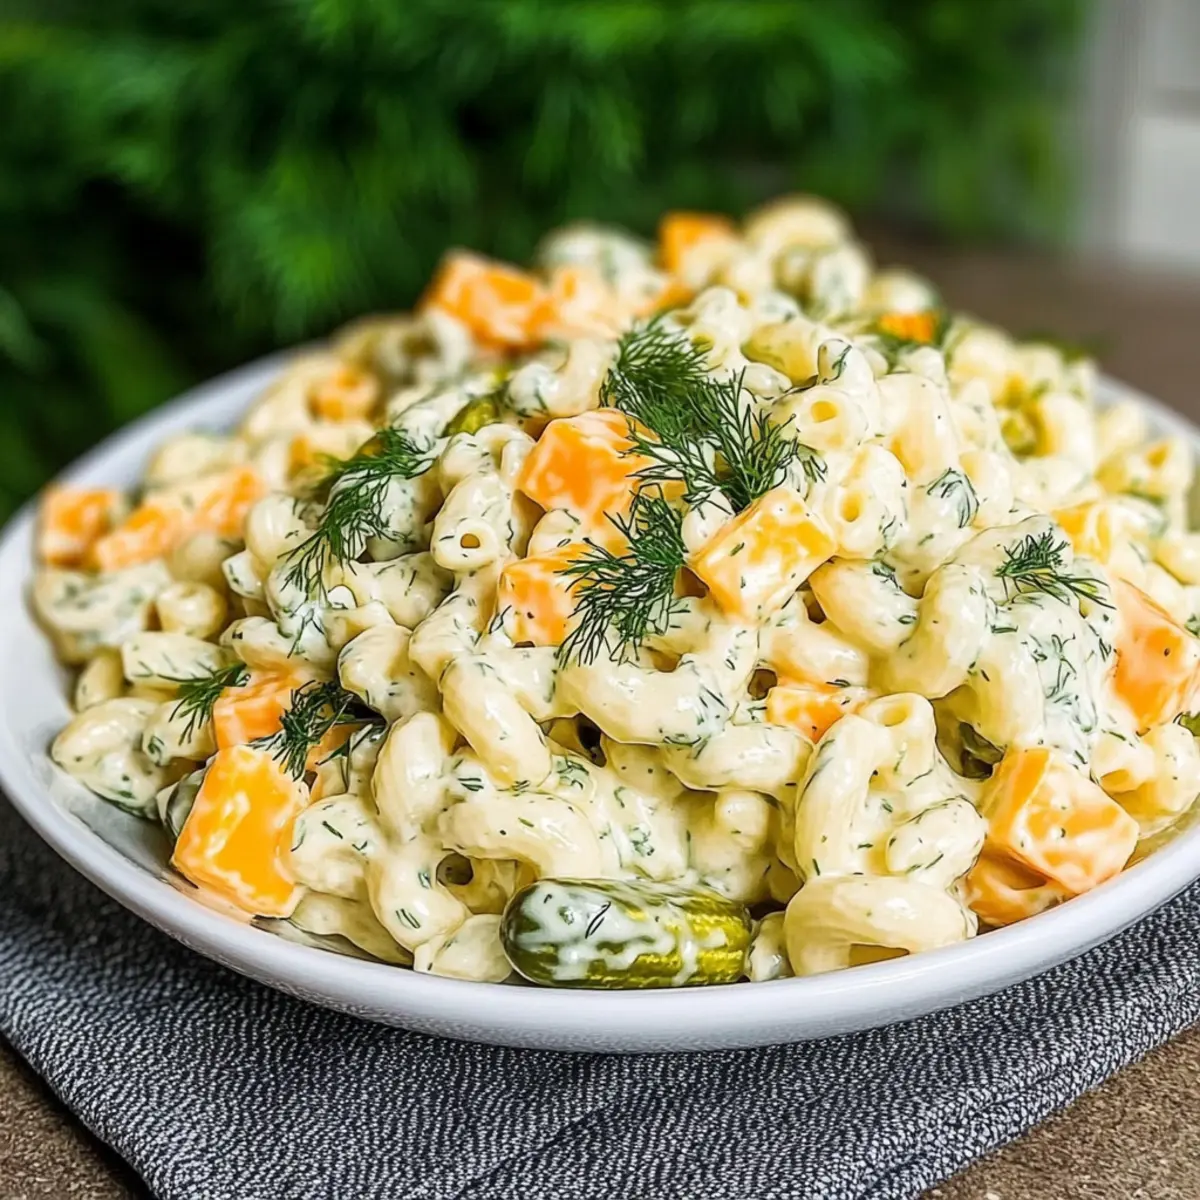
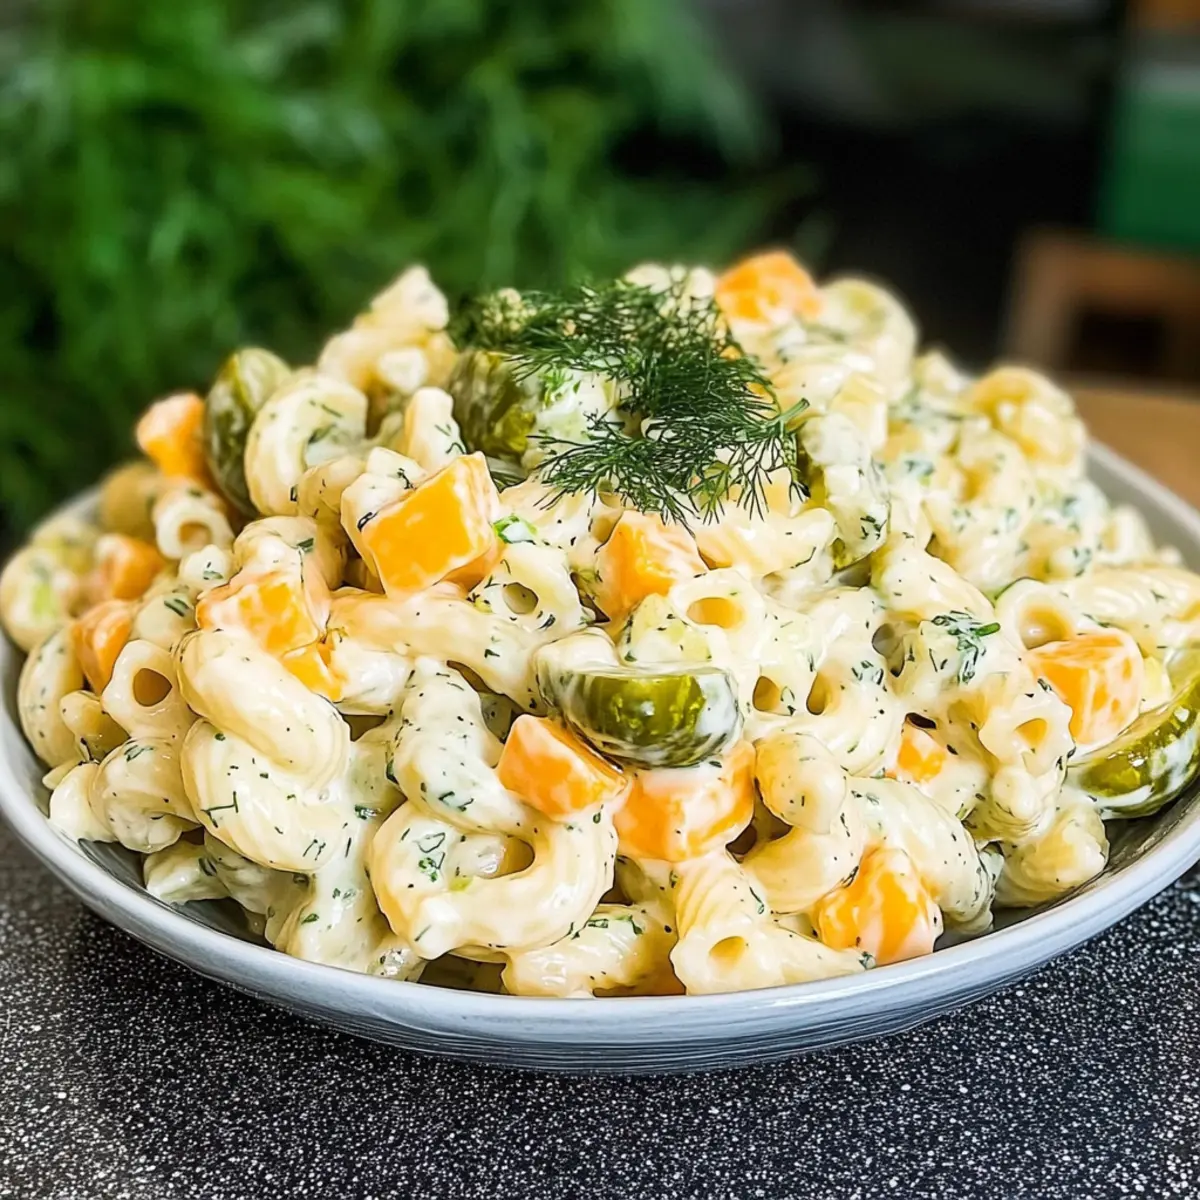
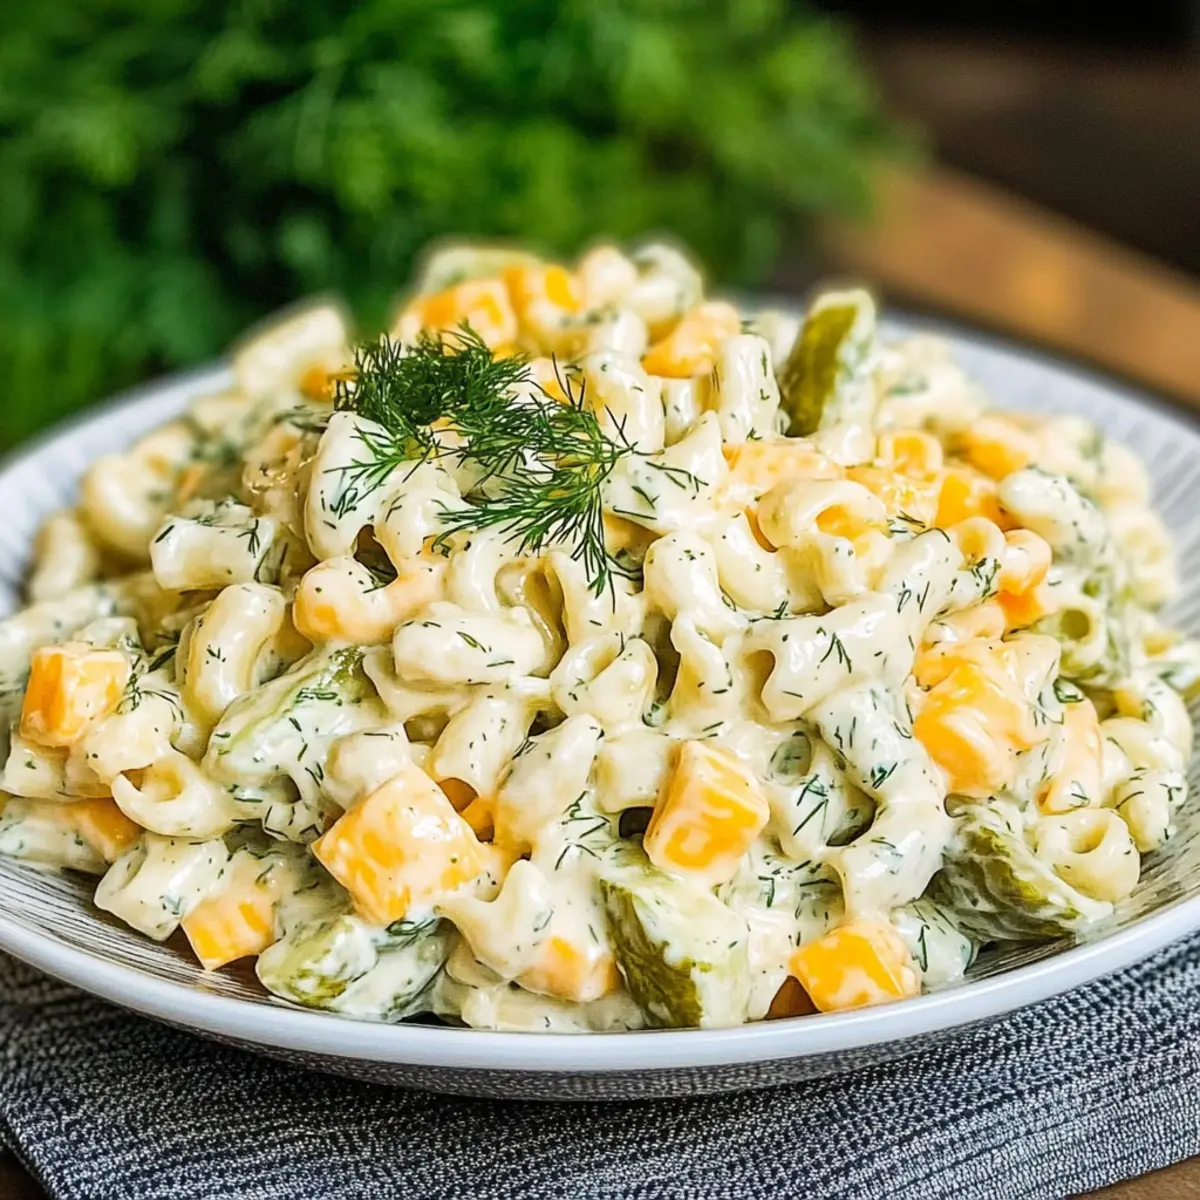
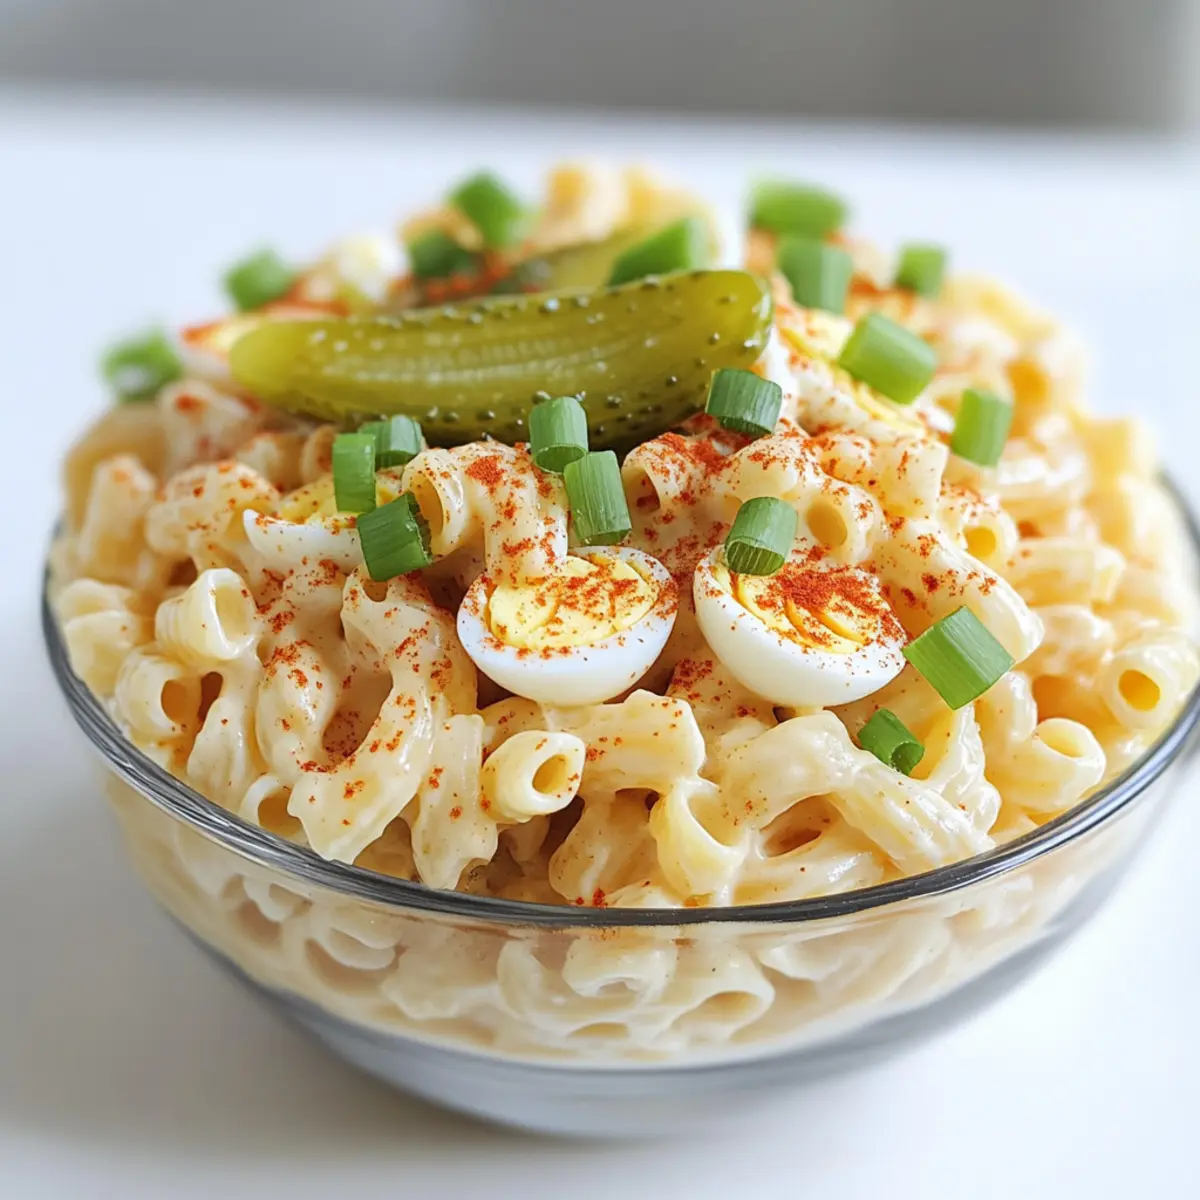
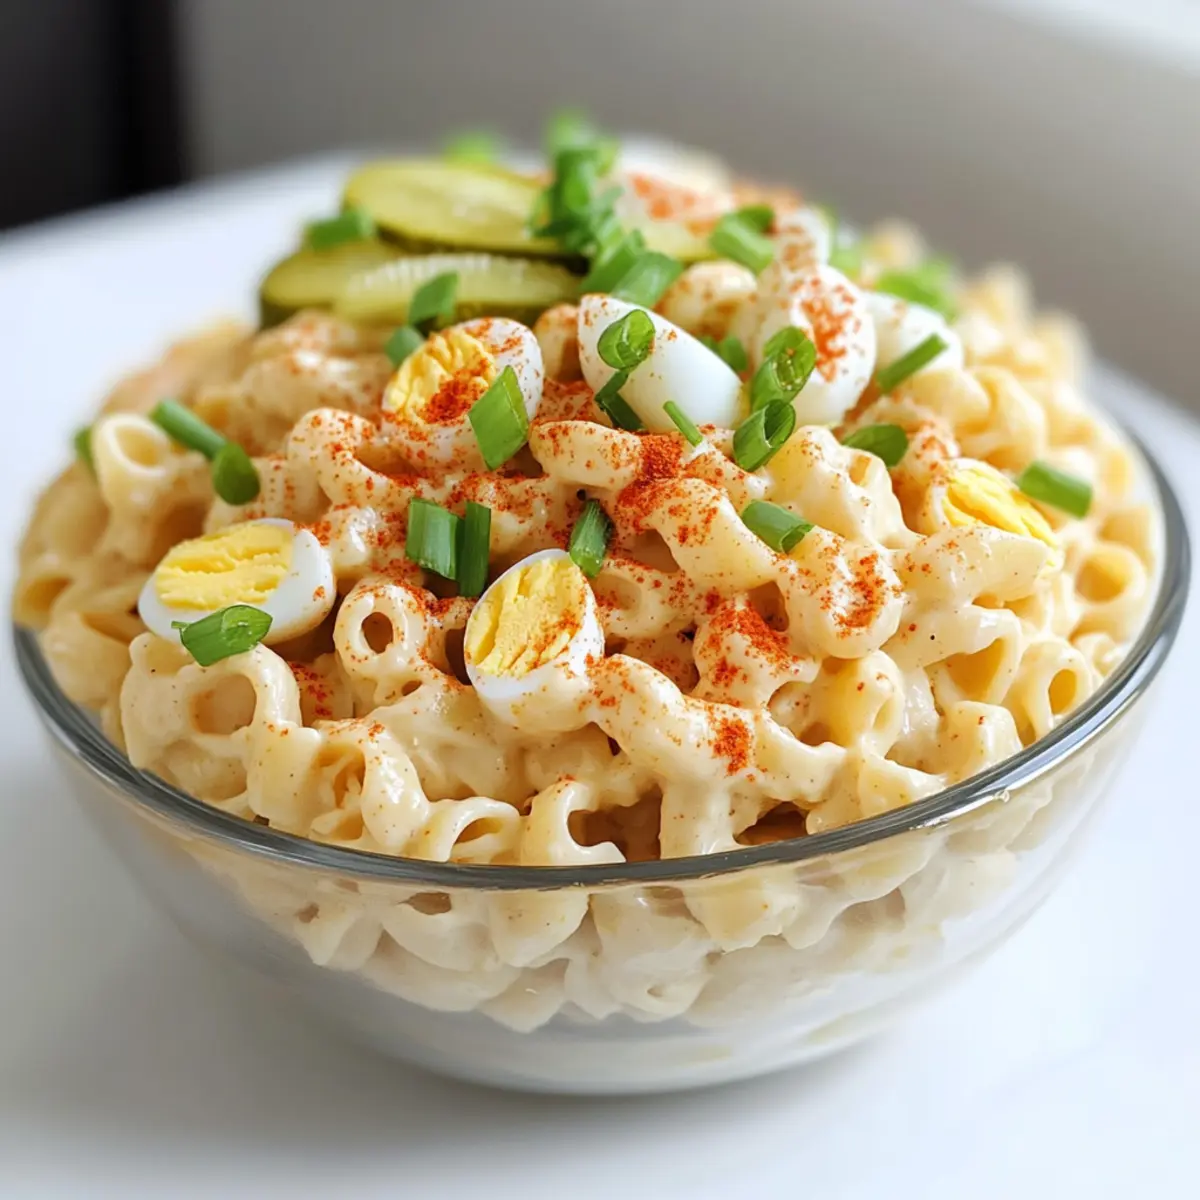
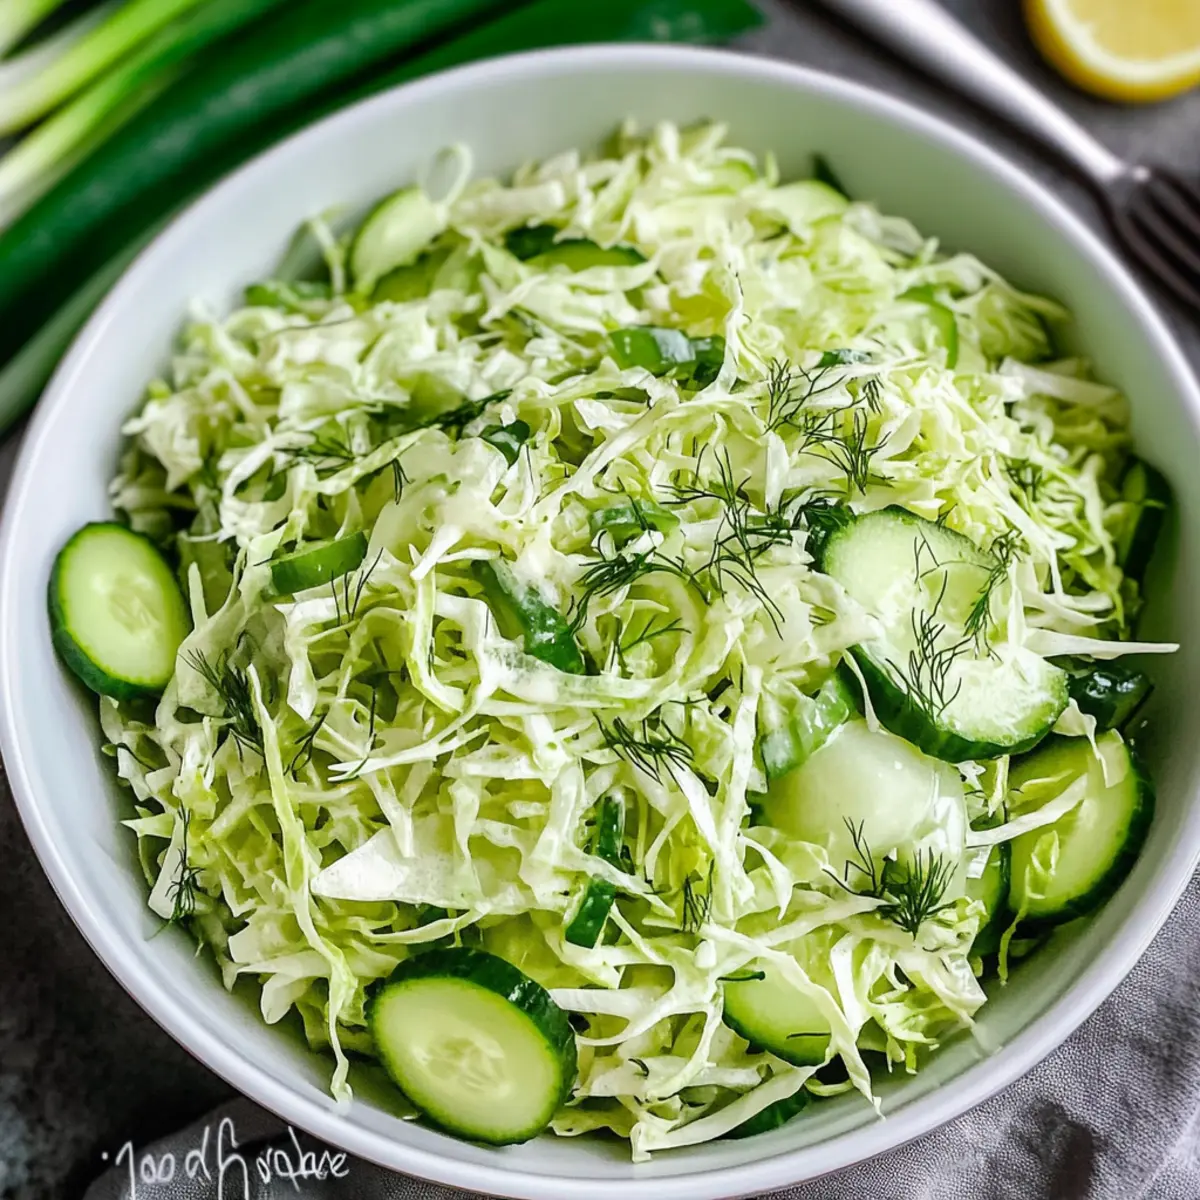
As the sun starts shining and backyard gatherings beckon, I can’t help but think of summer's iconic dish: Gordon Ramsay's Macaroni Salad. This recipe is a true crowd-pleaser, combining creamy mayonnaise and vibrant veggies that invite everyone to join in. Versatile and customizable, it’s perfect for those of us who love to add a personal twist—whether that means turning up the heat with some crushed red pepper or opting for a vegan version without losing any of the comforting flavors. It’s the ideal solution for quick prep and fuss-free meals, letting you spend more time enjoying sunny days and less time in the kitchen. Curious about how to make this delicious salad your own? Let’s dive in!

Why Is This Macaroni Salad Special?

Versatility: This salad adapts to your preferences, with options for sweetness, spice, or vegan substitutions. Flavor-packed: The creamy dressing rich with tangy sour cream and Dijon mustard elevates every bite. Easy Preparation: In just a few simple steps, you’ll have a dish ready for any occasion, whether a summer barbecue or a quick lunch. Crowd Favorite: Guaranteed to impress friends and family; they'll keep coming back for more! Plus, if you love classics, don’t miss our Chicken Salad Apples or German Potato Salad.Make-Ahead Friendly: This salad can be prepped hours or even days in advance, so you’re free to enjoy your gatherings with less stress!

Gordon Ramsay Macaroni Salad Ingredients

For the Salad

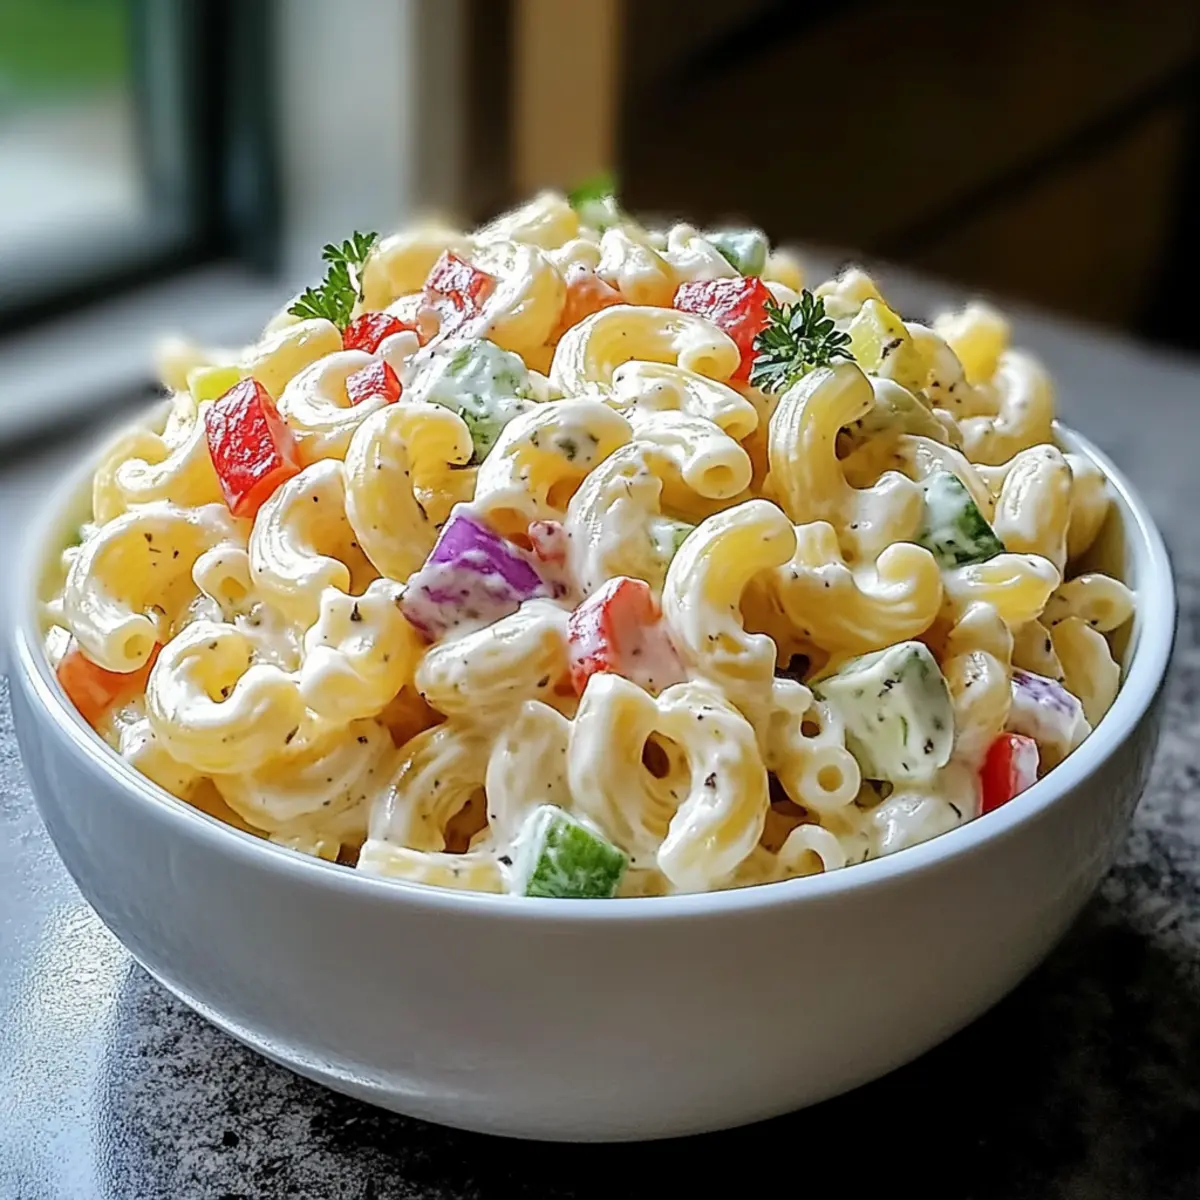
  • Dry Macaroni Noodles – Use elbow macaroni for the best texture that holds the dressing perfectly.
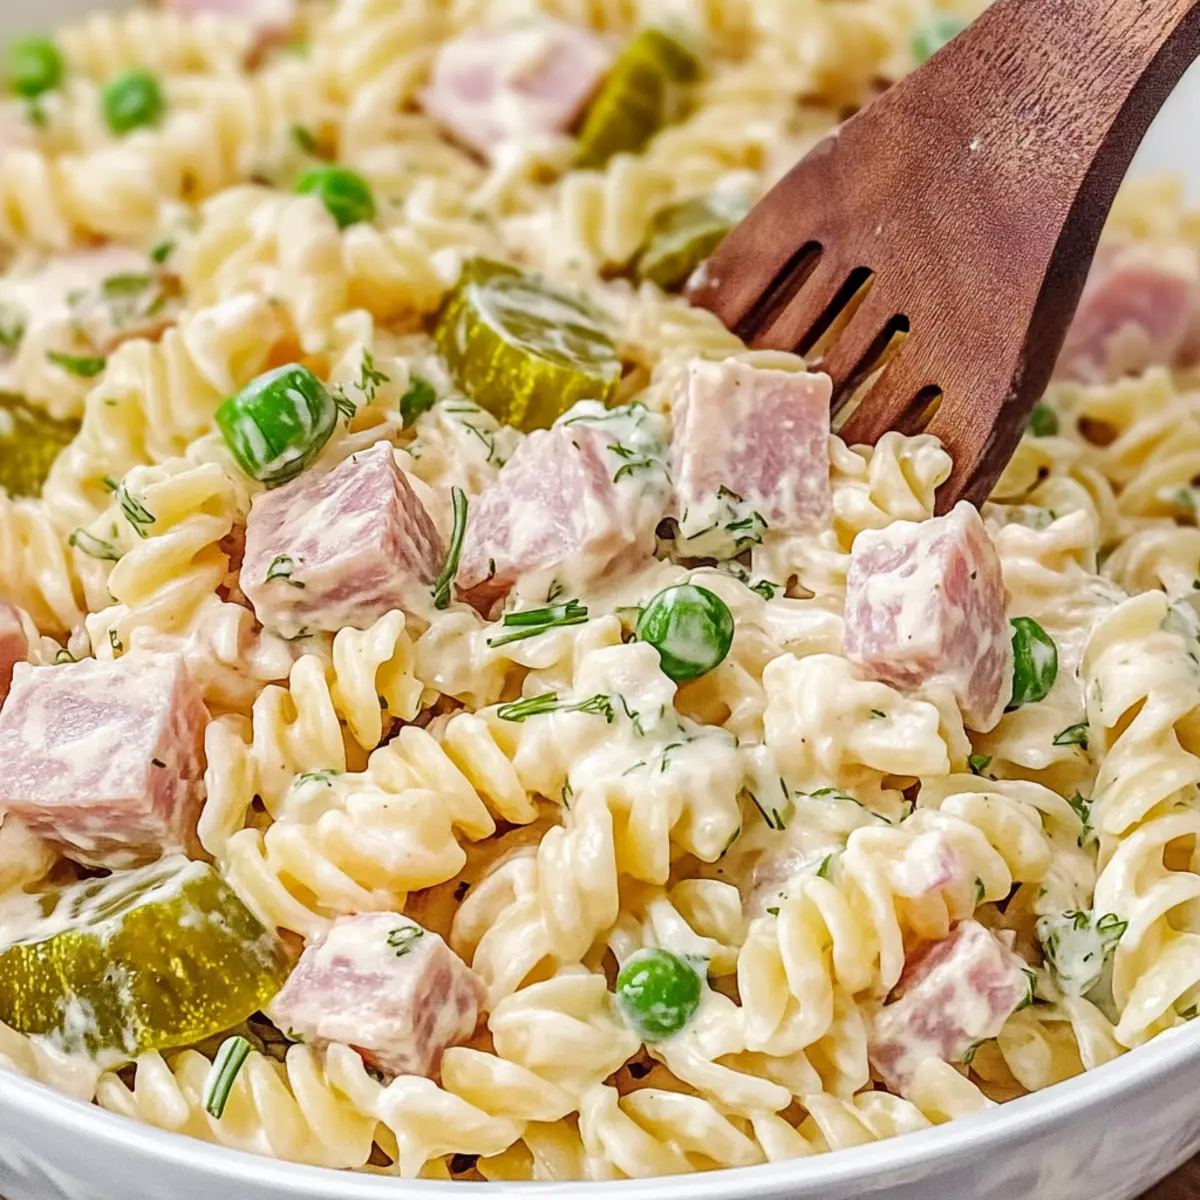
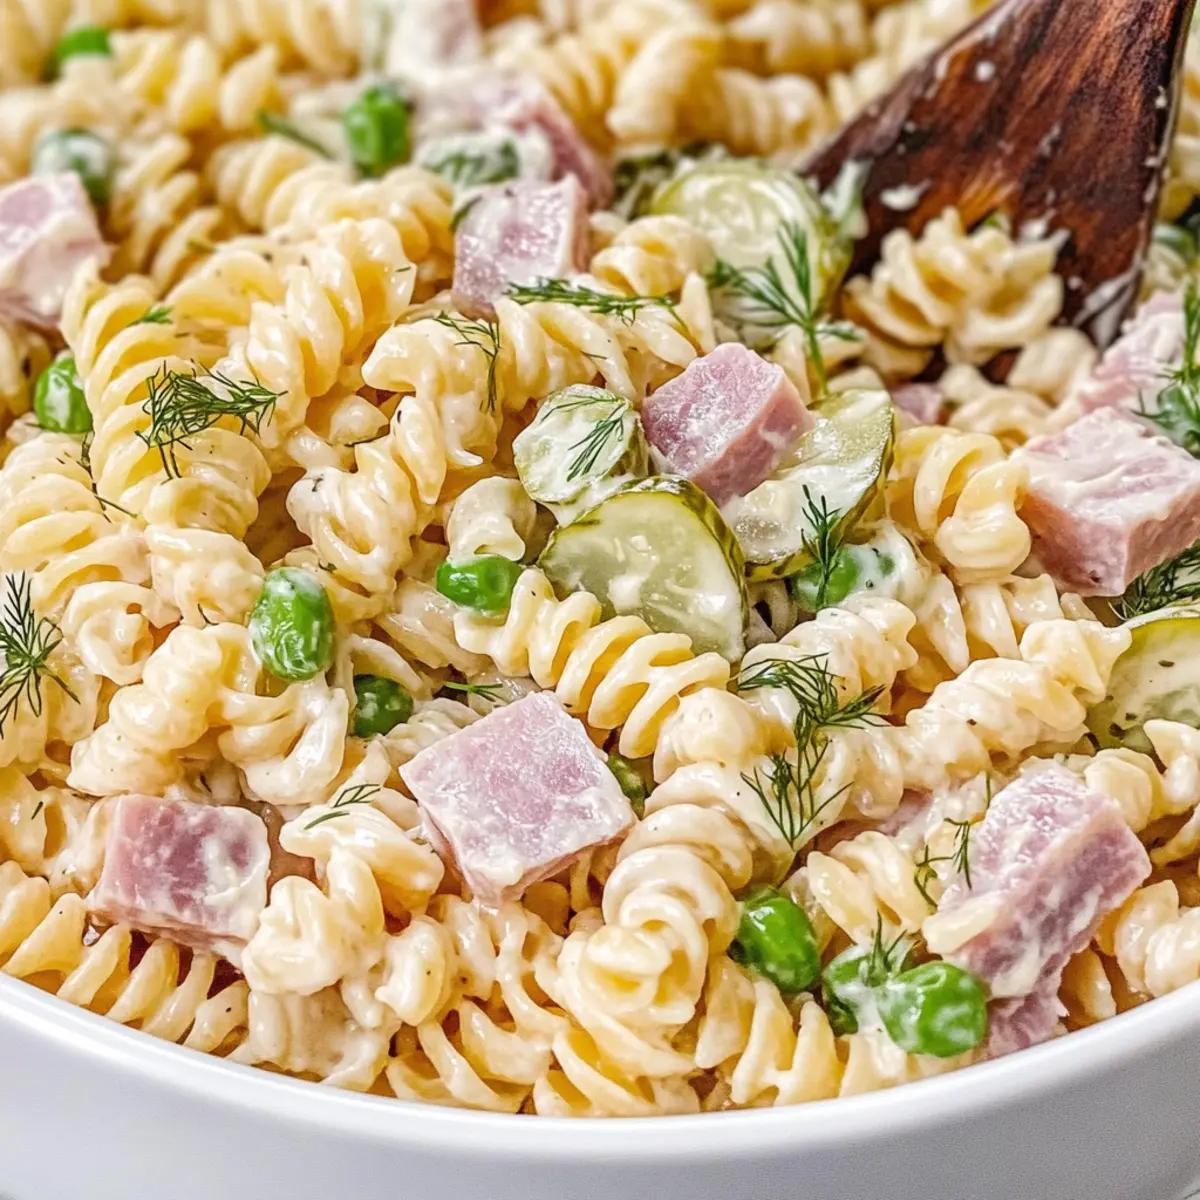
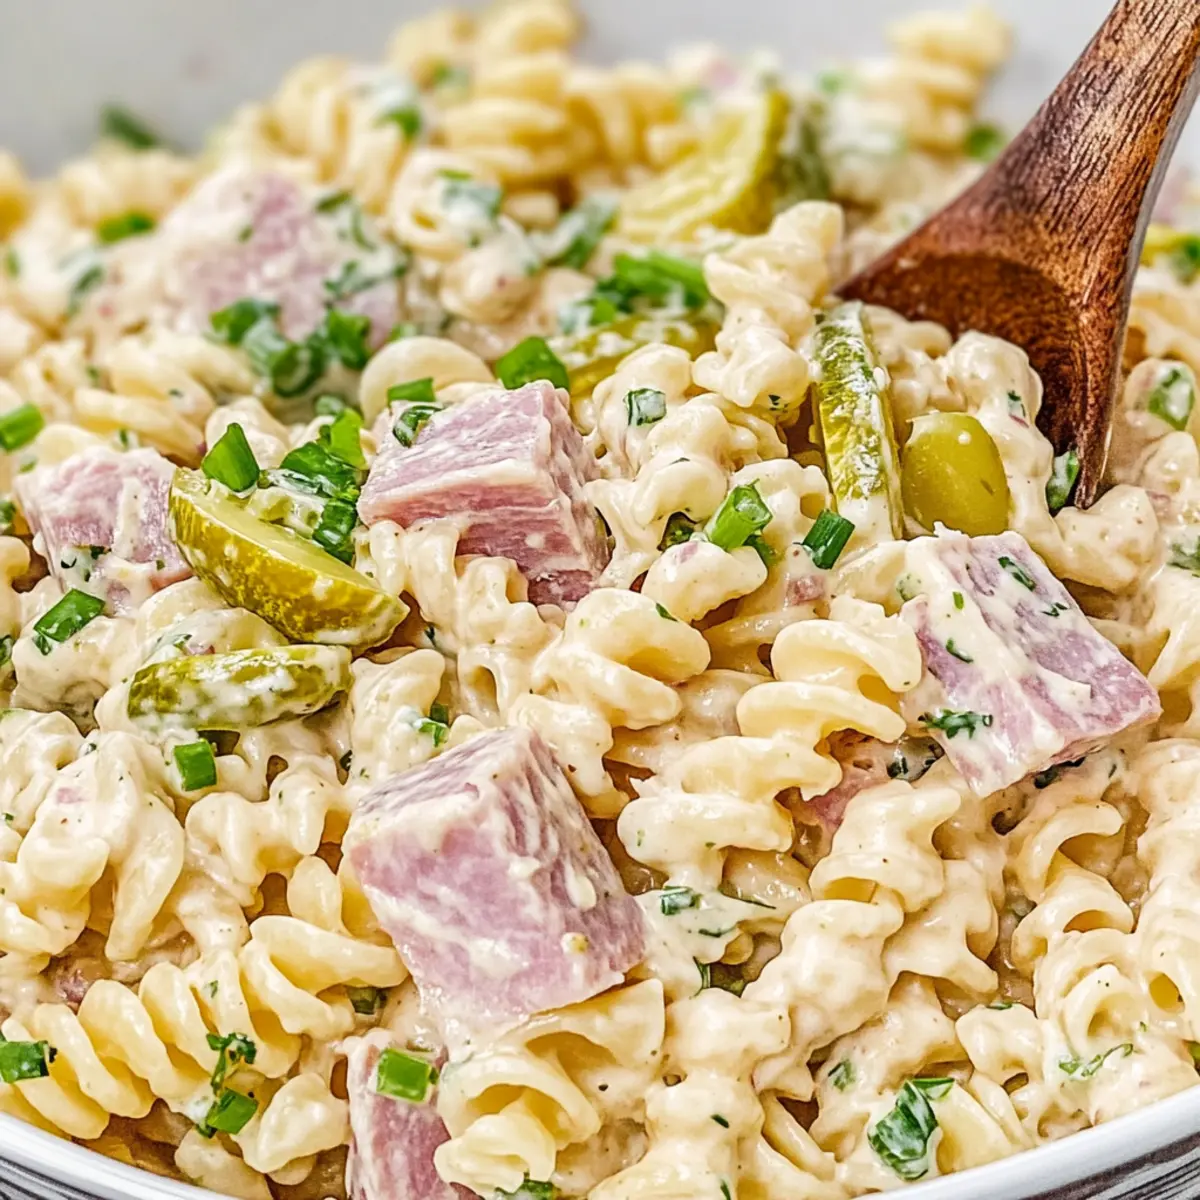
  • Sweet Gherkins – These add a delightful sweetness and crunch; swap with dill pickles for a tangy alternative.
  • Red Bell Pepper – Provides freshness and a pop of color, though yellow or green bell peppers work just as well.
  • Celery – Introduces a satisfying crunch; feel free to increase the amount for more texture.
  • Red Onion – Offers a sharp flavor contrast; opt for sweet onions if you prefer a milder taste.
  • Hard-Boiled Eggs – Adds creaminess and richness; omit for a vegan version of the Gordon Ramsay Macaroni Salad.

For the Dressing

  • Mayonnaise – This creamy base makes the salad luscious; use vegan mayo for a plant-based version.
  • Sour Cream – Enhances the dressing’s tanginess; substitute with Greek yogurt for a healthier option.
  • Sweet Pickle Juice – Contributes sweetness and acidity; adjust to your taste preference.
  • Red Wine Vinegar – Adds a bit of acidity; apple cider vinegar can be used if needed.
  • Sugar – Enhances sweetness; feel free to reduce or swap with a sugar alternative.
  • Dijon Mustard – Infuses depth of flavor; yellow mustard can be used if desired.
  • Salt & Black Pepper – Essential for enhancing the overall flavor profile.
  • Garlic Powder – Infuses the dressing with robust flavor; fresh garlic is a great alternative if you prefer.
  • Crushed Red Pepper – Adds a touch of spice; omit for a milder option.

Step‑by‑Step Instructions for Gordon Ramsay Macaroni Salad

Step 1: Cook Pasta
Begin by boiling a large pot of salted water. Add 8 oz of dry elbow macaroni noodles and cook until al dente, about 8-10 minutes. Stir occasionally to prevent sticking. Once cooked, drain the pasta and immediately rinse it under cold water to stop the cooking process. Toss the cooled macaroni with a splash of olive oil to keep it from clumping.

Step 2: Prep Mix-Ins
While the pasta is cooling, finely dice the sweet gherkins, red bell pepper, celery, red onion, and hard-boiled eggs (if using). Aim for uniform sizes to ensure even distribution in your Gordon Ramsay Macaroni Salad. Set aside the diced vegetables in a large mixing bowl, which will soon hold all the delicious components.

Step 3: Make Dressing
In a separate bowl, whisk together 1 cup of mayonnaise, 1/2 cup of sour cream, 2 tablespoons of sweet pickle juice, and 2 tablespoons of red wine vinegar. Add 1 tablespoon of sugar, 1 tablespoon of Dijon mustard, and season with salt, black pepper, garlic powder, and crushed red pepper to taste. Whisk until the dressing is smooth and creamy, then adjust seasoning if desired.

Step 4: Combine Ingredients
In the large bowl with your diced vegetables, add the cooled macaroni and the prepared dressing. Gently mix everything together until the pasta and veggies are well coated with the dressing, creating that signature creamy texture of the Gordon Ramsay Macaroni Salad.

Step 5: Chill Salad
Cover the bowl with plastic wrap or a lid and refrigerate the macaroni salad for at least 1 hour. This chilling time allows the flavors to meld beautifully, enhancing the overall taste of your Gordon Ramsay Macaroni Salad.

Step 6: Serve and Enjoy
When ready to serve, give the salad a quick stir to refresh its texture. Taste and adjust the seasoning if necessary. Present your vibrant, creamy macaroni salad as a delightful side dish for your summer gatherings or picnics. The contrast of flavors and textures will surely impress!

How to Store and Freeze Gordon Ramsay Macaroni Salad

Fridge: Store the macaroni salad in an airtight container for up to 3 days. Stir before serving to refresh its creamy texture.

Freezer: It’s recommended to avoid freezing the macaroni salad, as the texture of the ingredients may change when thawed.

Make-Ahead: You can prepare the salad a day in advance. Just keep it chilled in the refrigerator and serve it cold for the best flavor experience.

Leftovers: If you have any leftovers, they should be consumed within the 3-day fridge timeframe to ensure freshness and flavor in your Gordon Ramsay Macaroni Salad.

Make Ahead Options

These Gordon Ramsay Macaroni Salad make-ahead options are perfect for busy weeknights and gatherings! You can prepare the macaroni salad up to 3 days in advance. To maximize flavor, mix the pasta and veggies, but wait to add the dressing until just before serving; this helps maintain the creamy texture and prevents the salad from becoming soggy. Simply combine the cooled macaroni with diced vegetables and store them in an airtight container in the refrigerator. On the day of your meal, whisk together the dressing and mix it in before serving. You’ll enjoy a flavorful, crowd-pleasing salad that tastes just as delicious as when it was first made!

Expert Tips for Gordon Ramsay Macaroni Salad

• Cool Pasta Properly: Allow your macaroni to cool completely after cooking to prevent clumping, ensuring a light texture in your salad.

• Even Dice for Flavor: Finely dice your vegetables for even distribution throughout the Gordon Ramsay Macaroni Salad, enhancing every bite with flavor.

• Chill for Better Taste: Refrigerate your salad for at least one hour before serving; this resting time melds flavors beautifully for a more delicious experience.

• Adjust Post-Chill: Taste and adjust seasoning after chilling, as flavors can mellow; don’t hesitate to add a pinch of salt or pepper if needed.

• Say No to Overmixing: Gently combine ingredients to maintain the integrity of the veggies and pasta; overmixing can break them down, affecting texture.

Gordon Ramsay Macaroni Salad Variations

Feel free to personalize your delicious salad with these exciting twists and substitutions!

  • Dairy-Free: Swap mayonnaise and sour cream for a vegan alternative, like tofu-based mayo, for a creamy vegan delight.
    When you're looking for a lighter option, this subtle change brings all the creamy goodness you crave without any dairy.

  • Extra Crunch: Toss in peas or corn for a delightful crunch and natural sweetness to each bite.
    Adding these vegetables not only boosts nutrition but also enhances the overall texture, making every forkful a bit more delightful.

  • Spicy Kick: Incorporate finely chopped jalapeños or a dash of your favorite hot sauce for an exciting zing.
    If you love a little heat, this addition introduces a vibrant flavor layer that's bound to impress your spice-loving friends!

  • Herb-Infused: Mix in fresh herbs like dill or parsley for an aromatic twist that brightens the flavor profile.
    Just a handful of herbs can elevate your salad, making it feel fresh and gourmet—perfect for summer picnics.

  • Nutty Texture: Add chopped walnuts or pecans for a nutty flavor that complements the creamy dressing.
    This twist not only introduces a contrasting texture but brings a delightful richness that pairs beautifully with the dish’s other components.

  • Swap the Noodles: Try whole grain or gluten-free pasta for a healthier or alternative option while maintaining that comforting flavor.
    With this little switch, enjoy a healthful dose of fiber or accommodate dietary needs without sacrificing taste.

  • Zesty Twist: Replace red wine vinegar with apple cider vinegar for a milder, fruitier acidity.
    This simple swap can refresh the flavor of your salad, bringing out the sweetness of the other ingredients beautifully.

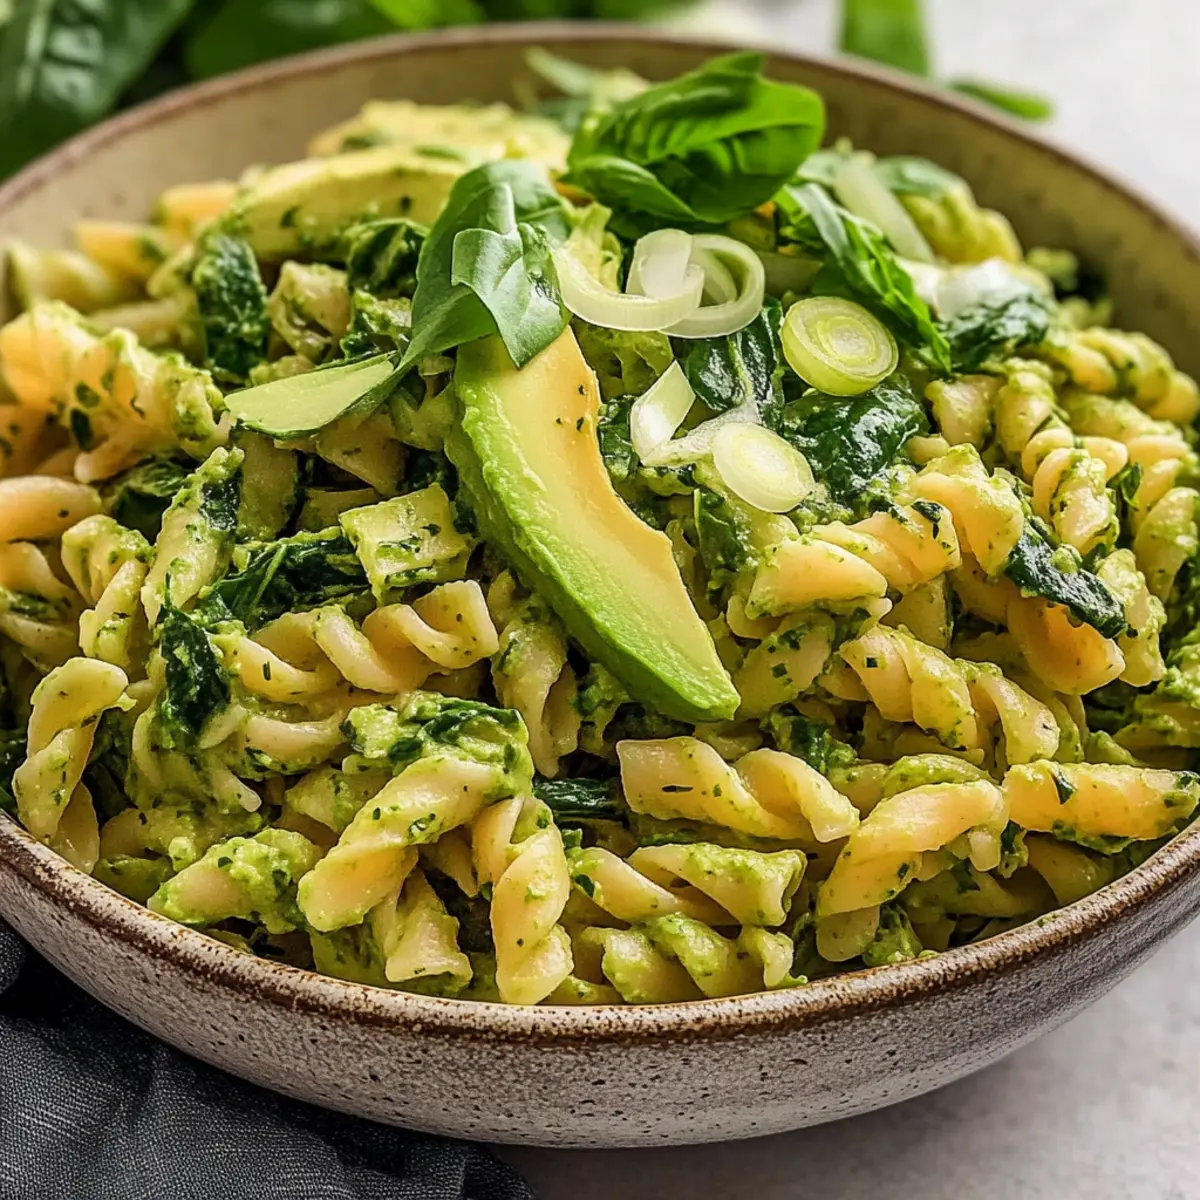
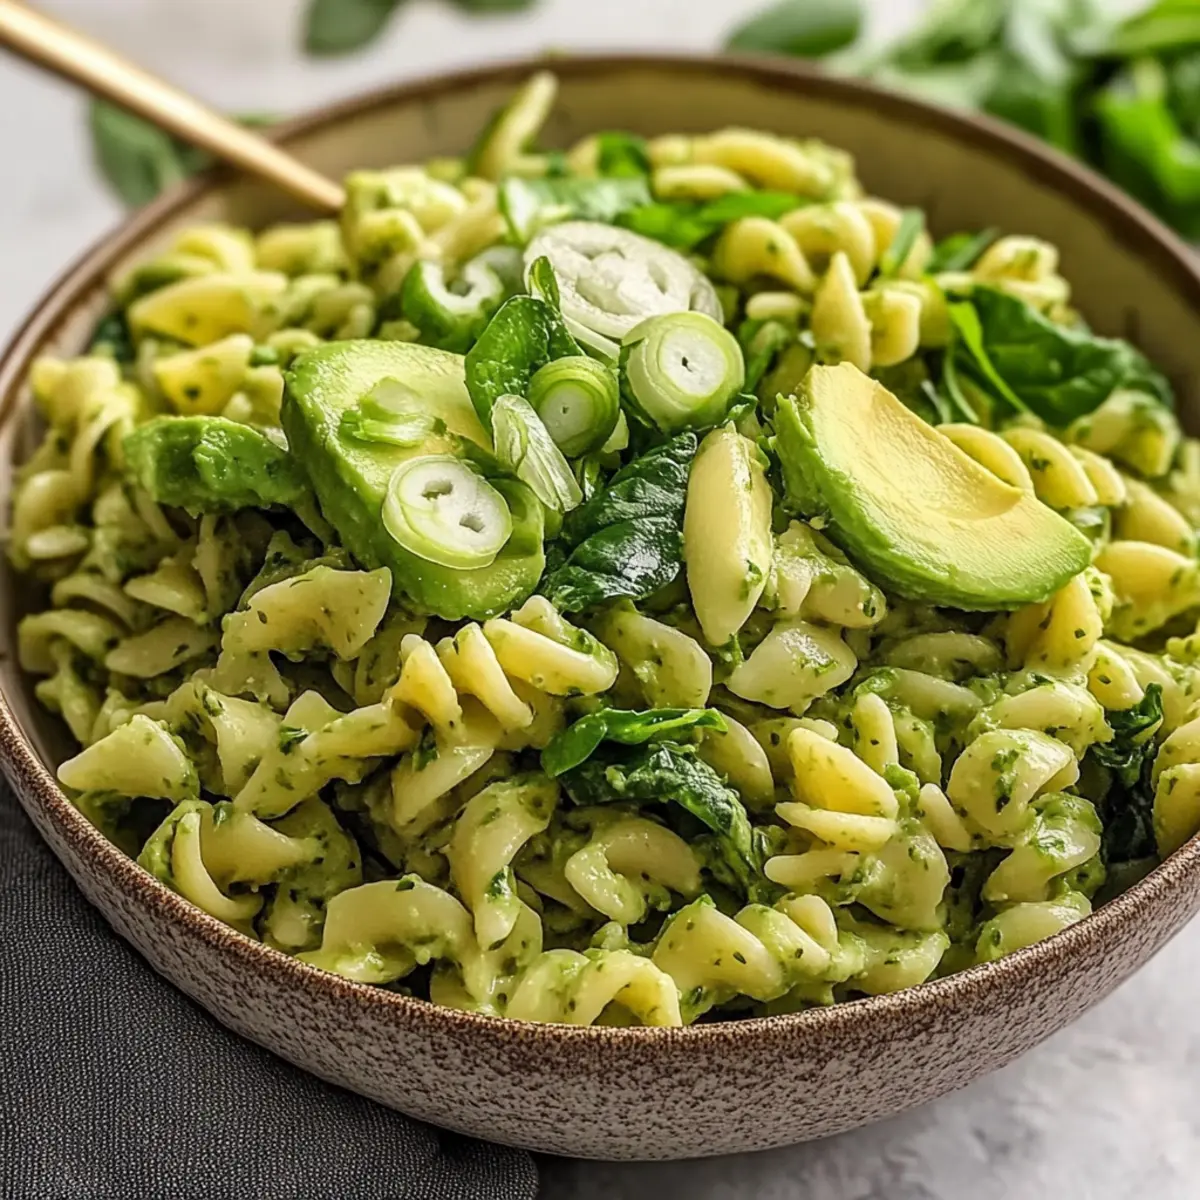
  • Avocado Delight: Incorporate diced avocado for a creamy richness and healthy fats that perfectly blend with the overall flavor.
    Just remember to add it just before serving to keep it from browning and to enjoy that buttery texture!

For more delightful salads, consider trying our Avocado Egg Salad or the hearty Grilled Balsamic Steak Salad. The world of flavors is yours to explore!

What to Serve with Gordon Ramsay Macaroni Salad

As you prepare to delight family and friends with this creamy dish, consider these tempting pairings to complete your summer feast.

  • Grilled Chicken: The smoky flavors from the grill beautifully complement the creamy macaroni, making for a satisfying meal.

  • Corn on the Cob: Sweet, buttery corn adds a crunchy, juicy contrast that mirrors the fresh vegetables in the salad.

  • Fresh Fruit Salad: A vibrant medley of seasonal fruits brightens your plate and offers a refreshing, sweet finish to the meal.

  • Potato Chips: Crunchy, salty chips provide a wonderful texture juxtaposition that everyone loves alongside creamy dishes.

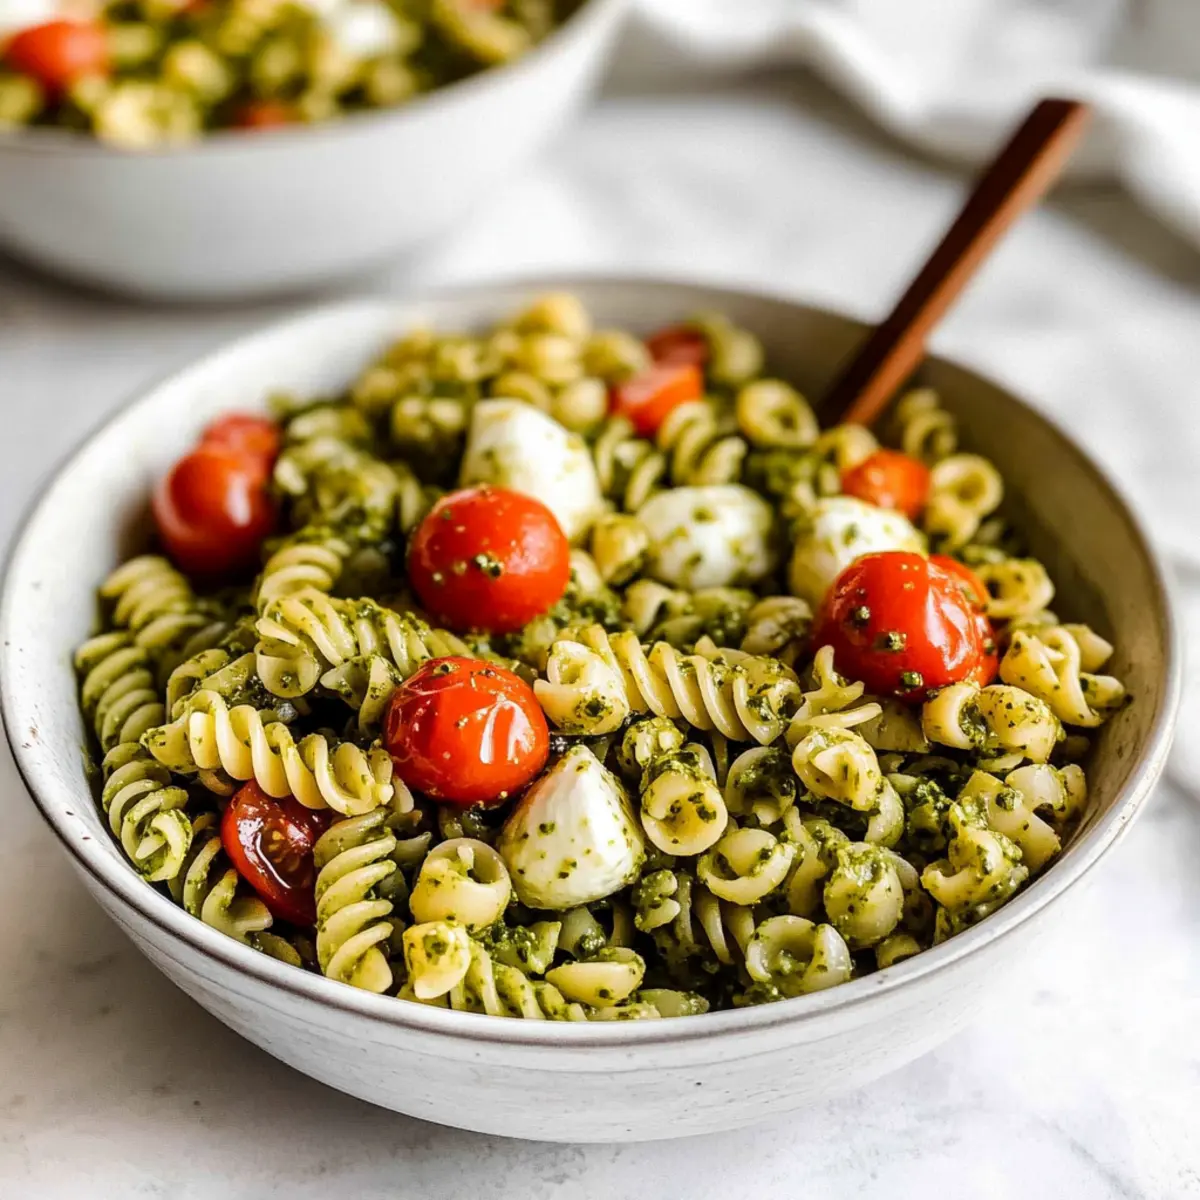
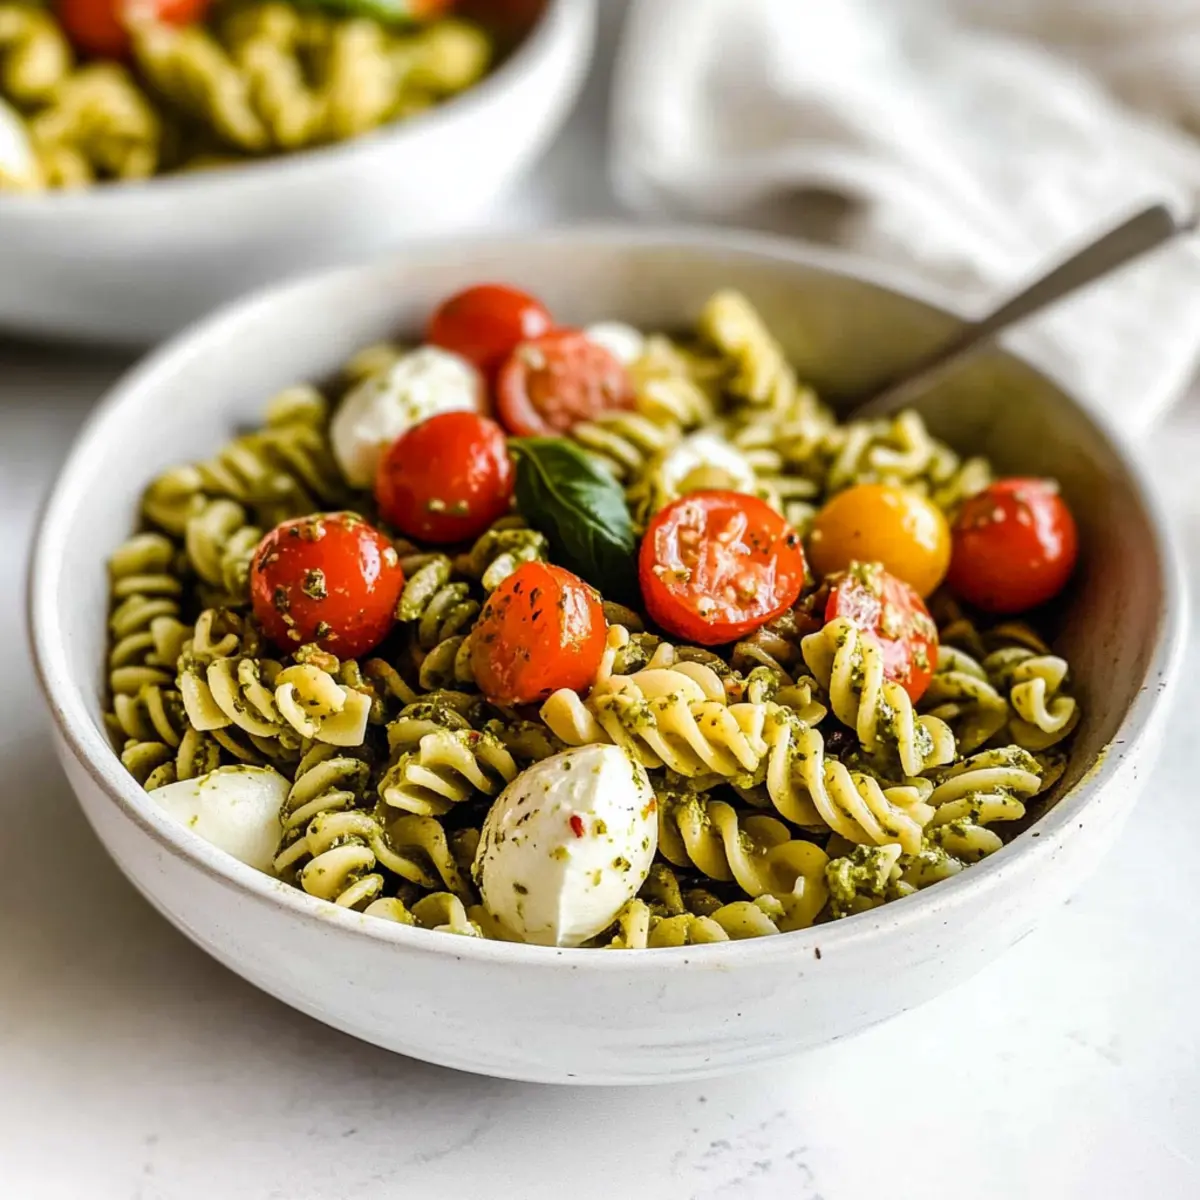
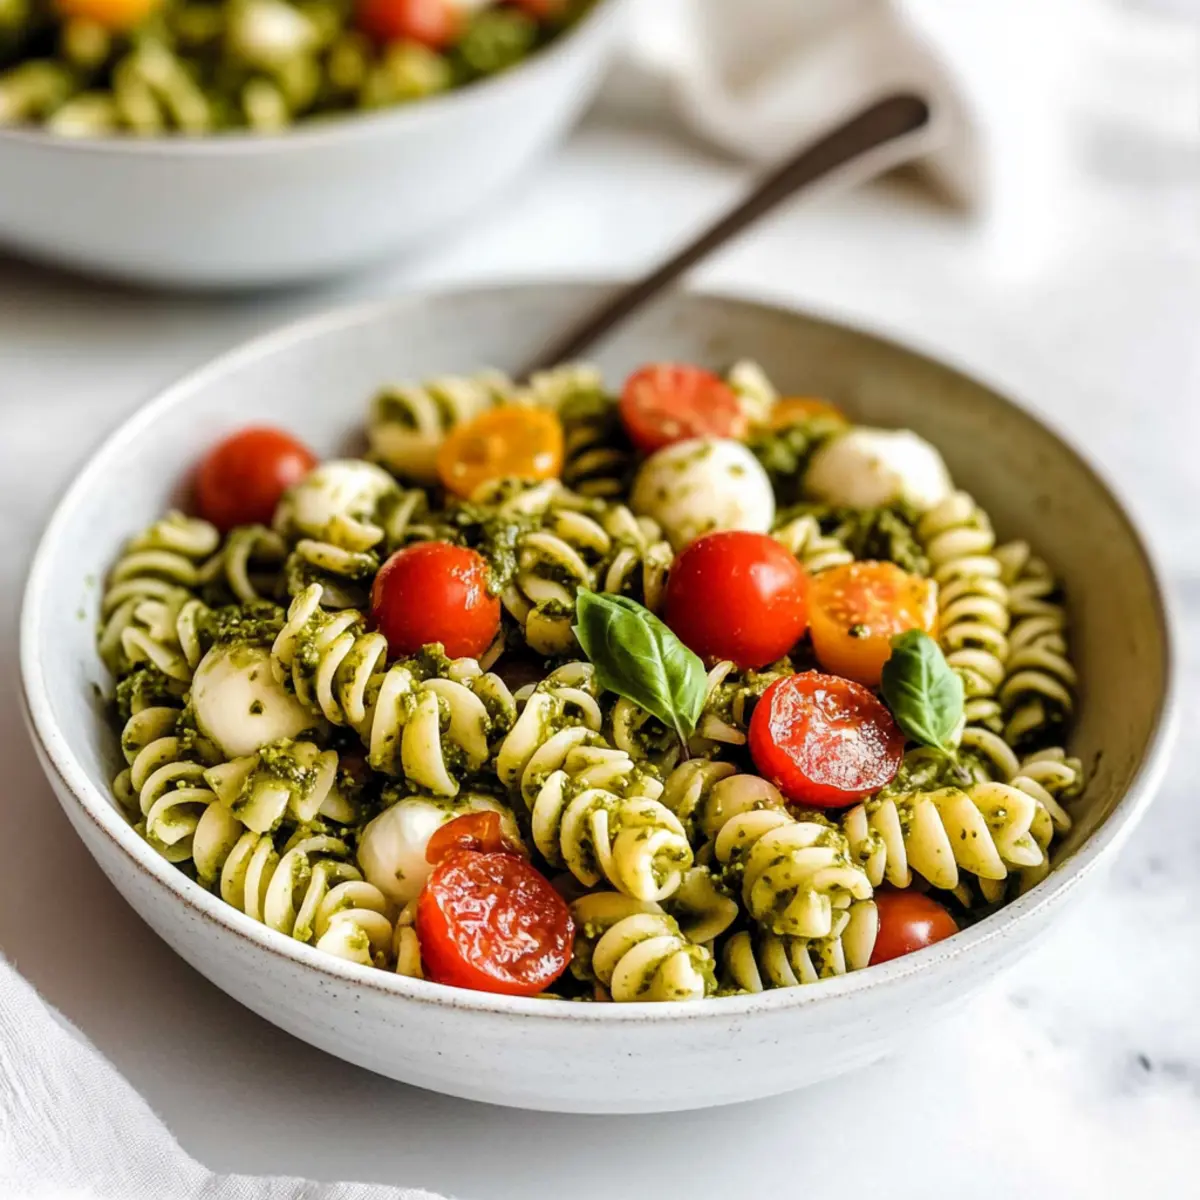
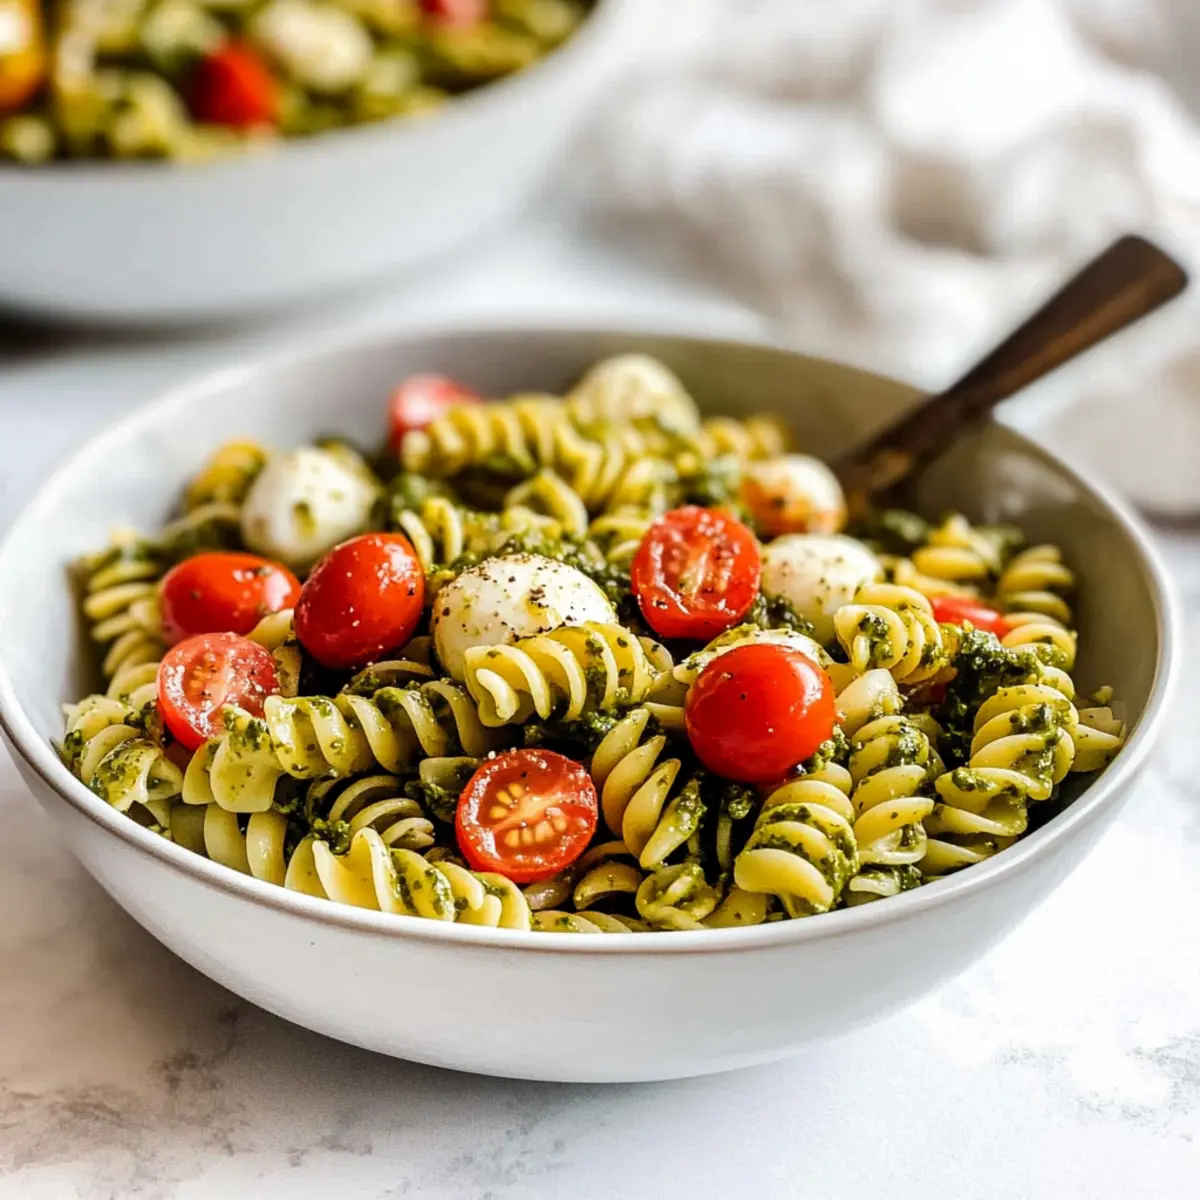
  • Caprese Skewers: Juicy tomatoes, creamy mozzarella, and fresh basil create a colorful and flavorful side that enhances the summer vibes.

  • Herbed Garlic Bread: Soft, buttery bread with fragrant herbs is perfect for rounding out your meal and soaking up any leftover dressing.

  • Iced Tea: A sweet, refreshing drink, perfect for warm days, complements the salad's rich creaminess while keeping things cool.

  • Lemonade: Tart and sweet lemonade acts as a palate cleanser, balancing the richness of the dish with a zesty finish.

  • Chocolate Chip Cookies: End the meal on a sweet note with classic cookies; their warm, gooey texture provides the perfect comfort food finale.

Gordon Ramsay Macaroni Salad Recipe FAQs

How do I select the best macaroni noodles for this salad?
Absolutely! For the best texture, I highly recommend using elbow macaroni. Look for pasta that’s uniform in size and shape, as this will help ensure that the noodles hold the creamy dressing beautifully. Avoid any with visible dark spots or rough edges, as they may not cook evenly.

How should I store leftover macaroni salad?
You can simply store your Gordon Ramsay Macaroni Salad in an airtight container in the refrigerator, where it will stay fresh for up to 3 days. Just stir it gently before serving to refresh its creamy texture. If you notice any separation, a quick mix will bring it right back to life!

Can I freeze macaroni salad?
While it's not the best idea to freeze macaroni salad due to the texture of the ingredients—especially the veggies and mayo—if you must, place the salad in a freezer-safe container and consume it within 1 month. To thaw, move it to the fridge for 24 hours before serving, and be prepared for a change in texture.

What if my macaroni salad seems too dry after chilling?
Very! This is a common issue. If after chilling your salad feels a bit dry, simply stir in a tablespoon of mayonnaise or a splash of olive oil to restore creaminess. It’s a quick fix that keeps the flavors fresh and delicious.

Are there any allergy considerations with this recipe?
Definitely! If you're preparing the Gordon Ramsay Macaroni Salad for someone with allergies, consider using gluten-free pasta and vegan mayo to accommodate dietary restrictions. Always double-check ingredient labels for allergens like eggs in mayonnaise or specific preservatives, since people can have varying sensitivities. I often take extra care to ensure all ingredients are safe for everyone at the table.

How long will the flavors meld if I prepare this salad ahead of time?
For the best flavor experience, it’s ideal to chill your macaroni salad for at least 1 hour, but if you can make it a day in advance, that’s even better! The flavors continue to blend beautifully, creating a more delightful taste on serving day. Just remember to give it a little stir before serving to re-integrate all those delicious components!

Gordon Ramsay Macaroni Salad

Gordon Ramsay Macaroni Salad: A Creamy Summer Delight

This Gordon Ramsay Macaroni Salad is a creamy crowd-pleaser, perfect for summer gatherings.
Print Recipe Pin Recipe
Prep Time 15 minutes mins
Cook Time 10 minutes mins
Chill Time 1 hour hr
Total Time 1 hour hr 25 minutes mins
Servings: 6 servings
Course: Salads
Cuisine: American
Calories: 250
Ingredients Equipment Method Nutrition Notes

Ingredients
  

For the Salad
  • 8 oz Dry Macaroni Noodles Use elbow macaroni for the best texture.
  • 1 cup Sweet Gherkins These add sweetness and crunch.
  • 1 medium Red Bell Pepper Provides freshness and color.
  • 2 stalks Celery Adds crunchy texture.
  • 1 medium Red Onion Offers a sharp flavor contrast.
  • 2 large Hard-Boiled Eggs Adds creaminess; omit for vegan version.
For the Dressing
  • 1 cup Mayonnaise Use vegan mayo for plant-based version.
  • 1/2 cup Sour Cream Enhances the dressing’s tanginess.
  • 2 tablespoons Sweet Pickle Juice Contributes sweetness and acidity.
  • 2 tablespoons Red Wine Vinegar Adds acidity; apple cider vinegar can be used.
  • 1 tablespoon Sugar Enhances sweetness.
  • 1 tablespoon Dijon Mustard Infuses depth of flavor.
  • to taste Salt & Black Pepper Essential for flavor enhancement.
  • 1 teaspoon Garlic Powder Adds robust flavor.
  • to taste Crushed Red Pepper Adds a touch of spice.

Equipment

  • Large pot
  • Mixing Bowl
  • Whisk
  • Knife
  • Cutting Board

Method
 

Step-by-Step Instructions
  1. Boil a large pot of salted water. Add 8 oz of dry elbow macaroni noodles and cook until al dente, about 8-10 minutes. Drain and rinse under cold water. Toss with olive oil to prevent clumping.
  2. Finely dice the sweet gherkins, red bell pepper, celery, red onion, and hard-boiled eggs. Set aside in a large mixing bowl.
  3. In a separate bowl, whisk together 1 cup of mayonnaise, 1/2 cup of sour cream, 2 tablespoons of sweet pickle juice, and 2 tablespoons of red wine vinegar. Add 1 tablespoon of sugar, 1 tablespoon of Dijon mustard, and season with salt, black pepper, garlic powder, and crushed red pepper. Whisk until smooth.
  4. Add the cooled macaroni and dressing to the large bowl with diced vegetables. Gently mix until well-coated.
  5. Cover the bowl and refrigerate for at least 1 hour to meld flavors.
  6. Before serving, give the salad a quick stir and adjust seasoning if necessary.

Nutrition

Serving: 1cupCalories: 250kcalCarbohydrates: 30gProtein: 5gFat: 12gSaturated Fat: 2gPolyunsaturated Fat: 3gMonounsaturated Fat: 5gCholesterol: 70mgSodium: 300mgPotassium: 200mgFiber: 1gSugar: 3gVitamin A: 500IUVitamin C: 15mgCalcium: 50mgIron: 1mg

Notes

Chill the salad for better taste. It's best served cold for summer gatherings.

Tried this recipe?

Let us know how it was!

Ham Roll Up Pasta Salad: A Fun Twist on Classic Flavors

January 11, 2026 by Grace Snow Leave a Comment

As I stirred the vibrant colors of my latest culinary creation, a thought struck me: why not blend the comfort of classic ham roll ups with the joy of a pasta salad? Enter the Ham Roll Up Pasta Salad, a delightful twist that reimagines familiar flavors into a quick, crowd-pleasing side dish! With just 30 minutes of prep time, it’s perfect for potlucks, backyard barbecues, or any spontaneous gathering. The combination of salty ham, crunchy dill pickles, and fresh green onions enveloped in a rich cream cheese dressing creates a savory sensation that will leave everyone asking for seconds. Trust me, your friends and family will be hooked! Ready to bring this addictively delicious dish to your next table setting? Let’s dive into the recipe!

Why Try Ham Roll Up Pasta Salad?

Quick and Easy: In just 30 minutes, you can whip up a delicious side that’s perfect for all occasions!

Unique Flavor Fusion: This dish beautifully combines classic ham roll ups with a pasta twist for something truly refreshing.

Crowd-Pleasing Delight: Ideal for potlucks and BBQs, it's a guaranteed hit that will have everyone coming back for seconds!

Versatile Ingredients: Feel free to swap the ham for turkey or chicken, or jazz it up with extra veggies like bell peppers or celery.

Creamy Texture: The rich cream cheese dressing envelops the dish, creating a delightful contrast with the crunchy pickles and fresh onions.

For more delicious recipes, don't miss our take on Seafood Pasta Savory or Jello Salad Cottage.

Ham Roll Up Pasta Salad Ingredients

For the Pasta
• Rotini – This shape pairs well with creamy dressings and absorbs flavors beautifully.

For the Salad
• Sliced Polish Ham – Provides a savory richness; feel free to substitute with turkey or chicken for a lighter option.
• Dill Pickles – Adds a delightful crunch and tanginess; consider Grillo's brand for a tasty twist.
• Green Onions – Brings freshness; you can swap them with chives if you prefer a milder taste.

For the Dressing
• Cream Cheese – Creates a creamy base; make sure it’s softened for easier mixing.
• Mayonnaise – Enhances the creaminess; using homemade Avocado Oil Mayonnaise gives a healthy flair.
• Sour Cream – Adds a nice tang; let it reach room temperature for better blending.
• Pickle Juice – Infuses the dressing with flavor; adjust the amount to suit your tangy preference.
• Milk – Helps with consistency; buttermilk can be used for an extra zing.
• Salt & Black Pepper – Essential for elevating flavors; adjust to your liking.

Optional Garnish
• Fresh Dill – Adds an herbaceous note as an optional garnish; a lovely touch to finish the dish.

Now that you have the ingredients for this Ham Roll Up Pasta Salad, you're all set to start cooking! Enjoy the process, and watch your loved ones delight in this quick and addicting side dish!

Step‑by‑Step Instructions for Ham Roll Up Pasta Salad

Step 1: Cook the Pasta
Begin by boiling a large pot of salted water over high heat. Add your rotini pasta and cook according to the package instructions, usually about 8-10 minutes, until al dente. Once cooked, drain the pasta in a colander and rinse it under cold water to stop the cooking process. Let it drain well while you prepare the dressing.

Step 2: Prepare the Dressing
In a large mixing bowl, combine 8 ounces of softened cream cheese, ½ cup of mayonnaise, ½ cup of sour cream, ¼ cup of pickle juice, and 2-4 tablespoons of milk. Use a hand mixer on medium speed for about 2-3 minutes until the mixture is light and fluffy. Adjust the milk to achieve your desired dressing consistency, ensuring it’s creamy yet pourable for your Ham Roll Up Pasta Salad.

Step 3: Mix the Ingredients
In a separate large bowl, add the drained rotini pasta, 1 cup of chopped sliced Polish ham, 1 cup of diced dill pickles, and ½ cup of chopped green onions. Gently fold the ingredients together using a spatula, ensuring everything is well combined. The colorful mix will start to resemble the classic flavors of traditional ham roll ups, but in a pasta format.

Step 4: Combine and Serve
Carefully drizzle the cream cheese dressing over the pasta mixture and toss gently to coat every ingredient evenly. Your Ham Roll Up Pasta Salad should now be beautifully creamy, with hints of green from the onions and pops of color from the pickles and ham. For a fresh touch, top with additional green onions, fresh dill, and a sprinkle of black pepper before serving.

Ham Roll Up Pasta Salad Variations

Feel free to get creative with your Ham Roll Up Pasta Salad and discover a world of delightful twists!

  • Turkey Substitute: Swap Polish ham for turkey or chicken for a lighter, leaner dish that still retains fantastic flavor.
  • Dill Relish: Use dill relish instead of dill pickles for a finer texture and an extra punch of tanginess. It provides a new layer of flavor for those who appreciate a little zing!
  • Creamy Avocado Twist: Change the dressing base by adding mashed avocado for creaminess and a hint of healthy fats. The unique creamy texture will surprise and delight your palate.
  • Veggie Boost: Add crunchy bell peppers or celery for a burst of color and texture, enhancing the salad with more nutrients. Toss them in just before serving for that fresh crunch.
  • Sweet Pickle Option: Substitute dill pickles with sweet pickles. This change offers a delightful sweetness that stands in contrast to the creaminess of the dressing.
  • Spicy Kick: Mix in diced jalapeños or a dash of hot sauce for a surprising heat element. This little kick can elevate the salad and excite adventurous eaters!
  • Herb Blitz: Introduce fresh herbs such as chopped parsley or basil to shake things up. They’ll add a fragrant touch and a fresh burst of flavor, perfect for summer gatherings.
  • Creamy Greek Style: Incorporate feta cheese and olives to give the dish a Mediterranean twist. This combination pairs wonderfully with the ham for an unexpected flavor adventure.

As you whip up your Ham Roll Up Pasta Salad, consider trying out one or more of these variations. If you're in the mood for something different, you might also enjoy our Pumpkin Cinnamon Roll Muffins or Cauliflower Pasta Ready. Happy cooking!

Storage Tips for Ham Roll Up Pasta Salad

Fridge: Store your Ham Roll Up Pasta Salad in an airtight container for up to 7 days. Make sure to stir well before serving, as the dressing may thicken over time.

Freezer: While it's best enjoyed fresh, you can freeze the salad for up to 3 months. Remember, the texture may change upon thawing, especially the creamy dressing.

Leftovers: When reheating, gently mix and let it sit at room temperature for about 20 minutes for the best flavor before serving.

Preparation Tip: If the salad thickens after refrigeration, add a splash of milk to reach your desired consistency before enjoying!

Make Ahead Options

Preparing your Ham Roll Up Pasta Salad in advance is a fantastic way to save time during busy weeknights or gatherings! You can cook the rotini pasta and store it in an airtight container in the refrigerator for up to 3 days. Additionally, mix the diced ham, pickles, and green onions together in another container and refrigerate for maximum freshness. When you’re ready to enjoy, simply prepare the cream cheese dressing - which can also be made ahead - and combine everything just before serving. This ensures every bite is just as delicious, refreshing, and vibrant as it should be. Enjoy the convenience of meal prep with this easy and crowd-pleasing dish!

What to Serve with Ham Roll Up Pasta Salad?

Create a delightful meal experience by pairing this creamy, savory pasta salad with complementary dishes.

  • Grilled Chicken Skewers: Smoky, juicy chicken adds a satisfying contrast to the creamy salad, enhancing the flavor profile with savory bites. Perfect for a summer cookout!

  • Fresh Garden Salad: Crisp, colorful veggies deliver freshness, lightness, and crunch, balancing the richness of the pasta salad. Top it off with a tangy vinaigrette for extra zing.

  • Potato Wedges: Crispy, golden-brown wedges seasoned with herbs provide a comforting side that pairs well with the salad's creamy texture, making every bite a satisfying experience.

  • Deviled Eggs: Creamy and tangy, these bites offer a delightful burst of flavor that connects beautifully with the pasta salad’s savory elements, making them a classic pairing.

  • Fruit Salad: A refreshing medley of seasonal fruits adds a sweet contrast that brightens the meal. Its natural sweetness will keep everyone coming back for more.

  • Lemonade or Iced Tea: Quench your thirst with these refreshing beverages. Their citrusy notes invigorate the palate, balancing the richness of the Ham Roll Up Pasta Salad and enhancing the overall dining experience.

Expert Tips for Ham Roll Up Pasta Salad

• Room Temperature Dairy: Ensure all dairy products, especially the cream cheese, are at room temperature to prevent clumping and achieve a smooth dressing.

• Taste as You Go: Adjust the pickle juice and milk in the dressing gradually, tasting until you reach your desired tanginess and consistency for the Ham Roll Up Pasta Salad.

• Chill Before Serving: For the best flavors, allow the salad to chill in the refrigerator for at least 30 minutes before serving, but let it sit out briefly if it thickens too much.

• Add Crunch: To elevate texture, consider adding extra veggies like diced bell peppers or celery, enhancing both flavor and crunch without compromising the dish's integrity.

• Proper Storage: Store leftovers in an airtight container for up to 7 days, but remember to stir before serving again, as the dressing may thicken in the fridge.

Ham Roll Up Pasta Salad Recipe FAQs

How do I select the best ingredients for my Ham Roll Up Pasta Salad?
Absolutely! For the pasta, look for rotini or fusilli, as they hold the dressing well. Choose Polish ham that feels slightly moist and isn’t discolored, while dill pickles should be crisp and bright green, avoiding those with dark spots. Fresh green onions should be firm and vibrant.

How long can I store leftovers of Ham Roll Up Pasta Salad?
You can store your salad in an airtight container for up to 7 days in the refrigerator. Just remember to stir well before serving, as the dressing may thicken during storage.

Can I freeze Ham Roll Up Pasta Salad?
Yes, you can freeze it for up to 3 months! To do so, place the salad in a freezer-safe container, ensuring it is sealed tightly. When ready to enjoy, let it thaw in the refrigerator overnight. If the dressing appears too thick after thawing, mix in a splash of milk to restore its creaminess.

What should I do if my dressing turns out too thick?
No worries! If your dressing is thicker than you’d like, simply add a tablespoon of milk at a time and mix until you reach your desired consistency. This is a quick fix, and it helps maintain the flavor you crave in your Ham Roll Up Pasta Salad!

Are there any dietary considerations for this recipe?
Certainly! If you have dietary restrictions, you can swap Polish ham with turkey or chicken. Additionally, make sure to check for any allergies associated with cream cheese, mayonnaise, or sour cream. For a dairy-free version, consider using vegan cream cheese and plant-based mayonnaise.

Can I add extra ingredients to my Ham Roll Up Pasta Salad?
The more, the merrier! You can creatively incorporate extra ingredients like diced bell peppers or celery for added crunch and freshness. Just be careful not to overpower the existing flavors; balance is key!

Ham Roll Up Pasta Salad

Ham Roll Up Pasta Salad: A Fun Twist on Classic Flavors

Ham Roll Up Pasta Salad combines classic flavors into a quick and crowd-pleasing side dish perfect for gatherings.
Print Recipe Pin Recipe
Prep Time 30 minutes mins
Cook Time 10 minutes mins
Total Time 40 minutes mins
Servings: 6 cups
Course: Salads
Cuisine: American
Calories: 350
Ingredients Equipment Method Nutrition Notes

Ingredients
  

For the Pasta
  • 8 ounces Rotini
For the Salad
  • 1 cup Sliced Polish Ham Feel free to substitute with turkey or chicken.
  • 1 cup Dill Pickles Consider Grillo's brand for a tasty twist.
  • ½ cup Chopped Green Onions Swap with chives if preferred.
For the Dressing
  • 8 ounces Cream Cheese Make sure it’s softened.
  • ½ cup Mayonnaise Homemade Avocado Oil Mayonnaise for a healthy flair.
  • ½ cup Sour Cream Let it reach room temperature.
  • ¼ cup Pickle Juice Adjust to suit your tangy preference.
  • 2-4 tablespoons Milk Buttermilk can be used for an extra zing.
  • 1 teaspoon Salt Adjust to your liking.
  • 1 teaspoon Black Pepper Adjust to your liking.
Optional Garnish
  • to taste Fresh Dill A lovely touch to finish the dish.

Equipment

  • Large pot
  • Colander
  • Mixing Bowl
  • Spatula
  • hand mixer

Method
 

Step-by-Step Instructions
  1. Begin by boiling a large pot of salted water over high heat. Add your rotini pasta and cook according to the package instructions, usually about 8-10 minutes, until al dente. Once cooked, drain the pasta in a colander and rinse it under cold water to stop the cooking process. Let it drain well while you prepare the dressing.
  2. In a large mixing bowl, combine 8 ounces of softened cream cheese, ½ cup of mayonnaise, ½ cup of sour cream, ¼ cup of pickle juice, and 2-4 tablespoons of milk. Use a hand mixer on medium speed for about 2-3 minutes until the mixture is light and fluffy. Adjust the milk to achieve your desired dressing consistency.
  3. In a separate large bowl, add the drained rotini pasta, 1 cup of chopped sliced Polish ham, 1 cup of diced dill pickles, and ½ cup of chopped green onions. Gently fold the ingredients together using a spatula until well combined.
  4. Carefully drizzle the cream cheese dressing over the pasta mixture and toss gently to coat every ingredient evenly. Top with additional green onions, fresh dill, and a sprinkle of black pepper before serving.

Nutrition

Serving: 1cupCalories: 350kcalCarbohydrates: 30gProtein: 12gFat: 22gSaturated Fat: 10gPolyunsaturated Fat: 2gMonounsaturated Fat: 8gCholesterol: 60mgSodium: 800mgPotassium: 250mgFiber: 2gSugar: 1gVitamin A: 800IUVitamin C: 5mgCalcium: 100mgIron: 1mg

Notes

For best flavors, allow the salad to chill in the refrigerator for at least 30 minutes before serving. Store leftovers in an airtight container for up to 7 days, stirring before serving again.

Tried this recipe?

Let us know how it was!

Waldorf Chicken Pasta Salad: Your Fresh Summer Picnic Must-Have

January 11, 2026 by Grace Snow Leave a Comment

The sound of sizzling grills and laughter fills the air as summer gatherings kick into high gear. This is the perfect time to impress friends and family with a dish that’s as delightful to eat as it is to behold: Waldorf Chicken Pasta Salad. Merging the classic Waldorf salad with hearty pasta, this light and refreshing dish is a total crowd-pleaser. It's packed with savory chicken, juicy red grapes, and a satisfying crunch from almonds, making it ideal for potlucks, cookouts, or casual lunch. Additionally, it’s a breeze to whip up, meaning you can spend less time in the kitchen and more time enjoying those sun-soaked moments. Ready to make this delightful salad shine at your next gathering? Let’s dive into the recipe!

Why Is This Salad a Must-Try?

Bursting with Flavor: This Waldorf Chicken Pasta Salad combines savory chicken with the sweetness of juicy red grapes and crunchy almonds for a taste sensation that will have everyone coming back for seconds.

Versatile Ingredients: Whether you’re using rotisserie chicken for a quick meal or want to add some diced apples for extra sweetness, this recipe adapts beautifully to your preferences.

Perfect for Any Occasion: From cookouts to potlucks, this dish shines at summer gatherings, ensuring you stand out among a sea of typical side dishes.

Quick and Simple: With just a few straightforward steps, you can throw together a delightful salad in no time. If you need something also light and easy, consider pairing it with Hawaiian burgers for the ultimate summer feast!

Enjoy the refreshing twist of traditional flavors with little fuss. Ideal for making ahead, just remember to add the dressing right before serving to keep everything fresh and vibrant!

Waldorf Chicken Pasta Salad Ingredients

For the Chicken

  • Boneless, Skinless Chicken Breasts – Provides protein and substance to the salad. Substitution: Use rotisserie chicken for quicker prep.

For the Pasta

  • Bow Tie Pasta (16 oz) – Offers a fun shape and texture. Note: Cook to al dente for best results.

For the Crunch

  • Diced Celery (1 cup) – Adds crunch and freshness. Substitution: Cucumber can be used for a lighter crunch.
  • Green Onions (3-4, chopped) – Introduces mild onion flavor. Substitution: Regular onion can be used, but use sparingly.
  • Sliced Almonds (1 cup) – Introduces nutty flavor and texture. Substitution: Pecans or walnuts can also work well.

For the Dressing

  • Real Mayonnaise (2 cups) – Forms the creamy dressing base. Substitution: Greek yogurt can be used for a lighter option.
  • Lemon Juice (2 tablespoons) – Provides acidity to balance flavors. Note: Fresh juice preferred for brightness.
  • Coarse Ground Pepper (1 teaspoon) – Adds seasoning and a hint of spice. Note: Adjust to taste based on preference.
  • Dried Parsley (1 teaspoon) – Enhances flavor and visual appeal. Substitution: Fresh parsley can be used for more vibrant taste.

For Sweetness

  • Red Seedless Grapes (2 cups, halved) – Adds sweet pops and juiciness. Note: Can substitute with halved strawberries or candied nuts for variation.

Step‑by‑Step Instructions for Waldorf Chicken Pasta Salad

Step 1: Cook the Chicken
Begin by bringing a large pot of salted water to a boil. Add boneless, skinless chicken breasts and let them cook for about 15-20 minutes or until the internal temperature reaches 165°F (75°C). Once cooked, carefully remove the chicken from the pot, drain, and allow it to cool completely before chopping or shredding into bite-sized pieces.

Step 2: Prepare the Pasta
In the same pot, add bow tie pasta and cook according to the package instructions until al dente, usually around 10-12 minutes. You’ll know it's ready when the pasta is firm yet tender with a slight bite. Drain the pasta, rinse under cold water to stop the cooking process, and set aside to cool completely for the Waldorf Chicken Pasta Salad.

Step 3: Mix the Vegetables
In a large mixing bowl, combine the chopped chicken, diced celery, and chopped green onions. Ensure the chicken and veggies are evenly distributed for balanced flavors and textures throughout the Waldorf Chicken Pasta Salad. Toss gently to mix, making sure not to mash the ingredients, keeping everything light and fresh.

Step 4: Prepare the Dressing
In a separate measuring cup, whisk together the mayonnaise, lemon juice, coarse ground pepper, and dried parsley until smooth and well combined. The dressing should have a creamy consistency with a zesty kick from the lemon, adding brightness to the Waldorf Chicken Pasta Salad. Taste and adjust seasoning if needed.

Step 5: Combine Ingredients
Pour the prepared dressing over the chicken mixture and stir gently until everything is well coated. The creamy dressing should beautifully embrace all the ingredients, ensuring every bite has the delightful flavors of the Waldorf Chicken Pasta Salad.

Step 6: Fold in Grapes and Pasta
Carefully fold in the halved red seedless grapes, cooked pasta, and sliced almonds into the chicken mixture. Gently combining these ingredients will incorporate sweetness from the grapes and crunch from the almonds while preventing any breakage of delicate pasta.

Step 7: Chill and Serve
For the best flavor, cover the Waldorf Chicken Pasta Salad with plastic wrap and refrigerate for at least 30 minutes before serving. This allows the flavors to meld beautifully. Before serving, give it a gentle stir and you may optionally top with additional cracked pepper for a finishing touch. Enjoy chilled or at room temperature!

Expert Tips for Waldorf Chicken Pasta Salad

  • Chicken Cooling: Allow the chicken to cool completely before mixing it into the salad. This helps prevent wilting and ensures a refreshing bite.

  • Quick Prep: Opt for rotisserie chicken to save time in the kitchen. Shred it before adding to maintain a light texture in your Waldorf Chicken Pasta Salad.

  • Pasta Absorption: Remember that the pasta will absorb the dressing over time. If you're preparing in advance, mix in the dressing just before serving for the best flavor and consistency.

  • Adjusting Crunch: For a lighter option, you can substitute diced celery with cucumber, which still provides an enjoyable crunch without overpowering the dish.

  • Flavor Boost: Fresh lemon juice can really brighten the flavors in your salad. Always opt for fresh instead of bottled for a more vibrant taste!

How to Store and Freeze Waldorf Chicken Pasta Salad

Fridge: Keep the Waldorf Chicken Pasta Salad in an airtight container; it can last up to 3 days, but for optimal freshness, consume within 1-2 days.

Freezer: We don’t recommend freezing this salad due to the pasta and dressing, which may become mushy upon thawing. Enjoy it fresh instead!

Reheating: If you have leftover chicken, microwave it gently until warmed through. However, the dressing should remain cool when served.

Make-Ahead Tips: You can prepare the salad a day in advance, but mix in the dressing just before serving to keep the ingredients crisp and vibrant.

What to Serve with Waldorf Chicken Pasta Salad?

Elevate your summer gatherings with delightful pairings that bring out the flavors of this refreshing dish.

  • Hawaiian Burgers: Juicy and sweet, these burgers complement the salad’s crunch with a tropical twist, perfect for cookouts.
  • Lemonade Refrigerator Pickles: The zesty tang of these pickles balances the creamy pasta salad while adding a touch of brightness.
  • Deviled Eggs: Creamy and savory, deviled eggs are a classic crowd-pleaser, adding a bit of nostalgia to your outdoor feast.
  • Garlic Breadsticks: Their crispy exterior and soft inside provide a comforting contrast to the textural delights of the salad.
  • Fruit Skewers: Freshly cut berries and melons add a sweet note that enhances the salad’s fruitiness, invigorating your palate.
  • Chilled White Wine: Opt for a crisp Sauvignon Blanc that complements the savory chicken and fruity notes, enhancing your dining experience.
  • Potato Salad: Creamy and hearty, potato salad makes for a satisfying side that stands up to the Waldorf Chicken Pasta Salad without competing.
  • Ice Cream Sundaes: End your meal with these sweet treats, allowing everyone to indulge in a bit of nostalgia that makes summer evenings unforgettable.
  • Corn on the Cob: Charred and buttery, nothing says summer like corn on the cob, adding sweetness and a delightful crunch to every bite.

Make Ahead Options

These Waldorf Chicken Pasta Salad is perfect for busy home cooks seeking meal prep solutions! You can prepare the chicken, pasta, and vegetable mix up to 24 hours in advance. Simply cook and cool the chicken, then shred it into bite-sized pieces. Cook the pasta until al dente, drain, and let it cool. Combine the chicken, diced celery, and green onions, refrigerating them in an airtight container. To maintain quality, avoid mixing in the dressing until just before serving; this prevents the pasta from becoming soggy. When it's time to dig in, whisk together the dressing, fold in the grapes and almonds, combine everything, and enjoy a refreshing salad that tastes just as delicious as when freshly made!

Variations & Substitutions for Waldorf Chicken Pasta Salad

Feel free to get creative with this Waldorf Chicken Pasta Salad and tailor it to your taste buds!

  • Nut-Free: Omit the sliced almonds entirely or substitute with sunflower seeds for a delightful crunch without the nuts.
  • Dairy-Free: Swap out mayonnaise for a creamy dairy-free alternative, such as avocado or cashew cream for a rich consistency.
  • Fruit Variations: Incorporate diced apples or pear for a fruity twist, adding an extra layer of sweetness and texture. The apples not only enhance the flavor but also bring the traditional Waldorf vibe to this pasta delight.
  • Flavor Kick: Add a teaspoon of Dijon mustard to the dressing for an invigorating flavor boost that pairs beautifully with the sweetness of the grapes.
  • Vegan Option: Use chickpeas or lentils in place of chicken and replace mayonnaise with vegan yogurt. This swap keeps the dish hearty while catering to plant-based diets.
  • Spicy Twist: Toss in a pinch of red pepper flakes or diced jalapeños for those who like a little heat with their sweetness! It’s a fun contrast that adds excitement to each bite.
  • Herb Infusion: Switch out dried parsley for fresh herbs like dill or chives to brighten the flavors and offer a garden-fresh taste. These herbs complement the creamy dressing beautifully.
  • Pasta Swaps: Try different pasta shapes like orzo or fusilli for a fun twist on texture. Each shape brings its own charm and enhances the overall appeal.

As you whip up this delightful salad, consider pairing it with Hawaiian burgers or serving alongside flavorful seafood pasta for a summer feast that will leave everyone raving!

Waldorf Chicken Pasta Salad Recipe FAQs

What type of chicken is best for this salad?
Absolutely! For this Waldorf Chicken Pasta Salad, using boneless, skinless chicken breasts is ideal for a lean protein option. However, I often use rotisserie chicken when I'm looking for quick prep. Just shred it before mixing with the other ingredients for a deliciously convenient meal!

How long does this salad last in the fridge?
Very good question! You can store the Waldorf Chicken Pasta Salad in an airtight container in the refrigerator for up to 3 days. However, for the best flavor and texture, I recommend enjoying it within 1-2 days.

Can I freeze Waldorf Chicken Pasta Salad?
We don’t recommend freezing this salad. Since the pasta and creamy dressing may become mushy upon thawing, it's best to savor this dish fresh. If you want to prep ahead, make the chicken and pasta separately, then mix with the other ingredients and dressing right before serving.

What should I do if the pasta absorbs too much dressing?
If you find that the pasta has absorbed too much dressing, simply make a quick batch of the dressing again with mayonnaise, lemon juice, and seasonings. Mix it in gently until the salad is well-coated again. Just be careful to maintain that delightful crunch and freshness in each bite!

Are there any dietary considerations I should be aware of?
Definitely! If you're preparing this salad for guests, keep an eye out for possible allergies. Ensure the ingredients such as nuts and dairy like mayonnaise are okay for everyone. For nut-free options, simply substitute sliced almonds with sunflower seeds. It's always great to be mindful of your guests' dietary needs!

Is this salad suitable for pets?
Good question! While the ingredients of the Waldorf Chicken Pasta Salad are safe for human consumption, it’s not suitable for pets. Ingredients like grapes can be harmful to dogs, so it’s best to keep this salad strictly for human enjoyment.

Waldorf Chicken Pasta Salad

Waldorf Chicken Pasta Salad: Your Fresh Summer Picnic Must-Have

Waldorf Chicken Pasta Salad is a delightful, refreshing dish, perfect for summer gatherings with savory chicken, juicy grapes, and crunchy almonds.
Print Recipe Pin Recipe
Prep Time 20 minutes mins
Cook Time 20 minutes mins
Chilling Time 30 minutes mins
Total Time 1 hour hr 10 minutes mins
Servings: 6 servings
Course: Salads
Cuisine: American
Calories: 450
Ingredients Equipment Method Nutrition Notes

Ingredients
  

For the Chicken
  • 2 pieces Boneless, Skinless Chicken Breasts Substitution: Use rotisserie chicken for quicker prep.
For the Pasta
  • 16 oz Bow Tie Pasta Cook to al dente for best results.
For the Crunch
  • 1 cup Diced Celery Substitution: Cucumber can be used for a lighter crunch.
  • 3-4 Green Onions, chopped Substitution: Regular onion can be used, but use sparingly.
  • 1 cup Sliced Almonds Substitution: Pecans or walnuts can also work well.
For the Dressing
  • 2 cups Real Mayonnaise Substitution: Greek yogurt can be used for a lighter option.
  • 2 tablespoons Lemon Juice Fresh juice preferred for brightness.
  • 1 teaspoon Coarse Ground Pepper Adjust to taste based on preference.
  • 1 teaspoon Dried Parsley Substitution: Fresh parsley can be used for more vibrant taste.
For Sweetness
  • 2 cups Red Seedless Grapes, halved Can substitute with halved strawberries or candied nuts for variation.

Equipment

  • Large pot
  • Mixing Bowl
  • Measuring cup
  • Whisk

Method
 

Step-by-Step Instructions
  1. Cook the Chicken: Bring a large pot of salted water to a boil. Add the chicken breasts and cook for about 15-20 minutes or until the internal temperature reaches 165°F (75°C). Remove, drain, and cool completely before chopping.
  2. Prepare the Pasta: In the same pot, add bow tie pasta and cook according to package instructions until al dente, about 10-12 minutes. Drain and rinse under cold water; set aside to cool.
  3. Mix the Vegetables: In a large bowl, combine chopped chicken, diced celery, and green onions. Toss gently to mix.
  4. Prepare the Dressing: In a measuring cup, whisk together mayonnaise, lemon juice, pepper, and parsley until smooth.
  5. Combine Ingredients: Pour dressing over chicken mixture and stir gently until well coated.
  6. Fold in Grapes and Pasta: Carefully fold in halved grapes, cooked pasta, and sliced almonds into the chicken mixture.
  7. Chill and Serve: Cover with plastic wrap and refrigerate for at least 30 minutes before serving.

Nutrition

Serving: 1servingCalories: 450kcalCarbohydrates: 44gProtein: 30gFat: 20gSaturated Fat: 3gPolyunsaturated Fat: 5gMonounsaturated Fat: 10gCholesterol: 70mgSodium: 500mgPotassium: 300mgFiber: 3gSugar: 6gVitamin A: 10IUVitamin C: 15mgCalcium: 5mgIron: 10mg

Notes

Allow the chicken to cool completely before mixing to prevent wilting. Mix the dressing just before serving for optimal freshness.

Tried this recipe?

Let us know how it was!

Bruschetta Pasta Salad That Brightens Your Summer Days

January 11, 2026 by Grace Snow Leave a Comment

As I stood in my kitchen one sunny afternoon, the enticing aroma of garlic and fresh basil wafted through the air, coaxing me into culinary creation. Inspired by the vibrant flavors of Italy, I set out to craft a Bruschetta Pasta Salad that not only satisfies my cravings but also invites my friends to gather around the table. This delightful dish combines juicy cherry tomatoes, creamy mini mozzarella balls, and crunchy homemade sourdough breadcrumbs, ensuring it’s a crowd-pleaser for summer barbecues or any friendly get-together. With prep time under 30 minutes, it's perfect for those busy days when a healthy, flavorful meal is needed in a pinch. Plus, the versatility of this salad allows for gluten-free and dairy-free options, so everyone can join in on the fun! Curious to take this taste trip to Italy without leaving your home? Let’s dive in!

Why is Bruschetta Pasta Salad a Must-Try?

Unforgettable Flavor: This salad is bursting with juicy tomatoes and fragrant basil, creating a refreshing bite that transports you to Italy.

Quick and Easy: Ready in just 30 minutes, it's the ideal choice for quick meals or last-minute gatherings.

Versatile Options: Adjust the recipe to meet your dietary needs; whether you're opting for gluten-free pasta or a dairy-free cheese substitute, everyone can enjoy it!

Crowd-Pleaser: The mix of textures from the creamy mozzarella and crunchy breadcrumbs makes it a hit at summer barbecues and dinner parties alike.

Perfect Side Dish: Pair it with grilled meats or serve it as a satisfying main for your picnic; it’s the perfect addition to any meal!

Why not check out my Avocado Egg Salad for another delightful option? You can't go wrong with a delicious salad on the table!

Bruschetta Pasta Salad Ingredients

• Get ready to create a delicious dish!

For the Salad

  • Small Pasta Shape – This is the base of your dish; feel free to substitute with gluten-free pasta for a wonderful alternative.
  • Cherry Tomatoes – Choose vine-ripened for maximum flavor; other small tomato varieties can also work well.
  • Garlic – Adds depth to the salad; consider using roasted garlic for a milder touch.
  • Shallot – Provides a subtle sweetness; can be substituted with red onion or omitted if you prefer.
  • Mini Bocconcini – Offers creamy goodness; skip or replace with dairy-free cheese for a lighter option.
  • Fresh Basil Leaves – Infuses fresh flavor; you can use parsley in its place or omit if desired.
  • Olive Oil – This enriches the dish; avocado oil is a nice twist as a substitute.
  • Red Wine Vinegar – Adds the needed acidity; balsamic vinegar can give a sweet twist if you prefer.
  • Salt + Pepper – Essential for bringing out the flavors; season according to your taste preferences.

For the Crunch

  • Sourdough Bread – Perfect for creating your breadcrumbs, but feel free to swap it with any bread type, including gluten-free.
  • Olive Oil (for breadcrumbs) – This helps in achieving that toasty perfection!
  • Garlic Powder (optional) – Use for an extra kick of flavor in your breadcrumbs; omit if you want a simpler taste.

With these key ingredients, your Bruschetta Pasta Salad will shine on any table, bringing taste and joy to every bite!

Step‑by‑Step Instructions for Bruschetta Pasta Salad

Step 1: Cook Pasta
Bring a large pot of salted water to a rolling boil over high heat. Add your small pasta and cook according to package instructions, usually about 8-10 minutes, until al dente. Once cooked, drain the pasta in a colander, shaking off excess water, and set it aside to cool while you prepare the other salad ingredients.

Step 2: Prep Salad Mix
In a large mixing bowl, combine halved cherry tomatoes, minced garlic, chopped shallot, halved mini bocconcini, and the fresh basil. Drizzle with olive oil and red wine vinegar, then season with salt and pepper. Toss the mixture gently to coat evenly, allowing the flavors to meld for about 10 minutes while you prepare the crunchy breadcrumbs.

Step 3: Make Breadcrumbs
Take your sourdough bread slices and tear them into smaller pieces. Using a food processor, pulse the bread until coarse crumbs form. This should only take about 30 seconds. If you prefer a more rustic texture, you can do this process by hand. Set the breadcrumbs aside as you get ready to toast them.

Step 4: Toast Breadcrumbs
In a skillet over medium heat, add 1.5 teaspoons of olive oil. Once warmed, add the prepared breadcrumbs and optional garlic powder. Sauté for 5-7 minutes, stirring frequently until the breadcrumbs turn golden brown and crispy. You'll know they're ready when they emit a toasty aroma and have a nice crunch. Remove from heat.

Step 5: Combine Ingredients
Add the cooled pasta to the bowl with your salad mix. Gently fold in the toasted breadcrumbs to the bruschetta pasta salad, ensuring everything is well distributed. Taste and adjust seasoning if necessary, adding more salt and pepper as desired to enhance those vibrant flavors in your dish. Enjoy the medley of textures in every bite!

How to Store and Freeze Bruschetta Pasta Salad

Fridge: Store the Bruschetta Pasta Salad in an airtight container for up to 2 days. Keep the toasted breadcrumbs separate until serving for optimal crunch.

Make-Ahead: You can prepare the salad (without breadcrumbs) a day in advance. Just mix everything except the breadcrumbs, and refrigerate to enhance the flavors.

Freezer: It's best not to freeze this salad due to the nature of the ingredients, as fresh tomatoes and mozzarella may change in texture.

Reheating: Serve cold or at room temperature. If you've stored it in the fridge, simply give it a gentle stir before enjoying to refresh the flavors!

Bruschetta Pasta Salad Variations

Feel free to play with these delicious variations and substitutions that allow you to make this Bruschetta Pasta Salad uniquely yours!

  • Dairy-Free: Swap mini bocconcini with a vegan cheese alternative or simply omit for a lighter option.
  • Gluten-Free: Use gluten-free pasta varieties like brown rice or quinoa pasta for a hearty dish without the gluten.
  • Grilled Veggies: Add grilled zucchini or bell peppers for an extra depth of flavor and delightful texture that echoes summer barbecues.
  • Protein Boost: Toss in some grilled chicken or chickpeas to turn this salad into a more filling meal.
  • Herb Swap: Experiment with fresh herbs! Try parsley or oregano instead of basil for a different herbal note.
  • Balsamic Twist: Substitute red wine vinegar with balsamic vinegar for a sweeter, deeper flavor that complements the tomatoes beautifully.
  • Extra Crunch: Incorporate toasted pine nuts or walnuts for a nutty crunch that pairs wonderfully with the creamy mozzarella.
  • Spicy Kick: Add a sprinkle of red pepper flakes for a warming heat that elevates the salad to new flavor heights.

Looking for something different? Dive into my Cauliflower Pasta Ready for another delicious twist on pasta that's sure to please!

What to Serve with Bruschetta Pasta Salad

This vibrant pasta salad shines on its own but pairs beautifully with a variety of delightful sides and sips to create the ultimate meal experience.

  • Grilled Chicken: The savory, smoky flavors of grilled chicken provide a hearty contrast to the freshness of the pasta salad. It’s a match perfect for outdoor celebrations.
  • Lemon Garlic Shrimp: Succulent shrimp sautéed with lemon and garlic add a zesty twist that elevates your meal. This combination feels like a warm day on the Italian coast!
  • Caprese Skewers: Bright, fresh bites of mozzarella, basil, and cherry tomatoes on skewers complement the salad’s flavors while adding a fun finger-food element.
  • Roasted Vegetables: A colorful medley of roasted veggies drizzled with balsamic glaze brings a deep, earthy richness, rounding off the lightness of the pasta salad beautifully.
  • Crusty Garlic Bread: Crispy on the outside and soft on the inside, garlic bread is a comforting side that adds warmth and texture to your meal, making every bite delightful.
  • Sparkling Lemonade: This refreshing drink offers a burst of citrus flavor that mirrors the acidity in the salad, cleansing your palate in between bites.
  • Chocolate Mousse: End your meal on a sweet note with a rich and airy chocolate mousse. Its creamy texture creates a luscious contrast to the pasta salad.
  • Tossed Green Salad: A simple green salad with light vinaigrette balances the richness of the bruschetta pasta salad, providing refreshing crunch in every bite.

Expert Tips for Bruschetta Pasta Salad

  • Pasta Perfection: Avoid overcooking the pasta. Aim for al dente for the best texture in your Bruschetta Pasta Salad.

  • Breadcrumb Crunch: For the ultimate crunch, store toasted breadcrumbs separately and mix them into the salad right before serving.

  • Flavorful Substitutions: Feel free to switch up the tomatoes or cheese. Use any small tomato variety or dairy-free cheese to suit your taste!

  • Freshness Factor: Use freshly chopped basil for the best flavor. Dried basil won’t provide the same aromatic touch.

  • Mild Garlic Option: If you prefer a milder taste, try roasted garlic instead of raw. It provides a sweet depth to your Bruschetta Pasta Salad!

Make Ahead Options

These Bruschetta Pasta Salad ingredients are perfect for meal prep, saving you time on busy evenings! You can chop the cherry tomatoes, shallots, and basil and mix them with the garlic, olive oil, and red wine vinegar up to 24 hours in advance. Store this mixture in an airtight container in the refrigerator to keep the flavors fresh. For optimal quality, prepare the toasted sourdough breadcrumbs separately and store them in a sealed bag at room temperature, so they remain crunchy. When you're ready to serve, simply cook your pasta, combine it with the salad mixture, and add the breadcrumbs right before serving for that delightful, fresh bite everyone loves!

Bruschetta Pasta Salad Recipe FAQs

What types of pasta can I use for Bruschetta Pasta Salad?
Absolutely! You can use any small pasta shape like bowtie, penne, or fusilli. If you’re looking for a gluten-free option, substitute with gluten-free pasta varieties available in stores. The key is to ensure you cook it al dente for the best texture.

How should I store leftovers of Bruschetta Pasta Salad?
Store your leftovers in an airtight container in the refrigerator for up to 2 days. Just remember to keep the toasted breadcrumbs separate until you're ready to serve to ensure they remain crunchy and fresh!

Can I freeze Bruschetta Pasta Salad?
Not really! It’s best not to freeze this salad since the ingredients, particularly fresh tomatoes and mozzarella, can become mushy and lose their vibrant texture once thawed. Enjoy it fresh for the best experience!

What if my tomatoes aren’t ripe?
No worries! If the cherry tomatoes aren’t at peak ripeness, you can try using a drizzle of balsamic glaze to enhance the sweetness. Alternatively, roasting them in the oven for about 15-20 minutes can help concentrate their flavors, turning them into deliciously caramelized bites in your salad.

Is there a way to make this salad vegan?
Absolutely! To make the Bruschetta Pasta Salad vegan, simply omit the mini bocconcini cheese, or substitute it with a dairy-free cheese alternative. You can also try adding chickpeas or grilled vegetables for extra nutrition and texture.

How do I ensure my breadcrumbs stay crunchy?
For the utmost crunch, after toasting the breadcrumbs in a skillet, store them in a separate sealed container until you’re ready to serve the pasta salad. This way, they won’t lose their delightful crispiness when mixed with the salad ingredients!

Bruschetta Pasta Salad

Bruschetta Pasta Salad That Brightens Your Summer Days

Enjoy a refreshing Bruschetta Pasta Salad bursting with vibrant flavors, perfect for summer gatherings.
Print Recipe Pin Recipe
Prep Time 15 minutes mins
Cook Time 15 minutes mins
Total Time 30 minutes mins
Servings: 4 servings
Course: Salads
Cuisine: Italian
Calories: 350
Ingredients Equipment Method Nutrition Notes

Ingredients
  

For the Salad
  • 8 oz small pasta shape gluten-free option available
  • 2 cups cherry tomatoes halved, vine-ripened preferred
  • 2 cloves garlic minced, roasted optional
  • 1 medium shallot chopped, substitute red onion if desired
  • 8 oz mini bocconcini dairy-free cheese optional
  • 1 cup fresh basil leaves can be substituted with parsley
  • 2 tbsp olive oil or avocado oil
  • 2 tbsp red wine vinegar or balsamic vinegar
  • to taste salt
  • to taste pepper
For the Crunch
  • 2 slices sourdough bread gluten-free option available
  • 1.5 tbsp olive oil (for breadcrumbs)
  • 1 tsp garlic powder optional

Equipment

  • Large pot
  • Colander
  • Mixing Bowl
  • Food Processor
  • Skillet

Method
 

Steps
  1. Bring a large pot of salted water to a boil. Add pasta and cook for 8-10 minutes until al dente. Drain and set aside to cool.
  2. In a mixing bowl, combine cherry tomatoes, garlic, shallot, bocconcini, and basil. Drizzle with olive oil and vinegar, season with salt and pepper, and toss gently.
  3. Tear sourdough bread into pieces and pulse in a food processor to make coarse crumbs.
  4. In a skillet over medium heat, add olive oil and breadcrumbs. Sauté for 5-7 minutes until golden brown and crispy.
  5. Combine cooled pasta with salad mix and gently fold in toasted breadcrumbs. Adjust seasoning if necessary.

Nutrition

Serving: 1servingCalories: 350kcalCarbohydrates: 40gProtein: 12gFat: 15gSaturated Fat: 5gPolyunsaturated Fat: 1gMonounsaturated Fat: 9gCholesterol: 15mgSodium: 450mgPotassium: 450mgFiber: 3gSugar: 4gVitamin A: 500IUVitamin C: 20mgCalcium: 250mgIron: 2mg

Notes

Use freshly chopped basil for the best flavor. Avoid overcooking the pasta for a perfect texture.

Tried this recipe?

Let us know how it was!

Fresh and Zesty Pesto Pasta Salad for Summer Fun

January 11, 2026 by Grace Snow Leave a Comment

As I savored the last bite of perfectly al dente pasta, a light bulb moment struck me. Nothing beats the vibrant combination of a Quick and Refreshing Pesto Pasta Salad on a sunny afternoon. This delightful dish comes together in just 30 minutes, making it a go-to for anyone looking to create a meal that’s as fast as it is fabulous. Packed with vegetarian goodness and brimming with fresh flavors, it’s a wonderful centerpiece for potlucks or a quick lunch paired with a glass of chilled lemonade. Plus, the recipe offers a fun twist with easy ingredient substitutions, so you can adapt it to your pantry’s whims or dietary preferences. Ready to elevate your summer dining experience? Let’s turn this colorful bowl of goodness into your new favorite dish!

Why Is Pesto Pasta Salad a Must-Try?

Quick preparation: You'll love that this Pesto Pasta Salad comes together in just 30 minutes—perfect for busy days or last-minute gatherings. Fresh and vibrant: The colors and flavors of cherry tomatoes and basil will brighten up any meal. Versatile options: Don't hesitate to mix it up with substitutes like grilled chicken or seasonal veggies. Plus, it's a fantastic addition to potlucks, standing out among the usual fare. Light and filling: With only 287 calories per serving, it's a satisfying choice without the heaviness. So why not try it alongside other summer favorites, like Avocado Egg Salad or Jello Salad Cottage? You’ll be glad you did!

Pesto Pasta Salad Ingredients

For the Salad
• Pasta – This is the foundational element; you can substitute with gluten-free pasta for dietary needs.
• Cherry Tomatoes – Their sweetness adds brightness; diced bell peppers work as a delightful alternative.
• Fresh Mozzarella – This creamy treat enhances texture; queso fresco is a great substitute if needed.
• Red Onion – Adds a sharp bite; green onions can provide a milder flavor if preferred.
• Pepperoncini – Their tangy heat is fantastic; omit if you want to keep it gentle on the palate.
• Parsley – This herb enhances freshness; feel free to swap it with basil for a twist.

For the Pesto
• Basil Leaves – The star of the show; experiment with spinaches or arugula for varied flavors.
• Olive Oil – Adds richness to the pesto; avocado oil can serve as an excellent alternative.
• Pine Nuts – They provide a nutty flavor and creamy consistency; walnuts or sunflower seeds work well too.
• Grated Parmesan Cheese – This ingredient brings umami to the dish; nutritional yeast can make it dairy-free.
• Lemon Juice – Balances flavors and brightens the dish; lime juice can also do the trick.
• Garlic – Adds aromatic bliss; adjust the amount to suit your taste.
• Sea Salt and Black Pepper – Essential for seasoning; always use kosher salt and freshly cracked pepper for the best results.

With this Pesto Pasta Salad ingredient lineup, get ready to savor a dish that’s quick, fresh, and vibrant!

Step‑by‑Step Instructions for Pesto Pasta Salad

Step 1: Cook the Pasta
Begin by bringing a large pot of salted water to a rolling boil over high heat. Add your pasta and cook according to the package instructions until it reaches a tender yet firm texture, about 8-10 minutes. Once done, drain the pasta in a colander and rinse it under cold running water to stop the cooking process and prevent sticking.

Step 2: Make the Pesto
While the pasta cools, gather your food processor to whip up the pesto. In the processor, combine fresh basil leaves, pine nuts, grated parmesan cheese, garlic, lemon juice, olive oil, sea salt, and freshly cracked black pepper. Secure the lid and pulse until the mixture transforms into a smooth and creamy sauce, scraping down the sides as necessary.

Step 3: Assemble the Pasta Salad
In a spacious mixing bowl, combine the cooled pasta with the freshly made pesto. Gently fold in halved cherry tomatoes, diced fresh mozzarella, chopped red onion, sliced pepperoncini, and chopped parsley until everything is evenly coated and mixed well. Take a moment to visually inspect the salad, ensuring all ingredients are harmoniously blended.

Step 4: Adjust Seasoning
Taste your Pesto Pasta Salad for seasoning, and feel free to add extra salt or pepper as needed. This is your opportunity to balance the flavors perfectly. If it feels a bit flat, consider adding a splash more lemon juice for brightness or a hint more pesto if you desire a richer flavor profile.

Step 5: Chill and Serve
For optimal flavor, cover the bowl with plastic wrap and refrigerate the pasta salad for at least 30 minutes. This chilling step allows the flavors to meld beautifully. Once ready to serve, give it a gentle stir, and enjoy it cold or at room temperature, making it perfect for summer gatherings or a quick lunch.

How to Store and Freeze Pesto Pasta Salad

Fridge: Keep your pesto pasta salad in an airtight container for up to 4 days. This helps maintain its fresh flavors and prevents drying out.

Freezer: If you'd like to freeze, portion the salad into resealable bags or containers and store for up to 2 months. Note that the texture of the tomatoes and mozzarella may change slightly upon thawing.

Reheating: To serve, let the salad thaw in the fridge overnight. Stir gently to refresh its flavors before indulging.

Mix Before Serving: If the salad has been stored, give it a quick stir to reinvigorate the flavors, ensuring your pesto pasta salad is as delightful as the first day!

What to Serve with Pesto Pasta Salad

Elevate your dining experience by pairing this beautiful salad with complementary dishes that enhance its vibrant flavors.

  • Garlic Bread: Warm, crusty garlic bread adds a delightful crunch, balancing the creamy pasta perfectly for a comforting meal.
  • Caprese Skewers: A fresh combination of mozzarella and basil on skewers complements the salad’s flavors while adding a fun, colorful presentation.
  • Grilled Vegetables: Smoky grilled zucchini and bell peppers offer a nice contrast in texture and depth, making for a wholesome dish that screams summer.
  • Lemonade or Iced Tea: A chilled glass of lemonade or iced tea refreshes the palate, brightening the meal and mirroring the salad’s citrusy notes.

Serve with a fresh fruit platter for added sweetness. Juicy watermelon and tangy berries marry beautifully with the savory elements of the pasta salad. Don’t forget dessert! A light sorbet or a slice of lemon tart would be a zesty ending to your delightful meal.

Expert Tips for Pesto Pasta Salad

  • Chill for Flavor: Allow your Pesto Pasta Salad to chill for at least 30 minutes before serving. This enhances the flavors and makes it even more refreshing.
  • Cool the Pasta: Rinse the cooked pasta under cold water thoroughly. This not only stops the cooking but also prevents it from sticking together.
  • Taste Before Serving: Always taste and adjust the seasoning right before serving. A dash of salt or extra lemon juice can elevate your dish perfectly.
  • Substitution Ideas: Don't hesitate to swap ingredients based on what’s in your pantry, like using chickpeas for protein or other seasonal veggies for crunch in your pesto pasta salad.
  • Presentation Matters: For a lovely presentation, garnish your salad with fresh basil leaves or a sprinkle of extra parmesan cheese right before serving.

Pesto Pasta Salad Variations & Substitutions

Unleash your creativity with this Pesto Pasta Salad, making it truly your own with these delightful twists!

  • Dairy-Free: Swap grated Parmesan with nutritional yeast for a nutty flavor without the dairy.
  • Gluten-Free: Use gluten-free pasta for a celiac-friendly alternative without sacrificing taste.
  • Spicy Kick: Add a dash of crushed red pepper flakes to your pesto for a delightful kick of heat.
  • Seasonal Veggies: Toss in grilled zucchini or asparagus for seasonal freshness and added crunch.
  • Protein Boost: Mix in grilled chicken or roasted chickpeas to enhance the protein factor, making it even more satisfying.
  • Herb Change-Up: Experiment with various fresh herbs, such as parsley or cilantro, instead of basil for a different flavor profile.
  • Creamy Twist: Stir in some Greek yogurt or avocado for a creamy texture while maintaining that fresh taste.

Each of these variations tells a little story of its own, encouraging you to savor every delicious bite, much like other crowd-pleasers like Skillet Pasta Sun and Cauliflower Pasta Ready. Explore, customize, and enjoy this versatile dish on your culinary journey!

Make Ahead Options

Preparing this Pesto Pasta Salad ahead of time makes meal planning a breeze! You can cook the pasta and store it in the refrigerator for up to 3 days before assembling the salad. Additionally, the pesto can be made in advance and refrigerated for up to 5 days (just drizzle a little olive oil on top to prevent browning). When you’re ready to serve, simply combine the chilled pasta with the prepared pesto, cherry tomatoes, mozzarella, and remaining ingredients, and give it a good toss. This ensures your Pesto Pasta Salad remains just as delicious and fresh, saving you precious time on busy weeknights or during a potluck preparation!

Pesto Pasta Salad Recipe FAQs

What type of pasta should I use for Pesto Pasta Salad?
You can use any pasta you like, but I recommend a small shape, like fusilli or rotini, as they hold onto the pesto beautifully. If gluten-free is a must, simply substitute with gluten-free pasta; it works wonderfully without compromising flavor!

How long can I store Pesto Pasta Salad in the fridge?
Store your Pesto Pasta Salad in an airtight container for up to 4 days in the refrigerator. This keeps the flavors fresh and vibrant, but be sure to give it a good stir before serving again, as some ingredients might settle.

Can I freeze Pesto Pasta Salad?
Yes, you can freeze it! Portion your pasta salad into resealable bags or airtight containers, and it will keep well for up to 2 months. However, be aware that the texture of the tomatoes and mozzarella may change slightly upon thawing. To enjoy, let it thaw in the fridge overnight and stir gently before serving.

How do I know if my basil is fresh enough for pesto?
Look for bright, vibrant green leaves without any dark spots or wilting. Fresh basil should feel smooth to the touch and have a fragrant aroma. If you notice dark spots or a faded color, it’s best to choose a fresh batch for your Pesto Pasta Salad to ensure a tasty result.

Can I serve Pesto Pasta Salad to kids or those with allergies?
Absolutely! If you're serving it to kids or anyone with dietary restrictions, you can tweak the recipe to exclude ingredients that may cause issues. For instance, omit walnuts from the pesto if there's a nut allergy, or use nutritional yeast instead of parmesan for a dairy-free option. It’s all about customizing to suit everyone’s needs!

Is there a way to make Pesto Pasta Salad less oily?
If you prefer a lighter dressing, you can reduce the amount of olive oil in the pesto. Start by adding only half the oil, blend to your desired consistency, and adjust gradually as needed. You can also incorporate a little water or vegetable broth to help achieve the desired texture without added oil. Enjoy creating a version that works for you!

Pesto Pasta Salad

Fresh and Zesty Pesto Pasta Salad for Summer Fun

Enjoy this Quick and Refreshing Pesto Pasta Salad perfect for summer gatherings.
Print Recipe Pin Recipe
Prep Time 30 minutes mins
Cook Time 10 minutes mins
Total Time 40 minutes mins
Servings: 4 servings
Course: Salads
Cuisine: Italian
Calories: 287
Ingredients Equipment Method Nutrition Notes

Ingredients
  

For the Salad
  • 8 oz Pasta or gluten-free pasta
  • 1 cup Cherry Tomatoes halved
  • 8 oz Fresh Mozzarella diced
  • 1/2 medium Red Onion chopped
  • 1/2 cup Pepperoncini
  • 1/4 cup Parsley chopped
For the Pesto
  • 2 cups Basil Leaves
  • 1/2 cup Olive Oil or avocado oil
  • 1/4 cup Pine Nuts or walnuts
  • 1/2 cup Grated Parmesan Cheese or nutritional yeast
  • 2 tbsp Lemon Juice or lime juice
  • 2 cloves Garlic
  • 1 tsp Sea Salt to taste
  • 1 tsp Black Pepper freshly cracked

Equipment

  • Large pot
  • Colander
  • Food Processor
  • Mixing Bowl

Method
 

Cooking and Preparation
  1. Cook the pasta in boiling salted water until al dente, about 8-10 minutes. Drain and rinse under cold water.
  2. In a food processor, blend basil leaves, pine nuts, parmesan, garlic, lemon juice, olive oil, salt, and pepper until smooth.
  3. In a bowl, combine pasta, pesto, tomatoes, mozzarella, onion, pepperoncini, and parsley. Mix gently until evenly coated.
  4. Taste and adjust seasoning with additional salt, pepper, or lemon juice as needed.
  5. Cover and refrigerate the salad for at least 30 minutes before serving.

Nutrition

Serving: 1servingCalories: 287kcalCarbohydrates: 34gProtein: 9gFat: 12gSaturated Fat: 4gPolyunsaturated Fat: 1gMonounsaturated Fat: 7gCholesterol: 15mgSodium: 300mgPotassium: 300mgFiber: 3gSugar: 2gVitamin A: 500IUVitamin C: 10mgCalcium: 200mgIron: 1mg

Notes

Allow salad to chill for enhanced flavor. Substitute ingredients as needed based on personal preference.

Tried this recipe?

Let us know how it was!

Dill Pickle Pasta Salad: Your New Favorite Summer Side

January 11, 2026 by Grace Snow Leave a Comment

Summer gatherings are the perfect excuse to indulge in vibrant flavors, and what better way to do that than with a delightful Dill Pickle Pasta Salad? This refreshing dish combines creamy textures with the tangy crunch of dill pickles, making it an irresistible crowd-pleaser that your family and friends will adore. With this easy recipe, you can whip up a satisfying side dish in just 25 minutes (plus chilling time), allowing you more time to enjoy the sunshine. Whether you're heading to a potluck, a picnic in the park, or simply preparing a family dinner, this salad adds a fun twist to traditional pasta salads. Are you curious to find out how to elevate your summer meals effortlessly? Let's dive into the details!

Why is Dill Pickle Pasta Salad a Must-Try?

Unforgettable Flavor: This Dill Pickle Pasta Salad boasts a masterful blend of creamy, tangy, and crunchy elements that tantalize your taste buds.

Quick and Easy: Ready in just 25 minutes, plus chilling time, this recipe is perfect for those busy summer days when you want deliciousness without fuss.

Perfect for Gatherings: This salad is a total crowd-pleaser, making it an ideal choice for potlucks, picnics, and family barbecues.

Versatile Substitutions: Feel free to customize the recipe with different cheeses or pasta variations, ensuring every batch suits your taste!

Make-Ahead Convenience: Whip it up a day in advance and simply chill—it's a time-saver that enhances flavors, giving you more time to relax and enjoy.

If you're looking for more delicious summer options, check out our delightful Skillet Pasta Sun or try the refreshing Avocado Egg Salad for lighter fare!

Dill Pickle Pasta Salad Ingredients

• Gather everything you need for this flavorful dish!

For the Pasta
• Elbow Pasta – Provides the bulk of the salad; cook until al dente for the best texture.

For the Dressing
• Dill Pickle Juice – Adds that tangy flavor; adjust to your liking from the jar!
• Mayonnaise – Serves as the creamy base; consider Greek yogurt for a lighter alternative.
• Sour Cream – Enhances the creaminess; you can also use Greek yogurt for fewer calories.
• Sriracha – Adds an optional spicy kick; feel free to adjust to taste.
• Salt & Black Pepper – Enhances overall flavor; season to your preference.

For the Salad Mix
• Cheddar Cheese – Offers creaminess and flavor; try Colby Jack or Pepper Jack for a twist!
• Sliced Dill Pickles – Provide a crunchy texture and strong dill flavor; sweet pickles work for a sweeter alternative.
• Fresh Dill – Elevates the dill flavor; fresh is best, but dried dill can be a substitute (use less).
• White Onion – Adds sharpness; red onion can offer a milder taste if desired.

The perfect Dill Pickle Pasta Salad ingredients are all at your fingertips, ready to create a dish that will soon become your go-to summer side!

Step‑by‑Step Instructions for Dill Pickle Pasta Salad

Step 1: Cook the Pasta
Begin by boiling a large pot of salted water. Add 8 ounces of elbow pasta and cook according to the package instructions until al dente, typically about 7-9 minutes. The pasta should be firm yet tender. Once cooked, drain it in a colander, and rinse under cold water to halt the cooking process and cool it down.

Step 2: Marinate the Pasta
After draining, return the pasta to the pot and stir in half of the dill pickle juice, ensuring it's evenly distributed. Allow the pasta to sit for 5 minutes, absorbing some of the tangy flavor. After the time has elapsed, drain the pasta completely again to remove excess liquid before proceeding.

Step 3: Prepare the Dressing
In a large mixing bowl, combine the creamy dressing ingredients: mayonnaise, sour cream, the remaining dill pickle juice, Sriracha, salt, black pepper, and fresh dill. Mix everything until you have a smooth consistency. This creamy dressing will be the flavorful base for your Dill Pickle Pasta Salad.

Step 4: Combine the Salad Ingredients
In a large serving bowl, mix the cooled pasta with diced cheddar cheese, sliced dill pickles, chopped fresh dill, and chopped white onion. Gently fold these ingredients together, ensuring they are well combined, which will enhance the overall flavor of your Dill Pickle Pasta Salad.

Step 5: Add the Dressing
Pour the prepared creamy dressing over the pasta and mix gently but thoroughly, ensuring all pieces are coated. The dressing adds a rich creaminess that binds the flavors together. Taste and adjust seasoning if needed before moving on to the chilling step.

Step 6: Chill the Salad
Cover the salad with plastic wrap or a lid and place it in the refrigerator. Let the Dill Pickle Pasta Salad chill for at least 4-6 hours, preferably overnight. Chilling allows the flavors to meld beautifully, creating a more delicious dish when served at your summer gathering.

Make Ahead Options

These Dill Pickle Pasta Salad options are perfect for busy home cooks looking to save time! You can prepare the pasta and the dressing up to 24 hours in advance. To get started, cook and cool the elbow pasta as directed, then drizzle with half the dill pickle juice and store it in an airtight container. The dressing can be mixed and refrigerated as well. On the day you're ready to serve, combine the pasta, diced cheese, sliced pickles, onions, and the creamy dressing, then chill for at least 4 hours (or overnight for optimal flavor). This meal prep strategy ensures your salad is just as delicious while giving you more time to enjoy your summer gatherings!

Dill Pickle Pasta Salad Variations

Feel free to get creative with your Dill Pickle Pasta Salad for a delightful twist that caters to your taste buds!

  • Gluten-Free: Substitute elbow pasta with gluten-free pasta for a lighter option that everyone can enjoy. You'll still savor all the creamy goodness!

  • Cheese Swap: Try substituting the cheddar cheese with feta or goat cheese for a tangy burst of flavor. It brings a unique twist that will surprise your guests!

  • Sweet Twist: Use sweet pickles instead of dill pickles for a more subtle and sweet flavor profile. This variation gives a delightful contrast that may just become your new favorite!

  • Veggie Boost: Incorporate diced bell peppers or cucumbers to add extra crunch and freshness to your salad. You’ll elevate not just taste, but also color!

  • Protein Punch: Add diced ham or cooked chicken for a hearty version that works well as a standalone meal. The protein addition turns this side into a filling dish perfect for lunch!

  • Creamy Alternative: Swap the mayonnaise and sour cream for Greek yogurt for a tangy, healthier alternative. This keeps your salad light while still being creamy!

  • Spicy Kick: If you love heat, consider mixing in some diced jalapeños or an extra dash of Sriracha to increase the spice level. It will make your salad exciting and full of vibrant flavors!

For more delightful side options, check out our refreshing Avocado Egg Salad or indulge in our savory Seafood Pasta Savory. Each recipe brings its own unique flair to your table!

Storage Tips for Dill Pickle Pasta Salad

  • Fridge: Store your Dill Pickle Pasta Salad in an airtight container in the refrigerator for up to 3 days. This keeps it fresh and flavorful for your next meal.

  • Make-Ahead: You can prepare this salad a day in advance. Just remember to add a splash of milk or extra dressing if it thickens overnight.

  • Freezer: While it’s best enjoyed fresh, you can freeze the pasta salad, but note that the texture may change. It’s best consumed within 2 months for optimal taste.

  • Reheating: If serving after freezing, thaw in the fridge overnight before gently mixing in a bit of fresh dressing to revive its creaminess.

What to Serve with Dill Pickle Pasta Salad

The perfect summertime dish pairs wonderfully with a variety of delectable sides and drinks, elevating your meal to another level.

  • Grilled Chicken: Juicy, flavorful grilled chicken complements the salad’s creamy tanginess, making for a balanced plate. The smoky char adds an extra layer of delight.

  • BBQ Ribs: The sweetness of BBQ ribs harmonizes beautifully with the tangy crunch of the pasta salad, offering a delightful contrast in flavors that everyone will love.

  • Roasted Vegetables: A medley of roasted seasonal vegetables brings a vibrant color and earthiness that pairs perfectly with the zesty pasta salad, enhancing your meal visually and flavor-wise.

  • Corn on the Cob: Sweet, buttery corn on the cob is a classic summer side that adds sweetness and a bit of crunch, creating a delicious duo with the creamy salad.

  • Watermelon Slices: Juicy watermelon bursts with freshness, providing a refreshing palate cleanser between bites of pasta salad and grilled delights.

  • Lemonade: A cold glass of homemade lemonade brings brightness to your meal with its citrusy zing, perfectly balancing the creamy richness of the dish.

  • Chocolate Chip Cookies: For dessert, soft, chewy chocolate chip cookies offer that homey sweetness that rounds off your summer feast in the most satisfying way.

Expert Tips for Dill Pickle Pasta Salad

  • Perfectly Cooked Pasta: Cook elbow pasta just until al dente to avoid mushiness; a firm texture enhances the salad's crunch.

  • Chill for Flavor: Refrigerate the salad for at least 4 hours. This waiting time allows the flavors in your Dill Pickle Pasta Salad to meld and develop wonderfully.

  • Adjust Seasonings: Customize the amount of dill pickle juice based on your tang preference. Less juice means a milder flavor, but don't compromise on the zing!

  • Mind the Mix-ins: Be cautious with salty ingredients like cheese and pickles. When substituting, balance is key to maintaining flavor harmony.

  • Storage Savvy: Prepare ahead by making the salad a day before your gathering. Keep it covered and consider adding a bit of milk or dressing if it thickens up overnight.

Dill Pickle Pasta Salad Recipe FAQs

How do I choose ripe dill pickles?
Absolutely! When selecting dill pickles, look for ones that are firm and bright in color, without any dark spots or blemishes. The brine should be clear, indicating freshness, while the pickles themselves should have a crisp texture. If you're considering sweet pickles instead, ensure they aren't overly soft or mushy.

What’s the best way to store leftovers of Dill Pickle Pasta Salad?
Very! Store your Dill Pickle Pasta Salad in an airtight container in the refrigerator for up to 3 days. This keeps it fresh and delicious! If you notice it has thickened, a splash of milk or a little extra dressing will help bring back its creamy consistency.

Can I freeze Dill Pickle Pasta Salad?
Definitely! While it's best enjoyed fresh, you can freeze your Dill Pickle Pasta Salad for up to 2 months. Just ensure it's in an airtight container to prevent freezer burn. When ready to eat, thaw it overnight in the refrigerator and consider stirring in a bit of fresh dressing to restore creaminess before serving.

What if my pasta salad turns out too salty?
Don't worry; it happens! If your salad is too salty, consider adding diced potatoes or extra cooked pasta to dilute the saltiness without impacting the flavors too much. You can also mix in extra fresh veggies like diced cucumbers or bell peppers, which can balance out the flavors beautifully.

What dietary considerations should I keep in mind?
Absolutely! When serving Dill Pickle Pasta Salad, be mindful of allergies, particularly to dairy or gluten. For those with gluten sensitivities, opt for gluten-free pasta. If preparing for anyone with dairy allergies, you can substitute the mayonnaise and sour cream with a vegan alternative, such as cashew cream or a dairy-free yogurt.

How long should I chill the pasta salad for optimal flavor?
Very! It's ideal to refrigerate the Dill Pickle Pasta Salad for at least 4-6 hours—or even overnight—before serving. This chilling time allows all the flavors to meld together beautifully, enhancing the final taste. Trust me; the wait is worth it!

Dill Pickle Pasta Salad

Dill Pickle Pasta Salad: Your New Favorite Summer Side

Enjoy a refreshing Dill Pickle Pasta Salad, perfect for summer gatherings, combining creamy textures with tangy dill pickles.
Print Recipe Pin Recipe
Prep Time 25 minutes mins
Cook Time 9 minutes mins
Chilling Time 6 hours hrs
Total Time 6 hours hrs 34 minutes mins
Servings: 6 servings
Course: Salads
Cuisine: American
Calories: 350
Ingredients Equipment Method Nutrition Notes

Ingredients
  

For the Pasta
  • 8 ounces Elbow Pasta Cook until al dente.
For the Dressing
  • 0.5 cup Dill Pickle Juice Adjust to taste.
  • 0.5 cup Mayonnaise Or Greek yogurt for a lighter alternative.
  • 0.5 cup Sour Cream Or Greek yogurt for fewer calories.
  • 1 tablespoon Sriracha Optional, adjust to taste.
  • to taste Salt
  • to taste Black Pepper
For the Salad Mix
  • 1 cup Cheddar Cheese Diced.
  • 1 cup Sliced Dill Pickles Or sweet pickles for a sweeter alternative.
  • 0.25 cup Fresh Dill Chopped; use less dried if substituting.
  • 0.5 cup White Onion Diced; red onion can be milder.

Equipment

  • Large pot
  • Colander
  • Mixing Bowl
  • Serving bowl

Method
 

Preparation
  1. Boil a large pot of salted water, add elbow pasta, and cook until al dente, about 7-9 minutes. Drain and rinse under cold water.
  2. Return pasta to pot, stir in half of the dill pickle juice, and let sit for 5 minutes. Drain excess juice.
  3. In a large mixing bowl, combine mayonnaise, sour cream, remaining dill pickle juice, Sriracha, salt, black pepper, and fresh dill. Mix until smooth.
  4. In a large serving bowl, mix cooled pasta with cheddar cheese, sliced dill pickles, fresh dill, and onion. Fold together gently.
  5. Pour dressing over the pasta mixture and mix thoroughly. Taste and adjust seasoning if needed.
  6. Cover with plastic wrap or a lid and refrigerate for at least 4-6 hours, preferably overnight.

Nutrition

Serving: 1cupCalories: 350kcalCarbohydrates: 30gProtein: 10gFat: 20gSaturated Fat: 3.5gPolyunsaturated Fat: 0.5gMonounsaturated Fat: 10gCholesterol: 15mgSodium: 600mgPotassium: 200mgFiber: 2gSugar: 2gVitamin A: 500IUVitamin C: 5mgCalcium: 150mgIron: 1mg

Notes

Best served chilled. Adjust seasoning based on personal preference. Great for potlucks and picnics.

Tried this recipe?

Let us know how it was!

Green Goddess Pasta Salad Ready in Just 20 Minutes!

January 11, 2026 by Grace Snow Leave a Comment

As I stood in my kitchen, the aroma of fresh herbs wafted through the air, transporting me to sun-drenched summer picnics. That's when I realized I needed a dish that encapsulated that vibrant essence: enter the Green Goddess Pasta Salad. This colorful creation is not just a feast for the eyes; it’s a quick and easy vegan delight that comes together in just 20 minutes! With creamy avocado bringing a rich texture and a medley of summer greens elevating each bite, this pasta salad is perfect for those busy weeknights when time is tight, but flavor is non-negotiable. Plus, it’s fully customizable with endless options for pasta and veggies, making it a versatile addition to your week’s menu. Ready to stir up some culinary magic in your kitchen?

Why is This Pasta Salad a Must-Try?

Quick Preparation: This fantastic Green Goddess Pasta Salad can be whipped up in just 20 minutes, making it an ideal solution for busy weeknight meals.

Vegan Delight: Packed with wholesome ingredients like creamy avocado and fresh herbs, it's a guilt-free indulgence you can feel good about.

Customizable: Feel free to substitute with gluten-free pasta or your favorite veggies, catering to any dietary preferences effortlessly!

Crowd-Pleaser: Whether it's a family gathering or a picnic, this salad is vibrant and appealing, sure to impress every guest at the table.

Nutrient-Rich: With healthy fats from avocado and fiber from greens, it’s not just delicious—it’s nourishing too!

Elevate your meal experience with this versatile dish, perfect when paired with Avocado Egg Salad for a hearty lunch or alongside a refreshing Jello Salad Cottage for dinner!

Green Goddess Pasta Salad Ingredients

For the Pasta
• Pasta – The base of the salad providing structure; opt for gluten-free pasta if desired.

For the Dressing
• Avocado – Adds creaminess and healthy fats; use a slightly ripe avocado to avoid browning.
• Herbs (Basil and Dill) – Provide aromatic flavor; feel free to experiment with your favorite herbs for a unique twist.
• White Wine Vinegar – Adds acidity and balance; substitute with apple cider vinegar for a different zing.
• Garlic – Enhances flavor depth; adjust the quantity to suit your taste, but 3-4 cloves are recommended.
• Nutritional Yeast – Provides umami flavor; can be omitted or swapped with miso paste or vegan parmesan for an alternative.

For the Salad Mix
• Spinach – Offers fresh greens; fresh is ideal but thawed frozen spinach works too.
• Green Onions – For garnish and a subtle onion flavor; can be replaced with shallots if preferred.

Make your Green Goddess Pasta Salad today and let this vibrant, nutrient-rich dish revitalize your dinner routine!

Step‑by‑Step Instructions for Green Goddess Pasta Salad

Step 1: Boil the Pasta
Begin by bringing a large pot of salted water to a rolling boil over high heat. Once boiling, add your choice of pasta and cook according to the package instructions, typically around 8 to 10 minutes, until al dente. Drain the pasta in a colander and set it aside to cool slightly, allowing it to retain its shape while you prepare the rest of the salad.

Step 2: Cool the Pasta
Return the drained pasta to the pot and drizzle about a tablespoon of olive oil over it to prevent sticking. Add a few ice cubes to cool it off quickly, tossing gently for even distribution. This step ensures your pasta maintains a delightful texture in the Green Goddess Pasta Salad without becoming mushy.

Step 3: Prepare the Dressing
In a blender or food processor, combine a ripe avocado, fresh herbs like basil and dill, a splash of white wine vinegar, garlic, and nutritional yeast. Blend on high until smooth, scraping down the sides as needed, which should take about 1 to 2 minutes. The dressing should be creamy and vibrant, ready to elevate your pasta salad.

Step 4: Mix the Salad
Once your pasta has cooled, transfer it to a large mixing bowl. Add fresh spinach, chickpeas, and any crunchy vegetables of your choice. Pour the creamy Green Goddess dressing over the pasta and veggies, and toss everything together gently until well combined. Each bite should be coated in that rich, herbaceous flavor.

Step 5: Garnish and Serve
Finally, slice some green onions and sprinkle them generously over the top of your Green Goddess Pasta Salad for a fresh touch. Serve immediately for the best flavor and texture, or refrigerate for about 15 minutes to allow the flavors to meld. This pasta salad can be enjoyed warm or cold, making it a versatile dish for any occasion.

What to Serve with Vegan 20 Minute Green Goddess Pasta Salad

Elevate your meal by exploring delightful pairings that enhance the flavors and bring balance to your vibrant creation.

  • Crusty Bread: Perfect for soaking up the delicious Green Goddess dressing and adds a comforting, hearty element to your meal.

  • Roasted Vegetables: A medley of seasonal veggies, such as zucchini and bell peppers, provides a sweet and savory contrast to the creamy pasta salad.

  • Chickpea Fritters: Crispy on the outside and tender inside, these offer a protein-packed addition that complements the salad’s texture beautifully.

  • Mixed Green Salad: A simple, refreshing salad with mixed greens and a light vinaigrette adds a crisp element, enhancing the overall freshness.

  • Lemonade Spritzer: A fizzy drink with the zesty kick of lemon complements the Green Goddess flavors and provides a refreshing palate cleanser.

  • Fruit Salad: Seasonal fruits like berries and melons introduce a natural sweetness, creating a perfect balance with the herbaceous notes of the salad.

  • Vegan Garlic Bread: A slice of this savory treat brings together warm flavors that harmonize wonderfully with the pasta's coolness and creaminess.

How to Store and Freeze Green Goddess Pasta Salad

Fridge: Keep your Green Goddess Pasta Salad in an airtight container for up to 3 days. To maintain freshness, press plastic wrap over the top of the salad before sealing.

Freezer: This salad is best enjoyed fresh, but if you need to freeze, store it in a freezer-safe container without the avocado dressing. It can last up to 2 months.

Reheating: When ready to enjoy after freezing, thaw overnight in the fridge, then stir in fresh dressing ingredients or a splash of olive oil to restore creaminess.

Serving Tip: If you're serving leftovers, consider topping with additional fresh herbs and green onions right before serving for a burst of flavor.

Green Goddess Pasta Salad Variations

Feel free to get creative and make this Green Goddess Pasta Salad truly your own!

  • Gluten-Free: Substitute regular pasta with gluten-free options like lentil pasta or brown rice pasta for a deliciously safe alternative.
  • Herb Twist: Experiment with fresh herbs! Swap basil and dill for cilantro or parsley to give it an entirely different flavor profile.
  • Roasted Veggies: Add some roasted veggies like bell peppers or zucchini for a delicious caramelized touch and extra texture in every bite.
  • Protein Boost: Mix in some grilled tofu or chickpeas for a heartier version that packs an extra punch of protein, making it an even more satisfying meal.
  • Nutritional Swap: If you’re not a fan of nutritional yeast, try using a sprinkle of vegan parmesan or a spoonful of tahini for that creamy umami essence.
  • Different Dressings: Switch up the dressing by mixing in a tablespoon of pesto or tahini for a unique spin that complements the greens beautifully.
  • Extra Crunch: Toss in some toasted seeds or nuts like pumpkin seeds or almonds to add an extra crunch and elevate the salad's flavor.
  • Spice it Up: For those who like a bit of heat, add a pinch of red pepper flakes or some diced jalapeños to the mix for a zesty kick!

If you love speedy meals that can be tailored to your taste, check out this Skillet Pasta Sun or invigorate your palate with Seafood Pasta Savory.

Expert Tips for Green Goddess Pasta Salad

  • Ripeness Matters: Ensure your avocado is ripe but not overly soft. A perfectly ripe avocado maintains color and texture in your Green Goddess Pasta Salad.

  • Prevent Browning: To keep leftover salad fresh, press plastic wrap directly onto the surface before sealing the container. This minimizes exposure to air and helps avoid avocado oxidation.

  • Don’t Skip Salt: Salting the pasta water enhances flavor. Adding salt elevates your dish’s overall taste, so don’t let this crucial step slip your mind!

  • Chill for Best Flavor: If you have a little time, let the salad chill in the fridge for about 15 minutes post-preparation. This allows the flavors to meld beautifully and taste even better.

  • Veggie Variety: Feel free to get creative! Substitute or add in your favorite crunchy vegetables like bell peppers or cucumbers for additional texture to the Green Goddess Pasta Salad.

Make Ahead Options

This Green Goddess Pasta Salad is a fantastic option for meal prep, saving you valuable time during your busy week! You can prepare the dressing and cook the pasta up to 24 hours in advance—just store the dressing in an airtight container to keep it fresh and vibrant. If you’re using avocado, add it just before serving to prevent browning. To maintain quality, mix the cooled pasta with your desired veggies and chickpeas just before mealtime, and pour the dressing over everything to ensure a delightful flavor burst. With these make-ahead steps, you’ll easily have a nutritious meal ready with minimal effort!

Green Goddess Pasta Salad Recipe FAQs

How do I select the right avocado for this pasta salad?
Absolutely! Choose an avocado that is slightly ripe to ensure it’s creamy yet firm enough to maintain its texture in the salad. Look for avocados that yield gently to pressure but aren’t overly soft, as this will help avoid browning and maintain that vibrant green color in your Green Goddess Pasta Salad.

How can I store leftover Green Goddess Pasta Salad?
Very! Store your Green Goddess Pasta Salad in an airtight container in the fridge for up to 3 days. To minimize browning, make sure to press plastic wrap directly onto the surface of the salad before sealing the container. This trick will help keep it fresh and delicious for your next meal.

Can I freeze Green Goddess Pasta Salad?
The more the merrier! While this pasta salad is best enjoyed fresh, you can freeze it for up to 2 months. However, make sure to omit the avocado dressing prior to freezing, as it doesn’t freeze well. Store the salad mix in a freezer-safe container, and when you’re ready to enjoy it again, thaw overnight in the fridge and stir in fresh dressing ingredients to restore creaminess.

What can I do if my pasta salad is too dry?
If you find that your Green Goddess Pasta Salad feels dry, don't worry! Simply add a splash of olive oil or a few spoonfuls of your dressing to moisten it. Toss gently to ensure that each ingredient is evenly coated, enhancing both flavor and texture.

Is this pasta salad suitable for people with nut allergies?
Absolutely! The Green Goddess Pasta Salad is nut-free, making it a great option for those with nut allergies. However, always double-check the labels on any substitute ingredients you choose, such as vegan cheeses, to ensure they don't contain nuts.

Can I make this salad ahead of time?
Yes! You can prepare the pasta salad in advance and store it in the fridge. To enhance the flavor, let it chill for about 15 minutes before serving. Just make sure to keep the dressing separate until you’re ready to enjoy, as this will help prevent the salad from becoming too soggy!

Green Goddess Pasta Salad

Green Goddess Pasta Salad Ready in Just 20 Minutes!

This Green Goddess Pasta Salad is a quick, vibrant, and customizable vegan dish that embodies the essence of summer picnics.
Print Recipe Pin Recipe
Prep Time 10 minutes mins
Cook Time 10 minutes mins
Cooling Time 5 minutes mins
Total Time 20 minutes mins
Servings: 4 servings
Course: Salads
Cuisine: American, Vegan
Calories: 300
Ingredients Equipment Method Nutrition Notes

Ingredients
  

For the Pasta
  • 8 oz Pasta Gluten-free optional
For the Dressing
  • 1 whole Avocado Slightly ripe
  • 1 cup Herbs (Basil and Dill) Fresh
  • 2 tbsp White Wine Vinegar Can substitute with apple cider vinegar
  • 3-4 cloves Garlic Adjust to taste
  • 2 tbsp Nutritional Yeast Optional; can use miso or vegan parmesan instead
For the Salad Mix
  • 4 cups Spinach Fresh or thawed frozen
  • 2 whole Green Onions For garnish

Equipment

  • Large pot
  • Colander
  • Blender
  • Mixing Bowl

Method
 

Step-by-Step Instructions
  1. Bring a large pot of salted water to a boil. Add pasta and cook according to package instructions for 8-10 minutes until al dente. Drain and set aside.
  2. Drizzle olive oil over drained pasta and add ice cubes. Toss gently to cool and prevent sticking.
  3. Blend avocado, herbs, white wine vinegar, garlic, and nutritional yeast until smooth and creamy.
  4. In a large bowl, combine cooled pasta, spinach, and any crunchy veggies. Pour the dressing over and toss gently.
  5. Slice green onions and sprinkle over the salad. Serve immediately or refrigerate for 15 minutes to meld flavors.

Nutrition

Serving: 1servingCalories: 300kcalCarbohydrates: 40gProtein: 7gFat: 14gSaturated Fat: 2gPolyunsaturated Fat: 3gMonounsaturated Fat: 8gSodium: 350mgPotassium: 600mgFiber: 8gSugar: 2gVitamin A: 3500IUVitamin C: 15mgCalcium: 50mgIron: 2mg

Notes

Perfect when paired with Avocado Egg Salad or Jello Salad Cottage for a hearty meal. Keep leftovers fresh by pressing plastic wrap on the surface before sealing the container.

Tried this recipe?

Let us know how it was!

Deviled Egg Pasta Salad That'll Brighten Your Summer Picnics

January 11, 2026 by Grace Snow Leave a Comment

As the sun begins to shine brighter and the air becomes warmer, my culinary adventures naturally shift towards light, refreshing dishes. This is where my Creamy Deviled Egg Pasta Salad comes to the rescue! It takes the beloved flavors of traditional deviled eggs and transforms them into a delightful pasta salad, making it the perfect companion for all your spring and summer gatherings. With a quick prep that lets you spend more time enjoying the company of friends and family, this creamy pasta salad is sure to impress. Plus, the added crunch from red onions and pickles gives it an irresistible texture that will have everyone reaching for seconds. Curious to know how to whip up this crowd-pleaser? Let’s dive into the recipe!

Why is Deviled Egg Pasta Salad a Must-Try?

Creamy, the blend of mayo and tangy mustard creates a luscious dressing that brings joy in every bite. Savory goodness shines through with the combination of hard-boiled eggs and the crunch of pickles, reminding you of your favorite deviled eggs. Quick prep means you can whip this up in no time, perfect for those sunny days when you want to enjoy rather than slave away in the kitchen. Versatile too—substitute ingredients as you like or pair it with grilled meats for a complete meal! And for more delicious side dish inspiration, check out this refreshing Avocado Egg Salad. This pasta salad is sure to be a hit at your next gathering!

Deviled Egg Pasta Salad Ingredients

For the Pasta
• 8 ounces small pasta (elbows or ditalini) – Provides the perfect base for your creamy salad, ensuring each bite is satisfying.

For the Dressing
• 3/4 cup mayo – Adds a rich creaminess; substitute with Greek yogurt for a lighter twist.
• 1 tablespoon pickle juice – Enhances flavor with a tangy kick that complements the salad beautifully.
• 1 tablespoon dijon mustard – Contributes a subtle sharpness; use yellow mustard for a milder taste.

For the Salad
• 6 hard-boiled eggs (peeled and diced) – The star of the show, giving your Deviled Egg Pasta Salad its traditional flavor profile.
• 1/2 cup red onion – Adds a delightful crunch and mild heat; substitute with green onions for a lighter flavor.
• 1/3 cup chopped pickles – Provides the necessary crunch and tang; sweet or dill pickles work wonderfully.
• 1 teaspoon garlic powder – Boosts overall seasoning to elevate the flavor experience.
• 1/2 teaspoon paprika – Enhances warmth and color; sprinkle before serving for that perfect finishing touch.
• Salt and pepper – Essential for balancing all the flavors and enhancing the overall taste.
• Green onions (sliced, for serving) – Adds a fresh and vibrant garnish just before serving.

Feel free to gather these ingredients, and let’s create a delightful Deviled Egg Pasta Salad that will brighten up your summer picnics!

Step‑by‑Step Instructions for Deviled Egg Pasta Salad

Step 1: Cook the Pasta
Begin by bringing a large pot of salted water to a boil. Add the 8 ounces of small pasta—elbows or ditalini—and cook according to the package instructions until al dente, about 8–10 minutes. Once cooked, drain the pasta in a colander and rinse it under cold water until cool to the touch. This step stops the cooking process, ensuring your Deviled Egg Pasta Salad has the perfect texture.

Step 2: Prepare the Dressing
In a large mixing bowl, combine 3/4 cup mayo, 1 tablespoon pickle juice, and 1 tablespoon dijon mustard. Whisk these ingredients together until smooth and creamy. The dressing should be well-blended and luscious, setting the stage for the rich flavors of your deviled egg-inspired salad. Taste and adjust with salt and pepper as needed, creating a base that harmonizes all new ingredients to come.

Step 3: Assemble the Salad
To the bowl with your prepared dressing, add the cooled pasta, 6 diced hard-boiled eggs, 1/2 cup finely chopped red onion, and 1/3 cup chopped pickles. Sprinkle in 1 teaspoon garlic powder and 1/2 teaspoon paprika for that essential flavor. Gently toss everything together, ensuring the pasta and eggs are evenly coated with the flavorful dressing. The mixture should be colorful and inviting, reflecting the deliciousness that awaits.

Step 4: Chill the Salad
Cover the bowl with plastic wrap or transfer the salad to an airtight container. Place it in the refrigerator to chill for at least 30 minutes. This resting period allows the flavors of your Deviled Egg Pasta Salad to meld beautifully, enhancing the overall taste. Take this time to relax while you anticipate the delightful dish you’ll soon enjoy!

Step 5: Finish & Serve
Just before serving, remove the Deviled Egg Pasta Salad from the refrigerator. Give it a gentle stir and taste again, adjusting any seasonings if necessary. To elevate the dish visually, sprinkle with additional paprika and garnish with sliced green onions. Serve chilled at your spring or summer gatherings, inviting friends and family to savor the creamy, savory delight of this pasta salad.

Deviled Egg Pasta Salad Variations

Feel free to customize this dish to match your flavor preferences and dietary needs!

  • Whole Wheat: Substitute elbow pasta with whole wheat for a heartier option, adding a nutty flavor to your salad.
  • Gluten-Free: Use gluten-free pasta to make this dish accessible to everyone at your summer gatherings, ensuring all can delight in this creamy goodness.
  • Extra Crunch: Add diced celery or bell peppers for a refreshing crunch, boosting the salad's appeal and adding vibrant color.
  • Bacon Crush: Incorporate crumbled bacon for an irresistible smoky twist that pairs beautifully with the creamy dressing.
  • Herbaceous Flavors: Mix in fresh dill or parsley to infuse a delightful herb flavor into the salad and elevate each bite with freshness.
  • Spicy Kick: Add jalapeños or a dash of cayenne pepper to introduce some heat, making your pasta salad a vibrant choice for those who love a little spice.
  • Fruitiness: Toss in chopped apples or grapes for a sweet surprise that balances the savory elements of the dish, creating a unique flavor profile.
  • Creamy Avocado: Blend in diced avocado for an even greener, creamier texture that adds a rich, buttery flavor to your salad.

These variations make it easy to tailor the dish to your gathering's needs. And if you’re looking for more delightful salads, consider trying this refreshing Tofu Caesar Salad, or how about combining flavors with this delicious Jello Salad Cottage? Enjoy being the culinary star of your summer picnics!

Storage Tips for Deviled Egg Pasta Salad

  • Fridge: Store your Deviled Egg Pasta Salad in an airtight container for up to 3-4 days. This helps maintain its creamy texture and fresh flavors.

  • Serving: When ready to serve, give the salad a good stir and adjust any seasonings if necessary. The flavors will meld beautifully after chilling, making it even tastier!

  • Avoid Freezing: Do not freeze the pasta salad, as the ingredients won’t retain their texture once thawed, compromising the delightful experience.

  • Make-Ahead: Prepare the salad a day in advance for optimal convenience; just ensure it’s well-covered in the fridge to keep it fresh!

Make Ahead Options

These Deviled Egg Pasta Salad are perfect for meal prep, allowing you to focus more on enjoying your time with family and friends. You can prepare the salad up to 3 days in advance, making it an ideal side for spontaneous gatherings. Simply cook the pasta and mix all ingredients, but avoid adding garnishes like green onions or paprika until you’re ready to serve, ensuring they retain their fresh flavor and vibrant appearance. Store the salad in an airtight container in the refrigerator to keep it just as delicious until serving. When it’s time to enjoy, give it a gentle stir, garnish, and you’ll be ready to impress without the last-minute rush!

Expert Tips for Deviled Egg Pasta Salad

  • Cooling the Pasta: Rinse the cooked pasta under cold water immediately after draining. This stops the cooking process and prevents a mushy texture in your Deviled Egg Pasta Salad.

  • Adjusting Creaminess: Feel free to modify the mayo amount based on your taste preferences! A touch more mayo will yield an even creamier dressing, enhancing the flavor of the salad.

  • Serving Freshness: It’s best to serve the pasta salad chilled, so prepare it ahead of time! Just don’t forget to give it a quick stir and taste just before serving to adjust the seasoning.

  • Ingredient Substitutions: If you’re looking for more crunch, consider adding diced celery or bell peppers. These add freshness, elevating the overall appeal of your Deviled Egg Pasta Salad.

  • Avoid Freezing: Remember that freezing is a no-go! The salad's texture won’t hold up well, so enjoy fresh for the best experience.

What to Serve with Deviled Egg Pasta Salad

As the sun shines and gatherings abound, pairing this delightful pasta salad elevates your meal to new heights.

  • Grilled Chicken: Juicy, herb-marinated chicken adds a satisfying heartiness that complements the creamy pasta salad perfectly.
  • Broccoli Salad: A fresh, crunchy broccoli salad with a tangy dressing offers a vibrant contrast and brings a zesty flair to your table.
  • Corn on the Cob: Sweet and tender corn on the cob, slathered in butter, adds a delightful summer feel that harmonizes beautifully.
  • Fruit Salad: A refreshing fruit salad brings bright, natural sweetness to the mix, balancing the rich flavors of the pasta salad wonderfully.
  • Crisp Lettuce Wraps: Light and refreshing, lettuce wraps filled with grilled shrimp or tofu provide a fun, crunchy element to your spread.
  • Lemonade or Iced Tea: Quench your thirst with homemade lemonade or iced tea; their citrusy tang and refreshing nature perfectly complement the creamy dish.
  • Chocolate Chip Cookies: End the meal on a sweet note with classic chocolate chip cookies; their warm, gooey texture is always a crowd-pleaser.
  • Potato Chips: Serve alongside a bowl of salty potato chips for that extra crunch and playful contrast to the creamy salad.
  • Caprese Skewers: Fresh mozzarella, basil, and cherry tomatoes on skewers deliver a burst of color, showcasing seasonal ingredients beautifully.

Deviled Egg Pasta Salad Recipe FAQs

What type of pasta is best for Deviled Egg Pasta Salad?
When it comes to pasta for this dish, I recommend small pasta shapes like elbows or ditalini. They catch the creamy dressing perfectly and allow for satisfying bites. You can also try whole wheat or gluten-free pasta for a different twist!

How should I store leftover Deviled Egg Pasta Salad?
Absolutely! Store your Deviled Egg Pasta Salad in an airtight container in the refrigerator for up to 3-4 days. This will help maintain its creamy texture and fresh flavors, ensuring you can enjoy it later. Just give it a stir and maybe adjust seasonings before serving again!

Can I freeze Deviled Egg Pasta Salad?
I advise against freezing this salad. The ingredients, especially the mayonnaise and eggs, won’t hold up well once thawed, leading to a less appetizing texture. Enjoy it fresh for the best taste and quality!

How can I tell if my hard-boiled eggs are fresh?
Freshness is crucial! To check if your eggs are fresh, fill a bowl with water and gently place the eggs inside. If they sink and lay flat on the bottom, they’re fresh. If they stand upright or float, it’s best to discard them. Always use the freshest eggs for your Deviled Egg Pasta Salad to achieve the best flavor.

Can I make the Deviled Egg Pasta Salad ahead of time?
Definitely! You can prepare the salad a day in advance; just store it in an airtight container in the fridge. The flavors will meld beautifully, making it even more delicious the next day. Just remember to stir it well and give it a quick taste to see if any seasonings need adjusting before serving!

Deviled Egg Pasta Salad

Deviled Egg Pasta Salad That'll Brighten Your Summer Picnics

A refreshing Deviled Egg Pasta Salad that combines the flavors of traditional deviled eggs, perfect for summer picnics.
Print Recipe Pin Recipe
Prep Time 15 minutes mins
Cook Time 10 minutes mins
Chill Time 30 minutes mins
Total Time 55 minutes mins
Servings: 6 servings
Course: Salads
Cuisine: American
Calories: 300
Ingredients Equipment Method Nutrition Notes

Ingredients
  

For the Pasta
  • 8 ounces small pasta (elbows or ditalini) Provides the perfect base for the creamy salad.
For the Dressing
  • 3/4 cup mayo Adds a rich creaminess.
  • 1 tablespoon pickle juice Enhances flavor with a tangy kick.
  • 1 tablespoon dijon mustard Contributes a subtle sharpness.
For the Salad
  • 6 pieces hard-boiled eggs (peeled and diced) The star ingredient.
  • 1/2 cup red onion Adds a delightful crunch.
  • 1/3 cup chopped pickles Provides necessary crunch and tang.
  • 1 teaspoon garlic powder Boosts overall seasoning.
  • 1/2 teaspoon paprika Enhances warmth and color.
  • Salt Essential for flavor.
  • Pepper Essential for flavor.
  • Green onions (sliced, for serving) Adds fresh garnish before serving.

Equipment

  • Large pot
  • Mixing Bowl
  • Colander

Method
 

Step-by-Step Instructions
  1. Cook the pasta in a large pot of salted boiling water for 8-10 minutes until al dente, then drain and rinse under cold water.
  2. Prepare the dressing by whisking together mayo, pickle juice, and dijon mustard until smooth and creamy.
  3. Assemble the salad by adding the cooled pasta, diced eggs, red onion, chopped pickles, garlic powder, and paprika to the dressing. Toss gently.
  4. Chill the salad in the refrigerator for at least 30 minutes.
  5. Finish and serve the salad by stirring, adjusting seasonings, garnishing with paprika and green onions, then serving chilled.

Nutrition

Serving: 1servingCalories: 300kcalCarbohydrates: 28gProtein: 10gFat: 18gSaturated Fat: 3gPolyunsaturated Fat: 0.5gMonounsaturated Fat: 5gCholesterol: 200mgSodium: 500mgPotassium: 300mgFiber: 2gSugar: 2gVitamin A: 500IUVitamin C: 2mgCalcium: 30mgIron: 1mg

Notes

Adjust mayo and seasoning to your preference. The salad tastes best when chilled for at least 30 minutes before serving.

Tried this recipe?

Let us know how it was!

Refreshing Strawberry Cucumber Salad: A Summer Delight

January 7, 2026 by Grace Snow Leave a Comment

As I stood in my kitchen, the warm sun streaming through the window, I couldn’t help but marvel at the vibrant colors of the fresh produce on my counter. This is the perfect moment to whip up a quick and easy Strawberry Cucumber Salad, a dish that brilliantly captures the essence of summer in every bite. With just 20 minutes to spare, you can create this refreshing side that strikes a delightful balance between the sweetness of ripe strawberries and the crunch of crisp cucumbers. It’s not just a treat for the senses; it’s also gluten-free and vegetarian, making it a versatile choice for any meal. Picture it paired alongside grilled meats or enjoyed as a light lunch all on its own. Ready to dive in and elevate your summer dining experience? Let’s get started!

Why is This Salad So Refreshing?

Quick and Easy: In just 20 minutes, you’ll have a vibrant salad ready to impress your guests.

Flavor Explosion: The sweet strawberries combined with crunchy cucumbers and herby mint bring a delightful balance that will awaken your taste buds.

Versatile Pairing: This salad is perfect alongside grilled chicken or shrimps, or even as a standalone lunch like our Avocado Egg Salad.

Health Benefits: Gluten-free and packed with Vitamin C, it’s a guilt-free indulgence that actually boosts your health!

Make Ahead Option: Prepare ingredients in advance for a fast assembly, making it a convenient choice for busy days.

Elevate your summer meals with this salad—it's a guaranteed crowd-pleaser!

Strawberry Cucumber Salad Ingredients

• Fresh, colorful ingredients create a deliciously vibrant dish.

For the Salad

  • Chopped Strawberries – Choose ripe berries for natural sweetness and vibrant color.
  • Chopped Cucumbers – Opt for Persian or mini cucumbers for a crispy texture.
  • Crumbled Feta Cheese – Use high-quality sheep's feta for a creamy, tangy kick.
  • Fresh Basil – Aromatic herbs bring an earthy note; slice them to release their flavor.
  • Fresh Mint – A refreshing element; tear the leaves just before serving.
  • Salt + Pepper – Essential for enhancing and balancing the flavors.

For the Dressing

  • Olive Oil – Rich base for the dressing, adding smoothness and depth.
  • Lemon Juice – Brightens the salad with a zesty acidity that complements the sweetness.
  • Honey – Incorporate a touch of sweetness; substitute with maple syrup for a vegan option.
  • White Wine Vinegar – Provides a tangy punch; apple cider vinegar works as a substitute.
  • Garlic Powder – Infuses depth into the dressing for a more complex flavor profile.

Incorporate these ingredients for a delightful Strawberry Cucumber Salad that is both refreshing and satisfying!

Step‑by‑Step Instructions for Strawberry Cucumber Salad

Step 1: Prepare the Dressing
In a small bowl or jar, combine ¼ cup of olive oil, the juice of one lemon, 2 tablespoons of honey, 1 tablespoon of white wine vinegar, and ½ teaspoon of garlic powder. Season with a pinch of salt and pepper. Whisk vigorously or seal the jar and shake until well combined, about 30 seconds. The dressing should have a smooth and creamy texture, ready to enhance your Strawberry Cucumber Salad.

Step 2: Chop the Ingredients
In the meantime, take 2 cups of chopped strawberries and 2 cups of chopped cucumbers and place them in a large mixing bowl. Use ripe strawberries for maximum sweetness and opt for Persian cucumbers for their delightful crunch. Ensure that the strawberries are roughly the same size as the cucumber pieces for an even distribution of flavors in your refreshing salad.

Step 3: Incorporate the Herbs and Cheese
Next, gently fold in ½ cup of crumbled feta cheese, ¼ cup of freshly chopped basil, and ¼ cup of freshly torn mint leaves into the bowl with strawberries and cucumbers. Use a spatula to incorporate these ingredients with care, preserving the integrity of the soft strawberries and feta while evenly distributing their fragrant and flavorful essence throughout your Strawberry Cucumber Salad.

Step 4: Combine the Salad and Dressing
Now it’s time to bring it all together! Drizzle the prepared dressing over the salad mixture and toss everything gently, ensuring each piece is coated without breaking the ingredients apart. This should take about a minute to achieve a beautiful blend of colors and flavors in your Strawberry Cucumber Salad. The vivid hues of the salad will make it truly tempting!

Step 5: Taste and Adjust Seasonings
Before serving, taste the salad and adjust the seasonings as needed. Add more salt, pepper, or a drizzle of honey to enhance the flavor profile. Allow the salad to sit for about 5 minutes to allow the flavors to marry together, making the Strawberry Cucumber Salad even more delicious.

Step 6: Serve Immediately
Transfer your vibrant Strawberry Cucumber Salad to a serving dish and enjoy it immediately. This delightful salad pairs beautifully with grilled meats or stands alone as a light, refreshing lunch. For the best flavor and texture, it's best to serve it fresh, ensuring that the crispy cucumbers and juicy strawberries shine through.

Strawberry Cucumber Salad Variations

Feel free to adapt this salad recipe to suit your taste buds and dietary needs—let your creativity shine!

  • Vegan Option: Substitute feta with a plant-based alternative for a creamy texture that fits your vegan lifestyle. Enjoy the same delightful flavors with a fresh twist!
  • Sweetness Swap: Replace honey in the dressing with maple syrup for a vegan-friendly alternative. It adds a unique depth of flavor while keeping that delightful sweetness.
  • Herb Variations: Switch up the herbs by using fresh cilantro or dill for an exciting flavor twist. Each herb brings its own character, inspiring a whole new salad experience!
  • Nutty Crunch: Add toasted pecans or almonds on top for an earthy crunch that enhances the texture and provides a satisfying contrast to the soft strawberries.
  • Zesty Kick: Incorporate diced jalapeño for a mild kick of heat. It balances the sweetness beautifully and adds a refreshing surprise to every bite!
  • Fruit Medley: Mix in diced kiwi or mango for an unexpectedly fruity twist. The diverse flavors will create a delicious fusion that's sure to impress!
  • Spicy Feta: Opt for a spicy feta cheese to lend an exciting edge to your dressing. The creaminess paired with a hint of heat will elevate your salad to new levels!
  • Serving Style: Turn this salad into a wrap by using large lettuce leaves as a base. It’s perfect for a fresh, portable meal, ideal for picnics or packed lunches!

Explore these variations and enjoy your Strawberry Cucumber Salad in a whole new light. If you're looking for more delicious dishes to complement your summer meals, check out our refreshing German Potato Salad or try the vibrant Balsamic Steak Salad for a delightful main course!

Storage Tips for Strawberry Cucumber Salad

  • Fridge: Store leftover Strawberry Cucumber Salad in an airtight container in the fridge for up to 1 day. It’s best enjoyed fresh, as the cucumbers may become soggy over time.

  • Dressing Separation: If you prepare the salad in advance, keep the dressing separate until ready to serve. This prevents sogginess and preserves the crunchy texture of the cucumbers.

  • Room Temperature: The salad may sit at room temperature for up to 2 hours during serving; after that, it’s best to refrigerate any leftovers to ensure freshness.

  • Reheating: There’s no need to reheat this salad as it’s served cold. Prioritize enjoying it fresh for the most delightful experience!

Expert Tips for Strawberry Cucumber Salad

  • Quality Ingredients: Use ripe, in-season strawberries for the sweetest flavor. Fresh produce elevates your Strawberry Cucumber Salad to something extraordinary.

  • Crunchy Texture: Opt for Persian or mini cucumbers, which provide the perfect crispiness. Avoid larger cucumbers, as they can be watery and less flavorful.

  • Mind the Herbs: Add chopped basil and mint just before serving to maintain their vibrant color and fresh taste. Adding them too early can lead to browning.

  • Dressing Separation: If you're prepping ahead, store the dressing separately from the salad. This keeps the cucumbers from getting soggy and maintains a fresh crunch.

  • Feel Free to Experiment: Don't hesitate to try different cheeses or herbs! Vegan alternatives can spark creativity, allowing you to make a truly customized Strawberry Cucumber Salad.

Make Ahead Options

These Strawberry Cucumber Salad components are perfect for meal prep, allowing you to save precious time on busy weeknights! You can chop the strawberries and cucumbers up to 24 hours in advance and store them separately in airtight containers to maintain their freshness and crunch. Additionally, prepare the honey lemon dressing a day ahead, refrigerating it until you're ready to serve to prevent the fruits from becoming soggy. When it's time to enjoy your refreshing Strawberry Cucumber Salad, simply combine the prepped ingredients, sprinkle in the crumbled feta and fresh herbs, toss with the dressing, and savor the vibrant flavors—all without the last-minute rush!

What to Serve with Strawberry Cucumber Salad

This vibrant salad is a delightful accompaniment that can elevate any meal, providing fresh and colorful flavors.

  • Grilled Chicken: Juicy grilled chicken offers a hearty contrast to the lightness of the salad, making for a balanced summer meal.
  • Shrimp Skewers: The slight sweetness of grilled shrimp complements the strawberries, while the savory notes add depth to the overall dining experience.
  • Quinoa Salad: A protein-packed quinoa salad mixed with fresh veggies can create a satisfying vegetarian option, pairing beautifully with the refreshing tastes of the cucumber salad.
  • Lemon Herb Rice: Light and zesty, this rice dish mirrors the salad's freshness, enhancing the meal with a touch of brightness.
  • Creamy Potato Salad: The rich creamy texture of traditional potato salad provides a lovely contrast to the crisp elements of the strawberry cucumber salad.
  • Rosemary Grilled Pork: The aromatic qualities of rosemary-infused pork harmonize perfectly with the vibrant flavors of the salad, creating a memorable dish.
  • Iced Green Tea: Serve with a refreshing glass of iced green tea to cleanse the palate and offer a refreshing finish to your meal.
  • Frozen Yogurt: A scoop of tangy frozen yogurt makes for a delightful dessert that mirrors the sweetness of the strawberries, leaving a light ending to your dining experience.

Strawberry Cucumber Salad Recipe FAQs

What should I look for when selecting strawberries?
When choosing strawberries, look for berries that are bright red all around, firm to the touch, and free from dark spots or mold. Ripe strawberries should have a sweet fragrance and should be slightly soft but not mushy. Ideally, buy them in season for the best flavor!

How should I store leftover Strawberry Cucumber Salad?
Store any leftover Strawberry Cucumber Salad in an airtight container in the fridge for up to 1 day. It's best enjoyed fresh, as the cucumbers may become soggy over time. To extend freshness, keep the dressing separate until you're ready to serve.

Can I freeze the Strawberry Cucumber Salad?
Freezing is not recommended for this salad due to the high water content of cucumbers and strawberries, which may turn mushy once thawed. Instead, enjoy it fresh! If you have excess herbs, consider freezing them in ice cube trays mixed with a little olive oil for later use.

What dietary considerations should I keep in mind?
This Strawberry Cucumber Salad is gluten-free and vegetarian, making it suitable for many diets. If you're aiming for a vegan option, simply replace the honey with maple syrup. Also, if you have allergies or dietary restrictions, please ensure that the feta cheese is safe for your needs or substitute it with a dairy-free alternative.

How can I prevent my cucumbers from becoming soggy?
To keep cucumbers crisp, store them in a separate container, uncut, until just before you're ready to serve. You can also peel them for a less watery texture, or sprinkle salt over cut cucumbers and let them drain for about 30 minutes before mixing them into the salad. This draws out excess moisture!

Strawberry Cucumber Salad

Refreshing Strawberry Cucumber Salad: A Summer Delight

A vibrant Strawberry Cucumber Salad that captures summer's essence, perfect as a light side or stand-alone lunch. Gluten-free and vegetarian.
Print Recipe Pin Recipe
Prep Time 20 minutes mins
Total Time 20 minutes mins
Servings: 4 servings
Course: Salads
Cuisine: American
Calories: 150
Ingredients Equipment Method Nutrition Notes

Ingredients
  

For the Salad
  • 2 cups chopped strawberries Use ripe berries for natural sweetness.
  • 2 cups chopped cucumbers Opt for Persian or mini cucumbers.
  • ½ cup crumbled feta cheese Use high-quality sheep's feta.
  • ¼ cup fresh basil Chopped.
  • ¼ cup fresh mint Torn leaves.
  • to taste salt
  • to taste pepper
For the Dressing
  • ¼ cup olive oil Rich base for the dressing.
  • 1 each lemon Juiced.
  • 2 tablespoons honey Substitute with maple syrup for vegan option.
  • 1 tablespoon white wine vinegar Apple cider vinegar may be used.
  • ½ teaspoon garlic powder

Equipment

  • Mixing Bowl
  • small bowl or jar
  • Whisk
  • Spatula

Method
 

Step-by-Step Instructions
  1. In a small bowl or jar, combine the dressing ingredients: olive oil, lemon juice, honey, white wine vinegar, and garlic powder. Whisk until well combined.
  2. In a large mixing bowl, add the chopped strawberries and cucumbers.
  3. Gently fold in the crumbled feta cheese, chopped basil, and torn mint leaves.
  4. Drizzle the prepared dressing over the salad mixture and toss gently to coat.
  5. Taste the salad and adjust the seasonings if needed. Allow it to sit for 5 minutes before serving.
  6. Transfer to a serving dish and enjoy immediately.

Nutrition

Serving: 1cupCalories: 150kcalCarbohydrates: 12gProtein: 3gFat: 10gSaturated Fat: 2gPolyunsaturated Fat: 1gMonounsaturated Fat: 7gCholesterol: 5mgSodium: 200mgPotassium: 250mgFiber: 2gSugar: 5gVitamin A: 100IUVitamin C: 30mgCalcium: 150mgIron: 1mg

Notes

For the best flavor, serve fresh. Store leftovers in an airtight container for up to 1 day.

Tried this recipe?

Let us know how it was!

Crunchy Green Cabbage Cucumber Salad for a Refreshing Meal

January 7, 2026 by Grace Snow Leave a Comment

As I stood in my kitchen the other day, the vibrant colors of fresh vegetables caught my eye, sparking an idea for a dish that embodies simplicity and flavor: Easy Green Cabbage Cucumber Salad. This refreshing side dish is not only a perfect companion for summer barbecues and potlucks, but it’s also incredibly quick to prepare—ideal for those busy weeknights when you crave something bright and healthy without the fuss. Imagine the satisfying crunch of green cabbage paired with cool, crisp cucumbers and a dash of fresh dill, all coated in a tangy dressing. Plus, this salad is make-ahead friendly, allowing you to whip it up in advance and store it in the fridge for a hassle-free addition to any meal. Ready to elevate your salad game? Let’s dive into this deliciously easy recipe!

Why Is This Salad So Refreshing?

Crunchy textures: Delight in the crispy combination of green cabbage and cool cucumbers that create a vibrant crunch in every bite.
Versatile dish: This salad shines as a potluck favorite, pairing nicely with grilled meats or as a refreshing side to elevate any meal.
Make-ahead convenience: Prepare it ahead of time, allowing the flavors to meld beautifully, providing you with a hassle-free side on busy days.
Nutritional powerhouse: Packed with vitamins C and K, this salad is not only delicious but also a healthy addition to your repertoire.
Simple ingredients: With fresh, accessible ingredients, you can whip up a tasty dish like this German Potato Salad just as easily!
Quick preparation: Ready in no time, you can enjoy this salad without spending hours in the kitchen.

Green Cabbage Cucumber Salad Ingredients

For the Salad

  • Green Cabbage – Offers a crunchy base; select fresh heads without any wilted leaves for the best texture.
  • Cucumbers – Brings crispness and lightness; both standard and English cucumbers work wonderfully.
  • Green Onions – Adds a mild onion flavor and vibrant color; red onions can be used for a more pronounced taste.
  • Fresh Dill – Imparts a fragrant herbal note; if unavailable, parsley can substitute, or you can skip it for a simpler profile.

For the Dressing

  • Sunflower Oil – Provides a rich base for the dressing; feel free to use olive oil for a different flavor twist.
  • Distilled White Vinegar – Adds essential acidity to balance the flavors; apple cider vinegar is a lovely alternative for a milder kick.
  • Fine Salt – Enhances all the flavors; adjust to personal taste for a perfect seasoning.
  • Ground Black Pepper – Introduces subtle heat; freshly ground pepper will elevate the flavor even more.

Step‑by‑Step Instructions for Easy Green Cabbage Cucumber Salad

Step 1: Prepare the Dressing
In a measuring cup, whisk together ½ cup of sunflower oil, ¼ cup of distilled white vinegar, 1 teaspoon of fine salt, and ½ teaspoon of ground black pepper. Allow the mixture to sit for about 5 minutes so the salt can dissolve completely, while the flavors start to meld. This dressing will enhance the overall taste of your Green Cabbage Cucumber Salad.

Step 2: Wash and Dry Veggies
Rinse the green cabbage and cucumbers thoroughly under cold water, then pat them dry with a clean kitchen towel or paper towels. This step is crucial to ensure that your vegetables remain crisp and don’t dilute the dressing. You can place them aside momentarily as you prepare the other ingredients of the salad.

Step 3: Shred the Cabbage
Remove the outer leaves of the green cabbage and cut it into quarters. Using a mandolin or a sharp knife, shred the cabbage into thin strips, placing them into a large mixing bowl. Aim for a uniform size for an even texture throughout your Easy Green Cabbage Cucumber Salad, which will make it more visually appealing and enjoyable to eat.

Step 4: Slice the Cucumbers
Take the cucumbers and halve them lengthwise. Then, slice each half into thin, half-moon shapes. This will add beautiful shapes and textures to the salad. Combine the sliced cucumbers with the shredded cabbage in the mixing bowl and marvel at the fresh colors as they come together.

Step 5: Chop the Aromatics
Finely chop the green onions and fresh dill to release their robust flavors. Add these aromatic ingredients directly into the mixing bowl with the cabbage and cucumbers. These herbs provide a wonderful contrast to the crunch of the cabbage and cucumbers while adding a delightful freshness that makes this salad shine.

Step 6: Combine the Salad
Pour the prepared dressing over the mixed vegetables in the bowl. Using salad tongs or two large spoons, gently toss everything together until all the vegetables are well-coated in the dressing. Take a moment to enjoy the vibrant colors and aromas of your Easy Green Cabbage Cucumber Salad coming together beautifully.

Step 7: Chill and Serve
You can serve the salad immediately for a fresh, crunchy experience, or refrigerate it for 1-2 hours. Allowing it to chill helps the flavors meld and the cabbage to soften slightly. If serving later, give it a good stir and taste; you might want to add a pinch more salt or pepper before enjoying this refreshing side dish!

Make Ahead Options

These Easy Green Cabbage Cucumber Salad preparations are perfect for meal prep enthusiasts! You can shred the cabbage and slice the cucumbers up to 24 hours in advance. Store them in an airtight container in the refrigerator to maintain their crispness. Additionally, you can prepare the dressing a day ahead and refrigerate it separately; this not only saves time but allows the flavors to meld beautifully. When you're ready to serve, simply combine the prepped vegetables, add the dressing, and toss gently. This way, you’ll have a refreshing side dish ready to impress with minimal last-minute effort—just as delicious as if made fresh!

How to Store and Freeze Green Cabbage Cucumber Salad

Fridge: Store your Green Cabbage Cucumber Salad in an airtight container for up to 2-3 days. This helps maintain freshness and texture, but seasoning may need adjustment before serving.

Make-Ahead: You can prepare the salad a day in advance. Ensure it's tightly covered in the refrigerator, which allows the flavors to develop, making it even more delicious.

Freezer: While it's not recommended to freeze the salad due to the high water content in cucumbers, any cabbage leftovers can be frozen for later use in cooked dishes, lasting about 3 months.

Reheating: If you’ve frozen cabbage, thaw it in the fridge overnight. Use it in stir-fries or soups for a quick and healthy meal. Avoid reheating the salad directly, as it’s best enjoyed cold.

Expert Tips for Green Cabbage Cucumber Salad

  • Uniform Shreds: Use a mandolin slicer for evenly shredded cabbage. This ensures a consistent texture, making your Green Cabbage Cucumber Salad delightful in every bite.

  • Chill Before Serving: Refrigerate the salad for about 1-2 hours before enjoying. This lets the flavors marry beautifully and improves the overall taste.

  • Taste and Adjust: After refrigeration, always taste the salad again before serving. You may need to adjust the seasoning, as flavors can intensify over time.

  • Fresh Ingredients: Select the freshest vegetables possible to enhance the crunch and flavor. Wilted or old vegetables can lead to a less appealing salad.

  • Vinegar Variations: Feel free to experiment with different types of vinegar. Apple cider vinegar provides a milder taste compared to distilled, adding a unique twist to your dressing.

Green Cabbage Cucumber Salad Variations

Feel free to explore these exciting twists that can elevate your Green Cabbage Cucumber Salad into something uniquely yours!

  • Kale Twist: Substitute half the cabbage for kale for added nutrients and a heartier texture. The kale adds a lovely earthy flavor to each bite, seamlessly blending with the crisp cucumbers.

  • Carrot Sweetness: Add shredded carrots to the mix for a pop of color and subtle sweetness. This adds a delightful crunch that complements the cabbage beautifully without overwhelming the existing flavors.

  • Bell Pepper Crunch: Incorporate sliced bell peppers for an extra crunch and vibrant colors in your salad. Their natural sweetness and variety of textures make this salad even more appealing.

  • Spicy Kick: For those who love heat, toss in some diced jalapeños or a sprinkle of red pepper flakes. The spicy notes contrast nicely with the cool cucumbers, creating a dynamic flavor profile.

  • Creamy Edition: For a richer salad, blend in a dollop of Greek yogurt into the dressing. This adds creaminess while maintaining the salad's refreshing appeal, making each morsel a delightful experience.

  • Herb Medley: Mix additional herbs like parsley or cilantro for a fresh flavor boost. Experimenting with different herbs can transform this simple salad into a fragrant delight that captivates your senses.

  • Asian Flair: Drizzle with a soy sauce or sesame oil dressing instead of the traditional vinaigrette. This twist creates an exciting flavor fusion, perfect for serving alongside Asian-inspired dishes.

  • Pickled Veggies: Add some pickled radishes or cucumbers for a tangy twist. The acidity of the pickles gives your salad a surprising zing that brightens every bite, making it irresistible!

Whether you're pairing this salad with grilled meats or simply enjoying it on its own, enhancing it with these variations can transform your experience into something truly memorable. If you're in the mood for more flavorful salads, why not try a Chicken Salad with Apples or a delightful Buffalo Tofu with Caesar Salad?

What to Serve with Easy Green Cabbage Cucumber Salad

Imagine a delightful spread unfolding, where light, bright flavors dance on your palate alongside this vibrant salad.

  • Grilled Chicken Skewers: Tender and juicy, they add a smoky element that complements the crisp salad beautifully. The flavors meld perfectly with the freshness of the vegetables.

  • Herbed Quinoa: This nutty side provides protein and a delightful texture that harmonizes with the crunchy salad. Consider tossing in some extra herbs for a burst of flavor!

  • Roasted Sweet Potatoes: Their sweet, earthy notes play off the tanginess of the salad, creating a satisfying balance on your plate. The contrasting textures make each bite a joy.

  • Balsamic Glazed Vegetables: Rich and caramelized, these vegetables add depth to your meal while still keeping it light. Their sweetness pairs wonderfully with the freshness of the salad.

  • Light White Wine: A chilled glass of Sauvignon Blanc or Pinot Grigio offers a refreshing zing that elevates your dining experience. Its crisp acidity balances the salad’s flavors brilliantly.

  • Lemon Sorbet: A light and refreshing dessert, it serves as a palate cleanser after a meal, leaving a lingering brightness that echoes the salad’s crispness. Enjoy it on a warm evening for an extra treat!

Green Cabbage Cucumber Salad Recipe FAQs

How do I choose the right green cabbage?
Absolutely! When selecting green cabbage for your salad, look for heads that feel heavy for their size and have tightly packed leaves without any dark spots or wilted outer leaves. Opting for a bright green head ensures optimal crunch and freshness.

How should I store the Green Cabbage Cucumber Salad?
You can store your salad in an airtight container in the refrigerator for up to 2-3 days. This keeps it fresh, but remember to check the seasoning before serving as it may require a pinch more salt or pepper after refrigeration.

Can I freeze the Green Cabbage Cucumber Salad?
Not really! Freezing this salad isn't recommended because cucumbers have high water content which can make them mushy when thawed. However, if you have leftover shredded cabbage, it can be frozen for up to 3 months. Just make sure it's tightly wrapped in freezer-friendly packaging.

What should I do if the salad tastes too acidic?
Very! If you find the salad too tangy, it’s an easy fix. Add a teaspoon of sugar or honey to the mixture, which balances the acidity, or incorporate a bit of additional oil to mellow the flavors. Toss well and taste again until it suits your palate.

Is this Green Cabbage Cucumber Salad suitable for my dog?
This salad isn’t recommended for dogs. While raw cabbage is safe in moderation, the vinegar and seasoning can upset their stomachs. Always stick to plain, fresh vegetables like carrots or green beans for a safe pet treat!

What if I want to make the salad in advance?
Definitely! To make it ahead, prepare the salad and dressing separately. Store them in airtight containers in the fridge. Mix them together just before serving to keep the veggies crisp. You can do this up to a day in advance, allowing flavors to meld beautifully!

Green Cabbage Cucumber Salad

Crunchy Green Cabbage Cucumber Salad for a Refreshing Meal

This Green Cabbage Cucumber Salad is a perfect, refreshing side dish for summer barbecues, quick to prepare and packed with flavor.
Print Recipe Pin Recipe
Prep Time 15 minutes mins
Chilling Time 1 hour hr
Total Time 1 hour hr 15 minutes mins
Servings: 4 servings
Course: Salads
Cuisine: American
Calories: 150
Ingredients Equipment Method Nutrition Notes

Ingredients
  

For the Salad
  • 1 head Green Cabbage Select fresh heads without wilted leaves.
  • 2 cups Cucumbers Standard or English cucumbers work well.
  • 1 bunch Green Onions Finely chopped.
  • 1/4 cup Fresh Dill Can substitute with parsley.
For the Dressing
  • 1/2 cup Sunflower Oil Can use olive oil for a different flavor.
  • 1/4 cup Distilled White Vinegar Apple cider vinegar is a good alternative.
  • 1 teaspoon Fine Salt Adjust to taste.
  • 1/2 teaspoon Ground Black Pepper Freshly ground is best.

Equipment

  • mandolin slicer
  • Mixing Bowl
  • Measuring cup
  • salad tongs

Method
 

Preparation Steps
  1. In a measuring cup, whisk together the sunflower oil, distilled white vinegar, fine salt, and ground black pepper. Allow it to sit for about 5 minutes.
  2. Rinse the green cabbage and cucumbers thoroughly under cold water, then pat them dry.
  3. Remove the outer leaves of the green cabbage and cut it into quarters. Shred the cabbage into thin strips.
  4. Halve the cucumbers lengthwise and slice each half into thin, half-moon shapes.
  5. Finely chop the green onions and fresh dill and add to the bowl with cabbage and cucumbers.
  6. Pour the prepared dressing over the mixed vegetables and gently toss until well-coated.
  7. Serve immediately or refrigerate for 1-2 hours before serving.

Nutrition

Serving: 1servingCalories: 150kcalCarbohydrates: 10gProtein: 2gFat: 12gSaturated Fat: 1gPolyunsaturated Fat: 3gMonounsaturated Fat: 8gSodium: 250mgPotassium: 300mgFiber: 2gSugar: 3gVitamin A: 100IUVitamin C: 23mgCalcium: 50mgIron: 0.5mg

Notes

This salad is great to make-ahead. Store in the fridge in an airtight container for 2-3 days. Adjust seasoning before serving if necessary.

Tried this recipe?

Let us know how it was!
  • « Previous Page
  • 1
  • …
  • 3
  • 4
  • 5
  • 6
  • 7
  • …
  • 11
  • Next Page »

Welcome!

Hi, I’m Grace, a Sydney-based home cook with a passion for bold flavors and trending ingredients. Whether you’re a busy beginner or a seasoned foodie, you’ll find dishes here that are fresh, fun, and full of flavor.

More about me

Popular Recipes

  • Cheesy Chicken Garlic Bread Sandwich
    Cheesy Chicken Garlic Bread Sandwich for Cozy Family Moments
  • Easy Chicken Ranch Wraps
    Easy Chicken Ranch Wraps: Quick, Creamy & Totally Satisfying
  • Chicken Caesar Sandwiches
    Delicious Chicken Caesar Sandwiches for Quick Comfort Food
  • best Cuban sandwich
    The Best Cuban Sandwich You’ll Want Every Weeknight!

Footer

↑ back to top

About

  • Privacy Policy
  • Disclaimer
  • Terms & Conditions

Newsletter

  • Sign Up! for emails and updates

Contact

  • About me
  • Contact me

Copyright © 2025 TastyTrendIngredients