tastytrendingredients

  • Home
  • Recipes
    • Appetizers
    • Breakfast
    • Dessert
    • Dinner
    • Drinks
    • Salads
    • Snacks
    • Soups
  • About me
  • Contact
menu icon
go to homepage
  • Home
  • Recipes
    • Appetizers
    • Breakfast
    • Dessert
    • Dinner
    • Drinks
    • Salads
    • Snacks
    • Soups
  • About me
  • Contact
search icon
Homepage link
  • Home
  • Recipes
    • Appetizers
    • Breakfast
    • Dessert
    • Dinner
    • Drinks
    • Salads
    • Snacks
    • Soups
  • About me
  • Contact
×

Savory Slow Cooker Beef & Noodles for Ultimate Cozy Comfort

September 29, 2025 by Grace Snow Leave a Comment

As I shuffled through my kitchen, the air filled with the warm aroma of spices and simmering beef, I knew something special was about to unfold. This Hearty Beef Noodle Soup is the cozy comfort food that chases away the chill of a cold evening. Within just one pot, you can create a deliciously satisfying meal that warms the heart and belly alike. Made with tender beef chuck and a flavorful broth infused with onion and Worcestershire sauce, this easy recipe also features egg noodles that cradle each bite in pure delight. The best part? It’s not just a simple recipe—it's an effortless one-pot wonder that gets better with time, perfect for busy weeknights or leisurely weekends. Are you ready to dive into a bowl of warm, hearty goodness? Let’s get cooking!
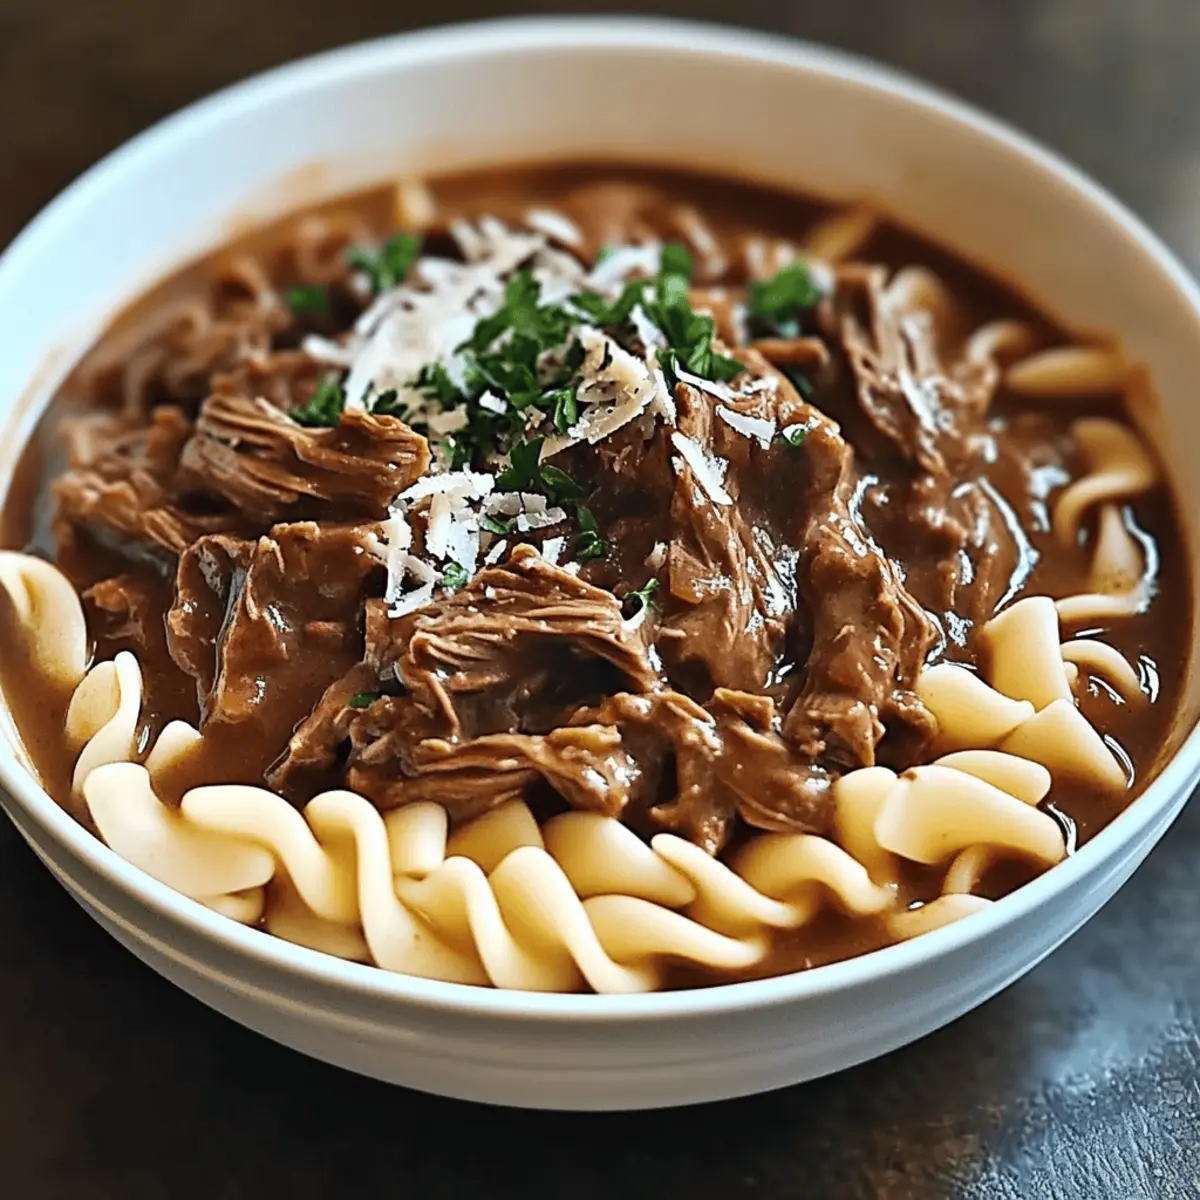
Why is this Beef & Noodles recipe a must-try?

Comforting Flavors: This Hearty Beef Noodle Soup envelops you in a warm, savory embrace, making it the perfect dish for chilly nights.

One-Pot Wonder: Easy preparation means less stress in the kitchen; just toss everything in your slow cooker and let the magic happen.

Tender Beef: With a few hours of simmering, you'll be rewarded with fork-tender beef that melts in your mouth.

Versatile Ingredients: Feel free to customize with vegetables or switch to chicken for a lighter twist! For those craving variety, check out my Gochujang Sesame Noodles or Ground Beef Enchiladas.

Embrace the cozy vibes, and serve alongside some crusty bread for the ultimate comfort meal!

Slow Cooker Beef & Noodles Ingredients

For the Soup

  • Beef Chuck Roast – Adds rich flavor and becomes melt-in-your-mouth tender after slow cooking.
  • Beef Broth – Serves as the savory base; opt for low-sodium for a healthier choice.
  • Onion Soup Mix – Provides easy seasoning without the fuss; try homemade onion seasoning for a personal touch.
  • Worcestershire Sauce – Infuses a tangy umami flavor; coconut aminos can be a gluten-free substitute.
  • Garlic Powder – A must-have for aromatic depth; adjust to your preference.

For the Noodles

  • Egg Noodles – The hearty backbone of the dish, soaking up all those delicious flavors; whole wheat or gluten-free pasta works well too.

Optional Garnishes

  • Fresh Parsley – Adds a burst of color and freshness; use as much or as little as you like.
  • Grated Parmesan Cheese – For a rich, creamy finish that enhances each bowl of Slow Cooker Beef & Noodles.

Perfect for embracing the cozy vibes, this simple yet flavorful recipe awaits you!

Step‑by‑Step Instructions for Savory Slow Cooker Beef & Noodles

Step 1: Prepare the Ingredients
Begin by trimming any excess fat from the beef chuck roast and cutting it into large chunks. In your slow cooker, place the beef alongside the beef broth, onion soup mix, and Worcestershire sauce. Stir gently to combine the flavors. This base will create a rich, savory broth for your Slow Cooker Beef & Noodles.

Step 2: Season the Mixture
Sprinkle in salt, pepper, and garlic powder to taste, adjusting according to your preference for seasoning. Give the mixture another light stir. The aromas will start to blend beautifully, setting the stage for a comforting dish. Now, cover the slow cooker and set it to low heat, letting it work its magic for 6-8 hours.

Step 3: Check the Beef for Tenderness
After about 6 hours, check the beef for doneness. It should be fork-tender and easy to shred. If it’s not there yet, allow it to cook a bit longer. Once tender, carefully remove the beef from the pot using tongs and set it aside to cool slightly before shredding it into bite-sized pieces.

Step 4: Return the Shredded Beef
Once you're done shredding, return the beef to the slow cooker, stirring it back into the savory broth. This infusion of beef adds fantastic flavor to your dish. Cover the slow cooker again, allowing all the flavors to meld beautifully for an additional 30 minutes on low.

Step 5: Cook the Noodles
About 30 minutes before you’re ready to serve, add the egg noodles directly into the slow cooker. Make sure to stir them well into the broth. Cover and cook for around 10-15 minutes, or until the noodles are al dente. Keep an eye on them, as they should be tender but not mushy, soaking up that delightful broth.

Step 6: Serve the Soup
Once everything is cooked perfectly, it’s time to serve your hearty Slow Cooker Beef & Noodles! Ladle the soup into bowls, making sure each serving has a generous portion of beef and noodles. If desired, sprinkle with fresh parsley and grated Parmesan cheese on top for an extra touch of luxury.

Step 7: Enjoy and Store Leftovers
Savor each comforting bite while the soup is hot. If you have leftovers, let them cool slightly before storing in airtight containers. This delicious beef noodle soup can be refrigerated for up to 3 days or frozen for a future cozy meal. Enjoy the warmth of this delightful dish!
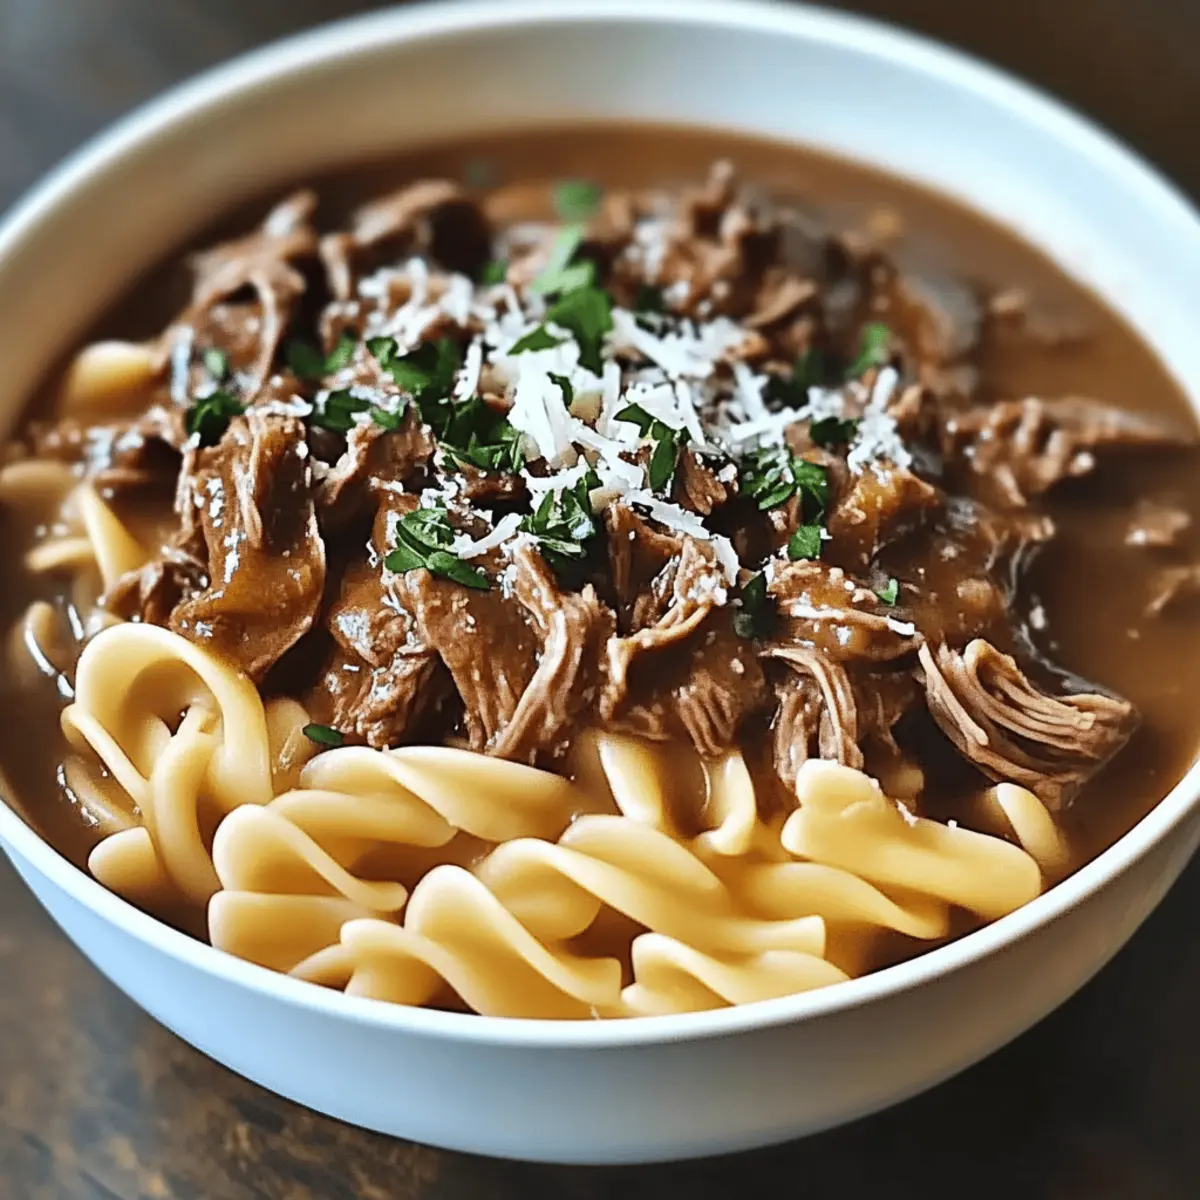
What to Serve with Hearty Beef Noodle Soup?

Warm your heart and satisfy your cravings by creating the perfect meal to accompany this delectable dish.

  • Crusty Bread: Perfect for dipping, this bread soaks up the flavorful broth, making each bite even more comforting. Pair your soup with a fresh baguette or rustic sourdough for an irresistible crunch.

  • Simple Side Salad: A light salad with mixed greens, cherry tomatoes, and a tangy vinaigrette offers a refreshing contrast to the rich soup, enhancing your meal's texture.

  • Garlic Breadsticks: Soft, warm, and infused with garlic butter, these breadsticks are an indulgent treat, inviting you to savor every last bite of your soup.

  • Roasted Vegetables: A side of seasonal roasted carrots and broccoli provides an earthy sweetness and delightful crunch, balancing out the hearty flavors of the beef and noodles.

  • Creamy Mashed Potatoes: Creamy and buttery mashed potatoes create a lovely, comforting texture that mirrors the heartwarming qualities of the soup. An absolute crowd-pleaser!

  • Red Wine: A glass of full-bodied red wine enhances the umami flavors, adding a sophisticated touch to your cozy dining experience. Perfectly warming for chilly nights!

Serve your Hearty Beef Noodle Soup with these delightful additions for a meal that warms both body and soul.

Slow Cooker Beef & Noodles Variations

Feel free to play with this recipe to make it your own and explore delightful twists to enhance your meal.

  • Chicken Swap: Replace beef with chicken and use chicken broth for a lighter, equally comforting dish.
  • Pasta Choices: Try using whole wheat or gluten-free noodles for a healthier or dietary-sensitive option.
  • Veggie Boost: Add in vegetables like sliced carrots or celery for a nourishing touch and added texture.
  • Spice It Up: For a little heat, consider adding red pepper flakes or some diced jalapeños to the mix during cooking.
  • Savory Umami: Sneak in some soy sauce or miso paste for an extra depth of flavor in your broth.
  • Herbaceous Delight: Fresh herbs like thyme or rosemary can bring an aromatic twist when added during the last hour of cooking.
  • Creamy Version: Stir in a splash of heavy cream or half-and-half just before serving for a luxurious creamy broth.
  • Leftover Bliss: Use leftover cooked beef, substituting it during the last hour to save time and still enjoy a cozy meal.

Whether you're looking for something a little different or want to elevate the classic taste, these variations will surely do the trick! For more unique ideas, check out my recipe for Gochujang Sesame Noodles or Chicken Teriyaki Noodles.

Expert Tips for Slow Cooker Beef & Noodles

  • Taste the Broth: Always sample the broth before serving to adjust seasonings as needed; this guarantees maximum flavor in your comfort dish.

  • Meat Quality Matters: Use good quality beef chuck roast, as it enhances the overall taste and tenderness of your Slow Cooker Beef & Noodles.

  • Avoid Overcooking: Monitor the beef carefully; check for fork-tenderness around 6 hours. Overcooking can lead to dry or stringy meat.

  • Watch the Noodles: Add noodles in the last 10-15 minutes to avoid mushiness; they should be al dente and well combined with the broth.

  • Garnish for Flavor: Don’t skip the parsley and Parmesan cheese; they brighten flavors and add a delightful finishing touch to your hearty bowl.

How to Store and Freeze Slow Cooker Beef & Noodles

Fridge: Store leftovers in an airtight container for up to 3 days to maintain freshness and flavor.

Freezer: For long-term storage, freeze in portions for up to 3 months. Ensure it's in airtight containers or freezer bags to prevent freezer burn.

Reheating: To reheat, thaw overnight in the fridge, then warm in a pot over low heat until heated through, stirring occasionally. Avoid microwaving if possible, as it can make the noodles mushy.

Tip: The Slow Cooker Beef & Noodles will taste even better after a day in the fridge, as the flavors continue to meld.

Make Ahead Options

Preparing this Savory Slow Cooker Beef & Noodles ahead of time is a fantastic way to save precious minutes during busy evenings! You can cut the beef chuck roast and combine it with the beef broth, onion soup mix, and Worcestershire sauce, refrigerating this mixture for up to 24 hours. This not only enhances the flavors but also streamlines your cooking process. When you’re ready to enjoy your cozy meal, simply add the seasoned beef mixture to the slow cooker, set it to low heat, and let it cook as usual. Remember to check the beef for tenderness before shredding and adding the noodles closer to your serving time for the best quality. Your hearty soup will be just as delicious, ensuring a comforting meal is only a few steps away!
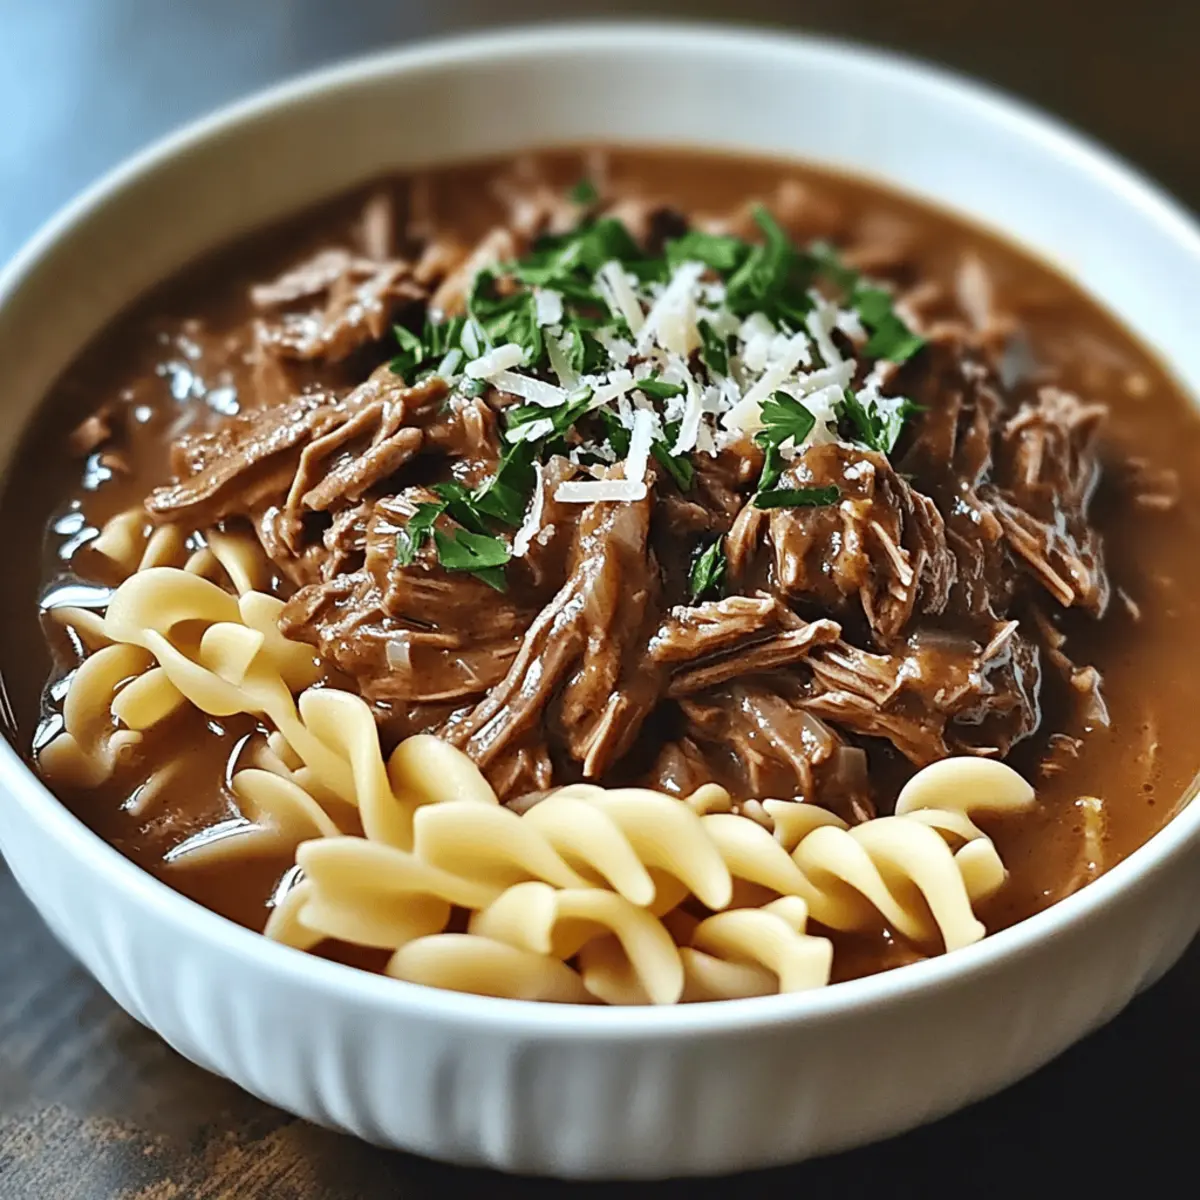
Slow Cooker Beef & Noodles Recipe FAQs

How do I select the best beef chuck roast for this recipe?
Absolutely! When choosing a beef chuck roast, look for one with good marbling—this fat will melt during cooking, adding flavor and tenderness. Ideally, it should have a rich red color with minimal dark spots. Avoid any cuts that look discolored or excessively dry.

What’s the best way to store leftovers of Slow Cooker Beef & Noodles?
Very simple! Allow the soup to cool slightly, then transfer it to an airtight container. You can store it in the refrigerator for up to 3 days. For longer storage, place portions in freezer-safe bags or containers, ensuring all air is removed, and it will keep well for up to 3 months.

Can I freeze Slow Cooker Beef & Noodles?
Absolutely! To freeze this dish, let it cool completely, then ladle it into portions in airtight containers or heavy-duty freezer bags. Be sure to label and date them! When ready to enjoy, thaw overnight in the fridge and reheat gently on the stove for the best texture.

What should I do if the beef isn't tender enough after cooking?
If your beef hasn't reached fork-tenderness after the recommended cooking time, simply cover the slow cooker and continue cooking for additional 30-minute intervals. As you're watching it closely, check periodically to ensure it doesn’t overcook. It helps to note that every slow cooker can vary, so timing may need to be adjusted based on the specific model.

Are there any dietary considerations for this recipe?
Definitely! If you’re looking to make this dish gluten-free, substitute the Worcestershire sauce with coconut aminos and use gluten-free egg noodles. Additionally, if you have any allergies, always read the ingredient labels and opt for low-sodium or homemade versions of sauces and seasoning mixes to ensure they align with your dietary needs.

How can I enhance the flavor of my Slow Cooker Beef & Noodles?
I recommend adding fresh herbs like thyme or rosemary for an aromatic twist. You can also toss in vegetables like carrots or celery at the start of cooking for added nutrition and depth of flavor. Just remember to adjust the broth or seasoning accordingly since the additions can alter the overall taste!
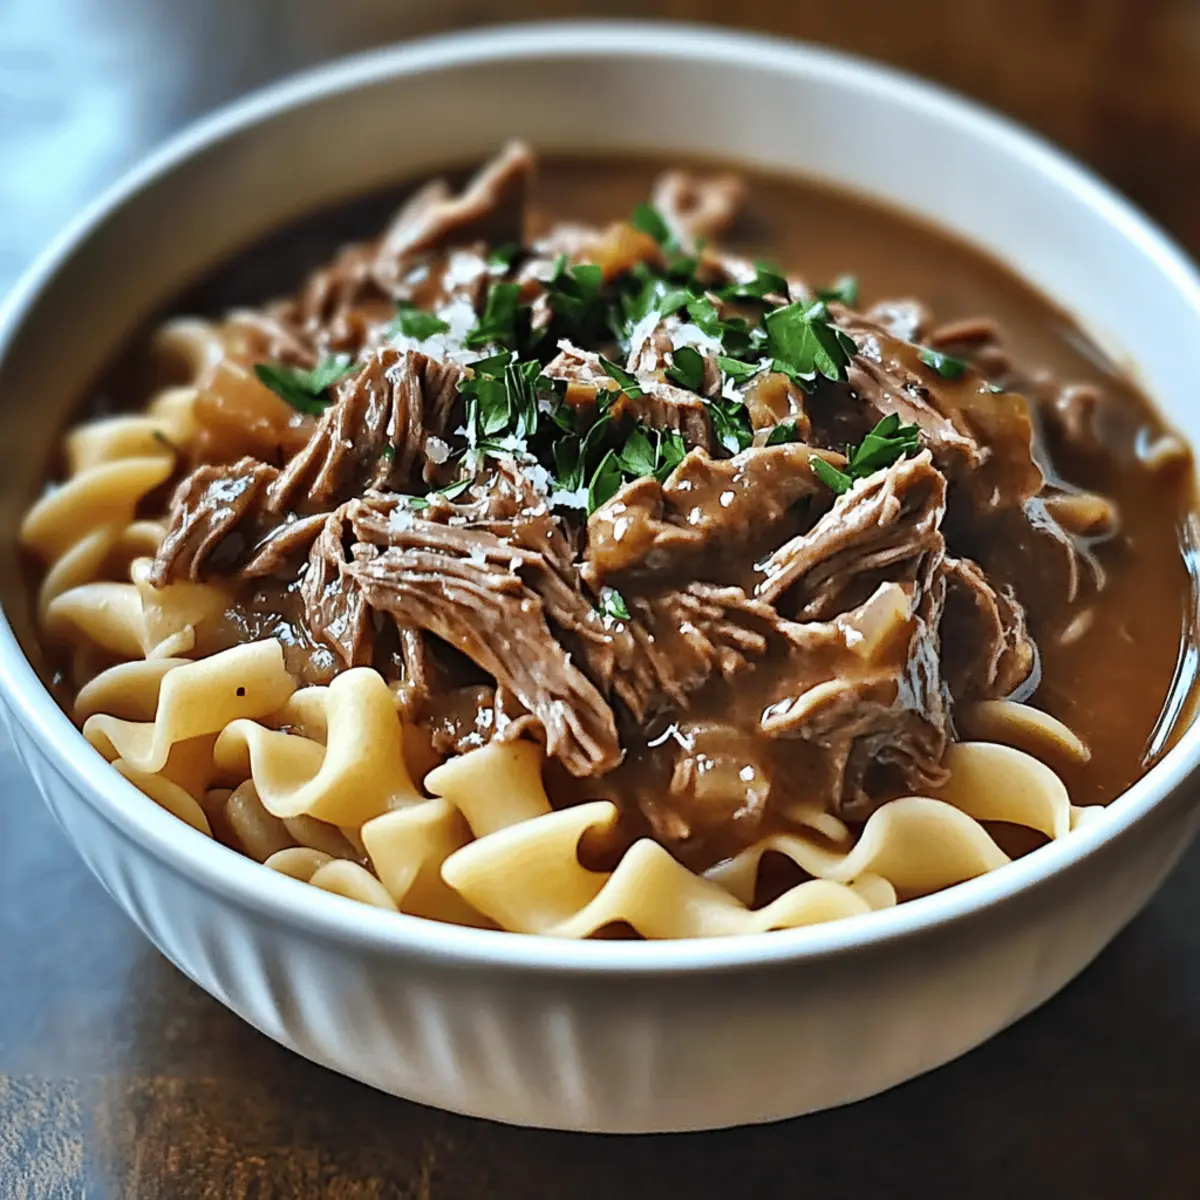
Slow Cooker Beef & Noodles

Savory Slow Cooker Beef & Noodles for Ultimate Cozy Comfort

Experience the warmth of Slow Cooker Beef & Noodles, a deliciously cozy dish perfect for chilly evenings.
Print Recipe Pin Recipe
Prep Time 20 minutes mins
Cook Time 7 hours hrs
Total Time 7 hours hrs 20 minutes mins
Servings: 6 servings
Course: Dinner
Cuisine: American
Calories: 450
Ingredients Equipment Method Nutrition Notes

Ingredients
  

For the Soup
  • 2 pounds Beef Chuck Roast Trimmed and cut into large chunks
  • 4 cups Beef Broth Low-sodium preferred
  • 1 packet Onion Soup Mix Or homemade onion seasoning
  • 2 tablespoons Worcestershire Sauce Coconut aminos for gluten-free option
  • 1 teaspoon Garlic Powder Adjust according to taste
For the Noodles
  • 12 ounces Egg Noodles Whole wheat or gluten-free options available
Optional Garnishes
  • 1/4 cup Fresh Parsley Chopped
  • 1/2 cup Grated Parmesan Cheese For serving

Equipment

  • Slow Cooker

Method
 

Step‑by‑Step Instructions
  1. Trim any excess fat from the beef chuck roast and cut it into large chunks. Place the beef in your slow cooker with the beef broth, onion soup mix, and Worcestershire sauce. Stir gently to combine.
  2. Sprinkle in salt, pepper, and garlic powder to taste. Stir again and cover the slow cooker. Set to low heat and cook for 6-8 hours.
  3. Check the beef after 6 hours for tenderness. If fork-tender, remove it and shred into bite-sized pieces.
  4. Return the shredded beef to the slow cooker and let it meld with the broth for an additional 30 minutes.
  5. Add egg noodles to the slow cooker about 30 minutes before serving. Stir well and cook for 10-15 minutes until al dente.
  6. Serve the soup hot, optionally garnished with fresh parsley and grated Parmesan cheese.
  7. Enjoy and store leftovers in airtight containers. Refrigerate for up to 3 days or freeze for future meals.

Nutrition

Serving: 1bowlCalories: 450kcalCarbohydrates: 40gProtein: 35gFat: 15gSaturated Fat: 6gPolyunsaturated Fat: 1gMonounsaturated Fat: 6gCholesterol: 85mgSodium: 900mgPotassium: 650mgFiber: 2gSugar: 2gVitamin A: 500IUVitamin C: 3mgCalcium: 50mgIron: 3mg

Notes

Taste the broth before serving to adjust seasonings. Use good quality beef chuck for tenderness. Avoid overcooking the beef and add noodles last to maintain texture.

Tried this recipe?

Let us know how it was!

Hubble Bubble Pumpkin Pot: A Cozy Fall Meal for Families

September 27, 2025 by Grace Snow Leave a Comment

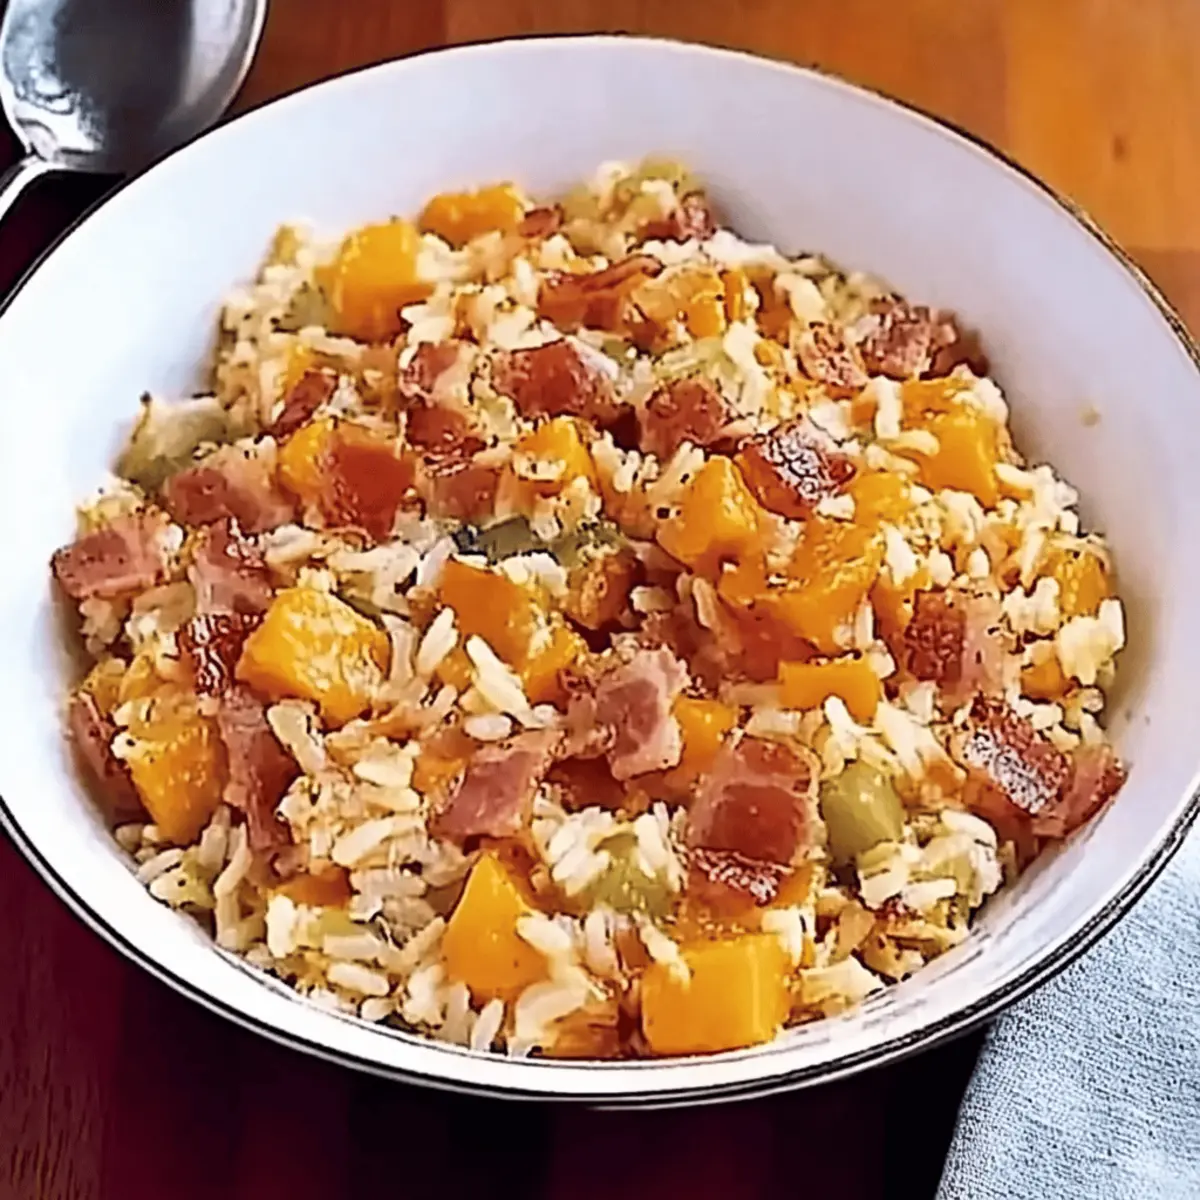
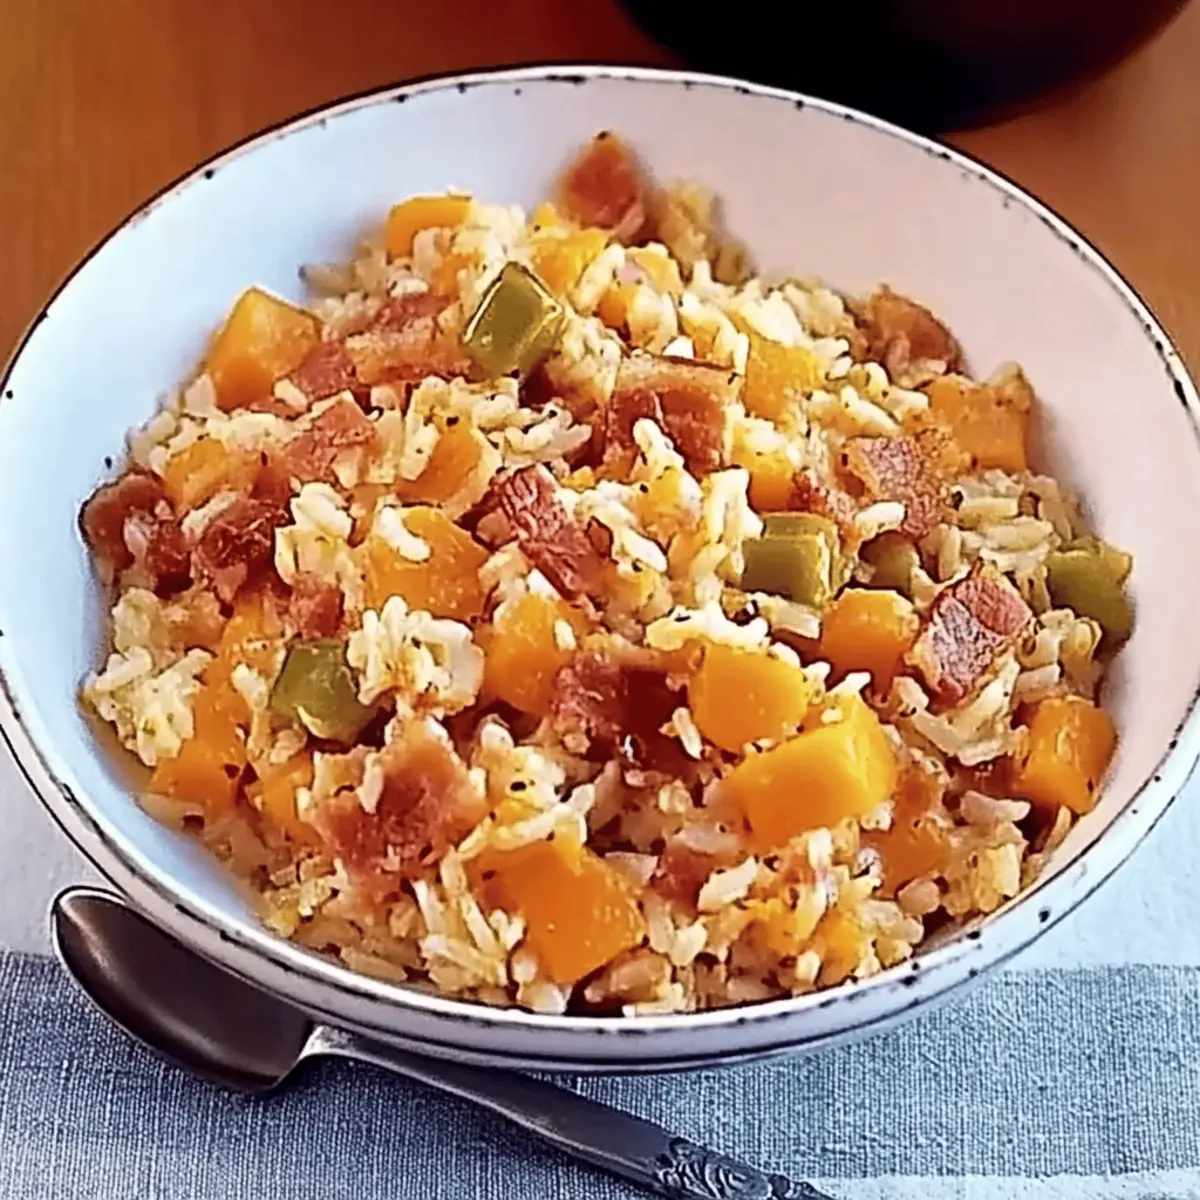
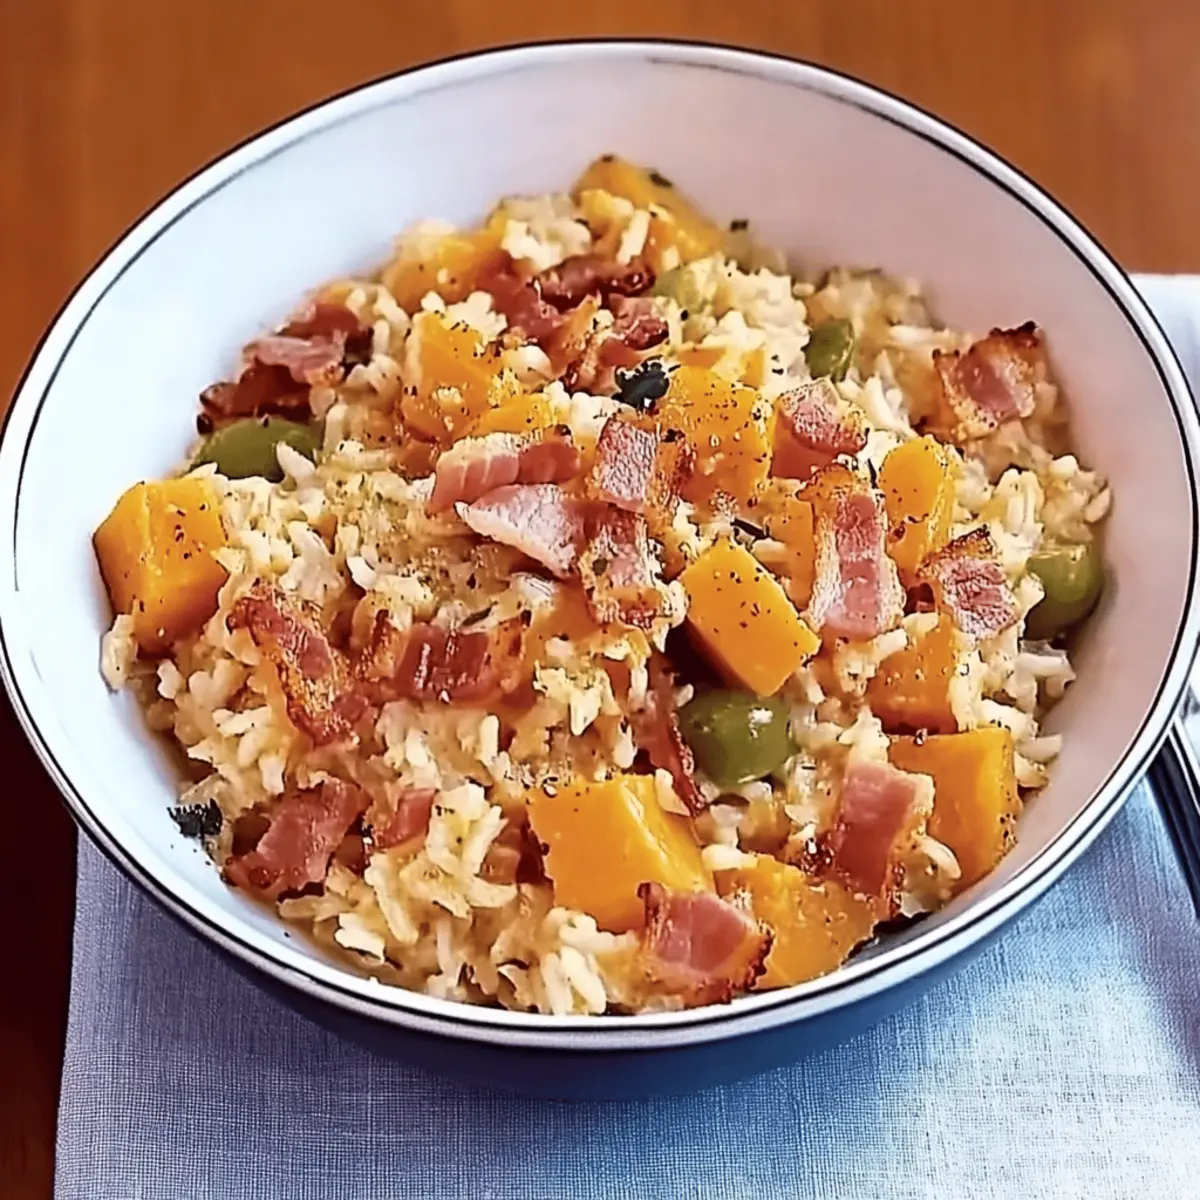
The crisp autumn air whispers a call to the kitchen, where I find myself beckoned by a lively dance of flavors and colors. Oh, the joy of making a Hubble Bubble Pumpkin Pot! This quick and easy family meal not only warms the hearts of loved ones but also encourages the kids to join in the fun of cooking. Imagine the excitement as they help toss together tender pumpkin, savory bacon, and fluffy rice, all whipped up in a matter of minutes in the microwave. This Halloween-themed dish is not just a time-saver for our busy weeknights; it's a delightful way to spark a culinary adventure right at home. Who knew that mixing simple ingredients could create such comforting magic? Are you ready to discover the bubbling goodness that awaits?

Why is Hubble Bubble Pumpkin Pot a Must-Try?

Quick Preparation: This dish is ready in a flash, perfect for busy families craving a home-cooked meal.

Kid-Friendly Fun: Involve your little chefs as they mix together ingredients, creating excitement in the kitchen.

Flavorful Ingredients: The combination of pumpkin, smoky bacon, and leeks offers a rich flavor profile that everyone will love.

Versatile Base: Feel free to swap in seasonal vegetables like sweet potatoes or even add proteins such as chicken to customize it.

Comforting Meal: Each serving delivers a warm and hearty experience, making it ideal for those cozy fall evenings.

Storage Friendly: Prepare it ahead of time and simply reheat for quick meals throughout the week! You could also explore other delightful options like Pumpkin Cinnamon Roll Muffins to complement this hearty dish.

Hubble Bubble Pumpkin Pot Ingredients

Discover the simple elements that bring this delightful dish to life!

For the Base

  • Leeks – Adds a mild onion flavor and a subtle crunch; make sure to wash thoroughly to remove grit.
  • Smoked Bacon – Provides savory depth and richness; feel free to substitute with turkey bacon for a lighter option.
  • Pumpkin Flesh – Offers sweetness and a creamy texture; butternut squash can work as a wonderful alternative.
  • Butter – Enhances flavor with creamy richness; use vegan butter for a dairy-free version.

For the Rice Mixture

  • Long Grain Rice – Acts as the heart of the dish, binding everything together; consider using basmati or jasmine rice for a fragrant twist.
  • Chicken Stock Cube – Imparts a savory essence to the rice; for a vegetarian option, switch to vegetable stock.

Get ready to create your Hubble Bubble Pumpkin Pot and experience the warmth of homemade goodness!

Step‑by‑Step Instructions for Hubble Bubble Pumpkin Pot

Step 1: Prep the Ingredients
In a large microwaveable bowl, add the cleaned and sliced leeks, diced smoked bacon, and cubed pumpkin. Ensure that the pumpkin is cut into even pieces for consistent cooking. Dot the top with small pats of butter to infuse rich flavor. Cover the bowl tightly with cling film, puncturing it with a few holes to let steam escape, and microwave on High for 5 minutes.

Step 2: Prepare the Stock
While the pumpkin and bacon cook, bring around 700ml of water to a boil in a separate pot. Add a chicken stock cube, stirring well until it dissolves completely to create a savory broth. Keep the prepared stock hot on the stove, ensuring it’s ready for the next step while the vegetables are finishing in the microwave.

Step 3: Combine the Rice
After the initial 5 minutes, carefully remove the bowl from the microwave, taking caution to avoid the hot steam. Remove the cling film and stir the cooked mixture gently to combine. Add the rinsed long grain rice, sprinkle with salt and pepper, and carefully pour in the hot stock. Use a spoon to mix all the ingredients together evenly, ensuring the rice is well coated.

Step 4: Cook Thoroughly
Cover the bowl again with cling film, ensuring it is tight to lock in moisture, and microwave on High for another 10 minutes. During this time, the rice will absorb the flavors of the pumpkin and bacon as it cooks. Keep an eye on the dish to prevent bubbling over, adjusting the power level if necessary to maintain a steady cook without spills.

Step 5: Finalize Cooking
After the initial cooking time, remove the bowl once more and give the mixture a good stir to distribute heat and prevent sticking. Cover and microwave again for an additional 5-10 minutes, until the rice is fully cooked and tender. The Hubble Bubble Pumpkin Pot should be bubbling softly, signaling it's time to let all those delightful flavors meld together.

Step 6: Serve and Enjoy
Let the dish stand, covered, for 5 minutes to enhance the flavors further. Once the resting time is up, remove the cover and give the mixture one final stir to bring everything together. Serve the Hubble Bubble Pumpkin Pot scooped directly from the bowl for a warm, cozy meal that’s perfect for family gatherings or Halloween-themed cooking.

Hubble Bubble Pumpkin Pot Variations

Feel free to jazz up your Hubble Bubble Pumpkin Pot with these fun twists and ingredient swaps that add delightful flair!

  • Seasonal Swaps: Substitute pumpkin with sweet potatoes or carrots for a fresh seasonal spin. Each option brings a unique sweetness and texture, creating a new favorite for your table.

  • Protein Packed: Add Cooked Chicken: Boost nutrition and heartiness by mixing in shredded cooked chicken or sausage. It elevates the dish, transforming it into a comfort classic that's both filling and delicious.

  • Spicy Kick: Chili Pepper: For those who enjoy a little heat, adding diced chili peppers can really elevate the flavor. Just a small amount offers a delightful warmth that dances on the palate.

  • Herb Infusion: Fresh Herbs: Toss in a handful of fresh herbs like thyme or sage for a fragrant uplift. These herbs not only enhance the aroma but also bring a fresh, vibrant taste that's perfect for cozy meals.
  • Rice Variety: Gluten-Free Option: Switch long grain rice for quinoa or cauliflower rice for a gluten-free alternative. Each offers a different texture—quinoa adds nuttiness, while cauliflower offers a lighter feel.

  • Nutty Flavor: Add Nut Toppings: Consider topping your dish with toasted pumpkin seeds or pecans before serving. This adds a delightful crunch and a nutty flavor that beautifully complements the softness of the pot.

  • Coconut Cream: Creamy Twist: A splash of coconut cream instead of butter adds a luscious layer of flavor and creaminess. It also pairs wonderfully with the sweetness of pumpkin for an exotic twist.

  • Save Time: One-Pot Pasta: Yet another option is tossing in some pre-cooked pasta. It's an easy way to turn this pot into a pasta delight, ideal for those nights when you want comforting carbs.

As you embark on your culinary adventure with the Hubble Bubble Pumpkin Pot, let these variations inspire your creativity in the kitchen! Pair it with a side of Pumpkin Cinnamon Roll Muffins for a delightful fall meal.

What to Serve with Hubble Bubble Pumpkin Pot?

Elevate your cozy fall meal experience with delightful accompaniments that complement the Hubble Bubble Pumpkin Pot's flavors and textures.

  • Simple Green Salad: Fresh greens drizzled with olive oil and lemon brightens the meal, adding a refreshing crunch alongside the warm dish.

  • Crusty Bread: A warm, crusty bread or garlic baguette is perfect for soaking up every delicious bite of this hearty pot, enhancing the meal with comforting warmth.

  • Creamy Mashed Potatoes: Smooth and buttery mashed potatoes enhance the dish's cozy vibes, creating a comforting equilibrium with the pumpkin's sweetness.

  • Roasted Brussels Sprouts: Crispy, caramelized Brussels sprouts bring a nutty depth that perfectly contrasts the creamy pumpkin base, adding a lovely crunch to the meal.

  • Sautéed Kale with Garlic: This simple yet flavorful side adds vibrant color and earthy flavor, enriching the overall palate of your autumn dining experience.

  • Sparkling Apple Cider: A refreshing glass of sparkling apple cider captures the essence of fall, delighting the senses and pairing beautifully with the dish's savory elements.

  • Pumpkin Spice Muffins: Continue the pumpkin theme with these fluffy muffins, providing a sweet ending to your fall-inspired feast and keeping the spirit of the season alive.

How to Store and Freeze Hubble Bubble Pumpkin Pot

Fridge: Store leftover Hubble Bubble Pumpkin Pot in an airtight container for up to 2 days. Be sure to let it cool before sealing to preserve freshness.

Freezer: For longer storage, freeze portions of the dish in freezer-safe containers for up to 3 months. Label with the date to keep track of freshness.

Reheating: When ready to enjoy, thaw overnight in the fridge if frozen, and reheat individual portions in the microwave for 2–3 minutes or until heated through.

Make Ahead: Prepare the dish in advance for a quick weeknight meal. Just reheat and serve for a delightful, comforting experience anytime!

Make Ahead Options

These Hubble Bubble Pumpkin Pots are perfect for meal prep enthusiasts looking to save time! You can chop the leeks, bacon, and pumpkin, and combine them in a microwaveable bowl up to 24 hours in advance, covering tightly with cling film to lock in freshness. The stock can also be prepared beforehand and stored in the refrigerator. When you're ready to enjoy this cozy dish, simply add the rinsed rice and hot stock, microwave as instructed, and you’ll achieve that delightful warmth and flavor just like on the day it was made. With these make-ahead steps, you’ll have a quick, comforting meal ready in no time!

Expert Tips for Hubble Bubble Pumpkin Pot

Pierce the Film: Always pierce the cling film before microwaving to prevent steam buildup. This helps avoid any splatters or burns.

Cut Uniformly: Ensure that the pumpkin and vegetables are cut into even pieces. This guarantees even cooking and a harmonious blend of flavors.

Watch the Time: Keep an eye on your dish while it cooks to prevent bubbling over. Adjust the microwave power level if it starts to overflow.

Let It Rest: After microwaving, let your Hubble Bubble Pumpkin Pot sit covered for 5 minutes. This allows the flavors to meld beautifully, enhancing the overall taste.

Add Your Twist: Don’t hesitate to experiment with seasonal veggies or proteins. This dish is versatile, so feel free to customize it to your family's taste preference.

Hubble Bubble Pumpkin Pot Recipe FAQs

What type of pumpkin should I use for the Hubble Bubble Pumpkin Pot?
Absolutely! I recommend using sugar pumpkins or any pumpkin labeled for cooking, as they have the sweetest flesh. If you can't find those, butternut squash is a fantastic alternative that offers similar sweetness and texture.

How should I store leftovers from the Hubble Bubble Pumpkin Pot?
Very simply! Store any leftovers in an airtight container in the refrigerator for up to 2 days. Let the pot cool completely before sealing the container to maintain the best flavor and texture.

Can I freeze Hubble Bubble Pumpkin Pot?
Yes, you can! To freeze, portion the Hubble Bubble Pumpkin Pot into freezer-safe containers and store it for up to 3 months. Make sure to label the containers with the date. When you're ready to enjoy it again, thaw it overnight in the fridge and reheat in the microwave for about 2–3 minutes, or until heated through.

What can I do if my Hubble Bubble Pumpkin Pot turns out too watery?
If your dish ends up a bit watery, don't worry! You can stir in a little bit of cooked rice to absorb the excess liquid. Alternatively, let it sit uncovered for a few minutes, which may help some of the moisture evaporate and thicken the consistency.

Are there any dietary considerations for the Hubble Bubble Pumpkin Pot?
Absolutely! For a vegetarian option, simply substitute the chicken stock cube with a vegetable stock cube and omit the bacon or replace it with a plant-based equivalent. Just make sure to choose a vegan butter if you're looking for a dairy-free alternative.

Can pets eat the Hubble Bubble Pumpkin Pot?
It's best to avoid feeding this dish to pets, particularly because of the bacon and stock cube, which can be too salty for them. However, plain cooked pumpkin is safe for many pets in moderation. Always consult with your vet if you're unsure.

Enjoy cooking your Hubble Bubble Pumpkin Pot with these tips and answers to common questions!

Hubble bubble pumpkin pot

Hubble Bubble Pumpkin Pot: A Cozy Fall Meal for Families

Enjoy the delicious Hubble Bubble Pumpkin Pot, a cozy fall meal perfect for family dinners!
Print Recipe Pin Recipe
Prep Time 15 minutes mins
Cook Time 20 minutes mins
Resting Time 5 minutes mins
Total Time 40 minutes mins
Servings: 4 servings
Course: Dinner
Cuisine: American, Fall
Calories: 400
Ingredients Equipment Method Nutrition Notes

Ingredients
  

For the Base
  • 2 medium Leeks Washed thoroughly to remove grit
  • 200 grams Smoked Bacon Substitute with turkey bacon for a lighter option
  • 400 grams Pumpkin Flesh Butternut squash can work as a wonderful alternative
  • 2 tablespoons Butter Use vegan butter for a dairy-free version
For the Rice Mixture
  • 1 cup Long Grain Rice Can use basmati or jasmine rice for a fragrant twist
  • 1 cube Chicken Stock Cube Use vegetable stock for a vegetarian option

Equipment

  • Microwave
  • Large Microwaveable Bowl
  • pot

Method
 

Step-by-Step Instructions for Hubble Bubble Pumpkin Pot
  1. In a large microwaveable bowl, add the cleaned and sliced leeks, diced smoked bacon, and cubed pumpkin. Dot the top with butter, cover tightly with cling film (punctured), and microwave on High for 5 minutes.
  2. While the pumpkin and bacon cook, bring around 700ml of water to a boil in a pot. Add a chicken stock cube and stir until dissolved.
  3. Remove the bowl from the microwave, stir the mixture, add the rinsed rice, seasoning, and pour in the hot stock. Mix well.
  4. Cover tightly again with cling film and microwave on High for another 10 minutes.
  5. After 10 minutes, stir the mixture again and microwave again for 5-10 minutes until the rice is fully cooked.
  6. Let the dish sit covered for 5 minutes before serving.

Nutrition

Serving: 1servingCalories: 400kcalCarbohydrates: 50gProtein: 15gFat: 15gSaturated Fat: 7gPolyunsaturated Fat: 3gMonounsaturated Fat: 5gCholesterol: 30mgSodium: 800mgPotassium: 600mgFiber: 5gSugar: 4gVitamin A: 5000IUVitamin C: 15mgCalcium: 50mgIron: 3mg

Notes

Ensure to pierce the cling film to prevent steam buildup, and let the dish sit to enhance flavors.

Tried this recipe?

Let us know how it was!

Savory Garlic Chicken Zucchini Noodles for a Fresh Twist

September 26, 2025 by Grace Snow Leave a Comment

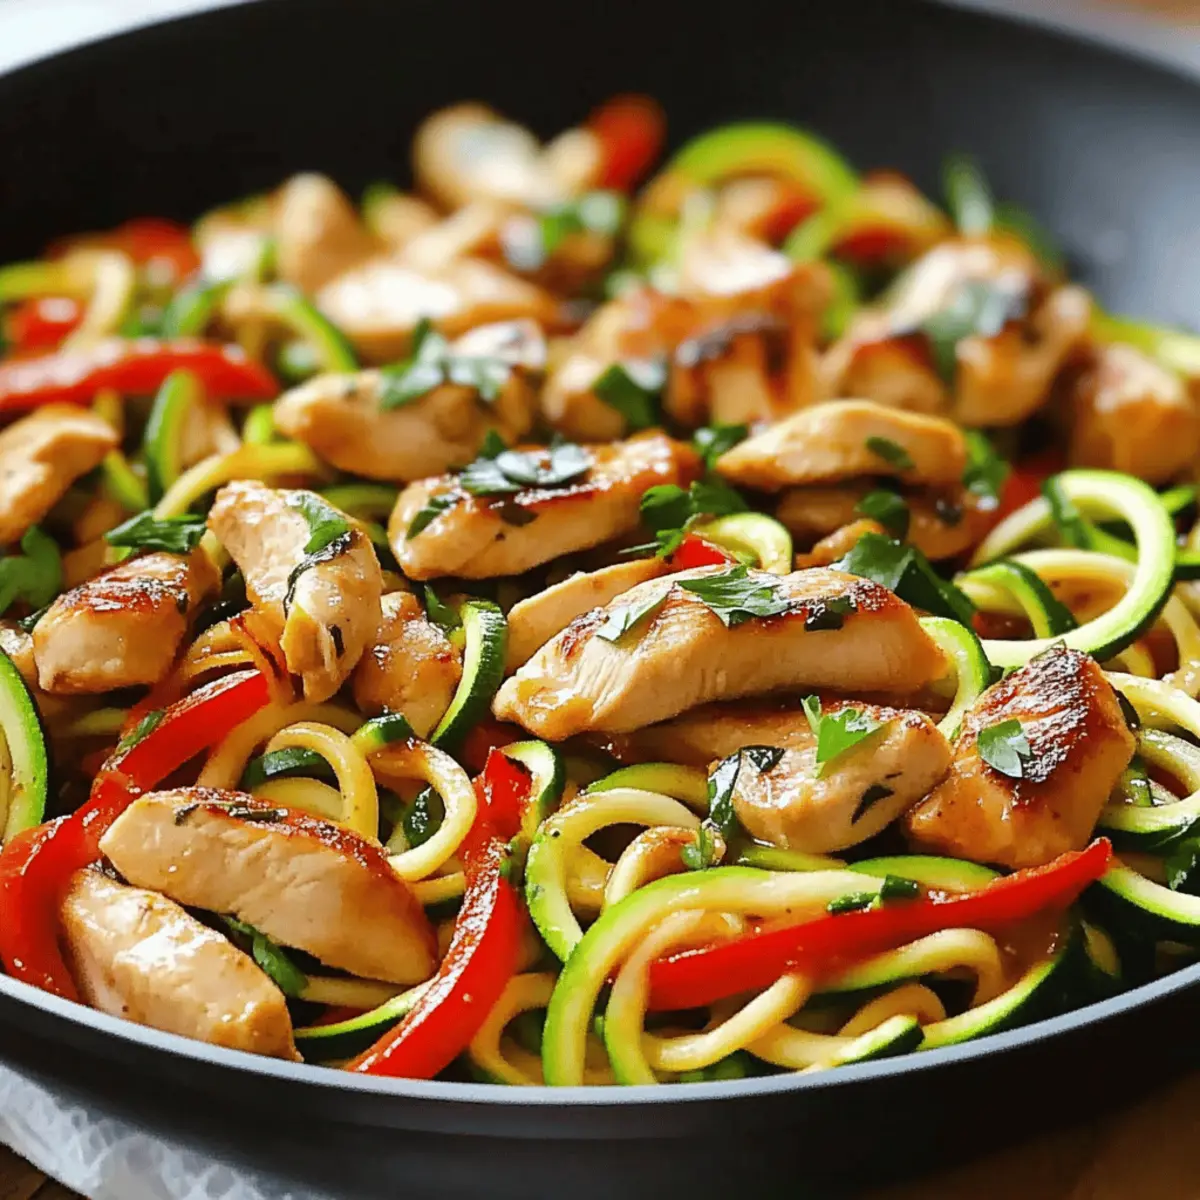
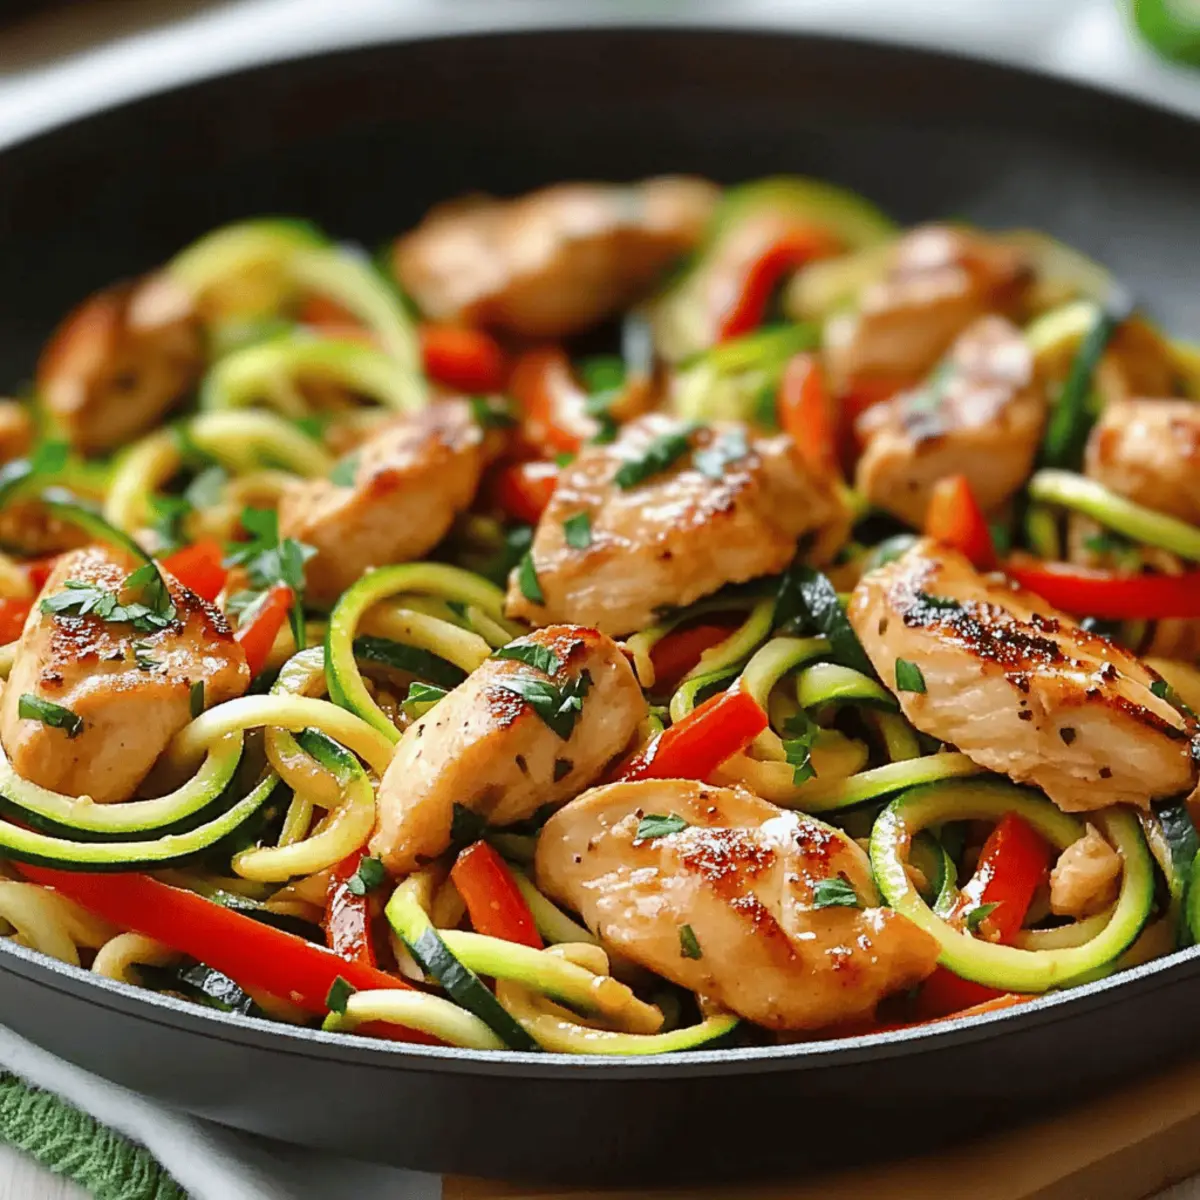
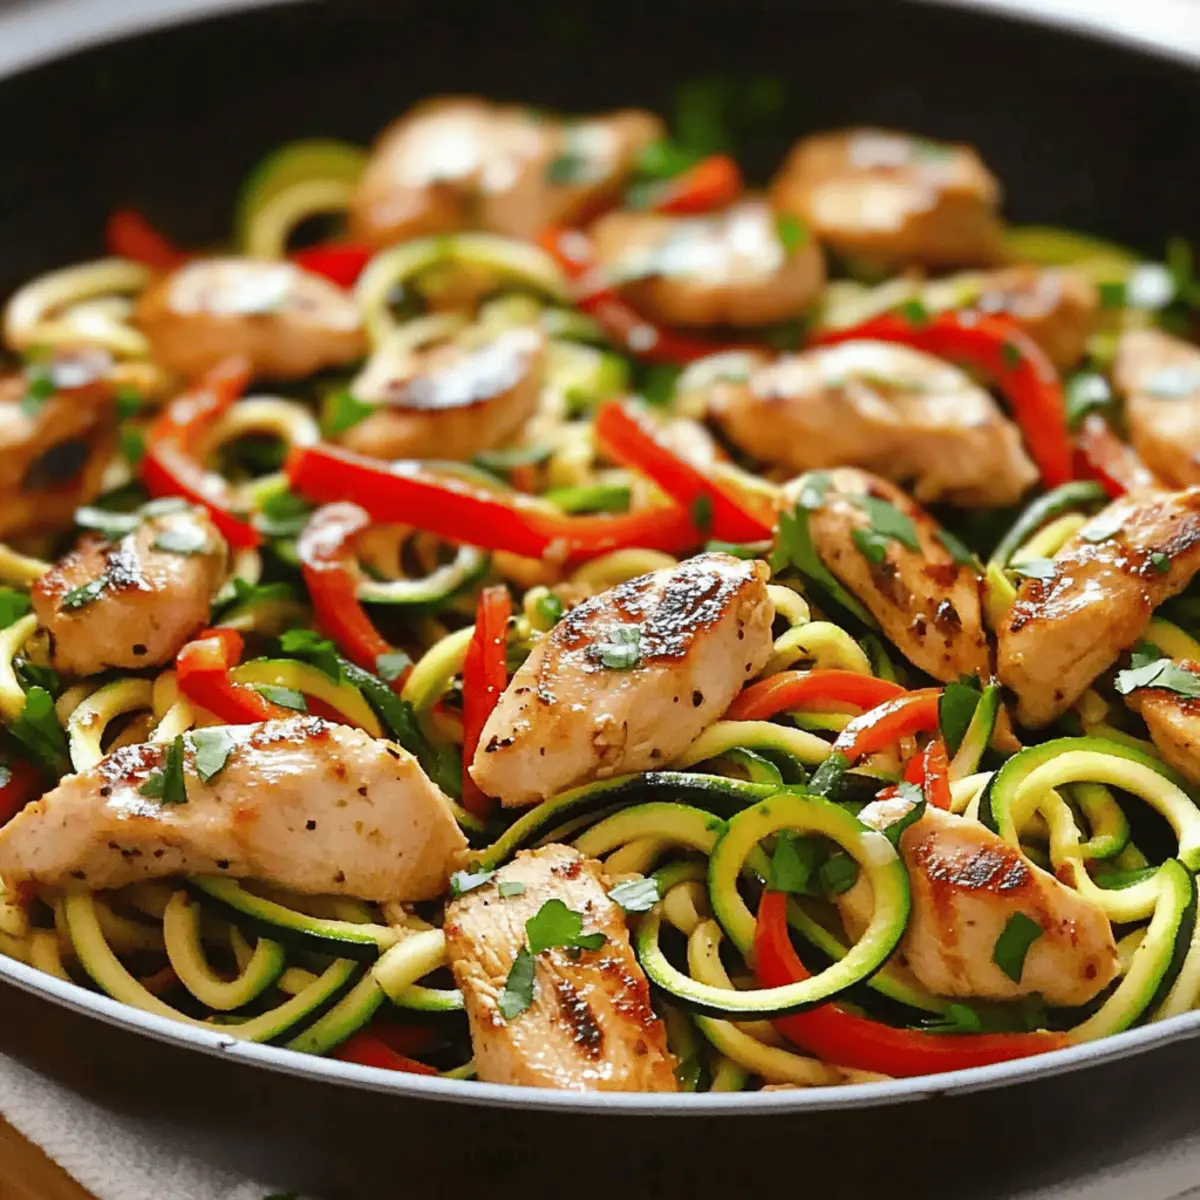
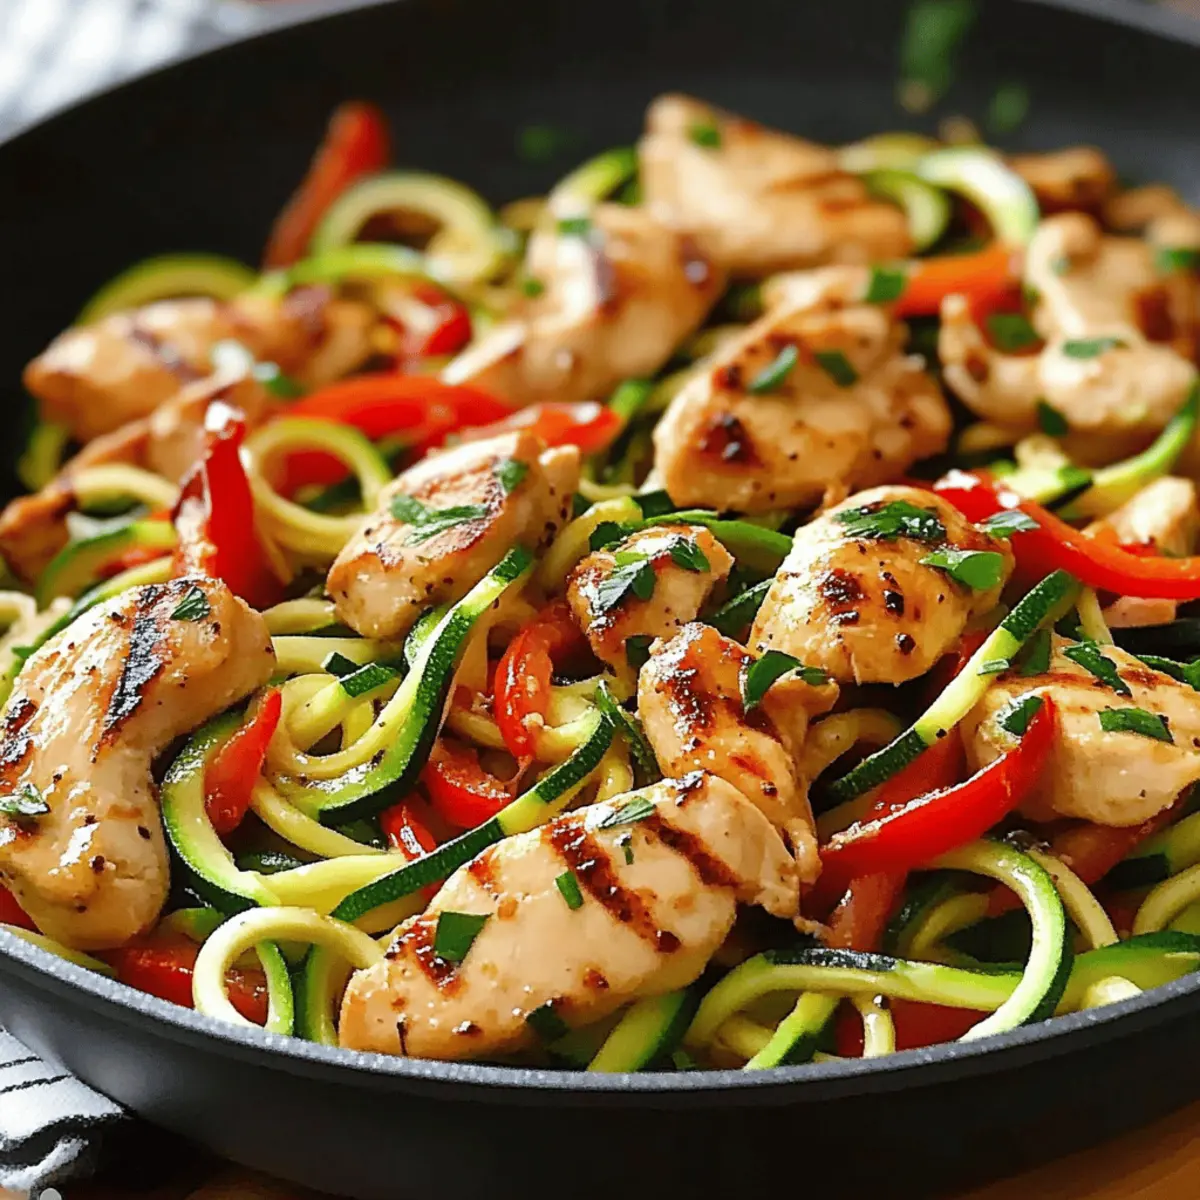
The aroma of sizzling garlic wafts through my kitchen, instantly transporting me to a cozy bistro where flavors dance and mingle. This Savory Garlic Chicken Zucchini Noodles Stir-Fry is not just a meal; it’s a celebration of health and taste that fits seamlessly into your busy life. With tender chicken and vibrant zucchini noodles enveloped in a rich garlic sauce, this dish is a low-carb, dairy-free delight that’s quick and easy to prepare. Whether you’re looking to please a crowd or simply craving a comforting, nutritious dinner, this recipe has you covered. Are you ready to indulge in a fresh twist on your favorite stir-fry? Let's dive in!

Why love garlic chicken zucchini noodles?

Deliciously Light: This dish offers a refreshing twist, replacing traditional pasta with zucchini noodles, giving you a lighter, guilt-free meal.
Savory and Satisfying: The savory garlic sauce combined with tender chicken and colorful veggies creates layers of flavor that will please your palate.
Quick Prep Time: With a total cooking time under 30 minutes, it’s perfect for busy weeknights when you crave homemade goodness without the fuss.
Versatile Options: Feel free to mix things up by adding shrimp or tofu for a protein boost or incorporating extra veggies like broccoli for added nutrition. If you enjoy quick and flavorful dishes, check out my Honey Garlic Chicken or Chicken Teriyaki Noodles for more meal inspiration!
Healthy and Wholesome: Low in carbs yet high in protein, this dish supports your wellness goals—enjoy a comforting meal that won't derail your diet.

Garlic Chicken Zucchini Noodles Ingredients

For the Noodles

  • Zucchini – Spiralized to create a noodle-like texture; yellow squash can be a delightful alternative.

For the Chicken

  • Chicken Breasts – Tender and protein-packed; swap for turkey or tofu if desired.

For the Vegetables

  • Olive Oil – Perfect for sautéing, lending richness; coconut oil can be used for a unique twist.
  • Garlic – Provides depth of flavor; you can substitute with garlic powder (1/8 teaspoon per clove) in a pinch.
  • Onion – Adds sweetness and aroma; shallots work as a milder alternative.
  • Red Bell Pepper – Brings color and sweetness; feel free to use any sweet pepper of choice.
  • Crushed Red Pepper Flakes – Introduces a touch of heat; omit if you prefer a milder dish.

For the Sauces

  • Soy Sauce – Infuses umami flavor; tamari is a great gluten-free option.
  • Oyster Sauce – Enhances richness; substitute with hoisin sauce for a vegetarian option.

For the Garnish

  • Fresh Parsley – Adds a burst of freshness; basil can be used as an alternative.
  • Grated Parmesan Cheese – Optional for creaminess; skip for a completely dairy-free dish.

For Seasoning

  • Salt and Pepper – Essential for balancing flavors; adjust according to your taste preferences.

Indulge in these Garlic Chicken Zucchini Noodles ingredients and prepare for a delightful meal that’s easy and satisfying!

Step‑by‑Step Instructions for Garlic Chicken Zucchini Noodles

Step 1: Prepare the Zucchini
Start by spiralizing the zucchini using a spiralizer, creating long noodle-like strands. This step can take about 5 minutes. Once spiralized, set the zucchini noodles aside on a plate, ensuring they don’t release too much moisture before cooking. Visualize a pile of fresh, vibrant green noodles, ready to soak up the delicious flavors of your Garlic Chicken Zucchini Noodles.

Step 2: Sauté Aromatics
In a large skillet, heat 2 tablespoons of olive oil over medium-high heat until shimmering, which should take about 1 minute. Add 3 minced garlic cloves and ½ sliced onion, stirring them frequently. Sauté until the mixture becomes fragrant and the onions are translucent, about 2-3 minutes. The garlic should turn golden but not burnt, adding a rich base for your dish.

Step 3: Cook the Chicken
Introduce 1 pound of sliced chicken breasts to the skillet, seasoning with salt, pepper, and a pinch of crushed red pepper flakes to taste. Cook the chicken for about 5-7 minutes, stirring occasionally until it turns golden brown and is cooked through. You'll know the chicken is done when it reaches an internal temperature of 165°F and the juices run clear.

Step 4: Add the Vegetables
Once the chicken is nicely browned, add 1 sliced red bell pepper into the skillet. Cook for an additional 2 minutes, stirring often, to soften the bell pepper while maintaining its vibrant color and crunch. This step adds a sweet flavor and a beautiful pop of color to your Garlic Chicken Zucchini Noodles.

Step 5: Combine Everything
Lower the heat to medium and gently stir in the spiralized zucchini noodles, along with 2 tablespoons of soy sauce and 1 tablespoon of oyster sauce, if using. Mix everything well and cook for another 3-4 minutes until the zucchini noodles are tender but still have a slight bite, which is essential for retaining their texture.

Step 6: Garnish and Serve
Finally, remove the skillet from the heat and garnish your Garlic Chicken Zucchini Noodles with freshly chopped parsley. If desired, sprinkle some grated Parmesan cheese on top for extra richness. Serve immediately on warm plates to enjoy this vibrant and delicious meal while it's at its freshest, bringing together the fantastic flavors you’ve just created.

Expert Tips for Garlic Chicken Zucchini Noodles

  • Spiralize Properly: Make sure to spiralize the zucchini evenly to ensure it cooks at the same rate, providing a consistent texture throughout your dish.

  • Mind the Cooking Time: Avoid overcooking the zucchini noodles; cook them until just tender to maintain their pleasant crunch, enhancing the overall dish.

  • Flavor Boost: Use fresh garlic instead of garlic powder for a more vibrant flavor in your garlic chicken zucchini noodles, as it truly elevates the taste experience.

  • Quality Ingredients Matter: Invest in high-quality soy sauce and fresh vegetables; they make a noticeable difference in flavor and overall satisfaction of your dish.

  • Temperature Check: Be sure the chicken reaches an internal temperature of 165°F (75°C) before serving to ensure it's safe and perfectly cooked every time.

What to Serve with Savory Garlic Chicken Zucchini Noodles

Elevate your dining experience by pairing these flavorful noodles with delightful sides and beverages that perfectly complement their delicious essence.

  • Crispy Green Salad: A light salad with mixed greens and a tangy vinaigrette adds a refreshing crunch, perfectly balancing the richness of the garlic sauce.
  • Garlic Breadsticks: Soft, warm breadsticks infused with garlic are perfect for soaking up any leftover sauce, creating a comforting dining experience.
  • Roasted Asparagus: Seasoned with olive oil and a sprinkle of salt, the earthy flavors of roasted asparagus enhance the meal with bright colors and nutrients.
  • Cauliflower Rice: Light and fluffy, cauliflower rice is a great low-carb alternative that mirrors the textures of the zucchini noodles while adding more vegetables to your plate.
  • Chilled White Wine: A crisp Sauvignon Blanc or Pinot Grigio pairs perfectly, enhancing the savory elements while providing a refreshing sip between bites.
  • Coconut Chia Pudding: Finish the meal on a sweet note with a light, dairy-free dessert that brings together coconut and fresh fruit, balancing savory flavors with tropical sweetness.
  • Sweet Potato Fries: Roasted or air-fried, these crispy bites offer a sweet contrast to your savory main, adding a delightful crunch to every meal.
  • Herbed Quinoa: Light, fluffy quinoa cooked with herbs provides a protein-packed side that harmonizes well with the flavors of garlic chicken.
  • Lemon Sorbet: A refreshing way to cleanse the palate, this bright dessert lightens the meal and leaves you feeling satisfied.

Storage Tips for Garlic Chicken Zucchini Noodles

  • Fridge: Store leftovers in an airtight container in the refrigerator for up to 2 days. Make sure to keep the noodles separate from the sauce to maintain texture.
  • Freezer: While it's best enjoyed fresh, you can freeze the chicken mixture (without noodles) for up to 1 month. Thaw in the fridge overnight before reheating.
  • Reheating: To reheat, warm gently in a skillet over medium heat. If the zucchini noodles are included, add a splash of water to prevent them from becoming too mushy.
  • Fresh Garnish: When serving leftovers, consider adding a bit of fresh parsley or a sprinkle of Parmesan to revive the flavors of your Garlic Chicken Zucchini Noodles.

Make Ahead Options

These Garlic Chicken Zucchini Noodles are perfect for meal prep enthusiasts! You can spiralize the zucchini and store it in an airtight container in the refrigerator for up to 3 days, which helps maintain its crisp texture. Additionally, you can sauté the chicken and vegetables a day in advance, letting the flavors meld beautifully; just reheat gently before adding the zucchini and sauces. When you're ready to serve, simply toss everything together and heat for a quick, delicious dinner. This prep method ensures a fresh, vibrant dish with minimal effort, so you spend less time cooking during your busy weekdays!

Garlic Chicken Zucchini Noodles Variations

Embark on a culinary adventure by customizing your Garlic Chicken Zucchini Noodles to suit your taste!

  • Dairy-Free: Omit Parmesan cheese and use nutritional yeast for a cheesy flavor without dairy. It adds a delightful umami kick!
  • Low-Carb Enrichment: Add sautéed mushrooms for an earthy flavor that complements the dish while amplifying its low-carb profile beautifully.
  • Spicy Kick: Incorporate chopped jalapeños for a fresh burst of heat. This twist electrifies the dish with every spiralized noodle!
  • Extra Protein: Toss in cooked shrimp or chickpeas to amp up the protein content. Both offer unique textures and flavors that enhance the overall dish.
  • Vegetable Medley: Include snap peas and shredded carrots for a colorful presentation and added crunch. Kids will love the vibrant mix in every bite!
  • Citrus Zing: Squeeze fresh lemon juice over the dish just before serving for a bright flavor lift. It’s a tangy surprise in your savory concoction!
  • Gluten-Free Swap: Use tamari instead of soy sauce for a gluten-free option. It maintains the rich umami taste without compromising dietary needs.
  • Herbal Infusion: Experiment with fresh basil or cilantro instead of parsley for a herby twist that will transport your taste buds to a sunny garden.

As you explore these variations, don’t forget to check out my delicious Crock Pot Chicken for a hearty meal or try the flavorful Spatchcock Chicken Flavor when you crave something warm and comforting!

Garlic Chicken Zucchini Noodles Recipe FAQs

How do I choose the best zucchini for this recipe?
Absolutely! Look for zucchinis that are firm and shiny, with no dark spots or blemishes. Smaller zucchinis (around 6 to 7 inches) tend to be sweeter and less watery, making them ideal for spiralizing. If you notice any soft spots, it’s best to skip those, as they could negatively affect the texture of your Garlic Chicken Zucchini Noodles.

How should I store leftovers of Garlic Chicken Zucchini Noodles?
Very good question! Store leftovers in an airtight container in the refrigerator for up to 2 days. It's important to keep the zucchini noodles separate from the chicken mixture to maintain their texture. For the best results, reheat gently in a skillet over medium heat, adding a splash of water if necessary to prevent the noodles from getting mushy.

Can I freeze Garlic Chicken Zucchini Noodles?
While it’s best enjoyed fresh, you can freeze the chicken mixture (without the zucchini noodles) for up to 1 month. Here’s how to do it: let the chicken cool completely, then transfer it to a freezer-safe bag or container. When you’re ready to enjoy it again, thaw it in the fridge overnight. Reheat in a skillet and cook your zucchini noodles fresh as needed for the best outcome!

What can I do if my zucchini noodles get mushy during cooking?
Ah, the classic zucchini noodle conundrum! To prevent mushiness, be mindful of the cooking time—aim for 3-4 minutes until just tender. If you find they’ve become too soft, you could consider sautéing them separately for just a minute before combining with the chicken. This helps retain some firmness and makes for a more enjoyable texture in your dish.

Are there any dietary considerations for Garlic Chicken Zucchini Noodles?
Certainly! This recipe is both low-carb and dairy-free, making it a great option for those with dietary restrictions. If you have gluten allergies, ensure to use tamari instead of soy sauce. For those with shellfish allergies, simply omit any oyster sauce or substitute it with hoisin sauce for flavor. Remember, if you're serving this dish to pets, it’s best to keep garlic and onion away, as they’re not safe for them!

Garlic Chicken Zucchini Noodles

Savory Garlic Chicken Zucchini Noodles for a Fresh Twist

A delightful Garlic Chicken Zucchini Noodles dish that’s a low-carb, dairy-free twist on a classic stir-fry.
Print Recipe Pin Recipe
Prep Time 10 minutes mins
Cook Time 20 minutes mins
Total Time 30 minutes mins
Servings: 4 servings
Course: Dinner
Cuisine: Asian
Calories: 320
Ingredients Equipment Method Nutrition Notes

Ingredients
  

For the Noodles
  • 2 medium Zucchini Spiralized
For the Chicken
  • 1 pound Chicken Breasts Sliced
For the Vegetables
  • 2 tablespoons Olive Oil Can substitute with coconut oil
  • 3 cloves Garlic Minced
  • ½ medium Onion Sliced
  • 1 medium Red Bell Pepper Sliced
  • ¼ teaspoon Crushed Red Pepper Flakes Optional
For the Sauces
  • 2 tablespoons Soy Sauce Can substitute with tamari
  • 1 tablespoon Oyster Sauce Optional, substitute with hoisin sauce for vegetarian
For the Garnish
  • ¼ cup Fresh Parsley Chopped
  • ¼ cup Grated Parmesan Cheese Optional
For Seasoning
  • to taste Salt
  • to taste Pepper

Equipment

  • Skillet
  • Spiralizer

Method
 

Preparation Steps
  1. Spiralize the zucchini and set aside.
  2. Heat olive oil in a skillet and sauté garlic and onion until fragrant.
  3. Add sliced chicken, season, and cook until browned and cooked through.
  4. Stir in sliced red bell pepper and cook for 2 minutes.
  5. Add zucchini noodles, soy sauce, and oyster sauce; mix and cook until tender.
  6. Garnish with parsley and Parmesan before serving.

Nutrition

Serving: 1servingCalories: 320kcalCarbohydrates: 10gProtein: 30gFat: 15gSaturated Fat: 2gPolyunsaturated Fat: 1gMonounsaturated Fat: 8gCholesterol: 80mgSodium: 700mgPotassium: 800mgFiber: 3gSugar: 4gVitamin A: 1200IUVitamin C: 60mgCalcium: 80mgIron: 2mg

Notes

Store leftovers in an airtight container for up to 2 days. If freezing, exclude the noodles.

Tried this recipe?

Let us know how it was!

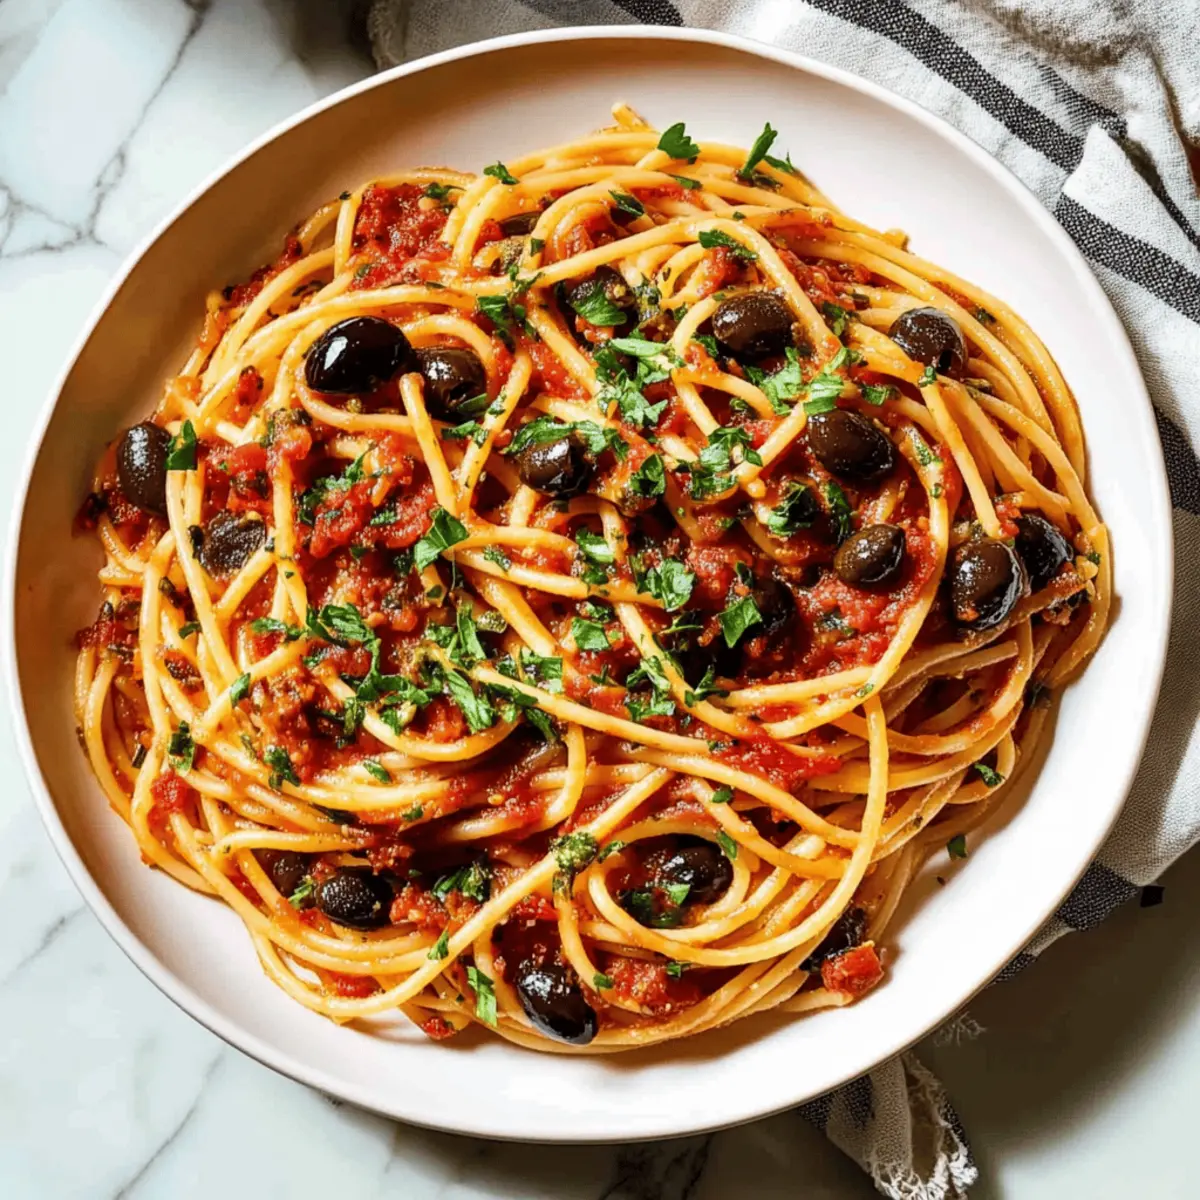
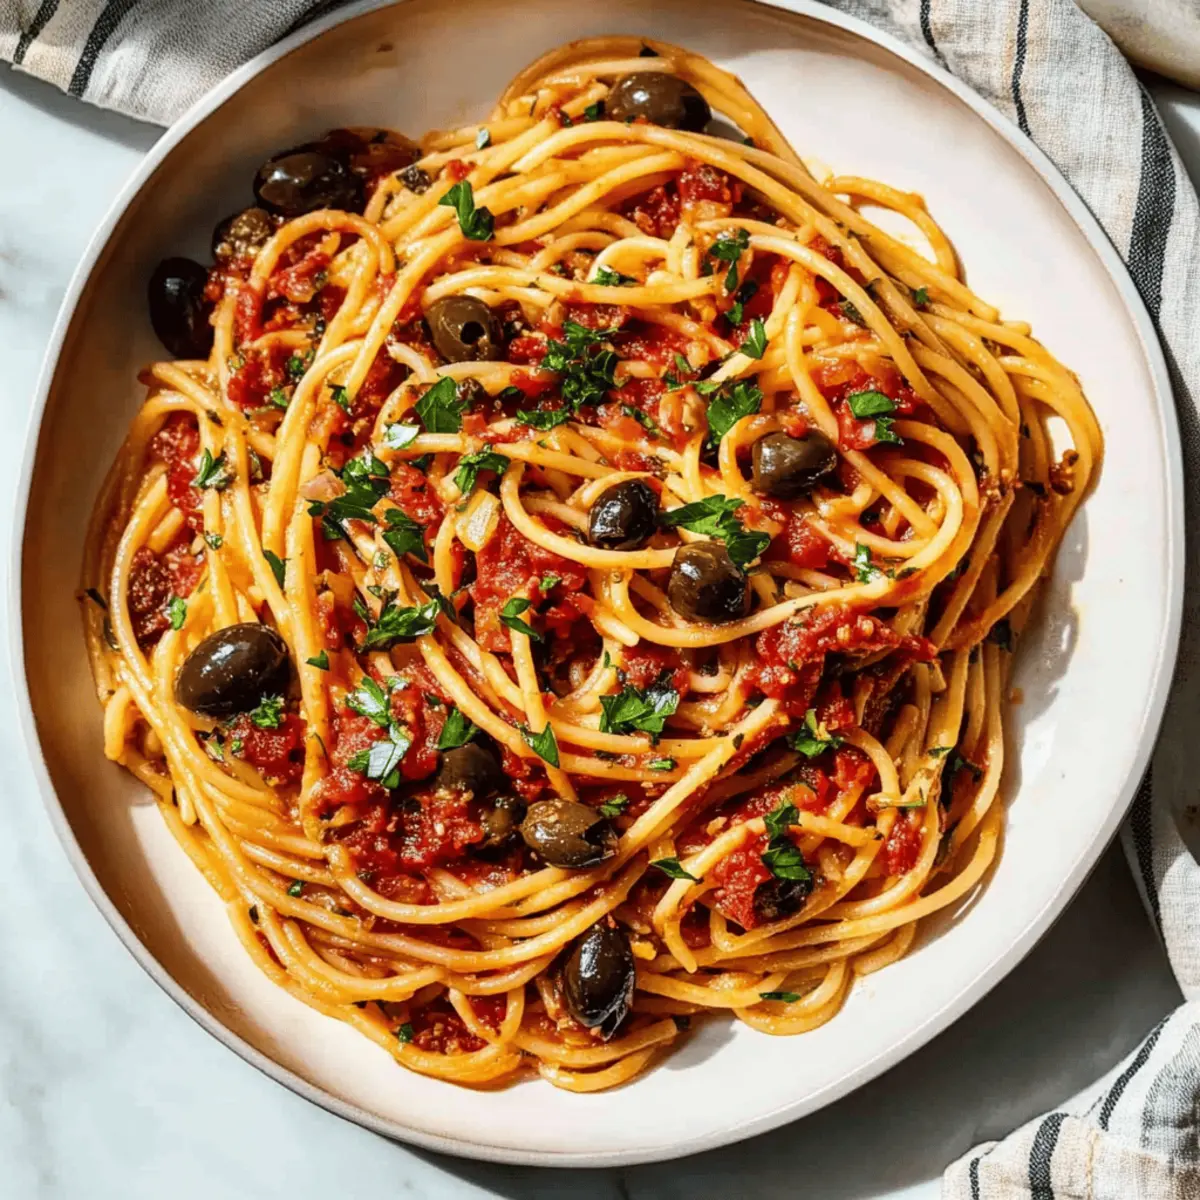
Easily Whip Up Flavorful Pasta Puttanesca in 30 Minutes

September 26, 2025 by Grace Snow Leave a Comment

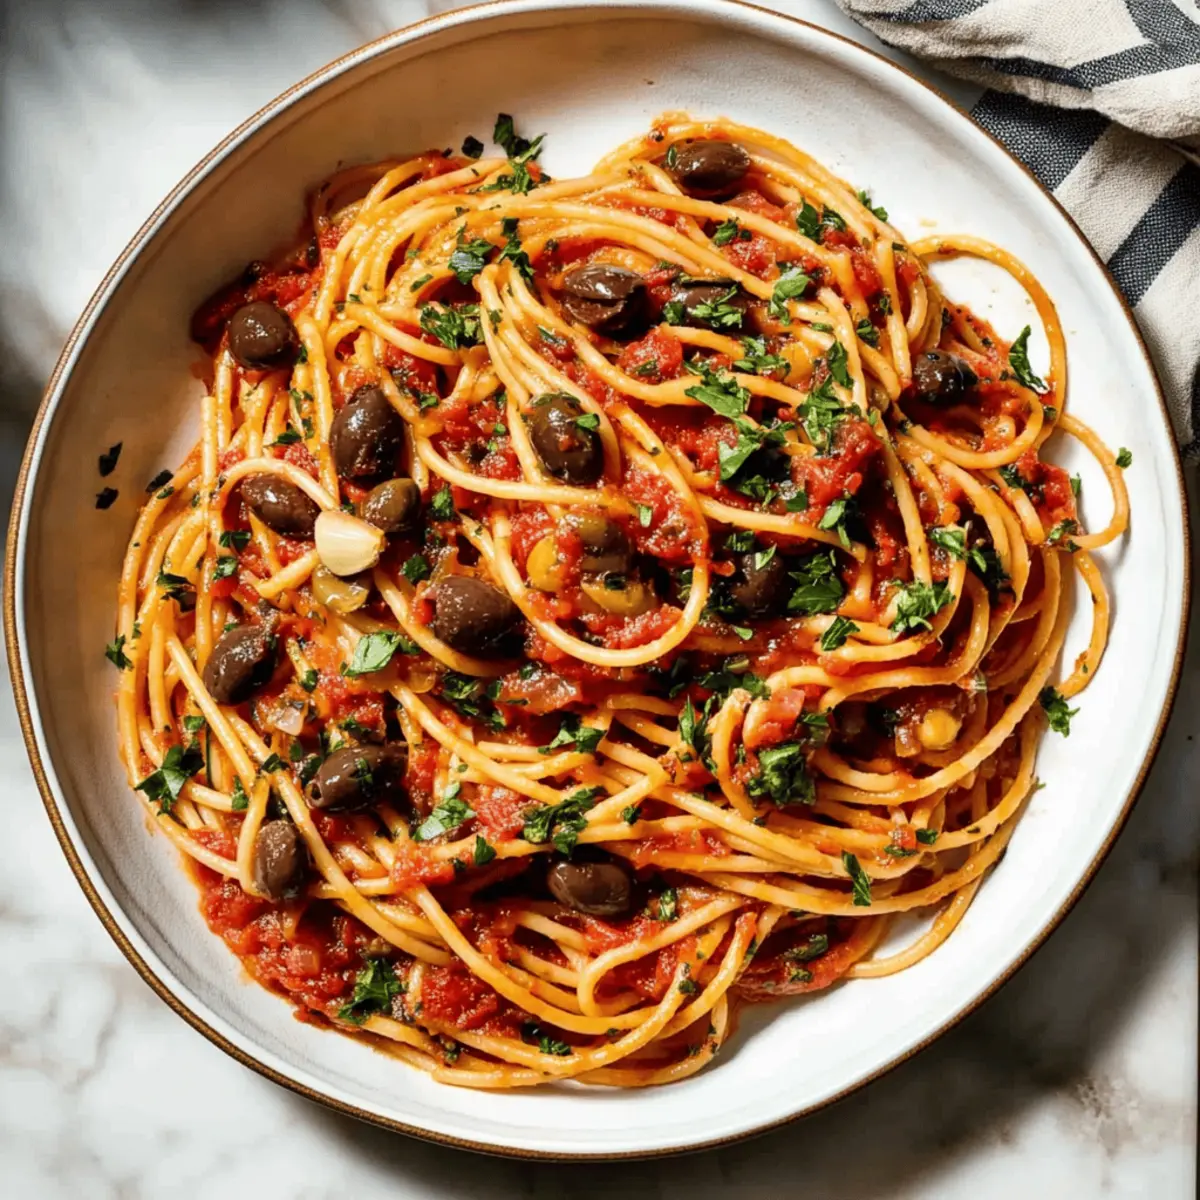
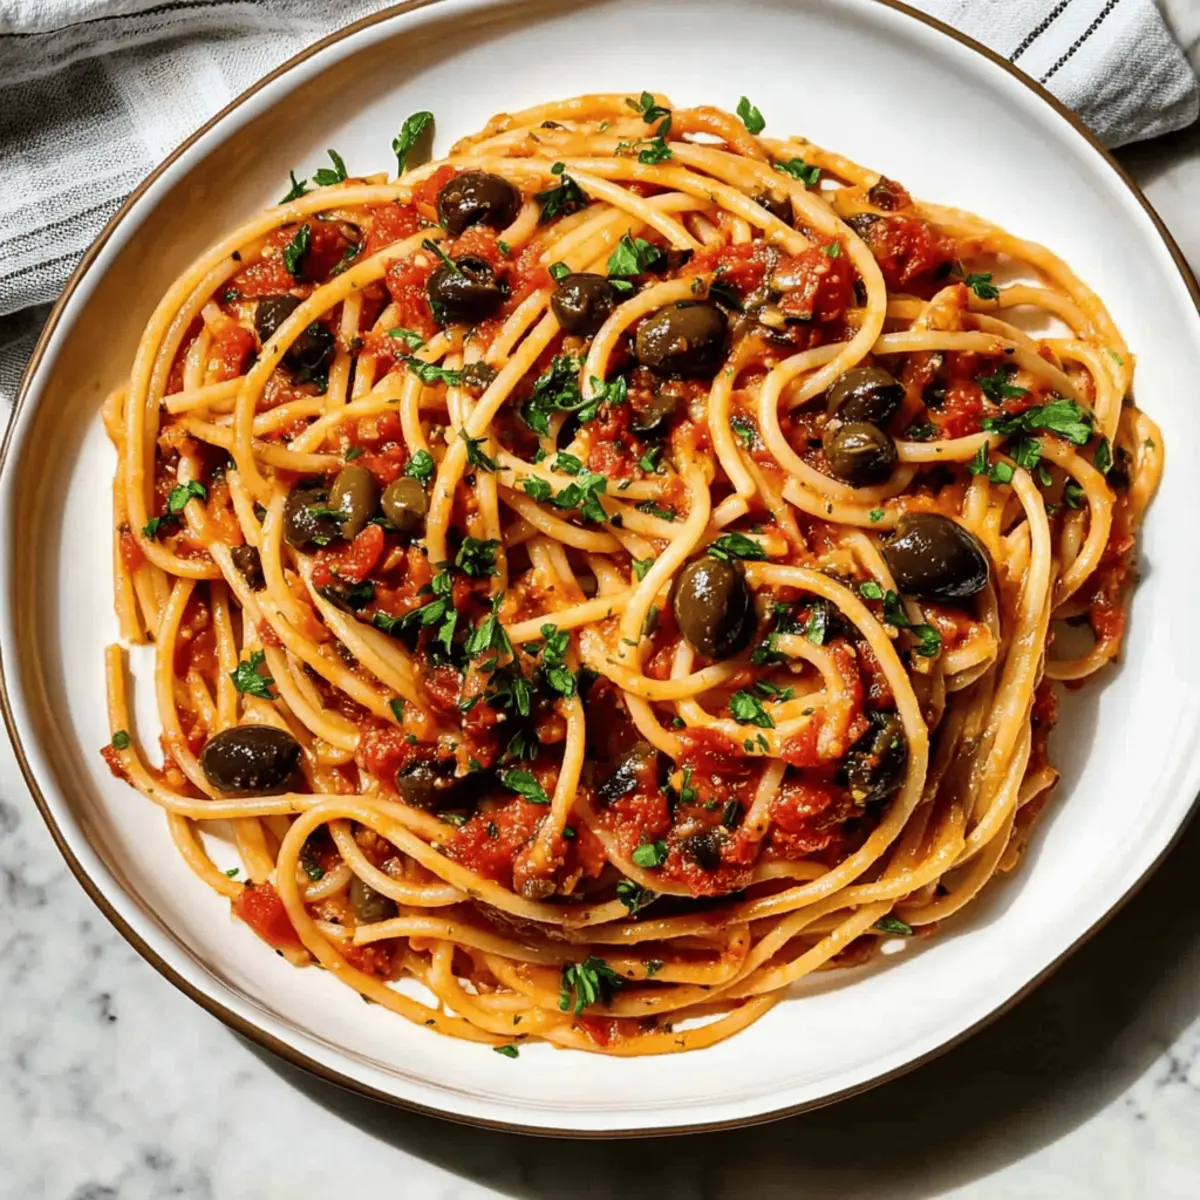
A vibrant, tangy tomato sauce is the heart of every great pasta dish, but there's something truly enchanting about the bold flavors found in Pasta Puttanesca. With garlic, briny capers, and olives swirling together in a mouthwatering medley, it's a dish that not only satisfies your cravings but also brings a taste of Italy right to your kitchen. This quick vegetarian version skips the anchovies while still delivering robust flavor in under 30 minutes, making it perfect for hectic weeknights or lazy weekends alike. Imagine delighting your family or friends with a hearty meal that’s easy to whip up, yet sophisticated enough to impress. Ready to dive into the delightful world of Pasta Puttanesca? Let’s explore how to bring this delectable dish to your table tonight!

Why is Pasta Puttanesca a Must-Try?

Quick Preparation: This recipe comes together in under 30 minutes, making it ideal for busy schedules.

Robust Flavor: The irresistible combination of capers, olives, and garlic creates a tangy, savory sauce that will tantalize your taste buds.

Vegetarian Delight: Perfectly embracing the essence of traditional puttanesca, but without anchovies, this vegetarian version offers full-bodied flavor that everyone will love.

Versatile Base: Feel free to customize with veggies like spinach or zucchini noodles; it’s the perfect dish to adapt to your preferences or dietary needs.

Crowd-Pleaser: Whether you’re serving family or hosting friends, this meal is sure to elicit compliments and happy bellies, truly encapsulating the spirit of Italian cuisine. Try pairing with a fresh salad or homemade garlic bread for a complete experience that will make you feel right at home.

Pasta Puttanesca Ingredients

• A classic dish with a twist awaits you!

For the Sauce

  • San Marzano Tomatoes – These whole peeled tomatoes provide the sauce's rich foundation and exceptional flavor.
  • Extra-Virgin Olive Oil – A splash of this oil adds depth; high-quality olive oil works well if needed.
  • Shallot – This mild, sweet onion enhances the sauce's base; you can use a small yellow onion if you don’t have shallots.
  • Sea Salt – Crucial for enhancing flavors; substitute with kosher or table salt as necessary.
  • Garlic – Fresh garlic is key in delivering that aromatic savoriness; avoid switching it to garlic powder.
  • Red Pepper Flakes – They add just the right heat; adjust the amount to suit your spice preference.
  • Capers – Essential for the classic briny taste of a true Pasta Puttanesca; don’t skip this ingredient!
  • Kalamata Olives – Their salty flavor complements the sauce beautifully; green olives can be used as a substitute.

For the Pasta

  • Spaghetti – The traditional choice for this dish; feel free to swap in linguine or bucatini for variety.

For Garnish

  • Fresh Parsley – Adds a pop of freshness and color; while optional, it enhances the dish’s appearance and flavor.

Explore the vibrant flavors and enjoy cooking your very own Pasta Puttanesca while creating memorable moments around the dinner table!

Step‑by‑Step Instructions for Pasta Puttanesca

Step 1: Prep the Tomatoes
Begin by draining a can of whole San Marzano tomatoes. Place them in a bowl and use your hands or a fork to crush them into a chunky consistency. This will serve as the flavorful base of your Pasta Puttanesca sauce, bringing brightness and richness to every bite.

Step 2: Cook Aromatics
In a large skillet, heat 3 tablespoons of extra-virgin olive oil over medium heat. Add 1 finely chopped shallot and a pinch of sea salt, sautéing for 4-5 minutes until tender and translucent. Mix in 2 minced garlic cloves, 1/2 teaspoon of red pepper flakes, 2 tablespoons of capers, and 1/2 cup of sliced Kalamata olives, cooking for an additional 2 minutes until fragrant.

Step 3: Make the Sauce
Stir the crushed tomatoes into the skillet and bring to a gentle simmer over medium-low heat. Allow the mixture to bubble away for 8-10 minutes, stirring occasionally. As the sauce thickens, its vibrant color will deepen, melding the flavors of garlic, olives, and capers, creating a robust sauce for your Pasta Puttanesca.

Step 4: Cook Pasta
While the sauce simmers, fill a large pot with water and bring it to a rolling boil. Once boiling, add a generous amount of salt and then the spaghetti or long pasta of your choice. Cook according to the package instructions until al dente, usually around 8-10 minutes. Don’t forget to reserve 1 cup of the starchy pasta water before draining!

Step 5: Combine & Toss
After draining the pasta, return it to the pot. Add the simmering sauce and 1/2 cup of the reserved pasta water, tossing everything together to coat the noodles evenly. If the sauce seems too thick, gradually add more pasta water until you achieve your preferred consistency for this delightful Pasta Puttanesca.

Step 6: Finish & Serve
Incorporate a handful of freshly chopped parsley into your pasta, mixing well to brighten up the dish. Taste and season with additional salt if needed, considering the saltiness of the olives and capers. Serve hot, garnished with extra parsley for a fresh pop of color, and enjoy the vibrant flavors of your Pasta Puttanesca!

Tips for the Best Pasta Puttanesca

  • Use Quality Ingredients: High-quality San Marzano tomatoes and extra-virgin olive oil make a significant difference in flavor. Avoid low-grade substitutes.
  • Don’t Skip the Salt: Adding sea salt helps elevate the flavors in your Pasta Puttanesca. Remember to adjust the salt at the end since capers and olives contribute saltiness.
  • Pasta Water Magic: Always reserve that starchy pasta water! It helps bind the sauce to the spaghetti and adds a lovely creaminess.
  • Adjust Spiciness: If you prefer a milder dish, start with less red pepper flakes. You can always add more during cooking!
  • Fresh Garnish: Finish your dish with freshly chopped parsley, which adds vibrant color and enhances the overall presentation and flavor.
  • Experiment and Customize: Feel free to incorporate your favorite vegetables like zucchini, peas, or spinach; it’s a versatile base for bringing in added nutrition!

Storage Tips for Pasta Puttanesca

  • Room Temperature: Keep Pasta Puttanesca at room temperature for no more than 2 hours to maintain safety and freshness before storing it in the fridge.

  • Fridge: Store any leftovers in an airtight container for up to 3 days. Reheat gently on the stovetop or in the microwave, adding a splash of water if needed to loosen the sauce.

  • Freezer: If you'd like to save it for later, Pasta Puttanesca can be frozen for up to 2 months. Make sure to cool it completely before transferring it to a freezer-safe container.

  • Reheating: When ready to enjoy, thaw overnight in the fridge if frozen. Reheat over low heat, stirring occasionally, until warmed through, and adjust seasoning as needed.

What to Serve with Quick Vegetarian Pasta Puttanesca

Elevate your meal experience with these delightful pairings that will complement and enhance the flavors of your vibrant dish.

  • Garlic Bread: Soft yet crispy, this beloved classic is perfect for soaking up that rich, tangy sauce, adding a comforting crunch.

  • Mixed Green Salad: A light salad with a zesty vinaigrette provides a refreshing contrast to the hearty pasta, brightening up the meal.

  • Roasted Vegetables: Seasonal veggies like bell peppers and zucchini, lightly seasoned and caramelized, add color and nutrition that harmonizes beautifully with pasta flavors.

  • Parmesan Cheese: For those who enjoy a touch of decadence, sprinkling freshly grated Parmesan on top enhances umami flavors while adding creaminess to each bite.

  • Rosé Wine: A chilled glass of rosé will complement the briny notes of capers and olives while balancing the meal with its fruity undertones.

  • Focaccia: This soft Italian bread is great for dipping into sauce or enjoying as a side dish, introducing extra textures to your dining experience.

  • Tiramisu: Cap off your meal with a classic tiramisu for a delightful end; its layers of coffee-soaked cake and creamy mascarpone will surely please your sweet tooth.

Indulge in these pairings to create a truly memorable dinner that brings everyone together around the table!

Pasta Puttanesca Variations & Substitutions

Feel free to get creative with your Pasta Puttanesca! With these simple swaps and additions, you can tailor this dish to your tastes and dietary preferences.

  • Zucchini Noodles: Swap traditional spaghetti for zucchini noodles for a low-carb, gluten-free alternative. It's light and refreshing, perfect for summer!

  • Extra Veggies: Boost nutrients by adding fresh spinach or bell peppers. Sauté them with the aromatics for added flavor and texture in every bite.

  • Creamy Twist: For a luscious side, fold in a splash of cream or a dollop of ricotta cheese just before serving. This adds a delightful richness to each forkful.

  • Spicy Kick: If you love heat, amp up the red pepper flakes or toss in a chopped fresh chili. Feel free to adjust the spice levels to suit your palate!

  • Noodle Options: While this recipe calls for spaghetti, try using whole grain pasta, linguine, or even gluten-free varieties for a different flavor profile and texture.

  • Herb Swap: Fresh parsley adds a vibrant touch, but experiment with fresh basil or even a sprinkle of oregano for an added Italian flair.

  • Seafood Variation: For those who enjoy seafood, consider adding shrimp or mussels to the puttanesca sauce as it simmers. The flavors meld beautifully with the briny olives and capers.

  • Elevated Proteins: Incorporate white beans or chickpeas for extra protein and heartiness. This is a fantastic plant-based protein boost that complements the sauce perfectly.

For even more pasta inspiration, check out Skillet Pasta Sun, or if you're looking for a change of pace, try our Cauliflower Pasta Ready. Each variation can offer a fresh twist on this beloved classic!

Make Ahead Options

Pasta Puttanesca is a fantastic choice for meal prep, ensuring you can savor delicious home-cooked flavors even on the busiest nights! You can prepare the sauce up to 3 days in advance; simply cook the sauce according to the recipe, let it cool, and store it in an airtight container in the refrigerator. To prevent the pasta from sticking together, cook it fresh just before serving—only boil the spaghetti or your preferred long pasta according to package instructions right before you plan to combine it with the sauce. Reheat the sauce gently on the stovetop, and add a splash of reserved pasta water for the perfect consistency. Enjoy restaurant-quality Pasta Puttanesca with minimal fuss!

Pasta Puttanesca Recipe FAQs

How do I choose the best San Marzano tomatoes for this recipe?
Absolutely! When selecting San Marzano tomatoes, look for whole peeled varieties packaged in a can. They should have a rich red color without dark spots or blemishes. Check the label for "San Marzano" designations; authentic ones will come from the Campania region in Italy.

What is the best way to store leftover Pasta Puttanesca?
Very! Once your Pasta Puttanesca has cooled, store it in an airtight container in the refrigerator. It will keep fresh for up to 3 days. When reheating, gently warm it on the stovetop, and consider adding a splash of reserved pasta water to bring back its original consistency.

Can I freeze Pasta Puttanesca, and how should I do it?
Absolutely! To freeze your Pasta Puttanesca, allow it to cool completely, then transfer it into a freezer-safe container. It can be frozen for up to 2 months. When you’re ready to enjoy it, thaw in the refrigerator overnight, then reheat on the stovetop over low heat, stirring often to ensure even warming.

What should I do if my sauce is too salty?
Oh no! If your sauce turns out too salty due to the capers and olives, try adding a pinch of sugar or a few slices of raw potato to the sauce while simmering. This helps absorb some of the excess salt. Allow it to cook for a few more minutes, then remove the potato and adjust seasoning as needed.

Is there a way to make this dish gluten-free?
Yes! The more the merrier! You can easily swap out traditional spaghetti with gluten-free pasta made from rice or quinoa. There are also excellent options available like legume-based pasta that offer a lovely texture while keeping it gluten-free and nutritious.

Can I give this dish to my pets?
Not really. It's best to avoid sharing Pasta Puttanesca with pets, especially due to the ingredients like garlic and onions, which can be harmful to them. Always ensure to keep your beloved furry friends safe by offering them pet-friendly treats instead!

Pasta Puttanesca

Easily Whip Up Flavorful Pasta Puttanesca in 30 Minutes

Pasta Puttanesca combines bold flavors of garlic, capers, and olives in a vibrant sauce, perfect for a quick, satisfying meal.
Print Recipe Pin Recipe
Prep Time 10 minutes mins
Cook Time 20 minutes mins
Total Time 30 minutes mins
Servings: 4 servings
Course: Dinner
Cuisine: Italian
Calories: 350
Ingredients Equipment Method Nutrition Notes

Ingredients
  

For the Sauce
  • 1 can San Marzano Tomatoes whole peeled tomatoes
  • 3 tablespoons Extra-Virgin Olive Oil high-quality works best
  • 1 medium Shallot finely chopped
  • 1 teaspoon Sea Salt or to taste
  • 2 cloves Garlic minced
  • 0.5 teaspoon Red Pepper Flakes adjust to taste
  • 2 tablespoons Capers drained
  • 0.5 cup Kalamata Olives sliced
For the Pasta
  • 12 ounces Spaghetti or long pasta of choice
For Garnish
  • 0.5 cup Fresh Parsley chopped

Equipment

  • Large skillet
  • Large pot
  • Bowl

Method
 

Step‑by‑Step Instructions for Pasta Puttanesca
  1. Prep the Tomatoes: Drain a can of whole San Marzano tomatoes and crush them in a bowl.
  2. Cook Aromatics: Heat olive oil in a skillet, add chopped shallot and salt, sauté until tender. Mix in garlic, red pepper flakes, capers, and olives, cooking until fragrant.
  3. Make the Sauce: Stir crushed tomatoes into the skillet, bring to a simmer, and let bubble for 8-10 minutes.
  4. Cook Pasta: Boil water, add salt and spaghetti, cook until al dente, reserving 1 cup of pasta water.
  5. Combine & Toss: Mix drained pasta with sauce and reserved pasta water to achieve desired consistency.
  6. Finish & Serve: Toss in parsley, season to taste, serve hot with extra parsley on top.

Nutrition

Serving: 1servingCalories: 350kcalCarbohydrates: 55gProtein: 9gFat: 12gSaturated Fat: 1.5gMonounsaturated Fat: 10gSodium: 800mgPotassium: 550mgFiber: 4gSugar: 6gVitamin A: 8IUVitamin C: 20mgCalcium: 4mgIron: 10mg

Notes

Using high-quality ingredients, like San Marzano tomatoes, significantly enhances the flavor of Pasta Puttanesca.

Tried this recipe?

Let us know how it was!

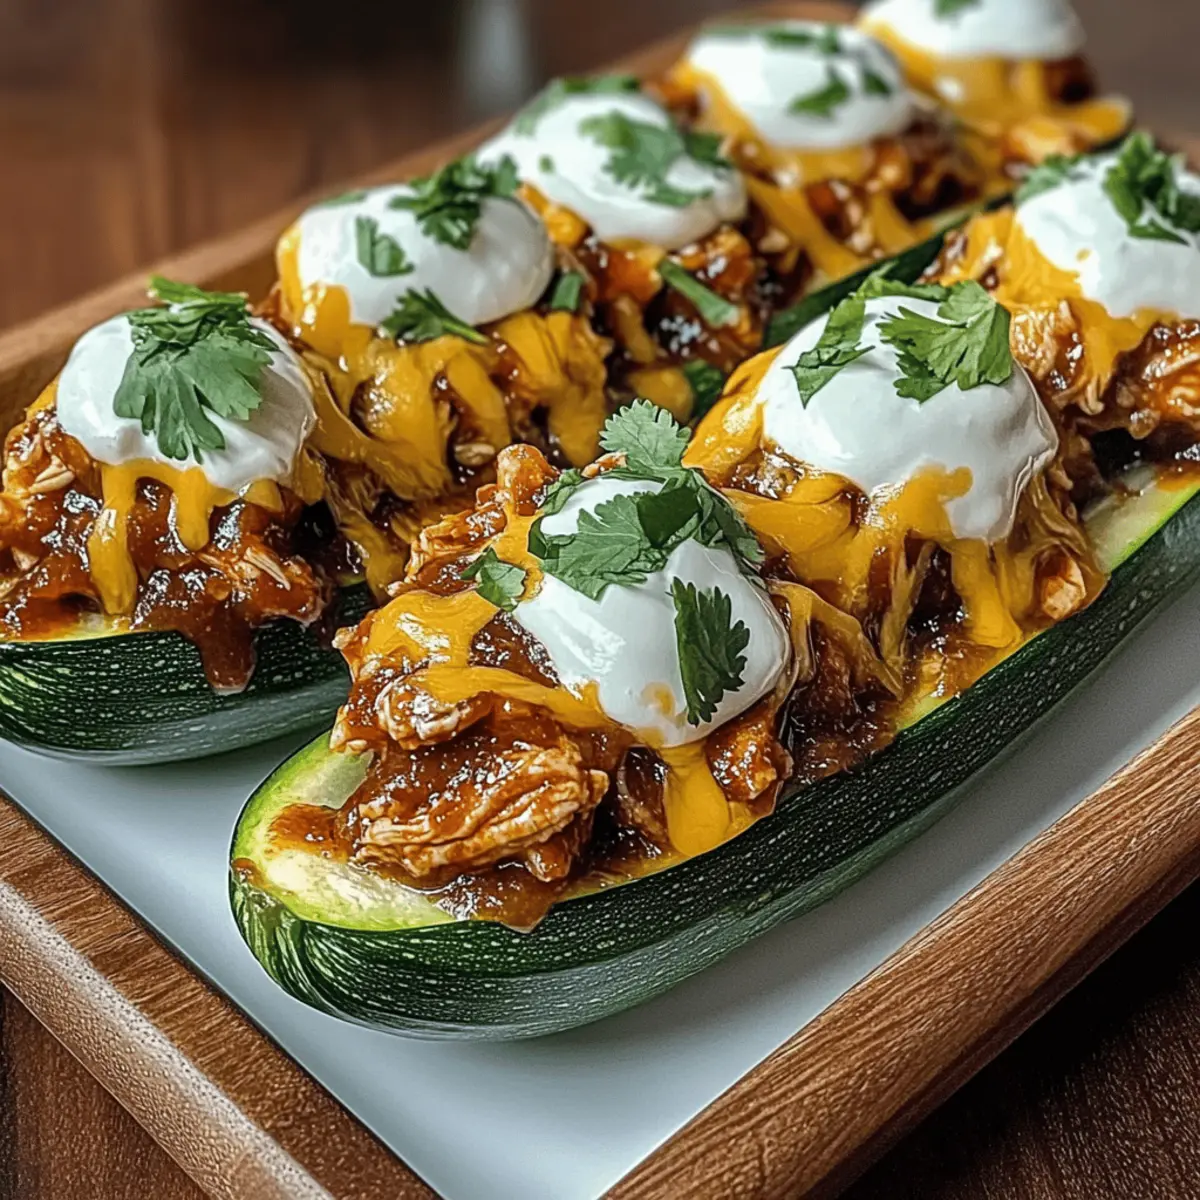
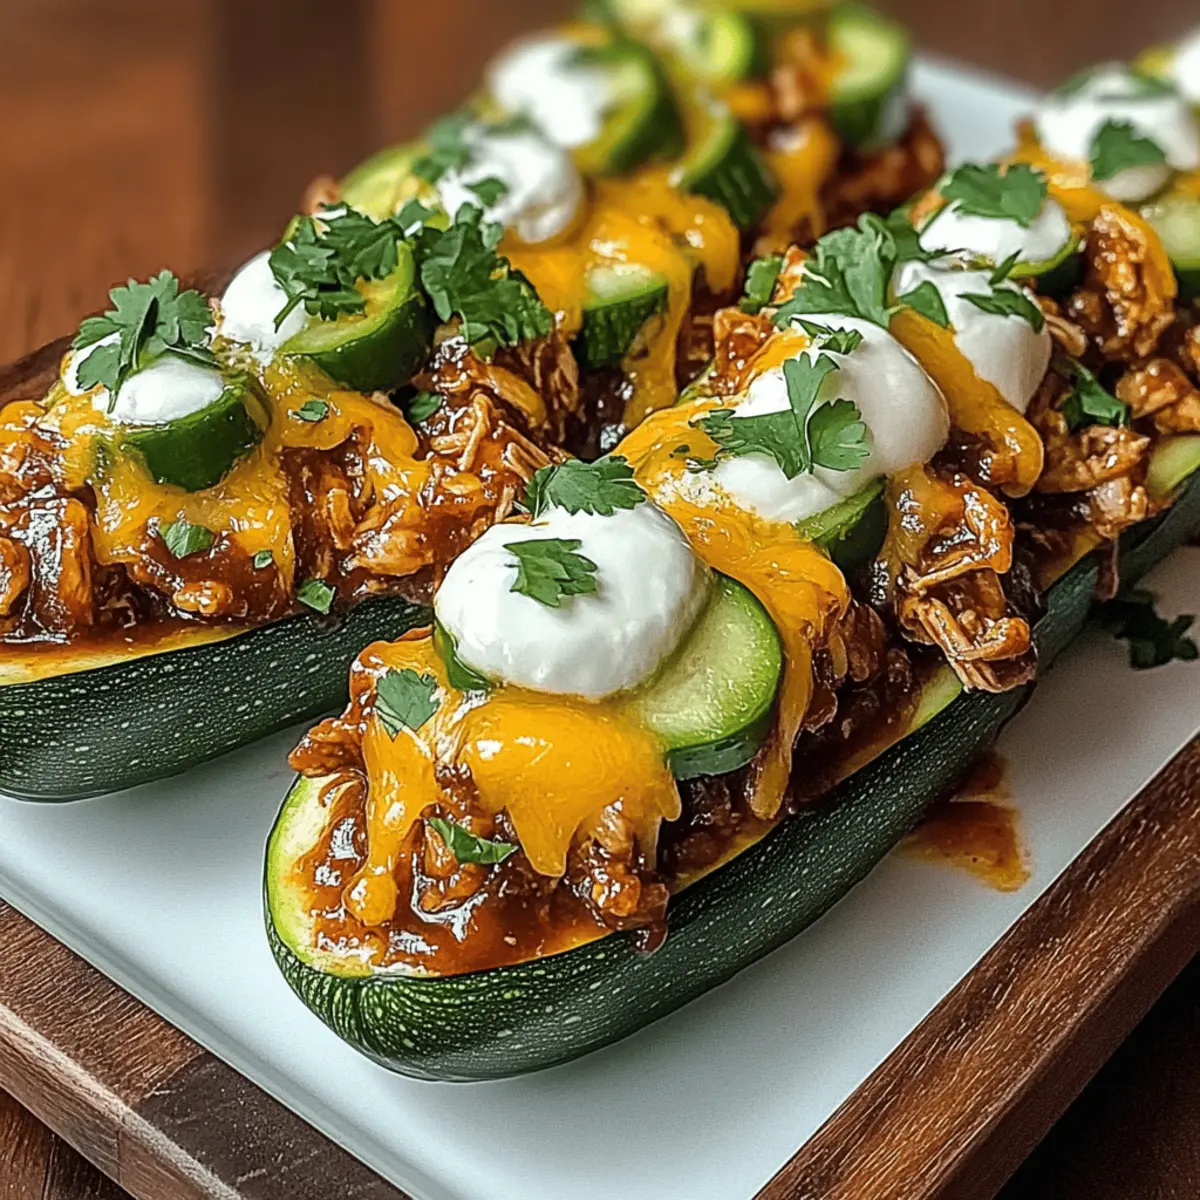
Sticky BBQ Chicken Zucchini Boats: Healthy Dinner Bliss

September 25, 2025 by Grace Snow Leave a Comment

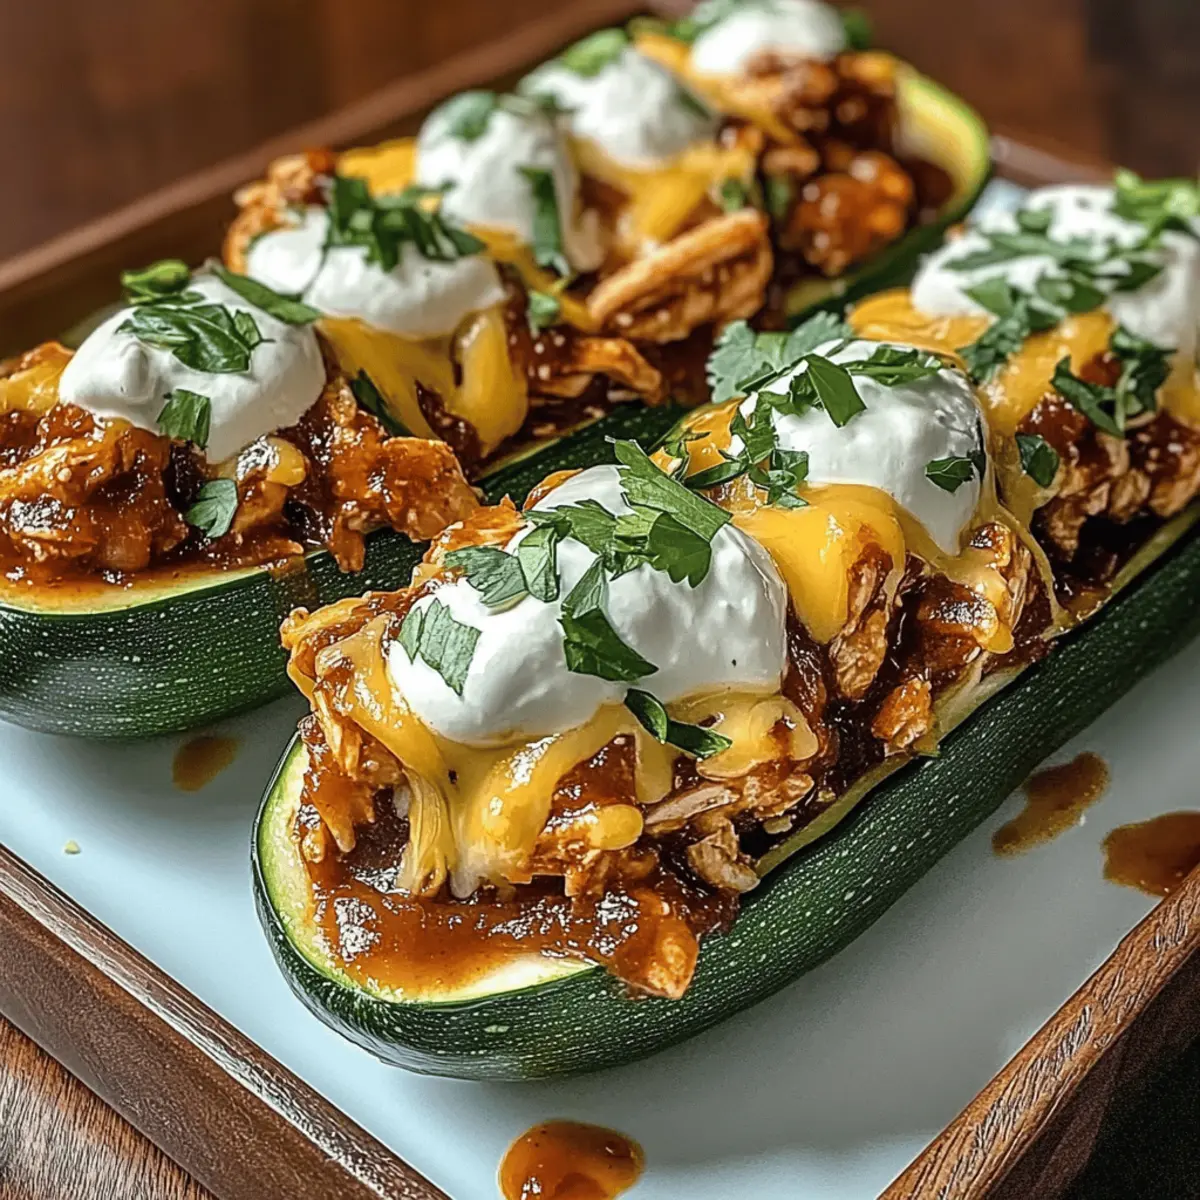
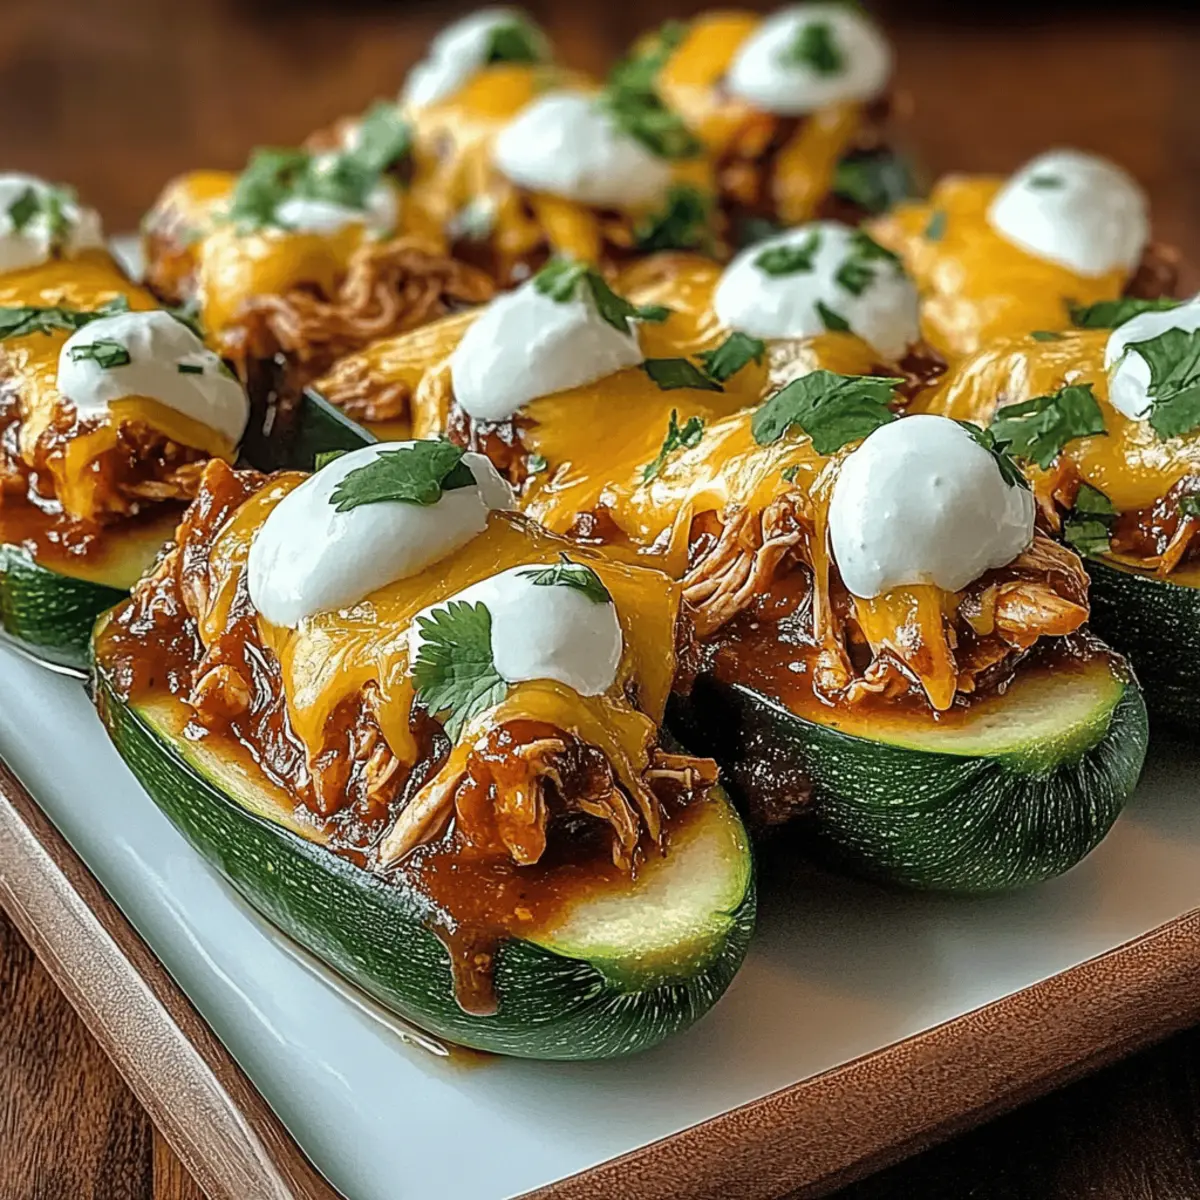
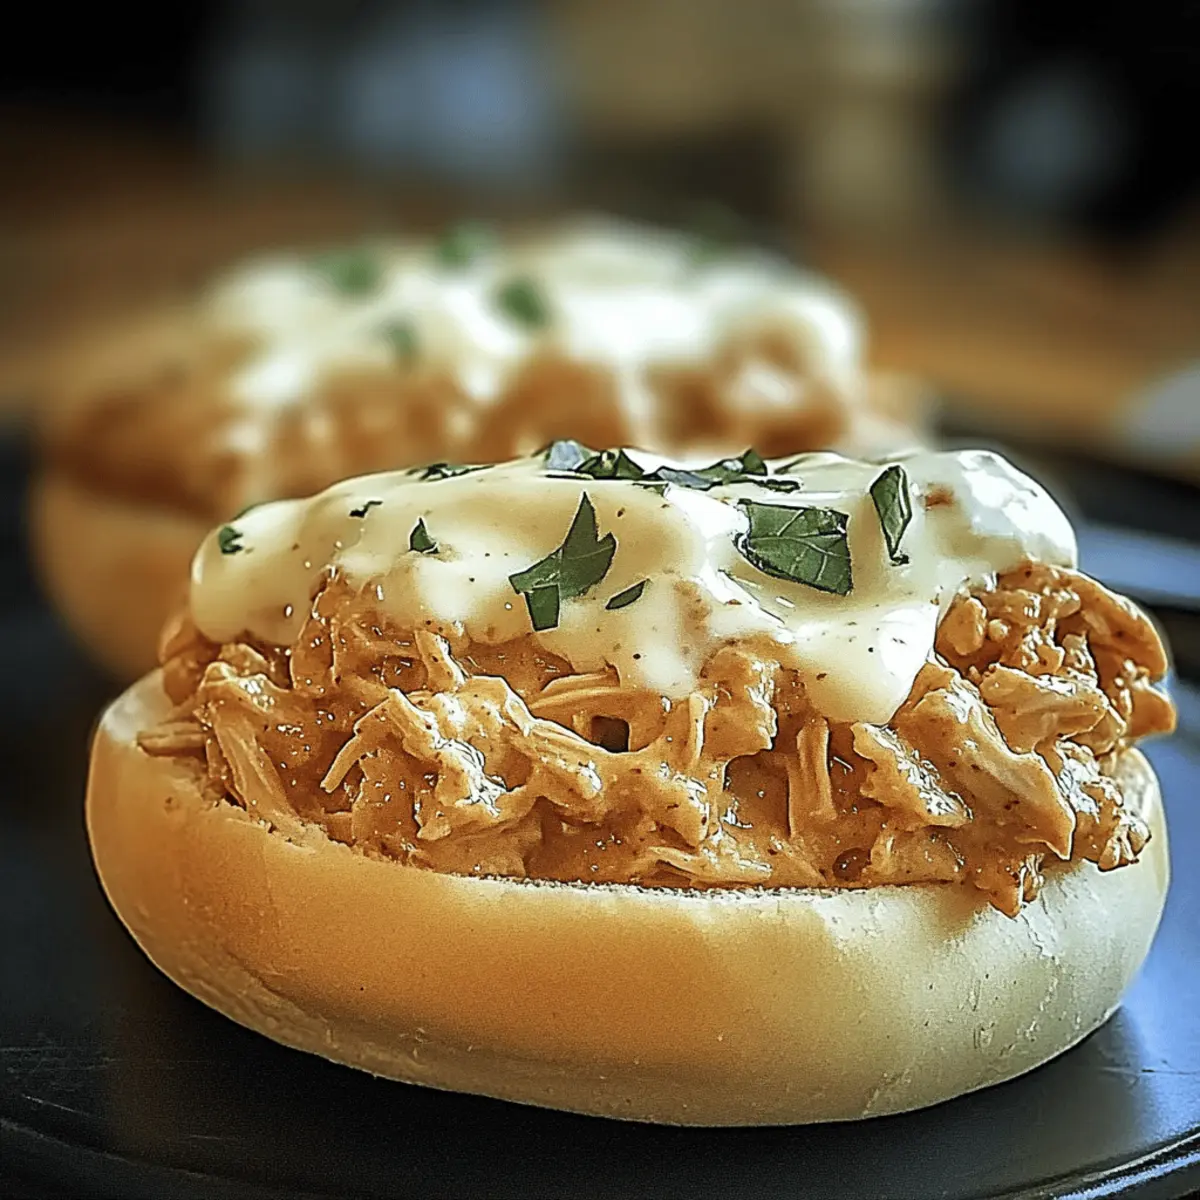
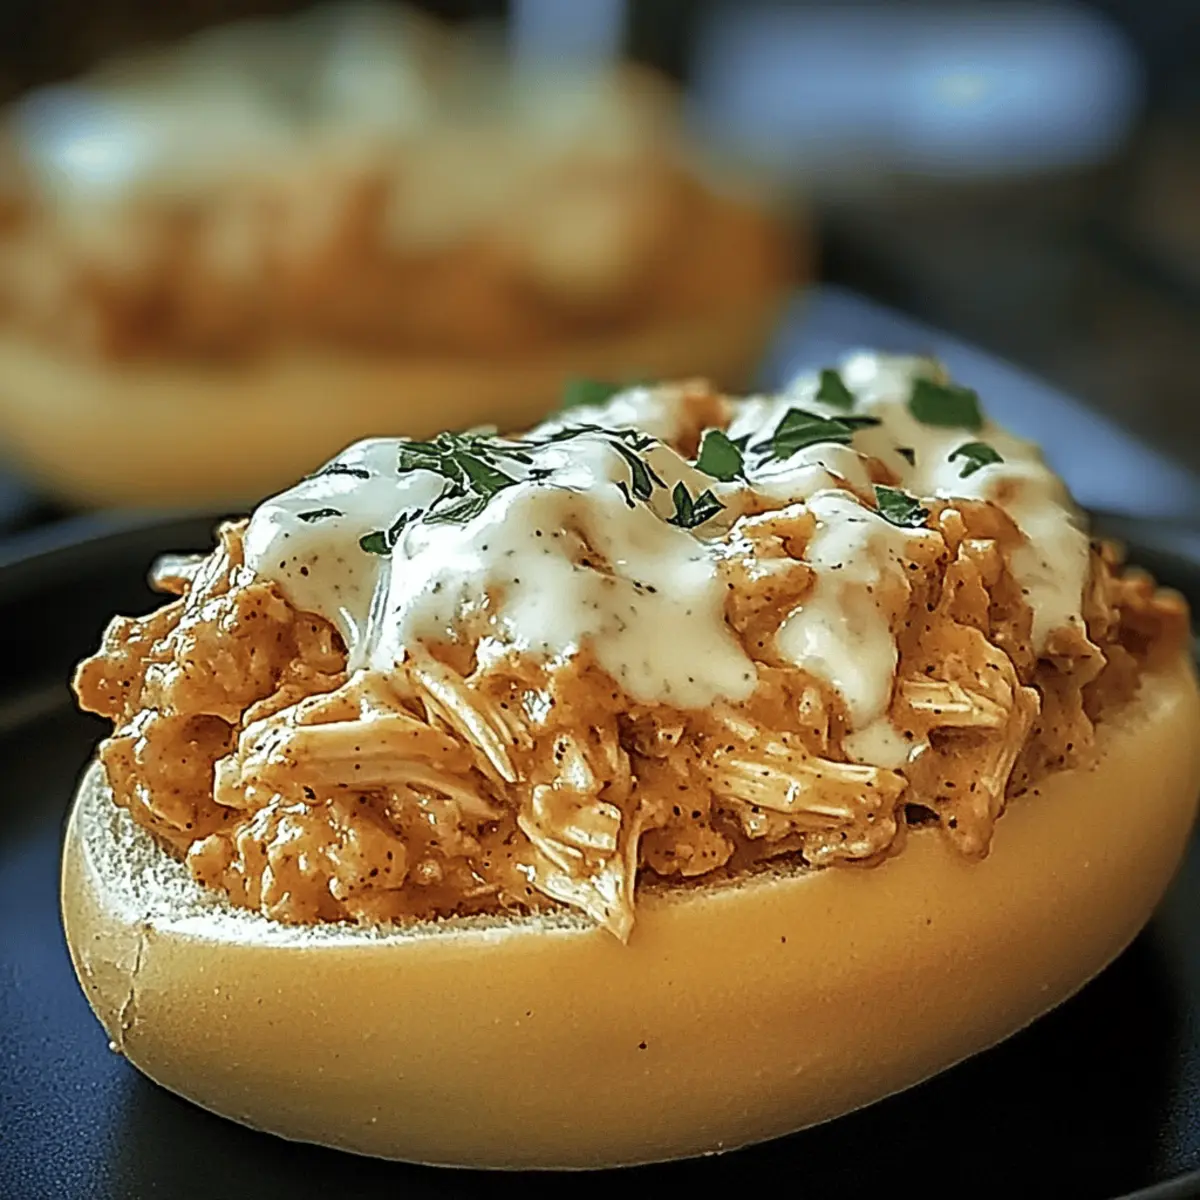
As I stood in my kitchen, the aroma of sweet BBQ mingled with the earthy scent of fresh zucchini, an instant reminder of summer gatherings. These Sticky BBQ Chicken Zucchini Boats are my secret weapon for making healthy dinners a hit with the whole family. Packed with tender, juicy chicken and topped with melted cheese, each bite offers a delightful crunch and an explosion of flavors. Best of all, this dish is not only quick to prepare, perfect for busy weeknights, but it’s also a fantastic way to sneak in some veggies. Whether you’re looking to impress dinner guests or simply treating yourself to a nourishing meal, you’ll find that these boats are as versatile as they are delicious. Curious about how to whip up this delightful dish? Let’s get cooking!

Why are these Zucchini Boats Amazing?

Simplicity: This recipe is incredibly easy to whip up, making it perfect for busy nights! Just mix, stuff, and bake.

Healthier Alternative: With low-carb and nutritious ingredients, these Sticky BBQ Chicken Zucchini Boats are a great way to enjoy a tasty meal without the guilt.

Crowd-Pleaser: Loaded with flavors that appeal to both adults and kids, they're ideal for family dinners or entertaining guests.

Endless Variations: Feel free to swap ingredients, like using ground turkey instead of chicken, or experiment with different cheeses. Looking for more options? Try out the flavors of Honey Garlic Chicken or Chipotle Lime Chicken for culinary inspiration!

Delicious Leftovers: These boats store well and can be enjoyed for lunch the next day, making them a smart meal prep choice. Just reheat and savor!

Sticky BBQ Chicken Zucchini Boats Ingredients

• Prepare to create an unforgettable healthy meal!

For the Zucchini Boats

  • Zucchini – The star of the dish; low-calorie with vitamins A and C; switch to bell peppers for a different flavor base.
  • Cooked Chicken (Shredded) – Your protein powerhouse; use rotisserie chicken for convenience, or opt for turkey for a leaner choice.
  • BBQ Sauce – Provides that irresistible flavor and moisture; choose your favorite brand or make homemade sauce for authenticity.

For the Toppings

  • Cheddar Cheese – Creaminess and flavor enhancer; swap with mozzarella or pepper jack for a spicy kick.
  • Red Onion – Adds crunch and sweetness; shallots are a milder alternative if desired.
  • Fresh Cilantro – Brightens flavors as a garnish; substitute with parsley for a slightly different taste.

For Seasoning

  • Olive Oil – Helps in brushing zucchinis for roasting; feel free to use avocado oil for a healthier option.
  • Garlic Powder – Intensifies flavor; fresh garlic works too, just remember to adjust the amount.
  • Onion Powder – Complements the overall flavor profile; can be omitted if using enough red onion.
  • Salt and Pepper – Essential for seasoning; don't hesitate to adjust to your taste!
  • Jalapeños (Optional) – For a touch of heat; leave them out for a milder dish or pile them in for spice lovers.

With these ingredients in hand, you’re ready to embark on your culinary adventure with these Sticky BBQ Chicken Zucchini Boats that not only nourish but delight everyone at your table!

Step‑by‑Step Instructions for Sticky BBQ Chicken Zucchini Boats

Step 1: Preheat the Oven
Begin by preheating your oven to 375°F (190°C). This initial step ensures that your Sticky BBQ Chicken Zucchini Boats will bake evenly, resulting in perfectly cheesy and gooey toppings. While the oven warms up, gather all your ingredients to splash some joy into your cooking experience!

Step 2: Prepare the Zucchini
Wash your zucchinis thoroughly, then slice them in half lengthwise. Use a spoon to gently scoop out the seeds, creating boats for the filling. Brush the insides with olive oil, and sprinkle with salt and pepper. You'll want them lightly glistening, ready to hold the flavorful chicken filling.

Step 3: Make the Filling
In a mixing bowl, combine the shredded cooked chicken with ¾ cup of your favorite BBQ sauce, garlic powder, onion powder, diced red onion, and half of the fresh cilantro. Stir the mixture until well blended, making sure each strand of chicken is coated in that delicious BBQ flavor, creating an irresistible filling for your zucchini boats.

Step 4: Stuff the Zucchini
Carefully spoon the BBQ chicken mixture into each zucchini half, filling them generously but without overpacking. Take care to evenly distribute the filling so that every bite of your Sticky BBQ Chicken Zucchini Boats is packed with flavor. The goal is to achieve that perfect balance between the zucchini and the savory chicken.

Step 5: Add Toppings
Once stuffed, it's time to drizzle the remaining BBQ sauce over the chicken filling. Follow this by generously sprinkling the shredded cheddar cheese on top. If you love a bit of heat, feel free to add diced jalapeños as well. This layer will melt into gooey goodness as it bakes, enhancing the dish's overall appeal.

Step 6: Bake the Zucchini Boats
Cover the zucchini boats with aluminum foil and place them in the preheated oven. Bake for about 25 minutes; the zucchinis should become tender while soaking up all the flavors. After this initial bake, remove the foil and continue baking for an additional 10-15 minutes, until the cheese is golden and bubbling, signaling that it's nearly ready.

Step 7: Garnish and Serve
Once baked to perfection, remove the Sticky BBQ Chicken Zucchini Boats from the oven and let them cool slightly. This will allow the cheese to set a bit, making them easier to serve. Before diving in, sprinkle the remaining cilantro on top for a burst of freshness that complements the hearty, sticky fillings beautifully.

What to Serve with Sticky BBQ Chicken Zucchini Boats

Looking to create a delightful dining experience that perfectly complements the flavors of your zucchini boats?

  • Mixed Green Salad: Fresh greens, cherry tomatoes, and a light vinaigrette add a crunchy, refreshing contrast to the savory zucchinis.
  • Quinoa: This nutty, protein-packed grain will not only elevate your meal but also provide a wholesome base that balances the rich filling.
  • Roasted Sweet Potatoes: Their natural sweetness pairs beautifully with the BBQ chicken, offering a delightful contrast in flavors and textures.
  • Grilled Corn on the Cob: The sweet kernels and smoky char enhance the summer feel, making your meal feel like a backyard barbecue.
  • Garlic Bread: Crispy, buttery slices bring an indulgent element to the table, ideal for soaking up any remaining BBQ sauce.
  • Fruit Salad: A vibrant mix of seasonal fruits adds a sweet and juicy touch, refreshing your palate between bites of the savory zucchini boats.
  • Iced Tea or Lemonade: A chilled drink balances the richness while keeping things light and refreshing as you enjoy your meal.

These pairings will take your Sticky BBQ Chicken Zucchini Boats from a delicious dish to an unforgettable meal!

Storage Tips for Sticky BBQ Chicken Zucchini Boats

Fridge: Store your Sticky BBQ Chicken Zucchini Boats in an airtight container for up to 3-4 days. This will keep them fresh and flavorful, ready for quick meals.
Freezer: For longer storage, freeze these boats before baking. Wrap each one individually in plastic wrap and then place in a freezer-safe bag for up to 3 months.

Reheating: When ready to enjoy, bake from frozen at 375°F (190°C) for 30-35 minutes or until heated through. For refrigerated boats, reheat in the oven at 375°F (190°C) for about 15-20 minutes until warm.

Texture Maintenance: To preserve the zucchini's texture, avoid reheating in the microwave, as this can make them soggy.

Sticky BBQ Chicken Zucchini Boats Variations

Customize your Sticky BBQ Chicken Zucchini Boats to suit your taste and dietary needs—there are plenty of delicious tweaks you can explore!

  • Dairy-Free: Swap out cheddar cheese for a dairy-free alternative like cashew cheese or nutritional yeast for a cheesy flavor without the dairy.

  • Vegetarian Version: Replace the chicken with a plant-based protein like crumbled tofu or tempeh, marinated in BBQ sauce for added flair. This provides a hearty texture that everyone will appreciate.

  • Spicy Kick: Add sliced jalapeños into the chicken mixture or on top for an extra heat level that spice lovers will adore. Consider pairing this with a creamy avocado sauce for a cooling contrast.

  • Flavor Boost: Mix in chopped bell peppers or spinach with the filling to add texture and nutrients. These vibrant veggies will create a lovely color pop and added crunch.

  • Herb Swap: If cilantro isn't your favorite, feel free to use fresh basil or dill as a garnish. Each herb brings its own unique flavor profile, which can subtly change the dish’s direction.

  • Sautéed Onions & Peppers: Sauté some onions and bell peppers to mix in with the chicken for added sweetness and flavor depth. This blend can create a more complex filling for the boats.

  • Different Sauces: Experiment with different BBQ sauces or marinades, such as honey mustard or teriyaki, to give your dish a twist—try sweet and tangy flavors for a delightful surprise!

  • Accompaniments: Serve with a side of flavored quinoa or a fresh garden salad drizzled with lemon vinaigrette. This will balance the hearty zucchini boats with something light and refreshing.

With these variations, your cooking experience becomes even more exciting! Explore ideas for additional chicken dishes like Honey Garlic Chicken or the zesty flavors of Chipotle Lime Chicken to inspire your next culinary adventure!

Expert Tips for Sticky BBQ Chicken Zucchini Boats

  • Perfect Zucchini: Ensure you don’t over-scoop the zucchinis to maintain their structure, allowing enough room for the tasty filling without breaking them apart.

  • BBQ Sauce Flavor: Experiment with various BBQ sauce flavors—smoky, sweet, or spicy—to personalize the taste of your Sticky BBQ Chicken Zucchini Boats.

  • Cheese Alert: Keep an eye on the cheese while baking; place foil over the boats for the first half to avoid burning, then remove for a beautifully golden finish.

  • Fresh Herbs: If you don’t have cilantro, parsley is a great substitute for garnish, maintaining that fresh pop of flavor to your delicious dish.

  • Ingredient Substitutions: Feel free to swap rotisserie chicken for grounded turkey, and don’t hesitate to include veggies like corn for added nutrition in your filling.

Make Ahead Options

These Sticky BBQ Chicken Zucchini Boats are perfect for meal prep and can save you precious time on busy weeknights! You can prepare the filling (shredded chicken, BBQ sauce, and seasonings) up to 3 days in advance, securely store it in an airtight container in the refrigerator, and simply stuff the zucchinis when you're ready to bake. Additionally, the zucchini halves can be scooped and brushed with olive oil up to 24 hours ahead to prevent browning. When it's time to enjoy, just stuff the prepared zucchini with your filling, top with cheese, and bake as directed. This way, you’ll have a wholesome meal ready in no time, without sacrificing flavor!

Sticky BBQ Chicken Zucchini Boats Recipe FAQs

How do I choose the best zucchini for this recipe?
Absolutely! Look for zucchinis that are firm, glossy, and free from blemishes or dark spots. Just like picking the freshest veggies, you want them to feel dense and full. Aim for zucchinis that are medium-sized (around 6-7 inches long) for the perfect boat.

How should I store leftovers of Sticky BBQ Chicken Zucchini Boats?
These delicious boats can be stored in an airtight container in the fridge for 3-4 days. Just make sure they cool down completely before storing to maintain their texture. When you're ready to enjoy them, pop them in the oven at 375°F (190°C) for about 15-20 minutes to reheat.

Can I freeze Sticky BBQ Chicken Zucchini Boats?
Yes! To freeze, prepare the boats but do not bake them first. Wrap each zucchini boat individually in plastic wrap, then place them in a freezer-safe bag or container. They can be stored in the freezer for up to 3 months. When you’re ready to bake, remove them from the freezer and bake straight from frozen at 375°F (190°C) for 30-35 minutes, or until heated through.

What can I do if my zucchini boats are soggy after baking?
Very! If you notice that your zucchini boats turn out soggy, there are a couple of things to consider for the next time. Avoid over-scooping the zucchini, which can lead to too much moisture. You can also try salting the insides of the zucchini for about 10-15 minutes before stuffing them to draw out excess water. Pat them dry with a paper towel before adding your filling.

Are there any dietary considerations I should keep in mind for sticky BBQ chicken zucchini boats?
Of course! These nutritious boats are low-carb, but be mindful of the barbecue sauce you choose, as some could be high in sugar. If you have any food allergies, check that your BBQ sauce is free of allergens, and consider using soy or coconut aminos as a low-sodium option. For a gluten-free meal, ensure that all sauces and toppings are certified gluten-free.

Sticky BBQ Chicken Zucchini Boats

Sticky BBQ Chicken Zucchini Boats: Healthy Dinner Bliss

Sticky BBQ Chicken Zucchini Boats are a delicious and healthy dinner option, perfect for family meals and packed with flavor.
Print Recipe Pin Recipe
Prep Time 15 minutes mins
Cook Time 35 minutes mins
Resting Time 5 minutes mins
Total Time 55 minutes mins
Servings: 4 boats
Course: Dinner
Cuisine: American
Calories: 250
Ingredients Equipment Method Nutrition Notes

Ingredients
  

For the Zucchini Boats
  • 4 medium Zucchini Slice in half lengthwise
  • 2 cups Cooked Chicken (Shredded) Use rotisserie chicken for convenience
  • 3/4 cup BBQ Sauce Choose your favorite brand or make homemade
For the Toppings
  • 1 cup Cheddar Cheese Shredded, can substitute with mozzarella or pepper jack
  • 1/2 cup Red Onion Diced
  • 1/4 cup Fresh Cilantro Chopped, can substitute with parsley
For Seasoning
  • 1 tablespoon Olive Oil Or avocado oil for a healthier option
  • 1 teaspoon Garlic Powder
  • 1 teaspoon Onion Powder Can be omitted if using enough red onion
  • to taste Salt
  • to taste Pepper
  • optional Jalapeños Diced, for added heat

Equipment

  • Oven
  • Mixing Bowl
  • Spoon
  • Baking Dish
  • Aluminum Foil

Method
 

Step-by-Step Instructions
  1. Preheat your oven to 375°F (190°C).
  2. Wash the zucchinis, slice them in half lengthwise, and scoop out the seeds. Brush the insides with olive oil, and sprinkle with salt and pepper.
  3. In a mixing bowl, combine shredded chicken, BBQ sauce, garlic powder, onion powder, red onion, and half of the cilantro. Stir until well blended.
  4. Spoon the BBQ chicken mixture into each zucchini half, filling them generously without overpacking.
  5. Drizzle remaining BBQ sauce over the filling and sprinkle shredded cheese on top. Add diced jalapeños if desired.
  6. Cover with aluminum foil and bake for 25 minutes. Remove foil and bake for an additional 10-15 minutes until cheese is golden.
  7. Let cool slightly, then garnish with remaining cilantro before serving.

Nutrition

Serving: 1boatCalories: 250kcalCarbohydrates: 10gProtein: 30gFat: 10gSaturated Fat: 5gPolyunsaturated Fat: 1gMonounsaturated Fat: 3gCholesterol: 70mgSodium: 500mgPotassium: 300mgFiber: 3gSugar: 5gVitamin A: 700IUVitamin C: 20mgCalcium: 200mgIron: 2mg

Notes

These Zucchini Boats are a healthier alternative and perfect for meal prep. Store in an airtight container for up to 3-4 days.

Tried this recipe?

Let us know how it was!

Creamy Chicken and Broccoli Alfredo Bake Your Family Will Love

September 25, 2025 by Grace Snow Leave a Comment

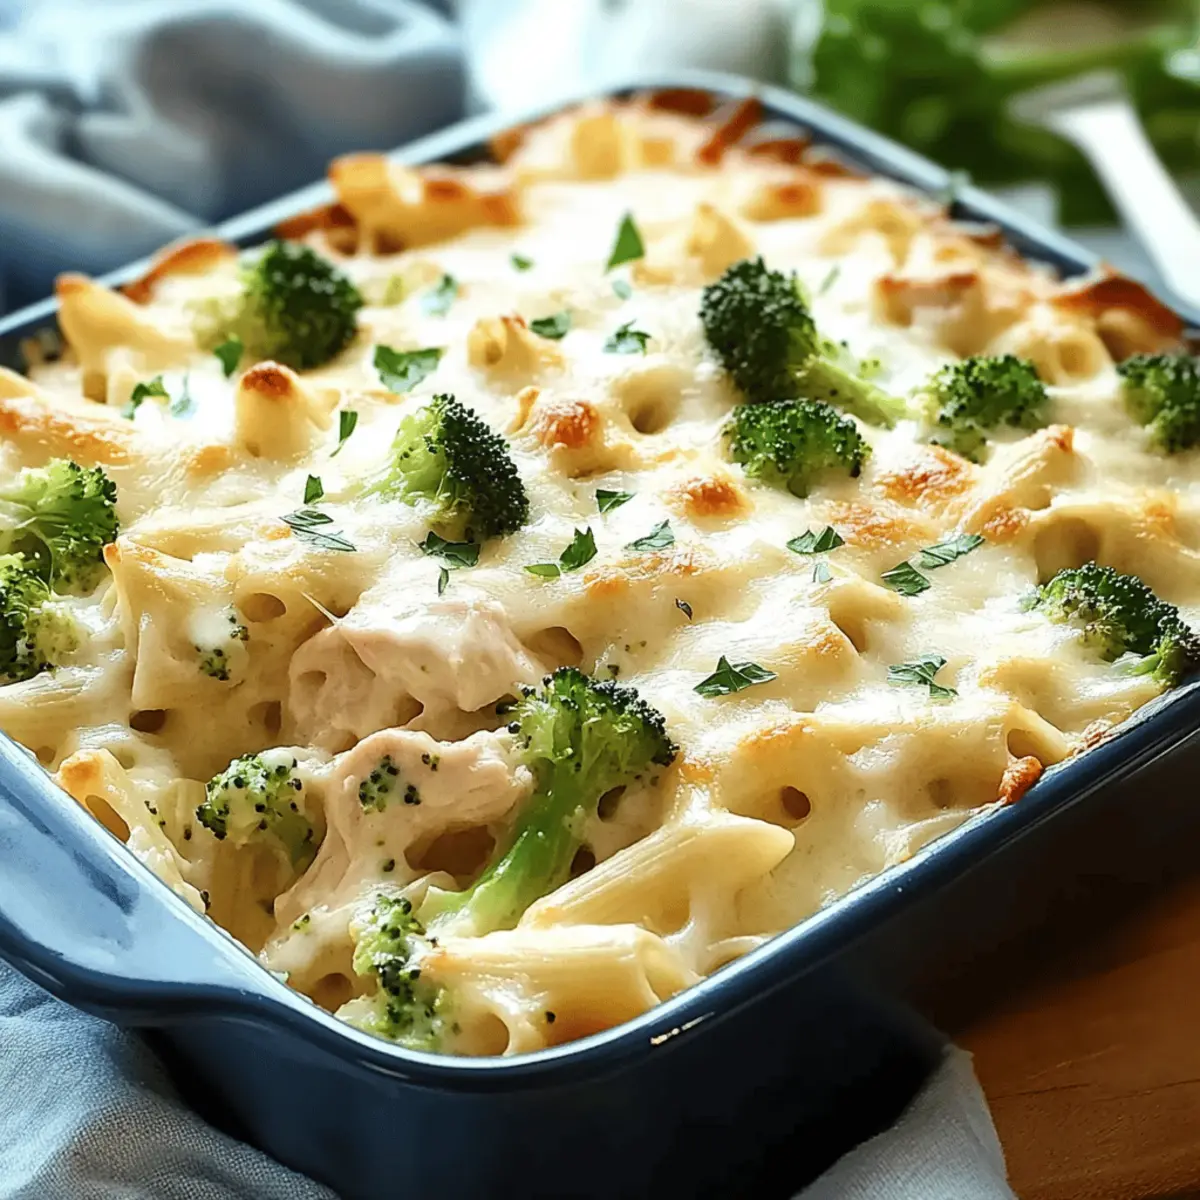
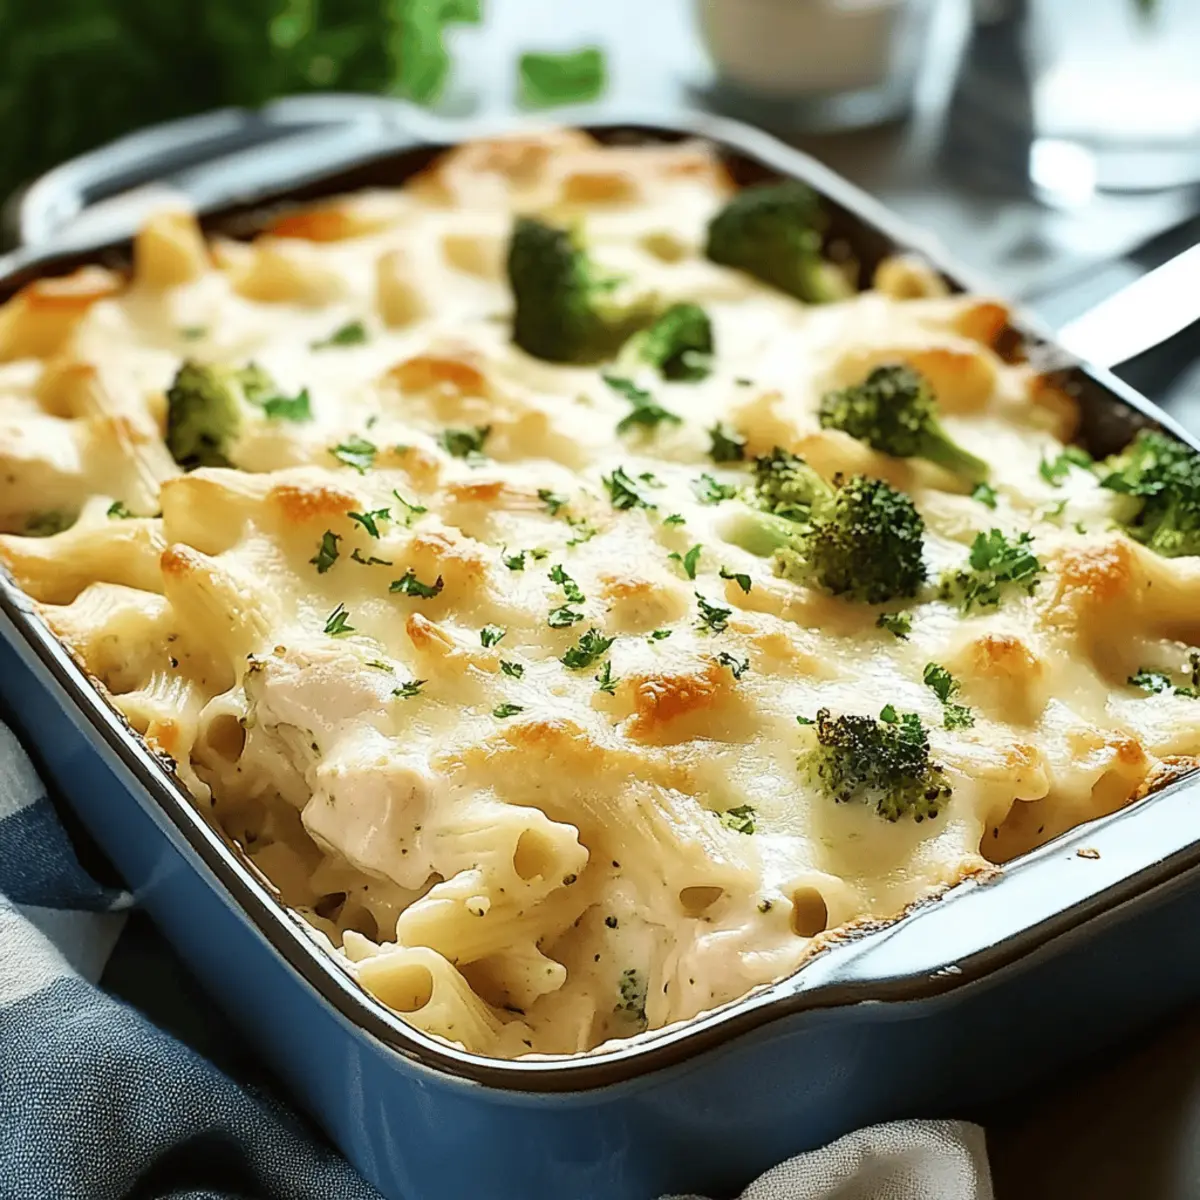
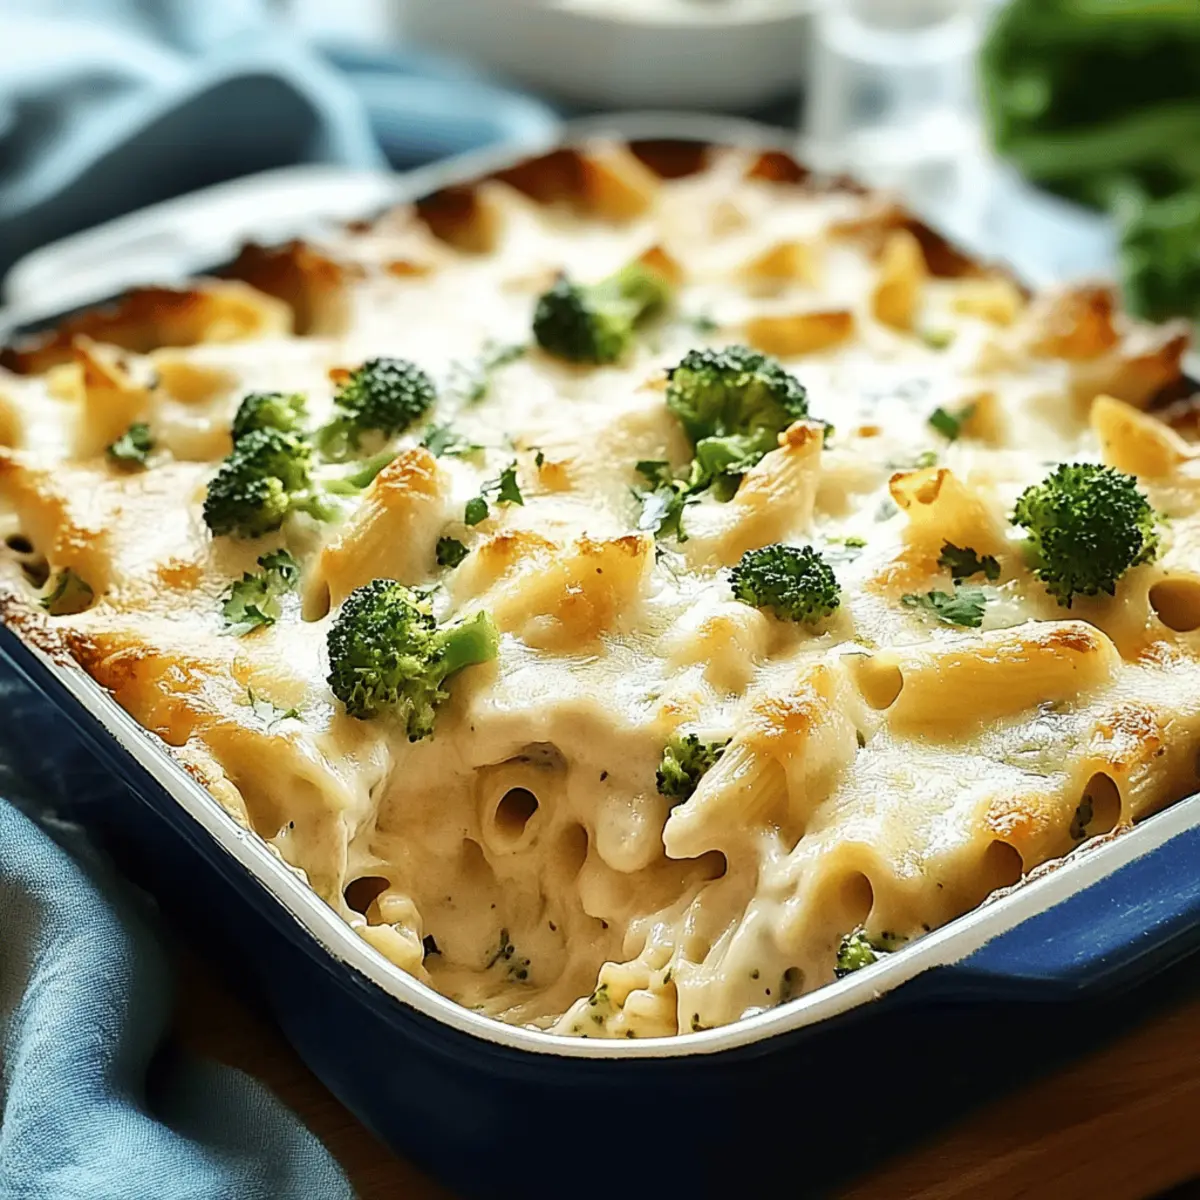
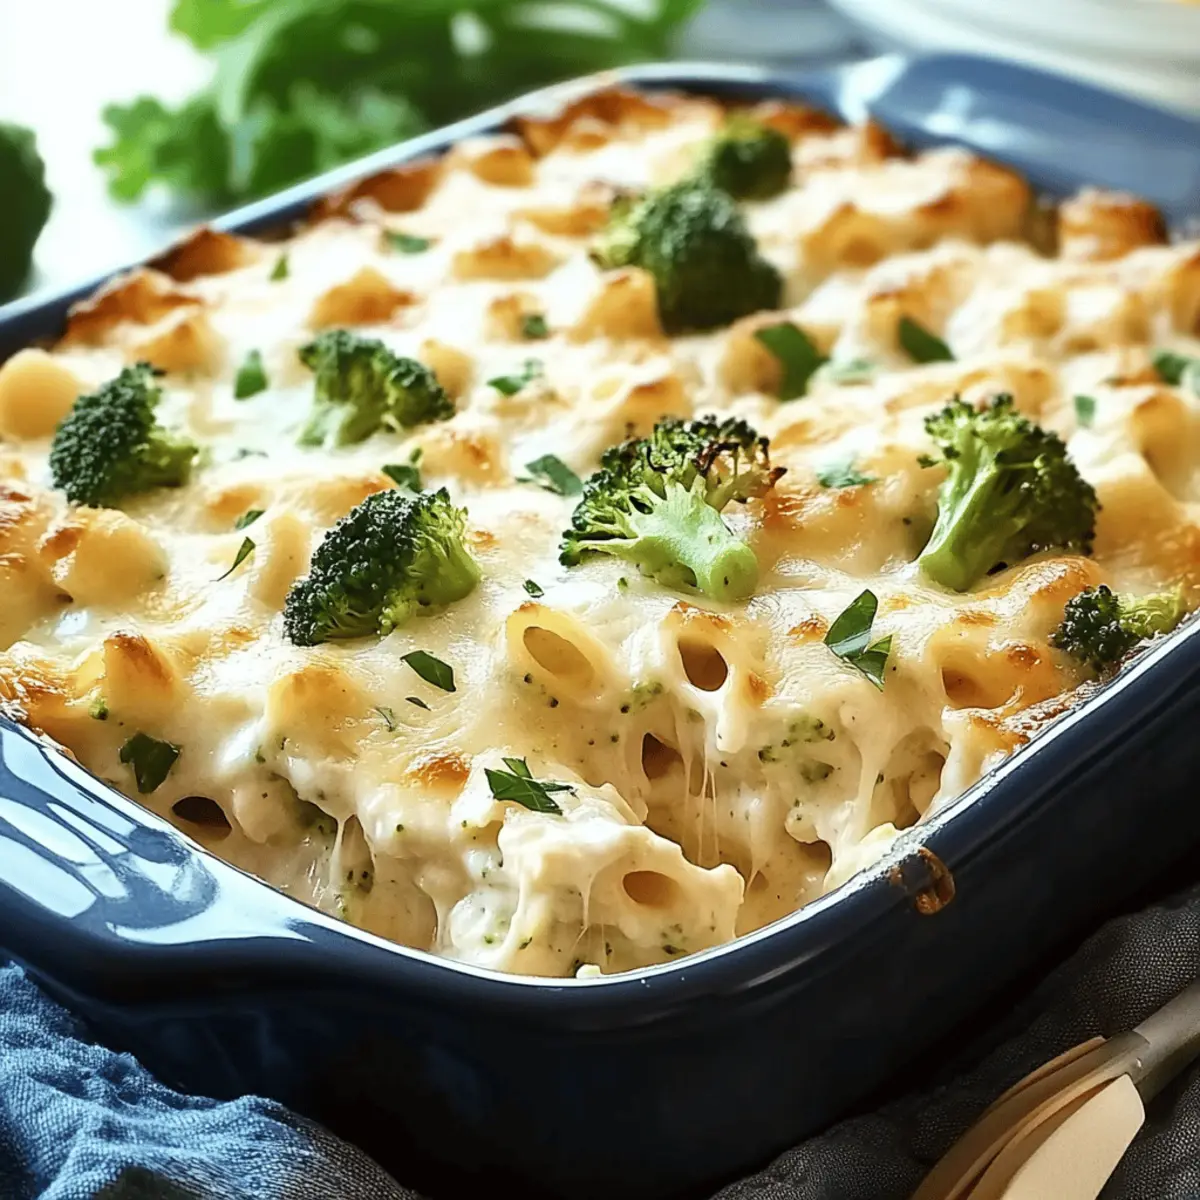
As I stood in the kitchen, the aroma of garlic and melted cheese wafted through the air, transporting me back to family dinners filled with laughter and love. This Chicken Broccoli Alfredo Bake has become a beloved staple in our home—a comforting one-dish meal that never fails to please. It’s not just about the rich, creamy goodness; it’s the combination of tender chicken and vibrant broccoli working in harmony that makes it truly special. Plus, with its simple preparation, you can whip it up on those busy weeknights without the hassle. Whether you’re serving up a crowd or just enjoying a cozy night in, this dish is sure to warm hearts and bellies alike. Ready to dive into a bowl of cheesy comfort? Let’s get cooking!

Why Is This Bake a Must-Try?

Simplicity is key—this one-dish meal requires minimal prep time and cleanup, perfect for busy weeknights. Flavor-packed with creamy Alfredo and tender chicken, every bite is a delightful combination of comfort food goodness. Nutritious broccoli adds a vibrant pop of color and valuable nutrients, making it a family-friendly favorite. Versatile options allow for easy adaptations; swap the chicken for shrimp or add more veggies for a personalized twist. Crowd-pleasing appeal makes this bake an instant hit, ensuring everyone at the table will be asking for seconds! Want a similar cozy dish? Check out my Chicken Dumplings Cozy recipe.

Chicken Broccoli Alfredo Bake Ingredients

• Dive into the heart of this family-friendly dish with these essential ingredients!

For the Bake
• 2 cups cooked chicken, shredded or diced – Provides protein and texture; rotisserie chicken is a perfect time-saver.
• 4 cups fresh broccoli florets – Adds nutrition, color, and crunch; feel free to use frozen as a quick substitute.
• 8 ounces fettuccine pasta – Serves as the hearty foundation; swap for whole wheat or gluten-free if desired.
• 2 cups Alfredo sauce (store-bought or homemade) – Provides creamy flavor and binds all the delicious ingredients together.
• 1 cup shredded mozzarella cheese – Adds a melty touch; cheddar can offer a sharper flavor instead.
• 1/2 cup grated Parmesan cheese – Enhances the dish with its salty, nutty profile; Pecorino Romano is a great alternative too.

For Seasoning
• 1 teaspoon garlic powder – Infuses depth of flavor; fresh minced garlic can amplify this beautifully.
• 1 teaspoon onion powder – Complements the garlic, enriching the overall taste; substituting with fresh diced onion adds fresh notes.
• 1/2 teaspoon black pepper – Brings warmth to the dish; white pepper offers a lighter peppery essence if preferred.
• 1/2 teaspoon salt – Elevates the flavors; adjust based on dietary needs.

To Finish
• 1 tablespoon olive oil – Prevents sticking and adds richness; melted butter works well too.
• 1/2 teaspoon red pepper flakes (optional) – Brings a subtle heat; feel free to omit for a milder bake.
• Fresh parsley, chopped (for garnish) – A pop of freshness and color; fresh basil can be a delightful substitute.

Gather these ingredients, and you’re on your way to creating a warm and comforting Chicken Broccoli Alfredo Bake that everyone will love!

Step‑by‑Step Instructions for Chicken Broccoli Alfredo Bake

Step 1: Prepare Oven and Ingredients
Begin by preheating your oven to 350°F (175°C) to ensure a perfectly baked Chicken Broccoli Alfredo Bake. While the oven warms, bring a large pot of salted water to a rolling boil. In a separate pot, blanch your fresh broccoli florets for 2-3 minutes until vibrant and tender-crisp, then drain them and set aside.

Step 2: Cook Pasta
Once the water is boiling, add 8 ounces of fettuccine pasta. Cook according to the package instructions, typically around 8-10 minutes, until al dente. Drain the pasta well in a colander and return it to the pot while drizzling it with 1 tablespoon of olive oil to prevent sticking, stirring gently to coat.

Step 3: Make Alfredo Sauce
In a medium saucepan over low heat, prepare your Alfredo sauce if making from scratch. Start by melting butter, then stir in heavy cream and gradually add 1/2 cup of grated Parmesan cheese, mixing until smooth. Season with 1 teaspoon of garlic powder, salt, and 1/2 teaspoon of black pepper, ensuring the sauce is creamy and flavorful before removing it from the heat.

Step 4: Combine Ingredients
In a large mixing bowl, combine the cooked chicken, blanched broccoli, and the olive oil-coated fettuccine pasta. Pour in your prepared Alfredo sauce, mixing everything thoroughly until all ingredients are well-coated and evenly distributed. If you like a bit of heat, sprinkle in 1/2 teaspoon of red pepper flakes at this stage for an extra kick.

Step 5: Transfer to Baking Dish
Take a greased 9x13 inch baking dish and carefully spread the Chicken Broccoli Alfredo mixture evenly throughout. Make sure to distribute it evenly to ensure even cooking and cheesy goodness in every bite. This is where the heart of your one-dish meal begins to come together beautifully.

Step 6: Add Cheeses
Sprinkle generously with 1 cup of shredded mozzarella cheese and an additional 1/2 cup of grated Parmesan cheese to top off the Chicken Broccoli Alfredo Bake. This melty layer of cheese will create a delicious golden crust as it bakes, adding both flavor and texture to your warm comfort dish.

Step 7: Bake
Cover the baking dish with foil and place it in the preheated oven. Bake for 20 minutes to allow the flavors to meld together. After 20 minutes, carefully remove the foil and return the dish to the oven for another 10-15 minutes. You’ll know it’s ready when the cheese is bubbling and has reached a lovely golden brown color.

Step 8: Serve
Once out of the oven, let your Chicken Broccoli Alfredo Bake rest for about 5 minutes. This resting period allows the layers to set slightly, making it easier to serve. Garnish with freshly chopped parsley for a burst of color and flavor before diving in and enjoying this comforting, family-friendly dish.

Storage Tips for Chicken Broccoli Alfredo Bake

Fridge: Store any leftovers in an airtight container in the refrigerator for up to 3 days. This keeps the Chicken Broccoli Alfredo Bake fresh and ready for quick reheating.

Freezer: For longer storage, freeze the dish before baking. Wrap tightly in plastic wrap and then in aluminum foil; it can stay fresh in the freezer for up to 3 months.

Reheating: To reheat, thaw overnight in the fridge and then bake at 350°F (175°C) until heated through, about 25-30 minutes. Alternatively, you can microwave individual portions, covering them to retain moisture.

Covering: Always cover the dish with foil or a lid while reheating to maintain moisture and prevent drying out.

Make Ahead Options

These Chicken Broccoli Alfredo Bake preparations are perfect for busy home cooks looking to streamline mealtime! You can assemble the entire dish up to 24 hours in advance; simply cover it tightly with foil or plastic wrap and refrigerate. The pasta and broccoli maintain their perfect texture when prepped this way. If you prefer to prep components separately, cook the fettuccine and blanch the broccoli up to 3 days ahead, storing them in airtight containers in the refrigerator. When you're ready to serve, just combine all the ingredients in the baking dish, sprinkle with cheese, and bake directly from the fridge for a convenient, homemade meal that’s just as delicious!

Expert Tips for Chicken Broccoli Alfredo Bake

• Perfectly Cooked Broccoli: Avoid overcooking the broccoli during blanching to retain its bright color and tender-crisp texture.

• Alfredo Sauce Consistency: If using store-bought Alfredo sauce, ensure it’s creamy; homemade version can be adjusted by adding heavy cream for a richer taste.

• Pasta Precautions: Drain pasta thoroughly to avoid a watery Chicken Broccoli Alfredo Bake. Drizzling with olive oil helps prevent clumping.

• Cheese Melting Tip: For an ultra-creamy top, use a mix of mozzarella and Parmesan. Mozzarella melts beautifully, while Parmesan adds a nice flavor boost.

• Garnishing Ideas: Fresh parsley adds a pop of color, but don’t hesitate to include freshly cracked pepper or a sprinkle of red pepper flakes for added flavor complexity.

What to Serve with Chicken Broccoli Alfredo Bake

Elevate your family dinner experience with delightful sides that perfectly complement the creamy goodness of this one-dish meal.

  • Garlic Bread: This classic pairing provides a crispy contrast to the creamy bake and is perfect for mopping up every last bit of sauce.

  • Caesar Salad: A crisp, refreshing salad adds a vibrant touch, with crunchy romaine and zesty dressing balancing the rich flavors.

  • Roasted Vegetables: A medley of seasonal vegetables roasted until caramelized offers a wholesome, earthy flavor that rounds out the meal beautifully.

  • Steamed Green Beans: Bright and crunchy, these beans provide a fresh texture to each bite, making for a delightful contrast to the soft pasta.

  • Creamy Coleslaw: Add a cool, tangy slaw for a crunchy texture that enhances the overall dining experience. Its refreshing taste complements the richness of the bake.

  • Wine Pairing: A chilled white wine, like Chardonnay, complements the creamy sauce beautifully and elevates the dining experience.

  • Brownies for Dessert: End your meal on a sweet note with fudgy brownies. Their rich chocolate flavor will satisfy the whole family after the savory bake.

These delicious and varied sides ensure that your Chicken Broccoli Alfredo Bake truly shines as the centerpiece of your family meal!

Chicken Broccoli Alfredo Bake Variations & Substitutions

Feel free to mix things up and make this Chicken Broccoli Alfredo Bake your own by trying these delicious variations!

  • Dairy-Free: Substitute dairy ingredients with unsweetened almond milk for the sauce and vegan cheese for a creamy, lactose-friendly option.
  • Extra Veggies: Add in bell peppers, spinach, or peas for a nutritious and colorful twist. These veggies not only enhance flavor but also boost the nutritional content of your bake.
  • Protein Swap: Replace the chicken with cooked shrimp, or for a vegetarian version, use sautéed mushrooms and extra veggies for an earthy flavor. Trust me, it’s equally delightful!
  • Different Pasta: Swap fettuccine for whole wheat or gluten-free pasta to accommodate dietary preferences, keeping the heartiness intact.
  • Spicy Kick: For the heat lovers, sprinkle in additional red pepper flakes or add diced jalapeños to the mix to spice things up.
  • Herb Infusion: Fresh herbs such as basil or thyme can add a fragrant aroma and fresh flavor profile to your dish, brightening up the creamy elements beautifully.
  • Bacon Love: Crumbled crispy bacon is a delicious optional addition, adding a savory crunch that pairs wonderfully with the creaminess of the sauce.
  • Cheese Alteration: Try swapping mozzarella for Gouda, Fontina, or even a sharp cheddar to create unique flavor combinations that keep dinner exciting.

Each of these variations can tailor your Chicken Broccoli Alfredo Bake to fit the tastes of your loved ones while keeping things fun and flavorful. For even more comfort food inspiration, check out my delightful Honey Garlic Chicken or the cozy warmth of Crock Pot Chicken. Happy cooking!

Chicken Broccoli Alfredo Bake Recipe FAQs

What kind of chicken should I use for this recipe?
Absolutely! For this dish, I recommend using cooked chicken, shredded or diced. You can opt for rotisserie chicken for a quick and flavorful choice, which will save you time on busy weeknights. Just ensure the chicken is well-seasoned for the best taste!

How can I store leftovers of the Chicken Broccoli Alfredo Bake?
Store any leftovers in an airtight container in the refrigerator for up to 3 days. It’s best to let it cool completely before sealing to maintain freshness. When you’re ready to enjoy, you can reheat it in the oven or microwave—just cover it to keep moisture in.

Can I freeze the Chicken Broccoli Alfredo Bake?
Yes, absolutely! To freeze, I recommend assembling the bake but not cooking it. Wrap it tightly in plastic wrap, then in aluminum foil to prevent freezer burn. It can stay fresh in the freezer for up to 3 months. When you’re ready to bake it, simply thaw overnight in the fridge and follow the original baking instructions!

What should I do if my broccoli turns mushy?
To avoid mushy broccoli, make sure you blanch it for just 2-3 minutes, until it's bright green and tender-crisp. If you find the texture off after cooking, it might have been cooked too long. Blanch quickly, stop the cooking process by plunging it in ice water, and ensure it’s well-drained before adding to the bake.

Are there any dietary considerations I should be aware of?
Definitely! If you’re cooking for someone with dietary restrictions, you can easily adapt this recipe. For gluten-free diets, substitute the fettuccine with gluten-free pasta. Those with dairy sensitivities can experiment with dairy-free cheeses and sauces. Always check labels for allergens when using store-bought products!

How can I enhance the flavor of the Chicken Broccoli Alfredo Bake?
To boost flavor, consider adding freshly minced garlic and diced onions to the mix for a pop of freshness. You can also sprinkle additional spices like Italian seasoning or use fresh herbs such as basil or thyme. Every little touch adds to the overall warmth and comfort of the dish!

Chicken and Broccoli Alfredo Bake

Creamy Chicken and Broccoli Alfredo Bake Your Family Will Love

This Chicken and Broccoli Alfredo Bake features creamy goodness with tender chicken and vibrant broccoli, making it a beloved family favorite.
Print Recipe Pin Recipe
Prep Time 15 minutes mins
Cook Time 35 minutes mins
Resting Time 5 minutes mins
Total Time 55 minutes mins
Servings: 6 servings
Course: Dinner
Cuisine: American
Calories: 450
Ingredients Equipment Method Nutrition Notes

Ingredients
  

For the Bake
  • 2 cups cooked chicken, shredded or diced Rotisserie chicken is a perfect time-saver.
  • 4 cups fresh broccoli florets Feel free to use frozen as a quick substitute.
  • 8 ounces fettuccine pasta Swap for whole wheat or gluten-free if desired.
  • 2 cups Alfredo sauce Store-bought or homemade.
  • 1 cup shredded mozzarella cheese Cheddar can offer a sharper flavor instead.
  • 1/2 cup grated Parmesan cheese Pecorino Romano is a great alternative too.
For Seasoning
  • 1 teaspoon garlic powder Fresh minced garlic can amplify this beautifully.
  • 1 teaspoon onion powder Substituting with fresh diced onion adds fresh notes.
  • 1/2 teaspoon black pepper White pepper offers a lighter peppery essence if preferred.
  • 1/2 teaspoon salt Adjust based on dietary needs.
To Finish
  • 1 tablespoon olive oil Melted butter works well too.
  • 1/2 teaspoon red pepper flakes Optional; omit for a milder bake.
  • Fresh parsley chopped Fresh basil can be a delightful substitute.

Equipment

  • Large pot
  • Medium saucepan
  • Baking Dish
  • Colander
  • Mixing Bowl

Method
 

Step-by-Step Instructions
  1. Preheat your oven to 350°F (175°C). Bring a large pot of salted water to a boil. Blanch broccoli for 2-3 minutes, then drain.
  2. Add fettuccine to boiling water and cook for 8-10 minutes until al dente. Drain and toss with olive oil.
  3. In a medium saucepan over low heat, prepare Alfredo sauce. Melt butter, add heavy cream, and gradually stir in Parmesan cheese. Season with garlic powder, salt, and black pepper.
  4. In a large mixing bowl, combine chicken, broccoli, and pasta. Pour in Alfredo sauce and mix thoroughly.
  5. Spread mixture in a greased 9x13 inch baking dish.
  6. Top with mozzarella cheese and Parmesan cheese.
  7. Cover with foil and bake for 20 minutes. Remove foil and bake for another 10-15 minutes until cheese is golden brown.
  8. Let rest for 5 minutes, garnish with parsley, and serve.

Nutrition

Serving: 1pieceCalories: 450kcalCarbohydrates: 40gProtein: 30gFat: 20gSaturated Fat: 10gCholesterol: 70mgSodium: 800mgPotassium: 600mgFiber: 3gSugar: 2gVitamin A: 15IUVitamin C: 45mgCalcium: 30mgIron: 10mg

Notes

Store leftovers in an airtight container in the fridge for up to 3 days or freeze before baking for up to 3 months. Reheat at 350°F until heated through.

Tried this recipe?

Let us know how it was!

Creamy Orzo with Roasted Butternut Squash and Spinach Bliss

September 25, 2025 by Grace Snow Leave a Comment

As I sliced into the vibrant butternut squash, the sweet aroma instantly transported me to my favorite autumn kitchen, where cozy dinners come alive. This Creamy Orzo with Roasted Butternut Squash and Spinach brings the warmth of home right to your table, creating a dish that envelops you like a soft blanket. It's not just a feast for the eyes with its colorful hues; it's a nourishing vegetarian option that offers both comfort and health, making it perfect for a delicious weeknight dinner or a cozy weekend gathering. The creamy texture pairs wonderfully with the tender squash and fresh spinach, promising a satisfying bite that’s simple to prepare yet impressively delicious. So, are you ready to elevate your dinner game and indulge your senses? Let’s dive into the recipe!

Why Is This Orzo Dish So Special?

Comforting textures combine creamy orzo, sweet butternut squash, and vibrant spinach, making every bite a cozy experience. Versatile ingredients let you swap veggies to suit your palate or what you have on hand, like adding zucchini or bell peppers. Quick and Easy to prepare, it’s ready in under 30 minutes, perfect for busy weeknights! Crowd-Pleasing and visually stunning, it's sure to impress guests at any dinner gathering. And if you want to round out your meal, try serving it alongside Maple Roasted Sweet potatoes or a simple salad for a delightful balance!

Creamy Orzo with Roasted Butternut Squash and Spinach Ingredients

For the Roasted Squash

  • Butternut Squash – This star ingredient provides delightful sweetness and a satisfying texture; feel free to switch it out for zucchini or bell peppers if desired.
  • Olive Oil – Essential for roasting, it adds a rich flavor; other neutral oils can be used if preferred.
  • Salt and Black Pepper – Simple yet important for enhancing flavor; adjust to your taste for the best experience.

For the Orzo Base

  • Orzo Pasta – The main carbohydrate that absorbs all the creamy goodness; consider substituting with ditalini or any small pasta for variety.
  • Vegetable Broth – Adds depth and richness to the dish; if needed, water can work as a substitute.
  • Butter – Brings richness to the dish; you can opt for plant-based butter for a vegan twist.
  • Garlic – This aromatic adds a lovely flavor; fresh garlic is recommended for the best taste.

For the Creamy Sauce

  • Parmesan Cheese – Infuses the dish with savory umami; for a vegan option, try nutritional yeast instead.
  • Heavy Cream – Provides the signature creaminess; cream cheese can serve as a substitute for a richer texture.

For the Fresh Taste

  • Baby Spinach – Brings freshness and nutrients to the dish; you can use other leafy greens as a substitute.
  • Dried Thyme – Enhances the herbal notes beautifully; feel free to omit if you don’t have it on hand.
  • Red Pepper Flakes – Offers a touch of heat; it's optional depending on your spice preference.

Step‑by‑Step Instructions for Creamy Orzo with Roasted Butternut Squash and Spinach

Step 1: Roast the Squash
Begin by preheating your oven to 400°F (200°C). While the oven warms up, toss diced butternut squash in a mixing bowl with olive oil, salt, and black pepper until every piece is well-coated. Spread the squash evenly on a baking sheet, ensuring they have room to roast. Bake for 25–30 minutes, flipping halfway through, until the squash is golden and tender.

Step 2: Cook the Orzo
In a medium saucepan, melt 2 tablespoons of butter over medium heat. Add minced garlic and sauté for about 1 minute until fragrant and lightly golden. Stir in the orzo pasta and cook for an additional 2 minutes, making sure it’s coated in butter and slightly toasted, which enhances the flavors in your Creamy Orzo with Roasted Butternut Squash and Spinach.

Step 3: Add Broth
Next, pour in 4 cups of vegetable broth and bring the mixture to a gentle simmer. Cook the orzo for 10–12 minutes, stirring occasionally, until it absorbs most of the liquid and becomes tender yet firm to the bite. Keep an eye on the texture, as you want it creamy without being mushy, setting the foundation for your creamy dish.

Step 4: Make It Creamy
Once the orzo is cooked, reduce the heat to low and stir in ½ cup of grated Parmesan cheese and ½ cup of heavy cream. This will create that deliciously creamy texture. Add in the chopped baby spinach and cook for an additional 1–2 minutes, stirring until the spinach wilts and combines beautifully into the creamy orzo mixture.

Step 5: Combine
Now it’s time to bring everything together! Gently fold in the roasted butternut squash from the oven into the creamy orzo base. Taste the mixture and season with additional salt, black pepper, dried thyme, and a pinch of red pepper flakes if you desire some heat. This final touch enhances the flavors of your Creamy Orzo with Roasted Butternut Squash and Spinach.

Step 6: Serve
Serve the dish immediately, garnishing with extra Parmesan cheese or a drizzle of olive oil for an extra touch of richness. Enjoy your hearty, comforting Creamy Orzo with Roasted Butternut Squash and Spinach, ideally paired with crusty bread or a light salad to balance its creamy goodness.

Creamy Orzo with Roasted Butternut Squash Variations

Feel free to get creative with your dish, letting your taste buds lead the way!

  • Roasted Veggies: Add color and flavor by mixing in roasted zucchini, carrots, or bell peppers alongside the squash for a more diverse veggie medley.
  • Protein Boost: For a heartier meal, toss in cooked chickpeas or white beans; they'll provide additional protein and texture that complements the creaminess beautifully.
  • Vegan Twist: Replace the butter, cream, and Parmesan cheese with plant-based alternatives like coconut cream and nutritional yeast to enjoy a creamy vegan version.
  • Nutty Flavor: Stir in a handful of toasted pine nuts or walnuts right before serving for a delightful crunch and a nutty flavor that pairs wonderfully with the other ingredients.
  • Herb Infusion: Experiment with fresh herbs like basil or parsley; adding them just before serving can enhance freshness and elevate the entire dish.
  • Cheesy Goodness: Want more cheese? Swap in fontina or gouda instead of Parmesan for a richer, creamier experience that melts beautifully.
  • Spicy Kick: Amp up the heat by incorporating diced jalapeños or a dash of cayenne pepper; this will give your dish a vibrant depth of flavor.
  • Flavor Fusion: Take your dish in a different direction by adding a splash of lemon juice or zest for brightness, pairing nicely with the sweet butternut squash.

Feel inspired? You might also enjoy pairing this dish with some Roasted Bratwurst Peppers for a hearty meal, or a side of Roasted Corn Fried for a delightful contrast!

Expert Tips for Creamy Orzo

  • Prep Ahead: Prepare all ingredients before cooking. This keeps things organized and helps you avoid burning the garlic while multitasking.

  • Use Fresh Ingredients: Fresh garlic and high-quality vegetable broth enhance flavors significantly, making your Creamy Orzo with Roasted Butternut Squash and Spinach even more delicious.

  • Achieve Perfect Texture: Remember to stir the orzo often while it cooks, ensuring it’s tender yet al dente without becoming mushy.

  • Roasting Tips: Make sure the butternut squash is well-coated in olive oil. This will help achieve that golden, caramelized flavor everyone loves!

  • Season Wisely: Taste and adjust the seasoning throughout the cooking process. Adding salt and pepper at different stages helps build layers of flavor.

  • Garnish with Love: Add fresh herbs or a sprinkle of additional Parmesan cheese before serving for a beautiful presentation that elevates the dish visually!

Make Ahead Options

These Creamy Orzo with Roasted Butternut Squash and Spinach are ideal for making ahead, saving you precious time on busy weeknights! You can roast the butternut squash up to 24 hours in advance and store it in an airtight container in the refrigerator. Additionally, you can prepare the orzo mixture (minus the cream and spinach) and refrigerate it for up to 3 days. To finish the dish, simply reheat the orzo on the stovetop, adding in the heavy cream and spinach for a fresh, vibrant touch. Keeping the components separate until serving ensures that everything stays delicious and creamy, ready to delight your taste buds with minimal effort!

What to Serve with Creamy Orzo with Roasted Butternut Squash and Spinach

Creating a memorable meal is all about pairing flavors that complement each other beautifully, and this dish sets the perfect stage.

  • Garlic Bread: A crunchy, buttery delight that pairs wonderfully with the creamy orzo’s richness, allowing for that satisfying bite.

  • Arugula Salad: The peppery freshness of arugula drizzled with lemon vinaigrette cuts through the creaminess, bringing brightness to the meal.

  • Roasted Brussels Sprouts: These caramelized veggies provide a crispy texture and earthy flavor that enhances the sweetness of the butternut squash.

  • Crispy Chickpeas: Add a fun crunch with protein-packed roasted chickpeas, balancing the dish’s creaminess while delivering a satisfying texture.

  • Stuffed Peppers: Offering a hearty, wholesome addition, stuffed peppers filled with quinoa or brown rice create a beautiful flavor harmony with the creamy orzo base.

  • Chardonnay: A glass of chilled Chardonnay perfectly complements the creamy notes of the dish, enhancing the overall dining experience.

  • Seasonal Fruit Salad: A light, colorful fruit salad with fresh berries and citrus offers a refreshing contrast, providing a sweet and zesty finish to your meal.

How to Store and Freeze Creamy Orzo with Roasted Butternut Squash and Spinach

Fridge: Store leftovers in an airtight container for up to 3 days. Reheat gently on the stovetop, adding a splash of broth or water to maintain creaminess.

Freezer: For longer storage, freeze portions in airtight containers for up to 2 months. Thaw overnight in the fridge before reheating.

Reheating: When reheating, use low heat to prevent the orzo from becoming mushy. Stir in a little extra cream or broth as needed to regain a creamy texture.

Airtight Tips: Always ensure your containers are airtight to avoid freezer burn and preserve the vibrant flavors of your Creamy Orzo with Roasted Butternut Squash and Spinach.

Creamy Orzo with Roasted Butternut Squash and Spinach Recipe FAQs

What should I look for when selecting butternut squash?
Absolutely! When choosing butternut squash, look for ones that feel heavy for their size with smooth, unblemished skin. Avoid any with dark spots or soft spots, as these can indicate spoilage. A ripe squash should feel firm and have a matte finish instead of shiny.

How can I store leftovers of this Creamy Orzo with Roasted Butternut Squash and Spinach?
Very simply! Store leftovers in an airtight container in the fridge for up to 3 days. To reheat, gently warm it on the stovetop, adding a splash of vegetable broth or water to restore its creamy texture. Enjoy it just like day one!

Can I freeze Creamy Orzo with Roasted Butternut Squash and Spinach?
Yes, you can! To freeze, divide portions of the creamy orzo into airtight containers, making sure to leave a little space at the top for expansion. It will last in the freezer for up to 2 months. To enjoy, thaw overnight in the fridge and reheat gently on low heat, stirring in a bit of broth or cream as needed to achieve that creamy consistency.

What if my orzo turns out mushy while cooking?
Don't worry, it happens! To prevent mushiness, cook the orzo according to package instructions, checking for texture at the 10-minute mark. If you're concerned, cook it a minute or two less than the recommended time and let it sit in the residual heat to finish cooking. This helps keep that perfect tender bite without losing its shape.

Is this dish suitable for those with allergies?
Absolutely! The Creamy Orzo with Roasted Butternut Squash and Spinach can be easily adjusted for various dietary needs. For nut allergies, ensure that your broth and cheese substitutes are nut-free. If you're preparing it for pets, it's best to avoid feeding them any dishes high in garlic or onion. Always check ingredient labels for any allergens.

Creamy Orzo with Roasted Butternut Squash and Spinach

Creamy Orzo with Roasted Butternut Squash and Spinach Bliss

This Creamy Orzo with Roasted Butternut Squash and Spinach is a comforting vegetarian dish that brings warmth to your dinner table.
Print Recipe Pin Recipe
Prep Time 10 minutes mins
Cook Time 25 minutes mins
Total Time 35 minutes mins
Servings: 4 servings
Course: Dinner
Cuisine: Vegetarian
Calories: 430
Ingredients Equipment Method Nutrition Notes

Ingredients
  

For the Roasted Squash
  • 1 large Butternut Squash Diced
  • 2 tbsp Olive Oil For roasting
  • to taste Salt
  • to taste Black Pepper
For the Orzo Base
  • 2 cups Orzo Pasta Can substitute with ditalini or any small pasta
  • 4 cups Vegetable Broth Can substitute with water
  • 2 tbsp Butter Can use plant-based butter for vegan option
  • 2 cloves Garlic Minced
For the Creamy Sauce
  • ½ cup Parmesan Cheese Grated, can substitute with nutritional yeast for vegan option
  • ½ cup Heavy Cream Can substitute with cream cheese
For the Fresh Taste
  • 4 cups Baby Spinach
  • 1 tsp Dried Thyme Can omit if not available
  • to taste Red Pepper Flakes Optional

Equipment

  • Oven
  • Mixing Bowl
  • Baking Sheet
  • Medium saucepan
  • Spatula
  • measuring cups
  • Measuring Spoons

Method
 

Step-by-Step Instructions
  1. Preheat your oven to 400°F (200°C). Toss diced butternut squash in a mixing bowl with olive oil, salt, and black pepper. Spread the squash evenly on a baking sheet and bake for 25–30 minutes, flipping halfway through.
  2. In a medium saucepan, melt 2 tablespoons of butter over medium heat. Add minced garlic and sauté for about 1 minute until fragrant and lightly golden. Stir in the orzo pasta and cook for an additional 2 minutes.
  3. Pour in 4 cups of vegetable broth and bring to a gentle simmer. Cook the orzo for 10–12 minutes, stirring occasionally, until it absorbs most of the liquid and becomes tender.
  4. Reduce heat to low and stir in ½ cup of Parmesan cheese and ½ cup of heavy cream. Cook for an additional 1–2 minutes until the spinach wilts.
  5. Fold in the roasted butternut squash. Taste and adjust seasoning with salt, black pepper, thyme, and red pepper flakes as desired.
  6. Serve immediately, garnished with extra Parmesan cheese or a drizzle of olive oil.

Nutrition

Serving: 1servingCalories: 430kcalCarbohydrates: 60gProtein: 12gFat: 18gSaturated Fat: 10gPolyunsaturated Fat: 1gMonounsaturated Fat: 5gCholesterol: 45mgSodium: 300mgPotassium: 650mgFiber: 5gSugar: 3gVitamin A: 3500IUVitamin C: 15mgCalcium: 200mgIron: 3mg

Notes

For optimal flavor and texture, use fresh ingredients and adjust seasoning throughout cooking.

Tried this recipe?

Let us know how it was!

Savory Cumin Lamb Noodles: A Comforting Homemade Delight

September 23, 2025 by Grace Snow Leave a Comment

In the heart of my kitchen, surrounded by the tantalizing aroma of spices, I recently embarked on a culinary journey to recreate the unforgettable taste of restaurant-style cumin lamb noodles. This dish, with its tender lamb bathed in a fiery chili oil sauce, is a comforting nod to the vibrant flavors of Xi’an cuisine. What makes these cumin lamb noodles truly special is not just the bold taste but also the fun of making hand-pulled noodles from scratch, turning your cooking into an experience to savor. Plus, it’s a showstopper that’s perfect for entertaining friends or simply indulging on a cozy night in. Are you ready to elevate your weeknight dinners with this delightful recipe?

Why are these cumin lamb noodles unforgettable?

Bold flavors permeate every bite, thanks to a unique blend of spices that dances on your palate. Homemade noodles elevate this dish, offering authenticity and a chewy texture that store-bought varieties can’t match. Spicy and savory elements come together in a chili oil sauce that’s utterly addictive. Perfect for impressing guests at dinner parties or for a comforting family meal, these cumin lamb noodles are sure to become a beloved staple in your recipe repertoire. For a different experience, try them alongside Lamb Stew Hearty or the delightful Chicken Teriyaki Noodles.

Cumin Lamb Noodles Ingredients

Discover the essential ingredients for crafting flavorful cumin lamb noodles!

For the Hand-Pulled Noodles
• Homemade Hand-Pulled Noodles – Base of the dish, providing texture and authenticity. Substitute with wide, semi-fresh noodles if needed.

For the Marinade & Lamb
• Lamb (1 lb, thinly sliced, well-marbled) – Main protein, contributing richness. Use lamb loin or shoulder; for alternatives, consider well-marbled beef.
• Shaoxing Wine (1 tbsp) – Adds depth to the meat marinade. Dry sherry can be used as a substitute.
• Salt (1 tsp) – Essential for flavor enhancement.
• Peanut Oil (1 tsp for marinade; 1 tbsp for stir fry) – For cooking and flavor. Olive oil can be used as an alternative.
• Cornstarch (2 tsp) – Used for marinating the lamb, aiding in tenderness.
• Whole Cumin Seeds (2 tbsp) – Adds aromatic flavor. Can be replaced with ground cumin, but fresh spices are recommended for best taste.
• Sichuan Peppercorns (2 tsp) – Provides a numbing spice characteristic of the dish. Avoid substitution for a true flavor profile.
• Whole Coriander Seeds (1 tsp) – Enhances the spice mix. Use ground coriander in a pinch, though flavor may differ.

For the Sauce
• Homemade Chili Oil (1/2 cup) – Key to the sauce; adds heat and flavor. Can reduce to 1/4 cup and add more to taste if desired.
• Chinkiang Vinegar (3 tbsp) – Balances flavors in the sauce.
• Light Soy Sauce (4 tsp) – Adds umami flavor.
• Dark Soy Sauce (4 tsp) – Provides color and deeper flavor.
• Garlic (8 cloves, minced) – Infuses aroma and flavor.
• Ginger (2 inches, minced) – Adds warmth and spice.
• Red Onion (1, thinly sliced) – Gives sweetness and texture.
• Hot Green Chili (1, sliced) – For heat. Customize according to desired spice level.
• Cilantro (1/2 bunch, chopped) – Fresh garnish to brighten the dish.

These ingredients will help you whip up an incredible plate of homemade cumin lamb noodles that your family and friends will adore!

Step‑by‑Step Instructions for Cumin Lamb Noodles

Step 1: Prep Noodles
Start by making your hand-pulled noodles. Mix flour and water until a dough forms, knead for 10 minutes until smooth. Cover the dough with a damp cloth and let rest for 30 minutes. In a pot, bring water to a rolling boil, preparing for when your noodles are ready to cook.

Step 2: Toast and Grind Spices
In a dry skillet over medium heat, add whole cumin seeds, Sichuan peppercorns, and coriander seeds. Toast for about 5 minutes, stirring frequently until fragrant and slightly darkened. Remove from heat, then grind the mixture in a spice grinder or mortar and pestle until it's partially powdered to release the aromatic oils.

Step 3: Marinate Lamb
In a mixing bowl, combine thinly sliced lamb with Shaoxing wine, salt, peanut oil, and the ground spice mixture. Add cornstarch and mix until the lamb is evenly coated. Allow it to marinate for 15 minutes at room temperature; this enhances the flavors and tenderness before cooking your cumin lamb noodles.

Step 4: Cook Lamb
Heat 1 tablespoon of peanut oil in a large skillet over high heat until shimmering. Introduce the marinated lamb in a single layer, cooking for about 2-3 minutes until browned. Add minced garlic and ginger, stirring briefly before mixing in sliced red onion and hot green chili for an additional 10-20 seconds, ensuring vibrant flavors meld without overcooking.

Step 5: Add Sauce Mixture
Once the lamb is well-cooked, pour in the remaining sauce ingredients: homemade chili oil, Chinkiang vinegar, light and dark soy sauces. Quickly stir-fry everything together for about 1-2 minutes, letting the flavors coat the lamb and creating an inviting aroma that wafts through your kitchen.

Step 6: Finish with Cilantro
Remove the skillet from heat, and fold in the chopped cilantro to brighten the dish. The residual heat will help infuse the dish with fresh herb flavor. Transfer the fragrant lamb mixture to a platter, allowing the extra steam to escape, ensuring your cumin lamb is perfectly seasoned and ready for serving.

Step 7: Cook Noodles
Return to the boiling water, gently pull and twist the rested dough into your desired noodle shape, then add them to the pot. Cook the hand-pulled noodles for 1-2 minutes until they float and are tender. For alternatives, follow the package instructions to ensure everything is perfectly cooked.

Step 8: Serve
To serve your cumin lamb noodles, place a generous handful of noodles in bowls, top with the savory lamb mixture, and drizzle additional chili oil, vinegar, and soy sauce to taste. Enjoy each bite of this comforting, homemade delight, perfect for any occasion!

What to Serve with Cumin Lamb Noodles

Imagine a cozy dinner filled with rich aromas that invite everyone to the table. Complementing these delicious noodles creates a full experience that will linger in your guests’ memories long after the meal is over.

  • Crispy Spring Rolls: The perfect crunch pairs beautifully with the tender noodles, adding a delightful textural contrast to your meal.

  • Garlic Bok Choy: Lightly sautéed, these greens offer a fresh, vibrant pop and healthful balance to the rich lamb and chili oil.

  • Chilled Cucumber Salad: Crisp cucumbers tossed in a tangy sauce serve as a refreshing palate cleanser between those bold flavors.

  • Sweet Soy Glazed Eggplant: Tender eggplant in a sweet glaze adds a depth of flavor, complementing the spices in the cumin lamb noodles beautifully.

  • Fried Rice: This classic side brings a comforting carb element and a hint of umami, soak up the chili oil flavor drizzling down.

  • Chinese Tea: A warm pot of jasmine or oolong tea balances the spices while enhancing the overall dining experience.

  • Mango Sticky Rice: Finish with a sweet note; the coconut-infused rice and ripe mango create a luscious dessert to end your meal on a high note.

Each pairing enhances the succulent flavors of your cumin lamb noodles, bringing both warmth and joy to your shared table.

How to Store and Freeze Cumin Lamb Noodles

Room Temperature: Enjoy the cumin lamb noodles fresh for the best flavor, but if left out, refrain from keeping them at room temperature for more than 2 hours.

Fridge: Leftover cumin lamb noodles can be stored in an airtight container in the fridge for up to 3 days. Reheat gently in a skillet with a splash of water or broth to restore moisture.

Freezer: For longer storage, freeze the lamb mixture (not the noodles) in a sealed container for up to 3 months. Thaw overnight in the fridge before reheating.

Reheating: When ready to enjoy your leftovers, reheat the lamb mixture in a skillet until warmed through and serve atop freshly cooked noodles for a delightful meal.

Make Ahead Options

These Cumin Lamb Noodles are perfect for meal prep enthusiasts! You can marinate the lamb and prepare your hand-pulled noodles up to 24 hours in advance. Simply marinate the thinly sliced lamb with Shaoxing wine, salt, peanut oil, and spices, then store it in an airtight container in the refrigerator. The noodles can be made the day before and kept covered in a damp cloth to prevent drying out. When ready to serve, sauté the marinated lamb and cook the noodles for about 1-2 minutes in boiling water. This preparation not only saves you time during a busy weeknight but also ensures that your cumin lamb noodles taste just as delicious when finished!

Cumin Lamb Noodles Variations & Substitutions

Feel free to get creative with your cumin lamb noodles and make them your own, enhancing both flavors and textures!

  • Dairy-Free: Opt for coconut milk in the sauce for a creamy, rich flavor that’s completely dairy-free.
  • Gluten-Free: Use rice noodles or gluten-free ramen noodles to accommodate dietary needs without sacrificing taste.
  • Spicy Kick: Increase the heat with sliced jalapeños or add a spoonful of chili paste for an extra fiery bite.
  • Veggie-Loaded: Mix in colorful vegetables like bell peppers, bok choy, or carrots stir-fried with the lamb for a nutritious twist.
  • Herb Infusion: Experiment by adding fresh basil or mint alongside cilantro for a fresh flavor burst.
  • Beef Alternative: Substitute the lamb with flank steak or sirloin for a different protein option that still holds its own against the robust sauce.
  • Noodle Twist: For a fun texture, try using udon or soba noodles instead of hand-pulled for a quicker cooking time.
  • Umami Boost: Add a splash of oyster sauce to the marinade for a deeper savory taste that complements the existing flavors beautifully.

These variations offer delightful possibilities to tailor the dish to your family’s preferences. Want to explore more flavorful combinations? Don't forget to check out the comforting Lamb Stew Hearty or try out the mouthwatering Chicken Teriyaki Noodles for a fantastic weeknight meal!

Expert Tips for Cumin Lamb Noodles

Prep Ahead: Ensure all ingredients are prepped before starting; this will help you avoid overcooking the lamb during the process.

Use Whole Spices: Whole spices provide a freshness and stronger flavor than pre-ground options. Toasting them before grinding enhances the aroma.

Trim the Lamb: Carefully trim any connective tissue from the lamb for a more tender and enjoyable eating experience.

Chili Oil Control: Adjust the amount of homemade chili oil to suit your spice tolerance. If unsure, start with less and add more after tasting.

Noodle Consistency: Hand-pulled noodles can vary in thickness; aim for a consistent width to ensure even cooking and a delightful bite in your cumin lamb noodles.

Cooking Order: Cook your lamb first, then stir-fry vegetables briefly to maintain their crunch and flavor, avoiding a mushy texture.

Cumin Lamb Noodles Recipe FAQs

What type of lamb should I use for cumin lamb noodles?
Absolutely! For the best flavor and tenderness, I recommend using well-marbled lamb loin or shoulder. They create a rich and succulent dish. If you’re looking for an alternative, thinly sliced beef can also be used to achieve a similar taste profile.

How should I store leftover cumin lamb noodles?
Leftover cumin lamb noodles can be stored in an airtight container in the fridge for up to 3 days. When reheating, add a splash of water or broth in a skillet to bring back moisture and flavor. This method prevents the noodles from drying out, helping to retain the dish's mouthwatering essence.

Can I freeze cumin lamb noodles?
Very! To freeze, I suggest freezing the lamb mixture separately from the noodles. Place the cooled lamb in a sealed container or freezer bag and store it in the freezer for up to 3 months. When ready to eat, thaw it overnight in the fridge and reheat in a skillet before serving over freshly cooked noodles.

How do I know if my ingredients, like the cumin seeds and spices, are fresh enough?
A great question! Ensure your spices are fresh by checking the aroma—whole spices should have a strong, pleasant scent. If they smell dull or have lost their fragrance, it’s better to replace them. You might notice that whole cumin seeds have a robust aroma; if they appear faded or lack fragrance, consider getting fresh ones for your cumin lamb noodles.

What should I do if my homemade chili oil is too spicy?
If you find your chili oil is too spicy, don't worry! You can balance the heat by adding more Chinkiang vinegar or incorporating additional soy sauce into the dish. If the dish still seems too fiery, serving with a dollop of yogurt or sour cream can help mellow out the spice while adding creaminess.

Can I use store-bought noodles instead of making hand-pulled noodles?
Certainly! If you’re short on time, you can easily substitute with wide, semi-fresh noodles or any type of Asian noodle you enjoy. Just follow the package instructions for cooking, and you’ll still enjoy a delicious plate of cumin lamb noodles without the hand-pulling process.

Cumin Lamb Noodles

Savory Cumin Lamb Noodles: A Comforting Homemade Delight

Cumin Lamb Noodles are a comforting homemade dish that combines bold spices and tender lamb for a delicious meal.
Print Recipe Pin Recipe
Prep Time 30 minutes mins
Cook Time 20 minutes mins
Resting Time 30 minutes mins
Total Time 1 hour hr 20 minutes mins
Servings: 4 bowls
Course: Dinner
Cuisine: Chinese
Calories: 540
Ingredients Equipment Method Nutrition Notes

Ingredients
  

For the Hand-Pulled Noodles
  • 2 cups All-Purpose Flour
  • 3/4 cup Water
For the Marinade & Lamb
  • 1 lb Lamb, thinly sliced Use lamb loin or shoulder; for alternatives, consider well-marbled beef.
  • 1 tbsp Shaoxing Wine Dry sherry can be used as a substitute.
  • 1 tsp Salt
  • 1 tsp Peanut Oil 1 tsp for marinade; 1 tbsp for stir fry.
  • 2 tsp Cornstarch Used for marinating the lamb.
  • 2 tbsp Whole Cumin Seeds Can be replaced with ground cumin, but fresh spices are recommended.
  • 2 tsp Sichuan Peppercorns Avoid substitution for a true flavor profile.
  • 1 tsp Whole Coriander Seeds Use ground coriander in a pinch.
For the Sauce
  • 1/2 cup Homemade Chili Oil Add more to taste if desired.
  • 3 tbsp Chinkiang Vinegar
  • 4 tsp Light Soy Sauce
  • 4 tsp Dark Soy Sauce
  • 8 cloves Garlic, minced
  • 2 inches Ginger, minced
  • 1 whole Red Onion, thinly sliced
  • 1 whole Hot Green Chili, sliced Customize according to desired spice level.
  • 1/2 bunch Cilantro, chopped Fresh garnish.

Equipment

  • Skillet
  • pot
  • Mixing Bowl
  • Spice Grinder

Method
 

Step-by-Step Instructions for Cumin Lamb Noodles
  1. Prep Noodles: Mix flour and water until a dough forms, knead for 10 minutes until smooth. Cover and let rest for 30 minutes.
  2. Toast and Grind Spices: In a dry skillet, toast cumin seeds, Sichuan peppercorns, and coriander seeds for about 5 minutes until fragrant. Grind until partially powdered.
  3. Marinate Lamb: Combine lamb with Shaoxing wine, salt, peanut oil, and ground spice mixture. Marinate for 15 minutes.
  4. Cook Lamb: Heat peanut oil in a skillet, add marinated lamb and cook until browned. Add garlic, ginger, onion, and chili for another 10-20 seconds.
  5. Add Sauce Mixture: Pour in remaining sauce ingredients and quickly stir-fry together for 1-2 minutes.
  6. Finish with Cilantro: Remove from heat, fold in chopped cilantro, and transfer mixture to a platter.
  7. Cook Noodles: Pull and twist rested dough into desired shape, cook in boiling water for 1-2 minutes until tender.
  8. Serve: Place noodles in bowls, top with lamb mixture, and drizzle with additional chili oil and sauces as desired.

Nutrition

Serving: 1bowlCalories: 540kcalCarbohydrates: 67gProtein: 32gFat: 18gSaturated Fat: 3gPolyunsaturated Fat: 4gMonounsaturated Fat: 9gCholesterol: 75mgSodium: 890mgPotassium: 600mgFiber: 4gSugar: 3gVitamin A: 30IUVitamin C: 7mgCalcium: 40mgIron: 4mg

Notes

Ensure all ingredients are prepped before starting; use whole spices for freshness and trim lamb for tenderness.

Tried this recipe?

Let us know how it was!

Caramelized Slow Roast Asian Beef Short Rib for Cozy Nights

September 23, 2025 by Grace Snow Leave a Comment

As I stood over the simmering pot, a wave of savory aromas wafted through my kitchen, instantly transporting me to the bustling streets of Asia. Today, I’m excited to share my beloved recipe for Caramelized Slow Roast Asian Beef Short Rib, a dish that embodies comfort food at its finest. The slow, tender roasting process highlights rich, mouth-watering flavors, creating a feast that feels special yet is surprisingly easy to prepare. With just a handful of simple ingredients—think soy sauce, brown sugar, and fragrant spices—you can craft a sumptuous meal that dazzles your family or guests. Plus, this recipe is perfect for meal prep; it keeps well in the fridge or freezer, making busy weeknights a breeze. Are you ready to dive into this culinary adventure that will leave your taste buds singing? Let’s get started!

Why Is This Recipe a Must-Try?

Simplicity at Its Core: The Caramelized Slow Roast Asian Beef Short Rib is perfectly approachable for cooks of any skill level, ensuring that your time in the kitchen is enjoyable, not stressful.

Rich, Complex Flavors: Each ingredient, from the umami-packed soy sauce to the aromatic ginger, comes together to create a flavor profile that’s both comforting and exciting.

Crowd-Pleasing Appeal: This dish is perfect for entertaining! Serve it at dinner parties or family gatherings, and watch as everyone reaches for second helpings.

Versatility: Pair it with fluffy jasmine rice or vibrant steamed bok choy, as you create a wholesome meal that caters to all preferences.

Meal Prep Friendly: With easy storage options, you can whip up a double batch to enjoy throughout the week, making meals a breeze on busy days.

Don’t forget to check out my recipes for Maple Roasted Sweet Potatoes with Pecans or Roasted Corn and Fried Egg Tacos for some more delightful options to complement this delicious dish!

Caramelized Slow Roast Asian Beef Short Rib Ingredients

For the Marinade

  • Beef Short Ribs – The star of the dish; select well-marbled ones for ultimate tenderness.
  • Soy Sauce – Adds a rich umami depth; opt for low-sodium to manage saltiness.
  • Brown Sugar – Creates that perfect caramelization; coconut sugar can add a unique twist.
  • Rice Vinegar – Balances the sweetness with its acidity; apple cider vinegar also works well.
  • Sesame Oil – Infuses the dish with a nutty aroma; use vegetable oil if sesame isn't on hand.
  • Garlic (minced) – Elevates the dish's aroma; fresh garlic brings the best flavor.
  • Fresh Ginger (grated) – Adds a fresh zing; ground ginger can step in if needed.
  • Black Pepper – Introduces a mild heat; feel free to adjust based on your spice preference.

For the Glaze

  • Cornstarch – Helps thicken the glaze for a luscious finish; arrowroot powder is a good alternative.
  • Water – Essential for making the slurry; there's no need to substitute here.

For Garnish

  • Green Onions (sliced) – A bright touch for garnish; adds color and a fresh bite.
  • Sesame Seeds – Optional, but these provide a delightful crunch and extra flavor.

With these simple yet flavorful ingredients, your Caramelized Slow Roast Asian Beef Short Rib will be a dish to remember!

Step‑by‑Step Instructions for Caramelized Slow Roast Asian Beef Short Rib

Step 1: Preheat the Oven
Begin by preheating your oven to 300°F (150°C). This slow roasting temperature ensures your beef short ribs will cook evenly and develop that mouthwatering tenderness. While the oven heats up, gather your equipment: a large oven-safe pot and a mixing bowl for your marinade.

Step 2: Prepare the Marinade
In a mixing bowl, whisk together the soy sauce, brown sugar, rice vinegar, sesame oil, minced garlic, grated ginger, and a pinch of black pepper until well combined. This savory marinade forms the flavor foundation for your Caramelized Slow Roast Asian Beef Short Rib, creating a delightful blend that will soak into the meat.

Step 3: Marinate the Ribs
Place the beef short ribs in a shallow dish and pour the prepared marinade over them, ensuring they are thoroughly coated. Cover the dish and let it marinate for at least 30 minutes at room temperature or, for even deeper flavor, refrigerate overnight. This step allows the tantalizing marinade to penetrate the meat.

Step 4: Sear the Ribs
In the same oven-safe pot, heat a tablespoon of oil over medium-high heat. Once the oil shimmers, add the marinated short ribs, searing them for about 2-3 minutes on each side until they achieve a deep golden-brown color. This caramelization adds depth to the overall flavor profile of your dish.

Step 5: Slow Roast the Ribs
After searing, pour the remaining marinade over the short ribs in the pot. Cover it with a tight-fitting lid, then carefully transfer the pot to your preheated oven. Roast for approximately 3 hours, or until the ribs are fork-tender and a beautiful dark hue appears, signaling they are ready for the next step.

Step 6: Create the Glaze
Once the short ribs are done roasting, remove them from the oven and transfer the ribs to a plate. In a small bowl, mix the cornstarch with water to form a slurry. Pour this mixture into the pot with the remaining juices and simmer on the stove over medium heat for about 5 minutes, stirring until thickened into a glossy glaze.

Step 7: Glaze the Ribs
Preheat your oven broiler and brush the thickened glaze generously over the short ribs. Place them back into the oven, about 6 inches from the heating element, and broil for 5-10 minutes until the glaze is caramelized and bubbling. Keep a close watch to ensure they do not burn, as this step enhances the overall presentation.

Step 8: Rest and Slice
Remove the caramelized short ribs from the oven and let them rest on a cutting board for about 15 minutes. Resting allows the juices to redistribute, ensuring flavorful, juicy bites when sliced. After resting, slice the ribs against the grain, ready to serve with your favorite sides.

What to Serve with Caramelized Slow Roast Asian Beef Short Rib

Indulging in the deep, savory flavors of slow-roasted beef short ribs is like wrapping yourself in a warm embrace, and pairing it with the right sides can elevate the experience even further.

  • Jasmine Rice: A classic accompaniment that soaks up the rich sauce, offering a fluffy and fragrant base for the beef's bold flavors.

  • Steamed Bok Choy: Tender yet crunchy, this vibrant green vegetable adds a fresh contrast and its light bitterness pairs beautifully with the sweet and savory ribs.

  • Sesame Noodle Salad: The nutty flavor of sesame oil combined with fresh veggies creates a refreshing side that balances the richness of the short ribs.

The unique textures of silky noodles, crunchy vegetables, and the luscious sauce harmonize well, making each bite a celebration of flavors.

  • Pickled Vegetables: A zesty touch that cuts through the dish’s richness, pickles enhance every bite with a satisfying crunch and tang.

  • Asian Slaw: A crunchy mixture of cabbage, carrots, and a sesame dressing provides a delightful bite that complements the beef’s tenderness.

  • Chilled Sake: This light, smooth drink enhances the meal and brings a touch of elegance to your dining experience.

As you enjoy the Caramelized Slow Roast Asian Beef Short Rib, these pairings will create a memorable feast that warms the heart and nourishes the soul.

How to Store and Freeze Caramelized Slow Roast Asian Beef Short Rib

Fridge: Store leftovers in an airtight container for up to 3 days. Ensure they are fully cooled before refrigerating to maintain texture and flavor.

Freezer: For longer storage, freeze the short ribs for up to 3 months. Wrap tightly in plastic wrap and then in foil, or use a freezer-safe container to prevent freezer burn.

Reheating: Thaw overnight in the fridge for best results. Reheat in a covered skillet over low heat or in the oven until warmed through, adding a splash of water or broth to retain moisture.

Meal Prep: Cooking a double batch? This Caramelized Slow Roast Asian Beef Short Rib makes for a comforting meal prep option, ready to heat and enjoy throughout the week!

Expert Tips for Caramelized Slow Roast Asian Beef Short Rib

  • Choose Quality Ribs: Select well-marbled beef short ribs for optimal tenderness and rich flavor; this makes a significant difference in your dish.

  • Marination Matters: For deeper flavor, marinate the ribs overnight; even a few hours can elevate the overall taste of your Caramelized Slow Roast Asian Beef Short Rib.

  • Searing Technique: Don’t rush the searing step; aim for a nice golden-brown crust without burning to enhance the depth of flavor.

  • Watch the Broil: While broiling, keep a close eye on the ribs to prevent them from burning; this step is crucial for that delightful caramelized finish.

  • Resting is Key: Always let the ribs rest for 15 minutes before slicing; this allows the juices to redistribute, ensuring every bite is juicy and flavorful.

Make Ahead Options

These Caramelized Slow Roast Asian Beef Short Ribs are a fantastic choice for meal prep! You can marinate the beef short ribs up to 24 hours in advance, allowing the savory flavors to deeply penetrate the meat. Simply combine the marinade ingredients and let the ribs soak in the fridge for maximum flavor. The searing can be done up to 3 days ahead; just sear the ribs, cover them in the marinade, and refrigerate. When you're ready to serve, slow roast for 3 hours as per the instructions, and finish with the glaze. This way, you’ll enjoy tender, delicious ribs with minimal effort, making busy weeknights feel like a special occasion!

Caramelized Slow Roast Asian Beef Short Rib Variations

Feel free to play around with these ideas to elevate your Caramelized Slow Roast Asian Beef Short Rib into something uniquely yours!

  • Dairy-Free: Swap any ingredients that contain dairy, like butter if you choose to baste, with vegetable oil for a completely dairy-free option.

  • Spicy Kick: Add a tablespoon of chili paste or sriracha to the marinade to boost the heat and add a new layer of flavor. This subtle addition transforms the dish and adds a delightful zing.

  • Herb Infusion: Incorporate fresh herbs like cilantro or scallions into the marinade for a fresh twist, enhancing aroma and flavor that celebrates the vibrant tastes of Asian cuisine.

  • Sweet Twist: Use honey instead of brown sugar for a floral sweet note, creating a different depth in your glaze while achieving that luscious caramelization.

  • Alternative Meat: Try using beef chuck or pork ribs for a different texture and flavor while still maintaining that melt-in-your-mouth experience. Each meat brings its character to the dish.

  • Umami Boost: Add a tablespoon of miso paste into your marinade for an . extra umami punch, elevating the savory goodness of your short ribs to new heights.

  • Vegetable Medley: Include vegetables like carrots or bell peppers in your roasting pot for a colorful side that absorbs the delicious marinade, creating a beautiful balance on your plate.

  • Asian Slaw: To brighten the meal, serve your short ribs with a tangy Asian slaw. This refreshing side dish complements the richness of the ribs and rounds out the meal beautifully.

If you're looking to serve this dish with flair, consider pairing it with something delightful, like Maple Roasted Sweet Potatoes with Pecans, or a flavorful side of Roasted Corn and Fried Egg Tacos.

Caramelized Slow Roast Asian Beef Short Rib Recipe FAQs

What is the best way to select beef short ribs?
When choosing beef short ribs, look for well-marbled cuts with a good amount of fat throughout. This marbling ensures that the meat will become tender and flavorful during the slow roasting process. If you see dark spots or excessive bone, it’s best to avoid those cuts.

How should I store leftovers from this recipe?
You can store leftovers in an airtight container in the refrigerator for up to 3 days. Be sure the ribs have cooled to room temperature before placing them in the refrigerator to maintain their delightful texture and flavors.

Can I freeze the caramelized short ribs?
Absolutely! To freeze your Caramelized Slow Roast Asian Beef Short Rib, wrap them tightly in plastic wrap followed by aluminum foil or transfer them to a freezer-safe container. They can be frozen for up to 3 months. When you're ready to enjoy them, thaw them overnight in the fridge before reheating.

How can I reheat the short ribs without drying them out?
To reheat your short ribs, place them in a covered pan over low heat on the stove or in the oven set to 300°F (150°C). Adding a splash of water or broth will help retain moisture and prevent the meat from drying out. Heat until warmed through, ensuring to keep them covered.

What should I do if the ribs are tough after cooking?
If you find that your short ribs are tough, they may need more time in the oven. Return the pot to the oven and continue roasting, checking for tenderness every 30 minutes. If the ribs need to cook longer, simply add a bit of broth or water to the pot, cover it tightly, and keep roasting until fork-tender.

Are there any meal prep tips for this recipe?
Indeed! This Caramelized Slow Roast Asian Beef Short Rib is perfect for meal prepping. You can double the recipe and store individual portions in airtight containers. Reheat as needed throughout the week, allowing you to enjoy a comforting meal without the fuss on busy nights.

Caramelized Slow Roast Asian Beef Short Rib

Caramelized Slow Roast Asian Beef Short Rib for Cozy Nights

A savory Caramelized Slow Roast Asian Beef Short Rib dish that captures the essence of comfort food.
Print Recipe Pin Recipe
Prep Time 30 minutes mins
Cook Time 3 hours hrs
Resting Time 15 minutes mins
Total Time 3 hours hrs 45 minutes mins
Servings: 4 servings
Course: Dinner
Cuisine: Asian
Calories: 350
Ingredients Equipment Method Nutrition Notes

Ingredients
  

Marinade
  • 2 pounds Beef Short Ribs well-marbled
  • 1/2 cup Soy Sauce low-sodium
  • 1/4 cup Brown Sugar or coconut sugar
  • 1/4 cup Rice Vinegar or apple cider vinegar
  • 2 tablespoons Sesame Oil or vegetable oil
  • 4 cloves Garlic minced
  • 1 tablespoon Fresh Ginger grated
  • 1/2 teaspoon Black Pepper
Glaze
  • 2 tablespoons Cornstarch or arrowroot powder
  • 1/4 cup Water
Garnish
  • 2 tablespoons Green Onions sliced
  • 1 tablespoon Sesame Seeds optional

Equipment

  • Oven-safe pot
  • Mixing Bowl

Method
 

Preparation
  1. Preheat your oven to 300°F (150°C).
  2. In a mixing bowl, whisk together the soy sauce, brown sugar, rice vinegar, sesame oil, minced garlic, grated ginger, and black pepper until well combined.
  3. Place the beef short ribs in a shallow dish and pour the prepared marinade over them, ensuring they are thoroughly coated. Cover and marinate for at least 30 minutes at room temperature or refrigerate overnight.
  4. Heat a tablespoon of oil in the same pot over medium-high heat. Sear the marinated short ribs for 2-3 minutes on each side until golden-brown.
  5. Pour the remaining marinade over the short ribs and cover with a tight-fitting lid. Roast in the preheated oven for approximately 3 hours until fork-tender.
  6. Mix the cornstarch with water to form a slurry. Pour into the pot with the remaining juices and simmer over medium heat for about 5 minutes, stirring until thickened into a glaze.
  7. Preheat the oven broiler and brush the thickened glaze over the short ribs. Broil for 5-10 minutes until the glaze is caramelized and bubbling.
  8. Let the caramelized short ribs rest on a cutting board for about 15 minutes before slicing.

Nutrition

Serving: 1servingCalories: 350kcalCarbohydrates: 30gProtein: 25gFat: 15gSaturated Fat: 4gPolyunsaturated Fat: 2gMonounsaturated Fat: 7gCholesterol: 100mgSodium: 1500mgPotassium: 500mgFiber: 1gSugar: 10gVitamin C: 1mgCalcium: 20mgIron: 2mg

Notes

For deeper flavor, marinate the ribs overnight and ensure they are well-seared for maximum flavor development.

Tried this recipe?

Let us know how it was!

Creamy Chicken Alfredo Sloppy Joes for Quick Comfort Food

September 23, 2025 by Grace Snow Leave a Comment

As I stood in my kitchen, the aroma of sautéed onions and garlic wafted through the air, instantly drawing me back to cozy family dinners. This is the moment I knew I was about to create something special: Chicken Alfredo Sloppy Joes. With its creamy, comforting filling and soft buns, this dish merges the best of two favorites, promising a joyful twist that's both quick to prepare and family-friendly. In just 30 minutes, you can whip up a satisfying meal that pleases even the pickiest eaters and transforms any ordinary weeknight into a delightful occasion. Ready to swap your usual fast food for an irresistible homemade comfort dish? Let’s dive into this delicious recipe together!

Why Are These Sloppy Joes a Must-Try?

Unique Fusion: This recipe takes two classic favorites and combines them into a mouthwatering dish that’s both familiar and exciting. Quick Prep: Ready in just 30 minutes, it’s perfect for busy nights when you crave comfort without the wait. Crowd-Pleaser: With creamy Chicken Alfredo packed into soft buns, it’s a guaranteed hit for family dinners or gatherings. Versatile & Adaptable: Feel free to modify it for dietary needs or add veggies like bell peppers for a vibrant twist. Make the swap from fast food to homemade magic with these delicious Chicken Alfredo Sloppy Joes!

Chicken Alfredo Sloppy Joes Ingredients

For the Chicken Filling

  • Ground Chicken – The main protein source that provides lean meat; can substitute with ground turkey for a lighter option.
  • Olive Oil – Used for sautéing; vegetable oil or avocado oil can be a suitable alternative.
  • Onion – Adds sweetness and depth; yellow or white onions work great; shallots can be used as a substitute.
  • Garlic – Enhances aroma and flavor; fresh minced garlic is best, but garlic powder can work in a pinch.
  • Heavy Cream – The key to a rich Alfredo sauce; half-and-half or low-fat cream can be chosen for a lighter version.
  • Grated Parmesan Cheese – Provides creaminess and a salty kick; consider using Pecorino Romano for an alternative sharp taste.
  • Italian Seasoning – Adds flavor complexity; a blend of dried oregano, basil, and thyme can work as a substitute.
  • Salt and Pepper – Essential for seasoning; adjust to your personal taste preferences.

For Assembly

  • Hamburger Buns – Serve as the vessel for this dish; whole wheat or gluten-free buns are great options.
  • Fresh Parsley – Adds a pop of color and fresh flavor for garnish; it’s optional but a lovely touch!

Step‑by‑Step Instructions for Chicken Alfredo Sloppy Joes

Step 1: Prep Chicken Mixture
Begin by heating 1 tablespoon of olive oil in a large skillet over medium heat. Once the oil shimmers, add 1 chopped onion and sauté for 3-4 minutes until it becomes translucent. Stir in 2 minced garlic cloves and cook for an additional 1-2 minutes, until fragrant but not browned. This aromatic base sets the stage for your Chicken Alfredo Sloppy Joes.

Step 2: Cook Chicken
Next, stir in 1 pound of ground chicken, using a wooden spoon to break it apart as it cooks. Allow it to sauté for about 5-7 minutes, or until it turns fully cooked with no pink remaining. This is crucial for food safety, so ensure the chicken is cooked through while mixing well with the onions and garlic.

Step 3: Make Alfredo Sauce
Reduce the heat to low and pour in 1 cup of heavy cream, stirring continuously to combine with the chicken mixture. Gradually mix in 1 cup of grated Parmesan cheese until it melts and creates a creamy sauce. Season the blend with 1 teaspoon of Italian seasoning, salt, and pepper to taste. The sauce should look luscious and thick, perfect for your Chicken Alfredo Sloppy Joes.

Step 4: Assemble Sloppy Joes
While the sauce simmers gently, toast your hamburger buns in a toaster or under the broiler for about 2-3 minutes, until they are lightly golden. Spoon generous portions of the Chicken Alfredo mixture onto the bottom half of each bun, ensuring every bite is enveloped in that creamy goodness. Place the top bun on and press lightly to hold everything together.

Step 5: Serve
Serve your Chicken Alfredo Sloppy Joes warm, garnished with fresh parsley if desired. These hearty sandwiches can be paired with sides like crispy fries or a garden salad for a well-rounded meal. Enjoy this delightful fusion of flavors that brings comfort food to a whole new level within minutes.

Chicken Alfredo Sloppy Joes Variations

Feel free to mix things up and make this dish your own with these delicious twists!

  • Veggie-Packed: Add sautéed bell peppers or spinach for a burst of color and nutrition, creating balance with creamy filling.

  • Extra Heat: Incorporate crushed red pepper flakes into the sauce for a spicy kick that warms the soul. This heat perfectly complements the creamy Alfredo.

  • Cheesy Delight: Swap in mozzarella for a gooey, melty texture, or try cream cheese in place of heavy cream for even more richness. Experimenting with cheese can elevate flavors beautifully.

  • Dairy-Free: Use coconut milk or a dairy-free cream alternative to create a vegan Alfredo sauce that’s just as satisfying. Plus, you'll have a dish that everyone can enjoy!

  • Bold Flavor: Consider adding BBQ sauce for a sweet twist or use my favorite Honey BBQ Chicken in the mix for a fun, different flair.

  • Smoky Notes: Incorporate a touch of smoked paprika, adding a lovely depth that perfectly complements the chicken in your sloppy joes.

  • Make it Mediterranean: Add some kalamata olives or feta cheese and swap the Italian seasoning for herbes de Provence for a tasty Mediterranean spin.

  • Asian Inspiration: Use sesame oil instead of olive oil and swap the Italian seasoning for soy sauce and ginger to create an Asian-inspired variation. Top with green onions for added zing!

Don’t hesitate to explore these variations and check out my other popular recipes like Spatchcock Chicken Flavor for more culinary adventures!

What to Serve with Chicken Alfredo Sloppy Joes?

Ready to elevate your meal with delightful sides that complement the creamy, dreamy flavors of these unique Chicken Alfredo Sloppy Joes?

  • Crispy Sweet Potato Fries:
    These golden fries add a hint of sweetness and crispness, providing a perfect contrast to the creamy filling.

  • Garden Salad:
    A fresh salad with vivid greens and a zesty dressing brightens the dish, balancing the richness of the Sloppy Joes.

  • Steamed Broccoli:
    Lightly steamed broccoli offers a nutritious crunch that pairs beautifully with the soft texture of the buns.

  • Classic Potato Chips:
    Add a crunchy element with classic potato chips; their salty goodness is a delightful match for the savory slaw.

  • Roasted Asparagus:
    Tender, roasted asparagus adds a gourmet touch and enhances the dish with its earthy flavor and stunning appearance.

  • Fruit Salad:
    A refreshing fruit salad provides a sweet and juicy counterpoint to the rich chicken Alfredo flavors.

  • Iced Lemonade:
    Quench your thirst with a refreshing iced lemonade that cuts through the creaminess and adds a vibrant citrus note.

  • Chocolate Chip Cookies:
    Wrap up your meal with the ultimate comfort dessert! Soft, gooey chocolate chip cookies bring a sweet finish to a cozy evening.

Expert Tips for Chicken Alfredo Sloppy Joes

  • Avoid Garlic Burn: Add garlic after the onions are translucent to prevent it from burning, which can turn bitter.

  • Thicken with Care: If your Alfredo sauce gets too thick, add a splash of chicken broth or water to achieve your desired consistency.

  • Cook Thoroughly: Ensure your chicken is fully cooked, reaching an internal temperature of 165°F (74°C) for food safety.

  • Cheese Swap: Experiment with different cheeses like mozzarella for a gooey texture or cream cheese for extra creaminess in your Chicken Alfredo Sloppy Joes.

  • Veggie Boost: Incorporate extra vegetables, such as sautéed bell peppers or spinach, to enhance flavor and nutrition without compromising the creamy goodness.

How to Store and Freeze Chicken Alfredo Sloppy Joes

Fridge: Keep leftover chicken Alfredo mixture in an airtight container for up to 3 days. Store hamburger buns separately to prevent them from becoming soggy.

Freezer: For longer storage, you can freeze the chicken mixture in an airtight container for up to 3 months. Thaw overnight in the fridge before reheating.

Reheating: Reheat the chicken Alfredo filling on the stovetop or in a microwave until it reaches a safe temperature of 165°F (74°C). Assemble on toasted buns for best results.

Make-Ahead Tip: Prepare the chicken Alfredo mixture in advance, store it in the fridge, then quickly assemble and serve during busy weeknights!

Make Ahead Options

These Chicken Alfredo Sloppy Joes are perfect for meal prep enthusiasts! You can prepare the creamy chicken filling up to 3 days in advance, storing it in an airtight container in the refrigerator to maintain its delicious flavor and texture. Simply cook the chicken mixture as directed and let it cool before refrigerating. When you’re ready to serve, just reheat the filling on the stovetop until warmed through, while toasting your buns. This way, you’ll have a quick, satisfying meal ready in no time that tastes just as delicious as when it was freshly made!

Chicken Alfredo Sloppy Joes Recipe FAQs

How do I know if the ingredients are ripe or fresh?
Absolutely! When selecting garlic, look for firm, unblemished bulbs with tight skin. For onions, choose ones that feel heavy for their size and have a fresh, clean scent. Avoid any that show dark spots or sprouting. Fresh chicken should be pink and moist, without any off smells.

What’s the best way to store leftover chicken Alfredo Sloppy Joes?
Keep the leftover chicken Alfredo mixture in an airtight container in the refrigerator for up to 3 days. To maintain the integrity of the buns, store them separately. This way, you can enjoy that fresh texture when you assemble them for a second time!

Can I freeze Chicken Alfredo Sloppy Joes?
Absolutely! To freeze the chicken mixture, place it in an airtight container or a heavy-duty freezer bag, ensuring to remove as much air as possible. It will last for up to 3 months. When you're ready to enjoy, thaw it overnight in the refrigerator and reheat on the stovetop before serving on freshly toasted buns.

What should I do if my Alfredo sauce is too thick?
If your Alfredo sauce thickens too much, no worries! Simply add a splash of chicken broth or water to the pan. Stir well to reach your desired consistency. This can help lighten it without losing that creamy, delightful flavor that makes these Chicken Alfredo Sloppy Joes so irresistible!

Can I make this recipe dairy-free or gluten-free?
Certainly! To make it dairy-free, substitute heavy cream with a plant-based cream alternative (like coconut cream) and use nutritional yeast instead of Parmesan cheese for a cheesy flavor. For gluten-free options, opt for gluten-free buns and ensure all ingredients, including sauces and seasonings, are gluten-free.

Is this recipe safe for children or those with allergies?
While this recipe is generally family-friendly, always check for specific allergies related to the ingredients. For example, some children might be allergic to dairy or gluten. Feel free to modify ingredients to cater to dietary needs, such as using ground turkey for a lighter protein option!

Chicken Alfredo Sloppy Joes

Creamy Chicken Alfredo Sloppy Joes for Quick Comfort Food

Enjoy these Chicken Alfredo Sloppy Joes, a creamy, comforting twist on classic sloppy joes that is quick to prepare and family-friendly.
Print Recipe Pin Recipe
Prep Time 10 minutes mins
Cook Time 20 minutes mins
Total Time 30 minutes mins
Servings: 4 sandwiches
Course: Dinner
Cuisine: American
Calories: 450
Ingredients Equipment Method Nutrition Notes

Ingredients
  

For the Chicken Filling
  • 1 pound Ground Chicken can substitute with ground turkey
  • 1 tablespoon Olive Oil or vegetable oil
  • 1 medium Onion chopped, yellow or white
  • 2 cloves Garlic minced
  • 1 cup Heavy Cream or half-and-half
  • 1 cup Grated Parmesan Cheese or Pecorino Romano
  • 1 teaspoon Italian Seasoning can substitute with dried herbs
  • to taste Salt and Pepper
For Assembly
  • 4 pieces Hamburger Buns or whole wheat/gluten-free
  • Fresh Parsley optional for garnish

Equipment

  • Large skillet
  • Toaster
  • Wooden spoon

Method
 

Preparation Instructions
  1. Heat 1 tablespoon of olive oil in a large skillet over medium heat. Add 1 chopped onion and sauté for 3-4 minutes until translucent.
  2. Stir in 2 minced garlic cloves and cook for an additional 1-2 minutes until fragrant but not browned.
  3. Stir in 1 pound of ground chicken, breaking it apart as it cooks for about 5-7 minutes until fully cooked.
  4. Reduce heat to low, pour in 1 cup of heavy cream and mix in 1 cup of grated Parmesan cheese until melted.
  5. Season with 1 teaspoon of Italian seasoning, salt, and pepper to taste.
  6. Toast hamburger buns for about 2-3 minutes until lightly golden.
  7. Spoon the Chicken Alfredo mixture onto the bottom half of each bun and top with the other half.
  8. Serve warm, optionally garnished with fresh parsley.

Nutrition

Serving: 1sandwichCalories: 450kcalCarbohydrates: 35gProtein: 30gFat: 25gSaturated Fat: 10gPolyunsaturated Fat: 5gMonounsaturated Fat: 15gCholesterol: 90mgSodium: 800mgPotassium: 700mgFiber: 2gSugar: 3gVitamin A: 500IUVitamin C: 2mgCalcium: 250mgIron: 2mg

Notes

Leftover chicken Alfredo mixture can be stored in the fridge for up to 3 days. Freeze for longer storage.

Tried this recipe?

Let us know how it was!
  • « Previous Page
  • 1
  • …
  • 87
  • 88
  • 89
  • 90
  • 91
  • …
  • 102
  • Next Page »

Welcome!

Hi, I’m Grace, a Sydney-based home cook with a passion for bold flavors and trending ingredients. Whether you’re a busy beginner or a seasoned foodie, you’ll find dishes here that are fresh, fun, and full of flavor.

More about me

Popular Recipes

  • Honey Sriracha Salmon Bowls
    Delicious Honey Sriracha Salmon Bowls for Quick Dinners
  • Air Fryer Apple Pie Taquitos
    Crispy Air Fryer Apple Pie Taquitos for a Sweet Treat
  • Crispy Parmesan Crusted Cod
    Crispy Parmesan Crusted Cod: A Healthy Flavor Explosion
  • Air Fryer French Toast Bites
    Delicious Air Fryer French Toast Bites for Busy Mornings

Footer

↑ back to top

About

  • Privacy Policy
  • Disclaimer
  • Terms & Conditions

Newsletter

  • Sign Up! for emails and updates

Contact

  • About me
  • Contact me

Copyright © 2025 TastyTrendIngredients