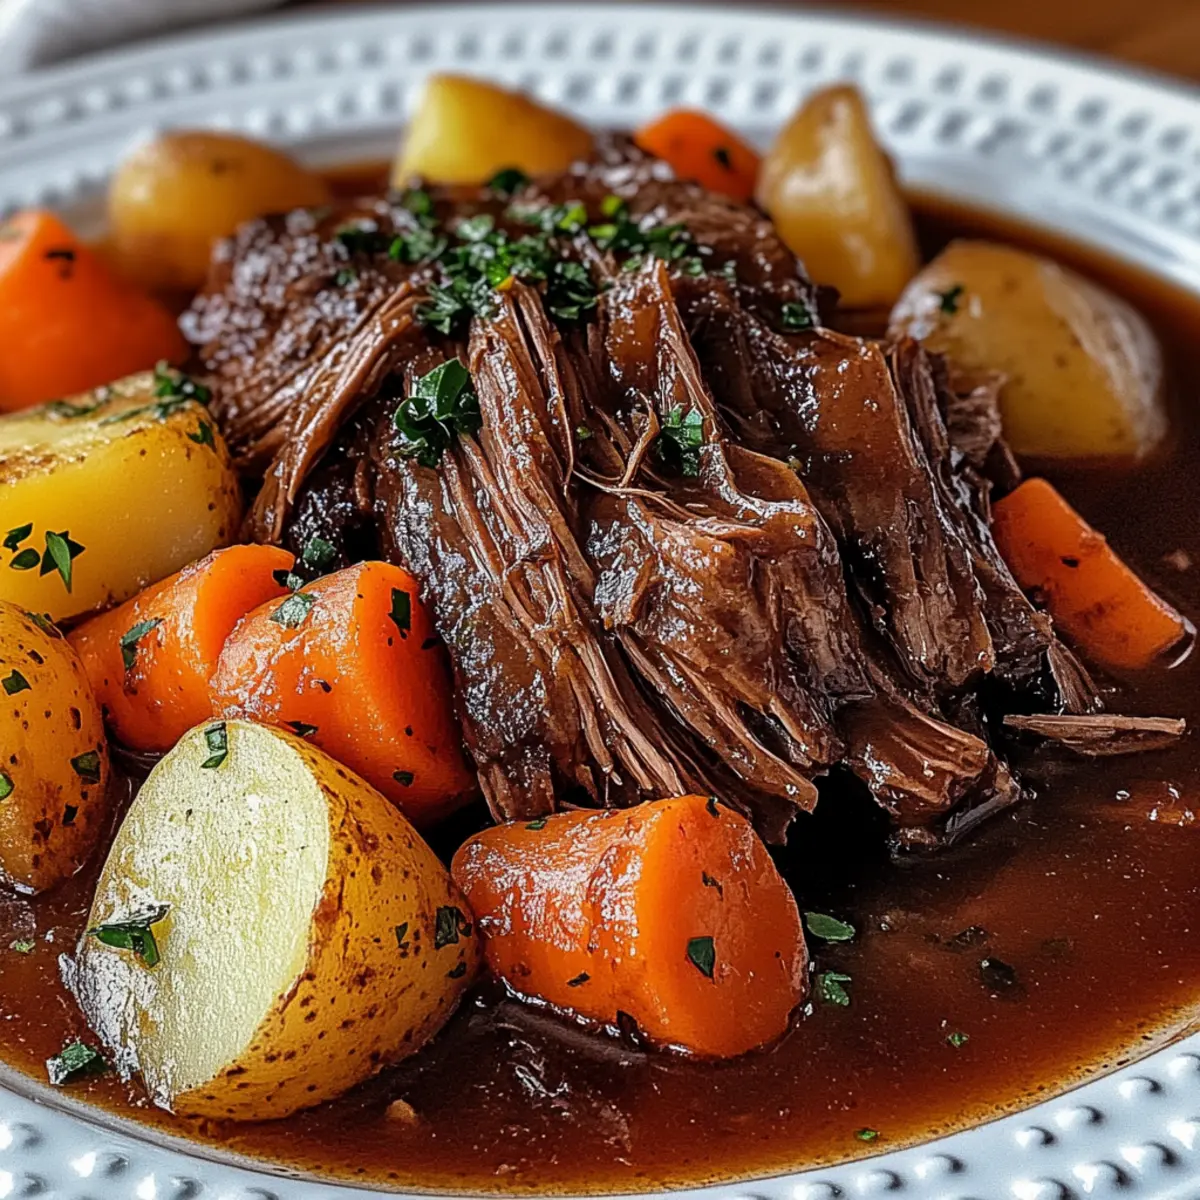
The aroma of a home-cooked meal can evoke cherished memories, transporting me back to family gatherings filled with laughter and warmth. Today, I’m excited to share my recipe for Slow Cooker Pot Roast, a quintessential comfort meal that wraps your kitchen in a savory embrace. With just a little prep time, this dish transforms tender chuck roast and hearty vegetables into a soul-soothing feast that practically cooks itself. It’s perfect for busy weeknights and is guaranteed to be a crowd-pleaser at cozy family dinners. Plus, this gluten-free recipe ensures that everyone can enjoy a plateful of nostalgia without worry. Are you ready to dive into the simplicity and deliciousness of this pot roast slow cooker masterpiece? Let’s get cooking!
Why is Pot Roast Slow Cooker a Must-Try?
Simplicity at Its Finest: This pot roast slow cooker recipe requires minimal prep and effort, making it the perfect solution for busy cooks.
Unforgettable Flavor: The slow cooking process melds the rich, savory flavors of beef, herbs, and vegetables, creating a delicious aroma that will have your family gathering around the table.
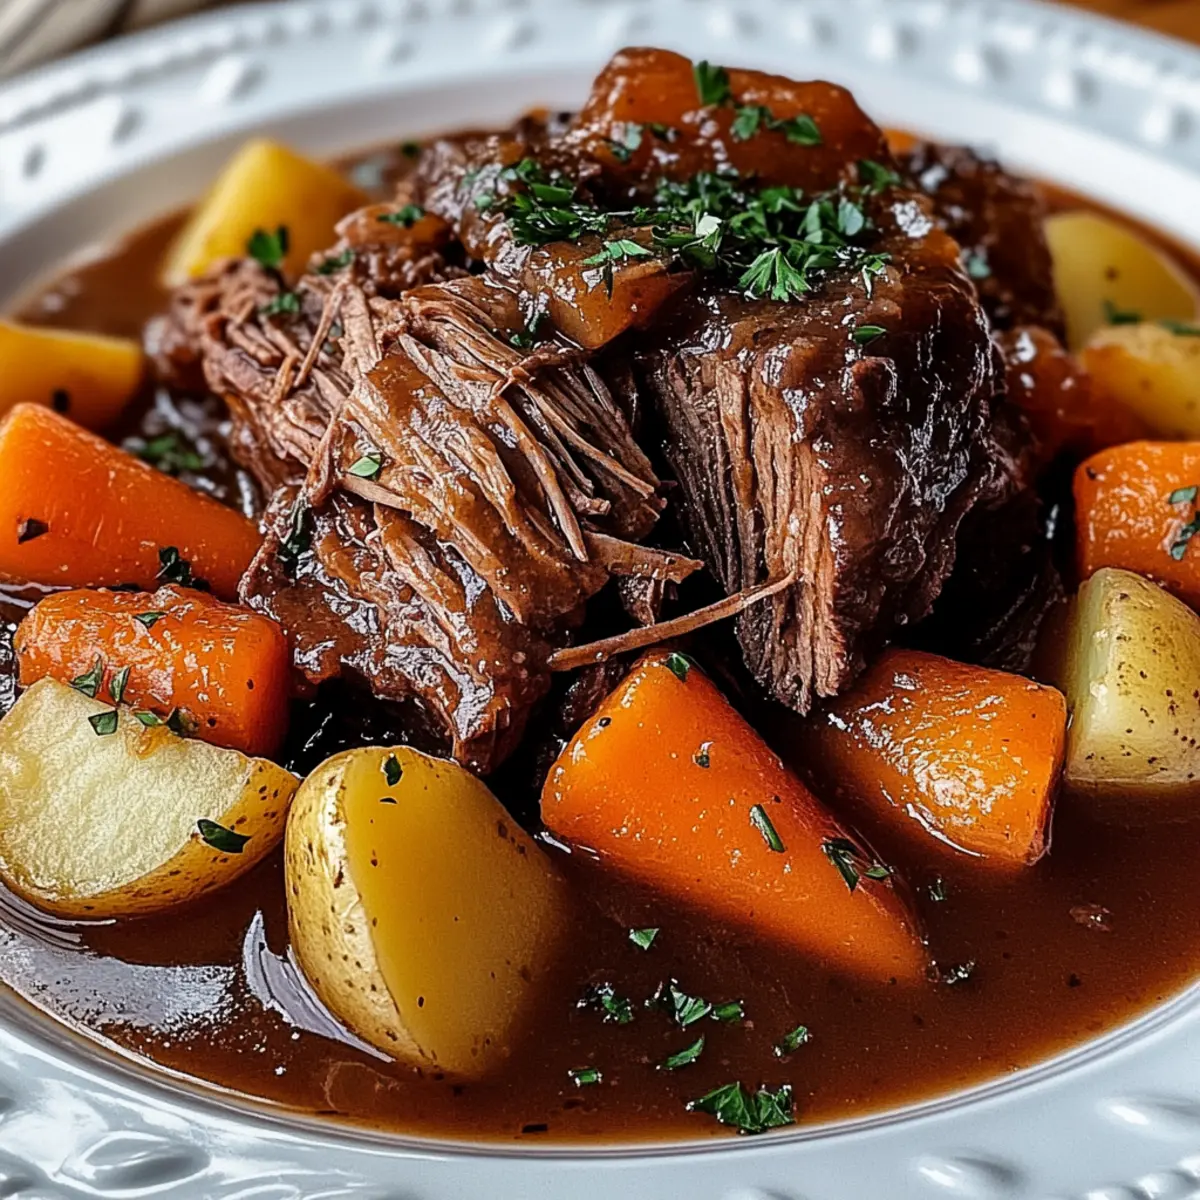
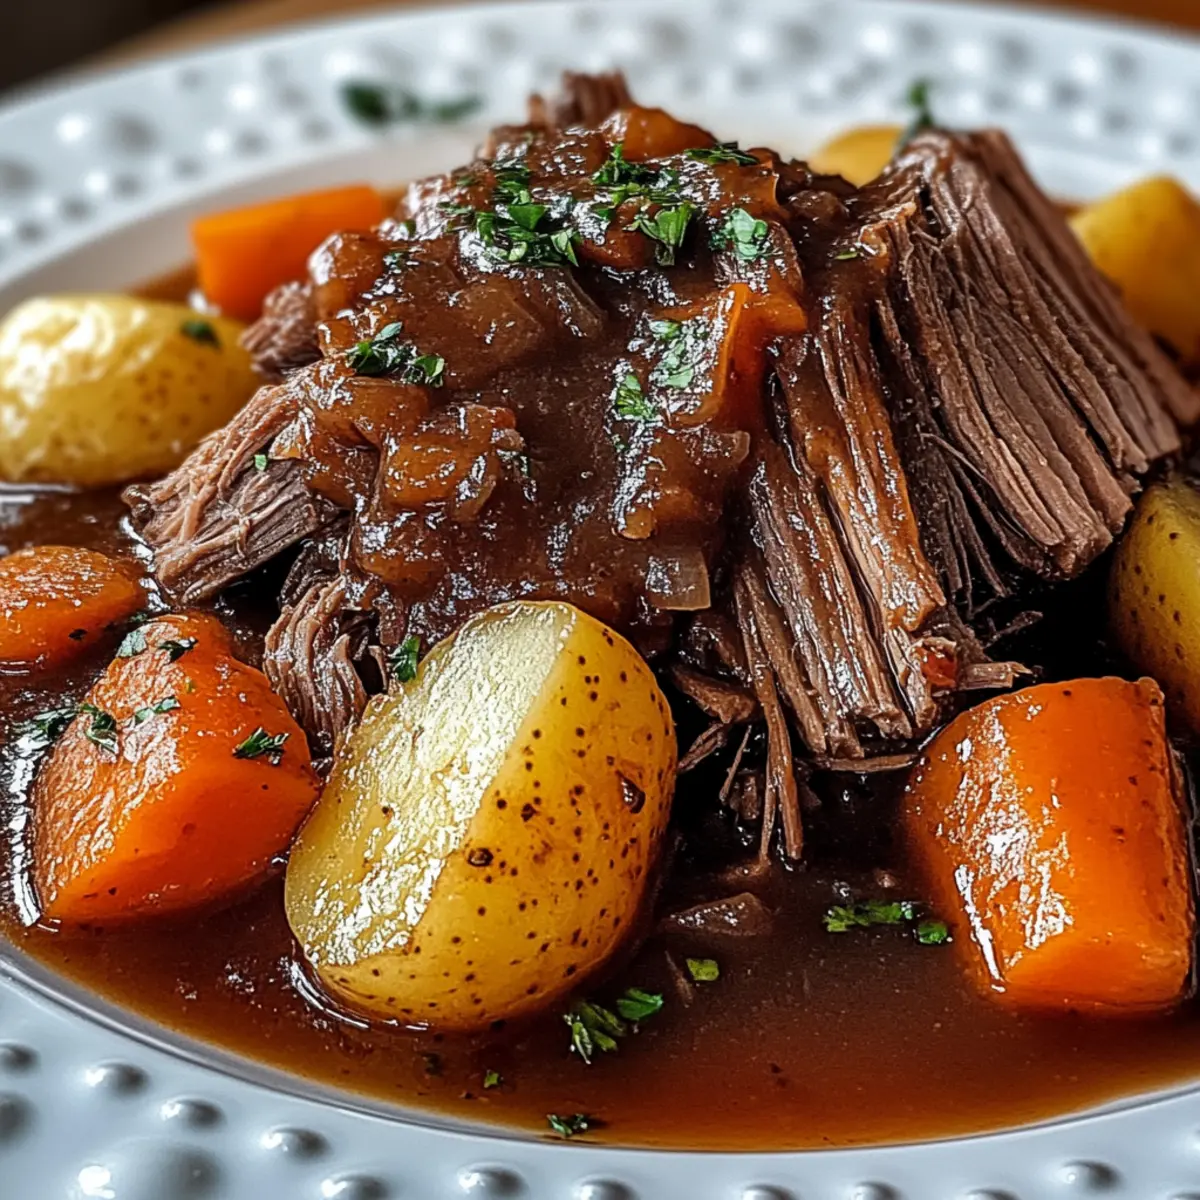
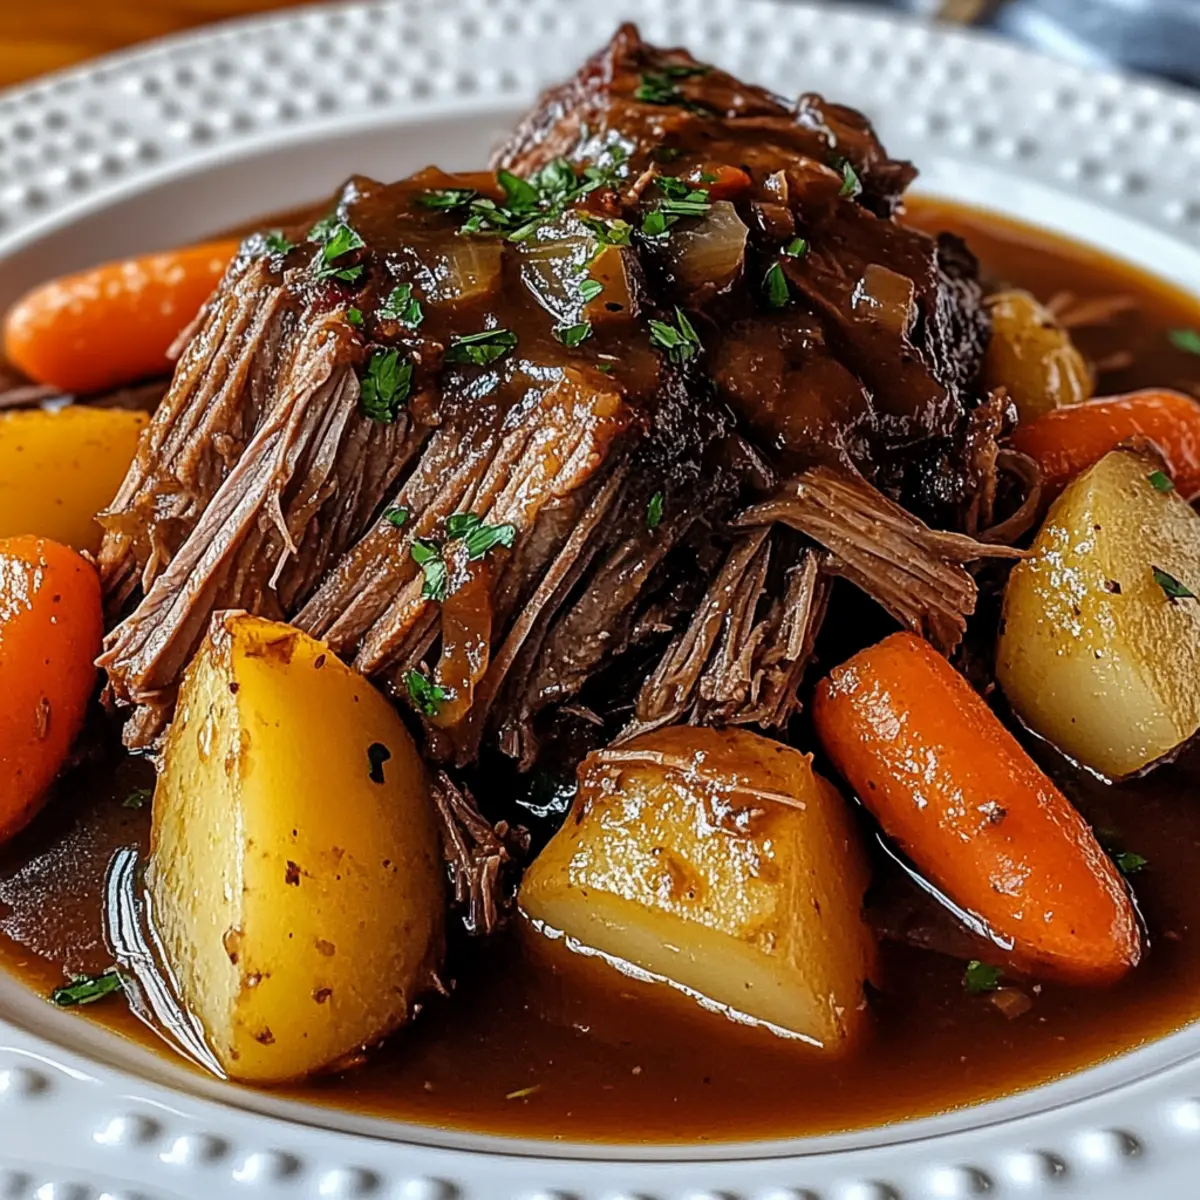
Comfort in Every Bite: Enjoy fork-tender beef paired with perfectly cooked root vegetables drowned in a luscious gravy—just like your grandma used to make!
Versatile Enjoyment: Serve it with crusty bread, or try it over mashed potatoes for an even heartier experience. And don't forget to check out my Roasted Sweet Potatoes as a delightful side!
Leftover Magic: This recipe makes great leftovers! Store it away for easy meals later in the week, or consider making a comforting stew with the extras, just like my Crock Pot Chicken.
With its mouthwatering appeal and ease of preparation, you’ll wonder how you ever lived without this pot roast slow cooker gem!
Pot Roast Slow Cooker Ingredients
For the Meat
- Chuck Roast (3–4 lb) – The ideal cut for slow cooking, ensuring tenderness and rich flavor thanks to its marbling.
For the Vegetables
- Yellow Onion (1, sliced) – Adds a sweet depth that dissolves into a flavorful broth as it cooks.
- Carrots (4, cut into chunks) – Contributes natural sweetness and visual appeal; larger pieces prevent mushiness.
- Gold Potatoes (4, quartered) – Maintains shape while absorbing the flavorful broth; avoid overcutting for best texture.
- Garlic (3 cloves, minced) – Enhances the dish’s earthy richness; use crushed cloves for a milder flavor if desired.
For the Broth and Seasoning
- Beef Broth (2 cups) – Forms the savory base; opt for low-sodium for better control over the flavors.
- Worcestershire Sauce (1 tbsp) – Adds depth with a slight tang that perfectly balances the richness.
- Salt (1 tsp) – Essential for enhancing the overall flavor profile.
- Black Pepper (½ tsp) – Complements the other seasonings for a well-rounded taste.
- Dried Thyme (1 tsp) – A classic herb for beef that brings woodsy undertones to the dish.
- Bay Leaf (1) – Introduces aromatic depth as it cooks.
This pot roast slow cooker recipe is sure to bring warmth and comfort to your family dinners!
Step‑by‑Step Instructions for Pot Roast Slow Cooker
Step 1: Prepare the Chuck Roast
Pat the chuck roast dry with paper towels, ensuring it's free of moisture for better searing. Generously season the roast with salt and black pepper on all sides, creating a flavorful base for your pot roast slow cooker dish. This important step enhances the overall taste of the meat throughout the cooking process.
Step 2: Sear the Roast
In a large skillet, heat 1 tablespoon of olive oil over medium-high heat until it shimmers. Carefully place the seasoned roast in the skillet and sear for 2-3 minutes per side, or until a golden brown crust forms. This step helps to lock in the juices and flavors as the pot roast slow cooker works its magic.
Step 3: Layer the Vegetables
While the roast is searing, prepare your slow cooker by layering sliced yellow onions at the bottom. Next, arrange the carrot chunks and quartered gold potatoes on top of the onions, creating a colorful and hearty vegetable base. This arrangement will ensure that the vegetables absorb all the delicious flavors during cooking.
Step 4: Add Aromatics and Seasonings
Sprinkle the minced garlic evenly over the layered vegetables, followed by dried thyme and Worcestershire sauce. This combination will infuse the vegetables with rich aroma and depth of flavor as your pot roast slow cooker does its job. Make sure the seasonings are evenly distributed for maximum impact.
Step 5: Place the Roast on Top
Carefully transfer the seared chuck roast to the slow cooker, positioning it right on top of the vegetables. This setup allows the natural juices from the roast to flow down onto the veggies as they cook together, enhancing the flavors of your pot roast slow cooker masterpiece.
Step 6: Add the Broth
Pour in 2 cups of beef broth around the roast, ensuring that the vegetables are nearly covered but the roast remains above the liquid. The broth will create a rich, flavorful base while maintaining the dish's perfect balance. This step is crucial for achieving that comforting, juicy end result.
Step 7: Start Cooking
Cover the slow cooker with the lid and set it to cook on low for 8 hours or high for 4-5 hours. Avoid lifting the lid during cooking, as this can release steam and affect the cooking time. The slow, even heat will make the meat fork-tender and allow all flavors to meld beautifully.
Step 8: Final Touches and Serving
Once the cooking time is up, carefully remove the bay leaf from the pot roast slow cooker. Let the roast rest for about 10 minutes before slicing; this step retains the flavorful juices, ensuring each bite is moist and succulent. Serve your delicious pot roast with the cooked vegetables and enjoy the heartwarming flavors.
How to Store and Freeze Pot Roast Slow Cooker
Fridge: Store leftover pot roast in an airtight container for up to 4 days. This keeps the meat moist and retains the flavors of the gravy and vegetables.
Freezer: If you want to keep it longer, freeze pot roast for up to 3 months. Place it in a freezer-safe container or wrap it tightly in plastic wrap and aluminum foil to prevent freezer burn.
Thawing: When you're ready to enjoy your frozen pot roast again, thaw it in the refrigerator overnight. This gradual thawing helps maintain the meat's texture and juiciness.
Reheating: To reheat, warm the pot roast slow cooker on the stove over low heat until heated through. Add a splash of beef broth if needed to rejuvenate the gravy.
Pot Roast Slow Cooker Variations
Feel free to personalize this comforting recipe and make it your own with these delightful variations!
-
Different Cuts: Substitute brisket or bottom round for chuck roast to explore new flavors. Each cut brings its own unique texture, ensuring a delicious result.
-
Root Veggies Galore: Add parsnips or turnips into the mix for extra sweetness and depth. Their unique flavors can elevate the dish, bringing a fresh twist to classic comfort.
-
Herb Boost: Sprinkle in flavors like rosemary or parsley for a fragrant finish. These herbs not only add vibrancy but also enhance the overall earthy notes of your pot roast.
-
Spicy Kick: Add a few slices of jalapeño or a teaspoon of red pepper flakes to spice things up. This gentle heat can add excitement to your comforting dish.
-
Luscious Gravy: For a thicker gravy, mix a tablespoon of cornstarch with cold water and stir it into the broth in the last 30 minutes of cooking. This trick ensures you grab every bit of flavor on your plate!
-
Wine Wonders: Deglaze the skillet after searing your roast with a splash of red wine before pouring into the slow cooker. This adds a rich depth that transforms your dish into a gourmet delight.
-
Paleo-Friendly: Swap traditional beef broth for bone broth for an even richer, nourishing base that's perfect for a paleo diet. This adds health benefits without compromising taste.
-
Vegetarian Option: Season robust mushrooms like shiitake and a plant-based protein in place of beef for a hearty vegetarian alternative that doesn’t skimp on flavor.
With these variations, your pot roast slow cooker creation can be as unique and exciting as the memories it will create. For a perfect side, consider pairing it with some flavorful Roasted Sweet Potatoes or my comforting One Pot Salmon recipe to round out the meal. Enjoy crafting your delicious, heartwarming dish!
Expert Tips for Pot Roast Slow Cooker
-
Searing is Key: Sear the roast well to develop a flavorful crust, which enriches the overall taste of your pot roast slow cooker dish.
-
Vegetable Size Matters: Cut vegetables into larger chunks to prevent them from becoming mushy during the long cooking process.
-
Don’t Peek: Avoid lifting the lid while cooking; steam is essential for proper cooking and tenderness of the meat.
-
Rest for Juiciness: Allow the roast to rest for 10 minutes before slicing. This helps the juices redistribute, keeping the beef moist.
-
Season Wisely: Use low-sodium beef broth to control salt levels; this way, you're in charge of seasoning your pot roast slow cooker perfectly without overwhelming flavors.
What to Serve with Tender Pot Roast Slow Cooker?
Transform your comforting pot roast into an unforgettable meal with these delightful sides and pairings that complement its rich flavors beautifully.
-
Creamy Mashed Potatoes: The ultimate comfort food, these velvety potatoes soak up the flavorful gravy perfectly, enhancing every bite of the pot roast slow cooker.
-
Roasted Brussels Sprouts: With their caramelized edges and earthy flavor, these sprouts bring a satisfying crunch that beautifully contrasts the tender roast.
-
Honey Glazed Carrots: Adding a touch of sweetness, these tender-glazed carrots make for a colorful, palate-pleasing side that brightens the plate.
-
Fresh Garden Salad: Crisp greens and bright veggies drizzled with a zesty vinaigrette provide a refreshing contrast to the hearty pot roast slow cooker.
-
Crusty Bread: A loaf of warm, crusty bread is perfect for sopping up every delicious drop of gravy, rounding out this comforting meal.
-
Red Wine: A smooth, medium-bodied red wine enhances the savory flavors of the roast, making your dining experience feel extra special.
-
Chocolate Cake: For dessert, indulge in a rich chocolate cake that offers a decadent sweet finish to this sumptuous meal. It adds a delightful endnote to all that savory goodness!
Make Ahead Options
These Pot Roast Slow Cooker preparations are perfect for busy home cooks looking to save time without sacrificing flavor! You can season and sear the chuck roast up to 24 hours in advance; simply wrap it tightly in plastic wrap and store it in the refrigerator. Additionally, you can chop the vegetables (onions, carrots, and potatoes) and keep them in an airtight container for up to 3 days. When you’re ready to cook, layer the vegetables in the slow cooker, add the roast, and pour in the beef broth. This method ensures your pot roast slow cooker dish remains just as delicious, offering you the comforting taste of home-cooked goodness with minimal effort on busy nights!
Pot Roast Slow Cooker Recipe FAQs
What cut of beef is best for a pot roast slow cooker?
Absolutely! Chuck roast is the ideal cut for this recipe due to its ample marbling, which renders the meat tender and flavorful during the slow cooking process. The more marbling, the better the result!
How should I store leftovers from the pot roast slow cooker?
Leftovers can be stored in airtight containers for up to 4 days in the fridge. Make sure to seal them well to keep the flavors intact and prevent drying out. It’s always a joy to enjoy the comforting taste of pot roast for leftovers!
Can I freeze pot roast slow cooker leftovers?
Yes, you can! I recommend freezing your pot roast for up to 3 months. To do this, let it cool completely, then place it in a freezer-safe container or tightly wrap in plastic wrap and aluminum foil. This prevents freezer burn and keeps the flavors fresh!
What’s the best way to reheat frozen pot roast slow cooker?
When you're ready to enjoy your frozen pot roast, thaw it in the refrigerator overnight to maintain its juicy texture. Once thawed, reheat it gently on the stove over low heat, adding a splash of beef broth if necessary to bring back its rich gravy consistency.
How can I avoid mushy vegetables in my pot roast slow cooker?
Great question! To prevent mushy veggies, cut them into larger chunks and layer them properly in the slow cooker. By placing the denser vegetables like potatoes at the bottom and adding sturdier carrots in larger pieces, you'll achieve that perfect texture and retain their vibrant flavors.
Is pot roast slow cooker recipe gluten-free?
Very! This recipe is inherently gluten-free as long as you use gluten-free beef broth and Worcestershire sauce. Always check the labels of your ingredients to ensure they meet your dietary needs, so everyone can enjoy this comforting dish!
Tender Pot Roast Slow Cooker Recipe for Ultimate Comfort
Ingredients
Equipment
Method
- Pat the chuck roast dry and season with salt and black pepper.
- Sear the roast in a skillet with olive oil over medium-high heat for 2-3 minutes per side.
- Layer sliced onions in the slow cooker, followed by carrots and potatoes.
- Sprinkle minced garlic, thyme, and Worcestershire sauce over vegetables.
- Place the seared roast on top of the vegetables.
- Pour in beef broth ensuring the vegetables are nearly covered.
- Cover and cook on low for 8 hours or high for 4-5 hours.
- Remove the bay leaf and let the roast rest for 10 minutes before slicing.