As I stood by the grill last weekend, I overheard a couple of friends debating the ultimate comfort food. “Nothing beats a burger!” one declared. But what if I told you, you could have the juicy satisfaction of a burger wrapped in a crispy quesadilla? That’s where my Smashburger Quesadillas come in—a delicious fusion that makes weeknight dinners a breeze! With juicy beef seasoned to perfection and gooey cheese all nestled in a warm tortilla, this dish promises to elevate your meals without the fuss. Not only is it a quick meal that you can customize with your favorite toppings, but it also brings a fun twist to traditional burger night. Are you ready to turn up the heat in your kitchen and explore new flavor territories?
Why Are Smashburger Quesadillas Perfect?
Customizable Delight: These quesadillas allow you to tailor them to your taste. Add your favorite toppings, from pickles to spicy salsa, to create a unique flavor explosion.
Quick and Efficient: When time is short, this recipe shines! With just a few simple steps, you'll have dinner on the table in under 30 minutes.
Ultimate Comfort Food: Combining the heartiness of burgers with the warm embrace of quesadillas, you're sure to satisfy everyone’s cravings.
Versatile Ingredients: Use ground beef, turkey, or even a vegetarian option, making it a recipe that fits various dietary needs. Explore using gluten-free tortillas without missing a beat!
Perfect for Gatherings: Whether it's a casual weeknight meal or a fun party snack, you can’t go wrong with these crowd-pleasers. Serve with some crispy waffle fries for the ultimate experience!
Smashburger Quesadilla Ingredients
For the Filling
• Ground Beef – Adds rich, savory flavor and juiciness; opt for an 80/20 fat ratio for best results.
• Salt, Pepper, Garlic Powder – Essential seasonings that enhance the beef; consider adding smoked paprika for a twist.
• Cheddar or American Cheese – Creates a melty texture; using a mix offers a depth of flavor.
For the Tortilla
• Flour Tortillas – Serves as the hearty base; large (burrito-size) tortillas work best for a satisfying bite. Substitution: Use almond flour tortillas for a gluten-free option.
Optional Toppings
• Pickles – Introduces crunch and tang; a classic burger complement.
• Diced Onions – Adds flavor and texture; fresh or sautéed work wonderfully.
• Burger Sauce – Elevates taste and adds creaminess; experiment with hot sauce for a fiery kick.
• Kimchi or Crushed Chips – If you fancy a crunch, these options add an exciting twist!
Experience the magic of Smashburger Quesadillas with these ingredients and customize to your heart's content!
Step‑by‑Step Instructions for Smashburger Quesadillas
Step 1: Preheat the Skillet
Start by heating a skillet or griddle over medium-high heat. Allow the surface to warm until water droplets sizzle upon contact, indicating it's hot enough for cooking. This step is crucial for achieving that perfectly crispy texture on your Smashburger Quesadillas.
Step 2: Prepare the Beef
While the skillet heats up, take your ground beef and press a portion onto one half of each tortilla. Season generously with salt, pepper, and garlic powder. This preparation enhances the beef’s robust flavor, ensuring that every bite of your quesadilla is packed with deliciousness.
Step 3: Cook the Beef
Place the tortilla, beef side down, onto the hot skillet. Cook for 2–3 minutes until the beef is nicely browned and crispy. You'll know it’s ready to flip when the beef has developed a rich, golden crust that releases easily from the skillet.
Step 4: Add Cheese and Fold
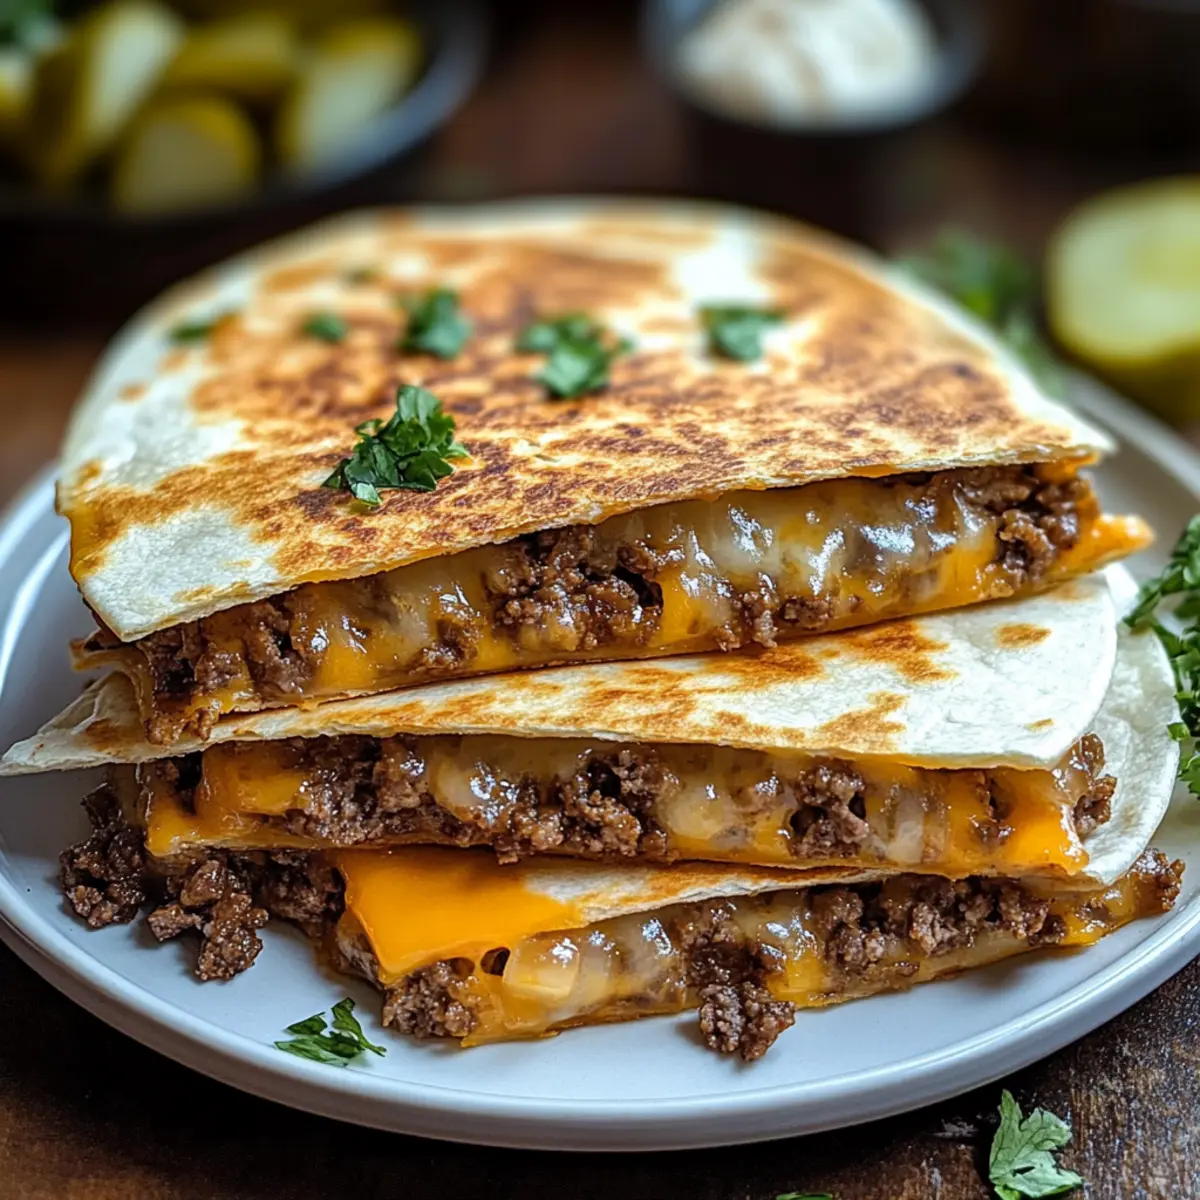
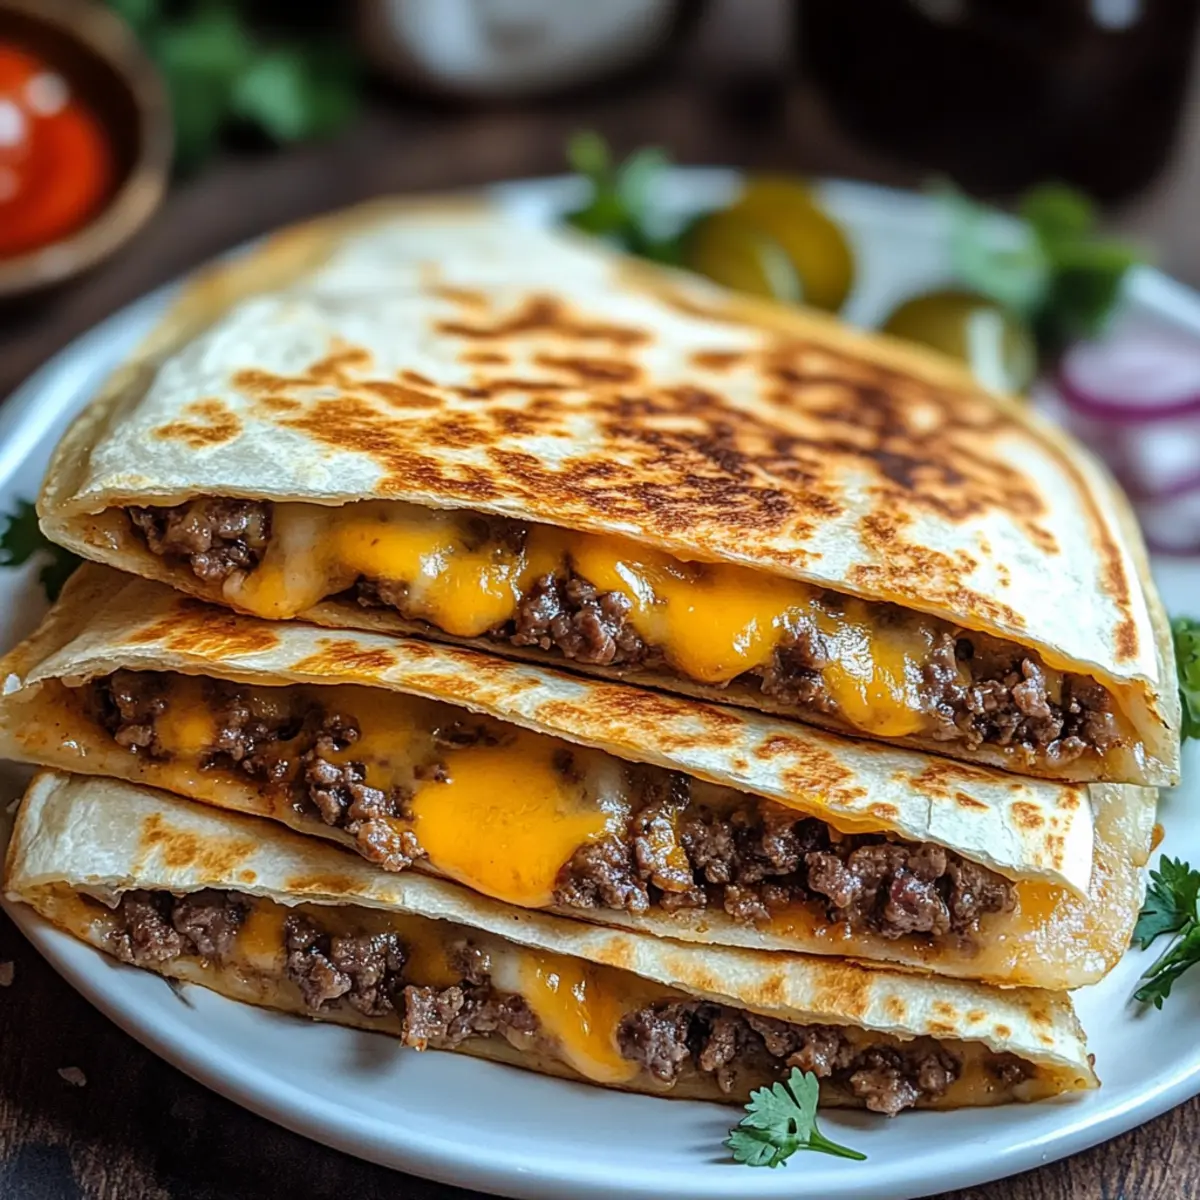
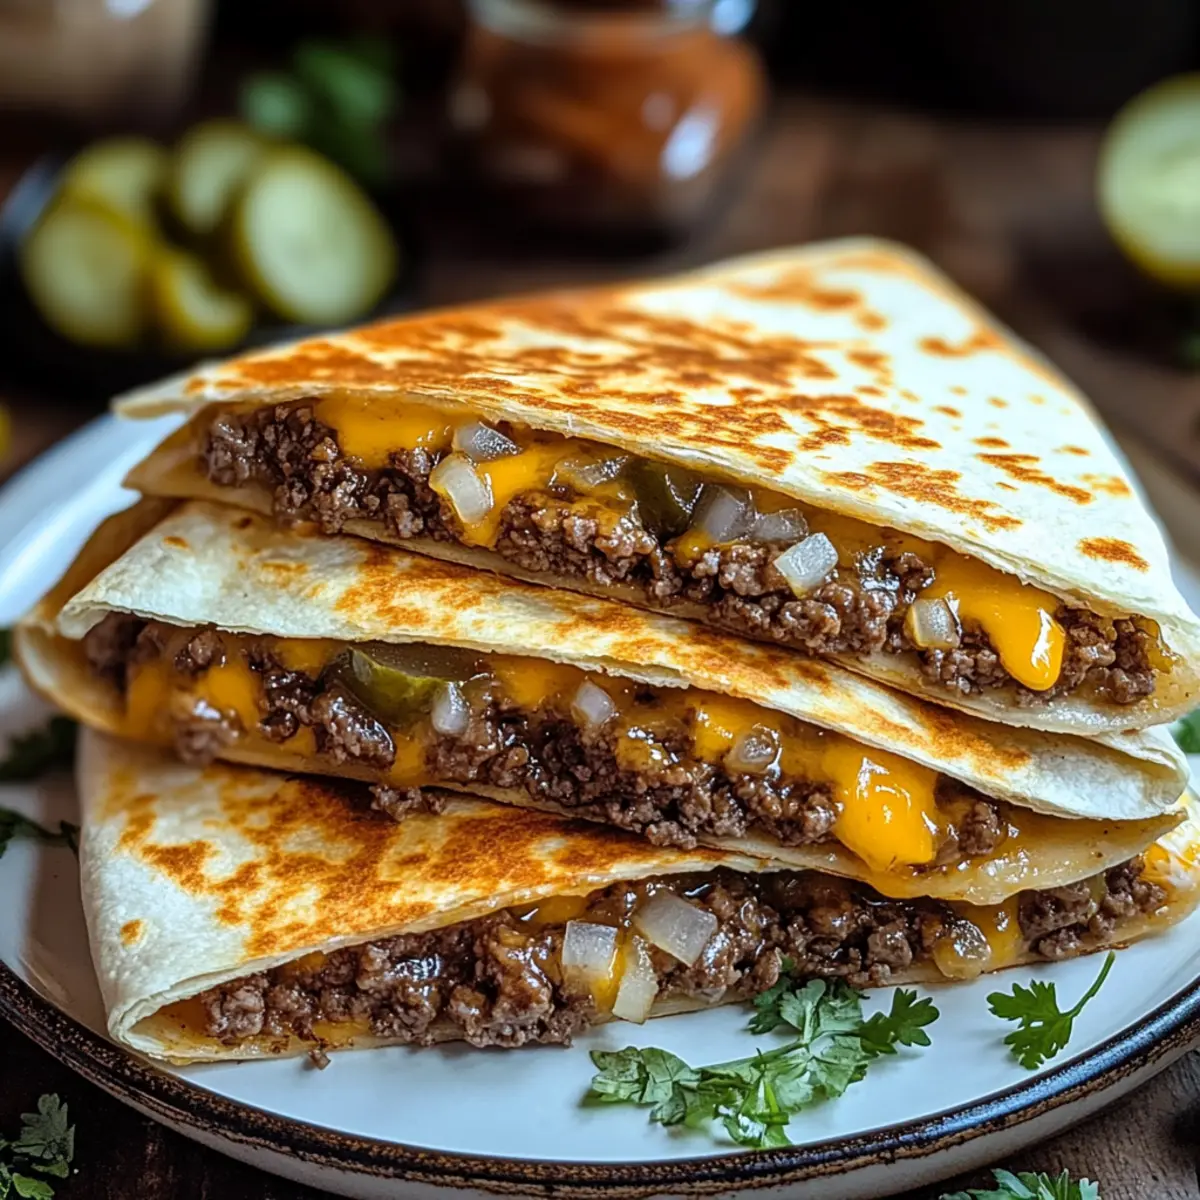
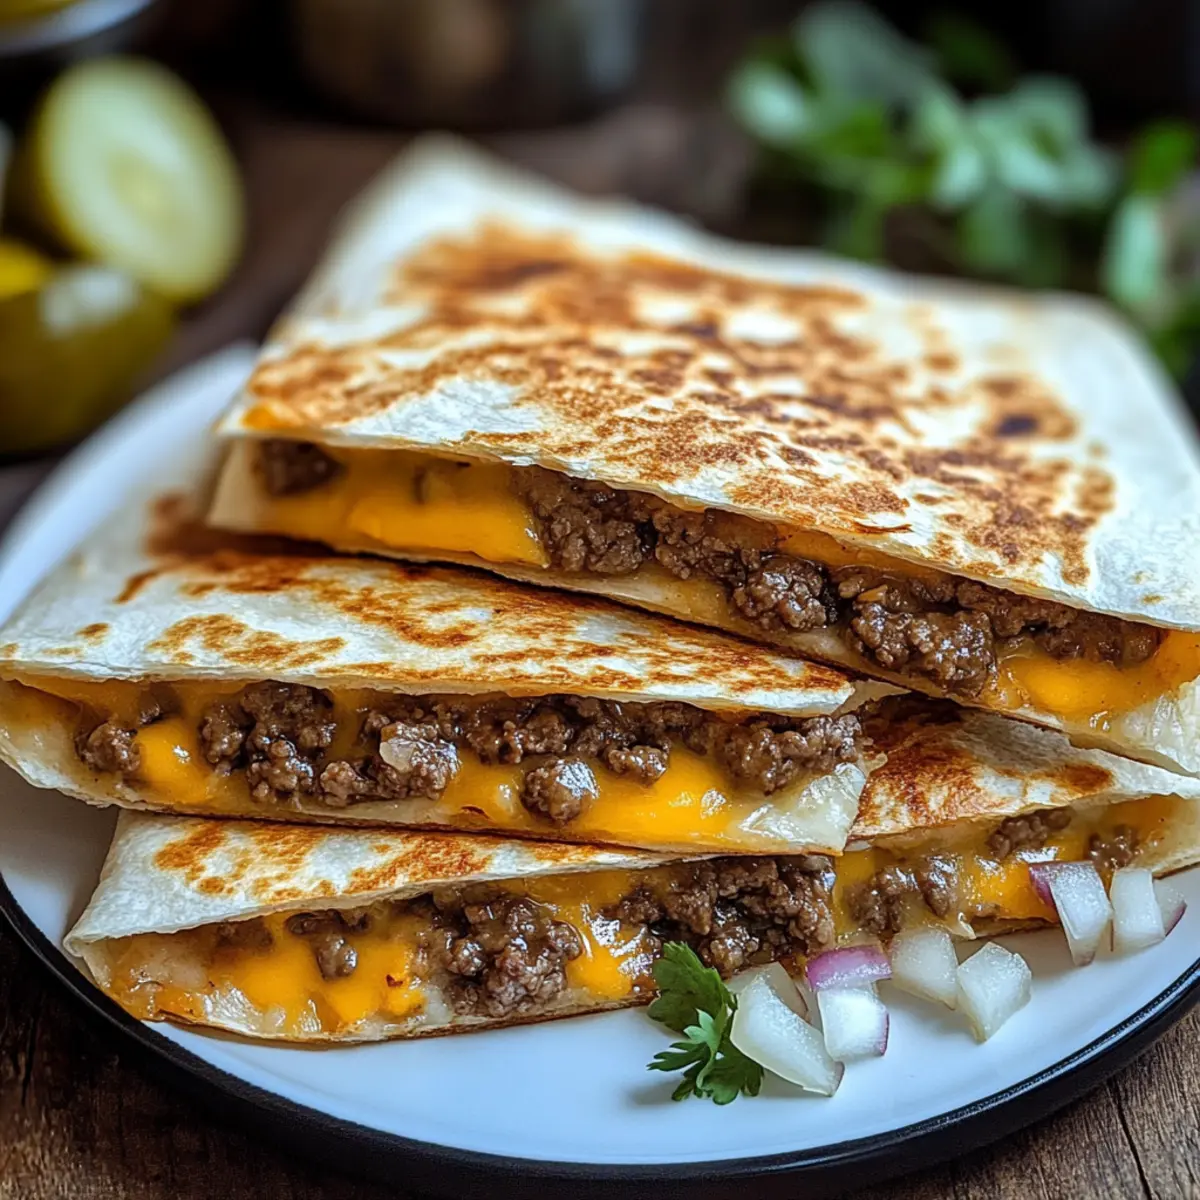
Once the beef is cooked, carefully flip the tortilla over to reveal the other side. Immediately add a generous layer of cheddar or American cheese on top of the beef, and then fold the tortilla in half. This step melds the savory beef with the creamy cheese for that iconic Smashburger Quesadilla taste.
Step 5: Grill to Perfection
Return the folded quesadilla to the skillet and press down gently with a spatula. Grill for about 2 minutes per side, until the outside is golden-brown and crispy. Keep an eye on it to prevent burning, and ensure that the cheese has melted beautifully within.
Step 6: Let it Rest and Slice
Once the quesadilla is cooked to perfection, transfer it to a cutting board and allow it to rest for a couple of minutes. This brief resting period helps the cheese set, making it easier to slice without spilling all that gooey goodness.
Step 7: Serve with Toppings
Slice the quesadilla into triangles and serve warm with your favorite toppings like pickles, diced onions, or a drizzle of burger sauce. The delicious fusion of flavors in your Smashburger Quesadillas is sure to become a new family favorite!
Expert Tips for Smashburger Quesadillas
• Toasty Tortillas: Brush tortillas lightly with mayo before grilling to achieve an even, golden-brown crust. This adds depth without extra oil.
• Crispy Perfection: For optimal browning, use a cast-iron skillet. Non-stick pans might work, but cast iron gives that beautiful crispiness everyone loves.
• Cheese Meltdown: If your cheese doesn’t melt well, try shredding it yourself and covering the skillet with a lid while cooking. This traps heat and promotes melting.
• Rest Before Cutting: Allow quesadillas to rest briefly after cooking. This prevents a cheesy avalanche and helps maintain a perfect triangular shape.
• Flexibility with Fillings: Don’t hesitate to customize your Smashburger Quesadillas! Add veggies or beans for extra nutrition and don’t forget about gluten-free options!
What to Serve with Smashburger Quesadillas?
Elevate your meal with mouthwatering sides that perfectly complement the crispy, cheesy delight of quesadillas.
- Crispy Waffle Fries: The perfect pairing! Their crispiness and salty flavor provide a satisfying crunch alongside the melty quesadillas.
- Creamy Coleslaw: A cool, crunchy slaw adds freshness and balances the richness of the quesadillas, making each bite feel lighter.
- Zesty Mexican Street Corn: This sweet and savory side adds a pop of brightness with its lime and chili flavors, enhancing the meal's overall appeal.
- Garlic Butter Green Beans: Tender green beans tossed in garlic butter provide a delicious contrast to the crispy quesadillas, rounding out the meal beautifully.
- Spicy Salsa: Bright, tangy salsa not only enhances the taste of your quesadillas, but also offers a refreshing kick with every scoop.
- Homemade Guacamole: Rich, creamy guacamole serves as a delightful dip, adding an extra layer of flavor to each cheesy bite.
- Fruit Salad: A light and refreshing fruit salad can cut through the richness, offering a sweet contrast that invigorates your palate.
- Craft Beer: Pair your meal with a light craft beer for a refreshing drink that complements the savory flavors of the quesadillas.
- Chocolate Chip Cookies: Finish your meal with warm cookies—sweet, gooey, and a classic dessert that brings smiles all around!
How to Store and Freeze Smashburger Quesadillas
• Fridge: Allow cooked quesadillas to cool before placing them in an airtight container. They can be stored in the fridge for up to 3 days, maintaining their delicious flavor.
• Freezer: For longer storage, freeze quesadillas in a single layer on a baking sheet until solid, then transfer to a freezer-safe bag. They can be stored for up to 1 month without fresh toppings.
• Reheating: When ready to enjoy, reheat frozen quesadillas in a skillet over medium heat or an air fryer at 350°F until heated through and crispy, about 5-7 minutes.
• Serving Tip: For the best taste experience, add fresh toppings after reheating your Smashburger Quesadillas to keep them vibrant and flavorful!
Make Ahead Options
Smashburger Quesadillas are fantastic for meal prep, saving busy cooks time during the week! You can prepare the seasoned ground beef filling up to 3 days in advance. Simply cook it according to the recipe, let it cool, then store it in an airtight container in the refrigerator. Additionally, you can portion out your tortillas and cheese in advance to streamline assembly. When you're ready to enjoy your quesadillas, just assemble the tortillas with the refrigerated beef and cheese, then grill them in a skillet for about 2-3 minutes per side until golden and crispy. This approach will ensure your quesadillas are just as delicious as when made fresh!
Smashburger Quesadilla Variations
Feel free to unleash your creativity and customize these Smashburger Quesadillas to suit your taste preferences. The options are endless!
-
Breakfast Smash: Add scrambled eggs and crumbled bacon for a hearty breakfast twist. Finish with optional hash browns for extra texture.
-
Spicy Fiesta: Incorporate cooked chorizo and switch to jalapeño or pepper jack cheese for a zesty kick. This version adds a lively heat to your plate.
-
Hawaiian Style: Introduce thin pineapple slices and a light brushing of teriyaki glaze for a sweet and savory combination. It's like a summer luau in every bite!
-
Pizza Party: Swap in Italian sausage and mozzarella and serve with marinara sauce for dipping. It's a delicious way to marry two crowd-pleasing favorites.
-
Lighten Up: Use ground turkey or chicken and add grated zucchini for a healthier option. This works beautifully with fresh herbs for added flavor.
-
Vegan Delight: Try using black beans or lentils in place of beef, and opt for dairy-free cheese to keep it entirely plant-based.
-
Gourmet Touch: Experiment with caramelized onions and blue cheese for a sophisticated flavor boost. It'll elevate your quesadilla to a restaurant-worthy dish!
-
Smoky Cheddar: Elevate the flavor profile by using smoked cheddar instead of regular cheese. This twist brings a unique depth that everyone will love!
Explore these variations and make your Smashburger Quesadillas a true reflection of your culinary style. Enjoy the journey of flavors!
Smashburger Quesadillas Recipe FAQs
What type of ground beef should I use?
I recommend using ground beef with an 80/20 fat ratio for the perfect balance of flavor and juiciness. If you're looking for a healthier option, you can also substitute with ground turkey or try vegetarian alternatives like Impossible Meat or black beans for a delicious twist.
How should I store leftover Smashburger Quesadillas?
Once your quesadillas have cooled, store them in an airtight container in the fridge. They’ll stay fresh for up to 3 days. Just reheat them in a skillet or air fryer to get that crispy texture back—it's a surefire way to make them taste almost as good as when they were first cooked!
Can I freeze Smashburger Quesadillas?
Absolutely! To freeze, place your cooked quesadillas in a single layer on a baking sheet until solid. Once frozen, transfer them to a freezer-safe bag and they’ll keep for up to 1 month. When you’re ready to enjoy, simply reheat them in a skillet or air fryer until heated through, about 5-7 minutes.
What if the cheese doesn’t melt properly?
If you find that your cheese isn’t melting to your satisfaction, consider shredding it just before use instead of using pre-shredded varieties. This often results in better melting. Additionally, covering the skillet while cooking can help trap heat and ensure a beautifully gooey filling.
Can I make these quesadillas gluten-free?
Yes, you can easily make Smashburger Quesadillas gluten-free by opting for almond flour tortillas or any gluten-free tortilla of your choice. Just make sure to check the labels of any additional ingredients you use to keep it gluten-free.
What toppings work best with Smashburger Quesadillas?
The beauty of Smashburger Quesadillas is their customizable nature! Popular toppings include pickles, diced onions, and burger sauce. You can also get creative with options like kimchi, avocado, or crushed tortilla chips for an extra crunch. The more, the merrier!
Smashburger Quesadillas: Crispy, Cheesy Comfort in Every Bite
Ingredients
Equipment
Method
- Preheat the skillet over medium-high heat until water droplets sizzle.
- Press ground beef onto one half of each tortilla and season with salt, pepper, and garlic powder.
- Cook the tortilla with beef side down for 2–3 minutes until nicely browned.
- Flip the tortilla, add cheese, and then fold it in half.
- Grill the folded quesadilla for about 2 minutes per side until golden-brown and crispy.
- Let the quesadilla rest for a couple of minutes before slicing.
- Slice and serve warm with toppings like pickles and diced onions.