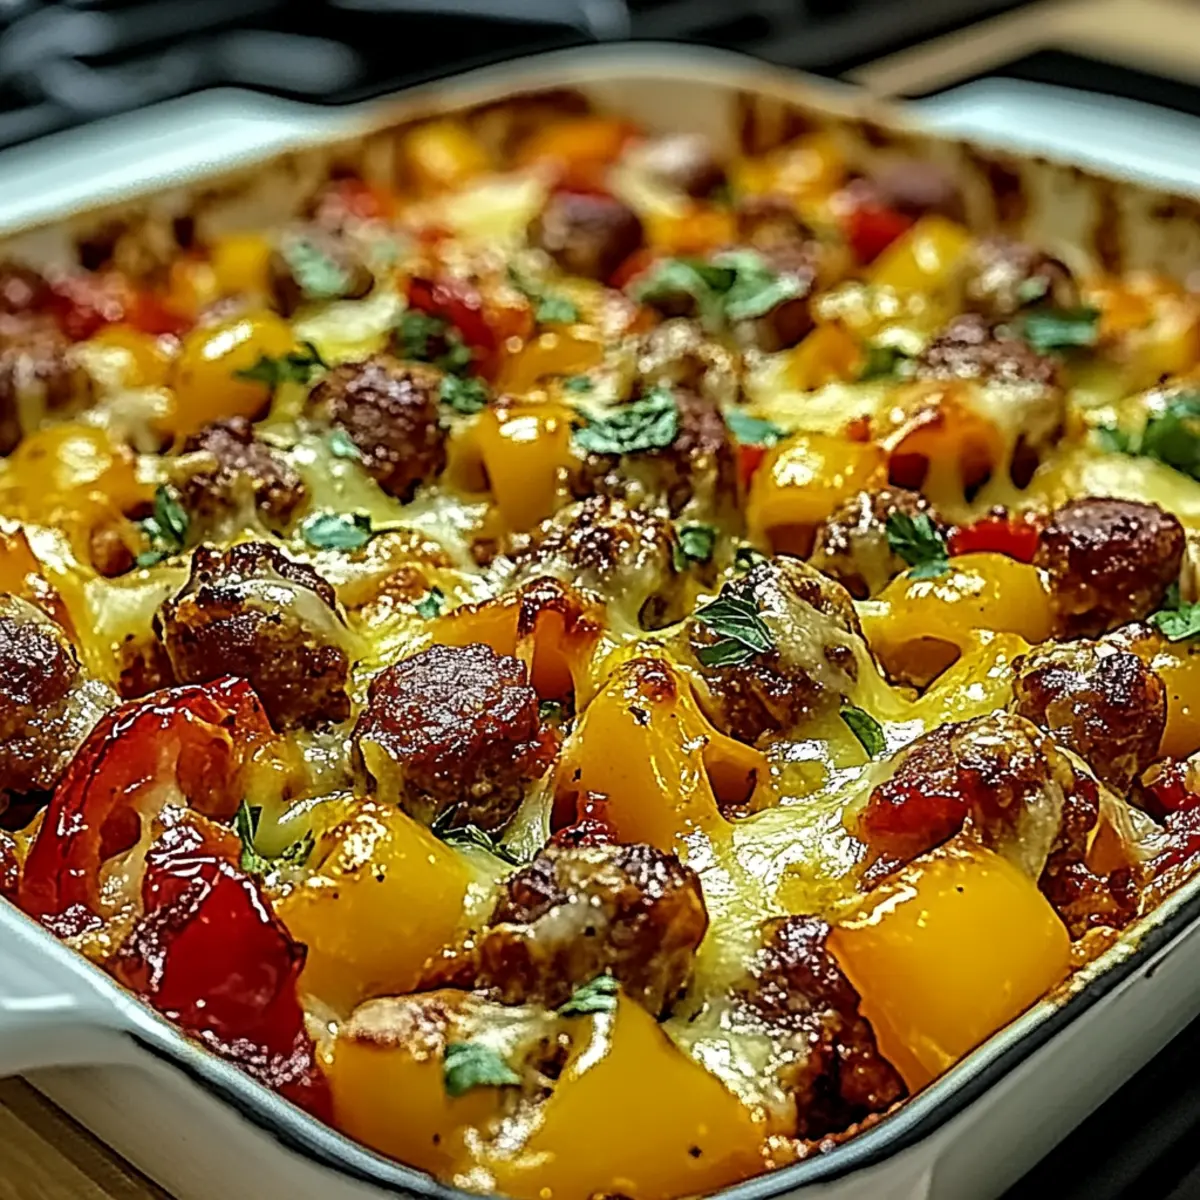
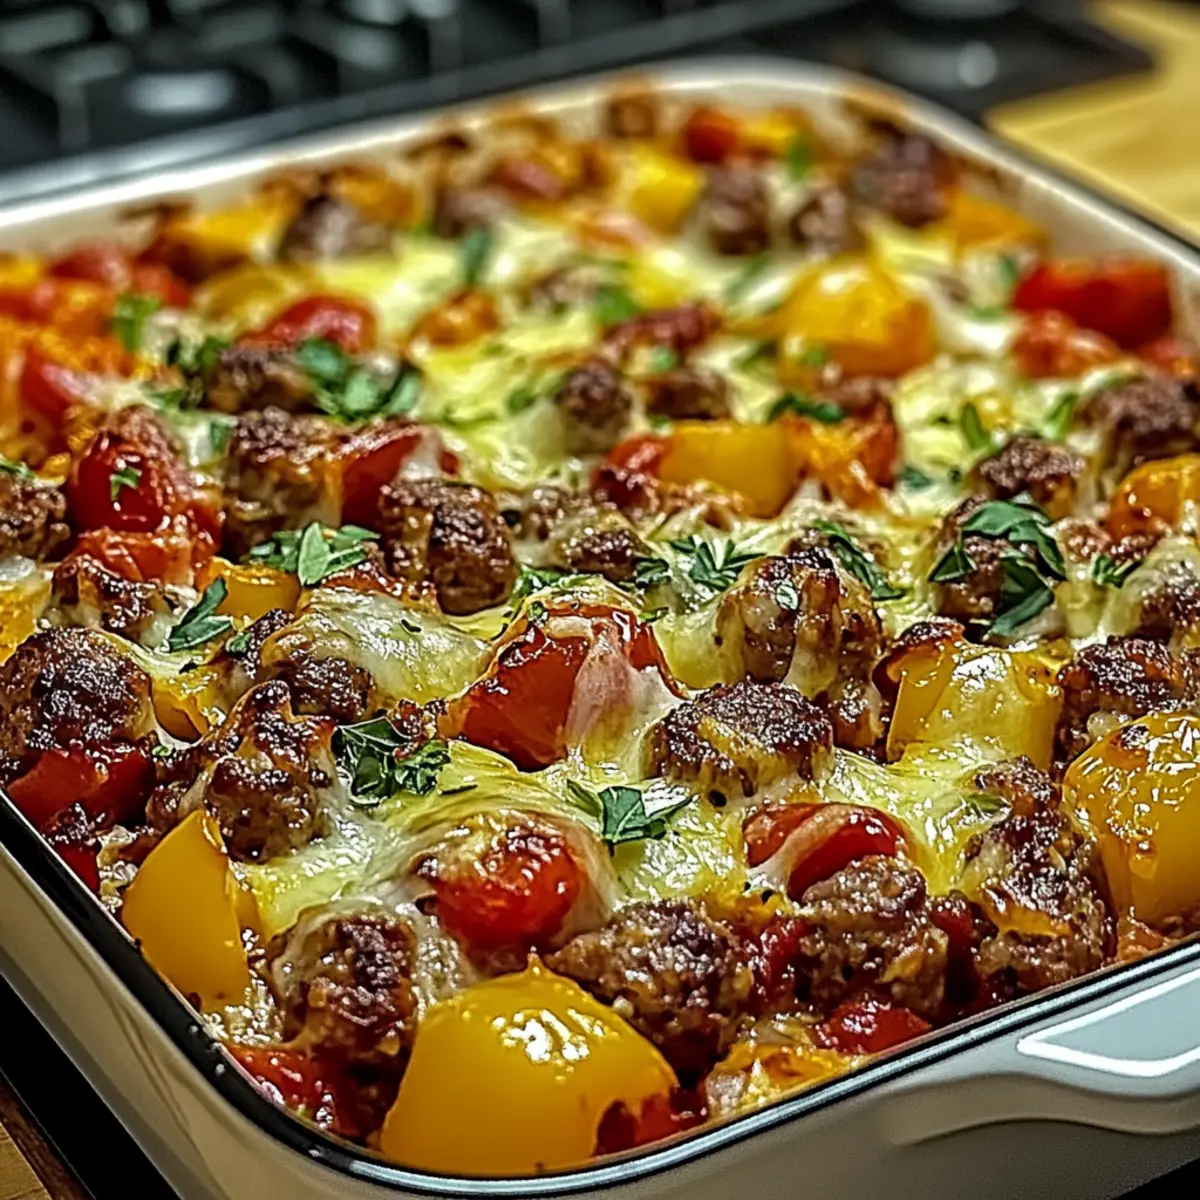
tastytrendingredients

  • Home
  • Recipes
    • Appetizers
    • Breakfast
    • Dessert
    • Dinner
    • Drinks
    • Salads
    • Snacks
    • Soups
  • About me
  • Contact me
menu icon
go to homepage
  • Home
  • Recipes
    • Appetizers
    • Breakfast
    • Dessert
    • Dinner
    • Drinks
    • Salads
    • Snacks
    • Soups
  • About me
  • Contact me
search icon
Homepage link
  • Home
  • Recipes
    • Appetizers
    • Breakfast
    • Dessert
    • Dinner
    • Drinks
    • Salads
    • Snacks
    • Soups
  • About me
  • Contact me
×

Hearty Orecchiette with Broccoli Rabe for Cozy Evenings

September 5, 2025 by Grace Snow Leave a Comment

On chilly evenings, a steaming bowl of pasta can transform the mood of any meal, don’t you think? My Hearty Orecchiette Pasta with Broccoli Rabe & Sun-Dried Tomatoes is not just a dish; it’s a warm embrace on your plate, teeming with vibrant flavors. This plant-based delight is a perfect weeknight savior, packed with the bittersweet contrast of broccoli rabe and the lusciousness of caramelized onions. What’s more, it comes together in under 40 minutes, making it an ideal choice for those who want comfort food without the extended wait. Trust me, your taste buds will thank you for this comforting and hearty recipe that nourishes both body and soul. Ready to elevate your pasta game? Let’s dive in!

Why is Orecchiette with Broccoli Rabe Special?

Comforting Warmth: This dish provides a hearty hug in every bite, perfect for cold evenings.
Vibrant Colors: Expect a beautiful contrast of greens and reds that dazzles the eye while tantalizing the palate.
Quick to Prepare: Made in just 40 minutes, it’s perfect for busy weeknights.
Customizable Options: Enjoy endless variations—swap broccoli rabe for kale or omit the cheese for a vegan delight! Pair it with a side of Tofu Caesar Salad for a complete meal that will impress everyone at your table.
Packed with Flavor: The combination of sun-dried tomatoes and caramelized onions creates a rich, savory depth that's hard to resist. Dive into this comforting pasta dish and let every forkful take you to your happy place!

Orecchiette with Broccoli Rabe Ingredients

For the Pasta
• Dry Orecchiette Pasta – 8 ounces is ideal for 4 servings, cooked until al dente for the best texture.
• Sea Salt – Essential for seasoning the pasta water; don’t skip it for the best flavor.

For the Sauce
• Extra-Virgin Olive Oil – Use high-quality oil for richness and to sauté your ingredients beautifully.
• Garlic (4 cloves, sliced) – Fresh garlic adds aromatic depth; feel free to adjust the amount according to your taste.
• Dry White Wine (¼ cup) – Enhances flavor complexity; substitute with vegetable broth for a non-alcoholic version.
• Caramelized Onions (2) – These contribute sweetness and can be prepared in advance to save time.
• Oil-Packed Sun-Dried Tomatoes (8, chopped) – Offers a tangy depth of flavor; you can use dried if needed after soaking in oil.
• Red Pepper Flakes (¼ to ½ teaspoon) – Adds a hint of heat; adjust this based on your spice preference.
• Grated Parmesan Cheese (⅓ cup, optional) – Adds a creamy element; omit for a vegan dish.
• Lemon Juice & Zest (1 tablespoon lemon juice + 1 teaspoon zest) – Brightens the dish beautifully; fresh is best for flavor.
• Freshly Ground Black Pepper – Essential for balancing flavors; season to taste.

For the Greens
• Broccoli Rabe – This main veggie's slightly bitter flavor contrasts deliciously with the sweetness of onions; regular broccoli works in a pinch.

For Topping
• Pine Nuts (⅓ cup) – Adds a crunchy texture; substitute with walnuts or omit for a nut-free option.

With this delightful blend of ingredients, your Orecchiette with Broccoli Rabe will come together in a comforting, hearty dish that’s perfect for winter evenings! Enjoy every flavorful bite!

Step‑by‑Step Instructions for Hearty Orecchiette Pasta with Broccoli Rabe & Sun-Dried Tomatoes

Step 1: Caramelize Onions
Start by heating a large skillet over low heat and adding a touch of extra-virgin olive oil. Slice two onions and place them in the skillet, stirring occasionally. Cook gently for about 45 minutes to 1 hour, aiming for a deep golden color and soft texture. This slow process creates naturally sweet caramelized onions that will enhance your orecchiette's flavor.

Step 2: Sauté Plant-Based Sausages
Once your onions are caramelized, increase the skillet's heat to medium. Add your plant-based Italian sausages and brown them for about 5-7 minutes, turning occasionally until they develop a nice crust. Once browned, remove them from the skillet and set aside, keeping the flavorful drippings for the next step.

Step 3: Prepare Broccoli Rabe
In a separate pot, bring salted water to a boil. Add the broccoli rabe and blanch it for 2 minutes; you want it tender yet bright green. Drain the broccoli rabe and chop it roughly, then set it aside. This will maintain its vibrant color and prepare it perfectly for blending with your orecchiette.

Step 4: Cook Orecchiette
In the same pot used for the broccoli rabe, add more salted water and bring it back to a boil. Cook the dry orecchiette pasta according to package instructions, usually around 10-12 minutes, until it reaches a delightful al dente texture. Reserve ½ cup of the pasta water before draining the pasta to create a luscious sauce later.

Step 5: Sauté Garlic and Combine
Using the skillet with the sausage drippings, heat a tablespoon of olive oil over medium heat. Add sliced garlic and chopped broccoli rabe, sautéing for about 30 seconds until fragrant. Next, pour in the white wine, allowing it to evaporate for about 1-2 minutes. This step infuses your dish with a layer of savory depth that complements the orecchiette beautifully.

Step 6: Mix Pasta and Sauces
Add the drained orecchiette directly into the skillet, along with the reserved pasta water. Then, incorporate the caramelized onions, grated Parmesan cheese, lemon juice and zest, red pepper flakes, and season generously with salt and pepper. Toss everything together for about 2-3 minutes, allowing the pasta to absorb the delightful flavors.

Step 7: Add Sausages and Toppings
Finally, stir in the browned plant-based sausages and chopped sun-dried tomatoes for additional tanginess. Continue mixing until everything is evenly coated and heated through. Top the dish with toasted pine nuts for a satisfying crunch. Taste and adjust seasoning if needed, ensuring each mouthful is packed with the vibrant flavors of orecchiette with broccoli rabe.

Make Ahead Options

These Hearty Orecchiette Pasta with Broccoli Rabe & Sun-Dried Tomatoes are perfect for meal prep enthusiasts! You can prepare the caramelized onions up to 3 days in advance—just store them in the refrigerator in an airtight container to maintain their sweet flavor. Additionally, you can chop the broccoli rabe and store it separately, ready to be cooked just before assembly. When you're ready to serve, simply cook the orecchiette and sauté the garlic and broccoli rabe, then mix in the prepped ingredients. This method ensures a quick and hearty meal on busy weeknights, with flavors just as delicious as when made fresh.

Tips for the Best Orecchiette with Broccoli Rabe

  • Pasta Timing: Ensure your orecchiette is cooked al dente as it will absorb flavors while mixing. Overcooked pasta may result in a mushy dish.

  • Caramelization Secrets: Stir your onions frequently and maintain low heat to achieve perfect caramelization over 45-60 minutes. This will enhance sweetness and depth in your orecchiette.

  • Quality Ingredients: Use high-quality extra-virgin olive oil and fresh garlic to elevate the overall flavor of the dish. These small details make a big difference!

  • Balance the Flavors: Adjust salt, pepper, and red pepper flakes according to your taste. Remember that the parmesan also adds saltiness, so taste before adding more seasoning.

  • Reserve Pasta Water: Don’t forget to save some pasta water! This starchy liquid is perfect for loosening your mixture and creating a luscious sauce consistency in your orecchiette with broccoli rabe.

  • Customize with Love: Feel free to experiment with toppings or vegetables. Try swapping in kale for even more nutrition—let your creativity shine!

Orecchiette with Broccoli Rabe Variations

Feel free to explore creative twists to make this dish cater to your taste and dietary needs!

  • Vegan Delight: Omit the Parmesan cheese and use nutritional yeast for a cheesy flavor without dairy.

  • Gluten-Free: Swap regular pasta for gluten-free orecchiette or your favorite GF pasta for a delicious alternative.

  • Kale Substitute: If broccoli rabe isn’t available, use kale or regular broccoli for a different leafy green experience.

  • Crispy Finish: Top off with crispy chickpeas instead of sausage for an extra crunch and protein boost.

  • Extra Flavor: Toss in some capers or olives while sautéing for a salty punch that elevates the taste profile.

  • Creamy Twist: Stir in a dollop of vegan cream cheese or cashew cream at the end for a creamy texture without dairy.

  • Onion-Free: For a milder flavor, skip the caramelized onions and use fresh shallots instead, sautéing briefly until translucent.

  • Fruity Addition: Toss in some chopped fresh tomatoes or arugula before serving for a burst of freshness and color.

With these variations, your Orecchiette with Broccoli Rabe will never feel repetitive, allowing you to enjoy a delightful bowl of comfort in multiple ways! And for a lovely pairing, consider serving it with a side of Chicken Salad Apples to complement the richness of this pasta dish.

What to Serve with Hearty Orecchiette Pasta with Broccoli Rabe?

Pair your delightful pasta with these tempting accompaniments to create an unforgettable meal experience.

  • Mixed Greens Salad: A light, refreshing salad with a zesty vinaigrette balances the richness of the pasta, providing a crisp contrast that leaves you feeling satisfied but not stuffed.

  • Garlic Bread: Crunchy, buttery garlic bread adds a satisfying texture and complements the pasta’s flavors beautifully. It’s perfect for soaking up any leftover sauce!

  • Roasted Vegetables: Serve seasonal roasted veggies like carrots and bell peppers for extra nutrients and natural sweetness. Their caramelized edges and warm interior harmonize with the earthiness of the orecchiette.

  • Lemon Tart: A slice of tangy lemon tart or a lemon sorbet is a refreshing dessert to cleanse the palate after the hearty pasta, leaving a delightful citrusy finish to your meal.

  • Red Wine: Pair with a glass of Chianti or another light red wine. The wine's fruity notes enhance the flavors of the dish, making each bite even more enjoyable.

  • Crispy Polenta Chips: These crispy bites add a crunchy texture that beautifully contrasts the smooth pasta, making them a fun appetizer or side that everyone will love.

  • Herbed Quinoa: A fluffy quinoa side with fresh herbs is a nutritious addition to your meal. The nutty flavor complements the dish without overpowering it.

  • Pine Nut-Crusted Tofu: For an additional protein boost, serve crispy tofu coated in pine nuts. It echoes the nutty crunch of the pasta’s toppings and adds a delightful twist.

Feel free to mix and match these ideas to compose a meal that warms your heart and tantalizes your taste buds!

How to Store and Freeze Orecchiette with Broccoli Rabe

Fridge: Store your Orecchiette with Broccoli Rabe in an airtight container for up to 3 days. Make sure it cools completely before sealing to prevent condensation.

Freezer: You can freeze this dish for up to 3 months. Portion it into airtight freezer bags or containers—leave a little space for expansion.

Reheating: When ready to enjoy, thaw in the fridge overnight. Reheat gently on the stove over low heat, adding a splash of water or olive oil to restore moisture and flavor.

Leftover Caramelized Onions: If you have any leftovers, store caramelized onions separately in the fridge. They can last up to a week and elevate various dishes!

Orecchiette with Broccoli Rabe Recipe FAQs

What should I look for when selecting broccoli rabe?
Absolutely! When selecting broccoli rabe, look for vibrant green leaves and firm, unblemished stalks. Avoid any varieties that have yellowing leaves or dark spots, as these can indicate age or spoilage. Freshness is key, as it directly affects the dish's flavor and texture.

How should I store the leftovers of Orecchiette with Broccoli Rabe?
You can store your Orecchiette with Broccoli Rabe in an airtight container in the fridge for up to 3 days. For best results, let the dish cool down completely before sealing to prevent condensation, which may lead to sogginess. When reheating, add a splash of water or olive oil to restore moisture.

Can I freeze Orecchiette with Broccoli Rabe?
Yes, you can! To freeze your Orecchiette with Broccoli Rabe, portion it into airtight freezer bags or containers, ensuring you leave a little space for expansion. It can last in the freezer for up to 3 months. When you're ready to enjoy, thaw it in the fridge overnight and reheat gently on the stove.

What should I do if my pasta turns out mushy?
Don't worry, it happens to the best of us! If your pasta becomes mushy, try tweaking your cooking method next time. Cook the orecchiette just until al dente according to package instructions, as it will soften further when mixed with the sauce. If you do end up with mushy pasta, consider turning it into a pasta bake—toss it with sauce, top with cheese, and bake until bubbly for a delicious transformation!

Can this recipe accommodate dietary restrictions?
Very much so! This Orecchiette with Broccoli Rabe can easily cater to various dietary preferences. For a vegan option, simply omit the Parmesan cheese or use a plant-based alternative. If nuts are an issue, feel free to skip the pine nuts or swap them for seeds like sunflower seeds to maintain that delightful crunch without compromising safety.

How long can I keep caramelized onions?
Caramelized onions are a fantastic ingredient to have on hand! You can store leftover caramelized onions in the fridge for up to a week in an airtight container. They are versatile and can elevate many dishes, so prep a batch and enjoy them in sandwiches, salads, or stirred into other pasta recipes!

Orecchiette with Broccoli Rabe

Hearty Orecchiette with Broccoli Rabe for Cozy Evenings

A warm embrace on your plate, this Hearty Orecchiette with Broccoli Rabe is a comforting pasta that packs vibrant flavors and is perfect for chilly evenings.
Print Recipe Pin Recipe
Prep Time 10 minutes mins
Cook Time 30 minutes mins
Total Time 40 minutes mins
Servings: 4 servings
Course: Dinner
Cuisine: Italian
Calories: 450
Ingredients Equipment Method Nutrition Notes

Ingredients
  

For the Pasta
  • 8 ounces Dry Orecchiette Pasta Cooked until al dente
  • to taste Sea Salt For seasoning pasta water
For the Sauce
  • 2 tablespoons Extra-Virgin Olive Oil For richness
  • 4 cloves Garlic, sliced Fresh garlic adds aromatic depth
  • 0.25 cup Dry White Wine Enhances flavor complexity
  • 2 Caramelized Onions Adds sweetness
  • 8 Oil-Packed Sun-Dried Tomatoes, chopped Offers tangy depth of flavor
  • 0.25-0.5 teaspoon Red Pepper Flakes Adjust spice level to taste
  • 0.33 cup Grated Parmesan Cheese Optional, omit for vegan
  • 1 tablespoon Lemon Juice Fresh is best for flavor
  • 1 teaspoon Lemon Zest Adds brightness
  • to taste Freshly Ground Black Pepper For balancing flavors
For the Greens
  • 1 bunch Broccoli Rabe Main veggie, can substitute with kale
For Topping
  • 0.33 cup Pine Nuts Add crunch, can substitute with walnuts

Equipment

  • Large skillet
  • pot

Method
 

Cooking Steps
  1. Caramelize onions by heating oil in a skillet, adding sliced onions, and cooking on low heat for 45 minutes to 1 hour until golden.
  2. Sauté plant-based sausages in the same skillet until browned, then set aside.
  3. Blanch broccoli rabe in salted boiling water for 2 minutes, drain, and chop.
  4. Cook orecchiette in salted boiling water for about 10-12 minutes until al dente, reserving ½ cup of pasta water.
  5. Sauté garlic and chopped broccoli rabe in sausage drippings, adding white wine for flavor depth.
  6. Mix drained orecchiette with reserved pasta water, caramelized onions, cheese, lemon juice, and seasoning. Toss for 2-3 minutes.
  7. Add sausages and sun-dried tomatoes, mix and top with toasted pine nuts. Adjust seasoning if needed.

Nutrition

Serving: 1servingCalories: 450kcalCarbohydrates: 60gProtein: 15gFat: 20gSaturated Fat: 3gPolyunsaturated Fat: 5gMonounsaturated Fat: 10gCholesterol: 10mgSodium: 600mgPotassium: 500mgFiber: 6gSugar: 4gVitamin A: 15IUVitamin C: 80mgCalcium: 15mgIron: 20mg

Notes

Store in an airtight container for up to 3 days in the fridge or freeze for up to 3 months. Reheat gently with added moisture.

Tried this recipe?

Let us know how it was!

Savory Cornish Hens with Wild Rice and Celery Delight

September 4, 2025 by Grace Snow Leave a Comment

As I stood in my kitchen, the aroma of savory herbs and toasty wild rice dancing in the air, I couldn’t help but feel a surge of excitement. Today, I’m sharing my recipe for Cornish Hens with Wild Rice and Celery—an impressive yet surprisingly easy dish that’s perfect for any special occasion or cozy gathering. These succulent hens provide a delightful alternative to traditional turkey, turning mealtime into a festive celebration with minimal effort. The combination of tender hens stuffed with a fragrant rice blend, accented by mushrooms and sweet cranberries, promises to warm your heart and please your palate. What could be better than a dish that not only looks stunning but also allows you to spend more time with your loved ones? Are you ready to transform your next meal into a memorable experience? Let’s dive into the recipe!

Why Are Cornish Hens So Special?

Unique celebration: This dish transforms any gathering into a festive occasion, making it perfect for holidays or family dinners.
Effortless flair: The easy preparation means you have more time to enjoy with your guests.
Savory stuffing: The wild rice and cranberries create a delicious medley that tantalizes your taste buds.
Stunning presentation: Beautifully golden hens are visually appealing and impress at the dinner table.
Versatile option: Ideal as a traditional turkey alternative, or try it alongside recipes like Skillet Pasta Feta for added variety!

Cornish Hens with Wild Rice Ingredients

Here’s everything you’ll need to create your delicious Cornish Hens with Wild Rice and Celery.

For the Hens

  • Cornish hens – Ensure they are fully thawed for even cooking.
  • Butter – Provides richness and helps sauté vegetables; olive oil can be used for a dairy-free option.

For the Stuffing

  • Celery – Adds crunch and flavor to the rice stuffing; you can substitute with chopped bell peppers for a different flavor profile.
  • Fresh mushrooms – Contributes an earthy flavor to the stuffing; canned mushrooms can be used in a pinch but may lose some texture.
  • Long grain and wild rice mix – The hearty base for stuffing that offers texture and nuttiness; a quinoa mix can replace it for a gluten-free option.
  • Reduced-sodium chicken broth – Enhances the flavor and moisture of the stuffing; vegetable broth works for a vegetarian alternative.
  • Water – Necessary for cooking the rice mix; no substitutions needed.
  • Water chestnuts – Adds a crunchy element to the stuffing; these are optional if you don’t have them on hand.
  • Dried cranberries – Provides sweetness and a contrasting texture; feel free to substitute with raisins or chopped dried apricots.
  • Green onions – Introduces color and freshness; shallots can be a suitable alternative.
  • Reduced-sodium soy sauce – Enhances umami flavor in the stuffing; omit for a gluten-free dish or use tamari instead.

This delightful combination in your Cornish Hens with Wild Rice and Celery will surely make your meal unforgettable!

Step‑by‑Step Instructions for Cornish Hens with Wild Rice and Celery

Step 1: Preheat the Oven
Begin by preheating your oven to 375°F (190°C). This ensures the perfect cooking environment for your Cornish Hens. Preparing the oven ahead of time allows for an even bake, helping to achieve that golden, crispy skin that we all crave.

Step 2: Sauté the Vegetables
In a large saucepan, melt a generous amount of butter over medium heat. Once melted, add the chopped celery and fresh mushrooms, sautéing until they’re tender and fragrant—about 5 minutes. Keep stirring occasionally, as this creates a savory base for your wild rice and celery stuffing, while filling your kitchen with delicious aromas.

Step 3: Cook the Rice Mixture
Next, stir in the long grain and wild rice mix, cooking it for an additional minute to toast the grains slightly. Then, mix in the seasoning packets, reduced-sodium chicken broth, and water, bringing the mixture to a boil. Once bubbling, lower the heat and let it simmer for about 5-6 minutes, until the rice is tender and the liquid has absorbed.

Step 4: Combine the Stuffing Ingredients
After the rice is cooked, gently fold in the diced water chestnuts, dried cranberries, minced green onions, and soy sauce. This creates a colorful and flavorful stuffing that complements your Cornish Hens perfectly. Make sure the ingredients are evenly distributed for that harmonious taste in every bite!

Step 5: Stuff the Cornish Hens
Carefully stuff each Cornish hen with the wild rice and celery mixture. Ensure that the stuffing is packed lightly to allow for expansion during cooking. Alternatively, you can serve any extra stuffing on the side, reheating it just before serving to enjoy the delightful flavors separately.

Step 6: Roast the Hens
Place the stuffed Cornish hens on a rack set inside a shallow roasting pan. Bake them in the preheated oven for 50-60 minutes, or until the juices run clear and the internal temperature reaches 170°F (77°C). Look out for that beautiful golden-brown color on the skin, signaling that they’re ready to be enjoyed.

Step 7: Serve the Hens
Once roasted, carefully remove the Cornish hens from the oven and let them rest for about 10 minutes. This resting period enhances the juiciness. Cut each hen in half lengthwise to serve, allowing guests to savor the tender meat and flavorful stuffing nestled inside. Enjoy this delightful meal!

Make Ahead Options

These Cornish Hens with Wild Rice and Celery are fantastic for meal prep, making your special occasion a breeze! You can prepare the wild rice stuffing up to 24 hours in advance; simply sauté the vegetables, cook the rice mixture, and combine all ingredients. Store the stuffing in an airtight container in the refrigerator to maintain its freshness. The Cornish hens can also be stuffed and refrigerated for up to 3 days before cooking—just make sure to cover them tightly to prevent drying out. When ready to enjoy, bake the hens directly from the fridge, adding a few extra minutes to the cooking time for perfectly juicy results. With this prep, you’ll save valuable time while impressing your guests with a stunning dish!

Storage Tips for Cornish Hens with Wild Rice

Fridge: Store leftover Cornish hens in an airtight container in the fridge for up to 3 days. Be sure to reheat thoroughly before serving to preserve flavor and texture.

Freezer: If you need to freeze your Cornish hens, wrap them tightly in plastic wrap or aluminum foil, then place them in a freezer bag. They can last for up to 3 months in the freezer.

Reheating: To reheat, thaw in the fridge overnight if frozen, then warm in the oven at 350°F (175°C) until heated through, ideally to an internal temperature of 165°F (74°C).

Leftover Stuffing: Any remaining wild rice stuffing can also be stored in the fridge for up to 3 days or frozen for up to 3 months. Reheat it separately before serving.

Cornish Hens with Wild Rice Variations

Feel free to add your own twist to this delightful dish and make it your own with these creative ideas!

  • Olive Oil Swap: Replace butter with olive oil for a lighter, dairy-free option that's just as delicious.

  • Bell Pepper Crunch: Swap out celery for chopped bell peppers to add a sweet crunch to the stuffing. The color and flavor will brighten your dish beautifully.

  • Canned Mushrooms: If fresh mushrooms aren't on hand, use canned mushrooms, but remember they may slightly change the texture.

  • Quinoa Mix: Use a quinoa mix instead of wild rice for a gluten-free alternative that’s rich in protein and flavor. The nutty taste will complement the hens perfectly!

  • Vegetable Broth: Swap reduced-sodium chicken broth for vegetable broth to keep the dish vegetarian-friendly without sacrificing flavor.

  • Chopped Nuts: For an added crunch, mix in some chopped walnuts or pecans into the stuffing. The earthy flavors will enhance the dish beautifully and add an elegant touch.

  • Tangy Twist: Experiment by adding a splash of balsamic vinegar to the stuffing for a tangy kick that will elevate the flavor profile.

  • Herb Infusion: Infuse fresh herbs like thyme or rosemary into the stuffing for an aromatic experience that brings warmth to the dish. Pair it with roasted vegetables for a seamless meal!

These variations will not only make your Cornish Hens with Wild Rice and Celery unique but will also keep your family guessing what delightful surprises await them on the table. And don’t forget, if you're looking for other comforting recipes, you might enjoy the hearty flavors of Furikake Fried Rice or the delicious Lime Chicken Rice. Enjoy your culinary journey!

What to Serve with Cornish Hens with Wild Rice and Celery

Elevate your dining experience by pairing these flavorful Cornish hens with delightful sides that complement their rich and savory profile.

  • Garlic Mashed Potatoes: Creamy and buttery, these mashed potatoes add an indulgent touch that balances the herbs in the hens. Plus, they make a comforting, satisfying side.

  • Roasted Seasonal Vegetables: A medley of roasted veggies lends a sweet, caramelized note that perfectly contrasts the savory hens, adding color and nutrients to your plate.

  • Cranberry Sauce: Fresh cranberry sauce provides a vibrant acidity to cut through the richness of the dish, harmonizing beautifully with the stuffing’s cranberries.

  • Simple Garden Salad: Crisp greens, cherry tomatoes, and a light vinaigrette offer a refreshing crunch that enhances the meal’s overall lightness, encouraging seconds without feeling heavy.

  • Honey-Glazed Carrots: Sweet and tender, honey-glazed carrots draw out earthy flavors, creating a delightful contrast with the savory stuffing inside the hens.

  • Herb-Infused Quinoa: This fluffy, nutty grain adds a wholesome touch and nuttiness that pairs wonderfully with the savory notes of Cornish hens and wild rice.

  • Red Wine: A medium-bodied red wine complements the depth of flavor in the hens, enhancing the overall experience with its rich undertones.

Enjoy crafting a memorable meal that brings joy to the table!

Expert Tips for Cornish Hens

  • Thaw Completely: Ensure the hens are fully thawed before cooking to avoid uneven cooking. Thawing overnight in the refrigerator is best.

  • Use a Thermometer: Always check the internal temperature with a meat thermometer for safety. It should reach 170°F (77°C) for perfectly cooked Cornish hens.

  • Baste for Flavor: Basting the hens with their juices halfway through cooking ensures a rich, golden skin. Don’t skip this step!

  • Don’t Overpack Stuffing: When stuffing the hens, pack the mixture lightly to allow it to expand during cooking. Overpacking can lead to uneven cooking.

  • Experiment with Ingredients: Feel free to customize your stuffing with seasonal vegetables or different dried fruits for your Cornish Hens with Wild Rice and Celery.

  • Rest Before Serving: Allow the hens to rest after roasting before serving. This step enhances juiciness and makes for a more enjoyable meal.

Cornish Hens with Wild Rice and Celery Recipe FAQs

What is the best way to choose Cornish hens?
When selecting Cornish hens, look for ones that are firm with no dark spots or discoloration. The skin should be pale yellow and plump, indicating freshness. Additionally, choose hens that feel heavy for their size, as this usually means they’re juicier and more flavorful.

How should I store leftover Cornish hens with wild rice?
Leftover Cornish hens can be stored in an airtight container in the fridge for up to 3 days. Make sure to allow them to cool before sealing them in to maintain their texture and flavor. For longer storage, you can wrap them tightly with plastic wrap or aluminum foil and freeze them for up to 3 months. Just remember to reheat thoroughly before enjoying!

Can I freeze Cornish hens with wild rice?
Absolutely! To freeze Cornish hens, wrap them tightly in plastic wrap or aluminum foil and place them in a freezer bag. It’s essential to remove as much air as possible to prevent freezer burn. When ready to use, simply thaw them in the fridge overnight and reheat in the oven until they reach an internal temperature of 165°F (74°C).

What should I do if my stuffing seems too dry?
If you find your stuffing is too dry, it’s an easy fix! When making your Cornish hens with wild rice, you can add a splash of chicken broth or water to the mixture while stirring in the finishing ingredients. This will add moisture and help create that desirable texture. Alternatively, you can also drizzle a bit of melted butter over the stuffing when it’s ready to bake.

Are Cornish hens safe for pets?
Cornish hens can be safe for pets, but moderation is key! If you decide to share some of your dish with your furry friends, make sure to remove any bones and avoid giving them skin or seasoning. Always check with your veterinarian first to ensure it aligns with your pet’s dietary needs.

Can I substitute the wild rice?
Absolutely! If wild rice isn’t available, you can substitute it with quinoa for a gluten-free alternative or use regular long-grain rice for a quicker option. Just be aware of the different cooking times and liquid requirements for each type of rice. If you decide to use long-grain rice, be sure to adjust your cooking time to around 15-20 minutes, as this rice cooks faster than wild rice.

Cornish Hens with Wild Rice and Celery

Savory Cornish Hens with Wild Rice and Celery Delight

An impressive yet easy recipe for Cornish Hens with Wild Rice and Celery, perfect for special occasions.
Print Recipe Pin Recipe
Prep Time 15 minutes mins
Cook Time 1 hour hr
Resting Time 10 minutes mins
Total Time 1 hour hr 25 minutes mins
Servings: 4 hens
Course: Dinner
Cuisine: American
Calories: 450
Ingredients Equipment Method Nutrition Notes

Ingredients
  

For the Hens
  • 2 whole Cornish hens Ensure they are fully thawed for even cooking.
  • 4 tablespoons Butter Can substitute with olive oil for a dairy-free option.
For the Stuffing
  • 1 cup Celery Can substitute with chopped bell peppers.
  • 1 cup Fresh mushrooms Canned mushrooms can be used in a pinch.
  • 1 cup Long grain and wild rice mix A quinoa mix can replace it for gluten-free.
  • 2 cups Reduced-sodium chicken broth Vegetable broth works for a vegetarian option.
  • 1 cup Water Necessary for cooking the rice mix.
  • 1 cup Water chestnuts Optional.
  • 1 cup Dried cranberries Substitute with raisins or chopped dried apricots.
  • 1 cup Green onions Shallots can be a substitute.
  • 2 tablespoons Reduced-sodium soy sauce Omit for gluten-free or use tamari instead.

Equipment

  • Oven
  • Large saucepan
  • Roasting pan
  • Meat Thermometer

Method
 

Step-by-Step Instructions
  1. Preheat your oven to 375°F (190°C).
  2. Melt butter in a large saucepan over medium heat, then add chopped celery and mushrooms, sautéing until tender.
  3. Stir in the rice mix and toast for a minute, then add broth and water, bring to boil, and simmer until rice is tender.
  4. Fold in water chestnuts, cranberries, green onions, and soy sauce into the rice mixture.
  5. Stuff each Cornish hen with the rice mixture lightly and optionally serve extra stuffing on the side.
  6. Place the stuffed hens in a roasting pan and bake for 50-60 minutes until juices run clear and internal temperature reaches 170°F.
  7. Allow the hens to rest for 10 minutes, then cut in half lengthwise to serve.

Nutrition

Serving: 1henCalories: 450kcalCarbohydrates: 40gProtein: 35gFat: 20gSaturated Fat: 8gPolyunsaturated Fat: 2gMonounsaturated Fat: 8gCholesterol: 120mgSodium: 600mgPotassium: 500mgFiber: 3gSugar: 4gVitamin A: 500IUVitamin C: 6mgCalcium: 30mgIron: 2mg

Notes

Ensure the hens are thawed completely before cooking, check internal temperature for safety, and feel free to customize stuffing ingredients as desired.

Tried this recipe?

Let us know how it was!

Spooky Eyeball Pasta: A Fun Family Dinner for Halloween

September 4, 2025 by Grace Snow Leave a Comment

As I rummaged through my pantry looking for those last-minute meal ideas, a spooky thought crossed my mind: why not whip up some Eyeball Pasta for Halloween? This playful dish features juicy meatballs sculpted to look like creepy eyeballs, swimming atop tender spaghetti and drenched in rich marinara sauce. Not only does it make for a delightful family-friendly feast, but it's also quick enough to get on the table before the kids finish their last-minute costume preparations. Imagine the laughter and shrieks of delight as everyone digs into their dinner! Whether you're planning a spooky gathering or just want to add some fun to your weeknight meals, this recipe is sure to impress. Ready to transform your dinner into a frightfully fun experience? Let's dive in!

Why Is Eyeball Pasta Perfect for Halloween?

Transformative Experience: Eyeball Pasta does more than feed the family; it transforms mealtime into a spooky adventure that kids and adults alike will love!

Quick and Easy: Preparing this playful dish is a breeze, making it ideal for busy weeknights packed with Halloween activities.

Family-Friendly Fun: Everyone gets involved; see the joy on their faces as they create their "eyeball" meatballs!

Versatile Dish: Want to cater to different diets? Easily switch out ingredients for turkey or veggie options, ensuring everyone can enjoy.

Memorable Moments: This eye-catching meal promises laughter and stories, enriching your Halloween traditions while savoring the delightful flavors.

For a lighter version, consider checking out my Cauliflower Pasta Ready recipe!

Eyeball Pasta Ingredients

For the Meatballs

  • Ground Beef – Your main protein source, offering hearty flavor; substitute with ground turkey for a leaner option.
  • Medium Onion, finely chopped – Adds sweetness and depth; shallots can be used for a milder taste.
  • Panko Bread Crumbs – Provide structure and light texture; opt for Italian seasoned breadcrumbs for extra flavor.
  • Cloves Garlic, minced – Elevates the flavor profile; garlic powder is a convenient alternative if you're short on time.
  • Chopped Fresh Parsley – Brings freshness and color; dried parsley will suffice in a pinch.
  • Large Egg, beaten – Binds the mixture together; a flax egg works for a vegan substitute.
  • Kosher Salt – Essential for seasoning; regular salt can be used but adjust the quantity to taste.
  • Freshly Ground Black Pepper – Adds a touch of heat and complexity; white pepper can serve as a milder option.

For the Pasta and Sauce

  • Spaghetti – The perfect base for your Eyeball Pasta; any pasta works, including gluten-free options if needed.
  • Marinara Sauce, warmed – A rich and tangy sauce that brings the dish together; you can swap it for homemade tomato sauce or basil pesto for a twist.

For the Eyeballs

  • Ciliegine, cut into rounds – Mimics the pupil of the eyeball; substitute with mozzarella balls for a similar effect.
  • Black Olives, sliced crosswise into rounds – Creates the “iris” of the eyeball and adds saltiness; feel free to use olives of your choice or omit.

This festive Eyeball Pasta is a delightful way to celebrate Halloween while enjoying a family-friendly meal!

Step‑by‑Step Instructions for Eyeball Pasta

Step 1: Preheat the Oven
Begin by preheating your oven to 400°F (200°C) and line a baking sheet with parchment paper. This prepares an ideal cooking environment for your spooky Eyeball Pasta meatballs. While the oven warms up, gather your ingredients and equipment, ensuring everything is within arm's reach for a smoother prep process.

Step 2: Mix the Meatball Ingredients
In a large mixing bowl, combine ground beef, finely chopped onion, panko breadcrumbs, minced garlic, chopped parsley, beaten egg, kosher salt, and freshly ground black pepper. Use your hands or a spatula to mix thoroughly until well blended, but be careful not to overmix. This blend is what will give your meatballs their delicious flavor and tenderness.

Step 3: Form the Meatballs
Take small portions of the mixture and roll them into meatballs, about the size of golf balls. Aim for consistent sizes to ensure even cooking for all meatballs. Once formed, place them on your prepared baking sheet, leaving some space between each one. This step is where the excitement for your Eyeball Pasta begins to take shape!

Step 4: Bake the Meatballs
Place the baking sheet in the preheated oven and bake the meatballs for about 20 minutes, or until they're beautifully browned and cooked through. To check their doneness, you can insert a meat thermometer into the center; it should read 160°F (71°C). The aroma wafting through your kitchen will be truly delightful!

Step 5: Cook the Spaghetti
While your meatballs are baking, boil a large pot of salted water and cook the spaghetti according to package instructions, usually around 8–10 minutes for al dente. Stir occasionally to prevent sticking. Once done, drain the pasta and return it to the pot while you get ready to combine it with the warm marinara sauce.

Step 6: Warm the Marinara Sauce
In a separate saucepan, gently warm your marinara sauce over medium heat until it’s hot and bubbling lightly. This will enrich the flavors and create the perfect companion for your Eyeball Pasta. By the time your sauce is warmed through, your meatballs should be ready to come out of the oven.

Step 7: Assemble the Eyeball Pasta
To serve, plate a generous helping of spaghetti and ladle warm marinara sauce over it. Carefully place the baked meatballs on top of the spaghetti, mimicking the look of eyes peeking out from within. The combination of flavors and textures is both delicious and visually inviting, perfect for a Halloween theme!

Step 8: Garnish with Eyeballs
For the finishing touch, add slices of ciliegine on top of each meatball to represent the "pupils," and then crown them with a slice of black olive to complete your eye creations. These little touches make your Eyeball Pasta not only tasty but also fun and festive for your Halloween dinner!

Eyeball Pasta Variations & Substitutions

Customize your Eyeball Pasta to fit your family's tastes and dietary needs—let your creativity shine in the kitchen!

  • Turkey Meatballs: Swap ground beef for ground turkey for a lighter twist. They’ll still pack flavor and delight!

  • Veggie Delight: Use veggie ground meat or black beans to create a hearty vegetarian version. Perfect for meatless meals that everyone can enjoy.

  • Spaghetti Alternatives: Feel free to use any type of pasta you love; gluten-free options work wonderfully, ensuring no one misses out on the fun.

  • Zesty Marinara: Replace marinara sauce with basil pesto or homemade tomato sauce for a fresh texture and sweet taste—an easy way to mix it up!

  • Garlicky Goodness: Boost flavors with extra minced garlic in the meatball mixture or add roasted garlic to the marinara sauce for an aromatic twist.

  • Layered Spiciness: Want a kick? Mix in crushed red pepper flakes into the meatball mixture or garnish with spicy jalapeños for those who love heat.

  • Cheesy Finish: Top the meatballs with shredded mozzarella or Parmesan cheese before serving. A quick broil will melt the cheese beautifully, adding an indulgent touch.

  • Eyeball Enhancements: For a more colorful eyeball effect, use cherry tomatoes instead of olives. The bright red adds an exciting visual surprise, making the dish even more festive!

This Halloween, let your Eyeball Pasta mystique enchant the table, and don't forget to explore other delicious options like Skillet Pasta Sun or Seafood Pasta Savory for family-friendly meals year-round!

What to Serve with Spooky Eyeball Pasta?

Transforming your dinner into a whimsical Halloween spectacle is easy when you complement your Eyeball Pasta with these delightful side dishes and treats.

  • Garlic Bread: Serve warm, buttery garlic bread for a satisfying crunch, perfect for dipping into rich marinara sauce. The aromas will transport your guests into a cozy dinner setting!

  • Simple Green Salad: A vibrant salad with mixed greens, cherry tomatoes, and a light vinaigrette adds freshness. It balances the richness of the Eyeball Pasta while offering a splash of color to the table.

  • Roasted Pumpkin Wedges: Sweet, caramelized pumpkin wedges bring the seasonal spirit to your meal. Their earthy flavors tie in beautifully with the Halloween theme!

  • Crusty Dinner Rolls: Soft, flaky rolls are ideal for mopping up sauce, making every bite a little more enjoyable. Spread some herb butter on top for an added touch of deliciousness.

  • Spooky Fruit Skewers: Create festive and fun fruit skewers with grapes, strawberries, and melon balls. The playful presentation adds a sweet counterpoint to your savory feast.

  • Chilled Apple Cider: Pair your dinner with glasses of refreshing apple cider. Its sweetness and hint of spice will enhance the festive atmosphere.

  • Chocolate-Covered Ghosts: For dessert, consider these fun chocolate-covered marshmallows shaped like ghosts. They are cute, easy to make, and sure to delight the whole family!

  • Pumpkin Spice Cookies: Celebrate the season with warm pumpkin spice cookies. Their comforting flavors will leave everyone eagerly looking forward to dessert!

Expert Tips for Eyeball Pasta

  • Even Meatball Size: Ensure your meatballs are uniform in size to cook evenly and achieve that perfect juiciness.

  • Don't Overmix: Mix the meatball ingredients just until combined to keep them tender and fluffy.

  • Fat Content Choice: Use ground beef with higher fat content for juicy, flavorful meatballs.

  • Temperature Check: Always use a meat thermometer to ensure meatballs reach an internal temperature of 160°F for safety and optimal flavor.

  • Alternative Ingredients: If you’re looking to adjust the recipe, ground turkey or chicken works beautifully and remains family-friendly.

  • Make-Ahead Magic: Prepare the meatballs in advance for a speedy dinner on Halloween, simply reheat before serving with the spaghetti!

Make Ahead Options

Preparing Eyeball Pasta ahead of time can save you precious minutes on busy Halloween nights! You can make the meatballs and store them in an airtight container in the refrigerator for up to 3 days. Just bake them and prepare the spaghetti on the day of serving. Additionally, cook the pasta and toss it with a small amount of olive oil to prevent sticking, refrigerating for up to 24 hours. When you're ready to serve, simply warm the marinara sauce while baking the meatballs, and heat the pasta in a pan for a few minutes. This way, you’ll enjoy a fun family dinner with restaurant-quality results and minimal fuss!

How to Store and Freeze Eyeball Pasta

Fridge: Store any leftovers in an airtight container for up to 3 days. This keeps your Eyeball Pasta fresh and ready for a quick reheat!

Freezer: For longer storage, freeze the meatballs in a single layer on a baking sheet before transferring to a freezer-safe container for up to 3 months. Be sure to label it!

Reheating: Reheat the meatballs in the oven at 350°F (175°C) for about 15 minutes or until warmed through. Alternatively, use the microwave for a quicker option, ensuring they’re heated evenly.

Assembly Tip: To keep the pasta perfectly saucy, store the spaghetti and meatballs separately, combining them just before serving to maintain the best texture!

Eyeball Pasta Recipe FAQs

What type of ground meat is best for Eyeball Pasta?
I recommend using ground beef for a juicy and hearty flavor, but you can easily substitute ground turkey or chicken for a leaner alternative. If you prefer, veggie ground meat or beans can work well for a vegetarian version, ensuring everyone can enjoy this spooky dish.

How long can I store leftovers of Eyeball Pasta?
Leftovers can be stored in an airtight container in the fridge for up to 3 days. Just make sure to keep the spaghetti and meatballs separate to maintain the best texture. Reheat in the oven or microwave before serving, and you'll have a quick meal ready to enjoy!

Can I freeze Eyeball Pasta?
Absolutely! To freeze the meatballs, roll them and place them in a single layer on a baking sheet until firm. Then, transfer to a freezer-safe container or bag for up to 3 months. Thaw in the fridge overnight before reheating, or cook them straight from frozen for about 25 minutes at 350°F (175°C) until cooked through.

How do I ensure my meatballs are tender and not dry?
To keep your meatballs tender, avoid overmixing the ingredients when combining. Aim for uniform sizes to ensure even cooking, and consider using ground beef with a higher fat content for optimal moisture. Using a meat thermometer to check for doneness at 160°F (71°C) is also a great way to prevent overcooking.

Can I use gluten-free pasta for this recipe?
Yes, you can substitute spaghetti with any gluten-free pasta of your choice! Just follow the cooking instructions on the package to ensure it achieves the desired texture for your Eyeball Pasta.

What can I use instead of ciliegine and black olives for garnish?
If you can't find ciliegine or black olives, small rounds of mozzarella can work well in place of ciliegine, while any kind of sliced olives or even a small piece of cherry tomato can add a pop of color for the eyeballs. Be creative and make it your own!

Eyeball Pasta

Spooky Eyeball Pasta: A Fun Family Dinner for Halloween

Eyeball Pasta transforms dinner into a spooky adventure, perfect for Halloween fun.
Print Recipe Pin Recipe
Prep Time 15 minutes mins
Cook Time 40 minutes mins
Total Time 55 minutes mins
Servings: 4 servings
Course: Dinner
Cuisine: Italian
Calories: 450
Ingredients Equipment Method Nutrition Notes

Ingredients
  

For the Meatballs
  • 1 pound Ground Beef Substitute with ground turkey for a leaner option.
  • 1 medium Onion, finely chopped Shallots can be used for a milder taste.
  • 1 cup Panko Bread Crumbs Opt for Italian seasoned breadcrumbs for extra flavor.
  • 2 cloves Garlic, minced Garlic powder is a convenient alternative.
  • 1/4 cup Chopped Fresh Parsley Dried parsley will suffice in a pinch.
  • 1 large Egg, beaten A flax egg works for a vegan substitute.
  • 1 teaspoon Kosher Salt Regular salt can be used but adjust quantity to taste.
  • 1/2 teaspoon Freshly Ground Black Pepper White pepper can serve as a milder option.
For the Pasta and Sauce
  • 8 ounces Spaghetti Any pasta works, including gluten-free options if needed.
  • 2 cups Marinara Sauce Substitute with homemade tomato sauce or basil pesto.
For the Eyeballs
  • 12 ounces Ciliegine, cut into rounds Substitute with mozzarella balls for a similar effect.
  • 1/2 cup Black Olives, sliced Feel free to use olives of your choice or omit.

Equipment

  • Oven
  • large mixing bowl
  • Baking Sheet
  • Parchment Paper
  • Large pot
  • Saucepan

Method
 

Step-by-Step Instructions for Eyeball Pasta
  1. Preheat the oven to 400°F (200°C) and line a baking sheet with parchment paper.
  2. In a large mixing bowl, combine ground beef, onion, breadcrumbs, garlic, parsley, egg, salt, and pepper. Mix until well blended.
  3. Form meatballs about the size of golf balls and place them on the baking sheet.
  4. Bake the meatballs for about 20 minutes until browned and cooked through.
  5. While meatballs are baking, boil a pot of salted water and cook spaghetti until al dente, about 8-10 minutes.
  6. Warm the marinara sauce over medium heat until hot and bubbling.
  7. Plate spaghetti, layer with warm marinara sauce, and add baked meatballs on top.
  8. Garnish each meatball with ciliegine and a slice of black olive to complete the 'eyeball' look.

Nutrition

Serving: 1servingCalories: 450kcalCarbohydrates: 55gProtein: 20gFat: 18gSaturated Fat: 7gPolyunsaturated Fat: 1gMonounsaturated Fat: 10gCholesterol: 90mgSodium: 900mgPotassium: 550mgFiber: 3gSugar: 5gVitamin A: 10IUVitamin C: 15mgCalcium: 8mgIron: 15mg

Notes

Consider alternatives like ground turkey for a lighter meal. Prepare meatballs in advance for a speedy dinner on Halloween!

Tried this recipe?

Let us know how it was!

Crispy Tofu Bowls with Kimchi: A Flavorful Weeknight Hit

September 2, 2025 by Grace Snow Leave a Comment

As I stood in my kitchen, the tantalizing aroma of sesame and garlic enveloped me, igniting memories of my favorite Asian dishes. Today, I’m excited to share my Crispy Tofu Bowls with Kimchi, a dish that transforms the chaos of weeknight cooking into a vibrant, satisfying meal. This recipe not only offers a delightful crunch with every bite of sesame-crusted tofu and garlicky roasted broccoli but also packs a nutritional punch—high in protein and low in carbs. With minimal prep time, you can whip this up faster than any takeout order! Ready to elevate your dinner game and savor a little slice of deliciousness? Let’s dive into this flavorful adventure together!

Why is this recipe a must-try?

Flavor Explosion: The combination of crispy tofu, garlicky broccoli, and tangy kimchi creates a mouthwatering harmony that delights the palate.
Nutrient-Dense: Packed with protein and low in carbs, these bowls are a filling yet healthy choice for any meal.
Quick & Easy: With minimal prep and cook time, you can enjoy this gourmet experience on any busy weeknight.
Customizable: Feel free to swap ingredients! Replace tofu with shrimp or add your favorite veggies to make it your own. Explore other options like Buffalo Tofu Caesar for a twist!
Crowd-Pleaser: Perfect for family dinners, this dish appeals to both veggie lovers and meat enthusiasts alike.

Crispy Tofu Bowls with Kimchi Ingredients

  • For the Tofu

  • Extra-firm tofu – The primary protein source, providing a satisfying texture when roasted or fried. Substitute tempeh or edamame for a different protein boost.

  • Cornstarch – Creates a crispy coating for the tofu. For a gluten-free option, use potato starch or rice flour.

  • Sesame seeds – Adds nuttiness and texture contrast. Try poppy seeds or crushed nuts as alternatives.

  • Gochugaru – Provides heat and flavor; can be substituted with red pepper flakes for a similar spice level.

  • Neutral oil for frying – Enhances crispiness while cooking tofu; olive oil or avocado oil work well as substitutes.

  • For the Broccoli

  • Broccoli – Roasts beautifully for flavor and texture; consider using cauliflower or Brussels sprouts as alternatives.

  • For the Sauce

  • Yogurt – Forms the creamy base; plain or coconut yogurt works well, or use a vegan yogurt for a plant-based option.

  • Mayonnaise – Adds richness; opt for vegan mayo if desired.

  • Toasted sesame oil – Provides depth of flavor; regular sesame oil can be used if needed.

  • Rice vinegar – Adds a tangy kick to the sauce.

  • Fresh ginger – Enhances flavor with its warm, zesty notes.

  • Garlic – Contributes aromatic flavor to the sauce.

  • For the Bowl Assembly

  • Cooked brown rice – Serves as the base; consider cauliflower rice for a low-carb alternative.

  • Shelled edamame – Adds protein and vibrant color to your bowl.

  • Chopped kimchi with juice – Provides a tangy, spicy kick; feel free to adjust the amount to your taste.

  • Scallions – Sliced for a fresh garnish, bringing brightness to the dish.

  • Optional garnishes – Include sesame seeds and chili crisp for added flavor and heat.

These Crispy Tofu Bowls with Kimchi will bring excitement back to your dinner table and satisfy your cravings for a delicious, homemade meal!

Step‑by‑Step Instructions for Crispy Tofu Bowls with Kimchi

Step 1: Preheat the Oven
Begin by preheating your oven to 425°F (220°C). This high temperature will ensure that your broccoli roasts to perfection, getting crispy and flavorful. Once your oven is heated, you’ll be ready to start preparing the broccoli while it warms up.

Step 2: Roast the Broccoli
Toss the broccoli florets in a mixing bowl with neutral oil, salt, and 1 teaspoon of gochugaru until evenly coated. Spread the florets on a parchment-lined sheet pan in a single layer, ensuring they aren’t overcrowded. Roast for 20-25 minutes, turning halfway through, until the edges are lightly charred and crispy.

Step 3: Prepare the Tofu
While the broccoli is roasting, cube the pressed extra-firm tofu and toss it with cornstarch, sesame seeds, and the remaining ½ teaspoon of gochugaru in a bowl. Make sure each piece is well-coated for maximum crispiness. This will create an irresistible outer layer when cooked.

Step 4: Heat the Oil for Frying
In a large skillet, heat 2-3 tablespoons of neutral oil over medium-high heat. You’ll know the oil is ready when it shimmers slightly. This step is crucial for achieving that perfect golden exterior on your tofu, so take care to not overcrowd the pan.

Step 5: Fry the Tofu
Add the coated tofu cubes to the skillet in a single layer. Cook for 2-3 minutes on each side until golden brown and crispy, turning carefully with tongs or a spatula. Once cooked, transfer the tofu to a plate lined with paper towels to drain excess oil.

Step 6: Whisk the Sauce Together
In a separate bowl, whisk together the yogurt, mayonnaise, toasted sesame oil, rice vinegar, grated ginger, minced garlic, and a pinch of salt. Mix until smooth and creamy, adjusting the flavor to your liking—this sauce will add a delightful richness to your Crispy Tofu Bowls with Kimchi.

Step 7: Warm the Kimchi
In a small pan over low heat, warm the chopped kimchi for a few minutes until heated through. If you prefer a milder flavor, feel free to stir in a little honey at this stage to balance the spiciness. The warmth will enhance the flavors, making it a perfect complement to your dish.

Step 8: Assemble the Bowls
To assemble your Crispy Tofu Bowls with Kimchi, start by fluffing your cooked brown rice or cauliflower rice as the base. Top with the roasted broccoli, shelled edamame, warm kimchi, and finally, the crispy tofu. Drizzle the creamy yogurt sauce generously over the top and garnish with sliced scallions and optional sesame seeds for added texture.

What to Serve with Crispy Tofu Bowls with Kimchi

Elevate your meal experience with delightful side dishes that add flavor, texture, and satisfaction to your vibrant crispy tofu bowls.

  • Jasmine Rice: This fragrant rice complements the bowl’s flavors while remaining a familiar and comforting base. Its light texture allows the other ingredients to shine.

  • Garlic Edamame: A quick and healthy snack, these tender soybeans bring a satisfying crunch and enhance the protein content of your meal. Toss them with a sprinkle of sea salt for extra flavor!

  • Miso Soup: Warm and brothy, miso soup offers a umami-rich pairing that balances the brightness of kimchi. Serve it as a starter for a complete dining experience.

  • Asian Slaw: A crunchy mix of cabbage, carrots, and a tangy sesame dressing adds freshness and texture. The add a bright contrast to the hearty tofu bowls!

  • Cucumber Salad: Light and refreshing, a simple cucumber salad dressed with rice vinegar and sesame oil can cleanse the palate between bites, enhancing your overall enjoyment.

  • Chili Oil: Drizzle a bit of chili oil over the finished bowls for a spicy kick that intensifies the flavors of the dish.

  • Green Tea: The earthy notes of green tea provide a soothing complement that balances the bowl's richness and aids in digestion.

These options will turn your Crispy Tofu Bowls with Kimchi into a delightful multi-course experience, tinged with various textures and flavors. Enjoy the journey!

How to Store and Freeze Crispy Tofu Bowls with Kimchi

Fridge: Store individual components separately in airtight containers; tofu and broccoli will stay fresh for up to 2 days, while kimchi can last up to 1 week.

Freezer: For long-term storage, freeze cooked tofu (without sauce) in a single layer for up to 3 months. Thaw in the fridge overnight before reheating.

Sauce: Keep the yogurt sauce in the fridge for up to 3 days; store it in a well-sealed jar to prevent drying out.

Reheating: To restore tofu's crispness, reheat it in an air fryer at 375°F for 5-7 minutes or in a hot skillet for a few minutes until heated through. Enjoy your Crispy Tofu Bowls with Kimchi fresh and flavorful!

Expert Tips for Crispy Tofu Bowls with Kimchi

  • Hot Oil is Key: Ensure your oil is properly heated before frying tofu; this helps avoid sticking and gives that essential crispy texture.

  • Fry in Batches: Don’t overcrowd the skillet when frying tofu. This ensures each piece gets crispy without steaming, leading to the perfect golden tofu.

  • Broccoli Timing: Check the broccoli frequently in the oven. Cooking times can vary, so look for lightly charred edges for that ideal crunch.

  • Adjust Kimchi Spice: If you're not a fan of spicy flavors, warm the kimchi with a touch of honey to mellow its heat, balancing it nicely with the creamy sauce.

  • Sauce Customization: Feel free to adjust the sauce ingredients; a splash of lemon juice can brighten the flavors, or adding a pinch of cumin could give it a lovely twist.

These Crispy Tofu Bowls with Kimchi are sure to become a favorite, full of flavor, texture, and satisfying goodness!

Crispy Tofu Bowls with Kimchi Variations

Feel free to get creative with these bowls, turning them into your own culinary masterpiece that excites your taste buds!

  • Meat Lover’s Swap: Use quick-seared shrimp or marinated chicken thighs instead of tofu for a savory, hearty dish. The seafood's delicate flavor pairs beautifully with the kimchi, bringing a delightful twist!

  • Keto-Friendly: Omit the rice and double the broccoli, adding creamy avocado slices for a low-carb alternative that's still satisfying. This version won't skimp on flavor while keeping your carb count in check.

  • Kimchi Options: Experiment with cucumber kimchi for a refreshing crunch or try white kimchi for a milder, sweeter flavor. Both variations will retain that authentic tang while offering something fresh!

  • Sauce Remix: Blend in some peanut butter into the yogurt sauce for a satay-like twist full of creaminess and richness. You'll find it’s a delightful departure from the traditional!

  • Rainbow Upgrade: Add colorful veggies like shredded purple cabbage, pickled radishes, or mango slices to make your bowl pop with color and texture. Each bite becomes a feast for both the eyes and the palate.

If you love the vibrant flavor of this dish, you'll enjoy how it pairs well with options like Fish Taco Bowls and Smoky Sweet Corn for even more culinary adventures!

Make Ahead Options

These Crispy Tofu Bowls with Kimchi are perfect for busy home cooks looking to save time! You can prepare the roasted broccoli and crispy tofu up to 3 days in advance. Simply roast the broccoli, allow it to cool, then store it in an airtight container in the fridge. For the tofu, after cooking, let it cool and refrigerate it in an airtight container; reheat in an air fryer to maintain crispiness before serving. The yogurt sauce can be prepared up to 24 hours in advance and stored in the fridge. When you’re ready to enjoy your bowls, just fluff the rice, warm the kimchi, and assemble everything for a delightful meal with minimal effort!

Crispy Tofu Bowls with Kimchi Recipe FAQs

How do I select ripe ingredients for my Crispy Tofu Bowls with Kimchi?
Absolutely! When choosing tofu, look for extra-firm varieties that feel dense and have no dark spots or excessive moisture. Fresh broccoli should be vibrant green with firm florets, and avoid any that appear yellow or have wilting leaves. If you're picking kimchi, opt for brands that mention fermentation on the label for the best flavor.

What are the best storage methods and duration for the Crispy Tofu Bowls?
To keep your Crispy Tofu Bowls delicious, store each component separately. The tofu and broccoli in airtight containers will last up to 2 days in the fridge, while the kimchi can stay fresh for up to 1 week. The yogurt sauce will be good for about 3 days. Keeping ingredients separate preserves their textures, which is essential for that perfect bite!

Can I freeze the components of my Crispy Tofu Bowls with Kimchi?
Yes, you can! For freezing, ensure the cooked tofu is cooled and then spread it in a single layer on a baking sheet to freeze before transferring to a freezer-safe bag. This prevents clumping, and it can stay fresh for up to 3 months. To reheat, thaw it in the fridge overnight and then warm it in an air fryer or skillet to restore its crispiness.

What if my tofu sticks to the pan while frying?
Not to worry! If you find that your tofu is sticking, it might be because the oil wasn't hot enough. Ensure the oil shimmers and is properly heated before adding tofu. Frying in batches also helps to prevent sticking, as overcrowding the pan traps steam. If sticking occurs, a bit of patience will help to free the tofu as it cooks.

Are there any dietary considerations for the Crispy Tofu Bowls with Kimchi?
This recipe is quite versatile! It's suitable for a vegan diet with dairy-free yogurt and vegan mayo. If you have gluten sensitivities, opt for gluten-free cornstarch and check that your kimchi contains no gluten or wheat products. As for pet considerations, avoid letting pets indulge in spicy ingredients like kimchi, as these can be harmful to them.

Can I customize my Crispy Tofu Bowls with Kimchi further?
Very! This recipe is highly customizable; feel free to swap in your favorite vegetables or proteins. For example, if you want something even more filling, add avocado slices or double the amount of broccoli. Don't hesitate to make this bowl truly your own by mixing in diverse flavors with different sauces or garnishes!

Crispy Tofu Bowls with Kimchi

Crispy Tofu Bowls with Kimchi: A Flavorful Weeknight Hit

Crispy Tofu Bowls with Kimchi is a vibrant weeknight meal combining protein-rich tofu, crispy vegetables, and a creamy sauce.
Print Recipe Pin Recipe
Prep Time 15 minutes mins
Cook Time 30 minutes mins
Total Time 45 minutes mins
Servings: 4 bowls
Course: Dinner
Cuisine: Asian
Calories: 400
Ingredients Equipment Method Nutrition Notes

Ingredients
  

For the Tofu
  • 1 block extra-firm tofu Can substitute tempeh or edamame.
  • 1/4 cup cornstarch Substitute potato starch or rice flour for a gluten-free option.
  • 2 tablespoons sesame seeds Try poppy seeds or crushed nuts as alternatives.
  • 1 teaspoon gochugaru Can substitute with red pepper flakes.
  • 2-3 tablespoons neutral oil for frying Olive oil or avocado oil work well as substitutes.
For the Broccoli
  • 2 cups broccoli florets Consider using cauliflower or Brussels sprouts as alternatives.
For the Sauce
  • 1/2 cup yogurt Plain or coconut yogurt works well.
  • 2 tablespoons mayonnaise Opt for vegan mayo if desired.
  • 1 tablespoon toasted sesame oil Regular sesame oil can be used if needed.
  • 1 tablespoon rice vinegar Adds a tangy kick to the sauce.
  • 1 teaspoon fresh ginger Grated.
  • 2 cloves garlic Minced.
For the Bowl Assembly
  • 2 cups cooked brown rice Consider cauliflower rice for a low-carb alternative.
  • 1 cup shelled edamame Adds protein and color.
  • 1 cup chopped kimchi with juice Adjust amount to taste.
  • 2 scallions sliced For fresh garnish.
  • optional garnishes Include sesame seeds and chili crisp.

Equipment

  • Oven
  • Skillet
  • Mixing Bowl
  • sheet pan

Method
 

Preparation Steps
  1. Preheat your oven to 425°F (220°C).
  2. Toss the broccoli florets in a bowl with neutral oil, salt, and 1 teaspoon of gochugaru. Spread on a parchment-lined sheet pan and roast for 20-25 minutes until crispy.
  3. Cube the pressed tofu and toss with cornstarch, sesame seeds, and remaining ½ teaspoon of gochugaru.
  4. Heat 2-3 tablespoons of neutral oil in a skillet over medium-high heat until shimmering.
  5. Add tofu cubes in a single layer and fry for 2-3 minutes on each side until golden brown. Drain on paper towels.
  6. Whisk together yogurt, mayonnaise, sesame oil, rice vinegar, ginger, garlic, and a pinch of salt in a bowl until smooth.
  7. Warm kimchi in a small pan over low heat for a few minutes.
  8. Assemble bowls starting with rice, topped with roasted broccoli, edamame, warm kimchi, and crispy tofu. Drizzle with yogurt sauce and garnish with scallions and sesame seeds.

Nutrition

Serving: 1bowlCalories: 400kcalCarbohydrates: 50gProtein: 20gFat: 15gSaturated Fat: 2gPolyunsaturated Fat: 8gMonounsaturated Fat: 3gSodium: 600mgPotassium: 800mgFiber: 10gSugar: 5gVitamin A: 500IUVitamin C: 60mgCalcium: 200mgIron: 3mg

Notes

Ensure oil is heated properly for frying to get crispy tofu. Adjust sauce ingredients as per taste.

Tried this recipe?

Let us know how it was!

Hearty Kale, Sausage & White Bean Skillet in 30 Minutes

September 2, 2025 by Grace Snow Leave a Comment

As I stood in my kitchen, the savory aroma of sizzling Italian sausage filled the air, instantly transporting me to a cozy Italian eatery. In just 30 minutes, I crafted this hearty Kale, Sausage & White Bean Skillet, a delightful one-pan meal that’s as satisfying as it is simple. With the perfect balance of creamy cannellini beans, vibrant kale, and that splash of fresh lemon, it’s a dish that elevates weeknight dinners without fuss. One of my favorite benefits? Not only does it come together in a snap, but clean-up is a breeze, leaving more time for family and conversation around the table. Are you ready to whip up this comforting classic tonight?

Why is this skillet so special?

Hearty, one-pan meal: This Kale, Sausage & White Bean Skillet is the ultimate solution for busy weeknights, marrying flavor with convenience in just 30 minutes.

Flavor-packed comfort: The savory Italian sausage and creamy beans create a delightful balance, while the fresh kale adds a nutritious crunch.

Versatile and adaptable: Feel free to swap in chicken sausage or even add roasted sweet potatoes for an extra twist!

Easy dish to impress: It's a crowd-pleaser, making it perfect for family gatherings or casual get-togethers.

Quick clean-up: With just one skillet needed, you'll spend less time washing dishes and more time enjoying the meal, just like with my Tuscan White Bean or Skillet Pasta Sun.

Kale, Sausage & White Bean Ingredients

For the Skillet
• 1 lb Italian sausage (spicy or sweet) – Adds protein and flavor; consider using turkey sausage for a leaner option.
• 1 can (15 oz) cannellini beans, drained & rinsed – Provides creaminess and fiber; can substitute with Great Northern or Navy beans if desired.
• 1 small onion, diced – Enhances sweetness and depth; yellow or white onions work beautifully.
• 2-3 garlic cloves, minced – Offers aromatic flavor; adjust quantity based on your preference.
• 4 cups chopped kale (stems removed) – Adds nutrients and heartiness; feel free to substitute with spinach if you prefer.
• 1 tbsp olive oil – Used for cooking; avocado oil serves as a great alternative.
• Salt & black pepper, to taste – Essential for seasoning and balancing flavors.
• Juice of ½ lemon – Brightens the dish; a splash of vinegar can be used instead if lemon is unavailable.

Optional Additions
• Pinch of red pepper flakes – For a touch of heat that pairs wonderfully with the sausage.
• Parmesan cheese for topping – Adds richness and umami; non-negotiable if you're aiming for extra flavor.
• Crusty bread for serving – Perfect for scooping up that hearty dish and truly completes the meal.

Now that you have all the ingredients ready, you're just moments away from enjoying this delightful Kale, Sausage & White Bean Skillet!

Step‑by‑Step Instructions for Kale, Sausage & White Bean Skillet

Step 1: Heat the Skillet
Begin by heating a large skillet over medium heat. Add 1 tablespoon of olive oil and let it warm until shimmering but not smoking. This will create a perfect base for your Kale, Sausage & White Bean Skillet, ensuring that the sausage browns nicely without sticking.

Step 2: Brown the Sausage
Add 1 pound of Italian sausage to the heated skillet, breaking it up into small crumbles with a wooden spoon. Cook for 5-7 minutes, stirring occasionally until the sausage is golden brown and cooked through. If there’s excess fat, drain it off to keep your dish balanced and savory.

Step 3: Soften the Onion
Next, add 1 diced small onion to the skillet, stirring it in with the sausage. Cook for 4-5 minutes, or until the onion becomes translucent and fragrant. This combination of flavors will lay the foundation for your Kale, Sausage & White Bean Skillet, enriching it with sweetness.

Step 4: Add Garlic
Introduce 2-3 minced garlic cloves to the skillet. Sauté for about 1 minute, stirring constantly until the garlic is fragrant and slightly golden. Be careful not to let it burn, as this step elevates the overall flavor profile of your dish.

Step 5: Wilt the Kale
Incorporate 4 cups of chopped kale, along with a pinch of salt, into the skillet mixture. Stir well, allowing the kale to wilt for 3-5 minutes until it becomes vibrant and tender. If needed, add a splash of water to help the greens soften beautifully, melding with the sausage and beans.

Step 6: Incorporate the Beans
Now, stir in 1 can (15 oz) of drained and rinsed cannellini beans. Cook for another 2-3 minutes until the beans are heated through, becoming creamy and delightful with the other ingredients. This step ensures your Kale, Sausage & White Bean Skillet is hearty and nourishing.

Step 7: Finish the Dish
Remove the skillet from heat and season the mixture with salt and black pepper to taste. Squeeze the juice of ½ lemon over the top, brightening the flavors and adding a zesty finish. Serve your Kale, Sausage & White Bean Skillet immediately for a warm, comforting meal.

Expert Tips for Kale, Sausage & White Bean Skillet

  • Perfectly Cooked Sausage: Always break the sausage into small crumbles for even cooking and flavor distribution in the Kale, Sausage & White Bean Skillet.

  • Fresh Ingredients: Use fresh kale and quality Italian sausage for the best flavor; this dish shines with quality components.

  • Avoid Mushy Kale: Remove the stems from kale before adding it to prevent a tough texture; tender greens elevate your meal.

  • Seasoning Balance: Don’t skip the final squeeze of lemon juice—it brightens the dish and balances flavors beautifully.

  • Meal Prep Friendly: For efficiency, brown the sausage and sauté the onions ahead of time, then combine with fresh ingredients when ready to cook.

Make Ahead Options

This Kale, Sausage & White Bean Skillet is perfect for meal prep enthusiasts looking to save time during hectic weekdays! You can brown the sausage and sauté the onions up to 24 hours in advance, refrigerating them in an airtight container. Additionally, you can wash and chop the kale, keeping it fresh in the fridge until you’re ready to cook. When it’s time to enjoy this hearty skillet, simply reheat the sausage mixture in the skillet, add the kale, and incorporate the beans as you follow the final steps. This way, you can savor a delicious, homemade meal without any last-minute hustle, ensuring it's just as delightful as if made fresh!

What to Serve with Kale, Sausage & White Bean Skillet

When you’re ready to turn your comforting skillet into a full meal, consider these delightful pairings that elevate your dining experience.

  • Crusty Bread: This non-negotiable side beckons to be dipped into the savory skillet, soaking up every flavorful bite.

  • Mixed Green Salad: A light salad topped with a tangy vinaigrette balances the hearty elements of the skillet, adding freshness and crunch.

  • Roasted Vegetables: Seasonal roasted veggies provide wonderful textures and vibrant flavors, making for an inviting plate that complements your meal.

  • Garlic Bread: Toasted garlic bread adds an aromatic touch, perfect for scooping up the creamy beans and luscious sausage.

  • Parmesan Shavings: Freshly shaved Parmesan on top enhances the umami flavors, providing a rich finish that makes your dish even more comforting.

  • Chilled White Wine: A crisp Sauvignon Blanc or Pinot Grigio pairs beautifully, cutting through the richness while enhancing the dish’s bright notes.

  • Apple Crisp: End on a sweet note with warm apple crisp, its spiced sweetness providing a delightful contrast to your savory skillet.

  • Lemonade Spritzer: A refreshing lemonade spritzer adds a zingy pop, ensuring your palate stays lively and engaged through every bite.

How to Store and Freeze Kale, Sausage & White Bean Skillet

Fridge: Store leftovers in an airtight container for up to 3 days. Reheat on the stovetop over low heat, adding a splash of water or broth to maintain moisture.

Freezer: While not recommended, you can freeze the dish for up to 2 months. To avoid mushiness, consider freezing only the sausage and beans separately and combining them fresh with kale later.

Reheating: To reheat, thaw any frozen portions in the refrigerator overnight. Warm gently on the stovetop, stirring occasionally, until heated through; add a bit of lemon juice for flavor.

Tip: Enjoy fresh kale in your meal as it doesn't freeze well; plan to cook this hearty Kale, Sausage & White Bean Skillet fresh for the best texture!

Kale, Sausage & White Bean Skillet Variations

Feel free to get creative with this dish and make it your own!

  • Lean Protein: Substitute the Italian sausage with chicken sausage for a lighter option without sacrificing flavor.
  • Different Beans: Swap the cannellini beans for chickpeas or even lentils; both will add a unique twist. Chickpeas will give a nutty flavor, while lentils offer a lovely earthiness.
  • Sweet Potatoes: Add roasted sweet potatoes for a delightful sweetness that complements the savory elements beautifully. Imagine the comforting aroma filling your kitchen!
  • Leafy Green Swap: If kale isn't your favorite, spinach folds in easily and wilts quickly, making it a great, nutritious substitute that's milder in flavor.
  • Extra Crunch: Top with toasted breadcrumbs or crushed nuts for added texture; both bring a delightful crunch that contrasts beautifully with the creamy beans.
  • Spice it Up: For a bolder flavor, incorporate sliced jalapeños or a dash of hot sauce. The heat can elevate the dish and excite the taste buds!
  • Herb Infusion: Fresh herbs like thyme or parsley can breathe new life into the dish. Their vibrant aromas add freshness and depth after cooking.
  • Cheese Lover's Delight: Add a sprinkle of feta or goat cheese instead of Parmesan for a tangy kick that enhances the richness of the skillet. Need more cheesy inspiration? Check out my Coconutty Beans Greens recipe!

Embrace these variations to create a customized experience everyone at the table will love!

Kale, Sausage & White Bean Skillet Recipe FAQs

How do I choose the best kale for this dish?
Absolutely! Look for kale with vibrant, dark green leaves and a crisp texture. Avoid any bunches with yellowing or dark spots all over, as they may be past their prime. The fresher the kale, the better the flavor and texture in your Kale, Sausage & White Bean Skillet.

How should I store leftovers?
You can store any leftover Kale, Sausage & White Bean Skillet in an airtight container in the fridge for up to 3 days. When reheating, try warming it up on the stovetop over low heat, adding a splash of water or broth to keep it moist and delicious.

Can I freeze this dish?
It's not recommended to freeze the entire dish since the kale may turn mushy upon thawing. However, if you must, consider freezing only the sausage and beans separately. You can then combine them fresh with sautéed kale when you’re ready to eat. If you do freeze, store it for up to 2 months.

What if I don’t have Italian sausage?
Very! You can absolutely substitute Italian sausage with chicken sausage or even turkey sausage for a leaner meal. The key is to still keep that savory flavor, so ensure you choose a sausage that’s well-seasoned. Additionally, adding a pinch of red pepper flakes can replicate some of that heat!

Any dietary considerations I should be aware of?
Great question! This dish is naturally gluten-free, but you should always check the labels on your sausage and any broth you might use to ensure there are no allergens. If you're serving this to pets, the dish is not suitable for dogs or cats due to the garlic and onion content; always prepare pet meals separately.

What can I do if my kale doesn’t wilt properly?
If your kale isn’t wilting as you'd like, it may be too tough. Make sure to remove the stems thoroughly before cooking, as they can be quite fibrous. If you find that it's still not tender after adding to the skillet, add a splash of water and cover it momentarily to create steam. This will help soften the kale nicely, ensuring a delicious, hearty texture for your Kale, Sausage & White Bean Skillet!

Kale, Sausage & White Bean Skillet

Hearty Kale, Sausage & White Bean Skillet in 30 Minutes

A delightful Kale, Sausage & White Bean Skillet combines savory Italian sausage, creamy beans, and vibrant kale for a satisfying weeknight dinner.
Print Recipe Pin Recipe
Prep Time 10 minutes mins
Cook Time 20 minutes mins
Total Time 30 minutes mins
Servings: 4 servings
Course: Dinner
Cuisine: Italian
Calories: 350
Ingredients Equipment Method Nutrition Notes

Ingredients
  

For the Skillet
  • 1 lb Italian sausage (spicy or sweet) Consider using turkey sausage for a leaner option.
  • 1 can (15 oz) cannellini beans, drained & rinsed Can substitute with Great Northern or Navy beans.
  • 1 small onion, diced Yellow or white onions work beautifully.
  • 2-3 cloves garlic, minced Adjust quantity based on preference.
  • 4 cups chopped kale (stems removed) Feel free to substitute with spinach.
  • 1 tbsp olive oil Avocado oil serves as a great alternative.
  • Salt & black pepper, to taste Essential for seasoning and balancing flavors.
  • ½ lemon Juice of A splash of vinegar can be used if lemon is unavailable.
Optional Additions
  • Pinch of red pepper flakes For a touch of heat.
  • Parmesan cheese for topping Adds richness and umami.
  • Crusty bread for serving Perfect for scooping up the dish.

Equipment

  • Large skillet

Method
 

Step-by-Step Instructions
  1. Heat the skillet over medium heat and add olive oil, warming until shimmering.
  2. Add Italian sausage, breaking it into crumbles. Cook for 5-7 minutes until golden brown.
  3. Add diced onion and cook for 4-5 minutes until translucent.
  4. Introduce minced garlic and sauté for about 1 minute until fragrant.
  5. Incorporate chopped kale and a pinch of salt, cooking for 3-5 minutes until wilted.
  6. Stir in cannellini beans and cook for another 2-3 minutes until heated through.
  7. Remove from heat and season with salt, black pepper, and lemon juice before serving.

Nutrition

Serving: 1servingCalories: 350kcalCarbohydrates: 30gProtein: 20gFat: 15gSaturated Fat: 4gPolyunsaturated Fat: 1gMonounsaturated Fat: 9gCholesterol: 60mgSodium: 800mgPotassium: 600mgFiber: 8gSugar: 2gVitamin A: 1200IUVitamin C: 70mgCalcium: 100mgIron: 4mg

Notes

Use fresh ingredients for the best flavor and avoid mushy kale by removing stems.

Tried this recipe?

Let us know how it was!

Savoring Japanese Yakisoba with Cabbage & Carrots Tonight

September 2, 2025 by Grace Snow Leave a Comment

The sizzling sound of yakisoba in a hot pan is like music to my ears, instantly transporting me to bustling Japanese street markets. This Quick and Flavorful Japanese Yakisoba with Cabbage & Carrots is your ticket to an easy, delicious dinner that comes together in under 20 minutes. Perfect for busy weeknights, this stir-fry not only highlights vibrant vegetables but also offers flexibility with ingredient swaps, making it delightful for vegetarians and meat lovers alike. Packed with savory, slightly sweet notes, it’s a dish I find myself turning to again and again when I need a comforting meal that doesn’t skimp on flavor. So, why not join me in whipping up this easy and delightful recipe that’s sure to impress everyone at your table? What variations will you try?

Why is Yakisoba a Weeknight Favorite?

Quick Preparation: In just 20 minutes, you can serve a delicious meal that's perfect for busy evenings.

Flavor Explosion: A delightful mix of savory and slightly sweet flavors from the sauce elevates simple ingredients.

Versatile Ingredients: Customize your yakisoba by adding your favorite veggies or proteins—tofu, chicken, or even shrimp, the choice is yours!

Healthy & Fresh: With vibrant cabbage and carrots, this dish is not just tasty but also packed with nutrients.

Boredom Buster: Say goodbye to fast food! This easy recipe is a fun way to bring Japanese street food to your kitchen. Dive into this comforting dish, and if you're seeking more delicious stir-fry options, check out my Fried Shrimp Cabbage or Sweet Potatoes Black. Enjoy!

Japanese Yakisoba with Cabbage & Carrots Ingredients

For the Stir-Fry
• Vegetable Oil – Adds fat for cooking and prevents ingredients from sticking. Substitution: Canola or avocado oil may also be used.
• Yakisoba Noodles – The base of the dish; fresh or instant-style noodles provide a quick cook time. Note: Soak in warm water to loosen if using instant noodles.
• Onion – Adds sweetness and depth of flavor. Preparation: Thinly sliced.
• Carrots – Provides sweetness and texture. Preparation: Julienned to ensure quick cooking.
• Green Cabbage – Contributes bulk and crunch. Preparation: Shredded.
• Green Onions – Offers fresh flavor; used twice in cooking and as garnish. Preparation: Sliced, with white/light green parts for cooking and dark green for garnish.

For the Sauce
• Worcestershire Sauce – Introduces a complex umami flavor. Note: Essential for authenticity; cannot be fully substituted.
• Soy Sauce – Adds saltiness and depth. Suggestion: Use low-sodium for a lighter dish.
• Ketchup – Provides sweetness and balances flavors. Can be adjusted to taste.
• Oyster Sauce – Adds a savory note; optional for vegetarian diets. Note: Vegetarian versions are available.
• Sugar – Balances the savory flavors of the sauce.

Step‑by‑Step Instructions for Japanese Yakisoba with Cabbage & Carrots

Step 1: Prepare the Sauce
In a bowl, whisk together the Worcestershire sauce, soy sauce, ketchup, oyster sauce, and sugar until well combined. This savory mixture is essential for flavoring your Japanese yakisoba. Set the sauce aside, allowing the ingredients to meld while you move on to the noodles and veggies.

Step 2: Soak the Noodles
If you're using instant yakisoba noodles, soak them in warm water for 1–2 minutes until they loosen. Drain well and toss them with a bit of oil to prevent sticking. If you're using fresh noodles, rinse briefly under hot water. This step ensures the noodles cook perfectly in your flavorful stir-fry.

Step 3: Heat the Skillet
Place a large skillet or wok over medium-high heat and wait for faint smoke to rise. It's crucial to preheat the pan adequately to achieve that satisfying sizzle once you add the ingredients. This will keep your vegetables crisp and prevent the noodles from steaming instead of stir-frying.

Step 4: Stir-Fry the Vegetables
Add vegetable oil to the hot skillet, followed by the sliced onions and julienned carrots. Stir-fry for 2–3 minutes until the onions become translucent and the carrots soften slightly. Keep them moving with a spatula or tongs to ensure even cooking and enhance their sweetness before introducing the cabbage.

Step 5: Add Cabbage
Next, add the shredded green cabbage to the skillet. Continue to stir-fry for another 2–3 minutes until the cabbage wilts and becomes tender yet retains a bit of crunch. This vibrant addition provides bulk and texture, balancing the dish beautifully with the other vegetables.

Step 6: Incorporate the Noodles and Sauce
Gently toss the cooked yakisoba noodles into the skillet, then pour the prepared sauce evenly over the mixture. Using tongs or a spatula, ensure everything is coated well. Stir-fry for about 2–4 minutes, allowing the sauce to thicken and envelop the noodles as they get deliciously caramelized.

Step 7: Add Green Onions
Stir in most of the sliced green onions, reserving a handful for garnishing later. This final touch adds freshness and color to your Japanese yakisoba. Keep stirring until everything is mixed thoroughly, ensuring those beautiful flavors meld into each bite.

Step 8: Serve and Garnish
Once everything is hot and beautifully cooked, transfer the yakisoba to serving bowls. Garnish with the reserved green onions and, if desired, a sprinkle of sesame seeds, pickled ginger, or Kewpie mayonnaise for added flavor. Serve immediately while hot, and savor the warmth and tastes of your homemade Japanese yakisoba!

Japanese Yakisoba with Cabbage & Carrots Variations

Feel free to make this recipe your own by experimenting with different ingredients and flavors!

  • Vegetable Medley: Add bell peppers, zucchini, or snow peas for a colorful crunch. Mixing in different vegetables not only enhances the flavor but adds vibrant textures to your dish.
  • Protein-Packed: Toss in tofu, chicken, or shrimp to make it heartier. Simply cube the tofu or chicken, or use precooked shrimp, and stir-fry until cooked through for a satisfying meal.
  • Spicy Kick: Add chili paste or sriracha to the sauce for a fiery twist. Just a dash can lift the flavors and tickle your taste buds, making each bite more exciting!
  • Nutty Flavors: Sprinkle sesame seeds or chopped peanuts for extra nutty depth. Not only does this add an appealing crunch, but it also brings a delightful richness that complements the sauce beautifully.
  • Herbaceous Touch: Incorporate fresh herbs like cilantro or Thai basil for a pop of freshness. Herbs can transform the flavor profile and make each bowl of yakisoba feel like a gourmet dish.
  • Sweet and Sour: Opt for sweet chili sauce in place of ketchup for a tangy twist. The balance of sweetness and heat will elevate your yakisoba to a whole new level.
  • Gluten-Free: Use gluten-free soy sauce and rice noodles as a substitute for traditional yakisoba noodles. This way, you can enjoy the same great taste in a gluten-free way!
  • Leftover Remix: Turn yesterday's yakisoba into a fun fried rice by adding day-old rice to the mix. This twist is a great way to utilize leftovers while keeping the essence of the original dish.

If you're in the mood for more fabulous recipes, why not try my comforting Buffalo Tofu Caesar or a refreshing Chicken Salad Apples? Happy cooking!

How to Store and Freeze Japanese Yakisoba with Cabbage & Carrots

Fridge: Store leftovers in an airtight container and refrigerate for up to 3 days. Reheat gently on the stovetop to prevent overcooking the noodles.

Freezer: For longer storage, freeze in portions using freezer-safe containers. It can last for about 2 months. Thaw overnight in the fridge before reheating.

Reheating: When reheating, add a splash of water or broth to help revive the textures and flavors. Stir-fry over medium heat until warmed through, ensuring it doesn't dry out.

Airtight Packaging: For best results, wrap tightly or use vacuum-sealed bags to prevent freezer burn, preserving the delicious taste of your Japanese yakisoba with cabbage and carrots.

Make Ahead Options

These Japanese Yakisoba with Cabbage & Carrots are perfect for meal prep enthusiasts! You can slice and prep your vegetables, including onions, carrots, and cabbage, up to 3 days in advance. Store them in airtight containers in the fridge to maintain their freshness and crunch. Additionally, the sauce can be mixed and refrigerated for up to 24 hours before use. When you're ready to serve, simply stir-fry the prepped ingredients in a hot skillet, add the soaked noodles, and pour in the sauce. This approach allows you to whip up a delicious, satisfying meal in just minutes, proving that convenience doesn't mean sacrificing flavor!

Expert Tips for Japanese Yakisoba

  • Well-Drained Noodles: Ensure that your noodles are well-drained after soaking to avoid a mushy texture in your Japanese yakisoba.
  • Pan Preheating: Preheating your pan is essential—this avoids steaming the ingredients and helps achieve that delightful stir-fry sizzle.
  • Sauce Consistency: If your sauce appears too watery, keep stir-frying over medium-high heat to evaporate the excess moisture until it thickens beautifully.
  • Worcestershire Essential: For authentic flavor, don’t skip the Worcestershire sauce; it provides a unique depth that enhances your yakisoba.
  • Flexibility with Veggies: Feel free to substitute vegetables like bell peppers or zucchini if you prefer; it’s all about personal taste!

What to Serve with Japanese Yakisoba with Cabbage & Carrots

Enhance your mealtime experience and create a delightful spread that complements the savory flavors of this quick stir-fry.

  • Crispy Tempura: Lightly battered and fried vegetables or shrimp offer a delightful crunch that pairs beautifully with the tenderness of yakisoba.
  • Miso Soup: A warm bowl of miso soup brings a comforting umami flavor, balancing the meal perfectly with its light broth and tofu.
  • Edamame: Fresh, steamed edamame sprinkled with sea salt add a fun texture and a pop of freshness, making it a nutritious side.
  • Pickled Vegetables: Japanese pickles (tsukemono) lend a refreshing tang that enlivens your palate, contrasting beautifully with the savory yakisoba flavors.
  • Steamed Rice: A simple bowl of fluffy jasmine or sticky rice can soak up the delicious sauce, making every bite satisfying and savory.
  • Japanese Beer or Sake: Refreshing beer or warm sake enhances the authentic experience, heightening flavors while offering a comforting touch to your meal.
  • Fruit Salad: A light fruit salad featuring tangy citrus or sweet melon can cleanse the palate after every bite, making it a lovely, refreshing end.
  • Green Salad: A simple green salad with sesame dressing adds a fresh crunch and lightness to balance out the richness of the yakisoba.
  • Chocolate Mochi: Wind down your meal with a sweet treat like chocolate mochi. The chewy texture and sweet filling are delightful after the savory yakisoba.

Japanese Yakisoba with Cabbage & Carrots Recipe FAQs

What kind of yakisoba noodles should I use?
For this recipe, you can opt for either fresh or instant-style yakisoba noodles. If using instant noodles, soak them in warm water for about 1–2 minutes to loosen them up before cooking. Fresh noodles are ready to go after a quick rinse under hot water.

How long can I store leftovers in the fridge?
Store any leftover Japanese Yakisoba in an airtight container in the refrigerator for up to 3 days. When reheating, do it gently over medium heat on the stovetop to avoid overcooking the noodles and maintaining the dish’s vibrant textures.

Can I freeze Japanese Yakisoba, and how?
Absolutely! To freeze your Japanese Yakisoba, portion it into freezer-safe containers or bags. It can last for about 2 months in the freezer. When you're ready to enjoy it again, simply thaw it overnight in the fridge. Reheat in a pan, adding a splash of water or broth to restore moisture as you stir-fry over medium heat.

What if my sauce turns out too watery?
If you find that your sauce is too watery, it's best to continue stir-frying over medium-high heat. This will allow excess moisture to evaporate and thicken the sauce. Keep tossing the noodles and vegetables for optimal flavor distribution. If you prefer a thicker sauce next time, you can also adjust the sugar or soy sauce amounts slightly.

Are there any dietary considerations for this recipe?
Yes, please note that the Worcestershire sauce typically contains anchovies, so it's not suitable for vegetarians. However, you can find vegetarian alternatives in stores, or create a sauce with soy sauce, rice vinegar, and brown sugar as a substitute. Always check ingredient labels for potential allergens if you're serving this dish to guests with dietary restrictions.

What's the best way to enjoy my leftover yakisoba?
The best way to enjoy your leftover Japanese Yakisoba is to simply reheat it gently on the stovetop. Adding a splash of water or vegetable broth during reheating will help revive the dish’s flavors and textures, preventing it from drying out. Enjoy those vibrant, savory bites all over again!

Japanese Yakisoba with Cabbage & Carrots

Savoring Japanese Yakisoba with Cabbage & Carrots Tonight

This Quick and Flavorful Japanese Yakisoba with Cabbage & Carrots offers an easy dinner option.
Print Recipe Pin Recipe
Prep Time 10 minutes mins
Cook Time 10 minutes mins
Total Time 20 minutes mins
Servings: 4 servings
Course: Dinner
Cuisine: Japanese
Calories: 450
Ingredients Equipment Method Nutrition Notes

Ingredients
  

For the Stir-Fry
  • 2 tablespoons Vegetable Oil Can substitute with Canola or avocado oil.
  • 8 oz Yakisoba Noodles Soak in warm water to loosen if using instant noodles.
  • 1 medium Onion Thinly sliced.
  • 1 cup Carrots Julienned.
  • 2 cups Green Cabbage Shredded.
  • 4 stalks Green Onions Sliced; use white/light green for cooking and dark green for garnish.
For the Sauce
  • 2 tablespoons Worcestershire Sauce Essential for authenticity.
  • 2 tablespoons Soy Sauce Use low-sodium for a lighter dish.
  • 2 tablespoons Ketchup Adjust to taste.
  • 1 tablespoon Oyster Sauce Optional for vegetarian diets.
  • 1 teaspoon Sugar Balances savory flavors.

Equipment

  • Skillet
  • Bowl
  • Tongs
  • Spatula

Method
 

Step-by-Step Instructions
  1. In a bowl, whisk together the Worcestershire sauce, soy sauce, ketchup, oyster sauce, and sugar until well combined. Set the sauce aside.
  2. If using instant yakisoba noodles, soak them in warm water for 1–2 minutes until they loosen. Drain well.
  3. Place a large skillet or wok over medium-high heat and wait for faint smoke to rise.
  4. Add vegetable oil, followed by the sliced onions and julienned carrots. Stir-fry for 2–3 minutes until onions are translucent.
  5. Add shredded green cabbage and stir-fry for another 2–3 minutes until it wilts and is tender.
  6. Gently toss in the yakisoba noodles and pour the prepared sauce over the mixture. Stir-fry for 2–4 minutes.
  7. Stir in most of the sliced green onions, reserving some for garnish.
  8. Transfer the yakisoba to serving bowls and garnish with reserved green onions.

Nutrition

Serving: 1plateCalories: 450kcalCarbohydrates: 60gProtein: 10gFat: 20gSaturated Fat: 3gPolyunsaturated Fat: 2gMonounsaturated Fat: 5gSodium: 800mgPotassium: 600mgFiber: 4gSugar: 6gVitamin A: 3500IUVitamin C: 30mgCalcium: 70mgIron: 2mg

Notes

Store leftover yakisoba in an airtight container for up to 3 days. Reheat gently on the stovetop.

Tried this recipe?

Let us know how it was!

Creamy Tomato Risotto with Pan Fried Barramundi Bliss

September 1, 2025 by Grace Snow Leave a Comment

As the aroma of simmering garlic and onions fills the kitchen, I can feel the warmth of comfort food embracing me on a chilly evening. Today, I’m excited to share my recipe for Creamy Tomato Risotto with Pan Fried Barramundi—a dish that perfectly combines satisfying textures and sumptuous flavors. Not only is this seafood recipe a true crowd-pleaser, but it’s also a wonderful way to enjoy sustainable fish while impressing family and friends. The creamy risotto, enhanced by rich fire-roasted tomatoes, comes together effortlessly, creating a delightful meal that’s perfect for cozy dinners or special gatherings. Are you ready to dive into this Italian-inspired dish? Let’s get cooking!

Why is this risotto recipe irresistible?

Comforting Creaminess: The creamy tomato risotto brings warmth and satisfaction to your table, making it a go-to dish for chilly evenings.

Sustainable Choice: Featuring pan-fried barramundi, this recipe highlights responsible eating, allowing you to enjoy a delicious seafood meal guilt-free.

Versatile Variations: Whether you're a fan of spicy flavors or prefer a vegetarian twist, this risotto easily adapts to your taste.

Quick to Prepare: With just a few simple steps, you can create an impressive feast that comes together in under 30 minutes, saving you time without compromising on flavor.

Crowd-Pleaser: Impress friends and family with this delightful combination of rich flavors, making it a perfect dish for gatherings or cozy nights in!

Pair it with a crisp green salad or some crusty bread for an unforgettable meal experience.

Creamy Tomato Risotto Ingredients

For the Risotto
• Arborio Rice – Provides the creamy texture essential for a perfect risotto; you can substitute it with Carnaroli rice for a similar result.
• Fire Roasted Tomatoes – Adds a rich depth and sweetness; fresh tomatoes can be used, but remember to adjust cooking time!
• Parmesan Cheese – Enhances flavor and creaminess; nutritional yeast can be substituted for a dairy-free option.
• Garlic – Infuses the dish with aroma and flavor; use fresh garlic for the best results, but garlic powder works in a pinch.
• Vegetable Broth – Adds overall flavor; you can swap it with chicken broth for a heartier option.
• Onion – Provides sweetness and depth; shallots can make a fine substitute if you're out of onions.
• Butter – Offers richness to the risotto; olive oil can replace it if you prefer a dairy-free version.

For the Barramundi
• Barramundi Fish – A sustainable white fish that cooks quickly and pairs beautifully with the risotto; tilapia makes a great substitute if needed.
• Fresh Basil – Provides a delightful fresh finish; if fresh is unavailable, dried basil can be used instead.

Get ready to enjoy this divine Creamy Tomato Risotto with Pan Fried Barramundi that brightens up any cold evening!

Step‑by‑Step Instructions for Creamy Tomato Risotto with Pan Fried Barramundi

Step 1: Prepare the Risotto Base
Begin by finely chopping one medium onion and two cloves of garlic. In a large skillet, melt two tablespoons of butter over medium heat. Sauté the onion and garlic for about 5 minutes, or until softened and fragrant, stirring occasionally. This aromatic base will complement the creamy tomato risotto beautifully.

Step 2: Toast the Rice
Next, stir in one cup of Arborio rice, allowing it to cook for about 2-3 minutes, ensuring each grain gets coated in the buttery goodness. You'll notice the rice becoming slightly translucent around the edges; this is the perfect time to add depth to your creamy tomato risotto.

Step 3: Incorporate Tomatoes and Broth
Add a 14-ounce can of fire-roasted tomatoes to the skillet, mixing them thoroughly with the rice. Gradually pour in 4 cups of warm vegetable broth, about one cup at a time, stirring frequently. Allow the risotto to absorb the liquid before adding more. Continue this process for about 18-20 minutes until the risotto is creamy and the rice is al dente.

Step 4: Cook the Barramundi
While the risotto cooks, heat a tablespoon of olive oil in a separate non-stick pan over medium-high heat. Once hot, carefully place two barramundi fillets in the pan, skin side down. Sauté for about 4-5 minutes per side, or until golden brown and the fish reaches an internal temperature of 145°F, ensuring it’s flaky and cooked through.

Step 5: Finish Risotto
When the rice is tender and creamy, remove the risotto from heat and stir in half a cup of grated Parmesan cheese. Season with salt and pepper to taste, mixing thoroughly until the risotto is velvety. This enriching step will elevate your creamy tomato risotto to a whole new level of flavor.

Step 6: Plate and Serve
To serve, ladle generous portions of the creamy tomato risotto into warm bowls. Top each bowl with a crispy barramundi fillet and a sprinkle of fresh basil for a burst of color and aroma. The combination of flavors creates a delightful dish that’s both comforting and impressive.

Make Ahead Options

Making Creamy Tomato Risotto with Pan Fried Barramundi ahead of time is a fantastic way to save precious moments during your busy week! You can prepare the risotto base (steps 1 to 3) up to 24 hours in advance and store it in the refrigerator. To maintain its creamy texture, be sure to refrigerate it in an airtight container. When you’re ready to serve, simply reheat it gently over low heat, adding a splash of vegetable broth if needed to loosen it up. As for the barramundi, it’s best cooked fresh, so plan to pan fry it just before serving for the ultimate crispy finish. Enjoy the luxury of a delicious home-cooked meal with minimal stress!

Creamy Tomato Risotto Variations

Feel like putting your own spin on this recipe? Here are some inviting ways to customize your creamy creation!

  • Dairy-Free: Use a plant-based butter and nutritional yeast instead of Parmesan for a creamy and tasty option.
    Explore the wonderful world of flavors with dairy alternatives that give your risotto a new identity!

  • Vegan Delight: Omit the barramundi entirely and enjoy a hearty risotto packed with sautéed mushrooms or spinach.
    This allows the creamy risotto to take center stage while still providing incredible texture and depth to your meal.

  • Citrus Brightness: Add a splash of lemon juice or zest for a refreshing twist that balances the richness.
    The acidity of citrus will amplify the flavors and brighten up your dish beautifully!

  • Seafood Medley: Swap barramundi for shrimp or scallops to create a delightful mix of seafood flavors.
    Cooking with different seafood adds a new dimension and diversifies your risotto experience.

  • Herb Infusion: Mix in fresh herbs like dill or tarragon to elevate the dish with fragrant notes.
    Herbs can transform the flavor profile, making it feel fresh and sophisticated!

  • Nutty Texture: Stir in toasted pine nuts or walnuts for a delightful crunch alongside the creaminess.
    The extra texture will give your risotto a delightful surprise that guests will love!

  • Spicy Twist: Want to heat things up? Infuse some chopped jalapeños or a dash of sriracha for a fiery kick.
    This variation will add depth and warmth, turning your dish into a flavor-packed delight!

  • Italian Sauté: Incorporate sautéed bell peppers and zucchini for a colorful and healthy addition.
    These veggies not only enhance the visual appeal but also provide a lovely sweetness to balance the dish.

Consider pairing this risotto with dishes like Pan Fried Shrimp or a fresh salad on the side to create a wholesome meal. Enjoy exploring these variations to find your perfect creamy tomato risotto!

What to Serve with Creamy Tomato Risotto with Pan Fried Barramundi

A harmonious meal awaits your table, where each dish enhances the creamy delight of risotto and crispy fish.

  • Crispy Garlic Bread: This crunchy delight helps to soak up any extra risotto, making each bite of creamy tomato bliss even more satisfying. A touch of garlic butter enhances the flavors beautifully.

  • Simple Green Salad: A fresh salad with mixed greens, ripe cherry tomatoes, and a light vinaigrette adds a refreshing balance to the rich risotto. The crispness of the lettuce complements the creaminess perfectly.

  • Grilled Asparagus: Tender, slightly charred asparagus provides a delightful crunch and earthy flavor that balances the savory notes of the risotto. Its vibrant green color also brightens up the plate.

  • Lemon-Herb Quinoa: This fluffy, lemon-infused quinoa introduces a zesty kick while maintaining a light texture. It pairs well with the savory tomato and fish, offering a nutritious side.

  • Roasted Brussels Sprouts: These caramelized sprouts bring a nutty flavor and a hint of sweetness, complementing the creamy dish. Their crispy outsides create a pleasing contrast to the risotto.

  • White Wine Spritzer: A light and bubbly drink, such as a white wine spritzer, refreshes the palate and complements the dish's flavors without overwhelming them. Perfect for a delightful dining experience!

  • Tiramisu: Finish the meal with a classic Italian dessert that balances rich flavors with a coffee and cocoa kick. Its creamy layers make for a sweet ending to your delightful gourmet experience.

Expert Tips for Creamy Tomato Risotto

  • Constant Stirring: Always stir your risotto while cooking. This prevents the rice from sticking to the pan and ensures even cooking, achieving that perfect creamy texture.

  • Right Broth Temperature: Use warm vegetable broth during cooking. Adding cold broth can shock the rice and disrupt the creamy consistency of your tomato risotto.

  • Perfect Cheese Mix: For an even creamier risotto, combine both Parmesan cheese and a splash of cream. This adds richness and enhances the overall flavor of the dish.

  • Check Barramundi Temperature: Use a food thermometer to ensure your pan-fried barramundi reaches an internal temperature of 145°F. This guarantees it’s cooked safely while remaining flaky and tender.

  • Flavor Infusion: To boost flavors, consider adding a splash of white wine to the risotto after toasting the rice. This adds depth and complements the creamy tomato risotto beautifully.

How to Store and Freeze Creamy Tomato Risotto

Fridge: Store leftover creamy tomato risotto in an airtight container for up to 3 days. Gently reheat it on the stove or microwave, adding a splash of vegetable broth to restore creaminess.

Freezer: You can freeze risotto for up to 3 months. Allow it to cool completely, then transfer to a freezer-safe container or zip-top bag, removing as much air as possible to prevent freezer burn.

Reheating: When ready to enjoy, thaw the risotto in the fridge overnight, then reheat on the stove with a little broth or water, stirring until warmed through.

Serving Tip: The pan-fried barramundi is best enjoyed fresh, so consider cooking it separately when you're ready to serve the reheated creamy tomato risotto.

Creamy Tomato Risotto with Pan Fried Barramundi Recipe FAQs

How do I choose the best tomatoes for this risotto?
Absolutely! For the best flavor in your creamy tomato risotto, look for fire-roasted tomatoes, which add a delightful depth and sweetness. If you prefer fresh tomatoes, choose ripe, high-quality ones without dark spots or blemishes. Use about 3-4 medium-sized tomatoes, but do remember to adjust your cooking time, as fresh tomatoes need a bit longer to soften and blend into the risotto.

What’s the best way to store leftover risotto?
Very simple! Store any leftover creamy tomato risotto in an airtight container in the fridge for up to 3 days. When reheating, add a splash of vegetable broth or water to loosen it up and bring back that creamy texture. You can gently reheat it on the stovetop over low heat, stirring frequently until warmed through.

Can I freeze creamy tomato risotto?
Of course! Freezing risotto is a great option. Allow it to cool completely, then transfer it to a freezer-safe container or a zip-top bag. Be sure to remove as much air as possible to prevent freezer burn. It can be stored in the freezer for up to 3 months. When you’re ready to enjoy it, thaw in the fridge overnight and reheat on the stove with a splash of broth for the best results.

What should I do if my risotto becomes too thick while cooking?
No worries! If your risotto gets too thick, simply add a touch more warm vegetable broth or water, one tablespoon at a time, stirring frequently until it reaches that desired creamy consistency. Remember, risotto should be slightly loose when served, as it will thicken as it cools.

Is this risotto recipe suitable for those with dietary restrictions?
Absolutely! For dairy-free options, you can replace the Parmesan cheese with nutritional yeast. If you're serving someone with gluten sensitivities, ensure the vegetable broth is certified gluten-free. If you're accommodating vegetarians, simply omit the barramundi and consider adding sautéed seasonal vegetables instead to enhance the dish.

How can I add an extra kick of flavor to the risotto?
Great question! To add an extra layer of flavor, consider tossing in a splash of white wine after toasting the rice. This will enhance the overall taste of your creamy tomato risotto beautifully. Additionally, a sprinkle of fresh herbs or a dash of crushed red pepper flakes can elevate the dish with a bit of heat!

Creamy Tomato Risotto with Pan Fried Barramundi

Creamy Tomato Risotto with Pan Fried Barramundi Bliss

Creamy Tomato Risotto with Pan Fried Barramundi is a delightful dish that combines rich flavors and satisfying textures, perfect for dinner.
Print Recipe Pin Recipe
Prep Time 10 minutes mins
Cook Time 20 minutes mins
Total Time 30 minutes mins
Servings: 4 servings
Course: Dinner
Cuisine: Italian
Calories: 600
Ingredients Equipment Method Nutrition Notes

Ingredients
  

For the Risotto
  • 1 cup Arborio Rice or Carnaroli rice
  • 14 ounces Fire Roasted Tomatoes can substitute with fresh tomatoes
  • 0.5 cup Parmesan Cheese or nutritional yeast for dairy-free
  • 2 cloves Garlic fresh garlic recommended
  • 4 cups Vegetable Broth or chicken broth for a heartier option
  • 1 medium Onion or shallots as a substitute
  • 2 tablespoons Butter or olive oil for dairy-free
For the Barramundi
  • 2 fillets Barramundi Fish or tilapia as a substitute
  • to taste Fresh Basil or dried basil if fresh is unavailable

Equipment

  • Large skillet
  • Non-Stick Pan
  • food thermometer

Method
 

Step-by-Step Instructions
  1. Finely chop one medium onion and two cloves of garlic. In a large skillet, melt two tablespoons of butter over medium heat. Sauté the onion and garlic for about 5 minutes, stirring occasionally.
  2. Stir in one cup of Arborio rice and cook for about 2-3 minutes until slightly translucent. This coats the rice in butter.
  3. Add a 14-ounce can of fire-roasted tomatoes and mix with the rice. Gradually pour in 4 cups of warm vegetable broth, stirring frequently for 18-20 minutes until creamy and al dente.
  4. In a separate non-stick pan, heat one tablespoon of olive oil over medium-high heat. Cook two barramundi fillets for about 4-5 minutes per side until golden brown and cooked through.
  5. Remove the risotto from heat and stir in half a cup of grated Parmesan cheese. Season with salt and pepper, mixing thoroughly until velvety.
  6. Ladle risotto into bowls, top with crispy barramundi fillets and a sprinkle of fresh basil.

Nutrition

Serving: 1servingCalories: 600kcalCarbohydrates: 70gProtein: 25gFat: 20gSaturated Fat: 10gPolyunsaturated Fat: 2gMonounsaturated Fat: 8gCholesterol: 80mgSodium: 800mgPotassium: 800mgFiber: 4gSugar: 6gVitamin A: 10IUVitamin C: 15mgCalcium: 20mgIron: 10mg

Notes

For even creamier risotto, combine both Parmesan cheese and a splash of cream. Stir constantly to prevent sticking during cooking.

Tried this recipe?

Let us know how it was!

Creamy Garlic Herb Mushroom Spaghetti for Cozy Nights

September 1, 2025 by Grace Snow Leave a Comment

As I stood in my kitchen, the delightful aroma of sautéing garlic and mushrooms filled the air, promising a comforting meal ahead. That’s when I decided to whip up my favorite quick dish: Creamy Garlic Herb Mushroom Spaghetti. This recipe is a game changer—not only does it offer a luxurious, creamy texture in just 30 minutes, but it's also packed with rich, buttery flavor that even the busiest weeknights can accommodate. The beauty of this dish lies in its versatility; it’s vegetarian-friendly and can easily adapt to gluten-free or lactose-free diets without sacrificing taste. Whether you’re a seasoned home chef or just beginning your culinary journey, you’ll find joy in making this cozy pasta. Ready to savor a plate of pure comfort? Let's dive into the delightful world of garlic herb mushroom spaghetti together!

Why is this dish a must-try?

Quick Preparation: In just 30 minutes, this spaghetti dish transforms simple ingredients into a gourmet meal, perfect for busy nights.

Indulgent Flavor: Garlicky goodness and buttery textures create a taste sensation that’s hard to resist.

Vegetarian Delight: This recipe is completely meat-free, yet satisfying enough to please even the heartiest of appetites.

Versatile Options: Whether you prefer gluten-free pasta or need a lactose-free sauce, this dish adapts seamlessly to your dietary needs.

Crowd-Pleaser: Perfect for family dinners or a cozy date night, it’s a comforting option everyone will love. Pair it with some Cheesy Garlic Bread for an unforgettable meal!

Garlic Herb Mushroom Spaghetti Ingredients

• Perfectly crafted for your kitchen adventure!

For the Pasta

  • Spaghetti – This is the main carbohydrate; feel free to substitute with gluten-free pasta if needed.

For the Sauce

  • Mushrooms (e.g., baby portabella) – They provide umami flavor and can also be swapped with shiitake or cremini for varied taste.
  • Garlic – Use fresh cloves for optimal aroma; powdered can be a substitute in a pinch.
  • Butter – A rich base that creates creaminess; swap with olive oil for a dairy-free version.
  • Vegetable Broth – Adds moisture and flavor; chicken broth works for non-vegetarian versions.
  • Heavy Cream – Ensures the dish is creamy; coconut cream or cashew cream are great dairy-free alternatives.
  • Herbes de Provence – This blend enhances flavor with herbal notes; you can use Italian seasoning if needed.
  • Salt & Pepper – Essential basic seasonings; adjust to taste for ultimate flavor.

Optional Garnish

  • Fresh Herbs – Enhance presentation and flavor with a sprinkle of parsley or basil before serving.

Elevate your Garlic Herb Mushroom Spaghetti with these delightful ingredients, and let your culinary creativity shine!

Step‑by‑Step Instructions for Creamy Garlic Herb Mushroom Spaghetti

Step 1: Cook Spaghetti
Begin by bringing a large pot of salted water to a rolling boil over high heat. Add the spaghetti and cook according to package instructions until al dente, typically around 8-10 minutes. Remember to reserve about ½ cup of the pasta water before draining the spaghetti in a colander. This starchy water will help create a creamy sauce later.

Step 2: Sauté Mushrooms
In a large skillet, melt 2 tablespoons of butter over medium heat. Once melted, add sliced mushrooms and sauté for about 5-7 minutes, stirring occasionally, until they become golden brown and tender. The mushrooms should shrink and release their moisture, enhancing their flavor. Next, add minced garlic and cook for 1-2 minutes, until fragrant, stirring continuously to prevent burning.

Step 3: Create Sauce
Pour in 1 cup of vegetable broth and 1 cup of heavy cream into the skillet, stirring everything together. Increase the heat slightly and bring the sauce to a gentle simmer. Allow it to simmer for about 5 minutes, stirring occasionally until it thickens slightly and coats the back of a spoon. The creamy garlic herb mushroom spaghetti sauce should be rich and luscious.

Step 4: Combine
Add the drained spaghetti to the skillet with the sauce, tossing everything together to ensure the pasta is thoroughly coated. If the sauce seems too thick, gradually add the reserved pasta water until you reach your desired consistency. This step is vital for achieving that perfect creamy texture that clings beautifully to each strand of spaghetti.

Step 5: Season
Finally, stir in 1-2 teaspoons of herbes de Provence, along with salt and pepper to taste. Make sure to mix well, allowing all the flavors to meld together and enhance the garlic herb mushroom spaghetti. Taste and adjust the seasoning if necessary before serving, and consider garnishing with fresh herbs for an added touch of color and flavor.

Garlic Herb Mushroom Spaghetti Variations

Feel free to explore these delightful variations to customize your creamy garlic herb mushroom spaghetti experience!

  • Lactose-Free: Swap heavy cream for coconut milk or cashew cream for a rich and creamy dairy-free alternative. You'll still enjoy that delectable texture without the lactose.

  • Protein Packed: Add grilled chicken or shrimp for a protein boost. This simple twist transforms the dish into a hearty main course, perfect for satisfying those bigger appetites.

  • Mushroom Medley: Try out different mushrooms like porcini or morels for an earthy flavor upgrade. Mixing varieties will create a richer taste and fascinating texture in your pasta.

  • Herbal Infusion: Experiment with fresh herbs like basil or thyme for an added aromatic touch. Just a few fresh leaves can elevate your dish, making every bite fragrant and exciting.

  • Spicy Kick: For those craving some heat, sprinkle in red pepper flakes while sautéing. This spicy twist brings warmth and zest, perfect for elevating your pasta experience.

  • Healthy Grain: Substitute regular spaghetti with whole wheat or chickpea pasta for added nutrients. These alternatives pack in fiber and protein while maintaining familiarity in flavor.

  • Creamy Mushroom Stroganoff: Turn the dish into a stroganoff style by adding a dash of soy sauce and a splash of white wine during the sauce-making process. It’s a comforting change that packs a punch!

  • Serve with Style: Pair your spaghetti with a colorful salad or delectable grilled mushrooms for a delightful meal. With such a variety of sides, you’ll never run out of ideas for this comforting dish!

What to Serve with Creamy Garlic Herb Mushroom Spaghetti?

Elevate your dining experience by pairing this delicious pasta with delightful sides that complement its rich flavors.

  • Simple Green Salad: A crisp salad dressed with lemon vinaigrette adds brightness, balancing the creamy pasta perfectly.

  • Garlic Bread: The savory crunch of garlic bread is an irresistible accompaniment, perfect for soaking up any leftover sauce.

  • Steamed Broccoli: Lightly steamed broccoli provides a fresh, vibrant contrast and adds a delightful crunch to your meal.

  • Roasted Asparagus: Tender asparagus spears with a drizzle of olive oil serve as a sophisticated side, enhancing the dish's earthy notes.

  • Parmesan Cheese: A sprinkle of freshly grated parmesan adds an extra layer of richness, making each bite more indulgent.

  • Light White Wine: A chilled glass of Sauvignon Blanc harmonizes with the garlic herb flavors, enhancing your dining experience.

  • Lemon Sorbet: For dessert, a refreshing lemon sorbet cleanses the palate after the creamy indulgence, leaving a bright finish.

  • Crusty Italian Bread: Serve with crusty bread for a comforting touch; the texture offers a nice contrast to the silky pasta.

Make Ahead Options

These Creamy Garlic Herb Mushroom Spaghetti are perfect for busy weeknights! You can cook the spaghetti and sauté the mushrooms up to 24 hours in advance, ensuring you have a quick meal ready to go. To prep ahead, just store the cooked spaghetti in an airtight container in the refrigerator and keep the sautéed mushrooms separately; this avoids sogginess and preserves their flavor. When you’re ready to enjoy your meal, simply reheat the mushrooms, add the broth and cream to create the sauce, and toss everything together. This way, your creamy garlic herb mushroom spaghetti remains just as delicious, saving you valuable time in the kitchen!

How to Store and Freeze Garlic Herb Mushroom Spaghetti

Fridge: Store any leftovers in an airtight container for up to 3 days. Make sure the pasta has cooled down before sealing to avoid moisture buildup.

Freezer: For longer storage, place portions of garlic herb mushroom spaghetti in freezer-safe bags or containers. It can be frozen for up to 2 months.

Reheating: When ready to enjoy, thaw overnight in the fridge and reheat gently on the stove with a splash of broth to restore creaminess, ensuring it stays delectable!

Tip: If you plan to freeze, consider slightly undercooking the pasta to prevent it from becoming mushy when reheated.

Expert Tips for Garlic Herb Mushroom Spaghetti

  • Fresh is Best: Use fresh garlic and mushrooms for maximum flavor impact; dried alternatives won't deliver the same richness.

  • Pasta Water Magic: Don’t skip reserving pasta water! It’s critical for adjusting the sauce's consistency, making your garlic herb mushroom spaghetti perfectly creamy.

  • Watch the Heat: Sauté mushrooms over medium heat to avoid burning; too high a temperature can lead to bitter flavors.

  • Taste as You Go: Always taste your sauce before serving. This helps ensure the right balance of seasoning, elevating your garlic herb mushroom spaghetti.

  • Add a Kick: For a spicy twist, consider sprinkling in some red pepper flakes as you sauté the garlic and mushrooms to enhance the dish's depth.

Creamy Garlic Herb Mushroom Spaghetti Recipe FAQs

What type of mushrooms are best for this recipe?
Absolutely! For this creamy garlic herb mushroom spaghetti, I recommend using baby portobello mushrooms for their rich, umami flavor. You can also substitute them with shiitake or cremini mushrooms if you prefer. Make sure they are firm and free of dark spots, as this indicates freshness.

How should I store leftovers?
Very simply! Store any leftover creamy garlic herb mushroom spaghetti in an airtight container in the refrigerator for up to 3 days. Ensure the pasta has cooled down before sealing to prevent moisture buildup, which could make the dish soggy.

Can I freeze this spaghetti?
Of course! To freeze, place portions of your garlic herb mushroom spaghetti in freezer-safe bags or airtight containers. It can be stored in the freezer for up to 2 months. When you're ready to enjoy it, thaw it overnight in the fridge. When reheating on the stove, add a splash of vegetable broth to restore its creamy texture and ensure it's delicious.

What if my dish turns out too thick?
No worries at all! If your creamy garlic herb mushroom spaghetti ends up too thick, simply add a tablespoon or two of reserved pasta water or vegetable broth while stirring it over low heat. This will help loosen the sauce without losing its creamy goodness. Always taste as you go to maintain just the right balance of flavor!

Are there any dietary considerations for the ingredients?
Definitely! This recipe is vegetarian and can be made lactose-free by substituting the heavy cream with coconut cream or cashew cream. Always check for any allergies related to specific ingredients, such as nuts in cashew cream. If you’re cooking for pets, take care to exclude garlic and other harmful ingredients if they're part of the meal preparation.

How can I adjust this recipe for gluten-free diets?
Very easily! To make this creamy garlic herb mushroom spaghetti gluten-free, simply swap out the traditional spaghetti for gluten-free pasta. There are many delicious brands available now, and they work just as well in this recipe, ensuring that everyone can enjoy a comforting plate of pasta!

Garlic Herb Mushroom Spaghetti

Creamy Garlic Herb Mushroom Spaghetti for Cozy Nights

An indulgent and quick Garlic Herb Mushroom Spaghetti that offers a creamy texture in just 30 minutes, perfect for busy weeknights.
Print Recipe Pin Recipe
Prep Time 10 minutes mins
Cook Time 20 minutes mins
Total Time 30 minutes mins
Servings: 4 servings
Course: Dinner
Cuisine: Italian
Calories: 450
Ingredients Equipment Method Nutrition Notes

Ingredients
  

For the Pasta
  • 8 ounces Spaghetti Can substitute with gluten-free pasta
For the Sauce
  • 8 ounces Mushrooms (e.g., baby portabella) Can substitute with shiitake or cremini
  • 4 cloves Garlic Use fresh cloves for optimal aroma
  • 2 tablespoons Butter Can substitute with olive oil for dairy-free
  • 1 cup Vegetable Broth Chicken broth can be used for non-vegetarian
  • 1 cup Heavy Cream Coconut cream or cashew cream are good dairy-free alternatives
  • 1-2 teaspoons Herbes de Provence Can use Italian seasoning if needed
  • Salt & Pepper Adjust to taste
Optional Garnish
  • Fresh Herbs Sprinkle of parsley or basil before serving

Equipment

  • Large pot
  • Colander
  • Large skillet

Method
 

Cooking Instructions
  1. Cook a large pot of salted water and bring it to a rolling boil. Add the spaghetti and cook according to package instructions until al dente, about 8-10 minutes. Reserve ½ cup pasta water before draining.
  2. In a large skillet, melt butter over medium heat. Add sliced mushrooms and sauté for about 5-7 minutes until golden brown. Add minced garlic and cook for an additional 1-2 minutes.
  3. Pour in vegetable broth and heavy cream into the skillet, stir, and bring to a gentle simmer for about 5 minutes until it thickens slightly.
  4. Add drained spaghetti to the skillet, tossing to coat. If too thick, add reserved pasta water until desired consistency is achieved.
  5. Stir in herbes de Provence, salt, and pepper to taste, mixing well before serving.

Nutrition

Serving: 1servingCalories: 450kcalCarbohydrates: 60gProtein: 10gFat: 20gSaturated Fat: 12gPolyunsaturated Fat: 2gMonounsaturated Fat: 5gCholesterol: 50mgSodium: 500mgPotassium: 300mgFiber: 3gSugar: 2gVitamin A: 550IUVitamin C: 5mgCalcium: 50mgIron: 2mg

Notes

Use fresh ingredients for the best flavor. Reserve pasta water for sauce consistency.

Tried this recipe?

Let us know how it was!

Rosemary Goat Cheese Wild Rice: A Cozy Comfort Food Delight

September 1, 2025 by Grace Snow Leave a Comment

As the cool breeze whispers through the trees, there's something comforting about a warm bowl of deliciousness to greet the season. Enter my Rosemary Goat Cheese Wild Rice—a dish that transforms simple ingredients into a cozy culinary hug. With the nutty texture of wild rice paired with the fragrant notes of fresh rosemary and the creamy tang of goat cheese, this wild rice recipe offers a hearty alternative to the usual salads that might leave you wanting more. Not only is it nutritious and satisfying, but it also comes together quickly, making it perfect for a weeknight dinner or a delightful side at your next gathering. Are you ready to discover how this comforting dish can elevate your mealtime? Let’s dive in!

Why will you love this wild rice dish?

Flavorful Harmony: The delightful balance of nutty wild rice, fragrant rosemary, and tangy goat cheese creates a comforting dish that warms the soul.

Quick and Easy: With just a few ingredients, you can whip up this savory recipe in no time, perfect for busy weeknights or impromptu gatherings.

Versatile Options: Whether as a main dish or a complementary side, it pairs beautifully with grilled chicken or fish, and can be customized with your favorite ingredients.

Nutritionally Dense: Packed with fiber and protein, this dish not only satisfies but also nourishes.

For more delicious options, check out my Furikake Fried Rice for another sides that impress!

Rosemary Goat Cheese Wild Rice Ingredients

For the Rice
• Wild Rice – The hearty base of the dish, offering a chewy texture and nutty flavor; for a different bite, you can substitute with brown rice.

For the Vegetables
• Rosemary – Fresh rosemary adds delightful aroma and flavor; if unavailable, dried rosemary can be used in moderation.
• Broccoli – Introduces color and crunch; swap it for spinach if you prefer a softer texture.

For the Creaminess
• Goat Cheese – Provides a creamy, tangy profile; dairy-free eaters can substitute with cashew cheese for a similar taste.
• Butter (optional) – Enhances richness and flavor; for a lighter dish, use olive oil instead.

Step‑by‑Step Instructions for Rosemary Goat Cheese Wild Rice

Step 1: Cook the Wild Rice
Begin by rinsing 1 cup of wild rice under cold water. In a medium saucepan, combine the wild rice with 3 cups of water and a pinch of salt. Bring to a boil, then reduce to a simmer, covering the pot. Cook for about 45 minutes, or until the rice is tender and has absorbed most of the water. Fluff the rice with a fork before moving to the next step.

Step 2: Sauté the Broccoli
While the wild rice cooks, heat 1 tablespoon of olive oil in a large skillet over medium heat. Add 2 cups of chopped fresh broccoli and sauté for about 5–7 minutes, until the broccoli is bright green and tender-crisp. Stir occasionally to ensure even cooking and remove from heat once done. This step adds a delightful crunch to your Rosemary Goat Cheese Wild Rice.

Step 3: Combine the Ingredients
In a large mixing bowl, combine the cooked wild rice and sautéed broccoli. Add 2 tablespoons of freshly chopped rosemary to the mixture, stirring gently to combine. This blend infuses the wild rice recipe with irresistible flavors, ensuring that each bite is packed with earthy herbs and vibrant colors.

Step 4: Fold in the Goat Cheese
Crumble 4 ounces of goat cheese over the wild rice and broccoli mixture. Using a spatula, gently fold in the cheese until it begins to melt and coat the rice evenly. Aim for a creamy texture in your Rosemary Goat Cheese Wild Rice, as the warm rice will help the cheese incorporate beautifully.

Step 5: Add Optional Butter
For an extra touch of richness, melt 1 tablespoon of butter in the skillet over low heat and drizzle it over the warm grain mixture. Carefully combine everything, ensuring the buttery goodness envelops the wild rice evenly. This optional step enhances the overall flavor, making your dish even more comforting and delicious.

Storage Tips for Rosemary Goat Cheese Wild Rice

  • Fridge: Store any leftover rosemary goat cheese wild rice in an airtight container in the refrigerator for up to 3 days to maintain freshness and flavor.

  • Freezer: For longer storage, you can freeze the wild rice dish in portions. Place in freezer-safe containers and enjoy within 2–3 months for best quality.

  • Reheating: To reheat, thaw overnight in the fridge if frozen, then warm in a skillet over low heat. Add a splash of water or broth to retain creaminess while reheating.

  • Room Temperature: It's best to avoid keeping the dish at room temperature for more than 2 hours to prevent spoilage.

Rosemary Goat Cheese Wild Rice Variations

Embrace your creativity and let's personalize this warm dish to suit your taste buds!

  • Quinoa Base: Substitute wild rice with quinoa for a lighter texture that’s equally delicious. This nutty grain packs a punch of protein, making it a perfect alternative.

  • Herb Swap: Try using fresh thyme or sage instead of rosemary for a unique flavor twist. Both herbs bring their distinct essence, adding a new layer of warmth to the dish.

  • Nutty Crunch: Add toasted almonds or walnuts for an irresistible crunch. These nuts not only enhance the texture but also contribute a savory note that's simply delightful.

  • Veggie Addition: Toss in roasted sweet potatoes or butternut squash for a touch of sweetness. This not only adds color but also a hearty feel that pairs beautifully with the creaminess of goat cheese.

  • Dairy-Free Delight: Use cashew cheese instead of goat cheese for a creamy dairy-free option. The slight nuttiness of cashew cheese harmonizes with the wild rice, ensuring no one misses out!

  • Spicy Kick: Add a pinch of red pepper flakes or a dash of hot sauce for a fiery boost. The heat contrasts wonderfully with the creaminess, turning up the flavor dial!

  • Fruity Touch: Incorporate dried cranberries or cherries for a sweet-tart burst. This addition perfectly complements the savory elements while giving your dish a beautiful pop of color.

  • Savory Variation: For extra depth, consider mixing in sautéed mushrooms. The earthy flavors of mushrooms enhance the overall dish, creating a symphony of textures and tastes.

For more ideas, don’t miss out on my Potato Blue Cheese for a creative twist on comfort food!

Expert Tips for Rosemary Goat Cheese Wild Rice

  • Wild Rice Cooking Time: Ensure to monitor the cooking time; overcooking can lead to mushy rice. Aim for tender yet chewy grains for the perfect wild rice recipe.

  • Fresh vs. Dried Rosemary: Always prefer fresh rosemary when available, as it offers more robust flavor. If using dried, remember that it’s more potent, so use sparingly.

  • Goat Cheese Quality: Opt for high-quality goat cheese to elevate the dish's flavor. The creaminess can dramatically change based on the quality you choose.

  • Texture Variation: To add crunch, consider folding in toasted nuts like almonds or walnuts before serving. It enhances the texture of your rosemary goat cheese wild rice.

  • Serving Temperature: Serve this dish warm for the best taste experience. Reheating may dull the creamy texture, so enjoy it fresh for maximum satisfaction.

Make Ahead Options

These Rosemary Goat Cheese Wild Rice bowls are perfect for meal prep and can save you time during busy weeknights! You can make the wild rice up to 24 hours in advance and store it in an airtight container in the refrigerator. Additionally, sauté the broccoli ahead of time; this will maintain its color and crunch for about 3 days. When you're ready to enjoy, simply reheat the wild rice mixture in a skillet over medium heat, fold in the sautéed broccoli and goat cheese, and allow everything to warm through. This way, you'll have a delicious and satisfying meal with minimal effort!

What to Serve with Rosemary Goat Cheese Wild Rice

Transform your delightful wild rice dish into a complete meal with these thoughtful pairings that accentuate its beautiful flavors.

  • Grilled Chicken: The savory, smoky notes from grilled chicken complement the creamy goat cheese, making it a protein-rich pairing.

  • Roasted Salmon: A luxurious pairing, the richness of salmon enhances the earthy tones of rosemary herb in the wild rice.

  • Garlic Bread: Crunchy on the outside and soft on the inside, this buttery delight adds a comforting touch to your dining experience.

  • Steamed Asparagus: Freshly steamed asparagus brings a vibrant green color and textural contrast, enhancing the dish's nourishing appeal.

  • Arugula Salad: A light arugula salad with a lemon vinaigrette introduces a zesty freshness that balances the creaminess of the goat cheese.

  • Toasted Pecans: Adding toasted pecans provides a delightful crunch while complementing the nutty flavor profile of wild rice beautifully.

For a truly cozy meal, consider pairing with a glass of crisp white wine or a warm spiced cider. A tart fruit tart will also serenade your sweet tooth, rounding off the meal with light, delightful notes!

Rosemary Goat Cheese Wild Rice Recipe FAQs

What type of wild rice should I use?
When selecting wild rice for this recipe, look for a blend that has a robust nutty flavor and whole grains. I typically prefer brands that offer long grains, as they maintain a lovely chewy texture. If you can’t find wild rice, you can substitute with brown rice, though the cooking time will be different—about 30 to 40 minutes instead of 45.

How should I store leftover rosemary goat cheese wild rice?
For optimal freshness, store any leftovers in an airtight container in the refrigerator. They will stay good for up to 3 days. Just remember to let it cool to room temperature before sealing it. If you find you're not going to eat it in that time, you can extend its life by freezing it.

Can I freeze rosemary goat cheese wild rice?
Absolutely! To freeze, let the dish cool completely, then portion it into freezer-safe containers or bags. This way, you can enjoy it at your convenience. It's best consumed within 2-3 months for the best flavor. When you're ready to eat, just thaw it overnight in the fridge, then reheat in a skillet with a splash of water to keep it moist.

Why is my wild rice mushy?
Mushy wild rice is often a result of overcooking. To avoid this, check the rice around the 40-minute mark and taste for tenderness—it should still have a slight chew. A good rule of thumb is to follow the package instructions closely while keeping an eye on it. If it appears to absorb all the water but isn't tender yet, add a bit more water and continue cooking.

Is this recipe suitable for a dairy-free diet?
Yes! If you’re looking for a dairy-free alternative, you can substitute the goat cheese with cashew cheese or another dairy-free cheese of your choice. This will still give you that creamy texture without compromising flavor. Just make sure to check the labels for any allergens if you have specific dietary restrictions.

Can I make this dish ahead of time?
Certainly! You can prepare the entire dish in advance—just hold off on adding the goat cheese until you’re ready to serve. Store the completed dish in the fridge for up to 3 days. When you're ready to enjoy, reheat it on the stovetop, stirring in the cheese until it melts and blends, ensuring a delightful experience every time.

Rosemary Goat Cheese Wild Rice

Rosemary Goat Cheese Wild Rice: A Cozy Comfort Food Delight

Rosemary Goat Cheese Wild Rice is a comforting dish with nutty wild rice, fragrant rosemary, and creamy goat cheese, perfect for nourishing weeknight dinners.
Print Recipe Pin Recipe
Prep Time 10 minutes mins
Cook Time 45 minutes mins
Total Time 55 minutes mins
Servings: 4 servings
Course: Dinner
Cuisine: American
Calories: 350
Ingredients Equipment Method Nutrition Notes

Ingredients
  

For the Rice
  • 1 cup wild rice or substitute with brown rice
For the Vegetables
  • 2 cups broccoli or swap with spinach
  • 2 tablespoons fresh rosemary or use dried rosemary in moderation
For the Creaminess
  • 4 ounces goat cheese or substitute with cashew cheese for dairy-free
  • 1 tablespoon butter optional; use olive oil for a lighter alternative

Equipment

  • Medium saucepan
  • Large skillet
  • Mixing Bowl
  • Spatula

Method
 

Step-by-Step Instructions
  1. Rinse 1 cup of wild rice under cold water. In a medium saucepan, combine the wild rice with 3 cups of water and a pinch of salt. Bring to a boil, then reduce to a simmer, covering the pot. Cook for about 45 minutes, or until the rice is tender and has absorbed most of the water. Fluff the rice with a fork before moving to the next step.
  2. While the wild rice cooks, heat 1 tablespoon of olive oil in a large skillet over medium heat. Add 2 cups of chopped fresh broccoli and sauté for about 5–7 minutes, until the broccoli is bright green and tender-crisp. Stir occasionally to ensure even cooking and remove from heat once done.
  3. In a large mixing bowl, combine the cooked wild rice and sautéed broccoli. Add 2 tablespoons of freshly chopped rosemary to the mixture, stirring gently to combine.
  4. Crumble 4 ounces of goat cheese over the wild rice and broccoli mixture. Using a spatula, gently fold in the cheese until it begins to melt and coat the rice evenly.
  5. For an extra touch of richness, melt 1 tablespoon of butter in the skillet over low heat and drizzle it over the warm grain mixture. Carefully combine everything, ensuring the buttery goodness envelops the wild rice evenly.

Nutrition

Serving: 1servingCalories: 350kcalCarbohydrates: 40gProtein: 12gFat: 15gSaturated Fat: 8gPolyunsaturated Fat: 1gMonounsaturated Fat: 6gCholesterol: 30mgSodium: 250mgPotassium: 400mgFiber: 5gSugar: 2gVitamin A: 400IUVitamin C: 60mgCalcium: 150mgIron: 2mg

Notes

Serve this dish warm for the best taste experience. For variation, consider folding in toasted nuts like almonds or walnuts before serving.

Tried this recipe?

Let us know how it was!

Braised Short Ribs with Charred Scallion Risotto for Comfort

August 28, 2025 by Grace Snow Leave a Comment

The aroma hit me like a warm embrace, wrapping me in its savory embrace as I walked into the kitchen. Braised Short Ribs with Charred Scallion Risotto is not just a meal; it’s an experience, transporting your senses with its melt-in-your-mouth tenderness and rich, comforting flavors. What I adore about this dish is how effortlessly it transforms any ordinary evening into something special, making it perfect for cozy nights in or impressing friends at gatherings. Plus, it offers a gluten-free option to accommodate all dinner guests! Trust me, the creamy risotto paired with smoky scallions takes comfort food to a whole new level. Are you ready to indulge in a plateful of heartfelt goodness? Let’s dive into the recipe!

Why Are Braised Short Ribs So Irresistible?

Comforting and homey, this dish is perfect for cozy nights, warming not just your palate but your soul. Flavor-packed with slow-braised beef, it boasts tender meat that melts in your mouth, complemented by creamy risotto. Quick prep, with just a few steps required, means that you can impress your guests without the stress! Versatile, you can serve it on special occasions or simply as a comforting weeknight dinner. Plus, its gluten-free option ensures that everyone can enjoy it, making it an all-around crowd-pleaser! If you love comforting dishes like Chicken Salad Apples or Buffalo Tofu Caesar, then this recipe is a must-try!

Braised Short Ribs Ingredients

• This recipe for braised short ribs with charred scallion risotto is sure to warm your heart!

For the Ribs

  • Bone-in Beef Short Ribs – The star of the dish; rich, flavorful meat that becomes incredibly tender during the braising process.
  • Oil (Canola or Avocado) – Perfect for searing; avocado oil is a great choice for its high smoke point.
  • All-Purpose Flour – A light coating for browning; rice flour can be used for a gluten-free option.
  • Beef or Chicken Stock – Adds moisture and depth; using homemade stock enhances the dish’s richness.
  • Salt & Pepper – Essential seasonings that highlight the meat's natural flavors.

For the Risotto

  • Arborio Rice – Key for creamy risotto, thanks to its high starch content; Carnaroli rice can be substituted for a firmer texture.
  • Unsalted Butter – Brings richness and a velvety texture; substitute with olive oil for a dairy-free version.
  • Grated Parmesan Cheese – Adds a salty depth; for a dairy-free option, try using nutritional yeast.
  • Green Onions (Scallions) – Infuse freshness and sweetness when charred; leeks or shallots make suitable alternatives.
  • Hot Stock (Beef or Chicken) – Gradually added to the risotto for that creamy consistency; always keep it hot for the best results.

Get ready to assemble these delightful ingredients and create a dish that's bound to impress and satisfy!

Step‑by‑Step Instructions for Braised Short Ribs with Charred Scallion Risotto

Step 1: Sear the Ribs
Preheat your oven to 325°F (160°C). Pat the bone-in beef short ribs dry, then season them generously with salt and pepper before dusting lightly with all-purpose flour. In a Dutch oven, heat a few tablespoons of oil over medium-high heat. Sear the ribs for 3-4 minutes on each side until they develop a rich, deep-brown crust. Once browned, remove the ribs and set them aside.

Step 2: Braise the Ribs
In the same Dutch oven, reduce the heat to medium and deglaze the pot by pouring in 1 cup of beef or chicken stock, scraping up all the delicious browned bits from the bottom. Return the ribs to the pot, adding enough stock to cover three-quarters of the meat. Cover with a lid and braise in the preheated oven for 2.5-3 hours, or until the ribs are fork-tender and irresistible.

Step 3: Char the Scallions
While the ribs are braising, prepare the charred scallions. Preheat your grill or broiler to high. Place the green onions directly on the grill or on a baking sheet under the broiler. Cook for 3-4 minutes, turning occasionally, until they're blistered and charred. Remove from heat and roughly chop the scallions to enhance their smoky flavor for your risotto.

Step 4: Make the Risotto
In a large saucepan, heat a splash of oil over medium heat and add Arborio rice, stirring constantly for about 2 minutes until the rice is lightly toasted. Gradually pour in hot beef or chicken stock, one ladle at a time, stirring continuously for about 25 minutes. The key here is to ensure each addition is absorbed before adding more. Once creamy, remove from heat and stir in butter, grated Parmesan, and the charred scallions for that comforting touch.

Step 5: Serve the Dish
To serve your Braised Short Ribs with Charred Scallion Risotto, spoon the creamy risotto into shallow bowls. Top generously with the tender short ribs and drizzle some of the reduced braising liquid over the top. This delightful combination of flavors and textures is sure to create a heartwarming dining experience that everyone will love!

Make Ahead Options

If you’re looking to streamline your cooking for the week, Braised Short Ribs with Charred Scallion Risotto is a fantastic option! You can easily braise the short ribs up to 2 days in advance; simply allow them to cool in their liquid before refrigerating. This method helps to enhance the flavors while keeping the meat moist. The risotto, however, is best made fresh to avoid becoming gluey. When you’re ready to serve, reheat the short ribs gently in their braising liquid and prepare the risotto from scratch for that creamy texture. With this prep strategy, you’ll enjoy a delicious, stress-free meal that tastes just as wonderful as if it were freshly made!

How to Store and Freeze Braised Short Ribs with Charred Scallion Risotto

Fridge: Store leftover braised short ribs in an airtight container for up to 3 days. Keep the risotto separate to maintain its creamy texture.

Freezer: For longer storage, freeze the short ribs in their braising liquid for up to 3 months. Risotto is best prepared fresh as it can become gluey when frozen.

Reheating: Reheat the ribs gently on the stovetop over low heat, adding a splash of stock if needed. Reheat the risotto slowly, adding a little extra hot broth or water to restore creaminess.

Make-Ahead Tips: Braise the short ribs up to 2 days in advance; just store them in their liquid for maximum flavor retention.

What to Serve with Braised Short Ribs with Charred Scallion Risotto

Elevate your dining experience with delectable sides that harmonize beautifully and complement the rich flavors of your main dish.

  • Crisp Garden Salad: A refreshing mix of greens and vegetables adds a crunch that balances the meat’s richness and creamy risotto.

  • Garlic Roasted Vegetables: Roasted carrots, Brussels sprouts, and potatoes bring earthy flavors, enhancing the savory notes of the short ribs.

  • Creamy Mashed Potatoes: Silky potatoes provide a comforting contrast to the tender ribs, offering a luscious texture to savor with each bite.

  • Herbed Bread Rolls: These warm rolls are perfect for mopping up sauce, making every last bit of the braising liquid unforgettable.

  • Steamed Asparagus: Bright green asparagus adds a fresh, lightly crisp element, providing a vibrant contrast to the hearty dish.

  • Red Wine Pairing: A glass of full-bodied red wine elevates the meal, pairing wonderfully with the bold flavors of the short ribs.

  • Chocolate Molten Cake: End on a sweet note with a rich dessert that complements the savory dinner, offering a spectacular finish to your cozy meal.

Expert Tips for Braised Short Ribs

  • Dry Ribs First: Ensure the ribs are thoroughly dried before searing to get that beautiful caramelization, which enhances the overall flavor.

  • Check for Tenderness: If the ribs aren't falling apart after the initial braising time, don't hesitate to continue braising. They may need an extra hour for that perfect tenderness.

  • Instant Pot Option: For a speedier approach, consider utilizing an Instant Pot. Cook on high pressure for about 45 minutes to achieve tender, flavorful braised short ribs.

  • Add Stock Gradually: When making the risotto, ensure to add the hot stock slowly—this helps achieve that creamy consistency crucial for the perfect Braised Short Ribs with Charred Scallion Risotto.

  • Avoid Cold Stock: If you’re aiming for a smooth risotto, never add cold stock; it shocks the rice and disrupts the cooking process.

  • Serve Fresh: For the best experience, serve the risotto right after making it. Leftovers can become gummy, so prepare it fresh if possible.

Braised Short Ribs with Charred Scallion Risotto Variations

Feel free to explore these delightful twists on the classic dish that will inspire your culinary creativity!

  • Slow Cooker Option: Transfer seared ribs to a slow cooker, adding stock and cook on low for 8 hours for easy, tender meat that’s perfect for busy days.

  • Add Flavor: Mix in a tablespoon of tomato paste or soy sauce to the braising liquid for a depth of umami that elevates the overall flavor profile.

  • Dairy-Free Adjustments: Swap out the unsalted butter for olive oil and use nutritional yeast instead of Parmesan cheese to keep it rich yet dairy-free.

  • Spicy Kick: For those who crave heat, sprinkle in a pinch of red pepper flakes when making the risotto or serve with a bit of sriracha on top.

  • Herb Boost: Stir in fresh herbs like parsley or thyme at the end of cooking to brighten up the rich flavors and add a lovely aromatic touch.

  • Vegetable Risotto: Consider adding sautéed mushrooms, zucchini, or peas to your risotto for a boost of nutrition and flavor, making it even heartier.

  • Red Wine Braising: For an even deeper flavor, replace half of the stock with a robust red wine during the braising process. Just let it cook down to enhance that rich taste!

  • Grain Swap: If you're looking for a twist on texture, try substituting Arborio rice with farro or barley for a nutty flavor and a chewy bite that complements the ribs beautifully.

Feel free to pair your delicious creation with a crisp salad or a side of roasted vegetables for well-rounded meals that everyone will adore!

Braised Short Ribs with Charred Scallion Risotto Recipe FAQs

How do I choose the right beef short ribs?
Absolutely! Look for short ribs with good marbling; the fat will melt during cooking, ensuring tenderness and flavor. Fresh ribs will have a bright red color and moist appearance. Stay away from any that have dark spots or a dry look, as these can indicate spoilage.

How should I store leftovers?
After enjoying your delightful meal, store your leftover braised short ribs in an airtight container in the fridge for up to 3 days. For the best results, keep the risotto separate to prevent it from becoming gluey and losing its creamy texture.

Can I freeze the braised short ribs?
Yes, you can! To freeze Braised Short Ribs with Charred Scallion Risotto, place the ribs in an airtight container along with their braising liquid. They can be frozen for up to 3 months. I recommend thawing the ribs overnight in the fridge before reheating. However, avoid freezing the risotto as it doesn't hold up well; it’s much better made fresh.

What should I do if my risotto is too sticky?
If your risotto turns out too gluey, don’t worry! You can try adding a splash of warm broth or water while stirring gently, which can help loosen it up. For future efforts, remember to add the stock gradually, allowing each addition to absorb before adding more.

Are there any dietary considerations for this recipe?
Definitely! This recipe can easily accommodate dietary restrictions. For a gluten-free option, use rice flour instead of all-purpose flour. If you're looking to make it dairy-free, substitute the butter with olive oil and the Parmesan with nutritional yeast. As for pets, the ingredients are not safe for dogs due to the rich seasoning and fats, so be sure to keep them away from leftovers.

What is the best way to reheat the short ribs?
To reheat your delicious Braised Short Ribs, gently warm them in a saucepan over low heat, adding a splash of their braising liquid to keep them moist and flavorful. This method allows the flavors to re-infuse into the meat, making each bite as tender and juicy as when you first cooked them!

Braised Short Ribs with Charred Scallion Risotto

Braised Short Ribs with Charred Scallion Risotto for Comfort

Braised Short Ribs with Charred Scallion Risotto is a comforting dish with melt-in-your-mouth tenderness and rich flavors.
Print Recipe Pin Recipe
Prep Time 15 minutes mins
Cook Time 3 hours hrs
Total Time 3 hours hrs 15 minutes mins
Servings: 4 servings
Course: Dinner
Cuisine: American
Calories: 850
Ingredients Equipment Method Nutrition Notes

Ingredients
  

For the Ribs
  • 4 pieces Bone-in Beef Short Ribs Rich, flavorful meat
  • 2 tablespoons Oil (Canola or Avocado) For searing
  • 1/4 cup All-Purpose Flour For browning
  • 3 cups Beef or Chicken Stock Adds moisture and depth
  • 1 teaspoon Salt
  • 1 teaspoon Pepper
For the Risotto
  • 1 cup Arborio Rice Key for creamy risotto
  • 2 tablespoons Unsalted Butter Brings richness
  • 1/2 cup Grated Parmesan Cheese For salty depth
  • 4 pieces Green Onions (Scallions) To be charred
  • 4 cups Hot Stock (Beef or Chicken) For creamy consistency

Equipment

  • Dutch oven
  • Grill or broiler
  • Large saucepan

Method
 

Step-by-Step Instructions
  1. Preheat your oven to 325°F (160°C). Pat the bone-in beef short ribs dry, then season them generously with salt and pepper before dusting lightly with all-purpose flour.
  2. In a Dutch oven, heat a few tablespoons of oil over medium-high heat. Sear the ribs for 3-4 minutes on each side until they develop a rich, deep-brown crust.
  3. Once browned, remove the ribs and set them aside. In the same Dutch oven, reduce the heat to medium and deglaze the pot by pouring in 1 cup of beef or chicken stock.
  4. Return the ribs to the pot, adding enough stock to cover three-quarters of the meat. Cover with a lid and braise in the preheated oven for 2.5-3 hours.
  5. While the ribs are braising, prepare the charred scallions. Preheat your grill or broiler to high.
  6. Place the green onions directly on the grill or on a baking sheet under the broiler. Cook for 3-4 minutes until they're blistered and charred.
  7. Remove from heat and roughly chop the scallions. In a large saucepan, heat a splash of oil over medium heat and add Arborio rice.
  8. Stir constantly for about 2 minutes until the rice is lightly toasted. Gradually pour in hot beef or chicken stock, one ladle at a time, stirring continuously for about 25 minutes.
  9. Once creamy, remove from heat and stir in butter, grated Parmesan, and the charred scallions.
  10. To serve, spoon the creamy risotto into shallow bowls. Top generously with the tender short ribs and drizzle some of the reduced braising liquid over the top.

Nutrition

Serving: 1servingCalories: 850kcalCarbohydrates: 50gProtein: 60gFat: 40gSaturated Fat: 15gPolyunsaturated Fat: 5gMonounsaturated Fat: 20gCholesterol: 120mgSodium: 800mgPotassium: 900mgFiber: 3gSugar: 2gVitamin A: 500IUVitamin C: 10mgCalcium: 150mgIron: 4mg

Notes

Serve the risotto fresh for the best experience; leftovers can become gummy.

Tried this recipe?

Let us know how it was!
  • « Previous Page
  • 1
  • …
  • 61
  • 62
  • 63
  • 64
  • 65
  • …
  • 71
  • Next Page »

Welcome!

Hi, I’m Grace, a Sydney-based home cook with a passion for bold flavors and trending ingredients. Whether you’re a busy beginner or a seasoned foodie, you’ll find dishes here that are fresh, fun, and full of flavor.

More about me

Popular Recipes

  • Mediterranean Chicken Zucchini Bake
    Mediterranean Chicken Zucchini Bake: Flavorful & Easy One-Dish Delight
  • Mediterranean Chicken Zucchini Bake That's Bursting with Flavor
  • Tomato Zucchini Pasta
    Tomato Zucchini Pasta: A Vibrant Summer Classic You’ll Love
  • Cheesy Zucchini Breadsticks
    Cheesy Zucchini Breadsticks That Won’t Ruin Your Diet

Footer

↑ back to top

About

  • Privacy Policy
  • Disclaimer
  • Terms & Conditions

Newsletter

  • Sign Up! for emails and updates

Contact

  • About me
  • Contact me

Copyright © 2025 TastyTrendIngredients