tastytrendingredients

  • Home
  • Recipes
    • Appetizers
    • Breakfast
    • Dessert
    • Dinner
    • Drinks
    • Salads
    • Snacks
    • Soups
  • About me
  • Contact me
menu icon
go to homepage
  • Home
  • Recipes
    • Appetizers
    • Breakfast
    • Dessert
    • Dinner
    • Drinks
    • Salads
    • Snacks
    • Soups
  • About me
  • Contact me
search icon
Homepage link
  • Home
  • Recipes
    • Appetizers
    • Breakfast
    • Dessert
    • Dinner
    • Drinks
    • Salads
    • Snacks
    • Soups
  • About me
  • Contact me
×

Decadent Chocolate Raspberry Cupcakes with Creamy Ganache

February 12, 2026 by Grace Snow Leave a Comment

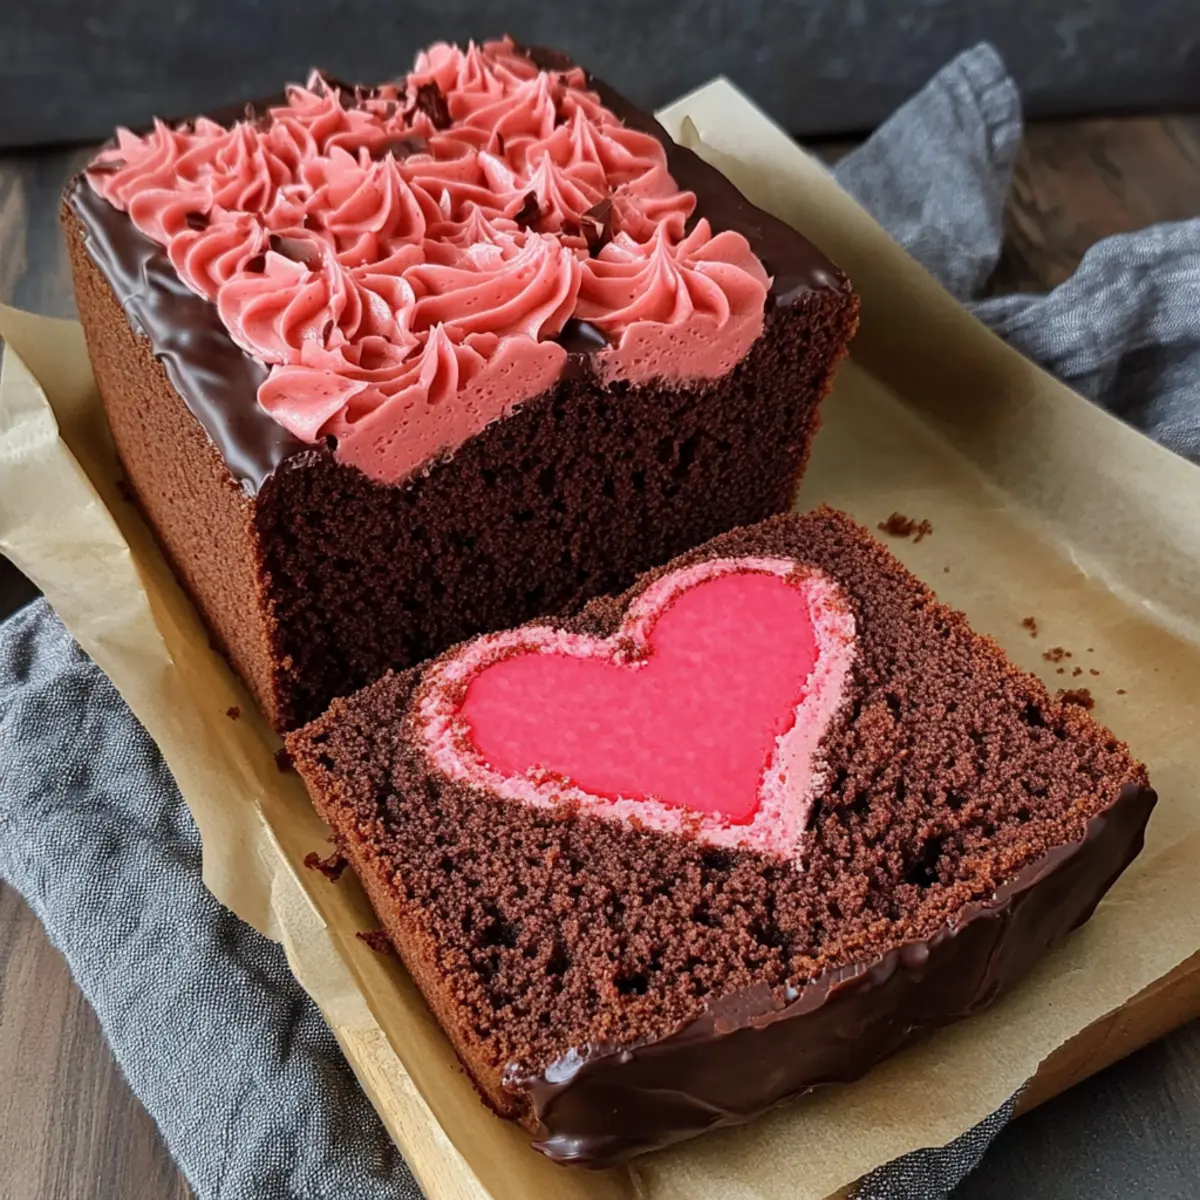
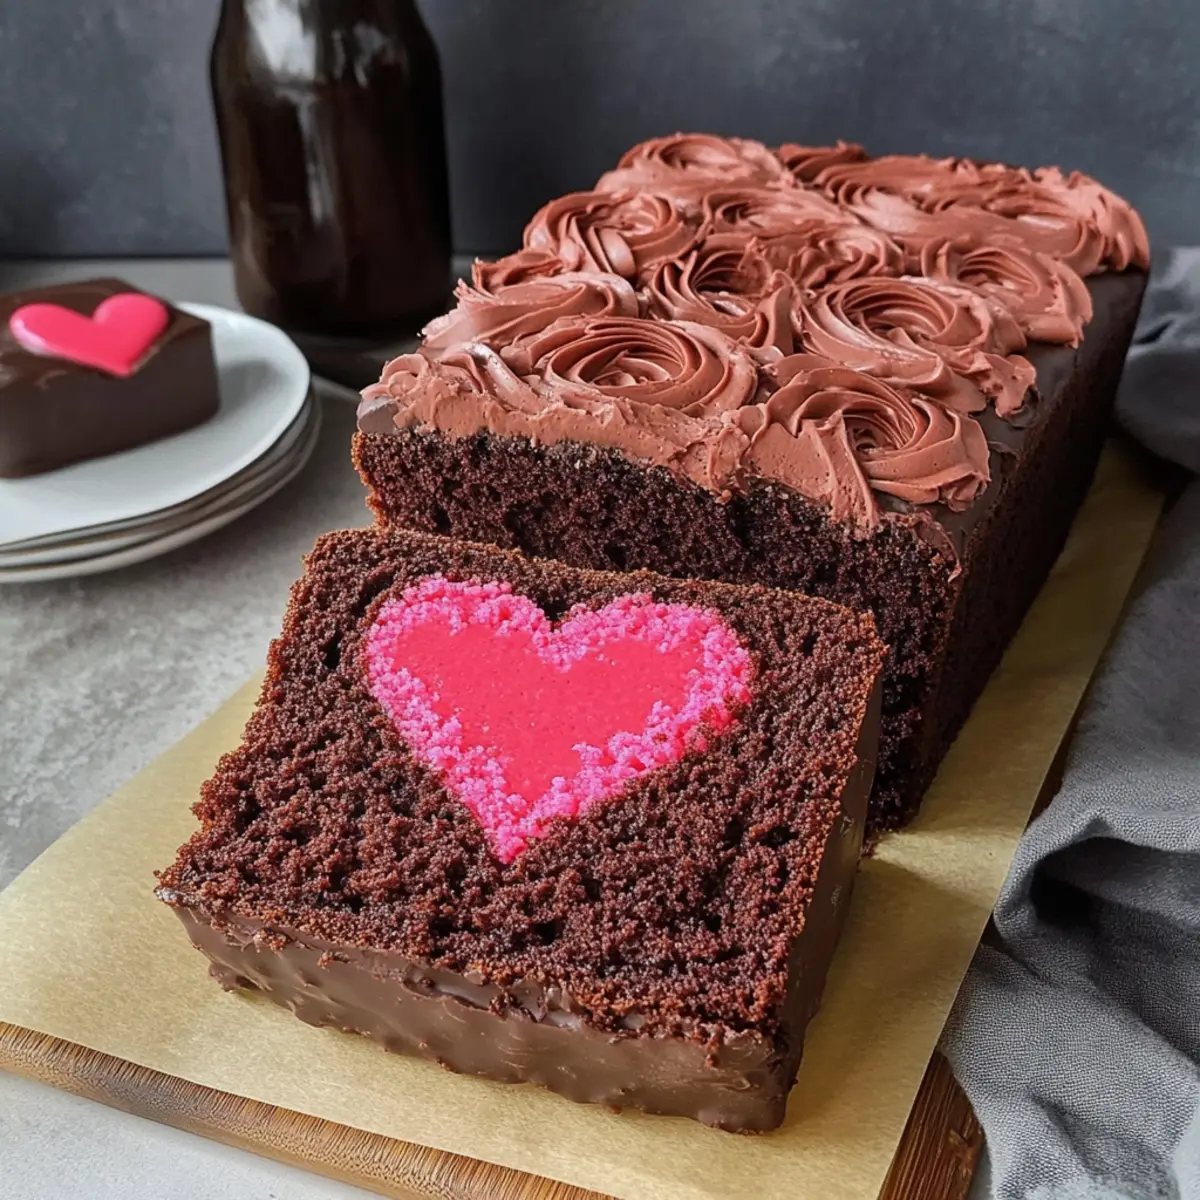
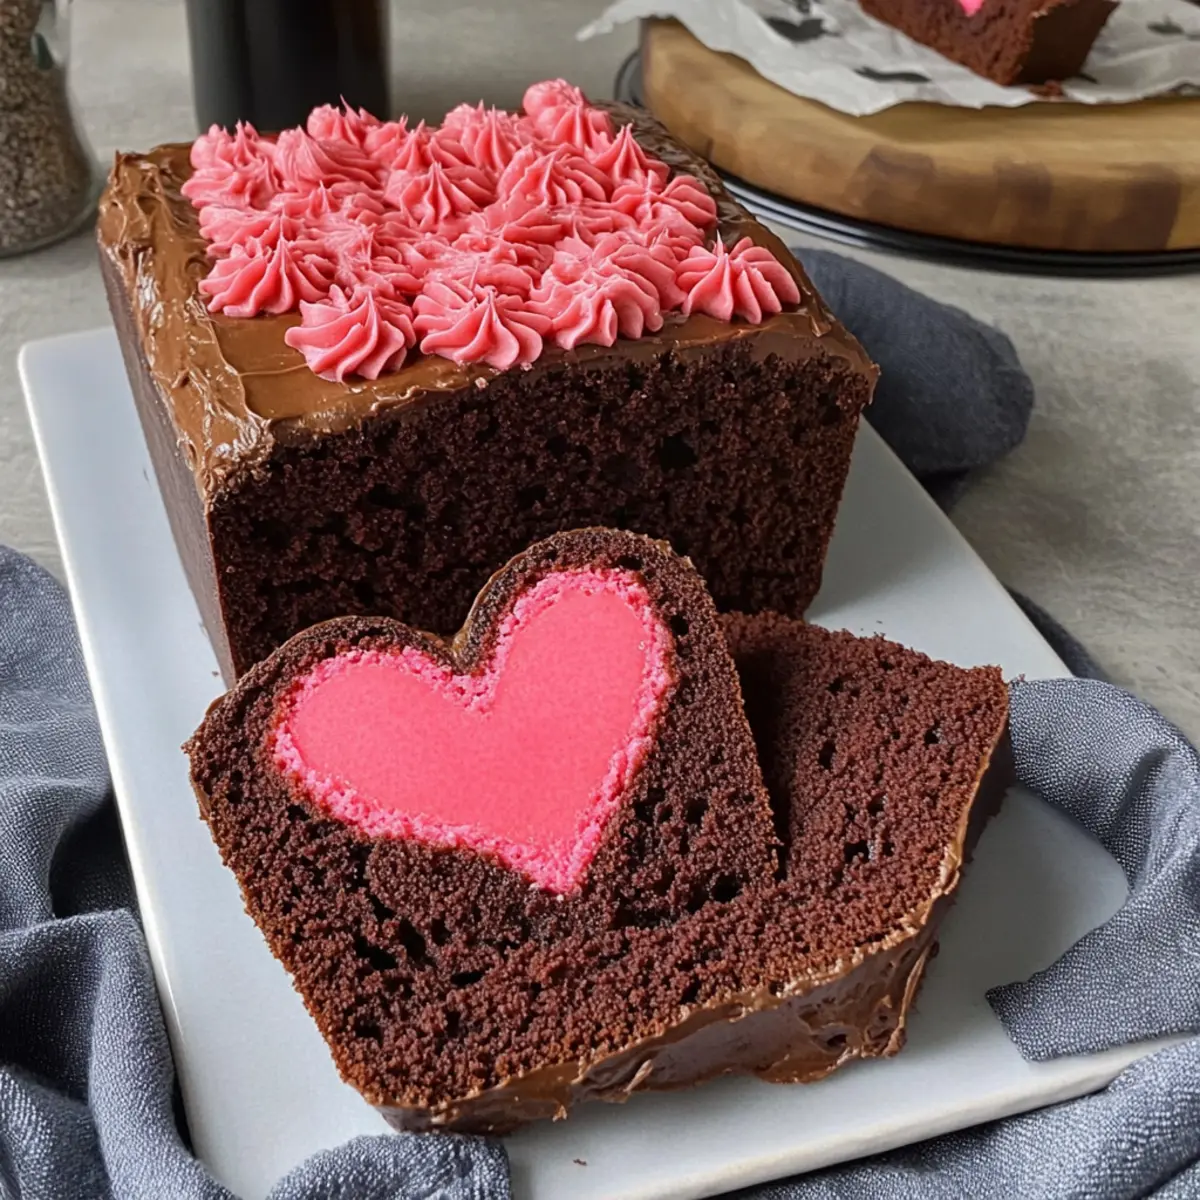
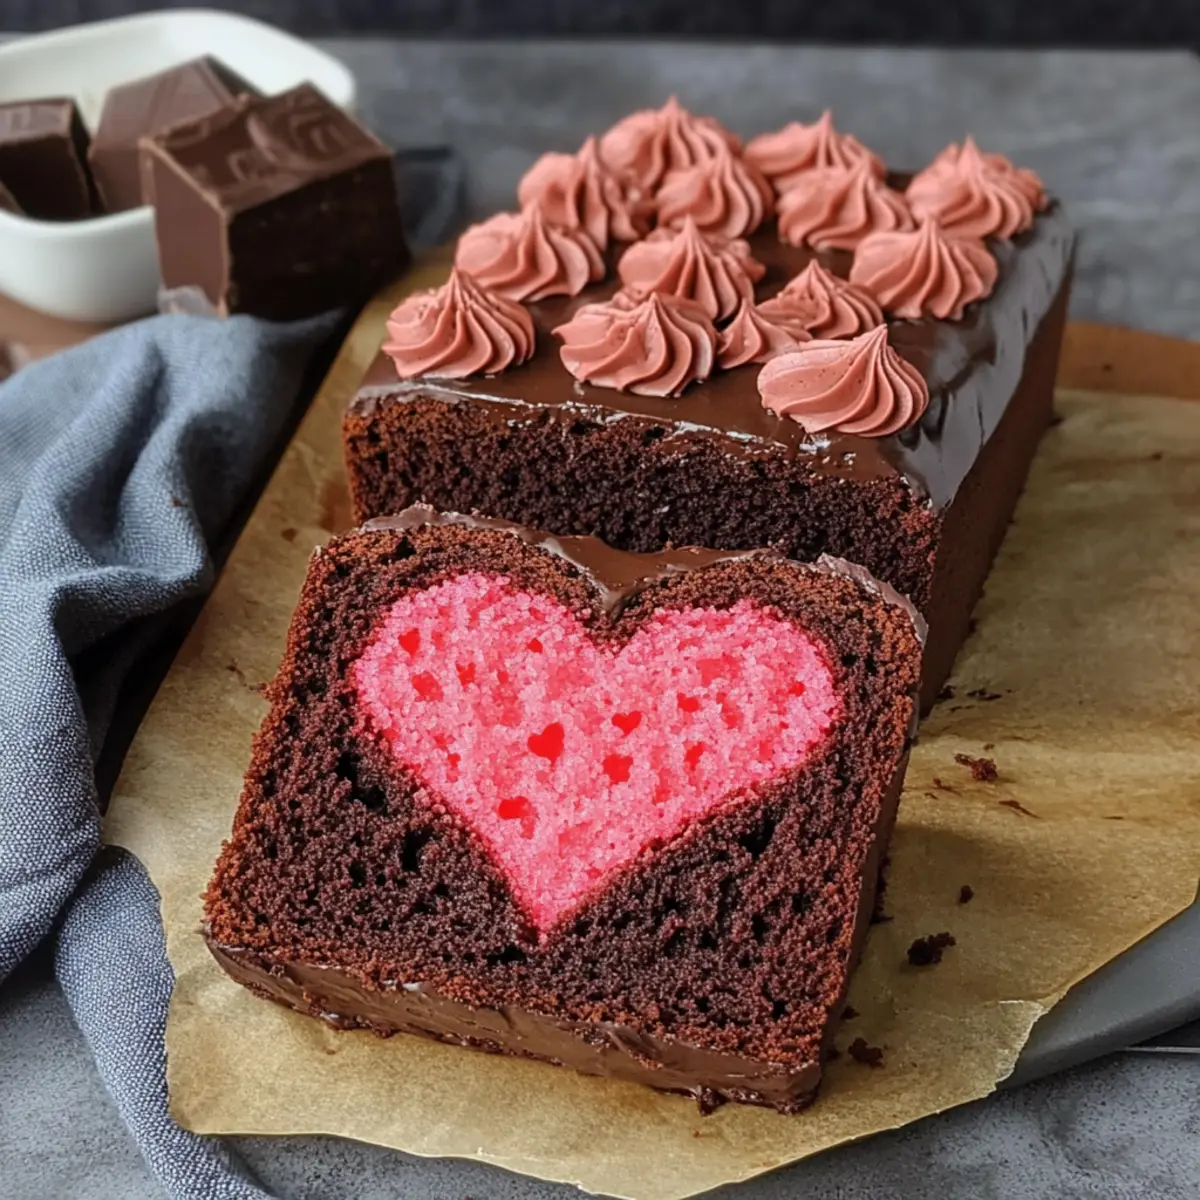
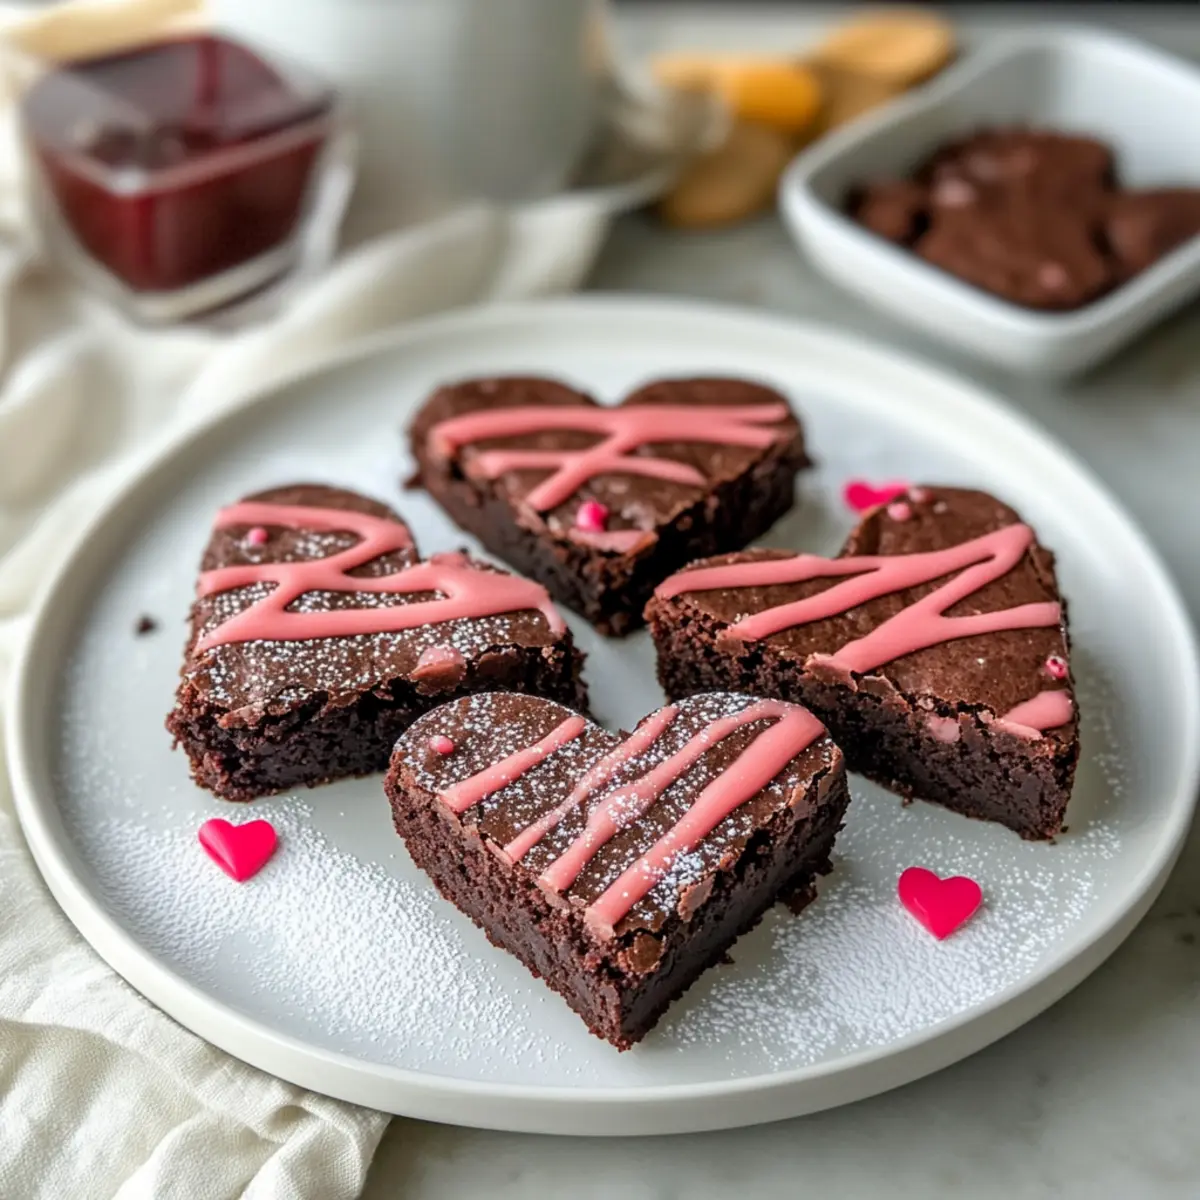
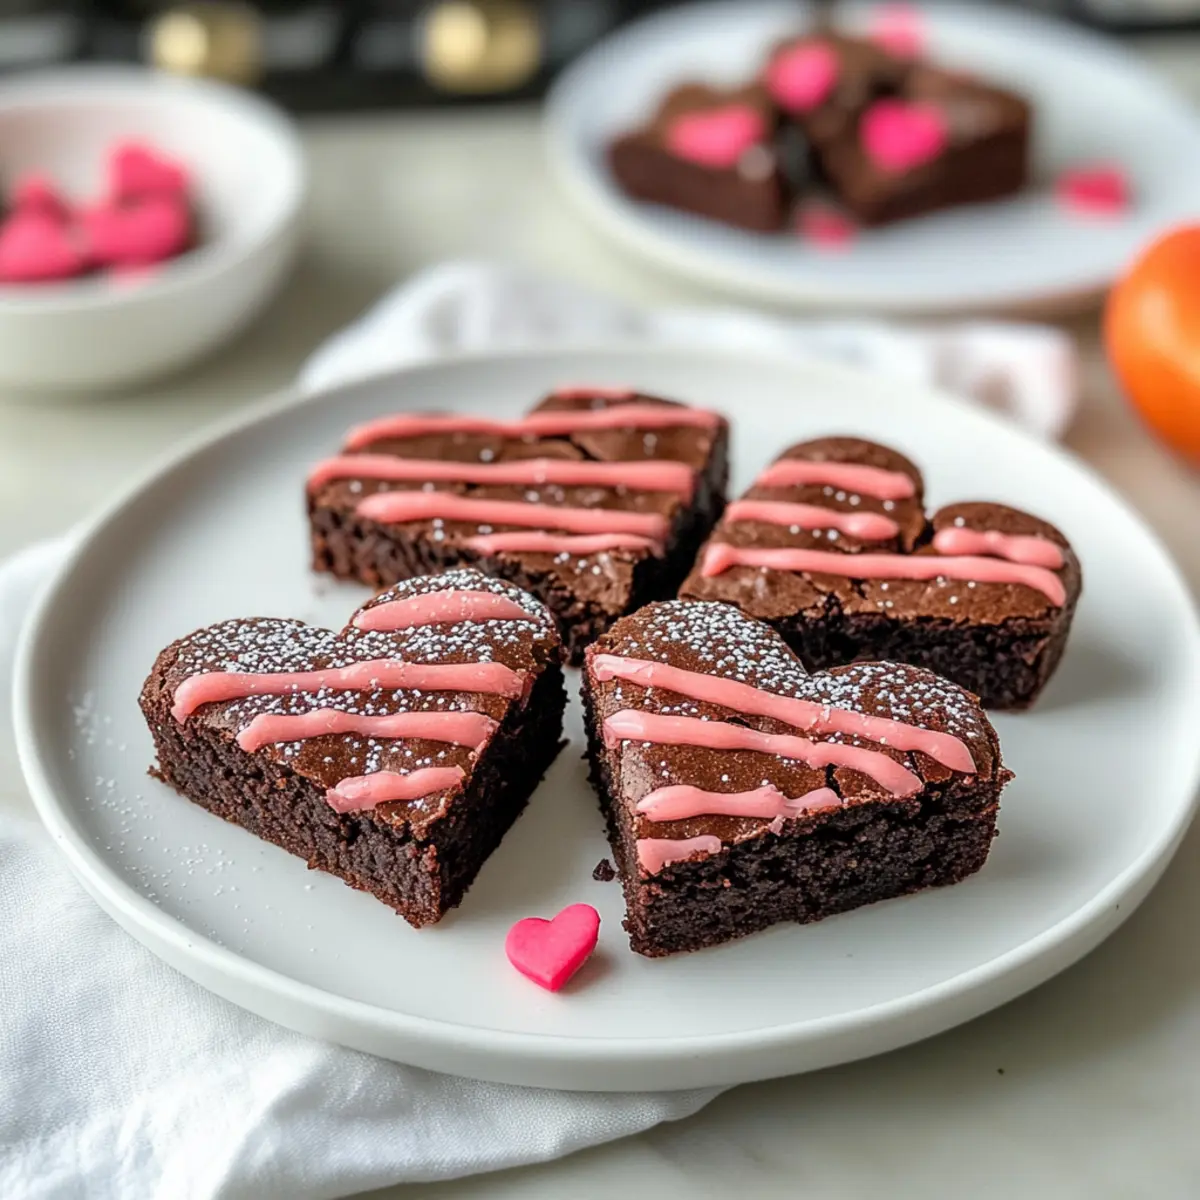
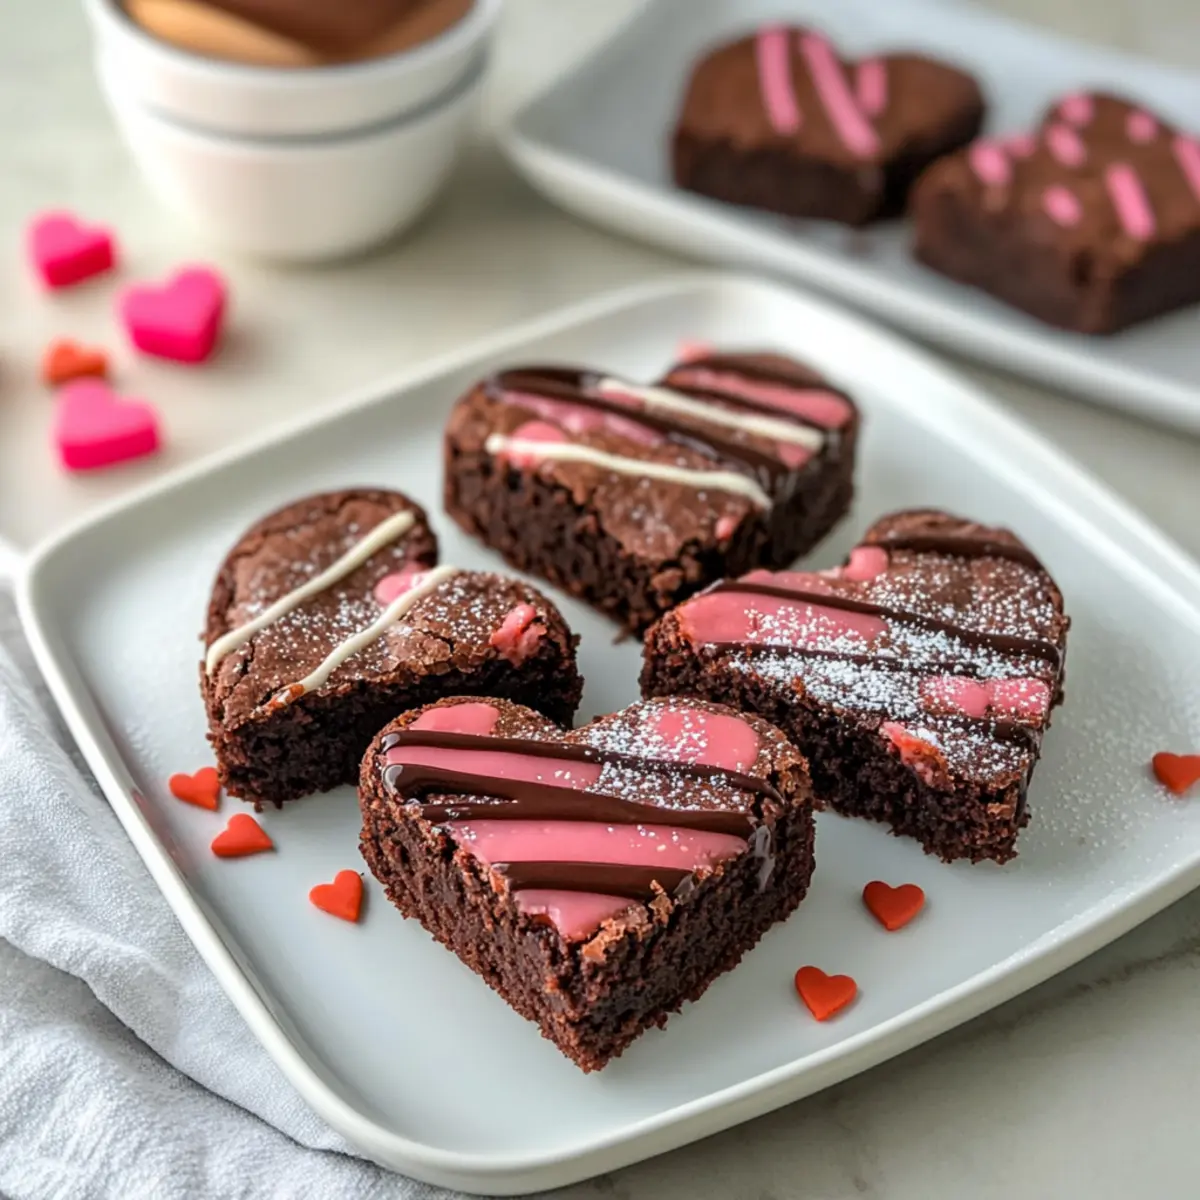
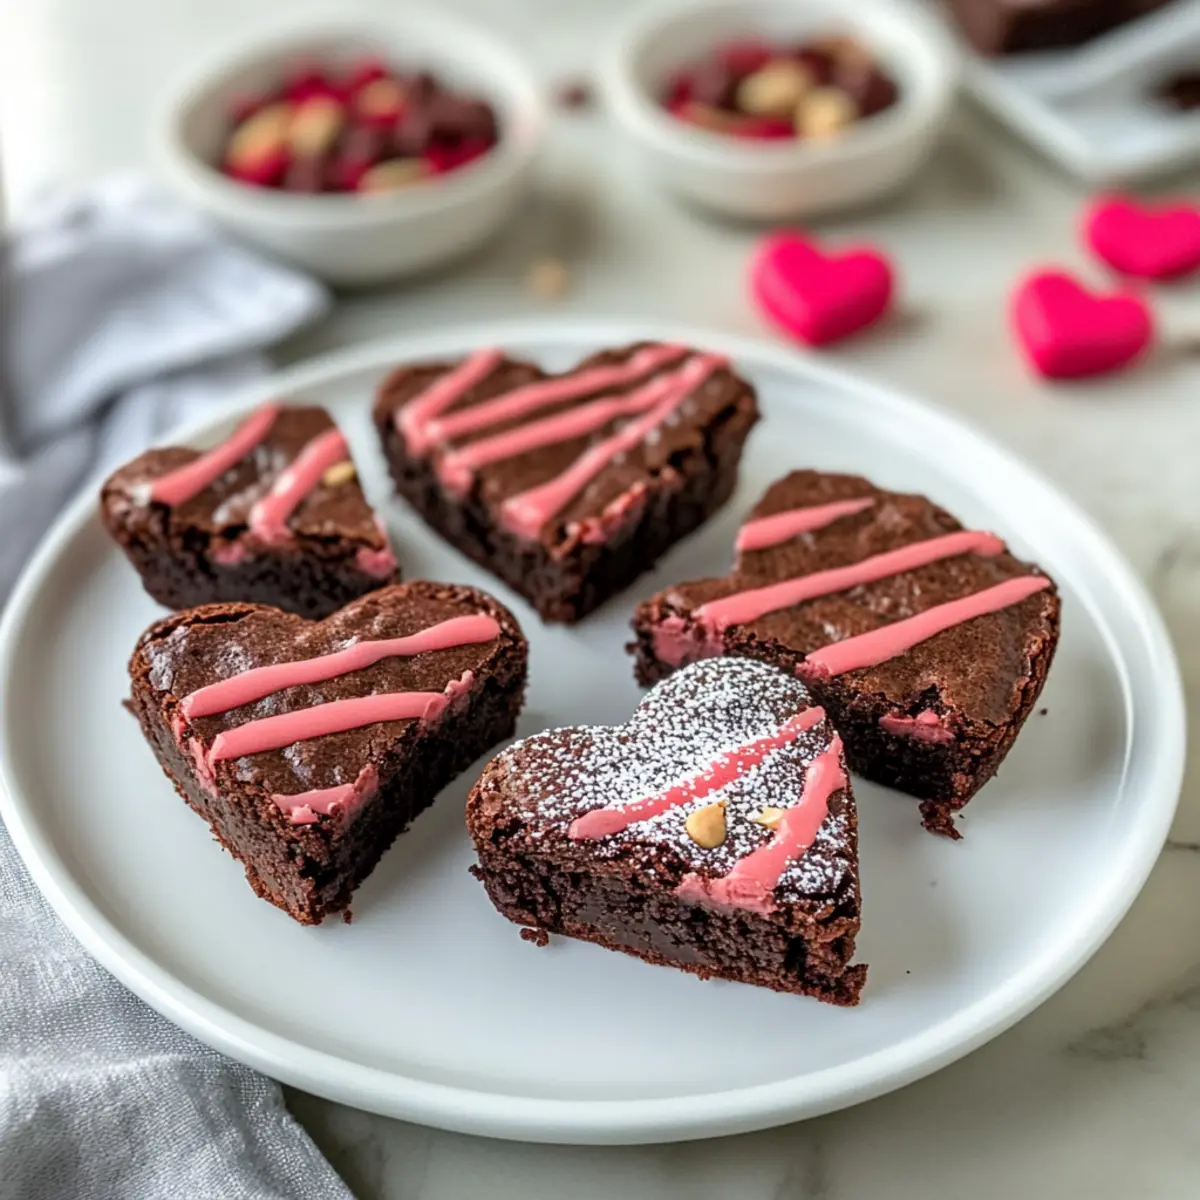
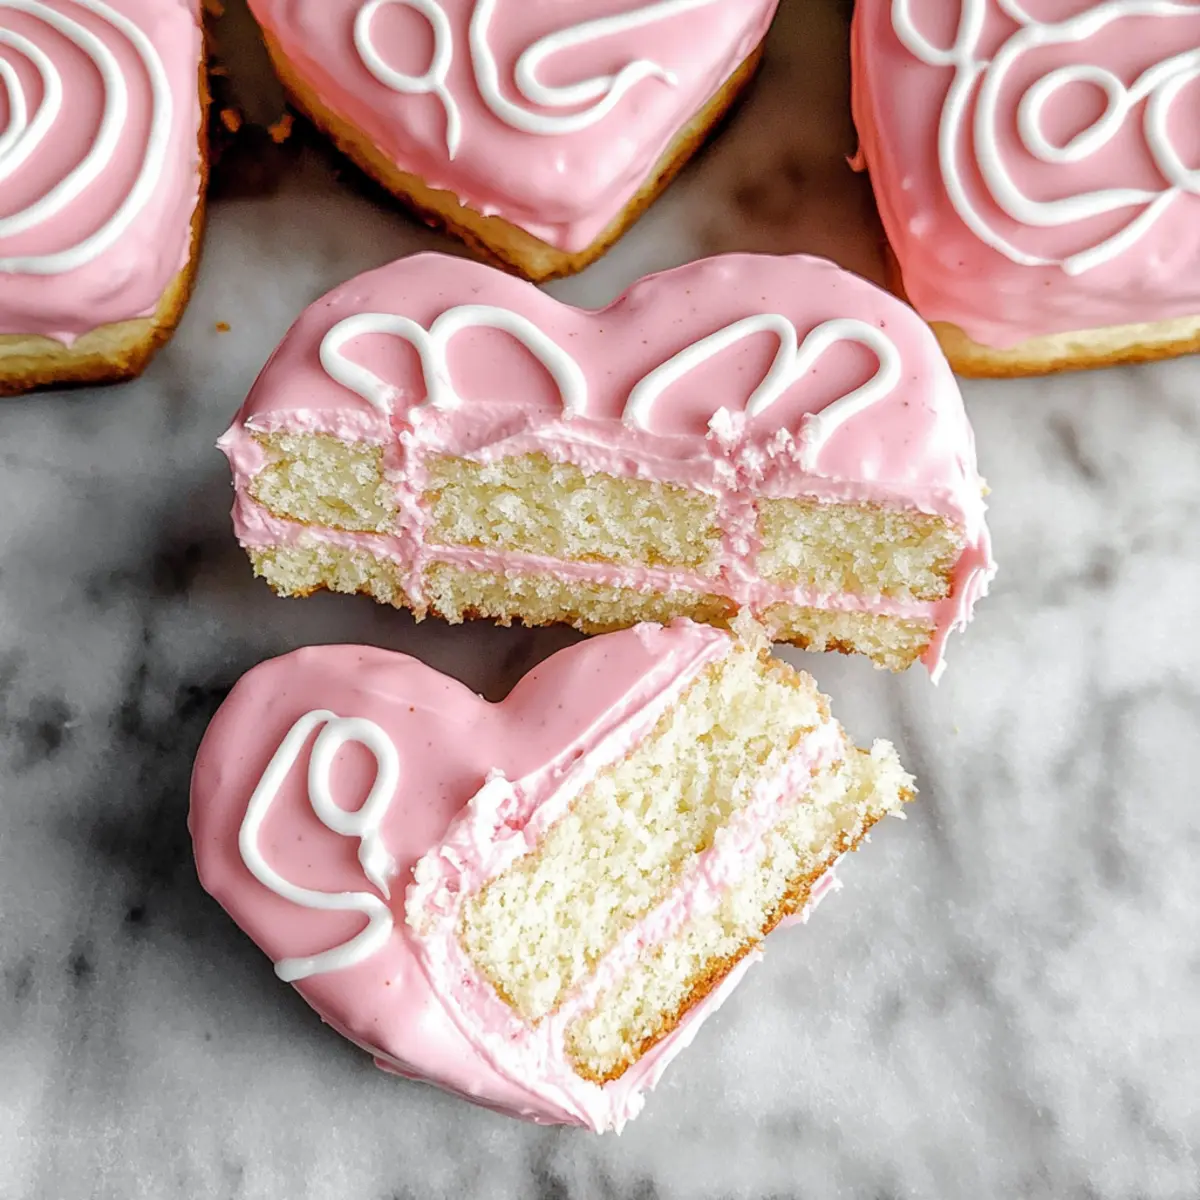
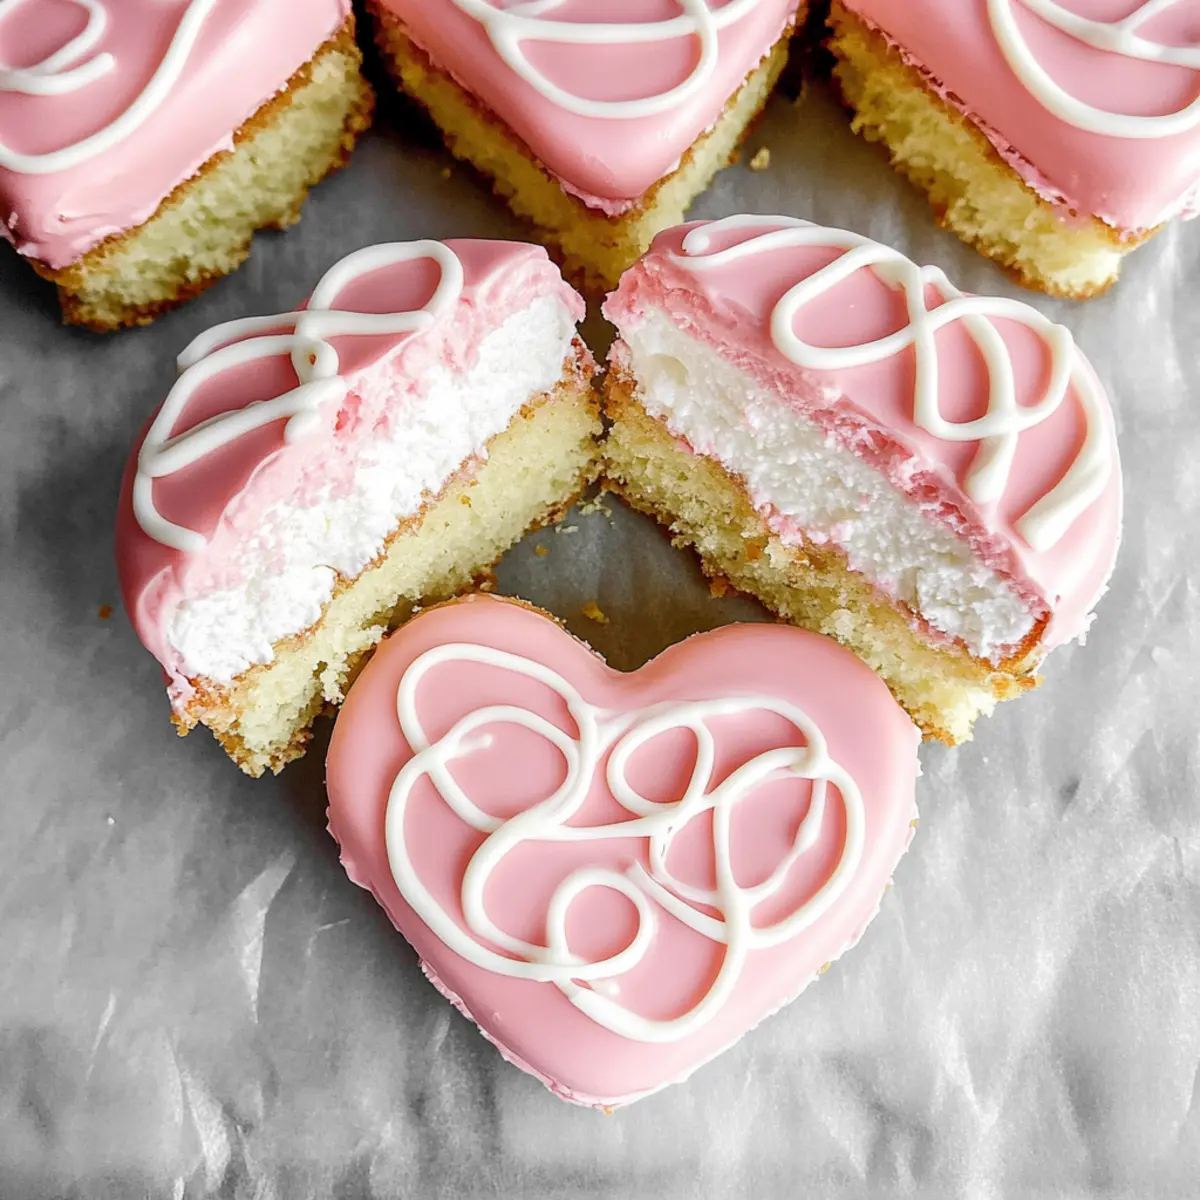
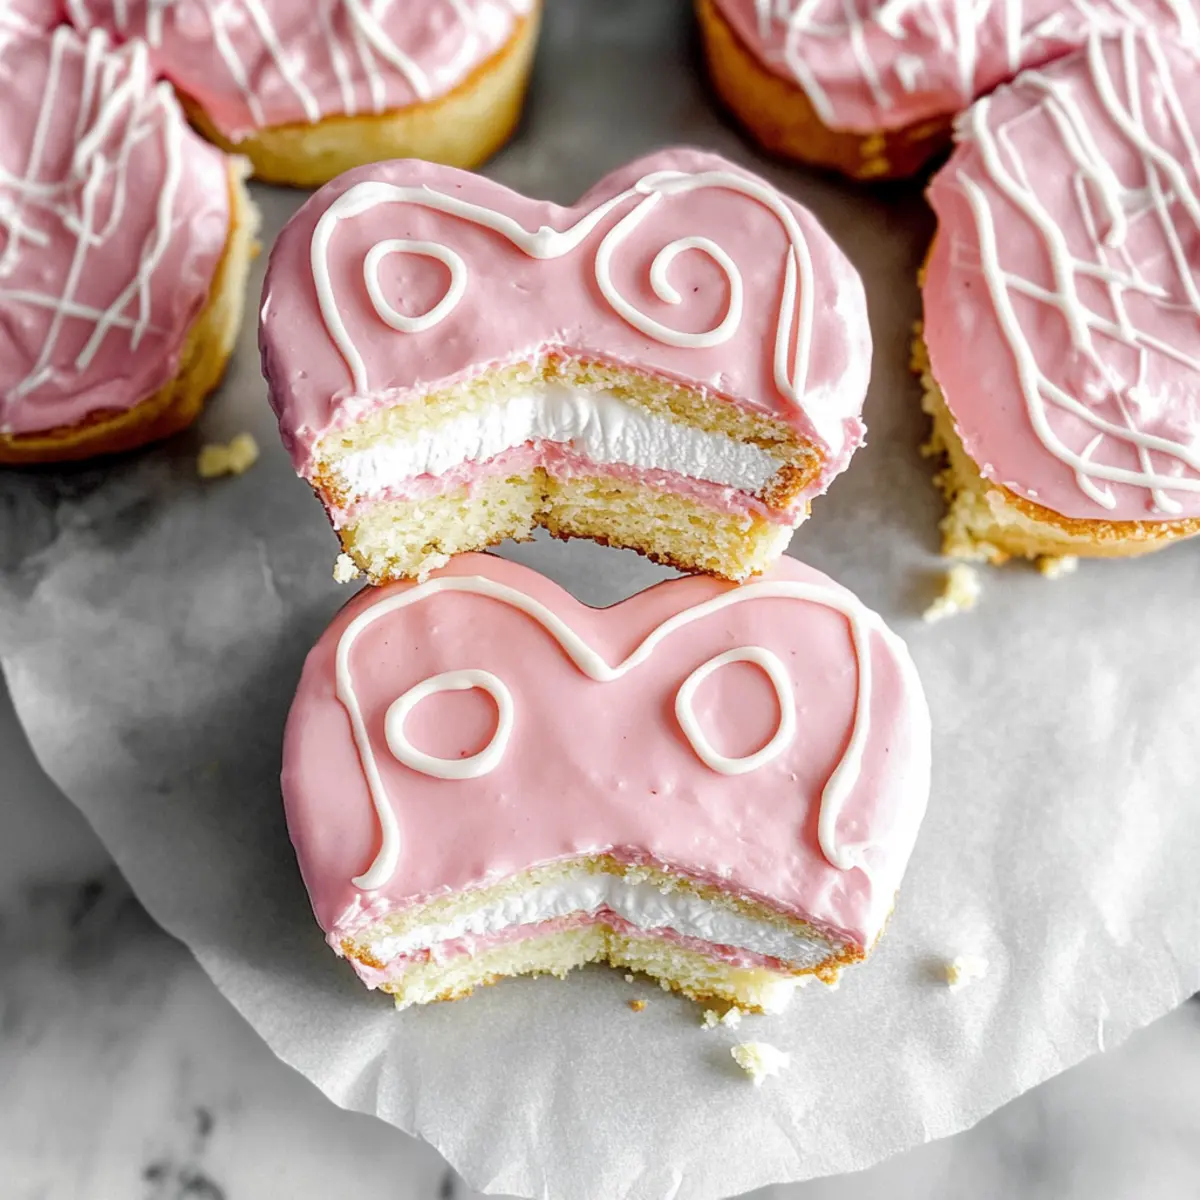
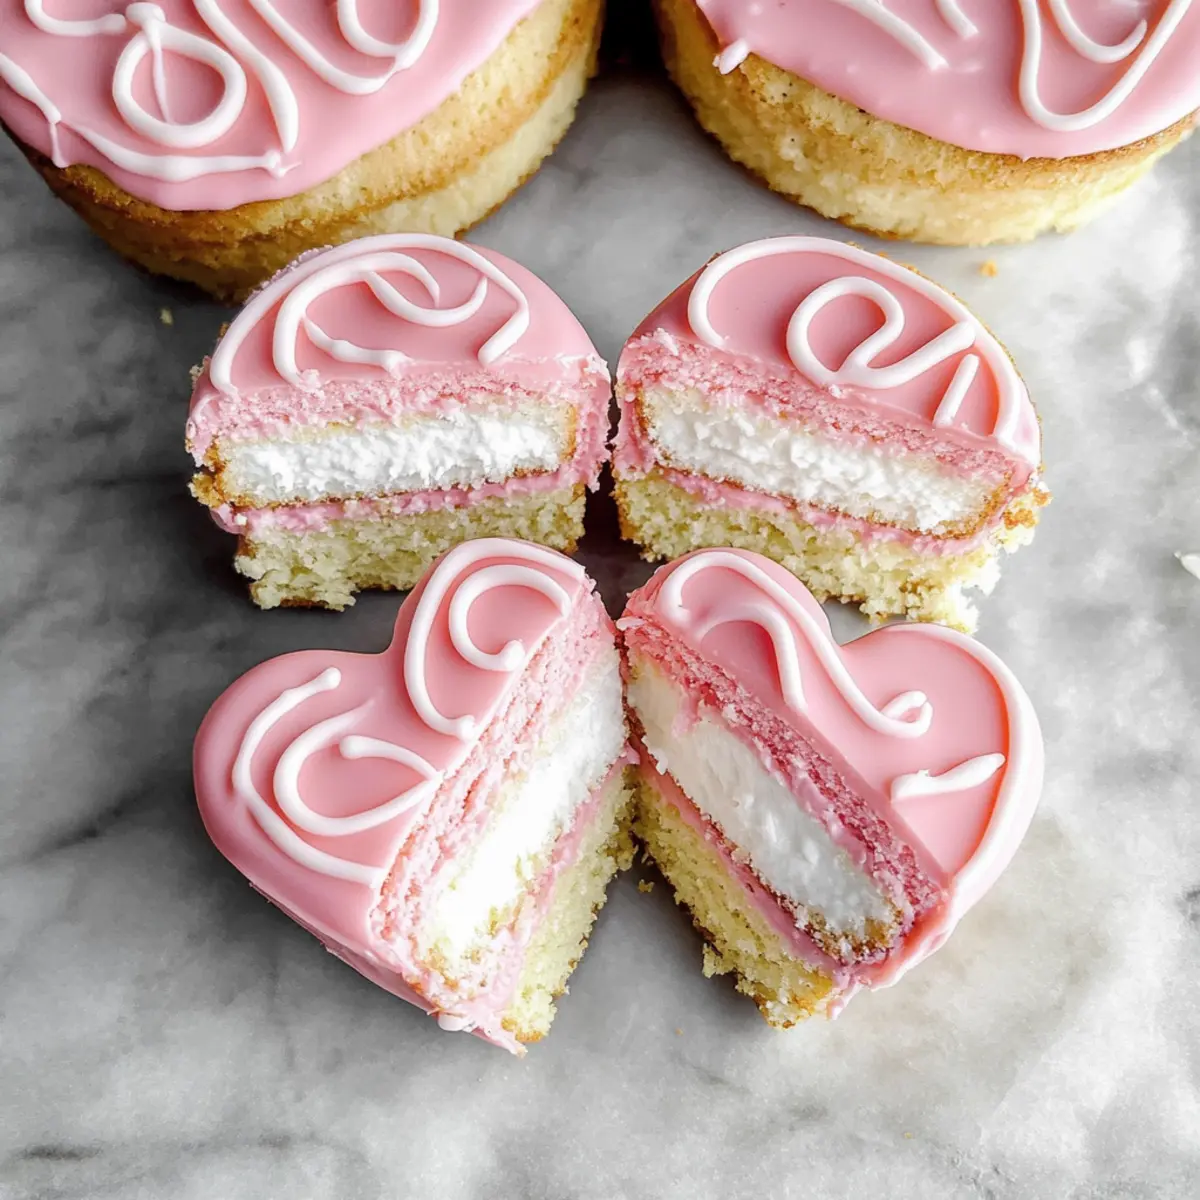
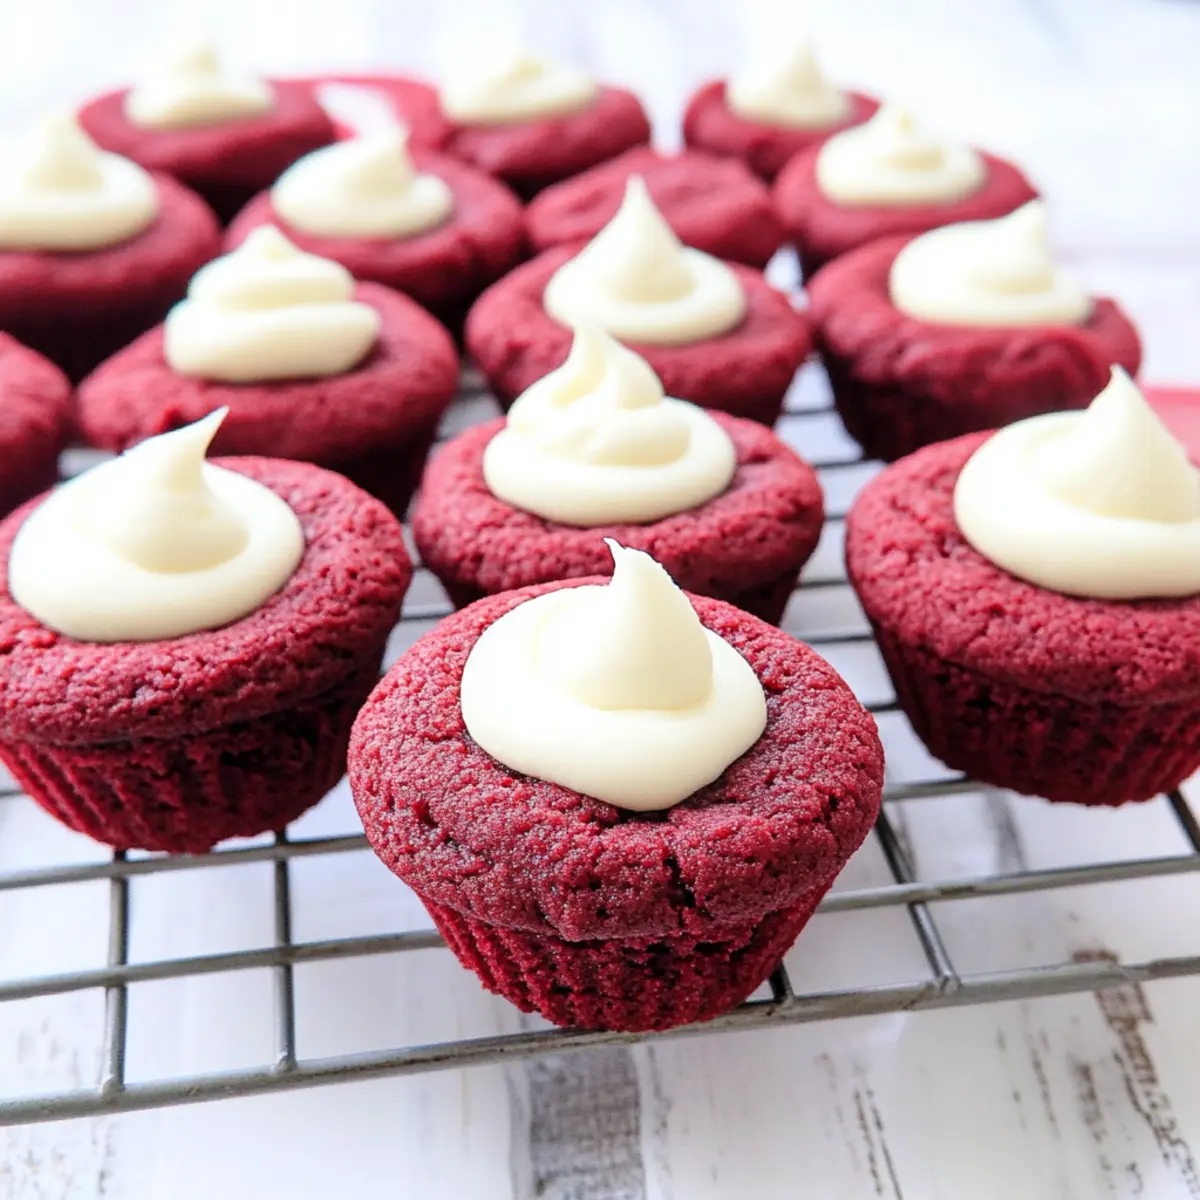
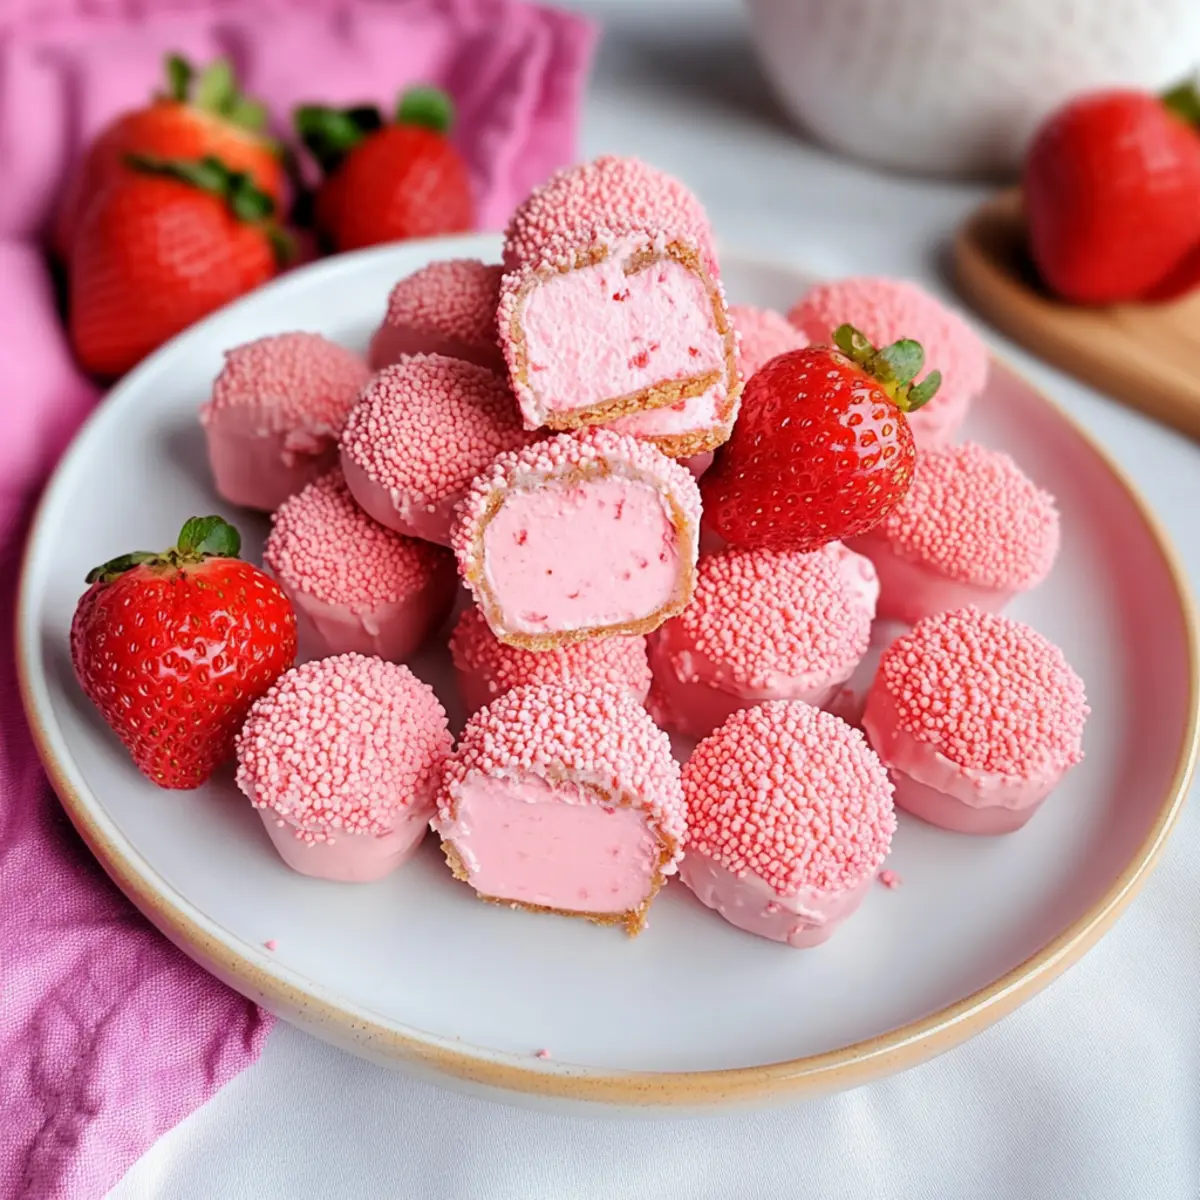
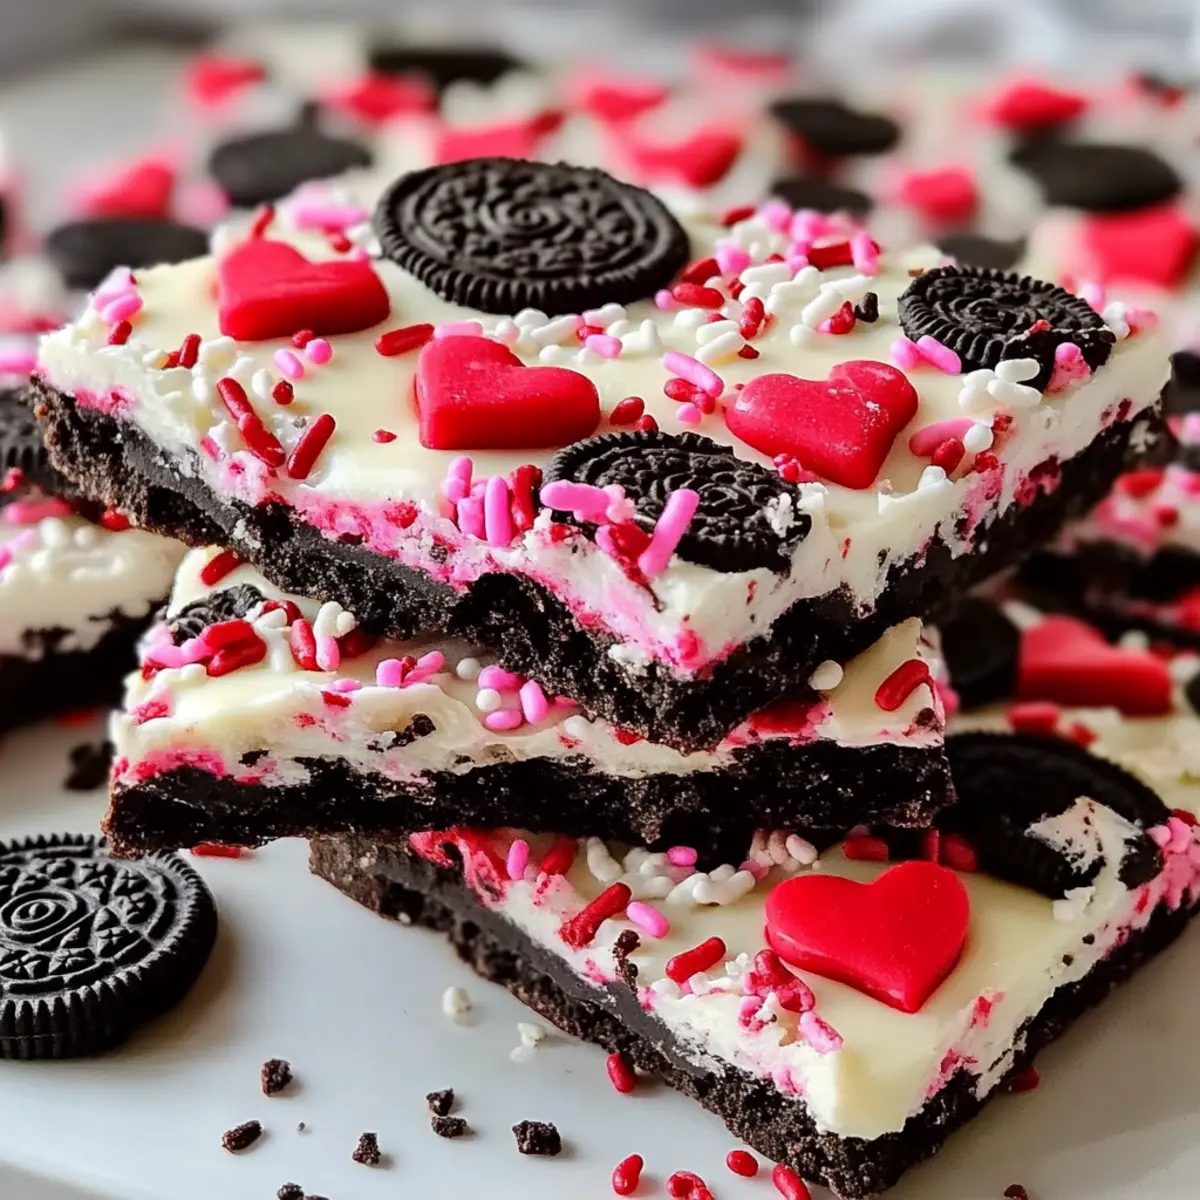
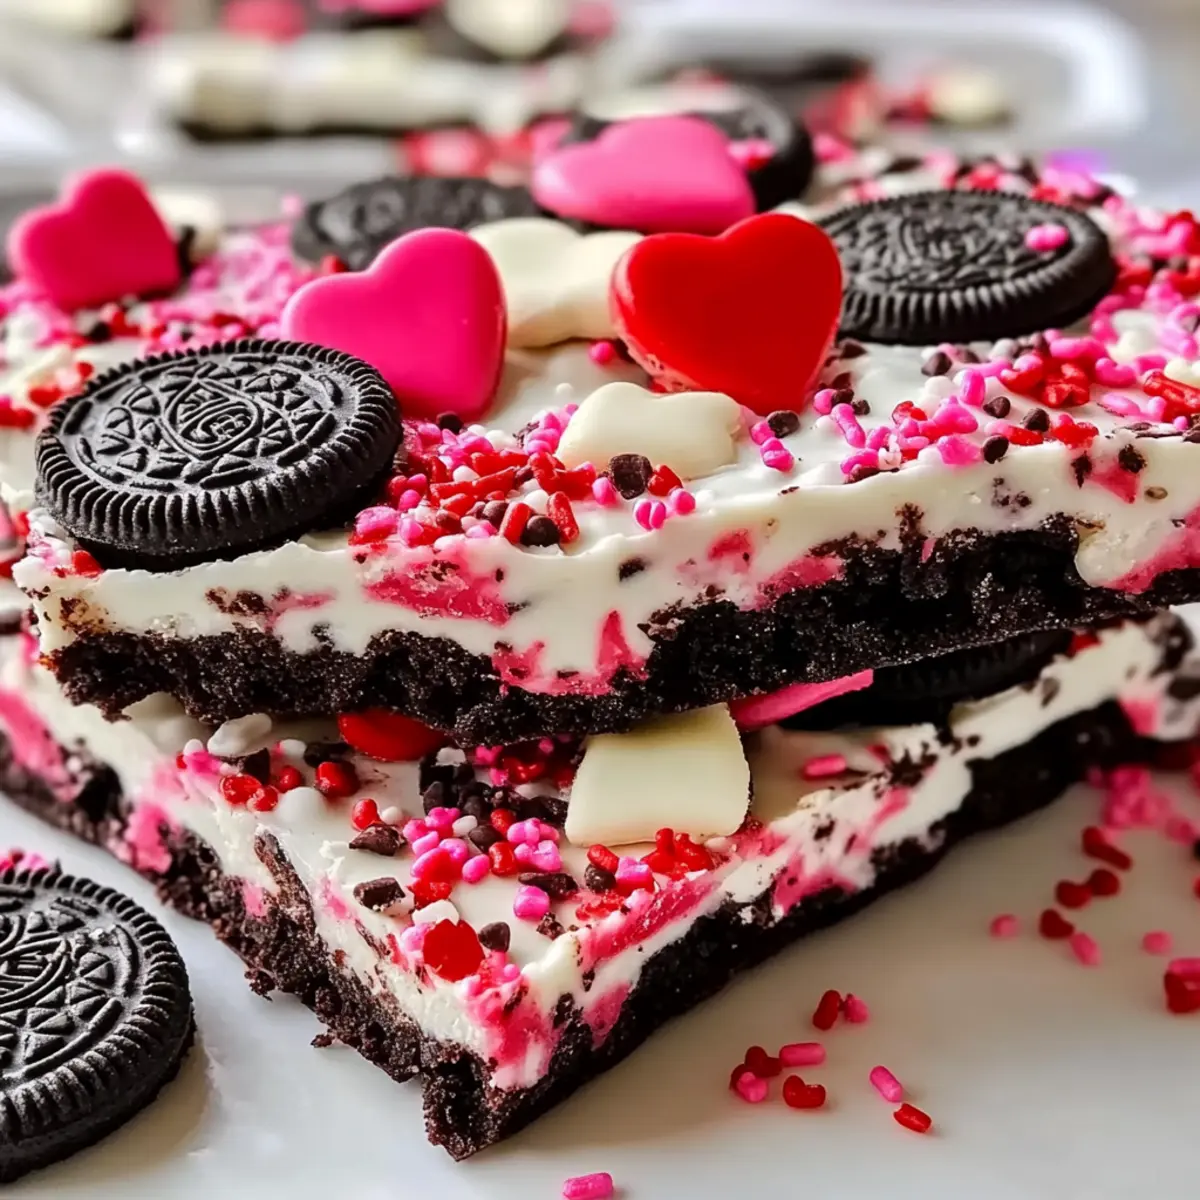
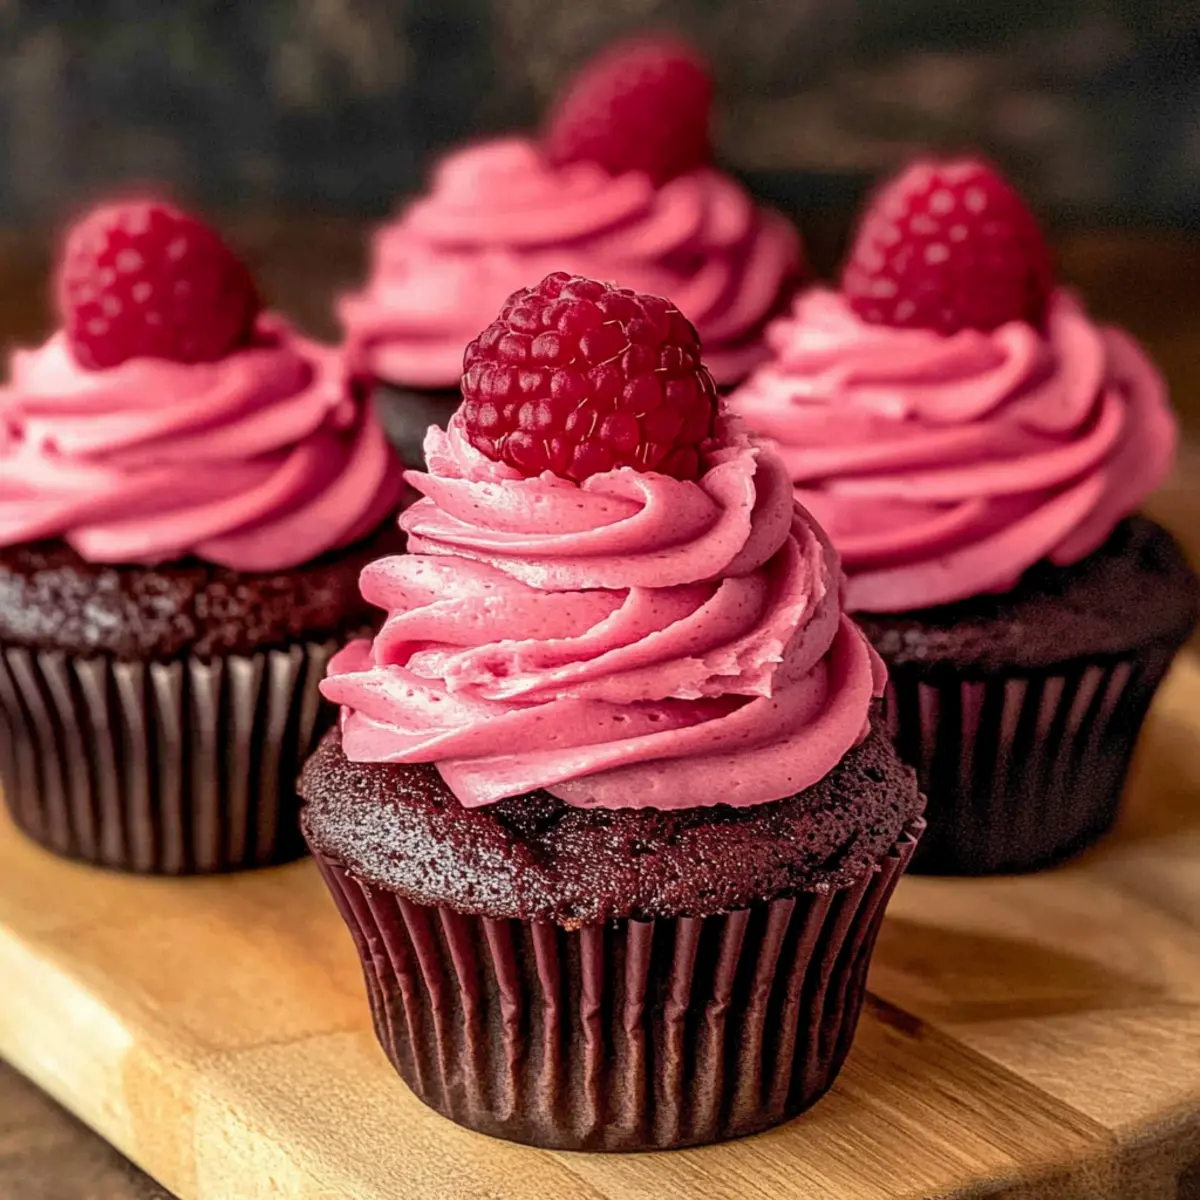
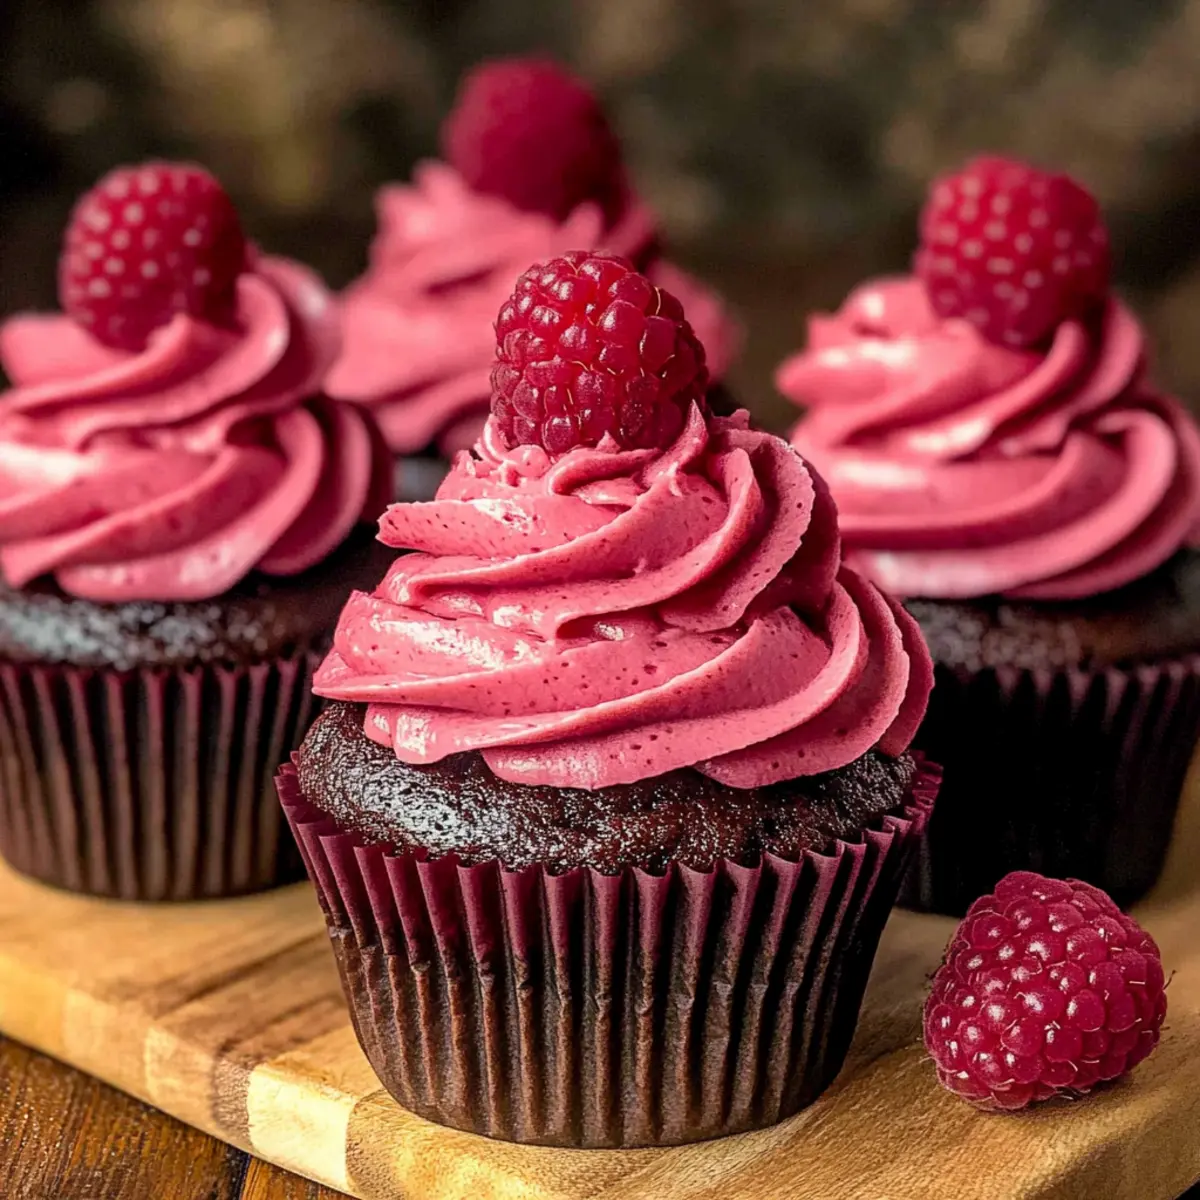
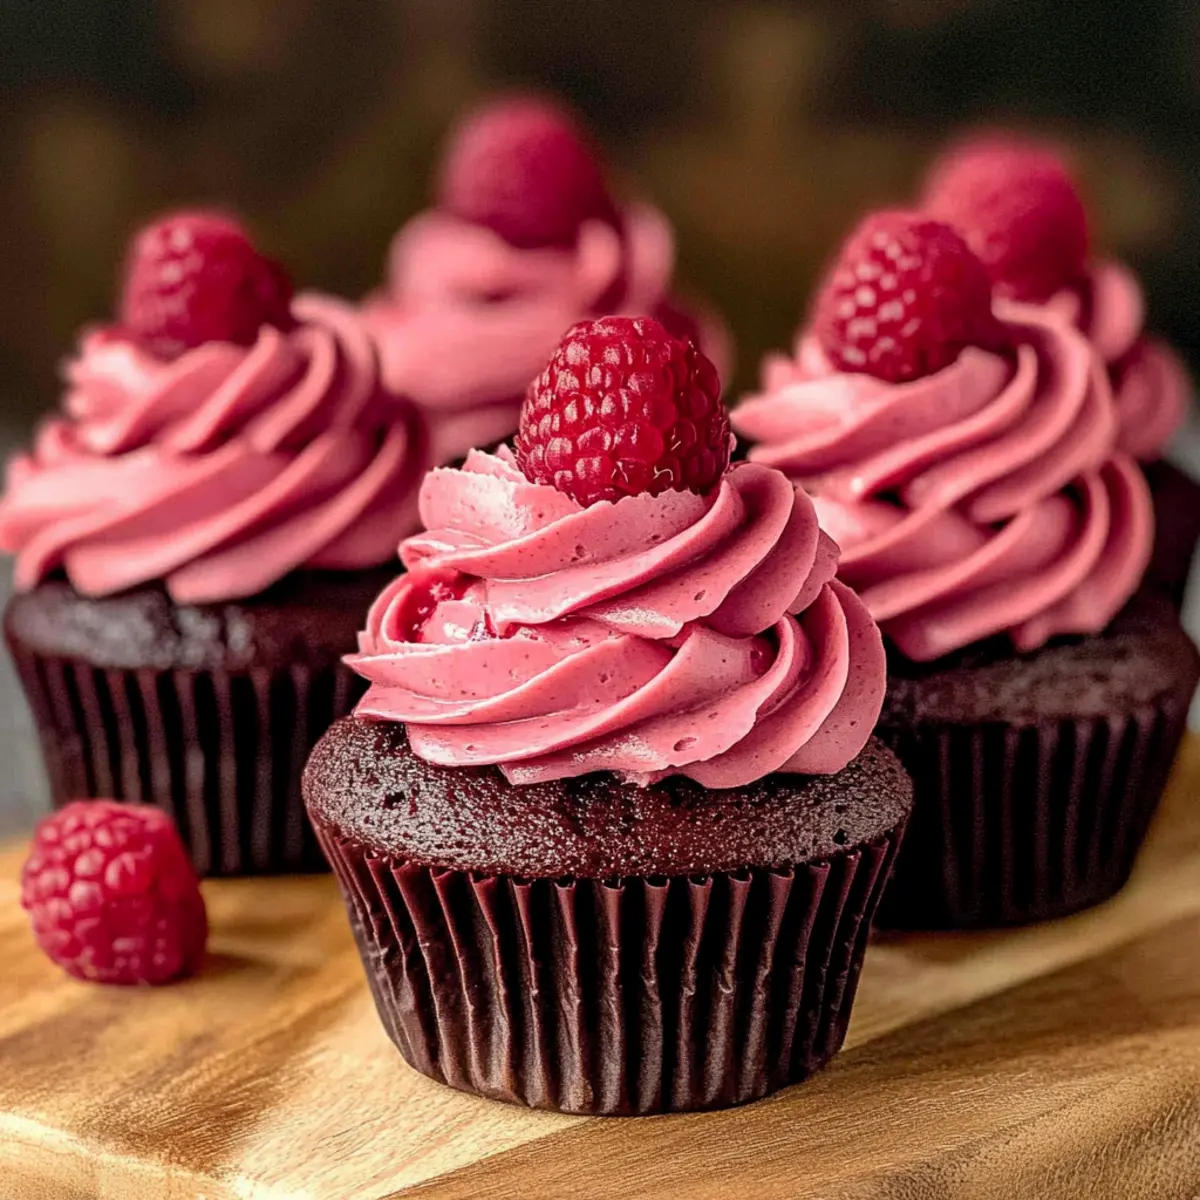
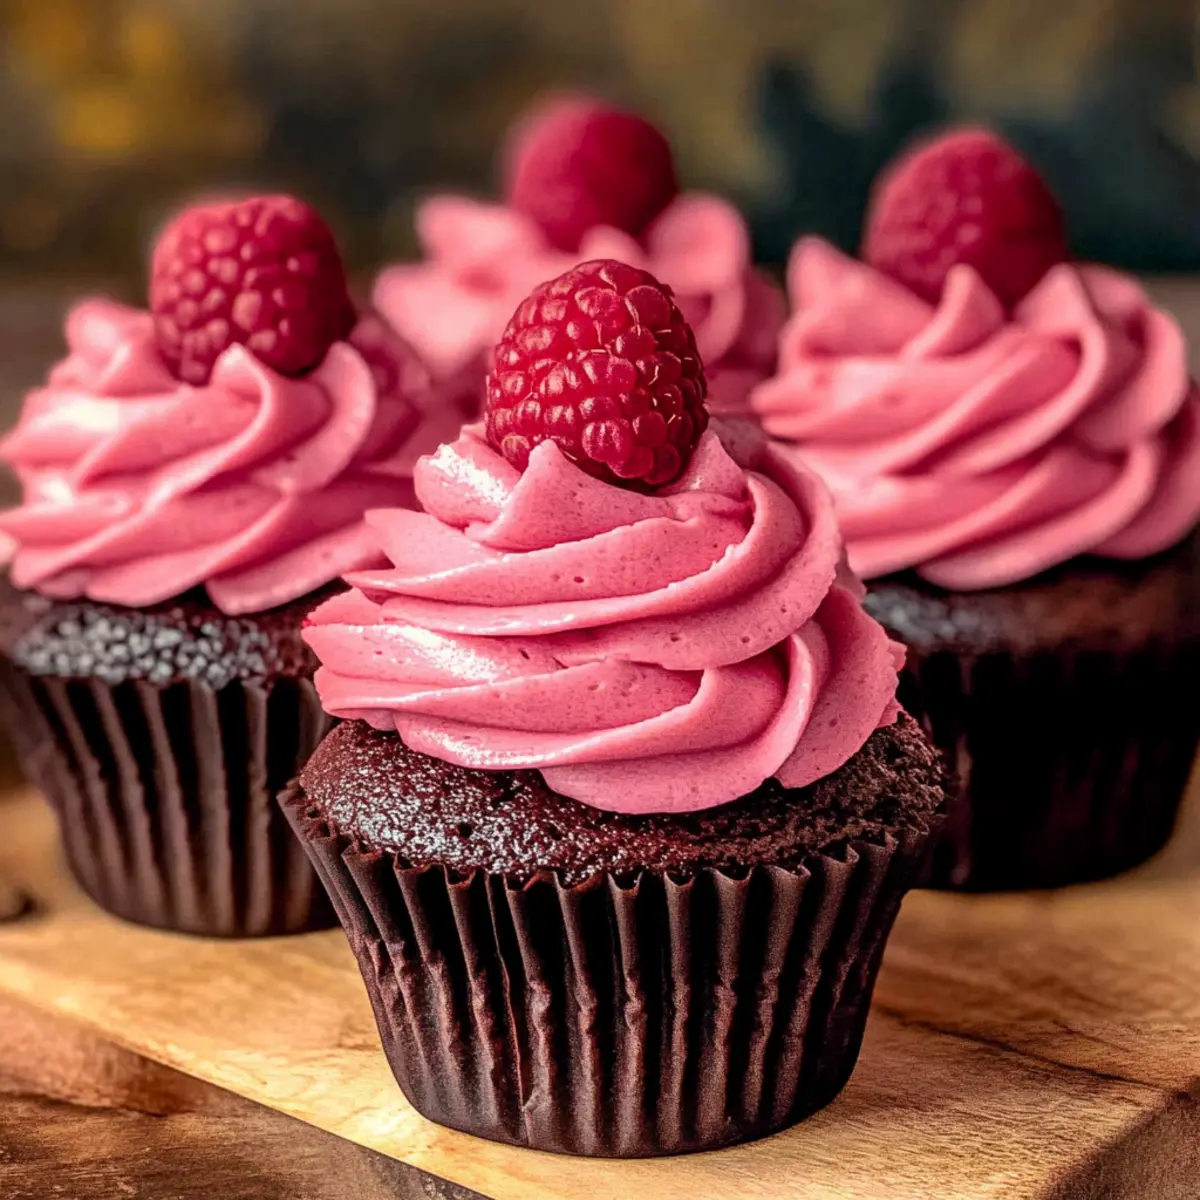
With a flourish, I unveiled my latest baking creation—Chocolate Raspberry Cupcakes. The delightful combination of rich chocolate and tangy raspberry is truly a match made in dessert heaven. This cupcake recipe not only offers a unique twist perfect for cozy gatherings and romantic occasions, but it also features a luscious raspberry ganache filling that creates a sweet surprise with every bite. Plus, they’re easy to whip up, making them a splendid option for both seasoned bakers and those just starting to explore their culinary skills. Tempted to make your loved ones swoon with this irresistible treat? Let's dive into the details of how to create these mouthwatering masterpieces!

Why Choose Chocolate Raspberry Cupcakes?

Irresistible Flavor: These cupcakes combine the deep, rich flavor of chocolate with the vibrant tartness of raspberry, creating a dessert experience like no other.

Easy to Prepare: Even if you're a beginner, this recipe is straightforward, proving that special treats don’t require advanced techniques.

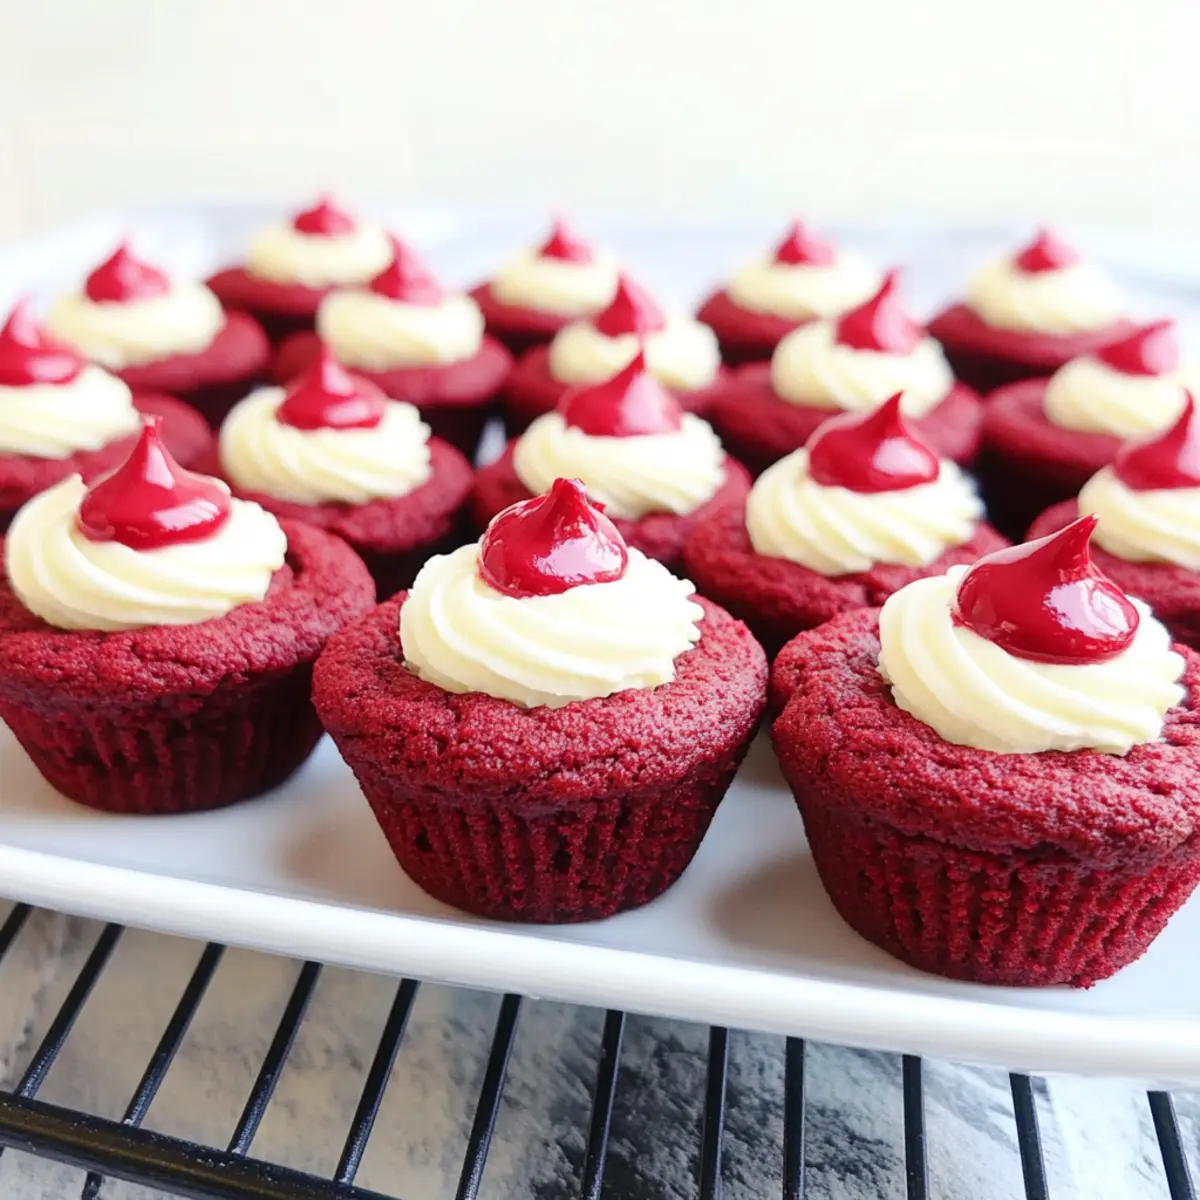
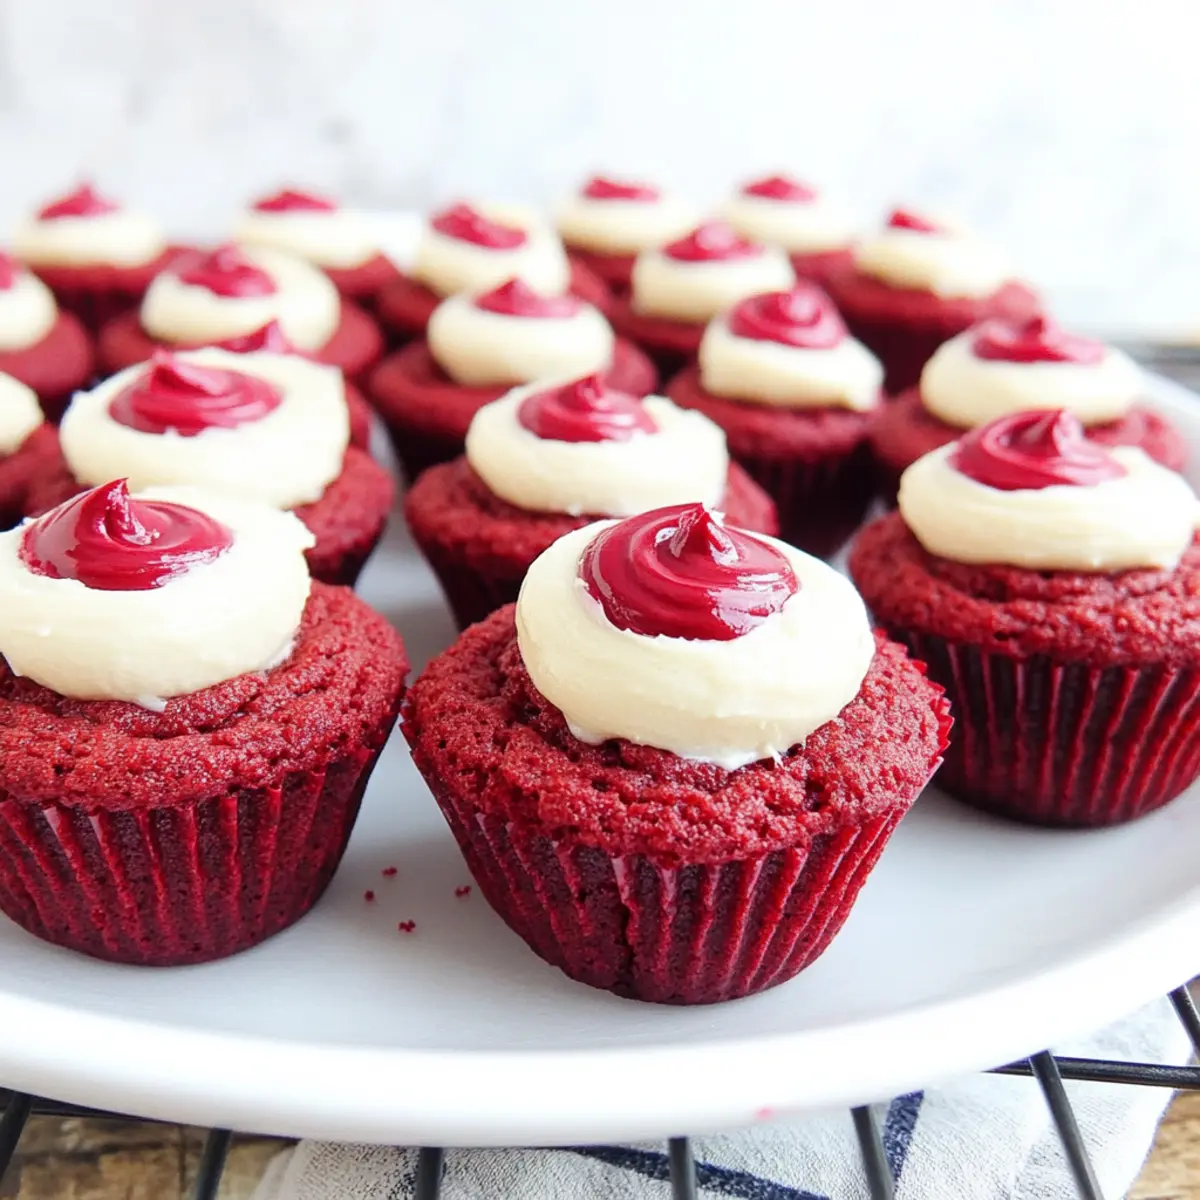
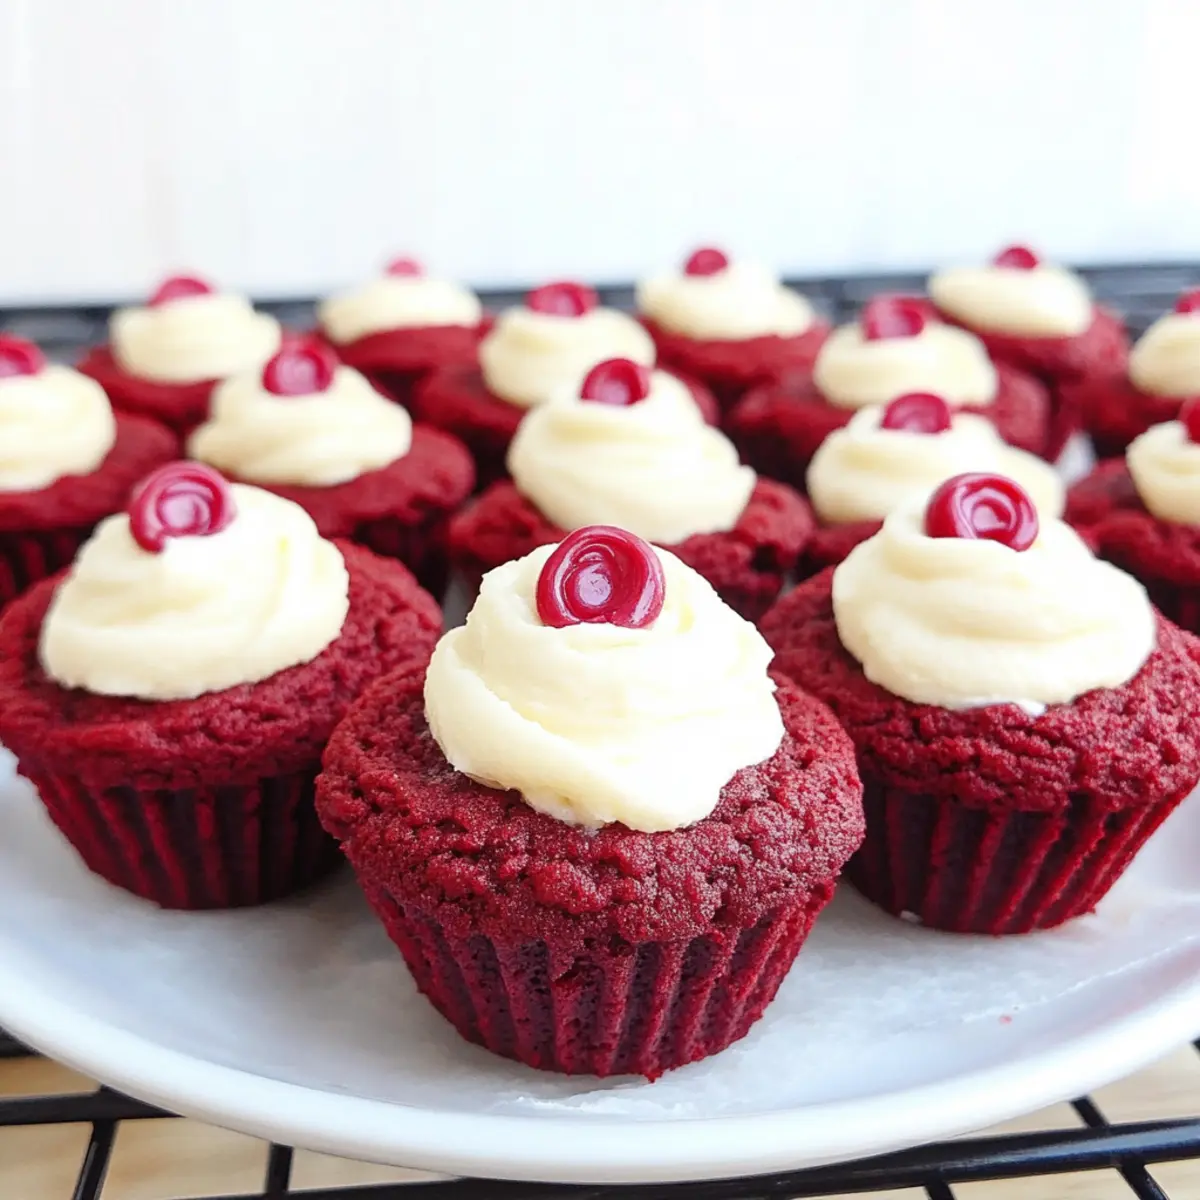
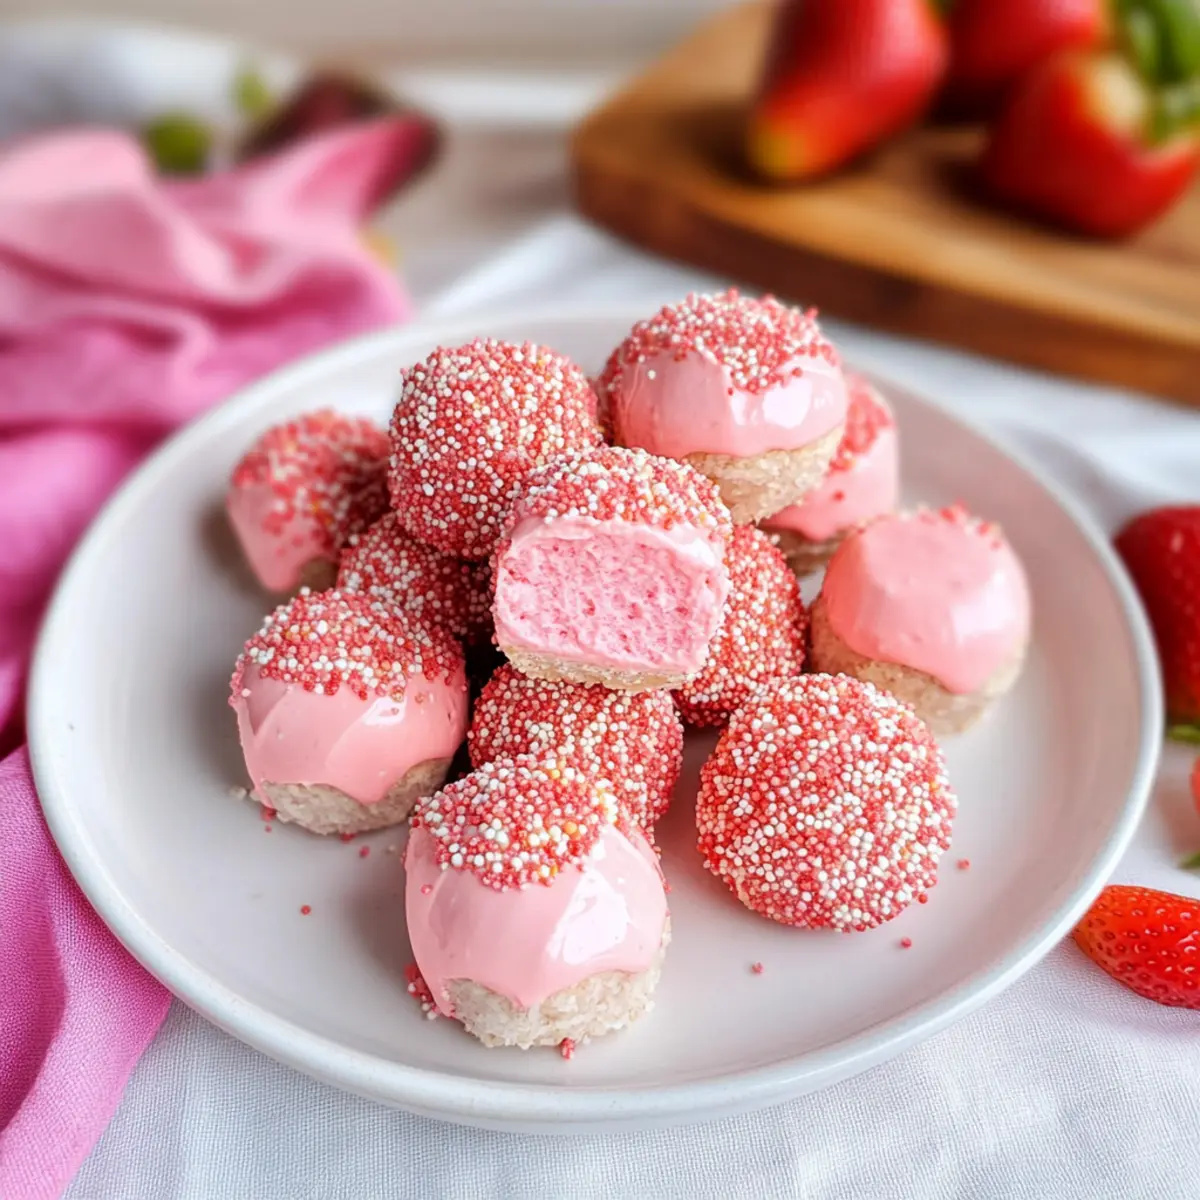
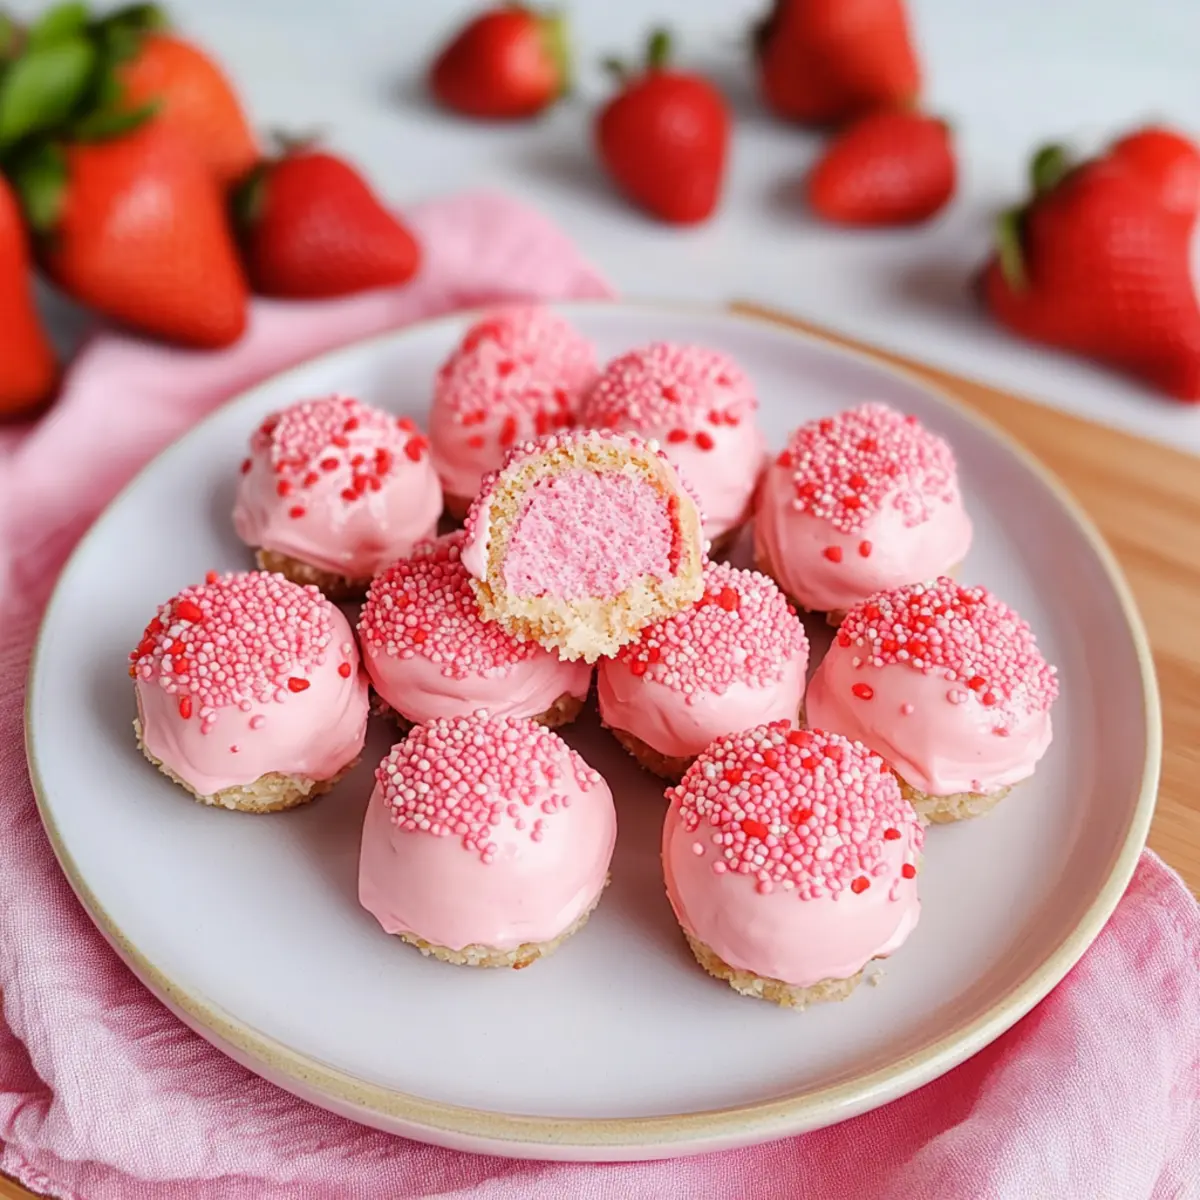
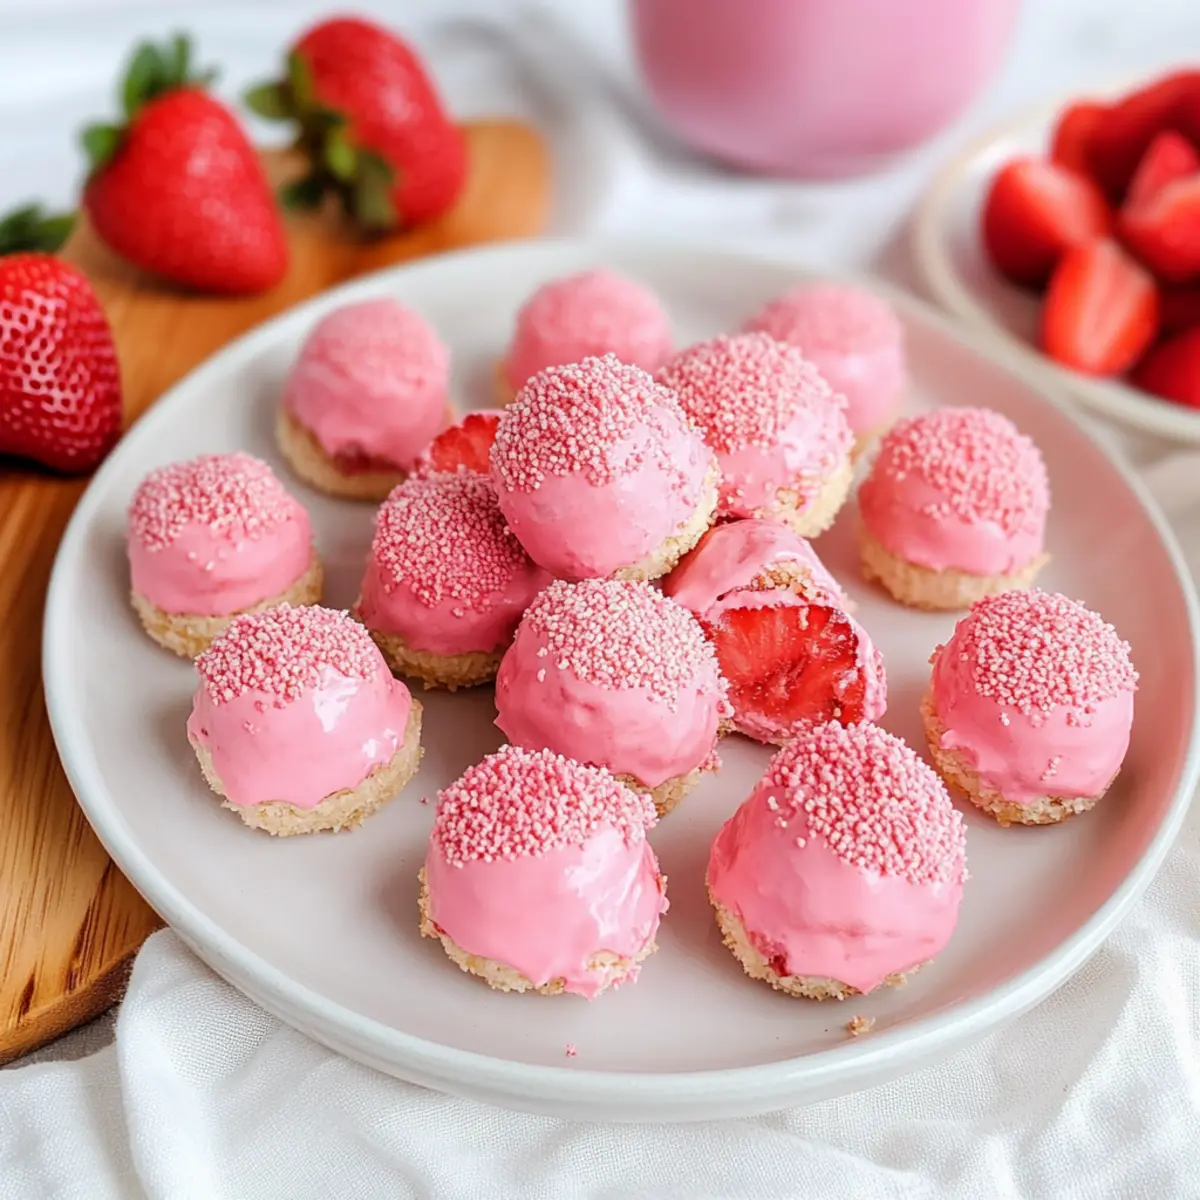
Show-Stopping Presentation: With their gorgeous raspberry ganache and fluffy frosting, these cupcakes will wow your guests, making them perfect for any occasion, including a romantic Valentine’s Day.

Versatile Delight: Feel free to explore different fillings! If you’re curious about other flavors, try swapping raspberry preserves for strawberry in your ganache for an equally delectable twist.

Unique Texture: Every bite is a delightful journey, from the moist cupcake to the luscious, gooey center, all topped with an airy buttercream.

Perfect for Sharing: Bring these cupcakes to gatherings or bake them for loved ones to make any day feel special. Get ready for compliments!

Chocolate Raspberry Cupcake Ingredients

• Get ready to create your scrumptious Chocolate Raspberry Cupcakes with this simple and delightful ingredient list!

For the Cupcakes

  • All-purpose Flour – Provides the essential structure for your cupcakes; for gluten-free, use a gluten-free flour blend.
  • Dutch Process Cocoa Powder – Ensures a deep chocolate flavor and rich color; regular cocoa powder can be substituted, but it may change the taste.
  • Baking Powder & Baking Soda – These leavening agents will help your cupcakes rise to fluffy perfection; ensure they are fresh for the best results.
  • Salt – Enhances the sweetness and balances flavors.
  • Espresso Powder – Optional; adds depth to the chocolate flavor and makes it even more irresistible.
  • Unsalted Butter – Adds moisture and richness; always use unsalted to control the salt level in your recipe.
  • Granulated Sugar – Sweetens the batter while contributing to a light, tender texture.
  • Egg + Egg Yolk – These bind the ingredients beautifully and add richness, ensuring you have a tender crumb; make sure they are at room temperature.
  • Vanilla Extract – A wonderful enhancer that flavors the batter.
  • Whole Milk & Sour Cream – Keeps the cupcakes moist and tender; ensure both are at room temperature for easier mixing.

For the Ganache Filling

  • Semi-Sweet Chocolate – Perfect for the ganache filling; chocolate chips are a convenient alternative if needed.
  • Heavy Cream – Creates a silky, luxurious ganache texture.
  • Raspberry Preserves – Adds a burst of fruit flavor to the ganache; a delightful addition to your Chocolate Raspberry Cupcakes.

For the Frosting

  • Unsalted Butter (for frosting) – Forms the base for your raspberry buttercream; whip until light and fluffy for perfect texture.
  • Powdered Sugar – Sweetens the frosting and gives it structure; adjust for desired sweetness and thickness.
  • Freeze-Dried Raspberries – Imparts color and tartness to the buttercream; can substitute fresh raspberries for a softer texture, but stability may be affected.

Step‑by‑Step Instructions for Chocolate Raspberry Cupcakes

Step 1: Preheat the Oven
Begin by preheating your oven to 350°F (175°C). As it warms up, line a standard cupcake pan with beautiful cupcake liners, ensuring your delightful Chocolate Raspberry Cupcakes will pop with color once baked. This preparation is key to achieving that moist, fluffy texture we all love.

Step 2: Prepare the Dry Ingredients
In a mixing bowl, sift together the all-purpose flour, Dutch process cocoa powder, baking powder, baking soda, salt, and optional espresso powder. This ensures an even distribution of ingredients, contributing to the fluffy rise of the cupcakes. Set your dry mix aside while you whip up the wet ingredients.

Step 3: Mix the Wet Ingredients
In a separate large bowl, cream together the unsalted butter and granulated sugar until the mixture is light and fluffy—about 3 to 4 minutes using a hand mixer. Add the egg, egg yolk, and vanilla extract, continuing to mix until the batter turns pale and creamy. This step builds the base for your luscious Chocolate Raspberry Cupcakes.

Step 4: Combine Wet and Dry Ingredients
Gradually add the room-temperature milk and sour cream to the butter mixture, mixing until well incorporated. Slowly fold in the dry ingredient mixture until just combined, avoiding overmixing to ensure a tender crumb in your cupcakes. The batter should be smooth and slightly thick, ready for filling the cupcake liners.

Step 5: Bake the Cupcakes
Spoon the batter into the lined cupcake pan, filling each cup about three-quarters full. Bake in the preheated oven for 17-20 minutes, watching for a toothpick to come out clean from the center of a cupcake. Once done, let them cool in the pan for 10 minutes before transferring them to a wire rack—this helps maintain their moist texture.

Step 6: Make the Ganache
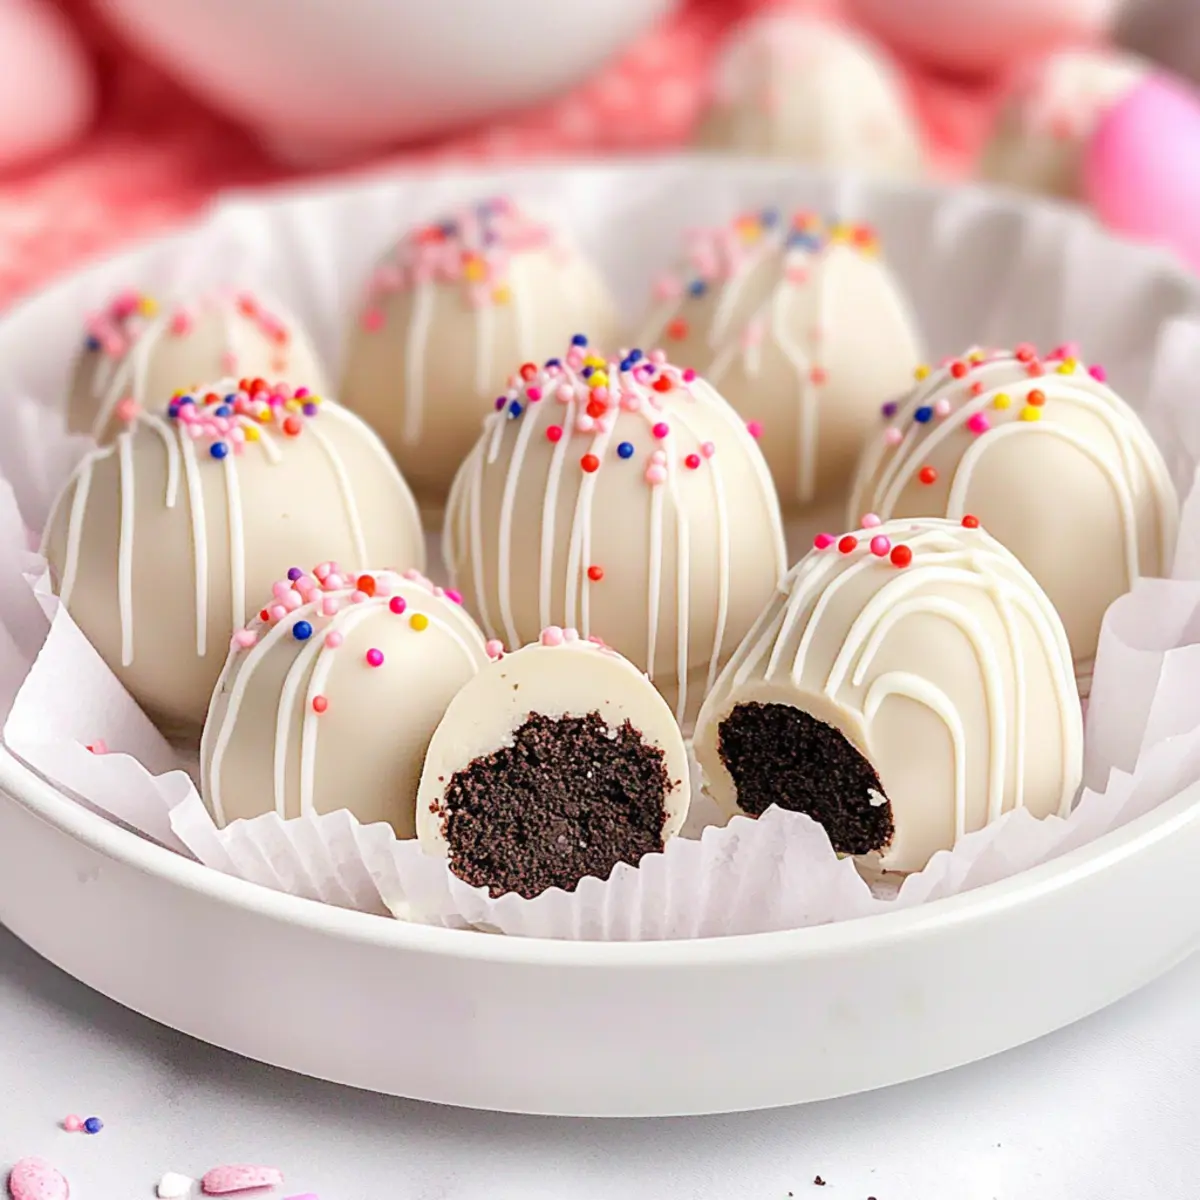
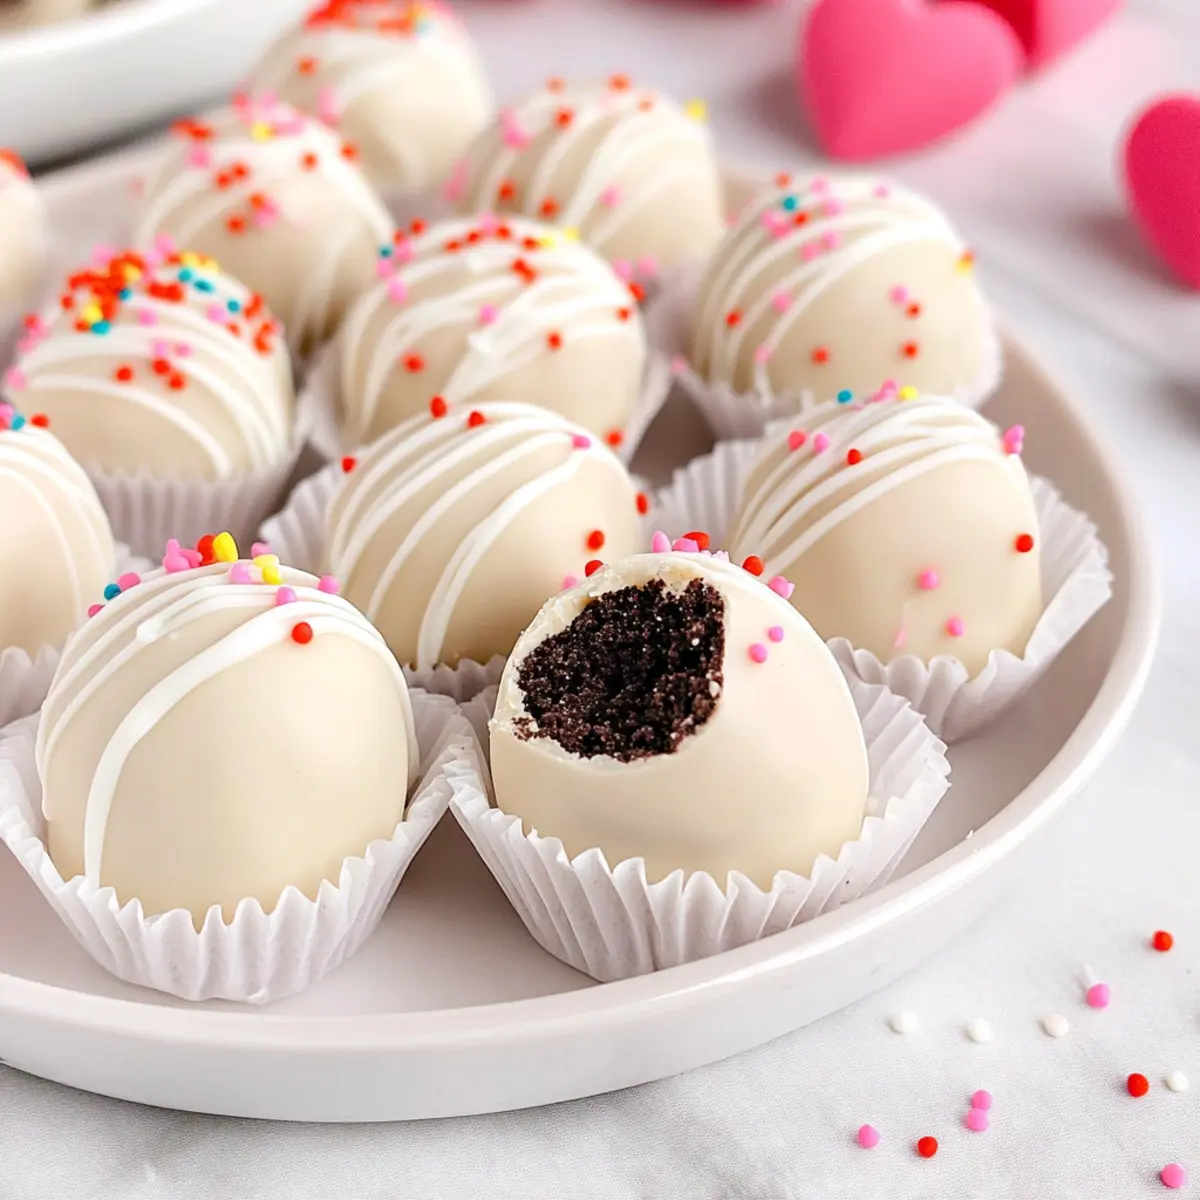
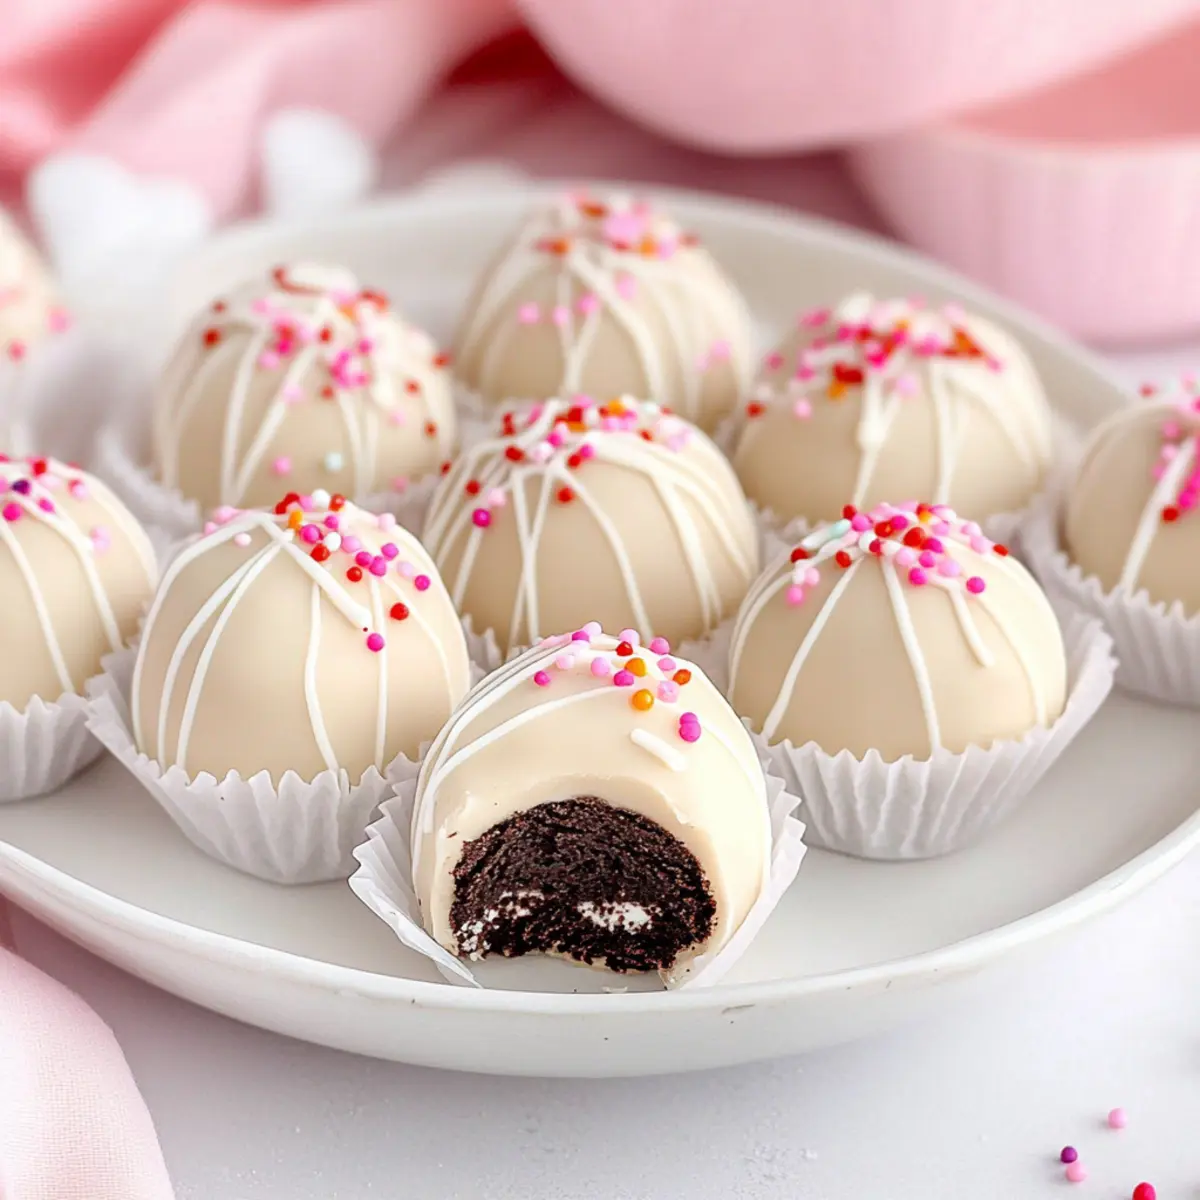
To prepare the delightful ganache filling, heat the heavy cream in a small saucepan until just steaming. Pour the hot cream over the chopped semi-sweet chocolate in a bowl, allowing it to sit for a couple of minutes before stirring in the raspberry preserves. Let the ganache cool and thicken while you prepare the frosting.

Step 7: Prepare the Frosting
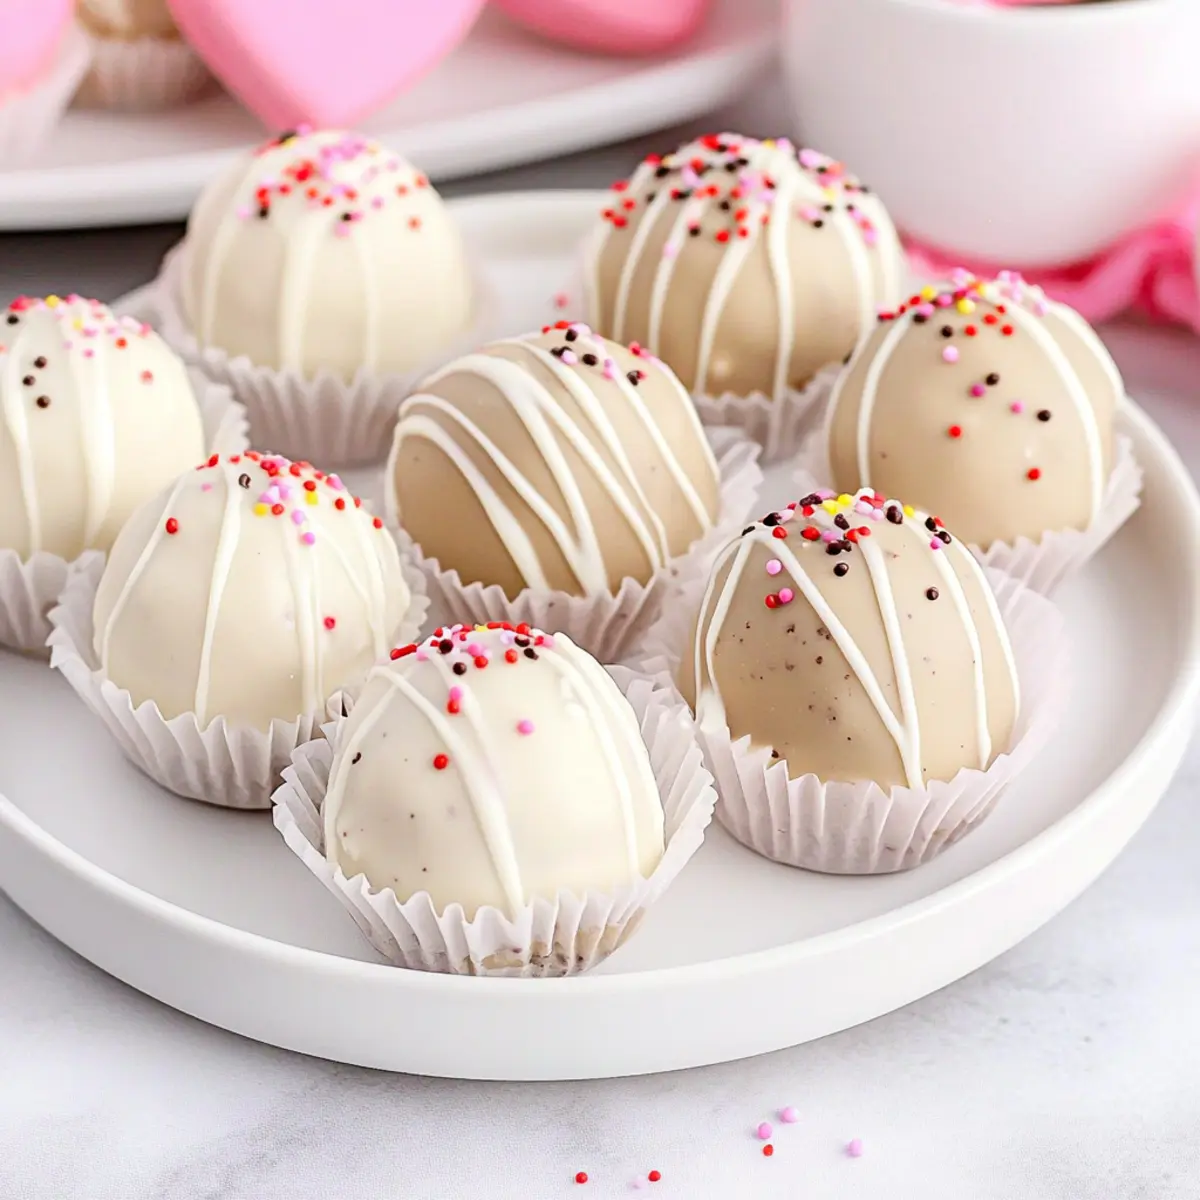
In a mixing bowl, beat the unsalted butter on high speed until it's light and fluffy, about 4-5 minutes. Gradually mix in the powdered sugar, crushed freeze-dried raspberries, remaining raspberry preserves, and vanilla extract. Beat until the frosting is airy and smooth, creating a perfect topping for your moist Chocolate Raspberry Cupcakes.

Step 8: Assemble the Cupcakes
Once the cupcakes have cooled completely, use a cupcake corer or a small knife to create a hole in the center of each cupcake. Fill these holes with your luscious ganache to achieve that delightful surprise inside. Finally, pipe a generous swirl of the raspberry buttercream on top and decorate with fresh raspberries for an irresistible finish.

Expert Tips for Chocolate Raspberry Cupcakes

  • Measure Flour Properly: Measure flour by spooning it into the cup and leveling off. Scooping directly can lead to dense cupcakes.

  • Room Temperature Ingredients: Ensure egg, milk, and sour cream are at room temperature for optimal mixing, giving your Chocolate Raspberry Cupcakes a tender crumb.

  • Mind the Mixing: Avoid overmixing the batter; just combine until no dry ingredients are visible to keep the cupcakes fluffy.

  • Cooling Time: Let cupcakes cool in the pan for 10 minutes before transferring to a wire rack to maintain their moisture and texture.

  • Piping Frosting: Use a piping bag for the buttercream to create beautiful swirls; a large round tip gives a professional touch.

  • Storage Tips: Store leftover cupcakes in an airtight container at room temperature; they stay fresh for up to three days, ensuring you can enjoy them longer!

Chocolate Raspberry Cupcakes Variations

Feel free to explore these delightful twists on the classic Chocolate Raspberry Cupcakes to make them uniquely yours!

  • Gluten-Free: Use a gluten-free flour blend instead of all-purpose flour for a delightful alternative that everyone can enjoy.

  • Fruit Filling: Instead of ganache, try filling your cupcakes with strawberry or blueberry preserves for a fruity surprise that dances on the palate.

  • Cream Cheese Frosting: Swap out the buttercream for a rich cream cheese frosting, adding a tangy flavor that layers beautifully with the chocolate and raspberry.

  • Nutty Crunch: Fold in some chopped nuts or mini chocolate chips into the batter before baking. The added crunch brings a delightful texture that compliments the softness of the cupcakes.

  • Decadent Espresso: For coffee lovers, add a teaspoon of espresso powder to the dry ingredients for an extra depth of flavor—because who could resist chocolate and coffee together?

  • Dairy-Free: Substitute coconut milk and vegan butter to create a dairy-free version of these scrumptious cupcakes without sacrificing flavor.

  • Spicy Kick: For a unique twist, sprinkle in a touch of cayenne or chili powder into the ganache for a spicy kick that surprises the taste buds delightfully.

  • Mini Cupcakes: Make bite-sized versions using a mini cupcake pan. They're perfect for parties and can be served with various toppings, including a drizzle of chocolate sauce!

If you’re intrigued by other dessert adventures, you might enjoy experimenting with this Homemade Hot Chocolate or exploring more chocolate variations like German Chocolate Poke for delightful new experiences!

Make Ahead Options

These Chocolate Raspberry Cupcakes are perfect for those busy days when you want to save time without sacrificing flavor! You can bake the cupcakes up to 24 hours in advance; simply store them in an airtight container at room temperature. The ganache filling and raspberry buttercream can also be prepared a day ahead and refrigerated separately—just make sure to let them come to room temperature and give them a quick whip before assembly. When ready to serve, core the cooled cupcakes, fill them with the luscious ganache, and pipe on the buttercream for a delightful treat that tastes fresh and delicious, saving you precious time while impressing your loved ones!

How to Store and Freeze Chocolate Raspberry Cupcakes

Room Temperature: Keep leftover cupcakes in an airtight container at room temperature for up to 3 days to maintain their moisture and freshness.

Fridge: For longer storage, place the cupcakes in the fridge, where they will stay fresh for about a week. Just be sure to keep them covered to prevent drying out.

Freezer: If you'd like to freeze your Chocolate Raspberry Cupcakes, wrap them individually in plastic wrap and then place them in a freezer-safe bag. They can be stored for up to 3 months.

Reheating: To enjoy frozen cupcakes, let them thaw overnight in the fridge, then bring them to room temperature before serving. They can also be warmed gently in the microwave for a few seconds if you prefer them a bit cozy!

What to Serve with Chocolate Raspberry Cupcakes

Indulging in these decadent delights opens the door to endless pairing possibilities, enhancing your dessert experience.

  • Vanilla Ice Cream: The creamy texture beautifully contrasts with the moist cupcakes and balances the rich chocolate and raspberry flavors.

  • Decadent Hot Chocolate: A warm, velvety beverage adds to the chocolatey experience, perfect for cozy gatherings or festive occasions.

  • Fresh Berries Salad: Light and refreshing, a mix of strawberries, blueberries, and raspberries offers a tart complement to the sweetness of the cupcakes.

  • Whipped Cream: A dollop of lightly sweetened whipped cream provides fluffiness and a delicate touch that enhances every bite.

  • Sparkling Wine: Elevate your dessert experience with a bubbly pairing. A sweet Prosecco plays well with the fruitiness of the raspberry.

  • Chocolate Covered Strawberries: For the chocolate lover, these elegant treats mirror the flavors in your cupcakes while adding a delightful crunch.

  • Chocolate Lava Cake: Rich and gooey, this dessert creates a luxurious chocolate trio when served alongside your cupcakes for absolute indulgence.

  • Coffee or Espresso: The bitter notes of coffee enhance the chocolate flavors, making it the perfect drink pairing for your sweet affair.

  • Mint Chocolate Chip Milkshake: This playful twist on a classic adds creaminess and a touch of minty freshness that cuts through the richness of the cupcakes.

These delicious companions will elevate your Chocolate Raspberry Cupcakes to new heights, making any occasion unforgettable!

Chocolate Raspberry Cupcakes Recipe FAQs

How do I choose ripe raspberries for my cupcakes?
Absolutely! Look for raspberries that are plump, firm, and have a vibrant color. Avoid those with dark spots or mushiness, as they may indicate overripeness. Fresh raspberries not only enhance the visual appeal but also ensure a bright, tangy flavor in your cupcakes.

How should I store leftover Chocolate Raspberry Cupcakes?
For sure! Keep your leftover cupcakes in an airtight container at room temperature for up to 3 days. If you prefer longer storage, transfer them to the fridge, where they can last about a week—just remember to keep them covered, so they stay moist.

Can I freeze Chocolate Raspberry Cupcakes? If so, how?
Yes, you can! To freeze your cupcakes, wrap each one individually in plastic wrap, ensuring they are tightly covered to prevent freezer burn. Next, place them in a freezer-safe bag, and they will be good for up to 3 months. When you're ready to enjoy them, thaw overnight in the refrigerator before bringing them to room temperature.

What should I do if my cupcakes aren’t rising properly?
Very! If your cupcakes aren’t rising as expected, it could be due to stale baking powder or baking soda. Ensure these leavening agents are fresh. Additionally, avoid overmixing the batter, as this can lead to dense cupcakes. Lastly, ensure your oven is preheated properly; if it's not hot enough, the cupcakes will struggle to rise.

Are there any allergy considerations with your Chocolate Raspberry Cupcakes?
Definitely! These cupcakes contain common allergens such as eggs and dairy. If you’re baking for someone with allergies, consider using egg replacers like flaxseed or unsweetened applesauce and dairy alternatives like almond milk or coconut cream. For gluten-free options, substitute the all-purpose flour with a gluten-free blend.

How can I modify the flavor profile of my cupcakes?
Feel free to get creative! You can swap the raspberry preserves for other flavors like strawberry or blueberry for a different twist. For a delightful texture, consider folding mini chocolate chips into the batter before baking. Don't hesitate to adapt to your taste!

Chocolate Raspberry Cupcakes

Decadent Chocolate Raspberry Cupcakes with Creamy Ganache

Experience irresistible Chocolate Raspberry Cupcakes—a perfect blend of rich chocolate and tangy raspberry for any occasion.
Print Recipe Pin Recipe
Prep Time 30 minutes mins
Cook Time 20 minutes mins
Cooling Time 10 minutes mins
Total Time 1 hour hr
Servings: 12 cupcakes
Course: Dessert
Cuisine: American
Calories: 320
Ingredients Equipment Method Nutrition Notes

Ingredients
  

For the Cupcakes
  • 1.5 cups All-purpose Flour For gluten-free, use a gluten-free flour blend.
  • 0.75 cups Dutch Process Cocoa Powder Regular cocoa powder can be substituted.
  • 1 tsp Baking Powder Ensure freshness for best results.
  • 0.5 tsp Baking Soda Ensure freshness for best results.
  • 0.5 tsp Salt Enhances sweetness.
  • 1 tsp Espresso Powder Optional; adds depth to flavor.
  • 0.5 cups Unsalted Butter At room temperature.
  • 1 cups Granulated Sugar Sweetens and tenderizes.
  • 1 whole Egg At room temperature.
  • 1 yolk Egg Yolk At room temperature.
  • 1 tsp Vanilla Extract Enhances flavor.
  • 0.5 cups Whole Milk At room temperature.
  • 0.5 cups Sour Cream At room temperature.
For the Ganache Filling
  • 8 oz Semi-Sweet Chocolate Chopped, chocolate chips can be used.
  • 0.5 cups Heavy Cream Creates silky texture.
  • 0.25 cups Raspberry Preserves Adds fruit flavor.
For the Frosting
  • 0.5 cups Unsalted Butter (for frosting) At room temperature.
  • 2 cups Powdered Sugar Adjust for sweetness.
  • 0.5 cups Freeze-Dried Raspberries For color and tartness.

Equipment

  • Oven
  • Mixing bowls
  • Cupcake pan
  • hand mixer
  • sifter
  • Saucepan
  • Cupcake Corer
  • piping bag

Method
 

Cupcake Instructions
  1. Preheat the oven to 350°F (175°C) and line a cupcake pan with liners.
  2. Sift together flour, cocoa powder, baking powder, baking soda, salt, and espresso powder in a bowl.
  3. Cream butter and sugar until light and fluffy, then add egg, yolk, and vanilla.
  4. Mix in milk and sour cream, then fold in dry ingredients until just combined.
  5. Spoon batter into liners and bake for 17-20 minutes. Cool for 10 minutes.
  6. Make ganache by heating cream and pouring it over chocolate; stir in raspberry preserves.
  7. Beat butter for frosting, then gradually mix in sugar and raspberries until smooth.
  8. Create holes in cooled cupcakes and fill with ganache, then frost with raspberry buttercream.

Nutrition

Serving: 1cupcakeCalories: 320kcalCarbohydrates: 45gProtein: 4gFat: 15gSaturated Fat: 9gPolyunsaturated Fat: 1gMonounsaturated Fat: 4gCholesterol: 40mgSodium: 180mgPotassium: 150mgFiber: 2gSugar: 30gVitamin A: 5IUVitamin C: 3mgCalcium: 2mgIron: 8mg

Notes

Store cupcakes in an airtight container at room temperature for up to 3 days, or refrigerate for a week. Freeze for up to 3 months wrapped individually.

Tried this recipe?

Let us know how it was!

Hidden Heart Chocolate Loaf Cake: A Sweet Surprise Inside

February 3, 2026 by Grace Snow Leave a Comment

As I preheat the oven and gather my ingredients, excitement builds for the Hidden Heart Chocolate Loaf Cake—a delightful showstopper perfect for Valentine’s Day. Each slice reveals a charming pink heart nestled within a rich chocolate exterior, transforming dessert into a heartfelt love note. This cake not only impresses with its striking appearance but also boasts a moist texture paired with silky dark chocolate buttercream, ensuring it’s a crowd-pleaser at any gathering. Plus, it offers the flexibility of gluten-free and dairy-free options, making it an inclusive treat for all. Ready to create a memorable moment with this lovely cake? Let’s get baking!

Why Is This Cake So Special?

Delightful Surprise: The Hidden Heart Chocolate Loaf Cake is more than just a dessert; it’s a heartfelt gesture that brings smiles with every slice.

Beautiful Presentation: Featuring a stunning pink heart hidden inside a rich chocolate exterior, it’s perfect for impressing loved ones or guests.

Versatile Options: Tailor it to your guests' needs with gluten-free or dairy-free variations, ensuring everyone can enjoy this sweet treat.

Easy to Make: With straightforward instructions and common ingredients, this recipe is accessible even for novice bakers.

Crowd Favorite: The combination of rich chocolate flavor and a charming hidden design makes it ideal for celebrations—think Valentine’s Day or anniversaries!

Consider pairing this lovely cake with fresh strawberries or whipped cream for an extra touch, and if you're looking for more chocolate delights, check out our Chocolate Pudding Cake for a classic finish to your meal!

Hidden Heart Chocolate Loaf Cake Ingredients

For the Pink Sponge

  • Baking spread (175g) – Provides fat and moisture; you can substitute with unsalted butter.
  • Caster sugar (175g) – Sweetens and contributes to the cake's texture; regular granulated sugar works too.
  • Eggs (3 large) – Binds ingredients while adding richness; ensure they're at room temperature.
  • Vanilla extract (1 tsp) – Adds flavor complexity; using pure vanilla extract will give the best results.
  • Self-raising flour (175g) – Gives structure and lightness; substitute with plain flour and add baking powder (2 tsp per 200g).
  • Pink food coloring – Creates the vibrant color for the heart; opt for professional-grade gel for best results.

For the Chocolate Sponge

  • Cocoa powder (35g) – Provides richness and deep chocolate flavor; make sure to use unsweetened cocoa powder.
  • Milk (1 ½ tbsp) – Adds moisture to the chocolate sponge; you can use dairy or non-dairy milk.
  • Baking powder (½ tsp) – Adds leavening when using plain flour.

For the Buttercream

  • Butter (100g, softened and unsalted) – The main fat for the buttercream; it’s best if at room temperature.
  • Icing sugar (200g) – Sweetens and thickens the buttercream; sift for a smoother finish.

For Decoration

  • Heart sprinkles – Optional decoration to enhance visual appeal and celebrate the hidden heart feature.

With these ingredients in hand, you're all set to create your very own Hidden Heart Chocolate Loaf Cake, a centerpiece sure to delight and surprise!

Step‑by‑Step Instructions for Hidden Heart Chocolate Loaf Cake

Step 1: Preheat the Oven
Begin by preheating your oven to 160°C fan/180°C/350°F/Gas Mark 4. While the oven warms up, prepare a 2lb loaf tin by greasing it or lining it with parchment paper to ensure easy removal later. This initial step sets the foundation for baking the perfect Hidden Heart Chocolate Loaf Cake, so make sure your oven reaches the desired temperature.

Step 2: Make the Pink Sponge
In a mixing bowl, cream together 175g of baking spread and 175g of caster sugar for about 3 minutes until the mixture is light and fluffy. Next, add 3 large room-temperature eggs and 1 teaspoon of vanilla extract, mixing well to incorporate. Gradually fold in 175g of self-raising flour and a few drops of pink food coloring until combined, achieving a smooth batter. Pour this into the prepared loaf tin and bake for approximately 50 minutes, or until a skewer inserted in the center comes out clean. Let it cool completely before trimming the ends, scoring the top, and cutting out hearts from the sponge.

Step 3: Create the Chocolate Sponge
Using the same mixing technique, cream another 175g of baking spread and 175g of caster sugar for about 3 minutes. Incorporate the 3 large eggs and 1 ½ tablespoons of milk, blending until fully combined. Gradually fold in 175g of self-raising flour, 35g of cocoa powder, and ½ teaspoon of baking powder, ensuring a smooth chocolate batter. Spread a layer of this delightful mixture into the bottom of the loaf tin, arrange the heart-shaped cutouts of pink sponge on top, and cover them with the remaining chocolate batter. Bake for another 50 minutes, and once cooled completely, remove it from the tin.

Step 4: Prepare the Buttercream
In a clean mixing bowl, beat 100g of softened unsalted butter until fluffy and light in color. Gradually add in 200g of sifted icing sugar along with 1 teaspoon of vanilla extract and 1 ½ tablespoons of milk, mixing until smooth. For an indulgent touch, mix in melted dark chocolate until the buttercream reaches a silky, spreadable consistency. This rich buttercream will perfectly complement your Hidden Heart Chocolate Loaf Cake.

Step 5: Frost and Decorate the Cake
Once the cake layers have cooled completely, generously frost the top and sides with the luscious buttercream. If desired, add heart sprinkles on top to enhance the visual appeal of your Hidden Heart Chocolate Loaf Cake. Slice into this enchanting dessert to reveal the charming pink heart inside; it's sure to delight everyone who gets a taste!

Hidden Heart Chocolate Loaf Cake Variations

Feel free to let your creativity shine by customizing your Hidden Heart Chocolate Loaf Cake—there’s a world of delightful twists and substitutions to explore!

  • Gluten-Free: Use a 1:1 gluten-free baking flour blend and ensure all other ingredients are gluten-free too.

  • Dairy-Free: Substitute the baking spread with a plant-based alternative and swap the milk for almond or oat milk.

  • Different Colors: For a vibrant twist, try using red food coloring instead of pink to match different celebrations or preferences.

  • Flavored Buttercream: Add a hint of almond or orange extract to the buttercream for an exciting flavor boost.

  • Additions: Stir in mini chocolate chips or nuts into the chocolate batter for extra texture and flavor.

  • Alternative Shapes: Instead of hearts, use cookie cutters to create different hidden shapes, such as stars or flowers.

  • Spiced Cake: Incorporate a teaspoon of cinnamon or even chili powder into the chocolate batter for a warm, spicy kick.

By trying out these variations, you can make this cake uniquely yours! If you’re craving more chocolatey goodness, consider checking out our Chocolate Pudding Cake for another delicious treat. Enjoy the baking journey!

Expert Tips for Hidden Heart Chocolate Loaf Cake

Room Temperature Ingredients: Use room temperature butter and eggs for a smoother batter and improved texture in your Hidden Heart Chocolate Loaf Cake.

Don’t Overmix: When incorporating flour into the batter, mix just until combined to maintain a light and airy texture.

Think Ahead: Refrigerate your cut-out hearts before baking the chocolate sponge; this helps them hold their shape better during baking.

Use Quality Cocoa: For a richer chocolate flavor, opt for high-quality unsweetened cocoa powder in your chocolate batter.

Proper Cooling: Allow the cake to cool completely before frosting, ensuring the buttercream doesn’t melt and the cake holds its shape beautifully.

What to Serve with Hidden Heart Chocolate Loaf Cake

Indulge your senses and create the ultimate dessert experience by pairing this delightful cake with these fabulous accompaniments.

  • Whipped Cream: A dollop of freshly whipped cream adds a light and creamy contrast, enhancing the cake's rich chocolate flavor.
  • Fresh Strawberries: Juicy, ripe strawberries bring a burst of freshness that perfectly complements the indulgent chocolate, making for a beautiful presentation.
  • Vanilla Ice Cream: Creamy vanilla ice cream melts into the warm cake, providing a delightful contrast in temperature and a luscious mouthfeel.
  • Chocolate Ganache: Drizzling smooth chocolate ganache over the top amplifies the chocolate experience, making it even more decadent.
  • Mint Leaves: A sprinkle of chopped fresh mint brightens the dish and adds a refreshing herbal note, creating a lovely balance with the sweetness.
  • Decadent Hot Chocolate: Pairing with a rich, creamy hot chocolate makes for an ultimate chocolate lover’s dream, perfect for cozy evenings.
  • Espresso or Coffee: A warm cup of espresso or coffee enhances and complements the chocolate flavor, perfect for rounding out a sweet indulgence.
  • Sparkling Wine: For celebrations, a bit of sparkling wine adds a festive touch, making every bite feel like a special occasion.
  • Chocolate-Covered Strawberries: As an extra treat, chocolate-covered strawberries mirror the flavors of the cake, making it a delightful addition to your dessert spread.

How to Store and Freeze Hidden Heart Chocolate Loaf Cake

Room Temperature: Keep the cake in an airtight container at room temperature for up to 3 days to maintain its moisture and flavor.

Fridge: If you need to store it longer, place the cake in the refrigerator for up to a week, ensuring it's well-wrapped to prevent drying out.

Freezer: For longer storage, freeze the cake, either decorated or undecorated, for up to 3 months. Make sure to wrap it tightly with plastic wrap and then with aluminum foil.

Reheating: When ready to enjoy, thaw the cake in the fridge overnight and allow it to come to room temperature before serving. Enjoy the delightful surprise of the Hidden Heart Chocolate Loaf Cake!

Make Ahead Options

Preparing the Hidden Heart Chocolate Loaf Cake in advance is a fantastic way to save time, especially for busy weeknights or special occasions. You can make the pink sponge and chocolate sponge up to 24 hours ahead; simply bake them, let them cool completely, and then wrap each layer tightly in plastic wrap to maintain moisture. The buttercream can also be made up to 3 days in advance and stored in an airtight container in the refrigerator. When you’re ready to serve, just frost the cake and add the heart sprinkles for that finishing touch. By prepping these components ahead, your cake will be just as delightful and fresh, allowing you to focus on enjoying the moment!

Hidden Heart Chocolate Loaf Cake Recipe FAQs

How do I select ripe and fresh ingredients for this cake?
Absolutely! For the best results, choose fresh eggs, ideally free-range, as they provide better flavor and richer color. Look for baking spreads and butter that are at room temperature for easy creaming with sugar. Be sure to check the expiry dates on the baking powder and flour so that they are still effective for leavening.

How should I store the Hidden Heart Chocolate Loaf Cake?
You can store your cake in an airtight container at room temperature for up to 3 days. If you want it to last longer, it can be refrigerated for up to a week. Just make sure it's well-wrapped to prevent it from drying out. It’s so lovely to take out a slice on a special occasion!

Can I freeze the cake, and how should I do it?
Absolutely! To freeze the Hidden Heart Chocolate Loaf Cake, wrap it tightly in plastic wrap and then in aluminum foil to prevent freezer burn. You can freeze it for up to 3 months. When you’re ready to enjoy, thaw it in the fridge overnight, then let it come to room temperature before serving. This way, the flavors will remain rich and delicious!

What should I do if the cake doesn't rise properly?
Very! If your cake doesn't rise, ensure that your baking powder is fresh and that you haven't overmixed the batter. Overmixing can create a dense cake by developing gluten in the flour. Also, remember to preheat your oven correctly to the temperature specified in the recipe to achieve that perfect rise.

Are there any dietary considerations for the Hidden Heart Chocolate Loaf Cake?
Absolutely! You can make a gluten-free version by substituting gluten-free self-raising flour. For a dairy-free option, simply swap out the butter for a plant-based spread and use dairy-free chocolate in the buttercream. Just make sure to double-check all ingredients for hidden allergens to cater to anyone with allergies!

Is this cake pet-friendly?
No! Chocolate is toxic to pets, especially dogs and cats, so it's best to keep it out of their reach. Always opt for pet-friendly treats for your furry friends to ensure their health and happiness!

Hidden Heart Chocolate Loaf Cake

Hidden Heart Chocolate Loaf Cake: A Sweet Surprise Inside

The Hidden Heart Chocolate Loaf Cake is a delightful dessert revealing a charming pink heart within a rich chocolate exterior, perfect for Valentine’s Day.
Print Recipe Pin Recipe
Prep Time 20 minutes mins
Cook Time 1 hour hr 40 minutes mins
Cooling Time 1 hour hr
Total Time 3 hours hrs
Servings: 8 slices
Course: Dessert
Cuisine: American
Calories: 320
Ingredients Equipment Method Nutrition Notes

Ingredients
  

For the Pink Sponge
  • 175 g baking spread Can substitute with unsalted butter.
  • 175 g caster sugar Regular granulated sugar works too.
  • 3 large eggs Ensure they're at room temperature.
  • 1 tsp vanilla extract Using pure vanilla extract is best.
  • 175 g self-raising flour Can substitute with plain flour and add baking powder (2 tsp per 200g).
  • pink food coloring Opt for professional-grade gel for best results.
For the Chocolate Sponge
  • 35 g cocoa powder Ensure to use unsweetened cocoa powder.
  • 1.5 tbsp milk Can use dairy or non-dairy milk.
  • 0.5 tsp baking powder Used when using plain flour.
For the Buttercream
  • 100 g butter Softened and unsalted, best at room temperature.
  • 200 g icing sugar Sift for a smoother finish.
For Decoration
  • heart sprinkles Optional decoration.

Equipment

  • loaf tin
  • Mixing Bowl
  • Silicone Spatula
  • Whisk

Method
 

Preparation Steps
  1. Step 1: Preheat the oven to 160°C fan/180°C/350°F/Gas Mark 4. Prepare a 2lb loaf tin by greasing it or lining it with parchment paper.
  2. Step 2: Make the pink sponge: Cream together baking spread and caster sugar, add eggs and vanilla, then fold in self-raising flour with pink food coloring. Bake for approx. 50 mins.
  3. Step 3: Create the chocolate sponge: Cream baking spread and caster sugar, add eggs and milk, then fold in self-raising flour, cocoa powder, and baking powder. Layer in the loaf tin and bake for another 50 mins.
  4. Step 4: Prepare the buttercream: Beat softened butter until fluffy, add icing sugar, vanilla, and milk to mix until smooth. Optionally mix in melted dark chocolate.
  5. Step 5: Frost and Decorate the Cake: Once cooled, frost the cake with buttercream and top with heart sprinkles if desired.

Nutrition

Serving: 1sliceCalories: 320kcalCarbohydrates: 45gProtein: 4gFat: 15gSaturated Fat: 9gCholesterol: 80mgSodium: 200mgPotassium: 150mgFiber: 1gSugar: 25gVitamin A: 500IUCalcium: 50mgIron: 2mg

Notes

Use room temperature ingredients for a smoother batter. Don’t overmix to maintain texture. Refrigerate heart cutouts before baking for better shape retention.

Tried this recipe?

Let us know how it was!

Delicious Heart Shaped Brownies for Your Sweetest Moments

February 3, 2026 by Grace Snow Leave a Comment

What is it about a heart-shaped treat that instantly brings a smile? As soon as I take a bite of these fudgy heart-shaped brownies, memories of cozy celebrations flood my mind. Perfectly rich and chewy, this easy one-bowl recipe makes baking a breeze, letting you whip up these delectable brownies in under an hour and fifteen minutes. With a shiny top and chewy edges, they're sure to impress your loved ones—especially on Valentine’s Day. Plus, cleanup is a snap, allowing you to focus on the sweetness of the moment rather than the mess. Wouldn’t you love to share a plate of these delightful brownies with someone special?

Why Are Heart Shaped Brownies So Special?

Simplicity at its Best: This easy one-bowl recipe is a game changer! You’ll love how quick it is to prepare these fudgy heart-shaped brownies—mix, bake, and enjoy.

Impressive & Festive: The heart shapes make them a standout choice for Valentine’s Day or any special occasion. They elevate your dessert game, bringing smiles to everyone at the table.

Rich, Decadent Flavor: The combination of unsweetened cocoa and chocolate chips delivers a deep chocolate flavor that satisfies any sweet tooth.

Versatile Treat: Feel free to swap in your favorite mix-ins or pair these brownies with ice cream or fresh strawberries for an even more delightful experience.

Crowd-Pleaser: These brownies are designed to charm—everyone will be asking for seconds! They’re the perfect way to show love and affection to friends and family.

For more sweet ideas, check out my delicious Pumpkin Brownies Decadent or the yummy Cinnamon Roll Muffins.

Heart Shaped Brownies Ingredients

Get ready to whip up something special with these easy heart-shaped brownies!

For the Brownie Batter

  • Unsalted Butter – Adds richness and moisture; you can substitute with salted butter but reduce additional salt.
  • Granulated Sugar – Provides sweetness for those fudgy heart shaped brownies; swap with brown sugar for a deeper flavor.
  • Large Eggs – Binds the ingredients for that chewy texture; no substitute recommended.
  • Vanilla Extract – Enhances flavor; for a twist, use almond extract!
  • Unsweetened Cocoa Powder – Gives the brownies their beloved chocolate flavor; consider dark cocoa for a richer treat.
  • All-Purpose Flour – Acts as the backbone of the brownies; gluten-free flour can easily be swapped in.
  • Salt – Enhances flavor and balances sweetness; reducing it may lessen the flavor complexity.
  • Baking Powder – Provides the lift needed for lighter brownies; ensure it's fresh for the best results.
  • Chocolate Chips – Boosts the chocolate flavor and texture; go for milk or dark chocolate based on your preference.

For Cutting

  • Heart-Shaped Cookie Cutter – Essential for creating charming heart shapes; feel free to use different shapes if you want to mix it up!

Step‑by‑Step Instructions for Heart Shaped Brownies

Step 1: Preheat and Prepare
Start by preheating your oven to 350°F (175°C). Next, grease an 8-inch square baking pan and line it with parchment paper, allowing some overhang on the sides. This will make it easy to lift the brownies out later. Set your prepared pan aside while you mix the batter.

Step 2: Melt the Butter
In a microwave-safe bowl, melt ½ cup of unsalted butter in the microwave for about 30 seconds to 1 minute, checking for a fully melted consistency. Stir it soft, then add 1 cup of granulated sugar, 2 large eggs, and 1 teaspoon of vanilla extract. Whisk everything together until the mixture is smooth and glossy, ensuring a rich foundation for your heart shaped brownies.

Step 3: Combine Dry Ingredients
Next, sift in ½ cup of unsweetened cocoa powder, ½ cup of all-purpose flour, ¼ teaspoon of salt, and ¼ teaspoon of baking powder to the wet mixture. Gently fold the dry ingredients into the wet ones using a spatula or wooden spoon. Mix until just combined; be careful not to overmix, as you want to keep the batter thick and fudgy.

Step 4: Add Chocolate Chips
Now it's time to enhance your heart shaped brownies! Fold in ½ cup of chocolate chips, distributing them evenly throughout the batter. This addition not only intensifies the chocolate flavor but also adds delightful pockets of melted chocolate in each bite.

Step 5: Spread the Batter
Pour the brownie batter into the prepared baking pan, using a spatula to evenly spread it out to the corners. Make sure the chocolate mixture is well-distributed so that each piece has that fudgy, chewy texture. The thickness of the batter will create the perfect structure when baked.

Step 6: Bake to Perfection
Place your baking pan in the preheated oven and bake for 20–25 minutes. To check for doneness, insert a toothpick into the center of the brownies; it should come out with a few moist crumbs. Avoid overbaking to keep your heart shaped brownies fudgy and soft.

Step 7: Cool and Cut
Once baked, allow the brownies to cool completely in the pan on a wire rack. This usually takes about 30 minutes. After cooling, use a heart-shaped cookie cutter to cut out the brownies into charming shapes. For cleaner edges, consider chilling the brownies briefly before cutting.

Step 8: Serve with a Smile
Your delightful heart shaped brownies are now ready to share! Dust them with powdered sugar or drizzle some melted chocolate for an elegant touch, perfect for a special occasion like Valentine’s Day. Enjoy serving these sweet treats to your loved ones!

Expert Tips for Heart Shaped Brownies

Chill Before Cutting: Chilling the brownies for about 30 minutes before using the cookie cutter helps achieve cleaner shapes and prevents crumbling.

Don’t Overbake: Keep an eye on the baking time; overbaking can lead to dry heart shaped brownies. Aim for moist crumbs on the toothpick test.

Flavor Enhancements: Consider adding a pinch of espresso powder to deepen the chocolate flavor or a splash of peppermint extract for a festive twist.

Diverse Toppings: Dust with powdered sugar, drizzle melted chocolate, or serve with ice cream to elevate your heart shaped brownies—perfect for impressing loved ones.

Quality Ingredients: Use high-quality cocoa powder and chocolate chips to truly savor those rich flavors; the difference is noticeable!

What to Serve with Fudgy Heart Shaped Brownies?

Indulge in a complete experience by pairing these delightful treats with complementary flavors and textures that enhance their richness.

  • Vanilla Ice Cream: Scoop this classic pairing alongside your brownies for a creamy, cool contrast that melts into yummier bites.

  • Fresh Strawberries: Slice up some juicy strawberries; their bright flavor and freshness perfectly balance the rich, fudgy brownies.

  • Whipped Cream: Light and fluffy, a dollop of whipped cream adds an airy touch that enhances the brownies’ decadence.

  • Chocolate Sauce: Drizzle warm chocolate sauce over your brownies for an extra layer of chocolatey goodness that will satisfy even the most intense cravings.

  • Espresso: A small cup of strong espresso offers a delightful contrast, enhancing the chocolate's depth while providing an energizing kick.

  • Dusting of Powdered Sugar: A simple garnish of powdered sugar lends a touch of elegance, making these brownies look as gorgeous as they taste.

  • Caramel Sauce: For a sweet and salty twist, add a drizzle of caramel sauce—its buttery richness elevates each bite to sheer bliss.

  • Chilled Milk: Nothing quite beats the nostalgic combination of brownies and a cold glass of milk, making it a comforting classic treat.

Sharing these pairings will elevate your dessert experience and create sweet memories that linger long after the last heart-shaped brownie is devoured.

Make Ahead Options

These fudgy heart shaped brownies are perfect for busy home cooks looking to save time without sacrificing flavor! You can prepare the brownie batter up to 24 hours in advance; simply mix the ingredients as instructed, then cover the bowl tightly and refrigerate it. This will not only enhance the chocolate flavor but also make for a smoother baking process when you're ready to bake. When it's time to bake, pour the chilled batter into your prepared pan and follow the original baking instructions. For even cleaner edges, consider chilling the brownies after baking before using your heart-shaped cookie cutter. Enjoy the ease of having a delightful dessert ready to impress at a moment's notice!

Heart Shaped Brownies Variations

Feel free to get creative with these fudgy heart-shaped brownies! Each twist can enhance the experience, allowing you to leave a lasting impression.

  • Nutty Add-Ins: Fold in chopped walnuts or pecans for a delightful crunch and added flavor depth.
    Incorporating nuts can elevate the texture, introducing a satisfying crunch to balance the fudginess.

  • Flavored Extracts: Experiment with different extracts like almond or hazelnut to change the flavor profile.
    This small adjustment can lead to uniquely flavored brownies that surprise and delight your taste buds.

  • Fruit Boost: Add fresh raspberries or cherries to the batter for a fruity twist that complements the chocolate.
    These juicy bursts of flavor create a lovely contrast with the rich chocolate, making each bite a celebration.

  • Dairy-Free: Swap butter with coconut oil or a dairy-free butter substitute for a delicious dairy-free version.
    This twist makes the recipe accessible while still yielding a rich and fudgy treat everyone can enjoy.

  • Gluten-Free: Use a 1-to-1 gluten-free flour blend instead of all-purpose flour for a gluten-free version.
    Enjoying brownies shouldn't be limited—this swap ensures everyone can revel in the fudgy goodness!

  • Decadent Toppings: Drizzle with salted caramel or chocolate ganache for an extra decadent treat.
    Toppings can elevate your brownies from simple to sensational, creating a truly indulgent dessert experience.

For even more sweet ideas, try my delicious Pumpkin Brownies Decadent or the delicious Crispy Parmesan Artichoke Hearts for some savory balance!

  • Spicy Delight: Add a pinch of cayenne pepper or chili powder for a surprising hit of heat.
    This unexpected addition can create a thrilling contrast to the sweetness, awakening your taste buds!

How to Store and Freeze Heart Shaped Brownies

Room Temperature: Keep your heart shaped brownies in an airtight container at room temperature for up to 3 days, allowing them to stay soft and fudgy.

Fridge: For longer freshness, store the brownies in the fridge for up to a week. Just remember to seal them well to prevent drying out.

Freezer: You can freeze brownies for up to 3 months. Wrap them individually in plastic wrap and place in a freezer-safe container for easy access to sweet treats later.

Reheating: To enjoy frozen heart shaped brownies, thaw in the fridge overnight and reheat in the microwave for 10-15 seconds, just until warm!

Heart Shaped Brownies Recipe FAQs

How do I choose the best ingredients for heart shaped brownies?
Absolutely! For the best results, pick high-quality unsweetened cocoa powder and chocolate chips; it makes a noticeable difference in flavor. Ensure eggs are fresh for the right binding texture, and use unsalted butter to control salt levels. For the perfect cocoa, look for a rich, dark color without any lumps—this ensures you’re getting that deep flavor in your brownies.

How should I store heart shaped brownies, and how long do they last?
For room temperature storage, place your heart shaped brownies in an airtight container where they’ll stay fresh for up to 3 days. If you want them to last longer, refrigerate them for up to a week, but make sure they're sealed well to prevent drying out. I often add a piece of parchment paper between layers to keep them from sticking together—works like a charm!

Can I freeze heart shaped brownies, and what’s the best method?
You sure can! To freeze your heart shaped brownies, wrap them individually in plastic wrap to prevent freezer burn, then place them in a freezer-safe container. They can be frozen for up to 3 months. When you’re ready to enjoy, simply thaw them overnight in the fridge. To warm them up, pop them in the microwave for 10-15 seconds—so delicious!

What should I do if my brownies turn out dry?
If your brownies end up a bit dry, it’s often due to overbaking. Always check for doneness with a toothpick; a few moist crumbs should stick to it. For a remedy, try serving the brownies with a scoop of vanilla ice cream or a drizzle of chocolate sauce. You might also add a splash of coffee in your next batch to boost moisture and flavor!

Are these brownies suitable for a gluten-free diet?
Yes, they can easily be adjusted! Substitute all-purpose flour with a gluten-free flour blend, making sure it includes xanthan gum for baking. However, always check your chocolate chip packaging, as some may contain gluten. But don’t worry—you can still whip up a batch of delicious heart shaped brownies that everyone can enjoy!

Can I use alternative sweeteners in heart shaped brownies?
Very! You can experiment with alternative sweeteners like coconut sugar or even stevia for a lower-calorie option. If you choose to use a liquid sweetener, like agave or honey, remember to adjust the flour slightly to maintain the right brownie texture. Just keep in mind that swapping sweeteners may slightly alter the flavor and texture!

Heart Shaped Brownies

Delicious Heart Shaped Brownies for Your Sweetest Moments

These heart shaped brownies are rich, chewy, and perfect for sweet moments on special occasions.
Print Recipe Pin Recipe
Prep Time 15 minutes mins
Cook Time 25 minutes mins
Cooling Time 30 minutes mins
Total Time 1 hour hr 10 minutes mins
Servings: 12 brownies
Course: Dessert
Cuisine: American
Calories: 200
Ingredients Equipment Method Nutrition Notes

Ingredients
  

For the Brownie Batter
  • 1/2 cup Unsalted Butter Melted
  • 1 cup Granulated Sugar
  • 2 large Large Eggs
  • 1 teaspoon Vanilla Extract
  • 1/2 cup Unsweetened Cocoa Powder
  • 1/2 cup All-Purpose Flour
  • 1/4 teaspoon Salt
  • 1/4 teaspoon Baking Powder
  • 1/2 cup Chocolate Chips
For Cutting
  • Heart-Shaped Cookie Cutter For cutting brownies into shapes

Equipment

  • Oven
  • 8-inch Square Baking Pan
  • Mixing Bowl
  • Whisk
  • Spatula
  • Heart-Shaped Cookie Cutter

Method
 

Step-by-Step Instructions for Heart Shaped Brownies
  1. Preheat your oven to 350°F (175°C) and grease an 8-inch square baking pan.
  2. Melt 1/2 cup of unsalted butter in the microwave, then whisk with 1 cup of granulated sugar, 2 eggs, and 1 teaspoon of vanilla extract until smooth.
  3. Sift in 1/2 cup of cocoa powder, 1/2 cup of flour, 1/4 teaspoon of salt, and 1/4 teaspoon of baking powder. Fold gently until just combined.
  4. Fold in 1/2 cup of chocolate chips evenly throughout the batter.
  5. Spread the brownie batter in the prepared baking pan.
  6. Bake for 20-25 minutes until toothpick comes out with a few moist crumbs.
  7. Allow the brownies to cool completely, then cut out using the heart-shaped cookie cutter.
  8. Dust with powdered sugar or drizzle melted chocolate before serving.

Nutrition

Serving: 1brownieCalories: 200kcalCarbohydrates: 28gProtein: 3gFat: 10gSaturated Fat: 6gPolyunsaturated Fat: 1gMonounsaturated Fat: 3gCholesterol: 50mgSodium: 120mgPotassium: 150mgFiber: 1gSugar: 15gVitamin A: 200IUCalcium: 20mgIron: 1mg

Notes

Chill brownies before cutting for cleaner shapes. Overbaking may lead to dryness, so monitor closely.

Tried this recipe?

Let us know how it was!

Homemade Little Debbie Valentine Cakes for a Sweet Surprise

February 3, 2026 by Grace Snow Leave a Comment

You might feel a rush of sweetness when you catch a whiff of nostalgia wafting through your kitchen, just like the blissful days of your childhood. This is exactly what you’ll experience as you whip up these delightful Homemade Copycat Little Debbie Valentine Cakes. With their tender, moist cake layered with fluffy marshmallow crème and coated in a cheerful pink chocolate, these treats are not just a feast for the eyes, but an easy way to celebrate love on Valentine’s Day. Each bite is reminiscent of those beloved snacks we devoured, but crafted with homemade warmth and care. Plus, they’re perfect for impressing guests or enjoying a sweet moment with someone special! Ready to create some heart-shaped magic that will take you back? Let’s dive in!

Why Love Little Debbie Valentine Cakes?

Nostalgic Treat: These cakes bring back fond childhood memories while adding a homemade touch to your Valentine’s Day festivities.

Simple Steps: With easy-to-follow instructions, even novice bakers can create these delightful desserts without stress.

Rich Marshmallow Filling: The fluffy, sweet marshmallow crème elevates each bite into a luxurious treat that’s sure to impress!

Fun for Any Occasion: Use different cookie cutter shapes to make these cakes perfect for birthdays or anniversaries, not just Valentine’s Day.

Shared Joy: These whimsical creations are perfect for gatherings, sparking smiles and sweet conversations with every slice. If you’re looking for more fun dessert ideas, check out my delicious Crab Cakes Forget and Ricotta Protein Pancakes!

Little Debbie Valentine Cakes Ingredients

For the Cake
• Boxed White Cake Mix – Provides the base structure and flavor. Substitution: Yellow box cake mix can also be used in a pinch.
• Granulated Sugar – Adds sweetness.
• Water – Hydrates the batter.
• Eggs (room temperature) – Contributes to the cake's structure and moisture.
• Vanilla Extract – Enhances flavor.
• Vegetable Oil – Keeps the cake moist and tender.
• All-purpose Flour – Aids in the cake’s structure.
• Kosher Salt – Balances sweetness.
• Full Fat Sour Cream – Adds moisture and richness. Note: Not to skip; it enriches flavor and texture.

For the Filling
• Marshmallow Crème – Used for the filling. Note: Can substitute with marshmallow fluff.
• Salted Butter (room temperature) – Provides creaminess for the filling.
• Powdered Sugar – Gives sweetness to the filling.
• Heavy Cream (room temperature) – Adjusts filling consistency to be spreadable.

For the Coating
• Almond Bark – Coating chocolate; easy to melt. Note: Real white chocolate can be used but may be more temperamental.
• Crisco – Used to adjust the consistency of melted chocolate.
• Pink Gel Food Dye – For coloring the coating chocolate; must be gel-based to avoid seizing.

Step‑by‑Step Instructions for Little Debbie Valentine Cakes

Step 1: Preheat Oven
Begin by preheating your oven to 350°F (175°C). While the oven heats, prepare two half sheet pans by lining them with parchment paper to ensure easy removal of the cake later. This foundation sets the stage for your Homemade Little Debbie Valentine Cakes, so be sure to have everything ready before moving on to the next step.

Step 2: Mix Cake Batter
In a large mixing bowl, combine the boxed white cake mix, granulated sugar, water, eggs, vanilla extract, and vegetable oil. Use a mixer on medium speed to blend these ingredients until smooth, about 2–3 minutes. Next, incorporate the all-purpose flour, kosher salt, and full-fat sour cream, mixing until you achieve a smooth batter that’s ready to be transformed into delightful cake layers.

Step 3: Divide & Bake
Carefully divide the cake batter evenly between the prepared pans, using a spatula to smooth the tops. Place them in the preheated oven and bake for 15-18 minutes, or until a toothpick inserted into the center comes out clean. Once baked, remove the cakes and allow them to cool for 30 minutes at room temperature before placing them in the refrigerator for an additional 30-60 minutes to firm up.

Step 4: Prepare Filling
In a mixing bowl, beat together the marshmallow crème and soft salted butter until fluffy and smooth, approximately 2-3 minutes. Gradually add the powdered sugar and a pinch of salt, then mix thoroughly. Next, incorporate enough heavy cream until you reach a spreadable consistency that will create a deliciously sweet layer for your Little Debbie Valentine Cakes.

Step 5: Cut Cake Hearts
Once cooled completely, remove the cakes from the pans and use a 3-inch heart-shaped cookie cutter to cut out 32 hearts from the cake layers. Gently press the cutter down, making sure you get clean edges. Gather any leftover cake scraps and save them for a fun decoration or snacking later.

Step 6: Assemble Cakes
Take half of the heart-shaped cake pieces and spread a generous layer of the marshmallow filling on top of each. Carefully place another heart on top of each frosted piece, creating a sandwich effect. Once assembled, place them in the freezer for 1 hour to firm up, allowing for easier handling when it’s time to dip them in chocolate.

Step 7: Melt Coating
In a heatproof bowl, melt the almond bark in the microwave or over a double boiler, heating in intervals of 30 seconds and stirring in between until fully melted and smooth. Once melted, mix in a small amount of Crisco to adjust the consistency for a perfect dipping glaze. This coating will beautifully cover your Homemade Little Debbie Valentine Cakes.

Step 8: Dip & Decorate
Remove the frozen cakes from the freezer and carefully dip each one into the melted pink chocolate coating. Allow any excess chocolate to drip off before placing them on a parchment-lined tray. After all the cakes are coated, drizzle any reserved white chocolate on top for a decorative finish. Let them set at room temperature until the coating hardens, and then they’re ready to share!

Make Ahead Options

These Homemade Little Debbie Valentine Cakes are fantastic for meal prep enthusiasts looking to save time during busy days! You can prepare the cake layers and filling up to 24 hours in advance; simply bake and cool the cakes, then wrap them tightly in plastic wrap and refrigerate. The filling can also be made ahead and stored in an airtight container for up to 3 days in the fridge. When you're ready to serve, cut out your heart shapes, assemble the cakes, and freeze briefly for easy dipping in chocolate. By prepping these components in advance, you’ll have a delightful dessert ready to impress with minimal effort on the day of serving!

How to Store and Freeze Little Debbie Valentine Cakes

Fridge: Keep assembled Little Debbie Valentine Cakes in an airtight container in the fridge for up to 1 week, preserving their freshness and flavor.

Freezer: Freeze uncoated, assembled cakes for up to 3 months. Wrap each cake in plastic wrap then foil to prevent freezer burn before dipping in chocolate.

Reheating: To enjoy, let frozen cakes thaw in the fridge overnight before dipping or serving, allowing for a delightful texture.

Room Temperature: If serving the cakes the same day, they can be kept at room temperature for 1-2 hours, ensuring they stay delightful for any gathering.

Little Debbie Valentine Cakes Variations

Feel free to get creative and make these delightful cakes uniquely yours with a few simple adjustments!

  • Cake Flavor: Swap the boxed white cake mix for a chocolate or strawberry cake mix to add a twist in flavor. Vanilla will always be classic, but chocolate will elevate the indulgence!

  • Filling Variety: Try using strawberry or raspberry jam for a fruity filling instead of marshmallow crème. The tartness will perfectly balance the sweetness, creating a delicious contrast!

  • Gluten-Free Option: Use a gluten-free cake mix for accommodating dietary needs without sacrificing taste. Both flavor and texture will still shine through in your creation.

  • Dairy-Free Delight: Substitute the full-fat sour cream and butter with dairy-free alternatives like coconut cream and plant-based butter. Your cakes will be just as rich and delicious!

  • Coating Alternatives: Instead of almond bark, feel free to use chocolate candy melts or dark chocolate for a different coating flavor. Dark chocolate adds a sophisticated touch to these sweet treats.

  • Decorative Shapes: Use cookie cutters to create festive shapes other than hearts, such as stars or flowers, to make these cakes perfect for any occasion or celebration.

  • Extra Crunch: Sprinkle finely chopped nuts or crushed cookies on top after dipping the cakes in chocolate for added texture and a satisfying crunch.

  • Creamy Center: For an added layer of richness, mix in a few spoonfuls of peanut butter or Nutella with the marshmallow filling. It introduces a delightful surprise in each bite!

These variations are just the beginning! Explore your special touches while keeping the nostalgia alive. For more inspiration, don’t miss my delightful Crab Cakes Forget or these tasty Ricotta Protein Pancakes.

What to Serve with Homemade Copycat Little Debbie Valentine Cakes

The perfect sweet companion elevates your celebration, making each bite even more delightful.

  • Fresh Berries: Bright, juicy strawberries and raspberries offer a refreshing contrast to the rich cakes, enhancing the overall sweetness while adding a hint of tartness. Serve them nestled alongside the cakes for an inviting, colorful display.

  • Vanilla Ice Cream: A scoop of creamy vanilla ice cream provides a dreamy, cold balance to the soft, fluffy cakes. The combination of warm and cold sensations will enchant your taste buds and make the moment extra special.

  • Rich Hot Chocolate: Warm, velvety hot chocolate brings a cozy beverage option to your dessert table and effortlessly pairs with the chocolate-coated cakes, inviting everyone to savor each indulgent bite.

  • Whipped Cream: A dollop of freshly whipped cream adds airy lightness, enhancing the sweetness without overwhelming flavors. It creates a charming presentation when piped onto cakes or served alongside.

  • Coffee or Espresso: A rich cup of coffee or a shot of espresso counterbalances the sweetness beautifully, making it an excellent choice for adults enjoying these treats after a romantic dinner.

  • Chocolate-Covered Strawberries: These sweet, decadent additions mirror the pink chocolate coating on the cakes while providing a familiar flavor profile that nods to love and affection. Perfect for sharing!

  • Sparkling Water with Lemon: A refreshing glass of sparkling water with a squeeze of fresh lemon invigorates the palate and cleanses the taste buds, ensuring every bite of cake feels just as special as the first.

  • Pink Champagne: Raise the celebratory flair with a glass of bubbly pink champagne. This effervescent drink adds a luxurious touch to any gathering and pairs beautifully with sweet treats, perfect for toasting to love!

Expert Tips for Little Debbie Valentine Cakes

• Room Temperature Ingredients: Always use room temperature ingredients for better mixing and a fluffy texture in your Little Debbie Valentine Cakes.

• Cool Before Frosting: Make sure your cakes are entirely cooled before adding the filling to prevent it from melting and sliding off.

• Freeze for Stability: Freezing the assembled cakes before dipping helps them maintain their shape and makes handling easier.

• Gel Food Dye: When coloring the coating, opt for gel-based dye to ensure it doesn’t seize, allowing for a smooth chocolate finish.

• Monitor Baking Time: Keep an eye on your cakes while baking; check at the lower end of the time range to avoid overbaking and maintain moisture.

Little Debbie Valentine Cakes Recipe FAQs

What kind of cake mix works best for this recipe?
Absolutely! A boxed white cake mix is preferred for its light and fluffy texture, but in a pinch, you can substitute it with a yellow box cake mix. Just ensure to adjust any other sweeteners as needed for balance!

How do I store my Little Debbie Valentine Cakes?
Keep your assembled cakes in an airtight container in the refrigerator for up to 1 week. This will help preserve their freshness and fluffy marshmallow filling. If you want to store them longer, see the next question!

Can I freeze these cakes?
Yes! To freeze your Little Debbie Valentine Cakes, I recommend wrapping each uncoated cake tightly in plastic wrap and then in foil to prevent freezer burn. They can be stored for up to 3 months. When you’re ready to enjoy them, simply thaw in the fridge overnight before dipping!

What should I do if my chocolate coating seizes during melting?
Oh no! If your chocolate becomes thick and clumpy, it sounds like it may have come into contact with moisture. To remedy this, add a teaspoon of vegetable oil or Crisco while gently reheating it in your microwave or over a double boiler. Stir continuously until smooth and shiny again.

Are there any dietary considerations I should be aware of?
Definitely! If you have guests with specific dietary restrictions, be sure to check for allergies to key ingredients like eggs, dairy, or nut products. You can also make these cakes gluten-free by opting for a gluten-free cake mix, which can still provide that delightful taste and texture!

How can I make these cakes truly special for Valentine’s Day?
Consider adding extra flair by making heart-shaped decorations from colored sprinkles or edible glitter on top of the pink chocolate. You can also experiment with flavored extracts in the cake batter or filling, such as almond or raspberry, to give your Little Debbie Valentine Cakes a unique and personal touch!

Little Debbie Valentine Cakes

Homemade Little Debbie Valentine Cakes for a Sweet Surprise

These Homemade Little Debbie Valentine Cakes are a nostalgic treat, perfect for celebrating love on Valentine’s Day.
Print Recipe Pin Recipe
Prep Time 30 minutes mins
Cook Time 18 minutes mins
Chilling Time 1 hour hr
Total Time 1 hour hr 48 minutes mins
Servings: 32 cakes
Course: Dessert
Cuisine: American
Calories: 210
Ingredients Equipment Method Nutrition Notes

Ingredients
  

For the Cake
  • 1 box White Cake Mix Substitution: Yellow box cake mix can also be used in a pinch.
  • 1 cup Granulated Sugar
  • 1 cup Water
  • 3 large Eggs room temperature
  • 1 teaspoon Vanilla Extract
  • 1/2 cup Vegetable Oil
  • 1 cup All-purpose Flour
  • 1/4 teaspoon Kosher Salt
  • 1 cup Full Fat Sour Cream Not to skip; it enriches flavor and texture.
For the Filling
  • 1 cup Marshmallow Crème Can substitute with marshmallow fluff.
  • 1/2 cup Salted Butter room temperature
  • 2 cup Powdered Sugar
  • 1/4 cup Heavy Cream room temperature
For the Coating
  • 1 lb Almond Bark Real white chocolate can be used but may be more temperamental.
  • 1 tablespoon Crisco
  • 3 drops Pink Gel Food Dye must be gel-based to avoid seizing.

Equipment

  • Mixer
  • Baking Pans
  • Parchment Paper
  • Cookie cutter
  • Heatproof bowl
  • Double Boiler

Method
 

Step-by-Step Instructions
  1. Preheat your oven to 350°F (175°C) and prepare two half sheet pans by lining them with parchment paper.
  2. In a large mixing bowl, combine the boxed white cake mix, granulated sugar, water, eggs, vanilla extract, and vegetable oil. Blend until smooth, about 2–3 minutes. Incorporate the all-purpose flour, kosher salt, and full-fat sour cream until smooth.
  3. Divide the batter evenly between the prepared pans and smooth the tops. Bake for 15-18 minutes until a toothpick inserted comes out clean. Cool the cakes for 30 minutes before refrigerating for 30-60 minutes.
  4. Beat together the marshmallow crème and salted butter until fluffy. Gradually add powdered sugar and mix thoroughly, then add heavy cream until you reach a spreadable consistency.
  5. Use a 3-inch heart-shaped cookie cutter to cut out 32 hearts from the cooled cake layers. Press down gently to ensure clean edges.
  6. Spread a generous layer of the marshmallow filling on half of the heart-shaped cake pieces. Place another heart on top, creating a sandwich. Freeze for 1 hour to firm up.
  7. Melt the almond bark in a heatproof bowl using the microwave or double boiler, mixing in Crisco for consistency. This coating will cover your cakes beautifully.
  8. Dip each frozen cake into the melted pink chocolate coating and allow excess chocolate to drip off. Let set until coating hardens.

Nutrition

Serving: 1cakeCalories: 210kcalCarbohydrates: 25gProtein: 2gFat: 10gSaturated Fat: 5gPolyunsaturated Fat: 1gMonounsaturated Fat: 3gCholesterol: 40mgSodium: 130mgPotassium: 110mgSugar: 15gVitamin A: 200IUCalcium: 20mgIron: 1mg

Notes

Room temperature ingredients ensure better mixing. Cool cakes before adding filling to prevent sliding off. Freeze assembled cakes for stability before dipping.

Tried this recipe?

Let us know how it was!

Red Velvet Cookie Cups: A Sweet Valentine's Day Delight

February 3, 2026 by Grace Snow Leave a Comment

With each tick of the clock, anticipation filled the air as I dove into a whirlwind of colors and flavors. The moment you take a bite of these Red Velvet Cookie Cups, you’re met with a scrumptious, soft crumb enveloped in the delightful tang of creamy cheese frosting. Not only are they an impeccable treat for special occasions like Valentine’s Day, but their charm as a cozy, homemade dessert will have everyone at the table swooning. Plus, they’re surprisingly quick to prepare, making them a go-to for any spontaneous get-together! So, whether you're crafting sweet moments for loved ones or indulging in a quiet evening treat, these cookie cups are here to elevate your dessert game. Ready to create a colorful masterpiece that tastes as good as it looks?

Why are Red Velvet Cookie Cups irresistible?

Irresistible sweetness: These Red Velvet Cookie Cups bring a delightful twist on a classic dessert, bursting with flavor and topped with creamy frosting.
Perfect for sharing: Ideal for Valentine’s Day or birthday parties, these cookie cups are sure to impress friends and family.
Quick and easy: With simple ingredients and a fast preparation time, you’ll have perfect treats ready in no time.
Versatile options: Feel free to mix up the frosting flavors or toppings, like sprinkles or chocolate, to match any occasion.
Homemade goodness: There's nothing like the satisfaction of enjoying a cozy, homemade dessert that elevates any gathering!

Red Velvet Cookie Cups Ingredients

For the Cookie Cups

  • All-Purpose Flour – Provides essential structure for the cookie cups.
  • Unsweetened Cocoa Powder – Adds a rich and decadent chocolate flavor that enhances the cookies.
  • Kosher Salt – Balances the sweetness and elevates the flavors in the cookie dough.
  • Baking Soda – Ensures the cookies rise beautifully, creating a light and fluffy texture.
  • Butter (softened) – Contributes a rich, buttery flavor and adds moisture to the mix.
  • Granulated Sugar – Sweetens the cookie cups and helps in achieving the desired structure.
  • Brown Sugar – Imparts depth and moisture, rounding out the sweetness.
  • Egg – Acts as a binder for all ingredients; consider using a flax egg for a vegan twist.
  • Red Food Coloring – Gives the cookie cups their iconic, vibrant red color; beet juice can be a natural substitute.
  • Vanilla Extract – Enhances the overall flavor profile of the cookie.
  • White Vinegar – Activates the baking soda, aiding in creating a tender crumb.

For the Cream Cheese Frosting

  • Cream Cheese (softened) – The star ingredient that provides a creamy and tangy flavor.
  • Butter (softened) – Adds richness to the frosting, ensuring a smooth texture.
  • Powdered Sugar – Sweetens and gives the frosting that silky smooth consistency.
  • Vanilla Extract – Infuses the frosting with a warm and inviting flavor.

Step‑by‑Step Instructions for Red Velvet Cookie Cups

Step 1: Preheat the Oven
Begin by preheating your oven to 350°F (175°C). This ensures an evenly baked batch of Red Velvet Cookie Cups that rise beautifully. Take a moment to familiarize yourself with your oven settings, and while you’re waiting, gather all your ingredients to keep the process smooth and enjoyable.

Step 2: Mix the Dry Ingredients
In a small mixing bowl, sift together the all-purpose flour, unsweetened cocoa powder, kosher salt, and baking soda. This combines the ingredients and removes any lumps, creating a light and airy texture for your cookie cups. Set this mixture aside as you prepare to work on the wet ingredients, making sure to use a whisk for even blending.

Step 3: Cream the Butter and Sugars
In a large mixing bowl, beat together the softened butter, granulated sugar, and brown sugar until the mixture is fluffy and pale, which usually takes about 3–5 minutes using an electric mixer. This step adds air to your dough, enhancing the overall texture of the Red Velvet Cookie Cups.

Step 4: Incorporate Wet Ingredients
Once your sugars are creamed, add in the egg, red food coloring, vanilla extract, and white vinegar. Mix on medium speed until everything is well combined, creating a vibrant, rich batter. The red food coloring is essential for that iconic look, so ensure it’s evenly distributed throughout the mixture.

Step 5: Combine the Mixtures
Gradually add your reserved dry ingredients to the wet mixture, gently mixing until just combined. Avoid overmixing to maintain the tenderness of the Red Velvet Cookie Cups. A few flour streaks are okay; you want the dough to retain some moisture for delightful cups.

Step 6: Prepare the Muffin Tins
Grease two 24-cup mini muffin tins with cooking spray or line them with paper liners. Make sure each cavity is well-coated to prevent sticking, setting the stage for easy removal of your beautifully baked Red Velvet Cookie Cups after they’re finished in the oven.

Step 7: Fill the Tins
Spoon the cookie dough into each muffin cup, filling them about ¾ full to allow room for rising. You should see a lovely red batter nestled in each cup, promising a delightful treat ahead. Ensure even distribution to ensure all cookies bake uniformly.

Step 8: Bake the Cookie Cups
Place the filled muffin tins in your preheated oven and bake for approximately 13 minutes. Keep an eye on them; the edges should appear set while the centers may still look slightly underbaked. This will ensure they stay soft and chewy once cooled.

Step 9: Create Indentations
Once baked, carefully remove the muffin tins from the oven. While they are still warm, use a spatula to gently press the center of each cookie to create a cup shape. This step is crucial for holding that luscious cream cheese frosting, so take care to shape them evenly.

Step 10: Cool Completely
Allow the cookie cups to cool in the tins for about 5 minutes before transferring them to a wire rack. This cooling process will help them firm up while maintaining a tender interior, making it easier to frost them later on.

Step 11: Make the Cream Cheese Frosting
In a large bowl, blend together the softened cream cheese, softened butter, powdered sugar, and vanilla extract. Use an electric mixer to whip until smooth and creamy, which usually takes about 2-3 minutes. The frosting should be light and fluffy, perfect for topping your Red Velvet Cookie Cups.

Step 12: Pipe the Frosting
Transfer the cream cheese frosting into a piping bag fitted with your preferred tip. Once the cookie cups are completely cooled, pipe a generous swirl of frosting onto each cup, creating a beautiful and inviting top. Your Red Velvet Cookie Cups are now ready for a delightful presentation!

What to Serve with Red Velvet Cookie Cups

Indulge in an unforgettable dessert experience by crafting a delightful spread to accompany these joyous treats!

  • Vanilla Ice Cream: The cool creaminess beautifully complements the rich, chocolatey flavor of the cookie cups, creating a heavenly contrast. A scoop beside your cookie adds a touch of indulgence that’s hard to resist.

  • Coffee or Espresso: This warm beverage enhances the dessert's chocolate notes while the robust flavor balances out the sweetness. A lovely sip of coffee while nibbling on these treats creates a comforting experience.

  • Fresh Berries: Strawberries or raspberries provide a refreshing burst of tartness that cuts through the richness of the frosting. Their juiciness pairs beautifully with the soft cookies, adding a lovely pop of color.

  • Chocolate Drizzle: A drizzle of melted chocolate over the frosted cookie cups creates an elegant presentation. This extra layer of chocolate not only enhances flavor but also makes them a visual delight for any gathering.

  • Sparkling Wine: Celebrate special moments with a bubbly toast! The effervescence of sparkling wine perfectly contrasts the creamy frosting, making every bite feel festive and joyous.

  • Chocolate-Covered Pretzels: The salty crunch of chocolate-covered pretzels adds texture and a surprise twist to your dessert table. Their sweetness plays nicely with the cookie cups’ frosting, providing a balanced snack that guests will enjoy.

  • Milkshakes: A classic pairing, vanilla or chocolate milkshakes bring nostalgia and joy to your dessert experience. Their creamy texture enhances the delightful flavors of the cookie cups, making them a nostalgic treat.

  • Caramel Sauce: A light drizzle of caramel adds a rich, buttery sweetness that elevates each bite. This luxurious addition pairs beautifully with the tangy cream cheese frosting for an indulgent experience.

Make Ahead Options

These Red Velvet Cookie Cups are a dream for busy home cooks looking to save time! You can prepare the cookie dough up to 24 hours in advance; simply mix the ingredients and refrigerate them in an airtight container. For even more convenience, the baked cookie cups can be stored at room temperature for up to 3 days without losing their delightful texture. Just ensure they cool completely before storing to maintain their soft interior. When you're ready to serve, frost them with the cream cheese frosting, which can also be made ahead and kept in the fridge for up to 3 days. Just let it sit at room temperature for about 30 minutes to soften before piping onto your beautiful cookies. This way, you can enjoy your sweet creations with minimal effort on the day of your event!

Red Velvet Cookie Cups Variations

Feel free to explore these delightful twists that will make your Red Velvet Cookie Cups even more special!

  • Frosting Flavors: Add flavors like almond extract or lemon zest for a unique twist on the cream cheese frosting. This is a brilliant way to personalize each cookie cup. Imagine the surprise of your guests when they bite into a zingy lemon treat!

  • Decorative Toppings: Top with festive sprinkles, shaved chocolate, or mini chocolate chips for added texture and visual appeal. A little color and crunch can elevate your cookies from homemade to showstopper!

  • Nutty Addition: Fold in chopped walnuts or pecans into the batter for a crunchy surprise in every bite. This nutty dimension will blend beautifully with the rich flavors, creating a delightful contrast.

  • Gluten-Free Option: Substitute all-purpose flour with a gluten-free blend for a safe alternative that everyone can enjoy. With a perfect texture, these cookies will satisfy gluten-free diners without compromising on flavor.

  • Vegan Swap: Replace the egg with a flax egg to make these cookie cups vegan-friendly. Combine 1 tablespoon of ground flaxseed with 3 tablespoons of water, let it sit to thicken, and mix it in as you would the egg.

  • Chocolate Drizzle: Enhance the cookie cups with a drizzle of melted chocolate over the frosting. The rich chocolate complements the creamy topping, creating an indulgent treat no one will resist!

  • Spicy Kick: Add a pinch of cayenne pepper or cinnamon to the cookie dough for a subtle, warming flavor that perfectly balances the sweetness. A hint of spice can surprise and delight!

Why not also check out my Matcha Cookies Soft or Peaches Cream Cookies for more baking inspiration?

Storage Tips for Red Velvet Cookie Cups

  • Room Temperature: Store leftover Red Velvet Cookie Cups in an airtight container at room temperature for up to 3 days to maintain their soft texture and flavor.
  • Fridge: If you prefer a firmer frosting, refrigerate the cookie cups in an airtight container for up to 5 days. Allow them to come to room temperature before serving for the best taste.
  • Freezer: For longer storage, freeze un-frosted cookie cups in a single layer on a baking sheet, then transfer to an airtight container for up to 2 months. Frost them after thawing for freshness.
  • Reheating: To enjoy them warm, microwave refrigerated or frozen cookie cups for about 10-15 seconds; this will revitalize their delightful, soft texture.

Expert Tips for Red Velvet Cookie Cups

  • Room Temperature Ingredients: Ensure butter and cream cheese are softened to room temperature for easy mixing and a smooth frosting texture, resulting in perfect Red Velvet Cookie Cups.
  • Avoid Overmixing: When combining dry and wet ingredients, mix just until combined to keep the texture tender; overmixing can lead to tough cookie cups.
  • Create Perfect Indentations: Use a spatula or the handle of a wooden spoon to gently press centers of the warm cookies to form cup shapes, ensuring they hold the frosting beautifully.
  • Monitor Baking Time: Keep an eye on your cookie cups as they bake — look for set edges and slightly underbaked centers for that perfect soft texture upon cooling.
  • Storage Advice: Store leftover cookie cups in an airtight container at room temperature for up to three days, ensuring their delightful taste lasts.
  • Experiment with Toppings: Feel free to mix frosting flavors or use decorative toppings like sprinkles, adding a personal touch to your Red Velvet Cookie Cups.

Red Velvet Cookie Cups Recipe FAQs

How do I select the best ingredients for my Red Velvet Cookie Cups?
Absolutely! For the best results, choose high-quality unsweetened cocoa powder to enhance the chocolate flavor and fresh eggs to ensure proper binding. Look for a vibrant food coloring, or opt for organic beet juice if you prefer a natural alternative. Using room temperature butter and cream cheese will make your mixing process smoother, creating the perfect texture for both the cookies and frosting.

How should I store leftover Red Velvet Cookie Cups?
Very! Store your leftover cookie cups in an airtight container at room temperature for up to 3 days. If you want to keep them fresher longer, you can refrigerate them for up to 5 days. Just let them come to room temperature before serving to ensure they maintain their delightful flavor and soft texture.

Can I freeze my Red Velvet Cookie Cups?
Absolutely! To freeze, first, allow the un-frosted cookie cups to cool completely. Place them in a single layer on a baking sheet and freeze for about 1-2 hours until firm. Then, transfer them to an airtight container or freezer bag, layering parchment paper between cups if needed, and store for up to 3 months. Frost them after thawing for the best taste and texture!

What should I do if my cookie cups don’t hold their shape after baking?
Oh no! If your cookie cups don’t keep their shape, there may have been a few factors at play. Make sure to press down gently in the center while they’re still warm to create those perfect cup shapes. Overmixing the batter can also cause them to spread too much, so remember to combine only until just mixed. Always keep an eye on the baking time, as underbaking can also lead to a softer structure.

Are Red Velvet Cookie Cups suitable for special diets?
Certainly! If you're looking for vegan options, simply substitute the egg with a flax egg (1 tablespoon of flaxseed meal mixed with 2.5 tablespoons of water, let sit for 5 minutes until it gels). For gluten-free Red Velvet Cookie Cups, replace the all-purpose flour with a gluten-free blend designed for baking. Always check for allergies related to dairy and nuts in your ingredients to ensure they’re safe for everyone!

Red Velvet Cookie Cups

Red Velvet Cookie Cups: A Sweet Valentine's Day Delight

Delight in the scrumptious flavors of Red Velvet Cookie Cups, the perfect Valentine's Day treat.
Print Recipe Pin Recipe
Prep Time 20 minutes mins
Cook Time 13 minutes mins
Cooling Time 5 minutes mins
Total Time 38 minutes mins
Servings: 24 cookie cups
Course: Dessert
Cuisine: American
Calories: 180
Ingredients Equipment Method Nutrition Notes

Ingredients
  

For the Cookie Cups
  • 2 cups All-Purpose Flour
  • 1 tablespoon Unsweetened Cocoa Powder
  • 1 teaspoon Kosher Salt
  • 1 teaspoon Baking Soda
  • 1 cup Butter (softened)
  • 1 cup Granulated Sugar
  • 1/2 cup Brown Sugar
  • 1 large Egg or flax egg for vegan
  • 1 tablespoon Red Food Coloring or beet juice
  • 1 teaspoon Vanilla Extract
  • 1 teaspoon White Vinegar
For the Cream Cheese Frosting
  • 8 oz Cream Cheese (softened)
  • 1/2 cup Butter (softened)
  • 4 cups Powdered Sugar
  • 1 teaspoon Vanilla Extract

Equipment

  • Mixing bowls
  • Electric mixer
  • Whisk
  • Spatula
  • piping bag
  • mini muffin tins

Method
 

Step-by-Step Instructions
  1. Preheat your oven to 350°F (175°C).
  2. Sift together flour, cocoa powder, salt, and baking soda in a mixing bowl.
  3. Beat together softened butter, granulated sugar, and brown sugar until fluffy.
  4. Add egg, red food coloring, vanilla extract, and vinegar; mix until combined.
  5. Gradually mix in dry ingredients until just combined.
  6. Grease or line 24-cup mini muffin tins.
  7. Fill muffin cups 3/4 full with cookie dough.
  8. Bake for approximately 13 minutes, watching for set edges.
  9. Press the center of each cookie to create a cup shape while warm.
  10. Cool in tins for about 5 minutes before transferring to a wire rack.
  11. Blend cream cheese, butter, powdered sugar, and vanilla until smooth.
  12. Pipe frosting onto cooled cookie cups.

Nutrition

Serving: 1cookie cupCalories: 180kcalCarbohydrates: 22gProtein: 2gFat: 9gSaturated Fat: 5gCholesterol: 25mgSodium: 150mgPotassium: 50mgFiber: 1gSugar: 10gVitamin A: 2IUCalcium: 2mgIron: 4mg

Notes

Ensure ingredients like butter and cream cheese are at room temperature for best results.

Tried this recipe?

Let us know how it was!

No-Bake Strawberry Cheesecake Bites for Effortless Indulgence

February 3, 2026 by Grace Snow Leave a Comment

As I walked through the vibrant farmers' market, the scent of fresh strawberries wafted through the air, igniting my craving for a sweet, no-bake delight. That's when I decided it was time to whip up some No-Bake Strawberry Cheesecake Bites. These little gems are not only a splendidly easy dessert, they also offer that perfect balance of creamy goodness and delightful crunch that will have both kids and adults reaching for seconds! With minimal prep time and no baking involved, this recipe quickly turns our favorite cheesecake into a playful treat. Plus, they’re versatile enough to be customized with whatever toppings you have on hand. Are you ready to dive into this fruity bliss and impress your loved ones? Let’s get started!

Why Make No-Bake Strawberry Cheesecake Bites?

Irresistibly Easy: You’ll love how effortlessly these bites come together with just a few simple ingredients!

Family-Friendly Fun: Kids can help, making these bites a great way to bond while creating a delicious treat.

Versatile Treat: Swap the strawberry cake mix for other flavors to suit your taste or the season—chocolate or vanilla would be delightful!

No-Bake Convenience: Perfect for warm weather when you want dessert without heating up the kitchen.

Crowd-Pleasing Delight: Whether it's a party or a casual family dinner, these bites are sure to impress and disappear quickly!

Enjoy your delightful creation paired with whipped cream or a side of chocolate-covered strawberries for an extra indulgent touch!

No-Bake Strawberry Cheesecake Bites Ingredients

For the Filling

  • Cream Cheese – provides a creamy texture and rich flavor; use full-fat for the best results.
  • Fine Sea Salt – enhances sweetness and balances flavors; regular salt can be a substitute.
  • Clear Vanilla Extract – adds depth of flavor; pure vanilla extract works as a great alternative.
  • Strawberry Cake Mix – this is the base of the dessert and gives that delightful strawberry flavor; remember to heat-treat if using for raw consumption.

For the Coating

  • Almond Bark or Pink Melting Wafers – used to create a crunchy, sweet exterior; chocolate chips can also be used as a substitute.
  • White Chocolate (optional) – drizzle over the bites for a decorative touch that adds sweetness.

With these ingredients, you're all set to create your No-Bake Strawberry Cheesecake Bites! Enjoy the ease of this quick dessert that everyone will adore.

Step‑by‑Step Instructions for No-Bake Strawberry Cheesecake Bites

Step 1: Prep the Filling
Start by taking your softened cream cheese and placing it in a mixing bowl. Using a hand mixer, beat it together with the salt and clear vanilla extract for about 2-3 minutes until smooth and creamy. This step is crucial as it sets the foundation for the rich filling of your No-Bake Strawberry Cheesecake Bites.

Step 2: Incorporate Cake Mix
Gradually add the heat-treated strawberry cake mix to your cream cheese mixture. Mix on low speed for about 1-2 minutes, or until a thick, crumbly dough forms. The dough should be soft yet hold its shape well, making it easy to scoop into balls later on.

Step 3: Chill
Once your dough is ready, cover the mixing bowl with plastic wrap and place it in the refrigerator. Chill for at least 2 hours, or overnight if you prefer a firmer texture. This chilling time is essential for allowing the flavors to meld and the dough to become easier to handle when shaping into bites.

Step 4: Melt Coating
While your dough chills, prepare the coating by melting almond bark or pink melting wafers. Chop the bark into smaller pieces for even melting and heat in a microwave-safe bowl in 30-second intervals, stirring in between, until fully smooth. Aim for a glossy consistency, as this will create a beautiful outer layer for your No-Bake Strawberry Cheesecake Bites.

Step 5: Shape the Bites
Once the dough is sufficiently chilled, take it out of the refrigerator. Using a cookie scoop or your hands, form small balls, about 1-1.5 inches in diameter. Roll each ball gently to ensure a smooth surface, making it easier to coat later.

Step 6: Dip and Set
Carefully dip each shaped bite into the melted almond bark or pink wafers, allowing excess coating to drip off. Place the coated bites onto a parchment-lined baking sheet. If desired, sprinkle with colorful sprinkles before the coating sets. Refrigerate again for about 30 minutes, or until the coating is firm and set.

Expert Tips for No-Bake Strawberry Cheesecake Bites

  • Softened Cream Cheese: Ensure your cream cheese is at room temperature for the smoothest filling. This makes mixing easier and avoids lumps.

  • Heat Treat Cake Mix: Don't forget to heat-treat your strawberry cake mix to eliminate raw flour risks. Spread it on a baking sheet and bake at 350°F for optimal safety.

  • Chill Time Matters: Allow the mixture to chill for at least 2 hours or overnight. This step ensures the bites hold their shape and flavors meld beautifully.

  • Coating Consistency: Melt the almond bark or pink wafers until glossy and smooth for the best coating. Stir frequently during melting to avoid burning.

  • Add a Personal Touch: Feel free to add toppings like crushed nuts or cookie crumbs before the coating sets. This will enhance texture and flavor!

No-Bake Strawberry Cheesecake Bites Variations

Feel free to get creative and personalize your No-Bake Strawberry Cheesecake Bites to suit your taste preferences or dietary needs!

  • Flavor Swap: Substitute strawberry cake mix with vanilla or chocolate for fun, flavorful twists that will delight everyone.
    Mixing up the cake flavors offers a world of possibilities. Vanilla has a classic charm, while chocolate brings a decadent richness.

  • Nutty Crunch: Add crushed almonds or walnuts to the coating for a delightful contrast and added crunch.
    The nuttiness beautifully complements the creamy filling, creating a delightful texture that enhances each bite.

  • Caramel Drizzle: Top your bites with a drizzle of caramel sauce for an indulgent, sweet finish.
    The combination of caramel and strawberry will make your taste buds dance with joy!

  • Coconut Bliss: Roll your bites in toasted coconut flakes instead of chocolate for a tropical twist.
    This adds a lovely chewiness while amplifying that sweet, fruity flavor everyone loves.

  • Spicy Kick: Toss in a pinch of cayenne pepper or chili powder to the filling for a surprising and delightful heat kick.
    This twist transforms the sweetness into a truly unique flavor experience, perfect for adventurous eaters!

  • Yogurt Dip: Serve these bites with a side of yogurt dip flavored with honey and lemon for an added layer of flavor.
    The creamy dip complements the bites perfectly, providing a lovely balance of sweetness and tang.

  • Fruit Infusion: Fold in some finely chopped fresh strawberries or raspberries for an extra fruit burst in the filling.
    This not only enhances the color but also adds a refreshing note to each bite of cheesecake.

  • Chocolate Coating: For chocolate lovers, dip the bites in milk or dark chocolate for an extra chocolatey treat.
    The richness of chocolate pairs beautifully with the creamy cheesecake interior, creating utter decadence!

With these variations, your No-Bake Strawberry Cheesecake Bites will always be a hit! They’re perfect for gatherings or simply indulging at home—with a touch of creativity, you can make them uniquely yours. Consider pairing them with a dollop of whipped cream for an extra touch of indulgence!

How to Store and Freeze No-Bake Strawberry Cheesecake Bites

  • Fridge: Store the bites in an airtight container in the refrigerator for up to 3-5 days. They’ll stay deliciously creamy if kept fully sealed.

  • Freezer: For longer storage, you can freeze the No-Bake Strawberry Cheesecake Bites in a freezer-safe container for up to 3 months. Just remember to separate layers with parchment paper to prevent sticking.

  • Thawing: To thaw, simply place them in the fridge overnight. This gentle method will help maintain their texture and flavor.

  • Serving After Freezing: Enjoy directly from the freezer for a refreshing treat, or let them sit at room temperature for a few minutes before savoring your delightful bites!

What to Serve with No-Bake Strawberry Cheesecake Bites

Delight in these charming treats while crafting a full meal experience that your family will cherish.

  • Whipped Cream: A dollop of fluffy whipped cream adds a light and airy touch, enhancing the creamy texture of the bites.

  • Fresh Berries: A medley of fresh strawberries, blueberries, or raspberries provides a juicy contrast and elevates the dessert's overall freshness.

  • Chocolate-Covered Strawberries: Pairing these bites with chocolate-covered strawberries gives a luxurious appeal, creating a dessert plate that’s both decadent and delightful.

  • Vanilla Ice Cream: The classic pairing of these bites with smooth vanilla ice cream adds an extra layer of creaminess, making every bite feel indulgent.

  • Mint Leaves: A sprinkle of fresh mint leaves can elevate presentation and provide a refreshing, aromatic note to balance the sweetness.

  • Iced Tea or Lemonade: Both beverages offer a refreshing, tart complement, cleansing the palate between bites of the rich cheesecake delight.

  • Coffee or Espresso: A warm beverage like coffee or espresso can contrast beautifully with the cold, sweet bites, adding a touch of sophistication to your dessert experience.

  • Chocolate Drizzle: A drizzle of melted chocolate over the cheesecake bites enhances their aesthetic appeal, adding both flavor and texture.

With these pairing ideas, you’re all set to create a beautiful, balanced dessert experience that will delight everyone around the table!

Make Ahead Options

These No-Bake Strawberry Cheesecake Bites are perfect for busy home cooks who want to simplify dessert prep! You can prepare the filling and chill it in the refrigerator up to 24 hours in advance, ensuring a firmer texture for easy shaping later. Simply cover the mixing bowl tightly with plastic wrap to prevent any drying out. With the filling ready, you can also roll the bites into balls, dip them in the coating, and refrigerate them again for about 30 minutes to set the outer layer. When you’re ready to serve, just take them out, and enjoy a delicious treat that tastes fresh and delightful, keeping your dessert game strong without the last-minute rush!

No-Bake Strawberry Cheesecake Bites Recipe FAQs

How do I choose ripe strawberries for this recipe?
Absolutely! When selecting strawberries, look for vibrant red, firm berries with no dark spots or bruises. Those with a bright green cap indicate freshness. You want strawberries that are sweet; if they have that fragrant aroma, they're likely perfect for your cheesecake bites!

What’s the best way to store No-Bake Strawberry Cheesecake Bites?
For the best storage, keep your bites in an airtight container in the refrigerator for up to 3-5 days. This will ensure they remain creamy and enjoyable. Just make sure they are fully sealed to avoid drying out – you want all that lovely flavor to stick around!

Can I freeze the No-Bake Strawberry Cheesecake Bites?
Absolutely! To freeze your bites, place them in a single layer in a freezer-safe container lined with parchment paper to prevent sticking. They can be stored in the freezer for up to 3 months. When you're ready to enjoy them, simply thaw in the refrigerator overnight to maintain their delightful texture.

What if the dough seems too crumbly?
If your dough appears crumbly and isn't holding together, I recommend adding a touch more softened cream cheese or a splash of milk to bring it together. Mix until well combined – this should help achieve that creamy consistency you're looking for!

Are these bites safe for children with allergies?
Great question! The No-Bake Strawberry Cheesecake Bites contain cream cheese and cake mix, which may have allergens such as dairy and gluten. If you're catering to someone with allergies, consider using gluten-free cake mix and dairy-free cream cheese alternatives. Always check packaging for allergen information!

Can I make these bites ahead of time?
Very! These bites actually taste even better after a day or two in the fridge as the flavors meld together beautifully. You can prepare them a day before your event, just remember to cover them securely to keep them fresh!

No-Bake Strawberry Cheesecake Bites

No-Bake Strawberry Cheesecake Bites for Effortless Indulgence

Indulge in No-Bake Strawberry Cheesecake Bites, a delightful dessert combining creamy and crunchy textures that everyone will love.
Print Recipe Pin Recipe
Prep Time 15 minutes mins
Chill Time 2 hours hrs
Total Time 2 hours hrs 15 minutes mins
Servings: 12 bites
Course: Dessert
Cuisine: American
Calories: 120
Ingredients Equipment Method Nutrition Notes

Ingredients
  

For the Filling
  • 8 oz Cream Cheese Softened, full-fat recommended
  • 1/4 tsp Fine Sea Salt Enhances sweetness
  • 1 tsp Clear Vanilla Extract Or use pure vanilla extract
  • 1 cup Strawberry Cake Mix Heat-treated if using for raw consumption
For the Coating
  • 12 oz Almond Bark or Pink Melting Wafers Chocolate chips can be used as a substitute
  • optional qty White Chocolate For drizzling on top

Equipment

  • Mixing Bowl
  • hand mixer
  • Microwave-safe bowl
  • Parchment Paper
  • Cookie Scoop

Method
 

Step-by-Step Instructions
  1. Prep the Filling: Beat softened cream cheese, salt, and clear vanilla extract until smooth and creamy.
  2. Incorporate Cake Mix: Gradually add the heat-treated strawberry cake mix, mixing on low until a thick dough forms.
  3. Chill: Cover the bowl with plastic wrap and refrigerate for at least 2 hours or overnight.
  4. Melt Coating: Melt almond bark or pink melting wafers in intervals until smooth.
  5. Shape the Bites: Form small balls from the chilled dough, about 1-1.5 inches in diameter.
  6. Dip and Set: Dip each ball in the melted coating, place on a lined baking sheet, and chill for 30 minutes.

Nutrition

Serving: 1biteCalories: 120kcalCarbohydrates: 15gProtein: 2gFat: 7gSaturated Fat: 4gCholesterol: 15mgSodium: 90mgPotassium: 50mgSugar: 8gVitamin A: 5IUVitamin C: 2mgCalcium: 3mgIron: 2mg

Notes

Store in an airtight container in the fridge for up to 3-5 days, or freeze for up to 3 months. Thaw in the fridge overnight.

Tried this recipe?

Let us know how it was!

Sugar Plum Fairy Shortbread Bites for Joyful Gifting

February 3, 2026 by Grace Snow Leave a Comment

As I was sifting through my pantry for joyful baking inspiration, I stumbled upon the perfect combination of flavors that whisked me away to enchanted holiday gatherings. Enter the delightful Sugar Plum Fairy Shortbread Bites, a recipe that brings together the comforting embrace of buttery dough and festive colors without the hassle of rolling or cutting. These easy-to-make bites are not just a treat for the taste buds; they’re a fabulous giftable dessert that will make anyone feel cherished during the season. Plus, their melt-in-your-mouth texture will have friends and family asking for seconds. Ready to sprinkle some magic into your kitchen? Let’s dive into this festive wonder.

Why Choose Sugar Plum Fairy Shortbread Bites?

Easy Preparation: No rolling or cutting makes these bites a hassle-free treat, perfect for busy bakers.

Irresistible Flavor: Buttery goodness combined with sweet almond and vanilla extracts ensures each bite is rich and delightful.

Gorgeous Presentation: Use festive food coloring and nonpareils to create a visually stunning gift that’s as beautiful as it is tasty.

Giftable Convenience: These shortbread bites make a thoughtful gift for any occasion, whether during the holidays or as a sweet surprise for someone special.

Crowd-Pleasing Treat: Their melt-in-your-mouth texture guarantees that everyone at your gathering will be coming back for more! You might also enjoy making a batch of Easy Festive Cookies to spread the joy even further!

Sugar Plum Fairy Shortbread Bites Ingredients

For the Dough
• Butter – Provides richness and a melt-in-your-mouth texture; ensure it's very soft for easy mixing.
• Granulated Sugar – Sweetens the shortbread; can be replaced with powdered sugar for a slightly different texture.
• Almond Extract – Adds a delightful nutty flavor; substitute with vanilla extract if desired.
• Vanilla Extract – Enhances the overall flavor profile of the cookies.
• Food Coloring (pink or red) – Optional for a festive touch; adds visual appeal to your Sugar Plum Fairy Shortbread Bites.
• All-Purpose Flour – The main structure of the cookies; no direct substitutes recommended, but gluten-free flour might work for a gluten-free version.
• Kosher Salt – Balances the sweetness and enhances flavor.

For the Topping/Glaze
• Multi-Colored Nonpareils – Provides visual appeal and a crunchy texture; can substitute with any sprinkles or omit altogether.
• Powdered Sugar – Key for the optional glaze, which adds sweetness and a beautiful finish.
• Half & Half – Used in the glaze for creamy consistency; can substitute with milk or a non-dairy alternative.

Step‑by‑Step Instructions for Sugar Plum Fairy Shortbread Bites

Step 1: Preheat and Prepare Your Pan
Begin by preheating your oven to 325°F (163°C). As the oven warms, line a 9-inch square baking pan with foil, ensuring it hangs over the edges for easy removal later. This will help your Sugar Plum Fairy Shortbread Bites lift out seamlessly once baked.

Step 2: Cream the Butter and Sugar
In a large mixing bowl, beat the very soft butter with granulated sugar, almond extract, and vanilla extract until the mixture is creamy and well blended, taking about 2-3 minutes. If you’re adding food coloring for a festive touch, incorporate a few drops at this point until you achieve your desired shade, creating a cheerful base for the cookie dough.

Step 3: Combine Dry Ingredients
Gradually sift in the all-purpose flour and kosher salt to the butter mixture, mixing on low speed until a crumbly texture forms, which should take about 1-2 minutes. This dough should just hold together when pressed. Now, fold in half of the multi-colored nonpareils with a spatula, leaving the rest for sprinkling later.

Step 4: Press the Dough into the Pan
Transfer the dough into the prepared baking pan, pressing it evenly into the bottom to create a smooth layer. Take a moment to sprinkle the reserved nonpareils on top for added color and visual appeal. Then, cover the pan with plastic wrap and refrigerate for about 10 minutes to firm up the dough slightly.

Step 5: Cut and Chill the Dough
After refrigerating, remove the pan and cut the dough into 1-inch squares with a sharp knife, taking care not to separate the pieces just yet. Place the squares onto ungreased cookie sheets, leaving a small gap between each square, then return them to the refrigerator for at least 30 minutes to chill.

Step 6: Bake the Shortbread Bites
Once chilled, pop the baking sheets into the preheated oven and bake the Sugar Plum Fairy Shortbread Bites for 13-18 minutes, or until the edges are just lightly golden. Keep an eye on them to prevent over-baking, as the centers should remain pale. Let them cool on racks for about 10 minutes before transferring them from the sheets.

Step 7: Prepare the Optional Glaze
If you want to add a glaze, whisk together powdered sugar, half & half, almond extract, and vanilla extract in a bowl until smooth and glossy. Make sure it’s not too runny; it should be pourable but thick enough to coat the bites without dripping too quickly.

Step 8: Glaze and Decorate
Using a spoon, drizzle the glaze over each cooled Sugar Plum Fairy Shortbread Bite, allowing it to slightly drip down the sides. Immediately sprinkle additional nonpareils atop the glazing for that extra festive flair. Once decorated, allow the bites to sit undisturbed for about 3-4 hours, giving the glaze ample time to set before serving or packaging.

Sugar Plum Fairy Shortbread Bites Variations

Feel free to sprinkle your own magic into these delightful bites with some fun twists and swaps!

  • Nutty Delight: Swap almond extract for peanut butter for a unique nutty flavor that takes these bites to another level. It's a fantastic way to create a rich, comforting taste that everyone will love.

  • Different Extracts: Try using flavored extracts like peppermint or orange instead of vanilla or almond. This subtle tweak can bring unexpected seasonal flavors that are perfectly delightful.

  • Gluten-Free Option: Use gluten-free flour in place of all-purpose flour for a gluten-free version. Your guests will appreciate the thoughtful consideration to include everyone at the table.

  • Dairy-Free Glaze: Switch half & half with coconut milk to create a lovely glaze that’s dairy-free. The subtle coconut flavor adds another layer of charm to your treats.

  • Explore Colors: Get creative with various food coloring options! Experiment with blues or greens for holiday parties, or perhaps pastels for a spring celebration. The visual appeal will match the taste!

  • Sweet Spice: Add a dash of cinnamon or nutmeg to the dough for a warm flavor twist that’s especially comforting during the colder months. It’s a simple change that makes a big impact.

  • Chocolate Chunk: Fold in a handful of mini chocolate chips into the dough for chocolate lovers! The combination of buttery shortbread with rich chocolate is absolutely irresistible.

  • Festive Sprinkles: Instead of multi-colored nonpareils, use seasonal themed sprinkles like snowflakes or holiday shapes. It’s a small change that can really amp up the festive spirit!

Enhance your baking experience, and should you wish to explore more festive delights, take a look at these Easy Festive Cookies for additional inspiration!

Expert Tips for Sugar Plum Fairy Shortbread Bites

• Perfect Butter Temperature: Ensure your butter is very soft to create a creamy mixture; if it's too cold, the dough won't come together properly.

• Mixing Dough: The dough should be crumbly yet hold together when pressed. Avoid over-mixing once you add the flour to keep it tender.

• Chill Before Baking: Refrigerate the dough squares for at least 30 minutes to help maintain their shape while baking.

• Glaze Setting Time: Allow the glaze to set for at least 3-4 hours before serving or packaging; this ensures a lovely finish without smudges.

• Storage Tips: Keep your Sugar Plum Fairy Shortbread Bites in an airtight container at room temperature to maintain freshness; they can also be frozen for later enjoyment.

What to Serve with Sugar Plum Fairy Shortbread Bites

As you delight in the buttery magic of these festive treats, consider pairing them with complementary flavors and textures for a full experience.

  • Creamy Hot Chocolate: Rich and velvety, this drink envelops your senses, making each sweet bite even more indulgent. A warm cup adds coziness to any occasion.

  • Festive Fruit Platter: Bright seasonal fruits like pomegranates and citrus not only refresh the palate but also elevate the vibrant colors of your shortbread bites, creating a stunning visual feast.

  • Chocolate Dipped Strawberries: Juicy strawberries coated in bittersweet chocolate provide a luscious contrast to the sweet shortbread, making for an irresistible combination that feels luxurious.

  • Spiced Chai Latte: The warm spices of chai enhance the sweetness of the shortbread, wrapping you in a comforting embrace. This aromatic drink is perfect for cozy winter evenings!

  • Whipped Cream and Berries: A dollop of fluffy whipped cream paired with fresh berries adds both decadence and a pop of tartness, balancing the sweetness of the bites beautifully.

  • Vanilla Ice Cream: Creamy vanilla ice cream offers a comforting, cold treat alongside your warm shortbread bites, creating a delightful textural contrast that indulgently melts in your mouth.

  • Sweet Almond Milk: A lovely, dairy-free option that mirrors the nutty flavor in the shortbread, sweet almond milk pairs harmoniously, emphasizing the festive spirit.

  • Lemon Sorbet: A refreshing, tangy sorbet cleanses the palate between treats and complements the buttery bites, making each subsequent mouthful even more delightful.

  • Peppermint Bark: For an extra festive touch, serve these bites alongside crunchy peppermint bark that adds a refreshing crunch, perfectly harmonizing with the shortbread’s subtle sweetness.

Embrace the season and create a magical atmosphere by offering these delightful pairings with your Sugar Plum Fairy Shortbread Bites!

Make Ahead Options

These delightful Sugar Plum Fairy Shortbread Bites are perfect for busy home cooks looking to save time during the hectic holiday season! You can prepare the dough and keep it refrigerated for up to 3 days before baking, ensuring a fresh-tasting treat when you're ready to serve. Simply follow the initial steps of mixing the ingredients and pressing the dough into the pan, then cover and chill. To maintain quality, make sure your dough is wrapped tightly to prevent drying out. When you're ready to bake, simply cut and chill the dough for an additional 30 minutes before placing it in the oven, and you'll have mouthwatering, festive bites that are just as delicious as if they were made fresh that day!

How to Store and Freeze Sugar Plum Fairy Shortbread Bites

Room Temperature: Store your shortbread bites in an airtight container at room temperature for up to 1 week to keep them fresh and tasty.

Fridge: For longer freshness, you can also refrigerate the sugar plum bites, where they will stay delicious for up to 2 weeks. Just allow them to come to room temperature before enjoying.

Freezer: To extend their shelf life, freeze the bites in a single layer on a baking sheet, then transfer them to an airtight container or freezer bag. They can be kept frozen for up to 3 months.

Reheating: When ready to enjoy, simply thaw at room temperature for a couple of hours or warm in a preheated oven at 250°F (120°C) for about 10 minutes. Enjoy your Sugar Plum Fairy Shortbread Bites fresh!

Sugar Plum Fairy Shortbread Bites Recipe FAQs

How do I choose ripe ingredients for the recipe?
Absolutely! For the best results, ensure your butter is very soft, ideally at room temperature, which allows for easy mixing and a creamy texture. The granulated sugar should be fresh, and when using almond extract, check for a strong, nutty aroma—this indicates quality. If you opt for food coloring, choose gel colors for vibrant hues that won’t alter the dough's consistency.

What is the best way to store Sugar Plum Fairy Shortbread Bites?
I recommend storing your Sugar Plum Fairy Shortbread Bites in an airtight container at room temperature, where they’ll stay fresh for about one week. If you want to keep them longer, refrigerating them can extend their lifespan up to 2 weeks. Just be sure to allow them to come back to room temperature before serving for the best flavor and texture.

Can I freeze Sugar Plum Fairy Shortbread Bites? How?
Definitely! Freezing is a great way to enjoy these delights later. First, place the bites in a single layer on a baking sheet and freeze until solid, about 1-2 hours. Then, transfer them to an airtight container or freezer bag, separating layers with parchment paper. They can be stored in the freezer for up to 3 months. When you're ready to enjoy them, just thaw at room temperature for a couple of hours, or warm them in a preheated oven at 250°F (120°C) for about 10 minutes.

What should I do if my dough is too crumbly?
Very common! If your dough is too crumbly and doesn’t hold together, it may need a touch of moisture. Try adding a teaspoon of milk or half & half gradually until the dough comes together without becoming sticky. Make sure your butter is soft enough before mixing, as this is crucial in achieving the right texture.

Are there any dietary considerations I should be aware of?
Absolutely! If you're concerned about allergies, these Sugar Plum Fairy Shortbread Bites can be made nut-free by substituting almond extract with vanilla extract. Be mindful of the food coloring and sprinkles you choose, as some may contain allergens like gluten or artificial dyes. Always check packaging for any dietary restrictions, particularly if you're baking for someone with food sensitivities.

Can I adjust the flavoring of these shortbread bites?
The more the merrier! You can easily swap the almond extract with another extract, such as lemon or coconut, for a unique twist. If you’re up for it, you could even mix in spices like cinnamon or nutmeg to give your bites a warm, seasonal flair. Feel free to experiment with different flavored extracts to customize your Sugar Plum Fairy Shortbread Bites!

Sugar Plum Fairy Shortbread Bites

Sugar Plum Fairy Shortbread Bites for Joyful Gifting

Delightful Sugar Plum Fairy Shortbread Bites, perfect for gifting and festive gatherings.
Print Recipe Pin Recipe
Prep Time 30 minutes mins
Cook Time 18 minutes mins
Chilling Time 30 minutes mins
Total Time 1 hour hr 18 minutes mins
Servings: 16 bites
Course: Dessert
Cuisine: American
Calories: 120
Ingredients Equipment Method Nutrition Notes

Ingredients
  

For the Dough
  • 1 cup Butter Very soft
  • 3/4 cup Granulated Sugar Can use powdered sugar
  • 1 teaspoon Almond Extract Substitute with vanilla if desired
  • 1 teaspoon Vanilla Extract
  • 1 teaspoon Food Coloring (pink or red) Optional
  • 2 cups All-Purpose Flour No direct substitutes recommended
  • 1/4 teaspoon Kosher Salt
For the Topping/Glaze
  • 1/4 cup Multi-Colored Nonpareils Or any sprinkles
  • 1 cup Powdered Sugar For the glaze
  • 1 tablespoon Half & Half Can use milk or non-dairy alternative

Equipment

  • 9-inch square baking pan
  • Mixing Bowl
  • Spatula
  • Sharp Knife
  • Electric mixer

Method
 

Preparation
  1. Preheat your oven to 325°F (163°C) and line a 9-inch square baking pan with foil.
  2. Beat the very soft butter with granulated sugar, almond extract, and vanilla extract until creamy, about 2-3 minutes. Add food coloring if desired.
  3. Sift in all-purpose flour and kosher salt, mixing until crumbly. Fold in half of the multi-colored nonpareils.
  4. Press the dough into the prepared pan and sprinkle the reserved nonpareils on top. Cover and refrigerate for about 10 minutes.
  5. Cut the chilled dough into 1-inch squares and place on ungreased cookie sheets. Refrigerate for at least 30 minutes.
  6. Bake for 13-18 minutes or until edges are lightly golden. Cool on racks for about 10 minutes.
  7. Whisk together powdered sugar, half & half, almond extract, and vanilla extract for the glaze until smooth.
  8. Drizzle the glaze over each cooled bite and sprinkle additional nonpareils on top. Let sit undisturbed for 3-4 hours to set.

Nutrition

Serving: 1biteCalories: 120kcalCarbohydrates: 15gProtein: 1gFat: 6gSaturated Fat: 4gMonounsaturated Fat: 2gCholesterol: 20mgSodium: 50mgPotassium: 30mgSugar: 6gVitamin A: 250IUCalcium: 10mgIron: 0.3mg

Notes

Store in an airtight container at room temperature for up to 1 week, or freeze for up to 3 months.

Tried this recipe?

Let us know how it was!

Decadent No-Bake Valentine’s Day Truffles You'll Love

February 3, 2026 by Grace Snow Leave a Comment

While scrolling through Instagram the other day, I stumbled upon a tantalizing image of truffles that instantly took me back to childhood Valentine’s Days filled with sweet surprises. Today, I’m excited to share my recipe for Creamy No-Bake Valentine’s Day Oreo Truffles, a delightful treat that captures the essence of love in every bite. With an easy preparation method and creamy, cheesecake-like filling, these truffles are perfect for impressing your special someone or simply treating yourself. Not only do they require no baking, but they’re also a fun way to get creative with decorations, making them an enjoyable project for all skill levels. Whether you're planning a romantic dinner or just want to brighten someone’s day, these truffles are bound to be a hit! Ready to dive into a world of rich flavors and festive fun? Let’s get started!

Why Are These Truffles a Must-Try?

Creamy, Dreamy Texture: Each bite offers a fudgy center that melts in your mouth, reminiscent of classic cheesecake.
No Bake Needed: With no baking required, these truffles are super easy to whip up, making them perfect for busy home cooks.
Endless Customization: Experiment with various Oreo flavors or chocolate coatings for a personal twist!
Perfect for Sharing: Whether for Valentine’s Day or just because, they’ll impress everyone and are easy to gift.
Make-Ahead Magic: Prep them in advance and store in the fridge for a stress-free dessert option on special occasions.
Try pairing them with a cup of coffee or surprising the kids with a sweet treat after dinner. They're just as delightful as my Cinnamon Roll Muffins or a cozy plate of Shakshuka Savor Bold.

Valentine’s Day Truffles Ingredients

For the Truffle Center
• Vanilla Oreos – Provides sweetness and a rich, cookie base for the truffle center; feel free to use any Oreo flavor for fun variations.
• Cream Cheese – Adds creaminess and structure, giving a delightful cheesecake-like texture; ensure it's softened for easy blending.

For the Chocolate Coating
• White Chocolate Melts – Creates a sweet and glossy finish on each truffle; dark chocolate can be a delicious alternative if preferred.
• Red Oil-Based Food Coloring – Optional; adds a festive touch to the melted white chocolate for that perfect Valentine’s Day vibe.

For Decoration
• Sprinkles – Optional; perfect for adding a colorful touch, sprinkle them on while the chocolate is still wet.

These Valentine’s Day Truffles are an indulgent treat that’s sure to impress!

Step‑by‑Step Instructions for Creamy No-Bake Valentine’s Day Oreo Truffles

Step 1: Prepare the Baking Sheet
Begin by lining a sheet pan with parchment paper to ensure your truffles don't stick. This will be where your Chocolate Coated Valentine’s Day Truffles will rest as they set. Make sure the sheet is ready before you move on to mixing the filling.

Step 2: Crush the Oreos
In a food processor, add your Vanilla Oreos and pulse them into fine crumbs. This should take about 30 seconds, using 10-second increments to avoid overprocessing. Once you achieve a sandy texture, your base is ready for the creamy filling.

Step 3: Mix the Filling
In a mixing bowl, combine the Oreo crumbs with softened cream cheese. Using your hands or a spatula, mix until the ingredients are smoothly blended and form a dough-like consistency. This step is crucial for creating the cheesecake-like texture of your Valentine’s Day Truffles, so make sure there are no dry spots.

Step 4: Form the Truffles
Using a 1.5-tablespoon cookie scoop, portion out the mixture and roll it into small balls. Place each ball on your prepared parchment-lined sheet. Once all the balls are formed, place them in the freezer for 30 minutes or refrigerate for 1 hour to firm up; this will help them hold shape when dipped.

Step 5: Melt the Chocolate
In a microwave-safe bowl, add the white chocolate melts. Microwave in 20-second intervals, stirring between each burst until fully melted and smooth. Alternatively, you can melt the chocolate using a double boiler. Keep the melted chocolate warm but not too hot, to avoid burning.

Step 6: Dip the Truffles
Once the truffles are firm, take them out of the freezer. Dip each truffle in the melted white chocolate using a fork, ensuring it's fully covered. Gently tap the fork on the edge of the bowl to remove excess chocolate, allowing for a nice, even coating on your Valentine’s Day Truffles.

Step 7: Add Decorations
If you want to add a drizzle of colored chocolate or sprinkles, chill the dipped truffles for about 10 minutes to allow the coating to set slightly. Once cooled, drizzle extra melted chocolate or sprinkle decorations while the coating is still wet for the cutest presentation.

Step 8: Let the Chocolate Set
After decorating, allow the truffles to set at room temperature for approximately 2 hours. This will ensure the chocolate coating hardens completely, making them ready for gifting or serving. Store any leftovers in an airtight container in the fridge and enjoy these delightful Valentine’s Day Truffles!

What to Serve with Creamy No-Bake Valentine’s Day Oreo Truffles

Indulge in a delightful array of accompaniments that will elevate your Valentine’s Day celebration!

  • Fresh Strawberries: Their natural sweetness and tangy flavor make a perfect contrast to the rich truffles, bringing a burst of freshness to each bite.

  • Chocolate-Covered Pretzels: Combining salty and sweet, these crunchy treats add a fun texture that complements the creamy truffles beautifully.

  • Vanilla Ice Cream: A scoop of smooth vanilla ice cream adds a cool, creamy element, perfect for a decadent dessert experience.

  • Coffee or Espresso: The rich, bold flavors of coffee create a delightful balance to the sweetness of the truffles, making it an ideal pairing for an after-dinner treat.

  • Sparkling Wine: Bubbly adds an air of celebration and lightness to your dessert experience, enhancing the overall festive mood.

  • Chocolate Mousse: For chocolate lovers, pairing with a light, airy mousse creates a layered dessert that satisfies every craving.

  • Red Velvet Cake Slices: Keep the theme going with this classic dessert; the moist, velvety cake harmonizes beautifully with these truffles.

Each of these pairings brings its own unique flavor, texture, and charm that complements the creamy allure of your Valentine’s Day truffles, making your occasion even more special!

How to Store and Freeze Valentine’s Day Truffles

Fridge: Place the truffles in an airtight container and store in the fridge for up to one week. This keeps them fresh and delicious for your special occasions.

Freezer: If you want to enjoy these treats later, freeze the truffles in a single layer on a baking sheet for about 1-2 hours, then transfer to an airtight container. They can last up to 3 months in the freezer!

Thawing: To thaw frozen Valentine’s Day Truffles, simply remove them from the freezer and let them sit at room temperature for about 30 minutes before enjoying.

Reheating: There's no need to reheat the truffles; enjoy them chilled for the best flavor and texture!

Valentine’s Day Truffles Variations & Substitutions

Feel free to unleash your creativity with these delightful treats and explore fun twists that are sure to intrigue your taste buds!

  • Gluten-Free: Use gluten-free Oreos to enjoy these truffles without sacrificing flavor or texture. It’s a simple swap that ensures everyone can indulge!
  • Nutty Delight: Incorporate finely chopped nuts into your truffle filling for added crunch and flavor. Chopped almonds or hazelnuts work beautifully, giving a lovely earthy taste.
  • Chocolate Coating Varieties: Experiment with dark or milk chocolate for the coating to delight different chocolate lovers. Each option offers a unique richness that complements the creamy filling.
  • Flavor Variations: Swap Vanilla Oreos with flavors like mint or peanut butter for a fun twist. This twist will create a surprising and delightful taste experience!
  • Spiced Up: Add a pinch of cinnamon or a splash of vanilla extract to the filling for an extra depth of flavor. It’s a subtle change that will elevate your truffles to the next level.
  • Fruity Touch: Mix in crushed freeze-dried strawberries or raspberries for a fruity burst in the truffles. This will give them a refreshing tanginess that pairs well with the sweetness!
  • Heat It Up: For a spicy kick, blend some cayenne pepper or chili powder into the filling. It’s a daring twist that will tantalize adventurous palates!
  • Decorate Differently: Instead of sprinkles, try using edible glitter or a drizzle of caramel for a show-stopping presentation. These finishing touches will make your truffles truly special!

Feeling inspired? Just like my scrumptious Eggnog Cookies, these customizable truffles can be tailored to fit every occasion. Enjoy swirling your culinary magic!

Expert Tips for Valentine’s Day Truffles

• Chill for Better Dipping: Freezing the truffles for 30 minutes before dipping helps them retain their shape and ensures a neat coating.

• Soften Cream Cheese: Make sure the cream cheese is at room temperature, as this makes mixing with the Oreo crumbs easier and gives the truffles that creamy texture.

• Choose Quality Chocolate: Use high-quality white chocolate melts for a smooth and tasty coating. Avoid chocolate chips, as they may not melt as smoothly.

• Avoid Overmixing: When combining the ingredients, mix just until they are combined to avoid a dense texture; overworking can lead to heavy truffles.

• Decorate While Wet: For sprinkles to stick effectively, apply them immediately after dipping the truffles in chocolate, before the coating sets.

These tips will help you create the perfect Valentine’s Day Truffles that are sure to impress!

Make Ahead Options

These Creamy No-Bake Valentine’s Day Truffles are perfect for busy home cooks looking to save time! You can prepare the truffle filling up to 24 hours in advance — simply follow all the steps up to forming the balls, then refrigerate the mixture. Once you're ready to serve, roll the mixture into balls and freeze them for an hour before dipping in chocolate. To maintain quality, store the formed truffles in an airtight container and keep them chilled until ready to coat. After dipping, let them set for about 2 hours; they’ll be just as delightful as if made fresh!

Valentine’s Day Truffles Recipe FAQs

What type of Oreos should I use for the truffles?
Absolutely! While Vanilla Oreos are a classic choice for these Valentine’s Day Truffles, feel free to experiment with any flavor of Oreos you love. From chocolate to peanut butter or even seasonal varieties, the different flavors can create delightful twists that personalize your truffles!

How should I store my truffles and how long do they last?
It's super easy! Simply place your truffles in an airtight container and store them in the fridge for up to one week. If you want to make them last longer, they can be frozen for up to 3 months, which is great for planning ahead!

Can I freeze Valentine’s Day Truffles? How do I do it properly?
Certainly! To freeze your Valentine’s Day Truffles, place them in a single layer on a baking sheet and freeze for about 1-2 hours until firm. Then, transfer them to an airtight container or freezer bag, separating layers with parchment paper to prevent sticking. When you're ready to enjoy them, just thaw them at room temperature for about 30 minutes before diving in!

What should I do if my chocolate coating isn’t smooth?
No worries! If your chocolate isn't smooth, it might be too hot or not tempered correctly. To fix it, try adding a tablespoon of vegetable oil or shortening to the melted chocolate, stirring until it emulsifies. If it starts to seize, lower the heat and add a small amount of heavy cream while mixing gently. This will help achieve that glossy finish you desire!

Are these truffles safe for people with dairy allergies?
While these Valentine’s Day Truffles do contain cream cheese and white chocolate, you can make them dairy-free by substituting with non-dairy cream cheese and dairy-free chocolate. Just be sure to check labels for hidden dairy ingredients, ensuring your sweet treats can be enjoyed by everyone!

Can I decorate the truffles in different colors or styles?
Very much so! Get creative with your decorations! You can use different colors of oil-based food coloring to tint the white chocolate or swap in festive sprinkles, chopped nuts, or even drizzles of dark or milk chocolate for a personal touch. The more, the merrier when it comes to customizing your Valentine’s Day Truffles!

Valentine’s Day Truffles

Decadent No-Bake Valentine’s Day Truffles You'll Love

Indulge in these delightful Valentine’s Day Truffles, a no-bake treat that captures the essence of love with every creamy bite.
Print Recipe Pin Recipe
Prep Time 30 minutes mins
Setting Time 2 hours hrs
Total Time 2 hours hrs 30 minutes mins
Servings: 12 truffles
Course: Dessert
Calories: 120
Ingredients Equipment Method Nutrition Notes

Ingredients
  

For the Truffle Center
  • 16 cookies Vanilla Oreos Feel free to use any Oreo flavor for variations.
  • 8 oz Cream Cheese Ensure it's softened for easy blending.
For the Chocolate Coating
  • 12 oz White Chocolate Melts Dark chocolate can be a delicious alternative.
  • 1 drop Red Oil-Based Food Coloring Optional for a festive touch.
For Decoration
  • Sprinkles Optional for adding a colorful touch.

Equipment

  • Food Processor
  • Mixing Bowl
  • Cookie Scoop
  • Microwave-safe bowl
  • Parchment Paper

Method
 

Step-by-Step Instructions
  1. Prepare the Baking Sheet by lining a sheet pan with parchment paper.
  2. Crush the Oreos in a food processor until fine crumbs are formed.
  3. Mix the crushed Oreos with softened cream cheese until well combined.
  4. Form the mixture into small balls and place on the prepared sheet. Freeze for 30 minutes.
  5. Melt the white chocolate in a microwave-safe bowl, stirring until smooth.
  6. Dip each truffle in the melted chocolate, ensuring full coverage.
  7. Add sprinkles or drizzle chocolate while the coating is still wet.
  8. Let the truffles set at room temperature for about 2 hours.

Nutrition

Serving: 1truffleCalories: 120kcalCarbohydrates: 15gProtein: 2gFat: 7gSaturated Fat: 4gPolyunsaturated Fat: 0.5gMonounsaturated Fat: 2gCholesterol: 15mgSodium: 35mgPotassium: 50mgSugar: 10gVitamin A: 100IUCalcium: 30mgIron: 0.5mg

Notes

These truffles can be stored in the fridge for up to one week or frozen for up to 3 months.

Tried this recipe?

Let us know how it was!

Easy Valentine Cookie Cups That Melt Hearts with Every Bite

February 3, 2026 by Grace Snow Leave a Comment

The aroma of freshly baked cookies has a magical way of transforming any space into a warm embrace. As I whisk together the ingredients for these Easy Valentine Cookie Cups, there’s a sense of joy bubbling within me—who could resist a soft, chewy peanut butter cookie topped with creamy Reese’s Peanut Butter Cups? In just 30 minutes, this delightful treat is ready to be shared at parties, classroom celebrations, or even as a sweet surprise for loved ones. Not only do these adorable cookie cups offer a fun twist on traditional treats, but they’re also a quick crowd-pleaser that requires minimal effort. Curious about how to whip up these delectable bites? Let’s dive into the recipe together!

Why You'll Adore These Cookie Cups

Simplicity At Its Finest: With just a handful of ingredients and quick steps, you’ll have delicious cookie cups in just 30 minutes.

Crowd-Pleasing Goodness: Perfect for parties or gift-giving, everyone loves these delightful treats!

Indulgent Flavor Fusion: The combination of peanut butter and chocolate creates an irresistible richness that’s hard to resist.

Versatile Options: Swap in Nutella or different toppings for varied taste sensations, just like with my Matcha Cookies Soft or Eggnog Cookies Soft.

Heartfelt Touch: The festive sprinkles not only enhance the appearance but also elevate the whole experience, making each bite feel special.

Easy Valentine Cookie Cups Ingredients

For the Cookie Base

  • Unsalted Butter – 6 tablespoons; ensure it's softened to room temperature for the best texture.
  • Creamy Peanut Butter – ½ cup; regular creamy peanut butter is essential for the perfect chewy cookie.
  • Brown Sugar – ½ cup; this contributes to the moistness and chewiness of your cookie cups.
  • Granulated Sugar – ½ cup; a mix of sugars provides just the right structure for your cookies.
  • Vanilla Extract – ½ teaspoon; adds that irresistible depth of flavor to the mix.
  • Large Egg – 1; binds everything together, creating the perfect dough.
  • Baking Soda – ¾ teaspoon; this leavening agent helps the cookies puff up beautifully.
  • All-Purpose Flour – 1¼ cups; forms the bulk of the dough—be careful not to overmix after adding.

For the Topping

  • Miniature Reese’s Peanut Butter Cups – 30; these will serve as the delightful center, keeping things ooey-gooey and sweet.
  • Jumbo Heart Sprinkles – For decoration; these festive sprinkles add a lovely touch to each cookie cup and make them even more special.

These Easy Valentine Cookie Cups are not only delicious but also a wonderful way to share love through baking—let's get started!

Step‑by‑Step Instructions for Easy Valentine Cookie Cups

Step 1: Prepare Pan and Preheat Oven
Begin by preheating your oven to 350°F (175°C). While the oven warms up, lightly grease a mini muffin pan with cooking spray or butter to ensure easy removal of your cookie cups later. Visualize a shiny surface that ensures nothing sticks, setting the stage for your delightful Easy Valentine Cookie Cups.

Step 2: Cream Butter and Sugars
In a large mixing bowl, beat together 6 tablespoons of softened unsalted butter and ½ cup each of creamy peanut butter, brown sugar, and granulated sugar. Use an electric mixer on medium speed until the mixture is light and fluffy, taking about 2-3 minutes. You’ll know it’s ready when it appears well combined and creamy.

Step 3: Add Egg and Vanilla
Next, crack in 1 large egg and pour in ½ teaspoon of vanilla extract. Mix on low speed just until these ingredients are fully incorporated, about 30 seconds. The batter should achieve a smooth and slightly glossy consistency, signaling it’s time to move on to the next step in creating your Easy Valentine Cookie Cups.

Step 4: Mix in Baking Soda
With the wet ingredients ready, sprinkle ¾ teaspoon of baking soda into the bowl. Gently mix just until the baking soda is evenly distributed, which should take no more than 15-20 seconds. The key here is to ensure your dough gains the right lift without overmixing, keeping it soft and pliable.

Step 5: Add Flour
Now, gradually fold in 1¼ cups of all-purpose flour using a spatula. Mix until the dough forms and is slightly sticky, being careful not to overwork it—about 30 seconds is ideal. You’ll notice it should come together nicely, appearing soft and a tad tacky, perfect for shaping those cookie cups.

Step 6: Shape Dough
Roll the dough into small balls, approximately 1 tablespoon each. Once shaped, place the dough balls gently into the prepared muffin cavities, leaving some space in between. This should take about 5 minutes, and the dough will give you a sense of warmth and nostalgia as you prepare for the baking magic ahead.

Step 7: Bake
Slide the muffin pan into the preheated oven and bake for around 8 minutes. Keep an eye on them; the edges should be set while the centers remain soft. This perfect balance of textures is what makes your Easy Valentine Cookie Cups so delightful, pulling them when they look just a hint underdone.

Step 8: Add Peanut Butter Cups
Once the cookie cups are out of the oven, immediately press one miniature Reese’s Peanut Butter Cup into the center of each cookie. The warmth will soften the chocolate, creating a gooey goodness that embraces the cookie base. This step is best done swiftly to ensure a perfect melt in every cup.

Step 9: Decorate
After waiting a minute for the chocolate to soften, top each Reese’s with a jumbo heart sprinkle. These little pops of color not only add visual appeal but also enhance the cookie's festive feel, allowing your Easy Valentine Cookie Cups to shine with holiday spirit.

Step 10: Chill
To set the chocolate and make the cookie cups easier to remove, refrigerate them for about 10-15 minutes. This cooling step is crucial, ensuring that the tops firm up nicely without losing that mouthwatering gooeyness, making your final presentation super inviting.

Step 11: Remove and Serve
Finally, carefully run a knife or a small offset spatula around the edges of each cookie cup to help release them from the pan. Gently lift each one out, revealing perfectly shaped Easy Valentine Cookie Cups. They’re now ready to be enjoyed or gifted to your loved ones.

How to Store and Freeze Easy Valentine Cookie Cups

Room Temperature: Store in an airtight container at room temperature for up to 5 days to maintain their delicious softness and flavor.

Fridge: If you prefer, refrigerate the cookie cups for up to 7 days. This helps keep them fresh and adds a delightful chill.

Freezer: Freeze the cookie cups in a single layer on a baking sheet for 2 hours, then transfer them to an airtight container or freezer bag. They can be frozen for up to 2 months.

Thawing: To enjoy, simply thaw at room temperature for about 30 minutes before serving. You’ll relish the rich blend of peanut butter and chocolate all over again!

Easy Valentine Cookie Cups Variations

Feel free to get creative with these cookie cups and discover new flavors that delight your taste buds!

  • Peanut-Free: Swap peanut butter with sun butter for delicious, nut-free cookie cups that everyone can enjoy. It offers a unique flavor without compromising on indulgence!

  • Nutella Twist: Use Nutella instead of peanut butter and top with Ferrero Rocher candies for a luxurious hazelnut treat. The blend of chocolate and hazelnut takes your cookie cups to a whole new level!

  • Candy Swap: Replace miniature Reese’s cups with M&M's or caramel candies like Rolo for a different flavor profile. You can mix and match candies to create delightful surprises with every bite!

  • Sprinkle Variety: Change up heart sprinkles with various colored sprinkles or mini chocolate chips for a festive twist that matches any occasion. It’s a simple way to add personality to your treats!

  • Spiced Up: Add a pinch of cinnamon or a dash of cayenne pepper to the dough for a warm, spicy kick. It's an unexpected twist that brings an exciting flavor explosion to your old favorites!

  • Gluten-Free Option: Substitute all-purpose flour with a gluten-free blend to cater to those with gluten sensitivities. This keeps the cookie cups soft and chewy while accommodating all guests!

  • Mini Delights: Scale down the dough size to create mini cookies that pack the same punch in adorably bite-sized portions! They're perfect for parties or as sweet little gifts for loved ones.

Try out these variations and let your imagination run wild! Whether you explore the sweet nuances of a hazelnut version or cater to dietary needs, your holiday spirit will shine through in every delicious bite. Don't forget to enjoy these cookies with a mug of hot cocoa or alongside a plate of Thumbprint Cookies Melt for a memorable dessert experience!

Expert Tips for Easy Valentine Cookie Cups

  • Choose the Right Peanut Butter: Regular creamy peanut butter works best for these cookie cups; natural varieties can affect the texture and flavor.

  • Grease Properly: Ensure your mini muffin pan is generously greased to prevent any cookie cups from sticking, as this makes removal much easier.

  • Watch Your Bake Time: Avoid overbaking—look for slightly underdone centers. The remaining heat from the pan will continue to cook them, ensuring a soft bite.

  • Quick Assembly: Work swiftly when adding the miniature Reese’s; pressing them into the warm cookie base allows the chocolate to melt into that delightful gooey center.

  • Chill for Success: Refrigerate to set the chocolate and make removal easier. This step is vital for achieving perfect cookie cups without messy breakage.

Make Ahead Options

These Easy Valentine Cookie Cups are fantastic for meal prep, saving you time on busy days! You can prepare the cookie dough up to 24 hours in advance by rolling it into balls and storing them in an airtight container in the refrigerator. This keeps the dough fresh and ready to bake whenever you need a sweet treat! Additionally, bake the cookies without the Reese’s cups and store them in an airtight container for up to 3 days at room temperature. When you're ready to serve, simply press the peanut butter cups into the warm cookie centers and let them melt before topping with sprinkles. This approach ensures that your cookie cups stay just as delicious as when freshly made, making them perfect for spontaneous gatherings or special occasions!

What to Serve with Easy Valentine Cookie Cups

The magic of these delightful treats doesn't stop at cookie cups; let's elevate your dessert experience with perfect pairings that tantalize the taste buds.

  • Cold Glass of Milk: This classic pairing enhances the rich flavors and creates a nostalgic connection to childhood treats. A tall, frosty glass will have everyone feeling like a kid again!

  • Fresh Strawberries: Juicy and sweet, they add a refreshing burst that beautifully balances the richness of the cookies. Imagine the color contrast on your dessert table—simply irresistible.

  • Vanilla Ice Cream: A scoop of creamy vanilla ice cream transforms these cookie cups into an indulgent treat. The cool, melt-in-your-mouth sensation harmonizes flawlessly with the warm cookie.

  • Chocolate Drizzle: Drizzling a bit of melted chocolate on top brings an extra layer of decadence. It’s like a sweet hug for your cookies, adding visual appeal and a richer flavor.

  • Coffee or Espresso: A hot cup of coffee or a shot of espresso perfectly complements the peanut butter and chocolate. The robust flavors of coffee enhance the sweetness, making each bite even more delightful.

  • Chocolate Ganache Dip: Mimicking classic fondue, a side of rich chocolate ganache allows guests to dunk their cookie cups, making for a playful, interactive dessert experience.

  • Whipped Cream Clouds: Light and fluffy whipped cream adds a touch of elegance, perfect for a special occasion. It contrasts the dense cookie and offers a delightful lightness.

Explore these pairings for the ultimate dessert experience, and let your Easy Valentine Cookie Cups shine even brighter!

Easy Valentine Cookie Cups Recipe FAQs

What kind of peanut butter should I use?
Absolutely! For the best results in your Easy Valentine Cookie Cups, I recommend using regular creamy peanut butter. Natural peanut butters may mix differently and can lead to a less chewy texture, which is essential for that delightful cookie base.

How should I store my cookie cups?
You can keep your Easy Valentine Cookie Cups in an airtight container at room temperature for up to 5 days. If you prefer to enjoy them a bit colder, refrigerating them can extend their freshness to about 7 days, offering a delightful chilled treat.

Can I freeze these cookie cups?
Yes, freezing is a fantastic option! To freeze, first arrange your cookie cups in a single layer on a baking sheet and pop them in the freezer for about 2 hours. Once they're firm, transfer them to an airtight container or freezer bag—these can be frozen for up to 2 months. Just remember to thaw them at room temperature for about 30 minutes before indulging.

What if my cookie cups stick to the pan?
Oh no! If your Easy Valentine Cookie Cups are sticking, it might be due to insufficient greasing of the muffin pan. Make sure to use a generous layer of cooking spray or butter before baking. Additionally, running a knife around the edges can help release any stubborn cups.

Are there any allergy considerations I should be aware of?
Great question! Since this recipe uses peanut butter and eggs, those with nut allergies or egg sensitivities should look for alternate ingredients. You can try substituting peanut butter with sun butter for a nut-free option. Always check labels to ensure that other ingredients haven't been cross-contaminated.

Easy Valentine Cookie Cups

Easy Valentine Cookie Cups That Melt Hearts with Every Bite

These Easy Valentine Cookie Cups are soft, chewy peanut butter cookies topped with creamy Reese’s Peanut Butter Cups, perfect for celebrations.
Print Recipe Pin Recipe
Prep Time 15 minutes mins
Cook Time 15 minutes mins
Chilling Time 10 minutes mins
Total Time 30 minutes mins
Servings: 30 cookie cups
Course: Dessert
Cuisine: American
Calories: 120
Ingredients Equipment Method Nutrition Notes

Ingredients
  

For the Cookie Base
  • 6 tablespoons Unsalted Butter softened to room temperature
  • 0.5 cup Creamy Peanut Butter regular creamy peanut butter
  • 0.5 cup Brown Sugar contributes to moisture
  • 0.5 cup Granulated Sugar
  • 0.5 teaspoon Vanilla Extract
  • 1 large Egg binds the dough
  • 0.75 teaspoon Baking Soda for leavening
  • 1.25 cups All-Purpose Flour do not overmix
For the Topping
  • 30 Miniature Reese’s Peanut Butter Cups
  • Jumbo Heart Sprinkles for decoration

Equipment

  • Mini muffin pan
  • Mixing Bowl
  • Electric mixer
  • Spatula
  • measuring cups
  • Measuring Spoons

Method
 

Step-by-Step Instructions for Easy Valentine Cookie Cups
  1. Preheat your oven to 350°F (175°C) and lightly grease a mini muffin pan.
  2. In a large mixing bowl, cream together unsalted butter and both sugars until light and fluffy.
  3. Add in egg and vanilla extract, mixing until just combined.
  4. Sprinkle in baking soda and gently mix it into the dough.
  5. Gradually fold in all-purpose flour until a slightly sticky dough forms.
  6. Roll dough into balls, about 1 tablespoon each, and place them in the muffin pan.
  7. Bake for about 8 minutes or until the edges are set but the centers are soft.
  8. Press a miniature Reese’s Peanut Butter Cup into the center of each cookie immediately after removing from the oven.
  9. Top each Reese's with a jumbo heart sprinkle after waiting a minute.
  10. Refrigerate for 10-15 minutes to set the chocolate.
  11. Run a knife around the edges to release cookie cups from the pan and serve.

Nutrition

Serving: 1cookie cupCalories: 120kcalCarbohydrates: 15gProtein: 2gFat: 6gSaturated Fat: 2gPolyunsaturated Fat: 1gMonounsaturated Fat: 2gCholesterol: 20mgSodium: 80mgPotassium: 45mgSugar: 8gVitamin A: 2IUCalcium: 1mgIron: 3mg

Notes

These cookie cups can be stored at room temperature for up to 5 days. They can also be refrigerated for up to 7 days or frozen for 2 months.

Tried this recipe?

Let us know how it was!

Valentine’s Day Oreo Cookie Bark: A Sweet No-Bake Delight

February 3, 2026 by Grace Snow Leave a Comment

As I walked through the aisles of my local market, the vibrant pinks and reds of Valentine's Day decorations caught my eye, instantly sparking my creativity. It’s the perfect season to whip up something sweet and delightful, like my Valentine's Day Oreo Cookie Bark. This fun, no-bake dessert combines the smoothness of white chocolate with the beloved crunch of Oreo cookies, making it a breeze to prepare. With just a few simple steps, you’ll craft a crowd-pleasing treat that’s not only quick to make but also perfect for gifting or cozy evenings in. Trust me, bringing this colorful delight into your kitchen will spread joy with every bite. Are you ready to dive into the world of charming homemade treats?

Why Is This Treat a Must-Make?

Quick and Easy: No baking involved! This Valentine’s Day Oreo Cookie Bark comes together in a matter of minutes, making it ideal for busy schedules.

Crowd-Pleasing Delight: The combination of creamy white chocolate and crunchy Oreos makes this treat irresistible for all ages.

Customizable Options: Swap Oreos for your favorite chocolate sandwich cookie or try different chocolate types for a unique twist.

Stunning Presentation: With vibrant heart-shaped sprinkles, it's not just delicious but a feast for the eyes—perfect for gifting or sharing!

Perfect for Any Occasion: While ideal for Valentine’s Day, this dessert is versatile enough to brighten any gathering or celebration.

So, whether you're also interested in our delightful Eggnog Cookies Soft or classic Thumbprint Cookies Melt, get ready for a treat that’s as enjoyable to make as it is to share!

Valentine’s Day Oreo Cookie Bark Ingredients

For the Base

  • Oreo Cookies – These crunchy delights provide the signature flavor and texture; feel free to swap for any chocolate sandwich cookie you love!
  • White Chocolate Chips – Their creamy profile makes for a luscious coating; opt for quality brands that melt smoothly for the best results.

For the Decoration

  • Candy Melts (optional) – Great for adding colorful accents; natural food coloring can replace these if you prefer a purer option.
  • Heart-Shaped Sprinkles – They add a festive touch for Valentine’s Day, but any themed sprinkles can brighten your bark!

This Valentine’s Day Oreo Cookie Bark is not only easy to make but also perfect for treating your loved ones and satisfying those sweet cravings!

Step‑by‑Step Instructions for Valentine’s Day Oreo Cookie Bark

Step 1: Crush the Oreos
Begin by placing the Oreo cookies into a zip-top bag and using a rolling pin to crush them. Aim for a mix of fine crumbs and larger chunks, which will create varied textures in your Valentine’s Day Oreo Cookie Bark. This process should take about 2–3 minutes, ensuring the pieces are not too fine.

Step 2: Melt White Chocolate
In a microwave-safe bowl, combine your white chocolate chips. Microwave them in 30-second increments, stirring after each session until the chocolate is completely smooth and melted, which should take around 1 to 2 minutes in total. Be cautious to avoid overheating, as this can cause the chocolate to seize.

Step 3: Prepare Baking Sheet
Line a baking sheet with parchment paper to prevent sticking. Pour the melted white chocolate onto the parchment and gently spread it out with a spatula to achieve an even layer about 1/4-inch thick. This base will be the foundation of your Valentine’s Day Oreo Cookie Bark, so aim for a consistent surface.

Step 4: Add Crushed Oreos
Sprinkle half of the crushed Oreo mixture evenly over the melted white chocolate layer. Gently press the cookie pieces down into the chocolate, ensuring they adhere well. This step should take about 1 minute and can be visually checked when the Oreos are visibly embedded within the chocolate.

Step 5: Melt Candy Melts
If you are using candy melts, repeat the melting process in a separate microwave-safe bowl, utilizing 30-second intervals just like the white chocolate. Stir until smooth. This should take around 1–2 minutes. The vibrant colors from the candy melts will add a beautiful accent to your bark.

Step 6: Drizzle Candy Melts
Once the candy melts are ready, drizzle them over the melted chocolate layer in a swirling motion using a spoon or a piping bag. This creates a marbled effect that's visually appealing. Use a toothpick to gently swirl the colors together if desired, which adds an artistic flair to your Valentine’s Day Oreo Cookie Bark.

Step 7: Finish with Toppings
Sprinkle the remaining crushed Oreos and heart-shaped sprinkles generously on top of the chocolate layer. Aim to distribute the toppings evenly for aesthetic appeal. This step should take about 1–2 minutes and will ensure your dessert is as festive as it is delicious.

Step 8: Set in Refrigerator
Place the baking sheet in the refrigerator to chill for about 30 minutes, or until the chocolate is fully hardened. This will make it easier to break into pieces later. Keep an eye on it; you want a solid structure but not overly cold, which can cause cracking.

Step 9: Break into Pieces
Once the Valentine’s Day Oreo Cookie Bark is set, remove it from the refrigerator. Break the bark into irregular pieces using your hands or a sharp knife. The delightful combination of creamy and crunchy textures will be revealed as you break it apart, making it a captivating treat to enjoy or gift.

What to Serve with Valentine’s Day Oreo Cookie Bark

This delightful treat transforms any occasion into a celebration, offering a perfect blend of fun and nostalgia.

  • Classic Milk: A tall glass of milk enhances the dunking experience, balancing the sweetness of the Oreo Cookie Bark beautifully.

  • Vanilla Ice Cream: Creamy and cool, vanilla ice cream complements the rich chocolate and crunchy Oreos, creating a delightful textural contrast.

  • Fresh Strawberries: Juicy, ripe strawberries add a refreshing tartness, brightening the dessert while keeping the Valentine's theme alive.

  • Chocolate-Covered Fruits: Pair with chocolate-covered strawberries or bananas for an indulgent, chocolatey experience that takes the sweetness to the next level!

  • Hot Chocolate: Serve with a warm mug of hot chocolate, rich in flavor and perfect for cozy evenings while enjoying this delightful bark.

  • Coffee or Espresso: A subtly bitter cup of coffee cuts through the sweetness of the bark, making it a sophisticated pairing for adult gatherings.

  • Whipped Cream Topping: A dollop of whipped cream adds a light, airy element to the bark, enhancing its indulgent qualities and adding creaminess to every bite.

Hearty treats like these encourage sharing and create memories, making your gatherings all the more special!

Expert Tips for Valentine’s Day Oreo Cookie Bark

  • Perfect Melting: Always use dry utensils when melting chocolate; even a droplet of water can cause it to seize unexpectedly.

  • Quality Matters: Choose high-quality white chocolate chips for a smooth melt and delicious flavor in your Valentine's Day Oreo Cookie Bark.

  • Textural Variety: Make sure to crush the Oreos to your desired consistency; large chunks mixed with crumbs create a delightful textural contrast.

  • Colorful Swirls: When drizzling candy melts, don’t rush the process. The swirls create visually appealing patterns that'll impress your loved ones.

  • Customize Toppings: Feel free to explore different themed sprinkles or nuts for added texture and flavor, making your bark uniquely yours!

Valentine’s Day Oreo Cookie Bark Variations

Feel free to get creative with your Valentine’s Day Oreo Cookie Bark and make it suit your taste!

  • Gluten-Free: Swap out traditional Oreos for gluten-free chocolate sandwich cookies to enjoy this treat without worries.

  • Vegan-Friendly: Use vegan white chocolate and ensure that the cookie substitutes match your dietary needs, for a plant-based delight.

  • Flavored Chocolate: Experiment with milk or dark chocolate instead of white chocolate for a completely different flavor profile that still pleases the palate.

  • Nutty Addition: Add roasted pecans or almonds to the crushed Oreos for an exciting crunch and a nutty twist. This extra layer elevates the overall texture!

  • Dried Fruit Twist: Incorporate dried cherries or cranberries for a hint of tartness that beautifully contrasts the sweetness of the chocolate.

  • Spicy Kick: For those who love a little heat, sprinkle some chili powder or cayenne over the melted chocolate layer. It might just surprise and delight your taste buds!

  • Chocolate Drizzle: Create an elegant finish by drizzling some melted dark chocolate atop the set bark. This adds both visual appeal and a rich flavor contrast.

As you craft your own masterpiece, don't forget to check out delightful recipes like Matcha Cookies Soft or Mexican Wedding Cookies for more sweet inspirations!

Make Ahead Options

These Valentine’s Day Oreo Cookie Bark pieces are perfect for making ahead of time! You can prepare the entire recipe up to 24 hours in advance, storing it in an airtight container in the refrigerator to ensure freshness and maintain flavor. To do this, simply follow the steps up to the chilling process, allowing the bark to set completely before breaking it into pieces. Once ready to serve, bring the bark to room temperature for about 10-15 minutes for optimal flavor and to prevent it from being too cold or brittle. This way, you can spend more time enjoying the special moments with your loved ones and less time in the kitchen!

Storage Tips for Valentine’s Day Oreo Cookie Bark

Room Temperature: Store your Valentine’s Day Oreo Cookie Bark in an airtight container at room temperature for up to one week to maintain its delightful crunch.

Refrigerator: For longer freshness, keep the bark in the fridge for up to two weeks. Just be sure it's covered to prevent drying out.

Freezer: If you want to store it for an extended period, freeze it for up to three months. Wrap it tightly in plastic wrap and place it in a freezer-safe container.

Reheating: No need to reheat; simply let the bark sit at room temperature for a few minutes before enjoying to restore its perfect texture!

Valentine’s Day Oreo Cookie Bark Recipe FAQs

How do I know if my Oreo cookies are fresh enough to use?
Absolutely! Look for Oreos with no dark spots or unusual smells, which can indicate staleness. They should be crisp, and ideally, check the expiration date on the package. Fresh cookies ensure optimal texture in your Valentine’s Day Oreo Cookie Bark.

What’s the best way to store leftovers of the Valentine’s Day Oreo Cookie Bark?
Very simple! Store your bark in an airtight container at room temperature for up to one week or in the refrigerator for up to two weeks. Ensure it is sealed tightly to maintain that delightful crunch we've all come to love.

Can I freeze the Valentine’s Day Oreo Cookie Bark?
Yes, you can! For long-term storage, wrap the pieces tightly in plastic wrap or aluminum foil and place them in a freezer-safe container. It's best to freeze for up to three months. When you're ready to enjoy, simply let it sit at room temperature for a few minutes to soften slightly; there's no need to reheat!

What if my chocolate seized while melting?
No worries, it happens to the best of us! If your chocolate seizes, try adding a small amount of vegetable oil or coconut oil—about 1 teaspoon per cup—to salvage it. Mix it in and gently reheat until smooth again. To avoid this in the future, ensure all utensils and bowls are completely dry before you start melting.

Are there any dietary considerations for this recipe?
Definitely! You can easily adapt this recipe for vegan diets by using vegan white chocolate and ensuring that your cookie alternatives are vegan-friendly. If allergies are a concern, always check for potential allergens, such as gluten or dairy in the ingredients you choose.

What sprinkles should I use for decoration?
Feel free! Heart-shaped sprinkles are perfect for a festive touch, but you can use any themed sprinkles that catch your eye. Just keep in mind that colorful sprinkles can bring a fun and vibrant look to your Valentine’s Day Oreo Cookie Bark, making it even more appealing for sharing!

Valentine’s Day Oreo Cookie Bark

Valentine’s Day Oreo Cookie Bark: A Sweet No-Bake Delight

This Valentine’s Day Oreo Cookie Bark is a delightful no-bake dessert that combines white chocolate with crunchy Oreo cookies for a festive treat.
Print Recipe Pin Recipe
Prep Time 15 minutes mins
Cook Time 5 minutes mins
Chilling Time 30 minutes mins
Total Time 50 minutes mins
Servings: 12 pieces
Course: Dessert
Cuisine: American
Calories: 180
Ingredients Equipment Method Nutrition Notes

Ingredients
  

For the Base
  • 1 package Oreo Cookies Feel free to swap for any chocolate sandwich cookie.
  • 2 cups White Chocolate Chips Opt for quality brands that melt smoothly.
For the Decoration
  • 1 cup Candy Melts Optional for colorful accents.
  • 1 cup Heart-Shaped Sprinkles Any themed sprinkles can be used.

Equipment

  • Microwave-safe bowl
  • Rolling Pin
  • Zip-top bag
  • Baking Sheet
  • Parchment Paper
  • Spatula
  • toothpick

Method
 

Step‑by‑Step Instructions
  1. Crush the Oreo cookies into a mix of fine crumbs and larger chunks.
  2. Melt the white chocolate chips in a microwave-safe bowl, stirring until smooth.
  3. Line a baking sheet with parchment paper, then pour and spread the melted chocolate.
  4. Sprinkle half of the crushed Oreo mixture over the melted chocolate and press down.
  5. Melt the candy melts in a separate bowl until smooth.
  6. Drizzle melted candy melts over the chocolate in a swirling motion.
  7. Sprinkle the remaining crushed Oreos and heart-shaped sprinkles on top.
  8. Refrigerate for about 30 minutes until fully hardened.
  9. Break into irregular pieces and enjoy your treat.

Nutrition

Serving: 1pieceCalories: 180kcalCarbohydrates: 25gProtein: 2gFat: 9gSaturated Fat: 5gPolyunsaturated Fat: 1gMonounsaturated Fat: 2gCholesterol: 5mgSodium: 50mgPotassium: 50mgFiber: 1gSugar: 16gCalcium: 2mgIron: 2mg

Notes

Store in an airtight container at room temperature for up to one week, or refrigerate for up to two weeks.

Tried this recipe?

Let us know how it was!
  • « Previous Page
  • 1
  • …
  • 7
  • 8
  • 9
  • 10
  • 11
  • …
  • 49
  • Next Page »

Welcome!

Hi, I’m Grace, a Sydney-based home cook with a passion for bold flavors and trending ingredients. Whether you’re a busy beginner or a seasoned foodie, you’ll find dishes here that are fresh, fun, and full of flavor.

More about me

Popular Recipes

  • Cheesy Chicken Garlic Bread Sandwich
    Cheesy Chicken Garlic Bread Sandwich for Cozy Family Moments
  • Easy Chicken Ranch Wraps
    Easy Chicken Ranch Wraps: Quick, Creamy & Totally Satisfying
  • Chicken Caesar Sandwiches
    Delicious Chicken Caesar Sandwiches for Quick Comfort Food
  • best Cuban sandwich
    The Best Cuban Sandwich You’ll Want Every Weeknight!

Footer

↑ back to top

About

  • Privacy Policy
  • Disclaimer
  • Terms & Conditions

Newsletter

  • Sign Up! for emails and updates

Contact

  • About me
  • Contact me

Copyright © 2025 TastyTrendIngredients