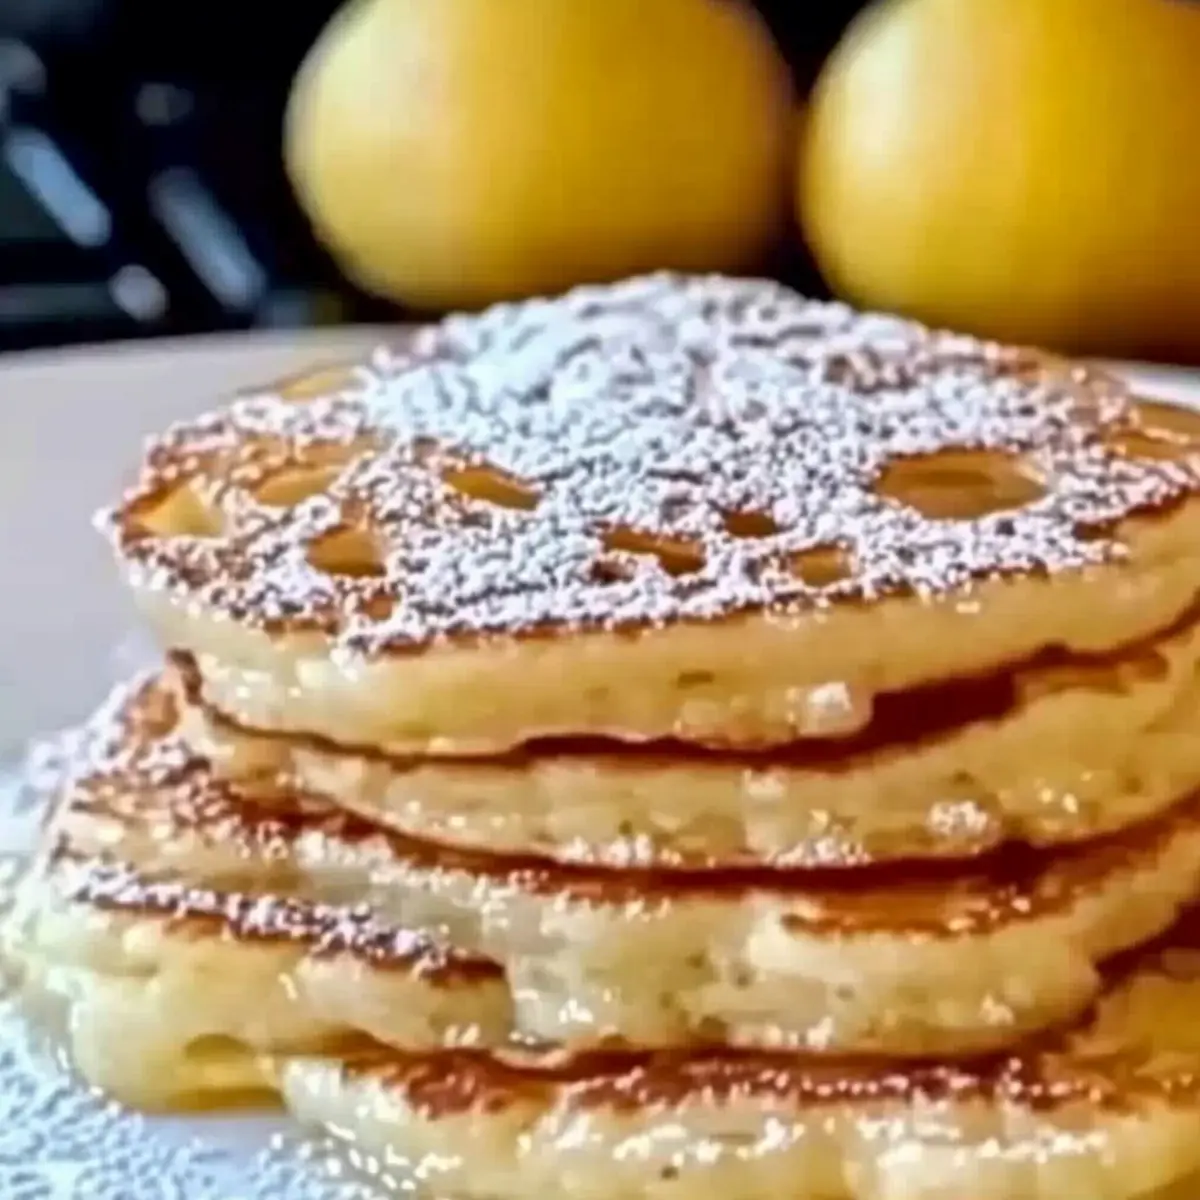
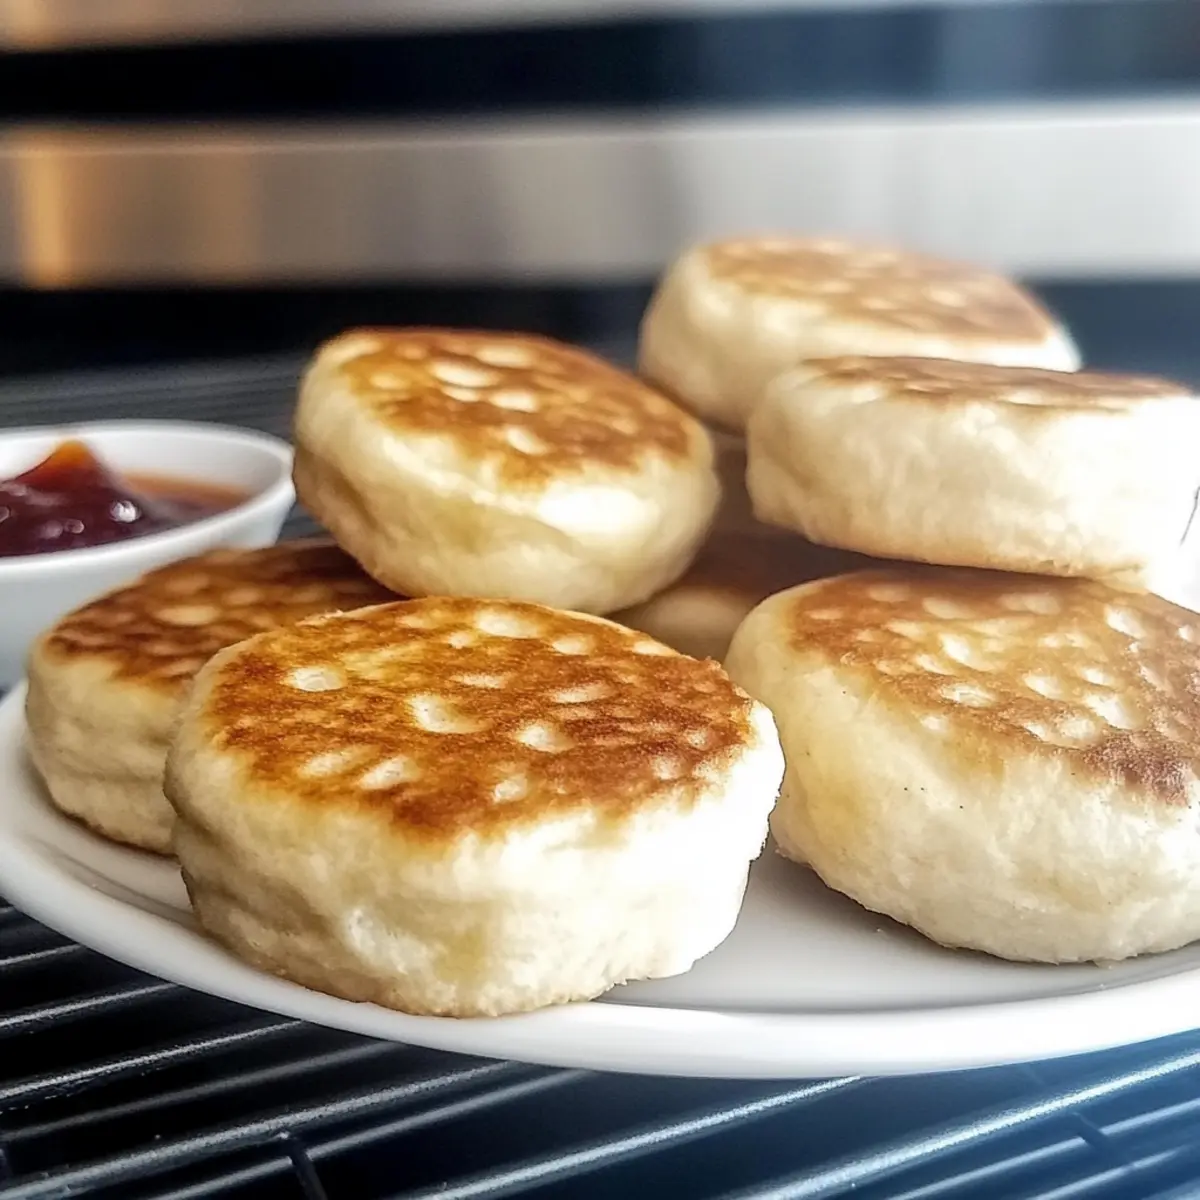
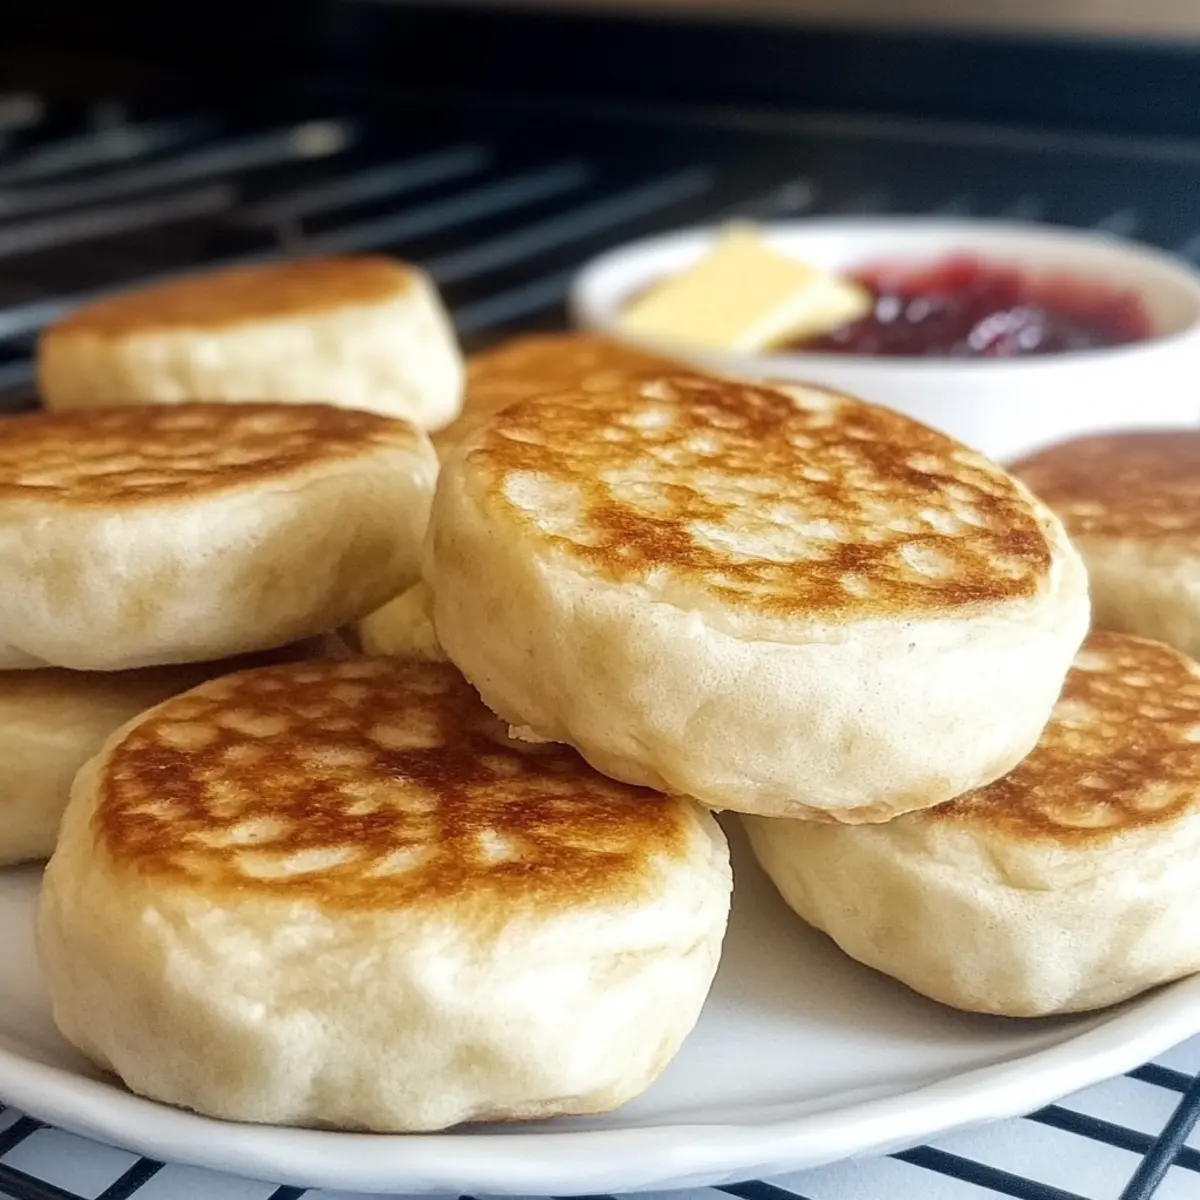
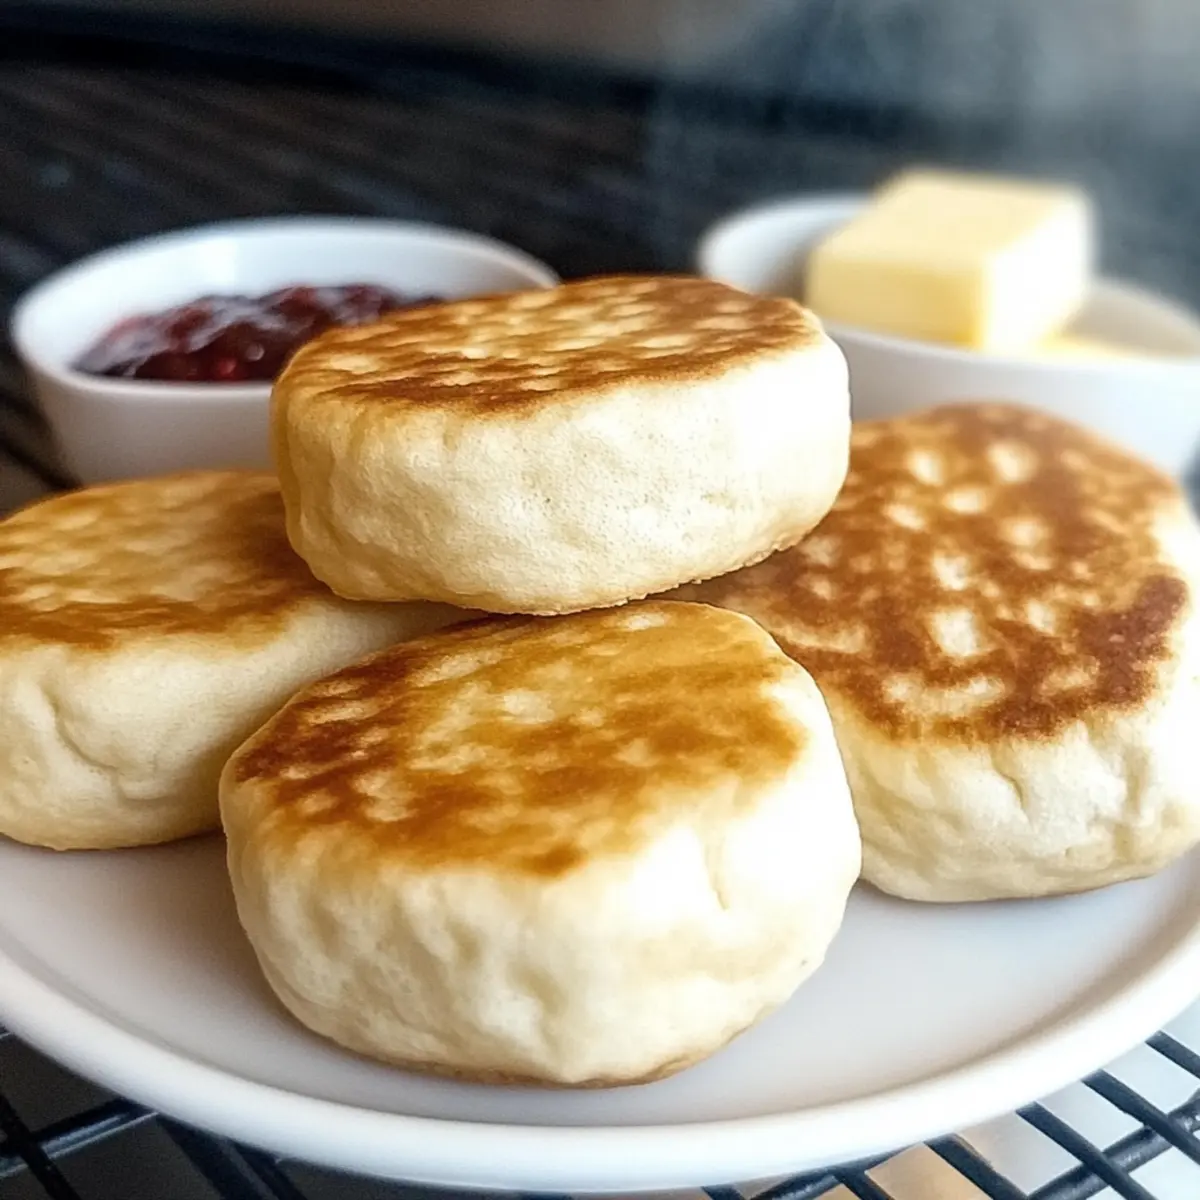
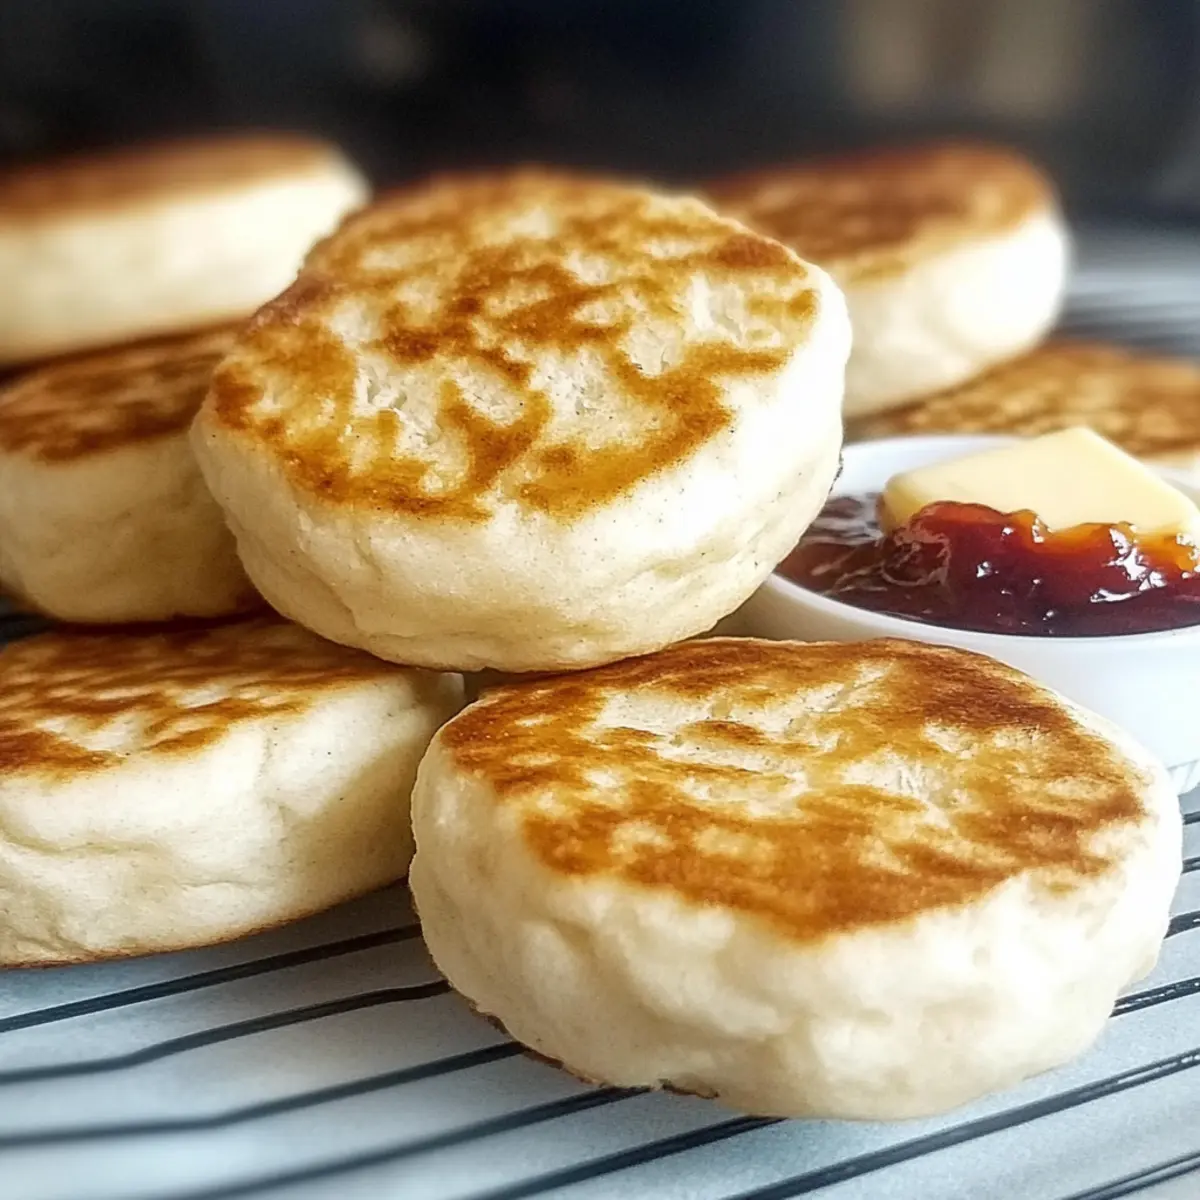
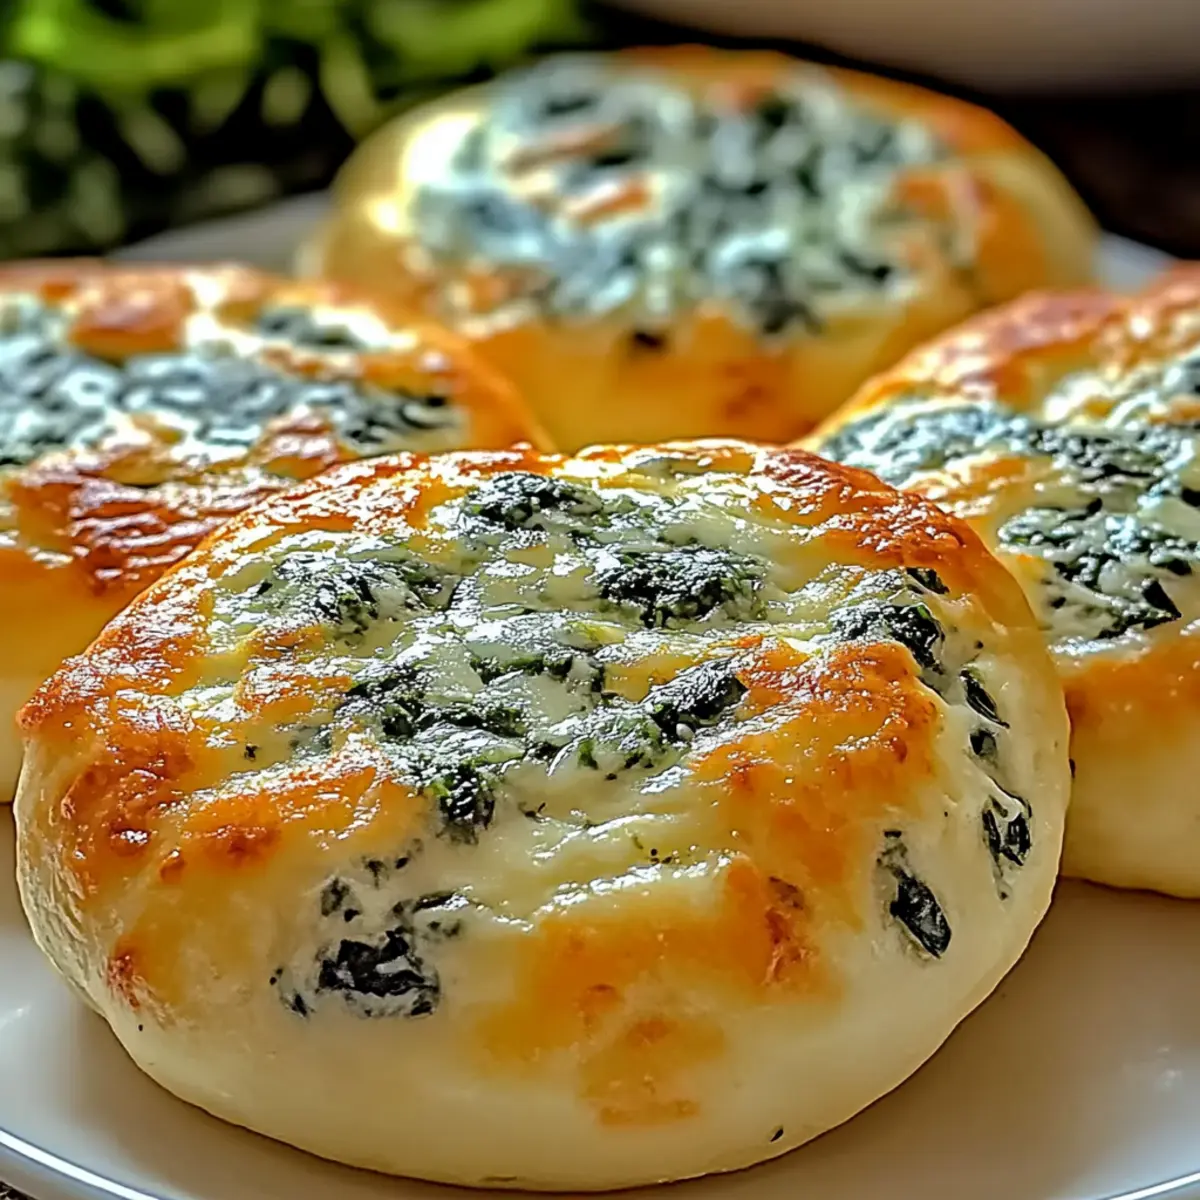
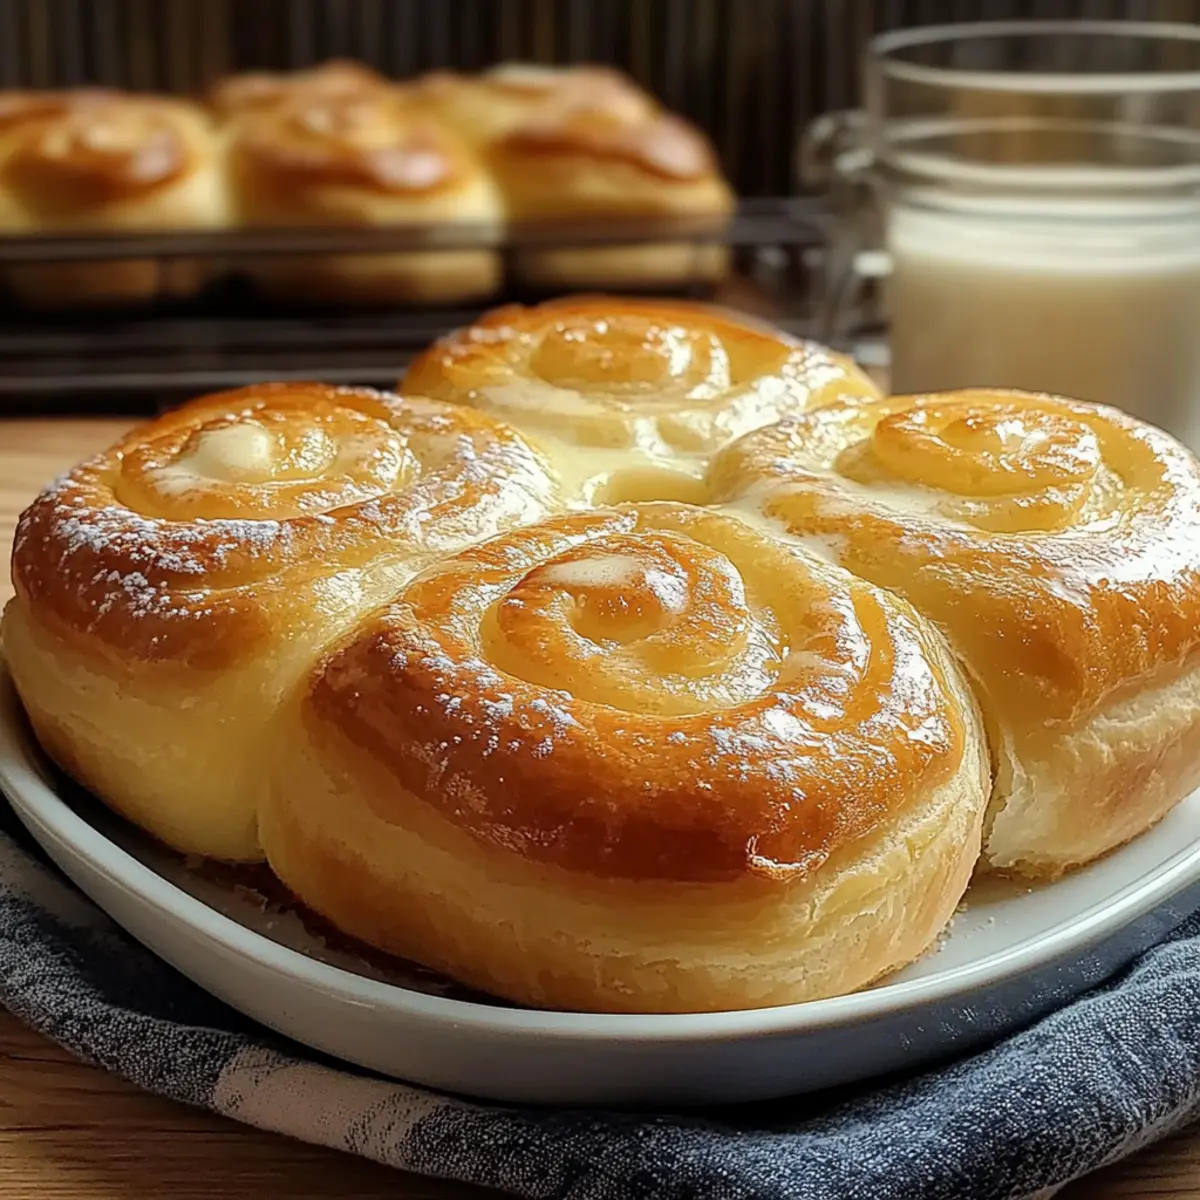
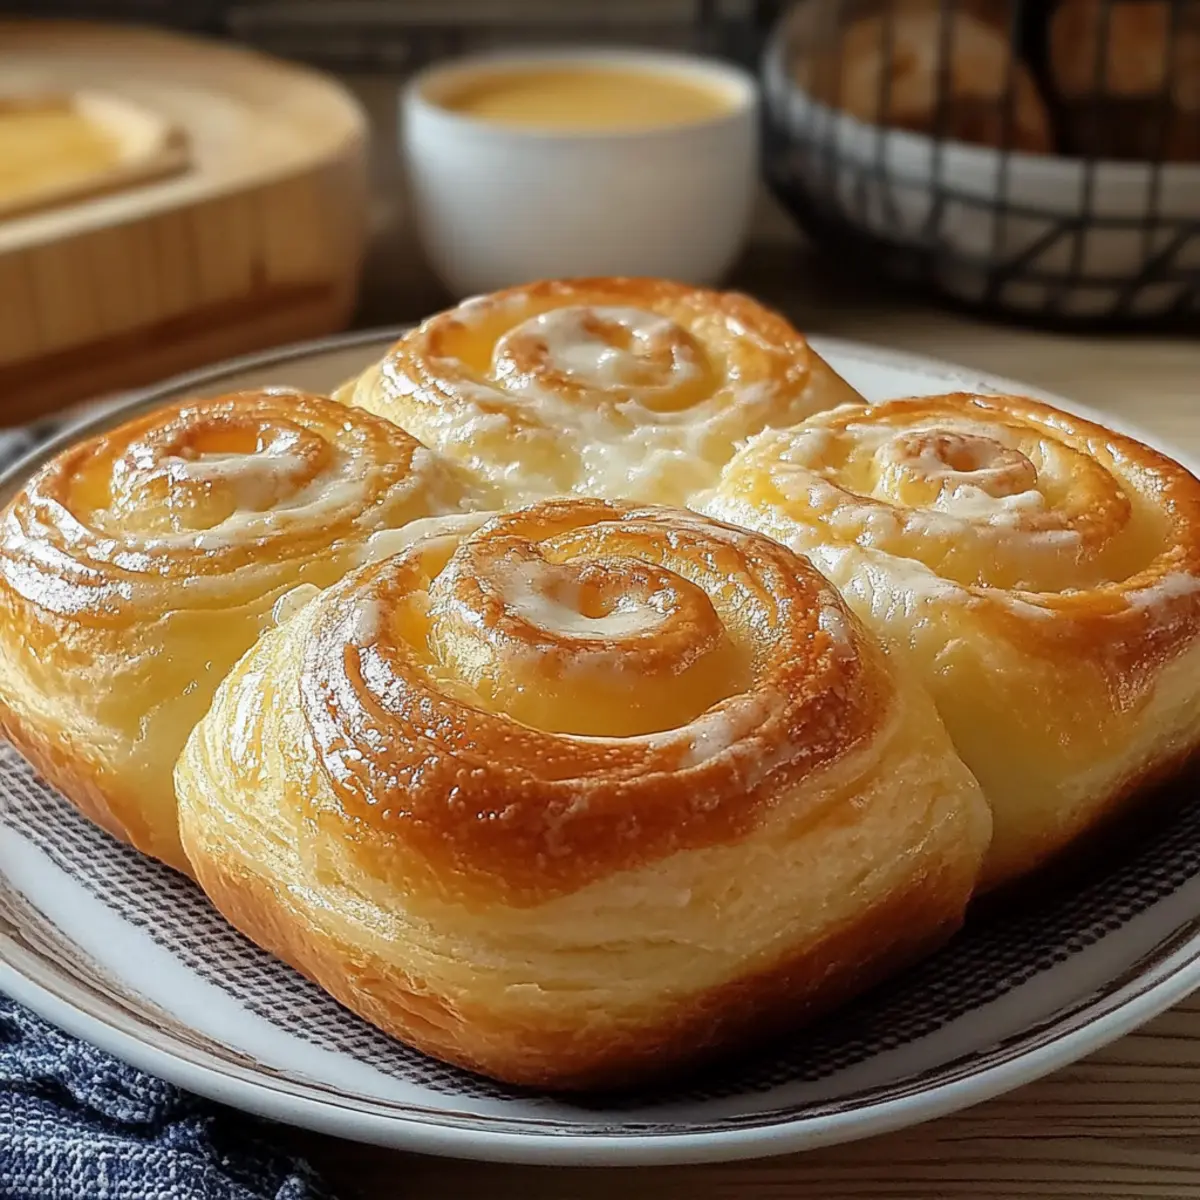
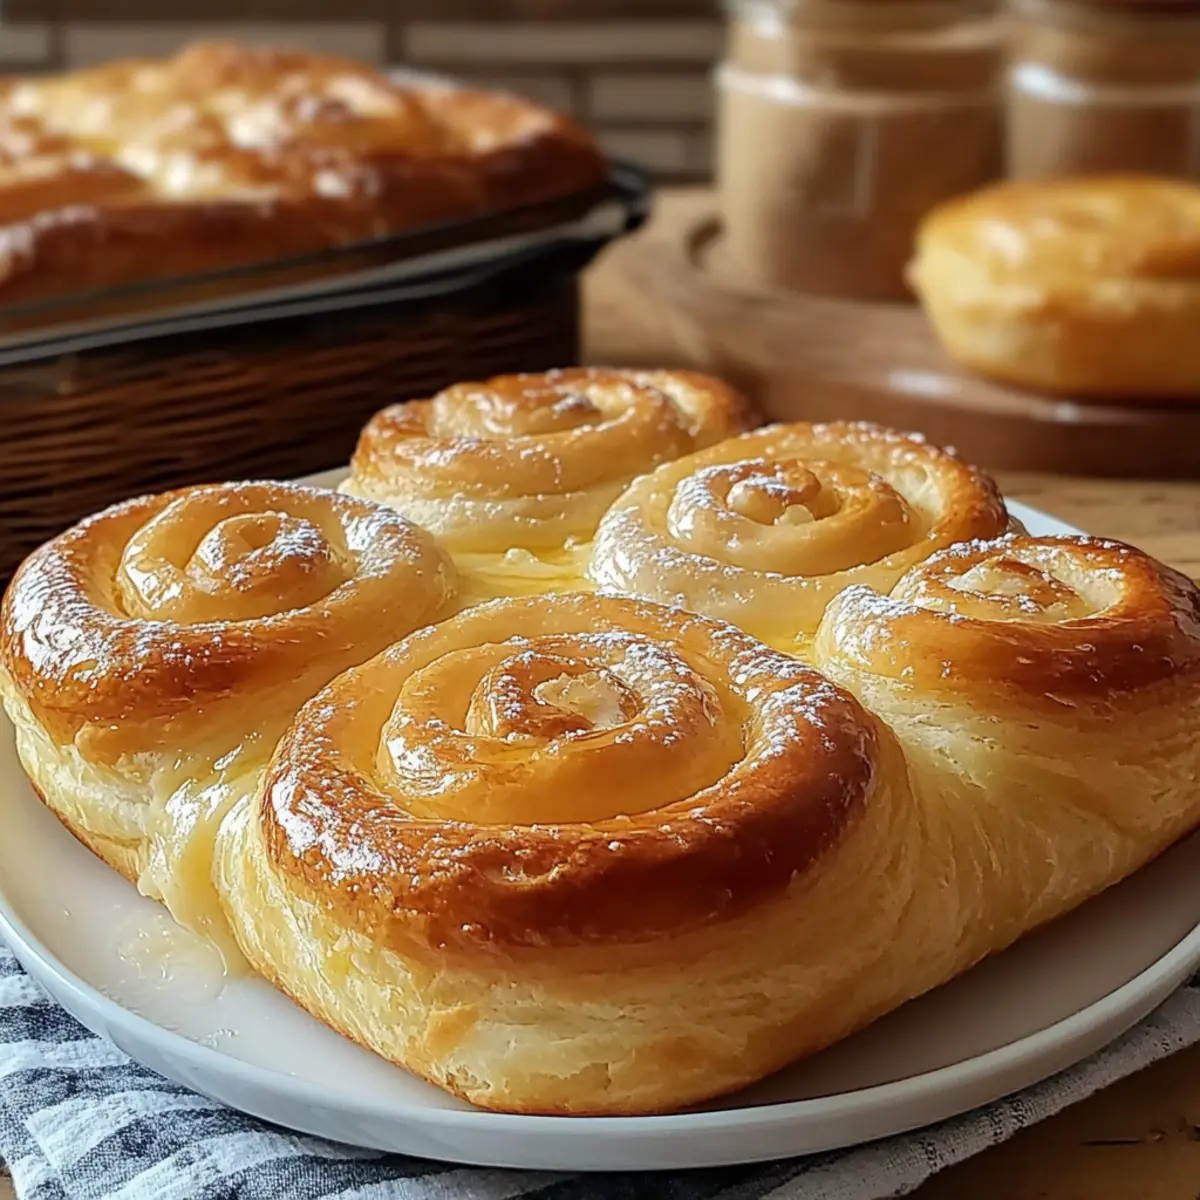
As the rich aroma of freshly baked bread wafts through the kitchen, there's an undeniable magic in the air—especially when I'm making Classic Ensaymada Bread. This fluffy Filipino delight not only captures my heart but also brings smiles to anyone lucky enough to taste it. With its tender, cloud-like texture and a slight hint of sweetness topped with savory cheese, it's perfect for breakfast or a cozy afternoon snack. The beauty of this recipe lies in its versatility; whether you choose the classic version or explore variations like Coconut, Ube, or even Chocolate Ensaymada, each bite takes you on a delightful journey. Not only is this bread a true comfort food, but it also comes together quickly, making it an ideal choice for both novice and seasoned bakers. Ready to impress your friends and family with a delightful twist on a beloved classic? Let’s get started!
Why is Classic Ensaymada Bread a Must-Try?
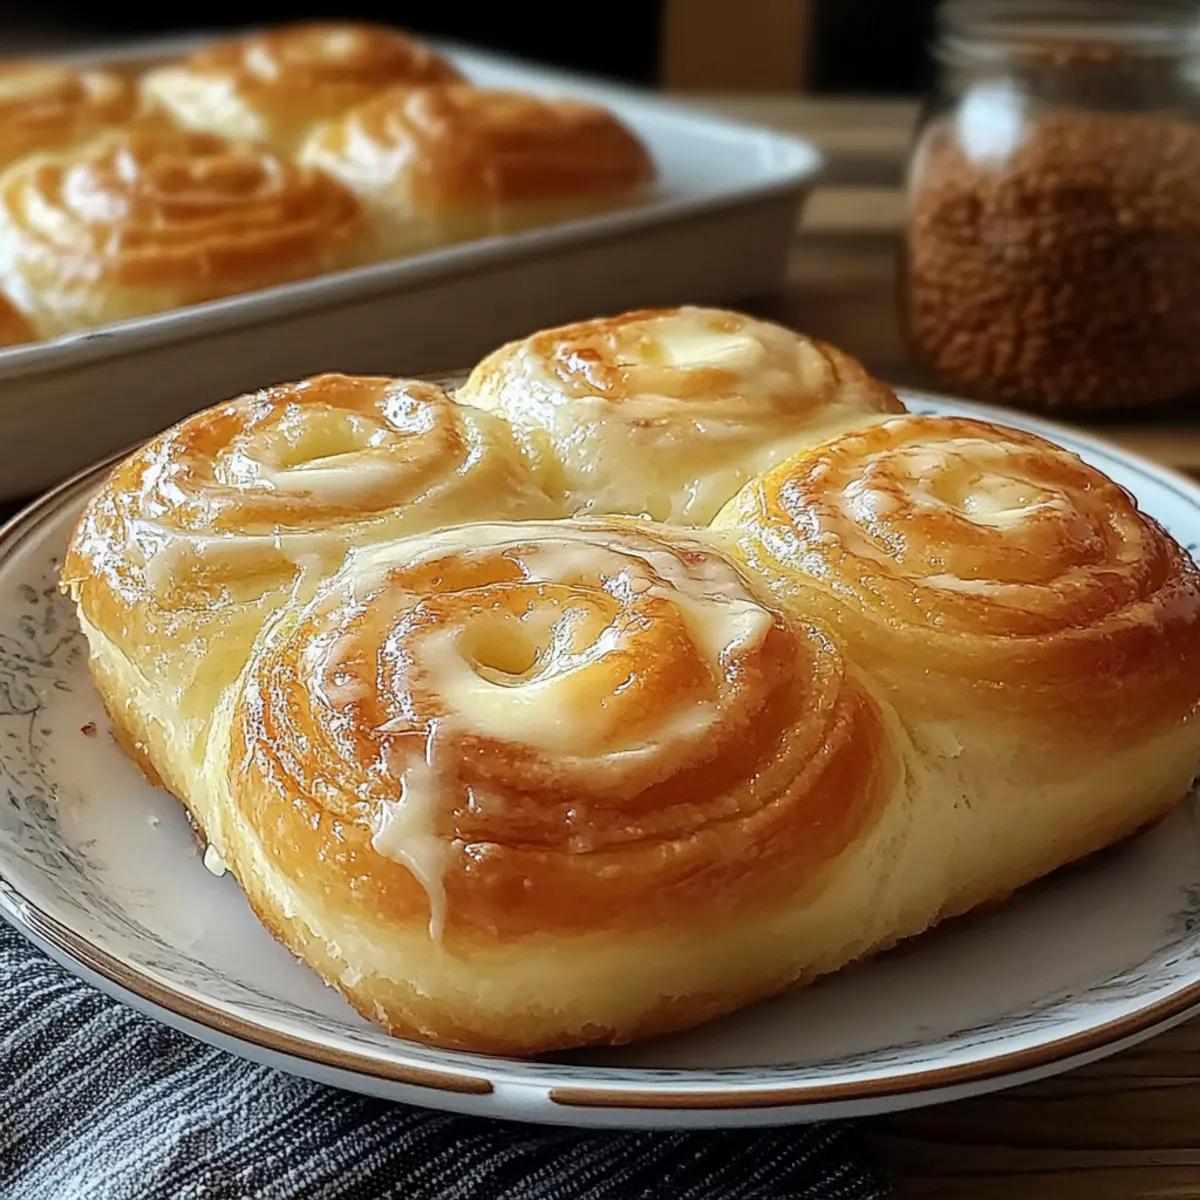
Irresistible Fluffiness: The light and airy texture of classic Ensaymada Bread is like biting into a cloud, making it an unforgettable treat.
Versatile Variations: Want to elevate your baking game? Try the Coconut, Ube, or Chocolate Ensaymada variations for added excitement and flair!
Quick and Easy: Perfect even for beginners, the recipe is straightforward, allowing you to create a stunning treat in no time.
Crowd Favorite: Whether for breakfast or an afternoon snack, this bread is sure to impress family and friends, delighting everyone with its unique sweet-savory blend.
Cultural Treat: Indulging in this Filipino classic connects you to a culture rich in flavor and tradition, making every bite a nostalgic experience.
Classic Ensaymada Bread Ingredients
For the Dough
- All-Purpose Flour – Provides structure to the bread; whole wheat flour can be used for a denser texture.
- Granulated Sugar – Adds sweetness and helps with browning; consider reducing if preferred.
- Salt – Enhances flavor and balances sweetness.
- Instant Yeast – Leavens the dough; ensure it’s fresh for proper rising.
- Milk – Adds moisture; can substitute with plant-based milk for a lactose-free option.
- Unsalted Butter – Provides rich flavor; use salted butter if desired, but adjust the added salt.
- Eggs – Contributes to richness and structure; flaxseed meal or applesauce can replace eggs if needed.
- Vanilla Extract – Adds aromatic sweetness for a lovely depth of flavor.
For the Topping
- Melted Butter (for brushing) – Enhances flavor and creates a beautiful finish.
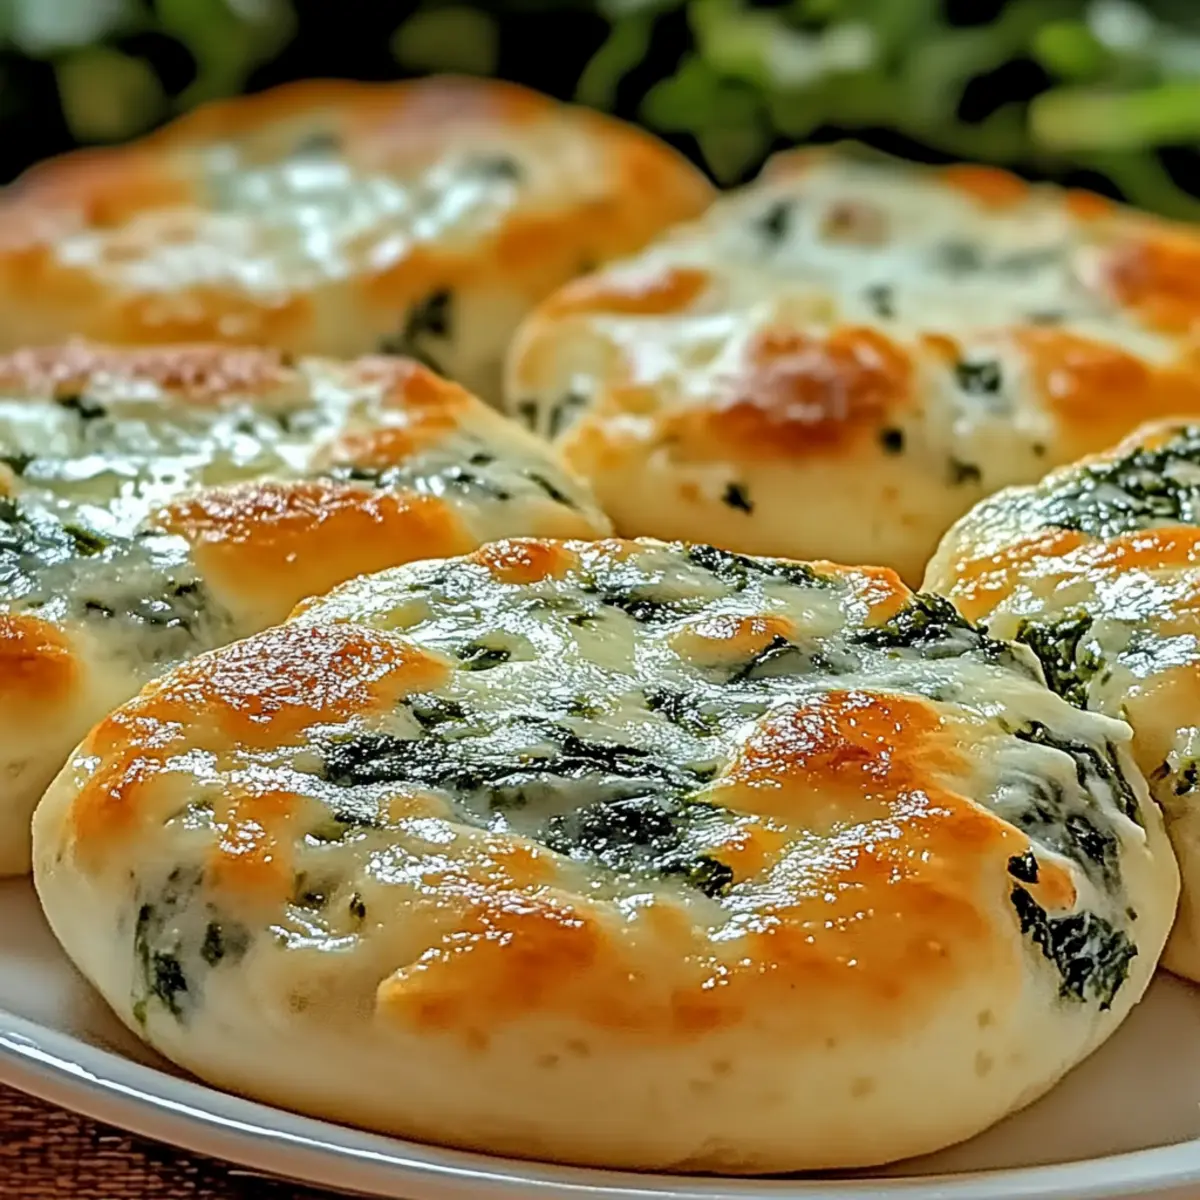
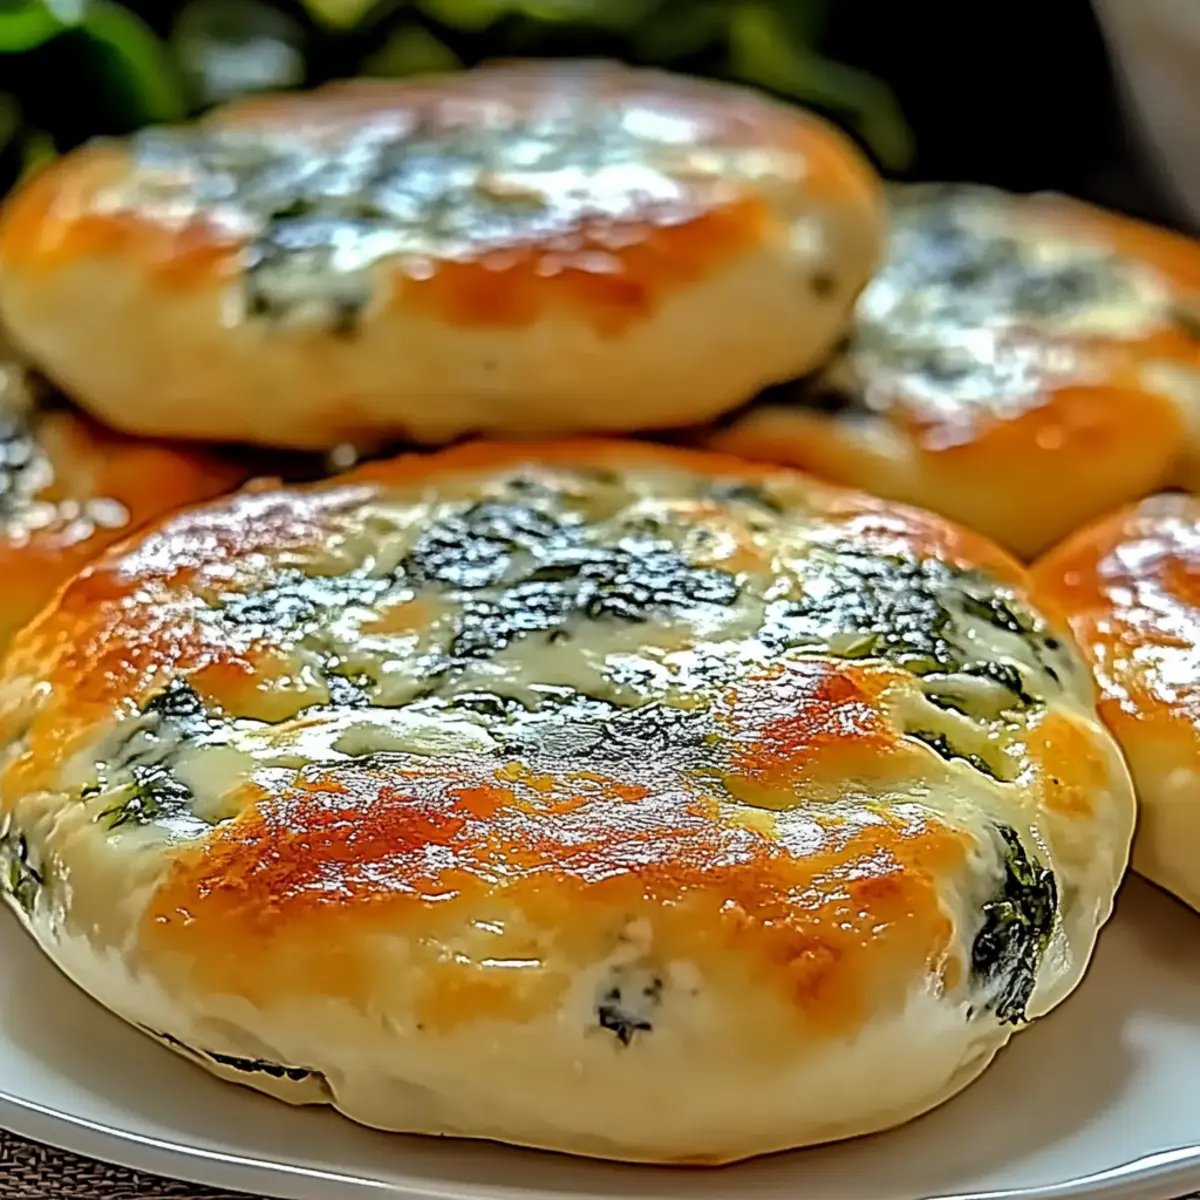
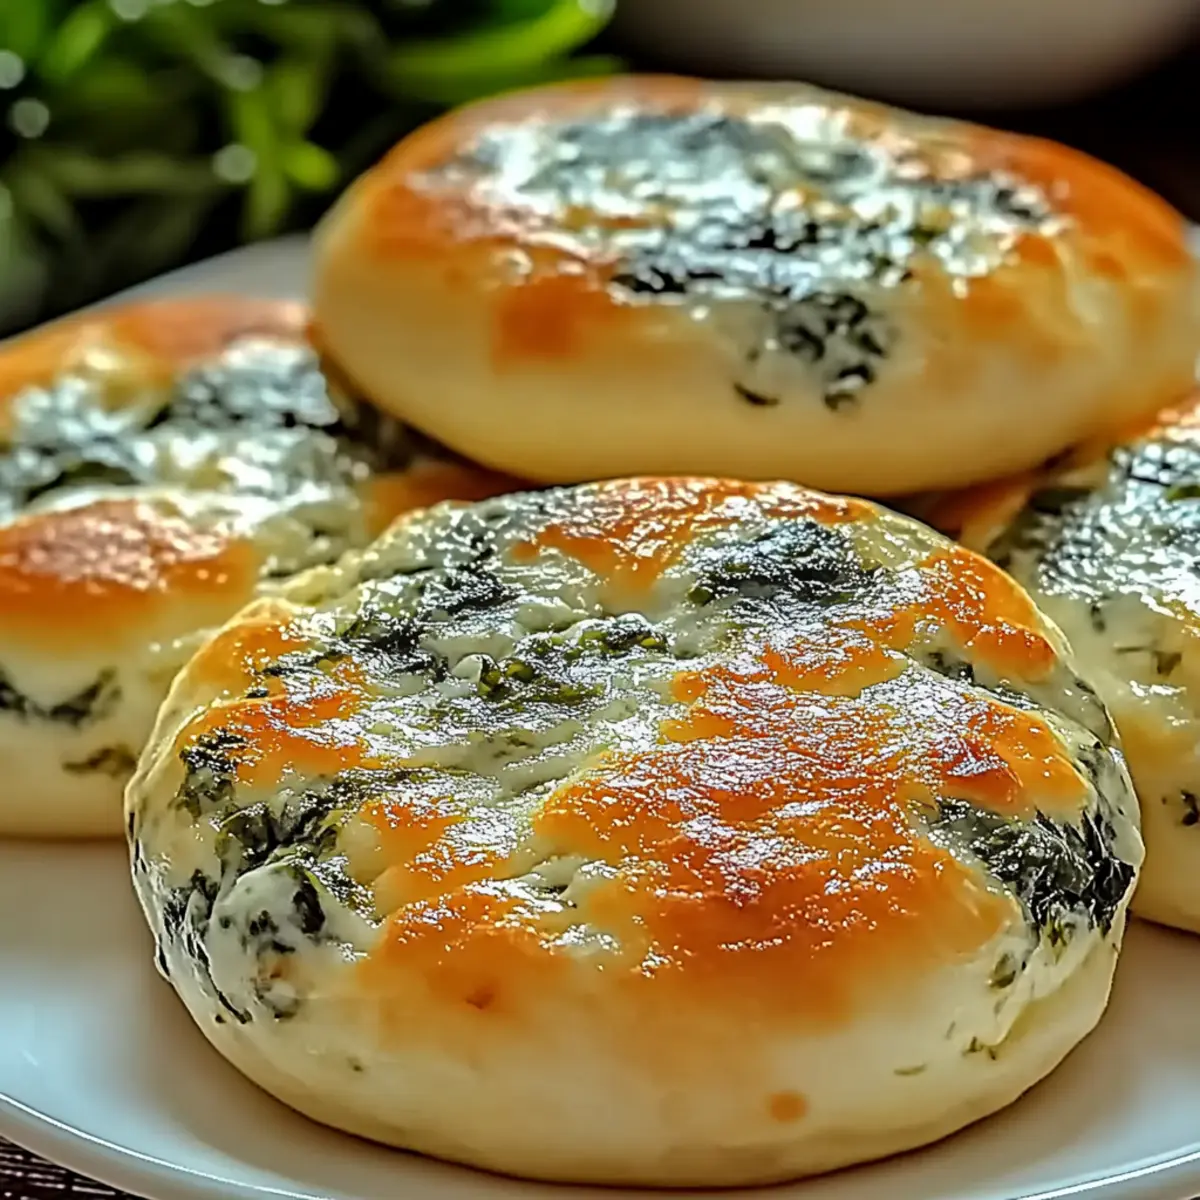
- Grated Cheese (e.g., cheddar or queso de bolsa) – Adds a savory note; any soft cheese can work for a different flavor.
- Sugar (for dusting) – Sweetens the top and gives a delightful finish to the bread.
Discover the warmth and joy of baking with Classic Ensaymada Bread—your taste buds will thank you!
Step‑by‑Step Instructions for Classic Ensaymada Bread
Step 1: Gather Your Ingredients
Start by collecting all the ingredients needed for the Classic Ensaymada Bread: all-purpose flour, sugar, salt, instant yeast, milk, unsalted butter, eggs, and vanilla extract. Having everything at hand makes the process smoother and enjoyable. Ensure your milk is warm (about 100°F or 38°C) to help activate the yeast for that perfect rise.
Step 2: Activate Your Yeast
In a small bowl, mix the warm milk with the instant yeast and 1 tablespoon of sugar. Allow this mixture to sit for 5-10 minutes. You'll know it’s ready when it becomes frothy and bubbly, which indicates that the yeast is active and ready to leaven your dough.
Step 3: Mix the Dry Ingredients
In a large mixing bowl, combine the all-purpose flour, the remaining sugar, and salt. Whisk these dry ingredients together until well blended. This step ensures an even distribution of the flavors and helps you avoid clumps, setting a solid foundation for the soft, fluffy Classic Ensaymada Bread.
Step 4: Combine Wet Ingredients
In a separate bowl, beat the eggs and whisk in the softened unsalted butter and vanilla extract. Mix until smooth and creamy. This combination adds richness to your dough, contributing to the delightful texture of the ensaymada bread.
Step 5: Create the Dough
Once your yeast mixture is frothy, pour it into the bowl with the dry ingredients, followed by the egg mixture. Stir everything together until a soft dough forms. You may need to use your hands to ensure all the flour is incorporated and to create a cohesive dough.
Step 6: Knead the Dough
Transfer the dough onto a lightly floured surface and knead it for about 8-10 minutes. You’re aiming for a smooth and elastic texture that springs back when pressed. If the dough feels too dry, add a little warm milk until it reaches the desired consistency.
Step 7: Let It Rise
Place your kneaded dough into a greased bowl, cover it with a kitchen towel, and let it rise in a warm area for 1 hour or until it doubles in size. Keep an eye on it; the dough should become puffy and airy, ready to transform into the delicious Classic Ensaymada Bread.
Step 8: Shape the Dough
After the dough has risen, punch it down gently to release the air. Divide it into smaller equal portions, shape each piece into a smooth ball, and then roll each into a spiral shape. This step is crucial for creating the signature fluffy layers of the ensaymada.
Step 9: Second Rise
Place the shaped dough spirals into greased molds or on a baking sheet. Cover them again with a towel and let rise for another 30-45 minutes. During this time, they should puff up again, becoming light and airy in preparation for baking.
Step 10: Preheat and Bake
Preheat your oven to 350°F (175°C). Once adequately heated, bake the risen dough for 20-25 minutes. Keep an eye on them; they are ready when they turn golden brown on top, and you can smell that delightful aroma wafting through the kitchen.
Step 11: Cool Down
After baking, allow the Classic Ensaymada Bread to cool in the molds for about 10 minutes. Then, gently transfer them to a wire rack to cool completely. This cooling process helps set the texture and flavor, leading to the perfect final product.
Step 12: Add Toppings
Once cool, brush each piece with melted butter, then sprinkle generously with grated cheese and a touch of sugar on top. This final touch adds a delightful sweet-savory flavor that is the hallmark of Classic Ensaymada Bread, making it irresistible to anyone who takes a bite!
Classic Ensaymada Bread: Tasty Twists Await
Get ready to unleash your creativity in the kitchen! The delightful sensory experience of creating variations of this beloved bread is sure to inspire you.
-
Coconut Ensaymada: Incorporate shredded coconut into the dough or sprinkle it on top for a tropical twist. The subtle texture adds a fun crunch along with a hint of sweetness!
-
Ube Ensaymada: Add ube extract or powder to your dough for a vibrant color and unique flavor that'll have everyone asking for the secret ingredient.
-
Chocolate Ensaymada: Stir cocoa powder into the dough and finish with velvety chocolate frosting on top for an indulgent treat that brings a touch of luxury to your bake.
-
Nutty Ensaymada: Fold in chopped walnuts or almonds for added texture and a delightful surprise in every fluffy bite. The nutty flavor enhances the overall richness of the bread.
-
Savory Mayonnaise Ensaymada: Brush with a mix of mayonnaise and hot sauce before the second rise for a spicy kick. It'll create an exciting flavor balance to the sweet elements!
-
Cheese-filled Ensaymada: Stuff the dough with a mixture of salty cheese before rolling for a cheesy surprise that melts beautifully, adding depth and flavor.
-
Fruit-Infused Ensaymada: Consider folding in dried fruits like raisins or cranberries for a fruity sweetness that contrasts beautifully with the savory cheese topping. It's a touch of nostalgic flavor!
-
Spiced Ensaymada: Add a touch of cinnamon or nutmeg to the dough for a warm, aromatic twist that evokes the coziness of festive gatherings.
Feel free to explore these variations, and while you're at it, don't forget to serve your Classic Ensaymada Bread warm with a side of Cheesy Garlic Bread or alongside a slice of Cornbread Breakfast Casserole. For a sweet finish, whip up some Mini Tropical Pavlovas to complete your feast! Enjoy the journey of flavors and creativity!
How to Store and Freeze Classic Ensaymada Bread
Room Temperature: Store classic Ensaymada Bread in an airtight container at room temperature for up to 3 days to maintain its fluffiness.
Fridge: While refrigeration is not recommended as it may dry out the bread, you can refrigerate it for up to 5 days if necessary; just make sure to wrap it well.
Freezer: For longer storage, wrap the bread tightly in plastic wrap, then place it in a freezer-safe bag. It can be frozen for up to 2 months.
Reheating: When ready to enjoy your Classic Ensaymada Bread, thaw overnight in the fridge, then reheat in the oven at 350°F (175°C) for 10-15 minutes until warmed through.
What to Serve with Classic Ensaymada Bread
As you revel in the sweet aroma of your freshly baked ensaymada, it’s time to think about the perfect companions that will elevate your meal experience.
-
Rich Coffee: The bold richness of a freshly brewed coffee enhances the sweet creaminess of the ensaymada, making it a classic way to start your day.
-
Fruity Smoothies: Refreshing fruit smoothies bring a burst of flavor and moisture, balancing the sweet, fluffy bread for a delightful contrast. Try a tropical mango or berry blend.
-
Zesty Fruit Salad: A vibrant fruit salad with citrus dressings complements the sweetness of ensaymada. The fresh acidity cuts through the richness, creating a harmonious flavor experience.
-
Creamy Hot Chocolate: Indulge in a warm mug of hot chocolate for a cozy dessert pairing. The chocolate’s sweetness harmonizes beautifully with ensaymada’s cheesy topping, creating a comforting treat.
-
Savory Cheese Platter: Serve a selection of cheeses alongside the ensaymada to amplify its savory topping. Options like sharp cheddar or a mild brie create a delightful contrast of flavors.
-
Toasted Coconut Flakes: Sprinkling some crispy toasted coconut on top adds a crunchy texture and nutty flavor that enhances the traditional experience of classic ensaymada.
-
Vanilla Ice Cream: For a decadent dessert, pairing warm ensaymada with a scoop of vanilla ice cream creates a classic combination of warm and cold that’s simply irresistible.
-
Sweet Iced Tea: A refreshing glass of iced tea, lightly sweetened with lemon, perfectly complements the rich flavors of ensaymada, rounding out your meal with a refreshing sip.
Expert Tips for Classic Ensaymada Bread
-
Room Temperature Ingredients: Ensure all ingredients, especially eggs and milk, are at room temperature for smoother mixing and better dough texture.
-
Kneading is Key: Knead the dough thoroughly for 8-10 minutes. This develops gluten, resulting in the fluffy, airy texture that characterizes Classic Ensaymada Bread.
-
Watch the Rising: Cover the dough with a kitchen towel while it rises to prevent drying out. Check on it regularly, as environmental factors can impact the rising time.
-
Check for Doneness: Ensure your bread is fully baked by looking for a golden brown color. You can also tap the bottom; it should sound hollow when done.
-
Flavor Variations: Don’t hesitate to try adding ingredients like shredded coconut or ube for a unique twist on the Classic Ensaymada Bread that adds depth to the flavor.
Make Ahead Options
These Classic Ensaymada Bread are perfect for busy home cooks looking to save time without sacrificing taste! You can prepare the dough up to 24 hours in advance by following the first six steps and then refrigerating the kneaded dough in a greased bowl covered with plastic wrap. When ready to bake, simply take it out and allow it to rise at room temperature for about 30 minutes before shaping and proceeding with the second rise. If you prefer to bake ahead, the fully baked ensaymada can be stored in an airtight container at room temperature for up to 3 days or frozen for up to 2 months. Reheat in the oven for a few minutes before serving to enjoy that freshly baked taste!
Classic Ensaymada Bread Recipe FAQs
What kind of flour is best for Classic Ensaymada Bread?
For the best results, all-purpose flour is ideal as it provides structure and a light texture to the bread. If you're looking for a different flavor profile, you can experiment with whole wheat flour, which gives a denser texture.
How should I store Classic Ensaymada Bread?
Store your ensaymada in an airtight container at room temperature for up to 3 days. This will help keep it soft and fluffy. You can refrigerate it for up to 5 days if necessary, though it's best to avoid the fridge to prevent it from drying out.
Can I freeze Classic Ensaymada Bread?
Absolutely! To freeze your Classic Ensaymada Bread, wrap it tightly in plastic wrap and then place it in a freezer-safe bag. It can be stored for up to 2 months. When you’re ready to enjoy, let it thaw overnight in the fridge, and then reheat in the oven at 350°F (175°C) for about 10-15 minutes until warmed through.
What should I do if my dough doesn’t rise properly?
If your dough isn't rising, it could be due to inactive yeast. Make sure your yeast is fresh and that you're using warm milk (around 100°F or 38°C) to activate it. If your dough feels too stiff, try adding a bit more warm milk while kneading. A warm, draft-free environment can also help the dough rise better.
Can I make Classic Ensaymada Bread without eggs?
Yes! If you have an egg allergy or prefer to make it egg-free, you can substitute eggs with 1/4 cup of unsweetened applesauce or 1 tablespoon of flaxseed meal mixed with 3 tablespoons of water. Keep in mind that this may alter the texture slightly but will still yield a tasty bread.
What cheese works best for topping Classic Ensaymada Bread?
I recommend using grated cheese such as cheddar or queso de bolsa for the topping; they melt beautifully and create that delicious sweet-savory contrast. If you want to try something different, any soft cheese like cream cheese or ricotta can work well!
Classic Ensaymada Bread: Soft, Sweet, and Simply Irresistible
Ingredients
Equipment
Method
- Gather all ingredients: all-purpose flour, sugar, salt, instant yeast, milk, unsalted butter, eggs, and vanilla extract.
- Mix warm milk with instant yeast and 1 tablespoon of sugar; let sit for 5-10 minutes until frothy.
- In a large bowl, combine flour, remaining sugar, and salt; whisk until well blended.
- In a separate bowl, beat eggs and mix in butter and vanilla until smooth.
- Combine yeast mixture with dry ingredients, then add egg mixture; stir to form a soft dough.
- Knead the dough on a floured surface for 8-10 minutes until smooth and elastic.
- Place the kneaded dough in a greased bowl, cover, and let rise in a warm place for about 1 hour.
- After rising, punch down dough, divide into portions, shape into balls, and roll into spirals.
- Place shaped spirals in greased molds and cover; let rise again for 30-45 minutes.
- Preheat oven to 350°F (175°C) and bake for 20-25 minutes until golden brown.
- Allow bread to cool in molds for 10 minutes, then transfer to a wire rack.
- Brush cooled bread with melted butter, sprinkle with grated cheese and sugar.