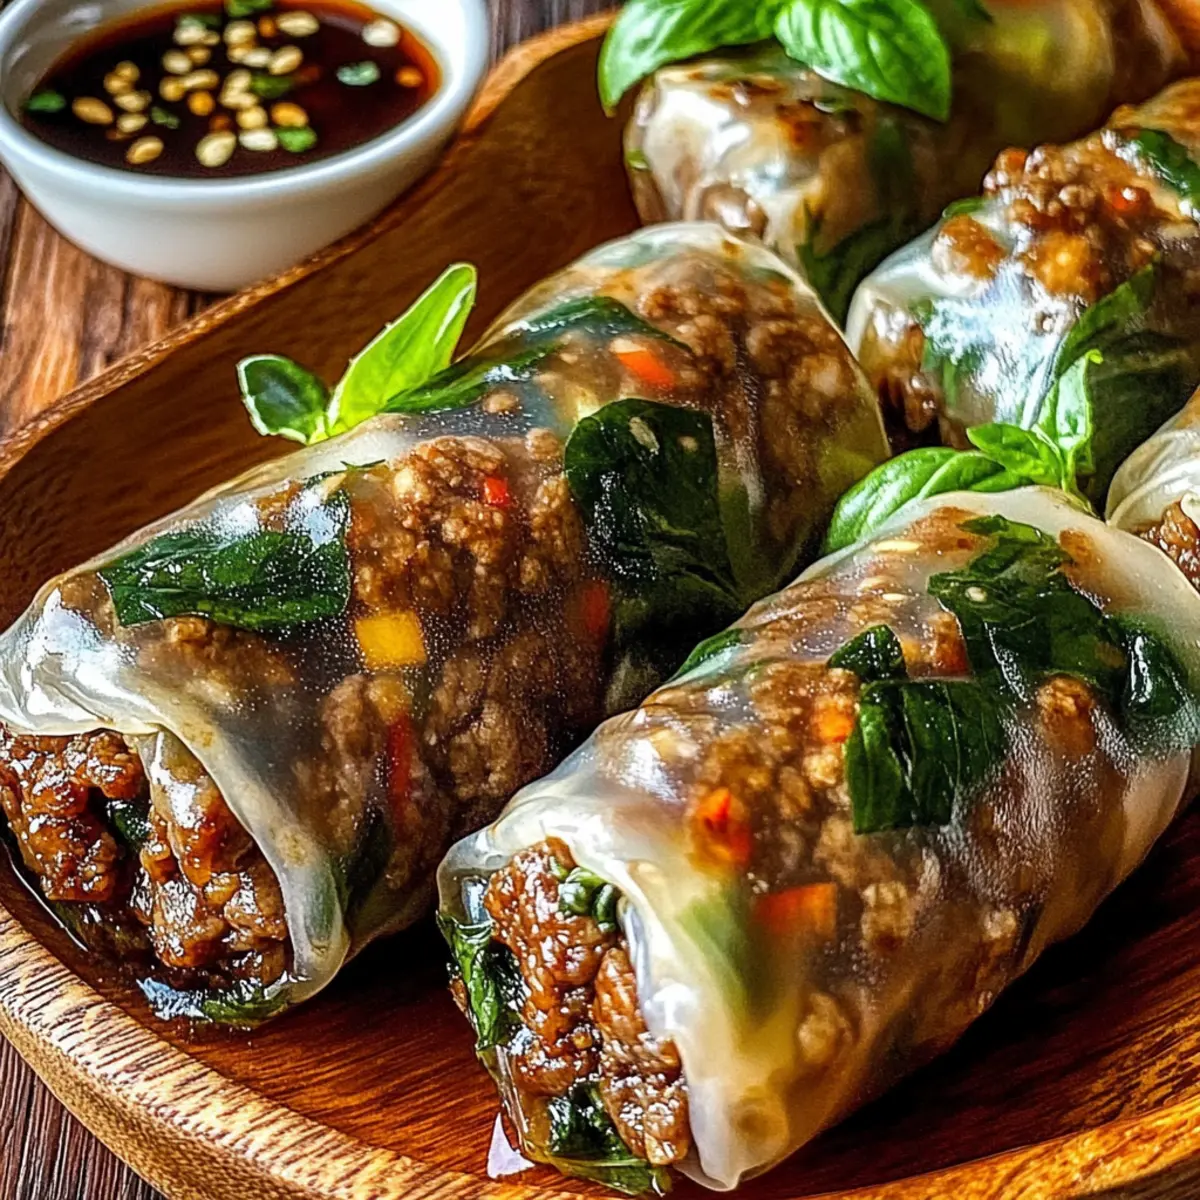
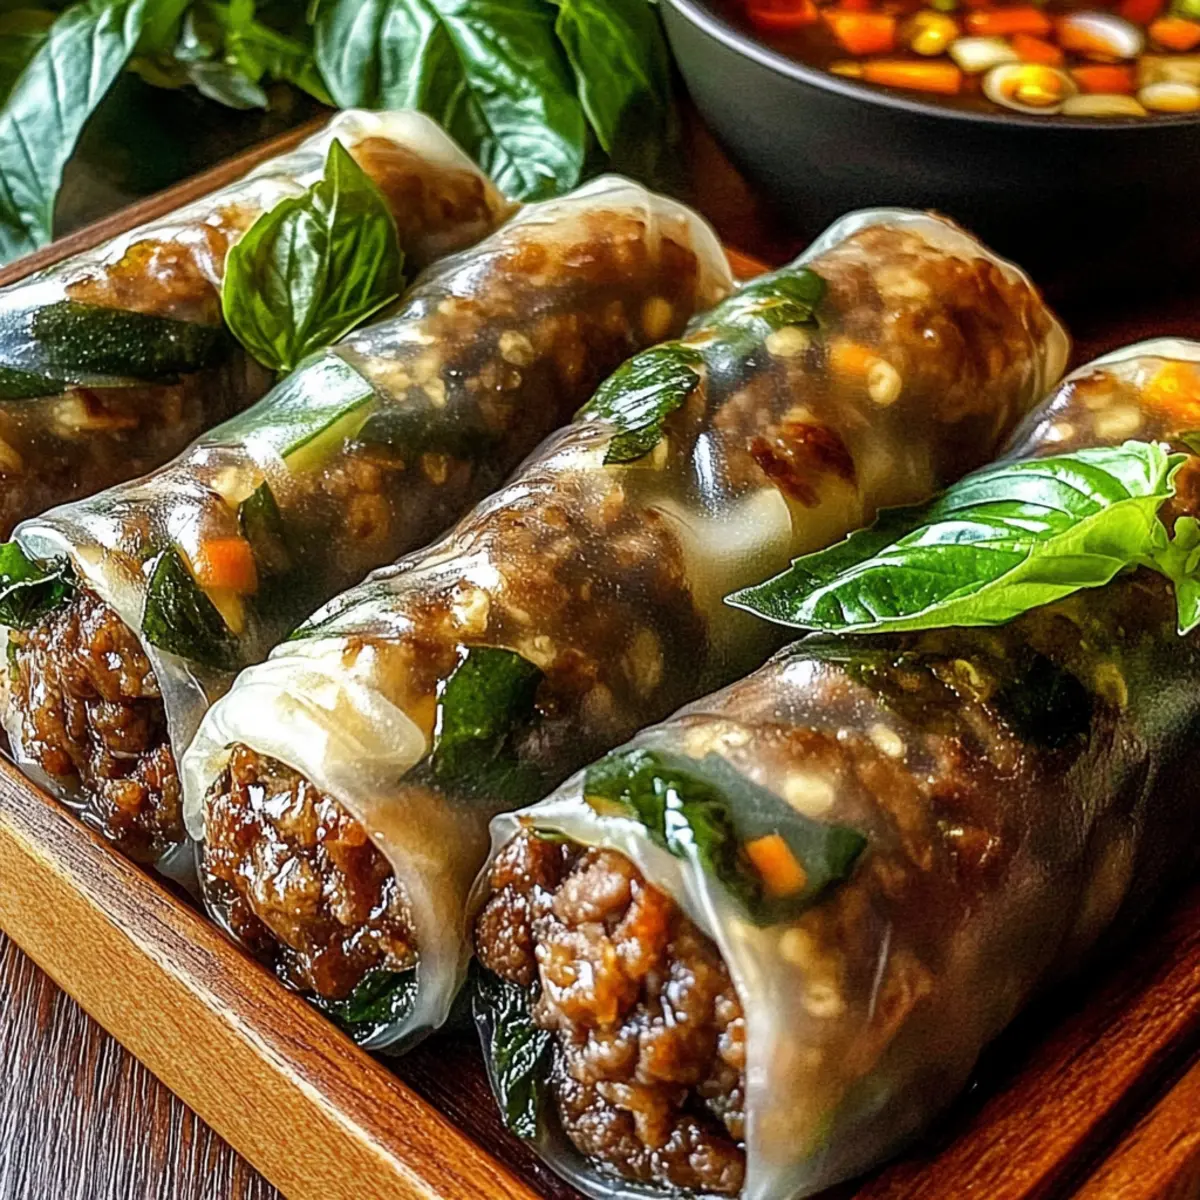
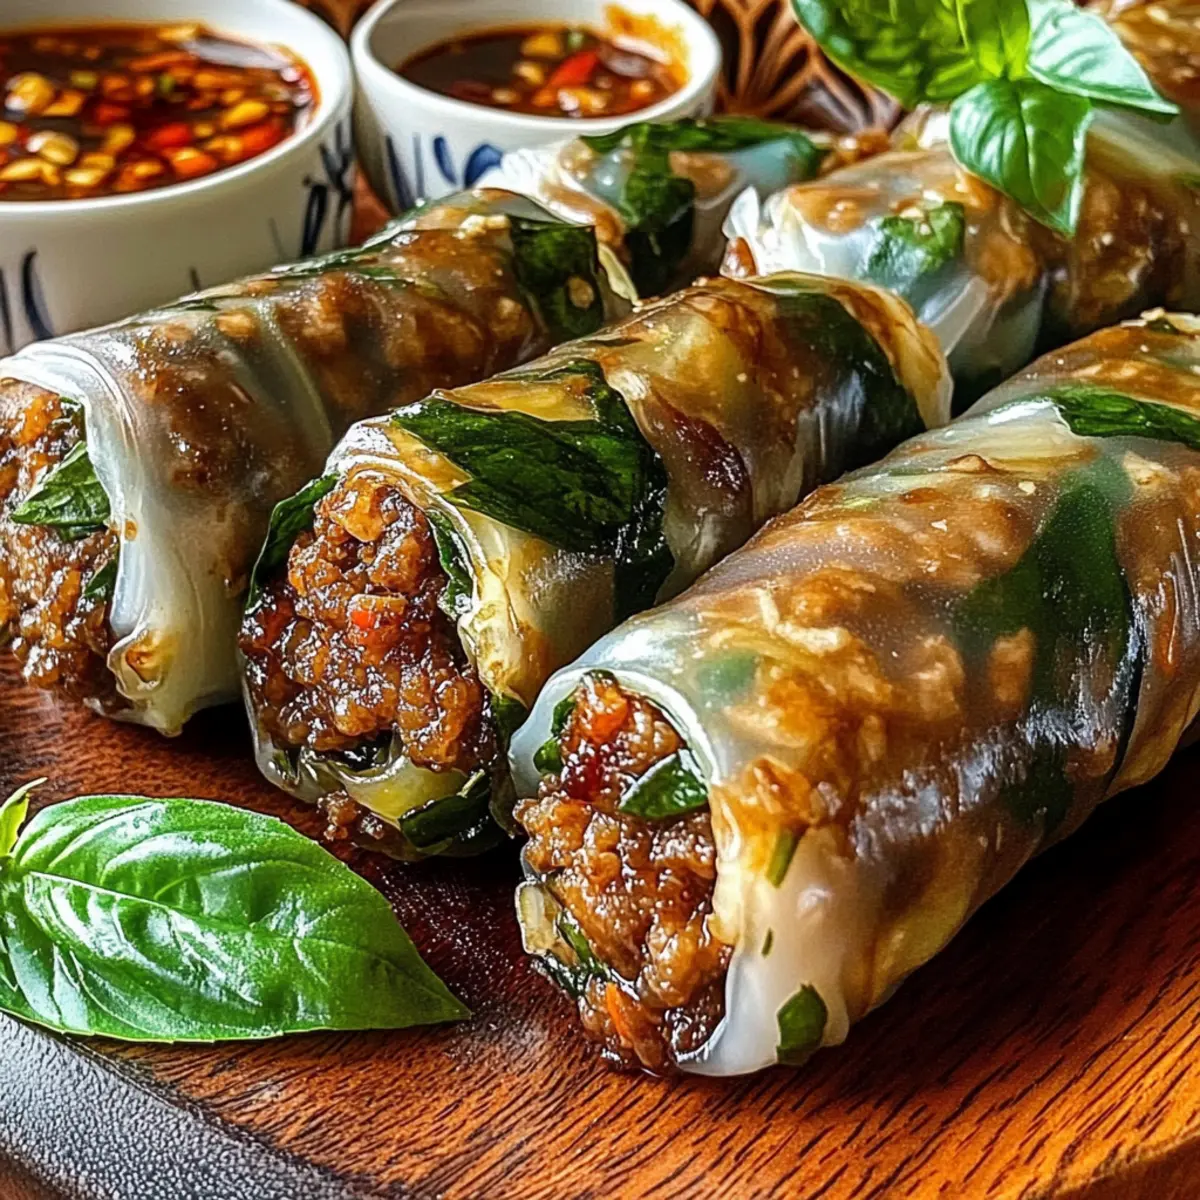
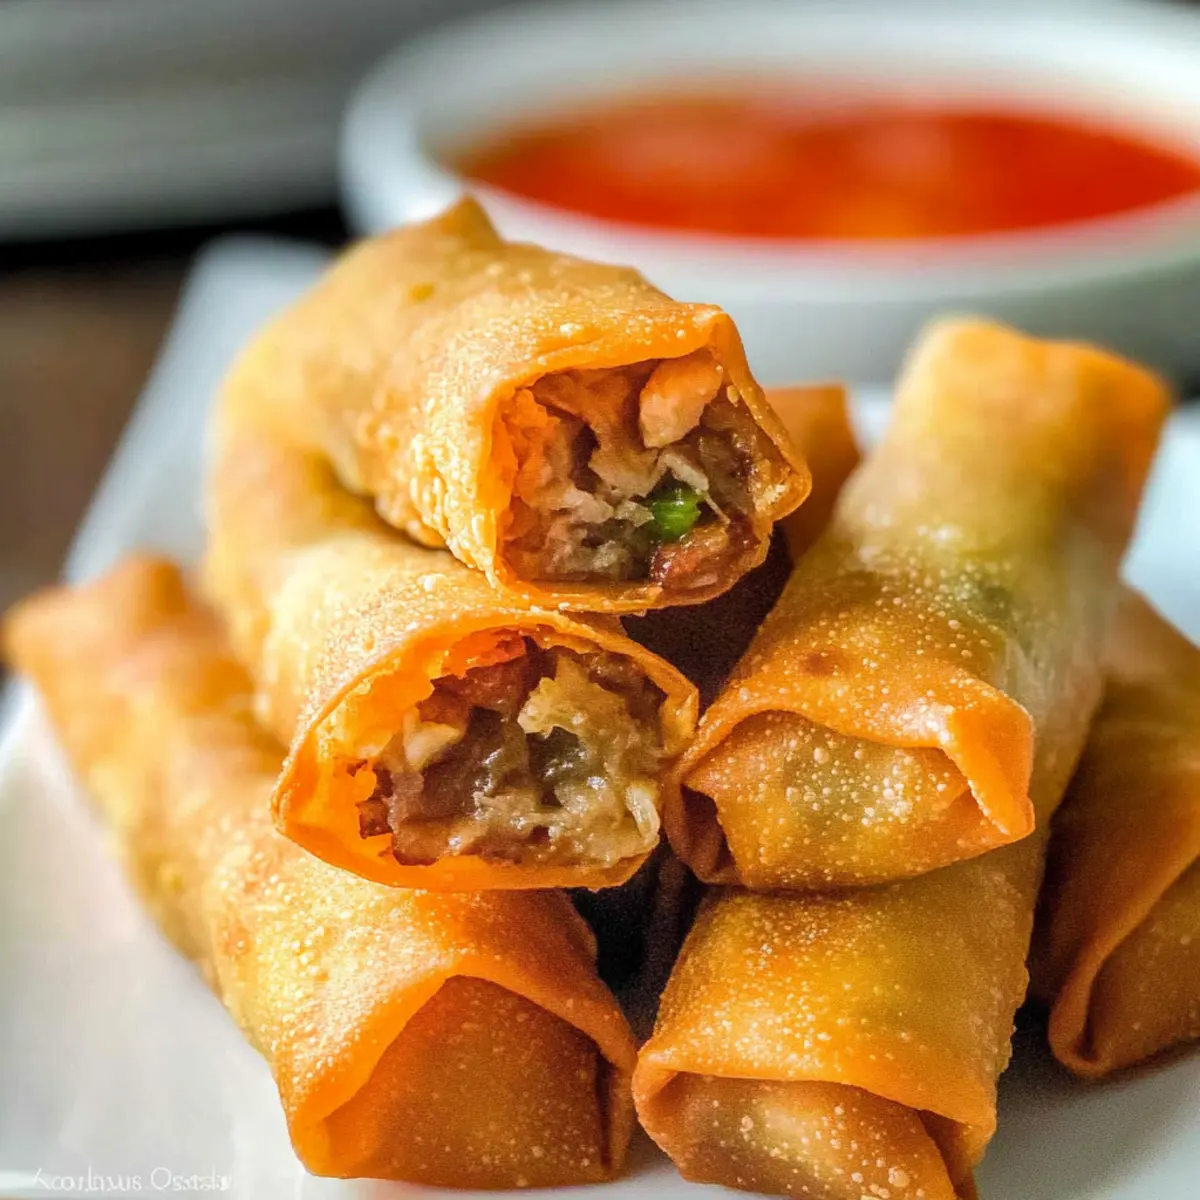
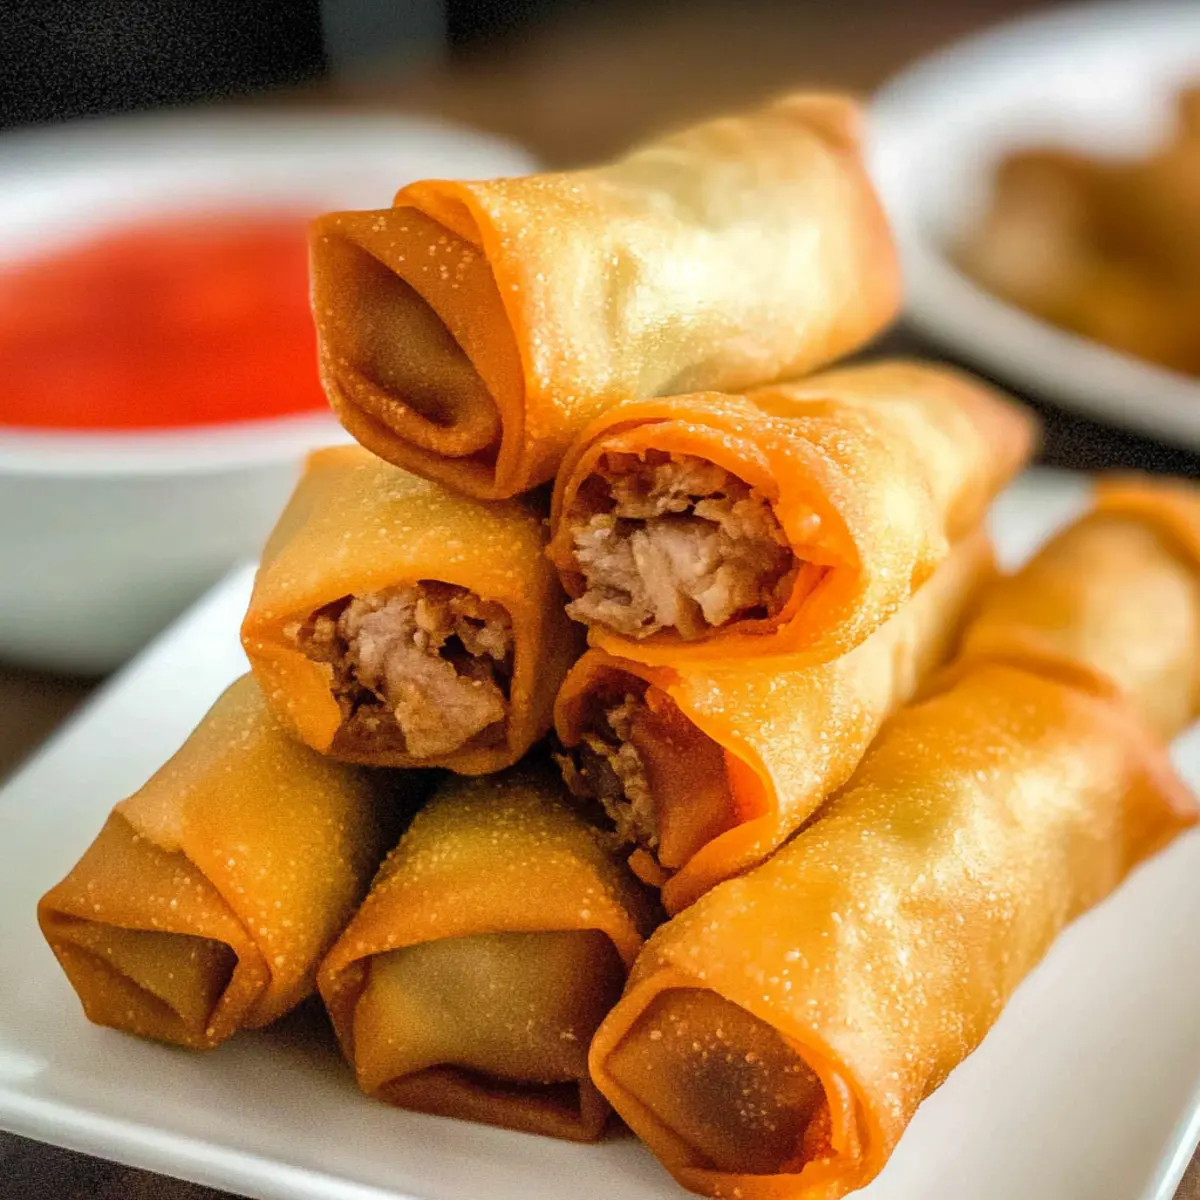
As I peeled back the wrappers, the tempting scent of seasoned pork mingled with crisp vegetables flooded my kitchen, instantly transporting me to a bustling street market in Asia. This Ultra-Crispy Pork Egg Roll Recipe not only captures that vibrant essence, but it also brings an element of homemade comfort that's hard to beat. These delicious bites are not just a fun culinary project; they are a true crowd-pleaser, perfect for any gathering and easy to freeze for spontaneous cravings. Plus, you can easily customize the filling for a vegetarian twist or swap out the pork for other proteins. Who knew a simple snack could be this versatile? Ready to roll up your sleeves and dive into a world of crispy goodness?
Why Are These Egg Rolls So Incredible?
Crispy Texture: Each bite boasts an irresistibly crispy exterior that rivals your favorite takeout.
Savory Filling: The combination of seasoned pork, fresh vegetables, and aromatic spices creates a robust flavor explosion.
Customizable: Whether you go vegetarian or switch proteins, this recipe accommodates every dietary preference with ease.
Quick & Easy: Perfect for busy weeknights, these egg rolls are quick to make and can be batch-cooked for effortless snack time.
Freezer-Friendly: Prep a large batch and freeze them for a convenient treat that’s just a fry away!
Crowd-Pleaser: Impress your family and friends with these delicious bites that are sure to disappear at any gathering. Try pairing with a delightful dipping sauce, such as sweet chili or homemade teriyaki, for the ultimate flavor experience!
Egg Roll Recipe Ingredients
For the Wrapper
• Frozen egg roll or spring roll wrappers – The perfect base for these crispy bites; ensure they’re thawed at room temperature for 45 minutes before use.
For the Filling
• Vermicelli rice noodles – Light noodles that enhance the filling; opt for Chinese angel hair rice sticks for the best texture.
• Ground pork – Adds a rich flavor and moisture; feel free to substitute with ground chicken, turkey, or skip it for a vegetarian egg roll recipe.
• Mushrooms (brown or white) – Contributes umami and moisture; adjust with extra veggies if preferred.
• Medium onion – Infuses sweetness and depth; chop finely for even cooking throughout.
• Carrots (grated or matchsticks) – Adds delightful crunch and sweetness; always choose fresh for optimal texture.
• Green cabbage – Provides bulk and crunch; thinly slice for quicker wilting when sautéing.
• Salt – Enhances flavors beautifully; adjust to your personal taste.
• Black pepper – Adds warmth; use according to your spice preference.
• Soy sauce – Imparts that essential savory note; tamari can work as a gluten-free alternative.
• Sesame oil – Offers a nutty flavor to the mix; reduce if you prefer a milder taste.
For Frying
• Peanut or canola oil – Critical for achieving that crispy exterior; maintain oil temperature between 340-350°F for ideal frying results.
• Egg (beaten) – Essential for sealing the wrappers tightly; one egg is typically enough to seal your delicious egg rolls.
Enjoy the process of creating these delightful bites, and don’t hesitate to swap ingredients and make this egg roll recipe your own!
Step‑by‑Step Instructions for Ultra-Crispy Pork Egg Rolls
Step 1: Prep Noodles
Begin by placing vermicelli rice noodles in a bowl of hot water, allowing them to soak for about 5-7 minutes until softened. Once tender, drain the noodles and chop them into 1-inch pieces. This will ensure they blend seamlessly into the egg roll filling, contributing a delightful texture to your Ultra-Crispy Pork Egg Rolls.
Step 2: Cook Filling
In a large skillet over medium heat, add a splash of oil and sauté the ground pork for about 5-7 minutes, until fully cooked and browned. Once done, transfer the pork to a bowl. In the same skillet, cook finely chopped mushrooms, onion, and grated carrots for another 3-4 minutes until soft, then add the thinly sliced cabbage and sauté until wilted, about 2 minutes. Combine all with your seasonings for that rich flavor.
Step 3: Wrap Egg Rolls
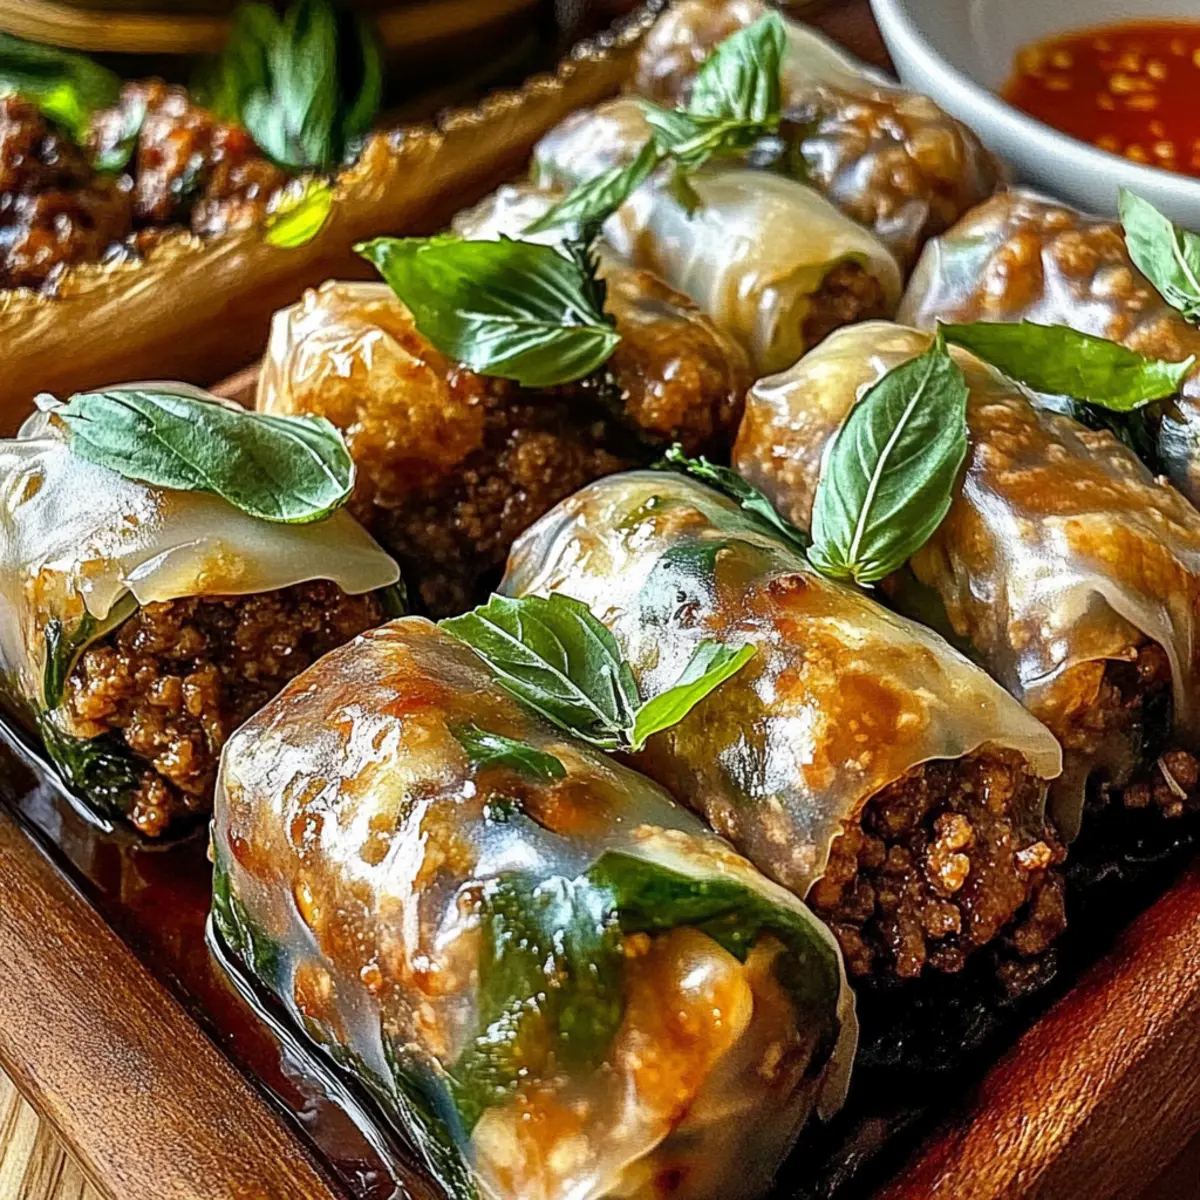
Lay an egg roll wrapper on a clean surface in a diamond shape, placing about 2 tablespoons of the pork and vegetable filling near the bottom corner. Roll the wrapper tightly away from you, folding in the sides halfway through, and seal the edge with a brush of beaten egg. Repeat this process until all the filling is wrapped in your crispy egg rolls, ready for frying.
Step 4: Fry Rolls
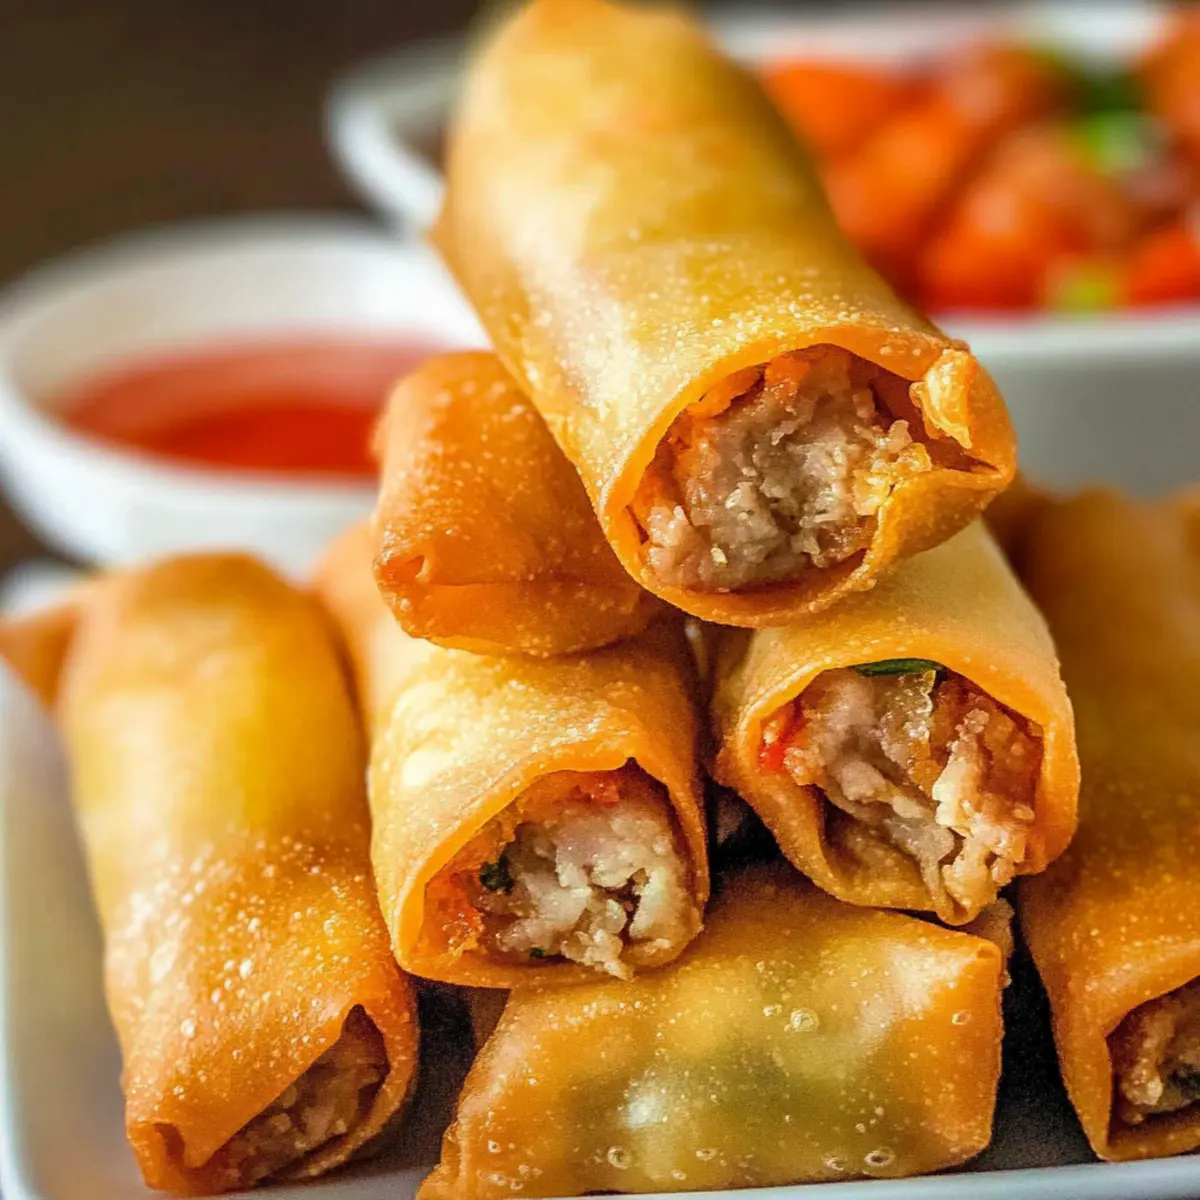
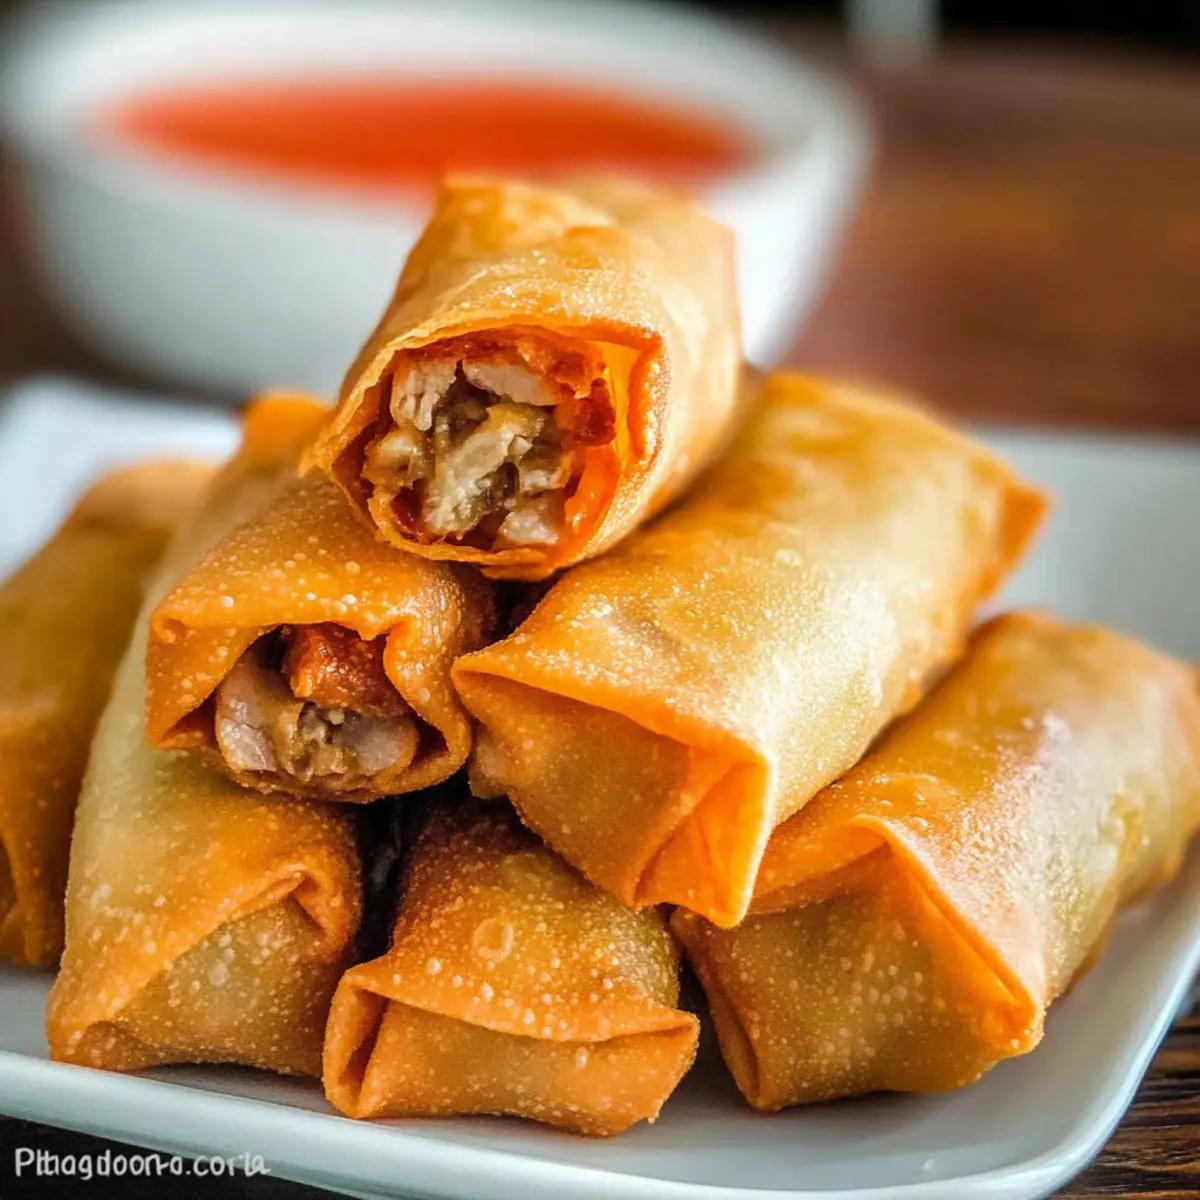
Heat a deep skillet filled with peanut or canola oil over medium-high heat until it reaches 350°F (175°C). Carefully add 5-7 egg rolls to the hot oil, ensuring not to overcrowd the pan, and fry for about 5-6 minutes, turning occasionally until they are golden brown and crispy. Use a slotted spoon to transfer the cooked egg rolls to a wire rack to drain excess oil.
Step 5: Serve
Allow the freshly fried Ultra-Crispy Pork Egg Rolls to cool slightly before serving. Pair these delectable bites with your choice of dipping sauces, such as sweet chili or homemade teriyaki, to enhance their savory goodness and create a delightful flavor experience. Enjoy these crispy treats warm and watch them disappear at your next gathering!
Make Ahead Options
These Ultra-Crispy Pork Egg Rolls are perfect for busy home cooks looking to save time. You can prepare the filling up to 24 hours in advance—simply cook the pork, vegetables, and seasonings, then let them cool before refrigerating in an airtight container. When ready to serve, wrap the filling in the thawed egg roll wrappers and fry them fresh. Alternatively, you can assemble the egg rolls and freeze them before frying for up to 3 months; just lay them flat on a baking sheet to prevent sticking, then transfer to a freezer bag. To cook from frozen, fry directly without thawing, adding an extra minute or two to cooking time. Enjoy delicious homemade egg rolls with minimal effort any day!
Egg Roll Recipe Variations
Feel free to let your culinary creativity shine by customizing this delightful egg roll recipe!
-
Vegetarian Delight: Substitute ground pork with seasoned tofu or mushrooms for a hearty, meatless option. You won't miss the meat with all those delicious flavors!
-
Crunchy Texture: Add bean sprouts or shredded zucchini to the filling for an extra layer of crunch. These additions not only elevate the texture but also bring a lovely freshness to each bite.
-
Flavor Boost: Incorporate minced garlic or ginger for an aromatic kick that transports your taste buds. A touch of spice can make all the difference in your egg rolls!
-
Heat It Up: Toss in a dash of chili paste or Sriracha for those craving a little heat. Your unsuspecting guests will be delightfully surprised by the fiery twist.
-
Different Proteins: Swap ground pork for ground beef or chicken, or try a fresh crab meat filling for a luxurious seafood twist. Each protein will create a distinctive flavor profile!
-
Color and Sweetness: Mix in diced bell peppers or sweet corn for a pop of color and sweet undertone. This not only enhances the visual appeal but also adds a touch of sweetness to complement the savory filling.
-
Sauce It Up: Serve with different sauces—try sweet chili, homemade teriyaki, or even a tangy peanut sauce to switch up the flavor experience. These dips can truly transform your egg rolls!
-
Make Ahead: Prepare your egg rolls, then freeze them before frying for those times when you're in a hurry. Just fry them frozen; they’ll still taste fresh and delicious! You can also check out my other crowd-pleasing recipes like these Pumpkin Cinnamon Rolls to keep your dessert bid going.
Let each variation inspire a new family favorite that brings your own unique twist to these egg rolls!
What to Serve with Ultra-Crispy Pork Egg Rolls?
Create a delightful meal experience that perfectly complements your crispy bites and enhances your dining pleasure.
-
Sweet Chili Sauce: A sticky, sweet sauce that balances the savory flavors of the egg rolls and adds a refreshing kick.
-
Homemade Teriyaki Sauce: Rich and slightly sweet, this sauce elevates the flavor profile, making each bite even more indulgent.
-
Cucumber Salad: A light, crunchy dish with a hint of tanginess that beautifully contrasts the warm, savory egg rolls.
-
Fried Rice: A satisfying side with its fluffy texture and mixed veggies that combine well with the flavor of pork.
-
Steamed Edamame: This protein-packed snack provides a lush, buttery flavor and makes a delightful complement to the egg rolls.
-
Miso Soup: A warm, umami-rich broth that soothes and balances the meal, enhancing the overall experience of savoring your egg rolls.
-
Light Beer or Sake: A chilled beverage that pairs well with the crunch of the egg rolls and clears the palate perfectly in between bites.
-
Fruit Sorbet: A refreshing dessert option that cleanses the palate with its fruity flavor, rounding off the meal on a light note.
How to Store and Freeze Egg Rolls
Fridge: Store leftover egg rolls in an airtight container for up to 3 days. Reheat in the oven at 375°F for about 10-12 minutes until hot and crispy.
Freezer (before frying): Arrange unwrapped egg rolls on a baking sheet and freeze until firm. Once frozen, transfer them to a freezer bag for up to 3 months.
Freezer (after frying): If you’ve fried them already, let them cool completely before placing in a single layer on a sheet. Once solid, move to a freezer bag and consume within 2 months for best quality.
Reheating: For best results, reheat frozen egg rolls in an air fryer or oven rather than a microwave to retain their crispy texture.
Expert Tips for Ultra-Crispy Pork Egg Rolls
-
Perfect Wrappers: Use thin, frozen egg roll wrappers to achieve the best crispiness; ensure they're fully thawed before use.
-
Don’t Overcrowd: Fry in small batches to maintain oil temperature, preventing soggy egg rolls. This ensures your egg roll recipe has that perfect crunch!
-
Right Oil Temperature: Keep your oil between 340-350°F for optimal frying. Use a thermometer for accurate results.
-
Avoid Wet Filling: Ensure the vegetable filling isn’t too moist to prevent leakage during frying. Strain any excess liquid.
-
Seal Well: Use a generous amount of egg wash to seal the wrappers tightly; this keeps them from opening while cooking.
Ultra-Crispy Pork Egg Rolls Recipe FAQs
How do I select the best frozen egg roll or spring roll wrappers?
Absolutely! Look for thin, well-stacked wrappers that are labeled as "spring roll" for the crispiest results. Make sure they’re fully thawed before use, as this helps them roll more easily—spending about 45 minutes at room temperature should do the trick!
What’s the best way to store leftover egg rolls?
You can store your leftover egg rolls in an airtight container in the fridge for up to 3 days. When reheating, I recommend placing them in the oven at 375°F for about 10-12 minutes to restore their glorious crispiness!
Can I freeze egg rolls, and how do I do it?
Yes, you can absolutely freeze egg rolls! If you freeze them before frying, lay them flat on a baking sheet until firm, then transfer to a freezer bag. They’ll stay fresh for up to 3 months. For pre-fried egg rolls, let them cool completely first, then freeze in a single layer before bagging. Enjoy them within 2 months for the best quality!
What if my egg rolls are soggy after frying?
Very! If your egg rolls come out soggy, this could be due to overcrowding the frying pan, which lowers the oil temperature. Ensure you fry in small batches and maintain that 340-350°F oil temperature. Also, check that your filling isn’t too wet—draining excess moisture helps keep them crunchy.
Are there any dietary considerations I should keep in mind?
For sure! If you or your guests have allergies or dietary restrictions, remember that gluten is present in soy sauce and some wrappers. You can easily make these egg rolls gluten-free by using tamari instead, and swapping out ground pork for ground turkey, chicken, or tofu opens up options for anyone looking for alternatives. Plus, you can always include a variety of fresh vegetables to suit different preferences!
How should I reheat frozen egg rolls for the best texture?
When reheating, aim for the oven or an air fryer rather than a microwave. Preheat your air fryer to 350°F and reheat for about 8-10 minutes, or bake in the oven at 375°F for 10-12 minutes. This method provides the perfect crispy texture, making it seem like they were just freshly made!
Crispy Egg Roll Recipe That Beats Takeout Every Time
Ingredients
Equipment
Method
- Begin by placing vermicelli rice noodles in a bowl of hot water, allowing them to soak for about 5-7 minutes until softened. Once tender, drain and chop into 1-inch pieces.
- In a large skillet over medium heat, add a splash of oil and sauté the ground pork for about 5-7 minutes until fully cooked and browned.
- Transfer cooked pork to a bowl. In the same skillet, cook chopped mushrooms, onion, and grated carrots for 3-4 minutes until soft.
- Add thinly sliced cabbage and sauté until wilted for about 2 minutes, then combine with seasonings.
- Lay an egg roll wrapper in a diamond shape, placing about 2 tablespoons of filling near the bottom corner. Roll tightly away, folding in sides halfway, and seal with beaten egg.
- Heat oil in a deep skillet over medium-high heat until it reaches 350°F. Fry 5-7 egg rolls for about 5-6 minutes until golden brown and crispy.
- Transfer cooked egg rolls to a wire rack to drain excess oil and allow them to cool slightly before serving.
- Serve with your choice of dipping sauces such as sweet chili or homemade teriyaki.