tastytrendingredients

  • Home
  • Recipes
    • Appetizers
    • Breakfast
    • Dessert
    • Dinner
    • Drinks
    • Salads
    • Snacks
    • Soups
  • About me
  • Contact me
menu icon
go to homepage
  • Home
  • Recipes
    • Appetizers
    • Breakfast
    • Dessert
    • Dinner
    • Drinks
    • Salads
    • Snacks
    • Soups
  • About me
  • Contact me
search icon
Homepage link
  • Home
  • Recipes
    • Appetizers
    • Breakfast
    • Dessert
    • Dinner
    • Drinks
    • Salads
    • Snacks
    • Soups
  • About me
  • Contact me
×

Irresistible Chocolate Chip Cheesecake Bars You’ll Crave

December 16, 2025 by Grace Snow Leave a Comment

You might think of cheesecake as a special-occasion dessert, but what if I told you there's a way to make it a go-to treat? Enter my Chocolate Chip Cheesecake Bars, where creamy cheesecake meets a buttery graham cracker crust, all topped with a delicious layer of chocolate chip cookie dough. This recipe is not only easier to whip up than traditional cheesecake, but it's also perfect for make-ahead gatherings—allowing you to wow your guests without the fuss. And trust me, these bars are a crowd-pleaser, combining the best of classic cheesecake and cookie flavors into one irresistible bite. Ready to dive into dessert bliss? Let’s make these bars together!

Why Are These Bars So Irresistible?

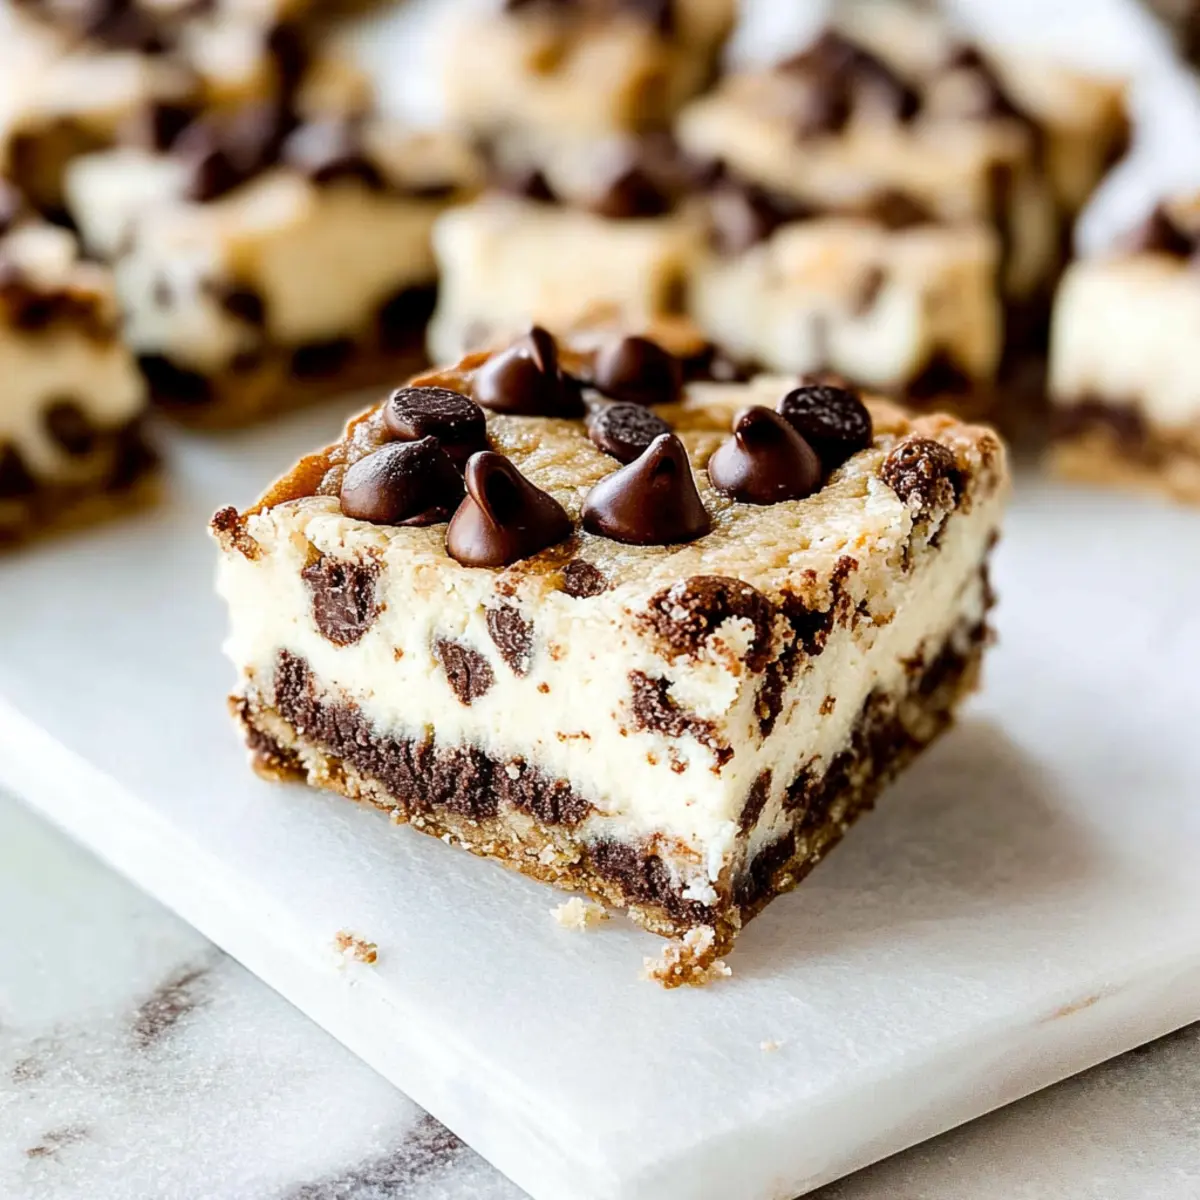
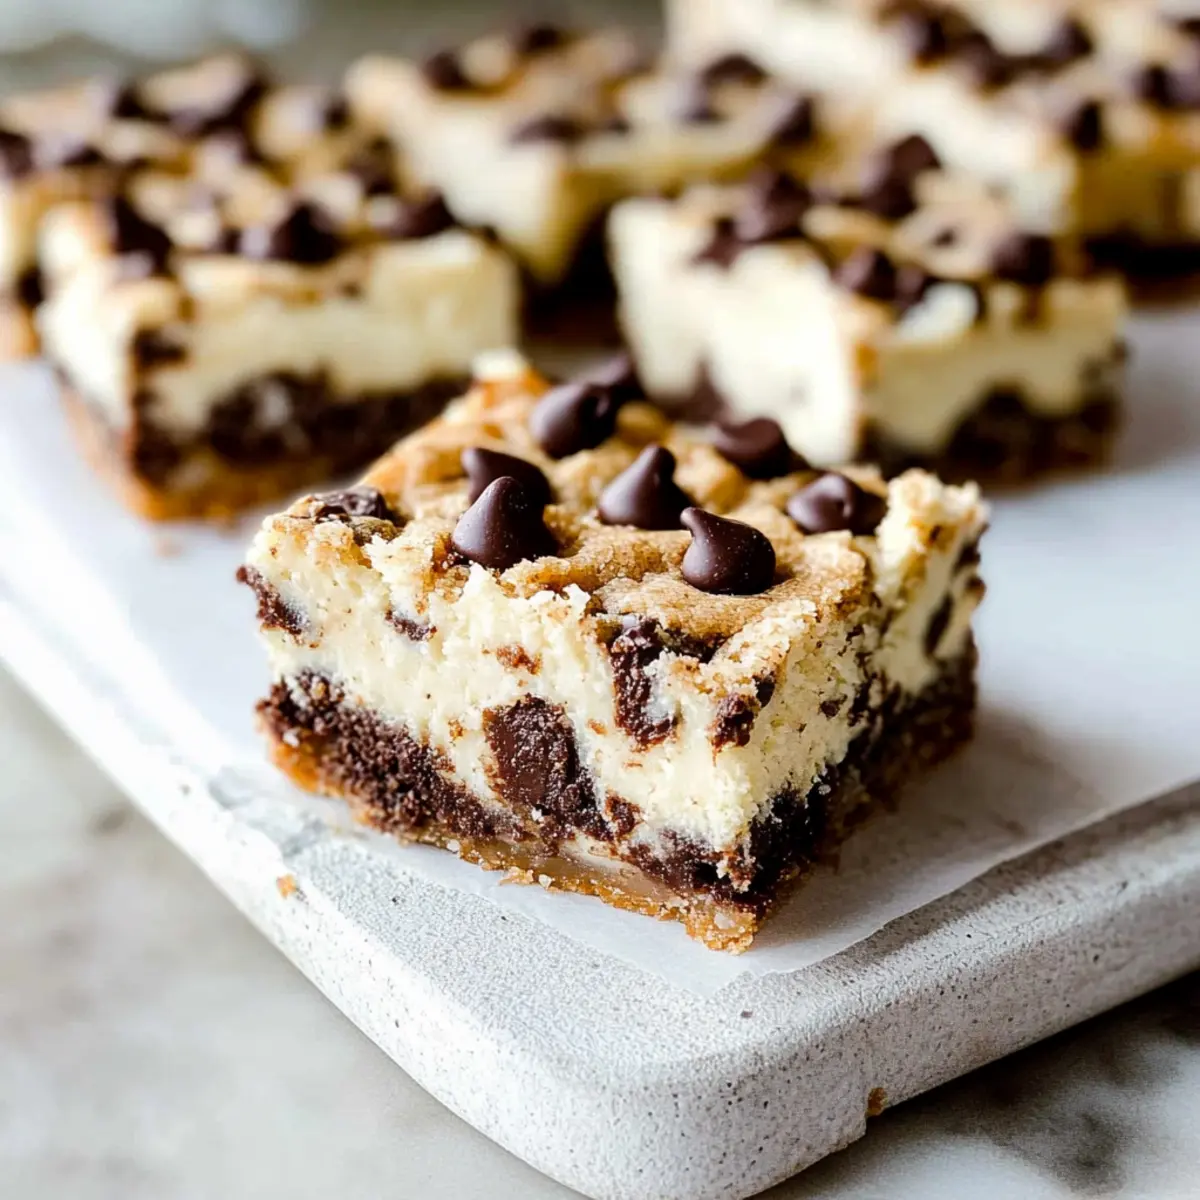
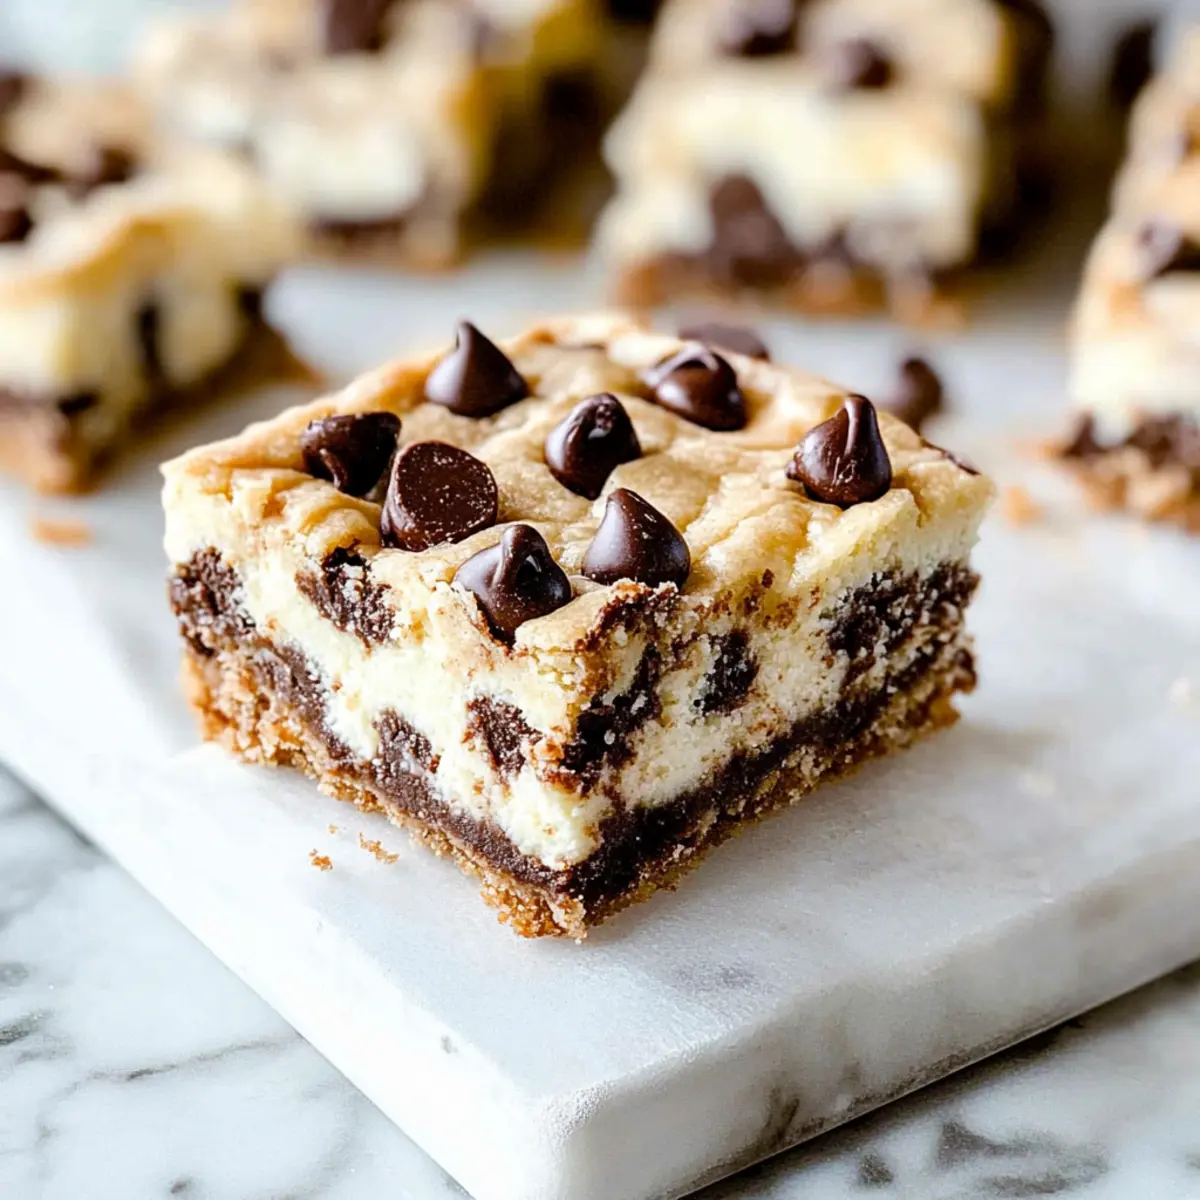
Decadent Layers: These Chocolate Chip Cheesecake Bars combine a creamy cheesecake layer with a crumbly graham cracker crust, creating an unforgettable dessert experience.

Effortlessly Versatile: Perfect for any occasion, you can customize them with different crusts or add-ins, like nuts for crunch or seasonal spices for a unique twist.

Make-Ahead Convenience: These bars can be prepared in advance, helping to save you time and stress before gatherings. Simply chill and serve!

Crowd Favorite: With rich flavors and delightful textures, they cater to both cheesecake lovers and cookie enthusiasts, ensuring everyone will enjoy them.

Whether you’re serving them at a weekend BBQ or enjoying a sweet treat with a cup of Homemade Hot Chocolate, these bars are sure to impress your guests!

Chocolate Chip Cheesecake Bars Ingredients

For the Crust

  • Graham Cracker Crumbs – This forms the sturdy base for your bars; swap with crushed Oreos for a unique twist!
  • Melted Butter – Binds everything together; unsalted butter is best to control sweetness.
  • Granulated Sugar – Sweetens the crust; reduce the amount or use a sugar alternative for a lighter option.

For the Cheesecake Filling

  • Cream Cheese – Essential for a creamy base; ensure it’s softened for a smooth mix, and consider lactose-free options if needed.
  • Sour Cream – Adds a tangy richness; Greek yogurt makes a great healthier substitute.
  • Egg – Provides stability; for a vegan option, substitute with a flaxseed meal and water mixture.
  • Lemon Juice – Balances the sweetness and brightens the flavor.
  • Vanilla Extract – Infuses warmth into the filling; almond extract can be used for a different flavor twist.

For the Cookie Dough Topping

  • Butter (softened) – Creates a soft texture in the cookie dough; for a lighter version, consider using applesauce.
  • White Sugar – Sweetens the dough; you can adjust to taste.
  • Brown Sugar – Gives moisture and depth; brown sugar also enhances the overall flavor profile.
  • All-Purpose Flour – Provides structure; gluten-free flour blends can be substituted if needed.
  • Salt – Enhances all flavors; it’s optional based on your preference.
  • Chocolate Chips – The finishing touch for sweetness; feel free to use dark chocolate or nut-free chips for alternatives.

Enjoy crafting these Chocolate Chip Cheesecake Bars, the perfect balance of creamy and crunchy goodness that you and your guests will love!

Step‑by‑Step Instructions for Chocolate Chip Cheesecake Bars

Step 1: Prepare the Crust
Preheat your oven to 350°F (175°C) and line an 8x8-inch baking dish with parchment paper for easy removal. In a mixing bowl, combine the graham cracker crumbs, melted butter, and granulated sugar, mixing until it resembles wet sand. Press the mixture firmly into the bottom of the prepared dish, creating an even layer. Bake in the preheated oven for about 10 minutes, or until the crust is lightly golden and fragrant.

Step 2: Make the Cheesecake Filling
While the crust cools slightly, prepare the cheesecake filling. In a large mixing bowl, beat together the softened cream cheese and granulated sugar until smooth and creamy, about 2-3 minutes. Add in the sour cream, egg, lemon juice, and vanilla extract, continuing to beat until the mixture is completely smooth. Pour the cheesecake filling over the warm crust, spreading it evenly with a spatula.

Step 3: Prepare Cookie Dough Topping
In a separate bowl, cream together the softened butter, white sugar, and brown sugar until light and fluffy, about 2 minutes. Mix in the vanilla extract, then gradually incorporate the all-purpose flour, salt, and chocolate chips, stirring until just combined. The cookie dough should be thick but soft. Take spoonfuls of the dough and gently drop it over the cheesecake layer, spreading it out to cover as much of the surface as possible.

Step 4: Bake the Bars
Return the baking dish to the oven and bake for 30-35 minutes, or until the cookie dough topping is set and lightly golden. You want the center to be slightly jiggly but not wet; it will firm up as it cools. Keep an eye on it towards the end to avoid overbaking, which could dry out the dessert.

Step 5: Cool and Chill
Once baked, remove the dish from the oven and let it cool on a wire rack for about 15 minutes. After it cools, refrigerate the bars for at least 1 hour, or overnight if time allows. This chilling time helps the flavors meld together beautifully and allows for easier cutting.

Step 6: Serve
When ready to serve, lift the bars out of the baking dish using the parchment paper. Slice them into squares with a sharp knife. These Chocolate Chip Cheesecake Bars are best enjoyed chilled, but for easier cutting, allow them to sit at room temperature for about 10 minutes before serving. Enjoy the rich layers of cheesecake and cookie goodness!

Expert Tips for Chocolate Chip Cheesecake Bars

  • Soften Cream Cheese: Ensure your cream cheese is at room temperature before mixing to prevent lumps and create a smooth filling.
  • Use Parchment Paper: Line your baking dish with parchment paper to make removing and cutting the bars a breeze.
  • Chill for Flavor: Let the bars cool and chill in the refrigerator for at least an hour, or overnight if possible, to enhance flavor and texture.
  • Keep an Eye on Baking: Bake until the cookie topping is set and golden, but avoid overbaking to keep the bars moist and creamy.
  • Adjust Pan Size: If you use a different-sized pan, monitor the baking time closely to ensure even cooking of your Chocolate Chip Cheesecake Bars.

What to Serve with Chocolate Chip Cheesecake Bars

Transform your dessert into a delightful feast with these perfect pairings for your sweet treat!

  • Fresh Berries: Juicy strawberries or blueberries add a burst of freshness that contrasts beautifully with the creamy cheesecake.
  • Whipped Cream: A dollop of fluffy whipped cream enhances texture and provides a light airiness to every bite of cheesecake.
  • Chocolate Sauce: Drizzling chocolate sauce over the bars intensifies the chocolate flavor and adds an indulgent touch.
  • Coffee or Espresso: A cup of rich coffee cuts through the sweetness and adds sophistication, making each bite irresistible.
  • Ice Cream: Creamy vanilla or cookie dough ice cream complements the flavors while providing a delightful temperature contrast.
  • Caramel Drizzle: Sweet and buttery caramel sauce adds a gourmet flair, enhancing the sweet charm of the chocolate chip cheesecake bars.
  • Nutty Granola: For a delightful crunch, sprinkle some nutty granola over the bars, adding texture and a hint of nuttiness.
  • Mint Leaves: A touch of fresh mint on the side gives a refreshing lift, balancing indulgence with brightness.

Chocolate Chip Cheesecake Bars Variations

Feel free to let your creativity shine as you make these delectable bars uniquely yours!

  • Oreo Crust: Swap the graham cracker crust for crushed Oreos for a delightful chocolatey twist. This adds a rich flavor that enhances the overall experience.

  • Nutty Surprise: Add chopped pecans or walnuts to the cookie dough for an extra crunch that beautifully contrasts the creamy cheesecake.

  • Pumpkin Spice: Mix pumpkin puree and pumpkin spice into the cheesecake filling for a seasonal treat that captures the essence of fall in each bite.

  • Coconut Delight: Stir shredded coconut into the cheesecake filling or sprinkle it on top of the cookie dough for a tropical flair.

  • Peanut Butter Swirl: Incorporate swirls of peanut butter into the cheesecake layer before baking. This nutty addition will delight any peanut butter lover!

  • Gluten-Free Option: Replace the all-purpose flour in the cookie dough with a gluten-free flour blend for an inclusive treat that everyone can enjoy.

  • Chocolate Chip Variations: Switch up the chocolate chips with white chocolate or butterscotch chips for different flavor profiles that cater to your sweet tooth.

  • Extra Layer of Flavor: Combine a touch of espresso powder or instant coffee into the cheesecake filling to create a delightful coffee-infused dessert.

These variations allow you to tailor the recipe to your tastes and make every bite a new adventure. Whether you enjoy them with friends at a gathering or as a cozy dessert while sipping a warm cup of Homemade Hot Chocolate, these bars are bound to impress! If you’re feeling inspired, check out other dessert bars like the German Chocolate Poke for more delicious options to explore. Enjoy!

Storage Tips for Chocolate Chip Cheesecake Bars

  • Fridge: Store the bars tightly covered in the refrigerator for up to 7 days. This helps maintain their creamy texture and prevents them from drying out.
  • Freezer: For longer storage, freeze the bars in an airtight container for up to 3 months. To thaw, place them in the fridge overnight before serving to retain their deliciousness.
  • Reheating: If you prefer warm bars, gently reheat individual slices in the microwave for about 10-15 seconds. Enjoy the melt-in-your-mouth goodness of these Chocolate Chip Cheesecake Bars!

Make Ahead Options

These Chocolate Chip Cheesecake Bars are a lifesaver for busy home cooks! You can prepare the crust and cheesecake filling up to 24 hours in advance; simply refrigerate them separately to maintain their quality. For the cookie dough topping, mix it and chill it in a covered container for up to 3 days. When you're ready to serve, just layer the cookie dough on top of the cheesecake filling and bake as instructed. This make-ahead strategy allows the flavors to meld beautifully, ensuring your cheesecake bars are just as delicious while saving you precious time on the day of your gathering!

Chocolate Chip Cheesecake Bars Recipe FAQs

How do I choose ripe ingredients for my cheesecake bars?
Absolutely! For the best flavor, select cream cheese that is at room temperature, as it mixes easier and yields a creamy texture. When choosing lemons for juice, look for ones that feel heavy for their size and have a smooth skin; these are usually juicier.

How should I store my leftover Chocolate Chip Cheesecake Bars?
You can store the bars tightly covered in the refrigerator for up to 7 days. This method keeps them fresh and maintains their creamy texture. I often place a layer of plastic wrap directly over the bars before covering with a lid to prevent any drying out.

Can I freeze Chocolate Chip Cheesecake Bars?
Certainly! You can freeze these bars for up to 3 months. To do this, first, let them cool completely, then wrap them tightly in plastic wrap and place them inside an airtight container. When you’re ready to enjoy, thaw them overnight in the refrigerator for best results.

What should I do if my cheesecake layer is lumpy?
No worries! Lumpy cheesecake filling usually happens when the cream cheese isn’t softened enough. Ensure your cream cheese is at room temperature next time, beating it for a full 2-3 minutes to get it creamy and lump-free. If you find lumps despite this, simply mix it longer until smooth.

Are there any dietary considerations I should be aware of?
Very! If you're making these bars for guests with dietary restrictions, you can easily adapt the recipe. For those who are lactose intolerant, consider using lactose-free cream cheese and sour cream. Additionally, substitute the egg with a flaxseed meal (1 tablespoon of flaxseed mixed with 2.5 tablespoons of water is a great alternative). Always double-check labels for chocolate chips if nut allergies are a concern.

Chocolate Chip Cheesecake Bars

Irresistible Chocolate Chip Cheesecake Bars You’ll Crave

These Chocolate Chip Cheesecake Bars combine creamy cheesecake and cookie flavors for a crave-worthy dessert.
Print Recipe Pin Recipe
Prep Time 15 minutes mins
Cook Time 45 minutes mins
Cooling Time 1 hour hr
Total Time 2 hours hrs
Servings: 16 bars
Course: Dessert
Cuisine: American
Calories: 250
Ingredients Equipment Method Nutrition Notes

Ingredients
  

For the Crust
  • 1 cup Graham Cracker Crumbs Substitute with crushed Oreos for a unique twist.
  • 1/2 cup Melted Butter Unsalted butter is best to control sweetness.
  • 1/4 cup Granulated Sugar Reduce the amount or use a sugar alternative for lighter option.
For the Cheesecake Filling
  • 16 oz Cream Cheese Ensure it’s softened for a smooth mix.
  • 1/2 cup Sour Cream Greek yogurt makes a great substitute.
  • 1 large Egg Substitute with flaxseed meal and water for vegan option.
  • 1 tbsp Lemon Juice Balances sweetness.
  • 1 tsp Vanilla Extract Can substitute with almond extract.
For the Cookie Dough Topping
  • 1/2 cup Butter (softened) Consider using applesauce for a lighter version.
  • 1/4 cup White Sugar Adjust to taste.
  • 1/4 cup Brown Sugar Enhances overall flavor profile.
  • 1 cup All-Purpose Flour Gluten-free flour blends can be substituted.
  • 1/2 tsp Salt Optional based on preference.
  • 1 cup Chocolate Chips Use dark chocolate or nut-free chips as alternatives.

Equipment

  • 8x8-inch baking dish
  • Mixing bowls
  • Spatula

Method
 

Directions
  1. Preheat your oven to 350°F (175°C) and line an 8x8-inch baking dish with parchment paper. Combine the graham cracker crumbs, melted butter, and granulated sugar. Press into the bottom of the dish evenly. Bake for about 10 minutes until golden.
  2. In a mixing bowl, beat together softened cream cheese and granulated sugar until smooth. Add sour cream, egg, lemon juice, and vanilla extract, beating until completely smooth. Pour this mixture over the warm crust.
  3. Cream together softened butter, white sugar, and brown sugar until fluffy. Mix in vanilla extract, then gradually incorporate flour, salt, and chocolate chips. Drop spoonfuls over cheescake layer.
  4. Bake for 30-35 minutes until the cookie dough is set and lightly golden, with the center slightly jiggly. Avoid overbaking.
  5. Let the dish cool for about 15 minutes before refrigerating for at least 1 hour or overnight.
  6. Lift the bars using the parchment paper, slice into squares, and serve chilled.

Nutrition

Serving: 1barCalories: 250kcalCarbohydrates: 30gProtein: 4gFat: 14gSaturated Fat: 8gPolyunsaturated Fat: 1gMonounsaturated Fat: 3gCholesterol: 40mgSodium: 180mgPotassium: 120mgFiber: 1gSugar: 18gVitamin A: 500IUVitamin C: 1mgCalcium: 60mgIron: 1mg

Notes

Ensure cream cheese is at room temperature for a smooth filling. Use parchment paper for easy removal and cutting. Chill for at least an hour for enhanced flavor and texture.

Tried this recipe?

Let us know how it was!

Irresistible Tiramisu Brownies That Will Delight Your Tastebuds

December 16, 2025 by Grace Snow Leave a Comment

As I stood in my kitchen, the aroma of fresh-brewed espresso mingled with rich chocolate, wrapping me in a warm embrace. This is the magic moment I cherish most, especially when diving into a batch of my unforgettable tiramisu brownies. Crafted with fudgy brownie layers and topped with creamy mascarpone, these delightful treats marry the classic Italian tiramisu with the comforting texture of a brownie. Not only do these tiramisu brownies bake up quickly, but they also impress everyone they touch—making them a perfect dessert for gatherings. The combination of rich chocolate and coffee flavors will surely make your taste buds dance! Curious about how to create this indulgent treat that feels both elevated and homey? Let's get baking!

Why are Tiramisu Brownies a Must-Try?

Indulgence Awaits: These tiramisu brownies blend rich chocolate and espresso, creating a dessert that’s both decadent and delightful.
Fudgy Delight: With a perfectly moist, fudgy brownie base, every bite feels like a warm hug.
Elevated Flavor: The creamy mascarpone topping paired with coffee-soaked ladyfingers adds a unique twist to traditional brownies.
Quick to Make: This recipe is simple enough for a weekday treat but impressive enough for gatherings.
Crowd-Pleasing Comfort: Perfect for dinner parties, these brownies are sure to garner compliments—your friends won't be able to resist asking for the recipe!
Craving more delicious ideas? Why not try the Pumpkin Brownies Decadent for a seasonal twist!

Tiramisu Brownies Ingredients

For the Brownie Base

• Dark or Semi-Sweet Chocolate (100 g) – Provides a rich chocolate flavor; substitute with milk chocolate for a sweeter taste.
• Natural Cocoa Powder (50 g) – Enhances the chocolaty richness; unsweetened cocoa is best for balanced flavor.
• Unsalted Butter (230 g) – Adds moisture and richness, crucial for fudgy texture; keep at room temperature for even melting.
• Large Eggs (4) – Essential for binding and creating a light texture; ensure room temperature for better mixing.
• Granulated Sugar (150 g) – Sweetens the brownies; can replace half with brown sugar for added moisture.
• Brown Sugar (100 g) – Adds depth of flavor and moisture; you can substitute with additional granulated sugar if necessary.
• All-Purpose Flour (100 g) – Provides structure to the brownies; avoid overmixing to prevent tough texture.

For the Mascarpone Topping

• Mascarpone Cheese (250 g) – Key ingredient for the creamy layer; available at most grocery stores; can be replaced with cream cheese for a tangy twist.
• Whipping Cream (200 g) – Lightens the mascarpone; for a richer texture, use heavy cream.
• Powdered Sugar (50 g) – Sweetens the mascarpone cream for balance; avoid substituting, as it dissolves better than granulated sugar.
• Vanilla Extract (½ teaspoon) – Adds aroma and flavor; vanilla bean paste or imitation vanilla works as alternatives.

For the Espresso Soak

• Espresso Powder (2 teaspoons) – Intensifies the coffee flavor; instant coffee can be used if espresso is unavailable.
• Hot Water (150 g) – Dissolves espresso powder for soaking ladyfingers.
• Coffee Liqueur or Dark Rum (1 tablespoon, optional) – Enhances flavor richness; skip for a non-alcoholic version.
• Ladyfingers (12) – Framework for the tiramisu layer; finger biscuits are a direct substitute but skip if gluten-free is required.

For Dusting

• Cocoa Powder for Dusting (1 tablespoon) – Final touch for presentation and flavor; essential for that classic tiramisu look.

Get ready to experience the magic of tiramisu brownies that blend the best of both worlds!

Step‑by‑Step Instructions for Tiramisu Brownies

Step 1: Prep the Oven and Pan
Begin by preheating your oven to 350°F (175°C). While the oven warms, prepare a 9x9-inch baking pan by lining it with parchment paper, allowing for easy removal of the brownies later. Make sure the edges of the paper overhang slightly for easy lifting out.

Step 2: Combine Chocolate and Cocoa
In a medium-sized mixing bowl, combine the chopped dark or semi-sweet chocolate and natural cocoa powder. This mixture is key for your fudgy brownie base. As the oven continues to heat, set it aside to focus on the next step—a flavorful, luscious treat awaits!

Step 3: Brown the Butter
In a saucepan over medium heat, melt the butter until it begins to foam, stirring continuously. Allow it to cook until it turns golden brown, about 5-7 minutes. Pour the browned butter over the chocolate and cocoa mixture, letting it sit for a few minutes until the chocolate melts, then stir until smooth and combined.

Step 4: Mix Egg Ingredients
In a separate large bowl, whisk together the large eggs, granulated sugar, and brown sugar until smooth and slightly thickened, about 3 minutes. This step combines the sweetness with the richness of the chocolate. Gradually mix in the chocolate mixture, ensuring everything is well combined.

Step 5: Incorporate Flour
Gently fold the all-purpose flour into the chocolate mixture using a spatula. Mix just until combined, ensuring not to overmix, which keeps the brownies fudgy. The batter should look thick and glossy—a true sign of delicious tiramisu brownies ready to bake.

Step 6: Bake the Brownies
Pour the batter into your prepared baking pan, spreading it evenly into the corners. Place it in the preheated oven and bake for 28-30 minutes. You'll know they're done when a toothpick inserted comes out mostly clean, with a few moist crumbs—this is key for that fudgy texture.

Step 7: Cool the Brownies
After baking, remove the brownies from the oven and allow them to cool in the pan for about 15-20 minutes. This cooling time is essential before adding the decadent mascarpone layer, so resist the urge to dive in just yet!

Step 8: Prepare the Mascarpone Cream
In a clean mixing bowl, beat the mascarpone cheese until creamy. Gradually add the whipped cream, powdered sugar, and vanilla extract, mixing until the cream thickens and is light and airy. This will create the heavenly topping for your tiramisu brownies.

Step 9: Soak the Ladyfingers
In a shallow dish, dissolve the espresso powder in hot water, adding the coffee liqueur if desired. Quickly dip each ladyfinger into the coffee mixture—just a few seconds on each side to avoid sogginess, then place them on a plate, ready for layering.

Step 10: Layer with Ladyfingers
Once the brownies have cooled, carefully arrange the soaked ladyfingers over the brownie base in a single layer. This creates a beautiful contrast with the fudgy brownie underneath, enhancing the flavors of your tiramisu brownies.

Step 11: Add the Mascarpone Topping
Spread the prepared mascarpone cream evenly over the layer of ladyfingers, smoothing it out with a spatula. Take your time to ensure every corner is covered for that creamy, indulgent touch that makes tiramisu brownies irresistible.

Step 12: Chill and Serve
Refrigerate the assembled tiramisu brownies for at least 1 hour to allow the layers to set, enhancing the flavors. Before serving, dust the top with cocoa powder for a classic finish. Cut into squares and savor the delightful combination of textures and tastes in each bite!

Tiramisu Brownies Variations & Substitutions

Feeling adventurous? Personalize your tiramisu brownies with these delightful variations!

  • Gluten-Free: Substitute ladyfingers with gluten-free biscuits for an equally delicious texture. This ensures everyone can enjoy the treat without worry!

  • Nutty Twist: Add chopped hazelnuts or walnuts into the brownie batter for a delightful crunch. This unexpected twist will make your brownies a true showstopper.

  • Flavored Mascarpone: Try folding in a splash of almond extract or orange zest into the mascarpone cream for a fragrant layer of flavor. It’s an easy way to elevate your dessert!

  • Add Spice: Sprinkle in a pinch of cinnamon or nutmeg for a warm, inviting flavor that pairs beautifully with chocolate and coffee. This adds a cozy touch everyone will love.

  • Vegan Option: Use aquafaba instead of eggs and coconut cream instead of mascarpone for a plant-based-friendly dessert. You won’t miss the dairy with this luscious substitute!

  • Decadent Layering: Consider crumbling some dark chocolate or chocolate cookies on top of the mascarpone layer for added texture and indulgence. It makes each bite even more enticing!

  • Heat Things Up: Drizzle a bit of chili-infused chocolate over the top to give your brownies a surprising kick. The contrasting flavors of sweet and spice will excite anyone who tries them!

  • Fruity Finish: Top your brownies with fresh raspberries or strawberries for a burst of freshness. The tartness will beautifully balance the rich, fudgy base.

For a seasonal delight, feel free to check out the Pumpkin Brownies Decadent that bring a whole new flavor to your dessert table!

How to Store and Freeze Tiramisu Brownies

Fridge: Store tiramisu brownies in an airtight container in the refrigerator for up to 3 days. Let them come to room temperature for about 30 minutes before serving to restore their fudgy texture.

Freezer: To freeze, wrap individual brownie squares tightly in plastic wrap and place them in a freezer-safe bag. They can last up to 2 months. Thaw overnight in the fridge before enjoying.

Reheating: If you prefer a warm dessert, gently reheat thawed brownies in the microwave for about 10-15 seconds. This will revive their moist, fudgy charm.

Layering: It’s best to keep the layers intact until serving to maintain the lovely contrast between the brownie base and the mascarpone topping.

What to Serve with Tiramisu Brownies

Indulging in rich, fudgy brownies topped with creamy mascarpone and coffee flavors invites a feast of complementary delights to round out your dessert experience.

  • Freshly Brewed Espresso: The bold coffee notes enhance the espresso in the brownies, creating a harmonious pairing that coffee lovers will adore.
  • Vanilla Ice Cream: Creamy and cold, vanilla ice cream balances the richness of the brownies, adding a refreshing touch that mirrors classic tiramisu.
  • Whipped Cream: Light and airy, a dollop of freshly whipped cream provides a contrasting texture and extra sweetness, elevating each indulgent bite.
  • Chocolate Mousse: For a dessert tower, pairing with a light chocolate mousse introduces lusciousness while keeping the overall experience decadent yet airy.
  • Baileys Irish Cream: This whiskey cream liqueur serves as an elegant drizzle, marrying perfectly with the coffee and chocolate flavors for an adult twist on classic flavors.
  • Berries Medley: Raspberries or strawberries offer a burst of tartness, cutting through the richness of the brownies, while adding a beautiful color contrast for presentation.
  • Tiramisu Inspired Milkshake: Blend some mascarpone, coffee, and chocolate ice cream for a delightful shake that mirrors the flavors of your brownies, creating a fun surprise.
  • Chilled Moscato: This sweet, sparkling wine adds a fruity note that complements the rich brownie without overpowering it, making for a delightful finish to your meal.

Expert Tips for Tiramisu Brownies

  • Optimal Cooling Time: Let the brownies cool completely before adding the mascarpone cream; this prevents melting and keeps the layers intact.
  • Perfect Flour Measurement: Use a kitchen scale for accurate flour measurement, as overpacking can lead to dense brownies.
  • Quick Ladyfinger Dip: Soak ladyfingers just long enough to absorb espresso without becoming soggy, ensuring they hold their shape.
  • Rich Flavor Boost: For a deeper coffee flavor, use espresso powder. If unavailable, instant coffee is a fine substitute—just ensure it’s well-dissolved.
  • Smoothing the Topping: When spreading the mascarpone topping, take your time to create an even layer, enhancing the overall aesthetic of your tiramisu brownies.

Make Ahead Options

These tiramisu brownies are perfect for meal prep enthusiasts! You can prepare the brownie base up to 24 hours in advance; just wrap it tightly in plastic wrap to keep it fresh. The mascarpone cream can also be made ahead—store it in an airtight container in the refrigerator for up to 3 days. When ready to assemble, simply soak the ladyfingers right before layering and top with the mascarpone cream. For best results, allow the finished tiramisu brownies to chill for at least 1 hour before serving, ensuring the flavors meld beautifully while keeping the fudgy texture intact. Enjoy a delightful dessert with just a bit of planning!

Tiramisu Brownies Recipe FAQs

How do I choose the best chocolate for my tiramisu brownies?
Absolutely! For the best flavor, opt for dark or semi-sweet chocolate, which provides a rich and intense chocolate taste. If you're looking for something sweeter, milk chocolate can be used as an alternative. Just ensure it’s high-quality for the best results!

How long can I store leftover tiramisu brownies?
You can keep your tiramisu brownies in an airtight container in the refrigerator for up to 3 days. To enjoy them at their best texture, let them sit at room temperature for about 30 minutes before serving.

Can I freeze tiramisu brownies?
Yes, you can absolutely freeze your tiramisu brownies! Wrap individual squares tightly in plastic wrap and place them in a freezer-safe bag. They’ll stay fresh for up to 2 months. To enjoy, simply thaw them overnight in the fridge.

What if my ladyfingers become too soggy during the espresso soak?
Very good question! To prevent sogginess, dip each ladyfinger in the espresso mixture for only a few seconds on each side. This quick dunk allows for flavor absorption without compromising their structure. If you've accidentally soaked them too long, they might break apart, but don’t fret! You can still layer them, and they’ll taste delicious!

Are there any dietary considerations for making tiramisu brownies?
Certainly! For a gluten-free version, substitute ladyfingers with gluten-free biscuits. Additionally, if anyone has dairy allergies, you can use a dairy-free cream cheese alternative for the mascarpone layer. Always check your ingredients to ensure they meet your specific dietary needs!

Can I incorporate other flavors into my tiramisu brownies?
Absolutely! While classic flavors shine in this recipe, feel free to experiment by adding flavored liqueurs like hazelnut or amaretto for a unique twist. Just be sure to skip the coffee liqueur if you'd like a non-alcoholic dessert. The more the merrier when it comes to flavor!

Tiramisu Brownies

Irresistible Tiramisu Brownies That Will Delight Your Tastebuds

These tiramisu brownies combine rich chocolate and coffee flavors, offering a decadent twist on a classic dessert.
Print Recipe Pin Recipe
Prep Time 30 minutes mins
Cook Time 30 minutes mins
Cooling Time 20 minutes mins
Total Time 1 hour hr 20 minutes mins
Servings: 12 squares
Course: Dessert
Cuisine: Italian
Calories: 250
Ingredients Equipment Method Nutrition Notes

Ingredients
  

For the Brownie Base
  • 100 g Dark or Semi-Sweet Chocolate Substitute with milk chocolate for a sweeter taste.
  • 50 g Natural Cocoa Powder Unsweetened cocoa is best.
  • 230 g Unsalted Butter Keep at room temperature for even melting.
  • 4 large Eggs Room temperature for better mixing.
  • 150 g Granulated Sugar Can replace half with brown sugar.
  • 100 g Brown Sugar Can substitute with additional granulated sugar.
  • 100 g All-Purpose Flour Avoid overmixing to prevent tough texture.
For the Mascarpone Topping
  • 250 g Mascarpone Cheese Can be replaced with cream cheese.
  • 200 g Whipping Cream For richer texture, use heavy cream.
  • 50 g Powdered Sugar Dissolves better than granulated sugar.
  • 0.5 teaspoon Vanilla Extract Vanilla bean paste is an alternative.
For the Espresso Soak
  • 2 teaspoons Espresso Powder Instant coffee can be used if unavailable.
  • 150 g Hot Water Dissolves espresso powder.
  • 1 tablespoon Coffee Liqueur or Dark Rum Skip for a non-alcoholic version.
  • 12 pieces Ladyfingers Finger biscuits are a direct substitute.
For Dusting
  • 1 tablespoon Cocoa Powder for Dusting Essential for presentation.

Equipment

  • 9x9-inch baking pan
  • Mixing bowls
  • Spatula
  • Saucepan

Method
 

Step-by-Step Instructions for Tiramisu Brownies
  1. Preheat your oven to 350°F (175°C) and prepare a 9x9-inch baking pan by lining it with parchment paper.
  2. In a bowl, combine the chopped dark or semi-sweet chocolate and cocoa powder.
  3. Melt the butter in a saucepan over medium heat until golden brown, then pour over the chocolate mixture and stir until smooth.
  4. In a large bowl, whisk together eggs, granulated sugar, and brown sugar until smooth, then mix in the chocolate mixture.
  5. Fold in the all-purpose flour until combined, avoiding overmixing.
  6. Pour the batter into the prepared pan and bake for 28-30 minutes.
  7. Allow the brownies to cool in the pan for 15-20 minutes before adding the mascarpone layer.
  8. Beat mascarpone cheese until creamy, then add whipped cream, powdered sugar, and vanilla extract until thickened.
  9. Dissolve espresso powder in hot water and dip each ladyfinger quickly before layering on the brownies.
  10. Spread the mascarpone cream evenly over the ladyfingers.
  11. Refrigerate for at least 1 hour before dusting with cocoa powder and serving.

Nutrition

Serving: 1squareCalories: 250kcalCarbohydrates: 30gProtein: 3gFat: 12gSaturated Fat: 7gPolyunsaturated Fat: 1gMonounsaturated Fat: 3gCholesterol: 50mgSodium: 150mgPotassium: 200mgFiber: 2gSugar: 20gVitamin A: 300IUCalcium: 30mgIron: 2mg

Notes

Store in an airtight container in the refrigerator for up to 3 days or freeze individually for up to 2 months.

Tried this recipe?

Let us know how it was!

Cranberry Lemon Bars That Spark Joy and Flavor

December 16, 2025 by Grace Snow Leave a Comment

When the holiday season rolls around, my kitchen becomes a cozy refuge filled with wonderful scents and cheerful flavors. One of my go-to treats is these delightful Cranberry Lemon Bars, perfectly blending the tartness of fresh cranberries with the bright zing of lemons—layered atop a buttery shortbread crust that practically melts in your mouth. This recipe isn’t just easy to whip up; it’s also a crowd-pleaser, bringing a refreshing twist to your typical holiday dessert lineup. Plus, with their vibrant colors and luscious layers, they’re sure to impress everyone at your gatherings. Are you ready to add a little cheer to your dessert table? Let’s dive into this scrumptious recipe!

Why Are Cranberry Lemon Bars So Irresistible?

Tantalizing Tartness: The combination of fresh cranberries and zesty lemons creates an explosion of vibrant flavors that dance on your palate.

Buttery Crust Perfection: This recipe features a wonderfully crumbly shortbread crust that perfectly balances the tangy layers above, satisfying your cravings for something rich and delicious.

Unique Visual Appeal: With their bright colors and gooey texture, these Cranberry Lemon Bars are not just tasty but also make a stunning centerpiece for any holiday dessert spread.

Time-Saving Tip: If you're in a pinch, consider using leftover cranberry sauce as a quick filling alternative, ensuring you keep your holiday prep stress-free.

Versatile Delight: Serve these bars chilled with a dollop of yogurt or whipped cream for extra indulgence, and enjoy the perfect treat for gatherings and celebrations.

Cranberry Lemon Bars Ingredients

• Here’s everything you need to create these delightful treats!

For the Cranberry Layer

  • Fresh Cranberries (8 ounces) – Provides tartness and flavor; frozen can be used for convenience.
  • Water (1/2 cup) – Helps cook and break down cranberries into a sauce.
  • Granulated Sugar (6 tablespoons) – Sweetens the cranberry layer; adjust according to your taste.

For the Crust

  • Unsalted Butter (1/2 cup, melted) – Adds richness to the crust; switch to salted butter, reducing added salt.
  • Granulated Sugar (1/4 cup) – Enhances sweetness in the crust.
  • Vanilla Extract (1 teaspoon) – Boosts the flavor profile of the crust.
  • Salt (1/4 teaspoon) – Balances the sweetness; use kosher or table salt as preferred.
  • All-Purpose Flour (1 cup + 1 tablespoon) – Provides structure to the crust.

For the Lemon Layer

  • Large Eggs (3) – Acts as a binder and creates a rich custard texture; room temperature is best for even mixing.
  • Granulated Sugar (1 cup) – Sweetens the lemon layer; adjust for desired tartness.
  • All-Purpose Flour (3 tablespoons) – Ensures stability for the lemon custard.
  • Fresh Lemon Juice (1/2 cup, roughly 3 lemons) – Adds essential tanginess; fresh is always better than bottled.

Optional Finishing Touch

  • Powdered Sugar – For dusting on top before serving, adding a pretty presentation.

Get ready to bring some joy with these Cranberry Lemon Bars!

Step‑by‑Step Instructions for Cranberry Lemon Bars

Step 1: Prepare Cranberries
Start by rinsing 8 ounces of fresh cranberries under cold water. In a medium saucepan, combine the cranberries with 1/2 cup of water and 6 tablespoons of sugar. Bring the mixture to a boil over medium heat, then reduce to a simmer, cooking for 10-15 minutes until the cranberries break down and form a chunky sauce. Set aside to cool for at least 30 minutes.

Step 2: Make the Crust
Preheat your oven to 325°F (163°C). In a mixing bowl, whisk together 1/2 cup of melted unsalted butter, 1 teaspoon of vanilla extract, 1/4 cup of sugar, and 1/4 teaspoon of salt until smooth. Gradually mix in 1 cup and 1 tablespoon of all-purpose flour until fully combined. Press this buttery mixture firmly into the bottom of a lined 9-inch baking dish to create an even layer. Bake for 16-18 minutes or until lightly browned, then let it cool for about 20 minutes. Poke holes in the crust with a fork to prevent bubbling.

Step 3: Prepare Lemon Layer
In a clean mixing bowl, whisk together 1 cup of sugar and 3 tablespoons of flour for the lemon filling. Beat in 3 large eggs and 1/2 cup of freshly squeezed lemon juice until the mixture is smooth and well combined. Once the crust has cooled, evenly spread the cranberry mixture on top, followed by the lemon filling, making sure to cover the cranberries completely. Chill in the refrigerator for 45 minutes before baking.

Step 4: Bake the Bars
Preheat the oven to 350°F (177°C). Carefully pour the lemon mixture over the chilled cranberry layer in the baking dish. Bake for 43-45 minutes, or until the edges are set, and the center feels slightly firm to the touch. Allow the bars to cool at room temperature for about 1 hour before transferring them to the refrigerator to chill for 1-2 hours, which will help in setting up beautifully.

Step 5: Serve the Delicious Bars
Once chilled, dust your Cranberry Lemon Bars with powdered sugar for a lovely finishing touch. Using a sharp knife, slice the cooled bars into squares for serving. These bars are best enjoyed chilled and can be paired with a dollop of whipped cream or yogurt for an extra treat.

Make Ahead Options

These Cranberry Lemon Bars are a fantastic choice for meal prep, allowing you to enjoy their deliciousness with less stress! You can prepare the cranberry layer and even the buttery shortbread crust up to 24 hours in advance. Simply make the cranberry sauce and crust, then store them separately in airtight containers in the refrigerator. When you’re ready to bake, let the crust come to room temperature for about 15 minutes, spread the cranberry mixture on top, and pour the lemon layer over it. Bake as directed and allow to cool completely before slicing. This way, you'll still achieve that perfect gooey texture and vibrant flavor, making your holiday gatherings a breeze!

What to Serve with Cranberry Lemon Bars?

These vibrant treats deserve a delightful companion on your dessert table, elevating your sweet experience to new heights.

  • Whipped Cream: A dollop of fluffy whipped cream balances the tartness beautifully, creating a creamy contrast that enhances each bite.
  • Vanilla Ice Cream: This classic pairing offers a cool, rich complement that harmonizes with the citrusy flavors of the bars, making it irresistibly indulgent.
  • Yogurt Parfait: Layered with Greek yogurt and fresh berries, this light option adds a fresh element and vibrant colors to your dessert display.
  • Fruit Salad: A medley of seasonal fruits refreshes the palate and provides a burst of color, offering a nutritious counterpoint to the rich bars.
  • Herbal Tea: A soothing chamomile or mint tea complements the bars’ tangy flavors while providing a grounding warmth to the dessert experience.
  • Sparkling Wine: A light and bubbly Prosecco or champagne adds a celebratory touch, pairing wonderfully with the sweet-tart notes of the cranberry lemon bars.

Let this assortment of delightful accompaniments turn your dessert moment into a cherished memory, ensuring every bite creates a taste of joy!

Cranberry Lemon Bars Variations

Feel free to get creative and customize these delightful bars to suit your taste!

  • Leftover Sauce: Replace fresh cranberries with leftover cranberry sauce for a quicker option without sacrificing flavor.
  • Gluten-Free: Substitute all-purpose flour with a gluten-free flour blend to make a deliciously inclusive treat for everyone.
  • Zesty Twist: Add zest from 1 lemon into the crust or lemon filling for an extra punch of citrus brightness.
  • Berry Medley: Boost the fruit flavor by incorporating fresh blueberries or raspberries along with the cranberries for a mixed berry experience.
  • Nutty Crunch: Toss in chopped pecans or almonds to the crust for an added texture and nutty flavor that complements the bars beautifully.
  • Spicy Kick: Spice things up by adding a pinch of cayenne pepper to the lemon layer for a surprising heat balance against the tartness.
  • Fruity Infusion: Let's mix it up! Try adding another layer of sliced strawberries or mango puree underneath the lemon layer for a fun twist on flavors.
  • Creamy Topping: Finish off with a cream cheese frosting or whipped coconut cream on top for a smooth, indulgent treat that balances the tanginess.

For a cozy dessert experience, pair these with a warm cup of tea or enjoy them alongside a scoop of vanilla ice cream. Don’t forget to check out my other recipes, like these delicious Lemon Ricotta Protein pancakes or my comforting Lemon Chicken Soup, to bring more zest to your meals!

Expert Tips for Cranberry Lemon Bars

  • Perfect Crust Pressing: Ensure the crust mixture is pressed firmly from edge to edge to prevent any leaking filling during baking.

  • Egg Whisking Technique: Whisk the eggs until they are pale and slightly frothy; this helps create a smooth and luscious lemon layer texture.

  • Cooling is Essential: Let the cranberry lemon bars cool completely before slicing to achieve clean and neat squares. A clean knife helps maintain their beautiful appearance.

  • Add Zest for Zing: For an extra layer of flavor, consider mixing in some lemon zest into the crust or lemon layer—this will enhance the aromatic taste!

  • Utilize Leftovers: If you're pressed for time, don’t hesitate to use leftover cranberry sauce for the filling; it’s a fantastic and quick substitute!

How to Store and Freeze Cranberry Lemon Bars

Fridge: Store your Cranberry Lemon Bars in an airtight container in the refrigerator for up to 6-7 days. This keeps them fresh and flavorful for your sweet tooth cravings.

Freezer: For long-term storage, these bars can be frozen for up to 3 months. Make sure to wrap them tightly in plastic wrap and then place them in a freezer-safe container to prevent freezer burn.

Thawing: To enjoy frozen bars, simply transfer them to the refrigerator and let them thaw overnight. This helps maintain their taste and texture—perfect for last-minute holiday gatherings!

Reheating: If you prefer these bars slightly warmed, heat individual portions in the microwave for about 10-15 seconds, but enjoy them best chilled with a dusting of powdered sugar before serving.

Cranberry Lemon Bars Recipe FAQs

How do I select the best cranberries for my recipe?
Absolutely! Look for fresh cranberries that are firm, plump, and bright in color. Avoid ones that have soft spots or blemishes. If using frozen cranberries, ensure they are unthawed before cooking to maintain the integrity of the sauce.

What is the best way to store leftover Cranberry Lemon Bars?
Very easy! Place your bars in an airtight container and store them in the refrigerator. They should last for about 6 to 7 days, maintaining their fresh flavor. If you have a lot, consider wrapping them individually in plastic wrap for convenience!

Can I freeze Cranberry Lemon Bars for later enjoyment?
Of course! These delicious bars can be frozen for up to 3 months. First, let them cool completely, then wrap them tightly in plastic wrap. For extra protection, place the wrapped bars in a freezer-safe container or bag. To thaw, simply leave them in the refrigerator overnight.

What should I do if my crust leaks during baking?
Not to worry! If you notice your crust leaking, it may be because it wasn’t pressed firmly enough into the baking dish. In the future, ensure that the crust mixes are evenly pressed from edge to edge. You can also create a slight lip around the edge of the crust to contain the filling better.

Are these bars safe for those with dietary restrictions?
Great question! These bars contain eggs and flour, which can be allergens for some. If you have guests with gluten sensitivities, substitute the all-purpose flour with a gluten-free blend. Always check for any specific allergies when serving to pets or individuals with sensitivities as well.

Cranberry Lemon Bars

Cranberry Lemon Bars That Spark Joy and Flavor

Delightful Cranberry Lemon Bars perfectly blend the tartness of cranberries with the zing of lemons, atop a buttery shortbread crust.
Print Recipe Pin Recipe
Prep Time 30 minutes mins
Cook Time 1 hour hr
Chilling Time 1 hour hr
Total Time 2 hours hrs 30 minutes mins
Servings: 10 slices
Course: Dessert
Cuisine: American
Calories: 220
Ingredients Equipment Method Nutrition Notes

Ingredients
  

For the Cranberry Layer
  • 8 ounces Fresh Cranberries Frozen can be used for convenience.
  • 1/2 cup Water Helps cook and break down cranberries into a sauce.
  • 6 tablespoons Granulated Sugar Adjust according to your taste.
For the Crust
  • 1/2 cup Unsalted Butter, melted Switch to salted butter, reducing added salt.
  • 1/4 cup Granulated Sugar Enhances sweetness in the crust.
  • 1 teaspoon Vanilla Extract Boosts the flavor profile of the crust.
  • 1/4 teaspoon Salt Use kosher or table salt as preferred.
  • 1 cup + 1 All-Purpose Flour Provides structure to the crust.
For the Lemon Layer
  • 3 Large Eggs Room temperature is best for even mixing.
  • 1 cup Granulated Sugar Adjust for desired tartness.
  • 3 tablespoons All-Purpose Flour Ensures stability for the lemon custard.
  • 1/2 cup Fresh Lemon Juice Adds essential tanginess; fresh is always better.
Optional Finishing Touch
  • Powdered Sugar For dusting on top before serving.

Equipment

  • 9-inch baking dish
  • Medium saucepan
  • Mixing Bowl
  • Whisk

Method
 

Step-by-Step Instructions for Cranberry Lemon Bars
  1. Start by rinsing 8 ounces of fresh cranberries under cold water. In a medium saucepan, combine the cranberries with 1/2 cup of water and 6 tablespoons of sugar. Bring the mixture to a boil and then reduce to a simmer, cooking for 10-15 minutes until the cranberries break down and form a chunky sauce. Set aside to cool for at least 30 minutes.
  2. Preheat your oven to 325°F. In a mixing bowl, whisk together 1/2 cup of melted unsalted butter, 1 teaspoon of vanilla extract, 1/4 cup of sugar, and 1/4 teaspoon of salt until smooth. Gradually mix in 1 cup and 1 tablespoon of all-purpose flour until fully combined. Press this mixture firmly into the bottom of a lined baking dish and bake for 16-18 minutes or until lightly browned, then let cool for about 20 minutes. Poke holes in the crust with a fork.
  3. In a clean mixing bowl, whisk together 1 cup of sugar and 3 tablespoons of flour for the lemon filling. Beat in 3 large eggs and 1/2 cup of freshly squeezed lemon juice until the mixture is smooth. Once the crust has cooled, evenly spread the cranberry mixture on top, followed by the lemon filling. Chill in the refrigerator for 45 minutes before baking.
  4. Preheat the oven to 350°F. Carefully pour the lemon mixture over the chilled cranberry layer in the dish. Bake for 43-45 minutes, or until the edges are set, and the center feels slightly firm. Allow to cool at room temperature for about 1 hour before transferring to the refrigerator to chill for 1-2 hours.
  5. Once chilled, dust the bars with powdered sugar for a lovely finishing touch. Cut into squares for serving. Best enjoyed chilled.

Nutrition

Serving: 1sliceCalories: 220kcalCarbohydrates: 30gProtein: 3gFat: 10gSaturated Fat: 6gPolyunsaturated Fat: 0.5gMonounsaturated Fat: 3.5gCholesterol: 70mgSodium: 90mgPotassium: 120mgFiber: 1gSugar: 18gVitamin A: 300IUVitamin C: 10mgCalcium: 15mgIron: 1mg

Notes

Ensure the crust mixture is pressed firmly from edge to edge to prevent any leaking during baking. Let the bars cool completely before slicing for clean edges.

Tried this recipe?

Let us know how it was!

Christmas Eve Cinnamon-Vanilla Custard Pie for Cozy Celebrations

December 16, 2025 by Grace Snow Leave a Comment

As the holidays approach, the scent of cinnamon and vanilla wafts through my kitchen, instantly transporting me to warm family gatherings. This Christmas Eve Cinnamon-Vanilla Custard Pie is not just a dessert; it’s a nostalgic embrace of cherished moments shared around the table. With its silky custard filling and the perfect balance of spices, this pie is an unforgettable addition to your holiday festivities. Easy to make ahead and wonderfully satisfying, it’s the kind of festive treat that will impress your loved ones without causing stress in the kitchen. Are you ready to indulge in a slice of this comforting classic? Let's dive into the recipe!

Why Is This Pie a Holiday Favorite?

Indulgent, Velvety Custard: The rich custard filling is perfectly balanced with cozy cinnamon and sweet vanilla, making every bite a delightful experience.
Effortlessly Make-Ahead: Prepare this pie in advance, freeing up your holiday schedule for more cherished moments with family.
Versatile Variations: Whether you choose a graham cracker crust or a splash of rum, this recipe allows you to tailor it to your taste.
Crowd-Pleasing Delight: This dessert is sure to impress guests, evoking feelings of warmth and nostalgia that comes with holiday celebrations.
Beautiful Presentation: Its stunning golden hue and creamy texture will make you the star of any festive gathering! Don’t forget to check out my Tamale Pie Hearty or Spinach Pie Deliciously for more holiday inspiration!

Christmas Eve Cinnamon-Vanilla Custard Pie Ingredients

• Here’s everything you need to create this delightful holiday dessert!

For the Crust

  • Pie Crust – Use a homemade or store-bought option for that perfect base; just remember to blind-bake for a crisp texture.

For the Custard

  • Eggs – Fresh, room-temperature eggs are vital for creating a smooth custard that sets perfectly.
  • Granulated Sugar – Adjust the amount to your taste; it sweetens without overpowering the spices.
  • Whole Milk – This creamy richness pairs beautifully with the custard; feel free to swap it for half-and-half for a decadent twist!
  • Heavy Cream – Adds an ultra-smooth texture; if you want it lighter, more milk works too.
  • Ground Cinnamon – The star of the show! It brings warmth to the custard, or steep a cinnamon stick for an enticing infusion.
  • Pure Vanilla Extract – Use for that luscious depth of flavor; vanilla beans can elevate this even further!
  • Pinch of Salt – A tiny but mighty addition that harmonizes all the flavors; don’t skip this essential ingredient.

Optional Ingredients

  • Ground Nutmeg – A sprinkle brings warmth, but use sparingly to avoid overshadowing the main flavors.
  • Orange Zest – Add a fresh, citrusy note for a festive lift to your Christmas Eve Cinnamon-Vanilla Custard Pie.

Step‑by‑Step Instructions for Christmas Eve Cinnamon-Vanilla Custard Pie

Step 1: Pre-bake the Crust
Preheat your oven to 375°F (190°C). Roll out your pie crust and gently place it into a 9-inch pie dish. Line the crust with parchment paper and fill it with pie weights or dried beans. Bake for 15 minutes until set, then carefully remove the weights and parchment, and bake for an additional 5 minutes until the crust is lightly golden. Let it cool completely.

Step 2: Prepare Custard Base
In a medium saucepan over medium heat, combine your whole milk, heavy cream, ground cinnamon, and pure vanilla extract. Warm the mixture until it's steaming, ensuring it doesn’t boil to prevent separation. If you're using a cinnamon stick or vanilla bean, allow it to steep for 10 minutes; then remove it, leaving behind a fragrant, warm mixture that forms the base for your Christmas Eve Cinnamon-Vanilla Custard Pie.

Step 3: Whisk Eggs & Sugar
In a large mixing bowl, crack your room-temperature eggs and add granulated sugar with a pinch of salt. Using a whisk, blend these ingredients together until the mixture becomes pale and smooth, approximately 2-3 minutes. This creates a lovely, airy texture for your custard filling, crucial for achieving the perfect balance in your Christmas Eve Cinnamon-Vanilla Custard Pie.

Step 4: Temper & Combine
Slowly pour the hot milk mixture into the egg mixture while continuously whisking—this process is called tempering and prevents the eggs from curdling. Once combined, strain the mixture through a fine-mesh sieve to achieve a silky smooth custard texture, ensuring your Christmas Eve Cinnamon-Vanilla Custard Pie has that velvety finish with no lumps.

Step 5: Fill & Bake
Lower your oven temperature to 325°F (160°C). Carefully pour the custard mixture into the pre-baked pie crust. Bake in the preheated oven for 35–40 minutes until the edges are set but the center still jiggles slightly—it should look slightly firm yet creamy. This baking ritual brings your Christmas Eve Cinnamon-Vanilla Custard Pie to life.

Step 6: Cool & Chill
Once out of the oven, allow the pie to cool to room temperature for about an hour. Afterward, refrigerate it for at least 2 hours to let the flavors meld and the custard set properly. Once chilled, your Christmas Eve Cinnamon-Vanilla Custard Pie is ready to be sliced and served, perfect for those cozy holiday gatherings.

How to Store and Freeze Christmas Eve Cinnamon-Vanilla Custard Pie

  • Fridge: Store your pie covered in plastic wrap or an airtight container for up to 3 days. This keeps the custard fresh and creamy for your holiday gatherings.
  • Freezer: If you wish to enjoy it later, wrap the pie tightly in foil or a freezer-safe container; it can be frozen for up to 1 month.
  • Thawing: For optimal taste and texture, thaw your Christmas Eve Cinnamon-Vanilla Custard Pie overnight in the refrigerator before serving.
  • Reheating: If you prefer a warm slice, gently warm in a preheated oven at 250°F (120°C) for about 10-15 minutes until just heated through.

Christmas Eve Cinnamon-Vanilla Custard Pie Variations

Feel free to make this cozy classic your own with these delightful twists and swaps!

  • Graham Cracker Crust: Swap the traditional pie crust for a graham cracker crust for a sweet, crunchy contrast.
  • Bourbon Infusion: Add a tablespoon of bourbon for a rich depth that complements the vanilla and cinnamon beautifully.
  • Mini Pies: Use tart pans to create adorable mini custard pies, perfect for individual servings at your holiday celebration.
  • Nutmeg Touch: Introduce a pinch of ground nutmeg to the custard for a subtle warmth alongside the comforting cinnamon flavors.
  • Dairy-Free Delight: Substitute dairy with almond milk and coconut cream for a vegan-friendly custard that remains rich and enjoyable.
  • Chocolate Drizzle: Melt some dark chocolate and drizzle it over the pie before serving for a decadent flair that chocolate lovers will adore.
  • Spicy Extra: Enhance the warmth with a dash of cayenne pepper in the custard for a surprising kick that balances the sweet flavors.
  • Fruit Garnish: Top the cooled pie with fresh berries or a citrusy fruit salad for a refreshing complement to the creamy custard base.

For more delightful holiday recipes, you might enjoy checking out my Watermelon Popsicles Blissful for a lighter treat or a savory option like Spinach Pie Deliciously. Happy baking!

What to Serve with Christmas Eve Cinnamon-Vanilla Custard Pie

Indulge your senses and elevate your holiday gathering with delightful pairings that bring out the best in this silky dessert.

  • Whipped Cream: A dollop of freshly whipped cream adds lightness and a sweet contrast, enhancing the rich custard.

  • Sugared Cranberries: These festive, tart bites offer a pop of color and a refreshing crunch, perfectly balancing the pie's sweetness.

  • Cinnamon Sugar Cookies: The warm, buttery flavors of these cookies echo the pie's spice profile, making for a delightful dessert duo.

  • Hot Cocoa or Spiced Cider: Cozy drinks like rich hot cocoa or infused spiced cider offer comforting warmth that pairs beautifully with the custard.

  • Gingerbread Cookies: Their spiciness complements the cinnamon in the custard, creating a joyous holiday flavor harmony reminiscent of childhood.

  • Mini Fruit Tarts: Fresh fruits in sweet tarts provide a vibrant, juicy contrast to the creamy custard pie, adding brightness to your dessert table.

  • Vanilla Ice Cream: A scoop of classic vanilla ice cream creates a luscious combination when drizzled over the warm custard slice, enhancing the dessert experience.

  • Eggnog: This creamy, spiced drink is a classic holiday favorite and makes an indulgent pairing alongside the custard pie, enhancing those warm festive feelings.

  • Pecan Pie Bites: These bite-sized treats bring nutty sweetness and texture, making each bite of custard pie even more delightful.

  • Apple Crisp: A warm, cinnamon-spiced apple crisp enriches your holiday spread and contrasts beautifully with the smooth custard filling.

Expert Tips for Christmas Eve Cinnamon-Vanilla Custard Pie

  • Fresh Ingredients: Use fresh, room-temperature eggs and dairy for the best texture and flavor. Cold eggs can cause the custard to curdle.

  • Blind-Baking: Always blind-bake your pie crust to avoid a soggy bottom. This extra step ensures that your Christmas Eve Cinnamon-Vanilla Custard Pie has the perfect crispness.

  • Temperature Checks: Keep an eye on the baking process. The pie is ready when the edges are set, and the center jiggles slightly—don’t overbake to maintain a creamy custard texture.

  • Strain for Smoothness: Straining the custard mixture after tempering removes any lumps and results in a silky custard that glides effortlessly onto the palate.

  • Let It Chill: Refrigerate the pie for at least 2 hours before slicing. This resting time enhances the flavors and helps the custard set perfectly for serving.

Make Ahead Options

Preparing the Christmas Eve Cinnamon-Vanilla Custard Pie ahead of time is a wonderful way to save yourself from last-minute holiday stress. You can make the pie crust up to 3 days in advance; just blind-bake it, then let it cool completely before wrapping it in plastic wrap and refrigerating. The custard filling can be prepared up to 24 hours ahead; simply combine the ingredients, strain, and then refrigerate until you’re ready to pour it into the crust. When you’re set to serve, gently reheat the pie in a low oven (around 300°F/150°C) for 10-15 minutes to revitalize the flavors and enjoy a silky-smooth dessert that’s just as delicious as if made fresh!

Christmas Eve Cinnamon-Vanilla Custard Pie Recipe FAQs

What should I look for when selecting eggs for my custard pie?
Absolutely! For the best results, use fresh, room-temperature eggs. They play a crucial role in making the custard smooth and creamy. Look for eggs with clean, uncracked shells and a “sell by” date that is as fresh as possible.

How can I store my Christmas Eve Cinnamon-Vanilla Custard Pie?
You can store your pie covered in plastic wrap or an airtight container in the refrigerator for up to 3 days. This keeps it fresh and maintains the lovely creamy texture. I often suggest letting it sit for a bit at room temperature before serving to rediscover its delightful flavors!

Can I freeze the custard pie for later enjoyment?
Yes! To freeze your Christmas Eve Cinnamon-Vanilla Custard Pie, wrap it tightly in aluminum foil or place it in a freezer-safe container. It can be frozen for up to 1 month. When you’re ready to enjoy it, thaw the pie overnight in the refrigerator for the best results.

What’s the best way to troubleshoot if my custard pie doesn't set?
If your pie hasn’t set properly, don’t fret! It can still be salvaged. Gently reheat the custard in a saucepan over low heat, whisking continuously until it thickens. Then, re-pour the mixture into the crust and bake again at 325°F (160°C) until the edges are set. This step should help firm it up.

Are there any dietary considerations for my guests regarding this pie?
It's wise to consider dietary restrictions! The recipe contains dairy and eggs, which may not be suitable for those with lactose intolerance or egg allergies. You can experiment with dairy-free milk alternatives and thickening agents like cornstarch to cater to different needs, making this Christmas Eve Cinnamon-Vanilla Custard Pie more inclusive.

How long can I keep my Christmas Eve Cinnamon-Vanilla Custard Pie in the freezer?
Your pie can remain in the freezer for up to 1 month without sacrificing flavor. For the best taste, ensure it's wrapped securely to prevent freezer burn, and thaw it overnight in the refrigerator before serving. A bit of patience often leads to delicious rewards!

Christmas Eve Cinnamon-Vanilla Custard Pie

Christmas Eve Cinnamon-Vanilla Custard Pie for Cozy Celebrations

This Christmas Eve Cinnamon-Vanilla Custard Pie captures nostalgic holiday moments with its velvety custard and warm spices.
Print Recipe Pin Recipe
Prep Time 30 minutes mins
Cook Time 1 hour hr
Cooling Time 2 hours hrs
Total Time 3 hours hrs 30 minutes mins
Servings: 8 slices
Course: Dessert
Cuisine: American
Calories: 290
Ingredients Equipment Method Nutrition Notes

Ingredients
  

For the Crust
  • 1 whole Pie Crust homemade or store-bought, blind-baked
For the Custard
  • 4 large Eggs fresh and room-temperature
  • 3/4 cup Granulated Sugar adjust to taste
  • 1 cup Whole Milk can substitute with half-and-half
  • 1/2 cup Heavy Cream for ultra-smooth texture
  • 1 teaspoon Ground Cinnamon or steep a cinnamon stick
  • 1 teaspoon Pure Vanilla Extract vanilla beans can be used
  • 1 pinch Salt
Optional Ingredients
  • 1/4 teaspoon Ground Nutmeg use sparingly
  • 1 tablespoon Orange Zest for a citrusy note

Equipment

  • 9-inch pie dish
  • Medium saucepan
  • large mixing bowl
  • Whisk
  • Fine-mesh sieve
  • Parchment Paper
  • pie weights or dried beans

Method
 

Step-by-Step Instructions
  1. Preheat your oven to 375°F (190°C). Roll out your pie crust and place it in a 9-inch pie dish. Line with parchment and fill with weights. Bake for 15 minutes, then remove weights and parchment, baking for an additional 5 minutes until golden. Cool completely.
  2. In a medium saucepan, combine the whole milk, heavy cream, ground cinnamon, and pure vanilla extract. Warm until steaming, without boiling. If using a cinnamon stick or vanilla bean, steep for 10 minutes.
  3. In a large mixing bowl, crack the eggs and add granulated sugar and a pinch of salt. Whisk until pale and smooth, about 2-3 minutes.
  4. Slowly pour the hot milk mixture into the egg mixture while whisking continuously. Strain the mixture through a fine-mesh sieve to ensure a smooth custard.
  5. Lower the oven temperature to 325°F (160°C). Pour the custard mixture into the pre-baked crust and bake for 35–40 minutes until the edges are set but the center jiggles slightly.
  6. Allow the pie to cool to room temperature for about an hour, then refrigerate for at least 2 hours before serving.

Nutrition

Serving: 1sliceCalories: 290kcalCarbohydrates: 30gProtein: 4gFat: 17gSaturated Fat: 10gPolyunsaturated Fat: 0.5gMonounsaturated Fat: 5gCholesterol: 110mgSodium: 150mgPotassium: 200mgSugar: 20gVitamin A: 500IUCalcium: 150mgIron: 1mg

Notes

Use fresh ingredients for best results. Blind-baking is essential for texture. Refrigeration improves flavor and texture.

Tried this recipe?

Let us know how it was!

Gingerbread Latte Mousse Domes That Wow Your Holiday Guests

December 16, 2025 by Grace Snow Leave a Comment

As the first winter flakes begin to fall, the warm spice of gingerbread fills the air, conjuring memories of cozy gatherings and festive cheer. I’m thrilled to share my take on this season's irresistible dessert: Gingerbread Latte Mousse Domes. These gourmet delights seamlessly blend the cozy flavors of gingerbread with a smooth hint of espresso, resembling your favorite café treat. Not only do they look stunning with their glossy mirror glaze, but they’re also surprisingly easy to make, ensuring you impress your guests without spending all day in the kitchen. Perfect for holiday dinners or just a special treat for yourself, these mousse domes are a delightful way to embrace the spirit of the season. Curious about how to create this elegant dessert? Let’s dive in!

Why Are These Mousse Domes Unique?

Gourmet Appeal: These Gingerbread Latte Mousse Domes are a show-stopping dessert that combines the cozy essence of gingerbread with a luxurious mousse, perfect for impressing guests.
Easy to Make: Surprisingly simple, this recipe is accessible to both novice bakers and seasoned chefs looking to elevate their dessert game.
Festive Flavors: Infused with spices like cinnamon and nutmeg, each bite brings warmth and nostalgia, making them ideal for Christmas gatherings.
Visually Stunning: The glossy mirror glaze provides a beautiful finish that captures attention, ensuring your dessert stands out on any holiday table.
Versatile Options: Feel free to experiment with flavor variations or different coatings to personalize your mousse domes, catering to various tastes.
Make-Ahead Friendly: Prepare these sweet treats in advance and store them in the freezer, allowing you more time to enjoy the festivities with friends and family. Whether you're hosting a holiday dinner or sharing a cozy evening at home, these mousse domes will surely delight your palate and enhance your celebrations!

Gingerbread Latte Mousse Domes Ingredients

For the Mousse

  • Espresso – Provides a robust flavor and enhances the ginger and spices; use strong brewed coffee if espresso is unavailable.
  • Brown Sugar – Contributes sweetness and depth to the mousse base.
  • White Chocolate – Adds creaminess and richness to the mousse texture.
  • Cinnamon, Cloves, Nutmeg – Spices that impart warmth and a holiday aroma, perfectly complementing your gingerbread latte mousse domes.
  • Gelatin – Stabilizes the mousse, ensuring it holds shape when frozen and glazed; bloom it in warm liquid before mixing.
  • Mascarpone Cheese – Adds smoothness and body without weighing down the mousse; substitute with cream cheese for a tangier result.
  • Molasses – Provides additional sweetness and depth, pivotal for that authentic gingerbread flavor.
  • Egg Yolk – Binds the mousse, keeping it tender yet firm.
  • Ginger – Delivers the hallmark flavor of gingerbread, perfect for this festive treat.

For the Cookie Base

  • Sugar, Flour, Spices – Create a sturdy foundation for the mousse dome, ensuring a perfect contrast between the crispy base and airy mousse.

Step‑by‑Step Instructions for Gingerbread Latte Mousse Domes

Step 1: Prepare Cookie Base
In a large mixing bowl, combine flour, brown sugar, ground ginger, cinnamon, cloves, and nutmeg to create the gingerbread cookie dough. Add molasses and egg, mixing until a smooth dough forms. Roll the dough out on a lightly floured surface to about ¼ inch thick. Cut out rounds slightly larger than your silicone molds. This will serve as the base for the Gingerbread Latte Mousse Domes.

Step 2: Bake Cookies
Preheat your oven to 350°F (175°C). Place the cookie rounds on a parchment-lined baking sheet, ensuring they’re evenly spaced. Bake for 8–10 minutes or until firm to the touch. Let the cookies cool completely on the baking sheet. This step is crucial to ensure the cookies retain their shape and have the perfect texture as the base of your mousse domes.

Step 3: Bloom Gelatin
In a small bowl, mix espresso with brown sugar, warming it gently until the sugar dissolves. Sprinkle the gelatin over the warm espresso mixture and let it sit for about 5 minutes to bloom. This process activates the gelatin, allowing it to properly gel when added to your Gingerbread Latte Mousse Domes later, ensuring a stable structure.

Step 4: Prepare Mousse
Melt the white chocolate in a heatproof bowl over simmering water, stirring until smooth. Remove from heat and pour in the bloomed gelatin and espresso mixture, combining thoroughly. Allow the mixture to cool slightly, but not set. This rich blend will form the base of your mousse, bringing together the flavors of gingerbread and espresso beautifully.

Step 5: Whip Cream and Mascarpone
In a large mixing bowl, whip the cream with an electric mixer until soft peaks form. In another bowl, beat the mascarpone cheese until smooth. Gently fold the whipped cream into the mascarpone until fully combined, being careful not to deflate the mixture. This creates a light and airy mousse, crucial for the overall texture of the Gingerbread Latte Mousse Domes.

Step 6: Combine Mousse Ingredients
Slowly fold the cooled espresso and white chocolate mixture into the whipped cream and mascarpone blend. Use a spatula to gently incorporate the ingredients until everything is well mixed and smooth. Take care not to overmix, as you want to maintain the light, fluffy texture that makes your mousse so delightful.

Step 7: Assemble Domes
Spoon the mousse mixture into your silicone molds, filling each one about halfway. Place the baked cookie rounds on top of the mousse, pressing them down gently. Tap the molds lightly against the counter to release any air bubbles. Freeze the molds for at least 4 hours or overnight, allowing the Gingerbread Latte Mousse Domes to firm up entirely.

Step 8: Glaze Preparation
To prepare the mirror glaze, heat it gently to 90°F (32°C), stirring until smooth and lump-free. Once the mousse domes are completely frozen, carefully invert the molds to release the domes onto a wire rack. Pour the warm glaze evenly over the domes, ensuring an even coat. This glossy finish will enhance the festive look of your Gingerbread Latte Mousse Domes as they set.

What to Serve with Gingerbread Latte Mousse Domes

The Gingerbread Latte Mousse Domes create a divine experience, whether celebrating the holidays with loved ones or treating yourself to an elegant dessert at home.

  • Creamy Mashed Potatoes: The buttery richness and smooth texture create a cozy contrast that balances the sweetness of the mousse.
  • Spiced Winter Salad: Featuring candied pecans, apple slices, and a light vinaigrette, this salad adds freshness and a crunchy element to the meal.
  • Mulled Wine: A fragrant blend of spices and fruity notes is a perfect pairing, complementing the warm gingerbread flavors beautifully.
  • Chocolate Fondue: The indulgent and rich experience of dipping fruits or marshmallows enhances the festive atmosphere of your dessert spread.
  • Pumpkin Bread: This moist, spiced loaf not only ties in seasonal flavors but also provides a satisfying texture alongside the delicate mousse.
  • Cinnamon Hot Chocolate: Rich and comforting, sipping this beverage echoes the warm spices in the mousse, delightful for cold winter evenings.
  • Candied Ginger Cookies: Offering a similar flavor profile, these cookies create a harmonious tastescape, perfect for sharing alongside the mousse domes.

Gingerbread Latte Mousse Domes Variations

Feel free to get creative with your Gingerbread Latte Mousse Domes! Explore these delightful twists that will take your dessert to the next level.

  • Dairy-Free: Swap mascarpone and cream with coconut cream for a luscious, dairy-free mousse option that’s still rich and satisfying.

  • Chocolate Lovers: Substitute half of the white chocolate with dark chocolate for a deeper flavor, blending perfectly with the spices in the mousse.

  • Nutty Crunch: Add crushed pecans or walnuts to the cookie base for extra crunch and a delicious nutty flavor that complements the gingerbread.

  • Spiced Rum: Incorporate a splash of spiced rum into the mousse for an adult twist that pairs beautifully with the ginger and coffee flavors.

  • Fruity Fusion: Mix in some finely chopped dried cranberries or candied ginger for a fruity zing, adding a textural surprise alongside the creamy mousse.

  • Minty Fresh: Replace the spices with peppermint extract for a refreshing twist, making it feel even more festive during the holiday season.

  • Heat It Up: Add a pinch of cayenne pepper to the mousse for a subtle kick that gives a surprising depth to the sweet flavors of ginger and chocolate.

  • Mirror Glaze Variations: Instead of the classic glaze, try a chocolate or caramel glaze for a different flavor profile while retaining that glossy wow factor.

Enhancing your Gingerbread Latte Mousse Domes is simple and fun! For more ideas on desserts with a festive flair, check out my Joyful Holiday Dessert Ideas and Magical Seasonal Treats that are sure to impress your guests.

Storage Tips for Gingerbread Latte Mousse Domes

  • Fridge: Store the mousse domes in an airtight container for up to 3 days. Ensure they are properly covered to maintain their freshness and prevent absorption of other odors.
  • Freezer: The domes can be frozen for up to 1 week. Wrap each dome tightly in plastic wrap and store them in a freezer-safe container to preserve texture and flavor.
  • Thawing: When ready to serve, thaw the frozen domes in the refrigerator for several hours. Avoid thawing at room temperature to maintain stability and prevent melting.
  • Glazing: For best results, glaze the Gingerbread Latte Mousse Domes just before serving. This ensures a glossy finish and perfect texture that impresses your holiday guests.

Make Ahead Options

These Gingerbread Latte Mousse Domes are perfect for meal prep, allowing you to enjoy the flavors of the season without the last-minute stress! You can prepare the mousse mixture and freeze it in the molds for up to 3 days in advance. To do this, simply assemble the mousse in the molds, place the cookie bases on top, and freeze overnight. When you're ready to serve, glaze the domes with the mirror glaze and let them set before enjoying. To ensure the domes remain just as delicious, store them in an airtight container to prevent freezer burn. With this make-ahead method, you’ll have a stunning dessert ready to impress at your holiday gatherings!

Expert Tips for Gingerbread Latte Mousse Domes

  • Choose Quality Ingredients: Using high-quality espresso and chocolate elevates the flavor of your Gingerbread Latte Mousse Domes significantly.

  • Bloom Gelatin Correctly: Ensure the gelatin is completely bloomed in warm liquid before mixing. This step is crucial for a stable mousse that holds its shape.

  • Monitor Whipping: Avoid overwhipping the cream and mascarpone—stop once soft peaks form. This retains the light, airy texture vital for your mousse.

  • Freezing Precision: Make sure to freeze the domes fully before glazing. If they’re not firm enough, the glaze may run off instead of creating a beautiful coat.

  • Maintain Temperature: Heat the mirror glaze to the correct temperature (90°F). If too hot or cold, it could lead to a lumpy finish on your domes.

  • Storage Tips: Prepare and freeze your Gingerbread Latte Mousse Domes a day ahead to save time on the day of your gathering.

Gingerbread Latte Mousse Domes Recipe FAQs

How should I select ripe ginger for my mousse?
When picking ginger for your Gingerbread Latte Mousse Domes, choose root pieces that feel plump and firm. They should be smooth without any dark spots or wrinkles. If the ginger has a strong, fragrant aroma, it's a sign of freshness and potency!

What’s the best way to store leftover mousse domes?
Store any leftover mousse domes in an airtight container in the refrigerator for up to 3 days. To keep them fresh and flavorful, ensure they are well-covered to prevent them from absorbing odors from other foods.

Can I freeze the Gingerbread Latte Mousse Domes?
Absolutely! You can freeze these delightful mousse domes for up to 1 week. Wrap each dome tightly in plastic wrap to avoid freezer burn and place them in a freezer-safe container. When you’re ready to enjoy them, just thaw them in the refrigerator for several hours.

My mousse didn't set properly; what might have gone wrong?
If your mousse didn’t set, the most common reasons are under-bloomed gelatin or not incorporating the mousse components properly. Ensure you properly bloom the gelatin in warm espresso as instructed and gently fold all ingredients together without overmixing. If you’re still having trouble, try letting it chill longer in the fridge next time.

Are there any dietary substitutions for the ingredients?
Definitely! If you're looking for alternatives, you can swap mascarpone with cream cheese for a somewhat denser mousse but still delicious. For a dairy-free option, consider using coconut cream instead. Additionally, be wary of any allergens; ensure your guests have checked for allergies concerning ingredients like eggs, chocolate, or espresso.

How do I achieve a flawless mirror glaze?
To ensure a perfect mirror glaze, start by heating the glaze to a precise temperature of 90°F (32°C)—too hot, and it can separate; too cold, and it won’t flow properly. Once your mousse domes are frozen solid, carefully pour the warm glaze over them, allowing it to settle evenly. If any drips occur, gently wipe the bottom of the dome to keep everything tidy before serving!

Gingerbread Latte Mousse Domes

Gingerbread Latte Mousse Domes That Wow Your Holiday Guests

Indulge in Gingerbread Latte Mousse Domes, a cozy dessert blending gingerbread flavors with smooth espresso, perfect for holiday gatherings.
Print Recipe Pin Recipe
Prep Time 30 minutes mins
Cook Time 10 minutes mins
Freezing Time 4 hours hrs
Total Time 4 hours hrs 40 minutes mins
Servings: 8 domes
Course: Dessert
Cuisine: American
Calories: 350
Ingredients Equipment Method Nutrition Notes

Ingredients
  

For the Mousse
  • 1 cup Espresso Use strong brewed coffee if espresso is unavailable.
  • 1/2 cup Brown Sugar Contributes sweetness and depth.
  • 6 ounces White Chocolate Adds creaminess and richness.
  • 1 teaspoon Cinnamon Infuses warmth and aroma.
  • 1/2 teaspoon Cloves Adds seasonal spice.
  • 1/2 teaspoon Nutmeg Infuses warmth and aroma.
  • 1 tablespoon Gelatin Bloom in warm liquid before mixing.
  • 8 ounces Mascarpone Cheese Smoothness and body.
  • 1/4 cup Molasses Authentic gingerbread flavor.
  • 2 large Egg Yolk Binds the mousse.
  • 1 tablespoon Ginger Delivers the hallmark flavor.
For the Cookie Base
  • 1 cup Sugar Sweetens the cookie base.
  • 2 cups Flour Forms the base foundation.
  • 1 tablespoon Mixed Spices Combines for flavor.

Equipment

  • Silicone molds
  • Mixing bowls
  • Electric mixer
  • Parchment Paper
  • wire rack
  • Heatproof bowl

Method
 

Step-by-Step Instructions
  1. In a large mixing bowl, combine flour, brown sugar, ground ginger, cinnamon, cloves, and nutmeg to create the gingerbread cookie dough. Add molasses and egg, mixing until smooth.
  2. Preheat your oven to 350°F (175°C). Place cookie rounds on a baking sheet and bake for 8–10 minutes. Let cool completely.
  3. Mix espresso with brown sugar, warming gently until dissolved. Sprinkle gelatin over warm mixture and let sit for about 5 minutes to bloom.
  4. Melt white chocolate in a heatproof bowl. Remove from heat, pour in bloomed gelatin and espresso mixture. Cool slightly.
  5. Whip cream to soft peaks. Beat mascarpone cheese until smooth. Fold whipped cream into mascarpone until combined.
  6. Fold cooled espresso mixture into whipped cream and mascarpone blend. Mix until smooth.
  7. Spoon mousse into silicone molds, fill halfway. Place cookie rounds on top and freeze for at least 4 hours.
  8. Heat mirror glaze to 90°F (32°C). Invert molds to release domes and pour glaze over them.

Nutrition

Serving: 1domesCalories: 350kcalCarbohydrates: 40gProtein: 5gFat: 20gSaturated Fat: 12gPolyunsaturated Fat: 1gMonounsaturated Fat: 6gCholesterol: 50mgSodium: 150mgPotassium: 100mgFiber: 1gSugar: 25gVitamin A: 300IUCalcium: 80mgIron: 1mg

Notes

These mousse domes can be prepared a day in advance and stored in the freezer.

Tried this recipe?

Let us know how it was!

Honey Cinnamon Oatmeal Bread for Cozy Breakfasts at Home

December 13, 2025 by Grace Snow Leave a Comment

Waking up to the sun filtering through the kitchen window, I can already smell the sweet, warm notes of cinnamon swirling around my home. The best part? It’s coming from my Honey-Cinnamon Oatmeal Bread, a delightful recipe that pairs the heartiness of oats with the natural sweetness of honey. This bread isn’t just a breakfast option; it’s a comforting embrace after a long day, effortlessly blending quick prep with wholesome ingredients. Whether you're treating yourself to a quiet morning or hosting a gathering of family and friends, this loaf is sure to impress. Curious about how to create your own slice of morning bliss? Let’s dive into the recipe that transforms simple ingredients into something truly special!

Why is Honey-Cinnamon Oatmeal Bread a Must-Try?

Irresistible Aroma: Just imagine filling your home with the delightful scent of cinnamon and honey as this bread bakes—it's an experience you don’t want to miss.

Wholesome Ingredients: Packed with oats, this bread is not only delicious but also nutritious, making it a heartwarming option for breakfast or a snack.

Easy Preparation: With simple steps, you can whip this up without any fuss, perfect for busy mornings or spontaneous cravings.

Customizable Delight: Want to elevate your loaf? Feel free to add your favorite nuts or dried fruits for a personal touch!

Crowd-Pleasing Flavor: Whether enjoyed fresh out of the oven or toasted, every slice promises a comforting blend of sweet and hearty goodness that everyone will love.

Get ready to make mornings a little sweeter with this amazing recipe for Homemade Pumpkin Cinnamon Roll and elevate your breakfast game even further!

Honey-Cinnamon Oatmeal Bread Ingredients

For the Bread

  • Honey – Provides natural sweetness and moisture; substitute with maple syrup for a vegan option.
  • Cinnamon – Adds warmth and flavor, enhancing the sweetness of honey; swap for ground nutmeg for a different spice profile.
  • Rolled Oats – Offers texture and nutrition; quick oats can be used but may lead to a softer texture.
  • All-Purpose Flour – Provides structure; whole wheat flour can be substituted for a healthier option.
  • Baking Soda – Helps the bread rise, creating a lighter texture; ensure it’s fresh for the best outcome.
  • Salt – Enhances flavor; don’t skip it for optimal taste.
  • Milk (or alternative) – Adds moisture; almond milk makes it dairy-free.
  • Butter (or alternative) – Adds richness; replace with coconut oil for a dairy-free version.

Optional Toppings

  • Extra Oats – Sprinkle on top for added texture and visual appeal; they bring a rustic touch to your loaf.
  • Chopped Nuts – Pecans or walnuts can add a delightful crunch and nutty flavor; they’re a fantastic addition!
  • Dried Fruits – Raisins or dried cranberries can introduce a fruity burst; feel free to mix and match your favorites!

With these ingredients on hand, you're well on your way to crafting your very own Honey-Cinnamon Oatmeal Bread that’s sure to become a family favorite. Happy baking!

Step‑by‑Step Instructions for Honey-Cinnamon Oatmeal Bread

Step 1: Preheat the Oven
Start by preheating your oven to 350°F (175°C). While the oven warms up, prepare a loaf pan by greasing it lightly with butter or non-stick spray. This will ensure your Honey-Cinnamon Oatmeal Bread releases easily after baking, allowing you to enjoy that perfect loaf without any hassle.

Step 2: Mix Dry Ingredients
In a large mixing bowl, combine the rolled oats, all-purpose flour, baking soda, ground cinnamon, and salt. Whisk these ingredients together until they are evenly blended, creating a dry mixture that sets the foundation for your hearty bread. You’ll know it’s ready when the cinnamon is well distributed and you can see the vibrant colors of oats and flour.

Step 3: Mix Wet Ingredients
In a separate bowl, whisk together the honey, milk, and melted butter until the mixture is smooth and well combined. The honey will add that beautiful sweetness while the melted butter enhances richness, making your Honey-Cinnamon Oatmeal Bread irresistibly moist. Take a moment to breathe in the sweet aroma as it melds together.

Step 4: Combine Mixtures
Gradually pour the wet ingredients into the dry mixture, stirring gently with a wooden spoon or spatula. Continue to mix until just combined; be careful not to overmix, as this could lead to a dense loaf. You’ll know it’s ready when no dry flour is visible, and everything feels moist and cohesive.

Step 5: Shape the Dough
Transfer the batter into the prepared loaf pan, using a spatula to smooth the top for an even bake. If you’d like, sprinkle some extra oats on top for added texture and a rustic look. This will create an inviting crust as your Honey-Cinnamon Oatmeal Bread bakes to golden perfection.

Step 6: Bake the Bread
Place the loaf pan in the oven and bake for 35-40 minutes. Keep an eye on the bread, and know it’s ready when it turns golden brown and a toothpick inserted in the center comes out clean. The delightful scent of honey and cinnamon will fill your kitchen, signaling a cozy treat is on the way.

Step 7: Cool the Bread
Once baked, remove the Honey-Cinnamon Oatmeal Bread from the oven and allow it to cool in the pan for about 10 minutes. Then, carefully transfer it to a wire rack to cool completely for at least 30 minutes before slicing. This cooling period allows the bread to set, ensuring each slice holds together beautifully.

Honey Cinnamon Oatmeal Bread Variations

Feel free to sprinkle a little creativity into your Honey-Cinnamon Oatmeal Bread with these delightful variations!

  • Nuts: Add chopped pecans or walnuts to give your bread a satisfying crunch. The nuttiness enhances the overall flavor while providing extra texture.

  • Spices: Try a dash of nutmeg or ginger for a spiced twist. This subtle change can elevate the warmth of your bread to new heights, making every bite uniquely delightful.

  • Fruit: Incorporate raisins or dried cranberries for a fruity surprise. They add natural sweetness and beautiful little bursts of flavor throughout, making this loaf even more special.

  • Gluten-Free: Substitute gluten-free flour for a version that caters to dietary needs. This way, everyone can enjoy a slice of homemade goodness, no matter their restrictions!

  • Dairy-Free: Swap out regular milk for almond or oat milk and use coconut oil in place of butter. This keeps the bread light and suitable for those avoiding dairy.

  • Sweet Swirl: Add a cream cheese frosting swirl after baking for an indulgent treat. Imagine a sweet ribbon of cream cheese running through each slice, creating a luscious breakfast experience.

  • Savory Touch: Mix in cheddar cheese or herbs such as rosemary for an unexpected savory version. The mingling of sweet and savory can make delightful contrasts in each bite.

Enjoying a slice of this bread is a wonderful way to kick-start your day or share with loved ones, and if you’re looking for more cozy treats, consider trying this Homemade Pumpkin Cinnamon Roll for even more breakfast bliss!

Feel free to explore and find your favorite combination through these substitutions!

Make Ahead Options

These Honey-Cinnamon Oatmeal Bread loaves are perfect for meal prep enthusiasts! You can mix the dry ingredients (oats, flour, baking soda, cinnamon, and salt) up to 3 days in advance and store them in an airtight container to maintain freshness. Additionally, you can combine the wet ingredients (honey, milk, and melted butter) and refrigerate them for up to 24 hours. When you're ready to bake, simply bring the wet mixture to room temperature and combine with the dry ingredients, then proceed with shaping and baking as instructed. This way, you’ll have fresh, warm bread with minimal effort on busy mornings, making breakfast a breeze!

Expert Tips for Honey-Cinnamon Oatmeal Bread

  • Perfect Cooling Time: Allow the bread to cool for at least 30 minutes before slicing to prevent a gummy texture. Patience pays off!

  • Fresh Ingredients: Use fresh baking soda for the best rise. Stale ingredients can lead to a dense loaf that doesn’t quite meet your expectations.

  • Mix Gently: When combining the wet and dry ingredients, stir just until everything is moistened. Overmixing can toughen the bread, so be gentle!

  • Customize Wisely: Feel free to add nuts or fruits, but balance is key. Too many additions can alter the texture of your Honey-Cinnamon Oatmeal Bread.

  • Check Your Oven: Ovens can vary in temperature; consider using an oven thermometer to ensure accurate baking, leading to perfectly baked bread every time.

What to Serve with Honey-Cinnamon Oatmeal Bread

Delight in a complete breakfast experience that truly warms the soul and satisfies the palate.

  • Creamy Greek Yogurt: A dollop on the side adds tanginess and creaminess, enhancing the bread's sweetness in each delightful bite. Pairing yogurt with honey and oats brings a refreshing balance to your morning.

  • Fresh Berries: Strawberries, blueberries, or raspberries offer a burst of fruity freshness that perfectly complements the warm flavors of cinnamon and honey. Their natural sweetness adds a vibrant touch to your plate!

  • Scrambled Eggs: The richness of scrambled eggs creates a delicious contrast with the syrupy sweetness of the bread. When served alongside, they create a heartier breakfast that’s both satisfying and nourishing.

  • Honey Butter: Spread honey butter on warm slices for an extra layer of sweetness and a velvety texture. This sweet addition makes each bite feel indulgent and decadent.

  • Herbal Tea: Enjoy a soothing cup of chamomile or mint tea for a refreshing drink that offers a gentle, aromatic contrast to the bread's hearty flavors. The warmth of the tea perfectly complements your cozy breakfast.

  • Cinnamon-Spiced Apple Slices: Serve thinly sliced apples sprinkled with cinnamon as a crunchy, sweet accompaniment. Their crispness pairs beautifully with the soft texture of the bread, creating a delightful contrast.

Let these pairings enhance your Honey-Cinnamon Oatmeal Bread experience for a truly comforting breakfast spread!

How to Store and Freeze Honey-Cinnamon Oatmeal Bread

Room Temperature: Wrap the cooled loaf in plastic wrap or store it in an airtight container at room temperature for up to 2-3 days to keep it fresh and soft.

Fridge: If you prefer to extend the shelf life, refrigerate the bread in an airtight container for up to a week, though it may dry out slightly compared to room temperature storage.

Freezer: For long-term storage, slice the Honey-Cinnamon Oatmeal Bread and freeze the pieces in a freezer-safe bag for up to 3 months. Thaw overnight in the fridge or toast directly for a quick breakfast.

Reheating: To enjoy your bread warm, simply pop the slices in a toaster or reheat in the microwave for 10-15 seconds until warmed through.

Honey-Cinnamon Oatmeal Bread Recipe FAQs

What kind of oats should I use for Honey-Cinnamon Oatmeal Bread?
You should use rolled oats for this recipe as they provide the best texture and nutrition. Quick oats can be used in a pinch, but remember they will result in a softer loaf.

How should I store Honey-Cinnamon Oatmeal Bread?
Wrap the cooled loaf in plastic wrap or store it in an airtight container at room temperature for up to 2-3 days. For longer preservation, refrigerate in an airtight container for up to a week, although it may lose some moisture.

Can I freeze my Honey-Cinnamon Oatmeal Bread?
Absolutely! Slice your loaf and freeze individual slices in a freezer-safe bag for up to 3 months. When you’re ready to enjoy, thaw overnight in the fridge or toast directly from the freezer for a quick, delightful breakfast.

What if my Honey-Cinnamon Oatmeal Bread is too dense?
If you find your bread turns out too dense, it may be due to overmixing or using stale baking soda. For the best results, mix the wet and dry ingredients gently until just combined. Always ensure your baking soda is fresh for optimal rise. If necessary, consider expanding the baking time slightly and checking for doneness with a toothpick.

Are there any dietary considerations for Honey-Cinnamon Oatmeal Bread?
This recipe can easily accommodate dietary needs! For a vegan option, substitute honey with maple syrup and use dairy-free milk and coconut oil. Additionally, if you or your loved ones have nut allergies, be cautious with any added nuts or dried fruits. Always read labels to ensure safety.

How do I know when my bread is done baking?
Look for a golden-brown color and a toothpick inserted in the center should come out clean. The delightful aroma of honey and cinnamon will fill your kitchen during baking, acting as a lovely indicator that your Honey-Cinnamon Oatmeal Bread is nearly ready to be enjoyed!

Honey Cinnamon Oatmeal Bread

Honey Cinnamon Oatmeal Bread for Cozy Breakfasts at Home

This Honey Cinnamon Oatmeal Bread is a warm and inviting breakfast choice, combining the heartiness of oats with the sweetness of honey.
Print Recipe Pin Recipe
Prep Time 15 minutes mins
Cook Time 40 minutes mins
Cooling Time 40 minutes mins
Total Time 1 hour hr 35 minutes mins
Servings: 8 slices
Course: Breakfast
Cuisine: American
Calories: 180
Ingredients Equipment Method Nutrition Notes

Ingredients
  

For the Bread
  • 1 cup Honey Substitute with maple syrup for a vegan option.
  • 1 teaspoon Cinnamon Swap for ground nutmeg for a different spice profile.
  • 2 cups Rolled Oats Quick oats can be used but may lead to a softer texture.
  • 1.5 cups All-Purpose Flour Whole wheat flour can be substituted for a healthier option.
  • 1 teaspoon Baking Soda Ensure it's fresh for the best outcome.
  • 0.5 teaspoon Salt Don't skip it for optimal taste.
  • 1 cup Milk (or alternative) Almond milk makes it dairy-free.
  • 0.25 cup Butter (or alternative) Replace with coconut oil for a dairy-free version.
Optional Toppings
  • 0.5 cup Extra Oats Sprinkle on top for added texture.
  • 0.5 cup Chopped Nuts Pecans or walnuts can add crunch.
  • 0.5 cup Dried Fruits Raisins or dried cranberries can be used.

Equipment

  • Loaf pan
  • Mixing bowls
  • Whisk

Method
 

Step-by-Step Instructions for Honey-Cinnamon Oatmeal Bread
  1. Preheat your oven to 350°F (175°C) and grease a loaf pan with butter or non-stick spray.
  2. In a large mixing bowl, combine the rolled oats, all-purpose flour, baking soda, ground cinnamon, and salt, whisking until blended.
  3. In a separate bowl, whisk together the honey, milk, and melted butter until smooth and combined.
  4. Gradually pour the wet ingredients into the dry mixture, stirring gently until just combined.
  5. Transfer the batter into the prepared loaf pan and smooth the top. Sprinkle extra oats on top if desired.
  6. Bake for 35-40 minutes, until golden brown and a toothpick inserted comes out clean.
  7. Allow the bread to cool in the pan for about 10 minutes before transferring to a wire rack to cool completely for at least 30 minutes.

Nutrition

Serving: 1sliceCalories: 180kcalCarbohydrates: 30gProtein: 4gFat: 6gSaturated Fat: 3gMonounsaturated Fat: 1gCholesterol: 15mgSodium: 200mgPotassium: 150mgFiber: 2gSugar: 8gVitamin A: 200IUCalcium: 40mgIron: 1mg

Notes

Allow the bread to cool for at least 30 minutes before slicing to avoid a gummy texture. Use fresh baking soda for the best rise. Mix wet and dry ingredients gently.

Tried this recipe?

Let us know how it was!

Garlic Herb Braided Bread: Your New Favorite Homemade Treat

December 13, 2025 by Grace Snow Leave a Comment

If you ever found yourself enchanted by the sight of a beautifully braided loaf in a bakery window, then this Garlic Herb Braided Bread will transport you right there. It’s astonishing how something so visually stunning can also be so approachable for home bakers. Not only will this recipe fill your kitchen with savory, mouthwatering aromas, but its golden crust and fluffy interior are a guaranteed crowd-pleaser at any gathering. Perfect for family dinners or cozy evenings, this bread effortlessly complements everything from hearty soups to fresh salads. Plus, it's beginner-friendly, meaning anyone can master this artisan classic with ease. So, are you ready to indulge in the warm comfort of freshly baked bread? Let’s dive in!

Why Is This Bread So Irresistible?

Aromatic Experience: The moment you bake this bread, your kitchen will fill with the irresistible scent of garlic and herbs, creating a warm and inviting atmosphere.

Artisan Quality: With its beautifully braided appearance, this Garlic Herb Braided Bread looks gourmet, making it perfect for special occasions or a simple weeknight dinner.

Beginner-Friendly: You don't need to be a pro baker to achieve this artisanal delight! The straightforward method and easy-to-find ingredients make it accessible for all skill levels.

Versatile Pairing: This bread works fabulously with various dishes! Serve it warm with your favorite butter, or pair it with dishes like Crockpot Potato Broccoli Cheddar Soup for a comforting meal.

Customizable: Feel free to unleash your creativity! Experiment by adding spices, herbs, or even cheese to make it uniquely yours.

Garlic Herb Braided Bread Ingredients

For the Dough

  • 3 cups all-purpose or bread flour – Provides structure; using bread flour yields a chewier texture.
  • 2¼ tsp active dry yeast – Acts as a leavening agent; instant yeast can reduce rise time by 15 minutes.
  • 1 cup warm water (110°F) – Activates the yeast and hydrates the dough.
  • 2 tbsp olive oil – Adds flavor and moisture; consider using garlic butter for a richer taste.
  • 1 tsp salt – Enhances the overall flavor.
  • 1 tbsp sugar – Feeds the yeast for a better rise.
  • 3–4 cloves garlic, minced or roasted – Infuses the bread with bold garlic flavor.
  • 1 tbsp dried mixed herbs (oregano, thyme, basil) – Offers aromatic qualities; substitute with 2 tbsp fresh herbs for a fresher taste.
  • ½ cup grated parmesan cheese – Contributes savory depth.

For Brushing & Topping

  • 1 tbsp melted butter – Adds shine and enhances crust flavor.

Optional Add-ins

  • ¼ tsp red pepper flakes – Introduces a delightful hint of heat.
  • 2 tbsp shredded mozzarella – For those who desire an extra cheesy indulgence.
  • 1 tbsp fresh parsley for garnish – Adds a pop of color for visual appeal.

With this Garlic Herb Braided Bread, you'll create a culinary masterpiece that not only delights the senses but also beckons for customization to suit your taste! Happy baking!

Step‑by‑Step Instructions for Garlic Herb Braided Bread

Step 1: Activate the Yeast
In a large mixing bowl, combine 1 cup of warm water (110°F) with 1 tablespoon of sugar, stirring gently. Sprinkle 2¼ teaspoons of active dry yeast over the top and let it sit undisturbed for 5 to 10 minutes until it's foamy and bubbly, indicating the yeast is alive and ready for your Garlic Herb Braided Bread.

Step 2: Mix the Dough
Once the yeast is activated, stir in 2 tablespoons of olive oil, minced garlic, dried herbs, 1 teaspoon of salt, and 2½ cups of flour. Mix until a shaggy dough forms, adding more flour gradually until the dough is neither too sticky nor too dry, creating the perfect base for your braided bread.

Step 3: Knead the Dough
Transfer the shaggy dough to a floured surface and knead it for about 6 to 8 minutes. During this time, gradually incorporate ½ cup of grated parmesan cheese until it's well distributed, and the dough becomes smooth and elastic. This step is vital for developing the bread's texture, ensuring that your Garlic Herb Braided Bread has that delightful chew.

Step 4: First Rise
Place the kneaded dough into a greased bowl, covering it with a damp cloth or plastic wrap. Set it in a warm, draft-free area for about 1 hour, or until the dough has doubled in size. This rising process allows the yeast to work its magic and gives your bread that light, airy structure.

Step 5: Shape the Ropes
After the dough has risen, gently punch it down to release any excess air. Divide it into three equal pieces, then roll each piece into a long rope, 14 to 16 inches in length. With these ropes prepared, you're ready to create the beautiful braid that will make your Garlic Herb Braided Bread both stunning and appetizing.

Step 6: Braid the Bread
Lay the three ropes side by side and pinch the ends together. Braid the ropes together tightly, tucking the ends underneath the loaf. Ensure the braid is uniform in thickness, as this will affect the final appearance and evenness of baking. Now, your braided loaf is taking shape and is sure to impress.

Step 7: Second Rise
Place your braided bread on a parchment-lined baking sheet, cover it again with a cloth, and let it rise for another 30 to 40 minutes in a warm spot. This second rise allows the dough to puff up even more, giving it a light and airy texture that will become irresistible when baked.

Step 8: Preheat and Prepare for Baking
While your Garlic Herb Braided Bread undergoes its second rise, preheat the oven to 375°F (190°C). Once the dough has completed its rise, gently brush the top with melted butter for a golden, glossy finish, and sprinkle any optional toppings, like red pepper flakes or shredded mozzarella, to elevate the flavors.

Step 9: Bake the Bread
Carefully place the baking sheet in the preheated oven and let your braided bread bake for 25 to 30 minutes. It's ready when it turns a beautiful golden brown and emits an enticing aroma. To check doneness, tap the bottom; if it sounds hollow, it’s perfect!

Step 10: Cool and Serve
Remove the Garlic Herb Braided Bread from the oven and let it cool on a wire rack for a few minutes before slicing. This will enhance its flavor and texture. As you slice into the warm loaf, you'll appreciate the beautiful braided pattern and delectable garlic and herb aroma calling out to you.

How to Store and Freeze Garlic Herb Braided Bread

Room Temperature: Keep the bread in an airtight container for up to 3 days to maintain freshness and texture.

Freezer: To freeze, wrap the cooled bread tightly in plastic wrap, then place it in a freezer bag. It can be stored for up to 3 months.

Reheating: For the best results, thaw in the fridge overnight, then reheat wrapped in foil at 350°F (175°C) for about 10-15 minutes before serving.

Slicing Tips: Slice the bread before freezing; this makes it convenient to reheat individual pieces when craving your delicious Garlic Herb Braided Bread.

Garlic Herb Braided Bread Variations

Feel free to explore your creativity and tailor this recipe to your personal taste for a delicious twist!

  • Gluten-Free: Substitute all-purpose flour with gluten-free flour blend for a wheat-free version that maintains the delicious flavors.
  • Cheesy Delight: Add ½ cup of shredded cheddar or mozzarella to the dough for a gooey, cheesy interior that complements the garlic perfectly.
  • Herb Twists: Try swapping in fresh rosemary or sage instead of dried herbs for a fragrant and seasonal variation that brightens the flavor.
  • Spice It Up: Mix in ¼ teaspoon of cayenne pepper or chili flakes to the dough for a delightful kick that warms you up.

The beauty of baking is that you can make it your own! For a stunning presentation, consider making individual braids or rolls instead of a single loaf. Plus, this Garlic Herb Braided Bread is delicious alongside hearty dishes like Crockpot Potato Broccoli Cheddar Soup or served with a slice of Honey Garlic Chicken. Enjoy experimenting!

Make Ahead Options

These Garlic Herb Braided Bread are perfect for busy home cooks looking to save time! You can prepare the dough up to 24 hours in advance by following steps 1 to 4, then cover it with plastic wrap and refrigerate. When you're ready to bake, simply remove the dough from the fridge, let it rest at room temperature for about 30 minutes, shape it, and proceed with the second rise (step 6 and 7). Keeping the dough chilled helps maintain its quality and flavor, ensuring your bread will be just as delicious as the day it was made. With this plan in place, you'll have freshly baked bread ready to impress with minimal effort!

Tips for the Best Garlic Herb Braided Bread

  • Pick the Right Flour: Use bread flour for extra chewiness. If you prefer a lighter texture, all-purpose flour works beautifully, too.

  • Watch the Yeast: Ensure your water is warm (about 110°F) but not hot, as overheating can kill the yeast. The yeast needs to foam to show it's alive!

  • Don’t Rush the Rise: Allow the dough plenty of time to rise until doubled in size. Rushing this step can yield a denser bread than desired.

  • Braiding Basics: Start with a 3-strand braid for ease; as your confidence builds, try more strands for a beautiful, intricate design in your garlic herb braided bread.

  • Flavor Boost: Add fresh herbs, cheese, or spices to customize the flavor. It’s easy to make this artisan classic uniquely yours!

  • Proper Cooling: Always cool your bread on a wire rack to prevent sogginess and maintain that perfect crispy crust.

What to Serve with Garlic Herb Braided Bread

Warm, inviting aromas and a golden crust make this bread the perfect centerpiece for a comforting meal.

  • Creamy Tomato Soup: The acidity and creaminess of tomato soup beautifully balance the savory flavors of the bread, creating a satisfying combination.

  • Garden Salad: A fresh salad featuring mixed greens, cherry tomatoes, and a zesty vinaigrette brightens the meal and adds crunch alongside the bread.

  • Roasted Vegetables: The earthy sweetness of roasted carrots and Brussels sprouts complements the herb-infused bread, adding depth to your dinner table.

  • Cheesy Garlic Dip: A warm, gooey cheese dip paired with slices of your braided bread turns every bite into an indulgent treat; perfect for gatherings!

  • Spaghetti Aglio e Olio: The simple garlic and olive oil pasta elevates the bread’s flavors while satisfying carb cravings in the most delightful way.

  • Grilled Chicken Breast: Juicy, seasoned chicken will pair wonderfully with the bread’s herbs and garlic, ensuring every bite is full of flavor.

  • Chardonnay or Chianti: A glass of chilled Chardonnay or a smooth Chianti not only complements the bread but adds an elegant touch to your dining experience.

  • Chocolate Chip Cookies: For a sweet finish, serve warm chocolate chip cookies as a delightful dessert that flows seamlessly from the bread's warm savoriness.

Garlic Herb Braided Bread Recipe FAQs

What is the best way to choose garlic for this recipe?
Absolutely! Look for garlic bulbs that are firm, with tight, dry skins and no dark spots. When using fresh garlic, choose cloves that are plump and free from any soft or sprouting signs. This ensures you’ll have the robust flavor for your Garlic Herb Braided Bread!

How should I store my Garlic Herb Braided Bread?
To keep your Garlic Herb Braided Bread fresh, store it in an airtight container at room temperature for up to 3 days. If you live in a humid environment, it’s best to wrap it in wax paper or a cloth before placing it in the container to help absorb moisture.

Can I freeze Garlic Herb Braided Bread, and how?
Yes, you can freeze it! First, let the bread cool completely after baking. Then, wrap it tightly in plastic wrap and place it in a freezer-safe bag. It can be stored for up to 3 months. For serving, thaw overnight in the fridge and reheat at 350°F (175°C) wrapped in foil for about 10-15 minutes for the best texture.

What should I do if my dough isn’t rising?
If your dough isn’t rising, ensure that your yeast is fresh. You can perform a quick test by adding it to warm water with sugar—if it doesn't foam after 10 minutes, it may be too old. Additionally, make sure your dough is placed in a warm, draft-free location, as drafts can impact rising. If it’s still cool in your kitchen, preheat your oven for a minute or two, turn it off, and let the dough rise there instead!

Is this recipe suitable for those with gluten sensitivity?
Definitely! You can make this Garlic Herb Braided Bread gluten-free by substituting the all-purpose or bread flour with a 1:1 gluten-free baking mix. Make sure the blend contains xanthan gum, which mimics the elasticity of gluten. Keep in mind that the texture may vary slightly, but it’s equally delightful!

Are there any allergy considerations I should keep in mind?
While this recipe is generally safe for many, those with dairy allergies should opt for vegan cheese or leave out the parmesan. Additionally, for nut allergies, double-check any pre-packaged ingredients you use. As always, it’s good to consult with those you’re serving if there are any dietary restrictions!

Garlic Herb Braided Bread

Garlic Herb Braided Bread

Discover the delight of baking Garlic Herb Braided Bread, a visually stunning and flavorful treat that's perfect for any occasion.
Print Recipe Pin Recipe
Prep Time 1 hour hr
Cook Time 30 minutes mins
Rising Time 40 minutes mins
Total Time 2 hours hrs 10 minutes mins
Servings: 8 slices
Course: Uncategorized
Cuisine: Baking
Calories: 150
Ingredients Equipment Method Nutrition Notes

Ingredients
  

For the Dough
  • 3 cups all-purpose or bread flour using bread flour yields a chewier texture.
  • 2.25 tsp active dry yeast instant yeast can reduce rise time by 15 minutes.
  • 1 cup warm water (110°F) activates the yeast and hydrates the dough.
  • 2 tbsp olive oil consider using garlic butter for a richer taste.
  • 1 tsp salt enhances the overall flavor.
  • 1 tbsp sugar feeds the yeast for a better rise.
  • 3–4 cloves garlic, minced or roasted infuses the bread with bold garlic flavor.
  • 1 tbsp dried mixed herbs (oregano, thyme, basil) substitute with 2 tbsp fresh herbs for a fresher taste.
  • 0.5 cup grated parmesan cheese contributes savory depth.
For Brushing & Topping
  • 1 tbsp melted butter adds shine and enhances crust flavor.
Optional Add-ins
  • 0.25 tsp red pepper flakes introduces a delightful hint of heat.
  • 2 tbsp shredded mozzarella for those who desire an extra cheesy indulgence.
  • 1 tbsp fresh parsley for garnish adds a pop of color for visual appeal.

Equipment

  • Mixing Bowl
  • Baking Sheet
  • Floured surface
  • wire rack

Method
 

Step-by-Step Instructions
  1. In a large mixing bowl, combine 1 cup of warm water (110°F) with 1 tablespoon of sugar, stirring gently. Sprinkle 2¼ teaspoons of active dry yeast over the top and let it sit undisturbed for 5 to 10 minutes until it's foamy and bubbly, indicating the yeast is alive and ready for your Garlic Herb Braided Bread.
  2. Once the yeast is activated, stir in 2 tablespoons of olive oil, minced garlic, dried herbs, 1 teaspoon of salt, and 2½ cups of flour. Mix until a shaggy dough forms, adding more flour gradually until the dough is neither too sticky nor too dry.
  3. Transfer the shaggy dough to a floured surface and knead it for about 6 to 8 minutes, incorporating ½ cup of grated parmesan cheese until it's well distributed and the dough becomes smooth and elastic.
  4. Place the kneaded dough into a greased bowl, covering it with a damp cloth. Set it in a warm area for about 1 hour, or until doubled in size.
  5. Gently punch down the dough and divide it into three equal pieces, rolling each into a long rope, 14 to 16 inches in length.
  6. Lay the ropes side by side, pinch the ends together, and braid them tightly, tucking the ends underneath.
  7. Place the braided bread on a parchment-lined baking sheet, cover with a cloth, and let it rise for another 30 to 40 minutes.
  8. Preheat the oven to 375°F (190°C). Once the dough has completed its rise, brush the top with melted butter.
  9. Bake for 25 to 30 minutes, until golden brown and hollow-sounding when tapped.
  10. Cool on a wire rack for a few minutes before slicing.

Nutrition

Serving: 1sliceCalories: 150kcalCarbohydrates: 25gProtein: 4gFat: 4gSaturated Fat: 1gMonounsaturated Fat: 3gCholesterol: 2mgSodium: 200mgPotassium: 90mgFiber: 1gSugar: 1gVitamin A: 100IUCalcium: 50mgIron: 1mg

Notes

Feel free to experiment with different herbs and cheeses to customize your Garlic Herb Braided Bread to your liking.

Tried this recipe?

Let us know how it was!

Judy’s Homemade Brioche: Soft, Buttery Perfection Awaits

December 13, 2025 by Grace Snow Leave a Comment

As I kneaded the soft, buttery dough, I couldn’t help but feel transported to my favorite Parisian bakery with the inviting scent of freshly baked bread all around me. Judy’s Homemade Brioche is more than just a delightful twist on traditional bread; it's a culinary experience that transforms everyday meals into something extraordinary. This luxurious bread not only boasts a golden, glossy crust but also a tender crumb that makes it perfect for sandwiches or toasted with a simple pat of butter. While it may require a bit of patience, the joy of pulling a warm, aromatic loaf out of the oven is immeasurable. Who can resist that gorgeous golden hue inviting you to take a bite? Are you ready to create your own moment of baking bliss? Let's dive in!

Why Is Homemade Brioche a Must-Try?

Irresistibly Soft: The texture of Judy’s Homemade Brioche is like biting into a cloud—perfectly soft and fluffy.

Rich Buttery Flavor: With its generous amount of butter, this bread offers a depth of flavor that elevates any meal.

Versatile Use: Whether for sandwiches, breakfast toast, or indulgent French toast, you'll find countless ways to enjoy this delightful bread. Why not try it alongside a warm cup of Homemade Hot Chocolate for a true treat?

Impressive Presentation: The glossy golden crust not only looks stunning but also makes it a showstopper at any gathering, impressing friends and family alike.

Time Well Spent: While it may take a little time, the joy of homemade baking creates unforgettable moments in your kitchen. Trust me, the delicious aroma as it bakes is worth every second!

Judy’s Homemade Brioche Ingredients

For the Dough

  • Eggs – Provides moisture and richness; use room temperature eggs for better incorporation.
  • Unsalted Butter – Adds flavor and a tender texture; use two sticks (1 cup) at room temperature for easy mixing.
  • All-Purpose Flour – Supplies structure and bulk; a total of 4¾ cups required, divided throughout the process.
  • Active Dry Yeast – Ferments the dough, helping it rise; ensure yeast is fresh for best results.
  • Granulated Sugar – Enhances sweetness and browning; a quarter cup is used for flavor, plus additional for the glaze.
  • Salt – Balances sweetness and strengthens gluten structure; a key ingredient for flavor enhancement.
  • Warm Water – Activates the yeast; should be around 120°F (49°C) for optimal fermentation.

For the Glaze

  • Sugar Water – For brushing on finished brioche to achieve a shiny finish; combine 2 teaspoons of sugar with 1 tablespoon of water.

With these simple yet essential ingredients, you'll be well on your way to creating Judy’s Homemade Brioche, which promises to fill your kitchen with warmth and mouthwatering aromas. Let’s get started!

Step‑by‑Step Instructions for Judy’s Homemade Brioche

Step 1: Prepare the Dough
Begin by bringing the eggs and unsalted butter to room temperature for about 30 minutes. In a stand mixer bowl, combine 1 cup of flour, active dry yeast, granulated sugar, and salt. With the mixer on medium speed, gradually add 120°F warm water, mixing until smooth. Incorporate the eggs one at a time, ensuring each is fully blended before adding the next.

Step 2: Add Flour and Butter
Once the eggs are fully mixed in, gradually add 2 cups of all-purpose flour, continuing to mix to form a cohesive dough. Next, begin adding the softened butter in 2–3 batches, allowing the dough to fully absorb each addition before adding more. This will create a rich and buttery texture in your Judy’s Homemade Brioche.

Step 3: Incorporate Remaining Flour
Add the remaining flour, a little at a time, until the dough becomes thick and slightly sticky. You may even need to switch to a dough hook if you haven’t already. Look for a dough that pulls away from the sides but sticks to the bottom of the bowl; this indicates a good texture for your brioche dough.

Step 4: First Rise
Once the dough is well-formed, cover the bowl with a clean kitchen towel or plastic wrap and let it rise at room temperature for about 3 hours, or until it has doubled in size. After the first rise, gently punch down the dough to release air, cover again, and refrigerate it overnight for optimal flavor development.

Step 5: Preheat and Shape
The next day, preheat your oven to 350°F (180°C). Take the chilled dough out of the refrigerator and divide it into two equal pieces. Shape each piece into a log and place them in greased 9"x5" loaf pans. Make sure the dough fits snugly, creating a beautiful shape for your brioche.

Step 6: Second Rise
Cover the shaped dough with plastic wrap or a damp kitchen towel and allow it to proof for 2½ to 3 hours. The dough should rise until it doubles again and reaches the top of the pans; this is crucial for achieving the light and airy texture synonymous with Judy’s Homemade Brioche.

Step 7: Bake the Brioche
Once the brioche has risen adequately, place the pans in the preheated oven. Bake for 37 to 40 minutes or until the tops are golden brown and a toothpick inserted in the center comes out clean. For extra shine, brush the warm loaves with the prepared sugar water during the last few minutes of baking.

Step 8: Cool and Serve
After baking, let the brioche cool in the pans for about 5 minutes before carefully transferring them to a wire rack. Allow the loaves to cool completely before slicing to maintain that fluffy texture. Enjoy the delightful aroma of Judy’s Homemade Brioche filling your kitchen!

Make Ahead Options

Judy’s Homemade Brioche is perfect for meal prep enthusiasts looking to save time during their busy week! You can prepare the dough up to 24 hours ahead by completing the first rise, then refrigerating it overnight to develop deep flavors. For optimal texture, ensure the dough is tightly covered to prevent drying out. On baking day, simply shape the chilled dough and let it proof for 2½ to 3 hours until it doubles in size before baking. This make-ahead method guarantees delicious results without the stress, letting you enjoy bakery-quality brioche with minimal effort when you're ready to serve!

What to Serve with Judy's Homemade Brioche?

Delight in crafting a complete meal that amplifies the rich, buttery flavor and soft texture of this exquisite bread.

  • Creamy Mashed Potatoes: Their velvety texture enhances the brioche's fluffiness, creating a comforting combination that's hard to resist.
  • Savory Herb Chicken: The savory flavors of roasted herbs complement the bread's sweetness, making for a well-rounded plate. Serve with a drizzle of your favorite sauce for added richness!
  • Fresh Mixed Greens Salad: Crisp greens add a refreshing contrast to the brioche's indulgent nature, while a tangy vinaigrette brightens up the entire meal.
  • Mushroom Stroganoff: This hearty dish offers earthy tones that harmonize beautifully with the brioche, perfect for soaking up every last drop. A spoonful of creamy stroganoff atop a slice of warm brioche is pure bliss.
  • Homemade Jam or Honey Butter: Spread some luscious jam or whipped honey butter over a slice of warm brioche; it elevates breakfast into a sweet, dreamy experience.
  • Warm Apple Crisp: The warmth and sweetness of baked apples with a hint of cinnamon pair fantastically with the soft bread, crafting extraordinary dessert moments.
  • Classic Hot Chocolate: A cozy drink to sip while enjoying warm brioche; its sweetness balances beautifully with the rich flavors of the bread.
  • Decadent Dark Chocolate Mousse: For a luxurious experience, serve this velvety dessert alongside sliceable brioche to enjoy an indulgent end to your meal.

Let these delightful pairings inspire you to create unforgettable moments around your table!

Expert Tips for Judy's Homemade Brioche

  • Use Room Temperature Ingredients: Warm eggs and butter mix more easily into the dough, ensuring a smooth and cohesive brioche.

  • Don't Skip the Cold-Proofing: Refrigerating the dough overnight enhances the flavor, giving your brioche a rich, complex taste that's worth the wait.

  • Watch the Dough Consistency: The dough should be sticky; avoid adding too much flour, as this can lead to a dense loaf instead of the light, airy texture of Judy's Homemade Brioche.

  • Proof in a Warm Place: Make sure your dough rises in a draft-free, warm spot to promote optimal yeast activity, ensuring it doubles in size as it should.

  • Monitor Baking Time: Keep an eye on your brioche while baking; if it browns too quickly, tent it with foil to prevent burning.

  • Store Properly: For best freshness, store completely cooled brioche in an airtight container; it can also be frozen for longer storage without losing its delicious flavor!

Storage Tips for Judy’s Homemade Brioche

Room Temperature: Store completely cooled brioche in an airtight container at room temperature for up to 3 days to maintain its soft texture and rich flavor.

Fridge: If you plan to keep it longer, refrigerating is not recommended, as it can dry out the bread. Instead, wrap it tightly in plastic wrap before freezing.

Freezer: For extended storage, freeze slices of Judy’s Homemade Brioche by placing them in a freezer bag or container. It can be stored for up to 3 months without losing quality.

Reheating: To enjoy your brioche, simply thaw slices at room temperature or pop them in a toaster for a quick breakfast treat that tastes freshly baked!

Judy's Homemade Brioche Variations & Substitutions

Get ready to create your own delicious twists on this classic recipe, turning every loaf into a unique masterpiece!

  • Add-Ins: Incorporate chocolate chips or dried fruit for a fun, sweet dimension. They melt or soften as the brioche bakes, adding bursts of flavor with every bite.
  • Whole Wheat: Use part whole wheat flour for a healthier option. The nutty flavor adds character while enhancing the nutritional profile of your brioche.
  • Different Shapes: Shape the dough into individual buns instead of loaves for perfect breakfast sliders, making them great for gatherings or brunch. These little delights are sure to impress!
  • Flavor Variations: Experiment with different flavors by adding a tablespoon of vanilla extract or zest from an orange or lemon to the dough for a delightful twist. Citrus brightness gives a refreshing taste to this rich bread.
  • Herb-Infused: Mix in fresh herbs like rosemary or thyme for a savory version. This adds an unexpected depth that pairs beautifully with soups or hearty salads.
  • Spiced Brioche: Enhance the flavor with spices such as cinnamon or nutmeg for a cozy touch. This warming flavor is perfect for fall or holiday gatherings and will fill your kitchen with inviting aromas.
  • Gluten-Free: Substitute with a gluten-free flour blend and a binding agent like xanthan gum for a gluten-free brioche. You won’t lose the delightful texture; it's still soft and buttery in every bite!

Try serving your brioche alongside a warm cup of Homemade Hot Chocolate or use a slice for a decadent French toast breakfast with a twist. With every variation you create, your homemade brioche will be a stunning culinary journey!

Judy's Homemade Brioche Recipe FAQs

How do I select the right eggs for making brioche?
Absolutely! For making Judy's Homemade Brioche, use fresh, large eggs at room temperature. This ensures better mixing and incorporation of ingredients, resulting in a light and fluffy texture in the final bread.

What is the best way to store homemade brioche?
Very! Once your brioche is completely cooled, store it in an airtight container at room temperature for up to 3 days. This will keep it fresh and soft. Avoid refrigeration as it can dry out the bread; the freezer is a better option for longer storage.

Can I freeze Judy's Homemade Brioche?
Absolutely! To freeze your brioche, slice it if desired and wrap each piece tightly in plastic wrap, then place them in a freezer bag. You can store it for up to 3 months. When you want to enjoy it, simply thaw at room temperature or toast it directly from frozen—it tastes just as good!

What if my brioche dough doesn't rise properly?
The more the merrier! If your dough isn't rising, it might be due to inactive yeast. Ensure you’re using fresh active dry yeast and that your warm water is around 120°F (49°C). If you notice warm water too hot, it can kill the yeast; if it's too cool, it won’t activate properly. A good tip is to bloom your yeast in warm water with a pinch of sugar for about 5-10 minutes until it becomes frothy!

Are there any dietary restrictions I should consider with brioche?
Very! Homemade brioche contains eggs, dairy, and gluten from all-purpose flour, making it unsuitable for those with egg, dairy, or gluten allergies. However, you can adapt the recipe by using egg substitutes like flax eggs and gluten-free flour blends; just be aware that substituting may affect texture and flavor.

How long does the dough need to rest in the refrigerator?
For optimal flavor development, allow your brioche dough to rest in the refrigerator overnight for at least 8-12 hours. This cold-proofing process enhances its taste and texture, making the final product much richer and more delicious. Trust me, it's well worth the wait!

Judy’s Homemade Brioche

Judy’s Homemade Brioche: Soft, Buttery Perfection Awaits

Judy's Homemade Brioche is a deliciously soft and buttery bread perfect for any meal.
Print Recipe Pin Recipe
Prep Time 30 minutes mins
Cook Time 40 minutes mins
Resting Time 3 hours hrs
Total Time 4 hours hrs 10 minutes mins
Servings: 12 slices
Course: Breakfast
Cuisine: French
Calories: 250
Ingredients Equipment Method Nutrition Notes

Ingredients
  

For the Dough
  • 4.75 cups All-Purpose Flour Divided throughout the process.
  • 1 cup Unsalted Butter At room temperature for easy mixing.
  • 1 cup Granulated Sugar Plus additional for glaze.
  • 1 packet Active Dry Yeast Ensure yeast is fresh for best results.
  • 2 large Eggs Room temperature for better incorporation.
  • 1 teaspoon Salt Balances sweetness.
  • 1.5 cups Warm Water Around 120°F (49°C) for optimal fermentation.
For the Glaze
  • 2 teaspoons Sugar For brushing on finished brioche.
  • 1 tablespoon Water Combine with sugar for glaze.

Equipment

  • Stand Mixer
  • 9x5 loaf pans

Method
 

Step-by-Step Instructions
  1. Prepare the Dough: Bring the eggs and unsalted butter to room temperature. Combine 1 cup of flour, active dry yeast, granulated sugar, and salt in a stand mixer bowl. Gradually add warm water, mixing until smooth. Incorporate eggs one at a time.
  2. Add Flour and Butter: Gradually add 2 cups of all-purpose flour, mixing to form a cohesive dough. Add softened butter in 2–3 batches, allowing full absorption each time.
  3. Incorporate Remaining Flour: Add the remaining flour until the dough is thick and slightly sticky. Switch to a dough hook if needed.
  4. First Rise: Cover and let the dough rise at room temperature for about 3 hours until doubled. Punch down, cover, and refrigerate overnight.
  5. Preheat and Shape: Preheat oven to 350°F. Divide the chilled dough into two equal pieces, shape into logs, and place in greased loaf pans.
  6. Second Rise: Cover and allow to proof for 2½ to 3 hours until doubled.
  7. Bake the Brioche: Bake for 37 to 40 minutes until golden brown. Brush with sugar water during the last few minutes for extra shine.
  8. Cool and Serve: Let cool in pans for 5 minutes, then transfer to a wire rack. Cool completely before slicing.

Nutrition

Serving: 1sliceCalories: 250kcalCarbohydrates: 27gProtein: 5gFat: 14gSaturated Fat: 8gPolyunsaturated Fat: 1gMonounsaturated Fat: 4gCholesterol: 50mgSodium: 150mgPotassium: 90mgFiber: 1gSugar: 3gVitamin A: 400IUCalcium: 10mgIron: 1mg

Notes

For best results, use room temperature ingredients, and don’t skip the overnight refrigeration for enhanced flavor.

Tried this recipe?

Let us know how it was!

Ham and Cheese Sourdough Croissant Loaf for Effortless Brunch

December 13, 2025 by Grace Snow Leave a Comment

The rich aroma of warm sourdough wafting through my kitchen always brings a wave of comfort, but there's something about transforming that traditional bread into a Ham and Cheese Sourdough Croissant Loaf that electrifies my culinary spirit. This versatile recipe balances flaky layers with a deliciously savory filling, making it the perfect centerpiece for a brunch gathering or a delightful addition to a cozy weeknight meal. Imagine the joy of slicing into a loaf with a crunchy crust that reveals melty cheese and tender ham inside—it's pure bliss. Plus, it’s make-ahead friendly, ensuring you can savor every moment without the last-minute rush. Are you ready to elevate your brunch game? Let’s dive into the delectable details!

Why is this recipe a must-try?

Versatile Delight: This Ham and Cheese Sourdough Croissant Loaf effortlessly adapts to any occasion, from brunch to dinner.

Impressive Flavor: The harmony of tangy sourdough, rich Gruyère, and savory ham creates a flavor explosion that will wow both family and friends.

Simple Techniques: With straightforward steps, even novice bakers can master this artisanal loaf, making it accessible for everyone.

Make-Ahead Magic: Prepare it the night before, so your brunch can be a stress-free delight. Enjoy it fresh, warm, or even repurposed into scrumptious sandwiches later!

Crowd Pleaser: Serve it at gatherings, and watch guests rave about your homemade creation. Want more inspiration? Consider pairing it with a refreshing salad or check out our recipes for Chickpea Spinach Curry and Roasted Corn Fried for a well-rounded meal.

Ham and Cheese Sourdough Croissant Loaf Ingredients

For the Bread
• Sourdough Starter – This is the backbone of your loaf; ensure it’s bubbly and ripe for the best rise and flavor.
• All-Purpose/Bread Flour – Provides structure and chewiness; using bread flour can give your loaf an even better texture.
• Water – Hydrates the dough; warm water helps activate the yeast more effectively.
• Salt – Essential for flavor and gluten strength; don’t skip this for a well-seasoned loaf.
• Cold Butter – Key for creating those flaky layers; keep it chilled to ensure a light texture.

For the Filling
• Gruyère Cheese – Adds a rich, creamy flavor that beautifully complements the ham; you can also use Swiss or cheddar as a tasty alternative.
• Diced Ham – Offers a savory, protein-rich filling; consider turkey or roasted vegetables for a lighter twist.

Each of these ingredients contributes to the loving complexity of the Ham and Cheese Sourdough Croissant Loaf—your guests are bound to be impressed!

Step‑by‑Step Instructions for Ham and Cheese Sourdough Croissant Loaf

Step 1: Prepare Levain
Mix your ripe sourdough starter with flour and warm water in a bowl until combined. Cover it with a kitchen towel and place it in a warm spot for 10-12 hours, allowing the mixture to become bubbly and voluminous. This levain will be the flavorful base for your Ham and Cheese Sourdough Croissant Loaf.

Step 2: Make Dough
Once your levain is bubbly, combine it with more warm water and salt in a large mixing bowl. Gradually stir in flour until a sticky dough forms. Allow this mixture to rest for 30 minutes; this autolyse stage encourages gluten development, setting the stage for a chewy texture in your finished loaf.

Step 3: Incorporate Butter
After the rest period, fold cold butter into the dough. Work it in gently every 30 minutes for about 1.5 hours, ensuring the butter remains cold to achieve flaky layers. As you handle the dough, it will gradually become smoother and more elastic, preparing it for the rise to come.

Step 4: First Rise
Cover the dough with a damp towel and let it rise in a warm place for 6-7 hours. You’ll know it’s ready when it has risen about 70% and shows bubbles on the surface. This first rise builds flavor and structure for your Ham and Cheese Sourdough Croissant Loaf.

Step 5: Shape Loaf
Lightly flour your work surface and roll the risen dough into a rectangle. Layer the surface with Gruyère cheese and diced ham, then fold the dough over the filling and roll it tightly, sealing the edges well. This secures the savory filling inside your loaf and creates the delicious flaky texture.

Step 6: Cold Ferment
Wrap the shaped loaf in plastic wrap and refrigerate it for 12-18 hours. This cold fermentation allows the flavors to develop further while also improving the texture. Patience is key here, as the longer resting time enhances the taste of your Ham and Cheese Sourdough Croissant Loaf.

Step 7: Bake
Preheat your Dutch oven to 450°F. Carefully score the top of the loaf with a sharp knife to allow steam to escape, then sprinkle extra cheese on top if desired. Bake the loaf covered for 25 minutes, followed by an additional 20 minutes uncovered at 425°F until it turns golden brown and crispy.

Step 8: Cool
Once baked, carefully transfer your Ham and Cheese Sourdough Croissant Loaf to a cooling rack. Let it cool for at least 30 minutes before slicing to ensure proper texture and flavor. This waiting period is crucial for the crumb to set and allows the delicious aromas to settle into the loaf.

How to Store and Freeze Ham and Cheese Sourdough Croissant Loaf

Room Temperature: Store the Ham and Cheese Sourdough Croissant Loaf in a cool, dry place for up to 2 days, wrapped in a kitchen towel to maintain freshness.

Fridge: If you need to keep it longer, refrigerate in an airtight container for up to 1 week to prevent it from drying out.

Freezer: For longer storage, slice the loaf and freeze in airtight bags for up to 3 months. Reheat directly from frozen at 350°F for 10-15 minutes until warmed through.

Reheating: To enjoy leftovers, reheat slices in a toaster or oven to restore that crunchy exterior and melty interior, echoing the fresh-baked goodness of your Ham and Cheese Sourdough Croissant Loaf.

Expert Tips for Ham and Cheese Sourdough Croissant Loaf

  • Active Starter: Ensure your sourdough starter is bubbly and active for the best rise and flavor in your loaf. A weak starter will yield disappointing results.

  • Chill the Butter: Keeping the butter cold during lamination is crucial for achieving those signature flaky layers. Avoid letting it soften too much.

  • Proper Scoring: Use a sharp knife or a lame to score your loaf. This allows steam to escape without tearing the dough, ensuring an even bake.

  • Patience with Fermentation: Don’t rush the cold fermentation step; allowing your loaf to rest overnight deepens the flavors and improves texture.

  • Temperature Check: If you're unsure about doneness, use an instant-read thermometer; the internal temperature should be around 200°F for a perfectly baked Ham and Cheese Sourdough Croissant Loaf.

  • Experimentation: Feel free to modify the filling! Swap out ham for turkey or try different cheeses to make this recipe your own.

Make Ahead Options

These Ham and Cheese Sourdough Croissant Loaf are perfect for busy home cooks looking to save time! You can prepare the dough and shape the loaf up to 24 hours in advance. To do this, follow all steps up to the cold fermentation, wrap the shaped loaf tightly in plastic wrap, and refrigerate it. This not only allows you to develop richer flavors but also makes it easy to pop it in the oven whenever you're ready to serve. When it's time to bake, simply preheat your oven and follow the baking instructions—your loaf will turn out just as delicious as if made fresh! Enjoy the convenience of a gourmet treat without the last-minute rush!

Ham and Cheese Sourdough Croissant Loaf Variations

Feel free to explore these tantalizing variations and make this recipe uniquely yours!

  • Vegetarian Twist: Substitute diced ham with a mix of roasted vegetables for a delicious meat-free option. The earthy flavors elevate the loaf while keeping it hearty.

  • Cheese Swap: Experiment with different cheeses like Brie for a creamy richness or sharp cheddar for a bolder flavor. Each choice brings a new depth to your loaf.

  • Herb Infusion: Add fresh herbs, such as thyme or rosemary, into the filling for a fragrant twist. Not only does this enhance flavor, but it adds a beautiful aroma during baking.

  • Spice it Up: Dust the filling with a sprinkle of chili flakes or crushed black pepper for a kick. This subtle heat transforms the savory experience into something truly memorable.

  • Savory Spread: Before adding cheese and ham, spread a thin layer of garlic herb cream cheese on the dough. It introduces an extra creamy texture that pairs perfectly with the other flavors.

  • Nutty Addition: Fold in toasted nuts like walnuts or pecans into the filling for added crunch and a nutty depth. This variation not only improves texture but also offers a delightful surprise.

  • International Inspiration: Try adding flavors from around the globe! For instance, use feta and spinach for a Mediterranean flair or incorporate jalapeños and pepper jack cheese for a Tex-Mex spin.

  • Sweet Surprise: For a unique finish, add a swirl of fig jam between the layers. This delightful sweetness contrasts exquisitely with the savory filling, creating an unexpected taste sensation.

These variations not only keep the recipe fresh but inspire creativity! Consider pairing your loaf with a refreshing salad or enjoy it alongside a warm bowl of the delightful Pan Fried Mayo for a complete meal experience.

What to Serve with Ham and Cheese Sourdough Croissant Loaf

The perfect meal is just a dash of creativity away; let this delightful loaf take center stage while you explore mouthwatering pairings.

  • Crisp Green Salad: A refreshing side that balances the richness of the loaf, featuring mixed greens, cherry tomatoes, and a light vinaigrette.
  • Tomato Soup: A warm, creamy bowl of soup enhances the savory flavors while creating a comforting, nostalgic experience that warms the soul.
  • Herbed Quinoa: This nutrient-packed side offers a nutty flavor and a textured contrast that complements the loaf’s flakiness beautifully.
  • Roasted Vegetables: Toss your favorite veggies in olive oil and herbs. Their caramelized sweetness rounds out the savory richness of your Ham and Cheese Sourdough Croissant Loaf.
  • Fruit Salad: A vibrant medley of seasonal fruits adds a burst of sweetness, brightening up your plate and delighting the palate.
  • Sparkling White Wine: The effervescence cuts through the richness, creating a delightful pairing that elevates the brunch experience.
  • Chilled Iced Tea: A refreshing thirst-quencher that balances the savory notes while adding a hint of sweetness from your favorite infused blend.
  • Chocolate Chip Cookies: Cap off your meal with a sweet treat that delights the senses; after all, a touch of chocolate makes everything better!
  • Coffee or Espresso: Complete your brunch with a hot cup that complements the loaf’s flavors, ensuring each bite is as satisfying as the last.

Ham and Cheese Sourdough Croissant Loaf Recipe FAQs

How can I ensure my sourdough starter is ripe?
To ensure your sourdough starter is ripe, look for it to have doubled in size and be bubbly after feeding. This typically takes about 4-6 hours if kept at room temperature. A ripe starter will have a pleasant, slightly tangy aroma. If it passes the "float test" (a small dollop floats in water), it’s perfect for baking your Ham and Cheese Sourdough Croissant Loaf.

How should I store leftovers?
Store any leftover Ham and Cheese Sourdough Croissant Loaf in an airtight container at room temperature for up to 2 days. For longer freshness, refrigerate them for up to a week. Just ensure to wrap the loaf well to keep it from drying out.

Can I freeze the Ham and Cheese Sourdough Croissant Loaf?
Absolutely! To freeze your loaf, slice it first and then wrap each slice tightly in plastic wrap before placing it in an airtight freezer bag. It can be stored frozen for up to 3 months. When ready to enjoy, you can reheat the slices directly from frozen in a 350°F oven for about 10-15 minutes to restore their delightful warmth and texture.

What should I do if my dough doesn’t rise enough?
If your dough doesn’t rise enough, it could be due to a few factors. Make sure your sourdough starter is active before using it. If the dough hasn't risen after the recommended time, don’t panic—extend the rising time by an additional hour or so. Ensure it’s in a warm environment; an oven with the light on is perfect. You can also try warming the water slightly on the next attempt to help activate the yeast better.

Are there any dietary considerations I should watch for?
Yes! If you’re serving guests or family members with dietary restrictions, consider offering substitutes. For gluten-free options, use a gluten-free flour blend to ensure similar results, although the texture may vary. Additionally, if anyone is lactose intolerant, you can substitute Gruyère with lactose-free cheese or opt for a dairy-free cheese alternative.

Can I add different fillings to the loaf?
Very much so! The beauty of the Ham and Cheese Sourdough Croissant Loaf lies in its versatility. Feel free to swap out the ham for turkey, bacon, or even a medley of roasted seasonal vegetables for a vegetarian take. You can also experiment with various cheeses, such as Brie or blue cheese, to create new and exciting flavor profiles!

Ham and Cheese Sourdough Croissant Loaf

Ham and Cheese Sourdough Croissant Loaf for Effortless Brunch

This Ham and Cheese Sourdough Croissant Loaf is a delightful blend of flaky layers and savory filling, perfect for any brunch gathering.
Print Recipe Pin Recipe
Prep Time 1 hour hr
Cook Time 45 minutes mins
Fermentation Time 12 hours hrs
Total Time 13 hours hrs 45 minutes mins
Servings: 8 slices
Course: Breakfast
Cuisine: French
Calories: 250
Ingredients Equipment Method Nutrition Notes

Ingredients
  

For the Bread
  • 1 cup Sourdough Starter Ensure it’s bubbly and ripe
  • 3 cups All-Purpose/Bread Flour Bread flour is preferred for texture
  • 1 cup Water Warm to activate yeast
  • 1 tsp Salt Essential for flavor
  • 1/2 cup Cold Butter Keep chilled for flaky layers
For the Filling
  • 1 cup Gruyère Cheese Rich and complements the ham
  • 1 cup Diced Ham Savory filling option

Equipment

  • Mixing Bowl
  • Rolling Pin
  • Dutch oven
  • plastic wrap
  • Sharp Knife
  • cooling rack

Method
 

Step-by-Step Instructions
  1. Prepare the levain by mixing sourdough starter with flour and warm water. Cover and let sit for 10-12 hours.
  2. Make the dough by combining levain, warm water, and salt in a mixing bowl, then gradually add flour until sticky.
  3. Incorporate cold butter into the dough, folding it in every 30 minutes for about 1.5 hours.
  4. Let the dough rise covered in a warm place for 6-7 hours until about 70% risen.
  5. Shape the loaf by rolling it out, adding filling, and rolling it tightly, sealing the edges.
  6. Cold ferment the shaped loaf in plastic wrap for 12-18 hours in the refrigerator.
  7. Bake the loaf at 450°F for 25 minutes covered, then 20 minutes uncovered at 425°F until golden brown.
  8. Cool on a rack for at least 30 minutes before slicing to set the texture.

Nutrition

Serving: 1sliceCalories: 250kcalCarbohydrates: 30gProtein: 8gFat: 12gSaturated Fat: 7gPolyunsaturated Fat: 1gMonounsaturated Fat: 3gCholesterol: 30mgSodium: 600mgPotassium: 200mgFiber: 2gSugar: 1gVitamin A: 300IUCalcium: 150mgIron: 2mg

Notes

Ensure ingredients, especially the sourdough starter and butter, are properly prepared for best results.

Tried this recipe?

Let us know how it was!

Heavenly Custard-Filled Sweet Bread for Cozy Mornings

December 13, 2025 by Grace Snow Leave a Comment

There's something magical about the smell of freshly baked bread wafting through the kitchen, isn't there? This Creamy Custard-Filled Sweet Bread is where comfort meets creativity, making it an ultimate crowd-pleaser for breakfast or dessert. What I love most about this recipe is its versatility: you can enjoy it warm with a cup of tea, or cool with a dusting of powdered sugar for a delightful treat. Imagine diving into that soft, pillowy texture, only to discover a luscious custard center that simply melts in your mouth. Not only is it easy to whip up, but it's also a fun way to bring a touch of sweetness to any gathering. Are you ready to indulge in this comforting delight and surprise your loved ones?

Why is Custard-Filled Sweet Bread Irresistible?

Versatile Delight: This Custard-Filled Sweet Bread shines at any occasion, perfect for brunch gatherings or cozy desserts at home.

Creamy Center: Imagine that moment when you sink your teeth into the warm, soft dough, revealing a dreamy, creamy custard filling.

Easy to Make: With a straightforward preparation method, even novice bakers can master this delightful recipe.

Customizable Flavors: Feel free to play with different extracts or fillings, like the delightful addition of chocolate chips or zesty orange, for a unique twist!

Crowd-Pleasing: Everyone will love it, making it a fantastic choice for family get-togethers or holiday celebrations. Don’t forget to serve it alongside a slice of Cheesy Garlic Bread for a complementary flavor experience!

Custard-Filled Sweet Bread Ingredients

For the Dough
• All-purpose flour – Provides structure; use bread flour for a chewier texture.
• Granulated sugar – Adds sweetness; substitute with coconut sugar for a lower glycemic option.
• Butter – Brings moisture and richness; opt for unsalted or use coconut oil for dairy-free goodness.
• Milk – Infuses flavor; any nut milk, like almond, works as a dairy alternative.
• Yeast – Essential for leavening; active dry yeast is ideal, but instant yeast can be used without adjustments.
• Eggs – Serve as a binding agent and enhance flavor; flax eggs can replace for a vegan option.
• Vanilla extract – Enhances flavor; swap for almond extract for a unique profile.

For the Custard Filling
• Custard filling – The star of the show; premade custard saves time while providing a creamy texture and sweetness.

For Finishing Touch
• Powdered sugar – A beautiful dusting; optional but adds an elegant touch before serving.

Step‑by‑Step Instructions for Custard-Filled Sweet Bread

Step 1: Dough Preparation
In a large mixing bowl, combine all-purpose flour, granulated sugar, active dry yeast, and salt. In a separate bowl, gently warm the milk and melt the butter together until just lukewarm. Whisk in the eggs and vanilla extract, then pour this mixture into the dry ingredients. Mix until a dough forms, and knead for about 8-10 minutes until the dough is smooth and elastic.

Step 2: First Rise
Place the kneaded dough into a greased bowl, covering it with a damp cloth or plastic wrap. Let it rise in a warm place for about 1 hour, or until it has doubled in size. You’ll know it’s ready when your dough feels light and puffy to the touch, indicating the yeast is working its magic.

Step 3: Custard Making
While the dough is rising, prepare the custard filling. In a saucepan, combine your chosen custard ingredients, whisking continuously over medium heat until the mixture thickens, which should take about 5-7 minutes. Once thickened, remove from the heat and allow it to cool slightly while your dough continues to rise.

Step 4: Shaping
After the dough has completed its first rise, punch it down gently to release any air. Roll it out onto a floured surface, shaping it into a rectangle. Cut the dough into equal squares, placing a generous spoonful of custard in the center of each piece. Carefully fold the edges over to seal the custard inside, ensuring a tight closure to prevent leaks.

Step 5: Second Rise
Place the shaped custard-filled dough balls on a baking sheet lined with parchment paper. Cover them lightly and let them rise again for about 30 minutes, or until puffy. The dough should visibly expand and feel airy, resembling small pillows ready for baking.

Step 6: Baking
Preheat your oven to 350°F (175°C). Once preheated, bake the filled sweet breads for approximately 20 minutes, or until they turn a lovely golden brown. You’ll know they’re done when the tops are beautifully browned, and your kitchen fills with that irresistible aroma of baked bread.

Step 7: Cooling
After baking, remove the custard-filled sweet breads from the oven and allow them to cool on wire racks. Let them rest for about 10-15 minutes, allowing the custard filling to set slightly before dusting with powdered sugar for an elegant finish. Enjoy them warm or at room temperature!

What to Serve with Custard-Filled Sweet Bread

There's nothing quite like crafting a well-rounded meal around your favorite sweet breads, where flavors and textures dance in harmony.

  • Fresh Berries: The tartness of strawberries, blueberries, or raspberries contrasts beautifully with the creamy custard, offering a burst of freshness.

  • Vanilla Ice Cream: A scoop of creamy vanilla ice cream melting over the warm sweet bread transforms dessert into a delightful treat. The cool versus warm creates a dreamy experience.

  • Maple Syrup: Drizzling warm maple syrup adds a sweet, earthy dimension that complements the rich custard filling, enhancing every bite.

  • Coffee or Tea: Sipping a cup of freshly brewed coffee or herbal tea rounds out the meal, balancing the sweetness and creating a cozy ambiance.

  • Yogurt Parfait: Stacking layers of creamy yogurt with granola and fruits beside your sweet bread adds a refreshing and healthy crunch to your brunch spread.

  • Chocolate Sauce: Warm, silky chocolate sauce drizzled over a slice offers a dessert experience that feels indulgent and utterly luxurious.

  • Whipped Cream: A dollop of freshly whipped cream can elevate your custard-filled sweet bread into a sophisticated dessert, adding lightness while enhancing its sweetness.

Let these pairings inspire your next meal, turning a simple occasion into a delightful culinary celebration!

How to Store and Freeze Custard-Filled Sweet Bread

Room Temperature: Store your custard-filled sweet bread in an airtight container for up to 3 days to maintain its softness and freshness.

Fridge: If you need to keep it longer, refrigerate it for up to a week. Wrap it tightly to prevent it from drying out.

Freezer: For longer storage, freeze the sweet bread for up to 2 months. Ensure it's wrapped securely to prevent freezer burn.

Reheating: Rewarm in the oven at 350°F (175°C) for about 10 minutes, or microwave for 15-20 seconds, to enjoy that freshly baked texture again.

Custard-Filled Sweet Bread Variations

Feel free to get creative and customize your Custard-Filled Sweet Bread with these delightful twists, perfect for a baking adventure!

  • Chocolate Bliss: Fold chocolate chips into the custard filling for a rich chocolate experience. Each bite becomes a heavenly treat that chocolate lovers will adore.

  • Zesty Citrus: Add the zest of one orange or lemon to the dough for a refreshing hint of citrus. The brightness elevates the flavor profile and adds a lovely aroma.

  • Nutty Extra: Stir in chopped nuts, like pecans or walnuts, into the custard for added crunch. The combination of creamy and crunchy will leave your taste buds dancing.

  • Spiced Delight: Sprinkle cinnamon or nutmeg into the dough for a warm, aromatic twist. This variation will transport you to cozy winter mornings no matter the season!

  • Boozy Flavor: A splash of rum or brandy in the custard elevates this bread into dessert territory. Just imagine the incredible depth and warmth from each luscious slice.

  • Fruit Filling: Swap out the custard for your favorite jam or fruit preserves for a fruity surprise. Strawberry or apricot complements the sweet bread beautifully!

  • Vegan Option: Replace eggs with flax eggs and use almond milk instead of regular milk to make this recipe vegan-friendly while still maintaining its deliciousness.

  • Syrupy Sweet: Drizzle maple syrup over the warm bread just before serving to add an extra touch of sweetness. Pair it with a side of fresh fruits for balance!

Adventure awaits in your kitchen! If you enjoy experimenting, consider also preparing a side of Cornbread Breakfast Casserole or a delightful Sweet Potato Casserole to diversify your table. Happy baking!

Expert Tips for the Best Custard-Filled Sweet Bread

Warm Milk: Ensure your milk is warm but not hot when adding yeast; too much heat can kill the yeast, preventing proper rising.

Seal Carefully: Be sure to seal the dough properly around the custard filling; this prevents any delightful custard from leaking out while baking.

Rest Before Slicing: Let the baked sweet bread cool for at least 10-15 minutes before slicing; this helps set the custard and enhances the texture.

Knead Well: Knead the dough thoroughly for at least 8-10 minutes to develop the gluten, ensuring a soft, fluffy bread that holds its shape.

Don’t Rush the Rises: Give the dough ample time to rise in both stages; this is key for the light and airy texture of the custard-filled sweet bread.

Make Ahead Options

These Custard-Filled Sweet Breads are perfect for busy home cooks who love to meal prep! You can make the dough up to 24 hours in advance; simply prepare it, let it rise, and then refrigerate it in a covered bowl to slow down the fermentation. For the custard filling, you can prepare and refrigerate it for up to 3 days; this not only saves time but ensures it’s ready to use when you’re ready to assemble. When you’re set to bake, allow the dough to come to room temperature and complete the second rise for about 30 minutes before filling and baking. This way, you'll enjoy warm, fluffy sweet bread with rich custard, just as delicious as if freshly made!

Custard-Filled Sweet Bread Recipe FAQs

What type of flour is best for Custard-Filled Sweet Bread?
All-purpose flour is ideal for this recipe due to its balanced properties. However, if you're aiming for a chewier texture, bread flour can be a fantastic substitute. Just keep in mind that bread flour has a higher protein content, which may affect the bread’s final softness.

How should I store leftover Custard-Filled Sweet Bread?
Store your sweet bread in an airtight container at room temperature for up to 3 days. If you want to keep it fresh for a longer period, it can last in the fridge for up to a week when tightly wrapped to prevent drying.

Can I freeze Custard-Filled Sweet Bread and how?
Absolutely! To freeze, wrap the completely cooled sweet bread tightly in plastic wrap, followed by aluminum foil to prevent freezer burn. It will stay fresh for up to 2 months. When you're ready to enjoy it, simply unwrap and rewarm in the oven at 350°F (175°C) for about 10 minutes or until warmed through.

What should I do if my dough doesn’t rise?
If your dough fails to rise, it could be due to a few factors. First, make sure that the yeast is fresh and active—check the expiration date. Second, ensure your milk was warm (not hot!) when mixed with the yeast. If the environment is too cool, try placing the dough in a slightly warm area like an oven with just the light on. You can also let it rise longer until it doubles in size.

Are there any dietary considerations for Custard-Filled Sweet Bread?
Yes, if you have dietary restrictions, you can easily adapt this recipe. For a dairy-free version, replace the butter and milk with coconut oil and any nut milk. Additionally, you can use flax eggs as a plant-based alternative to traditional eggs. Just mix 1 tablespoon of ground flaxseed with 3 tablespoons of water per egg and let it sit until it thickens before adding to your dough.

Can I use premade custard for the filling?
Definitely! Using premade custard is an excellent way to save time and still achieve that creamy filling we all love. Just ensure to cool it slightly before adding to the dough to prevent disrupting the rising process!

Custard-Filled Sweet Bread

Heavenly Custard-Filled Sweet Bread for Cozy Mornings

This Custard-Filled Sweet Bread is a magical blend of comfort and creativity, perfect for breakfast or dessert.
Print Recipe Pin Recipe
Prep Time 30 minutes mins
Cook Time 20 minutes mins
Rising Time 1 hour hr 30 minutes mins
Total Time 2 hours hrs 20 minutes mins
Servings: 8 slices
Course: Dessert
Cuisine: Bakery
Calories: 180
Ingredients Equipment Method Nutrition Notes

Ingredients
  

For the Dough
  • 4 cups All-purpose flour Use bread flour for a chewier texture.
  • 1/4 cup Granulated sugar Substitute with coconut sugar for a lower glycemic option.
  • 1/2 cup Butter Opt for unsalted or coconut oil for dairy-free.
  • 1 cup Milk Any nut milk, like almond, works as a dairy alternative.
  • 2 teaspoons Active dry yeast Instant yeast can be used without adjustments.
  • 2 large Eggs Flax eggs can replace for a vegan option.
  • 1 teaspoon Vanilla extract Swap for almond extract for a unique profile.
For the Custard Filling
  • 2 cups Custard filling Premade custard saves time.
For Finishing Touch
  • 1 cup Powdered sugar Optional but adds an elegant touch.

Equipment

  • Mixing Bowl
  • Saucepan
  • Baking Sheet
  • Parchment Paper
  • wire rack

Method
 

Dough Preparation
  1. In a large mixing bowl, combine all-purpose flour, granulated sugar, active dry yeast, and salt.
  2. In a separate bowl, gently warm the milk and melt the butter together until just lukewarm.
  3. Whisk in the eggs and vanilla extract, then pour this mixture into the dry ingredients.
  4. Mix until a dough forms, and knead for about 8-10 minutes until the dough is smooth and elastic.
First Rise
  1. Place the kneaded dough into a greased bowl, covering it with a damp cloth or plastic wrap.
  2. Let it rise in a warm place for about 1 hour, or until it has doubled in size.
Custard Making
  1. While the dough is rising, prepare the custard filling by combining your chosen custard ingredients in a saucepan.
  2. Whisk continuously over medium heat until the mixture thickens, about 5-7 minutes.
  3. Once thickened, remove from heat and allow it to cool slightly.
Shaping
  1. After the dough has completed its first rise, punch it down gently to release any air.
  2. Roll it out onto a floured surface, shaping it into a rectangle.
  3. Cut the dough into equal squares, placing a generous spoonful of custard in the center of each piece.
  4. Carefully fold the edges over to seal the custard inside.
Second Rise
  1. Place the shaped custard-filled dough balls on a baking sheet lined with parchment paper.
  2. Cover them lightly and let them rise again for about 30 minutes.
Baking
  1. Preheat your oven to 350°F (175°C).
  2. Once preheated, bake the filled sweet breads for approximately 20 minutes, or until golden brown.
Cooling
  1. After baking, remove the custard-filled sweet breads from the oven and allow them to cool on wire racks.
  2. Let them rest for about 10-15 minutes before dusting with powdered sugar.

Nutrition

Serving: 1sliceCalories: 180kcalCarbohydrates: 25gProtein: 4gFat: 7gSaturated Fat: 4gPolyunsaturated Fat: 0.5gMonounsaturated Fat: 2.5gCholesterol: 40mgSodium: 120mgPotassium: 80mgFiber: 1gSugar: 6gVitamin A: 200IUCalcium: 50mgIron: 1mg

Notes

Allow the sweet bread to cool for at least 10-15 minutes before slicing to enhance the texture.

Tried this recipe?

Let us know how it was!
  • « Previous Page
  • 1
  • …
  • 76
  • 77
  • 78
  • 79
  • 80
  • …
  • 180
  • Next Page »

Welcome!

Hi, I’m Grace, a Sydney-based home cook with a passion for bold flavors and trending ingredients. Whether you’re a busy beginner or a seasoned foodie, you’ll find dishes here that are fresh, fun, and full of flavor.

More about me

Popular Recipes

  • Butter Pecan Cookies
    Irresistibly Soft Butter Pecan Cookies for Cozy Moments
  • Decadent Turtle Bars
    Decadent Turtle Bars: Indulge in Sweet Gooey Perfection
  • Salted Caramel Butter Bars
    Decadent Salted Caramel Butter Bars You Can't Resist
  • Easy Italian Pasta Salad
    Easy Italian Pasta Salad: A Summer Delight to Share

Footer

↑ back to top

About

  • Privacy Policy
  • Disclaimer
  • Terms & Conditions

Newsletter

  • Sign Up! for emails and updates

Contact

  • About me
  • Contact me

Copyright © 2025 TastyTrendIngredients