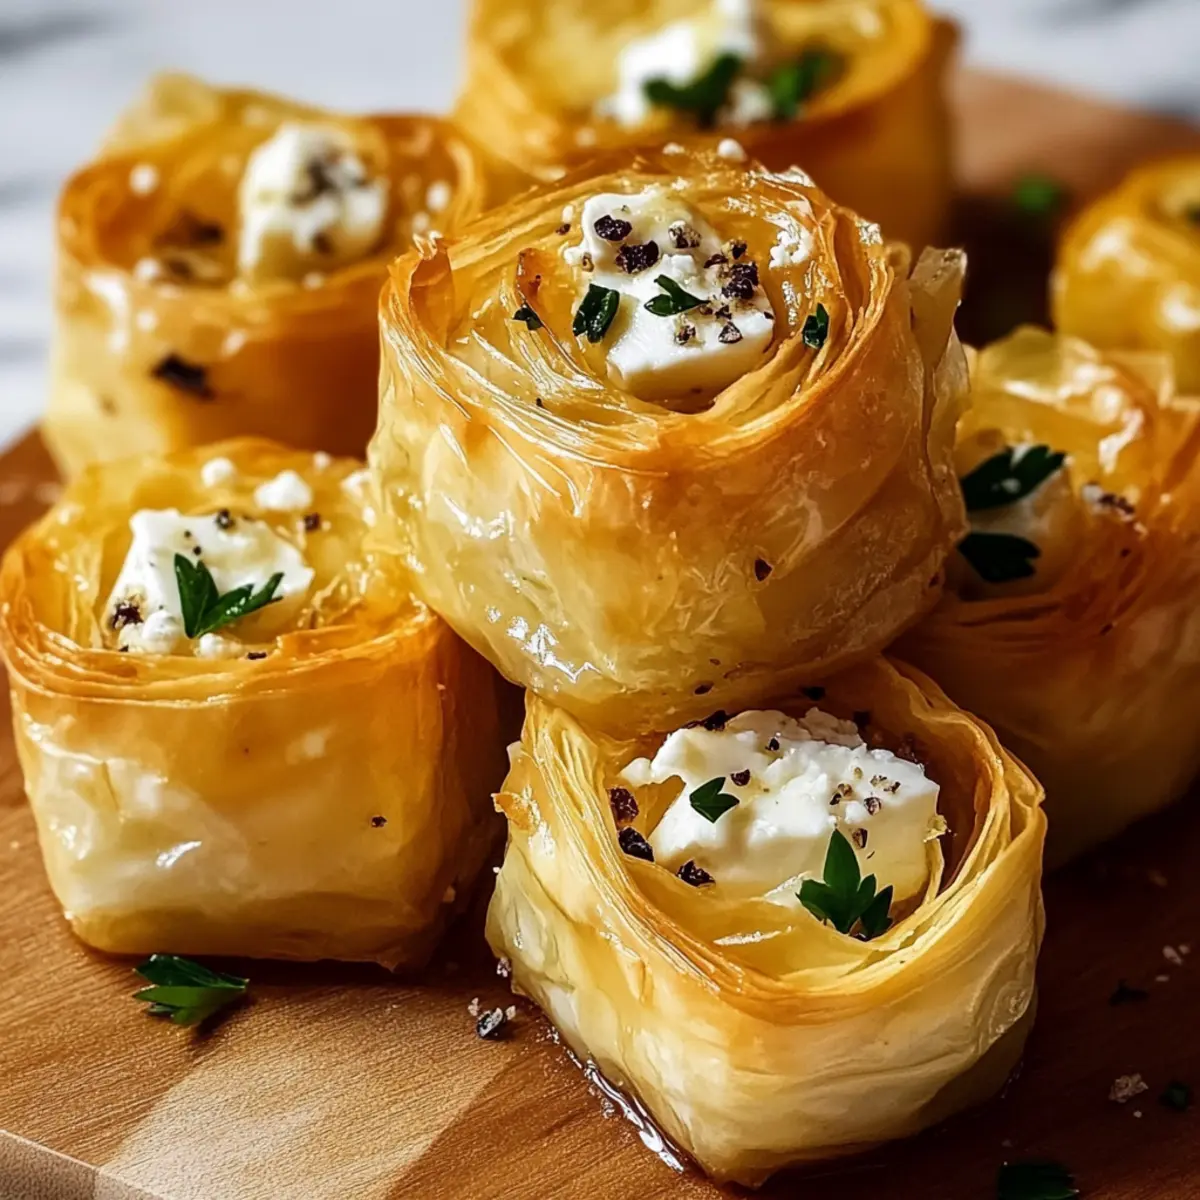
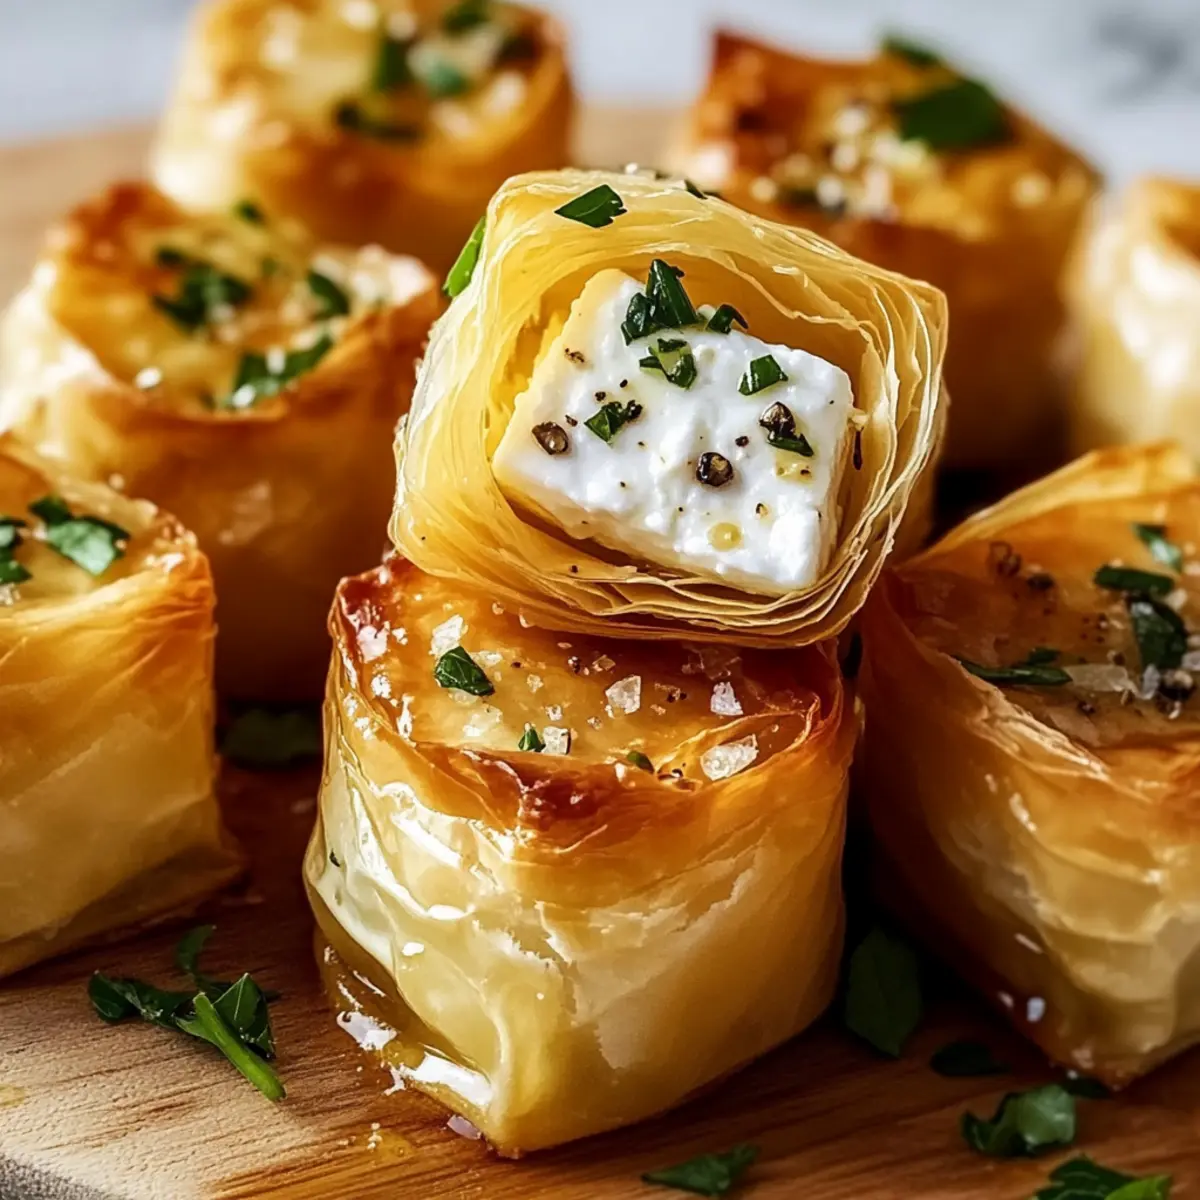
tastytrendingredients

  • Home
  • Recipes
    • Appetizers
    • Breakfast
    • Dessert
    • Dinner
    • Drinks
    • Salads
    • Snacks
    • Soups
  • About me
  • Contact me
menu icon
go to homepage
  • Home
  • Recipes
    • Appetizers
    • Breakfast
    • Dessert
    • Dinner
    • Drinks
    • Salads
    • Snacks
    • Soups
  • About me
  • Contact me
search icon
Homepage link
  • Home
  • Recipes
    • Appetizers
    • Breakfast
    • Dessert
    • Dinner
    • Drinks
    • Salads
    • Snacks
    • Soups
  • About me
  • Contact me
×

Delightful Black Forest Trifle for Christmas Gatherings

December 1, 2025 by Grace Snow Leave a Comment

As I stood in my kitchen, the scent of dark chocolate wafting through the air, I couldn’t help but feel wrapped in the warmth of the approaching holiday season. This Easy Black Forest Trifle for Christmas captures that cozy essence beautifully—a dessert that's as delightful to make as it is to savor. With its no-bake option and stunning layers of chocolate cake, tart cherries, and fluffy whipped cream, it’s a crowd-pleaser that will have everyone coming back for seconds. Plus, it’s perfect for those bustling days when you need a sweet treat ready in advance. Ready to impress your guests or make a quiet evening at home feel special? Let’s dive into creating this festive masterpiece together!

Why is Black Forest Trifle a Must-Try?

Festive Flair: This Black Forest Trifle radiates holiday spirit with its rich flavors and vibrant colors, making it a perfect centerpiece for Christmas gatherings.

Effortless Preparation: With a no-bake option utilizing store-bought chocolate cake, you can save time while still delivering a show-stopping dessert.

Layered Indulgence: Each spoonful offers a delightful mix of creamy whipped cream, tart cherries, and luxurious chocolate that will have your loved ones coming back for more.

Versatile Delight: Feel free to switch out cherries for raspberries or even try a layer of chocolate mousse for a twist—your creativity knows no bounds!

Make-Ahead Magic: Enjoy the luxury of assembling this treat a day before your celebrations, letting it chill to perfection while you focus on other holiday preparations.

Elevate your festive gatherings with this scrumptious dessert or pair it with other classics like Sweet Potatoes Black or a slice of Blackberry Crisp Amp for a well-rounded holiday feast!

Black Forest Trifle Ingredients

For the Trifle Layers
• Chocolate Cake – This forms the heart of your trifle; using store-bought chocolate cake makes it a no-bake treat.
• Cherries (fresh or jarred) – Their tartness balances the chocolate; opt for fresh in season, or use jarred for convenience.
• Whipped Cream – A cloud-like finish; real whipped cream adds richness, but you can swap for whipped topping if dairy-free.

For the Garnish
• Chocolate Shavings (optional) – To elevate the presentation; choose dark or milk chocolate based on your personal preference.

Dive into this delightful Black Forest Trifle for Christmas and create a dessert that will be the highlight of your seasonal gatherings!

Step‑by‑Step Instructions for Black Forest Trifle for Christmas

Step 1: Prepare Trifle Dish
Begin by selecting a clear trifle dish to beautifully showcase your layers. Make sure it's at least 6 to 8 inches in diameter and deep enough to hold multiple layers of the Black Forest Trifle. Having the right dish will not only enhance presentation but also allow for easy serving.

Step 2: Layer Chocolate Cake
Cut pieces of the store-bought chocolate cake into small cubes, about one-inch in size. Start by placing a generous layer of cake cubes at the bottom of your trifle dish, ensuring coverage of the base. This layer will provide a rich and moist foundation for your delicious dessert, so make sure it is evenly distributed.

Step 3: Add Cherry Layers
Sprinkle a layer of cherries over the chocolate cake, using either fresh or jarred cherries, depending on what you have available. If using jarred cherries, be sure to drain them well to avoid excess juice. Aim for a colorful and even layer, as this adds a vibrant visual contrast and tartness that balances the sweetness.

Step 4: Whipped Cream Layer
Spoon a layer of whipped cream over the cherries, spreading it evenly with a spatula for a smooth finish. Aim for about half an inch in thickness; this creamy layer enhances the overall richness of the Black Forest Trifle. The luscious whipped cream should just cover the cherries, creating a nice barrier for the next layer.

Step 5: Repeat Layering
Continue the layering process by repeating steps 2, 3, and 4 until you've used all your ingredients or reached the top of the trifle dish. Start with chocolate cake, followed by cherries, and then whipped cream each time. Finish with a final luxurious layer of whipped cream to create a delightful topping that will catch the eye.

Step 6: Chill the Trifle
Cover the assembled Black Forest Trifle with plastic wrap and place it in the refrigerator. Chill for at least 1 to 2 hours, or if possible, overnight. This resting period allows the flavors to meld beautifully, and the whipped cream will set perfectly, offering an ideal texture and firmness when served.

Step 7: Garnish and Serve
Before serving, remove the trifle from the refrigerator and uncover it. Sprinkle chocolate shavings on top to add an elegant touch and a hint of additional chocolate flavor. Use a large spoon to serve the Black Forest Trifle; the sight of its luscious layers will surely impress your guests and beckon them for a taste!

Expert Tips for Black Forest Trifle

• Use Real Cream: Choose real whipped cream for the best flavor. Store-bought options can be substituted, but ensure high quality for an enjoyable experience.

• Layering Care: When layering each component, do it gently to maintain the distinct colors and textures of the Black Forest Trifle. Avoid mixing for a beautiful presentation.

• Chill Time Matters: Allow the trifle to chill for at least 1-2 hours, or even overnight, to let the flavors meld and the whipped cream set perfectly.

• Fruits Flexibility: If cherries aren’t available, swap them for fresh raspberries or strawberries to give the dessert a refreshing twist while keeping the festive spirit.

• Make Ahead: Feel free to assemble the trifle a day ahead. Just cover it well in the refrigerator to ensure its freshness and flavor remain intact.

How to Store and Freeze Black Forest Trifle

Fridge: Store the assembled Black Forest Trifle covered in the refrigerator for up to 2 days. This allows the flavors to continue melding while keeping it fresh.

Freezer: It's not recommended to freeze the trifle, as the whipped cream may separate and affect the texture. Enjoy it fresh for the best experience!

Make-Ahead: You can prepare the Black Forest Trifle a day in advance, making it a perfect stress-free dessert for your holiday gatherings. Just keep it well-covered to maintain its deliciousness.

Reheating: There’s no need to reheat this lovely trifle; simply serve chilled for a refreshing treat during festive moments!

What to Serve with Easy Black Forest Trifle for Christmas

Imagine the joy of celebrating the holidays with a dessert that not only delights the taste buds but also fills the room with a warm, festive atmosphere.

  • Crispy Chocolate Biscotti: These crunchy treats enhance the trifle with their rich chocolate flavor and perfect for dipping.
  • Festive Fruit Salad: A vibrant mix of seasonal fruits adds a refreshing contrast that balances the trifle's richness.
  • Warm Vanilla Sauce: Drizzle this silky sauce over the trifle to amplify the indulgent experience with a touch of warmth.

For a delightful twist, try pairing the trifle with a warm mug of spiced hot cocoa. The smooth chocolate complements the trifle’s layers perfectly. Additionally, a scoop of vanilla ice cream on the side adds a classic touch, enhancing the creamy texture even further.

  • Sparkling Cider: This bubbly drink adds a festive flair and lightens up the palate between sweet bites.
  • Chocolate-Dipped Pretzels: The salty crunch of pretzels dipped in chocolate brings a fun texture contrast to each scoop of the trifle.
  • Peppermint Bark: Cut into small pieces, this festive treat provides a refreshing crunch that harmonizes beautifully with the trifle's chocolatey goodness.

Black Forest Trifle for Christmas Variations

Feel free to explore delicious twists on this classic dessert that will have everyone raving!

  • Berry Bliss: Swap cherries for fresh raspberries or strawberries to brighten up the flavor. The tartness of berries adds a refreshing contrast to the rich chocolate.

  • Chocolate Mousse Layer: Add a layer of silky chocolate mousse for indulgence. This will enhance the texture and bring an elegant flair to your trifle.

  • Gluten-Free Option: Substitute regular chocolate cake with a gluten-free chocolate cake. Your gluten-sensitive friends can join in the cheer without missing out!

  • Dairy-Free Delight: Use a whipped topping instead of dairy cream for a lighter, vegan alternative. It's just as fluffy and delicious, making it perfect for everyone at the table.

  • Nutty Crunch: Layer in some chopped nuts such as almonds or hazelnuts for added texture. This crunch elevates each bite, giving a delightful contrast to the creamy layers.

  • Boozy Infusion: Soak the chocolate cake cubes in a splash of cherry liqueur or rum for an adult twist. Just a hint of alcohol elevates the festive experience!

  • Coconut Cream: Substitute whipped cream with whipped coconut cream for a tropical take. This dairy-free option complements the chocolate and cherries beautifully.

  • Coffee Kick: Brush the chocolate cake layers with espresso or coffee for a delightful mocha flavor. It adds a rich depth that chocolate lovers will adore.

These variations can put your personal touch on the Black Forest Trifle for Christmas! For additional ideas, consider how you could pair this with a side of Sweet Potatoes Black or add a scoop of Blackberry Crisp Amp for a complete holiday dessert spread. Enjoy the festive creativity!

Make Ahead Options

These Easy Black Forest Trifle for Christmas are perfect for busy home cooks looking to save time during the festive season! You can assemble the entire trifle up to 24 hours in advance, covering it with plastic wrap to keep the layers fresh and prevent drying out. While the flavors meld beautifully overnight, the whipped cream layer maintains its texture, ensuring a delightful presentation upon serving. When you’re ready to impress your guests, simply uncover the trifle, add your chocolate shavings as a final touch, and serve. This makes the Black Forest Trifle a stress-free dessert that lets you enjoy the celebrations!

Black Forest Trifle for Christmas Recipe FAQs

What type of chocolate cake should I use for the trifle?
Absolutely, you can use store-bought chocolate cake for a hassle-free option, which saves time during the busy holiday season! If you want to make it from scratch, ensure it’s a rich, moist cake to provide a wonderful foundation for the layers.

How should I store the Black Forest Trifle?
I recommend storing the assembled Black Forest Trifle covered in the refrigerator for up to 2 days. This keeps it fresh and allows the flavors to continue melding beautifully. Just remember to cover it well to prevent it from absorbing any other odors in the fridge!

Can I freeze the Black Forest Trifle?
It’s best not to freeze the trifle, as the whipped cream may separate and change texture once thawed. Enjoy it fresh for an optimal taste experience! If needed, you can prepare the components separately and assemble them just before serving.

What should I do if the whipped cream doesn’t hold its shape?
No worries, this can happen sometimes! To ensure your whipped cream stays fluffy, make sure it’s cold before whipping, and you can add a tablespoon of powdered sugar or stabilizer like gelatin to help it maintain its structure. Aim for soft peaks, which create a light, airy layer in your trifle.

Are there any dietary substitutions I can make?
Very! For a dairy-free version, substitute real whipped cream with a high-quality whipped topping made from coconut or almond cream. Additionally, you can replace the chocolate cake with a gluten-free option to accommodate any dietary needs. Feel free to swap out cherries for other fruits like raspberries if you prefer!

How long should I let the trifle chill before serving?
For the best flavor and texture, allow the Black Forest Trifle to chill in the refrigerator for at least 1 to 2 hours. If you can plan ahead, letting it sit overnight will deepen the flavors even more, creating a truly delightful dessert for your guests.

Black Forest Trifle for Christmas

Delightful Black Forest Trifle for Christmas Gatherings

This Black Forest Trifle for Christmas captures festive essence with layers of chocolate cake, cherries, and whipped cream.
Print Recipe Pin Recipe
Prep Time 30 minutes mins
Chilling Time 2 hours hrs
Total Time 2 hours hrs 30 minutes mins
Servings: 8 servings
Course: Dessert
Cuisine: German
Calories: 350
Ingredients Equipment Method Nutrition Notes

Ingredients
  

For the Trifle Layers
  • 1 large Chocolate Cake Store-bought for no-bake option
  • 2 cups Cherries Fresh or jarred
  • 2 cups Whipped Cream Can be substituted with whipped topping
For the Garnish
  • 1/2 cup Chocolate Shavings Optional, choose dark or milk chocolate

Equipment

  • Trifle dish

Method
 

Step-by-Step Instructions
  1. Prepare a clear trifle dish that is at least 6 to 8 inches in diameter.
  2. Cut store-bought chocolate cake into one-inch cubes and layer them at the bottom of the trifle dish.
  3. Sprinkle a layer of cherries over the chocolate cake, ensuring an even distribution.
  4. Spread a layer of whipped cream over the cherries, about half an inch thick.
  5. Repeat the layering process until all ingredients are used, finishing with whipped cream on top.
  6. Cover with plastic wrap and chill in the refrigerator for at least 1 to 2 hours.
  7. Before serving, add chocolate shavings on top and serve with a large spoon.

Nutrition

Serving: 1servingCalories: 350kcalCarbohydrates: 45gProtein: 5gFat: 18gSaturated Fat: 10gPolyunsaturated Fat: 1gMonounsaturated Fat: 7gCholesterol: 50mgSodium: 200mgPotassium: 200mgFiber: 2gSugar: 30gVitamin A: 250IUVitamin C: 5mgCalcium: 50mgIron: 1mg

Notes

Use real whipped cream for best flavor. Assemble a day ahead for convenience.

Tried this recipe?

Let us know how it was!

Delightful White Chocolate Cranberry Cookies for the Holidays

December 1, 2025 by Grace Snow Leave a Comment

As I stood in my kitchen, the crisp winter air wafting in, I suddenly craved something warm and sweet to infuse the festivities with joy. That’s when my mind turned to these delightful White Chocolate Cranberry Cookies—an irresistible blend of chewy texture and a zesty kick from fresh orange! Perfect for cozy gatherings or a quiet afternoon treat, these cookies not only satisfy that sweet tooth but also offer a satisfying vegetarian option that everyone can enjoy. Their appealing balance of sweet white chocolate and tart cranberries guarantees they will turn heads, whether you're sharing them with family or saving a few for yourself. Are you ready to fill your home with the scent of baking bliss and create a new holiday tradition?

Why are these cookies a holiday favorite?

Irresistible Combination: The soft and chewy texture paired with creamy white chocolate and tart cranberries creates a flavor explosion that truly embodies the spirit of the holidays.
Fresh Zest: Adding orange zest brightens each bite, leaving a refreshing finish that sets them apart from standard cookie recipes.
Versatile Ingredient Options: Feel free to swap cranberries for nuts or experiment with different chocolates, catering to your taste preferences.
Quick to Make: In just 30 minutes, you can create these delightful treats, making them perfect for unexpected guests or last-minute baking sessions!
Crowd-Pleaser: Whether you’re hosting a festive gathering or enjoying a quiet afternoon, these cookies are sure to impress—similar to other favorites like Eggnog Cookies Soft or Thumbprint Cookies Melt.

White Chocolate Cranberry Cookies Ingredients

For the Cookies

  • All-purpose flour – Provides structure for the cookies; using a kitchen scale ensures accuracy.
  • Baking soda – Acts as a leavening agent, helping the cookies rise perfectly.
  • Salt – Balances sweetness and enhances overall flavor; essential for the final taste.
  • Unsalted butter (softened) – Adds richness and moisture; substitute with margarine for a less buttery flavor.
  • Granulated sugar – Sweetens the cookies and aids in browning; brown sugar can create a deeper flavor.
  • Brown sugar – Adds moisture and a hint of caramel flavor; can replace some granulated sugar if desired.
  • Egg – Binds all the ingredients together; no direct substitute for optimal results.
  • Vanilla extract – Adds depth of flavor; use imitation extract if you’re in a pinch.
  • Dried cranberries (or fresh) – Provides tartness and chewiness; toss fresh cranberries in flour to keep them suspended.
  • White chocolate chips – Essential for the sweet component; creamy texture makes these cookies irresistible.
  • Fresh orange zest – Adds a zesty brightness that complements the flavors; 1 tablespoon of orange juice can work in a pinch.

Be prepared to fall in love with these White Chocolate Cranberry Cookies—they're everything you desire for a cozy holiday treat!

Step‑by‑Step Instructions for White Chocolate Cranberry Cookies

Step 1: Preheat the Oven
Begin by preheating your oven to 350°F (175°C). This ensures that when your dough is ready to bake, the temperature is just right for achieving that perfect, chewy texture in your White Chocolate Cranberry Cookies. While the oven heats up, line a baking sheet with parchment paper to prevent sticking and make cleanup a breeze.

Step 2: Whisk the Dry Ingredients
In a medium bowl, whisk together 2 cups of all-purpose flour, 1 teaspoon of baking soda, and a pinch of salt until well combined. This dry mixture lays the foundation for your cookies, ensuring they rise evenly. Set it aside for now, letting the flour, baking soda, and salt mingle while you prepare the wet ingredients.

Step 3: Cream the Butter and Sugars
In a large bowl, use an electric mixer to cream together ½ cup of softened unsalted butter, ½ cup of granulated sugar, and ½ cup of brown sugar. Mix these until the mixture is light and fluffy, about 2-3 minutes. The goal here is to incorporate air for a delightful chewy cookie base, setting the tone for the comforting sweetness of your White Chocolate Cranberry Cookies.

Step 4: Add Egg and Vanilla
Next, beat in 1 large egg and 1 teaspoon of vanilla extract into your creamed butter and sugars. Ensure everything is well combined, which takes about a minute. This step adds richness and depth of flavor to your cookies, enhancing their overall taste and making them even more enticing.

Step 5: Combine Dry and Wet Ingredients
Gradually add the whisked dry ingredients to the wet mixture, mixing gently until just combined. Take care to avoid over-mixing, as this could result in denser cookies. You should see a soft dough forming, with flour just incorporated, setting your cookies up for that perfect, chewy finish.

Step 6: Fold in Add-Ins
Now it’s time to fold in 1 cup of dried cranberries, 1 cup of white chocolate chips, and the zest of one orange. Use a spatula or wooden spoon to gently mix these ingredients until they are evenly distributed throughout the dough, creating a beautiful blend of flavors that define your White Chocolate Cranberry Cookies.

Step 7: Scoop the Dough
Using a tablespoon or cookie scoop, portion out the dough and place it onto the prepared baking sheet, spacing each scoop about 2 inches apart. This allows the cookies to spread without touching each other while baking, ensuring each cookie has room to puff up beautifully.

Step 8: Bake Until Golden
Bake the cookies in your preheated oven for 11-13 minutes, or until the edges are lightly golden while the centers may appear slightly underbaked. This is the sweet spot for achieving that soft and chewy texture. Keep an eye on them, as baking times can vary based on your oven.

Step 9: Cool and Enjoy
Once baked, remove the baking sheet from the oven and allow the cookies to cool for about 5 minutes. Then, transfer them to a wire rack to cool completely. This cooling process helps set their shape and texture, preparing your White Chocolate Cranberry Cookies for that cozy evening or festive gathering.

What to Serve with Chewy White Chocolate Cranberry Cookies

Indulging in these delightful cookies opens the door to creating a warm and inviting atmosphere, perfect for sharing with loved ones.

  • Creamy Vanilla Ice Cream: A scoop of vanilla ice cream melting over a warm cookie creates a heavenly contrast of temperatures and textures. Every bite is a delightful experience that combines the soft chewiness of the cookie with the creaminess of the ice cream.

  • Festive Hot Chocolate: Rich hot chocolate topped with whipped cream complements your cookies beautifully, enhancing their sweet and tart flavors. Perfect for winter evenings by the fire, this pairing warms the heart.

  • Citrus Salad: A fresh salad with oranges and pomegranate seeds adds brightness, balancing the sweetness of the cookies. The tartness of the pomegranate and crispness of the oranges provide a refreshing contrast.

  • Nutty Trail Mix: A mix of nuts and dried fruits offers a crunchy texture that pairs perfectly with the soft cookies. It provides a wholesome snack option, keeping the sweet treat from feeling overly indulgent.

  • Spiced Chai Latte: The warm spiciness of chai tea pairs wonderfully with the cookies, enhancing their orange zest. This cozy drink adds a unique twist and brings a touch of comfort and warmth to your dessert experience.

  • Festive Fruit Punch: A holiday fruit punch with cranberry juice and orange slices echoes the flavors of the cookies, creating a cohesive dining experience. The sweetness of the punch harmonizes with every chewy bite of the cookies.

  • Cheese Platter: A selection of mild cheeses, like brie or goat cheese, offers a savory contrast to the sweet cookies. Pairing cheese with sweet treats adds a gourmet touch that’s sure to impress your guests.

  • Caramel Sauce Drizzle: Drizzling warm caramel sauce over cookies takes them to the next level of indulgence. The sweetness of the caramel complements the flavors in the cookies while adding a luxurious note.

Expert Tips for White Chocolate Cranberry Cookies

  • Chill the Dough: Chilling the dough for at least 30 minutes intensifies flavors and ensures a thicker cookie. Don’t skip this step for best results.
  • Avoid Overbaking: Keep a close eye on your cookies! They should be golden at the edges but soft in the center—this is key for achieving that chewy texture in your White Chocolate Cranberry Cookies.
  • Use Fresh Ingredients: Make sure your eggs and butter are fresh. This ensures the best flavor and texture. Fresh ingredients really do make a difference!
  • Measure Accurately: Baking is a science! Use a kitchen scale for flour to ensure precision and avoid dense cookies from too much flour.
  • Customize Your Mix-ins: Feel free to swap the cranberries for other dried fruits or nuts. Personalizing your White Chocolate Cranberry Cookies keeps things exciting!

How to Store and Freeze White Chocolate Cranberry Cookies

Airtight Container: Store cookies in an airtight container at room temperature for up to one week to maintain their chewy texture and freshness.

Freezer: To freeze, place cookie dough balls on a baking sheet until firm, then transfer to a zip-top bag. The cookie dough can be frozen for up to three months, allowing for fresh cookies whenever the craving hits!

Reheating: When ready to enjoy, bake from frozen at 350°F (175°C) for a few extra minutes to achieve that fresh-baked taste in your White Chocolate Cranberry Cookies.

Cooling: Always let baked cookies cool completely on a wire rack before storing to prevent moisture buildup, ensuring they remain deliciously chewy.

Make Ahead Options

These White Chocolate Cranberry Cookies are perfect for meal prep enthusiasts! You can prepare the cookie dough up to 24 hours in advance by mixing all the ingredients and then refrigerating the dough in an airtight container. Additionally, you can portion the cookie dough into balls and freeze them for up to three months; simply place the dough balls on a baking sheet and freeze until solid, then transfer them to a zip-top bag. When you're ready to bake, there’s no need to thaw—just bake them directly from frozen, adding a couple of extra minutes to the baking time. This ensures that every bite remains just as delicious and chewy, making your busy weeknights a breeze!

White Chocolate Cranberry Cookies Variations

Feel free to unleash your creativity and personalize this delightful recipe to match your taste buds!

  • Nutty Option: Replace cranberries with chopped nuts for a crunchy texture; walnuts or pecans complement the white chocolate wonderfully.
  • Minty Twist: Add ½ cup of peppermint chips for a refreshing holiday flavor; mint and chocolate are a holiday match made in heaven!
  • Gluten-Free Choice: Use a 1:1 gluten-free flour blend instead of all-purpose flour; still enjoy chewy cookies without the gluten.
  • Citrus Infusion: Swap orange zest for lemon or lime zest for a different citrusy flair; each brings its own unique brightness that’s equally delightful!
  • Spicy Kick: Add a pinch of cinnamon or nutmeg for a warm, spiced note; it pairs beautifully with the sweetness of white chocolate and tart cranberries.
  • Dairy-Free Delight: Substitute vegan butter for unsalted butter and use dairy-free chocolate chips; enjoy delicious cookies that cater to a vegan diet.
  • Chocolate Combinations: Try using milk chocolate chips instead of white chocolate for a different flavor profile; you can even mix both for a chocolate lover’s dream!
  • Cookie Sandwich: Make cookie sandwiches by filling cooled cookies with frosting or whipped cream; it’s an indulgent way to turn them into a festive treat, reminiscent of your favorite German Chocolate Poke dessert!

White Chocolate Cranberry Cookies Recipe FAQs

What’s the best way to choose fresh cranberries?
Absolutely! When selecting cranberries, look for berries that are bright in color and firm to the touch. Avoid any with dark spots, softness, or wrinkling, as these can indicate spoilage. If you go for dried cranberries, ensure they are plump and not overly sticky or hardened.

How should I store my cookies for maximum freshness?
For best results, store your White Chocolate Cranberry Cookies in an airtight container at room temperature for up to one week. If you live in a humid environment, consider placing a piece of parchment paper between layers of cookies to absorb excess moisture, ensuring they stay chewy.

Can I freeze the cookie dough before baking?
Yes, you can freeze the cookie dough! Simply scoop the dough into tablespoon-sized balls and place them on a baking sheet lined with parchment paper. Freeze until firm, then transfer the balls to a zip-top bag for up to three months. When you’re ready to bake, you can bake directly from frozen—just add a couple of extra minutes to your baking time!

What should I do if my cookies turn out too hard?
If your cookies come out hard, it might be due to overbaking or too much flour. Ensure you’re measuring your flour accurately, perhaps using a kitchen scale to avoid guessing. If your cookies are already baked, try placing a slice of bread in the container with them overnight—this will help reintroduce moisture and soften them up.

Are these cookies suitable for those with dietary allergies or restrictions?
These White Chocolate Cranberry Cookies are vegetarian-friendly and can be modified to suit various dietary needs! For a gluten-free option, substitute the all-purpose flour with a 1:1 gluten-free flour blend. However, if anyone has a nut allergy, be cautious with swapping out cranberries for nuts. Always check ingredient labels to ensure safety for those with specific allergies!

White Chocolate Cranberry Cookies

Delightful White Chocolate Cranberry Cookies for the Holidays

These White Chocolate Cranberry Cookies are a delightful blend of chewy texture and zesty orange, perfect for the holidays.
Print Recipe Pin Recipe
Prep Time 30 minutes mins
Cook Time 13 minutes mins
Cooling Time 5 minutes mins
Total Time 48 minutes mins
Servings: 24 cookies
Course: Dessert
Cuisine: American
Calories: 150
Ingredients Equipment Method Nutrition Notes

Ingredients
  

For the Cookies
  • 2 cups all-purpose flour Provide structure; use a scale for accuracy.
  • 1 teaspoon baking soda Acts as a leavening agent.
  • 1 pinch salt Balances sweetness.
  • ½ cup unsalted butter (softened) Richness and moisture.
  • ½ cup granulated sugar Sweetens and aids in browning.
  • ½ cup brown sugar Adds moisture and caramel flavor.
  • 1 large egg Binds ingredients together.
  • 1 teaspoon vanilla extract Depth of flavor.
  • 1 cup dried cranberries Provide tartness; use fresh if preferred.
  • 1 cup white chocolate chips Essential for sweetness.
  • 1 tablespoon fresh orange zest Adds brightness.

Equipment

  • Oven
  • Baking Sheet
  • Parchment Paper
  • Mixing bowls
  • Electric mixer
  • Spatula
  • Cookie Scoop

Method
 

Step-By-Step Instructions
  1. Preheat your oven to 350°F (175°C) and line a baking sheet with parchment paper.
  2. In a medium bowl, whisk together the flour, baking soda, and salt.
  3. In a large bowl, cream together the butter, granulated sugar, and brown sugar until light and fluffy.
  4. Beat in the egg and vanilla extract until well combined.
  5. Gradually mix the dry ingredients into the wet mixture until just combined.
  6. Fold in the cranberries, white chocolate chips, and orange zest.
  7. Scoop the dough onto the prepared baking sheet, spacing them about 2 inches apart.
  8. Bake for 11-13 minutes, until the edges are golden.
  9. Cool for 5 minutes before transferring to a wire rack to cool completely.

Nutrition

Serving: 1cookieCalories: 150kcalCarbohydrates: 22gProtein: 2gFat: 7gSaturated Fat: 4gPolyunsaturated Fat: 0.5gMonounsaturated Fat: 2.5gCholesterol: 15mgSodium: 120mgPotassium: 50mgFiber: 0.5gSugar: 10gVitamin A: 200IUCalcium: 20mgIron: 0.5mg

Notes

These cookies can be stored in an airtight container for up to a week. Freeze cookie dough balls for fresh cookies anytime.

Tried this recipe?

Let us know how it was!

Raspberry Almond Snowball Cookies for a Sweet Holiday Treat

December 1, 2025 by Grace Snow Leave a Comment

As I pulled a tray of Raspberry Almond Snowball Cookies from the oven, a wave of nostalgia washed over me. The moment I saw those little rounds of joy, dusted in powdered sugar, I was transported back to my grandmother's kitchen during the holidays. These cookies are not just a delicious treat; they embody warmth and family traditions, making them the perfect addition to any festive gathering. With their buttery, nutty flavors and a delightful raspberry filling, these easy-to-make holiday cookies can charm even the pickiest of eaters. Plus, they’re a fantastic make-ahead option for those hectic holiday weeks! What’s not to love about a cookie that melts in your mouth and brings a smile to everyone’s face? Are you ready to create some sweet memories in your own kitchen?

Why Try Raspberry Almond Snowball Cookies?

Delightful Nostalgia: The combination of buttery dough and tart raspberry filling will evoke fond memories of holiday gatherings.
Simple Preparation: With minimal ingredients and straightforward steps, these cookies are perfect for bakers of all levels.
Endless Versatility: You can easily swap the raspberry filling for other flavors, like chocolate or even pecans for a twist on tradition!
Perfect for Gifting: Their beautiful presentation makes them an ideal homemade gift for friends and family during the holiday season.
Crowd-Pleasing Flavor: These cookies are sure to impress with their melt-in-your-mouth texture and deliciously nutty undertones, a definite hit at any party or potluck!
For more delightful cookie recipes, check out Eggnog Cookies Soft and Peaches Cream Cookies.

Raspberry Almond Snowball Cookies Ingredients

For the Cookie Dough

  • Unsalted Butter – provides richness and moisture for a melt-in-your-mouth texture.
  • Powdered Sugar – sweetens the cookies while contributing to their delicate, snowy exterior.
  • All-Purpose Flour – serves as the main structure; be sure to measure accurately to ensure the right texture.
  • Ground Almonds – adds a nutty flavor and crumbly texture; fresh ground almonds enhance the taste.
  • Salt – balances the sweetness and enhances the overall flavor.

For the Raspberry Filling

  • Raspberry Filling – adds tartness; you can use either seedless raspberry jam or make a homemade filling by simmering fresh or frozen raspberries with sugar and lemon juice for a delightful twist on these Raspberry Almond Snowball Cookies.

These ingredients come together to create cookies that are not only easy to make but also bring that warm, festive spirit straight to your kitchen!

Step‑by‑Step Instructions for Raspberry Almond Snowball Cookies

Step 1: Cream Butter and Sugar
In a large mixing bowl, beat together 1 cup of softened unsalted butter and ½ cup of powdered sugar using an electric mixer on medium speed until the mixture is light and fluffy, about 3-5 minutes. This step is vital for creating a tender texture in your Raspberry Almond Snowball Cookies, so scrape down the sides of the bowl to ensure everything is well mixed.

Step 2: Mix Dry Ingredients
In a separate bowl, whisk together 2 cups of all-purpose flour, 1 cup of ground almonds, and ½ teaspoon of salt until well combined. This mixture provides the structure for your cookies. It's essential to aerate the flour properly to keep your dough from becoming dense, leading to a delightful, crumbly texture once baked.

Step 3: Combine Mixing
Gradually add the dry mixture to the creamed butter and sugar, mixing just until combined. Be cautious not to overmix, as this can develop gluten and make your cookies tough. The dough should come together nicely; if it's too crumbly, you may need to add a tablespoon of milk to achieve the right consistency for your Raspberry Almond Snowball Cookies.

Step 4: Shape Cookies
Using about a tablespoon of dough, roll it into a ball in the palms of your hands. Create an indentation in the center of each ball and fill this with your chosen raspberry filling, either seedless jam or homemade fruit mixture. Seal the filling inside, re-roll into a smooth ball, and place on a lined baking sheet, ensuring each cookie has enough space to spread during baking.

Step 5: Bake
Preheat your oven to 350°F (175°C) and then bake the assembled cookies in the center of the oven for 10-12 minutes or until they turn a light golden color around the edges. Keep an eye on them as they bake; you want the centers to remain soft to achieve that sought-after melt-in-your-mouth experience, characteristic of Raspberry Almond Snowball Cookies.

Step 6: Cool and Coat
Once baked, remove the cookies from the oven and let them cool on the baking sheet for about 5 minutes. Then, carefully transfer them to a wire rack to cool completely. Once cooled, roll each cookie in powdered sugar twice for a generous, snowy coating, making sure they resemble delightful little snowballs, perfect for any festive occasion.

How to Store and Freeze Raspberry Almond Snowball Cookies

Airtight Container: Store your cookies in an airtight container at room temperature for up to 5 days to maintain their delightful texture and flavor.

Freezer: For longer storage, freeze the Raspberry Almond Snowball Cookies in a single layer on a baking sheet, then transfer them to a freezer-safe container. They’ll stay fresh for up to 2 months.

Thawing: When ready to enjoy, simply remove the cookies from the freezer and let them thaw at room temperature completely before serving, preserving that melt-in-your-mouth quality.

Reheating: If you prefer your cookies warm, pop them in a preheated oven at 300°F (150°C) for about 5 minutes to revive their soft, buttery goodness.

Make Ahead Options

These Raspberry Almond Snowball Cookies are a wonderful treat for busy home cooks looking to save time during the hectic holiday season! You can prepare the cookie dough and refrigerate it for up to 2 days before baking, ensuring the cookies taste just as fresh when you’re ready to bake. Simply roll the dough into balls, fill them with raspberry filling, and seal them up. When you’re ready to enjoy your cookies, preheat the oven to 350°F (175°C) and bake them straight from the refrigerator, adding a minute or two to the baking time if needed for the best results. By preparing the dough ahead of time, you'll have these delightful holiday cookies ready to go with minimal effort, making your festive gatherings a breeze!

Expert Tips for Raspberry Almond Snowball Cookies

  • Perfect Butter Consistency: Make sure your butter is softened to room temperature but not melted; this ensures proper mixing and a tender dough for the cookies.
  • Avoid Overmixing: Mixing just until the ingredients are combined is key; overmixing can develop gluten and lead to tough cookies instead of the delicate texture you want.
  • Allow Cooling Time: Let cookies cool completely on a wire rack before rolling them in powdered sugar; this prevents the sugar from melting and creates that beautiful snowy finish.
  • Adjust Dough Consistency: If the dough feels too dry, simply add a tablespoon of milk to help bring it together. If it's too wet, sprinkle in a little more flour to achieve the right texture for your Raspberry Almond Snowball Cookies.
  • Baking Time Awareness: Keep an eye on the cookies while baking; remove them from the oven just as they turn lightly golden around the edges to ensure they maintain their soft, crumbly center.

Raspberry Almond Snowball Cookies Variations

Feel free to unleash your creativity and tailor these delightful cookies to your taste!

  • Nut Substitutes: Swap ground almonds for pecans or walnuts for a unique twist. Each nut brings its distinct flavor and texture, enhancing your snowball cookies in a delightful way.

  • Chocolate Filling: Try using chocolate ganache or Nutella instead of raspberry filling for a decadent upgrade. Rich chocolate pairs beautifully with the buttery cookie, making them truly irresistible.

  • Gluten-Free: Create a gluten-free version by using a 1:1 gluten-free flour blend. The cookies will retain their wonderful texture and flavor, allowing everyone at your table to enjoy them!

  • Bourbon Soaked Raisins: Add a handful of bourbon-soaked raisins in place of the raspberry filling for a warm, festive twist. The subtle flavors of bourbon will deliver a delightful surprise in every bite.

  • Coconut Topping: For a tropical flair, mix shredded coconut into the dough or sprinkle it on top of the cookies before the final roll in powdered sugar. The coconut adds an amazing chewy texture and pairs harmoniously with the cookies’ buttery base.

  • Lemon Zest: Incorporate lemon zest into the dough for a bright, citrusy flavor that complements the sweetness and slight tartness of the raspberry filling beautifully.

  • Spiced Variation: Add a pinch of cinnamon or nutmeg to the dough for a warm, spiced note. These cozy flavors make your cookies taste like a warm hug, perfect for cold winter evenings.

  • Layered Cookies: Assemble two flavors by creating half the batch with raspberry filling and the other half with chocolate ganache. Presenting these cookies side by side creates an appealing platter that promises variety and delight!

Whether you keep it classic or mix things up, these variations ensure your Raspberry Almond Snowball Cookies will be a hit! For more delightful cookie recipes, be sure to check out Matcha Cookies Soft and Thumbprint Cookies Melt.

What to Serve with Raspberry Almond Snowball Cookies?

These delightful treats are the perfect centerpiece for your holiday gatherings, inviting warmth and joy to each bite.

  • Hot Cocoa: A rich, velvety cup of cocoa complements the buttery cookies, creating a comforting pairing that's perfect for cozy evenings.
  • Fresh Fruit Salad: A vibrant mix of berries and citrus offers a refreshing contrast to the sweetness of the cookies, enhancing the overall experience.
  • Coffee or Espresso: The bold flavors of coffee elevate the nutty undertones of the Raspberry Almond Snowball Cookies, making every bite a delightful adventure.
  • Vanilla Ice Cream: Creamy and smooth, vanilla ice cream adds a delightful chill that offsets the sweet warmth of the cookies, creating a heavenly dessert combination.
  • Lemonade: A zesty glass of lemonade provides a tart counterpoint, cleansing the palate and balancing the rich buttery flavors in every mouthful.
  • Chocolate Truffles: Luxurious and indulgent, chocolate truffles are a decadent pairing that will impress your guests and satisfy any sweet tooth.
  • Spiced Apple Cider: Warm, spiced cider introduces a festive aroma and flavor that perfectly complements the cookies while evoking holiday cheer.
  • Cheese Platter: A selection of tangy cheeses rounds out the sweetness of the cookies, bringing richness and complexity to your holiday table.

Raspberry Almond Snowball Cookies Recipe FAQs

How do I choose the best raspberries for the filling?
Absolutely! For the filling, look for ripe raspberries that are plump and vibrant in color. Avoid those with dark spots or mushy texture, as they may not hold up well in the filling. If fresh raspberries are out of season, frozen raspberries work just as well; just make sure to thaw and drain any excess moisture before using.

What is the best way to store Raspberry Almond Snowball Cookies?
Very simple! Store your baked cookies in an airtight container at room temperature for up to 5 days. This helps keep their crumbly texture and rich flavors intact. If you're concerned about freshness beyond that, consider refrigerating them, although that may alter their texture slightly.

Can I freeze Raspberry Almond Snowball Cookies?
Absolutely! To freeze these cookies, place them on a baking sheet in a single layer to freeze for a couple of hours until solid. After that, transfer them to a freezer-safe container or a zip-top bag. They can stay fresh for up to 2 months. When you’re ready to enjoy, simply thaw them at room temperature and, if you like, warm them in the oven for that freshly baked feel!

Why are my cookies spreading too much while baking?
If you find your cookies are spreading too much, it might be due to softened butter that is too warm or not chilling the dough prior to baking. To avoid this, ensure your butter is just softened (not melted), and for extra assurance, chill the dough for about 30 minutes before shaping and baking. This will help maintain their shape and achieve that desired texture.

Are there any allergy considerations I should keep in mind with these cookies?
Yes, definitely! If you're catering to different dietary needs, these cookies contain gluten from the all-purpose flour and tree nuts from the ground almonds. To make them gluten-free, consider using a suitable gluten-free flour blend. Always check labels on pre-packaged ingredients, especially if accommodating allergies, and inform guests about the ingredients used.

Can I prepare the dough in advance?
Certainly! You can refrigerate the cookie dough for up to 2 days before shaping and baking. Simply wrap it tightly in plastic wrap to prevent drying out. When you’re ready to bake, allow the dough to sit at room temperature for about 15-20 minutes to make it easier to handle, and then proceed with shaping and baking your Raspberry Almond Snowball Cookies.

Raspberry Almond Snowball Cookies

Raspberry Almond Snowball Cookies for a Sweet Holiday Treat

Raspberry Almond Snowball Cookies are a delightful treat that evoke holiday nostalgia with their buttery dough and tart raspberry filling.
Print Recipe Pin Recipe
Prep Time 15 minutes mins
Cook Time 12 minutes mins
Cooling Time 5 minutes mins
Total Time 32 minutes mins
Servings: 24 cookies
Course: Dessert
Cuisine: American
Calories: 150
Ingredients Equipment Method Nutrition Notes

Ingredients
  

Cookie Dough
  • 1 cup Unsalted Butter softened to room temperature
  • ½ cup Powdered Sugar for sweetness and snowy appearance
  • 2 cups All-Purpose Flour measured accurately
  • 1 cup Ground Almonds for nutty flavor
  • ½ teaspoon Salt balances sweetness
Raspberry Filling
  • 1 cup Raspberry Filling seedless raspberry jam or homemade

Equipment

  • Mixing Bowl
  • Electric mixer
  • Baking Sheet
  • wire rack

Method
 

Step-by-Step Instructions
  1. In a large mixing bowl, beat together 1 cup of softened unsalted butter and ½ cup of powdered sugar until light and fluffy, about 3-5 minutes.
  2. In a separate bowl, whisk together 2 cups of all-purpose flour, 1 cup of ground almonds, and ½ teaspoon of salt until well combined.
  3. Gradually add the dry mixture to the creamed butter and sugar, mixing just until combined.
  4. Using about a tablespoon of dough, roll it into a ball, create an indentation, and fill it with raspberry filling, then seal it.
  5. Preheat your oven to 350°F (175°C) and bake the cookies for 10-12 minutes until lightly golden.
  6. Cool the cookies on the baking sheet for about 5 minutes, then transfer to a wire rack. Roll in powdered sugar twice once cooled.

Nutrition

Serving: 1cookieCalories: 150kcalCarbohydrates: 20gProtein: 2gFat: 7gSaturated Fat: 4gPolyunsaturated Fat: 1gMonounsaturated Fat: 2gCholesterol: 20mgSodium: 50mgPotassium: 30mgFiber: 1gSugar: 8gVitamin A: 300IUVitamin C: 1mgCalcium: 15mgIron: 0.5mg

Notes

Store in an airtight container at room temperature for up to 5 days, or freeze for up to 2 months.

Tried this recipe?

Let us know how it was!

Irresistible Christmas Red Velvet Cheesecake for Your Holiday Feast

December 1, 2025 by Grace Snow Leave a Comment

As the aroma of cinnamon and gingerbread wafts through the air, I often think of the magical moments that surround holiday desserts. This year, I'm inviting you to elevate your festive gatherings with a stunning Christmas Red Velvet Cheesecake. Combining the beloved essence of rich red velvet cake with the creamy luxury of cheesecake, every slice of this indulgent dessert is bound to leave your friends and family in awe. Not only does it make for an eye-catching centerpiece, but it's also surprisingly easy to prepare, allowing you to spend less time in the kitchen and more time making memories. So, are you ready to impress your guests and add some cheer to your holiday table? Let’s dive into this luscious recipe that promises to become a seasonal favorite!

Why You’ll Love This Cheesecake?

Festive Delight: This Christmas Red Velvet Cheesecake is a show-stopping dessert that will steal the spotlight at your holiday gatherings.

Irresistible Creaminess: The luscious combination of cream cheese and heavy whipping cream makes each slice a delightful experience.

Visually Stunning: Its bright red hue and beautiful toppings create an eye-catching centerpiece perfect for your table.

Simple to Make: With easy-to-follow steps, you can whip this up quickly, leaving more time for holiday festivities!

Crowd-Pleasing Flavor: Its balanced blend of rich flavors and textures will leave your friends and family clamoring for seconds—a dessert that resonates with everyone!

Ready to impress? Check out our tips for serving with a rich coffee or pairing with dessert wine for the perfect finish!

Christmas Red Velvet Cheesecake Ingredients

For the Crust

  • 24 Oreo cookies – A delightful base that adds rich chocolate flavor. Feel free to substitute with graham crackers for a simpler crust.
  • ⅓ cup butter, melted – This helps bind the crust together for a perfect texture. No substitutes are recommended for this key ingredient.

For the Cheesecake Filling

  • 4 (8-ounce) blocks cream cheese – Delivers the creamy, velvety texture essential for cheesecake. Make sure your cream cheese is at room temperature for easy mixing.
  • ½ cup white sugar – Sweetens the cheesecake to perfection. You can use granulated sugar alternatives if you prefer.
  • 2 cups heavy whipping cream – Whipped to add lightness and fluffiness to the filling. Non-dairy alternatives can be used for lactose intolerance.
  • 1 teaspoon vanilla extract – Enhances the cheesecake’s flavor profile. Feel free to skip if you're watching your sugar intake.
  • 2 tablespoons cocoa powder – Infuses a subtle chocolate flavor that complements the red velvet. Unsweetened cocoa is preferred for the best results.
  • Red food coloring – Achieves that iconic vibrant red color for the cheesecake. Consider using natural coloring for a healthier choice.
  • ¼ cup Christmas sprinkles – Adds a festive touch within the filling. Optional if you're making a non-holiday variation.

For the Toppings

  • Whipped cream – Light and fluffy topping that adds a beautiful finish. Alternatively, use a light dusting of powdered sugar for a simple garnish.
  • Mini Oreos – Cute and tasty garnishes that add a fun element to the presentation. Any seasonal cookie or chocolate can be used for variety.
  • Extra Christmas sprinkles – For a festive garnish that adds a pop of color. Optional based on personal preference.

Step‑by‑Step Instructions for Christmas Red Velvet Cheesecake

Step 1: Prep the Pan
Begin by preheating your oven to 350°F (175°C). While the oven heats, wrap a 9-inch springform pan tightly with aluminum foil to prevent any water from seeping in during the baking process. This preparation is crucial for achieving the perfect texture in your Christmas Red Velvet Cheesecake.

Step 2: Make the Crust
Take 24 Oreo cookies and crush them into fine crumbs using a food processor or a rolling pin. In a mixing bowl, combine the cookie crumbs with ⅓ cup of melted butter until well blended. Press this mixture firmly into the bottom of your springform pan. Bake the crust for 8-10 minutes until it's slightly set, and then allow it to cool completely.

Step 3: Prepare Filling
In a large mixing bowl, beat four blocks of room temperature cream cheese using an electric mixer until smooth and creamy. Gradually add ½ cup of white sugar while continuing to mix. Incorporate 1 teaspoon of vanilla extract, 2 tablespoons of cocoa powder, and several drops of red food coloring until you achieve the desired color, ensuring the mixture is well-combined.

Step 4: Fold in Whipped Cream
In another bowl, whip 2 cups of heavy whipping cream until stiff peaks form. Gently fold the whipped cream into the cream cheese mixture until fully combined. This step adds lightness to your Christmas Red Velvet Cheesecake. If desired, you can also fold in ¼ cup of Christmas sprinkles for added festive flair before pouring the filling into the cooled crust.

Step 5: Bake Cheesecake
Lower the oven temperature to 325°F (160°C). Place the foil-wrapped springform pan into a larger roasting pan. Carefully pour hot water into the roasting pan until it reaches halfway up the sides of your springform pan to create a water bath. Bake for 1 to 1.25 hours, until the edges are set but the center is still slightly jiggly for a perfect cheesecake consistency.

Step 6: Cool & Chill
Once baked, turn off the oven and leave the cheesecake inside with the door ajar for about 1 hour. This gradual cooling prevents cracks. Afterward, remove the cheesecake and let it cool on a wire rack for 2-3 hours before transferring it to the refrigerator. Chill for at least 6-8 hours, or overnight for best flavor and texture.

Step 7: Decorate & Serve
After chilling, carefully remove the sides of the springform pan. Top your beautiful Christmas Red Velvet Cheesecake with freshly whipped cream, garnishing with mini Oreos and festive sprinkles. To serve, use a sharp knife warmed in hot water to slice the cheesecake cleanly, showcasing its stunning layers.

Expert Tips for Christmas Red Velvet Cheesecake

Use a Water Bath: A water bath helps cook the cheesecake evenly and minimizes the chance of cracks, ensuring it looks as good as it tastes.

Cool Gradually: Allow the cheesecake to cool in the oven with the door ajar for an hour. This helps prevent temperature shock that can lead to cracks.

Soften Cream Cheese: Always start with room temperature cream cheese for a smooth filling. Cold cream cheese can lead to lumps, affecting the creamy texture of your Christmas Red Velvet Cheesecake.

Choose Quality Ingredients: Using high-quality cocoa powder and food coloring will enhance the overall flavor and color of your cheesecake.

Don’t Overmix: When folding in whipped cream, be gentle to retain airiness, which gives the cheesecake its light, fluffy texture.

What to Serve with Christmas Red Velvet Cheesecake?

Elevate your dessert experience with delightful pairings that enhance the rich flavors of your cheesecake.

  • Rich Coffee: The bold flavors of a freshly brewed cup complements the creaminess, creating a harmonious blend. Enjoy your cheesecake in the morning with a decadent coffee.
  • Hot Chocolate: Creamy and indulgent, hot chocolate pairs beautifully with the luxurious texture of the cheesecake—perfect for cozy gatherings!
  • Ice Cream: A scoop of vanilla or peppermint ice cream adds a cool, creamy contrast, making each bite even more satisfying.
  • Red Wine: A light-bodied red wine such as Pinot Noir enhances the flavors of both the red velvet cake and the creamy filling, offering a delightful pairing experience.
  • Fruit Compote: Fresh berries or a berry compote bring a tart brightness that balances the rich sweetness of the cheesecake, making it feel lighter.
  • Gingerbread Cookies: Serve alongside gingerbread cookies for a festive touch. Their spiced flavor pairs wonderfully with the cheesecake's sweetness, creating a holiday classic.
  • Festive Spritzers: A sparkling drink with cranberry juice and club soda adds a refreshing twist that cuts through the richness, enhancing the festive spirit.
  • Chocolate-Covered Strawberries: These delightful treats add a touch of elegance while their sweetness complements the cheesecake beautifully.
  • Mini Cupcakes: Pair with holiday-themed mini cupcakes for a playful dessert table—it creates a delightful variety of festive flavors!

Make Ahead Options

These Christmas Red Velvet Cheesecake are perfect for busy holiday planners looking to save time! You can prepare the crust by crushing the Oreo cookies and mixing with melted butter up to 24 hours in advance. It can be stored in the refrigerator in an airtight container. Additionally, the cheesecake filling can be mixed together and kept in the fridge for up to 3 days before pouring it over the crust. Just remember to re-whip the heavy cream before folding it into the filling to maintain its fluffy texture. When you’re ready to bake, simply pour the filling over the prepped crust, bake, cool, and chill overnight for a stunning dessert that’s just as delicious as if freshly made!

How to Store and Freeze Christmas Red Velvet Cheesecake

Fridge: Store leftover slices of Christmas Red Velvet Cheesecake in an airtight container in the refrigerator for up to 4 days to maintain freshness and flavor.

Freezer: You can freeze the cheesecake for up to 2 months. Wrap it tightly in plastic wrap, then in aluminum foil for maximum protection against freezer burn.

Thawing: To enjoy frozen cheesecake, transfer it to the fridge a day before serving and allow it to thaw slowly. This keeps the texture creamy and delightful.

Reheating: While serving cold is ideal, if desired, you can gently warm individual slices in the microwave for about 10 seconds to enhance the flavor and richness.

Christmas Red Velvet Cheesecake Variations

Feel free to unleash your creativity and customize this delightful cheesecake to suit your tastes!

  • Ginger Snap Crust: Swap the Oreo crust for crushed ginger snap cookies, adding a spicy twist to the dessert.

  • Non-Dairy Delight: Use a non-dairy cream cheese and coconut cream to make this cheesecake lactose-free without sacrificing flavor.

  • Citrus Zest Twist: Incorporate a teaspoon of orange or lemon zest into the filling for a refreshing burst of flavor that perfectly balances the richness.

  • Mini Cheesecakes: Create adorable mini versions by baking the cheesecake in muffin tins or ramekins, perfect for portion control and serving!

  • Chocolate Ganache Topping: Drizzle a rich chocolate ganache over the top for an added layer of indulgence that chocolate lovers will adore.

  • Nutty Touch: Fold in finely chopped nuts like walnuts or pecans into the filling for a delightful texture contrast that adds a nice crunch.

  • Extra Festive Sprinkles: Instead of Christmas sprinkles, use themed sprinkles such as snowflakes or stars, transforming this dessert into a whimsical treat for your holiday gatherings.

  • Heat It Up: For a bit of warmth, add a pinch of cayenne pepper to the filling. It’s a surprising touch that enhances the flavors without being overly spicy.

Each variation presents an exciting opportunity to elevate this creamy delight. Remember, if you’re curious about pairing this cheesecake with a nice beverage, a rich coffee or dessert wine could certainly enhance the flavor experience!

Christmas Red Velvet Cheesecake Recipe FAQs

How do I know when the cream cheese is at the right temperature?
Make sure your cream cheese is at room temperature, which typically takes about 30 minutes after removing it from the fridge. It should feel soft and spreadable, making it easier to blend smoothly into the cheesecake filling without any lumps.

How should I store my leftover Christmas Red Velvet Cheesecake?
Store leftover slices in an airtight container in the refrigerator for up to 4 days. To maintain their deliciousness, make sure they are well-covered to prevent drying out. Adding a layer of plastic wrap before sealing in a container can boost freshness!

Can I freeze the Christmas Red Velvet Cheesecake?
Absolutely! You can freeze the cheesecake for up to 2 months. First, let it cool completely, then wrap it tightly in plastic wrap followed by aluminum foil to protect against freezer burn.

What if my cheesecake cracks during baking?
If your cheesecake cracks, don’t worry—this can happen! Ensure that you use a water bath for even cooking and avoid overmixing the filling. If it does crack, cover it up with whipped cream or sprinkles for a festive touch.

Are there any dietary concerns with this cheesecake recipe?
Yes, if you have any allergies, be mindful of the cream cheese and whipped cream, which contain dairy. For a lactose-free option, substitute with dairy-free alternatives. Also, ensure that all ingredients, especially food coloring and cocoa powder, are allergy-safe if needed. Always check labels to be certain!

Can I make this cheesecake in advance?
Definitely! This Christmas Red Velvet Cheesecake can be made a day in advance, allowing the flavors to meld beautifully overnight in the fridge. Just ensure that you store it properly in an airtight container for maximum freshness.

Christmas Red Velvet Cheesecake

Irresistible Christmas Red Velvet Cheesecake for Your Holiday Feast

Indulge in the festive delight of Christmas Red Velvet Cheesecake, a stunning centerpiece for your holiday gatherings.
Print Recipe Pin Recipe
Prep Time 30 minutes mins
Cook Time 1 hour hr 15 minutes mins
Chilling Time 8 hours hrs
Total Time 9 hours hrs 45 minutes mins
Servings: 12 slices
Course: Dessert
Cuisine: American
Calories: 450
Ingredients Equipment Method Nutrition Notes

Ingredients
  

For the Crust
  • 24 cookies Oreo cookies A delightful base that adds rich chocolate flavor. Feel free to substitute with graham crackers for a simpler crust.
  • ⅓ cup butter, melted This helps bind the crust together for a perfect texture. No substitutes are recommended for this key ingredient.
For the Cheesecake Filling
  • 4 8-ounce blocks cream cheese Delivers the creamy, velvety texture essential for cheesecake. Make sure your cream cheese is at room temperature for easy mixing.
  • ½ cup white sugar Sweetens the cheesecake to perfection. You can use granulated sugar alternatives if you prefer.
  • 2 cups heavy whipping cream Whipped to add lightness and fluffiness to the filling. Non-dairy alternatives can be used for lactose intolerance.
  • 1 teaspoon vanilla extract Enhances the cheesecake’s flavor profile. Feel free to skip if you're watching your sugar intake.
  • 2 tablespoons cocoa powder Infuses a subtle chocolate flavor that complements the red velvet. Unsweetened cocoa is preferred for the best results.
  • red food coloring Achieves that iconic vibrant red color for the cheesecake. Consider using natural coloring for a healthier choice.
  • ¼ cup Christmas sprinkles Adds a festive touch within the filling. Optional if you're making a non-holiday variation.
For the Toppings
  • Whipped cream Light and fluffy topping that adds a beautiful finish. Alternatively, use a light dusting of powdered sugar for a simple garnish.
  • Mini Oreos Cute and tasty garnishes that add a fun element to the presentation. Any seasonal cookie or chocolate can be used for variety.
  • Extra Christmas sprinkles For a festive garnish that adds a pop of color. Optional based on personal preference.

Equipment

  • 9-inch springform pan
  • Mixing bowls
  • Electric mixer
  • Food Processor
  • Roasting pan

Method
 

Step-by-Step Instructions
  1. Preheat your oven to 350°F (175°C). Wrap a 9-inch springform pan tightly with aluminum foil to prevent water from seeping in during baking.
  2. Crush 24 Oreo cookies into fine crumbs. Combine with ⅓ cup melted butter and press into the bottom of the springform pan. Bake for 8-10 minutes and cool completely.
  3. Beat 4 blocks of room temperature cream cheese until smooth. Gradually add ½ cup white sugar, 1 teaspoon vanilla extract, 2 tablespoons cocoa powder, and red food coloring until desired color is achieved.
  4. Whip 2 cups of heavy whipping cream until stiff peaks form. Gently fold into the cream cheese mixture, adding ¼ cup Christmas sprinkles if desired.
  5. Lower oven temperature to 325°F (160°C). Place the foil-wrapped springform pan in a larger roasting pan, pour hot water to halfway up the sides. Bake for 1 to 1.25 hours.
  6. Turn off the oven and leave the cheesecake inside with the door ajar for 1 hour. Cool on a wire rack for 2-3 hours, then chill in the refrigerator for at least 6-8 hours.
  7. Remove the springform pan sides, top with whipped cream, mini Oreos, and festive sprinkles. Slice with a warmed knife.

Nutrition

Serving: 1sliceCalories: 450kcalCarbohydrates: 40gProtein: 6gFat: 32gSaturated Fat: 18gPolyunsaturated Fat: 2gMonounsaturated Fat: 12gCholesterol: 110mgSodium: 350mgPotassium: 200mgFiber: 1gSugar: 28gVitamin A: 800IUCalcium: 80mgIron: 1mg

Notes

Serve with rich coffee or dessert wine for the perfect finish. Use high-quality ingredients for best results.

Tried this recipe?

Let us know how it was!

Delicious Christmas Cookie Lasagna Dessert for Holiday Cheer

December 1, 2025 by Grace Snow Leave a Comment

The aroma of freshly baked cookies mingling with holiday spices can evoke a sense of nostalgia that’s hard to resist. That’s why I’m excited to share my go-to recipe for Festive No-Bake Christmas Cookie Lasagna! This delightful Christmas Cookie Lasagna Dessert is not only incredibly simple to make, but it also spares you the hassle of turning on the oven during the busy holiday season—so you can focus on what truly matters: gathering with family and friends. With layers of soft cookies and a creamy, luscious filling, this dessert is fully customizable; swap in your favorite cookies or toppings to make it uniquely yours. Plus, it’s perfect for anyone looking for a quick, crowd-pleasing treat that can be prepared in advance. Are you ready to indulge in a festive twist that will leave everyone asking for seconds? Let's dive in!

Why is this Christmas Cookie Lasagna Dessert irresistible?

Simplicity: With no baking required, this recipe is a breeze, allowing you to whip it up in no time!

Customizable Layers: Tailor this dessert to your taste by mixing in your favorite cookies or toppings, like crushed nuts or festive sprinkles.

Crowd-Pleasing: Perfect for holiday gatherings, this treat appeals to all ages, making it an instant hit at any celebration.

Make-Ahead Delight: Prepare it a day in advance and store it in the fridge, freeing up your time for festivities.

Decadent Textures: Experience the delightful contrast of creamy layers against crunchy cookies, creating a dessert that’s a feast for the senses.

For a different flavor twist, consider trying out my Eggnog Cookies Soft recipe or make some unique Mexican Wedding Cookies to accompany your holiday festivities!

Christmas Cookie Lasagna Dessert Ingredients

This simple yet decadent dessert is sure to delight and surprise!

For the Cookie Base

  • High-Quality Cookies – Choose your favorite like chocolate chip or gingerbread for a festive vibe.

For the Cream Mixture

  • Cream Cheese – Ensure it’s softened for a smooth and creamy texture.
  • Whipped Topping – Lightens up the mixture, creating a fluffy consistency.

For the Decor

  • Chocolate Chips or Festive Sprinkles – Use these to add a delightful touch and personalized flair.
  • Fruity Layers (Optional) – Fresh raspberries or cherries give a refreshing balance to the richness of the cookie layers.

Feel free to get creative with this Christmas Cookie Lasagna Dessert and make it your own!

Step‑by‑Step Instructions for Festive No-Bake Christmas Cookie Lasagna

Step 1: Prepare the Baking Dish
Begin by taking a 9x13 inch baking dish and arrange a layer of your chosen high-quality cookies, such as chocolate chip or gingerbread, at the bottom. Ensure the cookies are evenly spaced for a solid foundation. This will create the perfect base for your Christmas Cookie Lasagna Dessert.

Step 2: Mix the Cream Cheese Layer
In a mixing bowl, beat 8 ounces of softened cream cheese with an electric mixer until smooth and creamy, around 2 minutes. Gently fold in 8 ounces of whipped topping until well combined, creating a light and fluffy mixture. This will be the luscious layer of your dessert that adds creaminess to the cookies.

Step 3: Spread the Cream Mixture
Carefully spread half of the cream cheese mixture evenly over the base layer of cookies. Make sure to cover them fully for a delightful blend of flavors. The whimsical layers of your Christmas Cookie Lasagna Dessert are starting to come together beautifully, showcasing the rich creaminess over the crunchy cookies beneath.

Step 4: Add Another Layer of Cookies
Now, it’s time to add another layer of cookies over the cream mixture. Lay them out in even rows, ensuring there are no overlaps to maintain a structured look. This second layer adds depth to your dessert, enhancing both texture and presentation—so exciting to see!

Step 5: Top with Remaining Cream Mixture
Spread the remaining cream cheese mixture on top of the second cookie layer, smoothing it out carefully. This final layer will create a luscious and inviting finish to your Christmas Cookie Lasagna. Use a spatula to ensure the topping is evenly distributed, enhancing both the texture and visual appeal of your dessert.

Step 6: Chill in the Refrigerator
Cover the entire dish with plastic wrap, ensuring it seals tightly to keep the dessert fresh. Refrigerate for at least 4 hours or ideally overnight. This chilling time allows the layers to set properly, making it easier to slice and serve your delectable Christmas Cookie Lasagna Dessert when the festivities begin.

Step 7: Add Festive Toppings
Before serving, take the dessert out of the fridge and sprinkle a generous layer of chocolate chips or colorful festive sprinkles on top for a cheerful holiday touch. This final step enhances not only the appearance but also the flavor profile, making your no-bake dessert an attractive centerpiece for your holiday gathering.

Christmas Cookie Lasagna Dessert Variations

Feel free to let your creativity shine and customize this delightful dessert in countless ways!

  • Peppermint Twist: Substitute with peppermint-flavored cookies for a refreshing, minty holiday experience that complements the festive season beautifully.

  • Fall Flavor: Incorporate pumpkin spice cream cheese for a cozy twist, capturing the essence of autumn right in your layers.

  • Textured Crunch: Add a layer of crushed nuts between the cookie and cream layers for delightful crunch and rich flavor contrast that really elevates your dessert.

  • Chocolaty Delight: Opt for chocolate cookies instead of traditional ones and drizzle with caramel sauce for an even richer taste that chocolate lovers will adore.

  • Dairy-Free Version: Use vegan cream cheese and whipped topping for a dairy-free option, ensuring everyone can enjoy this tasty treat.

  • Fruity Surprise: Layer in fresh raspberries or cherries for a splash of color and a fruity burst that brightens the rich flavors of the cookies.

  • Seasonal Sprinkles: Top with festive sprinkles, such as red and green, for a playful holiday touch that makes the dessert visually irresistible.

For more indulgent treats, why not try some of my Peaches Cream Cookies for a refreshing summer spin or whip up a batch of Matcha Cookies Soft for a deliciously unique addition to your cookie collection?

What to Serve with Festive No-Bake Christmas Cookie Lasagna

The holidays are all about creating memorable moments, and pairing your dessert with the right sides can elevate the experience.

  • Rich Hot Chocolate: Offers a warm, velvety experience that complements the creamy layers of the lasagna. Add a sprinkle of cinnamon for that extra festive touch!

  • Gingerbread Cookies: These spiced delights echo the flavors of the season while providing a satisfying crunch alongside the soft lasagna. A lovely nod to holiday traditions!

  • Fruit Salad: A refreshing contrast to the dessert’s richness, a medley of seasonal fruits lightens up the meal. Opt for pomegranate, oranges, or kiwi for vibrant colors!

  • Pecan Pie Bars: The nutty and buttery flavor of pecan pie bars adds a delightful crunch and sweetness that perfectly harmonizes with the dessert’s creaminess.

  • Eggnog: This classic holiday drink infuses festive flavors which pair beautifully with the layers of soft cookies. Try garnishing with nutmeg for an aromatic finish!

  • Christmas Potato Salad: A unique twist, this salad adds both creaminess and a touch of crunch while incorporating seasonal herbs to lighten the palate between layers of dessert.

  • Sparkling Water with Lime: For those seeking a refreshing drink, this bubbly sensation with a citrus twist cleanses the palate and perfectly complements the festive flavors.

The combination of these delightful pairings will create a memorable holiday feast!

Make Ahead Options

These Festive No-Bake Christmas Cookie Lasagna Desserts are perfect for meal prep, allowing you to enjoy your holiday gatherings without the last-minute stress! You can prepare the entire dessert up to 24 hours in advance; simply layer the cookies and cream mixture as per the instructions, then cover tightly with plastic wrap and refrigerate. This chilling time enhances the flavors, ensuring your dessert is just as delicious when served. If needed, you can store it in the refrigerator for up to 3 days or freeze individual portions for up to 2 months. Just remember to sprinkle on the festive toppings right before serving for a fresh, cheerful finish!

How to Store and Freeze Christmas Cookie Lasagna

Refrigerator: Keep your Christmas Cookie Lasagna Dessert covered in plastic wrap or an airtight container for up to 3 days. This will help maintain its creamy texture and flavor.

Freezer: For longer storage, slice the dessert into individual portions and freeze them in airtight containers for up to 2 months. Thaw in the fridge before serving for the best taste and texture.

Make-Ahead: You can prepare this delightful dessert 24 hours in advance, making it an ideal choice for busy holiday schedules, ensuring everyone can enjoy it fresh and delicious!

Reheating: Since this is a no-bake dessert, there's no need for reheating. Just serve it chilled, and enjoy the layers of delightful flavors!

Expert Tips for Christmas Cookie Lasagna Dessert

  • Room Temperature Cream Cheese: Ensure your cream cheese is at room temperature for a silky smooth mixture. Cold cream cheese results in lumps that can ruin the texture.

  • Chilling is Crucial: Don’t skip the chilling time! Allowing the layers to set properly is key to achieving clean slices when serving your Christmas Cookie Lasagna Dessert.

  • Layer Evenly: Spacing cookies without overlapping is essential for a visually appealing presentation and neat layers. Overlapping can make it messy when serving.

  • Customize Wisely: Feel free to customize your cookie choices, but remember that some cookies absorb moisture faster than others, which could affect the dessert's consistency.

  • Topping Choices: Get creative with toppings! While chocolate chips and sprinkles are popular, consider using crushed nuts or a drizzle of caramel for a different flavor profile.

Christmas Cookie Lasagna Dessert Recipe FAQs

How do I choose the right cookies for this dessert?
Absolutely! For a great foundation, pick high-quality cookies that complement the cream mixture. Chocolate chip or gingerbread cookies are fantastic options. If you’re looking for a more festive twist, consider using peppermint-flavored cookies for a refreshing take!

How should I store any leftovers?
Very! Keep your Christmas Cookie Lasagna Dessert covered in plastic wrap or in an airtight container in your refrigerator where it can last for up to 3 days. This helps maintain its creamy texture and delicious flavor, perfect for those sweet cravings!

Can I freeze the Christmas Cookie Lasagna Dessert?
Of course! For longer storage, slice your dessert into individual portions and place them in airtight containers. You can freeze these portions for up to 2 months. When you're ready to enjoy a slice, simply thaw it in the fridge overnight for the best taste and texture.

What if my cream cheese mixture isn't smooth?
Oh, don’t fret! If your cream cheese seems lumpy, it’s likely that it wasn’t softened enough. Make sure you let it sit at room temperature for at least 30 minutes before mixing. Beat it well with an electric mixer until smooth, and you can always add a splash of milk to help with creaminess.

Is this dessert suitable for those with dietary restrictions?
Certainly! To make your Christmas Cookie Lasagna Dessert gluten-free, simply use gluten-free cookies. For dairy-free options, swap the cream cheese and whipped topping for suitable vegan alternatives. This way, everyone can indulge in the festive cheer without worry!

Can I make this dessert ahead of time?
Absolutely! You can prepare your Christmas Cookie Lasagna Dessert up to 24 hours in advance. This make-ahead option is perfect for busy holiday schedules, allowing the layers to meld beautifully. Just keep it covered in the refrigerator until you’re ready to serve!

Christmas Cookie Lasagna Dessert

Delicious Christmas Cookie Lasagna Dessert for Holiday Cheer

This Christmas Cookie Lasagna Dessert is a no-bake treat that combines layers of cookies with creamy filling, perfect for holiday gatherings.
Print Recipe Pin Recipe
Prep Time 20 minutes mins
Chilling Time 4 hours hrs
Total Time 4 hours hrs 20 minutes mins
Servings: 12 slices
Course: Dessert
Cuisine: American
Calories: 320
Ingredients Equipment Method Nutrition Notes

Ingredients
  

For the Cookie Base
  • 15 cookies High-Quality Cookies e.g., chocolate chip or gingerbread
For the Cream Mixture
  • 8 ounces Cream Cheese softened
  • 8 ounces Whipped Topping
For the Decor
  • 1 cup Chocolate Chips or Festive Sprinkles
  • Fruity Layers (Optional) e.g., fresh raspberries or cherries

Equipment

  • 9x13-inch baking dish

Method
 

Step-by-Step Instructions
  1. Prepare the Baking Dish: Arrange a layer of your chosen high-quality cookies at the bottom.
  2. Mix the Cream Cheese Layer: Beat 8 ounces of softened cream cheese until smooth, then fold in 8 ounces of whipped topping.
  3. Spread the Cream Mixture: Carefully spread half of the cream cheese mixture evenly over the layer of cookies.
  4. Add Another Layer of Cookies: Place another layer of cookies over the cream mixture.
  5. Top with Remaining Cream Mixture: Spread the remaining cream cheese mixture on top of the second cookie layer.
  6. Chill in the Refrigerator: Cover with plastic wrap and refrigerate for at least 4 hours or overnight.
  7. Add Festive Toppings: Sprinkle chocolate chips or festive sprinkles on top before serving.

Nutrition

Serving: 1sliceCalories: 320kcalCarbohydrates: 40gProtein: 3gFat: 18gSaturated Fat: 10gPolyunsaturated Fat: 2gMonounsaturated Fat: 3gCholesterol: 30mgSodium: 200mgPotassium: 100mgFiber: 1gSugar: 25gVitamin A: 500IUCalcium: 50mgIron: 1mg

Notes

Feel free to customize the cookies and toppings to your preference.

Tried this recipe?

Let us know how it was!

Delightful Autumn Harvest Honeycrisp Apple and Feta Salad

November 29, 2025 by Grace Snow Leave a Comment

The aroma of roasted butternut squash fills my kitchen, whisking me into a cozy corner of autumn. One quick glance at my vibrant Autumn Harvest Honeycrisp Apple and Feta Salad, and I can't help but feel thankful for the season's bounty. With sweet Honeycrisp apples, earthy squash, and crunchy pecans dancing together in this dish, it's a visual feast and a delightful celebration of flavors. Not only is this salad a stellar side dish for Thanksgiving gatherings, but it also takes less than 30 minutes to prepare—perfect for those weeknight dinners when you want something wholesome without the stress. Curious about how to make this seasonal favorite your own? Let's dive into the delicious details!

Why is this salad a must-try?

Vibrant Flavors: This Autumn Harvest Honeycrisp Apple and Feta Salad bursts with sweet, tangy, and savory notes that bring autumn to your plate.

Quick Prep: At under 30 minutes, it’s perfect for busy weekdays or last-minute guests, allowing for stress-free, delicious meals.

Seasonal Ingredients: Packed with fresh, seasonal produce, every bite is a taste of fall that celebrates the bountiful harvest.

Customizable Delight: Feel free to swap ingredients like feta for goat cheese or butternut squash for sweet potatoes, making it uniquely yours.

Crowd-Pleasing Appeal: Whether for Thanksgiving gatherings or casual dinners, this salad is sure to impress and satisfy everyone. Pair it beautifully with grilled meats or cozy fall soups for a complete meal.

Autumn Harvest Honeycrisp Apple and Feta Salad Ingredients

For the Salad
• Honeycrisp Apple – Adds a sweet crunch; for a different flavor, you can use Fuji or Pink Lady apples.
• Butternut Squash – Roasted, it brings a creamy, earthy flavor; alternatively, roasted sweet potatoes work well.
• Mixed Salad Greens – A fresh base for the salad; consider arugula, spinach, or spring mix for a twist.
• Feta Cheese – Its tangy creaminess enhances the salad; goat cheese or blue cheese are great alternatives.
• Dried Cranberries – Adds delightful sweetness; swap with chopped dates or figs for a unique touch.
• Chopped Pecans or Walnuts – Offers a satisfying crunch; pumpkin seeds are a nut-free option.
• Red Onion – Provides a sharp taste; slice thinly for a milder flavor.

For the Vinaigrette
• Olive Oil – Essential for dressing and roasting, enhancing all flavors beautifully.
• Apple Cider Vinegar – Delivers a tangy kick; red wine vinegar serves as a fine substitute.
• Dijon Mustard – Adds depth; feel free to skip if a smoother dressing is preferred.
• Honey (or Maple Syrup) – Sweetens the dressing; maple syrup is a great choice for a vegan alternative.
• Salt and Black Pepper – Essential seasoning to elevate the salad's overall flavor.

This vibrant Autumn Harvest Honeycrisp Apple and Feta Salad can be customized to your liking, ensuring it's perfect for any occasion!

Step‑by‑Step Instructions for Autumn Harvest Honeycrisp Apple and Feta Salad

Step 1: Preheat the Oven
Begin by preheating your oven to 400°F (200°C). This temperature is ideal for roasting the butternut squash, giving it a delicious caramelization. While the oven warms up, prepare a baking sheet by lining it with parchment paper for easy cleanup, ensuring you’re ready for the next step in your Autumn Harvest Honeycrisp Apple and Feta Salad.

Step 2: Roast the Butternut Squash
In a mixing bowl, toss the cubed butternut squash with olive oil, salt, and pepper until coated evenly. Spread the cubes in a single layer on the prepared baking sheet. Roast in the preheated oven for 20–25 minutes, or until the squash is tender and golden brown, stirring halfway through for even cooking. This savory addition will enhance the salad’s flavor profile.

Step 3: Prepare the Salad Base
While the squash roasts, take a large salad bowl and add your mixed salad greens as the vibrant base. Next, wash and slice the Honeycrisp apples into thin wedges, keeping the peel on for extra crunch. Add the apple slices to the greens alongside crumbled feta, chopped pecans or walnuts, dried cranberries, and thinly sliced red onion. Each ingredient brings a unique texture to the Autumn Harvest Honeycrisp Apple and Feta Salad.

Step 4: Make the Vinaigrette
In a small bowl, prepare the vinaigrette by whisking together olive oil, apple cider vinegar, Dijon mustard, honey (or maple syrup), and a pinch of salt and black pepper. Combine until the dressing is smooth and well-blended, which will enhance the flavors of your salad. This tangy vinaigrette will perfectly complement the sweetness of the apples and the earthiness of the roasted squash.

Step 5: Combine and Serve
Once the butternut squash has roasted to golden perfection, remove it from the oven and allow it to cool slightly. Drizzle the prepared vinaigrette over the salad mixture in the large bowl. Toss gently to ensure even coating without bruising the greens, allowing all the delicious flavors to meld. Serve immediately for the best texture and temperature, highlighting the delightful Autumn Harvest Honeycrisp Apple and Feta Salad.

Step 6: Presentation Tips
For an elegant presentation, consider layering the salad ingredients in a large serving bowl instead of mixing everything together. Arrange the salad greens at the bottom, followed by the apples, feta, nuts, cranberries, and finally the roasted butternut squash on top. Drizzle with vinaigrette just before serving to maintain the vibrant colors and freshness, making your Autumn Harvest Honeycrisp Apple and Feta Salad truly stunning.

Expert Tips for Autumn Harvest Honeycrisp Apple and Feta Salad

  • Fresh Ingredients: Use chilled, crisp Honeycrisp apples to maintain their crunch. Fresh ingredients make a world of difference in this salad.

  • Cooling Off: Allow the roasted butternut squash to cool slightly before adding it to the salad. This prevents the greens from wilting and keeps everything fresh.

  • Toast for Flavor: Don’t skip toasting your nuts! A quick toast in a dry skillet enhances their flavor, adding a delightful crunch to your Autumn Harvest Honeycrisp Apple and Feta Salad.

  • Chill Your Bowl: For an extra touch of freshness, chill the salad bowl in the fridge before assembling. This keeps your ingredients crisp and inviting.

  • Dress Gradually: Add the vinaigrette in stages to avoid overdressing. Toss gently and serve immediately to maintain the perfect balance in flavors and textures.

What to Serve with Autumn Harvest Honeycrisp Apple and Feta Salad

Creating the perfect meal is an art, and this colorful salad pairs beautifully with various delightful dishes.

  • Grilled Chicken: A juicy, marinated grilled chicken breast complements the salad's freshness, adding a satisfying protein element for a full meal.
  • Roasted Turkey: Perfect for Thanksgiving, tender roasted turkey resonates with the seasonal theme and creates a cozy, festive atmosphere.
  • Vegetable Soup: A warm, hearty vegetable soup offers comforting warmth and pairs naturally with the vibrant flavors of the salad.
  • Cranberry Sauce: Serve a spoonful of homemade cranberry sauce on the side; its tanginess connects beautifully with the salad’s sweet ingredients.
  • Crusty Bread: A loaf of crusty sourdough or whole grain bread is perfect for soaking up any leftovers of the vinaigrette, enhancing every bite.
  • Apple Cider: A glass of chilled apple cider echoes the sweetness of Honeycrisp apples and provides a refreshing counterpoint to the salad's flavors.
  • Pumpkin Pie: End your meal on a festive note with a slice of pumpkin pie, making this salad a delightful precursor to Thanksgiving indulgence.
  • Mixed Green Salad: A simple side of mixed greens dressed lightly can complement the flavors of the salad without overwhelming them.
  • Sparkling Water: A splash of lemon or mint in sparkling water creates a refreshing drink that cleanses the palate between bites.

Each of these pairings adds texture, flavor, or warmth, creating a delightful dining experience that's as enjoyable as the Autumn Harvest Honeycrisp Apple and Feta Salad itself.

How to Store and Freeze Autumn Harvest Honeycrisp Apple and Feta Salad

Fridge: Store the salad without dressing in an airtight container for up to 2 days. This keeps the fresh ingredients like apples and greens crisp and vibrant.

Freezer: Freezing is not recommended due to the salad ingredients’ textures; however, roasted butternut squash can be frozen for up to 3 months—just microwave or sauté before adding to the salad.

Reheating: If you store the roasted butternut squash separately, reheat it gently in the microwave or a pan until warm before mixing it back into the salad just before serving.

Make Ahead Options

These Autumn Harvest Honeycrisp Apple and Feta Salad components are perfect for meal prep, making your life easier on busy weeknights! You can roast the butternut squash and prepare the vinaigrette up to 3 days in advance; simply refrigerate both separately to keep everything fresh. Slice the Honeycrisp apples and store them in a sealed container with a splash of lemon juice for up to 24 hours. For the best flavor, assemble the salad right before serving by mixing the greens, apples, feta, nuts, and cranberries. Drizzle with the vinaigrette and toss gently to ensure your salad remains vibrant and delicious!

Autumn Harvest Honeycrisp Apple and Feta Salad Variations

Customize your salad to reflect your tastes and culinary creativity with these delightful twists!

  • Cheese Swap: Replace feta with goat cheese or omit entirely for a vegan salad bursting with flavor.

  • Sweet Potato Twist: Replace butternut squash with roasted sweet potatoes for a sweeter, heartier option that complements the apples beautifully.

  • Grain Boost: Toss in quinoa or lentils to turn this salad into a filling meal; they'll add protein and hearty texture.

  • Nut-Free Option: Use pumpkin seeds instead of pecans or walnuts for a satisfying crunch without the nuts—a great choice for those with allergies.

  • Herb Infusion: Fresh herbs like cilantro or basil can elevate the salad, adding a fragrant touch that brightens each bite. Just a sprinkle goes a long way!

  • Heat Level UP: For a spicy kick, add sliced jalapeños or a dash of cayenne pepper to the vinaigrette, turning up the heat for those who love a little spice.

  • Cranberry Swap: Substitute dried cranberries with chopped figs or dates for a different sweet profile that harmonizes well with the savoriness of the cheese.

Enhancing your Autumn Harvest Honeycrisp Apple and Feta Salad is easy and fun! Whether you’re serving it at a Thanksgiving feast or enjoying a quiet dinner, consider pairing it with warm dishes like Tofu Caesar Salad or comforting German Potato Salad for a complete seasonal experience.

Autumn Harvest Honeycrisp Apple and Feta Salad Recipe FAQs

What kind of apples should I use for this salad?
The Honeycrisp apple is my go-to choice for its sweet crunch, but feel free to substitute with Fuji or Pink Lady apples if you prefer. Just make sure they are firm and at the peak of ripeness for the best flavor in your Autumn Harvest Honeycrisp Apple and Feta Salad!

How should I store leftovers?
To keep the salad fresh, store it in an airtight container in the refrigerator without the dressing for up to 2 days. This will help maintain the crispness of the salad greens and apples; dress right before serving for optimal flavor and freshness!

Can I freeze any of the ingredients?
While the assembled salad isn't suitable for freezing, you can freeze roasted butternut squash. To do this, let it cool completely, then place it in a freezer-safe container and store it for up to 3 months. When ready to use, simply reheat it in the microwave or a pan before adding it back into your salad!

What if my salad ingredients turn brown too quickly?
Apples can brown quickly after slicing. To prevent this, toss them in a little lemon juice or apple cider vinegar right after slicing. This not only helps maintain their vibrant color but also adds a bit of tanginess to your Autumn Harvest Honeycrisp Apple and Feta Salad.

Are there any allergenic ingredients in this salad?
Yes, this salad contains nuts (pecans or walnuts) and dairy (feta cheese). If you have allergies, feel free to swap pecans with pumpkin seeds for a nut-free alternative and use dairy-free cheese or omit the cheese altogether for a vegan version. It's all about making this dish enjoyable for everyone!

Autumn Harvest Honeycrisp Apple and Feta Salad

Delightful Autumn Harvest Honeycrisp Apple and Feta Salad

This Autumn Harvest Honeycrisp Apple and Feta Salad is a vibrant dish filled with seasonal ingredients, perfect for fall gatherings.
Print Recipe Pin Recipe
Prep Time 10 minutes mins
Cook Time 25 minutes mins
Total Time 35 minutes mins
Servings: 4 servings
Course: Salads
Cuisine: American
Calories: 250
Ingredients Equipment Method Nutrition Notes

Ingredients
  

For the Salad
  • 2 medium Honeycrisp Apples or Fuji or Pink Lady apples
  • 2 cups Butternut Squash cubed; or use sweet potatoes
  • 4 cups Mixed Salad Greens arugula, spinach, or spring mix for a twist
  • 1 cup Feta Cheese or goat cheese or blue cheese
  • 1/2 cup Dried Cranberries or chopped dates or figs
  • 1/2 cup Chopped Pecans or walnuts or pumpkin seeds for nut-free option
  • 1/2 medium Red Onion thinly sliced
For the Vinaigrette
  • 1/4 cup Olive Oil
  • 2 tablespoons Apple Cider Vinegar or red wine vinegar
  • 1 tablespoon Dijon Mustard optional
  • 1 tablespoon Honey or maple syrup
  • 1 teaspoon Salt to taste
  • 1 teaspoon Black Pepper to taste

Equipment

  • Oven
  • Salad Bowl
  • Mixing Bowl
  • Baking Sheet
  • Whisk

Method
 

Step-by-Step Instructions
  1. Preheat your oven to 400°F (200°C). Line a baking sheet with parchment paper.
  2. Toss the cubed butternut squash with olive oil, salt, and pepper until coated. Spread in a single layer on the baking sheet and roast for 20–25 minutes, until tender and golden brown.
  3. In a large salad bowl, add mixed salad greens. Wash and slice the Honeycrisp apples into thin wedges and add them along with crumbled feta, chopped nuts, dried cranberries, and sliced red onion.
  4. In a small bowl, whisk together olive oil, apple cider vinegar, Dijon mustard, honey, and a pinch of salt and black pepper until smooth.
  5. Remove the roasted butternut squash from the oven and allow it to cool slightly. Drizzle the vinaigrette over the salad mixture and toss gently.
  6. For elegant presentation, layer the ingredients in a serving bowl rather than mixing. Serve immediately.

Nutrition

Serving: 1servingCalories: 250kcalCarbohydrates: 30gProtein: 6gFat: 14gSaturated Fat: 3gPolyunsaturated Fat: 2gMonounsaturated Fat: 8gCholesterol: 10mgSodium: 300mgPotassium: 300mgFiber: 4gSugar: 10gVitamin A: 2000IUVitamin C: 15mgCalcium: 100mgIron: 1mg

Notes

Use fresh ingredients for the best flavor, and consider chilling your salad bowl for extra freshness.

Tried this recipe?

Let us know how it was!

Cajun Seafood Boil with Garlic Butter Sauce for Ultimate Flavor

November 29, 2025 by Grace Snow Leave a Comment

The aroma of a simmering pot filled with spices and fresh seafood can transport you straight to a sun-soaked deck in Louisiana. This Cajun Seafood Boil with Garlic Butter Sauce is the ultimate culinary celebration that evokes the warmth of Southern gatherings. Featuring tender jumbo shrimp, sweet crab, and the smoky richness of andouille sausage, this dish not only brings a fun, messy dining experience but also impressively showcases an array of flavors that will have everyone at your table asking for seconds. With minimal prep time and the ability to feed a crowd, it’s the perfect solution for your next summer party or cozy family meal. Ready to dive into a pot of goodness that’s bursting with flavor and joy? Let’s get cooking!

Why is a Cajun Seafood Boil special?

Bold flavor imbued with spices and fresh ingredients makes this dish unforgettable. Ease of preparation means you don’t need to be a chef to impress your guests. Customizable options allow everyone to enjoy it—swap in your favorite seafood or add a veggie twist! Perfect for gatherings, its messy nature fosters laughter and connection around the table. For a delightful feast, pair it with Cheesy Garlic Bread to soak up that amazing garlic butter sauce, or enjoy with refreshing Shrimp Tacos Zesty for an exciting twist.

Cajun Seafood Boil Ingredients

For the Seafood
• Jumbo Shrimp – Adds sweetness and a tender bite; frozen shrimp works if properly thawed.
• Snow Crab Clusters – Offers rich, sweet meat; ensure they're pre-cooked for the best results.
• Andouille Sausage – Introduces a smoky flavor; kielbasa is a good substitute if you want a milder taste.

For the Vegetables
• Small Potatoes – Acts as a filling component; small waxy potatoes hold up well.
• Corn on the Cob – Brings sweetness and a juicy crunch; cutting it in half makes for easier eating.
• Eggs – Boosts protein and balances flavors; remember to hard boil before adding.

For Flavor
• Cajun Seasoning – Essential for flavor depth; Old Bay seasoning is a suitable alternative if desired.
• Garlic Butter Sauce – Elevates the dish with rich flavor; using fresh garlic is best for this sauce.
• Beer – Optional for the broth; a lager or IPA adds depth, but you can skip it if preferred.

With these ingredients, your Cajun Seafood Boil with Garlic Butter Sauce will surely be the highlight of any gathering!

Step‑by‑Step Instructions for Cajun Seafood Boil with Garlic Butter Sauce

Step 1: Prepare the Ingredients
Start by ensuring all your seafood is ready: if using frozen shrimp, thaw them properly. While the shrimp are thawing, cut the corn into halves and wash the small potatoes. Don’t forget to hard boil the eggs for about 9-12 minutes. Have everything prepped and within reach to create a smooth cooking process for your delightful Cajun Seafood Boil.

Step 2: Boil the Broth
In a large pot, combine 4-6 quarts of water, a can of beer (if using), and the Cajun seasoning. Add in 4-6 cloves of minced garlic for flavor. Bring the mixture to a rolling boil over high heat. You’ll know it’s ready when it’s filled with bubbles and the aroma of spices fills your kitchen, which typically takes about 10 minutes.

Step 3: Cook Vegetables
Once the broth is boiling, carefully add the small potatoes and corn halves into the pot. Let them simmer gently for about 15 minutes until the potatoes are fork-tender, but not mushy. This step is crucial as it lays a flavorful foundation for the seafood that will follow in your Cajun Seafood Boil.

Step 4: Add Seafood
After the vegetables are slightly tender, it’s time to introduce the stars of the show! Gently add the thawed shrimp, snow crab clusters, and sliced andouille sausage to the pot. Cook everything together for 5-7 minutes, or until the shrimp are pink and curled beautifully, and the crab is heated through. The colors will pop, creating a feast for the eyes!

Step 5: Prepare Garlic Butter Sauce
In a separate saucepan, melt a generous amount of butter over medium heat. Once melted, add minced garlic and sauté until fragrant, about 1-2 minutes. Combine the garlic butter sauce with the Cajun Seafood Boil right before serving for an added richness that elevates the entire dish with its delightful aroma.

Step 6: Serve & Enjoy
Now for the fun part—it's time to serve your delicious Cajun Seafood Boil! Spread a layer of newspaper or parchment on a large table or platter, and carefully pour the seafood and vegetables out. Drizzle the entire pot with the warm garlic butter sauce, allowing it to coat everything in rich, savory goodness. Gather friends and family, and get ready for a messy, enjoyable feast!

Expert Tips for Cajun Seafood Boil

  • Perfect Shrimp: Avoid overcooking shrimp; they should be pink and slightly curled for optimal tenderness.
  • Taste the Broth: Always sample your broth before adding seafood; adjust seasoning for a more flavorful Cajun Seafood Boil.
  • Check Cooking Times: Seafood cooking times vary, so be sure to follow package instructions for accurate timing.
  • Mess Control: Use an extra-large baking sheet or lined table to contain the delightful chaos when serving your seafood boil.
  • Make it Southern: For an authentic touch, consider adding sliced lemon or hot sauce at the table for an extra punch of flavor.

Storage Tips for Cajun Seafood Boil

  • Fridge: Store any leftovers in an airtight container for up to 3 days. This keeps the flavors preserved and the seafood safe to eat later.
  • Freezer: It’s best to freeze the broth and vegetables separately from the seafood to maintain quality. They can last in the freezer for up to 2 months.
  • Reheating: When ready to enjoy your Cajun Seafood Boil again, gently reheat on the stove over low heat. This prevents overcooking the seafood, keeping it tender and juicy.
  • Unused Ingredients: If you have leftover ingredients like Cajun seasoning or garlic butter, keep them in sealed containers in the fridge for up to a week for future use.

Make Ahead Options

Preparing your Cajun Seafood Boil with Garlic Butter Sauce ahead of time is a fantastic way to save precious moments on busy days! You can make the broth up to 24 hours in advance and store it in the refrigerator to deepen the flavors. Simply reheat it on the stove before adding the vegetables and seafood. Additionally, you can cut the corn and small potatoes, and hard boil the eggs up to 2 days ahead; just keep them in airtight containers in the fridge to maintain freshness. When it's time to serve, gently simmer the vegetables for about 15 minutes, then add the seafood, cooking until the shrimp are pink and curled to perfection. With these make-ahead options, your meal prep will be a breeze, allowing you to enjoy quality time with loved ones!

What to Serve with Cajun Seafood Boil with Garlic Butter Sauce

Create a feast that tantalizes the taste buds and brings joy to your gathering.

  • Crusty French Bread: Perfect for sopping up the garlicky goodness, this bread adds a satisfying crunch to each bite.
  • Coleslaw: A refreshing crunch balances the bold flavors; its creamy texture and tangy notes keep things light and fun.
  • Spicy Cornbread Muffins: Moist and sweet, these muffins come with a kick, perfectly complementing the spicy seafood without overwhelming it.
  • Garlic Butter Shrimp Pasta: A seamless addition that enhances the meal with a flavorful twist; the buttery garlic sauce mirrors the boil’s richness.
  • Cajun Rice: Celebrating Southern flavors, this fluffy rice provides a hearty base, soaking up any extra broth and making the meal even more filling.
  • Lemonade or Sweet Tea: These classic drinks cool down your palate while adding a touch of sweetness that balances the spices wonderfully.

Embrace the camaraderie of a Cajun Seafood Boil with dishes that enhance the experience, inviting laughter and satisfaction around your table.

Cajun Seafood Boil Variations

Customize your Cajun Seafood Boil to tantalize your taste buds and keep the flavors exciting!

  • Premium Seafood: Swap snow crab with king crab or lobster tails for a luxurious twist. The rich, sweet meat will take your boil to an extravagant new level.
  • Extra Shellfish: Toss in mussels or clams to introduce another layer of flavors and textures. They cook quickly and add a delightful brininess to the mix.
  • Spicy Kick: For those who enjoy a little heat, add sliced jalapeños or a sprinkle of cayenne pepper into the broth. This fiery enhancement will surely bring a vibrant zing to your feast!
  • Vegetarian Delight: To make a hearty vegetarian boil, replace the seafood with seasonal vegetables like zucchini, bell peppers, and asparagus. It's a fresh and colorful alternative that everyone will love.
  • Citrus Burst: Add lemon or lime wedges to the pot for a zesty infusion. The citrus will brighten all the flavors and add an irresistible aroma while cooking.
  • Herbaceous Flavor: Fresh herbs like parsley, dill, or thyme can elevate the dish with a Garden's touch. Add these in during the last few minutes for a refreshing finish.
  • Smoky Flavor: If you love a smoky flavor, ponder adding smoked paprika or substituting andouille sausage with a chipotle-flavored option. This will deepen the profile and give it a unique spin.
  • Beer Alternatives: Experiment with different types of beer, like a stout or a fruity ale for the broth. Each will add its own character, ensuring your seafood boil is never the same twice.

Embrace the creativity! Your table will be a canvas of flavors that everyone can savor. For a delightful side, try pairing your seafood boil with Cheesy Garlic Bread to soak up every drop of that luscious garlic butter sauce!

Cajun Seafood Boil with Garlic Butter Sauce Recipe FAQs

How do I choose the perfect seafood for my Cajun Seafood Boil?
Absolutely! Selecting fresh seafood is key to a successful Cajun Seafood Boil. For shrimp, look for bright, firm, and moist shells without dark spots. Fresh crab should have a salty sea smell and feel heavy for its size, while andouille sausage should be plump and free of any discoloration. If using frozen seafood, make sure it is completely thawed in the refrigerator, ideally overnight, for the best flavor and texture.

How should I store leftovers from my Cajun Seafood Boil?
Very! Store any leftovers in an airtight container and refrigerate them for up to 3 days. When you’re ready to enjoy them again, reheat gently on the stove over low heat. This ensures the seafood remains tender and prevents it from becoming rubbery. For best results, try to avoid reheating in the microwave as this can overcook the shrimp.

Can I freeze my Cajun Seafood Boil?
Yes, you can! To freeze your Cajun Seafood Boil, it’s best to separate the broth and vegetables from the seafood. The broth and vegetables can be stored in airtight containers or freezer-safe bags for up to 2 months. When you're ready to enjoy it, simply thaw overnight in the refrigerator, reheat gently, and add freshly cooked seafood for the best texture.

What should I do if my shrimp turns out rubbery?
Oh no! If your shrimp turns out rubbery, it’s likely due to overcooking. To avoid this in the future, cook the shrimp just until they turn pink and curl slightly, which typically takes only 5-7 minutes in the boil. Keeping a close eye on the cooking time and pulling them out as soon as they’re done is key to that tender bite we all crave.

Can I make modifications for dietary restrictions in my Cajun Seafood Boil?
Of course! This Cajun Seafood Boil is wonderfully adaptable. If someone in your gathering has seafood allergies, consider a vegetarian option by replacing the seafood with seasonal vegetables like zucchini, bell peppers, and potatoes for a hearty vegetable boil. Always make sure to communicate your ingredient choices clearly to your guests for their safety and enjoyment.

What is the best way to serve a Cajun Seafood Boil for a crowd?
The more, the merrier! Serving your Cajun Seafood Boil family-style on a newspaper-lined table creates a festive, casual atmosphere perfect for gatherings. Pour the seafood and vegetables directly onto the table, then drizzle with garlic butter sauce. Provide plenty of napkins and seafood crackers, as this dish is all about getting your hands messy and enjoying the experience together!

Cajun Seafood Boil with Garlic Butter Sauce

Cajun Seafood Boil with Garlic Butter Sauce for Ultimate Flavor

Discover the vibrant flavors of Cajun Seafood Boil with Garlic Butter Sauce, perfect for gatherings.
Print Recipe Pin Recipe
Prep Time 15 minutes mins
Cook Time 45 minutes mins
Total Time 1 hour hr
Servings: 6 people
Course: Dinner
Cuisine: Cajun, Southern
Calories: 600
Ingredients Equipment Method Nutrition Notes

Ingredients
  

For the Seafood
  • 1 lb Jumbo Shrimp thawed if frozen
  • 1 lb Snow Crab Clusters pre-cooked
  • 1 lb Andouille Sausage can substitute with kielbasa
For the Vegetables
  • 1 lb Small Potatoes waxy variety
  • 2 ears Corn on the Cob cut in half
  • 4 large Eggs hard boiled
For Flavor
  • 3 tbsp Cajun Seasoning or Old Bay seasoning
  • 1 cup Garlic Butter Sauce preferably made with fresh garlic
  • 1 can Beer optional, lager or IPA

Equipment

  • Large pot
  • Saucepan
  • Knife
  • Cutting Board

Method
 

Step-by-Step Instructions
  1. Prepare all seafood and vegetables, thaw shrimp if frozen, cut corn, and wash potatoes. Hard boil eggs.
  2. In a large pot, boil water and beer with Cajun seasoning and garlic. Bring to a rolling boil.
  3. Add small potatoes and corn to the boiling broth and simmer until potatoes are tender, about 15 minutes.
  4. Add shrimp, crab, and sausage to the pot, cook until shrimp are pink and curled, around 5-7 minutes.
  5. In a separate saucepan, melt butter and sauté minced garlic until fragrant. Combine with seafood before serving.
  6. Serve by pouring seafood and vegetables onto a table covered with newspaper and drizzle with garlic butter sauce.

Nutrition

Serving: 1plateCalories: 600kcalCarbohydrates: 45gProtein: 35gFat: 30gSaturated Fat: 15gPolyunsaturated Fat: 5gMonounsaturated Fat: 10gCholesterol: 200mgSodium: 1500mgPotassium: 800mgFiber: 5gSugar: 2gVitamin A: 150IUVitamin C: 10mgCalcium: 50mgIron: 2mg

Notes

Perfect for summer parties and family gatherings, this dish is easy to prepare and customizable.

Tried this recipe?

Let us know how it was!

Savory Apple Cheddar Galette with a Flaky Herb Crust

November 29, 2025 by Grace Snow Leave a Comment

The sweet aroma of honeycrisp apples mingling with the earthy notes of thyme fills the kitchen as I roll out the dough for my Apple Cheddar Galette with Crispy Herb Crust. This rustic dish isn't just visually stunning; it's a delightful blend of flavors that perfectly balances sweet and savory, ideal for any gathering or a cozy night in. One of the best parts? It’s remarkably simple to make, making it a perfect choice whether you're an experienced baker or just dipping your toes into the world of homemade desserts. And with its versatility, you can easily swap in seasonal fruits like pears or peaches, not to mention options for gluten-free adjustments. So, are you ready to create a culinary masterpiece that will impress your friends and family? Let’s dive in!

Why is this galette a must-try?

Simplicity at its core: With minimal ingredients and straightforward steps, this galette is perfect for beginners and seasoned bakers alike. Versatile yet sophisticated: Swap honeycrisp apples for your favorite seasonal fruits like pears or peaches, ensuring a fresh twist each time. Savory and sweet harmony: The combination of rich cheddar and aromatic thyme enhances the natural flavors, resulting in a dish that leaves a lasting impression. Quick to prepare: In just under an hour, you can present a stunning dish that looks as good as it tastes. Whether served warm with a dollop of crème fraîche or as a delightful snack on its own, this galette is a crowd-pleaser that's hard to resist! For more delicious options, try my Chicken Salad Apples or Fried Shrimp Cabbage.

Apple Cheddar Galette Ingredients

For the Crust

  • All-purpose flour – Provides the structure for the crust; substitute with gluten-free all-purpose flour for a gluten-free option.
  • Cold unsalted butter – Key for achieving a flaky pastry; keep it cold to ensure the best texture.
  • Vodka – Helps create a tender crust by inhibiting gluten formation; can be replaced with buttermilk or vinegar if needed.
  • Flaky salt – Enhances the flavor of the crust; sea salt or kosher salt works best.

For the Filling

  • Sharp cheddar cheese – Adds a savory kick and prevents a soggy crust by acting as a moisture barrier.
  • Thyme – Offers aromatic herbal notes; fresh thyme is recommended for the best flavor.
  • Honeycrisp apples – Provide natural sweetness and a lovely texture; feel free to substitute with pears, peaches, or plums based on what’s in season.
  • Sugar – Helps caramelize during baking and enhances the natural sweetness of the apples; adjust according to the fruit used.

For the Finish

  • Milk or egg wash – Used to brush the crust for browning; an egg wash adds a golden sheen, while milk gives a matte finish.

Elevate your dessert game with this delectable Apple Cheddar Galette! It’s not just a dish; it’s an experience that invites friends and family to the table with its rustic charm and delightful flavor profile.

Step-by-Step Instructions for Apple Cheddar Galette with Crispy Herb Crust

Step 1: Prepare the Dough
Begin by combining 1 ½ cups of all-purpose flour, ½ teaspoon of flaky salt, and ½ cup of cold unsalted butter cut into small cubes in a large mixing bowl. Use a pastry cutter or your fingers to mix until the mixture resembles coarse crumbs, about 2-3 minutes. Then, add 2 tablespoons of vodka while mixing until the dough just comes together. Shape it into a disc, wrap in plastic, and chill for 30 minutes.

Step 2: Assemble Filling
While the dough chills, prepare the filling for the Apple Cheddar Galette. Thinly slice about 3 cups of honeycrisp apples, aiming for ⅛ inch thickness for even cooking. Toss the apple slices with 2 tablespoons of sugar in a large bowl, ensuring each piece is lightly coated. This step enhances the natural flavors and will help caramelize the apples during baking.

Step 3: Roll Out Dough
After chilling, remove the dough from the refrigerator and let it sit for a few minutes to soften slightly. On a lightly floured surface, roll out the dough into a rough circle, about 12 inches in diameter. Aim for an even thickness of about ¼ inch, ensuring the edges are slightly thicker for better support. Set the rolled dough aside on a piece of parchment paper for easy transfer.

Step 4: Layer Ingredients
Once the dough is rolled out, sprinkle 1 cup of shredded sharp cheddar cheese evenly over the center, leaving about a 2-inch border. This cheese will provide a delightful contrast to the sweetness of the apples. Next, arrange the sliced apples concentrically over the cheese, overlapping them slightly. The vibrant colors will create an inviting appearance for your Apple Cheddar Galette.

Step 5: Fold and Chill
Carefully fold the edges of the dough over the filling, pleating as you go to create a rustic look and sealing the filling inside. Ensure that the center remains exposed. Once folded, brush the crust with a milk or egg wash to promote browning. Then, transfer the assembled galette to the refrigerator and chill for an additional 10-15 minutes, allowing it to firm up before baking.

Step 6: Bake
Preheat your oven to 400°F (200°C) and place a baking sheet lined with parchment paper on the middle rack. Once the oven is hot, carefully place the chilled galette on the baking sheet. Bake for 35-40 minutes, or until the crust is a beautiful golden brown and the apples are tender. You’ll know it's done when the aroma fills your kitchen, inviting everyone to gather around for a slice.

Expert Tips for the Best Apple Cheddar Galette

  • Keep Ingredients Cold: Ensure the butter remains cold throughout the process, as this is crucial for achieving that flaky crust texture you desire for your apple cheddar galette.

  • Slice Uniformly: Thinly slice your apples to about ⅛ inch thick. This promotes even cooking and helps achieve a beautifully caramelized filling that complements the cheddar.

  • Avoid Sogginess: Pat the sliced apples dry with paper towels before assembling the galette. This simple step helps prevent a soggy crust, ensuring every bite is deliciously crisp.

  • Chill After Assembling: After folding the crust, be sure to chill the assembled galette for an additional 10-15 minutes. This helps the crust maintain its structure during baking.

  • Adjust Sweetness: Depending on the sweetness of the seasonal fruit you choose, feel free to adjust the sugar accordingly to perfectly balance the flavors in your apple cheddar galette.

What to Serve with Apple Cheddar Galette with Crispy Herb Crust

Elevate your dining experience by complementing the deliciousness of this galette with perfect pairings that bring out its sweet and savory charm.

  • Light Salad: A fresh arugula salad with lemon vinaigrette brightens up the dish, providing a peppery contrast to the galette's richness.
  • Honeyed Yogurt: A dollop of honeyed Greek yogurt on the side adds creaminess that beautifully complements the galette’s flavors.
  • Roasted Veggies: Herb-roasted carrots and squash bring a hearty, earthy element, creating a delightful balance of textures and flavors.
  • Crispy Bacon: Adding crispy, crumbled bacon on top elevates the savory notes of the galette, enhancing its robust depth.
  • Savory Soup: A warm butternut squash soup offers a smooth, creamy partner, providing cozy warmth and balanced sweetness for a delightful meal.
  • Chardonnay: Pairing with a glass of chilled Chardonnay enhances the complexity of the dish with its fruity undertones and subtle oakiness.
  • Vanilla Ice Cream: Serve with vanilla ice cream for a classic dessert experience; the creamy sweetness contrasts the galette's savory notes perfectly.
  • Cheese Board: Pairing it with a selection of sharp cheeses and crackers invites sharing and celebration around the table, perfect for entertaining.
  • Sparkling Water: A refreshing bubbly drink with lemon slices cleanses the palate, ensuring each bite of galette is as delightful as the first.

Apple Cheddar Galette Variations & Substitutions

Feel free to get creative with this delectable galette and discover delightful twists that elevate the flavors even further!

  • Dairy-Free: Swap out the sharp cheddar for your favorite dairy-free cheese and use vegan butter for a plant-based delight.

  • Seasonal Fruits: Experiment with seasonal fruits, such as juicy pears or sweet peaches, to keep flavors fresh and exciting throughout the year. When in season, these fruits create a unique taste experience that’s truly memorable.

  • Savory Twist: For a completely savory version, replace apples with roasted squash or sweet potato, and omit the honey drizzle. This variation hints at autumn flavors, making it perfect for a cozy gathering.

  • Gluten-Free: Use a gluten-free all-purpose flour blend instead of regular flour for a delicious gluten-free crust without sacrificing taste or texture. It's a great way to make this dish accessible to everyone!

  • Herb Variations: Feel free to substitute thyme with fresh rosemary or sage for a delightful herbaceous twist. Each herb imparts a unique flavor, adding a new dimension to your galette.

  • Extra Crunch: Add crushed nuts, like walnuts or pecans, to the filling for an exciting crunch. This textural bonus takes each bite over the top.

  • Spiced Up: Incorporate a sprinkle of cinnamon or nutmeg into the filling to enhance the warmth and coziness of the apples. These warming spices are perfect for fall and winter gatherings.

  • Chutney Surprise: Serve the galette alongside a spoonful of apple chutney or a tangy relish for an unexpected burst of flavor that complements the sweetness of the apples beautifully.

Let your creativity shine with these variations! And if you're looking for more unique recipes, be sure to check out my delightful Buffalo Tofu Caesar or the flavorful Fish Taco Bowls.

Make Ahead Options

These Apple Cheddar Galettes are perfect for busy cooks looking to save time during the week! You can prepare the dough and shape the galette up to 24 hours in advance; simply wrap it tightly in plastic wrap and refrigerate to maintain freshness. The apple filling can also be prepped by slicing the apples and tossing them with sugar, which you can store in an airtight container for up to 3 days—this keeps them from browning. When you're ready to bake, assemble the galette, fold the edges, and chill for a quick 10-15 minutes before sliding it into the oven. You'll enjoy that rustic, homemade delight with minimal effort!

How to Store and Freeze Apple Cheddar Galette

Fridge: Keep leftover Apple Cheddar Galette in an airtight container for up to 4 days, ensuring it's stored in a single layer to maintain its crispness.

Freezer: Wrap unbaked galette tightly in plastic wrap or aluminum foil, and freeze for up to 1 month. Bake directly from frozen, extending baking time by 5-10 minutes.

Reheating: To restore the galette's flaky texture, reheat slices in a preheated oven at 350°F (175°C) for about 10-15 minutes, making it delightfully warm again.

Make-Ahead: You can prepare the dough and filling in advance; just assemble and bake it fresh when ready to serve for optimal flavor.

Apple Cheddar Galette with Crispy Herb Crust Recipe FAQs

How do I select the right apples for my galette?
Absolutely! For the best results, choose apples that are crisp and slightly tart, like Honeycrisp or Granny Smith. These varieties hold their shape well during baking and offer a delightful balance to the sharp cheddar. Avoid overly soft apples, as they can turn mushy and lead to a soggy filling.

What is the best way to store leftover galette?
After you’ve enjoyed your Apple Cheddar Galette, store it in an airtight container in the refrigerator for up to 4 days. I recommend keeping it in a single layer to ensure the crust maintains its delightful crispness. If it’s a bit soft upon serving, a quick reheating in the oven can help restore its texture!

Can I freeze the galette before baking?
Yes, indeed! If you want to prepare ahead, wrap the unbaked Apple Cheddar Galette tightly in plastic wrap or aluminum foil and freeze it for up to 1 month. When you’re ready to bake, place it directly from the freezer into your preheated oven, extending your baking time by about 5-10 minutes to ensure perfection.

What should I do if my crust turns out soggy?
Very! To prevent a soggy crust, pat your apple slices dry with paper towels before assembling your galette; this helps remove excess moisture. Additionally, if you're using particularly juicy fruits, adjusting the sugar and allowing your filling to sit for a few minutes can help release extra moisture that might affect the crust.

Are there any dietary considerations I should keep in mind?
Of course! This Apple Cheddar Galette is naturally vegetarian. If you're preparing it for strict vegetarians, ensure the cheddar cheese is made with vegetarian rennet. For a gluten-free option, simply swap regular flour with a gluten-free all-purpose blend. You can even make it vegan by using dairy-free cheese and vegan butter, adapting it to accommodate various dietary needs!

How can I tell when the galette is done baking?
To ensure your Apple Cheddar Galette is perfectly baked, watch for a beautiful golden brown crust and tender apples bubbling at the edges. Typically, this takes about 35-40 minutes at 400°F (200°C). Trust me, the heavenly aroma filling your kitchen is also a reliable indicator that it’s time to gather your loved ones and serve up this delightful dish!

null

Savory Apple Cheddar Galette with a Flaky Herb Crust

A deliciously simple dessert blending honeycrisp apples and cheddar cheese in a flaky herb crust.
Print Recipe Pin Recipe
Prep Time 30 minutes mins
Cook Time 40 minutes mins
Chilling Time 30 minutes mins
Total Time 1 hour hr 40 minutes mins
Servings: 8 slices
Course: Dessert
Cuisine: American
Calories: 250
Ingredients Equipment Method Nutrition Notes

Ingredients
  

For the Crust
  • 1.5 cups all-purpose flour can substitute with gluten-free all-purpose flour
  • 0.5 teaspoon flaky salt sea salt or kosher salt works best
  • 0.5 cups cold unsalted butter cut into small cubes
  • 2 tablespoons vodka can substitute with buttermilk or vinegar
For the Filling
  • 1 cups shredded sharp cheddar cheese
  • 3 cups honeycrisp apples thinly sliced, about ⅛ inch thick
  • 2 tablespoons sugar
  • 1 tablespoon thyme fresh recommended
For the Finish
  • 1 tablespoon milk for brushing the crust

Equipment

  • Mixing Bowl
  • Pastry cutter
  • Rolling Pin
  • Baking Sheet
  • Parchment Paper

Method
 

Step-by-Step Instructions
  1. Combine flour, flaky salt, and cold butter in a mixing bowl until it resembles coarse crumbs.
  2. Add vodka and mix until dough comes together; shape it into a disc, wrap, and chill for 30 minutes.
  3. Slice the apples and toss with sugar in a bowl to coat.
  4. Roll the chilled dough into a circle about 12 inches in diameter.
  5. Sprinkle shredded cheddar over the dough, followed by the sliced apples.
  6. Fold the dough edges over the filling and brush with milk or an egg wash.
  7. Chill for an additional 10-15 minutes before baking at 400°F for 35-40 minutes.

Nutrition

Serving: 1sliceCalories: 250kcalCarbohydrates: 30gProtein: 5gFat: 12gSaturated Fat: 8gPolyunsaturated Fat: 0.5gMonounsaturated Fat: 3gCholesterol: 30mgSodium: 200mgPotassium: 150mgFiber: 1gSugar: 5gVitamin A: 10IUVitamin C: 8mgCalcium: 10mgIron: 6mg

Notes

Store leftover galette in an airtight container for up to 4 days; unbaked galette can be frozen for a month.

Tried this recipe?

Let us know how it was!

Cranberry Brie Pull-Apart Bread Bites: Easy, Cheesy Delight

November 29, 2025 by Grace Snow Leave a Comment

As I flipped through my recipe book, a revelation hit me: Thanksgiving is not just about the turkey, but also about creating those unforgettable appetizers that set the mood for the entire feast. Among my favorites is the Cranberry Brie Pull-Apart Bread Bites, a dish that's both inviting and incredibly easy to whip up. These delightful bites come together quickly and are sure to impress your guests with their gooey, cheesy goodness paired with the sweet tang of cranberries. Perfect for keeping everyone satisfied before the main event, they seamlessly cater to a range of dietary preferences. How can you resist the allure of cheesy pull-apart bread on a holiday table? Let’s dive into this crowd-pleasing recipe and discover the joy of homemade Thanksgiving finger foods!

Why You'll Adore Cranberry Brie Bites

Easy Preparation: These bites come together in no time, making them perfect for busy holiday cooks.

Cheesy Bliss: The gooey brie melds beautifully with the tangy cranberry sauce, creating a flavor explosion in every bite.

Crowd-Pleaser: Whether your guests are meat lovers, vegetarians, or gluten-free, these bites adapt to everyone’s tastes.

Versatile Delight: Swap brie for camembert or even vegan cheese, and enjoy this recipe tailored to your dietary preferences.

Impressive Presentation: With their beautiful pull-apart design, these bites will steal the show on your Thanksgiving table—consider pairing them with something like Cheesy Garlic Bread for even more irresistible options.

Cranberry Brie Pull-Apart Bread Bites Ingredients

For the Bread
• Bread Loaf – A soft, pull-apart bread option works best for easy sharing.
• Brie Cheese – Melts into a lovely gooey consistency that pairs perfectly with cranberry.
• Cranberry Sauce – Offers a sweet and tart contrast; homemade or store-bought both work well.

For the Topping
• Fresh Rosemary – Adds a fragrant herbal note; feel free to substitute with thyme for a different flavor.
• Butter – Helps achieve a golden, crispy crust; use dairy-free alternatives for a vegan option.
• Garlic Powder – Elevates the flavor profile; adjust according to preference for a personal touch.

Optional Dipping Sauce
• Honey – A drizzle over the top enhances sweetness; consider agave syrup for a vegan-friendly option.
• Balsamic Glaze – Adds a tangy, sophisticated touch, enriching the overall flavor experience.

These Cranberry Brie Pull-Apart Bread Bites are a delightful addition to your Thanksgiving appetizers, ensuring that your gathering is filled with warmth and flavor!

Step‑by‑Step Instructions for Cranberry Brie Pull-Apart Bread Bites

Step 1: Preheat the Oven
Begin by preheating your oven to 350°F (175°C). This ensures that your Cranberry Brie Pull-Apart Bread Bites will bake evenly. While the oven warms up, gather all your ingredients to have them organized and ready for assembly.

Step 2: Prepare the Bread
Take your soft pull-apart bread loaf and slice it into squares, being careful not to cut all the way through, ensuring the loaf remains intact. The openings should allow space for the luscious brie and cranberry sauce to seep in while baking, creating that gooey goodness you crave.

Step 3: Add the Filling
Generously spoon cranberry sauce between the slices of the bread, tucking it in lovingly. Then, slice the brie cheese into smaller pieces and place them within the crevices of the loaf. The combination of sweet cranberry and creamy brie will be blissful once melted together in the oven.

Step 4: Season and Butter
Melt some butter and mix in garlic powder, then brush this mixture generously over the top of the bread. Sprinkle freshly chopped rosemary (or thyme) on top for an aromatic finish. This delicious layer will give your Cranberry Brie Pull-Apart Bread Bites a golden, crispy crust when they bake.

Step 5: Bake the Bread
Place the prepared loaf on a baking sheet lined with parchment paper. Bake in the preheated oven for about 20-25 minutes, until the bread is golden brown and the cheese is oozy and bubbling. You’ll know it's ready when you can smell that irresistible cheesy aroma filling your kitchen.

Step 6: Serve and Enjoy
Once out of the oven, allow the bread to cool slightly before serving. Drizzle with honey or balsamic glaze for an extra touch, then present your stunning Cranberry Brie Pull-Apart Bread Bites to your guests. They’ll be drawn in by the delightful scent and visually appealing pull-apart design!

What to Serve with Cranberry Brie Pull-Apart Bread Bites

As you gather around the table for Thanksgiving, think of these delectable bites as the perfect starter, inviting warm conversations and happy gatherings.

  • Creamy Potato Gratin: This rich, cheesy dish complements the sweet tang of cranberries while providing a comforting texture that is simply irresistible.

  • Crisp Green Salad: Bursting with freshness, a salad loaded with mixed greens, apples, and walnuts provides a bright contrast to the savory bites. It’s a light touch for your guests!

  • Sautéed Brussels Sprouts: The nutty flavor of roasted Brussels sprouts pairs excellently with the cheesy bites, adding a delightful crunch and slight bitterness to balance the sweetness.

  • Festive Cheese Platter: Serve alongside a beautiful cheese board featuring various cheeses, nuts, and dried fruits. The variety of flavors and textures will elevate the appetizer experience.

  • Sweet and Spicy Mustard Dip: This tangy dip offers a nice contrast to the rich cheese, making each bite of the Cranberry Brie Pull-Apart Bread Bites even more exciting.

  • Sparkling Cider: A refreshing, bubbly drink that complements the flavors beautifully, making it an enjoyable addition to your Thanksgiving spread.

  • Mini Pumpkin Pies: Keep the holiday spirit alive with these classic desserts. Their spiced sweetness perfectly rounds out the savory appetizers, leaving everyone satisfied and festive.

Variations & Substitutions for Cranberry Brie Pull-Apart Bread Bites

Feel free to get creative with these delightful bites, enhancing their flavors and textures to suit your taste buds!

  • Vegan Cheese: Substitute brie with your favorite plant-based cheese for a delicious vegan version that everyone can enjoy. It's a perfect way to keep the creamy goodness while accommodating dietary restrictions.

  • Sweet & Savory Twist: Add a layer of fig jam along with cranberry sauce for an additional sweetness that complements the savory cheese beautifully. This unexpected twist will elevate your appetizer into a gourmet experience.

  • Herb Options: Instead of rosemary, try using fresh thyme or even sage for a cozy, aromatic flavor profile. The different herbs can drastically change the vibe, giving you multiple options to explore!

  • Gluten-Free: Use gluten-free bread to make these bites accessible for gluten-sensitive guests. There are several tasty alternatives available that can match the soft, pull-apart texture.

  • Nutty Crust: For added crunch, sprinkle chopped nuts like walnuts or pecans on top before baking. This delightful addition will add both texture and a wonderful nutty flavor that pairs perfectly with the cheese.

  • Smoky Flavor: Incorporate smoked gouda or add a touch of smoked paprika to the butter mixture for a subtle smoky flavor that adds depth to every bite. It's a little twist that can really transform the flavor!

  • Balsamic Reduction Drizzle: Drizzle a balsamic reduction over the finished product for an extra layer of flavor and a beautiful presentation. It’s a sophisticated touch that will impress your guests.

Consider having these Cheesy Garlic Bread or Cornbread Breakfast Casserole alongside for a variety of delicious options, impressively diversified to match any palate at your Thanksgiving gathering!

How to Store and Freeze Cranberry Brie Pull-Apart Bread Bites

Fridge: Store leftover Cranberry Brie Pull-Apart Bread Bites in an airtight container for up to 3 days to maintain freshness and flavor.

Freezer: If you want to keep them longer, wrap the bites tightly in plastic wrap and then place them in a freezer-safe bag. They can be frozen for up to 2 months.

Reheating: When ready to enjoy, thaw in the fridge overnight and reheat in the oven at 350°F (175°C) for about 10-15 minutes until warmed through and cheese is melty again.

Make-Ahead Tip: Prepare the bites in advance and freeze before baking; this way, you can pop them straight into the oven when guests arrive for freshly baked goodness.

Make Ahead Options

These Cranberry Brie Pull-Apart Bread Bites are a fantastic option for meal prep, saving you time on the big day! You can prepare the bread and filling (cranberry sauce and brie) up to 24 hours in advance. Simply slice the bread and fill it with cranberry sauce and brie, then cover it tightly with plastic wrap and refrigerate. This helps the flavors meld while ensuring the bread stays fresh. When you’re ready to serve, brush the top with the butter-garlic mixture and rosemary, then bake straight from the refrigerator for 20-25 minutes until golden brown. Your guests will be treating themselves to the same delightful, cheesy experience as if made fresh that day!

Expert Tips for Cranberry Brie Pull-Apart Bread Bites

Uniform Cuts: Ensure bread is sliced evenly but not completely through to create perfect pockets for the cheese and cranberry.

Fresh Herbs: Use fresh rosemary or thyme for the best flavor; dried herbs can be too overpowering and may not provide the same aroma.

Mind the Bake Time: Keep an eye on your bites as they bake to avoid burning; every oven is different, so check them a few minutes early.

Perfect Pairing: Serve with a side of honey or balsamic glaze, enhancing the sweet-tart experience of your Cranberry Brie Pull-Apart Bread Bites.

Make Ahead: Prepare the bread with fillings a few hours in advance; just cover and refrigerate until ready to bake for a quicker serving solution.

Vegan Alternatives: Substitute brie with a creamy vegan cheese option to cater to guests with dietary restrictions without sacrificing flavor.

Cranberry Brie Pull-Apart Bread Bites Recipe FAQs

What type of bread is best for Cranberry Brie Pull-Apart Bread Bites?
For the best results, a soft pull-apart bread loaf is ideal, like a brioche or crusty white bread. This allows for easy sharing and creates the delightful gooey texture as it bakes. Avoid very dense breads, as they may not hold the toppings well.

How should I store leftover Cranberry Brie Pull-Apart Bread Bites?
Store any leftovers in an airtight container in the refrigerator for up to 3 days. It’s best to reheat them in the oven for a few minutes to bring back their delicious, cheesy texture.

Can I freeze Cranberry Brie Pull-Apart Bread Bites?
Absolutely! Wrap the bites tightly in plastic wrap and then place them in a freezer-safe bag. They can be frozen for up to 2 months. Just make sure they are well-sealed to avoid freezer burn.

What’s the best way to reheat frozen Cranberry Brie Pull-Apart Bread Bites?
Thaw overnight in the refrigerator and then reheat in the oven set to 350°F (175°C) for about 10-15 minutes. This will ensure they warm evenly, with the cheese becoming wonderfully melty again.

Are there any dietary considerations for guests with allergies?
Yes! Make sure to ask about any dietary restrictions, as this recipe includes dairy. You can easily substitute brie with a vegan cheese to cater to those who are lactose intolerant or following a plant-based diet. Additionally, ensure that your bread is gluten-free if necessary.

Can I prepare these bites in advance?
Absolutely! You can prepare the full assembly a few hours ahead of time. Just cover them and refrigerate until you're ready to bake. Alternatively, you can freeze them uncooked, so they’re ready to bake fresh when your guests arrive.

Cranberry Brie Pull-Apart Bread Bites

Cranberry Brie Pull-Apart Bread Bites: Easy, Cheesy Delight

Cranberry Brie Pull-Apart Bread Bites are an inviting appetizer, easy to make, and perfect for Thanksgiving gatherings.
Print Recipe Pin Recipe
Prep Time 15 minutes mins
Cook Time 25 minutes mins
Total Time 40 minutes mins
Servings: 8 bites
Course: Appetizers
Cuisine: American
Calories: 150
Ingredients Equipment Method Nutrition Notes

Ingredients
  

For the Bread
  • 1 loaf soft pull-apart bread A soft, pull-apart bread option works best for easy sharing.
  • 1 cup Brie cheese Melts into a lovely gooey consistency.
  • 1 cup cranberry sauce Homemade or store-bought both work well.
For the Topping
  • 2 tablespoons fresh rosemary Adds a fragrant herbal note; feel free to substitute with thyme.
  • 4 tablespoons butter Use dairy-free alternatives for a vegan option.
  • 1 teaspoon garlic powder Adjust according to preference for a personal touch.
Optional Dipping Sauce
  • 2 tablespoons honey Enhances sweetness; consider agave syrup for a vegan-friendly option.
  • 2 tablespoons balsamic glaze Adds a tangy, sophisticated touch.

Equipment

  • Oven
  • Baking Sheet
  • Parchment Paper
  • Mixing Bowl

Method
 

Step-by-Step Instructions
  1. Preheat the oven to 350°F (175°C). Gather all your ingredients.
  2. Slice the bread into squares, ensuring the loaf remains intact.
  3. Spoon cranberry sauce between the slices, then add pieces of brie cheese.
  4. Melt butter, mix in garlic powder, and brush over the top of the bread. Sprinkle rosemary on top.
  5. Bake for 20-25 minutes until golden brown and the cheese is melted.
  6. Allow to cool slightly, then drizzle with honey or balsamic glaze before serving.

Nutrition

Serving: 1biteCalories: 150kcalCarbohydrates: 20gProtein: 5gFat: 7gSaturated Fat: 4gMonounsaturated Fat: 2gCholesterol: 20mgSodium: 200mgPotassium: 100mgFiber: 1gSugar: 3gVitamin A: 200IUCalcium: 100mgIron: 1mg

Notes

Store leftovers in an airtight container for up to 3 days. You can freeze them for up to 2 months as well.

Tried this recipe?

Let us know how it was!

Ham & Cheese Puff Pastry Christmas Trees for Festive Fun

November 29, 2025 by Grace Snow Leave a Comment

As the holiday season approaches, each kitchen becomes a little warmer, filled with the spirit of celebration and delicious aromas. This year, let’s elevate your festivities with these charming Ham & Cheese Puff Pastry Christmas Trees. They are not just visually stunning; these savory delights are incredibly easy to make, turning your holiday gatherings into gourmet experiences without the stress of complicated recipes. With layers of flaky pastry cradling melty cheese and savory ham, each bite is sure to be a hit. They’re the perfect finger food, making them ideal for holiday parties, cozy nights in, or festive brunches. Plus, with options for vegetarian variations, everyone can join in the fun! What magical twists will you give to these delightful trees?

Why Make Ham & Cheese Christmas Trees?

Festive Appeal: These Ham & Cheese Puff Pastry Christmas Trees will definitely be the centerpiece of your holiday spread, delighting both kids and adults alike.
Quick & Easy: You’ll be amazed at how simple they are to prepare—perfect for last-minute gatherings!
Versatile Options: Feel free to swap in different cheeses or add your favorite herbs to personalize your trees.
Crowd-Pleasing Treats: Everyone loves a fun finger food, especially when it’s cheese-filled and flaky! Serve them alongside some tasty Jello Salad Cottage for a festive buffet.
Make Ahead: Prep them in advance—just assemble and refrigerate for up to 24 hours before baking. Enjoy the holiday ease!

Ham & Cheese Puff Pastry Ingredients

For the Pastry
• Puff Pastry – A flaky, golden base; thawed sheets yield the best results.
• Deli Ham – Provides savory flavor; ensure it's thinly sliced for even layering.

For the Filling
• Cheese (Cheddar, Gouda, Swiss, Mozzarella) – Choose a well-melting cheese for that creamy, decadent filling.
• Honey Mustard or Fig Jam – Optional spread that gives a sweet-savory contrast to the cheese.

For the Assembly
• Wooden Skewers – Serve as sturdy tree trunks; toothpicks can work, but skewers hold better.
• Melted Butter – Enhances flavor and helps achieve a beautiful golden color.
• Minced Garlic – Fresh or jarred adds a delightful aromatic touch.
• Chopped Fresh Parsley – Offers a pop of color and fresh herb flavor; dried parsley can be substituted with less quantity.
• Star-Shaped Cheese Cutouts – Decorative "tree toppers" that add festive flair.

For the Optional Toppings
• Sesame or Poppy Seeds – Sprinkle these for decorative flair and a pleasant crunch.

Step‑by‑Step Instructions for HAM & CHEESE PUFF PASTRY CHRISTMAS TREES

Step 1: Preheat the Oven
Begin by preheating your oven to 375°F (190°C). While the oven heats up, line a baking sheet with parchment paper, ensuring it’s ready to catch any delicious drips from your HAM & CHEESE PUFF PASTRY CHRISTMAS TREES while they bake.

Step 2: Assemble the Layers
Lay one sheet of puff pastry flat on the prepared baking sheet. Spread an even layer of your choice of cheese over the pastry, followed by a layer of thinly sliced deli ham. Place another sheet of puff pastry on top and gently press down to seal the layers, creating a deliciously flaky base.

Step 3: Cut Strips
Using a sharp knife, cut the layered pastry into 1-inch wide strips. Take care to make clean cuts, as these strips will become your tree shapes. Ensure the layers remain intact as you cut to keep the flavors cohesively wrapped in the pastry for your upcoming HAM & CHEESE PUFF PASTRY CHRISTMAS TREES.

Step 4: Shape the Trees
Take each pastry strip and thread it onto a wooden skewer. Fold the strip back and forth, alternating directions to create a tree-like shape. As you fold, keep the design tight and compact, ensuring your festive trees look as charming as they taste.

Step 5: Brush with Glaze
In a small bowl, mix melted butter, minced garlic, and chopped parsley. Using a pastry brush, generously coat each puff pastry tree with the garlic butter mixture. This step not only adds flavor but will also give your HAM & CHEESE PUFF PASTRY CHRISTMAS TREES a golden, appetizing finish once baked.

Step 6: Bake
Carefully place the decorated baking sheet into the preheated oven. Bake for 20 to 25 minutes, keeping an eye out for a perfect golden-brown appearance. The puff pastry should be airy and puffed up, indicating that it’s reached its delicious, flaky final form.

Step 7: Serve
Once baked, remove the HAM & CHEESE PUFF PASTRY CHRISTMAS TREES from the oven and let them cool slightly on the baking sheet. Serve them warm or at room temperature, festively arranged on a platter, perfect for indulging in during your holiday gathering!

Make Ahead Options

These Ham & Cheese Puff Pastry Christmas Trees are perfect for busy home cooks looking to save time during the holiday rush! You can assemble the trees and refrigerate them for up to 24 hours before baking. Simply layer the puff pastry with cheese and ham, shape into trees on skewers, and brush with the garlic butter mixture. Then, cover them tightly with plastic wrap to maintain their freshness and prevent drying out. When you're ready to impress your guests, bake them directly from the refrigerator, allowing an extra minute or two if they're particularly cold. Enjoy holiday gatherings with effortlessly delicious flavors, just as festive and flaky as if baked fresh!

Variations & Substitutions for Ham & Cheese Puff Pastry Christmas Trees

Feel free to get creative with these festive treats by switching things up and making them your own!

  • Vegetarian Option: Replace ham with thinly sliced roasted vegetables or a spinach-artichoke spread for a delightful flavor twist. This adds a pop of color and a hearty texture that everyone can enjoy.

  • Cheese Variety: Experiment with different cheeses like brie or pepper jack for a unique flair. Mixing cheeses can elevate the flavor profile, melting beautifully within the pastry trees.

  • Flavor Boost: Add fresh herbs like thyme or rosemary to the butter glaze for an aromatic touch. These fragrant herbs will infuse your trees with a deep, pleasing flavor that sets them apart.

  • Sweet-Savory Layer: Spread a thin layer of cranberry sauce or fig jam under the cheese for a festive sweet-savory contrast. This delightful combo will have your guests raving about your creativity!

  • Nutty Crunch: Sprinkle chopped walnuts or pecans inside the layers for added texture and surprise. The crunch complements the softness of the cheese and ham, balancing each bite perfectly.

  • Heat Things Up: Include jalapeño slices or a sprinkle of red pepper flakes for a spicy kick in your pastry trees. This will appeal to guests who enjoy an extra zing!

  • Flatbread Variation: For an ultra-easy twist, use flatbread instead of puff pastry to make mini versions that are quick and equally delicious. They're perfect for guests on the go!

  • Dipping Sauce Pairing: Serve these trees with a side of zesty ranch dressing or balsamic reduction for dipping. This complementary element enhances the entire experience, making every bite more enjoyable.

For more delicious ideas, consider pairing these festive trees with a refreshing Jello Salad Cottage or get inspired by this unique Potato Blue Cheese twist to complete your holiday spread!

What to Serve with Ham & Cheese Puff Pastry Christmas Trees

Delightfully simple, these festive treats are ready to shine alongside a variety of tasty sides.

  • Garlic Aioli: This creamy dip adds a rich, flavorful touch that complements the savory pastry beautifully. Use it to enhance the flavors and provide a luxurious, velvety contrast.

  • Fresh Salad: A vibrant mixed greens salad with citrus vinaigrette brings a refreshing burst that balances the richness of the puff pastry. The tanginess will elevate the entire dining experience.

  • Honey Mustard Dip: Sweet and tangy, this dip pairs wonderfully with the ham and cheese, enhancing the overall sweetness of the pastry while offering a delightful crunch.

  • Mini Quiches: Serve alongside these delectable bite-sized eggy treats for an extra layer of savory goodness. They’ll please the guests and add a brunchy vibe to your gathering.

  • Stuffed Mushrooms: Earthy and earthy, stuffed mushrooms bring a lovely umami flavor that complements the cheesy goodness of the trees while introducing a satisfying texture.

  • Mulled Wine: This fragrant, warm drink is perfect for holiday gatherings. Its spices will enhance the festive atmosphere, pairing harmoniously with the savory treats.

  • Spiced Cranberry Sauce: A sweet-tart sauce provides a wonderful contrast to the savory pastry, making each bite burst with flavor and seasonal joy.

  • Chocolate Fondue: For dessert, a warm chocolate fondue adds a touch of indulgence. Fruit and marshmallows dipped into chocolate offer a playful end to the meal, perfectly balancing the savory starters.

  • Baked Brie: This warm, melty cheese serves as a luxurious addition: spread it on crackers for a creamy, delicious bite that pairs well with the holiday spirit.

  • Roasted Vegetables: Caramelized roasted veggies lend a sweet, earthy flavor that complements the richness of the pastry while adding wholesome freshness to your festive table.

Expert Tips for Ham & Cheese Puff Pastry Trees

  • Keep It Cold: Ensure the puff pastry remains cold while you work; this helps create that light, flaky texture we all love in these ham & cheese puff pastry Christmas trees.

  • Accurate Baking: Use an oven thermometer to ensure your oven is at the correct temperature, resulting in evenly baked trees that are perfectly puffed.

  • Don’t Overfill: Avoid overstuffing your pastries to prevent unsightly cheese leakage during baking—leave a small border around the edges.

  • Customize Flavors: Feel free to switch out the cheese or ham for your personal favorites, making your ham & cheese puff pastry Christmas trees uniquely yours!

  • Garnish Wisely: If using seeds for garnish, sprinkle sparingly; too many could overshadow the flaky pastry and cheesy filling.

How to Store and Freeze Ham & Cheese Puff Pastry Christmas Trees

Fridge: Store baked Ham & Cheese Puff Pastry Christmas Trees in an airtight container for up to 3 days. Reheat in the oven at 350°F (175°C) for about 10 minutes for crispy results.

Freezer: If you have leftovers or want to prep ahead, freeze unbaked trees by placing them on a baking sheet. Once frozen solid, transfer to a freezer-safe bag for up to 3 months. Bake from frozen, adding a few extra minutes to the cooking time.

Make-Ahead: Assembled but unbaked trees can be refrigerated for up to 24 hours. Just pop them in the oven when you're ready to impress your guests!

Reheating: To rewarm leftover trees, place them on a baking sheet and heat in a preheated oven at 350°F (175°C) for about 10 minutes until warmed through and crispy.

Ham & Cheese Puff Pastry Christmas Trees Recipe FAQs

What type of puff pastry should I use?
I recommend using thawed sheets of store-bought puff pastry for best results. This ensures a flaky texture and easy handling. Be sure to keep the pastry cold while working for the best puff during baking!

How long can I store leftovers?
Baked Ham & Cheese Puff Pastry Christmas Trees can be stored in an airtight container in the fridge for up to 3 days. When you’re ready to enjoy them again, simply reheat in the oven at 350°F (175°C) for about 10 minutes to bring back their crispiness.

Can I freeze these pastry trees?
Absolutely! You can freeze unbaked Ham & Cheese Puff Pastry Christmas Trees by placing them on a baking sheet in a single layer. Once they are frozen solid, transfer them to a freezer-safe bag and store for up to 3 months. When ready to bake, cook them straight from the freezer, adding an extra 5 minutes to the baking time.

What if my puff pastry doesn't puff up?
If your Ham & Cheese Puff Pastry Christmas Trees don’t puff, it may be because the pastry was too warm before baking or the oven temperature was inaccurate. To prevent this, ensure that the puff pastry stays cold throughout preparation. An oven thermometer can help confirm that your oven temperature is spot on for that perfect, flaky texture.

Are there any dietary considerations?
Yes! If you want to make a vegetarian version, you can easily swap out the ham for turkey or use a delicious spinach-artichoke spread. Additionally, always check labels for allergens if serving to guests, ensuring no one has peanut or gluten sensitivities.

How can I make these festive treats visually appealing?
You can enhance the visual appeal of your Ham & Cheese Puff Pastry Christmas Trees by sprinkling sesame or poppy seeds on top before baking, or using star-shaped cheese cutouts as tree toppers. These simple touches add both crunch and holiday cheer to your festive platter!

HAM & CHEESE PUFF PASTRY CHRISTMAS TREES

Ham & Cheese Puff Pastry Christmas Trees for Festive Fun

Delight your holiday gatherings with these charming Ham & Cheese Puff Pastry Christmas Trees, a perfect finger food for festive fun.
Print Recipe Pin Recipe
Prep Time 25 minutes mins
Cook Time 25 minutes mins
Chill Time 30 minutes mins
Total Time 1 hour hr 20 minutes mins
Servings: 8 trees
Course: Appetizers
Cuisine: American
Calories: 200
Ingredients Equipment Method Nutrition Notes

Ingredients
  

For the Pastry
  • 2 sheets Puff Pastry thawed
  • 8 oz Deli Ham thinly sliced
For the Filling
  • 1 cup Cheese choose well-melting varieties like Cheddar, Gouda, Swiss, or Mozzarella
  • 2 tbsp Honey Mustard or Fig Jam optional
For the Assembly
  • 6 pieces Wooden Skewers or toothpicks
  • 4 tbsp Melted Butter for brushing
  • 2 cloves Minced Garlic fresh or jarred
  • 1 tbsp Chopped Fresh Parsley or dried parsley
  • 8 pieces Star-Shaped Cheese Cutouts for decoration
For the Optional Toppings
  • 2 tbsp Sesame or Poppy Seeds for decorative flair

Equipment

  • Baking Sheet
  • Parchment Paper
  • Pastry brush
  • Sharp Knife

Method
 

Step-by-Step Instructions
  1. Preheat your oven to 375°F (190°C) and line a baking sheet with parchment paper.
  2. Lay one sheet of puff pastry flat on the prepared baking sheet. Spread an even layer of cheese over the pastry, followed by a layer of deli ham. Place another sheet of puff pastry on top and gently press down to seal.
  3. Cut the layered pastry into 1-inch wide strips.
  4. Take each pastry strip and thread it onto a wooden skewer, folding it back and forth to create a tree shape.
  5. Mix melted butter, minced garlic, and chopped parsley. Brush each tree with the garlic butter mixture.
  6. Bake in the preheated oven for 20 to 25 minutes until golden brown.
  7. Remove from the oven and let cool slightly before serving.

Nutrition

Serving: 1treeCalories: 200kcalCarbohydrates: 20gProtein: 7gFat: 10gSaturated Fat: 5gPolyunsaturated Fat: 1gMonounsaturated Fat: 3gCholesterol: 20mgSodium: 450mgPotassium: 100mgFiber: 1gSugar: 1gVitamin A: 500IUCalcium: 150mgIron: 1mg

Notes

Keep puff pastry cold for better flakiness. Customize flavors with different cheeses or herbs.

Tried this recipe?

Let us know how it was!
  • « Previous Page
  • 1
  • …
  • 45
  • 46
  • 47
  • 48
  • 49
  • …
  • 134
  • Next Page »

Welcome!

Hi, I’m Grace, a Sydney-based home cook with a passion for bold flavors and trending ingredients. Whether you’re a busy beginner or a seasoned foodie, you’ll find dishes here that are fresh, fun, and full of flavor.

More about me

Popular Recipes

  • Lemon Cookies Raspberry Frosting
    Lemon Cookies with Raspberry Frosting – A Zesty Delight!
  • Brookies Cookies
    Brookies Cookies: The Ultimate Fudgy-Sweet Delight
  • Peanut Butter Pretzel Cookies
    Peanut Butter Pretzel Cookies: Sweet & Salty Magic!
  • Traditional Greek Honey Cookies
    Delicious Traditional Greek Honey Cookies to Sweeten Your Holidays

Footer

↑ back to top

About

  • Privacy Policy
  • Disclaimer
  • Terms & Conditions

Newsletter

  • Sign Up! for emails and updates

Contact

  • About me
  • Contact me

Copyright © 2025 TastyTrendIngredients