tastytrendingredients

  • Home
  • Recipes
    • Appetizers
    • Breakfast
    • Dessert
    • Dinner
    • Drinks
    • Salads
    • Snacks
    • Soups
  • About me
  • Contact me
menu icon
go to homepage
  • Home
  • Recipes
    • Appetizers
    • Breakfast
    • Dessert
    • Dinner
    • Drinks
    • Salads
    • Snacks
    • Soups
  • About me
  • Contact me
search icon
Homepage link
  • Home
  • Recipes
    • Appetizers
    • Breakfast
    • Dessert
    • Dinner
    • Drinks
    • Salads
    • Snacks
    • Soups
  • About me
  • Contact me
×

Crazy Good Casserole: Comfort Food Your Family Will Love

January 26, 2026 by Grace Snow Leave a Comment

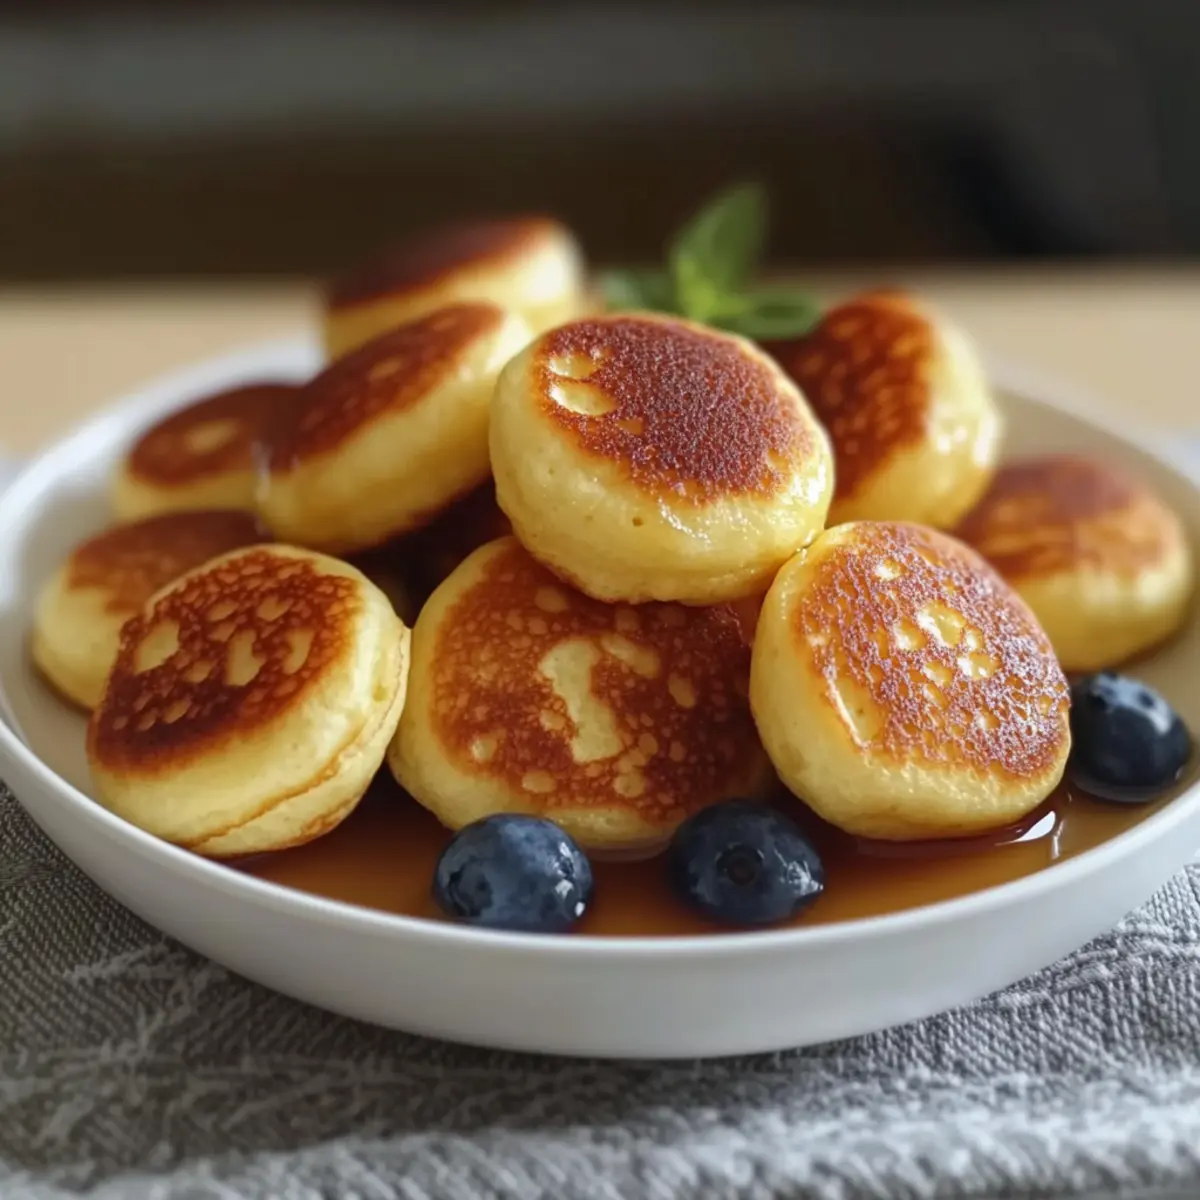
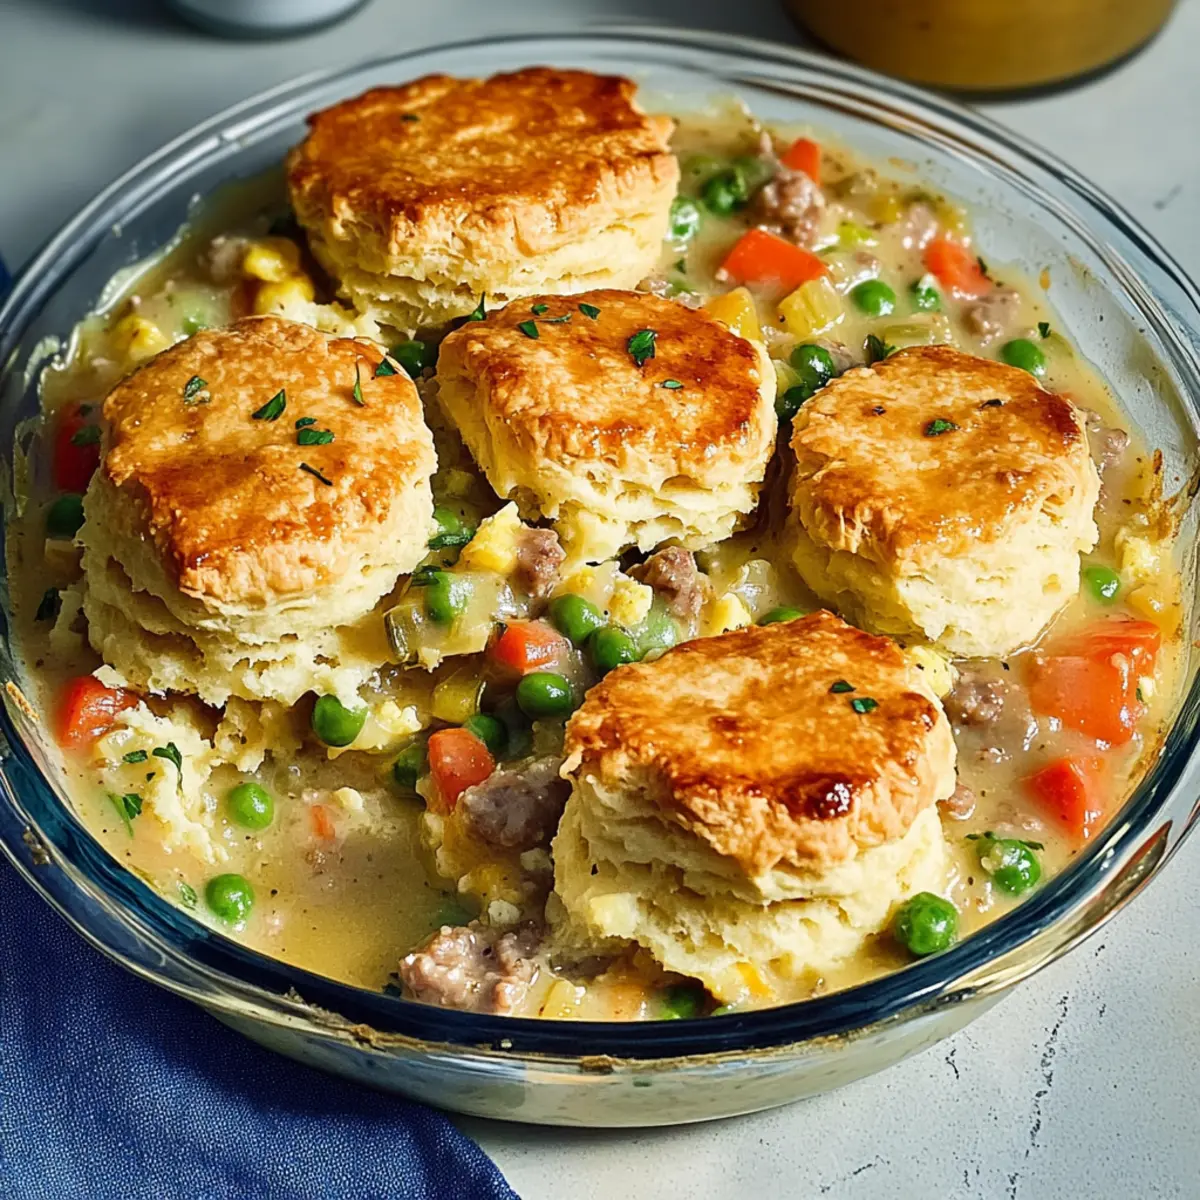
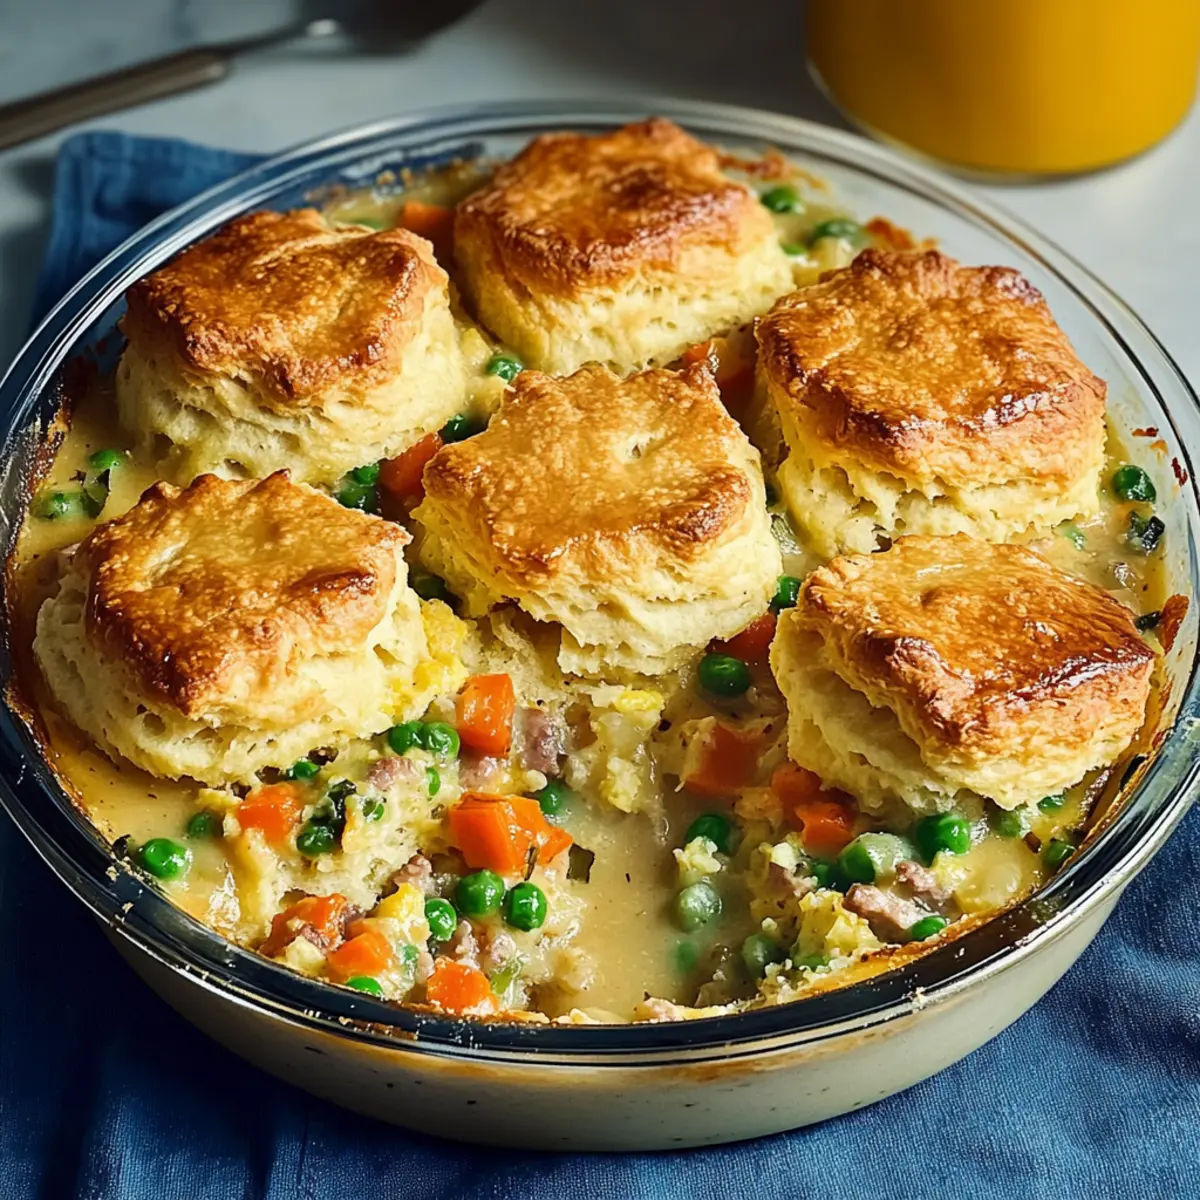
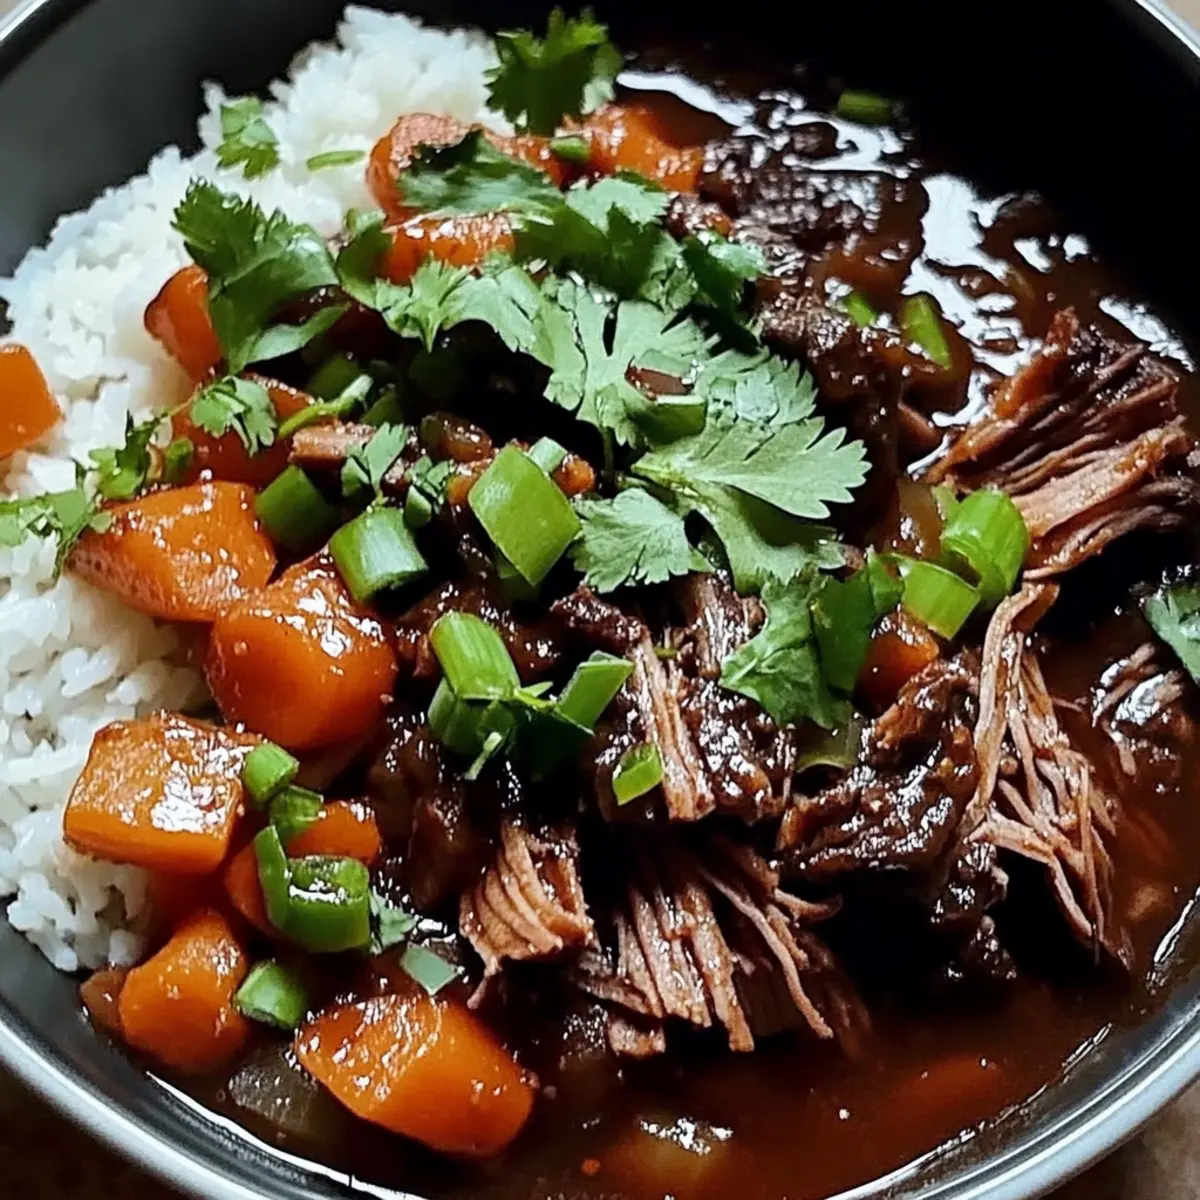
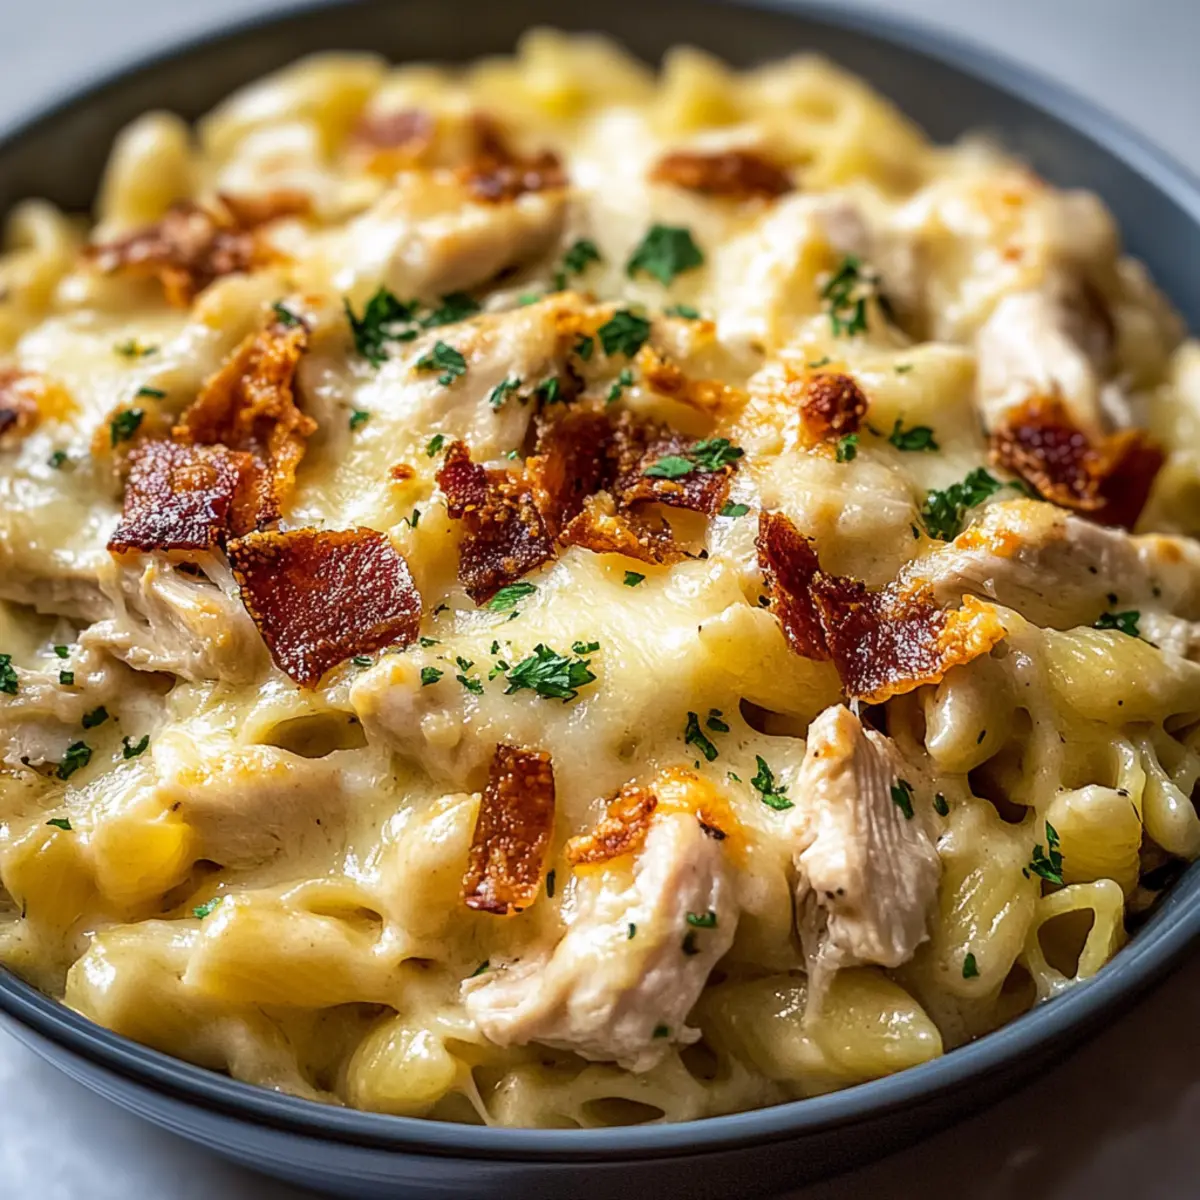
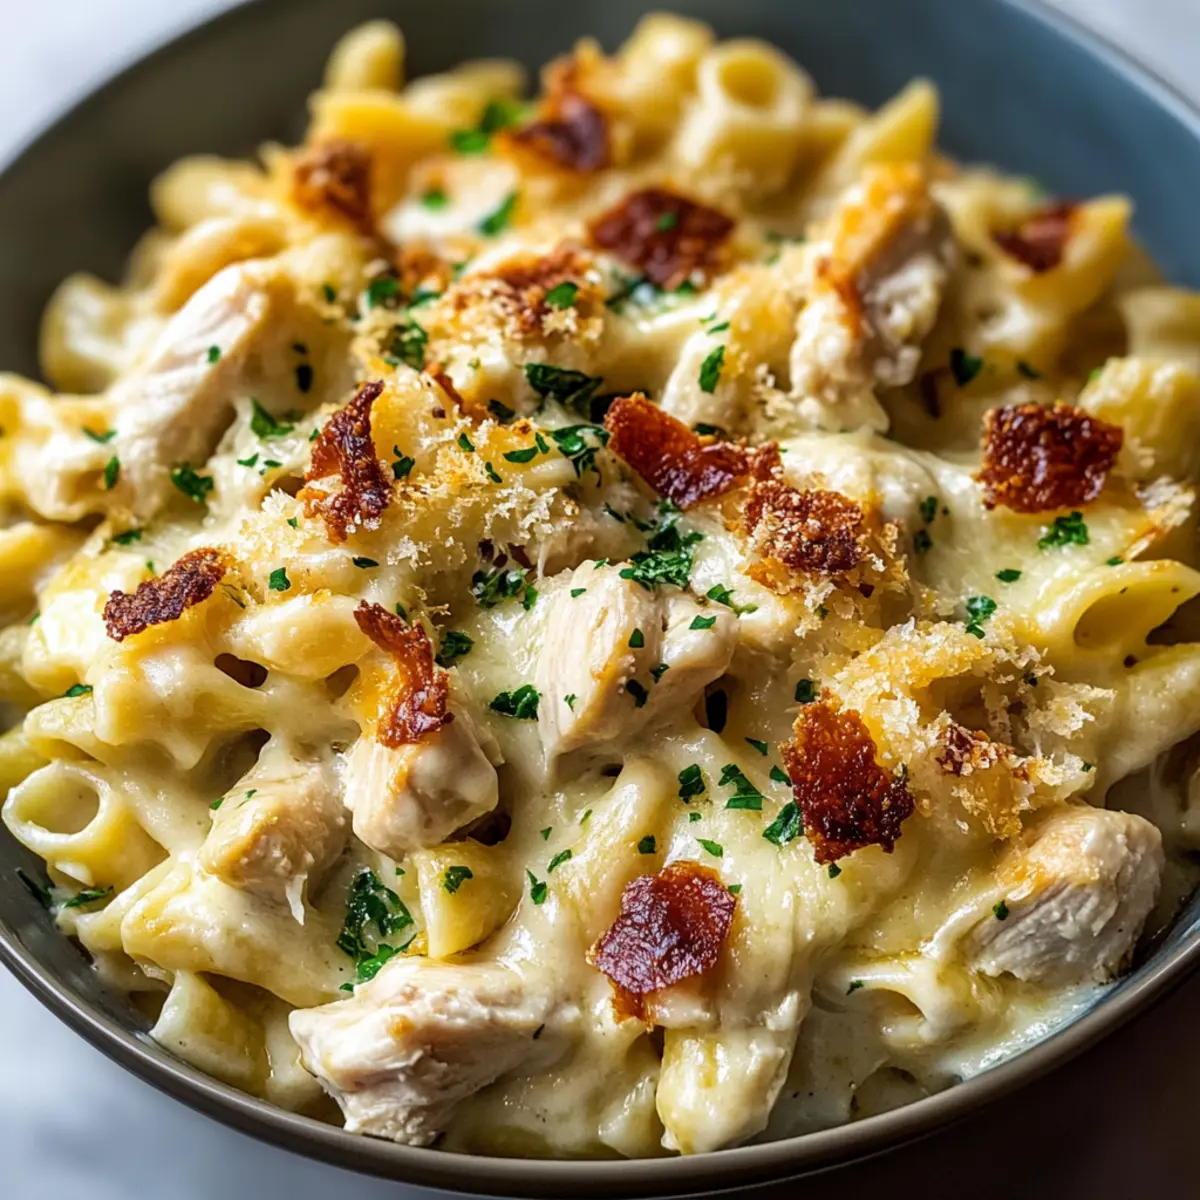
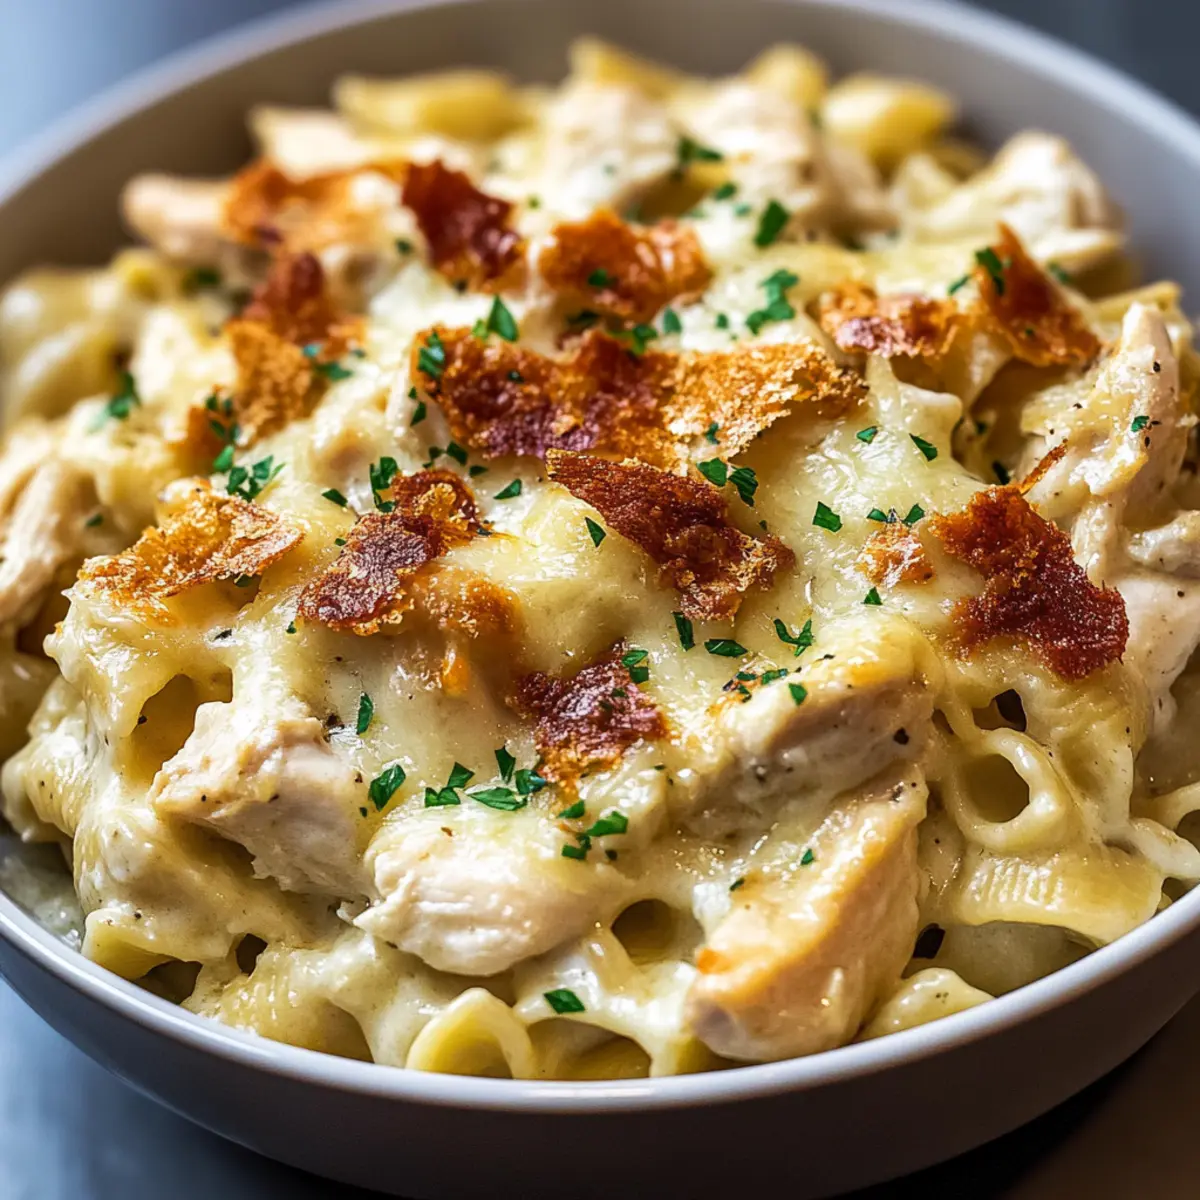
As I stirred the bubbling concoction in my trusted casserole dish, I couldn’t help but wonder why this Crazy Good Casserole has become a staple in my home. With its tender chicken nestled among creamy sour cream and layers of gooey cheese, it’s like a warm hug on a chilly evening. Not only is this dish family-friendly and delightfully comforting, but it’s also incredibly flexible, allowing you to swap ingredients based on what you have on hand. Whether you're whipping it up for a busy weeknight dinner or preparing ahead for a friendly potluck, this creamy, cheesy delight is sure to impress. Ready to learn how to make a meal that everyone will rave about? Let’s dive in!

Why Is This Casserole So Amazing?

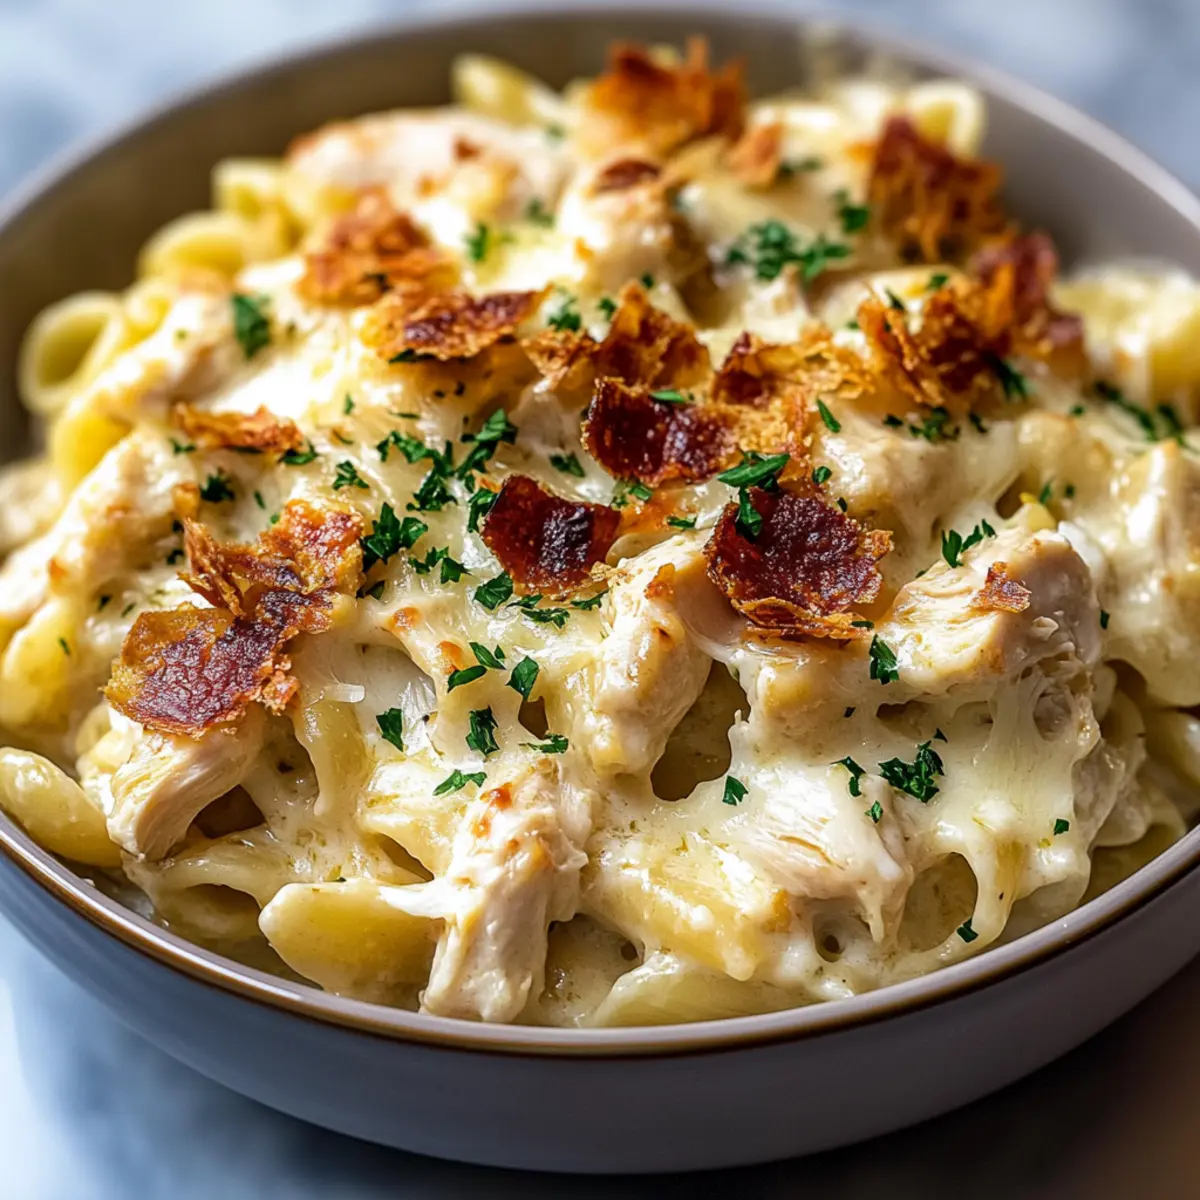
Comforting and Satisfying: This Crazy Good Casserole is a warm, hearty dish that wraps you in layers of cheesy goodness.
Flexibility at Its Best: Easily adapt the recipe to cater to picky eaters or whatever ingredients you have on hand, like leftover roast chicken or veggies from the fridge.
Quick and Easy Prep: With minimal chopping and straightforward steps, you can have this dish ready for the oven in no time—ideal for busy weeknights or last-minute guests!
Crowd-Pleasing Flavor: The creamy, savory combination is perfect for family dinners or potlucks; everyone will be asking for seconds! Pair it with a fresh side salad or some garlic bread for a complete meal. If you love casseroles, check out my Cornbread Breakfast Casserole for more delicious ideas.
Make Ahead Potential: Prep this dish in advance, refrigerate overnight, and just pop it in the oven when you’re ready—it’s a real time-saver!

Crazy Good Casserole Ingredients

• The perfect blend of creamy and cheesy!

For the Casserole

  • Cooked Chicken – Adds protein and substance; can easily substitute with turkey or leftover roast chicken.
  • Egg Noodles – Acts as the base structure; penne or rotini work great if you're looking for a change.
  • Cream of Chicken Soup – Provides essential creaminess; for a twist, use cream of mushroom instead.
  • Sour Cream – Gives tanginess and creaminess; Greek yogurt can lighten things up if you prefer.
  • Shredded Cheddar Cheese – The star of flavors; feel free to swap with mozzarella or Monterey Jack for variety.
  • Milk – Thins the sauce for even coating; if using a thicker cream soup, you might skip this.
  • Garlic Powder – Elevates flavor depth with no extra chopping; fresh garlic is a fantastic substitute if you’d like.
  • Onion Powder – Enhances flavor complexity; omit it for a simpler taste profile.
  • Black Pepper – Brings balance to the flavors; adjust according to your taste.
  • Salt – Essential for enhancing flavor; be sure to check the sodium levels of your cream soup first.
  • Crumbled Bacon (Optional) – Adds a delicious savory crunch; skip it if you want a lighter dish.
  • Chopped Green Onions (Optional) – A fresh garnish that adds color and pop.

Prepare to delight your family with this Crazy Good Casserole that stands out not just in flavor but in versatility as well!

Step‑by‑Step Instructions for Crazy Good Casserole

Step 1: Preheat Oven
Begin by preheating your oven to 350°F (175°C). While the oven heats up, grease a 9x13-inch baking dish with cooking spray or a bit of butter to prevent the casserole from sticking, ensuring easy serving once it's baked. This prep sets the stage for your delicious Crazy Good Casserole!

Step 2: Cook Noodles
In a large pot, bring salted water to a boil and add the egg noodles. Cook them until just al dente, about 6–7 minutes, as they'll continue cooking in the oven. Once done, drain the noodles, and be sure to toss them briefly in the pot to avoid sticking. This step ensures a perfect base for your creamy, cheesy concoction.

Step 3: Prepare Sauce
In a spacious mixing bowl, whisk together the cream of chicken soup, sour cream, milk, garlic powder, onion powder, salt, and black pepper until the mixture is smooth and creamy. This flavorful sauce serves as the heart of your Crazy Good Casserole, binding all the components together beautifully and providing that delightful creaminess.

Step 4: Combine Ingredients
Gently fold the cooked noodles into the sauce, followed by the shredded chicken, half of the cheddar cheese, and half of the crumbled bacon if using. Stir until everything is evenly coated. This is where the magic begins, as you create a hearty mixture packed with flavor and texture—the essence of your Crazy Good Casserole!

Step 5: Assemble Casserole
Transfer the noodle mixture into the prepared baking dish, spreading it out evenly. Sprinkle the remaining cheddar cheese on top, along with the rest of the crumbled bacon, if desired. This layers your casserole with cheesy goodness, ensuring a bubbly, golden finish that will make everyone eager to dig in!

Step 6: Bake
Cover your casserole tightly with aluminum foil and place it in the preheated oven. Bake for 20 minutes to let the flavors meld beautifully, then remove the foil and continue baking for another 10-15 minutes until the cheese is melted, bubbly, and has formed a lovely golden crust. Watch closely for that perfect cheesiness appearance!

Step 7: Serve
Once baked, take the casserole out of the oven and let it rest for 5 minutes before cutting into squares. This cooling period helps the layers set and makes serving easier. For a vibrant touch, garnish with chopped green onions if desired, and get ready to savor this family-favorite Crazy Good Casserole!

What to Serve with Crazy Good Casserole?

As you indulge in the creamy, cheesy wonder of this casserole, think about the delightful accompaniments that can elevate your meal!

  • Garlic Bread: The warm, buttery flavors of garlic bread are a classic pairing, offering a perfect balance to the creamy richness of the casserole.

  • Fresh Side Salad: A crisp salad, loaded with mixed greens, tomatoes, and cucumbers, adds a refreshing crunch that contrasts beautifully with the softness of the casserole.

  • Steamed Broccoli: Lightly steamed broccoli enhances the meal with bursts of color and a touch of earthiness, promoting a well-rounded dinner plate.

  • Roasted Brussels Sprouts: These crispy, caramelized sprouts bring nutty flavors and a satisfying crunch that complements the creamy texture of the casserole nicely.

  • Coleslaw: A tangy, crunchy coleslaw provides an excellent contrast, with its zesty dressing brightening each bite of the dish.

  • Sweet Corn Muffins: Soft and slightly sweet, these muffins offer a nostalgic side that's perfect for soaking up every bit of the casserole's creamy sauce.

Each pairing adds a unique flavor or texture, creating a delightful experience that will have your family asking for seconds!

Tips for the Best Crazy Good Casserole

  • Cook Noodles Just Right: Don’t overcook your egg noodles; aim for al dente. They’ll soak up some sauce while baking and maintain the perfect texture!

  • Customize to Taste: Feel free to swap in different proteins or vegetables based on what your family enjoys. This Crazy Good Casserole can adapt to fit your pantry!

  • Layer Wisely: Be sure to mix all ingredients thoroughly, but reserve some cheese and bacon for the top. This gives you that irresistible golden, bubbly finish!

  • Keep an Eye on Baking: Watch the casserole closely during the last few minutes of baking; the goal is golden, bubbly cheese without burning!

  • Leftover Magic: If you have leftovers, store them in an airtight container; simply reheat in the oven for best results. This dish tastes even better the next day!

  • Make Ahead Convenience: Prepare the casserole a day in advance and store it in the fridge. Just add a bit of extra baking time before serving.

Crazy Good Casserole Variations

Feel free to let your creativity shine with these delightful variations of the Crazy Good Casserole!

  • Mexican Twist: Add taco seasoning, black beans, corn, and top with pepper jack cheese for a spicy fiesta. The combination of flavors will transport your taste buds south of the border while still keeping it cozy and familiar!

  • Veggie Loaded: Stir in steamed broccoli, peas, or spinach for a green boost of nutrition. This not only adds vibrant color but also makes it a well-rounded meal that the kids won't even question—“More veggies? Yes, please!"

  • Buffalo Ranch Blast: Incorporate buffalo sauce and ranch seasoning for a zesty kick that brings bold flavor to the casserole. The heat from the buffalo sauce creates a delightful contrast to the creaminess, making this version a real crowd-pleaser for spice lovers.

  • Breakfast Delight: Swap pasta for scrambled eggs, layer in breakfast sausage, and add hash browns for a hearty morning treat. This savory breakfast casserole is perfect for brunch gatherings or that cozy weekend family start!

  • Dairy-Free Friendly: Use a plant-based cream soup alternative and dairy-free yogurt or sour cream. Enjoy the same comforting flavors without the dairy, and still feel like you’re indulging in something truly special!

  • Herb Infusion: Switch out the regular spices for fresh herbs like thyme, parsley, or rosemary. These fragrant additions will elevate the casserole's flavor profile, giving it a fresh twist with each bite!

  • Italian Style: Mix in diced tomatoes, Italian herbs, and swap out the cheddar for mozzarella and parmesan. This Italian-inspired take gives you a taste of home-cooked comfort reminiscent of your favorite pasta dishes like lasagna.

If you’re a fan of casserole magic, don't forget to check out my Sweet Potato Casserole for another delightful recipe that the whole family will adore!

Make Ahead Options

These Crazy Good Casserole preparations are a game changer for busy weeks! You can assemble the entire casserole up to 24 hours in advance. Just prepare it up to the baking step, cover it tightly with foil, and refrigerate. To ensure the best quality, glaze a bit of cooking spray on the foil to prevent sticking. When you’re ready to serve, preheat your oven and bake it straight from the fridge, adding an extra 10 minutes to your baking time for a perfectly melted cheese topping. This make-ahead tip not only saves you time but guarantees you’ll have a comforting, delicious meal ready with minimal effort!

Storage Tips for Crazy Good Casserole

  • Fridge: Store leftovers in an airtight container; they'll stay fresh for up to 4 days. Make sure to cover well to maintain moisture.
  • Freezer: You can freeze the casserole before baking for up to 3 months. Thaw it overnight in the fridge before baking as directed.
  • Reheating: For best results, reheat individual portions in the oven at 350°F (175°C) until heated through, about 15-20 minutes. This keeps the cheese bubbly and the casserole creamy!
  • Make Ahead: Assemble the Crazy Good Casserole up to the baking step and refrigerate for up to 24 hours before cooking; add 10 minutes to the baking time when ready to serve.

Crazy Good Casserole Recipe FAQs

How do I choose the best chicken for the casserole?
Absolutely! For the best flavor and texture, I recommend using cooked chicken that's tender and juicy. You can use rotisserie chicken, which is convenient and packed with flavor, or leftover roast chicken from a previous meal. If you're opting for turkey or any other protein, just ensure it's fully cooked and shredded into bite-sized pieces to blend seamlessly with the casserole.

What’s the best way to store leftovers from the Crazy Good Casserole?
Leftovers can be kept in an airtight container in the fridge for up to 4 days. Just make sure to let it cool completely before sealing it up to maintain moisture. For longer storage, consider freezing. Allow it to cool, then transfer it to a freezer-safe container—this casserole will stay fresh for up to 3 months! Thaw the casserole overnight in the fridge before reheating for the best results.

Can I freeze the Crazy Good Casserole? If so, how?
Yes! Freezing is a fantastic option if you're preparing the casserole ahead of time. To do this, assemble the casserole up to the baking step but don't bake it yet. Cover it tightly with plastic wrap and aluminum foil to prevent freezer burn and pop it in the freezer for up to 3 months. When you’re ready to bake, thaw in the refrigerator overnight, then bake as directed. If baking from frozen, add an extra 10 to 15 minutes to the cooking time.

What should I do if my casserole turns out too dry?
If your Crazy Good Casserole ends up a bit dry, don't worry! You can add a splash of milk or chicken broth before serving to moisten it up. Another option is to cover the casserole with foil during the last few minutes of baking; this will help retain moisture and create a lovely creamy texture. For future prep, consider using a little more sauce or cream-based ingredients to keep it extra moist.

Can I make this casserole gluten-free?
Very! To make the Crazy Good Casserole gluten-free, simply substitute the egg noodles with a gluten-free pasta variety, such as brown rice or quinoa pasta. Always check the labels of ingredients like cream of chicken soup and other sauces to ensure they're gluten-free. You can also make a homemade version of the soup using gluten-free flour or cornstarch to thicken.

Is this casserole suitable for kids or picky eaters?
Absolutely! The creamy, cheesy flavor is incredibly appealing to children and picky eaters. The flexibility of this recipe allows you to customize ingredients to suit their tastes, whether that's reducing the spices, omitting vegetables, or adding in something they love, like diced pizza toppings or chicken nuggets! It’s always a winner around the dinner table!

Crazy Good Casserole

Crazy Good Casserole: Comfort Food Your Family Will Love

Crazy Good Casserole is a creamy, cheesy dish that wraps you in comfort and flavor, making it a family favorite.
Print Recipe Pin Recipe
Prep Time 15 minutes mins
Cook Time 30 minutes mins
Resting Time 5 minutes mins
Total Time 50 minutes mins
Servings: 6 slices
Course: Dinner
Cuisine: American
Calories: 350
Ingredients Equipment Method Nutrition Notes

Ingredients
  

For the Casserole
  • 2 cups Cooked Chicken can substitute with turkey or leftover roast chicken
  • 8 ounces Egg Noodles can substitute with penne or rotini
  • 1 can Cream of Chicken Soup can use cream of mushroom for a twist
  • 1 cup Sour Cream can substitute with Greek yogurt
  • 2 cups Shredded Cheddar Cheese can swap with mozzarella or Monterey Jack
  • 1/2 cup Milk may skip if using a thicker cream soup
  • 1 teaspoon Garlic Powder fresh garlic can be used
  • 1 teaspoon Onion Powder can omit for simpler taste
  • 1 teaspoon Black Pepper adjust according to taste
  • 1 teaspoon Salt check sodium levels of cream soup
  • 1 cup Crumbled Bacon optional
  • 1/4 cup Chopped Green Onions optional garnish

Equipment

  • 9x13-inch baking dish
  • Large pot
  • Mixing Bowl

Method
 

Step-by-Step Instructions for Crazy Good Casserole
  1. Preheat your oven to 350°F (175°C) and grease a 9x13-inch baking dish.
  2. Bring salted water to a boil in a large pot and cook the egg noodles until just al dente, about 6–7 minutes. Drain and toss briefly to avoid sticking.
  3. In a mixing bowl, whisk together cream of chicken soup, sour cream, milk, garlic powder, onion powder, salt, and black pepper until smooth.
  4. Fold the cooked noodles into the sauce, then add the shredded chicken, half of the cheddar cheese, and half of the crumbled bacon (if using). Stir until evenly coated.
  5. Transfer the mixture to the prepared baking dish, sprinkle with remaining cheddar cheese and crumbled bacon (if desired).
  6. Cover with aluminum foil and bake for 20 minutes. Remove the foil and bake for an additional 10-15 minutes until cheese is melted and bubbly.
  7. Let the casserole rest for 5 minutes before serving. Garnish with chopped green onions, if desired.

Nutrition

Serving: 1sliceCalories: 350kcalCarbohydrates: 30gProtein: 25gFat: 15gSaturated Fat: 7gPolyunsaturated Fat: 1gCholesterol: 90mgSodium: 800mgPotassium: 300mgFiber: 2gSugar: 3gVitamin A: 15IUVitamin C: 2mgCalcium: 20mgIron: 10mg

Notes

This casserole can be customized with different proteins or vegetables. Store leftovers in an airtight container for up to 4 days, and it tastes even better the next day.

Tried this recipe?

Let us know how it was!

Delicious Breakfast Pancake Poppers for a Joyful Morning

January 26, 2026 by Grace Snow Leave a Comment

If you've ever been in a breakfast rush and craved something more than just toast, you'll appreciate the joy of these Breakfast Pancake Poppers. Not only are they fluffy and delicious, but they also come together in under 20 minutes, making them a perfect solution for busy mornings or leisurely brunches alike. The beauty of this recipe lies in its versatility; you can easily customize them with your favorite add-ins, whether that’s chocolate chips, fresh fruit, or even a hint of spice. Plus, they’re a meal prep dream – deliciously satisfying and freezer-friendly, so you can have a warm breakfast popper whenever the craving strikes. Ready to transform your morning routine? Let’s dive into the delightful world of pancake poppers!

Why Are These Pancake Poppers Special?

Convenience at Its Finest: Made in just 20 minutes, these fluffy poppers fit perfectly into your busy schedule.

Versatile Customization: Add your choice of mix-ins like chocolate chips or fresh fruit to create a flavor you'll love.

Healthy Alternatives: With gluten-free options available, you can enjoy a guilt-free breakfast that still satisfies.

Freezer-Friendly: Bake a batch ahead and store them for a quick reheatable meal—they're ideal for meal prep!

Crowd Pleaser: Perfect for family brunches or gatherings, these delightful morsels are sure to impress! Consider pairing them with some delicious Breakfast Egg Muffins for a complete breakfast spread.

Breakfast Pancake Poppers Ingredients

For the Batter
• 1 cup flour – Provides structure for the poppers. Substitution: Can use 1:1 gluten-free flour blend for gluten-free breakfast pancake poppers.
• 1 tbsp sugar – Adds a touch of sweetness. Note: Adjust based on personal preference for sweetness.
• 1 tsp baking powder – Acts as a leavening agent for fluffy texture. Freshness matters; check expiration date.
• 1/4 tsp salt – Enhances flavor balance. Essential for achieving overall taste.
• 3/4 cup milk – Adds moisture and richness. Substitution: Almond milk or any preferred non-dairy milk can be used.
• 1 egg – Binds ingredients together while adding moisture. Substitution: Flax egg for vegan option.
• 2 tbsp melted butter – Contributes to flavor and richness. Substitution: Can use vegetable oil or coconut oil.

Optional Add-ins
• Mini chocolate chips – For a sweet twist that kids will adore.
• Fresh berries – Add a burst of flavor and nutrition with blueberries or strawberries.
• Cinnamon – A sprinkle for a warm, comforting spice that complements the sweetness.

Step‑by‑Step Instructions for Breakfast Pancake Poppers

Step 1: Preheat Oven
Begin by preheating your oven to 375°F (190°C). While it warms up, lightly grease a mini muffin pan with cooking spray or melted butter to ensure a perfect pop out after baking. This step is crucial to achieving that golden, fluffy texture for your Breakfast Pancake Poppers.

Step 2: Mix Dry Ingredients
In a large mixing bowl, combine 1 cup of flour, 1 tablespoon of sugar, 1 teaspoon of baking powder, and 1/4 teaspoon of salt. Whisk these dry ingredients together until they are well incorporated, which will help distribute the leavening agent evenly. This mix forms the foundation for the light, fluffy poppers you desire.

Step 3: Whisk Wet Ingredients
In a separate bowl, combine 3/4 cup of milk, 1 whisked egg, and 2 tablespoons of melted butter. Use a whisk to mix until smooth, ensuring the mixture is uniform and well blended. This mixture adds moisture and richness to your Breakfast Pancake Poppers, resulting in deliciously tender bites.

Step 4: Combine Mixtures
Gently pour the wet ingredients into the bowl containing the dry ingredients. Using a spatula, fold the mixture together until just combined; be careful not to overmix to maintain the airy texture. The batter should be slightly lumpy, and this is perfectly fine - it will result in fluffier Breakfast Pancake Poppers.

Step 5: Fill Muffin Pan
Scoop the batter into your prepared mini muffin pan, filling each cup about two-thirds full. This allows room for the poppers to rise and become fluffy as they bake. Make sure to distribute the batter evenly across all the cups for uniform cooking.

Step 6: Bake
Place the filled muffin pan in your preheated oven and bake for 10 to 12 minutes. Keep an eye on them; they are ready when they puff up and turn a lovely golden brown on top. A toothpick inserted into the center should come out clean, ensuring that your Breakfast Pancake Poppers are fully cooked.

Step 7: Serve
Once baked, remove your Breakfast Pancake Poppers from the oven and allow them to cool slightly in the pan for about 5 minutes. Gently pop them out and serve warm with a drizzle of maple syrup, fresh fruit, or your favorite toppings. Indulge in these delightful bites perfect for any morning!

Expert Tips for Breakfast Pancake Poppers

  • Fluffiness Factor: Do not overmix the batter; lumps are your friends! Overmixing can lead to dense poppers, so fold gently.

  • Perfect Storage: Freeze extras in a zip bag for up to one month. Simply reheat in the microwave for a quick breakfast on the go.

  • Customize Wisely: When adding mix-ins, avoid too many wet ingredients like fresh fruit. Stick with 1/2 cup total to keep the texture right.

  • Bake for Best Results: Keep an eye on the baking time; these poppers are done when golden brown and a toothpick comes out clean.

  • Treats for Everyone: This Breakfast Pancake Poppers recipe can be easily made gluten-free by using a suitable flour blend, so everyone can enjoy!

How to Store and Freeze Breakfast Pancake Poppers

Room Temperature: Store freshly baked pancake poppers at room temperature in an airtight container for up to 3 days to maintain their softness.

Fridge: For longer freshness, keep them in the fridge for up to 5 days. Just make sure they’re in an airtight container to prevent drying out!

Freezer: Freeze any leftovers in a zip-top bag for up to one month. They’re perfect for a quick breakfast when you need it most!

Reheating: To enjoy warm and fluffy poppers, reheat them in the microwave for about 15 seconds, or until heated through, for a delightful start to your day.

What to Serve with Fluffy Breakfast Pancake Poppers

These delightful mini pancakes are not just a breakfast treat; they can effortlessly turn into a cherished meal moment when paired with delicious sides.

  • Savory Scrambled Eggs: A classic combo, the creaminess of eggs complements the fluffy texture of the poppers, making for a balanced, satisfying breakfast. The richness of the eggs contrasts beautifully with the sweetness of the pancakes.

  • Fresh Fruit Salad: Bright, juicy fruits bring a refreshing contrast to the warm poppers. Consider adding strawberries, blueberries, and bananas for a burst of color and natural sweetness that elevates the entire meal.

  • Crispy Bacon or Sausage Links: For those who appreciate a savory element, crispy bacon or savory sausage adds a satisfying crunch and meaty flavor that pairs well with the lightness of the pancake poppers.

  • Maple Syrup Drizzle: Enhance the sweetness of your pancake poppers further with a drizzle of pure maple syrup. The syrup’s rich, woody flavor brings out the best in your breakfast experience.

  • Whipped Yogurt Dip: A lighter option, a whipped yogurt dip gets an extra hint of sweetness from honey. It makes for a wonderful contrast to the fluffy texture of the poppers and provides a creamy element to enjoy.

  • Homemade Nutella: Give your meal a delicious twist by serving these poppers with homemade Nutella. The rich chocolate-hazelnut spread creates an indulgent treat perfect for a leisurely morning.

  • Iced Coffee: For an energizing boost, try a refreshing iced coffee to wash it all down. The smooth, bold flavors complement the sweetness of the poppers, creating a cheerful morning ritual that will brighten your day.

Breakfast Pancake Poppers Variations

Feel free to get creative with your Breakfast Pancake Poppers and tailor them to your taste buds!

  • Gluten-Free: Use a 1:1 gluten-free flour blend for a tasty, gluten-free version that everyone can enjoy.

  • Vegan: Swap the egg for a flax egg (1 tbsp ground flaxseed + 3 tbsp water) and use almond milk for a dairy-free delight.

  • Sweet Additions: Mix in mini chocolate chips or diced fruits like bananas for a sweet, irresistible twist. Your mornings just got a lot better!

  • Savory Spin: Try adding cooked bacon bits or cheese for a savory version. Pair these with avocado for a satisfying brunch.

  • Cinnamon Swirl: Stir in 1 teaspoon of cinnamon for that cozy, aromatic touch. It's like having a warm hug in every bite!

  • Nutty Crunch: Toss in crushed nuts such as walnuts or pecans for a delightful crunch in contrast to the fluffy texture.

  • Zesty Citrus: Add a teaspoon of lemon zest to the batter for a bright, zingy flavor that pairs beautifully with syrup.

  • Spicy Kick: For those who like a little heat, add a pinch of cayenne pepper to the batter for a fun, unexpected flavor boost.

Enjoy these variations alongside easy recipes like Cornbread Breakfast Casserole or Lemon Ricotta Protein Pancakes to elevate your breakfast spread!

Make Ahead Options

These Breakfast Pancake Poppers are a dream come true for busy home cooks looking to save time during hectic mornings! You can prepare the batter and store it in the refrigerator for up to 24 hours before baking to keep things fresh. Just mix the dry and wet ingredients as instructed, cover them tightly, and refrigerate. This not only allows the flavors to meld beautifully but also keeps your mornings stress-free. When you are ready to enjoy, simply scoop the chilled batter into your muffin pan, bake as directed, and you’ll have fluffy pancake poppers ready to serve in no time. Remember, for the best texture, avoid overmixing the batter and don’t skip greasing the pan. Enjoy delicious, homemade convenience!

Breakfast Pancake Poppers Recipe FAQs

How do I select the right flour for this recipe?
Absolutely! For the best results, use a high-quality all-purpose flour for softness and structure. If you need a gluten-free option, a 1:1 gluten-free flour blend works beautifully as a substitute, maintaining the fluffiness without any compromise in taste.

What’s the best way to store leftover pancake poppers?
I often store my leftover Breakfast Pancake Poppers in an airtight container at room temperature for up to three days. If you not planning to enjoy them soon, keep them in the refrigerator where they’ll stay fresh for up to five days. Just remember, the goal is to keep them from drying out!

Can I freeze pancake poppers for later?
Very! To freeze, simply place the cooled poppers in a zip-top bag, making sure to remove as much air as possible, and store them for up to one month. When you’re ready to enjoy, reheat in the microwave for about 15 seconds or until warmed through, and you’ll have a delicious breakfast ready in a flash!

What should I do if my pancake poppers come out dense?
A common culprit for dense pancake poppers is overmixing the batter. When combining wet and dry ingredients, gently fold them together until just mixed. A few lumps are totally fine! Also, ensure your baking powder is fresh; expired leavening agents can affect the fluffiness.

Are these pancake poppers safe for kids and those with allergies?
Definitely! This recipe is versatile and can be customized for dietary needs. Use almond milk for lactose intolerance, substitute flax eggs for vegan options, and ensure to choose gluten-free flour as a swap for those with gluten allergies. Always check packaging for potential allergen cross-contamination for added safety.

Breakfast Pancake Poppers

Delicious Breakfast Pancake Poppers for a Joyful Morning

Enjoy fluffy, tasty Breakfast Pancake Poppers that come together in under 20 minutes for a delightful breakfast or brunch.
Print Recipe Pin Recipe
Prep Time 10 minutes mins
Cook Time 12 minutes mins
Cooling Time 5 minutes mins
Total Time 27 minutes mins
Servings: 12 poppers
Course: Breakfast
Cuisine: American
Calories: 70
Ingredients Equipment Method Nutrition Notes

Ingredients
  

For the Batter
  • 1 cup flour Can use 1:1 gluten-free flour blend for gluten-free options.
  • 1 tbsp sugar Adjust based on personal preference for sweetness.
  • 1 tsp baking powder Check expiration date for freshness.
  • 1/4 tsp salt Essential for achieving overall taste.
  • 3/4 cup milk Almond milk or any preferred non-dairy milk can be used.
  • 1 piece egg Flax egg can be used for vegan option.
  • 2 tbsp melted butter Can use vegetable oil or coconut oil.
Optional Add-ins
  • mini chocolate chips For a sweet twist.
  • fresh berries Use blueberries or strawberries.
  • cinnamon A sprinkle for a comforting spice.

Equipment

  • Mini muffin pan
  • Mixing bowls
  • Whisk
  • Spatula

Method
 

Step‑by‑Step Instructions
  1. Preheat your oven to 375°F (190°C) and grease a mini muffin pan.
  2. Combine flour, sugar, baking powder, and salt in a bowl, whisking until well mixed.
  3. In another bowl, mix milk, whisked egg, and melted butter until smooth.
  4. Fold the wet ingredients into the dry ingredients until just combined.
  5. Fill each cup of the muffin pan about two-thirds full with batter.
  6. Bake in the oven for 10 to 12 minutes until golden brown and puffed.
  7. Cool in the pan for 5 minutes, then pop them out and serve warm.

Nutrition

Serving: 1popperCalories: 70kcalCarbohydrates: 10gProtein: 2gFat: 3gSaturated Fat: 1.5gMonounsaturated Fat: 1gCholesterol: 20mgSodium: 100mgPotassium: 50mgFiber: 1gSugar: 2gVitamin A: 150IUCalcium: 30mgIron: 0.5mg

Notes

These pancake poppers are versatile and can be customized with various add-ins for unique flavors. Great for breakfast and brunch gatherings.

Tried this recipe?

Let us know how it was!

Savory Texas Kolaches: Your New Breakfast Obsession

January 26, 2026 by Grace Snow Leave a Comment

There’s something magical about biting into a warm pastry that envelops a delicious savory filling, isn’t there? Texas Kolaches, also known as Klobasneks, are a beloved breakfast staple that transform this simple joy into something remarkable. With their tender, pillowy dough wrapped around savory sausages, these kolaches are not only easy to prepare but also serve as the perfect crowd-pleaser for brunch gatherings or quick breakfasts during busy weekdays. Plus, you can easily customize them with different fillings like cheese, ham, or even jalapenos to suit your unique taste. Ready to create your own batch of these delightful treats? Let’s roll up our sleeves and dive into the delicious world of Texas Kolaches!

Why are Texas Kolaches a must-try?

Warm, Fluffy Goodness: There’s nothing quite like the tender texture of these kolaches, wrapping savory sausage in a soft, sweet dough.

Customizable Fillings: Whether you prefer cheese, ham, or jalapenos, the versatility of this recipe lets you explore unique flavors.

Perfect for Any Occasion: Ideal for brunch or a grab-and-go breakfast, these kolaches are guaranteed to please a crowd.

Time-Saving Delight: Quick to prepare, they fit perfectly into your busy mornings, allowing you to enjoy homemade goodness without the hassle.

Family-Friendly Recipe: Everyone will love these delicious bites, making them a surefire hit at family gatherings!

Texas Kolaches Ingredients

• For those craving the ultimate breakfast treat!

For the Dough

  • Unsalted Butter – Provides richness and tenderness to the dough. Use salted butter if unsalted isn’t available, but reduce the added salt.
  • Whole Milk – Contributes moisture and a soft texture to the dough. Can substitute with any non-dairy milk for lactose-free options.
  • All-Purpose Flour – Main structural component that provides shape. Bread flour can be used for a chewier texture.
  • Granulated Sugar – Adds sweetness and helps activate the yeast. Use coconut sugar for a lower glycemic index alternative.
  • Rapid Rise Yeast – Leavening agent that ensures quick dough rising. Active dry yeast can be used; just activate it in warm water before mixing.
  • Salt – Enhances flavor and strengthens dough. No substitutions recommended for flavor balance.
  • Egg + Egg Yolk (slightly beaten) – Enhances richness and aids in browning. Replace with a flaxseed egg for a vegan version.

For the Filling

  • Smoked Sausage Links – The key filling that transforms the dough into a savory treat. Different varieties can be used like ham, boudin, or brisket for alternative flavors.

Now you're all set to embark on this delightful journey of making Texas Kolaches! Enjoy every warm, fluffy bite.

Step‑by‑Step Instructions for Texas Kolaches

Step 1: Prepare the Dough
Begin by melting 5 tablespoons of unsalted butter in a small saucepan over low heat until just melted—avoid browning. In a stand mixer, combine 4 cups of all-purpose flour, 1/4 cup of granulated sugar, 2 tablespoons of rapid rise yeast, and 1 teaspoon of salt. Slowly add the warm milk and melted butter mixture along with 1 beaten egg. Mix using a dough hook for 8 minutes until the dough is sticky and smooth.

Step 2: Proof the Dough
Grease a large bowl with a bit of cooking oil and place the dough inside, turning to coat. Cover the bowl with a clean kitchen towel and place it in a warm area for about 1 to 1.5 hours, or until the dough has doubled in size. You’ll know it’s ready when it looks puffy and fills the bowl, indicating optimal fermentation for your Texas Kolaches.

Step 3: Shape the Dough
Once the dough has risen, punch it down gently to release the air, then turn it out onto a floured surface. Divide the dough into 16 equal pieces, rolling each piece into a ball. Arrange the dough balls on two baking sheets lined with parchment paper, ensuring there's enough space between them. Cover with the kitchen towel again and allow them to proof for another 90 minutes until they have expanded in size.

Step 4: Prepare Filling
While the dough is proofing, take 16 smoked sausage links and slice each into 3-inch pieces. Set the sausage pieces aside on a cutting board or plate. This filling is what transforms your Texas Kolaches into a hearty breakfast treat, providing that savory flavor contrast to the sweet dough.

Step 5: Assemble Kolaches
Preheat your oven to 350°F (175°C). After the final proofing period, take each dough ball and flatten it slightly in your palm. Place a piece of sausage in the center, then wrap the dough around it, ensuring that you seal it tightly. This step is essential to prevent the filling from leaking during baking.

Step 6: Bake
Once all kolaches are shaped and secured, place them in the preheated oven. Bake for 22-25 minutes, or until they are golden brown. You’ll know they’re ready when the tops are lightly golden and a toothpick comes out clean from the dough. Let them cool slightly on a wire rack before serving your delightful Texas Kolaches.

Storage Tips for Texas Kolaches

Room Temperature: Keep baked Texas Kolaches covered at room temperature for up to 1 day, ensuring they remain soft and fresh.

Fridge: Store in an airtight container in the refrigerator for up to 4 days. This helps maintain their delicious flavor and texture.

Freezer: To freeze, wrap each kolache tightly in wax paper, then place in a freezer-safe container or bag. They can be frozen for up to 3 months.

Reheating: When ready to enjoy, reheat in the oven at 350°F for about 10 minutes or until warmed through for the best results.

Make Ahead Options

These Texas Kolaches are perfect for meal prep and can save you time on busy mornings! You can prepare the dough up to 24 hours in advance—simply follow the initial steps and let the dough rise before refrigerating it in a well-greased bowl covered with plastic wrap. The next day, allow the dough to come to room temperature for about 30 minutes before shaping and filling. Alternatively, you can assemble the kolaches with the filling and refrigerate for up to 3 days. To maintain their quality, cover the kolaches tightly after assembly. When you’re ready to enjoy them, just bake directly from the refrigerator, adding a few extra minutes to the baking time for delicious, freshly baked Texas Kolaches!

Texas Kolaches Variations & Substitutions

Feel free to get creative with your Texas Kolaches and cater them to your family’s tastes or dietary needs!

  • Vegetarian Option: Swap smoked sausage for plant-based sausage or sautéed mushrooms for a hearty meat-free filling. Trust me, they’ll be just as delightful!

  • Cheesy Delight: Add shredded cheddar or pepper jack cheese into the filling alongside sausage for an oozy, melty twist. The cheese melds beautifully with the savory sausage.

  • Spicy Kick: Incorporate diced jalapeños into the sausage filling for a zesty kick. If you love heat, this is a surefire way to turn up the flavor!

  • Sweet Treat: For a dessert version, fill with fruit preserves or sweetened cream cheese instead of sausage. Picture a delightful, sweet bite to balance those hearty brunch flavors!

  • Brisket Bliss: Instead of sausage, try shredded brisket for an authentic Texas barbecue spin. This adds a rich, smoky flavor that will wow your guests.

  • Breakfast Lovers’ Mix: Combine cooked, crumbled breakfast sausage with scrambled eggs and cheese for a breakfast-themed kolache. Each bite will feel like a delicious morning in a pastry!

  • Herby Goodness: Add fresh herbs like rosemary or chives into the dough for an aromatic flavor profile that complements the filling. It’s like a welcome embrace of taste!

  • Gluten-Free Alternative: Use a gluten-free flour blend to make the dough, ensuring that everyone can enjoy these fluffy wonders. Just be sure to adjust the liquid slightly for consistency!

These variations let you explore countless flavors! Don't hesitate to mix and match, and if you're feeling adventurous, try out my other recipes like Savory Breakfast Burritos or a classic Cheesy Potato Casserole for a brunch that everyone will be talking about!

What to Serve with Perfectly Pillowy Texas Kolaches (Klobasneks)

Elevate your breakfast experience with delightful pairings that bring out the savory goodness of these kolaches.

  • Scrambled Eggs: The fluffy texture of scrambled eggs complements the kolaches wonderfully, adding a light and creamy element to your meal.

  • Fresh Fruit Salad: A vibrant mix of seasonal fruits brings a refreshing contrast to the rich flavors of the kolaches, enhancing your breakfast plate.

  • Crispy Hash Browns: Their crunchy exterior and soft inside create a satisfying textural balance, making every bite of this traditional breakfast a delight.

  • Savory Cheese Dip: Creamy cheese dip for dunking adds a touch of indulgence while enhancing the flavors, perfect for any cheese lover.

  • Sweet Maple Syrup: Drizzling a bit of syrup on your kolaches adds a delightful sweetness, marrying perfectly with the savory sausage filling.

  • Iced Coffee: A chill on summer mornings or refreshing wake-up call, iced coffee pairs powerfully with the flavors of the kolaches, making for an energizing start.

  • Zesty Jalapeño Jam: This spicy-sweet condiment enhances the hearty sausage filling and adds an unexpected kick that spice lovers will adore.

  • Chocolate Chip Muffins: For a treat-yourself breakfast, the sweet burst of chocolate in muffins beautifully contrasts with the savory sausages.

Expert Tips for Texas Kolaches

  • Perfect Temperature: Ensure the milk and butter mixture is warm but not hot. Too much heat can kill the yeast and prevent proper rising.

  • Easy Kneading: Knead the dough until it’s smooth and slightly sticky. Over-kneading can lead to tough kolaches, while under-kneading can result in dense pastries.

  • Room Temperature Ingredients: Use room temperature eggs and milk for better blending, ensuring a softer texture in your Texas Kolaches.

  • Watch the Proofing: Don’t rush the proofing process; if the dough hasn’t doubled in size, it won’t achieve that light, fluffy texture we love.

  • Sealing Well: Be sure to tightly seal the dough around the filling to prevent any sausage from leaking out while baking, keeping your kolaches perfect.

Texas Kolaches (Klobasneks) Recipe FAQs

How do I choose the right sausage for my kolaches?
Absolutely! For the best flavor, select high-quality smoked sausage links. I often recommend using varieties such as kielbasa, and you can also get creative with links like boudin or spicy andouille for an extra kick. Just ensure the sausages are fully cooked if you're using a type that's not pre-cooked.

How should I store leftover Texas Kolaches?
You can keep your baked Texas Kolaches in an airtight container at room temperature for up to 1 day to maintain their softness. For longer storage, place them in the refrigerator where they'll stay fresh for up to 4 days. Just make sure they’re covered so they don’t dry out!

Can I freeze Texas Kolaches?
You can absolutely freeze these delightful pastries! Wrap each kolache tightly in wax paper, then place them in a freezer-safe container or bag. They can be stored in the freezer for up to 3 months. When you’re ready to enjoy, simply reheat them in the oven at 350°F for about 10 minutes, and they’ll taste freshly baked!

What should I do if my dough isn’t rising properly?
If your dough isn't rising, it could be due to a few factors. Make sure your yeast is fresh—activated yeast should bubble in warm water. The environment should also be warm during proofing; consider placing the bowl near a preheated oven or inside a turned-off oven with boiling water to create steam. If this still doesn’t help, a little patience may be needed; sometimes dough can take longer to proof, especially in cooler environments.

Are these kolaches safe for pets or those with allergies?
When making Texas Kolaches, remember that they are not suitable for pets, especially due to the sausage content and possible garlic or onion. If you have specific allergies, be mindful of ingredients like wheat, dairy, and eggs. You can easily modify them by using non-dairy milk and a flaxseed egg for a vegan option. Always check labels on sausage for allergens, and choose fillings that fit dietary restrictions.

Can I use non-dairy substitutes in this recipe?
Very! You can substitute whole milk with any non-dairy milk like almond or soy for a lactose-free version. For the butter, vegan margarine works as a great alternative. And if you need to make it egg-free, a flaxseed egg (1 tablespoon ground flaxseed mixed with 2.5 tablespoons water, let sit for 5 minutes) can stand in beautifully. Enjoy experimenting with these substitutions while whipping up your Texas Kolaches!

Texas Kolaches

Savory Texas Kolaches: Your New Breakfast Obsession

Discover the joy of Texas Kolaches, a delightful pastry filled with savory goodness perfect for breakfast.
Print Recipe Pin Recipe
Prep Time 30 minutes mins
Cook Time 25 minutes mins
Proofing Time 1 hour hr 30 minutes mins
Total Time 2 hours hrs 25 minutes mins
Servings: 16 kolaches
Course: Breakfast
Cuisine: American
Calories: 250
Ingredients Equipment Method Nutrition Notes

Ingredients
  

For the Dough
  • 5 tablespoons Unsalted Butter Use salted butter if unsalted isn’t available, but reduce the added salt.
  • 4 cups All-Purpose Flour Bread flour can be used for a chewier texture.
  • 1/4 cup Granulated Sugar Use coconut sugar for a lower glycemic index alternative.
  • 2 tablespoons Rapid Rise Yeast Active dry yeast can be used; just activate it in warm water before mixing.
  • 1 teaspoon Salt No substitutions recommended for flavor balance.
  • 1 cup Whole Milk Can substitute with any non-dairy milk for lactose-free options.
  • 1 each Egg + Egg Yolk (slightly beaten) Replace with a flaxseed egg for a vegan version.
For the Filling
  • 16 links Smoked Sausage Different varieties can be used like ham, boudin, or brisket for alternative flavors.

Equipment

  • Stand Mixer
  • small saucepan
  • Baking Sheets
  • Parchment Paper
  • wire rack

Method
 

Step-by-Step Instructions
  1. Melt 5 tablespoons of unsalted butter, then combine with 4 cups of flour, 1/4 cup of sugar, 2 tablespoons of yeast, and 1 teaspoon of salt in a mixer. Slowly add 1 cup of warm milk and 1 beaten egg. Mix for 8 minutes until sticky and smooth.
  2. Grease a large bowl with oil, place the dough inside, cover, and proof for 1 to 1.5 hours until doubled in size.
  3. Punch down the dough, divide into 16 pieces, roll into balls, and arrange on two lined baking sheets. Cover and proof for another 90 minutes.
  4. Slice smoked sausage into 3-inch pieces while the dough is proofing.
  5. Preheat oven to 350°F. Flatten a dough ball, insert a sausage piece, and wrap tightly to seal.
  6. Bake for 22-25 minutes until golden brown. Cool slightly on a wire rack before serving.

Nutrition

Serving: 1kolacheCalories: 250kcalCarbohydrates: 30gProtein: 10gFat: 10gSaturated Fat: 5gPolyunsaturated Fat: 1gMonounsaturated Fat: 3gCholesterol: 30mgSodium: 300mgPotassium: 200mgFiber: 1gSugar: 2gVitamin A: 200IUCalcium: 50mgIron: 1.5mg

Notes

Ensure the milk and butter mixture is warm but not hot; use room temperature ingredients for better blending. Watch the proofing time closely for optimal texture.

Tried this recipe?

Let us know how it was!

Savory Breakfast Pot Pie: Your Ultimate Morning Comfort Food

January 26, 2026 by Grace Snow Leave a Comment

As the sun peeks through the kitchen window, the aroma of fresh-baked biscuits envelops the room, instantly transforming my morning. There’s something so heartwarming about this Savory Breakfast Pot Pie with Honey Butter Biscuit Topping; it's the perfect blend of fluffy scrambled eggs, savory sausage gravy, and vibrant sautéed vegetables, all tucked under a golden, flaky crust. This dish isn’t just a comforting start to your day; it’s also incredibly customizable, so you can tailor it to whatever you have on hand. Plus, it's quick to whip up and effortlessly turns a usual breakfast into an extraordinary feast that pleases everyone at the table. Are you ready to elevate your morning routine with this delightful recipe?

Why Will You Love This Pot Pie?

Versatile: This Savory Breakfast Pot Pie allows for endless customization! Use your favorite veggies or cheeses to match your taste preferences.

Family Favorite: Its comforting flavors and delightful presentation make it a hit with both kids and adults, perfect for any breakfast gathering.

Easy to Prepare: With straightforward steps, you can easily whip this up on busy mornings or for leisurely brunches, just like our delicious Breakfast Egg Muffins.

Crowd-Pleasing: Serve it fresh out of the oven, and watch everyone at your table dig in happily.

Meal Prep Friendly: You can prepare the filling and biscuit dough ahead of time, making it a lifesaver for those hectic weekdays!

Embrace the joy of homemade comfort with this irresistible meal that promises a satisfying breakfast experience!

Savory Breakfast Pot Pie Ingredients

For the Filling

  • Breakfast Sausage – Provides a savory filling; can substitute with turkey or veggie sausage for a lighter option.
  • Mild Cheddar Cheese – Adds creaminess and flavor; Monterey Jack works as a great alternative.
  • Bell Peppers – Chopped for sweetness and color; swap with zucchini or spinach for variety.
  • Onion – Chopped, yellow or red varieties deliver great taste.
  • Salt – Enhances flavors; use kosher salt for more control over seasoning.
  • Pepper – Adds heat; adjust to your liking.
  • Eggs – Beaten, they're essential for the recipe's integrity.
  • Heavy Cream – Creates a rich gravy; substitute with half-and-half for a lighter dish.
  • Flour – Thickens the gravy; use a gluten-free blend if needed.

For the Biscuits

  • Red Lobster Honey Butter Biscuit Mix – Forms the base for the topping; feel free to use any biscuit mix.
  • Unsalted Butter – Adds richness; olive oil is a suitable alternative if desired.
  • Milk – Necessary for biscuit preparation; any type works just fine.
  • Honey – Sweetens the biscuit topping; maple syrup can be used instead.

For Cooking

  • Cooking Oil – For sautéing vegetables; olive oil or butter will do perfectly.

Each ingredient plays a vital role in making this Savory Breakfast Pot Pie a delightful and comforting experience, ensuring every bite is full of flavor!

Step‑by‑Step Instructions for Savory Breakfast Pot Pie

Step 1: Prepare Filling
In a large skillet, heat a drizzle of cooking oil over medium heat. Add the chopped bell peppers and onions, sautéing for about 3-4 minutes until softened and lightly browned. Next, crumble in the breakfast sausage and cook for 5-6 minutes until fully cooked and crispy. Stir in flour and pour in heavy cream, seasoning generously with salt and pepper. Cook until the mixture thickens, about 2-3 minutes, creating a rich gravy for your Savory Breakfast Pot Pie.

Step 2: Prep Biscuit Dough
In a large mixing bowl, combine the Red Lobster Honey Butter Biscuit Mix with milk. Stir gently until just combined, forming a shaggy dough—avoid overmixing to ensure tender biscuits. Allow the dough to sit for a couple of minutes while you prepare the eggs; this will help the biscuit topping rise perfectly when baked, complementing your savory filling beautifully.

Step 3: Cook Eggs
In a separate skillet, melt a tablespoon of unsalted butter along with a splash of olive oil over medium-low heat. Add the beaten eggs and cook gently, stirring frequently until they are just set but still soft, about 4-5 minutes. Season to taste with salt and pepper. Once cooked, remove from heat and set aside to cool slightly as you prepare to assemble the pot pies.

Step 4: Assemble Pot Pies
Preheat your oven to 425°F (220°C). Gather ramekins or a suitable baking dish and layer in the following order: a generous scoop of scrambled eggs, followed by the sautéed vegetable and sausage filling, a sprinkle of mild cheddar cheese, and finally, a rich layer of sausage gravy. Spoon the prepared biscuit dough on top, leaving a little space for expansion as it bakes.

Step 5: Bake
Place the ramekins on a baking sheet to catch any drips and bake in the preheated oven for 18-20 minutes. Keep an eye on them; you want the biscuit tops to rise and turn a beautiful golden brown. The savory aromas will fill your kitchen, signaling that your Savory Breakfast Pot Pie is close to perfection!

Step 6: Finish
As soon as the pot pies are out of the oven, brush the tops with a mixture of melted butter and honey for an added touch of sweetness and shine. This quick step enhances the flavor of the biscuits and adds a delightful sheen to your golden topping. Serve warm and enjoy the comforting goodness of your Savory Breakfast Pot Pie!

Make Ahead Options

These Savory Breakfast Pot Pies are perfect for meal prep enthusiasts! You can prepare the filling and biscuit dough up to 24 hours in advance. Simply sauté the vegetables and sausage, then let the mixture cool before refrigerating it in an airtight container. Likewise, prepare the biscuit dough and store it separately to prevent it from becoming too moist. When you're ready to serve, just layer everything in your ramekins as directed, top with the dough, and bake until golden brown. This method ensures you enjoy a homemade breakfast that's just as delicious, saving time on busy mornings while still indulging in comforting flavors!

Expert Tips for Savory Breakfast Pot Pie

• Cook Thoroughly: Ensure the breakfast sausage is fully cooked before combining with other ingredients for a rich, flavorsome filling.

• Don’t Overmix: Mix the biscuit dough just until combined to avoid tough biscuits; a shaggy consistency is perfect for a tender topping.

• Maintain Texture: When reheating leftovers of your Savory Breakfast Pot Pie, avoid the microwave. Instead, use the oven to keep it crispy and delicious.

• Flavor Variations: Experiment with different cheeses or veggies. For a unique twist, try feta cheese or swap bell peppers for spinach.

• Prep Ahead: Make the filling and biscuit dough the day before and store separately; this makes morning preparation a breeze!

Storage Tips for Savory Breakfast Pot Pie

• Fridge: Store leftover Savory Breakfast Pot Pie in an airtight container for up to 3 days. This ensures the flavors remain fresh while preserving the texture.

• Freezer: For longer storage, freeze portions in airtight containers or freezer bags for up to 2 months. This way, you can enjoy this comforting dish whenever the craving strikes!

• Reheating: When ready to enjoy, reheat in the oven at 350°F (175°C) for about 15-20 minutes or until warmed through. This keeps the biscuit topping crispy and enhances the savory filling.

• Make-Ahead Tips: Prepare the filling and biscuit dough up to 24 hours in advance; simply store them separately in the fridge before assembling and baking.

Savory Breakfast Pot Pie Variations

Customize your Savory Breakfast Pot Pie for a delightful twist that creates a flavor adventure with each bite!

  • Dairy-Free: Use a plant-based milk and cheese for a rich, creamy alternative that caters to dairy sensitivities.
    Dairy-free options still deliver delicious flavor and texture, making everyone feel included at the breakfast table!

  • Spicy Kick: Add diced jalapeños or a sprinkle of cayenne pepper to the filling for an exciting heat that wakes up your taste buds.
    This fiery addition complements the creamy gravy and adds a delicious contrast to the savory sausage.

  • Veggie-Packed: Swap out the sausage for a mix of mushrooms, spinach, and kale to create a wholesome vegetarian version.
    With the hearty veggie blend, you'll enjoy a fresh, colorful take on this comforting breakfast dish!

  • Herbed Goodness: Enhance flavor by adding fresh herbs like thyme or rosemary to the filling—freshness takes it to another level!
    The aromatic essence of these herbs adds depth, making your pot pie all the more enjoyable.

  • Sweet Twist: Try adding a touch of diced apples or pears to the filling for a sweet-savory combination that’s irresistible.
    This subtly sweet element can transform your breakfast experience into something uniquely delightful.

  • Cheese Lovers: Mix different cheeses like feta, gouda, or pepper jack with the cheddar for bold flavor variations.
    Each cheese brings its own personality to the dish, turning it into a cheesy delight that everyone will want seconds of!

  • Frozen Convenience: For a quicker meal prep, use frozen mixed vegetables instead of fresh; they make assembly faster without sacrificing taste.
    Just toss them straight into the filling for an easy, crowd-pleasing solution you can whip up any morning.

Elevate your breakfast game while mixing and matching these variations! For other delicious recipes to enjoy, you might also like our Cornbread Breakfast Casserole or the scrumptious Tamale Pie Hearty for more comforting options.

What to Serve with Savory Breakfast Pot Pie

Warm up your breakfast table and brighten your morning with these delightful pairings that complement your comforting creation perfectly.

  • Fresh Fruit Salad: Bursting with vibrant colors and sweet flavors, it adds a refreshing contrast to the savory pie.

  • Crispy Hash Browns: The golden, crispy texture of hash browns pairs beautifully with the soft, flaky pot pie, enhancing the breakfast experience.

  • Mixed Green Salad: A light and zesty salad balances the richness of the pot pie, offering a refreshing crunch with every forkful.

  • Sautéed Spinach: Tender sautéed spinach introduces earthy flavors, brightening your plate while providing a nutritious element alongside your hearty dish.

  • Breakfast Smoothie: A chilled smoothie, filled with fruits and yogurt, offers a sweet and creamy sip, complementing the savory warmth of the pot pie.

  • Maple Syrup Drizzle: A touch of maple syrup over individual servings can provide a delightful sweet contrast to the hearty filling.

Let your breakfast table sing with color and flavor, turning a comforting indulgence into a well-rounded meal experience!

Savory Breakfast Pot Pie Recipe FAQs

What type of sausage works best for this recipe?
I recommend using breakfast sausage for its rich flavor, but if you prefer a lighter option, turkey or veggie sausage works beautifully too!

How can I tell if my vegetables are fresh for the pot pie?
Look for vibrant colors and firm textures. Bell peppers shouldn't have dark spots all over, and the skin should be smooth and shiny. Fresh vegetables will enhance the flavors of your Savory Breakfast Pot Pie.

What's the best way to store leftovers?
Store leftover Savory Breakfast Pot Pie in an airtight container in the refrigerator for up to 3 days. To maintain their original texture, reheat them in the oven at 350°F (175°C) for 15-20 minutes until the filling is heated through and the biscuit topping remains crispy.

Can I freeze the Savory Breakfast Pot Pie?
Absolutely! To freeze, allow any leftovers to cool completely. Then, wrap the portions tightly in plastic wrap and place them in a freezer-safe bag or container. They can be frozen for up to 2 months. Just remember to thaw in the fridge before reheating to retain the best texture.

What if my biscuit topping doesn't rise properly?
If your biscuit topping doesn't rise, it could be because the dough was overmixed or the baking powder was old. Always mix until just combined to keep them fluffy, and check your leavening agents before baking for the best results!

Are there any dietary considerations to keep in mind?
Yes! If you or your guests have dietary restrictions, you can easily customize the filling. For a gluten-free option, use a gluten-free biscuit mix and flour. Also, double-check that the sausage and cheese are suitable for your dietary needs. Enjoy the versatility of this dish!

Savory Breakfast Pot Pie

Savory Breakfast Pot Pie: Your Ultimate Morning Comfort Food

This Savory Breakfast Pot Pie is your ultimate morning comfort food, filled with fluffy scrambled eggs, savory sausage gravy, and vibrant sautéed vegetables.
Print Recipe Pin Recipe
Prep Time 20 minutes mins
Cook Time 25 minutes mins
Total Time 45 minutes mins
Servings: 4 pot pies
Course: Breakfast
Cuisine: American
Calories: 350
Ingredients Equipment Method Nutrition Notes

Ingredients
  

For the Filling
  • 1 lb Breakfast Sausage Can substitute with turkey or veggie sausage
  • 1 cup Mild Cheddar Cheese Monterey Jack works as a great alternative
  • 1 cup Bell Peppers Chopped; swap with zucchini or spinach for variety
  • 1 medium Onion Chopped; yellow or red varieties deliver great taste
  • 1 tsp Salt Use kosher salt for more control over seasoning
  • 1/2 tsp Pepper Adjust to your liking
  • 4 large Eggs Beaten
  • 1/2 cup Heavy Cream Substitute with half-and-half for a lighter dish
  • 1/4 cup Flour Use a gluten-free blend if needed
For the Biscuits
  • 1 pkg Red Lobster Honey Butter Biscuit Mix Feel free to use any biscuit mix
  • 1/4 cup Unsalted Butter Add richness; olive oil is a suitable alternative
  • 3/4 cup Milk Any type works just fine
  • 2 tbsp Honey Maple syrup can be used instead
For Cooking
  • 1 tbsp Cooking Oil Olive oil or butter will do perfectly

Equipment

  • Skillet
  • Mixing Bowl
  • Baking Dish
  • Baking Sheet

Method
 

Step‑by‑Step Instructions
  1. In a large skillet, heat a drizzle of cooking oil over medium heat. Add the chopped bell peppers and onions, sautéing for about 3-4 minutes until softened and lightly browned. Next, crumble in the breakfast sausage and cook for 5-6 minutes until fully cooked and crispy. Stir in flour and pour in heavy cream, seasoning generously with salt and pepper. Cook until the mixture thickens, about 2-3 minutes, creating a rich gravy for your Savory Breakfast Pot Pie.
  2. In a large mixing bowl, combine the Red Lobster Honey Butter Biscuit Mix with milk. Stir gently until just combined, forming a shaggy dough—avoid overmixing to ensure tender biscuits. Allow the dough to sit for a couple of minutes while you prepare the eggs.
  3. In a separate skillet, melt a tablespoon of unsalted butter along with a splash of olive oil over medium-low heat. Add the beaten eggs and cook gently, stirring frequently until they are just set but still soft, about 4-5 minutes. Season to taste with salt and pepper. Once cooked, remove from heat and set aside to cool slightly.
  4. Preheat your oven to 425°F (220°C). Layer in the following order: a scoop of scrambled eggs, sautéed vegetable and sausage filling, a sprinkle of cheddar cheese, and biscuit dough on top.
  5. Place the ramekins on a baking sheet and bake for 18-20 minutes until golden brown.
  6. Brush the tops with melted butter and honey when out of the oven for added flavor. Serve warm.

Nutrition

Serving: 1pot pieCalories: 350kcalCarbohydrates: 30gProtein: 15gFat: 20gSaturated Fat: 10gPolyunsaturated Fat: 2gMonounsaturated Fat: 6gCholesterol: 180mgSodium: 800mgPotassium: 300mgFiber: 2gSugar: 4gVitamin A: 15IUVitamin C: 20mgCalcium: 10mgIron: 10mg

Notes

Ensure that all ingredients are fresh for the best flavor and texture.

Tried this recipe?

Let us know how it was!

Cinnamon Roll Baked Oatmeal Squares for a Cozy Morning Boost

January 26, 2026 by Grace Snow Leave a Comment

As the morning sun peeks through the windows, a delicious aroma fills the air—cinnamon warm and inviting, just begging to be savored. That’s the magic of my Cinnamon Roll Baked Oatmeal Squares, a delightful way to enjoy the comforting flavors of cinnamon rolls without the usual bustle of traditional baking. Best of all, this breakfast wonder is not just simple to prepare; it’s also perfect for those busy mornings when you crave something hearty yet wholesome. With the heartiness of oats and a touch of sweetness, each square becomes a delightful start to your day. Ready to indulge in this cozy morning treat? Let's dive in and create a batch that will keep everyone coming back for more!

Why are these oatmeal squares irresistible?

Comforting, warm flavors of cinnamon and maple syrup create a delightful start to your day. Simple to prepare, these squares come together effortlessly, making them perfect for busy mornings. Nutrient-packed with wholesome oats, they provide lasting energy. Plus, they’re versatile—add nuts or fruits to customize your treat! For a heartfelt breakfast experience, pair them with yogurt or fresh fruit as suggested in Pumpkin Cinnamon Roll recipes. Prep them in advance, and you’ll have a delicious breakfast ready to go!

Cinnamon Roll Baked Oatmeal Squares Ingredients

• Get ready to treat yourself!

For the Oatmeal Base

  • Rolled Oats – Old-fashioned oats are preferred for the best chewy texture!
  • Baking Powder – This helps create a light and fluffy texture for your squares.
  • Ground Cinnamon – Adds that warm, cozy flavor reminiscent of classic cinnamon rolls.
  • Salt – A crucial component that balances the sweetness beautifully.
  • Large Egg – Binds the ingredients together, adding moisture and richness.
  • Milk – Choose dairy or a non-dairy alternative for creamy goodness.
  • Maple Syrup or Honey – This will sweeten your squares naturally—pick your favorite!
  • Melted Butter or Coconut Oil – Incorporates richness and flavor; coconut oil is great for a dairy-free option.
  • Vanilla Extract – A splash elevates the flavor profile with warmth.

For the Swirl

  • Melted Butter or Coconut Oil – This adds richness to your delightful cinnamon swirl.
  • Brown Sugar – Brings a lovely sweetness with a hint of caramel flavor, perfect for the swirl!

These Cinnamon Roll Baked Oatmeal Squares offer heartiness and warmth, making them a staple in your breakfast rotation!

Step‑by‑Step Instructions for Cinnamon Roll Baked Oatmeal Squares

Step 1: Preheat the Oven
Begin by preheating your oven to 350°F (175°C). This temperature ensures that your Cinnamon Roll Baked Oatmeal Squares bake evenly, resulting in that perfect golden top. While the oven warms up, gather your baking dish—an 8x8 inch square pan works great—and grease it lightly to prevent sticking.

Step 2: Combine Dry Ingredients
In a large mixing bowl, combine the rolled oats, baking powder, ground cinnamon, and salt. Stir these ingredients together until they’re well blended, allowing the warm cinnamon scent to fill your kitchen. This blend will form the heart of your oatmeal squares, providing texture and flavor for every delicious bite.

Step 3: Mix Wet Ingredients
In a separate bowl, whisk together the large egg, milk, maple syrup or honey, melted butter (or coconut oil), and vanilla extract until smooth. This mixture adds moisture and sweetness to your Cinnamon Roll Baked Oatmeal Squares. Look for a lovely, creamy consistency before incorporating it into your dry ingredients.

Step 4: Combine Wet and Dry Ingredients
Pour the wet mixture into the bowl with the dry ingredients. Using a spatula, gently fold everything together until just combined. Be careful not to overmix; a few lumps are perfectly fine! This will ensure that your oatmeal squares remain soft and chewy after baking.

Step 5: Prepare the Cinnamon Swirl
In a small bowl, mix the melted butter or coconut oil with brown sugar and a sprinkle of cinnamon to create the swirl. Stir until well combined, forming a crumbly mixture. This step will add a delightful cinnamon flavor and sweetness that mimics the traditional cinnamon roll experience.

Step 6: Assemble the Mixture in the Baking Dish
Spread the oatmeal mixture evenly into the prepared baking dish, using a spatula to smooth the top. Next, drizzle the cinnamon swirl mixture over the oat base. Use a knife or skewer to gently swirl the mixture into the oatmeal, creating beautiful patterns without fully mixing it in.

Step 7: Bake the Oatmeal Squares
Place the baking dish in the preheated oven and bake for 25-30 minutes. You’ll know the Cinnamon Roll Baked Oatmeal Squares are done when the edges turn golden and a toothpick inserted into the center comes out mostly clean. Check around the 25-minute mark for best results.

Step 8: Cool and Slice
Once baked, remove the dish from the oven and allow it to cool for about 10 minutes. This cooling time makes it easier to slice into squares without crumbling. Use a sharp knife to cut them into squares, revealing layers of deliciousness waiting to be enjoyed.

Cinnamon Roll Baked Oatmeal Squares Variations

Feel free to mix it up! Your Cinnamon Roll Baked Oatmeal Squares can be customized to suit your taste and dietary needs.

  • Sweetener Swap: Use agave syrup or brown rice syrup for a different sweetness profile that caters to your preference.
  • Nutty Delight: Add chopped walnuts or pecans to the oat mixture for an irresistible crunch and texture.
  • Fruity Twist: Stir in some dried cranberries or banana slices before baking for a fruity explosion in every square.
  • Dairy-Free: Swap regular milk for almond, soy, or oat milk to keep it vegan-friendly and still scrumptiously creamy.
  • Extra Spice: Try adding nutmeg or pumpkin pie spice alongside cinnamon for an aromatic twist to your flavor palette.
  • Vegan Treat: Replace the egg with a flaxseed egg (1 tablespoon ground flaxseed + 2.5 tablespoons water) for a delightful vegan option.
  • Coconut Flake Fun: Fold in shredded coconut for a tropical flair—coconut pairs beautifully with cinnamon!
  • Cream Cheese Drizzle: Make a simple icing from cream cheese and a little sugar to drizzle on top of your squares for a decadent finish.

These variations keep your breakfast exciting and fresh! When you enjoy a batch of these sweet treats, consider trying them alongside a cup of coffee or paired with the dreamy flavor of Pumpkin Cinnamon Roll recipes for a delightful experience. You’ll find the perfect combination for everyone in your family!

Make Ahead Options

These Cinnamon Roll Baked Oatmeal Squares are a fantastic solution for busy mornings! You can prepare the entire oat mixture up to 24 hours in advance—simply make and combine your wet and dry ingredients, then store them in the fridge. For best results, keep the cinnamon swirl mixture separate until right before baking to maintain its textural integrity. When you're ready to enjoy them, just pour the oat mix into your baking dish, drizzle the swirl on top, and bake as directed. This method not only saves you time but ensures your breakfast is just as delicious in the morning as it was the day before!

What to Serve with Cinnamon Roll Baked Oatmeal Squares

Treat your senses to a complete breakfast experience that pairs beautifully with these squares' warm cinnamon goodness.

  • Creamy Yogurt: A dollop of Greek yogurt adds tangy creaminess, balancing the sweetness of your oatmeal squares while enhancing their wholesome texture.

  • Fresh Berries: Add a burst of freshness with strawberries or blueberries—these fruits provide a juicy contrast and vibrant color to your breakfast plate. Enjoying them together makes for a delightful morning!

  • Nutty Granola: A sprinkle of your favorite granola brings extra crunch and flavor depth, elevating each bite of the oatmeal squares with wonderful textures. This combination is sure to please everyone at the table.

  • Banana Slices: Sliced bananas complement the oatmeal's cinnamon flavor, adding natural sweetness and creaminess while making your plate visually appealing.

  • Maple Syrup Drizzle: Elevate the blissful flavors by drizzling warm maple syrup over the squares for an extra touch of sweetness that lingers perfectly on your palate.

  • Herbal Tea: Sip on a soothing cup of chamomile or peppermint tea, which calms the senses and makes for a cozy pairing with your Cinnamon Roll Baked Oatmeal Squares.

  • Cinnamon Spiced Milk: Warm up a glass of milk flavored with a pinch of cinnamon for an irresistible, comforting drink that echoes the flavors of your breakfast.

Each of these pairings enhances the experience of these heavenly Cinnamon Roll Baked Oatmeal Squares, ensuring a delightful start to your day!

Expert Tips for Cinnamon Roll Baked Oatmeal Squares

  • Use Old-Fashioned Oats: Always opt for old-fashioned rolled oats for the best texture. Instant or steel-cut oats will lead to undesirable results in your Cinnamon Roll Baked Oatmeal Squares.

  • Avoid Overmixing: Be careful not to overmix the wet and dry ingredients. A few lumps are fine and essential for maintaining a soft and chewy texture.

  • Proper Swirl Technique: Don't overmix the cinnamon swirl topping. A slightly crumbly mixture is perfect for achieving that beautiful swirl effect without losing texture.

  • Check for Doneness: Test for doneness by using a toothpick; it should come out mostly clean. A slight moistness is okay for a tender finish in your squares.

  • Customize Sweetness: Feel free to adjust the sweetness to your preference. You can reduce the maple syrup or brown sugar based on your taste preference while keeping the flavors in balance.

How to Store and Freeze Cinnamon Roll Baked Oatmeal Squares

Room Temperature: Keep the squares in an airtight container at room temperature for up to 3 days to maintain freshness, making it easy to grab for breakfast on busy mornings.

Fridge: For longer-lasting freshness, store the oatmeal squares in the fridge for up to 4 days. Just make sure to cover them well to prevent drying out.

Freezer: These delicious Cinnamon Roll Baked Oatmeal Squares freeze beautifully! Wrap each square in plastic wrap and place them in a freezer-safe bag for up to 3 months—perfect for meal prep!

Reheating: To enjoy the squares warm, simply reheat them in the microwave for about 20-30 seconds, or until warmed through.

Cinnamon Roll Baked Oatmeal Squares Recipe FAQs

How do I select the right rolled oats for this recipe?
Absolutely! For the best texture in your Cinnamon Roll Baked Oatmeal Squares, I recommend using old-fashioned rolled oats. They provide the perfect chewiness and structure you’re looking for. Avoid instant or steel-cut oats, as they won’t yield the same delightful result.

What’s the best way to store leftover oatmeal squares?
Very! You can store your Cinnamon Roll Baked Oatmeal Squares in an airtight container at room temperature for up to 3 days. For longer-lasting freshness, pop them in the fridge, where they’ll stay good for about 4 days. Just be sure they’re covered to prevent drying out!

Can I freeze the oatmeal squares, and how should I do it?
Absolutely! Freezing these oatmeal squares is a fantastic option. Wrap each square in plastic wrap, then place them in a freezer-safe bag or container. You can keep them frozen for up to 3 months. When you’re ready to enjoy, simply reheat them in the microwave for about 20-30 seconds until warmed through!

What should I do if my oatmeal squares are too dry after baking?
Ah, no worries! If your Cinnamon Roll Baked Oatmeal Squares turn out too dry, it might be a sign that they were overbaked or the oven temperature was too high. For a softer texture, make sure to check for doneness around the 25-minute mark and pull them out once the toothpick comes out mostly clean but still with a little moisture clinging. If you find them dry, you can enjoy them with a dollop of yogurt or some fresh fruit to add moisture back!

Are there any dietary restrictions I should keep in mind for this recipe?
Very! This recipe is vegetarian-friendly, and you can easily make it dairy-free by using non-dairy milk and coconut oil instead of butter. If you or someone enjoying these squares has allergies, be mindful of which sweeteners you choose and ensure they fit within individual dietary needs. These oatmeal squares are versatile and can accommodate many tweaks!

Can I add extra ingredients to the oatmeal squares?
Absolutely! You can customize your Cinnamon Roll Baked Oatmeal Squares by mixing in nuts, seeds, or dried fruits like raisins or cranberries for extra texture and nutrients. You could even experiment with different spices, such as nutmeg or allspice, to create unique flavor profiles while keeping the base the same!

Cinnamon Roll Baked Oatmeal Squares

Cinnamon Roll Baked Oatmeal Squares for a Cozy Morning Boost

Cinnamon Roll Baked Oatmeal Squares are a delightful way to enjoy the comforting flavors of cinnamon rolls without the usual bustle of traditional baking.
Print Recipe Pin Recipe
Prep Time 10 minutes mins
Cook Time 30 minutes mins
Cooling Time 10 minutes mins
Total Time 50 minutes mins
Servings: 9 squares
Course: Breakfast
Cuisine: American
Calories: 200
Ingredients Equipment Method Nutrition Notes

Ingredients
  

For the Oatmeal Base
  • 2 cups Old-fashioned Rolled Oats preferred for the best chewy texture
  • 1 tbsp Baking Powder helps create a light and fluffy texture
  • 2 tsps Ground Cinnamon adds warm, cozy flavor
  • 1/4 tsp Salt balances sweetness
  • 1 large Egg binds ingredients, adds moisture
  • 1 cup Milk dairy or non-dairy alternative
  • 1/4 cup Maple Syrup or Honey natural sweetener
  • 1/4 cup Melted Butter or Coconut Oil for richness and flavor
  • 1 tsp Vanilla Extract elevates flavor profile
For the Swirl
  • 2 tbsp Melted Butter or Coconut Oil adds richness to the swirl
  • 1/4 cup Brown Sugar provides sweetness and caramel flavor

Equipment

  • 8x8 inch square baking dish

Method
 

Step‑by‑Step Instructions
  1. Preheat your oven to 350°F (175°C). Grease an 8x8 inch square baking dish lightly.
  2. In a large mixing bowl, combine the rolled oats, baking powder, ground cinnamon, and salt.
  3. In a separate bowl, whisk together the egg, milk, maple syrup or honey, melted butter (or coconut oil), and vanilla extract until smooth.
  4. Pour the wet mixture into the bowl with the dry ingredients, and gently fold together until just combined.
  5. In a small bowl, mix the melted butter or coconut oil with brown sugar and a sprinkle of cinnamon to create the swirl.
  6. Spread the oatmeal mixture evenly into the prepared baking dish. Drizzle the cinnamon swirl mixture over the top and gently swirl it in.
  7. Bake for 25-30 minutes until golden and a toothpick inserted comes out mostly clean.
  8. Allow to cool for about 10 minutes before cutting into squares.

Nutrition

Serving: 1squareCalories: 200kcalCarbohydrates: 30gProtein: 4gFat: 8gSaturated Fat: 4gPolyunsaturated Fat: 1gMonounsaturated Fat: 2gCholesterol: 50mgSodium: 150mgPotassium: 150mgFiber: 3gSugar: 6gVitamin A: 500IUCalcium: 150mgIron: 1mg

Notes

Use old-fashioned oats for the best texture. Avoid overmixing to maintain a soft and chewy texture. Customize sweetness according to your taste.

Tried this recipe?

Let us know how it was!

Savory Cheddar & Bacon Dutch Baby: A Cozy Breakfast Delight

January 26, 2026 by Grace Snow Leave a Comment

As I flipped through an old cookbook, a forgotten recipe caught my eye: the Savory Cheddar & Bacon Dutch Baby. It beckoned with promises of fluffy indulgence and savory bites, perfect for welcoming a new day. In just 35 minutes, you can whip up this impressive breakfast that brings a delightful twist to your usual morning fare. The beauty of this dish lies not only in its warm, comforting texture but also in its versatility—offering a gluten-free option without compromising on flavor. Picture yourself serving this golden, puffed pancake straight from the skillet, delighting family and friends with every forkful. Ready to create a breakfast masterpiece that outshines fast food? Let’s dive in!

Why is this Dutch Baby a must-try?

Simplicity: With just a few ingredients and a quick prep time, achieving this stunning breakfast is a breeze.

Unforgettable Flavor: The combination of sharp cheddar and crispy bacon makes for a savory delight that’s hard to resist.

Gluten-Free Option: This recipe allows you to swap in a gluten-free flour blend, ensuring everyone can enjoy it!

Heightened Appeal: Serve it straight from the skillet to impress family and friends, creating a cozy kitchen atmosphere.

Versatile Ingredients: Feel free to experiment with different cheeses or substitute bacon with sautéed mushrooms to tailor it to your taste. Looking for more inspired recipes? Check out Grilled Mushrooms Savory or try a delightful Seafood Pasta Savory for variety!

Savory Cheddar & Bacon Dutch Baby Ingredients

For the Batter

  • Eggs – Provide structure and richness; no substitutions recommended for best results.
  • All-purpose Flour – Creates the body of the Dutch baby; substitute with gluten-free flour blend for a gluten-free option.
  • Milk – Adds moisture and flavor; any milk variety (dairy or plant-based) can be used.
  • Melted Butter – Contributes flavor and helps prevent sticking; can replace with oil if needed.
  • Salt – Enhances overall flavor.
  • Black Pepper – Adds a subtle spice; optional if a milder flavor is desired.

For the Filling

  • Sharp Cheddar Cheese – Provides a savory, tangy flavor; can substitute with gouda, feta, or pepper jack.
  • Crispy Bacon – Delivers a crunchy texture and savory depth; can replace with sautéed mushrooms or crispy tempeh for a vegetarian option.

For Garnishing

  • Fresh Parsley and Chives – For garnish and added brightness to the dish; optional.

Elevate your mornings with this Savory Cheddar & Bacon Dutch Baby that’s sure to impress!

Step‑by‑Step Instructions for Savory Cheddar & Bacon Dutch Baby

Step 1: Preheat the Skillet
Begin by preheating your oven to 425°F (220°C). While the oven warms up, place a cast-iron skillet inside to heat for about 10 minutes. This step is crucial for achieving that spectacular puff that makes the Savory Cheddar & Bacon Dutch Baby so irresistible. Ensure your skillet is very hot before moving on to the next step.

Step 2: Prepare the Batter
In a mixing bowl, combine the eggs, all-purpose flour, milk, melted butter, salt, and black pepper. Using a whisk or a blender, mix until you achieve a smooth, homogenous batter. Let the batter rest for 5 minutes, as this resting time is key to creating a fluffy texture in your Dutch baby.

Step 3: Coat the Skillet
Carefully remove the hot skillet from the oven—remember it will be very hot! Add a bit more melted butter to the skillet, swirling it around to coat the bottom and sides evenly. Immediately pour your rested batter into the skillet, ensuring it spreads evenly across the surface.

Step 4: Add the Fillings
Once the batter is in place, generously sprinkle the sharp cheddar cheese and crispy bacon on top. These ingredients will melt into the batter as it bakes, infusing the Savory Cheddar & Bacon Dutch Baby with rich, savory flavors and delightful textures.

Step 5: Bake to Perfection
Place the skillet back in the oven and bake for 20-25 minutes. Keep a close eye on it as the edges rise and turn a beautiful golden brown. Avoid opening the oven door during this time, as the heat is essential for that impressive puff!

Step 6: Garnish and Serve
When the edges are puffed and golden, carefully remove the skillet from the oven. Let the Dutch baby cool slightly, then garnish with fresh chopped parsley and chives for a pop of color and brightness. Serve hot from the skillet, allowing everyone to dig into the delicious Savory Cheddar & Bacon Dutch Baby.

Make Ahead Options

These Savory Cheddar & Bacon Dutch Babies are fantastic for meal prep and can save you precious time on busy mornings! You can prepare the batter up to 24 hours in advance; simply blend the ingredients and store it in an airtight container in the refrigerator. Additionally, you can cook the bacon ahead of time, storing it in the fridge for up to 3 days. When you're ready to serve, preheat your oven and skillet, pour the batter, top with the bacon and cheese, and bake until puffed and golden. This way, you’ll enjoy a delicious, homemade breakfast with minimal effort—all while impressing your family with this delightful dish!

What to Serve with Savory Cheddar & Bacon Dutch Baby

Imagine a cozy breakfast table adorned with delightful flavors and textures, designed to awaken your senses and nourish your soul.

  • Fresh Fruit Salad: A burst of sweet and juicy fruits balances the savory nature of the Dutch baby, creating a refreshing contrast. Think berries, melons, and citrus for vibrant colors!

  • Crisp Green Salad: A light salad with mixed greens, cherry tomatoes, and a tangy vinaigrette adds a delightful crunch and tanginess, enhancing the dish’s richness.

  • Roasted Vegetables: Warm, caramelized veggies such as bell peppers and zucchini provide a wholesome, savory element, complementing that cheesy, bacon-filled delight beautifully.

  • Herbed Yogurt Dip: A dollop of herbed yogurt adds a creamy tang and fresh notes, elevating each forkful of the Dutch baby with a soothing taste.

  • Spicy Maple Syrup: For a sweet-savory twist, drizzle spicy maple syrup over your serving. The hint of heat with the sweetness is irresistible!

  • Hot Coffee or Tea: A warm mug of rich coffee or herbal tea creates the perfect beverage pairing, enhancing the breakfast experience and warming your mornings.

Indulge in these delightful pairings that take your Savory Cheddar & Bacon Dutch Baby breakfast to the next level!

Savory Cheddar & Bacon Dutch Baby Variations

Feel free to make this dish your own by experimenting with mouthwatering variations that tantalize your taste buds!

  • Vegetarian Option: Replace crispy bacon with sautéed mushrooms or crispy tempeh for a hearty twist. The earthy flavors from the mushrooms will complement the cheesy goodness beautifully.

  • Cheese Swap: Try different cheeses like gouda or pepper jack for a unique flavor profile. Each cheese brings its own charm, allowing you to personalize every bite.

  • Add Zest: Incorporate jalapeños or diced green chiles for a spicy kick. This twist will awaken your senses and elevate your breakfast experience.

  • Sweet Touch: Drizzle your Dutch baby with honey or hot honey after baking for a delightful sweet-savory balance. The sweetness will beautifully contrast with the savory flavors, making each forkful a joy.

  • Herb Infusion: Mix in fresh herbs like thyme or rosemary into the batter for an aromatic twist. This subtle enhancement can elevate your dish to gourmet status.

  • Caramelized Onions: Add some sweet caramelized onions for added depth. Their sweet and savory flavor will create a rich layer of taste that will have your friends asking for seconds!

  • Nutty Crunch: Toss in some toasted walnuts or pecans for a surprising crunch. The nutty flavor will pair wonderfully with the creamy cheese and crispy edges.

For more delightful ideas, consider pairing your Dutch baby with a bowl of Santa Fe Soup Savory or enjoy a fresh side of Grilled Mushrooms Savory for a savory meal that warms the heart.

Expert Tips for Savory Cheddar & Bacon Dutch Baby

  • Skillet Safety: Always handle the hot skillet with care. Use oven mitts and be cautious during the transfer to avoid burns.

  • Resting Time Matters: Resting the batter for 5 minutes is essential. Skipping this step can result in a denser texture instead of the light, airy result you want.

  • Avoid Oven Door Dilemma: Resist the urge to open the oven door while baking. It can cause the batter to deflate, compromising the perfect puffiness of your Savory Cheddar & Bacon Dutch Baby.

  • Choice of Flour: If you're opting for the gluten-free variant, ensure you use a high-quality gluten-free flour blend for the best results in texture and flavor.

  • Creative Fillings: Don’t hesitate to get creative! Substitute bacon with sautéed mushrooms or add different cheeses to tailor the dish to your preferences.

How to Store and Freeze Savory Cheddar & Bacon Dutch Baby

Fridge: Store leftover Savory Cheddar & Bacon Dutch Baby in an airtight container in the fridge for up to 2 days.

Freezer: Allow it to cool completely, then wrap slices tightly in plastic wrap and aluminum foil before freezing for up to 2 months.

Reheating: For best results, reheat in the oven at 350°F (175°C) for about 10-15 minutes until warmed through and slightly crispy.

Serving Suggestion: Enjoy the reheated Dutch baby as-is or with a drizzle of honey for a delightful twist!

Savory Cheddar & Bacon Dutch Baby Recipe FAQs

What type of flour should I use for the Savory Cheddar & Bacon Dutch Baby?
The recipe calls for all-purpose flour, but if you're looking for a gluten-free option, simply substitute with a gluten-free flour blend. I've had great success with brands that include xanthan gum, which helps mimic the elasticity of gluten.

How should I store leftovers of the Savory Cheddar & Bacon Dutch Baby?
To keep your leftovers fresh, store them in an airtight container in the fridge for up to 2 days. For optimal texture, enjoy them within this timeframe, as they can dry out after that.

Can I freeze the Savory Cheddar & Bacon Dutch Baby?
Absolutely! Once it’s completely cooled, wrap slices tightly in plastic wrap followed by aluminum foil. You can freeze them for up to 2 months. When you're ready to enjoy, just reheat them in the oven at 350°F (175°C) for about 10-15 minutes until warmed through and slightly crispy.

What can I do if my Dutch baby is not puffing up?
If your Dutch baby isn’t puffing as expected, make sure your oven is fully preheated to 425°F (220°C) and avoid opening the oven door during baking, as this releases heat. Additionally, make sure your batter is smooth, and don’t skip the resting time, as it’s crucial for achieving that lovely fluffy texture.

Are there any dietary considerations for pets or allergies with this dish?
Yes, the Savory Cheddar & Bacon Dutch Baby contains eggs, dairy, and bacon, which should be kept away from pets, particularly dogs, as these ingredients can upset their stomachs. If you have allergies, make sure to double-check that all substitutes used are safe for your needs.

How long does it take to prepare and cook the Savory Cheddar & Bacon Dutch Baby?
From start to finish, including prep and baking time, you’re looking at about 35 minutes. It’s a quick and delightful way to start your day!

Savory Cheddar & Bacon Dutch Baby

Savory Cheddar & Bacon Dutch Baby: A Cozy Breakfast Delight

Savory Cheddar & Bacon Dutch Baby is a fluffy breakfast that combines sharp cheddar and crispy bacon for a deliciously indulgent start to your day.
Print Recipe Pin Recipe
Prep Time 10 minutes mins
Cook Time 25 minutes mins
Resting Time 5 minutes mins
Total Time 35 minutes mins
Servings: 4 slices
Course: Breakfast
Cuisine: American
Calories: 250
Ingredients Equipment Method Nutrition Notes

Ingredients
  

For the Batter
  • 3 large Eggs Provide structure and richness; no substitutions recommended for best results.
  • 1 cup All-purpose Flour Creates the body of the Dutch baby; substitute with gluten-free flour blend for a gluten-free option.
  • 1 cup Milk Adds moisture and flavor; any milk variety (dairy or plant-based) can be used.
  • 3 tablespoons Melted Butter Contributes flavor and helps prevent sticking; can replace with oil if needed.
  • 1/2 teaspoon Salt Enhances overall flavor.
  • 1/4 teaspoon Black Pepper Adds a subtle spice; optional if a milder flavor is desired.
For the Filling
  • 1 cup Sharp Cheddar Cheese Provides a savory, tangy flavor; can substitute with gouda, feta, or pepper jack.
  • 6 slices Crispy Bacon Delivers a crunchy texture and savory depth; can replace with sautéed mushrooms or crispy tempeh for a vegetarian option.
For Garnishing
  • 2 tablespoons Fresh Parsley Optional for garnish and added brightness to the dish.
  • 2 tablespoons Chives Optional for garnish and added brightness to the dish.

Equipment

  • cast iron skillet
  • Mixing Bowl
  • Whisk

Method
 

Cooking Steps
  1. Preheat your oven to 425°F (220°C) and place a cast-iron skillet inside to heat for about 10 minutes.
  2. In a mixing bowl, combine the eggs, all-purpose flour, milk, melted butter, salt, and black pepper. Whisk until smooth, then let rest for 5 minutes.
  3. Remove the hot skillet from the oven, add more melted butter, and swirl to coat. Pour the rested batter evenly into the skillet.
  4. Sprinkle the sharp cheddar cheese and crispy bacon on top of the batter.
  5. Bake for 20-25 minutes, watching for the edges to rise and turn golden brown.
  6. Remove from the oven, let cool slightly, and garnish with fresh chopped parsley and chives before serving.

Nutrition

Serving: 1sliceCalories: 250kcalCarbohydrates: 20gProtein: 10gFat: 15gSaturated Fat: 7gPolyunsaturated Fat: 1gMonounsaturated Fat: 3gCholesterol: 125mgSodium: 500mgPotassium: 200mgFiber: 1gSugar: 1gVitamin A: 500IUVitamin C: 2mgCalcium: 200mgIron: 1.5mg

Notes

Ensure to let the batter rest for 5 minutes for a fluffier texture and avoid opening the oven door during baking to prevent deflation.

Tried this recipe?

Let us know how it was!

Savory Breakfast Protein Biscuits for Energizing Mornings

January 26, 2026 by Grace Snow Leave a Comment

As I stood in my kitchen, juggling a busy morning schedule, it hit me—those store-bought breakfast options just weren't cutting it anymore. That’s when I decided to whip up a batch of my High-Protein Breakfast Biscuits, and let me tell you, they changed everything. Packed with gooey cheddar cheese and fresh spinach, these savory goodies deliciously bridge the gap between health and convenience. Perfect for meal prep, they make breakfast a breeze, so you can seize the day without compromising on nutrition. Whether you’re a fitness enthusiast or simply searching for a quick, homemade pantry staple, these biscuits fit the bill in just 37 minutes. Curious about how to elevate your morning routine? Let’s dive in!

Why are Breakfast Protein Biscuits a Game Changer?

Nourishing and Satisfying: Each biscuit is a delightful fusion of flavors, featuring gooey cheddar cheese and nutrient-rich spinach that keep you full and energized.
Quick and Easy: Ready in just 37 minutes, these biscuits are perfect for hectic mornings, proving that homemade doesn't have to mean time-consuming.
Meal Prep Hero: Make a batch ahead of time to enjoy throughout the week. Pair them with your favorite Breakfast Egg Muffins or a fresh side of Greek yogurt to round out your breakfast.
Versatile Ingredients: Customize with different cheeses, greens, or spices to suit your taste. Whether you're a fan of feta or prefer a blend of herbs, the options are endless!
Crowd Pleaser: These savory bites are a hit with everyone, making them ideal for family brunches or shared breakfasts. Ditch the fast food and grab a delicious biscuit instead!

Breakfast Protein Biscuits Ingredients

For the Batter
• Plain 2% Greek Yogurt – Provides moisture and protein; use non-fat or full-fat yogurt as alternatives.
• Large Eggs – Acts as a binding agent and adds richness; room temperature eggs work best for a uniform mix.
• All-Purpose Flour – Gives structure and texture; for gluten-free, substitute with a 1:1 gluten-free all-purpose blend.
• Ground Flaxseed – Adds fiber and omega-3 fatty acids; can be omitted if not available.
• Baking Powder – Leavening agent for lightness; make sure it’s fresh for optimal rise.
• Salt – Enhances flavor; essential for balancing the taste.
• Garlic Powder – Adds savory depth; optional to adjust flavor intensity.
• Red Pepper Flakes – Provides a hint of heat; optional for those preferring milder flavors.

For the Extras
• Spinach – Adds nutrients and moisture; can substitute with other greens, but squeeze out excess water.
• Chives – Contributes onion-like flavor; can replace with green onions for a different kick.
• Cheddar Cheese – Adds creaminess and flavor; reserve half for topping or substitute with other cheeses like mozzarella for variety.

With these Breakfast Protein Biscuits ingredients, you’re on your way to creating a nourishing start to your day!

Step‑by‑Step Instructions for Breakfast Protein Biscuits

Step 1: Preheat the Oven
Start by preheating your oven to 375°F (190°C). Meanwhile, grease a 12-cup muffin tin generously with cooking spray or butter to ensure your Breakfast Protein Biscuits release easily once baked. This step sets the stage for achieving that delightful golden finish.

Step 2: Mix Dry Ingredients
In a large mixing bowl, whisk together 2 cups of all-purpose flour, 1 tablespoon of ground flaxseed, 1 tablespoon of baking powder, 1 teaspoon of salt, 1 teaspoon of garlic powder, and a pinch of red pepper flakes until everything is well combined. You want a uniform mixture to ensure that each biscuit is perfectly seasoned and raises nicely in the oven.

Step 3: Combine Wet Ingredients
In a separate bowl, mix together 1 cup of plain 2% Greek yogurt and 2 large room-temperature eggs until the mixture is smooth and creamy. This blend will provide moisture and protein to your Breakfast Protein Biscuits, contributing to their delightful texture.

Step 4: Fold Wet into Dry Ingredients
Gently fold the creamy wet mixture into the dry ingredients, using a spatula until just combined. Be careful not to overmix, as this can lead to denser biscuits. You want to maintain a light and fluffy texture for the best results.

Step 5: Add Spinach, Chives, and Cheese
Next, stir in about 1 cup of wilted and squeezed spinach, 1/4 cup of chopped chives, and 1 cup of shredded cheddar cheese into the dough, ensuring even distribution. The addition of these ingredients not only boosts nutrition but enhances the flavor of your Breakfast Protein Biscuits.

Step 6: Fill Muffin Tin
Evenly distribute the batter among the muffin cups in your greased tin, filling each about 3/4 full to allow room for rising. Sprinkle the reserved half-cup of cheddar cheese generously on top of each biscuit for a melty, cheesy finish that adds visual appeal.

Step 7: Bake the Biscuits
Slide the muffin tin into your preheated oven and bake for 20–22 minutes. Keep an eye on them—you're looking for a golden-brown top and a toothpick inserted into the center to come out clean. This means your Breakfast Protein Biscuits are perfectly baked and ready to be devoured.

Step 8: Cool and Serve
Once baked, remove the biscuits from the oven and let them cool slightly in the tin for about 5 minutes. Then, transfer them to a wire rack to cool completely, allowing the flavors to settle. These savory Breakfast Protein Biscuits are now ready to enjoy as a delicious, nourishing start to your day!

Make Ahead Options

These Breakfast Protein Biscuits are perfect for meal prep enthusiasts! You can prepare the biscuit dough up to 24 hours in advance, storing it in an airtight container in the refrigerator to keep it fresh. Simply mix all the ingredients, then cover and refrigerate until you're ready to bake. If you'd like to bake them later, you can shape and fill the muffin tin, then cover it tightly with plastic wrap and refrigerate for up to 3 days to retain quality. When you're ready to enjoy, simply bake straight from the fridge for about 5 extra minutes, and you'll have warm, savory biscuits just like fresh from the oven!

Breakfast Protein Biscuits Variations

Feel free to get creative and make these biscuits your own with delightful twists and substitutions.

  • Kale Swap: Replace spinach with finely chopped kale for a robust flavor and extra nutrients. Kale is hearty and will add a lovely texture!
  • Cheese Variants: Try feta or gouda for a completely different flavor experience. Each cheese brings its own personality, adding complexity to your biscuits.
  • Herb Infusion: Add fresh herbs like parsley or dill to create a fragrant and vibrant twist. These herbs will elevate your breakfast with fresh garden goodness!
  • Spicy Kick: Mix in jalapeños or diced chili for an extra kick of heat. This spicy addition will awaken your taste buds and add a delightful surprise!
  • Texture Twist: Fold in some chopped walnuts or almonds for a satisfying crunch. Not only will this add texture, but it also boosts the health factor!
  • Savory Add-Ins: Toss in sun-dried tomatoes or roasted peppers for a Mediterranean flair. Their rich flavors will transport your taste buds while adding a splash of color!
  • Breakfast-Based Sub: Use this biscuit base to create mini breakfast sandwiches with eggs and avocado. A nourishing breakfast that’s still quick and satiating!
  • Sweet Treat: For a sweeter version, swap some cheese for a touch of honey and add cinnamon. Perfect if you’re in the mood for a unique breakfast biscuit!

Don't forget to pair these with a side of your favorite Breakfast Banana Split or a serving of the delightful Cornbread Breakfast Casserole for a breakfast feast!

Tips for the Best Breakfast Protein Biscuits

  • Avoid Overmixing: Gently combine your ingredients to maintain the light and fluffy texture in your Breakfast Protein Biscuits. Overmixing can lead to denser biscuits.

  • Drain Greens Thoroughly: Always squeeze out excess water from spinach (or any greens) before adding to the batter to prevent soggy biscuits that lose their intended texture.

  • Fresh Baking Powder: Ensure your baking powder is fresh for a good rise. An expired baking powder can result in flat, dense biscuits.

  • Room Temperature Eggs: Using room temperature eggs allows for a smoother mix, ensuring your ingredients blend seamlessly for the best final outcome.

  • Customize Wisely: Feel free to experiment with different cheeses or greens, but keep an eye on hydration levels. Baking can be a science, so adjust any added ingredients carefully!

What to Serve with Breakfast Protein Biscuits?

Pair these delightful morsels with a variety of sides that will turn your breakfast into a heartwarming feast.

  • Greek Yogurt Bowl: A creamy side that adds a refreshing balance, topped with honey and fresh berries for a sweet contrast.
  • Sliced Avocado: Creamy avocado provides healthy fats, making it a satisfying accompaniment that brings a vibrant, fresh element to your morning.
  • Scrambled Eggs: Fluffy eggs seasoned with herbs offer protein-packed content to enhance your breakfast while complementing the biscuits' flavors beautifully.
  • Fruit Salad: A colorful mix of seasonal fruits adds a sweet and juicy touch, awakening your taste buds and making each bite a delightful surprise.
  • Roasted Sweet Potatoes: These crunchy, naturally sweet potatoes provide a lovely texture and a hint of earthiness that pairs well with the biscuits’ savory notes.
  • Herb Blended Cream Cheese: Spread this over the biscuits for a rich and tangy kick. It elevates the flavor profile and fans out the deliciousness!
  • Coffee or Herbal Tea: Kickstart your morning with a warm drink. Pair with a smooth latte or a soothing herbal tea to balance the meal beautifully.
  • Baked Beans: The hearty, savory flavor of beans can add an unexpected twist, bringing a comforting warmth to your breakfast spread.

Elevate your mornings and enjoy these hearty Breakfast Protein Biscuits with some delightful complements that will surely energize your day!

Storage Tips for Breakfast Protein Biscuits

Fridge: Store the biscuits in an airtight container for up to 5 days. This keeps them fresh and ready for those busy morning grabs!

Freezer: To freeze, wrap each biscuit individually in plastic wrap or foil, then place them in a freezer-safe bag. They can last up to 2 months this way.

Reheating: For the best texture, reheat frozen biscuits in the microwave for about 30 seconds or place in a toaster oven until warmed through and slightly crispy.

Enjoyability: Remember, these Breakfast Protein Biscuits are tasty right out of the fridge, but a little warmth enhances that cheesy goodness!

Breakfast Protein Biscuits Recipe FAQs

How do I select ripe ingredients for my biscuits?
Absolutely! When choosing spinach, look for vibrant green leaves without dark spots or wilting. For the cheddar cheese, opt for a block of cheese rather than pre-shredded varieties, as it melts better and has fuller flavor. Eggs should be fresh—check the sell-by date on the carton to ensure they’re at their peak.

What’s the best way to store my Breakfast Protein Biscuits?
To keep your biscuits fresh for up to 5 days, store them in an airtight container in the fridge. If you want to prep ahead, divide them into portions and wrap each one in plastic wrap, placing them in a freezer-safe bag. This way, they can remain delicious for up to 2 months!

Can I freeze the Breakfast Protein Biscuits?
Certainly! To freeze, first let the biscuits cool completely. Then, wrap each biscuit tightly in plastic wrap or foil. Place them in a freezer-safe bag, labeling it with the date. When you're ready to enjoy, simply reheat them in the microwave for about 30 seconds or in a toaster oven until warmed through—perfect for busy mornings!

What if my dough is too dry or too wet?
Very often, this can happen due to variations in ingredient sizes or measuring methods. If your batter feels too dry, gradually add a tablespoon of Greek yogurt until you reach the desired consistency. Conversely, if it’s too wet, you can sprinkle in a little more flour gradually, folding it in until the texture feels just right—aim for a chunky but moist dough.

Are these biscuits suitable for people with dietary restrictions?
Absolutely! These Breakfast Protein Biscuits can easily be made gluten-free by substituting with a 1:1 gluten-free flour blend. For dairy-free options, you could use non-dairy yogurt and a dairy-free cheese alternative. Always check the specific ingredients to ensure they meet your dietary needs, especially if allergies are a concern.

Can I customize the spices or ingredients in the recipe?
The more the merrier! Feel free to swap the spices to suit your palate; you can use Italian seasoning or smoked paprika for a different flavor profile. If you want extra nutrition, adding in sun-dried tomatoes or zucchini can enhance both flavor and texture. Tailor this recipe according to your taste preferences!

Breakfast Protein Biscuits

Savory Breakfast Protein Biscuits for Energizing Mornings

These Breakfast Protein Biscuits are a quick, nourishing option perfect for busy mornings, combining gooey cheddar cheese and fresh spinach for a delightful start to your day.
Print Recipe Pin Recipe
Prep Time 15 minutes mins
Cook Time 22 minutes mins
Total Time 37 minutes mins
Servings: 12 biscuits
Course: Breakfast
Cuisine: American
Calories: 160
Ingredients Equipment Method Nutrition Notes

Ingredients
  

For the Batter
  • 1 cup Plain 2% Greek Yogurt Can use non-fat or full-fat as alternatives.
  • 2 large Eggs Room temperature works best.
  • 2 cups All-Purpose Flour For gluten-free, substitute with a 1:1 blend.
  • 1 tablespoon Ground Flaxseed Can be omitted if not available.
  • 1 tablespoon Baking Powder Ensure freshness for optimal rise.
  • 1 teaspoon Salt Essential for balancing flavor.
  • 1 teaspoon Garlic Powder Optional to adjust flavor intensity.
  • 1 teaspoon Red Pepper Flakes Optional for those preferring milder flavors.
For the Extras
  • 1 cup Spinach Squeeze out excess water.
  • 1/4 cup Chives Can replace with green onions.
  • 1 cup Cheddar Cheese Reserve half for topping or substitute with other cheeses.

Equipment

  • Oven
  • Muffin tin
  • Mixing bowls
  • Whisk
  • Spatula

Method
 

Step‑by‑Step Instructions for Breakfast Protein Biscuits
  1. Preheat your oven to 375°F (190°C) and grease a 12-cup muffin tin.
  2. In a large mixing bowl, whisk together flour, flaxseed, baking powder, salt, garlic powder, and red pepper flakes.
  3. In a separate bowl, mix Greek yogurt and eggs until smooth and creamy.
  4. Gently fold the wet mixture into the dry ingredients using a spatula until just combined.
  5. Stir in spinach, chives, and cheddar cheese until evenly distributed.
  6. Evenly distribute the batter among the muffin cups, filling each about 3/4 full and sprinkle with reserved cheddar cheese.
  7. Bake for 20–22 minutes until golden brown and a toothpick comes out clean.
  8. Cool in the tin for 5 minutes before transferring to a wire rack to cool completely.

Nutrition

Serving: 1biscuitCalories: 160kcalCarbohydrates: 23gProtein: 6gFat: 5gSaturated Fat: 3gPolyunsaturated Fat: 0.5gMonounsaturated Fat: 1gCholesterol: 55mgSodium: 300mgPotassium: 120mgFiber: 1gSugar: 1gVitamin A: 200IUVitamin C: 3mgCalcium: 150mgIron: 1mg

Notes

Avoid overmixing to keep biscuits light and fluffy. Drain greens thoroughly and ensure fresh baking powder for best results.

Tried this recipe?

Let us know how it was!

Melt-in-Your-Mouth Hawaiian Roll French Toast Bliss

January 26, 2026 by Grace Snow Leave a Comment

As I flipped through the pages of my favorite brunch cookbook, a golden slice of nostalgia caught my eye. That's when I discovered the magic of Hawaiian Roll French Toast, and my breakfast routine would never be the same. This recipe transforms sweet, soft King's Hawaiian Rolls into a comforting dish that combines the best of French toast with a tropical twist. Picture crispy edges and a fluffy center, making it a crowd-pleaser for lazy weekends or holiday gatherings. Not only is it quick to whip up in just 15 minutes, but it also brings a fun and unique approach to brunch. Are you ready to bring sunshine to your mornings with this delightful dish?

Why is Hawaiian Roll French Toast special?

Simplicity at its finest: With just a handful of ingredients, this recipe transforms the ordinary into the extraordinary using King's Hawaiian Rolls.

Fluffy and Flavorful: Each bite melts in your mouth, combining the soft texture of the rolls with rich custard, cinnamon, and a hint of sweetness.

Quick Preparation: Ready in only 15 minutes, it's perfect for busy mornings or last-minute brunch plans.

Versatile Toppings: Pair with fruits, maple syrup, or even whipped cream for a customized experience.

Crowd-Pleaser: Its delicious appeal is sure to impress family and friends alike, making it the star of any brunch gathering or holiday celebration.

Ready to explore more delightful breakfast options? You might also enjoy these Pumpkin Cinnamon Roll treats for a seasonal twist!

Hawaiian Roll French Toast Ingredients

Explore the sweet simplicity of Hawaiian Roll French Toast with these essential ingredients!

For the Custard

  • Large Eggs (3) – Vital for rich texture, ensure they're at room temperature for better mixing.
  • Half and Half or Whole Milk (3/4 cup) – Offers creaminess for the custard; almond milk works well as a dairy-free substitute.
  • Vanilla Extract (1 tablespoon) – Deepens flavor; opt for pure vanilla for a more aromatic experience.
  • Ground Cinnamon (1 teaspoon) – Adds that warm spice synonymous with traditional French toast.
  • Brown Sugar (2 tablespoons) – Sweetens the mixture while enhancing caramelization; granulated sugar can be used, but may lack depth.

For the Rolls

  • King's Hawaiian Rolls (6) – The foundation of this dish, providing sweet, soft goodness; any soft dinner roll can be substituted if needed.

For Cooking

  • Butter (4 tablespoons) – Essential for frying, it contributes rich flavor; use clarified butter for a higher smoke point.
  • Pinch of Salt – Balances sweetness and elevates overall taste.

For Serving

  • Powdered Sugar – Dust on top just before serving for a delightful sweetness.
  • Fresh Fruit & Maple Syrup – Recommended toppings that add freshness and elegance to your presentation.

Get ready to indulge in the melt-in-your-mouth bliss of Hawaiian Roll French Toast!

Step‑by‑Step Instructions for Heavenly Hawaiian Roll French Toast

Step 1: Prepare the Custard Mixture
In a large mixing bowl, whisk together 3 large eggs and 3/4 cup of half and half until the mixture is smooth and well combined, forming a creamy custard base. Add in 1 tablespoon of vanilla extract, 1 teaspoon of ground cinnamon, 2 tablespoons of brown sugar, and a pinch of salt. Continue whisking until all the ingredients are fully blended, creating a fragrant custard ready for soaking the rolls.

Step 2: Prepare the Rolls
Take 6 King's Hawaiian Rolls and poke holes in the bottoms using a toothpick. This allows the delicious custard to penetrate into the rolls, ensuring each bite of your Hawaiian Roll French Toast is flavorful. Set the rolls aside on a cutting board or clean surface while you prepare to dip them into the custard, letting the anticipation build for this delightful breakfast treat.

Step 3: Soak the Rolls
Working in batches, gently dip each Hawaiian Roll into the custard mixture, allowing about 30 seconds for each roll to soak. Ensure you coat all sides of the roll but avoid over-soaking to prevent sogginess. As you soak, you’ll notice the custard starting to saturate the rolls, making them plump and ready for cooking—the secret to creating that melt-in-your-mouth texture.

Step 4: Heat the Skillet
In a large skillet, melt 2 tablespoons of butter over medium-low heat. Allow the butter to fully melt and begin to sizzle gently, coating the pan well to prevent the rolls from sticking. The right temperature is crucial here, as it ensures that your Hawaiian Roll French Toast develops a golden-brown color while cooking evenly without burning.

Step 5: Cook the Rolls
Carefully place the soaked Hawaiian Rolls in the melted buttered skillet and cook for 30 to 60 seconds on each side. You’ll know they are ready to flip when they achieve a lovely golden-brown color and feel crisp to the touch. Turn each roll to achieve an even crust, using a spatula to gently turn them over while savoring the delightful aroma filling your kitchen.

Step 6: Serve and Delight
Once the rolls are beautifully golden brown, remove them from the skillet and plate them warm. Dust with powdered sugar for a touch of sweetness and serve with fresh berries and maple syrup for added delight. Each bite of your Heavenly Hawaiian Roll French Toast promises a burst of flavor and the comfort of home-cooked bliss.

Expert Tips for Hawaiian Roll French Toast

  • Soak Smartly: Avoid sogginess by soaking Hawaiian Rolls just long enough to absorb the custard without falling apart. About 30 seconds is ideal!

  • Non-Stick for Success: Use a non-stick skillet for easy cooking and clean-up. This prevents sticking and helps achieve that perfect golden-brown crust.

  • Temperature Matters: Cook on medium-low heat for even cooking. Too high, and you risk burning the outside before the inside is fully set.

  • Serve Fresh: For the best texture, serve your Hawaiian Roll French Toast right after cooking. Reheating can alter its delightful melt-in-your-mouth quality.

  • Customizing Comfort: Feel free to add your favorite toppings like whipped cream or berries for an extra special twist!

Hawaiian Roll French Toast Variations

Feel free to sprinkle your own magic on this delightful dish with these customization ideas!

  • Dairy-Free: Substitute half and half with almond or coconut milk for a lactose-free twist. This gives a nutty flavor that surprises your taste buds!

  • Richer Custard: Add 2 tablespoons of cream cheese to the custard mixture for a delightfully creamy consistency that elevates the breakfast experience.

  • Tropical Delight: Toss in some crushed pineapple or coconut flakes to the custard mix to enhance that Hawaiian vibe. It’ll create a lush, sweet backdrop that transports you to paradise!

  • Chocolate Lovers: Mix in a handful of chocolate chips into the custard or sprinkle them on top while cooking. The melty chocolate creates a heavenly, indulgent version of your French toast.

  • Nutty Crunch: Add a handful of chopped nuts, like walnuts or pecans, to the mixture or sprinkle as a topping. This will provide a delightful crunch that complements the soft texture of the rolls.

  • Cinnamon Roll Twist: Drizzle a simple icing made of powdered sugar and milk over the top for a cinnamon roll-inspired flair. This brings an extra sweetness that pancake lovers will adore.

  • Spicy Kick: Sprinkle a pinch of cayenne pepper or chili powder into the custard for those who love their breakfast with a little heat. It adds an exciting layer to the overall flavor.

  • Fruit Fusions: Enhance with various fresh fruits, like strawberries, bananas, or blueberries, either in the custard or as toppings. They’ll create a burst of freshness that perfectly balances the richness of the dish.

Looking for additional breakfast ideas? You may also want to try the delightful Pumpkin Cinnamon Roll for a cozy alternative!

Storage Tips for Hawaiian Roll French Toast

Fridge: Store leftover Hawaiian Roll French Toast in an airtight container for up to 2 days. Make sure to let it cool completely before sealing to avoid excess moisture.

Freezer: For longer storage, freeze individual pieces on a baking sheet until solid, then transfer them to a freezer-safe bag for up to 1 month. This helps maintain their texture.

Reheating: Reheat thawed Hawaiian Roll French Toast in a preheated oven at 350°F (175°C) for 10-15 minutes, or until heated through. You can also use an air fryer for 5-7 minutes, bringing back that crispy texture.

Tip: For best results, enjoy your Hawaiian Roll French Toast fresh. But with these simple storage and reheating tips, leftovers can still offer a delightful treat!

Make Ahead Options

These Heavenly Hawaiian Roll French Toast are perfect for meal prep enthusiasts looking to save time on busy mornings! You can prepare the custard mixture (eggs, half and half, vanilla, cinnamon, brown sugar, and salt) up to 24 hours in advance and refrigerate it in a sealed container. Additionally, you can poke holes in the bottoms of the Hawaiian Rolls the day before, which allows for maximum custard absorption. When you’re ready to indulge, simply dip the rolls in the custard mixture, cook in a skillet as instructed, and serve warm. This method ensures every bite remains just as delicious and fluffy!

What to Serve with Hawaiian Roll French Toast

Elevate your brunch experience with these delicious pairings that will complement the sweet, fluffy goodness of your Hawaiian Roll French Toast.

  • Crispy Bacon: The savory and salty crunch of crispy bacon balances the sweetness of the French toast, creating a delightful contrast in every bite. It's the classic pairing that never disappoints!

  • Fresh Berries: Bright and juicy berries like strawberries and blueberries add a refreshing pop of color and flavor, enhancing the dish's visual appeal and natural sweetness. Top your toast with these for a vibrant finish.

  • Maple Syrup: The rich, golden sweetness of pure maple syrup melts into every nook and cranny of the French toast, adding a luscious layer of flavor. It's a must-have drizzle for that quintessential breakfast experience.

  • Whipped Cream: Light and airy whipped cream takes this breakfast treat to dessert-like levels. A dollop adds creaminess that beautifully contrasts the warm, crispy exterior of the rolls.

  • Coconut Flavored Yogurt: For a refreshing and creamy element, serve with coconut-flavored yogurt. Its tropical vibes echo the Hawaiian roots of the dish while providing a tangy balance.

  • Coffee or Latte: A warm cup of coffee or a frothy latte will perfectly accompany your breakfast. The bitter notes of coffee complement the sweetness, making each sip a pleasure.

  • Chocolate Sauce: For a decadent twist, drizzle chocolate sauce over your French toast. This indulgent pairing transforms your meal into a dessert-like experience.

  • Fruit Salad: A side of mixed fruit salad provides a refreshing, bright note to the plate. The natural sweetness of various fruits complements the overall meal beautifully.

  • Pineapple Juice: Capture the essence of a tropical morning with a glass of pineapple juice. Its tangy sweetness pairs wonderfully, and it serves as a refreshing beverage alongside your breakfast.

Hawaiian Roll French Toast Recipe FAQs

How ripe should my King's Hawaiian Rolls be for this recipe?
Absolutely, the fresher the King's Hawaiian Rolls, the better! Look for rolls that are soft and pillowy, ideally without any dark spots or mold. If you can squeeze them gently without losing their shape, they’re perfect for this melting delight!

What’s the best way to store leftover Hawaiian Roll French Toast?
Very! Store any leftover Hawaiian Roll French Toast in an airtight container in the refrigerator for up to 2 days. Be sure to let them cool completely before sealing them away to avoid any moisture buildup that might make them soggy.

Can I freeze Hawaiian Roll French Toast?
Absolutely! To freeze, first let your Hawaiian Roll French Toast cool completely. Then, place individual slices on a baking sheet in a single layer and freeze until solid, about an hour. After they are frozen, transfer the slices to a freezer-safe bag or container and they’ll keep for up to 3 months. Just remember to label your bag with the date!

What should I do if my French toast ends up soggy?
If your Hawaiian Roll French Toast is soggy, it might be due to soaking them for too long or not cooking at the right temperature. Next time, ensure to soak each roll for just about 30 seconds and cook them on medium-low heat. This will help create that crispy exterior while keeping the inside fluffy and delicious.

Are there any dietary considerations for this Hawaiian Roll French Toast?
Definitely! If you're catering to allergies, consider using almond milk instead of half-and-half or whole milk for a dairy-free alternative. Check the ingredient list on the Hawaiian Rolls for potential allergens like gluten or specific preservatives. If you’re making it for pets, it’s best to avoid feeding them any human foods, especially those with added sugars or spices.

Can I substitute any ingredients in this recipe?
Yes, feel free to get creative! If you’re out of half-and-half, regular milk or almond milk will work just fine as a substitute. For added flavor, you might also consider infusing some coconut milk into your custard mix for a tropical flair. And if you want something sweeter, throw in some chocolate chips or top it with caramel sauce instead of syrup. The more the merrier when it comes to making this Hawaiian Roll French Toast your own!

Hawaiian Roll French Toast

Melt-in-Your-Mouth Hawaiian Roll French Toast Bliss

Discover the delightful Hawaiian Roll French Toast, a quick breakfast recipe combining soft rolls and rich custard for a truly tropical experience.
Print Recipe Pin Recipe
Prep Time 15 minutes mins
Cook Time 10 minutes mins
Total Time 25 minutes mins
Servings: 6 slices
Course: Breakfast
Cuisine: Hawaiian
Calories: 320
Ingredients Equipment Method Nutrition Notes

Ingredients
  

For the Custard
  • 3 large Eggs Ensure they're at room temperature for better mixing.
  • 3/4 cup Half and Half or Whole Milk Almond milk works as a dairy-free substitute.
  • 1 tablespoon Vanilla Extract Opt for pure vanilla for a more aromatic experience.
  • 1 teaspoon Ground Cinnamon Adds warm spice.
  • 2 tablespoons Brown Sugar Granulated sugar can be used, but may lack depth.
For the Rolls
  • 6 pieces King's Hawaiian Rolls Providing sweet, soft goodness.
For Cooking
  • 4 tablespoons Butter Use clarified butter for a higher smoke point.
  • 1 pinch Salt Balances sweetness.
For Serving
  • Powdered Sugar Dust on top before serving.
  • Fresh Fruit & Maple Syrup Recommended toppings.

Equipment

  • large mixing bowl
  • Skillet
  • Spatula

Method
 

Step-by-Step Instructions
  1. In a large mixing bowl, whisk together eggs and half and half until smooth, then add vanilla extract, cinnamon, brown sugar, and a pinch of salt.
  2. Poke holes in the bottoms of the Hawaiian Rolls to allow custard to penetrate.
  3. Gently dip each Hawaiian Roll into the custard mixture for about 30 seconds, ensuring all sides are coated.
  4. Melt butter in a skillet over medium-low heat.
  5. Cook soaked Hawaiian Rolls in the skillet for 30 to 60 seconds on each side until golden brown.
  6. Plate the rolls warm, dust with powdered sugar, and serve with fresh berries and maple syrup.

Nutrition

Serving: 1sliceCalories: 320kcalCarbohydrates: 35gProtein: 6gFat: 18gSaturated Fat: 10gCholesterol: 150mgSodium: 300mgPotassium: 200mgFiber: 1gSugar: 10gVitamin A: 500IUCalcium: 150mgIron: 1mg

Notes

For best results, serve fresh just after cooking to retain the melt-in-your-mouth quality.

Tried this recipe?

Let us know how it was!

California Roll Sushi Bowls: Quick, Healthy & Deliciously Fun

January 25, 2026 by Grace Snow Leave a Comment

In a delightful twist on classic sushi, California Roll Sushi Bowls offer a fresh and vibrant way to enjoy your favorite flavors without the fuss of rolling. Imagine a bowl brimming with fluffy sushi rice, creamy avocado, tender crab, and crisp cucumber—all coming together in a mouthwatering medley ready in just 30 minutes. This quick meal is not only customizable to cater to your unique taste preferences but also a healthy option for those seeking a break from fast food. Whether it's a cozy dinner at home or a casual lunch, these bowls promise to elevate your dining experience. What toppings will you choose to make your perfect sushi bowl?

Why Will You Love This Recipe?

Quick Meal: With only 30 minutes from start to finish, these California Roll Sushi Bowls fit seamlessly into your busy lifestyle.

Customizable Delight: Create your perfect bowl by choosing from a variety of proteins, sauces, and vibrant vegetables—whether it’s a classic crab or a zesty chicken alternative.

Healthy Indulgence: Packed with fresh ingredients like avocado and cucumber, this dish gives you the satisfaction of a sushi experience without compromising your health.

Fun Presentation: The colorful layers of your sushi bowl not only taste amazing but also create an eye-catching display, making it a hit at dinner parties!

Inspired Variations: Feeling adventurous? Try a Mediterranean twist or combine with our Pumpkin Cinnamon Roll. The options are endless!

California Roll Sushi Bowls Ingredients

For the Sushi Rice
• Sushi Rice – This is the foundation of your bowl, providing the essential sticky and fluffy texture.
• Rice Vinegar – Adds a tangy note; opt for unseasoned for the best results.
• Sugar – Balances the acidity of the vinegar for perfect seasoning; adjust according to taste.
• Salt – Essential for enhancing the overall flavor of the dish.

For the Fresh Ingredients
• Cucumber – Provides a refreshing crunch; radishes can be used instead for a spicy twist.
• Avocado – Adds creaminess and healthy fats; make sure it's ripe for the best flavor.
• Imitation Crab Meat (or real crab) – The signature flavor of California rolls; substitute with tofu for a plant-based option.

For the Sauce & Garnish
• Soy Sauce – Key for that savory depth; tamari is a great gluten-free alternative.
• Sriracha (optional) – For a kick of heat; adjust the amount based on your spice tolerance.
• Sesame Seeds/Nori Strips (optional) – Great for garnish, offering extra flavor and texture to your sushi bowl.

These California Roll Sushi Bowls are easy to customize, ensuring you can create your perfect meal each time!

Step‑by‑Step Instructions for California Roll Sushi Bowls

Step 1: Prepare Sushi Rice
Start by rinsing 1 cup of sushi rice under cold water until the water runs clear, typically about 3-5 times. Then, combine the rinsed rice with 1.5 cups of water in a medium pot. Bring to a boil over medium-high heat, then reduce to low, cover, and simmer for 18-20 minutes until water is absorbed and rice is tender. Remove from heat and let it sit covered for 10 minutes to steam.

Step 2: Season Rice
In a small bowl, mix together 3 tablespoons of rice vinegar, 2 tablespoons of sugar, and 1 teaspoon of salt until dissolved. After letting the sushi rice steam, transfer it to a large bowl and gently fold in the vinegar mixture while the rice is still warm. This will give your California Roll Sushi Bowls the perfect combination of sweetness and tanginess, enhancing the overall flavor profile.

Step 3: Chop Vegetables
While the rice is cooling and absorbing flavors, slice half a cucumber into thin rounds or matchsticks, depending on your preference. Next, dice 1 ripe avocado into bite-sized pieces. Place both vegetables aside in separate bowls, ensuring they stay fresh and crisp for the assembly of your California Roll Sushi Bowls.

Step 4: Assemble Bowls
Once the sushi rice is seasoned and the vegetables are ready, it’s time to assemble your California Roll Sushi Bowls. Start by placing a generous scoop of sushi rice at the bottom of each serving bowl, packing it gently. Layer the sliced cucumber, avocado, and imitation crab meat (or your chosen protein) on top, creating a vibrant and colorful presentation.

Step 5: Drizzle Sauce
In a small bowl, combine soy sauce and sriracha to create a flavorful drizzle. Adjust the sriracha according to your spice preference for your California Roll Sushi Bowls. Once mixed, evenly drizzle the sauce over the assembled ingredients, allowing it to seep into the rice and enhance each bite with savory and spicy notes.

Step 6: Serve Immediately
To enjoy the freshest flavors and textures, serve your California Roll Sushi Bowls immediately. The warm sushi rice pairs beautifully with the cool, crisp vegetables and the savory crab. Consider adding a sprinkle of sesame seeds or nori strips for extra flavor and visual appeal. Dive in and savor every delicious bite!

Tips for the Best California Roll Sushi Bowls

  • Rice Quality: Use high-quality sushi rice. Poor quality rice can lead to mushiness or a lack of flavor in your California Roll Sushi Bowls.

  • Proper Rinsing: Rinse the sushi rice thoroughly until the water runs clear; this removes excess starch and prevents clumping during cooking.

  • Fresh Ingredients: Prioritize using the freshest vegetables and seafood. Freshness enhances the overall taste and texture of your sushi bowls.

  • Keep Components Separate: To prevent sogginess, store components like avocado and cucumber separately until ready to serve in your California Roll Sushi Bowls.

  • Adjust Seasoning: Don’t hesitate to adjust the sugar and salt in the rice. Finding the perfect seasoning balance is key to elevating the dish's flavors.

  • Explore Variations: Try using different proteins or vegetables to keep your California Roll Sushi Bowls exciting and tailored to your personal taste!

What to Serve with California Roll Sushi Bowls?

Creating a full meal experience around your California Roll Sushi Bowls opens up a world of delightful pairing possibilities.

  • Miso Soup: A warm, savory broth that complements the fresh flavors of sushi bowls perfectly, soothing the palate between bites.

  • Pickled Ginger: Adds a tangy crunch and cleanses the palate, enhancing the sushi experience while bringing a pop of color to your meal.

  • Edamame: Lightly salted and packed with protein, these tender soybeans provide a satisfying bite that pairs beautifully with sushi rice.

  • Avocado Salad: A refreshing salad with diced avocados, tomatoes, and a squeeze of lime will match the creamy textures found in your sushi bowls.

  • Seaweed Salad: Offers a unique taste and chewy texture, enriching the meal with its umami flavor and vibrant green color.

  • Crispy Tempura: The crunchy exterior of tempura vegetables contrasts wonderfully with the soft textures of the sushi bowl, creating a deliciously layered experience.

  • Chilled Sake: This light and fruity drink is a perfect accompaniment, enhancing the flavors of the sushi without overpowering them.

  • Mango Sticky Rice (Dessert): End on a sweet note with this tropical dessert, its warm coconut milk contrasting deliciously against the bowl's fresh sushi flavors.

  • Green Tea: A fragrant, calming drink that aids digestion, perfectly complementing the sushi bowls while adding an authentic Japanese touch to your meal.

Make Ahead Options

These California Roll Sushi Bowls are perfect for meal prep enthusiasts! You can prepare the sushi rice and the sauce up to 24 hours in advance; simply store the cooked rice in an airtight container at room temperature once cooled, and keep the sauce refrigerated. For the vegetables, slice the cucumber and dice the avocado just before assembling to maintain their freshness—this prevents browning and sogginess. If you want to pre-chop the cucumber, do so no more than 3 days ahead, storing it in water to keep it crisp. When you're ready to serve, layer the rice with the cold toppings, drizzle the sauce, and enjoy a deliciously convenient meal with minimal effort!

California Roll Sushi Bowls Variations

Feel free to mix and match to create a bowl that satisfies your taste buds and cravings!

  • Protein Swap: Substitute imitation crab with grilled chicken or shrimp for a satisfying protein boost. Each option brings its own juicy flavor!

  • Vegetable Delight: Include bell peppers or shredded carrots for added color and crunch. These vibrant veggies not only enhance the bowl’s beauty but also its nutrition.

  • Mediterranean Twist: Swap the sushi rice for quinoa and add feta cheese and olives for a refreshing Mediterranean flare. It’s a lovely fusion that will surprise your palate!

  • Vegan Option: Use tofu in place of crab and swap soy sauce for tamari. You’ll enjoy a creamy, plant-based twist that everyone can love.

  • Heat Levels: For a milder experience, replace sriracha with a drizzle of sweet chili sauce. This complements the dish beautifully while keeping the heat in check.

  • Noodle Style: Trade sushi rice for soba or udon noodles for a delightful spin. Toss with sesame oil for added depth, making your bowl even more luscious.

  • Toppings Galore: Top with microgreens or spicy mayo for extra flavor. These little additions elevate the bowl into a whole new realm of deliciousness.

  • Customized Sauces: Experiment with teriyaki or ponzu sauce instead of traditional soy sauce for a different flavor profile. This choice allows you to set your creative culinary spirit free!

Explore the various twists you can achieve, making your California Roll Sushi Bowls a delightful culinary adventure every time!

Storage Tips for California Roll Sushi Bowls

  • Fridge: Store assembled bowls in an airtight container for up to 2 days. Keep components like avocado and cucumber separate until ready to eat to maintain freshness.

  • Sushi Rice: If you have leftover sushi rice, store it in a separate container in the fridge for up to 3 days. Reheat gently in the microwave, adding a splash of water to maintain moisture.

  • Crab Meat and Vegetables: Store leftover crab meat and chopped vegetables tightly wrapped in the fridge for up to 2 days. Use within this time for the best flavor and quality.

  • Reheating: When ready to assemble, combine all elements as fresh as possible. This ensures your California Roll Sushi Bowls retain their delightful textures and vibrant flavors!

California Roll Sushi Bowls Recipe FAQs

What type of sushi rice should I use?
Absolutely! For California Roll Sushi Bowls, it’s essential to use high-quality sushi rice. Look for short-grain sushi rice, as it becomes sticky when cooked, providing that perfect base for your bowls. Avoid using long-grain rice; it lacks the necessary texture.

How long can I store leftovers?
Very good question! Assemble bowls can be stored in an airtight container in the fridge for up to 2 days. However, it's best to keep components like avocado and cucumber separate until you're ready to eat to maintain their freshness and prevent sogginess.

Can I freeze sushi rice or other ingredients?
Of course! You can freeze cooked sushi rice for up to 3 months. To freeze, let it cool completely, then portion it into airtight freezer bags, removing as much air as possible. Thaw in the fridge overnight before reheating. Other ingredients, like chopped vegetables or crab meat, aren’t ideal for freezing, as they can lose texture and flavor.

What should I do if my sushi rice is too mushy?
No worries! If your sushi rice turns out mushy, it can be salvaged by spreading it out on a baking sheet to cool and dry out a bit. This will help the rice firm up. Always double-check your water-to-rice ratio and cooking time to ensure the best texture next time.

Are there any allergy considerations I should be aware of?
Definitely! If you’re concerned about allergies, be cautious with imitation crab, as it typically contains fish or shellfish. You can always substitute it with tofu for a vegan option. Also, if anyone in your household has a gluten allergy, make sure to use gluten-free soy sauce or tamari in your California Roll Sushi Bowls.

How can I customize the toppings for my sushi bowls?
The more the merrier! Get creative with your toppings according to your personal preferences or dietary needs. Consider adding ingredients like bell peppers, shredded carrots, or spicy mayo for an added kick. Don’t hesitate to explore and have fun with different combinations!

California Roll Sushi Bowls

California Roll Sushi Bowls: Quick, Healthy & Deliciously Fun

California Roll Sushi Bowls offer a fresh and vibrant way to enjoy sushi flavors without the fuss of rolling.
Print Recipe Pin Recipe
Prep Time 10 minutes mins
Cook Time 20 minutes mins
Resting Time 10 minutes mins
Total Time 30 minutes mins
Servings: 2 bowls
Course: Dinner
Cuisine: Japanese
Calories: 450
Ingredients Equipment Method Nutrition Notes

Ingredients
  

For the Sushi Rice
  • 1 cup Sushi Rice This is the foundation of your bowl, providing the essential sticky and fluffy texture.
  • 1.5 cups Water Needed for cooking the sushi rice.
  • 3 tablespoons Rice Vinegar Opt for unseasoned for the best results.
  • 2 tablespoons Sugar Balances the acidity of the vinegar for perfect seasoning; adjust according to taste.
  • 1 teaspoon Salt Essential for enhancing the overall flavor of the dish.
For the Fresh Ingredients
  • 0.5 cup Cucumber Provides a refreshing crunch; radishes can be used instead.
  • 1 piece Avocado Adds creaminess and healthy fats; ensure it's ripe.
  • 8 ounces Imitation Crab Meat The signature flavor of California rolls; substitute with tofu for a plant-based option.
For the Sauce & Garnish
  • 3 tablespoons Soy Sauce Key for that savory depth; tamari is a great gluten-free alternative.
  • 1 tablespoon Sriracha For a kick of heat; adjust according to your spice tolerance.
  • 2 tablespoons Sesame Seeds/Nori Strips Optional, for garnish and added flavor.

Equipment

  • Medium pot
  • large bowl
  • small bowl

Method
 

Preparation
  1. Rinse the sushi rice under cold water until clear, about 3-5 times.
  2. Combine rinsed rice with water in a medium pot. Bring to a boil, reduce to low, cover and simmer for 18-20 minutes.
  3. Let sit covered for 10 minutes to steam.
  4. Mix rice vinegar, sugar, and salt in a small bowl until dissolved.
  5. Transfer rice to a bowl, fold in vinegar mixture while rice is warm.
  6. Slice cucumber into rounds or matchsticks and dice avocado into pieces.
  7. Assemble bowls by placing sushi rice at the bottom and topping with cucumber, avocado, and crab meat.
  8. Combine soy sauce and sriracha in a bowl, then drizzle over the assembled ingredients.
  9. Serve immediately, optionally sprinkle sesame seeds or nori strips on top.

Nutrition

Serving: 1bowlCalories: 450kcalCarbohydrates: 65gProtein: 15gFat: 15gSaturated Fat: 2gPolyunsaturated Fat: 4gMonounsaturated Fat: 8gCholesterol: 30mgSodium: 800mgPotassium: 700mgFiber: 6gSugar: 3gVitamin A: 300IUVitamin C: 15mgCalcium: 60mgIron: 1.5mg

Notes

Prioritize using fresh ingredients for the best flavor. Store components separately until ready to serve to maintain freshness.

Tried this recipe?

Let us know how it was!

Delicious Korean Style Pot Roast to Warm Your Soul

January 25, 2026 by Grace Snow Leave a Comment

The aroma hit me like a warm embrace as I stepped into the kitchen, promising comfort and indulgence. Today, I'm excited to share my favorite twist on a classic—Korean Style Pot Roast with Gochujang Glaze. This recipe delivers all the heartiness you crave from a traditional pot roast while introducing the vibrant, spicy-sweet flavors of Korean cuisine. Not only is it a one-pot meal that makes cleanup a breeze, but it’s also an absolute crowd-pleaser, perfect for family dinners or meal prep for the week ahead. Imagine sinking your fork into meltingly tender beef, coated in a glossy, savory glaze that dances on your taste buds. Ready to explore this delicious fusion? Let’s dive in!

Why Will You Adore This Dish?

Unforgettable Flavor: The unique combination of gochujang and soy sauce creates a rich, savory glaze that elevates the traditional pot roast experience.

Effortless Cooking: With a simple one-pot method, this dish promises minimal cleanup, making it perfect for busy weeknights or relaxing weekends.

Meal Prep Friendly: Create a batch that tastes even better as leftovers, ensuring you have satisfying meals ready to go—a definite win for those hectic days.

Versatile Serving Options: Whether you enjoy it over rice, nestled in lettuce wraps, or alongside buttery mashed potatoes, your dining experience can be tailored to your preference.

Crowd-Pleasing Comfort: This hearty dish caters to everyone, making it an excellent choice for family dinners or gatherings. It's comfort food at its finest! Dive into this flavor-packed Korean Style Pot Roast for a warm meal that never disappoints.

Korean Style Pot Roast Ingredients

• Here's what you'll need:

For the Beef

  • Chuck Roast – The main protein that yields tender, flavorful meat when slow-cooked.
  • Salt & Pepper – Essential for seasoning the roast before searing to build a rich flavor base.

For the Vegetables

  • Carrots – Adds natural sweetness and texture; cut them into chunks for even cooking.
  • Onion – Serves as the aromatic base; slice for uniform cooking.
  • Garlic – Minced garlic enhances the aroma and taste significantly.
  • Fresh Ginger – Minced ginger provides a warm spice that complements the dish.

For the Sauce

  • Soy Sauce – Adds umami depth and saltiness; consider low-sodium for a healthier choice.
  • Gochujang – This spicy-sweet paste is the star ingredient that gives the roast its Korean flair; substitute with red chili paste if needed.
  • Brown Sugar – Balances the heat from the gochujang perfectly with a touch of sweetness.
  • Rice Vinegar – Contributes acidity and brightness to the overall flavor.
  • Sesame Oil – Drizzled before serving, it adds a delightful nuttiness to finish the dish.

For the Braising Liquid

  • Beef Broth – Provides moisture; essential for braising the roast until tender.

For Garnish

  • Green Onions – Sliced for a fresh, vibrant top note.
  • Fresh Cilantro – Adds a fresh contrast that brightens every bite.

This Korean Style Pot Roast is a delightful fusion of flavors and textures, bringing comfort food to life with every tender bite!

Step‑by‑Step Instructions for Korean Style Pot Roast

Step 1: Prepare the Roast
Begin by patting your chuck roast dry with paper towels, then season it generously with salt and pepper on all sides. This step is crucial for enhancing the flavor of the Korean Style Pot Roast. Allow the seasoned roast to sit for about 15 minutes at room temperature while you prep the other ingredients, ensuring even cooking.

Step 2: Sear the Roast
In a large Dutch oven, heat a tablespoon of oil over medium-high heat. Add the chuck roast once the oil is shimmering, and sear it for about 5-7 minutes on each side until it's deeply browned. This caramelization adds richness to the dish. Once seared, remove the roast from the pot and set it aside on a plate.

Step 3: Sauté the Aromatics
In the remaining drippings of the Dutch oven, add the sliced onion, minced garlic, and minced ginger. Sauté these ingredients over medium heat for 3-4 minutes, stirring frequently, until they are fragrant and the onion becomes translucent. This aromatic base will infuse the Korean Style Pot Roast with savory depth.

Step 4: Create the Sauce
Stir in the gochujang, soy sauce, brown sugar, and rice vinegar. Mix thoroughly for about a minute, allowing the ingredients to meld and creating a beautiful sauce that will coat the roast. You'll notice the vibrant colors and enticing aromas already filling the kitchen at this point!

Step 5: Add the Braising Liquid
Pour in the beef broth, using a wooden spoon to scrape up any browned bits stuck to the bottom of the pot. These bits are packed with flavor and will enhance the braising liquid, making your Korean Style Pot Roast even more delicious. Stir well to combine all the ingredients.

Step 6: Return the Roast
Carefully place the seared roast back into the Dutch oven, allowing it to rest in the flavorful sauce. Add the chopped carrots around the roast, which will soak up the savory essence as they cook. Ensure the carrots are nestled well to cook evenly as everything braises together.

Step 7: Braise the Roast
Cover the Dutch oven with a lid and transfer it to a preheated oven set at 325°F. Let it braise for about 3 to 3.5 hours. You'll know it's done when the meat is fork-tender and shreds easily. This low and slow cooking method ensures your Korean Style Pot Roast is infused with the bold flavors of the sauce.

Step 8: Finish and Garnish
After braising, remove the pot from the oven and skim off any excess fat from the top of the sauce. Drizzle the roast with sesame oil for a final touch of flavor and richness. Sprinkle sliced green onions and fresh cilantro on top for a bright finish that balances the robust flavors of the dish.

Step 9: Serve
Now, it's time to serve your Korean Style Pot Roast! Ladle generous portions over steamed rice, or serve it alongside buttery mashed potatoes for a comforting meal. It also works beautifully tucked into crisp lettuce wraps for a fresh and exciting alternative.

Korean Style Pot Roast Variations

Feel free to customize your pot roast with these fun and tasty ideas to suit your taste buds!

  • Vegetable Twist: Add potatoes or bell peppers for extra texture and flavor. Each bite will offer a delightful surprise as these veggies soak up the rich sauce.

  • Spice Level: Adjust the gochujang to increase or decrease the heat. Start with a little, and gradually add more until you find your perfect balance of spicy goodness.

  • Noodle Alternative: Swap out rice for noodles. The savory sauce coats the noodles beautifully, creating a delightful twist on the classic dish.

  • Taco Inspiration: Serve the pot roast in tacos. Use soft tortillas to wrap the tender beef and add a drizzle of sesame sauce, taking your taste buds on a flavor-packed adventure!

  • Slow Cooker Ease: If you're short on time, after searing, you can transfer the ingredients to a slow cooker and set it to low for 8 hours. This hands-off method yields tender results with pocket-friendly convenience.

  • Rice Vinegar Swap: Use apple cider vinegar instead of rice vinegar for a fruity tang. It adds a unique layer of flavor, making the dish even more memorable.

  • Herb Garnish: Experiment with added herbs like mint or basil for garnish. This touch adds freshness and takes the dish to new heights, enhancing that comforting feel while introducing an unexpected flair.

  • One-Pot Variation: Try the recipe by adding some quinoa or barley in place of rice to soak up the delicious sauce. This switch not only changes the texture but also makes the dish a complete meal packed with nutrients.

These variations allow you to embrace your creativity while savoring the mouthwatering flavors of your Korean Style Pot Roast! For inspiration, you might also enjoy trying out this One Pot Salmon or these delightful Roasted Corn Fried options. Happy cooking!

How to Store and Freeze Korean Style Pot Roast

Fridge: Store leftovers in an airtight container for up to 3 days. Reheating it will enhance the flavors as they deepen overnight.

Freezer: For longer storage, freeze the Korean Style Pot Roast in an airtight container or heavy-duty freezer bag for up to 3 months.

Reheating: Thaw overnight in the fridge before reheating. Warm gently on the stovetop or in the microwave until heated through, adding a splash of broth if needed to moisten.

Serving Freshness: Garnish with fresh green onions and cilantro after reheating to brighten the dish before serving.

Expert Tips for Korean Style Pot Roast

  • Sear for Flavor: Always sear the beef well to develop a rich, flavorful base. This step enhances the overall taste of your Korean Style Pot Roast.
  • Slow Cooker Option: If you're pressed for time, transfer the pot to a slow cooker after searing. Cook on low for 8 hours or high for 4-5 hours for a hands-free approach.
  • Authentic Ingredients: For true Korean flavor, using gochujang is key. If unavailable, consider a mix of red chili paste, miso, and sugar as a substitute.
  • Resting Time Matters: After cooking, let the roast rest for about 10-15 minutes before serving. This allows the juices to redistribute, resulting in a tender, juicy outcome.
  • Perfect Storage: This dish stores well in an airtight container in the refrigerator for up to 3 days. Reheating it will enhance the flavors even further!

Make Ahead Options

These Korean Style Pot Roast preparations are perfect for busy home cooks looking to save time during the week! You can season and sear the chuck roast up to 24 hours in advance, just make sure to store it in the refrigerator to maintain quality. Additionally, you can chop the vegetables (carrots, onion, garlic, and ginger) a day ahead and keep them refrigerated in an airtight container. When you're ready to enjoy this comforting dish, simply return the seared roast to the pot, add the sautéed aromatics, and proceed with the braising instructions. This thoughtful meal prep ensures your Korean Style Pot Roast is just as delicious, offering rich flavors with minimal effort on your busy nights!

What to Serve with Korean Style Pot Roast

This comforting dish creates the perfect opportunity to build a nourishing and delightful meal for your loved ones.

  • Steamed White Rice: The classic pairing that soaks up the delicious gravy, providing a neutral base that allows the flavors of the pot roast to shine.
  • Creamy Mashed Potatoes: Buttery and fluffy, these mashed potatoes offer a rich contrast to the tangy, spicy glaze of the roast, making every bite indulgent.
  • Stir-Fried Green Beans: Crisp and colorful, these add a fresh crunch and a touch of sweetness that beautifully complements the savoriness of the beef.
  • Kimchi Salad: A spicy, tangy side that enhances the overall meal with its crunchy texture and probiotic benefits, creating a vibrant balance with the rich pot roast.
  • Sesame Cucumber Salad: Refreshing and light, this salad introduces a crisp crunch that cuts through the richness of the dish, bringing a delightful medley of textures.
  • Lettuce Wraps: For a fun twist, serve the pot roast wrapped in crisp lettuce leaves; this adds a fresh, interactive element to the meal.
  • Soft Dinner Rolls: Perfect for soaking up any leftover glaze on your plate; serve warm for an irresistible finish to each meal.
  • Chilled Soju or Makgeolli: For beverage options, these traditional Korean drinks offer a refreshing counterpoint to the dish's rich flavors, enhancing your dining experience.

Korean Style Pot Roast Recipe FAQs

What type of chuck roast should I use for the best results?
Absolutely! Choose a well-marbled chuck roast, as the fat will render during cooking, making the meat beautifully tender and flavorful. Look for cuts that are deep red with a good amount of visible fat—this is key to achieving that melt-in-your-mouth texture we all crave.

How long can I store leftovers of Korean Style Pot Roast in the refrigerator?
You can store your delicious leftovers in an airtight container in the refrigerator for up to 3 days. I often find that the flavors deepen overnight, making each subsequent meal even more scrumptious!

Can I freeze Korean Style Pot Roast?
Definitely! To freeze, place your cooled pot roast in an airtight container or a heavy-duty freezer bag, making sure to squeeze out any excess air. It will keep well for up to 3 months. When you're ready to enjoy it again, thaw it overnight in the fridge and reheat gently on the stovetop or in the microwave.

What if my pot roast isn’t tender after cooking?
If your Korean Style Pot Roast isn’t tender after the recommended cooking time, it likely needs more time to braise. Check it at the 3-hour mark; if it’s still tough, cover and return it to the oven for 30-minute intervals until the beef shreds easily with a fork. Patience is key here for that perfect tenderness!

Are there any dietary considerations I should be aware of?
Very! If you're cooking for someone with soy allergies, you can easily substitute the soy sauce with a gluten-free option or use coconut aminos. Additionally, if anyone in your household has an aversion to spice, consider reducing the amount of gochujang or using a milder chili paste instead.

How do I know if my vegetables are fresh enough for the pot roast?
When selecting your carrots and onions, look for vibrant colors and firm textures—avoid any that show signs of wilting, discoloration, or dark spots. Fresh ingredients contribute significantly to the overall flavor, enhancing your Korean Style Pot Roast into the comfort food masterpiece it’s meant to be!

Korean Style Pot Roast

Delicious Korean Style Pot Roast to Warm Your Soul

This Korean Style Pot Roast brings comfort and hearty flavors with a spicy-sweet gochujang glaze, perfect for family dinners.
Print Recipe Pin Recipe
Prep Time 15 minutes mins
Cook Time 3 hours hrs 30 minutes mins
Resting Time 15 minutes mins
Total Time 4 hours hrs
Servings: 6 servings
Course: Dinner
Cuisine: Korean
Calories: 450
Ingredients Equipment Method Nutrition Notes

Ingredients
  

For the Beef
  • 3 pounds Chuck Roast Main protein that yields tender meat when slow-cooked.
  • to taste Salt Essential for seasoning the roast.
  • to taste Pepper Essential for seasoning the roast.
For the Vegetables
  • 3 cups Carrots Cut into chunks for even cooking.
  • 1 large Onion Sliced for uniform cooking.
  • 4 cloves Garlic Minced garlic enhances aroma.
  • 1 inch Fresh Ginger Minced ginger complements the dish.
For the Sauce
  • 1/2 cup Soy Sauce Consider low-sodium for a healthier choice.
  • 1/4 cup Gochujang Star ingredient for Korean flair.
  • 1/4 cup Brown Sugar Balances heat from the gochujang.
  • 2 tablespoons Rice Vinegar Contributes acidity and brightness.
  • 2 tablespoons Sesame Oil Adds nuttiness to finish the dish.
For the Braising Liquid
  • 4 cups Beef Broth Provides moisture for braising.
For Garnish
  • 1/4 cup Green Onions Sliced for a fresh top note.
  • 1/4 cup Fresh Cilantro Adds freshness to every bite.

Equipment

  • Dutch oven

Method
 

Preparing the Pot Roast
  1. Pat your chuck roast dry with paper towels, then season it generously with salt and pepper on all sides. Allow to sit for about 15 minutes.
  2. In a large Dutch oven, heat a tablespoon of oil over medium-high heat. Add the chuck roast and sear for about 5-7 minutes on each side until deeply browned.
  3. In the remaining drippings, add the sliced onion, minced garlic, and minced ginger. Sauté over medium heat for 3-4 minutes until fragrant.
  4. Stir in the gochujang, soy sauce, brown sugar, and rice vinegar. Mix thoroughly for about a minute to form the sauce.
  5. Pour in the beef broth, scraping any browned bits from the pot. Stir well to combine all ingredients.
  6. Return the seared roast to the Dutch oven, adding chopped carrots around it. Ensure the carrots are nestled well.
  7. Cover the Dutch oven and transfer it to a preheated oven at 325°F. Let it braise for about 3 to 3.5 hours until fork-tender.
  8. Remove the pot from the oven and skim off excess fat. Drizzle the roast with sesame oil and sprinkle with green onions and cilantro.
  9. Serve over steamed rice or alongside mashed potatoes. Enjoy tucked into lettuce wraps if desired.

Nutrition

Serving: 1servingCalories: 450kcalCarbohydrates: 30gProtein: 30gFat: 20gSaturated Fat: 5gPolyunsaturated Fat: 2gMonounsaturated Fat: 10gCholesterol: 90mgSodium: 800mgPotassium: 700mgFiber: 3gSugar: 5gVitamin A: 180IUVitamin C: 5mgCalcium: 50mgIron: 4mg

Notes

Sear the beef well for enhanced flavor. This dish is meal prep friendly and can be stored in the fridge for up to 3 days.

Tried this recipe?

Let us know how it was!
  • « Previous Page
  • 1
  • …
  • 38
  • 39
  • 40
  • 41
  • 42
  • …
  • 179
  • Next Page »

Welcome!

Hi, I’m Grace, a Sydney-based home cook with a passion for bold flavors and trending ingredients. Whether you’re a busy beginner or a seasoned foodie, you’ll find dishes here that are fresh, fun, and full of flavor.

More about me

Popular Recipes

  • Cheesy Chicken Garlic Bread Sandwich
    Cheesy Chicken Garlic Bread Sandwich for Cozy Family Moments
  • Easy Chicken Ranch Wraps
    Easy Chicken Ranch Wraps: Quick, Creamy & Totally Satisfying
  • Chicken Caesar Sandwiches
    Delicious Chicken Caesar Sandwiches for Quick Comfort Food
  • best Cuban sandwich
    The Best Cuban Sandwich You’ll Want Every Weeknight!

Footer

↑ back to top

About

  • Privacy Policy
  • Disclaimer
  • Terms & Conditions

Newsletter

  • Sign Up! for emails and updates

Contact

  • About me
  • Contact me

Copyright © 2025 TastyTrendIngredients