tastytrendingredients

  • Home
  • Recipes
    • Appetizers
    • Breakfast
    • Dessert
    • Dinner
    • Drinks
    • Salads
    • Snacks
    • Soups
  • About me
  • Contact me
menu icon
go to homepage
  • Home
  • Recipes
    • Appetizers
    • Breakfast
    • Dessert
    • Dinner
    • Drinks
    • Salads
    • Snacks
    • Soups
  • About me
  • Contact me
search icon
Homepage link
  • Home
  • Recipes
    • Appetizers
    • Breakfast
    • Dessert
    • Dinner
    • Drinks
    • Salads
    • Snacks
    • Soups
  • About me
  • Contact me
×

Sticky Honey Garlic Sausage Pasta Skillet That's Super Quick

February 10, 2026 by Grace Snow Leave a Comment

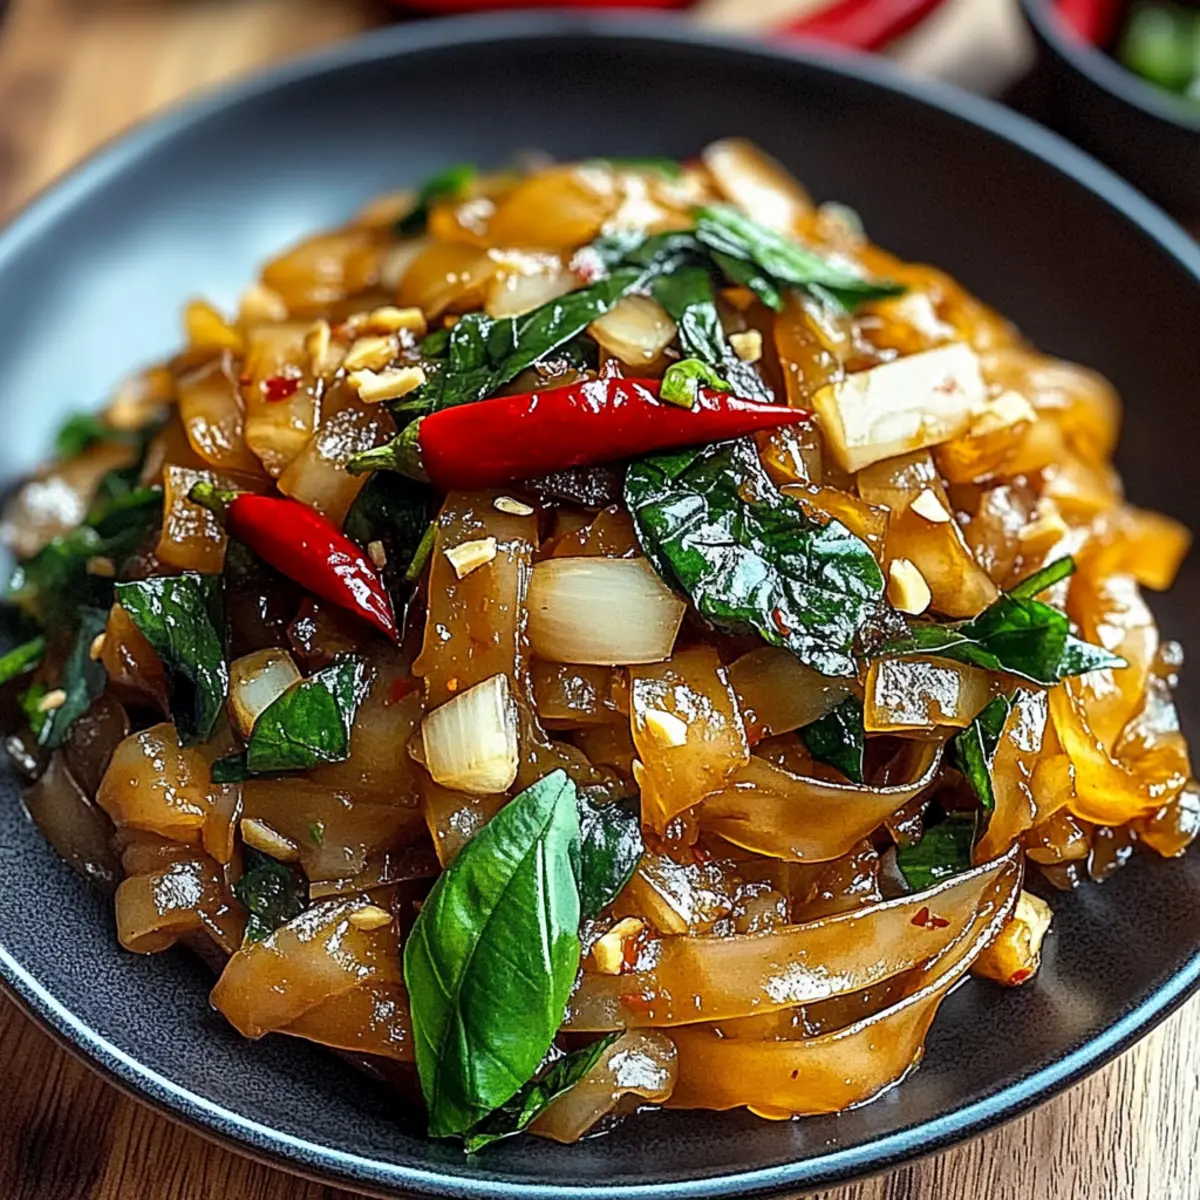
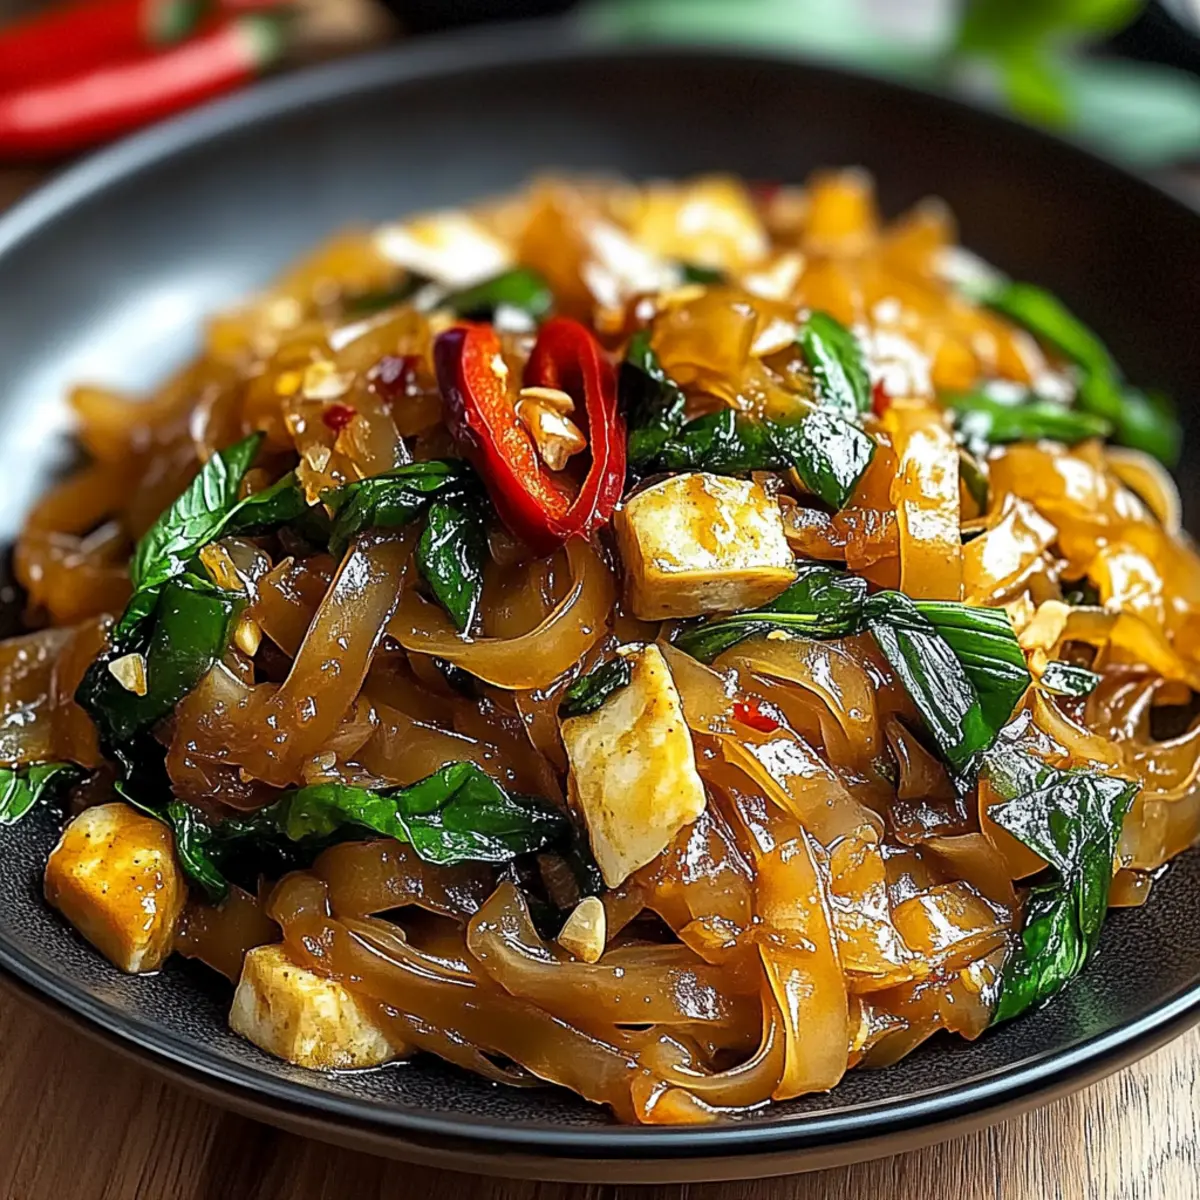
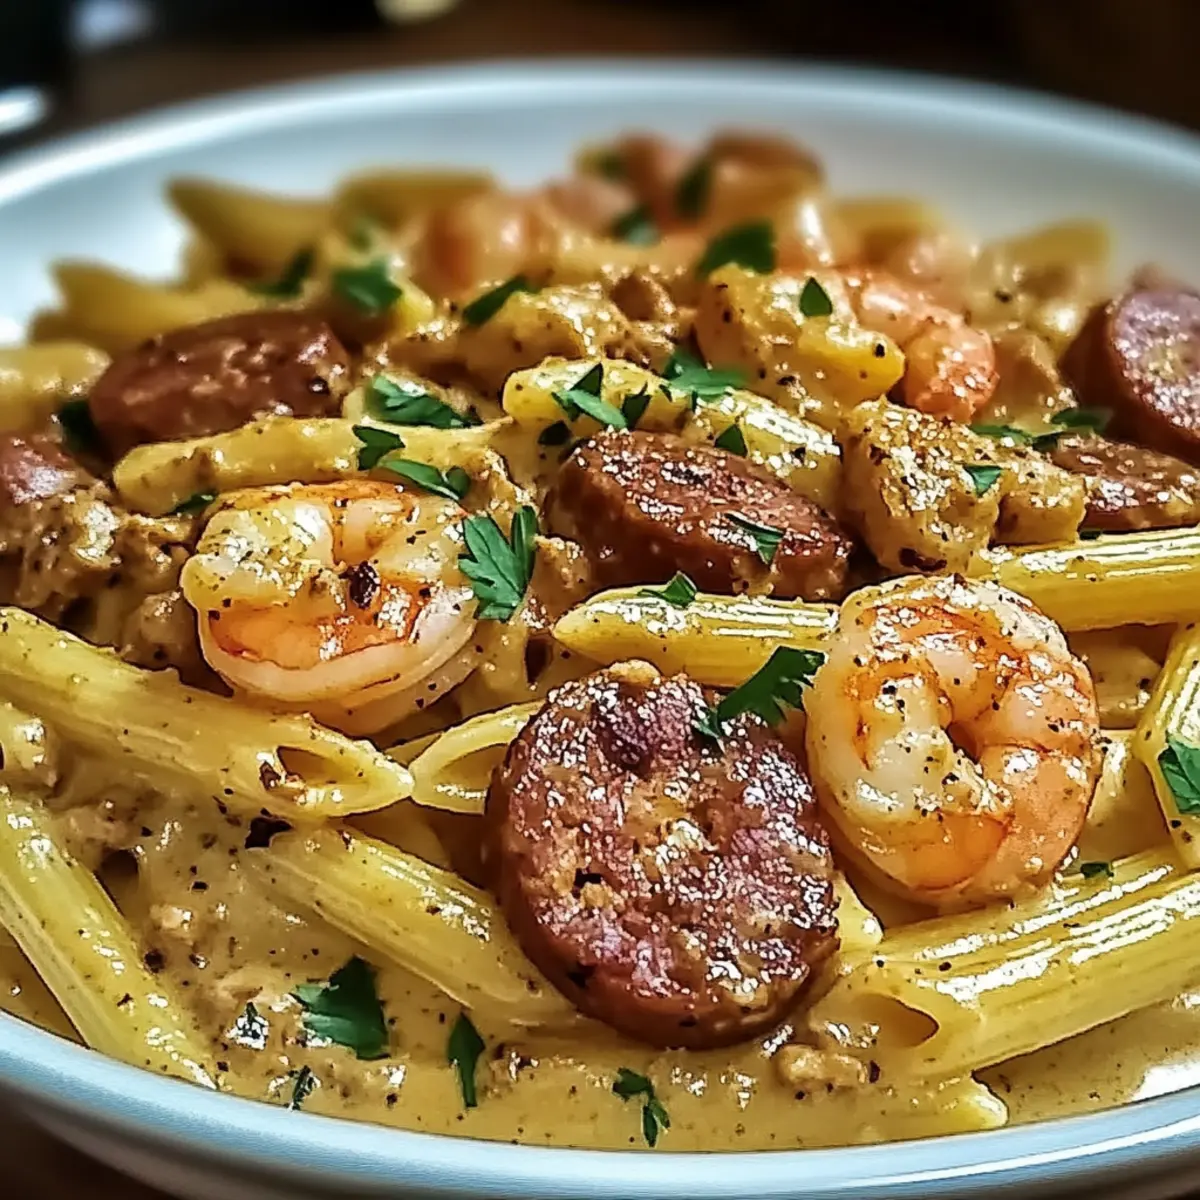
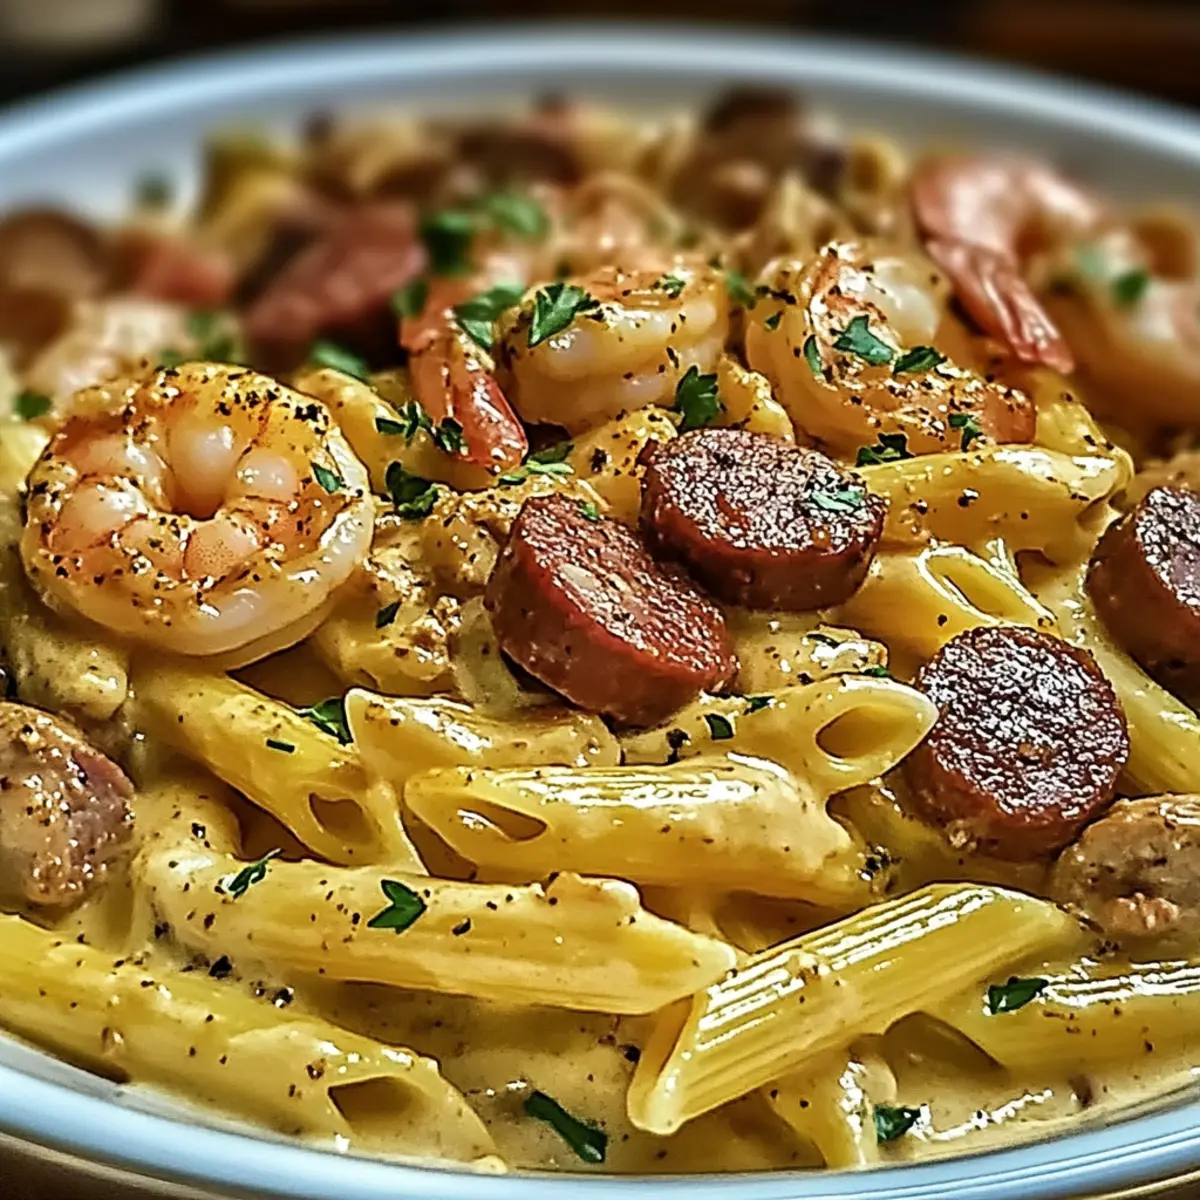
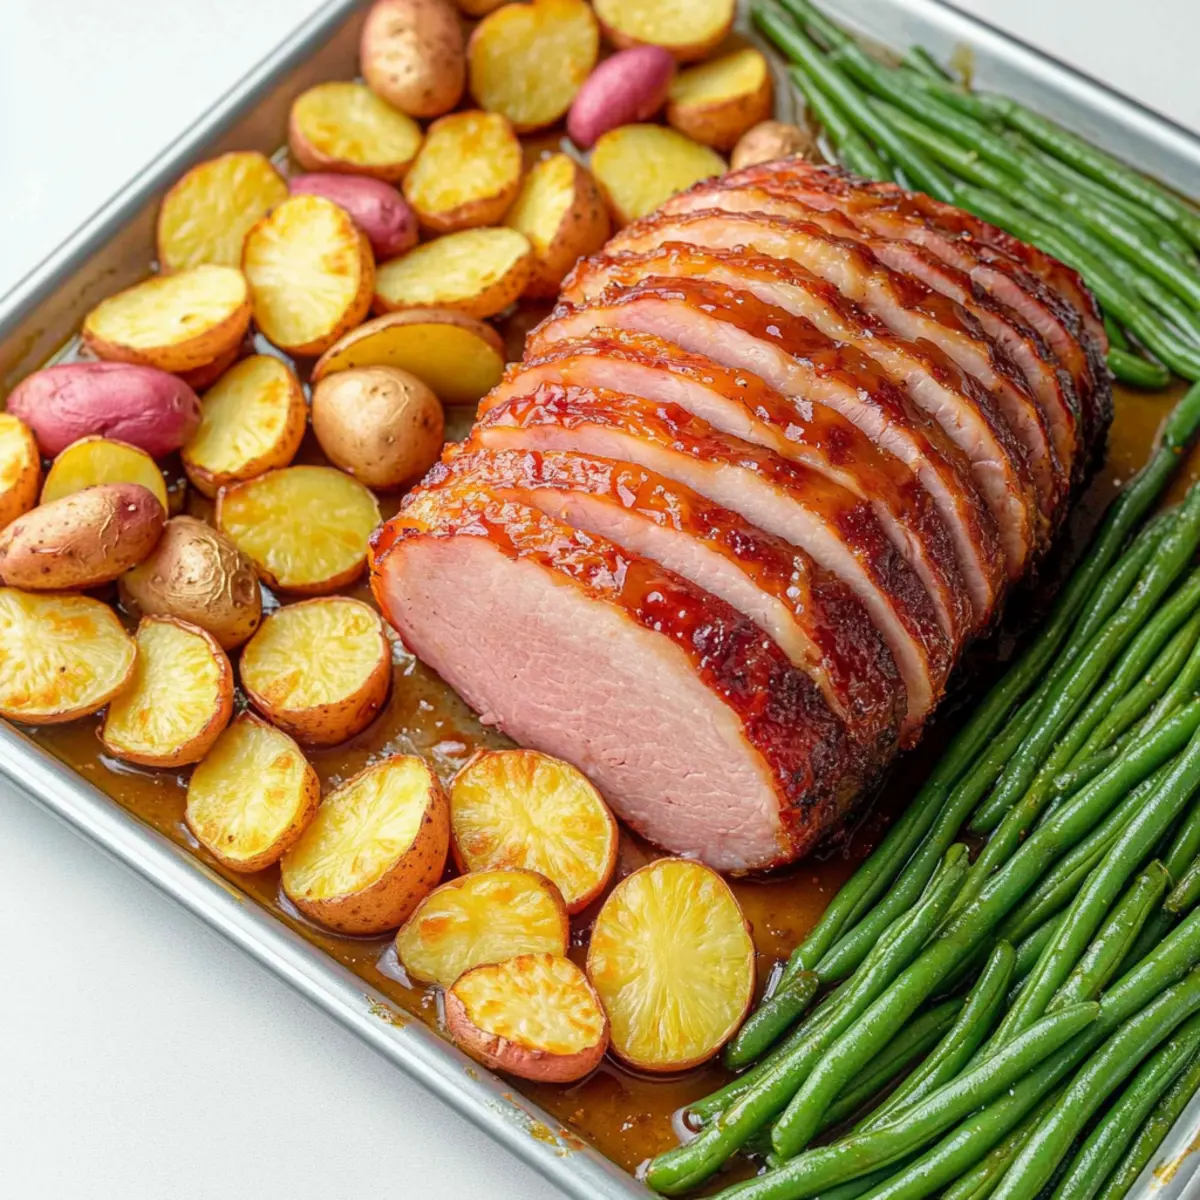
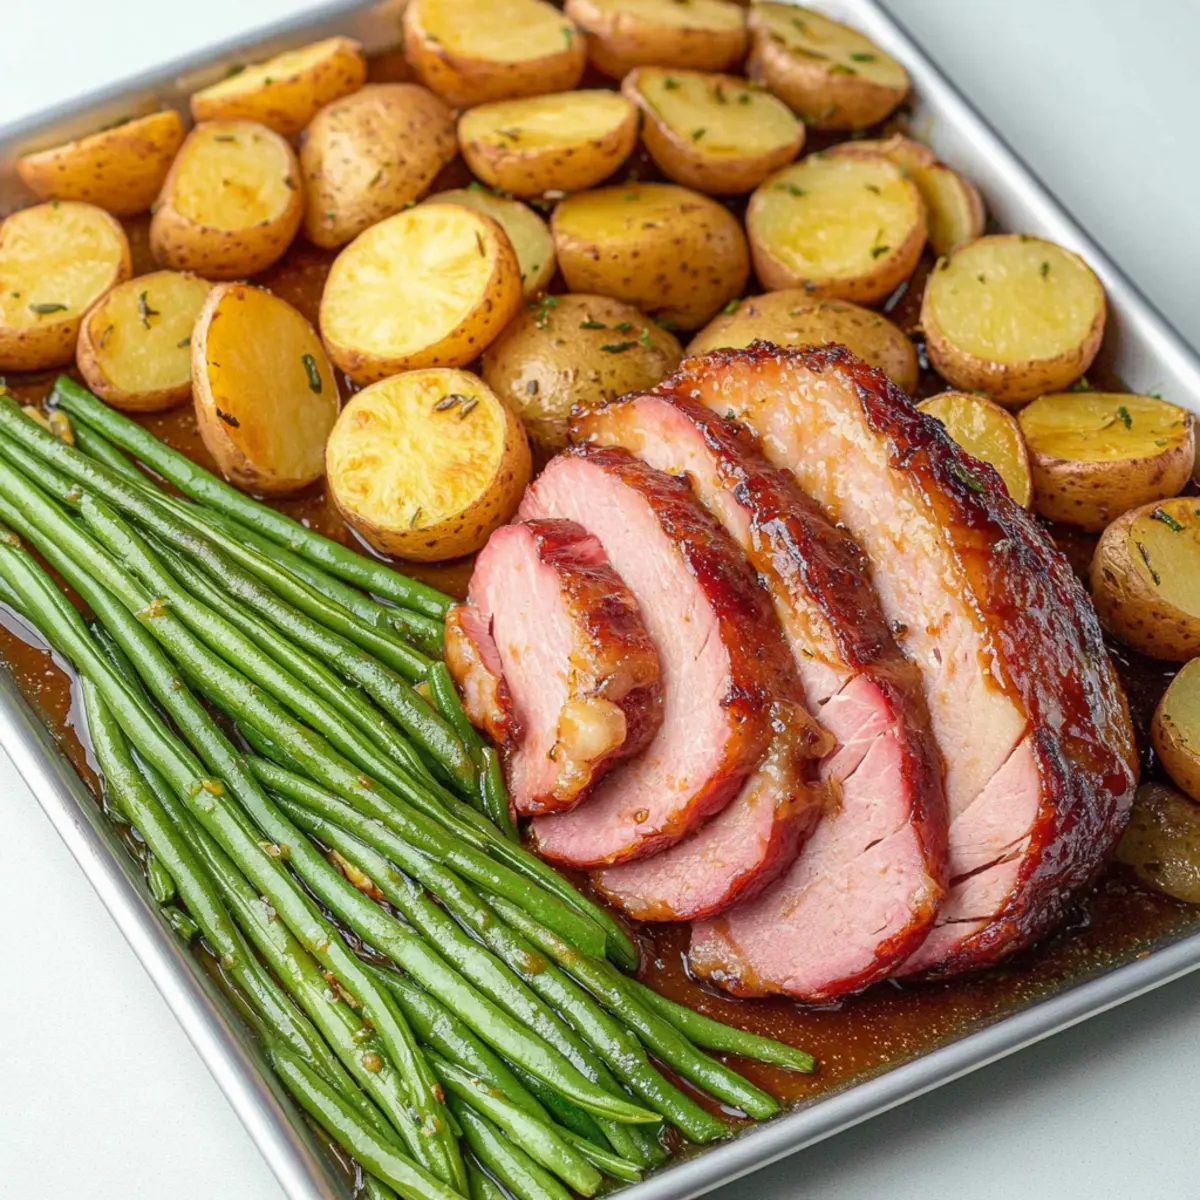
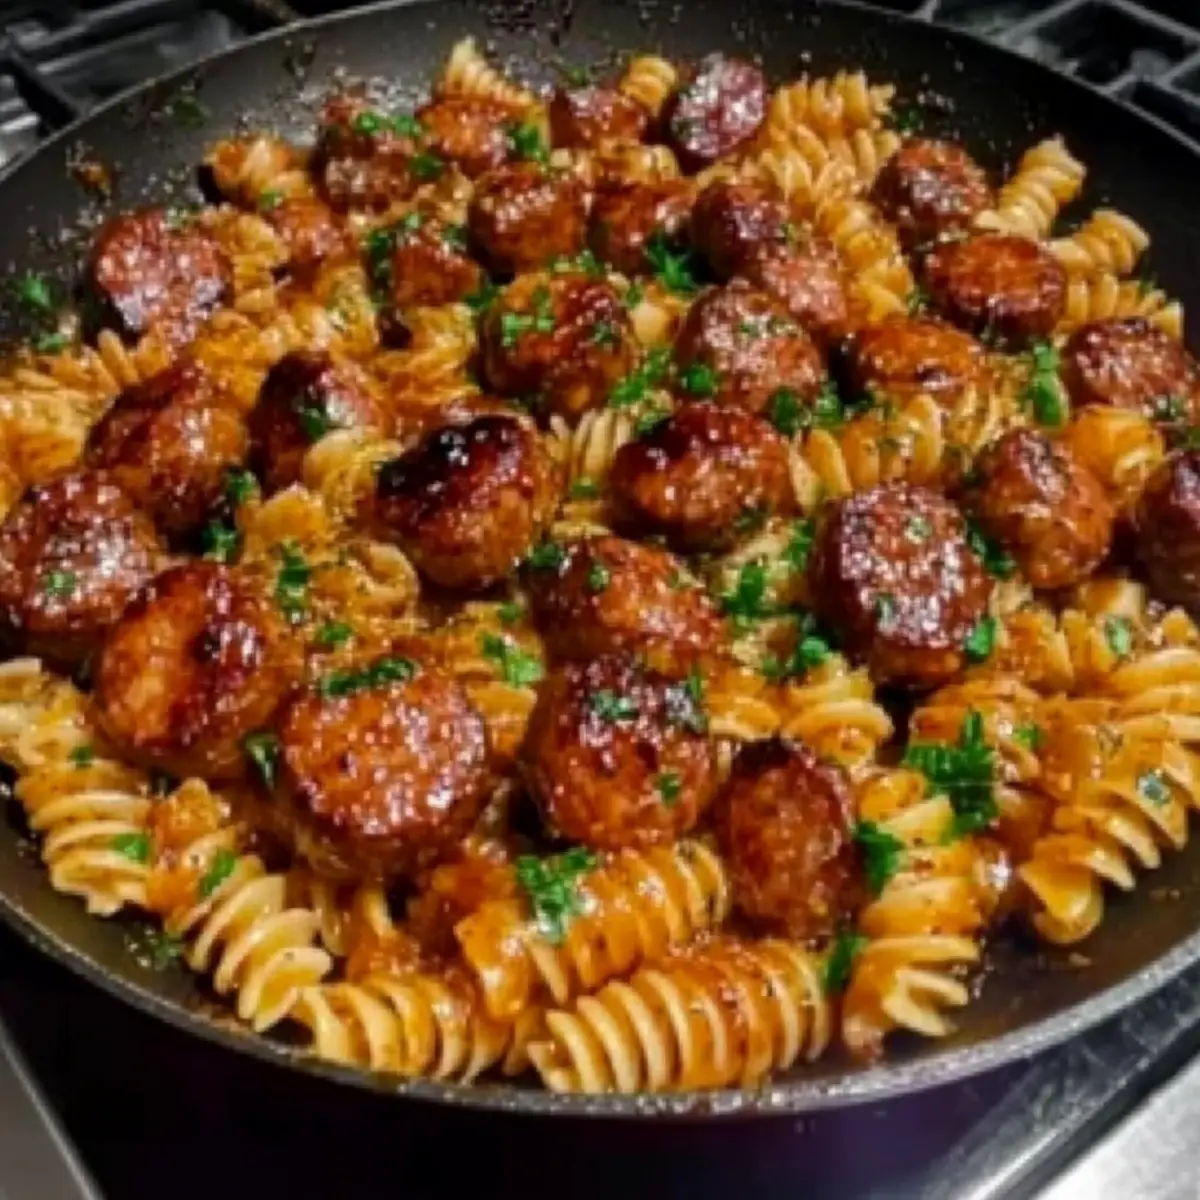
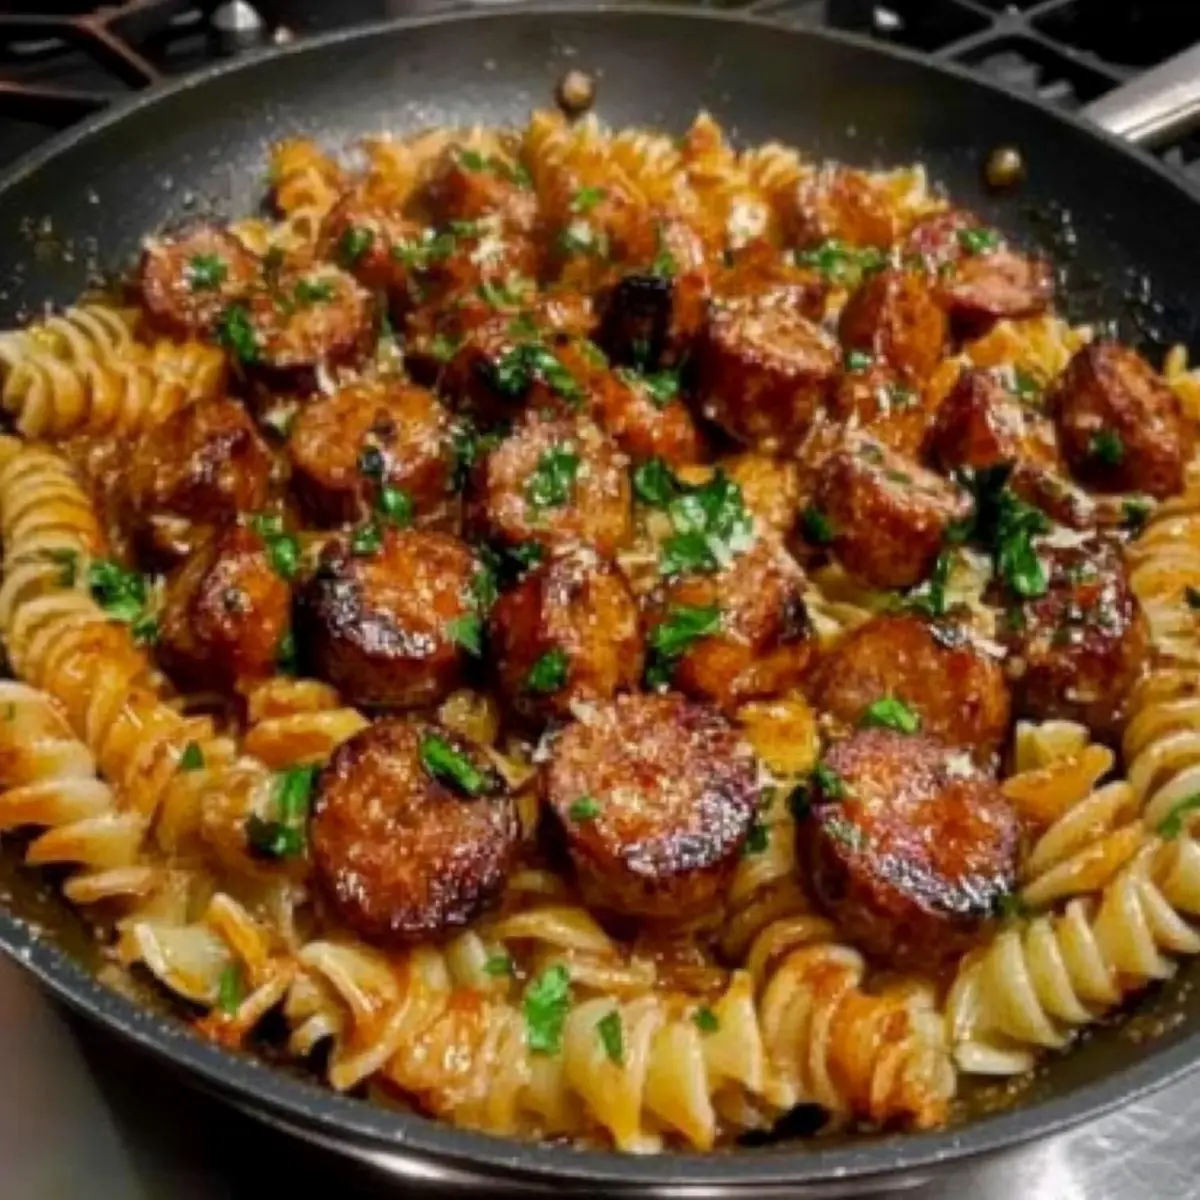
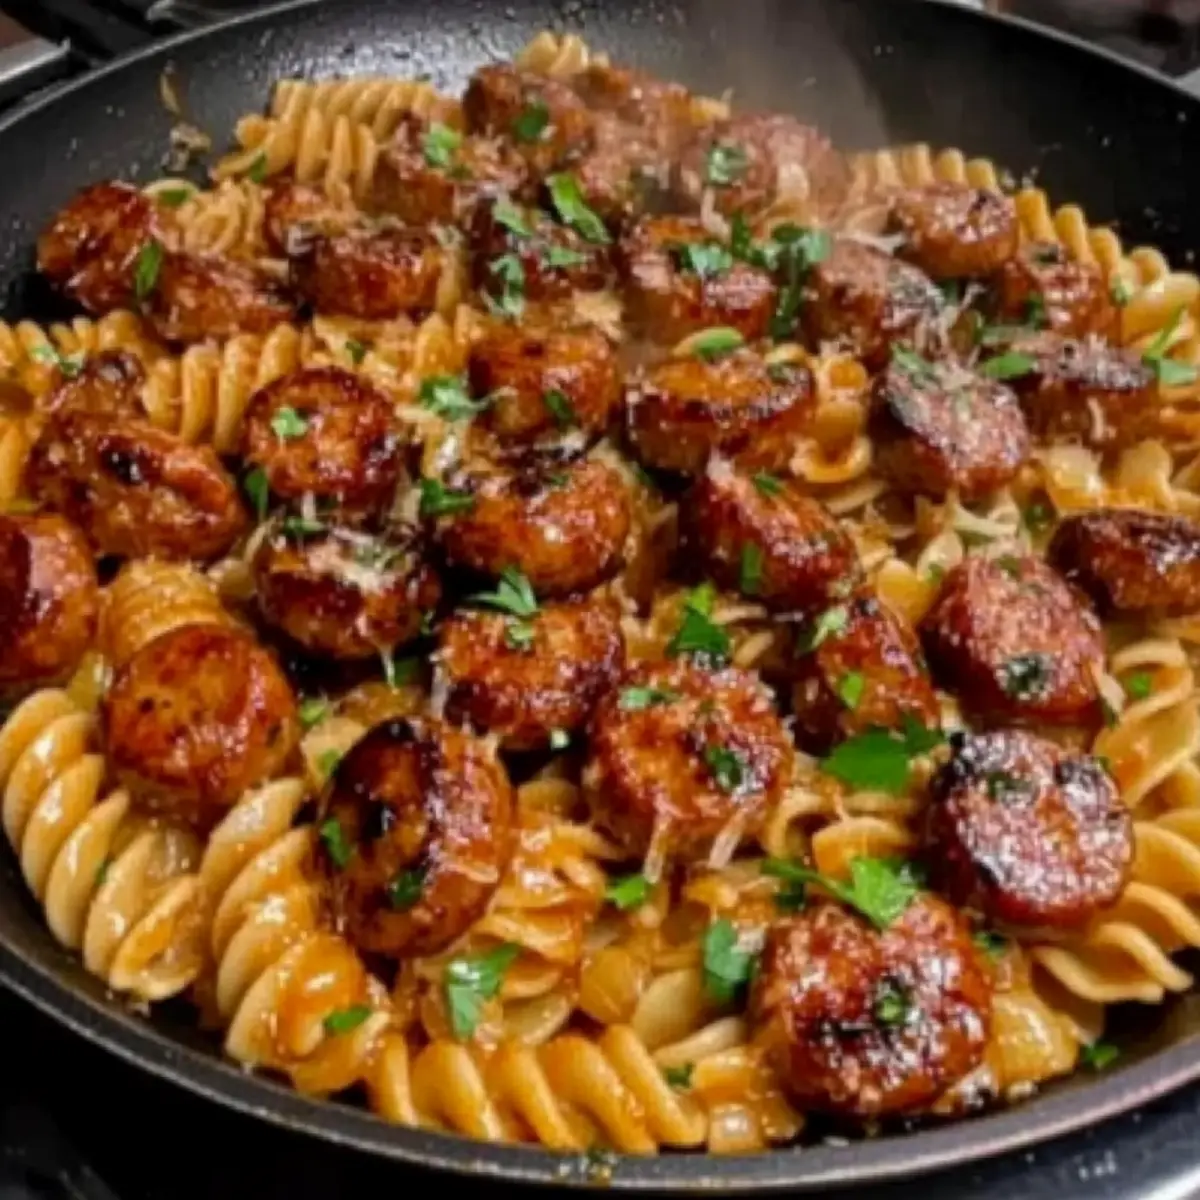
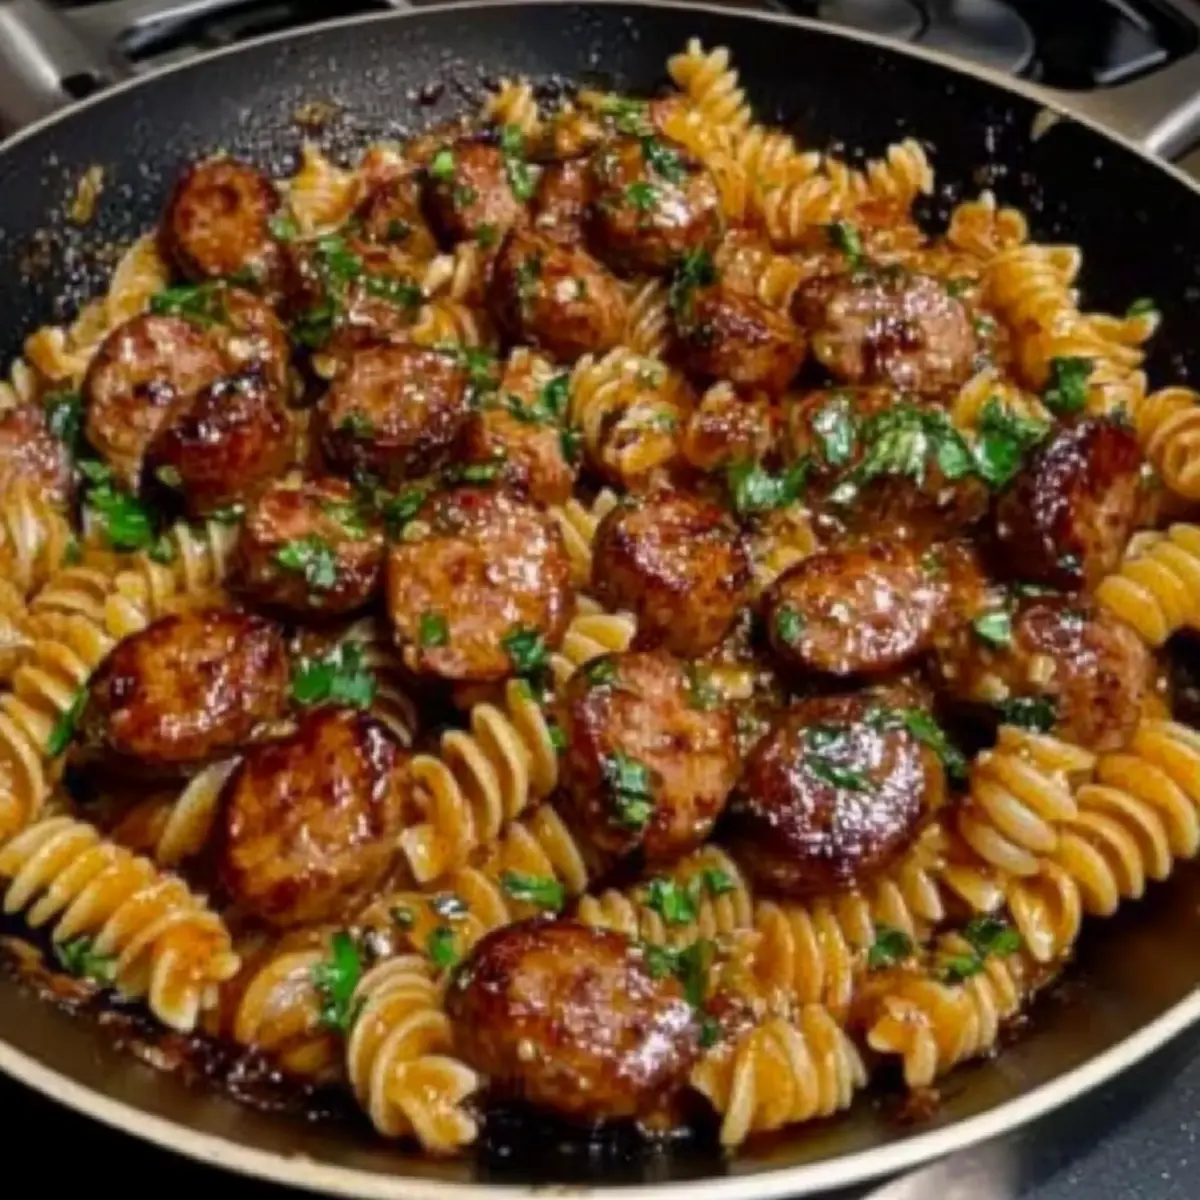
As I stood in my kitchen, the enticing aroma of garlic sizzling in olive oil wrapped around me like a warm hug. That’s the magic of cooking—transforming simple ingredients into something extraordinary. Today, I’m thrilled to share my Sticky Honey Garlic Sausage Pasta Skillet, a delightful one-pan dish that marries the sweetness of honey with the savory kick of garlic. What I love most about this recipe is how effortlessly it comes together, making it perfect for a quick dinner after a long day. Plus, it’s entirely customizable, so you can swap in your favorite proteins or veggies without missing a beat. Ready to indulge in this deliciously sticky creation? Let’s dive into the details!

Why is this pasta dish a must-try?

Easy and Quick: This Sticky Honey Garlic Sausage Pasta Skillet can be on your table in about 30 minutes—perfect for busy weeknights!
One-Pan Wonder: Say goodbye to a mountain of dishes; everything cooks together in just one skillet.
Customizable Flavor: Whether you prefer spicy with extra red pepper flakes or a veggie-packed version with bell peppers, you can tailor this dish to your taste!
Crowd-Pleaser: With its rich sauce and hearty sausage, this dish is sure to impress family and friends—perfect for gatherings or simple dinners!
Satisfying Comfort: The sticky, glossy sauce wraps around every piece of pasta, creating a satisfying meal that feels indulgent without being complicated.

Sticky Honey Garlic Sausage Pasta Skillet Ingredients

Get ready to whip up something delicious!

  • For the Pasta
    • Pasta – The base of the dish, adjust the type to your preference for the best bite.

  • For the Skillet
    • Olive Oil – Essential for sautéing; it adds a rich depth of flavor.
    • Sausage – Your choice of Italian, smoked, or chicken works wonderfully to create that heartiness.
    • Garlic – Fresh garlic is crucial for the aromatic base that brings this dish to life.

  • For the Sauce
    • Honey – This ingredient creates the sticky sauce that ties everything together, adding a sweet touch.
    • Soy Sauce – Adds saltiness and depth; swap it with tamari for a gluten-free version.
    • Apple Cider Vinegar – A balance of sweetness and acidity that enhances the overall flavor.
    • Chicken Broth – Keeps the sauce moist and flavorful; veggie broth serves as a great alternative.
    • Red Pepper Flakes – Add some heat, but it's optional based on your spice preference.
    • Butter – Stir in for a touch of richness; it’s optional for those looking for a lighter dish.

  • For Garnishing
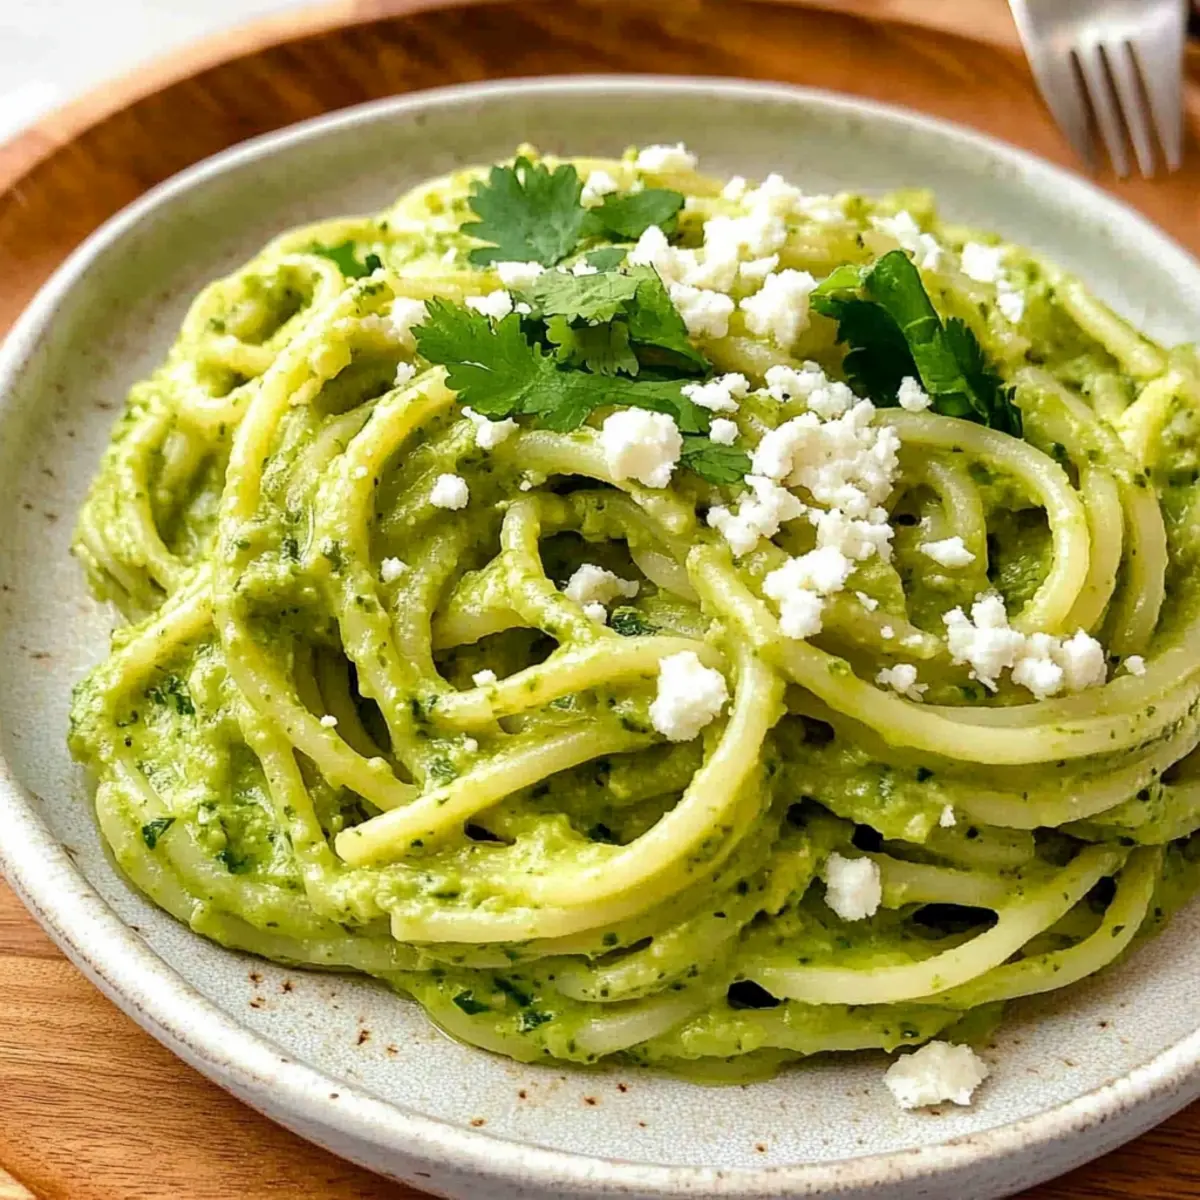
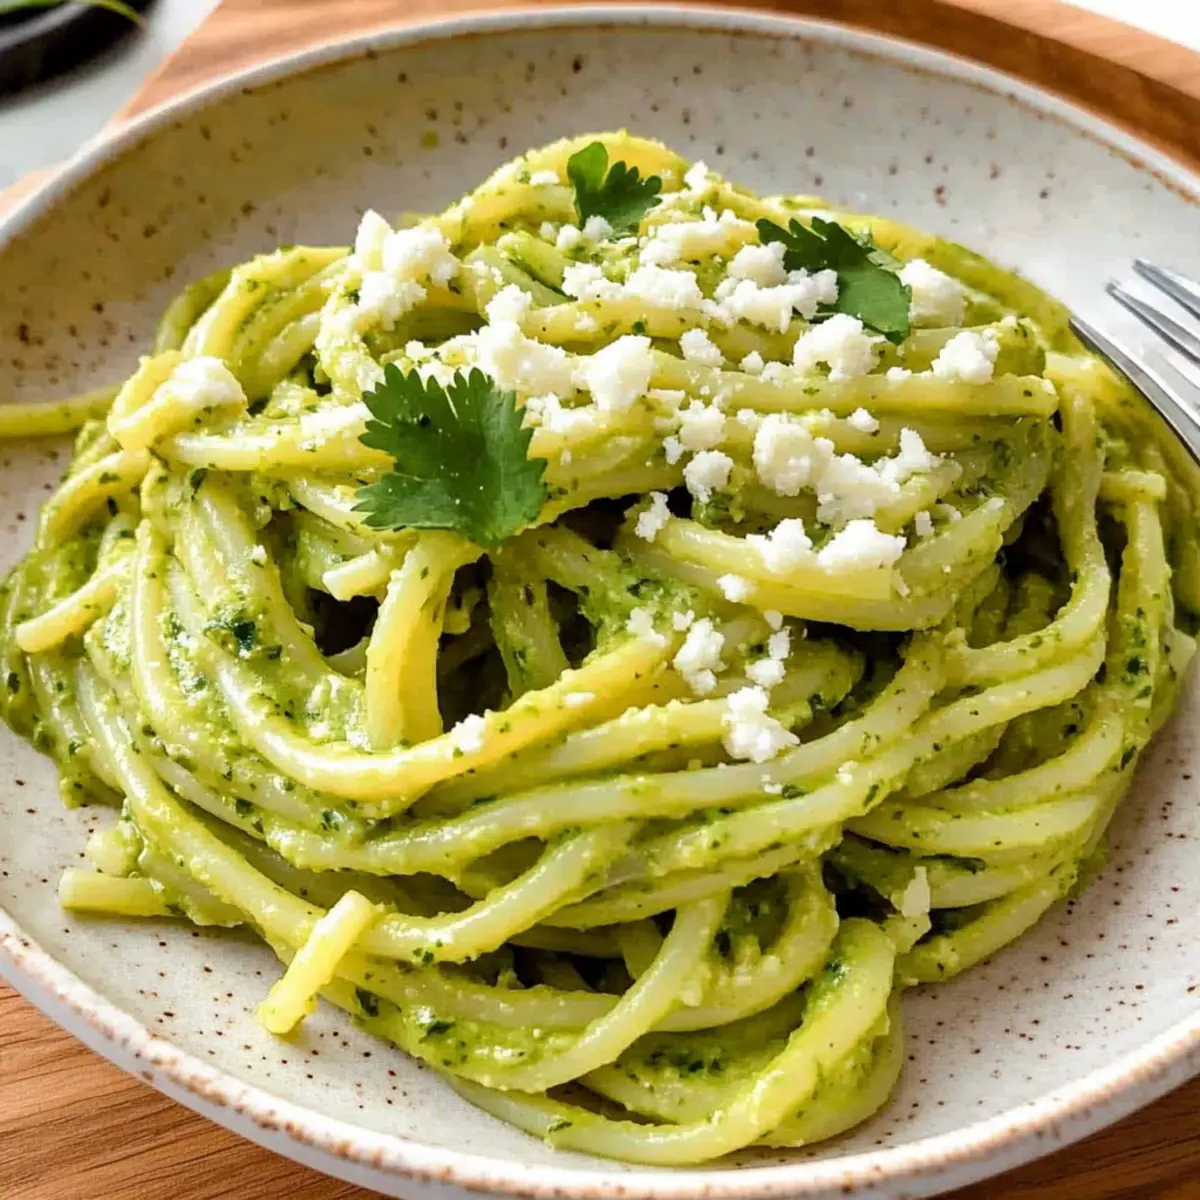
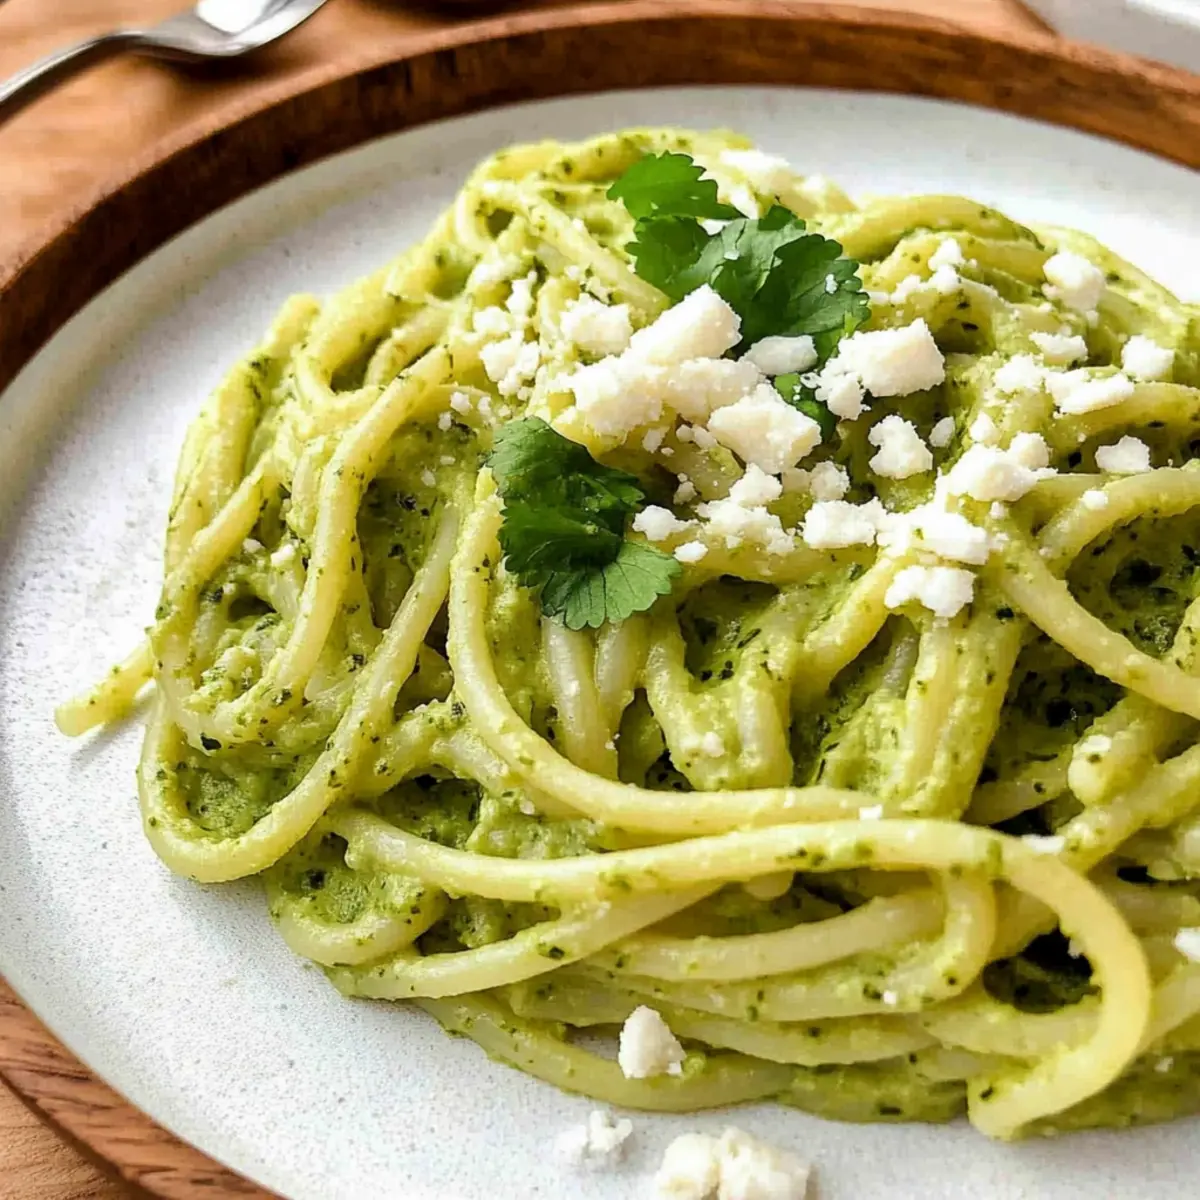
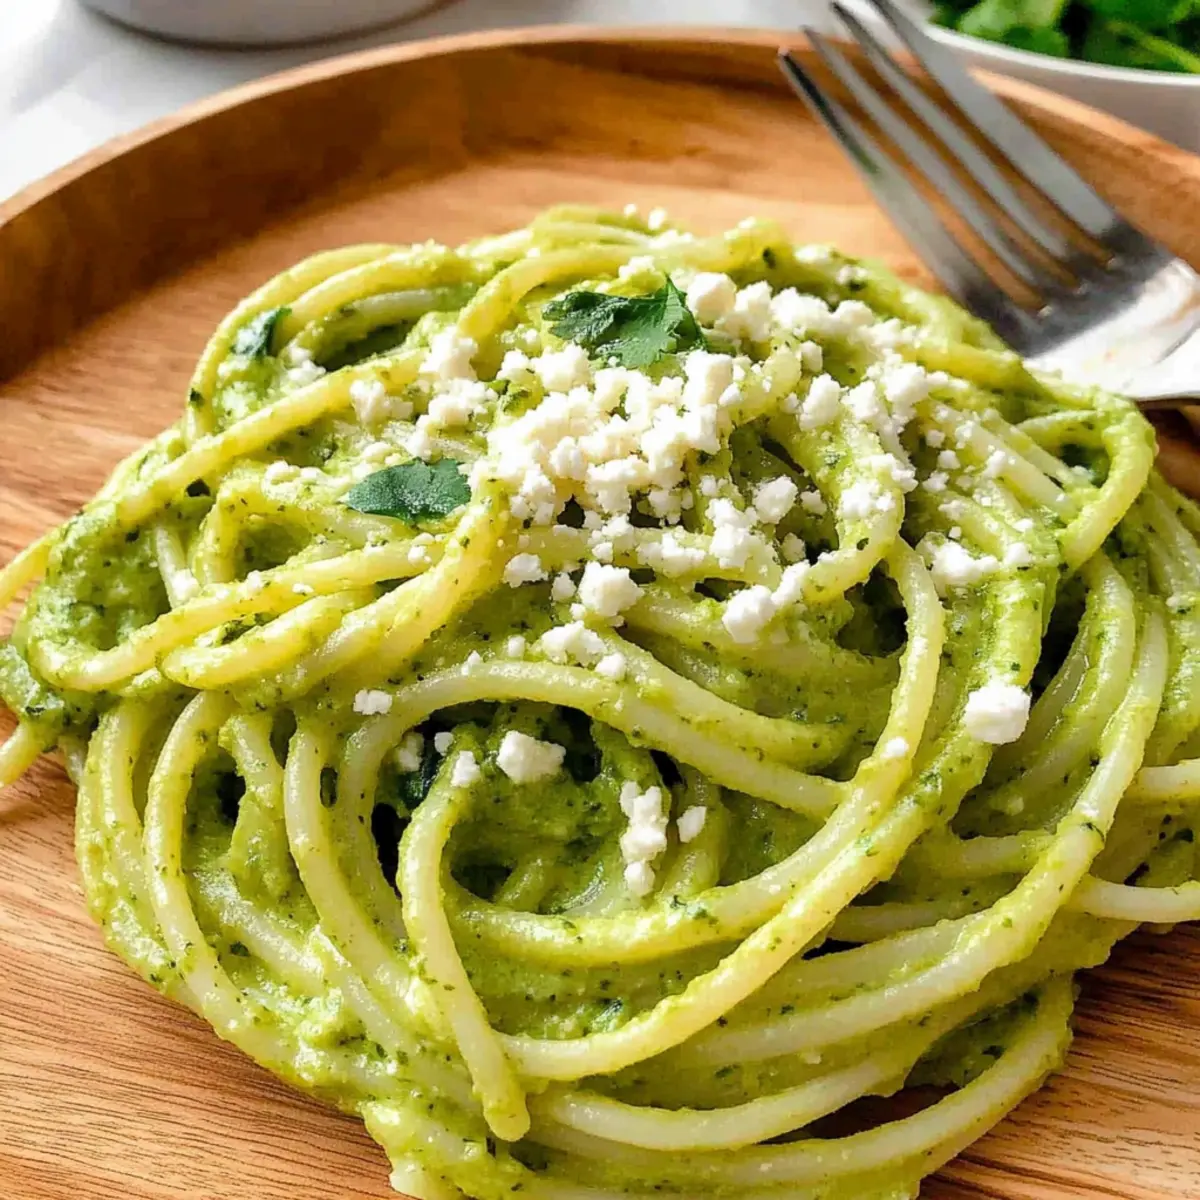
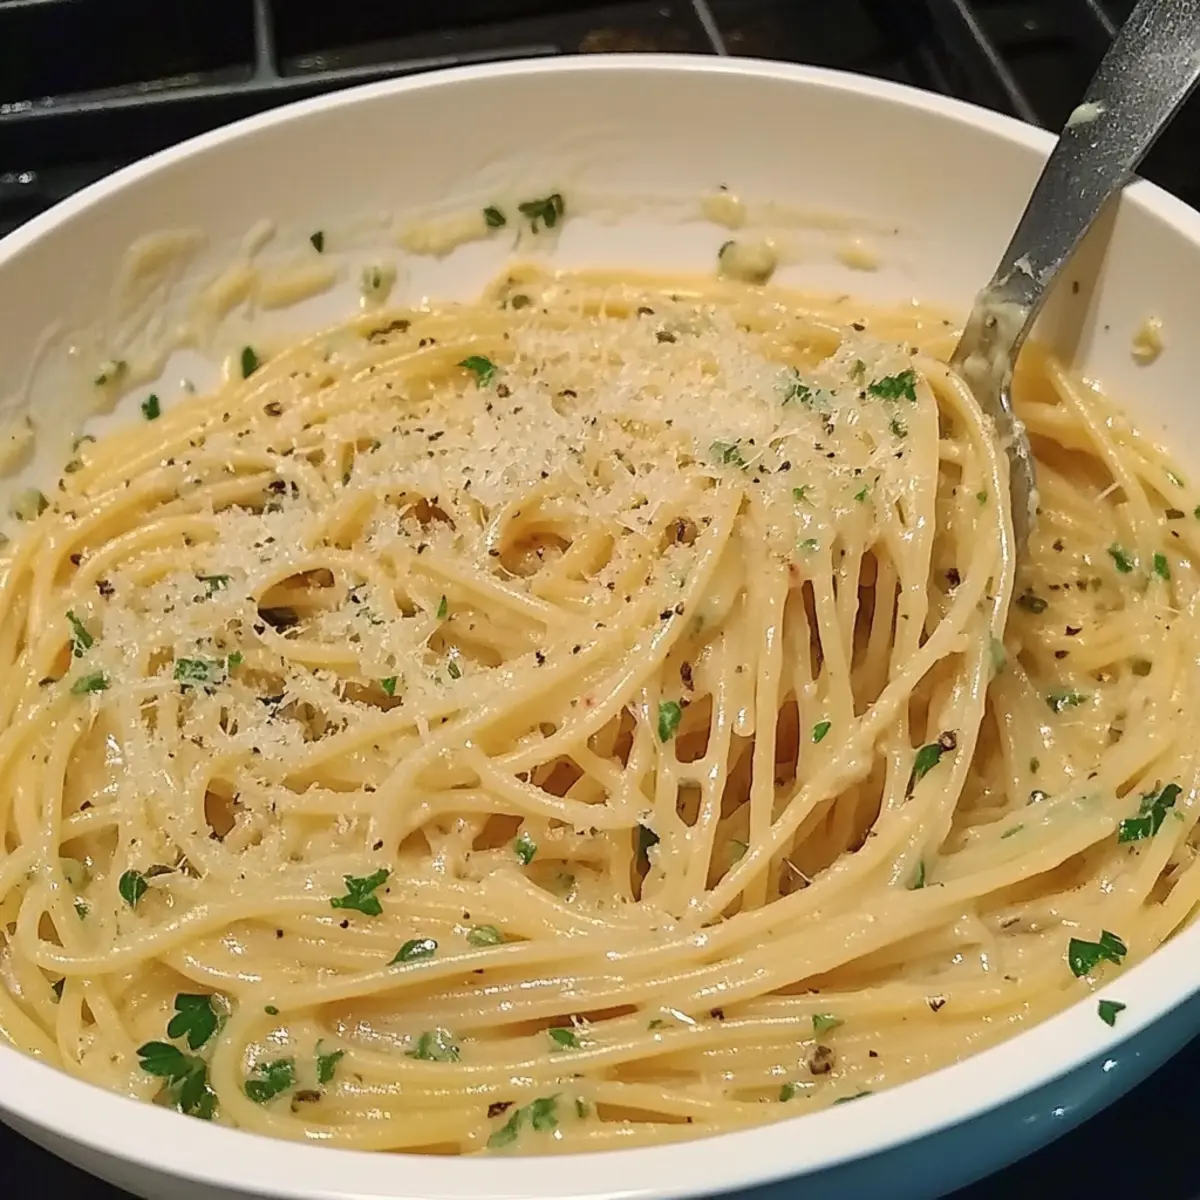
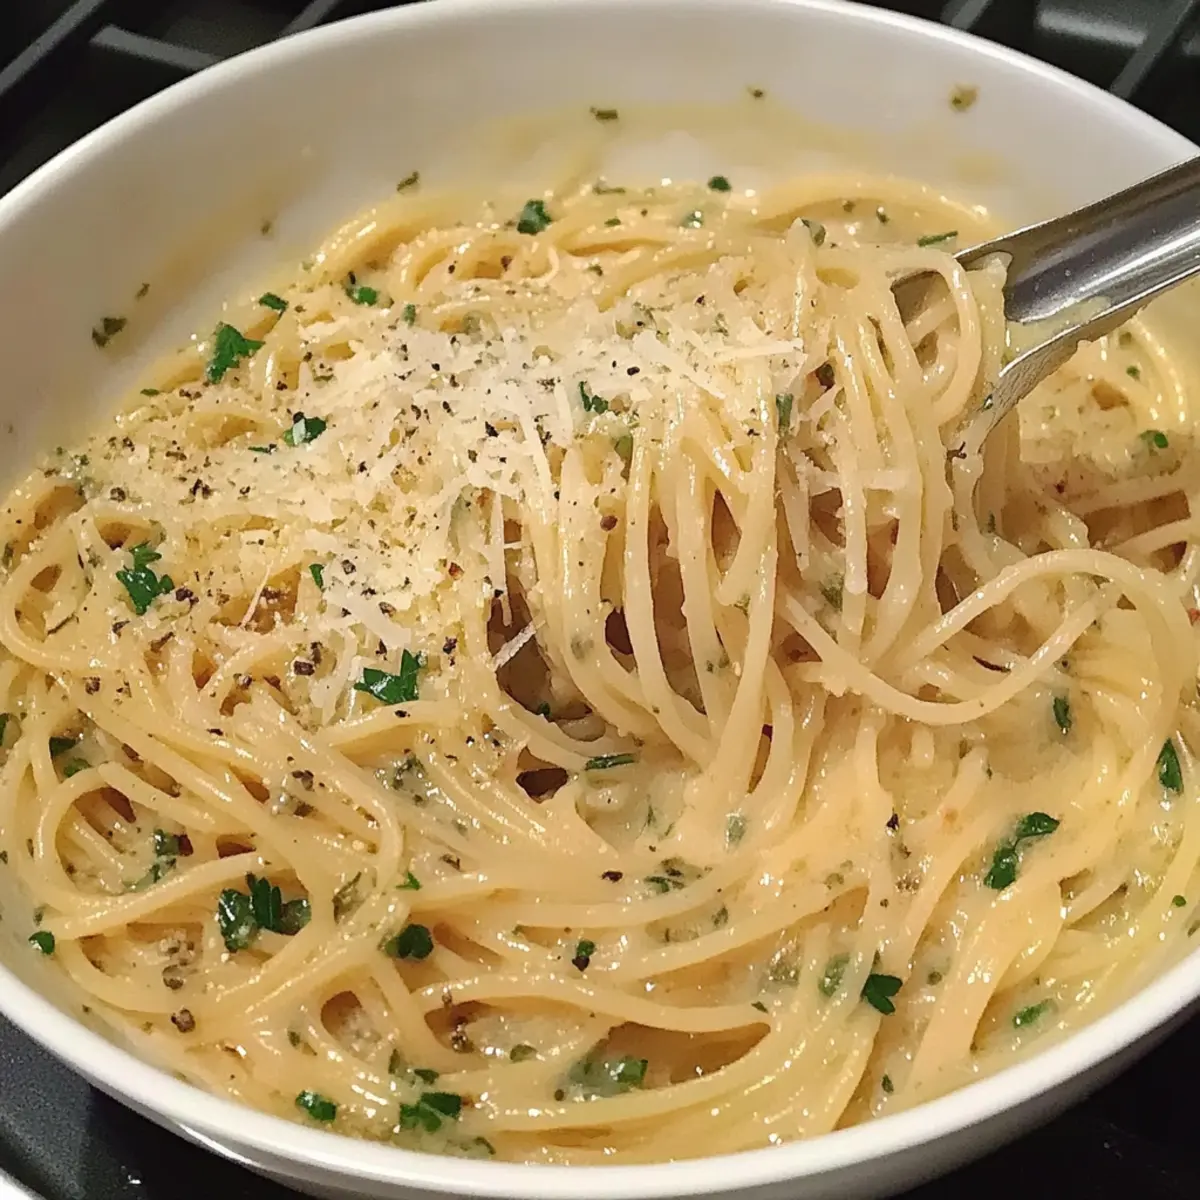
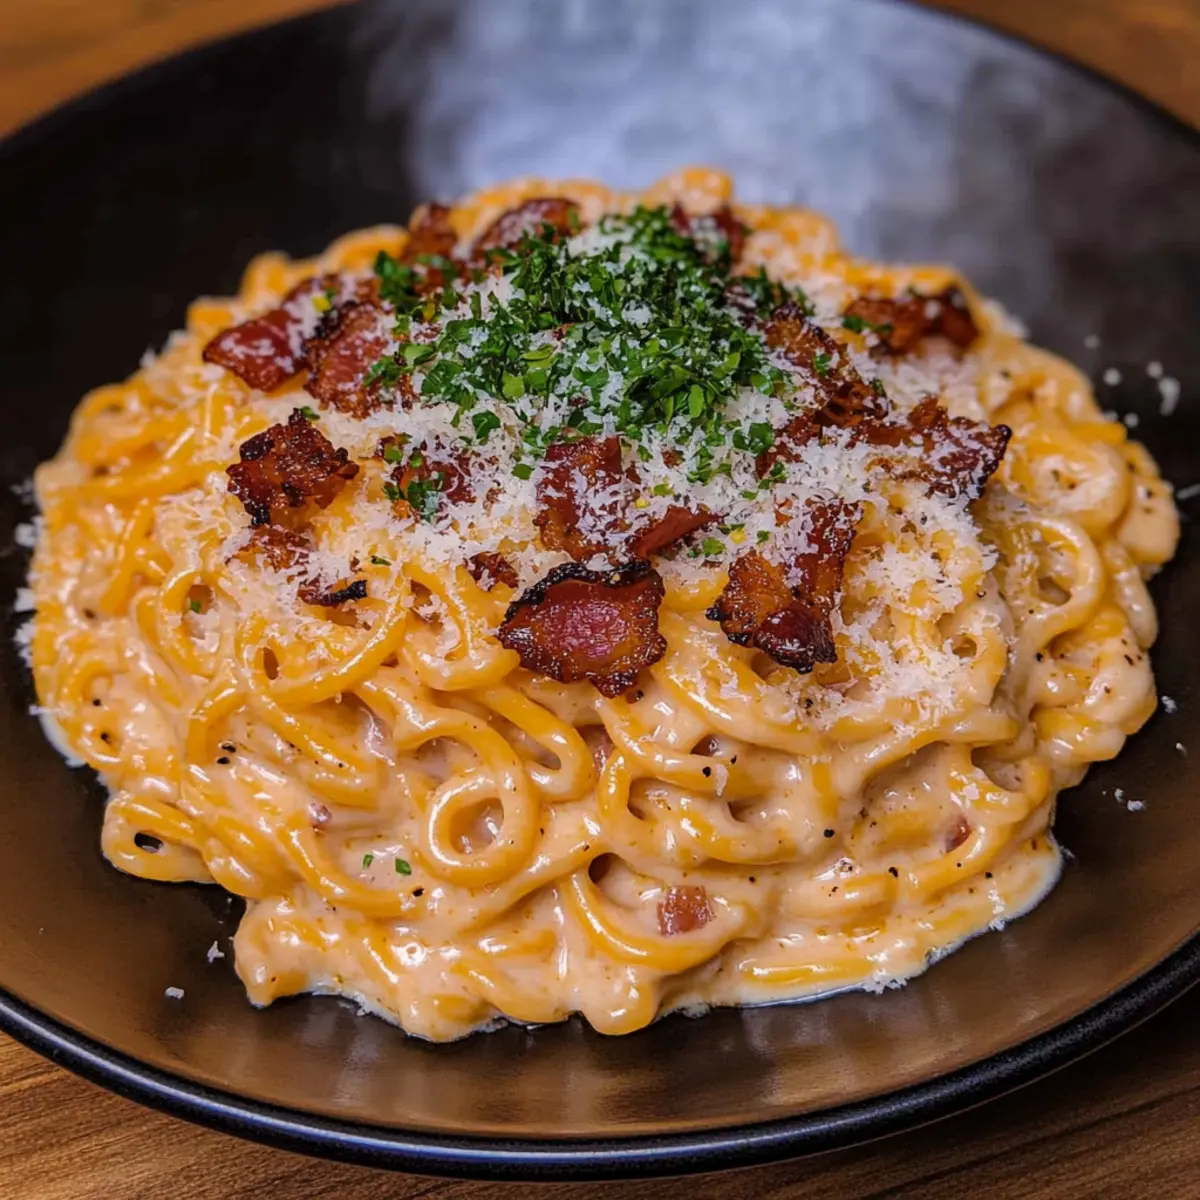
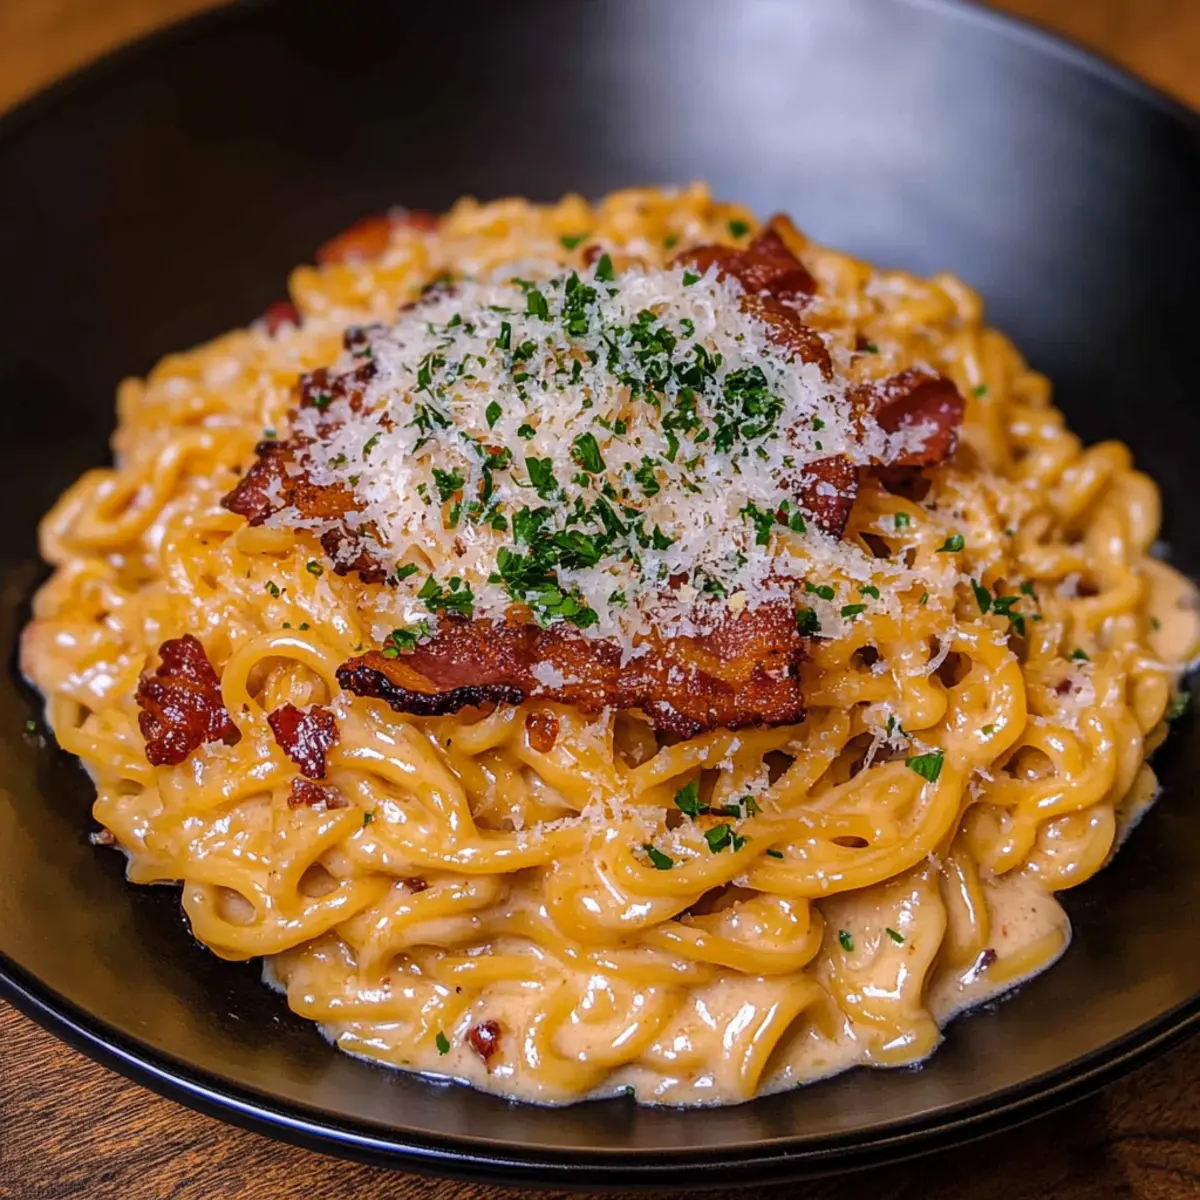
    • Fresh Parsley – A sprinkle of color and freshness that makes the dish visually appealing.
    • Parmesan Cheese – This is optional but adds a fantastic savory finish to each bite.

Now, let the deliciousness begin with this Sticky Honey Garlic Sausage Pasta Skillet!

Step‑by‑Step Instructions for Sticky Honey Garlic Sausage Pasta Skillet

Step 1: Cook Pasta
Bring a large pot of salted water to a rolling boil over high heat. Add your choice of pasta and cook until al dente, usually 8-10 minutes, stirring occasionally. Once cooked, reserve 1/2 cup of the pasta water for later, then drain the pasta and set it aside while you prepare the rest of the Sticky Honey Garlic Sausage Pasta Skillet.

Step 2: Sauté Sausage
In a large skillet, heat a drizzle of olive oil over medium-high heat. Add the sliced sausage to the skillet and cook for about 5-7 minutes, stirring occasionally, until the sausage is nicely browned and cooked through. Once done, remove the sausage from the pan and set it aside to prevent overcooking while you work on the flavorful garlic base.

Step 3: Cook Garlic
With the same skillet still warm, add a bit more olive oil if needed, and toss in the minced garlic. Sauté for about 30 seconds, stirring continuously until the garlic becomes fragrant and slightly golden, but be careful not to let it burn. This will create a delicious aromatic base for your Sticky Honey Garlic Sausage Pasta Skillet.

Step 4: Make Sauce
Pour in the honey, soy sauce, and apple cider vinegar into the skillet with the garlic. Stir well to combine the ingredients smoothly, allowing the sweet and savory flavors to blend together. This sticky sauce will be the heart of your dish, enhancing every bite of sausage and pasta.

Step 5: Simmer
Next, add the chicken broth to the skillet, stirring it into the sauce. Bring the mixture to a gentle simmer over medium heat for 2-3 minutes, letting the sauce thicken slightly. If you like a little heat, sprinkle in red pepper flakes at this point, allowing the flavors to meld beautifully.

Step 6: Combine Sausage
Return the browned sausage back to the skillet, gently mixing it into the sauce. Let the sausage simmer for an additional 3-4 minutes, allowing it to absorb those sweet and savory flavors. This step elevates the overall taste of your Sticky Honey Garlic Sausage Pasta Skillet.

Step 7: Toss Pasta
Add the drained pasta into the skillet with the sausage and sauce, tossing everything together to ensure the pasta is evenly coated. If the mixture appears too thick, gradually add some reserved pasta water until you reach the desired consistency, creating a luscious, sticky coating on the pasta.

Step 8: Finish
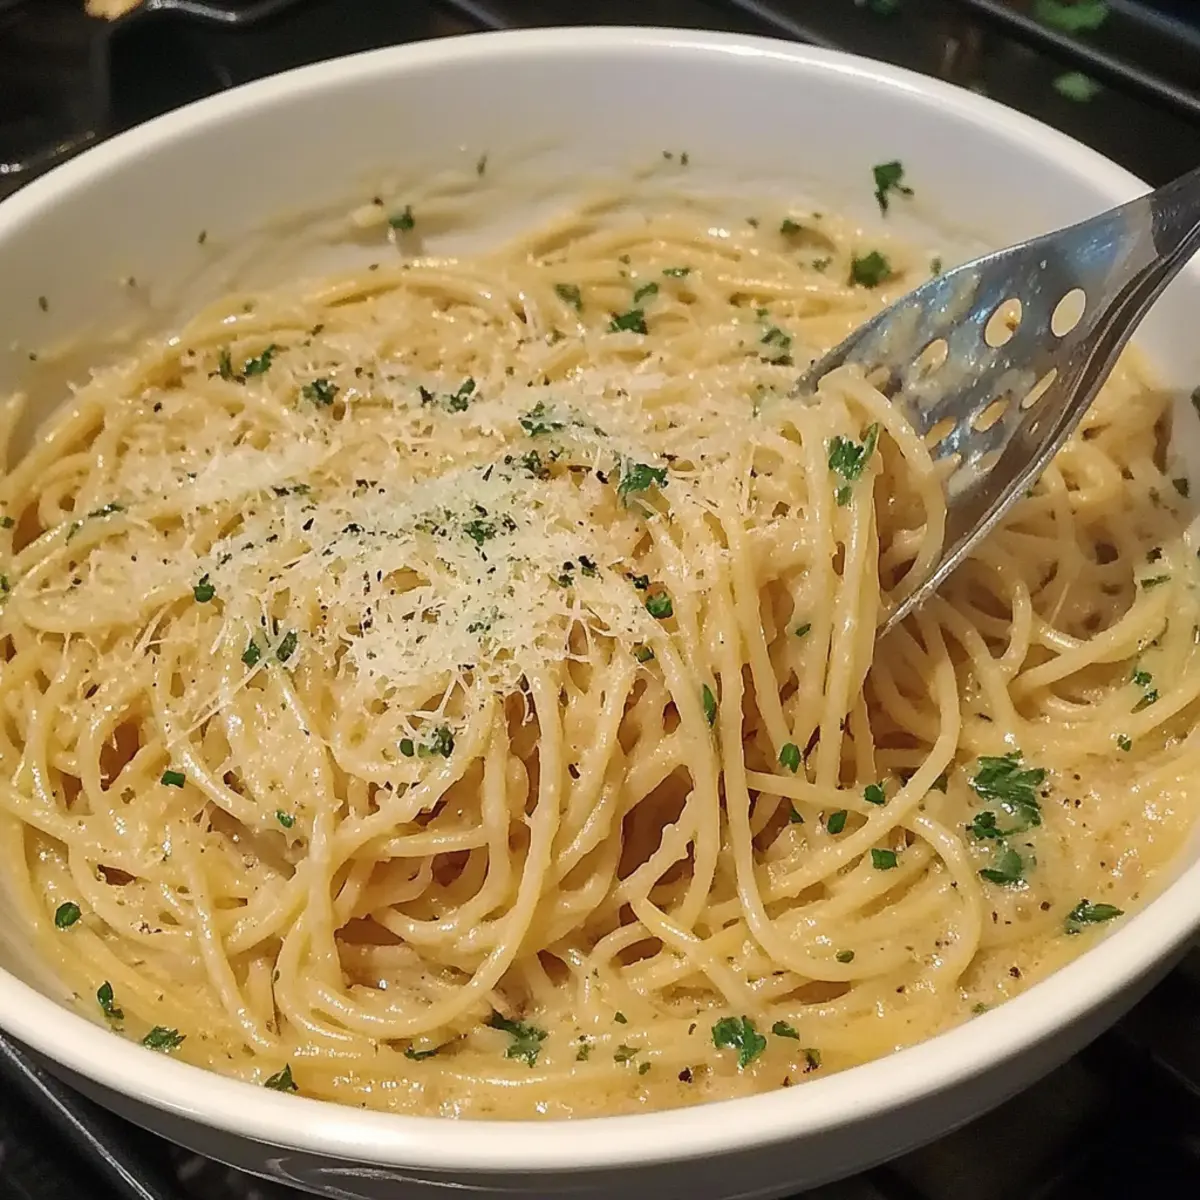
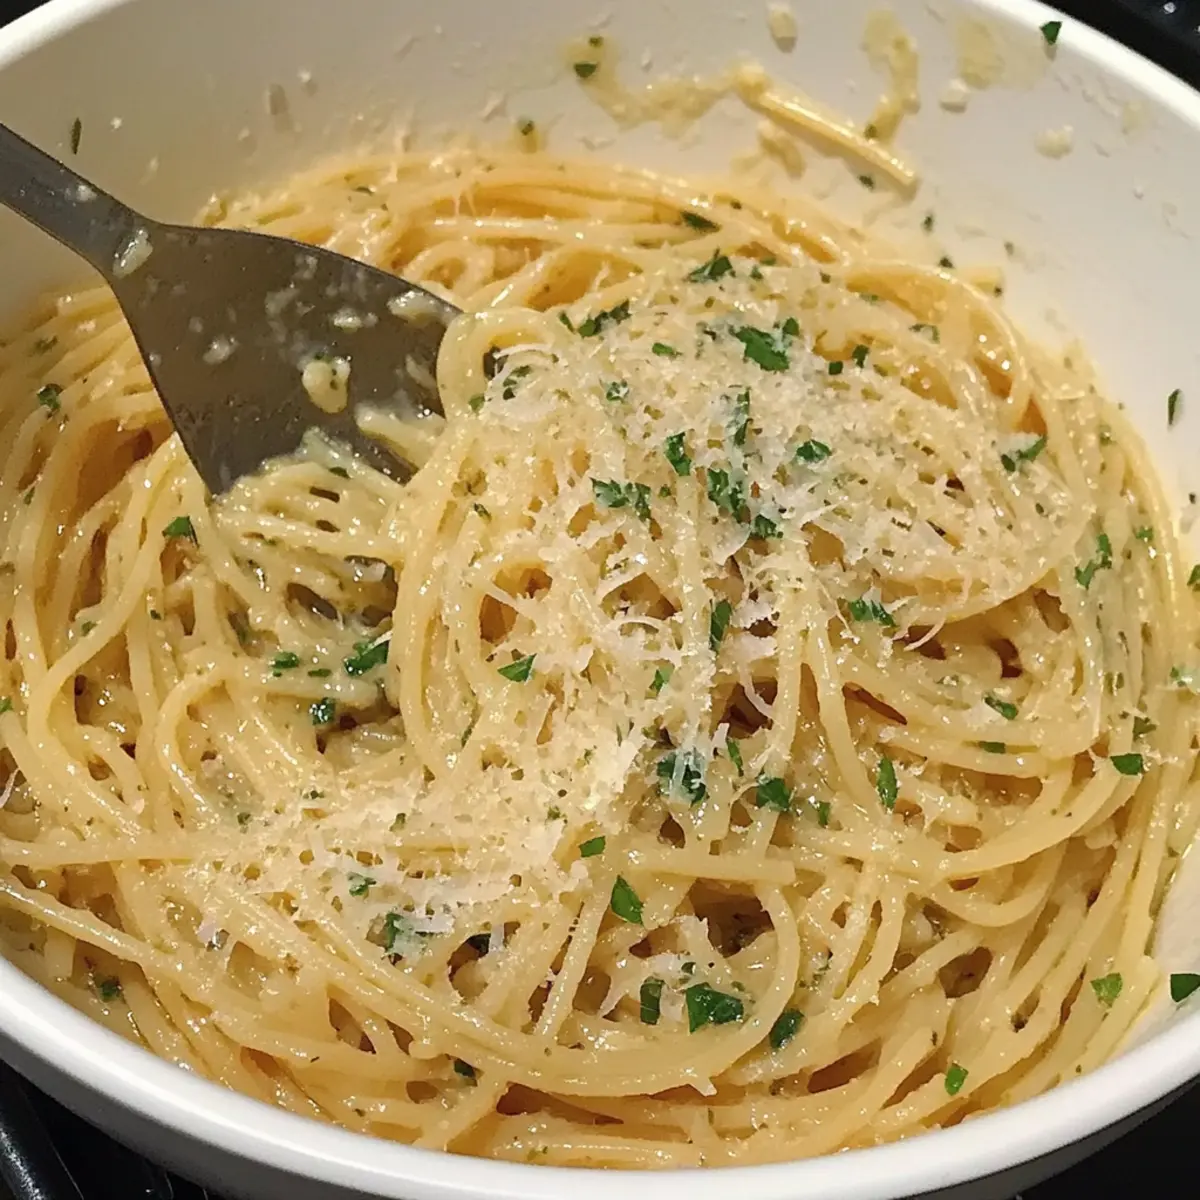
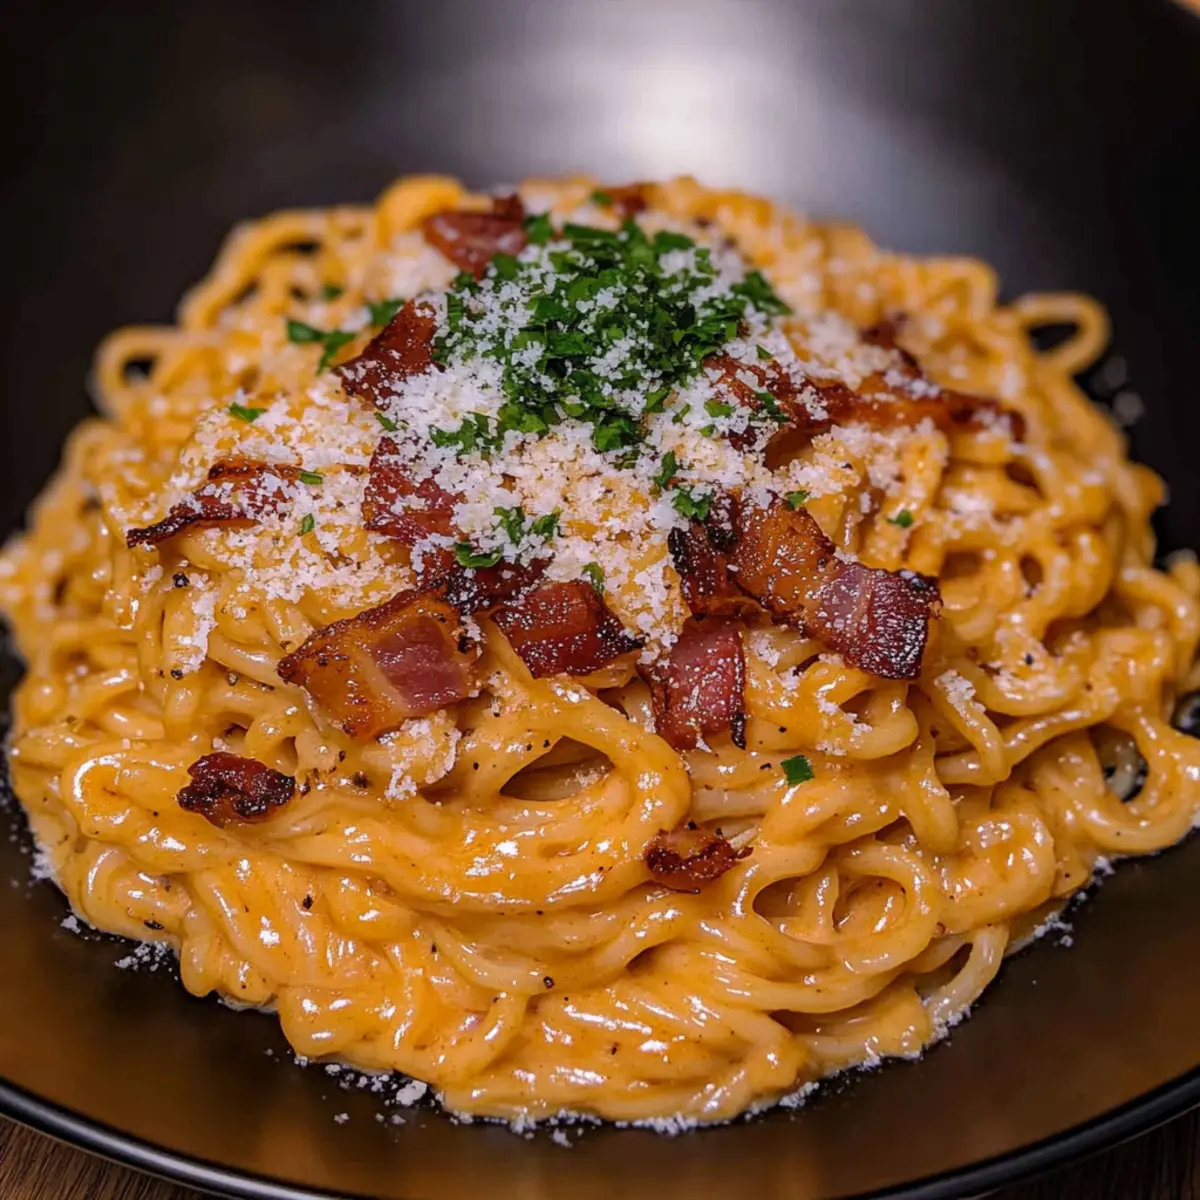
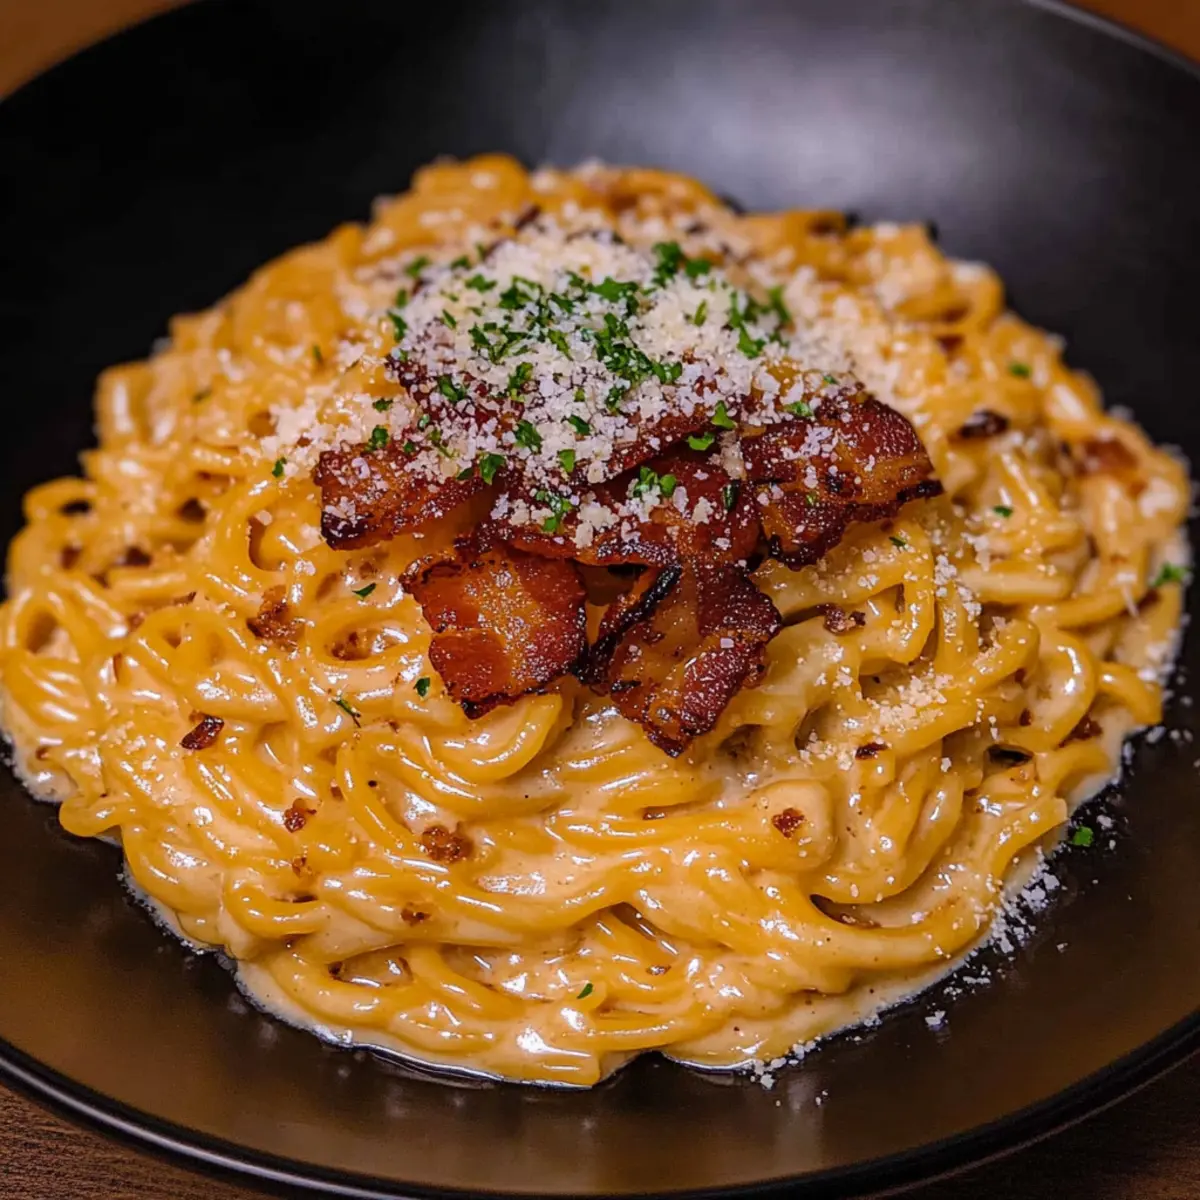
Finally, off the heat, stir in a pat of butter for extra richness as you season with salt and pepper to taste. Garnish your Sticky Honey Garlic Sausage Pasta Skillet with freshly chopped parsley and a sprinkle of Parmesan cheese if desired. Serve immediately while hot and enjoy the delightful flavors!

Expert Tips for Sticky Honey Garlic Sausage Pasta Skillet

  • Perfect Pasta: Make sure to cook your pasta al dente, as it will absorb some sauce while resting, keeping it flavorful without becoming mushy.
  • Sauté Right: Don’t overcrowd the skillet while browning the sausage to achieve that lovely golden crust and rich flavor; cook in batches if needed.
  • Garlic Caution: Watch the garlic closely—sauté it only until fragrant, around 30 seconds, to avoid bitterness in your Sticky Honey Garlic Sausage Pasta Skillet.
  • Consistency Check: If your sauce is too thick, gradually add the reserved pasta water to adjust the creaminess—start with just a splash at a time.
  • Season Wisely: Since flavors vary between sausage brands and soy sauce, taste your dish before serving and adjust with salt or pepper as needed.

Sticky Honey Garlic Sausage Pasta Skillet Variations

Feel free to get creative and make this dish your own with these flavorful twists!

  • Gluten-Free: Swap regular pasta with gluten-free pasta and use tamari instead of soy sauce for a similar taste.
  • Go Spicy: Add extra red pepper flakes or a dash of Sriracha for a delightful kick of heat that tantalizes the taste buds.
  • Add Veggies: Toss in bell peppers, zucchini, or broccoli to enhance the nutritional value and add vibrant colors to your dish.
  • Swap Proteins: Use chicken or shrimp for a lighter option; simply adjust the cooking time to ensure they’re cooked through.

Mixing and matching these variations can lead to a personalized version that you and your family will love! For a different flavor profile, you might also enjoy the hearty goodness of Cauliflower Pasta Ready or the rich taste of Honey Garlic Chicken Thighs. Don't hesitate to experiment to discover your favorite combination!

Make Ahead Options

These Sticky Honey Garlic Sausage Pasta Skillets are ideal for meal prep, helping you save precious time during busy weeknights! You can prep the sausage and garlic mixture up to 24 hours in advance; simply store them in an airtight container in the refrigerator. Just sauté the garlic, combine with the honey, soy sauce, and vinegar, then mix in the cooked sausage. The pasta can also be cooked and refrigerated, ensuring all you need to do is toss it in the skillet with the sauce when you’re ready to serve. For a fresh finish, stir in the butter and garnish just before enjoying, ensuring every bite is as delicious as the first!

How to Store and Freeze Sticky Honey Garlic Sausage Pasta Skillet

  • Room Temperature: It's best to avoid leaving this dish out; consume within 2 hours if not refrigerated, as it contains perishable ingredients.
  • Fridge: Store leftovers in an airtight container in the refrigerator for up to 3 days; to maintain moisture, add a splash of broth or water when reheating.
  • Freezer: If you need longer storage, freeze the pasta skillet in a freezer-safe container for up to 2 months. Thaw in the fridge overnight before reheating.
  • Reheating: Gently reheat in a skillet over low heat, adding a touch of liquid to restore its sticky sauce consistency, or microwave in quick intervals.

What to Serve with Sticky Honey Garlic Sausage Pasta Skillet

Looking to create a delightful meal around this irresistible skillet dish? Here are some perfect pairings to enhance your dining experience.

  • Garlic Bread: The warm, toasted slices are perfect for mopping up that sticky sauce, adding a delightful crunch.
  • Crisp Side Salad: A fresh salad with lemon vinaigrette provides a refreshing contrast, balancing the dish's richness beautifully.

Imagine munching on crisp greens while savoring each bite of pasta, the contrast of textures elevating your meal.

  • Roasted Vegetables: Seasonal veggies like zucchini or bell peppers add color, nutrients, and a bit of caramelized sweetness, pairing wonderfully with the dish's flavor profile.
  • Cheesy Garlic Knots: Soft, fluffy knots drizzled with garlic butter serve as an inviting sidekick to the pasta, ensuring no sauce goes to waste.

The aroma of garlic and cheese wafting through your kitchen makes for an irresistible combination.

  • White Wine: A chilled glass of Sauvignon Blanc or Pinot Grigio beautifully complements the sweet and savory notes, enhancing your overall dining experience.
  • Chocolate Mousse: For dessert, a light, airy chocolate mousse offers a sweet finish and contrasts nicely with the savory entrée, leaving you and your guests satisfied.

Sticky Honey Garlic Sausage Pasta Skillet Recipe FAQs

What is the best type of pasta to use for this dish?
Absolutely! You can use any pasta you prefer—spaghetti, penne, or even gluten-free varieties work wonderfully. Just remember to adjust the cooking time according to the package instructions to get that perfect al dente texture, which will hold up well in the sauce.

How long can leftovers be stored in the refrigerator?
Leftovers can be stored in an airtight container in the refrigerator for up to 3 days. To keep the pasta moist, I recommend adding a splash of chicken broth or water when reheating, which helps restore that delicious sticky sauce.

Can I freeze the Sticky Honey Garlic Sausage Pasta Skillet?
Certainly! To freeze this dish, let it cool completely, then transfer it into a freezer-safe container. It can be frozen for up to 2 months. When you're ready to enjoy it again, thaw overnight in the refrigerator, and gently reheat on the stovetop, adding a bit of liquid to achieve your desired consistency.

What should I do if my sauce turns out too thick?
Not a problem! If you find your sauce is too thick, simply add the reserved pasta water a little at a time until it reaches your desired creaminess. Just toss it back on the heat, stir well, and now you’re back to that luscious, sticky consistency.

Can I make this dish allergy-friendly?
Very! To make it gluten-free, choose gluten-free pasta and swap soy sauce with tamari, which is gluten-free. If you're concerned about allergies, double-check labels on all packaged ingredients and feel free to customize the proteins as well—like swapping sausage for turkey or tofu!

Sticky Honey Garlic Sausage Pasta Skillet

Sticky Honey Garlic Sausage Pasta Skillet That's Super Quick

This Sticky Honey Garlic Sausage Pasta Skillet is a quick and easy dish blending honey, garlic, and sausage for a comforting meal.
Print Recipe Pin Recipe
Prep Time 10 minutes mins
Cook Time 20 minutes mins
Total Time 30 minutes mins
Servings: 4 servings
Course: Dinner
Cuisine: Italian
Calories: 500
Ingredients Equipment Method Nutrition Notes

Ingredients
  

For the Pasta
  • 12 ounces Pasta Adjust type to preference
For the Skillet
  • 2 tablespoons Olive Oil For sautéing
  • 1 pound Sausage Italian, smoked, or chicken
  • 4 cloves Garlic Minced
For the Sauce
  • 1/2 cup Honey Creates sticky sauce
  • 1/4 cup Soy Sauce Swap with tamari for gluten-free
  • 2 tablespoons Apple Cider Vinegar
  • 1 cup Chicken Broth Use veggie broth for vegetarian
  • 1 teaspoon Red Pepper Flakes Optional
  • 2 tablespoons Butter Optional
For Garnishing
  • 2 tablespoons Fresh Parsley Chopped
  • 1/4 cup Parmesan Cheese Optional

Equipment

  • Large pot
  • Large skillet

Method
 

Step-by-Step Instructions
  1. Bring a large pot of salted water to a rolling boil, add pasta, and cook until al dente (8-10 minutes). Reserve 1/2 cup pasta water, drain, and set aside.
  2. In a large skillet, heat olive oil over medium-high heat, add sliced sausage, cook for 5-7 minutes until browned, then remove from pan.
  3. Add minced garlic to the skillet, sauté for about 30 seconds until fragrant but not burned.
  4. Pour in honey, soy sauce, and apple cider vinegar, stir to combine smoothly.
  5. Add chicken broth, bring to a gentle simmer for 2-3 minutes, optionally add red pepper flakes.
  6. Return browned sausage to skillet, simmer for an additional 3-4 minutes.
  7. Add drained pasta, toss to coat, and add reserved pasta water if needed.
  8. Stir in butter off heat, season with salt and pepper, garnish with parsley and Parmesan, and serve warm.

Nutrition

Serving: 1servingCalories: 500kcalCarbohydrates: 55gProtein: 20gFat: 20gSaturated Fat: 5gPolyunsaturated Fat: 0.5gMonounsaturated Fat: 10gCholesterol: 60mgSodium: 800mgPotassium: 500mgFiber: 3gSugar: 10gVitamin A: 10IUVitamin C: 2mgCalcium: 6mgIron: 15mg

Notes

Customize by adding favorite proteins or veggies. Store leftovers in the fridge for up to 3 days.

Tried this recipe?

Let us know how it was!

Mexican Green Spaghetti: A Creamy Twist for Dinner Delight

February 10, 2026 by Grace Snow Leave a Comment

On a recent sunny afternoon, the familiar scent of roasted peppers wafted through my kitchen, transporting me back to vibrant markets in Mexico. This Creamy Mexican Green Spaghetti, also known as Espagueti Verde, brings that essence right to your dining table. With its stunning green hue and a rich, velvety sauce crafted from roasted poblano peppers, garlic, and fresh cilantro, this dish will leave everyone craving more. Not only is it a quick and easy recipe, taking just over 30 minutes to prepare, but it’s also packed with nutrient-rich spinach, making it a smart choice for health-conscious food lovers. Whether you're hosting a dinner party or preparing a comforting meal at home, this recipe is sure to impress. What delightful twist will you add to your plate?

Why is Mexican Green Spaghetti a Must-Try?

Vibrant Colors: The stunning green of this dish comes from the combination of roasted poblanos and fresh spinach, making it visually appealing and perfect for impressing dinner guests.

Quick Preparation: In just 30 minutes, you can create a delicious gourmet meal without the hassle. It's perfect for busy weeknights yet special enough for gatherings.

Nutrient-Packed: With ingredients like spinach and poblano peppers, this recipe isn't just tasty; it’s also packed with vitamins and minerals.

Versatile Recipe: Whether you want to keep it vegetarian or make it vegan by substituting cream cheese with soaked cashews, this dish adapts easily to dietary preferences.

Flavor Explosion: Each bite offers a rich and creamy taste with a kick from jalapeños, which can be adjusted based on your spice level.

Crowd-Pleaser: Serve it as a main course with sides like Mexican Street Corn Salad, and watch as it becomes a favorite at your dining table!

Mexican Green Spaghetti Ingredients

• Get ready to whip up a delightful dish!

For the Sauce

  • Poblano Peppers – Provide the green color and rich flavor. Substitution: Anaheim peppers for a similar taste.
  • Olive Oil – For sautéing, adds flavor.
  • Onion – Adds sweetness and depth to the sauce. Note: Use yellow or white onion.
  • Jalapeño or Serrano Pepper – Adds a mild heat and flavor. Substitution: Omit for a milder sauce.
  • Garlic Cloves – Essential for aroma and flavor.
  • Spinach Leaves – Nutrient boost and adds a vibrant green color.
  • Cilantro – Freshness and flavor enhancement.
  • Sour Cream or Crema Mexicana – Creaminess and tanginess. Substitution: Non-dairy alternatives for a vegan version.
  • Chicken or Vegetable Bouillon – Enhances umami flavor. Substitution: Nutritional yeast for a vegan option.
  • Milk or Half and Half – Adjusts sauce consistency. Substitution: Oat or almond milk for a dairy-free version.
  • Cream Cheese – Contributes to the sauce's creaminess. Substitution: Dairy-free cream cheese or soaked cashews for vegan.

For the Pasta

  • Dry Spaghetti – The base of the dish, providing structure. Substitution: Gluten-free pasta for a gluten-free option.

Seasoning

  • Salt and Black Pepper – Enhancing overall flavor.

Garnish (optional)

  • Chopped Cilantro – For added freshness.
  • Crumbled Cotija Cheese or Queso Fresco – For an extra creamy touch.
  • Pepitas – For additional texture and flavor.

This Mexican Green Spaghetti is sure to be a hit, offering a delightful mix of tastes and colors that will brighten up your dinner table!

Step‑by‑Step Instructions for Mexican Green Spaghetti

Step 1: Cook Pasta
Begin by bringing a large pot of salted water to a rolling boil. Add the dry spaghetti and cook according to package instructions until al dente, typically around 8-10 minutes. Reserve 1 cup of the starchy pasta water before draining the noodles in a colander, ensuring they don’t stick together while you prepare the sauce.

Step 2: Prepare Sauce
In a large skillet, heat 2 tablespoons of olive oil over medium heat. Once the oil shimmers, add the chopped onion and diced jalapeño (if using) and sauté for about 3 minutes, or until the onion becomes translucent. This fragrant foundation will set the stage for your creamy Mexican Green Spaghetti’s sauce.

Step 3: Add Flavor
Next, stir in minced garlic and fresh spinach leaves. Continue to cook for an additional 2 minutes, allowing the spinach to wilt and shrink down. The vibrant green of the spinach will deepen your sauce's color and flavor, enriching the overall essence of your delicious Mexican Green Spaghetti.

Step 4: Blend Sauce
Transfer the sautéed mixture into a blender, adding the roasted poblano peppers, fresh cilantro, sour cream, bouillon, and 2/3 cup of milk. Blend on high until the sauce achieves a smooth and creamy consistency. This rich mixture will form the luscious coating for your pasta, bringing a burst of flavor to your dish.

Step 5: Combine
Pour the blended sauce back into the skillet and heat over low heat, stirring occasionally. Gradually add cream cheese to the warm sauce, mixing until melted and fully integrated. This step creates the velvety texture that will envelop the spaghetti, ensuring each bite of your Mexican Green Spaghetti is delightfully creamy.

Step 6: Final Mix
Introduce the drained spaghetti into the skillet with the sauce, tossing gently to combine. Add reserved pasta water one tablespoon at a time until reaching your desired creaminess. The pasta should be evenly coated with the vibrant green sauce, making it visually alluring as well as delicious.

Step 7: Serve
To serve, dish out the creamy Mexican Green Spaghetti onto plates. Garnish generously with chopped cilantro, crumbled cotija cheese, or pepitas for added texture and flavor. This colorful presentation is sure to impress family and friends alike, making your meal a true feast for the eyes and the taste buds!

How to Store and Freeze Mexican Green Spaghetti

Fridge: Store leftovers in an airtight container for up to 3-4 days. This helps maintain freshness while keeping the creamy sauce intact.

Freezer: Freezing is not recommended due to potential texture changes in the sauce. If necessary, freeze the sauce separately for up to 2 months and thaw before use.

Reheating: Gently reheat the Mexican Green Spaghetti in a skillet over low heat, adding a splash of broth or milk to restore creaminess. Stir frequently to avoid sticking.

Make-Ahead: Prepare the sauce 1-2 days in advance and refrigerate in an airtight container. Simply boil fresh spaghetti to serve it with the pre-made sauce!

Make Ahead Options

These Mexican Green Spaghetti are perfect for meal prep enthusiasts! You can prepare the sauce (without cream cheese) up to 3 days in advance by storing it in an airtight container in the refrigerator. Simply blend the ingredients as directed, then refrigerate. To maintain quality and prevent browning, ensure it's well-sealed. When you're ready to serve, heat the sauce gently over low heat and stir in the cream cheese until melted and creamy. Cook the spaghetti fresh, toss it with the reheated sauce, and you’ll have a delicious meal ready in minutes, making busy weeknights a breeze!

Mexican Green Spaghetti Variations

Feel free to personalize and elevate your Mexican Green Spaghetti with these tasty twists and substitutions!

  • Vegetarian Update: Use dairy-free cream cheese and sour cream for a vegan-friendly option that doesn’t skimp on creaminess. Your pasta will still be rich and delicious!

  • Gluten-Free Swap: Opt for gluten-free pasta instead of traditional spaghetti to cater to gluten-sensitive friends or family, ensuring everyone can enjoy this delightful dish.

  • Extra Veggies: Toss in roasted zucchini, bell peppers, or snap peas for added texture and nutrition. Not only will they amp up the flavor, but they also add vibrant colors to your plate!

  • Herb Boost: Experiment with fresh herbs like parsley or basil for a different aromatic profile. This small change can infuse your dish with a bright, fresh taste.

  • Spice It Up: If you're feeling adventurous, add a pinch of cayenne pepper or a splash of hot sauce for bubbling heat that complements the creamy salsa verde!

  • Creamy Twist: Try adding a dollop of goat cheese or ricotta on top for an extra indulgent finish. The tangy creaminess will elevate this dish to new heights!

  • Zesty Flavor: Incorporate lime zest into your sauce for a refreshing citrus kick that balances the richness beautifully. Your taste buds will thank you!

Looking to add even more joy to your meal? Pair this creamy pasta with a vibrant Mexican Street Corn Salad or follow it with a slice of Mexican Wedding Cookies for the ultimate culinary experience!

Expert Tips for Mexican Green Spaghetti

  • Perfect Roasting: To enhance flavor, roast poblano peppers until the skins are charred. This adds a smoky depth to your sauce.

  • Pasta Cooking: Ensure your spaghetti is al dente; overcooking can lead to mushy noodles, which won't hold up against the creamy sauce.

  • Creamy Consistency: If your sauce is too thick, add reserved pasta water gradually to achieve the desired creaminess without diluting flavor.

  • Spice Control: Adjust the amount of jalapeño or omit it altogether if you prefer a milder sauce for your Mexican Green Spaghetti.

  • Fresh Ingredients: Utilize fresh spinach and herbs for the most vibrant flavor and color; wilted or old greens can dull the dish’s appeal.

  • Storage Savvy: Store any leftovers in an airtight container in the fridge for up to 3-4 days. Reheat gently with a splash of milk or broth for optimal texture.

What to Serve with Mexican Green Spaghetti

Create a delightful dining experience that complements the vibrant flavors and creaminess of this pasta dish.

  • Mexican Street Corn Salad: This sweet and crunchy salad adds a fresh taste and vibrant color, perfectly balancing the creamy sauce’s richness. Its tangy lime dressing enhances the overall meal experience, making it a favorite side.

  • Roasted Brussels Sprouts: The crispy edges of roasted Brussels sprouts provide a satisfying contrast to the smooth texture of the spaghetti. Tossed with olive oil and garlic, they bring earthy flavors to the table.

  • Simple Garlic Bread: A classic pairing, warm garlic bread is perfect for soaking up the luscious sauce. Its crunch offers a delightful textural addition that perfectly complements the creamy pasta.

  • Zesty Avocado Salad: Slice up a refreshing avocado salad with tomatoes, lime, and onions. This vibrant dish adds a creamy, rich element that pairs beautifully with the spaghetti’s flavors.

  • Grilled Chicken or Tofu: Serve grilled chicken or marinated tofu as a protein option alongside the pasta. Both add a heartiness that rounds out the meal while keeping it flavorful.

  • Fresh Cilantro Lime Rice: A light and fragrant rice dish, enhanced with lime juice and fresh cilantro, ties the meal together. Its citrus notes provide a refreshing balance to the creamy Mexican Green Spaghetti.

  • Chilled White Sangria: Pair your dinner with a chilled glass of white sangria. The fruity notes and refreshing quality of this drink offer a delightful contrast to the warm, creamy dish, making it an ideal beverage choice.

Mexican Green Spaghetti Recipe FAQs

What type of poblano peppers should I use?
For the best flavor and green color in your Mexican Green Spaghetti, opt for fresh, firm poblano peppers. Look for those with smooth skins and no dark spots. If they're not available, Anaheim peppers are a great substitute as they provide a similar taste profile.

How should I store leftovers?
After enjoying your Mexican Green Spaghetti, store any leftovers in an airtight container in the fridge. They can stay fresh for up to 3-4 days. If the sauce becomes too thick when reheating, simply add a splash of milk or broth to restore its creaminess.

Can I freeze Mexican Green Spaghetti?
Freezing the entire dish is not recommended due to potential texture changes in the sauce. However, if you must freeze, you can freeze the sauce separately. Do this by allowing it to cool completely and then placing it in an airtight container for up to 2 months. Thaw in the refrigerator before reheating.

How can I make this dish vegan?
Absolutely! To adapt your Mexican Green Spaghetti for a vegan diet, replace the cream cheese and sour cream with soaked cashews blended to a creamy consistency or use non-dairy alternatives. Additionally, replace any non-vegan bouillon with nutritional yeast to maintain a rich umami flavor.

What if my sauce is too thick?
If your sauce becomes too thick while preparing your Mexican Green Spaghetti, simply add reserved pasta water gradually until you reach your desired consistency. This not only thins the sauce but also helps it cling to the pasta beautifully.

How do I select ripe ingredients for this recipe?
When choosing your ingredients, select ripe poblano peppers that feel heavy for their size, and use fresh spinach with vibrant green leaves, avoiding any that appear wilted or discolored. For the best flavor, onions should be firm and free from blemishes, and garlic should be unblemished with a solid texture.

Mexican Green Spaghetti

Mexican Green Spaghetti: A Creamy Twist for Dinner Delight

Discover the vibrant flavors of Mexican Green Spaghetti, a creamy, nutrient-packed dish that's quick to prepare and perfect for dinner.
Print Recipe Pin Recipe
Prep Time 10 minutes mins
Cook Time 20 minutes mins
Total Time 30 minutes mins
Servings: 4 servings
Course: Dinner
Cuisine: Mexican
Calories: 350
Ingredients Equipment Method Nutrition Notes

Ingredients
  

For the Sauce
  • 2 pieces Poblano Peppers Substitution: Anaheim peppers for a similar taste.
  • 2 tablespoons Olive Oil
  • 1 small Onion Use yellow or white onion.
  • 1 piece Jalapeño or Serrano Pepper Substitution: Omit for a milder sauce.
  • 2 cloves Garlic Cloves
  • 2 cups Spinach Leaves
  • 1 cup Cilantro
  • 1 cup Sour Cream or Crema Mexicana Substitution: Non-dairy alternatives for a vegan version.
  • 1 cube Chicken or Vegetable Bouillon Substitution: Nutritional yeast for a vegan option.
  • 2/3 cup Milk or Half and Half Substitution: Oat or almond milk for a dairy-free version.
  • 4 ounces Cream Cheese Substitution: Dairy-free cream cheese or soaked cashews for vegan.
For the Pasta
  • 12 ounces Dry Spaghetti Substitution: Gluten-free pasta for a gluten-free option.
Seasoning
  • to taste Salt
  • to taste Black Pepper
Garnish (optional)
  • 1/4 cup Chopped Cilantro For added freshness.
  • 1/2 cup Crumbled Cotija Cheese or Queso Fresco For an extra creamy touch.
  • 1/4 cup Pepitas For additional texture and flavor.

Equipment

  • Large pot
  • Large skillet
  • Blender
  • Colander

Method
 

Instructions
  1. Cook Pasta: Begin by bringing a large pot of salted water to a rolling boil. Add the dry spaghetti and cook according to package instructions until al dente, typically around 8-10 minutes. Reserve 1 cup of the starchy pasta water before draining the noodles in a colander.
  2. Prepare Sauce: In a large skillet, heat olive oil over medium heat, add chopped onion and diced jalapeño (if using) and sauté until translucent.
  3. Add Flavor: Stir in minced garlic and fresh spinach leaves. Cook for an additional 2 minutes, allowing the spinach to wilt.
  4. Blend Sauce: Transfer the sautéed mixture into a blender, adding roasted poblano peppers, fresh cilantro, sour cream, bouillon, and milk. Blend until smooth.
  5. Combine: Pour the blended sauce back into the skillet over low heat, mix in cream cheese until melted.
  6. Final Mix: Add the drained spaghetti into the skillet with the sauce, tossing gently to combine, adding reserved pasta water until reaching desired creaminess.
  7. Serve: Dish out the creamy Mexican Green Spaghetti onto plates. Garnish with chopped cilantro, crumbled cotija cheese, or pepitas.

Nutrition

Serving: 1servingCalories: 350kcalCarbohydrates: 45gProtein: 12gFat: 14gSaturated Fat: 6gPolyunsaturated Fat: 2gMonounsaturated Fat: 7gCholesterol: 30mgSodium: 600mgPotassium: 500mgFiber: 3gSugar: 2gVitamin A: 30IUVitamin C: 20mgCalcium: 10mgIron: 15mg

Notes

For the best flavor, use fresh spinach and herbs. Store leftovers in an airtight container for up to 3-4 days.

Tried this recipe?

Let us know how it was!

Savory Street Style Thai Drunken Noodles You'll Crave Daily

February 10, 2026 by Grace Snow Leave a Comment

The sizzling sound of garlic hitting hot oil, followed closely by the vibrant colors of fresh veggies and noodles, transports me straight to the bustling streets of Thailand. This is how I fell in love with Street Style Thai Drunken Noodles, a dish that brings the authentic taste of Thai cuisine right into my kitchen in just 30 minutes. What’s truly delightful about this recipe is its quick prep time and endless customization options; whether you prefer a fiery spicy kick or a hearty vegetarian twist, you can make it your own. As you plunge your fork into this one-pan wonder, the medley of flavors—from savory soy to the zest of lime—fills your senses with joy. Are you ready to whip up a dish that’s not only a culinary adventure but also perfect for those busy weeknights? Let’s dive in!

Why Are You Going to Love This?

Simplicity: This recipe is a breeze to follow, making it a perfect choice even for novice cooks. Flavor Explosion: The blend of soy sauce, fresh herbs, and a hint of lime brings authentic Thai street flavors to your plate. Customizable: Easily adapt the recipe to incorporate your favorite proteins or vegetables—feel free to experiment! Crowd-Pleaser: Perfect for family dinner or entertaining guests; everyone will be asking for seconds, just like with my popular Gochujang Sesame Noodles. Quick & Easy: Ready in just 30 minutes, this dish fits seamlessly into your busy schedule, making it your ultimate weeknight solution. One-Pan Wonder: Cleanup is a snap, allowing you to enjoy your meal without the fuss! Why not round out the meal with some crispy Thai spring rolls for extra flavor?

Street Style Thai Drunken Noodles Ingredients

For the Noodles
• Wide Rice Noodles – These are the backbone of the dish; you can also use egg noodles or gluten-free alternatives if you prefer.

For the Base
• Vegetable Oil – A neutral oil like canola or sunflower works perfectly for this vibrant dish.
• Garlic (3 cloves, minced) – Fresh garlic adds an aromatic punch; if you're in a pinch, garlic powder will do.

For the Vegetables
• Red Bell Pepper (1, sliced) – Sweet and colorful, you can swap this with other bell peppers or tasty snap peas.
• Green Beans (1 cup, trimmed and cut) – They bring crunch and nutrition; snow peas or broccoli can be great substitutes.
• Fresh Basil Leaves (1 cup) – Essential for the authentic flavor; try Thai basil for the real deal, but regular basil works too.

For the Heat
• Thai Bird Chilies (2-3, sliced) – Adjust the heat to your liking and consider jalapeños as a milder alternative if preferred.

For the Sauce
• Soy Sauce (2 tablespoons) – This brings umami goodness; use gluten-free soy sauce for a gluten-free dish.
• Oyster Sauce (1 tablespoon) – It adds depth; for a vegetarian version, hoisin sauce makes a great stand-in.
• Fish Sauce (1 tablespoon) – A key ingredient for that authentic taste; substitute with soy sauce for a vegan option.
• Sugar (1 tablespoon) – This balances flavors beautifully; feel free to use brown sugar or coconut sugar instead.
• Lime (1, juiced) – Fresh lime juice brightens the dish; skip bottled juice if possible for the best flavor.

Optional Protein
• Chicken, Shrimp, or Tofu – Adding protein can make this dish heartier; marinate for extra flavor before cooking.

With these Street Style Thai Drunken Noodles ingredients on hand, you're not just making dinner; you're crafting a flavorful adventure that's sure to delight!

Step‑by‑Step Instructions for Street Style Thai Drunken Noodles

Step 1: Prepare Noodles
Start by cooking the wide rice noodles according to the package instructions, usually boiling them for about 4–6 minutes until al dente. Drain them well and rinse under cold water to stop the cooking process. Set the noodles aside, ensuring they remain loose and don’t stick together as you prepare the other ingredients for your Street Style Thai Drunken Noodles.

Step 2: Heat Oil
In a large skillet or wok, heat 2 tablespoons of vegetable oil over medium-high heat. Allow the oil to get hot enough that it shimmers slightly, which usually takes about 1–2 minutes. This high temperature will help achieve that satisfying sizzle when you add the garlic and vegetables, creating the aromatic base for your Street Style Thai Drunken Noodles.

Step 3: Sauté Garlic
Add 3 cloves of minced garlic to the hot oil, stirring quickly for about 30 seconds until fragrant but not browned. Be careful not to let the garlic burn, as this can create a bitter taste. The aroma should fill your kitchen, setting the stage for the fresh vegetables that will follow in your vibrant Thai dish.

Step 4: Add Vegetables
Incorporate 1 sliced red bell pepper and 1 cup of trimmed green beans into the skillet, stirring frequently for about 2–3 minutes until the vegetables are tender yet still crisp. They should retain their bright colors, adding a lovely visual element to your Street Style Thai Drunken Noodles. This quick stir-fry brings out their natural sweetness and maintains their crunch.

Step 5: Incorporate Protein
If you’re adding any optional protein like chicken, shrimp, or tofu, toss it into the skillet now. Cook for 3–5 minutes, stirring frequently until the protein is thoroughly cooked and no longer pink. This step not only enhances the dish's heartiness but also allows flavors from the veggies and garlic to meld beautifully with your protein.

Step 6: Mix Sauces
In a small bowl, whisk together 2 tablespoons of soy sauce, 1 tablespoon of oyster sauce, 1 tablespoon of fish sauce, and 1 tablespoon of sugar until well combined. This sauce mixture will bring depth and a perfect balance of flavors to your Street Style Thai Drunken Noodles. Once combined, pour it over the sautéed mixture in the skillet.

Step 7: Combine Noodles and Sauce
Add the drained noodles back into the skillet, gently tossing them with the sauce and the mix of vegetables and protein. Stir well for about 2 minutes, ensuring every noodle is coated with the rich, savory sauce. The noodles should begin to warm through and take on that beautiful, glossy finish characteristic of authentic Thai street food.

Step 8: Add Basil and Chilies
Stir in 1 cup of fresh basil leaves and 2–3 sliced Thai bird chilies, cooking for an additional minute. The basil will wilt and release its aromatic oils while the chilies infuse their heat into the dish. This final step elevates your Street Style Thai Drunken Noodles, introducing that signature fresh herb flavor that pairs perfectly with the noodles.

Step 9: Season with Lime
Remove the skillet from heat, and squeeze the juice of 1 lime over the mixture, tossing everything together to blend the flavors. The acidity of the lime brightens the dish, enhancing the richness of the sauces and leaving you with a mouthwatering medley of flavors in your Thai noodles.

Step 10: Serve Hot
Garnish your Street Style Thai Drunken Noodles with extra basil leaves if desired and serve immediately. Enjoy this colorful, fragrant dish hot from the pan, relishing every bite as the flavors transport you to the vibrant streets of Thailand.

What to Serve with Street Style Thai Drunken Noodles

Pairing your flavorful noodles with the right sides can elevate your meal to new heights. Delight your taste buds by embracing a variety of textures and flavors.

  • Crispy Thai Spring Rolls: These savory bites are the perfect crunchy contrast to the softness of the noodles, adding a delightful texture to your meal. Stuffed with veggies and served with sweet chili sauce, they offer a satisfyingly crispy start to your dinner.

  • Cucumber Salad: Refreshing and light, a simple cucumber salad with a tangy lime dressing aids in balancing the spice of your drunken noodles. The coolness of the cucumbers will cleanse your palate between bites, enhancing your dining experience.

  • Tom Yum Soup: This classic Thai soup brings a warm and zesty contrast with its fragrant herbs and spices, complementing the bold flavors of your noodles. Each spoonful is a delicious journey that pairs beautifully with the rich, savory notes of the drunken noodles.

  • Stir-Fried Asian Veggies: A medley of seasonal vegetables such as bok choy, snap peas, and carrots adds additional crunch and nutrients to your meal. Stir-frying them in sesame oil with garlic will amplify the yum factor on your plate!

  • Thai Iced Tea: A sweet and creamy beverage, Thai iced tea is a refreshing pairing that cools the palate after every spicy bite. Its rich, tea flavors with a hint of vanilla harmonize perfectly with the dish's vibrant spices.

  • Mango Sticky Rice: For dessert, indulge in the sweetness of mango sticky rice. This classic Thai dessert combines the lusciousness of coconut milk with sticky rice, creating a delightful ending to your meal. Its sweetness perfectly contrasts the savory nature of the noodles, leaving you satisfied.

How to Store and Freeze Street Style Thai Drunken Noodles

Fridge: Store any leftovers in an airtight container in the refrigerator for up to 3 days. This keeps the flavors fresh while preventing spoilage.

Freezer: For longer storage, freeze the noodles in a freezer-safe container for up to 2 months. Make sure to cool them before freezing to maintain their texture.

Reheating: To reheat, thaw overnight in the fridge and warm in a skillet over medium heat with a splash of water or sauce to revive moisture and flavor.

Portioning: Consider dividing the leftovers into single servings before freezing. This makes it easy to enjoy your Street Style Thai Drunken Noodles later!

Make Ahead Options

These Street Style Thai Drunken Noodles are perfect for meal prep enthusiasts! You can cook the wide rice noodles and prepare the vegetables up to 24 hours in advance. Simply store them separately in airtight containers in the refrigerator to maintain their freshness and prevent sticking. When you're ready to serve, heat a tablespoon of vegetable oil in a skillet, sauté the garlic, then add the prepped veggies and protein. Toss in your noodles, mix with the sauce, and finish with fresh basil and lime juice, ensuring the flavors are just as vibrant as if made fresh. With this prep, you’ll have a delicious meal ready in no time, making your busy weeknights a breeze!

Expert Tips for Street Style Thai Drunken Noodles

  • Fresh Ingredients: Use the freshest garlic, vegetables, and basil for maximum flavor; wilted or overly soft ingredients can dull the taste of your dish.

  • Control the Heat: Adjust the number of Thai bird chilies to match your spice preference; for a milder version, consider using fewer chilies or substituting with bell peppers.

  • Marinate Proteins: Marinating chicken, shrimp, or tofu in soy sauce and lime juice before cooking can elevate the flavor of your Street Style Thai Drunken Noodles.

  • Don't Overcook Noodles: Ensure you cook the rice noodles just until al dente; overcooking will result in a mushy texture that detracts from the dish's appeal.

  • Mix Sauces Thoroughly: Whisk the sauce ingredients together until well combined; uneven sauce distribution can lead to bland areas in your noodles.

  • Garnish with Care: Add fresh basil just before serving to maintain its vibrant flavor and aroma, enhancing the overall presentation of your Street Style Thai Drunken Noodles.

Street Style Thai Drunken Noodles Variations

Feel free to put your unique spin on this dish by exploring these delightful variations!

  • Seafood Twist: Substitute traditional proteins with seafood like shrimp or scallops for a delicious ocean-inspired dish.

  • Vegetarian Delight: Toss in a colorful medley of carrots, zucchini, and broccoli, turning this dish into a wholesome vegetarian feast that’s just as satisfying.

  • Spicy Drunken Noodles: For those who love heat, mix in a tablespoon of chili paste or add extra sliced Thai bird chilies for fiery flavor.

  • Coconut Cream Sauce: Replace fish sauce with coconut aminos and stir in coconut milk for a creamy, rich variation that brings tropical vibes to dinner.

  • Gluten-Free Option: Use gluten-free rice noodles and tamari instead of soy sauce to create a dish that caters to gluten sensitivities without sacrificing flavor.

  • Noodle Swap: Instead of wide rice noodles, try using spaghetti or udon noodles for a different texture and chewiness that's equally delightful.

  • Savory Additions: Consider adding sliced mushrooms or baby corn for extra earthy flavors and a satisfying crunch throughout your dish.

  • Protein Boost: Introduce marinated chicken or crispy tofu, allowing the proteins to absorb the rich flavors of the sauce, making for a hearty meal that’s both filling and flavorful.

With these variations, you can keep your mealtime exciting! Try pairing your noodles with some delicious Chicken Teriyaki Noodles for even more culinary inspiration!

Street Style Thai Drunken Noodles Recipe FAQs

How do I choose the right wide rice noodles?
Absolutely! When selecting wide rice noodles, look for fresh ones if available; they have a delightful chewy texture. If using dried noodles, choose flat and wide options shaped like fettuccine. For gluten-free needs, stick with specialty brands that are predominantly made from rice flour.

What is the best way to store leftovers of Street Style Thai Drunken Noodles?
Very! After enjoying your meal, cool the leftovers completely and transfer them to an airtight container. They can be refrigerated for up to 3 days. Ensure to label the container with the date to keep track of freshness; trust me, your future self will thank you.

Can I freeze Street Style Thai Drunken Noodles, and how should I do it?
Absolutely! To freeze, allow the noodles to cool completely. Portion them into freezer-safe bags or containers, removing as much air as possible. They can be frozen for up to 2 months. When you're ready to enjoy them, thaw overnight in the refrigerator before reheating on the stove with a splash of water to restore moisture.

What should I do if my noodles become mushy?
Oh no! If your noodles turn mushy, it might mean they were overcooked initially. To prevent this, always boil them just until al dente. If they do become too soft, try tossing them in a hot pan briefly to regain some texture, but be mindful not to overdo it; they're delicate!

Are there any dietary considerations for Street Style Thai Drunken Noodles?
Definitely! This recipe can easily accommodate various dietary needs. For a gluten-free version, use gluten-free soy sauce and oyster sauce alternatives. Vegan options are simple too—just swap fish sauce with coconut aminos and omit the animal proteins. Always check for allergies when selecting sauces or additional ingredients.

Street Style Thai Drunken Noodles

Savory Street Style Thai Drunken Noodles You'll Crave Daily

A quick and customizable dish, Street Style Thai Drunken Noodles combines fresh veggies and noodles with bold flavors in just 30 minutes.
Print Recipe Pin Recipe
Prep Time 10 minutes mins
Cook Time 20 minutes mins
Total Time 30 minutes mins
Servings: 4 servings
Course: Dinner
Cuisine: Thai
Calories: 450
Ingredients Equipment Method Nutrition Notes

Ingredients
  

For the Noodles
  • 8 oz Wide Rice Noodles Can substitute with egg noodles or gluten-free alternatives
For the Base
  • 2 tablespoons Vegetable Oil Canola or sunflower oil works
  • 3 cloves Garlic Minced; garlic powder can be used in a pinch
For the Vegetables
  • 1 Red Bell Pepper Sliced; can substitute with other bell peppers or snap peas
  • 1 cup Green Beans Trimmed and cut; snow peas or broccoli can be alternatives
  • 1 cup Fresh Basil Leaves Thai basil is preferable, but regular works too
For the Heat
  • 2-3 Thai Bird Chilies Sliced; adjust for heat preference
For the Sauce
  • 2 tablespoons Soy Sauce Use gluten-free for a gluten-free dish
  • 1 tablespoon Oyster Sauce Hoisin sauce can be used for vegetarian version
  • 1 tablespoon Fish Sauce Substitute with soy sauce for vegan option
  • 1 tablespoon Sugar Brown or coconut sugar can be used
  • 1 Lime Juiced; fresh is best
Optional Protein
  • 1 cup Chicken, Shrimp, or Tofu Marinate for extra flavor if desired

Equipment

  • large skillet or wok

Method
 

Step-by-Step Instructions
  1. Start by cooking the wide rice noodles according to the package instructions, usually boiling them for about 4–6 minutes until al dente. Drain them well and rinse under cold water to stop the cooking process. Set the noodles aside.
  2. In a large skillet or wok, heat 2 tablespoons of vegetable oil over medium-high heat until it shimmers slightly, about 1–2 minutes.
  3. Add 3 cloves of minced garlic to the hot oil, stirring quickly for about 30 seconds until fragrant but not browned.
  4. Incorporate 1 sliced red bell pepper and 1 cup of trimmed green beans into the skillet, stirring for about 2–3 minutes until tender yet still crisp.
  5. If adding optional protein, toss it into the skillet now and cook for 3–5 minutes until thoroughly cooked.
  6. In a small bowl, whisk together 2 tablespoons of soy sauce, 1 tablespoon of oyster sauce, 1 tablespoon of fish sauce, and 1 tablespoon of sugar until well combined. Pour it over the sautéed mixture in the skillet.
  7. Add the drained noodles back into the skillet, gently tossing them with the sauce and the mix of vegetables and protein for about 2 minutes.
  8. Stir in 1 cup of fresh basil leaves and 2-3 sliced Thai bird chilies, cooking for an additional minute to blend flavors.
  9. Remove the skillet from heat, and squeeze the juice of 1 lime over the mixture, tossing to blend flavors.
  10. Garnish with extra basil leaves and serve immediately.

Nutrition

Serving: 1plateCalories: 450kcalCarbohydrates: 64gProtein: 20gFat: 15gSaturated Fat: 2gPolyunsaturated Fat: 5gMonounsaturated Fat: 8gCholesterol: 75mgSodium: 900mgPotassium: 600mgFiber: 2gSugar: 5gVitamin A: 25IUVitamin C: 35mgCalcium: 60mgIron: 3mg

Notes

Use the freshest ingredients for the best flavor and adjust the spice level according to your preference.

Tried this recipe?

Let us know how it was!

Creamy Garlic Butter Pasta in Just 20 Minutes for Dinner Bliss

February 10, 2026 by Grace Snow Leave a Comment

As I stood at the stove, a dance of scents captivated me: the pungent aroma of minced garlic sizzling in butter, weaving through my kitchen like a warm hug. If you’re looking for a comforting dish that doesn’t skimp on flavor, this Easy 20-Minute Garlic Butter Pasta is just the ticket. It’s perfect for anyone craving a quick, vegetarian meal that effortlessly elevates your dinner table. In just 20 minutes, you’ll relish pasta enveloped in creamy garlic bliss, topped with nutty Parmesan and a sprinkle of fresh herbs. Not only is it a triumph in simplicity, but it also invites variations—so feel free to add your favorite seasonal vegetables or swap in proteins to make it your own! Are you ready to take a bite of this delectable dish? Let’s dive into the recipe!

Why is Garlic Butter Pasta a Must-Try?

Simplicity at its finest: With just a handful of ingredients, you’ll whip up this delightful dish in no time. Creamy and Comforting: The rich garlic butter sauce will wrap around your pasta, delivering a luxurious experience. Versatile for all tastes: Feel free to customize with whatever veggies or proteins you have on hand—try adding spinach for a fresh twist or grilled shrimp for heartiness! Perfectly Quick: Ideal for busy weeknights, this recipe takes only 20 minutes from start to finish. Crowd-Pleaser: Whether you're cooking for family or friends, this dish is sure to impress, just like our Seafood Pasta Savory option. Get ready to enjoy a wonderfully satisfying plate of Garlic Butter Pasta that everyone will love!

Garlic Butter Pasta Ingredients

• Elevate your cooking with these essential ingredients.

For the Sauce

  • Unsalted Butter – Adds richness to the sauce; substitute with olive oil for a lighter option.
  • Onion – Provides a natural sweetness; shallots can be used for a more subtle flavor.
  • Garlic – Introduces bold and aromatic flavor; use roasted garlic for a roasted sweetness.
  • Salt – Enhances overall taste; adjust based on dietary needs and preference.
  • Black Pepper – Adds warmth and mild spice; substitute with white pepper for a gentler flavor.
  • Chili Flakes – Introduces a kick of heat; omit if you prefer a milder dish.
  • Oregano – Adds earthy herb notes; fresh oregano can replace dried for an even fresher taste.
  • Basil – Contributes a sweet, fresh flavor; opt for fresh basil to enhance the dish's profile.

For Serving

  • Freshly Grated Parmesan – Adds creaminess and a savory depth; omit for a dairy-free option or use nutritional yeast instead for flavor.
  • Pasta – Spaghetti, linguine, or fettuccine are all great choices; gluten-free pasta can also be used as a substitute.

Feel free to explore these amazing ingredients and take your Garlic Butter Pasta to the next level!

Step‑by‑Step Instructions for Garlic Butter Pasta

Step 1: Boil the Pasta
Begin by bringing a large pot of salted water to a rolling boil over high heat. Add your choice of spaghetti, linguine, or fettuccine, cooking according to the package instructions until al dente, about 8–10 minutes. Once cooked, reserve ¼ cup of the starchy pasta water before draining the pasta in a colander, ensuring you keep that flavorful liquid.

Step 2: Sauté the Aromatics
While the pasta cooks, heat a large skillet over medium heat and add unsalted butter. As the butter melts and begins to foam, add minced onion, stirring frequently until it becomes translucent and soft, about 3–4 minutes. Next, stir in minced garlic, cooking for an additional 1–2 minutes until fragrant, creating a rich aroma that will enhance your Garlic Butter Pasta.

Step 3: Add the Cheese
Once the garlic is sizzling and fragrant, sprinkle in freshly grated Parmesan cheese, stirring to allow the cheese to melt and meld into the butter sauce. This will create a creamy, rich base for your Garlic Butter Pasta. Keep stirring until the cheese has fully melted and incorporated, creating an inviting, glossy sauce.

Step 4: Toss in the Pasta
Add the drained pasta to the skillet along with the reserved pasta water. Use tongs or a pasta fork to gently toss everything together, ensuring each strand of pasta is coated in the luxurious garlic butter sauce. Continue to cook for about 2–3 minutes, allowing the flavors to meld and the sauce to thicken slightly.

Step 5: Final Touch and Serve
Adjust the seasoning of your Garlic Butter Pasta with salt, freshly cracked black pepper, and a pinch of chili flakes if desired. Once seasoned to your liking, remove from heat and garnish generously with more Parmesan and freshly chopped herbs like basil or parsley. Serve immediately for a warm, comforting meal that's sure to please.

What to Serve with Easy 20-Minute Garlic Butter Pasta

Elevate your meal experience with delightful accompaniments that enhance the rich, comforting flavors of this pasta dish.

  • Garlic Bread: Crispy on the outside and soft inside, it’s the perfect vessel for soaking up that delicious garlic butter sauce.
  • Caesar Salad: Crisp romaine with creamy dressing adds a refreshing contrast, balancing the rich pasta beautifully.
  • Roasted Asparagus: Tender asparagus with a pinch of salt and pepper brings a nutty crunch, complementing the creamy texture of the dish.
  • Cherry Tomato Salad: Bright, juicy tomatoes drizzled with olive oil provide a burst of freshness, enhancing the overall flavor of your meal.
  • Grilled Chicken: Tender, marinated chicken breast adds protein and balances the dish while bringing a smoky element to the plate.
  • Lemonade or Iced Tea: A cool, refreshing drink to cleanse your palate and beat the mild garlic flavor, enhancing the overall dining experience.
  • Tiramisu: End with a light and creamy dessert that mirrors the indulgence of your pasta while providing a sweet conclusion to your meal.

These pairings not only complement the textures and flavors of the Garlic Butter Pasta but also bring variety to your dinner table, making each bite an unforgettable celebration of comfort food!

Make Ahead Options

Garlic Butter Pasta is an excellent choice for meal prep, saving you precious time on busy weeknights! You can prepare the garlic butter sauce and cook the pasta up to 24 hours in advance. To do this, simply sauté the onion and garlic, then stir in the Parmesan, allowing it to cool completely before storing it in an airtight container in the refrigerator. When you're ready to serve, reheat the sauce gently and toss it with freshly cooked pasta. To maintain quality, avoid overcooking the pasta when preparing it ahead of time; it should be just al dente, so it retains its texture when reheated. Enjoy restaurant-quality Garlic Butter Pasta with the convenience of make-ahead prep!

How to Store and Freeze Garlic Butter Pasta

Fridge: Store any leftovers in an airtight container for up to 3 days, keeping it fresh and flavorful.

Freezer: For longer storage, freeze the Garlic Butter Pasta in a freezer-safe container for up to 2 months. When ready to eat, defrost overnight in the fridge.

Reheating: Gently reheat on the stovetop with a splash of reserved pasta water to restore creaminess, avoiding dryness.

Airtight Handling: Ensure the dish is cooled before sealing to prevent condensation and maintain its delightful taste.

Garlic Butter Pasta Variations & Substitutions

Tailor this recipe to your taste with these delicious twists, making your meal uniquely yours!

  • Dairy-Free: Use a vegan margarine instead of butter for a creamy, dairy-free option. Nutritional yeast can replicate the cheesy flavor as well.
  • Extra Protein: Incorporate sautéed chicken or shrimp for a heartier dish that adds protein and flavor, making it satisfying any time of the day.
  • Veggie Boost: Toss in seasonal favorites like asparagus or peas for a pop of color and nutrition. Fresh greens will brighten every bite!
  • Gluten-Free: Swap traditional pasta for spiraled zucchini or gluten-free alternatives, catering to dietary needs while keeping it delicious.
  • Roasted Garlic: For a sweeter twist, use roasted garlic instead of minced. Its mellow flavor adds depth to the sauce, making it incredibly aromatic.
  • Herb Infusion: Experiment with a mix of herbs, such as thyme or rosemary, for an herby profile. Fresh options will make your dish feel vibrant and refreshing.
  • Heat Factor: Amp up the spice with freshly chopped jalapeños or red pepper flakes for those who crave a kick. Adjust to your desired heat level!
  • Creamy Spin: Add a splash of heavy cream or coconut cream for an irresistible velvety finish. It’s perfect for a special occasion or a cozy night in!

These variations not only keep the dish exciting but also allow you to make the most of what you have on hand. For another delightful twist on pasta, check out our Cauliflower Pasta Ready recipe. Happy cooking!

Expert Tips for Garlic Butter Pasta

  • Cook Pasta Al Dente: Always follow package instructions to avoid mushy pasta. Al dente ensures a firm texture that holds the sauce beautifully.
  • Use Fresh Ingredients: Opt for fresh garlic and herbs for maximum flavor. Dried herbs can be convenient, but fresh truly shines in Garlic Butter Pasta.
  • Reserve Pasta Water: Don’t forget to save that starchy pasta water! It helps to thicken the sauce and makes it cling to the noodles perfectly.
  • Quality Cheese Matters: Choose high-quality Parmesan for the best melting results. Aged cheese provides a richer flavor, elevating your Garlic Butter Pasta.
  • Customize with Veggies: Feel free to incorporate vegetables like spinach or cherry tomatoes. This not only adds nutrition but also enhances the overall flavor and texture.
  • Adjust Seasoning Last: Taste your pasta before adding more salt or spices. The cheese and butter add flavor, so adjusting the seasoning at the end ensures a perfect balance.

Garlic Butter Pasta Recipe FAQs

How do I know if my garlic is fresh?
Absolutely! Fresh garlic should be firm and plump, with no dark spots or sprouting. If the cloves feel soft or rubbery, it’s best to toss them out for your Garlic Butter Pasta.

What’s the best way to store leftover Garlic Butter Pasta?
Store your leftovers in an airtight container in the fridge for up to 3 days. I often clear out space in my fridge to keep things tidy and fresh! Reheating gently on the stovetop with a splash of reserved pasta water can help restore its creamy texture.

Can I freeze Garlic Butter Pasta?
Yes, you can freeze it! Make sure to cool the pasta completely before transferring it to a freezer-safe container. It can be frozen for up to 2 months. When you’re ready to eat, defrost it in the fridge overnight, then reheat gently, adding a splash of water to prevent dryness.

What should I do if my Garlic Butter Pasta sauce is too thick?
If the sauce thickens too much as it sits, simply add a bit of the reserved pasta water or a splash of olive oil while gently reheating. This will help loosen the sauce and keep every strand perfectly coated!

Are there any allergy considerations with Garlic Butter Pasta?
Very! This dish includes dairy from Parmesan cheese, so for a dairy-free version, you can swap it for nutritional yeast. If you're cooking for someone with a gluten allergy, just use gluten-free pasta. Always check ingredient labels to avoid hidden allergens.

Can I make this dish vegan?
Yes, absolutely! Substitute the unsalted butter with a vegan margarine or olive oil, and omit the Parmesan cheese or use a plant-based alternative. Feel free to experiment with different herbs and spices!

Garlic Butter Pasta

Creamy Garlic Butter Pasta in Just 20 Minutes for Dinner Bliss

This Garlic Butter Pasta is a quick and delicious vegetarian dish, perfect for dinner in just 20 minutes.
Print Recipe Pin Recipe
Prep Time 10 minutes mins
Cook Time 10 minutes mins
Total Time 20 minutes mins
Servings: 4 servings
Course: Dinner
Cuisine: Italian
Calories: 400
Ingredients Equipment Method Nutrition Notes

Ingredients
  

For the Sauce
  • 1 stick Unsalted Butter Adds richness; substitute with olive oil for a lighter option.
  • 1 medium Onion Provides natural sweetness; shallots can be used for subtle flavor.
  • 4 cloves Garlic Introduce bold flavor; use roasted for sweetness.
  • 1 teaspoon Salt Enhances overall taste.
  • 1 teaspoon Black Pepper Adds warmth; substitute with white pepper for gentler flavor.
  • 1/2 teaspoon Chili Flakes Introduces heat; omit for milder dish.
  • 1 teaspoon Oregano Adds earthy herb notes; use fresh for fresher taste.
  • 1/4 cup Basil Contributes a sweet flavor; opt for fresh.
For Serving
  • 1 cup Freshly Grated Parmesan Adds creaminess; omit for dairy-free option.
  • 8 ounces Pasta Spaghetti, linguine, or fettuccine work well; gluten-free as substitute.

Equipment

  • Large pot
  • Large skillet
  • Colander
  • Tongs

Method
 

Step-by-Step Instructions
  1. Bring a large pot of salted water to a boil, add pasta, and cook until al dente (8–10 minutes). Reserve ¼ cup pasta water before draining.
  2. In a skillet, heat unsalted butter over medium heat until foaming, then add minced onion, cooking until translucent (3–4 minutes). Stir in minced garlic for 1–2 minutes until fragrant.
  3. Add freshly grated Parmesan, stirring to melt into the butter sauce, creating a creamy base.
  4. Combine the drained pasta with the reserved pasta water in the skillet, tossing to coat in the sauce for 2–3 minutes.
  5. Season with salt, black pepper, and chili flakes as preferred, then garnish with more Parmesan and fresh herbs. Serve immediately.

Nutrition

Serving: 1servingCalories: 400kcalCarbohydrates: 45gProtein: 12gFat: 20gSaturated Fat: 12gPolyunsaturated Fat: 1gMonounsaturated Fat: 6gCholesterol: 50mgSodium: 600mgPotassium: 300mgFiber: 2gSugar: 1gVitamin A: 500IUVitamin C: 2mgCalcium: 200mgIron: 1mg

Notes

For optimal flavor, use fresh garlic and herbs. Reserve pasta water for sauce consistency and adjust seasoning last before serving.

Tried this recipe?

Let us know how it was!

Irresistible Pappadeaux Mardi Gras Pasta in Under 30 Minutes

February 10, 2026 by Grace Snow Leave a Comment

As I stirred the simmering pot on the stove, the soulful essence of Cajun cuisine wafted through my kitchen, instantly transporting me to the vibrant streets of New Orleans. This Creamy Cajun Pappadeaux Mardi Gras Pasta is not just a meal; it’s a joyful celebration of flavor and comfort that can be on your table in just under 30 minutes. With a delightful fusion of succulent shrimp, juicy chicken, and smoky andouille sausage mingling with perfectly cooked penne, it’s a versatile dish that appeals to everyone. Perfect for busy weeknights or festive gatherings, this recipe allows you to indulge without endless hours in the kitchen. Are you ready to unleash a touch of Mardi Gras magic in your own home? Let’s dive in!

Why is this pasta a crowd-pleaser?

Quick and Easy: This Creamy Cajun Pappadeaux Mardi Gras Pasta can be on your table in just 30 minutes, making it ideal for a busy weeknight or last-minute gatherings.
Versatile Ingredients: With simple substitutions, you can tailor the recipe to cater to all tastes – whether you prefer chicken, seafood, or a veggie-packed option.
Flavor Explosion: The harmonious blend of spices, creaminess, and smoky sausage creates a dish bursting with flavor that everyone will adore.
Comfort Food Classic: It’s a comforting bowl of goodness that feels like a warm hug, perfect for any occasion.
Unforgettable Presentation: Garnished with fresh parsley, this pasta looks as great as it tastes, making it a standout dish for entertaining.
For additional delightful options, consider trying Seafood Pasta Savory or explore a delicious Skillet Pasta Sun for more ways to bring a taste of Cajun magic to your kitchen!

Pappadeaux Mardi Gras Pasta Ingredients

• Dive into the magic of Cajun cooking with these delightful ingredients!

For the Pasta

  • Penne Pasta – Holds creamy sauce well; substitute with fusilli or rigatoni if desired.

For the Protein

  • Boneless Skinless Chicken Breast – A lean protein option; substitute with turkey or omit for a seafood-only dish.
  • Shrimp – Adds a sweet, briny flavor; alternatively, use scallops or more veggies for a vegetarian twist.
  • Andouille Sausage – Provides essential smoky notes; consider chorizo or kielbasa for different flavors.

For the Vegetables

  • Bell Peppers – Offers sweetness and color; use mixed colors or one color; spicy peppers can add heat.
  • Red Onion – Brings a subtle sweetness; yellow onion can be used for a milder taste.
  • Garlic (minced) – Enhances flavor; garlic powder can substitute (1/8 tsp for each clove).

For the Sauce

  • Heavy Cream – Provides richness and creaminess; half-and-half or a non-dairy alternative can lighten the dish.
  • Parmesan Cheese – Elevates umami flavor; substitute with Pecorino Romano or nutritional yeast for a dairy-free option.
  • Cajun Seasoning – Essential for the dish's signature taste; adjust according to spice preference.

For Cooking

  • Olive Oil – For sautéing proteins; can use butter or neutral oil.
  • Salt and Pepper – Enhances flavors; adjust to taste.

For Garnish

  • Chopped Parsley – Adds fresh color and flavor; substitute with chives if desired.

Unleash your inner chef and experience the wonder of Pappadeaux Mardi Gras Pasta at your dining table!

Step‑by‑Step Instructions for Creamy Cajun Pappadeaux Mardi Gras Pasta

Step 1: Cook the Pasta
Begin by bringing a large pot of salted water to a rolling boil. Once boiling, add the penne pasta and cook for 10-12 minutes, or until al dente. Stir occasionally to prevent sticking. Once cooked, drain the pasta in a colander and set it aside, allowing any excess water to drip off.

Step 2: Sauté the Chicken
In a large skillet, heat 2 tablespoons of olive oil over medium-high heat. Season the boneless skinless chicken breast with Cajun seasoning, then add it to the hot skillet. Cook for 4-5 minutes, or until the chicken is golden brown and cooked through. Remove the chicken from the skillet and keep it warm on a plate covered with foil.

Step 3: Cook the Shrimp
Using the same skillet, add another tablespoon of olive oil if necessary. Add the shrimp and sauté for 2-3 minutes, flipping them until they turn pink and opaque. Once cooked, carefully remove the shrimp from the skillet and set them aside with the chicken, ensuring their flavors are retained.

Step 4: Sauté the Sausage and Veggies
In the same skillet, add the andouille sausage and sauté for about 2 minutes, allowing them to brown slightly. Then, add the bell peppers, red onion, and minced garlic. Cook the mixture for 4 minutes or until the veggies are tender and fragrant, stirring frequently to incorporate the flavors.

Step 5: Create the Sauce
Pour in the heavy cream into the veggie and sausage mixture, stirring well to combine. Bring the mixture to a gentle simmer for 2-3 minutes, allowing it to thicken slightly. Once it reaches the desired consistency, stir in the grated Parmesan cheese until melted, and adjust the seasoning with salt and pepper as needed.

Step 6: Combine Everything
Now, return the cooked chicken and shrimp back into the skillet along with the cooked penne pasta. Toss everything together gently over low heat for 1-2 minutes, ensuring all components are evenly coated with the creamy sauce and heated through, creating a flavorful mix.

Step 7: Add Garnish and Serve
To finish, sprinkle freshly chopped parsley over the Creamy Cajun Pappadeaux Mardi Gras Pasta before serving. You can dish it out onto individual plates or serve it family-style in the skillet, allowing everyone to enjoy this delightful and comforting meal.

How to Store and Freeze Pappadeaux Mardi Gras Pasta

Airtight Container: Store any leftovers in an airtight container in the fridge for up to 3 days to keep the pasta fresh and flavorful.

Freezer Friendly: For longer storage, you can freeze the Pappadeaux Mardi Gras Pasta for up to 2 months. Just ensure it’s fully cooled before freezing.

Thawing: When ready to enjoy again, thaw overnight in the fridge to maintain texture and flavor.

Reheating: Gently reheat on the stovetop over low heat, adding a splash of cream if needed to restore creaminess.

Variations & Substitutions for Pappadeaux Mardi Gras Pasta

Feel free to get creative with this recipe and personalize it to suit your taste buds!

  • Vegetarian Delight: Swap chicken and sausage for mushrooms, zucchini, and spinach for a hearty, plant-based meal. This twist allows you to enjoy the creamy sauce without sacrificing flavor.

  • Seafood Swap: Replace shrimp with crab meat or lobster to add a touch of luxury to your dish. Both options will elevate the overall flavor profile, making it truly special.

  • Spicy Kick: Incorporate chopped jalapeños or a sprinkle of cayenne pepper for an extra layer of heat. This enhances the Cajun spirit of the dish and caters to spice lovers!

  • Creamy Light: Use half-and-half or a non-dairy cream alternative to lighten the dish while keeping it creamy. This makes for a delicious yet guilt-free indulgence.

  • Bold Cheese: Experiment with cheeses like Gruyère or sharp cheddar instead of Parmesan for a unique flavor twist. Each cheese brings its own character that’ll surprise your palate!

  • Zest Boost: Add fresh lemon juice or zest for a refreshing, zesty note that brightens the dish. It’s a great way to balance the richness of the creamy sauce.

  • Pasta Variation: Try fettuccine or farfalle for a fun change in texture. These options can transform the dish and offer a delightful bite.

  • Flavorful Garnish: Top with crispy fried onions or toasted pine nuts for added crunch. These finishing touches provide a great contrast to the creamy base and bring extra excitement to every bite.

For more delightful options, don’t forget to explore Seafood Pasta Savory or try out some Skillet Pasta Sun for even more variety and excitement in your Cajun cooking adventures!

Expert Tips for Pappadeaux Mardi Gras Pasta

• Maintain Creaminess: Add a splash of cream when storing leftovers to preserve that luscious texture for your next meal.

• Perfect Pasta: Ensure your penne is cooked al dente to absorb the creamy sauce while retaining its satisfying bite—you don’t want mushy pasta!

• Non-Stick Needed: Use a non-stick skillet for sautéing proteins to prevent sticking and achieve a lovely sear, enhancing your dish’s flavor.

• Taste Test: Always taste your sauce before seasoning. The andouille sausage may contribute saltiness, so adjust your seasonings accordingly.

• Fresh Ingredients: Using fresh veggies ensures that your dish is vibrant and packed with flavor—don’t skimp on the bell peppers and onions!

• Garnish Wisely: A sprinkle of fresh parsley not only adds visual appeal but elevates the dish, bringing a fresh pop that complements the rich flavors of the Pappadeaux Mardi Gras Pasta.

What to Serve with Creamy Cajun Pappadeaux Mardi Gras Pasta

Experience flavors that transport you to New Orleans as you build a memorable meal around this delightful pasta dish.

  • Garlic Bread: Its crispy, buttery texture is perfect for soaking up every bit of the creamy sauce.
  • Caesar Salad: The crunch and tang of romaine, paired with parmesan and a creamy dressing, complement the richness of the pasta well.
  • Coleslaw: A refreshing and crunchy side balances the warmth and bold spices of the pasta, creating a delightful contrast.
  • Roasted Vegetables: Seasonal roasted veggies add vibrant colors and earthy flavors, enhancing your overall dining experience.
  • Cajun Chicken Wings: Introducing another layer of Cajun flavors, these spicy wings will delight the adventurous eaters at your table.
  • Sweet Tea: This classic Southern beverage provides a sweet, refreshing contrast, elevating your festive atmosphere.
  • Key Lime Pie: For dessert, this light and zesty pie offers a perfect sweet ending after enjoying the rich pasta dish.

Make Ahead Options

These Creamy Cajun Pappadeaux Mardi Gras Pasta components are perfect for meal prep enthusiasts! You can cook the penne pasta up to 24 hours in advance and refrigerate it in an airtight container to maintain its texture. Additionally, sauté the chicken, shrimp, and sausage beforehand, storing them separately in the refrigerator (up to 3 days). When you're ready to enjoy this flavorful dish, simply combine the prepped proteins and pasta with the sautéed veggies and cream sauce in a skillet. Heat on low, adding a splash of cream to maintain the sauce's richness, and you'll have a delightful dinner ready in no time, just as delicious as if made fresh!

Pappadeaux Mardi Gras Pasta Recipe FAQs

How do I choose the best ingredients for my Pappadeaux Mardi Gras Pasta?
Absolutely! When selecting your ingredients, look for fresh bell peppers that are firm and vibrant in color, avoiding any with dark spots. The shrimp should be pink and translucent, while the chicken breast should be free of any discoloration. For the andouille sausage, choose one with a good balance of spices and a firm texture for the best smoky flavor.

What are the best storage methods for leftovers?
You can store any remaining Pappadeaux Mardi Gras Pasta in an airtight container in the fridge for up to 3 days. If you want to keep it for longer, freezing is an excellent option! Place the cooled pasta in a freezer-safe container or resealable bag, ensuring all air is removed, and it will be good for up to 2 months. Just remember to label it; you’ll want to know what magic is waiting inside your freezer!

How do I reheat frozen Pappadeaux Mardi Gras Pasta?
To reheat from frozen, I recommend transferring the pasta to the fridge the night before to thaw it. Once thawed, gently reheat on the stovetop over low heat, adding a splash of cream or a little bit of milk to restore its creamy consistency. Stir it often to ensure even heating and avoid burning—the goal is to enjoy a comforting dish just as delightful as when it was first made!

What if my Pappadeaux Mardi Gras Pasta turns out too spicy?
If you find your dish has more kick than you intended, don’t worry too much! You can balance the heat by adding more cream or cheese to the sauce, which will help mellow out the flavors. Another fantastic option is to stir in a bit of sugar or honey, which can counteract the spice while enhancing the overall flavor. Remember, everyone’s palate is different, so don’t hesitate to adjust to suit your taste!

Can I make this dish dairy-free?
Very! To make a dairy-free version of the Pappadeaux Mardi Gras Pasta, simply substitute the heavy cream with coconut cream or a dairy-free cream alternative. For cheese, nutritional yeast can provide a cheesy flavor without the dairy. Just adjust the quantities and flavors to ensure delicious results—everyone will still be coming back for seconds!

Pappadeaux Mardi Gras Pasta

Irresistible Pappadeaux Mardi Gras Pasta in Under 30 Minutes

This Pappadeaux Mardi Gras Pasta is a flavorful Cajun dish featuring shrimp, chicken, and andouille sausage, ready in under 30 minutes.
Print Recipe Pin Recipe
Prep Time 10 minutes mins
Cook Time 20 minutes mins
Total Time 30 minutes mins
Servings: 4 servings
Course: Dinner
Cuisine: Cajun
Calories: 550
Ingredients Equipment Method Nutrition Notes

Ingredients
  

For the Pasta
  • 12 oz Penne Pasta Substitute with fusilli or rigatoni if desired.
For the Protein
  • 1 lb Boneless Skinless Chicken Breast Substitute with turkey or omit for seafood-only.
  • 1 lb Shrimp Alternatively, use scallops or more veggies.
  • 8 oz Andouille Sausage Consider chorizo or kielbasa for different flavors.
For the Vegetables
  • 2 cups Bell Peppers Mixed colors or one color; spicy peppers can add heat.
  • 1 medium Red Onion Yellow onion can be used for a milder taste.
  • 3 cloves Garlic (minced) Garlic powder can substitute (1/8 tsp for each clove).
For the Sauce
  • 1 cup Heavy Cream Substitute with half-and-half or a non-dairy alternative.
  • 1 cup Parmesan Cheese Substitute with Pecorino Romano or nutritional yeast.
  • 2 tbsp Cajun Seasoning Adjust according to spice preference.
For Cooking
  • 3 tbsp Olive Oil Can use butter or neutral oil.
  • to taste Salt and Pepper Adjust to taste.
For Garnish
  • 1/4 cup Chopped Parsley Substitute with chives if desired.

Equipment

  • Large pot
  • Skillet
  • Colander

Method
 

Cooking Instructions
  1. Begin by bringing a large pot of salted water to a rolling boil. Once boiling, add the penne pasta and cook for 10-12 minutes, or until al dente. Drain and set aside.
  2. In a large skillet, heat 2 tablespoons of olive oil over medium-high heat. Season the chicken breast with Cajun seasoning, then add it to the skillet. Cook for 4-5 minutes until golden brown and cooked through. Remove and keep warm.
  3. In the same skillet, add another tablespoon of olive oil if necessary. Add the shrimp and sauté for 2-3 minutes until pink and opaque. Remove and set aside.
  4. In the same skillet, add the andouille sausage and sauté for about 2 minutes. Then add the bell peppers, red onion, and minced garlic. Cook for 4 minutes until the veggies are tender and fragrant.
  5. Pour in the heavy cream and stir to combine. Simmer for 2-3 minutes until thickened. Stir in the Parmesan cheese until melted, adjusting seasoning with salt and pepper.
  6. Return the chicken and shrimp to the skillet along with the cooked penne pasta. Toss gently over low heat for 1-2 minutes until evenly coated with the sauce.
  7. Sprinkle freshly chopped parsley over the pasta before serving. Serve individually or family-style.

Nutrition

Serving: 1servingCalories: 550kcalCarbohydrates: 45gProtein: 35gFat: 25gSaturated Fat: 12gPolyunsaturated Fat: 2gMonounsaturated Fat: 10gCholesterol: 150mgSodium: 800mgPotassium: 600mgFiber: 4gSugar: 3gVitamin A: 700IUVitamin C: 60mgCalcium: 200mgIron: 3mg

Notes

Using fresh veggies ensures vibrant flavors. Add cream to leftovers to maintain creaminess.

Tried this recipe?

Let us know how it was!

Quick Kimchi Recipe: Fresh, Crunchy, and Ready in No Time

February 10, 2026 by Grace Snow Leave a Comment

The vibrant crunch of fresh vegetables and a zesty aroma fill my kitchen as I whip up this Quick Kimchi Recipe, also known as Geotjeori. With just a little over an hour, this playful take on traditional kimchi brings the delightful world of fermented flavors right to your table—perfect for those eager to dive into the bold art of kimchi-making. Not only is this recipe beginner-friendly, but it’s also a fantastic way to add a nutritious and flavorful twist to your meals, serving as a delightful side dish or topping for rice bowls. The refreshing taste of homemade kimchi, combined with the satisfying crunch of crisp napa cabbage, will have your taste buds dancing. Curious to learn how to make this vibrant dish that’s bound to impress your friends and family? Let’s get started!

Why is Quick Kimchi So Amazing?

Freshness and Crunch: This Quick Kimchi recipe guarantees a delightful crunch with every bite, making it an irresistible addition to your meals.

Beginner-Friendly: Perfect for novice cooks, it guides you step-by-step through the kimchi-making process, allowing anyone to create this delicious dish with ease.

Endless Variations: Feel free to swap in other vegetables, like radishes or bok choy, for personalized flavor profiles that suit your taste!

Quick Fermentation: Enjoy the zesty taste of kimchi in under an hour. No waiting around for days to enjoy this flavorful side!

Nutritional Boost: Packed with probiotics and essential vitamins, this kimchi recipe is not only tasty but also a healthy choice for any meal.

Serve it alongside a steaming bowl of rice, or elevate your dishes with a touch of this delightful kimchi. While you're at it, consider pairing it with Taco Spaghetti Cheesy for a fusion dinner that's sure to wow!

Quick Kimchi Recipe Ingredients

• Discover the essentials for creating a delicious Quick Kimchi right at home!

For the Kimchi Base

  • Napa Cabbage (4 lbs) – This main ingredient provides structure and texture, giving the kimchi its signature crunch.
  • Cold Water (3 cups) – Cold water is used for soaking the cabbage, ensuring even salting and crispness.
  • Korean Kimchi Sea Salt (1/2 cup) or Fine Sea Salt (1/3 cup) – Preferred for its traditional flavor, Korean sea salt enhances the salting process.

For the Flavoring Sauce

  • Garlic (10-12 cloves, chopped) – Fresh garlic is vital for authentic taste, adding depth and aroma to your kimchi.
  • Gochugaru (8 tbsp) – Adjust the quantity of these Korean red pepper flakes to control the spice level and color.
  • Yondu (2 tbsp) or Fermented Vegetable Sauce – This flavor enhancer brings umami depth; a vegan fish sauce substitute works wonders too.
  • Korean Soup Soy Sauce (1 tbsp) or Tamari – Adds a nice balance of saltiness and sweetness; opt for light soy for better color.
  • Maesilaek (3 tbsp) or Apricot/Apple Jam – Traditional Maesilaek offers a unique sweetness and acidity, but jam is a quick replacement.

For Texture and Finish

  • Green Onions (4-6, cut into 2-inch pieces) – These add freshness and crunch, balancing out the rich flavors of your kimchi.
  • Toasted Sesame Seeds (2 tsp) – Lightly toasted seeds bring a nutty flavor that enhances the overall taste of kimchi.
  • Salt (1/4 to 1/2 tsp for tasting) – Use this final seasoning to adjust to your personal taste preference after mixing.

This Quick Kimchi Recipe is all about embracing flavors, textures, and the joy of making something delightful in a short time. Enjoy creating this vibrant dish!

Step‑by‑Step Instructions for Quick Kimchi Recipe

Step 1: Prepare the Cabbage
Begin by cutting the napa cabbage into quarters, carefully removing the stem for easier soaking. Place the cabbage pieces into a large mixing bowl, ensuring they can adequately absorb the saltwater mixture. This first step is crucial for the crunch and texture that will define your Quick Kimchi.

Step 2: Create the Saltwater Bath
In a separate bowl, dissolve the Korean sea salt or fine sea salt in the cold water, stirring until fully mixed. Pour this salty solution over the cabbage, pressing down gently to immerse it completely. Allow the cabbage to soak for 1 hour at room temperature, flipping the pieces halfway through for even salting.

Step 3: Make the Kimchi Sauce
While the cabbage soaks, prepare the flavor-packed kimchi sauce. In a medium bowl, combine the chopped garlic, gochugaru, yondu or fermented vegetable sauce, soy sauce, and maesilaek. Mix these ingredients until you achieve a smooth consistency, releasing the delicious aromatic scents that will permeate your Quick Kimchi.

Step 4: Rinse the Cabbage
After an hour, carefully rinse the cabbage under cold water three times to wash away excess salt, ensuring your kimchi isn’t overly salty. Drain the cabbage thoroughly for about 5-10 minutes, allowing any excess water to escape, so it can fully absorb the upcoming flavors.

Step 5: Combine Ingredients
In a large mixing bowl, combine the drained cabbage with cut green onions and the prepared kimchi sauce. Using your hands (wear gloves to protect against the spice), gently mix everything together until the cabbage is well coated and absorbs the vibrant flavors—this step is where the magic of Quick Kimchi happens!

Step 6: Final Seasoning
Taste the mixture and adjust the salt by adding a small amount if needed, bearing in mind that the flavors will develop further as it sits. For an extra touch, sprinkle in the toasted sesame seeds and give everything a final toss, ensuring every bite is packed with flavor.

Step 7: Serve or Store
Your Quick Kimchi is now ready to bring delightful crunch to your table! Serve it immediately as a side dish, or transfer it to an airtight container to store in the fridge. This fresh kimchi can last up to 7 days, but it’s best enjoyed within the first few days for maximum flavor and freshness.

Make Ahead Options

These Quick Kimchi Recipe options are perfect for busy home cooks looking to save time while still enjoying delicious flavors! You can prepare the napa cabbage by cutting and soaking it in the saltwater solution up to 24 hours in advance. Just be sure to rinse it thoroughly before using to avoid overly salty kimchi. The kimchi sauce can also be mixed and refrigerated for up to 3 days, ensuring that all the flavors meld beautifully. When you're ready to finalize your Quick Kimchi, simply combine the drained cabbage, green onions, and sauce, and toss everything together. This method ensures you'll enjoy fresh, crunchy kimchi without the fuss on busier days!

Expert Tips for Quick Kimchi

  • Rinse Thoroughly: Rinse the cabbage well to prevent overly salty kimchi, ensuring a balanced flavor that highlights the spices.

  • Wear Gloves: Protect your hands from the spice when mixing your Quick Kimchi; gochugaru can cause irritation if it comes into direct contact with your skin.

  • Adjust Spice Levels: Feel free to modify the amount of gochugaru to suit your heat preference, creating a personalized Quick Kimchi experience.

  • Flavor Maturation: While this kimchi is best served fresh, letting it rest in the fridge for a few hours allows the flavors to deepen, enhancing its taste.

  • Storage Caution: Store your Quick Kimchi in an airtight container to maintain freshness. Consume within the first few days for optimal flavor and crunchy texture.

Quick Kimchi Recipe Variations

Explore the exciting possibilities to customize your quick kimchi experience with these refreshing variations!

  • Greens Swap: Use bok choy or kale instead of napa cabbage for unique flavors and textures that add a new twist to your kimchi.

  • Heat Adjustment: If you prefer a milder taste, reduce the amount of gochugaru or replace it with paprika for color without the spice.

  • Extra Veggies: Add sliced radishes or cucumbers to introduce different crunches and a fresh flair; this is a wonderful way to experiment with seasonal produce.

  • Herb Infusion: Toss in a handful of fresh cilantro or mint for a delightful herbal note that brightens up the fermented flavors.

  • Vegan-friendly: Swap yondu with a homemade blend of soy sauce and miso to keep your kimchi flavorful and entirely plant-based.

  • Sweetener Change: Experiment with honey or maple syrup instead of apricot/apple jam for a subtle sweetness that complements the spices beautifully.

  • Fermented Flavor: If time allows, let the kimchi sit at room temperature for up to 2 hours before refrigerating; this quick fermentation enhances the flavor profile significantly.

While enjoying your quick kimchi, think about making it a complete meal by pairing it with Spatchcock Chicken Flavor or seasoned with the delectable Air Fryer Fish for a mouthwatering family feast.

How to Store and Freeze Quick Kimchi

  • Fridge: Store your Quick Kimchi in an airtight container for up to 7 days. It’s best enjoyed within the first few days to savor its freshness and crunch.

  • Freezer: If you prefer to freeze your Quick Kimchi, pack it into freezer-safe bags, removing as much air as possible. It can last up to 3 months but may lose some crunch upon thawing.

  • Thawing: To enjoy frozen Quick Kimchi, transfer it to the fridge overnight before serving. Mix it gently to restore some texture after thawing.

  • Reheating: Kimchi is traditionally served cold or at room temperature. If you’d like to heat it, toss it into hot dishes like stir-fries but enjoy it fresh for the best flavor.

What to Serve with Quick Kimchi?

Creating a delicious meal is an adventure, and Quick Kimchi is the vibrant star of the show!

  • Steamed Rice: The classic companion to kimchi! Its fluffy, warm texture balances the spicy crunch and enhances the overall dining experience.

  • Korean BBQ Meat: Tender marinated meats like bulgogi or galbi pair perfectly with the tangy flavors of kimchi. They create a delightful contrast that promises excitement in every bite.

  • Soba Noodle Salad: This cool, refreshing dish can bring a delightful textural contrast to your meal. Toss soba noodles with fresh veggies, sesame oil, and a dash of soy sauce for a light side.

  • Vegetable Tempura: The crispy golden-brown batter of tempura veggies adds a satisfying crunch, perfectly complementing the spicy, zesty kimchi. This duo is a match made in culinary heaven!

  • Tofu Stir-Fry: Adding cubes of crispy tofu stir-fried with your favorite vegetables and soy sauce creates a heartier dish. This option lends savoriness that pairs beautifully with the kimchi's brightness.

  • Korean Pancakes (Pajeon): These savory pancakes, filled with green onions and vegetables, provide a delightful contrast to the bright and zesty kimchi. Each bite is a burst of flavor!

  • Pickled Vegetables: A medley of pickled radishes or carrots brings sweet and tangy notes to your plate, enhancing the refreshing qualities of your quick kimchi.

  • Korean Sodas or Iced Tea: Wash it all down with a fizzy Korean soda or a glass of refreshing iced tea. These fizzy beverages add a refreshing touch that refreshes your palate.

Each option enriches your meal, elevating your dining experience while celebrating the bold flavors of Quick Kimchi!

Quick Kimchi Recipe FAQs

How do I select the best napa cabbage?
Choosing the right napa cabbage is key! Look for heads that are heavy for their size with crisp, vibrant green leaves. Avoid ones with dark spots all over or wilting, as these indicate over-ripeness.

What’s the best way to store Quick Kimchi?
Absolutely, store your Quick Kimchi in an airtight container in the refrigerator. It will keep for up to 7 days! For optimal freshness and crunch, consume it within the first few days.

Can I freeze my Quick Kimchi?
Yes, you can freeze your Quick Kimchi! Just pack it into freezer-safe bags, removing as much air as possible. It can last for up to 3 months. When you're ready to enjoy it, thaw it in the fridge overnight for the best results.

What should I do if my kimchi turns out too salty?
If your kimchi is too salty, don't worry! You can balance this by mixing in some extra chopped vegetables like cucumbers or radishes to absorb some of the saltiness. Alternatively, add a bit more water or a splash of vinegar to help cut through the salt.

Is this Quick Kimchi recipe safe for my pet?
While the ingredients in this Quick Kimchi are typically healthy for humans, it's better to avoid giving it to pets. The garlic and spices can be harmful to dogs and cats, so it’s best enjoyed solely by you!

Can I make substitutions in this recipe?
Very! This recipe is incredibly flexible. You can swap napa cabbage with bok choy or kale, adjust the gochugaru to your heat liking, or even add additional vegetables like radishes or carrots for a unique twist. The more, the merrier!

Quick Kimchi Recipe

Quick Kimchi Recipe: Fresh, Crunchy, and Ready in No Time

Quick Kimchi Recipe brings vibrant flavors and crunch to your table, ready in under an hour—perfect for beginners!
Print Recipe Pin Recipe
Prep Time 1 hour hr 10 minutes mins
Total Time 1 hour hr 10 minutes mins
Servings: 8 servings
Course: Appetizers
Cuisine: Korean
Calories: 30
Ingredients Equipment Method Nutrition Notes

Ingredients
  

For the Kimchi Base
  • 4 lbs Napa Cabbage Main ingredient providing crunch.
  • 3 cups Cold Water Used for soaking the cabbage.
  • 1/2 cup Korean Kimchi Sea Salt Traditional flavor; alternatives can be used.
For the Flavoring Sauce
  • 10-12 cloves Garlic Chopped, vital for authentic taste.
  • 8 tbsp Gochugaru Korean red pepper flakes for spice.
  • 2 tbsp Yondu Or fermented vegetable sauce, adds umami.
  • 1 tbsp Korean Soup Soy Sauce Adds balance of saltiness and sweetness.
  • 3 tbsp Maesilaek Or Apricot/Apple Jam; traditional sweetness.
For Texture and Finish
  • 4-6 Green Onions Cut into 2-inch pieces.
  • 2 tsp Toasted Sesame Seeds For nutty flavor.
  • 1/4 to 1/2 tsp Salt For final seasoning to taste.

Equipment

  • large mixing bowl
  • medium bowl

Method
 

Step-by-Step Instructions
  1. Prepare the Cabbage: Cut napa cabbage into quarters, remove the stem, and place in a large bowl.
  2. Create the Saltwater Bath: Dissolve salt in cold water and pour over cabbage. Soak for 1 hour.
  3. Make the Kimchi Sauce: Combine garlic, gochugaru, yondu, soy sauce, and maesilaek until smooth.
  4. Rinse the Cabbage: Rinse cabbage under cold water three times to remove excess salt. Drain thoroughly.
  5. Combine Ingredients: Mix drained cabbage with green onions and kimchi sauce using gloves.
  6. Final Seasoning: Adjust salt to taste, sprinkle in sesame seeds, and mix.
  7. Serve or Store: Serve immediately or store in an airtight container in the fridge.

Nutrition

Serving: 1cupCalories: 30kcalCarbohydrates: 5gProtein: 1gSodium: 500mgPotassium: 200mgFiber: 1gSugar: 2gVitamin A: 5IUVitamin C: 20mgCalcium: 2mgIron: 2mg

Notes

Rinse thoroughly to avoid overly salty kimchi. Wear gloves for mixing to protect hands. Adjust spice levels as desired.

Tried this recipe?

Let us know how it was!

Savory Ramen Carbonara: A Quick Comfort Food Classic

February 10, 2026 by Grace Snow Leave a Comment

In my quest for the perfect weeknight meal, I stumbled upon a delightful revelation: Ramen Carbonara! This inventive fusion creates a comforting harmony between the creamy richness of classic Italian carbonara and the cheeky chew of Japanese ramen noodles. Imagine savoring a bowl that's not only ready in under 20 minutes but also boasts an irresistible blend of flavors and textures—definitely a win-win for busy evenings! With a luscious sauce made from eggs and parmesan, and a touch of crispy bacon (or mushrooms for my vegetarian friends), this dish is sure to tantalize your taste buds. So, are you ready to dive into this delicious culinary adventure that transforms traditional favorites into a quick dinner solution?

Why is Ramen Carbonara a Must-Try?

Unique Fusion: The Ramen Carbonara delightfully melds Italian and Japanese cuisines, showcasing flavors that are both familiar and exciting.
Quick Preparation: With a total cooking time of under 20 minutes, this dish is perfect for busy weeknights when time is of the essence.
Creamy Goodness: The luscious sauce made from eggs and parmesan envelops each noodle, creating a rich, satisfying experience with every bite.
Versatile Option: Whether you’re in the mood for bacon or prefer a vegetarian twist with mushrooms, this recipe easily adapts to different dietary preferences.
Crowd-Pleasing Dish: Ideal for gatherings, this comforting bowl is sure to impress your family and friends alike, making it a staple for your dinner table!

Ramen Carbonara Ingredients

For the Noodles
• Ramen Noodles – Choose Shin Ramyun or wholegrain for a delightful chew that complements the creamy sauce.

For the Sauce
• Eggs – Use large eggs to enhance the richness of the sauce.
• Parmesan Cheese – Grated parmesan adds a nutty flavor; alternatives like pecorino can also work well.

For the Protein
• Bacon – Provides a savory crunch; middle bacon rashers are great, or swap for sautéed mushrooms for a vegetarian option.

For Flavor
• Gochujang or Hot Sauce – A dash will spice things up; adjust according to your taste for the perfect kick!

Step‑by‑Step Instructions for Ramen Carbonara

Step 1: Cook Ramen
Start by boiling a large pot of water over high heat. Once it reaches a rolling boil, add the ramen noodles and cook according to the package instructions, typically about 3–4 minutes. When the noodles are al dente, drain them in a colander, shaking off excess water, and set them aside while you prepare the creamy sauce.

Step 2: Prepare Sauce
In a separate mixing bowl, crack open the large eggs and whisk them together with the grated parmesan cheese until smooth and well combined. This mixture will create the luscious sauce for your Ramen Carbonara. Set it aside while you crisp the bacon to ensure a delightful contrast of flavors and textures in the finished dish.

Step 3: Crisp Bacon
Heat a skillet over medium heat and add your bacon rashers, cooking them until they turn golden and crispy, about 5–7 minutes. Pay attention to the sizzling sound, which indicates that the bacon is rendering its fat beautifully. Once crispy, transfer the bacon to a paper towel-lined plate to drain any excess fat, but leave some drippings in the skillet for flavor.

Step 4: Combine Ingredients
With the skillet still warm, add the drained ramen noodles to the bacon drippings, tossing gently to combine. Remove the skillet from heat, then quickly pour in the egg and parmesan mixture, stirring vigorously to coat the noodles without scrambling the eggs. In this key step, you’ll see the creamy sauce enveloping each strand of ramen beautifully.

Step 5: Season & Serve
If desired, stir in gochujang or hot sauce to add an extra kick and mix well. Plate your delicious Ramen Carbonara, garnishing with extra parmesan and freshly chopped herbs like parsley or green onions for a pop of color and freshness. Enjoy this delightful fusion of Italian and Japanese flavors, perfect for a quick weeknight dinner!

Make Ahead Options

These Ramen Carbonara are perfect for busy weeknights and meal prep enthusiasts! You can cook the ramen noodles and crisp the bacon up to 24 hours in advance—just make sure to store them separately in airtight containers in the refrigerator. This prevents the noodles from becoming soggy and keeps the bacon crispy. You can also whisk together the egg and parmesan mixture ahead of time and refrigerate it until needed. When you're ready to serve, simply reheat the noodles and bacon gently in a skillet, remove from heat, and quickly stir in the egg mixture for that creamy finish. This way, you'll have a delicious and satisfying dinner with minimal effort!

Ramen Carbonara: Flavorful Variations Await!

Feel free to embrace your creativity and explore delightful twists that enhance this already delicious dish!

  • Vegetarian Option: Swap bacon for sautéed mushrooms or tofu, and use vegetarian ramen seasoning. This way, you still enjoy a rich flavor without the meat.
  • Add Vegetables: Incorporate peas, spinach, or bell peppers for a colorful nutrient boost. The added crunch and color elevate the overall dish.
  • Cheese Variations: Experiment with different cheeses like pecorino or gouda for unique flavors. Each cheese brings its own character, transforming your carbonara in exciting ways.
  • Spicy Kick: Introduce sliced chilies or a sprinkle of red pepper flakes for an extra heat level. This adds a fun bit of warmth that enhances the overall dish.
  • Coconut Cream Twist: For a dairy-free experience, replace the egg mixture with coconut cream and nutritional yeast. This creates a creamy, comforting sauce with a hint of tropical flavor.
  • Garlic Lovers Delight: Add minced garlic to the skillet while crisping the bacon for a fragrant aroma. This step brings depth and enhances the comforting essence of the dish.
  • Noodle Swap: Try using soba or udon noodles instead if you’re craving a different texture or flavor. Both options provide satisfying twists that keep things interesting.
  • Umami Boost: Stir in a splash of soy sauce or miso paste before serving to deepen the savory notes. This small addition creates new levels of flavor in each bite.

As you personalize your Ramen Carbonara, remember, creativity in cooking is all about exploring flavors and textures that resonate with your palate! If you're looking for another delicious comfort food dish, you might also enjoy these creamy garlic mushroom pasta or spicy chili ramen recipes to keep your culinary adventures thriving!

Expert Tips for Ramen Carbonara

• Heat Management: Remove the skillet from heat before adding the egg mixture to prevent scrambling; the residual heat gently cooks the eggs into a creamy sauce.

• Creamy Upgrade: For an extra touch of indulgence, whisk in a splash of cooking cream along with the eggs to enhance the richness of your Ramen Carbonara.

• Taste Test: Always taste and adjust seasoning with salt and pepper after combining the ingredients; this ensures every bite is full of flavor without overpowering the dish.

• Noodle Choice: Opt for Shin Ramyun or wholegrain ramen for the perfect chewy texture, enhancing the overall eating experience of your Carbonara.

• Vegetarian Twist: If you're opting for a vegetarian version, replace the bacon with sautéed mushrooms or tofu and use a vegetarian ramen seasoning for a delicious alternative.

How to Store and Freeze Ramen Carbonara

Fridge: Store leftover Ramen Carbonara in an airtight container for up to 2 days. Ensure it's cooled to room temperature before sealing to maintain freshness.

Freezer: For longer storage, freeze the Ramen Carbonara in a freezer-safe container for up to 3 months. Divide portions for convenient reheating later.

Reheating: Thaw overnight in the fridge before reheating. Gently warm on the stovetop over low heat, adding a splash of water or cream to restore the creamy texture.

Best When Fresh: While leftovers can be stored, Ramen Carbonara is best enjoyed fresh for that delightful creamy experience!

What to Serve with Ramen Carbonara?

Create a memorable meal by pairing delightful sides and finishes with your fusion masterpiece.

  • Garlic Bread: Homemade or store-bought, its crispy, buttery texture complements the creaminess of the carbonara beautifully.
  • Steamed Edamame: Lightly salted, these bite-sized beans add a fresh pop of color and a protein-packed snack.
  • Asian Salad: A mix of crunchy vegetables, like cucumbers and carrots, dressed with sesame vinaigrette creates a refreshing contrast to the creamy dish.
  • Chili Oil Drizzle: A simple drizzle of chili oil adds an exciting kick that enhances the flavor of your Ramen Carbonara.
  • Sushi Rolls: Pairing with a few maki rolls offers the perfect fusion twist, bringing together contrasting textures and flavors in one meal.
  • Cold Sake: A chilled glass of sake can elevate your dining experience, beautifully matching the savory notes of the carbonara.
  • Green Tea Tiramisu: For dessert, this light and creamy fusion provides a refreshing end to your meal, balancing the richness of the carbonara.

Ramen Carbonara Recipe FAQs

What type of ramen noodles should I use?
For a delightful chew and texture, I recommend using Shin Ramyun or wholegrain ramen noodles. These varieties stand up well to the creamy sauce while providing the perfect foundation for your Ramen Carbonara.

How should I store leftover Ramen Carbonara?
Store any leftovers in an airtight container in the fridge for up to 2 days. Make sure the dish has cooled to room temperature before sealing to help maintain its freshness.

Can I freeze Ramen Carbonara?
Absolutely! To freeze, portion the Ramen Carbonara into freezer-safe containers and store for up to 3 months. When you're ready to enjoy it again, thaw overnight in the fridge, then gently warm it on the stovetop, adding a splash of water or cream to help restore that creamy texture.

What should I do if my sauce turns out too thick?
If your sauce is thicker than you'd like after mixing in the egg and cheese, don’t worry! Simply add a small splash of hot water or a bit more cream and stir vigorously until the desired consistency is reached. This will help loosen the sauce while keeping all the delicious flavors intact!

Can I make this dish vegetarian?
Definitely! For a vegetarian version of Ramen Carbonara, swap the bacon for sautéed mushrooms or even tofu. You can use a vegetarian seasoning for the ramen as well to enhance the flavors while keeping it meat-free.

How long does it take to prepare Ramen Carbonara?
This delightful dish is a quick winner! From start to finish, including all prep and cooking, you can have Ramen Carbonara ready in under 20 minutes. Perfect for those busy weeknights!

Ramen Carbonara

Savory Ramen Carbonara: A Quick Comfort Food Classic

Ramen Carbonara combines creamy Italian flavors with Japanese ramen, making it a perfect quick weeknight meal.
Print Recipe Pin Recipe
Prep Time 5 minutes mins
Cook Time 15 minutes mins
Total Time 20 minutes mins
Servings: 2 bowls
Course: Dinner
Cuisine: Italian, Japanese
Calories: 600
Ingredients Equipment Method Nutrition Notes

Ingredients
  

For the Noodles
  • 2 packs Ramen Noodles Shin Ramyun or wholegrain
For the Sauce
  • 2 large Eggs
  • 1 cup Parmesan Cheese Grated
For the Protein
  • 4 slices Bacon Middle bacon rashers or sautéed mushrooms for vegetarian option
For Flavor
  • 1 tablespoon Gochujang or Hot Sauce Adjust according to taste

Equipment

  • Large pot
  • Mixing Bowl
  • Skillet
  • Colander

Method
 

Step-by-Step Instructions for Ramen Carbonara
  1. Start by boiling a large pot of water over high heat. Once boiling, add the ramen noodles and cook for about 3–4 minutes. Drain and set aside.
  2. In a mixing bowl, crack open the large eggs and whisk with the grated parmesan until smooth. Set aside.
  3. Heat a skillet over medium heat and add the bacon. Cook until golden and crispy, about 5–7 minutes. Transfer to a paper towel-lined plate.
  4. In the warm skillet, add drained ramen noodles to bacon drippings. Remove from heat and quickly stir in egg and parmesan mixture to coat noodles.
  5. Optional: Stir in gochujang or hot sauce. Serve garnished with extra parmesan and chopped herbs.

Nutrition

Serving: 1bowlCalories: 600kcalCarbohydrates: 70gProtein: 25gFat: 25gSaturated Fat: 10gPolyunsaturated Fat: 5gMonounsaturated Fat: 5gCholesterol: 200mgSodium: 1200mgPotassium: 500mgFiber: 2gSugar: 2gVitamin A: 15IUCalcium: 20mgIron: 15mg

Notes

Remove skillet from heat before adding the egg mixture to prevent scrambling. Best enjoyed fresh.

Tried this recipe?

Let us know how it was!

Delicious Portuguese Shrimp Croquettes You’ll Love to Make

February 10, 2026 by Grace Snow Leave a Comment

The aroma of sizzling shrimp mingles with herbs and garlic, instantly transporting me to the bustling streets of Portugal. Creating these Crispy Portuguese Shrimp Croquettes at home is not just about enjoying a delicious appetizer; it's a celebration of flavors that invites everyone to the table. These delectable bites offer a perfect blend of savory shrimp, creamy mashed potatoes, and a crunchy breadcrumb coating, making them a standout option for gatherings or a cozy night in. Plus, they’re versatile; you can customize them with spices or even switch up the seafood, ensuring every batch is a delightful surprise. Are you ready to dive into this tempting recipe and elevate your snacking game?

Why are Portuguese Shrimp Croquettes irresistible?

Crispy perfection awaits you as these croquettes deliver a satisfying crunch with every bite. Savory shrimp mixed with creamy mashed potatoes creates a flavor explosion that will impress your guests. Versatile variations allow you to swap seafood or spices, making each batch unique. Easy to prepare, they come together quickly, perfect for busy weeknights or spontaneous gatherings. Enjoy them with tangy dipping sauces for an extra kick, and you'll understand why these croquettes are bound to become a beloved staple in your kitchen!

Portuguese Shrimp Croquettes Ingredients

For the Croquettes

  • Shrimp – the heart of the dish, use fresh or thawed frozen shrimp for the best flavor.
  • Mashed Potatoes – they provide a creamy, comforting base; opt for instant mashed potatoes for quick prep.
  • Herbs (e.g., parsley, cilantro) – add vibrant freshness; dried herbs can work in a pinch if fresh isn’t available.
  • Garlic – infuses the croquettes with aromatic goodness; fresh is ideal, but garlic powder can substitute in a hurry.
  • Breadcrumbs – ensure a crunchy coating; panko breadcrumbs offer extra crispness, or use gluten-free ones if needed.
  • Eggs – essential for binding the ingredients; for an egg-free option, consider a flaxseed mixture.
  • Salt and Pepper – key for flavor enhancement; adjust to suit your personal taste.

For Serving

  • Lemon wedges – brighten up the dish with a zesty punch.
  • Tangy dipping sauce (like aioli or marinara) – a delicious complement to the rich croquettes, enhancing their savory notes.

These Portuguese Shrimp Croquettes will surely become a favorite, providing warmth and comfort with each and every bite!

Step‑by‑Step Instructions for Portuguese Shrimp Croquettes

Step 1: Prepare the Mashed Potatoes
Begin by cooking the mashed potatoes according to the package instructions or by boiling peeled potatoes until fork-tender, about 15-20 minutes. Once they’re soft, drain, mash, and let them cool completely at room temperature. This creamy base is essential for your Portuguese Shrimp Croquettes as it provides the perfect texture and flavor.

Step 2: Cook the Shrimp
In a skillet, heat a tablespoon of oil over medium heat. Add minced garlic and sauté for about 1 minute until fragrant. Toss in the shrimp and cook for 3-4 minutes until they turn pink and opaque, ensuring they are fully cooked but not rubbery. Remove from heat, chop the shrimp finely, and mix them with fresh herbs and a pinch of salt and pepper for added flavor.

Step 3: Combine Mixtures
In a large mixing bowl, combine the cooled mashed potatoes with the shrimp mixture. Stir until thoroughly mixed, ensuring the shrimp and herbs are evenly distributed throughout. This step is crucial to form a unified filling for your croquettes. It should have a thick, cohesive consistency, making it easy to shape into croquettes.

Step 4: Shape the Croquettes
Wet your hands to prevent sticking, then scoop portions of the mixture and shape them into small oval or round croquettes, approximately 2-3 inches in size. Place the formed croquettes on a baking sheet lined with parchment paper. This step allows you to prepare them all at once before frying or baking them for your Portuguese Shrimp Croquettes.

Step 5: Coat the Croquettes
Set up a breading station with one bowl containing beaten eggs and another with breadcrumbs. Dip each croquette first into the egg mixture, letting the excess drip off, then roll it in breadcrumbs, pressing gently to adhere. This double-coating ensures a crunchy and golden exterior. Repeat for all croquettes, then set aside.

Step 6: Fry or Bake the Croquettes
For frying, heat vegetable oil in a deep skillet over medium heat until shimmering. Carefully add the croquettes in batches and fry for about 3-4 minutes per side until golden brown. Alternatively, preheat your oven to 375°F and place the breaded croquettes on a baking sheet. Bake for 15-20 minutes until they’re crisp and golden, turning halfway through for even cooking.

Step 7: Serve Warm
Once the Portuguese Shrimp Croquettes are beautifully golden, transfer them to a plate lined with paper towels to absorb excess oil if fried. Serve them warm with lemon wedges and a tangy dipping sauce like aioli or marinara for an extra burst of flavor. These crispy bites are a delightful treat that you and your guests will come back for time and time again!

Expert Tips for Portuguese Shrimp Croquettes

• Fresh Ingredients: Use fresh shrimp and herbs for the best flavor; frozen options might lack freshness in taste.

• Avoid Overcooking: Make sure to cook the shrimp just until pink; overcooking can result in a rubbery texture in your Portuguese Shrimp Croquettes.

• Crispy Coating: Press the breadcrumbs firmly onto each croquette to ensure a nice golden crust when frying or baking.

• Chill Before Coating: If the mixture feels too soft, chill it in the refrigerator for about 30 minutes; this helps in shaping and coating.

• Spice It Up: Don’t hesitate to add your favorite spices like smoked paprika or cayenne for an extra kick in your croquettes!

Make Ahead Options

These Portuguese Shrimp Croquettes are perfect for meal prep enthusiasts! You can prepare the shrimp mixture and mashed potatoes up to 24 hours in advance, refrigerating them separately to maintain their freshness. To do this, simply cool the mashed potatoes completely before placing them in an airtight container, and store the cooked shrimp mixture in another container. When you're ready to serve, combine the two, shape into croquettes, and coat them just before frying or baking. This way, they retain their delightful texture and flavors, ensuring they come out just as delicious as if made fresh. Enjoy the convenience of having a phenomenal appetizer at your fingertips on busy weeknights!

Portuguese Shrimp Croquettes Variations

Feel free to get creative and customize your croquettes to suit your taste and dietary preferences!

  • Seafood Swap: Use crab or lobster instead of shrimp for a luxurious twist. Both options add a delightful richness!

  • Spicy Kick: Mix in smoked paprika or cayenne pepper for a fun heat that dances on your palate. A small pinch can transform the flavor profile!

  • Cheesy Goodness: Incorporate crumbled feta or shredded cheddar into the filling for added creaminess. Cheese can make these bites extra indulgent.

  • Herb Infusion: Swap traditional parsley for fresh dill or basil to change the herbaceous notes. Each herb offers a unique twist on flavor that can brighten each croquette.

  • Texture Boost: Add finely chopped vegetables like bell peppers or zucchini to the mixture for extra crunch and nutrition. This addition not only brightens the color but also adds a satisfying texture!

  • Vegan Version: Replace shrimp with mashed beans or chickpeas, and use a flaxseed mixture instead of eggs to bind everything together. These flavorful bites still celebrate the spirit of the originals!

  • Baked Variation: Skip the frying and bake your croquettes for a healthier option. Bake at 400°F for 20-25 minutes for a lighter, yet still crispy, result.

  • Dipping Sauces: Elevate your serving experience with different sauces like spicy aioli or a tangy yogurt dip. Experimenting with sauces can change the whole vibe of your meal!

You might find these tips helpful when crafting your perfect croquettes! Explore other delicious options like Shrimp Tacos Zesty or a lively Turmeric Dill Shrimp Stir Fry for even more flavorful ideas.

What to Serve with Crispy Portuguese Shrimp Croquettes

The perfect meal is just a few delightful pairings away, ensuring every bite of these croquettes shines.

  • Creamy Garlic Mashed Potatoes: Their rich texture complements the crunch of croquettes, making each mouthful a comforting delight.
  • Zesty Coleslaw: A refreshing crunch that adds a tangy contrast, elevating the dish with vibrant flavors.
  • Garlic Butter Asparagus: Tender asparagus drizzled with garlic butter brings a touch of elegance and earthiness to the table. Pairing them adds a nutritious boost alongside your crispy bites.
  • Lemon Wedges: Freshly squeezed juice brightens the savory shrimp flavors, enhancing the experience with a zesty kick that dances on your palate.
  • Aioli Dipping Sauce: A creamy partner that perfectly complements the robust flavors of the croquettes, inviting everyone to dip and savor.
  • Crisp White Wine: A chilled glass enhances the seafood notes, offering a refreshing balance to the rich, fried bites while ensuring the meal feels special.
  • Marinara Sauce: A classic choice that adds a tangy sweetness, creating a delicious balance with the savory shrimp filling.

How to Store and Freeze Portuguese Shrimp Croquettes

Room Temperature: Store cooked croquettes at room temperature for a maximum of 2 hours. They’re best enjoyed immediately after cooking for optimal taste and texture.

Fridge: Keep leftover croquettes in an airtight container in the fridge for up to 3 days. To reheat, simply warm them in the oven at 350°F for about 10-15 minutes to restore their crispiness.

Freezer: For longer storage, freeze uncooked croquettes on a baking sheet until solid, then transfer them to a freezer bag for up to 3 months. Cook from frozen, adding a couple of extra minutes to the frying or baking time.

Reheating: When reheating cooked Portuguese Shrimp Croquettes, place them on a baking sheet in a preheated oven at 350°F for about 10 minutes to achieve a crispy texture.

Portuguese Shrimp Croquettes Recipe FAQs

How do I select the best shrimp for my croquettes?
Absolutely! When choosing shrimp, look for fresh or previously frozen shrimp that are firm, have a clean, ocean-like smell, and are free of dark spots or strong odor. If you choose frozen shrimp, make sure they are completely thawed before use. Wild-caught shrimp often have a better flavor compared to farmed varieties.

How should I store leftover croquettes?
You can store leftover Portuguese Shrimp Croquettes in an airtight container in the fridge for up to 3 days. To reheat while preserving their crispiness, place them on a baking sheet in a preheated oven at 350°F for about 10-15 minutes. This way, you can enjoy them just as they were when freshly made!

Can I freeze uncooked croquettes?
Yes! To freeze uncooked Portuguese Shrimp Croquettes, arrange them in a single layer on a baking sheet and place them in the freezer until they’re solid, about 1-2 hours. Once frozen, transfer them to a freezer bag for up to 3 months. When you're ready to cook, no need to thaw! Just fry or bake them straight from the freezer, adding a couple of extra minutes to the cooking time.

What should I do if my croquette mixture is too wet to form?
If your mixture seems too wet, don’t worry! You can chill it in the refrigerator for about 30 minutes. This helps firm it up, making it easier to shape into croquettes. Additionally, consider adding a bit more breadcrumbs to absorb excess moisture, but be cautious not to overwhelm the mixture.

Are these croquettes pet-friendly or allergen-free?
While Portuguese Shrimp Croquettes are a delicious human treat, they are not recommended for pets, especially since shrimp can be an allergen for some animals. For allergy concerns, always check for potential allergens in your ingredients, and if serving to guests with specific dietary needs, consider using gluten-free breadcrumbs or substituting shrimp with alternative proteins like chicken or vegetables.

How can I make the croquettes spicier?
Very! You can easily amp up the spice level by incorporating smoked paprika, cayenne pepper, or even finely chopped jalapeños into the shrimp mixture. Start with a small amount and taste the mixture before frying to achieve your desired level of heat. Enjoy experimenting with flavors!

Portuguese Shrimp Croquettes

Delicious Portuguese Shrimp Croquettes You’ll Love to Make

Delight in these crispy Portuguese Shrimp Croquettes, a savory blend of shrimp, creamy mashed potatoes, and herbs.
Print Recipe Pin Recipe
Prep Time 30 minutes mins
Cook Time 20 minutes mins
Total Time 50 minutes mins
Servings: 4 croquettes
Course: Appetizers
Cuisine: Portuguese
Calories: 320
Ingredients Equipment Method Nutrition Notes

Ingredients
  

For the Croquettes
  • 1 pound Shrimp fresh or thawed
  • 2 cups Mashed Potatoes instant preferred
  • 1 tablespoon Herbs e.g., parsley, cilantro
  • 2 cloves Garlic minced
  • 1 cup Breadcrumbs panko or gluten-free
  • 2 large Eggs beaten
  • to taste Salt
  • to taste Pepper
For Serving
  • 1 cup Lemon wedges
  • 1 cup Tangy dipping sauce e.g., aioli or marinara

Equipment

  • Skillet
  • Mixing Bowl
  • Baking Sheet
  • Parchment Paper

Method
 

Step-by-Step Instructions
  1. Prepare the mashed potatoes by boiling peeled potatoes until fork-tender, drain, mash, and let them cool completely.
  2. In a skillet, heat oil and sauté minced garlic for 1 minute, add shrimp and cook until pink and opaque, then chop finely.
  3. Combine cooled mashed potatoes with the shrimp mixture in a large bowl; stir until evenly mixed.
  4. Wet hands, scoop portions of the mixture, and shape them into small oval or round croquettes.
  5. Set up a breading station with beaten eggs and breadcrumbs, dip each croquette, and ensure the coating adheres.
  6. Fry croquettes in vegetable oil until golden brown or bake at 375°F for 15-20 minutes until crisp.
  7. Serve warm with lemon wedges and a tangy dipping sauce.

Nutrition

Serving: 2croquettesCalories: 320kcalCarbohydrates: 28gProtein: 20gFat: 16gSaturated Fat: 3gPolyunsaturated Fat: 2gMonounsaturated Fat: 10gCholesterol: 150mgSodium: 800mgPotassium: 500mgFiber: 2gSugar: 1gVitamin A: 500IUVitamin C: 15mgCalcium: 30mgIron: 1.5mg

Notes

Use fresh ingredients for the best flavor. Avoid overcooking shrimp to maintain the right texture.

Tried this recipe?

Let us know how it was!

Mac and Cheese Quesadillas: A Cheesy Twist You’ll Love

February 8, 2026 by Grace Snow Leave a Comment

There's something magical about the first cheesy bite of Mac and Cheese Quesadillas. It’s like indulging in a nostalgic favorite, all wrapped up in a warm tortilla. This inventive dish beautifully marries the creamy goodness of classic macaroni and cheese with the crispy allure of a quesadilla, leveling up your lunch or snack game in just minutes. Not only is it a breeze to prepare, but it also lets your creativity shine—personalize it with zesty jalapeños, savory bacon, or even a splash of your favorite hot sauce! Plus, it’s vegetarian-friendly, with gluten-free options to accommodate various dietary needs. Ready to elevate your meal with this delicious twist? Let’s get cooking!

Why Are Mac and Cheese Quesadillas Unique?

Comforting Fusion: Mac and Cheese Quesadillas are the ultimate fusion dish that combines classic comfort food with a delightful twist, making them a hit with everyone.

Endless Customization: Whether you’re a vegetarian or meat-lover, you can easily customize these quesadillas with ingredients like sautéed spinach from our Chickpea Spinach Curry or bring the heat with spicy jalapeños!

Quick and Easy: Perfect for busy weeknights, these quesadillas come together in under 30 minutes—ideal for satisfying cravings without the hassle of takeout.

Crowd-Pleaser: Kids and adults alike will love the gooey, cheesy filling enveloped in a crispy tortilla, making this recipe a guaranteed success for family meals.

Perfect Pairing: Serve them with fresh guacamole, robust salsa, or even a simple salad, as seen in our Roasted Corn Fried recipe, for a complete and delicious meal.

Mac and Cheese Quesadilla Ingredients

• Dive into the deliciousness of Mac and Cheese Quesadillas with these essential ingredients!

For the Cheese Sauce

  • Elbow Macaroni – A classic base that provides structure; swap in gluten-free pasta for a gluten-free option.
  • Unsalted Butter – This adds a rich, creamy flavor to the roux; plant-based butter is great for a vegan version.
  • All-Purpose Flour – Thickens the cheese sauce beautifully—cornstarch is a perfect substitute for gluten-free needs.
  • Whole Milk – Creates that creamy consistency in the sauce; opt for oat milk for a dairy-free variant.
  • Sharp Cheddar Cheese – Offers a bold, rich flavor; feel free to switch to gouda or pepper jack for a twist.
  • Mozzarella Cheese – Melts like a dream, adding a stretchy chewiness to the quesadilla.
  • Mustard Powder – A secret ingredient that enhances the cheese flavor; entirely optional but worth a try.
  • Garlic Powder – Adds an extra layer of depth; though optional, it’s highly recommended for flavor.
  • Salt and Black Pepper – Essential for seasoning; adjust to your taste for the perfect kick.

For Assembling Quesadillas

  • Flour Tortillas – Encapsulate those cheesy wonders and provide a satisfying crunch; use gluten-free tortillas for dietary restrictions.
  • Butter (for cooking) – Ensures crispiness when grilling the quesadillas for that parfait golden finish.

Enjoy these delightful ingredients as you whip up scrumptious Mac and Cheese Quesadillas that everyone will adore!

Step‑by‑Step Instructions for Mac and Cheese Quesadillas

Step 1: Cook Pasta
Begin by bringing a large pot of salted water to a rolling boil. Add the elbow macaroni and cook until al dente, about 7-8 minutes. Once finished, strain the pasta and set it aside, allowing it to cool slightly while you prepare the cheese sauce.

Step 2: Make Roux
In a saucepan over medium heat, melt 2 tablespoons of unsalted butter. Whisk in 2 tablespoons of all-purpose flour, cooking for about 1 minute until it forms a smooth paste. This roux acts as the base for your cheese sauce, creating a deliciously thick consistency for your Mac and Cheese Quesadillas.

Step 3: Prepare Sauce
Gradually pour in 1 cup of whole milk while continuously whisking to prevent lumps. Continue cooking the mixture for 2-3 minutes until it thickens and bubbles gently. The sauce should have a creamy texture; this will be the heart of your mac and cheese filling, combining beautifully with the macaroni.

Step 4: Incorporate Cheese
Remove the saucepan from the heat, and stir in 1 cup of sharp cheddar cheese and 1 cup of mozzarella cheese until completely melted. Add in the mustard powder, garlic powder, salt, and pepper, adjusting to taste. You’ll achieve a luscious, cheesy sauce that’s perfect for coating your macaroni.

Step 5: Combine
Fold the cooked elbow macaroni into the cheese sauce, ensuring each piece is generously coated. This delectable mixture will be the star filling of your Mac and Cheese Quesadillas, providing a satisfying blend of creamy cheese and tender pasta.

Step 6: Assemble Quesadillas
Lay a flour tortilla flat on a clean surface. Spread a generous amount of the mac and cheese filling over half of the tortilla, then fold the other half over, creating a half-moon shape. Repeat the process for the remaining tortillas, stacking them carefully.

Step 7: Cook Quesadillas
In a large skillet over medium heat, melt 1 tablespoon of butter. Place the assembled quesadillas in the skillet and cook for about 2-3 minutes on each side, or until golden brown and crispy. Press down gently with a spatula to ensure even cooking and the perfect crispiness.

Step 8: Rest and Serve
Once cooked, remove the quesadillas from the skillet and let them rest for 1-2 minutes on a cutting board. This helps the filling set slightly for easy slicing. Cut into wedges and serve hot, paired with your favorite dips for a delightful treat.

What to Serve with Mac and Cheese Quesadillas

Light, crisp salads or zesty dips can elevate your homemade creation and make mealtime even more delightful.

  • Salsa: A vibrant, fresh salsa adds a pop of flavor and pairs beautifully with the creamy quesadillas.

  • Guacamole: Creamy and rich, guacamole brings a luscious balance to the dish—the perfect accompaniment for a cheesy treat!

  • Simple Green Salad: A light salad with mixed greens, cherry tomatoes, and a citrus vinaigrette offers a refreshing contrast to the rich quesadillas.

  • Pico de Gallo: Fresh tomatoes, onions, and cilantro create a zesty topping that enhances each cheesy bite.

  • Tomato Soup: Warm, comforting tomato soup provides a nostalgic pairing that complements the crispy texture of the quesadillas.

  • Sweet Potato Fries: The sweetness and crunch of baked sweet potato fries make for a delightful side, enhancing the overall meal experience.

  • Chili: A hearty bowl of chili—spicy or mild—adds warmth and richness, perfect for dipping those cheesy wedges.

  • Margaritas: For an adult touch, sip a refreshing margarita to balance the savory flavors while keeping the festivities lively.

  • Brownies: Finish your meal on a sweet note with fudgy brownies; their chewy texture contrasts delightfully with the crisp quesadillas.

Make Ahead Options

Mac and Cheese Quesadillas are a fantastic choice for meal prep, saving you time on busy nights! You can prepare the creamy mac and cheese filling up to 24 hours in advance. Simply follow the initial steps to cook the pasta and create the cheese sauce, then mix them together and store in an airtight container in the refrigerator. To maintain the quality, be sure to cover the filling tightly to prevent drying out. When you're ready to enjoy, just assemble the quesadillas and cook them in a skillet for 2-3 minutes on each side until crispy. You'll delight in the same deliciousness without the rush!

How to Store and Freeze Mac and Cheese Quesadillas

Airtight Storage: Store cooked quesadillas in an airtight container in the fridge for up to 3 days to maintain their freshness and flavor.

Freezer-Friendly: For longer storage, freeze quesadillas wrapped tightly in plastic wrap or aluminum foil for up to 3 months. This prevents freezer burn.

Reheating: To reheat, bake frozen quesadillas at 350°F for about 12 minutes until heated through and crispy. Skillets can also be used to restore crispiness.

Enjoy Later: When planning meals ahead, these Mac and Cheese Quesadillas make for a perfect make-ahead option, ready to serve anytime!

Mac and Cheese Quesadillas Variations

Feel free to add your personal touch to these delicious quesadillas to create even more flavor and excitement!

  • Vegetarian Delight: Substitute cooked bacon with sautéed mushrooms and spinach for a hearty, meat-free option. Fresh veggies can enhance the texture and flavor wonderfully!

  • Spicy Kick: Toss in sliced jalapeños or a dash of hot sauce to the cheese mix for a fiery twist. This will elevate your taste buds and make each bite more exciting!

  • Cheesy Blend: Mix in smoked gouda or pepper jack cheese for a unique flavor profile—smoky and spicy additions that enrich the classic cheese taste.

  • Gluten-Free Option: Use gluten-free pasta and tortillas to make this dish accessible to all. You can still enjoy that crispy texture and creamy filling without the gluten!

  • Tex-Mex Style: Add black beans, corn, and diced tomatoes to your macaroni for a vibrant, southwestern flavor. This variation creates a delightful harmony of tastes and textures.

  • Herbed Goodness: Infuse fresh herbs such as basil or cilantro into your cheese sauce for a refreshing twist. Nothing beats a bit of herbiness to liven things up!

  • Savory Sweet: Incorporate roasted butternut squash or caramelized onions into your filling for a sweet and savory combination that surprises the palate.

  • Crispy Corn: Try adding crushed tortilla chips inside the quesadilla for added crunch and texture. A playful twist that brings a fun crunch to every bite!

These variations allow you to get creative in the kitchen! For more unique combinations, consider serving your quesadillas alongside toppings from our delightful Fried Shrimp Cabbage recipe or try dipping them into a spicy salsa paired with Beans Greens Stew. Enjoy customizing your culinary creation!

Expert Tips for Mac and Cheese Quesadillas

• Crisp It Up: Press lightly down on the quesadillas while cooking for that extra crispy texture—everyone loves a good crunch!

• Fresh Ingredients: Use freshly shredded cheese instead of pre-packaged for a smoother melt—this will elevate the flavors in your Mac and Cheese Quesadillas.

• Avoid Sogginess: Assemble the quesadillas just before cooking to keep the tortillas from becoming soggy; this preserves their crispy charm.

• Reheat Right: For leftovers, reheat in a skillet instead of the microwave; this prevents them from losing their wonderful crispiness.

• Mix It Up: Don’t hesitate to experiment with fillings! Try adding cooked chicken or vegetables—your Mac and Cheese Quesadillas will become a versatile family favorite.

Mac and Cheese Quesadillas Recipe FAQs

How do I choose the right elbow macaroni for my quesadillas?
Absolutely! Look for elbow macaroni that is firm and holds its shape well after cooking. Check for any dark spots, which may indicate overripeness or damage. If you're seeking gluten-free options, there are great substitutes available made from brown rice or quinoa pasta.

What’s the best way to store leftover quesadillas?
You can store cooked quesadillas in an airtight container in the fridge for up to 3 days. Make sure they’re cooled completely before sealing to maintain their freshness and avoid sogginess. When ready to eat, simply reheat them in a skillet to preserve that delicious crispiness!

Can I freeze Mac and Cheese Quesadillas? How?
Yes! Mac and Cheese Quesadillas freeze exceptionally well. After allowing them to cool completely, wrap each quesadilla tightly in plastic wrap or aluminum foil to prevent freezer burn and place them in a freezer-safe bag. They can be frozen for up to 3 months. When you’re ready to enjoy, bake them at 350°F for about 12 minutes until heated through and crispy.

What if my cheese sauce isn’t thickening properly?
If your cheese sauce isn't thickening, it could be that you're not whisking vigorously enough while adding the milk. Ensure the roux is cooked for at least 1 minute before adding milk; this is crucial for thickening. If it’s still too thin, try mixing a bit of cornstarch with water and whisk it into the sauce—this should help it thicken beautifully!

Can I modify this recipe for dietary restrictions?
Very! To make this dish gluten-free, swap all-purpose flour with cornstarch or a gluten-free flour blend and use gluten-free tortillas. For a dairy-free option, use plant-based butter and non-dairy milk along with vegan cheese. You can still enjoy this comforting recipe without compromising on your dietary needs!

What’s the best way to keep my quesadillas crispy when reheating?
The best method to keep your quesadillas crispy is by reheating them in a skillet over medium heat. This allows the tortilla to crisp back up while the filling warms through. Avoid using the microwave since it can make the tortillas soggy; we want that delightful crunch!

Mac and Cheese Quesadillas

Mac and Cheese Quesadillas: A Cheesy Twist You’ll Love

Mac and Cheese Quesadillas offer a delightful fusion of creamy macaroni and cheese wrapped in crispy tortillas, perfect for snacks or lunch.
Print Recipe Pin Recipe
Prep Time 10 minutes mins
Cook Time 20 minutes mins
Resting Time 2 minutes mins
Total Time 30 minutes mins
Servings: 4 quesadillas
Course: Snacks
Cuisine: American
Calories: 400
Ingredients Equipment Method Nutrition Notes

Ingredients
  

For the Cheese Sauce
  • 8 oz Elbow Macaroni gluten-free option available
  • 2 tbsp Unsalted Butter or plant-based butter for vegan
  • 2 tbsp All-Purpose Flour or cornstarch for gluten-free
  • 1 cup Whole Milk or oat milk for dairy-free
  • 1 cup Sharp Cheddar Cheese or gouda/pepper jack for variation
  • 1 cup Mozzarella Cheese for stretchy texture
  • 1 tsp Mustard Powder optional
  • 1 tsp Garlic Powder optional but recommended
  • to taste Salt
  • to taste Black Pepper
For Assembling Quesadillas
  • 4 Flour Tortillas or gluten-free tortillas
  • 1 tbsp Butter (for cooking)

Equipment

  • Large pot
  • Saucepan
  • Skillet
  • Whisk
  • Spatula

Method
 

Instructions
  1. Bring a large pot of salted water to a rolling boil. Add elbow macaroni and cook until al dente, about 7-8 minutes. Strain and set aside.
  2. Melt 2 tablespoons of unsalted butter in a saucepan over medium heat. Whisk in 2 tablespoons of flour and cook for 1 minute until smooth.
  3. Gradually pour in 1 cup of whole milk while whisking continuously. Cook until it thickens and bubbles gently for 2-3 minutes.
  4. Remove from heat, stir in 1 cup of sharp cheddar cheese and 1 cup of mozzarella until melted. Add mustard powder, garlic powder, salt, and pepper.
  5. Fold cooked macaroni into the cheese sauce until well coated.
  6. Lay a tortilla flat, spread mac and cheese filling over half, and fold to form a half-moon. Repeat with remaining tortillas.
  7. Melt 1 tablespoon of butter in a skillet over medium heat. Cook quesadillas for 2-3 minutes on each side until golden brown.
  8. Let the quesadillas rest for 1-2 minutes, then cut into wedges and serve hot.

Nutrition

Serving: 1quesadillaCalories: 400kcalCarbohydrates: 45gProtein: 15gFat: 20gSaturated Fat: 12gPolyunsaturated Fat: 2gMonounsaturated Fat: 5gCholesterol: 60mgSodium: 800mgPotassium: 250mgFiber: 2gSugar: 3gVitamin A: 500IUCalcium: 300mgIron: 2mg

Notes

Customize with your favorite add-ins like jalapeños or bacon for added flavor! Serve with guacamole, salsa or salad for a complete meal.

Tried this recipe?

Let us know how it was!

Effortless Easy Easter Dinner on a Sheet Pan Delight

February 8, 2026 by Grace Snow Leave a Comment

As I caught the delightful aroma of honey-glazed ham wafting through my kitchen, I realized how a simple sheet pan could turn an ordinary meal into a festive celebration. With my Easy Easter Dinner on a Sheet Pan, we're talking about effortless preparation, minimal cleanup, and a medley of flavors that will steal the show at your holiday gathering. Imagine tender roasted potatoes, vibrant green beans, and that juicy ham crowned with luscious pineapple, all harmoniously cooking together. Best of all, this gluten-free recipe offers comfort food goodness without the hassle of juggling multiple dishes. Ready to impress your loved ones with a meal that’s as tasty as it is easy to prepare? Let’s dive into the details and make your Easter unforgettable!

Why is This Sheet Pan Dinner Perfect?

Effortless Prep: This sheet pan dinner makes cooking a breeze, requiring just one pan for a complete meal that frees you from multiple pots and pans.

Flavorful Combination: Enjoy the sweet and tangy glaze on the ham paired perfectly with roasted potatoes and green beans, delivering a burst of flavor in every bite.

Versatile Ingredients: Feel free to swap out vegetables based on what you have on hand, or customize the glaze to match your family’s taste for a truly personal touch.

Less Cleanup: With everything cooked on one sheet pan, you’ll spend less time scrubbing dishes and more time savoring the company of your guests, much like when you prepare Panna Cotta Sweet for dessert.

Diet-Friendly: This easy Easter dinner is gluten-free and checks the boxes for various dietary preferences, making it an excellent choice for gatherings.

Crowd-Pleaser: Bring comfort food to the table that will impress every guest, making your holiday gathering feel special without the stress of complicated recipes.

Easy Easter Dinner on a Sheet Pan Ingredients

For the Veggies
• Baby Potatoes – Perfect for texture; substitute with red or Yukon Gold if desired.
• Green Beans – Great for color and nutrition; swap with thick asparagus or Brussels sprouts for variety.

For the Glazing
• Olive Oil – Essential for roasting; can replace with melted butter for a richer flavor.
• Garlic (minced) – Adds aromatic depth; fresh is best, but garlic powder works in a pinch.
• Fresh Thyme – Brings herbal brightness; dried thyme can substitute in a pinch (1 tsp).
• Onion Powder, Salt, Pepper – Seasonings to enhance flavor; adjust to your taste.

For the Main Attraction
• Quartered Boneless Ham – The star of the dish; use ham steaks as an alternative if needed.
• Canned Sliced Pineapple – Offers sweetness and moisture; fresh pineapple is wonderful when in season.

For the Sweet Glaze
• Honey & Brown Sugar – Contribute sweetness and texture; maple syrup is a good alternative.
• Apple Cider Vinegar & Dijon Mustard – Balance the sweetness of the glaze; substitute with white vinegar and whole grain mustard if necessary.

This Easy Easter Dinner on a Sheet Pan is not only delicious but also a time-saver, bringing the joy of homemade cooking to your holiday table!

Step‑by‑Step Instructions for Easy Easter Dinner on a Sheet Pan

Step 1: Preheat the Oven
Begin by preheating your oven to 450°F (232°C). While it heats, prepare your sheet pan by spraying it liberally with nonstick spray to ensure easy cleanup. The higher temperature will help achieve beautifully roasted vegetables and a caramelized glaze on your ham.

Step 2: Prepare the Vegetables
Place the baby potatoes on one-third of the prepared sheet pan and the green beans in the middle section. Drizzle them generously with olive oil, and sprinkle with minced garlic, fresh thyme, onion powder, salt, and pepper. Toss everything lightly to coat well, making sure the flavors meld as they roast.

Step 3: Arrange the Ham and Pineapple
On the remaining third of the sheet pan, layer the quartered boneless ham slices, followed by the canned slices of pineapple. This combination not only adds sweetness but also keeps the ham juicy. Brush the ham and pineapple with the honey and brown sugar glaze for a delightful finish to your Easy Easter Dinner on a Sheet Pan.

Step 4: Bake to Perfection
Carefully place the sheet pan in the preheated oven. Bake for 25-30 minutes, checking at the halfway point. Your potatoes should be fork-tender, the green beans should look crisp-tender, and the ham should be heated through, taking on a lovely golden hue from the glaze.

Step 5: Finish and Serve
Once everything is beautifully cooked, remove the sheet pan from the oven and let it rest for a few minutes. This allows the flavors to settle. Serve the glorious Easy Easter Dinner on a Sheet Pan straight from the pan for a casual yet festive touch, and enjoy the delightful medley of flavors!

Expert Tips for Easy Easter Dinner on a Sheet Pan

  • Oven Check: Always check your oven's accuracy; cooking times can differ. If it's running hot, reduce the temperature slightly for even cooking.

  • Green Bean Timing: To avoid mushy green beans, add them halfway through the cooking time. This keeps them crisp and vibrant.

  • Flavor Adjustments: Don't hesitate to experiment with spices or add your favorite veggies. This Easy Easter Dinner on a Sheet Pan is versatile and accommodating!

  • Leftover Love: Save any leftover ham for quick lunches or sandwiches. It's perfect for using up that delicious ham and avoiding waste.

  • Uniform Sizing: Cut your vegetables into similar sizes so they cook evenly. This ensures everything is perfectly tender by the end of baking.

What to Serve with Easy Easter Dinner on a Sheet Pan

A delightful meal deserves equally inviting companions to elevate your Easter gathering.

  • Crispy Garlic Bread: The buttery richness adds a comforting texture, perfect for soaking up the delicious glaze from the ham and veggies.

  • Classic Caesar Salad: Fresh romaine with a tangy dressing offers a crisp contrast, balancing the sweetness of the ham beautifully.

  • Honey-Glazed Carrots: Sweet and vibrant, they echo the flavors of your sheet pan dinner while adding a lovely pop of color to the table.

  • Creamy Coleslaw: The crunch of cabbage paired with a creamy dressing provides a zesty contrast, enhancing the savory elements of your meal.

  • Savory Stuffing: A side of classic stuffing adds an aromatic element, bringing a homey touch to the table and complementing the ham perfectly.

  • Sparkling Fruit Punch: Refreshing and festive, this drink beautifully balances the hearty meal, making for lively sipping all meal long.

  • Lemon Tart: End the meal on a bright note with a tart dessert that cuts through richness, leaving your guests delighted and satisfied.

Overall, these additions will enhance your Easy Easter Dinner on a Sheet Pan, creating a festive feast that resonates warmth and joy.

Make Ahead Options

These Easy Easter Dinner on a Sheet Pan components can be prepped in advance to save you time and stress during the holiday. You can chop and season the baby potatoes and green beans up to 24 hours ahead, storing them in an airtight container in the fridge to preserve freshness. Additionally, prepare the glaze by mixing honey, brown sugar, vinegar, and mustard and keep it refrigerated for about 3 days. When you're ready to serve, simply assemble the potatoes, green beans, ham, and pineapple on the sheet pan, brush everything with the prepared glaze, and bake it as directed. Rest assured, this dinner will be just as delicious and vibrant as when made fresh!

Easy Easter Dinner on a Sheet Pan Variations

Feel the freedom to tailor this delightful sheet pan dinner to your family’s tastes and preferences! Each swap will take your meal to new delicious heights.

  • Root Veggies: Swap in carrots or sweet potatoes for extra sweetness and variety. Their natural sugars caramelize beautifully, adding richness to your dish.

  • Seasoning Twist: Try using smoked paprika or Italian seasoning for an unexpected flavor punch. The warmth of smoked paprika can really elevate the overall taste profile.

  • Cheesy Delight: Top the potatoes with Parmesan or another cheese of your choice for a creamy touch. The delightful melted layer adds a savory, luxurious vibe to the dish.

  • Fruit Options: Use fresh peaches or mango slices when in season, instead of pineapple. This fresh fruit addition brings a unique sweetness and brightness.

  • Protein Swap: Substitute the boneless ham with chicken thighs or turkey breast, allowing it to absorb the sweet glaze. This makes for a fantastic variation that’s equally delicious.

  • Veggie Mix: Throw in some bell peppers or zucchini for added color and a hint of crunch. Such vibrant veggies not only add flavor but also make your plate pop with energy.

  • Hearty Grains: Add a side of quinoa or farro on your sheet pan to make it heartier. This will also absorb the delicious flavors from the ham and veggies, enhancing every bite.

Feel free to serve this with a fresh salad or even follow it up with a lovely dessert, like Panna Cotta Sweet, for a well-rounded meal experience!

How to Store and Freeze Easy Easter Dinner on a Sheet Pan

Fridge: Store any leftovers in an airtight container for up to 3-4 days. This helps maintain the flavor and texture of your delicious sheet pan dinner.

Freezer: For extended storage, freeze leftovers in a sealed freezer bag or container for up to 3 months. Make sure to label with the date for easy tracking.

Reheating: When ready to enjoy, thaw the frozen dinner in the fridge overnight, then reheat in the oven at 350°F (175°C) until heated through, about 15-20 minutes.

Serving Tips: To revive the texture of your Easy Easter Dinner on a Sheet Pan, consider adding a drizzle of olive oil before reheating for extra moisture.

Easy Easter Dinner on a Sheet Pan Recipe FAQs

How do I select ripe vegetables for this recipe?
Absolutely! When choosing your baby potatoes, look for those that are smooth and firm without any dark spots or blemishes. For green beans, opt for bright, crisp ones with a vibrant green color and no signs of wilting. Freshness is key, so when in doubt, trust your instincts!

What’s the best way to store leftover sheet pan dinner?
You can store any leftover Easy Easter Dinner on a Sheet Pan in an airtight container in the fridge for up to 3-4 days. This helps retain the flavors and textures while allowing you to enjoy the delicious meal again.

Can I freeze this dish for later?
Yes, you can! To freeze your Easy Easter Dinner on a Sheet Pan, simply place the leftovers in a sealed freezer bag or container. Make sure to label it with the date for easy tracking. You can safely freeze it for up to 3 months. When you're ready to eat, thaw it overnight in the refrigerator, then reheat in the oven at 350°F (175°C) for 15-20 minutes until heated through.

Is it possible to adjust the recipe for dietary restrictions?
Very! This recipe is naturally gluten-free, but if you have specific allergies, be sure to check the ingredients carefully. For instance, if you need to swap the honey for a vegan option, maple syrup works beautifully as an alternative. Just keep in mind to modify any of the other ingredients as per your dietary needs.

What should I do if my potatoes aren’t cooking evenly?
If you find that your potatoes aren't cooking evenly, it’s likely due to size inconsistency. Make sure to cut them, along with the other veggies, into similar sizes for uniform cooking. If you're still running into trouble, try parboiling them for about 5-7 minutes before roasting — this jumpstarts the cooking process and ensures tender potatoes.

Can I use fresh pineapple instead of canned?
Absolutely! Fresh pineapple is a wonderful substitute when it’s in season — just cut it into slices or chunks similar in size to the canned version. It will give your Easy Easter Dinner on a Sheet Pan an even fresher flavor and lovely texture!

Easy Easter Dinner on a Sheet Pan

Effortless Easy Easter Dinner on a Sheet Pan Delight

Enjoy this Easy Easter Dinner on a Sheet Pan, featuring honey-glazed ham, roasted potatoes, and vibrant green beans for a delightful holiday meal.
Print Recipe Pin Recipe
Prep Time 15 minutes mins
Cook Time 30 minutes mins
Resting Time 10 minutes mins
Total Time 55 minutes mins
Servings: 6 servings
Course: Dinner
Cuisine: American
Calories: 450
Ingredients Equipment Method Nutrition Notes

Ingredients
  

For the Veggies
  • 1.5 pounds Baby Potatoes Substitute with red or Yukon Gold if desired.
  • 1 pound Green Beans Swap with thick asparagus or Brussels sprouts for variety.
For the Glazing
  • 2 tablespoons Olive Oil Can replace with melted butter.
  • 3 cloves Garlic (minced) Fresh is best, but garlic powder works in a pinch.
  • 1 tablespoon Fresh Thyme Dried thyme can substitute (1 tsp).
  • 1 teaspoon Onion Powder Adjust to your taste.
  • 1 teaspoon Salt Adjust to your taste.
  • 1 teaspoon Pepper Adjust to your taste.
For the Main Attraction
  • 2 pounds Quartered Boneless Ham Use ham steaks as an alternative if needed.
  • 1 can Canned Sliced Pineapple Fresh pineapple is wonderful when in season.
For the Sweet Glaze
  • 1/4 cup Honey Can be substituted with maple syrup.
  • 1/4 cup Brown Sugar Can be substituted with maple syrup.
  • 2 tablespoons Apple Cider Vinegar Substitute with white vinegar if necessary.
  • 1 tablespoon Dijon Mustard Substitute with white vinegar and whole grain mustard if necessary.

Equipment

  • sheet pan
  • Oven
  • Mixing Bowl

Method
 

Preparation Steps
  1. Preheat your oven to 450°F (232°C) and prepare your sheet pan with nonstick spray.
  2. Place baby potatoes on one-third of the sheet pan and green beans in the middle section. Drizzle with olive oil and sprinkle with garlic, thyme, onion powder, salt, and pepper. Toss to coat.
  3. Layer quartered boneless ham on the remaining third of the sheet pan, followed by canned sliced pineapple. Brush with honey and brown sugar glaze.
  4. Bake for 25-30 minutes, checking halfway. The potatoes should be fork-tender and the ham should be heated through.
  5. Remove from the oven and let it rest for a few minutes before serving straight from the pan.

Nutrition

Serving: 1plateCalories: 450kcalCarbohydrates: 42gProtein: 28gFat: 20gSaturated Fat: 6gPolyunsaturated Fat: 2gMonounsaturated Fat: 10gCholesterol: 90mgSodium: 800mgPotassium: 600mgFiber: 5gSugar: 15gVitamin A: 250IUVitamin C: 15mgCalcium: 25mgIron: 2mg

Notes

This Easy Easter Dinner on a Sheet Pan is not only delicious but also a time-saver for your holiday table.

Tried this recipe?

Let us know how it was!
  • « Previous Page
  • 1
  • …
  • 26
  • 27
  • 28
  • 29
  • 30
  • …
  • 179
  • Next Page »

Welcome!

Hi, I’m Grace, a Sydney-based home cook with a passion for bold flavors and trending ingredients. Whether you’re a busy beginner or a seasoned foodie, you’ll find dishes here that are fresh, fun, and full of flavor.

More about me

Popular Recipes

  • Cheesy Chicken Garlic Bread Sandwich
    Cheesy Chicken Garlic Bread Sandwich for Cozy Family Moments
  • Easy Chicken Ranch Wraps
    Easy Chicken Ranch Wraps: Quick, Creamy & Totally Satisfying
  • Chicken Caesar Sandwiches
    Delicious Chicken Caesar Sandwiches for Quick Comfort Food
  • best Cuban sandwich
    The Best Cuban Sandwich You’ll Want Every Weeknight!

Footer

↑ back to top

About

  • Privacy Policy
  • Disclaimer
  • Terms & Conditions

Newsletter

  • Sign Up! for emails and updates

Contact

  • About me
  • Contact me

Copyright © 2025 TastyTrendIngredients