tastytrendingredients

  • Home
  • Recipes
    • Appetizers
    • Breakfast
    • Dessert
    • Dinner
    • Drinks
    • Salads
    • Snacks
    • Soups
  • About me
  • Contact me
menu icon
go to homepage
  • Home
  • Recipes
    • Appetizers
    • Breakfast
    • Dessert
    • Dinner
    • Drinks
    • Salads
    • Snacks
    • Soups
  • About me
  • Contact me
search icon
Homepage link
  • Home
  • Recipes
    • Appetizers
    • Breakfast
    • Dessert
    • Dinner
    • Drinks
    • Salads
    • Snacks
    • Soups
  • About me
  • Contact me
×

Delicious Nigerian Spinach Stew for a Heartwarming Meal

February 11, 2026 by Grace Snow Leave a Comment

Amid the hustle of everyday life, you might find yourself in a culinary rut, reaching for those quick takeout options instead of delving into the heart of homemade flavors. Enter Efo Riro, a vibrant Nigerian Spinach Stew that not only awakens your taste buds but also proves that leafy greens can be a delightful experience. This gluten-free, low-carb dish is quick to whip up and doesn’t skimp on flavor, making it a perfect addition to your weekly meal prep. With options to customize the protein and the opportunity to swap spinach for other greens, this recipe invites creativity while ensuring a nutritious boost. So, are you ready to transform your kitchen and enjoy a taste of Nigerian cuisine? Let’s dive into this comforting delight!

Why is Efo Riro a must-try?

Vibrant flavors: This Nigerian Spinach Stew bursts with deliciousness, transforming humble ingredients into a feast for the senses.
Quick & easy: Perfect for busy schedules, you can prepare this comforting dish in no time.
Versatile options: Customize with your favorite proteins or greens for a meal that suits any dietary need.
Health benefits: Packed with nutrients, this gluten-free recipe is low in carbs and encourages healthy eating habits.
Crowd-pleaser: Whether as a main dish or a side, Efo Riro will impress your guests and family alike. Pair it with rice or fufu for a truly authentic experience!

Nigerian Spinach Stew Ingredients

• Get ready to create a delicious Efo Riro!

For the Stew

  • Spinach – This is the star ingredient that gives the dish its vibrant green color; fresh or frozen varieties work well.
  • Cooked Meat – Adds protein and richness; goat meat is traditional, but chicken or beef are great substitutions.
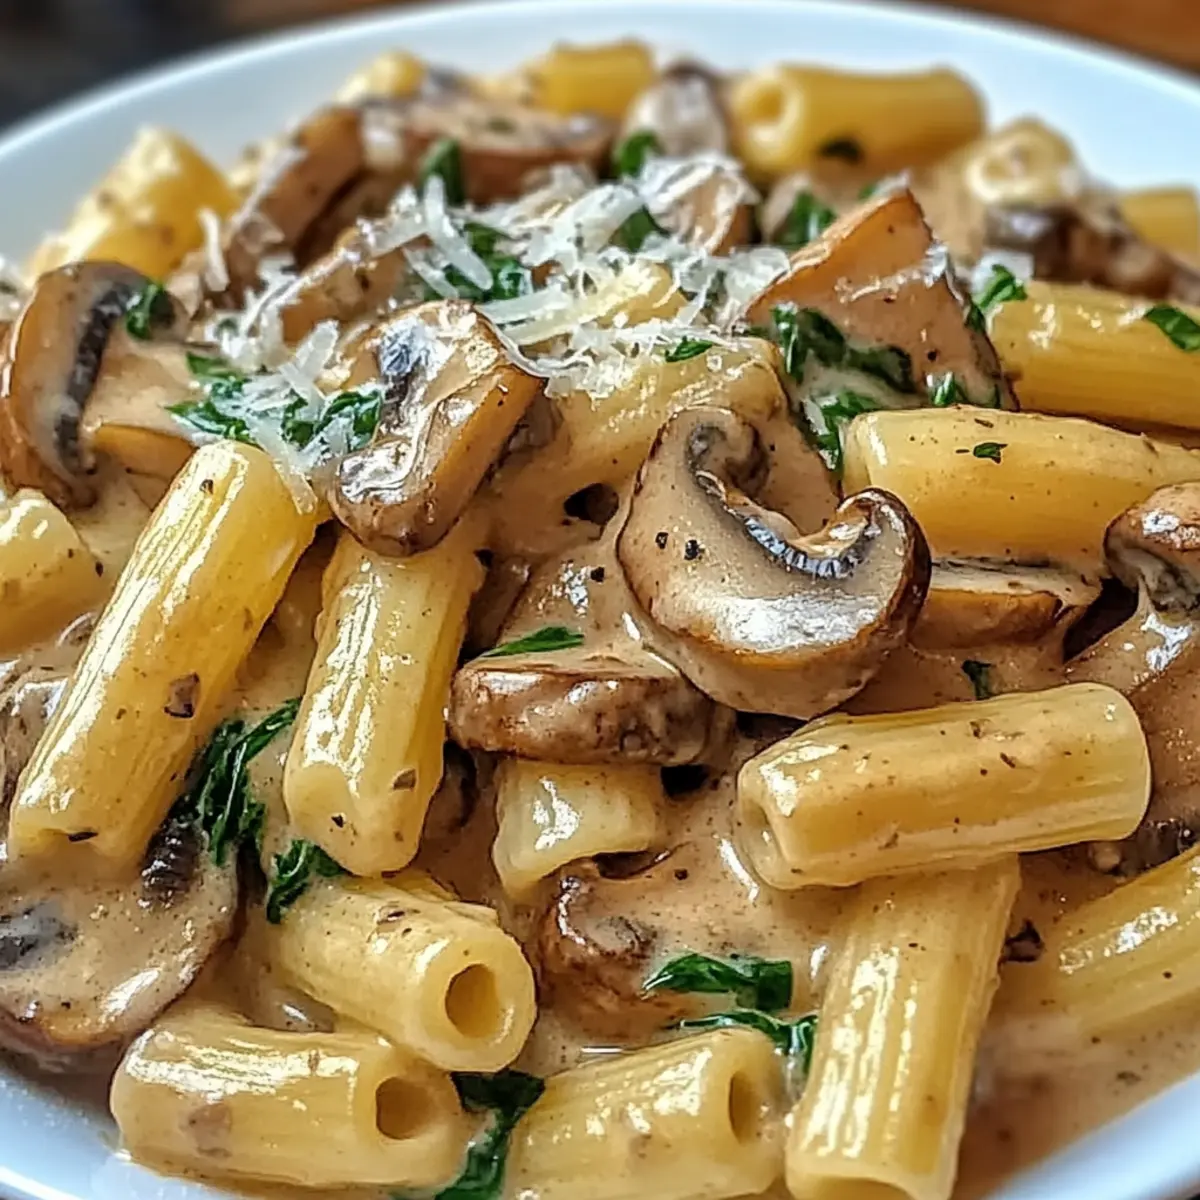
  • Mushrooms – For an extra umami kick and texture; can be omitted or replaced with tofu for a vegan option.
  • Palm Oil – Essential for an authentic flavor; coconut oil can be used in a pinch, though it may change the taste.
  • Tomatoes – Provides acidity and sweetness; you can use canned tomatoes if fresh aren’t available.
  • Bell Pepper – Adds sweetness and a splash of color; any color works beautifully!
  • Habanero Pepper – Gives the stew its signature heat; feel free to adjust based on your spice tolerance.
  • Onion – A base flavor that enhances overall taste; shallots can be substituted for a subtly different flavor.
  • Water or Stock – Adjusts the stew’s consistency; vegetable broth can add even more flavor.
  • Bouillon Powder, Cayenne Pepper, Black Pepper, Ground Crayfish, Pepper Flakes, Salt – This seasoning blend is vital for boosting flavor and can be customized according to dietary restrictions.

For Serving

  • Rice, Fufu, or Cauliflower Rice – These sides make the perfect pair for your flavorful Nigerian Spinach Stew!

Step‑by‑Step Instructions for Nigerian Spinach Stew

Step 1: Blend the Base Ingredients
Start by blending together the tomatoes, red bell pepper, habanero pepper, and half of the onion in a blender until smooth. This vibrant mixture should take about 2–3 minutes to achieve a silky texture. Set this aside in a bowl while you prepare the remaining ingredients, ensuring the base flavors will infuse beautifully into your Nigerian Spinach Stew.

Step 2: Prepare Onions and Spinach
Chop the remaining half of the onion into fine pieces and set aside. If using fresh spinach, wash it thoroughly and squeeze out excess water to eliminate bitterness. For frozen spinach, microwave it until just thawed, this should take about 3–4 minutes. Proper preparation here sets the stage for a delightful Efo Riro.

Step 3: Sauté the Onions
Heat a pot over medium heat and pour in about ¼ cup of palm oil. Once the oil shimmers, add the chopped onions and sauté for approximately 2 minutes until they're translucent and fragrant. This brings out the sweetness of the onions, creating a lovely base for your Nigerian Spinach Stew.

Step 4: Introduce the Blended Mixture
Carefully add the blended tomato and pepper mixture to the pot with the sautéed onions, stirring well to combine. Cook this medley for about 1 minute, allowing the flavors to marry. You should notice a rich aroma filling your kitchen, signaling that your stew's foundation is coming together beautifully.

Step 5: Add Seasonings
Stir in the bouillon powder, cayenne pepper, black pepper, ground crayfish, and salt to the pot. Stir continuously for about 5 minutes, allowing the seasonings to cook and deepen in flavor. This step is vital for achieving the signature taste of Efo Riro, allowing all those spices to permeate the stew.

Step 6: Incorporate Fresh Spinach
If you’re using fresh spinach, pour in a bit of water or stock to adjust the consistency of the stew and bring it to a boil. Once boiling, add in your cooked meat, whether it’s goat, chicken, or beef, and let it simmer for about 5 minutes. The meat will further enrich the stew, making it hearty and delicious.

Step 7: Final Touch with Spinach
Now, stir in the prepared spinach, either fresh or microwaved frozen, and let it cook for another 5 minutes. You'll want the spinach to wilt and incorporate fully into the stew, transforming your Nigerian Spinach Stew into a lush, vibrant dish that looks as delightful as it tastes.

Step 8: Serve and Garnish
Finally, taste your Efo Riro and adjust any seasonings if necessary. For an extra kick, feel free to garnish with red pepper flakes. Serve hot alongside rice, fufu, or cauliflower rice, allowing the rich flavors of your Nigerian Spinach Stew to shine as a comforting meal full of warmth and love.

Nigerian Spinach Stew Variations & Substitutions

Feel free to let your creativity shine by customizing this recipe with unique twists and substitutions!

  • Dairy-Free: Substitute any dairy-based ingredients with coconut cream or nut-based alternatives for a creamy texture.
  • Vegetarian: Replace the meat with tofu or mushrooms for an equally hearty and satisfying stew.
  • Nut-Free: If you have allergies, avoid ground crayfish and check all spices for potential cross-contamination.
  • Low-Carb: Instead of traditional sides, serve with cauliflower rice or a low-carb coconut fufu for a wholesome meal without the carbs.
  • Additional Greens: Swap spinach for kale, Swiss chard, or a mix of greens for a twist on flavor and texture.
  • Spicy Option: Increase the heat by adding crushed red pepper flakes or chili powder to elevate the spice level to your liking.
  • Flavor Boost: Add fresh herbs like cilantro or parsley at the end for a fresh burst of flavor that brightens the dish.
  • Protein Swap: Experiment with different proteins by using shrimp or lentils, making it suitable for various dietary preferences. If you're intrigued, try the delightful flavors of Chickpea Spinach Curry for another tasty veggie option.

With these variations, you can create a personalized version of this beloved Nigerian classic!

What to Serve with Flavorful Efo Riro?

Elevate your homemade Efo Riro experience by pairing it with vibrant sides and enriching drinks that create a comforting and delightful meal.

  • Jollof Rice: A classic West African dish, its savory, spiced flavors complement the richness of the stew beautifully.

  • Fufu: With its soft and doughy texture, fufu acts as the perfect vessel to scoop up the hearty Efo Riro, enhancing each delicious bite.

  • Cauliflower Rice: For a low-carb option, this fluffy alternative adds a light touch while soaking up the rich stew without overwhelming your palate.

  • Plantains: The subtle sweetness of fried or baked ripe plantains contrasts delightfully with the spicy flavors of the Efo Riro, creating a balanced experience.

  • Cucumber Salad: A refreshing pop of freshness, this salad adds crunch and lightness, making it a perfect foil for the hearty stew.

  • Zobo Drink: This sweet and tangy hibiscus beverage is a delightful accompaniment, providing a refreshing contrast to the depth of Efo Riro.

  • Pineapple Upside-Down Cake: For dessert, this moist and fruity cake adds a decadent finish to your meal, leaving everyone satisfied and happy.

  • Cold Nigerian Beer: Pairing your meal with a chilled local lager enhances the overall flavor experience, creating a thoroughly enjoyable dining occasion.

Expert Tips for Nigerian Spinach Stew

  • Fresh Spinach Choice: Always use fresh spinach if possible for the best flavor and texture. Frozen spinach is a great backup, but may result in a slightly different stew consistency.

  • Adjusting Spice Levels: Be cautious with the habanero pepper. Start with less and gradually add more to reach your desired heat—this Nigerian spinach stew should be flavorful without overwhelming your palate.

  • Perfect Cooking Time: Don't rush the sautéing of the onions. A little patience allows the onions to caramelize, enhancing the stew's overall richness.

  • Flavor Depth: Incorporating a splash of acid, like lime or lemon juice, at the end can brighten the flavors of your Nigerian spinach stew, making it even more vibrant.

  • Storage Success: For a longer shelf life, store your stew in airtight containers. It freezes well, making future meals a breeze—just remember to thaw it overnight in the fridge before reheating!

How to Store and Freeze Efo Riro

Fridge: Keep Efo Riro in an airtight container in the fridge for up to 5 days. This allows the flavors to meld beautifully while keeping it fresh and ready for a quick meal.

Freezer: To extend storage, freeze Efo Riro in individual portions for up to 3 months. Make sure to use freezer-safe containers to prevent freezer burn and retain the dish's savory goodness.

Thawing: When ready to enjoy, thaw your Nigerian Spinach Stew overnight in the fridge. This gradual thawing helps maintain the texture and flavor of the stew.

Reheating: Reheat Efo Riro on the stove over medium heat, stirring occasionally until warmed through. A splash of water or broth can help restore the consistency if needed.

Make Ahead Options

Efo Riro is perfect for busy home cooks looking to save time during the week! You can prepare the base sauce by blending the tomatoes, bell pepper, and habanero up to 24 hours in advance; simply refrigerate it in an airtight container. The chopped onions and spinach can also be prepped ahead of time and stored separately, keeping them fresh for up to 3 days in the fridge. When you're ready to enjoy your Nigerian Spinach Stew, sauté the onions, combine the blended sauce, and finish the cooking process by adding in the spinach and cooked meat, ensuring every bite is just as delicious as when made fresh!

Efo Riro (Nigerian Spinach Stew) Recipe FAQs

What type of spinach should I use for Efo Riro?
Fresh spinach is the best option for Efo Riro, as it provides the best flavor and texture. However, if you don’t have access to fresh spinach, frozen spinach can be used as a substitute—just ensure it's properly thawed and drained of excess water before adding it to the stew.

How long can I store Efo Riro in the fridge?
You can store your Efo Riro in an airtight container in the fridge for up to 5 days. This duration allows the flavors to develop even further, making it a great option for meal prep!

Can I freeze Efo Riro, and if so, how?
Absolutely! To freeze Efo Riro, let it cool completely, then portion it into freezer-safe containers. It can be stored in the freezer for up to 3 months. Be sure to label your containers with the date for easy tracking. When ready to enjoy, thaw it overnight in the fridge before reheating on the stove.

What if my Efo Riro is too spicy?
If your Efo Riro turns out too spicy for your liking, don’t worry! You can balance the heat by adding more vegetables, such as cooked potatoes or sweet potatoes, which absorb spice, or by incorporating a bit of cream or coconut milk for a milder flavor. You can also add more spinach to help distribute the heat!

Can my pets eat Efo Riro?
It's best to keep Efo Riro away from pets, as some ingredients may not be safe for them. Onions and garlic, in particular, can be toxic to dogs and cats, so be cautious if you're sharing meals around your furry friends.

Are there any gluten-free options for Efo Riro?
Yes! This Efo Riro recipe is naturally gluten-free, as it does not contain any wheat-based ingredients. However, always ensure that any substitutes, such as bouillon powders or sauces, are labeled gluten-free to stay within dietary restrictions.

Nigerian Spinach Stew

Delicious Nigerian Spinach Stew for a Heartwarming Meal

Nigerian Spinach Stew, also known as Efo Riro, offers a vibrant and nutritious meal using fresh spinach and customizable proteins.
Print Recipe Pin Recipe
Prep Time 15 minutes mins
Cook Time 30 minutes mins
Total Time 45 minutes mins
Servings: 4 servings
Course: Dinner
Cuisine: Nigerian
Calories: 250
Ingredients Equipment Method Nutrition Notes

Ingredients
  

For the Stew
  • 4 cups fresh spinach or frozen spinach
  • 2 cups cooked meat goat, chicken, or beef
  • 1 cup mushrooms optional, or use tofu for vegan option
  • 1/4 cup palm oil or coconut oil
  • 2 cups tomatoes fresh or canned
  • 1 medium bell pepper
  • 1 medium habanero pepper adjust based on spice tolerance
  • 1 medium onion divided
  • 1 cup water or stock vegetable broth can add more flavor
  • 1 tablespoon bouillon powder
  • 1 teaspoon cayenne pepper
  • 1 teaspoon black pepper
  • 1 tablespoon ground crayfish
  • 1 teaspoon pepper flakes
  • 1 teaspoon salt
For Serving
  • 4 cups rice or fufu or cauliflower rice

Equipment

  • Blender
  • pot

Method
 

Step-by-Step Instructions
  1. Blend together tomatoes, bell pepper, habanero, and half the onion until smooth. Set aside.
  2. Chop remaining onion and prepare spinach accordingly.
  3. Heat palm oil and sauté chopped onions until translucent (about 2 minutes).
  4. Add blended mixture to pot with sautéed onions and cook for 1 minute.
  5. Stir in seasonings and cook for 5 minutes.
  6. Add water or stock, then cooked meat, and let it simmer for 5 minutes.
  7. Stir in prepared spinach and cook for another 5 minutes until wilted.
  8. Adjust seasonings if necessary and serve hot with rice, fufu, or cauliflower rice.

Nutrition

Serving: 1cupCalories: 250kcalCarbohydrates: 15gProtein: 20gFat: 15gSaturated Fat: 5gPolyunsaturated Fat: 1gMonounsaturated Fat: 3gCholesterol: 60mgSodium: 800mgPotassium: 600mgFiber: 5gSugar: 3gVitamin A: 3000IUVitamin C: 60mgCalcium: 150mgIron: 4mg

Notes

Store Efo Riro in an airtight container for up to 5 days in the fridge or freeze for up to 3 months. Thaw overnight in the fridge before reheating.

Tried this recipe?

Let us know how it was!

Savory Brown Stew Chicken That Will Warm Your Soul

February 11, 2026 by Grace Snow Leave a Comment

As I stood by the kitchen counter, the tantalizing aroma of spices filled the air, transporting me straight to the vibrant streets of Jamaica. This Creamy and Spicy Jamaican Brown Stew Chicken is more than just a dish; it’s a celebration of culture and comfort in every bite. Not only is this savory brown stew chicken incredibly satisfying, but it also comes together quickly, making it perfect for busy weeknights or family gatherings. Plus, it’s easy to customize to tickle your taste buds—whether you prefer a mild hint of spice or a fiery kick. Are you ready to embark on a culinary adventure that promises warmth and joy? Let’s dive in!

Why is this Brown Stew Chicken special?

Hearty Comfort: This savory brown stew chicken warms your soul with its rich, aromatic flavors, making it a go-to for any occasion.

Quick Prep: Ideal for busy schedules, it comes together in under an hour, so you can enjoy homemade goodness without the long wait.

Customizable Spice: You can easily tweak the heat level! Adjust the habanero peppers to suit your taste, whether you like it mild or extra spicy.

Crowd-Pleaser: Perfect for family gatherings, the thick gravy makes it a hit, and it's superb when served over fluffy rice—an irresistible combo.

Versatile Pairings: Enjoy it with baked plantains, collard greens, or a light Caribbean salad for a balanced meal. This recipe pairs wonderfully with Honey Garlic Chicken or Crock Pot Chicken Stew if you want more flavors to explore!

Savory Brown Stew Chicken Ingredients

For the Chicken

  • Bone-in Chicken Thighs or Drumsticks – The main protein source; boneless can reduce fat content if preferred.
  • Chicken Bouillon – Adds savory depth; opt for low-sodium varieties to lower salt intake.

For the Marinade

  • Chopped Scallions – For a fresh flavor; green onions can be substituted.
  • Habanero Peppers – Provides heat; swap with jalapeños for a milder dish.
  • Minced Garlic – For an aromatic base; garlic powder can be used in a pinch.
  • Fresh Thyme Leaves – Adds an earthy note; you can also use dried thyme in smaller amounts.
  • Freshly Grated Ginger – Enhances warmth; ground ginger is a good alternative if needed.
  • Smoked Paprika – Provides a smoky flavor; regular paprika will work, too.
  • Black Pepper – Essential seasoning; use freshly ground for the best flavor.

For the Stew Base

  • Oil (Olive or Vegetable) – For browning the chicken; choose oil with a high smoke point.
  • Onion (Chopped) – An aromatic base; shallots can be a good substitute.
  • Carrots (Sliced) – Adds sweetness and texture; other root vegetables can work as alternatives.
  • Bell Pepper (Chopped) – Adds sweetness and color; any type of sweet pepper is fine.
  • Ketchup – Contributes to the stew's flavor and sweetness; tomato paste is a good substitute.
  • Brown Sugar – Enhances richness; honey or maple syrup can replace it.
  • Browning Seasoning – For color and depth; Maggi seasoning or soy sauce are good alternatives.
  • Bay Leaves – Infuses aroma; remember to remove them before serving.
  • Water – Use for simmering the stew; chicken broth enhances the flavor for a savory brown stew chicken experience.

Enjoy crafting your savory brown stew chicken with these fresh and flavorful ingredients!

Step‑by‑Step Instructions for Savory Brown Stew Chicken

Step 1: Marinate the Chicken
In a large zip bag, combine the bone-in chicken thighs with chicken bouillon, chopped scallions, minced habanero, garlic, thyme, ginger, smoked paprika, and black pepper. Seal the bag, gently massage to ensure the chicken is fully coated, and refrigerate for at least 2 hours or ideally overnight. This step enhances the flavors, making your savory brown stew chicken irresistible.

Step 2: Brown the Chicken
Heat a Dutch oven over medium-high heat and add a splash of oil. Once hot, add the marinated chicken pieces in batches, browning them evenly on all sides for about 5-7 minutes until golden and crispy. This caramelization not only adds texture but deepens the flavor of your savory brown stew chicken, making it even more delicious.

Step 3: Sauté the Vegetables
Remove the browned chicken from the pot and set aside. In the same Dutch oven, add chopped onions, sliced carrots, and bell peppers. Sauté the vegetables for about 5 minutes, stirring frequently, until they are softened and fragrant. This trio creates a beautifully aromatic base for your savory brown stew chicken.

Step 4: Prepare the Stew Base
Return the browned chicken to the pot, then add ketchup, brown sugar, browning seasoning, bay leaves, and enough water to cover everything. Stir well to combine all ingredients and bring to a gentle boil. Once boiling, reduce the heat, cover, and let simmer on low for about 20 minutes, allowing the flavors to meld beautifully in your savory brown stew chicken.

Step 5: Simmer and Thicken
After 20 minutes, uncover the pot and stir the stew gently. Continue to simmer uncovered for an additional 10 minutes. This will help thicken the sauce, giving your savory brown stew chicken that rich, hearty texture everyone loves. Make sure to scrape the bottom of the pot to incorporate all those flavorful bits!

Step 6: Adjust Seasoning
Taste the stew to assess the seasoning. At this stage, you can adjust with additional salt and freshly ground black pepper to achieve your desired flavor profile. Balancing the seasonings is crucial to making your savory brown stew chicken truly delightful and satisfying.

Step 7: Serve and Enjoy
Serve the savory brown stew chicken warm over a bed of fluffy rice, garnished with fresh herbs if desired. The combination of tender chicken and rich gravy is perfect for a comforting family meal. Pair it with baked plantains or collard greens for a complete Caribbean feast.

Savory Brown Stew Chicken Variations

Feel free to get creative with your stew! The possibilities to customize it are endless and will surely delight your palate.

  • Dairy-Free: Substitute the chicken bouillon with vegetable bouillon to make this dish suitable for dairy-free diets.
  • Gluten-Free: Use gluten-free tamari or coconut aminos in place of browning seasoning for an equally flavorful stew.
  • Spicy Twist: Add a few more slices of habanero or a dash of cayenne pepper for an extra kick of heat. Adjust to your spice tolerance!
  • Sweet and Savory: Toss in diced pineapple during the simmering phase to create a tantalizing blend of sweet and savory flavors.
  • Herb Swap: Instead of fresh thyme, experiment with fresh rosemary or oregano to bring a different aroma and taste to the stew.
  • Veggie Boost: Incorporate more vegetables like diced potatoes or sweet potatoes for a heartier texture and added nutrition.
  • Fruity Flavor: For a unique twist, consider adding chopped mango or apple for a delightful fruit-infused profile.
  • Broth Upgrade: Swap water for rich chicken broth to deepen the savory experience of your brown stew chicken. This small change makes a big impact on flavor!

These variations will keep your cooking exciting and satisfying, transforming your savory brown stew chicken into something new each time you whip it up.

How to Store and Freeze Savory Brown Stew Chicken

Fridge: Store any leftovers in an airtight container for up to 4 days. This keeps your savory brown stew chicken fresh while preserving its delicious flavors.

Freezer: If you want to enjoy the stew later, freeze portions in freezer-safe bags or containers for up to 2 months. Make sure to label them with the date for reference.

Thawing: When ready to eat, thaw in the refrigerator overnight for best results. Reheat on the stove over low heat, stirring occasionally to ensure even warmth without compromising the sauce's texture.

Reheating: Gently reheat in a saucepan, adding a splash of water or broth if needed to maintain the right consistency. This way, your savory brown stew chicken retains its comforting richness!

Expert Tips for Savory Brown Stew Chicken

• Marinate Thoroughly: For maximum flavor, marinate your chicken overnight. The longer the marination, the richer the taste of your savory brown stew chicken.

• Achieve Perfect Browning: Ensure your chicken is well-browned for depth in flavor. Avoid crowding the pan; brown in batches for an even crust.

• Control the Heat: If you prefer a milder stew, start with just a small amount of habanero peppers, then gradually increase to find your ideal spice level in the savory brown stew chicken.

• Thicken as Desired: If you like a thicker sauce, create a cornstarch slurry by mixing cornstarch with cold water, then stir it in and simmer until desired consistency is reached.

• Flavorful Broth Option: For a deeper taste, use chicken broth instead of water when simmering the stew. It enhances the overall flavor of your savory brown stew chicken beautifully.

• Serve Fresh: Garnish your finished dish with fresh herbs, like parsley or cilantro, to elevate the presentation and add a pop of color to your savory brown stew chicken.

Make Ahead Options

These savory brown stew chicken preparations are perfect for busy weeknights! You can marinate the chicken in the flavorful mixture of bouillon, scallions, habanero, garlic, and spices up to 24 hours in advance, allowing the meat to absorb all those delicious flavors. Additionally, you can chop your vegetables (onions, carrots, and bell peppers) and store them in the refrigerator for up to 3 days to save time during cooking. When you're ready to serve, simply brown the marinated chicken and sauté the prepped veggies, then add the remaining ingredients and let it simmer. This ensures your savory brown stew chicken is just as delicious while making mealtime a breeze!

What to Serve with Savory Brown Stew Chicken

Cozy up to a hearty meal with the delightful accompaniments that perfectly enhance your savory brown stew chicken experience.

  • Fluffy White Rice: This classic pairing absorbs the rich gravy, creating a comforting balance of flavors in each bite.

  • Baked Plantains: Their natural sweetness complements the savory depth of the chicken, adding a delightful texture contrast.

  • Collard Greens: These hearty greens provide a fresh, slightly bitter note that brightens the rich stew, making for a well-rounded meal.

  • Caribbean Salad: A refreshing blend of cucumbers, tomatoes, and avocados offers a light crunch and zing, perfectly cutting through the stew's richness.

  • Coconut Rice: With its creamy texture and subtle sweetness, coconut rice adds an exotic flair that beautifully harmonizes the spices of the stew.

  • Glass of Red Wine: A medium-bodied red wine brings out the aromatic flavors in the dish, offering a delightful pairing for your dining experience.

Pairing your savory brown stew chicken with these delightful sides guarantees a meal that feels like a warm hug, inviting all to gather around the table.

Savory Brown Stew Chicken Recipe FAQs

What type of chicken is best for brown stew chicken?
For the best results, I recommend using bone-in chicken thighs or drumsticks. The bones add rich flavor and moisture to the stew. However, if you're looking for lower fat content, feel free to substitute with boneless chicken pieces—just adjust the cooking time, as they will cook faster!

How should I store leftover brown stew chicken?
Store any leftovers in an airtight container in the refrigerator for up to 4 days. Make sure to let the stew cool to room temperature before sealing the container to maintain freshness. Reheating is easy—just warm it on the stove over low heat, and you might need to add a splash of water to restore the sauce's consistency.

Can I freeze brown stew chicken?
Absolutely! You can freeze your savory brown stew chicken in portions. Use freezer-safe bags or airtight containers, and make sure to label them with the date. It will keep well in the freezer for up to 2 months. When you’re ready to enjoy it, thaw in the refrigerator overnight and reheat gently on the stove.

What if my brown stew chicken sauce is too thin?
No worries! If your stew sauce is thinner than desired, you can thicken it easily. Mix 1 tablespoon of cornstarch with 2 tablespoons of cold water to create a slurry. Stir this mixture into the simmering stew and cook for a few more minutes until it thickens up nicely. This is a great trick to achieve that hearty texture!

Can I customize the spice level in the stew?
Very much so! The wonderful thing about this savory brown stew chicken is that you can adjust the heat according to your preference. Start with a smaller amount of habanero peppers, and taste as you go. You can always add more for an extra kick—it’s a fun way to make this dish your own!

Are there any dietary considerations for brown stew chicken?
Yes, if you're serving this stew to someone with allergies or dietary restrictions, always check that the bouillon and browning sauces you use are gluten-free, as some brands may contain gluten. Additionally, if you're cooking for pets, be cautious with ingredients like onions or garlic, which can be harmful to them.

Savory Brown Stew Chicken

Savory Brown Stew Chicken That Will Warm Your Soul

This savory brown stew chicken combines rich flavors and spices for a comforting meal that warms your soul.
Print Recipe Pin Recipe
Prep Time 20 minutes mins
Cook Time 40 minutes mins
Marination Time 2 hours hrs
Total Time 3 hours hrs
Servings: 4 servings
Course: Dinner
Cuisine: Jamaican
Calories: 450
Ingredients Equipment Method Nutrition Notes

Ingredients
  

For the Chicken
  • 4 pieces Bone-in Chicken Thighs or Drumsticks Boneless can reduce fat content if preferred.
  • 1 cube Chicken Bouillon Opt for low-sodium varieties.
For the Marinade
  • 2 stalks Chopped Scallions Green onions can be substituted.
  • 2 pieces Habanero Peppers Swap with jalapeños for a milder dish.
  • 4 cloves Minced Garlic Garlic powder can be used in a pinch.
  • 2 teaspoons Fresh Thyme Leaves Dried thyme can be used in smaller amounts.
  • 1 tablespoon Freshly Grated Ginger Ground ginger is a good alternative.
  • 1 teaspoon Smoked Paprika Regular paprika will work too.
  • 1 teaspoon Black Pepper Use freshly ground for the best flavor.
For the Stew Base
  • 2 tablespoons Oil (Olive or Vegetable) Choose oil with a high smoke point.
  • 1 medium Onion (Chopped) Shallots can be a good substitute.
  • 2 medium Carrots (Sliced) Other root vegetables can work as alternatives.
  • 1 medium Bell Pepper (Chopped) Any type of sweet pepper is fine.
  • 1 cup Ketchup Tomato paste is a good substitute.
  • 2 tablespoons Brown Sugar Honey or maple syrup can replace it.
  • 2 tablespoons Browning Seasoning Maggi seasoning or soy sauce are good alternatives.
  • 2 pieces Bay Leaves Remove them before serving.
  • 4 cups Water Chicken broth enhances the flavor.

Equipment

  • Dutch oven
  • zip bag

Method
 

Step-by-Step Instructions
  1. Marinate the chicken by combining bone-in chicken thighs with chicken bouillon, scallions, habanero, garlic, thyme, ginger, smoked paprika, and black pepper in a large zip bag. Refrigerate for at least 2 hours or overnight.
  2. Brown the chicken in a heated Dutch oven with oil, browning evenly on all sides for 5-7 minutes.
  3. Remove the chicken, then sauté onions, carrots, and bell peppers in the same pot for about 5 minutes.
  4. Return the chicken to the pot and add ketchup, brown sugar, browning seasoning, bay leaves, and enough water to cover. Stir well and bring to a boil.
  5. Reduce heat, cover, and simmer for 20 minutes to meld flavors.
  6. Uncover, stir the stew and continue to simmer for an additional 10 minutes to thicken the sauce.
  7. Taste and adjust seasoning as necessary, then serve warm over rice, garnished with fresh herbs if desired.

Nutrition

Serving: 1servingCalories: 450kcalCarbohydrates: 35gProtein: 30gFat: 20gSaturated Fat: 5gPolyunsaturated Fat: 2gMonounsaturated Fat: 10gCholesterol: 100mgSodium: 800mgPotassium: 800mgFiber: 4gSugar: 5gVitamin A: 500IUVitamin C: 30mgCalcium: 50mgIron: 2mg

Notes

For optimum flavor, marinate the chicken overnight and use chicken broth for deeper taste when simmering the stew.

Tried this recipe?

Let us know how it was!

Hearty Guinness Beef Stew for Cozy Family Dinners

February 11, 2026 by Grace Snow Leave a Comment

As I plopped down on the couch after a long day, the comforting aroma of my simmering Guinness Beef Stew wafted through the house, instantly lifting my spirits. This dish is the epitome of cozy comfort food, featuring fork-tender beef, vibrant vegetables, and a rich stout broth that invites you to take a seat at the table. Perfectly suited for family gatherings or special occasions like St. Patrick's Day, this one-pot meal not only saves time in the kitchen but also feeds the soul with its hearty flavors. Plus, it’s budget-friendly, making it an achievable delight for any home chef. Are you ready to warm your kitchen and your heart with a dish that’s sure to impress? Let’s dive in!

Why is Guinness Beef Stew a must-try?

Comforting, there's nothing quite like a bowl of Guinness Beef Stew on a chilly evening. Budget-friendly, this hearty dish uses affordable ingredients while delivering rich flavors that please everyone. Minimal effort is required, making it a time-saver for busy nights when you crave something special. Serve it with crusty bread or over creamy mashed potatoes for the ultimate experience! Plus, for a quick twist, consider making it in your Instant Pot or try similar comforting options like Lamb Stew Hearty or Crock Pot Chicken Stew.

Guinness Beef Stew Ingredients

For the Base

  • Bacon – Provides a smoky flavor and fat for cooking; pancetta can substitute for a similar effect.
  • Beef Chuck – Cut into bite-sized pieces, it becomes tender during long cooking; brisket is a good alternative for extra richness.
  • Yellow Onion – Adds aromatic sweetness; shallots can be used for a milder flavor.
  • Carrots – Provide sweetness and color; parsnips can add a different flavor profile.
  • Celery – Adds depth and an aromatic base.
  • Cabbage – Brings texture and slight earthiness; any leafy cabbage variety will work, like green or savoy.
  • Garlic – Enhances overall flavor richness.

For the Stew

  • Tomato Paste – Adds umami depth to the broth.
  • All-Purpose Flour – Used for thickening the stew; cornstarch can be a gluten-free alternative.
  • Guinness Stout – Provides the signature rich flavor; always use the classic version to avoid bitterness.
  • Beef Broth – Adds moisture and depth; enhances the flavor base.
  • Strong Brewed Coffee – Balances sweetness and adds complexity.
  • Bay Leaves – Infuses the stew with a herbal note.
  • Thyme Sprigs – Brings an aromatic, earthy flavor.

For the Heartiness

  • Baby Gold Potatoes – Adds heartiness that cooks well in the stew; they can be added later for a firmer texture.
  • Frozen Peas (optional) – Offers burst of sweetness and color; add during the last 15 minutes of cooking.

This Guinness Beef Stew is not just a meal; it's a warm embrace in a bowl, perfect for cozy family dinners!

Step‑by‑Step Instructions for Guinness Beef Stew

Step 1: Preheat and Prepare
Begin by preheating your oven to 350°F (175°C). While it warms, gather your ingredients and prepare your Dutch oven over medium-low heat. This will be your cooking vessel, so ensure it’s sturdy enough for slow cooking. It’s essential to have everything ready for smooth transitions as you cook your comforting Guinness Beef Stew.

Step 2: Render the Bacon
Add diced bacon to the heated Dutch oven and let it cook for about 5 minutes until crispy, stirring occasionally. Once golden brown, use a slotted spoon to transfer the bacon to a bowl, leaving the rendered fat in the pot. This flavorful base will enrich the stew, creating deep, smoky undertones as you continue to build on the ingredients.

Step 3: Sear the Beef
Increase the heat to medium-high. Season the beef chuck with salt and pepper, then add it to the hot pot, working in batches if necessary. Sear the beef for about 3–4 minutes on each side until nicely browned all over. This step is crucial, as it locks in flavor and texture for your Guinness Beef Stew. Remove the beef and set it aside after browning.

Step 4: Sauté the Vegetables
In the same pot, add diced onions, celery, cabbage, and carrots. Sauté for approximately 3–4 minutes until the vegetables soften and the onions turn translucent. This aromatic blend will infuse the stew with sweetness and depth. Finally, stir in minced garlic and cook for an additional minute, ensuring it doesn’t burn.

Step 5: Add Tomato Paste and Flour
Mix in the tomato paste and cook for 2–3 minutes, allowing it to darken slightly. This step enhances the umami flavor profile of your Guinness Beef Stew. Next, sprinkle the all-purpose flour over the vegetable mixture, stirring continuously to combine. Cook for another minute to eliminate the raw flour taste and create a thickening agent for the stew.

Step 6: Deglaze with Guinness
Slowly pour in the Guinness stout, carefully scraping the bottom of the pot to release any browned bits. These bits are flavor gold! Once combined, add beef broth and brewed coffee for added richness. Return the seared beef and crispy bacon to the pot, along with quartered baby potatoes, bay leaves, and thyme sprigs for that comforting aroma.

Step 7: Bake to Tender Perfection
Cover the Dutch oven tightly with its lid and transfer it to the preheated oven. Bake for 3 to 3.5 hours until the beef is fork-tender and fully infused with flavors. The aromas of your Guinness Beef Stew will waft through your home, making it a cozy place to be. A rich, hearty dish awaits you as it simmers.

Step 8: Add Final Touches
After the baking time, carefully stir in frozen peas for a burst of color and sweetness. Let the stew rest for about 15 minutes before serving. This allows the flavors to meld beautifully, resulting in a heartwarming, comforting dish that’s perfect for family dinners or gatherings. Get ready to enjoy your homemade Guinness Beef Stew!

What to Serve with Comforting Guinness Beef Stew

As the hearty aroma of your stew fills the kitchen, consider these delectable pairings that will elevate your meal experience and delight your loved ones.

  • Creamy Mashed Potatoes: Serve your stew over a generous scoop of buttery mashed potatoes that soak up the rich broth, creating a comforting combination.
  • Crusty Sourdough Bread: A warm, crisp loaf makes for the perfect companion, perfect for dipping and enjoying every last drop of your flavorful stew.
  • Leafy Green Salad: A fresh salad adds brightness and crunch, balancing the richness of the stew with crisp greens and a zesty vinaigrette.
  • Roasted Root Vegetables: Roasting carrots, parsnips, and sweet potatoes brings out their natural sweetness, complementing the savory depth of the beef stew beautifully.
  • Colcannon: Mixing mashed potatoes with sautéed cabbage gives a nod to Irish tradition and pairs perfectly with a robust stew for a comforting meal.
  • Guinness Brownies: For dessert, indulge in rich Guinness brownies that echo the stout used in your stew, rounding out the meal with a delightful chocolate finish.
  • Irish Whiskey: A glass of smooth Irish whiskey serves as an excellent drink pairing, enhancing the flavors of your meal while keeping the Irish theme alive.
  • Steamed Green Beans: Lightly steamed green beans provide a fresh and crunchy contrast to the hearty stew, making for a well-rounded plate.
  • Cheddar Cheese Biscuits: Fluffy biscuits made with sharp cheddar cheese offer a savory touch, perfect for sopping up flavorful broth from your stew.
  • Cider: A glass of refreshing apple cider brings a lovely tartness to balance the richness of the stout, enhancing the overall dining experience.

Make Ahead Options

This Guinness Beef Stew is perfect for meal prep enthusiasts, allowing you to savor its flavors on busy weeknights! You can chop the vegetables (onions, carrots, celery, and cabbage) and store them in an airtight container in the fridge for up to 3 days. Additionally, you can season and sear the beef ahead of time, refrigerating it separately for up to 24 hours. When you're ready to cook, simply add the prepped ingredients to your Dutch oven, deglaze with Guinness, and follow the remaining steps as usual. This way, you’ll enjoy a home-cooked meal that’s just as delicious without the last-minute rush!

Expert Tips for Perfect Guinness Beef Stew

  • Choose Quality Ingredients: Fresh, high-quality ingredients enhance the flavors of your Guinness Beef Stew, so don’t skimp on the beef or fresh vegetables.

  • Sear Meat Properly: Searing the beef and bacon before simmering adds depth of flavor. Ensure your Dutch oven is hot enough to achieve that gorgeous crust.

  • Use Heavy-Duty Cookware: A sturdy Dutch oven ensures even heat distribution and moisture retention, keeping your stew rich and flavorful without burning.

  • Mind the Thickness: Adjust the stew's thickness by varying the amount of flour. If it’s too thin, stir in a cornstarch slurry during the final cooking stages.

  • Flavor Adjustments: If the stew tastes a bit too bitter, balance it out with a pinch of sugar or more beef broth, which will enrich the overall taste.

  • Perfect Pairing: Serve your Guinness Beef Stew with a side of crusty bread or creamy mashed potatoes for a complete and comforting meal that everyone will love!

How to Store and Freeze Guinness Beef Stew

  • Room Temperature: Allow the stew to cool completely at room temperature for no longer than 2 hours before storing it.

  • Fridge: Store leftovers in an airtight container in the refrigerator for up to 4-6 days. Reheat gently on the stovetop or in the microwave until warmed through.

  • Freezer: For long-term storage, freeze the stew in a ziplock bag or airtight container for up to 3 months. Thaw in the refrigerator overnight before reheating.

  • Reheating: When ready to enjoy, gently reheat on the stovetop, adding a splash of beef broth if needed to enhance its savory flavor in your Guinness Beef Stew.

Variations on Guinness Beef Stew

Feel free to let your culinary creativity shine by customizing this delightful stew with some delicious twists!

  • Dairy-Free: Replace beef broth with a vegetable version for a lighter taste and balance.
  • Vegetarian: Swap beef for hearty mushrooms and use vegetable stock for a rich, earthy stew.
  • Spicy Kick: Add diced jalapeños or a dash of cayenne pepper during the sautéing stage for a fiery touch.
  • Herb Infusion: Fresh herbs like rosemary or a sprinkle of dill can elevate the flavor profile unexpectedly.
  • Root Veggie Upgrade: Incorporate sweet potatoes or turnips instead of gold potatoes for a unique sweetness.

For a slower preparation, consider trying an alternative recipe like Beans Greens Stew that boasts warmth and comfort without the meat!

  • Richness Boost: Enhance the beefiness by adding a splash of soy sauce or Worcestershire sauce for deeper umami flavors.
  • Thicker Stew: Adjust the thickness with more flour or instant potato flakes towards the end for a heartier consistency.
  • Beer-Free: Use non-alcoholic stout or dark vegetable broth as a flavor substitute without the booze.

Let your imagination guide you, and enjoy the journey of flavors with every simmer!

Guinness Beef Stew Recipe FAQs

What kind of beef is best for Guinness Beef Stew?
Absolutely! The best choice is beef chuck, as it becomes incredibly tender during the long cooking process. If you're looking for a richer flavor, brisket can also be used as an alternative.

How do I know when my beef is properly seared?
Very! Properly seared beef should have a deep brown crust on all sides, typically taking about 3-4 minutes per side over medium-high heat. This process locks in juices and maximizes flavor, which is crucial for your Guinness Beef Stew.

Can I freeze the Guinness Beef Stew?
Definitely! You can freeze the stew in a ziplock bag or an airtight container for up to 3 months. To thaw, simply place it in the refrigerator overnight before reheating it on the stovetop with a little beef broth to maintain its rich flavor.

How should I store leftover Guinness Beef Stew?
Very! Allow the stew to cool at room temperature for no more than 2 hours, then transfer it to an airtight container. It will keep in the refrigerator for 4-6 days. Reheat gently on the stovetop or microwave until warmed through.

What if my stew turns out too thick?
Don’t worry! If your stew is too thick, simply stir in a cornstarch slurry (1 tablespoon of cornstarch mixed with 2 tablespoons of cold water) during the last 15 minutes of cooking. This will thicken the stew without spoiling its flavor.

Can I make this stew gluten-free?
Absolutely! You can substitute the all-purpose flour with cornstarch for thickening. Also, ensure that you use a gluten-free beer or a dark broth in place of Guinness, allowing everyone to enjoy this comforting dish!

Guinness Beef Stew

Hearty Guinness Beef Stew for Cozy Family Dinners

This Guinness Beef Stew is a comforting dish perfect for cozy family dinners, featuring tender beef and rich flavors.
Print Recipe Pin Recipe
Prep Time 15 minutes mins
Cook Time 3 hours hrs 30 minutes mins
Resting Time 15 minutes mins
Total Time 4 hours hrs
Servings: 6 servings
Course: Dinner
Cuisine: Irish
Calories: 450
Ingredients Equipment Method Nutrition Notes

Ingredients
  

For the Base
  • 4 slices Bacon pancetta can substitute for a similar effect.
  • 2 lbs Beef Chuck cut into bite-sized pieces; brisket is a good alternative for extra richness.
  • 1 large Yellow Onion shallots can be used for a milder flavor.
  • 3 medium Carrots parsnips can add a different flavor profile.
  • 2 stalks Celery
  • 1 medium Cabbage any leafy cabbage variety will work, like green or savoy.
  • 4 cloves Garlic minced.
For the Stew
  • 2 tbl Tomato Paste
  • 1 cup All-Purpose Flour cornstarch can be a gluten-free alternative.
  • 1 bottle Guinness Stout always use the classic version to avoid bitterness.
  • 4 cups Beef Broth
  • 1 cup Strong Brewed Coffee
  • 2 leaves Bay Leaves
  • 4 sprigs Thyme fresh.
For the Heartiness
  • 1 lb Baby Gold Potatoes can be added later for a firmer texture.
  • 1 cup Frozen Peas optional; add during the last 15 minutes of cooking.

Equipment

  • Dutch oven

Method
 

Step‑by‑Step Instructions for Guinness Beef Stew
  1. Preheat your oven to 350°F (175°C) and prepare your Dutch oven over medium-low heat with your ingredients at the ready.
  2. Add diced bacon to the pot and cook for about 5 minutes until crispy.
  3. Sear seasoned beef chuck in batches for about 3–4 minutes on each side until browned, then remove.
  4. Sauté diced onions, celery, cabbage, and carrots for 3–4 minutes, then add garlic and cook for an additional minute.
  5. Mix in tomato paste and cook for 2–3 minutes, followed by sprinkling in the flour and stirring.
  6. Deglaze with Guinness, scraping the bottom; add beef broth and brewed coffee. Return seared beef, bacon, potatoes, bay leaves, and thyme.
  7. Cover and transfer to the oven, baking for 3 to 3.5 hours until the beef is fork-tender.
  8. Stir in frozen peas and let rest for about 15 minutes before serving.

Nutrition

Serving: 1bowlCalories: 450kcalCarbohydrates: 50gProtein: 30gFat: 17gSaturated Fat: 6gPolyunsaturated Fat: 0.5gMonounsaturated Fat: 4gCholesterol: 90mgSodium: 800mgPotassium: 900mgFiber: 5gSugar: 3gVitamin A: 800IUVitamin C: 25mgCalcium: 50mgIron: 4mg

Notes

Serve with crusty bread or creamy mashed potatoes for an ultimate comfort meal.

Tried this recipe?

Let us know how it was!

Big Mac Wraps Recipe: Your New Favorite Homemade Delight

February 10, 2026 by Grace Snow Leave a Comment

The unmistakable aroma of sizzling beef wafting through the kitchen can instantly transport me back to those weekends spent relishing my favorite fast-food meals. But what if you could enjoy that nostalgic taste without leaving the house? Enter my Big Mac Wraps Recipe—a fun and delicious twist on the classic Big Mac! Perfectly suited for a speedy weeknight dinner, these wraps are not only easy to whip up but are also customizable to suit the whole family's tastes. Each bite brings together juicy beef, tangy special sauce, and fresh veggies all enveloped in a soft tortilla. Trust me, once you try these wraps, you’ll want to make them a staple in your meal prep rotation. So, are you ready to create a delicious homemade version that’ll have everyone asking for seconds?

Why Are Big Mac Wraps So Irresistible?

Convenience, these Big Mac Wraps are a game-changer for busy families or anyone craving a quick meal without the drive-thru hassle. Flavor-packed, each wrap delivers the iconic taste of a Big Mac, thanks to the creamy special sauce and savory beef. Customizable, feel free to adjust the ingredients; swap the beef for turkey and switch up the cheese for your favorite! Meal prep-friendly, you can prep the ingredients in advance for an effortless dinner during the week. Plus, these wraps are sure to impress; everyone loves a fun twist on a classic!

Big Mac Wraps Recipe Ingredients

• Get ready to gather your ingredients for a delicious Big Mac Wraps recipe!

For the Special Sauce

  • Mayonnaise – Adds creaminess to the special sauce; substitute with Greek yogurt for a tangier flavor.
  • Dill Pickles – Provides a zesty crunch; finely chopped for the sauce, or use sweet pickles for a different taste.
  • Yellow Mustard – Adds tanginess; substitute with Dijon mustard for a spicier kick.
  • White Vinegar – Complements the sauce flavor; apple cider vinegar can be used as an alternative.
  • Paprika – Adds a hint of smokiness; try smoked paprika for deeper flavor.
  • Garlic Powder – Enhances flavor; substitute with fresh minced garlic for a stronger taste.
  • Onion Powder – Offers subtle sweetness; fresh onions can be used instead.

For the Filling

  • Lean Ground Beef – The main protein source; ground turkey can be used for a leaner option.
  • Onion – Provides sweetness and texture; finely chopped, and optional to include for more structure.
  • Salt and Pepper – Season to taste; essential for enhancing all other flavors.

For the Wraps

  • Large Flour Tortillas – Wraps for the filling; consider whole wheat or low-carb options for variety.
  • Shredded Lettuce – Adds crunch and freshness; substitute with spinach or mixed greens.
  • Shredded Cheddar Cheese – Delivers creaminess; can swap for mozzarella or leave out for dairy-free.
  • Dill Pickle Slices (Optional) – Additional crunch and flavor; omit if not preferred.

For Cooking

  • Olive Oil – For sautéing the beef and onions; can be replaced with avocado oil.

Get ready for a culinary adventure with this Big Mac Wraps recipe—an easy dinner option that delivers all the nostalgic flavors you love!

Step‑by‑Step Instructions for Big Mac Wraps Recipe

Step 1: Prepare the Special Sauce
In a mixing bowl, combine ½ cup mayonnaise, 2 tablespoons finely chopped dill pickles, 1 tablespoon yellow mustard, 1 tablespoon white vinegar, ½ teaspoon paprika, and ½ teaspoon garlic powder with ½ teaspoon onion powder. Stir well until the mixture is creamy and uniform. Cover the bowl with plastic wrap and refrigerate for about 30 minutes to let the flavors meld and infuse.

Step 2: Cook the Beef
Heat 1 tablespoon of olive oil in a large skillet over medium heat. Add ¼ cup of finely chopped onion and sauté for 2-3 minutes until softened. Next, add 1 pound of lean ground beef, breaking it apart with a spatula. Season with salt and pepper, cooking for about 6-8 minutes or until the beef is browned and fully cooked. Drain any excess grease before removing from heat.

Step 3: Warm the Tortillas
Take 4 large flour tortillas and warm them slightly for about 10-15 seconds in the microwave or in a skillet over low heat for 1-2 minutes. This will ensure that they are easy to wrap without tearing. Keeping the tortillas warm allows for better folding when assembling your delicious Big Mac Wraps.

Step 4: Assemble the Wraps
On each warm tortilla, spread about 2 tablespoons of the prepared special sauce evenly. Layer with approximately ⅓ cup of the cooked beef mixture, followed by a handful of shredded lettuce, a sprinkle of shredded cheddar cheese, and a few dill pickle slices if desired. Be generous with your toppings to create a deliciously filled wrap.

Step 5: Wrap and Serve
To wrap, fold in the sides of the tortilla then roll it tightly from the bottom up, ensuring the filling stays inside. If desired, slice the wraps in half diagonally for easy eating. Serve the Big Mac Wraps warm, and enjoy with your favorite sides or dips for a satisfying meal that brings together the classic Big Mac flavors!

Big Mac Wraps Recipe Variations

Feel free to mix and match ingredients to craft your own perfect Big Mac Wraps!

  • Ground Turkey: Use ground turkey instead of beef for a leaner, delicious option that’s just as satisfying.

    The mild flavor of turkey makes it a versatile substitute. This swap ensures you enjoy a lighter wrap that’s still packed with flavor!

  • Spicy Touch: Add jalapeños or your favorite hot sauce for a kick of heat that elevates the flavor profile.

    Transform your wraps into a fiery delight with this simplicity; just a few slices or dashes can make all the difference!

  • Alternative Tortillas: Opt for spinach or tomato-flavored tortillas for a colorful twist that packs added nutrients.

    These vibrant wraps not only look appealing but also add a unique flavor that will surprise and delight your family!

  • Dairy-Free Option: Skip the cheese or substitute with avocado for creamy richness without the dairy.

    Avocados can enhance texture while keeping things fresh and healthy. It's a delicious adjustment for anyone avoiding dairy!

  • Extra Veggies: Load your wraps with additional veggies like bell peppers or cucumbers for added crunch and nutrition.

    The more, the merrier! These veggies not only provide a refreshing bite but also elevate the nutritional value of your meal.

  • Flavorful Sauces: Swap the special sauce for a chipotle mayo or a Caesar dressing for a different taste experience.

    Experimenting with sauces can open up a delightful world of flavors—who knew wraps could be so versatile?

  • Grain-Free: Use large lettuce leaves as a wrap for a low-carb, grain-free alternative that still holds all the delicious fillings!

    *Lettuce wraps are a fun and healthy way to enjoy the same flavors while cutting down on carbs—perfect for a lighter meal. *

  • Herb Infusion: Mix fresh herbs, like cilantro or dill, into the beef to elevate the aroma and flavor of the filling.

    Herbs add a fresh and vibrant touch, bringing a burst of flavor that can make your wraps truly unforgettable!

Don’t forget to serve your Big Mac Wraps alongside a refreshing beverage, perhaps a soda or a delightful milkshake, for full nostalgic effect. For an added treat, you might even want to throw in some crispy fries or coleslaw on the side! Looking for more ideas? Check out how to add some zing with Chicken Adobo Again or see a refreshing dessert to complete your meal with Panna Cotta. Enjoy experimenting with these variations!

Expert Tips for Big Mac Wraps

• Fresh Ingredients Matter: Using fresh veggies like lettuce and cheese enhances flavor and texture, making your Big Mac Wraps truly irresistible.

• Customize the Sauce: Tailor the special sauce to your liking; add more pickles for crunch or a dash of hot sauce for some heat.

• Prevent Sogginess: Avoid adding lettuce until just before serving to keep it crisp, and ensure the beef is properly drained to maintain integrity.

• Warm Tortillas: Lightly warming tortillas makes them more pliable, preventing tears and making the wrapping process easier.

• Try Different Proteins: Switch ground beef for turkey or grilled chicken for a healthier twist while still compacting all the flavorful goodness of this Big Mac Wraps recipe!

Make Ahead Options

These Big Mac Wraps are perfect for meal prep enthusiasts looking to save time during busy weeknights! You can prepare the special sauce and cook the beef mixture up to 3 days in advance. Simply refrigerate each component in airtight containers to maintain their freshness. For the best texture, assemble the wraps just before serving to prevent the tortillas from getting soggy, and add the shredded lettuce and cheese right before wrapping. When ready to enjoy, simply grab a tortilla, spread the sauce, add your beef and toppings, wrap it up, and you’ll have a delicious homemade meal in minutes—just as satisfying as your favorite fast-food option!

What to Serve with Big Mac Wraps

Indulge in a satisfying home-cooked meal that's both delicious and easy to pull together, enhancing your dining experience.

  • Crispy French Fries: The perfect crunchy contrast, French fries complement the softness of the wraps, making it feel like a true fast-food feast.
  • Coleslaw: Creamy and tangy coleslaw brings a refreshing crunch, balancing the savory flavors of the Big Mac Wraps beautifully.
  • Onion Rings: Their crispy texture and slight sweetness add an extra layer of enjoyment, reminiscent of classic drive-in meals.
  • Fresh Veggie Salad: A light option, packed with seasonal ingredients, enhances the meal with freshness and color, making each bite feel vibrant.
  • Sweet Potato Fries: Deliciously sweet and crispy, they create a delightful twist on standard fries, adding a nutritious flair to your plate.
  • Pickle Chips: Serve on the side for extra tanginess; they echo the flavors in the wraps while providing a satisfying crunch.
  • Milkshakes: A classic beverage to enjoy alongside your wraps; the creamy, sweet flavor makes every bite even more special.
  • Lemonade: Refreshing and bright, a cold glass of lemonade offers the perfect contrast to the rich flavors of the Big Mac Wraps.
  • Chocolate Brownies: For dessert, this indulgent option is the sweet ending to your meal, balancing savory flavors with something sweet and decadent.

These pairings elevate the Big Mac Wraps recipe into a delightful dining experience that you and your family will cherish!

How to Store and Freeze Big Mac Wraps

  • Fridge: Store leftover Big Mac Wraps in an airtight container for up to 3 days to maintain freshness. Keep the sauce separate for optimal texture.
  • Freezer: Wrap tightly in plastic wrap or aluminum foil and place in an airtight container to freeze. Enjoy frozen wraps within 1 month for best flavor.
  • Reheating: Thaw in the fridge overnight if frozen; warm them in the microwave or a skillet over medium heat, ensuring they're heated through before serving.
  • Make-Ahead Tips: Prepare the beef and sauce in advance, refrigerating them separately. Assemble the wraps quickly before mealtime for a hassle-free dinner.

Big Mac Wraps Recipe FAQs

What is the best way to select ripe ingredients for my Big Mac Wraps?
Absolutely, using fresh ingredients is key to delicious Big Mac Wraps! For the best flavor, choose ripe tomatoes that are firm but slightly give when gently squeezed. Opt for greens that are vibrant and crisp; avoid any with dark spots or wilting. When picking pickles, go for ones that are free from blemishes and have a satisfying crunch.

How should I store leftover Big Mac Wraps?
To maintain freshness, store your leftover Big Mac Wraps in an airtight container in the fridge. They'll stay good for up to 3 days. I often recommend keeping the special sauce separate until you're ready to eat, which helps maintain the texture and flavor of the wraps.

Can I freeze Big Mac Wraps?
Yes, you can freeze them! First, tightly wrap each assembled wrap in plastic wrap and then place them in an airtight container or freezer bag. They can be frozen for up to 1 month. When you’re ready to enjoy them, simply thaw in the fridge overnight and reheat in the microwave or a skillet until warmed through.

What can I do if my tortillas are tearing while wrapping?
If your tortillas are tearing, they may be too cold or thick. Try warming them slightly in the microwave for about 10-15 seconds or in a skillet over low heat for 1-2 minutes. This makes them more pliable and easier to fold without breaking!

Are there any dietary considerations I should keep in mind?
Definitely! If you're cooking for someone with allergies, make sure to check the ingredient labels for the mayonnaise and any sauces you use. You can easily substitute the mayonnaise with Greek yogurt for a healthier option that’s also dairy-free. Additionally, consider using gluten-free tortillas to accommodate gluten sensitivities.

How can I customize the recipe for different tastes?
The more the merrier! You can customize your Big Mac Wraps by swapping out the ground beef for ground turkey or adding extra veggies like jalapeños for a spicy kick. Feel free to experiment with different types of cheese, like pepper jack for zest or even skipping cheese altogether for a dairy-free version. Enjoy the creativity in your cooking!

Big Mac Wraps Recipe

Big Mac Wraps Recipe: Your New Favorite Homemade Delight

Enjoy the nostalgic taste of Big Mac Wraps with this easy homemade recipe. Perfect for a speedy weeknight dinner, customizable for family preferences.
Print Recipe Pin Recipe
Prep Time 30 minutes mins
Cook Time 15 minutes mins
Chilling Time 30 minutes mins
Total Time 1 hour hr 15 minutes mins
Servings: 4 wraps
Course: Dinner
Cuisine: American
Calories: 350
Ingredients Equipment Method Nutrition Notes

Ingredients
  

For the Special Sauce
  • 1/2 cup Mayonnaise Substitute with Greek yogurt for a tangier flavor.
  • 2 tablespoons Dill Pickles Finely chopped for the sauce.
  • 1 tablespoon Yellow Mustard Substitute with Dijon mustard for a spicier kick.
  • 1 tablespoon White Vinegar Apple cider vinegar can be used as an alternative.
  • 1/2 teaspoon Paprika Try smoked paprika for deeper flavor.
  • 1/2 teaspoon Garlic Powder Substitute with fresh minced garlic for a stronger taste.
  • 1/2 teaspoon Onion Powder Fresh onions can be used instead.
For the Filling
  • 1 pound Lean Ground Beef Ground turkey can be used for a leaner option.
  • 1/4 cup Onion Finely chopped, optional to include.
  • Salt and Pepper Season to taste.
For the Wraps
  • 4 large Flour Tortillas Consider whole wheat or low-carb options.
  • 1 cup Shredded Lettuce Substitute with spinach or mixed greens.
  • 1 cup Shredded Cheddar Cheese Can swap for mozzarella or omit for dairy-free.
  • Dill Pickle Slices Optional for additional crunch and flavor.
For Cooking
  • 1 tablespoon Olive Oil Can be replaced with avocado oil.

Equipment

  • Mixing Bowl
  • Skillet
  • Spatula
  • Microwave
  • measuring cups
  • Measuring Spoons

Method
 

Step‑by‑Step Instructions
  1. In a mixing bowl, combine mayonnaise, dill pickles, yellow mustard, white vinegar, paprika, garlic powder, and onion powder. Stir well and refrigerate for 30 minutes.
  2. Heat olive oil in a skillet. Add chopped onion and sauté for 2-3 minutes. Add ground beef, season with salt and pepper, and cook for 6-8 minutes until browned.
  3. Warm flour tortillas in the microwave or skillet for about 10-15 seconds.
  4. On each tortilla, spread 2 tablespoons of special sauce, layer with cooked beef, shredded lettuce, shredded cheese, and dill pickle slices.
  5. Fold the sides in and roll the tortilla tightly. Slice in half diagonally if desired and serve warm.

Nutrition

Serving: 1wrapCalories: 350kcalCarbohydrates: 30gProtein: 22gFat: 16gSaturated Fat: 4gPolyunsaturated Fat: 1gMonounsaturated Fat: 8gCholesterol: 70mgSodium: 800mgPotassium: 400mgFiber: 3gSugar: 2gVitamin A: 500IUVitamin C: 5mgCalcium: 150mgIron: 2mg

Notes

Using fresh ingredients enhances flavor. Customize sauce to your liking and avoid adding lettuce until just before serving to keep it crisp.

Tried this recipe?

Let us know how it was!

Mouthwatering Turkish Flatbread: A Flavor Explosion Awaits

February 10, 2026 by Grace Snow Leave a Comment

Just the other day, I found myself whisked away in a culinary daydream, imagining the delightful aroma of freshly baked Turkish Flatbread wafting through my kitchen. Turkish Pide, with its pillowy dough and savory fillings, is a marvel that transports you straight to the vibrant streets of Istanbul. Perfect as a shared appetizer or a filling main course, this recipe is not only quick to prepare but also an exceptional way to impress your loved ones. Whether you fill it with ground beef, melty cheese, or colorful roasted veggies, your taste buds are in for a joyful surprise. Ready to create a little magic in your kitchen? Let’s dive into the world of Turkish Pide and bring this delicious tradition to life!

Why is Turkish Flatbread a Must-Try?

Satisfying Versatility: This Turkish Flatbread can be filled with endless combinations, from savory ground beef to vibrant roasted vegetables, ensuring there's something for everyone.
Time-Saving Delight: With a simple preparation process and a quick bake time, you’ll have a delicious homemade meal ready in no time.
Gourmet Appeal: Impress family and friends with this authentic Turkish dish that rivals restaurant offerings. Serve alongside a refreshing salad or Turkish Eggs Discover for a complete meal!
Cultural Experience: Enjoy a slice of Turkey in your home, as Turkish Pide is loved by locals and visitors alike, making it perfect for gatherings.
Golden Perfection: The crispy crust and soft, chewy interior create a mouthwatering texture that will leave everyone wanting more!

Turkish Flatbread Ingredients

For the Dough
• Bread Flour – Essential for a strong base; substitute with all-purpose flour if needed.
• Instant Yeast – Helps the dough rise quickly; active dry yeast works too, just activate it in warm water first.
• Sugar – Enhances flavor and activates yeast; can be omitted for a less sweet taste.
• Kosher Salt – Balances sweetness and enhances flavor; regular salt can replace it, but adjust quantity as it’s saltier.
• Olive Oil – Keeps the dough moist; can be replaced with melted butter for a different taste.
• Warm Water – Activates the yeast and hydrates the dough; ensure it’s around 105-110°F for best results.
• Warm Milk – Adds richness to the dough; substitute with more warm water if lactose-free.
• Egg + Water (for wash) – Adds shine and a golden color upon baking.

For the Toppings
• Kesar Akkawi or Mozzarella Cheese – Provides creaminess; substitute with any melting cheese if unavailable.
• Sucuk (or ground beef) – Delivers flavor and protein; swap for ground lamb or turkey for a variation.
• Sesame/Nigella Seeds (optional) – Adds texture and flavor; feel free to omit if desired.

Step‑by‑Step Instructions for Turkish Flatbread

Step 1: Prepare Dough
In a stand mixer, combine 4 cups of bread flour, 1 packet of instant yeast, 1 tablespoon of sugar, and 1 teaspoon of kosher salt. Gradually add 1 cup of warm water and 1 cup of warm milk, along with 2 tablespoons of olive oil. Mix on medium speed for about 10 minutes until the dough is smooth and elastic. The consistency should be soft but not sticky.

Step 2: Rest Dough
Once the dough is kneaded, shape it into a ball and place it in a lightly oiled bowl. Cover the bowl with a damp cloth or plastic wrap, then set it aside in a warm area for about 60-90 minutes. The Turkish Flatbread dough should noticeably rise and double in size, becoming puffy and airy.

Step 3: Preheat Oven
While the dough is proofing, preheat your oven to 500°F (260°C), placing a pizza stone or baking steel inside. Allow it to heat for at least 45 minutes to ensure a crisp crust. This step is crucial for achieving that perfect golden-brown finish on your Turkish Flatbread.

Step 4: Divide & Roll Dough
After the dough has risen, gently punch it down to release excess air. Divide the dough into 5 equal pieces, and on a lightly floured surface, roll each piece into an oval shape about 18 inches long. Make sure the thickness is uniform, as this helps with even cooking.

Step 5: Fill Pide
Place your desired filling, such as a mixture of ground beef and cheese, down the center of each rolled dough oval. Gently fold the edges over the filling to create a boat shape, then pinch the ends to seal. Brush the tops with an egg wash made from 1 beaten egg and a tablespoon of water, and sprinkle with sesame or nigella seeds if desired.

Step 6: Bake
Carefully transfer your prepared Turkish Pide to a baking sheet sprinkled with semolina or cornmeal to prevent sticking. Bake in the preheated oven for 14-17 minutes or until they turn golden brown and the cheese is bubbly. Keep an eye on them, as they might bake faster if using a pizza stone.

Step 7: Cool & Serve
Once baked, remove the Turkish Flatbread from the oven and let them cool slightly on a wire rack. This resting time allows the cheese to set. Slice the pide into portions and serve warm, sharing this delightful pastry with family and friends for an authentic taste of Turkish cuisine.

What to Serve with Savory Turkish Pide?

Nothing quite compares to the joy of savoring Turkish Pide, especially when accompanied by delightful sides that enhance its rich flavors and textures.

  • Turkish Lentil Soup: A warm and comforting soup that adds a hearty, nutritious element to your meal. Its earthy lentils beautifully contrast the fluffy pide, creating a satisfying balance.

  • Fresh Tabbouleh Salad: This vibrant salad, bursting with fresh parsley, tomatoes, and lemony dressing, can elevate your meal with a refreshing zing, harmonizing perfectly with the savory pide.

  • Grilled Vegetables: Charred zucchini, bell peppers, and eggplants provide a smoky sweetness that complements the pide’s flavors. Toss them in olive oil and herbs for an irresistible side.

  • Yogurt Sauce: A creamy garlic yogurt sauce brings a cooling effect, balancing out the rich fillings of the pide. It serves as a comforting dip or drizzle on top.

  • Cilbir (Turkish Poached Eggs): This rich dish pairs perfectly with pide, offering silky eggs and garlicky yogurt, enhancing the overall culinary experience with a delightful textural contrast.

  • Simit (Turkish Bagels): This sesame-encrusted bread adds a crunchy snack option, making a delightful companion for the pide while also introducing a delightful nutty flavor.

  • Pineapple Mint Cooler: For a refreshing beverage, this tropical drink combines sweetness and minty freshness, cleansing your palate after each bite of pide. It’s simply perfect for warm weather enjoyment.

  • Baklava: End your meal on a sweet note with this luscious dessert. The flaky layers and honey syrup perfectly complement the savory notes of the pide, leaving everyone with a lasting impression.

Make Ahead Options

These Turkish Flatbreads are a fantastic option for meal prep, saving you precious time on busy weeknights! You can prepare the dough up to 24 hours in advance; simply follow the initial steps, then wrap and refrigerate the dough until you’re ready to roll and fill. Additionally, any fillings, such as ground beef or sautéed vegetables, can be made ahead and stored in the fridge for up to 3 days to enhance their flavors. When you’re ready to enjoy your Turkish Flatbread, just bring the dough to room temperature, roll it out, fill it, and bake as directed. This way, you’ll serve fresh, delicious pide that’s just as satisfying as if you made it all at once!

Turkish Flatbread Variations & Substitutions

Invite your culinary creativity to shine as you explore these delightful twists on traditional Turkish Flatbread. Each variation offers a unique flavor experience that will tantalize your taste buds!

  • Vegetarian Delight: Swap ground beef for sautéed spinach and feta to create a wholesome, veggie-loaded pide. The briny cheese complements the earthy greens beautifully, making it a satisfying option for meat-free nights.

  • Cheese Lovers: Experiment with different cheese combinations like feta or aged provolone for added depth. Mixing cheeses can yield delightful surprises, turning each bite into a creamy explosion of flavor!

  • Spice It Up: Amplify your fillings by adding spices like cumin or coriander to the meat mixture. These spices bring an aromatic warmth that elevates the pide, inviting your taste buds on an exotic journey.

  • Nutty Crunch: Incorporate chopped nuts such as pistachios or almonds into your filling for an unexpected crunch. The nutty texture adds both contrast and richness, turning your pide into a gourmet experience.

  • Savory Twist: Substitute traditional meat fillings with spicy chorizo or even roasted vegetables for an exciting flavor boost. Each option adds its own delightful twist, making your Turkish Flatbread a personalized treat!

  • Sweet Surprise: For a unique dessert option, fill the pide with sweetened ricotta and a drizzle of honey. Bake until golden for a mouthwatering finale to any meal that balances indulgence and authenticity.

  • Nut-Free Option: Use oat flour instead of regular flour to keep this dish inclusive for those with nut allergies. Oat flour offers a soft texture while ensuring no nut-related concerns arise!

  • Quick Fix: Use store-bought dough instead of making it from scratch to save time, especially when unexpected guests arrive. A simple shortcut that doesn't compromise on deliciousness!

Embrace the magic of Turkish Flatbread and tailor these suggestions to suit your palate! Whether you’re serving it alongside a refreshing salad or some delightful Turkish Eggs Discover, your loved ones are sure to enjoy this remarkable dish.

Storage Tips for Turkish Flatbread

Fridge: Store leftover Turkish flatbread in an airtight container for up to 3 days. This helps retain its fresh taste while keeping it soft.

Freezer: For longer storage, wrap the Turkish flatbread tightly in plastic wrap or aluminum foil and freeze for up to 2 months. Thaw in the fridge overnight before reheating.

Reheating: Reheat your Turkish flatbread in a preheated oven at 350°F (175°C) for about 10-15 minutes, allowing it to regain its crispy exterior and warm interior.

Room Temperature: If you plan to eat the Turkish flatbread within a few hours, keep it at room temperature in a covered cloth to prevent it from drying out.

Expert Tips for Turkish Flatbread

  • Dough Consistency: Ensure your dough is soft but not sticky; add flour gradually if it clings to your hands. A perfect Turkish flatbread starts with a well-made dough.

  • Preheating is Key: Don't skip preheating your oven! This step guarantees a crispy outer crust that contrasts beautifully with the fluffy interior of your flatbread.

  • Watch the Bake Time: If you’re using a pizza stone, check your Turkish flatbread at around 10-12 minutes to prevent burning. Every oven varies, so stay vigilant!

  • Fillings Galore: Feel free to get creative with fillings! Just remember to avoid overstuffing, or your Turkish flatbread might burst during baking.

  • Glaze for Shine: Brush with egg wash before baking for a lovely golden finish. It not only looks appealing but also enhances flavor.

Turkish Flatbread Recipe FAQs

What type of flour should I use for Turkish Flatbread?
For the best results, use bread flour as it provides the necessary structure for the dough. However, if you don’t have bread flour on hand, all-purpose flour works as a suitable substitute, though the texture might be slightly less chewy.

How do I know if my dough is properly risen?
Your dough should double in size during the resting period, usually after 60-90 minutes. Visually, it should look puffy and airy with a smooth surface. If it hasn't risen significantly, it might be due to inactive yeast or a too-cool environment.

How should I store leftover Turkish Flatbread?
Leftover Turkish Flatbread can be stored in an airtight container in the fridge for up to 3 days. To maintain the soft texture, you can wrap each piece in plastic wrap. For longer storage, freeze them wrapped tightly in plastic wrap or aluminum foil for up to 2 months.

Can I freeze Turkish Flatbread?
Absolutely! To freeze, ensure the baked Turkish Flatbread is cooled completely. Wrap each piece tightly in plastic wrap followed by aluminum foil to prevent freezer burn. When you’re ready to enjoy, thaw them in the fridge overnight and reheat in the oven at 350°F (175°C) for about 10-15 minutes.

What should I do if my filling leaks out during baking?
Overstuffing your Turkish Flatbread can cause the filling to leak out, so be cautious with the amount you use. If it does happen, simply keep an eye on the baking time to avoid burning the exposed filling. It might be helpful to seal the edges of the dough tightly.

Are there any dietary considerations I should keep in mind?
If you’re making Turkish Flatbread for someone with dietary restrictions, consider using lactose-free milk or a non-dairy substitute for the dough. For gluten sensitivities, you can experiment with gluten-free all-purpose flour blends, but the texture might vary. Always check labels on packaged ingredients to ensure they meet dietary needs.

Turkish Flatbread

Mouthwatering Turkish Flatbread: A Flavor Explosion Awaits

Experience the delight of Turkish Flatbread, a versatile and quick appetizer that brings the flavor of Istanbul to your kitchen.
Print Recipe Pin Recipe
Prep Time 30 minutes mins
Cook Time 17 minutes mins
Resting Time 1 hour hr 15 minutes mins
Total Time 2 hours hrs 2 minutes mins
Servings: 5 pieces
Course: Appetizers
Cuisine: Turkish
Calories: 250
Ingredients Equipment Method Nutrition Notes

Ingredients
  

For the Dough
  • 4 cups bread flour Substitute with all-purpose flour if needed.
  • 1 packet instant yeast Active dry yeast works too, activate in warm water first.
  • 1 tablespoon sugar Can be omitted for a less sweet taste.
  • 1 teaspoon kosher salt Regular salt can replace it, adjust quantity as it's saltier.
  • 2 tablespoons olive oil Can be replaced with melted butter.
  • 1 cup warm water Ensure it’s around 105-110°F for best results.
  • 1 cup warm milk Substitute with more warm water if lactose-free.
  • 1 egg egg + water (for wash) Adds shine and golden color upon baking.
For the Toppings
  • 1 cup Kesar Akkawi or Mozzarella Cheese Substitute with any melting cheese if unavailable.
  • 1 cup Sucuk (or ground beef) Swap for ground lamb or turkey for a variation.
  • Sesame/Nigella Seeds Optional, add texture and flavor; omit if desired.

Equipment

  • Stand Mixer
  • Baking Sheet
  • Pizza stone or baking steel

Method
 

Step-by-Step Instructions for Turkish Flatbread
  1. In a stand mixer, combine 4 cups of bread flour, 1 packet of instant yeast, 1 tablespoon of sugar, and 1 teaspoon of kosher salt. Gradually add 1 cup of warm water and 1 cup of warm milk, along with 2 tablespoons of olive oil. Mix on medium speed for about 10 minutes until the dough is smooth and elastic.
  2. Once the dough is kneaded, shape it into a ball and place it in a lightly oiled bowl. Cover the bowl with a damp cloth or plastic wrap, then set it aside in a warm area for about 60-90 minutes.
  3. While the dough is proofing, preheat your oven to 500°F (260°C), placing a pizza stone or baking steel inside. Allow it to heat for at least 45 minutes.
  4. After the dough has risen, gently punch it down to release excess air. Divide the dough into 5 equal pieces, and roll each piece into an oval shape about 18 inches long.
  5. Place your desired filling, such as a mixture of ground beef and cheese, down the center of each rolled dough oval. Gently fold the edges over the filling to create a boat shape, then pinch the ends to seal.
  6. Carefully transfer your prepared Turkish Pide to a baking sheet sprinkled with semolina or cornmeal to prevent sticking. Bake in the preheated oven for 14-17 minutes or until golden brown.
  7. Once baked, remove the Turkish Flatbread from the oven and let them cool slightly on a wire rack. Slice the pide into portions and serve warm.

Nutrition

Serving: 1pieceCalories: 250kcalCarbohydrates: 30gProtein: 8gFat: 10gSaturated Fat: 1.5gPolyunsaturated Fat: 0.5gMonounsaturated Fat: 8gCholesterol: 30mgSodium: 200mgPotassium: 150mgFiber: 2gSugar: 1gVitamin A: 100IUCalcium: 150mgIron: 1.5mg

Notes

Store leftover Turkish flatbread in an airtight container for up to 3 days. Wrap tightly in plastic wrap for freezing up to 2 months.

Tried this recipe?

Let us know how it was!

Crispy Baked Smashed Potatoes With Garlic & Parmesan Bliss

February 10, 2026 by Grace Snow Leave a Comment

As I stood in my kitchen, the rich scent of garlic wafting through the air, I couldn't help but smile at the crispy delights emerging from my oven. These Baked Smashed Potatoes with Garlic & Parmesan are a revelation—delivering a wonderfully crunchy exterior that cradles a fluffy, buttery interior. Not only do they come together in a snap, making them a perfect solution for busy weeknights, but they're also a vegetarian comfort food that everyone can enjoy. With just a handful of simple ingredients, these satisfying bites serve as the ultimate side dish or an irresistible snack on their own. Ready to elevate your potato game and impress your friends and family? Let’s dive into this delightful recipe!

Why Are These Smashed Potatoes So Special?

Crispy Perfection: The golden-brown edges provide a satisfying crunch that's hard to resist.

Flavor Explosion: Infused with garlic and topped with Parmesan, these potatoes burst with savory goodness.

Quick & Easy: Ready in under an hour, they are perfect for busy weeknights when you crave comfort food.

Versatile Snack: Enjoy them as a side to your favorite dishes or a standalone treat—ideal for any occasion!

Crowd-Pleaser: Whether it’s family dinner or game day, these crispy bites will disappear fast; serve them with a dip like creamy garlic aioli or sriracha mayo for an extra zing!

Baked Smashed Potatoes With Garlic & Parmesan Ingredients

For the Potatoes

  • Baby Potatoes – These small spuds cook evenly and provide the ideal base for your smashed potatoes.
  • Salt – Generously season during boiling for deeper flavor.
  • Olive Oil – Adds richness and helps achieve that golden, crispy exterior; avocado oil works as a great substitute.

For the Seasoning Mix

  • Butter (melted) – Provides a creamy touch; feel free to use vegan butter for a plant-based option.
  • Minced Garlic – Fresh garlic gives a robust aroma and flavor; garlic powder can be used in a pinch.
  • Black Pepper – A must-have seasoning to balance flavors; adjust to your personal taste.
  • Smoked Paprika – Offers a subtle smokiness; regular paprika may be substituted or omitted if desired.
  • Oregano – Adds that lovely herbal hint; both dried and fresh versions work well.

For the Topping

  • Grated Parmesan Cheese – Contributes indulgent cheesiness and texture; nutritional yeast serves as a vegan alternative.
  • Fresh Parsley – A pop of color and freshness for garnish; completely optional.
  • Red Pepper Flakes – These are perfect if you like a little bit of heat—great with the Baked Smashed Potatoes with Garlic & Parmesan!

Step‑by‑Step Instructions for Baked Smashed Potatoes With Garlic & Parmesan

Step 1: Boil the Potatoes
In a large pot, bring salted water to a boil over high heat. Carefully add the baby potatoes and cook for 15-20 minutes, or until they are fork-tender and easily pierced. Once done, drain the potatoes in a colander, allowing them to cool for a few minutes. This step ensures you have the perfect base for your Baked Smashed Potatoes with Garlic & Parmesan.

Step 2: Prepare the Oven
While the potatoes are cooling, preheat your oven to 425°F (220°C). Line a baking sheet with parchment paper or lightly grease it to prevent sticking. Preparing the baking sheet in advance will help your smashed potatoes crisp up beautifully during baking, delivering that delightful golden-brown finish we all crave.

Step 3: Smash the Potatoes
Once the potatoes are cool enough to handle, place each one on the prepared baking sheet. Using the bottom of a glass or a fork, gently flatten each potato to about ½-inch thick. Don’t worry if they break apart a little; the aim is to create rustic, crispy surfaces that will soak up the delicious flavors in the upcoming steps.

Step 4: Mix the Seasoning
In a small bowl, combine the olive oil, melted butter, minced garlic, salt, black pepper, smoked paprika, and oregano. Whisk this mixture until combined. This seasoning mix will infuse the baked smashed potatoes with garlic and savory goodness, ensuring every bite is bursting with flavor.

Step 5: Brush the Potatoes
Using a pastry brush or a spoon, generously coat each smashed potato with the flavorful oil and garlic mixture. Make sure the potatoes are well-covered to achieve that mouthwatering crispy texture and taste. This step is essential for bringing the Baked Smashed Potatoes with Garlic & Parmesan to life!

Step 6: Add the Cheese
Evenly sprinkle the grated Parmesan cheese over the top of each smashed potato. The cheese will melt and crisp up beautifully in the oven, creating a deliciously indulgent layer on top. This is what elevates your smashed potatoes into a truly irresistible side dish.

Step 7: Bake the Potatoes
Transfer your baking sheet to the preheated oven and bake for 25-30 minutes. Keep an eye on them, as you’re looking for a golden-brown, crispy exterior. For extra crunch, switch to the broil setting for an additional 2-3 minutes, watching carefully to avoid burning. The end result should be heavenly crispy on the outside and soft on the inside.

Step 8: Garnish and Serve
Once baked to perfection, remove the potatoes from the oven and garnish with fresh parsley and a sprinkle of red pepper flakes for a little kick. Serve your Baked Smashed Potatoes with Garlic & Parmesan hot, alongside your favorite dipping sauces or as a delightful side to your main dishes. Enjoy every crispy, creamy bite!

Expert Tips for Baked Smashed Potatoes

• Choose the Right Potatoes: Opt for baby potatoes as they cook evenly and are easy to smash. The size ensures a perfect texture for your baked smashed potatoes with garlic & Parmesan.

• Don't Over-Salt: While boiling, generously season the water but be mindful of additional salt later in the recipe to prevent overly salty potatoes.

• Smash Carefully: Avoid over-smashing to keep some shape and structure in the potatoes. This will help them hold onto that delicious garlic and cheese topping!

• Coat Well: Be generous with the oil and seasoning mix to ensure each bite is packed with flavor. A thorough coating is the secret to crispy, tasty potatoes.

• Customize Your Cheese: Feel free to swap Parmesan for your favorite cheese variety for a unique flavor twist. Just ensure it melts well and crisps up nicely!

Baked Smashed Potatoes With Garlic & Parmesan Variations

Feel free to mix things up and make this delightful recipe your own!

  • Dairy-Free: Swap out Parmesan for nutritional yeast for a cheesy flavor without the dairy.
  • Herbed Twist: Add fresh herbs like rosemary or thyme to the olive oil mixture for an aromatic boost.
  • Spicy Appeal: Mix in some cayenne pepper or chili flakes for an exciting heat level that will awaken your taste buds.
  • Cheesy Delight: Top with a blend of mozzarella and cheddar cheese for an extra cheesy experience that’s gooey and irresistible.
  • Garlic Lovers: Roast whole garlic cloves in foil and mash them into your butter for an even richer garlic experience.
  • Smoky Flavor: Substitute smoked paprika with chipotle powder for a tantalizing smoky heat that complements the dish.
  • Veggie Surprise: Toss in some cherry tomatoes or bell pepper slices on the baking sheet for added color and flavor with your Baked Smashed Potatoes with Garlic & Parmesan.
  • Crunchy Topping: Sprinkle some panko breadcrumbs mixed with melted butter on top before baking for an extra crunchy topping that adds a delightful texture.

Looking for more delicious inspiration? Try pairing these crispy lovelies with Honey Garlic Chicken for a cozy family meal or whip up some Crispy Parmesan Artichoke Hearts as a delightful appetizer!

Make Ahead Options

These Baked Smashed Potatoes with Garlic & Parmesan are a lifesaver for meal prep enthusiasts! You can boil the baby potatoes up to 24 hours in advance, then store them in the refrigerator. Once cooled, simply place them in an airtight container. When you're ready to enjoy, follow the smashing and seasoning steps before baking. To maintain that crispy texture, ensure they're coated well with the olive oil mixture right before baking. Bake the potatoes for 25-30 minutes until golden, and for an extra crunch, you can broil them for 2-3 minutes. This way, you’ll have delicious, restaurant-quality potatoes ready to impress with minimal effort!

How to Store and Freeze Baked Smashed Potatoes

Fridge: Store leftovers in an airtight container for up to 3 days. Reheat in the oven or air fryer to regain their crispy texture, making every bite just as delightful.

Freezer: For longer storage, freeze the baked smashed potatoes on a baking sheet for 1-2 hours until solid. Transfer to a freezer bag or container for up to 3 months.

Reheating: When ready to enjoy, reheat from frozen in the oven at 400°F (204°C) for 15-20 minutes until heated through. This keeps them crispy and flavorful.

Pre-Prepared Potatoes: If you'd like, you can also boil and smash the potatoes ahead of time, keeping them in the fridge for up to 2 days before baking. Just coat them with the garlic and Parmesan topping before roasting!

What to Serve with Baked Smashed Potatoes with Garlic & Parmesan

These delightful, crispy bites of goodness deserve to shine alongside complementary dishes that enhance their flavor profile!

  • Creamy Garlic Aioli: A rich, garlicky dip that echoes the potato's flavor, creating a delightful pairing that elevates every bite.

  • Roasted Vegetables: Seasonal veggies roasted to caramelized perfection add a beautiful touch of color and robust flavor, balancing the potatoes' richness.

  • Herbed Grilled Chicken: Juicy, well-seasoned chicken brings a savory protein element that pairs beautifully with the cheesy, buttery potatoes, making it a complete meal.

  • Fresh Garden Salad: Crisp greens with a tangy vinaigrette provide a refreshing contrast to the warmth and creaminess of the potatoes, brightening the plate with vibrant colors.

  • Classic Beef Burgers: The hearty and juicy burgers complement the potatoes as a delicious side, perfect for casual get-togethers or weekend cookouts.

  • Homemade Ranch Dressing: Creamy ranch dressing serves as a fun and flavorful dip that adds a zesty twist, perfect for those who love extra flavor with their potatoes.

  • Sparkling Lemonade: A fizzy and refreshing drink that cuts through the richness of the potatoes, bringing a burst of freshness to your dining experience.

  • Chocolate Chip Cookies: Sweeten up your meal with warm, gooey cookies for dessert; the perfect end to a savory dish, satisfying any sweet tooth!

Baked Smashed Potatoes With Garlic & Parmesan Recipe FAQs

How do I choose the best baby potatoes for this recipe?
Absolutely! Look for baby potatoes that are firm and smooth, avoiding any that have dark spots or blemishes. The smaller size not only cooks evenly but also makes smashing easier, ensuring a delightful texture in your Baked Smashed Potatoes with Garlic & Parmesan.

How should I store leftover smashed potatoes?
Store your leftover Baked Smashed Potatoes in an airtight container in the refrigerator for up to 3 days. To reheat, pop them back into the oven or air fryer at 350°F (175°C) for 10-15 minutes until they regain their crispy exterior.

Can I freeze these smashed potatoes?
Certainly! To freeze, place the baked smashed potatoes on a baking sheet spaced apart and freeze for 1-2 hours until solid. Once frozen, transfer them to a freezer-safe bag or container, where they can last for up to 3 months. When you're ready to enjoy, just reheat directly from the freezer in a preheated oven at 400°F (204°C) for about 15-20 minutes.

What should I do if my potatoes are too soft after boiling?
If your potatoes are too soft after boiling, don’t worry! It’s important to boil them just until they are fork-tender but still firm. If they've become too soft, you may need to handle them more gently when smashing to keep their structure. You can also try refrigerating the boiled potatoes briefly to firm them up before smashing.

Is it safe for my pets to eat these potatoes?
While plain, cooked potatoes can be safely enjoyed by pets in moderation, the garlic and spices in this recipe can be harmful to dogs and cats. So, it's best to keep these Baked Smashed Potatoes with Garlic & Parmesan as a human delight only! Always consult your vet for dietary concerns.

Can I make these mashed potatoes vegan or gluten-free?
Absolutely! To make them vegan, simply substitute regular butter with vegan butter and use nutritional yeast instead of Parmesan cheese. For gluten-free, ensure any seasonings or alternative cheeses used are certified gluten-free, so everyone can enjoy this delicious dish!

Baked Smashed Potatoes With Garlic & Parmesan

Crispy Baked Smashed Potatoes With Garlic & Parmesan Bliss

These Baked Smashed Potatoes with Garlic & Parmesan are a crunchy delight, perfect for busy weeknights and vegetarian comfort food.
Print Recipe Pin Recipe
Prep Time 10 minutes mins
Cook Time 30 minutes mins
Cooling Time 5 minutes mins
Total Time 45 minutes mins
Servings: 4 servings
Course: Snacks
Cuisine: American
Calories: 250
Ingredients Equipment Method Nutrition Notes

Ingredients
  

For the Potatoes
  • 1 pound Baby Potatoes Small spuds that cook evenly.
  • 1 tablespoon Salt For boiling
  • 3 tablespoons Olive Oil Can substitute with avocado oil.
For the Seasoning Mix
  • 2 tablespoons Butter (melted) Feel free to use vegan butter.
  • 3 cloves Minced Garlic Fresh is preferred.
  • 1 teaspoon Black Pepper Adjust to taste.
  • 1 teaspoon Smoked Paprika Regular paprika may be substituted.
  • 1 teaspoon Oregano Both dried and fresh work well.
For the Topping
  • 1 cup Grated Parmesan Cheese Nutritional yeast as a vegan alternative.
  • 2 tablespoons Fresh Parsley Optional for garnish.
  • 1 teaspoon Red Pepper Flakes For some heat.

Equipment

  • Large pot
  • Baking Sheet
  • Fork
  • pasty brush
  • small bowl

Method
 

Step-by-Step Instructions
  1. Boil the Potatoes: In a large pot, bring salted water to a boil. Add baby potatoes and cook for 15-20 minutes until fork-tender. Drain and cool.
  2. Prepare the Oven: Preheat your oven to 425°F (220°C) and line a baking sheet with parchment paper.
  3. Smash the Potatoes: Place each potato on the baking sheet and flatten to about ½-inch thick.
  4. Mix the Seasoning: In a small bowl, combine olive oil, melted butter, minced garlic, salt, black pepper, smoked paprika, and oregano.
  5. Brush the Potatoes: Generously coat each smashed potato with the seasoning mixture.
  6. Add the Cheese: Sprinkle grated Parmesan cheese over each potato.
  7. Bake the Potatoes: Bake for 25-30 minutes until golden brown. Broil for 2-3 minutes for extra crunch, watching carefully.
  8. Garnish and Serve: Remove from oven, garnish with parsley and red pepper flakes. Serve hot.

Nutrition

Serving: 1servingCalories: 250kcalCarbohydrates: 35gProtein: 5gFat: 12gSaturated Fat: 5gPolyunsaturated Fat: 1gMonounsaturated Fat: 6gCholesterol: 15mgSodium: 500mgPotassium: 600mgFiber: 4gSugar: 1gVitamin A: 10IUVitamin C: 30mgCalcium: 10mgIron: 8mg

Notes

Store leftovers in an airtight container for up to 3 days. Reheat in the oven for best results.

Tried this recipe?

Let us know how it was!

Anna Paul's Viral Turkish Pasta: A Creamy Comfort Delight

February 10, 2026 by Grace Snow Leave a Comment

As I sat down with a steaming plate of Anna Paul's Viral Turkish Pasta, the warmth wrapped around me like a cozy blanket. This dish beautifully intertwines creamy garlic yogurt and spiced ground beef, all drizzled with rich paprika butter—an exquisite comfort food that’s almost impossible to resist. What I love most about this recipe is its ability to deliver a hearty meal in a snap, making it perfect for those busy weeknights when you still want something delicious. Plus, its vibrant flavors are sure to impress even the pickiest guests! Are you ready to elevate your dinner game with this unforgettable Turkish delight?

Why is this pasta a must-try?

Comforting, Rich Flavor: The combination of creamy garlic yogurt and spiced ground beef creates a symphony of taste that will warm your heart.

Quick & Easy: This recipe is ideal for busy evenings, bringing comfort food to your table in under 30 minutes.

Versatile Ingredients: With simple substitutions like using ground turkey or omitting cheese, you can easily adapt the dish to your preferences.

Crowd-Pleasing Appeal: Impress family and friends alike with this vibrant meal that looks as beautiful as it tastes.

Cultural Twist: Experience the flavors of Turkey with every bite, adding a global flair to your dinner rotation.

Whether you're enjoying a cozy night in or hosting a dinner party, Anna Paul's Viral Turkish Pasta promises to be a delightful addition to your culinary collection!

Anna Paul's Viral Turkish Pasta Ingredients

  • For the Garlic Yogurt

  • Greek yogurt – Provides creaminess and tang; substitute with plain yogurt for a lighter option.

  • Garlic – Adds aromatic flavor; use roasted garlic for a milder sweetness.

  • Lemon juice – Brightens the yogurt mix; lime juice can serve as a substitute.

  • Salt – Enhances flavor; adjust based on personal taste.

  • For the Spiced Beef

  • Ground beef – The hearty protein base; ground lamb or turkey is an excellent alternative.

  • Yellow onion – Adds sweetness and depth of flavor when sautéed; shallots can be used if preferred.

  • Sweet paprika – Infuses warmth and color; smoked paprika can add a different flavor profile.

  • Garlic powder – Provides an additional depth of garlic flavor; use fresh garlic as a substitute, adjusting to taste.

  • Cumin – Offers an earthy note; omit if unpreferred or substitute with coriander.

  • Tomato paste – Adds richness and umami; tomato sauce can be used as a lighter substitute.

  • Pepper – Adds heat and balance; adjust according to preference.

  • Butter – Creates a silky texture in the paprika sauce while adding flavor; can be replaced with olive oil for a lighter option.

  • For Assembly

  • Cooked pasta (fusilli/penne) – Serves as the base for the dish; any textured pasta works well to hold the sauce.

  • Cherry tomatoes – Freshness and color as toppings; any small tomato variety can be used.

  • Fresh parsley – Adds brightness and color; substitute with other fresh herbs like cilantro or basil.

  • Feta cheese – Provides saltiness and texture; any crumbled cheese like goat cheese can offer a tangy kick.

Dive into the delightful world of Anna Paul's Viral Turkish Pasta—you won’t be disappointed!

Step‑by‑Step Instructions for Anna Paul's Viral Turkish Pasta

Step 1: Prepare Garlic Yogurt
In a small bowl, combine 1 cup of Greek yogurt, 2 grated cloves of garlic, 1 tablespoon of lemon juice, and a pinch of salt. Mix everything together until smooth and creamy. Set the garlic yogurt aside, allowing the flavors to meld together while you prepare the rest of the dish.

Step 2: Cook Spiced Beef
Heat a large skillet over medium heat and add a drizzle of oil. Once hot, sauté 1 diced yellow onion until it becomes translucent, about 3–5 minutes. Stir in 1 tablespoon of sweet paprika, 1 teaspoon of garlic powder, and 1 teaspoon of cumin, toasting them for 2 minutes until fragrant. Add 1 pound of ground beef, breaking it apart and cooking until browned, approximately 10 minutes. Season with salt, pepper, and 2 tablespoons of tomato paste; simmer for another 2-3 minutes.

Step 3: Make Paprika Butter
While the beef simmers, melt 3 tablespoons of butter in a small saucepan over low heat. Once melted, stir in an additional tablespoon of sweet paprika until it is bubbling gently. Remove the saucepan from heat and let it sit, allowing the flavors to develop while you assemble the pasta.

Step 4: Assemble Dish
In a large serving bowl, combine the cooked pasta (about 12 ounces of fusilli or penne) with the spiced beef mixture, tossing to coat evenly. Top the pasta with the creamy garlic yogurt, and drizzle the paprika butter generously over the entire dish.

Step 5: Add Toppings
Finish off Anna Paul's Viral Turkish Pasta by adding halved cherry tomatoes, crumbled feta cheese, and a sprinkle of freshly chopped parsley for brightness. These toppings provide added flavor and color, making the dish as visually appealing as it is delicious.

Step 6: Serve Warm
Serve the pasta warm to appreciate the creamy garlic yogurt and the rich spiced beef fully. Gather your loved ones around the table and enjoy this comforting, flavorful meal that’s bound to impress!

Expert Tips for Anna Paul's Viral Turkish Pasta

  • Mind the Garlic: Use fresh garlic for an aromatic punch; overcooking it can lead to bitterness. Roasted garlic offers a sweeter alternative.

  • Beef Browning: Ensure the ground beef is well-browned for deep flavor. Avoid overcrowding the pan, as this can cause steaming instead of browning.

  • Yogurt Creaminess: Let the garlic yogurt sit for at least 10 minutes before serving; it enhances the flavors and gives a creamier texture.

  • Season Gradually: When seasoning the beef, add salt slowly. Remember that feta cheese adds saltiness, so taste as you go.

  • Easy Cleanup Tips: Prep your ingredients ahead and use one large skillet for cooking. This cuts down on dishes and makes for a quicker cleanup after enjoying your Anna Paul's Viral Turkish Pasta!

How to Store and Freeze Anna Paul's Viral Turkish Pasta

  • Fridge: Store leftovers in an airtight container for up to 3 days. For best texture, keep the garlic yogurt and beef mixture separate from the pasta until ready to eat.

  • Freezer: You can freeze the spiced beef mixture for up to 2 months. Thaw it in the fridge overnight before reheating to restore its flavor and consistency.

  • Reheating: To reheat, warm the beef mixture in a skillet over medium heat and add a splash of water or broth for moisture. Heat the pasta separately and combine with the beef before serving.

  • Texture Preservation: Avoid freezing the garlic yogurt, as it may separate upon thawing; prepare it fresh for the best flavor and creaminess when enjoying Anna Paul's Viral Turkish Pasta.

Variations & Substitutions for Anna Paul's Viral Turkish Pasta

Customize your cooking experience by exploring these delightful twists that will elevate your pasta!

  • Dairy-Free: Swap Greek yogurt with coconut yogurt for a similar creamy texture with a tropical flair. The subtle sweetness pairs surprisingly well with the spices!

  • Vegetarian: Substitute ground beef with lentils or textured vegetable protein. Cooking these with spices will provide the same hearty satisfaction without the meat.

  • Pasta Variety: Use whole wheat or gluten-free pasta to fit different dietary preferences. The flavors will shine through on any base, making it equally comforting.

  • Herb Infusion: Add chopped fresh mint or dill to the yogurt for a refreshing twist. These herbs brighten the dish, giving it a daring yet delightful flavor profile.

  • Spicy Kick: Incorporate crushed red pepper flakes or a dash of cayenne pepper when cooking the beef. This will elevate the spice levels for those who love a bit of heat!

  • Veggie Boost: Toss in sautéed spinach, bell peppers, or zucchini for added nutrition. You can mix these vegetables directly into the beef mixture or layer them on top for a vibrant presentation.

  • Alternative Toppings: Experiment with toppings by using olives or roasted nuts instead of feta cheese. This offers a delightful crunch, while olives pack a briny punch that complements the dish.

  • Sour Cream Substitute: If Greek yogurt isn't available, plain sour cream works beautifully as a substitute in the sauce. It’s tangy and provides that creamy mouthfeel that you crave.

When savoring Anna Paul's Viral Turkish Pasta, consider pairing it with Skillet Pasta Sun or dive into a fresh side salad to complete your meal. These variations ensure that each plate remains special and unforgettable!

What to Serve with Anna Paul's Viral Turkish Pasta

The delightful balance of flavors in this dish sets the stage for various tasty sides that enhance your dining experience.

  • Crispy Garlic Bread: Perfect for scooping up the creamy yogurt sauce, garlic bread adds a satisfying crunch to your meal.
    Enhancing your dining experience, freshly baked garlic bread can soak up every last bit of flavor, making it a favorite.

  • Simple Green Salad: A refreshing mix of greens and a light vinaigrette will balance the rich flavors of the pasta and keep the meal light.
    With a crisp texture and zesty dressing, this salad adds a burst of freshness that's hard to resist.

  • Roasted Vegetables: Roasted seasonal vegetables bring earthiness and a bit of char that pairs beautifully with the savory beef.
    An array of colorful veggies like bell peppers and zucchini will complement the richness of the dish while adding vibrant colors.

  • Tzatziki Sauce: A cool, creamy dip made with yogurt, cucumber, and herbs nicely contrasts the warm pasta for a refreshing bite.
    Serve it on the side for dipping or drizzling, enhancing the meal with Mediterranean flair.

  • Sparkling Water with Lemon: A chilled spritz of lemon offers a bright, refreshing cleanse between bites of the rich pasta.
    This beverage elevates your dining experience, ensuring you stay hydrated and feeling light as you enjoy each decadent morsel.

  • Baklava: End your meal on a sweet note with this flaky pastry and honey dessert, perfectly balancing the savory notes of your dinner.
    Each bite of baklava offers a delightful sweetness and nutty crunch that rounds out your gastronomic journey through Turkey.

Make Ahead Options

These Anna Paul's Viral Turkish Pasta is perfect for busy home cooks who want to save time during the week! You can prepare the garlic yogurt and spiced beef mixture up to 24 hours in advance. Simply mix the yogurt, garlic, lemon juice, and salt, then refrigerate it, ensuring the lid is sealed tightly to maintain its creamy texture. For the beef, cook it as directed, cool completely, and store in an airtight container in the fridge. When you’re ready to enjoy, cook the pasta fresh and combine everything together for a meal that’s just as delicious as when made fresh. This way, you can savor a comforting dish with minimal effort on busy evenings!

Anna Paul's Viral Turkish Pasta Recipe FAQs

What type of yogurt should I use for the garlic mixture?
Using Greek yogurt adds a lovely creaminess and tang to your dish. If you're looking for a lighter option, plain yogurt works well too. Just remember that Greek yogurt offers a thicker texture which complements the pasta beautifully!

How can I store leftovers of Anna Paul's Viral Turkish Pasta?
Absolutely! Store leftovers in an airtight container in the fridge for up to 3 days. I recommend keeping the garlic yogurt, spiced beef, and pasta separately to maintain the best texture upon reheating.

Can I freeze the spiced beef mixture?
Yes, you can! The spiced beef mixture can be frozen for up to 2 months. To freeze, let it cool completely, then transfer it to a freezer-safe container or bag. When you're ready to enjoy it again, simply thaw it in the fridge overnight before reheating.

What should I do if my pasta sticks together when reheating?
To prevent sticking, add a splash of water or broth while reheating the pasta in a skillet over medium heat. Stir occasionally and if needed, you can drizzle a bit of olive oil to help loosen it up. This should help restore its desired texture.

Are there any dietary alternatives I should consider?
Definitely! If you're looking to make this dish dairy-free, feel free to omit the feta cheese or substitute it with a vegan cheese alternative. Additionally, for a protein alternative, ground turkey or lamb can be delicious substitutes for the ground beef.

How do I know if my garlic is fresh for the yogurt?
Look for firm, plump cloves without any dark spots or sprouts. Fresh garlic should have a strong aroma. If the cloves are soft or you notice any mold, it’s best to discard them. Fresh garlic will elevate the flavor of your garlic yogurt beautifully!

Anna Paul's Viral Turkish Pasta

Anna Paul's Viral Turkish Pasta: A Creamy Comfort Delight

Anna Paul's Viral Turkish Pasta is a creamy and delicious dish featuring garlic yogurt and spiced beef, perfect for busy weeknights.
Print Recipe Pin Recipe
Prep Time 10 minutes mins
Cook Time 20 minutes mins
Total Time 30 minutes mins
Servings: 4 servings
Course: Dinner
Cuisine: Turkish
Calories: 550
Ingredients Equipment Method Nutrition Notes

Ingredients
  

For the Garlic Yogurt
  • 1 cup Greek yogurt substitute with plain yogurt for a lighter option
  • 2 cloves Garlic use roasted garlic for a milder sweetness
  • 1 tablespoon Lemon juice lime juice can serve as a substitute
  • Salt adjust based on personal taste
For the Spiced Beef
  • 1 pound Ground beef ground lamb or turkey is an excellent alternative
  • 1 medium Yellow onion shallots can be used if preferred
  • 1 tablespoon Sweet paprika smoked paprika can add a different flavor profile
  • 1 teaspoon Garlic powder use fresh garlic as a substitute, adjusting to taste
  • 1 teaspoon Cumin omit if unpreferred or substitute with coriander
  • 2 tablespoons Tomato paste tomato sauce can be used as a lighter substitute
  • Pepper adjust according to preference
  • 3 tablespoons Butter can be replaced with olive oil for a lighter option
For Assembly
  • 12 ounces Cooked pasta (fusilli or penne) any textured pasta works well to hold the sauce
  • Cherry tomatoes any small tomato variety can be used
  • Fresh parsley substitute with other fresh herbs like cilantro or basil
  • Feta cheese any crumbled cheese like goat cheese can offer a tangy kick

Equipment

  • Large skillet
  • small bowl
  • small saucepan
  • large serving bowl

Method
 

Step-by-Step Instructions
  1. In a small bowl, combine Greek yogurt, grated garlic, lemon juice, and salt. Mix until smooth and creamy. Set aside.
  2. Heat a large skillet over medium heat and sauté diced onion until translucent, about 3–5 minutes. Stir in paprika, garlic powder, and cumin; toast for 2 minutes. Add ground beef, cooking until browned, about 10 minutes. Season with salt, pepper, and tomato paste; simmer for another 2–3 minutes.
  3. Melt butter in a small saucepan over low heat and stir in paprika until bubbling gently. Remove from heat.
  4. In a large serving bowl, combine cooked pasta with the spiced beef mixture, tossing to coat. Top with creamy garlic yogurt and drizzle with paprika butter.
  5. Finish with halved cherry tomatoes, crumbled feta, and a sprinkle of parsley.
  6. Serve warm to appreciate the flavors.

Nutrition

Serving: 1servingCalories: 550kcalCarbohydrates: 60gProtein: 30gFat: 20gSaturated Fat: 10gPolyunsaturated Fat: 2gMonounsaturated Fat: 8gCholesterol: 70mgSodium: 600mgPotassium: 500mgFiber: 4gSugar: 5gVitamin A: 500IUVitamin C: 10mgCalcium: 150mgIron: 3mg

Notes

Expert tips include using fresh garlic for better flavor, ensuring the beef is well-browned, and letting the yogurt sit before serving.

Tried this recipe?

Let us know how it was!

Crockpot Pizza Pasta: A Cheesy Family Favorite Made Easy

February 10, 2026 by Grace Snow Leave a Comment

As the sun sets on another bustling day, I can’t help but reflect on the joy of coming home to a warm, inviting bowl of Crockpot Pizza Pasta. This delightful dish marries the beloved flavors of pizza with the comforting embrace of hearty pasta, making it the ultimate family-friendly meal that’s as satisfying as it is easy to prepare. The beauty of this recipe lies in its simple hands-off approach—just toss everything into your slow cooker, and voilà! In just a few hours, you’ll have a cheesy, delicious crowd-pleaser ready for busy weeknights or gatherings. Plus, it’s budget-friendly, so you can enjoy it without breaking the bank. Are you ready to discover how to create this delicious fusion of flavors? Let’s dive in!

Why is Crockpot Pizza Pasta a Must-Try?

Simplicity at Its Best: Just toss all ingredients into the slow cooker without fuss.

Budget-Friendly: Utilize affordable ingredients without compromising on taste.

Crowd-Pleasing Flavor: The irresistible combination of cheesy goodness and savory sauce makes it perfect for families and gatherings.

Versatile Customization: Feel free to mix in your favorite toppings like black olives or pineapple chunks for a personal touch.

Time-Saving Delight: With minimal prep, this dish frees up your evening, allowing you to relax while dinner cooks.

Give it a try alongside other delicious options like Crockpot Butter Chicken or explore variations with Cauliflower Pasta Ready. You won’t regret it!

Crockpot Pizza Pasta Ingredients

• For the Pasta Base

  • Lean Ground Beef – A hearty protein that makes it filling; substitute with turkey for a leaner option.
  • Uncooked Rotini Pasta – Provides great structure and holds sauce well; avoid thin pasta to prevent mushiness.
  • Low-Sodium Beef Broth – Adds moisture and flavor; can be swapped with chicken broth for a lighter taste.

• For the Sauce and Flavor

  • Marinara Sauce – Essential for that rich pizza flavor; opt for low-sodium varieties to keep it healthy.
  • Yellow Onion – Adds sweetness and depth; red onion can be used for a bolder flavor.
  • Green Bell Pepper – For crunch and color; substitute with red or yellow for a sweeter taste.
  • Garlic Powder – Gives an aromatic kick; fresh garlic can elevate the flavor even further.
  • Italian Seasoning – Vital for authentic Italian flavor; you can create your own blend to suit your taste.
  • Salt & Black Pepper – Essential for seasoning; adjust according to your preference.

• For the Cheesy Goodness

  • Shredded Mozzarella Cheese – Melty and creamy, a must for the cheesy top layer; try provolone for a different taste.
  • Shredded Cheddar Cheese – Adds a sharp contrast to the mozzarella; optional if you prefer a simpler cheesy flavor.
  • Turkey Pepperoni – A lighter take on traditional pepperoni; feel free to use regular pepperoni or leave it out entirely.

• Optional Add-Ins

  • Black Olives – A classic pizza topping that adds brininess; perfect for those who love a bit of extra flavor.
  • Mushrooms – For an earthy flavor; add them for a veggie-loaded twist! You can customize with any toppings that excite your palate.

With these ingredients, your Crockpot Pizza Pasta is just moments away from delighting your family. Enjoy the process and the delicious outcome of this family-friendly, cheesy dish that’s bound to become a favorite!

Step‑by‑Step Instructions for Crockpot Pizza Pasta

Step 1: Brown the Ground Beef
Start by heating a skillet over medium heat. Add the lean ground beef and cook for about 6-8 minutes until it’s browned and fully cooked, breaking it apart with a spatula. Season it with garlic powder, salt, and black pepper. Once cooked, drain any excess fat, and set the beef aside to make way for the savory layer of flavors in your Crockpot Pizza Pasta.

Step 2: Mix the Base Ingredients
In your crockpot, combine the cooked ground beef, marinara sauce, and low-sodium beef broth. Chop the yellow onion and green bell pepper, adding them to the mixture. Sprinkle in Italian seasoning for that pizza flair. Stir everything well with a spoon to ensure an even distribution of flavors, creating a comforting base for your hearty dinner.

Step 3: Add the Pasta and Pepperoni
Next, add the uncooked rotini pasta to the crockpot, ensuring it’s thoroughly coated with the sauce and other ingredients. Layer half of the turkey pepperoni on top; this will infuse the dish with that classic pizza essence. Cover the crockpot, allowing the delicious aroma to fill your kitchen as it cooks low and slow.

Step 4: Cook and Stir
Set the crockpot to low and let it cook for 3 to 4 hours. It’s important to stir halfway through cooking—this ensures all the pasta cooks evenly and prevents sticking. Check for doneness; you’re looking for tender pasta that has absorbed all the delicious flavors, making this Crockpot Pizza Pasta a crowd-pleaser.

Step 5: Melt the Cheeses
Once the cooking time is up and the pasta is tender, it’s time to take it to the next level of cheesy goodness. Sprinkle the shredded mozzarella and cheddar cheese over the top, along with the remaining pepperoni slices. Cover the crockpot again and cook for an additional 15-20 minutes, until the cheese melts beautifully and becomes gooey.

Step 6: Let It Rest Before Serving
After the cheese is melted to perfection, remove the crockpot from heat and let your Crockpot Pizza Pasta sit for about 10 minutes. This resting time will help thicken the texture, allowing the flavors to meld together even more. Now, you’re ready to serve a warm, hearty meal that the whole family will savor!

What to Serve with Crockpot Pizza Pasta

As you savor the deliciousness of this cheesy, hearty meal, consider enhancing your dining experience with these delightful pairings.

  • Garlic Bread: The buttery, garlicky flavor of freshly baked bread is perfect for soaking up extra sauce and adds a crunchy element.

  • Caesar Salad: Crisp romaine leaves topped with Parmesan and creamy dressing provide a refreshing contrast to the rich pasta.

  • Steamed Vegetables: A medley of seasonal veggies adds a pop of color and vital nutrients, making your meal well-rounded.

  • Fruit Salad: A vibrant blend of fresh fruits offers a sweet, juicy complement to the savory pasta dish—perfect for balancing flavors.

  • Italian Lemonade: Cool and tangy, this refreshing drink adds a bright burst of citrus that elevates the comfort of your meal.

  • Baked Zucchini Fries: Crispy, baked zucchini fries deliver a satisfying crunch while being a healthier alternative to traditional fries.

These pairings play beautifully with your Crockpot Pizza Pasta, creating a satisfying dining experience that your family will treasure!

Expert Tips for Crockpot Pizza Pasta

• Pasta Type Matters: Use thicker pasta shapes like rotini to ensure they hold up well during cooking and don't become mushy.

• Stir Occasionally: Make sure to stir the Crockpot Pizza Pasta halfway through cooking to promote even heat distribution and prevent sticking.

• Monitor Cooking Time: Check the pasta around the 2.5-hour mark; undercooking slightly makes it easier to melt cheese at the end without overdoing the pasta.

• Adjust Liquid Levels: If you notice too much liquid absorption, add extra beef broth to maintain a creamy consistency throughout the dish.

• Customize to Taste: Feel free to experiment with different vegetables or toppings; think of it as a personal pizza in pasta form!

Make Ahead Options

Preparing your Crockpot Pizza Pasta in advance is a fantastic way to save time on busy weeknights! You can brown the ground beef and chop your vegetables up to 24 hours in advance, refrigerating them separately to maintain freshness. Additionally, you can mix the marinara sauce and beef broth together for up to 3 days ahead, storing it in an airtight container. When you're ready to serve, simply combine all ingredients in the crockpot, add the uncooked rotini, and layer your turkey pepperoni. In just a few hours, you'll enjoy a delicious, cheesy meal that tastes just as fresh and satisfying as if you made it that day!

Crockpot Pizza Pasta Variations & Substitutions

Feel free to tailor this comforting recipe to suit your unique tastes and preferences for a delightful twist!

  • Veggie-Loaded: Add mushrooms, zucchini, or spinach for a nutritious boost. The more veggies, the merrier! They bring freshness and flavor that even the kids will love.

  • Dairy-Free: Swap out the mozzarella and cheddar for plant-based alternatives. This way, everyone can enjoy a creamy texture without the dairy.

  • Spicy Kick: Mix in some crushed red pepper flakes or diced jalapeños for a delightful heat that will awaken your taste buds. Spice lovers rejoice!

  • Meat Lovers: Include cooked sausage or bacon for an extra layer of deliciousness. The more meaty goodness, the heartier the dish.

  • Hawaiian Style: Add pineapple chunks for a sweet and savory combination that captures the essence of Hawaiian pizza. It’s a fun twist that’s always a hit!

  • Gluten-Free: Substitute rotini with gluten-free pasta if needed. Sandwich in the same flavors, and you won’t miss a beat of that delightful taste.

  • One-Pot Wonder: Skip the skillet and brown the ground beef directly in the crockpot for an even faster cooking method. Less cleanup is always a bonus!

For more culinary adventures, consider trying this alongside Seafood Pasta Savory or experience the robust flavors of Tuscan White Bean Pasta. Enjoy the journey of cooking!

Storage Tips for Crockpot Pizza Pasta

  • Room Temperature: Allow the Crockpot Pizza Pasta to cool to room temperature before storing; leftovers can sit out for a maximum of 2 hours for safety.

  • Fridge: Store any leftovers in an airtight container in the fridge for up to 3 days. Reheating gently in the microwave or on the stovetop with a splash of additional broth helps refresh the flavors.

  • Freezer: For longer storage, freeze the pasta in a freezer-safe container for up to 2 months. Slightly undercooking the pasta before freezing helps maintain the right texture upon reheating.

  • Reheating: When ready to enjoy again, thaw overnight in the fridge and reheat on low heat, adding a little broth or water to restore creaminess, if needed.

Crockpot Pizza Pasta Recipe FAQs

What type of pasta should I use for Crockpot Pizza Pasta?
Absolutely go for thicker pasta shapes like rotini or penne. These types hold their shape well during cooking and absorb flavors without becoming mushy. Avoid thin pasta shapes, as they can disintegrate in the long cooking time.

How should I store leftover Crockpot Pizza Pasta?
To keep your leftovers fresh, allow the Crockpot Pizza Pasta to cool to room temperature, then transfer it into an airtight container. It can be stored in the fridge for up to 3 days. When ready to enjoy, reheat gently on the stovetop or microwave, adding a splash of broth to rejuvenate the flavors.

Can I freeze Crockpot Pizza Pasta?
Yes, you can freeze it! I recommend slightly undercooking the pasta before freezing to maintain the best texture. Store it in a freezer-safe container for up to 2 months. When you're ready to eat, thaw it overnight in the fridge, then reheat on low heat, adding just a bit of broth or water to help restore creaminess.

What if my pasta is overcooked in the Crockpot?
If you notice the pasta has become mushy, don't worry! For next time, try stirring halfway through cooking and monitoring it closely after the 2.5-hour mark. If you happen to overcook it, you can mix in a bit of extra broth and heat it gently to help redistribute moisture and improve the texture.

Are there any dietary considerations for Crockpot Pizza Pasta?
Absolutely! This recipe is quite adaptable for different dietary needs. You can substitute lean ground beef with turkey for a lighter option, use gluten-free pasta to accommodate gluten sensitivities, or omit cheese for a dairy-free version. Always check ingredient labels to ensure they align with your dietary preferences or allergies.

Crockpot Pizza Pasta

Crockpot Pizza Pasta: A Cheesy Family Favorite Made Easy

Crockpot Pizza Pasta is a delightful dish that combines pizza flavors with pasta, perfect for families and easy to prepare.
Print Recipe Pin Recipe
Prep Time 15 minutes mins
Cook Time 4 hours hrs
Resting Time 10 minutes mins
Total Time 4 hours hrs 25 minutes mins
Servings: 6 servings
Course: Dinner
Cuisine: Italian
Calories: 350
Ingredients Equipment Method Nutrition Notes

Ingredients
  

For the Pasta Base
  • 1 pound Lean Ground Beef substitute with turkey for a leaner option
  • 3 cups Uncooked Rotini Pasta avoid thin pasta to prevent mushiness
  • 2 cups Low-Sodium Beef Broth can be swapped with chicken broth
For the Sauce and Flavor
  • 24 ounces Marinara Sauce opt for low-sodium varieties
  • 1 medium Yellow Onion red onion can be used for bolder flavor
  • 1 medium Green Bell Pepper substitute with red or yellow for sweetness
  • 1 teaspoon Garlic Powder fresh garlic can elevate flavor
  • 1 teaspoon Italian Seasoning you can create your own blend
  • 1 teaspoon Salt adjust according to taste
  • 1/2 teaspoon Black Pepper adjust according to taste
For the Cheesy Goodness
  • 2 cups Shredded Mozzarella Cheese try provolone for a different taste
  • 1 cup Shredded Cheddar Cheese optional if you prefer simpler flavor
  • 1 cup Turkey Pepperoni or use regular pepperoni
Optional Add-Ins
  • 1 cup Black Olives for additional flavor
  • 1 cup Mushrooms for a veggie-loaded twist

Equipment

  • Slow Cooker

Method
 

Step-by-Step Instructions
  1. Brown the Ground Beef: Heat a skillet over medium heat. Add the lean ground beef and cook for 6-8 minutes until browned. Season with garlic powder, salt, and black pepper. Drain excess fat.
  2. Mix the Base Ingredients: In your crockpot, combine cooked ground beef, marinara sauce, and low-sodium beef broth. Chop and add yellow onion and green bell pepper. Stir well.
  3. Add the Pasta and Pepperoni: Add uncooked rotini pasta to the crockpot, ensuring it's coated with sauce. Layer half of the turkey pepperoni on top.
  4. Cook and Stir: Set crockpot to low and cook for 3 to 4 hours, stirring halfway through.
  5. Melt the Cheeses: After cooking time, sprinkle mozzarella and cheddar cheese over the top with remaining pepperoni. Cover and cook for an additional 15-20 minutes.
  6. Let It Rest Before Serving: Remove crockpot from heat and let it rest for about 10 minutes before serving.

Nutrition

Serving: 1bowlCalories: 350kcalCarbohydrates: 45gProtein: 20gFat: 12gSaturated Fat: 6gPolyunsaturated Fat: 1gMonounsaturated Fat: 4gCholesterol: 60mgSodium: 800mgPotassium: 400mgFiber: 2gSugar: 4gVitamin A: 500IUVitamin C: 20mgCalcium: 200mgIron: 2mg

Notes

Pasta type matters; thicker pasta varieties hold up well. Stir occasionally during cooking to prevent sticking. Adjust liquid levels for desired consistency.

Tried this recipe?

Let us know how it was!

Baked Chicken Parmesan Pasta: Your Ultimate Comfort Meal

February 10, 2026 by Grace Snow Leave a Comment

As the sun dips below the horizon, a warm, savory aroma wafts from my kitchen, making it hard to resist. There’s something truly magical about the way Baked Chicken Parmesan Pasta comes together—it turns an ordinary weeknight into a cozy culinary escape. Imagine tender chicken bursting with Italian flavors, all nestled among perfectly cooked pasta and smothered in rich marinara sauce. This one-pot wonder not only saves you from endless dishes but is also sure to bring everyone to the table, smiling and hungry. Plus, it’s a comfort food that caters to the entire family without a fuss! How do you elevate your weeknight meals when time is short?

Why Is This Pasta Recipe So Appealing?

Simplicity at its core: This one-pot wonder minimizes clean-up while delivering maximum flavor, making weeknight cooking a breeze.

Mouthwatering flavors: Each bite is a delightful blend of tender chicken and rich marinara, hitting all the comfort food notes we crave.

Crowd-pleaser: Perfect for families, this dish brings everyone together and never fails to impress—just like when you create your own Chipotle Lime Chicken as a crowd favorite!

Versatile delight: Customize it with your favorite veggies for a twist. Want a lighter option? Consider swapping in zoodles, just like my easy Cauliflower Pasta recipe!

Quick cooking: Ready in under an hour, it’s perfect for busy nights, ensuring you savor every moment around the dinner table.

Baked Chicken Parmesan Pasta Ingredients

• Here's what you need to create this delightful one-pot meal!

For the Chicken
• Boneless Skinless Chicken Breasts – A lean protein that absorbs Italian flavors beautifully; feel free to swap for thighs for added juiciness.

For the Pasta
• Short Pasta (16 oz) – Use shapes like penne or fusilli that hold sauce well; dried pasta saves time!

For the Sauce
• Marinara Sauce (24 oz) – This is the dish's flavor base; Rao's is my go-to for rich taste.
• Water (1 cup) – Essential to ensure pasta cooks perfectly; make sure there's enough liquid.

For the Cheese
• Freshly Grated Parmesan Cheese (1/2 cup) – Offers a sharp, nutty taste; always choose fresh for better melting quality.
• Shredded Mozzarella Cheese (1 cup) – Imparts creaminess throughout; it's essential for that gooey topping.

For the Aromatics
• Diced Onion (1 medium) – Adds fragrant flavor; yellow or white onions work perfectly here.
• Garlic (3 cloves, minced) – Fresh garlic enhances your dish’s aroma; you can use garlic powder if you’re in a pinch.

For Seasoning
• Italian Seasoning (1 tsp) – A traditional blend that gives this dish its classic Italian flair.
• Salt and Pepper – Essential for enhancing all the flavors; don’t forget the basics!
• Garlic Powder (1/2 tsp) – Gives an additional garlic punch for flavor lovers.

Each ingredient contributes to the comforting allure of Baked Chicken Parmesan Pasta—perfect for making cherished family memories!

Step‑by‑Step Instructions for Baked Chicken Parmesan Pasta

Step 1: Sear Chicken
In a large pot or skillet, heat a drizzle of olive oil over medium-high heat. Season the boneless skinless chicken breasts with salt and pepper, then add them to the hot pan. Sear for about 5 minutes until golden brown, then flip and cook for an additional 3-4 minutes. The chicken should not be fully cooked; remove it from the pot and set it aside on a plate.

Step 2: Sauté Aromatics
Using the same pot, add the diced onion and minced garlic. Sauté over medium heat for 2-3 minutes, stirring frequently until the onion is translucent and the garlic is fragrant. This step infuses the pot with a lively aroma that will enhance the overall flavor of the Baked Chicken Parmesan Pasta.

Step 3: Prepare Sauce
Pour in the marinara sauce and one cup of water, scraping the bottom of the pot to release any browned bits. Stir well and bring the mixture to a gentle boil. This rich sauce forms the base of your one-pot dish, contributing depth and savory goodness as it simmers.

Step 4: Cook Pasta
Return the seared chicken to the pot along with the dried pasta. Stir everything together to ensure the pasta is well-coated in sauce. Cover the pot and reduce the heat to low, allowing it to simmer for 10-15 minutes. Stir occasionally until the pasta is tender and the chicken reaches an internal temperature of 165°F.

Step 5: Add Cheese
Once the pasta is cooked, stir in the freshly grated Parmesan cheese and 1/4 cup of shredded mozzarella. Mix until the cheeses are melted and create a creamy texture throughout the dish. This step enhances the Baked Chicken Parmesan Pasta with a delightful cheesy richness that will have everyone craving more.

Step 6: Bake
Transfer the pasta mixture into a baking dish, spreading it evenly. Sprinkle the remaining mozzarella cheese generously on top. Place the dish under the broiler for 2-3 minutes, or until the cheese is bubbly and golden brown. This final step creates a beautiful melty crust that makes this comfort food irresistible.

Step 7: Garnish
Remove the baking dish from the oven and let it rest for a few minutes. For a touch of freshness, top with torn basil leaves and chopped parsley before serving. This simple garnish adds a pop of color and flavor to your Baked Chicken Parmesan Pasta, making it the perfect meal to share with loved ones.

What to Serve with Baked Chicken Parmesan Pasta

Imagine a cozy family gathering where every bite delivers warmth, flavor, and a touch of nostalgia.

  • Caesar Salad: Crisp romaine, creamy dressing, and crunchy croutons create a refreshing contrast to the cheesy richness of the pasta.

  • Garlic Bread: This classic side is perfect for soaking up the marinara sauce, offering a satisfying crunch that pairs beautifully with each creamy bite.

  • Steamed Green Beans: Tender yet crunchy, these vibrant beans add a fresh element to your plate, brightening up the hearty dish.

  • Roasted Vegetables: A medley of seasonal veggies, caramelized to perfection, enhances the meal’s flavor profile with natural sweetness and a delightful textural contrast.

  • Italian Wine: A glass of Chianti or a light Pinot Grigio complements the savory notes of the dish, turning your home-cooked meal into a delightful dining experience.

  • Chocolate Mousse: End your culinary journey on a sweet note! This rich, creamy dessert provides a satisfying finish after such a hearty meal, balancing the flavors beautifully.

Storage Tips for Baked Chicken Parmesan Pasta

Fridge: Store leftovers in an airtight container for up to 4 days. To keep flavors intact, add a splash of marinara sauce before reheating.

Freezer: For longer storage, freeze your Baked Chicken Parmesan Pasta in a tightly sealed container for up to 2 months. Thaw in the fridge before reheating.

Reheating: Reheat in the microwave or on the stovetop over low heat. Add a little water or marinara to ensure the pasta remains moist and creamy.

Room Temperature: Avoid leaving the pasta out at room temperature for more than 2 hours to ensure food safety.

Expert Tips for Baked Chicken Parmesan Pasta

  • Liquid Control: Ensure there's enough water added for the pasta; no one wants crunchy pasta in their creamy dish.
  • Sear Smartly: Avoid fully cooking the chicken when searing. It will finish cooking with the pasta, keeping it juicy.
  • Stir Occasionally: Give your pasta a gentle stir as it simmers. This prevents sticking and helps achieve even cooking for your Baked Chicken Parmesan Pasta.
  • Check for Cheese: Ensure you’re using freshly grated cheese for better melting and flavor. Pre-shredded cheese may not give you that desired gooey texture.
  • Serve with Flair: Garnish with fresh herbs like basil and parsley for a burst of flavor and a beautiful presentation!

Baked Chicken Parmesan Pasta Variations

Feel free to mix things up and let your creativity shine in this delicious dish!

  • Dairy-Free: Substitute dairy cheeses with plant-based alternatives for a creamy texture without the dairy.

  • Whole Wheat Pasta: Swap regular pasta with whole wheat to boost fiber content and add a nutty flavor. Your family might even enjoy the heartiness!

  • Veggie-Loaded: Add chopped spinach, bell peppers, or zucchini for extra nutrition. Colorful veggies not only enhance the dish visually but also blend beautifully with the chicken and cheese.

  • Spicy Kick: Sprinkle red pepper flakes or diced jalapeños for that extra heat. It’s a fun way to spice up a comforting classic!

  • Homemade Sauce: Use a homemade tomato sauce instead of marinara for a personal touch. Not only will it taste fresher, but you can customize the flavor to your liking.

  • Seafood Delight: Turn this into a seafood pasta by incorporating shrimp or scallops. Their delightful flavors will give a whole new twist reminiscent of a luxurious dinner.

  • Pasta Variety: Experiment with different short pasta shapes like tortiglioni or shells. They might hold onto the sauce differently, creating a unique experience each time.

  • Herb Infusion: For a flavor boost, toss in fresh herbs such as basil or oregano right at the end of cooking. A hint of freshness elevates any dish, just like my Chicken Adobo recipe.

These variations will not only keep the dish exciting but also allow you to cater to your family’s preferences! Enjoy making it your own!

Make Ahead Options

Baked Chicken Parmesan Pasta is perfect for meal prep, allowing you to enjoy comfort food with far less fuss on busy nights! You can prepare the chicken and sauté the aromatics up to 24 hours in advance and store them in the refrigerator. Additionally, you can combine the marinara sauce and water ahead of time. When you're ready to serve, simply add the cooked chicken and aromatics to the sauce mixture, follow with the dried pasta, cover, and simmer as directed. To maintain quality, ensure everything is tightly covered to prevent drying out. The result? A delectable, homemade meal that will taste just as delicious as if you made it fresh!

Baked Chicken Parmesan Pasta Recipe FAQs

How do I choose the right chicken for my pasta?
Absolutely! When selecting chicken, boneless skinless breasts are ideal for this dish because they cook evenly and absorb Italian flavors beautifully. If you're looking for a juicier option, chicken thighs work wonderfully as a substitute. Just ensure that whatever chicken you choose is fresh and has no dark spots or blemishes.

What’s the best way to store leftovers of Baked Chicken Parmesan Pasta?
Very! Leftovers can be stored in an airtight container in the fridge for up to 4 days. To revive the flavors, consider adding a splash of marinara sauce during reheating, which can help retain moisture and make it taste freshly made!

Can I freeze Baked Chicken Parmesan Pasta?
Definitely! For longer storage, freeze your Baked Chicken Parmesan Pasta in a tightly sealed container for up to 2 months. To freeze, allow the dish to cool completely, then transfer it to a freezer-safe container. When you're ready to enjoy it again, simply thaw it in the fridge overnight before reheating.

What should I do if my pasta turns out crunchy?
Oh no! If your pasta is crunchy, it's likely that it didn't have enough liquid to absorb while cooking. In future batches, make sure to add enough water when preparing the sauce. If you find this happening during cooking, add an extra 1/2 cup of water gradually, stirring and checking the doneness until it’s tender.

Are there any dietary considerations for Baked Chicken Parmesan Pasta?
Yes, indeed! This delicious recipe is generally family-friendly, but you should be mindful of any allergies. For dairy-free options, consider using vegan cheese alternatives. If you're cooking for pets or sensitive family members, make sure to omit any seasoning or cheese that's not safe for them.

How can I enhance the flavor of my sauce?
Absolutely! For a flavor boost, consider adding fresh herbs like basil or oregano while the sauce simmers. You could also mix in red pepper flakes for a little heat or even a splash of red wine to deepen the flavor. Experimenting is part of the fun!

Baked Chicken Parmesan Pasta

Baked Chicken Parmesan Pasta: Your Ultimate Comfort Meal

Baked Chicken Parmesan Pasta is a family-friendly one-pot meal bursting with Italian flavors that brings comfort to any dinner table.
Print Recipe Pin Recipe
Prep Time 15 minutes mins
Cook Time 30 minutes mins
Total Time 45 minutes mins
Servings: 4 servings
Course: Dinner
Cuisine: Italian
Calories: 550
Ingredients Equipment Method Nutrition Notes

Ingredients
  

For the Chicken
  • 1 pound Boneless Skinless Chicken Breasts Feel free to swap for thighs for added juiciness.
For the Pasta
  • 16 oz Short Pasta Use shapes like penne or fusilli that hold sauce well.
For the Sauce
  • 24 oz Marinara Sauce Rao's is my go-to for rich taste.
  • 1 cup Water Essential to ensure pasta cooks perfectly.
For the Cheese
  • 1/2 cup Freshly Grated Parmesan Cheese Always choose fresh for better melting quality.
  • 1 cup Shredded Mozzarella Cheese Essential for that gooey topping.
For the Aromatics
  • 1 medium Diced Onion Yellow or white onions work perfectly here.
  • 3 cloves Garlic Minced; enhances aroma of the dish.
For Seasoning
  • 1 tsp Italian Seasoning Gives this dish its classic Italian flair.
  • Salt and Pepper Essential for enhancing all the flavors.
  • 1/2 tsp Garlic Powder Gives an additional garlic punch.

Equipment

  • Large pot
  • Skillet
  • Baking Dish

Method
 

Step-by-Step Instructions
  1. In a large pot or skillet, heat a drizzle of olive oil over medium-high heat. Season the boneless skinless chicken breasts with salt and pepper, then add them to the hot pan. Sear for about 5 minutes until golden brown, then flip and cook for an additional 3-4 minutes. The chicken should not be fully cooked; remove it from the pot and set it aside on a plate.
  2. Using the same pot, add the diced onion and minced garlic. Sauté over medium heat for 2-3 minutes, stirring frequently until the onion is translucent and the garlic is fragrant.
  3. Pour in the marinara sauce and one cup of water, scraping the bottom of the pot to release any browned bits. Stir well and bring the mixture to a gentle boil.
  4. Return the seared chicken to the pot along with the dried pasta. Stir everything together to ensure the pasta is well-coated in sauce. Cover the pot and reduce the heat to low, allowing it to simmer for 10-15 minutes.
  5. Once the pasta is cooked, stir in the freshly grated Parmesan cheese and 1/4 cup of shredded mozzarella. Mix until the cheeses are melted.
  6. Transfer the pasta mixture into a baking dish, spreading it evenly. Sprinkle the remaining mozzarella cheese generously on top. Place the dish under the broiler for 2-3 minutes, or until the cheese is bubbly and golden brown.
  7. Remove the baking dish from the oven and let it rest for a few minutes. Top with torn basil leaves and chopped parsley before serving.

Nutrition

Serving: 1servingCalories: 550kcalCarbohydrates: 60gProtein: 35gFat: 20gSaturated Fat: 10gPolyunsaturated Fat: 1gMonounsaturated Fat: 5gCholesterol: 90mgSodium: 800mgPotassium: 800mgFiber: 4gSugar: 5gVitamin A: 500IUVitamin C: 2mgCalcium: 300mgIron: 2mg

Notes

Expert tips include ensuring enough liquid for pasta, not fully cooking the chicken when searing, and using freshly grated cheese for the best melting quality.

Tried this recipe?

Let us know how it was!

Creamy Tuscan Mushroom Pasta Skillet in Just 30 Minutes

February 10, 2026 by Grace Snow Leave a Comment

As the sun dipped below the horizon, casting a warm glow in my kitchen, the delightful aroma of sautéed mushrooms started to beckon. That’s when I knew it was time for my beloved Creamy Tuscan Mushroom Pasta Skillet. This quick meal is a game-changer for busy weeknights, transforming simple ingredients into a comforting dish that feels indulgent without the fuss. In just 30 minutes, you can whip up a vibrant, one-pan wonder that’s as customisable as it is delicious—perfect for those evenings when creativity strikes or even when the pantry feels a bit bare. Plus, it’s vegetarian-friendly, making it a hit with everyone at the table. Are you ready to dive into this creamy, dreamy bowl of goodness? Let’s get started!

Why is this pasta skillet a must-try?

Quick and Easy: This Creamy Tuscan Mushroom Pasta Skillet comes together in just 30 minutes, making it ideal for busy weeknights when you crave comfort food without spending hours in the kitchen.

Versatile Base: Use any pasta shape you love! From penne to fettuccine, mix it up depending on your mood.

Flavor-Packed: The sautéed mushrooms paired with rich, creamy sauce create an explosion of flavor, ensuring your taste buds are delighted with every bite.

Customizable Goodness: Want to switch things up? Add proteins like grilled chicken or shrimp, or toss in vibrant veggies for extra nutrition.

Vegetarian Appeal: Perfect for meat-free nights, this dish is satisfying and nutritious, with fresh spinach and earthy mushrooms that leave you feeling good.

Recipe enthusiasts will also love pairing this with a fresh side salad or crusty bread, making it a complete meal!

Creamy Tuscan Mushroom Pasta Skillet Ingredients

• Dive into the heart of flavor with the key components of this delightful dish!

For the Pasta

  • Pasta – Use your favorite shape, like penne or fettuccine, to create a comforting base that holds the creamy sauce beautifully.

For the Sauce

  • Olive Oil – A drizzle for sautéing, adding richness; butter can be a tasty substitute if you crave a different depth of flavor.
  • Mushrooms – These earthy delights give a meaty texture; cremini or button mushrooms are perfect picks for this dish.
  • Garlic – Fresh, minced garlic infuses aromatic depth, so opt for fresh cloves for the finest flavor.
  • Fresh Spinach – Nutrient-rich and vibrant, this adds color and freshness; kale or Swiss chard makes a fabulous substitute too.
  • Heavy Cream – The star that creates a luscious, creamy sauce; half-and-half or coconut milk work well for lighter or dairy-free options.
  • Parmesan Cheese – Grated fresh for that nutty flavor and ideal sauce thickness—freshly grated melts better than the pre-grated kind!
  • Salt and Pepper – Essential for seasoning, adjust according to your taste preference.

With these fresh ingredients ready, you’re on your way to whipping up a Creamy Tuscan Mushroom Pasta Skillet that’s sure to delight everyone at the table!

Step‑by‑Step Instructions for Creamy Tuscan Mushroom Pasta Skillet

Step 1: Cook the Pasta
Begin by bringing a large pot of salted water to a rolling boil over high heat. Add your preferred pasta shape, cooking it until al dente, which typically takes about 8 to 10 minutes. Once cooked, drain the pasta, reserving a cup of pasta water for later use to adjust the sauce's thickness.

Step 2: Sauté the Mushrooms
In a large skillet, heat a couple of tablespoons of olive oil over medium heat. Once shimmering, add the sliced mushrooms, stirring occasionally for about 5 to 7 minutes until they turn golden brown and tender. This step contributes to the deep, earthy flavor profile of your Creamy Tuscan Mushroom Pasta Skillet.

Step 3: Add Garlic
Next, toss in the minced garlic, cooking for an additional minute until fragrant—be sure not to burn it, as that will alter the dish's taste. The aroma will fill your kitchen, signaling it’s almost time to bring your creamy sauce to life and elevating the flavor of the mushrooms.

Step 4: Stir in Spinach
Add the fresh spinach to the skillet, stirring for about 2 minutes until it wilts down nicely. The vibrant green of the spinach perfectly complements the earthy mushrooms, creating a beautiful base for your creamy sauce that’s both nutritious and visually appealing.

Step 5: Create the Creamy Sauce
Pour in the heavy cream, reducing the heat to low and allowing it to come to a gentle simmer. Stir in the grated Parmesan cheese, mixing it until melted and seamlessly incorporated into the cream. This step transforms your mixture into a luscious sauce that envelops the pasta perfectly in the Creamy Tuscan Mushroom Pasta Skillet.

Step 6: Combine Pasta and Sauce
Now it’s time to add the drained pasta to the skillet, using tongs to toss everything together, ensuring each piece of pasta gets a generous coating of that creamy sauce. If the sauce seems too thick, gradually incorporate some of the reserved pasta water, stirring until you reach your desired consistency.

Step 7: Season and Serve
Finally, taste your Creamy Tuscan Mushroom Pasta Skillet and season generously with salt and freshly cracked black pepper to enhance all the delightful flavors. Serve your dish warm, garnished with a sprinkle of fresh basil if desired, and enjoy the comforting, rich goodness you’ve created!

How to Store and Freeze Creamy Tuscan Mushroom Pasta Skillet

  • Fridge: Store leftovers in an airtight container for up to 3 days. Make sure the pasta has cooled before sealing to prevent condensation.

  • Freezer: For longer storage, freeze the Creamy Tuscan Mushroom Pasta Skillet in a freezer-safe container for up to 2 months. Ensure it's cooled completely before freezing.

  • Reheating: When ready to enjoy, thaw in the fridge overnight, then reheat on the stove over low heat, adding a splash of water or cream to restore the sauce’s creamy texture.

  • Airtight Tips: Always use airtight containers for both fridge and freezer storage to keep out moisture and preserve flavor.

Creamy Tuscan Mushroom Pasta Skillet Variations

Feel free to tailor this dish to your taste and pantry staples for an even more delightful experience!

  • Protein-Packed: Add grilled chicken or shrimp for a satisfying boost. This little twist turns your pasta into a fulfilling meal perfect for any occasion.

  • Flavor Burst: Stir in roasted sun-dried tomatoes for a tangy explosion of flavor. Their unique sweetness perfectly complements the creaminess of the sauce.

  • Veggie Lover's Delight: Incorporate bell peppers or zucchini for added crunch and nutrition. A pop of color can elevate this dish, making it even more visually appealing.

  • Light & Fresh: Substitute heavy cream with half-and-half or coconut milk for a lighter version. This swap not only lightens the dish but also brings a unique flavor twist.

  • Dairy-Free Dream: Swap Parmesan with nutritional yeast or a dairy-free cheese alternative. Enjoy the rich taste without compromising your dietary choices.

  • Herb Infusion: Toss in fresh herbs like basil or parsley for an aromatic finish. The brightness of fresh herbs adds another layer of flavor and a touch of elegance.

  • Spice Things Up: For a kick, add red pepper flakes to the sauce while simmering. This little addition can turn your pasta dish from mild to wild in no time!

  • Savory Substitution: Use sautéed spinach and grilled mushrooms in combination with Grilled Mushrooms Savory to enhance the dish's earthy flavor. This duo elevates the umami experience beautifully.

With these suggestions, you can make your Creamy Tuscan Mushroom Pasta Skillet an exciting, customized dish each time you serve it.

Expert Tips for Creamy Tuscan Mushroom Pasta Skillet

  • Pasta Perfection: Make sure to cook the pasta al dente to maintain a bit of bite, which helps prevent it from becoming mushy in the creamy sauce.

  • Garlic Caution: Keep an eye on the garlic while it cooks, as burnt garlic can impart bitterness. It should be fragrant and lightly golden for the best flavor.

  • Reserve Pasta Water: Always reserve some pasta water before draining! It’s a handy trick to loosen the sauce if it becomes too thick when you combine it with the pasta.

  • Mushroom Choice: Opt for a mix of cremini and button mushrooms for a deeper, richer flavor profile in your Creamy Tuscan Mushroom Pasta Skillet.

  • Elevate the Greens: Feel free to experiment with greens! Adding kale or Swiss chard can enhance nutrition while diversifying the texture and taste.

  • Cheese Control: Use freshly grated Parmesan to avoid clumping in the sauce, ensuring a smooth and creamy consistency throughout your dish.

What to Serve with Creamy Tuscan Mushroom Pasta Skillet

The perfect meal deserves delightful companions, making every bite even more satisfying.

  • Fresh Garden Salad: Crisp and vibrant, a light salad with mixed greens and a tangy vinaigrette balances the richness of the pasta. A simple arugula salad with lemon dressing adds a refreshing crunch.

  • Crusty Garlic Bread: Golden and crisp on the outside, warm and buttery within, garlic bread is perfect for mopping up the creamy sauce, elevating every mouthful into a cozy experience.

  • Roasted Vegetables: Smoky, caramelized veggies like zucchini and bell peppers pair wonderfully, adding both texture and depth of flavor. The charred edges provide a delightful contrast to the creaminess of the pasta.

  • Grilled Chicken or Shrimp: For those craving protein, tender grilled chicken or juicy shrimp can be served alongside or tossed into the skillet, offering an additional layer of flavor and making the meal even heartier.

  • Sparking Water or Wine: A bubbly sparkling water or light white wine creates a refreshing pause in between bites, complementing the dish's richness. A chilled Pinot Grigio can be particularly delightful!

  • Lemon Tart: For a sweet finish, a zesty lemon tart, with its bright citrus flavor, cleanses the palate and perfectly wraps up your meal, leaving a light and happy taste behind.

Make Ahead Options

These Creamy Tuscan Mushroom Pasta Skillets are perfect for meal prep enthusiasts! You can cook the pasta and store it separately for up to 3 days in advance, which allows for easy assembly during a busy week. Additionally, you can sauté the mushrooms and garlic, then refrigerate them (in an airtight container) for up to 24 hours to lock in freshness—this will prevent browning. When you're ready to serve, simply reheat the mushrooms, add the spinach, pour in the heavy cream, and mix in the cooked pasta. With these make-ahead tips, you’ll enjoy a comforting meal in minimal time, just as delicious as if you made it on the spot!

Creamy Tuscan Mushroom Pasta Skillet Recipe FAQs

How do I choose the right mushrooms for this recipe?
I recommend using cremini or button mushrooms for their earthy flavor and meaty texture. Look for mushrooms that are firm, with a smooth and unblemished surface—avoid any with dark spots all over or those that feel slimy, as these indicate they’re past their prime.

How should I store leftover Creamy Tuscan Mushroom Pasta Skillet?
Store any leftovers in an airtight container in the refrigerator for up to 3 days. Make sure to let the pasta cool before sealing to avoid condensation. This way, you can enjoy this delicious meal again without losing any flavor!

Can I freeze Creamy Tuscan Mushroom Pasta Skillet?
Yes, you can! To freeze, let the dish cool completely and transfer it to a freezer-safe container. It will keep well for up to 2 months. When you're ready to enjoy it again, thaw it overnight in the fridge, then reheat gently on the stove with a splash of water or cream to restore its creamy texture.

What if my sauce is too thick when combining pasta?
No worries! If your sauce is too thick after adding the pasta, gradually add some of the reserved pasta water until you achieve the desired creaminess. Start with a tablespoon at a time, stirring until everything is well coated and silky smooth.

Is this recipe suitable for vegetarians and those with allergies?
Absolutely! The Creamy Tuscan Mushroom Pasta Skillet is vegetarian-friendly, packed with mushrooms and spinach for a nutrient boost. However, if you have specific allergies (for example, to dairy), you can substitute heavy cream with coconut milk and use a dairy-free cheese alternative to keep it suitable for everyone at your table.

Can I customize the ingredients in this dish?
Very! The beauty of this recipe lies in its versatility. You can add grilled chicken, shrimp, or even roasted sun-dried tomatoes for added flavor. Feel free to mix in additional vegetables like bell peppers or zucchini, tailoring the dish perfectly to your taste and dietary preferences!

Creamy Tuscan Mushroom Pasta Skillet

Creamy Tuscan Mushroom Pasta Skillet in Just 30 Minutes

This Creamy Tuscan Mushroom Pasta Skillet is a quick, flavorful, vegetarian dish perfect for busy weeknights.
Print Recipe Pin Recipe
Prep Time 10 minutes mins
Cook Time 20 minutes mins
Total Time 30 minutes mins
Servings: 4 servings
Course: Dinner
Cuisine: Italian
Calories: 400
Ingredients Equipment Method Nutrition Notes

Ingredients
  

For the Pasta
  • 12 ounces pasta any shape like penne or fettuccine
For the Sauce
  • 2 tablespoons olive oil for sautéing
  • 8 ounces mushrooms cremini or button mushrooms
  • 2 cloves garlic minced
  • 4 ounces fresh spinach or substitute with kale or Swiss chard
  • 1 cup heavy cream can use half-and-half or coconut milk for dairy-free
  • 1 cup Parmesan cheese grated
  • to taste salt
  • to taste black pepper

Equipment

  • Large pot
  • Large skillet
  • Tongs

Method
 

Cooking Instructions
  1. Bring a large pot of salted water to a rolling boil, add pasta and cook until al dente, about 8-10 minutes. Drain, reserving a cup of pasta water.
  2. In a large skillet, heat olive oil over medium heat. Add mushrooms and sauté for 5-7 minutes until golden brown.
  3. Add minced garlic to the skillet and cook for an additional minute until fragrant.
  4. Stir in fresh spinach and cook for about 2 minutes until wilted.
  5. Pour in heavy cream, reduce heat to low, and let simmer. Stir in grated Parmesan until melted.
  6. Add drained pasta to the skillet, toss to combine, and adjust the sauce consistency with reserved pasta water if necessary.
  7. Season with salt and pepper to taste, serve warm, and enjoy!

Nutrition

Serving: 1servingCalories: 400kcalCarbohydrates: 50gProtein: 12gFat: 18gSaturated Fat: 10gPolyunsaturated Fat: 1gMonounsaturated Fat: 6gCholesterol: 50mgSodium: 400mgPotassium: 600mgFiber: 3gSugar: 2gVitamin A: 1500IUVitamin C: 15mgCalcium: 200mgIron: 2mg

Notes

For the best flavor, use freshly grated Parmesan and watch the garlic closely while cooking.

Tried this recipe?

Let us know how it was!
  • « Previous Page
  • 1
  • …
  • 25
  • 26
  • 27
  • 28
  • 29
  • …
  • 179
  • Next Page »

Welcome!

Hi, I’m Grace, a Sydney-based home cook with a passion for bold flavors and trending ingredients. Whether you’re a busy beginner or a seasoned foodie, you’ll find dishes here that are fresh, fun, and full of flavor.

More about me

Popular Recipes

  • Cheesy Chicken Garlic Bread Sandwich
    Cheesy Chicken Garlic Bread Sandwich for Cozy Family Moments
  • Easy Chicken Ranch Wraps
    Easy Chicken Ranch Wraps: Quick, Creamy & Totally Satisfying
  • Chicken Caesar Sandwiches
    Delicious Chicken Caesar Sandwiches for Quick Comfort Food
  • best Cuban sandwich
    The Best Cuban Sandwich You’ll Want Every Weeknight!

Footer

↑ back to top

About

  • Privacy Policy
  • Disclaimer
  • Terms & Conditions

Newsletter

  • Sign Up! for emails and updates

Contact

  • About me
  • Contact me

Copyright © 2025 TastyTrendIngredients