tastytrendingredients

  • Home
  • Recipes
    • Appetizers
    • Breakfast
    • Dessert
    • Dinner
    • Drinks
    • Salads
    • Snacks
    • Soups
  • About me
  • Contact
menu icon
go to homepage
  • Home
  • Recipes
    • Appetizers
    • Breakfast
    • Dessert
    • Dinner
    • Drinks
    • Salads
    • Snacks
    • Soups
  • About me
  • Contact
search icon
Homepage link
  • Home
  • Recipes
    • Appetizers
    • Breakfast
    • Dessert
    • Dinner
    • Drinks
    • Salads
    • Snacks
    • Soups
  • About me
  • Contact
×

Homemade Gluten Free Hamburger That's Deliciously Simple

May 15, 2026 by Grace Snow Leave a Comment

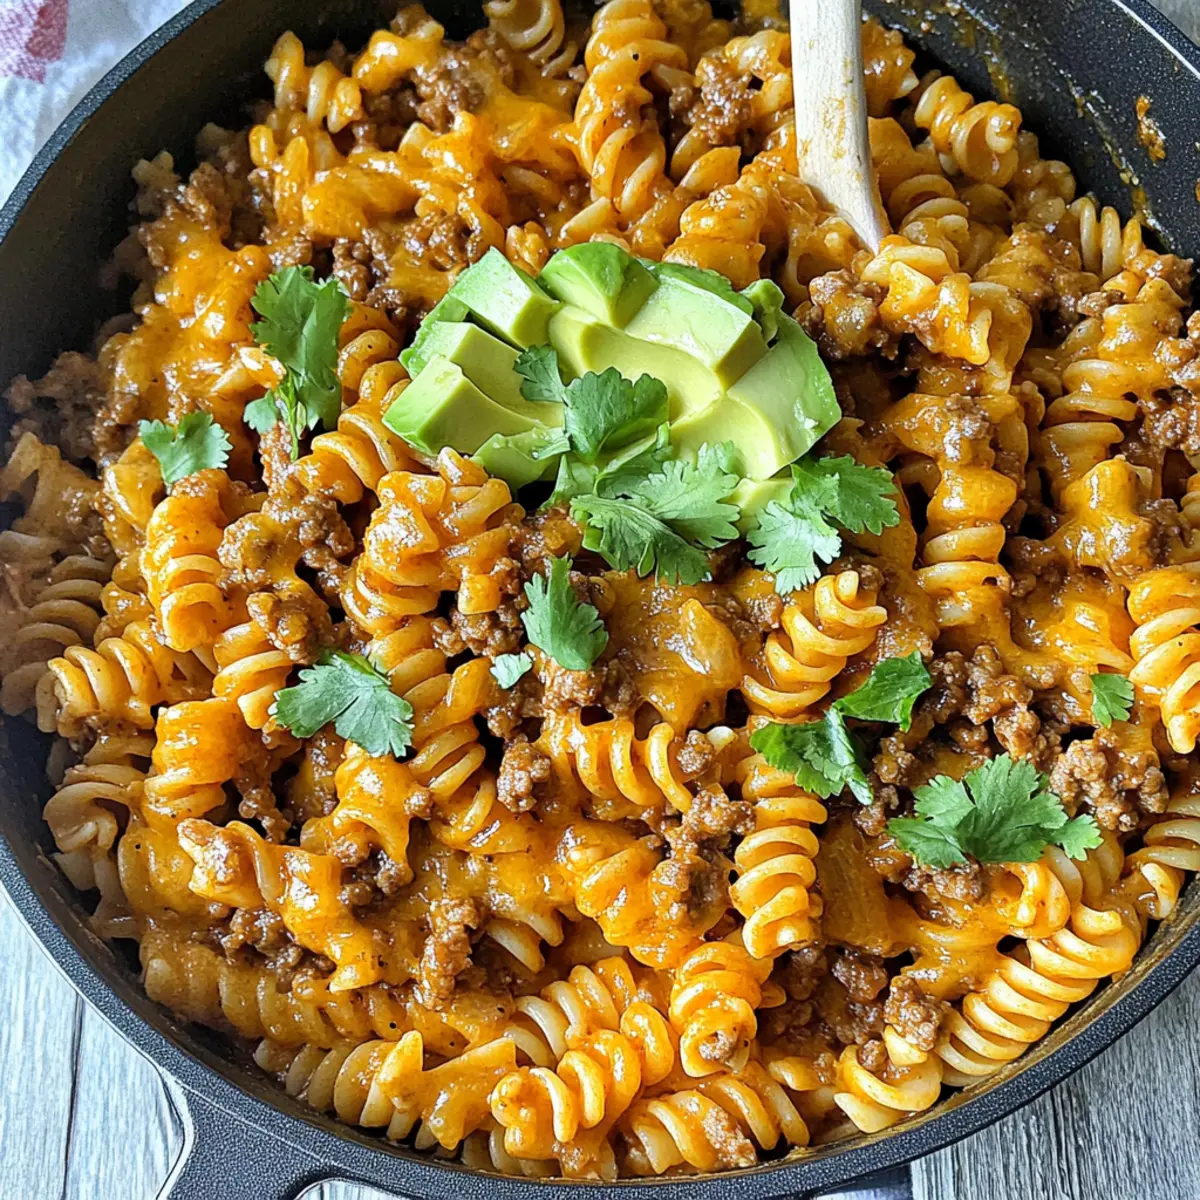
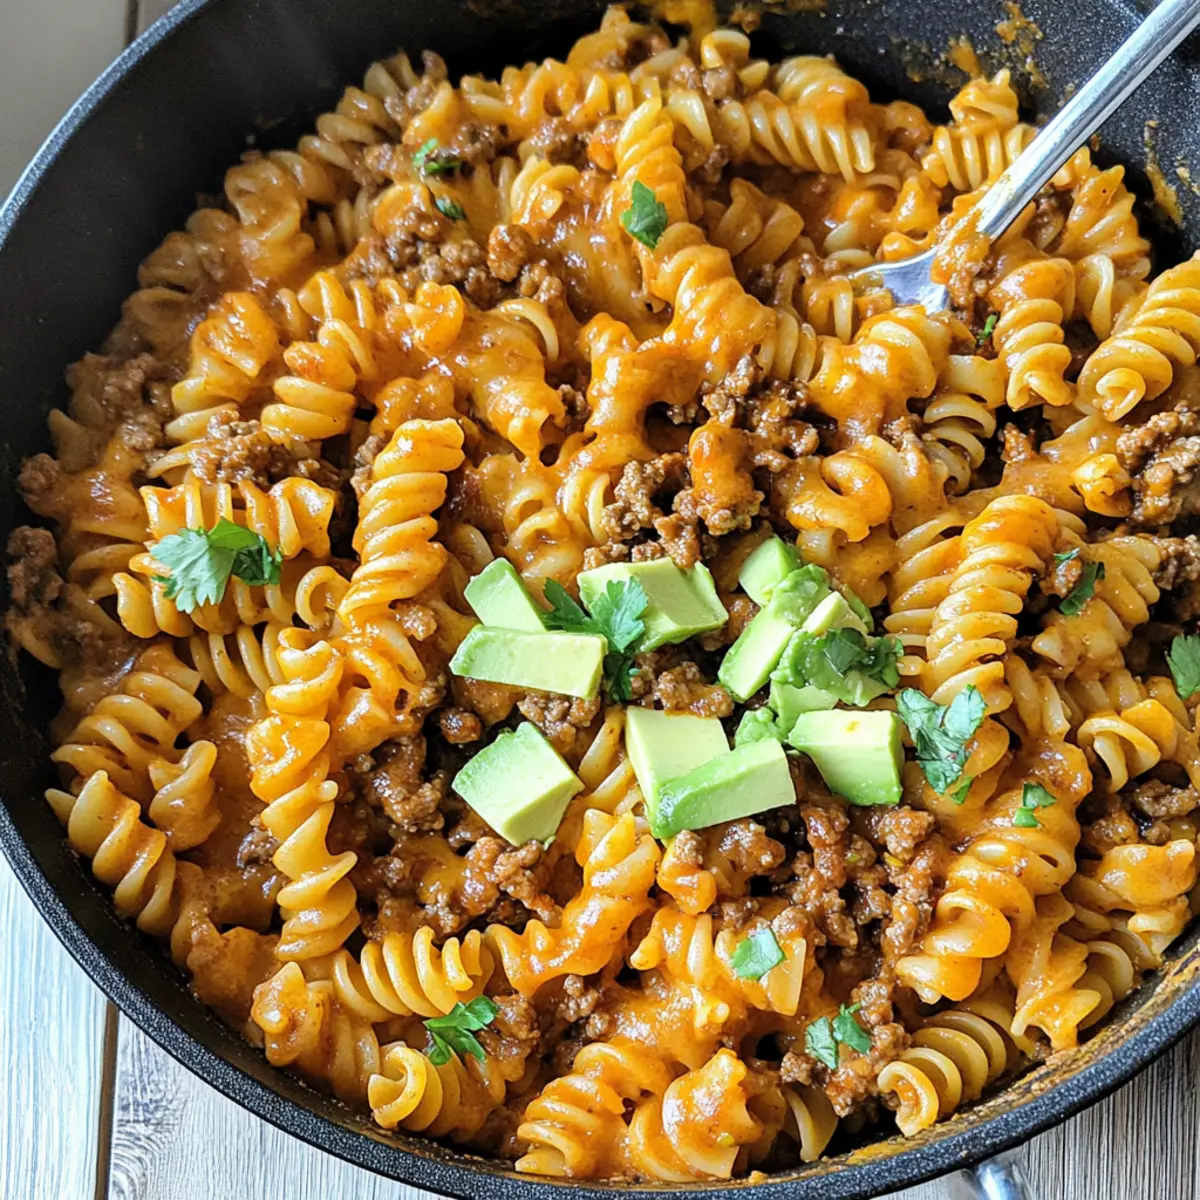
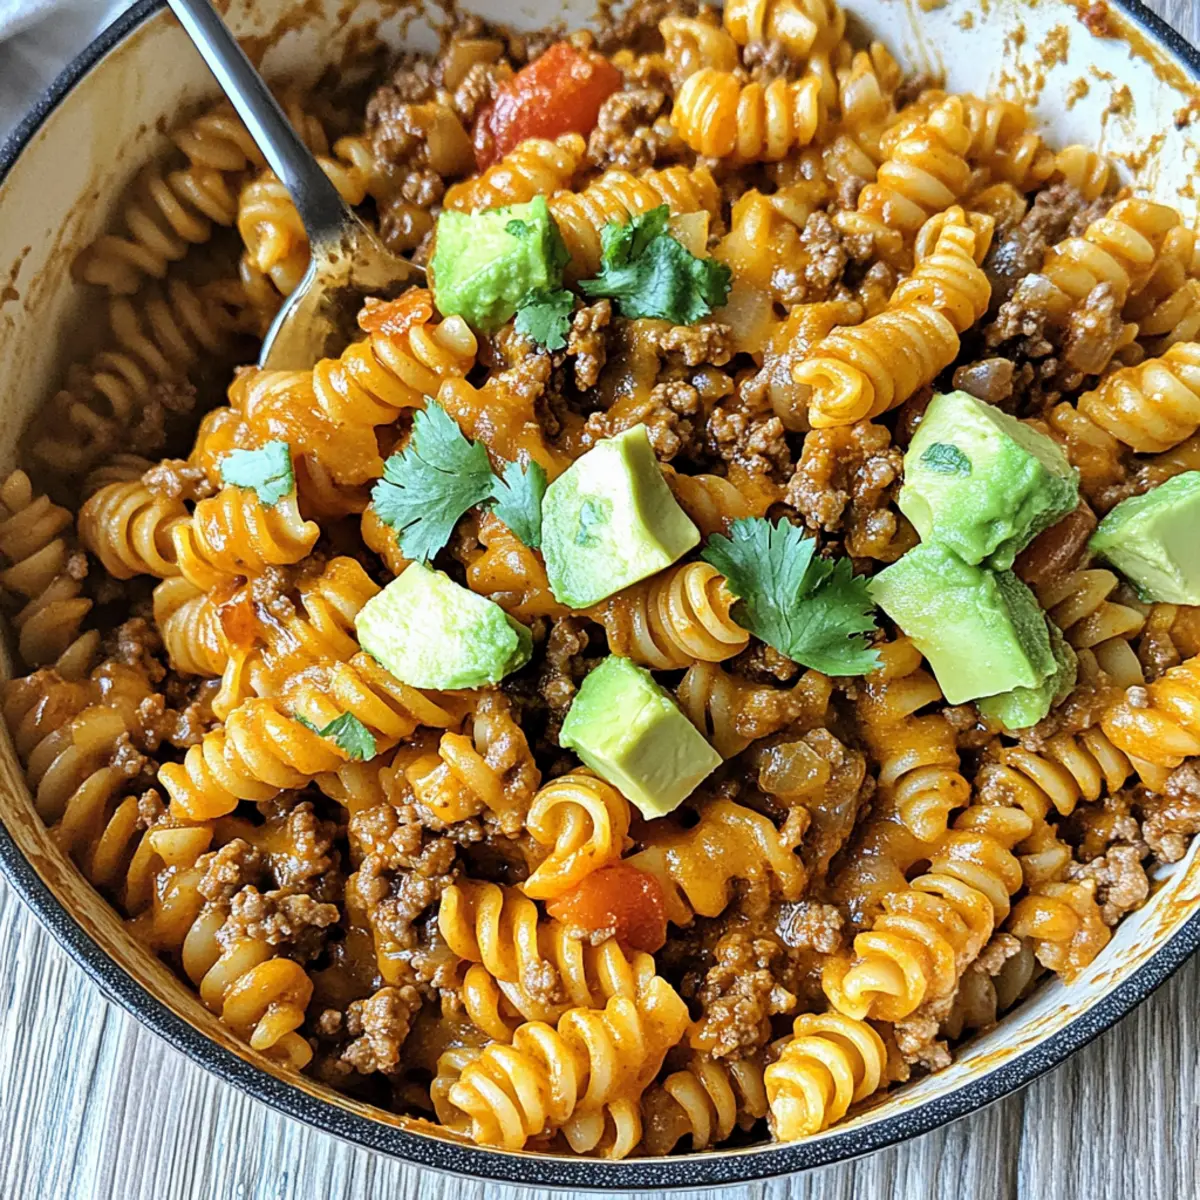
The aroma of sizzling garlic and onions wafts through my kitchen, instantly transporting me to cozy weeknight dinners from my childhood. Today, I'm sharing my go-to recipe for Homemade Gluten Free Hamburger Helper—a delightful dish that captures all the comfort of the original but swaps in healthier, gluten-free ingredients. With just one pot and 30 minutes of your time, this family-friendly meal makes it easier than ever to say goodbye to fast food. Plus, it’s versatile enough to satisfy various dietary needs, whether you’re gluten-free or simply looking for a delicious meal that won’t break the bank. Have you ever craved that nostalgic taste without the guilt? Let’s dive into the recipe and make mealtime magic happen!

Why Choose Homemade Gluten Free Hamburger?

Simplicity at its Best: This recipe comes together in just one pot, making cleanup a breeze after a busy day.

Family-Friendly Delight: Everyone can gather around the table and enjoy this creamy, comforting dish that feels like a warm hug.

Healthy Ingredients: Crafted with wholesome components, it’s a meal you can feel good about serving, knowing it's packed with nutrients.

Versatile Options: Whether you prefer using ground turkey or chickpea pasta, you can tailor this recipe to fit various diets, including dairy-free.

Quick and Easy: With minimal prep time, this dish is a lifesaver for weeknight dinners. Say goodbye to fast food cravings and hello to homemade goodness! For a sweet finish, consider pairing it with a comforting dessert like Homemade Hot Chocolate.

Ingredients for Homemade Gluten Free Hamburger

For the Base

  • Olive Oil – Adds richness and helps sauté vegetables; use extra virgin for maximum flavor.
  • Yellow Onion – Provides a savory base flavor; can substitute with shallots for a milder taste.
  • Garlic – Enhances flavor with aromatic notes; fresh minced garlic is preferred.
  • Ground Beef – Main protein source; ground turkey or chicken can be used as a leaner alternative.

For the Liquid Ingredients

  • Beef Broth – Adds depth and moisture to the dish; low-sodium is preferable to control salt levels.
  • Tomato Paste – Contributes umami and thickening; can substitute with crushed tomatoes for a different texture.
  • Coconut Aminos – A soy sauce alternative providing a hint of sweetness; can substitute with soy sauce for non-gluten-free diets.
  • Dijon Mustard – Adds tanginess and depth; use whole grain mustard for an extra kick.

For Seasoning

  • Chili Powder – Offers spice and warmth; adjust quantity for desired heat level.
  • Dried Oregano – Provides herbaceous notes; Italian seasoning can be used as a substitute.
  • Smoked Paprika – Enhances flavor with a mild smokiness; sweet paprika is a suitable alternative.
  • Salt and Ground Black Pepper – Essential for seasoning; adjust to taste.

For Thicker Sauce

  • All-Purpose Gluten Free Flour – Optional thickening agent for creaminess; can omit for a lighter sauce.

For Pasta

  • Gluten-Free Pasta – Base of the dish; any preferred shape works to create the ultimate homemade gluten free hamburger experience.

Step‑by‑Step Instructions for Homemade Gluten Free Hamburger Helper

Step 1: Heat the Base
In a dutch oven or large skillet, heat 2 tablespoons of olive oil over medium heat. Allow the oil to shimmer but not smoke, signaling it's ready for cooking. This will serve as a flavorful base for your Homemade Gluten Free Hamburger Helper.

Step 2: Sauté Aromatics
Add 1 diced yellow onion and 2 minced garlic cloves to the skillet. Sauté for about 3-5 minutes, stirring frequently until the onions become translucent and fragrant. Watch for a slight golden hue to indicate they’re perfectly cooked and ready for the next ingredient.

Step 3: Brown the Meat
Introduce 1 pound of ground beef to the skillet, breaking it apart with a spatula. Cook for approximately 5-7 minutes, or until the beef is browned all over and no longer pink. This step ensures your meat is well-cooked and adds depth to the flavors in your homemade dish.

Step 4: Combine Liquid Ingredients
Pour in 2 cups of beef broth, followed by 2 tablespoons of tomato paste, 2 tablespoons of coconut aminos, and 1 tablespoon of Dijon mustard. Stir everything together and bring the mixture to a low simmer. Observe the bubbling around the edges as everything melds beautifully into a savory sauce.

Step 5: Thicken the Sauce
Sprinkle 2 tablespoons of all-purpose gluten-free flour over the mixture. Whisk briskly to combine, ensuring there are no lumps. This will create a thicker, creamier sauce, enhancing the overall texture of your Homemade Gluten Free Hamburger Helper.

Step 6: Cook the Pasta
Gently fold in 8 ounces of gluten-free pasta. Stir well and bring the mixture back to a simmer. Cook uncovered for 10-12 minutes, stirring occasionally. Keep an eye on the pasta; it should be tender but still firm, achieving that perfect al dente texture.

Step 7: Final Seasoning Touches
Once the pasta is cooked, taste the dish and adjust seasoning with salt and ground black pepper as needed. You can also add a pinch of chili powder, dried oregano, and smoked paprika for an extra flavor kick. Stir to incorporate the spices thoroughly into the sauce.

Step 8: Serve and Enjoy
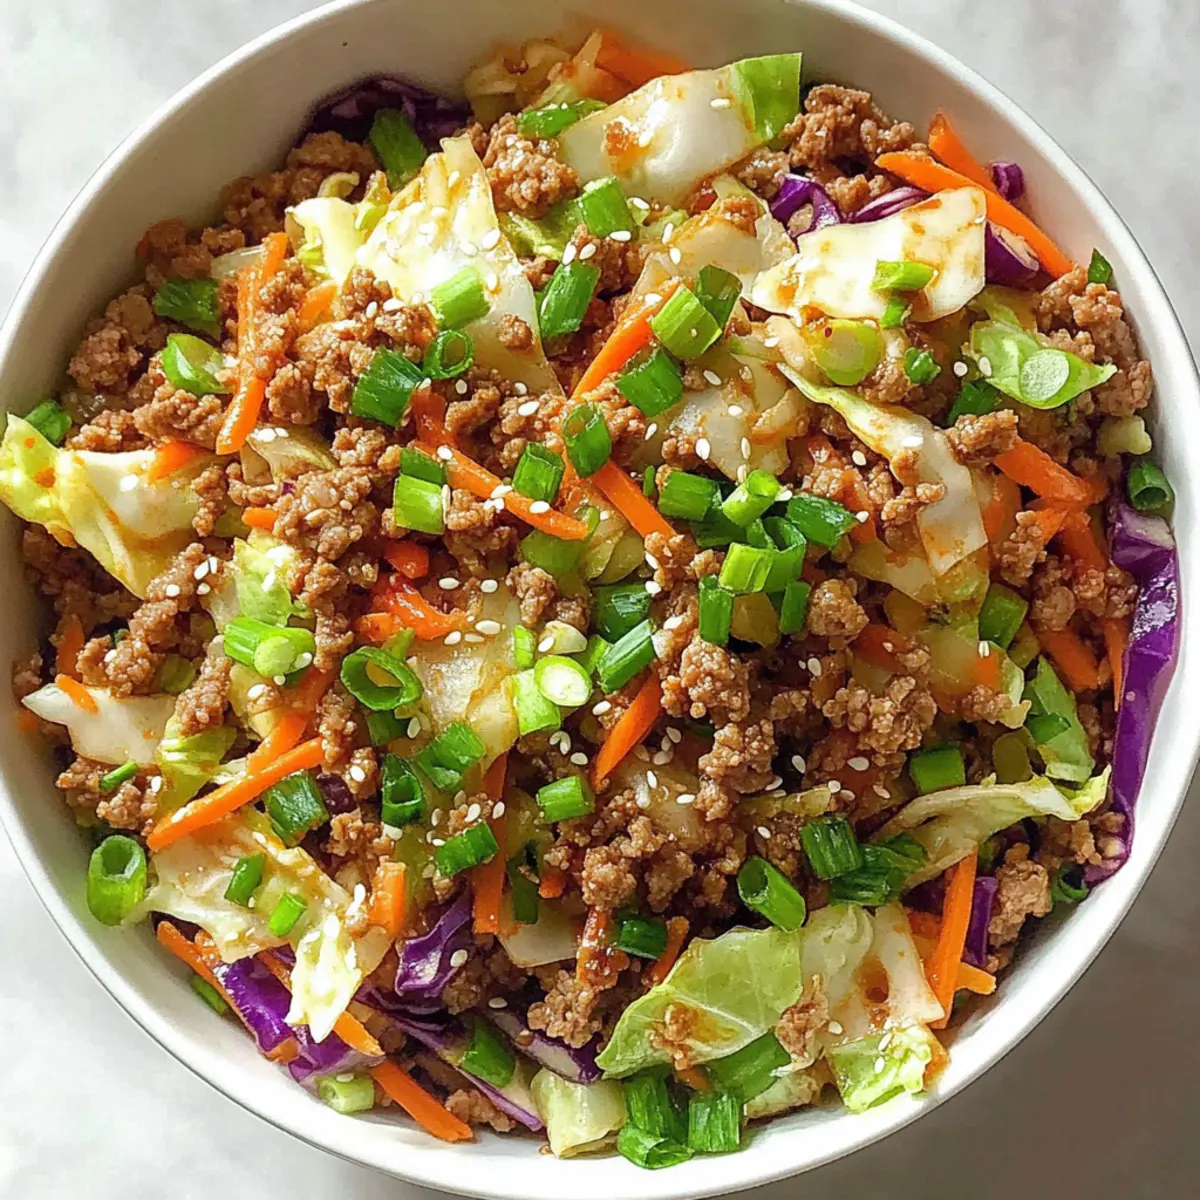
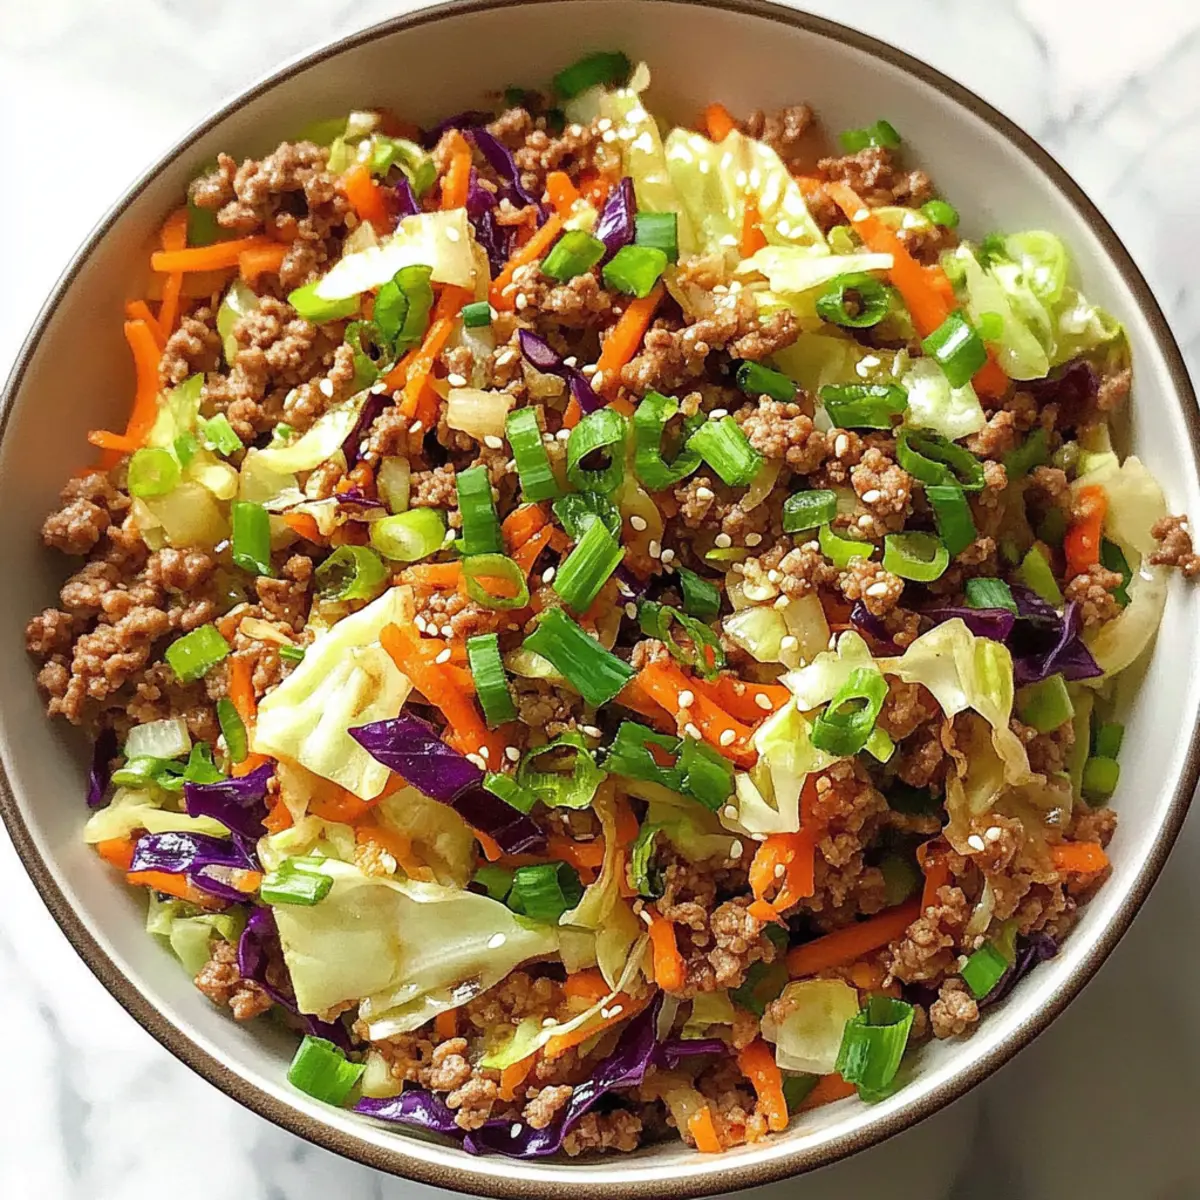
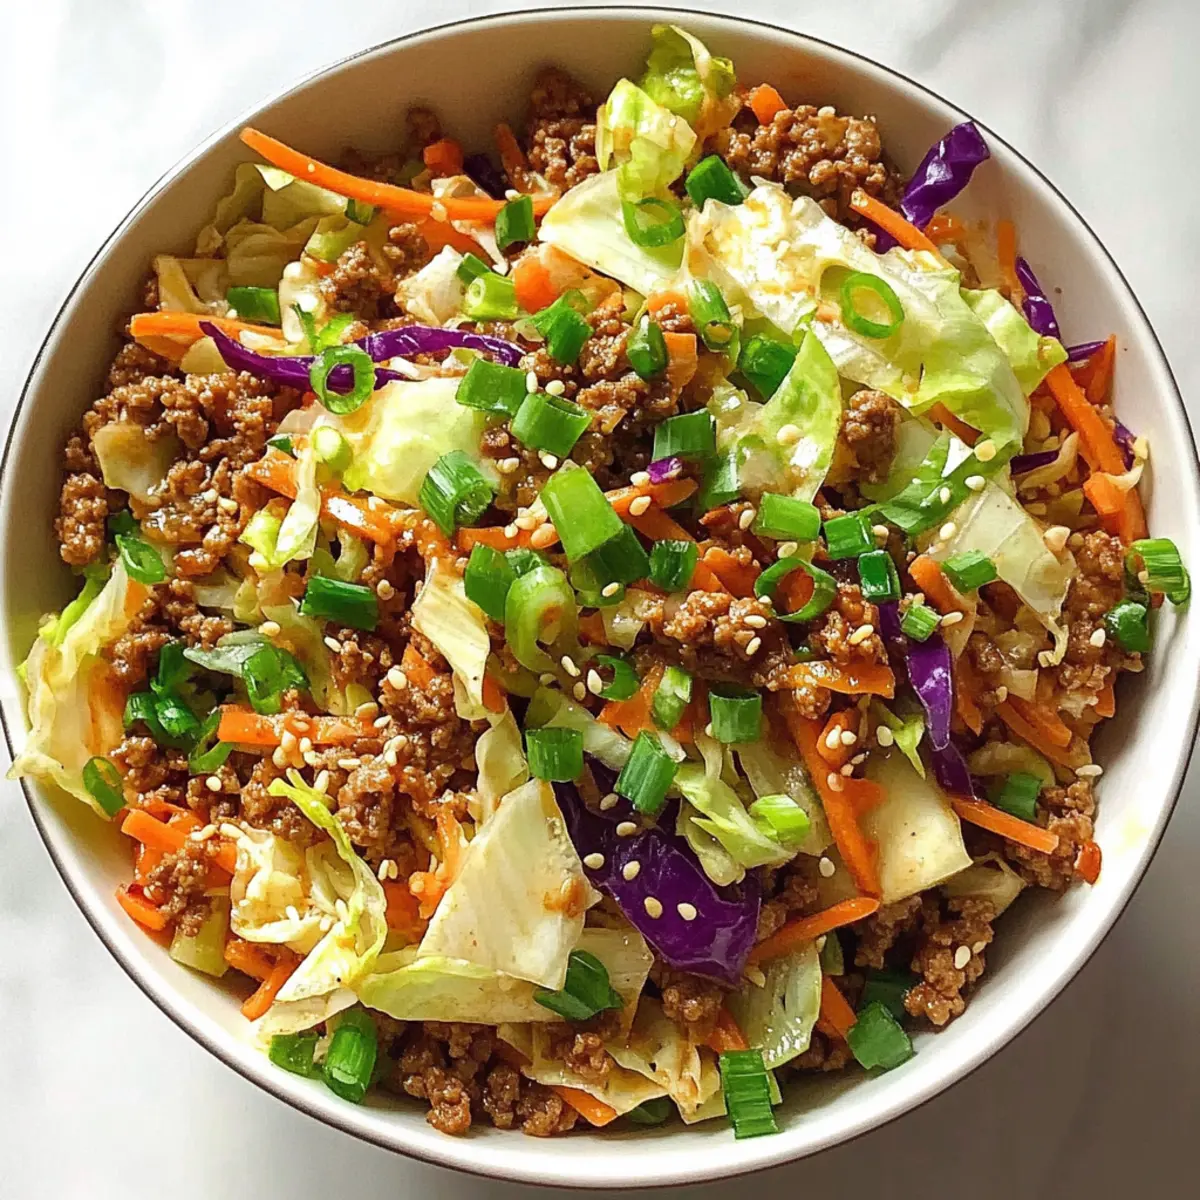
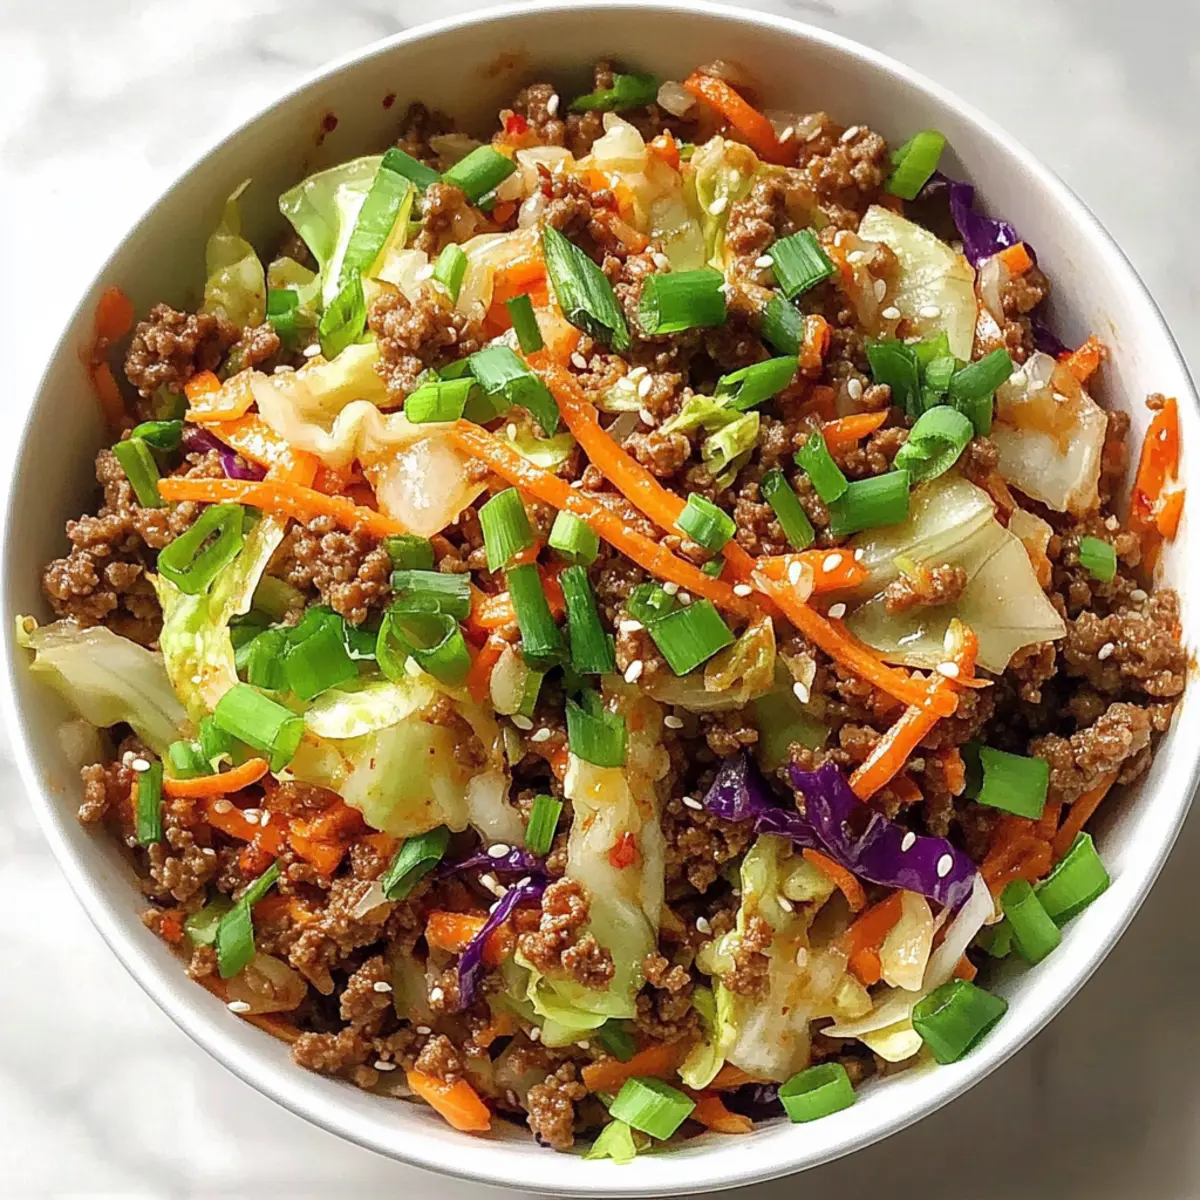
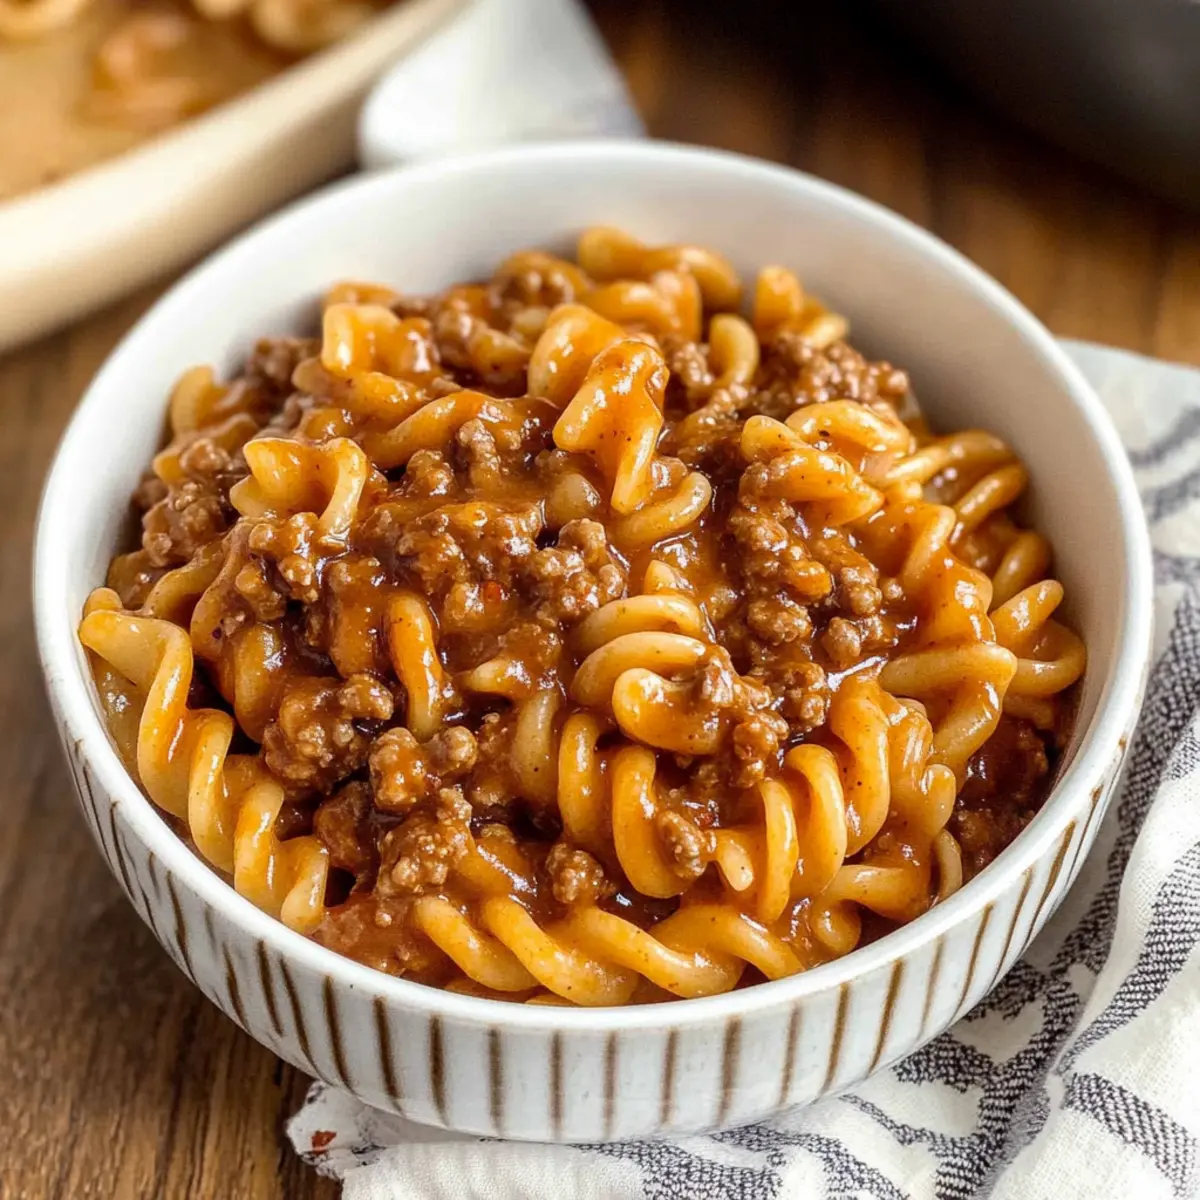
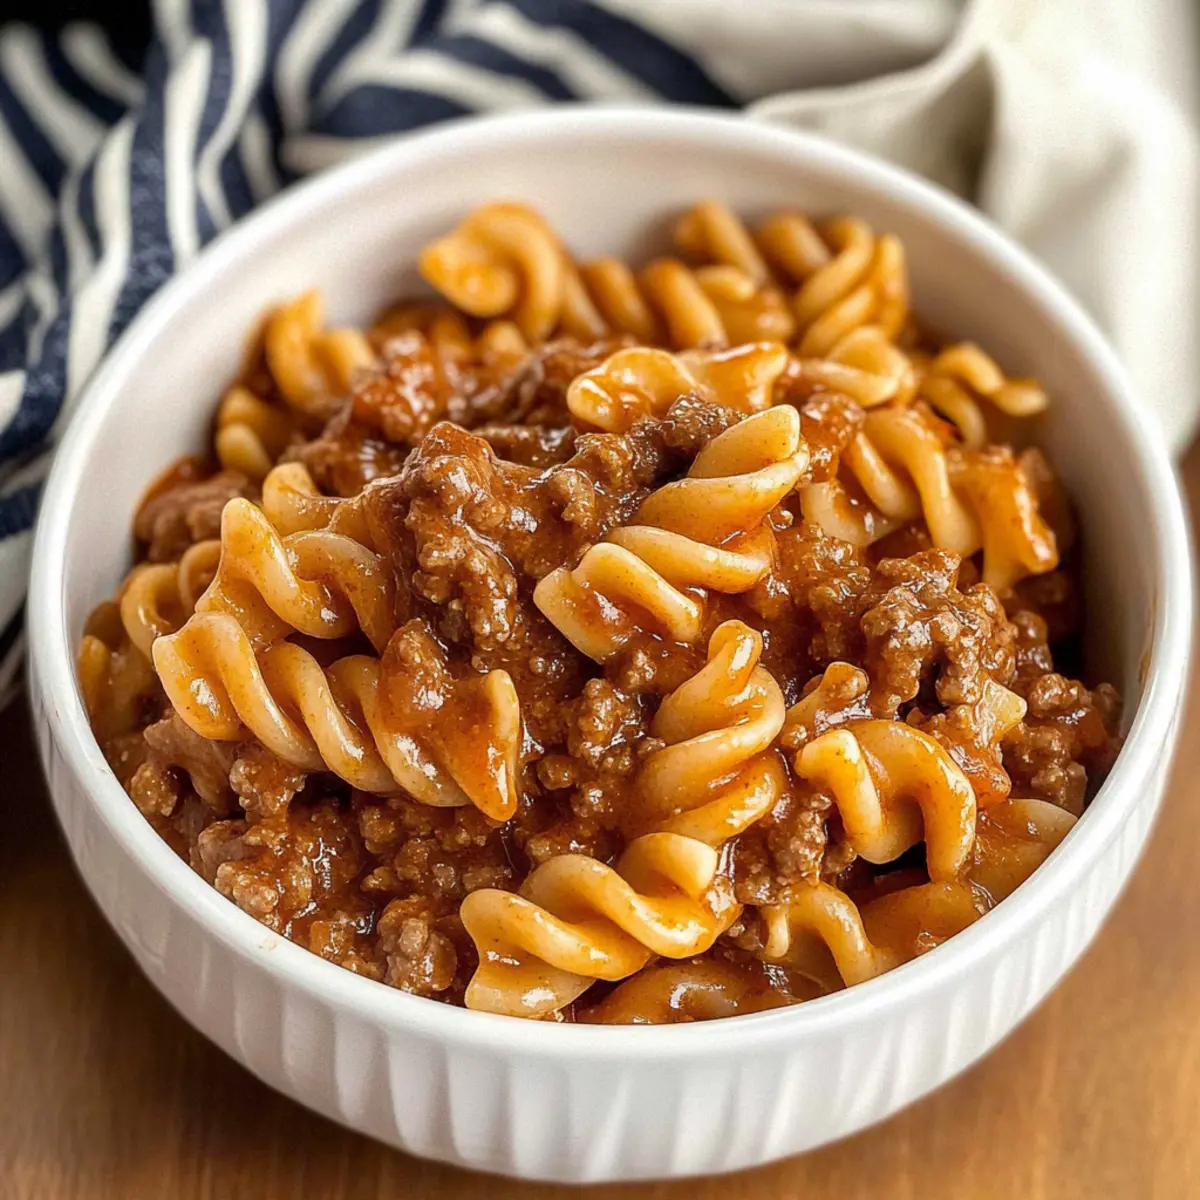
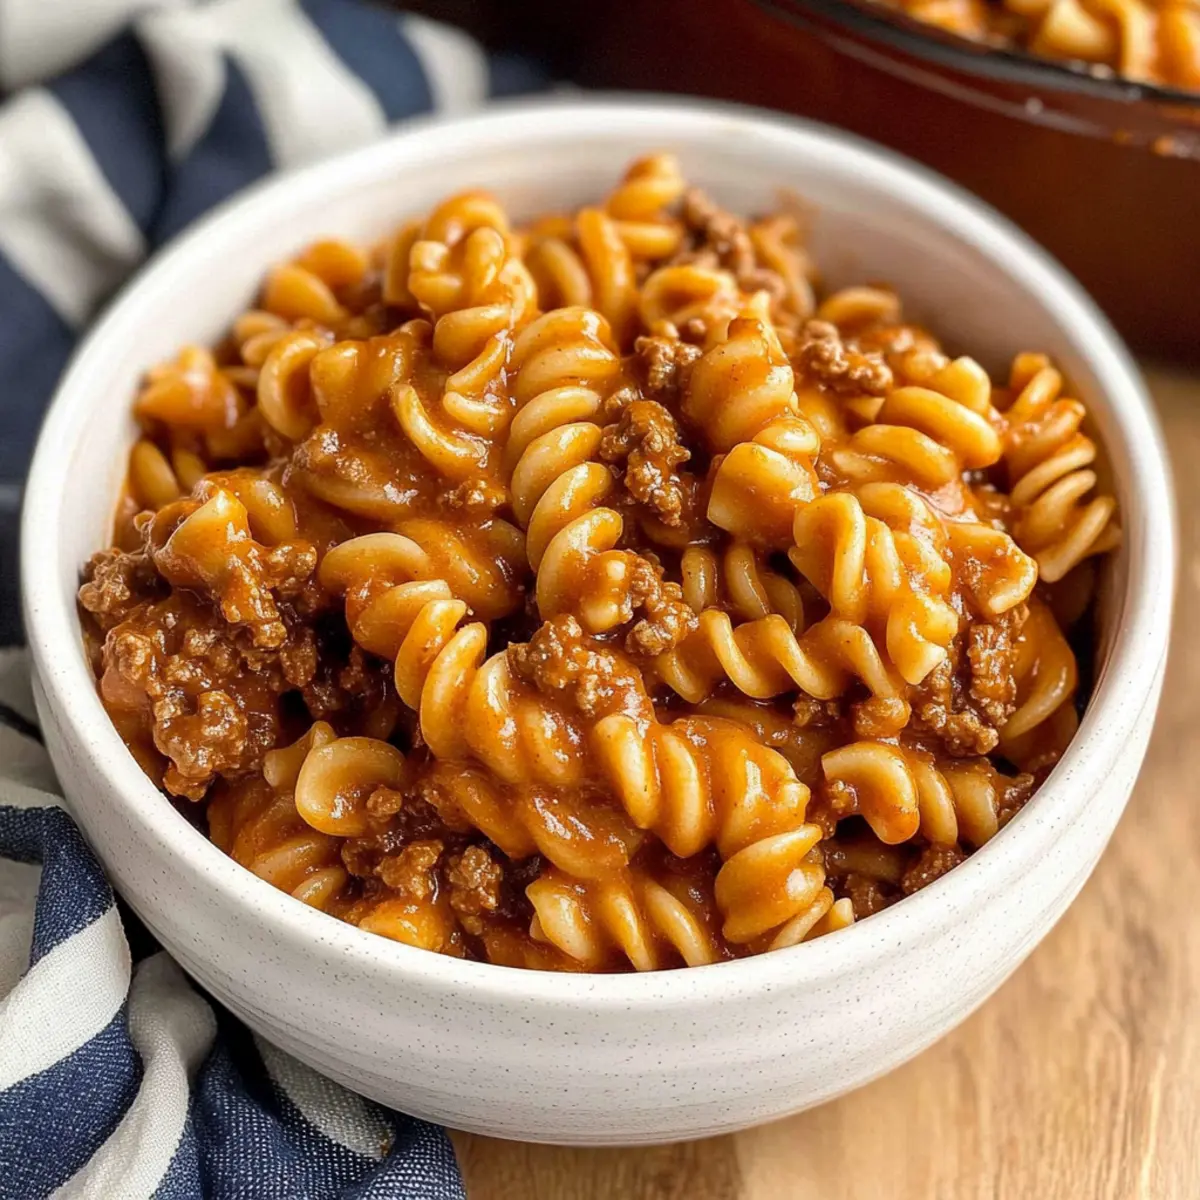
Your Homemade Gluten Free Hamburger Helper is now ready! Serve it warm in bowls, optionally topped with shredded cheddar cheese and a sprinkle of red pepper flakes for an extra flavor boost. Enjoy the comforting and wholesome meal with your family gathered around the table.

What to Serve with Homemade Gluten Free Hamburger Helper

The perfect meal deserves perfect companions to enhance its flavors and textures.

  • Garlic Bread: This crunchy, buttery treat offers a delightful contrast to the creamy pasta, making every bite a joy.

  • Steamed Broccoli: Lightly seasoned, this vibrant green side adds a nutritious crunch, balancing the richness of the Hamburger Helper.

  • Caesar Salad: Crisp romaine and tangy dressing create a fresh and zesty contrast, complementing the hearty flavors of the main dish.

  • Roasted Vegetables: A medley of seasonal veggies brings warmth and sweetness, making your plate colorful and the meal even more satisfying.

  • Crispy Sweet Potato Fries: These sweet, lightly spiced fries provide a fun and flavorful twist that pairs wonderfully with the savory pasta.

  • Homemade Coleslaw: The creamy, tangy crunch of coleslaw can offer a refreshing balance to the richness of the Hamburger Helper.

  • Red Wine: A glass of medium-bodied red wine like Merlot harmonizes with the robust flavors, deepening your dining experience.

  • Chocolate Mousse: For dessert, a light mousse is the perfect way to end your meal on a sweet, indulgent note.

  • Fruit Salad: A refreshing and naturally sweet option to cleanse your palate, adding a light finish to your comforting dinner.

  • Herbal Tea: Wind down your meal with a warm cup of herbal tea, enhancing relaxation and rounding out your evening beautifully.

Expert Tips for Homemade Gluten Free Hamburger

  • Stir Often: Make sure to stir the gluten-free pasta frequently while cooking to prevent it from sticking together.

  • Adjust Cooking Time: Different pasta shapes may require varying cooking times. Always check your pasta for the perfect al dente texture.

  • Use Quality Broth: Opt for low-sodium beef broth to control salt levels and let the natural flavors of your dish shine in this homemade gluten-free hamburger recipe.

  • Creaminess Matters: For a creamier texture, consider adding more broth while cooking, and don’t hesitate to adjust the gluten-free flour for your preference.

  • Taste as You Go: Seasoning is key! Taste and adjust your spices—salt, pepper, and chili powder—before serving to elevate the flavor profile.

How to Store and Freeze Homemade Gluten Free Hamburger

Fridge: Store leftovers in an airtight container for up to 3-4 days. This allows you to enjoy your delicious homemade gluten free hamburger on busy days.

Freezer: Freeze individual portions in airtight containers for up to 3 months. Label with the date, so you know when to enjoy it again.

Reheating: Reheat on the stove or in the microwave, adding a splash of broth to restore moisture. Enjoy the same comforting taste as when it was freshly made!

Room Temperature: Avoid leaving your homemade gluten free hamburger out for more than 2 hours to keep it safe and tasty.

Make Ahead Options

These Homemade Gluten Free Hamburger Helper are perfect for busy weeknights when you need meal prep in your life! You can sauté the onion and garlic up to 24 hours in advance and refrigerate them in an airtight container. Additionally, you can brown the ground beef and combine it with other liquid ingredients (broth, tomato paste, etc.) up to 3 days ahead, just make sure to cool it completely before refrigerating to preserve quality. When you're ready to enjoy, simply reheat the mixture and then stir in the gluten-free pasta, cooking it for about 10-12 minutes until tender. This way, you’ll have a comforting, homemade dish ready with minimal effort!

Homemade Gluten Free Hamburger Variations

Feel free to make this dish your own with these tasty swaps and twists that will tantalize your taste buds!

  • Dairy-Free: Omit cheese for a completely dairy-free option, or replace it with a dairy-free cheese alternative for a similar taste.

  • Turkey Substitute: Swap the ground beef for ground turkey or chicken. It’s a leaner option that still delivers on flavor, offering a little twist on a classic recipe.

  • Chickpea Pasta: For a hearty protein boost, try using chickpea pasta. It adds a delightful texture and keeps the dish gluten-free, ensuring everyone feels satisfied.

  • Spicy Kick: Add a pinch of cayenne pepper or diced jalapeños for a bit of heat. This will elevate the flavor profile, transforming your dish into a spicy sensation.

  • Vegetarian Delight: Replace meat entirely with diced zucchini, bell peppers, and mushrooms for a hearty vegetarian version that’s bursting with garden-fresh flavors.

  • Crushed Tomatoes: Substitute tomato paste with crushed tomatoes for a chunkier sauce. This change will introduce a rustic element, perfect for family-style dining.

  • Herb Infusion: Experiment with different herbs like fresh basil or thyme instead of dried oregano. Fresh herbs can brighten the dish and add depth to the flavor.

  • Creamy Twist: For an extra creamy texture, stir in a tablespoon of cashew cream or coconut cream just before serving. It will bring a luscious mouthfeel that’s hard to resist.

With these variations, making this Homemade Gluten Free Hamburger can be a new culinary adventure each time! And if you feel inspired to explore even more cozy comfort dishes, check out Chicken Dumplings Cozy or delight your dessert cravings with Homemade Hot Chocolate. Happy cooking!

Homemade Gluten Free Hamburger Helper Recipe FAQs

What type of gluten-free pasta works best for this recipe?
You can use any gluten-free pasta shape you prefer! Options like penne, fusilli, or shells work wonderfully. Make sure to check the cooking time on the package, as some may require adjustment.

How should I store leftovers of Homemade Gluten Free Hamburger Helper?
Store any leftovers in an airtight container in the fridge for up to 3-4 days. It’s perfect for a quick reheating during busy days ahead! Just remember to let it cool down to room temperature before sealing it away.

Can I freeze Homemade Gluten Free Hamburger Helper?
Absolutely! For optimal freshness, freeze portions in airtight containers for up to 3 months. I recommend labeling them with the date so you can enjoy the comforting flavors again within that timeframe. When you're ready to eat, just pop it in the fridge to thaw overnight before reheating.

What if my pasta sticks together while cooking?
To prevent sticking, be sure to stir the gluten-free pasta often during cooking. If you find it still clumps together, try adding a splash more broth while it simmers. You can also drizzle a little olive oil to help keep it separated.

Is this recipe suitable for dairy-free diets?
Yes! This Homemade Gluten Free Hamburger Helper can easily be made dairy-free by omitting the cheese topping. You can still enjoy a creamy texture by adjusting the broth and flour as desired.

What are some good substitutes for the ground beef?
If you're looking for lighter options, ground turkey or chicken work beautifully in this recipe. Additionally, chickpea or lentil pasta can provide a hearty, protein-rich alternative to ensure it remains gluten-free and delicious!

Homemade Gluten Free Hamburger

Homemade Gluten Free Hamburger That's Deliciously Simple

A deliciously simple Homemade Gluten Free Hamburger that satisfies fast food cravings with wholesome ingredients.
Print Recipe Pin Recipe
Prep Time 10 minutes mins
Cook Time 20 minutes mins
Total Time 30 minutes mins
Servings: 4 portions
Course: Dinner
Cuisine: American
Calories: 400
Ingredients Equipment Method Nutrition Notes

Ingredients
  

For the Base
  • 2 tablespoons Olive Oil Use extra virgin for maximum flavor.
  • 1 large Yellow Onion Can substitute with shallots for a milder taste.
  • 2 cloves Garlic Fresh minced garlic is preferred.
  • 1 pound Ground Beef Ground turkey or chicken can be used as a leaner alternative.
For the Liquid Ingredients
  • 2 cups Beef Broth Low-sodium is preferable.
  • 2 tablespoons Tomato Paste Can substitute with crushed tomatoes.
  • 2 tablespoons Coconut Aminos A soy sauce alternative.
  • 1 tablespoon Dijon Mustard Use whole grain mustard for an extra kick.
For Seasoning
  • 1 teaspoon Chili Powder Adjust quantity for desired heat level.
  • 1 teaspoon Dried Oregano Italian seasoning can be used as a substitute.
  • 1 teaspoon Smoked Paprika Sweet paprika is a suitable alternative.
  • to taste Salt and Ground Black Pepper Essential for seasoning.
For Thicker Sauce
  • 2 tablespoons All-Purpose Gluten Free Flour Can omit for a lighter sauce.
For Pasta
  • 8 ounces Gluten-Free Pasta Any preferred shape works.

Equipment

  • Dutch oven
  • Skillet

Method
 

Cooking Instructions
  1. In a dutch oven or large skillet, heat 2 tablespoons of olive oil over medium heat.
  2. Add 1 diced yellow onion and 2 minced garlic cloves to the skillet. Sauté for about 3-5 minutes until translucent.
  3. Introduce 1 pound of ground beef to the skillet, breaking it apart with a spatula. Cook for approximately 5-7 minutes until browned.
  4. Pour in 2 cups of beef broth, followed by 2 tablespoons of tomato paste, 2 tablespoons of coconut aminos, and 1 tablespoon of Dijon mustard. Stir and bring to a low simmer.
  5. Sprinkle 2 tablespoons of gluten-free flour over the mixture and whisk to combine.
  6. Gently fold in 8 ounces of gluten-free pasta. Stir well and bring back to a simmer. Cook uncovered for 10-12 minutes, stirring occasionally.
  7. Once the pasta is cooked, taste and adjust seasoning with salt, pepper, chili powder, oregano, and smoked paprika.
  8. Serve warm in bowls, optionally topped with shredded cheddar cheese and red pepper flakes.

Nutrition

Serving: 1portionCalories: 400kcalCarbohydrates: 45gProtein: 25gFat: 15gSaturated Fat: 5gPolyunsaturated Fat: 0.5gMonounsaturated Fat: 9gCholesterol: 80mgSodium: 600mgPotassium: 600mgFiber: 5gSugar: 3gVitamin A: 500IUVitamin C: 5mgCalcium: 50mgIron: 3mg

Notes

Stir often and adjust cooking times as needed for various pasta shapes. Use low-sodium broth for better flavor control.

Tried this recipe?

Let us know how it was!

Easy Tater Tot Casserole with Ground Beef for Cozy Nights

May 15, 2026 by Grace Snow Leave a Comment

It was one of those chill evenings when all I wanted was a heartwarming meal that didn’t demand hours in the kitchen. Enter my Cozy Tater Tot Casserole with Ground Beef, a dish that wraps you in comfort with every bite. This fabulous casserole combines seasoned ground beef with a creamy mushroom sauce, topped with crispy tater tots for that satisfying crunch. The best part? It’s incredibly quick to whip up, making it perfect for busy weeknights or those impromptu family gatherings. Plus, it's customizable to suit everyone's taste—feel free to swap in ground turkey or add a medley of veggies for a personal touch. Ready to create a cozy classic that everyone will love? Let’s dive in!

Why is this casserole a must-try?

Comforting, crowd-pleaser: This Tater Tot Casserole with Ground Beef is the ultimate time-saver for hectic evenings while still delivering rich flavors that everyone will adore.

Customizable: Feel free to swap ground beef for ground turkey or even plant-based options, tailoring it to various tastes and diets. You can also increase the nutritional punch by adding in your favorite vegetables like spinach or bell peppers.

Crispy Top: The golden, crispy layer of tater tots creates a delectable contrast with the creamy, savory filling underneath, ensuring every bite offers delightful textures.

Easy Prep: With just one skillet and a few simple steps, you’ll have a comforting meal ready to pop into the oven—perfect for meal prep or when unexpected guests arrive.

Perfectly Cozy: It’s like a warm hug on a plate, ideal for chilly nights or family gatherings, making it a dish you’ll turn to again and again. Why not pair it with a refreshing salad or roasted vegetables for a well-rounded meal?

Tater Tot Casserole with Ground Beef Ingredients

For the Casserole

  • Ground Beef – Ideal for heartiness and protein; you can substitute with ground turkey for a lighter dish.
  • Cream of Mushroom Soup – Provides a creamy texture and savory flavor; try a dairy-free version for a vegan option.
  • Sour Cream – Adds richness and a tangy kick; swap in a dairy-free alternative as needed.
  • Diced Onion – Enhances overall flavor when sautéed; shallots can be used for a milder taste.
  • Cheddar Cheese – Melts beautifully to enrich the flavor; opt for freshly shredded cheese for the best results.
  • Frozen Tater Tots – Forms the crispy topping; consider sweet potato tots for a twist on the classic.
  • Optional Vegetables (e.g., peas, bell peppers, corn) – Boosts nutrition and texture; select according to your family's preferences.
  • Spices (e.g., Worcestershire sauce, hot sauce) – Enhances the flavor profile; adjust to your preferred spice level.

For Serving

  • Chopped Green Onions – A fresh garnish that adds color and a mild onion flavor to the finished dish.

This Tater Tot Casserole with Ground Beef invites you to enjoy a warm, comforting meal that’s as simple as it is delicious.

Step‑by‑Step Instructions for Tater Tot Casserole with Ground Beef

Step 1: Preheat Your Oven
Begin by preheating your oven to 375°F (190°C). This important step ensures that when you pop in your Tater Tot Casserole with Ground Beef, it will cook evenly and perfectly from the start, creating that delicious golden crust.

Step 2: Brown the Beef
In a large skillet, add 1 pound of ground beef over medium heat. Stir it occasionally for about 5-7 minutes until it’s browned and cooked through. Add in 1 diced onion, cooking for an additional 3-4 minutes until the onion is soft and translucent. Don’t forget to season with salt, pepper, and your choice of spices for added flavor.

Step 3: Create the Creamy Mixture
Once the beef and onion are cooked, reduce the heat to low and stir in a can of cream of mushroom soup and a half-cup of sour cream. Mix thoroughly until the ingredients are well combined and creamy. This luscious mixture is what makes your Tater Tot Casserole irresistible!

Step 4: Assemble the Casserole
Grease a 9x13-inch casserole dish with cooking spray or butter. Spoon the creamy beef mixture into the bottom of the dish, spreading it out evenly. This will serve as the hearty base for your casserole, inviting the golden tater tots on top.

Step 5: Add Cheese and Tater Tots
Sprinkle 1 cup of shredded cheddar cheese over the beef mixture, ensuring even coverage. Next, take your frozen tater tots and place them in a single layer on top of the cheese. This crispy layer will transform into a delightful crunch during baking, complementing the creamy filling below.

Step 6: Bake to Perfection
Place the casserole in your preheated oven and bake for 25-30 minutes. Keep an eye on it as the tater tots become golden and crispy. For even cooking, you may rotate the dish halfway through baking for a more uniform crispiness.

Step 7: Melt Extra Cheese
After the initial baking time, remove the casserole briefly from the oven and sprinkle an additional cup of cheddar cheese over the tater tots. Return it to the oven for another 5 minutes. This extra melting will create an irresistible cheesy layer atop your Tater Tot Casserole.

Step 8: Finishing Touches
If you desire an extra crispy finish, turn on the broiler for just 1-2 minutes, watching closely to avoid burning. Once done, allow the casserole to cool for about 5 minutes before serving. For a vibrant touch, consider garnishing with chopped green onions.

What to Serve with Tater Tot Casserole with Ground Beef

To create a delightful meal that balances flavors and textures, explore these delicious pairings that elevate your cozy casserole experience.

  • Garden Salad: A crisp and refreshing mix of greens, tomatoes, and cucumbers, this salad brightens up your plate and adds a crunchy contrast.

  • Garlic Bread: Warm and buttery garlic bread is the perfect side, inviting a delightful mingle of flavors with each bite—ideal for scooping up the creamy casserole.

  • Steamed Broccoli: The tender, vibrant green of steamed broccoli provides a nutritious and subtle flavor that complements the richness of the casserole beautifully.

  • Roasted Brussels Sprouts: Caramelized in the oven, roasted Brussels sprouts add a nutty flavor and crisp texture, creating a delightful balance with the creamy casserole.

  • Coleslaw: A tangy, crunchy coleslaw adds a refreshing bite that cuts through the casserole's richness. Its crunchiness brings a fun texture to the meal.

  • Mashed Potatoes: Creamy mashed potatoes amplify the comfort food vibe while enhancing the overall heartiness of the meal—perfect for those who crave extra indulgence.

  • Fruit Salad: Light and sweet, a refreshing fruit salad adds a vibrant contrast to the savory casserole, balancing out the meal with a hint of natural sweetness.

  • Sparkling Water or Lemonade: A fizzy sparkling water or homemade lemonade quenches thirst and complements the rich flavors of the casserole while keeping the meal light and refreshing.

Storage Tips for Tater Tot Casserole with Ground Beef

Fridge: Store your Tater Tot Casserole in an airtight container for up to 3-4 days to maintain freshness and flavor.

Freezer: For long-term storage, wrap the casserole tightly in plastic wrap and foil, freezing it for up to 2-3 months before baking.

Reheating: When ready to enjoy leftovers, bake them in the oven at 350°F (175°C) for 20-25 minutes or until heated through to keep the tater tots crispy.

Make-Ahead Option: Prepare the casserole in advance and refrigerate it unbaked. When you're ready, add 5-10 extra minutes to the baking time for the best results.

Tater Tot Casserole with Ground Beef Variations

Feel free to explore these delightful twists that make this dish uniquely yours!

  • Ground Meat: Substitute ground turkey or plant-based protein for a lighter or vegetarian-friendly option.
  • Creamy Alternatives: Swap cream of mushroom soup for homemade cream sauce or dairy-free alternatives for a healthier touch.
  • Veggie Boost: Add in vegetables like spinach, zucchini, or bell peppers for extra nutrition and vibrant color.
  • Cheesy Twists: Try using pepper jack or mozzarella cheese for a different flavor profile and creamy texture.
  • Herb Infusion: Sprinkle fresh herbs like thyme or parsley into the beef mixture for a fragrant taste.
  • Spice Level: Elevate the heat by incorporating jalapeños or a splash of hot sauce in the beef mixture.
  • Sweet Potato Tots: Replace regular tater tots with sweet potato tots for a sweet and savory twist that’s sure to impress.
  • Topping Variations: For a crunchy finish, sprinkle panko breadcrumbs mixed with parmesan cheese on top before baking.

By tailoring this comforting casserole to your preferences, you will create a memorable meal experience. If you're seeking more inspiration, why not check out our Sweet Potato Casserole for a tasty side or Spicy Miso Tuna Noodle Casserole when you're craving something different? Your kitchen is your playground!

Make Ahead Options

These Tater Tot Casserole with Ground Beef make-ahead tips are perfect for busy cooks looking to save time without sacrificing flavor! You can prepare the entire casserole up to 24 hours in advance by assembling it and refrigerating, covering it tightly to maintain freshness. Additionally, you can brown the ground beef and sauté the onions up to 3 days ahead, storing them in an airtight container in the refrigerator. When you're ready to cook, simply preheat your oven to 375°F (190°C) and bake the casserole directly from the fridge, adding an extra 5-10 minutes to the cooking time for optimal results. This way, you ensure a cozy and comforting meal is always within reach, ready to warm your family’s hearts!

Expert Tips for Tater Tot Casserole

  • Choose Quality Meat: Opt for 80% lean ground beef for better flavor and less grease; ground turkey is a perfect alternative for a lighter option.

  • Tater Tot Placement: Avoid overlapping tater tots to ensure each one becomes perfectly golden and crispy while baking.

  • Storage Savvy: Store leftovers in an airtight container for 3-4 days; reheat in the oven instead of the microwave to retain that crispy texture.

  • Make Ahead: Assemble the Tater Tot Casserole in advance and refrigerate. When ready to bake, simply add an extra 5-10 minutes to the cooking time.

  • Customization is Key: Don’t hesitate to mix in your favorite vegetables like bell peppers or spinach for added nutrition and flavor.

Tater Tot Casserole with Ground Beef Recipe FAQs

What kind of ground beef should I use for this casserole?
I recommend using 80% lean ground beef for optimal flavor with reduced grease. However, ground turkey is a fantastic alternative if you prefer a lighter option.

How should I store leftovers?
Store your Tater Tot Casserole in an airtight container in the fridge for up to 3-4 days. For the best reheating results, use the oven at 350°F (175°C) for 20-25 minutes to keep those tater tots crispy!

Can I freeze this casserole?
Absolutely! You can freeze the unbaked casserole tightly wrapped in plastic and foil for up to 2-3 months. When you're ready to enjoy it, bake directly from frozen, adding about 10-15 minutes to the baking time.

What can I do if my tater tots aren’t getting crispy?
Make sure that the tater tots are placed in a single layer without overlapping in the casserole. For an even crispier finish, consider rotating the casserole halfway through the baking process to ensure all sides get that delightful crunch.

Are there any dairy-free options for this recipe?
Yes, you can easily make this Tater Tot Casserole dairy-free! Substitute the cream of mushroom soup and sour cream with dairy-free alternatives, like coconut cream or a dairy-free sour cream alternative.

Can I add more vegetables to the casserole?
Very much so! Feel free to include your favorite vegetables like spinach, zucchini, or bell peppers. Just sauté them with the onions before adding to the beef mixture. This will enhance the nutrition and flavor of your casserole!

Tater Tot Casserole with Ground Beef

Easy Tater Tot Casserole with Ground Beef for Cozy Nights

This Tater Tot Casserole with Ground Beef is a comforting and quick dinner option perfect for cozy nights.
Print Recipe Pin Recipe
Prep Time 15 minutes mins
Cook Time 35 minutes mins
Cooling Time 5 minutes mins
Total Time 55 minutes mins
Servings: 6 portions
Course: Dinner
Cuisine: American
Calories: 350
Ingredients Equipment Method Nutrition Notes

Ingredients
  

For the Casserole
  • 1 pound Ground Beef or ground turkey
  • 1 can Cream of Mushroom Soup dairy-free version for vegan
  • 0.5 cup Sour Cream dairy-free alternative as needed
  • 1 cup Diced Onion or shallots for milder taste
  • 1 cup Cheddar Cheese freshly shredded for best results
  • 32 ounces Frozen Tater Tots consider sweet potato tots
  • Optional Vegetables e.g., peas, bell peppers, corn
  • Spices e.g., Worcestershire sauce, hot sauce
For Serving
  • 1 bunch Chopped Green Onions for garnish

Equipment

  • Large skillet
  • 9x13-inch casserole dish

Method
 

Step-by-Step Instructions
  1. Preheat your oven to 375°F (190°C).
  2. In a large skillet, add 1 pound of ground beef over medium heat. Stir occasionally for about 5-7 minutes until browned. Add 1 diced onion and cook for an additional 3-4 minutes.
  3. Reduce heat to low and stir in a can of cream of mushroom soup and a half-cup of sour cream until mixed.
  4. Grease a 9x13-inch casserole dish and spoon the creamy beef mixture into the bottom.
  5. Sprinkle 1 cup of shredded cheddar cheese over the beef mixture. Place frozen tater tots in a single layer on top.
  6. Bake for 25-30 minutes until tater tots are golden and crispy.
  7. Sprinkle an additional cup of cheddar cheese over the tater tots and bake for another 5 minutes.
  8. For an extra crispy finish, turn on the broiler for 1-2 minutes. Allow the casserole to cool for 5 minutes before serving, and garnish with chopped green onions.

Nutrition

Serving: 1portionCalories: 350kcalCarbohydrates: 30gProtein: 20gFat: 15gSaturated Fat: 7gPolyunsaturated Fat: 1gMonounsaturated Fat: 7gCholesterol: 70mgSodium: 600mgPotassium: 500mgFiber: 2gSugar: 2gVitamin A: 10IUVitamin C: 5mgCalcium: 20mgIron: 15mg

Notes

Customizable by using different ground meats or adding vegetables. Perfect for meal prep.

Tried this recipe?

Let us know how it was!

Savor the Flavor: Quick Egg Roll In A Bowl Made Healthy

May 15, 2026 by Grace Snow Leave a Comment

As I stood in my kitchen, the aroma of sizzling onions and garlic made my stomach rumble with anticipation. If you're like me and long for the delightful flavors of an egg roll without the hassle of frying or carbs, you’re in for a treat! This Quick Egg Roll In A Bowl recipe combines seasoned ground meat, crisp cabbage, and a flavorful sauce, all created in just 30 minutes. It's the perfect solution when you need a healthy meal that doesn't sacrifice taste, and the best part? You can easily switch up the ingredients to suit any craving or dietary need. Whether you’re meal prepping for the week or enjoying a quick weeknight dinner, this dish offers effortless customization and a scrumptious home-cooked experience. Ready to dig in and get creative?

Why Choose Quick Egg Roll In A Bowl?

Simplicity at Its Best: This recipe combines everyday ingredients, making it a breeze to whip up in just 30 minutes.

Flavor Explosion: With its mix of savory ground meat and fresh veggies, every bite bursts with the classic taste of egg rolls, but in a healthier form!

Endless Customization: Feel free to swap proteins or add extra veggies for a unique twist—ground turkey or shredded pork work great!

Meal Prep Friendly: Perfect for preparing in batches, this dish stores well in the fridge, making lunches easy all week.

Guilt-Free Indulgence: Enjoy the flavors you love, without the carbs—substituting soy sauce with coconut aminos keeps this dish gluten-free and light.

Whether you serve it in lettuce wraps or over rice, you can’t go wrong! Check out our Acai Bowl Nutritious for another satisfying recipe to try this week.

Quick Egg Roll In A Bowl Ingredients

  • For the Protein

  • Ground Beef – Main protein source, providing flavor and heartiness; substitute with ground turkey, chicken, or shredded pork.

  • For the Vegetables

  • Onion – Adds sweetness and depth; use any variety, diced.

  • Garlic – Enhances aroma and taste; always use fresh, minced.

  • Shredded Carrots – Adds sweetness and visual appeal; can substitute with diced bell peppers or omit.

  • Coleslaw Mix – Easy mix of cabbage and carrots, providing crunch; can replace with shredded cabbage and carrots.

  • For the Sauce

  • Soy Sauce or Coconut Aminos – Key seasoning for umami flavor; use coconut aminos for a gluten-free option.

  • Rice Vinegar – Adds tanginess to balance flavors.

  • Sesame Oil – Offers a nutty, aromatic essence.

  • Honey or Maple Syrup – Provides sweetness; can use a sugar alternative for a keto-friendly version.

  • Ground Ginger – Adds warmth and spice.

  • Garlic Powder – Intensifies the garlic flavor.

  • Red Pepper Flakes – Optional for added heat; adjust to your taste.

  • For the Toppings

  • Sesame Seeds – Adds a delightful crunch.

  • Sriracha – For those who love a spicy kick.

  • Crispy Wonton Strips – Offers fantastic texture; optional but highly recommended!

  • Peanuts – Provides a nutty flavor and extra crunch; a great topping addition.

This Quick Egg Roll In A Bowl is your delicious, hassle-free answer to healthy fast food cravings! Enjoy customizing your bowl as you embark on this culinary adventure.

Step‑by‑Step Instructions for QUICK EGG ROLL IN A BOWL

Step 1: Brown Meat
In a large skillet or wok, heat over medium-high heat and add your ground beef. As it cooks, break it apart with a spatula and stir occasionally, allowing it to brown evenly—around 5–7 minutes. Once it's browned and no longer pink, drain any excess grease to keep the dish healthier and set the beef aside momentarily.

Step 2: Sauté Onions and Garlic
Next, keep the skillet warm and add diced onion, cooking until it's softened and translucent, about 3-5 minutes. Stir in minced garlic and continue cooking until fragrant, roughly 30 seconds more. This step adds a rich depth of flavor essential for your QUICK EGG ROLL IN A BOWL, so watch for a gently golden hue.

Step 3: Add Vegetables
Stir in your coleslaw mix—this adds a delightful crunch and vibrant color. Sauté the mix for 5–7 minutes until the cabbage becomes tender but still crisp. Keep stirring to ensure even cooking and prevent sticking. The vegetables should look bright and inviting, signaling that they are ready for the sauce.

Step 4: Prepare Sauce
While the vegetables are cooking, grab a small bowl and whisk together soy sauce (or coconut aminos), rice vinegar, sesame oil, honey or maple syrup, ground ginger, garlic powder, and red pepper flakes. This flavor-packed sauce will enhance the essence of your QUICK EGG ROLL IN A BOWL, so ensure it is well combined.

Step 5: Combine
Pour the prepared sauce over the cooked meat and vegetable mixture in the skillet. Stir thoroughly to coat everything beautifully; then, let the mixture simmer on medium heat for 3–5 minutes or until the sauce thickens slightly. You'll know it's done when the dish smells heavenly and has a glossy finish.

Step 6: Garnish and Serve
Remove from heat and transfer your delicious QUICK EGG ROLL IN A BOWL to serving dishes. Garnish with sliced green onions, sesame seeds, and any desired toppings like crispy wonton strips or peanuts for added texture. Serve immediately, and relish the vibrant flavors and satisfying crunch in every bite!

Make Ahead Options

These Quick Egg Roll In A Bowl are perfect for busy weeknights and meal prep enthusiasts! You can prepare the seasoned ground meat and sautéed vegetables up to 3 days in advance, storing them together in an airtight container in the refrigerator. To prevent the cabbage from becoming too soggy, keep the sauce separate and add it when you're ready to reheat. When it's time to enjoy your meal, simply warm the mixture in a skillet over medium heat until heated through, then add the sauce and simmer for a few minutes to enhance the flavors. With these easy make-ahead options, dinner can be on the table with minimal effort and just as delicious as freshly made!

Expert Tips for Quick Egg Roll In A Bowl

  • Don’t Overcook Veggies: Aim for tender-crisp cabbage; overcooked vegetables can lose their vibrant taste and texture.
  • Customize Your Protein: Swap in ground turkey, chicken, or shredded pork to keep things interesting while still enjoying this quick egg roll in a bowl!
  • Taste as You Go: Adjust seasonings throughout cooking for a well-rounded flavor; adding more soy sauce or honey can enhance the umami or sweetness.
  • Meal Prep Magic: This dish keeps well in the fridge; prepare extra portions for quick lunches by storing in airtight containers.
  • Embrace Toppings: Enhance flavor and crunch with sesame seeds, sriracha, or crispy wonton strips—don’t skip this step for an elevated experience!

What to Serve with Quick Egg Roll In A Bowl?

Serve your delightful egg roll creation with these tasty sides and flavors.

  • Steamed Jasmine Rice: A fragrant base that absorbs the delicious flavors, offering a satisfying foundation for your egg roll.

  • Cauliflower Rice: A guilt-free alternative, this light and fluffy option pairs perfectly while keeping the dish low-carb!

  • Szechuan Noodles: The perfect companion; their chewy texture and savory notes enhance the overall dish. Add these for a comforting twist.

  • Sesame Broccoli: Steamed to perfection and drizzled with sesame oil, this nutritious side adds a fresh crunch that balances the flavors.

  • Sweet Chili Edamame: A sweet and spicy treat with a unique twist that complements the savory elements of the main dish beautifully.

  • Crispy Wonton Chips: For an extra crunch, these addictively crispy chips bring a delightful texture contrast. Dip them in the sauce for added fun!

Pair your Quick Egg Roll In A Bowl with these options, and treat your loved ones (and yourself!) to a fulfilling meal worth savoring.

QUICK EGG ROLL IN A BOWL Variations & Substitutions

Feel free to mix things up and personalize your Quick Egg Roll In A Bowl for a delightful twist that suits your cravings!

  • Protein Swap: Try ground turkey or ground chicken for a leaner option, or shredded pork for added richness. Each protein brings its unique flavor, making this dish versatile and enjoyable.

  • Vegetable Boost: Incorporate diced bell peppers, mushrooms, or even snap peas to enhance the texture and nutrients. Their colors will brighten your bowl and offer a delightful crunch!

  • Keto-Friendly Sweetener: Replace honey with a keto-approved sweetener like erythritol or monk fruit for a low-carb alternative. Enjoy the sweetness without the guilt while keeping the flavor intact.

  • Add Some Heat: Spice it up by including minced jalapeños or a dash of chili paste along with the red pepper flakes for a fiery kick. Adjust to your personal heat preference!

  • Tasty Toppings: Enhance your bowl with crunchy toppings like chopped cashews or crispy fried onions for added flavor and texture. Don't forget the toppings—they're the cherry on top!

  • Gluten-Free Option: Use coconut aminos instead of soy sauce for a gluten-free version that doesn’t compromise on flavor. Your tastebuds will thank you while keeping it healthy!

  • Fresh Herbs: Toss in some fresh cilantro or green onions right before serving to elevate the taste with fresh herbiness. It adds a burst of flavor that shines through every bite.

  • Serve in Style: For a lighter meal, serve your egg roll mixture in fresh lettuce leaves or over cauliflower rice instead of traditional rice. It’s a fun and refreshing way to enjoy this classic dish.

With these fun variations, your Quick Egg Roll In A Bowl will never get boring! And while you're at it, why not try our delicious Pumpkin Cinnamon Roll for an equally satisfying dessert? Enjoy your culinary adventure!

How to Store and Freeze Quick Egg Roll In A Bowl

Fridge: Store leftovers in an airtight container for up to 3-4 days. Reheat in a skillet over medium heat, adding a splash of water to prevent drying out.

Freezer: This dish freezes well for up to 2-3 months. Allow it to cool completely, then portion into freezer-safe containers or bags.

Thawing: To use frozen quick egg roll in a bowl, thaw overnight in the refrigerator before reheating. Ideally, heat it on the stovetop for best texture.

Reheating: When reheating, ensure it's heated through to an internal temperature of 165°F. Add a bit of water or broth to retain moisture and flavor.

Quick Egg Roll In A Bowl Recipe FAQs

What should I look for when choosing ground meat?
Absolutely! When selecting ground meat, look for fresh cuts with minimal discoloration. Whether you choose ground beef, turkey, or chicken, ensure it has a bright color and no dark spots. Leaner meats like ground turkey offer fewer calories, making them excellent alternatives for a lighter dish.

How should I store leftover Quick Egg Roll In A Bowl?
Very! Store your leftovers in an airtight container in the fridge for up to 3-4 days. When you're ready to enjoy it again, simply reheat it in a skillet over medium heat for the best texture, adding a splash of water if needed to maintain moisture.

Can I freeze Quick Egg Roll In A Bowl?
Absolutely! This dish freezes beautifully for up to 2-3 months. After cooking, let it cool completely, then portion it into freezer-safe containers or bags. When you're ready to eat, thaw it overnight in the refrigerator, then reheat on the stovetop until warmed through.

What can I do if my sauce is too salty?
No problem! If you find your sauce is on the salty side, consider adding a splash of unsweetened coconut milk or a bit of extra shredded cabbage to balance the flavors. Another option is to mix in a tablespoon of sugar or honey to counteract the saltiness without compromising flavor.

Is this dish suitable for gluten-free diets?
Absolutely! To keep your Quick Egg Roll In A Bowl gluten-free, simply substitute soy sauce with coconut aminos. It's a fantastic alternative that preserves the umami flavor while being mindful of dietary restrictions. Always double-check labels on other ingredients if you're strictly avoiding gluten.

Can I make this dish vegetarian?
Yes, indeed! To make a vegetarian version of Quick Egg Roll In A Bowl, simply replace the ground meat with crumbled tofu or tempeh. You can also increase the amount of vegetables like bell peppers, mushrooms, and zucchini for added heartiness. Adjust the seasonings to enhance flavor, and enjoy your delectable meat-free meal!

QUICK EGG ROLL IN A BOWL

Savor the Flavor: Quick Egg Roll In A Bowl Made Healthy

Delight in a healthy, flavorful Quick Egg Roll In A Bowl, combining seasoned ground meat, crisp cabbage, and a delicious sauce in just 30 minutes.
Print Recipe Pin Recipe
Prep Time 10 minutes mins
Cook Time 20 minutes mins
Total Time 30 minutes mins
Servings: 4 bowls
Course: Dinner
Cuisine: Asian
Calories: 350
Ingredients Equipment Method Nutrition Notes

Ingredients
  

For the Protein
  • 1 pound Ground Beef Can substitute with ground turkey, chicken, or shredded pork.
For the Vegetables
  • 1 medium Onion Diced.
  • 2 cloves Garlic Minced.
  • 1 cup Shredded Carrots Can substitute with diced bell peppers or omit.
  • 4 cups Coleslaw Mix Easy mix of cabbage and carrots.
For the Sauce
  • 3 tablespoons Soy Sauce or Coconut Aminos Use coconut aminos for a gluten-free option.
  • 2 tablespoons Rice Vinegar
  • 1 tablespoon Sesame Oil
  • 1 tablespoon Honey or Maple Syrup Can use a sugar alternative for a keto-friendly version.
  • 1 teaspoon Ground Ginger
  • 1 teaspoon Garlic Powder
  • 1/2 teaspoon Red Pepper Flakes Optional for added heat.
For the Toppings
  • 1 tablespoon Sesame Seeds
  • 2 tablespoons Sriracha Optional.
  • 1 cup Crispy Wonton Strips Optional but highly recommended.
  • 1/4 cup Peanuts Chopped.

Equipment

  • Skillet
  • Spatula
  • Wok
  • small bowl

Method
 

Cooking Instructions
  1. In a large skillet or wok, heat over medium-high heat and add your ground beef. Brown for about 5–7 minutes, breaking apart with a spatula, then drain excess grease.
  2. Add diced onion and cook until softened, about 3-5 minutes. Stir in minced garlic and cook until fragrant, about 30 seconds.
  3. Stir in the coleslaw mix and sauté for 5–7 minutes until tender but still crisp, stirring regularly.
  4. In a small bowl, whisk together soy sauce, rice vinegar, sesame oil, honey, ground ginger, garlic powder, and red pepper flakes.
  5. Pour the sauce over the meat and vegetable mixture. Stir well and let simmer for 3–5 minutes until the sauce thickens slightly.
  6. Remove from heat and garnish with sesame seeds, sriracha, crispy wonton strips, or peanuts before serving.

Nutrition

Serving: 1bowlCalories: 350kcalCarbohydrates: 25gProtein: 30gFat: 15gSaturated Fat: 4gPolyunsaturated Fat: 2gMonounsaturated Fat: 8gCholesterol: 100mgSodium: 700mgPotassium: 600mgFiber: 4gSugar: 6gVitamin A: 200IUVitamin C: 25mgCalcium: 6mgIron: 15mg

Notes

This dish keeps well and is great for meal prep. Store leftovers in airtight containers and reheat as needed.

Tried this recipe?

Let us know how it was!

One-Pot Cheesy Taco Pasta: A Quick Family Favorite Delight

May 15, 2026 by Grace Snow Leave a Comment

As I stirred my pot of simmering goodness, the rich aroma of taco seasoning wrapped around me like a warm hug. If you think dinner needs to be both quick and hearty, let me introduce you to my One-Pot Cheesy Taco Pasta. In just under 30 minutes, this family-friendly dish brings together savory ground beef and melted cheese for a blissful weeknight meal that even the pickiest eaters will rave about. The best part? There’s minimal cleanup since everything cooks in one pot! You can customize it with your favorite toppings or even sneak in some veggies for added nutrition. So, are you ready to turn your weeknight dinner into a fiesta?

Why is One-Pot Cheesy Taco Pasta a Must-Try?

Simplicity and Convenience: It’s made in just one pot, making cleanup a breeze on busy nights.
Quick and Delicious: Ready in under 30 minutes, making it the ultimate family-friendly dish.
Customizable: Tailor with your favorite toppings like fresh avocado or crushed tortilla chips for added flair.
Satisfying Texture: Enjoy creamy, cheesy goodness combined with tender rotini pasta, creating a delightful meal for all.
Nutrition Meets Flavor: Sneak in some veggies for a nutritious boost without sacrificing taste—perfect for health-conscious families!

Don’t miss trying this alongside a refreshing salad or whip up some Taco Spaghetti Cheesy for another easy dinner option!

One-Pot Cheesy Taco Pasta Ingredients

For the Pasta

  • Ground Beef – Provides protein and flavor; can substitute with ground turkey for a healthier option.
  • Uncooked Rotini Pasta – Main carb component that cooks perfectly; try other shapes but adjust cooking times accordingly.
  • Mild Salsa – Adds moisture and tang; use your favorite store-bought or homemade salsa for extra freshness.

For the Seasoning

  • Taco Seasoning – Infuses spiced flavor into the dish; a homemade mix can be made for a personalized kick.
  • Salt – Enhances the overall flavor; adjust to taste for a perfect balance.
  • Black Pepper – Adds warmth; freshly cracked provides better flavor.
  • Water – Helps cook the pasta and meld flavors—ensure you have the right amount for best results.

For the Creaminess

  • Shredded Mexican-Style Cheese – Adds creaminess and richness; feel free to substitute with cheddar or your favorite blend.

Optional Toppings

  • Chopped Tomatoes – Adds freshness and juiciness; perfect for brightening the dish.
  • Avocado – For a creamy texture; enhances the dish with healthy fats.
  • Crushed Tortilla Chips – Introduces a delightful crunch; sprinkle on top for extra layer.
  • Chopped Cilantro – Adds a fresh herb flavor; brightens up the overall taste of your One-Pot Cheesy Taco Pasta.

Bring your family to the dinner table and treat them to this comforting One-Pot Cheesy Taco Pasta! Enjoy the simplicity and satisfaction of a meal that everyone will love.

Step‑by‑Step Instructions for One-Pot Cheesy Taco Pasta

Step 1: Preheat Skillet
Begin by heating a large deep skillet over medium heat for about 2-3 minutes until it’s warm. This step prepares your cooking surface for the ground beef, ensuring that it sears nicely and develops flavor. As the skillet heats, enjoy the anticipation of the delicious One-Pot Cheesy Taco Pasta coming together.

Step 2: Cook Beef
Add the ground beef to the hot skillet, breaking it apart with a spatula. Season it with a pinch of salt and freshly cracked black pepper, then cook for about 5-7 minutes, stirring occasionally until it’s browned and fully cooked. The meat should turn from pink to a rich brown color, bringing that hearty flavor to your One-Pot Cheesy Taco Pasta.

Step 3: Remove Grease
Once the beef is cooked, carefully drain off any excess grease from the skillet. You can do this by tilting the skillet slightly and using the spatula to hold back the meat. This step is crucial for keeping your One-Pot Cheesy Taco Pasta from becoming too oily, allowing the flavors of the taco seasoning to shine through in the final dish.

Step 4: Combine Ingredients
Stir in the taco seasoning, ensuring the beef is evenly coated, about 1 minute. Then, pour in the water and mild salsa, stirring well to combine. Finally, add the uncooked rotini pasta to the skillet, ensuring it is submerged in the liquid. This layer of flavor sets the foundation for your savory One-Pot Cheesy Taco Pasta.

Step 5: Boil Mixture
Increase the heat to high and bring the mixture to a rolling boil, which should take about 3-4 minutes. Once boiling, cover your skillet with a lid, reduce the heat to a simmer, and let it cook for 15 minutes. Keep an eye on it to prevent sticking, and the pasta should become tender while soaking up all those delicious taco flavors.

Step 6: Cook Pasta
After simmering for 15 minutes, check the pasta’s doneness. It should be al dente and well-coated in the flavorful sauce. If it looks a little dry, you can add a splash more water to achieve the desired consistency. This step is the perfect moment to envision the creamy outcome of your One-Pot Cheesy Taco Pasta.

Step 7: Add Cheese
Turn off the heat and add the shredded Mexican-style cheese into the skillet, stirring until it’s fully melted and creamy. This will take about 1-2 minutes. The cheese should meld beautifully with the pasta, creating a rich and gooey mixture that defines your One-Pot Cheesy Taco Pasta.

Step 8: Serve
Finally, taste and adjust the seasoning if needed, then serve the One-Pot Cheesy Taco Pasta warm. You can sprinkle optional toppings like chopped tomatoes, crushed tortilla chips, or cilantro on top for added flavor and texture. Witness the joy on your family’s faces as they dig into this comforting meal!

One-Pot Cheesy Taco Pasta Variations

Feel free to sprinkle some creativity into your dish with these delightful twists that enhance flavors and textures!

  • Ground Turkey: Substitute ground beef for a lighter protein option that still offers great flavor. Perfect for health-conscious families!
  • Plant-Based Meat: Use plant-based crumbles for a vegetarian version that’s just as satisfying. Enjoy all the deliciousness without the meat!
  • Vegetable Medley: Fold in chopped bell peppers, zucchini, or spinach for a colorful and nutritious addition that brings freshness to your pasta.
  • Extra Spice: Kick up the heat by adding diced jalapeños or a sprinkle of cayenne pepper to the mix. Your taste buds will thank you!
  • Cheese Fun: Experiment with different cheeses such as pepper jack for a spicy melt or mozzarella for a smooth, gooey texture. Choose your favorite!
  • Creamy Replacement: Swap half of the salsa with sour cream or cream cheese for extra creaminess that will make every bite sumptuous.
  • Taco-flavored Couscous: Instead of pasta, substitute couscous for a different texture, cooking it according to package directions with taco seasoning.
  • Crunchy Toppings: Add toasted corn or crushed tortilla chips on top for an extra layer of crunch and delicious contrast to the creamy pasta.

Looking for more inspiration? Try this alongside our Taco Bell Crunchwrap for a fun family dinner or check out our Tuscan White Bean Pasta for a vegetarian twist!

What to Serve with One-Pot Cheesy Taco Pasta?

Elevate your taco-inspired dinner experience with these delightful sides and accompaniments that enhance both flavor and enjoyment.

  • Crispy Side Salad: A refreshing quinoa or mixed greens salad adds a crisp contrast to the creamy pasta. Toss in some cherry tomatoes and a zesty vinaigrette for that extra zing.

  • Guacamole: Rich, creamy guacamole complements the spice of the pasta and offers a smooth texture. Dipping tortilla chips into guacamole is a fun and tasty way to enjoy your meal!

  • Crushed Tortilla Chips: Serve a side of crunchy tortilla chips for a delightful textural contrast. Perfect for scooping up the cheesy pasta, they add a playful spin to the dish.

  • Spanish Rice: Fluffy Spanish rice bathed in spices and herbs can be an ideal side to absorb the bold flavors of the One-Pot Cheesy Taco Pasta. It brings a pop of color and additional carbohydrates!

  • Corn on the Cob: Grilled or boiled corn on the cob brings a touch of sweetness that balances the savory spice of the pasta. Drizzle with lime and sprinkle with chili powder for an added kick!

  • Margaritas: Pair your meal with a refreshing margarita or a non-alcoholic limeade for a festive touch. Their tartness will enhance the overall flavor profile of this comforting dish.

These delightful pairings will take your One-Pot Cheesy Taco Pasta from an ordinary dinner to an unforgettable family feast!

Make Ahead Options

These One-Pot Cheesy Taco Pasta are perfect for meal prep enthusiasts! You can cook the pasta and ground beef mixture up to 24 hours in advance, allowing the flavors to develop while saving time on busy weeknights. To ensure optimal quality, refrigerate the mixture in an airtight container. When you're ready to serve, simply reheat it over medium heat with a splash of water to loosen it up, then stir in the shredded cheese until melted. This way, you'll have a deliciously creamy and satisfying dish with minimal effort—just like a homemade meal should be!

Storage Tips for One-Pot Cheesy Taco Pasta

Fridge: Store leftover One-Pot Cheesy Taco Pasta in an airtight container for up to 3 days. This will keep it fresh and delicious for reheating later.

Freezer: For longer storage, freeze portions in freezer-safe containers for up to 2 months. Make sure to leave some space, as the pasta may expand when frozen.

Reheating: When ready to enjoy again, thaw overnight in the fridge if frozen, then reheat on the stovetop over low heat, adding a splash of water to refresh the texture.

Room Temperature: Avoid leaving the pasta out at room temperature for more than 2 hours to ensure food safety and taste quality.

Expert Tips for One-Pot Cheesy Taco Pasta

  • Quality Ingredients: Choose fresh and high-quality ingredients for the best flavor. A good ground beef or turkey can elevate your One-Pot Cheesy Taco Pasta experience.
  • Stir Occasionally: To prevent sticking, stir the pasta mixture while it simmers. This ensures even cooking and a creamy sauce that clings to every bite.
  • Taste as You Go: Don’t forget to taste your dish before serving! Adjust salt and spice levels based on your family's preferences for perfectly seasoned One-Pot Cheesy Taco Pasta.
  • Add Veggies: Sneak in some chopped bell peppers or spinach for extra nutrition without sacrificing taste, maintaining the dish’s delightful allure.
  • Perfect Toppings: Use a mix of fresh toppings like diced avocado and crushed tortilla chips to add layers of flavor and texture, making your pasta even more inviting.

One-Pot Cheesy Taco Pasta Recipe FAQs

How do I choose ripe ingredients for my One-Pot Cheesy Taco Pasta?
Absolutely! For the best flavor, select firm tomatoes that are vibrant in color and free from dark spots. When choosing avocado, pick ones that yield to gentle pressure, indicating ripeness. Fresh herbs like cilantro should be bright green, with no wilting or browning.

What’s the best way to store leftover One-Pot Cheesy Taco Pasta?
Very! You should keep your One-Pot Cheesy Taco Pasta in an airtight container in the fridge for up to 3 days. When properly stored, it stays fresh and maintains its rich flavors. Be sure to cool it completely before sealing and refrigerating.

Can I freeze One-Pot Cheesy Taco Pasta? How?
Of course! To freeze, portion the pasta into freezer-safe containers, leaving a little space for expansion, as the pasta will swell when frozen. It can last for up to 2 months. To thaw, place the container in the fridge overnight, then reheat on low on the stovetop. Adding a splash of water can help regain creaminess.

What should I do if the pasta is overcooked or soggy?
No worries! If your pasta becomes overcooked, try to reduce the cooking time next round to avoid mushiness. If it seems too wet, you can simmer it uncovered for a few extra minutes to allow some liquid to evaporate, stirring occasionally. Adding a bit of cheese can also help absorb excess moisture while enhancing the flavor.

Are there any dietary considerations for the One-Pot Cheesy Taco Pasta?
Absolutely! This dish is versatile; for gluten-free options, substitute regular pasta with gluten-free alternatives. If you're sensitive to dairy, use lactose-free cheese or nutritional yeast for cheesiness without the lactose. Always check labels for allergens if you're feeding someone with specific dietary needs.

One-Pot Cheesy Taco Pasta

One-Pot Cheesy Taco Pasta: A Quick Family Favorite Delight

One-Pot Cheesy Taco Pasta is a quick and hearty dish made with savory ground beef and melted cheese, perfect for family dinners.
Print Recipe Pin Recipe
Prep Time 10 minutes mins
Cook Time 15 minutes mins
Total Time 25 minutes mins
Servings: 4 servings
Course: Dinner
Cuisine: Mexican
Calories: 600
Ingredients Equipment Method Nutrition Notes

Ingredients
  

For the Pasta
  • 1 lb Ground Beef Can substitute with ground turkey for a healthier option.
  • 8 oz Uncooked Rotini Pasta Adjust cooking times if using different shapes.
  • 1 cup Mild Salsa Use your favorite store-bought or homemade.
For the Seasoning
  • 1 packet Taco Seasoning A homemade mix can be made for a personalized kick.
  • 1 tsp Salt Adjust to taste.
  • 1 tsp Black Pepper Freshly cracked provides better flavor.
  • 2 cups Water Ensure you have the right amount for best results.
For the Creaminess
  • 2 cups Shredded Mexican-Style Cheese Feel free to substitute with cheddar or your favorite blend.
Optional Toppings
  • 1 cup Chopped Tomatoes Perfect for brightening the dish.
  • 1 avocado Avocado Enhances the dish with healthy fats.
  • 1 cup Crushed Tortilla Chips Sprinkle on top for an extra layer.
  • 1/4 cup Chopped Cilantro Brightens up the overall taste.

Equipment

  • large deep skillet

Method
 

Cooking Steps
  1. Preheat a large deep skillet over medium heat for 2-3 minutes.
  2. Add ground beef, breaking it apart with a spatula. Season with salt and pepper, cook for 5-7 minutes until browned.
  3. Drain any excess grease from the skillet.
  4. Stir in taco seasoning, then add water and salsa. Add uncooked rotini pasta ensuring it is submerged.
  5. Bring to a rolling boil, cover, reduce heat to simmer and cook for 15 minutes.
  6. Check pasta doneness, and if needed add more water.
  7. Turn off heat, add shredded cheese, stirring until melted and creamy.
  8. Serve warm with optional toppings.

Nutrition

Serving: 1plateCalories: 600kcalCarbohydrates: 50gProtein: 30gFat: 25gSaturated Fat: 10gPolyunsaturated Fat: 2gMonounsaturated Fat: 8gCholesterol: 80mgSodium: 900mgPotassium: 700mgFiber: 5gSugar: 3gVitamin A: 500IUVitamin C: 15mgCalcium: 300mgIron: 3mg

Notes

Use high-quality ingredients and taste as you go to adjust seasoning for perfect results.

Tried this recipe?

Let us know how it was!

Comforting Sausage and Vegetable Soup for Cozy Nights

May 15, 2026 by Grace Snow Leave a Comment

On a chilly evening, as the wind howls outside, there's nothing quite like the aroma of a simmering pot of Hearty Italian Sausage and Vegetable Soup to lift the spirits. This soul-soothing dish brings together savory Italian sausage, tender potatoes, and a vibrant mix of vegetables, creating a meal that is both comforting and nutritious. Not only can it be whipped up in under an hour, making it perfect for those busy weeknights, but it also doubles as a freezer-friendly meal that’s ready when you need it most. With endless customization options, from different types of sausage to your favorite veggies, this recipe puts you in control of your kitchen creations. So, what delightful twist will you add to your soup tonight?

Why is this soup a must-try?

Comforting, on a cold night, this Hearty Italian Sausage and Vegetable Soup envelops you in warmth with every spoonful. Customizable, it invites you to experiment with various sausages and seasonal veggies, ensuring a new twist each time. Time-saving, it’s ready in under an hour, perfect for busy weeknights. Nutrient-packed, this dish is rich in vitamins and fiber, making it a wholesome meal. Freezer-friendly, it can be stored for those unexpected busy days—just reheat and enjoy! For more hearty soup ideas, check out my Asparagus Soup Healthy and Lemon Chicken Soup.

Sausage and Vegetable Soup Ingredients

• Get ready to gather all the comforting flavors!

For the Soup Base

  • Italian Sausage – Provides savory richness; swap for ground turkey or chicken for a lighter option.
  • Onion – Adds sweetness and depth; shallots work well for a milder taste.
  • Celery – Contributes crunch and aroma; leeks can be used instead for a different flavor.
  • Garlic – Enhances flavor; fresh garlic is best, but garlic powder can suffice in a pinch.
  • Chicken Broth – Serves as the flavorful base; vegetable broth can substitute for a vegetarian meal.
  • Water – Balances out the broth; omit if you prefer a thicker soup.

For the Vegetables

  • Carrots – Adds sweetness and texture; frozen carrots are a great time-saving alternative.
  • Russet Potatoes – Provides heartiness; you can use Yukon gold or red potatoes for a unique texture.
  • Red Bell Pepper – Adds sweetness and vibrant color; green bell peppers can be used in place.
  • Corn (Frozen) – Offers sweetness; canned corn can also be a convenient substitute.

Seasoning

  • Salt & Pepper – Enhances overall flavor; adjust to taste, especially mindful of the broth's sodium.

This Sausage and Vegetable Soup makes for the perfect cozy meal, packed with nutrients and ready to warm you up!

Step‑by‑Step Instructions for Hearty Italian Sausage and Vegetable Soup

Step 1: Brown the Sausage
In a large Dutch oven or heavy soup pot, heat over medium-high heat and add the crumbled Italian sausage. Cook it for about 5 minutes, stirring occasionally to break it apart as it cooks, until it's nicely browned and has released its flavorful oils. You'll know it’s ready when the meat is no longer pink.

Step 2: Sauté the Vegetables
Add the chopped onion, diced celery, and minced garlic to the pot with the browned sausage. Continue cooking for another 5 minutes, stirring frequently until the onion becomes translucent and softens, and the garlic is fragrant. This step builds a wonderful aromatic foundation for your hearty Sausage and Vegetable Soup.

Step 3: Drain Excess Fat
If there’s excessive fat in the pot, carefully spoon out some of it to prevent the soup from being greasy. This will ensure that your Hearty Italian Sausage and Vegetable Soup maintains a perfect balance of flavors and richness.

Step 4: Add Broth and Vegetables
Pour in the chicken broth and water, then add the sliced carrots, diced potatoes, chopped red bell pepper, and corn. Stir everything together well, bringing all the vibrant ingredients and flavors into harmony. You’ll start to see the soup come together beautifully!

Step 5: Bring to a Boil
Increase the heat to high and allow the mixture to come to a vigorous boil. Watch closely, as it can bubble over quickly. This step is crucial as it helps to infuse the flavors into your soup, creating that hearty essence you crave.

Step 6: Simmer for Tenderness
Once boiling, reduce the heat to low and let the soup simmer for about 15-20 minutes. Stir occasionally until the potatoes and carrots are tender and easily pierced with a fork. This slow cooking will ensure all the ingredients meld wonderfully, showcasing the delightful qualities of your Sausage and Vegetable Soup.

Step 7: Season and Serve
Before serving, taste the soup and season with salt and pepper according to your preference. Remember to start lightly, as the broth may already have salt. Once perfectly seasoned, ladle the soup into bowls, ready to warm your hearts and feed your family with this comforting Hearty Italian Sausage and Vegetable Soup!

Expert Tips for Sausage and Vegetable Soup

  • Choose Quality Sausage: Select a flavorful Italian sausage, as it defines the soup's richness. Avoid low-fat sausages, which may lack depth.

  • Cut Uniformly: Chop vegetables into similar-sized pieces to ensure even cooking and a harmonious texture in your sausage and vegetable soup.

  • Season Gradually: Taste and adjust your seasonings throughout the cooking process to achieve the perfect balance. Broth can be salty, so start with less salt.

  • Add Greens: For extra nutrition and color, toss in fresh greens like spinach or kale during the last few minutes of cooking.

  • Store Smartly: This sausage and vegetable soup keeps well in the fridge for up to 5 days. For longer storage, freeze portions for those busy days ahead!

  • Reheat With Care: If reheating, add a splash of broth or water to prevent the soup from drying out. Adjust seasoning as needed after reheating.

Make Ahead Options

These Hearty Italian Sausage and Vegetable Soup are perfect for meal prep enthusiasts! You can chop the vegetables and store them in the refrigerator for up to 3 days, ensuring they stay fresh and ready to go. Additionally, you can brown the sausage up to 24 hours in advance and refrigerate it, which reduces your cooking time significantly. When you're ready to enjoy your soup, simply sauté the vegetables, add the browned sausage, broth, and remaining ingredients, then bring everything to a boil before simmering until tender. This way, you’ll have a comforting, homemade meal that is just as delicious as if you prepared it fresh that day!

What to Serve with Hearty Italian Sausage and Vegetable Soup

Warm your heart with a delightful meal that perfectly complements the flavors of cozy soup!

  • Crusty Bread: A classic pairing, its crunchy crust and tender inside are perfect for soaking up every last drop of savory broth.
  • Mixed Greens Salad: Fresh salad brings a crisp contrast, brightening the meal with vibrant colors and a zesty dressing that balances the soup's warmth.
  • Garlic Breadsticks: Fluffy and buttery, these are fantastic for dipping, with an extra touch of garlic enhancing the overall flavor experience.
  • Parmesan Cheese: A sprinkle of this nutty cheese adds an indulgent creaminess, elevating each spoonful with its rich, savory notes.
  • Roasted Vegetables: Offering a textural contrast, the caramelized sweetness of roasted seasonal vegetables harmonizes beautifully with the soup.
  • Pinot Noir: A light-bodied red wine with soft tannins enhances the flavors of the sausage, making for a sophisticated yet comforting dining experience.
  • Fruit Sorbet: A refreshing palate cleanser, it provides a light finish after enjoying the hearty soup, making every bite a new adventure.
  • Chili Lime Cornbread: This unique twist adds a hint of sweetness and a zesty kick, which perfectly complements the robust flavors of the soup.

Let each choice create a memorable meal, surrounding your Hearty Italian Sausage and Vegetable Soup with delightful contrasts and flavors!

Storage Tips for Sausage and Vegetable Soup

  • Fridge: Store leftover Sausage and Vegetable Soup in an airtight container for up to 5 days. Let it cool to room temperature before refrigerating for best results.

  • Freezer: Freeze servings of the soup in airtight containers or freezer bags for up to 3 months. Be sure to leave space for expansion as it freezes.

  • Thawing: To enjoy frozen soup, thaw it overnight in the fridge or use the defrost setting on your microwave.

  • Reheating: Reheat the soup gently on the stove or in the microwave, adding a splash of broth or water if needed to maintain moisture and flavor.

Sausage and Vegetable Soup Variations

Embrace the freedom to make this cozy dish uniquely yours, experimenting with flavors and textures that tantalize your taste buds.

  • Spicy Kick: Add sliced jalapeños or a dash of red pepper flakes for a fiery twist that warms you from the inside out. Your soup will transform into a lively harmony of heat and comfort!

  • Vegetarian Delight: Swap the Italian sausage for plant-based sausage or simply omit it entirely. Packed with protein from beans, this version retains heartiness while being completely meat-free—perfect for plant lovers!

  • Creamy Twist: Stir in a touch of heavy cream or coconut milk at the end of cooking for a luscious, creamy base that adds richness to the dish. This transforms your soup into a silky wonder, ideal for special occasions.

  • Herb-Infusion: Enhance the flavor by tossing in fresh herbs like thyme or basil during the last minutes of cooking. These fresh notes will awaken your soup with aromatic bliss that feels like a hug from the garden.

  • Sweet Potato Swap: Substitute Russet potatoes with diced sweet potatoes for a hint of natural sweetness. They add a beautiful color and a slightly different texture, making the dish even more comforting.

  • Beans Galore: Incorporate white beans, like cannellini or navy beans, for added protein and creaminess. This variation not only fulfills but also enriches the nutrient profile of your soup.

  • Root Vegetable Medley: Experiment with seasonal root vegetables like parsnips or turnips alongside your standard fare. Each bite delivers a delightful surprise, turning your classic soup into a seasonal celebration.

  • Garnish Galore: Top with fresh parsley, chives, or a sprinkle of cheese before serving for an added layer of flavor. This little touch can elevate your bowl to a gourmet experience that impresses every guest.

With all these options, feel free to craft your own masterpiece! And if you're looking for more delicious soup ideas, don't forget to check out my cozy Zuppa Toscana Soup and warm Egg Drop Soup.

Sausage and Vegetable Soup Recipe FAQs

What type of sausage should I use for the best flavor?
Absolutely! Choosing a good quality Italian sausage is key to achieving a rich, savory flavor in your sausage and vegetable soup. Look for ground sausage that has a mix of herbs and spices included. If you’re looking for a lighter option, ground turkey or chicken sausage can work well too, although the flavor will be milder.

How do I store leftovers of this soup?
Very easy! Store any leftover sausage and vegetable soup in an airtight container in the refrigerator for up to 5 days. Make sure to let the soup cool to room temperature before sealing it up. This helps maintain the freshness and flavor, ensuring you have a delicious meal ready to enjoy later!

Can I freeze this soup?
Yes, for sure! To freeze the sausage and vegetable soup, ladle it into airtight containers or freezer bags, leaving some space at the top for expansion (about 1 inch). Label the containers with the date and it will keep nicely frozen for up to 3 months. When you’re ready to enjoy it, just thaw it in the fridge overnight or use the microwave's defrost setting.

What should I do if my soup is too salty?
If you find your soup has become too salty, there are a couple of tricks you can try. First, you can add more vegetables or an extra potato to absorb some of the excess salt. Alternatively, adding a splash of vinegar can help to balance the flavors. Remember to take small steps, tasting frequently, so you don’t overcorrect.

Are there any dietary considerations for this recipe?
Yes! If you or a loved one have dietary restrictions, keep in mind that Italian sausage contains a fair amount of fat and sodium. For a healthier alternative, opt for lean ground turkey or chicken sausage. Additionally, if you have allergies, make sure to choose broth without allergens and always check labels for potential issues. This soup is also easily customized to be vegetarian; simply substitute the sausage with beans or additional veggies, and use vegetable broth instead!

Sausage and Vegetable Soup

Comforting Sausage and Vegetable Soup for Cozy Nights

A comforting Sausage and Vegetable Soup perfect for chilly nights, combining savory sausage and vibrant vegetables for a nutritious meal.
Print Recipe Pin Recipe
Prep Time 10 minutes mins
Cook Time 30 minutes mins
Total Time 40 minutes mins
Servings: 6 bowls
Course: Soups
Cuisine: Italian
Calories: 350
Ingredients Equipment Method Nutrition Notes

Ingredients
  

For the Soup Base
  • 1 pound Italian Sausage Savory richness; swap for ground turkey or chicken for a lighter option.
  • 1 medium Onion Adds sweetness and depth; shallots work well for a milder taste.
  • 2 stalks Celery Contributes crunch and aroma; leeks can be used instead for a different flavor.
  • 3 cloves Garlic Enhances flavor; fresh garlic is best, but garlic powder can suffice.
  • 4 cups Chicken Broth Flavorful base; vegetable broth can substitute for a vegetarian meal.
  • 2 cups Water Balances out the broth; omit if you prefer a thicker soup.
For the Vegetables
  • 2 medium Carrots Adds sweetness and texture; frozen carrots are a great alternative.
  • 2 medium Russet Potatoes Provides heartiness; you can use Yukon gold or red potatoes.
  • 1 medium Red Bell Pepper Adds sweetness and color; green bell peppers can be used.
  • 1 cup Corn (Frozen) Offers sweetness; canned corn can also be used.
Seasoning
  • to taste Salt Enhances overall flavor; adjust to taste.
  • to taste Pepper Enhances overall flavor; adjust to taste.

Equipment

  • Dutch oven

Method
 

Step-by-Step Instructions
  1. Brown the sausage in a large Dutch oven over medium-high heat for about 5 minutes until nicely browned.
  2. Sauté the chopped onion, diced celery, and minced garlic for another 5 minutes until the onion is translucent.
  3. Drain excess fat if necessary to keep the soup balanced.
  4. Add the chicken broth and water along with the carrots, potatoes, bell pepper, and corn. Stir well.
  5. Bring the mixture to a vigorous boil, watching closely.
  6. Once boiling, reduce to low and let simmer for 15-20 minutes until vegetables are tender.
  7. Season with salt and pepper to taste before serving.

Nutrition

Serving: 1bowlCalories: 350kcalCarbohydrates: 35gProtein: 20gFat: 15gSaturated Fat: 5gPolyunsaturated Fat: 1gMonounsaturated Fat: 3gCholesterol: 55mgSodium: 800mgPotassium: 850mgFiber: 5gSugar: 5gVitamin A: 3000IUVitamin C: 30mgCalcium: 80mgIron: 3mg

Notes

This soup keeps well in the fridge for up to 5 days and can be frozen for up to 3 months. Add greens for extra nutrition if desired.

Tried this recipe?

Let us know how it was!

Creamy Cheese Tortellini Alfredo for Quick Comfort Nights

May 15, 2026 by Grace Snow Leave a Comment

As I stirred the creamy sauce, a wave of nostalgia swept over me, transporting me back to cozy family dinners filled with laughter and love. The star of the meal was always my creamy Cheese Tortellini Alfredo, an indulgent dish that balances the ease of weeknight cooking with the richness of gourmet dining. This easy yet decadent recipe is perfect for those evenings when you crave something comforting without spending hours in the kitchen. Plus, it’s versatile enough to offer healthier alternatives or a twist on store-bought tortellini. Whether serving it alongside garlic bread or fresh salad, this Creamy Cheese Tortellini Alfredo is bound to become a staple in your home. Are you ready to bring a taste of Italy to your dinner table?

Why choose Creamy Cheese Tortellini Alfredo?

Simplicity at its finest: This recipe offers an easy solution for busy weeknights, requiring minimal prep while delivering maximum comfort.

Decadent flavor: The rich blend of creamy sauce and cheese tortellini creates a dish that feels indulgent without the fuss of fine dining.

Versatile options: Want to lighten things up? Swap in light cream or toss in fresh veggies like spinach or mushrooms for a nutritious boost!

Family-friendly: With its irresistible creamy texture, this dish is sure to please even the pickiest eaters, making it perfect for family gatherings.

Quick to make: Enjoy a delicious meal in under 30 minutes—ideal for those last-minute dinners after a long day!

For a delightful side, check out a refreshing Avocado Egg Salad or pair it with some crispy garlic bread for a wholesome feast.

Creamy Cheese Tortellini Alfredo Ingredients

• The ingredients you need to create this comforting dish are both simple and satisfying!

For the Tortellini

  • Cheese Tortellini – This is the star of the dish; fresh or frozen will work beautifully for convenience.

For the Alfredo Sauce

  • Butter – Adds a rich base to your sauce; olive oil makes a lighter alternative.
  • Heavy Cream – Ensures a velvety texture for that creamy indulgence; half-and-half can be used for a lighter option.
  • Grated Parmesan Cheese – Adds depth and flavor; freshly grated cheese elevates the taste significantly.
  • Garlic Powder – Enhances the sauce's savory profile; fresh minced garlic packs an extra punch!
  • Salt and Pepper – Essential for seasoning; adjust to fit your palate.

For Garnish

  • Chopped Parsley (optional) – Adds a pop of color and a fresh herbal note that brightens up the dish.

Whether you’re whipping this up for a cozy family meal or impressing friends, this Creamy Cheese Tortellini Alfredo is sure to bring smiles around the table!

Step‑by‑Step Instructions for Creamy Cheese Tortellini Alfredo

Step 1: Cook the Tortellini
Begin by bringing a large pot of salted water to a boil over high heat. Once boiling, gently add the cheese tortellini and cook according to the package instructions, usually about 3-5 minutes, until they are al dente. Stir occasionally to prevent sticking, and once done, drain the tortellini in a colander and set aside.

Step 2: Prepare the Alfredo Sauce
In a large skillet, melt 2 tablespoons of butter over medium heat, allowing it to bubble gently without browning. Once melted, pour in 1 cup of heavy cream and sprinkle in 1 teaspoon of garlic powder. Stir well, and bring the mixture to a gentle simmer, allowing it to cook for 3-5 minutes until the sauce thickens slightly and becomes creamy.

Step 3: Add the Cheese
While the sauce simmers, gradually stir in 1 cup of freshly grated Parmesan cheese, mixing until it melts completely and forms a velvety texture. Keep cooking for another 2-3 minutes, ensuring the sauce does not boil, as you want it to remain smooth. Adjust the seasoning with salt and pepper to taste to enhance the flavors of your Creamy Cheese Tortellini Alfredo.

Step 4: Combine the Tortellini and Sauce
Once the tortellini are cooked and the sauce is ready, carefully add the drained tortellini into the skillet with the Alfredo sauce. Gently toss the pasta in the sauce to coat it evenly, ensuring every piece is enveloped in that creamy goodness. Allow it to cook together for an additional minute to marry the flavors beautifully.

Step 5: Serve and Garnish
Remove the skillet from heat and transfer the Creamy Cheese Tortellini Alfredo to serving plates. For a fresh touch, sprinkle with chopped parsley if desired, adding a pop of color and flavor. Serve immediately while it's warm, and enjoy this delightful comfort dish with your favorite sides!

Expert Tips for Creamy Cheese Tortellini Alfredo

  • Fresh Cheese Matters: Use freshly grated Parmesan cheese instead of the pre-grated kind for a richer flavor in your creamy Cheese Tortellini Alfredo.

  • Watch the Sauce: Keep an eye on the Alfredo sauce while it simmers. Boiling can cause it to separate, so aim for a gentle simmer instead.

  • Perfectly Al Dente: Be careful not to overcook your tortellini. They should be al dente for the best texture, so follow package instructions closely.

  • Thaw Frozen Tortellini: If using frozen tortellini, ensure they are completely thawed before cooking. This helps achieve even cooking and texture.

  • Season to Taste: Don’t forget to adjust your salt and pepper according to your taste preferences—this makes all the difference in enhancing your dish!

Creamy Cheese Tortellini Alfredo Variations

Embrace your creativity in the kitchen and make this dish your own with delightful twists and substitutions!

  • Dairy-Free: Substitute heavy cream with coconut milk or cashew cream for a luscious, vegan alternative that maintains richness.
    Imagine indulging in creamy goodness without the dairy. It’s a fantastic way to enjoy this comforting dish while keeping it plant-based.

  • Vegetable-Packed: Stir in sautéed spinach, mushrooms, or broccoli for a nutritious flavor boost.
    These vegetables not only add color but also enhance the dish's texture and nutritional value. Your family will love the added goodness!

  • Spicy Kick: Add red pepper flakes to the sauce for a tangy, spicy twist.
    Perfect for those who enjoy a bit of heat, this variation will awaken your taste buds and create a memorable meal.

  • Protein Boost: Toss in grilled chicken, shrimp, or cooked sausage for a heartier dish.
    Choosing a protein option will turn your creamy tortellini into a satisfying main course that’s sure to please even the hungriest of diners.

  • Pasta Alternatives: Use fettuccine, penne, or even zucchini noodles for a different texture.
    By opting for various pasta shapes or a veggie base, you can create a unique dish tailored to your preference.

  • Gourmet Touch: Drizzle with truffle oil before serving for an upscale finish that elevates your Alfredo experience.
    This luxurious addition turns a comforting classic into something extraordinary, perfect for impressing guests or treating yourself.

  • Lighter Creaminess: Swap heavy cream with light cream or half-and-half for a lower-calorie option.
    You can still savor the creamy texture while keeping the dish a bit lighter! It’s a great way to enjoy comfort food without the guilt.

Feel free to mix and match these variations to truly customize your Creamy Cheese Tortellini Alfredo. If you're in the mood for something different, consider pairing it with a refreshing Asparagus Soup or the delicious richness of Cajeta Ice Cream to round out your meal!

What to Serve with Creamy Cheese Tortellini Alfredo

Elevate your dinner table with delightful companions that perfectly balance the indulgence of this creamy dish.

  • Garlic Bread: The crispy, buttery goodness of garlic bread beautifully complements the rich Alfredo sauce, making every bite a savory delight.

  • Fresh Green Salad: A light, crisp salad with a tangy vinaigrette adds refreshing contrast to the creamy tortellini, ensuring a well-rounded meal. Toss in some cherry tomatoes for sweetness!

  • Steamed Broccoli: Adding vibrant, tender broccoli not only elevates the dish with a nutritious crunch but also offers a pop of color to your plate.

  • Roasted Asparagus: The slightly charred, earthy flavor of roasted asparagus pairs excellently with the rich flavors of the creamy sauce. A sprinkle of lemon zest enhances this delightful medley.

  • Italian Wine: A glass of light Pinot Grigio or a fruity Chianti can accentuate the flavors, giving a cozy Italian dining experience.

  • Lemon Sorbet: A scoop of refreshing lemon sorbet serves as a light and zesty dessert, cleansing the palate beautifully after the richness of the Alfredo.

Make Ahead Options

These Creamy Cheese Tortellini Alfredo are perfect for those busy weeknights when time is of the essence! You can cook the tortellini up to 24 hours in advance and refrigerate them in an airtight container. Additionally, the Alfredo sauce can be prepared ahead too; simply store it in the fridge for up to 3 days. When you’re ready to enjoy, gently reheat the sauce in a skillet over low heat, adding a splash of cream to restore its creamy texture. Toss in the pre-cooked tortellini to warm through, and you've got a meal that's just as delicious as if you'd made it fresh! This prep ahead strategy saves you precious time while still delivering comfort food at its best.

Storage Tips for Creamy Cheese Tortellini Alfredo

Fridge: Store any leftover Creamy Cheese Tortellini Alfredo in an airtight container for up to 3 days. Make sure it is completely cooled before sealing to avoid condensation.

Freezer: For longer storage, you can freeze the dish in a freezer-safe container for up to 2 months. To prevent freezer burn, cover with plastic wrap before sealing the container.

Reheating: When ready to enjoy, thaw frozen tortellini in the fridge overnight. Reheat gently on the stove over low heat, adding a splash of cream or milk to restore its creamy consistency.

Leftover Use: Transform leftovers into a comforting pasta bake! Add extra cheese and bake until bubbly for a delightful twist.

Creamy Cheese Tortellini Alfredo Recipe FAQs

How do I select the best cheese tortellini?
Absolutely! For the perfect Creamy Cheese Tortellini Alfredo, choose either fresh or frozen cheese tortellini based on your convenience. Fresh tortellini usually has a softer, more tender texture, while frozen tortellini can be a quick, time-saving alternative. Look for tortellini that is plump and firm, avoiding any packages with dark spots or signs of freezer burn.

What are the best storage methods for leftovers?
Very! To keep your Creamy Cheese Tortellini Alfredo fresh, store any leftovers in an airtight container in the refrigerator for up to 3 days. Make sure it's completely cooled before sealing to prevent condensation, which can make the sauce watery. When you’re ready to enjoy the leftovers, reheat gently over low heat on the stove to maintain its creamy texture.

Can I freeze my Creamy Cheese Tortellini Alfredo?
Of course! You can freeze this delicious dish for up to 2 months. To do this, allow the dish to cool completely, then transfer it to a freezer-safe container. To prevent freezer burn, cover the top with plastic wrap before sealing. When you're ready to eat, thaw it in the fridge overnight and reheat it gently on low heat, adding a splash of cream or milk to restore its creamy consistency.

What if my sauce separates during cooking?
Don't worry! If you notice that your Alfredo sauce has started to separate, it typically means the temperature was too high. To fix this, remove the sauce from heat and whisk vigorously until it comes back together. If it’s too thick, adding a splash of warm cream or milk can help smooth it out. The key is to simmer gently—you want to maintain that luscious creamy texture without boiling.

Are there any dietary concerns I should think about?
Absolutely! If you’re cooking for guests with dietary restrictions, keep in mind that tortellini often contains gluten and dairy. You can find gluten-free tortellini options or make your own at home if necessary. Also, if anyone has lactose intolerance, consider using lactose-free cream or a dairy-free cheese alternative to accommodate their needs—you can still enjoy delicious comfort food together!

Can I make this healthier?
Very! To lighten up your Creamy Cheese Tortellini Alfredo, consider using light cream or substituting half of the heavy cream with homemade vegetable broth. You can also sneak in more nutrition by adding sautéed vegetables like spinach, mushrooms, or zucchini into the mix. These adjustments maintain flavor while making this comforting dish a bit more wholesome!

Creamy Cheese Tortellini Alfredo

Creamy Cheese Tortellini Alfredo for Quick Comfort Nights

Indulge in this Creamy Cheese Tortellini Alfredo recipe, perfect for quick weeknight dinners and family gatherings.
Print Recipe Pin Recipe
Prep Time 10 minutes mins
Cook Time 15 minutes mins
Total Time 25 minutes mins
Servings: 4 servings
Course: Dinner
Cuisine: Italian
Calories: 560
Ingredients Equipment Method Nutrition Notes

Ingredients
  

For the Tortellini
  • 1 package Cheese Tortellini fresh or frozen
For the Alfredo Sauce
  • 2 tablespoons Butter or olive oil for lighter option
  • 1 cup Heavy Cream or half-and-half for a lighter option
  • 1 cup Grated Parmesan Cheese freshly grated for best flavor
  • 1 teaspoon Garlic Powder or fresh minced garlic for extra flavor
  • to taste Salt
  • to taste Pepper
For Garnish
  • 2 tablespoons Chopped Parsley optional

Equipment

  • Large pot
  • Skillet
  • Colander

Method
 

Step-by-Step Instructions
  1. Bring a large pot of salted water to a boil over high heat. Add the tortellini and cook according to package instructions, usually about 3-5 minutes.
  2. In a large skillet, melt butter over medium heat. Once melted, pour in heavy cream and sprinkle garlic powder. Bring to a gentle simmer for 3-5 minutes until slightly thickened.
  3. Gradually stir in Parmesan cheese until it melts completely, about 2-3 minutes, adjusting salt and pepper to taste.
  4. Carefully add the drained tortellini into the skillet, tossing to coat evenly in the sauce. Cook together for an additional minute.
  5. Remove from heat and transfer to serving plates. Garnish with chopped parsley if desired and serve immediately.

Nutrition

Serving: 1servingCalories: 560kcalCarbohydrates: 50gProtein: 20gFat: 33gSaturated Fat: 20gPolyunsaturated Fat: 1gMonounsaturated Fat: 10gCholesterol: 100mgSodium: 600mgPotassium: 300mgFiber: 2gSugar: 3gVitamin A: 800IUVitamin C: 1mgCalcium: 400mgIron: 1mg

Notes

For best results, use freshly grated cheese and watch the sauce to prevent boiling, which can cause separation.

Tried this recipe?

Let us know how it was!

World's Best Chocolate Cake That Melts in Your Mouth

May 13, 2026 by Grace Snow Leave a Comment

As I stood in my kitchen, the aroma of melting chocolate wafting around me, I felt an undeniable sense of joy—a moment that could only be captured by whipping up the World’s Best Chocolate Cake. With every rich layer promising an embrace of indulgent flavor, this cake is not only incredibly moist but also easy enough to whip up for any occasion, be it a birthday bash or a cozy weekend treat. It’s the kind of recipe that brings people together, turning ordinary days into celebrations. If you're ready to treat yourself and your loved ones to a delightful culinary experience, let's dive into this chocolatey bliss—because honestly, who can resist a slice of homemade cake that tastes so good it feels like a warm hug? What’s your favorite way to enjoy dessert?

Why Is This Chocolate Cake Irresistible?

Moisture, Flavor, and Simplicity: This cake is a masterpiece, featuring a soft and moist crumb that almost melts in your mouth. Indulgent Layers: Rich chocolate flavor shines through each layer, making it the showstopper at any gathering. Quick to Prepare: With straightforward instructions, you'll have a delicious dessert ready in no time! Versatile Options: Feel free to customize it; whether it’s adding espresso powder or swapping frosting styles, the possibilities are endless. And if you're also a fan of unique desserts, check out our delightful Chocolate Pudding Cake. It’s bound to impress!

World’s Best Chocolate Cake Ingredients

For the Cake

  • All-Purpose Flour – Provides structure and stability; swap for cake flour for a lighter texture.
  • Granulated Sugar – Sweetens the cake and ensures a moist crumb.
  • Cocoa Powder – Imparts a rich chocolate flavor; use Dutch-processed cocoa for deeper taste.
  • Baking Powder & Baking Soda – Leavening agents for rise; ensure freshness for the best results.
  • Salt – Enhances flavor and balances sweetness beautifully.
  • Eggs – Adds moisture and structure; use room temperature for better emulsion.
  • Milk – Contributes to a tender crumb; substitute with almond or oat milk for a dairy-free version.
  • Vegetable Oil – Keeps the cake moist; can be swapped for melted coconut oil.
  • Vanilla Extract – Adds a depth of flavor that complements chocolate beautifully.
  • Boiling Water (or Coffee) – Intensifies the chocolate flavor; coffee is optional, but enhances richness.

For the Frosting

  • Unsalted Butter – Creates a creamy texture for frosting; switch to vegan butter for dairy-free.
  • Powdered Sugar – Sweetens the frosting and gives a smooth, spreadable consistency.
  • Extra Cocoa Powder – Enhances the frosting with even more chocolate flavor.
  • Heavy Cream – Helps achieve a light, fluffy frosting; substitute with whipping cream or almond milk for a lighter option.

Embrace the joy of baking with the World’s Best Chocolate Cake! 🧁

Step‑by‑Step Instructions for World’s Best Chocolate Cake

Step 1: Preheat and Prep
Begin by preheating your oven to 350°F (175°C). As the oven warms up, grease and line two 9-inch round cake pans with parchment paper to prevent sticking. This essential prep step ensures your World’s Best Chocolate Cake will release smoothly once baked, leaving you with perfect rounds to stack and frost later.

Step 2: Mix Dry Ingredients
In a large mixing bowl, combine all the dry ingredients: all-purpose flour, granulated sugar, cocoa powder, baking powder, baking soda, and salt. Whisk them together for about a minute until well blended, ensuring there are no lumps in the cocoa, which will help create that rich chocolate flavor in your cake.

Step 3: Add Wet Ingredients
Next, crack in the eggs and pour in the milk, vegetable oil, and vanilla extract into the dry mixture. Using an electric mixer or a whisk, mix everything together on medium speed for about 2 minutes until the batter is smooth and well combined. The batter should be thick, but pourable, representing the beginning of your chocolate delight.

Step 4: Stir in Boiling Water
Gradually add the boiling water (or brewed coffee) into the batter, stirring gently until completely incorporated. This step not only thin out the mixture but also intensifies the chocolate flavor. You should have a smooth, glossy batter that looks rich and inviting, setting the stage for your decadent World’s Best Chocolate Cake.

Step 5: Bake the Cakes
Divide the batter evenly between the prepared cake pans. Place them in the preheated oven and bake for about 30–35 minutes. To check for doneness, insert a toothpick into the center of the cakes; it should come out clean or with just a few crumbs clinging to it.

Step 6: Cool the Cakes
Once baked, remove the pans from the oven and let them cool in the pans for about 10 minutes. Then, carefully transfer the cakes to a wire rack to cool completely. This step is crucial for preventing any melting during frosting; the cakes need to be completely cool for the best results.

Step 7: Prepare the Frosting
While the cakes cool, make the frosting by beating softened unsalted butter in a mixing bowl until creamy. Gradually add the powdered sugar, cocoa powder, salt, vanilla extract, and heavy cream, blending well until the mixture is light and fluffy, taking about 5–7 minutes.

Step 8: Frost the Cake
Once the cakes are completely cool, place one layer on your serving plate. Generously spread frosting on top, then gently place the second cake layer on top. Use the remaining frosting to coat the sides and top of the cake evenly, creating a luscious, decadent finish to your World’s Best Chocolate Cake.

Step 9: Decorate and Serve
For that extra touch, feel free to decorate your frosted cake with chocolate shavings, sprinkles, or fresh berries just before serving. These simple decorations will add visual interest and enhance your dessert experience. Slice into this gorgeous cake and prepare for delightful reactions!

Tips for the Best Chocolate Cake

  • Room Temperature Ingredients: Make sure all your ingredients, particularly eggs and milk, are at room temperature. This ensures better mixing and helps achieve a smooth batter for the World’s Best Chocolate Cake.

  • Avoid Overmixing: Mix your batter just until everything is combined. Overmixing can lead to a denser texture instead of the light, fluffy cake you desire.

  • Cooling Matters: Allow your cakes to cool completely before frosting. Frosting a warm cake can result in a melty frosting disaster instead of the beautiful layers you’re aiming for.

  • Enhance Flavor: For an enriched chocolate flavor, consider adding a teaspoon of espresso powder to the dry ingredients. It beautifully elevates the chocolate without adding a coffee taste.

  • Decorative Touches: Don’t forget to have fun with garnishes! Fresh berries, chocolate curls, or a dusting of powdered sugar can transform your World’s Best Chocolate Cake into a stunning dessert centerpiece.

World’s Best Chocolate Cake Variations

Feel free to let your creativity shine by customizing this indulgent chocolate cake with delightful twists!

  • Dairy-Free: Substitute milk with almond or oat milk and use vegan butter for the frosting to create a delicious dairy-free dessert.

  • Flour Twist: Swap half of the all-purpose flour for almond flour to bring a nutty flavor and unique texture to your cake.

  • Espresso Boost: Add a tablespoon of espresso powder to your batter to amplify the chocolate richness without a coffee flavor.

  • Frosting Variations: Experiment with different frostings, such as cream cheese or peanut butter, for a fun and unique twist on flavor.

  • Spice it Up: Incorporate a teaspoon of cinnamon or cayenne pepper in the batter for an unexpected warm spice essence.

  • Extra Decadence: For added texture, fold in chocolate chips or chopped nuts into the batter before baking for delightful surprises in each bite.

  • Layered Delight: Create a layered cake by adding a layer of your favorite fruit preserves or whipped cream between the layers for a fresh touch.

  • Seasonal Flavors: Infuse the frosting with seasonal flavors like peppermint extract in winter or fresh zest from citrus fruits in summer for a refreshing lift.

Whichever variation you choose, this cake will surely remain a beloved treat in your home. If you find yourself craving another chocolate experience, don’t forget to check out our mouthwatering Chocolate Pudding Cake.

Make Ahead Options

These irresistible moist chocolate cakes are perfect for meal prep and can save you time during busy weeks! You can bake both cake layers up to 24 hours in advance. Once they are completely cool, wrap each layer in plastic wrap and refrigerate them to maintain their moisture and prevent them from drying out. The frosting can also be prepared ahead of time; simply store it in an airtight container in the fridge for up to 3 days. When you're ready to serve, allow the cakes to come to room temperature, frost them, and add your favorite decorations. This way, you’ll have a stunning World’s Best Chocolate Cake ready to impress with minimal effort!

Storage Tips for World’s Best Chocolate Cake

Room Temperature: Keep leftover slices in an airtight container at room temperature for up to 3 days to maintain their moist texture.

Fridge: For longer freshness, store the cake in the refrigerator, where it can last for up to a week. Just ensure it’s well-covered to prevent drying out.

Freezer: To freeze, wrap the cooled cake layers tightly in plastic wrap and then foil. It can be frozen for up to 3 months. Thaw overnight in the fridge when ready to enjoy!

Reheating: If you prefer warm cake, microwave individual slices for about 10-15 seconds. The World’s Best Chocolate Cake tastes divine when slightly heated!

What to Serve with World’s Best Chocolate Cake?

As you slice into this chocolate marvel, consider side dishes that will elevate your dessert experience to pure bliss.

  • Vanilla Ice Cream: A scoop of rich, creamy vanilla ice cream adds a delightful contrast to the indulgent chocolate flavors, creating an irresistible combination. Picture that creamy texture melting softly against the moist, rich cake—heavenly!

  • Fresh Berries: Bright strawberries, raspberries, or blueberries not only add a pop of color but also introduce a refreshing tartness that perfectly complements the sweetness of the cake. Their juiciness enhances every bite while offering a lightness to balance the richness.

  • Chocolate Ganache: Drizzle some warm chocolate ganache over your slices for an extra layer of chocolate bliss. This rich topping intensifies the indulgence and turns your cake into a truly decadent treat, perfect for special occasions.

  • Coffee or Espresso: Serve alongside a freshly brewed cup of coffee or espresso, as the bitter notes enhance the chocolate richness delightfully. Each sip provides a warm embrace that accentuates the cake’s velvety flavors, creating a comforting after-dinner ritual.

  • Milkshake: A thick, chocolatey milkshake can be a fun pairing that channels childhood nostalgia. It’s a playful contrast to the cake and can brush away any lingering thoughts of fast food with its homemade charm.

  • Toasted Nuts: A sprinkle of toasted walnuts or pecans adds a delightful crunch and earthy flavor, providing a beautiful texture contrast against the soft, moist cake. Pairing this with a scoop of ice cream could turn your dessert into a sophisticated treat!

World’s Best Chocolate Cake Recipe FAQs

What type of cocoa powder should I use?
For the richest flavor, I recommend using Dutch-processed cocoa powder. It has a smoother taste and deeper color, making your cake even more indulgent. If you only have natural cocoa powder, it can work too, but the flavor will be slightly different.

How should I store leftover chocolate cake?
To maintain its moist texture, store leftover slices in an airtight container at room temperature for up to 3 days. If you'd like to keep it longer, refrigerate it, where it can last for up to a week. Just ensure it's well covered to prevent drying out.

Can I freeze the chocolate cake?
Absolutely! To freeze your beautiful cake, wrap the cooled layers tightly in plastic wrap, followed by aluminum foil. This will protect it from freezer burn. You can keep it in the freezer for up to 3 months. When you're ready to enjoy it, simply thaw in the refrigerator overnight!

I’m worried my cake turned out dry. What could’ve gone wrong?
Dry cake can happen for several reasons. First, ensure you’re using room temperature ingredients, as they combine better. Also, be careful not to overmix the batter, as this can develop gluten and create a denser texture. Lastly, check that your oven temperature is accurate; investing in an oven thermometer can help with this!

Are there any dietary considerations I should know?
If you're baking for anyone with allergies, just remember the key ingredients: eggs, dairy, and gluten from the flour. For a dairy-free option, swap regular milk for almond or oat milk and use vegan butter in the frosting. Additionally, if you're looking for a gluten-free version, you can use a gluten-free all-purpose flour blend!

World’s Best Chocolate Cake

World's Best Chocolate Cake That Melts in Your Mouth

Experience the World’s Best Chocolate Cake, a moist and easy dessert perfect for any occasion.
Print Recipe Pin Recipe
Prep Time 15 minutes mins
Cook Time 35 minutes mins
Cooling Time 10 minutes mins
Total Time 1 hour hr
Servings: 12 slices
Course: Dessert
Cuisine: American
Calories: 350
Ingredients Equipment Method Nutrition Notes

Ingredients
  

For the Cake
  • 2 cups All-Purpose Flour Swap for cake flour for a lighter texture.
  • 2 cups Granulated Sugar Ensures a moist crumb.
  • 3/4 cup Cocoa Powder Use Dutch-processed for deeper flavor.
  • 1 tbsp Baking Powder Leavening agent for rise.
  • 1/2 tsp Baking Soda Leavening agent for rise.
  • 1 tsp Salt Enhances flavor.
  • 2 large Eggs Use room temperature.
  • 1 cup Milk Substitute with almond or oat milk for dairy-free.
  • 1/2 cup Vegetable Oil Keep the cake moist.
  • 2 tsp Vanilla Extract Adds depth of flavor.
  • 1 cup Boiling Water Can use brewed coffee for richness.
For the Frosting
  • 1 cup Unsalted Butter Switch to vegan butter for dairy-free.
  • 3 cups Powdered Sugar Sweetens and gives smooth consistency.
  • 1/2 cup Extra Cocoa Powder Enhances chocolate flavor.
  • 1/4 cup Heavy Cream Substitute with whipping cream or almond milk.

Equipment

  • Oven
  • Mixing bowls
  • Electric mixer
  • Whisk
  • measuring cups
  • Measuring Spoons
  • 9-inch Round Cake Pans
  • wire rack

Method
 

Step-by-Step Instructions
  1. Preheat your oven to 350°F (175°C). Grease and line two 9-inch round cake pans with parchment paper.
  2. In a large mixing bowl, combine all the dry ingredients: all-purpose flour, granulated sugar, cocoa powder, baking powder, baking soda, and salt. Whisk them together for about a minute.
  3. Crack in the eggs and pour in the milk, vegetable oil, and vanilla extract into the dry mixture. Mix everything together on medium speed for about 2 minutes until smooth.
  4. Gradually add the boiling water (or brewed coffee) into the batter, stirring gently until completely incorporated.
  5. Divide the batter evenly between the prepared pans. Bake for about 30–35 minutes. Check for doneness with a toothpick.
  6. Cool the cakes in the pans for about 10 minutes, then transfer to a wire rack to cool completely.
  7. Make the frosting by beating softened butter until creamy. Gradually add powdered sugar, cocoa powder, salt, vanilla extract, and heavy cream, blending until light and fluffy.
  8. Once completely cooled, frost the first cake layer, place the second layer on top and coat the sides and top evenly with frosting.
  9. Decorate with chocolate shavings, sprinkles, or fresh berries just before serving.

Nutrition

Serving: 1sliceCalories: 350kcalCarbohydrates: 52gProtein: 4gFat: 14gSaturated Fat: 7gPolyunsaturated Fat: 1gMonounsaturated Fat: 5gCholesterol: 65mgSodium: 300mgPotassium: 180mgFiber: 2gSugar: 30gVitamin A: 500IUCalcium: 100mgIron: 2mg

Notes

For the best results, ensure all ingredients are at room temperature and avoid overmixing to keep the cake light and fluffy.

Tried this recipe?

Let us know how it was!

Heavenly Strawberry Chocolate Shell Cake for Your Sweet Tooth

May 13, 2026 by Grace Snow Leave a Comment

Tucked away in the heart of my kitchen, there's a special synergy that unfolds when fresh strawberries meet luscious chocolate. As I whisk ingredients and layer decadent flavors, the magic begins, and moments come alive with the indulgence of my Strawberry Chocolate Shell Cake. This delightful dessert isn’t just a feast for the eyes; it’s impressively simple to prepare, making it the perfect centerpiece for gatherings or a cozy night in. With the rich chocolate cake blanketing juicy, macerated strawberries and enveloped in a glossy chocolate shell, you’ll find this cake is both a crowd-pleaser and a wonderful way to elevate your dessert game. Plus, it offers options for gluten-free or vegan variations, so everyone can enjoy! Are you ready to dive into a slice of this sweet temptation?

Why is this cake a must-try?

Decadent, Rich Layers: The indulgent combination of moist chocolate cake and fresh strawberries creates a flavor explosion that is both comforting and luxurious.

Versatile Options: Want a gluten-free twist? No problem! Just swap in gluten-free flour or try a vegan version with simple substitutes.

Stunning Presentation: The glossy chocolate shell wraps the cake in elegance, making it the perfect centerpiece for any gathering.

Easy to Make: Don’t let the beauty intimidate you; this recipe is straightforward and requires only basic baking skills!

Comforting and Crowd-Pleasing: This cake is sure to impress family and friends alike, turning any occasion into a special celebration. Plus, for more chocolate delights, check out my Chocolate Pudding Cake!

Strawberry Chocolate Shell Cake Ingredients

Get ready to create a dessert masterpiece with this heavenly Strawberry Chocolate Shell Cake!

For the Cake

  • All-Purpose Flour – Provides structure and texture; gluten-free flour can work as a substitute for a gluten-free version.
  • Granulated Sugar – Sweetens the cake; try brown sugar for a deeper flavor.
  • Unsweetened Cocoa Powder – Delivers rich chocolate flavor; Dutch-process cocoa offers a smoother taste.
  • Baking Powder – Acts as a leavening agent; ensure it's fresh for optimal results.
  • Baking Soda – Provides additional leavening; can be omitted if using self-rising flour.
  • Salt – Enhances flavor; sea salt is a great alternative for a subtle difference.
  • Buttermilk – Adds moisture and richness; substitute with yogurt or milk mixed with vinegar for a vegan option.
  • Vegetable Oil – Keeps the cake moist; melted coconut oil lends a tropical twist.
  • Eggs – Contributes structure and richness; use flaxseed meal mixed with water for a vegan alternative.
  • Vanilla Extract – Enhances flavor; almond extract can provide a delightful variation.
  • Boiling Water – Intensifies chocolate flavor and ensures a tender crumb (not substitutable).

For the Filling

  • Fresh Strawberries – Provide a juicy filling; swap in other berries like raspberries or blueberries for variety.
  • Lemon Juice – Brightens the flavors of the strawberry filling; lime juice can be an appropriate substitute.

For the Chocolate Shell

  • Dark Chocolate – Creates a decadent chocolate shell; use semi-sweet chocolate for a different taste if desired.
  • Coconut Oil – Adds sheen and smoothness to the shell; vegetable oil can replace it, but may affect texture.

Prepare to wow your taste buds and your guests with this delightful Strawberry Chocolate Shell Cake!

Step‑by‑Step Instructions for Strawberry Chocolate Shell Cake

Step 1: Preheat the Oven
Begin by preheating your oven to 350°F (175°C). While the oven heats, take the time to grease two 9-inch round cake pans with vegetable oil or butter. This ensures your moist chocolate cake will release easily once baked. Set the pans aside, ready to receive your rich cake batter.

Step 2: Mix Dry Ingredients
In a large mixing bowl, combine your dry ingredients: all-purpose flour, granulated sugar, unsweetened cocoa powder, baking powder, baking soda, and salt. Whisk them together vigorously until well blended, making sure there are no lumps. This step is vital for creating a delightful texture in your Strawberry Chocolate Shell Cake.

Step 3: Combine Wet Ingredients
In a separate bowl, whisk together the wet ingredients: buttermilk, vegetable oil, eggs, and vanilla extract until smooth and well-combined. Take a moment to appreciate the fragrant aroma as you mix. Once combined, gently pour this mixture into your bowl of dry ingredients, ensuring a seamless transition between the two mixtures for a uniform batter.

Step 4: Incorporate Boiling Water
Gradually stir in the boiling water to your mixture, ensuring an even blend. This crucial step enhances the chocolate flavor and creates a tender crumb. The batter will be thin, but do not worry! Once evenly mixed, you will have a luscious chocolate cake batter ready for the oven.

Step 5: Bake the Cakes
Divide the cake batter evenly between the two prepared pans. Pop the pans into your preheated oven and bake for 30–35 minutes. Keep a close eye on them; you’ll know they are done when a toothpick inserted in the center comes out clean. This is the moment where the anticipation starts to build for your Strawberry Chocolate Shell Cake.

Step 6: Macerate the Strawberries
While the cakes bake, prepare the filling. Slice fresh strawberries and place them in a bowl, then sprinkle with sugar and lemon juice. Allow them to macerate for 15-20 minutes. This process brings out the sweetness and juices, creating a delightful syrup that enhances the cake's flavor.

Step 7: Layer the Cakes
Once your cakes are baked and cooled, gently remove them from the pans. Place one cake layer on your serving platter, spreading a generous layer of the macerated strawberries and syrup on top. Carefully add the second layer of cake and chill in the refrigerator for about 30 minutes to set before adding the chocolate shell.

Step 8: Prepare the Chocolate Shell
Melt the dark chocolate and coconut oil together in a heatproof bowl over simmering water or in the microwave, stirring until smooth. Allow the mixture to cool slightly before pouring over the chilled layered cake. This step adds a beautiful, glossy finish to your Strawberry Chocolate Shell Cake.

Step 9: Set and Serve
After pouring the chocolate over the cake, let it set at room temperature for 15-20 minutes. You’ll notice the shiny shell forming beautifully. Once fully set, slice into the cake to reveal the luscious layers and serve this indulgent Strawberry Chocolate Shell Cake at your next gathering!

Strawberry Chocolate Shell Cake Variations

Feel free to make this cake your own with these fun twists and substitutions!

  • Gluten-Free: Substitute all-purpose flour with a 1:1 gluten-free flour blend for a delicious, inclusive treat.

  • Vegan Delight: Swap eggs with flaxseed meal mixed with water and use almond milk instead of buttermilk for a vegan twist. Your guests won’t even notice!

  • Berry Bliss: Instead of strawberries, try using raspberries, blueberries, or a mix for a delightful berry medley that brightens the flavor profile.

  • Citrus Zing: Add grated orange or lime zest to the macerated strawberries for a refreshing citrus boost that complements the sweetness of the fruit beautifully.

  • Nutty Crunch: Fold in chopped walnuts or pecans into the cake batter for added texture and a nutty flavor that pairs beautifully with chocolate.

  • White Chocolate Shell: For a lighter dessert option, experiment with a white chocolate shell instead of dark chocolate for a sweet surprise.

  • Spicy Kick: Add a dash of cayenne pepper or cinnamon to the cake batter for a hint of spice that enhances the chocolate flavor in unexpected ways.

  • Chocolate Variation: Substitute dark chocolate with semi-sweet chocolate for a slightly different flavor, allowing for more sweetness to shine through.

Explore these variations based on your preferences, and don’t forget to check out my other delightful recipes like Chocolate Pudding Cake for more dessert inspiration!

Expert Tips for Strawberry Chocolate Shell Cake

  • Ingredient Temperature: Ensure all ingredients are at room temperature for improved mixing and fluffiness, resulting in a light and airy cake.
  • Chill Before Chocolate: Chill the cake layers before pouring the chocolate shell to maintain a glossy finish and beautiful texture when serving.
  • Doneness Check: Use a toothpick to check doneness; if it comes out clean, the cakes are ready—this prevents over-baking a delicate chocolate cake.
  • Macerate Thoroughly: Allow strawberries to macerate fully for at least 20 minutes to enhance sweetness and create a syrup that adds depth to the cake.
  • Slow Chocolate Pouring: When pouring the chocolate shell, do so slowly for a smooth, even coat, ensuring that your Strawberry Chocolate Shell Cake looks as perfect as it tastes!

Make Ahead Options

These gorgeous Strawberry Chocolate Shell Cakes are perfect for busy home cooks wanting to save time on special occasions! You can prepare the chocolate cake layers up to 24 hours in advance; simply bake, cool, and wrap them tightly in plastic wrap to maintain moisture. The macerated strawberries can also be prepped and refrigerated for up to 3 days, allowing the flavors to deepen. However, it's best to wait to pour the chocolate shell on top until just before serving, ensuring that the glossy finish remains pristine. When you're ready to serve, layer the chilled cakes with strawberries and then pour the melted chocolate over for an irresistibly fresh, indulgent treat everyone will love!

How to Store and Freeze Strawberry Chocolate Shell Cake

Fridge: Store your Strawberry Chocolate Shell Cake in an airtight container in the refrigerator for up to 3 days to keep it fresh and moist.

Freezer: For longer storage, slice the cake and wrap each piece tightly in plastic wrap, then place in a freezer-safe bag. It can be frozen for up to 1 month.

Thawing: To enjoy, simply transfer frozen slices to the fridge to thaw overnight or let them sit at room temperature for a couple of hours before serving.

Reheating: If desired, warm individual slices in the microwave for 10-15 seconds before enjoying to bring back some of its delightful fudginess!

What to Serve with Indulgent Strawberry Chocolate Shell Cake

Elevate your dessert experience by pairing this exquisite cake with delightful companions that enhance its flavors and textures.

  • Whipped Cream: A dollop of freshly whipped cream adds a light, creamy texture that beautifully balances the rich chocolate and fruity filling.

  • Vanilla Ice Cream: The cool creaminess of vanilla ice cream creates a delightful contrast with the warm chocolate shell, making each bite irresistible.

  • Fresh Berries: Serve with a side of assorted fresh berries to introduce a pop of color and bright, refreshing flavors that enhance the strawberry elements.

  • Chocolate Drizzle: A drizzle of warm chocolate sauce over the cake enhances the chocolate experience and provides an extra layer of indulgence.

  • Espresso or Coffee: Pairing your cake with a rich cup of espresso or a warm coffee complements the chocolate and enhances the dessert’s sumptuousness.

  • Mint Leaves: Fresh mint leaves sprinkled on top not only add a splash of color but also provide a refreshing burst that cuts through the sweetness.

  • Fancy Dessert Wine: A glass of sweet dessert wine or champagne pairs wonderfully, elevating the cake's richness and making every bite feel like a special occasion.

For a treat that’s truly decadent, consider experimenting with these pairings to find your perfect match alongside the Indulgent Strawberry Chocolate Shell Cake!

Strawberry Chocolate Shell Cake Recipe FAQs

What kind of strawberries should I use for the filling?
Absolutely! It's best to use fresh, ripe strawberries that are bright red and sweet. Look for berries that are firm and free from dark spots or bruising. If fresh strawberries are unavailable, you can substitute them with other berries like raspberries or blueberries for a delightful variation.

How should I store my Strawberry Chocolate Shell Cake?
To keep your cake fresh, store it in an airtight container in the refrigerator for up to 3 days. This will help maintain its moisture and flavor. If you'd like to preserve the cake for a longer time, consider freezing it.

How can I freeze the Strawberry Chocolate Shell Cake?
To freeze, slice the cake into portions and wrap each slice tightly in plastic wrap. Then, place them in a freezer-safe bag or container. This will help prevent freezer burn and keep the cake fresh for up to 1 month. When you're ready to enjoy, simply transfer the slices to the fridge to thaw overnight or let them sit out at room temperature for a couple of hours.

What can I do if my cake layers are too dense?
If your strawberry chocolate shell cake turns out dense, it might be due to over-mixing the batter. To troubleshoot, make sure to mix the wet and dry ingredients just until combined. Additionally, ensure your leavening agents (baking powder and baking soda) are fresh and properly measured. If you feel your cake is still too heavy, try adding a bit more boiling water to loosen the batter a little more before baking.

Can I make a vegan version of the Strawberry Chocolate Shell Cake?
Very! To make this cake vegan, substitute the eggs with a flaxseed meal mixture (1 tablespoon of flaxseed meal plus 2.5 tablespoons of water per egg), use almond milk or coconut milk mixed with vinegar instead of buttermilk, and replace vegetable oil with melted coconut oil. This way, you'll have a deliciously rich vegan dessert that everyone can enjoy!

Strawberry Chocolate Shell Cake

Heavenly Strawberry Chocolate Shell Cake for Your Sweet Tooth

A delicious and easy-to-make Strawberry Chocolate Shell Cake that pleases every sweet tooth.
Print Recipe Pin Recipe
Prep Time 30 minutes mins
Cook Time 35 minutes mins
Chilling Time 30 minutes mins
Total Time 1 hour hr 35 minutes mins
Servings: 12 slices
Course: Dessert
Cuisine: American
Calories: 350
Ingredients Equipment Method Nutrition Notes

Ingredients
  

For the Cake
  • 2 cups All-Purpose Flour gluten-free flour can be substituted
  • 1.5 cups Granulated Sugar brown sugar can be used for deeper flavor
  • 0.75 cups Unsweetened Cocoa Powder Dutch-process cocoa offers a smoother taste
  • 1.5 teaspoons Baking Powder ensure it's fresh for optimal results
  • 1 teaspoon Baking Soda omit if using self-rising flour
  • 0.5 teaspoon Salt sea salt is a good alternative
  • 1 cup Buttermilk can be substituted with yogurt or milk mixed with vinegar
  • 0.5 cups Vegetable Oil melted coconut oil can be used
  • 2 large Eggs use flaxseed meal mixed with water for a vegan alternative
  • 2 teaspoons Vanilla Extract almond extract can be a delightful variation
  • 1 cup Boiling Water not substitutable
For the Filling
  • 2 cups Fresh Strawberries can substitute with raspberries or blueberries
  • 1 tablespoon Lemon Juice lime juice can be an appropriate substitute
For the Chocolate Shell
  • 10 ounces Dark Chocolate semi-sweet chocolate can be used
  • 2 tablespoons Coconut Oil vegetable oil may affect texture

Equipment

  • 9-inch Round Cake Pans
  • Mixing bowls
  • Whisk
  • Heatproof bowl
  • Microwave

Method
 

Step-by-Step Instructions
  1. Preheat your oven to 350°F (175°C) and grease two 9-inch round cake pans.
  2. In a large mixing bowl, combine all-purpose flour, granulated sugar, cocoa powder, baking powder, baking soda, and salt. Whisk until well blended.
  3. In a separate bowl, whisk together buttermilk, vegetable oil, eggs, and vanilla extract until smooth.
  4. Pour the wet mixture into the dry ingredients and mix to form a batter. Gradually stir in boiling water.
  5. Divide the batter between the prepared pans and bake for 30-35 minutes or until a toothpick comes out clean.
  6. While the cakes are baking, slice fresh strawberries and mix with sugar and lemon juice. Allow to macerate for 15-20 minutes.
  7. After baking, cool the cakes, then remove from pans. Layer them with the macerated strawberries in between.
  8. Melt dark chocolate and coconut oil together, then pour over the chilled layered cake.
  9. Let the chocolate shell set at room temperature for 15-20 minutes before slicing and serving.

Nutrition

Serving: 1sliceCalories: 350kcalCarbohydrates: 45gProtein: 4gFat: 18gSaturated Fat: 10gPolyunsaturated Fat: 1gMonounsaturated Fat: 7gCholesterol: 50mgSodium: 230mgPotassium: 250mgFiber: 3gSugar: 25gVitamin A: 200IUVitamin C: 10mgCalcium: 50mgIron: 2mg

Notes

Ensure all ingredients are at room temperature for best results. Chilling cake layers before pouring chocolate will enhance its glossy finish.

Tried this recipe?

Let us know how it was!

Air Fryer Tilapia: Quick, Crispy, and Flavor-Packed Delight

May 13, 2026 by Grace Snow Leave a Comment

The moment I pressed the button on my air fryer, a wave of anticipation washed over me. In just 15 minutes, I would transform mild tilapia into a crispy, flaky delight that dances with deliciousness! This Air Fryer Tilapia recipe is not just quick—it’s an effortless way to enjoy a healthy meal packed with omega-3 fatty acids and customizable flavors to suit any palate. Whether you’re looking to impress guests or simply need a satisfying weeknight dinner, this dish has your back. The beauty of tilapia lies in its versatility, soaking up whatever spices you choose to highlight, from zesty lemon to smoky paprika. Did I mention it’s freezer-friendly? You can prepare a batch and always have a flavorful meal on hand. So, are you ready to elevate your cooking game with this easy and delightful recipe? Let's dive in!

Why is Air Fryer Tilapia a Game Changer?

Quick and Easy: In just 15 minutes, you can whip up a dinner that feels gourmet without the hassle. Perfect for those busy weekdays!

Health Benefits: Packed with omega-3 fatty acids, this dish is not only delicious but also nutritious—great for heart health.

Customizable Flavors: Dress it up with your favorite seasonings; whether you go for zesty lemon or spicy Cajun, this tilapia can take it all!

Crispy Texture: Expect a lovely, crispy exterior while the inside remains tender and flaky, offering a perfect balance that’s hard to resist.

Freezer-Friendly: Prep extra fillets and freeze for quick meals; simply reheat in the air fryer for that fresh-cooked taste.

Ready to take your meal prep to the next level? Pair with cilantro lime quinoa or some garlic roasted asparagus for a complete meal!

Air Fryer Tilapia Ingredients

For the Fish
• Tilapia Fillets – Rich in omega-3 fatty acids, fresh or frozen tilapia works perfectly for this dish.
• Olive Oil – A light spray ensures moisture and crispiness without excess grease.

For the Seasoning
• Paprika – Adds a mild sweetness and vibrant color; smoked paprika elevates the flavor profile.
• Garlic Powder – Infuses savory depth; feel free to swap with fresh garlic for a more intense taste.
• Onion Powder – Enhances the overall flavor; finely diced onion is a great substitute if you're feeling fresh.
• Salt – Key for elevating flavors; remember to adjust according to your dietary needs.
• Black Pepper – Introduces a touch of mild heat; you can omit it for a lighter option.

For Garnish
• Fresh Chopped Parsley – This optional garnish adds a burst of color and freshness to your serving.
• Lemon Juice – A squeeze of lemon brightens the dish and is highly recommended for a refreshing kick.

This Air Fryer Tilapia is not only quick to prepare but also offers endless possibilities for customizing flavors to suit any taste. Happy cooking!

Step‑by‑Step Instructions for Air Fryer Tilapia

Step 1: Prepare Seasoning
In a small bowl, mix together paprika, garlic powder, onion powder, salt, and black pepper to create your seasoning blend. This vibrant mixture will coat the fillets, enhancing the flavor of your Air Fryer Tilapia. Set it aside, ready to bring deliciousness to your fish!

Step 2: Preheat Air Fryer
Preheat your air fryer to 400°F (200°C). This step is crucial for achieving that crispy texture we all crave. Allow about 5 minutes for the air fryer to reach the desired temperature while you prepare the tilapia fillets.

Step 3: Coat Fillets
Take your tilapia fillets and lightly brush or spray olive oil on both sides. This coating ensures that the fish cooks evenly and stays moist while achieving that delightful crispiness. You’re already on your way to a satisfying meal!

Step 4: Season Fillets
Sprinkle the seasoning mixture generously over both sides of the tilapia fillets. Ensure that the spices cover the surface evenly for maximum flavor infusion. This step elevates your Air Fryer Tilapia to a whole new level of deliciousness!

Step 5: Arrange in Air Fryer Basket
Place the seasoned fillets in the air fryer basket in a single layer, making sure they don’t overlap. This allows hot air to circulate and cook the fish evenly, which is essential for that perfect flaky texture.

Step 6: Air Fry
Cook the tilapia for 8-10 minutes, or until the fish easily flakes with a fork and reaches an internal temperature of 145°F (63°C). Keep an eye on it as it cooks – you want that gorgeous golden-brown color to indicate it’s ready!

Step 7: Garnish and Serve
Once cooked, carefully remove the tilapia from the air fryer and place it on a serving plate. Finish with a sprinkle of fresh chopped parsley and a squeeze of lemon juice for a zesty, refreshing touch. Your Air Fryer Tilapia is now ready to shine on your table!

Air Fryer Tilapia Variations & Substitutions

Feel free to get creative and customize this dish to suit your preferences and pantry staples!

  • Different Fish: Swap tilapia for cod or haddock to explore new flavors and textures. Each fish brings its own character, creating delightful variations.

  • Herbaceous Twist: Replace dried spices with fresh herbs like dill or cilantro for an aromatic freshness that brightens the dish. It’s perfect for when you want that garden-fresh sensation.

  • Flavorful Seasonings: Change it up by using a Cajun or curry seasoning blend. Each spice mix offers a delicious adventure, making the tilapia uniquely your own.

  • Vegetable Addition: Toss in some sliced bell peppers or zucchini with the tilapia in the air fryer. Not only does it add color, but it also boosts the nutritional value of your meal.

  • Crunchy Texture: To create an extra crispy layer, coat the fillets with panko breadcrumbs before air frying. This adds a delightful crunch that everyone will love.

  • Zesty Alternatives: Use lime juice instead of lemon for a tangy twist that pairs wonderfully with fish. This brightens up the dish and adds an unexpected kick!

  • Avocado Oil: For higher smoke points and a subtle flavor, consider swapping olive oil with avocado oil while ensuring perfect crispiness.

  • Garnish Variations: Instead of parsley, try dill or chives for a fresh pop of color and flavor as a garnish. Both offer a unique twist to finish your dish beautifully.

Experimenting with your air fryer fish options is part of the fun, so let creativity guide your cooking journey!

Expert Tips for Air Fryer Tilapia

Prepare the Fillets: Make sure to pat frozen tilapia fillets dry before seasoning; this helps spices adhere better and ensures crispness.

Don’t Overcrowd: Avoid placing too many fillets in the air fryer at once. Overlapping can lead to uneven cooking and a soggy texture.

Check Temperature: Use a food thermometer to ensure the tilapia reaches an internal temperature of 145°F. This guarantees a safe and perfectly cooked fish.

Customize Seasoning: Feel free to adjust the seasoning to your taste. Experiment with different spice blends for a unique flavor profile with your Air Fryer Tilapia.

Reheat for Freshness: Store any leftovers in an airtight container. To maintain crispiness, reheat in the air fryer instead of the microwave.

What to Serve with 15-Minute Air Fryer Tilapia

Creating a full meal around your crispy tilapia can turn dinner into a delightful experience that your family will look forward to!

  • Garlic Roasted Asparagus: The earthy flavors of asparagus drizzled with garlic oil provide a crunchy contrast, enhancing the fish's mild taste.

  • Cilantro Lime Quinoa: This bright and zesty side dish pairs beautifully with tilapia, offering a refreshing bite that complements the fish's delicate flavors.

  • Mushroom Rice: Rich and savory, this creamy rice dish adds a comforting base that balances the lightness of the tilapia, creating a satisfying meal.

  • Caesar Salad: A crunchy, crisp mix with a creamy dressing makes for a classic pairing; the bold flavors enhance the tilapia without overpowering it.

  • Roasted Sweet Potatoes: Their natural sweetness and crispy texture contrast wonderfully with the seasoned fish, adding color and nutrition to your plate.

  • Lemon Herb Couscous: Light and fluffy, this dish infused with herbs mirrors the lemony brightness of tilapia, creating harmony in every forkful.

  • Chardonnay or Sauvignon Blanc: Both white wines are perfect accompaniments, enhancing the meal's flavors while providing a soothing sip alongside dinner.

  • Key Lime Pie: For a refreshing dessert, this tart pie echoes the citrus notes in your tilapia while offering a sweet ending to your meal.

How to Store and Freeze Air Fryer Tilapia

Fridge: Store any cooked Air Fryer Tilapia in an airtight container for up to 3 days. When ready to enjoy, simply reheat it to restore that delightful crispiness.

Freezer: For longer storage, you can freeze the cooked fillets for up to 2 months. Seal them well to prevent freezer burn, and reheat directly from frozen in the air fryer.

Reheating: To maintain that perfect texture, always reheat in the air fryer. Aim for about 5-7 minutes at 400°F until heated through and crispy again.

Thawing: If frozen, thaw in the fridge overnight for best results before reheating, if time allows; this keeps the tilapia juicy and flavorful.

Make Ahead Options

These Air Fryer Tilapia fillets are perfect for meal prep enthusiasts! You can season the fish up to 24 hours in advance, allowing the spices to deeply infuse flavor. First, prepare the seasoning mixture and coat the tilapia fillets with olive oil; then, place the fillets in an airtight container and refrigerate. To maintain quality, avoid overcrowding to ensure even flavor absorption. When you’re ready to serve, simply preheat your air fryer, arrange the fillets in a single layer, and air fry for 8-10 minutes until they flake easily with a fork. This way, you’ll enjoy a quick and healthy dinner with minimal effort!

Air Fryer Tilapia Recipe FAQs

How do I choose ripe tilapia fillets?
Absolutely! When selecting tilapia fillets, look for ones that are fresh and have a mild ocean scent. The flesh should be translucent with a firm texture and should bounce back when pressed. Avoid fillets that are discolored, dry, or have dark spots; these are indicators of spoilage.

What is the best way to store leftover Air Fryer Tilapia?
You can store cooked Air Fryer Tilapia in an airtight container in the fridge for up to 3 days. Make sure it's well-sealed to prevent it from drying out. When you're ready to enjoy it again, reheat in the air fryer for 5-7 minutes to restore that wonderful crispiness.

Can I freeze Air Fryer Tilapia?
Yes, you can! For freezing, allow the cooked tilapia to cool completely, then wrap it tightly in plastic wrap followed by aluminum foil or place it in a freezer-safe bag. It will maintain its quality for up to 2 months. When you're ready to eat, simply reheat directly from the freezer in the air fryer for a quick meal!

What should I do if my tilapia is overcooked?
If you find that your tilapia is overcooked and dry, don’t worry! Try serving it with a lemon or a creamy sauce, like a garlic butter sauce, to add moisture and flavor back into the dish. For the future, check the fish at the 8-minute mark, and use a food thermometer to ensure it reaches just 145°F for perfectly flaked fish.

Is Air Fryer Tilapia safe for pets or people with allergies?
Certainly! Generally, plain tilapia is safe for dogs; however, watch for any seasoning that may be harmful to pets, such as excessive salt or garlic. For those with food allergies, be cautious with any added ingredients; always tailor the recipe to fit dietary restrictions, avoiding any known allergens like certain spices or oils.

What if my tilapia doesn't get crispy in the air fryer?
If your tilapia isn’t achieving that desired crispiness, ensure you're not overcrowding the air fryer basket, as this will trap steam and lead to sogginess. Pat dry frozen fillets before seasoning; moisture can hinder crispiness. Preheating the air fryer to the necessary temperature is crucial, so never skip this step for best results!

Air Fryer Tilapia

Air Fryer Tilapia: Quick, Crispy, and Flavor-Packed Delight

This Air Fryer Tilapia recipe is quick, healthy, and packed with flavor, featuring crispy tilapia fillets in just 15 minutes.
Print Recipe Pin Recipe
Prep Time 5 minutes mins
Cook Time 10 minutes mins
Total Time 15 minutes mins
Servings: 4 fillets
Course: Dinner
Cuisine: American
Calories: 220
Ingredients Equipment Method Nutrition Notes

Ingredients
  

For the Fish
  • 4 fillets Tilapia fresh or frozen
  • 1 tablespoon Olive Oil light spray
For the Seasoning
  • 1 teaspoon Paprika smoked for better flavor
  • 1 teaspoon Garlic Powder can substitute with fresh garlic
  • 1 teaspoon Onion Powder or finely diced onion
  • 1 teaspoon Salt adjust to taste
  • 1/2 teaspoon Black Pepper omit for lighter option
For Garnish
  • 1 tablespoon Fresh Chopped Parsley optional
  • 1 tablespoon Lemon Juice for a refreshing kick

Equipment

  • Air fryer

Method
 

Step‑by‑Step Instructions
  1. Mix together paprika, garlic powder, onion powder, salt, and black pepper for the seasoning blend.
  2. Preheat the air fryer to 400°F (200°C) for about 5 minutes.
  3. Brush or spray olive oil on both sides of the tilapia fillets.
  4. Generously sprinkle the seasoning mixture over both sides of the tilapia fillets.
  5. Arrange the seasoned fillets in a single layer in the air fryer basket.
  6. Cook the tilapia for 8-10 minutes, or until it easily flakes with a fork.
  7. Garnish with chopped parsley and lemon juice before serving.

Nutrition

Serving: 1filletCalories: 220kcalCarbohydrates: 3gProtein: 30gFat: 10gSaturated Fat: 1.5gPolyunsaturated Fat: 2gMonounsaturated Fat: 7gCholesterol: 60mgSodium: 300mgPotassium: 500mgVitamin A: 500IUVitamin C: 5mgCalcium: 20mgIron: 1mg

Notes

This Air Fryer Tilapia is versatile and can be paired with various sides like quinoa or asparagus. Great for meal prep and freezer-friendly!

Tried this recipe?

Let us know how it was!

Creamy Salmon Fettuccine Alfredo with a Zesty Twist

May 13, 2026 by Grace Snow Leave a Comment

The moment I seasoned that fresh salmon with a sprinkle of salt and pepper, a wave of anticipation washed over me. It’s amazing how simple ingredients can come together to create something truly magical. This Creamy Lemon-Dill Salmon Fettuccine Alfredo is a delightful twist on classic comfort food, perfect for busy weeknights or cozy family gatherings. Not only is it family-friendly, but it also delivers indulgent flavors while packing in the healthy omega-3 fats from the salmon. It's a fast and elegant dish that transforms everyday meals into something special. Curious about how the bright notes of lemon and the aromatic drape of dill elevate this creamy pasta? Keep reading—your new favorite dinner awaits!

Why is this Salmon Fettuccine Alfredo a Must-Try?

Comforting and Indulgent: This dish wraps you in warmth with its creamy texture and zesty flavors, making it a perfect choice for family dinners or cozy nights in.

Flavor Explosion: The combination of lemon and dill enhances the rich Alfredo sauce, creating a refreshing twist on a classic favorite that your taste buds will adore.

Versatile Adaptations: Feel free to substitute proteins or pasta types—from succulent shrimp to whole wheat options, this recipe is as flexible as it is delicious!

Quick and Easy: In just 30 minutes, you can plate this impressive meal, making it ideal for busy weeknights; it's a fantastic alternative to fast food.

Healthy Goodness: Packed with omega-3 fatty acids from salmon, this recipe not only satisfies your cravings but also supports your health, making it a smart choice for the family.

Elevate your dinner routine by pairing this delightful dish with a crisp green salad or consider trying my One Pot Salmon for another quick meal option that's sure to impress!

Ingredients for Salmon Fettuccine Alfredo

For the Salmon
• Salmon fillets – Main protein providing lean, heart-healthy omega-3 fatty acids. Can substitute with frozen salmon if thawed properly.
• Olive oil – Enhances flavor while cooking.
• Salt – Essential for seasoning salmon and pasta.
• Black pepper – Adds spice to the dish.
• Garlic powder – Contributes depth of flavor to salmon.

For the Fettuccine
• Fettuccine pasta – Base of the dish providing structure and texture. Can experiment with whole wheat or gluten-free pasta.

For the Alfredo Sauce
• Unsalted butter – Forms the foundation of the Alfredo sauce’s creamy texture.
• Garlic (minced) – Gives aromatic flavor in the Alfredo sauce.
• Heavy cream – Creates the rich, luxurious sauce; essential for desired creaminess.
• Parmesan cheese (freshly grated) – Introduces umami and creaminess; pre-shredded cheese may affect sauce texture due to additives.
• Lemon juice – Brightens the flavors in both salmon and sauce.
• Fresh dill (chopped) – Adds freshness and an aromatic quality; can substitute with dried dill (adjust amount).
• Pasta water – Used to adjust sauce consistency; adds starch for creamier texture.

Step‑by‑Step Instructions for Creamy Lemon-Dill Salmon Fettuccine Alfredo

Step 1: Prepare the Salmon
Start by patting the salmon fillets dry with a paper towel and seasoning both sides with salt, pepper, and garlic powder. In a large skillet, heat 2 tablespoons of olive oil over medium heat. Once the oil shimmers, place the salmon skin-side down in the skillet and sear for 4 to 6 minutes until the skin is crispy and the salmon is halfway cooked through. Carefully flip it over and cook for another 3 to 5 minutes until the fish is flaky and opaque. Squeeze fresh lemon juice over the top.

Step 2: Cook the Fettuccine
While the salmon is cooking, bring a large pot of salted water to a rolling boil. Add the fettuccine pasta and cook according to package directions, usually about 10 to 12 minutes, until al dente. Once cooked, reserve about 1 cup of the pasta water, then drain the fettuccine in a colander. Set aside the pasta and allow it to cool slightly, ensuring it’s ready to coat in the creamy Alfredo sauce.

Step 3: Make the Alfredo Sauce
In the same skillet used for the salmon, melt 4 tablespoons of unsalted butter over medium heat. Add 2 cloves of minced garlic and sauté until fragrant, about 30 seconds, being careful not to let it brown. Slowly pour in 1 cup of heavy cream and bring the mixture to a gentle simmer, stirring frequently to avoid boiling. Gradually whisk in 1 cup of freshly grated Parmesan cheese until the sauce is smooth and creamy, adjusting the heat as needed.

Step 4: Combine the Ingredients
Once the Alfredo sauce is ready, squeeze in the remaining lemon juice and fold in 2 tablespoons of chopped fresh dill. Taste the sauce and adjust seasoning with more salt and pepper if desired. Gently add the drained fettuccine to the sauce, tossing to ensure every strand is beautifully coated. Add flaked pieces of the cooked salmon on top, stirring gently to combine without breaking up the salmon too much.

Step 5: Serve and Garnish
Once fully combined, transfer the creamy Lemon-Dill Salmon Fettuccine Alfredo to serving plates. For an elegant touch, garnish each serving with a sprinkle of extra freshly chopped dill and additional grated Parmesan cheese. Serve immediately while hot, allowing everyone to enjoy the delightful creamy goodness and fresh flavors of this comforting pasta dish.

How to Store and Freeze Salmon Fettuccine Alfredo

Fridge: Keep leftovers in an airtight container for up to 2-3 days. The creamy texture may change slightly, but the flavors will still shine brightly.

Freezer: For longer storage, freeze the Salmon Fettuccine Alfredo in a freezer-safe container for up to 1 month. When ready to enjoy, thaw overnight in the refrigerator.

Reheating: Gently reheat on the stovetop over low heat, adding a splash of heavy cream or milk to restore the creamy consistency. Stir frequently until warmed through.

Avoids Food Waste: If you have extra sauce, store it separately from the pasta to maintain the best texture when serving later.

Salmon Fettuccine Alfredo Variations

Feel free to get creative and make this dish your own with these exciting twists!

  • Protein Swap: Substitute salmon with grilled chicken or shrimp for a delightful variation. Both options pair wonderfully with the creamy sauce, offering a new flavor profile.

  • Whole Wheat or Gluten-Free: For a healthier option, use whole wheat or gluten-free fettuccine. Not only do they provide a unique texture, but they also meet dietary preferences while still embracing that creamy goodness.

  • Vegetable Boost: Add seasonal vegetables like asparagus or spinach to increase the nutritional value. They not only enhance flavor but add beautiful color to your dish!

  • Herb Variations: Experiment with different fresh herbs like basil or parsley instead of dill. Fresh basil brings a sweet yet peppery flavor, while parsley adds a bright touch.

  • Creamy Alternatives: Go for a lighter version by replacing heavy cream with Greek yogurt or reduced-fat sour cream. This swap adds protein and tang while keeping the creaminess.

  • Cheesy Upgrades: Try mixing different cheeses, like Gruyère or goat cheese, for an unexpected flavor twist. These options lend their unique character to the sauce, elevating every bite.

  • Adding Heat: For a spicy kick, sprinkle in some red pepper flakes or serve with a side of chili oil. This fiery addition can turn up the flavor while contrasting nicely with the creamy base.

  • Citrus Zing: Boost the lemony flavor by adding lemon zest to the sauce. It brightens up the dish and enhances the freshness of your Salmon Fettuccine Alfredo.

If you're looking for inspiration, don’t forget to check out my One Pot Salmon for another fantastic and easy weeknight meal option bursting with flavor!

Expert Tips for Salmon Fettuccine Alfredo

  • Fresh Cheese Only: Always use freshly grated Parmesan cheese for the best sauce texture and flavor. Pre-shredded cheese can lead to clumping.

  • Gentle Simmer: Avoid boiling the Alfredo sauce vigorously. A gentle simmer helps to keep the sauce creamy and prevents separation.

  • Perfectly Cooked Salmon: Make sure the salmon is cooked to the right tenderness. Undercook slightly to keep it flaky and moist for your Salmon Fettuccine Alfredo.

  • Save Pasta Water: Always reserve some pasta water before draining. Adding a splash helps adjust the sauce's consistency for a creamier finish.

  • Right Timing for Dill: If using dried dill, incorporate it earlier in the sauce cooking process to enhance its flavor as it hydrates fully.

Make Ahead Options

These Creamy Lemon-Dill Salmon Fettuccine Alfredo are perfect for busy weeknights! You can prepare the Alfredo sauce up to 3 days in advance and store it in an airtight container in the refrigerator. To ensure freshness, refrigerate flaked salmon separately and add it when you’re ready to combine everything. Alternatively, the fettuccine can be cooked and chilled up to 24 hours ahead of time. When it’s time to serve, simply reheat the sauce over low heat, adding a splash of reserved pasta water for creaminess, then toss in the fettuccine and salmon. You'll enjoy restaurant-quality results with minimal effort, making dinner a breeze!

What to Serve with Creamy Lemon-Dill Salmon Fettuccine Alfredo

Elevate your dining experience by pairing this warm, creamy pasta with delightful sides that complement its rich flavors and textures.

  • Crisp Green Salad: A refreshing salad with mixed greens and a light vinaigrette balances the richness of the Alfredo, offering a refreshing crunch with every bite.

  • Garlic Bread: The buttery, garlicky goodness of freshly baked bread is perfect for soaking up any remaining Alfredo sauce. It adds a comforting aspect to the meal that everyone loves.

  • Roasted Asparagus: Tender asparagus drizzled with olive oil and roasted until slightly charred complements the salmon beautifully, enhancing both flavors and presentation.

  • Steamed Broccoli: Bright green broccoli brings a vibrant color to the plate and provides a nice texture contrast against the creamy pasta. It's a healthy addition that kids often enjoy too.

  • Zesty Lemon Sorbet: For dessert, a light and refreshing lemon sorbet highlights the lemony notes in the pasta, leaving everyone with a bright finish to their meal.

  • Chardonnay: This crisp white wine with citrus notes pairs impeccably with your salmon fettuccine Alfredo, balancing the creamy sauce while enhancing the zesty flavors.

Each suggestion creates a delightful balance of flavors and textures, ensuring that your dining experience is as enjoyable as the main dish itself!

Creamy Lemon-Dill Salmon Fettuccine Alfredo Recipe FAQs

What should I look for when selecting salmon?
Absolutely! When selecting salmon, look for firm fillets that are bright in color without any dark spots. The flesh should be moist but not sticky, and it should have a fresh, ocean-like smell. Avoid salmon that looks dull or has a strong fishy odor. If using frozen salmon, ensure it’s completely thawed and not overly mushy when cooked.

How should I store leftover Salmon Fettuccine Alfredo?
Leftovers can be stored in an airtight container in the refrigerator for up to 2-3 days. While the creaminess of the sauce might change slightly, the flavors will still be delightful. Be sure to let the dish cool before sealing to prevent condensation, which can affect the texture.

Can I freeze my Salmon Fettuccine Alfredo?
Yes, you can! To freeze, transfer the Salmon Fettuccine Alfredo into a freezer-safe container, leaving a little room to allow for expansion. It can last up to 1 month in the freezer. When you’re ready to enjoy, thaw it overnight in the refrigerator. Reheat gently on the stovetop, adding a splash of heavy cream or milk to restore that wonderful creamy texture.

What if my pasta sauce is too thick?
No worries! If your Alfredo sauce is too thick, you can brighten it right up. Start by adding a couple of tablespoons of the reserved pasta water, stirring gently until you reach your desired consistency. If it needs a bit more, don’t hesitate to add a little more heavy cream or milk, which brings back creaminess while balancing flavor.

Is this recipe suitable for those with dairy allergies?
Unfortunately, the traditional recipe for Salmon Fettuccine Alfredo contains dairy ingredients like butter, heavy cream, and Parmesan cheese. However, you can make a dairy-free version using coconut cream or a dairy-free alfredo sauce made from blended cashews, nutritional yeast, and plant-based milk. It’s an excellent way to enjoy that creamy texture without the dairy!

How can I enhance the nutritional value of this dish?
Very! You can enhance the nutritional profile by adding seasonal vegetables like asparagus, spinach, or cherry tomatoes to the dish during the cooking of the fettuccine. These additions not only boost the vitamins and minerals but also add a lovely splash of color to your plate!

Salmon Fettuccine Alfredo

Creamy Salmon Fettuccine Alfredo with a Zesty Twist

This Salmon Fettuccine Alfredo combines creamy textures with zesty flavors, making it a must-try family dinner.
Print Recipe Pin Recipe
Prep Time 10 minutes mins
Cook Time 30 minutes mins
Total Time 40 minutes mins
Servings: 4 servings
Course: Dinner
Cuisine: Italian
Calories: 540
Ingredients Equipment Method Nutrition Notes

Ingredients
  

For the Salmon
  • 4 fillets Salmon Can substitute with frozen salmon if thawed properly.
  • 2 tablespoons Olive oil Enhances flavor while cooking.
  • to taste Salt Essential for seasoning salmon and pasta.
  • to taste Black pepper Adds spice to the dish.
  • 1 teaspoon Garlic powder Contributes depth of flavor to salmon.
For the Fettuccine
  • 12 ounces Fettuccine pasta Can experiment with whole wheat or gluten-free pasta.
For the Alfredo Sauce
  • 4 tablespoons Unsalted butter Forms the foundation of the Alfredo sauce’s creamy texture.
  • 2 cloves Garlic Minced, gives aromatic flavor in the Alfredo sauce.
  • 1 cup Heavy cream Creates the rich, luxurious sauce.
  • 1 cup Parmesan cheese Freshly grated, introduces umami and creaminess.
  • 2 tablespoons Lemon juice Brightens the flavors in both salmon and sauce.
  • 2 tablespoons Fresh dill Chopped, adds freshness and aromatic quality.
  • 1 cup Pasta water Used to adjust sauce consistency.

Equipment

  • Large skillet
  • Large pot
  • Colander

Method
 

Step-by-Step Instructions
  1. Pat the salmon fillets dry and season with salt, pepper, and garlic powder. Heat olive oil in a skillet over medium heat, add salmon skin-side down, and sear for 4-6 minutes. Flip and cook for another 3-5 minutes until flaky. Squeeze lemon juice over it.
  2. Boil salted water in a pot. Add fettuccine and cook according to package directions, about 10-12 minutes, until al dente. Reserve 1 cup of pasta water, drain and set aside.
  3. In the same skillet, melt butter over medium heat. Add minced garlic and sauté until fragrant. Pour in heavy cream and bring to a gentle simmer. Gradually whisk in Parmesan cheese until smooth.
  4. Once the sauce is ready, add remaining lemon juice and fold in chopped dill. Adjust seasoning. Toss drained fettuccine in the sauce and add flaked salmon.
  5. Transfer to serving plates, garnish with extra dill and grated Parmesan, and serve immediately.

Nutrition

Serving: 1servingCalories: 540kcalCarbohydrates: 45gProtein: 30gFat: 28gSaturated Fat: 15gPolyunsaturated Fat: 5gMonounsaturated Fat: 12gCholesterol: 100mgSodium: 600mgPotassium: 500mgFiber: 3gSugar: 2gVitamin A: 800IUVitamin C: 5mgCalcium: 200mgIron: 2mg

Notes

Always use freshly grated Parmesan cheese for best texture. Reserve pasta water for adjusting consistency.

Tried this recipe?

Let us know how it was!
  • « Previous Page
  • 1
  • …
  • 23
  • 24
  • 25
  • 26
  • 27
  • …
  • 245
  • Next Page »

Welcome!

Hi, I’m Grace, a Sydney-based home cook with a passion for bold flavors and trending ingredients. Whether you’re a busy beginner or a seasoned foodie, you’ll find dishes here that are fresh, fun, and full of flavor.

More about me

Popular Recipes

  • One Pot Keto Tuna Casserole
    One Pot Keto Tuna Casserole: Creamy Comfort in Minutes
  • Ultimate Jalapeno Popper Chicken Salad
    Ultimate Jalapeno Popper Chicken Salad That'll Wow Your Tastebuds
  • Green Chile Cheese Dip
    Mouthwatering Green Chile Cheese Dip for Cozy Gatherings
  • Easy Chimichurri Sauce
    Fresh and Zesty Easy Chimichurri Sauce in Just Minutes

Footer

↑ back to top

About

  • Privacy Policy
  • Disclaimer
  • Terms & Conditions

Newsletter

  • Sign Up! for emails and updates

Contact

  • About me
  • Contact me

Copyright © 2025 TastyTrendIngredients