tastytrendingredients

  • Home
  • Recipes
    • Appetizers
    • Breakfast
    • Dessert
    • Dinner
    • Drinks
    • Salads
    • Snacks
    • Soups
  • About me
  • Contact me
menu icon
go to homepage
  • Home
  • Recipes
    • Appetizers
    • Breakfast
    • Dessert
    • Dinner
    • Drinks
    • Salads
    • Snacks
    • Soups
  • About me
  • Contact me
search icon
Homepage link
  • Home
  • Recipes
    • Appetizers
    • Breakfast
    • Dessert
    • Dinner
    • Drinks
    • Salads
    • Snacks
    • Soups
  • About me
  • Contact me
×

Creamy Garlic Parmesan Cabbage: A Comforting Low-Carb Delight

February 20, 2026 by Grace Snow Leave a Comment

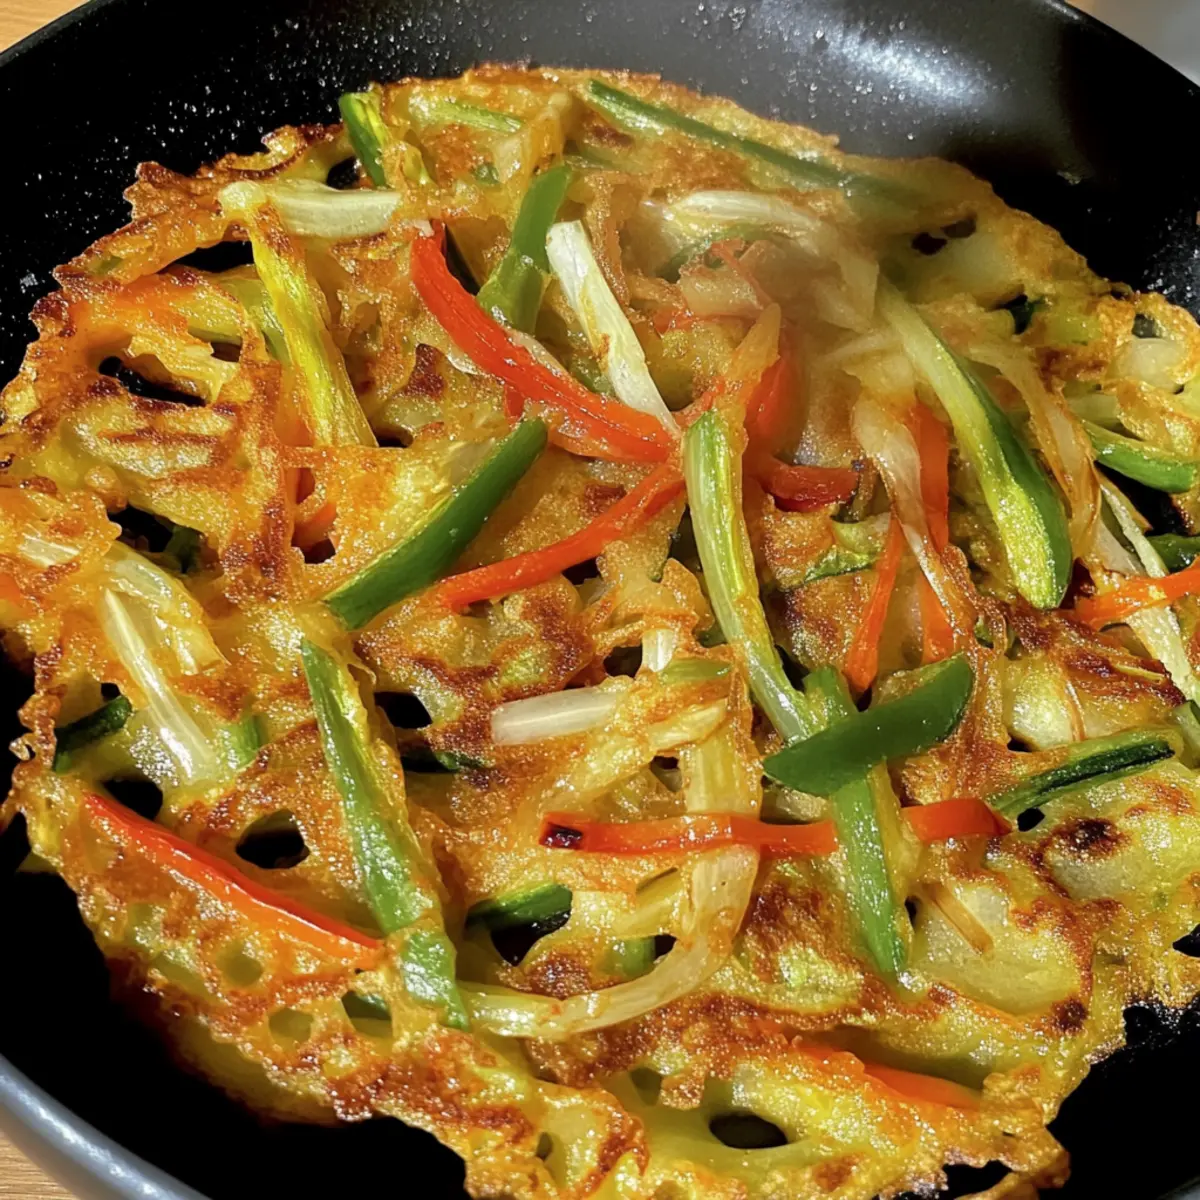
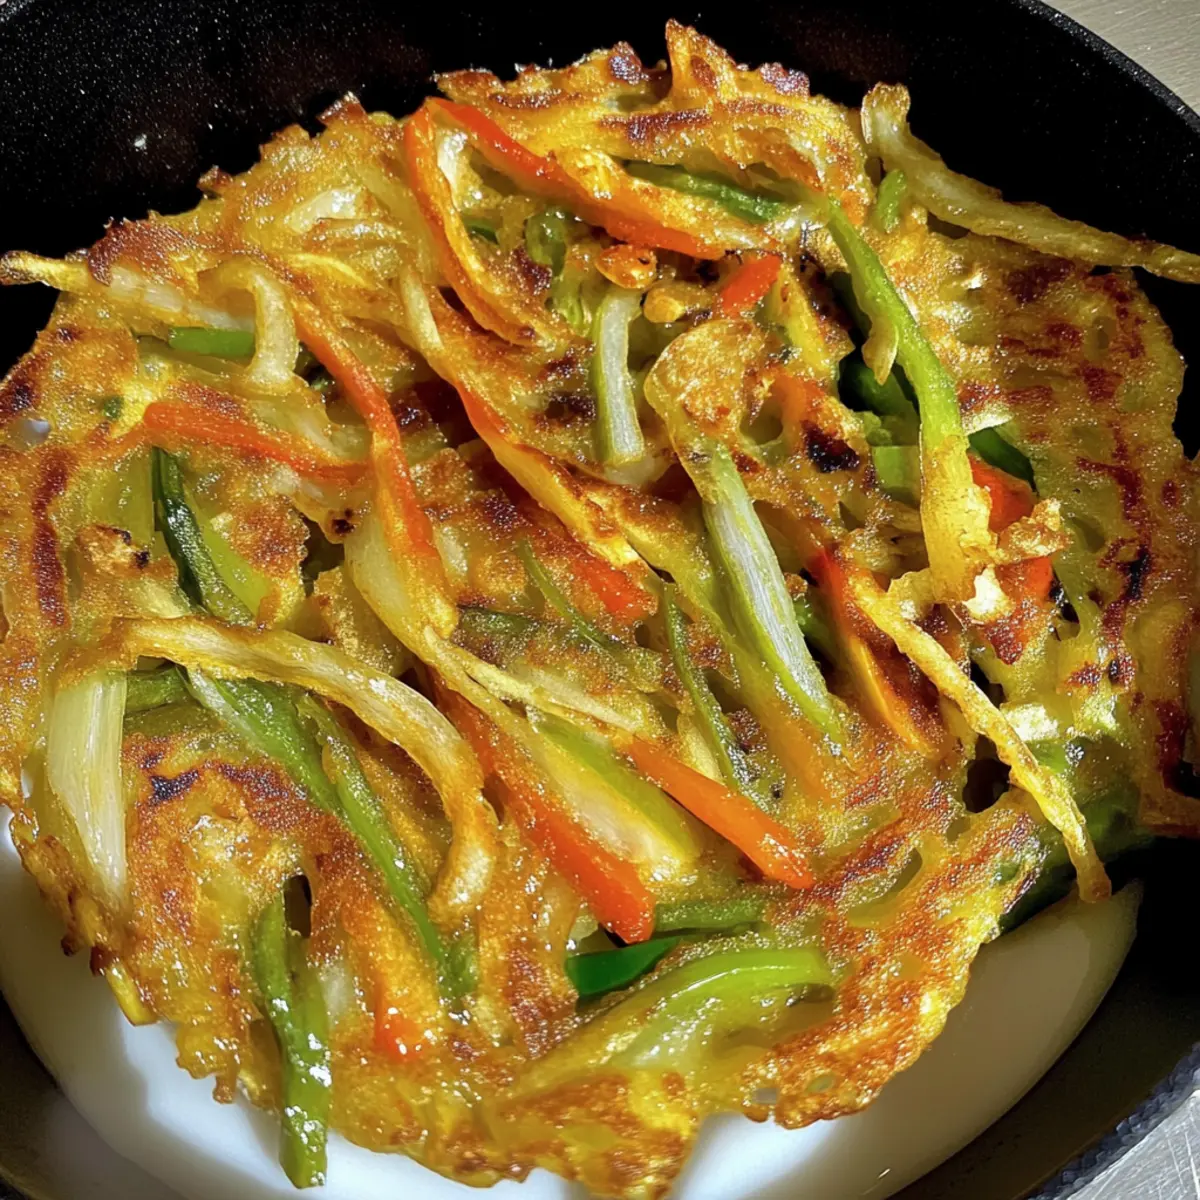
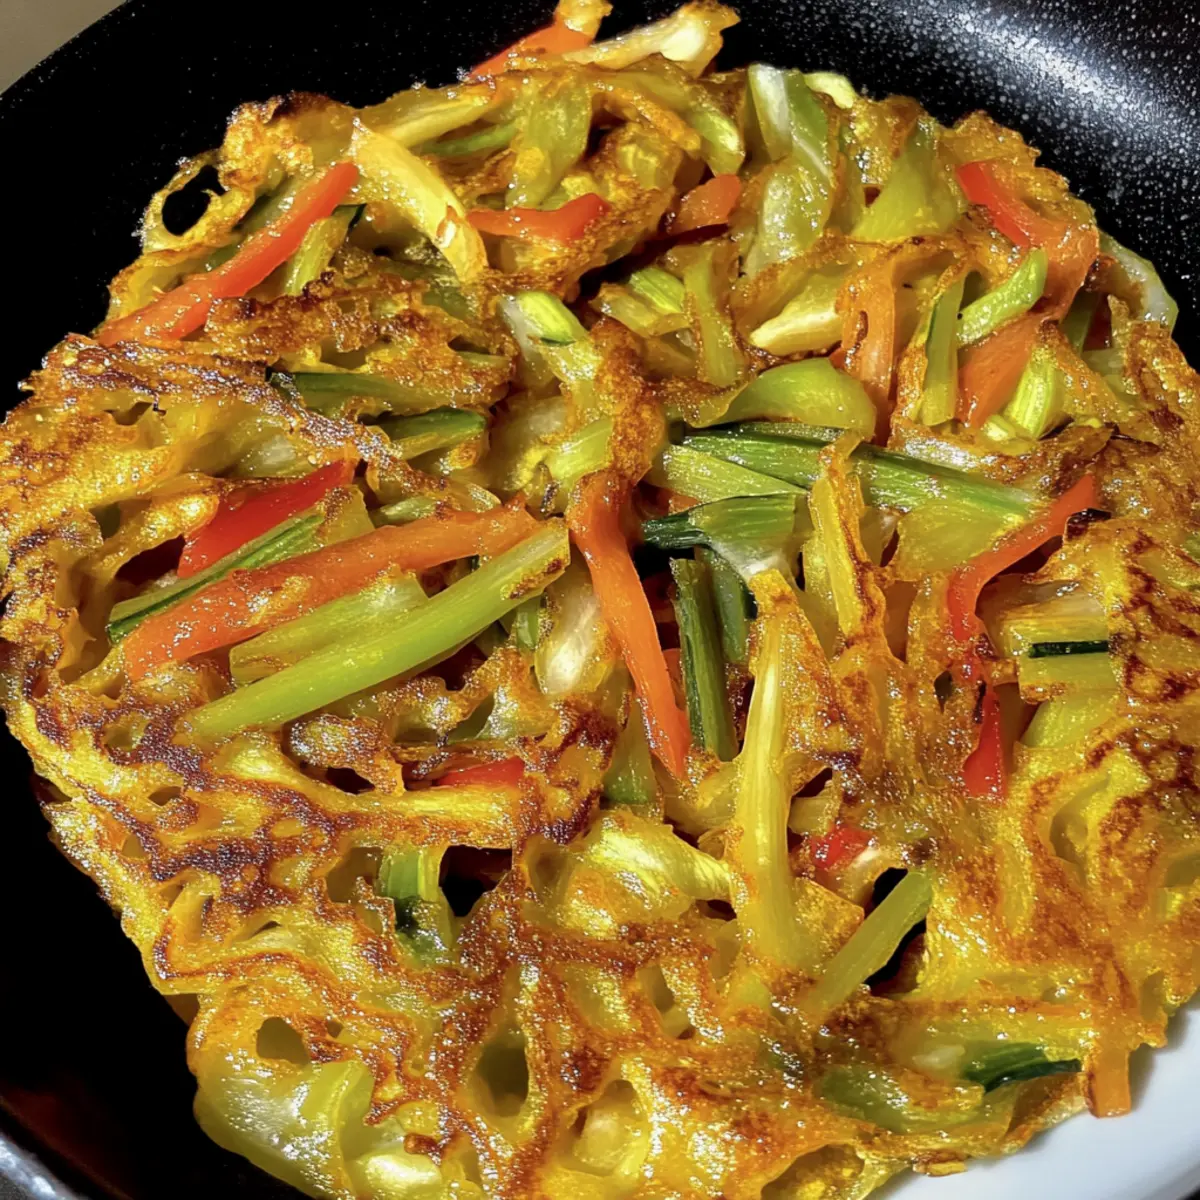
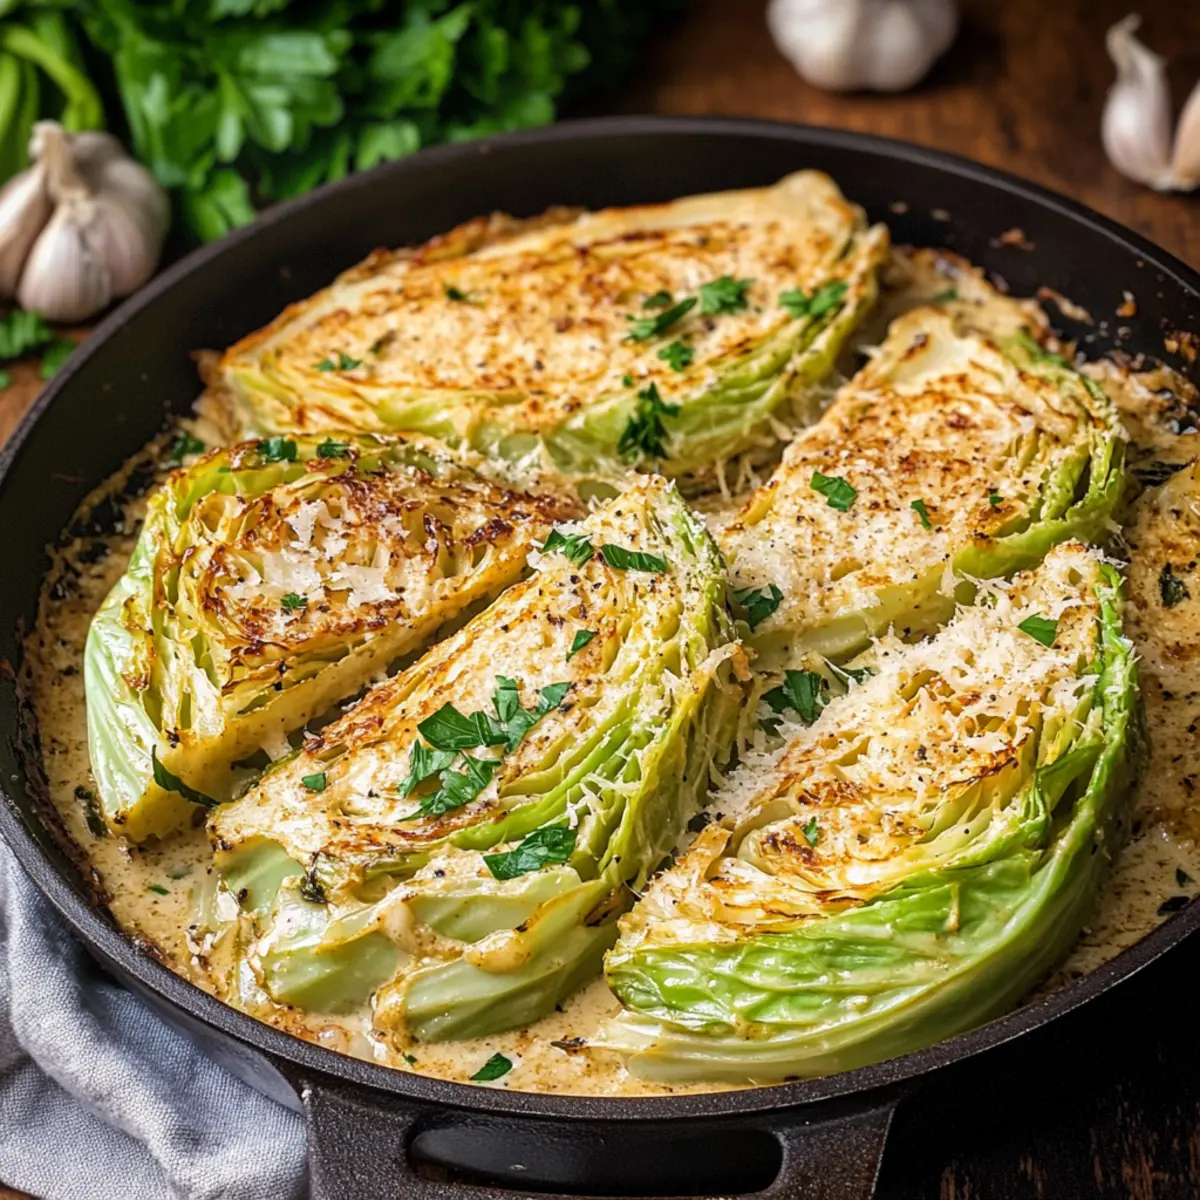
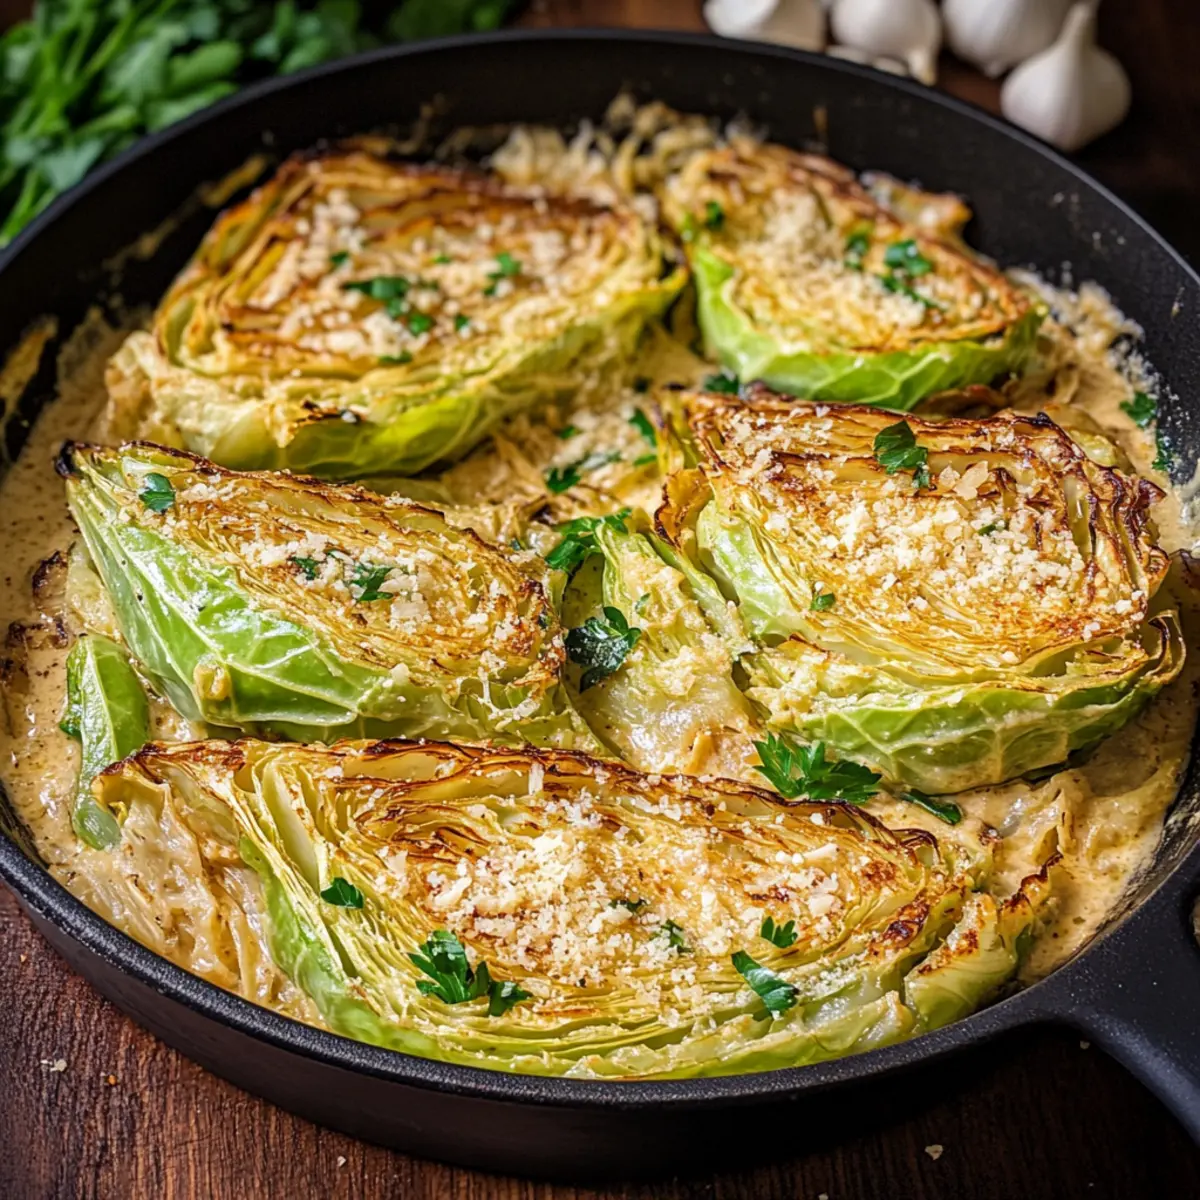
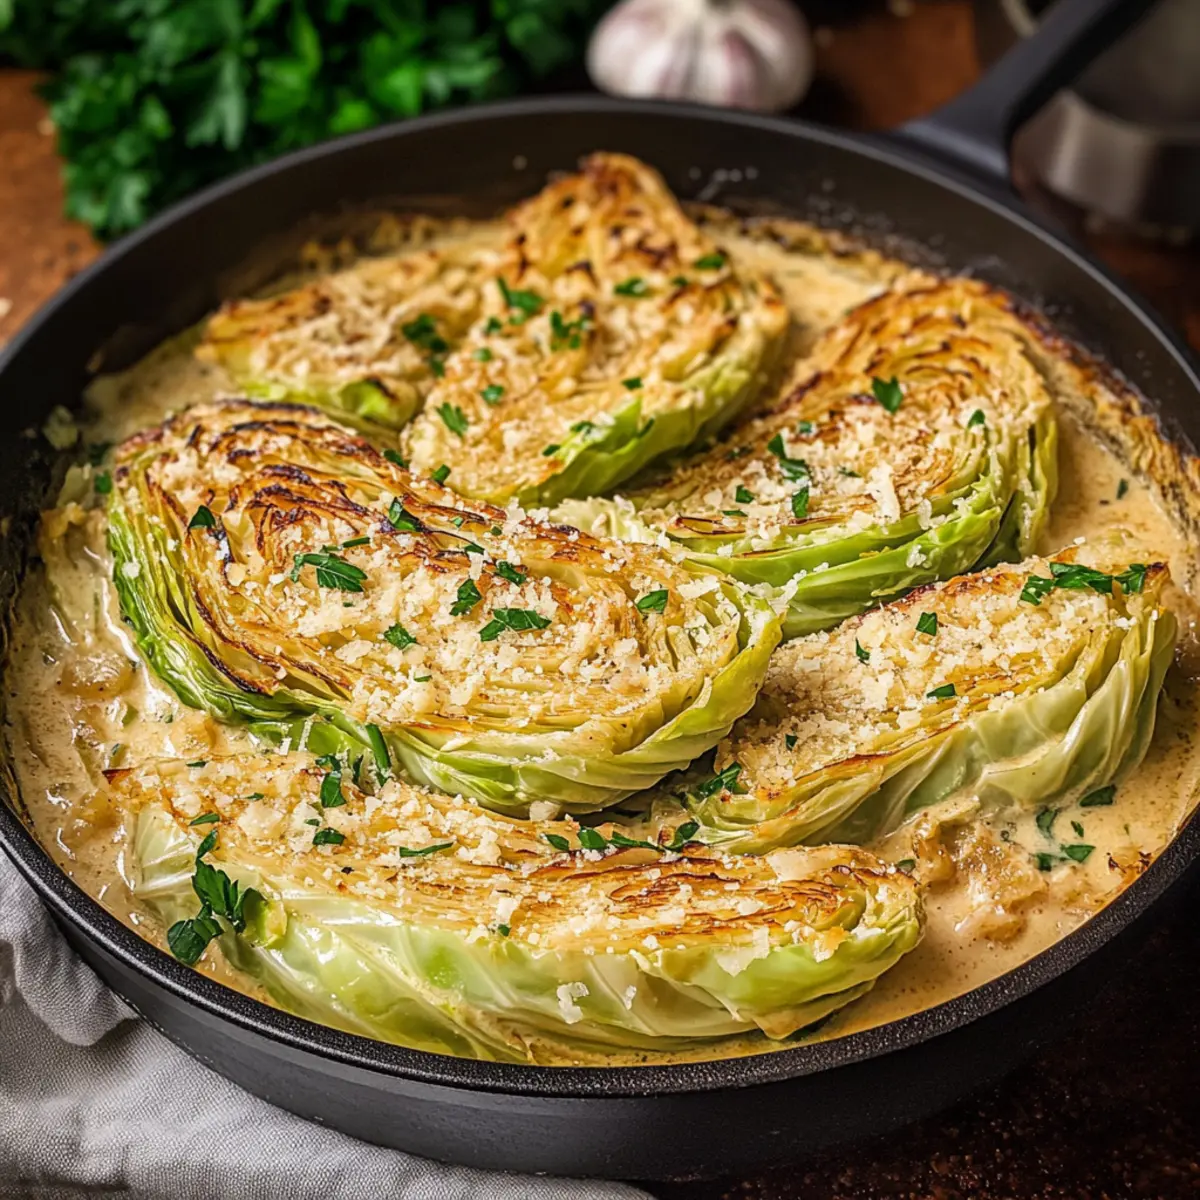
As I ladled the creamy garlic Parmesan sauce over the seared cabbage, a wave of comfort washed over me, instantly reminding me of cozy family dinners. This Creamy Garlic Parmesan Cabbage dish transforms the humble vegetable into an irresistible low-carb skillet recipe that dazzles both the eyes and the taste buds. Not only is this side dish quick to prepare—taking just 30 minutes from pan to plate—but it's also a delightful way to indulge your cravings without the guilt. The blend of rich cream and savory Parmesan envelops perfectly tender cabbage, making every bite a satisfying experience. Whether served alongside grilled meats or as a standalone vegetarian option, this recipe is sure to bring a touch of elegance to your meals. Are you ready to elevate your cabbage game?

Why Is This Cabbage Recipe a Game-Changer?

Simplicity: With only 30 minutes from start to finish, this recipe makes it easy to whip up a gourmet dish any night of the week.
Rich, Velvety Sauce: The creamy garlic Parmesan sauce transforms cabbage into a side dish that's both comforting and indulgent.
Low-Carb Delight: Perfect for those following a keto diet, you can enjoy this dish without guilt while keeping your carb intake in check.
Versatile Pairing: This creamy dish pairs wonderfully with anything from grilled steak to crispy Fried Shrimp Cabbage.
Crowd-Pleaser: Both kids and adults will love this delicious twist on a humble vegetable, ensuring everyone at the table will come back for seconds!

Creamy Garlic Parmesan Cabbage Ingredients

• Discover the key elements for this delightful dish!

For the Cabbage

  • Green Cabbage – The star of the dish, providing a hearty texture; red cabbage can be a fun visual alternative.

For the Sauce

  • Unsalted Butter – Adds richness; feel free to swap for salted butter but adjust salt accordingly.
  • Olive Oil – Enhances flavor and assists in searing the cabbage; other neutral oils can be used in place.
  • Yellow Onion – Adds a sweet, aromatic depth to the sauce; white or sweet onions can also work well.
  • Garlic (minced) – Fresh garlic gives a robust flavor; avoid powdered garlic for a more intense taste.
  • Heavy Cream – Provides the creamy base of the sauce; half-and-half can lighten this dish if desired.
  • Parmesan Cheese (freshly grated) – This is key for rich, umami flavor and thickening the sauce; pre-shredded won't melt as nicely.
  • Cajun Seasoning – Adds a nice kick; swap this for Italian seasoning for a milder flavor profile.
  • Salt and Black Pepper – Essential for enhancing overall flavor; season to your taste.

For Garnish

  • Fresh Parsley (chopped) – Brightens up the dish; dried parsley can be a substitute in a pinch.

Elevate your culinary experience with this Creamy Garlic Parmesan Cabbage, making it a perfect addition to your home-cooked meals!

Step‑by‑Step Instructions for Creamy Garlic Parmesan Cabbage

Step 1: Heat the Skillet
Begin by placing a large skillet over medium-high heat. Once hot, add 2 tablespoons of unsalted butter along with 1 tablespoon of olive oil. Allow the mixture to melt and shimmer, creating a rich base for your Creamy Garlic Parmesan Cabbage. This will enhance both the flavor and texture of the cabbage as it cooks.

Step 2: Sear the Cabbage
Take your green cabbage and slice it into thick wedges. Carefully lay the wedges flat-side down in the sizzling skillet. Sear each side for about 3–4 minutes, or until beautifully golden brown. You'll know they're ready when they develop a lovely caramelized crust, adding depth to the overall flavor of the dish.

Step 3: Remove and Cook the Onions
Once the cabbage is seared, gently remove the wedges from the skillet and set them aside. Lower the heat to medium, then add one chopped yellow onion to the remaining fat in the pan. Stir and cook for about 5 minutes, or until the onion becomes soft and translucent. This will infuse the oil with sweet, aromatic flavors.

Step 4: Add Garlic and Seasoning
Now it's time to enhance the aroma! Stir in 3 cloves of minced garlic and 1 tablespoon of Cajun seasoning, allowing them to cook for another minute. Keep an eye on it, as you want the garlic to become fragrant but not browned. This step is key to achieving the robust flavor in your creamy sauce.

Step 5: Deglaze with Cream
With the aromatic mixture ready, pour in 1 cup of heavy cream. Using a wooden spoon, scrape up any browned bits left in the pan—these will add a burst of flavor to your sauce. Bring the mixture to a gentle simmer and let it bubble for about 2–3 minutes, thickening slightly and creating a luscious sauce.

Step 6: Incorporate Parmesan
Next, add in 1 cup of freshly grated Parmesan cheese, stirring continuously until the cheese melts completely and blends into the cream. The sauce should now appear smooth and creamy. Taste and season with salt and black pepper as needed. This is what makes your Creamy Garlic Parmesan Cabbage truly indulgent!

Step 7: Return the Cabbage
Carefully return the seared cabbage wedges to the skillet, spooning some sauce over the top. Partially cover the skillet and allow it to cook for about 5 minutes, or until the cabbage is fork-tender but still retaining some firmness. This step allows the flavors to meld beautifully while ensuring the cabbage doesn't become mushy.

Step 8: Garnish and Serve
Finally, remove the skillet from the heat and sprinkle the dish with freshly chopped parsley for a burst of color and fresh flavor. Plate your delicious Creamy Garlic Parmesan Cabbage and serve immediately as a delightful side to your favorite grilled meats or as a satisfying vegetarian option.

What to Serve with Creamy Garlic Parmesan Cabbage?

Imagine a warm, inviting dinner table, where comforting flavors and fresh ingredients greet you, turning any meal into a special occasion.

  • Grilled Lemon Chicken: The bright citrus notes and succulent texture balance perfectly with the creamy, rich cabbage, ensuring a delightful dining experience.
  • Savory Pork Chops: The juicy, savory flavors of grilled or pan-seared pork complement the garlic and Parmesan, making them a match made in heaven.
  • Roasted Vegetables: A colorful medley of roasted seasonal vegetables adds crunch and a touch of sweetness, enhancing the meal’s overall appeal.
  • Cauliflower Rice: This light, low-carb alternative absorbs the luscious sauce, creating a deliciously cohesive dish while maintaining the keto-friendly theme.
  • Crusty Bread: A warm, crusty loaf is perfect for swiping up every bit of the creamy sauce, adding a satisfying textural contrast.
  • Herbed Quinoa: Nutty quinoa tossed with fresh herbs provides a nutritious boost that pairs beautifully with the indulgent cabbage, balancing flavors and textures.
  • Chilled White Wine: A crisp Pinot Grigio or Sauvignon Blanc refreshes and lightens the palate, making each bite of the creamy garlic Parmesan cabbage even more enjoyable.
  • Chocolate Mousse: Conclude your meal with a rich chocolate mousse for a decadent treat that satisfies your sweet tooth and rounds out a memorable dining experience.

Creamy Garlic Parmesan Cabbage Variations

Feel free to let your creativity shine and customize this delightful dish to suit your taste!

  • Dairy-Free: Swap heavy cream for coconut cream or a plant-based cream to maintain creaminess without dairy.
  • Spicy Kick: Add diced jalapeños or red pepper flakes for an extra layer of heat that elevates the flavor profile.
  • Smoky Flavor: Incorporate smoked paprika or chipotle seasoning for a delicious smoky twist that adds depth to the dish.
  • Herb Variations: Use fresh thyme or rosemary instead of parsley to bring an aromatic herbal note, enhancing the dish’s overall appeal.
  • Savory Cabbage Toast: Serve the creamy cabbage over toasted sourdough for a tasty open-faced sandwich, perfect for brunch!
  • Cheesy Cabbage Bake: Transform leftovers into a cheesy casserole by adding more cheese and broiling until golden brown and bubbly, reminiscent of a decadent gratin.
  • Nutty Texture: Sprinkle with toasted pine nuts or walnuts right before serving for a pleasing crunch that balances the creamy sauce.
  • Veggie Boost: Mix in some sautéed mushrooms, spinach, or broccoli for added nutrition and color, creating a heartier dish that feels indulgent.

No matter how you choose to tweak it, this recipe will still remind you of warm family dinners and happy moments shared around the table! For a fantastic pairing, consider serving it alongside Cheesy Garlic Bread or grilled meats to create a complete meal experience.

Make Ahead Options

These Creamy Garlic Parmesan Cabbage wedges are a fantastic meal prep solution for busy cooks! You can slice and sear the cabbage up to 24 hours before cooking, ensuring that it retains its texture and flavor. Once seared, store the cabbage in an airtight container in the refrigerator. The creamy sauce can also be made in advance and stored separately for up to 3 days. When you're ready to serve, simply reheat the sauce on the stove, add the cooked cabbage, and warm through until fork-tender, giving you a delicious dish with minimal effort that tastes just as fresh as when it was first prepared!

How to Store and Freeze Creamy Garlic Parmesan Cabbage

Fridge: Store leftovers in an airtight container for up to 4 days. This preserves the flavors of your creamy garlic Parmesan cabbage while keeping it fresh.

Reheating: Gently rewarm the cabbage on the stove over low heat, adding a splash of cream to loosen the sauce and maintain its creamy consistency.

Freezer: Freezing is not recommended for this dish, as the cabbage texture changes and may become mushy when thawed. Enjoy it fresh for the best experience!

Expert Tips for Creamy Garlic Parmesan Cabbage

  • Don’t Rush the Browning: Take your time searing the cabbage wedges to achieve a golden crust; this crucial step builds rich flavor.
  • Choose Fresh Ingredients: Using fresh garlic and freshly grated Parmesan ensures the best flavor and texture in your creamy sauce.
  • Watch the Cooking Time: Avoid overcooking the cabbage; it should be tender yet firm. This ensures a satisfying bite in your creamy garlic Parmesan cabbage.
  • Experiment with Spice: Adjust the Cajun seasoning based on your preference or replace it with Italian seasoning if you prefer a milder flavor.
  • Garnish Matters: Fresh parsley isn’t just for looks; it adds a hint of brightness that complements the dish's rich flavors perfectly.

Creamy Garlic Parmesan Cabbage Recipe FAQs

What type of cabbage works best for this recipe?
Absolutely! Green cabbage is the star of this dish, providing a hearty texture that holds up beautifully in the skillet. You can also use red cabbage for a vibrant visual twist, though it may add a slightly different flavor.

How should I store leftover Creamy Garlic Parmesan Cabbage?
Very good question! Store your leftovers in an airtight container in the refrigerator for up to 4 days. When you're ready to enjoy it again, gently rewarm it on the stove with a splash of cream to bring the sauce back to life.

Can I freeze Creamy Garlic Parmesan Cabbage?
It's best not to freeze this dish. Freezing can change the cabbage’s texture, making it mushy upon thawing. If you want to save any extra, stick to refrigerating it for the freshest flavor and texture.

What if my cabbage is not browning as expected?
No worries! If your cabbage isn't browning, check that your skillet is adequately heated before adding the wedges. Make sure not to overcrowd the pan, as this can cause steaming instead of searing. Aim for a flat, even surface for the best caramelization.

Is this dish suitable for those with dietary restrictions?
Yes! The Creamy Garlic Parmesan Cabbage is naturally low-carb and keto-friendly, making it a great option for those watching their carb intake. However, please note that it contains dairy; for a dairy-free version, try substituting heavy cream with a non-dairy cream alternative and ensuring cheese replacements fit your dietary needs.

What can I do if I don't have heavy cream?
If heavy cream is unavailable, you can substitute it with half-and-half for a lighter sauce without losing the creaminess. For a lower-fat option, consider using a plant-based cream alternative, but keep in mind that this may slightly alter the flavor.

Creamy Garlic Parmesan Cabbage

Creamy Garlic Parmesan Cabbage: A Comforting Low-Carb Delight

Creamy Garlic Parmesan Cabbage is an irresistible low-carb skillet recipe perfect for cozy dinners.
Print Recipe Pin Recipe
Prep Time 10 minutes mins
Cook Time 20 minutes mins
Total Time 30 minutes mins
Servings: 4 servings
Course: Dinner
Cuisine: American
Calories: 250
Ingredients Equipment Method Nutrition Notes

Ingredients
  

For the Cabbage
  • 1 head Green Cabbage Red cabbage can be a substitute.
For the Sauce
  • 2 tablespoons Unsalted Butter Salted butter can be used but adjust salt accordingly.
  • 1 tablespoon Olive Oil Other neutral oils can also be used.
  • 1 medium Yellow Onion White or sweet onions can be used.
  • 3 cloves Garlic (minced) Use fresh garlic for the best flavor.
  • 1 cup Heavy Cream Half-and-half can be used for a lighter option.
  • 1 cup Parmesan Cheese (freshly grated) Pre-shredded won't melt as nicely.
  • 1 tablespoon Cajun Seasoning Can be replaced with Italian seasoning for a milder flavor.
  • to taste Salt and Black Pepper Essential for enhancing overall flavor.
For Garnish
  • 1 tablespoon Fresh Parsley (chopped) Dried parsley can be used if needed.

Equipment

  • Skillet

Method
 

Step-by-Step Instructions for Creamy Garlic Parmesan Cabbage
  1. Heat the skillet over medium-high heat. Add the butter and olive oil and let it melt.
  2. Sear the cabbage wedges flat-side down for 3-4 minutes until golden brown.
  3. Remove the cabbage and cook the chopped onion in the remaining fat for about 5 minutes until soft.
  4. Add minced garlic and Cajun seasoning, cooking for another minute until fragrant.
  5. Pour in the heavy cream and scrape up any browned bits in the pan. Simmer for 2-3 minutes.
  6. Stir in the freshly grated Parmesan cheese until melted and smooth. Season with salt and pepper.
  7. Return the seared cabbage to the skillet and spoon some sauce over the top. Cook for about 5 minutes.
  8. Garnish with parsley before serving hot.

Nutrition

Serving: 1servingCalories: 250kcalCarbohydrates: 10gProtein: 5gFat: 23gSaturated Fat: 12gPolyunsaturated Fat: 1gMonounsaturated Fat: 9gCholesterol: 60mgSodium: 400mgPotassium: 300mgFiber: 3gSugar: 2gVitamin A: 500IUVitamin C: 40mgCalcium: 250mgIron: 1mg

Notes

Take care not to rush the browning of the cabbage for best flavor. Fresh ingredients yield the best results.

Tried this recipe?

Let us know how it was!

Vibrant Cucumber and Carrot Salad for a Refreshing Crunch

February 20, 2026 by Grace Snow Leave a Comment

In the midst of a hectic week, nothing feels more satisfying than a dish that whispers refreshment with each bite. This Quick & Refreshing Cucumber and Carrot Salad is exactly that—a symphony of vibrant colors and textures, ready in just 10 minutes! The magic lies in its delicious Asian dressing, which brings a tangy twist to the crisp cucumbers and sweet, tender carrots. Whether you're hosting a spontaneous gathering or simply seeking a healthy side for dinner, this versatile recipe is a crowd-pleaser that can easily be customized to suit your taste. Imagine the satisfaction of creating a stunning dish that’s both nutritious and bursting with flavor. What ingredients will you add to make this salad your own?

Why is this salad a must-try?

Quick prep: In just 10 minutes, you can whip up this bright salad, making it a lifesaver for busy weeknights.
Refreshing crunch: The combination of crisp cucumbers and tender carrots creates a delightful texture that’s perfect for any palate.
Versatile: Customize with your favorite veggies or proteins, making it suitable as a side or a main dish. You might explore adding grilled chicken or tofu for a heartier option!
Flavor explosion: The unique Asian dressing brings a tangy twist that enhances the natural sweetness of the carrots—making it truly memorable.
Healthy choice: Packed with vitamins and low in calories, it’s a nutritious addition to any meal, perfect for those looking to elevate their diet without sacrificing taste. Enjoy it as a light lunch or pair it with grilled meats or sushi for added delight!

Cucumber and Carrot Salad Ingredients

For the Salad
• Cucumbers – Main ingredient providing crunch and hydration; select firm cucumbers for the best texture.
• Carrots – Adds sweetness and color; shredded for better incorporation. Try substituting with bell peppers for a different flavor.
• Parsley or Cilantro – Offers fresh herbal notes; easy to swap based on preference.
• Green Onions – Introduces a mild onion flavor and a bit of crunch; while not interchangeable, they can be omitted if desired.
• Garlic (minced) – Adds pungency; a smaller amount can be used for a milder flavor.

For the Dressing
• Soy Sauce – Provides umami depth to the dressing; use tamari for a gluten-free option.
• Rice Vinegar – Offers a light acidity; can substitute apple cider vinegar for a similar taste.
• Apple Cider Vinegar – Adds additional tanginess; adjust based on preference for taste.
• Sesame Oil – Enhances flavor with a nutty aroma; replace with olive oil for a different profile.
• Honey or Sugar – Sweetener balancing the flavors; adjust based on your sweetness preference.
• Sesame Seeds – Optional garnish that adds texture; can omit or use other seeds like sunflower.
• Ground Ginger – Adds warmth and spice; fresh ginger can be used for a stronger punch.
• Crushed Red Peppers – Optional for heat; adjust quantity to taste in your Cucumber and Carrot Salad.

Now that you have a glimpse of what goes into this refreshing bowl of goodness, it's time to embrace the vibrant flavors and make this salad your own!

Step‑by‑Step Instructions for Cucumber and Carrot Salad

Step 1: Prepare the Dressing
In a small bowl, whisk together ¼ cup of soy sauce, 2 tablespoons of rice vinegar, and 1 tablespoon of apple cider vinegar. Add 1 tablespoon of honey, 1 teaspoon of sesame oil, and a sprinkle of sesame seeds for texture. Include ¼ teaspoon of ground ginger and season with salt and pepper. If you like it spicy, toss in some crushed red pepper. Set the dressing aside to let the flavors meld.

Step 2: Prepare the Vegetables
Next, grab a large mixing bowl and add 2 medium-sized cucumbers, thinly sliced, and 2 medium carrots, shredded or julienned for a lovely texture. Toss in ¼ cup of chopped parsley or cilantro, along with 2 finely chopped green onions, and 1 clove of minced garlic. This vibrant mix will ensure your Cucumber and Carrot Salad is bursting with fresh flavors and color.

Step 3: Combine & Serve
Drizzle the prepared dressing over the vegetable mixture, ensuring even coverage. Gently toss the salad using tongs or a fork, making sure to coat all the ingredients without bruising them. For the best results, allow the Cucumber and Carrot Salad to chill for about 10 minutes before serving, as this enhances the flavors and makes for a refreshing, crunchy dish.

How to Store and Freeze Cucumber and Carrot Salad

Fridge: Store the Cucumber and Carrot Salad in an airtight container for up to 3 days. Keep the dressing separate until serving to maintain the crispness of the vegetables.

Freezer: Avoid freezing this salad, as the texture will degrade and turn mushy upon thawing. It's best enjoyed fresh.

Preparation: For make-ahead convenience, prepare the vegetables in advance and store them separately. Combine them with the dressing just before serving to enhance freshness.

Reheating: Since this salad is ideally served cold, simply toss it together when ready to eat without any reheating needed!

Cucumber and Carrot Salad Variations

Feel free to let your imagination run wild as you customize this delightful salad!

  • Zucchini Swap: Use sliced zucchini instead of cucumbers for a unique twist. It offers a softer texture but still retains that refreshing crunch.

  • Extra Veggies: Add in diced bell peppers or julienned radishes for a pop of color and flavor. These additions not only enhance the taste but also boost the salad’s vibrancy.

  • Protein Boost: Incorporate grilled chicken or tofu for a heartier dish. These proteins transform your salad into a satisfying main course, perfect for lunch or dinner!

  • Nutty Twist: Sprinkle some toasted almonds or peanuts atop the salad for extra crunch. The added nutty flavor complements the Asian dressing beautifully.

  • Herb Variation: Switch parsley for mint or basil, giving the salad a fresh herbal twist. Each herb brings its own distinct personality, making every bite a fresh adventure!

  • Sweetness Adjustment: For a sweeter kick, mix in diced apples or mandarin oranges. Their juicy sweetness provides a lovely contrast to the salad's crisp vegetables.

  • Spicy Kick: Increase the heat by adding diced jalapeños or a splash of sriracha in the dressing. Perfect for those who love a fiery crunch!

  • Southwestern Flair: Infuse a southwestern twist with cumin and lime juice in the dressing. Pair with black beans for an unexpected yet delightful combination—perfect alongside grilled meats or tacos!

Looking for more delicious salads? Check out Jello Salad Cottage for a fruity twist or consider the rich flavors of Balsamic Steak Salad for a satisfying meal!

What to Serve with Quick & Refreshing Cucumber and Carrot Salad?

Transform your salad into a delightful meal with these complementary dishes that will leave everyone wanting more!

  • Grilled Chicken Skewers: Juicy chicken skewers marinated in garlic and soy sauce pair well with the salad’s fresh crunch, creating a wonderful medley of flavors.
  • Chilled Soba Noodles: This light and savory dish adds an extra layer of Asian-inspired taste, harmonizing beautifully with the bold salad dressing.
  • Rice Paper Spring Rolls: Filled with fresh herbs and veggies, these rolls add a deliciously chewy texture and are perfect for a refreshing bite alongside the salad.
  • Tofu Stir-Fry: Adding a savory tofu stir-fry brings protein and a warm element that contrasts with the salad's coolness, enhancing your meal’s variety.
  • Miso Soup: A warm bowl of miso soup serves as a comforting side, balancing the freshness of the Cucumber and Carrot Salad with umami richness.
  • Sesame Ciabatta: Crispy, seed-topped ciabatta provides a delightful crunch and is perfect for scooping up the vibrant salad.
  • Iced Green Tea: Refreshing and light, this beverage complements the salad’s flavors, offering a gentle herbal note that quenches your thirst.
  • Mango Sorbet: As a light dessert, mango sorbet brings a fruity sweetness that echoes the salad’s vibrant flavors and cleanses the palate.

Make Ahead Options

Preparing your Cucumber and Carrot Salad ahead of time can save precious minutes on busy weeknights! You can chop the cucumbers and shred the carrots up to 24 hours in advance and store them in an airtight container in the refrigerator to maintain their crunch. For optimal freshness, keep the dressing separate until you're ready to serve to prevent the salad from becoming soggy. Just before serving, simply drizzle the dressing over the salad mix and give it a gentle toss. This way, you'll have a vibrant, refreshing Cucumber and Carrot Salad that's just as delicious as when freshly made, all while enjoying the benefits of time saved in meal prep!

Expert Tips for Cucumber and Carrot Salad

  • Well-Drained Cucumbers: Ensure cucumbers are thoroughly dried after slicing to prevent a watery Cucumber and Carrot Salad. Lay them on paper towels to absorb excess moisture.
  • Dress at the Right Time: Keep the dressing separate until ready to serve. This keeps the salad crisp and prevents sogginess, ensuring the flavors remain vibrant.
  • Customize the Heat: Adjust the amount of crushed red pepper in the dressing according to your preference. This allows you to tailor the spice level in your Cucumber and Carrot Salad for different palates.
  • Use Fresh Ingredients: For the best flavor, use fresh, in-season vegetables. They not only taste better but also add wonderful color to your salad.
  • Avoid Freezing: Never freeze this salad, as it will compromise the texture of the cucumbers and carrots. Enjoy fresh for the best experience!

Cucumber and Carrot Salad Recipe FAQs

How do I choose the right cucumbers?
Absolutely! For the best Cucumber and Carrot Salad, select firm cucumbers that are free from dark spots or blemishes. Look for ones that feel heavy for their size, indicating good hydration and crispness. If they have soft spots, they may be overripe and will affect the salad's texture.

How should I store leftovers of my salad?
Very good question! Store the Cucumber and Carrot Salad in an airtight container in the refrigerator for up to 3 days. Make sure to keep the dressing in a separate container and dress the salad just before serving, to retain the freshness and crunch of the veggies.

Can I freeze Cucumber and Carrot Salad?
No, it's best to avoid freezing this salad. Unfortunately, the texture of cucumbers and carrots gets compromised and turns mushy upon thawing. Instead, prepare the salad fresh and enjoy the vibrant flavors as intended.

What should I do if my salad is too watery?
If you find your Cucumber and Carrot Salad is too watery, it could be that the cucumbers needed better draining. Ensure they are thoroughly dried after slicing to prevent excess moisture. Consider salting the cucumbers lightly and letting them sit for 10-15 minutes before draining—this helps draw out the excess water.

Are there any dietary considerations I should keep in mind?
Yes, if you have guests with allergies, it's important to note that soy sauce contains gluten unless you use tamari as a gluten-free option. Additionally, if cooking for pets, refrain from adding garlic, as it can be harmful to dogs. Always check labels for allergens such as honey or sesame, based on dietary needs!

What are some good variations for the Cucumber and Carrot Salad?
Great question! You can easily customize this salad by swapping cucumbers for zucchini or adding bell peppers, radishes, or snap peas for added crunch. If you're looking for a heartier option, consider incorporating grilled chicken or tofu for protein and making it a main dish!

Cucumber and carrot salad

Vibrant Cucumber and Carrot Salad for a Refreshing Crunch

A delightful Cucumber and Carrot salad ready in just 10 minutes, perfect for a refreshing and healthy side dish.
Print Recipe Pin Recipe
Prep Time 10 minutes mins
Total Time 10 minutes mins
Servings: 4 servings
Course: Salads
Cuisine: Asian
Calories: 80
Ingredients Equipment Method Nutrition Notes

Ingredients
  

For the Salad
  • 2 medium Cucumbers thinly sliced
  • 2 medium Carrots shredded or julienned
  • ¼ cup Parsley or Cilantro chopped
  • 2 Green Onions finely chopped
  • 1 clove Garlic minced
For the Dressing
  • ¼ cup Soy Sauce or tamari for gluten-free option
  • 2 tablespoons Rice Vinegar
  • 1 tablespoon Apple Cider Vinegar
  • 1 tablespoon Sesame Oil or olive oil
  • 1 tablespoon Honey or Sugar adjust based on preference
  • 2 teaspoons Sesame Seeds optional garnish
  • ¼ teaspoon Ground Ginger
  • Crushed Red Peppers optional, to taste

Equipment

  • Mixing Bowl
  • Whisk
  • Knife
  • Cutting Board

Method
 

Prepare the Dressing
  1. In a small bowl, whisk together soy sauce, rice vinegar, apple cider vinegar, honey, sesame oil, and sesame seeds. Add ground ginger and season with salt and pepper, adding crushed red pepper if desired.
Prepare the Vegetables
  1. In a large mixing bowl, add cucumbers, carrots, parsley or cilantro, green onions, and minced garlic.
Combine & Serve
  1. Drizzle the prepared dressing over the vegetable mixture and gently toss to coat. Chill for 10 minutes before serving.

Nutrition

Serving: 1salad servingCalories: 80kcalCarbohydrates: 10gProtein: 2gFat: 4gSaturated Fat: 0.5gPolyunsaturated Fat: 1gMonounsaturated Fat: 2gSodium: 500mgPotassium: 300mgFiber: 2gSugar: 3gVitamin A: 5000IUVitamin C: 20mgCalcium: 40mgIron: 0.5mg

Notes

For the best flavor, use fresh, in-season vegetables. Keep the dressing separate until serving to maintain crispness.

Tried this recipe?

Let us know how it was!

Vibrant Roasted Beet, Sweet Potato & Avocado Salad Delight

February 20, 2026 by Grace Snow Leave a Comment

In the midst of a bustling week, when eating well feels like a luxury, I stumbled upon the perfect solution—a Roasted Beet, Sweet Potato & Avocado Salad that’s both vibrant and satisfying. As I combined the earthy sweetness of roasted beets and sweet potatoes with the creamy goodness of ripe avocado, I couldn’t help but smile at how simple yet exquisite this dish turned out. Not only is it a feast for the eyes, but it’s also packed with nutrients, making it an ideal go-to for a meal that feels indulgent without the guilt. Plus, it can easily cater to vegan diners with just a quick swap! Are you ready to elevate your salad game and discover how this delightful dish balances heartiness with refreshing flavors? Let’s dive into this colorful recipe!

Why is this salad a must-try?

Vibrant Colors: This salad is a feast for the eyes, showcasing beautiful hues of roasted beets, sweet potatoes, and creamy avocado that brighten any table.

Nutritious Goodness: Packed with antioxidants and healthy fats, you’ll enjoy a meal that nourishes your body while tantalizing your taste buds.

Quick & Easy: You can whip up this deliciousness with minimal effort, making it perfect for busy weeknights or elegant gatherings alike.

Versatile Base: Feel free to swap in seasonal veggies or add protein like chickpeas for extra heartiness. Check out other variations like Smoky Sweet Potatoes for a fun twist!

Crowd-Pleaser: Impress family and friends with a dish that’s not only beautiful but bursting with flavor, perfect for any occasion!

Roasted Beet, Sweet Potato & Avocado Salad Ingredients

For the Salad
• Beets – Earthy flavor and vibrant color; roast them for a natural sweetness that pairs beautifully with other ingredients.
• Sweet Potatoes – Their creamy texture and natural sweetness are high in beta-carotene; caramelize for the best flavor.
• Avocado – Adds creamy goodness and healthy fats; sprinkle with lemon juice after slicing to prevent browning.
• Mixed Greens – A fresh base for the salad; choose your favorite varieties like arugula or spinach for added nutrients.

For the Whipped Ricotta
• Ricotta Cheese – Provides richness and creaminess; use light ricotta for a lower-calorie option.
• Lemon Juice – Brightens the ricotta and enhances its flavor; utilize fresh juice for a zesty kick.

For the Lemon-Tahini Drizzle
• Tahini – Adds a nutty depth that complements the salad; mix well for a silky consistency.
• Lemon Juice – Tangy and refreshing; a key element in making the drizzle bright and vibrant.
• Water – Thin the drizzle to your preferred consistency; helps achieve the perfect pourable texture.
• Salt and Pepper – Essential for enhancing flavors; season to taste for the best experience.

Optional Garnish
• Fresh Herbs (Parsley or Mint) – Add color and aroma; a perfect finishing touch for additional flavor layers.
• Toasted Nuts/Seeds (Pumpkin Seeds or Walnuts) – Introduce crunch and a satisfying texture; toss them on just before serving.

This Roasted Beet, Sweet Potato & Avocado Salad is a versatile delight that celebrates nutritious ingredients while creating a beautiful presentation!

Step‑by‑Step Instructions for Roasted Beet, Sweet Potato & Avocado Salad

Step 1: Roast the Vegetables
Preheat your oven to 400°F (200°C). Peel and chop the beets and sweet potatoes into small, even cubes. Toss them in a large bowl with olive oil, salt, and pepper until evenly coated. Spread the vegetables on a parchment-lined baking sheet and roast for 25-30 minutes, or until tender and caramelized, stirring halfway through for even cooking.

Step 2: Prepare Whipped Ricotta
While the vegetables are roasting, gather your food processor or blender. Add the ricotta cheese and a splash of fresh lemon juice. Blend until smooth and creamy, scraping down the sides as needed. This whipped ricotta will add richness to your Roasted Beet, Sweet Potato & Avocado Salad, so set it aside until assembly.

Step 3: Make Lemon-Tahini Drizzle
In a small mixing bowl, whisk together tahini, fresh lemon juice, and a splash of water. Stir until well combined and adjust the consistency with more water if needed—you're looking for a pourable yet creamy texture. Season with salt and pepper to taste, allowing the flavors to meld. This bright drizzle will elevate your salad brilliantly!

Step 4: Assemble the Salad
In a large salad bowl, begin by layering your mixed greens as a fresh base. Once the roasted beets and sweet potatoes have cooled slightly, add them on top of the greens. Next, dice the avocado and gently place it over the roasted vegetables.

Step 5: Add Toppings and Drizzles
Generously dollop your whipped ricotta over the salad, and then drizzle with the prepared lemon-tahini sauce. Finish with a sprinkle of fresh herbs like parsley or mint and toasted nuts or seeds for extra texture and flavor. This final step will turn your Roasted Beet, Sweet Potato & Avocado Salad into a visually stunning dish.

Expert Tips for Roasted Beet, Sweet Potato & Avocado Salad

  • Pre-Roast for Flavor: Roast the beets and sweet potatoes in advance for the best taste. Let them cool before assembly to enhance sweetness and preserve textures.

  • Avocado Freshness: To prevent browning, toss sliced avocado in lemon juice right after cutting it. Add it to the salad just before serving for optimal creaminess.

  • Vegan Swaps: If you want a vegan Roasted Beet, Sweet Potato & Avocado Salad, use plant-based ricotta alternatives, such as cashew cream, for a deliciously creamy finish.

  • Storage Tips: Store leftover salad in an airtight container for up to 2 days. Keep the avocado separate to maintain its freshness and color.

  • Experiment with Greens: Mix up the salad base by using different greens like kale or spinach for a nutrient boost and varied flavors.

How to Store and Freeze Roasted Beet, Sweet Potato & Avocado Salad

Fridge: Store leftovers in an airtight container for up to 2 days, making sure to keep the avocado separate to maintain freshness and prevent browning.

Freezer: While this Roasted Beet, Sweet Potato & Avocado Salad is best enjoyed fresh, you can freeze the roasted beets and sweet potatoes for up to 3 months. Assemble the salad after thawing.

Reheating: If you've frozen the roasted vegetables, reheat them in the oven at 350°F (175°C) until warmed through, about 10-15 minutes. Avoid reheating the avocado or greens, which are best fresh.

Make-Ahead: For convenience, roast the beets and sweet potatoes ahead of time and store them in the fridge. Assemble the salad just before serving to preserve texture and flavor.

Roasted Beet, Sweet Potato & Avocado Salad Variations

Feel free to celebrate your creativity in the kitchen with these delightful twists on the classic salad!

  • Quinoa Boost: Replace mixed greens with cooked quinoa for an extra protein-packed base. This adds a lovely nuttiness while enhancing the overall texture.

  • Seasonal Veggies: Swap in roasted carrots or parsnips based on the season. Their sweetness will harmonize beautifully with the other ingredients, making your salad feel both refreshing and comforting.

  • Chickpea Add-In: Toss in a handful of chickpeas for added heartiness and protein. Their creamy texture pairs well with the whipped ricotta and adds an earthy flavor.

  • Nutty Crunch: Sprinkle in some toasted walnuts or pumpkin seeds for a satisfying crunch. The nutty flavor will complement the earthy beets and sweet potatoes wonderfully.

  • Herbaceous Flair: Use fresh herbs like basil or dill instead of parsley for a unique aromatic twist that brightens the dish. Experimenting with herbs adds complexity to each bite.

  • Spicy Kick: Drizzle in a touch of sriracha or cayenne pepper to elevate the flavor with a spiciness that contrasts beautifully with the creamy avocado and sweet veggies.

  • Creamy Alternatives: For a delightful vegan option, swap ricotta with homemade cashew cream. Blend soaked cashews with lemon juice for a velvety texture that enhances the dish.

  • Zesty Citrus: Incorporate segments of orange or grapefruit for a burst of citrus that will enhance the freshness and add a zesty surprise amidst the earthy flavors.

By exploring these variations, you can craft a dish that not only pleases your palate but also showcases the beauty of seasonal produce. Happy cooking!

Make Ahead Options

These Roasted Beet, Sweet Potato & Avocado Salad ingredients are perfect for meal prep, allowing you to enjoy a wholesome, delicious dish even on your busiest days! You can roast the beets and sweet potatoes up to 3 days in advance, letting them cool before storing them in airtight containers in the refrigerator. To prevent the avocado from browning, slice it just before serving—this will keep it fresh and creamy. When you're ready to enjoy your salad, simply toss the roasted vegetables with your greens, top with avocado, and drizzle on the whipped ricotta and lemon-tahini dressing. This approach saves you time while ensuring your salad remains just as delicious!

What to Serve with Wholesome Roasted Beet, Sweet Potato & Avocado Salad

Elevate your dining experience by complementing this colorful salad with delightful side dishes and beverages that enhance its vibrant flavors.

  • Creamy Polenta: This comforting, creamy side adds a rich texture, perfectly soaking up the zesty lemon-tahini drizzle. It balances the earthiness of the salad nicely.

  • Grilled Lemon Herb Chicken: Juicy, herb-marinated chicken adds protein and flavor depth, creating a satisfying meal that's sure to please everyone at the table.

  • Crispy Roasted Chickpeas: A crunchy topping that brings extra protein and a delightful crunch, enhancing both texture and taste in a wonderful contrast to the creamy elements of the salad.

  • Fresh Bread: A warm, crusty baguette or rustic sourdough makes an excellent vessel for savoring the whipped ricotta and lemon-tahini drizzle, rounding out a complete dining experience.

  • Chilled White Wine: A crisp, refreshing white wine like Sauvignon Blanc complements the bright flavors of the salad, enhancing the overall flavors with its acidity.

  • Dark Chocolate Tart: A slice of rich, dark chocolate dessert adds a touch of indulgence at the end of the meal, contrasting beautifully with the salad's fresh and vibrant profile.

Combining these elements will create a beautifully cohesive meal that feels both indulgent and wholesome, transforming your dining occasion into something truly special.

Roasted Beet, Sweet Potato & Avocado Salad Recipe FAQs

How do I select ripe beets and sweet potatoes?
Absolutely! When choosing beets, look for firm, smooth skins without any dark spots; smaller beets are often sweeter. For sweet potatoes, go for ones that are smooth and free of blemishes; a little hint of sweetness will develop during roasting, so picking slightly smaller ones is usually best for this dish.

What’s the best way to store leftovers?
Very! To store your Roasted Beet, Sweet Potato & Avocado Salad, place it in an airtight container in the refrigerator for up to 2 days. However, keep the avocado separate to prevent it from browning. You can add the avocado fresh right before serving for the best flavor and texture.

Can I freeze roasted beets and sweet potatoes?
The more the merrier! You can definitely freeze roasted beets and sweet potatoes. Allow them to cool completely, then place them in a freezer-safe bag or container. They can be stored for up to 3 months. When you're ready to enjoy them again, thaw in the fridge overnight and reheat in the oven at 350°F (175°C) for optimal flavor.

What if my roasted vegetables are not caramelizing?
Don’t worry! If you find that your roasted beets and sweet potatoes are not caramelizing as expected, try increasing the oven temperature to 425°F (220°C) and ensure there’s enough space on the baking sheet for them to roast evenly. You can also toss them with a bit more olive oil to enhance browning. Remember to check on them around the 15-minute mark and stir for even cooking.

Are there any special dietary considerations?
Absolutely! This Roasted Beet, Sweet Potato & Avocado Salad can easily cater to different diets. To make it vegan, simply swap the ricotta cheese for a plant-based alternative like cashew cream. Additionally, keep in mind that both beets and sweet potatoes are naturally gluten-free, making this salad suitable for individuals with gluten sensitivities.

Roasted Beet, Sweet Potato & Avocado Salad

Vibrant Roasted Beet, Sweet Potato & Avocado Salad Delight

This Roasted Beet, Sweet Potato & Avocado Salad is vibrant and packed with nutrients, perfect for a healthy meal.
Print Recipe Pin Recipe
Prep Time 15 minutes mins
Cook Time 30 minutes mins
Total Time 45 minutes mins
Servings: 4 servings
Course: Salads
Cuisine: American
Calories: 350
Ingredients Equipment Method Nutrition Notes

Ingredients
  

For the Salad
  • 2 medium Beets Roasted for natural sweetness
  • 2 medium Sweet Potatoes Roasted for best flavor
  • 1 medium Avocado Sprinkle with lemon juice after slicing
  • 4 cups Mixed Greens Arugula or spinach recommended
For the Whipped Ricotta
  • 1 cup Ricotta Cheese Use light for lower calories
  • 1 tablespoon Lemon Juice Fresh for a zesty kick
For the Lemon-Tahini Drizzle
  • 3 tablespoons Tahini Mix for a silky consistency
  • 2 tablespoons Lemon Juice Key for brightness
  • 3 tablespoons Water Adjust for consistency
  • to taste Salt and Pepper Essential for flavor
Optional Garnish
  • 1/4 cup Fresh Herbs (Parsley or Mint) For added flavor
  • 1/4 cup Toasted Nuts/Seeds (Pumpkin Seeds or Walnuts) Add crunch

Equipment

  • Oven
  • Food Processor
  • Mixing Bowl
  • Baking Sheet
  • Whisk

Method
 

Step-by-Step Instructions
  1. Preheat your oven to 400°F (200°C). Peel and chop the beets and sweet potatoes into small, even cubes. Toss them in a bowl with olive oil, salt, and pepper. Spread on a baking sheet and roast for 25-30 minutes.
  2. While the vegetables roast, blend ricotta cheese with fresh lemon juice in a food processor until smooth.
  3. In a bowl, whisk tahini, lemon juice, and water until creamy and pourable. Season with salt and pepper.
  4. In a salad bowl, layer mixed greens, add roasted beets and sweet potatoes, then avocados.
  5. Dollop whipped ricotta, drizzle with lemon-tahini sauce, and garnish with fresh herbs and nuts.

Nutrition

Serving: 1servingCalories: 350kcalCarbohydrates: 35gProtein: 6gFat: 20gSaturated Fat: 5gPolyunsaturated Fat: 2gMonounsaturated Fat: 13gSodium: 200mgPotassium: 650mgFiber: 8gSugar: 6gVitamin A: 15000IUVitamin C: 30mgCalcium: 150mgIron: 2mg

Notes

Store leftover salad in an airtight container for up to 2 days. Keep avocado separate to maintain freshness.

Tried this recipe?

Let us know how it was!

Crispy Korean Vegetable Pancakes for a Flavorful Snack

February 20, 2026 by Grace Snow Leave a Comment

As the sizzling sound of batter hitting the hot pan fills the kitchen, I can’t help but smile at the anticipation of digging into these Crispy Korean Vegetable Pancakes (Yachaejeon). This simple yet vibrant dish combines an array of fresh vegetables, creating a delightful bite that’s as nutritious as it is satisfying. What I love most is how quick and easy these pancakes are to whip up, making them the perfect solution for a busy weeknight or a cozy weekend snack. Plus, they’re versatile enough to serve as an appetizer, side dish, or even a light meal when paired with a flavorful soy dipping sauce. Curious about how to get that perfect crisp on the outside while keeping the inside tender? Let’s dive into this colorful Korean culinary adventure together!

Why are Korean Vegetable Pancakes so special?

Crispy Texture: Achieve the perfect golden crunch that makes every bite irresistible.
Colorful Ingredients: A vibrant mix of fresh veggies ensures an eye-catching dish that’s also healthy.
Quick & Easy: Ready in under 30 minutes, these pancakes are perfect for busy days or impromptu gatherings.
Versatile Dish: Great as an appetizer or light meal, they adapt effortlessly to any occasion.
Flavorful Dipping Sauce: The accompanying soy dip elevates the taste, adding an extra layer of deliciousness.
Vegan & Gluten-Free: Enjoy a dish that caters to various dietary needs, including vegetarian and gluten-free options, just like my delicious Ricotta Protein Pancakes.

Korean Vegetable Pancakes Ingredients

• Dive into the delightful world of Korean Vegetable Pancakes with these essential ingredients!

For the Batter

  • Flour – Provides the pancake structure; substitute with a gluten-free flour blend if needed.
  • Cornstarch – Enhances crispiness; no direct substitute required.
  • Water – Hydrates the dry ingredients; adjust as needed for batter consistency.
  • Turmeric – Adds color and a subtle earthy flavor; optional if unavailable.
  • Salt – Essential for flavor enhancement; don't skip for the best results.
  • Baking Powder – Creates a light and airy texture; crucial for perfect pancakes.

For the Vegetables

  • Green Onions – Offers freshness and crunch; can substitute with chives.
  • Red Onion – Adds sweetness and flavor; yellow onion works as a substitute.
  • Carrot – Contributes natural sweetness and color; zucchini can replace it.
  • Red Pepper – Provides sweetness and crunch; green bell peppers are an alternative.
  • Cabbage – Adds texture and fiber; any variety works, with Napa cabbage being a great option.
  • Hot Pepper – Infuses heat; omit for a milder flavor if desired.

For Frying

  • Oil for Frying – Necessary to achieve a crispy texture; use vegetable or peanut oil for optimal results.

For the Soy Dipping Sauce

  • Soy Sauce – The base of the dipping sauce; choose low-sodium for a healthier option.
  • Rice Vinegar – Brightens flavors; substitute with apple cider vinegar if needed.
  • Toasted Sesame Seeds – Adds a nutty note; can be omitted if unavailable.
  • Chili Flakes – Offer a kick of heat; adjust to taste or skip if desired.
  • Sesame Oil – Imparts a rich fragrance; olive oil works for a milder flavor alternative.

Now you're ready to create these irresistible Korean Vegetable Pancakes, bursting with flavors and textures!

Step‑by‑Step Instructions for Korean Vegetable Pancakes

Step 1: Prepare the Vegetables
Begin by preparing your fresh vegetables for the Korean Vegetable Pancakes. Thinly slice green onions, red onion, carrot, red pepper, and cabbage to create a colorful mix. If you're using hot pepper for a spicy kick, slice that as well. Aim for uniform pieces to ensure even cooking. Set the chopped veggies aside in a large bowl while you make the batter.

Step 2: Make the Batter
In a large mixing bowl, whisk together flour, cornstarch, turmeric, baking powder, and salt. Gradually add in water, mixing until the batter is smooth and free of lumps; it should be thick but pourable. This perfect consistency is crucial for achieving that delightful crisp on the Korean Vegetable Pancakes once they're cooked.

Step 3: Mix Vegetables into the Batter
Gently fold the prepared vegetables into the batter until they are well coated. Ensure that all vegetables are incorporated evenly so that each pancake is bursting with flavor. The vibrant colors and textures of the veggies will make your batter enticing and delicious, ready for frying.

Step 4: Prepare Dipping Sauce
While the batter is resting, prepare the soy dipping sauce. In a small bowl, combine soy sauce, rice vinegar, toasted sesame seeds, and chili flakes for a zesty kick. Stir well until all ingredients are blended. Setting this aside allows the flavors to meld while you cook the pancakes, enhancing the overall taste experience.

Step 5: Heat the Pan
Place a non-stick skillet over medium heat and add enough oil to coat the bottom, ensuring a crispy finish for your pancakes. Let the oil heat up for a couple of minutes until shimmering but not smoking. A proper temperature is key for achieving that golden-brown crust on your Korean Vegetable Pancakes.

Step 6: Cook the Pancakes
Using a ladle or spoon, pour a portion of the batter into the hot pan, spreading it into a thin, even layer. Fry for about 3–4 minutes or until the edges are golden and crispy. Carefully flip the pancake and cook the other side for an additional 2–3 minutes until nicely browned. Repeat this process, adding more oil as needed.

Step 7: Repeat Cooking
Continue cooking the remaining batter, ensuring to add oil to the pan each time for a perfect crisp. Adjust the heat as necessary to prevent burning; keeping it at medium will allow for even cooking. Place cooked pancakes on a plate lined with paper towels to absorb excess oil and maintain their crispy texture.

Step 8: Serve Warm
Once all the pancakes are cooked, serve them warm alongside the soy dipping sauce. The combination of the crispy Korean Vegetable Pancakes and the savory dip makes for a delightful snack or light meal. Enjoy them fresh from the pan for the best flavor and texture!

How to Store and Freeze Korean Vegetable Pancakes

Fridge: Store leftovers in an airtight container in the refrigerator for up to 2 days. This ensures they stay fresh and maintain their flavor.

Freezer: For longer storage, freeze uncooked batter in an airtight container for up to 2 months. When ready to use, thaw in the fridge overnight and cook as directed.

Reheating: To regain the crispy texture, reheat leftover pancakes in a hot pan for about 2-3 minutes on each side. Avoid the microwave, as it can make them soggy.

Make-Ahead Tip: Prepare the batter ahead of time and keep it refrigerated for up to a day before cooking, making meal prep a breeze while enjoying your delicious Korean Vegetable Pancakes!

Make Ahead Options

These Korean Vegetable Pancakes (Yachaejeon) are a fantastic choice for meal prep, saving you precious time on busy weeknights! You can prepare the batter and store it in the refrigerator for up to 24 hours; just be sure to give it a good stir before cooking. Additionally, you can chop the vegetables and refrigerate them in an airtight container for up to 3 days. This not only ensures they stay fresh but also allows their flavors to mingle a bit. When you're ready to cook, simply mix the prepped vegetables into the batter and proceed with frying for delicious, crispy pancakes that taste just as good as when made fresh!

Korean Vegetable Pancakes Variations

Feel free to explore new flavors and textures with these delightful twists on the classic Korean Vegetable Pancakes!

  • Mushroom Medley: Mix in sautéed mushrooms for an earthy flavor. This addition not only enhances taste but adds an irresistible umami punch to every bite.

  • Zucchini Twist: Substitute half the carrots with grated zucchini. This makes for a lighter texture while keeping your pancakes vibrant and delicious. Zucchini’s subtle flavor works beautifully with the veggies.

  • Spicy Kick: Add chopped jalapeños or red chili flakes to the batter for an extra heat boost. Perfect for those who enjoy a little spice in their life! Just remember, a little can go a long way.

  • Chickpea Flour Base: Swap out half the regular flour for chickpea flour to create a gluten-free version that’s high in protein. This not only accommodates dietary needs but also adds a nutty flavor profile that’s simply delightful.

  • Herb Infusion: Stir in fresh herbs like cilantro or basil for a refreshing twist. These herbs brighten up the flavor and take the pancakes to a whole new level.

  • Sweet Potato Add-In: Replace carrots with grated sweet potato for a naturally sweet flavor and gorgeous orange hues. The sweet potato adds a lovely moistness, making each pancake a comforting treat.

  • Nutty Aroma: Use toasted sesame oil in your batter for an additional layer of flavor that's nutty and aromatic. It enhances the overall taste, making your pancakes memorable.

  • Different Dipping Sauces: Experiment with a homemade peanut sauce or mango chutney instead of the usual soy sauce. Each sauce brings a unique accompaniment to your crispy pancakes, just like the delightful pairing of my Ricotta Protein Pancakes with fruit.

Unlock the potential of these Korean Vegetable Pancakes and savor a delicious world of choices!

Expert Tips for Korean Vegetable Pancakes

  • Batter Consistency: Aim for a smooth batter. If too thick, add water gradually until it's pourable but not runny; this ensures even cooking.
  • Heat Control: Maintain a medium flame while cooking. Too hot can burn the pancakes, while too low may leave them soggy inside.
  • Small Pancakes: For easier flipping, make smaller pancakes. They cook more evenly and allow you to enjoy multiple bites of this delicious Korean Vegetable Pancakes dish.
  • Fresh Ingredients: Use the freshest vegetables possible. Their vibrant flavors not only enhance taste but also boost nutritional value.
  • Storage Method: Store any leftovers in an airtight container in the fridge for up to 2 days. Reheat in a pan to retain crispy texture.

What to Serve with Crispy Korean Vegetable Pancakes?

Warm up your dinner table with vibrant side dishes and delightful drinks that perfectly complement these crispy treasures.

  • Fresh Green Salad: A crisp salad with a citrus vinaigrette adds brightness and balances the pancakes' rich flavors. The refreshing crunch enhances the overall experience.

  • Steamed Edamame: This nutritious snack pairs wonderfully, providing a protein-packed contrast that’s easy to prepare and delicious to enjoy.

  • Pickled Vegetables: Offering a tangy bite, pickles or kimchi add depth and flavor contrast, enhancing the savory pancakes beautifully. They bring a zing that keeps each bite exciting.

  • Sesame Noodles: Flavorful sesame noodles make for a hearty side, incorporating nutty elements that match the dipping sauce while adding a delightful chew.

  • Spicy Dipping Sauce: For those who love an extra kick, a sweet chili sauce elevates the taste experience while harmonizing with the soy dip.

  • Chilled Soju: This smooth Korean spirit complements the meal well, finishing off your culinary adventure with a refreshing burst of flavor.

  • Coconut Sticky Rice: A soothing, slightly sweet contrast to the pancakes, this dessert wraps up the meal perfectly, leaving a lasting impression.

  • Bubble Tea: For a fun and refreshing drink option, bubble tea adds a playful twist to the dining experience, keeping the mood lively and enjoyable.

Mix and match these options to create a full meal that’s sure to impress family and friends, turning any night into a special occasion.

Korean Vegetable Pancakes Recipe FAQs

How do I select ripe vegetables for my pancakes?
Absolutely! When selecting vegetables, look for fresh, vibrant produce. Green onions should be firm without wilting, while carrots should be crisp and bright orange. Red peppers should be smooth and shiny, with no dark spots. Cabbage should feel heavy for its size and have tightly packed leaves. Choosing the freshest ingredients boosts both flavor and nutrients in your Korean Vegetable Pancakes!

How should I store leftovers after making the pancakes?
Very! To store leftovers, place them in an airtight container in the refrigerator for up to 2 days. It's essential to let them cool completely before sealing them to prevent moisture build-up. For the best reheat quality, warm them in a hot pan over medium heat for about 2-3 minutes on each side, restoring their delightful crispiness.

Can I freeze the Korean Vegetable Pancakes?
Absolutely! You can freeze uncooked batter in an airtight container for up to 2 months. Just thaw it in the fridge overnight when you're ready to use it. When cooking from frozen, adjust the cooking time slightly; it may take an extra minute or two. Cook as directed for a delicious treat straight from your freezer!

What should I do if my pancakes don’t seem crispy enough?
No worries! If your pancakes turn out soft, check your batter’s consistency. Ensure it’s thick but pourable; adding a bit more cornstarch can enhance crispiness. When frying, make sure your oil is hot enough — around 350°F (175°C) — before adding the batter. Cook them thin to allow moisture to escape, leading to that perfect crunch!

Are these pancakes safe for people with allergies or specific diets?
Very! The Korean Vegetable Pancakes can be tailored for various dietary needs. They're naturally vegetarian and easily made vegan by using plant-based ingredients. For gluten-free options, substitute regular flour with a gluten-free blend of your choice. Additionally, always double-check any sauces for gluten-containing ingredients if you're avoiding gluten altogether.

Can I add different vegetables or ingredients for variety?
The more the merrier! Feel free to get creative with your Korean Vegetable Pancakes by incorporating mushrooms, zucchini, or even shredded sweet potato for added sweetness. You could also explore different dipping sauces, such as a sweet chili sauce or a tangy peanut sauce, to elevate your meal even further!

Korean Vegetable Pancakes

Crispy Korean Vegetable Pancakes for a Flavorful Snack

These Crispy Korean Vegetable Pancakes are a delightful snack that is quick, easy, and versatile, perfect for any occasion.
Print Recipe Pin Recipe
Prep Time 15 minutes mins
Cook Time 15 minutes mins
Resting Time 10 minutes mins
Total Time 40 minutes mins
Servings: 4 pancakes
Course: Snacks
Cuisine: Korean
Calories: 150
Ingredients Equipment Method Nutrition Notes

Ingredients
  

For the Batter
  • 1 cup Flour Substitute with gluten-free flour blend if needed.
  • 2 tablespoons Cornstarch Enhances crispiness.
  • 1 cup Water Adjust as needed for batter consistency.
  • 1 teaspoon Turmeric Optional if unavailable.
  • 1/2 teaspoon Salt Essential for flavor enhancement.
  • 1 teaspoon Baking Powder Crucial for perfect pancakes.
For the Vegetables
  • 1 cup Green Onions Can substitute with chives.
  • 1 medium Red Onion Yellow onion works as a substitute.
  • 1 medium Carrot Zucchini can replace it.
  • 1 medium Red Pepper Green bell peppers are an alternative.
  • 1 cup Cabbage Any variety works.
  • 1 small Hot Pepper Omit for a milder flavor.
For Frying
  • 2 tablespoons Oil for Frying Use vegetable or peanut oil for optimal results.
For the Soy Dipping Sauce
  • 1 tablespoon Soy Sauce Choose low-sodium for a healthier option.
  • 1 tablespoon Rice Vinegar Substitute with apple cider vinegar if needed.
  • 1 tablespoon Toasted Sesame Seeds Can be omitted if unavailable.
  • 1 teaspoon Chili Flakes Adjust to taste or skip if desired.
  • 1 teaspoon Sesame Oil Use olive oil for a milder flavor.

Equipment

  • non-stick skillet
  • Mixing Bowl
  • Ladle

Method
 

Step‑by‑Step Instructions
  1. Prepare the vegetables by thinly slicing green onions, red onion, carrot, red pepper, and cabbage. Set aside in a large bowl.
  2. In a large mixing bowl, whisk together flour, cornstarch, turmeric, baking powder, and salt. Gradually add water until the batter is smooth.
  3. Gently fold the prepared vegetables into the batter until well coated.
  4. Prepare the soy dipping sauce by combining soy sauce, rice vinegar, toasted sesame seeds, and chili flakes in a small bowl. Stir well.
  5. Heat a non-stick skillet over medium heat and add enough oil to coat the bottom.
  6. Pour a portion of the batter into the hot pan, spreading it into a thin layer. Fry for 3–4 minutes until edges are golden.
  7. Flip the pancake and cook the other side for an additional 2–3 minutes until browned. Repeat with remaining batter.
  8. Serve the cooked pancakes warm alongside the soy dipping sauce.

Nutrition

Serving: 1pancakeCalories: 150kcalCarbohydrates: 20gProtein: 3gFat: 6gSaturated Fat: 1gPolyunsaturated Fat: 1gMonounsaturated Fat: 3gSodium: 300mgPotassium: 200mgFiber: 2gSugar: 1gVitamin A: 500IUVitamin C: 10mgCalcium: 30mgIron: 1mg

Notes

Use fresh ingredients for the best flavor and texture. Store any leftovers in an airtight container in the fridge for up to 2 days. Reheat in a pan to maintain crispiness.

Tried this recipe?

Let us know how it was!

Delicious Home-Cooked Meals to Ditch Fast Food Forever

February 20, 2026 by Grace Snow Leave a Comment

As I sifted through my spice cabinet, a forgotten jar of curry powder caught my eye, evoking the aroma of vibrant market days during my travels. That delightful memory inspired me to whip up a Comforting Chickpea Curry—a dish that’s not only packed with flavor but also a quick solution for those chaotic weeknights when cooking feels like a mini crisis. This recipe is a crowd-pleaser, bringing warmth and spice to your dinner table in just 30 minutes, all while being nourishing and satisfying. Plus, it's vegan and can easily be made gluten-free, making it a versatile go-to for family and friends. Curious to see how easy it is to elevate your weeknight meals with this soulful delight? Let’s dive in!

How can dinner be this quick and delicious?

Speedy Preparation: With a cooking time of just 30 minutes, this chickpea curry is perfect for busy weeknights when you're short on time.
Flavor Explosion: The blend of spices transforms simple ingredients into a mouthwatering dish that will have everyone asking for seconds.
Vegan and Gluten-Free: This recipe is not only plant-based but also easily adapted for gluten-free diets, making it a hit for all guests.
Crowd-Pleasing Comfort: Whether you're feeding your family or hosting friends, this curry promises to warm hearts and satisfy cravings—perfect for those who are tired of fast food! For additional inspiration, check out my ideas for easy weeknight dinners.
Nourishing Ingredients: Chickpeas provide protein and fiber, while vegetables lend their nutritional goodness, ensuring this meal is as wholesome as it is delightful.

Chickpea Curry Ingredients

For the Curry Base
• Chickpeas – canned or cooked, these little powerhouses are the star of your dish, rich in protein and fiber.
• Onion – finely chopped, it adds a sweet, aromatic base that enhances the overall flavor.
• Garlic – minced, it brings in those delightful warming notes that make your kitchen smell heavenly.
• Ginger – freshly grated for an extra zing, enriching the dish with its earthy warmth.
• Curry Powder – a vibrant blend that transforms ordinary ingredients into an exotic delight, making this chickpea curry unforgettable.
• Coconut Milk – creamy and luscious, it adds richness and balances the spices beautifully.
• Diced Tomatoes – fresh or canned, they contribute acidity and a touch of sweetness to round out the flavors.

For the Vegetables
• Spinach – fresh or frozen, it wilts down beautifully, adding color and nutrients to your curry.
• Bell Peppers – diced, they provide a sweet crunch and a pop of color to the dish.
• Carrots – sliced, they add natural sweetness and a bit of texture to the mix.

For Garnish
• Fresh Cilantro – chopped, it brings a fresh brightness that elevates the curry to a whole new level.
• Lime Wedges – serving on the side, they give a zesty kick that enhances the flavors of the chickpea curry.

With these ingredients, you’re already on your way to enjoying a hearty home-cooked meal that can easily replace fast food!

Step‑by‑Step Instructions for Comforting Chickpea Curry

Step 1: Sauté the Aromatics
Heat a tablespoon of oil in a large skillet over medium heat. Add the finely chopped onion and cook for about 5 minutes, stirring occasionally until translucent and slightly caramelized. Stir in the minced garlic and freshly grated ginger, allowing them to sauté for another minute until fragrant. The warm, inviting scents will begin to fill your kitchen!

Step 2: Add the Spices
Sprinkle in the vibrant curry powder, stirring well to coat the onions, garlic, and ginger. Continue cooking for 1-2 minutes, until the spices become fragrant and slightly darkened in color. This step is crucial for a depth of flavor in your Comforting Chickpea Curry.

Step 3: Incorporate the Tomatoes
Pour in the diced tomatoes, allowing them to blend with the spice mixture. Cook for about 3-4 minutes, letting the tomatoes soften and release their juices as they simmer. You’ll notice the mixture thickening slightly, creating a luscious base for the curry.

Step 4: Stir in the Coconut Milk
Slowly pour in the creamy coconut milk, stirring continuously to combine everything evenly. Bring the mixture to a gentle simmer and let it cook for 5 minutes. The beautiful blend of colors and aromas will surely tempt your taste buds, enhancing the richness of your chickpea curry.

Step 5: Add the Chickpeas and Vegetables
Gently fold in the drained chickpeas, diced bell peppers, and sliced carrots. Stir well, ensuring the vegetables are evenly distributed throughout the curry. Cover the skillet and allow it to simmer for an additional 10 minutes, or until the carrots are tender and the flavors meld together beautifully.

Step 6: Finish with Spinach
Finally, stir in the fresh spinach and cook for another 2-3 minutes until wilted. The vibrant green color will brighten the dish and add nutritious goodness to your Comforting Chickpea Curry.

Step 7: Prepare for Serving
Remove the skillet from heat and taste for seasoning. Adjust with salt if needed. Serve the chickpea curry warm in bowls with fresh cilantro on top and lime wedges on the side for an added zesty kick. The delicious home-cooked meal is now ready to be enjoyed!

Make Ahead Options

These Comforting Chickpea Curries are perfect for meal prep enthusiasts! You can chop the onions, garlic, and ginger up to 24 hours in advance and store them in an airtight container in the refrigerator to maintain freshness. Additionally, drain and rinse the chickpeas, as well as prepare all your vegetables, on the same day, ensuring they're ready to go. When you're ready to serve, simply sauté the aromatics and follow the remaining steps of the recipe. This method not only saves you precious time during busy weeknights, but it also guarantees that your curry turns out just as delicious and comforting as ever!

Chickpea Curry Variations & Substitutions

Feel free to explore different flavors and ingredients, making this chickpea curry truly your own!

  • Spicy Kick: Add diced fresh chili or a spoonful of chili paste to crank up the heat. Enjoy the warmth and zest explode on your palate!
  • Creamy Twist: Swap coconut milk for cashew cream for a richer, nutty flavor. This swap takes your curry experience to another level.
  • Extra Veggies: Toss in zucchini or cauliflower for added texture and nutrition. Each bite will surprise you with its delightful crunch and color!
  • Curry Blend: Experiment with different curry powders or blends—try garam masala for a unique twist. Your chickpea curry is sure to shine with new flavors!
  • Protein Boost: Mix in cooked lentils or chicken for an added protein punch, giving your curry an extra satisfying element. Combined flavors will create a hearty experience!
  • Zesty Additions: Include a splash of lemon juice or zest for a fresh, tangy brightness that enhances the overall flavor profile nicely. It’s like a burst of sunshine!
  • Herb Variation: Instead of cilantro, use fresh basil or mint for a different green note that elevates your dish to a whole new level of freshness.
  • Sweetness: For a hint of sweetness, add raisins or mango chunks. Their natural sugars provide a delightful contrast to the spices while enhancing the meal’s complexity.

From cozy weeknight dinners to meal prep for a busy week, this chickpea curry can adapt to any occasion! For more tips on customizing recipes, check out how to make simple substitutions in your favorite dishes.

How to Store and Freeze Chickpea Curry

Fridge: Store your chickpea curry in an airtight container for up to 5 days. This dish tastes even better the next day as the flavors meld together!

Freezer: Portion out the cooled chickpea curry into freezer-safe containers or bags. It can be frozen for up to 3 months, making it a perfect meal prep option.

Reheating: When ready to enjoy, thaw in the fridge overnight, then reheat gently on the stove or in the microwave until heated through. Enjoy the hearty comfort of homemade meals!

Avoid Freezer Burn: Make sure to seal your containers tightly, removing as much air as possible to prevent freezer burn and preserve the delightful flavors of your chickpea curry.

Expert Tips for Chickpea Curry

• Ingredient Freshness: Always use fresh spices and ingredients for maximum flavor. Dried spices lose potency over time, which can dull your chickpea curry.

• Don’t Rush the Sauté: Take your time in the sautéing step. This caramelizes the onions and enhances flavors, making your curry richer and more delicious.

• Customize Your Veggies: Feel free to swap in your favorite vegetables for a personal touch. Just ensure they cook to a tender texture for a fantastic chickpea curry.

• Taste As You Go: Always taste and adjust seasoning, especially before serving. This ensures your dish is perfectly balanced and keeps you engaged in the cooking process.

• Meal Prep Friendly: Make a double batch and freeze leftovers. Chickpea curry tastes even better the next day, making it an ideal meal prep option for those busy weeks!

What to Serve with Comforting Chickpea Curry

As the rich aroma of your chickpea curry fills the kitchen, it's time to consider what delectable sides can elevate this meal even further.

  • Coconut Rice: Fluffy rice cooked in coconut milk enhances the curry's richness and balances the spices beautifully. A luxurious, creamy base awaits!

  • Naan Bread: Soft and pillowy naan is perfect for scooping up the luscious chickpea curry, adding a comforting touch to your meal. Serve it warm for that heavenly experience.

  • Roasted Cauliflower: Crispy, spiced roasted cauliflower complements the curry's flavors while providing a delightful crunch. The charred edges bring an irresistible depth to your plate.

  • Green Salad: A crisp salad with fresh greens, cucumbers, and a tangy vinaigrette adds a refreshing contrast, brightening the meal and cutting through the curry's creaminess.

  • Chutney: Sweet mango or spicy mint chutney introduces a burst of flavor, making every bite an exciting journey of taste. A small dollop can elevate your curry experience.

  • Iced Hibiscus Tea: The floral notes of hibiscus tea create a cooling pairing that refreshes your palate between bites, making it a delightful, thirst-quenching companion.

  • Chocolate Avocado Mousse: For dessert, serve up a rich and creamy chocolate avocado mousse. Its smooth texture and deep chocolate flavor make for a dreamy ending that keeps your evening indulgent yet wholesome.

Chickpea Curry Recipe FAQs

What type of chickpeas should I use?
Absolutely! You can use canned chickpeas for convenience, giving you a tender texture right away. If you're feeling adventurous or want to control the texture, you can cook dried chickpeas. Soak them overnight in water, then cook them in boiling water for about 1 to 1.5 hours until tender. Both options work beautifully in this recipe!

How long can I store leftover chickpea curry?
Very! Your leftover chickpea curry can be stored in an airtight container in the fridge for up to 5 days. This dish usually tastes even better the next day since the flavors meld beautifully overnight. However, be sure to enjoy it within that timeframe to keep it fresh and tasty!

Can I freeze chickpea curry?
Absolutely! To freeze, allow the chickpea curry to cool completely. Portion it into freezer-safe containers or resealable bags, leaving some space for expansion. It can be frozen for up to 3 months. When ready to reheat, simply thaw in the fridge overnight and warm it up on the stove or in the microwave. Voila, a quick homemade meal awaits!

What if my chickpea curry is too thick?
Oh no! If you find your chickpea curry a tad too thick for your liking, just add a splash of water or vegetable broth to loosen it up. Stir it in gradually and let it simmer for a few more minutes to incorporate the added liquid into the curry. Remember, it’s all about balance, and you’re in control of your creation!

Are there any allergens in chickpea curry?
Very! This chickpea curry is naturally vegan and gluten-free, making it suitable for various dietary needs. However, double-check your curry powder for potential allergens, as some blends may contain gluten or other allergens. If you're serving guests with specific dietary restrictions, I recommend keeping any high-allergy ingredients—like nuts—out of the recipe to ensure everyone can enjoy a bowlful of comfort.

How can I customize my chickpea curry?
The more the merrier! You can easily customize your chickpea curry by adding different vegetables like zucchini, peas, or even cauliflower. For added texture and flavor, consider incorporating some cooked lentils or beans. Just ensure the cooking times allow for a tender finish. And don’t be shy with experimenting—your personal touches can cook up delightful surprises in every bowl!

Raspberry and Rose Cheesecake Buns

Delicious Home-Cooked Meals to Ditch Fast Food Forever

This comforting chickpea curry is a quick, delicious, and vegan-friendly meal that can replace your fast food cravings.
Print Recipe Pin Recipe
Prep Time 10 minutes mins
Cook Time 30 minutes mins
Total Time 40 minutes mins
Servings: 4 servings
Course: Uncategorized
Cuisine: Indian, Vegan
Calories: 350
Ingredients Equipment Method Nutrition Notes

Ingredients
  

For the Curry Base
  • 1 can Chickpeas canned or cooked, drained
  • 1 medium Onion finely chopped
  • 2 cloves Garlic minced
  • 1 inch Ginger freshly grated
  • 2 tablespoons Curry Powder
  • 1 can Coconut Milk
  • 1 can Diced Tomatoes fresh or canned
For the Vegetables
  • 2 cups Spinach fresh or frozen
  • 1 medium Bell Peppers diced
  • 2 medium Carrots sliced
For Garnish
  • 1/4 cup Fresh Cilantro chopped
  • 2 wedges Lime for serving

Equipment

  • Large skillet

Method
 

Step‑by‑Step Instructions
  1. Heat a tablespoon of oil in a large skillet over medium heat. Add the finely chopped onion and cook for about 5 minutes, stirring occasionally until translucent and slightly caramelized.
  2. Stir in the minced garlic and freshly grated ginger, allowing them to sauté for another minute until fragrant.
  3. Sprinkle in the vibrant curry powder, stirring well to coat the onions, garlic, and ginger.
  4. Continue cooking for 1-2 minutes, until the spices become fragrant and slightly darkened in color.
  5. Pour in the diced tomatoes, allowing them to blend with the spice mixture. Cook for about 3-4 minutes.
  6. Slowly pour in the creamy coconut milk, stirring continuously to combine everything evenly.
  7. Bring the mixture to a gentle simmer and let it cook for 5 minutes.
  8. Gently fold in the drained chickpeas, diced bell peppers, and sliced carrots. Stir well.
  9. Cover the skillet and allow it to simmer for an additional 10 minutes, or until the carrots are tender.
  10. Finally, stir in the fresh spinach and cook for another 2-3 minutes until wilted.
  11. Remove the skillet from heat, taste for seasoning, and adjust with salt if needed.
  12. Serve the chickpea curry warm in bowls with fresh cilantro on top and lime wedges on the side.

Nutrition

Serving: 1bowlCalories: 350kcalCarbohydrates: 45gProtein: 12gFat: 15gSaturated Fat: 8gPolyunsaturated Fat: 2gMonounsaturated Fat: 4gSodium: 600mgPotassium: 700mgFiber: 10gSugar: 5gVitamin A: 500IUVitamin C: 60mgCalcium: 100mgIron: 3mg

Notes

This recipe is easily customizable with your favorite vegetables and can be made ahead for meal prep. Ensure to taste and adjust seasonings for best flavor.

Tried this recipe?

Let us know how it was!

Tres Leches Cinnamon Rolls: Fluffy Bliss in Every Bite

February 20, 2026 by Grace Snow Leave a Comment

The aroma of fresh cinnamon rolls can transport me back to my grandmother’s cozy kitchen, where laughter and sweet indulgence danced together. Today, I’m excited to share my take on this classic treat with a delightful twist: Tres Leches Cinnamon Rolls. These fluffy rolls soak up a rich mixture of three types of milk, creating a melt-in-your-mouth experience that’s simply irresistible. Not only are they quick to whip up, but they also elevate any brunch or dessert table with their decadent flavors. Plus, for those following a gluten-free diet, I've got a simple substitution to ensure everyone can enjoy this comforting delight. Ready to embark on this delicious journey with me? Let’s get baking!

Why Are Tres Leches Cinnamon Rolls Irresistible?

Fluffy Texture: Each roll is light and airy, making it feel like a cloud of sweetness in your mouth.

Decadent Soak: With a luscious blend of three milks, they’re incredibly moist and bursting with flavor, a truly decadent treat!

Quick Prep Time: Easy to make, this recipe allows you to enjoy homemade goodness without spending all day in the kitchen.

Gluten-Free Option: Don’t worry if you need a gluten-free version; simply swap in your favorite gluten-free flour for the same delightful experience.

Crowd-Pleasing Delight: Perfect for brunch or dessert, they’re sure to impress friends and family, leaving everyone asking for seconds.

Pair these scrumptious rolls with a dollop of whipped cream or a scoop of vanilla ice cream for an unforgettable indulgence!

Tres Leches Cinnamon Rolls Ingredients

• Here’s everything you'll need to create these delightful rolls:

For the Dough

  • All-Purpose Flour – Provides structure for the rolls, but can be substituted with gluten-free flour for those avoiding gluten.
  • Granulated Sugar – Adds the perfect sweetness to the dough.
  • Instant Yeast – Helps achieve that fluffy texture you crave.
  • Salt – Enhances the overall flavor of your cinnamon rolls.
  • Whole Milk (warm) – Activates the yeast and ensures the dough is well-hydrated.
  • Unsalted Butter (melted) – Infuses the dough with rich flavor and moisture.
  • Large Eggs – Acts as a binding agent to give the rolls structure.
  • Vanilla Extract – Adds a warm aroma and enhances the sweetness.

For the Cinnamon Filling

  • Unsalted Butter (softened) – Ensures a rich, spreadable filling that melds beautifully with the dough.
  • Brown Sugar – Provides depth of flavor and sweetness to the filling.
  • Ground Cinnamon – This spice gives the rolls their signature, comforting warmth.

For the Tres Leches Soak

  • Whole Milk – Contributes creaminess that soaks into the rolls.
  • Sweetened Condensed Milk – Adds rich sweetness, taking the soak to the next level.
  • Evaporated Milk – Provides a smooth and creamy texture that enhances the flavor.

For the Frosting

  • Powdered Sugar – Adds sweetness and a velvety finish to your frosting.
  • Milk (to desired frosting consistency) – Adjust this to get your frosting just right for drizzling.

Now that you have all the delicious ingredients, you’re just a step away from creating these irresistible Tres Leches Cinnamon Rolls that will delight everyone at your table!

Step‑by‑Step Instructions for Tres Leches Cinnamon Rolls

Step 1: Activate Yeast
In a small bowl, combine 1/2 cup of warm milk, instant yeast, and 1 tablespoon of granulated sugar. Stir gently and let it sit for 5-10 minutes until it becomes frothy, signaling that the yeast is activated. This crucial step ensures your Tres Leches Cinnamon Rolls will rise beautifully and have that fluffy texture.

Step 2: Make Dough
In a large mixing bowl, whisk together 3 1/2 cups of all-purpose flour, the remaining sugar, and 1 teaspoon of salt. Create a well in the center, adding the melted butter, large eggs, vanilla extract, and the frothy yeast mixture. Mix until a soft dough forms, and be prepared to knead it to achieve that irresistible fluff.

Step 3: Knead & Rise
Turn the dough onto a lightly floured surface and knead for about 8-10 minutes until smooth and elastic. Form it into a ball and place it in a greased bowl, covering it with a clean kitchen towel. Let it rise in a warm location for 1 hour or until doubled in size, filling your kitchen with the delightful aroma of freshly baked bread.

Step 4: Prepare Filling
While waiting for the dough to rise, mix 1/2 cup of softened unsalted butter, 1 cup of brown sugar, and 2 tablespoons of ground cinnamon in a bowl until well combined. This sweet filling will ensure your Tres Leches Cinnamon Rolls are bursting with flavor, adding that signature touch.

Step 5: Shape Rolls
Once the dough has risen, gently punch it down and roll it out on a floured surface into a rectangle about 1/4-inch thick. Spread the cinnamon filling evenly over the surface, then tightly roll the dough into a log. Cut the log into 12 equal pieces, creating beautiful rolls ready for their second rise.

Step 6: Second Rise
Place the cut rolls into a greased 9x13-inch baking dish, positioning them closely together. Cover the dish with a towel and let the rolls rise again for 1 hour. During this time, the rolls will puff up, creating that dreamy fluffy texture that makes Tres Leches Cinnamon Rolls so delightful.

Step 7: Bake
Preheat your oven to 350°F (175°C). Once the rolls have risen, bake them in the preheated oven for 25-30 minutes, or until they are golden brown on top. The aroma will fill your home, signaling it’s almost time to indulge in the moist deliciousness of these rolls.

Step 8: Make Soak
In a medium bowl, whisk together the remaining whole milk, 1 can of sweetened condensed milk, and 1 can of evaporated milk until well blended. This rich tres leches soak will infuse every corner of your rolls, making them irresistibly moist and flavorful.

Step 9: Soak Rolls
As soon as the rolls come out of the oven, pour the tres leches mixture evenly over the warm rolls. Let them absorb the soak for about 30 minutes; they will plump up beautifully, creating a decadent and creamy texture that is the hallmark of Tres Leches Cinnamon Rolls.

Step 10: Frost
To prepare the frosting, whisk together 1 cup of powdered sugar with enough milk to achieve a smooth, drizzling consistency. Once the rolls have absorbed the soaking milk, drizzle the frosting generously over them for the perfect finishing touch that adds sweetness and an appealing shine.

What to Serve with Tres Leches Cinnamon Rolls

Enjoying these fluffy, indulgent rolls is just the beginning. To elevate your experience further, consider these delightful pairings that embrace a variety of textures and flavors.

  • Fresh Fruit Salad: A vibrant mix of seasonal fruits adds a refreshing contrast to the creamy richness of the cinnamon rolls. The sweetness of strawberries, blueberries, and kiwi brightens up every bite.

  • Whipped Cream: Light, airy, and slightly sweet, whipped cream is the perfect accompaniment. It enhances the rolls’ luxurious feel, creating a dreamy dessert that just melts in your mouth.

  • Vanilla Ice Cream: A scoop of vanilla ice cream adds a delightful creaminess alongside the warm rolls. The contrast between hot and cold makes for a sensational treat you won’t forget!

  • Coffee: A rich cup of coffee offers a lovely bitterness that balances the sweetness of the rolls. The aroma fills the air, inviting warmth and connection around the table during brunch or dessert.

  • Chocolate Sauce: Drizzling warm chocolate sauce over your rolls introduces an irresistible twist. The depth of flavor makes each bite even more decadent—perfect for chocolate lovers!

  • Caramel Sauce: A drizzle of caramel sauce provides a luscious, sweet-salty layer to each roll, heightening the indulgent experience with every delightful mouthful.

Treat yourself to a combination of flavors and textures that will create memories as delightful as the rolls themselves!

Expert Tips for Tres Leches Cinnamon Rolls

  • Yeast Activation: Ensure your yeast mixture is frothy; this confirms it's active. Without this step, your dough may not rise properly.

  • Flour Substitution: If using gluten-free flour, check the blend’s ingredients and adjust the baking time to achieve the right fluffiness and texture.

  • Perfect Filling: Spread the cinnamon filling evenly and roll tightly to avoid leaks and ensure every bite is deliciously sweet.

  • Soak Timing: Let the rolls absorb the tres leches mixture while they’re still warm. This enhances the moistness, creating the ultimate soft and fluffy cinnamon rolls.

  • Avoid Overmixing: When preparing the dough, mix until just combined to prevent tough rolls. The key to fluffy Tres Leches Cinnamon Rolls is a light touch!

Make Ahead Options

These Tres Leches Cinnamon Rolls are perfect for busy home cooks looking to save time without sacrificing flavor! You can prepare the dough and let it rise up to 24 hours in advance, simply placing it in the refrigerator after the first rise. When you're ready to bake, allow it to come to room temperature for about 30 minutes before shaping. Additionally, you can mix the filling ahead of time and refrigerate it, ensuring all your components are ready to go. To maintain the rolls' fluffy texture, soak them in the tres leches mixture right after baking and enjoy warm. With these make-ahead tips, you’ll have a delicious, fuss-free treat waiting for you!

How to Store and Freeze Tres Leches Cinnamon Rolls

Fridge: Store leftover Tres Leches Cinnamon Rolls in an airtight container for up to 3 days to maintain their fluffiness.

Freezer: Wrap individual rolls in plastic wrap, then place them in a freezer-safe bag. They can be frozen for up to 3 months.

Reheating: To enjoy frozen rolls, thaw overnight in the fridge, then reheat in a warm oven (350°F) for 10-15 minutes for the best texture.

Room Temperature: For short-term enjoyment, leave covered rolls at room temperature for a day, but they're best enjoyed chilled or warmed after being soaked in the tres leches mixture.

Tres Leches Cinnamon Rolls Variations

Feel free to indulge your creativity with these delightful variations and substitutions!

  • Gluten-Free: Substitute all-purpose flour with a gluten-free blend to create a delicious version for those avoiding gluten. It still delivers that fluffy splendor!

  • Cream Cheese Glaze: Whip up a tangy cream cheese frosting instead of traditional glaze for an added layer of rich flavor. It’s a match made in cinnamon roll heaven!

  • Nutty Delight: Sprinkle in some chopped pecans or walnuts within the cinnamon filling for a delightful crunch. These little additions bring a satisfying texture that complements the sweetness perfectly.

  • Spicy Twist: Add a pinch of nutmeg or cardamom to the cinnamon filling for an aromatic upgrade that elevates the flavor profile. It gives your rolls a cozy warmth that dances on your palate!

  • Chocolate Drizzle: Melt some chocolate and drizzle it over the frosting for a decadent chocolatey finish that will make chocolate lovers swoon.

  • Fruit Infusion: Consider pairing your Tres Leches Cinnamon Rolls with fresh fruit, like sliced strawberries or blueberries, for a refreshing contrast to the rich flavors. The fruity burst cuts through sweetness beautifully!

  • Coffee Flavor: Replace a portion of the milk in the tres leches soak with brewed coffee for a delightful mocha flavor that will energize your mornings. It brings a whole new showstopper experience!

  • Churro Style: For a fun twist, roll the dough in cinnamon and sugar before baking to create a churro-like exterior. It’s an irresistible crunchy coating that complements the soft interior irresistibly.

For more imaginative desserts, don’t forget to check out my Pumpkin Cinnamon Roll Muffins that are sure to bring seasonal flavors to life!

Tres Leches Cinnamon Rolls Recipe FAQs

What kind of flour should I use for the best results?
You can use all-purpose flour for a classic Tres Leches Cinnamon Rolls experience. If you need a gluten-free option, I recommend a high-quality gluten-free flour blend that includes xanthan gum, as this will help mimic the texture and rise of traditional flour.

How do I store leftover tres leches cinnamon rolls?
To maintain their fluffy texture, store leftover rolls in an airtight container in the fridge for up to 3 days. This way, they keep their moistness. If you enjoy them warm, just pop them in the microwave for a few seconds to revive that fresh-baked goodness.

Can I freeze these cinnamon rolls?
Absolutely! To freeze your Tres Leches Cinnamon Rolls, wrap each roll tightly in plastic wrap, and then place them in a freezer-safe zip-top bag. They can be stored in the freezer for up to 3 months. When you’re ready to enjoy, simply thaw them in the fridge overnight and reheat them at 350°F (175°C) for 10-15 minutes for the perfect texture.

What should I do if my dough doesn’t rise?
If your dough isn’t rising, it could be due to a few factors. First, check that your yeast is fresh and active; it should foam when combined with warm milk and sugar. Warmth is crucial, too; if your kitchen is too cold, consider placing the dough in a warmer area or using your oven’s low setting to create a cozy environment for rising.

Is this recipe safe for people with lactose intolerance?
While Tres Leches Cinnamon Rolls use dairy ingredients, those who are lactose intolerant may substitute with lactose-free milk and creams. You can look for dairy substitutes like coconut or oat milk as alternatives for the tres leches soak, but this may slightly alter the flavor profile. Always check allergen labels to stay safe!

Can I add different toppings or flavors?
Yes, you can absolutely customize your Tres Leches Cinnamon Rolls! Consider adding a cream cheese glaze for extra richness or even fresh fruits like strawberries for a light, refreshing contrast. Feel free to experiment with spices like cardamom or nutmeg in the filling to give it your unique twist!

Tres Leches Cinnamon Rolls

Tres Leches Cinnamon Rolls: Fluffy Bliss in Every Bite

These Tres Leches Cinnamon Rolls are fluffy and irresistible, soaked in a rich blend of three milks for a melt-in-your-mouth experience.
Print Recipe Pin Recipe
Prep Time 30 minutes mins
Cook Time 30 minutes mins
Rising Time 2 hours hrs
Total Time 3 hours hrs
Servings: 12 rolls
Course: Dessert
Cuisine: Mexican
Calories: 300
Ingredients Equipment Method Nutrition Notes

Ingredients
  

Dough Ingredients
  • 3.5 cups All-Purpose Flour Can substitute with gluten-free flour.
  • 0.5 cups Granulated Sugar
  • 1 tablespoon Instant Yeast
  • 1 teaspoon Salt
  • 1 cup Whole Milk Warm, for activating yeast.
  • 0.25 cups Unsalted Butter Melted.
  • 2 large Large Eggs
  • 2 teaspoons Vanilla Extract
Cinnamon Filling Ingredients
  • 0.5 cups Unsalted Butter Softened.
  • 1 cup Brown Sugar
  • 2 tablespoons Ground Cinnamon
Tres Leches Soak Ingredients
  • 1 cup Whole Milk
  • 1 can Sweetened Condensed Milk
  • 1 can Evaporated Milk
Frosting Ingredients
  • 1 cup Powdered Sugar
  • 3-4 tablespoons Milk To achieve desired frosting consistency.

Equipment

  • Mixing Bowl
  • Whisk
  • Baking Dish
  • Rolling Pin
  • measuring cups
  • Measuring Spoons

Method
 

Preparation Steps
  1. In a small bowl, combine 1/2 cup of warm milk, instant yeast, and 1 tablespoon of granulated sugar. Stir gently and let it sit for 5-10 minutes until frothy.
  2. In a large mixing bowl, whisk together 3 1/2 cups of flour, remaining sugar, and salt. Add melted butter, eggs, vanilla, and the frothy yeast mixture.
  3. Knead the dough for about 8-10 minutes until smooth and elastic. Let it rise in a greased bowl for 1 hour.
  4. Mix softened butter, brown sugar, and cinnamon in a bowl for the filling.
  5. Roll the risen dough into a rectangle and spread the filling evenly. Roll tightly and cut into 12 pieces.
  6. Place rolls in a greased dish and let rise again for 1 hour.
  7. Preheat oven to 350°F and bake for 25-30 minutes until golden brown.
  8. Whisk together milk, sweetened condensed milk, and evaporated milk for the soak.
  9. Pour the tres leches mixture over the warm rolls and let absorb for 30 minutes.
  10. Whisk powdered sugar with enough milk for a smooth consistency and drizzle over the rolls.

Nutrition

Serving: 1rollCalories: 300kcalCarbohydrates: 50gProtein: 5gFat: 10gSaturated Fat: 6gPolyunsaturated Fat: 0.5gMonounsaturated Fat: 3gCholesterol: 50mgSodium: 200mgPotassium: 150mgFiber: 1gSugar: 25gVitamin A: 300IUCalcium: 100mgIron: 1mg

Notes

For a gluten-free version, substitute all-purpose flour with a suitable blend and adjust baking time as needed.

Tried this recipe?

Let us know how it was!

Grapefruit Bars: A Refreshing Citrus Treat for Any Occasion

February 20, 2026 by Grace Snow Leave a Comment

As I sliced into the warm, golden crust of my Grapefruit Bars, the delightful aroma of citrus filled the kitchen, instantly awakening my senses. This sophisticated citrus dessert is not just a visually stunning addition to any gathering; it’s a deliciously refreshing twist on the classic lemon bar that balances sweet and tart in each bite. Perfect for brunch or an afternoon snack, these bars are surprisingly simple to make, providing an elegant treat that’s bound to impress your guests. Plus, they chill beautifully for a cool finish on warm days. Ready to elevate your dessert game and bring a taste of sunshine into your kitchen? Let’s dive into this zesty adventure!

Why Are Grapefruit Bars a Must-Try?

Sophisticated, Grapefruit Bars offer a unique twist on the classic lemon bar, capturing the essence of citrus in a delightful dessert. Visually stunning, their bright hue is sure to impress at any gathering. Easy to make, this recipe demands only basic skills steps, ensuring you can whip them up without fuss. Versatile enough to pair beautifully with brunch or as a refreshing afternoon snack, they're perfect for any occasion. Crowd-pleasing in flavor, the balance of sweet and tart will leave everyone wanting seconds! For more ideas on how to elevate your citrus desserts, check out our guide on making the best lemon bars.

Grapefruit Bars Ingredients

• Discover the delightful components of these refreshing treats!

For the Crust

  • All-Purpose Flour – Provides the structure for a buttery base; consider adding an extra tablespoon for firmness.
  • Unsalted Butter – Ensures rich flavor in the crust; using unsalted allows for better control of saltiness.
  • Granulated Sugar – Sweetness in the crust to contrast the tart filling; adjust to taste.

For the Filling

  • Grapefruit Juice – Delivers the primary tart and slightly bitter flavor that defines the bars; fresh juice is best.
  • Grapefruit Zest – Enhances the citrus fragrance and flavor; avoid the white pith to minimize bitterness.
  • Granulated Sugar – Balances the tang of grapefruit; tweak according to your preferred sweet-tart ratio.
  • Eggs – Adds richness and stability to the filling; ensure they are beaten until pale yellow for the best texture.
  • All-Purpose Flour – Helps thicken and stabilize the filling; this ensures a firm consistency after baking.

Optional Garnish

  • Powdered Sugar – A light dusting adds a touch of sweetness and elegance when serving.
  • Whipped Cream – A dollop elevates your presentation and offers a creamy contrast to the tartness of the grapefruit bars.

These Grapefruit Bars may just become your new favorite dessert!

Step‑by‑Step Instructions for Grapefruit Bars

Step 1: Prep Crust
Begin by preheating your oven to 350°F (175°C). In a mixing bowl, combine 1 cup of all-purpose flour, 1/4 cup of granulated sugar, and 1/2 cup of softened unsalted butter. Using a pastry blender or your fingertips, mix until the mixture resembles coarse crumbs. Press this buttery mixture evenly into the bottom of an 8-inch square baking dish to form your crust.

Step 2: Bake Crust
Place the prepared baking dish in the preheated oven and bake for 10–15 minutes, or until the edges are lightly golden and the crust is firm. Keep an eye on it to avoid over-baking. Once done, remove the crust from the oven and set it aside to cool slightly while you prepare the filling for your Grapefruit Bars.

Step 3: Prepare Filling
In a large mixing bowl, whisk together 2 eggs and 1 cup of granulated sugar until the mixture is pale and smooth. Gradually add in 3/4 cup of fresh grapefruit juice, 2 tablespoons of grapefruit zest, and 2 tablespoons of all-purpose flour. Mix until everything is well combined, ensuring a nice balance of sweet and tart flavors in your filling.

Step 4: Add Filling to Crust
Carefully pour the grapefruit filling over the pre-baked crust in the baking dish. Make sure to spread the filling evenly across the surface, allowing the filling to settle into the crust smoothly. The contrast of colors and textures will make your Grapefruit Bars appealing right from the start.

Step 5: Bake Again
Return the baking dish to the oven and bake for an additional 25–30 minutes, or until the filling is set and slightly golden around the edges. A light jiggle in the center is perfectly normal, but the overall texture should appear firm. This stage is crucial for achieving that delectable, creamy filling.

Step 6: Cool and Chill
Once baked, remove the Grapefruit Bars from the oven and allow them to cool at room temperature for at least an hour. Once cool, cover the dish with plastic wrap and refrigerate for at least 2 hours to firm them up fully. Chilling enhances the texture and makes slicing easier when you’re ready to serve these delightful treats.

Make Ahead Options

These Grapefruit Bars are perfect for busy home cooks looking to save time during the week! You can prepare the crust up to 24 hours in advance; simply bake it and allow it to cool before covering it and refrigerating. The filling can also be whisked together and refrigerated for up to 3 days—just remember to stir it gently again before pouring it over the crust to maintain smoothness. When ready to serve, bake the bars after layering the filling—this encourages the flavors to meld beautifully. Don’t forget to chill the baked bars for at least 2 hours before slicing to ensure a refreshing, firm texture that’s just as delicious as freshly made!

How to Store and Freeze Grapefruit Bars

Refrigerator: Keep your Grapefruit Bars in an airtight container in the fridge for up to one week. This ensures they maintain their zesty flavor and texture while staying fresh.

Freezer: For longer storage, wrap the bars tightly in plastic wrap and then in aluminum foil, or place them in a freezer-safe container. They can be frozen for up to three months.

Thawing: When ready to enjoy, thaw the bars in the refrigerator overnight. This maintains their delightful texture and flavor.

Serving After Storage: Once thawed, you can serve the bars chilled, dusted with powdered sugar, or with a dollop of whipped cream for a perfect finish!

Expert Tips for Grapefruit Bars

• Gentle Mixing: Avoid over-beating when preparing the filling; this prevents unwanted air bubbles that can affect the texture of your Grapefruit Bars.

• Chill Time Matters: Letting the bars cool and chill is key. They’ll firm up nicely, making them easier to slice and enhancing their flavors.

• Zesting Wisely: Use a microplane to zest the grapefruit, and steer clear of the white pith to minimize bitterness. A little zest goes a long way!

• Serving Suggestions: For an elegant presentation, serve your Grapefruit Bars chilled with a dusting of powdered sugar or a dollop of freshly whipped cream.

• Storage Tip: Keep any leftovers in the refrigerator for up to a week. They taste even better after a couple of days, as the flavors have time to meld!

What to Serve with Grapefruit Bars

Savor the delightful flavors of grapefruit bars and create a complete meal experience that tantalizes the senses.

  • Crisp Salad: A fresh arugula or mixed greens salad adds a peppery bite that counterbalances the sweetness of the bars.

  • Sparkling Water with Lime: This refreshing drink cleanses the palate, enhancing the bright citrus notes in your dessert.

  • Charcuterie Board: A selection of cheeses and cured meats introduces savory elements, providing an enticing contrast to the grapefruit's tart profile.

  • Lemon Sorbet: The cool, refreshing dessert echoes the citrus theme while offering a delightful textural contrast.

  • Champagne or Prosecco: Bubbly not only complements the fruity flavors beautifully but also adds a touch of elegance to your serving experience.

  • Chocolate-Dipped Strawberries: The sweetness of strawberries dipped in rich chocolate provides a luxurious pairing, balancing the tang of the grapefruit bars.

  • Mango Salsa: A tropical, sweet-tangy salsa brings a vibrant, fresh twist to your dessert spread, inviting exciting flavor combinations.

  • Coconut Macaroons: These chewy, sweet bites enhance the overall dessert table's texture and indulge your sweet tooth after each tart bar.

With these pairings, your grapefruit bars become part of a deliciously harmonious spread, perfect for any occasion!

Grapefruit Bars Variations & Substitutions

Get ready to play with flavors and textures as you customize your delightful Grapefruit Bars!

  • Lemon Variation: Swap grapefruit juice and zest for fresh lemon for a classic lemon bar twist that brightens up the dish.
  • Lime Alternative: Use lime juice and zest instead for a tropical vibe that adds just the right amount of zing.
  • Herb-Infused: Incorporate finely chopped fresh basil or mint into the filling for an exciting herbal twist against the citrus backdrop.
  • Gluten-Free Option: Substitute all-purpose flour with a 1:1 gluten-free flour blend to cater to gluten sensitivities while enjoying the same deliciousness.
  • Salted Caramel Drizzle: Enhance your bars with a rich salted caramel drizzle on top; the sweet and salty combination will create luscious layers of flavor.
  • Fruity Fusion: Mix in some diced fresh strawberries or blueberries with the grapefruit filling for a fruity twist and a little extra sweetness.
  • Spicy Kick: Add a pinch of cayenne pepper or gently folded in chopped jalapeños to give your bars a surprising heat that will tantalize the taste buds.
  • Coconut Cream Top: For a creamy contrast, dollop a layer of coconut whipped cream on top of the chilled bars before serving; it adds a delightful texture and flavor.

With these variations, there's no limit to how you can transform your Grapefruit Bars! Dive into the world of flavors and check out our recipe for making the best lemon bars for more inspiration.

Grapefruit Bars Recipe FAQs

How do I select ripe grapefruits for the bars?
Absolutely! When choosing grapefruits, pick ones that are firm with smooth skin and a slightly fragrant scent. Avoid any that have dark spots or blemishes, as they may be overripe. A grapefruit should feel heavy for its size, indicating juiciness.

What’s the best way to store leftover Grapefruit Bars?
You can keep your Grapefruit Bars in an airtight container in the refrigerator for up to one week. This helps preserve their delightful zesty flavor and keeps the texture nice. Just make sure they are well-wrapped to avoid any absorption of odors from other foods.

Can I freeze Grapefruit Bars, and if so, how?
Yes, of course! To freeze your Grapefruit Bars, first cool them completely at room temperature. Then, wrap the bars tightly in plastic wrap, followed by aluminum foil to ward off freezer burn. Alternatively, you can place them in a freezer-safe container with layers of parchment paper between to prevent sticking. They can be stored in the freezer for up to three months. Just remember to thaw them in the refrigerator overnight before serving to maintain their texture!

What should I do if my filling is too runny after baking?
If your filling turns out runny, it may be that it wasn’t baked long enough. You can put the bars back in the oven and bake for an additional 5-10 minutes, but keep an eye on it to avoid overcooking. Alternatively, ensure that you whisk your filling just enough to mix but not too vigorously, as incorporating too much air can prevent it from setting nicely.

Are Grapefruit Bars safe for people with citrus allergies?
If you or someone you’re serving has a citrus allergy, it's best to avoid Grapefruit Bars altogether, as grapefruit is a type of citrus fruit. Instead, consider using alternate flavors such as vanilla or a different fruit that is safe for those with allergies, like berries. Always check labels on additional ingredients for potential allergens!

Can I make any substitutions for the ingredients in Grapefruit Bars?
Definitely! If you're looking to try different flavors, you can substitute the grapefruit with lemon or lime for a classic twist. For a unique flavor profile, consider adding a pinch of salt to the filling, or even tossing in some finely chopped fresh herbs like mint or basil for an unexpected yet delightful twist!

Grapefruit Bars

Grapefruit Bars: A Refreshing Citrus Treat for Any Occasion

Grapefruit Bars are a refreshing twist on lemon bars, balancing sweet and tart flavors in a delightful dessert.
Print Recipe Pin Recipe
Prep Time 20 minutes mins
Cook Time 40 minutes mins
Cooling Time 2 hours hrs
Total Time 3 hours hrs
Servings: 16 slices
Course: Dessert
Cuisine: American
Calories: 150
Ingredients Equipment Method Nutrition Notes

Ingredients
  

For the Crust
  • 1 cup All-Purpose Flour Add an extra tablespoon for firmness
  • 1/2 cup Unsalted Butter Softened
  • 1/4 cup Granulated Sugar Adjust to taste
For the Filling
  • 3/4 cup Grapefruit Juice Fresh juice is best
  • 2 tablespoons Grapefruit Zest Avoid the white pith to minimize bitterness
  • 1 cup Granulated Sugar Adjust to your preferred sweet-tart ratio
  • 2 large Eggs Beaten until pale yellow
  • 2 tablespoons All-Purpose Flour Helps thicken and stabilize the filling
Optional Garnish
  • 1 cup Powdered Sugar For dusting
  • 1 cup Whipped Cream For serving

Equipment

  • Mixing Bowl
  • Pastry Blender
  • 8-inch Square Baking Dish

Method
 

Step-by-Step Instructions for Grapefruit Bars
  1. Preheat your oven to 350°F (175°C). In a mixing bowl, combine 1 cup of all-purpose flour, 1/4 cup of granulated sugar, and 1/2 cup of softened unsalted butter. Mix until the mixture resembles coarse crumbs. Press this mixture evenly into the bottom of an 8-inch square baking dish.
    Grapefruit Bars
  2. Place the baking dish in the preheated oven and bake for 10–15 minutes, until the edges are lightly golden and firm. Let it cool slightly while preparing the filling.
    Grapefruit Bars
  3. In a large mixing bowl, whisk together 2 eggs and 1 cup of granulated sugar until smooth. Gradually add in 3/4 cup of fresh grapefruit juice, 2 tablespoons of grapefruit zest, and 2 tablespoons of all-purpose flour. Mix until well combined.
    Grapefruit Bars
  4. Carefully pour the grapefruit filling over the pre-baked crust, spreading it evenly.
    Grapefruit Bars
  5. Return the baking dish to the oven and bake for an additional 25–30 minutes, until the filling is set and slightly golden around the edges.
    Grapefruit Bars
  6. Remove from the oven and allow to cool at room temperature for at least an hour. Cover with plastic wrap and refrigerate for at least 2 hours before serving.
    Grapefruit Bars

Nutrition

Serving: 1sliceCalories: 150kcalCarbohydrates: 22gProtein: 2gFat: 7gSaturated Fat: 4gPolyunsaturated Fat: 0.5gMonounsaturated Fat: 2gCholesterol: 50mgSodium: 50mgPotassium: 90mgSugar: 10gVitamin A: 200IUVitamin C: 10mgCalcium: 10mgIron: 0.5mg

Notes

For an elegant presentation, serve your Grapefruit Bars chilled with a dusting of powdered sugar or a dollop of freshly whipped cream. Store leftovers in the refrigerator for up to a week or wrap tightly and freeze for up to three months.

Tried this recipe?

Let us know how it was!

Delightful Raspberry and Rose Cheesecake Buns to Impress

February 20, 2026 by Grace Snow Leave a Comment

As I scoured through my pantry in search of inspiration, I stumbled upon a bottle of rosewater that instantly transported me to a sun-kissed garden blooming with fragrant blossoms. Perfect for a cozy afternoon or a festive gathering, Edd Kimber’s Raspberry and Rose Cheesecake Buns bring that enchanting aroma straight into your kitchen. These delightful sweets merge the creamy indulgence of cheesecake with a hint of tart raspberry, and they’re not only a feast for the eyes but an absolute crowd-pleaser. Plus, with gluten-free and dairy-free substitutions available, everyone can enjoy a piece of this elegant dessert. Curious how to create these soft, fluffy marvels that will impress your loved ones with every bite? Let’s get baking!

Why Are These Buns So Irresistible?

Light, Fluffy Texture: The combination of strong white bread flour and careful kneading results in a cloud-like softness, making each bite a melt-in-your-mouth experience.

Decadent Flavor Fusion: The blend of rich cream cheese, sweet raspberry jam, and fragrant rosewater creates a luxurious flavor profile that’s perfect for special occasions or a cozy afternoon treat.

Customizable Creations: Want to switch it up? These buns are versatile—try different jams, like apricot, or even go for a chocolate drizzle for an added indulgence.

Diet-Friendly Options: With gluten-free and dairy-free substitutions available, everyone can enjoy these delightful treats, making them perfect for gatherings of all kinds.

Impressive Presentation: Looking for a showstopper? These beautifully glazed buns, adorned with rose petals and pistachios, make a stunning centerpiece at any event, dazzling both the eyes and taste buds!

Pair them with a warm cup of tea, or enjoy them alongside a scoop of ice cream for a truly delightful dessert experience!

Raspberry and Rose Cheesecake Buns Ingredients

For the Dough

  • Strong White Bread Flour – Provides structure and texture; consider all-purpose flour for a softer bun.
  • Caster Sugar – Adds sweetness to the dough; you can also use granulated sugar.
  • Fine Sea Salt – Enhances flavor; a small but vital ingredient for taste.
  • Fast-Action Dried Yeast – Acts as a leavening agent; fresh yeast can be substituted with minor adjustments.
  • Whole Milk – Adds moisture and richness; almond or oat milk can be used for dairy-free versions.
  • Large Eggs – Binds the mixture; equivalent egg substitutes work as alternatives.
  • Unsalted Butter – Contributes to a rich, tender crumb; margarine can replace it for a dairy-free option.

For the Filling

  • Full-Fat Cream Cheese – Forms the creamy base for the filling; low-fat alternatives may alter the texture.
  • Raspberry Jam – Provides vibrant tartness; feel free to switch to other fruity jams.

For the Glaze and Topping

  • Icing Sugar – Creates a sweet glaze; granulated sugar can be powdered as a substitute.
  • Lemon Juice – Adds acidity crucial for the glaze; vinegar can work in a pinch.
  • Vanilla Bean Paste – Enhances flavor depth; vanilla extract is a convenient alternative.
  • Rose Water – Infuses the buns with floral notes; can be omitted if unavailable.
  • Edible Dried Rose Petals – Adds elegance; substitute with extra nuts or leave out altogether.
  • Chopped Shelled Pistachios – Adds a delightful crunch; any nuts or seeds can work here.

These Raspberry and Rose Cheesecake Buns are sure to be a hit, bringing together delightful flavors and textures with a touch of elegance!

Step‑by‑Step Instructions for Raspberry and Rose Cheesecake Buns

Step 1: Prepare Dough
In a stand mixer, combine strong white bread flour, caster sugar, fine sea salt, and fast-action dried yeast. Gradually add whole milk and large eggs, mixing until the dough comes together. Knead the mixture for 10-15 minutes on a floured surface until it is smooth and elastic, indicating it’s ready for the next step.

Step 2: Chill Dough
Once kneaded, transfer the dough into a greased bowl, covering it with a clean kitchen towel. Refrigerate for at least 8 hours or overnight; this slow rise develops flavor and texture. When ready, the dough should expand and appear puffy, perfect for rolling out.

Step 3: Roll Out and Fill
Remove the chilled dough from the fridge and roll it out on a floured surface into a large rectangle, about 1/4-inch thick. Spread a generous layer of full-fat cream cheese and raspberry jam evenly across the surface. Roll the dough tightly from one long end to the other, then cut it into 12 equal pieces, creating individual buns.

Step 4: Proof Buns
Place the sliced buns cut-side up in a greased baking tin, leaving space between them for expansion. Cover the tin with a damp cloth and let the buns rise in a warm location for 45-60 minutes, or until they have become noticeably puffy and are touching each other.

Step 5: Bake
Preheat your oven to 190°C (375°F). Once fully proofed, assess the buns to make sure they look fluffy and slightly larger. Bake them in the preheated oven for 30-35 minutes or until they turn golden brown and sound hollow when lightly tapped. Remove from the oven and allow them to cool slightly in the tin.

Step 6: Glaze and Decorate
While the buns cool, prepare the glaze by melting icing sugar, lemon juice, and rose water in a small bowl. Brush this silky glaze over the warm buns, allowing it to soak in for maximum flavor. Finally, sprinkle edible dried rose petals and chopped shelled pistachios on top for an elegant finish.

How to Store and Freeze Raspberry and Rose Cheesecake Buns

  • Room Temperature: Keep the buns in an airtight container for up to 2-3 days at room temperature to maintain their delicious freshness and fluffy texture.
  • Fridge: If you need to store them longer, refrigerate the buns for up to a week, but be aware that the texture may change slightly.
  • Freezer: For extended storage, cool the buns completely, wrap them tightly in plastic wrap and foil, and freeze for up to 2 months. Thaw in the fridge before reheating.
  • Reheating: To enjoy warm buns again, reheat in the oven at 180°C (350°F) for 5-10 minutes, restoring their delightful softness and flavor!

Raspberry and Rose Cheesecake Buns Variations

Feel free to get creative with your Raspberry and Rose Cheesecake Buns—customizing is part of the fun!

  • Fruit Swap: Try apricot or strawberry jam instead of raspberry for a delightful twist on flavor.

  • Citrus Zest: Infuse your glaze with a hint of orange or lemon zest, elevating the flavors with a refreshing note.

  • Nutty Crunch: Add chopped almonds or hazelnuts to the filling for an appealing crunch and extra depth.

  • Gluten-Free: Substitute with gluten-free all-purpose flour for an equally delicious gluten-free version.

  • Spiced Delight: Incorporate cardamom or cinnamon into the dough for warm, aromatic variations that round out the flavor profile.

  • Sugar-Free Glaze: Opt for coconut cream blended with lemon juice in place of icing sugar for a lighter, sugar-free choice.

  • Almond Essence: Replace rose water with almond extract to create an indulgent alternative with a nutty finish.

  • Chocolate Drizzle: Drizzle melted dark chocolate over the buns for an elegant, rich upgrade that takes indulgence to new heights.

Feel inspired? These variations will help you adapt your buns to suit any occasion or preference. For instance, if you’re in the mood for a savory twist, consider whipping up a batch of Chickpea Spinach Curry to accompany your sweet treats. Enjoy experimenting with flavors and textures!

Expert Tips for Raspberry and Rose Cheesecake Buns

  • Fresh Yeast Check: Ensure your yeast is fresh for proper rising; perform a proof test by mixing it with warm water and sugar before use.

  • Knead with Care: Knead the dough thoroughly for 10-15 minutes; under-kneaded dough can lead to dense buns that won't rise well.

  • Watch the Baking Time: Always check the buns towards the end of baking; they should be golden brown and sound hollow when tapped for perfect doneness.

  • Store Properly: Keep baked buns in an airtight container at room temperature for 2-3 days—this helps maintain that delightful texture of your Raspberry and Rose Cheesecake Buns.

  • Cool Before Glazing: Allow the buns to cool slightly before adding glaze; this prevents the glaze from melting away and ensures a beautiful finish.

Make Ahead Options

These delightful Raspberry and Rose Cheesecake Buns are perfect for meal prep, allowing you to enjoy homemade goodness with less hassle! You can prepare the dough up to 24 hours in advance; simply follow the instructions to knead the dough, then refrigerate it overnight to develop delicious flavor. In addition, the buns can be assembled and placed in the baking tin up to 3 days ahead of time—just be sure to cover them well with plastic wrap to prevent drying out. When you're ready to bake, let them proof in a warm area for about 45-60 minutes before popping them in the oven. This way, you’ll have warm, fluffy buns that are just as delicious as freshly made!

What to Serve with Edd Kimber’s Raspberry and Rose Cheesecake Buns

Savor the bliss of a delightful afternoon gathering with these exquisite treats that beckon for the perfect accompaniment.

  • Fresh Berries: Juicy strawberries or blueberries add a burst of freshness, balancing the rich sweetness of the buns beautifully.
  • Custard Cream: A rich and silky custard enhances the dessert experience, inviting a creamy contrast to the fluffy texture of the buns.
  • Flavored Tea: Pair with a fragrant herbal tea, like chamomile or rose, to elevate your senses and complement the floral notes of rosewater.
  • White Chocolate Drizzle: Adding a sweet drizzle of white chocolate on top creates an indulgent upgrade, pleasing both the eyes and the palate.
  • Vanilla Ice Cream: A scoop of vanilla ice cream brings a cold, creamy element, perfect for a delightful hot-and-cold experience.
  • Sparkling Wine: Enjoy with a glass of light sparkling wine or prosecco; bubbles elevate the occasion and match the elegance of the buns beautifully.
  • Citrus Salad: Tossed fresh citrus segments with mint provide a refreshing, zesty contrast, brightening each sumptuous bite.
  • Chocolate Ganache: For an extra layer of luxury, a smooth chocolate ganache drizzled over the buns is hard to resist.
  • Pistachio Meringue Cookies: Their crunchiness complements the soft texture of the buns, adding an elegant touch that enhances the dessert experience.

Raspberry and Rose Cheesecake Buns Recipe FAQs

What is the best way to choose ripe raspberries?
Absolutely! Look for raspberries that are plump, firm, and evenly colored, ideally bright red. Avoid any that have dark spots or are overly soft, as these can be overripe and mushy, which can affect the filling texture and flavor.

How should I store Raspberry and Rose Cheesecake Buns?
To enjoy these delightful buns at their best, store them in an airtight container at room temperature for up to 2-3 days. If you opt to refrigerate, they can last about a week, but the texture might not be as fluffy. Always let them come to room temperature before serving!

Can I freeze Raspberry and Rose Cheesecake Buns?
Certainly! Allow the buns to cool completely after baking. Then wrap each bun tightly in plastic wrap and foil, storing them in the freezer for up to 2 months. To enjoy, simply thaw them overnight in the fridge and reheat in the oven at 180°C (350°F) for 5-10 minutes to restore their fresh-baked softness.

What should I do if my dough isn’t rising?
Very often, the culprit is inactive yeast. Make sure your yeast is fresh and working by performing a proof test: mix it with warm water (around 110°F/43°C) and a pinch of sugar and wait for 5-10 minutes until it bubbles. If there’s no activity, it’s best to start over with new yeast. Also, make sure your environment is warm enough for proofing—it should be around 75°F (24°C).

Are there any dietary considerations for these buns?
Yes! These Raspberry and Rose Cheesecake Buns can be adapted to meet various dietary needs. For a gluten-free version, use gluten-free all-purpose flour instead of strong white bread flour. Dairy-free options can easily be achieved by substituting almond, oat, or coconut milk for the dairy products. Always check the ingredients of your jam and toppings for allergens, particularly if sharing with friends or family with dietary restrictions.

Can I make these buns ahead of time?
Definitely! You can prepare the dough and fill the buns, then keep them covered in the fridge for up to 3 days before baking. This not only saves time on the day of serving but allows for an even more developed flavor. Just let them come to room temperature and proof properly before baking to ensure they rise beautifully!

Raspberry and Rose Cheesecake Buns

Delightful Raspberry and Rose Cheesecake Buns to Impress

Raspberry and Rose Cheesecake Buns bring a delightful blend of creamy cheesecake and tart raspberry in a fluffy dough, perfect for any gathering.
Print Recipe Pin Recipe
Prep Time 15 minutes mins
Cook Time 35 minutes mins
Chill Dough 8 hours hrs
Total Time 8 hours hrs 50 minutes mins
Servings: 12 buns
Course: Dessert
Cuisine: American
Calories: 250
Ingredients Equipment Method Nutrition Notes

Ingredients
  

For the Dough
  • 500 g Strong White Bread Flour Consider all-purpose flour for a softer bun.
  • 100 g Caster Sugar Granulated sugar can also be used.
  • 5 g Fine Sea Salt Enhances flavor.
  • 7 g Fast-Action Dried Yeast Fresh yeast can be substituted.
  • 300 ml Whole Milk Almond or oat milk can be used for dairy-free versions.
  • 2 Large Eggs Equivalent egg substitutes work as alternatives.
  • 75 g Unsalted Butter Margarine can replace it for a dairy-free option.
For the Filling
  • 200 g Full-Fat Cream Cheese Low-fat alternatives may alter the texture.
  • 150 g Raspberry Jam Feel free to switch to other fruity jams.
For the Glaze and Topping
  • 150 g Icing Sugar Granulated sugar can be powdered as a substitute.
  • 30 ml Lemon Juice Vinegar can work in a pinch.
  • 1 tsp Vanilla Bean Paste Vanilla extract is a convenient alternative.
  • 1 tbsp Rose Water Can be omitted if unavailable.
  • 10 g Edible Dried Rose Petals Substitute with extra nuts or leave out altogether.
  • 30 g Chopped Shelled Pistachios Any nuts or seeds can work here.

Equipment

  • Stand Mixer
  • Baking tin
  • Rolling Pin
  • small bowl

Method
 

Dough Preparation
  1. In a stand mixer, combine strong white bread flour, caster sugar, fine sea salt, and fast-action dried yeast. Gradually add whole milk and large eggs, mixing until the dough comes together. Knead the mixture for 10-15 minutes on a floured surface until smooth and elastic.
  2. Transfer the dough into a greased bowl, cover with a clean kitchen towel, and refrigerate for at least 8 hours or overnight.
  3. Remove the chilled dough from the fridge and roll it out on a floured surface into a large rectangle, about 1/4-inch thick. Spread cream cheese and raspberry jam evenly across the surface. Roll tightly and cut into 12 equal pieces.
  4. Place the sliced buns cut-side up in a greased baking tin, cover with a damp cloth, and let rise for 45-60 minutes until puffy.
  5. Preheat your oven to 190°C (375°F). Bake buns for 30-35 minutes until golden brown and hollow when tapped.
  6. Allow to cool slightly and prepare the glaze with icing sugar, lemon juice, and rose water. Brush over warm buns and top with rose petals and pistachios.

Nutrition

Serving: 1bunCalories: 250kcalCarbohydrates: 35gProtein: 5gFat: 10gSaturated Fat: 4gPolyunsaturated Fat: 1gMonounsaturated Fat: 3gCholesterol: 40mgSodium: 150mgPotassium: 120mgFiber: 1gSugar: 15gVitamin A: 200IUVitamin C: 2mgCalcium: 50mgIron: 1mg

Notes

These buns are versatile, allowing for various fillings and toppings based on preference. Keep stored properly for best texture.

Tried this recipe?

Let us know how it was!

Italian Peach Cookies That Melt in Your Mouth

February 20, 2026 by Grace Snow Leave a Comment

As the summer sun sets, its golden light spills across the kitchen, filling the air with a rich, sweet aroma that promises a delightful treat. Today, I’m thrilled to share my version of Italian Peach Cookies—a soft and buttery delight that captures the essence of ripe peaches in every bite. These charming cookies not only bring a splash of color to your dessert table, but they’re also incredibly quick to make, which means you can whip them up for unexpected guests or sweeten your weeknight desserts. The luscious peach preserve center adds a touch of fruity goodness that’s simply irresistible. So, who’s ready to bake their way to dessert paradise? Let’s dive into this deliciously peachy recipe together!

Why Are These Cookies So Irresistible?

Irresistible flavors: The combination of sweet peach preserves and buttery dough creates a treat that's hard to resist. Vibrant and inviting: These cookies are not just tasty—they're visually stunning, resembling sun-kissed peaches! Quick and easy: With minimal prep time, you can impress your friends and family without spending hours in the kitchen. Perfect for sharing: Ideal for gatherings and celebrations, they'll vanish in no time at parties. Try pairing these Italian Peach Cookies with a refreshing Peach Smoothie for a delightful dessert combination!

## Italian Peach Cookies Ingredients

  • For the Dough

  • Unsalted Butter – Provides structure and richness. Use margarine or a vegan butter substitute if dairy-free.

  • Granulated Sugar – Essential for sweetness and texture. Brown sugar can add moisture and deeper flavor.

  • Large Eggs – Binds ingredients together and helps with rising. Flax eggs can be used for a vegan option.

  • Vanilla Extract – Enhances flavor. Almond extract can be substituted for a nuttier flavor.

  • All-Purpose Flour – Main structure of the cookies. Cake flour can be used for a softer texture.

  • Baking Powder – Leavening agent for lightness. Ensure it is fresh for best results.

  • Salt – Balances sweetness. No substitutes needed, as it's essential.

  • For the Filling

  • Peach Preserves – The star filling that provides sweetness and moisture. Fresh peaches can be used; cook down to prevent excess moisture.

  • For Coating & Visual Appeal

  • Granulated Sugar (for coating) – Adds a sweet finish. Mixing with cinnamon elevates the flavor.

  • Ground Cinnamon (optional) – Adds warmth and depth to the cookies. Omit if preferred.

  • Yellow Food Coloring (optional) – For a peach-like visual appeal. Omit if not desired, or use natural coloring.

  • Red Food Coloring (optional) – Used in coating for a realistic peach finish. Omit or adjust as desired.

Step‑by‑Step Instructions for Italian Peach Cookies

Step 1: Prep Dough
Start by creaming together 1 cup of softened unsalted butter and 1 cup of granulated sugar in a large mixing bowl until the mixture is light and fluffy, which should take about 2-3 minutes. Then, add in 2 large eggs, 1 teaspoon of vanilla extract, and 1 teaspoon of almond extract, mixing until everything is fully incorporated and smooth.

Step 2: Combine Dry Ingredients
In a separate bowl, whisk together 3 cups of all-purpose flour, 1 tablespoon of baking powder, and 1/2 teaspoon of salt until evenly mixed. Gradually add this dry mixture to your wet ingredients, stirring gently until just combined to ensure your Italian Peach Cookies remain tender and don’t become tough.

Step 3: Chill the Dough
Cover the dough with plastic wrap and place it in the refrigerator for about 30 minutes. Chilling is key, as it firms up the dough, making it easier to handle and prevents the cookies from spreading too much during baking. You’ll know it’s ready when the dough is slightly firmer and holds its shape.

Step 4: Shape Cookies
Once chilled, preheat your oven to 350°F (175°C). Roll the dough into small balls about 1 inch in size, and then create a small well in the center of each ball using your thumb. This well will later hold the sweet peach preserves, which are the special filling of your Italian Peach Cookies.

Step 5: Fill and Seal
Spoon a small amount of peach preserves into the well of each dough ball, being careful not to overfill. Next, carefully shape the dough around the preserves to form a spherical cookie again, ensuring the filling is closed within the dough. This step will keep your delicious filling intact during baking.

Step 6: Coat and Bake
Roll each filled cookie in a mixture of granulated sugar and ground cinnamon (if using) for a sweet and slightly spiced crust. Arrange the cookies on a baking sheet lined with parchment paper, ensuring they are spaced about 2 inches apart. Bake in your preheated oven for 12-15 minutes or until the bottom edges are lightly golden, appearing perfectly baked.

Step 7: Cool
After baking, let the cookies cool on the baking sheet for about 5 minutes before transferring them to a wire rack. This step allows any remaining heat to finish cooking the cookies, ensuring they stay soft while they cool completely. Enjoy the delightful aroma of your Italian Peach Cookies as they cool!

Expert Tips for Italian Peach Cookies

  • Chill Completely: Make sure to chill the dough adequately. This step prevents your Italian Peach Cookies from spreading too much during baking, maintaining their lovely shape.

  • Don’t Overmix: Be gentle when combining the wet and dry ingredients. Overmixing can lead to tough cookies; you want them to be soft and tender.

  • Check Baking Time: Keep an eye on the oven. Cookies are done when the bottoms are lightly golden but the tops remain soft. Overbaking can lead to dry cookies.

  • Sealing Technique: Ensure you seal the dough well around the peach preserves. This prevents leaks and keeps your cookies filled with that delicious fruity goodness.

  • Taste Variations: Feel free to get creative! Swap the peach preserves for other types, or add in some chopped nuts for texture. Experimenting can lead to delightful surprises!

What to Serve with Italian Peach Cookies?

As the sweet aroma of these delightful cookies fills your kitchen, consider these delicious pairings to elevate your dessert experience.

  • Peach Smoothie: This refreshing smoothie complements the fruity notes of the cookies, making a vibrant drink that’s perfect for warm days.

  • Peach Sorbet: A scoop of this light, frozen treat provides a refreshing contrast to the soft cookies and enhances the peach flavor beautifully.

  • Creamy Vanilla Ice Cream: The richness of vanilla ice cream pairs wonderfully with the buttery texture of the cookies, creating a classic dessert experience.

  • Whipped Cream: A dollop of homemade whipped cream adds a luscious touch, amplifying the joy of the peach-filled cookies.

  • Iced Tea: An iced peach or lemonade tea offers a sweet, refreshing beverage choice that perfectly balances the cookie’s sweetness on a sunny day.

  • Fresh Fruit Salad: A mix of seasonal fruits can brighten the plate and provide a fresh, tart contrast to the cookies' sweetness.

  • Espresso or Coffee: The bold flavors of coffee or a shot of espresso enhance the buttery richness of the cookies, perfect for an afternoon treat.

  • Chocolate Drizzle: A light drizzle of melted chocolate adds a decadent touch, creating an indulgent treat that’s sure to impress guests.

  • Almond Biscotti: For a crunchy contrast, serve with almond biscotti; the nutty flavor pairs lovely with the peach preserves.

  • Almond Milk: For a lighter drink option, chilled almond milk offers a smooth texture that complements the peachy sweetness beautifully.

How to Store and Freeze Italian Peach Cookies

  • Room Temperature: Store cookies in an airtight container for up to 5 days to keep them fresh and maintain their delightful softness.

  • Fridge: If you prefer, refrigerate the cookies in an airtight container, which extends freshness for up to 1 week, but the texture may change slightly.

  • Freezer: For longer storage, freeze Italian Peach Cookies in a single layer on a baking sheet, then transfer to an airtight container or freezer bag for up to 3 months.

  • Reheating: To enjoy your cookies warm, simply thaw at room temperature and reheat in a 350°F (175°C) oven for about 5 minutes for that just-baked softness!

Italian Peach Cookies – Creative Twists

Feel free to play around with these Italian Peach Cookies for a personalized touch that will make every batch uniquely yours!

  • Apricot Delight: Substitute peach preserves with apricot for a tangy twist that brings a refreshing flavor.

  • Nutty Texture: Mix in chopped almonds or walnuts for a delightful crunch that complements the buttery cookie base.

  • Colorful Coating: Use a mix of food colorings when coating your cookies for a vibrant, fun presentation that’ll wow your guests!

  • Cinnamon Sugar Boost: Add a sprinkle of cinnamon to your sugar coating for an extra layer of flavor, tantalizing the senses with warmth.

  • Spicy Heat: Incorporate a hint of chili powder in the dough for a surprising twist that pairs beautifully with the sweetness of the peach filling.

  • Fresh Peaches: Opt for fresh peaches in place of preserves—just cook them down to concentrate the flavors and drain excess moisture for a fresh bite.

  • Lemon Zest: Brighten the flavor by adding lemon zest to the dough, enhancing the overall fruity profile of these cookies.

  • Chocolate Dipping: After baking, dip the cooled cookies in melted chocolate for a rich indulgence that marries beautifully with the fruity center.

For more delightful variations, check out these delicious recipes: Eggnog Cookies Soft for a festive twist or Thumbprint Cookies Melt that offer more filling options!

Make Ahead Options

These Italian Peach Cookies are a fantastic treat for meal prep enthusiasts! You can prepare the dough up to 24 hours in advance by following the initial steps—cream the butter and sugar, mix in eggs and extracts, and combine with the dry ingredients. Cover the dough tightly with plastic wrap and refrigerate. You can also shape the cookies and fill them with peach preserves, then refrigerate the uncooked cookies for up to 3 days. Just remember to keep them well-covered to prevent drying out. When you're ready to bake, simply take them out and roll in granulated sugar before baking at 350°F (175°C) for fresh and delicious results!

Italian Peach Cookies Recipe FAQs

What kind of peaches should I use for the filling?
For the filling, I recommend using peach preserves for the best flavor and consistency. However, if you want to use fresh peaches instead, cook them down to a compote to avoid excess moisture. Ensure they are ripe, sweet, and free from dark spots for optimal taste!

How should I store the Italian Peach Cookies?
Store your Italian Peach Cookies in an airtight container at room temperature for up to 5 days. This keeps them fresh and maintains their delightful softness. If you prefer a longer shelf life, refrigerate them for up to a week—just note that the texture might slightly change.

Can I freeze the cookies, and how?
Absolutely! To freeze your Italian Peach Cookies, place them in a single layer on a baking sheet and freeze until solid. Then transfer them to an airtight container or freezer bag. They can be frozen for up to 3 months. When ready to eat, thaw at room temperature and reheat in a 350°F (175°C) oven for about 5 minutes for that freshly baked taste!

What if my cookies spread too much while baking?
If your cookies spread too much, it may be due to the dough not being chilled long enough. Make sure to chill the dough for a full 30 minutes before baking. Additionally, avoid overmixing the dough when combining wet and dry ingredients. If spreading continues to be an issue, try adding a bit more flour next time.

Are these cookies suitable for people with nut allergies?
Yes, the Italian Peach Cookies can be nut-free if you omit any optional nuts you might want to add. Be sure to check your extracts and any other ingredients for potential cross-contamination or allergens, particularly almond extract. Your cookie-loving friends will appreciate the accommodation!

Can I use a different fruit preserve instead of peach?
Very! You can swap out peach preserves with any other type of fruit preserve you fancy, such as apricot, raspberry, or even blackberry, for a unique twist. Just ensure the consistency matches that of peach preserves so your Italian Peach Cookies maintain their delightful structure and flavor!

Italian Peach Cookies

Italian Peach Cookies That Melt in Your Mouth

Delightful Italian Peach Cookies with a luscious peach preserve center that melts in your mouth.
Print Recipe Pin Recipe
Prep Time 30 minutes mins
Cook Time 15 minutes mins
Chilling Time 30 minutes mins
Total Time 1 hour hr 15 minutes mins
Servings: 24 cookies
Course: Dessert
Cuisine: Italian
Calories: 150
Ingredients Equipment Method Nutrition Notes

Ingredients
  

For the Dough
  • 1 cup unsalted butter Use margarine or a vegan butter substitute if dairy-free.
  • 1 cup granulated sugar Brown sugar can add moisture and deeper flavor.
  • 2 large eggs Flax eggs can be used for a vegan option.
  • 1 teaspoon vanilla extract Almond extract can be substituted for a nuttier flavor.
  • 3 cups all-purpose flour Cake flour can be used for a softer texture.
  • 1 tablespoon baking powder Ensure it is fresh for best results.
  • 1/2 teaspoon salt No substitutes needed, as it's essential.
For the Filling
  • 1 cup peach preserves Fresh peaches can be used; cook down to prevent excess moisture.
For Coating & Visual Appeal
  • 1 cup granulated sugar (for coating) Mixing with cinnamon elevates the flavor.
  • 1 teaspoon ground cinnamon (optional) Omit if preferred.
  • yellow food coloring (optional) Omit if not desired, or use natural coloring.
  • red food coloring (optional) Omit or adjust as desired.

Equipment

  • Mixing Bowl
  • Baking Sheet
  • Parchment Paper
  • Whisk
  • Refrigerator

Method
 

Step-by-Step Instructions
  1. Cream together the butter and granulated sugar until light and fluffy, about 2-3 minutes. Add eggs and extracts, mixing until incorporated.
  2. In a separate bowl, whisk together flour, baking powder, and salt. Gradually add to wet ingredients, stirring gently until just combined.
  3. Cover the dough with plastic wrap and chill in the refrigerator for about 30 minutes.
  4. Preheat oven to 350°F (175°C). Roll chilled dough into balls and create a well in the center.
  5. Spoon peach preserves into each dough ball well, carefully reshaping the dough to seal the filling.
  6. Roll cookies in sugar and cinnamon, bake on parchment-lined sheets for 12-15 minutes until lightly golden.
  7. Let cool on the baking sheet for 5 minutes before transferring to a wire rack.

Nutrition

Serving: 1cookieCalories: 150kcalCarbohydrates: 20gProtein: 2gFat: 7gSaturated Fat: 4gPolyunsaturated Fat: 0.5gMonounsaturated Fat: 2gCholesterol: 30mgSodium: 100mgPotassium: 70mgSugar: 10gVitamin A: 200IUVitamin C: 1mgCalcium: 10mgIron: 0.5mg

Notes

Chill the dough adequately to maintain cookie shape during baking. Overmixing can lead to tough cookies, so mix wet and dry ingredients gently.

Tried this recipe?

Let us know how it was!

Brighten Your Day with This Grapefruit Yogurt Cake Delight

February 20, 2026 by Grace Snow Leave a Comment

Standing in my kitchen, the enticing aroma of citrus wafts through the air as I prepare to bake one of my favorite treats: a Grapefruit Yogurt Cake. This delightful citrus cake not only celebrates the bright, zesty flavor of fresh grapefruit but also boasts the creaminess of Greek yogurt, making it a unique and moist dessert that’s perfect for any occasion. With its light texture and refreshing fragrance, this cake is a wonderful option for brunch gatherings or a special family celebration. Plus, it's incredibly adaptable, allowing you to swap in different yogurt types or even mix up the citrus flavors. Are you ready to brighten your day with a slice of this heavenly cake? Let’s dive in!

Why is this cake so irresistible?

Moisture From Yogurt: The Greek yogurt provides an incredible moistness that makes every bite delightful.
Zesty Flavor: Fresh grapefruit juice and zest bring a refreshing tang that brightens your palate.
Simple Technique: With just a few mixing steps, you’ll have a cake that looks impressive but requires minimal fuss.
Versatile Options: Feel free to experiment with different citrus fruits or even make cupcakes for a fun twist. For more citrus inspiration, check out my Chocolate Poke Cake variations!
Perfect for Occasions: Its light and airy texture is perfect for brunch or special celebrations like Mother's Day, making it a crowd pleaser that everyone will enjoy.

Grapefruit Yogurt Cake Ingredients

For the Cake
• Greek Yogurt – Adds moisture and a subtle tanginess; feel free to substitute with plain yogurt if needed.
• Fresh Grapefruit Juice and Zest – Provides flavor and fragrance; lemon or orange zest can be used as alternatives.
• All-Purpose Flour – Gives structure; you can substitute with almond flour for a gluten-free option, though it may change the cake's texture.
• Granulated Sugar – Sweetens the cake; can be reduced or replaced with a sugar substitute if desired.
• Vegetable Oil – Keeps the cake moist; coconut oil is a healthy alternative.
• Baking Powder – Provides leavening; ensure it’s fresh for the best rise.
• Salt – Enhances overall flavor and balance.

Optional Glaze
• Powdered Sugar – Creates a sweet finish for the cake; adjust the amount to your taste.
• Grapefruit Juice – Use for the glaze to echo the vibrant flavor of grapefruit in your finished treat.

This Grapefruit Yogurt Cake is not only a delightful citrus cake, but it also offers a refreshing twist to your dessert repertoire!

Step‑by‑Step Instructions for Grapefruit Yogurt Cake

Step 1: Preheat the Oven
Begin by preheating your oven to 350°F (175°C). While the oven heats, prepare a standard loaf pan by greasing it with a light coating of oil or butter. This will ensure your Grapefruit Yogurt Cake releases easily after baking. Set the greased pan aside while you mix the batter.

Step 2: Mix the Wet Ingredients
In a large mixing bowl, whisk together 1 cup of Greek yogurt, ½ cup of fresh grapefruit juice, ⅓ cup of vegetable oil, and ¾ cup of granulated sugar. Blend these ingredients until fully combined, aiming for a smooth texture without lumps. The mixture should be creamy and well incorporated, setting a solid foundation for your cake.

Step 3: Combine the Dry Ingredients
In a separate bowl, sift together 1 ½ cups of all-purpose flour, 2 teaspoons of baking powder, and ½ teaspoon of salt. Mix these dry ingredients well to ensure the baking powder is evenly distributed, which is key for achieving that lovely rise in your Grapefruit Yogurt Cake. Set this mixture aside to add later.

Step 4: Combine Both Mixtures
Gradually fold the dry ingredients into the wet mixture using a spatula or wooden spoon. Aim for a gentle mix to avoid overworking the batter, which can lead to a dense cake. Continue mixing until just combined, leaving some small lumps visible for an airy texture. This step is crucial for keeping your cake light and moist.

Step 5: Add Grapefruit Zest
Gently stir in the zest of one grapefruit into the batter, allowing the bright citrus oils to infuse throughout the mixture. The zest not only enhances the flavor but also gives your Grapefruit Yogurt Cake an inviting aroma. Make sure it is evenly distributed for consistent flavor in every bite.

Step 6: Bake the Cake
Pour the batter into your prepared loaf pan, spreading it evenly with a spatula. Place the pan in the preheated oven and bake for 45-50 minutes. Keep an eye on the cake, and use a toothpick inserted into the center to check for doneness; it should come out clean when the cake is ready.

Step 7: Cool and Glaze
Once baked, remove the Grapefruit Yogurt Cake from the oven and let it cool in the pan for about 10 minutes. After cooling slightly, carefully transfer the cake to a wire rack to cool completely. If desired, drizzle a simple grapefruit glaze over the top for an extra touch of sweetness and flavor, creating an irresistible finish to your cake.

Make Ahead Options

These delightful Grapefruit Yogurt Cakes are perfect for meal prep, allowing you to enjoy the sweet citrus flavor with minimal fuss! You can prepare the batter up to 24 hours ahead by mixing the wet and dry ingredients separately and storing them in the refrigerator. Just be sure to keep the dry mix tightly sealed to maintain its freshness. When you’re ready to bake, simply combine the mixtures, add the grapefruit zest, and pour the batter into your loaf pan. This makes it a breeze to whip up a delicious dessert on busy weeknights, ensuring that your cake is just as moist and flavorful when served!

Grapefruit Yogurt Cake Variations

Feel free to get creative with your Grapefruit Yogurt Cake and tailor it to your taste preferences!

  • Flavor Swap: Substitute grapefruit with lemon or orange for a fresh twist on this delightful cake.
  • Yogurt Choices: Use plain yogurt instead of Greek for a different texture, or try coconut yogurt for a dairy-free option.
  • Gluten-Free: Swap all-purpose flour with almond flour or a gluten-free blend for a lighter, gluten-free version—though note the texture may slightly change.
  • Sugar Reduction: Replace granulated sugar with a sugar substitute, or reduce the amount for a lighter sweetness. You can also experiment with honey for a floral hint.
  • Nutty Touch: Fold in chopped walnuts or almonds for added crunch, beautifully complementing the moistness of the cake.
  • Cupcake Twist: Transform the batter into cupcakes for individual servings—perfect for parties or brunch gatherings!
  • Poppy Seed Addition: Enhance your cake with poppy seeds for a delightful texture, reminiscent of classic lemon loaf cakes.
  • Extra Citrus Zing: Increase the zest and juice of the grapefruit if you crave an intensified citrus flavor explosion.

With these variations, you can explore new dimensions of flavor while still enjoying the delightful essence of the original Grapefruit Yogurt Cake. For more dessert ideas that feature citrus, don't forget to check out my delicious Chocolate Pudding Cake or explore other enticing options like Chocolate Poke Cake. Happy baking!

Expert Tips for Grapefruit Yogurt Cake

  • Room Temperature Ingredients: Ensure all ingredients are at room temperature for easy blending and consistent texture in your Grapefruit Yogurt Cake.
  • Avoid Over-Mixing: Be gentle when combining wet and dry ingredients; over-mixing can lead to a dense cake rather than the light, moist texture you want.
  • Flavor Boost: For an intense grapefruit flavor, consider increasing both the zest and juice amounts in your recipe.
  • Freshness Check: Make sure your baking powder is fresh to ensure optimal rise; expired baking powder can lead to a flat cake.
  • Glaze Adjustments: Adjust the sweetness of the glaze according to your preference; a lighter glaze will keep the cake’s natural citrus brightness front and center.

How to Store and Freeze Grapefruit Yogurt Cake

Room Temperature: Keep your cake in an airtight container at room temperature for up to 3 days to maintain moisture and freshness.

Fridge: If you need to store it longer, refrigerate the cake in an airtight container for up to a week. This will help keep it moist while enhancing the flavors.

Freezer: For extended storage, wrap the cake tightly in plastic wrap and then in aluminum foil. It can be frozen for up to 3 months. Thaw before serving for the best taste and texture.

Reheating: To enjoy the cake warm, place slices in the microwave for 10-15 seconds or until heated through. This will refresh the moistness of your delightful Grapefruit Yogurt Cake.

What to Serve with Moist Grapefruit Yogurt Cake

Pair delicious accompaniments with your cake for a complete sensory experience.

  • Whipped Cream: Light and airy, it contrasts the cake's dense texture and adds a creamy touch that complements the tangy grapefruit.

  • Fresh Berries: A medley of strawberries, blueberries, and raspberries provides a burst of sweetness and color, enhancing the cake's presentation and flavor.

  • Mint Leaves: Fresh mint adds a delightful, aromatic garnish, bringing a balance of refreshing notes that brighten each bite of cake.

  • Iced Tea: A tall glass of sweetened iced tea refreshes the palate with its crispness, making each slice of cake even more enjoyable.

  • Citrus Sorbet: A scoop of zingy lemon or lime sorbet offers a rich citrus contrast, keeping your dessert light and refreshing after a rich meal.

  • Almonds: Toasted almond slivers lend a crunchy texture and nutty flavor, creating a delightful balance with the moistness of the cake.

  • Chocolate Drizzle: For those chocolate lovers, a light drizzle of melted dark chocolate adds an indulgent touch that pairs expertly with the zesty grapefruit.

Enjoy each of these suggestions as a way to elevate the Grapefruit Yogurt Cake into a memorable occasion!

Grapefruit Yogurt Cake Recipe FAQs

What kind of Greek yogurt is best for this recipe?
Absolutely! I recommend using plain, full-fat Greek yogurt for the best flavor and moisture. However, if you're looking for a lighter option, low-fat Greek yogurt works as well. Just avoid flavored varieties, as they can alter the cake's taste.

How should I store the Grapefruit Yogurt Cake?
You can store your cake in an airtight container at room temperature for up to 3 days. If you want to keep it longer, refrigerate it for up to a week. This will help it retain its moistness, while the flavors will deepen in the fridge!

Can I freeze Grapefruit Yogurt Cake?
Very! To freeze your cake, ensure it's completely cooled first. Wrap it tightly in plastic wrap, then in aluminum foil to prevent freezer burn. It can be frozen for up to 3 months. When you’re ready to enjoy it, simply thaw it in the refrigerator overnight before serving.

What if my cake doesn't rise properly?
If your cake doesn't rise, the most common issue is expired baking powder. Before starting, always check the expiration date on your baking powder and perform a simple test: mix a teaspoon with hot water; it should fizz vigorously if it's fresh. Over-mixing can also result in a dense cake, so be gentle when combining the ingredients!

Is this cake pet-friendly?
No worries here! The ingredients in the Grapefruit Yogurt Cake are safe for humans but should be kept away from pets, especially dogs and cats, as citrus can be harmful to them. If you have furry friends, make sure to store the cake where they can’t reach it.

Can I substitute the grapefruit with another fruit?
Absolutely! If grapefruit isn't available or you prefer something else, you can use lemon or orange zest and juice for a different flavor profile. The key is to keep the same amount of liquid, so if you use lemon, just remember that it's usually a bit sharper in taste. Enjoy the experimentation!

Grapefruit Yogurt Cake

Brighten Your Day with This Grapefruit Yogurt Cake Delight

Enjoy a slice of Grapefruit Yogurt Cake, a delightful dessert celebrating vibrant citrus flavors and Greek yogurt's creaminess.
Print Recipe Pin Recipe
Prep Time 15 minutes mins
Cook Time 50 minutes mins
Cooling Time 10 minutes mins
Total Time 1 hour hr 15 minutes mins
Servings: 8 slices
Course: Dessert
Cuisine: American
Calories: 180
Ingredients Equipment Method Nutrition Notes

Ingredients
  

For the Cake
  • 1 cup Greek Yogurt feel free to substitute with plain yogurt
  • 1/2 cup Fresh Grapefruit Juice
  • 1/3 cup Vegetable Oil coconut oil is a healthy alternative
  • 3/4 cup Granulated Sugar can be reduced or replaced with a sugar substitute
  • 1 1/2 cups All-Purpose Flour can substitute with almond flour for gluten-free
  • 2 teaspoons Baking Powder ensure it’s fresh
  • 1/2 teaspoon Salt enhances flavor
Optional Glaze
  • 1 cup Powdered Sugar adjust to taste
  • 2 tablespoons Grapefruit Juice

Equipment

  • Loaf pan
  • Mixing bowls
  • Whisk
  • Spatula

Method
 

Step‑By‑Step Instructions
  1. Preheat your oven to 350°F (175°C). Grease a standard loaf pan with oil or butter.
  2. In a large mixing bowl, whisk together Greek yogurt, fresh grapefruit juice, vegetable oil, and granulated sugar until smooth.
  3. In a separate bowl, sift together all-purpose flour, baking powder, and salt.
  4. Gradually fold the dry ingredients into the wet mixture until just combined, leaving some small lumps visible.
  5. Gently stir in the zest of one grapefruit.
  6. Pour the batter into the prepared loaf pan and bake for 45-50 minutes, checking for doneness with a toothpick.
  7. Let the cake cool in the pan for about 10 minutes, then transfer to a wire rack. Drizzle with glaze if desired.

Nutrition

Serving: 1sliceCalories: 180kcalCarbohydrates: 26gProtein: 3gFat: 7gSaturated Fat: 1gPolyunsaturated Fat: 2gMonounsaturated Fat: 4gCholesterol: 10mgSodium: 150mgPotassium: 120mgFiber: 1gSugar: 10gVitamin C: 2mgCalcium: 50mgIron: 1mg

Notes

Ensure all ingredients are at room temperature for best results. Adjust glaze sweetness according to preference.

Tried this recipe?

Let us know how it was!
  • « Previous Page
  • 1
  • …
  • 15
  • 16
  • 17
  • 18
  • 19
  • …
  • 179
  • Next Page »

Welcome!

Hi, I’m Grace, a Sydney-based home cook with a passion for bold flavors and trending ingredients. Whether you’re a busy beginner or a seasoned foodie, you’ll find dishes here that are fresh, fun, and full of flavor.

More about me

Popular Recipes

  • Cheesy Chicken Garlic Bread Sandwich
    Cheesy Chicken Garlic Bread Sandwich for Cozy Family Moments
  • Easy Chicken Ranch Wraps
    Easy Chicken Ranch Wraps: Quick, Creamy & Totally Satisfying
  • Chicken Caesar Sandwiches
    Delicious Chicken Caesar Sandwiches for Quick Comfort Food
  • best Cuban sandwich
    The Best Cuban Sandwich You’ll Want Every Weeknight!

Footer

↑ back to top

About

  • Privacy Policy
  • Disclaimer
  • Terms & Conditions

Newsletter

  • Sign Up! for emails and updates

Contact

  • About me
  • Contact me

Copyright © 2025 TastyTrendIngredients