tastytrendingredients

  • Home
  • Recipes
    • Appetizers
    • Breakfast
    • Dessert
    • Dinner
    • Drinks
    • Salads
    • Snacks
    • Soups
  • About me
  • Contact me
menu icon
go to homepage
  • Home
  • Recipes
    • Appetizers
    • Breakfast
    • Dessert
    • Dinner
    • Drinks
    • Salads
    • Snacks
    • Soups
  • About me
  • Contact me
search icon
Homepage link
  • Home
  • Recipes
    • Appetizers
    • Breakfast
    • Dessert
    • Dinner
    • Drinks
    • Salads
    • Snacks
    • Soups
  • About me
  • Contact me
×

Lemon Dill Cabbage Soup: Comfort in Every Cozy Spoonful

September 23, 2025 by Grace Snow Leave a Comment

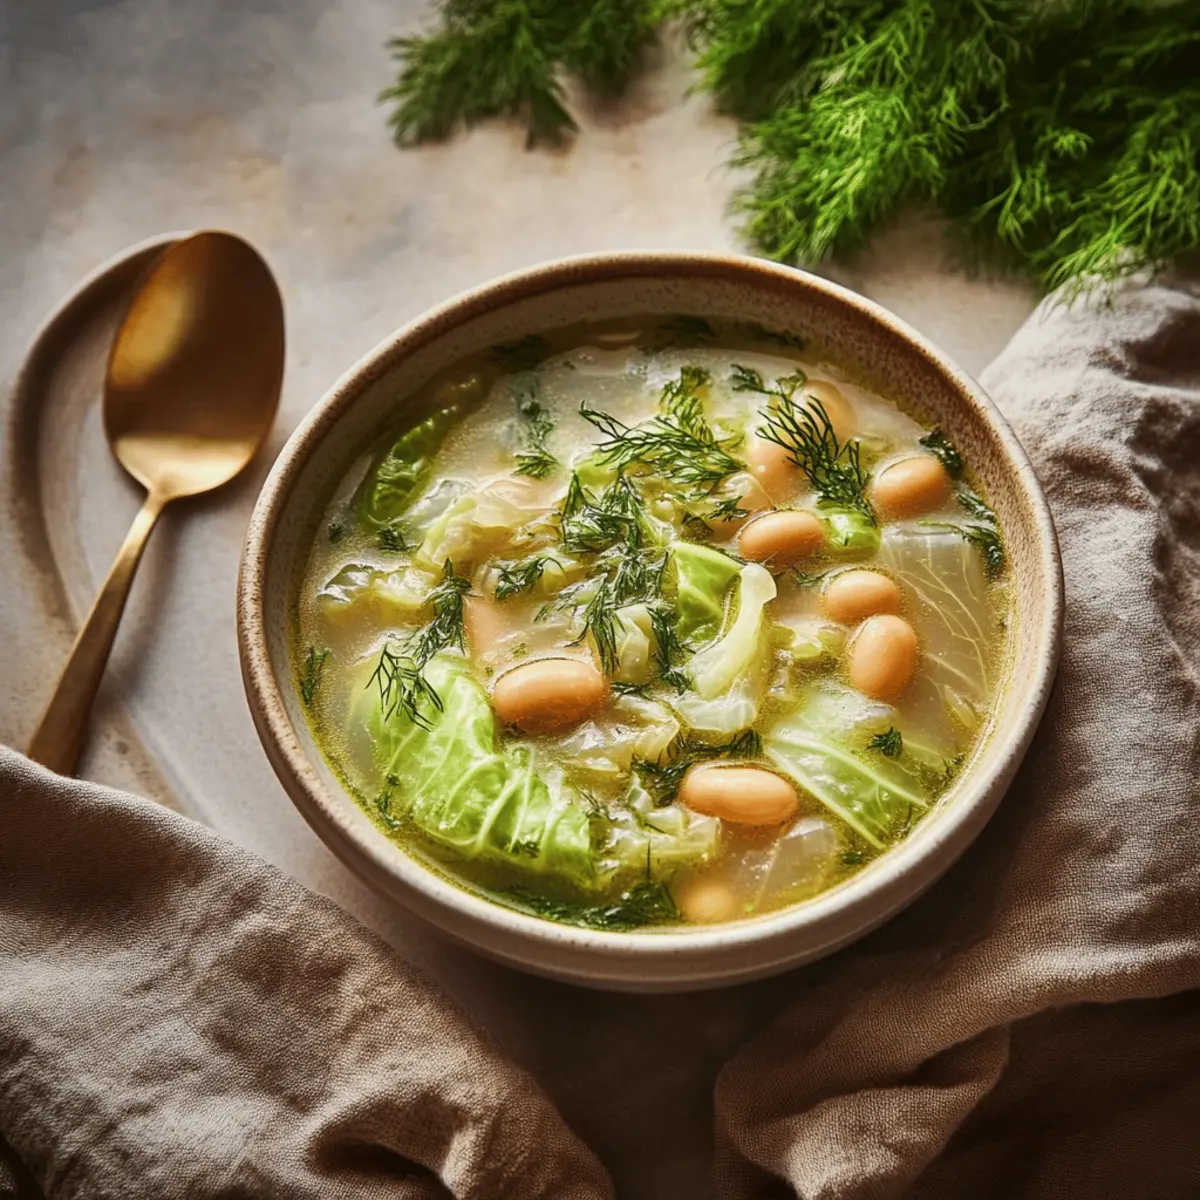
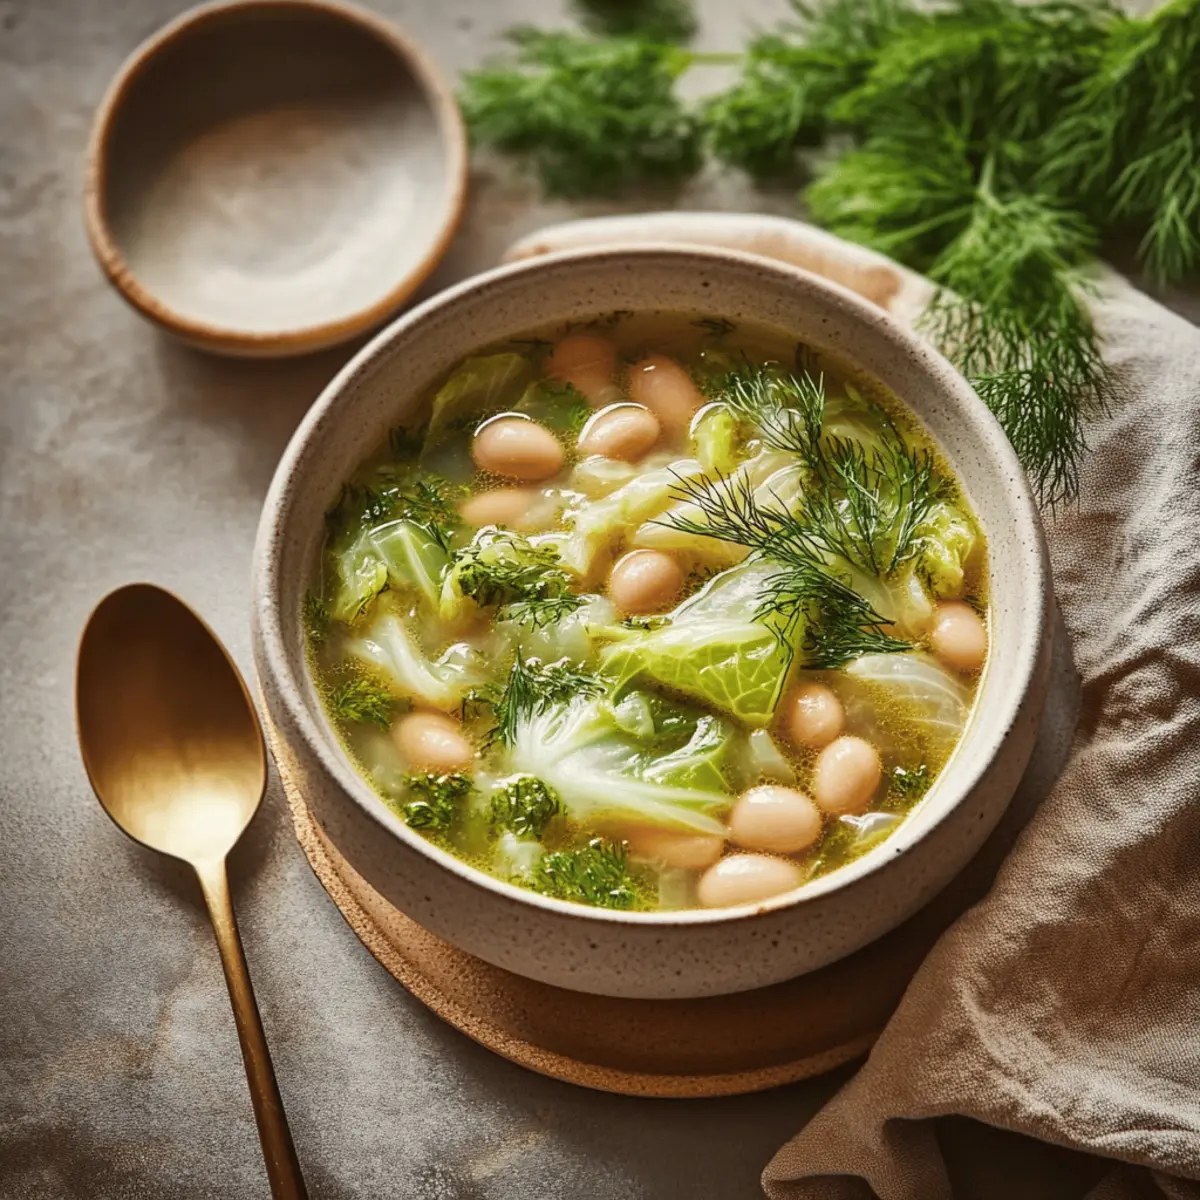
As I stood over the stove, the comforting scent of sautéing garlic and onions wafted through my kitchen, instantly transporting me to a cozy café nestled on a rainy street corner. There's something incredibly fulfilling about crafting a bowl of Lemon Dill Cabbage Soup, especially when it comes together in under 30 minutes! This hearty soup is made with protein-packed cannellini beans and comes alive with the zest of fresh lemon and the delightful aroma of dill. It's a naturally vegetarian dish that doesn't skimp on flavor or nourishment, making it perfect for a quick lunch or a satisfying dinner. Best of all, it’s versatile! You can make a vegan version that’s just as creamy and comforting without missing out on taste. Curious about how this simple soup can transform your weeknight meals? Let’s dive into the recipe!

Why is Lemon Dill Cabbage Soup a Must-Try?

Comforting and Quick: This soup is a perfect solution for busy evenings, as it comes together in under 30 minutes, allowing you to enjoy homemade goodness without a long wait.

Nutritious Ingredients: Packed with protein-rich cannellini beans and fresh veggies, it's a nourishing choice that makes you feel good inside and out.

Bright Flavors: The zesty lemon juice and aromatic dill work together to create a refreshing burst of flavor, elevating your taste buds with every spoonful.

Versatile Recipe: Whether you're looking for a cozy vegetarian meal or a satisfying vegan option, this soup adapts easily. Just swap the cheese and egg for coconut milk or nutritional yeast!

Crowd-Pleaser: With its hearty texture and savory aroma, this dish is sure to impress family and friends. Serve it alongside some crusty bread or a light salad, like a lemon vinaigrette mix, for a complete experience.

This Lemon Dill Cabbage Soup is truly a delightful dish that will quickly become a staple in your kitchen!

Lemon Dill Cabbage Soup Ingredients

For the Soup
• Olive Oil – Ideal for sautéing aromatics; extra virgin enhances the flavor profile.
• Onion – Provides a flavorful base; use yellow or sweet onions for a milder taste.
• Garlic – Infuses depth into the soup; slice thinly for even melting in the broth.
• Green Cabbage – Hearty and tender; can substitute with kale or spinach for a twist.
• Cannellini Beans – Creamy and protein-packed; chickpeas or navy beans work as excellent substitutes.
• Vegetable Broth – Choose reduced sodium for balanced flavor without overwhelming saltiness.
• Parmesan Cheese & Egg – Whisk together for a velvety finish; omit for a vegan option or add nutritional yeast for a cheesy flavor.
• Lemon Juice – Essential for brightness and acidity in the soup; don’t skip on this!
• Fresh Dill – Offers herbal notes; dried dill can substitute, but use half the amount for best results.

For Serving
• Crusty Bread – Pair with anything from a baguette to garlic toast for a hearty meal.
• Extra Dill & Black Pepper – Garnish your soup for added flavor and a pleasing presentation.

Incorporate this Lemon Dill Cabbage Soup into your culinary repertoire for a nourishing and comforting meal that your family will love!

Step‑by‑Step Instructions for Lemon Dill Cabbage Soup

Step 1: Sauté Aromatics
In a large Dutch oven, heat 2 tablespoons of olive oil over medium heat. Once shimmering, add a diced onion and 2 cloves of thinly sliced garlic, stirring often for about 4 minutes until the onions become translucent and fragrant. This aromatic base will set the stage for your delicious Lemon Dill Cabbage Soup.

Step 2: Soften Cabbage
Next, stir in 4 cups of chopped green cabbage along with a pinch of dried oregano and black pepper. Continue to sauté for another 3 minutes, gently stirring as the cabbage begins to soften and reduces in volume. The vibrant greens will look luscious and inviting, ready to blend with the other ingredients.

Step 3: Simmer with Beans
Pour in 4 cups of vegetable broth and add 1 can of rinsed cannellini beans, bringing the mixture to a gentle boil. Once bubbling, reduce the heat to a simmer and cover the pot, letting it cook for about 8 minutes until the cabbage is tender. You’ll want to see the cabbage wilt down nicely for that comforting texture.

Step 4: Prepare Egg Mixture
While the soup simmers, whisk together ½ cup of freshly grated Parmesan cheese, the juice of 1 lemon, and 1 large egg in a medium bowl. To temper the mixture, slowly drizzle in about a cup of the hot soup broth while whisking continuously. This step ensures a creamy integration without curdling, enhancing your Lemon Dill Cabbage Soup.

Step 5: Finish the Soup
Remove the pot from the heat and carefully stir in the tempered egg mixture along with ¼ cup of freshly chopped dill. This will give the soup a rich and velvety texture, while the dill adds a burst of herbal flavor. Season the soup with salt to taste, giving it a tantalizing, aromatic finish.

Step 6: Serve
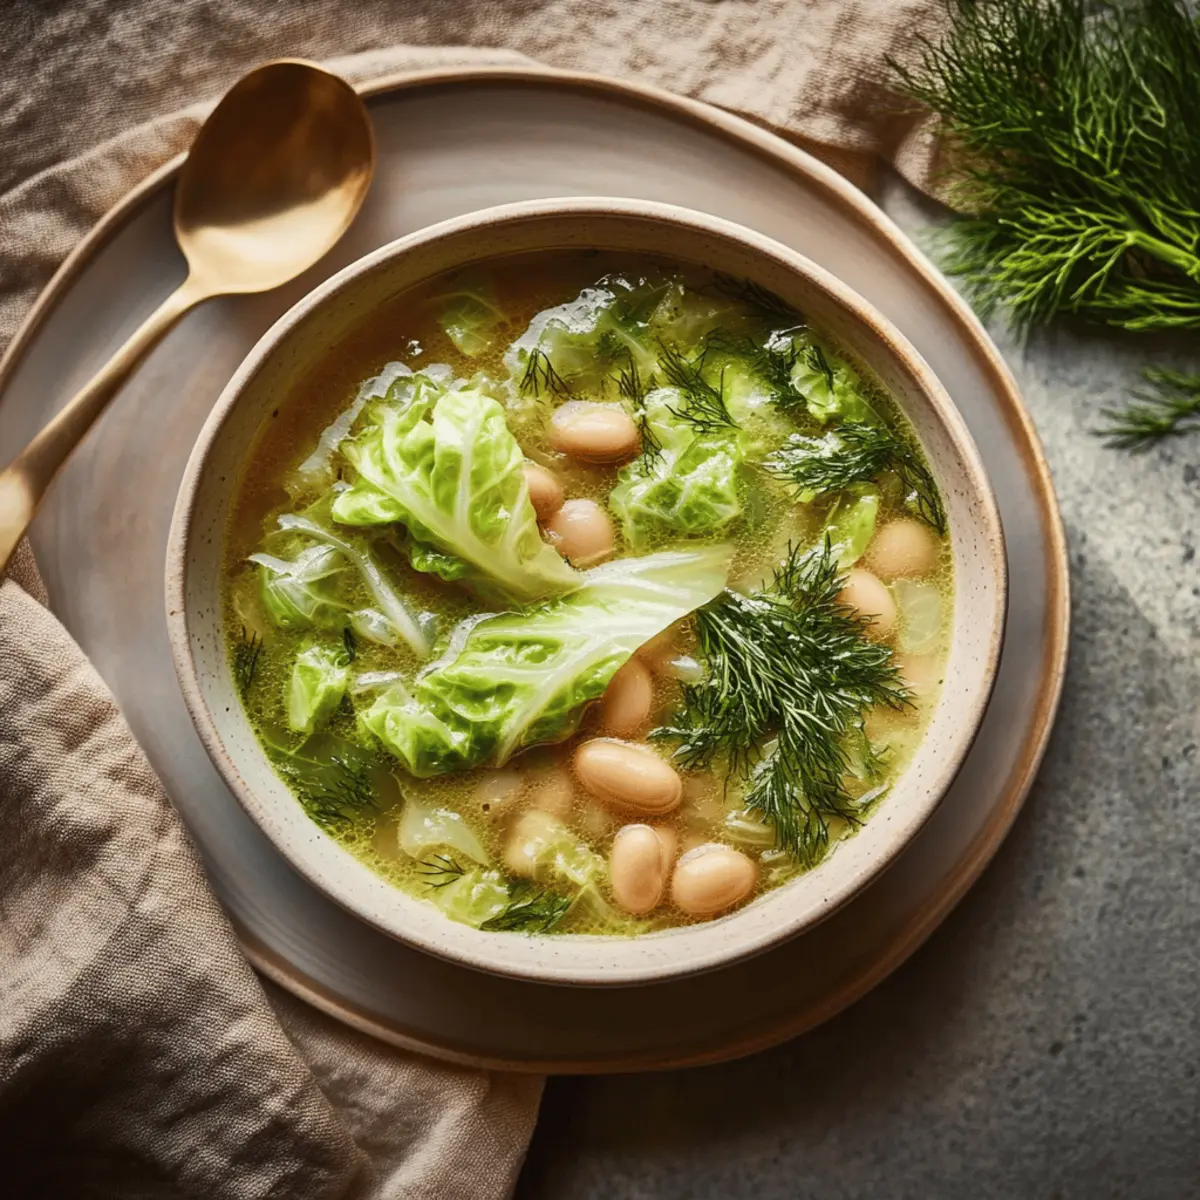
Ladle the warm Lemon Dill Cabbage Soup into bowls, garnishing each serving with a sprinkle of extra dill and freshly cracked black pepper. For a complete meal, serve it alongside crusty bread, allowing you to savor every delightful spoonful of this cozy dish.

Make Ahead Options

These Lemon Dill Cabbage Soup is perfect for meal prep enthusiasts! You can sauté the aromatics (onion and garlic) and soften the cabbage up to 24 hours in advance; just store them refrigerated in an airtight container. The soup can also be prepared and refrigerated for up to 3 days without the egg mixture, ensuring it stays fresh and flavorful. When you're ready to serve, bring the soup back to a gentle simmer, whisk in the tempered egg mixture, and finish with fresh dill. This way, you have a cozy, homemade meal ready to enjoy with minimal effort, all while maintaining the vibrant taste of your Lemon Dill Cabbage Soup!

What to Serve with Lemon Dill Cabbage Soup

Pairing this cozy soup with complementary sides creates a delightful dining experience.

  • Crusty Baguette: A warm, crusty baguette is perfect for dipping and soaking up the rich, velvety broth.
  • Garlic Toast: Crunchy garlic toast adds a savory crunch that balances the soup's creamy texture, making each bite satisfying.
  • Side Salad: A light side salad drizzled with lemon vinaigrette brings a fresh, zesty note that complements the soup's bright flavors. With crisp greens and a hint of acidity, this pairing adds a wholesome touch to your meal.
  • Steamed Asparagus: Bright green asparagus spears topped with a sprinkle of lemon zest provide a crisp and refreshing side, enhancing the overall vibrancy of your dining table.
  • Roasted Potatoes: Crispy roasted potatoes seasoned with herbs offer a hearty, comforting contrast to the light soup, making for a filling meal.
  • Dessert: A slice of lemon sorbet or light fruit tart can serve as a refreshing finish, echoing the soup's citrusy notes while cleansing the palate.
  • Herbal Tea: A warm cup of herbal tea, perhaps chamomile or lemon verbena, can complement the soothing nature of the soup, providing a calm end to your meal.
  • Sparkling Water: The effervescence of sparkling water with a twist of lemon enhances the meal's brightness and freshness, invigorating your palate with each sip.

Lemon Dill Cabbage Soup Variations

Feel free to explore these delightful twists to make your Lemon Dill Cabbage Soup even more exciting and personalized!

  • Kale Swap: Substitute green cabbage with kale for a heartier, nutrient-packed version. Kale adds a lovely texture and depth to the flavor.

  • Chickpea Option: Replace cannellini beans with chickpeas for a different protein source. This swap creates a lovely earthiness, which pairs beautifully with the zesty lemon.

  • Creamy Coconut: Make it vegan by omitting the egg and Parmesan; instead, stir in a splash of coconut milk for a creamy finish without losing rich flavor.

  • Spicy Kick: Add crushed red pepper flakes for a hint of heat. This will elevate the soup, providing a warm, comforting spice that delights the palate.

  • Lemon Zest Boost: For an enhanced lemon flavor, grate in some lemon zest along with the juice. This adds an aromatic brightness that will keep your taste buds humming.

  • Garlic Lovers: Increase the garlic to up to 4 cloves for extra depth. The delicious aroma will envelop your kitchen, enticing everyone to gather around the table.

  • Herbal Harmony: Mix in fresh thyme along with dill for a unique aromatic experience. Thyme brings a warm, earthy note that balances well with the lemon.

  • Corral Extra Veggies: Toss in diced carrots or celery for added texture and sweetness. These vibrant veggies will brighten your soup both in taste and color.

These variations can easily transform your Lemon Dill Cabbage Soup into something new and keep weeknight dinners vibrant and fun! And if you're ever in the mood for another cozy dish, try our Lemon Chicken Soup or Asparagus Soup Healthy for more nourishing comfort options. Enjoy your culinary adventure!

Expert Tips for Lemon Dill Cabbage Soup

  • Tempering Technique: To prevent curdling, always temper the egg mixture by gradually adding hot broth while whisking continuously. This will create a smooth, creamy texture.

  • Fresh vs. Dried Dill: Fresh dill offers superior flavor. If you must use dried, cut the quantity in half to avoid overpowering the soup.

  • Adding Greens: Consider adding a handful of baby spinach or kale for an extra nutrient boost, enhancing the soup's color and health benefits.

  • Flavor Balancing: Adjust the lemon juice to your taste; more acidity brightens the dish, but be careful not to overpower the delicate flavors.

  • Storing Leftovers: Refrigerate any leftovers in an airtight container for up to 4 days. Reheat gently over low heat to prevent boiling the egg mixture, ensuring a delightful experience with each serving.

Storage Tips for Lemon Dill Cabbage Soup

Fridge: Store leftovers in an airtight container for up to 4 days. Allow the soup to cool before sealing to preserve freshness.

Freezer: This soup is not recommended for freezing due to the egg content, which may curdle upon thawing.

Reheating: Gently reheat on the stove over low heat, stirring occasionally to maintain a creamy texture. Avoid boiling to prevent the egg from curdling.

Make-Ahead: Prepare the soup in advance, but add the egg mixture just before serving to keep it velvety and delicious.

Lemon Dill Cabbage Soup Recipe FAQs

How do I select the best cabbage for this soup?
Absolutely! Look for heads of green cabbage that feel heavy for their size and have crisp, tightly packed leaves. Avoid any that show dark spots or wilted leaves, as these may indicate aged cabbage. Fresh cabbage should feel firm and smell fresh, contributing a vibrant flavor to your Lemon Dill Cabbage Soup.

What’s the best way to store leftovers?
Very! Allow leftover Lemon Dill Cabbage Soup to cool to room temperature before transferring to an airtight container. It keeps well in the fridge for up to 4 days. For optimal flavor and texture, reheat gently on the stovetop over low heat to avoid curdling the egg mixture.

Can I freeze Lemon Dill Cabbage Soup?
Not recommended! Because of the egg content, freezing can cause curdling, which affects the soup's creamy consistency. However, you can prepare the soup base (without the egg and cheese) and freeze it for up to 3 months. When you're ready to serve, thaw it in the fridge overnight, then heat and add the egg mixture just before enjoying.

What if my soup turns out too thick?
No worries! If the soup is thicker than you'd like, simply stir in additional vegetable broth or water a little at a time until it reaches your desired consistency. Taste as you go, and adjust seasoning if needed. This tip can help maximize the enjoyment of your Lemon Dill Cabbage Soup!

Is this soup suitable for vegan diets?
Absolutely! To make a vegan version of Lemon Dill Cabbage Soup, simply omit the egg and Parmesan cheese. For a creamy finish, consider adding a splash of coconut milk or a handful of nutritional yeast for that delicious cheesy flavor without dairy.

Can my pets have any of the ingredients in this soup?
Very! While many of the ingredients like cabbage and beans can be safe for pets, it's best to avoid giving them anything with garlic or onion, as these can be harmful. If you're sharing with your furry friend, stick to plain cooked cabbage and beans!

Lemon Dill Cabbage Soup

Lemon Dill Cabbage Soup: Comfort in Every Cozy Spoonful

This Lemon Dill Cabbage Soup is a comforting dish made with cannellini beans, fresh lemon, and dill, perfect for a cozy meal.
Print Recipe Pin Recipe
Prep Time 10 minutes mins
Cook Time 20 minutes mins
Total Time 30 minutes mins
Servings: 4 bowls
Course: Soups
Cuisine: Vegetarian
Calories: 320
Ingredients Equipment Method Nutrition Notes

Ingredients
  

For the Soup
  • 2 tablespoons olive oil extra virgin enhances flavor
  • 1 medium onion diced; yellow or sweet for mild taste
  • 2 cloves garlic thinly sliced
  • 4 cups green cabbage chopped; can substitute with kale or spinach
  • 1 can cannellini beans rinsed; chickpeas or navy beans can substitute
  • 4 cups vegetable broth choose reduced sodium for balanced flavor
  • ½ cup Parmesan cheese freshly grated; omit for vegan
  • 1 large egg omit for vegan or substitute with nutritional yeast
  • 1 juice lemon essential for brightness
  • ¼ cup fresh dill offers herbal notes; dried can substitute
For Serving
  • crusty bread pair with baguette or garlic toast
  • extra dill for garnish
  • black pepper for garnish

Equipment

  • Large Dutch oven

Method
 

Step-by-Step Instructions
  1. In a large Dutch oven, heat 2 tablespoons of olive oil over medium heat. Add a diced onion and 2 cloves of thinly sliced garlic, stirring often for about 4 minutes until the onions become translucent and fragrant.
  2. Stir in 4 cups of chopped green cabbage along with a pinch of dried oregano and black pepper. Sauté for another 3 minutes, gently stirring as the cabbage begins to soften.
  3. Pour in 4 cups of vegetable broth and add 1 can of rinsed cannellini beans. Bring to a gentle boil, then reduce the heat to a simmer and cover the pot, letting it cook for about 8 minutes until the cabbage is tender.
  4. Whisk together ½ cup of freshly grated Parmesan cheese, the juice of 1 lemon, and 1 large egg in a medium bowl. Slowly drizzle in about a cup of the hot soup broth while whisking continuously.
  5. Remove the pot from the heat and carefully stir in the tempered egg mixture along with ¼ cup of freshly chopped dill. Season the soup with salt to taste.
  6. Ladle the warm soup into bowls, garnishing each serving with extra dill and freshly cracked black pepper. Serve alongside crusty bread.

Nutrition

Serving: 1bowlCalories: 320kcalCarbohydrates: 40gProtein: 15gFat: 10gSaturated Fat: 3gPolyunsaturated Fat: 1gMonounsaturated Fat: 5gCholesterol: 80mgSodium: 600mgPotassium: 800mgFiber: 10gSugar: 3gVitamin A: 500IUVitamin C: 70mgCalcium: 200mgIron: 3mg

Notes

Consider adding baby spinach or kale for extra nutrients. Adjust lemon juice to taste and refrigerate leftovers for up to 4 days.

Tried this recipe?

Let us know how it was!

Savory Sheet Pan Cashew Chicken for Effortless Dinners

September 23, 2025 by Grace Snow Leave a Comment

The kitchen filled with the tantalizing scent of roasting chicken as I placed my sheet pan into the oven—a perfect moment of culinary bliss. This Easy Sheet Pan Cashew Chicken is my go-to for busy weeknights when I crave a meal that’s both quick and satisfying. With juicy chicken, crunchy cashews, and colorful veggies all roasted together, it’s a hassle-free dinner that even the pickiest eaters will love. Not only is it healthy and gluten-free-friendly, but the best part is you’ll only need one pan for cooking and cleaning up! If you’ve got a busy schedule and want a homemade meal that shines on flavor without the fuss, this dish is just what you need. Ready to turn your weeknight dinners into delightful experiences? Let’s dive into the recipe!

Why is Sheet Pan Cashew Chicken a must-try?

Effortless Preparation: This dish comes together in a single pan, which means minimal cleanup—perfect for those busy weeknights!

Flavor Explosion: The combination of savory soy sauce, sweet honey, and aromatic garlic creates a mouthwatering taste that will have your family asking for seconds.

Customizable Ingredients: Feel free to swap out veggies or use tofu for a vegetarian twist. It's versatility at its finest!

Healthy Choice: Packed with protein and colorful vegetables, this meal keeps you energized and satisfied without the guilt.

Kid-Friendly: With its vibrant colors and fun textures, even picky eaters will be reaching for seconds. Enjoy it over rice or noodles for a complete meal!

If you love quick recipes like this, check out my Honey Garlic Chicken or Chipotle Lime Chicken and Rice for more easy dinner ideas!

Sheet Pan Cashew Chicken Ingredients

For the Chicken

  • Boneless, skinless chicken breasts – Perfect for tenderness; thighs offer even richer flavor if preferred.
  • Cashews – Use unsalted for optimal flavor; can swap with almonds or peanuts for variety.

For the Veggies

  • Bell peppers – Choose vibrant red and green for sweetness; orange or yellow can add more natural sugars.
  • Onion – Adds depth and sweetness; red onions can enhance the flavor profile further.

For the Marinade

  • Soy sauce – A key flavor enhancer; swap with tamari for gluten-free or coconut aminos for soy-free.
  • Honey – Adds natural sweetness; for a vegan alternative, use agave syrup or maple syrup.
  • Rice vinegar – Brings brightness; it's optional but adds a lovely tang to balance flavors.
  • Sesame oil – An ingredient for richness; olive oil is a good substitute if needed.
  • Minced garlic – Essential for a fragrant boost; fresh is best for maximum flavor.
  • Minced ginger – Complements garlic well and adds aromatic warmth to your dish.

Don't forget to savor every bite of this delicious Sheet Pan Cashew Chicken!

Step‑by‑Step Instructions for Sheet Pan Cashew Chicken

Step 1: Preheat the Oven
Begin by preheating your oven to 400°F (200°C). This high temperature ensures that your ingredients roast beautifully, creating that irresistible caramelization. While the oven heats up, you can gather your ingredients and be ready for a smooth cooking process.

Step 2: Prepare the Marinade
In a large mixing bowl, whisk together soy sauce, honey, rice vinegar, sesame oil, minced garlic, and minced ginger. This savory marinade will infuse the chicken with flavor. As you mix, the aromas will start to fill the kitchen, creating excitement for the meal ahead.

Step 3: Marinate the Chicken
Add your boneless, skinless chicken pieces into the bowl with the marinade, ensuring each piece is fully coated. Allow the chicken to marinate for at least 15 minutes to absorb all of the delicious flavors. If you have time, letting it sit longer will enhance the taste even more.

Step 4: Arrange on the Sheet Pan
Once marinated, take a large sheet pan and spread the marinated chicken, chopped bell peppers, and diced onions in a single layer. Make sure the chicken is evenly spaced for optimal roasting. The vibrant colors of the veggies will add visual appeal, creating a stunning one-pan meal.

Step 5: Drizzle and Season
Drizzle the remaining marinade over the chicken and veggies, then season lightly with salt and pepper. This extra seasoning will elevate the dish's flavor. The glossy marinade will beautifully complement the ingredients as they roast in the oven.

Step 6: Bake the Mixture
Place your sheet pan in the preheated oven and bake for 20 minutes. Remember to stir the chicken and vegetables halfway through cooking to promote even roasting and prevent sticking. You'll know it's time to flip them when the aroma starts to fill your home.

Step 7: Add the Cashews
After the initial bake, take the sheet pan out and sprinkle the unsalted cashews over the mixture. Return the pan to the oven for an additional 10-15 minutes, until the chicken is cooked through and begins to caramelize. Look for a golden-brown finish on the edges to know it’s done.

Step 8: Serve and Garnish
Once everything is cooked to perfection, remove the sheet pan from the oven. Garnish with fresh cilantro and serve your delightful Sheet Pan Cashew Chicken over rice or noodles. The combination of flavors and textures is sure to be a hit at the dinner table!

Sheet Pan Cashew Chicken Variations

You’ll love personalizing this dish to suit your taste buds and preferences in the kitchen!

  • Nut-Free: Swap cashews for sunflower seeds to enjoy a similar crunch without the nuts.

  • Gluten-Free: Replace soy sauce with tamari or coconut aminos to keep your meal gluten-free while maintaining depth of flavor.

  • Spicy Twist: Add sliced jalapeños to the mix for a delightful kick that will enliven your palate. The heat elevates the dish without overwhelming the other flavors.

  • Veggie-Packed: Toss in additional vegetables like broccoli or snap peas for added nutrition and color! This not only enhances the visual appeal but also brings in delightful textures.

  • Honeysuckle Sweet: Use maple syrup instead of honey for a unique sweetness that pairs beautifully with the savory notes. You might discover a new favorite flavor combination!

  • Herb Infusion: Sprinkle fresh herbs like Thai basil or cilantro over the cooked chicken before serving for a burst of freshness. Aromatic herbs will enhance every bite!

  • Asian-Inspired Rice: Serve over jasmine or basmati rice, adding a hint of coconut milk to the cooking water for a rich and fragrant experience.

If you enjoyed this easy creation, you might also love my Chicken Adobo for another delicious twist or the flavor-packed Spatchcock Chicken for a roast dinner with a crisp finish!

What to Serve with Easy Sheet Pan Cashew Chicken

Creating a delightful meal experience means pairing flavors and textures that complement each other beautifully.

  • Fluffy Jasmine Rice: The perfect canvas to absorb the savory sauce, adding a subtle sweet aroma that enhances every bite.
  • Garlicky Stir-Fried Greens: Crisp-tender greens like bok choy or spinach offer a fresh crunch and a vibrant color contrast to the chicken.
  • Crispy Egg Rolls: Their crunchy exterior and hearty filling provide a satisfying textural contrast and an extra layer of deliciousness.
  • Mango Salad: A refreshing mix of ripe mango, lime, and cilantro brings a tropical sweetness that pairs wonderfully with the savory chicken.
  • Creamy Coconut Soup: Its silky texture and coconut flavor make it a soothing complement to the robust cashew chicken.
  • Chilled Cucumber Salad: Cool, crunchy cucumbers dressed in a light vinaigrette provide an invigorating balance to the warm dish.
  • Iced Green Tea: This refreshing drink complements the meal with its lightness and subtle earthiness, cleansing your palate.
  • Chocolate Mousse: End your meal on a sweet note with a rich and airy dessert, providing a delightful contrast to the savory main dish.

Let these pairings elevate your dinner experience, creating a table full of love and flavor!

Storage Tips for Sheet Pan Cashew Chicken

  • Fridge: Store any leftovers in an airtight container for up to 3 days. This helps retain the flavor and prevents drying out.

  • Freezer: For longer storage, freeze portions in freezer-safe bags or containers for up to 2 months. Make sure to label them for easy identification.

  • Reheating: Reheat leftovers in the microwave or oven, adding a splash of water or broth to keep the chicken and veggies moist. Enjoy the delicious flavors of your Sheet Pan Cashew Chicken again!

  • Thawing: When ready to eat frozen portions, thaw overnight in the fridge before reheating for best texture and flavor.

Make Ahead Options

These Easy Sheet Pan Cashew Chicken bites are perfect for meal prep enthusiasts! To save time on busy weeknights, you can marinate the chicken and chop the vegetables up to 24 hours in advance. Simply follow the initial steps of the recipe and place the chicken in the marinade, covering it tightly in the refrigerator to keep flavors fresh. For the veggies, keep them in a separate airtight container so they remain crisp. When you're ready to serve, just arrange everything on the sheet pan and bake according to the recipe instructions. Doing this will ensure you enjoy a delicious, stress-free dinner that's just as flavorful and satisfying!

Expert Tips for Sheet Pan Cashew Chicken

  • Preheat Properly: Ensure your oven is fully preheated to 400°F (200°C) for optimal browning and flavor development.

  • Avoid Overcrowding: Give your chicken and vegetables room to roast, not steam. An overcrowded pan can lead to soggy results.

  • Marinade Hacks: Marinate your chicken and chop your veggies the night before for a quick, hassle-free dinner prep.

  • Checking Doneness: Use a meat thermometer to ensure the chicken reaches 165°F (75°C) before serving, ensuring it’s safe to eat.

  • Storage Tips: Store any leftovers in an airtight container for up to 3 days and add a splash of broth when reheating to restore moisture.

Sheet Pan Cashew Chicken Recipe FAQs

What type of chicken should I use for the best texture in Sheet Pan Cashew Chicken?
Absolutely! I recommend using boneless, skinless chicken breasts for their tenderness. If you're looking for something richer in flavor, chicken thighs are an excellent alternative. For a vegetarian option, tofu works beautifully; just ensure to press it to remove excess moisture before marinating.

How should I store leftovers from Sheet Pan Cashew Chicken?
Store any leftovers in an airtight container in the refrigerator for up to 3 days. This keeps them fresh and enhances flavor retention. If you find the chicken has dried out upon reheating, adding a splash of water or broth when warming it up can help restore moisture.

Can I freeze Sheet Pan Cashew Chicken?
Yes, you can freeze this dish! For best results, place leftovers in freezer-safe bags or containers. Make sure to label them and store for up to 2 months. To enjoy later, thaw overnight in the fridge before reheating in the oven or microwave, and add a splash of broth to maintain the dish's moisture.

What should I do if my chicken isn’t cooking evenly?
If you notice uneven cooking, it could be due to overcrowding on the sheet pan. Always arrange the chicken and veggies in a single layer, giving them room to roast rather than steam. Also, stirring halfway through cooking helps with even browning and heat distribution.

Can I make Sheet Pan Cashew Chicken gluten-free?
Very! Simply swap regular soy sauce for tamari or coconut aminos, which are great gluten-free alternatives. Make sure all other ingredients in your recipe don't contain gluten, especially any pre-packaged sauces or marinades. This dish can easily fit your dietary needs while remaining delicious!

Sheet Pan Cashew Chicken

Savory Sheet Pan Cashew Chicken for Effortless Dinners

This Easy Sheet Pan Cashew Chicken is a quick and healthy dinner option that's both delicious and hassle-free.
Print Recipe Pin Recipe
Prep Time 15 minutes mins
Cook Time 30 minutes mins
Total Time 45 minutes mins
Servings: 4 servings
Course: Dinner
Cuisine: Asian
Calories: 350
Ingredients Equipment Method Nutrition Notes

Ingredients
  

For the Chicken
  • 1 pound Boneless, skinless chicken breasts Thighs can be used for richer flavor.
  • 1 cup Cashews Use unsalted for optimal flavor.
For the Veggies
  • 2 cups Bell peppers Vibrant red and green are preferred.
  • 1 medium Onion Red onions enhance flavor profile.
For the Marinade
  • 1/4 cup Soy sauce Can swap with tamari or coconut aminos.
  • 2 tablespoons Honey For a vegan option, use agave syrup.
  • 1 tablespoon Rice vinegar Optional but adds tang.
  • 2 tablespoons Sesame oil Olive oil can be substituted.
  • 3 cloves Minced garlic Fresh is best for flavor.
  • 1 teaspoon Minced ginger Adds aromatic warmth.

Equipment

  • sheet pan
  • Mixing Bowl

Method
 

Step-by-Step Instructions
  1. Preheat your oven to 400°F (200°C).
  2. In a large mixing bowl, whisk together soy sauce, honey, rice vinegar, sesame oil, minced garlic, and minced ginger.
  3. Add your boneless, skinless chicken pieces into the bowl with the marinade, ensuring each piece is fully coated. Allow marinating for at least 15 minutes.
  4. On a large sheet pan, spread the marinated chicken, chopped bell peppers, and diced onions in a single layer.
  5. Drizzle the remaining marinade over the chicken and veggies, then season lightly with salt and pepper.
  6. Bake for 20 minutes, stirring halfway through cooking.
  7. Sprinkle the unsalted cashews over the mixture and return to the oven for 10-15 minutes until chicken is cooked through.
  8. Remove from the oven, garnish with fresh cilantro, and serve over rice or noodles.

Nutrition

Serving: 1servingCalories: 350kcalCarbohydrates: 20gProtein: 30gFat: 15gSaturated Fat: 2gPolyunsaturated Fat: 4gMonounsaturated Fat: 7gCholesterol: 80mgSodium: 600mgPotassium: 800mgFiber: 3gSugar: 6gVitamin A: 1000IUVitamin C: 60mgCalcium: 50mgIron: 1.5mg

Notes

Store leftovers in an airtight container for up to 3 days. Freeze for longer storage.

Tried this recipe?

Let us know how it was!

Frozen Greek Yogurt Peanut Butter Bites for Healthy Snacking

September 23, 2025 by Grace Snow Leave a Comment

As I rummaged through my pantry, searching for a satisfying snack, I stumbled upon the perfect ingredients to create a treat that embodies both indulgence and health. These Frozen Greek Yogurt Peanut Butter Bites are not only a deliciously creamy and nutty delight topped with rich chocolate, but they're also a quick and easy no-bake recipe that even the busiest home chefs can whip up. Packed with wholesome goodness, they're versatile enough to customize according to your taste, whether you’re craving a bit of almond butter instead of peanut or looking for a vegan option. Perfect for a post-workout pick-me-up or a guilt-free dessert, these bites are sure to become a staple in your snack rotation. Would you dare to add your own twist to these delightful morsels?

Why Choose Frozen Greek Yogurt Peanut Butter Bites?

Healthier snacking never tasted so good! These Frozen Greek Yogurt Peanut Butter Bites are like a dessert masquerading as a nutritious snack. Quick and easy to prepare, they require no baking, making them an effortless addition to your routine. Customizable to your tastes, simply swap out the peanut butter for almond or cashew and add your favorite toppings. Packed with protein, they're great for post-workout fuel or a sweet treat that won’t derail your healthy habits. Plus, if you enjoy these, you might love making comparable recipes like Crockpot Butter Chicken for a wholesome meal.

Frozen Greek Yogurt Peanut Butter Bites Ingredients

For the Base

  • Plain Greek Yogurt – Creamy and packed with protein; use full-fat for richness or nonfat for a lighter option.
  • Creamy Peanut Butter – Adds a nutty flavor and smooth texture; substitute with almond or cashew butter for variation.
  • Honey – Sweetens the bites naturally; swap with maple syrup for a vegan-friendly choice.
  • Vanilla Extract – Enhances the overall flavor profile, adding warmth to each bite.

For the Coating

  • Mini Chocolate Chips – Provide delightful sweetness and texture; regular chocolate chips work if mini aren’t available.
  • Dark Chocolate Chips – Used to coat the bites, giving a rich contrast; semi-sweet chocolate can be a perfect alternative.
  • Coconut Oil (optional) – Ensures the chocolate melts smoothly; if not on hand, you can skip this ingredient.

Optional Toppings

  • Crushed Peanuts – Enhances crunch and flavor; sprinkle on while chocolate is wet for stickiness.
  • Sea Salt Flakes – Provide a delicious savory contrast to the sweet chocolate.
  • Shredded Coconut – Adds tropical flavor and texture; a delightful addition to customize your Frozen Greek Yogurt Peanut Butter Bites.

These ingredients combine to create a healthy, frozen delight that’s perfect for snacking!

Step‑by‑Step Instructions for Frozen Greek Yogurt Peanut Butter Bites

Step 1: Mix Base
In a medium bowl, combine 1 cup of plain Greek yogurt, ½ cup of creamy peanut butter, ¼ cup of honey, and 1 teaspoon of vanilla extract. Stir the mixture thoroughly until it becomes smooth and well-blended, with a creamy consistency. Fold in half of the mini chocolate chips, and set aside the remaining for topping later.

Step 2: Portion & Freeze
Prepare a baking sheet by lining it with parchment paper for easy cleanup. Using a tablespoon, scoop out the mixture and roll it into tablespoon-sized balls, slightly flattening them as they go on the sheet. Place the baking sheet in the freezer and allow the bites to freeze for 1 to 2 hours, or until firm enough to handle easily.

Step 3: Prepare Chocolate Coating
While the bites are freezing, prepare the chocolate coating. In a microwave-safe bowl, combine 1 cup of dark chocolate chips with 1 teaspoon of coconut oil, if using. Microwave in 30-second bursts, stirring in between until the chocolate is completely melted and smooth, achieving a silky consistency perfect for dipping.

Step 4: Dip & Decorate
Once your Frozen Greek Yogurt Peanut Butter Bites are firm, take them out of the freezer. Using a fork or dipping tool, dip each bite into the melted chocolate, allowing any excess to drip off. Place the dipped bites back onto the parchment-lined baking sheet and immediately sprinkle with the reserved mini chocolate chips or any other toppings you desire.

Step 5: Final Freeze
Return the baking sheet with the coated bites back to the freezer for an additional 15 to 20 minutes, or until the chocolate has fully set and becomes crisp. This step ensures that each bite of your Frozen Greek Yogurt Peanut Butter Bites is encased in a deliciously firm shell of chocolate.

Step 6: Store
Once the chocolate coating has hardened, carefully transfer the Frozen Greek Yogurt Peanut Butter Bites to an airtight container, layering them with parchment paper if desired. Store in the freezer for up to three weeks, and let them sit at room temperature for 2-3 minutes before serving to achieve that wonderfully creamy texture.

How to Store and Freeze Frozen Greek Yogurt Peanut Butter Bites

  • Room Temperature: These treats are best enjoyed directly from the freezer. If left out, they should not sit at room temperature for longer than 15 minutes to maintain their texture.
  • Fridge: While refrigeration is not ideal, you can store them in the fridge for up to 3 days if necessary, but they may lose their signature frozen crunch.
  • Freezer: For optimal freshness, place your Frozen Greek Yogurt Peanut Butter Bites in an airtight container to prevent freezer burn, and they can stay good for up to 3 weeks. Layering the bites with parchment paper keeps them from sticking together.
  • Reheating: No reheating is needed; simply let them sit at room temperature for 2-3 minutes before enjoying for a creamier texture.

Make Ahead Options

These Frozen Greek Yogurt Peanut Butter Bites are a fantastic meal prep solution for busy weeks! You can prepare the base mixture (Greek yogurt, peanut butter, honey, and vanilla) in advance up to 24 hours before you need the snacks. Just mix everything in the bowl, cover it, and refrigerate it until you’re ready to shape the bites. Additionally, once you’ve portioned and frozen the bites, they can be stored in the freezer for up to three weeks. When it’s time to finish, simply melt the chocolate coating, dip the frozen bites, and let them set. This way, you’ll have delicious, healthy snacks ready anytime you need a quick treat or post-workout fuel, remaining just as delightful and creamy!

What to Serve with Frozen Greek Yogurt Peanut Butter Bites?

Treat yourself and your loved ones to a delightful culinary experience by pairing these creamy bites with tantalizing accompaniments.

  • Fresh Berries: Bursting with flavor, berries offer a juicy contrast to the creamy bites. Their vibrant colors add a cheerful touch to your snack plate.

  • Granola: The crunchiness of granola provides a satisfying texture that pairs perfectly with the smoothness of the bites. Sprinkle some on top for added flavor and crunch!

  • Nutty Trail Mix: A handful of trail mix blends earthy nuts with dried fruits, enhancing the bites’ nutty essence while adding a delightful chewiness.

  • Chia Seed Pudding: This healthy, silky companion adds an extra layer of creaminess and a boost of fiber, making for a well-rounded snack that feels indulgent yet nutritious.

  • Iced Coffee: The bold, smooth flavors of iced coffee balance the sweetness of the bites beautifully, making it an ideal refreshing drink to accompany your snack.

  • Dark Chocolate Dipped Fruit: Elevate your snack game with the luxurious addition of fruit dipped in dark chocolate, creating a harmonious balance of sweetness and richness.

  • Coconut Water: Refreshing and hydrating, coconut water provides a light, tropical twist that complements the creamy, nutty bites wonderfully, making for a satisfying afternoon treat.

  • Cinnamon-Spiced Apples: Warm, baked cinnamon apples contrast the cold bites perfectly, offering a cozy, inviting flavor combination that will make you feel right at home.

  • Mint Tea: A soothing beverage, mint tea cleanses the palate while bringing a fresh finish to your sweet bites, making each experience more refreshing.

Enjoy experimenting with these delightful pairings, and soon, they'll become your go-to companions for these delectable Frozen Greek Yogurt Peanut Butter Bites!

Useful Tips for Frozen Greek Yogurt Peanut Butter Bites

  • Smooth Coating: Use a fork or dipping tool to easily coat each bite in chocolate without making a mess.

  • Freeze Firm: Make sure your bites are fully frozen before dipping; this prevents a gooey chocolate disaster during coating.

  • Reheat Chocolate: If your chocolate thickens while dipping, take a moment to reheat it briefly in the microwave for a smoother consistency.

  • Add Protein: For an extra protein boost, consider folding in a scoop of protein powder into the yogurt mix.

  • Experiment with Flavors: Don’t hesitate to get creative with different nut butters or toppings to customize your Frozen Greek Yogurt Peanut Butter Bites to your liking!

Frozen Greek Yogurt Peanut Butter Bites Variations

Feel free to let your creativity shine by customizing these delightful bites with your unique twists and twists!

  • Nut Butter Swap: Substitute creamy peanut butter with almond or cashew butter for a different flavor profile that's equally delicious.
  • Vegan Delight: Use plant-based yogurt and vegan chocolate chips to make a completely dairy-free version that everyone will enjoy.
  • Crunchy Texture: Opt for crunchy peanut butter instead of creamy, adding delightful texture to every bite. For an extra crunch, toss in some oats or granola!
  • Sweet & Savory: Add a pinch of sea salt or a dash of cinnamon to elevate the flavor and provide a sweet-savory balance.
  • Tropical Vibe: Mix in shredded coconut and top your bites with coconut flakes for a refreshing, tropical twist. Perfect for summer snacking!
  • Chocolate Lover's Haven: Incorporate mini chocolate chips into the yogurt mix for double chocolate goodness. Who can resist that?
  • Fruit Fusion: Fold in some dried fruits like cranberries or chopped dates for an energy boost and a touch of natural sweetness. If you want to try a fruity taste, you can even dip the bites in white chocolate for a delicious combination!
  • Almond Joy-Inspired: Get inspired by the classic candy by substituting almond butter, mixing in shredded coconut, and topping with chopped almonds.

These variations will not only keep your taste buds excited but also inspire you to explore even more delightful adaptations; you might find yourself loving creations like Crockpot Butter Chicken next!

Frozen Greek Yogurt Peanut Butter Bites Recipe FAQs

How do I choose the right Greek yogurt?
Absolutely! For the creamiest results in your Frozen Greek Yogurt Peanut Butter Bites, I recommend using full-fat Greek yogurt. It provides a rich texture and flavor. If you prefer a lighter option, nonfat or low-fat varieties can work too—just expect a slightly different consistency.

How should I store my Frozen Greek Yogurt Peanut Butter Bites?
Very well! Transfer your bites into an airtight container, layering parchment paper between them to prevent sticking. They can be stored in the freezer for up to 3 weeks. If they sit out at room temperature for longer than 15 minutes, they may start losing their delightful frozen crunch.

Can I freeze the Greek Yogurt Peanut Butter Bites?
Absolutely! In fact, freezing is essential for achieving that perfect bite. After coating them with chocolate, return them to the freezer for 15-20 minutes to ensure the chocolate sets. Keeping them frozen will maintain their delightful texture, allowing you to enjoy them as a quick snack whenever you need a healthy treat.

What if my chocolate gets thick while I’m dipping?
Not to worry! If your chocolate starts to thicken during the dipping process, simply reheat it in the microwave in 30-second bursts, stirring between until it becomes smooth again. This ensures an even coat on your Frozen Greek Yogurt Peanut Butter Bites, keeping them looking as good as they taste!

Are these snacks safe for people with nut allergies?
Very much so! If you have nut allergies, feel free to substitute the creamy peanut butter with a seed butter like sunflower seed butter or pumpkin seed butter. This keeps the recipe safe for those with nut allergies while still delivering a deliciously creamy texture.

Can I make these bites vegan?
Of course! To create vegan Frozen Greek Yogurt Peanut Butter Bites, simply swap plain Greek yogurt for a plant-based yogurt and use dairy-free chocolate chips. You can also substitute honey with maple syrup for sweetness. These adjustments will still give you a delightful treat without any animal products!

Frozen Greek Yogurt Peanut Butter Bites

Frozen Greek Yogurt Peanut Butter Bites for Healthy Snacking

Frozen Greek Yogurt Peanut Butter Bites are a delicious, no-bake healthy snack packed with protein and customizable flavors.
Print Recipe Pin Recipe
Prep Time 15 minutes mins
Freezing Time 2 hours hrs
Total Time 2 hours hrs 15 minutes mins
Servings: 12 bites
Course: Snacks
Cuisine: American
Calories: 90
Ingredients Equipment Method Nutrition Notes

Ingredients
  

For the Base
  • 1 cup plain Greek yogurt use full-fat for richness or nonfat for a lighter option
  • ½ cup creamy peanut butter substitute with almond or cashew butter for variation
  • ¼ cup honey swap with maple syrup for a vegan option
  • 1 teaspoon vanilla extract
For the Coating
  • 1 cup mini chocolate chips regular chocolate chips work if mini aren’t available
  • 1 cup dark chocolate chips semi-sweet chocolate can be a perfect alternative
  • 1 teaspoon coconut oil optional for smooth melting
Optional Toppings
  • crushed peanuts sprinkle on while chocolate is wet
  • sea salt flakes provides a savory contrast
  • shredded coconut a delightful addition

Equipment

  • medium bowl
  • Baking Sheet
  • Parchment Paper
  • Microwave-safe bowl
  • fork or dipping tool

Method
 

Step-by-Step Instructions
  1. In a medium bowl, combine 1 cup of plain Greek yogurt, ½ cup of creamy peanut butter, ¼ cup of honey, and 1 teaspoon of vanilla extract. Stir until smooth and well-blended, then fold in half of the mini chocolate chips.
  2. Prepare a baking sheet lined with parchment paper. Scoop out tablespoon-sized balls of the mixture and flatten them slightly. Freeze for 1 to 2 hours.
  3. In a microwave-safe bowl, combine 1 cup of dark chocolate chips with 1 teaspoon of coconut oil. Microwave in 30-second bursts, stirring until melted and smooth.
  4. Dip each bite into the melted chocolate, allowing excess to drip off. Place on the baking sheet and sprinkle with reserved mini chocolate chips or other toppings.
  5. Return to the freezer for an additional 15 to 20 minutes, or until the chocolate is set.
  6. Transfer to an airtight container, layering with parchment paper if desired. Store in the freezer for up to three weeks.

Nutrition

Serving: 1biteCalories: 90kcalCarbohydrates: 9gProtein: 4gFat: 4gSaturated Fat: 1.5gPolyunsaturated Fat: 1gMonounsaturated Fat: 2gSodium: 20mgPotassium: 50mgFiber: 1gSugar: 5gCalcium: 20mgIron: 0.5mg

Notes

These treats are best enjoyed directly from the freezer. If left out, they should not sit at room temperature for longer than 15 minutes.

Tried this recipe?

Let us know how it was!

Turkey Cranberry Crescent Ring: Easy Festive Bite to Impress

September 23, 2025 by Grace Snow Leave a Comment

As I unwrapped a can of crescent dough, the aroma of buttery pastry filled the kitchen, promising a delightful creation ahead. The Turkey Cranberry Crescent Ring is my go-to recipe for those bustling holiday gatherings or cozy weeknight dinners when time is short. This dish makes meal prep a breeze, allowing you to whip up something festive in under 30 minutes, ideal for anyone tired of fast food! The savory turkey filling, paired with a hint of tart cranberry sauce, enveloped in warm, flaky dough, is sure to impress your family and friends. Plus, it’s versatile enough to adapt to your tastes! Are you ready to explore this joyful blend of flavors? Let’s dive into this delicious recipe together!

Why You’ll Love This Turkey Crescent Ring?

Easy Assembly: This recipe features pre-made crescent dough that saves you time, making it perfect for busy cooks.
Flavor Explosion: The combination of savory turkey and sweet cranberry sauce creates a mouthwatering blend that delights the palate.
Family-Friendly: It’s a dish that everyone will love, making it a fantastic choice for holiday gatherings or cozy family dinners.
Versatile Options: Feel free to swap turkey for chicken or try different sauces to keep things fresh and exciting! For more inspiration, check out Asparagus Soup Healthy or the delicious Potato Blue Cheese recipe.
Quick Cooking: In under 30 minutes, you can serve this impressive dish, leaving you more time to enjoy with your loved ones.
Crowd-Pleasing Appeal: Bring this stunning ring to your next gathering, and watch it become the star of the table!

Turkey Cranberry Crescent Ring Ingredients

For the Dough
• Crescent Dough – This pre-made dough is a time-saver that contributes to the dish's flaky texture.

For the Filling
• Cooked Turkey – The heart of this recipe; feel free to substitute with cooked chicken, ham, or roast beef for variation.
• Cranberry Sauce – This sweet and tangy addition keeps the filling moist; homemade sauce can elevate the flavors even more.
• Cheese (e.g., cheddar or mozzarella) – Adds creaminess and enhances the overall flavor; it’s optional for a lighter version.

For the Topping
• Melted Butter – Brushing this on top before baking ensures a golden, crispy finish that's irresistible.
• Sesame Seeds – These add a delightful crunch and flavor; poppy seeds or no seeds can also be great alternatives.

Step‑by‑Step Instructions for Turkey Cranberry Crescent Ring

Step 1: Preheat the Oven
Begin by preheating your oven to 375°F (190°C) to ensure the perfect baking environment for your Turkey Cranberry Crescent Ring. This warm temperature will create a beautifully golden and flaky crust while cooking the filling just right. Gather your baking sheet and parchment paper for easy cleanup later.

Step 2: Prepare the Dough
Chill the crescent dough in the fridge for about 10 minutes to make it easier to handle and prevent tearing. Once chilled, carefully unroll the dough directly onto your baking sheet lined with parchment paper. Make sure to keep the dough in one large piece for a lovely presentation.

Step 3: Assemble the Filling
In the center of the dough, layer the cooked turkey evenly, followed by a generous spoonful of cranberry sauce. If using cheese, sprinkle it over the turkey and cranberry to add a creamy texture. This combination brings out the savory and sweet elements of the Turkey Cranberry Crescent Ring, ensuring every bite is flavorful.

Step 4: Shape the Crescent Ring
Fold the outer edges of the dough over the filling to create a ring shape, pinching the seams firmly together to seal in all the delicious flavors. Ensure the filling is fully enclosed and the shape appears neat. This will help the filling stay intact while baking, resulting in a stunning presentation.

Step 5: Brush & Sprinkle
Using a pastry brush, gently coat the top of your Turkey Cranberry Crescent Ring with melted butter. This step adds a rich flavor and helps achieve that golden-brown finish. If desired, sprinkle sesame seeds evenly across the top for an added crunch and visual appeal before placing it into the oven.

Step 6: Bake to Perfection
Carefully transfer the baking sheet into the preheated oven and let it bake for 20-25 minutes. Keep a close eye on the ring as it bakes; it’s ready when the dough is gloriously golden brown and puffed up. The aroma will fill your kitchen, enticing everyone for a special taste.

Step 7: Serve Warm
Once baked to perfection, remove the Turkey Cranberry Crescent Ring from the oven and let it cool for about 5 minutes. This cooling time allows the filling to set slightly, making it easier to slice. Cut into wedges and serve warm, showcasing the deliciously savory and sweet filling that everyone will love.

Turkey Cranberry Crescent Ring Variations

Feel free to get creative and tailor this festive dish to suit your tastes or dietary needs!

  • Chicken Swap: Replace cooked turkey with shredded chicken for a lighter, yet equally delicious option.
  • Alternative Sauces: Swap cranberry sauce for apple butter or peach preserves to add a fruity twist.
  • Cheesy Delight: Experiment with different cheeses like feta or gouda for unique flavor combinations.
  • Herb Infusion: Add fresh herbs such as thyme or rosemary to the filling for a fragrant, savory boost.
  • Picante Kick: Toss in some diced jalapeños or red pepper flakes to give your dish a spicy kick.
  • Nutty Crunch: Add toasted walnuts or pecans to the filling for an extra layer of texture and flavor.
  • Vegetarian Twist: Opt for a hearty vegetable filling with sautéed mushrooms, spinach, and feta cheese for a delightful meatless version.
  • Sweet Addition: For a touch of sweetness, mix dried cranberries or raisins into the filling for added bursts of flavor.

Before you dive into experimenting with these variations, why not explore making a nutritious Asparagus Soup Healthy as an appetizer or pair your crescent ring with a flavor-packed Potato Blue Cheese dish for a delightful meal? The possibilities are endless!

Expert Tips for the Best Turkey Cranberry Crescent Ring

  • Chill the Dough: Always refrigerate the crescent dough before unrolling it. This prevents tearing, ensuring a beautiful presentation for your Turkey Cranberry Crescent Ring.

  • Layering Technique: Be generous when layering the turkey and cranberry sauce; avoid overfilling to prevent a messy bake. A balanced filling leads to delightful bites!

  • Butter Brushing: Don’t skip brushing melted butter on top! It creates that golden, crispy finish that makes the dish look as good as it tastes.

  • Time Management: Consider assembling the ring in advance and refrigerating for up to 8 hours. This makes last-minute baking super easy when hosting!

  • Flavor Enhancements: Feel free to experiment by adding herbs like thyme or rosemary to the filling. This can elevate the flavors of your Turkey Cranberry Crescent Ring to new heights!

Storage Tips for Turkey Cranberry Crescent Ring

  • Room Temperature: Once baked, the Turkey Cranberry Crescent Ring can be stored at room temperature for up to 2 hours before it should be refrigerated to ensure freshness.

  • Fridge: Store leftover slices in an airtight container in the fridge for up to 3 days. Make sure to cover them tightly to maintain moisture and flavor.

  • Freezer: For longer storage, wrap slices tightly in foil and freeze for up to 1 month. This keeps the deliciousness intact for later enjoyment!

  • Reheating: To reheat, place thawed slices in a preheated oven at 350°F (175°C) for about 10-15 minutes, or until heated through, ensuring that the flaky texture returns.

Make Ahead Options

This Turkey Cranberry Crescent Ring is a fantastic choice for meal prep, allowing you to enjoy festive flavors with less hassle when mealtime arrives. You can assemble the entire ring and refrigerate it up to 8 hours before baking, keeping the unbaked dough wrapped tightly in plastic wrap to maintain its freshness. If you need to prep even earlier, the filling (cooked turkey and cranberry sauce) can be prepared up to 3 days in advance and stored in an airtight container in the refrigerator. When you’re ready to serve, simply follow the final baking instructions—just brush with melted butter and sesame seeds, pop it in the oven, and you'll have a warm, delightful dish that's just as delicious as if made fresh!

What to Serve with Turkey Cranberry Crescent Ring

The perfect companion dishes can elevate your Turkey Cranberry Crescent Ring into a delightful feast, making every bite even more memorable.

  • Fresh Garden Salad: A crisp salad adds freshness and balance, complementing the rich flavors of the crescent ring with bright, vibrant notes. Toss together mixed greens, cherry tomatoes, and a light vinaigrette for an effortless side.

  • Roasted Vegetables: The caramelized sweetness of roasted root veggies like carrots and sweet potatoes pairs beautifully, enhancing the savory filling. Their hearty texture acts as a satisfying contrast to the flaky pastry.

  • Creamy Mashed Potatoes: Comfort food at its finest! Silky mashed potatoes provide a rich, creamy base that soaks up any leftover cranberry sauce, blending flavors in a delightful way.

  • Sweet Potato Fries: Crispy fries are a fun, casual option that add a sweet touch. Their crunchy exterior and tender inside make for an excellent dipping side that everyone will enjoy.

  • Stuffed Mushrooms: These bite-sized treats filled with cheesy goodness offer an extra layer of flavor and elegance to your meal. They’re an impressive appetizer that pairs perfectly with the crescent ring.

  • Sparkling Cider: A glass of bubbly cider complements the festive spirit of the meal with its refreshing fizz and sweet notes, making it an ideal beverage choice for gatherings.

  • Pumpkin Dessert Bars: Finish off your meal on a sweet note with these seasonal delights. Their warm spices tie harmoniously with the turkey and cranberry filling, embodying the essence of a festive celebration.

  • Cranberry Juice Cocktail: A festive drink that mirrors the dish's flavors, serving a cranberry juice cocktail brings a delightful tartness, further enhancing the holiday theme and festive feel.

Turkey Cranberry Crescent Ring Recipe FAQs

How do I choose the best turkey for this crescent ring?
Absolutely! For the best flavor, use turkey that is moist and tender. Leftover roasted turkey works wonderfully, but if you're buying fresh, look for pieces that are pale pink with minimal dark spots, which may indicate spoilage. Avoid turkey that seems slimy or has an off smell.

What’s the best way to store the Turkey Cranberry Crescent Ring?
After baking, let the crescent ring cool for about 2 hours at room temperature. Store it in an airtight container in the fridge for up to 3 days. Ensure it's tightly wrapped to preserve its flavors and moisture, making it easier to enjoy the following days.

Can I freeze the Turkey Cranberry Crescent Ring?
Very! To freeze, wrap the cooled crescent ring tightly in plastic wrap, then in aluminum foil for extra protection. It can be kept in the freezer for up to 1 month. For reheating, simply thaw in the fridge overnight and then warm in the oven at 350°F (175°C) for 10-15 minutes until heated through.

What if the dough tears while I’m assembling?
No worries! If your crescent dough tears, don't fret. Just take a small piece of excess dough, flatten it, and patch it over the tear. You can also roll it back together gently. This way, the filling remains intact, and you’ll still have a beautiful crescent ring after baking.

Is this recipe suitable for my family with nut allergies?
Absolutely! This Turkey Cranberry Crescent Ring does not contain any nuts, making it a safe option for nut allergy sufferers. Just ensure that any ingredients you use, like canned cranberry sauce or cheese, are also free from cross-contamination with nuts.

Turkey Cranberry Crescent Ring

Turkey Cranberry Crescent Ring: Easy Festive Bite to Impress

This Turkey Cranberry Crescent Ring blends savory turkey and tart cranberry in a flaky pastry, perfect for gatherings.
Print Recipe Pin Recipe
Prep Time 10 minutes mins
Cook Time 25 minutes mins
Cooling Time 5 minutes mins
Total Time 40 minutes mins
Servings: 8 slices
Course: Appetizers
Cuisine: American
Calories: 250
Ingredients Equipment Method Nutrition Notes

Ingredients
  

For the Dough
  • 1 can Crescent Dough Pre-made dough for a flaky texture.
For the Filling
  • 2 cups Cooked Turkey Can substitute with cooked chicken, ham, or roast beef.
  • 1/2 cup Cranberry Sauce Sweet and tangy, can use homemade.
  • 1 cup Cheese (e.g., cheddar or mozzarella) Optional for a lighter version.
For the Topping
  • 2 tablespoons Melted Butter For brushing on top before baking.
  • 1 tablespoon Sesame Seeds Can substitute with poppy seeds or omit.

Equipment

  • Oven
  • Baking Sheet
  • Parchment Paper
  • Pastry brush

Method
 

Instructions
  1. Preheat your oven to 375°F (190°C).
  2. Chill the crescent dough in the fridge for about 10 minutes, then unroll it onto a baking sheet lined with parchment paper.
  3. Layer the cooked turkey evenly in the center of the dough, followed by cranberry sauce and cheese.
  4. Fold the edges of the dough over the filling to form a ring, sealing it well.
  5. Brush the top with melted butter and sprinkle sesame seeds.
  6. Bake for 20-25 minutes until golden brown.
  7. Let cool for 5 minutes before slicing and serve warm.

Nutrition

Serving: 1sliceCalories: 250kcalCarbohydrates: 20gProtein: 15gFat: 12gSaturated Fat: 5gPolyunsaturated Fat: 1gMonounsaturated Fat: 4gCholesterol: 40mgSodium: 500mgPotassium: 200mgFiber: 1gSugar: 2gVitamin A: 500IUVitamin C: 1mgCalcium: 150mgIron: 1mg

Notes

Refrigerate the crescent dough before unrolling for a better presentation. Consider layering generously with turkey and cranberry sauce.

Tried this recipe?

Let us know how it was!

Savory Philly Cheesesteak Soup for Ultimate Comfort Cravings

September 22, 2025 by Grace Snow Leave a Comment

The aroma of sizzling beef paired with sweet caramelized onions transports me straight to a bustling Philly street corner, where the iconic cheesesteak sandwich reigns supreme. Enter my Hearty Philly Cheesesteak Soup—a cozy twist on this classic, where tender sirloin, vibrant peppers, and a creamy, cheesy broth unite to create a bowl of comfort food that’s simply irresistible. Perfect for those hectic weeknights or lazy weekends, this soup delivers all the savory goodness you crave without requiring the fuss of a traditional sandwich. Plus, it's easy to make and leaves you feeling warm and satisfied. Curious about how to bring this deliciousness to your kitchen? Let's dive right into the recipe!

Why is this soup a must-try?

Comforting flavors: Philly Cheesesteak Soup combines all your favorite elements of the classic sandwich—savory beef, creamy cheese, and sweet peppers—into one delicious bowl. Quick and easy: With straightforward steps and minimal prep time, you’ll have a hearty meal ready in no time. Customizable: Feel free to switch up ingredients; try adding mushrooms for a richer flavor or use different cheeses to create your perfect version! Pair it with crunchy crusty rolls for a delightful dip. If you're a fan of hearty soups, make sure to check out other favorites like Lemon Chicken Soup for cozy days or Zuppa Toscana Soup for something with a kick!

Philly Cheesesteak Soup Ingredients

• Discover the flavorful components for a comforting bowl!

For the Soup Base
• Olive Oil – Ideal for sautéing vegetables; swap with vegetable oil if necessary.
• Onion (1 large, chopped) – Adds sweetness and depth; yellow or white varieties work best.
• Green Bell Pepper (1, chopped) – Introduces crunch; any color bell pepper is a great alternative.
• Red Bell Pepper (1, chopped) – Enhances sweetness and color; can be substituted with yellow or orange.
• Sirloin Steak (1 lb, thinly sliced against the grain) – The heart of the soup, providing a rich flavor; consider ribeye or flank steak as alternatives.
• Beef Broth (8 cups) – Serves as the flavorful base; low-sodium broth is best for controlling saltiness.
• Diced Tomatoes (1 can, 14.5 oz, undrained) – Adds texture and acidity; fresh tomatoes are a delightful substitute.
• Worcestershire Sauce (1 tsp) – Provides umami flavor balance; soy sauce is a suitable swap.
• Dried Thyme (1/2 tsp) – Elevates the soup's flavor profile; fresh thyme can be used in greater quantities.
• Red Pepper Flakes (1/4 tsp, optional) – Introduces a touch of heat; adjust to personal preference or omit for mildness.
• Salt and Pepper – Essential for seasoning to taste.

For the Cheese Sauce
• Butter (4 tbsp) – Used for making the roux; margarine is an alternative if needed.
• All-Purpose Flour (4 tbsp) – Thickens the cheese sauce; gluten-free flour can serve as a substitute.
• Milk (3 cups) – Contributes to a creamy consistency; any milk or plant-based milk can work here.
• Cream Cheese (8 oz, softened) – Adds rich creaminess; consider Neufchâtel cheese for a lighter option.
• Shredded Provolone Cheese (8 oz) – The cheese that captures the cheesesteak essence; mozzarella or cheddar can be swappable for variety.
• Shredded Mozzarella Cheese (4 oz) – Offers stretchiness; more provolone can be added for extra flavor.
• Garlic Powder (1/4 tsp) – Boosts flavor profile; fresh minced garlic can be used for a stronger taste.
• Onion Powder (1/4 tsp) – Brings depth to the flavor; fresh onion may be used, but will vary the texture.

For Garnish and Serving
• Chopped Fresh Parsley – Adds a burst of freshness; substitute with chives for a different herbaceous note.
• Crusty Rolls – Perfect accompaniments for dipping; any sturdy bread works well to complement the soup.

Whip up your own delightful bowl of Philly Cheesesteak Soup and indulge in the ultimate comfort food experience!

Step‑by‑Step Instructions for Philly Cheesesteak Soup

Step 1: Sauté the Vegetables
In a large pot, heat 2 tablespoons of olive oil over medium heat. Add the chopped onion, green bell pepper, and red bell pepper. Sauté for 8-10 minutes, stirring occasionally, until the vegetables are softened and caramelized. This step is essential for building the flavor base of your Philly Cheesesteak Soup.

Step 2: Cook the Steak
Increase the heat to medium-high and add 1 pound of thinly sliced sirloin steak to the pot. Cook for about 5-7 minutes, stirring frequently, until the beef is browned all over. Make sure not to overcrowd the pot, as this helps achieve that perfectly seared flavor in your soup.

Step 3: Add Broth and Seasonings
Pour in 8 cups of beef broth along with 1 can of diced tomatoes, undrained. Scrape up any browned bits from the bottom of the pot to enhance the flavor. Stir in 1 teaspoon of Worcestershire sauce, 1/2 teaspoon of dried thyme, and optional red pepper flakes. Season generously with salt and pepper, then bring to a simmer. Let it cook for 30 minutes, allowing the flavors to meld.

Step 4: Make the Cheese Sauce
While the soup simmers, prepare the cheese sauce in a separate saucepan. Melt 4 tablespoons of butter over medium heat, then whisk in 4 tablespoons of all-purpose flour to create a roux. Cook for 1-2 minutes until it starts to bubble, then gradually whisk in 3 cups of milk. Continue cooking for about 5 minutes, stirring constantly, until the mixture thickens.

Step 5: Add Creaminess with Cheese
Stir in 8 ounces of softened cream cheese, 8 ounces of shredded provolone cheese, and 4 ounces of shredded mozzarella cheese into the thickened milk mixture. Keep stirring until the cheeses are melted and the sauce is smooth. Season your cheese sauce with 1/4 teaspoon of garlic powder and onion powder to enhance its flavor.

Step 6: Combine Soup and Cheese Sauce
Carefully combine the creamy cheese sauce with your Philly Cheesesteak Soup base in the large pot. Stir gently to incorporate the cheese sauce without bringing it to a boil, which could cause the cheese to separate. If the soup is too thick, adjust its consistency by adding a bit more beef broth.

Step 7: Serve and Garnish
Ladle the hot Philly Cheesesteak Soup into bowls, then top each serving with extra cheese and a sprinkle of chopped fresh parsley for a pop of color. Serve alongside warm, crusty rolls for dipping, and watch as everyone enjoys this comforting, hearty meal that’s perfect for sharing.

Expert Tips for Philly Cheesesteak Soup

  • Quality Ingredients: Use high-quality steak for the best flavor and tenderness; slicing against the grain makes a significant difference in texture.
  • Flavor Base Magic: Make sure to sauté the onion and peppers until they're caramelized, enhancing the flavor depth of your Philly Cheesesteak Soup.
  • Broth Choice: Opt for low-sodium beef broth to maintain control over the soup's saltiness and let other flavors shine without overwhelming the dish.
  • Cheese Caution: Avoid overheating the cheese sauce after combining it with the soup, as this can lead to separation; keep the soup at a gentle simmer.
  • Creative Variations: Don't hesitate to customize the soup by adding sautéed mushrooms or using different cheeses, which can elevate the comfort food experience even more!

How to Store and Freeze Philly Cheesesteak Soup

Fridge: Keep leftovers in an airtight container for up to 3 days, ensuring to let the soup cool completely before sealing.

Freezer: Freeze Philly Cheesesteak Soup in freezer-safe containers for up to 3 months. Allow it to cool, then portion before sealing tightly to prevent freezer burn.

Reheating: Thaw overnight in the fridge, then gently reheat on the stove over low heat, stirring frequently to combine the creamy cheese sauce back into the soup. Add a splash of broth if needed for consistency.

What to Serve with Philly Cheesesteak Soup

A bowl of Philly Cheesesteak Soup is comforting and rich, but pairing it with delightful sides can take your meal to the next level.

  • Crunchy Crusty Rolls: Perfect for dipping! These golden rolls soak up the creamy broth and add a satisfying crunch to each bite.
  • Garlic Bread: The flavors of roasted garlic spread on bread enhance the savory elements of the soup, making every dip even tastier.
  • Caesar Salad: A crisp, refreshing salad with crunchy romaine and creamy dressing contrasts beautifully with the hearty soup.
  • Roasted Vegetables: The natural sweetness of roasted carrots and bell peppers complements the savory soup, adding both color and health benefits.
  • Cheesy Garlic Biscuits: Soft and cheesy, these biscuits can act as a perfect complement to the soup's creamy texture—one bite and you'll be hooked!
  • Coleslaw: This crunchy, tangy side dish offers a refreshing balance to the rich flavors of the Philly Cheesesteak Soup, providing a delightful crunch.
  • Potato Chips: Give a satisfying crunch with a flavored or plain potato chip—who can resist that delightful mix of textures?
  • Sweet Potato Fries: The sweet and salty combo of these fries works wonderfully against the backdrop of the savory soup.

Make Ahead Options

These Philly Cheesesteak Soup preparations are perfect for busy home cooks looking to save time! You can chop the vegetables (onions and bell peppers) and slice the steak up to 24 hours in advance; just refrigerate them in separate airtight containers to maintain their freshness. Additionally, you can make the cheese sauce ahead of time and store it in the refrigerator for up to 3 days. When you're ready to serve, reheat the soup base and cheese sauce separately, then combine them without boiling to prevent separation. This way, you’ll enjoy all the comforting flavors of your Philly Cheesesteak Soup without the last-minute rush!

Philly Cheesesteak Soup Variations

Feel free to make this charming soup your own with these delicious twists!

  • Cut Swap: Substitute sirloin with ribeye or flank steak for richer flavors in every bite. You'll elevate the dish while still keeping that savory essence!
  • Veggie Boost: Add grilled mushrooms or sautéed zucchini for added depth and essential nutrients. This twist can also give your soup a delightful texture contrast.
  • Cheese Adjustment: Use cheddar or pepper jack cheese for a bolder, spicier profile. With these options, each bowl can take on a unique flavor that excites the palate!
  • Spice it Up: Top your soup with crispy jalapeños or a dash of hot sauce for an added kick. Mixing in these spicy elements turns up the heat just the way you like it!
  • Herb Variations: Try swapping fresh parsley for chives or cilantro to refresh the flavor. Each herb offers a distinct note that can brighten or complement the dish beautifully.
  • Gluten-Free Option: Use gluten-free flour to create your cheese sauce without sacrificing creaminess. This makes a comforting bowl accessible for everyone!
  • Dairy-Free Delight: Opt for cashew cream and dairy-free cheese alternatives to craft a vegan version of this classic soup. It’s a savory twist that doesn't skimp on flavor.
  • Hearty Add-Ins: Throw in some cooked pasta or quinoa for a heartier meal that sustains your hunger. It’s a creative way to add bulk and make the dish even more filling!

Want to discover other hearty soups? Don’t miss the comforting flavors of Zuppa Toscana Soup or the rich warmth of Lemon Chicken Soup!

Philly Cheesesteak Soup Recipe FAQs

How do I choose the right steak for my Philly Cheesesteak Soup?
Absolutely! Look for high-quality sirloin, ribeye, or flank steak. Sirloin is lean and flavorful, while ribeye provides more marbling for richness. Whichever you choose, slice it thinly against the grain for maximum tenderness.

What is the best way to store leftover Philly Cheesesteak Soup?
For sure! Store leftovers in an airtight container in the fridge for up to 3 days. Be sure to let the soup cool completely before sealing to prevent condensation, which can affect the texture.

Can I freeze Philly Cheesesteak Soup, and how do I do it?
Absolutely! Let the soup cool entirely, then spoon it into freezer-safe containers, leaving some space at the top for expansion. Seal tightly and freeze for up to 3 months. To reheat, thaw overnight in the fridge and warm slowly on the stove, adding a splash of broth if necessary.

What should I do if my cheese sauce separates after adding it to the soup?
Very! If you notice separation, don’t panic. Start by gently reheating the soup on low heat, stirring continuously. If it remains separated, you can whisk in a bit of fresh cream or milk to help smooth it out. Make sure to avoid boiling the soup, as this can cause further separation.

Can I adjust the recipe for dietary restrictions, like gluten allergies?
Definitely! To make this recipe gluten-free, swap all-purpose flour with a gluten-free flour blend. Make sure your broth and cheese are also gluten-free. For a dairy-free alternative, use plant-based milk and dairy-free cheese options—just keep an eye on the consistency and flavor adjustments!

Is this Philly Cheesesteak Soup pet-friendly?
Not at all! Many ingredients in this soup, like onion and garlic, can be harmful to pets. It’s best to keep your furry friends away from this dish. If you wish to make a pet-friendly version, consider using simple cooked beef without sauce and seasonings.

Philly Cheesesteak Soup

Savory Philly Cheesesteak Soup for Ultimate Comfort Cravings

Enjoy a bowl of hearty Philly Cheesesteak Soup, combining savory ingredients for ultimate comfort.
Print Recipe Pin Recipe
Prep Time 15 minutes mins
Cook Time 1 hour hr
Total Time 1 hour hr 15 minutes mins
Servings: 6 cups
Course: Soups
Cuisine: American
Calories: 450
Ingredients Equipment Method Nutrition Notes

Ingredients
  

For the Soup Base
  • 2 tbsp Olive Oil Ideal for sautéing vegetables; swap with vegetable oil if necessary.
  • 1 large Onion, chopped Adds sweetness and depth; yellow or white varieties work best.
  • 1 Green Bell Pepper, chopped Introduces crunch; any color bell pepper is a great alternative.
  • 1 Red Bell Pepper, chopped Enhances sweetness and color; can be substituted with yellow or orange.
  • 1 lb Sirloin Steak, thinly sliced The heart of the soup, rich flavor; consider ribeye or flank steak as alternatives.
  • 8 cups Beef Broth Serves as the flavorful base; low-sodium broth is best for controlling saltiness.
  • 1 can (14.5 oz) Diced Tomatoes, undrained Adds texture and acidity; fresh tomatoes are a delightful substitute.
  • 1 tsp Worcestershire Sauce Provides umami flavor; soy sauce is a suitable swap.
  • 1/2 tsp Dried Thyme Elevates the soup's flavor profile; fresh thyme can be used in greater quantities.
  • 1/4 tsp Red Pepper Flakes Introduces a touch of heat; adjust to preference or omit for mildness.
  • Salt Essential for seasoning to taste.
  • Pepper Essential for seasoning to taste.
For the Cheese Sauce
  • 4 tbsp Butter Used for making the roux; margarine is an alternative if needed.
  • 4 tbsp All-Purpose Flour Thickens the cheese sauce; gluten-free flour can serve as a substitute.
  • 3 cups Milk Contributes to a creamy consistency; any milk or plant-based milk can work.
  • 8 oz Cream Cheese, softened Adds rich creaminess; consider Neufchâtel cheese for a lighter option.
  • 8 oz Shredded Provolone Cheese Captures the cheesesteak essence; mozzarella or cheddar can be swapped.
  • 4 oz Shredded Mozzarella Cheese Offers stretchiness; more provolone can be added for extra flavor.
  • 1/4 tsp Garlic Powder Boosts flavor profile; fresh minced garlic can be used.
  • 1/4 tsp Onion Powder Brings depth to the flavor; fresh onion may be used.
For Garnish and Serving
  • Chopped Fresh Parsley Adds freshness; substitute with chives for a different herbaceous note.
  • Crusty Rolls Perfect accompaniments for dipping; any sturdy bread works well.

Equipment

  • Large pot
  • Saucepan
  • Whisk

Method
 

Step-by-Step Instructions
  1. In a large pot, heat 2 tablespoons of olive oil over medium heat. Add the chopped onion, green bell pepper, and red bell pepper. Sauté for 8-10 minutes until softened and caramelized.
  2. Increase heat to medium-high and add 1 pound of thinly sliced sirloin steak to the pot. Cook for about 5-7 minutes, stirring frequently, until browned all over.
  3. Pour in 8 cups of beef broth and 1 can of diced tomatoes. Scrape the bottom of the pot to enhance flavor. Stir in 1 teaspoon of Worcestershire sauce, 1/2 teaspoon of dried thyme, and optional red pepper flakes. Season with salt and pepper, then bring to a simmer.
  4. Melt 4 tablespoons of butter in a separate saucepan. Whisk in 4 tablespoons of all-purpose flour to create a roux. Cook for 1-2 minutes until bubbling, then gradually whisk in 3 cups of milk. Continue cooking for about 5 minutes, stirring constantly, until thickened.
  5. Stir in 8 ounces of softened cream cheese, 8 ounces of shredded provolone, and 4 ounces of shredded mozzarella into the thickened mixture. Keep stirring until melted and smooth. Season with garlic powder and onion powder.
  6. Carefully combine the cheese sauce with the Philly Cheesesteak Soup base in the large pot. Stir gently to incorporate without boiling.
  7. Ladle soup into bowls, top with extra cheese and chopped fresh parsley. Serve alongside warm, crusty rolls.

Nutrition

Serving: 1cupCalories: 450kcalCarbohydrates: 30gProtein: 35gFat: 25gSaturated Fat: 15gPolyunsaturated Fat: 2gMonounsaturated Fat: 8gCholesterol: 85mgSodium: 1200mgPotassium: 800mgFiber: 2gSugar: 5gVitamin A: 800IUVitamin C: 60mgCalcium: 300mgIron: 3mg

Notes

Use high-quality steak for best flavor and tenderness; avoid overheating cheese sauce after combining.

Tried this recipe?

Let us know how it was!

Savory Black Pepper Beef Udon: Quick Comfort in 20 Minutes

September 21, 2025 by Grace Snow Leave a Comment

As I took my first bite of this savory dish, I was instantly transported to a cozy corner of my favorite ramen shop, where the aromas of sizzling beef and rich spices dance through the air. This Quick and Flavorful Black Pepper Beef Udon recipe captures that essence perfectly, bringing together tender beef strips and chewy udon noodles in a luscious black pepper sauce. Not only is it a delightful crowd-pleaser, but it also comes together in just 20 minutes—ideal for those hectic weeknights when you're craving comfort food without the takeout fuss. Ready to impress your taste buds with a homemade dish that tastes like it’s straight from a chef’s kitchen? Let’s dive in!

Why is Black Pepper Beef Udon a Must-Try?

Quick Preparation: In just 20 minutes, you can whip up a delicious meal that rivals your favorite takeout. This dish is perfect for busy weeknights when you need something satisfying without spending hours in the kitchen.

Savory Umami: The combination of soy sauce, oyster sauce, and fresh black pepper creates a mouthwatering flavor profile that’s nothing short of addictive.

Endless Versatility: While the recipe showcases beef, you can easily switch it up by using tofu or mushrooms for a vegetarian version. This means everyone can enjoy it!

Comfort Food: Who doesn’t love a bowl of chewy udon noodles coated in a rich sauce? It's like a warm hug on a plate, sure to satisfy any comfort food cravings.

Crowd-Pleaser: This dish impresses guests and family alike, making it ideal for gatherings. Pair it with a light salad or some steamed vegetables for a complete meal! If you're looking for more quick dinner ideas, check out my recipes for Ground Beef Enchiladas and Sweet Potatoes Black.

Enjoy discovering the delightful flavors of Black Pepper Beef Udon!

Black Pepper Beef Udon Ingredients

For the Udon Noodles

  • Udon Noodles – The chewy basis for this dish; feel free to use rice noodles or soba noodles as a substitute.

For the Beef Marinade

  • Fresh Beef (200g) – Thinly sliced to ensure quick cooking; marinate for maximum tenderness.
  • Garlic – Use fresh for the best savory aroma and flavor.
  • Sesame Oil (1 tsp) – Imparts a nutty note to the marinade.
  • Soy Sauce (1 tbsp) – Adds umami and saltiness to enhance the overall taste.
  • Oyster Sauce (1 tbsp) – Brings a hint of sweetness that complements the savory flavors.
  • Chinese White Rice Vinegar (1 tsp) – Provides a tangy note that balances the richness.
  • Cornstarch/Potato Starch – Thickens the marinade and sauce; can be used interchangeably.

For the Vegetables

  • Chinese Cabbage – Adds a fresh crunch; substitute with any leafy green if unavailable.
  • White Onion – Brings sweetness and depth; shallots can be used for a milder flavor.

For the Sauce

  • Dark Soy Sauce (3 tbsp) – Gives a rich color and flavor to the sauce.
  • Fresh Ground Black Pepper (2 tsp) – This ingredient delivers the key spicy profile that makes this recipe shine.
  • Water (3 tbsp) – To adjust the sauce's consistency to your liking.

For Flavor Adjustments

  • Salt – Enhances the overall flavors; adjust according to your taste preferences.
  • Sugar – Balances savory and spicy notes; I recommend brown sugar for added depth.

Dive into the joy of cooking with this delicious Black Pepper Beef Udon recipe!

Step‑by‑Step Instructions for Black Pepper Beef Udon

Step 1: Marinate the Beef
In a mixing bowl, combine minced garlic, sesame oil, soy sauce, oyster sauce, Chinese white rice vinegar, and a spoonful of cornstarch to create a marinade. Add the thinly sliced beef, ensuring each piece is well coated. Let it marinate for about 10 minutes while you prepare the other ingredients, allowing the flavors to deeply infuse the meat.

Step 2: Cook Udon Noodles
Bring a pot of water to a rolling boil over high heat. Add the udon noodles and cook them for 1-2 minutes, or until they are tender yet still chewy. Drain the noodles in a colander and rinse briefly under cold water to stop the cooking process. Set the cooked noodles aside while you focus on the vegetables and beef.

Step 3: Stir-Fry Vegetables
In a large wok or a non-stick skillet, heat a tablespoon of oil over medium-high heat. Add minced garlic and sliced white onion, stir-frying for about 2 minutes until they soften and become fragrant. Next, add the chopped Chinese cabbage and season with a pinch of salt and sugar. Cook for another 2-3 minutes until the cabbage wilts down, then transfer the vegetable mix to a plate and set aside.

Step 4: Cook Beef
Using the same wok, return to medium-high heat and add the marinated beef along with the marinade. Spread the beef in an even layer and let it sear for about 2-3 minutes, until nicely browned. Stir occasionally to ensure even cooking. Once the beef is cooked through, it should be slightly caramelized, enhancing the dish's richness.

Step 5: Prepare Black Pepper Sauce
In a small bowl, mix the remaining marinade ingredients: dark soy sauce, freshly ground black pepper, and water. Pour this mixture into the wok with the cooked beef, stirring gently. Allow the sauce to simmer for 1-2 minutes, thickening and enveloping the beef in a rich glaze—a perfect complement to your Black Pepper Beef Udon.

Step 6: Combine Everything
Add the cooked udon noodles and the sautéed vegetables back into the wok, tossing everything together gently but thoroughly. Ensure the noodles and veggies are evenly coated with the luscious black pepper sauce. Cook for an additional minute, stirring continuously to heat everything through. Your Black Pepper Beef Udon is now ready to serve!

Expert Tips for Black Pepper Beef Udon

  • Marinate Properly: Ensuring the beef marinates for at least 10 minutes helps infuse the flavors throughout the meat for a more delicious result.

  • Avoid Overcrowding: When cooking the beef, give it space in the pan. Overcrowding can lead to steaming instead of browning, affecting the texture.

  • Customize the Heat: If you love spice, consider adding a pinch of cayenne pepper or red pepper flakes to the dish for extra kick without overpowering the black pepper flavor.

  • Don’t Skip Rinsing Noodles: Rinsing the udon noodles after cooking halts the cooking process and prevents them from sticking together when added to the sauce.

  • Balance Your Sauces: Taste and adjust the soy and oyster sauce to your preference; play with sweetness by incorporating a little brown sugar for a complete flavor profile in your Black Pepper Beef Udon.

How to Store and Freeze Black Pepper Beef Udon

  • Fridge: Store any leftovers in an airtight container for up to 2 days. Reheat in the microwave or on the stovetop, adding a splash of water to loosen the sauce if needed.
  • Freezer: If you want to freeze, portion the Black Pepper Beef Udon in freezer-safe bags or containers, where it can last for up to 3 months. Thaw overnight in the fridge before reheating.
  • Reheating: To enjoy, reheat gently over low heat on the stovetop, stirring occasionally to avoid sticking. For better results, add a little water or broth for moisture.
  • Wrap for Freshness: Always wrap tightly or use air-tight containers to maintain flavor and avoid freezer burn when storing in the freezer.

What to Serve with Black Pepper Beef Udon

Looking to create a well-rounded meal that complements the bold flavors of your udon dish?

  • Crispy Asian Salad: This refreshing mix of greens and sesame dressing provides a crunchy contrast to the tender beef and chewy noodles.
  • Steamed Broccoli: Lightly steamed, this veggie adds vibrant color and a subtle earthiness that perfectly balances the dish’s richness.
  • Garlic Breadsticks: Soft and buttery, these are perfect for sopping up any leftover black pepper sauce—comfort food heaven!
  • Miso Soup: A warm and savory starter that enhances the umami notes in your meal, making it feel like a full dining experience.
  • Chilled Soba Noodles: This cool, nutty side dish matches beautifully, offering a textural variance that elevates your udon feast.
  • Green Tea: The subtle flavors of this refreshing drink cleanse the palate, making every bite of beef udon an experience to savor.

With these delightful pairings, your Black Pepper Beef Udon will shine as the star of a truly memorable meal!

Make Ahead Options

These Black Pepper Beef Udon are fantastic for meal prep, allowing busy cooks to enjoy a delicious homemade meal with less hassle. You can marinate the beef up to 24 hours in advance to enhance its tenderness and flavor. Additionally, you can cook the udon noodles and vegetables ahead of time, storing them separately in the refrigerator for up to 3 days. To maintain the quality, ensure that everything is stored in airtight containers. When you're ready to serve, simply reheat the noodles and vegetables in a pan, cook the marinated beef, mix in the prepped ingredients, and pour over the delicious black pepper sauce. Enjoy restaurant-quality Black Pepper Beef Udon with minimal effort!

Black Pepper Beef Udon Variations

Customize your dish to suit your taste buds and dietary needs with these fun twists!

  • Vegetarian Delight: Replace beef with tofu or mushrooms and use vegetarian oyster sauce for a plant-based option. This can create a delightfully earthy flavor.

  • Sweet and Spicy: Drizzle a splash of chili oil or a touch of honey for a hint of sweetness that balances the spicy black pepper. It adds a whole new dimension to the dish!

  • Extra Crunch: Toss in a handful of bean sprouts or snap peas for added texture and freshness. They bring a delightful crunch that pairs beautifully with the tender noodles.

  • Spice it Up: If you prefer some heat, add cayenne or red pepper flakes according to your desired spice level. This will elevate your Black Pepper Beef Udon and make each bite exciting!

  • Zesty Citrus: A squeeze of lime or lemon juice just before serving enhances the flavors and adds a refreshing brightness to the dish. This simple addition can truly elevate your meal.

  • Umami Boost: Incorporate some shiitake mushrooms or a dash of miso paste into your broth for an extra umami kick that rounds out the flavors. It’s a small change that makes a big difference!

  • Alternative Noodles: If udon isn't your favorite, try rice noodles or soba noodles for different textures and tastes. Each option brings its own unique charm to this dish.

  • Herby Twist: Fresh cilantro or green onions can be incorporated as garnishes, providing a burst of fresh flavor. They complement the savory elements beautifully, inviting you to dive right in!

Let your creativity shine in the kitchen as you experiment with these variations. For more delightful recipes, be sure to check out my Blackberry Crisp Amp for dessert or the comforting Roasted Bratwurst with Peppers and Onions!

Black Pepper Beef Udon Recipe FAQs

How do I choose the best beef for this recipe?
Absolutely! Look for cuts of beef such as sirloin or flank, which are tender and marinate well. Make sure to select fresh beef that has a bright color with no dark spots. If you’re in a hurry, pre-sliced beef can be convenient, but for the best texture, slicing it thin yourself is ideal.

What’s the best way to store leftovers?
Very! Transfer any leftovers into an airtight container and store them in the refrigerator for up to 2 days. When you're ready to enjoy them again, reheat on the stovetop over low heat, adding a splash of water or broth to keep it from drying out.

Can I freeze Black Pepper Beef Udon? How?
Of course! Portion the Black Pepper Beef Udon into freezer-safe bags or containers and label them with the date. It can last up to 3 months in the freezer. When you're ready to eat, simply thaw overnight in the fridge. To reheat, warm gently on the stovetop over low heat, stirring occasionally until heated through.

The sauce seems too thick. What can I do?
No worries! If your sauce is too thick, you can add a bit of water or broth while reheating. Start with a tablespoon at a time and stir until you achieve your desired consistency. This will help restore moisture and flavor without compromising the dish.

Is this recipe suitable for those with food allergies?
Definitely! This recipe contains soy sauce and oyster sauce, both of which can trigger allergies in some individuals. If you want to make it allergy-friendly, you can use gluten-free soy sauce and substitute the oyster sauce with a mushroom-based version. Always check labels for potential allergens, especially if you are serving someone with dietary restrictions.

What if I want a vegetarian version of this dish?
Absolutely! You can swap out the beef for tofu or mushrooms to maintain the hearty texture. To create a vegan sauce, make sure to use a vegetarian oyster sauce or a combination of soy sauce and hoisin sauce for that depth of flavor. Enjoy customizing it to suit your dietary needs!

Black Pepper Beef Udon

Savory Black Pepper Beef Udon: Quick Comfort in 20 Minutes

This Savory Black Pepper Beef Udon recipe combines tender beef strips and chewy udon noodles in a luscious black pepper sauce, ready in just 20 minutes.
Print Recipe Pin Recipe
Prep Time 10 minutes mins
Cook Time 10 minutes mins
Total Time 20 minutes mins
Servings: 2 bowls
Course: Dinner
Cuisine: Asian, Japanese
Calories: 600
Ingredients Equipment Method Nutrition Notes

Ingredients
  

For the Udon Noodles
  • 200 g Udon Noodles Substitutes: rice noodles or soba noodles
For the Beef Marinade
  • 200 g Fresh Beef Thinly sliced
  • Garlic Fresh, minced
  • 1 tsp Sesame Oil
  • 1 tbsp Soy Sauce
  • 1 tbsp Oyster Sauce
  • 1 tsp Chinese White Rice Vinegar
  • Cornstarch/Potato Starch Use interchangeably
For the Vegetables
  • Chinese Cabbage Substitute with any leafy green if unavailable
  • White Onion Can substitute with shallots
For the Sauce
  • 3 tbsp Dark Soy Sauce
  • 2 tsp Fresh Ground Black Pepper
  • 3 tbsp Water
For Flavor Adjustments
  • Salt To taste
  • Sugar Brown sugar recommended

Equipment

  • Mixing Bowl
  • pot
  • Colander
  • Wok
  • non-stick skillet

Method
 

Step-by-Step Instructions
  1. In a mixing bowl, combine minced garlic, sesame oil, soy sauce, oyster sauce, Chinese white rice vinegar, and a spoonful of cornstarch to create a marinade. Add the thinly sliced beef, ensuring each piece is well coated. Let it marinate for about 10 minutes.
  2. Bring a pot of water to a rolling boil over high heat. Add the udon noodles and cook them for 1-2 minutes, or until they are tender yet still chewy. Drain the noodles in a colander and rinse briefly under cold water. Set the cooked noodles aside.
  3. In a large wok, heat a tablespoon of oil over medium-high heat. Add minced garlic and sliced white onion, stir-frying for about 2 minutes. Next, add the chopped Chinese cabbage and season with a pinch of salt and sugar. Cook for another 2-3 minutes until the cabbage wilts down, then transfer to a plate.
  4. Using the same wok, add the marinated beef along with the marinade. Spread the beef in an even layer and let it sear for about 2-3 minutes. Stir occasionally until the beef is nicely browned and slightly caramelized.
  5. In a small bowl, mix the remaining marinade ingredients: dark soy sauce, freshly ground black pepper, and water. Pour this mixture into the wok with the cooked beef, stirring gently. Allow the sauce to simmer for 1-2 minutes.
  6. Add the cooked udon noodles and the sautéed vegetables back into the wok, tossing everything together gently. Cook for an additional minute. Your Black Pepper Beef Udon is now ready to serve!

Nutrition

Serving: 1bowlCalories: 600kcalCarbohydrates: 80gProtein: 30gFat: 15gSaturated Fat: 5gPolyunsaturated Fat: 2gMonounsaturated Fat: 8gCholesterol: 60mgSodium: 1200mgPotassium: 800mgFiber: 5gSugar: 3gVitamin A: 10IUVitamin C: 15mgCalcium: 6mgIron: 20mg

Notes

For better results, add a little water or broth for moisture when reheating. Rinsing the udon noodles after cooking prevents sticking.

Tried this recipe?

Let us know how it was!

Tilapia in Roasted Pepper Sauce: A Quick Mediterranean Delight

September 21, 2025 by Grace Snow Leave a Comment

As I stood by the stove, the enticing aroma of roasting red peppers wafted through the kitchen, instantly lifting my spirits. There’s something magical about transforming simple ingredients into a delightful meal like Tilapia in Roasted Pepper Sauce. This Mediterranean-inspired dish allows tender, flaky tilapia to shine under a blanket of sweet and smoky sauce. Not only is it quick to prepare—ideal for those busy weeknights—but it’s also a healthy option that brings a gourmet feel to your table without the fuss. Trust me, your family or guests will be asking for seconds as the flavors dance around their taste buds. Are you ready to elevate your cooking game with this delightful recipe? Let’s dive in!

Why is Tilapia in Roasted Pepper Sauce Amazing?

Flavor Explosion: With smoky sweetness from roasted peppers, this dish is a Mediterranean delight that will wow your taste buds.
Quick Preparation: You can have a gourmet meal on the table in under 30 minutes—perfect for busy nights!
Healthy Choice: Packed with nutrients and low in saturated fat, it’s a great way to enjoy a delicious dinner without any guilt.
Crowd-Pleasing: This recipe has a unique blend of flavors that will impress family and friends, making it a go-to for entertaining.
Versatile Dish: Pair it with sides like steamed vegetables or a light salad for a well-rounded meal, and if you're looking for more delicious ideas, check out Maple Roasted Sweet or Roasted Bratwurst Peppers.

Tilapia in Roasted Pepper Sauce Ingredients

For the Tilapia

  • Tilapia – This main protein is tender and flaky when cooked; you can substitute it with firm white fish like cod or haddock for a different texture.

For the Roasted Pepper Sauce

  • Red Bell Peppers – The star of this dish, providing smoky sweetness and vibrant color; feel free to experiment with other pepper varieties for a unique flavor twist.
  • Garlic – Adds depth and aroma to the sauce; using fresh garlic will give you the strongest flavor.
  • Lemon Juice – This key ingredient balances the sweetness of the peppers and provides acidity; freshly squeezed is always best.
  • Olive Oil – Essential for roasting the peppers, adding richness; vegetable oil can be used as a substitute if needed.
  • Salt & Pepper – These staples are necessary for seasoning; adjust to your taste preference, but remember to enhance the overall flavor of the Tilapia in Roasted Pepper Sauce.

Now that you have the ingredients ready, let’s move on to creating this magnificent dish!

Step‑by‑Step Instructions for Tilapia in Roasted Pepper Sauce

Step 1: Prepare Workspace
Begin by gathering all your ingredients for Tilapia in Roasted Pepper Sauce, including fresh red bell peppers, garlic, and tilapia fillets. Preheat your oven to 400°F (200°C) to ensure it’s hot when you’re ready to roast the peppers. Arrange your workspace to make the cooking process smooth and efficient, laying out cutting boards, knives, and baking sheets.

Step 2: Roast Peppers
Slice the red bell peppers into halves and remove the seeds. Toss them in a bowl with olive oil, salt, and pepper, ensuring they are well coated. Spread the peppers cut-side down on a baking sheet and roast for approximately 20 minutes. Look for a slight charring and softness in the peppers, which will bring out their natural sweetness and enhance the flavor of your sauce.

Step 3: Blend Sauce
Once the roasted peppers have cooled slightly, transfer them to a blender. Add peeled garlic cloves and freshly squeezed lemon juice to the blender, combining these flavorful ingredients. Blend everything until the mixture is completely smooth and vibrant. This roasted pepper sauce will serve as a delightful, aromatic base for the tilapia, elevating the entire dish.

Step 4: Cook Fish
Heat a splash of olive oil in a large skillet over medium heat. When the oil shimmers, add the tilapia fillets to the pan. Cook each side for about 3-4 minutes, or until the fish turns golden brown and flakes easily with a fork. This cooking method helps preserve the fish’s moisture while creating a lovely crust, essential for making your Tilapia in Roasted Pepper Sauce irresistible.

Step 5: Combine & Serve
Once the tilapia is cooked to perfection, pour the smooth roasted pepper sauce over the fish in the skillet. Allow it to simmer for a couple of minutes, letting the flavors meld together. This final touch not only infuses the fish with more flavor but also makes a beautiful presentation. Plate your dish, making sure to enjoy this exceptional combination of tilapia and roasted pepper sauce right away.

What to Serve with Tilapia in Roasted Pepper Sauce

Elevate your meal with delightful sides that enhance the vibrant flavors of this Mediterranean-inspired dish.

  • Creamy Mashed Potatoes: These fluffy potatoes provide a comforting balance to the smoky sauce and tender fish, inviting a creamy contrast.
  • Garlicky Green Beans: The bright crunch of fresh green beans tossed with garlic complements the dish beautifully, adding a pop of color and texture.
  • Mediterranean Quinoa Salad: Light and refreshing, this salad pairs perfectly, bringing in herbs, vegetables, and a tangy dressing that echoes Mediterranean notes.
  • Herbed Couscous: Fluffy couscous seasoned with lemon and parsley acts as a perfect base, soaking up every drop of that luscious roasted pepper sauce.
  • Zucchini Noodles: For a light, low-carb option, spiralized zucchini tossed with olive oil and herbs adds a fresh, vibrant element to the dinner plate.
  • Chilled White Wine: A crisp, chilled Sauvignon Blanc pairs beautifully with the flavors of the dish, enhancing the overall dining experience.
  • Lemon Sorbet: Close the meal with a refreshing lemon sorbet, providing a light, sweet finish that cleanses the palate after the savory fish.

Expert Tips for Tilapia in Roasted Pepper Sauce

  • Sear for Flavor: Sear the tilapia in the skillet before adding the sauce to unlock a deeper, richer flavor in your Tilapia in Roasted Pepper Sauce.
  • Perfectly Cooked Fish: Check if the tilapia is done by gently flaking it with a fork; it should flake easily and be opaque throughout.
  • Fresh Ingredients Matter: Use fresh garlic and lemon juice for the sauce to achieve a more vibrant, robust flavor profile that stands out beautifully.
  • Adjusting Spice Levels: If you prefer a spicier kick, sprinkle in some red pepper flakes while blending the roasted pepper sauce for an added burst of heat.
  • Leftover Versatility: Consider using leftover tilapia and sauce in a wrap or on a salad for a delicious next-day meal, making the most of your cooking efforts.

Tilapia in Roasted Pepper Sauce Variations

Feel free to let your creativity shine with these tasty twists that will elevate your dish!

  • Creamy Version: Add a splash of cream or a dollop of Greek yogurt to the sauce for a rich, velvety texture.

  • Herb-Infused: Experiment with fresh herbs like basil or parsley to brighten the sauce and enhance the Mediterranean flair. A sprinkle of fresh greenery adds a delightful aroma and visual appeal.

  • Spicy Kick: Toss in some chopped jalapeños or a sprinkle of red pepper flakes to turn up the heat, giving your meal an exciting fiery touch.

  • Fish Alternatives: Swap tilapia for salmon or sea bass for a unique flavor and texture twist, allowing for different culinary experiences. Each fish brings its own character to the dish.

  • Vary the Peppers: Try using poblano or yellow bell peppers for a different flavor profile, allowing the sauce to take on a new character and color.

  • Zesty Flavor: Incorporate a splash of lime juice instead of lemon for a fresh and tangy taste that will brighten up this already vibrant dish.

  • Vegetarian Option: For a meatless alternative, substitute tilapia with hearty eggplant or zucchini slices cooked until tender, soaking up all that delicious pepper sauce.

  • Adding Nuts: Toss in chopped toasted nuts, like almonds or pine nuts, for extra crunch and richness that compliments the fish beautifully. A little texture goes a long way!

These variations ensure that you can customize your Tilapia in Roasted Pepper Sauce experience and surprise your family or friends every time you make it. For additional flavor inspiration, pair these variations with vibrant sides like Roasted Corn Fried or enjoy a hearty serving of Ricotta Stuffed Peppers. Happy cooking!

How to Store and Freeze Tilapia in Roasted Pepper Sauce

Fridge: Store leftovers in an airtight container for up to 3 days. Reheat gently on the stove or in the microwave, adding a splash of water if needed to keep the fish moist.

Freezer: Freeze portions of the tilapia and roasted pepper sauce in airtight containers for up to 2 months. Thaw overnight in the fridge before reheating.

Reheating: When ready to enjoy, reheat on low heat to ensure the fish remains tender and the sauce stays vibrant without burning.

Avoid Room Temperature: Do not leave cooked tilapia in roasted pepper sauce at room temperature for more than 2 hours to prevent foodborne illness.

Make Ahead Options

These Tilapia in Roasted Pepper Sauce are perfect for busy home cooks looking to save time! You can roast the red bell peppers and prepare the sauce up to 3 days in advance; just blend the cooled roasted peppers with garlic and lemon juice as directed and refrigerate in an airtight container. To keep the flavors fresh, store the sauce separately from the tilapia. When you're ready to serve, simply cook the tilapia fresh for a flaky texture, then pour the prepared sauce over the fish, allowing it to simmer briefly to meld the flavors. This method ensures that dinner is just as delicious, with minimal effort!

Tilapia in Roasted Pepper Sauce Recipe FAQs

What type of tilapia should I use?
Absolutely! Look for fresh, wild-caught tilapia if possible, as it has a cleaner flavor and better texture. You may also consider farmed tilapia; ensure it's sourced responsibly. If you don’t have tilapia, other firm white fish like cod or haddock make excellent substitutes.

How should I store leftovers?
Store any leftovers of Tilapia in Roasted Pepper Sauce in an airtight container in the refrigerator for up to 3 days. When ready to enjoy, gently reheat the dish on low heat in a skillet or microwave, adding a splash of water to maintain moisture.

Can I freeze tilapia and roasted pepper sauce?
Very! To freeze, place portions of the tilapia and sauce in airtight containers or resealable freezer bags. Make sure to label them with the date! They can last up to 2 months in the freezer. When you're ready to eat, thaw overnight in the fridge and reheat on low heat until warmed through.

What if my roasted pepper sauce is too thick or thin?
If your sauce ends up too thick, you can thin it out by adding a little extra lemon juice or warm water until you reach your desired consistency. Conversely, if it’s too thin, consider simmering it on the stove for a few more minutes to thicken and intensify the flavors.

Can I add spices or adjust the heat level?
Absolutely! If you want to spice things up, try adding red pepper flakes or cayenne pepper to the roasted pepper sauce before blending. You can also enhance the flavors with fresh herbs like basil or parsley. Just incorporate them gradually until you find the right balance for your palate.

Is this recipe suitable for people with allergies?
Most definitely! This recipe is naturally gluten-free and can easily be made dairy-free. However, please be cautious with the ingredients' origins for those with specific allergies, especially fish. For the sauce, opt for garlic and lemon juice that are certified allergen-friendly to be safe!

Tilapia in Roasted Pepper Sauce

Tilapia in Roasted Pepper Sauce: A Quick Mediterranean Delight

A quick and healthy Mediterranean dish featuring tender tilapia in a smoky roasted pepper sauce, perfect for busy weeknights.
Print Recipe Pin Recipe
Prep Time 10 minutes mins
Cook Time 20 minutes mins
Total Time 30 minutes mins
Servings: 4 servings
Course: Dinner
Cuisine: Mediterranean
Calories: 250
Ingredients Equipment Method Nutrition Notes

Ingredients
  

For the Tilapia
  • 4 fillets Tilapia can substitute with cod or haddock
For the Roasted Pepper Sauce
  • 2 large Red Bell Peppers the star of the dish
  • 3 cloves Garlic use fresh for best flavor
  • 2 tablespoons Lemon Juice freshly squeezed is best
  • 2 tablespoons Olive Oil can substitute with vegetable oil
  • to taste Salt
  • to taste Pepper

Equipment

  • Baking Sheet
  • Blender
  • Large skillet
  • Cutting Board
  • Knife

Method
 

Preparation Steps
  1. Gather all ingredients. Preheat oven to 400°F (200°C). Prepare cutting boards and baking sheets.
  2. Slice red bell peppers in half, remove seeds, and coat them with olive oil, salt, and pepper. Place cut-side down on a baking sheet and roast for about 20 minutes.
  3. After the peppers cool, blend them with garlic and lemon juice until smooth.
  4. Heat olive oil in a skillet. Cook tilapia fillets for 3-4 minutes on each side until golden brown.
  5. Pour roasted pepper sauce over the fish and simmer for a few minutes. Serve immediately.

Nutrition

Serving: 1servingCalories: 250kcalCarbohydrates: 10gProtein: 30gFat: 12gSaturated Fat: 2gPolyunsaturated Fat: 4gMonounsaturated Fat: 6gCholesterol: 80mgSodium: 500mgPotassium: 800mgFiber: 2gSugar: 3gVitamin A: 500IUVitamin C: 25mgCalcium: 50mgIron: 1mg

Notes

Serve with sides like steamed vegetables or a light salad for a well-rounded meal. Use fresh ingredients for the best flavor.

Tried this recipe?

Let us know how it was!

Savory Scotch Pie Recipe for Ultimate Comfort Food Bliss

September 21, 2025 by Grace Snow Leave a Comment

As I stood in my kitchen, the comforting scent of spices filled the air, instantly transporting me to the lively streets of Glasgow. There's nothing quite like savoring a warm, flaky Scotch Pie, a true celebration of traditional Scottish cuisine. This hearty delight boasts a rich, peppery minced meat filling wrapped in a crisp hot water crust, capturing the essence of comfort food. One of the best parts? It’s surprisingly easy to whip up, making it a perfect dish for weeknight dinners or impressing guests. Plus, with variations from lamb to vegetarian options, this recipe caters to everyone at your table. Are you ready to roll up your sleeves and bring the warmth of Scotland to your home?

Why Is Scotch Pie a Must-Try?

Unbeatable Comfort: A Scotch Pie is the ultimate comfort food, offering a flaky crust and a hearty filling that wraps you in warmth with every bite. Versatile Options: Easily swap meats or go vegetarian, allowing everyone to enjoy this dish. Quick Preparation: Preparing these pies is straightforward, making it perfect for busy weeknights. Crowd-pleaser: Ideal for gatherings, each pie can be sliced for sharing, complemented by tasty dips. For another delightful comfort dish, check out our Tamale Pie Hearty or our Spinach Pie Deliciously. Tradition in Every Bite: Experience the rich Scottish culinary heritage while creating lasting memories around the dinner table.

Scotch Pie Ingredients

Discover the essential components for crafting a delicious Scotch pie from scratch!

For the Pastry

  • All-Purpose Flour – Key for a sturdy yet flaky crust; measure accurately by spooning and leveling.
  • Lard or Butter – Provides richness and flavor; use butter for a vegetarian option.
  • Boiling Water – Hydrates the dough for perfect texture; always use freshly boiled water.
  • Salt – Enhances flavor throughout the pastry; divide into two uses for filling and crust.

For the Filling

  • Ground Lamb or Beef – The star protein that delivers a robust flavor; swap for pork or lentils and mushrooms for a vegetarian twist.
  • Onion – Adds aromatic depth to the filling when finely chopped; consider using shallots for a milder taste.
  • White Pepper – Brings a gentle heat and unique flavor dimension; adjust to taste if you're sensitive to spice.
  • Black Pepper – Enhances the overall seasoning profile; fresh ground offers the best flavor.
  • Ground Mace and Nutmeg – Imparts warmth and complexity; a little goes a long way in enriching the filling.
  • Beaten Egg – Brushed over the pastry for a beautiful golden finish; reserve a bit for a second coat if preferred.

With this simple and straightforward ingredient list, you're well on your way to creating a comforting Scotch Pie that will please the whole family!

Step‑by‑Step Instructions for Scotch Pie

Step 1: Make the Pastry
In a medium saucepan, combine 100g of lard and 250ml of boiling water. Heat until the lard melts completely, then remove from heat. Gradually mix in 500g of all-purpose flour and half of the 1 teaspoon of salt, stirring until combined. Allow the mixture to cool for a few minutes before kneading until smooth. This pastry forms the perfect crust for your Scotch pie.

Step 2: Prepare the Filling
In a large mixing bowl, combine 500g of ground lamb or beef, 1 finely chopped onion, 1 teaspoon of white pepper, 1 teaspoon of freshly ground black pepper, 1/4 teaspoon of ground mace, 1/4 teaspoon of ground nutmeg, and the remaining salt. Mix thoroughly using your hands or a spoon until all ingredients are well incorporated. This savory filling will bring warmth and richness to your Scotch pie.

Step 3: Shape the Pies
Once the pastry has cooled, roll it out on a floured surface to about 1/8-inch thickness. Using a round cutter, cut out circles large enough to line your pie rings or muffin tins. Next, take a smaller cutter to create the pie tops. Gently press the larger circles into the molds, ensuring there are no air pockets. This step sets the stage for your delicious Scotch pies.

Step 4: Fill and Seal
Spoon a generous amount of the meat mixture into each pastry-lined mold, filling them just below the rim. Moisten the edges with a little water and carefully place the smaller pastry circles on top. Press down firmly to seal, pinching or crimping the edges to prevent any filling from escaping. This sealing step is essential for keeping your Scotch pies succulent during baking.

Step 5: Bake
Preheat your oven to 180°C (350°F). Brush the tops of the Scotch pies with a beaten egg for a glossy finish. Place the pies on a baking tray and bake for 30-35 minutes until the pastry is golden brown and crispy. The aroma will fill your kitchen, promising a treat that embodies the heart of Scottish comfort food.

Step 6: Cool and Serve
Once baked, remove the Scotch pies from the oven and allow them to cool in the molds for about 5 minutes. This slight cooling ensures they hold their shape when removed. Serve them hot, warm, or at room temperature, showcasing their flaky crust and delicious filling. Perfect for a family meal or sharing with friends, these Scotch pies are sure to delight!

What to Serve with Traditional Scotch Pie

Nothing complements the savory flavors of a Scotch pie like carefully chosen sides that elevate your dining experience and create a delightful meal.

  • Buttery Mashed Potatoes:
    This creamy classic balances the pie's rich filling, adding a comforting element that’s irresistible with savory gravy.

  • Chunky Oven Fries:
    Golden and crispy, these fries can dip into the pie's meat juices for a hearty experience that pleases every palate.

  • Pickled Onions:
    Their tangy crunch cuts through the richness of the pie, offering a refreshing contrast that invigorates the palate with every bite.

  • Homemade Gravy:
    Pouring lush gravy over the pie and sides enhances the overall savoriness and brings warmth to your comforting feast.

  • Minted Peas:
    These fresh, vibrant peas add a pop of color and a sweet earthiness, lightening each mouthful of the hearty pie.

  • Crispy Salad:
    A simple salad with mixed greens, cucumber, and a zesty dressing provides a refreshing crunch that balances the pie’s richness.

  • Scottish Ale:
    Pairing your meal with a smooth Scottish ale completes the experience, enhancing the flavors while paying homage to traditional Scottish cuisine.

  • Sticky Toffee Pudding:
    For dessert, nothing beats the warmth of a decadent sticky toffee pudding, perfectly rounding off your meal with sweet satisfaction.

Scotch Pie Variations & Substitutions

Feel free to let your creativity shine as you explore these delightful twists on the classic Scotch pie!

  • Meat Swap: Replace ground lamb with beef or pork for a different flavor profile. Each offers its unique richness and texture.
  • Vegetarian Delight: Substitute meat with a mix of lentils, mushrooms, and finely chopped vegetables for a hearty vegetarian option. This twist brings earthiness and depth.
  • Herb Infusion: Add fresh herbs like thyme or rosemary to the filling for an aromatic boost. These herbs elevate the flavor and add a touch of freshness.
  • Spice it Up: For a little kick, incorporate a pinch of cayenne pepper or smoked paprika into the filling. This adds warmth and an exciting flavor dimension that surprises the palate.
  • Cheesy Goodness: Mix in some grated cheese, such as cheddar or feta, within the filling for a creamy extension of flavors. It melts beautifully, adding richness and indulgence!
  • Gluten-Free Crust: Use a gluten-free flour blend to make the pastry crust suitable for those with gluten sensitivities. Keep the flavors familiar while accommodating dietary needs.
  • Sweet Twist: Try adding a touch of sweet to the filling with diced apples or raisins for an unexpected flavor harmony. It creates a delightful contrast to the savory spices.
  • Mini Pies: Create bite-sized variations by using a mini muffin tray for quick appetizers. They are perfect for parties and gatherings, offering an irresistible option for sharing!

While you’re exploring the versatility of Scotch pie, you may also want to try out our recommendations for further delicious comfort food experiences, such as Tamale Pie Hearty and Spinach Pie Deliciously. Enjoy your culinary adventure!

Expert Tips for the Best Scotch Pie

  • Flaky Pastry Secret: Avoid overworking the pastry to maintain its flakiness; gently knead for the best results.
  • Balanced Fats: For optimal crispness, use a combination of lard and butter. Butter gives flavor, while lard ensures structure.
  • Filling Balance: Don’t overfill the pies; keep it just below the rim to prevent spills during baking. A juicy Scotch pie is perfect but should not overflow!
  • Egg Wash Perfection: Brush the tops with beaten egg just before baking for a beautiful golden color. A second coat can enhance the shine!
  • Make-ahead Magic: Assemble the pies and freeze them unbaked; you can bake fresh Scotch pies anytime with just a bit of planning.

Storage Tips for Scotch Pie

  • Room Temperature: Enjoy Scotch pies at room temperature for up to 2 hours after baking. This is perfect for serving at gatherings or casual meals with family.
  • Fridge: Store leftover Scotch pies in the fridge for up to 3 days. Keep them in an airtight container to maintain freshness and avoid drying out.
  • Freezer: Unbaked Scotch pies can be frozen for up to 3 months. Assemble them, wrap tightly in plastic wrap, and place in a freezer-safe bag for best results.
  • Reheating: To reheat cooked Scotch pies, place them in a preheated oven at 180°C (350°F) for about 15-20 minutes, ensuring the pastry remains crisp and delightful.

Make Ahead Options

These Scotch Pies are a fantastic option for meal prep enthusiasts! You can prepare the filling up to 3 days in advance by storing it in an airtight container in the refrigerator. Additionally, you can assemble the pies (without baking) and freeze them raw for up to 3 months, ensuring fresh, homemade comfort food is just a bake away. To preserve their quality, wrap the unbaked pies tightly in plastic wrap and place them in a freezer-safe bag. When you’re ready to enjoy them, simply bake straight from the freezer, adding a few extra minutes to the cooking time for those warm, flaky Scotch Pies!

Scotch Pie Recipe FAQs

What type of meat is best for Scotch pie?
Absolutely! Traditional Scotch pies are often made with ground lamb or beef due to their rich flavors. However, if you're looking for alternatives, you can use ground pork or even create a delicious vegetarian version by combining lentils and sautéed mushrooms for a hearty filling that everyone can enjoy.

How should I store leftover Scotch pies?
Leftover Scotch pies can be stored in the fridge for up to 3 days. Make sure to place them in an airtight container to keep the pastry from drying out. For longer storage, you can keep them at room temperature for up to 2 hours after baking, which is perfect for serving at gatherings.

Can I freeze Scotch pies?
Yes, indeed! Unbaked Scotch pies can be frozen for up to 3 months. Simply assemble the pies, wrap them tightly in plastic wrap, and place them in a freezer-safe bag. When you’re ready to enjoy, bake them straight from the freezer, adding an extra 10-15 minutes to the cooking time for best results.

What should I do if my pastry is too sticky?
If your pastry turns out too sticky, don’t worry! You can knead in a little more flour until it’s manageable. Always be gentle to avoid overworking it. Next time, make sure to measure the flour accurately and avoid adding the hot water too quickly to better control the dough's consistency.

Can I make Scotch pie ahead of time?
Certainly! For a time-saving option, you can prepare the pies in advance. Assemble them and refrigerate for up to a day before baking. If you wish to freeze them, do so before baking, and enjoy freshly baked Scotch pies whenever you desire!

Scotch Pie

Savory Scotch Pie Recipe for Ultimate Comfort Food Bliss

This Scotch Pie is a hearty celebration of Scottish cuisine with a peppery minced meat filling and a flaky crust, perfect for comfort food lovers.
Print Recipe Pin Recipe
Prep Time 30 minutes mins
Cook Time 35 minutes mins
Cooling Time 5 minutes mins
Total Time 1 hour hr 10 minutes mins
Servings: 8 pieces
Course: Dinner
Cuisine: Scottish
Calories: 250
Ingredients Equipment Method Nutrition Notes

Ingredients
  

For the Pastry
  • 500 g All-Purpose Flour spooned and leveled
  • 100 g Lard or Butter butter for vegetarian option
  • 250 ml Boiling Water freshly boiled
  • 1/2 teaspoon Salt divided
For the Filling
  • 500 g Ground Lamb or Beef can swap for pork or lentils and mushrooms
  • 1 piece Onion finely chopped; can use shallots
  • 1 teaspoon White Pepper adjust to taste
  • 1 teaspoon Black Pepper freshly ground
  • 1/4 teaspoon Ground Mace
  • 1/4 teaspoon Ground Nutmeg
  • 1/2 teaspoon Salt remaining
  • 1 piece Beaten Egg for brushing

Equipment

  • Medium saucepan
  • large mixing bowl
  • round cutter
  • Baking tray

Method
 

Step-by-Step Instructions
  1. In a medium saucepan, combine lard and boiling water. Heat until the lard melts, remove from heat, and mix in flour and half of the salt until combined. Cool briefly and knead until smooth.
  2. In a large mixing bowl, combine ground lamb or beef, chopped onion, white pepper, black pepper, ground mace, ground nutmeg, and remaining salt. Mix until well incorporated.
  3. Roll out the pastry on a floured surface to 1/8-inch thickness. Cut out circles for pie rings, pressing larger circles into molds and creating tops with a smaller cutter.
  4. Fill each pastry-lined mold with meat mixture, moisten edges, place smaller circles on top and seal.
  5. Preheat oven to 180°C (350°F). Brush tops with beaten egg and bake for 30-35 minutes until golden brown.
  6. Remove pies from oven and cool in molds for 5 minutes before serving.

Nutrition

Serving: 1pieceCalories: 250kcalCarbohydrates: 30gProtein: 12gFat: 10gSaturated Fat: 3gPolyunsaturated Fat: 1gMonounsaturated Fat: 5gCholesterol: 60mgSodium: 300mgPotassium: 400mgFiber: 2gSugar: 1gVitamin A: 200IUVitamin C: 1mgCalcium: 20mgIron: 2mg

Notes

For the best results, avoid overworking the pastry and balance the fats for crispiness. Make-ahead options include assembling and freezing unbaked pies.

Tried this recipe?

Let us know how it was!

Savory Vietnamese Lemongrass Chicken for Effortless Dinners

September 21, 2025 by Grace Snow Leave a Comment

As I stood in my kitchen, the enticing aroma of lemongrass began to waft through the air, instantly transporting me to the bustling street markets of Vietnam. This Vietnamese Lemongrass Chicken isn’t just a recipe; it’s a flavorful journey that showcases the perfect harmony of tangy, savory, and aromatic ingredients. With minimal prep time and satisfying results, it’s the ideal weeknight dinner that will impress even the pickiest of eaters. Plus, it’s a healthy option that doesn’t skimp on taste! Whether you serve it over fragrant jasmine rice or toss it in a vibrant stir-fry, this dish is sure to become a beloved addition to your culinary repertoire. Curiously enough, what twist would you put on this classic flavor-packed creation?

What makes this chicken recipe unforgettable?

Irresistible Flavors: The combination of lemongrass, garlic, and lime creates a tantalizing marinade that bursts with flavor.

Quick & Easy: Perfect for busy evenings, you can have this dish on the table in under 30 minutes, making it ideal when time is short.

Health-Conscious Choice: Packed with protein and low in carbs, this recipe is perfect for those looking to eat healthy without sacrificing taste.

Versatile Variations: Try it grilled, in a stir-fry, or even with creamy coconut milk for a unique twist. Explore my other recipes like Chipotle Lime Chicken for more flavor inspirations!

Crowd-Pleasing Dish: Whether for family dinners or gatherings with friends, this Vietnamese Lemongrass Chicken is sure to impress!

Vietnamese Lemongrass Chicken Ingredients

For the Marinade

  • Chicken thighs – A juicy source of protein that remains tender and flavorful when cooked.
  • Vegetable oil – Great for frying; substitute with olive oil for a Mediterranean twist.
  • Lemongrass – The star ingredient, offering a refreshing citrusy flavor; use fresh for the best results or lemongrass paste in a pinch.
  • Garlic – Adds depth and health benefits; opt for fresh cloves over powder whenever possible.
  • Shallot – Lends subtle sweetness; onion can be used if shallots aren't available, though the flavor will differ.
  • Fish sauce – Infuses umami richness essential for authentic taste; soy sauce works as a vegetarian alternative.
  • Soy sauce – Enhances overall seasoning; use tamari for a gluten-free version.
  • Brown sugar – Provides a touch of sweetness that balances the dish; honey or coconut sugar are perfect substitutes.
  • Lime juice – Offers acidity and brightness; always use fresh lime juice for the best flavor.
  • Ground black pepper – Brings warmth; freshly ground makes a notable difference in taste.
  • Chili paste (optional) – For those who like a kick of heat; adjust according to your spice preference.

For Garnish and Serving

  • Fresh cilantro – Brightens the dish with herbal notes; parsley works as a substitute if you’re not a cilantro fan.
  • Sliced lime wedges – Perfect for squeezing over the dish just before serving, intensifying freshness.

This Vietnamese Lemongrass Chicken recipe is your ticket to a vibrant and healthier dinner that everyone will love!

Step‑by‑Step Instructions for Vietnamese Lemongrass Chicken

Step 1: Prepare the Marinade
In a large bowl, combine minced lemongrass, garlic, shallot, fish sauce, soy sauce, brown sugar, lime juice, black pepper, and chili paste (if using). Whisk together until the sugar dissolves completely, creating a vibrant and aromatic marinade that captures the essence of Vietnamese Lemongrass Chicken. Allow the mixture to sit for a few minutes to meld the flavors while you prep the chicken.

Step 2: Marinate the Chicken
Add the boneless, skinless chicken thighs to the marinade, ensuring they are generously coated. Cover the bowl with plastic wrap or transfer everything to a resealable bag to keep the flavor locked in. For best results, let the chicken marinate in the refrigerator for 30 minutes to 2 hours; if time permits, overnight marinating enhances the flavors even more.

Step 3: Heat the Skillet
Place a large skillet or frying pan over medium-high heat and add 2 tablespoons of vegetable oil. Allow the oil to heat for 2–3 minutes until it shimmers slightly, indicating it's hot enough for cooking. This step is essential for achieving that enticing golden-brown sear on the chicken, which will add flavor and texture to your Vietnamese Lemongrass Chicken.

Step 4: Cook the Chicken
Carefully add the marinated chicken thighs to the hot skillet, spacing them out to avoid overcrowding. Cook the chicken for 5–7 minutes on each side until they turn a lovely golden brown and reach an internal temperature of 165°F (75°C). Use tongs to flip them halfway through, ensuring an even cook that delivers juicy and tender meat infused with the lemongrass flavor.

Step 5: Rest and Slice
Once cooked, transfer the chicken to a cutting board and let it rest for about 5 minutes. This resting period allows the juices to redistribute, ensuring each slice retains its moisture. Once rested, slice the Vietnamese Lemongrass Chicken into strips for serving, showcasing its flavorful, juicy interior.

Step 6: Garnish and Serve
To finish, arrange the sliced chicken on a serving platter and garnish generously with fresh cilantro leaves. Serve with lime wedges on the side for that extra burst of citrus. Enjoy your vibrant and mouthwatering Vietnamese Lemongrass Chicken over jasmine rice or in lettuce wraps, creating a cheerful dining experience that’s full of flavor!

Vietnamese Lemongrass Chicken Variations

Feel free to get creative with your Vietnamese Lemongrass Chicken! Each twist brings out new, exciting flavors that are bound to delight your taste buds.

  • Grilled Lemongrass Chicken: Grill the marinated chicken for a smoky flavor that enhances the dish's freshness and zest.

  • Lemongrass Chicken with Coconut Milk: Incorporate coconut milk into the marinade for a creamier finish that adds a tropical touch. This variation also balances the tanginess with sweetness, making for a comforting meal.

  • Lemongrass Chicken Stir-Fry: Quickly stir-fry with colorful vegetables like bell peppers and snap peas for a vibrant, speedy meal that you can toss over rice or noodles. This is perfect for getting the family together around the table!

  • Spicy Lemongrass Chicken: Boost the heat by increasing the chili paste or tossing in some fresh bird’s eye chilies for a fiery kick. Adjust the spice level to hit that sweet spot of flavor and heat just right for you!

  • Lemongrass Chicken Tacos: Serve the chicken in soft tortillas topped with pickled vegetables and a drizzle of creamy sriracha sauce. This crunchy, fresh twist makes for a fun fusion meal!

  • Lemongrass Chicken Salad: Cube grilled chicken and serve it over mixed greens, topped with a lemongrass vinaigrette for a refreshing, healthy option. You can also add crunchy nuts for extra texture and heartiness.

  • Honey Glazed Lemongrass Chicken: Add honey to the marinade for a sweet glaze that caramelizes beautifully during cooking. The sweetness complements the savory notes of the dish, making it mesmerizing!

  • Lemongrass Chicken Soup: After roasting, shred the chicken and add it to a broth with lemongrass, ginger, and cilantro. It’s a cozy way to enjoy those amazing flavors in a warm, hearty dish.

Don't forget to check out my other recipes like Honey Garlic Chicken Thighs for more delectable ideas!

What to Serve with Vietnamese Lemongrass Chicken

As you savor each bite of this aromatic concoction, consider delightful companions that elevate your mealtime experience to new heights.

  • Fragrant Jasmine Rice: The fluffy grains absorb the savory marinade, making each mouthful a soothing and satisfying experience.

  • Crunchy Asian Slaw: Bright and fresh, this slaw adds a crispy texture that contrasts beautifully with the juicy chicken, offering a delightful crunch.

  • Stir-Fried Vegetables: Colorful bell peppers, carrots, and snap peas stir-fried with a hint of garlic bring vibrant flavors and added nutrition, making your plate more colorful and balanced.

  • Lettuce Wraps: Light and refreshing, serve the chicken in crisp lettuce leaves with fresh herbs and lime juice for a fun, hand-held meal that bursts with flavor.

  • Coconut Rice: Substituting water with coconut milk creates a creamy base for the chicken, enhancing the Asian flavors and adding a touch of sweetness.

  • Iced Thai Tea: This sweet, creamy beverage is a fantastic counterpart, cooling the palate amidst the vibrant tastes of the chicken.

Each of these pairings not only complements the vibrant Vietnamese Lemongrass Chicken but also transforms your dining experience into a delightful culinary adventure!

How to Store and Freeze Vietnamese Lemongrass Chicken

Fridge: Store leftovers in an airtight container in the refrigerator for up to 3 days. Reheat gently on the stovetop or in the microwave, adding a splash of water to prevent dryness.

Freezer: To freeze, place cooled, cooked Vietnamese Lemongrass Chicken in a freezer-safe bag or container for up to 3 months. Thaw overnight in the fridge before reheating.

Marinade Storage: If you've marinated chicken and have extras, keep them in the fridge for up to 24 hours before cooking. This maximizes flavor and tenderness.

Reheating Tips: When reheating, aim for an internal temperature of 165°F (75°C) for food safety, ensuring a deliciously warm meal each time!

Make Ahead Options

These Vietnamese Lemongrass Chicken preparations are perfect for busy home cooks looking to save time without sacrificing flavor! You can marinate the chicken thighs up to 24 hours in advance, allowing the flavors to deeply penetrate the meat. Simply mix the marinade ingredients as usual, add the chicken, and seal in a resealable bag or dish. For the best results, refrigerate it overnight for maximum flavor. When you’re ready to cook, heat the skillet and follow the same cooking instructions. This method ensures your meal is just as delicious and juicy, making weeknight dinners effortless and enjoyable!

Expert Tips for Vietnamese Lemongrass Chicken

  • Fresh Ingredients: Always use fresh lemongrass for the best flavor; dried or paste versions lack that authentic aromatic profile.
  • Perfect Marinade Time: Marinate the chicken for at least 30 minutes, but for maximum flavor, aim for 2 hours or overnight.
  • High Heat Cooking: Cooking on high heat is crucial; it helps achieve a golden-brown sear while keeping the chicken juicy.
  • Rest the Chicken: Let the chicken rest for a few minutes after cooking; this helps the juices redistribute for tender, flavorful bites.
  • Customize the Spice: Adjust the chili paste according to your heat preference; remember, you can always add more but can’t take it away!

Vietnamese Lemongrass Chicken Recipe FAQs

What type of lemongrass should I use for the best flavor?
Absolutely, fresh lemongrass is key to achieving that vibrant and fragrant taste in your Vietnamese Lemongrass Chicken. Look for stalks that are firm and have a bright green color, without any dark spots or wilting. If fresh is not available, lemongrass paste can be used as a substitute, but the flavor will be less aromatic.

How should I store leftover Vietnamese Lemongrass Chicken?
Leftovers should be placed in an airtight container and stored in the refrigerator for up to 3 days. To reheat, gently warm it on the stovetop or in the microwave, adding a splash of water if necessary to maintain moisture.

Can I freeze the Vietnamese Lemongrass Chicken?
Definitely! To freeze, first, let the cooked chicken cool completely. Then, place it in a freezer-safe container or bag, ensuring most air is removed to avoid freezer burn. This way, it can be stored for up to 3 months. When you’re ready to enjoy it, thaw overnight in the refrigerator before reheating.

What should I do if my chicken becomes dry while cooking?
If the chicken turns out dry, it may be due to overcooking or cooking on too high a heat. Next time, use a meat thermometer to check for an internal temperature of 165°F (75°C) and consider marinating the chicken slightly longer for added moisture. A good resting period after cooking will also help keep it juicy.

Is this recipe suitable for gluten-free diets?
Yes! To make your Vietnamese Lemongrass Chicken gluten-free, simply substitute soy sauce with tamari, which is a gluten-free alternative. Always check labels on all sauces just to be safe, as some may contain gluten.

Can I make the marinade ahead of time?
Absolutely! You can prepare the marinade in advance and keep it in the fridge for up to 24 hours before adding the chicken. It will allow the flavors to develop even further, making your dish more flavorful when you cook it!

Vietnamese Lemongrass Chicken

Savory Vietnamese Lemongrass Chicken for Effortless Dinners

This Vietnamese Lemongrass Chicken is a flavorful journey with tangy, savory, and aromatic ingredients, perfect for a healthy weeknight dinner.
Print Recipe Pin Recipe
Prep Time 15 minutes mins
Cook Time 15 minutes mins
Marinating Time 2 hours hrs
Total Time 2 hours hrs 30 minutes mins
Servings: 4 servings
Course: Dinner
Cuisine: Vietnamese
Calories: 300
Ingredients Equipment Method Nutrition Notes

Ingredients
  

For the Marinade
  • 1 pound boneless skinless chicken thighs juicy source of protein
  • 3 tablespoons vegetable oil substitute with olive oil if desired
  • 2 stalks lemongrass fresh for the best results
  • 4 cloves garlic fresh cloves preferred
  • 1 small shallot onion can be used if unavailable
  • 2 tablespoons fish sauce essential for authentic taste
  • 2 tablespoons soy sauce tamari for gluten-free
  • 1 tablespoon brown sugar honey or coconut sugar can be substituted
  • 2 tablespoons lime juice use fresh juice for best flavor
  • 1/2 teaspoon ground black pepper freshly ground is better
  • 1 teaspoon chili paste optional for heat
For Garnish and Serving
  • 1/4 cup fresh cilantro can substitute with parsley if desired
  • 2 limes sliced lime wedges for serving

Equipment

  • large bowl
  • Skillet
  • Whisk
  • Tongs

Method
 

Cooking Steps
  1. In a large bowl, combine minced lemongrass, garlic, shallot, fish sauce, soy sauce, brown sugar, lime juice, black pepper, and chili paste (if using). Whisk together until the sugar dissolves completely, then let sit to meld flavors.
  2. Add the chicken thighs to the marinade, ensuring they are coated. Cover and refrigerate for 30 minutes to 2 hours, or overnight for best results.
  3. Heat a skillet over medium-high heat and add vegetable oil. Heat for 2-3 minutes until shimmering.
  4. Add the marinated chicken thighs to the skillet, cooking for 5-7 minutes on each side until golden brown and the internal temperature reaches 165°F.
  5. Transfer the cooked chicken to a cutting board and let it rest for about 5 minutes. Then slice into strips.
  6. Serve the sliced chicken on a platter, garnished with cilantro and lime wedges.

Nutrition

Serving: 1plateCalories: 300kcalCarbohydrates: 8gProtein: 28gFat: 18gSaturated Fat: 3gPolyunsaturated Fat: 1gMonounsaturated Fat: 10gCholesterol: 90mgSodium: 1200mgPotassium: 600mgFiber: 1gSugar: 3gVitamin A: 300IUVitamin C: 20mgCalcium: 20mgIron: 2mg

Notes

This Vietnamese Lemongrass Chicken recipe is perfect for busy weeknights and can be served over jasmine rice or in lettuce wraps for a cheerful dining experience.

Tried this recipe?

Let us know how it was!

Unlock Flavor with Easy Crying Tiger Beef Recipe

September 21, 2025 by Grace Snow Leave a Comment

As I stood in my kitchen, the vibrant scent of marinated flank steak dancing in the air pulled me back to the bustling streets of Thailand, where I first tasted the incredible Crying Tiger Beef. This Thai culinary gem is not only a feast for the senses but also a delightful solution for those who crave a quick, satisfying meal that’s bursting with flavor. The beauty of this dish lies in its tender, grilled beef served over fluffy jasmine rice—perfect for a cozy dinner or a lively gathering with friends. With its adjustable spice level, Crying Tiger Beef invites everyone to customize their experience, making it a versatile choice for any palate. Curious about how to bring this exotic taste into your own kitchen? Let’s dive into the recipe!

Why will you crave Crying Tiger Beef?

Unforgettable flavors: The marinated flank steak boasts an enticing blend of soy sauce, lime, and garlic that transports your taste buds straight to Thailand.

Versatile protein options: Prefer chicken or tofu? Easily swap in your favorite ingredients for a personalized touch.

Quick prep: With just a few simple steps, you can have this flavorful dish on the table in no time, perfect for busy weeknights.

Texture harmony: Enjoy the tender beef alongside fluffy jasmine rice and crunchy cucumbers, creating a delightful interplay of textures.

Crowd-pleasing appeal: Whether you're hosting a dinner party or cooking for the family, this dish promises mouthwatering satisfaction for everyone—just like our Ground Beef Enchiladas.

Healthy & hearty: Packed with protein and paired with whole grains, you’ll feel good about including this dish in your regular meal rotation.

Crying Tiger Beef Ingredients

Unlock the vibrant flavors of this Thai grilled delight!

For the Marinade

  • Flank Steak – The star of the dish; tender and flavorful, but feel free to swap it with chicken or tofu for a variation.
  • Soy Sauce – Provides necessary saltiness and umami depth; choose a low-sodium version for a healthier option.
  • Fish Sauce – Essential for an authentic Thai taste; can be replaced with extra soy sauce for a vegetarian alternative.
  • Brown Sugar – Balances savory flavors and adds a touch of sweetness to the marinade.
  • Lime Juice – Adds bright acidity; lemon juice makes for a good substitute in a pinch.
  • Garlic – Boosts the flavor profile; if fresh isn’t available, garlic powder can work as a quick substitute.
  • Black Pepper – Adds a warm spice; adjust to your preference for milder or bolder tastes.
  • Red Pepper Flakes – Introduces heat; tweak the amount for your desired spice level in this Crying Tiger Beef recipe.

For Cooking

  • Vegetable Oil – Used for cooking the beef; consider peanut oil for a hint of nuttiness or coconut oil for a tropical twist.

For Serving

  • Fresh Cilantro – A fragrant garnish that brightens the dish; can be omitted for those who prefer not to use it.
  • Cucumber – Provides a cool, crunchy contrast; feel free to add other fresh veggies like bell peppers or radishes.
  • Jasmine Rice – The perfect fluffy base; swap it with brown rice or quinoa for a healthier option.
  • Sesame Seeds (optional) – Adds a delightful crunch and visual appeal to your finished dish.

Step‑by‑Step Instructions for Crying Tiger Beef

Step 1: Prepare Marinade
In a medium bowl, whisk together ¼ cup soy sauce, 2 tablespoons fish sauce, 1 tablespoon brown sugar, juice of 1 lime, 2 minced garlic cloves, ½ teaspoon black pepper, and 1 teaspoon red pepper flakes until smooth. This marinade is the heart of your Crying Tiger Beef, giving it a rich flavor. Set aside after mixing, as it will beautifully infuse the beef later.

Step 2: Marinate Beef
Place 1 pound of flank steak into a resealable plastic bag and pour the marinade over it, ensuring the meat is well-coated. Seal the bag, pressing out as much air as possible, and refrigerate for 1 to 4 hours. Allowing the beef to marinate will deepen its flavor and tenderness, with a good 2-hour soak usually sufficient for great results.

Step 3: Cook Rice
While the beef marinates, rinse 1 cup of jasmine rice under cold water until the water runs clear. In a medium saucepan, bring 1.5 cups of water to a boil, add the rinsed rice, and stir briefly. Reduce the heat to low, cover the pot, and allow it to simmer for 15 minutes until tender. Once cooked, remove it from heat and let it rest for 10 minutes before fluffing with a fork.

Step 4: Cook Beef
Heat 2 tablespoons of vegetable oil in a large skillet over medium-high heat. Once the oil shimmers, carefully add the marinated flank steak, searing it for 4-5 minutes on each side for medium-rare. Ensure the beef develops a golden-brown crust while remaining tender. Use a meat thermometer for precise doneness, aiming for an internal temperature of 130°F.

Step 5: Slice and Serve
After cooking, transfer the beef to a cutting board and let it rest for 5 minutes. This step is crucial for locking in juices. Slice the steak against the grain into thin strips for maximum tenderness. Serve the flavorful Crying Tiger Beef over fluffy jasmine rice, garnished with fresh cilantro, sesame seeds, and crisp cucumber slices on the side for a refreshing contrast.

Expert Tips for Crying Tiger Beef

  • Slice Against the Grain: Ensure you cut the beef against the grain to maintain its tenderness and prevent chewy bites, enhancing your enjoyment of this Crying Tiger Beef dish.

  • Adapt Marinade Time: Feel free to adjust marinating time based on your flavor preference; longer soaking intensifies the flavor, but 2 hours is often ideal for great results.

  • Check Cooking Temperature: Use a meat thermometer to check for doneness, aiming for 130°F for medium-rare. This ensures your beef remains juicy and flavorful.

  • Discard Used Marinade: Always discard any leftover marinade after use to avoid cross-contamination, ensuring a safe and delicious meal for you and your family.

  • Customize Heat Levels: Adjust the amount of red pepper flakes based on your spice tolerance; less for a milder dish or more for that extra kick in your Crying Tiger Beef.

What to Serve with Crying Tiger Beef

As you savor the rich, smoky flavors of this Thai masterpiece, consider these delightful pairings to elevate your meal experience.

  • Creamy Coconut Rice: Indulge in the tropical essence of creamy coconut rice, which perfectly complements the savory notes of the beef while adding a silky texture.
  • Fresh Mango Salad: A refreshing mango salad brings a burst of sweetness and crunch, balancing the savory spice of the Crying Tiger Beef and enhancing its vibrant flavors.
  • Thai Peanut Sauce: Drizzling a nutty Thai peanut sauce over your dish adds an irresistible creaminess that pairs beautifully with the marinated beef.
  • Steamed Bok Choy: The subtle bitterness of steamed bok choy offers a lovely contrast, creating a harmonious blend of flavors and a refreshing crunch.
  • Spicy Thai Cucumber Salad: This zesty salad with cucumbers, chili, and lime is a cool and crunchy counterpart, cutting through the richness of the beef.
  • Iced Thai Tea: Sip on a cold, creamy Thai iced tea, which provides a sweet, soothing contrast to the heat of the marinated steak.
  • Grilled Corn on the Cob: Smoky, charred corn with a pat of butter can add another layer of flavor, contributing a sweet and smoky element that works beautifully.
  • Lemon Sorbet: Finish your meal with a light lemon sorbet for a palate-cleansing dessert that brightens up the dining experience after the savory beef.
  • Watermelon Feta Salad: This sweet and salty salad brings refreshing notes to the table, providing a perfect balance and delightful textural contrast.

Make Ahead Options

Crying Tiger Beef is an ideal dish for meal prep enthusiasts, allowing you to savor delicious flavors with minimal last-minute effort! You can marinate the flank steak up to 24 hours in advance, which not only enhances the flavor but also ensures the beef remains tender. Once marinated, simply refrigerate it in an airtight container. You can also prepare the jasmine rice up to 3 days ahead; just cook it, let it cool completely, and store it in the fridge. When you're ready to serve, quickly sear the marinated beef and reheat the rice, and you'll enjoy restaurant-quality results with ease—all while saving precious time during busy weeknights!

Crying Tiger Beef Variations & Substitutions

Explore the endless possibilities of the Crying Tiger Beef recipe with these delightful variations to suit your taste!

  • Dairy-Free: Substitute butter with coconut oil for a richer flavor, perfect for a more tropical twist on this Thai classic.
    You can also enhance the creaminess with a coconut milk drizzle for added richness.

  • Spicy Kick: Add fresh sliced chilies or a dash of sriracha to the marinade for an extra kick.
    Experimenting with different chili types can introduce a variety of heat levels and flavors.

  • Vegetarian: Swap flank steak for firm tofu or tempeh, marinating and cooking just like the beef.
    The resulting dish will still be packed with flavor and provide a protein-rich option.

  • Quinoa Base: Replace jasmine rice with fluffy quinoa to elevate the nutritional value while keeping the dish satisfying.
    This swap introduces a nutty flavor that pairs wonderfully with the marinated beef.

  • Herb Explosion: Spruce up your dish with fresh mint or Thai basil in place of cilantro.
    These greens can lend a refreshing note that beautifully complements the savory flavors of the beef.

  • Low-Carb: Use spiralized zucchini or cauliflower rice instead of jasmine rice for a lighter, low-carb alternative.
    Enjoy the same delicious flavors while keeping the meal healthy and satisfying.

  • Heat Control: To tone down the spice, simply reduce the red pepper flakes or omit them entirely.
    You can even offer sliced jalapeños on the side for those who want major flavor without the heat.

  • Asian Flavors: Drizzle a bit of sesame oil over the cooked beef to amplify the umami notes and add depth.
    This small tweak can transform your plate with a wonderfully robust flavor profile.

Whichever variation you choose, your journey with Crying Tiger Beef promises to stimulate your palate, much like our Ground Beef Enchiladas. Feel free to mix and match these ideas for an unforgettable meal every time!

How to Store and Freeze Crying Tiger Beef

Fridge: Store cooked Crying Tiger Beef in an airtight container for up to 3 days. Make sure it cools completely before sealing to maintain freshness.

Freezer: For longer storage, freeze the beef in a single layer on a baking sheet before transferring it to a freezer-safe bag. It can last up to 3 months in the freezer.

Reheating: Thaw in the refrigerator overnight before reheating. Warm it gently in a skillet over low heat or in the microwave until heated through, retaining its juicy texture.

Rice Storage: Leftover jasmine rice can also be stored in the fridge for up to 3 days or frozen for up to 1 month in a sealed container or bag. Reheat with a splash of water to bring back moisture.

Crying Tiger Beef Recipe FAQs

What type of flank steak should I choose for Crying Tiger Beef?
Absolutely! When selecting flank steak, look for cuts that are deep red and well-marbled. Avoid any with dark spots or excessive fat. If flank steak isn’t available, sirloin or even chicken thighs can also work beautifully in this dish—just remember to adjust cooking times accordingly!

How should I store cooked Crying Tiger Beef to keep it fresh?
Very straightforward! Store your cooked Crying Tiger Beef in an airtight container in the refrigerator for up to 3 days. Ensure it has cooled completely before sealing, as this helps retain its moisture and flavor.

Can I freeze Crying Tiger Beef, and if so, how?
Yes, indeed! To freeze Crying Tiger Beef, first, allow it to cool completely. Then, lay it in a single layer on a baking sheet and freeze until solid. Once frozen, transfer the beef to a freezer-safe bag or container. It can last up to 3 months in the freezer. When you’re ready to enjoy it again, thaw it in the refrigerator overnight.

What can I do to prevent the beef from being tough?
To keep your Crying Tiger Beef tender, remember to slice against the grain after cooking—it’s the best way to ensure each bite is melt-in-your-mouth soft! Also, be mindful of cooking times, aiming for an internal temperature of 130°F for medium-rare. If you marinate for at least 2 hours, it helps enhance flavor and tenderness as well.

How can I customize the heat level of my dish?
The more the merrier! You can easily adjust the spice level of your Crying Tiger Beef by modifying the amount of red pepper flakes in your marinade. If you prefer mild flavors, start with just a pinch or omit them entirely. For those who love a fiery kick, feel free to double the amount or even add fresh sliced chilies!

Are there dietary considerations I should know about?
Absolutely! If you or a guest has a soy allergy, opt for coconut aminos as a soy sauce substitute in the marinade for a similar flavor. Additionally, if preparing this dish for pets, keep the herbs and seasonings to a minimum. Always consult with a healthcare provider for any specific dietary restrictions you might have.

Crying Tiger Beef

Unlock Flavor with Easy Crying Tiger Beef Recipe

This Crying Tiger Beef recipe features marinated flank steak bursting with flavor, making it a quick and satisfying meal perfect for any occasion.
Print Recipe Pin Recipe
Prep Time 15 minutes mins
Cook Time 30 minutes mins
Marination Time 2 hours hrs
Total Time 2 hours hrs 45 minutes mins
Servings: 4 servings
Course: Dinner
Cuisine: Thai
Calories: 350
Ingredients Equipment Method Nutrition Notes

Ingredients
  

For the Marinade
  • 1 pound flank steak can substitute with chicken or tofu
  • 1/4 cup soy sauce low-sodium version recommended
  • 2 tablespoons fish sauce can replace with extra soy sauce for vegetarian
  • 1 tablespoon brown sugar
  • 1 tablespoon lime juice lemon juice can be used as a substitute
  • 2 cloves garlic minced or use garlic powder
  • 1/2 teaspoon black pepper adjust to preference
  • 1 teaspoon red pepper flakes adjust for desired spice level
For Cooking
  • 2 tablespoons vegetable oil peanut or coconut oil can be used
For Serving
  • 1 cup jasmine rice can substitute with brown rice or quinoa
  • to taste garnish fresh cilantro optional
  • 1 medium cucumber sliced
  • 1 tablespoon sesame seeds optional

Equipment

  • medium bowl
  • Skillet
  • Saucepan
  • Meat Thermometer
  • Resealable plastic bag

Method
 

Preparation
  1. In a medium bowl, whisk together the marinade ingredients until smooth. Set aside.
  2. Place the flank steak in a resealable bag, add the marinade, seal, and refrigerate for 1 to 4 hours.
  3. Rinse jasmine rice under cold water, bring water to a boil, add rice, reduce heat, cover, and simmer for 15 minutes.
  4. Heat vegetable oil in a skillet, sear marinated flank steak for 4-5 minutes on each side.
  5. Let the beef rest for 5 minutes, slice against the grain and serve over jasmine rice with garnishes.

Nutrition

Serving: 1servingCalories: 350kcalCarbohydrates: 45gProtein: 28gFat: 12gSaturated Fat: 3gPolyunsaturated Fat: 2gMonounsaturated Fat: 6gCholesterol: 70mgSodium: 800mgPotassium: 600mgFiber: 2gSugar: 5gVitamin A: 150IUVitamin C: 10mgCalcium: 30mgIron: 3mg

Notes

For best results, slice against the grain and adjust marination time based on your taste preferences.

Tried this recipe?

Let us know how it was!
  • « Previous Page
  • 1
  • …
  • 140
  • 141
  • 142
  • 143
  • 144
  • …
  • 179
  • Next Page »

Welcome!

Hi, I’m Grace, a Sydney-based home cook with a passion for bold flavors and trending ingredients. Whether you’re a busy beginner or a seasoned foodie, you’ll find dishes here that are fresh, fun, and full of flavor.

More about me

Popular Recipes

  • Cheesy Chicken Garlic Bread Sandwich
    Cheesy Chicken Garlic Bread Sandwich for Cozy Family Moments
  • Easy Chicken Ranch Wraps
    Easy Chicken Ranch Wraps: Quick, Creamy & Totally Satisfying
  • Chicken Caesar Sandwiches
    Delicious Chicken Caesar Sandwiches for Quick Comfort Food
  • best Cuban sandwich
    The Best Cuban Sandwich You’ll Want Every Weeknight!

Footer

↑ back to top

About

  • Privacy Policy
  • Disclaimer
  • Terms & Conditions

Newsletter

  • Sign Up! for emails and updates

Contact

  • About me
  • Contact me

Copyright © 2025 TastyTrendIngredients