tastytrendingredients

  • Home
  • Recipes
    • Appetizers
    • Breakfast
    • Dessert
    • Dinner
    • Drinks
    • Salads
    • Snacks
    • Soups
  • About me
  • Contact me
menu icon
go to homepage
  • Home
  • Recipes
    • Appetizers
    • Breakfast
    • Dessert
    • Dinner
    • Drinks
    • Salads
    • Snacks
    • Soups
  • About me
  • Contact me
search icon
Homepage link
  • Home
  • Recipes
    • Appetizers
    • Breakfast
    • Dessert
    • Dinner
    • Drinks
    • Salads
    • Snacks
    • Soups
  • About me
  • Contact me
×

The Bear Spaghetti: Indulge in Comfort Like Never Before

October 1, 2025 by Grace Snow Leave a Comment

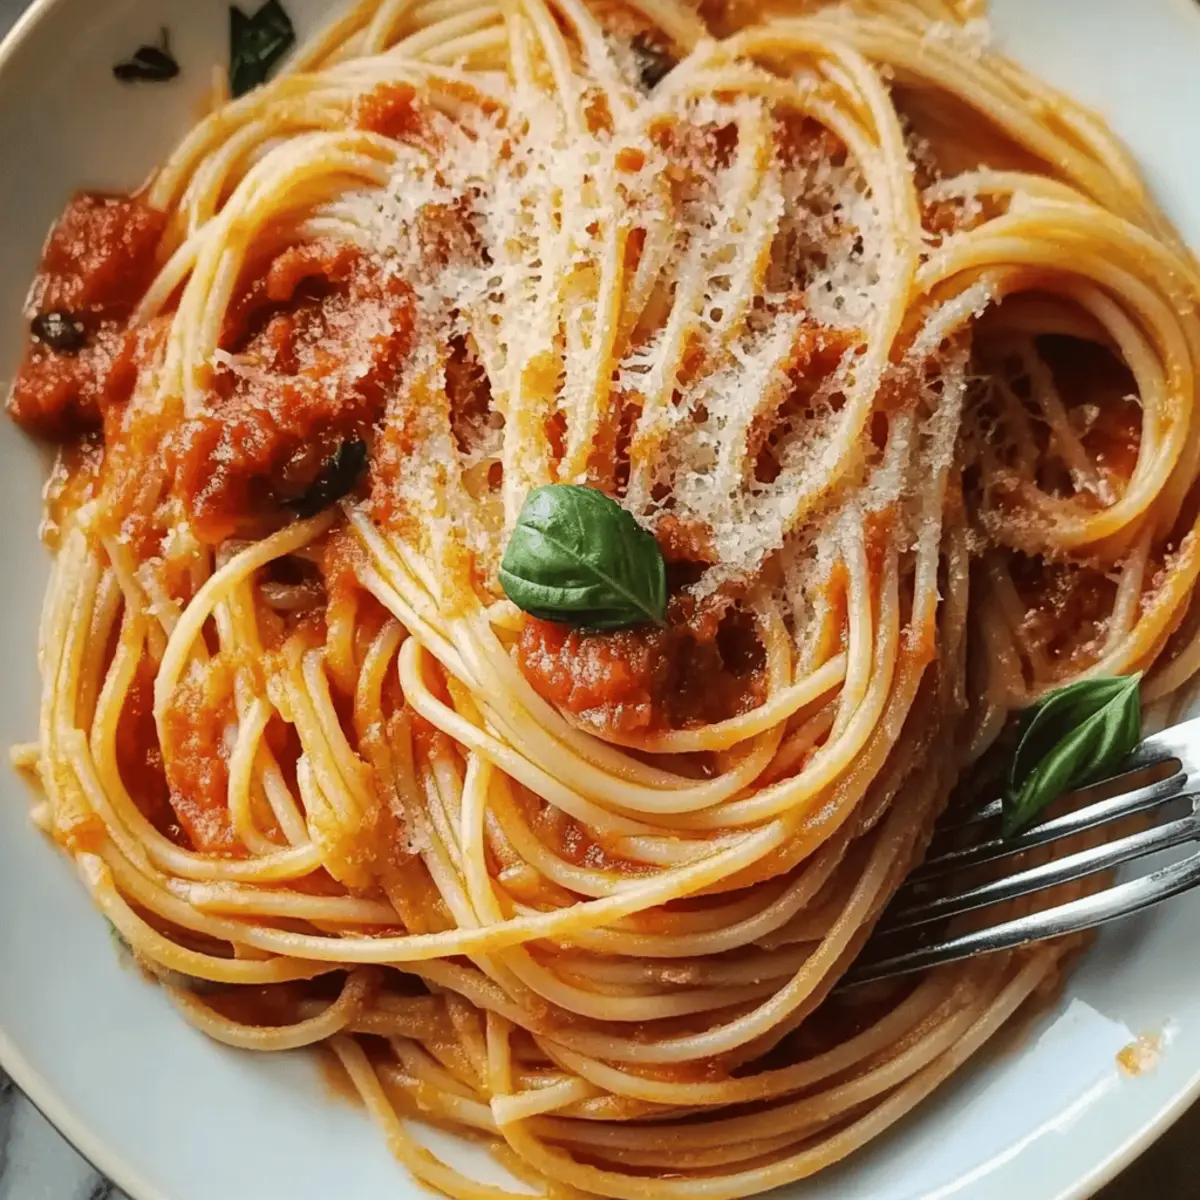
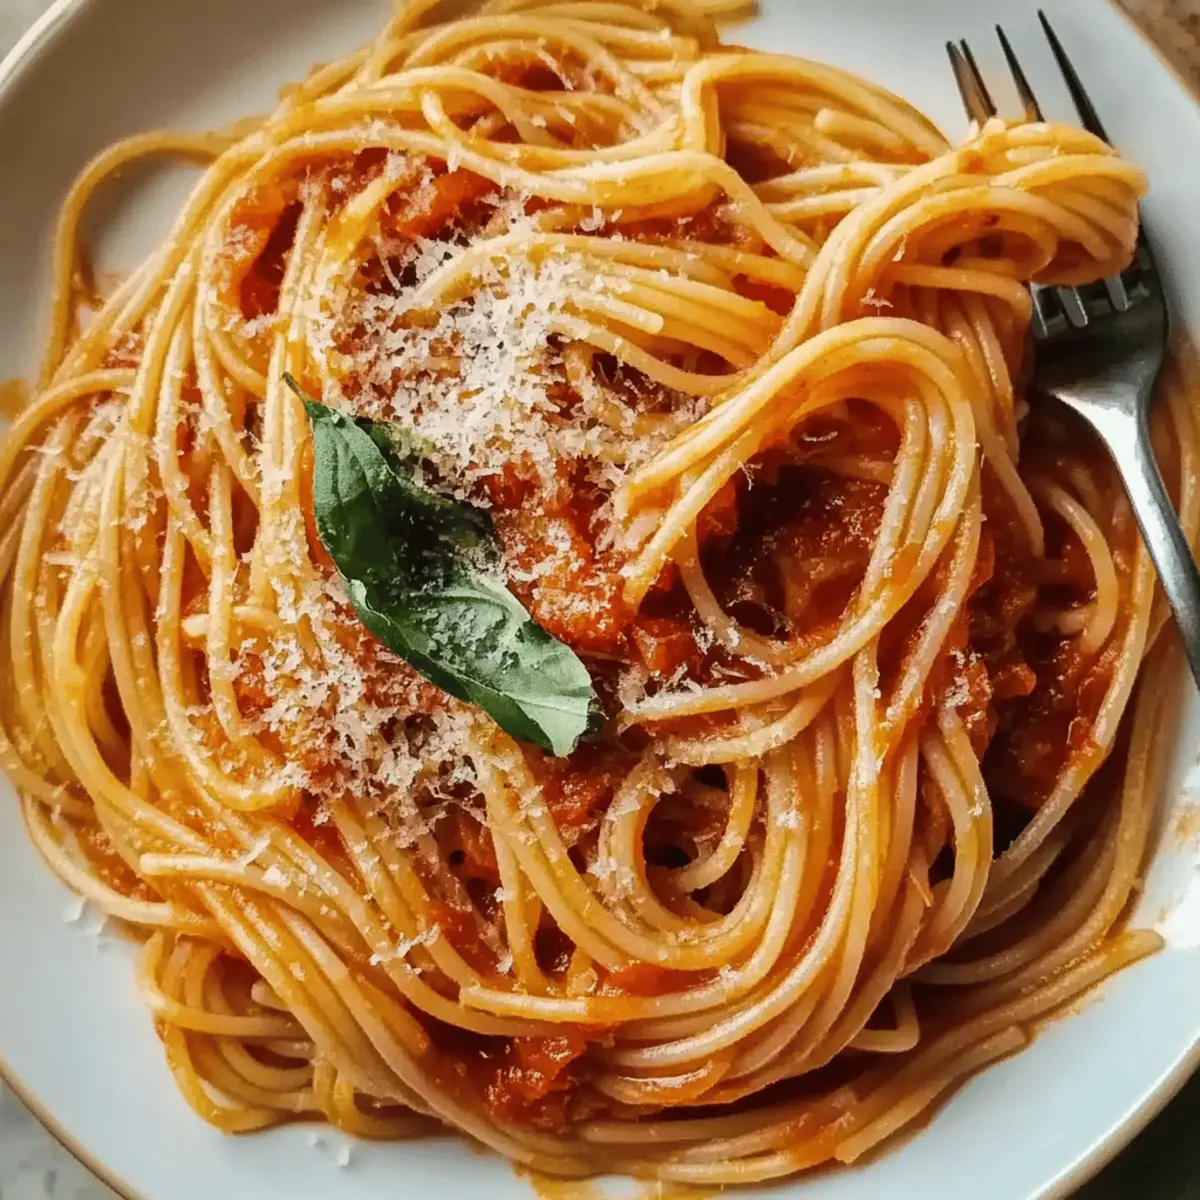
As the aroma of garlic and browned butter wafts through the kitchen, my heart skips a beat; it’s time to prepare The Bear Spaghetti. This restaurant-quality comfort dish brings a touch of culinary magic to your dining table with its silky, umami-packed sauce that’s surprisingly easy to whip up. With just a handful of simple ingredients like high-quality San Marzano tomatoes and fresh basil, you're not just cooking—you’re crafting a delicious experience that warms the soul. Perfect for cozy nights in or impressing guests, this pasta shines with its elegant flavors and luxurious mouthfeel. Plus, the joy of creating a meal that feels indulgent without occupying your entire evening is simply unbeatable. Ready to dive into this Italian-inspired masterpiece? Let’s get started!

Why Is The Bear Spaghetti So Special?

Simplicity, yet sophisticated: With just a few ingredients, you can create a restaurant-quality meal at home.
Rich, velvety sauce: The combination of San Marzano tomatoes and browned butter delivers a creamy texture that coats the pasta beautifully.
Aromatic basil adds freshness, elevating the overall flavor profile for a dish that feels vibrant and alive.
Versatile alternatives: Whether you're swapping spaghetti for zucchini noodles or adding grilled chicken for extra protein, this recipe fits seamlessly into any dietary preference.
Crowd-pleaser: Perfect for family dinners or entertaining guests, this comforting dish is sure to impress, just like my favorite Shakshuka Savor Bold or Roasted Sweet Potatoes.
Quick preparation means you won’t have to spend hours in the kitchen—this indulgence is ready in no time!

The Bear Spaghetti Ingredients

• Indulge your taste buds with these vibrant ingredients!

For the Sauce

  • San Marzano Tomatoes – The core ingredient; opt for high-quality canned for a rich, sweet sauce.
  • Fresh Basil – Adds aromatic freshness; substitute with dried if fresh isn't available, but it’s less flavorful.
  • Olive Oil – Used for infusing flavors; extra virgin gives the sauce a wonderful richness.
  • Browned Butter – Introduces nuttiness; watch closely so it doesn’t burn, which affects the flavor.
  • Garlic – Provides a savory base; fresh garlic is ideal over garlic powder for robust taste.
  • Red Pepper Flakes – Adds a hint of heat; adjust the amount based on your spice tolerance.
  • Onion – Offers sweetness and depth; brown it well but remember to remove it before serving for a smooth sauce.

To Serve

  • Spaghetti – The perfect vessel for the sauce; cook it al dente for best texture.

Elevate your meal with The Bear Spaghetti, and enjoy a delightful journey through flavors that make it a standout dish!

Step‑by‑Step Instructions for The Bear Spaghetti

Step 1: Infuse the Oil
In a medium saucepan, heat 2 tablespoons of extra virgin olive oil over low heat. Add 3 minced garlic cloves, a pinch of red pepper flakes, and a few torn basil leaves. Stir gently and let the flavors meld for about 5 minutes, being careful not to let the garlic brown, as this is the aromatic base of your rich Bear Spaghetti sauce.

Step 2: Brown the Onion
Next, add a halved onion to the pan, cooking it in the infused oil for approximately 8-10 minutes until it's caramelized and deeply golden. This step enhances the natural sweetness that will elevate your sauce. Once browned, remove the onion from the pan to maintain a smooth texture for your Bear Spaghetti sauce.

Step 3: Cook the Tomatoes
Introduce a can (28 ounces) of San Marzano tomatoes to the pan, gently breaking them down with a wooden spoon. Increase the heat to medium and bring the mixture to a simmer. Let it cook for 10-15 minutes, stirring occasionally, until the sauce thickens and bubbles with a vibrant rich red color, indicative of its delicious flavor.

Step 4: Add the Basil Oil
Once the tomatoes have thickened, return the aromatic basil oil from Step 1 to the pan. Stir well to incorporate the flavors and further deepen the aromatic profile of your Bear Spaghetti. Allow it to simmer together for another 2-3 minutes to ensure all components are well combined and flavorful.

Step 5: Finish the Sauce
Now, add 2 tablespoons of browned butter to the sauce, stirring to dissolve it completely. This will give your sauce a luxurious texture and depth. Season with salt and pepper to taste, adjusting as needed to achieve the perfect balance. The sauce is now ready to coat your spaghetti, bringing the essence of The Bear Spaghetti to your table.

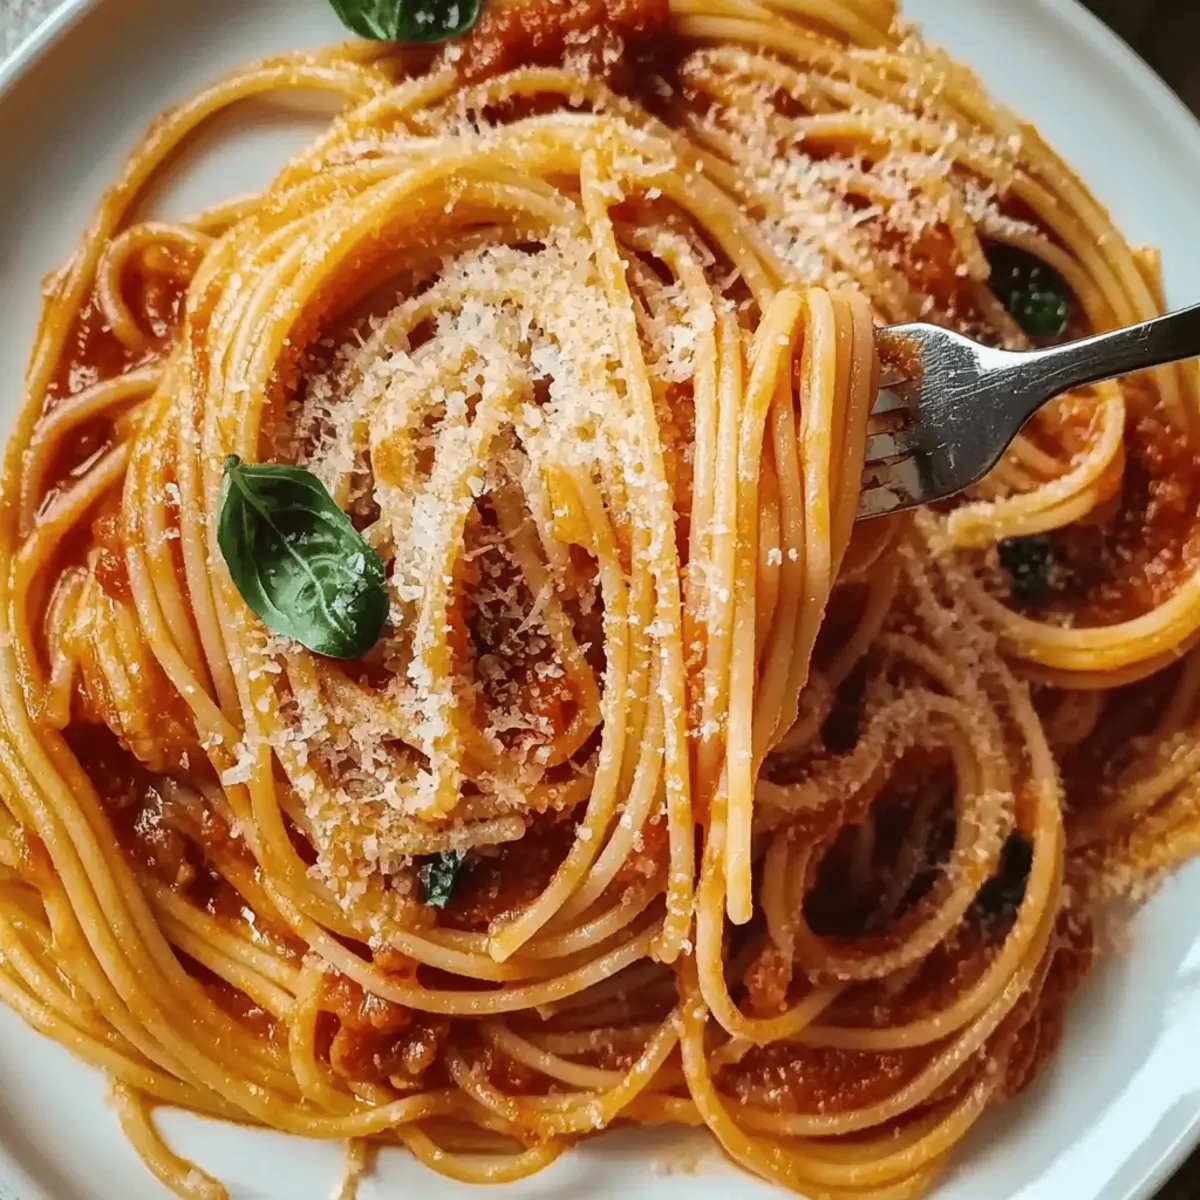
Step 6: Combine with Pasta
In a large pot, cook your spaghetti according to package instructions, ensuring it’s al dente. Once cooked, drain the pasta and add it directly to the sauce pan. Toss gently to coat the spaghetti thoroughly in the rich, glossy sauce. The Bear Spaghetti is now beautifully dressed and ready to serve, bursting with comforting flavors and an inviting aroma.

Make Ahead Options

The Bear Spaghetti is perfect for meal prep, allowing you to save time on busy nights! You can prepare the sauce up to 3 days in advance. Simply follow the recipe through Step 5, and then let the sauce cool before transferring it to an airtight container—this helps preserve its richness and flavor. Store it in the refrigerator and when you're ready to serve, reheat gently over low heat while cooking your spaghetti. This method ensures the sauce remains just as delicious as day one! Toss the warmed sauce with your al dente spaghetti, and you’ll have a comforting meal ready in no time!

Tips for the Best Bear Spaghetti

  • Choose Quality Tomatoes: Using high-quality San Marzano tomatoes is essential for depth and sweetness in your Bear Spaghetti sauce. Don't compromise!

  • Avoid Overheating Garlic: Keep garlic on low heat to prevent burning. Browned garlic can turn bitter and ruin the flavor of your dish.

  • Perfectly Brown the Onion: A good caramelization adds rich sweetness—don't rush this step! Take about 8-10 minutes to achieve a lovely golden color.

  • Simmer Gently: Allow your sauce to simmer slowly, which helps in deepening the flavors. Quick cooking isn’t the way to achieve the desired depth in your Bear Spaghetti.

  • Adjust Spice Level: Tailor the amount of red pepper flakes to your taste. If you're serving children or those sensitive to spice, reduce the amount for a milder dish.

  • Fresh Ingredients Matter: Fresh basil significantly enhances the overall flavor profile of your Bear Spaghetti. Opt for fresh whenever possible!

What to Serve with The Bear Spaghetti

Transform your dining experience with delightful side dishes that complement this rich and comforting pasta.

  • Garlic Bread: Golden and crispy, it's perfect for soaking up the luscious sauce while adding a delicious crunch.

  • Caesar Salad: Fresh romaine and creamy dressing provide a bright, tangy contrast to the spaghetti’s richness.

  • Roasted Vegetables: Seasonal veggies like zucchini and bell peppers bring a sweet, caramelized element that balances the flavors perfectly.

  • Bruschetta: Topped with fresh tomatoes and basil, this appetizer offers a refreshing bite that enhances the meal's Italian essence.

  • Cheesy Arancini: The crispy, cheesy rice balls bring texture and indulgence, making each bite a burst of flavor.

  • Red Wine: A glass of Chianti or other dry red wine enhances the meal with its robust flavors, beautifully matching the tomato sauce.

  • Tiramisu: End on a sweet note with this classic dessert; its creamy, coffee-infused layers are a delightful way to close the meal.

Gather these sides together to create a feast that’s as comforting and satisfying as The Bear Spaghetti itself!

Storage Tips for The Bear Spaghetti

  • Fridge: Store leftover Bear Spaghetti sauce in an airtight container for up to 3 days. Make sure it’s completely cooled before refrigerating to keep its freshness.

  • Freezer: For longer storage, freeze the sauce in a freezer-safe container for up to 3 months. Thaw overnight in the fridge before reheating.

  • Reheating: To bring your Bear Spaghetti back to life, reheat gently on the stovetop over low heat, adding a splash of water or broth if needed for moisture.

  • Pasta Storage: If you have leftover cooked spaghetti, keep it separate from the sauce in the fridge for best texture. Consume within 2 days for optimal taste.

The Bear Spaghetti Variations & Substitutions

Feel free to let your creativity shine while making The Bear Spaghetti, transforming it into your family favorite!

  • Zucchini Noodles: Swap traditional spaghetti with spiralized zucchini for a refreshing, low-carb option that still delivers great flavor.

  • Whole Wheat Pasta: For a heartier, healthier twist, use whole wheat spaghetti; it adds a nutty flavor while increasing fiber.

  • Grilled Chicken or Shrimp: Incorporate grilled chicken or shrimp to add protein, making it an even more satisfying meal. Simply toss them in just before serving!

  • Sautéed Spinach or Mushrooms: Boost the nutrition and flavor by adding sautéed spinach or mushrooms—just cook them alongside the garlic for extra aromatic goodness.

  • Vegan Option: Replace the butter with vegan margarine or olive oil, and skip the Parmesan cheese for a deliciously plant-based version.

  • Cheesy Delight: Add freshly grated Parmesan cheese for a creamy richness that melts beautifully into the sauce.

  • Heat Boost: If you enjoy extra spice, ramp up the red pepper flakes or add a splash of hot sauce to take the heat level up a notch.

  • Tomato Variations: Try using fire-roasted tomatoes for a smokier flavor that adds depth to your sauce, or mix in a bit of tomato paste for added richness.

With these variations, you can find the perfect version of The Bear Spaghetti for every mood! And if you’re looking for other delicious recipes, don’t miss out on my Taco Spaghetti Cheesy or the delightful tastes of Shakshuka Savor Bold.

The Bear Spaghetti Recipe FAQs

What kind of tomatoes should I use for The Bear Spaghetti?
Absolutely! For the best flavor in your Bear Spaghetti, I highly recommend using high-quality canned San Marzano tomatoes. These tomatoes are known for their sweetness and low acidity, which results in a rich and vibrant sauce. Look for brands that specify “San Marzano” on the label, ensuring authentic and premium quality.

How long can I store leftover Bear Spaghetti sauce?
Very! You can store leftover Bear Spaghetti sauce in an airtight container in the fridge for up to 3 days. Make sure it's completely cooled before transferring it to the container to maintain freshness. When you're ready to enjoy it again, just reheat gently on the stovetop over low heat.

Can I freeze The Bear Spaghetti sauce?
Definitely! To freeze your Bear Spaghetti sauce, first cool it completely. Then, pour the sauce into a freezer-safe container or a resealable plastic bag. It will keep well in the freezer for up to 3 months. When you’re ready to use it, simply thaw it overnight in the refrigerator before reheating gently on the stove, adding a splash of water if needed.

What if my sauce is too thick?
No problem! If you find that your Bear Spaghetti sauce is too thick, simply add a little water or broth to achieve your desired consistency. Start with a tablespoon at a time, stirring well until you reach the thickness you prefer. This way, you can maintain the rich flavor while adjusting the sauce to your liking.

Can I use dried basil instead of fresh?
Of course! If you don’t have fresh basil on hand, you can use dried basil as a substitute. For every tablespoon of fresh basil, use about 1 teaspoon of dried basil. While the fresh basil adds aromatic freshness that is hard to replace, dried basil can work in a pinch and still deliver good flavor. Just remember to add it early in the cooking process to allow its flavors to infuse the sauce.

Is The Bear Spaghetti suitable for a vegetarian diet?
Absolutely! The Bear Spaghetti is naturally vegetarian-friendly, made with delicious plant-based ingredients like San Marzano tomatoes, olive oil, and fresh basil. It's a great option for those seeking comfort food without meat. You can easily adapt it for a vegan diet by ensuring that the butter used is plant-based, making it a versatile dish for anyone looking to enjoy wholesome meals!

The Bear Spaghetti

The Bear Spaghetti: Indulge in Comfort Like Never Before

Experience The Bear Spaghetti, a comforting and indulgent dish that is both simple and sophisticated.
Print Recipe Pin Recipe
Prep Time 15 minutes mins
Cook Time 30 minutes mins
Total Time 45 minutes mins
Servings: 4 servings
Course: Dinner
Cuisine: Italian
Calories: 450
Ingredients Equipment Method Nutrition Notes

Ingredients
  

For the Sauce
  • 28 ounces San Marzano tomatoes opt for high-quality canned
  • 3 cloves garlic minced
  • 2 tablespoons extra virgin olive oil for infusion
  • 2 tablespoons browned butter watch closely to avoid burning
  • 1 large onion halved
  • 1 pinch red pepper flakes adjust based on spice tolerance
  • 1 bunch fresh basil torn
To Serve
  • 12 ounces spaghetti cook al dente

Equipment

  • Medium saucepan
  • Large pot

Method
 

Step-by-Step Instructions
  1. Infuse the oil by heating olive oil over low heat, adding minced garlic, red pepper flakes, and torn basil for 5 minutes.
  2. Brown the onion by cooking it in the infused oil for 8-10 minutes until caramelized, then remove it.
  3. Cook the tomatoes by introducing San Marzano tomatoes and simmering for 10-15 minutes.
  4. Add the basil oil back to the pan after the tomatoes have thickened and simmer for another 2-3 minutes.
  5. Finish the sauce by stirring in browned butter, seasoning with salt and pepper to taste.
  6. Combine with pasta by cooking spaghetti per package instructions and tossing it with the sauce.

Nutrition

Serving: 1servingCalories: 450kcalCarbohydrates: 60gProtein: 12gFat: 20gSaturated Fat: 5gPolyunsaturated Fat: 2gMonounsaturated Fat: 12gCholesterol: 15mgSodium: 400mgPotassium: 500mgFiber: 4gSugar: 6gVitamin A: 300IUVitamin C: 20mgCalcium: 50mgIron: 2mg

Notes

For the best Bear Spaghetti, choose quality ingredients and take your time during preparation.

Tried this recipe?

Let us know how it was!

Warm Up with Cozy One Pot Lasagna Soup Tonight

October 1, 2025 by Grace Snow Leave a Comment

As the aroma of garlic and onions filled my kitchen, I knew I was onto something special. The heartwarming comfort of One Pot Lasagna Soup seamlessly blends the beloved flavors of traditional lasagna into a cozy, satisfying bowl—perfect for those busy weeknights when time is of the essence. The beauty of this recipe lies in its simplicity: with just one pot, you'll whip up a dish that is not only family-friendly but wonderfully easy to clean up afterward. Imagine diving into a steaming bowl filled with savory tomato broth, tender pasta, and a wonderfully creamy finish from ricotta and mozzarella. If you're ready to elevate your homemade dinners, why not join me in creating this delightful soup? You might just find your new weeknight favorite!

What Makes One Pot Lasagna Soup Special?

Comforting, hearty flavors: This recipe captures the very essence of traditional lasagna, transforming it into a soup that's perfect for a cozy dinner.
Time-efficient: With everything cooked in one pot, it minimizes prep and cleanup time, so you can focus on enjoying your meal.
Family-friendly: Perfectly tailored to please both kids and adults, it’s a dish that everyone can love!
Versatile: Swap in your favorite proteins or veggies to personalize your soup—try replacing ground beef with turkey or mushrooms for a hearty option.
Creamy goodness: The addition of ricotta and mozzarella creates an irresistible creamy finish that takes this simple soup to the next level.
Whether served with crusty garlic bread or a fresh side salad like Caesar salad, this One Pot Lasagna Soup is sure to become a new family staple.

One Pot Lasagna Soup Ingredients

This recipe features familiar flavors while keeping the process simple!

For the Soup Base

  • Ground Beef – Provides protein and a rich flavor; aim for 80/20 to 85/15 fat content for the best taste.
  • Garlic (3 cloves, minced) – Adds depth and aroma; fresh garlic is best for maximum flavor.
  • Yellow Onion (1/2, diced) – Contributes sweetness and texture; can substitute shallots for a milder taste.
  • Kosher Salt (1 tsp, plus more as needed) – Essential for seasoning; adjust to taste.
  • Freshly Ground Black Pepper – Enhances flavor; use to your personal preference.

For the Broth

  • Crushed Tomatoes (14 oz can) – Creates the soup base with a perfect balance of acidity and sweetness.
  • Chicken Broth (32 oz) – Adds richness; keep extra on hand to adjust the soup’s consistency.
  • Water (1 cup) – Helps achieve the desired soup thickness.
  • Tomato Paste (2 tsp) – Intensifies the tomato flavor.

For the Pasta and Greens

  • Lasagna Noodles (6 oz, broken into pieces) – The main carbohydrate; make sure to cook just right to avoid mushiness.
  • Frozen Chopped Spinach (1 cup) – Adds nutrients and color; fresh spinach can be used if desired.

For the Creaminess

  • Heavy Cream (1/4 cup) – Provides a creamy texture; substitute with a non-dairy alternative for a lighter option.
  • Ricotta Cheese (for serving) – Adds a delightful creaminess reminiscent of traditional lasagna.
  • Mozzarella Cheese (4 oz, sliced for serving) – Melts beautifully and enhances the lasagna experience.
  • Parmesan Cheese (optional, for serving) – Adds a salty, savory finish to elevate the soup.

For Seasoning

  • Garlic Powder (1/2 tsp) & Onion Powder (1/2 tsp) – Enhances the flavor profile; can be omitted if fresh ingredients are used.
  • Dried Basil (1/4 tsp) & Dried Oregano (1/2 tsp) – Brings an Italian herb essence to this one pot lasagna soup—fresh herbs can be substituted if available.

Step‑by‑Step Instructions for One Pot Lasagna Soup

Step 1: Brown the Beef
In a large pot over medium-high heat, add the ground beef. Cook for about 5-7 minutes, breaking it into small pieces with a spatula until browned and no longer pink. Drain any excess grease, leaving just enough to add flavor to the soup.

Step 2: Sauté Aromatics
Add the minced garlic and diced onion to the pot, stirring them into the beef. Sauté for approximately 5 minutes, or until the onions become translucent and fragrant. Sprinkle in the garlic powder, onion powder, dried basil, dried oregano, kosher salt, and freshly ground black pepper for a wholesome flavor boost.

Step 3: Mix in the Broth
Introduce crushed tomatoes, chicken broth, water, and tomato paste to the pot, stirring gently to combine. Once incorporated, add in the broken lasagna noodles, ensuring they are submerged in the liquid. Bring the mixture to a boil over high heat, then reduce to a simmer.

Step 4: Simmer the Soup
Cover the pot and let the soup simmer on low heat for about 10 minutes. Keep an eye on the noodles, stirring occasionally to prevent sticking. You’ll know it’s ready when the noodles are tender yet al dente, soaking up that wonderful tomato flavor.

Step 5: Add Spinach and Cream
Stir in the frozen chopped spinach and heavy cream into the pot, allowing the spinach to wilt and the cream to meld into the soup. Cook for an additional 5 minutes, stirring occasionally, until everything is heated through and the soup is creamy.

Step 6: Serve It Up
To serve your One Pot Lasagna Soup, place slices of mozzarella cheese at the bottom of each bowl. Ladle the hot soup over the cheese, allowing it to melt slightly, then top with dollops of ricotta cheese. Finish with optional grated Parmesan for an extra savory touch.

What to Serve with One Pot Lasagna Soup

This soul-warming soup deserves the perfect companions to build a delightful meal experience.

  • Garlic Bread: The crunchy, buttery flavor of garlic bread makes a fantastic dipper, enhancing the soup's creamy richness.
  • Caesar Salad: Crisp romaine, tangy dressing, and crunchy croutons provide a refreshing contrast to the hearty soup, balancing the meal beautifully.
  • Roasted Vegetables: A medley of seasonal veggies roasted to perfection adds a lovely caramelized sweetness, perfectly complementing the savory flavors of the soup.
  • Homemade Pesto: Drizzle some vibrant pesto over the soup for an herby kick that brightens every spoonful in a delightful way.
  • Italian Wine: A glass of Chianti or a light Pinot Grigio pairs excellently, enhancing the Italian essence of the dish with every sip.
  • Chocolate Fondue: For dessert, go decadent! A warm chocolate fondue with strawberries and marshmallows makes for a sweet finish after the savory soup.

Make Ahead Options

One Pot Lasagna Soup is a fantastic choice for meal prep and can save you valuable time during the week! You can chop your garlic and onion up to 24 hours in advance and store them in the refrigerator to keep them fresh. Additionally, the ground beef can be browned and mixed with spices up to 3 days in advance; just refrigerate it in an airtight container. When you're ready to enjoy this comforting dish, simply reheat the beef, add in your broth, crushed tomatoes, and broken lasagna noodles. Finish by incorporating the heavy cream and spinach just before serving to ensure a deliciously creamy texture. With these make-ahead tips, your One Pot Lasagna Soup will taste just as delightful with minimal effort!

One Pot Lasagna Soup Variations

Customize your One Pot Lasagna Soup to your heart’s content and enjoy a new twist on this family-favorite dish!

  • Ground Meat Swap: Replace ground beef with turkey or sautéed mushrooms for a lighter or vegetarian option.

  • Gluten-Free Pasta: Use gluten-free lasagna noodles to make this a suitable choice for gluten-sensitive family members. It’s a simple switch that keeps the taste intact.

  • Extra Veggies: Add diced zucchini or colorful bell peppers for nutritious boosts. They not only enhance the flavor but also add lovely texture.

  • Cheese Variations: Experiment with different cheeses like gouda or provolone instead of mozzarella for a unique flavor profile that surprises the palate.

  • Spicy Kick: Toss in a pinch of crushed red pepper flakes or a dash of hot sauce for a delightful heat that livens up your soup.

  • Herb Alternatives: Use fresh herbs instead of dried for a burst of freshness—basil and parsley work wonderfully to brighten the dish.

  • Cream Alternatives: For a lighter option, swap heavy cream with coconut milk or cashew cream, retaining the creaminess without the heaviness.

  • Serve with Style: Pair with a hearty crusty bread or alongside an Italian-inspired salad like this delicious Caesar Salad to create a complete meal that everyone will love.

Expert Tips for One Pot Lasagna Soup

Avoid Soggy Noodles: Make sure to add the lasagna noodles only after the broth is simmering. This prevents them from becoming mushy.

Sautéing Skill: Brown the ground beef in small pieces instead of large chunks for maximum flavor in every spoonful.

Fresh Ingredients Preference: Whenever possible, opt for fresh garlic and herbs to elevate the taste of your One Pot Lasagna Soup.

Creaminess Control: Stir in the heavy cream at the end of cooking to prevent curdling, ensuring a smooth and rich texture.

Liquid Adjustments: Keep extra chicken broth on hand when reheating, as noodles absorb liquid over time.

Storage Tips for One Pot Lasagna Soup

Fridge: Store the soup in an airtight container for up to 4 days. The flavors improve overnight, making for delicious leftovers!

Freezer: For longer storage, freeze the soup for up to 3 months without adding cream. When ready to enjoy, reheat on the stovetop, stirring in fresh cream to restore its creamy texture.

Reheating: To heat, place the soup in a pot over medium-low heat, adding extra broth or water as needed for consistency. Stir occasionally until heated through.

Storage Note: Remember that the noodles will absorb liquid over time, so add a splash of broth during reheating to keep your One Pot Lasagna Soup perfect and flavorful!

One Pot Lasagna Soup Recipe FAQs

How do I choose the best ground beef for my One Pot Lasagna Soup?
Absolutely! I recommend selecting ground beef with a fat content of 80/20 to 85/15. This ratio not only provides rich flavor but also ensures the soup isn’t overly greasy. If you're looking for a leaner option, ground turkey or a mix of mushrooms and lentils makes a great substitute without sacrificing taste.

How should I store my One Pot Lasagna Soup?
For the best results, transfer the cooled soup into an airtight container and refrigerate it for up to 4 days. Over time, the flavors meld beautifully, making your leftovers even tastier! When storing, be sure to leave out any cream if you plan to freeze it, as this keeps the texture smooth upon reheating.

Can I freeze One Pot Lasagna Soup? If so, how?
Yes, you can freeze your soup for up to 3 months! To do this, allow the soup to cool completely before transferring it to a freezer-safe container or a sturdy zip-lock bag, removing as much air as possible. When you're ready to enjoy it, thaw in the refrigerator overnight and then reheat on the stovetop, stirring in fresh cream for that deliciously creamy finish.

What should I do if my soup is too thick?
Very common! If you find your One Pot Lasagna Soup turns out thicker than you’d like, simply add a little extra chicken broth or water while reheating. Stir gently until you reach your desired consistency. This method keeps each bowl hearty while ensuring it’s still enjoyable, sip after sip.

Is One Pot Lasagna Soup suitable for people with dietary restrictions?
Absolutely! To make this dish friendly for various diets, consider these options: use gluten-free pasta for a gluten-free version or substitute the heavy cream with a non-dairy alternative for creamy richness. If serving to young children or pets, monitor for high salt content as well as dairy allergies by adjusting ingredients accordingly.

How can I prevent my lasagna noodles from getting mushy in the soup?
Great question! To keep the noodles perfectly al dente, always add them to the soup after it has reached a gentle simmer. This timing ensures they cook through without becoming too soft. Keep an eye on them, stirring occasionally, and remember, each brand of noodles may have different cook times, so adjust as needed!

One Pot Lasagna Soup

Warm Up with Cozy One Pot Lasagna Soup Tonight

This One Pot Lasagna Soup is a heartwarming blend of traditional lasagna flavors in a cozy soup, perfect for busy weeknights.
Print Recipe Pin Recipe
Prep Time 15 minutes mins
Cook Time 30 minutes mins
Total Time 45 minutes mins
Servings: 4 bowls
Course: Soups
Cuisine: Italian
Calories: 450
Ingredients Equipment Method Nutrition Notes

Ingredients
  

For the Soup Base
  • 1 lb Ground Beef Aim for 80/20 to 85/15 fat content
  • 3 cloves Garlic minced
  • 1/2 medium Yellow Onion diced
  • 1 tsp Kosher Salt plus more as needed
  • Freshly Ground Black Pepper to taste
For the Broth
  • 14 oz Crushed Tomatoes canned
  • 32 oz Chicken Broth
  • 1 cup Water
  • 2 tsp Tomato Paste
For the Pasta and Greens
  • 6 oz Lasagna Noodles broken into pieces
  • 1 cup Frozen Chopped Spinach
For the Creaminess
  • 1/4 cup Heavy Cream substitute with a non-dairy alternative if desired
  • Ricotta Cheese for serving
  • 4 oz Mozzarella Cheese sliced for serving
  • Parmesan Cheese optional, for serving
For Seasoning
  • 1/2 tsp Garlic Powder
  • 1/2 tsp Onion Powder
  • 1/4 tsp Dried Basil
  • 1/2 tsp Dried Oregano

Equipment

  • Large pot

Method
 

Step‑by‑Step Instructions
  1. In a large pot over medium-high heat, add the ground beef. Cook for about 5-7 minutes, breaking it into small pieces until browned and no longer pink. Drain any excess grease.
  2. Add the minced garlic and diced onion to the pot, stirring them into the beef. Sauté for approximately 5 minutes, or until the onions become translucent and fragrant. Sprinkle in the garlic powder, onion powder, dried basil, dried oregano, kosher salt, and freshly ground black pepper.
  3. Introduce crushed tomatoes, chicken broth, water, and tomato paste to the pot, stirring gently to combine. Add in the broken lasagna noodles, ensuring they are submerged. Bring to a boil, then reduce to a simmer.
  4. Cover the pot and let the soup simmer on low heat for about 10 minutes, stirring occasionally.
  5. Stir in the frozen chopped spinach and heavy cream, allowing the spinach to wilt and the cream to meld into the soup. Cook for an additional 5 minutes until heated through.
  6. To serve, place slices of mozzarella cheese at the bottom of each bowl. Ladle the hot soup over the cheese, then top with dollops of ricotta cheese. Finish with optional grated Parmesan.

Nutrition

Serving: 1bowlCalories: 450kcalCarbohydrates: 30gProtein: 25gFat: 22gSaturated Fat: 12gPolyunsaturated Fat: 1gMonounsaturated Fat: 10gCholesterol: 80mgSodium: 800mgPotassium: 900mgFiber: 4gSugar: 6gVitamin A: 500IUVitamin C: 15mgCalcium: 200mgIron: 3mg

Notes

Make sure to add the lasagna noodles only after the broth is simmering to prevent them from becoming mushy. Opt for fresh garlic and herbs when possible for better taste.

Tried this recipe?

Let us know how it was!

Warm Baked Brie in Puff Pastry with Honey and Fig Delight

October 1, 2025 by Grace Snow Leave a Comment

As I peeled back the layers of golden, flaky pastry, the rich aroma of melted Brie filled the kitchen, instantly transporting me to a cozy bistro in the heart of France. This Perfect Baked Brie in Puff Pastry with Honey and Fig is an elegant yet simple appetizer that’s bound to impress. Not only is it a delightful treat for your taste buds, but it also comes together in a snap, making it perfect for spontaneous gatherings or quiet evenings that call for something special. With its creamy cheese enveloped in a buttery crust, all drizzled with sweet honey and topped with luscious fig preserves, you’ll find it hard to resist going back for seconds—especially when you discover how versatile this dish can be with a dash of cranberry sauce or a hint of orange zest. Curious to see how easy it is to whip up this irresistible appetizer? Let’s dive right in!

Why Is Baked Brie So Irresistible?

Indulgent layers of golden pastry embrace creamy Brie, creating a delightful contrast that’s hard to resist. Quick to assemble, this recipe is perfect for those busy evenings when you want to impress with minimal effort. Versatile toppings like cranberry sauce or a sprinkle of orange zest add delightful twists to suit any palate. Sophisticated yet approachable, it’s a crowd-pleaser at gatherings, making it the ideal companion alongside a nice glass of white wine or even a refreshing sparkling cider. Perfect for all occasions, it can grace your table during cozy nights in or festive celebrations alike!

Baked Brie in Puff Pastry Ingredients

For the Pastry
• Puff Pastry – This flaky dough is key for achieving that golden crust; keep it chilled until you're ready to use it.

For the Cheese
• Brie Cheese – The star of the show, this creamy cheese melts beautifully; if unavailable, Camembert makes a delicious alternative.

For the Sweet Topping
• Honey – A drizzle of honey balances the richness of the Brie, adding a touch of sweetness that elevates the dish.
• Fig Preserves – These luscious preserves bring a sophisticated flavor; you can easily swap them for cranberry sauce for a different taste.

Optional Additions
• Orange Zest – A sprinkle of fresh zest brightens the dish and enhances the flavor adventure.
• Cranberry Sauce – Use this as a substitute for fig preserves for a delightful, tangy twist in your Baked Brie in Puff Pastry with Honey and Fig.

Step‑by‑Step Instructions for Baked Brie in Puff Pastry with Honey and Fig

Step 1: Preheat the Oven
Start by preheating your oven to 375°F (190°C). This allows your oven to reach the perfect temperature for baking, ensuring the pastry becomes golden brown and crispy. While the oven is heating, gather your baking sheet and line it with parchment paper for easy cleanup later.

Step 2: Prepare the Puff Pastry
On a lightly floured surface, roll out the chilled puff pastry to about 1/8 inch thick. You want it to be large enough to fully encase your Brie cheese. Once rolled, carefully place the pastry on your prepared baking sheet, positioning it so that there is ample space around the edges for folding over the cheese.

Step 3: Center the Brie
Take your wheel of Brie cheese and place it right in the center of your rolled-out puff pastry. This ensures that each bite of your Baked Brie in Puff Pastry with Honey and Fig is filled with that creamy goodness. Make sure to keep the edges of the pastry clear to allow for folding and sealing in the next steps.

Step 4: Add the Toppings
Spoon a generous amount of fig preserves over the top of the Brie, allowing it to mound slightly. Then, drizzle a beautiful stream of honey over the preserves, ensuring a sweet complement to the rich Brie. This sweet layer is crucial, as it adds that gourmet touch to your delightful appetizer.

Step 5: Fold the Pastry
Carefully fold the edges of the puff pastry over the Brie, pinching the corners together to seal any openings. Ensure that the seams are well-sealed to prevent any of that tasty Brie from oozing out during baking. You’re creating a cozy blanket of pastry that will encase all the delicious flavors.

Step 6: Bake to Perfection
With the pastry neatly wrapped around the Brie, place your baking sheet in the preheated oven. Bake for 20 to 25 minutes, or until the puff pastry is puffed up and golden brown. Keep an eye on it to ensure it doesn’t brown too quickly—if it does, tent with foil for the remainder of the baking time.

Step 7: Cool and Slice
Once baked to perfection, remove your Baked Brie in Puff Pastry with Honey and Fig from the oven and let it cool for approximately 5 minutes. This brief resting period allows the cheese to set before slicing. Use a sharp knife to cut into the pastry, revealing that melty, gooey Brie inside, and serve it warm for the best experience.

Make Ahead Options

These Perfect Baked Brie in Puff Pastry with Honey and Fig are a fantastic choice for meal prep enthusiasts! You can assemble the entire dish up to 24 hours in advance; simply prepare your puff pastry, encase the Brie, and add the toppings, then tightly wrap it in plastic wrap and refrigerate. To maintain quality, keep the pastry cold to prevent it from getting soggy. When you're ready to bake, simply remove it from the fridge and pop it directly into a preheated oven at 375°F (190°C) for 20-25 minutes until golden brown. Enjoy gourmet results with minimal effort, perfect for those busy evenings!

Expert Tips for Baked Brie in Puff Pastry

  • Choose Quality Puff Pastry: Use high-quality puff pastry for the best flaky results. Avoid thawing it too long to maintain its texture.

  • Seal Well: Make sure to tightly seal the pastry around the Brie. A leaky pastry can lead to a messy oven, so pinch the seams properly!

  • Monitor Baking Time: Keep a close watch on your Baked Brie in Puff Pastry with Honey and Fig. If it browns too fast, use aluminum foil to cover it lightly to prevent burning.

  • Serve Warm: For the best experience, serve this dish warm. The gooey Brie paired with the sweet toppings is truly delightful right out of the oven.

  • Experiment With Flavors: Don’t hesitate to experiment! Swap fig preserves for your favorite jam or gain freshness with a touch of lemon or orange zest for a seasonal flair.

How to Store and Freeze Baked Brie in Puff Pastry with Honey and Fig

Fridge: Store leftover Baked Brie in Puff Pastry in an airtight container for up to 3 days. Ensure it's completely cooled before sealing to maintain its texture.

Freezer: For longer storage, freeze the unbaked wrapped Brie. Double-wrap it in plastic wrap and then aluminum foil; it can be frozen for up to 2 months.

Reheating: To reheat, thaw it in the fridge overnight and bake at 300°F (150°C) until warmed through, about 15-20 minutes. This helps retain that delicious, gooey cheese inside.

Make-Ahead Tips: Assemble your Baked Brie in Puff Pastry with Honey and Fig a few hours in advance. Refrigerate until ready to bake, ensuring it keeps that fresh, flaky crust.

What to Serve with Perfect Baked Brie in Puff Pastry with Honey & Fig

Elevate your gathering with a charming array of complementary dishes that enhance the warm, gooey goodness of your Brie.

  • Crispy Crostini: Toasted baguette slices provide a crunchy contrast to the creamy Brie and add a rustic touch. They’re perfect for scooping up melted cheese!

  • Fresh Apple Slices: The crisp and juicy sweetness of fresh apples beautifully balances the richness of the Brie. Their refreshing taste offers a delightful bite alongside the pastry.

  • Mixed Green Salad: A light salad of arugula and spinach, dressed with a simple vinaigrette brings a refreshing element to the table. The peppery flavors cut through the creaminess of the cheese.

  • Savory Prosciutto: Thin slices of prosciutto add a touch of saltiness that pairs exquisitely with the sweetness of honey and figs. Its delicate flavor perfectly complements the Baked Brie.

  • Sparkling Cider: The effervescence of sparkling cider enhances the flavors of the dish while providing a festive touch. It’s a delightful and elegant drink choice for your guests.

  • Honey-Drizzled Berries: A bowl of berries lightly drizzled with honey adds a sweet, juicy burst that echoes the notes of fig preserves. Their vibrant color adds beauty to the serving platter.

  • Roasted Vegetables: Seasoned and roasted veggies like zucchini and bell peppers offer a hearty, earthy contrast. They add depth, making your appetizer spread more satisfying.

  • Dark Chocolate Squares: For a decadent finish, serve rich dark chocolate alongside the Brie. The bittersweet chocolate harmonizes beautifully with the cheese and preserves, creating an indulgent delight.

Baked Brie in Puff Pastry Variations

Feel inspired to make this recipe uniquely yours while elevating the flavors even more!

  • Cranberry Sauce: Swap out fig preserves with cranberry sauce for a tangy twist that complements the rich Brie beautifully.

  • Orange Zest: Add a sprinkle of fresh orange zest atop the Brie before sealing it to bring a bright, citrusy flavor to the mix.

  • Phyllo Dough: Use phyllo dough instead of puff pastry for a lighter, crispier alternative, creating a delightful crunch with every bite.

  • Crescent Roll Dough: Embrace ease by using refrigerated crescent roll dough; it wraps the Brie nicely and provides a touch of buttery flavor.

  • Gift of Herbs: Incorporate fresh herbs like rosemary or thyme into the fig preserves for an aromatic burst that enhances each mouthful. Imagine the added depth of flavor—pure bliss!

  • Nuts Galore: Sprinkle crushed walnuts or pecans on top of the cheese before wrapping it up for added texture and a nutty flavor that elevates the entire dish.

  • Heat It Up: Spike your dish with a dash of red pepper flakes or a drizzle of spicy honey for a surprisingly delightful heat that beautifully balances the sweetness.

For more flavor-packed inspiration, don’t miss my recipes for Honey Garlic Chicken or Honey BBQ Chicken. Each twist highlights the versatility of this classic appetizer while enticing your taste buds!

Baked Brie in Puff Pastry with Honey and Fig Recipe FAQs

How do I know if my puff pastry is fresh?
Absolutely! When selecting puff pastry, look for one that is well-packaged and has a use-by date that’s not too far off. Ideally, it should be cold and have a nice flaky texture. If you notice any dark spots or tears in the pastry, it’s best to avoid using it.

What is the best way to store leftovers?
Very good question! Store any leftover Baked Brie in Puff Pastry in an airtight container in the refrigerator for up to 3 days. Make sure it's completely cooled before sealing; this helps maintain its delicious flaky texture.

Can I freeze my baked Brie?
Yes, you can! For freezing, I recommend wrapping the unbaked Brie tightly in plastic wrap and then in aluminum foil to prevent freezer burn. It can last in the freezer for up to 2 months. When you’re ready to bake it, simply thaw it in the fridge overnight before popping it into the oven.

What should I do if my puff pastry leaks during baking?
Oh no! If your puff pastry leaks, don’t worry too much. It might be that the seams weren't sealed well enough. Next time, make sure to pinch the edges tightly. You can also place a baking sheet on the rack below to catch any drips!

Is Baked Brie suitable for people with dairy allergies?
This is important! Baked Brie in Puff Pastry is not dairy-free since it contains cheese, but you might try a dairy-free cheese alternative to make it more inclusive for those with lactose intolerance. Always double-check labels to ensure that they align with dietary restrictions.

How can I elevate this recipe for a dinner party?
Get creative! To elevate your Baked Brie in Puff Pastry with Honey and Fig, consider adding fresh thyme or rosemary to the toppings. For a touch of elegance, serve it alongside a charcuterie board filled with assorted crackers, fruits, and flavorful meats.

Baked Brie in Puff Pastry with Honey and Fig

Warm Baked Brie in Puff Pastry with Honey and Fig Delight

Indulge in this elegant Warm Baked Brie in Puff Pastry with Honey and Fig, a simple yet impressive appetizer that delights the senses.
Print Recipe Pin Recipe
Prep Time 15 minutes mins
Cook Time 25 minutes mins
Cooling Time 5 minutes mins
Total Time 45 minutes mins
Servings: 6 servings
Course: Appetizers
Cuisine: French
Calories: 220
Ingredients Equipment Method Nutrition Notes

Ingredients
  

For the Pastry
  • 1 sheet Puff Pastry Keep chilled until ready to use.
For the Cheese
  • 1 round Brie Cheese Can substitute with Camembert.
For the Sweet Topping
  • 2 tablespoons Honey Drizzle over Brie.
  • 1/4 cup Fig Preserves Can substitute with cranberry sauce.
Optional Additions
  • 1 tablespoon Orange Zest Use as a sprinkle for added flavor.
  • 2 tablespoons Cranberry Sauce Alternative to fig preserves.

Equipment

  • Oven
  • Baking Sheet
  • Parchment Paper
  • Rolling Pin
  • Sharp Knife

Method
 

Step-by-Step Instructions
  1. Preheat the oven to 375°F (190°C) and line a baking sheet with parchment paper.
  2. Roll out the chilled puff pastry to about 1/8 inch thick on a lightly floured surface.
  3. Center the Brie cheese on the rolled-out puff pastry.
  4. Spoon fig preserves over the Brie and drizzle with honey.
  5. Fold the pastry over the Brie, sealing the edges tightly.
  6. Bake for 20 to 25 minutes or until the pastry is golden brown.
  7. Let cool for 5 minutes, then slice and serve warm.

Nutrition

Serving: 1servingCalories: 220kcalCarbohydrates: 12gProtein: 7gFat: 16gSaturated Fat: 8gPolyunsaturated Fat: 0.5gMonounsaturated Fat: 6gCholesterol: 30mgSodium: 360mgPotassium: 150mgSugar: 4gVitamin A: 400IUCalcium: 150mgIron: 1mg

Notes

For best results, serve warm and feel free to mix and match toppings according to preference.

Tried this recipe?

Let us know how it was!

Savory Cod & Potatoes in Rosemary Cream Sauce for Home Chefs

October 1, 2025 by Grace Snow Leave a Comment

As I stood over the stovetop, the delightful aroma of rosemary and garlic filled my kitchen, instantly transporting me to a quaint bistro nestled by the sea. Today, I’m thrilled to share my recipe for Baked Cod & Potatoes in Rosemary Cream Sauce, a dish that captures the essence of freshness with every bite. With the perfect balance of tender cod and creamy, herb-infused sauce, this meal is not only a breeze to whip up but also transforms a weeknight dinner into a special occasion. The buttery Yukon gold potatoes provide a comforting twist, making it a true crowd-pleaser everyone will rave about. Are you ready to bring some coastal charm to your table and impress your loved ones? Let’s dive into this delicious adventure!

Why is this dish a must-try?

Incredible taste: The combination of flaky cod and buttery Yukon gold potatoes creates an irresistible balance of flavors and textures.

Easy preparation: With just a few simple steps, this dish is perfect for home cooks looking to create a gourmet experience without spending hours in the kitchen.

Versatile options: Feel free to substitute halibut or use coconut milk for a dairy-free twist, ensuring everyone can enjoy this delightful meal.

Impressive presentation: The elegant look of the creamy sauce draping over tender fish will surely impress your guests, making it ideal for special occasions or cozy dinners.

Aromatic experience: As you prepare this dish, the fragrant rosemary and garlic will fill your kitchen, creating an inviting atmosphere that makes mealtime even more enjoyable.

For a refreshing side, consider pairing it with a Radish Salad with Yogurt Dill Dressing!

Cod & Potatoes Ingredients

• Get ready to savor the flavors of this scrumptious dish!

For the Fish and Potatoes

  • Cod fillet – This is the main protein source; use firm, white fish for best results.
  • Yukon gold potatoes – They provide a creamy texture when roasted, saving you the hassle of peeling.
  • Extra-virgin olive oil – Essential for roasting potatoes and forming the base of the cream sauce.
  • Kosher salt – A crucial ingredient that enhances the flavor of both the fish and potatoes.
  • Freshly cracked black pepper – Adds an aromatic touch to the fish and potatoes.

For the Rosemary Cream Sauce

  • Salted butter – Brings richness to the sauce for that luxurious mouthfeel.
  • Shallot – Offers sweetness and depth, making the sauce sing.
  • Garlic – Provides that irresistible aromatic flavor we all love.
  • Heavy cream – This creates a luscious sauce; you can substitute it with full-fat coconut milk for a dairy-free version.
  • Chicken or fish stock – Adds essential depth of flavor to the cream sauce, truly elevating it.
  • Fresh rosemary – Imparts a wonderful fragrant, herbal note that’s key to this dish.
  • Lemon zest and juice – Brightens the dish, balancing the richness of the sauce.
  • Dijon mustard – Introduces tanginess, perfectly balancing the cream’s richness.
  • Ground cayenne pepper – Just a hint adds a lovely kick to the sauce.
  • Capers – These little gems introduce briny flavor, enhancing the entire dish.
  • Minced flat-leaf parsley (optional) – Adds a fresh and colorful finishing touch.

Indulge in the delightful flavors of Cod & Potatoes in Rosemary Cream Sauce, and let this dish bring warmth and joy to your dining table!

Step‑by‑Step Instructions for Cod & Potatoes in Rosemary Cream Sauce

Step 1: Preheat and Prepare the Dish
Begin by preheating your oven to 450°F (232°C). While the oven heats, grease an 8x8-inch baking dish with a splash of extra-virgin olive oil. This ensures that your cod and potatoes will have a beautiful, golden finish and won’t stick during baking.

Step 2: Roast the Potatoes
Wash and chop the Yukon gold potatoes into uniform pieces for even cooking. In a mixing bowl, toss the potato chunks with olive oil, kosher salt, and freshly cracked black pepper until well coated. Spread the potatoes in a single layer on a baking sheet and roast in the oven for 20-25 minutes, or until they are tender and lightly golden, stirring halfway through for even browning.

Step 3: Create the Rosemary Cream Sauce
While the potatoes roast, prepare the rich and aromatic rosemary cream sauce. In a medium saucepan over medium heat, melt a tablespoon of salted butter with a tablespoon of olive oil. Add the finely chopped shallot and sauté until it becomes translucent and tender, about 3-4 minutes. Stir in minced garlic and cook until fragrant, around 30 seconds, then add heavy cream, chicken stock, chopped rosemary, lemon zest, lemon juice, Dijon mustard, cayenne pepper, and capers. Simmer gently for about 5 minutes, allowing the flavors to meld and the sauce to thicken slightly.

Step 4: Assemble the Dish for Baking
Once the potatoes are roasted, remove them from the oven and lower the temperature to 400°F (204°C). Place the roasted potatoes evenly in the greased baking dish and nestle the cod fillets on top of the potatoes. Pour the fragrant rosemary cream sauce generously over the cod, ensuring each piece is well-coated for that delightful flavor in every bite.

Step 5: Bake to Perfection
Place the assembled dish back into the oven and bake uncovered for 10-15 minutes. You’ll know the cod is done when it flakes easily with a fork and has turned opaque, creating a lovely contrast with the creamy sauce. The edges of the sauce should also begin to bubble.

Step 6: Ready to Serve
Once baked, remove the dish from the oven and let it rest for a few minutes. Optionally, sprinkle minced flat-leaf parsley over the top for a splash of color and freshness before serving. This delightful Cod & Potatoes in Rosemary Cream Sauce is now ready to impress your family or guests!

Tips for the Best Cod & Potatoes

  • Even Potato Cuts: Ensure you cut the Yukon gold potatoes into uniform pieces for even cooking; this prevents some from being undercooked while others are overdone.

  • Fish Handling: Use a fish spatula for flipping and transferring the delicate cod fillets, preventing them from breaking apart while handling.

  • Consistency Control: If you prefer a thicker sauce, simmer it a bit longer; just keep an eye on it to avoid over-reduction. Adjust the consistency to your taste!

  • Fish Substitutes: While cod is delightful, don’t hesitate to substitute with halibut or any firm white fish. They work beautifully in the Rosemary Cream Sauce.

  • Fresh Herbs Matter: For the freshest flavor, use fresh rosemary rather than dried; it significantly enhances the overall taste and aroma of the dish.

  • Buttery Finish: Consider adding an extra pat of butter to the sauce just before serving for an even richer, creamy mouthfeel in your Cod & Potatoes in Rosemary Cream Sauce.

Make Ahead Options

These Cod & Potatoes in Rosemary Cream Sauce are perfect for busy weeknights! You can prepare the potatoes by roasting them up to 24 hours in advance; just toss them with olive oil, salt, and pepper, then store them in an airtight container in the refrigerator. For the cream sauce, cook it completely and refrigerate for up to 3 days; simply reheat gently on the stovetop, stirring to maintain creaminess. When you’re ready to serve, layer the cold potatoes in a baking dish, top with the cod, pour over the warmed sauce, and bake as directed for a meal that’s just as delicious as when freshly made!

Storage Tips for Cod & Potatoes in Rosemary Cream Sauce

Fridge: Store leftovers in an airtight container for up to 2 days. While reheating, be gentle to maintain the texture of the cod, as it may become slightly dry.

Freezer: For longer storage, freeze the sauce and potatoes separately in airtight containers. The sauce can be stored for up to 1 month, but the fish is best enjoyed fresh.

Reheating: When ready to enjoy again, thaw in the fridge overnight. Reheat gently in a saucepan over low heat, adding a splash of cream or broth to revive the sauce.

Room Temperature: Avoid leaving the dish at room temperature for more than 2 hours to ensure food safety with the Cod & Potatoes in Rosemary Cream Sauce.

What to Serve with Baked Cod & Potatoes in Rosemary Cream Sauce

Pairing this exquisite dish with complementary sides enhances its delightful flavors while creating a satisfying meal experience.

  • Creamy Mashed Potatoes: The velvety texture of mashed potatoes adds richness and absorbs the rosemary cream sauce beautifully, creating a comforting experience.

  • Steamed Asparagus: Lightly steamed asparagus provides a crisp contrast, with its earthy notes balancing the dish's richness—a vibrant green addition to your plate.

  • Radish Salad with Yogurt Dill Dressing: This refreshing salad cuts through the creaminess with its crisp, peppery radish flavor and tangy dressing, offering a lively burst of freshness.

  • Garlic Bread: The crunchy, buttery goodness of garlic bread is perfect for soaking up any leftover sauce, adding a satisfying crunch that pairs well with the dish.

  • Roasted Brussels Sprouts: Their caramelization brings a sweet, nutty flavor, while the slight bitterness contrasts the creamy sauce, enhancing the meal's overall complexity.

  • Chilled White Wine: A glass of chilled Sauvignon Blanc or Chardonnay will elevate your dining experience, as the wine’s acidity complements the richness of the cod and the cream sauce perfectly.

  • Lemon Sorbet: To cleanse your palate after this rich meal, a refreshing lemon sorbet makes for a delightful and light dessert, brightening your taste buds and ending the dinner on a high note.

Variations & Substitutions for Cod & Potatoes in Rosemary Cream Sauce

Get creative with your cooking, and make this dish your own with these fun twists!

  • Halibut Swap: Substitute cod with halibut for a meatier flavor and texture that holds up beautifully in the sauce.

  • Dairy-Free Delight: Use full-fat coconut milk in place of heavy cream, giving the dish a rich, tropical flair without the dairy.

  • Extra Crunch: Top the dish with crispy panko breadcrumbs before baking for a delightful texture contrast that takes it to the next level.

  • Spicy Kick: Add sliced jalapeños to the cream sauce for a zesty heat that dances on your palate, perfect for spice lovers.

  • Herb Medley: Mix in fresh thyme or tarragon along with the rosemary for a complex herbal profile that will impress your guests.

  • Zesty Lemon Addition: Boost the citrus notes by stirring in some finely grated lemon zest into the sauce—this heightens the freshness!

  • Layered Veggies: Consider adding layers of fresh spinach or leeks alongside the potatoes for a colorful, nutritious twist.

  • Umami Boost: Incorporate a splash of soy sauce or tamari into the cream sauce for an unexpected umami depth that delectably complements the cod.

Make this dish your signature by trying out these variations, or pair it with a refreshing Radish Salad with Yogurt Dill Dressing for a complete meal!

Cod & Potatoes in Rosemary Cream Sauce Recipe FAQs

How do I choose the freshest cod fillet?
Absolutely! When selecting cod, look for fillets that are bright white with a slight translucent shimmer. Avoid any with dark spots or a fishy smell. The flesh should feel firm to the touch and spring back when pressed. A good rule of thumb is to ask your fishmonger for the catch of the day to ensure you get the freshest option.

How should I store leftovers?
Store your leftovers in an airtight container in the refrigerator for up to 2 days. While reheating, gently warm the dish over low heat to maintain the cod's texture. It’s best to avoid microwaving as it can dry out the fish. If you find the sauce has thickened, drizzle a little cream or broth to bring it back to life!

Can I freeze this dish?
Certainly! To freeze, I recommend separating the sauce and potatoes from the fish. You can freeze the rosemary cream sauce and roasted potatoes in airtight containers for up to 1 month. To reheat, thaw them overnight in the fridge and warm slowly on the stove, adding a splash of broth or cream if needed to revive the sauce. Keep in mind that it’s best to enjoy the fish fresh for the best texture.

What if my sauce is too thick?
Very! If your cream sauce ends up too thick, don't worry—it’s an easy fix! Just add a splash of chicken or fish stock, or even a bit of cream as you warm it on the stove, and stir until the desired consistency is reached. Always simmer gently to avoid overcooking the sauce, allowing it to maintain its delicious flavor.

Is there a good dairy-free substitute for the cream?
Absolutely! For those looking to make this dish dairy-free, full-fat coconut milk is an excellent substitute for heavy cream. It creates a rich, creamy texture while adding a subtle sweetness that pairs beautifully with the rosemary and garlic. Just make sure to stir well as it may separate during heating.

Can I use other types of fish?
Very! While cod is delightful, you can easily substitute halibut or any firm white fish of your choice. Just keep in mind that cooking times may vary slightly depending on the thickness of the fish fillets. The key is to bake until the fish flakes easily with a fork, ensuring you enjoy a tender, flavorful meal each time.

Cod & Potatoes in Rosemary Cream Sauce

Savory Cod & Potatoes in Rosemary Cream Sauce for Home Chefs

Delight in the flavors of Cod & Potatoes in Rosemary Cream Sauce, a dish infused with freshness and balance.
Print Recipe Pin Recipe
Prep Time 15 minutes mins
Cook Time 40 minutes mins
Total Time 55 minutes mins
Servings: 4 servings
Course: Dinner
Cuisine: Mediterranean
Calories: 550
Ingredients Equipment Method Nutrition Notes

Ingredients
  

Fish and Potatoes
  • 4 fillets Cod fillet firm, white fish preferred
  • 2 pounds Yukon gold potatoes no peeling required
  • 3 tablespoons Extra-virgin olive oil for roasting and sauce base
  • 1 teaspoon Kosher salt for seasoning
  • 1/2 teaspoon Freshly cracked black pepper
Rosemary Cream Sauce
  • 4 tablespoons Salted butter
  • 1 Shallot finely chopped
  • 3 cloves Garlic minced
  • 1 cup Heavy cream can substitute with coconut milk
  • 1 cup Chicken or fish stock
  • 2 tablespoons Fresh rosemary chopped
  • 1 tablespoon Lemon zest
  • 1 tablespoon Lemon juice
  • 1 teaspoon Dijon mustard
  • 1/4 teaspoon Ground cayenne pepper optional
  • 2 tablespoons Capers
  • 2 tablespoons Minced flat-leaf parsley optional, for garnish

Equipment

  • 8x8-inch baking dish
  • Mixing Bowl
  • Medium saucepan
  • Baking Sheet

Method
 

Preparation Steps
  1. Preheat your oven to 450°F (232°C) and grease an 8x8-inch baking dish with olive oil.
  2. Wash and chop the Yukon gold potatoes into uniform pieces, then toss with olive oil, salt, and pepper. Roast in the oven for 20-25 minutes until tender and golden.
  3. In a saucepan, melt butter and olive oil. Sauté the shallot until translucent, add garlic, then combine with cream, stock, rosemary, lemon zest, lemon juice, mustard, cayenne, and capers. Simmer for 5 minutes.
  4. Assemble by placing roasted potatoes in the baking dish, adding cod on top, and pouring the sauce over everything.
  5. Bake uncovered at 400°F (204°C) for 10-15 minutes until the cod is cooked through and flakes easily.
  6. Let it rest for a few minutes. Optionally, sprinkle parsley before serving.

Nutrition

Serving: 1servingCalories: 550kcalCarbohydrates: 45gProtein: 35gFat: 30gSaturated Fat: 17gPolyunsaturated Fat: 3gMonounsaturated Fat: 10gCholesterol: 90mgSodium: 600mgPotassium: 1000mgFiber: 5gSugar: 2gVitamin A: 800IUVitamin C: 25mgCalcium: 50mgIron: 2mg

Notes

Serve with a refreshing radish salad for a complete meal. Ensure even potato cuts for optimal cooking, and use fresh herbs for best flavors.

Tried this recipe?

Let us know how it was!

Savory Cod & Potatoes in Rosemary Cream Sauce for Home Chefs

October 1, 2025 by Grace Snow Leave a Comment

As I stood over the stovetop, the delightful aroma of rosemary and garlic filled my kitchen, instantly transporting me to a quaint bistro nestled by the sea. Today, I’m thrilled to share my recipe for Baked Cod & Potatoes in Rosemary Cream Sauce, a dish that captures the essence of freshness with every bite. With the perfect balance of tender cod and creamy, herb-infused sauce, this meal is not only a breeze to whip up but also transforms a weeknight dinner into a special occasion. The buttery Yukon gold potatoes provide a comforting twist, making it a true crowd-pleaser everyone will rave about. Are you ready to bring some coastal charm to your table and impress your loved ones? Let’s dive into this delicious adventure!

Why is this dish a must-try?

Incredible taste: The combination of flaky cod and buttery Yukon gold potatoes creates an irresistible balance of flavors and textures.

Easy preparation: With just a few simple steps, this dish is perfect for home cooks looking to create a gourmet experience without spending hours in the kitchen.

Versatile options: Feel free to substitute halibut or use coconut milk for a dairy-free twist, ensuring everyone can enjoy this delightful meal.

Impressive presentation: The elegant look of the creamy sauce draping over tender fish will surely impress your guests, making it ideal for special occasions or cozy dinners.

Aromatic experience: As you prepare this dish, the fragrant rosemary and garlic will fill your kitchen, creating an inviting atmosphere that makes mealtime even more enjoyable.

For a refreshing side, consider pairing it with a Radish Salad with Yogurt Dill Dressing!

Cod & Potatoes Ingredients

• Get ready to savor the flavors of this scrumptious dish!

For the Fish and Potatoes

  • Cod fillet – This is the main protein source; use firm, white fish for best results.
  • Yukon gold potatoes – They provide a creamy texture when roasted, saving you the hassle of peeling.
  • Extra-virgin olive oil – Essential for roasting potatoes and forming the base of the cream sauce.
  • Kosher salt – A crucial ingredient that enhances the flavor of both the fish and potatoes.
  • Freshly cracked black pepper – Adds an aromatic touch to the fish and potatoes.

For the Rosemary Cream Sauce

  • Salted butter – Brings richness to the sauce for that luxurious mouthfeel.
  • Shallot – Offers sweetness and depth, making the sauce sing.
  • Garlic – Provides that irresistible aromatic flavor we all love.
  • Heavy cream – This creates a luscious sauce; you can substitute it with full-fat coconut milk for a dairy-free version.
  • Chicken or fish stock – Adds essential depth of flavor to the cream sauce, truly elevating it.
  • Fresh rosemary – Imparts a wonderful fragrant, herbal note that’s key to this dish.
  • Lemon zest and juice – Brightens the dish, balancing the richness of the sauce.
  • Dijon mustard – Introduces tanginess, perfectly balancing the cream’s richness.
  • Ground cayenne pepper – Just a hint adds a lovely kick to the sauce.
  • Capers – These little gems introduce briny flavor, enhancing the entire dish.
  • Minced flat-leaf parsley (optional) – Adds a fresh and colorful finishing touch.

Indulge in the delightful flavors of Cod & Potatoes in Rosemary Cream Sauce, and let this dish bring warmth and joy to your dining table!

Step‑by‑Step Instructions for Cod & Potatoes in Rosemary Cream Sauce

Step 1: Preheat and Prepare the Dish
Begin by preheating your oven to 450°F (232°C). While the oven heats, grease an 8x8-inch baking dish with a splash of extra-virgin olive oil. This ensures that your cod and potatoes will have a beautiful, golden finish and won’t stick during baking.

Step 2: Roast the Potatoes
Wash and chop the Yukon gold potatoes into uniform pieces for even cooking. In a mixing bowl, toss the potato chunks with olive oil, kosher salt, and freshly cracked black pepper until well coated. Spread the potatoes in a single layer on a baking sheet and roast in the oven for 20-25 minutes, or until they are tender and lightly golden, stirring halfway through for even browning.

Step 3: Create the Rosemary Cream Sauce
While the potatoes roast, prepare the rich and aromatic rosemary cream sauce. In a medium saucepan over medium heat, melt a tablespoon of salted butter with a tablespoon of olive oil. Add the finely chopped shallot and sauté until it becomes translucent and tender, about 3-4 minutes. Stir in minced garlic and cook until fragrant, around 30 seconds, then add heavy cream, chicken stock, chopped rosemary, lemon zest, lemon juice, Dijon mustard, cayenne pepper, and capers. Simmer gently for about 5 minutes, allowing the flavors to meld and the sauce to thicken slightly.

Step 4: Assemble the Dish for Baking
Once the potatoes are roasted, remove them from the oven and lower the temperature to 400°F (204°C). Place the roasted potatoes evenly in the greased baking dish and nestle the cod fillets on top of the potatoes. Pour the fragrant rosemary cream sauce generously over the cod, ensuring each piece is well-coated for that delightful flavor in every bite.

Step 5: Bake to Perfection
Place the assembled dish back into the oven and bake uncovered for 10-15 minutes. You’ll know the cod is done when it flakes easily with a fork and has turned opaque, creating a lovely contrast with the creamy sauce. The edges of the sauce should also begin to bubble.

Step 6: Ready to Serve
Once baked, remove the dish from the oven and let it rest for a few minutes. Optionally, sprinkle minced flat-leaf parsley over the top for a splash of color and freshness before serving. This delightful Cod & Potatoes in Rosemary Cream Sauce is now ready to impress your family or guests!

Storage Tips for Cod & Potatoes in Rosemary Cream Sauce

Fridge: Store leftovers in an airtight container for up to 2 days. While reheating, be gentle to maintain the texture of the cod, as it may become slightly dry.

Freezer: For longer storage, freeze the sauce and potatoes separately in airtight containers. The sauce can be stored for up to 1 month, but the fish is best enjoyed fresh.

Reheating: When ready to enjoy again, thaw in the fridge overnight. Reheat gently in a saucepan over low heat, adding a splash of cream or broth to revive the sauce.

Room Temperature: Avoid leaving the dish at room temperature for more than 2 hours to ensure food safety with the Cod & Potatoes in Rosemary Cream Sauce.

Variations & Substitutions for Cod & Potatoes in Rosemary Cream Sauce

Get creative with your cooking, and make this dish your own with these fun twists!

  • Halibut Swap: Substitute cod with halibut for a meatier flavor and texture that holds up beautifully in the sauce.

  • Dairy-Free Delight: Use full-fat coconut milk in place of heavy cream, giving the dish a rich, tropical flair without the dairy.

  • Extra Crunch: Top the dish with crispy panko breadcrumbs before baking for a delightful texture contrast that takes it to the next level.

  • Spicy Kick: Add sliced jalapeños to the cream sauce for a zesty heat that dances on your palate, perfect for spice lovers.

  • Herb Medley: Mix in fresh thyme or tarragon along with the rosemary for a complex herbal profile that will impress your guests.

  • Zesty Lemon Addition: Boost the citrus notes by stirring in some finely grated lemon zest into the sauce—this heightens the freshness!

  • Layered Veggies: Consider adding layers of fresh spinach or leeks alongside the potatoes for a colorful, nutritious twist.

  • Umami Boost: Incorporate a splash of soy sauce or tamari into the cream sauce for an unexpected umami depth that delectably complements the cod.

Make this dish your signature by trying out these variations, or pair it with a refreshing Radish Salad with Yogurt Dill Dressing for a complete meal!

Make Ahead Options

These Cod & Potatoes in Rosemary Cream Sauce are perfect for busy weeknights! You can prepare the potatoes by roasting them up to 24 hours in advance; just toss them with olive oil, salt, and pepper, then store them in an airtight container in the refrigerator. For the cream sauce, cook it completely and refrigerate for up to 3 days; simply reheat gently on the stovetop, stirring to maintain creaminess. When you’re ready to serve, layer the cold potatoes in a baking dish, top with the cod, pour over the warmed sauce, and bake as directed for a meal that’s just as delicious as when freshly made!

Tips for the Best Cod & Potatoes

  • Even Potato Cuts: Ensure you cut the Yukon gold potatoes into uniform pieces for even cooking; this prevents some from being undercooked while others are overdone.

  • Fish Handling: Use a fish spatula for flipping and transferring the delicate cod fillets, preventing them from breaking apart while handling.

  • Consistency Control: If you prefer a thicker sauce, simmer it a bit longer; just keep an eye on it to avoid over-reduction. Adjust the consistency to your taste!

  • Fish Substitutes: While cod is delightful, don’t hesitate to substitute with halibut or any firm white fish. They work beautifully in the Rosemary Cream Sauce.

  • Fresh Herbs Matter: For the freshest flavor, use fresh rosemary rather than dried; it significantly enhances the overall taste and aroma of the dish.

  • Buttery Finish: Consider adding an extra pat of butter to the sauce just before serving for an even richer, creamy mouthfeel in your Cod & Potatoes in Rosemary Cream Sauce.

What to Serve with Baked Cod & Potatoes in Rosemary Cream Sauce

Pairing this exquisite dish with complementary sides enhances its delightful flavors while creating a satisfying meal experience.

  • Creamy Mashed Potatoes: The velvety texture of mashed potatoes adds richness and absorbs the rosemary cream sauce beautifully, creating a comforting experience.

  • Steamed Asparagus: Lightly steamed asparagus provides a crisp contrast, with its earthy notes balancing the dish's richness—a vibrant green addition to your plate.

  • Radish Salad with Yogurt Dill Dressing: This refreshing salad cuts through the creaminess with its crisp, peppery radish flavor and tangy dressing, offering a lively burst of freshness.

  • Garlic Bread: The crunchy, buttery goodness of garlic bread is perfect for soaking up any leftover sauce, adding a satisfying crunch that pairs well with the dish.

  • Roasted Brussels Sprouts: Their caramelization brings a sweet, nutty flavor, while the slight bitterness contrasts the creamy sauce, enhancing the meal's overall complexity.

  • Chilled White Wine: A glass of chilled Sauvignon Blanc or Chardonnay will elevate your dining experience, as the wine’s acidity complements the richness of the cod and the cream sauce perfectly.

  • Lemon Sorbet: To cleanse your palate after this rich meal, a refreshing lemon sorbet makes for a delightful and light dessert, brightening your taste buds and ending the dinner on a high note.

Cod & Potatoes in Rosemary Cream Sauce Recipe FAQs

How do I choose the freshest cod fillet?
Absolutely! When selecting cod, look for fillets that are bright white with a slight translucent shimmer. Avoid any with dark spots or a fishy smell. The flesh should feel firm to the touch and spring back when pressed. A good rule of thumb is to ask your fishmonger for the catch of the day to ensure you get the freshest option.

How should I store leftovers?
Store your leftovers in an airtight container in the refrigerator for up to 2 days. While reheating, gently warm the dish over low heat to maintain the cod's texture. It’s best to avoid microwaving as it can dry out the fish. If you find the sauce has thickened, drizzle a little cream or broth to bring it back to life!

Can I freeze this dish?
Certainly! To freeze, I recommend separating the sauce and potatoes from the fish. You can freeze the rosemary cream sauce and roasted potatoes in airtight containers for up to 1 month. To reheat, thaw them overnight in the fridge and warm slowly on the stove, adding a splash of broth or cream if needed to revive the sauce. Keep in mind that it’s best to enjoy the fish fresh for the best texture.

What if my sauce is too thick?
Very! If your cream sauce ends up too thick, don't worry—it’s an easy fix! Just add a splash of chicken or fish stock, or even a bit of cream as you warm it on the stove, and stir until the desired consistency is reached. Always simmer gently to avoid overcooking the sauce, allowing it to maintain its delicious flavor.

Is there a good dairy-free substitute for the cream?
Absolutely! For those looking to make this dish dairy-free, full-fat coconut milk is an excellent substitute for heavy cream. It creates a rich, creamy texture while adding a subtle sweetness that pairs beautifully with the rosemary and garlic. Just make sure to stir well as it may separate during heating.

Can I use other types of fish?
Very! While cod is delightful, you can easily substitute halibut or any firm white fish of your choice. Just keep in mind that cooking times may vary slightly depending on the thickness of the fish fillets. The key is to bake until the fish flakes easily with a fork, ensuring you enjoy a tender, flavorful meal each time.

Cod & Potatoes in Rosemary Cream Sauce

Savory Cod & Potatoes in Rosemary Cream Sauce for Home Chefs

Delight in the flavors of Cod & Potatoes in Rosemary Cream Sauce, a dish infused with freshness and balance.
Print Recipe Pin Recipe
Prep Time 15 minutes mins
Cook Time 40 minutes mins
Total Time 55 minutes mins
Servings: 4 servings
Course: Dinner
Cuisine: Mediterranean
Calories: 550
Ingredients Equipment Method Nutrition Notes

Ingredients
  

Fish and Potatoes
  • 4 fillets Cod fillet firm, white fish preferred
  • 2 pounds Yukon gold potatoes no peeling required
  • 3 tablespoons Extra-virgin olive oil for roasting and sauce base
  • 1 teaspoon Kosher salt for seasoning
  • 1/2 teaspoon Freshly cracked black pepper
Rosemary Cream Sauce
  • 4 tablespoons Salted butter
  • 1 Shallot finely chopped
  • 3 cloves Garlic minced
  • 1 cup Heavy cream can substitute with coconut milk
  • 1 cup Chicken or fish stock
  • 2 tablespoons Fresh rosemary chopped
  • 1 tablespoon Lemon zest
  • 1 tablespoon Lemon juice
  • 1 teaspoon Dijon mustard
  • 1/4 teaspoon Ground cayenne pepper optional
  • 2 tablespoons Capers
  • 2 tablespoons Minced flat-leaf parsley optional, for garnish

Equipment

  • 8x8-inch baking dish
  • Mixing Bowl
  • Medium saucepan
  • Baking Sheet

Method
 

Preparation Steps
  1. Preheat your oven to 450°F (232°C) and grease an 8x8-inch baking dish with olive oil.
  2. Wash and chop the Yukon gold potatoes into uniform pieces, then toss with olive oil, salt, and pepper. Roast in the oven for 20-25 minutes until tender and golden.
  3. In a saucepan, melt butter and olive oil. Sauté the shallot until translucent, add garlic, then combine with cream, stock, rosemary, lemon zest, lemon juice, mustard, cayenne, and capers. Simmer for 5 minutes.
  4. Assemble by placing roasted potatoes in the baking dish, adding cod on top, and pouring the sauce over everything.
  5. Bake uncovered at 400°F (204°C) for 10-15 minutes until the cod is cooked through and flakes easily.
  6. Let it rest for a few minutes. Optionally, sprinkle parsley before serving.

Nutrition

Serving: 1servingCalories: 550kcalCarbohydrates: 45gProtein: 35gFat: 30gSaturated Fat: 17gPolyunsaturated Fat: 3gMonounsaturated Fat: 10gCholesterol: 90mgSodium: 600mgPotassium: 1000mgFiber: 5gSugar: 2gVitamin A: 800IUVitamin C: 25mgCalcium: 50mgIron: 2mg

Notes

Serve with a refreshing radish salad for a complete meal. Ensure even potato cuts for optimal cooking, and use fresh herbs for best flavors.

Tried this recipe?

Let us know how it was!

Cozy Autumn Chicken Dinner That Feels Like Home

October 1, 2025 by Grace Snow Leave a Comment

The crisp chill of autumn air greets me as I step into my kitchen, the scent of earthy herbs and roasting veggies filling the room. It’s the perfect moment for a One Pan Autumn Chicken Dinner. This cozy, one-pan meal is not only simple to whip up but also makes my weeknight dinners feel like special occasions. With juicy chicken thighs nestled among sweet potatoes and Brussels sprouts, all infused with seasonal flavors, it’s a dish that warms both body and soul. Plus, the easy cleanup leaves more time for cozy evenings—or maybe a slice of pie! Are you ready to bring the essence of fall to your table?

Why is this recipe a fall favorite?

Cozy Comfort: This One Pan Autumn Chicken Dinner wraps you in warmth, making it the ultimate comfort food for crisp fall evenings. Simplicity: With everything cooked in just one pan, you’ll have minimal cleanup, letting you savor the flavors without stress. Adaptable Ingredients: You can easily substitute veggies and proteins based on what you have on hand, like using Honey Garlic Chicken for a delightful twist. Seasonal Flavors: The combination of sweet potatoes and apples harmonizes beautifully with savory herbs, creating a delicious balance that’s simply irresistible. Crowd-Pleaser: Whether it's a family weeknight dinner or a cozy gathering with friends, this dish will impress everyone at the table!

Autumn Chicken Dinner Ingredients

Just gather these hearty ingredients for a cozy meal!

For the Chicken

  • Bone-in, skin-on chicken thighs – Provide rich flavor and juiciness; substitute with chicken breasts or drumsticks if preferred.
  • Olive oil – Adds moisture and facilitates roasting; can be replaced with avocado oil.
  • Salt and black pepper – Essential for seasoning; adjust to taste.

For the Vegetables

  • Large sweet potato – Adds sweetness and texture; swap for regular potatoes or butternut squash if desired.
  • Brussels sprouts – Contributes earthy flavor and crunch; substitute with sturdy vegetables like carrots or parsnips.
  • Medium Fuji apples – Provide sweetness and a slight tartness; other firm apples can be used, like Honeycrisp.
  • Shallots – Contributes a mild onion flavor; can be replaced with yellow onion if needed.

For the Flavor

  • Garlic – Enhances aroma and taste; fresh minced garlic gives the best results.
  • Fresh thyme, sage, rosemary – Adds herbal fragrance and depth; dried herbs work in a pinch, but fresh is preferable.
  • Red wine vinegar – Introduces acidity and depth; substitute with apple cider vinegar if unavailable.

For the Extra Kick

  • Hickory smoked bacon – Introduces smoky richness; use turkey bacon for a lighter version or omit for a vegetarian dish.
  • Chopped parsley – Optional garnish for freshness and color.

With these ingredients, your Autumn Chicken Dinner will be a comforting success!

Step‑by‑Step Instructions for One Pan Autumn Chicken Dinner

Step 1: Preheat the Oven
Begin by preheating your oven to 425°F. This temperature is perfect for roasting the chicken and vegetables evenly, creating that warm, cozy aroma that signals the arrival of fall. While the oven heats up, gather your ingredients to streamline the cooking process and ensure everything is within reach.

Step 2: Marinate the Chicken
In a resealable bag, combine olive oil, red wine vinegar, minced garlic, and a generous sprinkle of fresh thyme, sage, and rosemary. Season the bone-in, skin-on chicken thighs with salt and pepper, then place them in the bag, seal it, and massage the marinade into the chicken. Allow it to marinate for at least 20 minutes while you prepare the vegetables, infusing them with autumnal flavors.

Step 3: Prepare the Vegetables
On a large rimmed baking sheet, toss the chopped sweet potatoes, halved Brussels sprouts, diced apples, and sliced shallots with a drizzle of olive oil, salt, and pepper. Spread the mixture evenly across the sheet. The vibrant colors of these seasonal ingredients will create a beautiful base for your One Pan Autumn Chicken Dinner, ensuring even roasting and delightful caramelization.

Step 4: Combine Chicken and Vegetables
Once the chicken has marinated, remove it from the bag and place the thighs on top of the prepared vegetable mixture. Be sure to distribute them evenly for even cooking. Cut the hickory smoked bacon into small pieces and sprinkle it generously over the chicken and vegetables, adding a smoky richness that enhances the comforting flavors of the dish.

Step 5: Roast in the Oven
Slide the baking sheet into the preheated oven and roast for 30 to 35 minutes. As the chicken cooks, the skin will turn a beautiful golden brown and the vegetables will become tender and caramelized. Use a meat thermometer to check that the chicken reaches an internal temperature of 165°F, ensuring it's perfectly juicy and cooked through.

Step 6: Crisp the Chicken Skin
For an extra touch of crispiness, switch to the broil setting for the last 2 to 3 minutes of cooking. Watch closely as the chicken skin crisps up beautifully, taking on a deep, rich color. This optional step adds a delightful texture to your One Pan Autumn Chicken Dinner, making it even more comforting and appealing.

Step 7: Garnish and Serve
Once everything is perfectly roasted, carefully remove the baking sheet from the oven. Let it rest for a couple of minutes, then garnish with freshly chopped parsley for a pop of color and freshness. Serve the One Pan Autumn Chicken Dinner warm, allowing everyone to delight in the cozy flavors of autumn amidst good company and laughter.

Autumn Chicken Dinner Variations

Feel free to make this cozy dinner your own with a few simple adjustments that delight your taste buds!

  • Root Veggies: Swap sweet potatoes for regular potatoes, parsnips, or turnips for a heartier base. These earthy varieties add depth and a unique twist!

  • Fall Fruits: Incorporate autumn fruits like pears or cranberries for a burst of sweetness and tang. Their vibrant flavors can transform your dish into a seasonal sensation.

  • Spicy Touch: For a little heat, add red pepper flakes or chipotle seasoning to the marinade. This subtle kick enhances the overall flavor and brings warmth to every bite.

  • Bacon Alternatives: Use turkey bacon or omit the bacon entirely for a lighter option. If you're going vegetarian, consider adding toasted nuts for a delightful crunch without compromising on flavor!

  • Herb Variations: Experiment with herbs by swapping fresh thyme or rosemary for tarragon or dill. Each herb brings its own personality, infusing your dish with a whole new vibe.

  • Cheesy Goodness: For a cheesy option, sprinkle grated Parmesan or feta cheese over the vegetables before serving. This adds a creamy, salty contrast that pairs beautifully with the savory chicken.

  • Citrus Zing: A squeeze of fresh lemon or orange juice right before serving can brighten the flavors significantly. It’s a subtle addition that can elevate your dish to a whole new level of deliciousness.

Feel inspired by these variations, and don’t hesitate to check out other delightful recipes like Crock Pot Chicken or Honey BBQ Chicken for even more cozy cooking possibilities!

Expert Tips for One Pan Autumn Chicken Dinner

  • Marination Matters: Allow the chicken thighs to marinate overnight for a deeper flavor. It helps the garlic and herbs penetrate the meat beautifully.
  • Chunky Vegetables: Cut veggies into large, uniform pieces to ensure they roast evenly. Smaller pieces can become mushy during the cooking process.
  • Use a Meat Thermometer: Check that your chicken reaches 165°F for optimal juiciness. It's the secret to perfectly cooked poultry in your Autumn Chicken Dinner.
  • Watch the Broiler: If you choose to broil for that crispy skin, stay close to avoid burning. Just a couple of minutes make all the difference!
  • Don't Skip the Garnish: Adding fresh parsley before serving not only enhances the presentation but also adds a refreshing brightness to the dish.

Make Ahead Options

These One Pan Autumn Chicken Dinners are ideal for busy home cooks looking to simplify weeknight meals! You can marinate the chicken thighs up to 24 hours in advance, allowing the flavors to deepen beautifully. Alternatively, chop and prepare the vegetables, such as sweet potatoes and Brussels sprouts, and store them in the refrigerator in an airtight container for up to 3 days. When it’s time to cook, simply assemble the marinated chicken on top of the prepped veggies, sprinkle the bacon, and roast as directed. This makes the dish just as delicious and saves you precious time, allowing you to enjoy cozy evenings with loved ones.

Storage Tips for Autumn Chicken Dinner

  • Fridge: Store leftovers in an airtight container for up to 3 days. Allow the dish to cool completely before sealing to prevent condensation.

  • Freezer: For longer storage, freeze the Autumn Chicken Dinner in a tightly sealed container or freezer bag for up to 3 months. Label with the date for easy tracking.

  • Reheating: Reheat thawed leftovers in the microwave or oven at 350°F until heated through. Add a splash of chicken broth or water to keep the chicken juicy and the veggies vibrant.

  • Room Temperature: Avoid leaving the dish out at room temperature for more than 2 hours to ensure food safety.

What to Serve with One Pan Autumn Chicken Dinner

Embrace the cozy vibes of autumn with delightful sides that perfectly complement your hearty chicken dish.

  • Crusty Bread: The perfect accompaniment for soaking up the savory juices from your One Pan Autumn Chicken Dinner, warm bread adds a rustic touch.
  • Warm Apple Crisp: A sweet contrast to the savory flavors, this comforting dessert highlights the apples in the main dish while satisfying your sweet tooth.
  • Crisp Green Salad: A light salad with mixed greens and a tangy vinaigrette offers a refreshing crunch that balances the richness of the chicken and veggies.
  • Roasted Garlic Mashed Potatoes: Creamy and comforting, these mashed potatoes will make your meal feel truly indulgent while melding beautifully with the flavors of the dish.
  • Honey-Glazed Carrots: Their natural sweetness and gentle crunch elevate the autumnal theme and pair wonderfully with the savory chicken and veggies.
  • Spiced Hot Cider: A warm beverage spiced with cinnamon and cloves not only complements the flavors of the season but also makes for a cozy sipping experience.

Feel free to mix and match, creating a heartwarming feast that celebrates the essence of fall!

One Pan Autumn Chicken Dinner Recipe FAQs

What type of chicken is best for this recipe?
Absolutely! Bone-in, skin-on chicken thighs are recommended for their rich flavor and juiciness. However, you can easily swap them for chicken breasts or drumsticks if preferred. Just keep in mind that different cuts may require varying cooking times.

How should I store leftovers?
Leftovers can be stored in an airtight container in the refrigerator for up to 3 days. Be sure to let the dish cool completely before sealing it to prevent condensation. For best results, reheat in the microwave or oven at 350°F until warmed through.

Can I freeze the Autumn Chicken Dinner?
Yes! To freeze your One Pan Autumn Chicken Dinner, wait for it to cool completely, then transfer it to a tightly sealed container or a freezer bag. It can be stored in the freezer for up to 3 months. Don’t forget to label with the date for easy tracking! When ready to eat, thaw overnight in the refrigerator and reheat in the oven.

What do I do if my vegetables are mushy?
If you find that your vegetables are turning mushy, make sure they are cut into larger, uniform chunks next time. This allows for even roasting and helps them maintain their texture. Also, keep an eye on the cooking time—overcooking can contribute to mushiness!

Is this recipe suitable for gluten-free diets?
Very! This One Pan Autumn Chicken Dinner is naturally gluten-free, provided no bread sides are served. Just be cautious with any added ingredients, like sauces, to ensure they meet gluten-free standards.

Can I substitute the vegetables in this recipe?
Absolutely! The beauty of this dish lies in its versatility. Feel free to swap sweet potatoes for regular potatoes or replace Brussels sprouts with hearty vegetables like carrots or parsnips. You might also add seasonal fruits such as pears or cranberries for an extra flavor kick!

Autumn Chicken Dinner

Cozy Autumn Chicken Dinner That Feels Like Home

This Autumn Chicken Dinner is a cozy one-pan meal that balances savory chicken with sweet potatoes and Brussels sprouts.
Print Recipe Pin Recipe
Prep Time 20 minutes mins
Cook Time 35 minutes mins
Total Time 55 minutes mins
Servings: 4 servings
Course: Dinner
Cuisine: American
Calories: 450
Ingredients Equipment Method Nutrition Notes

Ingredients
  

For the Chicken
  • 4 pieces Bone-in, skin-on chicken thighs Substitute with chicken breasts or drumsticks if preferred.
  • 2 tablespoons Olive oil Can be replaced with avocado oil.
  • to taste Salt Essential for seasoning.
  • to taste Black pepper Essential for seasoning.
For the Vegetables
  • 1 large Sweet potato Swap for regular potatoes or butternut squash if desired.
  • 2 cups Brussels sprouts Substitute with sturdy vegetables like carrots or parsnips.
  • 2 medium Fuji apples Other firm apples can be used, like Honeycrisp.
  • 2 pieces Shallots Can be replaced with yellow onion if needed.
For the Flavor
  • 4 cloves Garlic Fresh minced garlic gives the best results.
  • 1 tablespoon Fresh thyme Dried herbs work in a pinch, but fresh is preferable.
  • 1 tablespoon Fresh sage Dried herbs work in a pinch, but fresh is preferable.
  • 1 tablespoon Fresh rosemary Dried herbs work in a pinch, but fresh is preferable.
  • 2 tablespoons Red wine vinegar Substitute with apple cider vinegar if unavailable.
For the Extra Kick
  • 4 slices Hickory smoked bacon Use turkey bacon for a lighter version or omit for a vegetarian dish.
  • 2 tablespoons Chopped parsley Optional garnish for freshness and color.

Equipment

  • Large Rimmed Baking Sheet
  • Resealable Bag
  • Meat Thermometer

Method
 

Step-by-Step Instructions for One Pan Autumn Chicken Dinner
  1. Preheat your oven to 425°F.
  2. In a resealable bag, combine olive oil, red wine vinegar, minced garlic, and herbs. Season chicken thighs with salt and pepper, place in the bag, seal, and let marinate for 20 minutes.
  3. On a large rimmed baking sheet, toss sweet potatoes, Brussels sprouts, apples, and shallots with olive oil, salt, and pepper, then spread evenly.
  4. Remove the chicken from the marinade and place thighs on the vegetables. Cut bacon into pieces and sprinkle over the top.
  5. Slide the baking sheet into the oven and roast for 30 to 35 minutes until chicken is golden brown and reaches 165°F.
  6. Switch to the broil setting for the last 2 to 3 minutes for extra crispiness, watching closely.
  7. Remove from the oven, let rest for a couple of minutes, garnish with parsley, and serve warm.

Nutrition

Serving: 1plateCalories: 450kcalCarbohydrates: 30gProtein: 30gFat: 25gSaturated Fat: 8gPolyunsaturated Fat: 4gMonounsaturated Fat: 10gCholesterol: 100mgSodium: 600mgPotassium: 800mgFiber: 6gSugar: 8gVitamin A: 800IUVitamin C: 20mgCalcium: 50mgIron: 2mg

Notes

Marinating the chicken overnight enhances flavor. Use a meat thermometer for best results.

Tried this recipe?

Let us know how it was!

Savory Grilled Steak Bowl with Creamy Sauce & Zucchini Bliss

October 1, 2025 by Grace Snow Leave a Comment

The sizzle of steak on the grill fills the air with a tantalizing promise. As I gather the ingredients for my Grilled Steak Bowl with Creamy Sauce & Grilled Zucchini, I can already envision the succulent layers coming together—juicy steak, vibrant veggies, and a velvety sauce that elevates the meal. Not only is this dish high in protein and meal prep-friendly, but it also allows for endless customization; you can easily swap in chicken, salmon, or even portobello mushrooms to suit your taste. The comforting combination of flavors and textures makes this bowl perfect for a cozy weeknight dinner or a delightful weekend gathering. Are you curious about how to create this hearty, gourmet meal in your own kitchen? Let’s get grilling!

Why try this Grilled Steak Bowl?

Satisfying flavors meet in this incredible bowl, making it a must-try for any home chef! Customizable options allow you to mix and match proteins like grilled chicken thighs or salmon, ensuring there's something for everyone at the table. Quick to prepare, it's perfect for busy weeknights, while its meal prep-friendly nature means you can enjoy it throughout the week. Health-conscious eaters will love the high-protein content combined with fresh veggies, like grilled zucchini. Want to try a dairy-free twist? Swap the creamy sauce for a plant-based alternative! Embrace this delightful dish that’s sure to impress, just like the Cheesy Zucchini Bake for a side!

Grilled Steak Bowl Ingredients

• Here’s everything you need for a delicious Grilled Steak Bowl with Creamy Sauce & Grilled Zucchini.

For the Steak
• Steak (sirloin or ribeye) – Choose a cut that grills beautifully to lock in juicy flavor.

For the Grilled Zucchini
• Zucchini – This veggie adds a fresh, slightly smoky taste; try substituting with grilled eggplant or bell peppers for variety.

For the Grains
• Cooked Grains (quinoa, rice, or farro) – Provides a hearty base; think about cauliflower rice for a lower-carb option if desired.

For the Sauce
• Sour Cream or Greek Yogurt – Forms a creamy, tangy base for the sauce; use plant-based yogurt for a wonderful dairy-free version.
• Dijon Mustard – Adds a delightful tang that enhances the overall flavor.
• Garlic Powder – Contributes warmth and flavor; consider fresh garlic for an added punch!
• Smoked Paprika – Infuses a lovely depth to both the steak rub and the sauce.
• Salt & Black Pepper – Essential for highlighting the natural flavors of all the ingredients.

For Garnishing
• Fresh Parsley or Chives – Sprinkle these on top for a pop of color and fresh herbal brightness.

Each of these components plays a vital role in crafting the perfect Grilled Steak Bowl, ensuring a satisfying, flavorful dining experience!

Step‑by‑Step Instructions for Grilled Steak Bowl with Creamy Sauce & Grilled Zucchini

Step 1: Prepare the Steak
Pat the steak dry using paper towels to remove excess moisture, ensuring a beautiful sear. Rub olive oil, salt, black pepper, garlic powder, and smoked paprika all over the steak. Let it rest at room temperature for about 20 minutes, allowing the flavors to meld and the meat to soften, preparing it for that perfect grill.

Step 2: Preheat the Grill
While the steak rests, preheat your grill to high heat, aiming for around 450°F to 500°F. A hot grill is key to creating those lovely char marks and ensuring the steak cooks evenly. Once heated, keep the grill covered as you move on to prepping the zucchini for grilling.

Step 3: Prepare the Zucchini
Slice the zucchini into even rounds or lengthwise strips, about half an inch thick for even cooking. Brush each piece with olive oil and season generously with salt. This not only enhances the flavor but also helps achieve that desired grill char that complements the juicy steak beautifully.

Step 4: Grill the Zucchini
Place the seasoned zucchini on the grill. Cook for 2–3 minutes per side, until they are tender and have nice char marks. You’ll know they’re ready when they’re slightly softened and glistening. Once done, remove them from the grill and set them aside to rest while you focus on the steak.

Step 5: Grill the Steak
Now it’s time for the star of the dish: the steak! Place the seasoned steak directly on the hot grill for 4–5 minutes per side for medium-rare. Look for a beautifully browned crust. To ensure perfect doneness, aim for an internal temperature of 130°F. After grilling, let it rest for 5 minutes to retain the juices.

Step 6: Cook the Grains
While the steak and zucchini are grilling, prepare your choice of grains according to the package instructions. For quinoa, that’s usually about 15 minutes on the stovetop. This hearty base will soak up the savory sauce and provide a delightful texture when you build your Grilled Steak Bowl.

Step 7: Make the Creamy Sauce
In a mixing bowl, combine sour cream or Greek yogurt with Dijon mustard, garlic powder, smoked paprika, and a pinch of salt. Mix well until smooth. If the sauce is too thick, add a splash of water to reach your desired consistency. This creamy sauce will tie all components of the Grilled Steak Bowl together beautifully.

Step 8: Assemble the Bowl
To create your Grilled Steak Bowl, start by layering the cooked grains at the base of your bowl. Arrange the sliced grilled zucchini on top, followed by the sliced steak, elegantly layering them for a colorful presentation. Drizzle the creamy sauce over everything, and finish with a sprinkle of fresh parsley or chives for an extra touch of flavor and color.

What to Serve with Grilled Steak Bowl with Creamy Sauce & Grilled Zucchini

Elevate your dining experience beyond the bowl with these delightful pairings that balance flavors and textures.

  • Garlic Bread: Perfectly toasted with butter and garlic, it adds a savory crunch to your meal and complements the creamy sauce beautifully.
  • Fresh Green Salad: A simple salad with mixed greens, cherry tomatoes, and a lemon vinaigrette introduces a refreshing contrast, lightening the meal.
  • Roasted Sweet Potatoes: Their sweetness and slight crispiness provide a satisfying bite that pairs wonderfully with the savory steak and sauce.
  • Grilled Asparagus: Fire up the grill again! Their earthy flavor and tender crunch elevate your bowl with vibrant color and health benefits.
  • Chilled White Wine: A glass of crisp Sauvignon Blanc or Pinot Grigio can enhance the meal, cutting through the richness of the sauce.
  • Berry Parfait: For dessert, a light parfait made with Greek yogurt and mixed berries offers a sweet, fruity finish to this savory dinner.

These pairings create a symphony of flavors that transform your Grilled Steak Bowl into a full culinary experience.

Grilled Steak Bowl Variations & Substitutions

Feel free to mix things up and make this Grilled Steak Bowl reflect your personal tastes and dietary needs!

  • Chicken Swap: Replace the steak with grilled chicken thighs for a deliciously tender alternative. It adds a different flavor profile while keeping the bowl satisfying.
  • Salmon Twist: Try swapping the steak for grilled salmon fillets, which bring a lovely richness and are packed with omega-3 fatty acids. A delightful twist that pairs beautifully with the creamy sauce!
  • Portobello Mushrooms: For a vegetarian option, marinate and grill portobello mushrooms. They provide a meaty texture and a deep, earthy flavor that enhances the bowl.
  • Cauliflower Rice: Substitute grains with cauliflower rice for a lower-carb option. It offers a light texture that allows the flavors of the other ingredients to shine through.
  • Leafy Greens Base: Swap out grains entirely for a bed of shredded lettuce or baby spinach for a refreshing and crisp bite. Perfect if you’re craving something lighter!
  • Seasonal Vegetables: Experiment with seasonal veggies like bell peppers or grilled asparagus instead of zucchini. Each brings a unique flavor and color to your bowl.
  • Spice it Up: If you love heat, add red pepper flakes or a dash of hot sauce to the creamy sauce for an extra kick. It will elevate the flavors and add a fun twist to your meal.

These variations make it easy to tailor your Grilled Steak Bowl to your preferences or dietary needs while keeping it deliciously satisfying. For even more inspiration, consider adding a side of Grilled Mushrooms or pairing it with a colorful Acai Bowl for dessert!

How to Store and Freeze Grilled Steak Bowl

Fridge: Store any leftover Grilled Steak Bowl components separately in airtight containers for up to 3 days. This keeps the steak juicy and veggies fresh.

Freezer: If you want to prepare in advance, freeze grilled steak and zucchini without the grains or sauce for up to 2 months. Reheat thoroughly before serving.

Reheating: When ready to enjoy again, gently reheat the steak and veggies in a skillet over low heat or microwave until warmed through, ensuring they don’t dry out.

Make-Ahead Tip: Grill the components ahead of time and store them separately. Assemble the bowl just before serving for maximum flavor and freshness!

Expert Tips for Grilled Steak Bowl

  • Doneness Check: Use a meat thermometer to test doneness. Aim for 130°F for medium-rare. Avoid overcooking for tender steak in your Grilled Steak Bowl.

  • Rest for Juiciness: Always let the steak rest for 5 minutes after grilling. This essential step retains the juices, which keeps the meat succulent and delicious.

  • Prep Ahead: For a quick meal, grill the steak and veggies ahead of time and store them in the fridge. Assemble the Grilled Steak Bowl right before serving for freshness.

  • Consistent Sizes: Slice zucchini evenly to ensure uniform grilling. This helps them cook at the same rate, giving you that perfect char.

  • Sauce Variations: Feel free to experiment with the creamy sauce. Add herbs or spices to make it uniquely yours; just remember to keep it balanced to enhance the flavors in your bowl.

Make Ahead Options

These Grilled Steak Bowls with Creamy Sauce & Grilled Zucchini are a lifesaver for busy weeknights! You can prep the steak and zucchini up to 24 hours in advance by seasoning and marinating the steak and slicing the zucchini. Simply store both components in airtight containers in the refrigerator to ensure they stay fresh and flavorful. The creamy sauce can also be mixed ahead of time and refrigerated for up to 3 days; just give it a good stir before serving to maintain its creamy texture. When you're ready to enjoy, grill the prepped steak and zucchini, cook your grains, assemble your bowl, and drizzle on that luscious sauce for a satisfying meal that tastes just as delicious as if you made everything fresh that day!

Grilled Steak Bowl with Creamy Sauce & Grilled Zucchini Recipe FAQs

How do I choose ripe zucchini for grilling?
Absolutely! Look for zucchini that’s firm to the touch and has a glossy skin. Avoid any with dark spots all over or a soft texture, as these indicate overripeness. Smaller zucchinis are often sweeter and more tender, making them perfect for grilling.

How should I store leftover grilled steak and zucchini?
Very good question! Store any leftover components separately in airtight containers in the refrigerator for up to 3 days. This helps maintain the juiciness of the steak and the freshness of the veggies. If you think you won’t finish them in that time, consider freezing!

Can I freeze the grilled components of the steak bowl?
Absolutely! To freeze, allow the grilled steak and zucchini to cool completely, then place them in freezer-safe bags or containers. They can be frozen for up to 2 months. To reheat, gently warm them in a skillet over low heat or in a microwave, ensuring they stay moist.

What should I do if my steak ends up overcooked?
Oh no, we’ve all been there! If your steak is overcooked, slice it thinly against the grain and serve it over a flavorful grain base with plenty of sauce. This adds moisture and can help salvage the dish. Also, consider using a meat thermometer next time for perfect doneness!

Are there any dietary considerations I should keep in mind with this recipe?
For sure! If you’re cooking for guests with dietary restrictions, consider using plant-based yogurt for the sauce to make it dairy-free. Keep in mind any allergies related to mustard or gluten in your chosen grains. Always double-check the labels to ensure everyone can enjoy this yummy dish!

How can I adapt this recipe for different protein sources?
Great question! If you'd like to swap in chicken, salmon, or portobello mushrooms, the method is very similar. For chicken, grill until fully cooked—about 6-8 minutes per side. For salmon, aim for about 4-5 minutes per side. And for portobello mushrooms, grill them for about 5-7 minutes on each side until tender, brushing with olive oil and seasoning just like the zucchini. Enjoy experimenting!

Grilled Steak Bowl with Creamy Sauce & Grilled Zucchini

Savory Grilled Steak Bowl with Creamy Sauce & Zucchini Bliss

A delicious Grilled Steak Bowl with Creamy Sauce & Grilled Zucchini that is customizable and high in protein.
Print Recipe Pin Recipe
Prep Time 20 minutes mins
Cook Time 25 minutes mins
Resting Time 5 minutes mins
Total Time 50 minutes mins
Servings: 4 bowls
Course: Dinner
Cuisine: American
Calories: 500
Ingredients Equipment Method Nutrition Notes

Ingredients
  

For the Steak
  • 1 pound Sirloin or Ribeye Steak Choose a cut that grills beautifully.
For the Grilled Zucchini
  • 2 medium Zucchini Can substitute with eggplant or bell peppers.
For the Grains
  • 1 cup Cooked Grains (quinoa, rice, or farro) Cauliflower rice can be used for a lower-carb option.
For the Sauce
  • 1 cup Sour Cream or Greek Yogurt Use plant-based yogurt for a dairy-free version.
  • 1 tablespoon Dijon Mustard
  • 1 teaspoon Garlic Powder Consider fresh garlic for added flavor.
  • 1 teaspoon Smoked Paprika
  • to taste Salt Essential for flavor.
  • to taste Black Pepper Essential for flavor.
For Garnishing
  • 1/4 cup Fresh Parsley or Chives For a pop of color.

Equipment

  • Grill
  • Mixing Bowl
  • Knife
  • Cutting Board

Method
 

Step-by-Step Instructions
  1. Pat the steak dry using paper towels to remove excess moisture, rub with olive oil, salt, black pepper, garlic powder, and smoked paprika. Let it rest for about 20 minutes.
  2. Preheat your grill to high heat (450°F to 500°F).
  3. Slice the zucchini into even rounds or strips, brush with olive oil and season with salt.
  4. Place the seasoned zucchini on the grill. Cook for 2–3 minutes per side until tender and charred.
  5. Grill the steak for 4–5 minutes per side for medium-rare, aiming for an internal temperature of 130°F. Let it rest for 5 minutes before slicing.
  6. Prepare your grains according to package instructions, generally about 15 minutes for quinoa.
  7. In a mixing bowl, combine sour cream, Dijon mustard, garlic powder, smoked paprika, and salt. Mix until smooth.
  8. Assemble the bowl: layer cooked grains, grilled zucchini, sliced steak, and drizzle with the creamy sauce. Garnish with parsley or chives.

Nutrition

Serving: 1bowlCalories: 500kcalCarbohydrates: 40gProtein: 35gFat: 20gSaturated Fat: 8gPolyunsaturated Fat: 2gMonounsaturated Fat: 10gCholesterol: 80mgSodium: 600mgPotassium: 800mgFiber: 6gSugar: 4gVitamin A: 500IUVitamin C: 15mgCalcium: 150mgIron: 3mg

Notes

Perfect for meal prep by grilling components ahead and storing separately, then assembling just before serving.

Tried this recipe?

Let us know how it was!

Mushroom Swiss Cheese Meatloaf for Cozy Family Dinners

October 1, 2025 by Grace Snow Leave a Comment

As the aroma of sautéed mushrooms wafts through my kitchen, I can’t help but feel a wave of nostalgia for family dinners of the past. Today, I’m excited to share my Mushroom Swiss Cheese Meatloaf—a cozy dish that adds a gourmet twist to a beloved classic. This recipe doesn’t just satisfy hunger; it’s a heartfelt meal that brings everyone together, thanks to its crispy bacon topping and creamy Swiss cheese which really elevate the flavors. Plus, it only requires 15 minutes of prep time! Whether you’re cooking for a busy weeknight or a special occasion, this meatloaf is a delicious way to redefine comfort food. I can’t wait for you to taste the magic—what will you serve alongside this comforting delight?

Why Is This Meatloaf So Irresistible?

Flavorful Fusion: The savory blend of sautéed mushrooms and creamy Swiss cheese creates a delectable taste that will impress your family.
Quick Prep: With only 15 minutes of prep time, you can have this comfort food masterpiece ready to bake in no time.
Crowd-Pleasing Appeal: Crispy bacon on top adds a crunchy texture that ensures everyone will leave the dinner table satisfied.
Versatile Options: Feel free to make it gluten-free with the right breadcrumbs, or switch up the cheeses for an exciting twist. If you're looking to jazz up your meal, consider pairing it with buttery mashed potatoes or roasted vegetables for a complete dinner experience!
Hearty & Comforting: This Mushroom Swiss Cheese Meatloaf transforms a classic into a gourmet dish, making it perfect for both weeknights and special occasions.

Mushroom Swiss Cheese Meatloaf Ingredients

For the Meat Mixture
• Ground Beef – Provides a robust base flavor with plenty of protein.
• Ground Pork – Adds richness and moisture for a tender loaf.
• Breadcrumbs – Helps bind the mixture; opt for gluten-free if desired.
• Eggs – Essential for binding the ingredients into a cohesive loaf.

For the Flavor
• Sautéed Mushrooms – Infuses umami flavor and moisture; try portobello for a deeper taste.
• Swiss Cheese – Brings creaminess and delightful melting quality; Gruyère is a tasty alternative.
• Crispy Bacon – Offers a smoky crunch that elevates the meatloaf experience.
• Seasonings (salt, pepper, garlic powder, etc.) – Enhance the overall flavor profile of the dish.

Optional Topping
• More Swiss Cheese – Sprinkle additional cheese on top for an even cheesier Mushroom Swiss Cheese Meatloaf!

Step‑by‑Step Instructions for Mushroom Swiss Cheese Meatloaf

Step 1: Preheat the Oven
Begin by preheating your oven to 350°F (175°C). This step is crucial as it ensures that your Mushroom Swiss Cheese Meatloaf bakes evenly and thoroughly, achieving a lovely golden brown crust. Set your timer for approximately 1 hour once the meatloaf is in, giving you time to prepare the other ingredients while the oven heats.

Step 2: Prepare the Mushrooms
In a skillet over medium heat, sauté diced mushrooms until they are golden brown and their moisture has evaporated, which typically takes about 5–7 minutes. Stir occasionally to ensure even cooking. Once done, remove from heat and allow them to cool slightly before adding them to the meat mixture. This step enhances the umami flavor in your Mushroom Swiss Cheese Meatloaf.

Step 3: Combine the Ingredients
In a large mixing bowl, combine the ground beef, ground pork, breadcrumbs, eggs, sautéed mushrooms, salt, pepper, and garlic powder. Mix well until all ingredients are fully incorporated and have a uniform consistency. This mixture should be slightly sticky. Add half of the shredded Swiss cheese at this point to meld those cheesy flavors right into the meat.

Step 4: Shape the Loaf
Transfer the meat mixture onto a lined baking dish or a loaf pan. With clean hands, shape it into a loaf that’s about 2 inches tall. Ensure it’s compact but not overly tight, as you want the Mushroom Swiss Cheese Meatloaf to retain moisture while cooking. The shape will help it cook evenly and promote a delightful texture.

Step 5: Top with Cheese and Bacon
Sprinkle the remaining Swiss cheese generously over the top of the formed loaf. Then, layer the crispy bacon on top, allowing it to add crunchiness and flavor. Make sure to distribute the bacon evenly to ensure every slice of your Mushroom Swiss Cheese Meatloaf gets a taste of that smoky goodness.

Step 6: Bake the Loaf
Carefully place your baking dish in the preheated oven and bake for about 1 hour, or until the internal temperature reaches 160°F (70°C). Keep an eye on it—when the cheese is bubbling and golden, it’s almost ready! This essential step ensures your meatloaf is cooked through while remaining moist and flavorful.

Step 7: Rest before Slicing
Once your Mushroom Swiss Cheese Meatloaf is done, remove it from the oven and allow it to rest for about 10 minutes. This resting period helps the juices redistribute, resulting in a moist and tender loaf. Avoid slicing too soon, as this can risk losing those delicious flavors and textures you've worked hard for; patience truly pays off here!

Expert Tips for Mushroom Swiss Cheese Meatloaf

  • Mushroom Moisture Management: Ensure mushrooms are thoroughly sautéed to avoid excess moisture, which can lead to a mushy meatloaf.
  • Proper Binding: Use enough breadcrumbs and eggs to create a cohesive mixture. Too little binding can make the loaf crumble.
  • Cheese Layer Surprise: For an extra cheesy delight, try stuffing the center with more Swiss cheese before shaping the loaf.
  • Resting Time: Allowing the meatloaf to rest for 10 minutes after baking is crucial; this locks in moisture and makes slicing easier.
  • Flavor Variations: Feel free to experiment with different mushrooms or cheeses in your Mushroom Swiss Cheese Meatloaf for unique flavors!

How to Store and Freeze Mushroom Swiss Cheese Meatloaf

Refrigerator: Store leftover meatloaf in an airtight container for up to 3 days. This helps maintain moisture and flavor for your next meal.

Freezer: Wrap the Mushroom Swiss Cheese Meatloaf tightly in plastic wrap and foil, then freeze for up to 3 months. This keeps it fresh and ready for a cozy meal later.

Reheating: When you're ready to enjoy, thaw it overnight in the fridge. Reheat in the oven at 300°F (150°C) for about 20-30 minutes, adding a splash of broth to retain moisture.

Serving Tip: Slice the meatloaf before reheating; this helps it warm evenly and makes serving easier during busy weeknights!

Make Ahead Options

These Mushroom Swiss Cheese Meatloaf creations are perfect for busy home cooks looking to save time! You can prepare the meatloaf mixture up to 24 hours in advance. Simply combine the ground meats, breadcrumbs, sautéed mushrooms, eggs, and half of the Swiss cheese, then shape into a loaf and wrap it tightly in plastic wrap or place it in an airtight container in the refrigerator. To maintain quality, avoid adding the remaining cheese and bacon until just before baking, as this ensures they remain fresh and crispy. When you’re ready to enjoy, simply preheat your oven and bake as directed; you'll have a comforting, gourmet meal with minimal evening effort!

What to Serve with Mushroom Swiss Cheese Meatloaf

As you prepare to enjoy the warmth of your Mushroom Swiss Cheese Meatloaf, let’s explore some delightful pairings that will elevate your meal to new heights.

  • Creamy Mashed Potatoes: The buttery richness of mashed potatoes complements the savory flavors of the meatloaf perfectly. Their creamy texture balances well against the meatloaf's crisp bacon topping.

  • Roasted Seasonal Vegetables: A medley of roasted carrots, zucchini, and bell peppers brings a pop of color and freshness to the table. Their caramelized sweetness beautifully contrasts the meat's savory components.

  • Garlic Breadsticks: Warm, cheesy breadsticks add a touch of indulgence and perfect for soaking up any meaty juices. Their crunchy texture works wonderfully with the tender meatloaf.

  • Crisp Green Salad: A fresh, tangy salad of mixed greens with a light vinaigrette keeps the meal refreshing and adds a vibrant crunch. It's the ideal palate cleanser amid rich flavors.

  • Herb-Infused Quinoa: Nutty quinoa sprinkled with herbs offers a gluten-free grain option that is both hearty and wholesome. It complements the meatloaf without overpowering its flavors.

  • Savory Mushroom Gravy: A luscious mushroom gravy not only enhances the umami taste of your meatloaf but also adds extra moisture, making each bite even more delightful.

  • Red Wine: A glass of smooth red wine, like Merlot or Pinot Noir, pairs beautifully with the rich flavors of the meatloaf, enhancing the overall dining experience.

  • Chocolate Cake: End the meal on a sweet note with a slice of decadent chocolate cake. Its richness provides a lovely finish after the savory meatloaf.

These dishes will elevate your dining experience, bringing out the heartwarming flavors of your Mushroom Swiss Cheese Meatloaf in delightful ways!

Mushroom Swiss Cheese Meatloaf Variations

Embrace your creativity and give this delicious meatloaf your own special twist!

  • Gluten-Free: Swap out regular breadcrumbs for gluten-free ones to meet dietary needs without sacrificing taste.
  • Lean Meat Option: Use ground turkey or chicken instead of beef and pork for a lighter version, while still keeping it juicy and flavorful.
  • Vegetable Add-ins: Inspire your dish by incorporating diced bell peppers or spinach for extra nutrition and a pop of color!
  • Cheese Twist: Experiment with Gruyère or Provolone for different flavor dimensions; each cheese lends a unique twist to the loaf.
  • Herb Infusion: Add fresh herbs like thyme or parsley to elevate the taste with fresh, aromatic notes.
  • Saucy Topper: Spread a dollop of your favorite barbecue sauce or marinara on top for an extra burst of flavor.
  • Mini Meatloaves: Consider shaping the mixture into mini loaves for individual servings; they’ll cook faster and are perfect for meal prepping.
  • Savory Stuffing: Stuff the center with sautéed onions and more mushrooms for an irresistible hidden flavor surprise.

Looking for a delightful side? Imagine enjoying this comforting meatloaf alongside some buttery mashed potatoes or fresh grilled vegetables. Customize this recipe as you wish, and you'll create a truly unique family favorite!

Mushroom Swiss Cheese Meatloaf Recipe FAQs

What type of mushrooms should I use for the meatloaf?
Absolutely! I recommend using sautéed button, cremini, or portobello mushrooms since they add a rich umami flavor. For a stronger taste, shiitake mushrooms can be a delightful alternative! Just make sure to sauté them until they are golden brown and their moisture has evaporated to avoid a soggy meatloaf.

How should I store leftover Mushroom Swiss Cheese Meatloaf?
Very simply, store leftover meatloaf in an airtight container in the refrigerator for up to 3 days. This keeps it fresh and flavorful! If you'd like to keep it longer, wrap it tightly in plastic wrap and foil, and freeze it for up to 3 months.

Can I freeze the meatloaf? If so, how?
Of course! To freeze, allow the meatloaf to cool completely after baking. Then, tightly wrap it in plastic wrap and aluminum foil or use a freezer-safe container. This prevents freezer burn and keeps it delicious for up to 3 months. When you’re ready to enjoy, thaw it in the fridge overnight before reheating.

What do I do if my meatloaf turns out dry?
Oh no! If your meatloaf is dry, this may be due to overcooking or insufficient moisture. For next time, ensure your mushrooms are cooked properly to avoid excess moisture loss. If it’s already cooked, you can add a sauce or gravy on top when serving to add moisture. You might also want to bake it less if it’s starting to dry out in the oven.

Is this recipe suitable for gluten-free diets?
Yes, indeed! You can easily make this Mushroom Swiss Cheese Meatloaf gluten-free by substituting traditional breadcrumbs with gluten-free breadcrumbs. It retains great texture and flavor, so everyone can savor this comforting dish!

How long do I need to let the meatloaf rest before slicing?
I suggest letting your Mushroom Swiss Cheese Meatloaf rest for about 10 minutes after baking. This resting period is important as it allows the juices to redistribute, ensuring every slice is moist and flavorful. Trust me, waiting is worth it!

Mushroom Swiss Cheese Meatloaf

Mushroom Swiss Cheese Meatloaf for Cozy Family Dinners

A gourmet twist on a classic, this Mushroom Swiss Cheese Meatloaf combines savory flavors and hearty ingredients, perfect for family dinners.
Print Recipe Pin Recipe
Prep Time 15 minutes mins
Cook Time 1 hour hr
Resting Time 10 minutes mins
Total Time 1 hour hr 25 minutes mins
Servings: 6 slices
Course: Dinner
Cuisine: American
Calories: 350
Ingredients Equipment Method Nutrition Notes

Ingredients
  

For the Meat Mixture
  • 1 lb Ground Beef
  • 1 lb Ground Pork
  • 1 cup Breadcrumbs opt for gluten-free if desired
  • 2 large Eggs
For the Flavor
  • 1 cup Sautéed Mushrooms try portobello for deeper taste
  • 1 cup Swiss Cheese Gruyère is a tasty alternative
  • 4 slices Crispy Bacon
  • to taste Seasonings (salt, pepper, garlic powder, etc.)
Optional Topping
  • 1 cup More Swiss Cheese for an even cheesier meatloaf

Equipment

  • Skillet
  • Mixing Bowl
  • baking dish or loaf pan
  • Oven

Method
 

Step‑by‑Step Instructions
  1. Preheat your oven to 350°F (175°C).
  2. In a skillet over medium heat, sauté diced mushrooms until golden brown, about 5–7 minutes.
  3. In a large mixing bowl, combine the ground beef, ground pork, breadcrumbs, eggs, sautéed mushrooms, salt, pepper, and garlic powder. Mix well and add half of the shredded Swiss cheese.
  4. Transfer the meat mixture onto a lined baking dish or a loaf pan and shape into a loaf about 2 inches tall.
  5. Sprinkle remaining Swiss cheese and layer crispy bacon on top.
  6. Bake for about 1 hour, or until the internal temperature reaches 160°F (70°C).
  7. Allow the meatloaf to rest for about 10 minutes before slicing.

Nutrition

Serving: 1sliceCalories: 350kcalCarbohydrates: 15gProtein: 25gFat: 20gSaturated Fat: 8gPolyunsaturated Fat: 2gMonounsaturated Fat: 10gCholesterol: 80mgSodium: 600mgPotassium: 500mgFiber: 2gSugar: 3gVitamin A: 600IUVitamin C: 2mgCalcium: 200mgIron: 3mg

Notes

To maintain moisture, ensure mushrooms are well sautéed and allow resting time after baking for best texture.

Tried this recipe?

Let us know how it was!

Decadent Cherry Amaretto Tiramisu for Sweet Celebrations

October 1, 2025 by Grace Snow Leave a Comment

As I rummaged through the fridge, a forgotten bottle of amaretto caught my eye, and suddenly I was transported to a charming Italian café, with the scent of fresh cherries wafting through the air. That simple spark ignited my creation of Cherry Amaretto Tiramisu, a luscious dessert that merges sweet cherries with rich amaretto and creamy mascarpone. This recipe not only offers a delightful twist on a classic Italian tiramisu but also boasts a quick prep time, making it a fabulous option for both special celebrations and casual gatherings. The blend of flavors and textures will have your friends and family swooning with every creamy, cherry-kissed bite. Ready to indulge in a dessert that’s as easy to make as it is to devour? Let’s dive in!

Why is this tiramisu special?

Decadent layers of cherry and amaretto make this dessert a standout. Quick prep time allows you to whip it up even on busy days, perfect for last-minute gatherings. Bold flavor fusion of sweet cherries and nutty liqueur elevates classic tiramisu into an elegant showstopper. Serve chilled for a refreshing end to any meal, and don’t forget to pair it with a strong coffee! For more fruity delights, you might also enjoy our Chocolate Cherry Smoothie or bake a scrumptious Cherry Clafoutis French.

Cherry Amaretto Tiramisu Ingredients

For the Cream Mixture

  • Mascarpone Cheese – Provides a rich and creamy base for the dessert; can be substituted with cream cheese mixed with heavy cream for a similar texture.
  • Heavy Cream – Adds lightness and volume to the mascarpone mix, ensuring a fluffy texture.
  • Amaretto Liqueur – Infuses the dessert with nutty sweetness; may use almond extract with water for a non-alcoholic version.
  • Cherry Juice – Adds fruity flavor and complements amaretto; switch to a non-alcoholic cherry juice if desired.
  • Granulated Sugar – Sweetens the mascarpone mixture; can be reduced when using sweeter frozen cherries.
  • Cherry Preserves – Enhances the cherry flavor and adds sweetness; optional but highly recommended.
  • Vanilla Extract – Adds depth to the flavor profile; optional to use if wanting a simpler taste.

For the Tiramisu Layers

  • Ladyfingers – Form the structure of the tiramisu; quickly dip to avoid sogginess.
  • Fresh Cherries – Offers bright, juicy bursts in every bite; frozen cherries can be used if thawed and drained well.

For the Topping

  • Cocoa Powder – Provides a rich, chocolatey balance on top for garnishing; dust before serving.
  • Dark Chocolate (Shaved or Grated) – Enhances the presentation and introduces an extra layer of flavor.

Indulge in this Cherry Amaretto Tiramisu, and treat yourself to an unforgettable dessert experience!

Step‑by‑Step Instructions for Cherry Amaretto Tiramisu

Step 1: Prepare the Cream Mixture
In a large mixing bowl, add the mascarpone cheese and heavy cream. Using an electric mixer, beat on medium speed for 2-3 minutes until the mixture is smooth and fluffy. The cream should hold soft peaks. This rich cream forms the base of your Cherry Amaretto Tiramisu, providing a luscious texture.

Step 2: Incorporate Flavors
Stir in the amaretto liqueur, cherry juice, and vanilla extract. Continue mixing for another 1-2 minutes on low speed until the flavors are well combined. The addition of these ingredients will infuse the mascarpone mix with a delightful balance of sweet and nutty notes, enhancing your dessert's overall richness.

Step 3: Sweeten the Mixture
In a separate bowl, combine the granulated sugar and cherry preserves, mixing well until you achieve a smooth consistency. Gradually add this sugary mixture to the mascarpone blend while beating for an additional minute. This crucial step will deepen the cherry flavor in your Cherry Amaretto Tiramisu, adding sweetness and fruitiness.

Step 4: Fold in Cherries
Gently fold in the chopped fresh cherries into the cream mixture using a spatula. Be careful not to overmix, as you want to maintain the airy texture of the cream while distributing the bursts of juicy cherry throughout. Now, your creamy layer is ready to elevate the tiramisu.

Step 5: Prepare Ladyfingers
In a shallow dish, combine equal parts amaretto and cherry juice. Quickly dip each ladyfinger in the mixture, ensuring they soak just long enough to absorb flavor without becoming soggy. The ladyfingers form the structural elements of your Cherry Amaretto Tiramisu, so a brief dip is key to maintain their form.

Step 6: Layering the Tiramisu
Begin layering in a 9x13 inch dish by placing a single layer of dipped ladyfingers at the bottom. Then, spread half of the mascarpone mixture evenly over the ladyfingers, covering them completely. This creates a delightful combination of textures, where the cream meets the soft, infused ladyfingers.

Step 7: Repeat the Layers
Continue by adding another layer of quickly dipped ladyfingers, followed by the remaining mascarpone mixture spread on top. Smooth the cream evenly with a spatula for an impeccable finish. This double-layered approach will yield a beautifully balanced Cherry Amaretto Tiramisu with rich flavors.

Step 8: Chill the Tiramisu
Cover the dish tightly with plastic wrap and place it in the refrigerator for at least 4 hours or overnight. This chilling process allows the flavors to meld beautifully and enhances the creamy texture, making every bite of your Cherry Amaretto Tiramisu a heavenly experience.

Step 9: Garnish Before Serving
Just before serving, dust the top of the tiramisu with cocoa powder for a rich finish, and sprinkle shaved dark chocolate for an elegant touch. The cocoa adds a slight bitterness that beautifully contrasts the sweetness of the dessert, making each spoonful even more delightful.

Step 10: Serve and Enjoy
Slice the chilled Cherry Amaretto Tiramisu into squares and serve cold. Pair it with a strong coffee or espresso to balance the sweetness, or add a dollop of whipped cream for extra richness. Each bite promises a luscious experience that will leave your guests asking for more!

Make Ahead Options

Cherry Amaretto Tiramisu is a dream come true for busy cooks looking to save time! You can prepare the creamy mascarpone mixture and layer it with ladyfingers up to 24 hours before serving; just cover it tightly in the refrigerator to maintain freshness. The flavors meld beautifully during this time, creating a richer taste. If you like, you can also cut and store individual portions in airtight containers for easy serving later—perfect for sneaking a sweet treat after a long day! Just remember to dust with cocoa powder and sprinkle with dark chocolate shavings just before serving, ensuring your dessert looks as fabulous as it tastes!

Expert Tips for Cherry Amaretto Tiramisu

  • Layer Smartly: Alternate layers neatly to create a beautiful presentation. Ensure each ladyfinger is adequately dipped without becoming too soggy to maintain structure.
  • Chill Time Counts: Allow the Cherry Amaretto Tiramisu to chill overnight for the best flavor infusion—this helps the flavors meld and enhances the dessert’s overall texture.
  • Taste as You Go: Adjust sweetness based on your cherry variety; taste the mascarpone mixture before layering to find your perfect balance.
  • Use Quality Ingredients: Choose a high-quality amaretto and fresh cherries for an exceptional flavor that shines through in every bite of your Cherry Amaretto Tiramisu.
  • Decorate with Care: When dusting cocoa powder, use a fine sieve for an even coat, and add chocolate shavings just before serving to retain their texture and look beautiful.

How to Store and Freeze Cherry Amaretto Tiramisu

Fridge: Keep the Cherry Amaretto Tiramisu covered tightly in the refrigerator for up to 3 days. Use plastic wrap or an airtight container to maintain freshness and avoid absorbing odors.

Freezer: For longer storage, wrap the tiramisu tightly in plastic wrap followed by aluminum foil. It can be frozen for up to 1 month. Thaw overnight in the fridge before serving for the best texture.

Individual Portions: If you prefer, slice the tiramisu before freezing and store individual pieces in airtight containers. This makes it easy to grab a sweet treat whenever the craving hits!

Reheating: Tiramisu is best enjoyed cold; simply slice and serve straight from the fridge after thawing, as reheating can compromise the creamy texture.

Cherry Amaretto Tiramisu Variations

Feel free to personalize your Cherry Amaretto Tiramisu with these delightful twists!

  • Non-Alcoholic: Replace amaretto with almond extract mixed with a little water; use cherry juice for soaking. Enjoy the same great flavor without the alcohol.
  • Fruit Variations: Swap cherries for fresh raspberries or strawberries to create a new fruity dimension. The bright acidity of other berries will give a lighter touch to your dessert.
  • Layer with Nuts: Consider adding crushed almonds or hazelnuts between the layers for a delightful crunch. The nutty crunch complements the creamy texture beautifully, elevating each bite.
  • Chocolate Heaven: Incorporate chocolate shavings into the mascarpone mix for a decadent chocolate-cherry fusion. Just think about how indulgent it would be and how it could impress your guests!
  • Spiced Up: A pinch of cinnamon or nutmeg in the cream mixture can add warmth and depth to the flavor. It’s a simple yet effective way to make your dessert feel extra special during the holidays.
  • Flavored Whipped Cream: Top each serving with flavored whipped cream, such as vanilla or chocolate, for an added touch of indulgence. This twist not only looks pretty but enhances the creamy experience.
  • Caramel Drizzle: Finish your tiramisu with a drizzle of salted caramel before serving. The contrast of saltiness with sweet cherries is nothing short of a heavenly match.
  • Mini Desserts: Create mini portions in individual glasses for a beautiful presentation at gatherings. Layer the components artfully to show off those luscious layers!

Each variation offers a new adventure to explore while still celebrating the essence of your Cherry Amaretto Tiramisu. And don’t forget to pair this delightful dessert with a strong coffee or espresso, just as you would at an Italian café! If you’re looking for more fruity options to satisfy your sweet tooth, check out our Cherry Clafoutis French and the refreshing Chocolate Cherry Smoothie. Enjoy experimenting!

What to Serve with Cherry Amaretto Tiramisu?

Elevate your dessert experience by pairing the indulgent layers of Cherry Amaretto Tiramisu with complementary flavors and textures.

  • Espresso or Strong Coffee: The boldness of coffee balances the sweetness of the tiramisu, creating a harmonious flavor profile.
  • Whipped Cream: A dollop of softly whipped cream adds extra richness and a light, airy texture to every bite.
  • Chocolate-Dipped Strawberries: These sweet and juicy treats provide a fresh contrast to the creamy tiramisu, making your dessert plate irresistible.
  • Vanilla Ice Cream: A scoop of vanilla ice cream brings a delightful creaminess that mirrors the texture of the tiramisu while cooling down each mouthful.
  • Berry Compote: A tangy berry compote, made with fresh raspberries or blueberries, can slice through the sweetness, offering a refreshing palate cleanser.
  • Sparkling Wine: A glass of bubbly prosecco or champagne can enhance the celebration, adding a festive touch to your dessert experience.
  • Chocolate Ganache Sauce: Drizzling a rich chocolate ganache elevates the dessert with another layer of flavor, perfect for chocolate lovers.
  • Toasted Almonds: A sprinkle of toasted almonds offers a crunchy texture that contrasts beautifully with the softness of the tiramisu.
  • Mint Leaves: Fresh mint not only adds a pop of color but also a refreshing note that complements the cherry and amaretto flavors.
  • Almond Biscotti: This crunchy treat makes for a delightful pairing, allowing guests to enjoy dipping it into the coffee alongside their tiramisu.

Cherry Amaretto Tiramisu Recipe FAQs

What should I look for when selecting fresh cherries?
Absolutely! When choosing cherries, select those that are plump, firm, and have a vibrant color. Avoid cherries with dark spots or soft spots, as these may indicate overripeness. A good rule of thumb is to go for shiny, smooth-skinned cherries since they often have the best flavor.

How should I store my Cherry Amaretto Tiramisu?
Very simply! Keep the Cherry Amaretto Tiramisu covered tightly in the refrigerator for up to 3 days. Use plastic wrap or an airtight container to maintain its freshness and prevent any off-odors from affecting the dessert. Just be sure to let it chill overnight before serving for the best flavor!

Can I freeze Cherry Amaretto Tiramisu? If so, how?
Yes, you can! To freeze Cherry Amaretto Tiramisu, wrap the entire dish tightly in plastic wrap, followed by aluminum foil to prevent any freezer burn. It can be stored this way for up to 1 month. When you're ready to enjoy it, simply thaw it overnight in the fridge. For an individual treat, slice first and store the portions in airtight containers.

What if my ladyfingers turned out soggy? What can I do?
If your ladyfingers are too soggy, don't worry! To avoid this in the future, make sure to dip them quickly—just until they are moistened but not soaked. If they’re already soggy, consider using a smaller portion in a parfait-style presentation; line a glass with the soggy ladyfingers, add layers of mascarpone cream and cherries, and create a delicious trifle.

Is there a non-alcoholic version of Cherry Amaretto Tiramisu?
Absolutely! You can easily make a non-alcoholic version by substituting the amaretto liqueur with almond extract mixed with a little water. Just use the same amount to achieve that delightful nutty flavor in your Cherry Amaretto Tiramisu without the alcohol. This is a great way to accommodate everyone at your gathering!

Cherry Amaretto Tiramisu

Decadent Cherry Amaretto Tiramisu for Sweet Celebrations

Indulge in this luscious Cherry Amaretto Tiramisu, blending sweet cherries and rich amaretto for a delightful dessert.
Print Recipe Pin Recipe
Prep Time 30 minutes mins
Chilling Time 4 hours hrs
Total Time 4 hours hrs 30 minutes mins
Servings: 8 slices
Course: Dessert
Cuisine: Italian
Calories: 320
Ingredients Equipment Method Nutrition Notes

Ingredients
  

For the Cream Mixture
  • 1 cup Mascarpone Cheese Can be substituted with cream cheese mixed with heavy cream.
  • 1 cup Heavy Cream Adds lightness and volume.
  • 1/2 cup Amaretto Liqueur May use almond extract with water for a non-alcoholic version.
  • 1/2 cup Cherry Juice Switch to non-alcoholic cherry juice if desired.
  • 1/2 cup Granulated Sugar Can be reduced with sweeter frozen cherries.
  • 1/2 cup Cherry Preserves Optional but recommended.
  • 1 teaspoon Vanilla Extract Optional for a simpler taste.
For the Tiramisu Layers
  • 24 pieces Ladyfingers Quickly dip to avoid sogginess.
  • 1 cup Fresh Cherries Can use frozen cherries if thawed and drained.
For the Topping
  • 2 tablespoons Cocoa Powder Dust before serving.
  • 1/4 cup Dark Chocolate (Shaved or Grated) Enhances presentation.

Equipment

  • Mixing Bowl
  • Electric mixer
  • Shallow dish
  • 9x13 inch dish

Method
 

Step-by-Step Instructions
  1. In a large mixing bowl, add the mascarpone cheese and heavy cream. Beat on medium speed for 2-3 minutes until smooth and fluffy.
  2. Stir in the amaretto liqueur, cherry juice, and vanilla extract. Mix for another 1-2 minutes on low speed.
  3. In a separate bowl, combine the granulated sugar and cherry preserves until smooth. Gradually add to the mascarpone blend while beating for an additional minute.
  4. Gently fold in the chopped fresh cherries into the cream mixture using a spatula.
  5. In a shallow dish, combine equal parts amaretto and cherry juice. Dip each ladyfinger quickly to absorb flavor without sogginess.
  6. Layer dipped ladyfingers at the bottom of a 9x13 inch dish, then spread half of the mascarpone mixture evenly over them.
  7. Add another layer of dipped ladyfingers, then spread the remaining mascarpone mixture on top.
  8. Cover with plastic wrap and refrigerate for at least 4 hours or overnight.
  9. Just before serving, dust the top with cocoa powder and sprinkle shaved dark chocolate.
  10. Slice into squares and serve cold, optionally with strong coffee or whipped cream.

Nutrition

Serving: 1sliceCalories: 320kcalCarbohydrates: 40gProtein: 5gFat: 16gSaturated Fat: 10gPolyunsaturated Fat: 1gMonounsaturated Fat: 4gCholesterol: 80mgSodium: 80mgPotassium: 150mgFiber: 1gSugar: 25gVitamin A: 500IUVitamin C: 2mgCalcium: 60mgIron: 1mg

Notes

Allow the tiramisu to chill overnight for best flavor infusion. Use quality ingredients for exceptional flavor.

Tried this recipe?

Let us know how it was!

Crispy Rice Paper Crab Rangoons for a Guilt-Free Snack

October 1, 2025 by Grace Snow Leave a Comment

As I pulled the golden-brown Baked Rice Paper Crab Rangoons from the oven, my kitchen was filled with the enticing aroma of savory crab mingling with the crispy scent of freshly baked rice paper. This delightful appetizer is not only a healthier twist on a beloved classic but also a testament to how simple changes can elevate your cooking game. Imagine indulging in a creamy filling made with fresh crab, all wrapped in a perfectly crunchy exterior, without the guilt of deep-frying. The best part? You can customize these rangoons to suit your taste buds – whether you prefer a hint of spice or an extra dose of freshness from herbs. Perfect for gatherings or a cozy night in, these baked goodies are sure to impress. What unique filling will you try to make them your own?

Why Choose Rice Paper Crab Rangoons?

Healthy Alternative: These baked rangoons provide a guilt-free indulgence without sacrificing flavor. Crispy Texture: The rice paper creates a delightful crunch that complements the creamy filling. Customizable: Tailor your rangoons with different spices or seafood to suit your preferences. Quick to Prepare: Whip these up in no time, making them perfect for last-minute gatherings. Crowd-Pleasing: Their unique flavor profile is sure to impress friends and family, just like my popular Furikake Fried Rice or Bbq Chicken Rice. Enjoy a burst of fresh flavors that everyone will love!

Rice Paper Crab Rangoons Ingredients

For the Filling
• Crab Meat – Use fresh crab meat for the best flavor, but frozen is acceptable if necessary.
• Cream Cheese – Softened for a smooth mixture, contributing rich creaminess to the filling.
• Green Onions – Add freshness; substitute with chives if you prefer a milder taste.
• Soy Sauce – Enhances the umami; swap with tamari for a gluten-free alternative or coconut aminos for a soy-free option.

For the Wrappers
• Rice Paper – Ensures a crispy exterior; don't soak too long to maintain structure.

For Baking
• Oil – Brush over the rangoons to achieve that beautiful golden-brown color and crispy texture.

This collection of ingredients is what makes your Rice Paper Crab Rangoons not only a delightful snack but also a healthier choice for any occasion!

Step‑by‑Step Instructions for Rice Paper Crab Rangoons

Step 1: Prepare Workstation
Gather all your ingredients and tools to create a smooth preparation process for your Rice Paper Crab Rangoons. Set up a cutting board, mixing bowl, and a clean workspace where you can easily access your items. Make sure to have a baking sheet lined with parchment paper ready for the assembled rangoons, allowing you to keep everything organized and efficient.

Step 2: Make the Filling
In a mixing bowl, combine softened cream cheese, drained crab meat, chopped green onions, and soy sauce. Using a fork or spatula, blend the mixture until everything is well-integrated and smooth. This flavorful filling will be the star of your Rice Paper Crab Rangoons, setting a delicious foundation for their savory taste.

Step 3: Soak Rice Papers
Fill a shallow dish with warm water and carefully dip each rice paper sheet into the water for about 10-15 seconds. You want the paper to be flexible but not too soft, so keep an eye on the texture. Once softened, remove it from the water and gently shake off excess liquid, placing it on a flat surface to prepare for assembly.

Step 4: Assemble Rangoons
Lay the soaked rice paper onto your clean work surface and spoon about one tablespoon of the creamy filling onto the center. Fold the edges of the rice paper inwards like an envelope, making sure to encase the filling completely. Press the edges firmly to seal the rangoons, ensuring they maintain their shape during baking.

Step 5: Bake Rangoons
Preheat your oven to 400°F (200°C). Arrange the sealed rice paper rangoons on the parchment-lined baking sheet, ensuring they are not crowded. Lightly brush the tops with oil to promote a beautiful golden-brown color and crispiness. This baking process will create a delightful crunch that enhances your Rice Paper Crab Rangoons.

Step 6: Serve and Enjoy
Bake the assembled rangoons in the preheated oven for 15-20 minutes or until they are briskly golden and crispy. Keep an eye on them as they bake to avoid burning. Once perfectly crisp, remove them from the oven and let them cool slightly before serving with your favorite dipping sauce for a delicious appetizer experience.

Make Ahead Options

These Rice Paper Crab Rangoons are a fantastic recipe for meal prep, making your cooking experience easy and enjoyable! You can prepare the filling and assemble the rangoons up to 24 hours in advance. Just mix together the cream cheese, crab meat, green onions, and soy sauce, then fill and fold the rice papers as usual, taking care to seal the edges tightly. Keep the assembled rangoons in a single layer on a parchment-lined baking sheet, covered with plastic wrap in the refrigerator. When ready to serve, simply brush them with oil and bake directly from the fridge, adding a few extra minutes to the cooking time for perfectly crispy results. By prepping ahead, you’ll save time and still enjoy just as delicious crab rangoons!

What to Serve with Baked Rice Paper Crab Rangoons?

Imagine a feast of flavors accompanying these crispy delights, each complementing the rich, savory nature of your baked appetizers.

  • Sweet and Sour Sauce: A classic pairing that adds a tangy contrast, enhancing the creamy crab filling brilliantly.
  • Crispy Asian Slaw: Crunchy veggies tossed in a sesame vinaigrette bring freshness and a burst of color to your meal.
  • Garlic Fried Rice: This fragrant side dish layers on flavor, making it a satisfying companion to the rangoons.
  • Chili Mango Salsa: The sweet-spicy combo of fruit and chili elevates your rangoons, providing a refreshing twist.
  • Edamame: Lightly salted and steamed, these little legumes offer a nutritious snack that balances the richness of the rangoons.
  • Miso Soup: A warm and comforting option, its umami flavors harmonize beautifully with crab, making for a perfect pairing.

Serve these alongside a fragrant green tea or perhaps a light and fruity white wine for a complete culinary experience!

Rice Paper Crab Rangoons Variations

Feel free to let your culinary creativity shine as you explore these delicious twists on a classic!

  • Seafood Swaps: Try shrimp or lobster instead of crab for a luxurious filling. The different seafood profiles will tantalize your taste buds with each bite.

  • Herb Infusion: Incorporate fresh herbs like cilantro or basil into the filling for a burst of freshness. Adding these spices can evoke a delightful aroma that's simply irresistible.

  • Spicy Kick: Add diced jalapeños or a dash of sriracha to the filling for a spicy flavor boost. Perfect for those who crave a bit of heat in their appetizers.

  • Cheesy Delight: Mix in some shredded cheese, like mozzarella or gouda, for an extra creamy texture. The melted cheese adds a delightful surprise that will keep your guests coming back for more!

  • Veggie-Filled: Swap out crab altogether and load your rangoons with sautéed vegetables like bell peppers and mushrooms for a vegan option. This makes for a veggie-packed delight that everyone can enjoy.

  • Dipping Sauce Varieties: Experiment with homemade dipping sauces, such as a zesty mango chutney or tangy soy-vinegar blend, to elevate your serving experience. These sauces can add layers of flavor that will complement your rangoons beautifully.

  • Savory Sweet Variation: Combine traditional fillings with a touch of sweetness by adding a small spoonful of cream cheese frosting. This unexpected twist creates a delightful contrast that surprises and delights.

For more inspiration, why not try adding a touch of flavor from dishes like my Lime Chicken Rice or even enjoy a hearty serving of One Pot Rice? The possibilities are truly endless!

How to Store and Freeze Rice Paper Crab Rangoons

Fridge: Store leftover baked rangoons in an airtight container for up to 3 days. This keeps them fresh and preserves their delightful flavors.

Freezer: For longer storage, freeze uncooked rangoons on a baking sheet until solid, then transfer to a freezer-safe bag. They can be stored for up to 3 months.

Baking from Frozen: When ready to enjoy, bake the frozen rangoons directly from the freezer. Just add an extra 5-7 minutes to the original baking time to ensure they are heated through and crispy.

Reheating: If you have leftover cooked rangoons, reheat them in a preheated oven at 350°F (175°C) for about 10 minutes to restore some of their original crispiness.

Expert Tips for Rice Paper Crab Rangoons

  • Proper Soaking: Soak the rice paper for just 10-15 seconds to avoid becoming too pliable, which could lead to tearing during assembly.
  • Filling Balance: Use about one tablespoon of filling to prevent overfilling, which can cause the rangoons to burst while baking.
  • Edge Sealing: Press the edges firmly to ensure a tight seal; this helps maintain the shape of your Rice Paper Crab Rangoons while they bake.
  • Oven Monitoring: Keep an eye on the baking rangoons, as oven temperatures can vary; adjust the baking time if necessary to achieve that perfect golden brown.
  • Serving Variety: Experiment with different dipping sauces, like sweet and sour or spicy mayo, to enhance the flavor and impress your guests!

Rice Paper Crab Rangoons Recipe FAQs

What should I look for when selecting crab meat?
When selecting crab meat, freshness is key! Look for crab labeled as "fresh" rather than "imitation." If you’re using frozen crab meat, ensure it has been vacuum-sealed to retain flavor. Fresh crab should have a clean, briny smell with a slight sweetness, and it should be chunky and moist. If you notice any dark spots or a strong odor, it’s best to skip it!

How do I store leftover Rice Paper Crab Rangoons?
Store any leftovers in an airtight container in the refrigerator for up to 3 days. This will keep them fresh and flavorful. For best results, reheat them in the oven at 350°F (175°C) for about 10 minutes to get that delightful crispiness back. You can also serve them cold if you prefer that texture!

Can I freeze unbaked Rice Paper Crab Rangoons?
Absolutely! To freeze uncooked rangoons, arrange them on a baking sheet without touching, and place them in the freezer until solid (about 1-2 hours). Then, transfer them to a freezer-safe bag or container. They can be frozen for up to 3 months. When you're ready to enjoy them, bake straight from the freezer, adding an extra 5-7 minutes to the cooking time.

What can I do if my rice paper tears while assembling?
If your rice paper tears, don’t worry! Create a patch by cutting a small piece from another rice paper sheet and gently placing it over the tear. Lightly moisten the edges to help it stick together. Avoid soaking the rice paper for too long next time, as this can weaken its structure. You can also try using multiple layers of rice paper for added sturdiness, just remember to adjust your cooking time accordingly!

Are Rice Paper Crab Rangoons suitable for those with shellfish allergies?
Unfortunately, they are not safe for those allergic to shellfish, as the primary ingredient is crab meat. However, you could substitute with alternative fillings like sautéed mushrooms or a mix of cream cheese and herbs for a delicious vegetarian option! Always be cautious and ensure your filling alternatives don’t contain any allergens.

Rice Paper Crab Rangoons

Crispy Rice Paper Crab Rangoons for a Guilt-Free Snack

Enjoy these Rice Paper Crab Rangoons, a healthier twist on an appetizer classic, packed with savory crab and a crispy exterior.
Print Recipe Pin Recipe
Prep Time 15 minutes mins
Cook Time 20 minutes mins
Total Time 35 minutes mins
Servings: 4 rangoons
Course: Appetizers
Cuisine: Asian
Calories: 150
Ingredients Equipment Method Nutrition Notes

Ingredients
  

For the Filling
  • 1 cup Crab Meat Fresh or frozen
  • 8 oz Cream Cheese Softened
  • 2 Tbsp Green Onions Chopped
  • 1 Tbsp Soy Sauce Can substitute with tamari or coconut aminos
For the Wrappers
  • 10 sheets Rice Paper Do not soak too long
For Baking
  • 1 Tbsp Oil For brushing

Equipment

  • Oven
  • Mixing Bowl
  • Baking Sheet
  • Parchment Paper
  • Shallow dish

Method
 

Step‑by‑Step Instructions
  1. Prepare all ingredients and tools, ensuring a clean workspace.
  2. Combine crab meat, cream cheese, green onions, and soy sauce in a bowl.
  3. Soak each rice paper in warm water for 10-15 seconds until flexible.
  4. Place filling in the center of the rice paper and fold edges to seal.
  5. Preheat oven to 400°F (200°C) and arrange rangoons on a baking sheet.
  6. Brush tops with oil and bake for 15-20 minutes until crispy.
  7. Let cool slightly before serving with a dipping sauce.

Nutrition

Serving: 1rangoonsCalories: 150kcalCarbohydrates: 10gProtein: 8gFat: 9gSaturated Fat: 4gPolyunsaturated Fat: 1gMonounsaturated Fat: 3gCholesterol: 30mgSodium: 300mgPotassium: 200mgFiber: 1gSugar: 1gVitamin A: 500IUVitamin C: 3mgCalcium: 50mgIron: 1mg

Notes

Delightful guilt-free snack perfect for gatherings or casual evenings at home.

Tried this recipe?

Let us know how it was!
  • « Previous Page
  • 1
  • …
  • 132
  • 133
  • 134
  • 135
  • 136
  • …
  • 179
  • Next Page »

Welcome!

Hi, I’m Grace, a Sydney-based home cook with a passion for bold flavors and trending ingredients. Whether you’re a busy beginner or a seasoned foodie, you’ll find dishes here that are fresh, fun, and full of flavor.

More about me

Popular Recipes

  • Cheesy Chicken Garlic Bread Sandwich
    Cheesy Chicken Garlic Bread Sandwich for Cozy Family Moments
  • Easy Chicken Ranch Wraps
    Easy Chicken Ranch Wraps: Quick, Creamy & Totally Satisfying
  • Chicken Caesar Sandwiches
    Delicious Chicken Caesar Sandwiches for Quick Comfort Food
  • best Cuban sandwich
    The Best Cuban Sandwich You’ll Want Every Weeknight!

Footer

↑ back to top

About

  • Privacy Policy
  • Disclaimer
  • Terms & Conditions

Newsletter

  • Sign Up! for emails and updates

Contact

  • About me
  • Contact me

Copyright © 2025 TastyTrendIngredients