tastytrendingredients

  • Home
  • Recipes
    • Appetizers
    • Breakfast
    • Dessert
    • Dinner
    • Drinks
    • Salads
    • Snacks
    • Soups
  • About me
  • Contact me
menu icon
go to homepage
  • Home
  • Recipes
    • Appetizers
    • Breakfast
    • Dessert
    • Dinner
    • Drinks
    • Salads
    • Snacks
    • Soups
  • About me
  • Contact me
search icon
Homepage link
  • Home
  • Recipes
    • Appetizers
    • Breakfast
    • Dessert
    • Dinner
    • Drinks
    • Salads
    • Snacks
    • Soups
  • About me
  • Contact me
×

Hufflepuff Honeycomb Butterbeer: A Magical Sweet Treat

October 7, 2025 by Grace Snow Leave a Comment

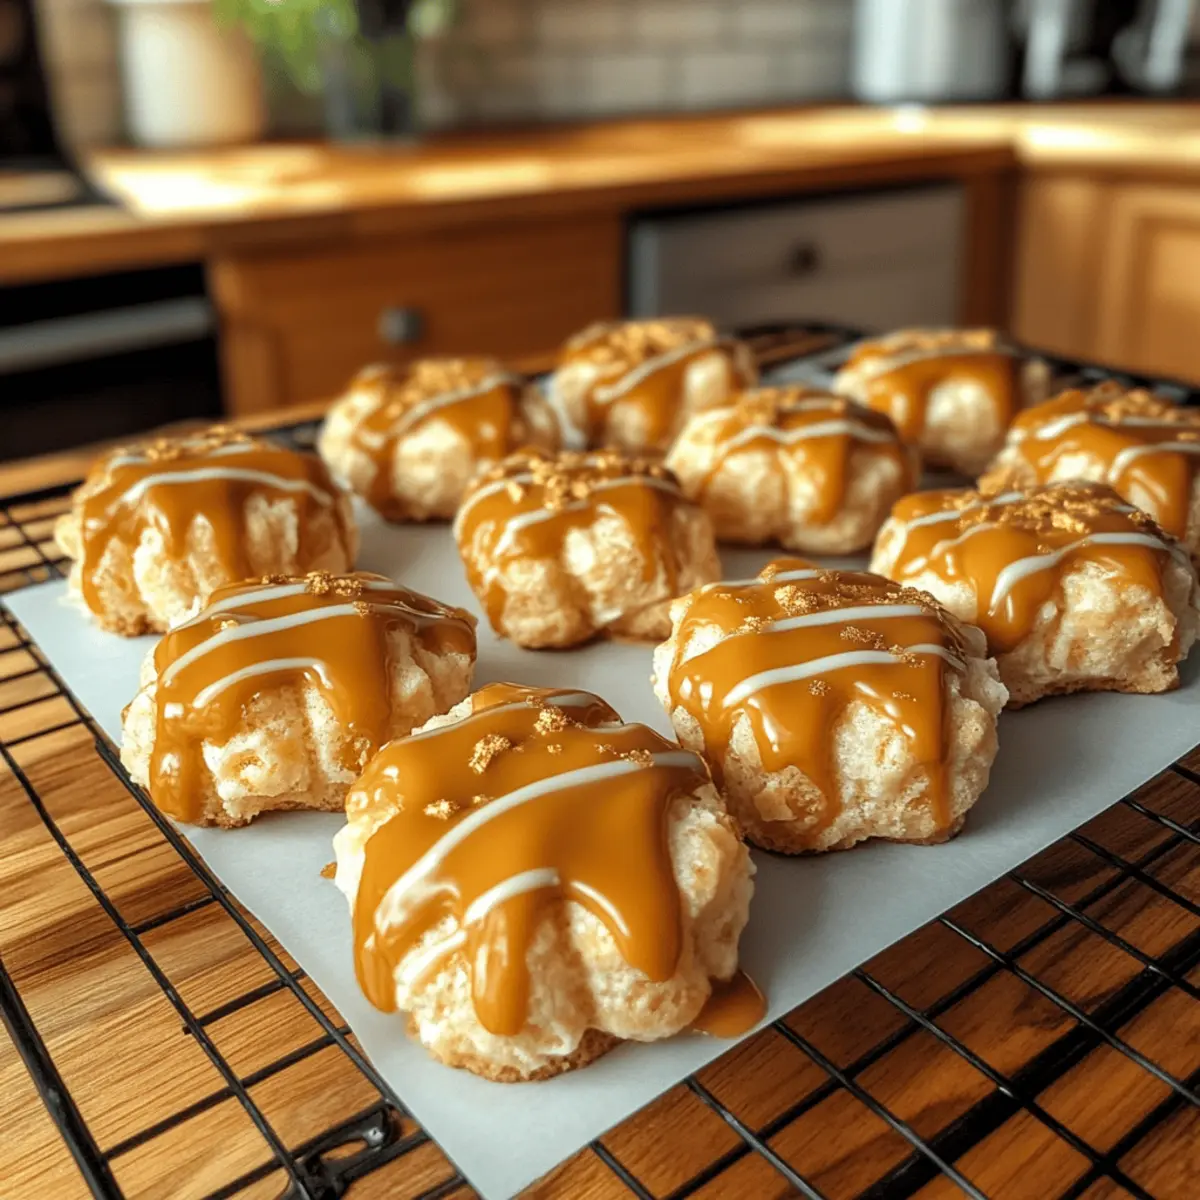
Walking into my kitchen, the sweet, buttery aroma of melting chocolate mingles with the inviting scent of honey, wrapping me in a warm embrace. Today, I’m excited to share my recipe for Hufflepuff Honeycomb Butterbeer Treats—a delightful dessert inspired by the beloved Harry Potter series. These treats not only bring a touch of magic to your table but also offer an irresistible indulgence that's perfect for any gathering. They’re quick to prepare, making them a hassle-free option for your next themed party or movie night. Plus, with a gluten-free version available, everyone can enjoy this cherished treat together. Ready to embark on a flavorful adventure and create some sweet memories? Let’s dive into this enchanting recipe!

Why Are These Treats So Magical?

Whimsical Flavor: The enchanting combination of honeycomb and butterbeer flavors will transport you straight to the magical world of Harry Potter.

Easy to Make: With simple steps and common ingredients, these treats offer a delightful kitchen adventure, perfect for both beginner and seasoned bakers.

Crowd-Pleasing Appeal: Whether for a party or a cozy movie night, these treats are sure to impress friends and family, making them a go-to dessert for any occasion.

Gluten-Free Option: Don’t worry—everyone can enjoy these sweets! With a few ingredient swaps, you can easily make a gluten-free version.

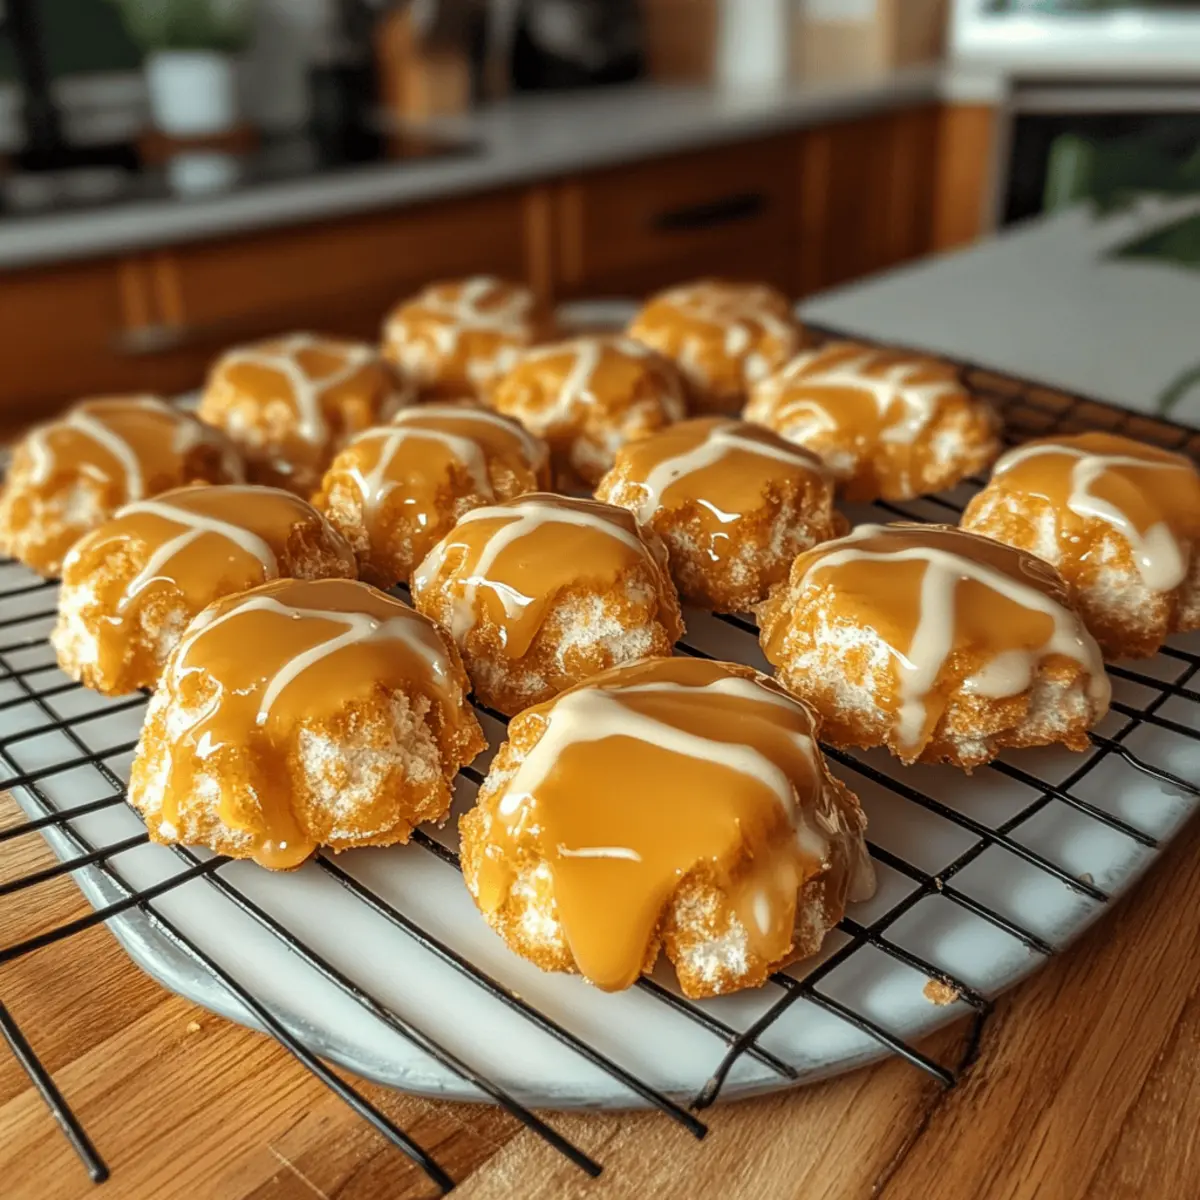
Decorative Touch: The optional edible gold dust or sprinkles adds a festive flair, making these treats visually stunning as well as delicious.

Grab your ingredients and let’s create these magical delights that surprise the taste buds and charm the heart!

Hufflepuff Honeycomb Butterbeer Ingredients

For the Honeycomb

  • Granulated Sugar – Provides sweetness and structure; ensure even heating to avoid caramelizing.
  • Light Corn Syrup – Helps achieve the desired texture and prevents crystallization; dark corn syrup may alter flavor.
  • Water – Assists in dissolving sugar; a crucial component for cooking the sugar mixture.
  • Baking Soda – Reacts with the sugar syrup to create bubbles for the honeycomb texture; whisk gently to avoid deflation.

For the Butterbeer Coating

  • White Chocolate Chips – Forms the main coating, adding richness reminiscent of butterbeer; can substitute with dairy-free options.
  • Cream Soda – Infuses the butterbeer flavor into the coating; vanilla-flavored soda can be used as an alternative.
  • Vanilla Extract – Enhances the overall flavor profile; hints of caramel complement the butterbeer taste.

For Decoration

  • Edible Gold Dust/Yellow Sprinkles – Optional decorative touches that add a magical flair to the treats.

With these ingredients, you’re ready to whip up your enchanting Hufflepuff Honeycomb Butterbeer Treats that everyone will adore!

Step‑by‑Step Instructions for Hufflepuff Honeycomb Butterbeer Treats

Step 1: Prepare Baking Sheet
Line a baking sheet with parchment paper, ensuring it covers the entire surface to prevent sticking. This will be the foundation where you'll pour the honeycomb mixture later. Make sure it's flat and secure to create a perfect backdrop for your magical Hufflepuff Honeycomb Butterbeer Treats.

Step 2: Make Honeycomb
In a medium-sized saucepan, combine granulated sugar, light corn syrup, and water over medium heat. Stir continuously until the sugar dissolves completely, then bring the mixture to a rolling boil. Keep an eye on the stove as it heats, and use a candy thermometer to monitor the temperature; once it reaches 300°F (150°C), it’s time for the exciting next step.

Step 3: Add Baking Soda
Remove the saucepan from heat and quickly whisk in the baking soda. Watch as the mixture foams and bubbles, expanding in size. This reaction creates the airy texture that makes the honeycomb delightful. Immediately pour the bubbling mixture onto the prepared baking sheet, spreading it out gently with a spatula to create an even layer as it begins to set.

Step 4: Cool Honeycomb
Allow the honeycomb to cool and harden completely at room temperature for about 30-45 minutes. During this time, resist the urge to touch it as it cools! Once firm, break the honeycomb into bite-sized pieces that will become the base for your indulgent Hufflepuff Honeycomb Butterbeer Treats.

Step 5: Melt Coating
In a microwave-safe bowl, combine the white chocolate chips and cream soda. Microwave the mixture in 30-second increments, stirring after each cycle until it becomes smooth and velvety. Once melted, add a splash of vanilla extract to enhance the flavor, creating a luscious butterbeer coating that will envelop your honeycomb pieces.

Step 6: Coat Honeycomb
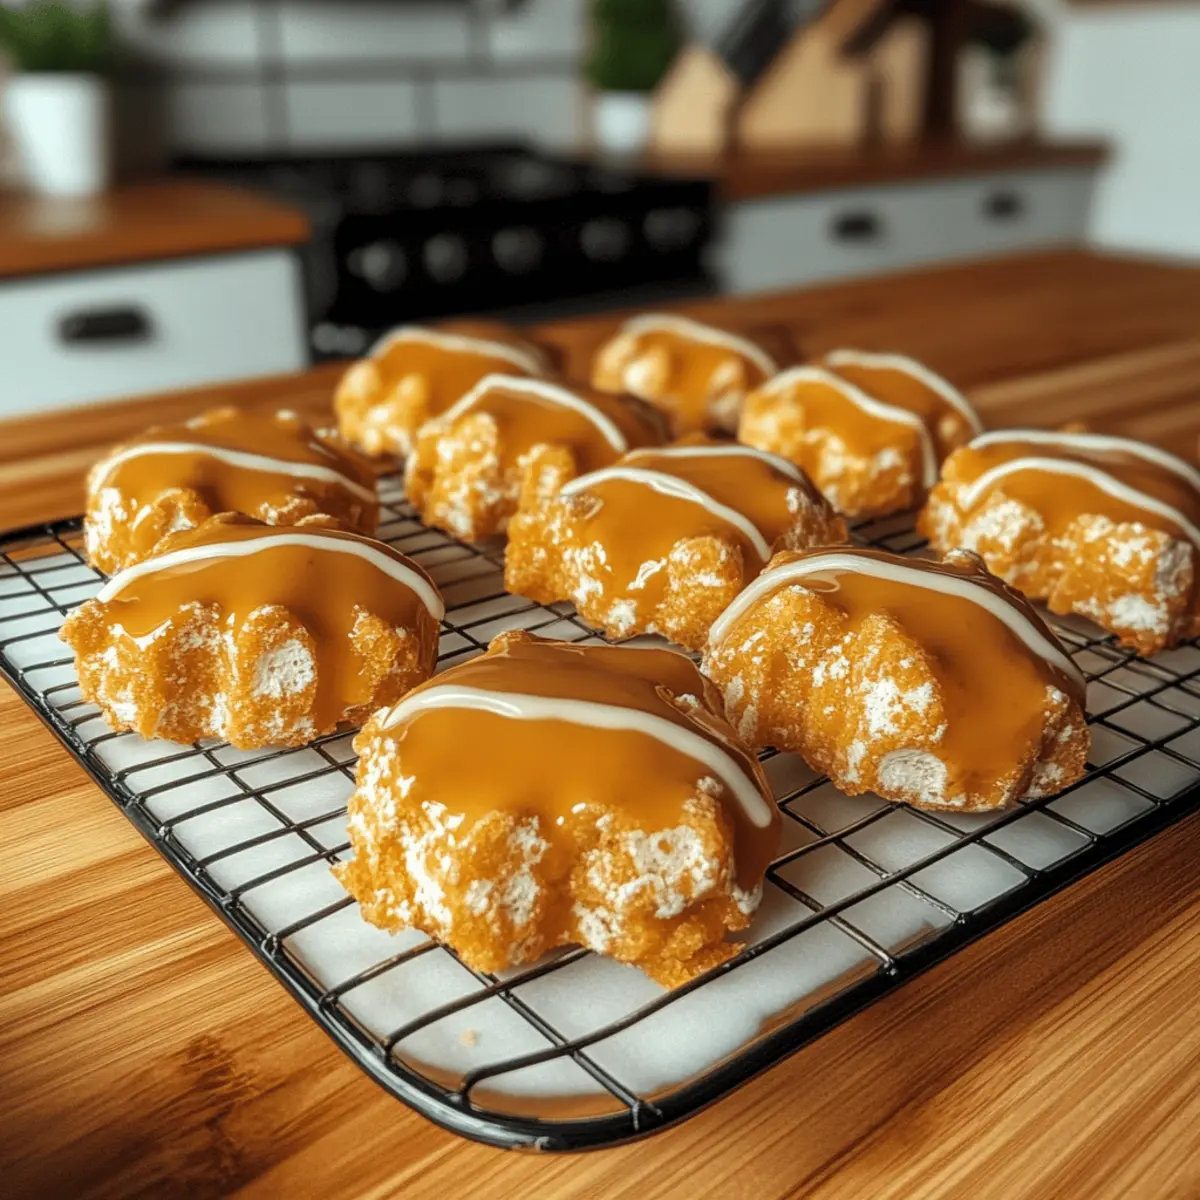
Dip each honeycomb piece into the warm butterbeer coating, ensuring it’s fully submerged. Allow any excess chocolate to drip off before placing the coated treats back onto the parchment-lined baking sheet. This step creates a deliciously rich shell around each honeycomb piece, turning them into delectable Hufflepuff Honeycomb Butterbeer Treats.

Step 7: Decorate
While the coating is still wet, sprinkle edible gold dust or yellow sprinkles over the top for that magical, festive flair. This adds a shimmering charm that reminds you of the enchanting world of Harry Potter. Ensure you do this promptly, as the coating will set quickly, locking in the beautiful decorations.

Step 8: Optional Drizzle
If you’d like to add an extra special touch, melt some additional butterbeer coating and drizzle it artfully over the freshly coated treats before they fully set. This elegant addition enhances the overall appearance and flavor of your Hufflepuff Honeycomb Butterbeer Treats, making them even more irresistible.

What to Serve with Hufflepuff Honeycomb Butterbeer Treats

Enhance your magical experience with delightful pairings that will transport you even further into the whimsical world of Harry Potter.

  • Pumpkin Juice: This sweet, spiced beverage perfectly complements the buttery flavors of the treats, offering a truly magical experience for your taste buds.

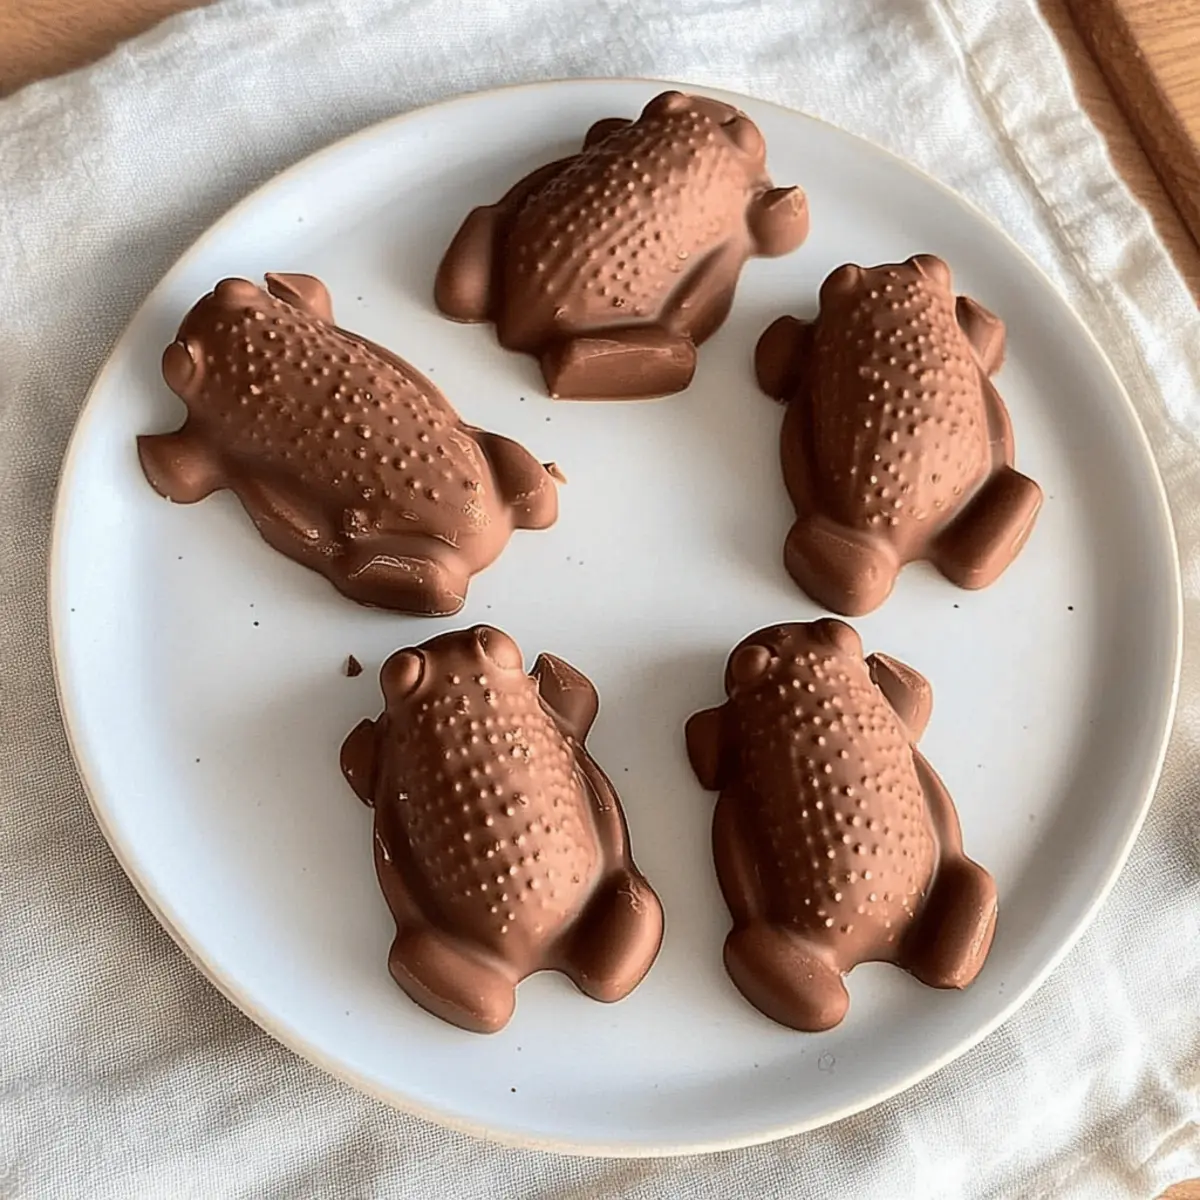
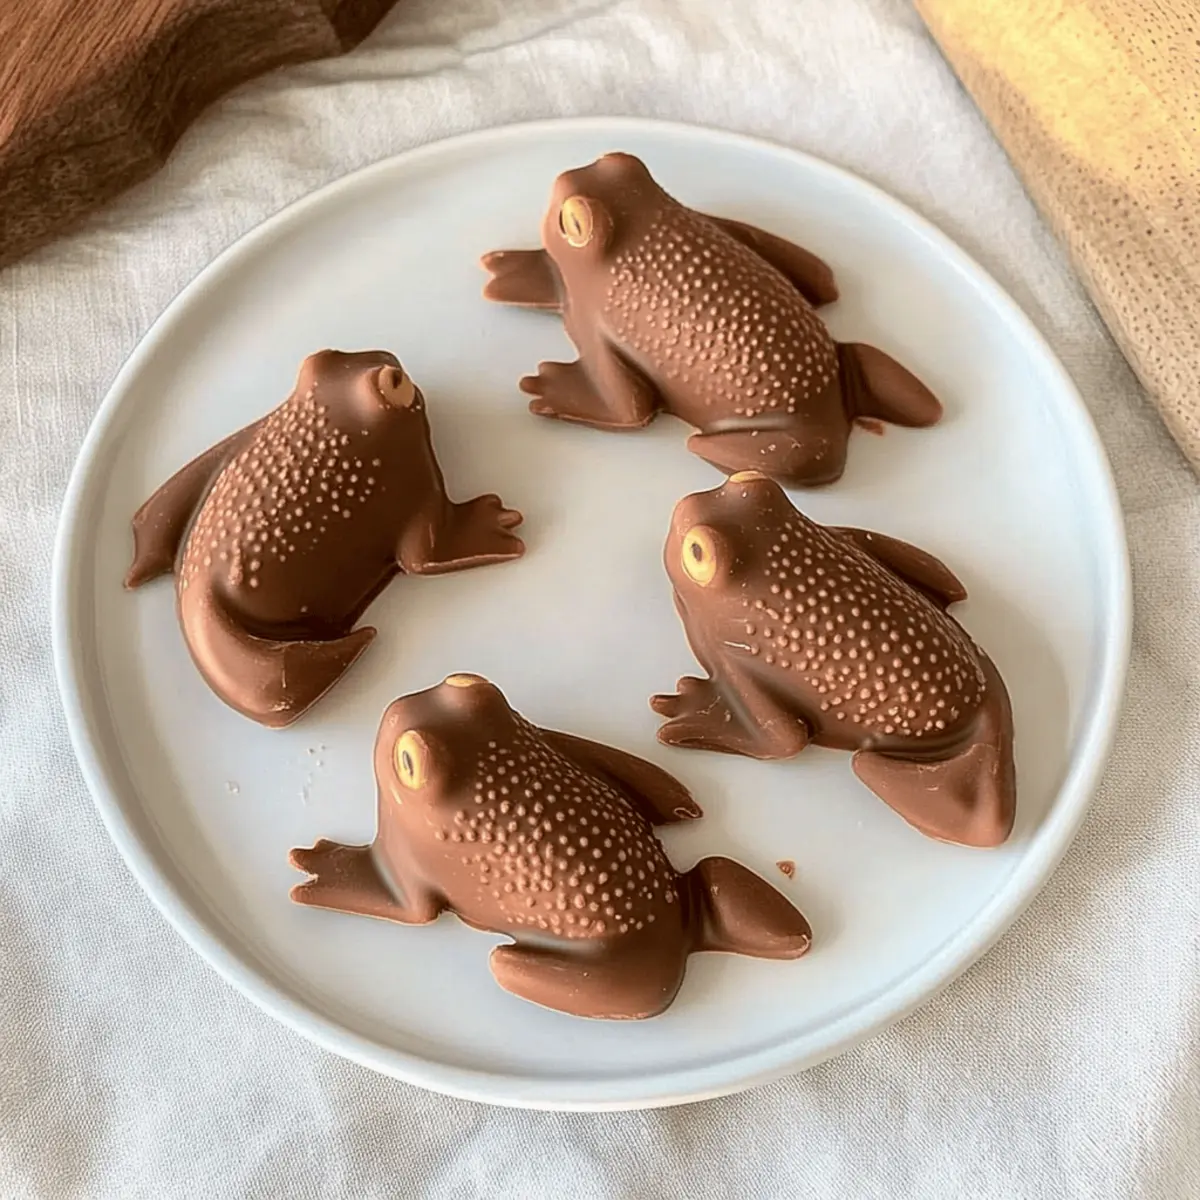
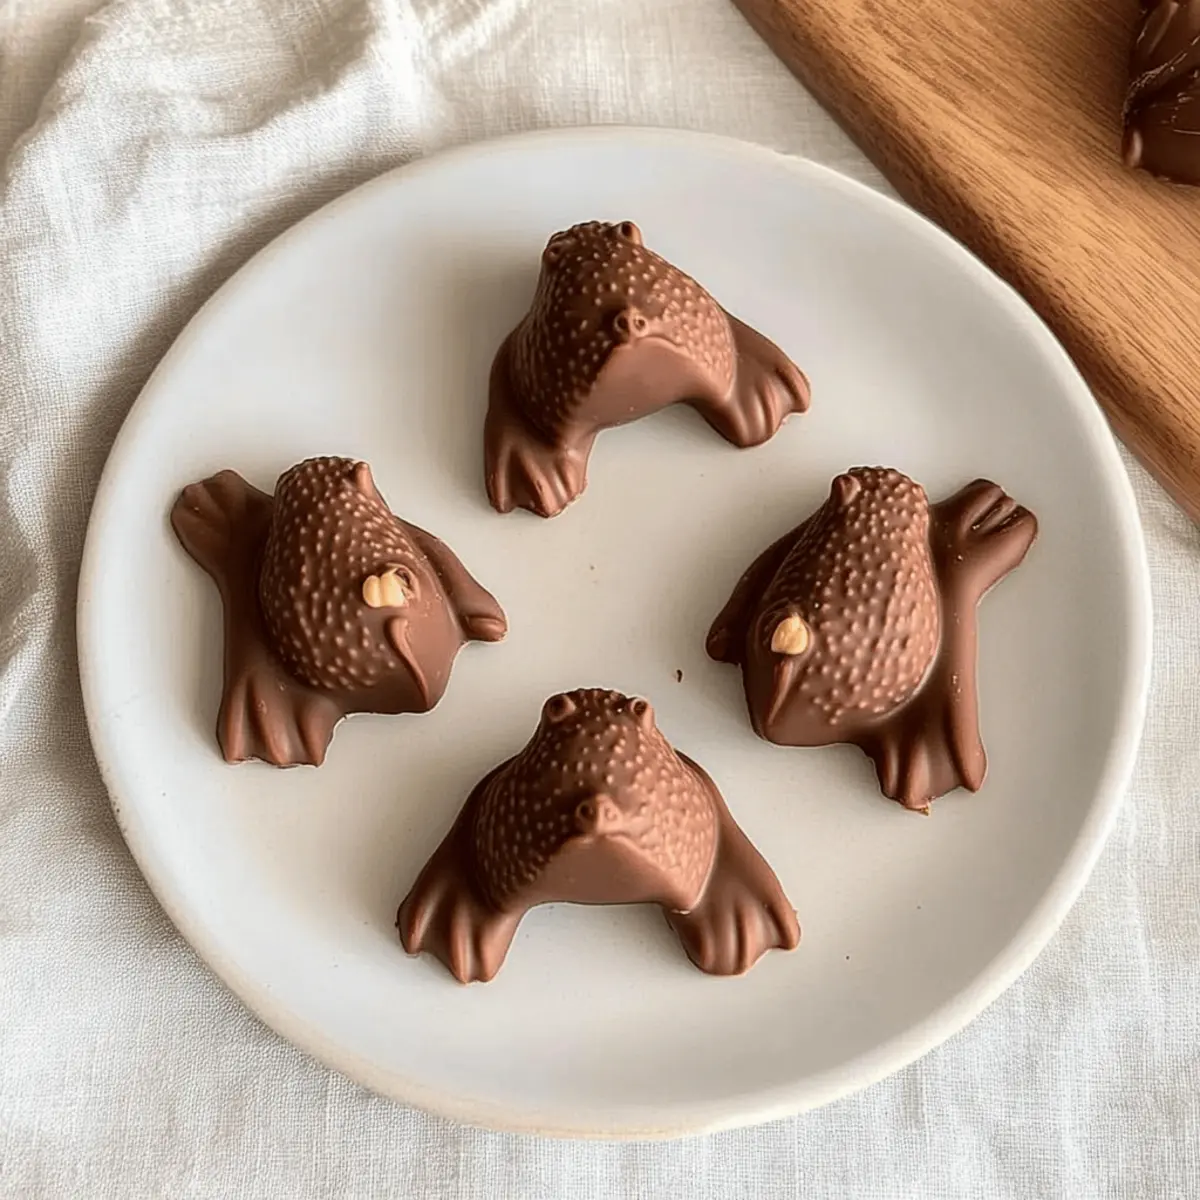
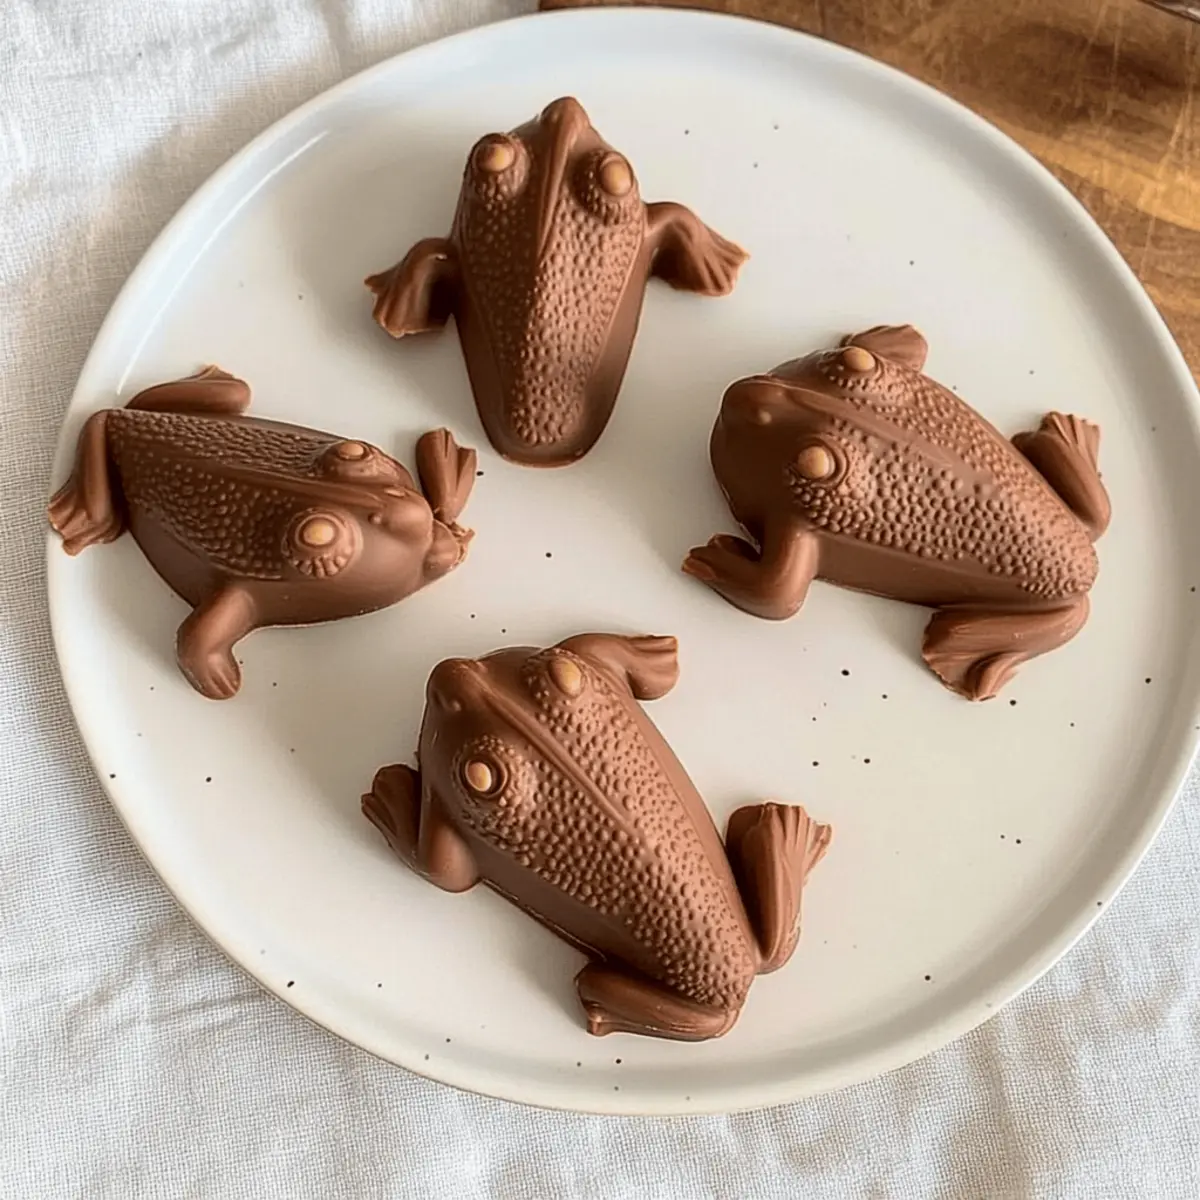
  • Chocolate Frogs: Iconic and fun, these treats add a playful touch to your dessert table while echoing the theme of your enchanting evening.

  • Caramel Popcorn: A crunchy, sweet contrast that balances the softness of the butterbeer coating and adds a delightful texture to your snacking experience.

  • Ginger Ale Floats: Light and fizzy, these refreshing floats offer a citrusy kick that enhances the sweetness of the honeycomb butterbeer without overpowering it.

  • Butterbeer Cupcakes: Create a delightful dessert duo with these fluffy cupcakes topped with creamy, butterbeer-flavored frosting for added indulgence.

  • Herb-Infused Tea: A warm cup of herbal tea can provide a soothing balance, allowing the sweetness of the honeycomb treats to shine while harmonizing all your flavors beautifully.

Let these pairings inspire a magical gathering that your friends and family will remember for years to come!

Expert Tips for Hufflepuff Honeycomb Butterbeer Treats

  • Perfect Temperature: Use a candy thermometer to ensure the sugar mixture reaches 300°F (150°C) for the ideal honeycomb texture.

  • Whisk Carefully: When adding baking soda, whisk slowly to maintain the bubbles created, as they are key to achieving the airy honeycomb structure.

  • Gentle Handling: Once cooled, be careful when breaking the honeycomb. Sharp edges can occur, so use caution during this step.

  • Chill for Decor: For a professional finish, chill the coated treats briefly to help the coating set before adding decorative touches.

  • Store Wisely: Keep uncoated honeycomb in an airtight container to preserve its crispness, or freeze it to extend freshness while ensuring you can still enjoy your Hufflepuff Honeycomb Butterbeer treats later!

Make Ahead Options

These Hufflepuff Honeycomb Butterbeer Treats are perfect for busy cooks looking to save time! You can prepare the honeycomb up to 24 hours in advance. Simply follow the steps to make and cool the honeycomb, then break it into pieces. Store the uncoated honeycomb in an airtight container at room temperature to maintain its crunchy texture. For the butterbeer coating, you can mix the white chocolate chips and cream soda up to 3 days ahead of time—just reheat gently before coating the honeycomb. When you’re ready to serve, quickly dip the prepped honeycomb pieces into the coating, decorate, and enjoy these magical treats without the last-minute rush!

Hufflepuff Honeycomb Butterbeer Variations

Feel free to let your creativity shine and adjust these treats to suit your taste and dietary needs!

  • Gluten-Free: Use gluten-free corn syrup if you're looking for a safe option for gluten-sensitive friends. They'll experience the same magical treat without compromise!

  • Dairy-Free: Swap white chocolate for dairy-free chocolate chips to create a vegan-friendly version that still captures that creamy, rich flavor. Everyone should enjoy these!

  • Flavorful Twist: Add a pinch of cinnamon or nutmeg to the butterbeer coating for a cozy, spiced flavor that'll warm your heart. A touch of magic enhances every bite.

  • Nutty Crunch: Incorporate crushed nuts, like almonds or pecans, into the honeycomb mix for added texture and flavor. Imagine the delightful crunch with every piece!

  • Different Sweetener: Substitute light corn syrup with agave syrup for a more natural sweetener while maintaining a similar texture (just note that results may vary slightly).

  • Different Chocolate: Use dark chocolate instead of white chocolate to give the treats a rich, bold flavor twist that chocolate lovers will adore. It's a magical transformation!

  • Spicy Kick: For those who enjoy a little heat, add a dash of cayenne pepper or chili powder into the coating. This unexpected twist will surprise and delight adventurous taste buds.

  • Toppings Galore: Experiment with toppings like crushed candy canes for a festive flair or whimsical marshmallows that bring out the playful side of these enchanting treats!

Remember, the magic truly lies in your creativity! You can explore different combinations and flavors that reflect your personality. If you're looking for other delightful recipes to try, don’t forget to check out my made-from-scratch chocolate frogs or refreshing pumpkin juice that pair perfectly with these treats!

Storage Tips for Hufflepuff Honeycomb Butterbeer Treats

Airtight Container: Store your Hufflepuff Honeycomb Butterbeer Treats in an airtight container at room temperature for up to 3 days. This will help maintain their delightful crunch.

Avoid Refrigeration: Keep the treats out of the fridge to prevent them from becoming soft. The cool temperature can alter the texture, making them less enjoyable.

Freezing Option: If you'd like to save some for later, freeze the uncoated honeycomb in an airtight bag for up to 1 month. Just re-coat and decorate when you’re ready to indulge again!

Reheating Notes: Don't attempt to reheat the coated treats, as this can melt the chocolate coating. Enjoy them as is for a sweet, magical experience!

Hufflepuff Honeycomb Butterbeer Treats Recipe FAQs

How do I choose the right ingredients for honeycomb?
Absolutely! For the best honeycomb, select granulated sugar that is free of lumps to ensure even melting. Light corn syrup is preferred to achieve the perfect texture; avoid dark corn syrup to keep the flavor consistent. Always use fresh ingredients, especially for the cream soda and chocolate chips, as they contribute significantly to the overall taste of your Hufflepuff Honeycomb Butterbeer Treats.

How should I store leftover treats?
Store your Hufflepuff Honeycomb Butterbeer Treats in an airtight container at room temperature for up to 3 days. This prevents moisture from softening the crunchy honeycomb. Be mindful—keeping them in the fridge will alter their lovely texture, turning them soft instead of crispy!

Can I freeze the honeycomb?
Certainly! To freeze the honeycomb, first, allow it to cool and break into pieces. Place the uncoated honeycomb in an airtight bag or container and freeze for up to 1 month. When you're ready to enjoy, simply re-coat and decorate them as you normally would. This method preserves freshness and lets you savor the magic whenever you wish!

What if my honeycomb doesn’t rise properly?
Very common! If your honeycomb fails to rise, it might be due to underheating the sugar mixture—ensure it reaches 300°F (150°C) for that perfect crack stage. Also, whisk the baking soda in quickly and gently; any over-whisking can cause the bubbles to deflate. Don’t worry; even if it doesn’t turn out perfectly this time, it still tastes delightful, and every attempt is a learning experience!

Are these treats suitable for dietary restrictions?
Yes! To make a gluten-free version of your Hufflepuff Honeycomb Butterbeer Treats, simply substitute the white chocolate with high-quality gluten-free dairy-free chocolate chips. Always check the labels to avoid any gluten-containing ingredients. It's a little change, but it makes these magical treats accessible to everyone, so no one misses out on the fun!

How long will the honeycomb stay crispy?
The uncoated honeycomb can remain crispy for several weeks when stored correctly in an airtight container. However, once coated with the chocolate, its optimum crunchiness is best enjoyed within 3 days, as the coating can introduce moisture over time. For longer-lasting joy, freeze the uncoated pieces, then coat them right before serving!

Hufflepuff Honeycomb Butterbeer

Hufflepuff Honeycomb Butterbeer: A Magical Sweet Treat

Enjoy Hufflepuff Honeycomb Butterbeer Treats, a delightful dessert inspired by Harry Potter, perfect for gatherings.
Print Recipe Pin Recipe
Prep Time 15 minutes mins
Cook Time 10 minutes mins
Cooling Time 30 minutes mins
Total Time 55 minutes mins
Servings: 12 treats
Course: Dessert
Cuisine: Magical
Calories: 150
Ingredients Equipment Method Nutrition Notes

Ingredients
  

For the Honeycomb
  • 1 cup granulated sugar Provides sweetness and structure
  • 1/4 cup light corn syrup Prevents crystallization
  • 1/4 cup water Assists in dissolving sugar
  • 1 teaspoon baking soda Creates bubbles for texture
For the Butterbeer Coating
  • 1 cup white chocolate chips Main coating, can substitute dairy-free options
  • 1/2 cup cream soda Infuses butterbeer flavor
  • 1 teaspoon vanilla extract Enhances flavor
For Decoration
  • to taste edible gold dust or yellow sprinkles Optional decorative touches

Equipment

  • medium-sized saucepan
  • candy thermometer
  • Baking Sheet
  • Parchment Paper
  • Microwave-safe bowl

Method
 

Step-by-Step Instructions
  1. Line a baking sheet with parchment paper.
  2. In a medium saucepan, combine granulated sugar, light corn syrup, and water over medium heat.
  3. Once the mixture reaches 300°F (150°C), remove from heat and whisk in baking soda.
  4. Pour the bubbling mixture onto the prepared baking sheet.
  5. Cool and harden the honeycomb for about 30-45 minutes.
  6. Melt white chocolate chips and cream soda in a microwave-safe bowl.
  7. Dip each honeycomb piece into the butterbeer coating.
  8. Sprinkle with edible gold dust or yellow sprinkles while coating is still wet.
  9. Add an optional drizzle of extra coating for decoration.

Nutrition

Serving: 1treatCalories: 150kcalCarbohydrates: 20gProtein: 1gFat: 7gSaturated Fat: 4gPolyunsaturated Fat: 0.5gMonounsaturated Fat: 1.5gSodium: 10mgPotassium: 30mgSugar: 12gCalcium: 10mgIron: 0.1mg

Notes

Perfect for themed parties or movie nights. Store in an airtight container for up to 3 days.

Tried this recipe?

Let us know how it was!

Slytherin’s Mystic Butterbeer Macarons for Magical Moments

October 7, 2025 by Grace Snow Leave a Comment

“While preparing for our latest themed gathering, I couldn’t help but feel the excitement in the air—the whispers of magic blending with the smell of something sweet. That's when I decided to craft Slytherin’s Mystic Butterbeer Macarons, a delightful treat that takes inspiration from the beloved world of wizardry. These whimsical confections combine delicate almond shells with a creamy butterscotch-inspired filling, transforming your kitchen into a cozy Hogwarts haven. Not only are these macarons a fun, crowd-pleasing dessert, but they’re also surprisingly quick to whip up, perfect for those who crave a homemade touch without hours in the kitchen. Plus, you can easily mix things up to create themed variations for other houses like Gryffindor or Ravenclaw! Ready to embark on this delicious magical journey with me?”

Why Are These Macarons So Magical?

**Delightful ** and whimsical, Slytherin’s Mystic Butterbeer Macarons are sure to enchant any gathering! Quickly prepared, these treats save you time without sacrificing flavor or flair. Versatile enough for any occasion, simply adjust the food coloring for different Hogwarts themes. Rich butterscotch filling blends beautifully with crisp almond shells, creating a dessert that’s both sophisticated and fun. Whether you're a seasoned chef or a kitchen novice, this recipe is designed to impress!

  1. Ingredients
    • • ## Slytherin’s Mystic Butterbeer Macarons Ingredients

  2. For the Macaron Shells

  • Almond Flour – Provides structure and a nutty flavor; for nut-free, try sunflower seed flour.
  • Powdered Sugar – Contributes sweetness and helps achieve that fine macaron texture.
  • Egg Whites – Essential for creating a stable meringue that gives those lovely shells.
  • Granulated Sugar – Sweetens the meringue and helps form stiff peaks.
  • Cream of Tartar – Stabilizes egg whites during whipping.
  • Food Coloring (green or shade of choice) – Customize to create themed versions for other Hogwarts houses.
  1. For the Butterbeer Filling
  • Unsalted Butter – Adds a rich creaminess to the filling.
  • Brown Sugar – Infuses depth and warmth, reminiscent of your favorite butterbeer.
  • Heavy Cream – Ensures a luxurious, creamy texture in the filling.
  • Butterscotch Extract (or caramel extract) – Delivers that signature butterbeer flavor.
  • Vanilla Extract – Enhances sweetness; a wonderful complement to the filling.
  • Salt – Balances out the overall sweetness beautifully.

Step‑by‑Step Instructions for Slytherin’s Mystic Butterbeer Macarons

Step 1: Prepare Dry Ingredients
Begin by sifting 1 cup of almond flour and 1 ¾ cups of powdered sugar together into a large bowl. Sifting removes any lumps, ensuring a fine texture for your macaron shells. This step is crucial for achieving the perfect consistency, so take your time. Set this mixture aside while you prepare the meringue.

Step 2: Make Meringue
In a clean mixing bowl, use an electric mixer to beat 3 large egg whites with ¼ teaspoon of cream of tartar until they become foamy. Gradually add ¾ cup of granulated sugar while continuing to beat on high speed until stiff peaks form and the mixture is glossy. This process takes about 5-7 minutes and is vital for creating sturdy macaron shells.

Step 3: Add Color
Once your meringue reaches stiff peaks, gently fold in a few drops of green food coloring using a spatula. Be careful not to deflate the meringue, which should remain light and airy. The color will be bright, but remember that baking may slightly alter its intensity. This step adds a magical flair, perfect for your Slytherin’s Mystic Butterbeer Macarons.

Step 4: Combine Mixtures
Now it’s time to fold the dry ingredients into the meringue. Add the sifted almond flour and powdered sugar mixture in three additions, gently folding after each addition until you achieve a smooth and slightly flowing batter. The batter should be thick yet pourable, resembling lava. This step is crucial in achieving the perfect macarons, so be patient and avoid overmixing.

Step 5: Pipe and Rest
Using a piping bag fitted with a round tip, pipe small circles of the macaron batter onto a baking sheet lined with parchment paper. Leave space between each to allow for spreading. Once piped, let the macarons rest at room temperature for 30–40 minutes, or until a skin forms on the surface. This resting period is essential for developing the macaron's signature “feet.”

Step 6: Bake
Preheat your oven to 150°C (300°F) while waiting for the macarons to rest. Once ready, place the baking sheets in the oven and bake for 15 to 18 minutes. Look for firm shells with slight rise and a smooth surface. You may want to rotate the sheets halfway through baking to ensure even cooking, helping your Slytherin’s Mystic Butterbeer Macarons achieve the perfect outer texture.

Step 7: Prepare Filling
While the macarons bake, prepare the butterbeer filling. In a saucepan, melt ½ cup of unsalted butter over medium heat, then stir in ¾ cup of brown sugar until dissolved. Add ¼ cup of heavy cream, followed by 1 teaspoon of butterscotch extract and 1 teaspoon of vanilla extract. Remove from heat and let it cool before beating until fluffy; this will create a rich filling bursting with butterbeer flavor.

Step 8: Assemble
Once the macaron shells have cooled completely, flip half of them upside down. Pipe a generous dollop of your butterbeer filling onto each of these shells and sandwich with the remaining halves, pressing down gently. The filling should ooze slightly out the sides, creating a delightful mess. This step transforms your delicate shells into the enchanting Slytherin’s Mystic Butterbeer Macarons.

Step 9: Rest Before Serving
For the best flavor and texture, refrigerate the assembled macarons for at least 24 hours. This allows the flavors to meld beautifully. Before serving, let them sit at room temperature for about 15 minutes. Your Slytherin’s Mystic Butterbeer Macarons will be perfectly magical and flavorful, ready to impress your guests!

Slytherin’s Mystic Butterbeer Macarons Variations

Feel free to unleash your creativity and customize these enchanting macarons to suit your taste and occasions!

  • Gryffindor Twist: Swap the green food coloring for a vibrant red. This adjustment brings a bold flair, creating an eye-catching treat for Gryffindor fans.

  • Ravenclaw Version: Opt for blue food coloring and add a touch of lemon zest to the filling for a refreshing twist that will tantalize the taste buds.

  • Magical Glitter: Sprinkle edible glitter on top of the macaron shells before baking. This extra touch adds sparkle, making your macarons even more captivating.

  • Nut-Free Alternative: Use finely ground sunflower seed flour instead of almond flour for a nut-free option that still delivers delicious results.

  • Spiced Variation: Mix in a dash of cinnamon or nutmeg into the filling for a warm spice that enhances the butterscotch flavor, perfect for cozy gatherings.

  • Chilled Delight: Add a hint of peppermint extract to the filling for a refreshing twist, making these macarons fantastic for winter festivities.

  • Caramel Surprise: Substitute the butterscotch extract with caramel extract for a different flavor profile that brings a luscious sweetness to each bite.

  • Vegan Adaptation: Replace egg whites with aquafaba and use vegan butter for the filling. This adjustment keeps the magical essence while accommodating plant-based diets.

For an added touch, serve these macarons alongside a warm cup of tea or a whimsical butterbeer-inspired cocktail, turning your dessert into a festive experience!

What to Serve with Slytherin’s Mystic Butterbeer Macarons

Indulging in these magical macarons invites endless possibilities for pairing delicious, comforting dishes that elevate your gathering.

  • Creamy Hot Chocolate: The rich, silky texture creates a delightful complement to the macarons' airy shells, enhancing each sweet bite.

  • Earl Grey Tea: With its floral notes and subtle bergamot taste, this tea provides a perfect backdrop for the butterscotch flavors, making every sip luxurious.

  • Spiced Apple Cider: The warm spices of cinnamon and nutmeg in cider contrast beautifully with the sweet, buttery filling, evoking feelings of cozy autumn evenings.

  • Chocolate-Dipped Strawberries: Fresh strawberries add a juicy burst that harmonizes with the macarons, providing a refreshing contrast and a pop of color to your dessert spread.

  • Mini Fruit Tarts: The bright tartness of mixed berries in these little pastries balances the sweetness of the macarons, creating a well-rounded dessert plate.

  • Butterbeer Cocktails: An enchanting signature drink can elevate your themed gathering, echoing the flavors of the macarons while adding a festive flair.

  • Vanilla Bean Ice Cream: A scoop of this classic treat adds creaminess and maintains the magical experience, inviting nostalgia with each enchanting taste.

Storage Tips for Slytherin’s Mystic Butterbeer Macarons

  • Fridge: Store filled macarons in an airtight container in the refrigerator for up to 5 days to maintain their delicate texture and flavor.

  • Freezer: For longer storage, freeze assembled macarons in a single layer on a baking sheet before transferring them to an airtight container for up to 1 month.

  • Thawing: When ready to enjoy your Slytherin’s Mystic Butterbeer Macarons, simply thaw them in the refrigerator for a few hours before serving for the best taste and texture.

  • Reheating: These macarons are best served chilled or at room temperature; avoid reheating in a microwave to keep the shells crisp and delightful.

Make Ahead Options

These Slytherin’s Mystic Butterbeer Macarons are ideal for meal prep enthusiasts! You can prepare the macaron shells up to 3 days in advance by storing them in an airtight container at room temperature to maintain their crisp texture. Additionally, the butterbeer filling can be made up to 24 hours ahead; simply refrigerate it in a sealed container. When you’re ready to finish, let the filling sit at room temperature for 15 minutes before piping it onto the shells. This ensures the macarons are just as delightful and fresh, saving you valuable time on busy days while still delivering a magical touch to your gatherings!

Expert Tips for Slytherin’s Mystic Butterbeer Macarons

  • Room Temperature Egg Whites: Make sure your egg whites are at room temperature for the best meringue stability; cold whites can lead to a weepy batter.

  • Gentle Folding: Be careful when incorporating the dry ingredients into the meringue. Overmixing can deflate the lightness needed for perfect macarons; aim for a smooth, flowing batter.

  • Resting is Key: Don’t skip the resting period! Allow the piped macarons to sit until they form a skin, which helps create those iconic "feet" during baking.

  • Consistent Sizing: Use a template or a piping tip to ensure each macaron is the same size for even baking and a lovely final presentation.

  • Storage Matters: Store your filled Slytherin’s Mystic Butterbeer Macarons in an airtight container in the fridge for up to five days; they also freeze well for later enjoyment!

Slytherin’s Mystic Butterbeer Macarons Recipe FAQs

What type of almond flour should I use?
Absolutely, you’ll want to use finely ground almond flour for these macarons to achieve the perfect texture. If you need a nut-free alternative, finely ground sunflower seed flour works beautifully in place of almond flour. Just remember, the results may vary slightly in flavor and color!

How should I store leftover macarons?
After you’ve indulged in these magical treats, store filled Slytherin’s Mystic Butterbeer Macarons in an airtight container in the refrigerator for up to 5 days. This keeps them fresh and preserves their delicate texture.

Can I freeze my macarons?
Very! To freeze your macarons, place them in a single layer on a baking sheet and freeze until solid. Then transfer them to an airtight container, where they can stay frozen for up to 1 month. When you’re ready to enjoy them, simply thaw in the refrigerator for a few hours—this will help maintain that delightful crunch!

What if my macarons don’t have feet?
Don’t worry, this happens to the best of us! If your shells didn’t form those lovely feet, it could be due to not resting them long enough before baking or overmixing the batter. Make sure to let the piped macarons rest until they form a skin, usually around 30-40 minutes, before popping them in the oven.

Are these macarons safe for pets or those with allergies?
Keep in mind that Slytherin’s Mystic Butterbeer Macarons contain nuts and dairy, which are not suitable for pets and may pose allergy concerns. Always check with your guests about dietary restrictions, and consider making a batch with nut-free flour for those who need alternatives—they can still enjoy the magic!

What variations can I make for different Hogwarts houses?
The more the merrier! You can easily customize these macarons based on the Hogwarts houses. Change up the food coloring to match each house's theme—red and gold for Gryffindor, blue and bronze for Ravenclaw, and even lighter tones for Hufflepuff. Add edible glitter for extra flair or swap extracts for different flavor profiles, like vanilla bean for a more universal appeal!

Slytherin’s Mystic Butterbeer Macarons

Slytherin’s Mystic Butterbeer Macarons for Magical Moments

Delight in Slytherin’s Mystic Butterbeer Macarons, a whimsical dessert inspired by wizardry that enchants any gathering.
Print Recipe Pin Recipe
Prep Time 40 minutes mins
Cook Time 18 minutes mins
Resting Time 30 minutes mins
Total Time 1 hour hr 28 minutes mins
Servings: 12 macarons
Course: Dessert
Cuisine: British
Calories: 120
Ingredients Equipment Method Nutrition Notes

Ingredients
  

For the Macaron Shells
  • 1 cup Almond Flour Provides structure and a nutty flavor; for nut-free, try sunflower seed flour.
  • 1.75 cups Powdered Sugar Contributes sweetness and helps achieve that fine macaron texture.
  • 3 large Egg Whites Essential for creating a stable meringue that gives those lovely shells.
  • 0.75 cup Granulated Sugar Sweetens the meringue and helps form stiff peaks.
  • 0.25 teaspoon Cream of Tartar Stabilizes egg whites during whipping.
  • Food Coloring (green or shade of choice) Customize to create themed versions for other Hogwarts houses.
For the Butterbeer Filling
  • 0.5 cup Unsalted Butter Adds a rich creaminess to the filling.
  • 0.75 cup Brown Sugar Infuses depth and warmth, reminiscent of your favorite butterbeer.
  • 0.25 cup Heavy Cream Ensures a luxurious, creamy texture in the filling.
  • 1 teaspoon Butterscotch Extract (or caramel extract) Delivers that signature butterbeer flavor.
  • 1 teaspoon Vanilla Extract Enhances sweetness; a wonderful complement to the filling.
  • Salt Balances out the overall sweetness beautifully.

Equipment

  • Electric mixer
  • piping bag
  • Saucepan
  • Baking Sheets
  • Parchment Paper

Method
 

Step‑by‑Step Instructions
  1. Sift almond flour and powdered sugar together into a large bowl and set aside.
  2. Beat egg whites and cream of tartar until foamy, then gradually add granulated sugar until stiff peaks form.
  3. Fold in food coloring into the meringue gently.
  4. Fold the dry mixture into the meringue in three additions until a smooth batter forms.
  5. Pipe circles of the batter onto lined baking sheets and let rest until a skin forms.
  6. Bake macarons at 150°C (300°F) for 15 to 18 minutes.
  7. Prepare the butterbeer filling by melting butter, mixing in the sugar, cream, extracts, and cooling it.
  8. Assemble the cooled macaron shells with the butterbeer filling.
  9. Refrigerate for at least 24 hours before serving, letting sit at room temperature prior to serving.

Nutrition

Serving: 1macaronCalories: 120kcalCarbohydrates: 16gProtein: 2gFat: 6gSaturated Fat: 4gMonounsaturated Fat: 2gCholesterol: 25mgSodium: 30mgPotassium: 30mgSugar: 10gVitamin A: 200IUCalcium: 15mgIron: 0.5mg

Notes

Store in an airtight container in the fridge for up to 5 days; can also freeze for up to 1 month.

Tried this recipe?

Let us know how it was!

Chill Out with Refreshing Watermelon Gazpacho Delight

October 7, 2025 by Grace Snow Leave a Comment

As the sun warms up the days and nature bursts with colors, there’s nothing quite like celebrating summer with a bowl of Refreshing Watermelon Gazpacho. This chilled soup marries the sweetness of ripe watermelon and juicy strawberries with the savory richness of fresh tomatoes, making it an ideal choice for a light meal or an impressive appetizer at gatherings. Best of all, it’s a breeze to whip up, requiring minimal prep while delivering a nutritious punch that’s both low-calorie and naturally vegetarian. Imagine serving this delightful dish on a hot afternoon, the cool flavors dancing on your palate as a refreshing break from the usual fare. Ready to dive into this vibrant twist on traditional gazpacho?

Why is Watermelon Gazpacho So Refreshing?

Vibrant and summery, this Watermelon Gazpacho delights the senses with its colorful ingredients. Effortless to prepare, you'll find that the simple blending process takes mere minutes, making it perfect for quick meals. Nutrient-rich, it’s low in calories and filled with vitamins A and C, offering both health and taste. Customizable to your liking, swap strawberries for peaches or add herbs like mint for an aromatic twist! For a delightful pairing, serve it alongside a crusty bread or a light salad, creating a perfect summer spread. Don't forget to check out our Watermelon Popsicles Blissful for a complementary treat!

Refreshing Watermelon Gazpacho Ingredients

For the Base
• Ripe Red Tomatoes – Essential for the base; use fresh varieties for best flavor.
• Watermelon – Provides natural sweetness and hydration; aim for a ripe specimen with a uniform shape.
• Ripe Strawberries – Adds sweetness and acidity to balance flavors.

For the Heat
• Red Jalapeno – Introduces a mild heat; substitute with bell pepper for a milder flavor.

For Texture
• Garlic Cloves – Enhances depth of flavor; fresh garlic is preferred for its potency.
• White Bread – Contributes to a smooth texture; can use gluten-free bread for a gluten-free option.

For Flavor
• Extra Virgin Olive Oil – Provides healthy fats and adds creaminess.
• Lime Juice – Brightens and adds zing; can be substituted with lemon juice.
• Red Wine Vinegar – Balances the sweetness; substitute with apple cider vinegar for a fruitier note.
• Kosher Salt – Elevates and balances flavors; regular table salt can also be used.

For Garnish
• Pink Peppercorns – Adds a visually appealing garnish and subtle flavor enhancement.

Dive into this refreshing watermelon gazpacho today!

Step‑by‑Step Instructions for Refreshing Watermelon Gazpacho

Step 1: Prepare the Ingredients
Begin by coarsely chopping ripe red tomatoes, juicy watermelon, ripe strawberries, a red jalapeno, and fresh garlic cloves. Aim for uniform pieces that make blending smoother. This process should take you about 10 minutes. Gather your ingredients and place them within easy reach of your blender for a seamless cooking experience.

Step 2: Blend the Base
Transfer the chopped tomatoes, watermelon, strawberries, jalapeno, and garlic into a high-powered blender. Blend until the mixture is completely smooth and vibrant, which should take around 1-2 minutes. Ensure there are no visible chunks remaining, as you want a silky consistency for your refreshing watermelon gazpacho.

Step 3: Incorporate Olive Oil
With the blender running, slowly drizzle in extra virgin olive oil. Blend for an additional 2-3 minutes until the gazpacho achieves a creamy, cohesive texture. The olive oil not only adds healthy fats but also enhances the richness of the refreshing watermelon gazpacho.

Step 4: Season to Taste
Pause the blender and taste your creation. Gradually adjust the seasoning by adding kosher salt, lime juice, and a splash of red wine vinegar. Blend briefly to combine, ensuring the flavor is balanced and delightful. Feel free to tweak the ingredients to suit your palate, enhancing the refreshing watermelon gazpacho.

Step 5: Chill the Gazpacho
Cover the blended gazpacho with plastic wrap or transfer it to an airtight container. Refrigerate for at least 2 hours to allow the flavors to meld together beautifully. This chilling process is essential for creating a refreshing watermelon gazpacho that’s perfect for warmer days.

Step 6: Serve and Garnish
Once chilled, ladle the gazpacho into bowls for serving. Consider garnishing each bowl with fresh corn, diced cucumber, or additional watermelon and strawberries for a pop of color and flavor. This finishing touch will elevate your refreshing watermelon gazpacho, providing a beautiful presentation that invites enjoyment.

Expert Tips for Refreshing Watermelon Gazpacho

• Chill Properly: Make sure to refrigerate the gazpacho for at least 2 hours to enhance its refreshing nature and meld the flavors beautifully.

• Quality Ingredients: Use the ripest tomatoes and watermelon available. Their natural sweetness will elevate the taste of your refreshing watermelon gazpacho.

• Smooth Consistency: A high-powered blender is essential for achieving that silky texture; avoid the temptation to rush through blending.

• Taste as You Go: Always taste the gazpacho before serving. Adjust the seasoning with salt, lime juice, or vinegar to ensure a balanced flavor profile.

• Flexible Variations: Don’t hesitate to experiment! Substitute strawberries with peaches or add fresh herbs like basil or mint to personalize your refreshing watermelon gazpacho.

Make Ahead Options

These Refreshing Watermelon Gazpacho bowls are a fantastic option for meal prep enthusiasts! You can chop all your ingredients—ripe tomatoes, watermelon, strawberries, jalapeno, and garlic—up to 24 hours in advance. Just store the chopped veggies in an airtight container in the refrigerator to prevent browning and maintain freshness. When you're ready to enjoy, blend the prepped ingredients and add olive oil, then refrigerate the gazpacho for at least 2 hours to allow the flavors to meld beautifully. This way, you’ll have a delightful, chilled gazpacho waiting for you on busy weeknights, offering the same vibrant taste and refreshing vibe with minimal effort!

Storage Tips for Refreshing Watermelon Gazpacho

Fridge: Refrigerate in an airtight container for up to 3 days; this keeps the flavors fresh and vibrant.

Freezer: Can be frozen in freezer-safe containers for up to 2 months. Thaw in the fridge overnight, and taste before serving to adjust seasoning if needed.

Reheating: Though typically enjoyed chilled, you may gently warm it on the stove over low heat if desired, stirring frequently to maintain the creamy texture. Enjoy your refreshing watermelon gazpacho at any temperature!

What to Serve with Refreshing Watermelon Gazpacho

As summer embraces us, consider delightful accompaniments that elevate your chilled soup experience and make every bite memorable.

  • Crusty Bread: Perfect for dipping, fresh, crunchy bread adds texture while enhancing the gazpacho's flavors. Try a slice of sourdough for a delightful contrast.

  • Light Garden Salad: A crisp salad with mixed greens, cucumbers, and a tangy vinaigrette complements the gazpacho's sweetness, creating balance on your plate.

  • Grilled Shrimp Skewers: The smoky flavors from the shrimp contrast beautifully with the freshness of your gazpacho, adding a lovely protein boost.

  • Feta Cheese Crumbles: Sprinkling crumbly feta over the soup adds a salty creaminess that harmonizes perfectly with the sweet watermelon.

  • Avocado Toast: Rich, creamy avocado on whole grain toast combines wonderfully with the lightness of the gazpacho, creating a satisfying and nutritious meal.

  • Mint Lemonade: Refreshing and zesty, this drink pairs beautifully, keeping the summer vibe alive and complementing the gazpacho's flavors.

  • Lemon Sorbet: For dessert, this light, fruity sorbet provides a refreshing and delightful way to end your meal while echoing the flavors of summer.

Refreshing Watermelon Gazpacho Variations

Feel free to get creative with your Watermelon Gazpacho and make it truly your own!

  • Tropical Twist: Substitute strawberries with peaches or mangoes for a sweet, fruity flavor explosion.
  • Herb Infusion: Incorporate fresh basil or mint to heighten the refreshing essence and add aromatic depth.
  • Creamy Dream: Blend in half an avocado for a silky, creamy texture that pairs beautifully with the sweetness of watermelon.
  • Milder Heat: Use green bell pepper in place of red jalapeno for a gentler kick, perfect for those who prefer less spice.
  • Vinegar Variety: Try using apple cider vinegar instead of red wine vinegar for a unique fruitier note that brightens the dish.
  • Chill with Corn: Add sweet corn kernels for a delightful crunch that complements the smooth gazpacho.
  • Nutty Crunch: Sprinkle some toasted pumpkin seeds or almonds on top for a satisfying texture contrast and nutty richness.
  • Citrus Burst: Replace lime juice with fresh grapefruit juice for a zesty twist that adds tanginess.

For more summer-inspired delights, don’t miss trying our Mini Tropical Pavlovas or snagging a taste of the ocean with our Shrimp Ceviche Zesty. Each adds their unique flair to your sunny day menu!

Refreshing Watermelon Gazpacho Recipe FAQs

How do I select the best watermelon for gazpacho?
Absolutely! When picking a watermelon, look for one that feels heavy for its size and has a uniform shape. A ripe watermelon will have a creamy yellow spot on the bottom where it rested on the ground. Avoid any that show dark spots all over, as these can indicate overripeness or spoilage.

How long can I store leftover watermelon gazpacho in the fridge?
Very! You can refrigerate your refreshing watermelon gazpacho in an airtight container for up to 3 days. This helps maintain its bright flavors and refreshing quality. Just be sure to give it a little stir before serving, as some separation can occur.

Can I freeze watermelon gazpacho, and how should I do it?
Absolutely! Freezing your gazpacho is a great way to preserve it. Pour the cooled gazpacho into freezer-safe containers, leaving a little space at the top for expansion. It can be frozen for up to 2 months. To enjoy it later, thaw it in the fridge overnight, and make sure to taste and adjust the seasoning, as some flavors may dull during freezing.

What should I do if my gazpacho tastes too sweet?
Very! If you find your refreshing watermelon gazpacho is a bit on the sweet side, try adding a splash of vinegar (like apple cider or red wine vinegar) or an extra squeeze of lime juice. This can help balance the sweetness. Additionally, incorporating more tomatoes can enhance the savory component of the flavor.

Is this gazpacho safe for pets or those with allergies?
Absolutely! This watermelon gazpacho is naturally vegetarian and gluten-free, making it a great option for different diets. However, it's important to note that garlic can be toxic to dogs, so if you plan to share with furry friends, skip the garlic or set aside a portion without it before adding. Always check ingredient labels for any allergens specific to your household.

Refreshing Watermelon Gazpacho

Chill Out with Refreshing Watermelon Gazpacho Delight

Experience the joy of summer with this Refreshing Watermelon Gazpacho, a delicious blend of watermelon, strawberries, and tomatoes.
Print Recipe Pin Recipe
Prep Time 10 minutes mins
Chilling Time 2 hours hrs
Total Time 2 hours hrs 10 minutes mins
Servings: 4 bowls
Course: Soups
Cuisine: Mexican
Calories: 100
Ingredients Equipment Method Nutrition Notes

Ingredients
  

For the Base
  • 4 cups Ripe Red Tomatoes Essential for the base; use fresh varieties for best flavor.
  • 3 cups Watermelon Provides natural sweetness and hydration; aim for a ripe specimen.
  • 1 cup Ripe Strawberries Adds sweetness and acidity to balance flavors.
For the Heat
  • 1 unit Red Jalapeno Introduces mild heat; substitute with bell pepper for milder flavor.
For Texture
  • 2 cloves Garlic Cloves Enhances depth of flavor; fresh garlic is preferred.
  • 1 slice White Bread Contributes to a smooth texture; can use gluten-free bread.
For Flavor
  • 2 tablespoons Extra Virgin Olive Oil Provides healthy fats and adds creaminess.
  • 2 tablespoons Lime Juice Brightens and adds zing; can substitute with lemon juice.
  • 1 tablespoon Red Wine Vinegar Balances the sweetness; substitute with apple cider vinegar.
  • 1 teaspoon Kosher Salt Elevates and balances flavors.
For Garnish
  • 1 teaspoon Pink Peppercorns Adds a visually appealing garnish.

Equipment

  • Blender

Method
 

Preparation Steps
  1. Coarsely chop ripe tomatoes, watermelon, strawberries, jalapeno, and garlic cloves. Aim for uniform pieces for smooth blending.
  2. Transfer the chopped ingredients into a high-powered blender. Blend until completely smooth and vibrant, around 1-2 minutes.
  3. With the blender running, slowly drizzle in olive oil and blend for an additional 2-3 minutes until creamy.
  4. Taste and adjust seasoning with salt, lime juice, and red wine vinegar, then blend briefly to combine.
  5. Cover the gazpacho and refrigerate for at least 2 hours to meld flavors.
  6. Ladle into bowls and garnish with fresh corn, diced cucumber, or additional watermelon and strawberries.

Nutrition

Serving: 1bowlCalories: 100kcalCarbohydrates: 25gProtein: 2gFat: 3gPolyunsaturated Fat: 1gMonounsaturated Fat: 2gSodium: 200mgPotassium: 300mgFiber: 3gSugar: 14gVitamin A: 1500IUVitamin C: 50mgCalcium: 30mgIron: 1mg

Notes

Chill properly for best flavor and texture. Use high-quality ingredients for optimal taste.

Tried this recipe?

Let us know how it was!

Irresistibly Moist Irish Barmbrack: A Slice of Tradition

October 7, 2025 by Grace Snow Leave a Comment

As the scent of spices and sweet fruit wafts through your kitchen, you'll feel transported to an Irish bakery, where the magic of tradition comes alive. Today, I’m excited to share my family’s cherished recipe for Irish Barmbrack—a delightful fruit cake that’s not only perfect for Halloween but also brings joy all year round. One of the fantastic aspects of this Irish Barmbrack is its ability to bring people together, whether for cozy family gatherings or festive celebrations. Plus, with its unique soaking process of tea and whisky (or a delightful alcohol-free twist), you’ll find that it’s incredibly moist and flavorful. So, are you ready to swirl some culinary enchantment into your next baking adventure? Let’s dive in!

Why Is Irish Barmbrack So Special?

Tradition: This delightful cake is steeped in history, often shared during Halloween in Ireland, where it’s part of festive fortune-telling traditions.

Moisture Magic: The unique soaking method with tea and whisky ensures every bite bursts with fruit flavor and tenderness, setting it apart from typical fruit cakes.

Versatile: Enjoy it with butter, cream cheese, or even a cup of tea—this barmbrack shines on its own but is a wonderful companion to other treats.

Customizable: Feel free to adapt the recipe with your choice of fruits or even experiment with an alcohol-free version that everyone can enjoy!

Gathering Appeal: This cake is perfect for sharing with family and friends, transforming any occasion into a delightful celebration. There’s just something about homemade barmbrack that invites connection.

So, whether it's a cozy evening at home or a festive gathering, your Irish Barmbrack promises to be a crowd-pleaser!

Irish Barmbrack Ingredients

• Here’s everything you need to create your delicious Irish Barmbrack!

For the Fruit Mixture

  • Raisins – Provides sweetness and juicy texture, essential for flavor depth.
  • Sultanas or Currants – Adds a mix of sweetness and tartness; can substitute with more raisins if desired.
  • Glace Cherries – Adds color and sweetness—can be omitted for a more classic flavor profile.
  • Strong, Cold Tea – The soaking liquid that infuses flavors into the dried fruit and helps with moisture.
  • Irish Whisky (or other alcohol) – Enhances flavor and preserves the cake; can substitute with an extra 50ml of tea for an alcohol-free version.

For the Cake

  • Medium Egg – Binds the ingredients together and adds moisture to the batter.
  • Caster or Soft Light Brown Sugar – Sweetens the cake while adding depth of flavor; can substitute with regular granulated sugar if necessary.
  • Self-Raising Flour – Provides structure and lightness; do not substitute with plain flour without adding baking powder.
  • Ground Mixed Spice – A blend of spices (e.g., cinnamon, nutmeg) that adds warmth; can use pumpkin pie spice as an alternative.
  • Orange Marmalade (optional) – Provides additional flavor and a glaze on top; can be omitted if not available.

Get ready to enchant your kitchen with the warmth and tradition of Irish Barmbrack!

Step‑by‑Step Instructions for Irish Barmbrack

Step 1: Soak the Dried Fruits
Begin by soaking the raisins, sultanas or currants, and glace cherries in a mixture of strong, cold tea and Irish whisky in a bowl. Make sure the fruits are well submerged, then cover the bowl and let it sit overnight at room temperature. This soaking process is vital for ensuring that your Irish Barmbrack is moist and flavorful.

Step 2: Prepare the Oven and Loaf Tin
The next day, preheat your oven to 180°C (356°F). While the oven heats up, take a 900g (2lb) loaf tin and grease it with butter or oil and line it with parchment paper to prevent sticking. This preparation will set you up for success as you layer in your delicious barmbrack batter later.

Step 3: Mix the Cake Batter
Once your oven is heated, drain any excess liquid from the soaked fruit, then combine it in a large bowl with a beaten medium egg, caster sugar, self-raising flour, and ground mixed spice. Stir everything together until smooth and well blended, creating a rich, thick batter that smells divine, signaling the magic of your Irish Barmbrack is about to unfold.

Step 4: Bake the Barmbrack
Pour the batter evenly into the prepared loaf tin, smoothing the top with a spatula for an even bake. Place the tin in the preheated oven and bake for 80 to 90 minutes. To check for doneness, insert a clean skewer into the center; it should come out clean with just a few moist crumbs clinging to it, indicating a perfectly baked Irish Barmbrack.

Step 5: Cool and Glaze the Cake
After baking, carefully remove the loaf tin from the oven and let the barmbrack cool in the tin for about 10 minutes. Then, transfer it to a wire rack to cool completely. If desired, brush the top of the warm cake with orange marmalade for an enticing glaze that adds flavor and shine, enhancing the delightful appearance of your Irish Barmbrack.

How to Store and Freeze Irish Barmbrack

Room Temperature: Store the cooled Irish Barmbrack wrapped in baking paper and foil in an airtight tin for up to 2 weeks. This keeps it fresh and flavorful.

Fridge: If you prefer, you can refrigerate the barmbrack for up to a month, but be sure to wrap it well to prevent it from drying out.

Freezer: For longer storage, freeze slices of the barmbrack in airtight freezer bags for up to 3 months. Just layer parchment between slices to avoid sticking.

Reheating: When ready to enjoy, thaw at room temperature or gently reheat slices in a toaster or microwave for a cozy treat that’s as good as fresh!

Make Ahead Options

These Irish Barmbrack are perfect for meal prep enthusiasts! You can soak the dried fruits (raisins, sultanas or currants, and glace cherries) in strong, cold tea and Irish whisky up to 24 hours in advance, ensuring they're plump and flavorful for baking. Additionally, you can mix the dry ingredients (flour and spices) and store them separately in an airtight container for up to 3 days to save time on busy baking days. When ready to bake, simply combine the soaked fruit with the egg, sugar, and dry mix, then pour into the loaf tin and follow the baking instructions. This approach allows you to enjoy a homemade Irish Barmbrack with minimal effort and just as delicious taste!

Tips for the Best Irish Barmbrack

  • Soaking Time: Ensure you soak the dried fruit overnight. This step is essential for enhancing the moisture and flavor of your Irish Barmbrack.

  • Baking Watch: Keep an eye on the cake while it bakes. If it starts to darken too quickly, cover it loosely with parchment paper to prevent burning.

  • Cooling Importance: Let the cake cool completely before slicing. This preserves its structure and prevents it from crumbling when you cut into it.

  • Flavor Additions: Consider adding orange zest or nuts to the batter for extra flavor and texture in your Irish Barmbrack.

  • Storage Method: Wrap the cooled cake in baking paper and foil, then store it in an airtight tin. This keeps it moist and flavorful for weeks, making it a delicious treat ready to share!

What to Serve with Irish Barmbrack

Irish Barmbrack is not just a delightful treat on its own; it invites a host of pairings that can elevate your meal into a wonderful dining experience.

  • Creamy Butter: A generous slab of butter on warm slices enhances the flavor and adds richness, making each bite even more indulgent.

  • Spiced Tea: This fruity cake pairs beautifully with a warm cup of spiced tea, harmonizing the cake's spices and deepening the flavor experience.

  • Fresh Cream Cheese: The tangy creaminess of fresh cream cheese complements the sweetness of the barmbrack, balancing flavors and adding a new texture.

  • Marmalade Glaze: Brush with additional orange marmalade for sweetness and a glossy finish, giving a beautiful shine and extra fruity flavor.

  • Mulled Wine: A glass of mulled wine with its warm spices is a fantastic companion for Irish Barmbrack, creating a cozy, festive atmosphere.

  • Vanilla Ice Cream: For dessert lovers, pairing a slice of barmbrack with a scoop of vanilla ice cream creates a delightful contrast of warm and cold textures.

Each pairing enhances the delightful experience of enjoying your homemade Irish Barmbrack, transforming it from simple dessert to a cherished gathering treat.

Irish Barmbrack Variations & Substitutions

Feel free to make this Irish Barmbrack your own with these delightful variations that will tantalize your taste buds!

  • Alcohol-Free: Replace the whisky with an extra 50ml of strong, cold tea for a deliciously moist cake.
  • Fruit Mix-Up: Swap out sultanas or currants for chopped dried apricots or dates, adding a unique twist.
  • Gluten-Free: Use a gluten-free flour blend instead of self-raising flour to accommodate dietary needs.
  • Spice It Up: Add a pinch of ground ginger or cloves alongside mixed spice for a flavor boost that warms the soul.
  • Citrus Zing: Stir in some freshly grated orange or lemon zest to enhance the citrus notes and brightness of your cake.
  • Nutty Crunch: Fold in a handful of finely chopped walnuts or pecans to introduce a delightful crunch with every slice, enhancing the overall texture.
  • Tropical Twist: Incorporate dried coconut flakes or pineapple to create a tropical spin, making your cake a conversation starter at gatherings.
  • Chocolate Delight: Add chocolate chips for a sweet surprise, perfect for those who love the combination of fruit and chocolate in baked goods.

These variations allow you to create a unique and personalized version of this traditional Irish treat. Explore and enjoy while considering pairing your warm barmbrack with a dollop of cream cheese or a hot cup of tea for an unforgettable experience! For those seeking an even more unique treat, you might enjoy learning about other traditional Irish desserts that charm the palate.

Irish Barmbrack Recipe FAQs

How do I select the right dried fruits for Irish Barmbrack?
Absolutely! Look for plump, moist raisins, sultanas, or currants without any dark spots or hard textures. The quality of your dried fruits will significantly affect the final taste and texture of your barmbrack. If you can find them, organic options are great for flavor, but regular ones work perfectly too!

How should I store Irish Barmbrack for the best freshness?
To keep your barmbrack deliciously moist and flavorful, wrap it in baking paper and foil, then place it in an airtight tin at room temperature. This method allows the cake to keep for up to 2 weeks without losing its delightful texture. Alternatively, if you prefer storing it in the fridge, ensure it’s wrapped well to prevent drying out, and it will last for about a month.

Can I freeze slices of Irish Barmbrack?
Very! Freezing is a great option if you want to keep your barmbrack longer. Simply slice the cooled cake, layer parchment paper between each slice, and place them in airtight freezer bags. This method is perfect for keeping your barmbrack fresh for up to 3 months. When you're ready to enjoy, thaw at room temperature or warm the slices gently in the microwave or toaster for that fresh-baked taste!

What should I do if my barmbrack turns out too dry?
If your barmbrack ends up drier than expected, don't worry! You can revive it by wrapping it in a damp cloth and microwaving it for about 10-15 seconds—just don’t overdo it! If you're baking again, perhaps soak the dried fruits for a longer time and ensure you check the baking time closely next time, as this can heavily influence moisture levels.

Is there a way to make Irish Barmbrack gluten-free?
Absolutely! To create a gluten-free version of Irish Barmbrack, substitute self-raising flour with a gluten-free flour blend. Make sure to add a gluten-free baking powder to ensure the cake rises properly. Typically, 1 teaspoon of baking powder per cup of gluten-free flour blend works well. It may take a little experimentation to get it just right, but you’ll enjoy a delightful treat that everyone can share!

Can I omit the alcohol in the recipe?
Yes! If you prefer an alcohol-free barmbrack, simply replace the Irish whisky with an extra 50ml of strong, cold tea. This alternative will still give you a rich flavor while keeping the traditional moistness of the cake. You can enjoy the same wonderful experience without the alcohol!

Irish Barmbrack

Irresistibly Moist Irish Barmbrack: A Slice of Tradition

Experience the delightful flavors of Irish Barmbrack, a traditional fruit cake perfect for any occasion.
Print Recipe Pin Recipe
Prep Time 15 minutes mins
Cook Time 1 hour hr 30 minutes mins
Soaking Time 8 hours hrs
Total Time 9 hours hrs 45 minutes mins
Servings: 10 slices
Course: Dessert
Cuisine: Irish
Calories: 250
Ingredients Equipment Method Nutrition Notes

Ingredients
  

For the Fruit Mixture
  • 150 g Raisins
  • 150 g Sultanas or Currants
  • 100 g Glace Cherries optional
  • 300 ml Strong, Cold Tea
  • 50 ml Irish Whisky or extra tea for alcohol-free option
For the Cake
  • 1 medium Egg
  • 200 g Caster or Soft Light Brown Sugar
  • 250 g Self-Raising Flour
  • 2 tsp Ground Mixed Spice or pumpkin pie spice
  • 100 g Orange Marmalade optional

Equipment

  • 900g loaf tin
  • Mixing Bowl
  • Spatula
  • wire rack

Method
 

Step-by-Step Instructions
  1. Soak the dried fruits: Combine the raisins, sultanas or currants, and glace cherries in a bowl with strong, cold tea and Irish whisky, cover and let sit overnight.
  2. Prepare the oven and loaf tin: Preheat the oven to 180°C (356°F) and grease a 900g loaf tin with butter or oil and line with parchment paper.
  3. Mix the cake batter: Drain excess liquid from the soaked fruit and mix with a beaten medium egg, caster sugar, self-raising flour, and ground mixed spice until smooth.
  4. Bake the barmbrack: Pour batter into the prepared tin and bake for 80 to 90 minutes, checking doneness with a skewer.
  5. Cool and glaze the cake: Let the cake cool in the tin for about 10 minutes, then transfer to a wire rack. Brush top with orange marmalade, if desired.

Nutrition

Serving: 1sliceCalories: 250kcalCarbohydrates: 42gProtein: 3gFat: 7gSaturated Fat: 3gCholesterol: 30mgSodium: 100mgPotassium: 150mgFiber: 1gSugar: 15gVitamin A: 200IUCalcium: 20mgIron: 1mg

Notes

Wrap cooled barmbrack in baking paper and foil, store it in an airtight tin for up to 2 weeks.

Tried this recipe?

Let us know how it was!

Magical Harry Potter Letter Hand Pies with Sweet Cherry Filling

October 7, 2025 by Grace Snow Leave a Comment

As I wandered through the whimsical corridors of Hogwarts in my imagination, the idea of crafting Vegan Harry Potter Letter Hand Pies sparked a delightful craving. These enchanting pastries have quickly become my secret weapon for festive gatherings, boasting a sweet cherry filling wrapped in a flaky, buttery crust. Not only are they easy to make, but they also deliver that magical touch that instantly impresses guests—whether at a holiday celebration or a cozy movie night. Unleash your inner wizard as you whip up these charming hand pies with a whimsical chocolate seal and watch everyone's faces light up with nostalgia. Who knew channeling a bit of magic could be this delicious? Ready to dive into the world of Harry Potter with a homemade treat?

Why Are These Hand Pies Special?

Magical appeal: Unleash your creativity with these delightful, retro-themed pastries that transport you straight to Hogwarts.

Easy and fun: This recipe is beginner-friendly, making it a perfect opportunity for families to bond while creating together.

Festive treat: Bursting with sweet cherry filling, these hand pies are ideal for holiday celebrations or themed parties.

Versatile options: Feel free to switch up the filling with different fruit jams or even add a dash of spice, making each batch uniquely yours.

Crowd-pleaser: Impress your guests at your next gathering with a charming culinary surprise that fits both kids and adults, perfect for sharing magic and smiles!

Harry Potter Letter Hand Pies Ingredients

For the Pastry

  • Plain flour – Provides structure and base for the pastry; gluten-free flour can be substituted for a gluten-free option.
  • Caster sugar – Adds sweetness to the pastry; reserve some extra for sprinkling on top for texture and extra sweetness.
  • Dairy-free block butter – Ensures a rich, buttery flavor and flaky texture; avoid margarine, which may contain unwanted additives.
  • Ice-water – Binds the dough without making it wet, critical for maintaining the pastry’s texture during baking.

For the Filling

  • Cherry jam/conserve – Serves as the sweet filling that adds flavor and moisture; can be replaced with other fruit jams based on preference.

For the Topping

  • Dairy-free milk – Used for brushing the pastry, giving it a golden finish during baking.
  • Dairy-free chocolate – Creates the edible wax seal for decoration, adding a touch of authenticity; use either white or dark chocolate.
  • Edible glitter (optional) – Enhances the festive appearance of the chocolate seal, adding a touch of sparkle.
  • Icing sugar (optional) – A dusting for a sweet finish that adds visual appeal.

Step-by-Step Instructions for Harry Potter Letter Hand Pies

Step 1: Prepare the Pastry
In a large mixing bowl, combine plain flour and caster sugar. Using a pastry cutter or your fingertips, incorporate cold dairy-free butter until the mixture resembles breadcrumbs. Gradually add ice-water, stirring until a dough forms. Shape it into a disc, wrap it in cling film, and chill in the refrigerator for 30 minutes to set the pastry.

Step 2: Roll & Cut
Preheat your oven to 170°C (fan). On a lightly floured surface, roll out the chilled dough between pieces of grease-proof paper into a large rectangle approximately 2-3 mm thick. Using a sharp knife, cut the dough into 12cm diamond shapes. Keep the cut shapes on a lined baking tray, ready for filling.

Step 3: Fill
Take each diamond shape and place a spoonful of cherry jam at the center. Be careful not to overfill, as this might cause spilling during baking. Then, use a brush to lightly coat the edges with dairy-free milk to help seal the pastries together. This step is essential for keeping the filling inside your Harry Potter Letter Hand Pies.

Step 4: Shape
Fold the corners of each diamond toward the center to create a letter envelope shape, pressing gently to seal. Use a fork to crimp the edges firmly, ensuring no filling leaks out while baking. After sealing, brush the tops with more dairy-free milk and sprinkle with a little caster sugar to achieve a lovely golden color during baking.

Step 5: Bake
Arrange your prepared pastries on the lined trays, spacing them evenly to allow for expansion. Pop them into the preheated oven and bake for 20-25 minutes, or until they are golden brown and delightful in appearance. Allow them to cool on a wire rack; they will firm up as they cool.

Step 6: Make Chocolate Seal
As the hand pies cool, melt the dairy-free chocolate using a bain-marie until smooth and glossy. Spoon small blobs of melted chocolate onto grease-proof paper and stamp them with a frozen letter stamp to create charming seals. If desired, sprinkle some edible glitter on top for a magical touch, embracing the whimsical spirit of these Harry Potter Letter Hand Pies.

Step 7: Decorate & Serve
Once the hand pies are completely cooled, carefully attach the chocolate seal to the top of each pastry, ensuring they adhere well. These charming Vegan Harry Potter Letter Hand Pies are now ready to be served! Present them on a decorative platter and enjoy with family and friends, sharing the magic of this delightful homemade treat.

Make Ahead Options

These Vegan Harry Potter Letter Hand Pies are perfect for meal prep enthusiasts! You can prepare the pastry dough and refrigerate it for up to 24 hours; just remember to wrap it tightly in cling film to maintain its freshness. If you want to take your prep even further, assemble the unbaked pastries and freeze them for up to a week. When you're ready to enjoy these delightful treats, simply bake them straight from the freezer, adding a few extra minutes to the baking time for perfectly golden hand pies. This way, you'll have a magical dessert ready with minimal effort, capturing that delicious charm whenever you need it!

Expert Tips for Harry Potter Letter Hand Pies

  • Cold Butter is Key: Ensure your dairy-free butter is very cold to achieve that perfectly flaky pastry texture; warm butter will lead to a dense crust.

  • Don't Overfill: When adding cherry jam, just a spoonful is enough; overfilling can cause the filling to spill out during baking, ruining the hand pies.

  • Chill the Dough: Always chill your pastry dough before rolling it out; this helps maintain its structure and prevents it from sticking.

  • Sealing Tips: For a secure seal, crimp the edges with a fork firmly; this not only looks nice but also prevents any filling from leaking out.

  • Golden Finish: Brush the tops of the hand pies with a dairy-free milk wash before baking for a beautiful golden brown color.

  • Customize Your Fillings: Feel free to experiment! Swap the cherry jam for other favorite flavors for your own twist on these Harry Potter Letter Hand Pies.

Harry Potter Letter Hand Pies Variations

Feel free to let your creativity soar with these magical hand pies, customizing each batch to your family’s taste.

  • Fruit Swap: Substitute cherry jam with raspberry or apricot preserves for a delightful twist on flavor.

  • Spice it Up: Add a pinch of cinnamon or a splash of vanilla extract to the pastry dough for extra warmth and depth.

  • Gluten-Free: Use a gluten-free flour blend in place of plain flour for a deliciously inclusive option for those with dietary restrictions.

  • Nutty Crunch: Incorporate finely chopped nuts like almonds or walnuts into the filling for added texture and a nutty flavor.

  • Chocolate Decadence: Add a layer of vegan chocolate spread inside before filling with jam for a rich, indulgent treat.

  • Berry Medley: Combine multiple fruit jams together, such as blackberry and blueberry, for a mixed berry flavor sensation.

  • Zesty Infusion: Mix in a teaspoon of lemon or orange zest into the filling for a refreshing citrus note that brightens each bite.

  • Extra Chocolate: Drizzle melted dairy-free chocolate over the cooled hand pies for a decadent finishing touch that your guests will love.

These variations ensure your Harry Potter Letter Hand Pies remain a crowd-pleaser at any gathering. Whether you go with a fruit swap or a zesty infusion, you can celebrate creativity in the kitchen! For more flavor inspiration, check out our guide on Vegan Baking Tips or consider how you can personalize your delicious hand pies with Creative Jam Choices.

What to Serve with Vegan Harry Potter Letter Hand Pies

These delightful hand pies are perfect for a magical gathering, bringing a touch of whimsy and sweetness to any occasion.

  • Crisp Green Salad: A refreshing salad with mixed greens and a tangy vinaigrette balances the sweetness of the cherry filling, creating a lovely contrast.
  • Hot Chocolate: Serve them alongside a warm cup of creamy hot chocolate, enhancing the cozy, nostalgic vibe of your Harry Potter movie marathon.
  • Herbal Tea: A fragrant herbal tea, like chamomile or mint, complements the pastries' sweetness while providing a soothing beverage option for your guests.
  • Roasted Vegetables: The savory, earthy flavors of roasted root vegetables make for a hearty side that contrasts nicely with the fruity pastries.
  • Fruit Platter: A vibrant fruit platter with strawberries, blueberries, and oranges adds a fresh, juicy element, providing a balance of flavors and textures.
  • Vanilla Ice Cream: A scoop of creamy vanilla ice cream melts into the warm hand pies, offering a delightful dessert experience that will enchant anyone at your gathering.
  • Sparkling Cider: Celebrate with a refreshing glass of sparkling cider, which adds a festive touch and pairs perfectly with the whimsical charm of the pastries.

How to Store and Freeze Harry Potter Letter Hand Pies

  • Room Temperature: Enjoy your hand pies fresh for up to 2 days at room temperature in a cool, dry place; they’ll taste just like magic!
  • Fridge: For best flavor retention, store in an airtight container in the fridge for up to 5 days. They can be enjoyed chilled or warmed slightly.
  • Freezer: You can freeze unbaked hand pies for up to a week. Bake directly from the freezer, adding a few extra minutes to the baking time for perfectly flaky results.
  • Reheating: To reheat baked hand pies, pop them in a preheated oven at 180°C (350°F) for about 10 minutes until warm and delightful again.

Harry Potter Letter Hand Pies Recipe FAQs

How do I select ripe ingredients for my hand pies?
Absolutely! When choosing your cherry jam, look for brands that have a vibrant color and a short ingredient list—this indicates real fruit without unnecessary additives. If you’re using fresh cherries, opt for those that are plump, firm, and deep red without dark spots, which signify overripeness.

What’s the best way to store my Harry Potter Letter Hand Pies?
For the most flavor, store your hand pies in an airtight container at room temperature for up to 2 days. They can also last up to 5 days in the fridge, and you can enjoy them warm or chilled. Just ensure they’re sealed well to maintain that delightful texture.

Can I freeze my hand pies for later enjoyment?
Yes! I often make a batch to freeze for later. You can freeze the unbaked hand pies for up to a week. Just prepare them as you normally would, then place them on a tray in the freezer until solid. Once frozen, stack them in an airtight container and bake directly from frozen, adding 3-5 extra minutes to the baking time.

What should I do if my pastry dough is too sticky or dry?
Very! If your dough is too sticky, sprinkle a little extra flour during the rolling process, or chill it longer to firm up. If it's too dry, add a teaspoon of ice water gradually and knead gently until it comes together. Remember, overworking the dough may lead to a tougher texture, so be gentle!

Are there any dietary considerations I should be aware of?
Definitely! Since this recipe is vegan, it’s perfect for those avoiding animal products. However, always check the labels on your jam and dairy-free butter for potential allergens like soy or nuts. This ensures that everyone, including family pets, can enjoy the magical flavors safely!

Harry Potter Letter Hand Pies

Magical Harry Potter Letter Hand Pies with Sweet Cherry Filling

These Vegan Harry Potter Letter Hand Pies are delightful pastries with a sweet cherry filling, perfect for festive gatherings.
Print Recipe Pin Recipe
Prep Time 30 minutes mins
Cook Time 25 minutes mins
Chilling Time 30 minutes mins
Total Time 1 hour hr 25 minutes mins
Servings: 12 patties
Course: Dessert
Cuisine: British
Calories: 250
Ingredients Equipment Method Nutrition Notes

Ingredients
  

For the Pastry
  • 300 grams Plain flour Gluten-free option available.
  • 50 grams Caster sugar Reserve some for sprinkling on top.
  • 150 grams Dairy-free block butter Avoid margarine.
  • 120 ml Ice-water
For the Filling
  • 150 grams Cherry jam/conserve Can replace with other fruit jams.
For the Topping
  • 30 ml Dairy-free milk For brushing pastry.
  • 100 grams Dairy-free chocolate For the edible wax seal.
  • Edible glitter Optional for decoration.
  • 50 grams Icing sugar Optional for dusting.

Equipment

  • Mixing Bowl
  • Pastry cutter
  • Baking tray
  • Rolling Pin
  • Fork
  • Grease-proof paper
  • Bain-marie

Method
 

Step-by-Step Instructions
  1. In a large mixing bowl, combine plain flour and caster sugar. Incorporate cold dairy-free butter until the mixture resembles breadcrumbs. Gradually add ice-water until a dough forms. Shape into a disc, wrap in cling film, and chill for 30 minutes.
  2. Preheat your oven to 170°C (fan). Roll out the chilled dough into a rectangle approximately 2-3 mm thick. Cut dough into 12cm diamond shapes.
  3. Place a spoonful of cherry jam at the center of each diamond. Brush edges with dairy-free milk to help seal the pastries.
  4. Fold corners of each diamond toward the center, press gently to seal. Use a fork to crimp the edges and brush the tops with dairy-free milk, sprinkle with caster sugar.
  5. Arrange pastries on a lined tray and bake for 20-25 minutes until golden brown. Allow to cool on a wire rack.
  6. Melt dairy-free chocolate until smooth. Spoon blobs onto grease-proof paper and stamp with a frozen letter stamp to create seals. Optional: sprinkle edible glitter on top.
  7. Attach the chocolate seal to the top of each cooled pastry. Serve on a decorative platter.

Nutrition

Serving: 1pattieCalories: 250kcalCarbohydrates: 35gProtein: 3gFat: 12gSaturated Fat: 5gPolyunsaturated Fat: 1gMonounsaturated Fat: 3gSodium: 150mgPotassium: 120mgFiber: 1gSugar: 10gVitamin A: 2IUVitamin C: 5mgCalcium: 3mgIron: 4mg

Notes

These hand pies are fun to make and can be customized with different fillings. Ensure to chill the dough and use cold butter for best results.

Tried this recipe?

Let us know how it was!

Spooky Bread of the Dead: A Vibrant Flatbread Delight

October 7, 2025 by Grace Snow Leave a Comment

As the autumn leaves rustle in the crisp air, I find myself reminiscing about the magical essence of the season. One culinary creation that perfectly embodies this vibe is Bread of the Dead. This enchanting flatbread stands out with its captivating blend of squid ink, earthy mushrooms, and aromatic herbs, making it a delightful centerpiece for any Halloween gathering. Perfect for meatless meals, this recipe not only satisfies your creative cravings but also brings a spooky charm to your table, appealing to even the most novice of home chefs. Plus, it's incredibly versatile—ideal for pairing with soups or enjoyed on its own! Are you ready to bake a batch that’ll impress your guests and elevate your festive celebrations?

Why is Bread of the Dead Special?

Visual Appeal: This stunning flatbread is not only delicious but also a true showstopper on your table, featuring a beautiful dark color that intrigues the eye.

Flavor Impact: The unique combination of squid ink and earthy mushrooms offers a flavor profile that is distinctly savory and complex, sure to delight any palate.

Meatless Marvel: This recipe is perfect for those seeking meatless options without sacrificing taste or satisfaction, making it suitable for vegetarians and a great addition to any holiday spread.

Versatile Use: Enjoy it on its own or as a side—this bread pairs wonderfully with soups or dips, like Cheesy Garlic Bread or a refreshing salad.

Easy to Make: With simple ingredients and straightforward instructions, even novice bakers can impress their guests with this fun twist on traditional bread.

Bread of the Dead Ingredients

For the Dough

  • All-purpose flour – This is the base structure for the bread; substitute with a gluten-free blend if needed.
  • Squid ink – Provides a distinctive dark color and unique flavor; black olive paste can also be used for similar effects.
  • Instant yeast – Essential for making the bread rise; you can use active dry yeast instead, just adjust the activation steps accordingly.
  • Water – Hydrates the dough; warm water is best for activating the yeast effectively.
  • Olive oil – Adds richness and moisture to the dough; swap with melted butter for a different flavor touch.
  • Salt – Enhances flavor; don't skip it for better taste.

For the Topping

  • Fresh herbs (e.g., parsley, cilantro) – These enhance the flavor and appearance of the flatbread; feel free to substitute with your favorite fresh herbs.
  • Mushrooms (e.g., button mushrooms) – Adds texture and earthy flavor, creating decorative, spooky shapes; any favorite mushrooms or even sautéed vegetables can be used instead.

The Bread of the Dead not only leaves a lasting impression but also invites creativity in your Halloween festivities!

Step‑by‑Step Instructions for Bread of the Dead

Step 1: Dough Prep
In a large mixing bowl, combine 3 cups of all-purpose flour, 2 tablespoons of squid ink, 1 packet of instant yeast, and 1 teaspoon of salt. Gradually pour in 1 cup of warm water and 2 tablespoons of olive oil. Stir with a wooden spoon until a dough begins to form. You’re looking for a shaggy yet cohesive mixture that holds together well.

Step 2: Kneading
Turn the dough out onto a floured surface and begin kneading it for about 8 to 10 minutes. Use the palms of your hands to push and fold the dough, creating a smooth, elastic texture. You’ll know it's ready when the dough is soft and bouncy, with a slight sheen. Keep your workspace lightly floured to prevent sticking.

Step 3: First Rise
Once kneaded, shape your dough into a ball and place it in a greased bowl. Cover the bowl with a cloth and set it in a warm, draft-free area to rise. Let it rest for approximately 1 hour or until it has doubled in size. You’re aiming for a fluffy, airy dough that springs back when gently poked.

Step 4: Forming Bread
After the dough has risen, gently punch it down to release the air. On a floured surface, roll it out into a large circle, about ½ inch thick. This is where your Bread of the Dead takes shape! The goal is to maintain an even thickness for consistent baking. Transfer the rolled dough onto a baking sheet lined with parchment paper.

Step 5: Topping
Preheat your oven to 450°F (230°C) while you prepare the toppings. Scatter an assortment of sliced mushrooms and freshly chopped herbs like parsley and cilantro over the dough. Get creative! Aim for an artistic pattern that will resemble skulls to celebrate the festive theme of the Bread of the Dead.

Step 6: Baking
Place your topped flatbread in the preheated oven and bake for 15 to 20 minutes. You’ll know it’s done when the crust turns a beautiful golden brown, and it sounds hollow when tapped. The enticing aroma will fill your kitchen, making the wait worthwhile as the Bread of the Dead transforms into a stunning centerpiece.

Step 7: Cooling
Once out of the oven, allow the Bread of the Dead to cool on the baking sheet for about 5 minutes. This brief cooling will make slicing easier while allowing the flavors to settle. After, transfer it to a wire rack to cool completely, letting the crust remain crispy while the inside stays delightfully soft.

What to Serve with Spooky Bread of the Dead?

The magic of your culinary creation can shine even brighter with the perfect pairings alongside. Each of these suggestions will enchant your dining experience.

  • Savory Pumpkin Soup: The creamy texture and warm spices bring an autumnal flavor that complements the earthy tones of the flatbread wonderfully.

  • Garlic Herb Olive Oil: A fragrant dip made with olive oil, minced garlic, and fresh herbs adds vibrant flavors that tantalize the taste buds while enhancing the bread's enchanting visuals.

  • Mixed Greens Salad: A light salad featuring arugula, cherry tomatoes, and a citrus vinaigrette adds freshness and a burst of color to your plate. Enjoy the crisp greens against the chewy bread for delightful contrast!

  • Roasted Beet Hummus: This visually stunning dip not only looks festive but pairs deliciously with the flatbread's flavor, making each bite pop with its earthy sweetness.

  • Wine Pairing: A glass of crisp Sauvignon Blanc will beautifully balance the bold flavors of the bread and lift your dining experience, ensuring every bite is a celebration.

  • Spicy Salsa Verde: The zesty and spicy notes of this vibrant green sauce will invigorate your taste buds and encourage a lively sharing atmosphere, perfect for festive gatherings!

  • Chocolate Avocado Mousse: For dessert, try a rich, creamy mousse that whispers indulgence after a savory feast. It’s a delightful way to end your meal and keeps the spooky theme alive!

Enjoy these splendid combinations to create a memorable Halloween gathering that celebrates flavors and fun!

Expert Tips for Bread of the Dead

  • Quality Ingredients: Use high-quality squid ink for vibrant color and flavor; it makes a noticeable difference in the final result.

  • Avoid Tough Dough: Be careful not to over-knead the dough; this can lead to a tough texture instead of the desired chewiness in your Bread of the Dead.

  • Yeast Activation: Ensure your water is warm, not hot; using too hot water can kill the yeast, preventing the bread from rising properly.

  • Creative Toppings: For decorative mushroom skulls, try carving button mushrooms before adding them to the top; this enhances the visual appeal of your bread.

  • Consistent Baking: Keep an eye on your baking time; every oven is different, so start checking at 15 minutes to avoid overcooking.

Storage Tips for Bread of the Dead

  • Room Temperature: Allow the Bread of the Dead to cool completely before storing. Keep it in a breadbox or covered with a cloth, where it will stay fresh for up to 2 days.
  • Fridge: If you want to keep it for longer, place the flatbread in an airtight container in the fridge for up to 3 days, ensuring it retains moisture and flavor.
  • Freezer: Wrap the bread tightly in plastic wrap and then store it in a freezer-safe bag. It can be frozen for up to 2 months without losing its delicious taste.
  • Reheating: To enjoy your Bread of the Dead, preheat the oven to 350°F (175°C) and warm for about 10 minutes. Alternatively, use a microwave on medium for 30 seconds to quickly bring it back to life!

Make Ahead Options

The Bread of the Dead is an excellent choice for meal prep, allowing you to enjoy quality homemade bread even on busy days. You can prepare the dough up to 24 hours in advance by mixing and kneading it, then allowing it to rise. After the first rise, you can wrap the dough tightly in plastic wrap and refrigerate it. For best results, bring it back to room temperature before shaping and baking. Alternatively, once baked, the flatbread can be stored in an airtight container for up to 3 days or frozen for up to 2 months—just reheat in a warm oven before serving to keep it deliciously fresh!

Bread of the Dead Variations & Substitutions

Feel free to make this festive flatbread your own with any of these delightful twists and tweaks!

  • Gluten-Free: Substitute all-purpose flour with a gluten-free flour blend to cater to those avoiding gluten. The texture might change slightly, but it's still a delicious treat!

  • Black Olive Paste: If squid ink isn’t available, black olive paste can be used for a similar dark hue and rich flavor. It adds a Mediterranean flair to your Bread of the Dead!

  • Active Dry Yeast: Use active dry yeast in place of instant yeast, adjusting the activation time as required. This could be a fun experiment, allowing you to watch the dough rise over time.

  • Vegetable Medley: Switch out mushrooms for a colorful array of roasted vegetables like bell peppers and zucchini for a vibrant topping. It not only looks stunning but also enhances the flavor profile!

  • Spiced Dough: Add spices such as garlic powder or onion powder into the dough for an extra kick. Just a pinch can elevate the overall taste, transforming your bread into something extraordinary.

  • Cheesy Twist: Mix in shredded cheese into the dough prior to kneading for a cheesy version of this flatbread. This is a delightful treat for cheese lovers and adds a delightful gooeyness!

For more flavor inspiration, you might want to explore pairing this bread with a savory Shakshuka Savor Bold or serve alongside creamy Cornbread Breakfast Casserole for a warm, comforting meal.

  • Herb Variations: While fresh herbs like parsley and cilantro are superb, consider using fresh thyme or rosemary if you prefer a stronger herbaceous flavor. These herbs lend a rustic note to the dish, celebrating the rich flavors of fall!

These fun variations invite you to customize your Bread of the Dead and create a spectacular centerpiece for your Halloween festivities!

Bread of the Dead Recipe FAQs

How do I choose the best squid ink for my Bread of the Dead?
Absolutely! Look for high-quality squid ink that is sold in jars rather than packets, as jarred ink is typically fresher and offers a richer flavor and color. Ensure it has a nice, deep black hue and check the ingredients to confirm there are no unnecessary additives.

What is the best way to store leftover Bread of the Dead?
To keep your Bread of the Dead fresh, allow it to cool completely, then place it in an airtight container. This way, it will stay delicious for up to 3 days in the refrigerator. If you'd like to keep it longer, wrap it tightly in plastic wrap and store it in a freezer-safe bag for up to 2 months.

Can I freeze the Bread of the Dead?
Very! To freeze your Bread of the Dead, let it cool completely first. Wrap the flatbread tightly in plastic wrap, ensuring no air is trapped inside, then place it in a freezer-safe bag. This will help maintain its texture and flavor. When you're ready to enjoy it, simply thaw it in the fridge overnight or at room temperature for a few hours.

What should I do if my dough doesn’t rise?
Oh no! If your dough doesn't rise, it could be due to inactive yeast. Make sure to check that your yeast is fresh and your water is warm but not hot (ideally around 110°F or 43°C). If your dough fails to rise after 1 hour, try a warm spot like an oven with the light on. Add a small pinch of sugar to re-activate the yeast and then place it back to rise for another 30-40 minutes.

Is Bread of the Dead suitable for vegetarians?
Absolutely! This recipe is entirely meatless and rich in complex carbohydrates and fiber, making it a fantastic option for vegetarians. Just be sure to use vegetarian-friendly toppings, avoiding any ingredients that may contain animal products like certain cheeses or broths.

Bread of the Dead

Spooky Bread of the Dead: A Vibrant Flatbread Delight

Bread of the Dead is a captivating flatbread featuring squid ink and mushrooms, perfect for Halloween gatherings.
Print Recipe Pin Recipe
Prep Time 1 hour hr
Cook Time 20 minutes mins
Cooling Time 5 minutes mins
Total Time 1 hour hr 25 minutes mins
Servings: 8 slices
Course: Dessert
Cuisine: Halloween
Calories: 150
Ingredients Equipment Method Nutrition Notes

Ingredients
  

For the Dough
  • 3 cups all-purpose flour Substitute with gluten-free blend if needed.
  • 2 tablespoons squid ink Black olive paste can be used as an alternative.
  • 1 packet instant yeast Active dry yeast can also be used.
  • 1 cup warm water Warm water is best for activating the yeast.
  • 2 tablespoons olive oil Can swap with melted butter.
  • 1 teaspoon salt Essential for flavor enhancement.
For the Topping
  • 1 bunch fresh herbs (e.g., parsley, cilantro) Feel free to substitute with favorite herbs.
  • 1 cup mushrooms (e.g., button mushrooms) Can use any favorite mushrooms or sautéed vegetables.

Equipment

  • Mixing Bowl
  • Wooden spoon
  • Baking Sheet
  • Oven
  • Floured surface
  • wire rack

Method
 

Step-by-Step Instructions
  1. In a large mixing bowl, combine 3 cups of all-purpose flour, 2 tablespoons of squid ink, 1 packet of instant yeast, and 1 teaspoon of salt.
  2. Gradually pour in 1 cup of warm water and 2 tablespoons of olive oil. Stir with a wooden spoon until a dough begins to form.
  3. Turn the dough out onto a floured surface and begin kneading for about 8 to 10 minutes.
  4. Once kneaded, shape the dough into a ball, place in a greased bowl, cover and let rise for approximately 1 hour.
  5. After rising, gently punch dough down to release air and roll out into a large circle, about ½ inch thick.
  6. Preheat your oven to 450°F (230°C) and prepare toppings with sliced mushrooms and chopped herbs.
  7. Bake for 15 to 20 minutes until crust is golden brown and sounds hollow when tapped.
  8. Allow to cool on the baking sheet for about 5 minutes before transferring to a wire rack.

Nutrition

Serving: 1sliceCalories: 150kcalCarbohydrates: 30gProtein: 4gFat: 2gSaturated Fat: 0.5gPolyunsaturated Fat: 0.5gMonounsaturated Fat: 1gSodium: 250mgPotassium: 150mgFiber: 2gSugar: 1gVitamin A: 5IUVitamin C: 2mgCalcium: 2mgIron: 8mg

Notes

Use high-quality squid ink for best results and avoid over-kneading the dough.

Tried this recipe?

Let us know how it was!

Spooky Bread of the Dead: A Vibrant Flatbread Delight

October 7, 2025 by Grace Snow Leave a Comment

As the autumn leaves rustle in the crisp air, I find myself reminiscing about the magical essence of the season. One culinary creation that perfectly embodies this vibe is Bread of the Dead. This enchanting flatbread stands out with its captivating blend of squid ink, earthy mushrooms, and aromatic herbs, making it a delightful centerpiece for any Halloween gathering. Perfect for meatless meals, this recipe not only satisfies your creative cravings but also brings a spooky charm to your table, appealing to even the most novice of home chefs. Plus, it's incredibly versatile—ideal for pairing with soups or enjoyed on its own! Are you ready to bake a batch that’ll impress your guests and elevate your festive celebrations?

Why is Bread of the Dead Special?

Visual Appeal: This stunning flatbread is not only delicious but also a true showstopper on your table, featuring a beautiful dark color that intrigues the eye.

Flavor Impact: The unique combination of squid ink and earthy mushrooms offers a flavor profile that is distinctly savory and complex, sure to delight any palate.

Meatless Marvel: This recipe is perfect for those seeking meatless options without sacrificing taste or satisfaction, making it suitable for vegetarians and a great addition to any holiday spread.

Versatile Use: Enjoy it on its own or as a side—this bread pairs wonderfully with soups or dips, like Cheesy Garlic Bread or a refreshing salad.

Easy to Make: With simple ingredients and straightforward instructions, even novice bakers can impress their guests with this fun twist on traditional bread.

Bread of the Dead Ingredients

For the Dough

  • All-purpose flour – This is the base structure for the bread; substitute with a gluten-free blend if needed.
  • Squid ink – Provides a distinctive dark color and unique flavor; black olive paste can also be used for similar effects.
  • Instant yeast – Essential for making the bread rise; you can use active dry yeast instead, just adjust the activation steps accordingly.
  • Water – Hydrates the dough; warm water is best for activating the yeast effectively.
  • Olive oil – Adds richness and moisture to the dough; swap with melted butter for a different flavor touch.
  • Salt – Enhances flavor; don't skip it for better taste.

For the Topping

  • Fresh herbs (e.g., parsley, cilantro) – These enhance the flavor and appearance of the flatbread; feel free to substitute with your favorite fresh herbs.
  • Mushrooms (e.g., button mushrooms) – Adds texture and earthy flavor, creating decorative, spooky shapes; any favorite mushrooms or even sautéed vegetables can be used instead.

The Bread of the Dead not only leaves a lasting impression but also invites creativity in your Halloween festivities!

Step‑by‑Step Instructions for Bread of the Dead

Step 1: Dough Prep
In a large mixing bowl, combine 3 cups of all-purpose flour, 2 tablespoons of squid ink, 1 packet of instant yeast, and 1 teaspoon of salt. Gradually pour in 1 cup of warm water and 2 tablespoons of olive oil. Stir with a wooden spoon until a dough begins to form. You’re looking for a shaggy yet cohesive mixture that holds together well.

Step 2: Kneading
Turn the dough out onto a floured surface and begin kneading it for about 8 to 10 minutes. Use the palms of your hands to push and fold the dough, creating a smooth, elastic texture. You’ll know it's ready when the dough is soft and bouncy, with a slight sheen. Keep your workspace lightly floured to prevent sticking.

Step 3: First Rise
Once kneaded, shape your dough into a ball and place it in a greased bowl. Cover the bowl with a cloth and set it in a warm, draft-free area to rise. Let it rest for approximately 1 hour or until it has doubled in size. You’re aiming for a fluffy, airy dough that springs back when gently poked.

Step 4: Forming Bread
After the dough has risen, gently punch it down to release the air. On a floured surface, roll it out into a large circle, about ½ inch thick. This is where your Bread of the Dead takes shape! The goal is to maintain an even thickness for consistent baking. Transfer the rolled dough onto a baking sheet lined with parchment paper.

Step 5: Topping
Preheat your oven to 450°F (230°C) while you prepare the toppings. Scatter an assortment of sliced mushrooms and freshly chopped herbs like parsley and cilantro over the dough. Get creative! Aim for an artistic pattern that will resemble skulls to celebrate the festive theme of the Bread of the Dead.

Step 6: Baking
Place your topped flatbread in the preheated oven and bake for 15 to 20 minutes. You’ll know it’s done when the crust turns a beautiful golden brown, and it sounds hollow when tapped. The enticing aroma will fill your kitchen, making the wait worthwhile as the Bread of the Dead transforms into a stunning centerpiece.

Step 7: Cooling
Once out of the oven, allow the Bread of the Dead to cool on the baking sheet for about 5 minutes. This brief cooling will make slicing easier while allowing the flavors to settle. After, transfer it to a wire rack to cool completely, letting the crust remain crispy while the inside stays delightfully soft.

Make Ahead Options

The Bread of the Dead is an excellent choice for meal prep, allowing you to enjoy quality homemade bread even on busy days. You can prepare the dough up to 24 hours in advance by mixing and kneading it, then allowing it to rise. After the first rise, you can wrap the dough tightly in plastic wrap and refrigerate it. For best results, bring it back to room temperature before shaping and baking. Alternatively, once baked, the flatbread can be stored in an airtight container for up to 3 days or frozen for up to 2 months—just reheat in a warm oven before serving to keep it deliciously fresh!

Storage Tips for Bread of the Dead

  • Room Temperature: Allow the Bread of the Dead to cool completely before storing. Keep it in a breadbox or covered with a cloth, where it will stay fresh for up to 2 days.
  • Fridge: If you want to keep it for longer, place the flatbread in an airtight container in the fridge for up to 3 days, ensuring it retains moisture and flavor.
  • Freezer: Wrap the bread tightly in plastic wrap and then store it in a freezer-safe bag. It can be frozen for up to 2 months without losing its delicious taste.
  • Reheating: To enjoy your Bread of the Dead, preheat the oven to 350°F (175°C) and warm for about 10 minutes. Alternatively, use a microwave on medium for 30 seconds to quickly bring it back to life!

Expert Tips for Bread of the Dead

  • Quality Ingredients: Use high-quality squid ink for vibrant color and flavor; it makes a noticeable difference in the final result.

  • Avoid Tough Dough: Be careful not to over-knead the dough; this can lead to a tough texture instead of the desired chewiness in your Bread of the Dead.

  • Yeast Activation: Ensure your water is warm, not hot; using too hot water can kill the yeast, preventing the bread from rising properly.

  • Creative Toppings: For decorative mushroom skulls, try carving button mushrooms before adding them to the top; this enhances the visual appeal of your bread.

  • Consistent Baking: Keep an eye on your baking time; every oven is different, so start checking at 15 minutes to avoid overcooking.

Bread of the Dead Variations & Substitutions

Feel free to make this festive flatbread your own with any of these delightful twists and tweaks!

  • Gluten-Free: Substitute all-purpose flour with a gluten-free flour blend to cater to those avoiding gluten. The texture might change slightly, but it's still a delicious treat!

  • Black Olive Paste: If squid ink isn’t available, black olive paste can be used for a similar dark hue and rich flavor. It adds a Mediterranean flair to your Bread of the Dead!

  • Active Dry Yeast: Use active dry yeast in place of instant yeast, adjusting the activation time as required. This could be a fun experiment, allowing you to watch the dough rise over time.

  • Vegetable Medley: Switch out mushrooms for a colorful array of roasted vegetables like bell peppers and zucchini for a vibrant topping. It not only looks stunning but also enhances the flavor profile!

  • Spiced Dough: Add spices such as garlic powder or onion powder into the dough for an extra kick. Just a pinch can elevate the overall taste, transforming your bread into something extraordinary.

  • Cheesy Twist: Mix in shredded cheese into the dough prior to kneading for a cheesy version of this flatbread. This is a delightful treat for cheese lovers and adds a delightful gooeyness!

For more flavor inspiration, you might want to explore pairing this bread with a savory Shakshuka Savor Bold or serve alongside creamy Cornbread Breakfast Casserole for a warm, comforting meal.

  • Herb Variations: While fresh herbs like parsley and cilantro are superb, consider using fresh thyme or rosemary if you prefer a stronger herbaceous flavor. These herbs lend a rustic note to the dish, celebrating the rich flavors of fall!

These fun variations invite you to customize your Bread of the Dead and create a spectacular centerpiece for your Halloween festivities!

What to Serve with Spooky Bread of the Dead?

The magic of your culinary creation can shine even brighter with the perfect pairings alongside. Each of these suggestions will enchant your dining experience.

  • Savory Pumpkin Soup: The creamy texture and warm spices bring an autumnal flavor that complements the earthy tones of the flatbread wonderfully.

  • Garlic Herb Olive Oil: A fragrant dip made with olive oil, minced garlic, and fresh herbs adds vibrant flavors that tantalize the taste buds while enhancing the bread's enchanting visuals.

  • Mixed Greens Salad: A light salad featuring arugula, cherry tomatoes, and a citrus vinaigrette adds freshness and a burst of color to your plate. Enjoy the crisp greens against the chewy bread for delightful contrast!

  • Roasted Beet Hummus: This visually stunning dip not only looks festive but pairs deliciously with the flatbread's flavor, making each bite pop with its earthy sweetness.

  • Wine Pairing: A glass of crisp Sauvignon Blanc will beautifully balance the bold flavors of the bread and lift your dining experience, ensuring every bite is a celebration.

  • Spicy Salsa Verde: The zesty and spicy notes of this vibrant green sauce will invigorate your taste buds and encourage a lively sharing atmosphere, perfect for festive gatherings!

  • Chocolate Avocado Mousse: For dessert, try a rich, creamy mousse that whispers indulgence after a savory feast. It’s a delightful way to end your meal and keeps the spooky theme alive!

Enjoy these splendid combinations to create a memorable Halloween gathering that celebrates flavors and fun!

Bread of the Dead Recipe FAQs

How do I choose the best squid ink for my Bread of the Dead?
Absolutely! Look for high-quality squid ink that is sold in jars rather than packets, as jarred ink is typically fresher and offers a richer flavor and color. Ensure it has a nice, deep black hue and check the ingredients to confirm there are no unnecessary additives.

What is the best way to store leftover Bread of the Dead?
To keep your Bread of the Dead fresh, allow it to cool completely, then place it in an airtight container. This way, it will stay delicious for up to 3 days in the refrigerator. If you'd like to keep it longer, wrap it tightly in plastic wrap and store it in a freezer-safe bag for up to 2 months.

Can I freeze the Bread of the Dead?
Very! To freeze your Bread of the Dead, let it cool completely first. Wrap the flatbread tightly in plastic wrap, ensuring no air is trapped inside, then place it in a freezer-safe bag. This will help maintain its texture and flavor. When you're ready to enjoy it, simply thaw it in the fridge overnight or at room temperature for a few hours.

What should I do if my dough doesn’t rise?
Oh no! If your dough doesn't rise, it could be due to inactive yeast. Make sure to check that your yeast is fresh and your water is warm but not hot (ideally around 110°F or 43°C). If your dough fails to rise after 1 hour, try a warm spot like an oven with the light on. Add a small pinch of sugar to re-activate the yeast and then place it back to rise for another 30-40 minutes.

Is Bread of the Dead suitable for vegetarians?
Absolutely! This recipe is entirely meatless and rich in complex carbohydrates and fiber, making it a fantastic option for vegetarians. Just be sure to use vegetarian-friendly toppings, avoiding any ingredients that may contain animal products like certain cheeses or broths.

Bread of the Dead

Spooky Bread of the Dead: A Vibrant Flatbread Delight

Delight your guests with Bread of the Dead, a savory flatbread enriched with squid ink and mushrooms, perfect for Halloween gatherings.
Print Recipe Pin Recipe
Prep Time 15 minutes mins
Cook Time 20 minutes mins
Rising Time 1 hour hr
Total Time 1 hour hr 35 minutes mins
Servings: 8 slices
Course: Dessert
Cuisine: Mexican
Calories: 200
Ingredients Equipment Method Nutrition Notes

Ingredients
  

Dough Ingredients
  • 3 cups all-purpose flour or gluten-free blend
  • 2 tablespoons squid ink or black olive paste
  • 1 packet instant yeast or active dry yeast
  • 1 cup warm water for activating yeast
  • 2 tablespoons olive oil or melted butter
  • 1 teaspoon salt
Topping Ingredients
  • to taste fresh herbs (e.g., parsley, cilantro) substitute with favorite herbs
  • to taste mushrooms (e.g., button mushrooms) can use favorite mushrooms

Equipment

  • Mixing Bowl
  • Wooden spoon
  • Floured surface
  • Baking Sheet
  • Parchment Paper

Method
 

Dough Preparation
  1. In a large mixing bowl, combine 3 cups of all-purpose flour, 2 tablespoons of squid ink, 1 packet of instant yeast, and 1 teaspoon of salt. Gradually pour in 1 cup of warm water and 2 tablespoons of olive oil. Stir with a wooden spoon until a dough begins to form.
  2. Turn the dough out onto a floured surface and knead for 8 to 10 minutes until smooth and elastic.
  3. Shape the dough into a ball and place it in a greased bowl. Cover and let it rise in a warm area for approximately 1 hour or until it doubles in size.
  4. Gently punch down the dough and roll it on a floured surface into a large circle, about ½ inch thick. Transfer to a lined baking sheet.
Topping and Baking
  1. Preheat your oven to 450°F (230°C). Scatter sliced mushrooms and chopped herbs over the dough.
  2. Bake for 15 to 20 minutes until the crust is golden brown and sounds hollow when tapped.
  3. Allow to cool on the baking sheet for about 5 minutes before transferring to a wire rack.

Nutrition

Serving: 1sliceCalories: 200kcalCarbohydrates: 30gProtein: 5gFat: 7gSaturated Fat: 1gPolyunsaturated Fat: 2gMonounsaturated Fat: 4gSodium: 200mgPotassium: 100mgFiber: 2gSugar: 1gCalcium: 10mgIron: 2mg

Notes

This bread is perfect for Halloween gatherings and can be served with soups or dips. Use high-quality squid ink for the best results and get creative with toppings.

Tried this recipe?

Let us know how it was!

Crispy Haunted Hash Browns for a Spooky Breakfast Delight

October 7, 2025 by Grace Snow Leave a Comment

As the crisp autumn air settles in, it's time to embrace all things spooky and fun in the kitchen! Enter my Haunted Hash Browns—a whimsical Halloween breakfast that not only teases your taste buds but also sparks joy in every bite. Made from simple pantry ingredients, these ghost-shaped delights are an easy way to gather the family around the table to kickstart the celebrations. They’re quick to whip up and perfect for impressing your gang without breaking a sweat. Imagine starting your Halloween morning with a golden, crispy hash brown that adds a playful twist to your day. Are you ready to bring some magic to your breakfast? Let’s dive into this delightful recipe together!

Why Are These Hash Browns Spooktacular?

Crispy Perfection: These Haunted Hash Browns offer a delightfully crispy exterior paired with a tender, fluffy inside—perfect for satisfying your cravings.

Family Fun: With their ghostly shapes, these hash browns turn an ordinary breakfast into a festive event that children and adults alike will love.

Quick and Easy: Made with minimal ingredients, you can whip these up in no time, making them a great option for busy mornings or last-minute gatherings.

Deliciously Versatile: Whether you want to add spices, incorporate sweet potatoes, or even shape them for other celebrations, the options are endless!

A Vegetarian Treat: This recipe not only caters to meat-free diets but also provides a healthy, veggie-packed start to your day. Plus, consider serving them with a side of scrambled eggs or salsa to wow your breakfast crew!

Haunted Hash Browns Ingredients

• Get ready to create spooky breakfast magic with these unforgettable ingredients!

For the Hash Browns

  • Potatoes – Use starchy varieties like Russets for perfect crispiness.
  • Onion – Adds flavor and depth; garlic makes a great substitution!
  • Egg – Essential for binding and keeping the ghost shapes intact.
  • Flour – Helps achieve that extra crispiness; consider gluten-free options if needed.
  • Salt & Pepper – Necessary for enhancing flavor; adjust to your personal taste.

For Decoration

  • Black Olives – Perfect for ghostly eyes; feel free to use small vegetables for fun alternatives.

These Haunted Hash Browns will not only bring smiles to your breakfast table but also add a festive touch to your Halloween celebrations!

Step‑by‑Step Instructions for Haunted Hash Browns

Step 1: Prep Potatoes
Begin by peeling and grating 2-3 starchy potatoes, like Russets, into a large bowl. Once shredded, place the grated potatoes in a clean kitchen towel and twist to squeeze out as much excess moisture as possible; this step is crucial for achieving that delightful crispiness in your Haunted Hash Browns.

Step 2: Mix Ingredients
In the same bowl, add in 1 chopped onion, 1 beaten egg, ¼ cup of flour, and a pinch of salt and pepper. Stir these ingredients together until well-combined and the mixture can hold its shape, ensuring every bit of potato is coated. This blend creates a hearty base for your ghostly breakfast treats!

Step 3: Shape Ghosts
With your hands, take small handfuls of the potato mixture and form them into ghost shapes, oval at the bottom and rounded at the top. Aim for about 2-3 inches in width so they cook evenly. Lay the shaped ghosts onto a plate, ensuring they’re ready for a spooktacular frying adventure.

Step 4: Heat Oil
In a large skillet, pour about ¼ inch of vegetable oil and heat it over medium-high heat. You’ll want the oil to shimmer but not smoke, indicating it’s ready for frying. This crucial step will help your Haunted Hash Browns achieve that golden brown, crispy exterior we all crave.

Step 5: Fry Hash Browns
Carefully place your ghost shapes into the hot oil, ensuring not to overcrowd the pan for even cooking. Fry them for about 3-4 minutes on each side until they turn a beautiful golden brown and develop a crispy texture. Use a wide spatula to flip them gently, keeping their ghostly forms intact.

Step 6: Add Decoration
Once fried, remove the Haunted Hash Browns from the pan and let them drain on paper towels. While they are still warm, press small pieces of black olives into the top to create spooky eyes. This simple decoration adds not only character but also a fun twist that kids will love!

What to Serve with Haunted Hash Browns?

Transform your Halloween breakfast into a complete feast with delightful pairings that enhance the fun and flavor of each bite!

  • Scrambled Eggs: Creamy scrambled eggs add richness and a breakfast classic that balances the crispiness of the hash browns.

  • Spicy Salsa: A zesty salsa brings a burst of flavor, offering a fresh contrast to the warm, crispy hash browns, making every bite more exciting.

  • Crispy Bacon: The smoky crunch of bacon pairs beautifully with the hash browns, making your breakfast both hearty and flavorful.

  • Pumpkin Spice Latte: A seasonal favorite, this warm drink adds a cozy touch to your morning spread, perfect for sipping alongside your spooky treats.

  • Fruit Salad: A refreshing fruit salad brings brightness and sweetness, harmonizing well with the savory flavors of the Haunted Hash Browns.

  • Ketchup or Ranch Dressing: Classic dips like ketchup or creamy ranch offer delightful tanginess, inviting playful interactions as you dunk those ghostly shapes.

  • Yogurt Parfait: Layered with granola and seasonal fruits, a yogurt parfait can add a nutritious sweet element that complements the hearty hash browns.

Enjoy crafting an unforgettable breakfast experience while celebrating Halloween with these enchanting pairings!

How to Store and Freeze Haunted Hash Browns

Fridge: Store any leftover cooked Haunted Hash Browns in an airtight container for up to 3 days; reheat in a skillet for optimal crispiness.

Freezer: To freeze uncooked shaped hash browns, place them on a baking sheet to flash freeze, then transfer to a zip-top bag for up to 1 month.

Reheating: For reheating, cook them from frozen in a skillet over medium heat for about 10-12 minutes, flipping halfway to ensure even cooking.

Prepping Ahead: You can prepare the ghost shapes ahead of time and refrigerate them for a few hours before frying, perfect for spontaneous Halloween brunches!

Make Ahead Options

These Haunted Hash Browns are perfect for meal prep enthusiasts looking to save time on festive mornings! You can prepare and shape the ghostly hash browns up to 24 hours in advance. Just follow the initial steps to grate the potatoes and mix all the ingredients before forming them into ghost shapes. Place the shaped hash browns on a parchment-lined baking sheet and cover them tightly with plastic wrap before refrigerating. To maintain their crispiness, ensure they are well-dried before storing; any excess moisture can lead to sogginess. When you're ready to enjoy, simply fry straight from the fridge, following the frying instructions, and marvel at how they turn out just as delicious as fresh!

Haunted Hash Browns Variations

Feel free to get creative as you make these spooky hash browns; your imagination can take them to new heights!

  • Cheesy Delight: Stir in shredded cheese to the potato mixture for a gooey, cheesy interior that everyone will love. There's nothing quite like the rich, comforting flavors of melted cheese paired with crispy hash browns.

  • Spicy Twist: Add a dash of your favorite hot sauce to the mix for a bit of heat. You can even sprinkle some crushed red pepper flakes for an extra kick that will wake up your taste buds!

  • Sweet Potato Fun: Swap out regular potatoes for sweet potatoes to create a sweeter, more colorful version. The natural sweetness of the sweet potatoes complements the savory flavors—perfect for those who like a little twist on tradition.

  • Garlic Lovers: Add garlic powder or sauté fresh minced garlic with the onion for a fragrant and flavorful boost. There’s something special about garlic that elevates any dish, creating an inviting aroma that fills the kitchen.

  • Festive Shapes: Shape the hash browns into cute shapes like bats or pumpkins for even more Halloween spirit. This could be a fun activity for kids, encouraging creativity in the kitchen!

  • Herb Infusion: Mix in chopped fresh herbs like parsley or chives for a fresh taste. This not only adds flavor but also a vibrant green touch that brightens up your spooky breakfast.

  • Vegetarian Eye Candy: Replace black olives with bell peppers or cherry tomatoes to create colorful eyes. The pops of color will make your Haunted Hash Browns even more delightful for kids and adults alike.

  • Breakfast Bowl: Transform these hash browns into a breakfast bowl by layering them with eggs, avocado, and salsa—a hearty meal that fuels your fun-filled Halloween day! Consider serving alongside some scrambled eggs for added protein goodness.

Get ready to wow your family and friends with these tailored variations that make every meal a celebration!

Expert Tips for Haunted Hash Browns

• Dry Potatoes: Ensure your grated potatoes are very dry; excess moisture will lead to sogginess instead of crispy Haunted Hash Browns. Salting them before squeezing helps!

• Oil Temperature: Monitor the oil temperature closely. If it’s too hot, your hash browns may burn; if it’s too cool, they’ll be greasy. Aim for medium-high heat.

• Flipping Technique: Use a wide spatula to flip your ghost shapes carefully, ensuring they maintain their form. Avoid overcrowding the pan to promote even cooking.

• Serving Suggestions: Pair these fun hash browns with ketchup or salsa for dipping. Add scrambled eggs for a complete, charming breakfast that everyone will enjoy.

• Make Ahead: Consider shaping your uncooked Haunted Hash Browns ahead of time. Refrigerate them for a few hours or freeze them for up to a month for convenience!

Haunted Hash Browns Recipe FAQs

How do I choose the right potatoes for Haunted Hash Browns?
Absolutely! For the best results, opt for starchy varieties like Russets. They provide the perfect texture and crispiness. Avoid waxy potatoes, as they can become too mushy and won’t hold their shape as well.

How should I store leftover Haunted Hash Browns?
Simply place any leftover cooked Haunted Hash Browns in an airtight container in the refrigerator for up to 3 days. When you’re ready to enjoy them again, reheat in a skillet over medium heat for that irresistible crispiness.

Can I freeze my uncooked Haunted Hash Browns?
Yes, you can! To freeze, shape the uncooked hash browns and place them in a single layer on a baking sheet. Flash freeze for about 1-2 hours, then transfer them to a zip-top bag. They can be stored in the freezer for up to 1 month. When ready to cook, there’s no need to thaw; simply fry them from frozen.

What should I do if my hash browns are soggy?
Very! If you find your hash browns are soggy, the most likely culprit is excess moisture. Be sure to grate and thoroughly squeeze out as much liquid from the potatoes as possible before mixing. Additionally, frying in oil that isn’t hot enough can lead to greasy textures, so ensure your oil is shimmering before adding the hash browns.

Can I modify this recipe to accommodate allergies or dietary preferences?
Absolutely! This Haunted Hash Browns recipe is vegetarian, but if you have gluten sensitivity, feel free to substitute regular flour with a gluten-free blend. For egg allergies, you might replace the egg with a flaxseed meal (1 tablespoon of flaxseed mixed with 2.5 tablespoons water, let it sit for 5 minutes) for binding. Always customize to fit your needs!

Haunted Hash Browns

Crispy Haunted Hash Browns for a Spooky Breakfast Delight

Delight in these Crispy Haunted Hash Browns, a spooky breakfast recipe that's easy to make and fun for the whole family.
Print Recipe Pin Recipe
Prep Time 15 minutes mins
Cook Time 12 minutes mins
Total Time 27 minutes mins
Servings: 4 servings
Course: Breakfast
Cuisine: Halloween
Calories: 150
Ingredients Equipment Method Nutrition Notes

Ingredients
  

For the Hash Browns
  • 2-3 medium starchy potatoes (like Russets)
  • 1 medium onion chopped; garlic can be substituted
  • 1 large egg beaten
  • 1/4 cup flour gluten-free options can be used
  • to taste salt
  • to taste pepper
For Decoration
  • to taste black olives for ghostly eyes

Equipment

  • large bowl
  • Skillet
  • Clean kitchen towel
  • wide spatula

Method
 

Step-by-Step Instructions for Haunted Hash Browns
  1. Begin by peeling and grating the potatoes into a large bowl. Squeeze out excess moisture using a clean kitchen towel.
  2. In the same bowl, mix in the chopped onion, beaten egg, flour, salt, and pepper until well combined.
  3. Shape the potato mixture into ghost shapes, about 2-3 inches wide.
  4. Heat vegetable oil in a skillet over medium-high heat until shimmering.
  5. Fry the shaped ghosts for 3-4 minutes on each side until golden brown and crispy.
  6. Remove from the pan and press pieces of black olives into the tops for eyes while still warm.

Nutrition

Serving: 1servingCalories: 150kcalCarbohydrates: 20gProtein: 3gFat: 7gSaturated Fat: 1gCholesterol: 25mgSodium: 300mgPotassium: 300mgFiber: 2gSugar: 1gVitamin A: 2IUVitamin C: 10mgCalcium: 2mgIron: 6mg

Notes

These hash browns are perfect for Halloween celebrations or any festive breakfast gatherings. They can be served with ketchup or salsa for dipping.

Tried this recipe?

Let us know how it was!

Devil’s Snare Black Pasta: A Spooky and Creamy Delight

October 7, 2025 by Grace Snow Leave a Comment

In the midst of Halloween festivities, I found myself searching for a dish that could capture both the whimsy and thrill of the season. That’s when I stumbled upon the enchanting Devil’s Snare Black Pasta. This spooky dish, with its striking black hue, becomes the star of any dinner table, especially during a cozy movie night with Harry Potter. What’s more, it’s a breeze to make and light enough to leave you room for all your favorite Halloween treats. Whether you're cooking for a crowd or just indulging in a personal treat, this vegetarian delight promises a unique flavor experience that’s both comforting and exciting. So, are you ready to weave a little magic into your next meal?

Why is Devil's Snare Black Pasta special?

Unique Visual Appeal: The striking black hue of this pasta makes it a showstopper at any gathering.
Deliciously Rich Sauce: The creamy blend of heavy cream and Parmesan offers a sumptuous mouthfeel.
Quick to Prepare: With just a few ingredients, you'll whip this up in no time, perfect for last-minute gatherings.
Flexible Recipe: This dish can easily be tailored; switch out for traditional linguine or go vegan with coconut milk. Enjoy this spooky delight paired with a light salad or some garlic bread for an ultimate dining experience! Explore more festive ideas like Skillet Pasta Sun to complete your Halloween menu.

Devil's Snare Black Pasta Ingredients

For the Pasta

  • Black Squid Ink Pasta – Provides an eye-catching color and unique flavor; substitute with regular linguine for a lighter option.

For the Sauce

  • Olive Oil – Use extra virgin for a richer taste while sautéing.
  • Yellow Onion – Finely diced for sweetness and depth; ensures even cooking.
  • Garlic – Freshly minced enhances the overall flavor; garlic powder can be used as a substitute.
  • Red Pepper Flakes – Adds a pinch of heat; adjust to your spice preference.
  • Dry White Wine – Contributes acidity; replace with chicken stock for a non-alcoholic option.
  • Heavy Cream – Creates a rich sauce; canned coconut milk works for a vegan alternative.
  • Parmesan Cheese – Provides creaminess and umami; nutritional yeast is a great vegan substitute.

For Garnish

  • Chopped Parsley – Adds freshness and enhances visual appeal; it’s optional but recommended.

Step‑by‑Step Instructions for Devil’s Snare Black Pasta

Step 1: Boil the Pasta
Start by bringing 3 quarts of salted water to a rolling boil in a large pot over high heat. Once it reaches a boil, add the black squid ink pasta. Cook according to the package directions, about 9–11 minutes, until al dente. Stir occasionally to prevent sticking. When perfectly cooked, the pasta should be firm yet tender, so taste a strand to check for doneness.

Step 2: Sauté the Onions
While the pasta cooks, heat half a tablespoon of extra virgin olive oil in a 10-inch skillet over medium heat. Add the finely diced yellow onion, sautéing for 4–7 minutes until it becomes translucent and fragrant. Stir occasionally, allowing the onions to soften without browning, which will ensure a sweet base for your sauce in the Devil’s Snare Black Pasta.

Step 3: Add Garlic and Spices
Next, add the minced garlic and a pinch of red pepper flakes to the skillet. Cook for about 1 minute, stirring constantly, until the garlic is fragrant but not browned. The aroma of garlic merging with onions will fill your kitchen, setting the stage for the rich flavors of the sauce that will coat your black pasta.

Step 4: Incorporate Wine
Pour in 2 tablespoons of dry white wine and allow it to simmer for 1–2 minutes. This reduction will concentrate the flavors, enhancing the overall depth of the Devil’s Snare Black Pasta. You’ll know it’s ready when the wine reduces by half, leaving a fragrant base that pairs perfectly with the creamy elements to come.

Step 5: Create the Creamy Sauce
Reduce the heat to low and stir in a quarter cup of heavy cream and 2 tablespoons of grated Parmesan cheese. Mix until the cheese melts and the sauce thickens, about 2–3 minutes. Season with kosher salt and black pepper to taste. The sauce should become smooth and creamy, beautifully enveloping the other ingredients for an enchanting finish.

Step 6: Combine Pasta and Sauce
Once the pasta is cooked and drained, add it directly to the skillet with your creamy sauce. Toss thoroughly for about 1-2 minutes to ensure the black squid ink pasta is evenly coated. The glossy strands should soak up the rich flavors of the sauce, creating a captivating and spooky dish ready for a Halloween feast.

Step 7: Serve and Garnish
Finally, plate the Devil’s Snare Black Pasta in bowls or on plates. Garnish generously with additional Parmesan cheese and chopped parsley for a fresh touch. This striking presentation, alongside the creamy goodness, will surely delight your guests, making it a memorable centerpiece for your Halloween dinner gathering.

How to Store and Freeze Devil's Snare Black Pasta

Fridge: Leftover Devil's Snare Black Pasta can be stored in an airtight container in the fridge for up to 3 days. Make sure to let it cool down before placing it into the container to maintain freshness.

Freezer: For longer storage, you can freeze the cooked pasta in a freezer-safe container for up to 2 months. Just be sure to separate it from the sauce to prevent clumping.

Reheating: When ready to enjoy leftovers, thaw in the fridge overnight, and reheat gently on the stove with a splash of water or additional cream to revive its creamy texture. Avoid microwave reheating for best results.

What to Serve with Devil's Snare Black Pasta

Transform your Halloween dinner into a memorable feast by complementing your spooky pasta dish with delightful sides and drinks.

  • Garlic Bread:
    Crispy and buttery, it’s the perfect vehicle for soaking up all the creamy sauce. The toasted crunch offers a comforting contrast.

  • Simple Green Salad:
    A fresh mix of greens dressed lightly balances the richness of the pasta, adding brightness and a refreshing crunch to your meal.

  • Roasted Brussels Sprouts:
    Savory and slightly sweet, these caramelized bites bring depth and a satisfying texture that pairs beautifully with the black pasta.

  • Mushroom Risotto:
    Creamy and earthy, it enriches the dining experience with its umami flavors, enhancing the overall richness of the meal.

  • Chardonnay:
    This crisp white wine harmonizes with the creamy sauce, cutting through the decadence while adding a lovely fruity note.

  • Pumpkin Spice Muffins:
    End your meal on a sweet note with these fluffy muffins. The warm spices echo the Halloween spirit, making for a seasonal treat.

Expert Tips for Devil's Snare Black Pasta

  • Perfect Pasta Texture: Avoid overcooking by testing for al dente at the minimum time recommended—trust your taste buds for the best results!

  • Onion Sautéing Skills: Keep the heat on medium while sautéing onions to prevent browning; this ensures a sweet base that enhances the sauce in the Devil's Snare Black Pasta.

  • Wine Reduction: Allow the white wine to reduce by half; this concentrates flavor—an easy mistake is to rush this step, leading to a less complex sauce.

  • Rest Before Serving: Let the pasta sit in the sauce for a few minutes before serving. This allows the flavors to marry beautifully and enhances the overall taste.

  • Make it Vegan: Want a vegan version? Simply substitute heavy cream with coconut milk and Parmesan with nutritional yeast, keeping all the spooky goodness!

Devil's Snare Black Pasta Variations

Feel free to sprinkle in your own creative twists and substitutions to elevate this spooky dish!

  • Vegan Option: Replace heavy cream with coconut milk and Parmesan with nutritional yeast for a completely plant-based delight.
  • Protein Boost: Add sautéed shrimp or grilled chicken for extra protein and heartiness, balancing flavors beautifully.
  • Spicy Delight: Amp up the heat by increasing the red pepper flakes or incorporating sautéed crushed red peppers for a fiery kick.
  • Light and Bright: Use vegetable broth instead of white wine for a lighter sauce that still maintains depth without the alcohol.
  • Mushroom Medley: Introduce sliced mushrooms for an earthy flavor profile that complements the black pasta's richness.
  • Caprese Style: Mix in cherry tomatoes and mozzarella balls for a fresh twist, creating a vibrant contrast against the dark pasta.
  • Herbaceous Touch: Add fresh basil or oregano along with the parsley for an aromatic burst that will take your dish to the next level.
  • Cheesy Goodness: Use a blend of cheeses, like Fontina or goat cheese, to give the sauce a unique, creamy texture and flavor profile.

If you're looking for more pasta inspiration, why not try out Tuscan White Bean Pasta or indulge in rich Seafood Pasta Savory? The possibilities are endless, and your dinner table is about to get a whole lot more exciting!

Make Ahead Options

These Devil's Snare Black Pasta preparations are perfect for busy home cooks looking to save time during the Halloween rush! You can prepare the creamy sauce (excluding the pasta) up to 3 days in advance; simply sauté the onions, garlic, and spices, then stir in the cream and parmesan until thickened. Allow it to cool before refrigerating in an airtight container to maintain its rich flavor and smooth texture. You can also cook the pasta and toss it with a bit of olive oil to prevent sticking up to 24 hours before serving. When you’re ready to feast, gently reheat the sauce and add the cooked pasta, tossing until well-coated for a delicious dish that's just as delightful as when freshly made!

Devil's Snare Black Pasta Recipe FAQs

What type of black pasta should I use?
Absolutely, the key ingredient for your Devil's Snare Black Pasta is black squid ink pasta, which gives it that signature spooky hue and unique flavor. If you can't find it, don't worry! Regular linguine also works perfectly, allowing you to still enjoy a delicious pasta dish, albeit without the dramatic visuals.

How long can I store leftover Devil's Snare Black Pasta?
Leftover Devil's Snare Black Pasta can be stored in an airtight container in the fridge for up to 3 days. To maintain its freshness, allow it to cool completely before storing. When you're ready to enjoy it again, gently reheat it on the stove to preserve its creamy sauce.

Can I freeze this black pasta dish?
Yes! To freeze your Devil's Snare Black Pasta, it's best to separate the pasta from the sauce. You can freeze the cooked pasta in a freezer-safe container for up to 2 months. When you're ready to enjoy it, thaw in the refrigerator overnight and reheating it gently on the stove, adding a splash of water or extra cream to revitalize its texture.

What if my sauce is too thick?
If your sauce turns out to be thicker than you'd like, no worries! You can easily adjust it. Simply add a splash of pasta cooking water or a bit of cream while gently stirring on low heat until you reach your desired consistency. The starchy water helps bind the sauce to the pasta while thin it out without losing flavor.

Is this recipe suitable for vegetarians and vegans?
Yes! The Devil's Snare Black Pasta is naturally vegetarian. To cater to a vegan diet, simply replace heavy cream with coconut milk and Parmesan cheese with nutritional yeast. This way, you can keep all the spooky charm while accommodating different dietary preferences.

How can I enhance the flavor of my Devil's Snare Black Pasta?
For an extra layer of flavor, consider adding sautéed mushrooms or spinach to your sauce for additional richness and nutrition. You can also experiment with various herbs, such as adding fresh basil or a touch of thyme, to elevate your dish even further. The more the merrier when it comes to flavor exploration!

Devil’s Snare Black Pasta

Devil’s Snare Black Pasta: A Spooky and Creamy Delight

A spooky and creamy delight, Devil’s Snare Black Pasta captivates with its unique black hue and rich flavors, perfect for Halloween festivities.
Print Recipe Pin Recipe
Prep Time 10 minutes mins
Cook Time 20 minutes mins
Total Time 30 minutes mins
Servings: 4 servings
Course: Dinner
Cuisine: Italian
Calories: 450
Ingredients Equipment Method Nutrition Notes

Ingredients
  

For the Pasta
  • 12 ounces Black Squid Ink Pasta Substitute with regular linguine for a lighter option.
For the Sauce
  • 1/2 tablespoon Extra Virgin Olive Oil Use for sautéing.
  • 1 medium Yellow Onion Finely diced.
  • 3 cloves Garlic Freshly minced.
  • 1/4 teaspoon Red Pepper Flakes Adjust to your spice preference.
  • 2 tablespoons Dry White Wine Replace with chicken stock for non-alcoholic option.
  • 1/4 cup Heavy Cream Canned coconut milk works for a vegan alternative.
  • 2 tablespoons Grated Parmesan Cheese Nutritional yeast is a great vegan substitute.
For Garnish
  • 2 tablespoons Chopped Parsley Optional but recommended.

Equipment

  • Large pot
  • 10-inch skillet

Method
 

Step-by-Step Instructions
  1. Start by bringing 3 quarts of salted water to a rolling boil in a large pot. Once it reaches a boil, add the black squid ink pasta and cook according to the package directions, about 9–11 minutes, until al dente.
  2. While the pasta cooks, heat half a tablespoon of extra virgin olive oil in a 10-inch skillet over medium heat. Add the finely diced yellow onion and sauté for 4–7 minutes until translucent.
  3. Add the minced garlic and a pinch of red pepper flakes to the skillet. Cook for about 1 minute, stirring constantly, until fragrant.
  4. Pour in 2 tablespoons of dry white wine and let it simmer for 1–2 minutes until reduced by half.
  5. Reduce the heat to low and stir in a quarter cup of heavy cream and 2 tablespoons of grated Parmesan cheese. Mix until melted and the sauce thickens.
  6. Once the pasta is cooked and drained, add it to the skillet with the creamy sauce. Toss thoroughly for 1-2 minutes until coated.
  7. Plate the Devil’s Snare Black Pasta and garnish with additional Parmesan cheese and chopped parsley.

Nutrition

Serving: 1servingCalories: 450kcalCarbohydrates: 60gProtein: 12gFat: 20gSaturated Fat: 10gPolyunsaturated Fat: 2gMonounsaturated Fat: 6gCholesterol: 50mgSodium: 500mgPotassium: 400mgFiber: 3gSugar: 2gVitamin A: 500IUVitamin C: 5mgCalcium: 200mgIron: 2mg

Notes

For best results, test pasta for doneness at the minimum time and let the pasta sit in the sauce before serving to marry the flavors.

Tried this recipe?

Let us know how it was!

Magical Harry Potter Chocolate Frogs You Can Make at Home

October 7, 2025 by Grace Snow Leave a Comment

Stumbling upon a charming treat meant for a magical celebration can feel like finding treasure in your kitchen. These DIY Harry Potter Chocolate Frogs bring a sprinkle of enchantment to any gathering, whether it's a birthday bash or a cozy movie night. The best part? They are as easy to whip up as they are delightful to savor! With this versatile recipe, you can customize fillings like creamy peanut butter, rich caramel, or even crunchy rice crisps, ensuring each frog is a delightful surprise. Not only are these treats visually stunning, but they also spark joy and nostalgia, making them a hit for fans of all ages. Ready to hop into some chocolatey fun? Let's get started!

Why Are These Chocolate Frogs So Special?

Magical Appeal: Each bite of these DIY Harry Potter Chocolate Frogs transports you straight to the wizarding world, perfect for fans and fantasy lovers alike.

Versatile Fillings: Choose from a variety of fillings, such as creamy peanut butter or crunchy rice, allowing personalization for every palate.

Simple Process: With basic melting and molding skills, you can create these whimsical treats quickly, making them a foolproof option for any gathering.

Family Fun: Get the kids involved in the kitchen! These chocolate frogs are a delightful way to make lasting memories with family.

Perfect for Parties: Their charming frog shape and rich flavors make these treats a show-stopping centerpiece at any event or themed party.

Store and Share: They're easy to store and can be made ahead of time, taking pressure off your planning—consider pairing them with a warm cup of Homemade Hot Chocolate for an extra festive touch!

Harry Potter Chocolate Frogs Ingredients

For the Chocolate
• Chocolate – Choose dark, milk, or white chocolate to suit your taste and create those glossy, irresistible shells.

For the Filling
• Peanut butter – Adds a creamy and flavorful element that kids will love; try crunchy or smooth based on preference.
• White chocolate – Offers a sweet and rich filling option that pairs beautifully with dark or milk chocolate shells.
• Caramel – Drizzle in divine sweetness, adding a chewy texture that creates a delightful contrast to the smooth chocolate.
• Rice crisps or almond crunch – Incorporate for an exciting crunch and add a fun twist to every bite; a fantastic allergy-friendly option!

For the Mold
• Frog-shaped chocolate mold – Essential to create the charming shape of the frogs; available online or at specialty shops for easy crafting.

Step‑by‑Step Instructions for Harry Potter Chocolate Frogs

Step 1: Melt Chocolate
Begin by chopping your chosen chocolate—dark, milk, or white—into small pieces for even melting. Using a microwave-safe bowl, melt the chocolate in 30-second bursts at medium power, stirring between each interval until smooth and glossy. Alternatively, use a double boiler on low heat, ensuring the water does not touch the chocolate. This step is crucial for your Harry Potter Chocolate Frogs to have that perfect sheen.

Step 2: Fill Molds
Once your chocolate is melted, carefully coat the insides of your frog-shaped molds with a generous layer using a spoon or pastry brush. Ensure that the chocolate reaches all sides and corners, creating a sturdy shell. Leave a small gap at the top for your filling. Allow the molds to sit for a few minutes to cool slightly, which helps the chocolate set into shape beautifully.

Step 3: Add Filling
With the initial layer set, it’s time to add your chosen filling. Spoon in your creamy peanut butter, rich caramel, or a sprinkle of crunchy rice crisps into each frog mold. Be careful to fill each one evenly without mixing it with the chocolate edges. This layering ensures that each bite of your Harry Potter Chocolate Frogs delivers a delightful surprise of flavor and texture.

Step 4: Cover Filling
Now that your fillings are in place, use the remaining melted chocolate to cover the filling completely. Make sure to seal the edges well to prevent any filling from leaking out. This layer should be evenly spread so your frogs have a smooth appearance. Tap the mold gently on the counter to remove any air bubbles, ensuring a seamless finish for each delectable frog.

Step 5: Set Chocolate
To finish the process, place your filled molds into the freezer for about 30 to 60 minutes. This chilling time allows the chocolate to firm up properly. Check for doneness by gently pressing the chocolate; it should feel solid to the touch. Once set, your Harry Potter Chocolate Frogs will be ready for the next step!

Step 6: Unmold Frogs
After the chocolate has fully hardened, carefully take the molds out of the freezer. Gently flex the molds or tap them on the countertop to release the chocolate frogs. Take your time with this step to avoid breaking any of your delightful creations. Once out, you’ll see glossy, whimsical frog shapes that are as enchanting as they are delicious.

Harry Potter Chocolate Frogs Variations

Feel free to get creative with these variations, turning each chocolate frog into a unique treat that tantalizes your taste buds!

  • Flavor Infusions: Add a splash of flavored extracts like vanilla or almond to your chocolate for an extra layer of richness. A couple of drops is all you need to elevate your frogs!

  • Nutty Swaps: Substitute the peanut butter filling with almond or cashew butter for a different nutty flavor. Each nut brings its personality, and you can even create a mixed nut filling for a delightful surprise.

  • Fruit-Filled: Incorporate fruit purees, like raspberry or mango, for a refreshing twist inside your chocolate frogs. The vibrant fruit will add both color and a zesty burst with every bite.

  • Crispy Combinations: Toss in some crushed graham crackers or cookies in with your rice crisps for that added crunch and texture. These crunchy layers will create a fun contrast against the smooth chocolate.

  • Spicy Kick: For those who love a little heat, consider adding a pinch of cayenne pepper or chili powder to your chocolate mixture. This unexpected twist will awaken the senses in a delightful way.

  • Customize Chocolate: Swap out the chocolate type entirely—for instance, try using ruby chocolate for a sweet and fruity flavor. It’s not only unique but will add a beautiful pop of pink to your frogs!

  • Decadent Ganaches: Experiment with ganache fillings instead of traditional fillings. Rich chocolate ganache or espresso ganache can create an indulgent surprise that will make these frogs truly gourmet.

  • Themed Sprinkles: Top your finished frogs with festive sprinkles, or themed ones if it’s for a special occasion—think stars for a party or Halloween-themed sprinkles! It adds a fun, decorative touch sure to impress.

Once you've made your magical creations, consider a cozy pairing with a warm cup of Homemade Hot Chocolate for a perfect treat!

Expert Tips for Magical Chocolate Frogs

  • Smooth Melting: Make sure to melt the chocolate slowly, stirring frequently. This prevents burning and ensures your Harry Potter Chocolate Frogs have a beautiful shine.

  • Fill with Care: Spoon your fillings gently into the molds without disturbing the chocolate coating. Mixing can lead to uneven flavors and textures.

  • Seal Well: When covering the filling, ensure the edges are well sealed. This prevents any filling from leaking out while setting and maintains the frog shape.

  • Chill Thoroughly: Be patient! Allow your chocolate frogs to set in the freezer for the full recommended time for best results. Rushing this step can lead to soft chocolate.

  • Gentle Unmolding: When releasing the frogs from the molds, flex them carefully. This will help maintain the shape and prevent any breakage of your whimsical treats.

Make Ahead Options

These Harry Potter Chocolate Frogs are perfect for meal prep enthusiasts looking to save time on busy days! You can prepare the chocolate shells up to 24 hours in advance; simply melt and coat your molds as directed, then refrigerate them. For fillings, such as peanut butter or caramel, you can mix and store them in an airtight container for up to 3 days. When you're ready to complete your treats, fill the molds and cover them with chocolate, then freeze until set. This ensure that your chocolate frogs are just as delicious and magical when it's time to serve them, making your event planning as stress-free as possible!

How to Store and Freeze Harry Potter Chocolate Frogs

Room Temperature: Store your chocolate frogs in an airtight container at room temperature for up to one week. This keeps them fresh while maintaining their delightful texture.

Fridge: If you prefer a cooler treat, you can keep the frogs in the refrigerator. Note that this may alter the texture slightly, so consume within 5 days for best flavor.

Freezer: For longer storage, place your Harry Potter Chocolate Frogs in a freezer-safe container. They can last up to one month. Thaw them in the fridge before serving for optimal taste.

Reheating: There’s no need to reheat these treats; enjoy them chilled or at room temperature for a delightful magical experience!

What to Serve with DIY Harry Potter Chocolate Frogs?

Pair these enchanting treats with delightful accompaniments that enhance their magical charm and satisfy your guests’ cravings.

  • Creamy Hot Chocolate: This velvety beverage pairs beautifully with the rich chocolate flavor, creating a cozy and indulgent experience. Perfect for chilly nights!

  • Popcorn Bar: Offer a variety of popcorn flavors, from sweet caramel to savory cheddar, for a fun, crunchy contrast to the smooth chocolate. This playful addition invites guests to customize their snacking adventure.

  • Fruity Fruit Skewers: Fresh fruits like strawberries and pineapple add a burst of color and refreshing flavor that balances the sweetness of the chocolate frogs. Plus, they make a lovely presentation!

  • Milkshake Treats: Whip up some thick milkshakes, whether chocolate, strawberry, or vanilla, as a delightful drink that pairs mischievously with chocolatey treats. Kids and adults alike will love this creamy duo!

  • Magical Themed Cupcakes: Serve whimsical cupcakes topped with edible glitter or themed decorations. Their whimsical touch elevates the theme, creating a magical dining experience.

  • Ice Cream: A scoop of smooth vanilla or chocolate ice cream rounds out the meal, providing a cold and luscious contrast to the chocolate-covered frogs. This classic treat is always a hit!

Indulging in these pairings will surely delight your guests and enhance the magical vibe of your gathering!

Harry Potter Chocolate Frogs Recipe FAQs

How do I choose the best chocolate for the frogs?
Absolutely! You can use dark, milk, or white chocolate, depending on your taste preference. Dark chocolate offers a rich flavor while milk chocolate provides a creamier sweetness. If you’re feeling adventurous, why not mix different types for an interesting twist? Always look for chocolate with a high cocoa content for the best melting results!

How long can I store my chocolate frogs?
You can store your Harry Potter Chocolate Frogs in an airtight container at room temperature for up to one week. If you refrigerate them, be sure to eat them within 5 days for the best flavor, as cooler temperatures can slightly alter their texture. Always keep them sealed to prevent them from losing that delightful gloss!

Can I freeze my chocolate frogs?
Very! To freeze your Harry Potter Chocolate Frogs, place them in a freezer-safe container, ensuring they are well separated (you can use parchment paper between layers). They will stay fresh for up to one month. When you're ready to enjoy, simply transfer them to the fridge to thaw for several hours, allowing the chocolate to regain its lovely texture.

What if my chocolate isn't melting smoothly?
No worries! If your chocolate becomes clumpy, it might be overheated. Ensure you're melting at medium power and in short 30-second bursts while stirring in between each interval. If you find it’s still not smooth, you can add a teaspoon of coconut oil or vegetable oil to help restore that glossy sheen while mixing until well combined.

Are there any dietary considerations with these chocolate frogs?
Absolutely! If you're making these for someone with allergies, be cautious with the fillings, particularly if using peanut butter or any nut-based products. Always read labels to ensure there are no cross-contaminants. You can also create a nut-free version by substituting with safe options like chocolate ganache or fruit purees, making your magical treats inclusive for everyone.

Harry Potter Chocolate Frogs

Magical Harry Potter Chocolate Frogs You Can Make at Home

These DIY Harry Potter Chocolate Frogs bring a sprinkle of enchantment to any gathering with customizable fillings.
Print Recipe Pin Recipe
Prep Time 15 minutes mins
Cook Time 10 minutes mins
Chilling Time 1 hour hr
Total Time 1 hour hr 25 minutes mins
Servings: 12 frogs
Course: Dessert
Cuisine: American
Calories: 150
Ingredients Equipment Method Nutrition Notes

Ingredients
  

For the Chocolate
  • 2 cups Chocolate dark, milk, or white chocolate
For the Filling
  • 1/2 cup Peanut butter smooth or crunchy
  • 1/2 cup White chocolate for filling
  • 1/2 cup Caramel for a chewy texture
  • 1 cup Rice crisps or almond crunch for added texture

Equipment

  • Microwave-safe bowl
  • Frog-shaped chocolate mold

Method
 

Step-by-Step Instructions
  1. Chop your chosen chocolate into small pieces and melt in a microwave-safe bowl or double boiler.
  2. Coat the insides of the frog-shaped molds with the melted chocolate.
  3. Spoon in your chosen filling into each mold without mixing it with the chocolate edges.
  4. Cover the filling with the remaining melted chocolate and seal edges well.
  5. Place filled molds into the freezer for 30 to 60 minutes to firm up.
  6. Carefully release the chocolate frogs from the molds once fully hardened.

Nutrition

Serving: 1frogCalories: 150kcalCarbohydrates: 18gProtein: 2gFat: 8gSaturated Fat: 4gMonounsaturated Fat: 3gCholesterol: 5mgSodium: 50mgPotassium: 100mgFiber: 1gSugar: 12gCalcium: 2mgIron: 4mg

Notes

These treats can be stored at room temperature or refrigerated to enjoy chilled.

Tried this recipe?

Let us know how it was!
  • « Previous Page
  • 1
  • …
  • 126
  • 127
  • 128
  • 129
  • 130
  • …
  • 179
  • Next Page »

Welcome!

Hi, I’m Grace, a Sydney-based home cook with a passion for bold flavors and trending ingredients. Whether you’re a busy beginner or a seasoned foodie, you’ll find dishes here that are fresh, fun, and full of flavor.

More about me

Popular Recipes

  • Cheesy Chicken Garlic Bread Sandwich
    Cheesy Chicken Garlic Bread Sandwich for Cozy Family Moments
  • Easy Chicken Ranch Wraps
    Easy Chicken Ranch Wraps: Quick, Creamy & Totally Satisfying
  • Chicken Caesar Sandwiches
    Delicious Chicken Caesar Sandwiches for Quick Comfort Food
  • best Cuban sandwich
    The Best Cuban Sandwich You’ll Want Every Weeknight!

Footer

↑ back to top

About

  • Privacy Policy
  • Disclaimer
  • Terms & Conditions

Newsletter

  • Sign Up! for emails and updates

Contact

  • About me
  • Contact me

Copyright © 2025 TastyTrendIngredients