tastytrendingredients

  • Home
  • Recipes
    • Appetizers
    • Breakfast
    • Dessert
    • Dinner
    • Drinks
    • Salads
    • Snacks
    • Soups
  • About me
  • Contact me
menu icon
go to homepage
  • Home
  • Recipes
    • Appetizers
    • Breakfast
    • Dessert
    • Dinner
    • Drinks
    • Salads
    • Snacks
    • Soups
  • About me
  • Contact me
search icon
Homepage link
  • Home
  • Recipes
    • Appetizers
    • Breakfast
    • Dessert
    • Dinner
    • Drinks
    • Salads
    • Snacks
    • Soups
  • About me
  • Contact me
×

Million Dollar Baked Ziti: The Ultimate Comfort Food Delight

December 6, 2025 by Grace Snow Leave a Comment

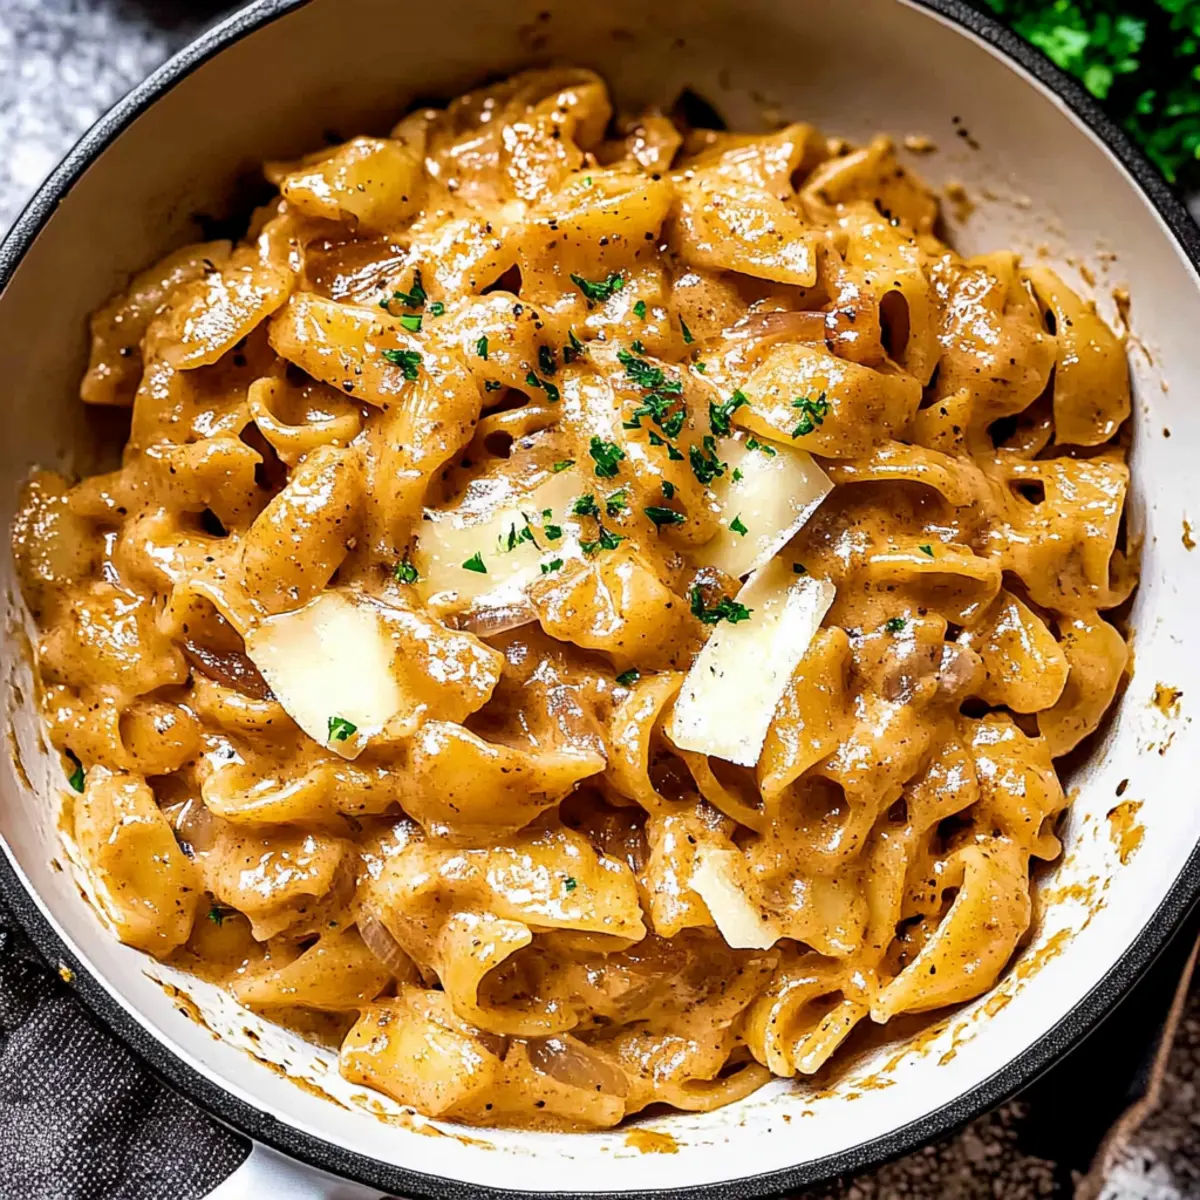
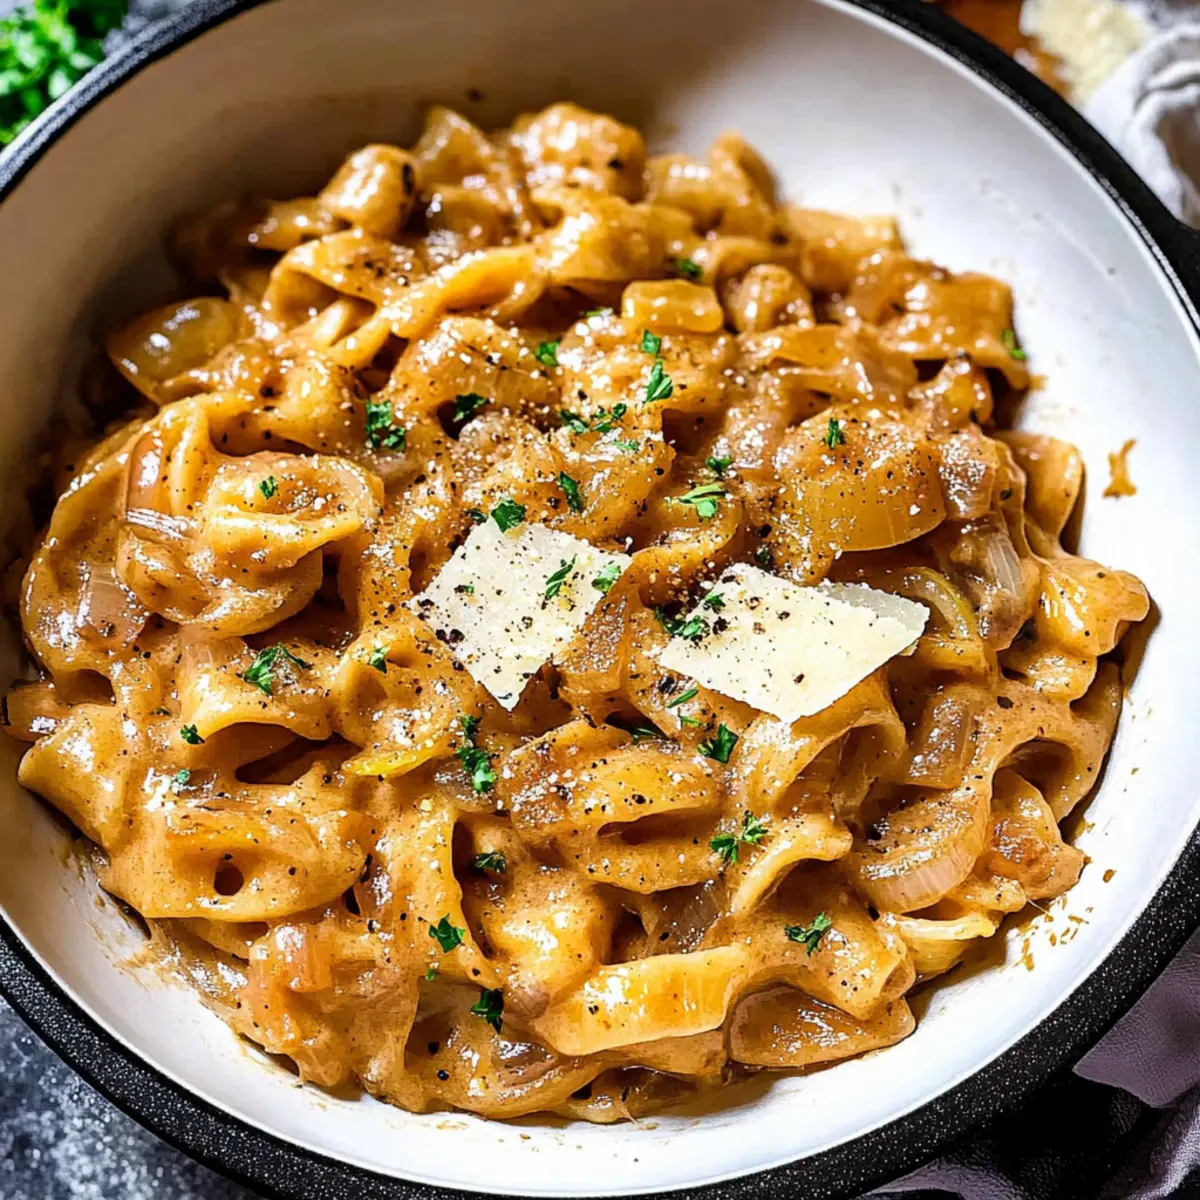
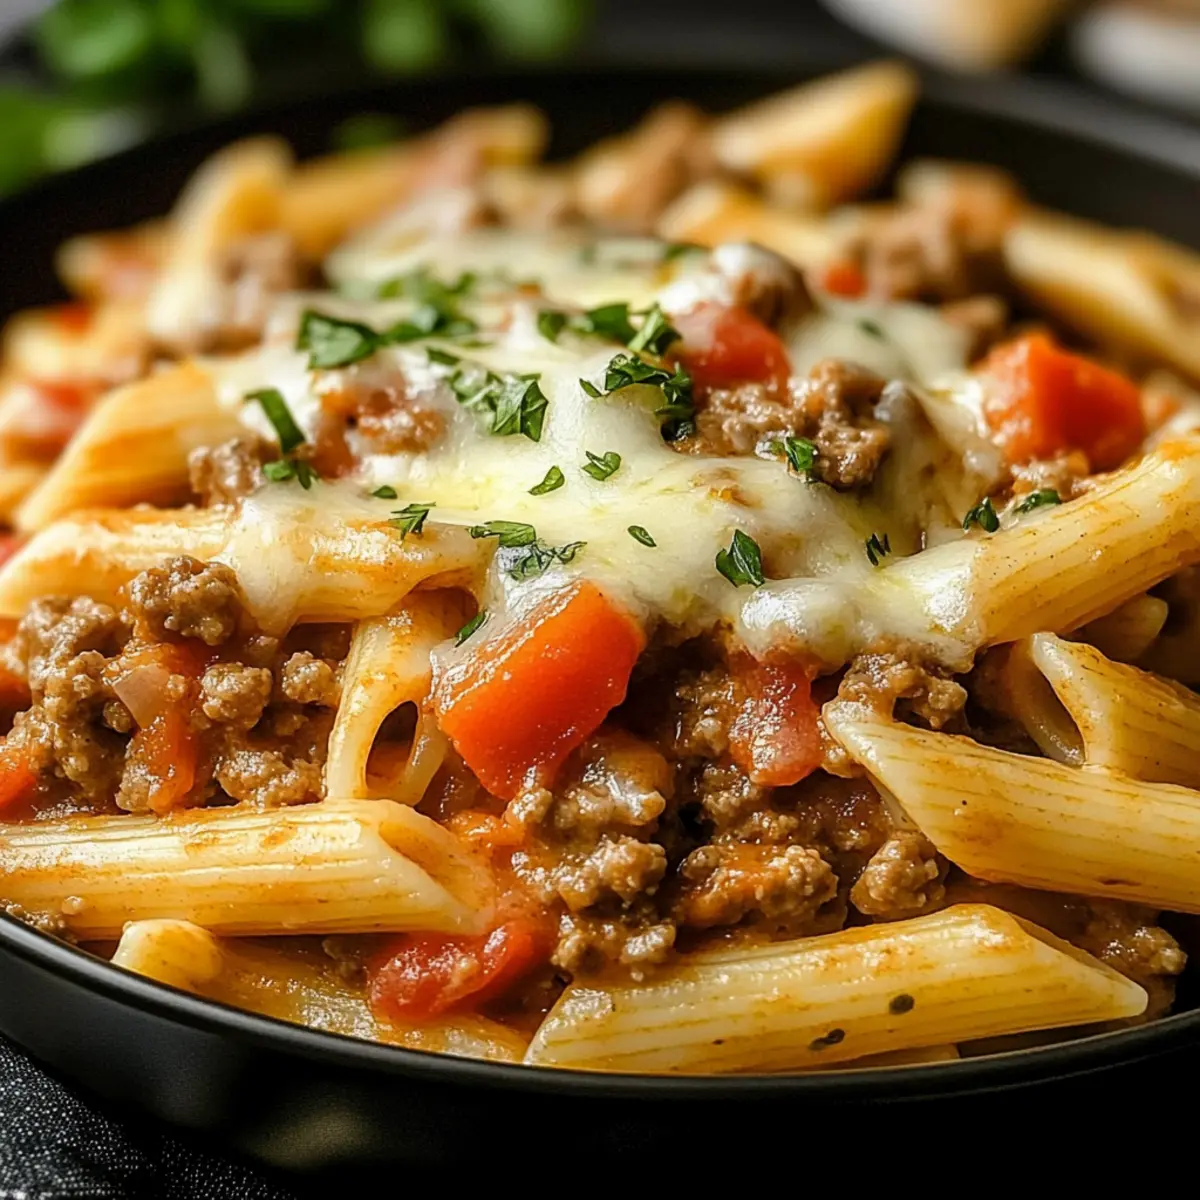
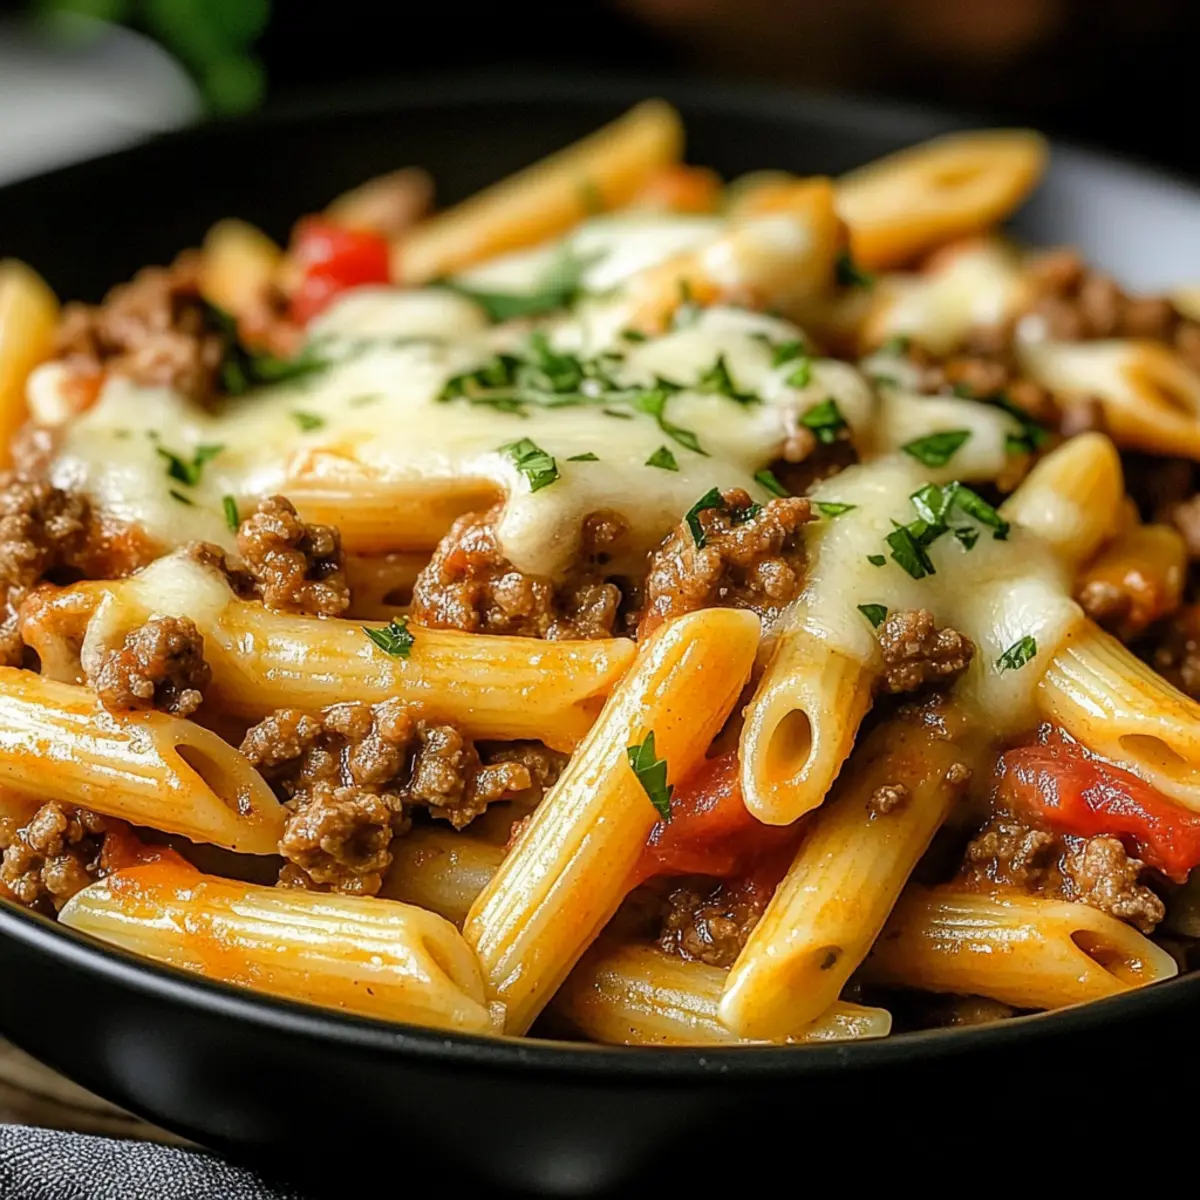
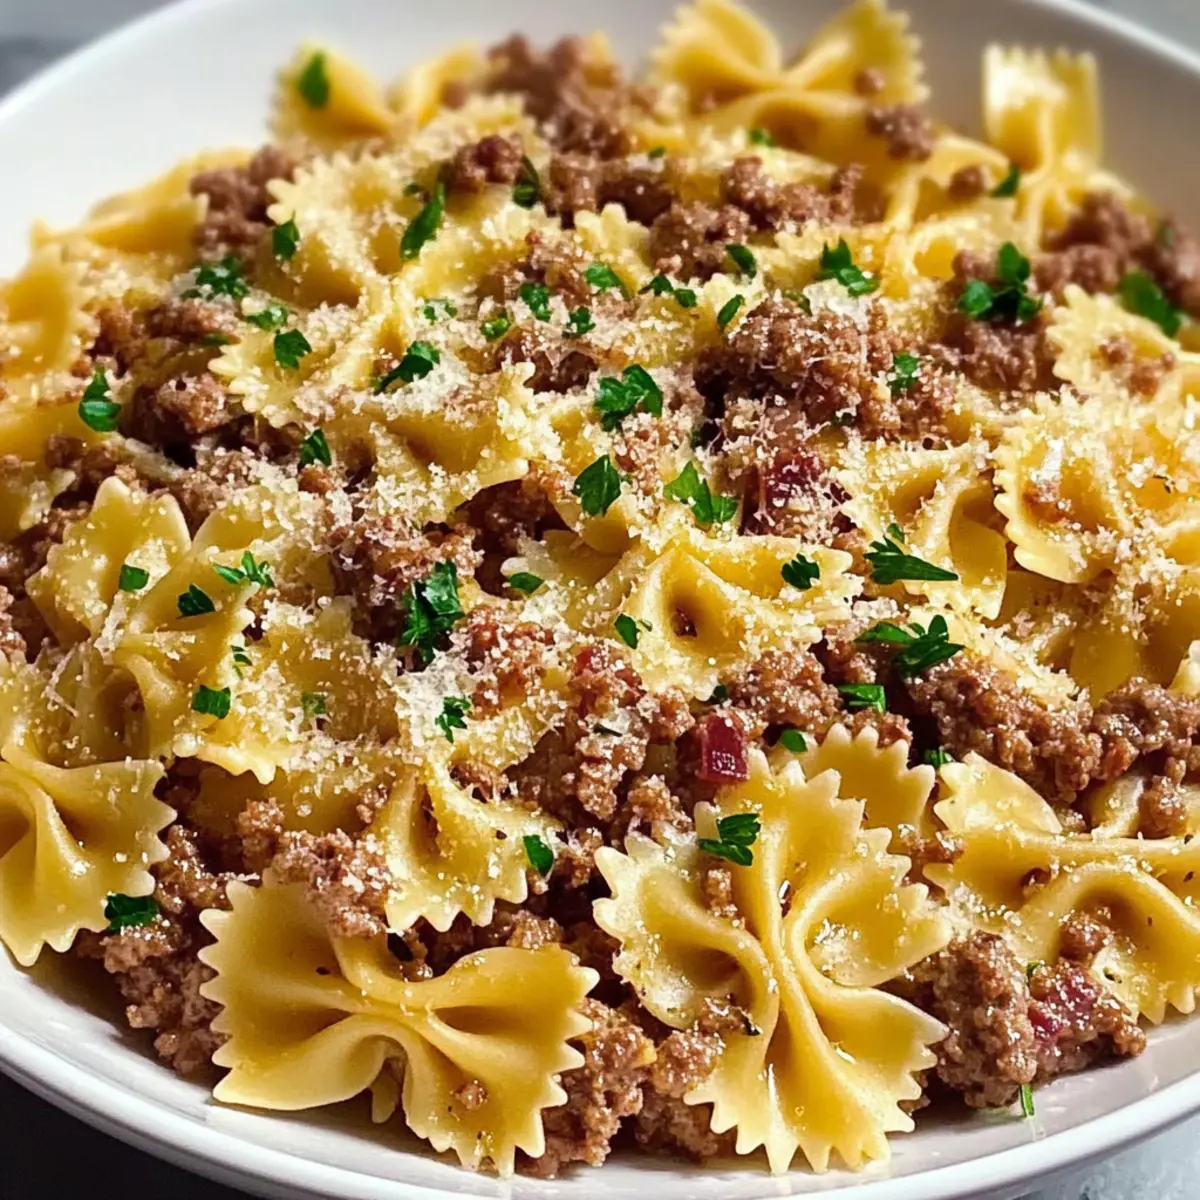
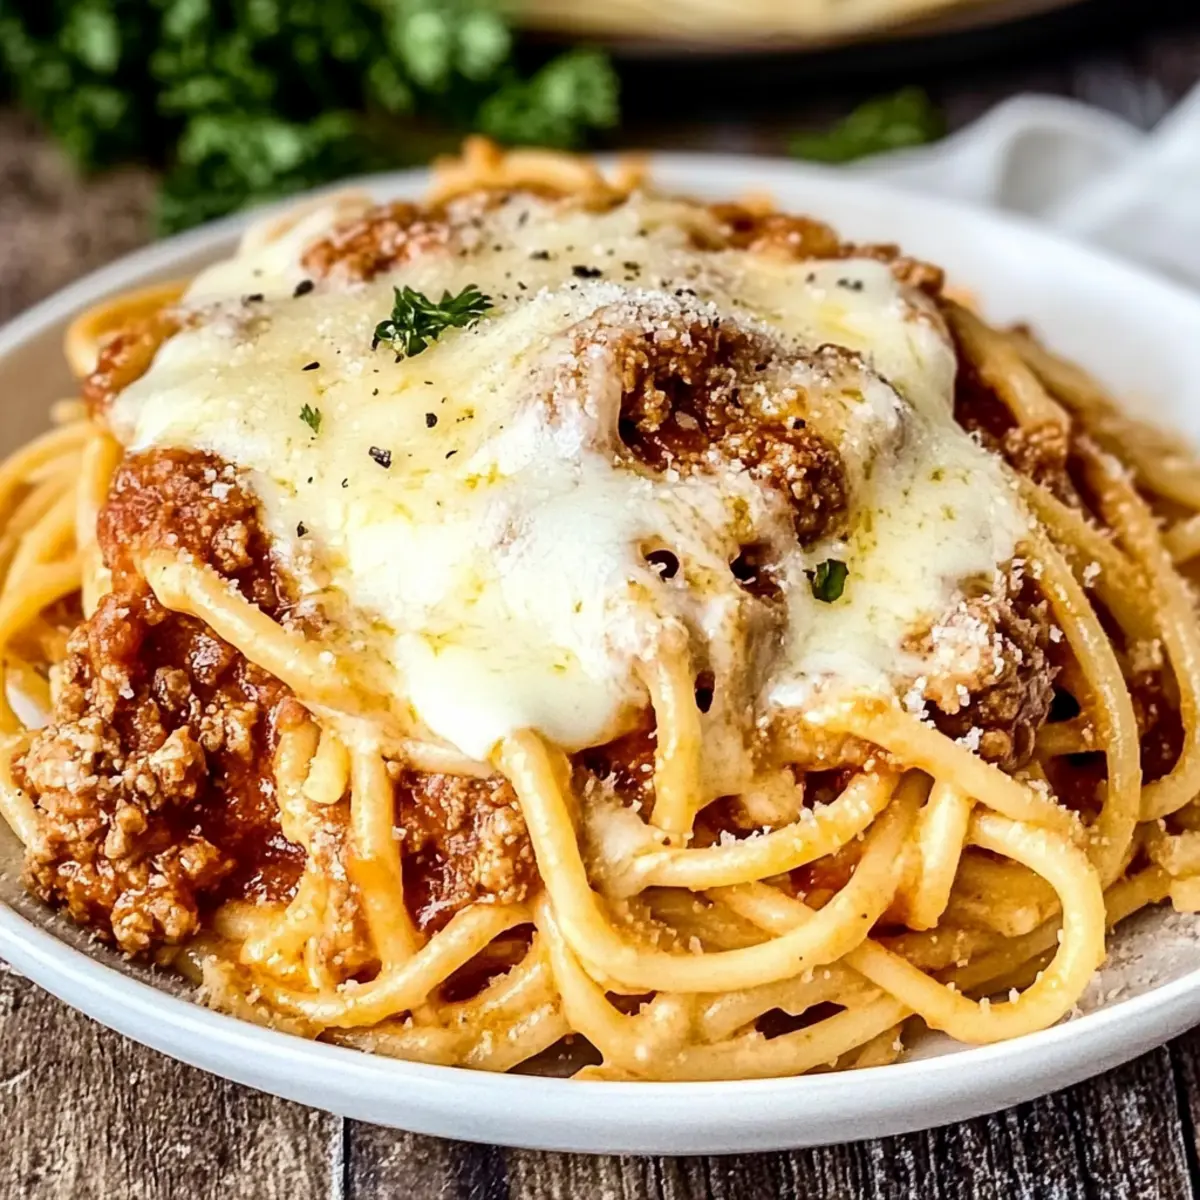
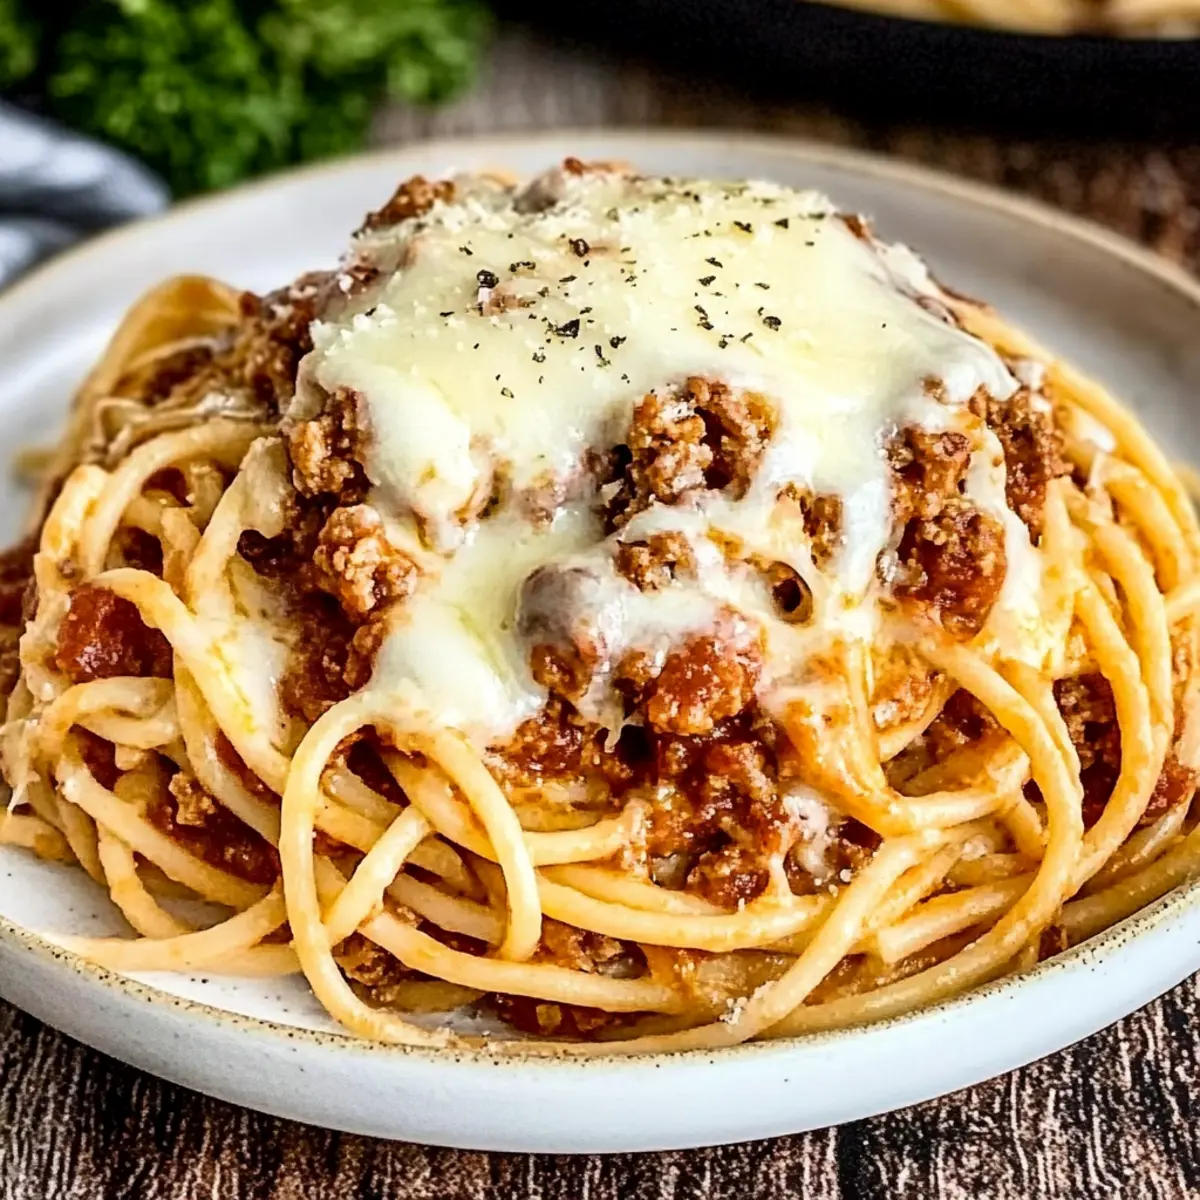
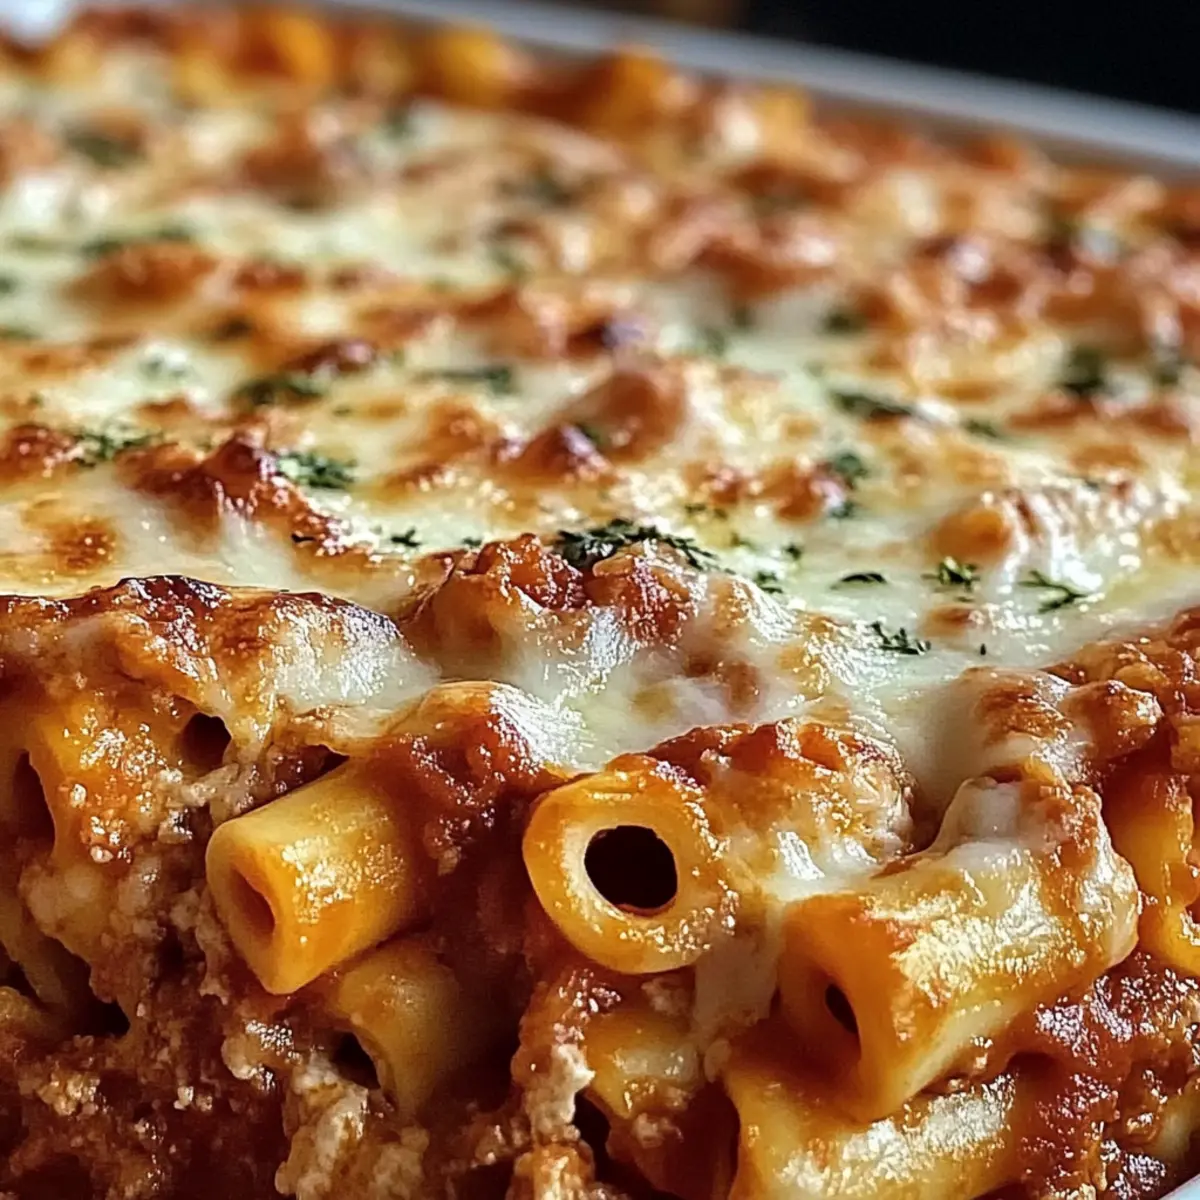
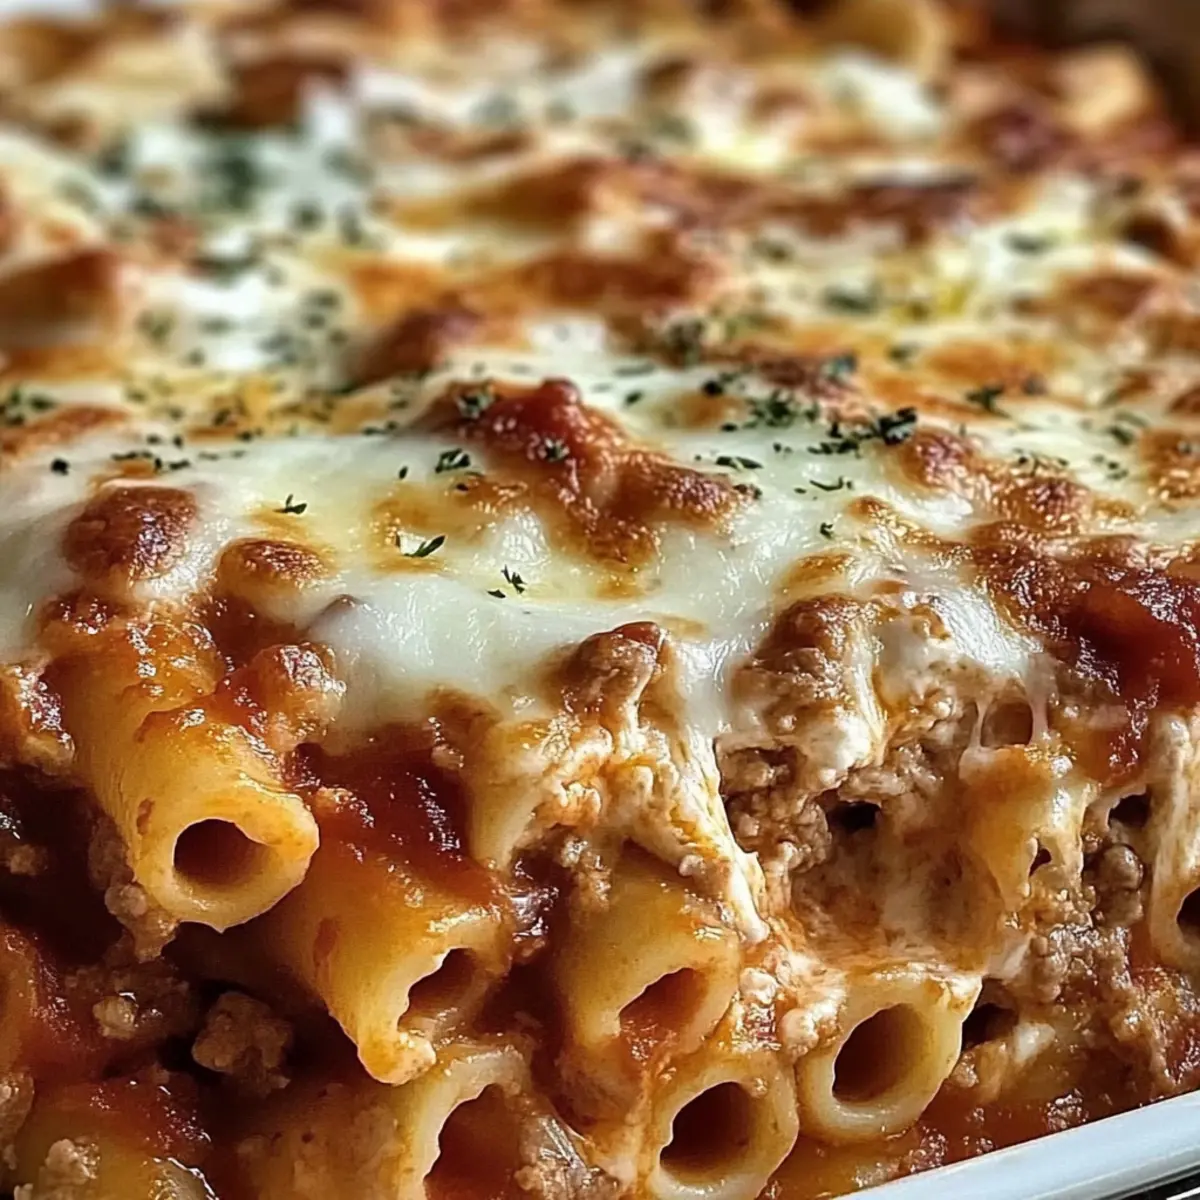
As I stood in my kitchen, the heavenly aroma of garlic and fresh basil wafting through the air, I couldn't help but smile. Today, I'm sharing a comforting classic that never fails to impress: Million Dollar Baked Ziti. This dish is ideal for family dinners or cozy gatherings, bringing everyone together with its rich layers of creamy ricotta, tangy sour cream, and delectable marinara sauce. With its gooey mozzarella topping and hearty pasta, it’s a crowd-pleaser that offers both simplicity and elegance. Plus, it's adaptable for different occasions—you can easily switch up ingredients or make it vegetarian! Curious about how to create this mouthwatering masterpiece? Let's dive into the recipe and elevate your cooking game!

Why is Million Dollar Baked Ziti a Must-Try?

Comforting Elegance: This dish perfectly balances indulgent flavors with simplicity, making it ideal for any occasion from weeknight dinners to festive gatherings.

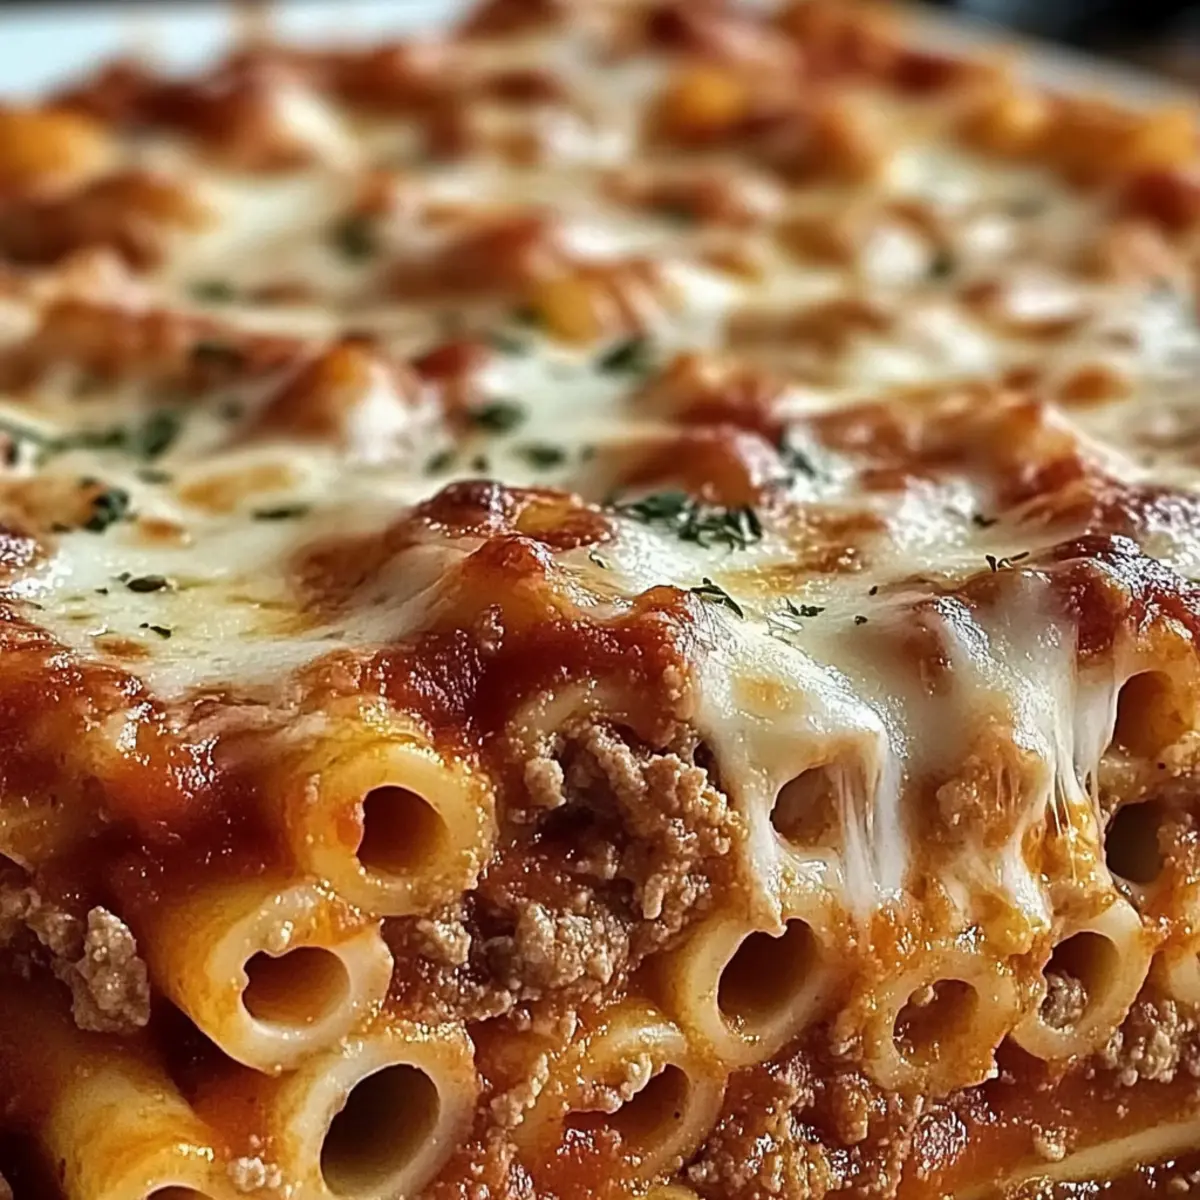
Layered Decadence: The rich combination of creamy ricotta, hearty beef, and gooey mozzarella creates a multi-dimensional taste experience that will leave everyone wanting seconds.

Versatile Adaptability: Feel free to customize the recipe by adding roasted veggies for a nutritious touch or swapping in Italian sausage for an extra flavor kick.

Crowd-Pleasing Delight: Whether serving it at a family meal or a potluck, the Million Dollar Baked Ziti is sure to impress and satisfy your guests, making it a true showstopper!

Easy to Prepare: With straightforward steps and simple ingredients, you'll have a sizzling hot dish ready in under an hour. Discover other delicious baked treats like these Matcha Baked Doughnuts to complement your meal!

Million Dollar Baked Ziti Ingredients

For the Pasta

• Ziti Pasta – A sturdy pasta that holds up well; substitute with penne if desired.

For the Cheesy Mixture

• Ricotta Cheese – Adds a creamy texture; try part-skim for a lighter option.
• Sour Cream – Provides tangy richness; Greek yogurt makes a great swap.
• Egg – Binds the ingredients together; omit for dairy-free or use a flax egg as a substitute.

For the Meat Sauce

• Ground Beef – Adds heartiness and protein; turkey is a lighter alternative, or you can make it vegetarian.
• Marinara Sauce – The flavor foundation of the dish; feel free to use homemade or your favorite store-bought brand.
• Garlic – Enhances the flavor profile; fresh cloves are ideal, but minced can work in a pinch.

For the Cheese Topping

• Mozzarella Cheese – Melts beautifully for a gooey finish; mixing in provolone adds extra taste.
• Parmesan Cheese – Brings a salty, nutty flavor to the dish; Pecorino Romano is an excellent substitute.

For the Garnish

• Fresh Basil – Provides aromatic freshness; dried basil can be used if fresh isn't available.

This Million Dollar Baked Ziti is sure to become a beloved addition to your family dinners and gatherings.

Step‑by‑Step Instructions for Million Dollar Baked Ziti

Step 1: Cook the Pasta
Begin by bringing a large pot of salted water to a rolling boil. Add the ziti pasta and cook until just al dente, about 8–10 minutes. Drain the pasta and set it aside in a large bowl, allowing it to cool slightly while you prepare the filling. This brief resting time will help the pasta hold its shape in the Million Dollar Baked Ziti.

Step 2: Prepare the Cheese Filling
In a medium mixing bowl, combine the ricotta cheese, sour cream, one beaten egg, minced garlic, and fresh basil. Stir the mixture until all ingredients are well incorporated and creamy. This rich cheese filling is what makes your Million Dollar Baked Ziti so irresistible, so take a moment to ensure it's smooth and combined beautifully.

Step 3: Cook the Ground Beef
In a large skillet over medium heat, add the ground beef and cook until fully browned, about 5–7 minutes. Use a spatula to break it up as it cooks. Once browned, drain any excess fat, then stir in your marinara sauce, allowing it to simmer for a couple of minutes until heated through. This savory meat sauce will enhance the layers of your baked ziti.

Step 4: Layer the Ingredients
Preheat your oven to 350°F (175°C) while you assemble your dish. In a large baking dish, start by spreading half of the cooked ziti as the base layer. Follow this with half of the meat sauce and then half of the cheese filling. Repeat the layers with the remaining ziti, sauce, and cheese mixture. This layering technique locks in all the delicious flavors within your Million Dollar Baked Ziti.

Step 5: Add Cheese Toppings
Sprinkle a generous amount of mozzarella cheese and Parmesan cheese evenly over the top of the assembled layers. This cheesy crust will melt and become golden brown in the oven, adding the perfect finishing touch to your Million Dollar Baked Ziti.

Step 6: Bake the Dish
Carefully place the baking dish in your preheated oven. Bake for 35 minutes, or until the cheese is bubbling and golden brown. Keep an eye on it during the last few minutes to prevent over-browning. Your kitchen will soon be filled with the tantalizing aroma of comfort food.

Step 7: Rest Before Serving
Once baked to perfection, remove the Million Dollar Baked Ziti from the oven and allow it to cool for about 5–10 minutes. This resting period makes it easier to slice and serve while still keeping the layers intact. Feel free to garnish with additional fresh basil for a burst of color before digging in.

Make Ahead Options

These Million Dollar Baked Ziti are perfect for busy home cooks looking to save time during the week! You can prepare the entire dish up to 24 hours in advance by assembling it fully, then covering tightly and refrigerating. For best quality, cook the pasta until just al dente and let the beef mixture cool before layering. This will help maintain texture and flavor. When you're ready to enjoy, simply bake from the fridge straight in the preheated oven for about 40 minutes (adding a few extra minutes if baking cold). You'll have a delicious, hearty meal with minimal effort, ready to impress your family!

Expert Tips for Million Dollar Baked Ziti

  • Perfect Pasta: Ensure the pasta is cooked al dente; it will finish cooking in the oven and maintain the right texture.

  • Layer Wisely: For the best flavor distribution, be generous with each layer; don't skimp on the cheese or sauce!

  • Resting Period: Let the baked ziti sit for a few minutes before slicing to allow the layers to set, making servings cleaner.

  • Cheese Variety: Experiment with different cheeses, like adding provolone or gouda, to create a unique flavor profile in your Million Dollar Baked Ziti.

  • Batch Cooking: Consider making a double batch and freezing one for a quick meal option later. Baked ziti freezes well!

  • Garnish Creativity: Finish with fresh basil or a sprinkle of red pepper flakes for a pop of color and flavor.

What to Serve with Million Dollar Baked Ziti

Transform your cozy meal into an unforgettable feast with these delightful pairings that enhance the luxurious vibe of your baked ziti.

  • Garlic Bread: The classic side that’s crispy on the outside and soft inside. It’s perfect for soaking up every last bit of marinara sauce.
  • Crisp Side Salad: A fresh blend of greens, tomatoes, and cucumbers drizzled with a zesty vinaigrette complements the richness of the pasta beautifully.
  • Roasted Vegetables: Colorful veggies like zucchini and bell peppers add a nutritious touch and a mild sweetness that balances the savory flavors.
  • Cheesy Garlic Knots: Soft, doughy knots dressed with garlic butter and cheese will make your meal feel extra special. Each bite is a delightful explosion of flavor!
  • Red Wine: A rich Chianti or robust Cabernet Sauvignon enhances the meal, amplifying the flavors of the marinara and cheese.
  • Dessert: Consider a light tiramisu or panna cotta to end the meal on a sweet note, keeping the indulgence theme alive.
  • Sparkling Water: For a refreshing drink option, serve sparkling water with lemon slices to cleanse the palate between bites.
  • Bruschetta: Toasted bread topped with fresh tomatoes, basil, and balsamic glaze adds a refreshing burst that contrasts beautifully with the creamy ziti.

Million Dollar Baked Ziti: Customizable Delights

Feel free to explore different variations of this cozy classic and add your unique twist to the Million Dollar Baked Ziti!

  • Protein Swap: Replace the ground beef with Italian sausage for a bolder, spicier flavor that elevates each bite.

  • Nutritious Add-In: Toss in roasted vegetables like zucchini or bell peppers for added nutrition and color; they absorb the delicious marinara sauce beautifully.

  • Vegetarian Option: Omit the meat completely and substitute with lentils or mushrooms for a satisfying vegetarian twist, making every layer hearty and fulfilling.

  • Creamy Spinach Layer: Incorporate a layer of sautéed spinach or kale mixed into the cheese filling for a nutritious boost without compromising on flavor.

  • Herb Infusion: Try adding a mix of fresh herbs like oregano and thyme into the cheese mixture to create a more complex flavor profile.

  • Cheese Variations: Swap regular mozzarella for burrata for an extra creamy experience on top. Alternatively, mix in some smoked gouda for a delightful smoky flavor.

  • Heat Lovers: For those who enjoy some heat, sprinkle in red pepper flakes or diced jalapeños to the meat sauce to kick your Million Dollar Baked Ziti up a notch!

  • Sauce Savvy: Instead of plain marinara, try using a roasted tomato sauce or arrabbiata for a unique flavor that adds depth to your ziti.

As you experiment with these ideas, consider complementing your meal with a side of fresh salad or perhaps some delightful Matcha Baked Doughnuts for dessert!

How to Store and Freeze Million Dollar Baked Ziti

Fridge: Store leftovers in an airtight container for up to 3 days. This will keep your Million Dollar Baked Ziti fresh and ready to enjoy again.

Freezer: For longer storage, freeze assembled but unbaked ziti for up to 3 months. Just cover tightly with foil and plastic wrap before freezing.

Reheating: When you're ready to enjoy, thaw overnight in the fridge. Reheat in a covered dish in the oven at 350°F (175°C) until heated through, about 25-30 minutes.

Make-Ahead Tip: Consider preparing and storing your Million Dollar Baked Ziti in advance; it can make weeknight dinners much simpler!

Million Dollar Baked Ziti Recipe FAQs

What type of pasta is best for Million Dollar Baked Ziti?
Absolutely! Ziti pasta is ideal because its tubular shape perfectly holds the sauce and filling. If ziti is unavailable, penne makes a great substitute, ensuring similar texture and flavor absorption.

How long can I store leftovers of Million Dollar Baked Ziti?
You'll want to store any leftovers in an airtight container, where they'll stay fresh in the fridge for up to 3 days. This way, you can enjoy the deliciousness again without compromising quality!

Can I freeze Million Dollar Baked Ziti? How?
Yes, you can freeze it! To do so, assemble the Million Dollar Baked Ziti but do not bake it. Cover the dish tightly with foil and plastic wrap, then freeze for up to 3 months. When ready to enjoy, thaw it overnight in the fridge, then bake at 350°F (175°C) for about 35-40 minutes until heated through.

What should I do if my Million Dollar Baked Ziti is too dry after baking?
If you find your baked ziti a bit dry, it might be due to insufficient sauce or overcooking. Next time, try adding a little extra marinara sauce before baking, ensuring that it's well-distributed. If you're current batch has dried out, mix in a splash of warm marinara after baking to revive the moisture.

Is this recipe suitable for those with dietary restrictions?
Indeed! You can easily make this dish vegetarian by omitting the ground beef and substituting it with vegetables like zucchini or mushrooms. If you have dairy allergies, try using dairy-free cheese alternatives and a flax egg instead of a traditional egg for binding.

How can I make my Million Dollar Baked Ziti more flavorful?
Layering in flavors is key! Consider sautéing minced garlic and onions with your ground meat for an aromatic base. Additionally, don't shy away from ample seasoning—season the marinara sauce or the layers with Italian herbs such as oregano and thyme to elevate the dish further.

Million Dollar Baked Ziti

Million Dollar Baked Ziti: The Ultimate Comfort Food Delight

Million Dollar Baked Ziti is a comforting dish with creamy ricotta, tangy sour cream, and gooey mozzarella, perfect for family dinners.
Print Recipe Pin Recipe
Prep Time 15 minutes mins
Cook Time 35 minutes mins
Resting Time 10 minutes mins
Total Time 1 hour hr
Servings: 8 servings
Course: Dinner
Cuisine: Italian
Calories: 450
Ingredients Equipment Method Nutrition Notes

Ingredients
  

For the Pasta
  • 1 pound Ziti Pasta Can substitute with penne
For the Cheesy Mixture
  • 15 ounces Ricotta Cheese Part-skim for lighter option
  • 1 cup Sour Cream Greek yogurt makes a great swap
  • 1 large Egg Omit for dairy-free or use a flax egg
For the Meat Sauce
  • 1 pound Ground Beef Turkey is a lighter alternative
  • 2 cups Marinara Sauce Homemade or store-bought
  • 2 cloves Garlic Fresh cloves are ideal
For the Cheese Topping
  • 2 cups Mozzarella Cheese Mixing in provolone adds extra taste
  • 1 cup Parmesan Cheese Pecorino Romano is an excellent substitute
For the Garnish
  • 1/4 cup Fresh Basil Dried basil can be used if fresh isn't available

Equipment

  • Large pot
  • medium mixing bowl
  • Large skillet
  • Large baking dish

Method
 

Step‑by‑Step Instructions
  1. Begin by bringing a large pot of salted water to a rolling boil. Add the ziti pasta and cook until just al dente, about 8–10 minutes. Drain the pasta and set it aside in a large bowl, allowing it to cool slightly while you prepare the filling.
  2. In a medium mixing bowl, combine the ricotta cheese, sour cream, one beaten egg, minced garlic, and fresh basil. Stir until well incorporated and creamy.
  3. In a large skillet over medium heat, add the ground beef and cook until fully browned, about 5–7 minutes. Drain excess fat, then stir in marinara sauce and simmer until heated through.
  4. Preheat your oven to 350°F (175°C). In a large baking dish, start by spreading half of the cooked ziti as the base layer. Follow with half of the meat sauce and half of the cheese filling. Repeat with the remaining ziti, sauce, and cheese mixture.
  5. Sprinkle mozzarella and Parmesan cheese evenly over the top of the assembled layers.
  6. Carefully place the baking dish in your preheated oven. Bake for 35 minutes, or until cheese is bubbling and golden brown.
  7. Once baked, remove from oven and allow to cool for about 5–10 minutes before serving. Garnish with additional fresh basil if desired.

Nutrition

Serving: 1servingCalories: 450kcalCarbohydrates: 40gProtein: 30gFat: 20gSaturated Fat: 10gPolyunsaturated Fat: 1gMonounsaturated Fat: 5gCholesterol: 100mgSodium: 600mgPotassium: 400mgFiber: 3gSugar: 4gVitamin A: 800IUVitamin C: 2mgCalcium: 250mgIron: 3mg

Notes

This Million Dollar Baked Ziti is adaptable for different occasions. Feel free to customize the ingredients based on your preference.

Tried this recipe?

Let us know how it was!

Savory Pumpkin Ravioli with Brown Butter Sauce Bliss

December 6, 2025 by Grace Snow Leave a Comment

As I sit cozy by the window, the golden hues of fall spilling through the glass, I find myself craving something wonderfully comforting. That’s when the thought of making Pumpkin Ravioli with Brown Butter Sauce dances into my mind. This dish is not just a meal—it's a heartfelt celebration of the season. The creamy pumpkin filling, paired with the rich nuttiness of brown butter and aromatic sage, creates an experience that's both luxurious and surprisingly simple to craft at home. Plus, it’s a perfect way to impress dinner guests or enjoy a warm night in with loved ones. So, are you ready to roll up your sleeves and dive into a culinary adventure that promises to be both delicious and rewarding? Let’s get started!

Why is Homemade Ravioli Special?

Homemade, there’s simply nothing quite like the experience of crafting your own pumpkin ravioli from scratch! Flavorful and packed with seasonal goodness, the creamy pumpkin filling paired with the nutty brown butter sauce is a match made in culinary heaven. Impressive yet Simple: This dish will wow your guests, but you don’t need a culinary degree to pull it off. Versatile: Feel free to swap in butternut squash or add your favorite spices; the possibilities are endless. If you’re up for a comforting meal that delights your palate, this is absolutely the recipe to try! Pair it with a fresh salad for the perfect dinner experience!

Pumpkin Ravioli with Brown Butter Sauce Ingredients

For the Ravioli Filling

  • Pumpkin Puree – Provides sweetness and moisture in the filling; substitute with roasted squash for a different flavor.
  • Ricotta or Mascarpone Cheese – Adds creaminess; use cottage cheese for a lighter option.
  • Grated Parmesan Cheese – Contributes savory depth; nutritional yeast works for a vegan alternative.
  • Ground Nutmeg – Enhances the flavor profile with warm, earthy notes; freshly grated nutmeg offers a more intense flavor.

For the Pasta Dough

  • All-Purpose Flour – Essential for structure in the pasta; substitute with gluten-free flour mix for a gluten-free version.
  • Large Eggs – Bind the dough together, ensuring it holds shape; for a vegan option, flaxseed meal can be used as a binding agent.
  • Salt – Enhances all flavors in the dish; adjust based on dietary needs.

For the Brown Butter Sauce

  • Unsalted Butter – Central for browning; use ghee for a dairy-free option.
  • Fresh Sage Leaves – Provide a fragrant, herbal note to the sauce; can substitute with thyme if sage is unavailable.
  • Black Pepper – Adds a mild heat; freshly ground for the best flavor.

This robust lineup of ingredients ensures that your Pumpkin Ravioli with Brown Butter Sauce is not just simply delicious but also a heartfelt tribute to the flavors of fall!

Step‑by‑Step Instructions for Pumpkin Ravioli with Brown Butter Sauce

Step 1: Prepare the Filling
In a medium bowl, combine the pumpkin puree, ricotta (or mascarpone), grated Parmesan cheese, ground nutmeg, salt, and pepper. Mix thoroughly until the filling is smooth and creamy, avoiding any lumps. This rich filling, highlighted by the natural sweetness of pumpkin, should take around 5 minutes to prepare. Set it aside to allow the flavors to meld while you make the pasta dough.

Step 2: Make the Pasta Dough
On a clean, floured surface, mound the all-purpose flour and create a well in the center. Crack in the eggs and sprinkle some salt. Gradually mix the flour into the eggs with your fingers, until a cohesive dough forms. Knead for about 8-10 minutes until the pasta dough is smooth and elastic. Cover it with plastic wrap or a damp cloth to rest for at least 30 minutes.

Step 3: Roll Out the Dough
After resting, divide the dough into quarters for easier handling. Using a pasta machine or a rolling pin, roll each piece of dough thinly into sheets about 1/16 inch thick. Dust with flour to prevent sticking. Aim for a smooth consistency with visible translucency to achieve that perfect Pumpkin Ravioli with Brown Butter Sauce texture. This rolling process should take around 15-20 minutes.

Step 4: Assemble Ravioli
Lay one sheet of rolled dough flat on a lightly floured surface. Place teaspoons of filling approximately 2 inches apart along the sheet. Brush water around the edges of each filling mound to help seal. Gently lay another sheet of dough on top, pressing out any air pockets and sealing the edges firmly. Use a ravioli cutter or knife to cut out individual pieces, ensuring they are well sealed to prevent leakage.

Step 5: Cook Ravioli
Bring a large pot of salted water to a gentle boil over medium-high heat. Carefully drop the ravioli into the boiling water and cook for about 3-4 minutes, or until they float and are tender to the touch. Keep an eye on them to avoid overcooking, as fresh ravioli cooks quickly. Once done, use a slotted spoon to transfer them to a plate while you prepare the brown butter sauce.

Step 6: Make Brown Butter Sauce
In a skillet over medium heat, add the unsalted butter and allow it to melt. As the butter begins to foam, add in the fresh sage leaves. Continue to cook, stirring occasionally, until the butter turns a golden brown and the sage is crispy, which should take about 5-7 minutes. Be cautious not to burn the butter; the rich aroma will signal that it's ready.

Step 7: Combine and Serve
Add the cooked ravioli directly into the skillet with the brown butter sauce. Toss gently to ensure each piece is coated evenly. Season with salt and freshly ground black pepper to taste. Garnish with additional grated Parmesan cheese before serving. This step brings together the delightful flavors of the Pumpkin Ravioli with Brown Butter Sauce, creating a dish that’s both comforting and elegant.

Expert Tips for Pumpkin Ravioli

  • Knead Properly: Make sure your pasta dough is well-kneaded. This helps achieve a texture that won't tear easily during rolling and shaping.

  • Crimp Edges: Use a fork to crimp the edges of your ravioli to not only create a beautiful design but also to ensure they are sealed tightly.

  • Avoid Overcooking: Fresh ravioli cooks quickly. Watch them closely in boiling water, cooking for just 3-4 minutes until they float and are tender.

  • Season Your Sauce: Don’t forget to adjust seasoning in the brown butter sauce with salt and pepper for that perfect balance, enhancing the flavors of your Pumpkin Ravioli with Brown Butter Sauce.

  • Chill the Dough: If your dough feels too soft to work with, chill it for a brief time to make rolling easier, ensuring a better shape for your ravioli.

Storage Tips for Pumpkin Ravioli

Room Temperature: Store uncooked pumpkin ravioli at room temperature for up to 1 hour if you're planning to cook them immediately. After that, they should be refrigerated or frozen.

Fridge: Cooked pumpkin ravioli can be kept in the refrigerator for up to 3 days. Place them in an airtight container to maintain freshness and prevent drying out.

Freezer: Uncooked pumpkin ravioli freeze beautifully and can be stored in an airtight container or freezer bag for up to a month. For best results, freeze them in a single layer before transferring to a bag to prevent sticking.

Reheating: When ready to enjoy, reheat cooked ravioli gently in a skillet with a little brown butter sauce, or steam them for a few minutes to warm through without losing texture.

What to Serve with Pumpkin Ravioli with Brown Butter Sauce

Pairing this delightful dish with the right sides will elevate your dining experience to new heights.

  • Simple Green Salad: A light, crisp salad tossed in lemon vinaigrette balances the richness of the ravioli, adding freshness to the meal.

  • Garlic Bread: Warm, crusty garlic bread is perfect for soaking up any leftover brown butter sauce, making each bite even more indulgent.

  • Roasted Brussels Sprouts: The caramelized flavors and slight bitterness of roasted Brussels sprouts complement the sweet pumpkin filling beautifully.

  • Sautéed Spinach: Quickly sautéed spinach adds a vibrant color and earthy flavor, creating a pleasing contrast to your pumpkin ravioli.

  • Buttery Corn on the Cob: Sweet and juicy corn on the cob, slathered with butter, enhances the comforting flavors of fall in every bite.

  • Honeycrisp Apple Slices: Fresh, crisp apple slices with a sprinkle of cinnamon serve as a refreshing palate cleanser between ravioli bites, delighting the senses.

  • Chardonnay: A chilled glass of Chardonnay pairs excellently with the rich flavors, enhancing the warm notes of the brown butter sauce.

  • Vanilla Ice Cream: For dessert, a scoop of vanilla ice cream creates a sweet finish, balancing out the savory and creamy elements of the meal.

Make Ahead Options

These Pumpkin Ravioli with Brown Butter Sauce are perfect for meal prep enthusiasts looking to save time during busy weeknights! You can prepare the filling and pasta dough up to 24 hours in advance; simply store them separately in the refrigerator to maintain freshness. When you're ready to cook, assemble the ravioli and boil them fresh for a delightful taste. Additionally, uncooked ravioli can be frozen for up to a month—just be sure to layer them between parchment paper to prevent sticking. To finish, simply boil frozen ravioli directly from the freezer for about 5-6 minutes and toss them in the brown butter sauce, ensuring a rich, flavorful dish just as delicious as if made fresh!

Pumpkin Ravioli with Brown Butter Sauce Variations

Feel free to explore these delightful twists that will make your pumpkin ravioli even more appealing, each bite a new adventure.

  • Squash Swap: Substitute pumpkin with butternut squash or sweet potatoes for a different flavor profile. The natural sweetness elevates the filling, adding depth.

  • Cheese Variation: Go for ricotta or mascarpone to alter creaminess; cottage cheese makes a lighter filling. This small change can refresh the whole dish!

  • Nutty Flavor: Incorporate toasted walnuts into the filling or as a topping. Their crunch and earthiness complement the creamy filling beautifully!

  • Herb Infusion: If fresh sage isn’t available, try thyme or rosemary for the brown butter sauce. Each herb imparts its unique fragrance, enhancing the overall experience.

  • Spice It Up: Add a pinch of cinnamon or ground cloves to the filling for a warm spice kick. This adds a cozy twist that sings of autumn!

  • Vegan Option: Substitute ricotta with silken tofu blended until smooth and the egg with flaxseed meal to create a delightful vegan-friendly filling.

  • Crispy Gourmet: Top with crispy pancetta for a savory kick that contrasts the sweetness of the pumpkin filling. It's an elegant upgrade that will surely impress.

To further delight your senses and celebrate the season, consider serving these with a fresh salad dressed with lemon vinaigrette or diving into an adventure with some Pumpkin Brownies Decadent for dessert. Each variations brings a fresh flair, ensuring your meal remains exciting and loved!

Pumpkin Ravioli with Brown Butter Sauce Recipe FAQs

How do I select the best pumpkin puree?
Look for pumpkin puree that is vibrant and has a smooth texture. If you're using canned puree, ensure there are no added sugars or preservatives. A homemade puree can elevate the flavor; just roast your pumpkin until tender, scoop out the flesh, and blend until smooth. This will give your ravioli an incredible depth of flavor!

How do I store uncooked and cooked pumpkin ravioli?
Uncooked pumpkin ravioli can be stored at room temperature for up to 1 hour if cooking immediately or in the fridge for 1-2 days. For longer storage, freeze them in a single layer on a baking sheet, then transfer to an airtight container or freezer bag for up to 1 month. Cooked ravioli can be kept in the refrigerator for up to 3 days in an airtight container, ensuring they don’t dry out.

Can I freeze pumpkin ravioli after assembling?
Absolutely! Freezing uncooked pumpkin ravioli is a great option. After assembling, freeze them in a single layer on a baking sheet. Once frozen solid, transfer them to a freezer bag or container for up to 1 month. When you're ready to cook, there's no need to thaw—simply drop them directly into boiling salted water, allowing an extra minute of cooking time.

What should I do if my ravioli dough is too sticky?
If your ravioli dough feels too sticky, simply sprinkle additional flour on your work surface and the dough itself as you knead it. Aim for a smooth and pliable dough that’s easy to roll out. If it becomes too dry, you can add a teaspoon of water at a time until it’s back to the right consistency.

Are there any dietary considerations I should keep in mind?
Yes! For a gluten-free version, substitute regular flour with a gluten-free all-purpose flour blend. Additionally, if you're vegan, use flaxseed meal instead of eggs for the dough, and opt for plant-based cheeses like cashew cream and nutritional yeast in place of ricotta and Parmesan. Check for allergies before serving, especially with ingredients like butter or cheese.

Pumpkin Ravioli with Brown Butter Sauce

Savory Pumpkin Ravioli with Brown Butter Sauce Bliss

Delight in this comforting Pumpkin Ravioli with Brown Butter Sauce, a culinary celebration of autumn flavors.
Print Recipe Pin Recipe
Prep Time 30 minutes mins
Cook Time 12 minutes mins
Resting Time 30 minutes mins
Total Time 1 hour hr 12 minutes mins
Servings: 4 ravioli
Course: Dinner
Cuisine: Italian
Calories: 350
Ingredients Equipment Method Nutrition Notes

Ingredients
  

For the Ravioli Filling
  • 1 cup Pumpkin Puree Substitute with roasted squash for a different flavor.
  • 1 cup Ricotta or Mascarpone Cheese Use cottage cheese for a lighter option.
  • 1/2 cup Grated Parmesan Cheese Nutritional yeast works for a vegan alternative.
  • 1/4 teaspoon Ground Nutmeg Freshly grated offers a more intense flavor.
For the Pasta Dough
  • 2 cups All-Purpose Flour Substitute with gluten-free flour mix for gluten-free version.
  • 2 large Eggs Use flaxseed meal for vegan option.
  • 1 teaspoon Salt Adjust based on dietary needs.
For the Brown Butter Sauce
  • 1/2 cup Unsalted Butter Use ghee for a dairy-free option.
  • 6 leaves Fresh Sage Can substitute with thyme if unavailable.
  • 1/2 teaspoon Black Pepper Freshly ground for best flavor.

Equipment

  • Pasta machine
  • Rolling Pin
  • medium bowl
  • Skillet
  • Ravioli cutter
  • slotted spoon

Method
 

Preparation Steps
  1. In a medium bowl, combine the pumpkin puree, ricotta (or mascarpone), grated Parmesan cheese, ground nutmeg, salt, and pepper. Mix thoroughly until the filling is smooth and creamy.
  2. On a clean, floured surface, mound the all-purpose flour and create a well in the center. Crack in the eggs and sprinkle some salt. Gradually mix the flour into the eggs with your fingers until a cohesive dough forms.
  3. Knead for about 8-10 minutes until the pasta dough is smooth and elastic. Cover it with plastic wrap to rest for at least 30 minutes.
  4. Divide the dough into quarters. Using a pasta machine or rolling pin, roll each piece thinly into sheets about 1/16 inch thick.
  5. Lay one sheet of rolled dough flat, place teaspoons of filling approximately 2 inches apart, brush water around edges, and lay another sheet on top before sealing.
  6. Bring a pot of salted water to a boil and cook ravioli for 3-4 minutes until they float. Use a slotted spoon to transfer to a plate.
  7. In a skillet, melt the unsalted butter and add fresh sage. Cook until the butter turns golden brown (5-7 minutes).
  8. Add the cooked ravioli into the skillet with the brown butter sauce, toss to coat, and season with salt and pepper before serving.

Nutrition

Serving: 1ravioliCalories: 350kcalCarbohydrates: 45gProtein: 12gFat: 15gSaturated Fat: 8gPolyunsaturated Fat: 1gMonounsaturated Fat: 4gCholesterol: 60mgSodium: 300mgPotassium: 300mgFiber: 3gSugar: 2gVitamin A: 2000IUVitamin C: 2mgCalcium: 150mgIron: 1mg

Notes

Knead dough properly for texture, seal ravioli edges tightly, and avoid overcooking for best results.

Tried this recipe?

Let us know how it was!

Sweet and Savory Maple Dijon Harvest Pasta Salad for Fall Bliss

December 6, 2025 by Grace Snow Leave a Comment

As fall takes center stage, I found myself rummaging through my pantry, looking for the perfect way to celebrate the season's bounty. That's when the idea for my Sweet and Savory Maple Dijon Harvest Pasta Salad came to life. This dish beautifully marries the comfort of roasted butternut squash with the crunch of apples and pecans, all drizzled in a homemade maple Dijon vinaigrette. What I adore most about this recipe is its versatility; it's not only vegetarian, but it also offers gluten-free options and can be prepped ahead, making it a true crowd-pleaser for cozy lunches or festive gatherings. How about transforming your autumnal meals with this vibrant salad? Let’s dive into the delicious details!

Why is this pasta salad a must-try?

Unique Flavor Profile: This salad features a delightful combination of sweet butternut squash, crunchy apples, and tangy feta that creates a perfect medley of flavors for fall.

Versatility: Whether you choose gluten-free pasta or swap ingredients to match your taste, this dish can be easily adapted to suit any dietary need.

Crowd-Pleasing: Perfect for gatherings or family dinners, the vibrant colors and rich flavors make it an eye-catching centerpiece at any table.

Make-Ahead Convenience: Prep this salad in advance and store it in the fridge, allowing flavors to meld beautifully. It's a hassle-free addition to busy weeknights!

Wholesome Ingredients: Packed with nutrients from fresh vegetables and healthy fats from nuts, it’s a guilt-free delight that nourishes both body and soul.

Why stop here? Pair it with these Maple Roasted Sweet Potatoes for a complete meal!

Sweet and Savory Maple Dijon Harvest Pasta Salad Ingredients

For the Pasta
• Pasta – Choose any pasta shape like cavatappi or rotini for a fun texture.

For the Roasted Veggies
• Butternut Squash – Brings natural sweetness; substitute with sweet potatoes for a similar flavor.
• Brussels Sprouts – Offers a savory contrast; spinach works for a milder profile.
• Red Onion – Adds sharpness; shallots can provide a sweeter touch.
• Olive Oil – Ideal for roasting and dressing; avocado oil serves as a great alternative.

For the Dressing
• Dijon Mustard – Infuses tang; yellow mustard can substitute for a milder flavor.
• Maple Syrup – Provides sweetness; agave syrup can be used for a vegan option.
• Apple Cider Vinegar – Balances flavors with acidity; white wine vinegar is a compatible choice.
• Salt and Pepper – Always adjust to taste for the best flavor.

For the Salad Mix
• Apples – Adds crunchy sweetness; Honeycrisp or Granny Smith works beautifully.
• Dried Cranberries – Contributes sweetness and color; raisins or chopped dates can be swapped.
• Feta Cheese – Imparts creaminess; vegan feta can be used for non-dairy diets.
• Chopped Pecans – Provides crunch; walnuts or sunflower seeds make great alternatives.

Embrace the warm, hearty flavors of this Sweet and Savory Maple Dijon Harvest Pasta Salad, and let it become a highlight of your fall gatherings!

Step‑by‑Step Instructions for Sweet and Savory Maple Dijon Harvest Pasta Salad

Step 1: Cook the Pasta
Begin by bringing a large pot of salted water to a rolling boil. Add your pasta of choice, such as rotini or cavatappi, and cook according to the package instructions until al dente, usually around 8-10 minutes. Once cooked, drain the pasta and rinse it under cold water to stop the cooking process and prevent it from becoming mushy. Set aside to cool completely.

Step 2: Roast the Vegetables
Preheat your oven to 425°F (220°C). While the oven is heating, prepare a baking sheet by lining it with parchment paper. In a large bowl, toss the cubed butternut squash, halved Brussels sprouts, and sliced red onion with olive oil, garlic powder, and a sprinkle of salt. Spread the vegetables evenly on the baking sheet and roast for 25-30 minutes, tossing halfway through until they are golden brown and tender.

Step 3: Prepare the Dressing
In a medium bowl, whisk together Dijon mustard, maple syrup, apple cider vinegar, and olive oil until the mixture is fully emulsified and creamy. Season with salt and pepper to taste, adjusting flavors as needed. This homemade dressing will add a zesty sweetness to your Sweet and Savory Maple Dijon Harvest Pasta Salad, enhancing the overall flavor profile beautifully.

Step 4: Combine the Ingredients
In a large mixing bowl, combine the cooled pasta, roasted vegetables, diced apples, dried cranberries, crumbled feta cheese, and chopped pecans. Gently fold the ingredients together, ensuring everything is well-distributed and coated in the delicious flavors. This colorful mix brings together the essence of fall while creating a satisfying texture in every bite.

Step 5: Chill Before Serving
To allow the flavors to meld beautifully, transfer the salad to the refrigerator for at least 30 minutes. This chilling time enhances the Sweet and Savory Maple Dijon Harvest Pasta Salad, making it even more refreshing when served. You can enjoy it cold, at room temperature, or even warmed slightly, depending on your preference.

Sweet and Savory Maple Dijon Harvest Pasta Salad Variations

Feel free to mix and match ingredients to create your own version of this delightful salad!

  • Gluten-Free Pasta: Substitute traditional pasta with gluten-free options like brown rice or quinoa pasta for a lighter dish.
    The joy of this salad is in its versatility, lending itself beautifully to different dietary needs.

  • Sweet Potato Swap: Replace butternut squash with sweet potatoes for an equally sweet and satisfying alternative. Their creamy texture melds wonderfully with the other ingredients.

  • Spinach Substitute: Instead of Brussels sprouts, toss in fresh spinach for a milder taste, adding a vibrant green hue to your dish. Fresh spinach brings a soft texture while retaining that delightful earthiness.

  • Pomegranate Seeds: For a burst of freshness, swap dried cranberries with juicy pomegranate seeds. Their tartness complements the sweetness of the dressing and adds a lovely crunch.

  • Chickpeas for Protein: Boost the nutritional value by adding chickpeas or grilled chicken. This not only enhances the protein content but also makes this salad a heartier meal.

  • Nutty Alternatives: Swap pecans for the crunch of walnuts or sunflower seeds. Each option provides a unique flavor profile and texture to elevate your salad.

  • Herb-Infused Dressing: Experiment with fresh herbs like parsley or thyme in the dressing for a fragrant twist. Adding herbs can enhance the flavor while giving an aromatic lift to each bite.

  • Spicy Kick: Add a pinch of red pepper flakes to the dressing for a touch of heat. This twist will awaken your taste buds and surprise your guests with a delightful contrast.

Pair your adaptations with other delicious recipes, like Seafood Pasta Savory or warm up alongside a comforting bowl of Avocado Egg Salad!

Storage Tips for Sweet and Savory Maple Dijon Harvest Pasta Salad

Fridge: Store leftover salad in an airtight container for up to 4 days. This keeps it fresh while allowing the flavors to deepen, making it even tastier.

Make-Ahead: Prepare the salad a day in advance for gatherings. Just dress it right before serving to maintain the crispness of the ingredients.

Freezer: For best quality, avoid freezing the pasta salad as the texture may change upon thawing. It's best enjoyed fresh!

Reheating: If you prefer to serve it warm, gently reheat the salad in a microwave or on the stovetop over low heat, being careful not to overcook the pasta.

Make Ahead Options

These Sweet and Savory Maple Dijon Harvest Pasta Salad are perfect for busy home cooks looking to streamline their meal prep! You can prepare the roasted vegetables (butternut squash, Brussels sprouts, and red onion) up to 3 days in advance and store them in an airtight container in the refrigerator. Additionally, you can cook the pasta and toss it with a bit of olive oil to prevent sticking, then refrigerate for up to 24 hours. When you're ready to enjoy, simply combine the chilled pasta, roasted veggies, diced apples, cranberries, feta, and pecans before adding the dressing. This method not only saves you time but ensures that your salad remains just as delicious as when made fresh!

Expert Tips for Sweet and Savory Maple Dijon Harvest Pasta Salad

• Pasta Perfection: Ensure the pasta is cooked al dente; overcooking can lead to a mushy texture that's less appetizing.

• Roast Right: Toss the vegetables halfway through roasting for even caramelization, bringing out their natural sweetness in the Sweet and Savory Maple Dijon Harvest Pasta Salad.

• Prevent Browning: To keep your apples fresh, toss them in a little lemon juice before adding them to the salad. This simple step preserves their lovely color and crunch.

• Flavor Balance: Taste the dressing after whisking. Adjust the salt and pepper according to your preference, ensuring a well-seasoned dish.

• Storage Secrets: Store leftovers in an airtight container for up to 4 days. The flavors deepen over time, enhancing your Sweet and Savory Maple Dijon Harvest Pasta Salad even further!

What to Serve with Sweet and Savory Maple Dijon Harvest Pasta Salad

Imagine a meal that dances on your palate with the colors and flavors of autumn, leaving you warm and satisfied.

  • Roasted Turkey: The savory depth of roasted turkey pairs perfectly with the sweetness of the pasta salad, creating a comforting contrast.
  • Pan-Seared Chicken: Tender chicken, lightly seasoned, complements the vibrant flavors for a hearty and protein-packed meal.
  • Butternut Squash Soup: A warm, creamy soup adds a delightful texture and richness that harmonizes beautifully with the salad’s crisp elements.
  • Grilled Vegetable Platter: A mix of charred seasonal veggies introduces smokiness that enhances the freshness in your pasta salad.
  • Warm Crusty Bread: Sliced sourdough or garlic bread for dipping lets you soak in the salad’s rich vinaigrette while adding a satisfying crunch.
  • Crisp Green Salad: A simple side of mixed greens dressed lightly with vinaigrette brings freshness to balance the richer flavors of both dishes.
  • Sparkling Apple Cider: This drink's effervescence complements the sweet notes in your salad, making every bite more exciting.
  • Pumpkin Spice Muffins: For a sweet finish, these muffins provide seasonal spices that echo the salad's fall flavors, creating a delightful ending to your meal.

Sweet and Savory Maple Dijon Harvest Pasta Salad Recipe FAQs

How do I choose the right pasta for the salad?
Absolutely! When selecting pasta for your Sweet and Savory Maple Dijon Harvest Pasta Salad, opt for shapes like cavatappi, rotini, or bowtie. These shapes provide great texture and hold onto the dressing beautifully. Choose whole wheat or gluten-free options to suit your dietary needs!

What are the best storage methods for leftovers?
After enjoying your delicious pasta salad, store any leftovers in an airtight container in the fridge for up to 4 days. This ensures the salad remains fresh while allowing the flavors to meld beautifully over time, making it even tastier the next day.

Can I freeze the Sweet and Savory Maple Dijon Harvest Pasta Salad?
I wouldn't recommend freezing this salad. Freezing can alter the texture of the pasta and vegetables, causing them to become mushy upon thawing. It's best enjoyed fresh, but you can prepare it a day ahead and store it in the fridge until you're ready to serve.

What can I do if my butternut squash is undercooked?
No worries! If your butternut squash is still too firm after roasting, return it to the oven for an additional 5–10 minutes, checking for doneness. You want it to be tender and caramelized for the best flavor and texture in your salad.

Are there any dietary considerations I should keep in mind?
Very! This recipe is vegetarian and can easily be adapted for gluten-free diets by using gluten-free pasta. If you have allergies, be cautious with ingredients like feta cheese and nuts; vegan feta and sunflower seeds are excellent substitutes that keep the salad nut-free and dairy-free.

How long should I chill the salad before serving?
For optimal flavor blending, refrigerate the salad for at least 30 minutes before serving. This helps the ingredients to marinate in the dressing and enhances the overall taste, making each bite a delightful experience!

Sweet and Savory Maple Dijon Harvest Pasta Salad

Sweet and Savory Maple Dijon Harvest Pasta Salad for Fall Bliss

Celebrate fall with the Sweet and Savory Maple Dijon Harvest Pasta Salad, a delightful blend of roasted butternut squash, crunchy apples, and a tangy vinaigrette.
Print Recipe Pin Recipe
Prep Time 30 minutes mins
Cook Time 30 minutes mins
Chill Time 30 minutes mins
Total Time 1 hour hr 30 minutes mins
Servings: 4 servings
Course: Salads
Cuisine: American
Calories: 320
Ingredients Equipment Method Nutrition Notes

Ingredients
  

For the Pasta
  • 8 ounces pasta cavatappi or rotini
For the Roasted Veggies
  • 1 medium butternut squash cubed
  • 1 cup Brussels sprouts halved
  • 1 medium red onion sliced
  • 2 tablespoons olive oil for roasting
For the Dressing
  • 2 tablespoons Dijon mustard
  • 2 tablespoons maple syrup or agave syrup
  • 2 tablespoons apple cider vinegar
  • to taste salt
  • to taste pepper
For the Salad Mix
  • 1 medium apple diced, Honeycrisp or Granny Smith
  • 1 cup dried cranberries
  • 1 cup feta cheese crumbled or vegan feta
  • 1/2 cup chopped pecans or walnuts

Equipment

  • Large pot
  • Baking Sheet
  • Mixing Bowl
  • Whisk

Method
 

Step-by-Step Instructions
  1. Cook the pasta in a large pot of salted boiling water for 8-10 minutes until al dente. Drain and rinse under cold water to cool.
    Sweet and Savory Maple Dijon Harvest Pasta Salad
  2. Preheat the oven to 425°F (220°C). Toss butternut squash, Brussels sprouts, and red onion with olive oil, garlic powder, and salt. Roast for 25-30 minutes until golden brown.
    Sweet and Savory Maple Dijon Harvest Pasta Salad
  3. In a bowl, whisk together Dijon mustard, maple syrup, apple cider vinegar, and olive oil until emulsified. Season with salt and pepper.
    Sweet and Savory Maple Dijon Harvest Pasta Salad
  4. In a large bowl, combine cooled pasta, roasted vegetables, diced apples, dried cranberries, feta cheese, and pecans. Gently fold to mix.
    Sweet and Savory Maple Dijon Harvest Pasta Salad
  5. Refrigerate the salad for at least 30 minutes to meld flavors. Serve chilled, at room temperature, or lightly warmed.
    Sweet and Savory Maple Dijon Harvest Pasta Salad

Nutrition

Serving: 1servingCalories: 320kcalCarbohydrates: 40gProtein: 8gFat: 15gSaturated Fat: 2gPolyunsaturated Fat: 4gMonounsaturated Fat: 8gCholesterol: 10mgSodium: 300mgPotassium: 500mgFiber: 6gSugar: 10gVitamin A: 1500IUVitamin C: 20mgCalcium: 150mgIron: 2mg

Notes

This salad is versatile; use gluten-free pasta or swap ingredients for dietary needs. Store leftovers in an airtight container for up to 4 days.

Tried this recipe?

Let us know how it was!

One Pot French Onion Pasta: Creamy Comfort in Minutes

December 6, 2025 by Grace Snow Leave a Comment

As I walked through the bustling streets of a charming French village, the warm, inviting aroma of caramelized onions wafted through the air, wrapping around me like a cozy blanket. That's the exact inspiration behind my One-Pot French Onion Pasta—an incredible dish that melds the comforting essence of traditional French onion soup with the convenience of a one-pot meal. With this recipe, you can indulge in deep, savory flavors while keeping your kitchen cleanup to a minimum. Not only is it a fantastic way to elevate simple pantry ingredients into a sumptuous feast, but it also manages to keep things creamy without a hint of heavy cream. Curious how you can whisk your loved ones into a culinary escape with just one pot? Let's dive in!

Why Is This Pasta Dish So Special?

Simplicity First: This One-Pot French Onion Pasta is designed for home cooks of all levels, requiring minimal prep and just one pot for easy cooking and cleanup.

Rich Umami Depth: The combination of caramelized onions, flavorful broth, and cheeses creates an irresistible savory experience that rivals traditional dishes.

Versatile Variations: Explore different pasta shapes or add hearty proteins and vegetables to customize this recipe to your taste. It’s a delightful base for creativity!

Comfort Food Redefined: Enjoy creamy, comforting flavors reminiscent of classic French onion soup, all while being pantry-friendly.

Quick & Easy: Perfect for busy weeknights, this dish transforms simple ingredients into a meal that your family will love, reminiscent of cozy evenings in a French bistro.

One Pot French Onion Pasta Ingredients

• Get ready to experience creamy comfort in a single pot!

For the Pasta

  • Pasta – Orecchiette works wonderfully for soaking up the flavors, but feel free to substitute with radiatori or rotini.

For the Onion Base

  • Onions – Yellow onions caramelize beautifully; for best results, slice them into 1/8-inch rings without substitutes.
  • Garlic – Fresh minced garlic adds a delightful punch; alternatively, you can use 1 teaspoon of garlic powder for convenience.

For the Broth

  • Water + Beef Bouillon – This combination creates a fantastic beef broth on a budget; you can also use 4 cups of beef broth if you prefer.
  • Worcestershire Sauce – A splash of this sauce elevates the umami; just be cautious with the amount for depth.
  • Soy Sauce – Enhances the savory notes; opt for reduced sodium varieties to control salt levels better.

For Creaminess

  • Evaporated Milk – This ingredient gives the dish a creamy texture without splitting during cooking; heavy cream can be a richer substitute as needed.

For Flavor

  • Herbs – Fresh thyme and parsley brighten up the dish; dried herbs can do the trick if fresh isn’t on hand.
  • Spices – Dried oregano, paprika, and a pinch of red pepper flakes bring warmth and complexity.

For the Cheesy Finish

  • Gruyere Cheese – Melts into a sweet, nutty layer; substitutes like Swiss or Provolone can work too.
  • Parmesan Cheese – Adds a salty depth; freshly grated versions will enhance meltability and flavor.

Step‑by‑Step Instructions for One Pot French Onion Pasta

Step 1: Caramelize the Onions
Begin by heating 2 tablespoons of butter and 1 tablespoon of olive oil in a large Dutch oven over medium heat. Once the butter melts, add 3 thinly sliced yellow onions, seasoning them with salt and pepper. Stir occasionally for 30-35 minutes, allowing the onions to caramelize until they turn a rich, golden brown. This step builds a sweet foundation of flavor for your One Pot French Onion Pasta.

Step 2: Add Flavor
After the onions are caramelized, mix in 2 cloves of minced garlic and a pinch of red pepper flakes to the pot. Stir these ingredients for about 30 seconds, letting the aroma fill your kitchen. Next, pour in 1 tablespoon of Worcestershire sauce and 1 tablespoon of soy sauce, stirring well to combine. This will deepen the umami flavor profile of your One Pot French Onion Pasta.

Step 3: Introduce Liquids
Now, it's time to add the liquids. Pour in 4 cups of water along with 2 teaspoons of beef bouillon, whisking to combine. Take 1 cup of evaporated milk and mix it with 1 tablespoon of cornstarch until smooth, then stir this into the pot. Bring this mixture to a boil over high heat. You’ll see bubbles form, indicating it’s ready for the next step, and the broth will start to thicken slightly.

Step 4: Cook the Pasta
Once boiling, add 12 ounces of orecchiette pasta to the pot. Reduce the heat to medium-low and allow the pasta to simmer uncovered for 11-14 minutes or until al dente, stirring occasionally to prevent sticking. As the pasta cooks, it will absorb the broth and flavors, enhancing the creaminess of your One Pot French Onion Pasta.

Step 5: Melt the Cheese
After the pasta is cooked, remove the pot from heat and immediately stir in 1 cup of shredded Gruyere cheese, followed by ½ cup of grated Parmesan cheese, a handful at a time. Stir until the cheeses are completely melted and the sauce is creamy. Taste and adjust seasoning if needed, ensuring every bite of your One Pot French Onion Pasta is as delicious as it sounds.

What to Serve with One-Pot French Onion Pasta?

As you savor the creamy, savory delight of this dish, consider these perfectly paired accompaniments to elevate your meal even further.

  • Garden Salad: Fresh greens dressed with a tangy vinaigrette balance the richness of the pasta, providing a refreshing contrast.

  • Garlic Bread: Crispy and buttery, garlic bread is the perfect way to soak up the delicious sauce, making each bite even more enjoyable.

  • Roasted Brussels Sprouts: The nutty flavor of roasted Brussels sprouts adds a delightful crunch and complements the creaminess of the pasta beautifully.

  • Steamed Green Beans: Lightly steamed green beans bring a pop of color and a fresh crunch, offering a lovely textural balance to the creamy pasta.

  • Cheesy Cauliflower Bake: This comforting dish delivers a savory warmth that aligns well with the delicious flavors of the French onion pasta.

  • Chardonnay: A chilled glass of Chardonnay adds a touch of elegance and its oaky notes beautifully complement the umami richness of the dish.

  • Apple Crisp: For dessert, a warm apple crisp brings in fruity sweetness and a crunchy topping, harmonizing wonderfully with the savory experience of the pasta.

  • Lemon Sorbet: Light and refreshing, lemon sorbet serves as a palate cleanser after the rich meal, leaving you feeling satisfied without being overly full.

  • Herbed Quinoa: Nutty, fluffy quinoa with fresh herbs creates a light yet satisfying side that perfectly complements the comforting pasta's heartiness.

One Pot French Onion Pasta: Customize It!

Feel free to explore these delicious variations that will let you make this comforting dish truly your own!

  • Different Pasta: Try using rotini or fusilli instead of orecchiette for a fun twist. Their shapes hold onto the creamy sauce beautifully.

  • Protein Addition: Add browned ground beef, chicken, or turkey for extra heartiness. It’s a great way to turn this dish into a complete meal!

  • Vegetable Boost: Consider tossing in sautéed mushrooms, fresh spinach, or thinly sliced bell peppers. This not only adds nutrition but also makes every bite even more delightful.

  • Make it Spicy: Craving a kick? Increase the amount of red pepper flakes or add a splash of hot sauce for a zesty spin that’ll warm your soul.

  • Dairy-Free Delight: Swap evaporated milk for coconut or almond milk and use vegan cheese for a comforting, dairy-free version. Perfect for those who need dairy alternatives!

  • Gluten-Free Goodness: Opt for gluten-free pasta and vegetable broth for a gluten-free version that still maintains all the comforting flavors.

  • Herb Variations: Play with different herbs like rosemary or basil to infuse new layers of freshness and aroma, customizing the taste to your liking.

  • Cheesy Explosion: For an extra cheesy experience, mix in some mozzarella or cheddar along with Gruyere and Parmesan. Who can resist more cheese?

To explore more delightful recipes that can complement your culinary adventures, you might want to check out my One Pot Salmon or indulge in some hearty Crock Pot Chicken for your next family dinner!

Expert Tips for One-Pot French Onion Pasta

  • Onion Caramelization: Don’t rush it! Cooking onions slowly for 30-35 minutes unlocks their natural sweetness, crucial for your One-Pot French Onion Pasta.

  • Frequent Stirring: While simmering, stir the pasta occasionally. This prevents it from sticking to the bottom and ensures even flavor absorption.

  • Taste as You Go: Always taste your dish while cooking. Adjust seasoning as needed to enhance the depth of the umami flavors in your One-Pot French Onion Pasta.

  • Cheese Quality Matters: Use freshly grated cheeses for the best melt and flavor—pre-shredded varieties often contain anti-caking agents that can affect texture.

  • Don’t Skimp on Liquid: Ensure there’s enough liquid throughout the cooking process. If it thickens too much, add a splash of water or broth to maintain creaminess.

Make Ahead Options

These One-Pot French Onion Pasta dish is an ideal candidate for meal prep, saving you precious time on busy evenings. You can caramelize the onions up to 3 days in advance; simply cool them and refrigerate in an airtight container to maintain their sweetness and prevent browning. Additionally, you can mix the dry pasta and broth components (water, bouillon, and evaporated milk) in a separate container for quicker assembly. When you're ready to cook, add the caramelized onions to the boiling mixture and follow the remaining steps as instructed. This way, you’ll still enjoy creamy comfort with just a fraction of the effort!

How to Store and Freeze One-Pot French Onion Pasta

Fridge: Store your One-Pot French Onion Pasta in an airtight container for up to 5 days. To maintain its creaminess, reheat gently with a splash of water or milk.

Freezer: Freeze portions in airtight containers for up to 3 months. For best results, let the dish cool completely before freezing to preserve its texture.

Reheating: When ready to enjoy, thaw overnight in the fridge and reheat on the stove over low heat, adding a bit of water or milk if necessary to restore creaminess.

Serving Tip: After reheating, sprinkle a little extra cheese on top for an indulgent finish!

One Pot French Onion Pasta Recipe FAQs

What type of onions should I use for this recipe?
Absolutely! Yellow onions are ideal for caramelization due to their natural sweetness. It's crucial not to substitute with other varieties, as they can alter the flavor and texture of your One Pot French Onion Pasta.

How long can I store this dish in the refrigerator?
You can store your One Pot French Onion Pasta in an airtight container for up to 5 days. To keep it creamy when reheating, I recommend adding a splash of water or evaporated milk to the pot.

Can I freeze One Pot French Onion Pasta?
Yes! To freeze your One Pot French Onion Pasta, let it cool completely and then transfer individual portions into airtight containers. It can be frozen for up to 3 months. When you're ready to enjoy it, thaw overnight in the refrigerator, then reheat gently on the stove, adding a little water or milk if needed.

What if the pasta turns out too starchy or clumpy?
Very good question! If your pasta becomes clumpy, it might be due to insufficient liquid or overcooking. Make sure to stir the pasta occasionally while it simmers. If it does get too thick, add a splash of hot water or broth to loosen it up and restore that creamy texture.

Are there any dietary considerations I should keep in mind?
Definitely! If you're cooking for someone with dietary restrictions, you can adapt this recipe. For a gluten-free version, use gluten-free pasta and vegetable broth. Additionally, for a dairy-free option, substitute evaporated milk with a non-dairy milk or cream alternative, and use vegan cheese instead.

Can I add other ingredients to this recipe?
Oh, absolutely! One of the joys of the One Pot French Onion Pasta is its versatility. You can easily add sautéed mushrooms, spinach, or proteins like ground beef or chicken to enhance the dish's nutrition and flavor. Just brown the protein separately and stir it into the pot before serving!

One Pot French Onion Pasta

One Pot French Onion Pasta: Creamy Comfort in Minutes

Indulge in this One Pot French Onion Pasta, combining comforting flavors of French onion soup with easy one-pot preparation.
Print Recipe Pin Recipe
Prep Time 10 minutes mins
Cook Time 35 minutes mins
Total Time 45 minutes mins
Servings: 4 servings
Course: Dinner
Cuisine: French
Calories: 500
Ingredients Equipment Method Nutrition Notes

Ingredients
  

For the Pasta
  • 12 ounces orecchiette pasta or other pasta types like radiatori or rotini
For the Onion Base
  • 3 medium yellow onions sliced into 1/8-inch rings
  • 2 cloves minced garlic or 1 teaspoon of garlic powder
For the Broth
  • 4 cups water can substitute with beef broth
  • 2 teaspoons beef bouillon
  • 1 tablespoon Worcestershire sauce
  • 1 tablespoon soy sauce preferably reduced sodium
For Creaminess
  • 1 cup evaporated milk can substitute with heavy cream
For Flavor
  • 1 fresh thyme
  • 1 fresh parsley dried herbs are a substitute
  • 1 teaspoon dried oregano
  • 1 teaspoon paprika
  • 1 pinch red pepper flakes
For the Cheesy Finish
  • 1 cup shredded Gruyere cheese or substitutes like Swiss or Provolone
  • ½ cup grated Parmesan cheese freshly grated preferred

Equipment

  • Dutch oven

Method
 

Cooking Instructions
  1. Heat 2 tablespoons of butter and 1 tablespoon of olive oil in a large Dutch oven over medium heat. Add 3 sliced yellow onions, seasoning with salt and pepper. Stir occasionally for 30-35 minutes until caramelized.
  2. Mix in 2 minced garlic cloves and a pinch of red pepper flakes, stirring for about 30 seconds. Add 1 tablespoon Worcestershire sauce and 1 tablespoon soy sauce, combining well.
  3. Pour in 4 cups of water and whisk in 2 teaspoons of beef bouillon. Mix 1 cup of evaporated milk with 1 tablespoon of cornstarch until smooth, then add to the pot. Bring to a boil.
  4. Add 12 ounces of orecchiette pasta. Reduce heat to medium-low and simmer uncovered for 11-14 minutes or until al dente, stirring occasionally.
  5. Remove from heat and stir in 1 cup of shredded Gruyere cheese and ½ cup of grated Parmesan cheese until melted and creamy.

Nutrition

Serving: 1servingCalories: 500kcalCarbohydrates: 60gProtein: 20gFat: 20gSaturated Fat: 10gPolyunsaturated Fat: 1gMonounsaturated Fat: 5gCholesterol: 50mgSodium: 800mgPotassium: 800mgFiber: 3gSugar: 4gVitamin A: 500IUVitamin C: 5mgCalcium: 300mgIron: 2mg

Notes

Store in an airtight container for up to 5 days in the fridge. Freeze for up to 3 months. Reheat gently with a splash of water or milk.

Tried this recipe?

Let us know how it was!

Savory Sweet Potato Goat Cheese Sage Pasta for Cozy Nights

December 6, 2025 by Grace Snow Leave a Comment

As I stood in my kitchen, the sweet scent of roasted sweet potatoes began to envelop the space, sparking a cozy feeling that promised warmth and comfort. This Creamy Sweet Potato Goat Cheese and Sage Pasta is a perfect embrace of flavors—rich, creamy, and oh-so-inviting! With its vibrant hues and tantalizing aroma, it captivates not only the senses but also the heart, making it an ideal dish for family gatherings or intimate dinners. One of the standout perks? This dish comes together in just about 30 minutes, making it a quick healthful delight that feels indulgent without the fuss. Plus, it’s versatile! You can easily adapt it to be vegan or gluten-free—so everyone at the table can join in the deliciousness. Are you ready to dive into this creamy comfort food dream and perhaps uncover some unique twists along the way?

Why is this pasta so irresistible?

Comforting Flavors: The creamy sweet potato and tangy goat cheese create a luxurious sauce that envelops the pasta in warmth, perfect for any cozy night in.
Quick Preparation: In just 30 minutes, you can whip up this delightful dish, making it an ideal choice for busy weekdays or last-minute gatherings.
Customizable Options: With easy adaptations for vegan and gluten-free diets, you can cater to everyone's preferences, ensuring nobody misses out on this delicious treat.
Autumn Vibes: This dish beautifully embraces seasonal ingredients, showcasing sweet potatoes and fresh sage—a seasonal favorite that spark joy in every bite!
Crowd-Pleasing Appeal: Perfect for family dinners or get-togethers, it’s a dish everyone will love, leaving your guests asking for seconds!
Versatility: Mix it up by incorporating other vegetables like roasted carrots or adding toasted nuts for an extra crunch! If you’re interested in more ideas, check out Smoky Sweet Potatoes or Roasted Sweet Potatoes.

Sweet Potato Goat Cheese Sage Ingredients

• Dive into the delightful components of this creamy pasta dish!

For the Pasta

  • Short Pasta (e.g., Rigatoni, Penne, Fusilli) – Choose a shape that holds the sauce well; gluten-free pasta is a great substitute.

For the Sauce

  • Sweet Potatoes – Adds natural sweetness and creaminess; can easily replace with butternut squash or pumpkin.
  • Garlic – Enhances the flavor profile; fresh minced cloves will provide the best taste.
  • Heavy Cream – Provides richness to the sauce; consider plant-based cream for a vegan twist.
  • Goat Cheese – Offers a creamy, tangy flavor; swap for creamy vegan cheese or ricotta for non-dairy options.
  • Unsalted Butter – Increases richness; optional for a vegan version.

For the Garnish

  • Fresh Sage Leaves – Infuses a distinct earthy aroma; fry until crispy for a delightful topping.
  • Grated Parmesan Cheese – Adds a savory finish; can be omitted or replaced with a nut-based cheese for vegan alternatives.
  • Olive Oil – Necessary for roasting vegetables and frying sage; drizzle extra for serving.
  • Salt and Black Pepper – Essential for elevating all the flavors.

This Sweet Potato Goat Cheese Sage dish promises a symphony of flavors, perfect for comforting nights or special occasions!

Step‑by‑Step Instructions for Sweet Potato Goat Cheese Sage

Step 1: Roast Sweet Potatoes
Preheat your oven to 430°F (220°C). In a mixing bowl, toss diced sweet potatoes with minced garlic, a drizzle of olive oil, salt, and pepper until evenly coated. Spread the mixture on a baking sheet in a single layer. Roast for 20-25 minutes, stirring halfway, until the sweet potatoes are tender and caramelized, filling your kitchen with a delightful aroma.

Step 2: Cook Pasta
Bring a large pot of salted water to a rolling boil. Add your choice of short pasta, such as rigatoni or penne, and cook according to package instructions until al dente, usually around 8-10 minutes. Once cooked, reserve 2/3 cup of pasta water to create a creamy sauce later, then drain the pasta and set aside while you prepare the rest of the dish.

Step 3: Fry Sage Leaves
In a skillet, heat a tablespoon of oil and a knob of unsalted butter over medium heat. Once the butter is melted and bubbling, add fresh sage leaves. Fry them for about 1-2 minutes or until they become crispy and fragrant. Immediately transfer the crispy sage to a plate lined with paper towels to absorb excess oil and keep them crunchy for garnishing later.

Step 4: Combine Roasted Vegetables and Pasta
Add the roasted sweet potatoes directly to the skillet you used for the sage. Mash half of the sweet potatoes with a fork or potato masher, leaving some chunks for texture. Stir in the drained pasta, heavy cream, and crumbled goat cheese, mixing until everything is well combined. Gradually incorporate the reserved pasta water to achieve a creamy consistency that clings to the pasta beautifully.

Step 5: Season and Serve
Taste and adjust seasoning by adding more salt and black pepper if desired. Serve your delicious Sweet Potato Goat Cheese Sage Pasta topped with the crispy sage leaves and a generous sprinkle of grated Parmesan cheese. Drizzle with a touch more olive oil for extra richness, and feel free to add red pepper flakes for a hint of heat, enhancing this comforting dish!

Make Ahead Options

These Sweet Potato Goat Cheese Sage Pasta preparations are a dream come true for busy home cooks! You can roast the sweet potatoes and prepare the garlic up to 24 hours in advance—just refrigerate them in an airtight container. The crispy sage can also be fried ahead of time; store it separately to keep its texture intact. When you're ready to serve, simply cook the pasta fresh, as this ensures the best texture. Combine the roasted sweet potatoes and pasta, along with goat cheese and cream, while adding a splash of reserved pasta water for creaminess. With these make-ahead tips, you'll enjoy a cozy dinner in no time!

Sweet Potato Goat Cheese Sage Variations

Feel free to customize this delightful pasta dish to fit your tastes and dietary needs!

  • Vegan Version: Replace heavy cream and goat cheese with plant-based cream and creamy vegan cheese for a completely dairy-free option.

  • Gluten-Free Twist: Use gluten-free pasta options like brown rice penne or chickpea spaghetti to cater to gluten-sensitive diners. Enjoy the same creamy goodness without worry!

  • Nutty Flavor Boost: Toss in toasted pecans or walnuts for an added crunch and a delicious nutty flavor. This variation makes for a satisfying textural contrast.

  • Seasonal Veggies: Substitute sweet potatoes with seasonal favorites like roasted butternut squash, pumpkin, or even fresh corn during summer months for a fresh spin. Each seasonal veggie brings a unique twist to this dish.

  • Herb swapping: Fresh thyme or rosemary can be used instead of sage for a different aromatic experience. This creates a beautiful herbal note that complements the sweet potatoes.

  • Spicy Kick: Add crushed red pepper flakes or diced jalapeños for a little heat. This lively addition will awaken your taste buds and brings a fun twist!

  • Creamy Ricotta: For an alternative to goat cheese, creamy ricotta enhances the richness and provides a delightful texture that pairs beautifully with sweet potatoes.

  • Savory Bacon Bits: For a non-vegetarian option, add crispy pancetta or bacon bits for a wonderful smoky flavor. This makes for a delicious indulgence on special occasions!

Whichever variation you choose, let your creativity shine and savor the comfort of homemade goodness! If you're looking for more seasonal inspiration, consider checking out Sweet Potato Casserole or German Potato Salad.

How to Store and Freeze Sweet Potato Goat Cheese Sage

Fridge: Store leftovers in an airtight container for up to 3 days. Reheat gently in a skillet with a splash of water to maintain creaminess.

Freezer: The sauce can be frozen (omit the crispy sage topping) for up to 2 months. Allow it to cool completely before transferring to a freezer-safe container.

Reheating: For best results, thaw overnight in the fridge before reheating. Reheat on the stove, adding a little reserved pasta water as needed to restore the creamy texture.

Crispy Sage: Keep crispy sage leaves separate until serving to preserve their delightful crunch, ensuring every bite remains flavorful and enjoyable!

What to Serve with Creamy Sweet Potato Goat Cheese and Sage Pasta

The right accompaniments can elevate your meal into a feast, where flavors harmonize and every bite becomes a delight.

  • Crisp Green Salad: A refreshing mix of arugula, cherry tomatoes, and a light vinaigrette brightens the palate and balances the creaminess of the pasta.
  • Garlic Bread: The crunchy, buttery slices of garlic bread provide a warm, inviting contrast, perfect for soaking up any remaining sauce.
  • Roasted Brussels Sprouts: Their earthy flavor and slight bitterness pair beautifully with sweet potatoes, adding depth and a lovely crunch to complement the dish.
  • Steamed Asparagus: Tossed with a squeeze of lemon, the vibrant green stalks bring a fresh zing, enhancing the comforting experience of the pasta.
  • Chilled White Wine: A crisp Sauvignon Blanc will enhance the dish's vibrant flavors, offering a refreshing sip between bites of creamy goodness.
  • Pumpkin Pie: Conclude your meal with a slice of spiced pumpkin pie; its sweet, warming spices echo the autumnal notes in your pasta, creating a delightful finish.

Expert Tips for Sweet Potato Goat Cheese Sage

Pre-Roast for Ease: Prioritize time-saving by roasting sweet potatoes ahead of time. Store them in the refrigerator, then simply reheat when you're ready to cook.

Crispy Sage Secrets: To maintain that delightful crunch in your crispy sage, keep it separate until serving. This way, it won't get soggy and will add that perfect textural contrast!

Fresh Pasta Perfection: For the best texture, avoid freezing cooked pasta. It tends to turn mushy, so aim to cook it fresh right before combining with the creamy sauce.

Seasonal Swaps: Don't hesitate to experiment! Substitute sweet potatoes with seasonal vegetables like roasted carrots or add fresh corn in the summer for a delightful twist.

Creaminess Guaranteed: Always reserve some pasta water to help achieve that creamy consistency in the Sweet Potato Goat Cheese Sage dish. Just a little goes a long way in perfecting your sauce!

Sweet Potato Goat Cheese Sage Pasta Recipe FAQs

How do I choose the right sweet potatoes?
Absolutely! When selecting sweet potatoes, look for ones that are firm and have smooth, unblemished skin. Avoid any with soft spots, dark spots, or signs of sprouting. The sweeter the potato, the better it'll enhance your dish, so choose those that feel heavy for their size.

How should I store leftovers of the pasta?
Leftovers can be stored in an airtight container in the refrigerator for up to 3 days. When reheating, add a splash of water or a dollop of cream to the skillet to help restore its creamy texture, ensuring it stays delicious and delightful for your next meal.

Can I freeze sweet potato goat cheese sage pasta?
Absolutely! You can freeze the sauce (omit the crispy sage topping) for up to 2 months. Allow the sauce to cool completely before transferring it to a freezer-safe container. To reheat, simply thaw overnight in the fridge, then warm on the stovetop, adding reserved pasta water to get that creamy consistency back.

What if my sauce is too thick?
If your sauce ends up thicker than you'd prefer, no worries! Gradually add a bit of the reserved pasta water while gently stirring over low heat. This should loosen it up and create a lovely creamy texture again. Don’t forget to taste and adjust seasonings if needed!

Is this recipe suitable for gluten-free diets?
Very! You can easily make this Sweet Potato Goat Cheese Sage Pasta gluten-free by simply swapping in your favorite gluten-free short pasta. Just make sure to check labels to ensure that all other ingredients, like sauces or cheeses, are also gluten-free to cater to dietary needs perfectly.

Can I use different types of cheese?
Of course! If you're looking to switch things up, you can replace goat cheese with creamy vegan cheese or ricotta for a non-dairy option. Alternatively, feta or a sharp cheddar can provide a unique flavor twist—just go for what you love!

Sweet Potato Goat Cheese Sage

Savory Sweet Potato Goat Cheese Sage Pasta for Cozy Nights

This Sweet Potato Goat Cheese Sage Pasta is a creamy delight perfect for cozy nights, combining flavors that comfort the senses.
Print Recipe Pin Recipe
Prep Time 10 minutes mins
Cook Time 30 minutes mins
Total Time 40 minutes mins
Servings: 4 servings
Course: Dinner
Cuisine: Italian
Calories: 450
Ingredients Equipment Method Nutrition Notes

Ingredients
  

For the Pasta
  • 8 ounces Short Pasta (e.g., Rigatoni, Penne, Fusilli) Gluten-free pasta is a great substitute.
For the Sauce
  • 2 cups Sweet Potatoes Can replace with butternut squash or pumpkin.
  • 3 cloves Garlic Fresh minced cloves provide the best taste.
  • 1 cup Heavy Cream Consider plant-based cream for a vegan twist.
  • 4 ounces Goat Cheese Swap for creamy vegan cheese or ricotta for non-dairy options.
  • 2 tablespoons Unsalted Butter Optional for a vegan version.
For the Garnish
  • 10 leaves Fresh Sage Leaves Fry until crispy for a delightful topping.
  • 1/2 cup Grated Parmesan Cheese Can be omitted or replaced with nut-based cheese for vegan alternatives.
  • 2 tablespoons Olive Oil Necessary for roasting vegetables and frying sage.
  • to taste Salt
  • to taste Black Pepper

Equipment

  • Oven
  • Mixing Bowl
  • Baking Sheet
  • Large pot
  • Skillet
  • potato masher
  • measuring cups
  • Measuring Spoons

Method
 

Step-by-Step Instructions
  1. Preheat your oven to 430°F (220°C). In a mixing bowl, toss diced sweet potatoes with minced garlic, olive oil, salt, and pepper. Spread on a baking sheet and roast for 20-25 minutes until tender.
  2. Bring a large pot of salted water to a boil. Add short pasta and cook according to package instructions until al dente, about 8-10 minutes. Reserve 2/3 cup of pasta water and drain.
  3. In a skillet, heat olive oil and unsalted butter over medium heat. Add sage leaves and fry for 1-2 minutes until crispy. Transfer to a plate to absorb excess oil.
  4. Mash half of the roasted sweet potatoes and add to the skillet with drained pasta, heavy cream, and crumbled goat cheese. Mix well and add reserved pasta water for creaminess.
  5. Adjust seasoning with salt and black pepper. Serve topped with crispy sage leaves, grated Parmesan, and a drizzle of olive oil.

Nutrition

Serving: 1servingCalories: 450kcalCarbohydrates: 60gProtein: 12gFat: 18gSaturated Fat: 10gPolyunsaturated Fat: 2gMonounsaturated Fat: 4gCholesterol: 45mgSodium: 350mgPotassium: 800mgFiber: 6gSugar: 8gVitamin A: 15000IUVitamin C: 20mgCalcium: 120mgIron: 2mg

Notes

This dish is adaptable for vegan and gluten-free diets. Store leftovers in an airtight container for up to 3 days, and reheat gently.

Tried this recipe?

Let us know how it was!

Creamy Rotel Pasta: A Cozy Tex-Mex Delight for Dinner

December 6, 2025 by Grace Snow Leave a Comment

When dinner time rolls around and you’re caught in the whirlwind of everyday life, nothing is more comforting than a big bowl of pasta. Enter my Creamy Rotel Pasta with Ground Beef—a delightful fusion of Tex-Mex flair and hearty comfort food. This dish not only comes together in a flash, making it perfect for busy weeknights, but it also warms the soul with its creamy, zesty sauce and tender pasta. It’s the kind of meal that turns a regular evening into a comforting feast, leaving everyone at the table feeling satisfied and happy. Ready to elevate your weeknight dining? Let’s dive into this tasty adventure together!

Why is this creamy pasta a must-try?

Comforting flavors: This Creamy Rotel Pasta is a delightful marriage of creamy textures and bold Tex-Mex flavors that will comfort your soul.
Quick preparation: Whipping up this dish is a breeze, with minimal prep time—perfect for those busy weeknights when you crave homemade goodness without extensive effort.
Versatile options: Not feeling beef? Swap in ground turkey or chicken for a lighter spin, or gear up for a veggie-packed version by tossing in your favorite seasonal vegetables.
Crowd-pleaser: It’s a dish the whole family will love, making it a fantastic choice for potlucks or gatherings. Pair it effortlessly with a side salad or some garlic bread, and you're all set! Check out my other quick pasta options, like Skillet Pasta Sun or Cauliflower Pasta Ready, for more dinner inspiration.
Protein-packed: With ground beef and creamy elements, you'll find this dish fulfilling—perfect for those who enjoy a hearty meal!

Creamy Rotel Pasta Ingredients

• Ready to create a delicious dish with a satisfying twist?

For the Pasta
• Penne Pasta – Provides a sturdy base; can substitute with gluten-free pasta for dietary needs.

For the Beef Mixture
• Ground Beef – Adds protein and a rich flavor; opt for lean ground turkey for a lighter alternative.
• Olive Oil – Used for sautéing and adds richness; can be replaced with vegetable oil if preferred.
• Onion (diced) – Imparts sweetness and depth; yellow or white onions work beautifully.
• Garlic (minced) – Elevates the overall flavor; fresh garlic is best but powdered works in a pinch.

For the Sauce
• Rotel Tomatoes – The star ingredient that makes this pasta zesty; diced fresh tomatoes with green chilies can be an alternative.
• Beef Broth – Adds essential moisture and flavor; chicken broth can be used for a different twist.
• Heavy Cream – Creates that perfect creamy sauce; substitute with half-and-half for a lighter version.
• Cream Cheese – Thickens and enriches the sauce; consider Greek yogurt for a lighter alternative.
• Worcestershire Sauce – Contributes a delicious umami flavor; soy sauce can serve as a substitute.

For Seasoning
• Spices (e.g., chili powder, cumin, salt, pepper) – Amp up the flavor; adjust according to your spice preference.
• Cheddar Cheese (shredded) – Melts into the sauce for richness; try Monterey Jack or pepper jack for a spicy kick.

For Garnish
• Fresh Cilantro/Parsley – A bright finish that adds freshness; basil can work too if you're feeling adventurous.

Feel free to get creative and adapt these ingredients as you see fit! Enjoy the flavorful journey of making this Creamy Rotel Pasta!

Step‑by‑Step Instructions for Creamy Rotel Pasta

Step 1: Cook the Pasta
Begin by bringing a large pot of salted water to a boil. Add the penne pasta and cook according to package instructions until al dente, usually around 10-12 minutes. Drain the pasta in a colander, giving it a gentle shake to remove excess water, then set it aside while you prepare the sauce.

Step 2: Sauté Beef & Onion
In a large skillet, heat 2 tablespoons of olive oil over medium-high heat. Once hot, add the ground beef and diced onions. Sauté for 5-7 minutes until the beef is browned and the onions are translucent and tender, stirring occasionally to ensure even cooking and to release those savory aromas.

Step 3: Add Garlic & Sauce Ingredients
Once the beef and onions are cooked, stir in the minced garlic and sauté for an additional minute until fragrant. Next, add the Rotel tomatoes, beef broth, heavy cream, cream cheese, Worcestershire sauce, and your chosen spices. Bring the mixture to a simmer, allowing it to bubble gently for about 5 minutes until the cream cheese melts and the sauce thickens slightly.

Step 4: Combine & Melt Cheese
Lower the heat to medium and stir in the shredded cheddar cheese, mixing continuously until it’s fully melted and integrated into the creamy sauce. The sauce should be smooth and rich at this point, enveloping all those delightful Tex-Mex flavors from the creamy Rotel pasta.

Step 5: Add Cooked Pasta
Now, gently fold the cooked penne pasta into the skillet with the creamy sauce. Toss everything together until the pasta is evenly coated with the rich sauce, ensuring a hearty mix of flavors in every bite. Let it cook together for about 2 minutes on low heat, allowing the pasta to absorb the sauce.

Step 6: Serve & Garnish
Remove the skillet from heat and serve the Creamy Rotel Pasta hot. For a fresh touch, sprinkle some chopped cilantro or parsley on top before serving. Enjoy this comforting dish that’s perfect for busy weeknights and sure to please everyone at your table!

Make Ahead Options

These Creamy Rotel Pasta with Ground Beef are a lifesaver for meal prep enthusiasts! You can cook the penne pasta up to 24 hours in advance, storing it in an airtight container in the refrigerator to maintain its texture. Additionally, you can sauté the ground beef and onions, along with the garlic, and prepare the creamy sauce, refrigerating it for up to 3 days. When you're ready to enjoy your meal, simply reheat the beef mixture in a skillet, add the cooked pasta, and stir in shredded cheese until melted for a deliciously satisfying dinner that's just as comforting as when freshly made. This prep approach saves you time on busy weeknights, ensuring a hearty dish is only moments away!

How to Store and Freeze Creamy Rotel Pasta

Fridge: Store the Creamy Rotel Pasta in an airtight container for up to 3 days. Reheat gently on the stovetop, adding a splash of milk or broth to restore creaminess.

Freezer: Freeze the pasta in an airtight container for up to 2 months. Thaw overnight in the fridge before reheating on low heat, stirring frequently to ensure even warmth.

Reheating: For best results, reheat on the stovetop and add a bit more cream or cheese if the sauce has thickened. Enjoy that comforting flavor just like the first time!

Leftovers: Don’t forget, leftovers make for a quick lunch option. Enjoy them straight from the fridge cold or warm them up for a cozy meal anytime!

What to Serve with Creamy Rotel Pasta with Ground Beef

When preparing a meal that’s as comforting as a warm hug, it’s essential to think about complementary dishes that elevate the experience.

  • Garlic Bread: A classic favorite, with its buttery, garlicky goodness—it’s perfect for soaking up every creamy drop of sauce. Crisp on the outside and tender on the inside, this combination is simply irresistible.

  • Simple Side Salad: Fresh greens with a light vinaigrette provide a refreshing balance to the richness of the pasta. The crunchy texture and acidity cut through the creaminess, making each bite delightful.

  • Corn on the Cob: Grilled or boiled, this summertime staple offers sweet, juicy kernels that add a wonderful contrast. Toss some cilantro-lime butter on top for a Tex-Mex twist that echoes the pasta’s flavor profile.

  • Refried Beans: Creamy and hearty, beans add protein and richness, perfectly pairing with the pasta’s zesty notes. Serve them warm with a sprinkle of cheese for a comforting side to this already satisfying meal.

  • Cheesy Quesadillas: These crispy delights add a fun twist and are great for dipping in leftover sauce. Extra cheese and fresh herbs can elevate their flavor while matching the Tex-Mex theme.

  • Margaritas: For a refreshing drink option, pair with a classic lime margarita. Its tangy, citrusy notes wash down the richness beautifully, enhancing the overall dining experience.

  • Churros: Conclude your meal with these warm pastries. Dusted in cinnamon sugar and served with chocolate sauce for dipping, they provide a sweet ending that everyone will love.

Expert Tips for Creamy Rotel Pasta

  • Heat Control: Keep the heat low when adding cream and cheese to avoid curdling, ensuring a smooth, creamy sauce.

  • Continuous Stirring: Stir continuously while mixing in the cheddar cheese to achieve a velvety texture that coats the pasta perfectly.

  • Spice Adjustment: Tailor the heat level of your Creamy Rotel Pasta by controlling the amount of Rotel used or adding red pepper flakes based on your taste preference.

  • Thickening the Sauce: If the sauce appears too thin, simply add more cream cheese gradually until you reach the desired thickness.

  • Ingredient Substitutions: Don't hesitate to swap ingredients, such as using ground turkey instead of beef for a lighter option that still delivers delicious flavor.

Creamy Rotel Pasta Variations

Feel free to customize your dish for exciting new flavors and textures that will delight your taste buds!

  • Turkey Twist: Substitute ground beef with ground turkey or chicken for a healthier option that’s just as satisfying. You'll still enjoy that familiar comfort!

  • Creamy Mushroom Base: Replace heavy cream and cream cheese with cream of mushroom soup and half-and-half for a creamy twist. It adds a savory depth to the sauce!

  • Spicy Kick: Toss in sliced jalapeños before serving for an extra layer of heat. This simple addition will elevate your dish to new spicy heights!

  • Veggie Delight: Add diced bell peppers, corn, or zucchini to the meat mixture for a veggie-packed version that bursts with color and flavor. Enjoy joyfully crunchy bits!

  • Cheese Variety: Experiment with cheese! Try using Monterey Jack for a mild kick or pepper jack for a zesty bite. Each option transforms the creamy sauce beautifully.

  • Herb Infusion: Fresh basil or oregano can be stirred into the sauce for a garden-fresh twist. It adds fragrance and brightness to each hearty bite!

  • Gluten-Free Pasta: Swap out traditional penne with gluten-free pasta that fits your dietary needs. Every forkful will still be full of that delightful creamy goodness.

  • Zesty Cilantro-Lime: Add a squeeze of fresh lime juice and chopped cilantro right before serving for a zesty burst of flavor. Your taste buds will sing with happiness!

For more delicious pasta ideas, check out my Seafood Pasta Savory or Tuscan White Bean Pasta to keep your culinary journey exciting!

Creamy Rotel Pasta with Ground Beef Recipe FAQs

How do I choose ripe Rotel tomatoes?
Absolutely! When selecting Rotel tomatoes, look for cans that are free from dents or swelling. The tomatoes should be vibrant red and have no dark spots. If using fresh tomatoes, choose ones that are firm with a fragrant aroma for optimal flavor.

What’s the best way to store leftover Creamy Rotel Pasta?
After enjoying your meal, let the Creamy Rotel Pasta cool down and transfer it to an airtight container. You can store it in the refrigerator for up to 3 days. When reheating, I recommend adding a splash of milk or broth to help restore its creamy texture.

Can I freeze Creamy Rotel Pasta, and how?
Definitely! To freeze, let the dish cool completely before placing it in an airtight container, ensuring there’s enough space for expansion. It will keep well for about 2 months. When you’re ready to enjoy it again, thaw it overnight in the fridge, then reheat in a skillet over low heat, stirring occasionally until warmed through.

What should I do if my pasta sauce is too thin?
Very! If your sauce isn't as thick as you’d like, you can add more cream cheese gradually, stirring until it reaches the desired consistency. Alternatively, allow the sauce to simmer for a few more minutes, which will help it thicken naturally as the liquid reduces.

Are there any dietary considerations I should keep in mind?
Of course! If you're serving this dish to someone with dietary restrictions, you can easily modify it. Use gluten-free penne pasta for those with gluten intolerance, and opt for lean ground turkey or chicken if you’re looking for a lighter meal. Consider using dairy-free alternatives for cream and cheese, such as coconut cream and nutritional yeast.

How long can I keep Creamy Rotel Pasta in the fridge?
You can store Creamy Rotel Pasta in the refrigerator for about 3 days. Be sure to keep it in an airtight container to maintain its freshness and flavor. If you notice any change in color or an off smell, it’s best to discard it. Enjoy those leftovers safely!

Creamy Rotel Pasta

Creamy Rotel Pasta: A Cozy Tex-Mex Delight for Dinner

Enjoy a comforting bowl of Creamy Rotel Pasta that combines Tex-Mex flavors with hearty pasta for a satisfying dinner.
Print Recipe Pin Recipe
Prep Time 10 minutes mins
Cook Time 20 minutes mins
Total Time 30 minutes mins
Servings: 4 servings
Course: Dinner
Cuisine: Tex-Mex
Calories: 650
Ingredients Equipment Method Nutrition Notes

Ingredients
  

For the Pasta
  • 12 ounces Penne Pasta can substitute with gluten-free pasta
For the Beef Mixture
  • 1 pound Ground Beef or lean ground turkey
  • 2 tablespoons Olive Oil or vegetable oil
  • 1 medium Onion (diced) yellow or white onions
  • 2 cloves Garlic (minced) fresh garlic is best
For the Sauce
  • 1 can Rotel Tomatoes or diced fresh tomatoes with green chilies
  • 1 cup Beef Broth or chicken broth
  • 1 cup Heavy Cream or half-and-half
  • 8 ounces Cream Cheese or Greek yogurt
  • 2 tablespoons Worcestershire Sauce or soy sauce
For Seasoning
  • to taste Spices (e.g., chili powder, cumin, salt, pepper) adjust according to spice preference
  • 1 cup Cheddar Cheese (shredded) or Monterey Jack for a spicy kick
For Garnish
  • 1/4 cup Fresh Cilantro/Parsley or basil if preferred

Equipment

  • Large pot
  • Skillet
  • Colander

Method
 

Step-by-Step Instructions
  1. Cook the Penne Pasta until al dente. Drain and set aside.
  2. Sauté the ground beef and diced onions in olive oil until browned.
  3. Add minced garlic and sauté for another minute. Mix in Rotel, beef broth, heavy cream, cream cheese, and Worcestershire sauce. Simmer for 5 minutes.
  4. Stir in shredded cheddar cheese until melted and well incorporated.
  5. Gently fold in the cooked penne pasta, mixing until evenly coated.
  6. Serve hot, garnished with chopped cilantro or parsley.

Nutrition

Serving: 1servingCalories: 650kcalCarbohydrates: 60gProtein: 35gFat: 30gSaturated Fat: 15gCholesterol: 100mgSodium: 900mgPotassium: 800mgFiber: 3gSugar: 5gVitamin A: 10IUVitamin C: 15mgCalcium: 20mgIron: 15mg

Notes

Feel free to swap ingredients like ground turkey for beef for a lighter option. Store leftovers in an airtight container for up to 3 days.

Tried this recipe?

Let us know how it was!

Garlic Butter Bowtie Pasta: A Cozy Comfort Food Delight

December 6, 2025 by Grace Snow Leave a Comment

As I pulled open the pantry door, I stumbled upon a forgotten package of bowtie pasta—a treasure waiting to be transformed into something delicious. That’s when the idea for Garlic Butter Bowtie Pasta with Savory Ground Beef struck me. This dish is more than just a quick weeknight meal; it’s a comforting hug on a plate. With minimal prep time, you can whip up a flavorful dinner that pleases the whole family, even on the busiest nights. The rich, buttery garlic sauce mingles beautifully with savory ground beef and al dente pasta, creating a symphony of flavors that will have everyone asking for seconds. Whether you’re a seasoned home chef or just starting, this recipe is designed for you. Ready to dive into a world of comfort food? Let’s get cooking!

Why is Garlic Butter Bowtie Pasta so special?

Comfort Food Bliss: This Garlic Butter Bowtie Pasta is the epitome of comfort food, delivering heartwarming flavors that feel like a cozy hug.

Quick and Easy: You can whip this up in under 30 minutes, making it ideal for busy weeknights.

Savory Satisfaction: The savory ground beef paired with aromatic garlic butter creates a dish that’s not only filling but deliciously satisfying.

Versatile Base: Feel free to customize by adding your favorite veggies or seasoning, just as you might with a tasty Honey Garlic Chicken for a vibrant twist.

Family Approved: This dish will have the whole family coming back for seconds, proving it’s a sure-fire winner for dinner time!

Garlic Butter Bowtie Pasta Ingredients

• Note: Perfect for a quick and hearty meal!

For the Pasta

  • Bowtie Pasta (Farfalle) – Provides the foundation; you can easily substitute with penne or rotini.

For the Sauce

  • Olive Oil – Essential for sautéing and boosting flavors; consider avocado oil for a different taste.
  • Onion (finely diced) – Adds a sweet base flavor when cooked; switch to red onions or shallots if preferred.
  • Garlic (minced) – Infuses aromatic depth; fresh garlic is best, but garlic powder may work in a pinch.
  • Ground Beef – The primary protein, with recommended fat ratio of 80/20 for richness; turkey can be a leaner swap.
  • Beef Broth – This forms the sauce base and enriches flavor; vegetable broth is a good vegetarian alternative.
  • Red Pepper Flakes – Adds a touch of heat; adjust according to your preference or omit for milder flavor.
  • Salt & Black Pepper – Crucial for balancing flavors; opt for kosher salt and freshly cracked pepper for the best texture.

For Garnish

  • Parmesan Cheese (grated) – Melts beautifully into the dish, enhancing richness; Pecorino Romano works well as a substitute.
  • Fresh Parsley – Adds freshness and a splash of color; swap with basil or chives for a different herbaceous twist.

Step‑by‑Step Instructions for Garlic Butter Bowtie Pasta

Step 1: Boil Pasta
Bring a large pot of water to a rolling boil and add a generous amount of salt. Cook the bowtie pasta (farfalle) according to package instructions until al dente, usually about 9-11 minutes. Once cooked, reserve a cup of pasta water, then drain the pasta and set it aside without rinsing, allowing it to hold onto its starch.

Step 2: Sauté Aromatics
In a large skillet, heat 2 tablespoons of olive oil over medium heat. Add the finely diced onion and sauté for about 4-5 minutes until it becomes translucent and lightly golden. Stir in the minced garlic and continue cooking for another 30 seconds until fragrant, filling your kitchen with irresistible aromas.

Step 3: Brown Beef
Add the ground beef to the skillet, breaking it apart with a spatula. Cook for approximately 6-8 minutes, stirring occasionally, until the beef is browned and no longer pink. If there’s excess fat in the pan, carefully drain it, ensuring that the savory flavors remain behind to enhance your Garlic Butter Bowtie Pasta.

Step 4: Create Sauce
Pour in the beef broth, scraping the bottom of the skillet to deglaze and lift any browned bits, which adds deep flavor. Stir in red pepper flakes, salt, and pepper, bringing the mixture to a simmer. Let it cook for about 4-5 minutes, allowing the sauce to meld together and reduce slightly for a richer taste.

Step 5: Combine
Toss the cooked bowtie pasta into the skillet with the sauce, mixing well to ensure each piece is coated in the flavorful liquid. If the pasta seems dry, add a splash of the reserved pasta water to help the sauce adhere. Gently fold in the mixture for about 2-3 minutes over low heat, allowing the flavors of the Garlic Butter Bowtie Pasta to blend beautifully.

Step 6: Serve
Remove the skillet from heat and plate the Garlic Butter Bowtie Pasta immediately. Top generously with grated Parmesan cheese and a sprinkle of fresh parsley for color and brightness. Feel free to add cracked black pepper and a touch of lemon zest for an extra zing, creating a delightful and comforting dish the whole family will love.

Expert Tips for Garlic Butter Bowtie Pasta

  • Cook Al Dente: Ensure your pasta is cooked al dente for the perfect bite; it will continue to cook in the sauce, so avoid overcooking.

  • Don’t Overcrowd: When browning the ground beef, cook in batches if necessary. Overcrowding the pan can lead to steaming instead of browning, affecting flavor.

  • Use Fresh Ingredients: Opt for fresh garlic and herbs whenever possible for the best taste. Dried alternatives lack the vibrant flavor of their fresh counterparts.

  • Adjust the Heat: Customize the spice level by adjusting red pepper flakes to your preference. Start with a little; you can always add more later, but you can't take it out!

  • Splash of Liquid: If the dish seems dry after combining pasta and sauce, add a tablespoon of reserved pasta water to help everything come together beautifully.

  • Enhance Flavor: For added richness, finish with a drizzle of high-quality olive oil or a splash of cream right before serving your Garlic Butter Bowtie Pasta.

What to Serve with Garlic Butter Bowtie Pasta?

Indulge in a delightful meal experience by creating perfect pairings to elevate your Garlic Butter Bowtie Pasta.

  • Simple Green Salad: A fresh salad with mixed greens and a tangy vinaigrette adds a crisp, vibrant contrast to the rich pasta.

  • Garlic Bread: Warm, buttery garlic bread is a classic choice, perfect for soaking up the creamy sauce and enhancing the meal’s comforting vibe.

  • Roasted Vegetables: Colorful roasted veggies like zucchini and bell peppers offer a sweet, caramelized balance that complements the savory notes of the dish.

  • Sautéed Spinach: Lightly wilted spinach dressed with olive oil and lemon adds an elegant green element, enhancing both nutrition and flavor harmony.

  • Creamy Coleslaw: A scoop of tangy coleslaw introduces crunch and zest, cutting through the richness of the pasta beautifully.

  • Chilled Chardonnay: A glass of chilled Chardonnay pairs wonderfully with the garlic butter, accentuating the flavors while providing a refreshing balance.

  • Chocolate Mousse: End the meal with a light and airy chocolate mousse for a sweet finish that offers a delightful contrast to the savory pasta.

Each pairing enhances the overall dining experience, making your Garlic Butter Bowtie Pasta truly memorable.

Make Ahead Options

These Garlic Butter Bowtie Pasta moments are perfect for meal prep enthusiasts! You can brown the ground beef and sauté the onions and garlic up to 3 days in advance, storing them in an airtight container in the refrigerator. The cooked beef mixture will stay flavorful and delicious, allowing for easy assembly when you're ready to serve. You can also cook the bowtie pasta up to 24 hours ahead, just toss it lightly with a bit of olive oil to prevent sticking. When ready to enjoy, reheat the beef mixture in a skillet, add the pasta and broth, and warm through for a satisfying, comforting meal that’s just as delightful as if you made it fresh!

How to Store and Freeze Garlic Butter Bowtie Pasta

  • Fridge: Store leftover Garlic Butter Bowtie Pasta in an airtight container for up to 3 days. This allows the flavors to deepen, making each bite even more enjoyable!

  • Freezer: For longer storage, freeze in airtight containers for up to 2 months. Allow the pasta to cool completely before sealing to prevent ice crystals.

  • Reheating: When ready to enjoy, reheat in a skillet over medium-low heat with a splash of beef broth or water. This helps restore the creamy consistency without drying out the pasta.

  • Thawing: If frozen, thaw overnight in the fridge before reheating. This ensures even heating and maintains the dish's delicious flavors.

Garlic Butter Bowtie Pasta Variations

Feel free to put your own spin on this comforting dish and explore these delectable variations!

  • Ground Turkey: Replace ground beef with ground turkey for a leaner option that still packs a savory punch. It's a great way to lighten things up without sacrificing flavor.

  • Vegetarian Delight: Swap out the meat entirely for a plant-based meat alternative or add diced mushrooms for a hearty texture. Consider stirring in some spinach at the end for a boost of nutrients and vibrant color.

  • Cheesy Goodness: Mix in cream cheese or ricotta for a creamier sauce that will delight cheese lovers. This twist brings a rich, luscious texture that pairs beautifully with the garlic flavors.

  • Add Veggies: Toss in colorful bell peppers, zucchini, or cherry tomatoes along with the beef. These additions not only enhance the dish’s visual appeal but also elevate its freshness and nutritional profile.

  • Kick of Heat: If you like things spicy, add sliced jalapeños or a pinch of cayenne pepper alongside the red pepper flakes. This fiery variation will awaken your taste buds and keep dinner exciting.

Have a craving for seafood? You could also consider a seafood pasta variation for the next family meal or gather around a comforting bowl of White Bean Pasta as an alternative.

  • Herb Infusion: Experiment with fresh herbs like basil or thyme to brighten the dish. Simply add them into the skillet during the finishing stage to release their fragrant aromas.

  • Wine-Lover's Twist: For an extra depth of flavor, deglaze the skillet with a splash of white wine before adding the broth. Allow it to simmer for a couple of minutes to enhance the savory profile of your Garlic Butter Bowtie Pasta.

Each of these variations invites you to get creative and adapt the recipe to your family's liking. Happy cooking!

Garlic Butter Bowtie Pasta Recipe FAQs

What type of bowtie pasta should I use for Garlic Butter Bowtie Pasta?
You should use farfalle for its charming shape and perfect texture. If you don't have bowtie pasta on hand, feel free to substitute with penne or rotini, which also hold the sauce well and provide a delicious bite.

How can I properly store leftover Garlic Butter Bowtie Pasta?
Absolutely! Store any leftovers in an airtight container in the refrigerator for up to 3 days. The flavors will actually deepen as they meld together, making for an even tastier meal the next day.

Can I freeze Garlic Butter Bowtie Pasta?
Yes, you can freeze it! Allow the dish to cool completely, then transfer it to an airtight container. It can be frozen for up to 2 months. When ready to enjoy, simply thaw overnight in the fridge and reheat gently on the stovetop with a splash of beef broth or water to revive the creamy sauce.

What should I do if my ground beef releases too much fat while cooking?
If you notice excess fat in the skillet while browning your ground beef, don’t fret! After fully cooking the beef and before creating your sauce, you can simply tilt the skillet gently and use a spoon to drain off the excess fat, or you can carefully spoon some out. This way, you keep the savory flavors without the grease.

Are there any dietary considerations when making Garlic Butter Bowtie Pasta?
If you or someone you're cooking for has specific dietary restrictions, such as allergies to gluten, remember to use gluten-free pasta options available. Additionally, if you're looking for a leaner dish, you can swap ground beef for ground turkey or plant-based alternatives—both work fantastically well in this recipe!

How can I enhance the flavor of my Garlic Butter Bowtie Pasta?
To elevate the flavors, consider adding a splash of white wine while deglazing the skillet with the beef broth for added depth. If you prefer a creamier take, adding a bit of heavy cream or Alfredo sauce just before combining everything will create a luscious texture that complements the dish beautifully.

Garlic Butter Bowtie Pasta

Garlic Butter Bowtie Pasta: A Cozy Comfort Food Delight

Garlic Butter Bowtie Pasta is a comforting dish combining savory ground beef and aromatic garlic butter for a delicious weeknight meal.
Print Recipe Pin Recipe
Prep Time 10 minutes mins
Cook Time 20 minutes mins
Total Time 30 minutes mins
Servings: 4 servings
Course: Dinner
Cuisine: Italian
Calories: 550
Ingredients Equipment Method Nutrition Notes

Ingredients
  

For the Pasta
  • 8 ounces Bowtie Pasta (Farfalle) Can substitute with penne or rotini.
For the Sauce
  • 2 tablespoons Olive Oil Can use avocado oil for a different taste.
  • 1 medium Onion (finely diced) Alternatively, use red onions or shallots.
  • 4 cloves Garlic (minced) Fresh garlic is best.
  • 1 pound Ground Beef Use 80/20 fat ratio for richness.
  • 1 cup Beef Broth Vegetable broth can be used as a vegetarian alternative.
  • 1 teaspoon Red Pepper Flakes Adjust to taste for heat.
  • 1 teaspoon Salt Use kosher salt for best texture.
  • 1 teaspoon Black Pepper Freshly cracked is preferred.
For Garnish
  • 1/2 cup Parmesan Cheese (grated) Pecorino Romano is a good substitute.
  • 2 tablespoons Fresh Parsley Basil or chives can be used instead.

Equipment

  • Large pot
  • Skillet
  • Spatula

Method
 

Step-by-Step Instructions
  1. Bring a large pot of water to a rolling boil and add salt. Cook bowtie pasta according to package instructions until al dente, about 9-11 minutes. Reserve a cup of pasta water, then drain.
  2. In a large skillet, heat olive oil over medium heat. Add the diced onion and sauté for about 4-5 minutes until translucent. Stir in minced garlic and cook for another 30 seconds.
  3. Add ground beef to the skillet, breaking it apart. Cook for 6-8 minutes until browned. Drain excess fat, if necessary.
  4. Pour in beef broth, scraping the skillet to deglaze. Stir in red pepper flakes, salt, and pepper, and simmer for 4-5 minutes.
  5. Toss the cooked pasta into the skillet, mixing well. If dry, add reserved pasta water to help the sauce adhere.
  6. Remove from heat, plate the pasta, and top with Parmesan cheese and parsley. Add black pepper and lemon zest if desired.

Nutrition

Serving: 1servingCalories: 550kcalCarbohydrates: 45gProtein: 30gFat: 25gSaturated Fat: 10gPolyunsaturated Fat: 2gMonounsaturated Fat: 12gTrans Fat: 1gCholesterol: 80mgSodium: 600mgPotassium: 600mgFiber: 2gSugar: 2gVitamin A: 500IUVitamin C: 5mgCalcium: 200mgIron: 3mg

Notes

This dish is perfect for quick prep and is sure to please the whole family.

Tried this recipe?

Let us know how it was!

Creamy Bacon Ranch Pasta Salad That's Perfect for Potlucks

December 6, 2025 by Grace Snow Leave a Comment

While packing for a summer picnic, I stumbled upon a delightful combination that would have anyone dreaming of sunshine and laughter—Creamy Bacon Ranch Pasta Salad. This easy and crowd-pleasing dish is not just an ordinary salad; it's a luscious blend of al dente pasta, crispy bacon, and a tangy dressing that dance together in perfect harmony. One of the best perks is that it comes together in mere minutes, making it ideal for those busy weeknights or last-minute potluck invites. Plus, it’s versatile enough for you to personalize it with your favorite add-ins! Ready to whip up a dish that will have everyone coming back for seconds? Let's dive into this delicious adventure together!

Why is this pasta salad a must-try?

Crowd-Pleaser: Perfect for potlucks, this Creamy Bacon Ranch Pasta Salad is sure to impress everyone. It's a dish that’s always a hit at gatherings.
Quick to Make: With just a few steps, you can have a stunning salad ready in no time. Ideal for busy weeknights!
Flavor Explosion: The combination of smoky bacon and zesty dressing creates a bold taste that makes every bite a delight.
Customizable: Feel free to add your favorite ingredients like bell peppers or even diced chicken for extra flair. Check out our Avocado Egg Salad for a refreshing twist!
Make Ahead: This salad tastes even better after sitting a while, making it a perfect meal prep option. It’s a joy to serve your family and friends something that’s not just fast but also full of flavor!

Creamy Bacon Ranch Pasta Salad Ingredients

• Dive into the essential components that make this salad irresistible!

For the Salad

  • Rotini Pasta – This twisted pasta shape holds dressing beautifully; feel free to swap it for penne or fusilli.
  • Cooked Bacon – Brings a smoky crunch; consider turkey bacon for a healthier option.
  • Cheddar Cheese – Adds creaminess; you can use Monterey Jack for a different twist.
  • Green Onions – Introduces a fresh, slightly sharp flavor; substitute with chives if desired.
  • Frozen Peas – Offers a pop of sweetness and color; fresh peas can also work here.

For the Dressing

  • Mayonnaise – Forms the creamy base; Greek yogurt is a lighter alternative.
  • Ranch Dressing – Elevates flavor; choose homemade or store-bought to suit your needs.
  • Dijon Mustard – Adds a tangy kick; yellow mustard is a suitable substitute if you’re in a pinch.
  • Apple Cider Vinegar – Brightens the dish with acidity; white vinegar or lemon juice are great alternatives.
  • Salt – Essential for enhancing flavor; don't skip this step!
  • Pepper – Infuses a mild spice; use freshly cracked pepper for the best taste.
  • Garlic Powder – Provides aromatic depth; fresh garlic can be a delightful substitute if you prefer.

This Creamy Bacon Ranch Pasta Salad is destined to be a favorite at your table, and with these ingredients at hand, deliciousness is just around the corner!

Step‑by‑Step Instructions for Creamy Bacon Ranch Pasta Salad

Step 1: Cook the Pasta
Begin by bringing a large pot of salted water to a boil over high heat. Once boiling, add the rotini pasta and cook according to the package instructions, typically around 8-10 minutes, until al dente. Drain the pasta in a colander and rinse it under cold water for about 30 seconds to stop the cooking process, then set aside to cool.

Step 2: Prepare the Dressing
While the pasta cools, grab a medium mixing bowl and add the mayonnaise, ranch dressing, Dijon mustard, apple cider vinegar, garlic powder, salt, and pepper. Whisk these ingredients together until the mixture is smooth and well combined, which should take about 1-2 minutes. This creamy dressing will be the flavorful heart of your Creamy Bacon Ranch Pasta Salad.

Step 3: Combine the Salad Ingredients
In a large mixing bowl, combine the cooled rotini pasta, chopped cooked bacon, shredded cheddar cheese, sliced green onions, and thawed peas. Mix gently with a spatula or wooden spoon to ensure an even distribution of ingredients, allowing the vibrant colors and textures to shine through, making the pasta salad visually appealing and appetizing.

Step 4: Add the Dressing
Now, pour the prepared dressing over the pasta mixture. Using a spatula, gently fold the dressing into the salad until everything is well coated and the pasta is glistening. Take care to mix lightly to avoid breaking the pasta, and ensure all ingredients are lovingly enveloped in the creamy goodness of the dressing.

Step 5: Chill Before Serving
Cover the bowl with plastic wrap or a lid and refrigerate the Creamy Bacon Ranch Pasta Salad for at least 30 minutes. This chilling time allows the flavors to meld together beautifully, enhancing the overall taste. The salad can be chilled longer if desired, making it a fantastic make-ahead dish for potlucks or gatherings.

Expert Tips for Creamy Bacon Ranch Pasta Salad

  • Cool the Pasta: Ensure your pasta is completely cooled before mixing with the dressing to prevent it from becoming gummy and separating.
  • Chill for Flavors: Allow the salad to chill for at least 30 minutes to let the flavors meld beautifully, enhancing the taste of your Creamy Bacon Ranch Pasta Salad.
  • Gentle Mixing: When combining the ingredients, use a light hand to avoid breaking the pasta, ensuring every piece remains intact and coated in delicious dressing.
  • Quality Ingredients: Don't skimp on the quality of bacon and cheese; they are the stars of the show! Fresh, high-quality ingredients make a huge difference in flavor.
  • Customize Freely: Feel free to get creative with add-ins like shredded chicken or crispy veggies, which will elevate your Creamy Bacon Ranch Pasta Salad even further!

Creamy Bacon Ranch Pasta Salad Variations

Feel free to get creative and make this recipe your own with these tantalizing twists!

  • Protein Boost: Add cooked and cubed chicken for a heartier salad that’s packed with flavor.

  • Crunchy Veggies: Incorporate diced bell peppers, chopped celery, or corn to introduce extra crunch and vibrant color. These additions create a texture transform that everyone will love!

  • Spicy Kick: For a flavor explosion, mix in chopped jalapeños or red pepper flakes. The heat will awaken your taste buds and add excitement to every bite.

  • Fresh Herbs: Consider adding fresh parsley or chives for a bright flavor boost. A little greenery goes a long way in elevating the salad’s overall taste!

  • Bacon Alternatives: Swap the cooked bacon for crispy pancetta or even vegan bacon for a delightful twist. The smoky notes remain, but with a new twist on the classic.

  • Cheese Variety: Experiment with cheeses like feta or crumbled goat cheese instead of cheddar. This substitution adds a distinct flavor that will surprise and delight your guests!

  • Creamy Dressings: If you’re craving something different, try mixing in ranch dip instead of dressing for extra thickness. This version is decadently creamy and oh-so-satisfying.

  • For a Twist: Try adding a touch of barbecue sauce along with your dressing to offer a sweet and tangy surprise. It’s a delicious twist that’s sure to be a hit!

For a refreshing accompaniment to your meal, consider pairing this salad with a simple side like German Potato Salad, or enjoy it with some enjoyable bites, just like our Jello Salad Cottage. Have fun mixing and matching ingredients to create your ultimate creamy bacon ranch pasta salad!

What to Serve with Creamy Bacon Ranch Pasta Salad?

Elevate your meal with delightful pairings that complement every creamy bite and make your gathering unforgettable.

  • Grilled Chicken Skewers: Juicy and smoky, they add a protein-packed companion to the rich salad.
  • Caprese Salad: Fresh mozzarella, tomatoes, and basil introduce a vibrant contrast that brightens the plate.
  • Garlic Breadsticks: Crunchy on the outside and soft inside, perfect for scooping up that creamy goodness!
  • Watermelon Feta Salad: The sweet and salty blend offers a refreshing contrast, ideal for summer picnics.

Consider serving a chilled glass of white wine alongside; a crisp Sauvignon Blanc beautifully complements the ranch flavors. For dessert, you can't go wrong with a light fruit tart to round off this delightful meal!

How to Store and Freeze Creamy Bacon Ranch Pasta Salad

Fridge: Store your Creamy Bacon Ranch Pasta Salad in an airtight container for up to 3-4 days. The flavors deepen as it sits, making it even tastier!

Freezer: While it's best enjoyed fresh, you can freeze it for up to a month. However, be aware that the texture may change upon thawing, especially the pasta and dressing.

Reheating: If you've frozen it, thaw it in the fridge overnight before serving. Gently stir before serving to redistribute the dressing. Add a splash of fresh mayo or ranch to revive the creaminess if needed.

Make-Ahead: This salad is perfect for making ahead of time. Prepare it a day in advance for gatherings so the flavors can meld beautifully before serving.

Make Ahead Options

These Creamy Bacon Ranch Pasta Salad preparations are perfect for busy home cooks looking to save time! You can prepare the pasta and the dressing separately up to 24 hours in advance. To do this, cook the rotini, rinse it with cold water, and store it in an airtight container in the refrigerator. Make the dressing by whisking together the mayonnaise, ranch dressing, Dijon mustard, and other ingredients, then refrigerate it as well. Just before serving, combine the chilled pasta with the dressing, crispy bacon, cheese, green onions, and peas. This method not only maintains flavor but also allows the salad to taste even better! Enjoy your hassle-free meal prep with this crowd-pleasing dish.

Creamy Bacon Ranch Pasta Salad Recipe FAQs

What type of pasta is best for this salad?
I recommend using rotini pasta because its twisted shape holds the dressing perfectly, but you can easily swap it for penne, fusilli, or elbow macaroni if you prefer a different texture.

How should I store the Creamy Bacon Ranch Pasta Salad?
Store your salad in an airtight container in the refrigerator for up to 3-4 days. It's even more delicious as the flavors meld together, so making it a day ahead of time is a fabulous idea!

Can I freeze Creamy Bacon Ranch Pasta Salad?
Yes, you can freeze it for up to a month. However, note that the texture may change upon thawing, especially for the pasta and dressing. To thaw, place it in the fridge overnight, and gently stir before serving. Adding a little fresh mayonnaise or ranch dressing can help revive the creaminess.

How do I prevent the pasta from becoming gummy?
Ensure that your pasta is fully cooled before mixing it with the dressing. Rinse it under cold water after draining to stop the cooking process. This little step makes a world of difference in keeping the pasta from sticking together!

What can I substitute for mayonnaise in the dressing?
For a lighter option, Greek yogurt works beautifully in place of mayonnaise. You'll still get that creamy texture, but with added protein! Alternatively, you can use a vegan mayo if you're looking for a dairy-free option.

Can pets eat this pasta salad?
While the ingredients in Creamy Bacon Ranch Pasta Salad are generally safe for humans, some, like garlic and onion (in the green onions), can be harmful to pets, especially dogs. It's best to keep this dish away from your furry friends!

Creamy Bacon Ranch Pasta Salad

Creamy Bacon Ranch Pasta Salad That's Perfect for Potlucks

Creamy Bacon Ranch Pasta Salad is an easy and delicious blend of pasta, bacon, and tangy dressing, perfect for any gathering.
Print Recipe Pin Recipe
Prep Time 10 minutes mins
Cook Time 10 minutes mins
Chill Time 30 minutes mins
Total Time 50 minutes mins
Servings: 6 servings
Course: Salads
Cuisine: American
Calories: 350
Ingredients Equipment Method Nutrition Notes

Ingredients
  

For the Salad
  • 8 ounces Rotini Pasta Can swap for penne or fusilli.
  • 6 slices Cooked Bacon Turkey bacon works for a healthier option.
  • 1 cup Cheddar Cheese Monterey Jack can be used.
  • 2 scallions Green Onions Chives can be a substitute.
  • 1 cup Frozen Peas Fresh peas can also work.
For the Dressing
  • 1 cup Mayonnaise Greek yogurt is a lighter alternative.
  • 1 cup Ranch Dressing Homemade or store-bought.
  • 1 tablespoon Dijon Mustard Yellow mustard is a substitute.
  • 2 tablespoons Apple Cider Vinegar White vinegar or lemon juice can be used.
  • 1 teaspoon Salt Essential for flavor enhancement.
  • 1 teaspoon Pepper Freshly cracked pepper recommended.
  • 1 teaspoon Garlic Powder Fresh garlic is a substitute.

Equipment

  • Large pot
  • medium mixing bowl
  • Colander
  • Spatula
  • Whisk

Method
 

Step-by-Step Instructions
  1. Cook the pasta in salted boiling water for 8-10 minutes until al dente, then drain and cool.
  2. Prepare the dressing by whisking together mayonnaise, ranch dressing, Dijon mustard, apple cider vinegar, garlic powder, salt, and pepper.
  3. Combine cooled pasta, chopped bacon, cheddar cheese, green onions, and peas in a large mixing bowl.
  4. Pour dressing over the salad mixture and gently fold until well coated.
  5. Chill the pasta salad for at least 30 minutes before serving.

Nutrition

Serving: 1cupCalories: 350kcalCarbohydrates: 30gProtein: 10gFat: 25gSaturated Fat: 6gPolyunsaturated Fat: 2gMonounsaturated Fat: 3gCholesterol: 35mgSodium: 600mgPotassium: 250mgFiber: 2gSugar: 3gVitamin A: 500IUVitamin C: 5mgCalcium: 200mgIron: 1mg

Notes

Allowing the salad to chill enhances its flavor. Customize with your favorite add-ins for extra flair.

Tried this recipe?

Let us know how it was!

Delicious TikTok Spaghetti: A Creamy Comfort Food Twist

December 6, 2025 by Grace Snow Leave a Comment

“Are you tired of the same old spaghetti routine? In today’s fast-paced world, even our beloved pasta can use a refreshing twist! Enter TikTok Spaghetti, a delightful dish that takes comfort food to the next level with its luscious combination of meaty red sauce and creamy Alfredo. This recipe not only promises a hearty, satisfying meal but also offers the joy of creating something that feels both nostalgic and modern—perfect for family gatherings or a cozy night in. Plus, it’s incredibly quick to prepare, coming together in under an hour, making it an ideal choice for busy weeknights. So, are you ready to impress your loved ones and elevate your dinner game?”

Why is TikTok Spaghetti a Must-Try?

Comforting and Hearty: This dish combines the familiar comfort of spaghetti with the richness of meaty sauce and creamy Alfredo for a delightful meal that warms the soul.
Quick Prep Time: In under an hour, you can create a restaurant-quality dish, making it perfect for busy weeknights or unexpected guests.
Versatile Ingredients: Feel free to swap out proteins or add veggies like spinach for a nutritious boost—just like with my Taco Spaghetti Cheesy!
Crowd-Pleaser: With its cheesy, bubbly topping and mouthwatering flavors, this spaghetti will have your family and friends coming back for seconds.
Simple Steps: You don’t need to be a gourmet chef; simplified cooking steps make it easy for anyone to master this dish!

TikTok Spaghetti Ingredients

• Get ready for a cheesy delight!

For the Sauce

  • Olive Oil – A must for sautéing your veggies; feel free to swap with vegetable oil if you need.
  • Onion – Adds a sweet depth to the sauce; use yellow or white onion for the best flavor.
  • Green Bell Pepper – Delivers a crunchy texture; red or yellow bell peppers can add a sweet twist.
  • Garlic – Boosts flavor in both sauces; fresh minced or pre-minced garlic will do wonders.
  • Ground Beef (80/20) – The star protein that provides rich flavor; ground turkey or plant-based alternatives work well too.
  • Salt – Essential for enhancing all the flavors; adjust to your preference!
  • Black Pepper – Adds the perfect kick; freshly ground black pepper is best for that bold taste.
  • Italian Seasoning – Infuses aromatic herbs into the dish; if you're out, try dried oregano and basil.
  • Spaghetti Sauce (1½ jars, 24-ounce each) – The flavorful base of the sauce; substitute with any marinara or pasta sauce on hand.

For the Pasta

  • Salt (for pasta) – Enhances the spaghetti's flavor during cooking; don’t skip this step!
  • Spaghetti (16 ounces) – The classic carb for this dish; whole wheat or gluten-free pasta can easily replace it.

For the Alfredo Sauce

  • Butter (½ cup) – Provides a rich base for the Alfredo; vegan butter can be used as a dairy-free alternative.
  • Garlic – An additional punch of flavor for the sauce; add fresh or pre-minced garlic.
  • All-Purpose Flour – Acts as a thickening agent for the Alfredo; cornstarch is a good gluten-free alternative.
  • Heavy Cream (2 cups) – The key to that creamy texture; for a lighter option, use half-and-half or coconut cream.
  • Parmesan Cheese (1½ cups) – Adds delicious umami flavor to the Alfredo; nutritional yeast is a great dairy-free substitute.
  • Mozzarella Cheese (2 cups) – For a gooey topping; low-fat mozzarella or dairy-free cheese works if you're looking to lighten it up.

Now you have everything you need to create a delightful TikTok Spaghetti that’ll impress!

Step‑by‑Step Instructions for TikTok Spaghetti

Step 1: Preheat and Prepare
Begin by preheating your oven to 350°F (177°C). While that’s warming up, take a 9x13-inch baking dish and spray it with nonstick spray to ensure your TikTok spaghetti doesn’t stick. This initial preparation sets the stage for building your delicious layers.

Step 2: Sauté the Vegetables
In a large skillet, heat a drizzle of olive oil over medium heat. Add chopped onion and green bell pepper, sautéing them for about 5 minutes until they turn translucent and fragrant. Then, stir in minced garlic, cooking for another minute until everything is beautifully aromatic.

Step 3: Brown the Ground Beef
Once the vegetables are softened, add the ground beef to the skillet. Cook for about 7-8 minutes, breaking it apart with a spatula until it is no longer pink. Drain any excess grease, then season it with salt, black pepper, and Italian seasoning before pouring in the spaghetti sauce. Stir well and set aside.

Step 4: Cook the Spaghetti
Bring a large pot of salted water to a rolling boil over high heat. Add the spaghetti and cook according to the package instructions, usually about 8-10 minutes, until al dente. Drain the spaghetti and set aside while you prepare the creamy Alfredo sauce.

Step 5: Make the Alfredo Sauce
In a separate saucepan, melt the butter over medium heat. Add minced garlic and sauté for about 1-2 minutes until fragrant. Sprinkle in the all-purpose flour and cook for another minute, then gradually whisk in heavy cream. Continue whisking for about 3-4 minutes until the sauce is smooth and thickened.

Step 6: Mix in the Cheese
Once your sauce is thickened, stir in the grated Parmesan cheese, letting it melt completely, which should take about 2-3 minutes. Make sure the sauce is creamy and well combined, then remove it from heat to prevent overcooking.

Step 7: Combine Spaghetti and Alfredo
In a large mixing bowl, toss the drained spaghetti in the creamy Alfredo sauce until it's evenly coated. This combination creates a rich base that will enhance your delicious TikTok spaghetti when layered in the baking dish.

Step 8: Layer the Sauces
Spread the coated spaghetti evenly across the bottom of your prepared baking dish. Carefully layer the meaty red sauce over the spaghetti without mixing them together, allowing for distinct flavors to shine through.

Step 9: Add the Cheese Topping
Finally, sprinkle the shredded mozzarella cheese generously over the top of your layered TikTok spaghetti. This cheesy crown will melt and bubble beautifully during baking, promising a delightful finish to your dish.

Step 10: Bake to Perfection
Place the baking dish in the preheated oven and bake uncovered for about 30 minutes. You’ll know it’s ready when the cheese is melted, bubbly, and turning a lovely golden brown. Let it cool for a few minutes before serving, garnished with fresh parsley if desired.

TikTok Spaghetti Variations & Substitutions

Feel free to embrace your creativity with this comforting TikTok spaghetti recipe—there are many ways to make it your own!

  • Ground Meat Swap: Substitute ground beef with ground turkey or chicken for a leaner option. This change keeps the dish hearty while offering a lighter taste.
  • Cheese Alternatives: Try using a mix of cheddar cheese for a sharper flavor alongside mozzarella. You could even use a fascinating blend of smoked gouda for added depth.
  • Veggie Boost: Toss in fresh spinach or sautéed mushrooms to the sauce for added nutrition. Not only will this enhance the flavor, but it'll also brighten up the dish.
  • Pasta Shape Variation: Switch up the classic spaghetti for penne, fettuccine, or even zoodles for a fun twist. Different pasta shapes offer varied textures that make every bite exciting!
  • Spicy Kick: Add red pepper flakes or diced jalapeños to the meat sauce for a zesty heat. Experimenting with spice levels can transform this dish into a delightful fiery feast.
  • Vegan Version: Use vegan ground beef and substitute dairy ingredients with cashew cream and nutritional yeast. This creates a creamy, cheesy experience without any animal products.
  • Sauce Swap: Instead of a red sauce, experiment with a homemade pesto or a creamy sun-dried tomato sauce for a fresh twist that completely changes the flavor profile.
  • Herb Infusions: Add fresh basil or parsley to the sauces right before serving for a burst of freshness. This simple addition will elevate your TikTok spaghetti, bringing lightness and brightness to each bite.

For those looking for inspiration, my delightful Taco Spaghetti Cheesy also showcases how creative variations can lead to mouthwatering dishes. Enjoy your culinary adventure!

Expert Tips for TikTok Spaghetti

  • Use Quality Meat: Choose ground beef with at least 20% fat for a richer flavor. Leaner meats can lead to a dryer sauce.
  • Don’t Overcook Pasta: Aim for al dente spaghetti, as it will absorb some sauce during baking and enhance the overall texture of your TikTok spaghetti.
  • Layer Wisely: To maintain distinct flavors, layer your sauces without mixing them together. This ensures a beautiful presentation and bold taste.
  • Taste as You Go: Adjust seasoning during cooking to ensure a well-balanced flavor in both the red and Alfredo sauces.
  • Make Ahead: Assemble the dish beforehand and store it in the refrigerator. Just remember to add an extra 10-15 minutes to the baking time!

Make Ahead Options

These TikTok Spaghetti are perfect for busy home cooks looking to save time during meal prep! You can assemble the entire dish up to 24 hours in advance. Simply prepare the meaty red sauce and the creamy Alfredo sauce, and layer them with cooked spaghetti in your baking dish. Cover tightly with plastic wrap to maintain freshness and prevent the sauces from drying out. When you’re ready to serve, remove the plastic wrap and bake directly from the refrigerator, adding an extra 10-15 minutes to the baking time to ensure it heats through. This way, you’ll still enjoy all the comforting flavors of homemade TikTok Spaghetti with minimal effort!

How to Store and Freeze TikTok Spaghetti

Fridge: Leftover TikTok spaghetti can be stored in an airtight container for up to 3 days. Ensure it's completely cooled before sealing to maintain freshness.

Freezer: For longer storage, freeze the baked TikTok spaghetti in a freezer-safe container for up to 3 months. Wrap it tightly to prevent freezer burn.

Reheating: Thaw overnight in the fridge for best results. Reheat in the oven at 350°F (177°C) for 20-25 minutes, covering with foil to retain moisture, or microwave in individual portions until hot.

What to Serve with TikTok Spaghetti

Create a delightful dining experience by pairing your dish with complementary sides and drinks.

  • Garlic Bread: The buttery, garlicky slices offer the perfect crunchy contrast to the creamy spaghetti, making every bite even more enjoyable.
  • Caesar Salad: Crisp romaine lettuce with Caesar dressing adds a refreshing crunch that balances the rich flavors of the spaghetti. Serve with homemade croutons for extra texture!
  • Roasted Vegetables: Colorful seasonal veggies roasted to caramelized perfection provide a healthy, flavorful side that adds vibrant nutrition to your meal.
  • Cheesy Breadsticks: These doughy delights keep the comfort theme alive, offering a cheesy pull that pairs splendidly with each forkful of spaghetti.
  • Lemonade: A chilled glass of tangy lemonade provides a refreshing sip to cleanse your palate between bites of the rich and hearty spaghetti.
  • Chocolate Lava Cake: For dessert, indulge in a warm, gooey chocolate lava cake that’s both comforting and sumptuous – the sweet finale your meal craves!

TikTok Spaghetti Recipe FAQs

How do I choose the right ground beef for TikTok spaghetti?
Look for ground beef with an 80/20 fat ratio, as this provides a flavorful and juicy result. The higher fat content helps make the sauce richer. If you're seeking a leaner option, ground turkey can be a great alternative, offering less fat while still keeping the dish hearty.

How should I store leftover TikTok spaghetti?
Absolutely! You can store leftover TikTok spaghetti in an airtight container in the refrigerator for up to 3 days. To maintain its flavor and texture, ensure it's completely cooled before sealing. For optimal freshness, enjoy it within this timeframe!

Can I freeze TikTok spaghetti for later use?
Very much so! You can freeze TikTok spaghetti in a freezer-safe container for up to 3 months. Be sure to wrap it tightly to prevent freezer burn. When ready to eat, thaw it overnight in the fridge and reheat in the oven at 350°F (177°C) for about 20-25 minutes, covered with foil to retain moisture.

What can I do if my Alfredo sauce is too thick?
If your Alfredo sauce turns out too thick, don't worry! Just whisk in a splash of milk or cream gradually until you reach your desired consistency. Heat it gently on low while stirring continuously to avoid clumps. This way, you can enjoy a perfectly creamy sauce every time!

Are there any dietary considerations I should keep in mind for TikTok spaghetti?
Certainly! If you or your guests have specific dietary needs, consider swapping ingredients. Use gluten-free pasta or dairy-free cheese alternatives to accommodate gluten and lactose sensitivities. Always read labels to check for allergens in pre-packaged sauces. If you're serving to pets, it's best to refrain as garlic and certain cheeses can be harmful to them.

What should I do if the cheese on top doesn’t melt properly?
If the cheese isn't melting as expected, it may be that the oven temperature isn’t hot enough, or the dish is too crowded. Additionally, ensure that the cheese is spread evenly across the top. If all else fails, you can broil it for a couple of minutes at the end, keeping a close eye to prevent burning. Enjoy your TikTok spaghetti!

TikTok Spaghetti

Delicious TikTok Spaghetti: A Creamy Comfort Food Twist

Discover TikTok Spaghetti, a creamy and meaty twist on classic pasta that delights and satisfies.
Print Recipe Pin Recipe
Prep Time 15 minutes mins
Cook Time 30 minutes mins
Total Time 45 minutes mins
Servings: 6 servings
Course: Dinner
Cuisine: Italian
Calories: 600
Ingredients Equipment Method Nutrition Notes

Ingredients
  

For the Sauce
  • 2 tablespoons Olive Oil or vegetable oil
  • 1 medium Onion yellow or white onion preferred
  • 1 medium Green Bell Pepper or red/yellow for sweetness
  • 3 cloves Garlic minced
  • 1 pound Ground Beef (80/20) or ground turkey/plant-based
  • 1 teaspoon Salt to taste
  • 1/2 teaspoon Black Pepper freshly ground preferred
  • 1 tablespoon Italian Seasoning or dried oregano and basil
  • 3 cups Spaghetti Sauce 1½ jars, 24-ounce each
For the Pasta
  • 1 tablespoon Salt for pasta cooking water
  • 16 ounces Spaghetti or whole wheat/gluten-free
For the Alfredo Sauce
  • 1/2 cup Butter or vegan butter
  • 3 cloves Garlic minced
  • 1/4 cup All-Purpose Flour or cornstarch as gluten-free
  • 2 cups Heavy Cream or half-and-half/coconut cream
  • 1 1/2 cups Parmesan Cheese or nutritional yeast for dairy-free
  • 2 cups Mozzarella Cheese or low-fat/dairy-free cheese

Equipment

  • 9x13-inch baking dish
  • Large skillet
  • Large pot
  • Saucepan

Method
 

Instructions
  1. Preheat the oven to 350°F (177°C) and prepare a 9x13-inch baking dish with nonstick spray.
  2. In a large skillet, heat olive oil over medium heat, add chopped onion and green bell pepper, sauté for about 5 minutes.
  3. Stir in garlic and cook for another minute until fragrant.
  4. Add ground beef to the skillet and cook for 7-8 minutes, breaking apart, until no longer pink; drain excess grease.
  5. Season with salt, black pepper, and Italian seasoning, then add spaghetti sauce and mix well. Set aside.
  6. In a large pot, bring salted water to a boil. Add spaghetti and cook according to the package instructions, 8-10 minutes.
  7. Drain spaghetti and set aside while preparing Alfredo sauce.
  8. In a saucepan, melt butter over medium heat, add garlic and sauté for 1-2 minutes.
  9. Sprinkle in flour and cook for another minute, then whisk in heavy cream gradually.
  10. Continue whisking for 3-4 minutes until the sauce is smooth and thickened.
  11. Stir in Parmesan cheese until melted, then remove from heat.
  12. Combine drained spaghetti with Alfredo sauce in a large mixing bowl until coated.
  13. Layer coated spaghetti in the prepared baking dish, then top with meaty red sauce.
  14. Sprinkle mozzarella cheese over the top and bake uncovered for about 30 minutes until golden brown.
  15. Cool for a few minutes before serving and garnish with fresh parsley if desired.

Nutrition

Serving: 1servingCalories: 600kcalCarbohydrates: 65gProtein: 35gFat: 25gSaturated Fat: 15gPolyunsaturated Fat: 2gMonounsaturated Fat: 7gTrans Fat: 1gCholesterol: 70mgSodium: 800mgPotassium: 600mgFiber: 3gSugar: 5gVitamin A: 10IUVitamin C: 20mgCalcium: 20mgIron: 15mg

Notes

Use quality meat for a richer flavor and don’t overcook pasta for the best texture. Layer sauces carefully for distinct flavors.

Tried this recipe?

Let us know how it was!

Creamy One-Pan Butter Parmesan Pasta Ready in 20 Minutes

December 6, 2025 by Grace Snow Leave a Comment

The aroma filled the air—garlic sizzling in olive oil, promising a comforting meal ahead. If you’re like me, sometimes you crave a dish that feels like a warm hug, and that’s where my One-Pan Butter Parmesan Pasta comes in. This recipe is not just quick and easy; it transforms simple ingredients into a creamy masterpiece that can elevate any weeknight dinner. In just 20 minutes, you can indulge in a dish that feels gourmet without the complexity. Whether you're cooking for yourself or a gathering, this one-pan wonder is bound to impress and leave everyone asking for seconds. Ready to discover the secret to effortless home-cooked satisfaction? Let’s dive in!

Why Is This Pasta Recipe a Must-Try?

Simplicity at Its Best: Enjoy a delicious gourmet meal with minimal fuss—perfect for busy weeknights!

Creamy Delight: The rich combination of butter and Parmesan envelops every bite, creating a comforting experience.

One-Pan Wonder: Save time on cleanup with this easy all-in-one cooking method.

Versatile Ingredients: Substitute with whatever you have on hand; even try adding grilled chicken from the flavorful Crockpot Butter Chicken for extra protein!

Quick to Make: Whip this up in just 20 minutes, making it perfect for those last-minute dinner decisions.

Transform your meals and rediscover the joy of home cooking with this delicious One-Pan Butter Parmesan Pasta recipe!

One-Pan Butter Parmesan Pasta Ingredients

  • For the Pasta

  • Ditalini Pasta – This small pasta shape holds the creamy sauce beautifully; feel free to substitute with spaghetti or your favorite pasta.

  • For the Sauce

  • Chicken Broth – Adds depth of flavor while the pasta cooks; for a vegetarian option, use vegetable broth instead.

  • Garlic – Fresh minced garlic introduces aromatic richness; always prefer fresh for the best taste.

  • Heavy Cream – Ensures a decadent creaminess; if you want something lighter, half-and-half works well too.

  • Parmesan Cheese – A key ingredient that brings nutty flavor and creaminess; Pecorino Romano is a great sharp substitute if desired.

  • For Cooking

  • Olive Oil – Essential for sautéing garlic and starting the flavor base; using butter will give an extra rich touch.

  • Salt & Pepper – Basic seasonings that elevate the dish; adjust to taste for the perfect balance.

  • Optional Toppings

  • Fresh Parsley – This herb adds a refreshing brightness; try incorporating it for a vibrant touch!

  • Red Pepper Flakes – Sprinkle for an extra spicy kick that contrasts beautifully with the creamy flavors.

This easy-to-prepare One-Pan Butter Parmesan Pasta comes together with simple yet delicious ingredients, perfect for a cozy night in or entertaining friends. Enjoy the comfort of homemade goodness!

Step‑by‑Step Instructions for One-Pan Butter Parmesan Pasta

Step 1: Sauté Garlic
In a large skillet, heat 2 tablespoons of olive oil over medium-low heat. Once the oil is shimmering, add 3 cloves of minced garlic and sauté for about 1 minute, until fragrant but not browned. This will create a flavorful base for your One-Pan Butter Parmesan Pasta.

Step 2: Toast Pasta
Add 8 ounces of ditalini pasta to the skillet, ensuring each piece is coated with the garlic-infused oil. Stir constantly for about 2 minutes to toast the pasta gently, which will enhance its nutty flavor as you prepare this creamy dish.

Step 3: Cook Pasta
Pour 4 cups of chicken broth into the skillet, ensuring it covers the pasta completely. Increase the heat to high and bring it to a boil. Once boiling, cover the skillet, reduce the heat to low, and let it simmer for about 9-10 minutes, or until the pasta is al dente and absorbs most of the liquid.

Step 4: Add Cream & Butter
Once the pasta is cooked, lower the heat and stir in 1 cup of heavy cream. Continue to cook on low for an additional minute, ensuring the cream blends well with the pasta. Then, remove the skillet from heat, allowing the residual warmth to infuse the flavors.

Step 5: Incorporate Cheese
Gradually add 4 tablespoons of butter and 1 cup of freshly grated Parmesan cheese into the pasta mixture. Stir gently until both the butter and cheese are fully melted and combined, creating a luscious, creamy sauce for your One-Pan Butter Parmesan Pasta.

Step 6: Serve & Enjoy
Taste the pasta and adjust seasoning with salt and pepper as needed. Serve the dish warm, garnished with freshly chopped parsley and a sprinkle of red pepper flakes if desired for an extra kick. Enjoy this comforting meal with loved ones for a delightful dining experience.

What to Serve with One-Pan Butter Parmesan Pasta

Imagine a cozy dinner where every bite is creamy and comforting, perfectly paired to elevate your dining experience.

  • Crisp Green Salad: A refreshing salad with mixed greens and a zesty vinaigrette balances the rich pasta perfectly.

  • Garlic Bread: Warm, buttery garlic bread adds a delightful crunch that complements the creamy sauce and pasta texture.

  • Roasted Asparagus: Tender asparagus drizzled with olive oil enhances your meal with vibrant color and a seasonal touch.

  • Grilled Chicken: Adding juicy, grilled chicken transforms this dish into a hearty feast that your family will love, making it more filling.

  • Zesty Lemonade: A glass of homemade lemonade refreshes the palate, cutting through the creaminess with a citrusy zing.

  • Chocolate Mousse: Treat yourself to a light chocolate mousse for dessert; its airy texture contrasts beautifully with the pasta’s richness.

Enjoy these pairings with your One-Pan Butter Parmesan Pasta for an unforgettable meal experience!

Storage Tips for One-Pan Butter Parmesan Pasta

  • Fridge: Store leftovers in an airtight container for up to 3 days to maintain freshness and prevent drying out.

  • Freezer: For longer storage, freeze in a sealed container for up to 2 months. Reheat from frozen on low heat for gentle warming.

  • Reheating: When reheating, add a splash of cream or milk to restore the creamy texture, stirring gently to combine evenly.

  • Room Temperature: It’s best to avoid leaving this dish at room temperature for more than 2 hours to ensure food safety. Enjoy your delicious One-Pan Butter Parmesan Pasta!

Expert Tips for One-Pan Butter Parmesan Pasta

  • Fresh Ingredients: Always use freshly minced garlic and grated Parmesan cheese for the best flavor impact in your One-Pan Butter Parmesan Pasta.
  • Whisk Carefully: When adding cream, whisk gently into the sauce to maintain a smooth texture and avoid clumps.
  • Al Dente Perfection: Ensure pasta is cooked al dente to prevent mushiness, as it will continue cooking in the sauce.
  • Adjust to Taste: Don’t be shy about seasoning; taste your dish before serving, and adjust salt and pepper to achieve the ideal flavor.
  • Experiment Freely: Feel free to add extras like grilled chicken or seasonal vegetables; this recipe is versatile and perfect for creativity!

Make Ahead Options

These One-Pan Butter Parmesan Pasta delights are perfect for meal prep enthusiasts! You can chop the garlic and measure out the pasta and broth up to 24 hours in advance, storing them in the refrigerator to keep ingredients fresh. The beauty of this dish is that when you’re ready to cook, simply sauté the garlic, add the pasta and broth, and follow the remaining steps. To ensure the sauce remains creamy, you can prepare the cream and cheese mixture up to 3 days ahead; just refrigerate it and stir it in right before serving. This way, you’ll enjoy a delicious, comforting meal with minimal effort on busy weeknights!

One-Pan Butter Parmesan Pasta Variations

Feel free to get creative with this dish, adding your own twist to make it truly yours!

  • Dairy-Free: Substitute heavy cream with coconut cream for a creamy vegan version, enhancing depth with nutritional yeast.

  • Gluten-Free: Use gluten-free pasta such as brown rice or quinoa pasta, allowing everyone to enjoy this delicious comfort food.

  • Herb-Infused: Stir in fresh basil or thyme for a vibrant herby flavor; it transforms the dish into a garden delight.

  • Extra Veggies: Toss in fresh spinach or roasted bell peppers for an added pop of color and nutrition; their subtle sweetness balances the dish perfectly!

  • Seafood Boost: Incorporate shrimp or diced salmon for a luxurious touch; the seafood pairs wonderfully with the creamy sauce.

  • Spicy Kick: Enhance the heat by adding diced jalapeños or a splash of hot sauce, making every bite exciting and bold!

  • Nutty Crust: Finish with toasted pine nuts or chopped walnuts for an earthy crunch that contrasts nicely with the creamy sauce.

  • Max Flavor: For a flavor booster, add a splash of white wine while cooking the broth; it creates a richer depth and enhances the overall taste.

Explore these delicious variations, and don’t hesitate to mix in elements from other recipes like Crispy Parmesan Artichoke Hearts or even a splash of broth used in Seafood Pasta Savory for new combinations. Happy cooking!

One-Pan Butter Parmesan Pasta Recipe FAQs

What type of pasta should I use for this recipe?
Absolutely! For this One-Pan Butter Parmesan Pasta, I recommend ditalini because its small shape perfectly holds the creamy sauce. However, feel free to use spaghetti, penne, or any other pasta you have on hand; just adjust the cooking time as necessary.

How do I store leftovers of One-Pan Butter Parmesan Pasta?
Store any leftovers in an airtight container in the fridge for up to 3 days. This will help maintain the creamy texture and flavor. If it starts to dry out, simply add a little extra cream or chicken broth when reheating to revive it!

Can I freeze One-Pan Butter Parmesan Pasta?
Yes! This dish freezes well. Portion the pasta into airtight containers or freezer bags, removing as much air as possible before sealing. It can be frozen for up to 2 months. When you’re ready to eat, thaw it overnight in the refrigerator and gently reheat on low, adding a splash of cream for that original creaminess.

What should I do if the pasta is overcooked?
If your pasta becomes overcooked, it can make the dish mushy. To prevent this, aim to cook it just to al dente as it will continue cooking in the residual heat of the sauce. If it does turn out too soft, try adding in some crispy sautéed vegetables or crispy bacon bits to introduce texture and balance it out.

Are there any dietary considerations or substitutions I should be aware of?
Absolutely! This recipe can easily be made vegetarian by substituting chicken broth with vegetable broth. Additionally, if you're lactose intolerant, you can use lactose-free cream or a plant-based cream alternative. For those with nut allergies, simply omit any nutty toppings like Parmesan cheese and try a dairy-free cheese alternative instead.

How can I enhance the flavor of this dish?
To elevate your One-Pan Butter Parmesan Pasta, consider adding fresh herbs like basil or thyme while cooking. You can also toss in grilled chicken, shrimp, or sautéed seasonal vegetables like asparagus or broccoli for added nutrition and flavor. The more toppings, the merrier!

One-Pan Butter Parmesan Pasta

Creamy One-Pan Butter Parmesan Pasta Ready in 20 Minutes

This One-Pan Butter Parmesan Pasta transforms simple ingredients into a creamy masterpiece ready in just 20 minutes, perfect for a quick gourmet meal.
Print Recipe Pin Recipe
Prep Time 5 minutes mins
Cook Time 15 minutes mins
Total Time 20 minutes mins
Servings: 4 servings
Course: Dinner
Cuisine: Italian
Calories: 500
Ingredients Equipment Method Nutrition Notes

Ingredients
  

For the Pasta
  • 8 ounces Ditalini Pasta Feel free to substitute with spaghetti or your favorite pasta.
For the Sauce
  • 4 cups Chicken Broth Use vegetable broth for a vegetarian option.
  • 3 cloves Garlic Fresh minced garlic is preferred for the best taste.
  • 1 cup Heavy Cream Half-and-half can be used for a lighter option.
  • 1 cup Parmesan Cheese Pecorino Romano is a great substitute.
For Cooking
  • 2 tablespoons Olive Oil Butter can be used for richer flavor.
  • to taste Salt Adjust to taste.
  • to taste Pepper Adjust to taste.
Optional Toppings
  • Fresh Parsley Incorporate for a vibrant touch!
  • Red Pepper Flakes Sprinkle for an extra spicy kick.

Equipment

  • Large skillet

Method
 

Step-by-Step Instructions
  1. In a large skillet, heat 2 tablespoons of olive oil over medium-low heat. Add 3 cloves of minced garlic and sauté for about 1 minute until fragrant but not browned.
  2. Add 8 ounces of ditalini pasta, ensuring each piece is coated with the garlic-infused oil. Stir for about 2 minutes to toast gently.
  3. Pour 4 cups of chicken broth into the skillet, covering the pasta. Bring to a boil, then cover, reduce heat to low, and simmer for about 9-10 minutes.
  4. Stir in 1 cup of heavy cream, cooking on low for an additional minute, allowing the cream to blend with the pasta.
  5. Gradually add 4 tablespoons of butter and 1 cup of freshly grated Parmesan cheese, stirring gently until melted and combined.
  6. Taste and adjust seasoning with salt and pepper as needed. Serve warm, garnished with parsley and red pepper flakes.

Nutrition

Serving: 1servingCalories: 500kcalCarbohydrates: 60gProtein: 15gFat: 25gSaturated Fat: 15gCholesterol: 80mgSodium: 900mgPotassium: 300mgFiber: 3gSugar: 2gVitamin A: 500IUCalcium: 250mgIron: 2mg

Notes

Use freshly minced garlic and grated Parmesan for the best flavor. Adjust seasonings to taste and feel free to add extras like grilled chicken or vegetables.

Tried this recipe?

Let us know how it was!
  • « Previous Page
  • 1
  • …
  • 125
  • 126
  • 127
  • 128
  • 129
  • …
  • 221
  • Next Page »

Welcome!

Hi, I’m Grace, a Sydney-based home cook with a passion for bold flavors and trending ingredients. Whether you’re a busy beginner or a seasoned foodie, you’ll find dishes here that are fresh, fun, and full of flavor.

More about me

Popular Recipes

  • World’s Best Chocolate Cake
    World's Best Chocolate Cake That Melts in Your Mouth
  • Strawberry Chocolate Shell Cake
    Heavenly Strawberry Chocolate Shell Cake for Your Sweet Tooth
  • Air Fryer Tilapia
    Air Fryer Tilapia: Quick, Crispy, and Flavor-Packed Delight
  • Salmon Fettuccine Alfredo
    Creamy Salmon Fettuccine Alfredo with a Zesty Twist

Footer

↑ back to top

About

  • Privacy Policy
  • Disclaimer
  • Terms & Conditions

Newsletter

  • Sign Up! for emails and updates

Contact

  • About me
  • Contact me

Copyright © 2025 TastyTrendIngredients