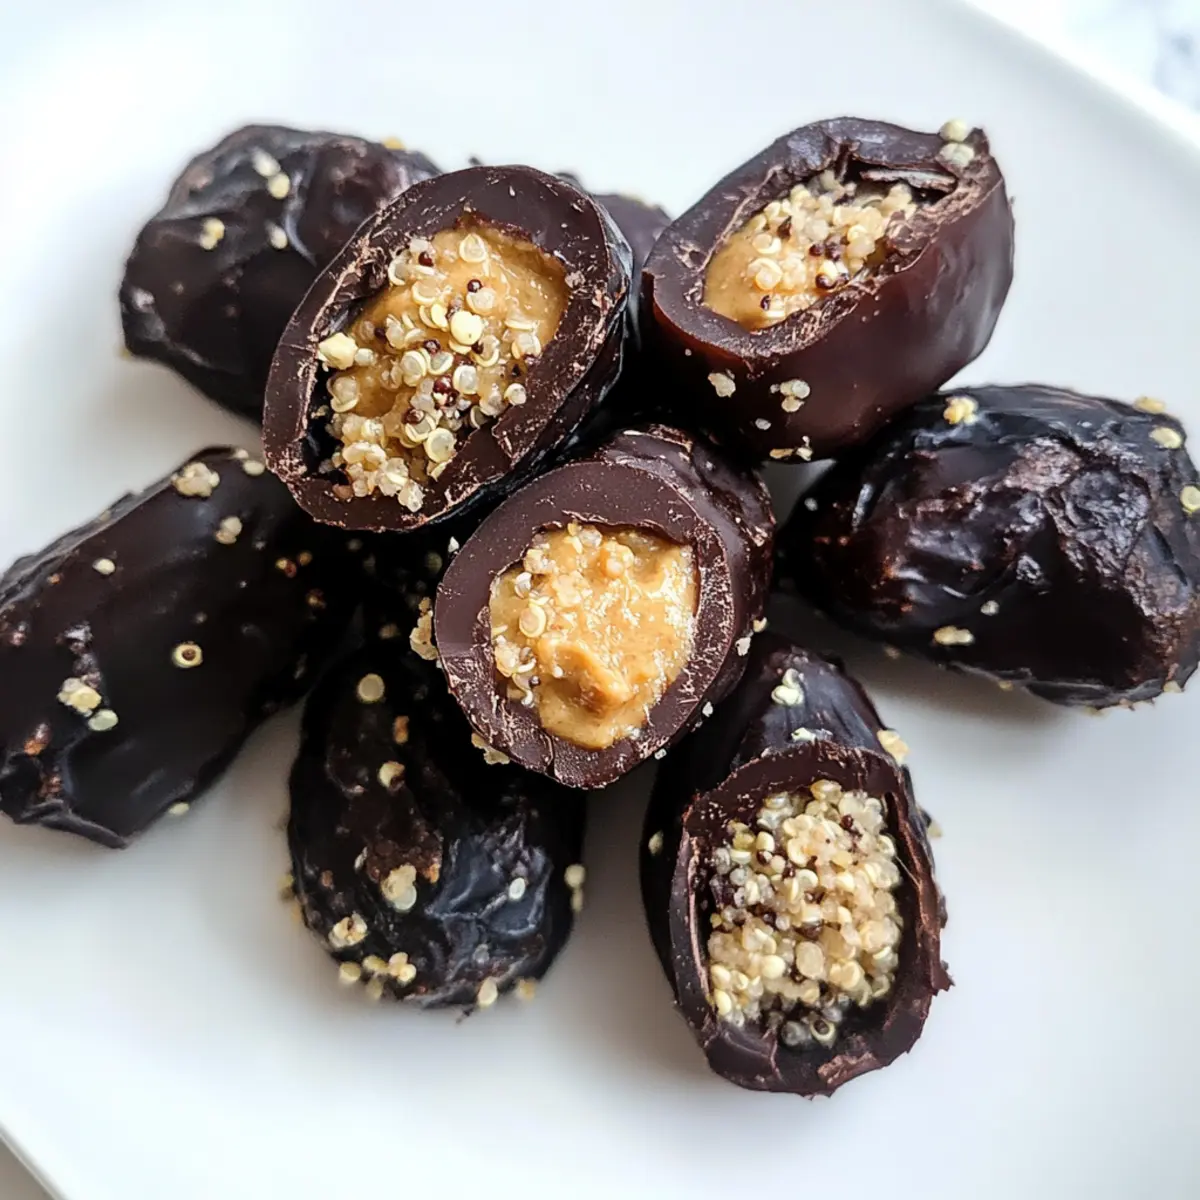
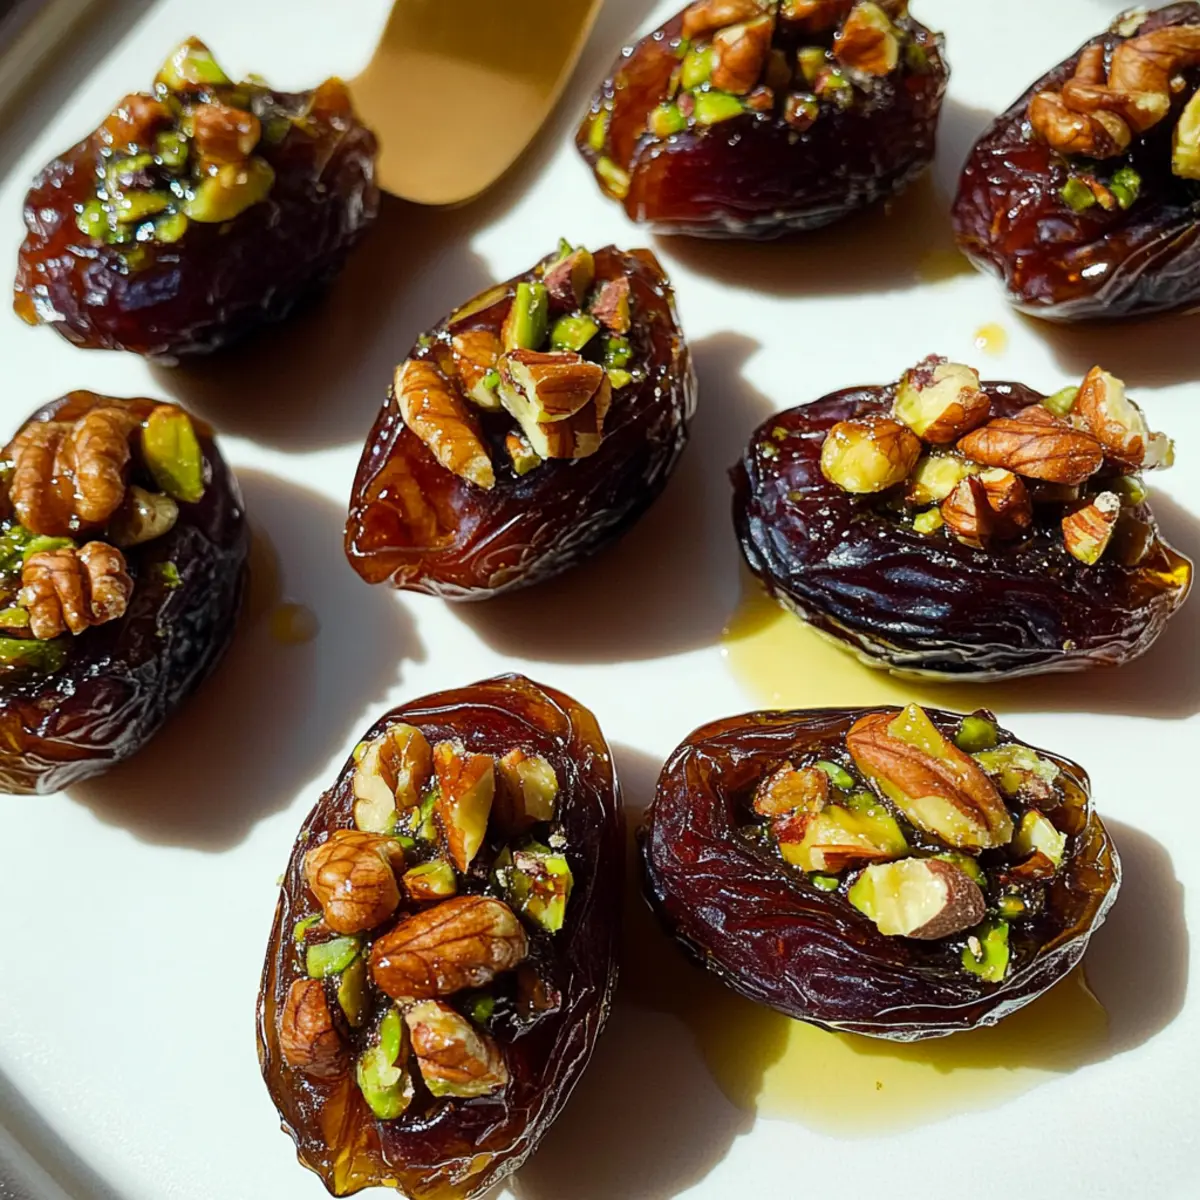
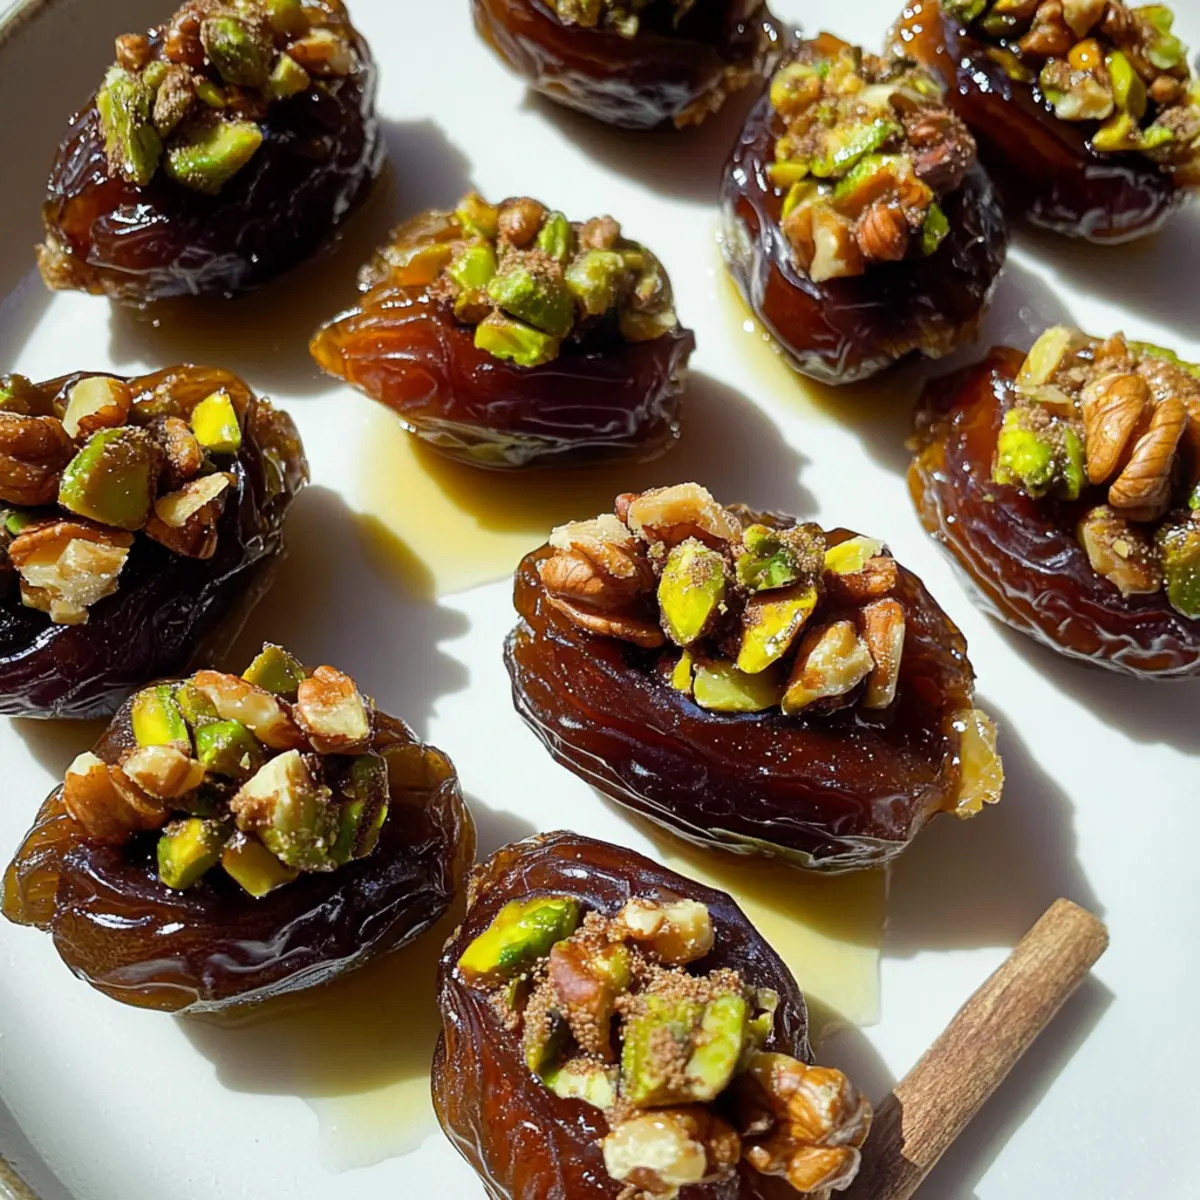
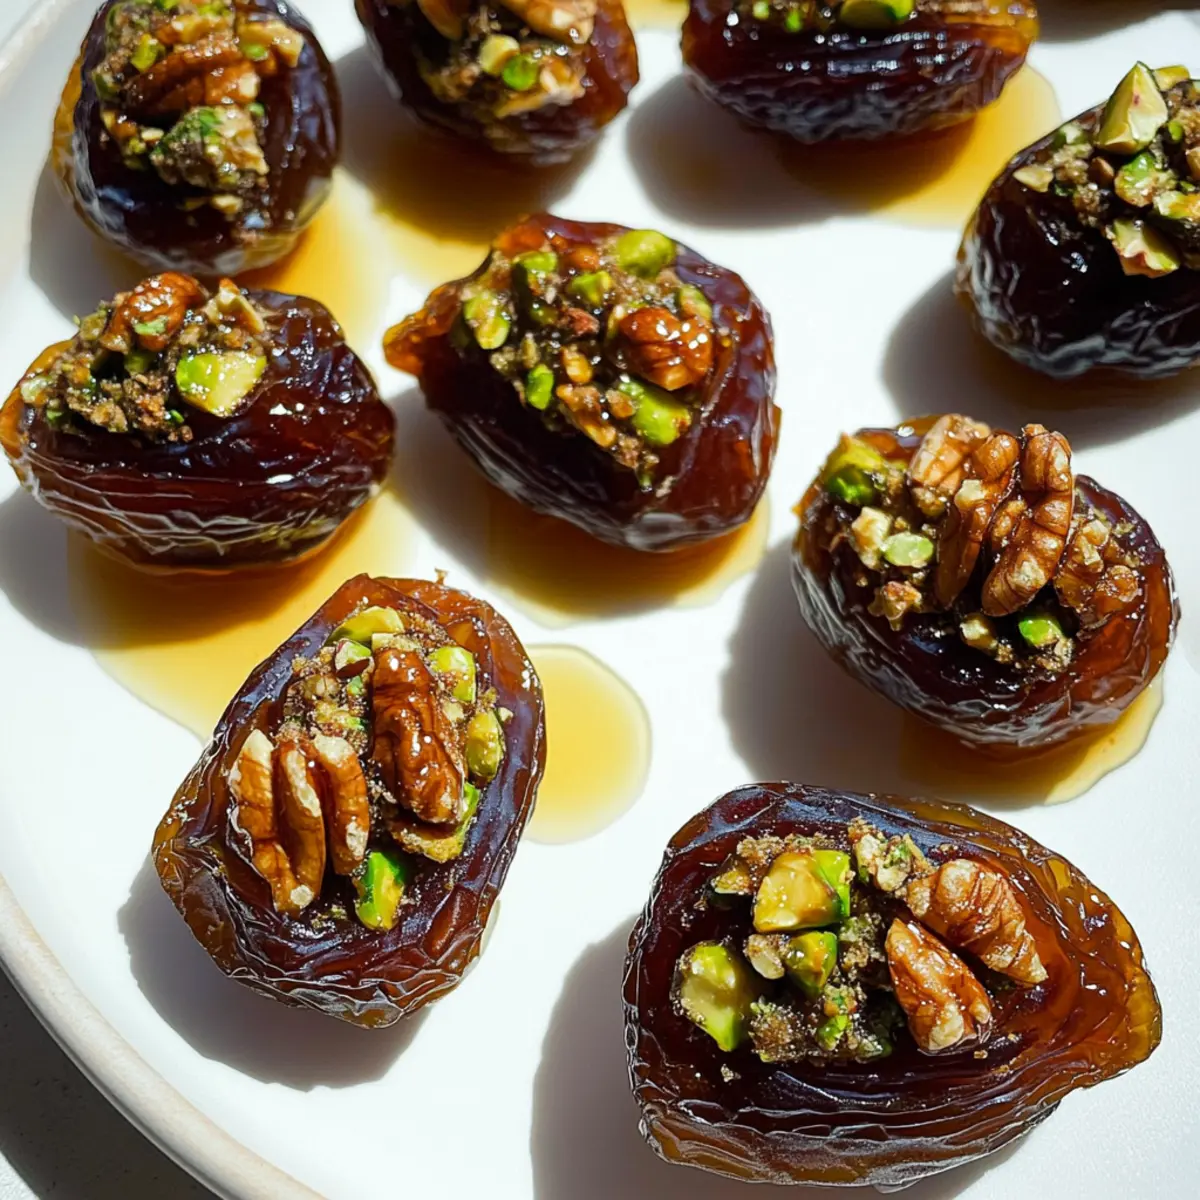
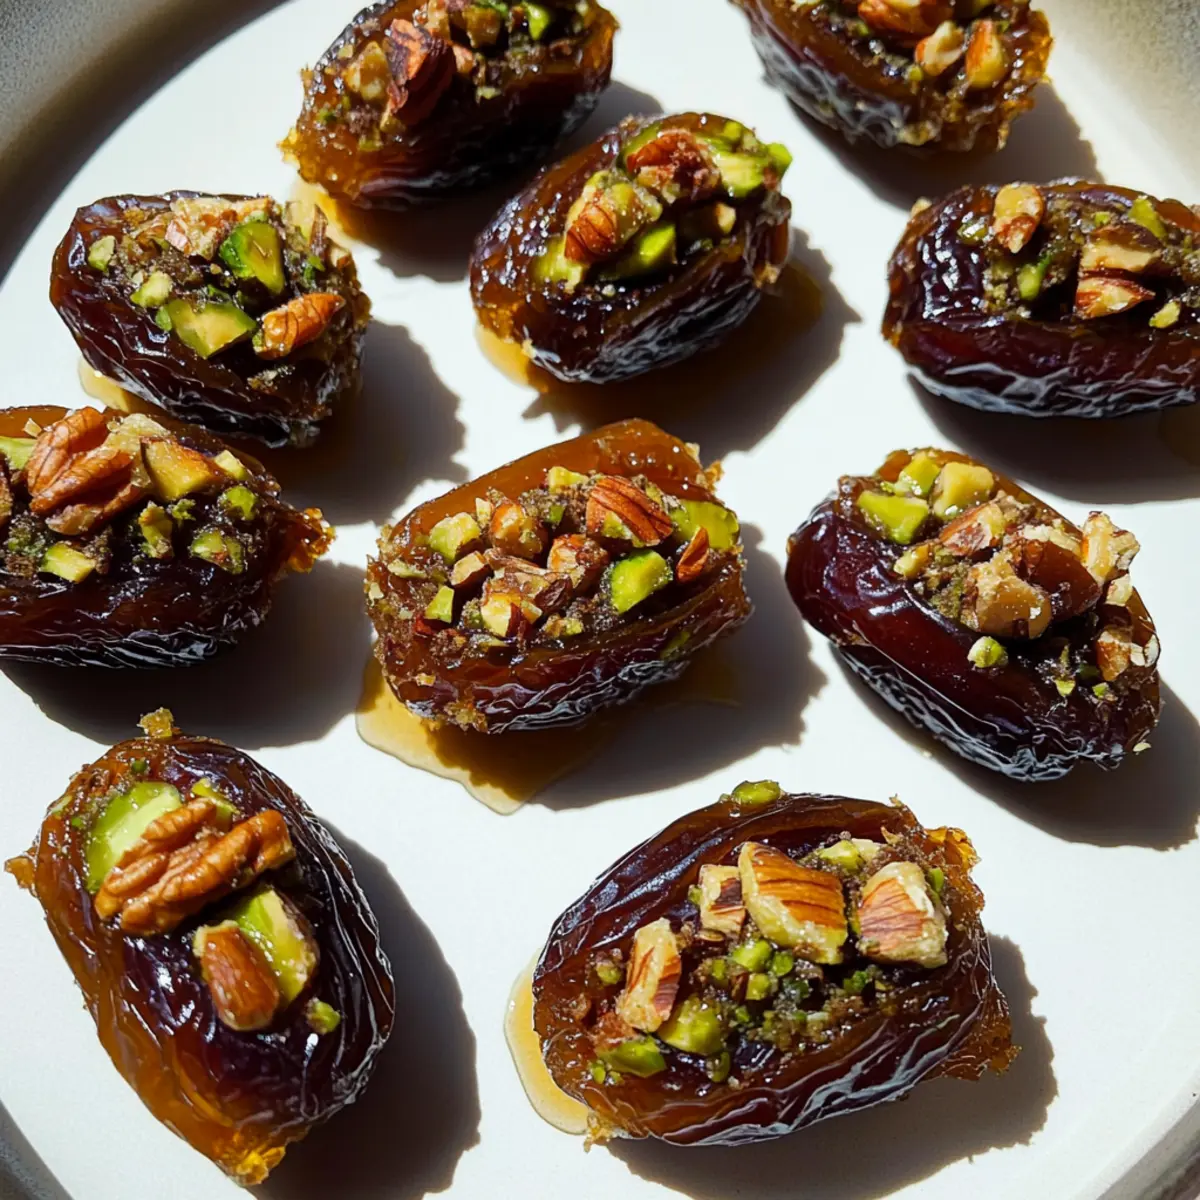
As I reached for a bite of something sweet, I found myself in a mini crisis—torn between indulging my cravings and sticking to healthier options. Enter my savior: No-Bake Baklava Stuffed Dates. These delightful treats marry the caramel-like sweetness of medjool dates with a nutty filling of walnuts and pistachios, all spiced up with cinnamon. They're ready in just five minutes and are not only a crowd-pleaser but also a delight for those of us craving a healthier snack. With gluten-free and vegan options, these Baklava Stuffed Dates promise a nutrient-dense indulgence that won't leave you with any guilt. Curious how this quick and easy recipe transforms simple ingredients into a show-stopping treat? Let’s dive in!
Why Choose Baklava Stuffed Dates?
Quick Preparation: In just 5 minutes, you can whip up a sweet treat that requires no baking at all. Perfect for last-minute gatherings or a cozy afternoon snack.
Nutritious Indulgence: Packed with healthy fats, fiber, and potassium, these stuffed dates offer guilt-free pleasure without sacrificing taste.
Versatile: Feel free to swap out nuts or add toppings like dark chocolate—these dates fit perfectly with any flavor preference.
Crowd-Pleasing: They're not just good for you; guests will devour them at parties or gatherings, leaving everyone impressed.
Healthy Options: With easy vegan substitutions, Baklava Stuffed Dates cater to a wide range of dietary needs, making them a great choice for anyone.
Storage Friendly: Enjoy the convenience of making ahead, as they last up to a week in the fridge for a quick grab-and-go snack! For delightful variety, check out our Herby Ricotta Stuffed options to compare flavors!
Baklava Stuffed Dates Ingredients
For the Filling
• Medjool Dates – The key ingredient, bringing natural sweetness; make sure they're pitted for the best experience.
• Chopped Walnuts – These nuts add a rich, buttery crunch that perfectly complements the chewy dates.
• Chopped Pistachios – Introduce a vibrant color and unique flavor; feel free to substitute with almonds or other nuts.
For Sweetness
• Honey – A natural sweetener that binds the mixture together; can be replaced with maple syrup or agave for a vegan alternative.
For Flavor
• Cinnamon – Provides warm, aromatic notes that enhance the overall taste of the stuffed dates.
• Vanilla Extract – A splash of this elevates the sweetness and rounds out the flavor beautifully.
Step‑by‑Step Instructions for Baklava Stuffed Dates
Step 1: Prepare the Dates
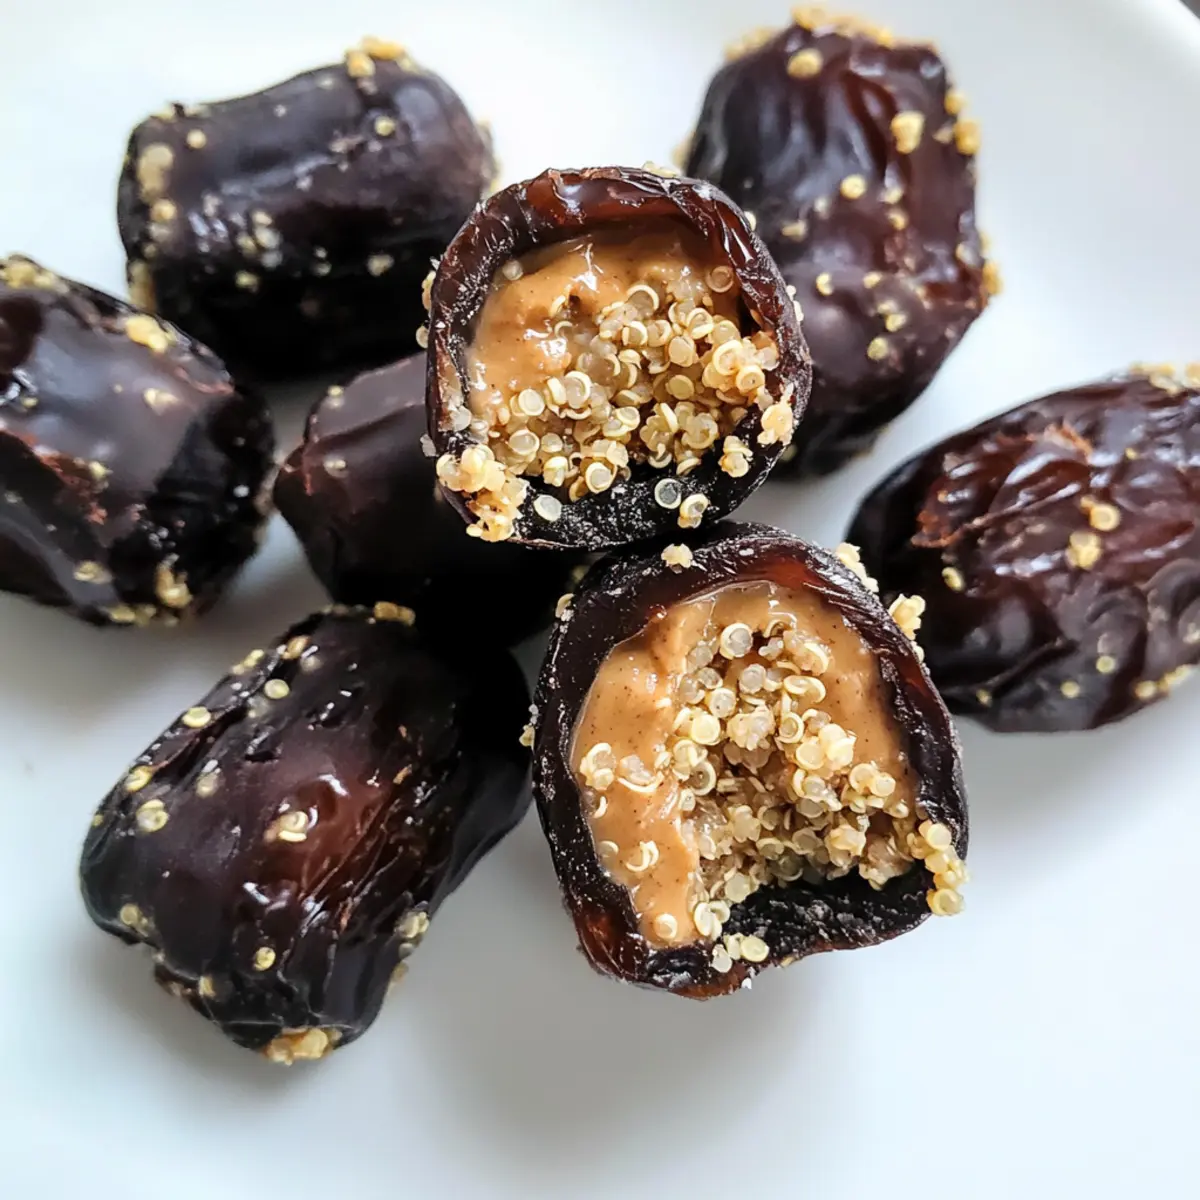
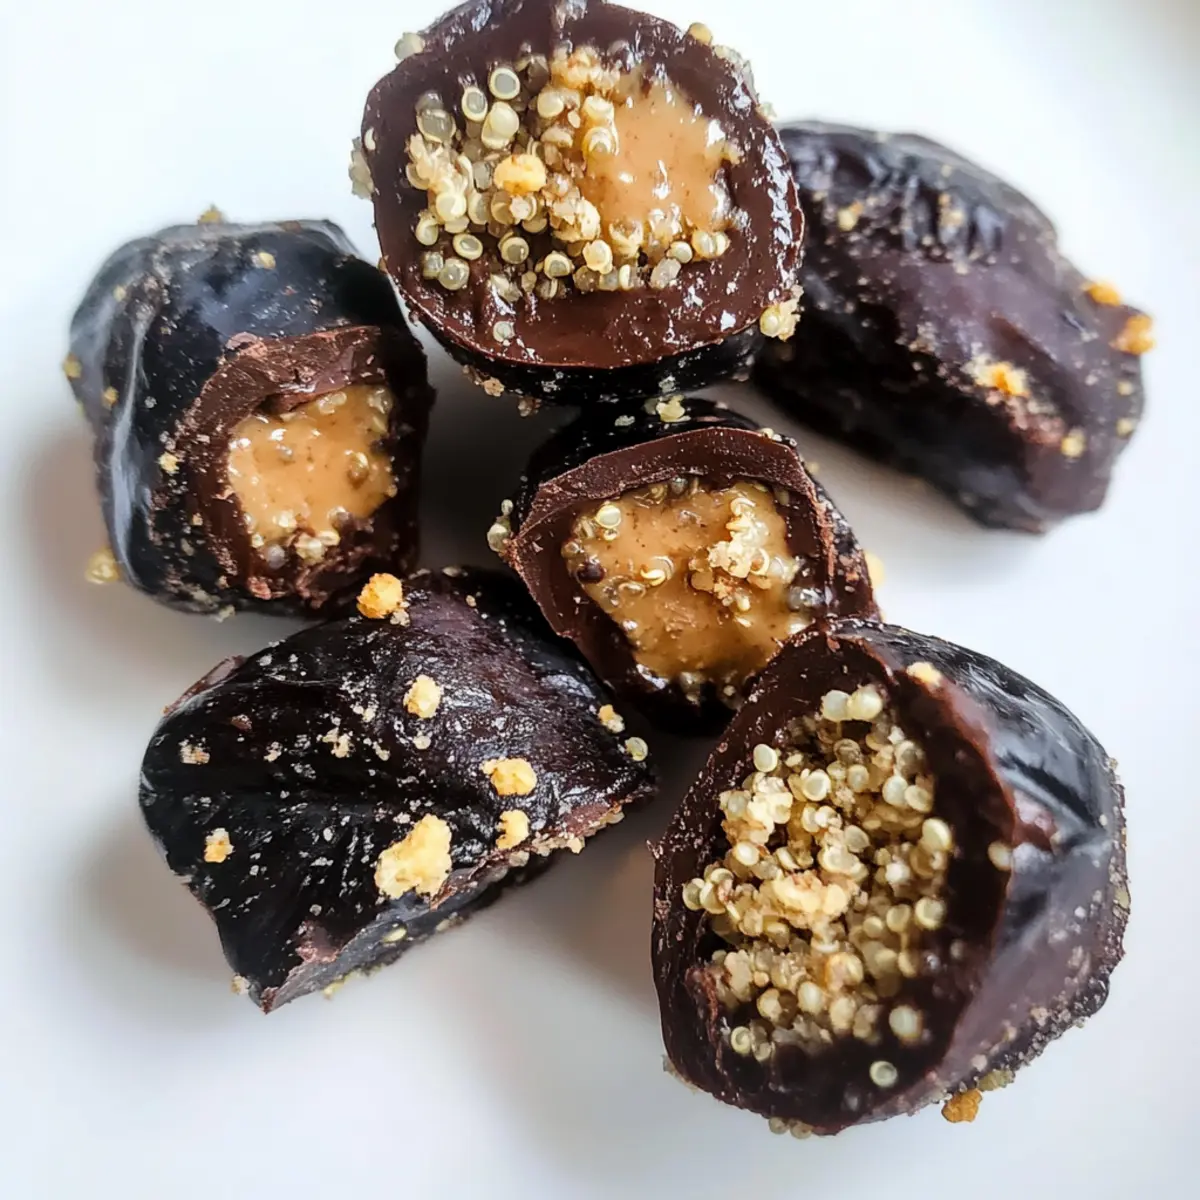
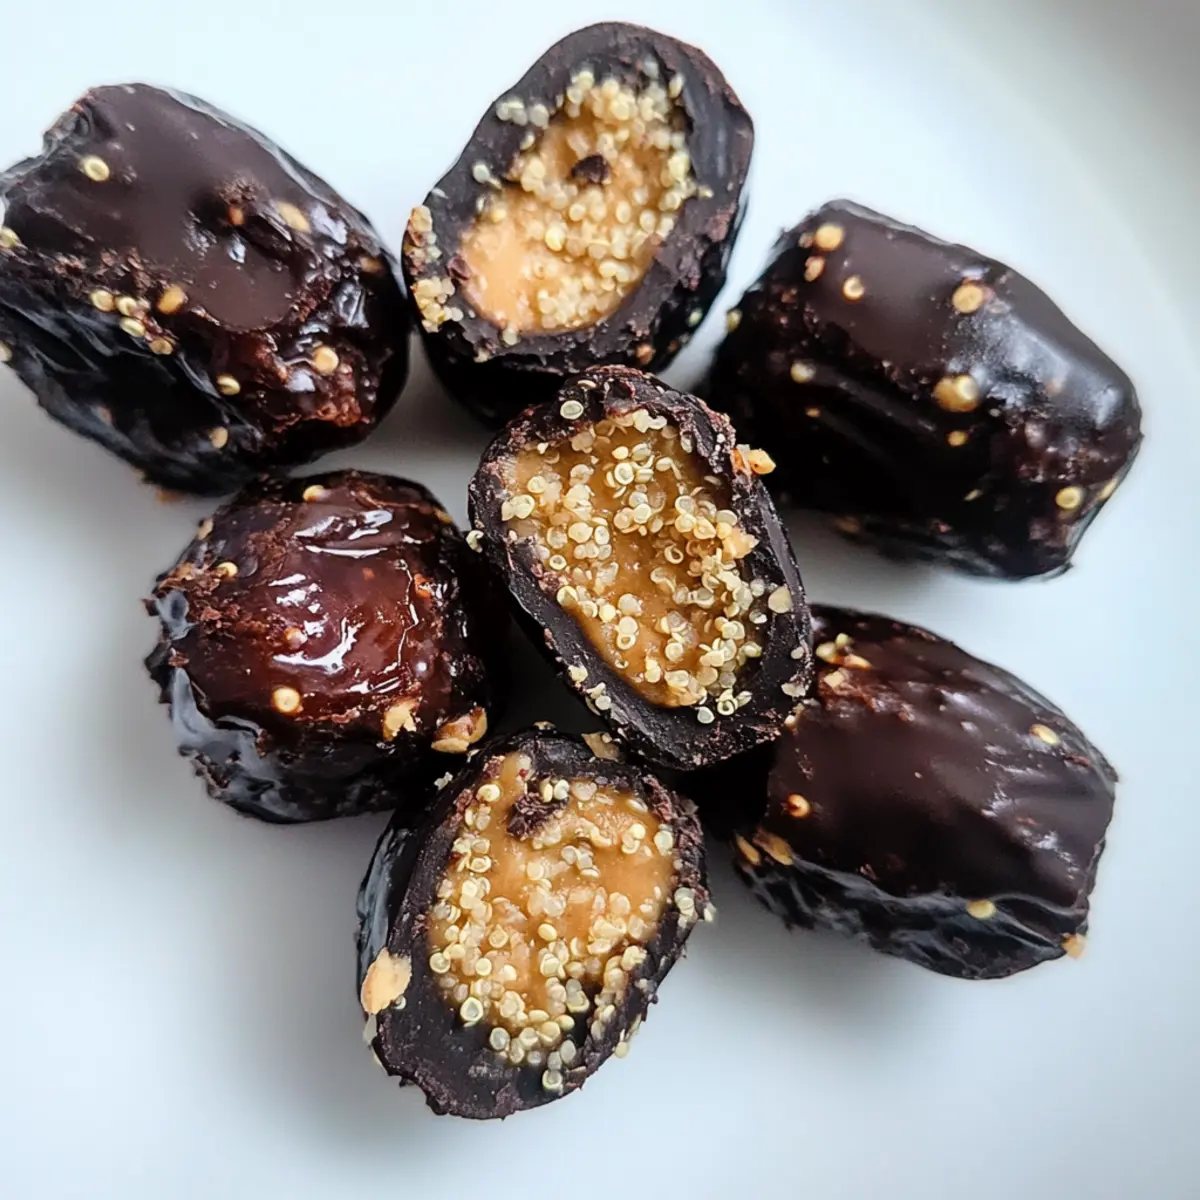
Start by ensuring you have pitted Medjool dates. If they are not already pitted, carefully slice each date along one side with a sharp knife, being cautious not to cut all the way through. Remove the pit and set the dates aside on a clean plate. This step is crucial for creating the perfect base for your Baklava Stuffed Dates.
Step 2: Mix the Filling
In a medium-sized mixing bowl, combine the chopped walnuts, chopped pistachios, honey (or maple syrup for a vegan option), cinnamon, and vanilla extract. Stir the mixture thoroughly until all ingredients are well combined and the nuts are evenly coated with the sweet and aromatic flavors. This delightful filling is what will make your Baklava Stuffed Dates truly irresistible.
Step 3: Stuff the Dates
Using a small spoon or your fingers, gently fill each opened date with the nut mixture, packing it in lightly but firmly. Aim to have each date fully stuffed, creating a generous scoop of the nutty filling. As you fill the dates, you’ll notice how they transform into decadent treats that echo the rich flavors of baklava.
Step 4: Serve and Store
Once all dates are filled, you can enjoy them immediately as a delightful snack or dessert. For later enjoyment, arrange the Baklava Stuffed Dates in an airtight container and store them in the refrigerator. These treats will stay fresh for up to one week, making them perfect for meal prep or last-minute cravings!
How to Store and Freeze Baklava Stuffed Dates
Fridge: Store Baklava Stuffed Dates in an airtight container for up to 1 week to maintain freshness and flavor. They make a perfect grab-and-go snack!
Freezer: For longer storage, place stuffed dates in a freezer-safe container lined with parchment paper. They can last for about 3 months. Just thaw in the fridge before serving.
Room Temperature: It’s best to avoid keeping Baklava Stuffed Dates at room temperature for more than a few hours. They may lose moisture and become sticky.
Reheating: These treats are best enjoyed cold or at room temperature. If you prefer a warm bite, heat them gently in the microwave for 10-15 seconds, but be careful not to overheat.
Baklava Stuffed Dates Variations & Substitutions
Feel free to let your creativity shine with these delicious twists on Baklava Stuffed Dates, each guaranteed to tantalize your taste buds!
-
Nut-Free: Use sunflower seeds or pumpkin seeds instead of nuts for a safe, allergen-friendly alternative.
-
Sweeten Up: Swap honey for agave for a completely vegan-friendly treat while keeping the sweetness intact.
-
Chocolate Drizzle: Melt some dark chocolate and drizzle over the stuffed dates for an indulgent twist that satisfies any chocolate lover.
-
Spicy Kick: Add a pinch of cayenne pepper to the nut mixture for an unexpected heat that complements the sweetness beautifully.
-
Fruit-Filled: Stuff the dates with a combination of cranberries or dried apricots alongside the nuts for an extra burst of flavor and texture.
-
Coconut Flakes: Roll the filled dates in shredded coconut before serving for a tropical twist and added chewiness.
-
Tea Pairing: For a delightful experience, serve your Baklava Stuffed Dates alongside a warm cup of chai. The spices from the tea beautifully enhance the flavors of the dates.
If you're craving more delicious ideas, don’t forget to check out our Herby Ricotta Stuffed options for more tasty variations!
Expert Tips for Baklava Stuffed Dates
-
Choose Quality Dates: Always opt for fresh medjool dates, as they are plump and sweet. Avoid overly dried out ones to enhance the flavor of your Baklava Stuffed Dates.
-
Even Filling Distribution: Make sure to evenly distribute the nut mixture among the dates. This helps in maintaining a balanced flavor and ensures that every bite is delicious.
-
Vegan Adaptations: If making a vegan version, substitute honey with maple syrup or agave nectar. This small swap keeps the sweetness while catering to dietary needs.
-
Keep them Fresh: Store Baklava Stuffed Dates in an airtight container in the fridge. This keeps them fresh for up to a week and prevents them from drying out.
-
Don’t Rush the Mixing: Take your time when mixing the filling to ensure all nuts are coated evenly with the honey or syrup and spices. This ensures maximum flavor in each date.
-
Experiment with Flavors: Don’t hesitate to play with spices or add other nuts. Variations like adding a pinch of nutmeg or using different nut combinations can elevate your Baklava Stuffed Dates!
Make Ahead Options
These Baklava Stuffed Dates are perfect for meal prep, allowing you to enjoy sweet indulgence without the last-minute fuss! You can prepare the filling of chopped walnuts, chopped pistachios, honey (or maple syrup for a vegan alternative), cinnamon, and vanilla extract up to 24 hours in advance. Simply mix all the ingredients and store them in an airtight container in the fridge. When you’re ready to serve, all you need to do is stuff the mixture into pitted Medjool dates and enjoy! This method ensures the ingredients remain fresh and flavorful, giving you that delightful treat just as delicious as when freshly made.
What to Serve with Baklava Stuffed Dates?
These delightful treats pair beautifully with a variety of flavors and textures, creating a full culinary experience.
-
Mint Tea: Its refreshing notes complement the sweet, nutty richness of the dates, providing a perfect balance.
-
Greek Yogurt: A creamy dollop adds a tangy contrast that enhances the flavors of the stuffed dates. The richness and creaminess come together beautifully for a delightful snack.
-
Dark Chocolate Drizzle: A decadent touch that contrasts with the sweetness of the filled dates, making for an indulgent treat.
-
Fresh Berries: Their tartness brightens each bite, creating a vibrant medley that dances on your palate.
-
Cinnamon Almond Milk: This lightly spiced drink mirrors the flavors inside the dates, wrapping you in warmth and comfort.
-
Trail Mix: A crunchy blend of nuts and dried fruits echoes the ingredients in the Baklava Stuffed Dates, making them a complementary snack for sharing.
-
Almond Biscotti: Their crunchy texture and subtle sweetness make for a delightful pairing with the chewy dates, creating a satisfying contrast.
-
Iced Coffee: A chilled cup serves as a refreshing counterpart, balancing the flavors and ensuring an invigorating experience with every bite.
Baklava Stuffed Dates Recipe FAQs
What type of dates should I use?
Absolutely! Medjool dates are the best choice for this recipe due to their natural sweetness and chewy texture. Always ensure they are pitted to prevent any crunch from seeds disrupting your delightful treat.
How do I store Baklava Stuffed Dates?
To keep your Baklava Stuffed Dates fresh, store them in an airtight container in the refrigerator for up to 1 week. This method preserves their flavor and prevents them from drying out.
Can I freeze Baklava Stuffed Dates?
Yes, you can! To freeze, place the stuffed dates in a single layer on a baking sheet lined with parchment paper for 1-2 hours until firm. Then transfer them to a freezer-safe container or bag. They will last for about 3 months. When ready to enjoy, thaw them in the fridge overnight.
What if my dates are too dry?
If you find your dates are too dry, try soaking them in warm water for 10-15 minutes before using them. This helps rehydrate the dates and makes them softer, ensuring a delightful bite. Just remember to pat them dry after soaking!
Are there any dietary considerations for Baklava Stuffed Dates?
Very! These Baklava Stuffed Dates can easily be adapted to various dietary needs. For a vegan option, simply substitute honey with maple syrup or agave nectar. They are also gluten-free as long as the nuts and sweeteners used are certified gluten-free.
How can I customize the filling for Baklava Stuffed Dates?
You can personalize your filling according to your taste! Feel free to swap nuts based on your preference, experimenting with almonds, cashews, or even adding coconut flakes. Additionally, a drizzle of melted dark chocolate can take them over the top for a decadent twist!
Delicious Baklava Stuffed Dates to Satisfy Your Sweet Cravings
Ingredients
Equipment
Method
- Start by ensuring you have pitted Medjool dates. Slice each date along one side and remove the pit.
- In a mixing bowl, combine the chopped walnuts, chopped pistachios, honey, cinnamon, and vanilla extract. Stir until well mixed.
- Using a spoon or fingers, gently fill each date with the nut mixture, packing it in firmly.
- Enjoy immediately or store in an airtight container in the refrigerator for up to one week.