“Can you smell the chocolate?” I overheard my neighbor’s kids exclaiming as they made their way to my door on Halloween night. It’s that magical time of year when spooky treats take center stage, and nothing brings the joy of the season quite like this Halloween Muddy Buddies Popcorn Mix! This easy snack combines the delightful crunch of popcorn with the rich flavors of chocolate and peanut butter, making it a deliciously fun treat for kids and adults alike. Not only is it a crowd-pleaser for movie nights and festive gatherings, but it also offers the flexibility to swap in healthier ingredients if you're looking to lighten things up. So, what’s your favorite Halloween memory—snacking in costume or whipping up festive treats in the kitchen? Let’s dive into this playful recipe!
Why is this Halloween treat so special?
Unique flavors: The combination of chocolate, peanut butter, and popcorn creates a delightful medley that is hard to resist.
Kid-friendly fun: This recipe invites children to help in the kitchen, making it a perfect bonding activity that sparks creativity.
Easy to customize: Whether you prefer healthier options, like using natural peanut butter, or festive colors with eye sprinkles, this mix adapts to your tastes.
Perfect for sharing: Ideal for Halloween parties, movie nights, or classroom treats—everyone will enjoy these whimsical clusters.
Quick and simple: Just a few steps to a delicious snack means you can whip this up in no time, making it stress-free for busy schedules! Plus, if you enjoy family-friendly recipes, you might want to check out our easy snacks collection for more tasty ideas.
Halloween Muddy Buddies Popcorn Mix Ingredients
Get ready to create this fun holiday treat!
For the Cereal Base
- Chex Cereal – Provides a crunchy texture and acts as the base for the mix; you can use any variety to spark your family's preference.
- Peanut Butter – Adds richness and creaminess; swap with a natural or no-sugar added peanut butter for a healthier option.
- Powdered Sugar – Sweetness and coating for the mix; look for organic options when possible for a cleaner treat.
For the Chocolate Coating
- Chocolate Chips – Gives the mix its sweet chocolatey flavor; consider high-quality brands like Ghirardelli or allergy-friendly Enjoy Life Chocolate Chunks for a fabulous taste.
- Butter – Helps to bind the ingredients; opt for grass-fed butter for a healthier alternative.
- White Chocolate Chips/Almond Bark – For drizzling, this adds sweetness; choose reputable brands depending on your preference for a creamy finish.
For the Popcorn
- Popcorn – The main volume of the mix that provides lightness; pop your own using avocado oil for a wellness-focused choice, or use brands like Skinny Pop for convenience.
For the Festive Touch
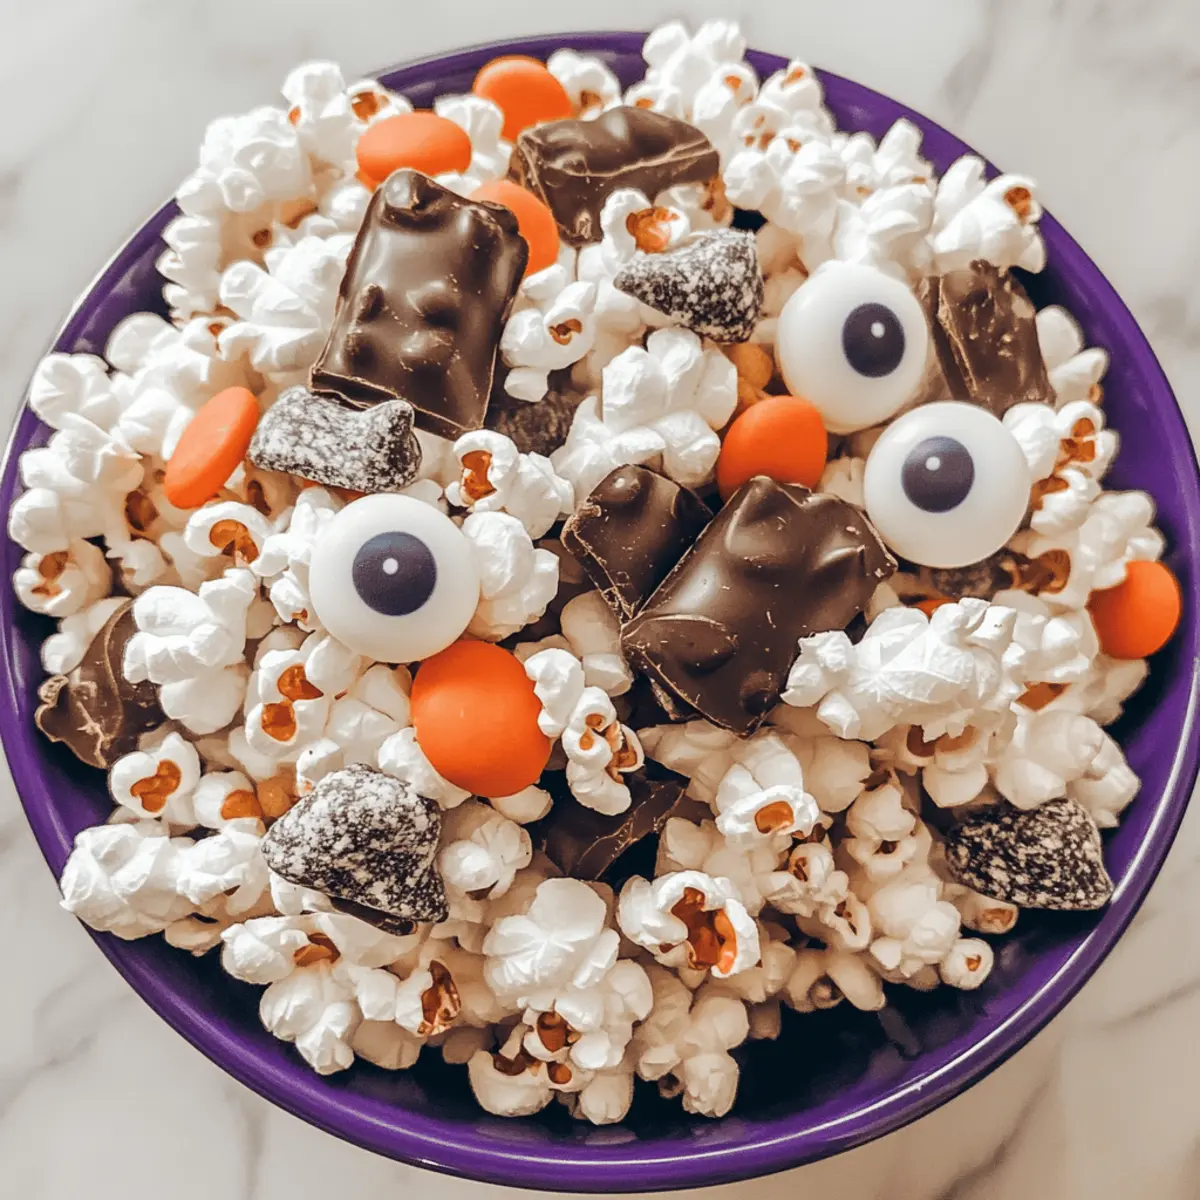
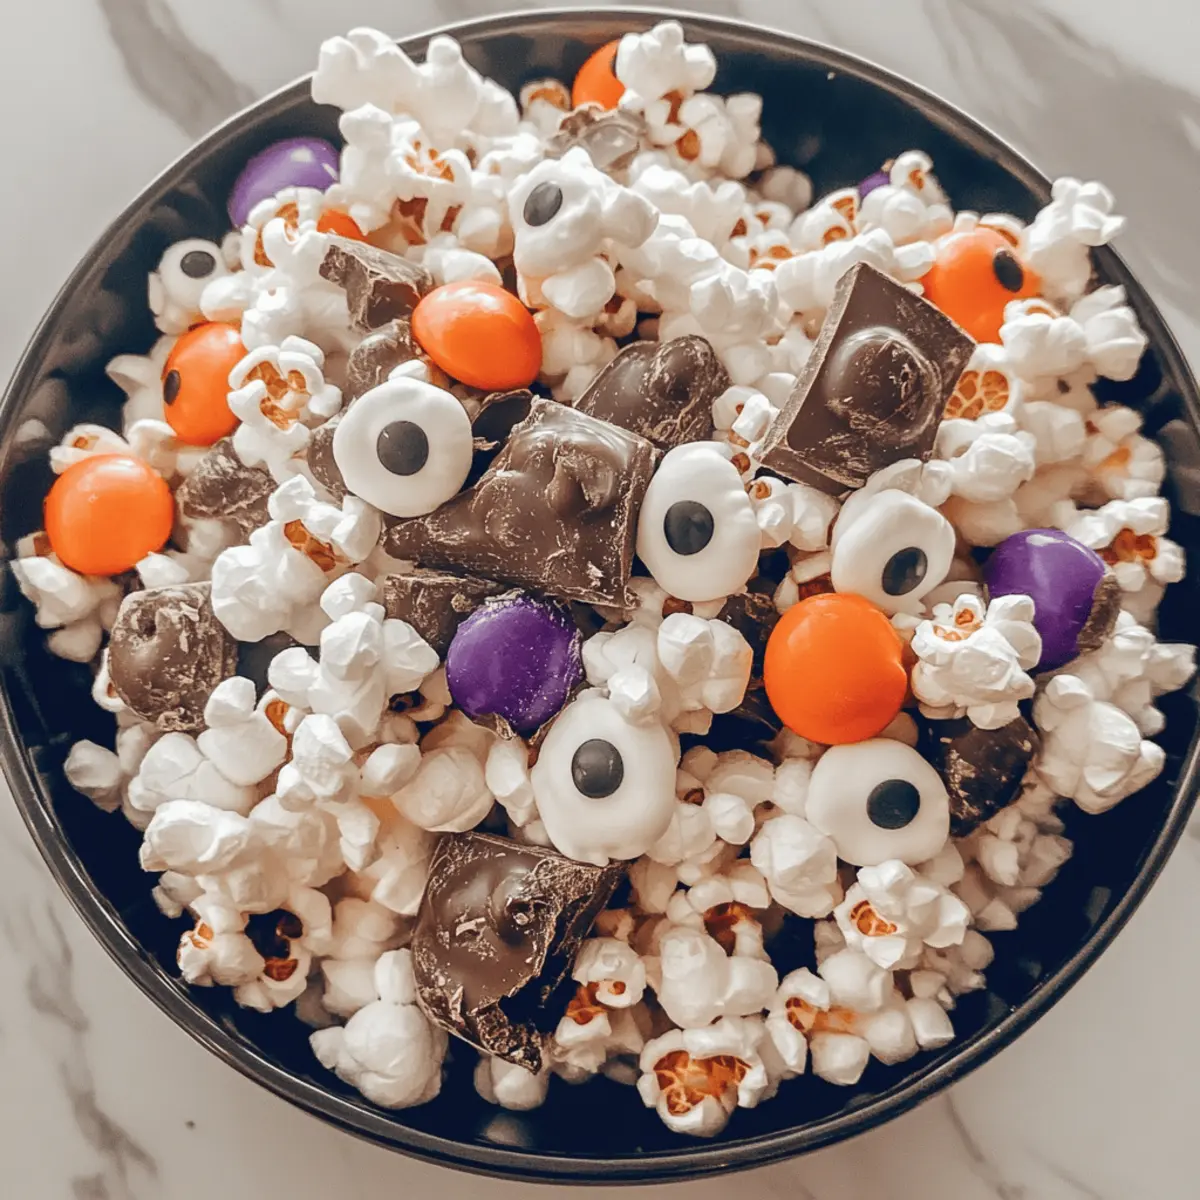
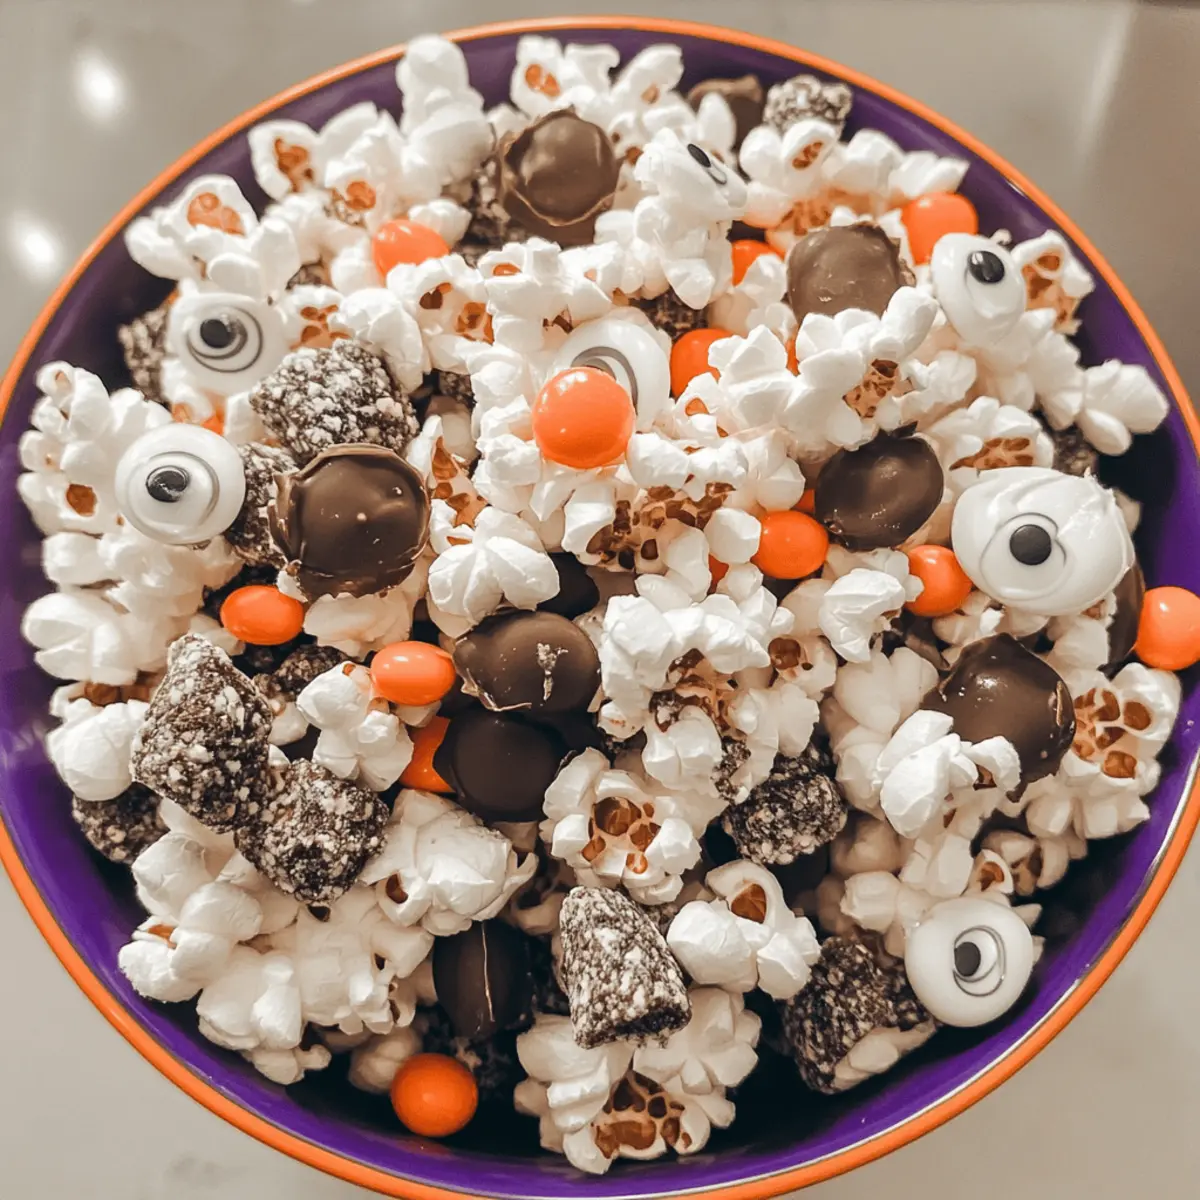
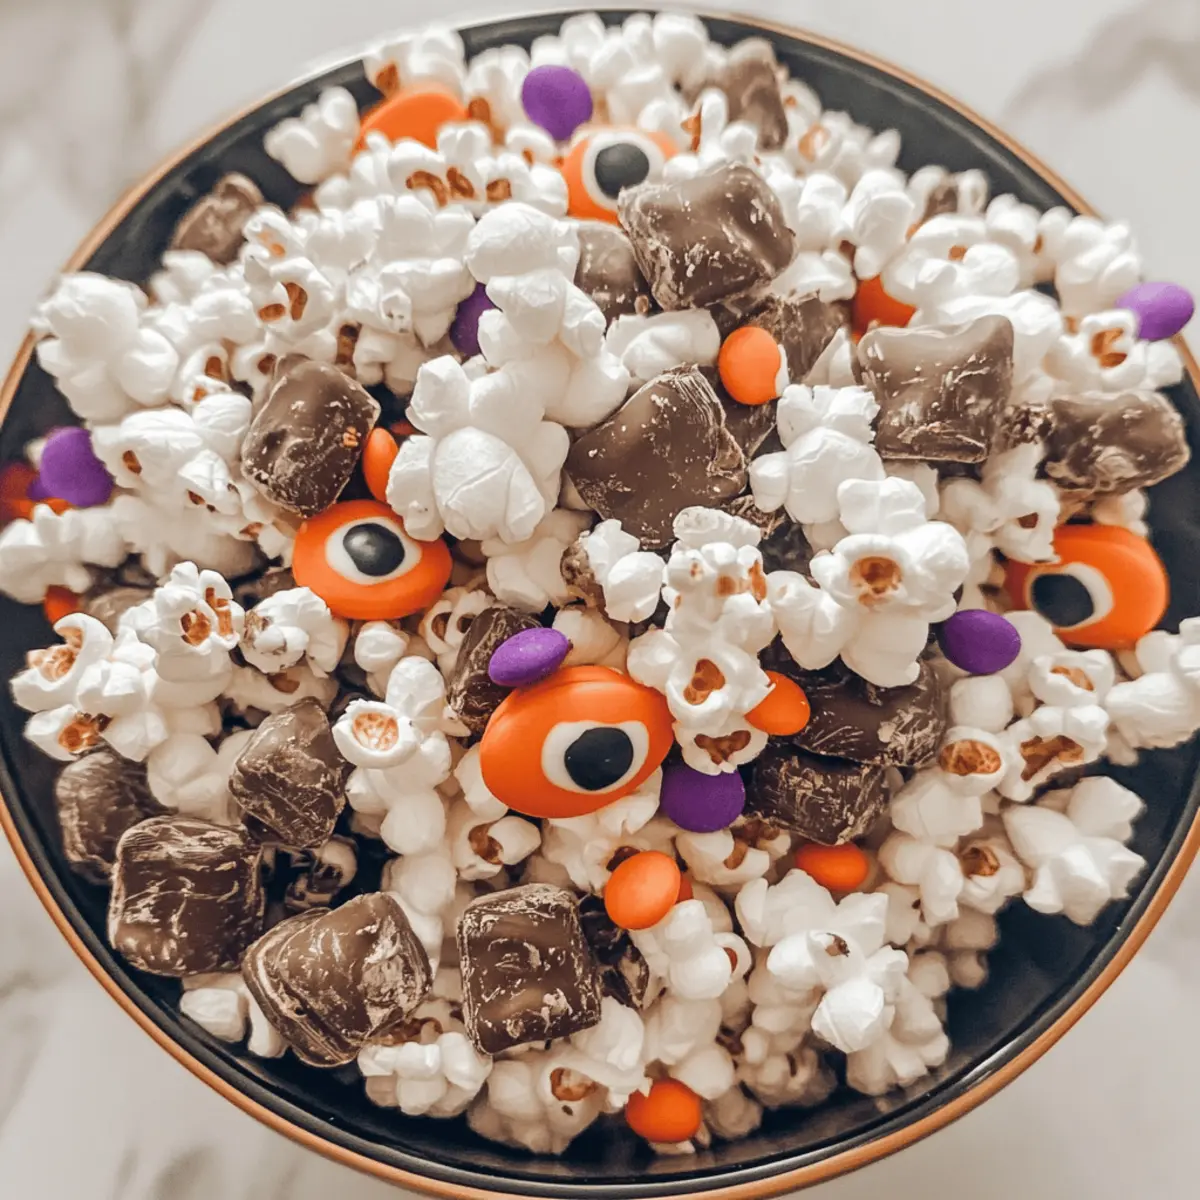
- Eye Sprinkles – A decorative delight that brings Halloween aesthetics to life!
- Candy Coated Chocolate (e.g., Reese's Pieces, UNREAL Chocolate Gems) – Adds color and flavor; opt for less sugary options if desired to keep things healthier.
The Halloween Muddy Buddies Popcorn Mix transforms any gathering into a delightful occasion, enticing kids and adults alike with its irresistible crunch and sweetness!
Step‑by‑Step Instructions for Halloween Muddy Buddies Popcorn Mix
Step 1: Prep Cereal
In a large mixing bowl, combine 6 cups of Chex cereal with a melted mixture of 1 cup of chocolate chips and ½ cup of peanut butter. Stir the mixture until the cereal is well-coated and glistening, about 2-3 minutes. You’ll know it’s ready when each piece is covered in a delicious chocolate-peanut buttery sheen.
Step 2: Set Cereal
Spread the coated Chex cereal evenly on two baking sheets lined with parchment paper. Allow it to set at room temperature for about 15-20 minutes, or until the chocolate coating is firm to the touch. This step is essential for creating that delightful crunch in your Halloween Muddy Buddies Popcorn Mix.
Step 3: Melt White Chocolate
While the cereal sets, place 1 cup of white chocolate chips or almond bark in a microwave-safe bowl. Microwave in 30-second intervals, stirring between each until the chocolate is completely melted and smooth, which should take about 1-2 minutes. Be cautious; avoid overheating to ensure a silky texture for drizzling.
Step 4: Combine Mix
In a large bowl, combine the popped popcorn (about 8 cups) with the set Chex Muddy Buddies cereal. Gently mix the two together using a spatula, ensuring even distribution without crushing the popcorn or cereals. This step encourages that wonderful mix of textures in your Halloween Muddy Buddies Popcorn Mix.
Step 5: Drizzle Chocolate
Pour the melted white chocolate over the popcorn and cereal mixture. Gently toss the mix using a spatula until everything is coated in the creamy, sweet chocolate. This will create a luscious combination of flavors and add an extra layer of sweetness to your Halloween treat.
Step 6: Decorate
Immediately sprinkle the mixture with colorful eye sprinkles and candy-coated chocolates, like Reese's Pieces, for that festive Halloween flair. As you do this, continue to toss the mix gently to distribute the decorations evenly. This fun step adds a playful touch and whimsy to your Halloween Muddy Buddies Popcorn Mix.
Step 7: Cool & Serve
Once decorated, allow the mix to cool completely on the baking sheets for about 15 minutes. After it's set, break the mixture into clusters and serve in charming festive bowls. Your Halloween Muddy Buddies Popcorn Mix is now ready to enjoy—perfect for sharing at parties or cozy movie nights!
Halloween Muddy Buddies Popcorn Mix Variations
Feel free to get creative and make this Halloween Muddy Buddies Popcorn Mix your own with these delicious and fun substitutions!
- Nut-Free Option: Replace peanut butter with almond butter for a nut-free alternative while keeping the creamy texture.
- Choco Delight: Swap in dark chocolate chips for a bolder chocolate flavor that adults will appreciate.
- Texture Twist: Instead of popcorn, try using a mix of pretzels and corn chips for a salty crunch to balance the sweetness.
- Sweetener Swap: Opt for honey or maple syrup in place of powdered sugar for a more natural sweetness that still sticks well.
- Extra Crunch: Mix in your favorite nuts or seeds to the popcorn mixture, adding extra crunch and nutrition.
- Spicy Kick: For a twist, add a pinch of cayenne or chili powder for an unexpected heat that contrasts beautifully with the sweetness.
- Vegan Version: Use vegan chocolate chips and coconut oil instead of butter to make this treat suitable for a vegan diet.
- Festive Sprinkles: Incorporate seasonal candy corn or pumpkin-shaped candies alongside eye sprinkles for an extra festive and colorful touch.
Whichever variation you choose, this Halloween Muddy Buddies Popcorn Mix is sure to be a hit! Dive into more creative ideas with our easy snacks collection for family gatherings.
How to Store and Freeze Halloween Muddy Buddies Popcorn Mix
Room Temperature: Store the Halloween Muddy Buddies Popcorn Mix in an airtight container at room temperature for up to 1 week to maintain its crunchiness.
Fridge: If you live in a humid climate, you can refrigerate it in an airtight container for up to 2 weeks. Just allow it to come to room temperature before enjoying to restore texture.
Freezer: For longer storage, freeze the mix in a zip-top bag or airtight container for up to 3 months. Thaw overnight in the fridge before serving.
Reheating: There's no need to reheat this snack! Just enjoy directly from your storage container for perfect munching.
Expert Tips for Halloween Muddy Buddies Popcorn Mix
-
Seal Tight: Ensure the zip-top bag for shaking the cereal is firmly closed to prevent spills, making cleanup a breeze.
-
Quality Counts: Use high-quality ingredients for the best flavor and texture in your Halloween Muddy Buddies Popcorn Mix; it truly makes a difference!
-
Melting Chocolate: Be cautious while melting chocolate; always do it in short bursts to avoid burning. Stirring is key to achieving a smooth consistency.
-
Engage Allies: Involve the kids in each step of the process for a fun and engaging family activity. Let them sprinkle and mix for added joy!
-
Customize Wisely: Experiment with substitutions carefully if you're aiming for healthier options, ensuring the delightful balance of flavors is still delightful.
What to Serve with Halloween Muddy Buddies Popcorn Mix
Create a delightful spread that will enchant your guests and make your gatherings unforgettable.
-
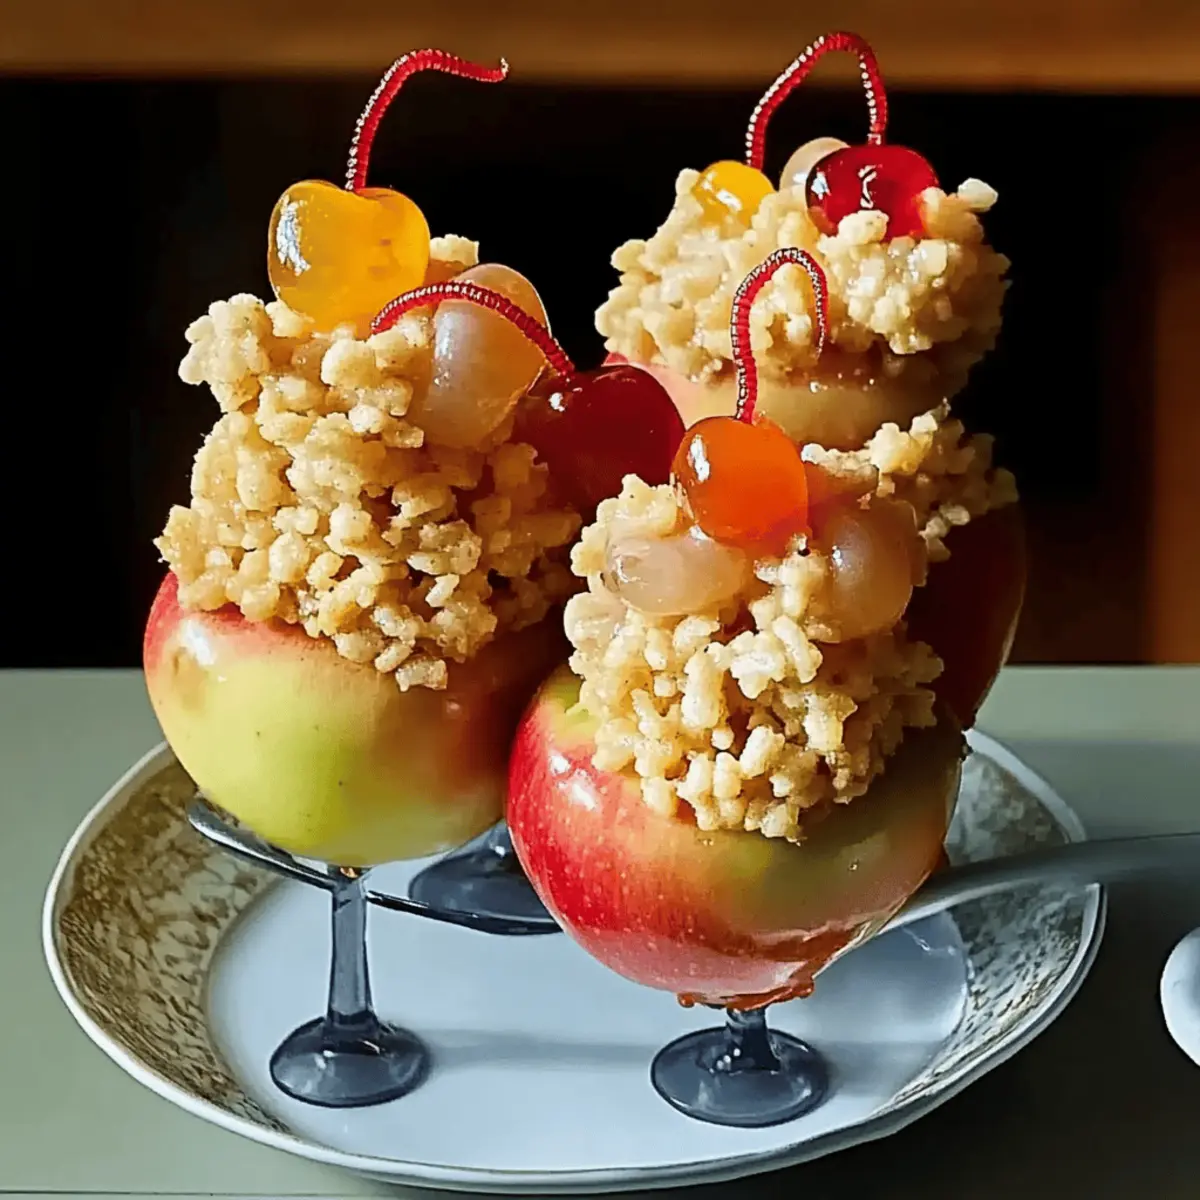
Caramel Apples: The crispness of fresh apples coated in caramel provides a delightful counterbalance to the chocolatey sweetness of the popcorn mix. Just imagine each bite filled with a crunchy and gooey treat, perfect for Halloween festivities!
-
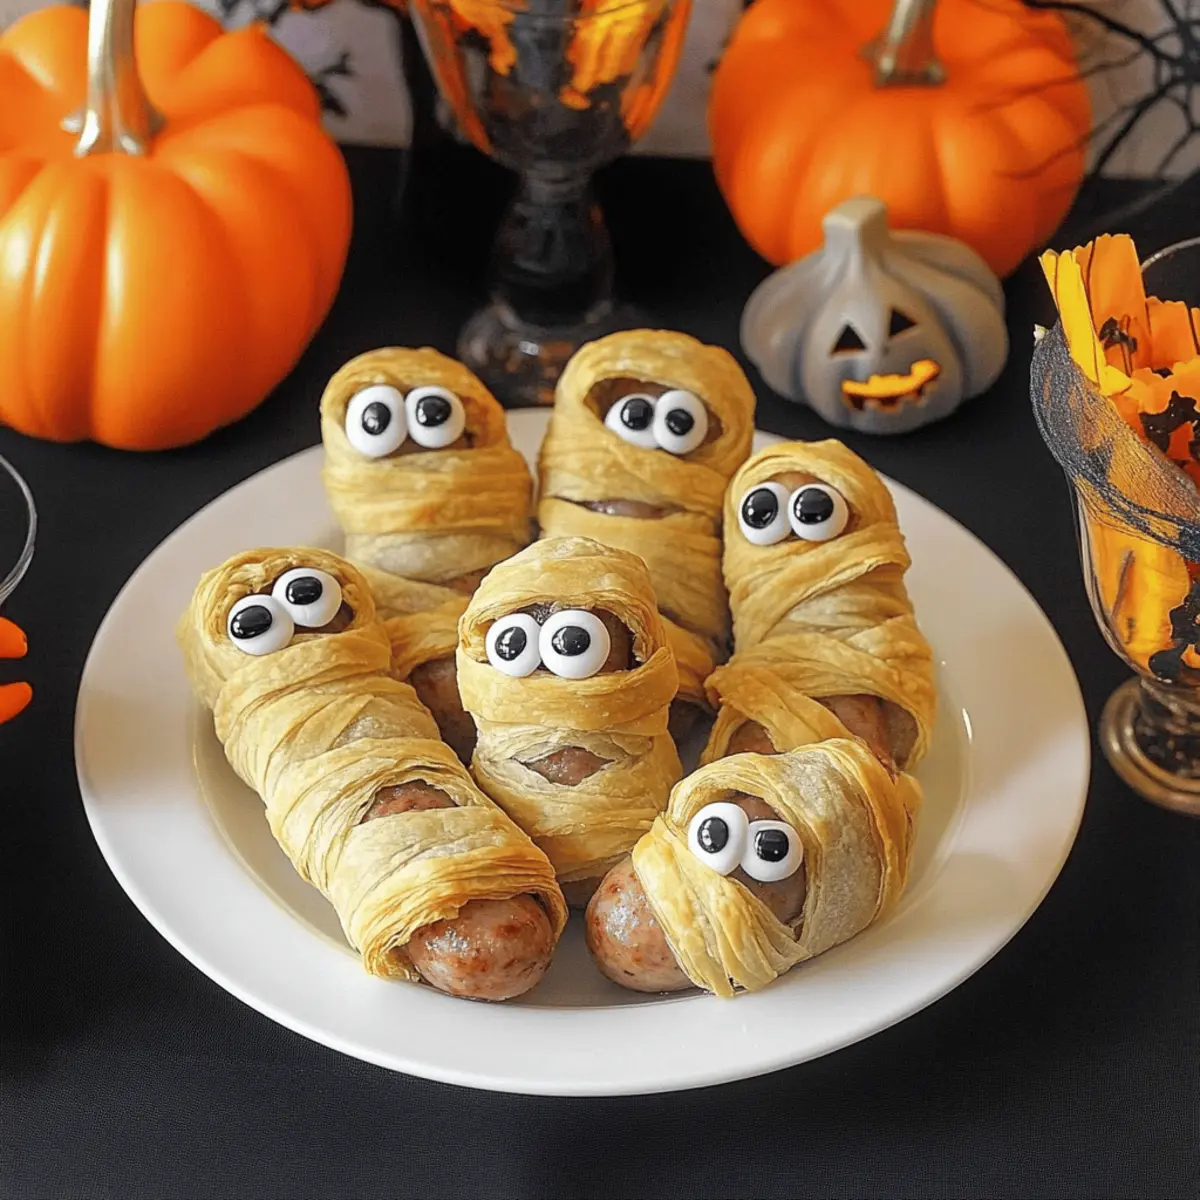
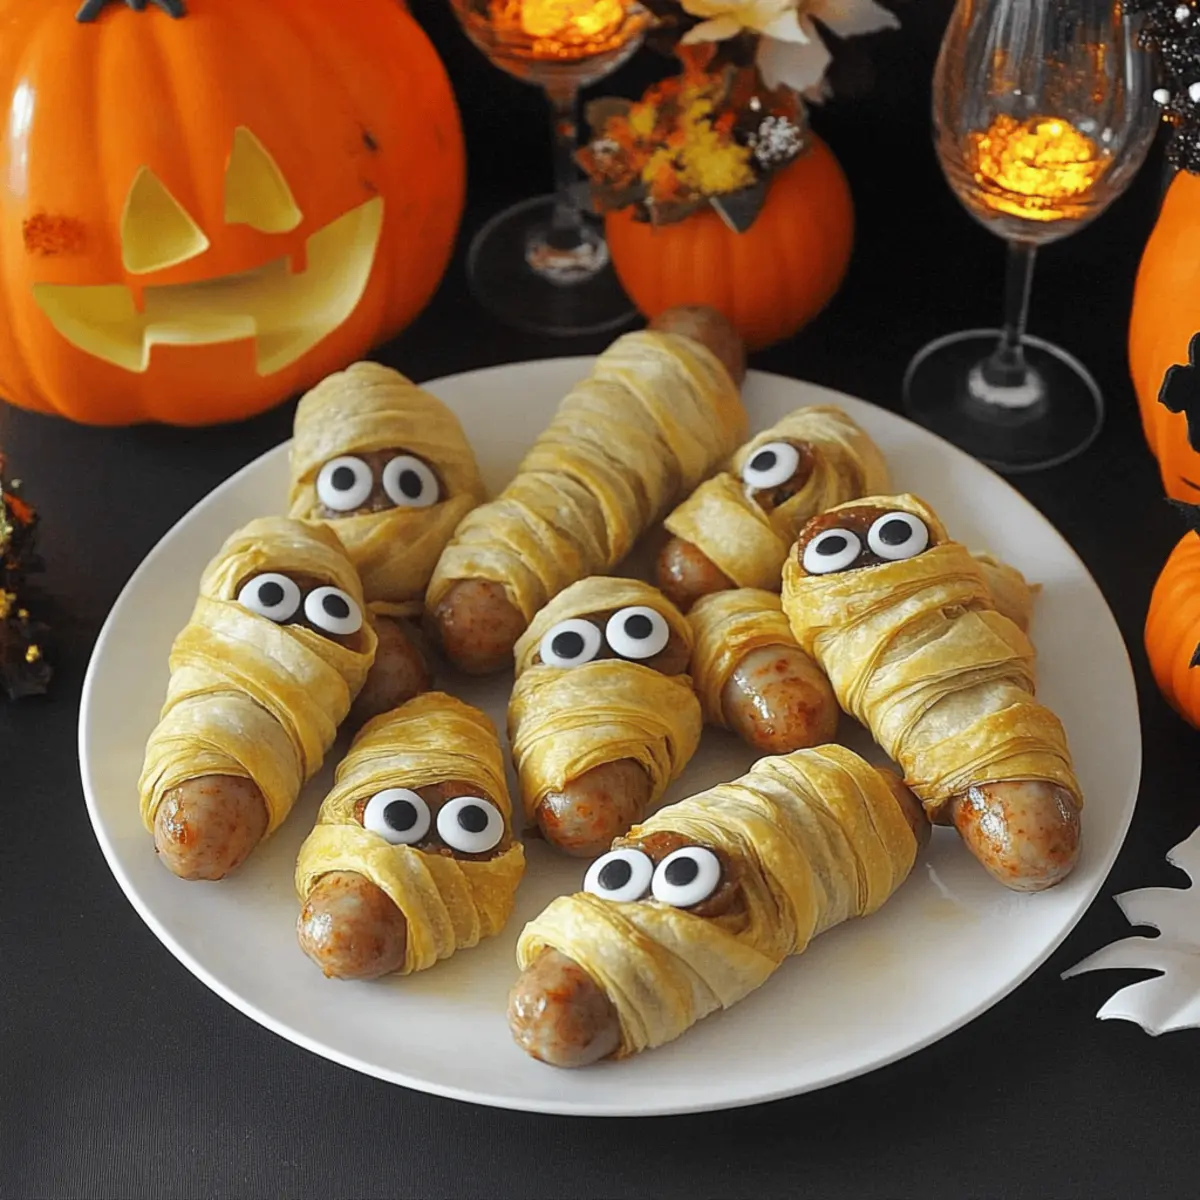
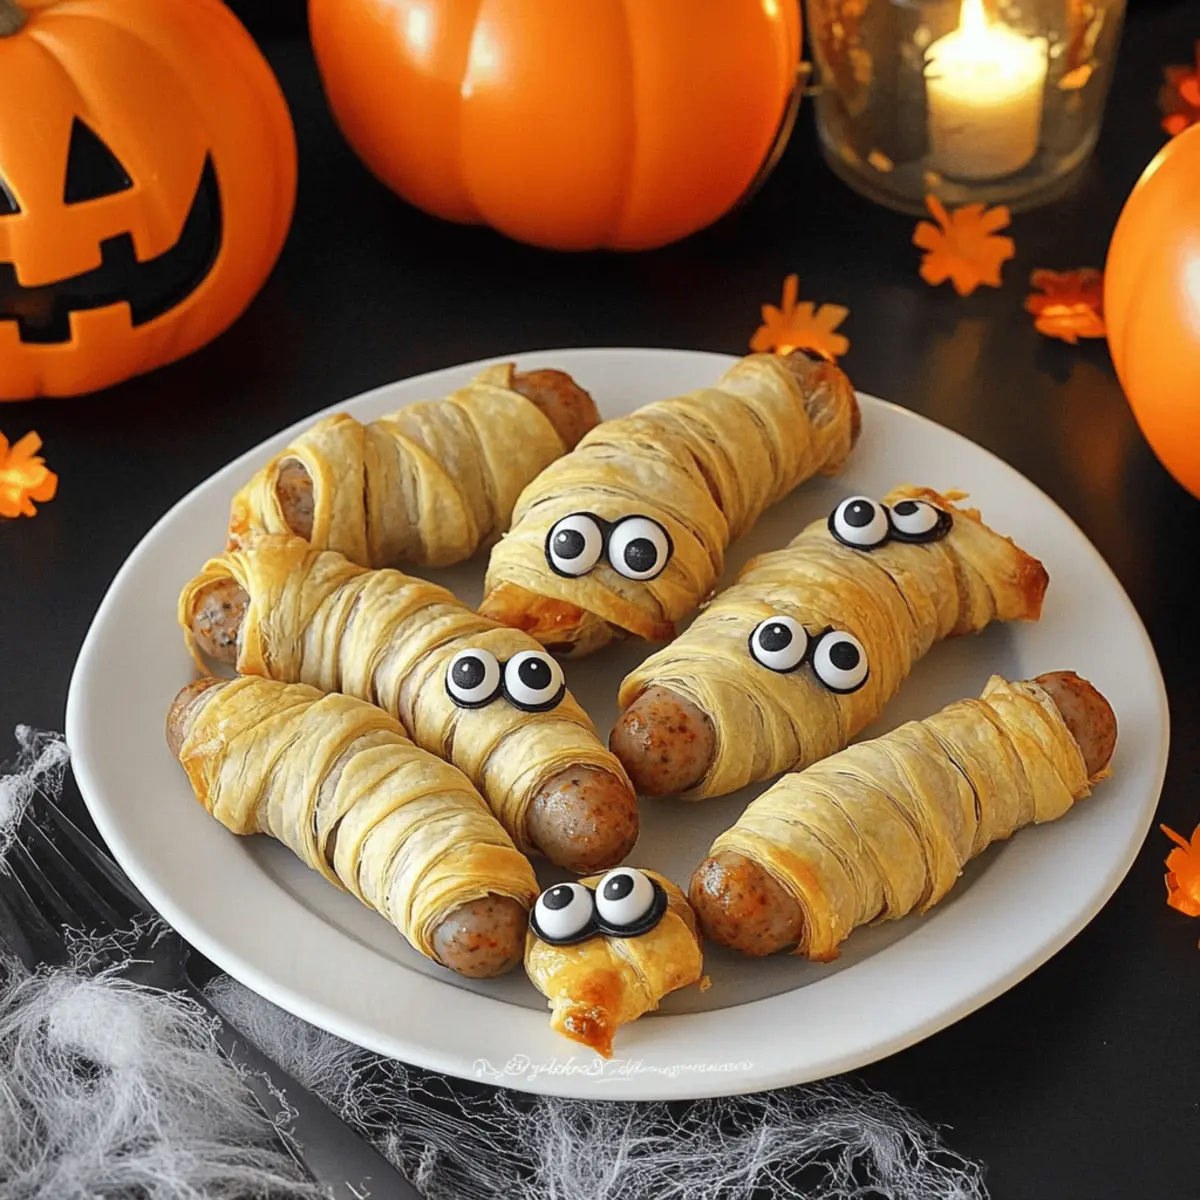
Mummy Hot Dogs: These fun and quirky snacks are easy to prepare and kids will love getting involved! Wrapped in crescent dough and baked to golden perfection, they pair perfectly with the sweet treat by adding a savory element to the mix.
-
Pumpkin Spice Cookies: Offer a comforting and seasonal touch with these soft cookies drizzled with icing. Their warm spices complement the rich flavors of the Halloween Muddy Buddies Popcorn Mix, creating a beautifully balanced dessert table.
-
Cheese Platter: A selection of cheeses, nuts, and dried fruits will add sophistication to your Halloween spread. The creaminess of cheese balances the sweet crunch of the popcorn, appealing to both kids and adults alike.
-
Hot Chocolate Bar: Warm, rich hot chocolate topped with whipped cream and sprinkles can be the perfect beverage to enjoy alongside your mix. The cozy flavors create a wonderfully festive atmosphere for your gathering.
-
Fruit Skewers: Bright, fresh fruits like strawberries, oranges, and grapes add a refreshing crunch and contrasting flavor profile that lightens the sweet treat. These vibrant skewers not only look stunning but also provide a healthier option for your guests!
Make Ahead Options
These Halloween Muddy Buddies Popcorn Mix treats are perfect for busy home cooks looking to save time! You can prepare the Chex Muddy Buddies mixture up to 24 hours in advance; simply mix and coat the cereal and let it set on the baking sheets. After it has cooled, store the coated cereal in an airtight container at room temperature to maintain its crunch. When you're ready to create the popcorn mix, combine the popcorn and the prepped Chex, drizzle with melted white chocolate, and toss in the sprinkles just before serving. This way, you’ll have a festive and delicious snack ready to impress with minimal effort!
Halloween Muddy Buddies Popcorn Mix Recipe FAQs
How do I choose the right Chex cereal?
Absolutely! You can use any variety of Chex cereal for this mix, whether it's rice, corn, or wheat. Each brings its own unique texture. Just make sure to select a cereal that's fresh—look for boxes without any damage or expired dates for the best results!
How should I store leftovers?
Store your Halloween Muddy Buddies Popcorn Mix in an airtight container at room temperature for up to 1 week. This will keep it crunchy and fresh. If the air is particularly humid where you live, consider refrigerating it in an airtight container for up to 2 weeks. Just let it come back to room temperature before enjoying for the best texture.
Can I freeze the Halloween Muddy Buddies Popcorn Mix?
Yes, you can! For longer storage, simply place your mix in a zip-top freezer bag or airtight container and freeze it for up to 3 months. To thaw, just transfer it to the fridge overnight. Be sure to enjoy it chilled, as there's no need to reheat this snack!
What if my chocolate is too thick while melting?
Very! If your chocolate isn’t melting smoothly, it may have been overheated or you may need to add a splash of coconut oil or a little bit of butter for a smoother consistency. Microwave it in 10-second bursts while stirring well each time until you achieve that creamy texture—this will help it coat your mix perfectly!
Are there any allergy considerations for this recipe?
Definitely, yes! If you're making this treat for others, keep in mind any allergies. You can use sunflower seed butter instead of peanut butter for a nut-free variant. Also, please check the labels for chocolate chips to ensure they’re free from allergens like dairy or gluten, especially if you’re using allergy-friendly brands. It’s important to cater to everyone’s needs!
Can I make healthier substitutions?
Absolutely! For healthier tweaks, consider using natural or no-sugar added peanut butter, high-quality dark chocolate instead of milk chocolate, and popping your own popcorn using avocado oil. You can also add nuts or seeds for added crunch and nutrition! The more the merrier when it comes to flavor combinations, so feel free to experiment!
Halloween Muddy Buddies Popcorn Mix
Ingredients
Equipment
Method
- In a large mixing bowl, combine Chex cereal with melted chocolate chips and peanut butter, stirring until well-coated.
- Spread coated cereal on baking sheets lined with parchment paper and let set at room temperature for about 15-20 minutes.
- Melt white chocolate chips or almond bark in a microwave-safe bowl, stirring until smooth.
- Combine popped popcorn with the set Chex Muddy Buddies cereal in a large bowl and mix gently.
- Drizzle the melted white chocolate over the popcorn and cereal mixture, and toss gently to coat.
- Sprinkle with eye sprinkles and candy-coated chocolates, continuing to toss for even distribution.
- Allow the mix to cool completely, break into clusters, and serve.