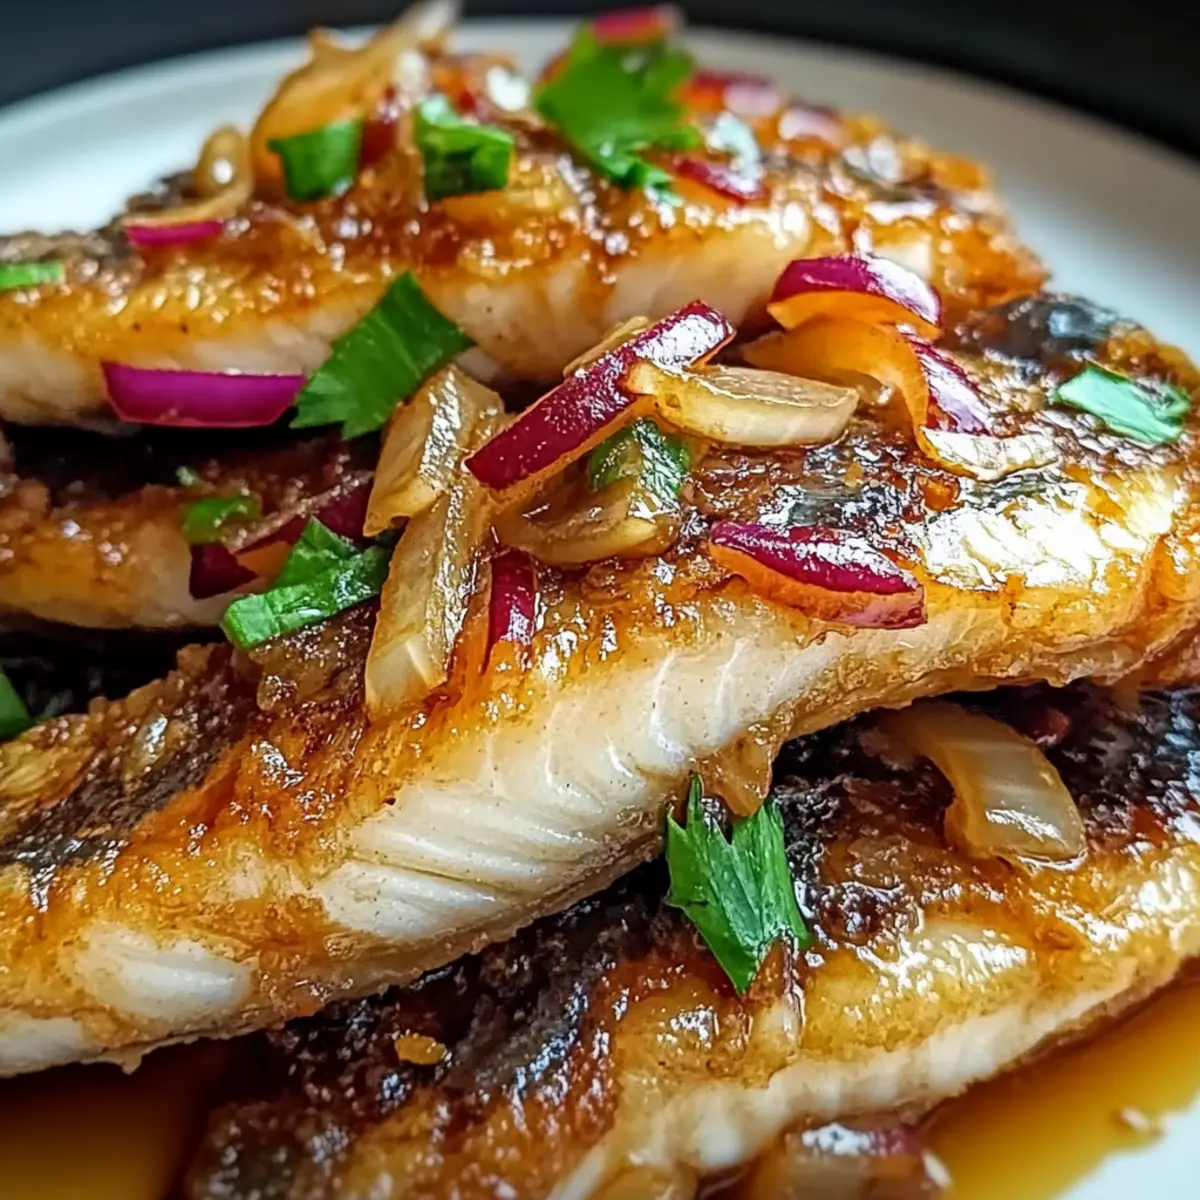
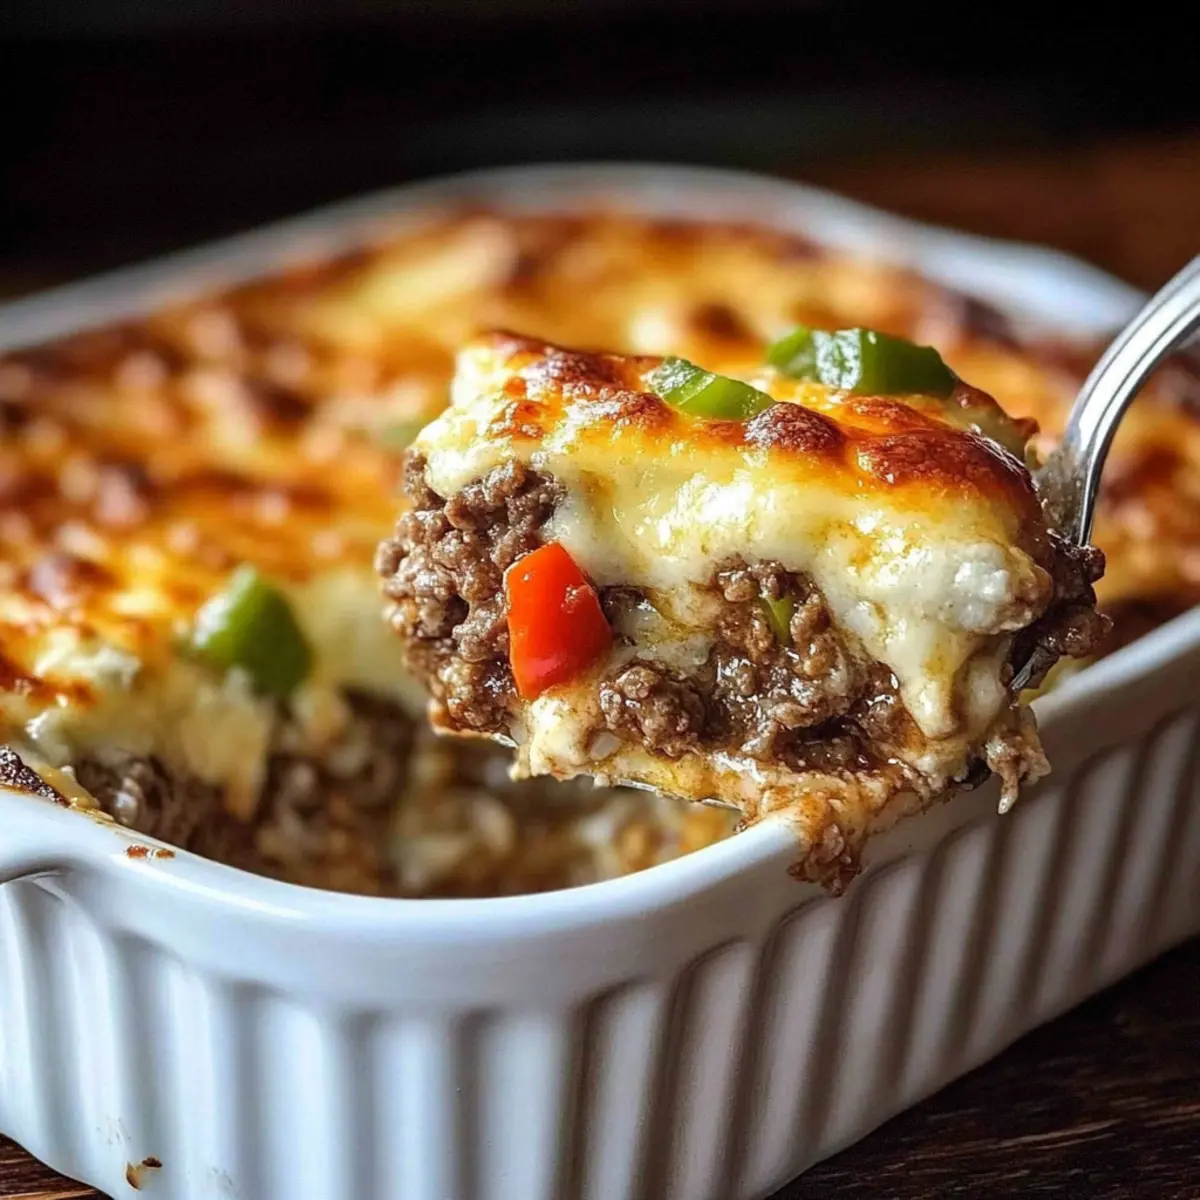
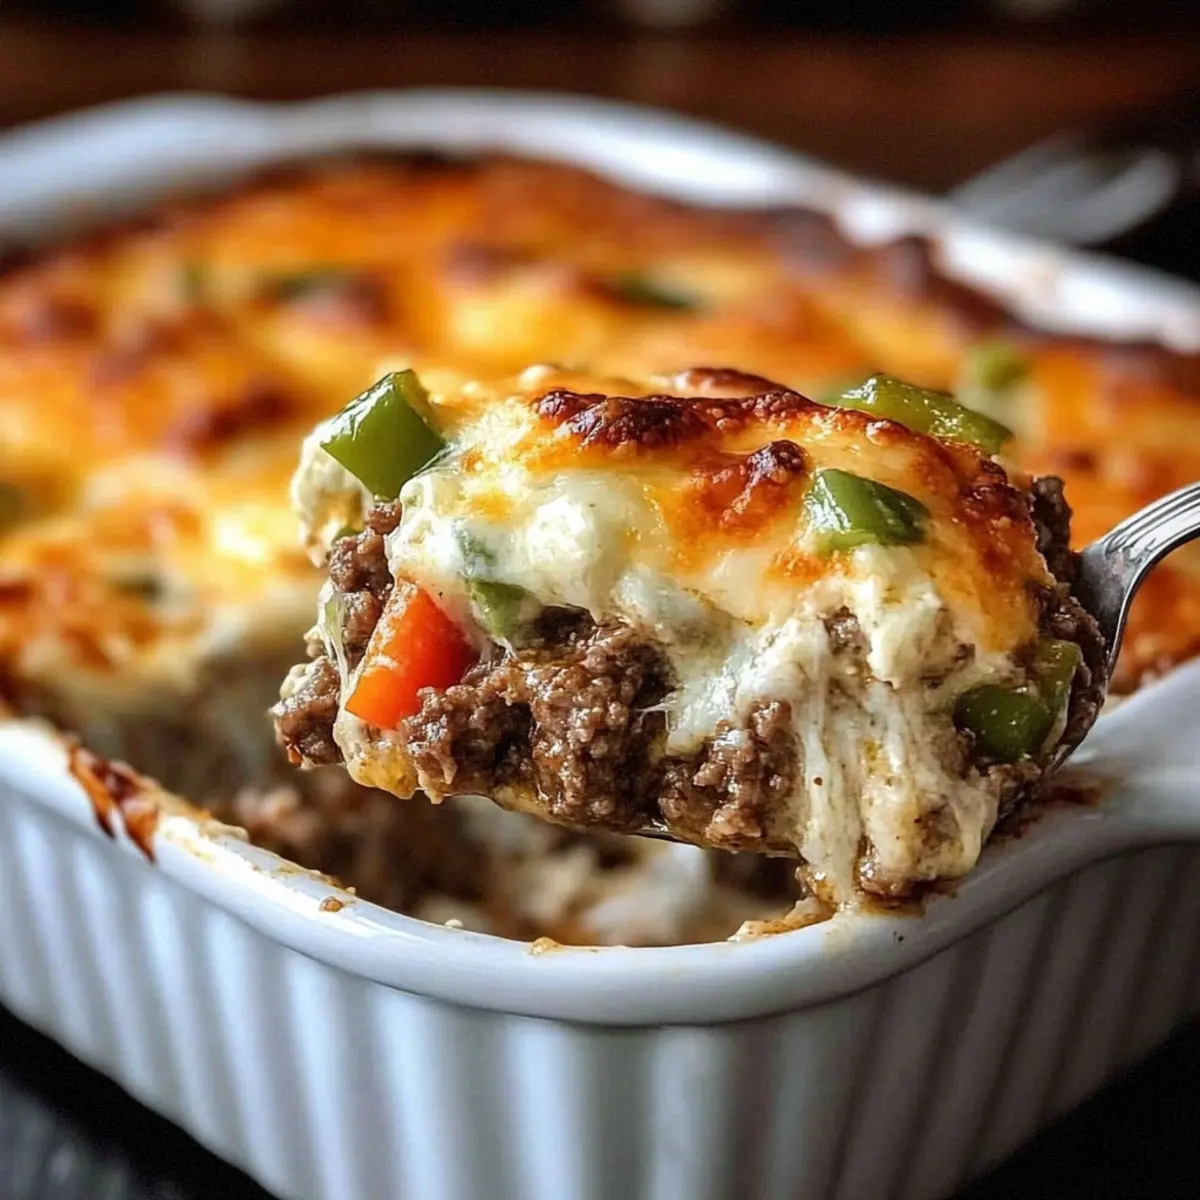
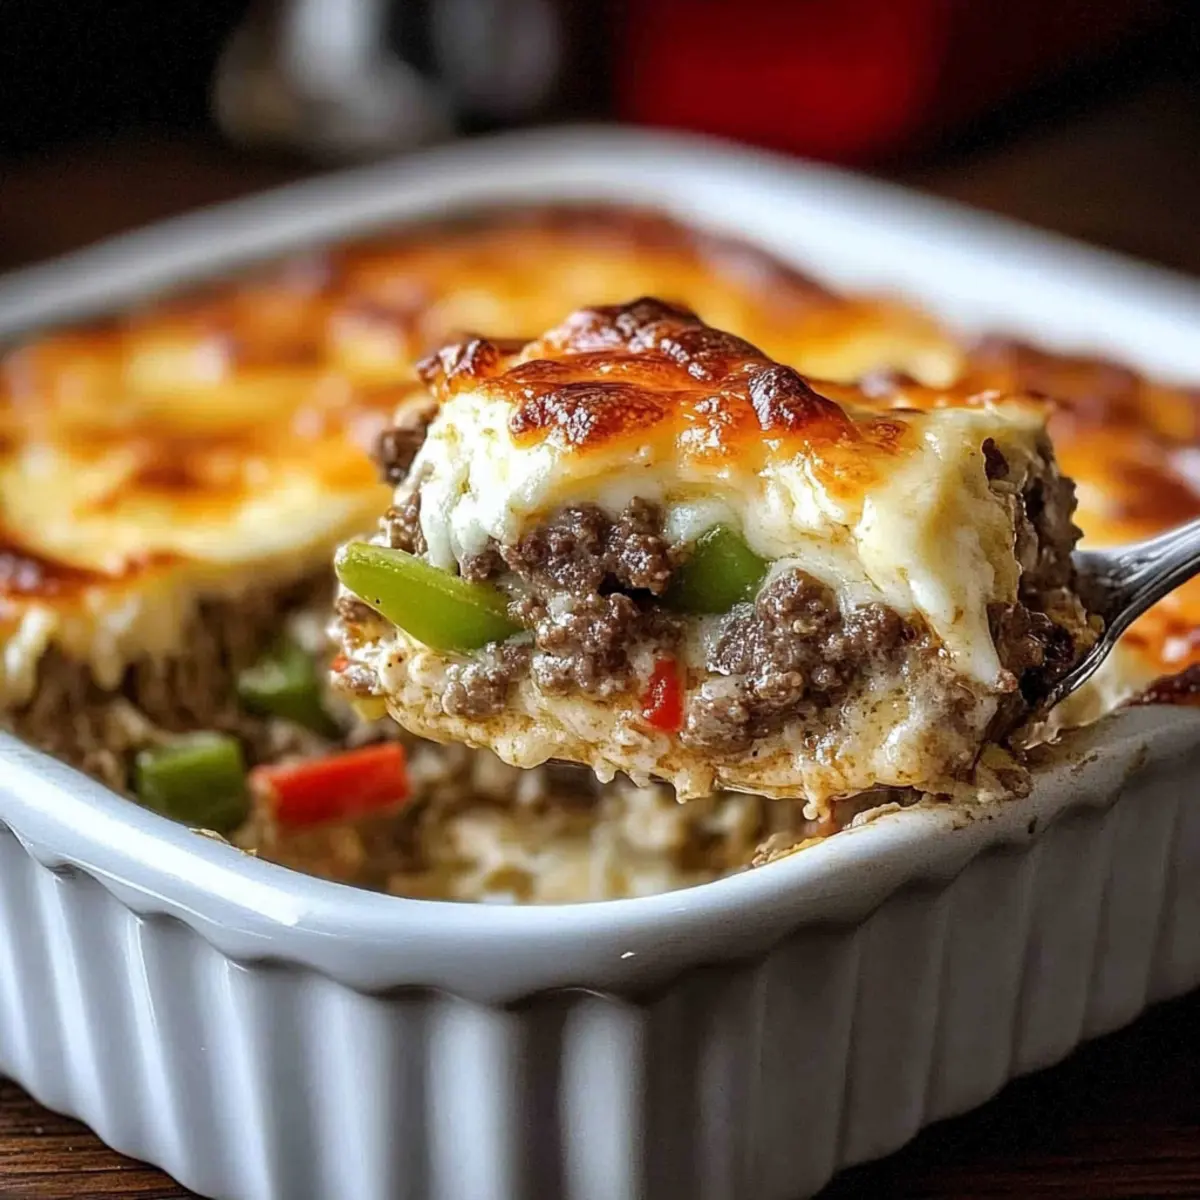
tastytrendingredients

  • Home
  • Recipes
    • Appetizers
    • Breakfast
    • Dessert
    • Dinner
    • Drinks
    • Salads
    • Snacks
    • Soups
  • About me
  • Contact me
menu icon
go to homepage
  • Home
  • Recipes
    • Appetizers
    • Breakfast
    • Dessert
    • Dinner
    • Drinks
    • Salads
    • Snacks
    • Soups
  • About me
  • Contact me
search icon
Homepage link
  • Home
  • Recipes
    • Appetizers
    • Breakfast
    • Dessert
    • Dinner
    • Drinks
    • Salads
    • Snacks
    • Soups
  • About me
  • Contact me
×

Heavenly Baked Italian Sub Sandwiches for Cozy Nights

December 9, 2025 by Grace Snow Leave a Comment

As I watched my favorite Italian deli turn into yet another fast-food joint, I couldn't help but feel a pang of loss for those warm, melty sandwiches that danced with flavor. That’s when I decided to whip up my own version—Baked Italian Sub Sandwiches. These delightful creations are not just any sandwiches; they're a symphony of savory meats, gooey cheese, and zesty toppings enveloped in a crusty roll. Perfect for busy weeknights or casual gatherings, they come together in a flash, making homemade comfort food an achievable delight. And the best part? The customization options are limitless, so you can tailor them to fit any craving or dietary preference. Are you ready to take a delicious bite out of nostalgia? Let’s dive in!

Why Are These Italian Subs So Irresistible?

Heavenly Flavor: The fusion of savory meats and gooey cheese creates a taste sensation that transports you straight to Italy.

Quick Prep: These sandwiches come together in a flash, making them ideal for busy evenings or last-minute gatherings.

Endless Customization: You can mix and match ingredients, swapping salami for turkey or adding your favorite veggies. It’s perfect for everyone's palate!

Crowd-Pleasing Choice: Whether it’s family game night or a cozy dinner with friends, these Baked Italian Sub Sandwiches will be a hit at your table.

Comfort Food Reimagined: Enjoy the nostalgia of a classic deli sandwich, warm and comforting, without ever leaving your kitchen.

So, why not pair these with a side of crispy chips or an Italian salad for a full, satisfying meal? Don’t forget to check out my suggestions for Matcha Baked Doughnuts for a finishing touch to your delightful dining experience!

Baked Italian Sub Sandwich Ingredients

For the Sandwiches
• Hoagie Rolls – The perfect vessel for your ingredients; fresh, crusty rolls are key to a delightful crunch.
• Salami – Adds a savory richness to your subs; swap with turkey for a lighter option.
• Capicola – Introduces a zesty kick; feel free to replace it with prosciutto if you prefer.
• Mozzarella Cheese – Melts beautifully, bringing creaminess; consider provolone for a sharper flavor twist.
• Provolone Cheese – Adds a mild but nutty profile; pepper jack works well if you're craving heat.
• Banana Peppers – Offers a tangy crunch; olives can serve as a briny alternative.
• Olive Oil – Enhances flavor and promotes a crispy crust; infused oils can add extra depth.

Optional Toppings
• Sliced Tomatoes – Freshness and juiciness for added flavor; they amplify the sandwich’s taste.
• Lettuce – Adds a fresh crunch; mix and match with spinach for extra nutrients.
• Italian Dressing – A zesty finish for those who like a little more kick; customize to your taste.

Enjoy crafting your own version of Baked Italian Sub Sandwiches!

Step‑by‑Step Instructions for Baked Italian Sub Sandwiches

Step 1: Preheat the Oven
Preheat your oven to 375°F (190°C) to ensure even baking. This temperature will help achieve a golden-brown, crispy exterior while keeping the interior warm and melty. You’ll know it’s ready when you see the oven light turn on, filling your kitchen with anticipation of the delicious Baked Italian Sub Sandwiches to come.

Step 2: Prepare the Rolls
Carefully slice the hoagie rolls in half, ensuring not to cut all the way through. This will create a perfect pocket for your fillings, letting the flavors meld together beautifully. As you see the fresh, crusty edges, you can imagine the warm, tasty goodness that awaits inside these rolls.

Step 3: Layer the Ingredients
Begin layering the salami, ensuring an even distribution across the roll for rich flavor in every bite. Next, add the capicola, followed by generous portions of mozzarella and provolone cheese. If desired, sprinkle banana peppers over the top for a zesty kick, visualizing the colorful layers that will soon melt into a savory masterpiece.

Step 4: Drizzle with Olive Oil
Lightly drizzle olive oil over the assembled sandwiches to enhance flavor and promote a crispy crust. Use a brush or your hands to make sure every inch is coated, watching as the oil glistens and seeps into the ingredients, promising a deliciously crunchy outcome once baked.

Step 5: Bake the Sandwiches
Place the prepared sandwiches on a baking sheet lined with parchment paper for easy cleanup. Bake for 15-20 minutes, or until the cheese is bubbly and the bread reaches a delightful golden brown. You’ll know they’re done when the aroma fills your kitchen with irresistible warmth and comfort, inviting everyone to the table.

Step 6: Serve Hot
Once removed from the oven, allow the Baked Italian Sub Sandwiches to cool for a few minutes. This is the perfect time to prepare a side of crunchy chips or a fresh salad. As you slice them into manageable portions, the gooey cheese will stretch, revealing the hearty filling, making each serving a satisfying delight.

Expert Tips for Baked Italian Sub Sandwiches

Customize Wisely: Tailor your Baked Italian Sub Sandwiches by swapping meats and cheeses according to your preferences. Mixing roasted vegetables can also add a delightful twist!

Watch the Bake Time: Keep an eye on the sandwiches while baking. Overbaking can lead to dry bread, while underbaking may leave the cheese too gooey.

Use Fresh Ingredients: The freshness of your hoagie rolls and toppings ensures a satisfying crunch and flavor. Stale rolls can ruin your delicious creation!

Layer Strategically: Ensure even layering of meats and cheeses for balanced flavor throughout the sandwich. This guarantees every bite is filled with the delightful symphony of flavors.

Store Smart: If you've got leftovers, pack them in an airtight container and refrigerate for up to three days. Reheat wrapped in foil for that freshly-baked taste.

Add Flavor with Oils: Experiment with flavored olive oil when drizzling on your sandwiches. Different oils can elevate your Baked Italian Sub Sandwiches to savory new heights!

Baked Italian Sub Sandwich Variations

Feel free to explore these delicious twists to make your Baked Italian Sub Sandwiches even more special!

  • Vegetarian Twist: Substitute salami and capicola with roasted vegetables for a hearty vegetarian option. Consider adding grilled zucchini or eggplant for added flavor!
  • Cheesy Delight: Use a blend of mozzarella, provolone, and gouda for a melty masterpiece. The three cheeses create a rich, creamy texture that makes every bite unforgettable!
  • Spicy Kick: Swap provolone with pepper jack cheese to introduce a delightful heat. If you crave more spice, try adding jalapeños or spicy Italian dressing for an extra zing.
  • Herb-Infused Oil: Replace plain olive oil with infused olive oil like garlic or basil. This simple change adds layers of flavor, enhancing the overall taste of the sandwich.
  • Crunchy Additions: Throw in some sautéed mushrooms or bell peppers for added flavor and nutrition. These veggies not only bring freshness but also a satisfying crunch to each bite.
  • Savory Sauces: Drizzle a bit of pesto or balsamic glaze before serving for a new dimension of flavor. The herbal notes from the pesto or the sweetness from the glaze make your subs truly special.
  • Italian Cold Cuts: Experiment with different cold cuts like prosciutto, turkey, or even capicola instead of salami for varied textures and tastes. Each choice brings its unique blend of flavors that excite the palate.

Check out my suggestions for Matcha Baked Doughnuts to round out your meal perfectly! These delightful doughnuts make a sweet finishing touch to your Italian feast!

Make Ahead Options

These Baked Italian Sub Sandwiches are an excellent choice for meal prep, allowing you to save time during busy weeknights! You can assemble the sandwiches and wrap them tightly in plastic wrap, storing them in the refrigerator for up to 24 hours before baking. Alternatively, you can prep the ingredients, such as slicing the rolls and layering the meats and cheeses, and keep them separated in airtight containers for up to 3 days. To maintain quality, avoid adding moist toppings like sliced tomatoes until right before serving, as this helps prevent sogginess. When ready to enjoy, simply unwrap and bake as directed for that delicious, fresh-out-of-the-oven taste!

What to Serve with Baked Italian Sub Sandwiches

Pairing the perfect side dishes with your sandwiches can elevate your meal to a whole new level of deliciousness.

  • Crispy Potato Chips: Their crunch beautifully contrasts with the softness of the sandwiches, adding a satisfying textural element.

  • Italian Pasta Salad: Refreshing and zesty, this dish provides a burst of flavor that complements the savory subs splendidly.

  • Garlic Bread: A classic pairing, its buttery, garlicky goodness is perfect for soaking up any extra cheese and sauce.

  • Creamy Coleslaw: Adds a crunchy, tangy contrast that balances the rich flavors of the subs, making every bite harmonious.

  • Caesar Salad: Crisp romaine and creamy dressing make for a refreshing side, and the parmesan ties the Italian theme together beautifully.

  • Roasted Vegetables: A mix of colorful veggies can provide a nutritious and flavorful option to round out your meal.

  • Sweet Potato Fries: Their sweetness pairs wonderfully with the savory subs, offering a delightful twist on traditional fries.

  • Lemonade or Iced Tea: The refreshing tang of lemonade or the coolness of iced tea serves as a perfect drink to cleanse the palate.

  • Mini Cannoli: Finish your meal with these sweet treats; their creamy filling and crispy shell provide a delightful ending to your Italian feast.

How to Store and Freeze Baked Italian Sub Sandwiches

Fridge: Store any leftover Baked Italian Sub Sandwiches in an airtight container for up to 3 days. This keeps them fresh and prevents sogginess while maintaining that delicious flavor.

Freezer: For longer storage, you can freeze the sandwiches before baking. Wrap each in plastic wrap and then foil to ensure they’re airtight; they'll stay good for up to 2 months.

Reheating: When ready to enjoy, simply thaw overnight in the fridge and bake at 350°F (175°C) wrapped in foil for about 20 minutes. This will help restore that crispy crust and melty cheese.

Meal Prep: Assemble sandwiches in advance for quick meals when time is short. Just keep them tightly wrapped in the fridge, then pop them in the oven when you're ready to indulge!

Baked Italian Sub Sandwiches Recipe FAQs

What is the best way to choose ripe ingredients for my sandwiches?
Absolutely! For the freshest flavor, choose hoagie rolls that are crusty on the outside yet soft on the inside. When selecting meats like salami and capicola, look for vibrant colors and avoid any packages with dark spots. Fresh mozzarella should be slightly soft and moist, while provolone should have a nice aroma. If using veggies like banana peppers, they should be firm and bright in color.

How should I store my leftover Baked Italian Sub Sandwiches?
Very! Place any leftover sandwiches in an airtight container and enjoy them within 3 days for the best taste. This prevents them from becoming soggy and keeps the flavors intact. If you find yourself with extra sandwiches, consider storing them wrapped in plastic wrap followed by aluminum foil for optimal freshness.

Can I freeze Baked Italian Sub Sandwiches, and how?
Of course! Freezing can be a great option if you're meal-prepping. Wrap each unbaked sandwich tightly in plastic wrap and then foil to make them airtight. They will keep well in the freezer for up to 2 months. When you’re ready to bake, thaw them overnight in the fridge, and bake them wrapped in foil at 350°F (175°C) for about 20 minutes to revitalize that crispy crust and gooey inside.

What should I do if my sandwiches come out too dry or too gooey?
Phew! If your Baked Italian Sub Sandwiches turn out dry, it might be due to overbaking. I recommend setting a timer and checking them a couple of minutes before the suggested time. On the other hand, if they’re too gooey, you may need to reduce the quantity of cheese or ensure your oven temperature is accurate. Try using an oven thermometer for best results.

Can I make these sandwiches suitable for dietary restrictions?
Absolutely! For a delicious vegetarian version, try substituting meats with roasted vegetables or marinated artichokes. If you need gluten-free options, replace the hoagie rolls with gluten-free bread. Always read ingredient labels to avoid allergens like gluten or dairy. Customizing toppings, like using avocado instead of cheese, is also a great way to satisfy different diets!

How do I enhance the flavor of my Baked Italian Sub Sandwiches?
The more the merrier! Incorporate flavored olive oils when drizzling over your sandwiches—rosemary or garlic-infused oils can elevate your sandwich to new heights. Also, adding fresh herbs like basil or oregano between toppings can boost the aromatic profile, creating a delightful Italian experience with every bite!

Baked Italian Sub Sandwiches

Heavenly Baked Italian Sub Sandwiches for Cozy Nights

Enjoy a delightful bite of nostalgia with these Baked Italian Sub Sandwiches, loaded with savory meats, gooey cheese, and endless customization options.
Print Recipe Pin Recipe
Prep Time 15 minutes mins
Cook Time 20 minutes mins
Cooling Time 5 minutes mins
Total Time 40 minutes mins
Servings: 4 sandwiches
Course: Dinner
Cuisine: Italian
Calories: 450
Ingredients Equipment Method Nutrition Notes

Ingredients
  

For the Sandwiches
  • 4 pieces Hoagie Rolls Fresh and crusty rolls
  • 6 ounces Salami Or swap with turkey
  • 6 ounces Capicola Or replace with prosciutto
  • 4 ounces Mozzarella Cheese Or use provolone for a sharper taste
  • 4 ounces Provolone Cheese Or substitute with pepper jack
  • 1 cup Banana Peppers Or use olives as an alternative
  • 2 tablespoons Olive Oil Infused oils can add extra flavor
Optional Toppings
  • 1 cup Sliced Tomatoes For added freshness
  • 1 cup Lettuce Can mix with spinach
  • 1 cup Italian Dressing For a zesty finish

Equipment

  • Oven
  • Baking Sheet
  • Parchment Paper
  • Brush

Method
 

Step-by-Step Instructions
  1. Preheat the oven to 375°F (190°C) for even baking.
  2. Slice the hoagie rolls in half, creating a pocket for fillings.
  3. Layer salami, capicola, mozzarella, and provolone cheese evenly.
  4. Drizzle olive oil over the sandwiches for added flavor.
  5. Bake on a parchment-lined sheet for 15-20 minutes until cheese is bubbly and bread is golden.
  6. Let cool for a few minutes before serving with chips or salad.

Nutrition

Serving: 1sandwichCalories: 450kcalCarbohydrates: 35gProtein: 20gFat: 25gSaturated Fat: 10gPolyunsaturated Fat: 2gMonounsaturated Fat: 15gCholesterol: 50mgSodium: 900mgPotassium: 300mgFiber: 2gSugar: 2gVitamin A: 500IUVitamin C: 10mgCalcium: 300mgIron: 2mg

Notes

Feel free to customize ingredients for your personal taste and preferences.

Tried this recipe?

Let us know how it was!

Crispy Japanese Katsu Bowls with Tonkatsu Sauce Bliss

December 9, 2025 by Grace Snow Leave a Comment

Crispy and comforting, Japanese Katsu Bowls with Tonkatsu Sauce whisk me away to bustling izakayas with every bite. The magic of this dish lies in the juicy panko-crusted cutlets—whether chicken or pork—that sit atop a fluffy bed of steaming white rice. Not only is this recipe a delightful crowd-pleaser, but it also offers quick prep for those busy weeknights when you crave homemade goodness over fast food. Picture adding your favorite customizable toppings, turning this classic meal into a personalized feast! Haven’t you ever wondered how such simple ingredients can create something truly unforgettable? Let's dive in and discover the secrets behind this delicious dish together!

Why are Katsu Bowls so Addictive?

Irresistible Crunch: The panko-breaded cutlets provide a delightful texture that pairs perfectly with soft, fluffy rice.

Flavor Explosion: Each bite of the cutlet coated in rich tonkatsu sauce delivers a balance of savory and slightly sweet flavors that’s simply unforgettable.

Quick and Easy: This dish is a breeze to prepare, making it ideal for busy evenings when you want something delicious without spending hours in the kitchen.

Customizable Toppings: Whether you prefer drizzling with fresh herbs or adding seasonal vegetables, you can easily make this dish your own.

Comfort Food Delight: Katsu bowls bring a cozy warmth to the table, transforming any meal into a comforting experience. For more flavorful ideas, check out my Tagliatelle Asparagus Peas or Fish Taco Bowls for inspiration!

Japanese Katsu Bowls Ingredients

For the Cutlets

  • Pork or Chicken Cutlets – The star of the dish; tenderize them for even cooking.
  • Salt and Pepper – Essential for seasoning; adjust according to your taste.
  • All-Purpose Flour – This forms the base coating for flavor; use gluten-free flour if necessary.
  • Eggs – Binds the panko breadcrumbs to the cutlets; swap for a flax or chia egg for a vegan-friendly option.
  • Panko Breadcrumbs – Provides a super crispy exterior; regular breadcrumbs can substitute, though they'll differ in texture.

For the Sauce

  • Ketchup – The main component of tonkatsu sauce, adding a sweet depth to the flavor.
  • Worcestershire Sauce – Offers a delightful tang that enhances the overall richness.
  • Soy Sauce – Introduces a savory umami flavor; opt for tamari for gluten-free needs.
  • Sugar – Balances the sauce's flavors; feel free to adjust to your liking.

For Serving

  • Steamed White Rice – This fluffy base complements the crunchy cutlets perfectly; consider substituting with brown rice or quinoa for a health twist.
  • Fresh Parsley or Green Onions – Optional garnishes that add a pop of freshness and color to your dish.

Enjoy crafting these Japanese Katsu Bowls with Tonkatsu Sauce, and let your kitchen transform into a delightful izakaya!

Step‑by‑Step Instructions for Japanese Katsu Bowls with Tonkatsu Sauce

Step 1: Prepare the Cutlets
Start by placing your pork or chicken cutlets between two sheets of plastic wrap and pound them to an even thickness of about ½ inch using a meat mallet. This ensures even cooking and tenderness. Once flattened, season both sides with salt and pepper to enhance the flavor of your Japanese Katsu Bowls.

Step 2: Set Up the Breading Station
Create a breading station by placing all-purpose flour in one shallow dish, beaten eggs in a second dish, and panko breadcrumbs in a third dish. This setup makes it easy to coat your cutlets thoroughly. It’s essential for achieving that wonderfully crispy texture in your Katsu Bowls!

Step 3: Bread the Cutlets
Dredge each seasoned cutlet in flour, making sure to shake off any excess. Next, dip it into the beaten eggs, allowing any excess egg to drip back into the dish. Finally, coat the cutlet with panko breadcrumbs, pressing gently to ensure they stick well. Your cutlets are now fully prepared for frying!

Step 4: Heat the Oil
In a large frying pan, heat about a half-inch of vegetable or canola oil over medium-high heat until it reaches around 350°F (175°C). You can test the oil's readiness by dropping in a few breadcrumbs; they should sizzle immediately. This temperature is key to achieving the perfect golden-brown crust for your Japanese Katsu Bowls.

Step 5: Fry the Cutlets
Carefully add the breaded cutlets to the hot oil, frying them for about 3-4 minutes on each side. Watch for a crunchy golden color as they cook. For safety, ensure the internal temperature reaches 165°F (74°C) for chicken or 145°F (63°C) for pork, so you know your Katsu Bowls are perfectly cooked and safe to eat.

Step 6: Drain the Cutlets
Once the cutlets are golden brown and cooked through, use tongs to transfer them to a plate lined with paper towels. This helps absorb any excess oil, keeping your Katsu Bowl delightful and crispy. Allow them to rest for a moment while you prepare the sauce.

Step 7: Make the Tonkatsu Sauce
In a small bowl, mix together ketchup, Worcestershire sauce, soy sauce, and sugar. Stir thoroughly to combine the flavors and adjust the sweetness to your liking. This tangy tonkatsu sauce is what brings your Japanese Katsu Bowls to life, adding that signature flavor that complements the crunchy cutlets.

Step 8: Assemble the Bowls
To serve, place a generous scoop of steamed white rice in each bowl, then slice the crispy cutlets and arrange them beautifully on top. Drizzle with the homemade tonkatsu sauce to infuse each bite with flavor. Feel free to add optional garnishes like fresh parsley or green onions for a burst of color and freshness.

Step 9: Serve Immediately
Serve your Japanese Katsu Bowls hot, allowing everyone to dig in while the cutlets are their crispiest. The combination of textures and flavors will create a comforting dining experience that’s sure to impress family and friends!

How to Store and Freeze Japanese Katsu Bowls

Fridge: Store leftover katsu and rice in separate airtight containers; they can last up to 3 days. This keeps the cutlets crispy and rice fluffy.

Freezer: You can freeze cooked cutlets for up to 2 months. Wrap them tightly in plastic wrap and place them in a freezer-safe bag to prevent freezer burn.

Reheating: To reheat, place cutlets in an oven at 350°F (175°C) for about 10-15 minutes until crisp. For the rice, add a splash of water and reheat in the microwave, covering it to preserve moisture.

Note: While the tonkatsu sauce can be refrigerated for up to a week, it’s best enjoyed fresh for your Japanese Katsu Bowls.

What to Serve with Japanese Katsu Bowls with Tonkatsu Sauce

Elevate your Katsu Bowl experience by exploring complementary dishes that enhance the delightful flavors and textures of this comforting meal.

  • Miso Soup: A warm, savory soup that adds depth and a touch of umami, perfectly balancing the richness of katsu.

  • Cucumber Salad: Refreshing and crunchy, this salad provides a crisp contrast that brightens each bite of the Katsu Bowl.

  • Steamed Edamame: Nutrient-packed and lightly salted, these bite-sized snacks offer a satisfying pop that pairs well with the sauce’s sweetness.

  • Pickled Vegetables: Tangy, crunchy pickles lift the dish’s flavors, providing a zesty counterpoint to the richness of the cutlets.

  • Sesame Noodles: The nutty flavor of sesame noodles creates a deliciously different texture while maintaining that delightful Asian flair.

  • Green Tea: A soothing drink, green tea cleanses the palate and complements the savory notes of the tonkatsu sauce.

  • Chocolate Mochi: For dessert, these chewy rice cakes filled with chocolate deliver a sweet finish that’s both fun and satisfying.

Each of these pairings enhances the experience, making your Japanese Katsu Bowls with Tonkatsu Sauce a truly memorable meal.

Expert Tips for Japanese Katsu Bowls

Oil Temperature Check: Ensure the oil is hot enough (around 350°F) before frying. This prevents greasy cutlets and promotes that perfectly crispy exterior.

Gentle Handling: Handle the cutlets gently during the breading process to avoid losing the panko coating, which is key for that delightful crunch in your Katsu Bowls.

Storage Wisdom: Store leftover katsu and rice separately in airtight containers to maintain the texture. Reheat rice with a splash of water for optimal fluffiness.

Custom Sauce Variations: Feel free to customize your tonkatsu sauce by adding ingredients like mustard or chili for an extra zing, enhancing the overall flavor of your Japanese Katsu Bowls.

Don’t Rush the Frying: Fry cutlets in batches if necessary; overcrowding can lower the oil temperature, resulting in less crispy katsu. Enjoy your cooking experience!

Make Ahead Options

These Japanese Katsu Bowls with Tonkatsu Sauce are perfect for busy home cooks looking to save time during hectic weeknights! You can prepare the panko-breaded cutlets and tonkatsu sauce up to 24 hours in advance. Simply bread the cutlets and store them in an airtight container in the refrigerator. For the sauce, mix the ingredients and refrigerate until needed. When ready to serve, just heat oil and fry the cutlets until golden brown, about 3-4 minutes per side. This method ensures your Katsu Bowls are just as delicious and crispy as if made fresh, making meal prep a breeze!

Japanese Katsu Bowls Variations & Substitutions

Feel free to explore the amazing possibilities for your Katsu Bowl and customize it to suit your taste and dietary needs!

  • Vegetarian Twist: Substitute chicken or pork with eggplant or tofu for a meatless delight that doesn’t skimp on flavor. You'll love the way the crispy coating contrasts with the tender vegetable or protein alternative.

  • Spicy Kick: Mix a teaspoon of sriracha or chili paste into your tonkatsu sauce for a heat boost that will spice things up. The warmth melds beautifully with the sweet and savory notes of the sauce!

  • Gluten-Free: Use gluten-free all-purpose flour and panko breadcrumbs to make this delightful dish accessible for those with gluten sensitivities. This way, everyone can enjoy the crispy goodness!

  • Brown Rice Base: Swap out the steamed white rice with brown rice or quinoa for a healthier, fiber-rich alternative that makes every bite even more satisfying. The nuttiness of the brown rice adds an extra layer of flavor!

  • Herbaceous Touch: Add fresh herbs like cilantro or basil to your rice or as a garnish to elevate the dish while adding a vibrant pop of color and freshness. The herbs can bring a whole new dimension to your bowls!

  • Tonkatsu Sauce Variants: Get creative with your tonkatsu sauce by incorporating coconut sugar instead of regular sugar for a deeper sweetness or a splash of lemon juice for a tangy twist. It can alter the flavor profile to suit your mood!

  • Flavorful Rice: Infuse steamed rice with furikake seasoning or mix in some pickled vegetables for an added crunch and burst of flavor. Just imagine each bite being a delightful surprise!

As you whip up your Katsu Bowls, consider pairing them with complementary dishes like Pan Fried Mayo or crispy sides like Sweet Potatoes Black to elevate your meal experience!

Japanese Katsu Bowls with Tonkatsu Sauce Recipe FAQs

How do I select the best cutlets for my Katsu Bowls?
When choosing pork or chicken cutlets, look for ones that are bright in color without any dark spots or blemishes. Tenderizing the cutlets to an even thickness of about ½ inch is key. This allows for uniform cooking and tenderness, ensuring your Japanese Katsu Bowls are perfectly juicy!

What’s the best way to store leftover Katsu and rice?
Store leftover cutlets and rice in separate airtight containers in the fridge. They'll stay fresh for up to 3 days. This separation helps maintain the cutlet's crispiness and the rice’s fluffiness, making sure you can enjoy them again!

Can I freeze my Katsu Bowls?
Absolutely! You can freeze the cooked cutlets for up to 2 months. I recommend wrapping them tightly in plastic wrap, then placing them in a freezer-safe bag to prevent freezer burn. For the best results when reheating, bake the cutlets at 350°F (175°C) for about 10-15 minutes, and reheat the rice with a splash of water in the microwave to keep it moist.

What dietary considerations should I keep in mind?
If you have dietary restrictions, consider using gluten-free flour and tamari instead of soy sauce for a gluten-free version. For a vegan option, substitute the chicken with eggplant or tofu and use a flax or chia egg as a binder for the breadcrumbs. Your personalized Katsu Bowl can still be delicious and satisfying while adhering to your dietary needs!

How can I troubleshoot if my cutlets end up greasy?
If your Katsu cutlets turn out greasy, it may be due to not enough oil heat. Make sure your oil is heated to around 350°F (175°C) before adding the cutlets. Additionally, avoid overcrowding the pan, as it can lower the temperature and lead to a soggier texture. Fry in smaller batches for optimal crispiness. Enjoy your Japanese Katsu Bowls to the fullest!

Japanese Katsu Bowls with Tonkatsu Sauce

Crispy Japanese Katsu Bowls with Tonkatsu Sauce Bliss

Experience the delightful crunch of Japanese Katsu Bowls with Tonkatsu Sauce, bringing you comfort and flavor in every bite.
Print Recipe Pin Recipe
Prep Time 20 minutes mins
Cook Time 30 minutes mins
Resting Time 5 minutes mins
Total Time 55 minutes mins
Servings: 4 bowls
Course: Dinner
Cuisine: Japanese
Calories: 650
Ingredients Equipment Method Nutrition Notes

Ingredients
  

For the Cutlets
  • 4 pieces Pork or Chicken Cutlets Tenderized for even cooking
  • 1 teaspoon Salt
  • 1 teaspoon Black Pepper
  • 1 cup All-Purpose Flour Gluten-free flour can be used
  • 2 large Eggs Can substitute with flax or chia egg
  • 2 cups Panko Breadcrumbs For extra crispiness
For the Sauce
  • 1/2 cup Ketchup
  • 2 tablespoons Worcestershire Sauce
  • 2 tablespoons Soy Sauce Tamari for gluten-free
  • 1 tablespoon Sugar Adjust to taste
For Serving
  • 4 cups Steamed White Rice Can substitute with brown rice or quinoa
  • 1/4 cup Fresh Parsley or Green Onions Optional for garnish

Equipment

  • Meat Mallet
  • frying pan
  • Shallow Dishes
  • Paper towels

Method
 

Step-by-Step Instructions
  1. Prepare the cutlets by pounding them to an even thickness of about ½ inch and seasoning with salt and pepper.
  2. Set up the breading station with flour, beaten eggs, and panko breadcrumbs in separate dishes.
  3. Bread the cutlets by dredging in flour, dipping in eggs, and coating with panko breadcrumbs.
  4. Heat vegetable or canola oil in a pan to about 350°F (175°C) for frying.
  5. Fry the cutlets for about 3-4 minutes on each side until golden brown and internal temperature is reached.
  6. Drain the fried cutlets on paper towels to absorb excess oil.
  7. Make the tonkatsu sauce by mixing ketchup, Worcestershire sauce, soy sauce, and sugar in a bowl.
  8. Assemble the bowls with steamed rice, sliced cutlets, and drizzle with tonkatsu sauce.
  9. Serve immediately for the best texture and flavor.

Nutrition

Serving: 1bowlCalories: 650kcalCarbohydrates: 75gProtein: 30gFat: 25gSaturated Fat: 5gPolyunsaturated Fat: 2gMonounsaturated Fat: 6gCholesterol: 150mgSodium: 800mgPotassium: 600mgFiber: 3gSugar: 8gVitamin A: 10IUVitamin C: 4mgCalcium: 2mgIron: 10mg

Notes

Store leftovers separately in airtight containers; reheat as needed, ensuring crispiness is maintained.

Tried this recipe?

Let us know how it was!

Savor Sweet Honey BBQ Chicken Rice for Easy Family Dinners

December 9, 2025 by Grace Snow Leave a Comment

A sweet and smoky aroma fills the kitchen as dinner time approaches, and I can barely contain my excitement for this Easy Honey BBQ Chicken Rice. This one-pan meal not only cuts down on cleanup time, but it’s also a delightful fusion of flavors that will have everyone at the table asking for seconds. In less than an hour, you’ll enjoy tender chicken glazed with a sticky honey barbecue sauce, resting on a bed of fluffy rice that soaks up all those delicious juices. It’s the kind of dish that can elevate a weeknight family dinner or impress guests at a casual gathering. Plus, it's budget-friendly and incredibly customizable, ensuring that even the pickiest eaters will find a way to love it. Are you ready to dive into a comforting and satisfying meal that you can make tonight?

Why is Honey BBQ Chicken Rice a Must-Try?

Simplicity at its finest: This easy recipe lets you whip up a delicious meal without the fuss, perfect for busy weeknights.
Flavors that pop: The sweet honey and smoky BBQ sauce blend beautifully, enticing your taste buds in every bite.
Customizable: Whether you prefer chicken or tofu, rice or quinoa, this dish adapts to your tastes or dietary needs.
Family-friendly: Suitable for all ages, even picky eaters will find joy in this comforting meal.
One-pan wonder: Minimal cleanup means more time to enjoy dinner with loved ones! For other delightful options, check out my Honey Garlic Chicken or Crock Pot Chicken for more tasty ideas.

Honey BBQ Chicken Rice Ingredients

• Explore the delightful components of this dish!

For the Chicken

  • Chicken Thighs – Juicy and tender, perfect for soaking up the sticky honey BBQ glaze; can substitute with chicken breasts if preferred.

For the Rice Base

  • Rice – Fluffy long-grain rice acts as the perfect canvas for flavors; brown rice is a nutritious alternative for a heartier option.
  • Chicken Broth – Keeps the rice moist and flavorful while cooking; vegetable broth can be used for a vegetarian twist.

For the Sauce

  • Honey – Provides the sweet kick that pairs beautifully with BBQ flavors and creates a sticky glaze.
  • BBQ Sauce – Choose your favorite brand or make your own to bring a smoky, tangy depth; customize the heat level to your liking.
  • Soy Sauce – Adds umami richness to the sauce; tamari can be swapped in for gluten-free needs.
  • Garlic – Freshly minced garlic brings aromatic flavor to the dish; roasted garlic will add a mellow sweetness.

For Added Color and Nutrients

  • Mixed Vegetables (optional) – Add a variety of colors and nutrients with peas, carrots, or bell peppers; frozen vegetables are a convenient choice.

Enjoy bringing these flavorful ingredients together to create your perfect Honey BBQ Chicken Rice!

Step‑by‑Step Instructions for Honey BBQ Chicken Rice

Step 1: Preheat the Oven
Begin by preheating your oven to 375°F (190°C). This step is crucial for ensuring that your Honey BBQ Chicken Rice cooks evenly and thoroughly. While the oven warms up, you can prep the sauce and chicken, making sure everything's ready to go when the time comes to bake.

Step 2: Prepare the Sauce
In a large mixing bowl, blend together honey, BBQ sauce, soy sauce, and minced garlic until smooth and well combined. The aroma of this mixture should be sweet and enticing! Make sure the ingredients are fully incorporated to create a luscious glaze for your chicken. Set this aside while you prepare the chicken.

Step 3: Coat the Chicken
Grease a baking dish lightly with oil to prevent sticking. Take your chicken thighs and coat them generously with half of the prepared sauce mixture, ensuring each piece is nicely glazed. Once coated, arrange the chicken in the greased dish, with the glazed side facing up, and pour the remaining sauce over the top for extra flavor.

Step 4: Add the Rice and Broth
Carefully pour chicken broth into the baking dish, making sure it surrounds the chicken. Next, add the rice to the dish, stirring gently to combine everything for an even distribution. This will allow the rice to absorb all the savory flavors from the chicken and the sauce while cooking.

Step 5: Bake Covered
Cover the baking dish with aluminum foil and place it in the preheated oven. Bake for 35-40 minutes, during which time the rice will cook and absorb the delicious flavors. Remember to check halfway through and remove the foil to baste the chicken with the accumulating juices for a nice caramelization.

Step 6: Rest Before Serving
Once the baking time is up, take the dish out of the oven and let it sit for about 5 minutes. This resting period allows the flavors of the Honey BBQ Chicken Rice to meld together beautifully, making each bite all the more delicious.

Step 7: Plate and Serve
To serve, fluff the rice gently with a fork and plate it up, topping with the juicy chicken pieces. Don’t forget to drizzle any remaining sauce over the chicken for an extra burst of flavor! Now, your scrumptious honey BBQ chicken rice is ready to be enjoyed by family and friends!

Make Ahead Options

These Honey BBQ Chicken Rice bowls are perfect for meal prep, allowing you to save time during busy weeknights. You can marinate the chicken in the honey BBQ sauce and let it sit in the refrigerator up to 24 hours beforehand for deeper flavor. Additionally, you can prepare the rice and broth combination, refrigerating it for up to 3 days. When you're ready to cook, simply add the marinated chicken on top, cover, and bake as directed. To maintain quality, ensure the chicken is well-coated in sauce and keep it covered to lock in the moisture. With these simple prep steps completed, you'll have a warm, comforting meal with minimal effort when it’s time to dine!

Expert Tips for Honey BBQ Chicken Rice

  • Coat Well: Ensure the chicken is thoroughly coated in the sauce so each bite is bursting with flavor.
  • Adjust Cooking Time: If you opt for brown rice, remember to increase the broth and baking time to ensure it’s cooked properly.
  • Check Temperature: Always check the chicken’s internal temperature; it should reach 165°F (74°C) for safety and perfect tenderness.
  • Add a Kick: For an extra punch of heat, consider mixing in a pinch of chili flakes into the sauce.
  • Use Fresh Ingredients: Fresh garlic enhances the flavor significantly; don’t substitute with garlic powder if you can avoid it.
  • Customize Veggies: Feel free to toss in your favorite mixed vegetables to make this Honey BBQ Chicken Rice even more nutritious and colorful.

Storage Tips for Honey BBQ Chicken Rice

  • Fridge: Store leftovers in an airtight container, where they will remain fresh for up to 3 days. Ensure it's cooled down before sealing to maintain flavor and texture.
  • Freezer: For longer storage, freeze the Honey BBQ Chicken Rice in a freezer-safe container for up to 2 months. Portioning it into smaller servings helps for easy reheating later.
  • Reheating: When ready to enjoy, thaw in the fridge overnight if frozen, then reheat gently in the microwave or on the stovetop with a splash of chicken broth to keep it moist.
  • Room Temperature: Avoid leaving the dish out for more than 2 hours to prevent any food safety issues; refrigerate promptly after serving.

What to Serve with Easy Honey BBQ Chicken Rice

The perfect side dishes can elevate your Honey BBQ Chicken Rice into a memorable meal, bringing delightful flavors and textures to your table.

  • Garlic Bread: Buttery, warm, and infused with garlic, this classic pairs beautifully to soak up any extra honey BBQ sauce.
  • Classic Coleslaw: Crisp and refreshing, coleslaw provides a crunchy contrast to the tender chicken and fluffy rice.
  • Steamed Broccoli: Bright green and slightly crunchy, steamed broccoli adds a nutritious element while balancing the sweetness of the dish.
  • Corn on the Cobb: Juicy and sweet, grilled or boiled corn brings a summer BBQ vibe that complements the flavors perfectly.
  • Crispy Potato Wedges: Golden and crunchy on the outside, these wedges offer a satisfying texture as a hearty side option.
  • Fruit Salad: A light and colorful medley of fresh fruits contrasts the rich flavors of your dish beautifully, making it a refreshing end to the meal.
  • Lemonade: A refreshing glass of homemade lemonade can balance the rich BBQ flavor, providing a zesty splash to the dining experience.

Honey BBQ Chicken Rice Customization

Feel free to make this recipe your own by exploring delicious twists and nutritious swaps!

  • Vegetarian Delight: Replace chicken with tofu or tempeh, marinating it in the sauce for extra flavor. This makes a hearty, meatless meal you’ll love!
  • Low-Carb Option: Try substituting rice with cauliflower rice or quinoa, keeping it light and healthy while still packed with flavor.
  • Herb Infusion: Add fresh herbs like cilantro or green onions for a burst of freshness that brightens the flavors beautifully.
  • Heat it Up: Incorporate a tablespoon of sriracha or a pinch of chili flakes into the sauce for a delightful spicy kick that packs a punch.
  • Sweet and Savory: Drizzle a little balsamic glaze over the finished dish for added sweetness and tang, elevating your flavor profile.
  • Nutty Crunch: Toss in chopped nuts like almonds or cashews for a deliciously crunchy texture that contrasts beautifully with the tender chicken.
  • Beefy Twist: Swap chicken for beef for a completely different take on this recipe — consider flank steak for quick cooking and great flavor.
  • Veggie Boost: Add a medley of colorful vegetables, such as bell peppers or broccoli, into the mix to enhance the dish's nutritional value and visual appeal.

For more inspiration, why not explore my Chipotle Lime Chicken and Rice or try some amazing Spatchcock Chicken Flavor for a delightful variation?

Honey BBQ Chicken Rice Recipe FAQs

How do I choose the right chicken for this recipe?
Absolutely! For Honey BBQ Chicken Rice, I recommend using chicken thighs since they’re juicy and tender, making them perfect for absorbing the flavors of the sauce. If you prefer chicken breasts, they can be a suitable substitute, but be aware they may dry out faster. Look for thighs that are plump and have a good amount of fat for the best taste.

What is the best way to store leftover Honey BBQ Chicken Rice?
Great question! Store your leftover Honey BBQ Chicken Rice in an airtight container in the refrigerator. It will last up to 3 days. Make sure the dish is cooled down before sealing it to maintain its flavor and texture. If stored properly, it can remain delicious and ready to reheat without losing its charm!

Can I freeze Honey BBQ Chicken Rice?
Yes, definitely! Honey BBQ Chicken Rice freezes beautifully. Transfer the cooled dish into a freezer-safe container and it will keep well for up to 2 months. For easier reheating later, portion it into smaller servings. When you’re ready to enjoy it, thaw it in the refrigerator overnight and reheat gently in the microwave or on the stovetop. You might want to add a splash of chicken broth while reheating to keep it nice and moist.

What should I do if the chicken isn’t cooking through?
It can be frustrating, but don't worry! If your chicken isn't cooked through after the recommended time, simply cover it back up and return it to the oven for an additional 5-10 minutes. Always check with a meat thermometer to ensure the internal temperature reaches 165°F (74°C). This will guarantee your chicken is safe to eat and tender.

Are there any allergies I should be aware of with this recipe?
Very important! This Honey BBQ Chicken Rice recipe contains common allergens like soy (from soy sauce) and honey. If you're making it for someone with allergies, consider using gluten-free tamari as a soy sauce substitute, and ensure you use a honey substitute like agave syrup if needed. Always double-check ingredient labels when in doubt!

Can I make this recipe vegetarian?
Absolutely! To make a wonderful vegetarian version of Honey BBQ Chicken Rice, simply swap out the chicken for tofu or tempeh. Marinate them in the honey BBQ sauce mixture just like you would with the chicken, and bake them according to the recipe instructions. Using vegetable broth instead of chicken broth will keep the flavors intact while ensuring it's plant-based.

Honey BBQ Chicken Rice

Savor Sweet Honey BBQ Chicken Rice for Easy Family Dinners

Enjoy a delightful Honey BBQ Chicken Rice that's budget-friendly and perfect for family dinners.
Print Recipe Pin Recipe
Prep Time 10 minutes mins
Cook Time 40 minutes mins
Resting Time 5 minutes mins
Total Time 55 minutes mins
Servings: 4 servings
Course: Dinner
Cuisine: American
Calories: 450
Ingredients Equipment Method Nutrition Notes

Ingredients
  

For the Chicken
  • 4 pieces Chicken Thighs Juicy and tender
For the Rice Base
  • 1 cup Rice Fluffy long-grain rice
  • 1 cup Chicken Broth Moist and flavorful
For the Sauce
  • 1/2 cup Honey Sweet kick for the glaze
  • 1/2 cup BBQ Sauce Your favorite brand
  • 2 tablespoons Soy Sauce Adds umami richness
  • 2 cloves Garlic Freshly minced
For Added Color and Nutrients
  • 1 cup Mixed Vegetables Optional; use frozen for convenience

Equipment

  • Baking Dish
  • Mixing Bowl
  • Aluminum Foil

Method
 

Directions
  1. Preheat your oven to 375°F (190°C).
  2. In a large mixing bowl, blend together honey, BBQ sauce, soy sauce, and minced garlic until smooth.
  3. Coat chicken thighs with half of the sauce, then place in a greased baking dish and pour remaining sauce on top.
  4. Pour chicken broth into the dish and add rice, stirring gently to combine.
  5. Cover with aluminum foil and bake for 35-40 minutes.
  6. Let sit for about 5 minutes before serving.
  7. Fluff the rice, plate with chicken, and drizzle with remaining sauce.

Nutrition

Serving: 1plateCalories: 450kcalCarbohydrates: 55gProtein: 30gFat: 15gSaturated Fat: 4gPolyunsaturated Fat: 2gMonounsaturated Fat: 8gCholesterol: 80mgSodium: 800mgPotassium: 500mgFiber: 2gSugar: 15gVitamin A: 600IUVitamin C: 10mgCalcium: 40mgIron: 2mg

Notes

Customize with different proteins or vegetables to suit your tastes. Adjust cooking times if using brown rice or other grains.

Tried this recipe?

Let us know how it was!

Savor the Loaded Potato Taco Bowl for Ultimate Comfort Food

December 9, 2025 by Grace Snow Leave a Comment

As I stood in my kitchen, the savory aroma of roasting potatoes filled the air, instantly whisking me back to warm family gatherings and shared meals. The Loaded Potato Taco Bowl is not just another weeknight dish; it's a celebration of comfort food that blends crispy roasted russet potatoes with layers of seasoned meat and vibrant vegetables. This recipe hits the sweet spot, offering both soul-soothing indulgence and hearty nourishment with only about 600 calories per serving. Plus, it’s flexible—perfect for customizing to your taste preferences or dietary needs! With an easy prep time of just one hour, you’ll find this bowl is not just a meal but a fun experience to assemble. Ready to dive into a delicious culinary adventure?

Why is this Loaded Potato Taco Bowl special?

Comforting in every bite, this Loaded Potato Taco Bowl is your new go-to for cozy weeknight dinners. Versatile ingredients let you swap in your favorites, from sweet potatoes to black beans, catering to any diet. Gather the Family: Perfect for sharing, this dish invites everyone to create their own masterpiece! Satisfying Flavor: A blend of spices and textures makes each spoonful delightful. Plus, it’s ready in just an hour, making it ideal for busy schedules! Enjoy with a side of Acai Bowl Nutritious for a vibrant finish.

Loaded Potato Taco Bowl Ingredients

• Here’s everything you need to create this delicious and hearty bowl that will surely be a hit!

For the Potatoes

  • Russet Potatoes – The fluffy interior and crispy exterior make them ideal; try sweet potatoes for a different flavor!
  • Olive Oil – Essential for even roasting and adds richness.
  • Garlic Powder – Brings amazing savory depth; fresh garlic can work too!
  • Onion Powder – Complements the roasted potato flavor perfectly.
  • Smoked Paprika – Adds a delightful smokiness; Spanish paprika is a great substitute.
  • Salt and Black Pepper – Essential for flavor enhancement; adjust according to your taste.

For the Filling

  • Ground Beef or Turkey – A hearty protein source; beans or tofu are excellent vegetarian options.
  • Chili Powder – Offers earthy, spicy notes; feel free to omit for a milder bowl.
  • Cumin – Deepens flavor with warm, nutty aromas that elevate the dish.
  • Red Onion – Adds sweetness and texture; yellow onion can be swapped if needed.
  • Black Beans – Boosts fiber and protein; kidney or pinto beans make for tasty alternatives.
  • Corn Kernels – Provides sweet flavor and color; fresh, canned, or frozen varieties work well.

For the Toppings

  • Shredded Cheddar Cheese – Melts beautifully and adds creaminess; try different cheese varieties if you like!
  • Cherry Tomatoes – Adds juiciness and brightness; diced bell peppers can work too.
  • Avocado – Gives creaminess and healthy fats; Greek yogurt is a good substitute.
  • Fresh Cilantro – An herbaceous garnish that brightens the dish; omit if allergic.
  • Lime Wedges – Optional for serving; adds a zesty kick.
  • Sour Cream – A classic topping that balances the spices; Greek yogurt can replace it if desired.

Embrace the joy of cooking with this Loaded Potato Taco Bowl and enjoy every delicious bite!

Step‑by‑Step Instructions for Loaded Potato Taco Bowl

Step 1: Preheat the Oven
Begin your Loaded Potato Taco Bowl by preheating your oven to 425°F (220°C). While the oven warms up, wash and dice your russet potatoes into bite-sized chunks. Spread the diced potatoes evenly on a large baking sheet, ensuring they’re well spaced for optimal roasting. Drizzle generously with olive oil and season with garlic powder, onion powder, smoked paprika, salt, and black pepper. Toss everything together until well coated.

Step 2: Roast the Potatoes
Once the oven has reached the desired temperature, place the baking sheet with the seasoned potatoes inside. Bake for 25-30 minutes, turning them halfway through to ensure even crispiness. You'll know they are ready when the potatoes are golden brown and crispy on the edges. This step sets the foundation for your Loaded Potato Taco Bowl with flavorful, crunchy potatoes.

Step 3: Brown the Meat
While the potatoes are roasting, grab a large skillet and heat it over medium-high heat. Add the ground beef or turkey, breaking it apart with a spatula as it cooks. Brown the meat for about 5-7 minutes, draining any excess fat. The goal here is to achieve a lovely golden color on the meat, which will infuse your Loaded Potato Taco Bowl with rich flavor.

Step 4: Add Spices and Onions
To the browned meat, sprinkle in chili powder, cumin, and finely chopped red onion. Stir well to combine, and then cook everything together for another 5 minutes, allowing the onions to soften. The delightful aroma of spices mingling with the meat will signal that the next layer of flavor is coming together for your Loaded Potato Taco Bowl.

Step 5: Incorporate Beans and Corn
Next, stir in the black beans and corn, mixing thoroughly to heat everything through for about 3-4 minutes. This addition will not only enhance the nutritional profile of your Loaded Potato Taco Bowl but also add a burst of color and texture. Taste the mixture and adjust the seasonings if needed, ensuring every bite is packed with flavor.

Step 6: Assemble the Bowls
Now it's time to bring your Loaded Potato Taco Bowl together! Start by layering the crispy roasted potatoes into the bottom of your serving bowls. Next, spoon the savory meat and vegetable mixture generously over the potatoes. This warm, hearty base creates a delicious platform for the toppings that will follow.

Step 7: Add the Toppings
Top each bowl with a generous sprinkle of shredded cheddar cheese, followed by halved cherry tomatoes, diced avocado, and fresh cilantro. The melty cheese paired with fresh toppings adds a delightful contrast to the warm ingredients, completing the Loaded Potato Taco Bowl with vibrant flavors and textures.

Step 8: Serve and Enjoy
Serve your Loaded Potato Taco Bowl immediately, accompanied by lime wedges for a zesty squeeze and a dollop of sour cream on top. This dish is not just a meal but an experience, ready to be enjoyed with family or friends. Feel free to customize your bowls with additional toppings as you create your perfect comfort food feast!

Expert Tips for Loaded Potato Taco Bowl

  • Crispy Potatoes: Ensure the potatoes are spread in a single layer on the baking sheet to achieve optimal crispiness.

  • Flip It: Remember to flip the potatoes halfway through roasting to promote even browning and avoid sogginess.

  • Taste as You Go: Adjust the seasonings gradually during preparation to ensure the flavors suit your preference, making your Loaded Potato Taco Bowl truly yours.

  • Texture Matters: When reheating, separate the components to maintain the crispy texture of the potatoes and the fresh crunch of vegetables.

  • Customize Toppings: Personalize your bowls with extra toppings like jalapeños or pickled onions for a delightful kick!

What to Serve with Loaded Potato Taco Bowl

Create a delightful feast that complements the comforting richness of your Loaded Potato Taco Bowl.

  • Creamy Coleslaw: A crisp, tangy side that provides a refreshing contrast to the hearty bowl, enhancing every bite.
  • Mexican Street Corn: Grilled corn slathered in lime and cotija cheese adds a burst of flavor and sweetness, perfectly pairing with the savory elements.
  • Zesty Salsa: Fresh salsa made from tomatoes, onions, and cilantro elevates the flavors while adding a vibrant freshness that ties all the ingredients together.
  • Guacamole: The creamy texture of guacamole complements the crunchy potatoes beautifully, making each bite feel elevated and indulgent.
  • Chili Lime Roasted Vegetables: Roasted veggies tossed in chili and lime bring smokiness and acidity, balancing the flavors of your taco bowl with colorful, nutritious additions.
  • Sour Cream Salad: A light salad drizzled with sour cream dressing acts as a nice palate cleanser, harmonizing with the flavors of the taco bowl.

Make Ahead Options

These Loaded Potato Taco Bowls are perfect for busy home cooks wanting to save time during hectic weeknights! You can roast the potatoes and prepare the meat mixture up to 3 days in advance; simply refrigerate them in airtight containers. To maintain their quality, allow the roasted potatoes to cool completely before storing to prevent sogginess. When you're ready to enjoy, reheat the potatoes and meat mixture in the oven or on the stovetop until heated through. Then, assemble your Loaded Potato Taco Bowl with fresh toppings just before serving for that delightful contrast in texture and flavor. Enjoy delicious, hassle-free meals any night of the week!

Loaded Potato Taco Bowl Variations

Feel free to put your own twist on the Loaded Potato Taco Bowl—it's all about your taste and preferences!

  • Sweet Potato Swap: Substitute russet potatoes with sweet potatoes for a naturally sweet and vibrant flavor. Their creamy texture, combined with the savory toppings, brings a new dimension to this dish!

  • Vegetarian Delight: Replace meat with a mix of black beans, chickpeas, and extra veggies for a hearty vegetarian option. This twist is not only nutritious but also bursting with flavor and color.

  • Spicy Kick: Add jalapeños or diced chipotle peppers to the meat mixture for some heat! This fiery variation will ignite your taste buds and make for an exciting flavor journey.

  • Cheesy Variants: Switch up the shredded cheddar with pepper jack or a smoky gouda for an unexpected flavor profile. Experimenting with different cheeses can elevate the creaminess and overall taste.

  • Crunchy Toppings: For added texture, throw on some crushed tortilla chips or crispy fried onions atop your bowl. These crunchy elements contrast beautifully with the softness of the potatoes and toppings.

  • Herb Substitution: If cilantro's not your thing, try fresh parsley or green onions as a garnish. These alternatives will lend a fresh pop without overpowering the dish!

  • Cuisine Fusion: Transform the bowl into a Mediterranean delight by adding feta cheese, olives, and roasted red peppers. This fusion will create a delightful Mediterranean twist on a classic comfort food.

For even more delectable ideas, check out our delicious Fish Taco Bowls or try the creative Taco Spaghetti Cheesy for a unique meal experience! Enjoy the journey of cooking!

Storage Tips for Loaded Potato Taco Bowl

  • Fridge: Store assembled bowls in the refrigerator for up to 3 days, ensuring toppings remain fresh and are kept in airtight containers to prevent browning.

  • Freezer: For longer storage, freeze individual components separately (potatoes, meat mixture, and toppings) for up to 2 months. Reheat thoroughly before assembling.

  • Reheating: When reheating, warm potatoes in the oven for crispiness and heat the meat mixture in a skillet or microwave. Avoid microwaving topped bowls to maintain texture.

  • Airtight Storage: Use airtight containers for each component to keep flavors intact and freshness alive, ensuring your Loaded Potato Taco Bowl is ready to enjoy at a moment's notice!

Loaded Potato Taco Bowl Recipe FAQs

How do I select the best russet potatoes for this recipe?
Absolutely! Look for russet potatoes that are firm and heavy for their size. Avoid any with dark spots, bruises, or sprouts, as these can affect the flavor and texture. The ideal potatoes will have a smooth skin, which indicates freshness. If you're feeling adventurous, you can also opt for sweet potatoes for a delightful twist in flavor!

What’s the best way to store leftovers of the Loaded Potato Taco Bowl?
Great question! To keep your Loaded Potato Taco Bowl fresh, store the components separately. Roasted potatoes and meat mixture can be refrigerated in airtight containers for up to 3-4 days. Ensure that fresh toppings like avocado and tomatoes are stored in separate airtight containers to prevent browning and maintain their freshness.

Can I freeze the Loaded Potato Taco Bowl?
Of course! For longer storage, you can freeze the individual components separately. Cool the roasted potatoes and meat mixture completely before freezing. Use freezer-safe containers or bags to store each part, and they will maintain their quality for up to 3 months. When you're ready to enjoy, thaw overnight in the fridge and reheat the potatoes in the oven for that lovely crispiness!

What should I do if my potatoes don't get crispy?
I often recommend that you ensure the potatoes are spread out in a single layer on the baking sheet, as overcrowding can lead to steaming instead of roasting. Flipping them halfway through the cooking time can also help to achieve that perfect golden crisp. If they still aren't as crispy as you'd like after baking, you can broil them for an additional 2-3 minutes while keeping a close watch!

Are there any allergens I should be aware of in the Loaded Potato Taco Bowl?
Very much! This recipe includes common allergens such as dairy from the cheese and sour cream, and the possibility of gluten depending on your choice of seasoning brands. Always read labels carefully if you have allergies. If you’re preparing this for someone with dietary concerns, feel free to customize the toppings or substitute with dairy-free options like cashew cheese or yogurt!

How can I customize the flavors in my Loaded Potato Taco Bowl?
The more the merrier! You can easily customize this recipe to suit your taste. Experiment with different spices or add extras like jalapeños, pickled onions, or your favorite hot sauce for added heat. Additionally, swapping out proteins for beans or tofu can cater to vegetarian diets while maintaining flavor and texture. Enjoy the creative process!

Loaded Potato Taco Bowl

Savor the Loaded Potato Taco Bowl for Ultimate Comfort Food

The Loaded Potato Taco Bowl is the perfect comfort food, blending crispy potatoes, seasoned meat, and vibrant veggies for a satisfying meal.
Print Recipe Pin Recipe
Prep Time 15 minutes mins
Cook Time 45 minutes mins
Total Time 1 hour hr
Servings: 4 bowls
Course: Dinner
Cuisine: American
Calories: 600
Ingredients Equipment Method Nutrition Notes

Ingredients
  

For the Potatoes
  • 4 large Russet Potatoes or sweet potatoes for different flavor
  • 2 tablespoons Olive Oil for roasting
  • 1 teaspoon Garlic Powder
  • 1 teaspoon Onion Powder
  • 1 teaspoon Smoked Paprika or Spanish paprika
  • 1 teaspoon Salt to taste
  • 1 teaspoon Black Pepper to taste
For the Filling
  • 1 pound Ground Beef or Turkey or beans/tofu for vegetarian
  • 1 tablespoon Chili Powder optional for milder flavor
  • 1 teaspoon Cumin
  • 1 medium Red Onion finely chopped
  • 1 can Black Beans drained and rinsed
  • 1 cup Corn Kernels fresh, canned, or frozen
For the Toppings
  • 1 cup Shredded Cheddar Cheese or different cheese varieties
  • 1 cup Cherry Tomatoes halved
  • 1 large Avocado diced
  • 0.25 cup Fresh Cilantro chopped
  • 2 wedge Lime optional for serving
  • 0.5 cup Sour Cream or Greek yogurt

Equipment

  • Baking Sheet
  • Large skillet
  • Spatula

Method
 

Preparation Steps
  1. Preheat the oven to 425°F (220°C). Wash and dice russet potatoes into bite-sized chunks. Spread on a baking sheet, drizzle with olive oil and seasonings, and toss to coat.
  2. Roast the diced potatoes for 25-30 minutes, turning halfway through, until golden brown and crispy.
  3. In a large skillet over medium-high heat, brown the ground meat for about 5-7 minutes, draining excess fat.
  4. Add chili powder, cumin, and chopped red onion to the meat, stirring and cooking for another 5 minutes.
  5. Incorporate black beans and corn, mixing thoroughly to heat through for 3-4 minutes.
  6. Layer crispy roasted potatoes in bowls, topping with the meat mixture.
  7. Add toppings: shredded cheese, cherry tomatoes, avocado, and cilantro.
  8. Serve immediately with lime wedges and sour cream.

Nutrition

Serving: 1bowlCalories: 600kcalCarbohydrates: 80gProtein: 25gFat: 22gSaturated Fat: 10gPolyunsaturated Fat: 3gMonounsaturated Fat: 8gCholesterol: 80mgSodium: 900mgPotassium: 1500mgFiber: 10gSugar: 5gVitamin A: 10IUVitamin C: 30mgCalcium: 15mgIron: 20mg

Notes

Customize your bowl with different toppings like jalapeños or pickled onions for a kick.

Tried this recipe?

Let us know how it was!

Million Dollar Chicken Casserole: Creamy Comfort in Every Bite

December 8, 2025 by Grace Snow Leave a Comment

As I stood in the kitchen, the aroma of melting cheese and savory chicken filled the air, instantly transporting me to cozy family dinners spent gathered around the table. This Million Dollar Chicken Casserole is the epitome of comfort food, bringing warmth and joy to any occasion. With its creamy layers of cream cheese, cottage cheese, and a buttery Ritz cracker crust, this dish isn’t just easy to whip up but also a wallet-friendly choice for those busy weeknights. Whether you’re new to cooking or just looking for a simple yet satisfying meal, this casserole delivers on all fronts—convenient, delicious, and perfect for feeding a crowd. Ready to bring a little piece of home comfort to your dinner table? Let's dive into this heartwarming recipe!

Why Is This Casserole So Irresistible?

Unforgettable Comfort: This Million Dollar Chicken Casserole wraps you in warmth with its creamy layers and golden crust, making it an ideal dish for cozy gatherings.
Beginner-Friendly: Even if you're a novice in the kitchen, this recipe requires minimal cooking skills, ensuring success every time.
Budget-Friendly: Utilizing common ingredients like rotisserie chicken and Ritz crackers, you can create a luxurious meal without breaking the bank.
Crowd-Pleaser: Whether at potlucks or family dinners, this casserole is a guaranteed hit that will have everyone asking for seconds—like our Chicken Adobo Again or Honey Garlic Chicken.
Versatile Options: Feel free to mix in veggies or switch proteins for a personalized twist. Each bite promises gooey indulgence that you and your loved ones will relish!

Million Dollar Chicken Casserole Ingredients

For the Casserole Base

  • Cooked Chicken – Provides hearty protein; rotisserie chicken makes for a quick and easy option.
  • Cream Cheese – The creamy backbone, adding delightful tanginess to the mix.
  • Cottage Cheese – Offers a light creaminess; ricotta can serve as an alternative.
  • Sour Cream – Enhances moisture and adds a smooth finish; Greek yogurt is a tangy substitute.
  • Mayonnaise – Infuses richness and helps combine the cheese elements seamlessly.
  • Cream of Chicken Soup – Adds nostalgic flavor and thickens the casserole; homemade is a fresh option.

For the Cheesy Topping

  • Parmesan Cheese – Provides a sharp, nutty flavor and helps create a crispy golden crust.
  • Mozzarella Cheese – Melts beautifully for that classic gooey texture everyone loves.

For the Crunchy Topping

  • Ritz Crackers – Adds a buttery crunch that balances the creamy filling; panko can offer a different style.
  • Unsalted Butter – Coats the crackers to enhance browning; coconut oil works as a dairy-free alternative.

Flavor Enhancers

  • Garlic Powder & Onion Powder – Elevate the overall flavor; adjust amounts based on taste preferences.
  • Salt and Pepper – Essential for seasoning; don’t forget to taste!
  • Fresh Parsley – Optional garnish that brightens the dish with a pop of color and freshness.

Dive into this Million Dollar Chicken Casserole recipe, and experience the delightful fusion of flavors and textures that makes it a beloved comfort food. Happy cooking!

Step‑by‑Step Instructions for Million Dollar Chicken Casserole

Step 1: Preheat and Prepare
Begin by preheating your oven to 350°F (175°C). This temperature is key for achieving a beautifully bubbly casserole. While the oven heats, gather a large mixing bowl to combine the creamy elements of your Million Dollar Chicken Casserole. Make sure your cream cheese is softened for easy mixing; it should be smooth and spreadable.

Step 2: Mix the Base
In your mixing bowl, combine the softened cream cheese, cottage cheese, sour cream, mayonnaise, and cream of chicken soup. Using a hand mixer or a sturdy spoon, blend these ingredients until they form a smooth, cohesive mixture. This creamy base will be the heart of your casserole, so ensure there are no lumps—about 2–3 minutes of mixing will do the trick.

Step 3: Season to Taste
Next, stir in a sprinkle of garlic powder, onion powder, salt, and pepper into the creamy mixture. Taste as you go and adjust according to your preference. These seasonings will enhance the flavor profile of your Million Dollar Chicken Casserole, ensuring each bite is deliciously savory.

Step 4: Fold in the Chicken
Carefully fold in your diced or shredded cooked chicken, making sure every piece is evenly coated in the creamy mixture. This step is crucial as it combines the protein with the sauce, making a flavorful filling. Depending on your chicken’s size, this should take about 2 minutes; you’re looking for an even distribution throughout.

Step 5: Prepare the Baking Dish
Grease a 9×13-inch baking dish with a bit of non-stick spray or softened butter to prevent sticking. Spread the chicken mixture evenly across the bottom of the dish, smoothing it out with a spatula for an even layer. This ensures that the casserole cooks uniformly, giving it that coveted golden crust on top.

Step 6: Add the Cheese Layer
Sprinkle a generous layer of Parmesan cheese over the entire chicken mixture. This not only adds flavor but also helps create a rich, savory crust as it bakes. Visualize that golden-brown color; this will be a delightful contrast to the creamy filling once baked.

Step 7: Prepare the Crunchy Topping
In a small bowl, mix crushed Ritz crackers with melted butter until the crackers are fully coated. This mixture will add a crunchy texture on top of your casserole. Take your time to ensure that all crumbs are buttery; this step takes about 1–2 minutes and is essential for that perfect crispy topping.

Step 8: Assemble the Final Layers
Spread the buttery Ritz cracker mixture evenly over the Parmesan cheese, ensuring full coverage. Finish by adding a layer of shredded mozzarella cheese on top, which will melt into gooey perfection. This delightful blend of toppings will create an irresistible, cheesy crust for your Million Dollar Chicken Casserole.

Step 9: Bake to Perfection
Place the baking dish in the preheated oven and bake for 25–30 minutes. Look for the casserole to bubble up and the top to turn a gorgeous golden brown. The aroma will fill your kitchen, signaling that your comforting meal is almost ready.

Step 10: Cool and Garnish
After baking, remove the dish from the oven and let it rest for about 10 minutes. This allows the casserole to set up nicely for serving. Before plating, sprinkle freshly chopped parsley on top for a pop of color and a hint of freshness, elevating your Million Dollar Chicken Casserole to a stunning presentation.

Million Dollar Chicken Casserole Variations

Feel free to get creative with this classic recipe and make it your own with these delightful twists!

  • Turkey Option: Substitute cooked chicken with turkey for a flavorful alternative, perfect after the holidays.
  • Veggie Boost: Add spinach or broccoli to the mix for an extra layer of nutrition and texture. The more colors on your plate, the better!
  • Greek Yogurt Swap: Replace sour cream with Greek yogurt for a healthier, tangy twist that adds creaminess.
  • Spicy Kick: Toss in some diced jalapeños or a pinch of cayenne for a delightful heat that complements the creamy base. It's sure to awaken your taste buds!
  • Richer Flavor: Use homemade cream of chicken soup instead of canned for a fresher, richer taste. This small swap can elevate your casserole to new heights!
  • Pasta Layer: Incorporate cooked pasta like rotini or penne between layers for a heartier meal that feels like a big comforting hug.
  • Different Cheese: Experiment with different cheeses like sharp cheddar or Gouda for a unique flavor profile that dances on your palate.
  • Herb Infusion: Add fresh herbs like thyme or rosemary into the filling for an aromatic punch that revitalizes each bite. It’s all about layering those delicious flavors!

Each variation opens the door to a new flavor adventure! You can also explore more hearty chicken options like Crock Pot Chicken or zesty choices like Chipotle Lime Chicken and Rice for even more delicious family meals. Happy cooking!

How to Store and Freeze Million Dollar Chicken Casserole

Fridge: Store leftovers in an airtight container for up to 3 days. It’s a great option for quick meals during the week!

Freezer: For longer storage, freeze the unbaked casserole for up to 3 months. Wrap tightly in plastic wrap and foil to prevent freezer burn.

Reheating: To reheat, bake thawed casserole in a preheated oven at 350°F (175°C) for about 25–30 minutes. Ensure it’s heated through completely for the best flavor.

Leftovers Tip: If you have leftover baked casserole, consume it within a couple of days for optimal freshness and taste.

Helpful Tricks for Million Dollar Chicken Casserole

  • Resting Period: Allow the casserole to rest after baking. This ensures it holds its shape when served, making for neater portions.
  • Seasoning Check: Taste and adjust seasoning before baking. This is the perfect moment to enhance the flavors of your Million Dollar Chicken Casserole.
  • Mixing Method: Ensure all ingredients are evenly mixed to prevent clumps. A hand mixer or sturdy spoon will create a smooth and cohesive filling.
  • Easy Substitutions: If you need a quicker option, rotisserie chicken works perfectly—saving you time without sacrificing flavor.
  • Crispy Topping Tip: Make sure the crushed Ritz crackers are well-coated in butter for that irresistible golden, crunchy topping.

What to Serve with Million Dollar Chicken Casserole

Pairing the right sides can elevate your dining experience, transforming a simple casserole into a memorable meal.

  • Garden Salad: A crisp garden salad provides a fresh contrast to the creamy casserole, balancing the rich flavors beautifully. Topped with a light vinaigrette, it brings a refreshing crunch to your table.

  • Steamed Broccoli: Tender steamed broccoli adds a nutritious touch while offering a mild flavor that complements the casserole’s richness. The vibrant green color also brightens up your plate, making your meal visually appealing.

  • Garlic Bread: Golden, buttery garlic bread pairs perfectly with this cheesy dish, offering a wonderful complementary flavor. It’s also ideal for scooping up every last bite of casserole.

  • Coleslaw: The tangy crunch of coleslaw adds a delightful contrast to the silky texture of the casserole. Its zesty flavors will wake up your palate while the coolness complements the heartiness of the dish.

  • Roasted Carrots: Sweet and caramelized roasted carrots bring both flavor and a pop of color to your meal. Their natural sweetness beautifully balances the savory notes of the Million Dollar Chicken Casserole.

  • Apple Crisp: For dessert, a warm apple crisp can provide a delightful sweet contrast after the savory casserole. The soft, baked apples topped with a crunchy oat topping is a classic comfort finish to your meal.

Make Ahead Options

These Million Dollar Chicken Casserole are perfect for busy home cooks looking to save time during hectic weeknights! You can prepare the creamy filling by mixing the cheeses, mayonnaise, and soup up to 24 hours in advance; store it in the refrigerator to maintain its freshness. Additionally, the casserole can be assembled (without baking) and covered tightly for up to 3 days in the fridge, allowing for quick cooking when you're ready. When you're set to serve, simply top with the cracker mixture and mozzarella, then bake at 350°F (175°C) for 25–30 minutes until golden and bubbly. This makes it just as delicious while saving you valuable time!

Million Dollar Chicken Casserole Recipe FAQs

How do I choose the right chicken for the casserole?
Absolutely! You can use any cooked chicken, but for convenience, rotisserie chicken is perfect. Just make sure it’s tender and juicy for the best flavor. Aim for about 4 cups of shredded chicken, and if you have leftovers, even better!

How should I store leftovers from the casserole?
Leftovers can be stored in an airtight container in the fridge for up to 3 days. This makes it super convenient for quick meals throughout the week. I often just pop it into individual containers for easy reheating!

Can I freeze Million Dollar Chicken Casserole?
Yes, you can freeze it! I recommend wrapping the unbaked casserole tightly in plastic wrap and then in foil to prevent freezer burn. You can store it in the freezer for up to 3 months. When you're ready to enjoy it again, thaw it overnight in the fridge and bake it at 350°F (175°C) for about 25–30 minutes, or until thoroughly heated.

What if my casserole turns out too dry?
If your casserole ends up a bit dry, don’t fret! Try adding a splash of chicken broth to the mix before baking, or serve it with a dollop of sour cream or yogurt on top when you serve. You want that creamy texture, so keep an eye on the baking time to avoid drying it out.

Are there any dietary concerns I should consider?
Absolutely! If anyone you’re serving has dairy allergies, use dairy-free alternatives like coconut yogurt and cream cheese. For gluten-free options, ensure your Ritz crackers or substitute are gluten-free. Always keep your guests' dietary needs in mind to make sure everyone can enjoy this hearty dish!

Million Dollar Chicken Casserole

Million Dollar Chicken Casserole: Creamy Comfort in Every Bite

Enjoy the comforting Million Dollar Chicken Casserole, featuring creamy layers and a buttery crust, perfect for family dinners.
Print Recipe Pin Recipe
Prep Time 15 minutes mins
Cook Time 30 minutes mins
Cooling Time 10 minutes mins
Total Time 55 minutes mins
Servings: 8 servings
Course: Dinner
Cuisine: American
Calories: 350
Ingredients Equipment Method Nutrition Notes

Ingredients
  

For the Casserole Base
  • 4 cups Cooked Chicken shredded rotisserie chicken
  • 8 oz Cream Cheese softened
  • 1 cup Cottage Cheese
  • 1 cup Sour Cream Greek yogurt can be substituted
  • 1/2 cup Mayonnaise
  • 1 can Cream of Chicken Soup homemade is an option
For the Cheesy Topping
  • 1 cup Parmesan Cheese grated
  • 2 cups Mozzarella Cheese shredded
For the Crunchy Topping
  • 1 cup Ritz Crackers crushed
  • 1/2 cup Unsalted Butter melted
Flavor Enhancers
  • 1 tsp Garlic Powder
  • 1 tsp Onion Powder
  • 1 tsp Salt to taste
  • 1 tsp Pepper to taste
  • 1/4 cup Fresh Parsley chopped, for garnish

Equipment

  • Oven
  • Mixing Bowl
  • Spatula
  • 9x13-inch baking dish

Method
 

Preparation Steps
  1. Preheat your oven to 350°F (175°C). Gather a large mixing bowl.
  2. Combine softened cream cheese, cottage cheese, sour cream, mayonnaise, and cream of chicken soup in the mixing bowl. Mix until smooth.
  3. Stir in garlic powder, onion powder, salt, and pepper into the creamy mixture.
  4. Fold in the cooked chicken until evenly coated.
  5. Grease a 9x13-inch baking dish and spread the chicken mixture evenly.
  6. Sprinkle Parmesan cheese over the chicken mixture.
  7. In a small bowl, mix crushed Ritz crackers with melted butter until fully coated.
  8. Spread the buttery cracker mixture over the Parmesan cheese, then add shredded mozzarella on top.
  9. Bake for 25-30 minutes until bubbly and golden brown.
  10. Let the casserole cool for about 10 minutes before serving, then garnish with fresh parsley.

Nutrition

Serving: 1servingCalories: 350kcalCarbohydrates: 30gProtein: 25gFat: 18gSaturated Fat: 10gPolyunsaturated Fat: 2gMonounsaturated Fat: 4gCholesterol: 80mgSodium: 700mgPotassium: 300mgFiber: 1gSugar: 2gVitamin A: 500IUVitamin C: 2mgCalcium: 250mgIron: 2mg

Notes

Allowing the casserole to rest after baking helps it hold its shape for serving. Adjust flavors as needed before baking and ensure all ingredients are well mixed.

Tried this recipe?

Let us know how it was!

Mouthwatering Swedish Meatballs Recipe in Creamy Mushroom Sauce

December 8, 2025 by Grace Snow Leave a Comment

As I settled in for a cozy evening, the aroma of savory spices wafted from my kitchen, transporting me straight to the heart of Sweden. This Swedish Meatballs Recipe features tender meatballs nestled in a creamy mushroom sauce that wraps around your taste buds like a warm hug. Perfect for busy weeknights, it comes together in just 25 minutes, making it an ideal choice for anyone craving comfort without the lengthy prep time. Whether you're entertaining friends or feeding your family, this dish is a guaranteed crowd-pleaser that will leave everyone asking for seconds. What’s your secret ingredient for elevating a classic dish?

What makes these meatballs a must-try?

Comforting, savory goodness: These Swedish meatballs offer a delightful blend of flavors that warm the soul—perfect for family dinners or entertaining.
Quick preparation: In just 25 minutes, you can serve a gourmet meal that feels indulgent without hours in the kitchen.
Creamy mushroom sauce: The luscious gravy elevates the dish, clinging beautifully to each meatball and pasta, ensuring every bite is heavenly.
Versatile ingredients: Swap in ground turkey or chicken for a lighter version, or add herbs to suit your palate. This recipe works well with many variations!
Crowd-pleasing flavor: Whether it's a weeknight dinner or a gathering with friends, these meatballs are bound to impress and satisfy everyone at the table. If you’re in the mood for more delicious options, explore our tasty Spatchcock Chicken or a comforting Chicken Adobo.

Swedish Meatballs Recipe Ingredients

For the Meatballs

  • Lean Ground Beef – This is the primary protein and offers rich flavor; choose 90% lean for optimal juiciness.
  • Egg – Acts as a binder; while no substitution is necessary, you can opt for a flax egg for a plant-based alternative.
  • Chopped Onion – Adds depth; shallots can be used for a milder flavor if preferred.
  • Minced Garlic – Enhances the flavor profile; use fresh garlic for the best results.
  • Panko Breadcrumbs – Provides structure and helps maintain moisture; regular breadcrumbs work if needed.
  • Nutmeg – Offers warm, earthy notes that define the meatballs; allspice or ground cloves are good substitutes.
  • Fresh Parsley – Adds freshness and color; dried parsley can be used if fresh is unavailable.
  • Salt and Pepper – Essential for seasoning; adjust based on your taste preference.

For the Sauce

  • Olive Oil – Used for browning the meatballs; you can replace it with butter or vegetable oil if you like.
  • Beef Broth – Adds immense richness to the gravy; vegetable broth works wonderfully for a lighter touch.
  • Condensed Cream of Mushroom Soup – Forms the base of the gravy; try homemade mushroom sauce for a healthier twist.
  • Sour Cream – Provides creaminess and a tangy note; Greek yogurt or crème fraîche are great alternatives.

For Serving

  • Freshly Cooked Pasta – The perfect bed for your meatballs and sauce; any pasta type is great, even gluten-free options will work!

Cook up these meatballs using this Swedish Meatballs Recipe, and your family will be clamoring for more!

Step‑by‑Step Instructions for Swedish Meatballs Recipe

Step 1: Prepare the Meatball Mixture
In a medium bowl, thoroughly combine 1 pound of lean ground beef, 1 egg, ½ cup chopped onion, 2 cloves minced garlic, ½ cup Panko breadcrumbs, ¼ teaspoon nutmeg, 2 tablespoons chopped fresh parsley, and a sprinkle of salt and pepper. Mix until just combined to avoid tough meatballs, ensuring all ingredients are evenly dispersed.

Step 2: Shape the Meatballs
Once your mixture is ready, shape it into approximately 20 even meatballs, about 1 inch in diameter. Place them on a plate or tray lined with parchment paper as you work. This step is crucial for achieving that beloved Swedish meatball texture, so be gentle yet firm in your shaping.

Step 3: Brown the Meatballs
Heat 2 tablespoons of olive oil in a large skillet over medium-high heat. Once the oil is shimmering, add the meatballs in a single layer, ensuring they have space to brown. Cook for 5-7 minutes, turning occasionally, until they're evenly browned on all sides. Transfer them to a plate and leave behind any excess fat in the skillet.

Step 4: Make the Creamy Sauce
In the same skillet, pour in 1 cup of beef broth, followed by 10.5 ounces of condensed cream of mushroom soup and ½ cup of sour cream. Stir everything together until smooth and well combined. Heat the mixture over medium heat, bringing it to a gentle boil, allowing the flavors to meld beautifully for about 2-3 minutes.

Step 5: Simmer the Meatballs in Sauce
Return the browned meatballs to the skillet, ensuring they are well-coated in the creamy sauce. Reduce the heat to low, cover the skillet, and let them simmer for 5-7 minutes, or until the meatballs are cooked through and the sauce has thickened slightly. The sauce should be bubbling gently, creating a luscious coating for your meatballs.

Step 6: Serve and Enjoy
Once your meatballs are ready, remove the skillet from the heat and serve the Swedish meatballs over freshly cooked pasta. Make sure to spoon extra sauce generously over the top for that creamy goodness in every bite. Garnish with additional parsley if desired for a touch of freshness, and gather your loved ones to indulge in this heartwarming dish.

Expert Tips for Swedish Meatballs

  • Mix with Care: Avoid overmixing the meat mixture to ensure tender and juicy meatballs; a gentle hand goes a long way!
  • Don’t Rush Browning: Properly browning the meatballs enhances their flavor, so take your time with this crucial step.
  • Add Extra Mushrooms: Sauté additional mushrooms for added texture and flavor; they blend perfectly with the creamy sauce!
  • Cook Ahead: Prepare the meatballs in advance and refrigerate them; this makes for a quick, effortless weeknight dinner using this Swedish meatballs recipe.
  • Perfect Pasta Pairing: Serve the meatballs over pasta that can adequately hold the creamy sauce, like fettuccine or pappardelle, for a delightful meal.

What to Serve with The Best Swedish Meatballs in Creamy Mushroom Sauce

Experience a fully enjoyable family meal loaded with textures and delicious flavors that perfectly complement this hearty dish.

  • Crusty Bread: Perfect for soaking up the rich mushroom gravy, this crunchy companion adds a satisfying texture and enhances the overall experience. A warm baguette or rustic country loaf makes an excellent choice here.

  • Fresh Garden Salad: A crisp salad with mixed greens, cherry tomatoes, and a tangy vinaigrette balances the creamy richness of the meatballs. This refreshing element also adds a bright flavor to your meal.

  • Roasted Vegetables: Sweet, roasted carrots, and earthy Brussels sprouts introduce a warm, caramelized flavor that pairs beautifully with the savory meatballs. The crispy texture adds an exciting contrast.

  • Creamy Mashed Potatoes: Smooth and buttery, mashed potatoes serve as a comforting base for the meatballs, soaking up the sauce wonderfully for a truly indulgent bite.

  • Steamed Green Beans: Lightly steamed green beans offer a crisp and fresh contrast to the meatballs and sauce. Their vibrant color and taste bring balance to your plate.

  • Light White Wine: A chilled glass of Sauvignon Blanc or Chardonnay beautifully complements the savory notes of the dish, enhancing the overall flavor experience.

Invest a little more time into your meal and savor the love and comfort these pairings bring to your Swedish Meatballs Recipe!

Make Ahead Options

These Swedish Meatballs Recipe are perfect for meal prep enthusiasts looking to save time during busy weeknights! You can prepare the meatball mixture up to 24 hours in advance; just mix the ingredients, shape them into meatballs, and refrigerate until you're ready to cook. The creamy mushroom sauce can also be made ahead and stored in the fridge for up to 3 days. When you’re ready to enjoy your meal, simply brown the meatballs as directed, add them to the sauce, and simmer until cooked through. By doing the prep work in advance, you'll have a delicious and comforting dinner on the table with minimal effort!

How to Store and Freeze Swedish Meatballs

Fridge: Store leftover Swedish meatballs in an airtight container for up to 3 days. Reheat gently on the stovetop or in the microwave, adding a splash of broth or water to maintain moisture.

Freezer: For longer storage, freeze meatballs in a single layer on a baking sheet, then transfer to a freezer bag for up to 1 month. Thaw overnight in the fridge before reheating.

Reheating: To reheat frozen meatballs, simmer them in the creamy mushroom sauce on low heat until heated through. This keeps them juicy and flavorful.

Make-Ahead: Prepare the meatballs ahead of time and refrigerate them until you're ready to cook. This makes for a quick and satisfying meal later on.

Swedish Meatballs Recipe Variations

Feel free to put your personal spin on this delectable Swedish meatballs recipe for a unique twist!

  • Lean Meat: Use ground turkey or chicken for a lighter alternative that still brings delicious flavor.
  • Herb Infusion: Experiment with fresh herbs like thyme or dill to elevate the taste profile of your meatballs beautifully.
  • Extra Umami: Add a splash of Worcestershire sauce to the meat mixture for an extra punch of savory goodness.
  • Vegetarian Twist: Swap meat for a blend of finely chopped mushrooms and lentils, creating a hearty, plant-based version that’s just as satisfying.
  • Spicy Kick: Mix in a pinch of crushed red pepper flakes for those who crave a bit of heat with their comfort food.
  • Nutty Flavor: Incorporate a tablespoon of ground almonds or almond flour for added texture and a nutty nuance in the meatballs.
  • Creamy Mushroom Sauce Upgrade: Try making your own mushroom sauce using a medley of sautéed mushrooms and a splash of white wine – it adds depth and sophistication!
  • Pasta Alternatives: Don’t limit yourself to just traditional pasta! Serve these meatballs over zoodles or quinoa for a refreshing twist that’s equally delicious.

These variations can bring a whole new life to your dish! And if you’re looking for more flavorful dishes, don't forget to check out our mouthwatering Spatchcock Chicken or comforting Chicken Adobo. Enjoy your culinary adventures!

Swedish Meatballs Recipe FAQs

How do I choose the best ground beef for my meatballs?
Absolutely! For the best Swedish meatballs, I recommend using 90% lean ground beef. This provides a rich flavor and keeps the meatballs juicy without being overly fatty. If you're looking for a lighter option, ground turkey or chicken can be substituted, and they work well in this dish!

What’s the best way to store leftover meatballs?
Store leftover Swedish meatballs in an airtight container in the refrigerator for up to 3 days. To reheat, gently warm them on the stovetop over low heat, or pop them in the microwave. Adding a splash of broth or water can help retain moisture during reheating, making them just as delicious as when they were freshly made.

Can I freeze the meatballs?
Yes, you can absolutely freeze them! To do this, shape the meatballs and place them on a baking sheet in a single layer. Freeze them for about 1 hour until firm, then transfer them to a freezer-safe bag or container. They can be frozen for up to 1 month. When you're ready to enjoy them, thaw overnight in the fridge and reheat in the creamy mushroom sauce on low heat until warmed through.

I’m having trouble with my meatballs falling apart. What can I do?
I hear you! If your meatballs are falling apart, it could be due to overmixing the meat mixture or not enough binder. Make sure to mix just until combined—about 30 seconds is usually perfect. Additionally, ensure you're using enough Panko breadcrumbs and egg to help bind everything together. If necessary, add a touch more breadcrumbs next time for better structure.

Are there any dietary considerations for this recipe?
Certainly! If someone in your household has allergies, it's essential to replace or omit certain ingredients. For a dairy-free version, you can substitute sour cream with coconut yogurt or a plant-based alternative. If using a flax egg, combine 1 tablespoon of ground flaxseed with 2.5 tablespoons of water and let it sit for 5 minutes before adding it to your meat mixture! Just remember to factor in the suggested cooking times, as they may vary slightly.

Can I use regular breadcrumbs instead of Panko?
Very! While Panko breadcrumbs offer a lighter and crunchier texture, you can absolutely use regular breadcrumbs if they're what you have on hand. Just be aware that they might result in a slightly denser meatball, but it will still taste delicious!

Swedish Meatballs Recipe

Mouthwatering Swedish Meatballs Recipe in Creamy Mushroom Sauce

This Swedish Meatballs Recipe features tender meatballs in a creamy mushroom sauce. Perfect for busy weeknights!
Print Recipe Pin Recipe
Prep Time 10 minutes mins
Cook Time 15 minutes mins
Total Time 25 minutes mins
Servings: 4 servings
Course: Dinner
Cuisine: Swedish
Calories: 450
Ingredients Equipment Method Nutrition Notes

Ingredients
  

For the Meatballs
  • 1 pound lean ground beef choose 90% lean for optimal juiciness
  • 1 large egg acts as a binder
  • ½ cup chopped onion adds depth; shallots can be used for milder flavor
  • 2 cloves minced garlic use fresh garlic for the best results
  • ½ cup Panko breadcrumbs provides structure and helps maintain moisture
  • ¼ teaspoon nutmeg offers warm, earthy notes; allspice or ground cloves are substitutes
  • 2 tablespoons fresh parsley adds freshness and color; dried parsley can be used if fresh is unavailable
  • salt and pepper essential for seasoning; adjust based on taste
For the Sauce
  • 2 tablespoons olive oil used for browning the meatballs; can replace with butter
  • 1 cup beef broth adds richness; vegetable broth works for lighter touch
  • 10.5 ounces condensed cream of mushroom soup forms the base of the gravy
  • ½ cup sour cream provides creaminess; Greek yogurt or crème fraîche are alternatives
For Serving

Equipment

  • medium bowl
  • Large skillet
  • plate or tray

Method
 

Step-by-Step Instructions
  1. In a medium bowl, combine lean ground beef, egg, chopped onion, minced garlic, Panko breadcrumbs, nutmeg, chopped parsley, and a sprinkle of salt and pepper. Mix until just combined.
  2. Shape the mixture into approximately 20 meatballs, about 1 inch in diameter, and place them on a lined plate or tray.
  3. Heat olive oil in a large skillet over medium-high heat. Add the meatballs in a single layer and cook for 5-7 minutes until browned on all sides. Transfer to a plate.
  4. In the same skillet, pour in beef broth, condensed cream of mushroom soup, and sour cream. Stir until smooth and bring to a gentle boil for 2-3 minutes.
  5. Return meatballs to the skillet and cover to simmer for 5-7 minutes until cooked through and sauce thickens.
  6. Serve the meatballs over freshly cooked pasta with extra sauce and garnish with parsley.

Nutrition

Serving: 1servingCalories: 450kcalCarbohydrates: 30gProtein: 25gFat: 28gSaturated Fat: 10gPolyunsaturated Fat: 2gMonounsaturated Fat: 10gCholesterol: 100mgSodium: 600mgPotassium: 700mgFiber: 2gSugar: 3gVitamin A: 500IUVitamin C: 3mgCalcium: 50mgIron: 3mg

Notes

Avoid overmixing the meat mixture for tender meatballs; take your time with browning. Prepare meatballs ahead of time for a quick dinner.

Tried this recipe?

Let us know how it was!

Savory Chicken and Garlic Gravy with Cheesy Mashed Potatoes

December 8, 2025 by Grace Snow Leave a Comment

The moment I caught a whiff of garlic sizzling in butter, I was transported back to my grandmother's kitchen, where cozy meals were served with love. That's what inspired me to create this Chicken and Garlic Gravy with Cheesy Mashed Potatoes, a comfort food classic that warms both the belly and the heart. This dish delivers big flavor with surprisingly quick prep, making it a perfect solution for busy weeknights or special gatherings with family and friends. Juicy chicken, enveloped in a luscious garlic gravy, pairs beautifully with creamy, cheesy mashed potatoes that everyone will rave about. Are you ready to bring some nostalgia into your kitchen? Let’s dive into this satisfying recipe that’s bound to become a favorite!

Why is this dish a must-try?

Comforting, This Chicken and Garlic Gravy with Cheesy Mashed Potatoes offers a heartwarming experience that feels like a hug on a plate.

Customizable, Whether you prefer chicken thighs or breasts, this recipe adapts to your taste, ensuring everyone can enjoy it.

Flavor-packed, The rich garlic and onion gravy perfectly complements the creamy, cheesy potatoes, creating a delightful harmony of flavors.

Quick and Easy, With straightforward steps, you can whip up this dish in no time, making it ideal for busy weeknights.

Crowd-pleaser, It’s a family-friendly meal that appeals to all age groups – a surefire way to impress your guests.

For a complete meal, consider serving this with a light mixed green salad to balance the richness, or why not try pairing it with a side of Cheesy Garlic Bread for extra flavor?

Chicken and Garlic Gravy Ingredients

For the Chicken
• Chicken Thighs or Breasts – Juicy thighs are recommended for better flavor and moisture retention, while breasts can offer a leaner option.

For the Gravy
• Garlic (6 cloves, minced) – Fresh garlic is preferred for vibrant taste; however, 1 teaspoon of garlic powder can substitute per 3 cloves.
• Yellow Onion (1 medium, finely chopped) – Adds sweetness and depth; caramelize it for enhanced flavors.
• Butter (2 tablespoons, divided) – Provides fat for cooking the chicken and making the roux; can be substituted with oil if desired.
• All-Purpose Flour (2 tablespoons) – Used to thicken the gravy by creating a roux.
• Chicken Broth (1.5 cups) – Forms the base of the gravy; vegetable broth is a lighter alternative.

For the Cheesy Mashed Potatoes
• Yukon Gold or Russet Potatoes (2 pounds, peeled and cubed) – These varieties are preferred for their buttery texture, making them ideal for creamy mashed potatoes.
• Shredded Cheddar Cheese (1 cup) – Adds creaminess and flavor; can be swapped for mozzarella or Gruyère for a twist.
• Milk or Heavy Cream (0.5 cup, warmed) – Ensures a rich and smooth mash; warming is essential to avoid lumps.

Seasoning & Garnish
• Salt and Black Pepper – Essential for enhancing flavors; adjust to personal taste.
• Fresh Parsley (1 tablespoon, chopped, optional) – Adds a pop of color and freshness to the dish.

With these ingredients at hand, you're on your way to creating a sumptuous Chicken and Garlic Gravy with Cheesy Mashed Potatoes that's sure to delight your family and friends!

Step‑by‑Step Instructions for Chicken and Garlic Gravy with Cheesy Mashed Potatoes

Step 1: Season the Chicken
Begin by seasoning your chicken thighs or breasts generously with salt and black pepper on both sides. This will enhance the flavor of your Chicken and Garlic Gravy with Cheesy Mashed Potatoes. Allow it to sit for a few minutes while you prepare your skillet.

Step 2: Sear the Chicken
In a large skillet, heat 1 tablespoon of butter over medium-high heat until it begins to sizzle. Carefully add the chicken and sear for 4–5 minutes on each side until golden brown and cooked through. Once done, remove the chicken from the skillet and set it aside on a plate.

Step 3: Sauté the Onion
Reduce the heat to medium and add the remaining tablespoon of butter to the same skillet. Once melted, add the finely chopped yellow onion and sauté for about 5 minutes, stirring frequently, until the onion becomes soft and golden. This step is crucial for building flavor in your gravy.

Step 4: Add the Garlic
Next, add the minced garlic to the skillet with the sautéed onions. Cook for an additional minute, stirring continuously to prevent burning. The fragrant aroma will begin to fill your kitchen, signaling it’s time to move on to the next step in creating your rich, savory garlic gravy.

Step 5: Create the Roux
Sprinkle the all-purpose flour over the onions and garlic mixture. Stir consistently for about 2 minutes, allowing the flour to cook and form a roux. This will help thicken your gravy and provide a rich flavor that complements the chicken perfectly.

Step 6: Incorporate the Broth
Gradually whisk in the chicken broth, making sure to scrape any browned bits from the bottom of the pan. This is where the flavor lies! Bring the mixture to a simmer, allowing it to cook and thicken slightly for about 3–4 minutes, stirring occasionally.

Step 7: Simmer the Chicken
Return the seared chicken to the skillet, making sure it’s submerged in the gravy. Cover your skillet and reduce the heat to low, letting it simmer for 15–20 minutes. This process will ensure the chicken is fully cooked, tender, and infused with the delicious flavors of the garlic gravy.

Step 8: Prepare the Mashed Potatoes
While the chicken simmers, bring a large pot of salted water to a boil. Add the peeled and cubed Yukon Gold or Russet potatoes, cooking them for about 15 minutes until fork-tender. This step will yield the creamy base for your cheesy mashed potatoes.

Step 9: Mash the Potatoes
Once the potatoes are tender, drain them and return them to the pot. Add the warmed milk or heavy cream along with the shredded cheddar cheese. Mash until smooth and creamy, seasoning with salt and black pepper to taste, creating a delightful companion to your chicken and gravy.

Step 10: Serve and Garnish
To serve, scoop a generous portion of the cheesy mashed potatoes onto each plate. Top with the chicken and a generous ladle of garlic gravy. For a finishing touch, sprinkle with freshly chopped parsley if desired, adding a pop of color and freshness that elevates your Chicken and Garlic Gravy with Cheesy Mashed Potatoes.

Helpful Tricks for Chicken and Garlic Gravy

  • Choose the Right Chicken: Select juicy chicken thighs for superior flavor and moisture; breast meat is leaner but can dry out without careful cooking.

  • Avoid Burnt Garlic: Add minced garlic only after the onions are soft, cooking it for no more than a minute; burnt garlic becomes bitter and can ruin your gravy.

  • Perfectly Crispy Chicken: Sear the chicken without moving it for the first 4-5 minutes; this allows a golden crust to form, enhancing both texture and flavor.

  • Master the Roux: Stir the flour constantly for about 2 minutes to ensure it cooks properly before adding liquid; this prevents a floury taste in your Chicken and Garlic Gravy.

  • Season the Potatoes Well: Add salt when boiling the cubed potatoes for mashed potatoes; this infuses flavor right into the potatoes, enhancing the overall dish.

With these expert tips, you'll create a Chicken and Garlic Gravy with Cheesy Mashed Potatoes that's sure to impress family and friends!

How to Store and Freeze Chicken and Garlic Gravy with Cheesy Mashed Potatoes

Fridge: Store leftovers in an airtight container for up to 3 days. Reheat gently on the stove or in the microwave, adding a splash of broth for moisture.

Freezer: For longer storage, freeze portions in freezer-safe containers for up to 3 months. Thaw overnight in the fridge before reheating.

Reheating: When reheating from the fridge or freezer, stir in a bit of milk or broth to maintain creaminess in the cheesy mashed potatoes and ensure the chicken and gravy are warmed through.

Make-Ahead: Prepare this Chicken and Garlic Gravy with Cheesy Mashed Potatoes a day in advance. Store it in the fridge and reheat before serving for convenience during busy weeknights.

Make Ahead Options

These Chicken and Garlic Gravy with Cheesy Mashed Potatoes are perfect for busy weeknights and can be prepped in advance to save time! You can sear the chicken and prepare the gravy up to 24 hours in advance; simply store them in an airtight container in the fridge. The creamy cheesy mashed potatoes can be made ahead as well, but avoid adding the cheese until you're ready to reheat; this keeps them fresh and melty! When you’re ready to serve, just reheat the gravy on the stovetop over low heat and warm the potatoes gently (adding a splash of milk or broth to loosen) to ensure they remain just as delicious as when freshly made.

Chicken and Garlic Gravy Variations

Customize your Chicken and Garlic Gravy with Cheesy Mashed Potatoes masterpiece to suit your taste buds and dietary needs!

  • Rotisserie Chicken: Use store-bought rotisserie chicken for a quicker prep—just shred and add to your gravy.

  • Vegan Option: Swap chicken for sautéed mushrooms or chickpeas and use plant-based butter and broth for a delightful vegan feast.

  • Herb-Infused: Add fresh thyme or rosemary to the gravy for an aromatic twist that elevates the flavor profile.

  • Cheesy Mix: Experiment with a blend of cheeses for the mashed potatoes, like Gruyère and mozzarella, for a creamy, flavor-rich base.

  • Spicy Kick: Sprinkle in a pinch of crushed red pepper flakes or cayenne pepper to heat things up if you enjoy a bit of spice.

  • Enriched Gravy: Stir in a tablespoon of dijon mustard or Worcestershire sauce while simmering the gravy for an extra depth of flavor.

If you're searching for even more complementary flavors, consider pairing this hearty dish with some Cheesy Garlic Bread to soak up that rich gravy or try it alongside Smoky Sweet Potatoes for an irresistible balance of flavors!

  • Veggie Boost: Add peas or spinach to the gravy to increase the nutrition and add a pop of color to your meal.

With these variations up your sleeve, you'll create a new family favorite every time you whip up this classic comfort food!

What to Serve with Chicken and Garlic Gravy with Cheesy Mashed Potatoes

A comforting dish deserves delightful companions that enhance the overall dining experience.

  • Light Mixed Green Salad: A fresh salad with a zesty vinaigrette brings a refreshing contrast to the rich, savory flavors of the gravy.

  • Crusty Garlic Bread: Warm, toasted bread infused with garlic offers a crunchy, flavorful side perfect for soaking up the delicious gravy.

  • Blistered Green Beans: Crisp-tender green beans, lightly sautéed, add vibrant color and a satisfying crunch that balances the creamy mashed potatoes.

  • Herbed Rice Pilaf: Fluffy rice with fresh herbs provides a gentle base to complement the hearty chicken and gravy, making each bite a joy.

  • Steamed Broccoli: A simple, vibrant side that adds a touch of color and nutrients to your plate, nicely offsetting the richness of the meal.

  • Red Wine: A glass of smooth red wine like Cabernet Sauvignon enhances the depth of flavors in the chicken and garlic gravy, making for a refined pairing.

  • Chocolate Mousse: Finish on a sweet note with a rich, airy chocolate mousse that provides a delightful contrast to the savory main course, closing the meal beautifully.

Chicken and Garlic Gravy with Cheesy Mashed Potatoes Recipe FAQs

How do I choose the right chicken?
Absolutely! For the best flavor and moisture, I recommend using chicken thighs. They tend to be tender and juicy, making them ideal for this dish. However, if you're looking for a leaner option, chicken breasts can certainly work—just be cautious not to overcook them.

What’s the best way to store leftovers?
Very! To keep your Chicken and Garlic Gravy with Cheesy Mashed Potatoes fresh, store leftovers in an airtight container in the fridge for up to 3 days. Gently reheat on the stove or in the microwave, adding a splash of broth to restore moisture and keep everything creamy and delicious.

Can I freeze this dish?
Absolutely! You can freeze portions of this dish in freezer-safe containers for up to 3 months. To do this, allow the dish to cool completely before sealing. When you're ready to enjoy it, thaw overnight in the fridge and reheat gently on the stove, stirring in a bit of milk or broth for extra creaminess.

What should I do if the gravy is too thin?
No worries! If your gravy turns out thinner than you'd like, you can thicken it by creating a slurry. Mix 1 tablespoon of cornstarch with 2 tablespoons of cold water until smooth, then stir this mixture into the simmering gravy. Cook for another few minutes until it thickens to your liking.

Are there any dietary considerations for this dish?
Indeed! This recipe is quite adaptable. For gluten-free options, you can substitute all-purpose flour with cornstarch or a gluten-free flour blend to thicken the gravy. Additionally, if you have a dairy allergy, consider using a dairy-free cream option and nutritional yeast for a cheesy flavor in the mashed potatoes.

What’s the best way to ensure the perfect mashed potatoes?
The key to achieving creamy mashed potatoes lies in the details! Make sure to use Yukon Gold or Russet potatoes for their buttery texture. Don’t forget to warm your milk or heavy cream before adding it to the potatoes, as this helps to avoid lumps. Finally, mash them with a gentle touch to keep them light and fluffy!

Chicken and Garlic Gravy with Cheesy Mashed Potatoes

Savory Chicken and Garlic Gravy with Cheesy Mashed Potatoes

A comforting Chicken and Garlic Gravy with Cheesy Mashed Potatoes recipe that warms both the belly and the heart.
Print Recipe Pin Recipe
Prep Time 15 minutes mins
Cook Time 35 minutes mins
Total Time 50 minutes mins
Servings: 4 servings
Course: Dinner
Cuisine: American
Calories: 700
Ingredients Equipment Method Nutrition Notes

Ingredients
  

Chicken and Garlic Gravy Ingredients
  • 4 pieces Chicken Thighs or Breasts Juicy thighs are recommended for better flavor and moisture retention.
  • 6 cloves Garlic, minced Fresh garlic is preferred for vibrant taste.
  • 1 medium Yellow Onion, finely chopped Adds sweetness and depth.
  • 2 tablespoons Butter, divided Provides fat for cooking the chicken and making the roux.
  • 2 tablespoons All-Purpose Flour Used to thicken the gravy.
  • 1.5 cups Chicken Broth Forms the base of the gravy.
Cheesy Mashed Potatoes
  • 2 pounds Yukon Gold or Russet Potatoes, peeled and cubed These varieties are preferred for their buttery texture.
  • 1 cup Shredded Cheddar Cheese Adds creaminess and flavor.
  • 0.5 cup Milk or Heavy Cream, warmed Warming is essential to avoid lumps.
Seasoning & Garnish
  • Salt and Black Pepper Essential for enhancing flavors.
  • 1 tablespoon Fresh Parsley, chopped, optional Adds a pop of color and freshness.

Equipment

  • Large skillet
  • pot
  • Mixing Bowl

Method
 

Chicken Preparation
  1. Season your chicken thighs or breasts generously with salt and black pepper on both sides.
  2. In a large skillet, heat 1 tablespoon of butter over medium-high heat until it begins to sizzle. Carefully add the chicken and sear for 4-5 minutes on each side.
  3. Remove the chicken from the skillet and set it aside.
  4. Add the remaining tablespoon of butter to the skillet, then add the finely chopped yellow onion and sauté for about 5 minutes until soft and golden.
  5. Add minced garlic and cook for an additional minute.
  6. Sprinkle flour over the onion and garlic mixture and stir for about 2 minutes to form a roux.
  7. Gradually whisk in the chicken broth, scraping any browned bits at the bottom, and bring to a simmer.
  8. Return the chicken to the skillet, cover, and let it simmer for 15-20 minutes.
Mashed Potatoes Preparation
  1. While the chicken simmers, bring a large pot of salted water to a boil. Add the peeled and cubed potatoes and cook for about 15 minutes until fork-tender.
  2. Drain the potatoes, return them to the pot, and add warmed milk or heavy cream and shredded cheddar cheese. Mash until smooth and season with salt and black pepper.
  3. To serve, scoop a generous portion of cheesy mashed potatoes onto each plate, top with the chicken and garlic gravy.
  4. Sprinkle with freshly chopped parsley if desired.

Nutrition

Serving: 1plateCalories: 700kcalCarbohydrates: 60gProtein: 40gFat: 30gSaturated Fat: 15gPolyunsaturated Fat: 5gMonounsaturated Fat: 10gCholesterol: 120mgSodium: 800mgPotassium: 1200mgFiber: 6gSugar: 4gVitamin A: 800IUVitamin C: 15mgCalcium: 200mgIron: 3mg

Notes

For a complete meal, consider serving with a light mixed green salad or Cheesy Garlic Bread.

Tried this recipe?

Let us know how it was!

Comforting Cattle Drive Casserole for Cozy Family Meals

December 8, 2025 by Grace Snow Leave a Comment

As I stood in my kitchen, the aroma of spices filled the air, reminding me of the vibrant flavors of the Old West. My newest creation, Cattle Drive Casserole, marries hearty ground beef, colorful veggies, and a crispy biscuit topping in a dish that’s both comforting and effortlessly satisfying. This recipe is a game-changer for family dinners or cozy gatherings, showcasing not only its rich layers but also the adaptability that makes it shine. With vegetarian and gluten-free options available, you can easily customize this rustic delight to suit any palate. Whether you're craving a taste of adventure or seeking a hearty comfort food, Cattle Drive Casserole is bound to deliver the warmth and satisfaction you’re after. Ready to dig in and unleash your culinary creativity? Let's start cooking!

Why is this casserole a must-try?

Comforting, Hearty Flavors: The Cattle Drive Casserole delivers a warm, nostalgic taste that fills you with joy after each bite.

Customizable Options: This recipe can effortlessly be adapted to suit various dietary needs, whether you're looking for vegetarian alternatives or gluten-free options.

Quick Prep: With straightforward steps, you’ll have a delicious meal ready in no time, perfect for busy weeknights.

Crowd-Pleaser: Friends and family will love its rich, layered goodness, making it an ideal dish for gatherings or potlucks.

Versatile Serving Suggestions: Pair it with a crisp salad or homemade cornbread for a complete meal, enhancing your dining experience. Looking for more ideas? Check out our Cornbread Breakfast Casserole for a delightful side!

Cattle Drive Casserole Ingredients

These essential ingredients make up your hearty Cattle Drive Casserole.

For the Meat Mixture

  • Lean Ground Beef – A rich protein source that brings heartiness; swap it with plant-based meat for a vegetarian twist.
  • Red Bell Pepper – Adds a sweet crunch and vibrant color; feel free to substitute with any preferred bell pepper or leave it out.
  • Yellow Onion – Provides essential flavor; can be replaced with shallots or leeks for a different taste.
  • Taco Seasoning Mix – Infuses the casserole with spice and depth; use your favorite homemade or store-bought blend.

For the Biscuit Topping

  • Biscuit Mix (like Bisquick) – Creates a fluffy topping with structure; substitute with gluten-free biscuit mix as needed.
  • Water – Binds the biscuit mix; broth can be used for additional flavor instead.
  • Cooking Spray – Helps with easy removal from the dish; oil or butter are also good alternatives.

For the Creamy Filling

  • Sour Cream – Adds creaminess and a tangy flavor; Greek yogurt makes a lighter alternative.
  • Mayonnaise – Keeps the mixture moist; substitute with more sour cream or Greek yogurt if desired.
  • Diced Green Chiles – Introduces mild heat and flavor; swap with jalapeños for a spicier kick or omit entirely.
  • Cheddar Cheese (Fiesta Blend) – Enhances richness; feel free to use any shredded cheese blend or vegan cheese for dairy-free options.
  • Garlic Powder – Boosts overall seasoning; fresh garlic can also be a great substitution.
  • Salsa – Adds moisture and depth; diced tomatoes serve as a milder alternative if preferred.

Dive into preparing your Cattle Drive Casserole—it's a customizable dish that can cater to any crowd!

Step‑by‑Step Instructions for Cattle Drive Casserole

Step 1: Preheat and Prepare
Begin by preheating your oven to 375°F (190°C). While the oven warms up, grab a 9x13-inch baking dish and lightly grease it with cooking spray to ensure your Cattle Drive Casserole releases easily after baking. Prepping your dish early sets the stage for a seamless cooking experience!

Step 2: Brown the Meat
In a large skillet over medium heat, add the lean ground beef along with diced yellow onion and red bell pepper. Cook this mixture for about 5–7 minutes, stirring frequently until the meat is browned and the vegetables are tender. Make sure to drain any excess fat to keep your casserole creamy, not greasy.

Step 3: Combine Ingredients
Turn the heat to low and mix in the taco seasoning and garlic powder with your beef and veggie blend, stirring until evenly coated. Next, fold in sour cream and mayonnaise, creating a creamy filling that melds the bold flavors together. This step is crucial for ensuring your Cattle Drive Casserole has that rich flavor throughout.

Step 4: Prepare the Biscuit Topping
In a separate bowl, combine the biscuit mix with the water, mixing until a dough forms. The texture should be slightly sticky but manageable. If you're using broth instead of water, you’ll enhance the overall flavor of your topping. This dough will provide a delightful contrast to the savory layers beneath.

Step 5: Layer the Casserole
Spoon half of the meat mixture into the prepared baking dish, spreading it evenly across the bottom. Next, layer half of the biscuit dough over the meat, carefully pressing it down. Follow with the remaining meat mixture, ensuring every bite of the Cattle Drive Casserole is packed with flavor, then top it off with cheese and diced green chiles for that perfect finishing touch.

Step 6: Bake to Perfection
Finally, place the casserole in your preheated oven and bake for 30–35 minutes, or until the top is golden brown and bubbly. You’ll know it’s done when the cheese is melted and the edges are slightly crisp. Let it cool for about 5 minutes before serving to allow the layers to set beautifully.

How to Store and Freeze Cattle Drive Casserole

Fridge: Store leftover Cattle Drive Casserole in an airtight container; it will keep well in the fridge for up to 3 days. Reheat individual portions in the microwave or oven until warmed through.

Freezer: For longer storage, freeze the casserole for up to 3 months. To do this, wrap tightly in plastic wrap, then aluminum foil to prevent freezer burn. Thaw in the refrigerator overnight before reheating.

Reheating: When ready to enjoy reheated casserole, place it in a 350°F (175°C) oven for about 25-30 minutes, or until heated thoroughly. Cover with foil if the top starts to brown too much.

Make Ahead Options

Preparing Cattle Drive Casserole in advance is a wonderful way to save time on busy nights! You can make the entire casserole up to 24 hours ahead. Simply prepare the meat mixture and layer it in the baking dish, covering it tightly with plastic wrap. This helps maintain freshness and prevents unwanted odors in your fridge. Additionally, you can mix the biscuit dough and refrigerate it separately. When you're ready to bake, remove the cover and add the biscuit topping, then bake as directed until golden and bubbly. Your Cattle Drive Casserole will taste just as delicious, making mealtime effortless and enjoyable!

Expert Tips for Cattle Drive Casserole

  • Layer Wisely: Ensure that each layer is evenly spread to maximize flavor distribution throughout the Cattle Drive Casserole, preventing any bites from being too dry or too rich.
  • Watch the Bake Time: Keep an eye on the casserole while it bakes; every oven is different. A perfectly golden crust is key to that satisfying texture.
  • Pre-cook Fresh Veggies: If using fresh vegetables, consider lightly steaming or sautéing them beforehand to enhance their flavors and ensure they’re tender after baking.
  • Customize Seasoning: Don’t hesitate to adjust the taco seasoning to match your spice preference; a pinch of cayenne can elevate the warmth of your casserole!
  • Cool Before Serving: Allow your Cattle Drive Casserole to cool for a few minutes post-baking. This helps the layers firm up and makes serving easier.

Cattle Drive Casserole Variations & Substitutions

Feel free to unleash your culinary creativity with these exciting variations to elevate your casserole experience!

  • Hispanic Twist: Add salsa, black beans, and corn for a lively flair, embracing the spirit of Tex-Mex cuisine. Your guests will love the added flavors that refresh this classic dish!

  • Vegetarian Delight: Swap out the ground beef for a mix of lentils and chopped veggies like zucchini and mushrooms. This makes the casserole not just heart-healthy but packed with satisfying flavors.

  • Gluten-Free Option: Use a gluten-free biscuit mix for the topping. This adaptation ensures everyone can enjoy the dish without compromising texture and taste!

  • Cheesy Explosion: Try using a blend of pepper jack cheese instead of cheddar for an extra layer of creaminess and a kick of heat. Imagine biting into that gooey, melty cheese—it’s always a winner!

  • Spicy Variation: Incorporate diced jalapeños into the filling or on top before baking for those who love a bit of fire in their comfort food. It’s an adventurous twist that adds zest!

  • Creamy & Lighter: Replace sour cream with Greek yogurt to lighten the casserole while still keeping that rich creaminess. You might not even notice the difference!

  • Herb Infusion: Sprinkle fresh herbs like cilantro or parsley in the meat mixture before baking for a burst of freshness. This simple addition makes every bite feel vibrant and alive.

  • Texture Heaven: Top the casserole with crushed tortilla chips along with the cheese before baking. This adds a delightful crunch that contrasts beautifully with the creamy layers beneath.

For some more recipe inspiration, why not check out our delicious Spicy Miso Casserole or the heartwarming Sweet Potato Casserole? Your taste buds will thank you!

What to Serve with Cattle Drive Casserole

To create a delightful meal experience alongside your comforting casserole, consider these vibrant pairings.

  • Fresh Garden Salad: A crisp salad with mixed greens and a tangy vinaigrette adds a refreshing crunch that complements the richness of the casserole.
  • Cornbread Muffins: Sweet, fluffy cornbread muffins are perfect for scooping up portions of casserole, enhancing the comforting theme of your meal.
  • Roasted Vegetables: Seasonal roasted vegetables bring a delightful caramelization and earthy flavor that balances the savory layers of the casserole.
  • Garlic Butter Breadsticks: Soft and warm breadsticks brushed with garlic butter offer a satisfying dip into the casserole’s creamy layers, creating a harmonious bite.
  • Coleslaw: A crunchy coleslaw with a hint of sweetness contrasts beautifully with the hearty casserole and adds a nice textural variation.
  • Crispy Tortilla Chips: Serve tortilla chips with a bowl of salsa or guacamole on the side. The crispy texture provides an exciting counterpoint to the casserole's softness.
  • Iced Tea or Lemonade: A chilled glass of refreshing iced tea or lemonade is the perfect drink to cleanse the palate between bites and rounds out the meal beautifully.

Cattle Drive Casserole Recipe FAQs

What kind of ground beef should I use for the Cattle Drive Casserole?
Absolutely! I recommend using lean ground beef (about 80/20) to reduce grease while still maintaining flavor. If you're opting for a lighter version, ground turkey or plant-based meat substitutes are great alternatives that fit seamlessly into this comforting dish.

How long can I store leftovers of Cattle Drive Casserole in the fridge?
You can store any leftover Cattle Drive Casserole in an airtight container in the fridge for up to 3 days. Just be sure to reheat individual portions until they're warmed through—usually about 2-3 minutes in the microwave.

Can I freeze Cattle Drive Casserole and how do I do it?
Absolutely! To freeze, let it cool completely first. Then, wrap it tightly in plastic wrap followed by aluminum foil to prevent freezer burn. It can be frozen for up to 3 months. For reheating, thaw overnight in the refrigerator and then bake in a preheated oven at 350°F (175°C) for about 25-30 minutes.

What should I do if my Cattle Drive Casserole turns out too soggy?
If you find your casserole is soggy, it might be due to excess liquid from ingredients like fresh vegetables or salsa. For next time, consider lightly sautéing your veggies before adding them, or reducing added liquids. You can also try using less sour cream or mayonnaise to balance it out.

Are there any dietary considerations for Cattle Drive Casserole?
Yes! For gluten-free options, simply substitute the biscuit mix with a gluten-free variety. If you have lactose intolerance or a dairy allergy, feel free to use plant-based cheese and yogurt as alternatives. This dish is fully customizable to fit various dietary needs, ensuring everyone can enjoy it!

Cattle Drive Casserole

Comforting Cattle Drive Casserole for Cozy Family Meals

This Cattle Drive Casserole combines hearty beef and colorful veggies for a comforting family dinner.
Print Recipe Pin Recipe
Prep Time 15 minutes mins
Cook Time 35 minutes mins
Cooling Time 5 minutes mins
Total Time 55 minutes mins
Servings: 6 servings
Course: Dinner
Cuisine: American
Calories: 480
Ingredients Equipment Method Nutrition Notes

Ingredients
  

For the Meat Mixture
  • 1 pound Lean Ground Beef Substitute with plant-based meat for vegetarian option
  • 1 medium Red Bell Pepper Substitute with any preferred bell pepper or omit
  • 1 medium Yellow Onion Can replace with shallots or leeks
  • 1 packet Taco Seasoning Mix Use your favorite homemade or store-bought blend
For the Biscuit Topping
  • 2 cups Biscuit Mix (like Bisquick) Substitute with gluten-free biscuit mix if needed
  • 3/4 cup Water Broth can be used for additional flavor
  • as needed Cooking Spray Oil or butter can also be used
For the Creamy Filling
  • 1 cup Sour Cream Greek yogurt makes a lighter alternative
  • 1/2 cup Mayonnaise Substitute with more sour cream or Greek yogurt
  • 1 can Diced Green Chiles Substitute with jalapeños for spicier kick or omit
  • 1 cup Cheddar Cheese (Fiesta Blend) Use any shredded cheese blend or vegan cheese
  • 1 teaspoon Garlic Powder Fresh garlic can be substituted as well
  • 1 cup Salsa Diced tomatoes can be used as a milder alternative

Equipment

  • 9x13-inch baking dish
  • Large skillet
  • Mixing Bowl

Method
 

Step-by-Step Instructions for Cattle Drive Casserole
  1. Preheat your oven to 375°F (190°C) and grease a 9x13-inch baking dish with cooking spray.
  2. In a large skillet over medium heat, cook the ground beef, onion, and red bell pepper until browned and tender, about 5–7 minutes.
  3. Stir in taco seasoning and garlic powder, followed by sour cream and mayonnaise, mixing well to combine.
  4. In a separate bowl, mix biscuit mix with water to form a dough, adjusting with broth if desired.
  5. Layer half of the meat mixture in the greased baking dish, followed by half of the biscuit dough, then add the remaining meat and top with cheese and diced chiles.
  6. Bake for 30–35 minutes until golden brown and bubbly, then cool for 5 minutes before serving.

Nutrition

Serving: 1servingCalories: 480kcalCarbohydrates: 28gProtein: 25gFat: 30gSaturated Fat: 12gPolyunsaturated Fat: 1gMonounsaturated Fat: 8gTrans Fat: 1gCholesterol: 90mgSodium: 850mgPotassium: 600mgFiber: 3gSugar: 2gVitamin A: 15IUVitamin C: 35mgCalcium: 20mgIron: 15mg

Notes

This casserole is customizable for various dietary needs and makes for an excellent dish for gatherings.

Tried this recipe?

Let us know how it was!

Sticky Apple Cider Chicken for Cozy Fall Dinners

December 8, 2025 by Grace Snow Leave a Comment

There's something magical about the first brisk breeze of autumn that beckons us to the kitchen, isn't there? With those warm spices and cozy ingredients swirling around, the stage is set for a culinary adventure. Enter Sticky Apple Cider Chicken with Crisp Autumn Slaw—a delightful autumn-inspired dish that brings a mouthwatering twist to your dinner table. The juicy, caramelized chicken glazed in sweet and tangy apple cider pairs beautifully with a refreshing, crunchy slaw. This recipe not only comes together quickly but is also a guaranteed crowd-pleaser, making it the perfect cozy dinner solution. As the leaves turn golden outside, why not warm up with a hearty plate celebrating the essence of fall? What’s your favorite autumn ingredient to cook with?

Why is Sticky Apple Cider Chicken special?

Fall Flavor Explosion: The sweet and tangy apple cider glaze offers an unforgettable burst of autumn flavor that warms the soul.
Easy Cooking: This recipe ensures effortless preparation, so even busy home chefs can create a memorable meal without spending hours in the kitchen.
Crowd-Pleaser: It’s a guaranteed hit at gatherings—your friends and family won't be able to resist coming back for more!
Versatile Slaw: The accompanying Crisp Autumn Slaw can be customized with seasonal veggies, making it as unique as your personal taste. You might also enjoy it with other delightful options, like Crock Pot Chicken for cozy nights in.
Make-Ahead Friendly: Prep the slaw ahead of time to streamline your cooking process, allowing you to enjoy the moment with loved ones.

Sticky Apple Cider Chicken Ingredients

For the Glaze

  • Apple Cider – Provides a sweet and tangy base; apple juice can be used for a lighter flavor, though cider is preferred for depth.
  • Honey – Adds sweetness and promotes caramelization; adjust to taste if substituting with another sweetener.
  • Dijon Mustard – Delivers a subtle tang; yellow mustard can be used for a milder flavor.
  • Minced Garlic – Enhances the flavor profile; use fresh or pre-minced garlic for convenience.

For the Chicken

  • Chicken Thighs – Juicy and flavorful, serving as the dish's hearty base; chicken breasts can be used for a leaner option.
  • Salt & Pepper – Essential for seasoning; adjust according to personal taste.

For the Slaw

  • Cabbage (shredded) – Adds crunch and texture; kale or a pre-packaged slaw mix can be used if preferred.
  • Carrots (shredded) – Contributes sweetness and vibrant color; substitute with radishes for a peppery bite.
  • Thin Apple Slices – For freshness and flavor in the slaw; pear slices can also work well as a substitution.
  • Apple Cider Vinegar – Balances flavors with acidity; lemon juice can work in a pinch if needed.
  • Celery Seeds – Enhances slaw flavor with their unique spice; omit if unavailable but consider adding a different herb for flavor.
  • Chopped Parsley/Chives – Adds freshness and a pop of color; cilantro or green onions can be used for a variation.

Step‑by‑Step Instructions for Sticky Apple Cider Chicken

Step 1: Prepare the Glaze
In a medium saucepan over medium heat, combine apple cider, honey, Dijon mustard, and minced garlic. Stir the mixture occasionally, allowing it to simmer for about 8–10 minutes, or until it thickens to a syrupy consistency. This will be the delicious glaze that coats your Sticky Apple Cider Chicken, enhancing its sweet and tangy flavor.

Step 2: Sear the Chicken
Heat a tablespoon of oil in a large skillet over medium-high heat. While the oil is heating, season the chicken thighs generously with salt and pepper. Once the oil is shimmering, carefully place the chicken skin-side down in the skillet. Sear for about 6-7 minutes until the skin is golden brown and crispy, then flip and cook for an additional 5 minutes, ensuring the chicken is nearly cooked through.

Step 3: Glaze the Chicken
Reduce the heat to medium-low and pour the prepared glaze over the seared chicken thighs, ensuring each piece is well coated. Gently spoon some of the glaze over the chicken, and let it simmer for about 5-6 minutes, basting frequently. The glaze will become sticky and caramelized, wrapping the Sticky Apple Cider Chicken in a glossy layer of flavor.

Step 4: Mix the Slaw
While the chicken is finishing up, prepare the slaw by combining the shredded cabbage, carrots, and thin apple slices in a large mixing bowl. In a separate small bowl, whisk together the apple cider vinegar, celery seeds, salt, and pepper to create a fresh dressing. Drizzle this dressing over the slaw ingredients and toss gently, incorporating the flavors without bruising the veggies.

Step 5: Serve
To serve, arrange the Sticky Apple Cider Chicken on plates, either nestled next to or on top of the Crisp Autumn Slaw for a layered visual presentation. Garnish with fresh chopped parsley or chives for a pop of color, and enjoy this heartwarming autumn dish that celebrates the flavors of the season.

Make Ahead Options

These Sticky Apple Cider Chicken and Crisp Autumn Slaw are perfect for meal prep enthusiasts! You can prepare the glaze up to 24 hours in advance by simmering the apple cider, honey, Dijon mustard, and garlic and then refrigerating it. Additionally, the slaw components can be prepped a day ahead; simply chop the cabbage, carrots, and apples and keep them in an airtight container in the fridge. To maintain their crunch, hold off on adding the dressing until just before serving. When ready to enjoy, just glaze the chicken and heat it up on the stove while tossing the slaw with the dressing for a fresh finish. You'll have a delightful meal ready with minimal effort!

Sticky Apple Cider Chicken Variations

Feel free to get creative and personalize your Sticky Apple Cider Chicken with these delightful variations that can add unique flavors and textures!

  • Dairy-Free: Use coconut aminos instead of soy sauce for a dairy-free option, enhancing the umami flavor without the creaminess!

  • Spicy Kick: Add sliced jalapeños or a pinch of cayenne pepper to the glaze for a kick of heat that dances on your taste buds. It’s perfect for those who love a bit of spice!

  • Herb-Infused: Incorporate fresh thyme or rosemary into the glaze while simmering for an aromatic infusion that elevates the dish to new heights. These herbs bring a wonderful depth of flavor!

  • Savory Slaw: Swap shredded cabbage for shaved Brussels sprouts or broccoli slaw to add a different texture and a nutty flavor that pairs beautifully with the chicken.

  • Maple Sweetness: Substitute honey with maple syrup in the glaze for a unique sweetness that brings a lovely fall vibe to your dish. It’ll compliment the apple cider beautifully!

  • Nutty Extra Crunch: Toss in toasted pecans or walnuts to your slaw for added crunch and a bite of nuttiness that makes every mouthful a delight. This provides not only flavor but delightful texture!

  • Citrus Zing: Incorporate zest from an orange or lemon in the glaze for a bright, zesty twist that complements the sweetness of the apple cider.

  • Seasonal Twist: Use other autumn vegetables like roasted butternut squash in the slaw for a hearty addition that celebrates the flavors of fall beautifully! The natural sweetness of the squash will harmonize well with the dish.

These variations not only cater to different dietary preferences but also allow you to express your culinary creativity. You might also enjoy pairing this dish with other comforting options such as Honey Garlic Chicken or Crock Pot Chicken for effortless meal planning. Happy cooking!

What to Serve with Sticky Apple Cider Chicken

Setting the table for a cozy autumn dinner is made simple with these delightful accompaniments that enhance the seasonal flavors.

  • Creamy Mashed Potatoes: The smooth, buttery texture complements the sticky glaze perfectly while soaking up every drop of flavor.
  • Roasted Root Vegetables: Carrots, parsnips, and sweet potatoes tossed in olive oil and herbs provide a sweet and hearty contrast, capturing fall’s essence.
  • Warm Quinoa Salad: A nutty, warm quinoa salad with cranberries and pecans adds a delightful chewiness that harmonizes with the savory chicken.
  • Apple Crisp: This warm dessert topped with a crumbly oat topping brings an additional apple element, enhancing the autumn vibe of your meal.
  • Sparkling Cider: Enjoy this non-alcoholic drink—its sweet notes echo the glaze while the bubbles add a festive touch to your dinner.
  • Sautéed Greens: Lightly sautéed kale or Swiss chard with garlic introduces a burst of color and a peppery flavor that balances the dish beautifully.
  • Buttery Cornbread: This warm bread brings a comforting sweetness and crumbly texture, perfect for mopping up any leftover glaze on your plate.
  • Cheese Platter: A selection of sharp cheeses served with sliced pears rounds out the meal, inviting guests to linger and enjoy a leisurely evening together.

How to Store and Freeze Sticky Apple Cider Chicken

Fridge: Store leftovers in an airtight container for up to 3 days to maintain freshness. Keep Sticky Apple Cider Chicken separate from slaw to prevent sogginess.

Freezer: For longer storage, freeze the chicken without the slaw in a freezer-safe container for up to 3 months. Thaw in the fridge before reheating.

Reheating: To reheat, place chicken in a skillet over medium heat, adding a splash of water or broth if needed. Cover to keep moist, stirring occasionally until heated through.

Prep Ahead: You can make the slaw a day ahead; just dress it right before serving to keep it crisp and colorful.

Expert Tips for Sticky Apple Cider Chicken

  • Perfect Glaze Thickness: Ensure the glaze is thick enough to coat the chicken well. If it's too runny, simmer longer while stirring—it intensifies the flavor!
  • Keep Slaw Crisp: Serve the slaw separately or add the dressing just before plating. This maintains the crunchiness and freshness of your seasonal veggies.
  • Flavor Variations: Don’t be afraid to experiment with your slaw! Swap in seasonal veggies like Brussels sprouts or sub honey for maple syrup in the glaze for a unique twist.
  • Storing Leftovers: Keep the Sticky Apple Cider Chicken and slaw separate in airtight containers. They’ll stay fresh for up to three days in the fridge, ensuring a delightful meal again!
  • Add Fresh Herbs: For a pop of freshness, garnish the finished dish with chopped parsley or chives. This not only enhances the look but adds a flavor burst!

Sticky Apple Cider Chicken Recipe FAQs

What type of apple cider should I use?
Absolutely! For the best flavor, choose a high-quality, unfiltered apple cider. The richness and complexity of real apple cider provide a deeper taste than apple juice or other substitutes. If you're looking for a lighter option, apple juice can work, but be aware it may slightly alter the taste of the dish.

How should I store leftovers of the Sticky Apple Cider Chicken?
Very good question! Store any leftover Sticky Apple Cider Chicken in an airtight container in the refrigerator for up to 3 days. To keep the slaw crisp, it’s best to store it separately and dress it just before serving. This way, you can enjoy the delightful textures even on the next day!

Can I freeze the Sticky Apple Cider Chicken?
Yes, you can! To freeze, place the cooled chicken in a freezer-safe container or zip-lock bag. It will stay fresh for up to 3 months. For the best results, thaws it in the refrigerator overnight before reheating. When ready, reheat gently in a skillet over medium heat, adding a splash of water or broth to keep it moist.

What can I do if my glaze doesn't thicken enough?
No worries! If your glaze is too runny, simply return it to medium heat in the saucepan. Stir it constantly and allow it to simmer for an additional 3-5 minutes, which will help it reduce and thicken. Just keep an eye on it to avoid burning. A thick glaze is essential to coat the chicken beautifully!

Is this recipe gluten-free?
Yes, the Sticky Apple Cider Chicken is naturally gluten-free! However, if you're using prepared ingredients like Dijon mustard or apple cider vinegar, double-check the labels to ensure there are no hidden gluten ingredients. It’s always best to play it safe for those with gluten sensitivities!

Sticky Apple Cider Chicken

Sticky Apple Cider Chicken for Cozy Fall Dinners

Sticky Apple Cider Chicken brings a sweet and tangy flavor to your autumn dinner table.
Print Recipe Pin Recipe
Prep Time 15 minutes mins
Cook Time 30 minutes mins
Total Time 45 minutes mins
Servings: 4 servings
Course: Dinner
Cuisine: American
Calories: 380
Ingredients Equipment Method Nutrition Notes

Ingredients
  

For the Glaze
  • 1 cup Apple Cider or apple juice for a lighter flavor
  • 1/4 cup Honey adjust to taste if substituting with another sweetener
  • 2 tablespoons Dijon Mustard or yellow mustard for a milder flavor
  • 2 cloves Minced Garlic use fresh or pre-minced for convenience
For the Chicken
  • 4 pieces Chicken Thighs or chicken breasts for a leaner option
  • to taste Salt
  • to taste Pepper
For the Slaw
  • 4 cups Cabbage (shredded) or kale/pre-packaged slaw mix
  • 2 medium Carrots (shredded) or substitute with radishes
  • 1 medium Thin Apple Slices or pear slices as substitution
  • 1/4 cup Apple Cider Vinegar or lemon juice in a pinch
  • 1 teaspoon Celery Seeds omit if unavailable
  • 1/4 cup Chopped Parsley/Chives or cilantro/green onions for variation

Equipment

  • Medium saucepan
  • Large skillet
  • Mixing Bowl
  • small bowl

Method
 

Step-by-Step Instructions
  1. Prepare the Glaze: In a medium saucepan over medium heat, combine apple cider, honey, Dijon mustard, and minced garlic. Stir occasionally for about 8–10 minutes until it thickens.
  2. Sear the Chicken: Heat oil in a large skillet over medium-high heat. Season chicken with salt and pepper. Sear skin-side down for 6-7 minutes until golden brown, then flip and cook for an additional 5 minutes.
  3. Glaze the Chicken: Reduce heat to medium-low, pour glaze over chicken, ensuring it’s well coated, and simmer for 5-6 minutes, basting frequently.
  4. Mix the Slaw: In a mixing bowl, combine shredded cabbage, carrots, and apple slices. In a separate bowl, whisk apple cider vinegar, celery seeds, salt, and pepper, then drizzle over slaw and toss gently.
  5. Serve: Arrange chicken on plates, nestled next to or on top of slaw. Garnish with chopped parsley or chives and enjoy.

Nutrition

Serving: 1servingCalories: 380kcalCarbohydrates: 25gProtein: 25gFat: 18gSaturated Fat: 5gPolyunsaturated Fat: 2gMonounsaturated Fat: 10gCholesterol: 120mgSodium: 600mgPotassium: 640mgFiber: 3gSugar: 15gVitamin A: 1500IUVitamin C: 40mgCalcium: 60mgIron: 2mg

Notes

Keep slaw separate until serving for maximum freshness. The glaze can also be adjusted to personal taste for sweetness or tanginess.

Tried this recipe?

Let us know how it was!

Crockpot Ham And Potato Casserole: A Cozy Dinner Delight

December 8, 2025 by Grace Snow Leave a Comment

As the sun dips below the horizon and the aroma of a hearty meal fills the kitchen, there's something undeniably enchanting about a dish that practically cooks itself. My Easy Crockpot Ham and Potato Casserole is just that—a stress-free, comforting delight that transforms tender potatoes and savory ham into a creamy masterpiece. This recipe is a lifesaver for those busy weeknights, allowing you to prep in just minutes while your slow cooker does all the heavy lifting. Imagine returning home to a warm, bubbling casserole that’s not only a crowd-pleaser but also the perfect antidote to fast food fatigue. With the option to customize and sneak in some veggies, you can easily make this dish your own. So, are you ready to indulge in this comforting hug of a meal? Let’s dive into the magic of slow-cooked goodness!

Why is this casserole a must-try?

Simplicity: This recipe requires minimal prep—just layer and let the slow cooker do its magic!

Comforting Flavor: A delightful blend of creamy cheese, savory ham, and tender potatoes gives each bite a warm, satisfying taste—perfect for any occasion.

Versatile Option: Easily customize it with your favorite vegetables or swap the ham for chicken or sausage for a twist.

Crowd-Pleaser: Guaranteed to please family and friends, making it ideal for potlucks and dinners.

Time-Saving: Set it, forget it, and come home to a delicious meal ready to serve—ideal for busy weeknights after a long day.

Why not serve it alongside a refreshing salad, like Cornbread Breakfast Casserole, for a balanced dinner?

Crockpot Ham and Potato Casserole Ingredients

For the Casserole

  • Potatoes – About 4 medium, diced; they create the comforting base of the casserole.
  • Cooked Ham – 2 cups, diced; this adds savory flavor and protein to the dish.
  • Shredded Cheddar Cheese – 1 cup; the cheese melts beautifully, providing richness to every bite.
  • Cream of Mushroom Soup – 1 can (10.5 oz); acts as a flavorful binder for the casserole.
  • Milk – 1 cup; thins the soup mixture for even distribution throughout the casserole.
  • Onion – 1 medium, diced; its aroma infuses the dish with depth and flavor.
  • Garlic Powder – 1 teaspoon; enhances the overall flavor profile.
  • Salt – 1 teaspoon; essential for seasoning, bringing all the flavors together.
  • Black Pepper – ½ teaspoon; adds a touch of warmth to the dish.
  • Paprika (Optional) – ½ teaspoon; for a burst of color and subtle smokiness.

Optional Add-Ins

  • Frozen Peas – For extra nutrition and a pop of color; toss in 1 cup.
  • Corn or Bell Peppers – Great for added crunch and sweetness—about 1 cup of either works!

Step‑by‑Step Instructions for Crockpot Ham And Potato Casserole

Step 1: Prepare the Ingredients
Start by dicing about 4 medium potatoes and 2 cups of cooked ham into bite-sized pieces. Additionally, chop 1 medium onion finely. This foundational prep work ensures even cooking and harmonious flavors in your Crockpot Ham And Potato Casserole. Set these aside while you mix the other ingredients.

Step 2: Mix the Creamy Base
In a large mixing bowl, combine 1 can (10.5 oz) of cream of mushroom soup with 1 cup of milk. Whisk until smooth, creating a creamy base that binds all the ingredients together. This mixture will infuse your casserole with rich flavor while ensuring the potatoes cook evenly throughout the slow process.

Step 3: Layer the Ingredients
Start layering your casserole in the crockpot by adding half of the diced potatoes at the bottom. Top this layer with half of the diced ham, followed by half of the chopped onion, and sprinkle with ½ cup of shredded cheddar cheese. This method of layering allows each bite of your Crockpot Ham And Potato Casserole to be filled with flavor.

Step 4: Repeat the Layering Process
Next, repeat the layering with the remaining ingredients. Add the remaining diced potatoes, ham, onion, and top off with the rest of the shredded cheddar cheese. This ensures your casserole is evenly distributed with all the delicious elements, creating a fulfilling meal that everyone will enjoy.

Step 5: Add the Soup Mixture and Season
Pour the creamy soup and milk mixture evenly over the layered ingredients in the crockpot. Sprinkle 1 teaspoon of garlic powder, 1 teaspoon of salt, and ½ teaspoon of black pepper over the top. If using, add ½ teaspoon of paprika for extra flavor. These seasonings are essential for enhancing the taste of your Crockpot Ham And Potato Casserole.

Step 6: Cook Low and Slow
Cover the crockpot with its lid and set it to cook on low for about 6 hours. As it simmers, the flavors meld beautifully while the potatoes become tender. You'll know it's ready when the potatoes are soft and the casserole is bubbling. This slow-cooked dish is perfect for those long, busy days.

Step 7: Final Adjustments and Serve
After the cooking time is up, taste the casserole and adjust the seasoning if necessary. Serve the hot Crockpot Ham And Potato Casserole directly from the crockpot, allowing everyone to enjoy a delicious, creamy bite. It’s perfect as a comforting main dish that warms the heart and soul!

How to Store and Freeze Crockpot Ham and Potato Casserole

Fridge: Store leftovers in an airtight container for up to 3 days to maintain freshness. Make sure the casserole cools slightly before sealing to avoid condensation.

Freezer: If you want to keep it longer, portion the casserole into freezer-safe containers and freeze for up to 2 months. Thaw in the fridge overnight before reheating.

Reheating: For best results, reheat individual portions in the microwave or bake in the oven until warmed through. You can add a splash of milk to restore creaminess if needed.

Make-Ahead Tip: Prepare the casserole a day in advance and store it in the fridge. Just pop it in the slow cooker the next day for a quick, satisfying meal!

Crockpot Ham And Potato Casserole Variations

Feel free to tailor this recipe to your liking with these delightful twists!

  • Vegetable Boost: Add 1 cup of frozen peas or corn for a pop of color and added nutrition without much effort.
  • Cheese Alternatives: Swap the cheddar for Gruyère or Monterey Jack for a creamier, different taste that still melts beautifully.
  • Zesty Freshness: Incorporate a sprinkle of lemon zest right before serving to brighten the flavors and add a fresh, uplifting note.
  • Protein Swap: Replace the cooked ham with diced cooked chicken or sausage for a flavorful spin that changes the entire profile.
  • Spice It Up: For a kick, stir in some diced jalapeños or a dash of cayenne pepper when seasoning the casserole.
  • Herb Infusion: Fresh herbs like thyme or parsley can be added for an aromatic touch; sprinkle them on before serving for a burst of flavor.
  • Mushroom Medley: Adding sautéed mushrooms can deepen the earthy flavor of your dish beautifully, enhancing the overall comfort food experience.
  • Creamy Upgrade: For an even richer texture, fold in some sour cream or cream cheese into the soup mixture before layering; it makes every bite enchanting!

And if you're in the mood for another comforting dish, consider trying my German Potato Salad or a delicious slice of Potato Blue Cheese for a lovely variation in your meal plan!

Expert Tips for Crockpot Ham and Potato Casserole

  • Prep Ahead: Consider prepping the ingredients the night before. Chop everything and store in the refrigerator; then layer in the crockpot in the morning for a hassle-free dinner.

  • Layering Technique: Ensure proper layering for even cooking! Start with potatoes at the bottom, which helps them absorb flavors and prevents burning.

  • Customize Wisely: Avoid adding too many watery vegetables, such as fresh tomatoes, which can alter the casserole's creamy consistency. Stick with heartier options like frozen peas or corn.

  • Cheese Substitution: Experiment with cheese types! For a different flavor, try Monterey Jack or Gouda instead of cheddar, but keep the same quantity for a creamy finish.

  • Keep it Seasoned: Before serving, always taste and adjust seasoning. A pinch of salt or a dash more pepper can elevate your Crockpot Ham and Potato Casserole to delightful heights!

What to Serve with Crockpot Ham and Potato Casserole

Create a cozy dining experience with delightful pairings that enhance your comforting casserole.

  • Simple Green Salad: A fresh mix of greens and veggies adds a bright contrast, balancing the rich flavors of the casserole. Add a zesty vinaigrette for an extra zing.

  • Garlic Breadsticks: Soft and buttery, these breadsticks are perfect for scooping up leftover creamy goodness, making every bite satisfying and enjoyable.

  • Steamed Broccoli: The crisp-tender texture and earthy flavor of broccoli complement the creamy casserole while adding nutritional value. A squeeze of lemon brightens it up beautifully.

  • Coleslaw: A crunchy coleslaw brings a refreshing crunch and a hint of sweetness, cutting through the richness of the dish. Plus, it adds a colorful touch to your table.

  • Roasted Carrots: Sweet, caramelized roasted carrots provide a lovely contrast to the savory casserole. Their vibrant color brightens your plate while adding nutrients.

  • Crisp Apple Slices: For dessert, serve thin apple slices for a light, sweet finish. Their crisp texture offers a delightful contrast to the creamy casserole, leaving a refreshing taste.

  • Cold Lemonade or Iced Tea: A glass of cold lemonade or iced tea complements your meal perfectly, providing a refreshing sip to cleanse the palate.

  • Butter Pecan Ice Cream: End the meal on a sweet note with a scoop of butter pecan ice cream. The nutty flavor and creamy texture create a delicious harmony with the casserole.

Make Ahead Options

These Crockpot Ham and Potato Casserole preps are a game-changer for busy weeknights! You can chop the potatoes, onion, and ham up to 24 hours in advance. Simply store them in an airtight container in the refrigerator to maintain freshness and prevent browning. Additionally, you can mix the cream of mushroom soup and milk ahead of time and keep that in the fridge too. When you’re ready to cook, layer the prepped ingredients in the crockpot, pour the soup mixture over them, season, and set it to cook on low for about 6 hours. You’ll come home to a delicious dinner that feels like it cooked just for you!

Crockpot Ham and Potato Casserole Recipe FAQs

What type of potatoes should I use for the casserole?
Absolutely! For the best results, I recommend using Yukon Gold or Russet potatoes. Both varieties hold their shape well during cooking and become tender and creamy. Avoid using waxy potatoes like red potatoes, as they may not give you the texture you're looking for.

How should I store leftovers from the casserole?
To keep your Crockpot Ham and Potato Casserole fresh, store leftovers in an airtight container in the fridge for up to 3 days. Make sure the casserole cools slightly before sealing to prevent condensation, which can make it soggy.

Can I freeze the casserole? How do I do it?
Yes! You can freeze your Crockpot Ham and Potato Casserole for up to 2 months. First, let it cool completely. Then, portion it into freezer-safe containers, ensuring there's enough space for expansion. When you're ready to enjoy it, thaw in the fridge overnight. Reheat individual portions in the microwave or bake in the oven until warmed through, adding a splash of milk if needed to restore creaminess.

What if my casserole is too runny?
Very easily fixed! If your casserole turns out too runny, you can thicken it by mixing a slurry of equal parts cornstarch and cold water (about 1-2 tablespoons each) and stirring it into the casserole during the last 30 minutes of cooking. Alternatively, you can leave the lid off for the last hour, allowing steam to escape and the liquid to reduce.

Can I include any other ingredients in the casserole?
The more the merrier! Feel free to get creative by adding vegetables like frozen peas, corn, or bell peppers for added nutrition and flavor. Just remember not to add too many watery veggies, such as fresh tomatoes, as they can alter the casserole's creamy consistency.

Is this recipe suitable for people with gluten allergies?
You can absolutely make this dish gluten-free by substituting the cream of mushroom soup with a gluten-free version or making your own using gluten-free ingredients. Always check labels for gluten content in processed items to ensure everyone can enjoy this comforting meal!

Crockpot Ham And Potato Casserole

Crockpot Ham And Potato Casserole: A Cozy Dinner Delight

This Crockpot Ham and Potato Casserole is a comforting, stress-free dinner option that combines tender potatoes and savory ham into a creamy masterpiece.
Print Recipe Pin Recipe
Prep Time 15 minutes mins
Cook Time 6 hours hrs
Total Time 6 hours hrs 15 minutes mins
Servings: 6 servings
Course: Dinner
Cuisine: American
Calories: 320
Ingredients Equipment Method Nutrition Notes

Ingredients
  

For the Casserole
  • 4 medium Potatoes diced
  • 2 cups Cooked Ham diced
  • 1 cup Shredded Cheddar Cheese
  • 1 can (10.5 oz) Cream of Mushroom Soup
  • 1 cup Milk
  • 1 medium Onion diced
  • 1 teaspoon Garlic Powder
  • 1 teaspoon Salt
  • 1/2 teaspoon Black Pepper
  • 1/2 teaspoon Paprika optional
Optional Add-Ins
  • 1 cup Frozen Peas
  • 1 cup Corn or Bell Peppers either works

Equipment

  • Crockpot

Method
 

Step-by-Step Instructions
  1. Start by dicing about 4 medium potatoes and 2 cups of cooked ham into bite-sized pieces. Additionally, chop 1 medium onion finely. Set these aside while you mix the other ingredients.
  2. In a large mixing bowl, combine 1 can of cream of mushroom soup with 1 cup of milk. Whisk until smooth, creating a creamy base that binds all the ingredients together.
  3. Start layering your casserole in the crockpot by adding half of the diced potatoes at the bottom. Top this layer with half of the diced ham, followed by half of the chopped onion, and sprinkle with ½ cup of shredded cheddar cheese.
  4. Next, repeat the layering with the remaining ingredients. Add the remaining diced potatoes, ham, onion, and top off with the rest of the shredded cheddar cheese.
  5. Pour the creamy soup and milk mixture evenly over the layered ingredients in the crockpot. Sprinkle 1 teaspoon of garlic powder, 1 teaspoon of salt, and ½ teaspoon of black pepper over the top. If using, add ½ teaspoon of paprika.
  6. Cover the crockpot with its lid and set it to cook on low for about 6 hours. You'll know it's ready when the potatoes are soft and the casserole is bubbling.
  7. After the cooking time is up, taste the casserole and adjust the seasoning if necessary. Serve hot directly from the crockpot.

Nutrition

Serving: 1servingCalories: 320kcalCarbohydrates: 40gProtein: 18gFat: 12gSaturated Fat: 7gPolyunsaturated Fat: 1gMonounsaturated Fat: 3gCholesterol: 50mgSodium: 800mgPotassium: 600mgFiber: 4gSugar: 2gVitamin A: 300IUVitamin C: 20mgCalcium: 200mgIron: 2mg

Notes

Consider prepping the ingredients the night before. Avoid adding too many watery vegetables. Experiment with cheese types for a different flavor.

Tried this recipe?

Let us know how it was!
  • « Previous Page
  • 1
  • …
  • 10
  • 11
  • 12
  • 13
  • 14
  • …
  • 43
  • Next Page »

Welcome!

Hi, I’m Grace, a Sydney-based home cook with a passion for bold flavors and trending ingredients. Whether you’re a busy beginner or a seasoned foodie, you’ll find dishes here that are fresh, fun, and full of flavor.

More about me

Popular Recipes

  • Mushroom Crostini
    Deliciously Easy Mushroom Crostini for Your Next Gathering
  • Mini Phyllo Feta Bites
    Mini Phyllo Feta Bites for Effortless Entertaining
  • Onion Boil
    Savory Onion Boil Recipe: A Flavorful Vegan Delight
  • Sweet Potato Fondant with Smoked Almond Cream & Rosemary Oil
    Savory Sweet Potato Fondant with Smoked Almond Cream Delight

Footer

↑ back to top

About

  • Privacy Policy
  • Disclaimer
  • Terms & Conditions

Newsletter

  • Sign Up! for emails and updates

Contact

  • About me
  • Contact me

Copyright © 2025 TastyTrendIngredients