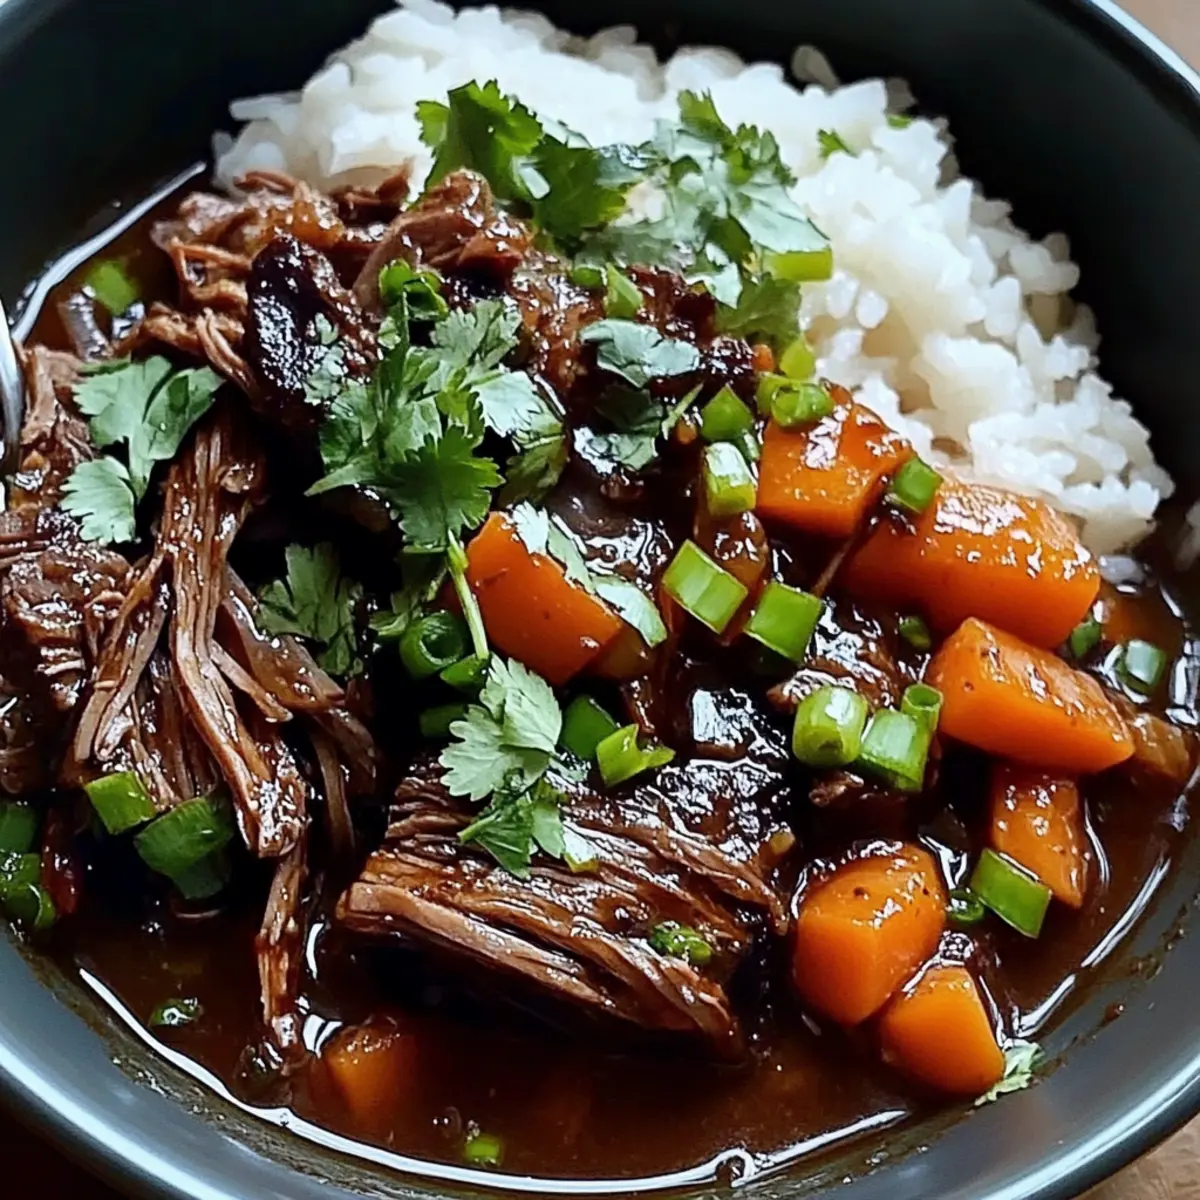
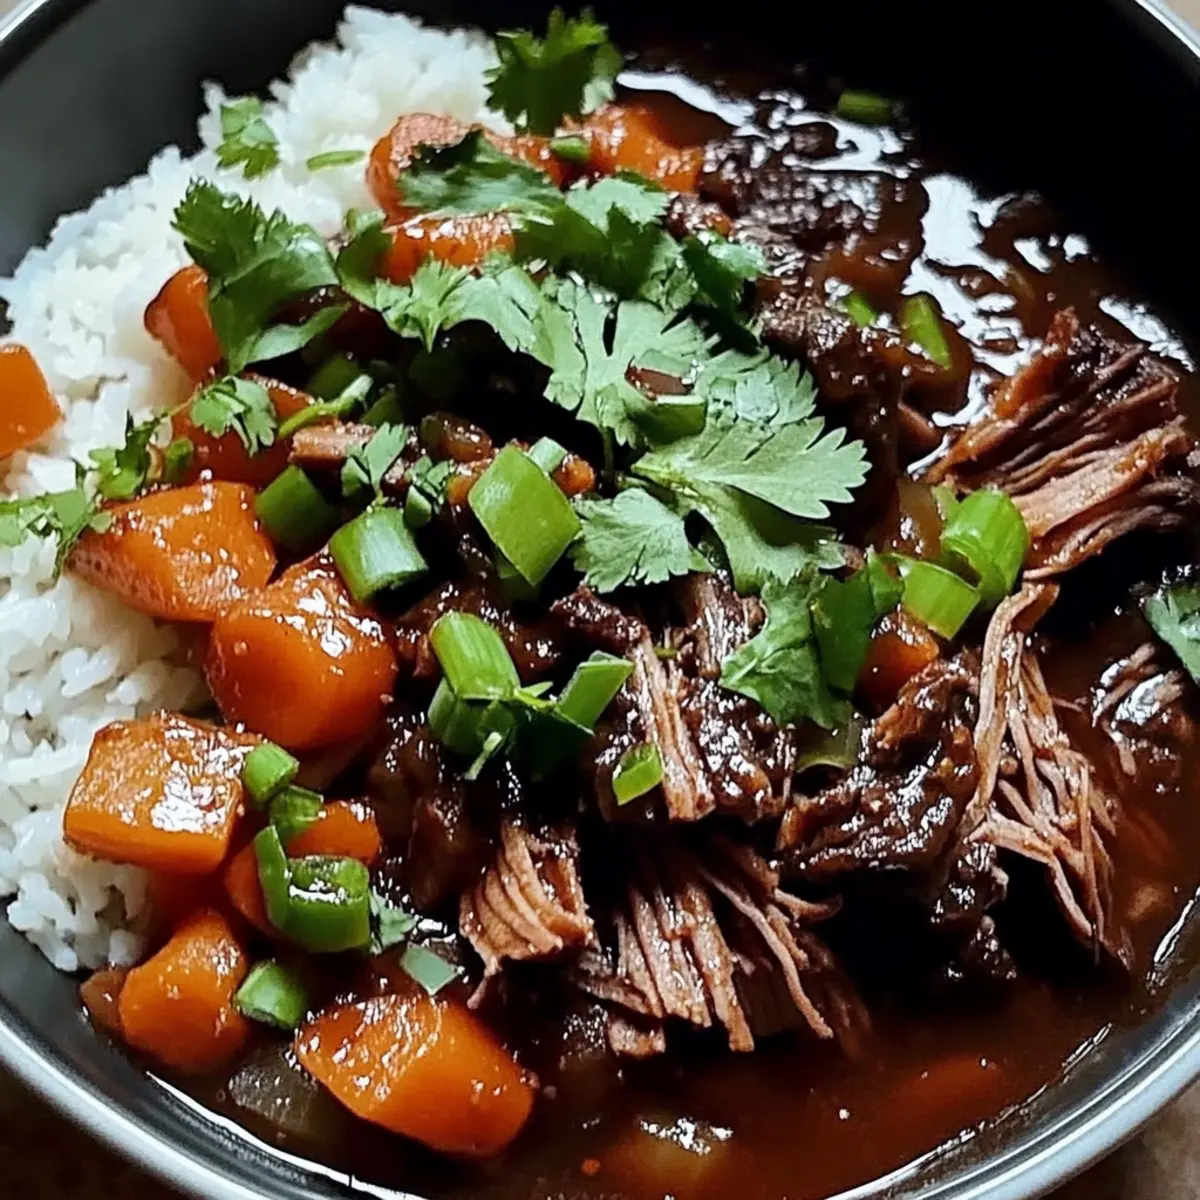
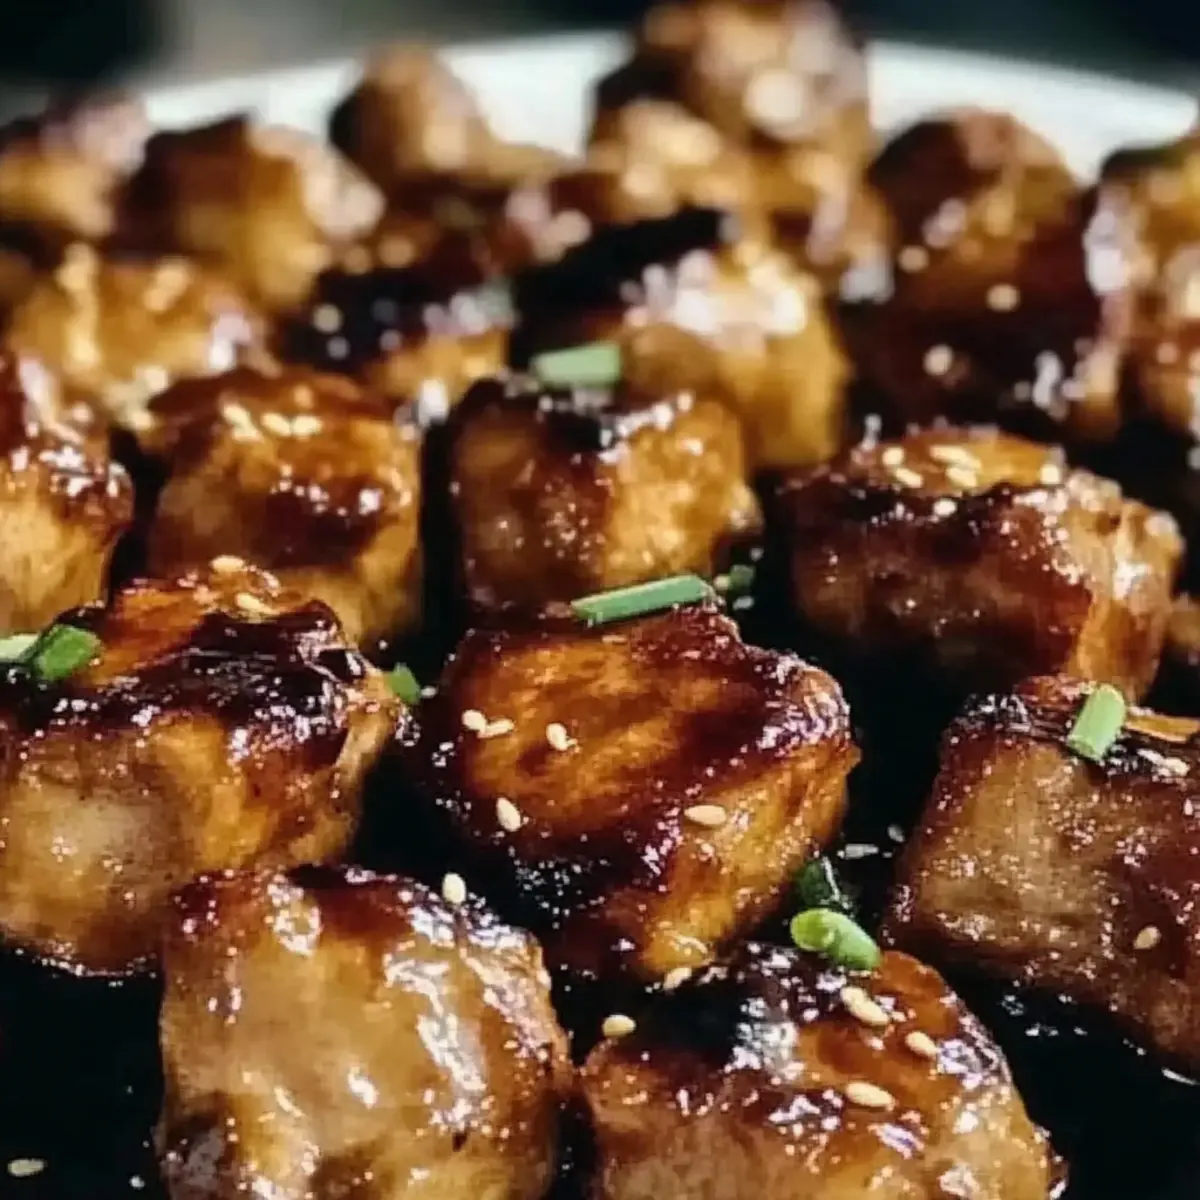
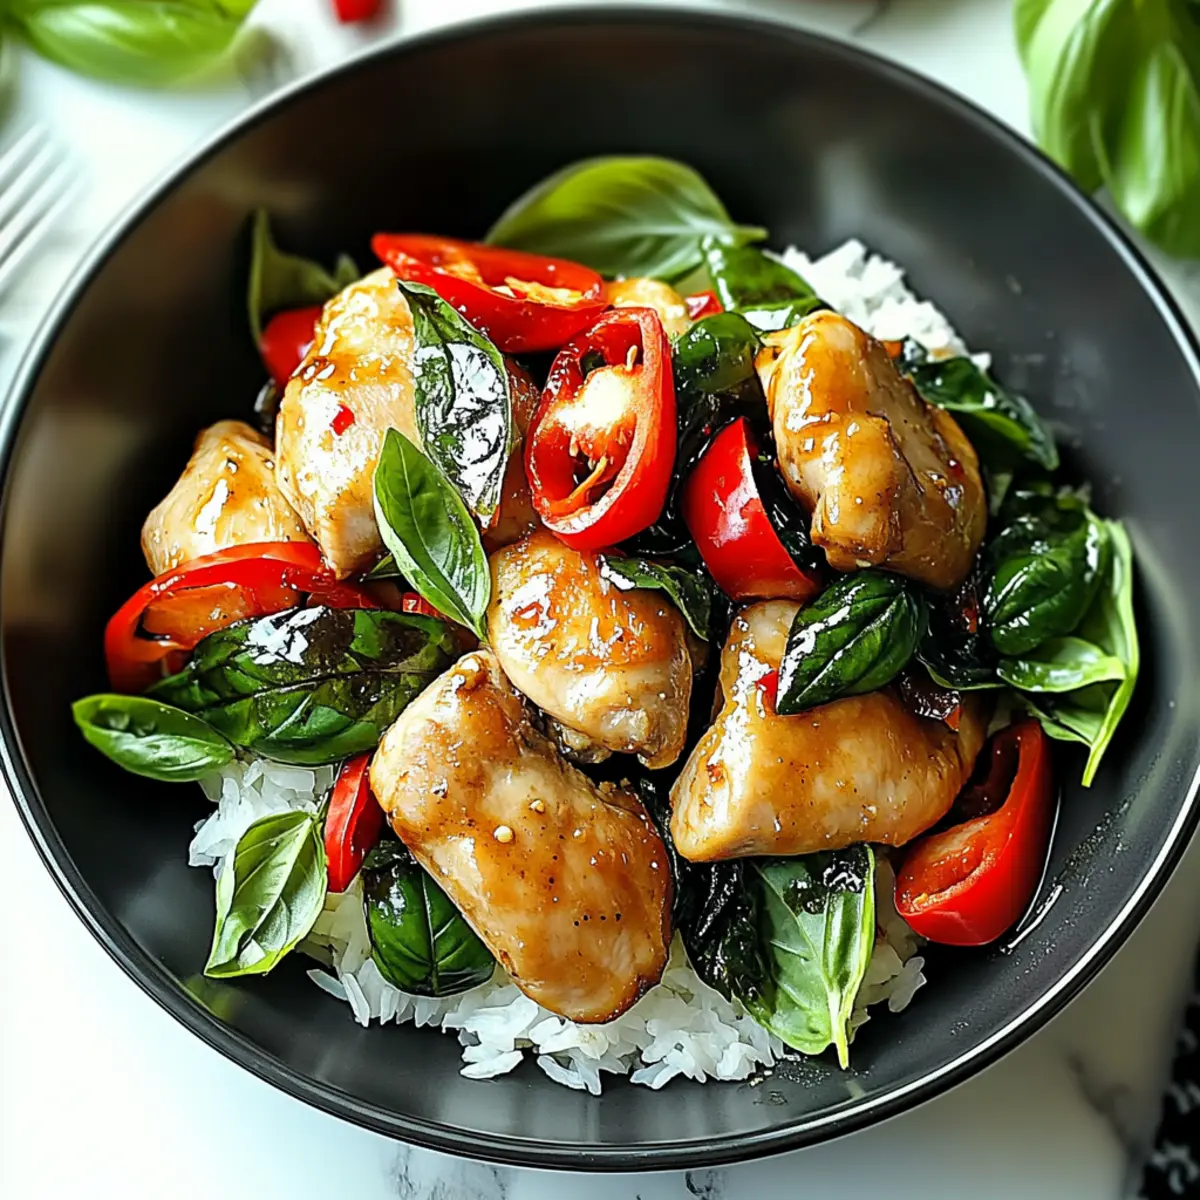
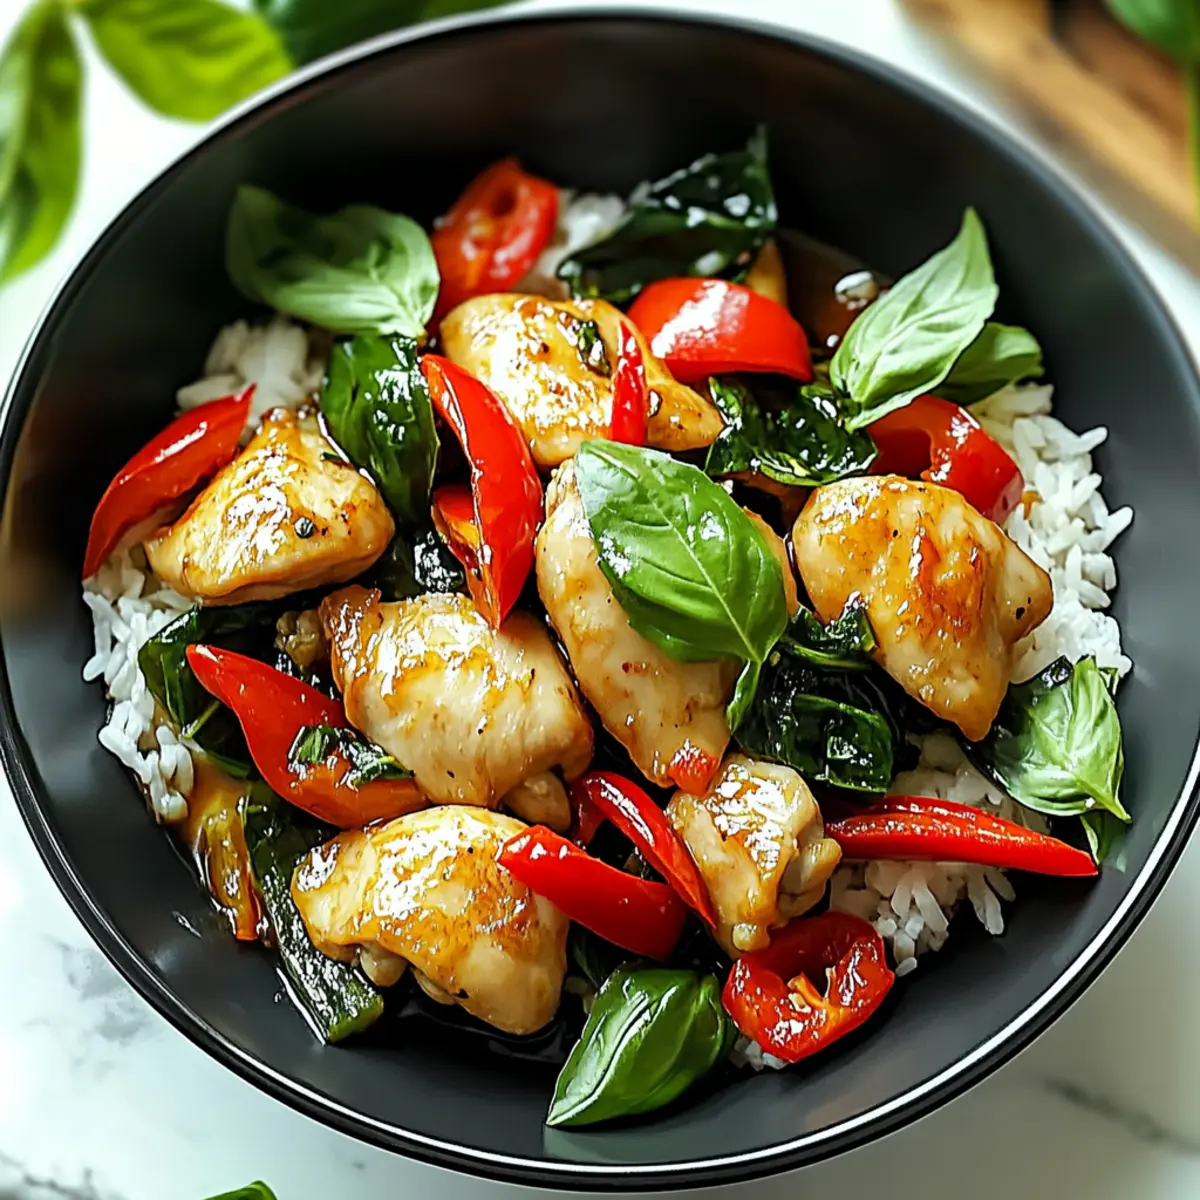
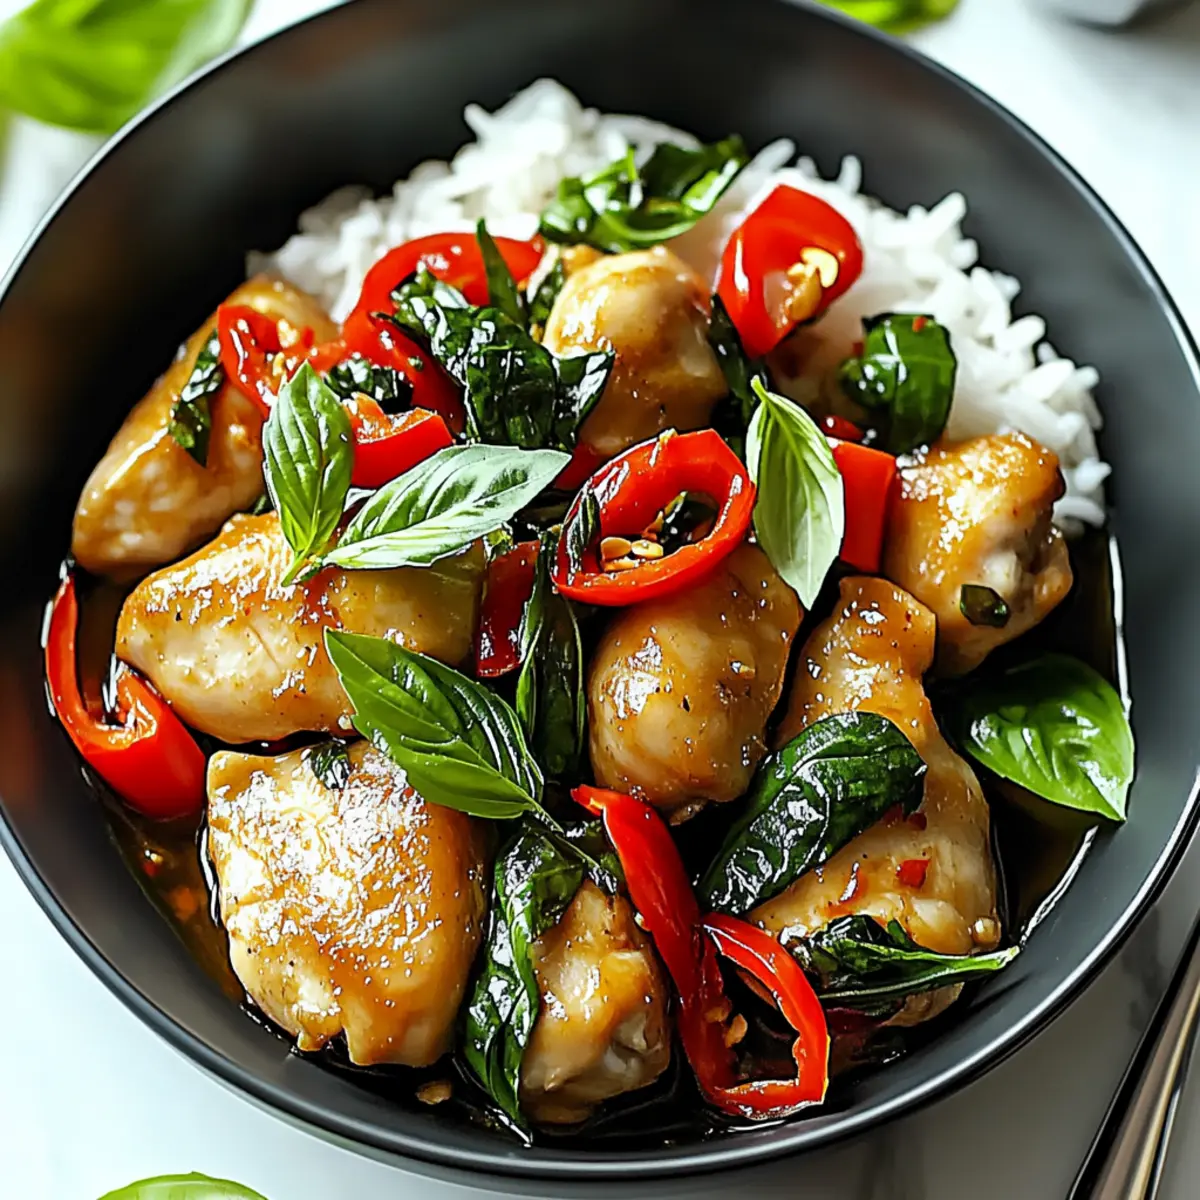
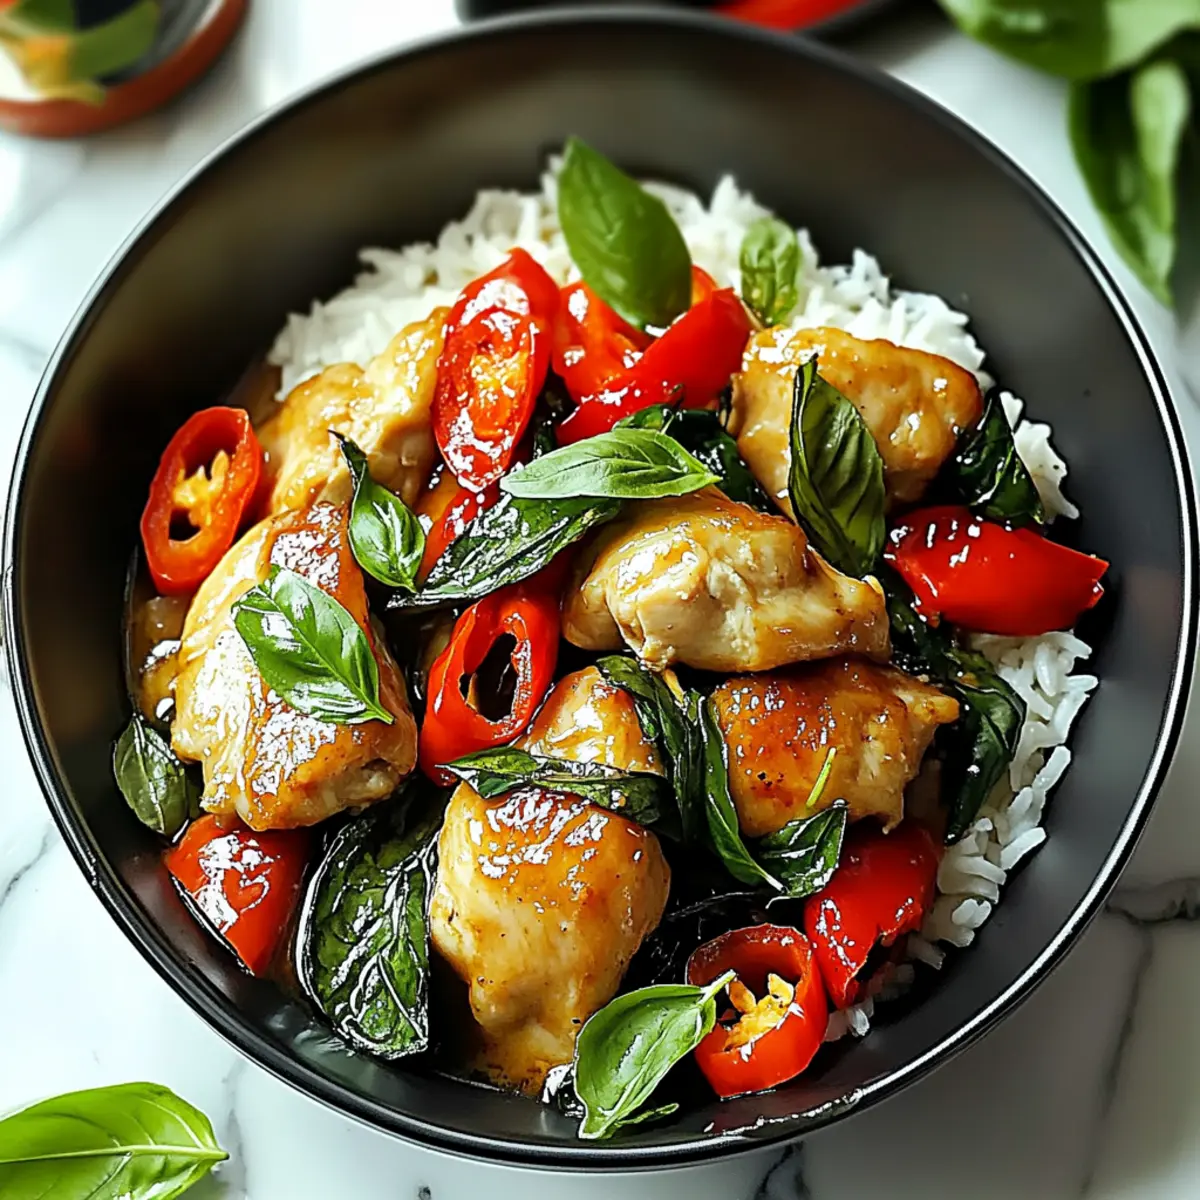
tastytrendingredients

  • Home
  • Recipes
    • Appetizers
    • Breakfast
    • Dessert
    • Dinner
    • Drinks
    • Salads
    • Snacks
    • Soups
  • About me
  • Contact me
menu icon
go to homepage
  • Home
  • Recipes
    • Appetizers
    • Breakfast
    • Dessert
    • Dinner
    • Drinks
    • Salads
    • Snacks
    • Soups
  • About me
  • Contact me
search icon
Homepage link
  • Home
  • Recipes
    • Appetizers
    • Breakfast
    • Dessert
    • Dinner
    • Drinks
    • Salads
    • Snacks
    • Soups
  • About me
  • Contact me
×

Delicious Air Fryer Calzones: Quick, Crispy, and Customizable

December 3, 2025 by Grace Snow Leave a Comment

As the air fryer hums in the kitchen, a wave of excitement washes over me—today, I’m creating Quick Air Fryer Calzones, the perfect canvas for culinary creativity. These delightful pockets of joy feature a crispy, golden crust that embraces your choice of savory fillings, making them a fantastic option for super busy days or casual gatherings. With the flexibility to swap ingredients and even use pre-made dough, they not only promise a satisfying meal but also a chance to customize everything to your liking. Whether you’re fueled by a need for comfort food or a craving for something fun and interactive, these calzones are your answer. What mouthwatering filling will you choose for your own delicious masterpiece?

What makes these calzones irresistible?

Customization at Its Finest: You can easily swap fillings to match your taste—try pepperoni, veggies, or even some bold spices!

Quick Cooking: Utilizing the air fryer not only saves time but also gives that perfect crispness without the oil of traditional frying.

Family-Friendly Fun: Kids can join in on the fun, creating their unique calzones with their favorite ingredients.

Gourmet Appeal: The golden crust and gooey filling elevate simple meals to gourmet experiences.

Meal Prep Friendly: Prepare extra calzones for hassle-free lunches, just like these tasty Air Fryer Fish sticks that can be made and frozen for later!

Crowd-Pleaser: Perfect for gatherings, these flavorful pockets are sure to please guests, combining comfort food vibes with a modern twist.

Air Fryer Calzone Ingredients

For the Dough
• All-Purpose Flour – Provides structure; substitute with gluten-free flour for a gluten-free option.
• Salt – Essential for enhancing the flavor in the dough.
• Sugar – Aids in fermentation and browning; use small amounts of alternative sweeteners if desired.
• Olive Oil – Adds moisture and richness; can be replaced with avocado oil or melted butter.
• Instant Yeast – Helps the dough rise quickly; regular yeast is an option but requires longer rising time.
• Warm Water – Activates yeast and hydrates the dough; avoid hot water to keep the yeast alive.

For the Filling
• Shredded Mozzarella Cheese – Provides a gooey, melted texture; swap for cheddar for a sharper taste.
• Cooked Chicken Ham – Offers protein and flavor; substitute with any cooked protein like sausage or turkey.
• Turkey Bacon – Adds a smoky flavor; you can use regular bacon or omit for a vegetarian option.
• Diced Bell Peppers – Contributes freshness and crunch; can replace with other veggies like spinach or zucchini.
• Sliced Mushrooms – Adds earthy flavor; can easily be omitted or substituted with your favorite veggies.
• Garlic Powder – Enhances flavor; fresh minced garlic works beautifully too.
• Dried Oregano – Provides aromatic herbal notes; Italian seasoning is a perfect substitute.

For the Egg Wash
• Egg – Gives a beautiful golden finish when baked; use milk as a vegan alternative if desired.

Explore the delightful versatility of Air Fryer Calzones with this comprehensive ingredients list, and let your culinary creativity shine!

Step‑by‑Step Instructions for Air Fryer Calzones

Step 1: Combine Dry Ingredients
In a large mixing bowl, whisk together 2 cups of all-purpose flour, 1 teaspoon of salt, 1 teaspoon of sugar, and 1 packet of instant yeast until thoroughly blended. This mixture will create a solid base for your Air Fryer Calzones, ensuring the dough rises beautifully.

Step 2: Add Liquids
Create a well in the center of the dry mixture and pour in ¾ cup of warm water and 2 tablespoons of olive oil. Stir with a wooden spoon until the dough begins to come together, which should take about 1-2 minutes. This is crucial for activating the yeast and ensuring a smooth, cohesive dough.

Step 3: Knead Dough
Transfer the dough onto a floured surface and knead for 8-10 minutes until it is smooth and elastic. You'll want the dough to be soft yet slightly tacky; this step is essential for developing the gluten that gives your calzones their delightful chewiness.

Step 4: Let Dough Rise
Place the kneaded dough in a lightly oiled bowl, cover it with a damp kitchen towel, and let it rise in a warm place for 1-1.5 hours, or until it doubles in size. You’ll know it’s ready when it looks puffy and springs back slightly when poked.

Step 5: Prepare Fillings
While the dough is rising, cook and chop up 4 slices of turkey bacon and ½ cup of chicken ham. Dice one bell pepper and slice ½ cup of mushrooms. In a mixing bowl, combine these ingredients with 1 cup of shredded mozzarella cheese, ½ teaspoon of garlic powder, and 1 teaspoon of dried oregano while setting the mixture aside for later use.

Step 6: Divide Dough
After the dough has risen, punch it down gently to release the air. Divide it into 6 equal portions and roll each piece into a circle about 6 inches in diameter. The rolled-out dough will be the perfect canvas for your delicious Air Fryer Calzones.

Step 7: Assemble Calzones
Take one circle of dough and spoon a portion of the filling onto one half, leaving space at the edges. Fold the dough over to meet the edges and crimp the sides to seal tightly. Repeat the process with the remaining dough and filling, ensuring each calzone is well secured.

Step 8: Apply Egg Wash
In a small bowl, beat one egg to create an egg wash. Brush the tops of each calzone with the egg wash using a pastry brush; this will give your Air Fryer Calzones a beautiful golden finish as they cook.

Step 9: Preheat Air Fryer
Preheat your air fryer to 375°F (190°C) for about 3-5 minutes. Allowing the air fryer to come up to temperature ensures even cooking and perfect crispiness for your calzones.

Step 10: Cook Calzones
Place 2-3 calzones in the air fryer basket, making sure they are not overcrowded. Air fry them for 12-15 minutes, flipping them halfway through, until they are golden brown and crispy on the outside. You’ll know they’re done when the aroma fills your kitchen!

Step 11: Serve
Once cooked, remove the calzones from the air fryer and let them cool slightly for about 5 minutes before serving. These delicious Air Fryer Calzones pair perfectly with your favorite dipping sauce, making them a delightful addition to any meal!

What to Serve with Quick Air Fryer Calzones

Savor the bliss of crafting a memorable meal by pairing these delightful calzones with complementary sides that enhance every bite.

  • Marinara Sauce: A classic dip that adds a tangy, rich flavor, perfect for those warm, cheesy bites.

  • Fresh Side Salad: Light and crisp greens tossed in a zesty dressing provide balance and freshness to your meal.

  • Garlic Breadsticks: The buttery, garlicky goodness complements the savory filling, creating a comforting Italian experience.

  • Roasted Vegetables: Seasoned veggies bring a textural contrast and a vibrant mix of flavors, warming up the palate beautifully.

  • Crispy Potato Wedges: Golden and crunchy, these wedges add heartiness next to the soft, cheesy calzones.

  • Herbed Yogurt Dip: Creamy and cool, this dip adds a refreshing touch and enhances the flavors of seasoned fillings.

  • Sparkling Lemonade: Crisp and bright, this drink is a delightful contrast to the savory richness of the calzones.

  • Dessert Pairing: Serve with a slice of warm apple pie to end the meal on a sweet note, offering a delightful balance to the savory main.

Expert Tips for Air Fryer Calzones

  • Avoid Soggy Filling: Make sure your fillings are not too watery, as this can lead to soggy calzones. Drain any excess liquid before assembling.

  • Prep Ahead: For a quicker dinner, prepare the dough in advance and refrigerate it for up to 24 hours before using. This way, you can enjoy homemade Air Fryer Calzones in no time!

  • Experiment with Flavors: Don’t be afraid to try different cheeses or spices in your calzone filling. Unique flavor combinations can elevate your dish to a whole new level.

  • Freeze Extras: If you have leftovers, unbaked calzones can be frozen. Just adjust the cooking time when you air fry them straight from the freezer.

  • Perfect the Dough: Knead the dough well to develop gluten, ensuring your calzones have a delightful chewy texture. This step is crucial for that perfect bite!

Make Ahead Options

These Air Fryer Calzones are perfect for meal prep enthusiasts! You can prepare the dough up to 24 hours in advance by mixing the dry ingredients and refrigerating the formed dough; ensure it's lightly oiled and covered to prevent drying out. Additionally, the filling can be prepped up to 3 days in advance by cooking and chopping your proteins and veggies; just store the mixture in an airtight container in the fridge. When you’re ready to enjoy, simply assemble the calzones and air fry for that freshly cooked taste—resulting in delicious, golden pockets with minimal effort! Perfect for busy weeknights!

Air Fryer Calzones Variations

Feel free to get creative with your Air Fryer Calzones—there’s a world of delicious possibilities waiting for you!

  • Vegetarian: Replace meats with a medley of your favorite vegetables, like zucchini, mushrooms, and spinach for a fresh twist. The vibrant colors and flavors will brighten your meal!

  • Spicy Kick: Add chopped jalapeños or crushed red pepper flakes to the filling for a warm, zesty bite. Feel the heat intensify and enjoy the burst of flavors with every bite!

  • Cheesy Delight: Mix different cheeses like feta, gouda, or pepper jack for a gourmet feel. Combining cheeses creates a rich, multi-dimensional flavor profile to savor.

  • Protein Swap: Try ground beef, turkey, or even quinoa for a different protein source. Each option offers its unique taste and texture, enhancing the calzone experience.

  • Sweet Indulgence: For dessert, fill calzones with Nutella and sliced bananas or berries. Air frying these will create a warm, gooey treat that’s utterly irresistible!

  • Herb Infusion: Add fresh herbs like basil or parsley to your filling for an aromatic touch. The fragrant blend elevates the taste and makes each calzone feel like a true Italian delight.

  • Classic Italian: Incorporate ricotta and spinach with your mozzarella for a classic Italian fill. This traditional combination brings a burst of creamy goodness to every mouthful.

If you’re looking for more cooking inspiration, try pairing these calzones with a side of Air Fryer Fish sticks for a fun and balanced meal. And remember, the sky's the limit—let your imagination soar as you explore the endless possibilities of your homemade Air Fryer Calzones!

How to Store and Freeze Air Fryer Calzones

Fridge: Store cooked calzones in an airtight container in the refrigerator for up to 3 days to maintain freshness and flavor.

Freezer: Unbaked calzones can be frozen for up to 2 months. Place them on a baking sheet to freeze individually before transferring to a freezer bag to prevent sticking.

Reheating: To restore their crispy texture, reheat cooked calzones in the air fryer at 350°F (175°C) for 5-7 minutes. Avoid the microwave, as it may make the crust soggy.

Make-Ahead Tips: Prepare the dough and fillings in advance, refrigerating the dough for up to 24 hours before assembly, making it easy to whip up your Air Fryer Calzones on a busy day.

Air Fryer Calzones Recipe FAQs

What type of flour should I use for the dough?
You can use all-purpose flour for a classic calzone dough. If you're looking for a gluten-free option, feel free to substitute with gluten-free flour. Just make sure to check for a blend that can rise well, and you might also need to adjust the hydration slightly.

How should I store leftover calzones?
Store any cooked Air Fryer Calzones in an airtight container in the refrigerator for up to 3 days. I recommend placing parchment paper between layers if you're stacking them to keep them nice and crispy! When you're ready to munch again, simply reheat them in the air fryer at 350°F (175°C) for about 5-7 minutes to restore that delicious crunch.

Can I freeze unbaked calzones?
Absolutely! To freeze, assemble the unbaked calzones and place them on a baking sheet lined with parchment paper. Freeze them individually for about 1-2 hours until solid, then transfer them to a freezer bag for up to 2 months. When you're ready to cook, simply remove from the freezer and air fry at 375°F (190°C) for about 15-20 minutes. Just add a few extra minutes to account for the frozen dough!

What can I do if my calzone dough isn't rising enough?
If your dough isn't rising as it should, it might be due to inactive yeast. Make sure to check the expiration date on your yeast packet! Also, ensure your water was warm, not hot, when mixing with the yeast. For better results, try letting the dough rise in a warmer spot, like inside an oven that's turned off but has the light on, as the added warmth can help.

Can my pets have any of the ingredients in these calzones?
It's best to keep calzones away from pets, especially if they contain ingredients like garlic or onion, which can be harmful to them. If you'd like to share a little treat with your furry friend, consider baking a plain version without those harmful ingredients or using pet-friendly replacements instead!

Air Fryer Calzones

Delicious Air Fryer Calzones: Quick, Crispy, and Customizable

Make quick and customizable Air Fryer Calzones with a crispy crust and savory fillings—perfect for busy days and gatherings.
Print Recipe Pin Recipe
Prep Time 20 minutes mins
Cook Time 15 minutes mins
Rising Time 1 hour hr 30 minutes mins
Total Time 2 hours hrs 5 minutes mins
Servings: 6 calzones
Course: Dinner
Cuisine: Italian
Calories: 280
Ingredients Equipment Method Nutrition Notes

Ingredients
  

For the Dough
  • 2 cups All-Purpose Flour Substitute with gluten-free flour for a gluten-free option.
  • 1 teaspoon Salt Essential for enhancing flavor.
  • 1 teaspoon Sugar Can use alternative sweeteners.
  • 2 tablespoons Olive Oil Can be replaced with avocado oil or melted butter.
  • 1 packet Instant Yeast Regular yeast can be used, but rising time will increase.
  • ¾ cup Warm Water Warm, not hot, to activate yeast.
For the Filling
  • 1 cup Shredded Mozzarella Cheese Can swap for cheddar for a sharper taste.
  • ½ cup Cooked Chicken Ham Substitute with any cooked protein.
  • 4 slices Turkey Bacon Use regular bacon or omit for vegetarian.
  • 1 medium Diced Bell Pepper Substitute with other veggies if desired.
  • ½ cup Sliced Mushrooms Can be omitted or substituted.
  • ½ teaspoon Garlic Powder Fresh minced garlic works too.
  • 1 teaspoon Dried Oregano Italian seasoning can be substituted.
For the Egg Wash
  • 1 large Egg Use milk as a vegan alternative.

Equipment

  • Air fryer
  • Mixing Bowl
  • Wooden spoon
  • Pastry brush
  • Baking Sheet

Method
 

Step-by-Step Instructions
  1. In a large mixing bowl, whisk together 2 cups of all-purpose flour, 1 teaspoon of salt, 1 teaspoon of sugar, and 1 packet of instant yeast until thoroughly blended.
  2. Create a well in the center of the dry mixture and pour in ¾ cup of warm water and 2 tablespoons of olive oil. Stir with a wooden spoon until the dough begins to come together.
  3. Transfer the dough onto a floured surface and knead for 8-10 minutes until smooth and elastic.
  4. Place the kneaded dough in a lightly oiled bowl, cover, and let it rise for 1-1.5 hours until it doubles in size.
  5. While the dough is rising, cook and chop 4 slices of turkey bacon and ½ cup of chicken ham. Dice one bell pepper and slice ½ cup of mushrooms. Combine these with 1 cup of shredded mozzarella cheese, ½ teaspoon of garlic powder, and 1 teaspoon of dried oregano.
  6. After the dough has risen, punch it down gently and divide into 6 equal portions. Roll each piece into a circle about 6 inches in diameter.
  7. Take a circle of dough, spoon a portion of the filling onto one half, fold, and crimp the sides to seal tightly.
  8. Beat one egg to create an egg wash. Brush the tops of each calzone with the egg wash.
  9. Preheat your air fryer to 375°F (190°C) for about 3-5 minutes.
  10. Place 2-3 calzones in the air fryer basket, and air fry for 12-15 minutes, flipping halfway through, until golden brown and crispy.
  11. Once cooked, remove calzones from the air fryer and let cool slightly before serving.

Nutrition

Serving: 1calzoneCalories: 280kcalCarbohydrates: 30gProtein: 12gFat: 10gSaturated Fat: 3gPolyunsaturated Fat: 1gMonounsaturated Fat: 6gCholesterol: 70mgSodium: 470mgPotassium: 200mgFiber: 2gSugar: 1gVitamin A: 200IUVitamin C: 12mgCalcium: 200mgIron: 2mg

Notes

Ensure fillings are not too watery to avoid soggy calzones. Prepare dough in advance for quicker meals. Unbaked calzones can be frozen.

Tried this recipe?

Let us know how it was!

Creamy Cowboy Butter Chicken Linguine Your Family Will Love

December 3, 2025 by Grace Snow Leave a Comment

The sizzling sound of chicken hitting a hot skillet transports me to a cozy kitchen, bustling with the excitement of a family dinner. Today, I’m whipping up a delightful Cowboy Butter Chicken Linguine that’s not just easy, but also a true showstopper. In under 30 minutes, this creamy, garlicky pasta dish brimming with tender chicken will charm your taste buds and leave everyone asking for seconds. One of the best parts? It’s an easily customizable recipe, so whether you’re catering to picky eaters or just looking for a convenient weeknight meal, this family-friendly dinner accommodates all. Are you ready to add this delectable dish to your rotation and impress your loved ones? Let’s dive into the full recipe and make some magic happen!

Why is Cowboy Butter Chicken Linguine a Must-Try?

Simplicity at Its Best: This recipe requires minimal effort while delivering maximum flavor, making it ideal for busy weeknights.

Creamy and Delicious: The rich, garlicky sauce envelops the linguine and chicken, creating a delightful dish that tastes gourmet yet homemade.

Customizable Options: With substitutions for protein and dietary needs, this recipe caters to every taste, whether you go for shrimp or a vegetarian twist!

Family-Friendly: It's a surefire hit with everyone at the table, sure to turn any meal into a satisfying family gathering.

Quick to Cook: You can whip this up in under 30 minutes—perfect for when you need a speedy, comforting dinner.

Serving Suggestions: Pair it with a side of garlic bread or a fresh salad to elevate the dining experience even further! Enjoy, and don’t forget to check out my Crockpot Butter Chicken for more delicious chicken options!

Cowboy Butter Chicken Linguine Ingredients

• Get ready for a flavor-packed journey!

For the Chicken
• Boneless, skinless chicken breasts – Provides tender, juicy protein; try using sliced turkey or shrimp for variety.

For the Pasta
• Linguine pasta – Serves as the perfect base to capture the creamy sauce; substitute with fettuccine or spaghetti if desired.

For the Sauce
• Olive oil – Adds depth while browning chicken and prevents sticking.
• Butter – Essential for the rich "cowboy butter" flavor; swap with plant-based butter for a dairy-free version.
• Garlic – Freshly minced for aromatic flavor; it’s the backbone of the sauce.
• Dijon mustard – Introduces a subtle tang that elevates overall taste.
• Paprika – Adds smoky undertones and vibrant color.
• Red pepper flakes (optional) – For added heat; adjust according to spice preference.
• Lemon juice and zest – Brightens and balances the dish’s creaminess.
• Chicken broth or reserved pasta water – Helps achieve the desired sauce consistency.
• Heavy cream – Essential for creamy texture; replace with coconut cream for a dairy-free option.
• Grated parmesan cheese – Adds savory flavor; use vegan cheese as an alternative.
• Salt and black pepper – Essential seasonings to enhance flavor.

For Garnish
• Fresh parsley – Provides herbaceous notes and adds a pop of color to your dish.

Step‑by‑Step Instructions for Cowboy Butter Chicken Linguine

Step 1: Cook Pasta
Start by bringing a large pot of salted water to a boil. Add the linguine pasta and cook according to the package instructions until al dente, usually around 8–10 minutes. Once cooked, drain the pasta, reserving ½ cup of the starchy pasta water for later. Set the linguine aside while you prepare the Cowboy Butter Chicken.

Step 2: Brown Chicken
In a large skillet, heat 2 tablespoons of olive oil and 2 tablespoons of butter over medium-high heat. Once the butter is melted and bubbling, add the minced garlic and sauté for about 30 seconds until fragrant. Add the boneless, skinless chicken breasts, seasoning them with salt and pepper, and cook for 6–7 minutes on each side until golden brown and cooked through. Remove the chicken from the skillet and slice it into bite-sized pieces.

Step 3: Make Sauce
In the same skillet, lower the heat and stir in 1 tablespoon of Dijon mustard, 1 teaspoon of paprika, and optional red pepper flakes. Cook for 1 minute, allowing the spices to bloom. Next, add the reserved lemon juice and zest, scraping up any browned bits from the bottom of the pan. Pour in ½ cup of chicken broth and 1 cup of heavy cream, stirring to combine. Let it simmer for about 3–5 minutes until the sauce thickens slightly.

Step 4: Combine
Return the sliced chicken to the skillet, mixing it with the creamy sauce for about 2 minutes, allowing the flavors to meld together. Add the cooked linguine to the skillet, tossing until the pasta is evenly coated with the Cowboy Butter sauce. If the sauce is too thick, gradually stir in the reserved pasta water until the desired consistency is reached.

Step 5: Serve
Once well combined, remove the skillet from heat and plate the Cowboy Butter Chicken Linguine. Finish by sprinkling with freshly chopped parsley and grated parmesan cheese. For an extra touch, serve with garlic bread on the side, and enjoy this comforting, family-friendly dinner that’s ready in no time!

Cowboy Butter Chicken Linguine Variations

Feel free to let your creativity shine by customizing this delightful dish to fit your family's preferences!

  • Turkey Twist: Substitute chicken with sliced turkey for a leaner option that still delivers on flavor. Turkey pairs wonderfully with the rich sauce.

  • Vegetarian Delight: Opt for mushrooms or tofu instead of chicken, creating a fulfilling vegetarian dish that brings out the sauce's creamy richness.

  • Spicy Kick: Amp up the heat by adding extra red pepper flakes or a dash of your favorite hot sauce. Spice lovers will rejoice at this flavor enhancement!

  • Dairy-Free Dream: Replace butter and heavy cream with plant-based butter and coconut cream, making this dish friendly for those with lactose intolerance.

  • Zesty Lemon: For an extra zing, add more lemon juice and zest in the sauce. It brightens the dish and enhances the overall flavor profile.

  • Pasta Variety: Swap out linguine for whole grain or gluten-free pasta options like zoodles or chickpea pasta. Explore different textures while staying health-conscious!

  • Herb Infusion: Experiment with fresh herbs like basil or thyme for a lovely aromatic touch that elevates the flavor to new heights—just freshen that Cowboy spirit!

And if you're looking for other chicken recipes to spice up your dinner rotation, don't miss my Chipotle Lime Chicken and Rice and Honey Garlic Chicken Thighs that are sure to please!

Storage Tips for Cowboy Butter Chicken Linguine

Fridge: Store leftovers in an airtight container for up to 3 days. Make sure to cool the pasta and sauce completely before sealing to prevent condensation.

Freezer: For longer storage, separate the sauce and pasta, placing them in airtight containers. Freeze for up to 2 months, ensuring no air remains to prevent freezer burn.

Reheating: To reheat, thaw overnight in the fridge if frozen. Add a splash of milk or reserved pasta water when warming in a skillet to restore creaminess and avoid drying out.

Leftover Tips: Use any leftover Cowboy Butter Chicken Linguine in a wrap or salad for a delicious twist on lunch the next day!

Make Ahead Options

These Cowboy Butter Chicken Linguine are perfect for busy weeknights when you need a delicious meal with minimal last-minute prep! You can marinate and slice the chicken up to 24 hours in advance, storing it in an airtight container in the refrigerator. Additionally, you can prepare the creamy sauce, combining the garlic, Dijon mustard, paprika, and heavy cream up to 3 days ahead; just store it separately to maintain its luscious texture. When ready to serve, simply reheat the sauce in a skillet while cooking the linguine (using the reserved pasta water if needed), then toss everything together for a warm, satisfying dinner that's just as delightful as if you made it fresh!

What to Serve with Cowboy Butter Chicken Linguine

Elevate your meal with delightful sides and beverages that perfectly complement this creamy, garlicky pasta dish.

  • Garlic Bread: A classic pairing, buttery garlic bread is perfect for soaking up every drop of the luscious sauce.
  • Caesar Salad: Crisp romaine and tangy dressing provide a refreshing contrast to the rich linguine, adding a burst of color to your table.
  • Roasted Vegetables: Caramelized seasonal veggies like zucchini, bell peppers, or asparagus balance the meal with their charred flavors and nutrients.
  • Parmesan Crusted Zucchini: These crispy bites offer a crunchy texture while harmonizing with the pasta's creamy goodness.
  • Coleslaw: A crunchy, tangy slaw adds brightness and a refreshing crunch after every savory bite of linguine.
  • Chardonnay: A chilled glass of Chardonnay complements the creamy flavors, adding a delightful acidity that enhances each mouthful.
  • Lemon Sorbet: For dessert, a light lemon sorbet refreshes the palate, offering a sweet yet tart end to your meal that ties back to the dish's citrus notes.

Mix and match these suggestions to create a heartwarming and well-rounded dinner your family will cherish!

Expert Tips for Cowboy Butter Chicken Linguine

  • Chicken Selection: Choose plump, boneless, skinless chicken breasts for the best texture; avoid pieces with dark spots that may indicate spoilage.

  • Pasta Perfect: Ensure you don't overcook the linguine; aim for al dente to maintain its structure when tossed with the creamy sauce.

  • Sauce Consistency: If the sauce is too thick, add reserved pasta water gradually until it reaches your desired creamy consistency.

  • Adjust for Spice: Love heat? Don't hesitate to add more red pepper flakes! For a milder dish, simply omit them entirely for a family-friendly Cowboy Butter Chicken Linguine.

  • Storing Leftovers: Keep any leftovers in an airtight container for 3 days, but for longer storage, separate the sauce and pasta before freezing to maintain quality.

  • Hearty Garnish: Elevate your dish with a sprinkle of fresh parsley and extra parmesan before serving for added flavor and a colorful presentation!

Cowboy Butter Chicken Linguine Recipe FAQs

What type of chicken is best for this recipe?
Absolutely! I recommend using plump boneless, skinless chicken breasts for the best texture. Look for pieces that are firm and free of dark spots, which can indicate spoilage. If you prefer, sliced turkey or even shrimp can be delightful alternatives to maintain that juicy protein base.

How should I store leftovers?
Very good question! Store any leftover Cowboy Butter Chicken Linguine in an airtight container and refrigerate for up to 3 days. Make sure you allow the dish to cool completely before sealing it to prevent condensation, which can make your pasta soggy.

Can I freeze Cowboy Butter Chicken Linguine?
Definitely! For optimal texture, I suggest separating the sauce and pasta before freezing. Place each in airtight containers, and they should stay fresh for about 2 months. When you're ready to enjoy, thaw overnight in the fridge, then reheat gently. To keep it creamy, add a splash of milk or reserved pasta water while warming.

What if I have dietary restrictions?
This recipe is wonderfully customizable! If you're catering to someone with dairy allergies, simply swap out the butter and cream for plant-based alternatives. You can also adjust the spice level by leaving out the red pepper flakes for a milder flavor or using vegetarian protein options like mushrooms or tofu.

How do I know if my pasta is cooked properly?
Great question! You want to aim for al dente, which means it should be firm to the bite. Usually, this takes around 8–10 minutes of cooking time in salted water. Remember to occasionally check the pasta while cooking, as every stove and pot can vary slightly in cooking times. Just taste a piece to ensure it's just right before draining!

What can I serve alongside Cowboy Butter Chicken Linguine?
You can't go wrong! Pairing it with garlic bread or a fresh salad can elevate your meal. A side of roasted vegetables or a light, zesty coleslaw works beautifully too, adding a refreshing balance to the richness of the pasta dish. Enjoy your culinary adventure!

Cowboy Butter Chicken Linguine

Creamy Cowboy Butter Chicken Linguine Your Family Will Love

This Cowboy Butter Chicken Linguine is a creamy, flavorful dish that the whole family will love.
Print Recipe Pin Recipe
Prep Time 10 minutes mins
Cook Time 20 minutes mins
Total Time 30 minutes mins
Servings: 4 servings
Course: Dinner
Cuisine: American
Calories: 600
Ingredients Equipment Method Nutrition Notes

Ingredients
  

For the Chicken
  • 1 lb boneless, skinless chicken breasts Try using sliced turkey or shrimp for variety.
For the Pasta
  • 8 oz linguine pasta Substitute with fettuccine or spaghetti if desired.
For the Sauce
  • 2 tbsp olive oil Adds depth while browning chicken.
  • 2 tbsp butter Essential for the rich 'cowboy butter' flavor.
  • 4 cloves garlic Freshly minced for aromatic flavor.
  • 1 tbsp Dijon mustard Introduces a subtle tang.
  • 1 tsp paprika Adds smoky undertones.
  • 1/2 tsp red pepper flakes Optional, adjust according to spice preference.
  • 1 tbsp lemon juice Brightens the dish.
  • 1 tbsp lemon zest
  • 1/2 cup chicken broth Or reserved pasta water.
  • 1 cup heavy cream Replace with coconut cream for a dairy-free option.
  • 1/2 cup grated parmesan cheese Use vegan cheese as an alternative.
  • to taste salt Essential seasoning.
  • to taste black pepper Essential seasoning.
For Garnish
  • 1/4 cup fresh parsley Provides herbaceous notes.

Equipment

  • Large pot
  • Large skillet
  • Measuring Spoons
  • measuring cups
  • Colander

Method
 

Step‑by‑Step Instructions
  1. Bring a large pot of salted water to a boil. Add the linguine pasta and cook according to package instructions until al dente, around 8–10 minutes. Drain, reserving ½ cup of starchy pasta water.
  2. In a large skillet, heat olive oil and butter over medium-high heat. Add minced garlic and sauté for about 30 seconds until fragrant. Add chicken, seasoning with salt and pepper, and cook for 6–7 minutes on each side until golden brown. Remove and slice into bite-sized pieces.
  3. In the same skillet, lower the heat and stir in Dijon mustard, paprika, and optional red pepper flakes. Cook for 1 minute. Add lemon juice and zest, scraping up browned bits. Pour in chicken broth and heavy cream, stirring to combine. Let simmer for 3–5 minutes until slightly thickened.
  4. Return sliced chicken to skillet, mixing it with the sauce for about 2 minutes. Add cooked linguine, tossing until evenly coated. Gradually stir in reserved pasta water if sauce is too thick.
  5. Remove from heat and plate the Cowboy Butter Chicken Linguine. Garnish with parsley and Parmesan cheese, and serve with garlic bread on the side.

Nutrition

Serving: 1plateCalories: 600kcalCarbohydrates: 65gProtein: 35gFat: 20gSaturated Fat: 12gPolyunsaturated Fat: 2gMonounsaturated Fat: 5gCholesterol: 150mgSodium: 800mgPotassium: 600mgFiber: 3gSugar: 2gVitamin A: 500IUVitamin C: 10mgCalcium: 200mgIron: 3mg

Notes

For optimal texture, use plump chicken breasts and do not overcook the linguine. Adjust red pepper flakes to your heat preference. Store leftovers in airtight containers.

Tried this recipe?

Let us know how it was!

Savory Cowboy Butter Chicken Linguine: Quick & Comforting Delight

December 3, 2025 by Grace Snow Leave a Comment

As I stood at the stove, the inviting aroma of garlic and butter wafted through my kitchen, instantly transporting me to a cozy restaurant in the heart of Texas. Enter Cowboy Butter Chicken Linguine, a dish that melds the rustic charm of cowboy cooking with the elegance of Italian cuisine. It’s the perfect solution for busy weeknights, coming together in just 30 minutes to deliver comfort food that feels both hearty and gourmet. With its creamy, garlicky sauce embracing tender chicken and linguine, this recipe is endlessly customizable—craving a kick? Toss in some red pepper flakes; prefer a lighter protein? Feel free to swap the chicken for shrimp or turkey. Whatever your choice, there’s something inherently satisfying about creating a meal that your family will love. Are you ready to elevate your weeknight dinners with this delightful fusion?

Why is Cowboy Butter Chicken Linguine special?

Quick, weeknight solution: In just 30 minutes, you can whip up this delicious meal, perfect for busy families.
Creamy, irresistible sauce: The combination of garlic, butter, and cream creates a decadent coating that hugs each strand of pasta beautifully.
Customizable options: Whether you want to spice it up with red pepper flakes or adjust the protein, this dish adapts to your taste.
Crowd-pleasing flavors: The rich blend of spices and savory ingredients ensures this dish will satisfy everyone's cravings.
Easy to make ahead: With simple storage tips, you can prep this meal in advance or save leftovers for quick lunches or dinners.
If you enjoy savory dishes with a twist, check out my Crockpot Butter Chicken or Honey Garlic Chicken Thighs for more flavorful inspirations!

Cowboy Butter Chicken Linguine Ingredients

For the Chicken
• Boneless, skinless chicken breasts – This tender protein ensures a juicy centerpiece; swap with turkey or shrimp for a twist.

For the Pasta
• Linguine pasta – Perfect for capturing the creamy sauce; you can use fettuccine or spaghetti if preferred.

For the Sauce
• Olive oil – Adds richness and prevents sticking; essential for sautéing.
• Butter – Delivers a rich flavor; for a dairy-free option, use plant-based butter.
• Garlic – Freshly minced for an addictive, aromatic depth; it’s crucial for the sauce.
• Dijon mustard – Imparts a subtle tang, enhancing the sauce's complexity.
• Paprika – Offers a lovely smokiness and color; adjust to your desired flavor intensity.
• Red pepper flakes (optional) – Perfect for adding a kick; tailor based on your spice preference.
• Lemon juice and zest – Brightens the dish, balancing its rich creaminess.
• Chicken broth/reserved pasta water – A flavorful base for the sauce; using pasta water helps with consistency.
• Heavy cream – Ensures the sauce is luxuriously creamy; coconut cream makes for a great dairy-free substitute.
• Grated parmesan cheese – Adds umami flavors; feel free to omit or replace with vegan cheese for a dairy-free version.
• Salt and black pepper – Essential seasonings enhancing the dish's overall taste.

For Garnish
• Fresh parsley – Adds a vibrant, herbaceous touch; ideal for garnishing the finished dish.

This Cowboy Butter Chicken Linguine recipe promises to be a crowd-pleaser, with its rich, creamy sauce and perfectly cooked pasta. Enjoy crafting a meal that brings everyone together!

Step‑by‑Step Instructions for Cowboy Butter Chicken Linguine

Step 1: Prepare Pasta
Begin by bringing a large pot of salted water to a rolling boil. Add the linguine and cook according to the package instructions, typically around 8-10 minutes for al dente. Once cooked, reserve about ½ cup of the pasta water for later and drain the linguine, returning it to the pot while you finish the Cowboy Butter Chicken sauce.

Step 2: Sauté Chicken
In a large skillet, heat 2 tablespoons of olive oil and 2 tablespoons of butter over medium-high heat. Cut the boneless, skinless chicken breasts into bite-sized pieces and season with salt and pepper. Cook the chicken for 5-7 minutes or until golden brown and cooked through, stirring occasionally. Remove the chicken from the skillet and set aside, keeping it warm.

Step 3: Make Sauce
In the same skillet, lower the heat to medium and add minced garlic, Dijon mustard, paprika, and red pepper flakes (if using). Sauté for about 1-2 minutes or until fragrant, ensuring the garlic doesn’t burn. Next, pour in 1 cup of chicken broth and the lemon juice and zest, stirring to combine all the flavors.

Step 4: Add Cream
Increase the heat slightly and add 1 cup of heavy cream to the skillet. Allow the mixture to come to a gentle simmer, stirring continuously to avoid curdling. Cook for about 3-5 minutes or until the sauce thickens slightly and becomes creamy. Adjust seasoning with salt and pepper to taste for your Cowboy Butter Chicken Linguine.

Step 5: Combine
Return the cooked chicken to the skillet, followed by the drained linguine. Toss everything together until the pasta is evenly coated in the creamy sauce. If the sauce is too thick, gradually add in the reserved pasta water until you reach your desired consistency.

Step 6: Serve
Once well combined, remove the skillet from heat. Serve your Cowboy Butter Chicken Linguine hot, garnished with fresh parsley and a sprinkle of grated parmesan cheese. Enjoy this comforting dish with a side of garlic bread or a fresh garden salad for a complete meal!

Expert Tips for Cowboy Butter Chicken Linguine

  • Choose Quality Chicken: Use plump, fresh chicken breasts without dark spots for the best flavor and tenderness in your Cowboy Butter Chicken Linguine.
  • Pasta Cooking Time: Ensure linguine is cooked al dente—slightly firm—to prevent mushiness when combined with the sauce.
  • Adjust Creaminess: Gradually add reserved pasta water to reach your preferred sauce consistency; don’t rush this step to avoid a too-thick texture.
  • Garlic Precautions: Sauté garlic just until fragrant, about 1-2 minutes; overcooking can lead to bitterness that affects the overall dish.
  • Custom Spice Levels: Start with less red pepper flakes if you're unsure about the heat; you can always add more to your Cowboy Butter Chicken Linguine for extra warmth.
  • Storage Tips: Cool leftovers completely before transferring to airtight containers; it keeps the sauce from thickening too much while stored.

How to Store and Freeze Cowboy Butter Chicken Linguine

Fridge: Store leftovers in an airtight container for up to 3 days. Ensure the pasta and sauce are mixed for optimal flavor retention.

Freezer: For long-term storage, separate the pasta and sauce, then freeze in airtight containers for up to 2 months. This helps maintain texture upon thawing.

Reheating: Gently reheat on the stove over low heat, adding a splash of reserved pasta water or milk to restore creaminess to your Cowboy Butter Chicken Linguine.

Make-Ahead Tips: Prepare the sauce in advance, storing it in the fridge for up to 3 days, and cook the pasta fresh when ready to serve for a quick meal.

Make Ahead Options

These Cowboy Butter Chicken Linguine are perfect for meal prep enthusiasts looking to save time on busy weeknights! You can chop the chicken and vegetables and portion the sauce (minus the cream) up to 24 hours in advance, storing them separately in the refrigerator. You can also cook the linguine ahead of time, just be sure to toss it with a little olive oil to prevent sticking. When ready to serve, simply sauté the chicken, whisk in the cream with the sauce, and combine everything together; it will taste just as delicious! This method ensures a flavorful meal on the table with minimal effort—perfect for busy families!

What to Serve with Cowboy Butter Chicken Linguine?

When it comes to creating a hearty, satisfying meal, the right accompaniments can elevate your dining experience to new heights.

  • Garlic Bread: The perfect side to soak up the creamy goodness, garlic bread adds a crunchy texture that contrasts beautifully with the smooth pasta sauce.

  • Mixed Green Salad: A refreshing salad with a zingy vinaigrette complements the richness of the dish, adding brightness and a satisfying crunch with each bite.

  • Roasted Vegetables: Seasonal veggies like zucchini or bell peppers bring vibrant colors and an extra layer of flavor; their natural sweetness pairs perfectly with the savory sauce.

  • Parmesan Crisps: These crunchy bites offer a delightful salty contrast to the creamy pasta, bringing an element of surprise and added texture to your meal.

  • Steamed Asparagus: A simple, elegant side that brings a fresh earthiness to the table, balancing the richness of the Cowboy Butter Chicken Linguine.

  • Chilled White Wine: A crisp Sauvignon Blanc enhances the dish's flavors while providing a cool contrast to the warmth of the pasta, making for a balanced meal.

  • Lemon Sorbet: Finish your meal on a light note with this refreshing dessert; it cleanses the palate and echoes the bright lemon notes in the pasta.

Cowboy Butter Chicken Linguine Variations

Customize your Cowboy Butter Chicken Linguine to perfectly suit your family’s taste buds and dietary needs!

  • Protein Swap: Replace chicken with shrimp or turkey for a delightful twist. Shrimp cooks quickly and infuses a lovely seafood flavor, while turkey provides a leaner option.
  • Vegetarian Version: Use chickpeas or tofu instead of chicken, pairing them with seasonal veggies like spinach or mushrooms. This adds both nutrition and texture, making every bite a story of flavor.
  • Pasta Alternatives: Swap linguine for gluten-free pasta or whole wheat varieties to suit dietary preferences. The sauce clings beautifully to any pasta shape, so feel free to get creative!
  • Extra Veggies: Toss in seasonal vegetables, such as diced zucchini or roasted bell peppers, for added nutrition and a pop of color. Vegetables enrich the dish while enhancing the creamy sauce.
  • Spicy Kick: Increase red pepper flakes or add chopped jalapeños for a fiery twist. Spice fans will love the added heat that elevates the dish to new flavor heights!
  • Citrus Twist: Try adding lime juice and zest instead of lemon for a zesty, tropical flair. The citrus balance brightens the creamy richness, creating a refreshing finish.
  • Herbs Galore: Experiment with different fresh herbs, like basil or cilantro, to change the flavor profile. Fresh herbs add a burst of aroma and elegance to your Cowboy Butter Chicken Linguine.

For more delicious chicken inspiration, don’t miss out on my easy Crockpot Butter Chicken or my flavorful Chicken Adobo Again!

Cowboy Butter Chicken Linguine Recipe FAQs

What type of chicken should I use for Cowboy Butter Chicken Linguine?
Absolutely! For the best results, choose plump, boneless, skinless chicken breasts. Look for chicken without dark spots for optimal tenderness. If you’re feeling adventurous, you can also substitute chicken with shrimp or turkey, which will still deliver delicious flavors.

How should I store leftovers of Cowboy Butter Chicken Linguine?
Very! Store your Cowboy Butter Chicken Linguine leftovers in an airtight container in the fridge for up to 3 days. Make sure to mix the pasta and sauce together before storing to keep the flavors intact!

Can I freeze Cowboy Butter Chicken Linguine?
Definitely! For freezing, it’s best to separate the pasta and sauce. You can freeze them in airtight containers for up to 2 months. When you’re ready to enjoy it again, simply thaw in the refrigerator overnight, then reheat gently on the stove.

What can I do if my sauce becomes too thick?
If you find your sauce getting too thick, don’t fret! Just gradually add a splash of the reserved pasta water while stirring until it reaches your desired consistency. This will help restore the creaminess of your Cowboy Butter Chicken Linguine.

Are there any dietary considerations for this recipe?
Absolutely! If you’re cooking for those who are lactose intolerant or following a dairy-free diet, you can easily substitute the butter, heavy cream, and parmesan cheese with plant-based alternatives. There are excellent dairy-free options available that maintain the creamy texture of the sauce.

How can I adjust the spice level in Cowboy Butter Chicken Linguine?
The more the merrier! If you're unsure about the heat level, start with a small amount of red pepper flakes and add more gradually. This way, everyone can enjoy the dish tailored to their spice preferences!

Cowboy Butter Chicken Linguine

Savory Cowboy Butter Chicken Linguine: Quick & Comforting Delight

Cowboy Butter Chicken Linguine is a quick and comforting dish that blends rustic cowboy cooking with Italian elegance, ready in just 30 minutes.
Print Recipe Pin Recipe
Prep Time 10 minutes mins
Cook Time 20 minutes mins
Total Time 30 minutes mins
Servings: 4 servings
Course: Dinner
Cuisine: Italian, Texan
Calories: 650
Ingredients Equipment Method Nutrition Notes

Ingredients
  

For the Chicken
  • 1 pound boneless, skinless chicken breasts
For the Pasta
  • 12 ounces linguine pasta
For the Sauce
  • 2 tablespoons olive oil
  • 2 tablespoons butter can use plant-based butter for dairy-free
  • 4 cloves garlic freshly minced
  • 1 tablespoon Dijon mustard
  • 1 teaspoon paprika
  • 1 teaspoon red pepper flakes optional
  • 2 tablespoons lemon juice
  • 1 teaspoon lemon zest
  • 1 cup chicken broth/reserved pasta water
  • 1 cup heavy cream can use coconut cream for dairy-free
  • 1/2 cup grated parmesan cheese omit for dairy-free
  • to taste salt
  • to taste black pepper
For Garnish
  • 2 tablespoons fresh parsley chopped

Equipment

  • Large pot
  • Large skillet

Method
 

Cooking Instructions
  1. Begin by bringing a large pot of salted water to a rolling boil. Add the linguine and cook according to the package instructions, typically around 8-10 minutes for al dente. Once cooked, reserve about ½ cup of the pasta water for later and drain the linguine, returning it to the pot while you finish the Cowboy Butter Chicken sauce.
  2. In a large skillet, heat 2 tablespoons of olive oil and 2 tablespoons of butter over medium-high heat. Cut the boneless, skinless chicken breasts into bite-sized pieces and season with salt and pepper. Cook the chicken for 5-7 minutes or until golden brown and cooked through, stirring occasionally. Remove the chicken from the skillet and set aside, keeping it warm.
  3. In the same skillet, lower the heat to medium and add minced garlic, Dijon mustard, paprika, and red pepper flakes (if using). Sauté for about 1-2 minutes or until fragrant, ensuring the garlic doesn’t burn. Next, pour in 1 cup of chicken broth and the lemon juice and zest, stirring to combine all the flavors.
  4. Increase the heat slightly and add 1 cup of heavy cream to the skillet. Allow the mixture to come to a gentle simmer, stirring continuously to avoid curdling. Cook for about 3-5 minutes or until the sauce thickens slightly and becomes creamy. Adjust seasoning with salt and pepper to taste for your Cowboy Butter Chicken Linguine.
  5. Return the cooked chicken to the skillet, followed by the drained linguine. Toss everything together until the pasta is evenly coated in the creamy sauce. If the sauce is too thick, gradually add in the reserved pasta water until you reach your desired consistency.
  6. Once well combined, remove the skillet from heat. Serve your Cowboy Butter Chicken Linguine hot, garnished with fresh parsley and a sprinkle of grated parmesan cheese. Enjoy this comforting dish with a side of garlic bread or a fresh garden salad for a complete meal!

Nutrition

Serving: 1servingCalories: 650kcalCarbohydrates: 60gProtein: 30gFat: 30gSaturated Fat: 15gPolyunsaturated Fat: 2gMonounsaturated Fat: 8gCholesterol: 80mgSodium: 700mgPotassium: 500mgFiber: 3gSugar: 3gVitamin A: 700IUVitamin C: 5mgCalcium: 200mgIron: 3mg

Notes

Store leftovers in an airtight container for up to 3 days. For long-term storage, separate the pasta and sauce, then freeze for up to 2 months. Reheat gently on the stove, adding a splash of reserved pasta water to restore creaminess.

Tried this recipe?

Let us know how it was!

Honey Garlic Sheet Pan Sausage: Quick Comfort Food Magic

December 3, 2025 by Grace Snow Leave a Comment

As I took a moment to breathe in the sweet and savory aromas wafting from my kitchen, I couldn't help but feel excited about my latest creation: Honey Garlic Sheet Pan Sausage with Sweet Potatoes and Broccoli. This one-pan dinner is a game changer for anyone tired of the same old fast food routine. The beauty of this recipe lies not just in its quick prep time but also in its incredible versatility, allowing you to tailor the ingredients to fit your dietary needs or flavor preferences. Whether you're a fan of chicken sausage, plant-based options, or just looking to sneak in more veggies, this dish delivers a balanced meal that’s both comforting and healthy. Curious about how this delicious fusion of flavors comes together? Let’s dive into the recipe!

Why is this sheet pan magic?

Ease of Preparation: With just one pan to clean, this Honey Garlic Sheet Pan Sausage makes weeknight dinners a breeze.

Versatile Options: Swap in your favorite sausage and seasonal vegetables, whether you're leaning towards chicken, turkey, or a plant-based alternative.

Flavor Explosion: The sweet and savory honey garlic glaze enhances the dish, creating harmony between the sausage and the caramelized sweet potatoes.

Nutritious & Balanced: Packed with protein, fiber, and vibrant colors, every bite satisfies both your taste buds and nutritional needs.

Quick & Convenient: Ready in under 30 minutes, this dish is perfect for those who crave delicious meals without the long prep time.

For a delightful pairing, consider serving over quinoa or enjoying it alongside a slice of Cheesy Garlic Bread for added comfort!

Honey Garlic Sheet Pan Sausage Ingredients

• Explore all the essential components for a perfect one-pan meal!

For the Sausage

  • Chicken or Turkey Sausage – A lean protein that pairs beautifully with the glaze; feel free to use pork, beef, or plant-based options for variety.

For the Vegetables

  • Sweet Potatoes – These cubes bring a natural sweetness and hearty texture; substitute with butternut or delicata squash for a seasonal twist.
  • Broccoli Florets – Packed with nutrients and color; consider bell peppers, onions, or Brussels sprouts for different tastes.

For the Glaze

  • Unsalted Butter – Adds richness to the glaze; olive oil or vegan butter makes a great dairy-free swap.
  • Garlic (minced) – Essential for aromatic depth; fresh garlic delivers the best flavor.
  • Honey – Offers sweetness to the glaze; swap with maple syrup or agave for a vegan option.
  • Low-Sodium Soy Sauce – Infuses umami and savory notes; tamari is a gluten-free alternative.
  • Apple Cider Vinegar – Balances and enhances sweetness; rice vinegar works in a pinch.
  • Salt and Black Pepper – Crucial for seasoning; adjust according to taste.

For Garnish

  • Fresh Parsley (minced) – Brightens the dish with freshness just before serving.

Step‑by‑Step Instructions for Honey Garlic Sheet Pan Sausage

Step 1: Preheat Oven
Begin by preheating your oven to 400°F (200°C) to create the perfect roasting environment. While the oven warms up, line a large sheet pan with parchment paper to prevent sticking and make cleanup easier later. This preparation is essential for achieving that delightful caramelization on your vegetables and sausage.

Step 2: Prepare Ingredients
Next, slice your chicken or turkey sausage into bite-sized pieces, peeling and dicing sweet potatoes into ½-inch cubes. Cut fresh broccoli florets into smaller ½-inch sections to ensure even cooking. Arrange all the prepared ingredients evenly on the lined sheet pan, creating a vibrant medley that will roast beautifully together.

Step 3: Make the Glaze
In a medium saucepan, melt unsalted butter over medium heat. Add minced garlic and sauté for about 1 minute until it's fragrant but not burnt. Then stir in honey, low-sodium soy sauce, apple cider vinegar, a pinch of salt, and black pepper. Allow the glaze to simmer gently for about 2-3 minutes, letting the flavors meld beautifully.

Step 4: Combine and Coat
Once the glaze is ready, drizzle it over the sausage, sweet potatoes, and broccoli on the sheet pan. Toss everything together thoroughly using a spatula or your hands, ensuring that every piece of sausage and vegetable is coated in the delicious honey garlic mixture for maximum flavor in your Honey Garlic Sheet Pan Sausage.

Step 5: Roast
Place the sheet pan in your preheated oven and roast for 25-30 minutes. Remember to stir the ingredients halfway through to encourage even cooking. The sweet potatoes should become fork-tender, and the sausage should be nicely browned, filling your kitchen with inviting aromas.

Step 6: Serve
When the dish is done roasting, remove it from the oven and let it cool for a few moments. Just before serving, garnish with freshly minced parsley for a pop of color and flavor. This final touch elevates your Honey Garlic Sheet Pan Sausage, making it a beautiful dish ready to impress your family or guests.

Honey Garlic Sheet Pan Sausage Variations

Invite your taste buds on a flavorful adventure by customizing this delightful dish with these creative twists!

  • Chicken Sausage: Swap chicken sausage for turkey or pork for a different flavor profile. Each option adds a delightful twist to your meal.

  • Plant-Based: Use plant-based sausage for a vegan-friendly version that’s just as satisfying. The rich glaze keeps it full of flavor without the meat!

  • Mixed Vegetables: Incorporate seasonal veggies like asparagus or bell peppers to elevate your dish's color and nutrition. Roasting different vegetables brings a new life to your one-pan wonder.

  • Sweet Potato Alternatives: Try butternut squash or delicata squash for a seasonal swap that maintains the dish's heavenly sweetness. Each alternative adds a unique, comforting touch.

  • Extra Spice: For those who crave heat, add red pepper flakes or a dab of sriracha to the honey garlic glaze. Spice enthusiasts will love this flavor enhancement!

  • Garlic Lovers: Infuse even more garlic by adding extra minced cloves or using garlic powder in the glaze. Each added layer of garlic provides a punch that’s sure to please.

  • Serving Suggestion: Pair this dish with a side of steamed rice or quinoa for a wholesome meal. Complement your dinner with a slice of Cheesy Garlic Bread to soak up that delicious glaze!

  • Quick Meal Prep: Assemble and freeze your ingredients before cooking; when you're ready, just defrost and roast for an effortless dinner option. This ensures that delicious homemade flavors are just a breeze away!

What to Serve with Honey Garlic Sheet Pan Sausage

As the sweet aroma of the honey garlic glaze fills the air, imagine a cozy dinner that brings warmth and harmony to your family table.

  • Creamy Mashed Potatoes: Silky and buttery, they absorb juicy flavors from the sausage, adding richness that complements the dish's heartiness.

  • Garlic Bread: Freshly baked and crispy, it provides a delightful crunch and a wonderful way to wipe up any remaining glaze.

  • Steamed Green Beans: Their crisp-tender texture offers a refreshing and vibrant contrast, while brightening the plate with a splash of color.

  • Quinoa Salad: Tossed with fresh herbs and lemon, this nutty grain salad adds a nutritious punch and balances the sweetness of the glaze.

  • Roasted Brussels Sprouts: Their caramelized edges and earthy flavor create a delightful pairing that elevates your one-pan meal.

  • Apple Cider: This sweet and tangy drink mirrors the flavors of the honey glaze, creating an enchanting culinary experience.

  • Chocolate Chip Cookies: End your meal on a sweet note; their warm familiarity and chocolatey goodness bring comfort—a perfect finish after savoring your Honey Garlic Sheet Pan Sausage!

Make Ahead Options

These Honey Garlic Sheet Pan Sausage meals are perfect for meal prep enthusiasts! You can prepare the sausage and vegetable mixture up to 24 hours in advance by slicing the sausage and dicing the sweet potatoes and broccoli. Simply combine them on the sheet pan, drizzle with the honey garlic glaze, and cover tightly with plastic wrap before refrigerating. To maintain quality, store it in the coldest part of your fridge to keep everything fresh. When you’re ready to enjoy, just preheat your oven and roast as directed for 25-30 minutes. You'll have a delicious, healthy dinner with minimal effort, ready to impress your family!

How to Store and Freeze Honey Garlic Sheet Pan Sausage

Fridge: Store leftover Honey Garlic Sheet Pan Sausage in an airtight container for up to 4 days to maintain freshness.

Freezer: Portion leftover servings into individual airtight containers and freeze for up to 3 months. Label containers for easy identification later.

Reheating: When ready to enjoy, reheat in the oven at 350°F (175°C) covered with foil for about 15-20 minutes or in a microwave for 2-3 minutes, adding a splash of water to keep it moist.

Serving Suggestions: Feel free to pair it with grains like quinoa or rice to round out your meal when serving leftovers.

Expert Tips for Honey Garlic Sheet Pan Sausage

  • Uniform Chopping: Ensure sweet potatoes and broccoli are cut into uniform sizes for even cooking, avoiding undercooked or overcooked pieces.

  • Flavor Boost: For an extra kick, consider adding red pepper flakes or a splash of hot sauce to your honey garlic glaze, enhancing your Honey Garlic Sheet Pan Sausage with a delightful heat.

  • Storage Wisdom: Store leftovers in an airtight container for up to 4 days. Reheat in the oven or microwave with a splash of water to keep the glaze moist and flavorful.

  • Sautéing Spice: Don’t rush the garlic sautéing process! Cooking it just until fragrant prevents bitterness and brings out its best flavors.

  • Alternate Veggies: If you’re feeling adventurous, substitute the broccoli or sweet potatoes with seasonal veggies like Brussels sprouts or asparagus for variety and seasonal freshness.

  • Check Doneness: Ensure your sausage is fully cooked and sweet potatoes are fork-tender; use a quick temperature check for peace of mind on doneness and safety.

Honey Garlic Sheet Pan Sausage Recipe FAQs

How do I choose the right sausage for this recipe?
Absolutely! For the best flavor, pick high-quality chicken or turkey sausage, as they pair beautifully with the honey garlic glaze. However, feel free to explore variations with pork, beef, or even plant-based options depending on your preference. If you enjoy spicier dishes, Italian sausage makes for a delightful twist!

What vegetables can I substitute if I don’t have sweet potatoes or broccoli?
Very! This recipe is wonderfully versatile. If sweet potatoes aren’t available, try using butternut squash or even regular potatoes. For broccoli, consider bell peppers, Brussels sprouts, or carrots, which all roast well and add vibrant colors and textures to your dish.

How should I store leftovers and how long do they last?
For optimal freshness, store leftover Honey Garlic Sheet Pan Sausage in an airtight container for up to 4 days. Ensure it’s completely cool before sealing. When reheating, adding a splash of water while microwaving can help retain moisture and prevent the glaze from drying out.

Can I freeze the Honey Garlic Sheet Pan Sausage? If so, how?
Absolutely! To freeze, portion your leftovers into individual airtight containers or freezer bags. Label each with the date, and they're good for up to 3 months. When you’re ready to enjoy, simply defrost in the refrigerator overnight before reheating, or you can cook from frozen at 350°F (175°C) for about 30-40 minutes, covered with foil.

Are there any dietary considerations for this dish?
Yes! If you’re preparing this for individuals with dietary restrictions, opt for gluten-free tamari in place of soy sauce to keep the dish gluten-free. For vegan needs, simply switch the sausage for a plant-based alternative and use maple syrup instead of honey. Always double-check labels to confirm no allergens are present.

What do I do if my sweet potatoes aren't cooking evenly?
If you find your sweet potatoes are not cooking evenly, it’s best to ensure uniformity when chopping them into ½-inch cubes. For future recipes, if you notice inconsistent cooking, consider parboiling the sweet potatoes for 5 minutes before roasting; this will give them a head start and ensure fork-tender results alongside perfectly cooked sausage.

Honey Garlic Sheet Pan Sausage

Honey Garlic Sheet Pan Sausage: Quick Comfort Food Magic

Enjoy a delightful Honey Garlic Sheet Pan Sausage loaded with sweet potatoes and broccoli, perfect for quick weeknight dinners.
Print Recipe Pin Recipe
Prep Time 10 minutes mins
Cook Time 30 minutes mins
Total Time 40 minutes mins
Servings: 4 servings
Course: Dinner
Cuisine: American
Calories: 350
Ingredients Equipment Method Nutrition Notes

Ingredients
  

For the Sausage
  • 1 pound Chicken or Turkey Sausage Feel free to use pork, beef, or plant-based options for variety.
For the Vegetables
  • 2 cups Sweet Potatoes Cubed, can substitute with butternut or delicata squash.
  • 2 cups Broccoli Florets Can substitute with bell peppers, onions, or Brussels sprouts.
For the Glaze
  • 2 tablespoons Unsalted Butter Or olive oil for a dairy-free option.
  • 2 cloves Garlic (minced) Fresh garlic delivers the best flavor.
  • 1/4 cup Honey Can use maple syrup or agave for a vegan option.
  • 2 tablespoons Low-Sodium Soy Sauce Tamari is a gluten-free alternative.
  • 1 tablespoon Apple Cider Vinegar Rice vinegar works in a pinch.
  • 1 teaspoon Salt Adjust according to taste.
  • 1/2 teaspoon Black Pepper Adjust according to taste.
For Garnish
  • 2 tablespoons Fresh Parsley (minced) For garnish before serving.

Equipment

  • Oven
  • sheet pan
  • Medium saucepan
  • Parchment Paper

Method
 

Step-by-Step Instructions
  1. Preheat oven to 400°F (200°C) and line a large sheet pan with parchment paper.
  2. Slice sausage into bite-sized pieces, peel and dice sweet potatoes into ½-inch cubes, and cut broccoli into smaller sections. Arrange on the sheet pan.
  3. In a medium saucepan, melt butter over medium heat. Add minced garlic and sauté for 1 minute until fragrant. Stir in honey, soy sauce, apple cider vinegar, salt, and pepper. Simmer for 2-3 minutes.
  4. Drizzle the glaze over the sausage, sweet potatoes, and broccoli on the sheet pan. Toss everything thoroughly to coat.
  5. Roast in the oven for 25-30 minutes, stirring halfway through for even cooking.
  6. Remove from oven and garnish with parsley before serving.

Nutrition

Serving: 1servingCalories: 350kcalCarbohydrates: 30gProtein: 20gFat: 15gSaturated Fat: 5gPolyunsaturated Fat: 2gMonounsaturated Fat: 8gCholesterol: 70mgSodium: 600mgPotassium: 800mgFiber: 5gSugar: 10gVitamin A: 12000IUVitamin C: 80mgCalcium: 50mgIron: 2mg

Notes

For an extra kick, consider adding red pepper flakes to the glaze. Store leftovers in an airtight container for up to 4 days.

Tried this recipe?

Let us know how it was!

Cheesy Taco Potatoes: Your New Family Favorite Comfort Dish

December 3, 2025 by Grace Snow Leave a Comment

The scent of roasted potatoes fills the air, transporting me back to my mom's kitchen on chilly evenings. As we gathered around the table, the star of the meal was always her Cheesy Taco Potatoes—an easy, comforting dish that felt like a warm hug. These potatoes, loaded with seasoned ground beef or a hearty vegetarian option, tastefully blend the indulgence of melted cheese with the satisfying crunch of fresh toppings. With minimal prep and the ability to customize to your family's liking, this dish fits seamlessly into both busy weeknights and fun gatherings. Imagine cozying up with these fluffy wonders topped with salsa and a dollop of creamy goodness. Whether you stick to the classic recipe or add your own twist, you’ll find joy in every delicious bite. Ready to whip up a family meal that brings everyone together? Let’s dive in!

Why Are Cheesy Taco Potatoes Irresistible?

Comforting and satisfying, Cheesy Taco Potatoes are the epitome of home-cooked goodness! Easily customizable, you can adapt this dish to cater to both meat lovers and vegetarians alike. Quick to prepare, they save you precious time on busy weeknights yet remain impressive enough for a family feast. Savory and cheesy, they combine rich flavors and delightful textures, ensuring every bite feels like a warm hug. For a similar uplifting experience, check out our Cheesy Zucchini Bake or a vibrant side of Smoky Sweet Potatoes with Black Beans. Get ready to impress with these delicious bites!

Cheesy Taco Potatoes Ingredients

For the Potatoes
• Russet Potatoes – The perfect base for a fluffy texture; consider sweet potatoes for a sweeter twist.
• Olive Oil – Helps create a crispy skin while baking; feel free to use vegetable oil if preferred.
• Salt and Pepper – Essential for enhancing flavor; don’t skip on seasoning for the best results.

For the Filling
• Ground Beef – Provides hearty, savory goodness; swap for black beans or lentils for a vegetarian option.
• Taco Seasoning – Creates the iconic taco flavor; mix your own with chili powder, cumin, and garlic powder if needed.

For the Toppings
• Shredded Cheddar Cheese – Adds creaminess and richness; switch to Monterey Jack or dairy-free cheese for a lighter choice.
• Sour Cream – Balances out the spice with creaminess; Greek yogurt makes a great tangy substitute.
• Chopped Green Onions – Offers freshness and a hint of crunch; any fresh herbs can work beautifully here.
• Diced Tomatoes – Adds juiciness and color; fresh or canned both do the job well.
• Sliced Black Olives – Complements the richness of the dish; omit if you're not a fan.
• Chopped Cilantro – Enhances flavor and freshness; can be swapped with parsley or omitted based on preference.

For Serving
• Fresh Salsa – A vibrant topping that adds zesty flavor; make it fresh or grab your favorite store-bought version.

Get ready to create the incredible flavor of Cheesy Taco Potatoes that will have everyone coming back for seconds!

Step‑by‑Step Instructions for Cheesy Taco Potatoes

Step 1: Preheat the Oven
Begin by preheating your oven to 400°F (200°C). This important step ensures that your Cheesy Taco Potatoes will bake evenly and develop that lovely golden exterior. While the oven warms up, prepare your potatoes, as they will require sufficient baking time to become perfectly fluffy inside.

Step 2: Prepare the Potatoes
Take your Russet potatoes and give them a good scrub under running water to clean. Once dried, pierce each potato several times with a fork; this allows steam to escape during baking. Rub them generously with olive oil, then season with salt and pepper. This will enhance their flavor and help create a deliciously crispy skin.

Step 3: Bake the Potatoes
Place the seasoned potatoes on a baking sheet, ensuring they are evenly spaced out for optimal air circulation. Bake in the preheated oven for 45-60 minutes. You’ll know they’re done when a fork easily pierces through the skin, revealing a soft, fluffy interior. Once done, remove the potatoes from the oven and let them cool slightly for easier handling.

Step 4: Cook the Ground Beef
While your potatoes bake, heat a skillet over medium heat. Add the ground beef, cooking it until browned and completely cooked through, approximately 5-7 minutes. Once cooked, drain any excess fat to keep your Cheesy Taco Potatoes from being overly greasy. This step ensures a flavorful and hearty filling for your potatoes.

Step 5: Add Taco Seasoning
To the cooked ground beef, stir in your taco seasoning along with a splash of water. Allow this mixture to simmer for about 5 minutes, stirring occasionally until it thickens slightly and the spices meld beautifully. This infused flavor is what makes your Cheesy Taco Potatoes so irresistible!

Step 6: Fluff the Baked Potatoes
After letting the baked potatoes cool for a few minutes, carefully slice them lengthwise down the middle, being cautious not to cut all the way through. Use a fork to gently fluff the insides, creating a nice bed for your savory beef mixture. This is the perfect moment to channel your excitement for the Cheesy Taco Potatoes!

Step 7: Stuff the Potatoes
Now it’s time to fill the fluffed potatoes! Spoon a generous amount of the seasoned ground beef into each potato half, making sure to distribute it evenly. Once filled, top the beef with a hearty sprinkle of shredded cheddar cheese. This melty layer is what elevates your Cheesy Taco Potatoes to a whole new level of deliciousness.

Step 8: Melt the Cheese
Return the stuffed potatoes to the oven and bake for an additional 10-15 minutes. Keep an eye on them, and as the cheese melts and bubbles with a lovely golden hue, you’ll be met with a mouth-watering aroma. This is when the Cheesy Taco Potatoes truly start to come together!

Step 9: Add Final Toppings
Finally, take your cheesy, golden potatoes out of the oven and let them cool for just a moment. Top each potato with fresh salsa, a dollop of sour cream, and a sprinkle of chopped cilantro or green onions. These final touches not only enhance the flavor but also add a vibrant presentation to your comforting dish.

Cheesy Taco Potatoes: Fun Customizations

Feel free to explore these delightful variations to make your Cheesy Taco Potatoes even more scrumptious and tailored to your taste!

  • Vegetarian Delight: Replace ground beef with black beans or lentils for a hearty, veggie-packed option that even meat lovers will savor.

  • Spicy Kick: Add diced jalapeños or a drizzle of hot sauce to the beef mixture to turn up the heat and give your potatoes an exciting twist.

  • Sweet Potato Swap: Try using sweet potatoes instead of russets for a naturally sweeter flavor and a vibrant color that will brighten up your meal.

  • Taco Bar Extravaganza: Set up a taco bar with toppings like guacamole, diced avocados, and different cheese options. Let everyone customize their own potato for a fun family activity!

  • Flavor Boost: Mix some corn or diced bell peppers into the beef filling for additional texture and a delightful burst of flavor, making each bite even more satisfying.

  • Creamy Alternative: Swap sour cream for Greek yogurt or a dairy-free alternative such as cashew cream for a lighter yet equally creamy topping.

  • Herbaceous Upgrade: Use fresh herbs like chives or parsley instead of cilantro to add a unique flavor profile to the potatoes. Each herb brings its own special touch.

  • Cheddar Blend: Experiment with different cheeses! Try Monterey Jack or Pepper Jack to add a kick of flavor that complements the taco seasoning beautifully.

These adaptations will not only enhance your Cheesy Taco Potatoes but also create a lively and engaging dinner experience! If you're interested in more cheesy goodness, don’t miss our Cheesy Corn Fritters or Taco Spaghetti Cheesy. Enjoy the creativity!

How to Store and Freeze Cheesy Taco Potatoes

Fridge: Store any leftover Cheesy Taco Potatoes in an airtight container for up to 3 days. Make sure they cool completely before sealing to maintain their texture.

Freezer: If you want to freeze them, wrap the individual stuffed potatoes tightly in plastic wrap or foil and place them in a freezer-safe bag. They can last up to 2 months!

Reheating: For best results, reheat frozen potatoes in the oven at 350°F (175°C) for about 25-30 minutes, until heated through. This ensures the cheese remains gooey and delicious!

Make-Ahead: You can prepare and stuff the potatoes ahead of time, then cover and refrigerate for up to 2 days. Bake them fresh just before serving for ultimate warmth and flavor.

Make Ahead Options

Cheesy Taco Potatoes are perfect for meal prep, saving you time on busy evenings! You can bake the potatoes up to 24 hours in advance, allowing them to cool completely before storing them in an airtight container in the refrigerator. The filling can be prepared ahead as well; cook the ground beef and sauté it with taco seasoning, then store it in the fridge for up to 3 days. When you're ready to serve, simply reheat the potatoes in the oven until warmed through, stuff them with the beef mixture, and top with cheese. This ensures your Cheesy Taco Potatoes are just as delicious, with crispy skins and melty cheese, ready to enjoy with minimal hassle!

What to Serve with Cheesy Taco Potatoes

There's something special about creating a full meal that complements the comfort of these delicious potatoes.

  • Crispy Tortilla Chips: Perfect for dipping into salsa, these chips add a satisfying crunch to your meal that contrasts beautifully with the creamy potatoes.
  • Fresh Green Salad: A light and refreshing salad with mixed greens, tomatoes, and vinaigrette balances the richness of the Cheesy Taco Potatoes.
  • Grilled Corn on the Cob: Juicy, sweet corn brings warmth and a touch of summer to the table, making it a delightful sidekick to your potatoes.
  • Spicy Black Bean Soup: This hearty soup not only enhances the meal but also offers a comforting spicy kick that pairs well with the cheesy goodness.
  • Mexican Street Corn Salad: Bright and flavorful, this salad combines lime, cotija cheese, and chili for a vibrant topping that echoes the flavors of your stuffed potatoes.
  • Margaritas or Sparkling Water: Pair these hearty potatoes with a refreshing margarita or sparkling water with lime for a fun, festive drink option that ties the meal together.
  • Fruit Salsa: A sweet and spicy medley of fruits like mango and pineapple offers a tropical twist that cuts through the savory elements of the dish.
  • Chocolate Avocado Mousse: For dessert, this creamy chocolate mousse is a rich, decadent finish that satisfies your sweet tooth without being overly heavy.

Let each side dish enhance your experience, creating a well-rounded meal bursting with flavors and textures!

Expert Tips for Cheesy Taco Potatoes

  • Perfect Potato Prep: Always scrub and pierce your potatoes before baking to ensure even cooking and prevent them from bursting in the oven.

  • Flavor Boosters: For richer flavor, try adding a splash of lime juice to your taco seasoning mix. It elevates the taste of your Cheesy Taco Potatoes!

  • Customize Wisely: Don’t be afraid to mix in your family's favorite ingredients like corn or bell peppers into the beef filling. It’s all about personalization!

  • Avoid Overcooking: Keep an eye on your baked potatoes; overcooking can lead to a mushy texture, especially when filling them later.

  • Cheese Alternatives: Prefer a healthier twist? Substitute regular cheese with a dairy-free option or simply reduce the cheese amount; your Cheesy Taco Potatoes will still shine!

Cheesy Taco Potatoes Recipe FAQs

What type of potatoes should I use for Cheesy Taco Potatoes?
For Cheesy Taco Potatoes, I recommend using Russet potatoes as they become perfectly fluffy when baked. If you're in the mood for a twist, substitute them with sweet potatoes for a sweeter flavor!

How should I store leftovers of Cheesy Taco Potatoes?
Absolutely! Store any leftover Cheesy Taco Potatoes in an airtight container in the fridge for up to 3 days. Make sure they cool to room temperature before sealing to help maintain their texture.

Can I freeze Cheesy Taco Potatoes, and how?
Yes, you can freeze Cheesy Taco Potatoes! Wrap each stuffed potato tightly in plastic wrap or aluminum foil, then place them in a freezer-safe bag. They will remain good for up to 3 months. When you're ready to enjoy them, simply reheat in the oven at 350°F (175°C) for around 25-30 minutes until heated through.

What if my Cheesy Taco Potatoes come out dry?
If your potatoes end up dry, it might be because they were baked too long. To avoid this, keep an eye on them, ensuring they become tender without overbaking. You can always add a dollop more of sour cream or salsa on top when serving for extra moisture and flavor.

Are there any dietary considerations for Cheesy Taco Potatoes?
Certainly! For a vegetarian option, swap the ground beef for black beans or cooked lentils. Always check for allergies related to dairy or certain toppings, and feel free to customize with non-dairy cheese or Greek yogurt if needed. Your family can enjoy this dish without compromise!

Cheesy Taco Potatoes

Cheesy Taco Potatoes: Your New Family Favorite Comfort Dish

Cheesy Taco Potatoes are a comforting and customizable dish blending the indulgence of melted cheese with savory toppings.
Print Recipe Pin Recipe
Prep Time 15 minutes mins
Cook Time 1 hour hr
Cooling Time 5 minutes mins
Total Time 1 hour hr 20 minutes mins
Servings: 4 potatoes
Course: Dinner
Cuisine: American
Calories: 450
Ingredients Equipment Method Nutrition Notes

Ingredients
  

For the Potatoes
  • 4 count Russet Potatoes Consider sweet potatoes for a sweeter twist.
  • 2 tablespoons Olive Oil Feel free to use vegetable oil if preferred.
  • 1 teaspoon Salt
  • 1 teaspoon Black Pepper
For the Filling
  • 1 pound Ground Beef Swap for black beans or lentils for a vegetarian option.
  • 1 packet Taco Seasoning Mix your own with chili powder, cumin, and garlic powder if needed.
For the Toppings
  • 1 cup Shredded Cheddar Cheese Switch to Monterey Jack or dairy-free cheese for a lighter choice.
  • 1/2 cup Sour Cream Greek yogurt makes a great tangy substitute.
  • 1/4 cup Chopped Green Onions Any fresh herbs can work beautifully here.
  • 1 cup Diced Tomatoes Fresh or canned both do the job well.
  • 1/2 cup Sliced Black Olives Omit if you're not a fan.
  • 1/4 cup Chopped Cilantro Can be swapped with parsley or omitted based on preference.
For Serving
  • 1 cup Fresh Salsa Make it fresh or grab your favorite store-bought version.

Equipment

  • Oven
  • Baking Sheet
  • Skillet
  • Fork

Method
 

Step-by-Step Instructions for Cheesy Taco Potatoes
  1. Preheat the oven to 400°F (200°C).
  2. Scrub and dry the Russet potatoes, pierce them with a fork, rub with olive oil, and season with salt and pepper.
  3. Place the prepared potatoes on a baking sheet and bake for 45-60 minutes until fork-tender.
  4. While the potatoes bake, heat a skillet over medium heat and brown the ground beef for about 5-7 minutes, draining excess fat.
  5. Add the taco seasoning and a splash of water to the beef, allowing it to simmer for about 5 minutes.
  6. Slice the baked potatoes lengthwise, fluff the insides with a fork.
  7. Stuff each potato half with the seasoned ground beef and sprinkle shredded cheddar cheese on top.
  8. Return to the oven and bake for an additional 10-15 minutes until the cheese is melted.
  9. Add fresh salsa, a dollop of sour cream, and optional cilantro or green onions on top before serving.

Nutrition

Serving: 1potatoCalories: 450kcalCarbohydrates: 50gProtein: 25gFat: 20gSaturated Fat: 10gPolyunsaturated Fat: 1.5gMonounsaturated Fat: 5gCholesterol: 70mgSodium: 800mgPotassium: 800mgFiber: 7gSugar: 3gVitamin A: 500IUVitamin C: 20mgCalcium: 200mgIron: 3mg

Notes

For best results, scrub and pierce potatoes before baking. Customize fillings with family favorites.

Tried this recipe?

Let us know how it was!

Tender Pot Roast Slow Cooker Recipe for Ultimate Comfort

December 3, 2025 by Grace Snow Leave a Comment

The aroma of a home-cooked meal can evoke cherished memories, transporting me back to family gatherings filled with laughter and warmth. Today, I’m excited to share my recipe for Slow Cooker Pot Roast, a quintessential comfort meal that wraps your kitchen in a savory embrace. With just a little prep time, this dish transforms tender chuck roast and hearty vegetables into a soul-soothing feast that practically cooks itself. It’s perfect for busy weeknights and is guaranteed to be a crowd-pleaser at cozy family dinners. Plus, this gluten-free recipe ensures that everyone can enjoy a plateful of nostalgia without worry. Are you ready to dive into the simplicity and deliciousness of this pot roast slow cooker masterpiece? Let’s get cooking!

Why is Pot Roast Slow Cooker a Must-Try?

Simplicity at Its Finest: This pot roast slow cooker recipe requires minimal prep and effort, making it the perfect solution for busy cooks.

Unforgettable Flavor: The slow cooking process melds the rich, savory flavors of beef, herbs, and vegetables, creating a delicious aroma that will have your family gathering around the table.

Comfort in Every Bite: Enjoy fork-tender beef paired with perfectly cooked root vegetables drowned in a luscious gravy—just like your grandma used to make!

Versatile Enjoyment: Serve it with crusty bread, or try it over mashed potatoes for an even heartier experience. And don't forget to check out my Roasted Sweet Potatoes as a delightful side!

Leftover Magic: This recipe makes great leftovers! Store it away for easy meals later in the week, or consider making a comforting stew with the extras, just like my Crock Pot Chicken.

With its mouthwatering appeal and ease of preparation, you’ll wonder how you ever lived without this pot roast slow cooker gem!

Pot Roast Slow Cooker Ingredients

For the Meat

  • Chuck Roast (3–4 lb) – The ideal cut for slow cooking, ensuring tenderness and rich flavor thanks to its marbling.

For the Vegetables

  • Yellow Onion (1, sliced) – Adds a sweet depth that dissolves into a flavorful broth as it cooks.
  • Carrots (4, cut into chunks) – Contributes natural sweetness and visual appeal; larger pieces prevent mushiness.
  • Gold Potatoes (4, quartered) – Maintains shape while absorbing the flavorful broth; avoid overcutting for best texture.
  • Garlic (3 cloves, minced) – Enhances the dish’s earthy richness; use crushed cloves for a milder flavor if desired.

For the Broth and Seasoning

  • Beef Broth (2 cups) – Forms the savory base; opt for low-sodium for better control over the flavors.
  • Worcestershire Sauce (1 tbsp) – Adds depth with a slight tang that perfectly balances the richness.
  • Salt (1 tsp) – Essential for enhancing the overall flavor profile.
  • Black Pepper (½ tsp) – Complements the other seasonings for a well-rounded taste.
  • Dried Thyme (1 tsp) – A classic herb for beef that brings woodsy undertones to the dish.
  • Bay Leaf (1) – Introduces aromatic depth as it cooks.

This pot roast slow cooker recipe is sure to bring warmth and comfort to your family dinners!

Step‑by‑Step Instructions for Pot Roast Slow Cooker

Step 1: Prepare the Chuck Roast
Pat the chuck roast dry with paper towels, ensuring it's free of moisture for better searing. Generously season the roast with salt and black pepper on all sides, creating a flavorful base for your pot roast slow cooker dish. This important step enhances the overall taste of the meat throughout the cooking process.

Step 2: Sear the Roast
In a large skillet, heat 1 tablespoon of olive oil over medium-high heat until it shimmers. Carefully place the seasoned roast in the skillet and sear for 2-3 minutes per side, or until a golden brown crust forms. This step helps to lock in the juices and flavors as the pot roast slow cooker works its magic.

Step 3: Layer the Vegetables
While the roast is searing, prepare your slow cooker by layering sliced yellow onions at the bottom. Next, arrange the carrot chunks and quartered gold potatoes on top of the onions, creating a colorful and hearty vegetable base. This arrangement will ensure that the vegetables absorb all the delicious flavors during cooking.

Step 4: Add Aromatics and Seasonings
Sprinkle the minced garlic evenly over the layered vegetables, followed by dried thyme and Worcestershire sauce. This combination will infuse the vegetables with rich aroma and depth of flavor as your pot roast slow cooker does its job. Make sure the seasonings are evenly distributed for maximum impact.

Step 5: Place the Roast on Top
Carefully transfer the seared chuck roast to the slow cooker, positioning it right on top of the vegetables. This setup allows the natural juices from the roast to flow down onto the veggies as they cook together, enhancing the flavors of your pot roast slow cooker masterpiece.

Step 6: Add the Broth
Pour in 2 cups of beef broth around the roast, ensuring that the vegetables are nearly covered but the roast remains above the liquid. The broth will create a rich, flavorful base while maintaining the dish's perfect balance. This step is crucial for achieving that comforting, juicy end result.

Step 7: Start Cooking
Cover the slow cooker with the lid and set it to cook on low for 8 hours or high for 4-5 hours. Avoid lifting the lid during cooking, as this can release steam and affect the cooking time. The slow, even heat will make the meat fork-tender and allow all flavors to meld beautifully.

Step 8: Final Touches and Serving
Once the cooking time is up, carefully remove the bay leaf from the pot roast slow cooker. Let the roast rest for about 10 minutes before slicing; this step retains the flavorful juices, ensuring each bite is moist and succulent. Serve your delicious pot roast with the cooked vegetables and enjoy the heartwarming flavors.

How to Store and Freeze Pot Roast Slow Cooker

Fridge: Store leftover pot roast in an airtight container for up to 4 days. This keeps the meat moist and retains the flavors of the gravy and vegetables.

Freezer: If you want to keep it longer, freeze pot roast for up to 3 months. Place it in a freezer-safe container or wrap it tightly in plastic wrap and aluminum foil to prevent freezer burn.

Thawing: When you're ready to enjoy your frozen pot roast again, thaw it in the refrigerator overnight. This gradual thawing helps maintain the meat's texture and juiciness.

Reheating: To reheat, warm the pot roast slow cooker on the stove over low heat until heated through. Add a splash of beef broth if needed to rejuvenate the gravy.

Pot Roast Slow Cooker Variations

Feel free to personalize this comforting recipe and make it your own with these delightful variations!

  • Different Cuts: Substitute brisket or bottom round for chuck roast to explore new flavors. Each cut brings its own unique texture, ensuring a delicious result.

  • Root Veggies Galore: Add parsnips or turnips into the mix for extra sweetness and depth. Their unique flavors can elevate the dish, bringing a fresh twist to classic comfort.

  • Herb Boost: Sprinkle in flavors like rosemary or parsley for a fragrant finish. These herbs not only add vibrancy but also enhance the overall earthy notes of your pot roast.

  • Spicy Kick: Add a few slices of jalapeño or a teaspoon of red pepper flakes to spice things up. This gentle heat can add excitement to your comforting dish.

  • Luscious Gravy: For a thicker gravy, mix a tablespoon of cornstarch with cold water and stir it into the broth in the last 30 minutes of cooking. This trick ensures you grab every bit of flavor on your plate!

  • Wine Wonders: Deglaze the skillet after searing your roast with a splash of red wine before pouring into the slow cooker. This adds a rich depth that transforms your dish into a gourmet delight.

  • Paleo-Friendly: Swap traditional beef broth for bone broth for an even richer, nourishing base that's perfect for a paleo diet. This adds health benefits without compromising taste.

  • Vegetarian Option: Season robust mushrooms like shiitake and a plant-based protein in place of beef for a hearty vegetarian alternative that doesn’t skimp on flavor.

With these variations, your pot roast slow cooker creation can be as unique and exciting as the memories it will create. For a perfect side, consider pairing it with some flavorful Roasted Sweet Potatoes or my comforting One Pot Salmon recipe to round out the meal. Enjoy crafting your delicious, heartwarming dish!

Expert Tips for Pot Roast Slow Cooker

  • Searing is Key: Sear the roast well to develop a flavorful crust, which enriches the overall taste of your pot roast slow cooker dish.

  • Vegetable Size Matters: Cut vegetables into larger chunks to prevent them from becoming mushy during the long cooking process.

  • Don’t Peek: Avoid lifting the lid while cooking; steam is essential for proper cooking and tenderness of the meat.

  • Rest for Juiciness: Allow the roast to rest for 10 minutes before slicing. This helps the juices redistribute, keeping the beef moist.

  • Season Wisely: Use low-sodium beef broth to control salt levels; this way, you're in charge of seasoning your pot roast slow cooker perfectly without overwhelming flavors.

What to Serve with Tender Pot Roast Slow Cooker?

Transform your comforting pot roast into an unforgettable meal with these delightful sides and pairings that complement its rich flavors beautifully.

  • Creamy Mashed Potatoes: The ultimate comfort food, these velvety potatoes soak up the flavorful gravy perfectly, enhancing every bite of the pot roast slow cooker.

  • Roasted Brussels Sprouts: With their caramelized edges and earthy flavor, these sprouts bring a satisfying crunch that beautifully contrasts the tender roast.

  • Honey Glazed Carrots: Adding a touch of sweetness, these tender-glazed carrots make for a colorful, palate-pleasing side that brightens the plate.

  • Fresh Garden Salad: Crisp greens and bright veggies drizzled with a zesty vinaigrette provide a refreshing contrast to the hearty pot roast slow cooker.

  • Crusty Bread: A loaf of warm, crusty bread is perfect for sopping up every delicious drop of gravy, rounding out this comforting meal.

  • Red Wine: A smooth, medium-bodied red wine enhances the savory flavors of the roast, making your dining experience feel extra special.

  • Chocolate Cake: For dessert, indulge in a rich chocolate cake that offers a decadent sweet finish to this sumptuous meal. It adds a delightful endnote to all that savory goodness!

Make Ahead Options

These Pot Roast Slow Cooker preparations are perfect for busy home cooks looking to save time without sacrificing flavor! You can season and sear the chuck roast up to 24 hours in advance; simply wrap it tightly in plastic wrap and store it in the refrigerator. Additionally, you can chop the vegetables (onions, carrots, and potatoes) and keep them in an airtight container for up to 3 days. When you’re ready to cook, layer the vegetables in the slow cooker, add the roast, and pour in the beef broth. This method ensures your pot roast slow cooker dish remains just as delicious, offering you the comforting taste of home-cooked goodness with minimal effort on busy nights!

Pot Roast Slow Cooker Recipe FAQs

What cut of beef is best for a pot roast slow cooker?
Absolutely! Chuck roast is the ideal cut for this recipe due to its ample marbling, which renders the meat tender and flavorful during the slow cooking process. The more marbling, the better the result!

How should I store leftovers from the pot roast slow cooker?
Leftovers can be stored in airtight containers for up to 4 days in the fridge. Make sure to seal them well to keep the flavors intact and prevent drying out. It’s always a joy to enjoy the comforting taste of pot roast for leftovers!

Can I freeze pot roast slow cooker leftovers?
Yes, you can! I recommend freezing your pot roast for up to 3 months. To do this, let it cool completely, then place it in a freezer-safe container or tightly wrap in plastic wrap and aluminum foil. This prevents freezer burn and keeps the flavors fresh!

What’s the best way to reheat frozen pot roast slow cooker?
When you're ready to enjoy your frozen pot roast, thaw it in the refrigerator overnight to maintain its juicy texture. Once thawed, reheat it gently on the stove over low heat, adding a splash of beef broth if necessary to bring back its rich gravy consistency.

How can I avoid mushy vegetables in my pot roast slow cooker?
Great question! To prevent mushy veggies, cut them into larger chunks and layer them properly in the slow cooker. By placing the denser vegetables like potatoes at the bottom and adding sturdier carrots in larger pieces, you'll achieve that perfect texture and retain their vibrant flavors.

Is pot roast slow cooker recipe gluten-free?
Very! This recipe is inherently gluten-free as long as you use gluten-free beef broth and Worcestershire sauce. Always check the labels of your ingredients to ensure they meet your dietary needs, so everyone can enjoy this comforting dish!

Pot Roast Slow Cooker

Tender Pot Roast Slow Cooker Recipe for Ultimate Comfort

This Pot Roast Slow Cooker recipe combines tenderness with rich flavors, perfect for family dinners.
Print Recipe Pin Recipe
Prep Time 20 minutes mins
Cook Time 8 hours hrs
Resting Time 10 minutes mins
Total Time 8 hours hrs 30 minutes mins
Servings: 6 servings
Course: Dinner
Cuisine: American
Calories: 350
Ingredients Equipment Method Nutrition Notes

Ingredients
  

For the Meat
  • 3–4 lb Chuck Roast Ideal cut for slow cooking.
For the Vegetables
  • 1 Yellow Onion, sliced Adds sweetness.
  • 4 Carrots, cut into chunks Natural sweetness.
  • 4 Gold Potatoes, quartered Maintains shape.
  • 3 cloves Garlic, minced Enhances earthy flavors.
For the Broth and Seasoning
  • 2 cups Beef Broth Opt for low-sodium.
  • 1 tbsp Worcestershire Sauce Adds depth.
  • 1 tsp Salt Enhances overall flavor.
  • ½ tsp Black Pepper For balanced taste.
  • 1 tsp Dried Thyme Brings woodsy undertones.
  • 1 Bay Leaf Introduces aromatic depth.

Equipment

  • Slow Cooker
  • Skillet

Method
 

Cooking Instructions
  1. Pat the chuck roast dry and season with salt and black pepper.
  2. Sear the roast in a skillet with olive oil over medium-high heat for 2-3 minutes per side.
  3. Layer sliced onions in the slow cooker, followed by carrots and potatoes.
  4. Sprinkle minced garlic, thyme, and Worcestershire sauce over vegetables.
  5. Place the seared roast on top of the vegetables.
  6. Pour in beef broth ensuring the vegetables are nearly covered.
  7. Cover and cook on low for 8 hours or high for 4-5 hours.
  8. Remove the bay leaf and let the roast rest for 10 minutes before slicing.

Nutrition

Serving: 1servingCalories: 350kcalCarbohydrates: 30gProtein: 40gFat: 15gSaturated Fat: 6gPolyunsaturated Fat: 1gMonounsaturated Fat: 8gCholesterol: 120mgSodium: 800mgPotassium: 800mgFiber: 5gSugar: 4gVitamin A: 800IUVitamin C: 10mgCalcium: 50mgIron: 3mg

Notes

This pot roast recipe makes great leftovers and can be turned into a stew.

Tried this recipe?

Let us know how it was!

Crispy Parmesan Crusted Baked Salmon That’ll Wow Your Taste Buds

December 3, 2025 by Grace Snow Leave a Comment

The aroma of lemon and garlic wafting through my kitchen brings back memories of family dinners filled with laughter and joy. Today, I’m excited to share my recipe for Crispy Parmesan Crusted Baked Salmon, a dish that effortlessly combines the comfort of home cooking with a healthy touch. Perfect for weeknight meals or special occasions, this easy recipe provides an impressive yet simple way to serve salmon that’s both low in fat and packed with flavor. With just a few fresh ingredients, you can create a gourmet experience right at home, ensuring everyone leaves the table satisfied. Are you ready to elevate your dinner game with this delightful dish? Keep scrolling to see how it’s done!

Why Is This Salmon Recipe a Must-Try?

Quick Preparation: With just a few simple steps, you’ll have a healthy meal on the table in 30 minutes or less.

Crispy Texture: The combination of finely grated Parmesan and fresh herbs creates a mouthwatering crust that contrasts beautifully with the tender salmon underneath.

Flavor Explosion: The zesty lemon juice and aromatic garlic powder elevate the flavor profile, making each bite a delight.

Versatile Options: Feel free to switch up the fish with options like trout or tilapia, or add fresh herbs such as dill to give it your personal touch. This recipe is fantastic alongside sides like Crispy Fish Taco Bowls or One Pot Salmon.

Crowd-Pleasing: Perfect for family dinners or impressing guests, this dish marries health and indulgence effortlessly!

Storage Friendly: Leftovers can be easily refrigerated and reheated without sacrificing that crispy topping, so it's a win-win for meal prep lovers.

Crispy Parmesan Crusted Baked Salmon Ingredients

• Here’s what you’ll need for this healthy delight!

For the Salmon

  • Salmon Fillet – Fresh salmon fillets yield the best flavor and texture for this dish.
  • Olive Oil – Drizzle this for moisture and to help the crust adhere beautifully.
  • Lemon Juice – Fresh lemon juice brightens the salmon's flavor; bottled works in a pinch.

For the Topping

  • Parmesan Cheese – Finely grated Parmesan creates that perfect crispy crust that everyone loves.
  • Dried Parsley – Adds color and flavor; fresh parsley can be used for an extra boost.
  • Garlic Powder – Gives an aromatic flavor, but feel free to substitute with minced garlic if needed.
  • Salt & Pepper – Essential for enhancing all the flavors; adjust to your preference!

Perfect for a healthy meal, these ingredients come together in the Crispy Parmesan Crusted Baked Salmon recipe for a dish that offers taste and nutrition without compromise!

Step‑by‑Step Instructions for Crispy Parmesan Crusted Baked Salmon

Step 1: Preheat the Oven
Begin by preheating your oven to 400°F (200°C). This crucial step ensures that your Crispy Parmesan Crusted Baked Salmon gets that perfect golden crust. While waiting for the oven to reach temperature, gather all your ingredients and feel free to line the baking sheet with parchment paper for easy cleanup.

Step 2: Prepare the Baking Sheet
Line a baking sheet with parchment paper to prevent sticking and make for easy cleanup. Place the fresh salmon fillet skin-side down on the lined sheet. The parchment paper will help the salmon's skin get crispy without sticking, while also making sure the fish stays intact when serving.

Step 3: Drizzle with Olive Oil and Lemon Juice
Generously drizzle olive oil and fresh lemon juice over the salmon fillet. The oil adds moisture while the lemon brightens the overall flavor of the dish. Be sure to coat the entire surface so the crust adheres well later on.

Step 4: Mix the Topping Ingredients
In a small bowl, combine finely grated Parmesan cheese, dried parsley, garlic powder, and a sprinkle of salt and pepper. Stir until the ingredients are evenly mixed. This delightful blend creates the crispy crust that makes the Crispy Parmesan Crusted Baked Salmon so irresistible.

Step 5: Apply the Parmesan Mixture
Sprinkle the Parmesan topping over the salmon fillet, pressing it down gently to ensure it sticks well. An even layer will guarantee each bite delivers that wonderful crispy texture. This step is pivotal for achieving that gourmet look and flavor.

Step 6: Bake the Salmon
Carefully place the baking sheet into the preheated oven and bake for approximately 12 to 15 minutes. Keep an eye on the salmon; it’s ready when the topping is golden brown, and the fish flakes easily with a fork.

Step 7: Serve and Enjoy
Once baked to perfection, remove your Crispy Parmesan Crusted Baked Salmon from the oven. Let it rest for a couple of minutes before serving. This brief cooling period allows the juices to settle, enhancing the flavor and texture for a delightful dining experience.

What to Serve with Crispy Parmesan Crusted Baked Salmon?

As you prepare the perfect meal, let your senses explore these delightful pairings that will elevate your dining experience.

  • Roasted Asparagus: The vibrant, slightly charred flavors of roasted asparagus add a fresh contrast to the rich salmon.
  • Quinoa Salad: Light and nutty, quinoa pairs well with the savory topping, creating a wholesome balance of textures in each bite.
  • Lemon-Herb Roasted Potatoes: Crispy on the outside, creamy on the inside, these potatoes enhance the dish with complementary flavors.
  • Creamy Garlic Mashed Potatoes: The rich, creamy texture of these mashed potatoes beautifully contrasts the crispy crust of the salmon, making every mouthful a delight.
  • Steamed Green Beans: Crisp-tender green beans provide a refreshing crunch, brightening the plate and palate alongside the baked salmon.
  • Light Vinaigrette Salad: A refreshing salad with a tangy vinaigrette cleanses the palate while harmonizing beautifully with the flavors of the dish.
  • Citrus-infused Sparkling Water: This effervescent drink offers a refreshing lift, enhancing the vibrant flavors of the salmon and brightening your dining experience.
  • Lemon Tart: To finish your meal on a sweet note, a zesty lemon tart offers a delightful balance of acidity and sweetness, perfect for and all seafood lovers.

Make Ahead Options

These Crispy Parmesan Crusted Baked Salmon fillets are perfect for meal prep lovers looking to save time during busy weeknights! You can season the salmon and apply the Parmesan topping up to 24 hours in advance—simply cover the prepared fillets with plastic wrap and refrigerate. This allows the flavors to meld beautifully while preventing the topping from losing its crispness. When you're ready to serve, simply preheat the oven, bake the salmon directly from the fridge for 12 to 15 minutes (no need to thaw), and enjoy restaurant-quality results with minimal effort. You'll be left with a delightful dish that’s just as delicious as when made fresh!

Variations for Crispy Parmesan Crusted Baked Salmon

Discover how to make this delightful dish your own by trying out these fun twists and swaps!

  • Fish Swap: Substitute salmon with tilapia or trout for a different flavor profile that’s just as delicious! Each type brings its unique characteristics to the table—experiment to find your favorite!

  • Herb Boost: Fresh herbs like dill or cilantro can elevate the dish’s freshness. Simply mix them into the topping or sprinkle over the salmon before serving for an aromatic flavor kick!

  • Zesty Upgrade: Adding lemon zest to the crust enhances that bright flavor. Just a teaspoon can take your dish from good to absolutely zesty!

  • Cheese Choices: Try using pecorino romano instead of Parmesan for a sharper, bolder crust. This twist will surprise your taste buds and offer a delightful change!

  • Veggie Crunch: Enhance the texture by incorporating crushed nuts like almonds or hazelnuts into the crust. It adds a delightful crunch that's hard to resist!

  • Spicy Kick: Add red pepper flakes to the topping for a little heat, perfect for those who enjoy a spicy edge to their meals. Balance the flavors by adjusting the amount to your taste.

  • Citrus Variations: Swap lemon juice with lime or orange juice for a refreshing twist. The citrus notes will bright up the flavors in a whole new way!

  • Gourmet Touch: Drizzle a balsamic reduction over the baked salmon before serving to introduce a sweet and tangy finish that pairs wonderfully with the crispy crust.

These options are just the beginning! Whether you're pairing this dish with sides like Crispy Fish Taco Bowls or Cocoa Crusted Steak, let your culinary creativity shine!

Storage Tips for Crispy Parmesan Crusted Baked Salmon

Fridge: Store leftovers in an airtight container within 2 hours of cooking. Enjoy them within 2-3 days for optimal freshness and flavor.

Freezer: If needed, you can freeze the salmon for up to 2 months. Place it in a freezer-safe container, ensuring it's tightly sealed to prevent freezer burn.

Reheating: For the best results, reheat in the oven at 350°F (175°C) for approximately 10-15 minutes, ensuring the crispiness of the topping on your Crispy Parmesan Crusted Baked Salmon is preserved.

Room Temperature: Avoid leaving the salmon out at room temperature for more than 2 hours to maintain safety and quality.

Expert Tips for Crispy Parmesan Crusted Baked Salmon

  • Perfect Preheat: Ensure your oven is fully preheated before baking to achieve that crispy topping that makes this salmon so irresistible.

  • Avoid Overcrowding: Give each salmon fillet room on the baking sheet. Overcrowding can lead to uneven cooking and a soggy crust.

  • Season Generously: Don’t skimp on the salt and pepper! A good seasoning enhances the flavors of this Crispy Parmesan Crusted Baked Salmon, making every bite pop.

  • Monitor Your Time: Keep an eye on the clock; baking for too long can dry out the salmon. Aim for 12-15 minutes for the best texture.

  • Reheat Wisely: If you have leftovers, reheat gently in the oven or air fryer to preserve that delightful crispiness.

  • Experiment with Herbs: Feel free to mix in fresh herbs like dill or cilantro for added flavor diversity in your Crispy Parmesan Crusted Baked Salmon.

Crispy Parmesan Crusted Baked Salmon Recipe FAQs

What kind of salmon is best to use for this recipe?
Absolutely! Fresh salmon fillets yield the best flavor and texture for your Crispy Parmesan Crusted Baked Salmon. Look for fillets that are brightly colored and free of dark spots or signs of browning. If fresh isn’t available, thawed frozen salmon is also a great option.

How should I store leftovers of Crispy Parmesan Crusted Baked Salmon?
I recommend storing any leftovers in an airtight container within 2 hours of cooking. They’ll stay fresh in the refrigerator for 2-3 days. If you're a meal prep lover, simply reheat gently in the oven or an air fryer at 350°F (175°C) for about 10-15 minutes to regain that delightful crispy texture.

Can I freeze the leftover salmon?
Yes, you can freeze your Crispy Parmesan Crusted Baked Salmon! Place it in a freezer-safe container, tightly sealed to prevent freezer burn, and it will be good for up to 2 months. When you’re ready to enjoy it again, let it thaw in the refrigerator overnight before reheating.

What if my salmon isn’t crispy enough after baking?
Very! If you find that your salmon isn’t crispy enough after the baking time, you can pop it under the broiler for an additional 1-2 minutes. Just keep an eye on it, as broilers can vary in strength and you don’t want to overcook the salmon!

Is this dish safe for people with allergies?
Always! This recipe contains fish and dairy (Parmesan cheese), which are common allergens. If you’re serving someone with allergies, consider using alternatives: a dairy-free cheese can replace Parmesan, and you might substitute the salmon with a safe fish option. Always check labels to ensure safety!

Crispy Parmesan Crusted Baked Salmon

Crispy Parmesan Crusted Baked Salmon That’ll Wow Your Taste Buds

A delightful Crispy Parmesan Crusted Baked Salmon that blends comfort and health, perfect for any dinner.
Print Recipe Pin Recipe
Prep Time 10 minutes mins
Cook Time 15 minutes mins
Total Time 25 minutes mins
Servings: 4 fillets
Course: Dinner
Cuisine: American
Calories: 350
Ingredients Equipment Method Nutrition Notes

Ingredients
  

For the Salmon
  • 4 fillets Salmon Fillet Fresh for best flavor
  • 2 tablespoons Olive Oil For moisture and crust adhesion
  • 2 tablespoons Lemon Juice Fresh or bottled
For the Topping
  • 1 cup Parmesan Cheese Finely grated
  • 2 tablespoons Dried Parsley Fresh can be used
  • 1 teaspoon Garlic Powder Can substitute with minced garlic
  • to taste Salt Essential for flavor
  • to taste Pepper Essential for flavor

Equipment

  • Oven
  • Baking Sheet
  • Parchment Paper
  • Mixing Bowl

Method
 

Step-by-Step Instructions
  1. Preheat your oven to 400°F (200°C).
  2. Line a baking sheet with parchment paper and place the salmon fillet skin-side down.
  3. Drizzle olive oil and lemon juice generously over the salmon fillet.
  4. In a small bowl, combine Parmesan cheese, dried parsley, garlic powder, salt, and pepper.
  5. Sprinkle the Parmesan topping over the salmon and press down gently.
  6. Place the baking sheet in the oven and bake for 12 to 15 minutes.
  7. Remove from the oven, let rest for a couple of minutes, then serve.

Nutrition

Serving: 1filletCalories: 350kcalCarbohydrates: 2gProtein: 30gFat: 25gSaturated Fat: 7gPolyunsaturated Fat: 3gMonounsaturated Fat: 15gCholesterol: 80mgSodium: 450mgPotassium: 700mgVitamin A: 500IUVitamin C: 2mgCalcium: 300mgIron: 1mg

Notes

Perfect for family dinners; leftovers can be refrigerated and reheated for meal prep lovers.

Tried this recipe?

Let us know how it was!

Mac and Cheese Meatloaf Casserole: Your Ultimate Family Comfort

December 3, 2025 by Grace Snow Leave a Comment

As I pulled a golden-brown casserole from the oven, the aroma of savory meat mingling with creamy cheese filled the kitchen, instantly transporting me back to simpler times. Enter the Mac and Cheese Meatloaf Casserole, a delightful mashup that brings two beloved comfort foods together into one irresistible dish. This recipe is not just about satisfying hunger; it’s an easy, family-friendly option that promises to please even the pickiest eaters. With quick prep time and endless customization possibilities—think vibrant veggies or alternative cheeses—it’s perfect for weeknight dinners or cozy gatherings. Ready to indulge in a deliciously nostalgic culinary adventure? Let’s dive in!

Why is this casserole so irresistible?

Comforting Layers: This Mac and Cheese Meatloaf Casserole combines two heartwarming classics that everyone loves. Creamy, Cheesy Goodness: The melted cheese envelops the macaroni, creating a velvety texture. Family-Friendly: It's a dish that pleases both kids and adults, making it ideal for family gatherings. Customizable: Add your favorite veggies or switch up the cheeses to suit your taste, just like in my Cornbread Breakfast Casserole. Quick Prep: Assembling this casserole takes minimal time, allowing you to enjoy more moments around the table. Crowd-Pleaser: Serve it at potlucks or cozy dinners, and watch it disappear in seconds!

Mac and Cheese Meatloaf Casserole Ingredients

For the Meatloaf Base
• Ground Beef – Provides protein and structure; can be substituted with ground turkey or lamb for lighter variations.
• Onion – Offers flavor and moisture; use shallots for a milder taste.
• Breadcrumbs – Acts as a binder for the meatloaf; panko can be used for a crunchier texture.
• Egg – Binds ingredients together; aquafaba (chickpea brine) can be used for a vegan version.
• Milk – Adds moisture to the meat mixture; almond or soy milk can substitute for a dairy-free option.
• Salt & Pepper – Essential seasonings that enhance flavors; adjust based on dietary preferences.

For the Cheese Sauce
• Butter – Used for the cheese sauce; can be replaced with olive oil for a healthier choice.
• Flour – Thickens the cheese sauce; cornstarch may be used as a gluten-free alternative.
• Cheese (Shredded) – Provides creaminess and flavor; experiment with mozzarella or gouda for different tastes.
• Paprika & Dry Mustard – Adds flavor depth to the cheese sauce; customize seasoning to personal preference.

For the Macaroni
• Macaroni – Main carbohydrate component that holds the cheese sauce; gluten-free pasta options are available for those with dietary restrictions.

Step‑by‑Step Instructions for Mac and Cheese Meatloaf Casserole

Step 1: Preheat the Oven
Begin by preheating your oven to 350°F (175°C). This temperature is ideal for ensuring that your Mac and Cheese Meatloaf Casserole cooks evenly throughout. While the oven heats, gather your ingredients and prepare a greased baking dish to make assembly smoother.

Step 2: Prepare the Meat Mixture
In a large mixing bowl, combine the ground beef, finely chopped onion, breadcrumbs, egg, and milk. Season generously with salt and pepper. Using your hands, mix everything until just combined, being careful not to overwork the meat, which could lead to a dense texture.

Step 3: Form the Meatloaf Base
Once combined, press the meat mixture firmly into the greased baking dish, forming an even layer. The surface should be smooth and level, which helps with even cooking. Bake in the preheated oven for about 20 minutes, or until the surface is lightly browned and cooked through.

Step 4: Cook the Macaroni
While the meatloaf base bakes, bring a pot of salted water to a boil. Add the macaroni and cook according to package directions until al dente. This typically takes about 6 to 8 minutes. Drain the pasta well, then set it aside to combine with the cheese sauce later.

Step 5: Make the Cheese Sauce
In a medium saucepan over medium heat, melt the butter until foamy, then whisk in the flour. Stir for about 1 minute until the mixture is bubbly, creating a roux. Gradually whisk in the milk, cooking until the sauce thickens and coats the back of a spoon, roughly 5 minutes. Add in salt, pepper, paprika, and dry mustard to enhance the flavor.

Step 6: Add Cheese to the Sauce
Once the cheese sauce has thickened, reduce the heat to low and stir in the shredded cheese until fully melted and creamy. The sauce should be rich and velvety, perfect for enveloping your macaroni. If it’s too thick, add a splash more milk to achieve your desired consistency.

Step 7: Combine Macaroni and Cheese Sauce
In a large mixing bowl, combine the drained macaroni with the creamy cheese sauce, stirring well until all the pasta is evenly coated. This step is crucial for achieving that delightful cheesy goodness throughout the casserole, making every bite deliciously satisfying.

Step 8: Assemble the Casserole
After the meatloaf base has baked for 20 minutes, carefully remove it from the oven. Pour the macaroni and cheese mixture evenly over the meatloaf, spreading it gently to cover the surface. The layers of flavors will meld beautifully during baking, creating a hearty meal.

Step 9: Add Topping and Bake Again
Sprinkle any remaining shredded cheese over the top of the assembled casserole for a gooey, golden finish. Return the dish to the oven and bake for an additional 25 minutes, or until the cheese is bubbly and slightly browned. The aroma will fill your kitchen with savory warmth.

Step 10: Cool and Serve
Once baked, remove the casserole from the oven and let it sit for about 10 minutes before serving. This will help set the layers and make serving easier. The combination of layers in your Mac and Cheese Meatloaf Casserole is now ready to delight your family and friends!

Mac and Cheese Meatloaf Casserole Variations

Feel free to explore the art of customization with these delightful twists on the classic casserole, ensuring it suits every palate!

  • Vegetable Boost: Add a cup of your favorite vegetables, like spinach or bell peppers, to the meat mixture for extra nutrition and color. This delightful addition brings in a fresh crunch that complements the richness of the dish beautifully.

  • Cheese Swap: Experiment with different cheese blends such as sharp cheddar, smoky gouda, or zesty pepper jack to infuse unique flavors. Each cheese will lend its own personality, making your casserole a versatile favorite.

  • Herb Infusion: Stir in fresh herbs like parsley, thyme, or basil into the cheese sauce or meat mixture for aromatic depth. A sprinkle of fresh ingredients can elevate your dish to a whole new level of comfort food joy.

  • Creamy Option: For an extra creamy texture, mix in a dollop of sour cream or cream cheese into the cheese sauce. This twist adds silkiness that will have everyone wanting seconds!

  • Spicy Kick: For those who enjoy a bit of heat, toss in some diced jalapeños or a dash of hot sauce in the cheese sauce. It’s a fun way to spice things up and cater to adventurous taste buds.

  • Gluten-Free Delight: Substitute traditional macaroni with gluten-free pasta to create a gluten-free version that everyone can enjoy. It’s just as delicious, ensuring that nobody misses out on this comforting treat.

  • Plant-Based Variation: For a vegetarian delight, swap out the meat for plant-based ground meat, and use vegetable broth instead of milk. You’ll keep all the flavors while catering to a meatless lifestyle that’s kind to the planet!

  • Loaded Toppings: Top your casserole with crispy fried onions or bacon bits before baking. This adds a delicious crunch and an extra burst of flavor, perfect for enticing the taste buds at the dinner table.

By giving your Mac and Cheese Meatloaf Casserole a personal twist, you can create a dish that’s uniquely yours, much like my beloved Spicy Miso Casserole and Sweet Potato Casserole. Enjoy the creativity of cooking!

Expert Tips for Mac and Cheese Meatloaf Casserole

  • Quality Ingredients: Use high-quality ground beef or substitutes to avoid a dry texture in the meatloaf. Avoid lean options, as they lack flavor and moisture.

  • Cook Pasta Al Dente: Ensure you cook the macaroni just until al dente as it will continue cooking in the oven. This helps maintain the right texture in your Mac and Cheese Meatloaf Casserole.

  • Layer Wisely: When pouring the macaroni and cheese over the meatloaf, spread it evenly to make sure every bite is deliciously cheesy and meaty, enhancing the overall flavor profile.

  • Rest Before Serving: Allow the casserole to cool for 10 minutes after baking. This resting period helps the layers set and makes for easier slicing and serving.

  • Customize Seasoning: Don't hesitate to adjust seasonings like salt and pepper in both the meatloaf and cheese sauce according to your taste. This small step can make a huge difference.

Make Ahead Options

These Mac and Cheese Meatloaf Casserole are perfect for busy weeknights and meal prep enthusiasts! You can prepare the meatloaf base and refrigerate it for up to 24 hours before baking, which allows the flavors to meld beautifully. Simply combine the ground beef, onion, breadcrumbs, egg, and milk, then press it into your baking dish. Meanwhile, you can cook the macaroni and make the cheese sauce, storing each component separately in the fridge for up to 3 days. When ready to bake, layer the macaroni and cheese mixture over the meatloaf, add the remaining cheese on top, and bake as instructed. This way, you’ll have that comforting satisfaction of homemade goodness with minimal last-minute effort!

Storage Tips for Mac and Cheese Meatloaf Casserole

Fridge: Store leftovers in an airtight container for up to 3 days. Ensure it's completely cooled before sealing to prevent moisture buildup.

Freezer: If you want to keep it longer, freeze the casserole for up to 3 months. Wrap it tightly in plastic wrap and foil to prevent freezer burn.

Reheating: Reheat individual portions in the microwave for 1-2 minutes or warm the entire casserole in a preheated oven at 350°F (175°C) for about 20 minutes, covered with foil to retain moisture.

Serving Suggestion: Enhance your meal by pairing it with a side salad or garlic bread to balance the richness of the Mac and Cheese Meatloaf Casserole.

What to Serve with Mac and Cheese Meatloaf Casserole?

Create the perfect dining experience to complement your deliciously hearty casserole.

  • Garlic Bread: A warm, buttery loaf adds a crunchy side that’s perfect for mopping up cheesy goodness.
  • Simple Green Salad: Crisp lettuce and refreshing veggies provide a light contrast, balancing the richness of the casserole.
  • Steamed Broccoli: Vibrant, tender florets not only add nutrition but also a pop of color, enhancing your plate visually.
  • Baked Beans: Their sweetness contrasts beautifully with savory flavors, creating a delightful mix of textures and tastes.
  • Roasted Brussels Sprouts: With their slight bitterness and crispy edges, they elevate the meal while providing a nutritional boost.
  • Apple Crisp: Finish your meal on a sweet note with this warm dessert that pairs perfectly with a scoop of vanilla ice cream.

With these delicious options, your Mac and Cheese Meatloaf Casserole dinner will feel complete and inviting!

Mac and Cheese Meatloaf Casserole Recipe FAQs

What type of ground beef is best for this casserole?
Absolutely! For the best flavor and moisture, I recommend using high-quality ground beef. Look for meat with at least 15% fat content; lower-fat varieties can result in a dry texture. If you prefer a lighter option, ground turkey or lamb are fantastic alternatives that still provide great flavor.

How long can I store leftovers of the casserole?
Leftovers can be stored in an airtight container in the fridge for up to 3 days. Allow the casserole to cool to room temperature before sealing, as this helps prevent excess moisture and keeps it fresh. Reheat in the microwave or oven until warmed through.

Can I freeze the Mac and Cheese Meatloaf Casserole?
Very! To freeze, let the casserole cool completely, then wrap it tightly in plastic wrap followed by aluminum foil to prevent freezer burn. It can be frozen for up to 3 months. When you're ready to enjoy it again, thaw in the refrigerator overnight and reheat in the oven, covered with foil, at 350°F (175°C) until heated through.

How do I ensure the macaroni doesn't get mushy after baking?
Good question! Cooking your macaroni al dente is key, as it allows for some texture to remain after baking. Typically, this means cooking it for about 1-2 minutes less than the package instructions suggest. This way, it doesn’t become overly soft when combined with the cheese sauce and baked in the casserole.

Can I customize the ingredients for dietary restrictions?
Absolutely! If you’re looking for a vegetarian version, substitute the ground meat with plant-based ground meat and use vegetable broth instead of milk. For a gluten-free option, swap regular macaroni with gluten-free pasta and use cornstarch instead of flour to thicken the sauce. Feel free to toss in your favorite vegetables, too, like spinach or bell peppers!

Mac and Cheese Meatloaf Casserole

Mac and Cheese Meatloaf Casserole: Your Ultimate Family Comfort

Enjoy the delightful Mac and Cheese Meatloaf Casserole, a mashup of comfort foods that pleases even the pickiest eaters.
Print Recipe Pin Recipe
Prep Time 15 minutes mins
Cook Time 45 minutes mins
Cooling Time 10 minutes mins
Total Time 1 hour hr 10 minutes mins
Servings: 6 slices
Course: Dinner
Cuisine: American
Calories: 400
Ingredients Equipment Method Nutrition Notes

Ingredients
  

For the Meatloaf Base
  • 1 lb Ground Beef Can substitute with ground turkey or lamb.
  • 1 medium Onion Finely chopped; shallots can be used for milder taste.
  • 1 cup Breadcrumbs Panko can be used for crunchier texture.
  • 1 large Egg Aquafaba can be used for a vegan version.
  • 1/2 cup Milk Almond or soy milk can be substituted for dairy-free option.
  • to taste Salt
  • to taste Pepper
For the Cheese Sauce
  • 1/4 cup Butter Can be replaced with olive oil.
  • 1/4 cup Flour Cornstarch may be used as gluten-free alternative.
  • 2 cups Cheese (Shredded) Experiment with mozzarella or gouda.
  • 1 teaspoon Paprika
  • 1 teaspoon Dry Mustard
For the Macaroni
  • 8 oz Macaroni Gluten-free pasta options available.

Equipment

  • Oven
  • Mixing Bowl
  • Baking Dish
  • Saucepan
  • pot
  • Whisk

Method
 

Step‑by‑Step Instructions
  1. Preheat your oven to 350°F (175°C).
  2. In a large mixing bowl, combine the ground beef, onion, breadcrumbs, egg, and milk. Season with salt and pepper.
  3. Press the meat mixture into a greased baking dish to form an even layer. Bake for about 20 minutes.
  4. Boil a pot of salted water, add macaroni, and cook until al dente (about 6-8 minutes). Drain and set aside.
  5. In a saucepan, melt butter and whisk in flour. Add milk gradually, cooking until thickened. Season with salt, pepper, paprika, and dry mustard.
  6. Stir in shredded cheese until melted and creamy.
  7. Combine drained macaroni with the cheese sauce until thoroughly coated.
  8. Pour the macaroni and cheese mixture over the meatloaf base, spreading evenly.
  9. Sprinkle remaining cheese over the top and bake for an additional 25 minutes.
  10. Let cool for 10 minutes before serving.

Nutrition

Serving: 1sliceCalories: 400kcalCarbohydrates: 30gProtein: 25gFat: 20gSaturated Fat: 10gPolyunsaturated Fat: 2gMonounsaturated Fat: 8gCholesterol: 80mgSodium: 600mgPotassium: 500mgFiber: 2gSugar: 3gVitamin A: 500IUVitamin C: 2mgCalcium: 300mgIron: 2mg

Notes

Quality ingredients enhance flavor. Customize seasoning to your taste preferences.

Tried this recipe?

Let us know how it was!

Cowboy BBQ Bacon Cheddar Chicken for a Flavor Explosion

December 2, 2025 by Grace Snow Leave a Comment

In the heart of the Wild West, meals were meant to be hearty and satisfying, and my Cowboy BBQ Bacon Cheddar Chicken pays homage to that spirit. Picture tender chicken breasts, sizzling away, then topped with a crispy bacon blanket, melty cheddar, and a drizzle of smoky BBQ sauce that ties it all together. This dish is not only a crowd-pleaser for family dinners but also simple enough to whip up after a busy day, making it the ultimate comfort food. Whether you’re looking for something to impress guests or just a tasty weeknight meal, this recipe fills your kitchen with warmth and deliciousness. Are you ready to transform your dinner routine with this cowboy-inspired delight?

Why is this chicken recipe a must-try?

Simplicity: This Cowboy BBQ Bacon Cheddar Chicken is a breeze to prepare, making it perfect for both novice and seasoned home cooks.

Flavor Explosion: The combination of smoky BBQ sauce, crispy bacon, and melty cheddar delivers a taste sensation that’s bold and unforgettable.

Crowd-Pleaser: Whether for family dinners or gatherings, this dish never fails to impress and satisfy everyone’s cravings.

Versatile Options: Feel free to customize with toppings like jalapeños or switch up the cheese for a new twist.

Quick Cooking: Ready in just over 30 minutes, it’s a fantastic option for busy weekdays and spontaneous dinner parties alike.

Once you’ve tried this dish, you’ll understand why it’s a gourmet favorite! Consider pairing it with simple green salads or serving it with Crock Pot Chicken for a delightful contrast of flavors and textures.

Cowboy BBQ Bacon Cheddar Chicken Ingredients

For the Chicken

  • Boneless, skinless chicken breasts – A juicy, protein-packed base that holds all the flavors.
  • Olive oil – Coats the chicken for a rich taste and ensures even cooking.
  • Garlic powder – Adds aromatic depth, enhancing the savory notes of the chicken.
  • Onion powder – Introduces a savory flavor without interrupting the chicken's texture.
  • Smoked paprika – Brings a mild smoky heat that enriches the dish's personality.
  • Salt – Essential for amplifying the natural flavors of every ingredient.
  • Black pepper – Contributes a subtle heat that perfectly balances the dish’s richness.

For the Topping

  • Bacon – Crispy, savory slices that give a delightful crunch and depth of flavor.
  • Shredded cheddar cheese – Melts beautifully over the chicken, making it ooey-gooey and rich.
  • Barbecue sauce – Infuses the dish with tangy sweetness, complementing the cheese and bacon.
  • Green onions, chopped – Adds a fresh crunch that brightens the flavors.
  • Red pepper flakes (optional) – For those who like a spicy kick, enhancing the Cowboy BBQ Bacon Cheddar Chicken experience.

Feel the excitement in your kitchen as you gather these ingredients, gearing up to create a meal that delights both the palate and the heart!

Step‑by‑Step Instructions for Cowboy BBQ Bacon Cheddar Chicken

Step 1: Preheat the Oven
Start by preheating your oven to 400°F (200°C). This temperature ensures that the Cowboy BBQ Bacon Cheddar Chicken cooks evenly and achieves that perfect golden-brown finish. While the oven heats up, gather your ingredients and get ready for the deliciousness that’s about to unfold.

Step 2: Cook the Bacon
In a skillet over medium heat, cook the bacon for about 5-7 minutes until it’s crispy and golden. Keep an eye on it to prevent burning, stirring occasionally. Once done, transfer the bacon to a plate lined with paper towels to drain excess grease and allow it to cool, enhancing its crunchiness.

Step 3: Crumble the Bacon
Let the bacon cool for a few minutes, then crumble it into small pieces. Set aside the crumbled bacon while you prepare the chicken. This crispy bacon will add a wonderful texture and flavor contrast to your Cowboy BBQ Bacon Cheddar Chicken once it’s baked.

Step 4: Prepare the Chicken
Take your boneless, skinless chicken breasts and coat them generously with olive oil on both sides. This not only adds richness but also helps the seasonings stick. Gently rub the oil into the chicken for an even layer, preparing it to soak up all those delicious flavors.

Step 5: Season the Chicken
Sprinkle the garlic powder, onion powder, smoked paprika, salt, and black pepper evenly over both sides of the chicken breasts. This seasoning blend will infuse the meat with savory depth and a hint of smokiness, elevating your Cowboy BBQ Bacon Cheddar Chicken to new flavor heights.

Step 6: Sear the Chicken
Using the same skillet that cooked the bacon, increase the heat to medium-high and sear the seasoned chicken for about 4-5 minutes on each side. Look for a beautiful golden-brown crust before flipping it. This step locks in juices and builds flavor, setting the stage for the toppings.

Step 7: Prepare Taco Toppings
While the chicken is searing, chop the green onions and prepare your barbecue sauce. The fresh green onions will provide a lovely crunch and brightness, while the barbecue sauce adds that essential tangy sweetness to your Cowboy BBQ Bacon Cheddar Chicken once it’s topped.

Step 8: Assemble the Chicken
After the chicken is seared, pour the barbecue sauce generously over each piece. Make sure to cover them completely for that flavorful kick. Next, sprinkle a generous amount of shredded cheddar cheese over the barbecue sauce, creating a cheesy barrier that holds all the deliciousness together.

Step 9: Add the Bacon
Scatter the crumbled bacon evenly over the melted cheese, ensuring every bite of the Cowboy BBQ Bacon Cheddar Chicken is packed with flavor. This crispy topping adds a delightful crunch that enhances the overall experience of the dish as it bakes to perfection.

Step 10: Bake
Place the skillet in the preheated oven and bake for 10-12 minutes. Keep an eye on it and look for the cheese to be beautifully melted and bubbly while the chicken is fully cooked and registers 165°F (74°C) internally, ensuring it’s safe and juicy.

Step 11: Garnish and Serve
Once baked, remove the skillet from the oven and top your Cowboy BBQ Bacon Cheddar Chicken with the chopped green onions and optional red pepper flakes for a kick. This adds freshness and vibrancy, transitioning the dish from oven to table.

Step 12: Let It Rest
Allow the chicken to rest for a few minutes after it comes out of the oven. This resting period ensures the juices redistribute, keeping your Cowboy BBQ Bacon Cheddar Chicken tender and juicy. Then, slice it and serve for a delicious family feast.

Make Ahead Options

Preparing Cowboy BBQ Bacon Cheddar Chicken ahead of time is a game-changer for busy weeknights! You can season and sear the chicken up to 24 hours in advance. Just store it in an airtight container in the refrigerator. Additionally, you can cook the bacon and crumble it a day ahead, then refrigerate it to maintain its crispiness. When you're ready to enjoy this delicious meal, simply take the chicken out, add the barbecue sauce, and layer with cheese and bacon. Bake in the oven for about 10-12 minutes until heated through and cheese is bubbly. This way, you'll savor restaurant-quality results with minimal effort!

What to Serve with Cowboy BBQ Bacon Cheddar Chicken

Bring your dinner table to life by complementing this mouthwatering dish with some fabulous sides!

  • Creamy Mashed Potatoes: The buttery, velvety texture creates a comforting contrast to the smoky, savory chicken, making each bite unforgettable.
  • Roasted Brussels Sprouts: The slight bitterness of roasted Brussels sprouts offers a delightful balance to the rich flavors of the chicken and bacon.
  • Garlic Breadsticks: Soft, warm breadsticks are perfect for soaking up that scrumptious BBQ sauce, adding a delightful crunch to your meal.
  • Coleslaw: A refreshing crunch and tangy dressing brighten the plate, providing a crisp counterpoint to the hearty chicken.
  • Corn on the Cob: Sweet, juicy corn brings a taste of summer right to your table, enhancing the overall flavor palette of your meal.
  • Simple Green Salad: Tossed greens dressed with a zesty vinaigrette add a light touch, ensuring every bite feels balanced and fresh.
  • Sweet Potato Fries: The sweetness contrasts beautifully with the savory chicken, creating a dish that delights the senses.
  • Iced Tea or Lemonade: Quench your thirst with these refreshing beverages, making your Cowboy BBQ Bacon Cheddar Chicken dinner even more enjoyable.
  • Chocolate Chip Cookies: For a sweet ending, serve warm cookies that bring comfort and nostalgia, perfect for rounding off a hearty meal.

How to Store and Freeze Cowboy BBQ Bacon Cheddar Chicken

Fridge: Store leftovers in an airtight container for up to 3 days. This keeps the chicken moist and flavorful, perfect for quick reheating.

Freezer: Wrap tightly in plastic wrap, then place in a freezer-safe bag. It stays fresh for up to 3 months; defrost in the fridge overnight before reheating.

Reheating: To retain the best texture, reheat in the oven at 350°F (175°C) for about 10-15 minutes or until warmed through. Enjoy your Cowboy BBQ Bacon Cheddar Chicken just as delicious as the first serving!

Wrap it Up: If you’re storing individual portions, separate them with parchment paper to prevent sticking, making it easier to grab a quick meal later on.

Cowboy BBQ Bacon Cheddar Chicken Variations

Now it’s time to get creative and make this dish your own with some delicious twists!

  • Cheese Swap: Try using mozzarella or Monterey Jack for a lighter, milder cheese experience. Each cheese brings its unique charm!
  • Add Some Heat: Toss in sliced jalapeños or serrano peppers for a fiery kick. Summer barbecues or cozy family dinners will never be the same.
  • BBQ Sauce Variants: Experiment with different BBQ sauces—try a honey mustard or spicy chipotle for a zesty twist. Each sauce can transform the flavor completely!
  • Herb Infusion: Add fresh herbs like chopped cilantro or parsley to elevate the flavors. It not only adds a color pop but also a touch of freshness that brightens every bite.
  • Creamy Avocado: Top with slices of creamy avocado for richness that perfectly balances the smoky flavors. This tantalizing addition makes it feel like a gourmet treat!
  • Ranch Seasoning: Sprinkle ranch dressing mix over the chicken before adding the BBQ sauce for a delightful flavor fusion. It adds an unexpected tang that works wonders.
  • Cauliflower Option: For a low-carb alternative, use cauliflower steaks instead of chicken. Roast them until golden for a satisfying, vegetarian twist.
  • Gluten-Free Version: Make this chicken gluten-free by using a certified gluten-free barbecue sauce and ensuring your bacon is free from gluten-containing additives.

Don't forget, variations are the spice of life! This Cowboy BBQ Bacon Cheddar Chicken serves as a great base to explore new tastes and textures, and if you're looking for more exciting chicken recipes, consider trying Honey Garlic Chicken or Spatchcock Chicken Flavor for different flavor profiles!

Expert Tips for Cowboy BBQ Bacon Cheddar Chicken

  • Sear with Care: Ensure the skillet is hot enough before adding the chicken; this locks in moisture and creates a beautiful crust.

  • Crispy is Key: Don't rush the bacon cooking process; patience ensures it becomes crispy and adds the perfect crunch to your Cowboy BBQ Bacon Cheddar Chicken.

  • Rest Time Matters: Allow the chicken to rest after baking; this helps keep it juicy and flavorful, ensuring every bite is tender.

  • Taste Test BBQ Sauce: Adjust the amount of barbecue sauce based on your personal preference; some love it tangy, while others prefer a sweeter taste.

  • Cheese Choices: Feel free to substitute cheddar with mozzarella or pepper jack for a unique twist on your Cowboy BBQ Bacon Cheddar Chicken.

  • Spice It Up: If you enjoy heat, sprinkle red pepper flakes generously over the dish before serving, but remember to start with a little and adjust to taste!

Cowboy BBQ Bacon Cheddar Chicken Recipe FAQs

What kind of chicken should I use for this recipe?
Absolutely, boneless, skinless chicken breasts are best for this Cowboy BBQ Bacon Cheddar Chicken. They maintain moisture and tenderness while allowing the flavors to infuse beautifully. If you prefer dark meat, boneless chicken thighs can also work wonderfully, giving a richer flavor.

How do I store leftovers?
To keep your Cowboy BBQ Bacon Cheddar Chicken fresh, store it in an airtight container in the fridge for up to 3 days. This helps retain moisture and flavor. When you're ready to enjoy it again, simply reheat in the oven or microwave, depending on your preference!

Can I freeze this dish?
Yes! You can freeze your Cowboy BBQ Bacon Cheddar Chicken for up to 3 months. Just wrap it tightly in plastic wrap and place it in a freezer-friendly bag. For the best texture when you’re ready to eat it, defrost in the fridge overnight and reheat in the oven at 350°F (175°C) for around 10-15 minutes until warmed through.

What if my chicken is dry after baking?
If you find your chicken comes out dry, it might be because it was overcooked. Always check the internal temperature with a meat thermometer; it should reach 165°F (74°C). To help, try using a meat mallet to slightly flatten the chicken before cooking—this encourages even cooking and juicy results.

Can I use a different cheese or add spicy ingredients?
Very! Feel free to swap out cheddar cheese for mozzarella, Monterey Jack, or even pepper jack if you like a spicy kick. You can also add jalapeños or other favorite toppings to customize your Cowboy BBQ Bacon Cheddar Chicken to your taste!

Is this recipe suitable for my dietary restrictions?
If you're watching out for allergens, this dish does contain poultry, dairy, and gluten from the barbecue sauce. Always check labels and consult your dietary guidelines. For a gluten-free barbecue sauce and cheese alternative, you can easily make adjustments, ensuring that everyone can enjoy this flavorful feast.

Cowboy BBQ Bacon Cheddar Chicken

Cowboy BBQ Bacon Cheddar Chicken for a Flavor Explosion

This Cowboy BBQ Bacon Cheddar Chicken is a hearty dish filled with bold flavors that’s perfect for any meal.
Print Recipe Pin Recipe
Prep Time 10 minutes mins
Cook Time 20 minutes mins
Resting Time 5 minutes mins
Total Time 35 minutes mins
Servings: 4 pieces
Course: Dinner
Cuisine: American
Calories: 450
Ingredients Equipment Method Nutrition Notes

Ingredients
  

For the Chicken
  • 4 pieces Boneless, skinless chicken breasts A juicy, protein-packed base that holds all the flavors.
  • 2 tablespoons Olive oil Coats the chicken for a rich taste and ensures even cooking.
  • 1 teaspoon Garlic powder Adds aromatic depth, enhancing the savory notes of the chicken.
  • 1 teaspoon Onion powder Introduces a savory flavor without interrupting the chicken's texture.
  • 1 teaspoon Smoked paprika Brings a mild smoky heat that enriches the dish's personality.
  • 1 teaspoon Salt Essential for amplifying the natural flavors of every ingredient.
  • 1/2 teaspoon Black pepper Contributes a subtle heat that perfectly balances the dish’s richness.
For the Topping
  • 6 slices Bacon Crispy, savory slices that give a delightful crunch.
  • 1 cup Shredded cheddar cheese Melts beautifully over the chicken, making it ooey-gooey.
  • 1/2 cup Barbecue sauce Infuses the dish with tangy sweetness.
  • 1/4 cup Green onions, chopped Adds a fresh crunch that brightens the flavors.
  • 1/4 teaspoon Red pepper flakes Optional for those who like a spicy kick.

Equipment

  • Skillet
  • Oven
  • Meat Thermometer

Method
 

Step-by-Step Instructions
  1. Preheat your oven to 400°F (200°C).
  2. In a skillet over medium heat, cook the bacon for about 5-7 minutes until crispy and golden.
  3. Once done, transfer the bacon to a plate lined with paper towels to drain excess grease.
  4. Let the bacon cool and then crumble it into small pieces.
  5. Coat the chicken breasts generously with olive oil on both sides.
  6. Sprinkle garlic powder, onion powder, smoked paprika, salt, and black pepper evenly over both sides of the chicken breasts.
  7. Increase the heat to medium-high and sear the seasoned chicken for about 4-5 minutes on each side.
  8. Chop the green onions and prepare your barbecue sauce.
  9. Pour the barbecue sauce generously over each piece of chicken.
  10. Sprinkle a generous amount of shredded cheddar cheese over the barbecue sauce.
  11. Scatter the crumbled bacon evenly over the melted cheese.
  12. Place the skillet in the preheated oven and bake for 10-12 minutes.
  13. Once baked, top your Cowboy BBQ Bacon Cheddar Chicken with the chopped green onions and optional red pepper flakes.
  14. Allow the chicken to rest for a few minutes before slicing and serving.

Nutrition

Serving: 1pieceCalories: 450kcalCarbohydrates: 4gProtein: 35gFat: 32gSaturated Fat: 12gPolyunsaturated Fat: 1gMonounsaturated Fat: 15gTrans Fat: 1gCholesterol: 90mgSodium: 900mgPotassium: 650mgFiber: 1gSugar: 3gVitamin A: 10IUVitamin C: 2mgCalcium: 20mgIron: 8mg

Notes

Feel free to customize with toppings like jalapeños or switch up the cheese for a new twist.

Tried this recipe?

Let us know how it was!

Pollo Loco: Irresistibly Creamy Mexican Chicken and Rice

December 2, 2025 by Grace Snow Leave a Comment

The kitchen was a whirlwind of aromas as I pulled the lid off the pot, revealing a vibrant medley of saffron-infused rice and tender chicken simmering in a savory embrace. This Pollo Loco - Mexican Chicken and Rice with Queso is my go-to for those busy weeknights when the family craves something hearty yet easy to whip up. With its comforting layers and creamy queso gracefully melting over each bite, it transforms simple pantry staples into an unforgettable feast. Not only is this recipe family-friendly, making it a crowd-pleaser for kids and adults alike, but it’s also a breeze to prep in advance—perfect for meal prepping! Ready to dig into a dish that combines warmth and flavor in every forkful? Let’s dive in!

Why Is Pollo Loco a Must-Try?

Comforting, rich flavors: Each bite of this Pollo Loco bursts with savory goodness, thanks to the creamy queso and tender, seasoned chicken.
Quick & Easy: With simple ingredients and less than 30 minutes of cook time, it's perfect for busy weeknights.
Meal Prep Friendly: Make it ahead and enjoy leftovers all week! Pair it with a fresh avocado and lime salad for a refreshing side.
Kid-Approved: Its familiar taste is sure to win over picky eaters, making family dinners stress-free.
Versatile: Adjust spice levels or swap ingredients for endless variations, like using rotisserie chicken or trying different types of cheese.

This recipe is ideal for those craving flavor without the fuss—just like our Fiesta Lime Chicken or Honey BBQ Chicken Rice. Dive into this delicious dish and share the love with your family!

Pollo Loco Ingredients

• Prepare for a flavor-packed journey with these essential ingredients!

For the Chicken

  • Chicken Breast – The main protein; opting for rotisserie chicken can save time!
  • Olive Oil – Used for sautéing, it ensures delicious flavor and moisture in the chicken.
  • Adobo Seasoning – Adds spice and depth; apply generously for the best flavor.

For the Rice

  • Saffron Yellow Rice – The colorful base of the dish; it infuses delightful flavor.
  • Tomato Bouillon Cube – Enhances umami, bringing out the rich taste in the rice.
  • Water – Essential for cooking the rice to perfection.

For the Creamy Topping

  • White Queso – Provides creaminess and richness; if needed, use cream cheese and Monterey Jack as a substitute.
  • Milk – Ensures a smooth and creamy consistency when mixed with the queso.

This Pollo Loco - Mexican Chicken and Rice with Queso is a delightful meal that transforms everyday cooking into a vibrant celebration!

Step‑by‑Step Instructions for Pollo Loco - Mexican Chicken and Rice with Queso

Step 1: Prepare the Chicken
Begin by patting the chicken breasts dry with paper towels. Generously season both sides with adobo seasoning, ensuring an even coating for full flavor. This step is crucial for making your Pollo Loco flavorful. Set the seasoned chicken aside while you heat the skillet.

Step 2: Sauté the Chicken
Heat a tablespoon of olive oil in a large skillet over medium heat. Once the oil shimmers, carefully place the seasoned chicken breasts into the skillet. Sauté each side for about 3 minutes, or until the chicken is nicely browned and no longer pink in the center. This caramelization adds great flavor to your Pollo Loco.

Step 3: Combine Ingredients
With the chicken cooked, add the saffron yellow rice to the skillet, followed by a cup of water and a crumbled tomato bouillon cube. Stir everything together, ensuring the rice is well-coated. Bring the mixture to a rolling boil, which will help infuse the rice with all the savory flavors from the chicken.

Step 4: Simmer the Rice
Once your mixture is boiling, reduce the heat to low and cover the skillet with a lid. Let it simmer for 20 to 25 minutes, checking occasionally. The rice should absorb the liquid and become fluffy, while the chicken continues cooking through. You’ll know it’s ready when the rice is tender and has a light, airy texture.

Step 5: Add Creamy Queso
After the rice has cooked, remove the skillet from heat. Stir in the white queso and a splash of milk, mixing until the queso melts and creates a creamy sauce that envelops the chicken and rice. This step is what makes your Pollo Loco irresistibly creamy and rich.

Step 6: Serve and Enjoy
Ladle generous portions of the Pollo Loco onto plates, ensuring each serving includes chicken and the flavorful rice. The creamy queso on top adds a lovely finish. For an added touch, consider garnishing with fresh cilantro, lime wedges, or a dollop of sour cream. Enjoy your comforting meal!

Make Ahead Options

Preparing Pollo Loco - Mexican Chicken and Rice with Queso in advance is a game changer for busy weeknights! You can season and cook the chicken up to 24 hours ahead, storing it in the refrigerator to allow the flavors to deepen. Additionally, you can prepare the saffron rice and combine it with the cooked chicken, refrigerating the mixture for up to 3 days. To maintain its quality, be sure to add a splash of water or broth when reheating to keep it moist. Just before serving, melt in the creamy queso and milk, mixing until smooth, and you’ll have a comforting feast ready in no time!

Pollo Loco Variations & Substitutions

Feel free to mix things up and create the Pollo Loco of your dreams with these delightful twists and swaps!

  • Dairy-Free: Use vegan cheese or coconut cream to replace the white queso, ensuring a creamy finish without dairy.
  • Spicy Kick: Add diced jalapeños during sautéing for an extra layer of heat that complements the chicken beautifully.
  • Brown Rice: Substitute white rice with brown rice for a nuttier flavor and added fiber. Just be mindful of the longer cooking time!
  • Vegetarian Delight: Swap the chicken for sautéed bell peppers and mushrooms, offering a colorful and hearty veggie alternative.
  • Flavorful Broth: Instead of water, use chicken or vegetable broth for cooking the rice to intensify flavors.
  • Citrus Zing: Add the juice of a lime or lemon during the final mixing stage for a refreshing burst of brightness that elevates the dish.
  • One-Pot Wonder: Combine all ingredients, including the chicken and rice, in a slow cooker for an effortless, hands-off cooking experience.
  • Smoky Notes: Incorporate smoked paprika into the adobo seasoning for a subtle smoky flavor that pairs perfectly with the other ingredients.

If you're in the mood for something different, you might also enjoy our One Pot Rice or a comforting bowl of Chicken Dumplings Cozy. So go ahead, unleash your creativity, and enjoy crafting your unique Pollo Loco experience!

Expert Tips for Pollo Loco

  • Flavor Development: Allow the Pollo Loco to sit for a bit after cooking. This helps the flavors meld together beautifully, making it taste even better next day.

  • Avoid Soggy Rice: Be careful not to overcook the rice; this can lead to a mushy texture. Keep an eye on the liquid level while it simmers.

  • Protein Variations: If you’re short on time, opt for shredded rotisserie chicken instead of raw to speed up preparation while still achieving delicious results.

  • Adjusting Spice Levels: Want a kick? Add diced jalapeños or a sprinkle of chipotle powder during cooking, but taste as you go to avoid overwhelming heat.

  • Creamy Consistency: If your queso isn’t melting smoothly, a little extra splash of milk can help achieve that luscious, creamy sauce you desire in this Pollo Loco dish.

How to Store and Freeze Pollo Loco

Fridge: Store leftovers in an airtight container and refrigerate for up to 3 days. Ensure the dish is completely cooled before sealing to maintain freshness.

Freezer: For longer storage, freeze Pollo Loco in a freezer-safe container for up to 3 months. Place parchment paper between layers if stacking to prevent sticking.

Reheating: Thaw in the fridge overnight, then reheat gently in a skillet over medium heat, adding a splash of broth or water to keep the creamy queso luscious and moist.

Make-Ahead: Prepare up to 2 days in advance. Combine all ingredients, refrigerate, and simply heat before serving for effortless meal prep.

What to Serve with Pollo Loco - Mexican Chicken and Rice with Queso

To create a delightful dining experience alongside this comforting Pollo Loco, consider these complementary dishes that elevate your meal.

  • Creamy Avocado Salad: The refreshing avocado salad adds a cool, creamy texture that balances the spicy and savory notes of the Pollo Loco, enhancing overall enjoyment.

  • Cilantro Lime Rice: Bright and zesty, this side dish echoes the flavors of saffron rice while adding a pop of freshness that pairs beautifully with the rich chicken and queso.

  • Roasted Corn on the Cob: Sweet and slightly charred, this classic Mexican side brings a satisfying crunch that contrasts nicely with the tenderness of the chicken.

  • Pico de Gallo: This fresh salsa loaded with tomatoes, onions, and cilantro provides a burst of flavor and acidity, cutting through the creaminess of the dish while adding a vibrant touch.

  • Chips and Guacamole: Crispy tortilla chips served with creamy guacamole make for a delightful snack or appetizer, inviting everyone to dig in and enjoy a bit of Mexican tradition before the main event.

  • Spicy Margaritas: A refreshing cocktail option to elevate your meal, the sweet and tangy notes of a spicy margarita perfectly complement the bold flavors in Pollo Loco, making it a fantastic pairing choice.

By combining these elements, you'll create a memorable meal that celebrates the rich flavors and textures of your Pollo Loco - Mexican Chicken and Rice with Queso, making any night feel like a special occasion.

Pollo Loco - Mexican Chicken and Rice with Queso Recipe FAQs

What is the best way to select chicken for Pollo Loco?
Absolutely! For the best flavor and texture, select chicken breasts that are firm and plump, with no dark spots or bruising. If you're short on time, using high-quality rotisserie chicken can save you the hassle and still deliver fantastic results.

How should I store leftover Pollo Loco?
Leftovers should be kept in an airtight container in the fridge where they can last for up to 3 days. Make sure the dish is completely cooled before sealing it to maintain freshness and flavor. Add a splash of water when reheating to keep it moist.

Can I freeze Pollo Loco for later?
Yes, you can! To freeze, let the Pollo Loco cool completely, then transfer it to a freezer-safe container, ensuring it's sealed tightly. It can be frozen for up to 3 months. For best results, I recommend labeling containers with the date for easy tracking.

What if my rice turns out mushy?
If your rice ends up mushy, it’s likely due to overcooking or too much liquid. Next time, keep an eye on the simmering process and check for doneness closer to the 20-minute mark. If it's not ready, give it a few extra minutes, but avoid letting it sit on the heat too long.

Can I make this dish egg-free or dairy-free?
Absolutely! To make Pollo Loco dairy-free, you can substitute the white queso with a vegan cheese alternative or a homemade cashew cream. Just blend soaked cashews with a bit of nutritional yeast and water until smooth for a creamy texture without any dairy.

What other ingredients can I add to enhance flavor?
Feel free to elevate your Pollo Loco with diced jalapeños for heat, fresh cilantro for herbiness, or a splash of lime juice for zesty brightness. The more the merrier! Don't hesitate to get creative with your additions based on what your family enjoys!

Pollo Loco - Mexican Chicken and Rice with Queso

Pollo Loco: Irresistibly Creamy Mexican Chicken and Rice

Pollo Loco - Mexican Chicken and Rice with Queso is a comforting and flavorful dish, perfect for busy weeknights.
Print Recipe Pin Recipe
Prep Time 10 minutes mins
Cook Time 25 minutes mins
Total Time 35 minutes mins
Servings: 4 servings
Course: Dinner
Cuisine: Mexican
Calories: 450
Ingredients Equipment Method Nutrition Notes

Ingredients
  

For the Chicken
  • 2 pieces Chicken Breast Can use rotisserie chicken for quicker prep.
  • 1 tablespoon Olive Oil Used for sautéing.
  • 2 tablespoons Adobo Seasoning Generously apply for best flavor.
For the Rice
  • 1 cup Saffron Yellow Rice Colorful base of the dish.
  • 1 cube Tomato Bouillon Enhances umami flavor.
  • 1 cup Water Essential for cooking the rice.
For the Creamy Topping
  • 1 cup White Queso Provides creaminess; can substitute if needed.
  • 1/2 cup Milk Ensures a smooth and creamy consistency.

Equipment

  • Skillet
  • measuring cups
  • Paper towels

Method
 

Step-by-Step Instructions
  1. Pat the chicken breasts dry with paper towels and season with adobo seasoning.
  2. Heat olive oil in a skillet over medium heat and sauté chicken for about 3 minutes each side until browned.
  3. Add saffron yellow rice, water, and crumbled tomato bouillon to the skillet, stirring well.
  4. Reduce heat to low, cover, and simmer for 20 to 25 minutes until rice is fluffy.
  5. Stir in white queso and milk off the heat until creamy.
  6. Serve with garnishes like cilantro and lime wedges, if desired.

Nutrition

Serving: 1servingCalories: 450kcalCarbohydrates: 40gProtein: 30gFat: 20gSaturated Fat: 7gPolyunsaturated Fat: 1gMonounsaturated Fat: 6gCholesterol: 70mgSodium: 900mgPotassium: 600mgFiber: 2gSugar: 2gVitamin A: 500IUVitamin C: 3mgCalcium: 250mgIron: 3mg

Notes

Allow flavors to meld by letting the dish sit after cooking. Store leftovers in the fridge for up to 3 days.

Tried this recipe?

Let us know how it was!
  • « Previous Page
  • 1
  • …
  • 41
  • 42
  • 43
  • 44
  • 45
  • …
  • 71
  • Next Page »

Welcome!

Hi, I’m Grace, a Sydney-based home cook with a passion for bold flavors and trending ingredients. Whether you’re a busy beginner or a seasoned foodie, you’ll find dishes here that are fresh, fun, and full of flavor.

More about me

Popular Recipes

  • Chocolate Cake Pops
    Delightful Chocolate Cake Pops for Your Sweet Cravings
  • Cottage Cheese Banana Bread
    Cottage Cheese Banana Bread: Moist, Protein-Packed Delight
  • Flourless Oat Waffles
    Flourless Oat Waffles for a Quick, Healthy Breakfast Boost
  • Cinnamon Waffles
    Fluffy Cinnamon Waffles with Dreamy Whipped Cream Bliss

Footer

↑ back to top

About

  • Privacy Policy
  • Disclaimer
  • Terms & Conditions

Newsletter

  • Sign Up! for emails and updates

Contact

  • About me
  • Contact me

Copyright © 2025 TastyTrendIngredients