tastytrendingredients

  • Home
  • Recipes
    • Appetizers
    • Breakfast
    • Dessert
    • Dinner
    • Drinks
    • Salads
    • Snacks
    • Soups
  • About me
  • Contact me
menu icon
go to homepage
  • Home
  • Recipes
    • Appetizers
    • Breakfast
    • Dessert
    • Dinner
    • Drinks
    • Salads
    • Snacks
    • Soups
  • About me
  • Contact me
search icon
Homepage link
  • Home
  • Recipes
    • Appetizers
    • Breakfast
    • Dessert
    • Dinner
    • Drinks
    • Salads
    • Snacks
    • Soups
  • About me
  • Contact me
×

Healthy Homemade Twix Bars: Guilt-Free Chocolate Indulgence

August 25, 2025 by Grace Snow Leave a Comment

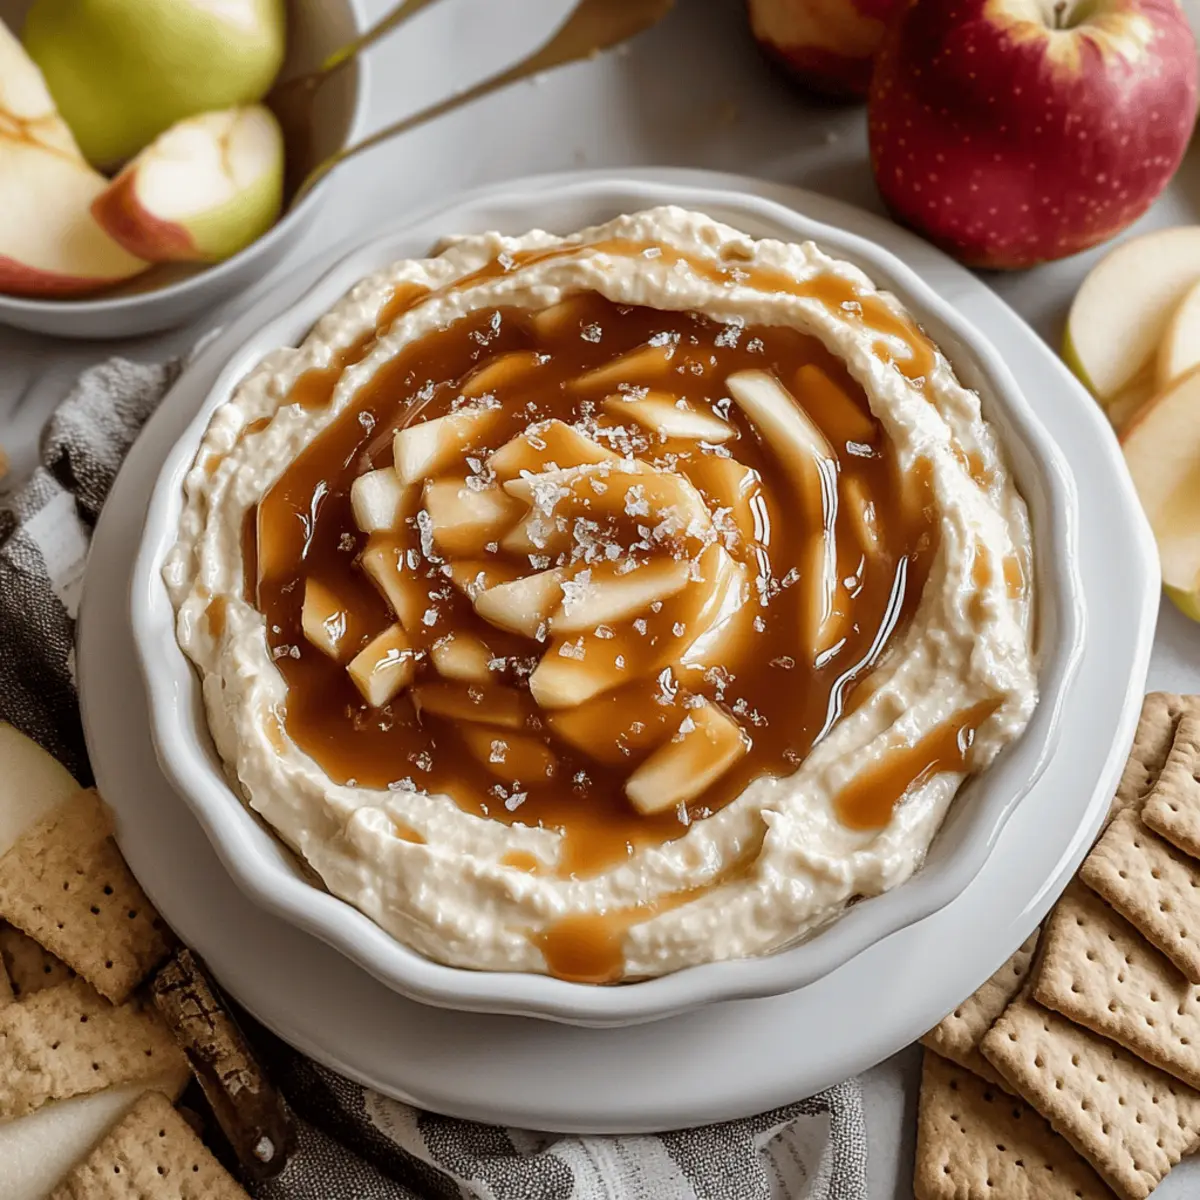
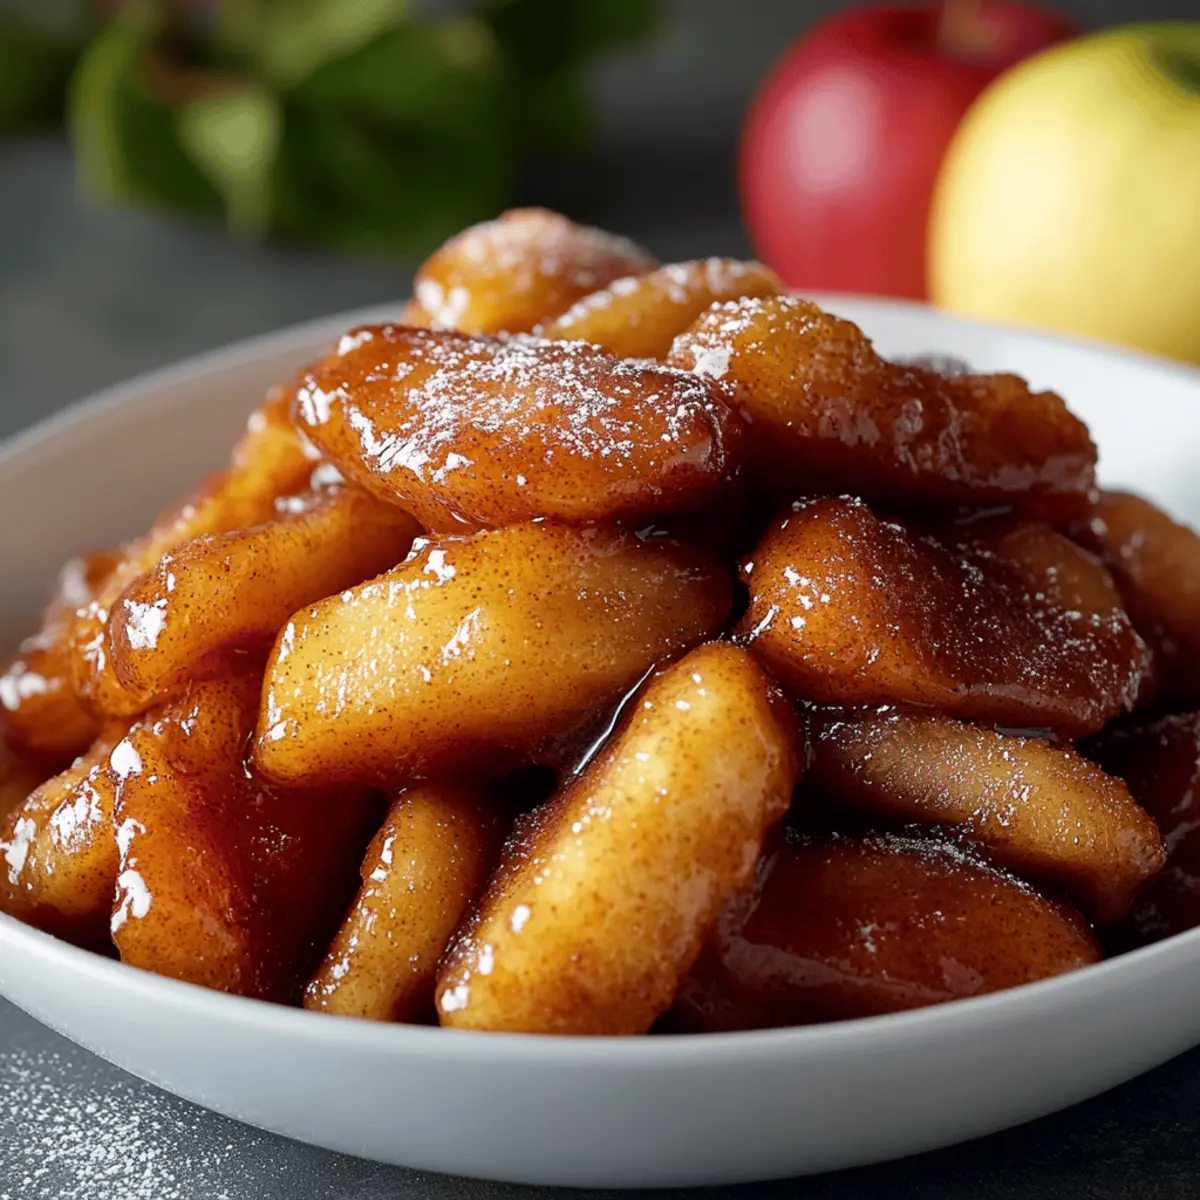
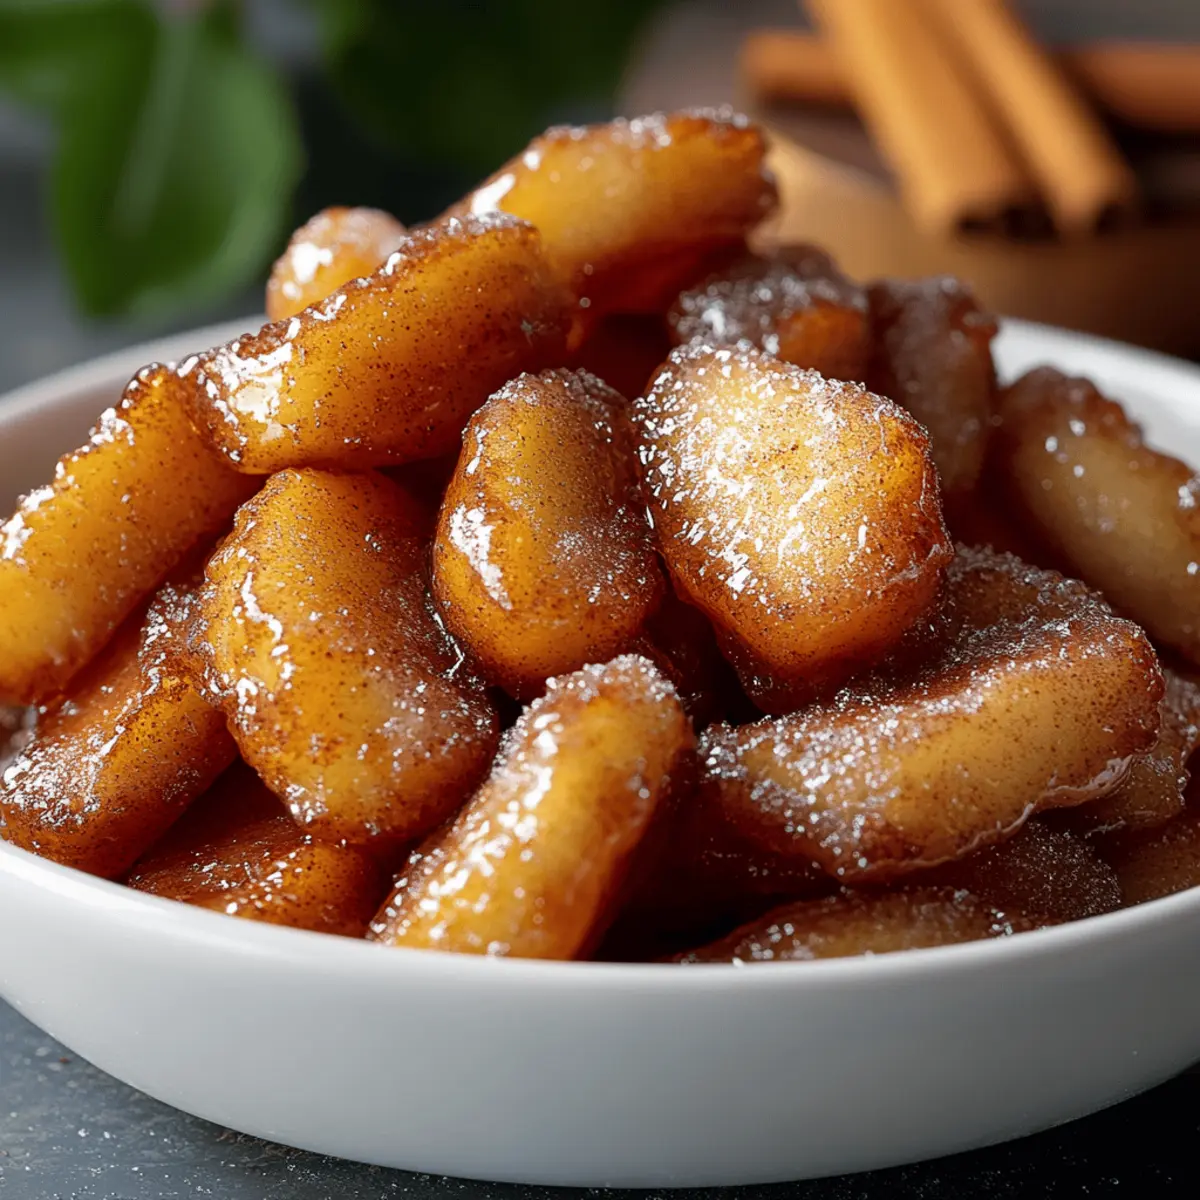
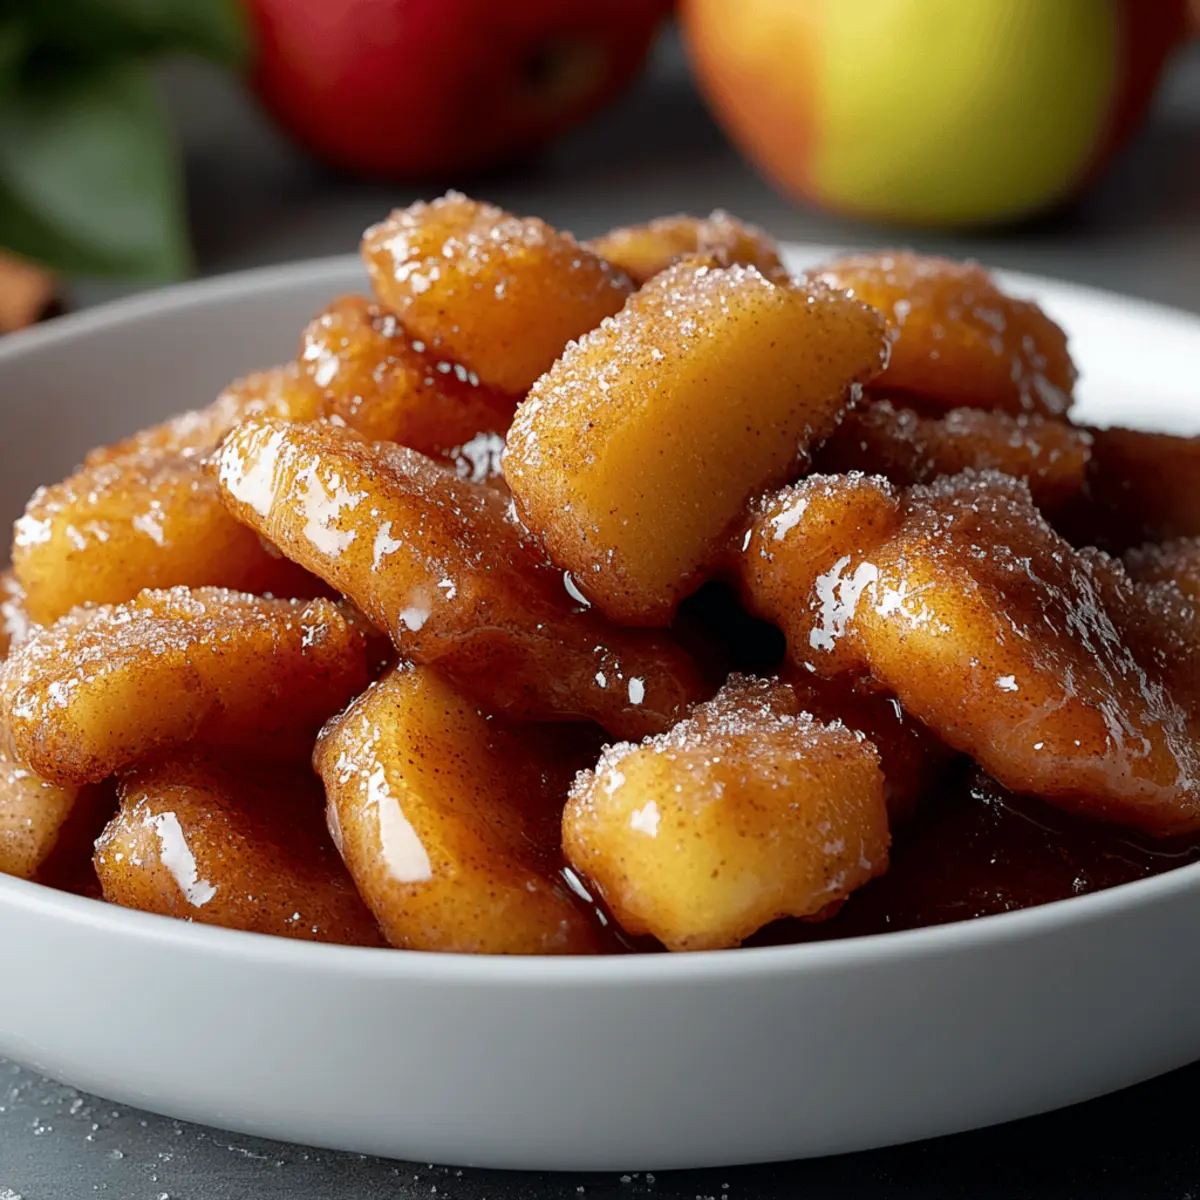
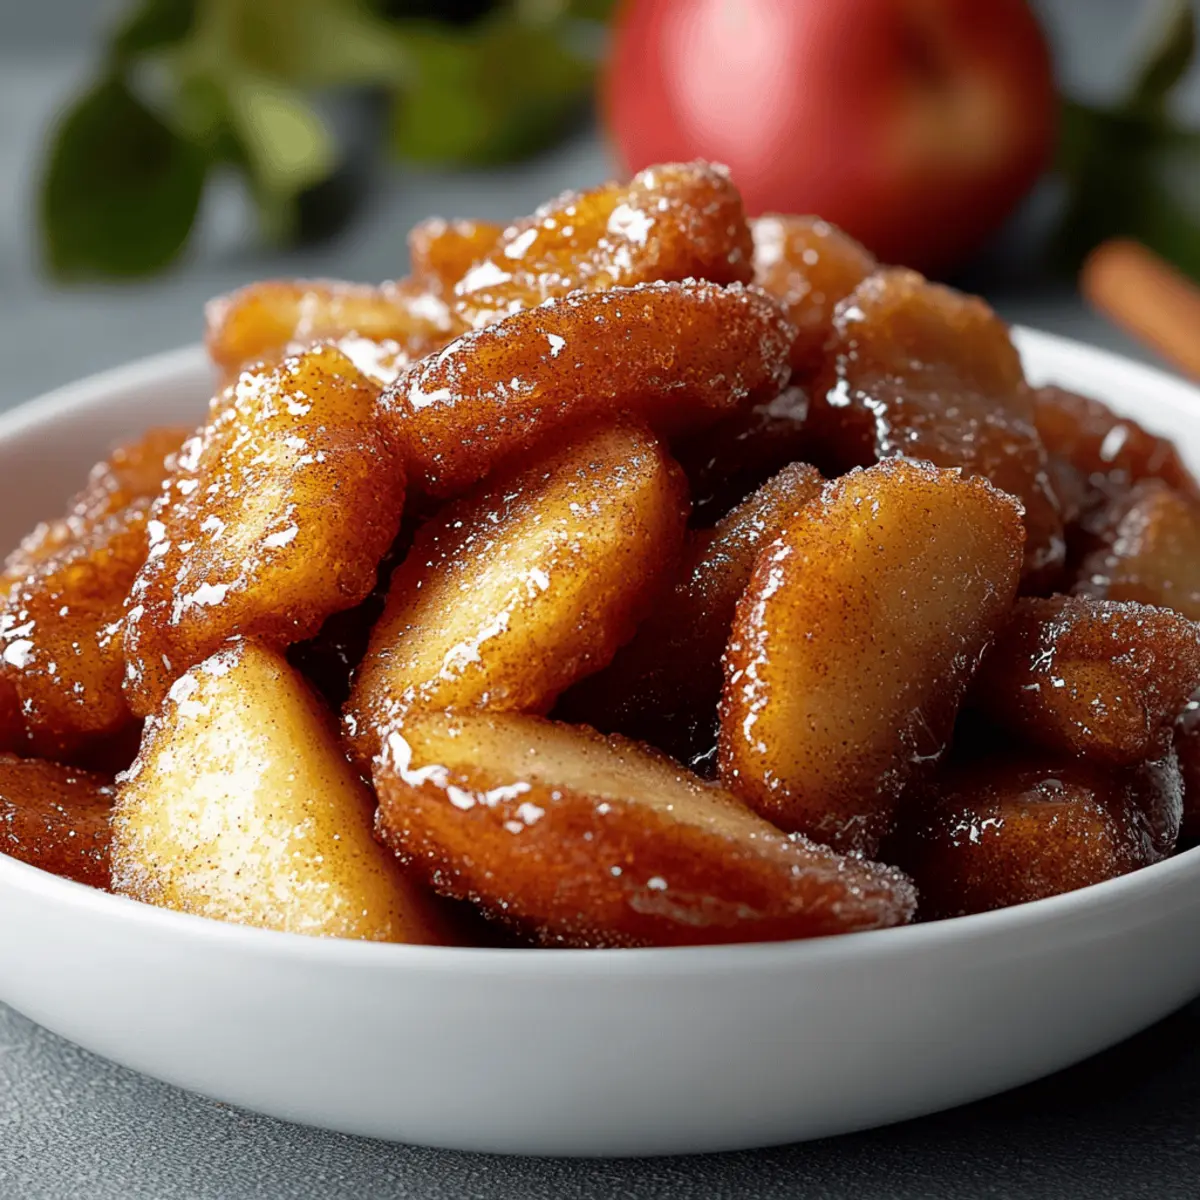
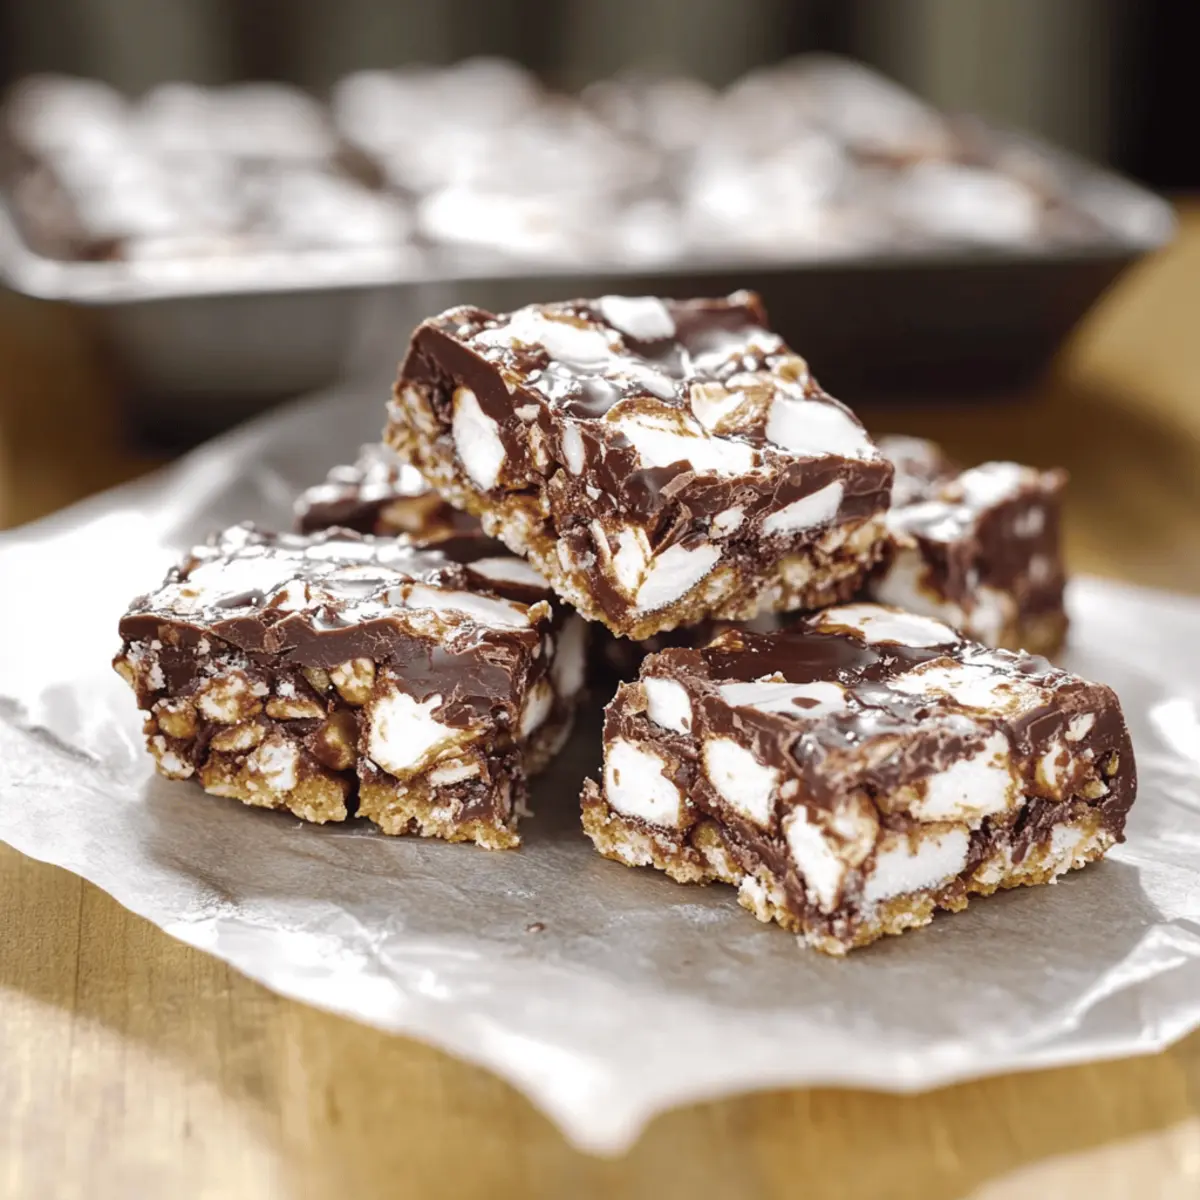
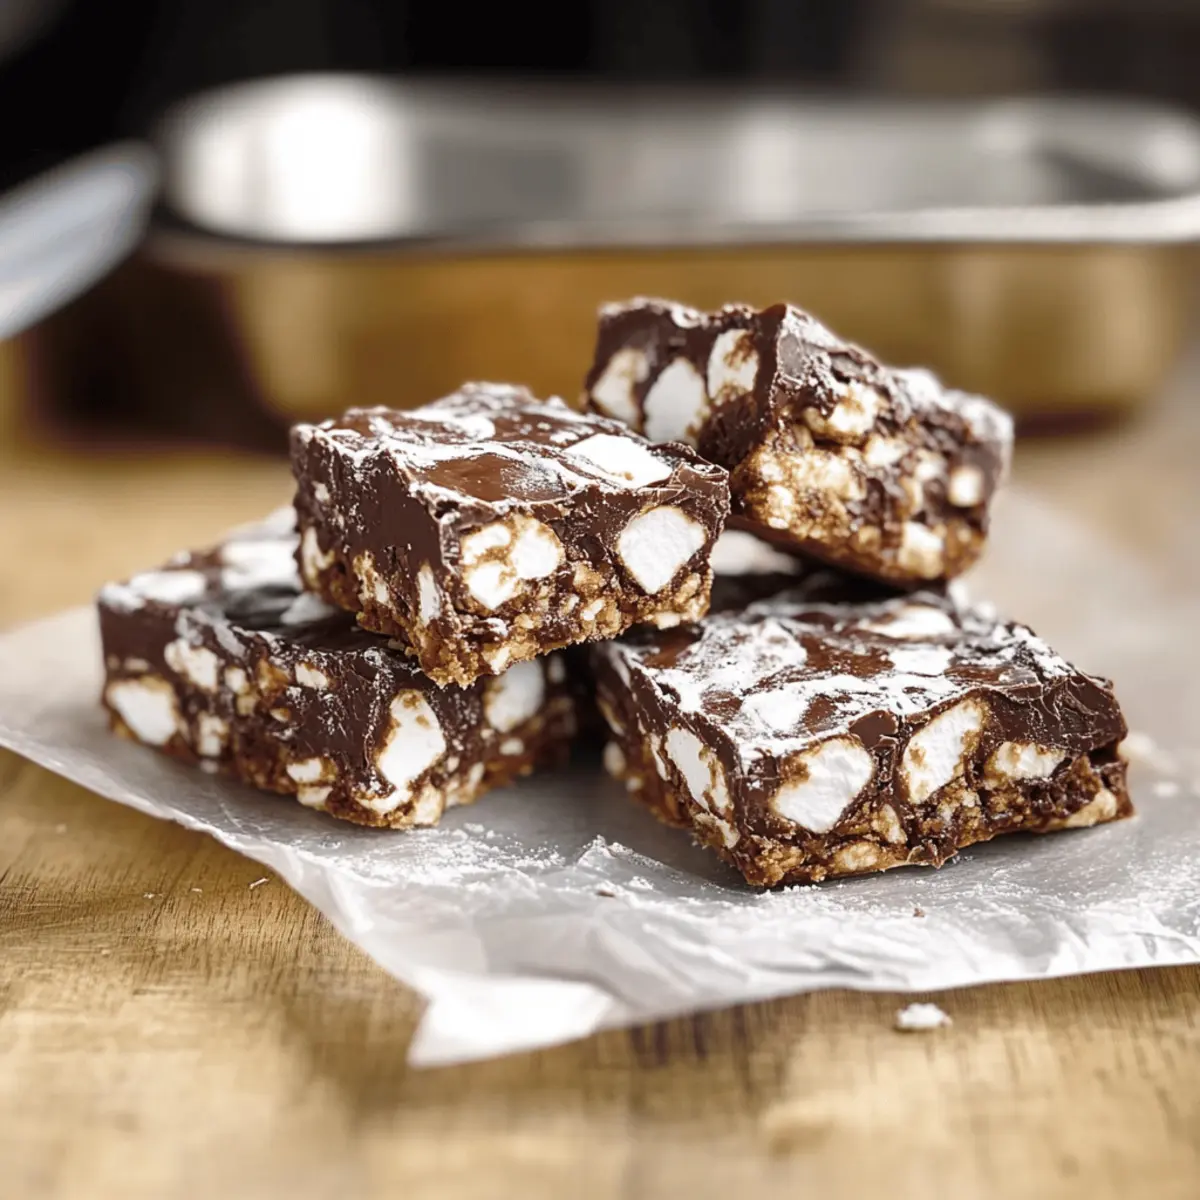
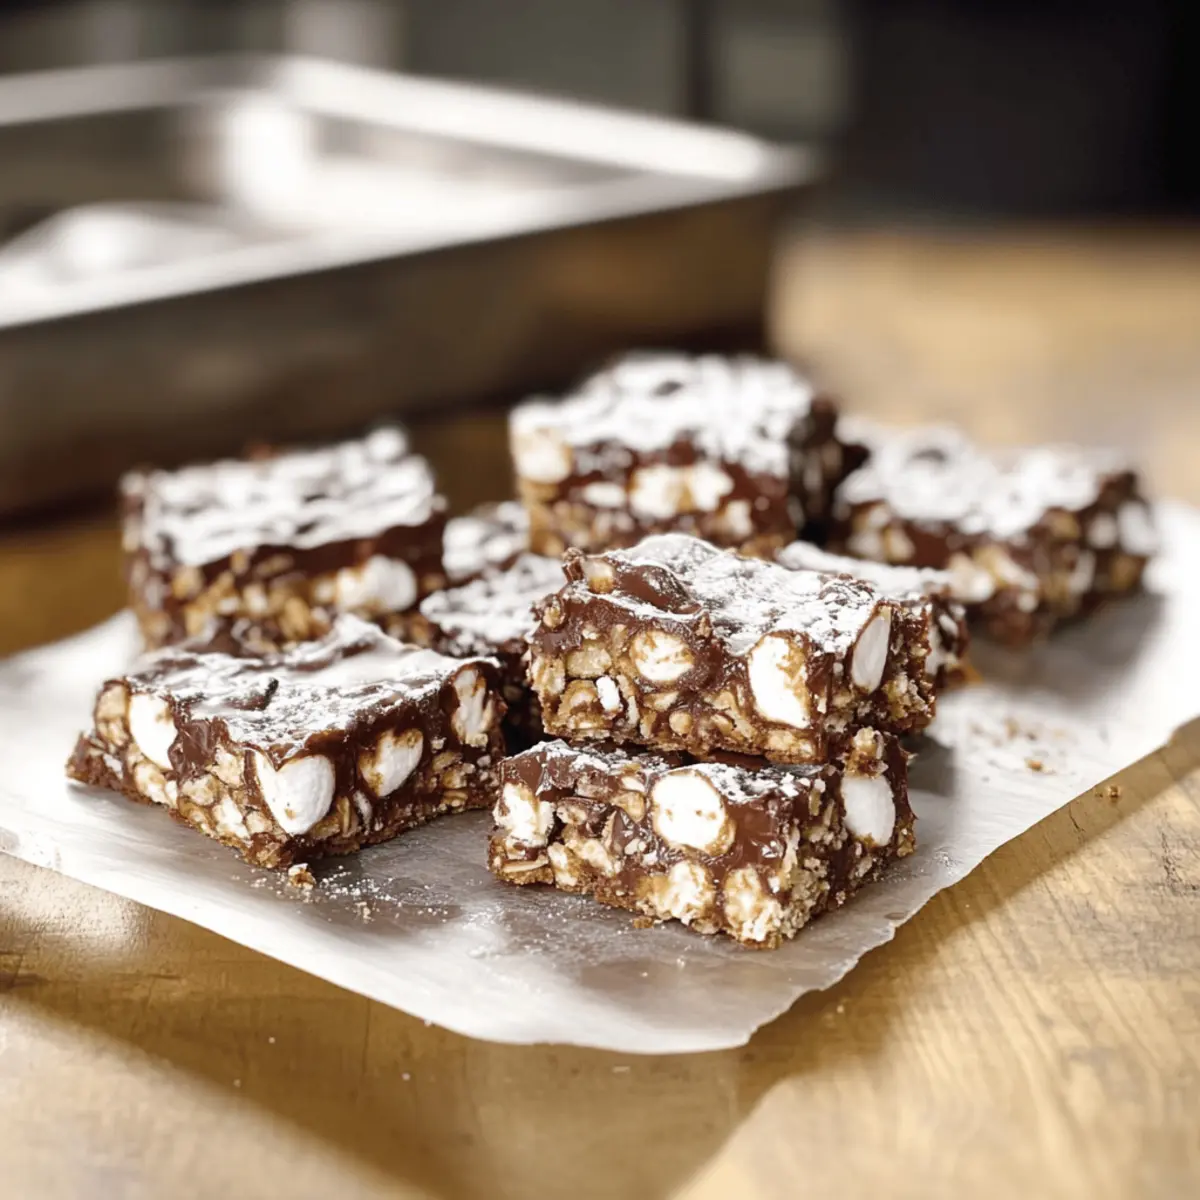
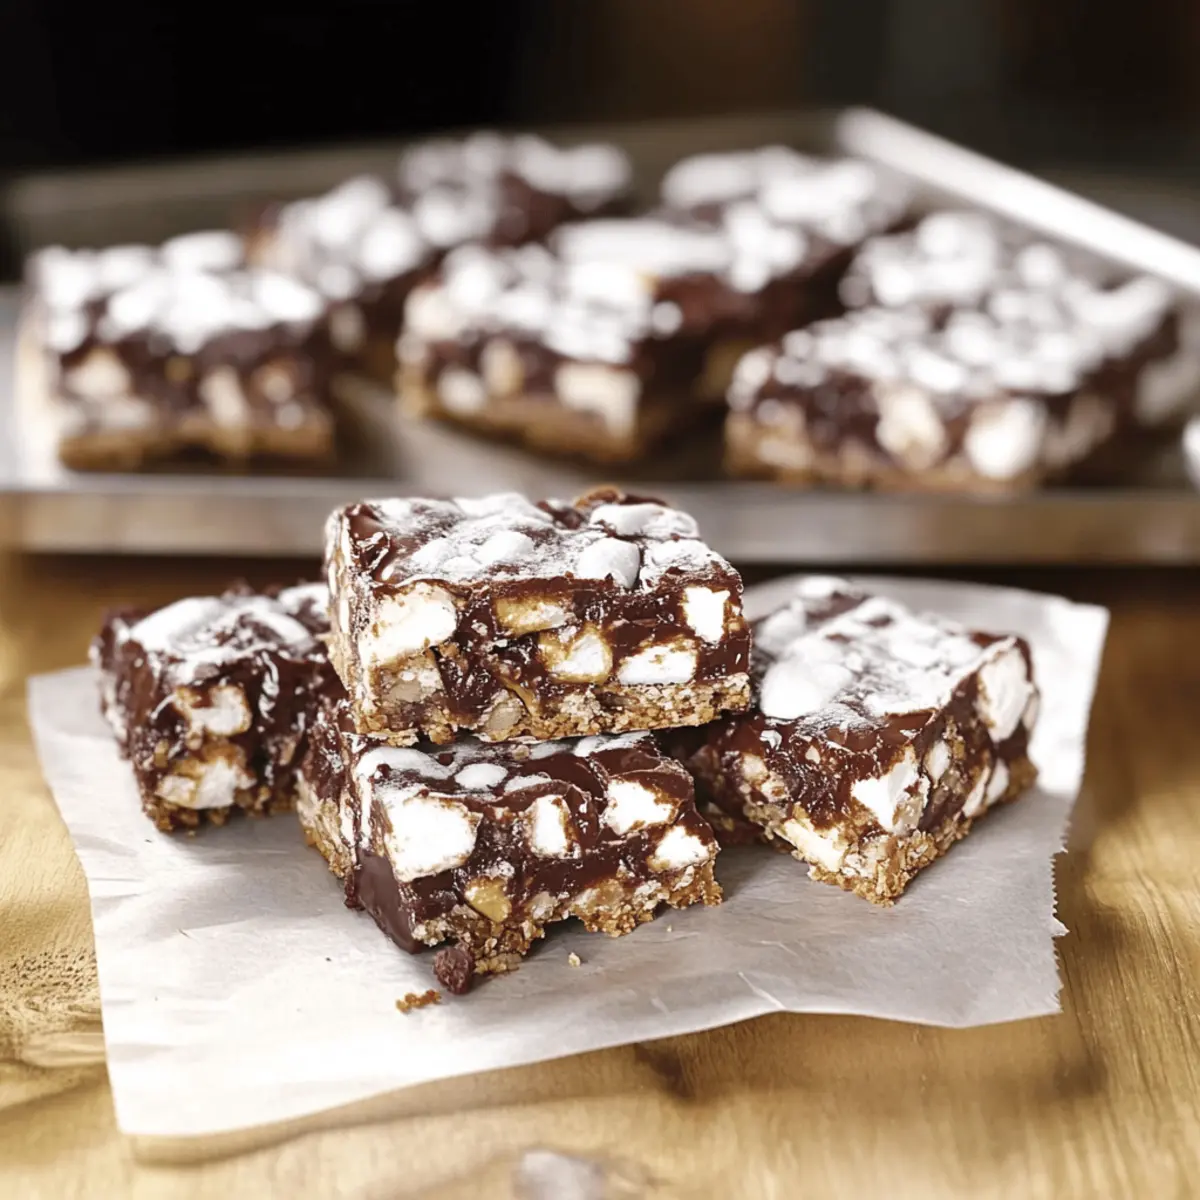
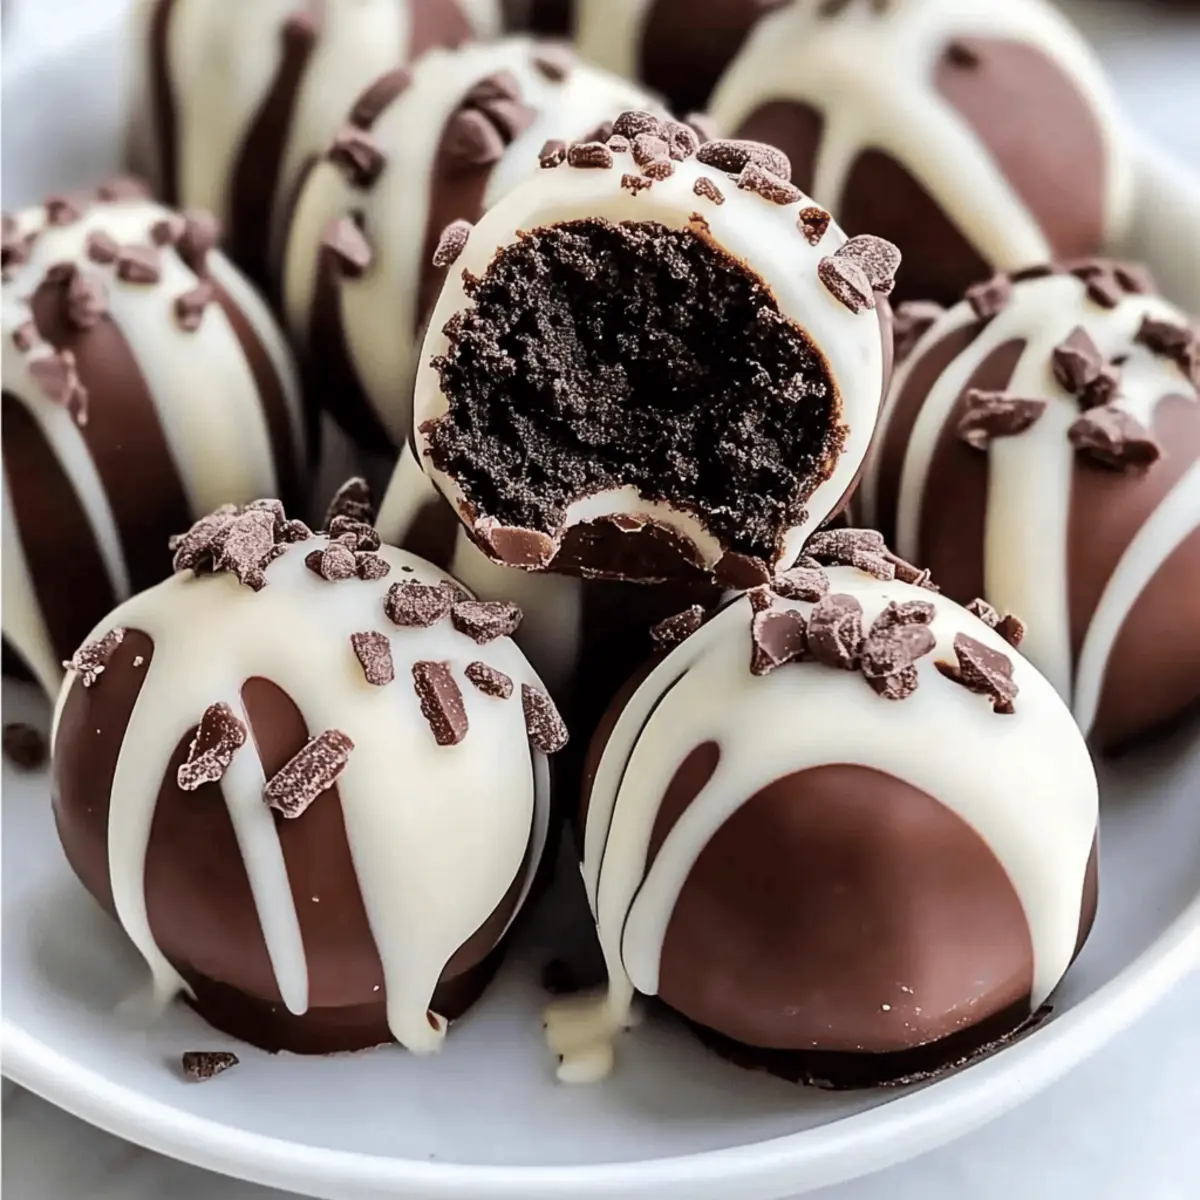
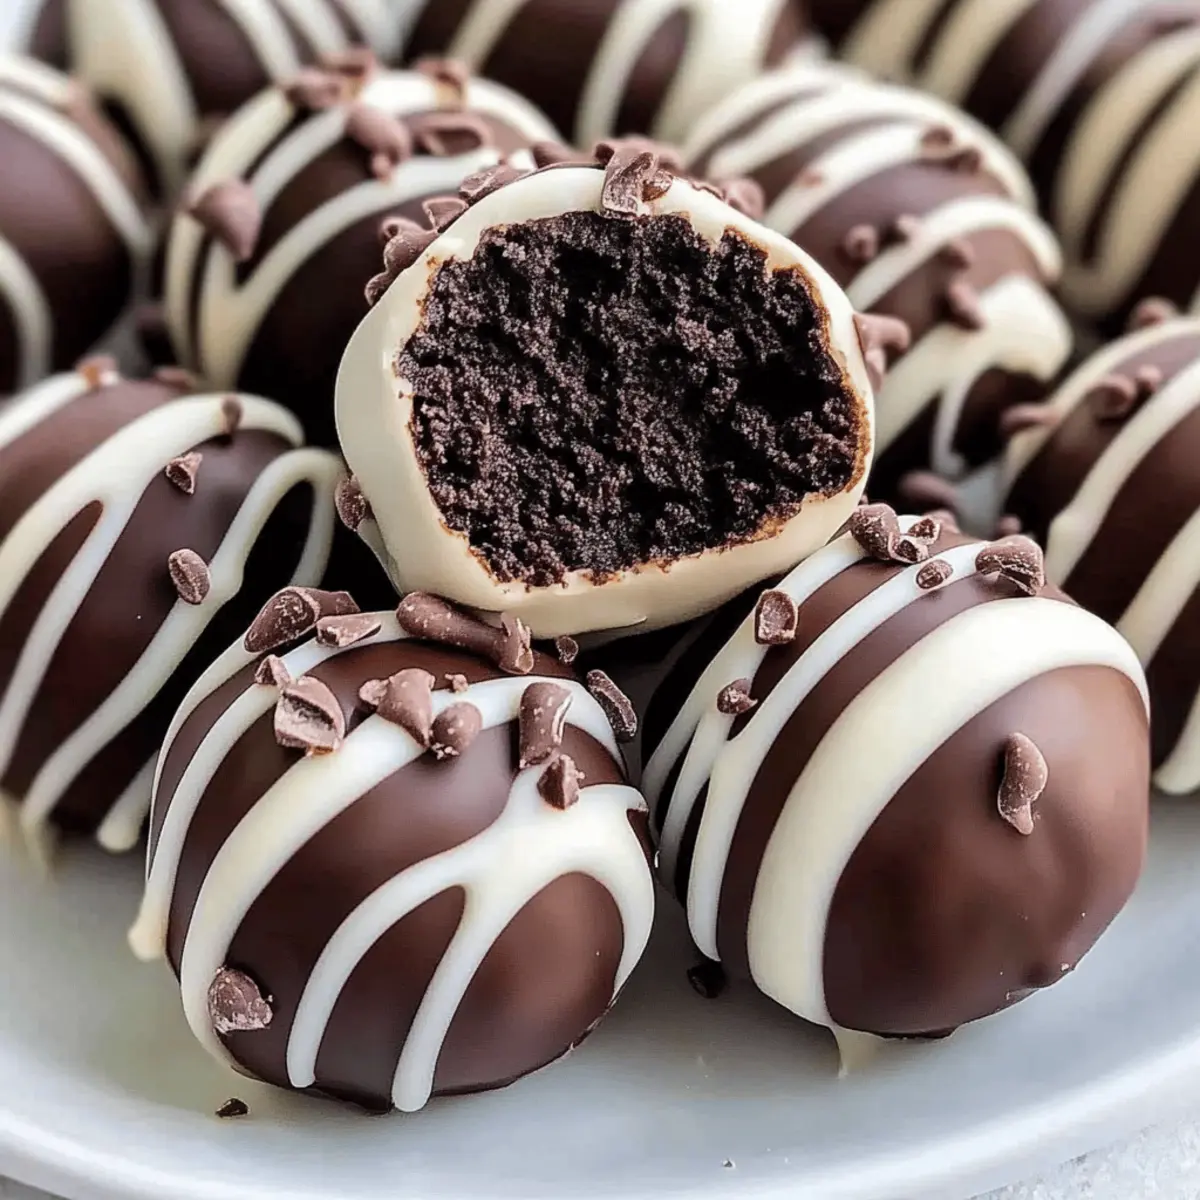
There's nothing quite like unwrapping a treat that evokes memories of childhood bliss. These Healthy Homemade Twix Bars capture that essence, combining a crunchy almond flour shortbread, a creamy peanut butter “caramel,” and a luscious dark chocolate topping. What makes them truly special is that they’re gluten-free and refined sugar-free, letting you indulge without the guilt. Quick to make and absolutely delightful, these bars are perfect for satisfying your sweet tooth while keeping your health goals in mind. Whether you're whipping them up for a snack or a treat for friends, you'll find they’re a crowd-pleaser that brings the joy of homemade goodness back to your kitchen. Ready to dive into this deliciously simple recipe? Let's get started!

Why Are These Twix Bars Special?

Indulgence redefined: These Healthy Homemade Twix Bars are a guilt-free treat that combines nostalgia with nutrition. No baking required: With simple, wholesome ingredients, this recipe is straightforward and quick to prepare. Sweet without compromise: Enjoy a rich, chocolatey flavor that’s gluten-free and refined sugar-free. Perfect for sharing: Bring these bars to gatherings or enjoy them at home—they’re sure to impress! If you love delightful desserts like Homemade Hot Chocolate, this recipe will take your sweet tooth satisfaction to the next level!

Healthy Homemade Twix Bars Ingredients

Indulge in these guilt-free delights with wholesome ingredients!

For the Shortbread Base
• Almond Flour – Provides structure and a gluten-free base. Substitute with coconut flour for a different texture.
• Melted Butter (or Coconut Oil) – Adds richness and moisture. Coconut oil is a dairy-free option.
• Maple Syrup – Natural sweetener for the shortbread and caramel layers. Substitute 1:1 with honey, noting that honey has a stronger flavor.
• Vanilla Extract – Enhances sweetness and flavor profile. No direct substitution needed, but can omit for a more neutral flavor.
• Salt – Balances flavors and heightens sweetness. Omit for low-sodium diets.

For the Caramel Layer
• Creamy Peanut Butter – Acts as the “caramel” layer, providing creaminess and flavor. Use a thicker brand to avoid softness.

For the Chocolate Coating
• Dark Chocolate Chips – Adds a rich chocolate coating; use 70% or higher for less sugar. Ensure dairy-free for vegan options.
• Coconut Oil (for chocolate) – Used to help melt chocolate smoothly and add sheen. Omit for a richer chocolate flavor.

Step‑by‑Step Instructions for Healthy Homemade Twix Bars

Step 1: Make the Base
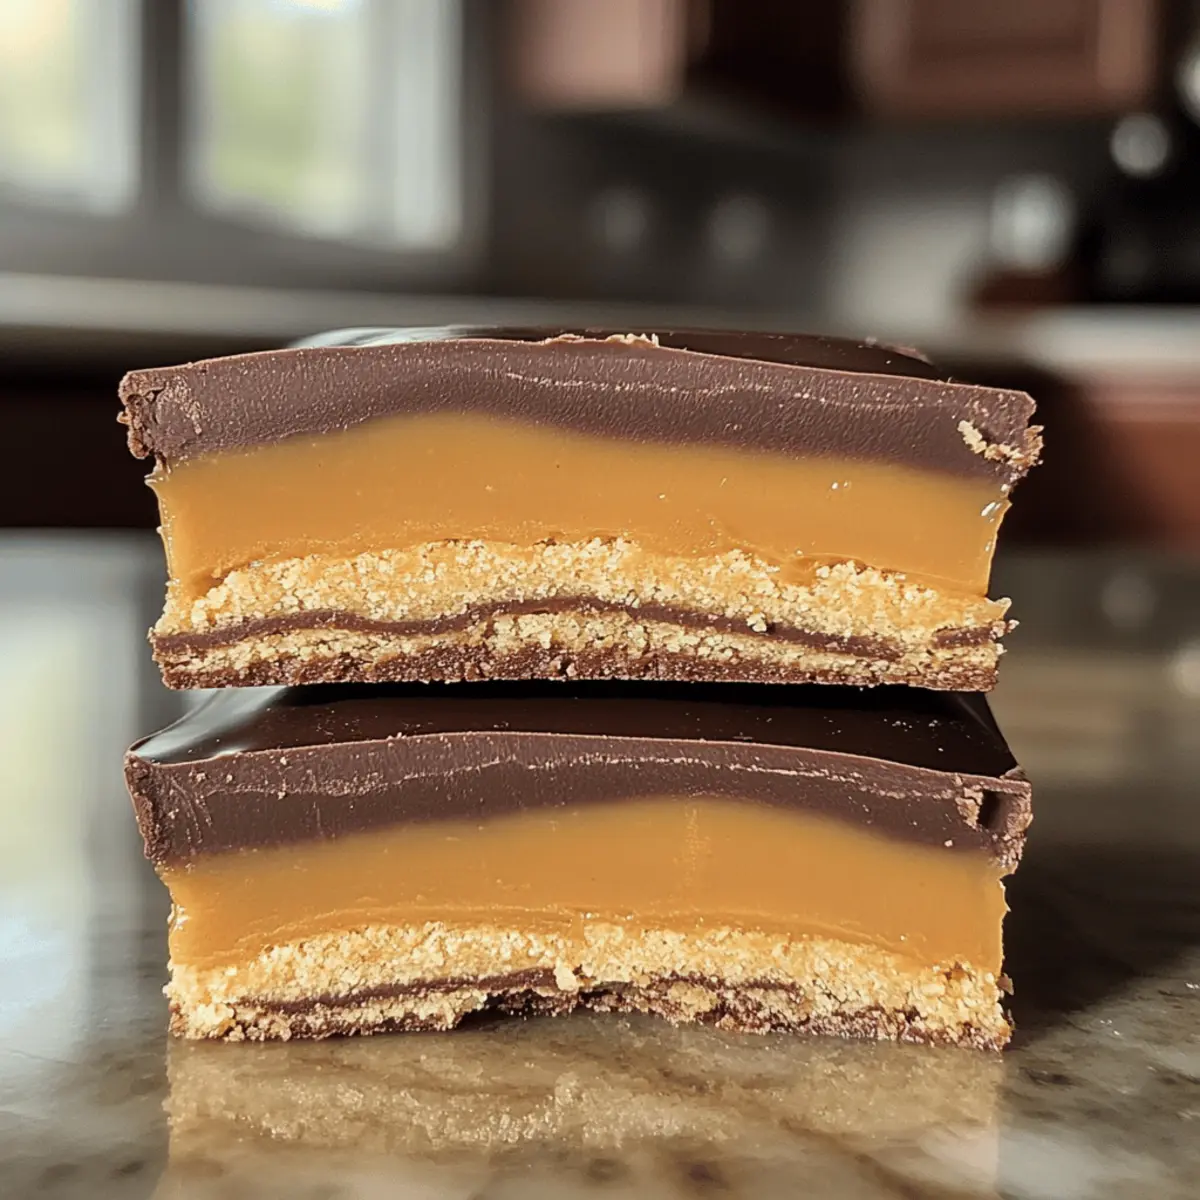
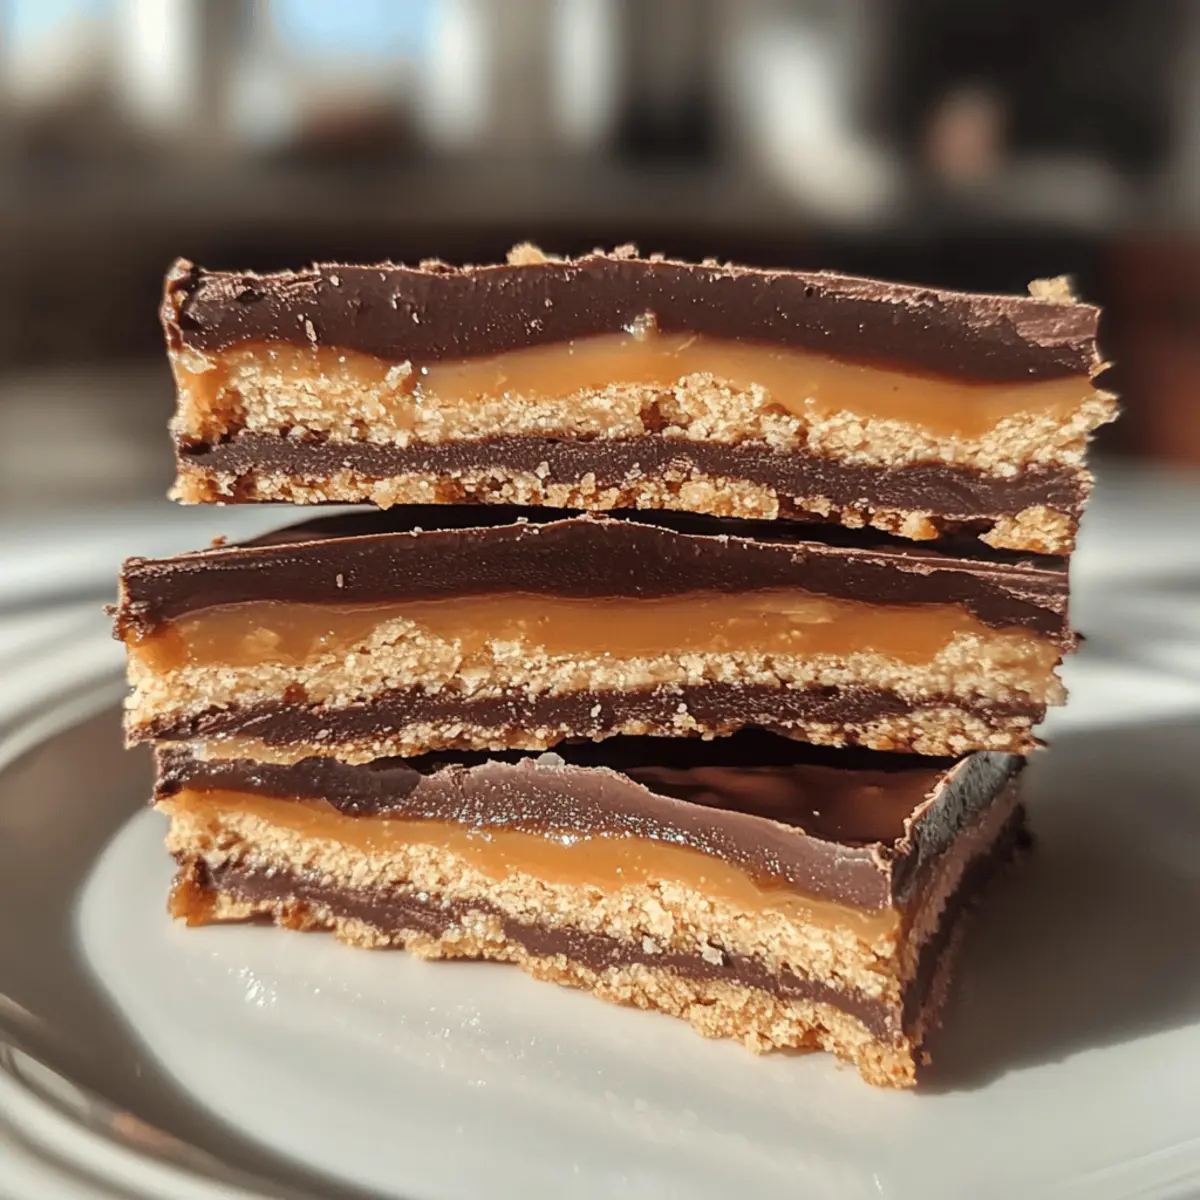
Preheat your oven to 350°F (175°C) and line a loaf pan with parchment paper to ensure easy removal. In a mixing bowl, combine the almond flour, melted butter (or coconut oil), maple syrup, vanilla extract, and salt. Mix until the mixture resembles coarse crumbs. Press this mixture firmly into the lined pan, ensuring an even layer. Bake for 10-12 minutes until golden brown and fragrant, then let it cool completely.

Step 2: Make the Caramel
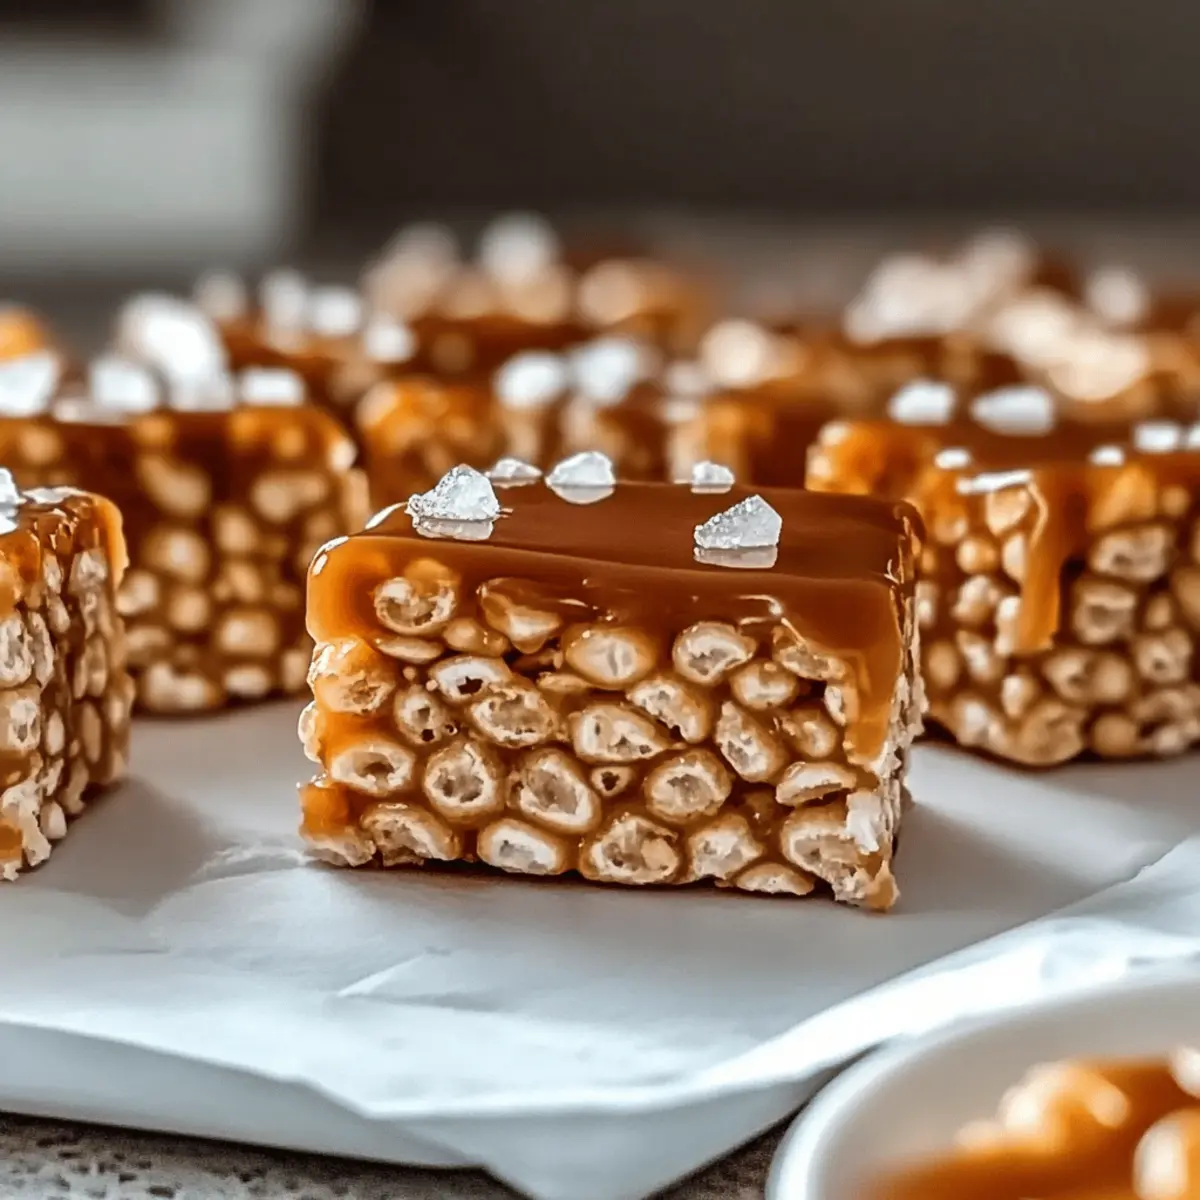
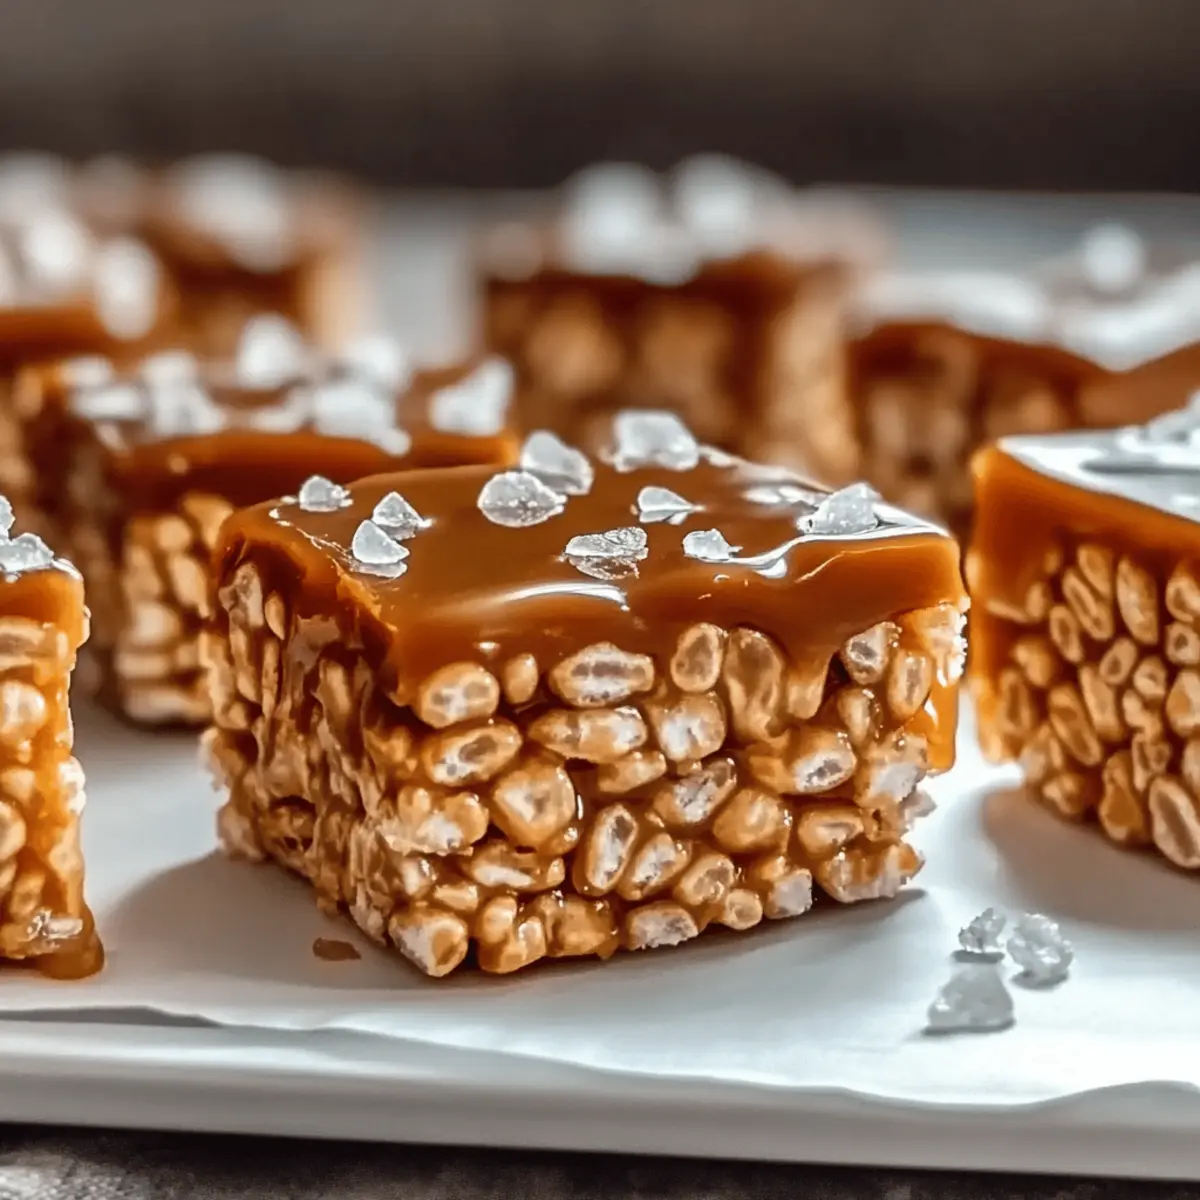
In a separate bowl, blend together creamy peanut butter, maple syrup, vanilla extract, and a bit of almond flour until the mixture is thick and smooth. This will serve as the luscious “caramel” layer for your Healthy Homemade Twix Bars. Once the shortbread base has cooled, spread the peanut butter mixture evenly over it. Place the pan in the freezer for 30 minutes to allow the caramel layer to firm up.

Step 3: Top with Chocolate
While the caramel is chilling, melt the dark chocolate chips and coconut oil together in a microwave-safe bowl, stirring every 30 seconds until smooth. Once melted, carefully pour the chocolate over the hardened caramel layer, tilting the pan slightly to ensure an even coating across the top. Return the pan to the freezer for an additional 15-20 minutes until the chocolate is set.

Step 4: Slice & Serve
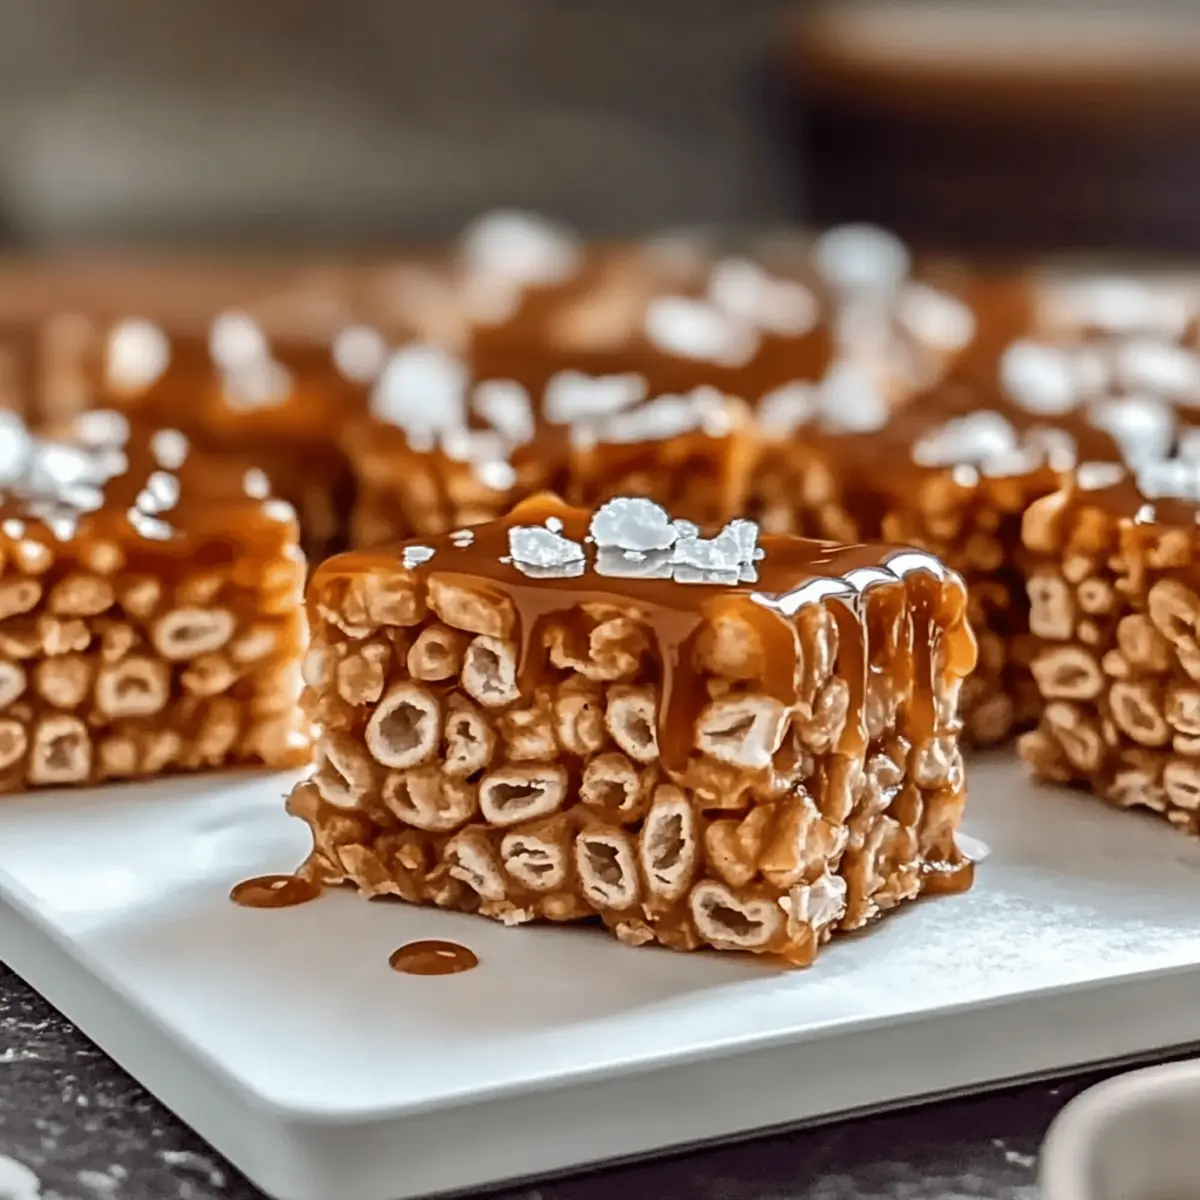
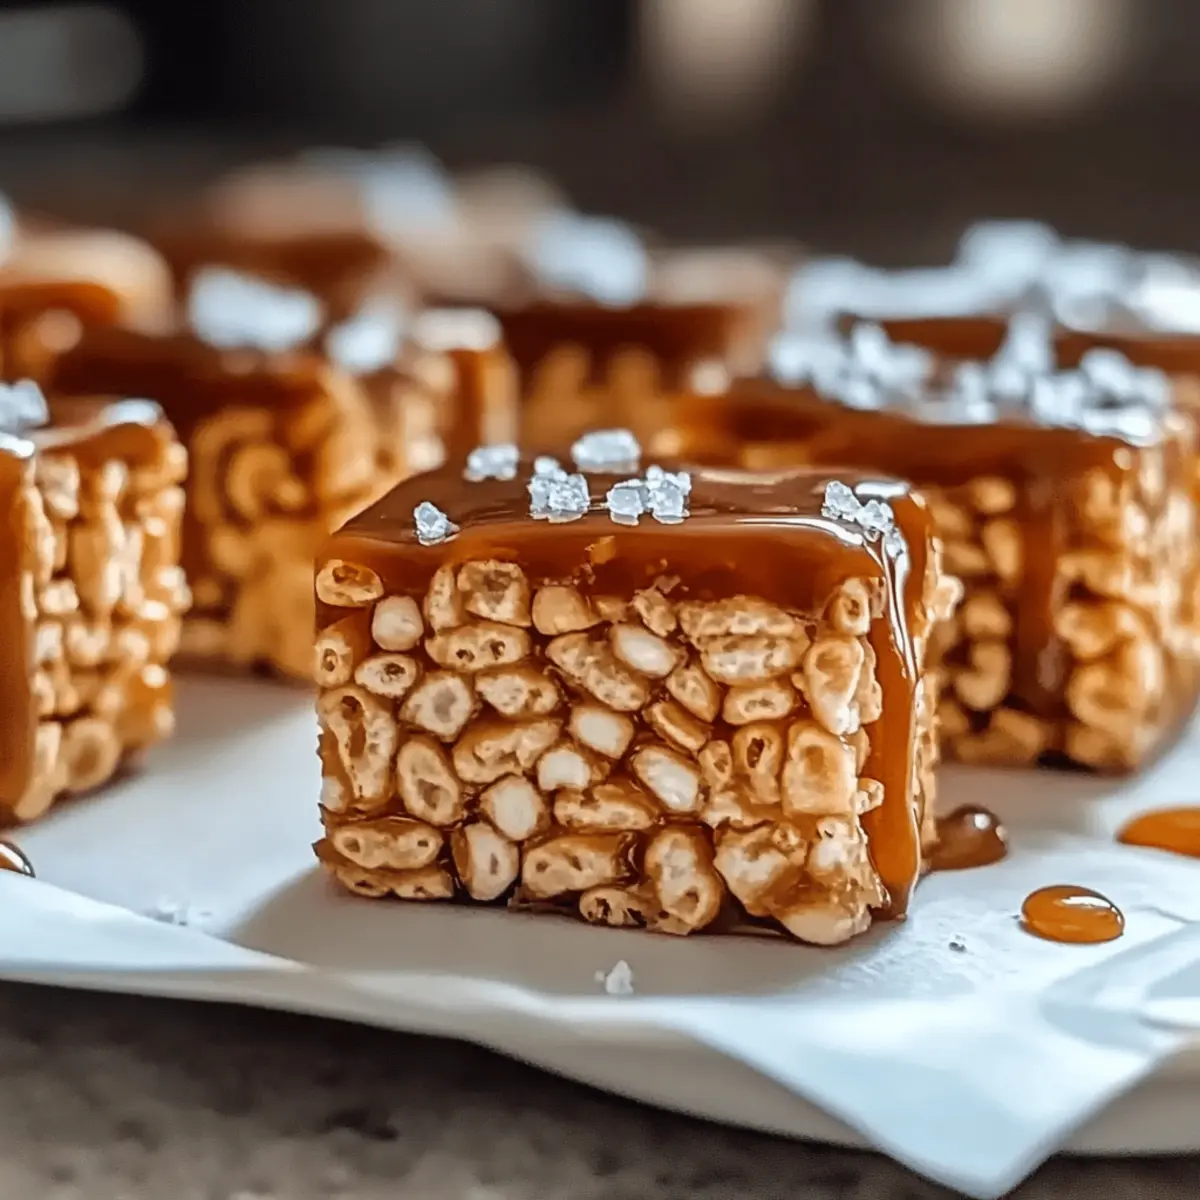
After everything has chilled and set well, lift the dessert from the loaf pan using the parchment paper for easy access. With a warm knife (run it under hot water), slice the bars into 12 even portions for the perfect treat size. Store the Healthy Homemade Twix Bars in an airtight container in the fridge for the best texture, and enjoy the indulgence guilt-free!

Healthy Homemade Twix Bars: Customize Your Treats

Feel free to unleash your creativity and tailor these delicious bars to suit your taste and dietary preferences!

  • Coconut Flour: Swap almond flour for coconut flour for a fun twist. This change will impart a subtle coconut flavor while keeping it gluten-free.

  • Nut Butter Variation: Experiment with different nut butters like creamy cashew or sunflower seed for a unique caramel flavor. Each variety brings its own personality to the bars, making it an exciting adventure!

  • Chocolate Variety: Use white chocolate chips for a sweeter spin. This irresistible topping creates a milky contrast with the rich caramel, giving it a playful look and flavor.

  • Flavor Infusion: Add a pinch of cinnamon or sea salt to the chocolate layer for a delightful kick. It elevates the taste, taking these bars from simple to extraordinary.

  • Texture Boost: Fold in some dark chocolate chunks or chopped nuts into the caramel layer for added crunch. This variation enhances the bars while providing an extra bite of deliciousness!

  • Dairy-Free Delight: Opt for dairy-free chocolate chips if you’re vegan or lactose intolerant. They offer the same rich flavor and satisfy those chocolate cravings seamlessly.

  • Spicy Kick: Feeling adventurous? Add a sprinkle of cayenne pepper to the chocolate layer for a surprising heat that contrasts beautifully with the sweetness.

  • Satisfy Your Cravings: If you’re in for a different homemade treat, consider trying these delightful recipes, such as Asparagus Soup Healthy or savory Shakshuka Savor Bold.

Make Ahead Options

These Healthy Homemade Twix Bars are perfect for meal prep, allowing you to indulge in a delightful treat without the last-minute hassle! You can prepare the almond flour shortbread base up to 24 hours in advance and store it covered in the fridge to maintain its freshness. The peanut butter “caramel” layer can also be made ahead of time; simply freeze it for up to 3 days in an airtight container. When you're ready to finish the bars, melt the dark chocolate, pour it over the caramel, and chill until set. With these make-ahead steps, you’ll enjoy delicious, guilt-free treats with minimal effort!

What to Serve With Healthy Homemade Twix Bars?

Indulge in a full culinary experience by pairing these delightful bars with complementary flavors and textures.

  • Rich Coffee: The boldness of freshly brewed coffee enhances the chocolate, making it a perfect companion for your treats.

  • Almond Milk: A soothing glass of almond milk brings a nutty flavor that pairs wonderfully with the bars, delighting both kids and adults alike.

  • Fresh Berries: Juicy strawberries or raspberries add a sweet-tart contrast, balancing the richness of the peanut butter and chocolate layers.

  • Whipped Coconut Cream: This light and airy topping offers a creamy, dairy-free option that accentuates the bars’ flavors beautifully.

  • Nutty Granola: Top your bars with a sprinkle of nutty granola for an extra crunch, enhancing the textural experience of these delicious squares.

  • Fruit Salad: A colorful mix of seasonal fruits provides a refreshing side, bringing a fruity brightness to your indulgent dessert.

  • Matcha Latte: The earthy tones of a matcha latte create an intriguing flavor combination, perfect for those seeking a unique pairing.

  • Dark Chocolate Dipped Fruit: Elevate your dessert game with fruit dipped in dark chocolate, echoing the chocolatey goodness of the Twix Bars.

  • Vanilla Ice Cream: A scoop of creamy vanilla ice cream next to a warm bar brings a delightful contrast that’s impossible to resist.

How to Store and Freeze Healthy Homemade Twix Bars

Fridge: Keep your Healthy Homemade Twix Bars in an airtight container in the refrigerator for up to 1 week. This will ensure they maintain their delightful texture and flavor.

Freezer: To enjoy them later, freeze the bars in a single layer, wrapped tightly in plastic wrap and then placed in a freezer-safe container. They can be stored for up to 2 months.

Thawing: When you’re ready to savor a bar, simply transfer it to the fridge to thaw for a few hours or overnight. This will retain its creamy and delicious texture.

Reheating: There’s no need to reheat these bars; enjoy them chilled for the best experience and to preserve that satisfying crunch!

Expert Tips for Healthy Homemade Twix Bars

  • Solid Caramel Required: Ensure the caramel layer is fully set before pouring the chocolate to avoid cracks. A firm layer keeps everything intact!
  • Adjust Consistency: If the caramel is too soft, freeze it longer or mix in more almond flour to achieve the right thickness for the Healthy Homemade Twix Bars.
  • Layering Technique: Allow the caramel to rest for 3-5 minutes before adding the chocolate layer; this helps in achieving the perfect layered finish.
  • Warm Knife Slicing: For clean slices, run a knife under hot water before cutting the bars. It prevents crumbs and ensures a neat presentation.
  • Freezing for Freshness: These bars can freeze well for up to 2 months! Double the batch to quench those sweet cravings anytime.

Healthy Homemade Twix Bars Recipe FAQs

What is the best way to select almond flour for this recipe?
Absolutely! When choosing almond flour, look for a finely ground, blanched version for the best texture in your Healthy Homemade Twix Bars. Avoid almond meal, which is coarser and can alter the consistency of the bars. Make sure there are no dark specks or hard chunks, as this can indicate old or improperly stored flour.

How long will Healthy Homemade Twix Bars last in the fridge?
These delightful bars can be stored in an airtight container in the fridge for up to 1 week. This storage method keeps their delightful texture intact, ensuring you can savor them throughout the week. Just remember to allow them to sit at room temperature for a few minutes for the best experience!

Can I freeze Healthy Homemade Twix Bars? If so, how?
Yes, you can absolutely freeze these bars! To do this, wrap each bar individually in plastic wrap and place them in a freezer-safe container. They will stay deliciously good for up to 2 months. When you’re ready to enjoy one, let it thaw in the fridge overnight or for a few hours at room temperature for the perfect texture.

What should I do if my caramel layer is too soft?
If your caramel layer is too soft, don’t worry! You can simply pop the dessert back into the freezer for an additional 10-15 minutes until it firms up nicely. Alternatively, if you’d like to adjust the consistency, adding a tablespoon of almond flour to the mixture can help thicken it while still maintaining that creamy goodness.

Are these Healthy Homemade Twix Bars suitable for people with nut allergies?
Unfortunately, these bars do contain nuts, specifically almond flour and peanut butter. For those with nut allergies, you could try substituting almond flour with sunflower seed flour or oat flour, and use a sunbutter or soy nut butter in place of peanut butter. Keep in mind that the flavor and texture may vary, but it allows for a delicious alternative!

Can I use a different sweetener besides maple syrup?
Very! You can substitute maple syrup with honey in a 1:1 ratio; just keep in mind that honey has a stronger flavor. Alternatively, a liquid stevia or agave syrup can also work well, but for stevia, be sure to check the conversion ratio on the label, as it can be much sweeter than maple syrup!

Healthy Homemade Twix Bars

Healthy Homemade Twix Bars: Guilt-Free Chocolate Indulgence

These Healthy Homemade Twix Bars are a guilt-free chocolate treat that combines a crunchy almond flour shortbread, creamy peanut butter caramel, and luscious dark chocolate—perfectly healthy and indulgent!
Print Recipe Pin Recipe
Prep Time 15 minutes mins
Cook Time 12 minutes mins
Chilling Time 30 minutes mins
Total Time 57 minutes mins
Servings: 12 bars
Course: Dessert
Cuisine: American
Calories: 150
Ingredients Equipment Method Nutrition Notes

Ingredients
  

Shortbread Base
  • 1 cup Almond Flour Substitute with coconut flour for a different texture.
  • 1/4 cup Melted Butter (or Coconut Oil) Coconut oil is a dairy-free option.
  • 1/4 cup Maple Syrup Substitute 1:1 with honey.
  • 1 teaspoon Vanilla Extract Omit for a neutral flavor.
  • 1/4 teaspoon Salt Omit for low-sodium diets.
Caramel Layer
  • 1/2 cup Creamy Peanut Butter Use a thicker brand to avoid softness.
Chocolate Coating
  • 1 cup Dark Chocolate Chips Use 70% or higher for less sugar.
  • 1 tablespoon Coconut Oil Omit for a richer chocolate flavor.

Equipment

  • Loaf pan
  • Mixing Bowl
  • Microwave-safe bowl

Method
 

Shortbread Base
  1. Preheat your oven to 350°F (175°C) and line a loaf pan with parchment paper. In a mixing bowl, combine almond flour, melted butter (or coconut oil), maple syrup, vanilla extract, and salt. Mix until resembling coarse crumbs. Press into the lined pan and bake for 10-12 minutes until golden brown and fragrant. Let cool completely.
Caramel Layer
  1. In a separate bowl, blend together creamy peanut butter, maple syrup, vanilla extract, and almond flour until thick and smooth. Spread over the cooled shortbread base. Place in freezer for 30 minutes to firm up.
Chocolate Coating
  1. Melt dark chocolate chips and coconut oil in a microwave-safe bowl, stirring every 30 seconds until smooth. Pour over the caramel layer, tilting the pan for an even coating. Return to freezer for 15-20 minutes until set.
Slice & Serve
  1. Lift the dessert from the loaf pan using parchment paper. Use a warm knife to slice into 12 even portions. Store in an airtight container in the fridge.

Nutrition

Serving: 1barCalories: 150kcalCarbohydrates: 12gProtein: 4gFat: 10gSaturated Fat: 3gPolyunsaturated Fat: 2gMonounsaturated Fat: 5gSodium: 50mgPotassium: 150mgFiber: 2gSugar: 5gCalcium: 4mgIron: 6mg

Notes

These bars can freeze well for up to 2 months! Double the batch to satisfy sweet cravings anytime.

Tried this recipe?

Let us know how it was!

Decadent Caramel Apple Cheesecake Dip for Cozy Fall Gatherings

August 25, 2025 by Grace Snow Leave a Comment

The aroma of crisp autumn air often brings back fond memories of family gatherings surrounded by apple orchards, where laughter mingles with the scent of warm spices. That cozy feeling is what inspired this easy and indulgent Caramel Apple Cheesecake Dip. With just a handful of ingredients, this no-bake treat combines creamy cheesecake and gooey caramel, making it a guaranteed crowd-pleaser at any get-together. Not only does it whip up in a flash, but it also invites everyone to dive in with tart apple slices and buttery graham crackers. Perfect for both casual snacking and festive occasions, this dip is the ultimate way to embrace the flavors of fall! Ready to impress your guests with a show-stopping dessert that requires minimal effort?

Why Is This Dip a Must-Try?

Quick Preparation: This recipe is a breeze to make, requiring no baking and minimal time in the kitchen—perfect for those busy fall days.

Luscious Layers: The creamy cheesecake base beautifully contrasts with the rich caramel, offering a delightfully indulgent treat that's sure to impress.

Crowd-Pleaser: Whether it's for a cozy family gathering or a festive celebration, this Caramel Apple Cheesecake Dip is guaranteed to be a hit that has everyone coming back for more!

Versatility: Serve it with tart apple slices, flaky graham crackers, or even pretzel rods for a sweet-savory experience. For added fun, check out Chicken Salad Apples for serving suggestions!

Easy Variations: Feel free to customize the flavors! Consider adding a sprinkle of cinnamon or using different apple varieties for a twist to please every palate at the table.

Caramel Apple Cheesecake Dip Ingredients

For the Creamy Base

  • Cream Cheese – Use full-fat for a rich, creamy texture that makes the dip delightful.
  • Dark Brown Sugar – Adds a depth of sweetness with its molasses flavor; light brown can substitute if needed.
  • Vanilla Bean Paste (or Vanilla Extract) – Enhances the flavor profile—vanilla paste gives a richer taste, but extract works fine.
  • Kosher Salt – Balances the sweetness of the dip; avoid fine salt to prevent over-salting.

For the Sweet Swirl

  • Caramel Sauce – The star ingredient that brings gooey sweetness; feel free to make homemade for an extra touch.

For the Lightness

  • Cool Whip (or Whipped Cream + Powdered Sugar) – Provides a fluffy texture; using whipped cream with sugar is better for stability.

For the Topper

  • Flaky Sea Salt – A pinch on top before serving enhances flavor and adds a delightful crunch.

Garnish Options

  • Tart Apple Slices – They provide a crisp contrast to the creamy dip, balancing sweetness.
  • Graham Crackers and Vanilla Wafers – These make excellent dippers for a crunchy, sweet addition.
  • Pecans – Add a nutty crunch that pairs beautifully with the dip's flavors.

Let the flavors of this Caramel Apple Cheesecake Dip steal the show at your next gathering!

Step‑by‑Step Instructions for Caramel Apple Cheesecake Dip

Step 1: Prepare the Creamy Base
Start by placing your softened cream cheese in a mixing bowl. Using an electric mixer on medium speed, beat the cream cheese for about 1 minute until it's smooth and creamy. Gradually add in the dark brown sugar, vanilla bean paste, and kosher salt, continuing to mix for another minute until the mixture is ultra-smooth and fluffy with no lumps.

Step 2: Swirl in Half of the Caramel
Next, gently fold half of the caramel sauce into the prepared cream cheese base. Use a spatula to create warm, flowing ribbons without fully mixing it in; you want to see swirls of caramel throughout. This adds a delightful contrast in flavor and presentation to your Caramel Apple Cheesecake Dip.

Step 3: Incorporate the Cool Whip
Now it's time to lighten up your dip by adding the Cool Whip. Use a figure-eight motion to fold it into the mixture, being careful not to deflate the airy texture. Stop once you see a few streaks of Cool Whip remaining; this gives the dip a beautiful marbled look and makes it extra fluffy and inviting.

Step 4: Layer & Add Final Touches
Spread the luscious dip into a serving dish, smoothing it out evenly with a spatula. Drizzle the remaining caramel sauce on top, and using a toothpick, swirl it in for a decorative touch. Sprinkle a pinch of flaky sea salt over the dip to enhance the sweetness and create an eye-catching finish.

Step 5: Chill or Serve Immediately
You can either serve your Caramel Apple Cheesecake Dip right away or chill it in the refrigerator for about 30 minutes to allow it to firm up. If you choose to chill, consider letting it sit at room temperature for 10 minutes before serving for optimal scoopability. Pair it with tart apple slices, graham crackers, or pecans for a delightful and inviting snack.

Expert Tips for Caramel Apple Cheesecake Dip

  • Choose Quality Ingredients: Fresh cream cheese and premium caramel sauce make a world of difference. Avoid generic brands for the best flavor in your Caramel Apple Cheesecake Dip.

  • Mixing Method: Beat the mixture thoroughly to eliminate lumps, but avoid over-mixing after adding the Cool Whip; this keeps the dip light and fluffy.

  • Chilling Time: For a firmer texture, refrigerate the dip for at least 30 minutes before serving. It also allows the flavors to meld beautifully.

  • Apple Freshness: To keep apple slices from browning, soak them briefly in lemon juice mixed with water. This simple trick enhances presentation!

  • Topping Ideas: Experiment with toppings! Consider drizzling extra caramel, sprinkling crushed nuts, or even adding a dash of cinnamon for flavor boosts and visual appeal.

Caramel Apple Cheesecake Dip Variations

Feel free to put your spin on this delightful dip and let your creativity shine through sweet flavors!

  • Flavor Variations: Try using Honeycrisp or Fuji apples instead of Granny Smith for a sweeter twist. Each bite will have a different flavor profile that entices your taste buds.

  • Spiced Up: Add cinnamon or nutmeg to the cream cheese mixture for a warm, inviting aroma. This addition will transport you right into the heart of fall!

  • Nutty Addition: Mix in some chopped pecans or walnuts for extra crunch and flavor. Nuts provide a pleasing texture contrast and a lovely nutty undertone in every scoop.

  • Vegan Option: Substitute cream cheese with vegan cream cheese and use coconut whipped cream instead of Cool Whip. This way, everyone can enjoy the creamy goodness, regardless of dietary needs.

  • Fun Dippers: Serve with pretzel rods for a sweet and salty combination. The crunch of the pretzels pairs perfectly with the luscious dip and adds an element of surprise!

  • Extra Sweetness: Drizzle more caramel sauce over the top before serving for those who can’t get enough of that gooey goodness, creating an eye-catching display.

  • Serving Suggestion: For a unique take, offer this dip alongside vanilla ice cream for a lovely dessert twist. The creamy dip atop chilled ice cream creates a heavenly dessert experience.

By exploring these variations, you can turn your Caramel Apple Cheesecake Dip into something truly unique! Feel free to also look into different serving ideas, such as pairing with Chicken Salad Apples for a delightful contrast.

Make Ahead Options

These Caramel Apple Cheesecake Dip is perfect for meal prep, allowing you to enjoy more time with loved ones at your gatherings. You can prepare the cream cheese base up to 2 days in advance, just store it in an airtight container in the refrigerator to maintain its creamy texture. When you're ready to serve, gently fold in the Cool Whip and finish with the caramel and flaky sea salt just before presenting it to your guests. This way, you'll have a luxurious, crowd-pleasing dip that tastes just as delicious as when freshly made, saving you time without sacrificing flavor!

What to Serve with Caramel Apple Cheesecake Dip?

The perfect accompaniment can elevate your Caramel Apple Cheesecake Dip into an unforgettable family feast or cozy gathering.

  • Tart Apple Slices: Their crisp texture contrasts wonderfully with the creamy dip, offering a light, fresh bite that balances sweetness.
  • Buttery Graham Crackers: These are classic dippers that bring a satisfying crunch and subtle sweetness to complement the dip’s rich flavors.
  • Vanilla Wafers: Smooth and sweet, they pair beautifully, adding another layer of flavor to every scoop of cheesecake dip.
  • Pecans: Chopped pecans provide a delightful nuttiness that enriches the overall experience, adding a satisfying crunch with each bite.
  • Savory Pretzel Rods: The saltiness of pretzels creates a delightful sweet and savory harmony, making for an unforgettable taste sensation.
  • Cinnamon-Dusted Pita Chips: Offer a warm, spiced element that aligns perfectly with the autumn theme, bringing warmth to every scoop.
  • Caramel Drizzle: Enhance the experience by drizzling extra caramel over your dippers to deepen that luscious taste and look.
  • Hot Apple Cider: Serve alongside your dip to warm everyone's hearts; the spices in the cider echo the flavors of fall beautifully.
  • Pumpkin Spice Latte: This iconic drink brings cozy vibes that perfectly harmonize with the dip’s rich, creamy profile and autumnal essence.
  • Vanilla Ice Cream: For a decadent dessert idea, top off your dip with a scoop of vanilla ice cream, creating a tasty duo sure to impress!

How to Store and Freeze Caramel Apple Cheesecake Dip

Room Temperature: Do not leave the dip out for more than 2 hours, as cream cheese can spoil if left unrefrigerated.

Fridge: Store any leftovers in an airtight container for up to 3 days. The flavors meld beautifully when allowed to sit in the fridge!

Freezer: For longer storage, freeze the cream cheese base (without Cool Whip) in an airtight container for up to 2 months. Thaw in the fridge before folding in Cool Whip.

Reheating: This dip is best served cold or at room temperature. Simply let it sit out for about 10 minutes after removing from the fridge for optimal scoopability.

Caramel Apple Cheesecake Dip Recipe FAQs

How do I select the best apples for this dip?
Absolutely! For a delightful contrast of flavors, I recommend using tart varieties like Granny Smith or Honeycrisp apples. Look for apples that are firm and free of dark spots—these will add a crunchy texture to your dip and enhance its overall flavor.

How should I store leftovers of the Caramel Apple Cheesecake Dip?
Store any leftover dip in an airtight container in the fridge for up to 3 days. This creamy concoction becomes even more delightful as the flavors meld together, giving you a tasty treat to enjoy later!

Can I freeze the Caramel Apple Cheesecake Dip?
Yes! You can freeze the cream cheese base separately (before adding Cool Whip) in an airtight container for up to 2 months. When you’re ready to enjoy, thaw it in the fridge overnight, then fold in the Cool Whip and fresh caramel before serving.

What should I do if my dip is too runny?
If you find your dip is on the runny side, don’t worry! Simply whip in an additional 2 tablespoons of powdered sugar. This will help thicken it up significantly. Also, chilling it for about 30 minutes can help firm it up as well.

Are there any allergy concerns with this recipe?
Very! This dip contains dairy from cream cheese and Cool Whip, which can be an issue for those with lactose intolerance or dairy allergies. However, you can substitute with dairy-free cream cheese and whipped toppings for an allergen-friendly alternative.

How long can I keep the cream cheese base before serving?
You can prepare the cream cheese base up to two days in advance. Just store it in the fridge and fold in the Cool Whip and caramel sauce just before serving. This makes it easier to manage your time, especially during a busy gathering!

Make sure to embrace these tips for a successful and scrumptious Caramel Apple Cheesecake Dip experience!

Caramel Apple Cheesecake Dip

Decadent Caramel Apple Cheesecake Dip for Cozy Fall Gatherings

This Caramel Apple Cheesecake Dip combines creamy cheesecake and gooey caramel, perfect for a cozy fall gathering.
Print Recipe Pin Recipe
Prep Time 15 minutes mins
Chill Time 30 minutes mins
Total Time 45 minutes mins
Servings: 8 dips
Course: Dessert
Cuisine: American
Calories: 250
Ingredients Equipment Method Nutrition Notes

Ingredients
  

For the Creamy Base
  • 8 oz cream cheese full-fat recommended
  • 1/2 cup dark brown sugar light brown can substitute if needed
  • 1 tsp vanilla bean paste or vanilla extract
  • 1/4 tsp kosher salt avoid fine salt
For the Sweet Swirl
  • 1 cup caramel sauce store-bought or homemade
For the Lightness
  • 8 oz Cool Whip or whipped cream with powdered sugar
For the Topper
  • 1 pinch flaky sea salt to enhance flavor
Garnish Options
  • 2 cups tart apple slices for dippers
  • 1 box graham crackers for dippers
  • 1 cup pecans for added crunch

Equipment

  • Mixing Bowl
  • Electric mixer
  • Spatula
  • toothpick

Method
 

Step-by-Step Instructions for Caramel Apple Cheesecake Dip
  1. Place softened cream cheese in a mixing bowl. Beat on medium speed for about 1 minute until smooth.
  2. Gradually add dark brown sugar, vanilla bean paste, and kosher salt; mix for another minute until fluffy.
  3. Gently fold half of the caramel sauce into the cream cheese base with a spatula to create swirls.
  4. Fold in the Cool Whip using a figure-eight motion, stopping once a few streaks remain for a marbled look.
  5. Spread dip into a serving dish, drizzle remaining caramel on top, swirl with a toothpick, and sprinkle with flaky sea salt.
  6. Chill for about 30 minutes or serve immediately, pairing with apple slices, graham crackers, or pecans.

Nutrition

Serving: 1cupCalories: 250kcalCarbohydrates: 35gProtein: 2gFat: 12gSaturated Fat: 7gPolyunsaturated Fat: 1gMonounsaturated Fat: 3gCholesterol: 30mgSodium: 200mgPotassium: 150mgFiber: 1gSugar: 26gVitamin A: 500IUVitamin C: 1mgCalcium: 50mgIron: 0.5mg

Notes

Best served cold or at room temperature. Let it sit out for about 10 minutes after refrigeration for optimal scoopability.

Tried this recipe?

Let us know how it was!

Cinnamon Sugar Fried Apples: Your New Go-To Comfort Dessert

August 25, 2025 by Grace Snow Leave a Comment

As I hurried past the local fair, the sweet aroma of caramelized apples and cinnamon wafted through the air, and I felt a rush of nostalgia wash over me. That’s when it hit me—why not replicate that comforting memory at home? Enter my recipe for Cinnamon Sugar Fried Apples, a delightful dessert that captures the magical essence of county fairs in just 25 minutes. This easy-to-make treat is not only a quick fix for your cravings but also versatile enough to crown pancakes, dollop on yogurt, or serve over vanilla ice cream. Plus, for those looking for a vegan twist, I've got you covered with simple substitutions! Ready to transform ordinary days into something a little more special?

Why You’ll Love Cinnamon Sugar Fried Apples

Simplicity at Its Best: This recipe is quick and requires minimal ingredients, making it accessible for home cooks of all skill levels.

Nostalgic Comfort: Every bite transports you back to carefree days at the county fair, blending the warmth of cinnamon with the sweetness of caramelized apples.

Versatile Serving Options: Whether you’re topping oatmeal, pancakes, or indulging in a scoop of ice cream, these fried apples elevate any meal. Check out my Pumpkin Cinnamon Roll for another warm and cozy dessert!

Healthy Substitutions: Easily transform this dish into a vegan delight with simple swaps, so everyone can enjoy!

Family-Friendly Appeal: Kids and adults alike will love the sweet, gooey texture—perfect for family gatherings or cozy brunches.

Prepare to make this your go-to dessert and watch everyone come back for seconds!

Cinnamon Sugar Fried Apples Ingredients

For the Fried Apples

• Unsalted Butter – Essential for richness and flavor; substitute vegan butter for a dairy-free option.
• Granulated Sugar – Provides sweetness and helps create a glossy glaze; consider swapping half for brown sugar for deeper flavor.
• Ground Cinnamon – Adds warmth and spice; choose either Ceylon or Cassia based on your preference.
• Granny Smith Apples – Tartness balances sweetness; slice them into ½-inch thick pieces for even cooking.
• Lemon Juice (Optional) – Brightens the overall flavor, but can be omitted if you prefer.
• Salt (Pinch) – Enhances flavor and balances sweetness.

Give this delightful recipe a try, and savor the heavenly taste of Cinnamon Sugar Fried Apples—it’s a treat your whole family will adore!

Step‑by‑Step Instructions for Cinnamon Sugar Fried Apples

Step 1: Melt the Butter
In a large skillet, melt 3 tablespoons of unsalted butter over medium heat until it becomes foamy. The butter should shimmer but not brown too quickly; adjust the heat as needed. Once melted, add a tiny pinch of salt to enhance the flavor of your Cinnamon Sugar Fried Apples.

Step 2: Create the Glaze
Sprinkle in ¼ cup of granulated sugar and 1 tablespoon of ground cinnamon into the melted butter, whisking continuously for about 2 minutes. Keep an eye on the mixture; it should turn into a glossy syrup without darkening too much. If it starts to darken quickly, lower the heat to maintain its ideal consistency.

Step 3: Add the Apples
Now, introduce your sliced Granny Smith apples—all at once—to the syrupy mixture in the skillet. They should sizzle as they hit the hot surface. Using tongs or a spatula, gently toss the apple slices to evenly coat them in the cinnamon-sugar glaze, creating a mouthwatering aroma.

Step 4: Cook the Apples
Allow the apples to cook for 10–15 minutes, stirring occasionally. You want the apples to become tender yet maintain their shape; they should poke easily with a fork when ready. If desired, add a squeeze of lemon juice halfway through cooking to brighten the flavors, enhancing your Cinnamon Sugar Fried Apples.

Step 5: Let the Syrup Thicken
Once the apples reach the desired tenderness, remove the skillet from the heat and let it sit for about 5 minutes. This resting period allows the syrup to thicken, making the resulting dish rich and decadent while ensuring the syrup coats the apples beautifully.

Step 6: Serve Warm
Spoon your Cinnamon Sugar Fried Apples into bowls, serving them warm over fluffy pancakes, ice cream, or yogurt. Their glossy finish and delightful sweetness will bring smiles to your table, making them a comforting treat that feels like a warm hug on a plate.

What to Serve with Cinnamon Sugar Fried Apples

These warm and inviting fried apples create the perfect opportunity for a cozy meal, enhancing each dish they accompany.

  • Creamy Mashed Potatoes: The rich, buttery flavor of mashed potatoes complements the sweet apples, balancing savory and sweet in every bite.

  • Fluffy Buttermilk Pancakes: Serve the fried apples over pancakes for a delightful breakfast twist, turning your morning into a special occasion.

  • Vanilla Ice Cream: The cold creaminess of vanilla ice cream contrasts beautifully with the warm, gooey apples, creating a heavenly dessert experience.

  • Greek Yogurt: Spoon the fried apples atop Greek yogurt for a light yet indulgent treat, adding protein and tang to the sweetness.

  • Warm Oatmeal: Mix some cinnamon sugar fried apples into warm oatmeal for a cozy breakfast, filling your home with delightful aromas.

  • Savory Sausages: Pair with savory breakfast sausages for a delicious contrast; the sweetness from the apples complements the spiciness of the sausages beautifully.

  • Sweet Tea or Cider: Enjoy a glass of sweet tea or spiced cider on the side, enhancing the overall nostalgic and comforting experience of your meal.

  • Butter Pecan Cookies: For dessert lovers, serve alongside butter pecan cookies for a delightful treat that heightens the flavors of warm cinnamon and apples.

  • Caramel Sauce Drizzle: For those who want to go the extra mile, a drizzle of caramel sauce over the dish will add an indulgent touch that pairs perfectly!

  • Lemonade or Sparkling Water: A refreshing glass of lemonade or sparkling water provides a light contrast to the rich dessert, keeping things balanced and refreshing.

Make Ahead Options

These Cinnamon Sugar Fried Apples are perfect for busy home cooks looking to save time during the week! You can prepare the apple slices up to 24 hours in advance; simply slice and toss them with a teaspoon of lemon juice (to prevent browning) before storing them in an airtight container in the refrigerator. You can also mix the sugar and cinnamon together ahead of time, so you're one step closer to a delightful dessert! When you're ready to cook, melt the butter and quickly incorporate the prepared apples and sugar mixture, cooking just until they are tender and coated in that luscious syrup. This way, you'll have a comforting treat on the table with minimal effort—just as delicious as if you made them from scratch!

Expert Tips for Cinnamon Sugar Fried Apples

  • Control the Heat: Keep the skillet on medium heat to avoid burning the sugar while making the glaze.

  • Uniform Slices: Slice your apples evenly to ensure they cook at the same rate, preventing some from becoming mushy.

  • Cook in Batches: If doubling the recipe, use a larger skillet or cook in batches to avoid overcrowding, which can lead to uneven cooking.

  • Dissolve Sugar Fully: Whisk thoroughly to ensure the sugar dissolves completely; gritty syrup is a common mistake to avoid.

  • Dry Apples First: Pat your apple slices dry before cooking to prevent them from becoming soggy in the syrup.

Each tip helps elevate your Cinnamon Sugar Fried Apples to perfection!

How to Store and Freeze Cinnamon Sugar Fried Apples

Fridge: Store leftovers in a sealed jar or airtight container for up to 5 days. Ensure they cool completely before refrigerating to maintain texture.

Freezer: If you want to freeze Cinnamon Sugar Fried Apples, place them in an airtight container or freezer bag. They can be frozen for up to 3 months for best flavor.

Reheating: To enjoy stored fried apples, reheat them gently on the stovetop over low heat with a teaspoon of water. This helps revive the syrupy consistency.

Serving Suggestions: Once reheated, serve them warm over pancakes, oatmeal, or yogurt, bringing back that delightful comfort!

Cinnamon Sugar Fried Apples Variations

Feel free to get creative and make this recipe your own with these delightful twists!

  • Bourbon Kiss: Stir in 2 tablespoons of bourbon for a grown-up version that adds a warm, rich undertone. It’s an unexpected twist that elevates the flavors beautifully.

  • Apple Pie Vibes: Enhance the sweetness with a pinch of nutmeg and cardamom for that quintessential apple pie taste. This variation will take you on a journey back to grandma's kitchen!

  • Savory-Sweet: Finish off with cracked black pepper and flaky sea salt for an amazing contrast to the sweetness. This surprising flavor combination will wow your guests!

  • Vegan Version: Swap in plant-based butter and coconut sugar, then top with coconut whip to create a vegan-friendly dessert that everyone can enjoy. This version is light and equally delicious!

  • Oatmeal’s BFF: Add rolled oats to the skillet during the last 5 minutes for a heartier breakfast option. These fried apples tucked into oatmeal create a cozy morning treat.

  • Nutty Crunch: Sprinkle chopped walnuts or pecans in the last few minutes of cooking for added texture and a delightful crunch. The nuttiness complements the soft apples perfectly.

  • Cinnamon Sugar Fried Pears: Try using pears instead of apples for a sweeter, softer alternative that’s equally satisfying. They cook down beautifully and add a unique flair.

For more inspiration, serve your crispy creations alongside fluffy buttermilk pancakes or a dollop of yogurt, reminiscent of my favorite Pumpkin Cinnamon Roll recipe for a truly comforting experience!

Cinnamon Sugar Fried Apples Recipe FAQs

What type of apples are best for this recipe?
I recommend using Granny Smith apples for their tartness, which wonderfully balances the sweetness of the sugar and cinnamon. Their firmness helps them maintain structure when cooked, ensuring you get tender, yet not mushy, slices.

How should I store leftovers?
Store any leftover Cinnamon Sugar Fried Apples in a sealed jar or airtight container in the refrigerator for up to 5 days. Make sure they cool completely before sealing to maintain their texture and flavor.

Can I freeze Cinnamon Sugar Fried Apples?
Absolutely! To freeze them, place the cooled fried apples in an airtight container or freezer bag. They can be frozen for up to 3 months. When you’re ready to enjoy, simply thaw in the refrigerator overnight, and reheat gently on the stovetop with a teaspoon of water to restore their syrupy consistency.

What can I do if my sugar syrup turns gritty?
If your syrup gets gritty, it means the sugar hasn't fully dissolved. To fix this, make sure to whisk the mixture thoroughly while it's cooking. If you notice it still isn't smooth, lower the heat and keep whisking until it becomes glossy and cohesive again.

Are there any dietary considerations for this recipe?
Yes! For a dairy-free version, simply substitute unsalted butter with vegan butter and use coconut or brown sugar. Always check for allergies, especially with toppings like ice cream or yogurt, and consider alternatives if you're serving those with dietary restrictions.

How do I make sure my apples don’t get mushy?
To prevent mushy apples, ensure you slice them into even ½-inch thick pieces. Also, avoid overcrowding the skillet by cooking in batches if you're doubling the recipe—this ensures even cooking and maintains their texture beautifully!

Cinnamon Sugar Fried Apples

Cinnamon Sugar Fried Apples: Your New Go-To Comfort Dessert

Cinnamon Sugar Fried Apples is a delightful dessert that blends caramelized apples and cinnamon, evoking nostalgia from county fairs.
Print Recipe Pin Recipe
Prep Time 10 minutes mins
Cook Time 15 minutes mins
Resting Time 5 minutes mins
Total Time 30 minutes mins
Servings: 4 servings
Course: Dessert
Cuisine: American
Calories: 200
Ingredients Equipment Method Nutrition Notes

Ingredients
  

For the Fried Apples
  • 3 tablespoons Unsalted Butter Substitute vegan butter for a dairy-free option.
  • 1/4 cup Granulated Sugar Consider swapping half for brown sugar for deeper flavor.
  • 1 tablespoon Ground Cinnamon Choose either Ceylon or Cassia based on your preference.
  • 4 Granny Smith Apples Slice into ½-inch thick pieces.
  • 1 tablespoon Lemon Juice Optional, can be omitted.
  • 1 pinch Salt Enhances flavor.

Equipment

  • Skillet

Method
 

Step-by-Step Instructions
  1. Melt the Butter: In a large skillet, melt the butter over medium heat until foamy, adding a pinch of salt.
  2. Create the Glaze: Whisk in granulated sugar and ground cinnamon for about 2 minutes until glossy.
  3. Add the Apples: Introduce sliced Granny Smith apples to the skillet and toss to coat in the glaze.
  4. Cook the Apples: Cook for 10-15 minutes until tender but not mushy, stirring occasionally.
  5. Let the Syrup Thicken: Remove from heat and let rest for 5 minutes to thicken.
  6. Serve Warm: Spoon into bowls and serve over pancakes, ice cream, or yogurt.

Nutrition

Serving: 1cupCalories: 200kcalCarbohydrates: 30gProtein: 1gFat: 9gSaturated Fat: 5gMonounsaturated Fat: 4gCholesterol: 15mgSodium: 100mgPotassium: 150mgFiber: 3gSugar: 20gVitamin A: 500IUVitamin C: 5mgCalcium: 20mgIron: 0.5mg

Notes

This recipe is easy to make and can be converted into a vegan delight with simple swaps. Perfect for family gatherings or a cozy treat.

Tried this recipe?

Let us know how it was!

Forgotten Pudding: A Heavenly Light Dessert to Love

August 25, 2025 by Grace Snow Leave a Comment

Stepping into the world of desserts, I often find myself enchanted by the simple elegance of a classic recipe that feels almost forgotten. Enter Forgotten Pudding, a light and luxurious marshmallow delight that’s bound to win over your heart (and stomach!). This gluten-free gem is not only easy to prepare—just whip, spread, and let the oven work its magic overnight—but it also offers a delightful, airy texture that transforms any meal into a special occasion. It's the perfect make-ahead dessert for gatherings, ensuring you can savor the moment rather than being tied to the kitchen. Topped with fresh fruits and a cloud of cream, this treat beckons with its promise of nostalgia and charm. Curious how to recreate this elegant dessert in your own home? Let’s dive into the details!

Why is Forgotten Pudding a must-try?

Lightness: This dessert boasts an airy quality that melts in your mouth, making it a perfect ending to any meal.
Ease of Preparation: With just a few basic steps, you can whip up this decadent treat without any fuss.
Gluten-Free Goodness: Ideal for those with dietary restrictions, everyone can indulge in this delightful dessert.
Versatile Toppings: Top it with fresh fruits or whipped cream, allowing you to customize every serving based on your guests’ preferences.
Make-Ahead Magic: Prepare it the night before and let the oven do the work, freeing you up to enjoy your gathering—just like with our Chocolate Pudding Cake.
Crowd-Pleasing Flavor: Its nostalgic taste is sure to captivate both young and old alike, making it a hit at any gathering.

Forgotten Pudding Ingredients

For the Meringue

  • Egg Whites – Ensure they’re at room temperature for better whipping to achieve that light, fluffy texture in your Forgotten Pudding.
  • Granulated Sugar – This sweetener stabilizes the meringue; avoid brown sugar for a cleaner finish.
  • Cream of Tartar – It helps stabilize the egg whites, allowing for maximum volume when whipped.
  • Vanilla Extract – Adds a lovely aromatic flavor; feel free to substitute with almond extract for a twist.

For Topping

  • Fresh Fruit (e.g., berries, passion fruit) – Use any in-season fruits for a burst of freshness that complements the pudding beautifully; they make a perfect garnish.
  • Whipped Cream – A dollop of freshly whipped cream enhances the dessert's creamy texture; it also serves as the perfect contrast to the light pudding.

Step‑by‑Step Instructions for Forgotten Pudding

Step 1: Preheat and Prepare
Preheat your oven to 200°F (93°C) and line a swiss roll tin with parchment paper, allowing some overhang for easy removal later. This will be the base where your Forgotten Pudding bakes. Make sure the parchment is smooth against the tin to ensure an even meringue surface.

Step 2: Whip the Egg Whites
In a clean mixing bowl, add the room temperature egg whites along with the cream of tartar. Using a hand or stand mixer, beat the mixture on medium speed until soft peaks begin to form, which should take about 3–4 minutes. Visualize peaks that gently flop over when you lift the whisk—this means you’re on the right track.

Step 3: Add Sugar Gradually
Once soft peaks have formed, gradually add the granulated sugar, about a tablespoon at a time. Increase the speed to high and continue to whip until you achieve stiff peaks, which typically takes an additional 4–5 minutes. The mixture should be glossy and hold firm peaks when the whisk is removed, indicating your Forgotten Pudding is perfect for spreading.

Step 4: Incorporate Vanilla
Carefully fold in the vanilla extract into the meringue using a spatula. This step adds a lovely aromatic depth to your Forgotten Pudding. Ensure it is well combined but avoid over-mixing, as you want to maintain the airy texture achieved during the whipping process.

Step 5: Spread the Meringue
Transfer the meringue mixture into the prepared swiss roll tin. Use an offset spatula to spread it evenly, smoothing the surface to about 1-inch thick. Aim for a nice, flat top so that your Forgotten Pudding bakes uniformly, ensuring an even textural finish.

Step 6: Bake and Cool Overnight
Turn off the oven and place the tin inside, allowing the meringue to cool slowly overnight. The residual heat will dry out the meringue to achieve a crispy exterior and soft marshmallow-like center. This is the beauty of Forgotten Pudding—patience leads to perfection!

Step 7: Serve with Fresh Toppings
When ready to serve, gently remove the meringue from the tin by lifting it out using the parchment overhang. Top generously with freshly whipped cream and your choice of seasonal fruit, like berries or passion fruit. This fresh garnish enhances both flavor and presentation, making your Forgotten Pudding absolutely irresistible.

Step 8: Enjoy the Memories
Serve your delightful Forgotten Pudding immediately to capture its best texture. The contrast between the crisp shell and the soft, airy interior will transport you and your guests to dessert heaven. Revel in the compliments and relive the joy of creating a nostalgic classic!

Forgotten Pudding Variations & Substitutions

Feel free to let your creativity soar and customize the Forgotten Pudding to suit your taste or dietary needs!

  • Dairy-Free: Substitute whipped coconut cream for fresh cream, offering a delightful twist of flavor and texture.
  • Fruit Alternatives: Use tropical fruits like mango or pineapple for an exotic spin; they add a refreshing sweetness that’s delightful!
  • Zesty Kick: Swap out vanilla extract for citrus zest like lemon or orange for a refreshing touch that brightens the dessert.
  • Berries Galore: Experiment with various berries—strawberries, blueberries, or raspberries add vibrant color and tangy goodness.
  • Nutty Flavor: Incorporate a dash of almond or hazelnut extract instead of vanilla for a rich, nutty aroma that complements the meringue beautifully.
  • Chocolate Indulgence: Drizzle melted chocolate or sprinkle cocoa powder on top for a stunning visual and delightful chocolatey flavor.
  • Event-Specific Toppings: During holidays, consider topping with festive fruits like poached pears or pomegranate seeds for seasonal charm.
  • Crispy Texture: Add crushed meringue pieces on top for a crunchy texture that contrasts with the pudding’s softness—just like with our Chocolate Pudding Cake!

Each variation enhances the charm of your Forgotten Pudding, ensuring it's as unique as the gatherings you share it with!

Expert Tips for Forgotten Pudding

• Egg Whites Matter: Use room temperature egg whites for better volume. Cold egg whites don’t whip as easily, impacting your Forgotten Pudding’s texture.

• Sugar Slowly: Gradually adding sugar while whipping ensures a smoother meringue. If added too quickly, you risk collapsing the volume you’ve created.

• Avoid Humidity: Keep your pudding in a dry environment to prevent it from absorbing moisture, which can ruin that delicate, airy texture.

• Perfect Peaks: Know the difference between soft and stiff peaks. Look for glossy, firm peaks to achieve that lightness essential to your Forgotten Pudding.

• Flavor Testing: The vanilla extract can be swapped for other flavors. Experiment to find the one that sings to you, whether it’s almond or even mint.

What to Serve with Forgotten Pudding

Dreaming of the perfect meal to accompany your light and airy dessert?

  • Fresh Berries: The tartness of berries like raspberries and strawberries provides a refreshing contrast to the sweet, fluffy pudding. Their vibrant colors make your plate pop, enhancing presentation.

  • Whipped Cream: A generous dollop of freshly whipped cream adds a luxurious touch. Its rich, velvety texture beautifully complements the airy pudding, creating a decadent experience with every bite.

  • Mint Leaves: Adding a sprinkle of fresh mint can elevate the dish, introducing a cool freshness that brightens the flavors. Plus, the herbal notes can balance the sweetness, offering a delightful finish.

  • Light White Wine: A chilled glass of fruity Sauvignon Blanc or a light Prosecco pairs perfectly. The crispness of these wines cuts through the richness of the pudding, making it an elegant choice for dessert.

  • Coconut Sorbet: For an exotic twist, serve alongside a scoop of coconut sorbet. The tropical flavors harmonize beautifully while offering a refreshing coolness that enhances the dessert's lightness.

  • Chocolate Drizzle: A drizzle of warm chocolate ganache can add an indulgent twist to your dessert. The rich chocolate creates a delightful interplay of flavors with the sweet, fluffy pudding.

With these tasty pairings, your Forgotten Pudding will shine as the star of the dessert table!

Make Ahead Options

Forgotten Pudding is the ideal dessert for meal prep, allowing you to get ahead and enjoy more time with loved ones. You can prepare the meringue base up to 24 hours in advance and store it wrapped in a cool, dry place to maintain its crispness. After allowing it to cool overnight in the oven, let it sit at room temperature until you're ready to top it with whipped cream and fresh fruit just before serving. This way, you'll have a stunning and delicious dessert that's just as delightful as if you made it the same day, ensuring it remains airy and light for your gathering.

How to Store and Freeze Forgotten Pudding

Room Temperature: Enjoy homemade Forgotten Pudding fresh for the best taste; it should not be left out more than 2 hours.

Fridge: If you have leftovers topped with fruit and cream, refrigerate them in an airtight container for up to 24 hours. Serve chilled for the best texture.

Freezer: The meringue base can be frozen without toppings for up to 1 month. Wrap it tightly in plastic wrap, then place it in a freezer-safe bag to prevent freezer burn.

Reheating: To serve, let the pudding thaw in the refrigerator overnight. For a quick warm-up, place it in a low-temperature oven for 10-15 minutes, but avoid overheating to maintain the airy texture.

Forgotten Pudding Recipe FAQs

How do I choose the right egg whites for Forgotten Pudding?
Absolutely! For the best results in your Forgotten Pudding, always opt for fresh, high-quality eggs. Room temperature egg whites whip much better than cold ones, giving your meringue the lightness it needs. You can separate the egg whites from the yolks ahead of time; just ensure there’s no yolk contamination, as even a tiny bit can hinder the whipping process.

What’s the best way to store leftovers of Forgotten Pudding?
Very! If you have leftovers topped with cream and fruit, place them in an airtight container and refrigerate for up to 24 hours. For the best taste and texture, serve chilled, as this keeps the pudding light and the toppings fresh. Remember, it’s best enjoyed the day it's made!

Can I freeze Forgotten Pudding?
Certainly! To freeze your meringue base, wrap it tightly in plastic wrap and then place it in a freezer-safe bag to prevent freezer burn. It can be stored in the freezer for up to 1 month. When you're ready to enjoy, let it thaw in the refrigerator overnight for a gentle defrost. This way, you can keep the airy texture intact.

What if my meringue didn’t achieve stiff peaks?
Don't worry! If your meringue didn’t reach stiff peaks, it could be due to greasy equipment or under-beating. Make sure your mixing bowl and whisk are completely clean and free of any grease. If you're not getting the volume you want, continue whipping at medium to high speed until you see glossy, firm peaks. If the mixture is still runny, it might help to add a little more cream of tartar or sugar gradually while beating.

Are there any dietary considerations for Forgotten Pudding?
Indeed! This delightful dessert is gluten-free, making it perfect for those with dietary restrictions. However, if you're serving guests with allergies, be mindful of the fresh fruits and whipped cream, as they may also cause reactions. Always ask about specific allergens before preparing or serving the pudding!

Forgotten Pudding

Forgotten Pudding: A Heavenly Light Dessert to Love

Discover the delight of Forgotten Pudding, a gluten-free dessert that combines elegance and ease for any occasion.
Print Recipe Pin Recipe
Prep Time 15 minutes mins
Cooling Time 8 hours hrs
Total Time 8 hours hrs 15 minutes mins
Servings: 8 servings
Course: Dessert
Cuisine: Gluten-Free
Calories: 150
Ingredients Equipment Method Nutrition Notes

Ingredients
  

For the Meringue
  • 4 large Egg Whites Ensure they’re at room temperature.
  • 1 cup Granulated Sugar Avoid brown sugar for a cleaner finish.
  • 1 teaspoon Cream of Tartar Helps stabilize the egg whites.
  • 1 teaspoon Vanilla Extract Can substitute with almond extract.
For Topping
  • 2 cups Fresh Fruit e.g., berries, passion fruit.
  • 1 cup Whipped Cream Freshly whipped enhances texture.

Equipment

  • Swiss roll tin
  • Mixing Bowl
  • Hand mixer or stand mixer
  • Offset spatula

Method
 

Step‑by‑Step Instructions for Forgotten Pudding
  1. Preheat your oven to 200°F (93°C) and line a swiss roll tin with parchment paper.
  2. In a clean mixing bowl, add the room temperature egg whites along with the cream of tartar. Beat on medium speed until soft peaks form, about 3–4 minutes.
  3. Gradually add the granulated sugar, about a tablespoon at a time. Increase to high speed and whip until stiff peaks form, about 4–5 minutes.
  4. Carefully fold in the vanilla extract into the meringue using a spatula.
  5. Transfer the meringue mixture into the prepared swiss roll tin and spread it evenly.
  6. Turn off the oven and place the tin inside, allowing the meringue to cool slowly overnight.
  7. Remove the meringue from the tin and top generously with whipped cream and fresh fruit.
  8. Serve immediately to enjoy the contrast between the crisp shell and soft interior.

Nutrition

Serving: 1servingCalories: 150kcalCarbohydrates: 31gProtein: 3gSodium: 5mgPotassium: 100mgSugar: 29gVitamin C: 5mgCalcium: 1mgIron: 1mg

Notes

For best results, use room temperature egg whites and gradually add sugar for a smoother meringue. Keep in dry environments to maintain texture.

Tried this recipe?

Let us know how it was!

Rocky Road Crunch Bars: Irresistible No-Bake Chocolate Bliss

August 25, 2025 by Grace Snow Leave a Comment

As I stood in my kitchen, a towering stack of chocolate was calling my name, and I couldn't resist the urge to create something special. Enter my No-Bake Rocky Road Crunch Bars, a delightful concoction that combines creamy chocolate with a remix of crunchy biscuits and the whimsical chew of marshmallows. Not only are these treats incredibly easy to whip up, but they're also a customizable dream, allowing you to add your favorite nuts or even dried fruits for a personal twist. Perfect for potlucks, coffee breaks, or simply to indulge yourself at home, these bars transport beautifully—no crumbling or melting on the way. Ready to uncover the magic of this simple recipe that's sure to become a favorite in your household? Let’s dive in!

Why are Rocky Road Bars a Must-Try?

Decadent Flavor: The rich chocolate combined with crunchy biscuits and chewy marshmallows creates a flavor explosion in every bite.

No-Bake Simplicity: With just a few easy steps, you can have these bars ready in no time, making them perfect for weekend baking or last-minute treats.

Customizable Delight: Add your twist! Substitute ingredients or mix in your favorite nuts, dried fruits, or even switch to Oreos for a fun spin.

Perfect for Sharing: These bars transport beautifully, making them an ideal dessert for potlucks or parties—no fear of messy melting.

Crowd-Pleasing Appeal: Whether for coffee breaks or family gatherings, everyone will enjoy this delightful treat. Feel free to pair them with delicious bites like Cheesy Corn Fritters for a full snack spread!

Rocky Road Crunch Bars Ingredients

For the Base
• Dark Chocolate – Richly sweet; can substitute with milk or white chocolate for a different flavor.
• Butter – Adds creaminess and binds the mixture; unsalted is preferred for better control over seasoning.
• Rich Tea Biscuits – Crunchy base that gives structure; feel free to swap with digestive biscuits or graham crackers for variation.

For the Mix-Ins
• Mini Marshmallows – Provide delightful chewiness and sweetness; consider freeze-dried marshmallows for an exciting texture.
• Nuts (optional) – Adds a lovely crunch; you can substitute nuts with seeds or leave them out for a nut-free option.
• Dried Fruits (optional) – Introduce a fruity zing; cranberries or cherries can elevate the flavor profile beautifully.

For Serving
• Icing Sugar – A light dusting for beautiful presentation; totally optional but elevates the look of your Rocky Road Crunch Bars!

Step‑by‑Step Instructions for Rocky Road Crunch Bars

Step 1: Melt Chocolate and Butter
In a heatproof bowl, combine dark chocolate and butter. Set this bowl over a saucepan filled with simmering water, ensuring the bowl doesn’t touch the water. Stir continuously for about 5–7 minutes until the mixture is completely melted and smooth. Remove from heat once melted, letting the glossy chocolate blend invite you to the next step of creating your Rocky Road Crunch Bars.

Step 2: Mix in Biscuits and Marshmallows
Allow the chocolate mixture to cool slightly for about 3 minutes, preventing the marshmallows from melting. Gently fold in the crushed rich tea biscuits and mini marshmallows, ensuring every piece is coated in that luscious chocolate. Keep stirring for another 2–3 minutes until everything is evenly mixed, creating a delightful blend for your no-bake Rocky Road Crunch Bars.

Step 3: Set the Mixture
Prepare a baking tray by lining it with parchment paper for easy removal. Pour the chocolate-biscuit-marshmallow mixture into the tray, spreading it evenly with a spatula. Press down firmly to compact the mixture; this will help the bars hold together. Aim for an even thickness, ensuring that you can cut beautiful squares later on after the mixture sets!

Step 4: Chill
Place the tray in the refrigerator and allow the mixture to chill for at least 4 hours, or overnight for optimal firmness. This waiting period helps your Rocky Road Crunch Bars to firm up beautifully. You'll know they’re ready when they feel firm to the touch, allowing you to achieve that perfect texture when cut.

Step 5: Cut and Serve
Once set, lift the mixture out of the tray using the parchment paper. Use a sharp knife to cut into rectangular bars, showcasing the delightful layers of chocolate, crunchy biscuits, and marshmallows. For an extra touch, dust the top with icing sugar just before serving, creating an inviting look for these delicious Rocky Road Crunch Bars.

What to Serve with Rocky Road Crunch Bars?

Elevate your dessert table with these delightful pairings, perfect for enhancing your Rocky Road Crunch Bars experience.

  • Fresh Fruits: A refreshing plate of berries or sliced apples balances the sweetness while adding a juicy pop to your dessert table.
  • Classic Vanilla Ice Cream: The creamy texture of vanilla ice cream pairs beautifully with the rich chocolate, creating a delightful contrast.
  • Espresso or Coffee: A strong cup of coffee or espresso cuts through the sweetness, making each bite of your Rocky Road Crunch Bars even more enjoyable.
  • Homemade Whipped Cream: A scoop of light, fluffy whipped cream on the side offers a decadent contrast and makes for a charming presentation.
  • Toasted Coconut Flakes: Sprinkling toasted coconut on top adds a tropical twist and enhances the bars' crunch and flavor profile.
  • Nutty Honey Drizzle: A drizzle of honey mixed with your favorite nuts adds a subtle sweetness and complements the chocolate beautifully.
  • Dark Chocolate Sauce: Offer a side of rich chocolate sauce for a dipping option, elevating the chocolate experience to new heights.
  • Mint Tea: A refreshing cup of mint tea provides a soothing contrast, soothing your palate while enhancing the chocolate flavor.
  • Chocolate-Covered Strawberries: These elegant treats are both romantic and flavorful, making a perfect pair for a decadent dessert spread.
  • Rice Crispy Treats: A classic combination of crunchy textures will complement the dense richness of Rocky Road Crunch Bars perfectly.

How to Store and Freeze Rocky Road Crunch Bars

Airtight Container: Store your Rocky Road Crunch Bars in an airtight container at room temperature for up to 1 week to maintain their freshness and delightful texture.

Refrigerator: If the weather is particularly warm, keep them in the fridge for up to 2 weeks. Just be sure to let them sit at room temperature for a few minutes before serving for optimal texture.

Freezer: For longer storage, these bars can be frozen for up to 1 month. Individually wrap each bar in plastic wrap or foil before placing them in a freezer-safe bag to prevent freezer burn.

Thawing: To enjoy, simply remove the desired number of bars and let them thaw at room temperature for about 15-20 minutes before indulging in these chocolatey delights!

Make Ahead Options

These Rocky Road Crunch Bars are a dream for meal prep enthusiasts! You can prepare the chocolate mixture and press it into the tray up to 24 hours in advance, allowing the flavors to meld beautifully while saving you time. Once you’ve set the bars in the refrigerator, simply cover them with plastic wrap to maintain their freshness. When you’re ready to serve, just cut the bars into squares and dust with icing sugar for that extra touch of decadence. This way, your treats will be just as delicious as when they were freshly made, providing a hassle-free, sweet option for busy weeknights or unexpected guests!

Expert Tips for Rocky Road Crunch Bars

• Cool First: Allow your chocolate mixture to cool slightly before adding marshmallows to prevent them from melting into a gooey mess.

• Don’t Overmix: Gently fold in the ingredients to keep the marshmallows intact, ensuring you get those delightful chewy bites in your Rocky Road Crunch Bars.

• Chill Time Matters: If you’re in a hurry, chill your ingredients before mixing to reduce setting time on warm days.

• Use Quality Chocolate: Opt for high-quality dark chocolate for richer flavor. A good chocolate can elevate your Rocky Road Crunch Bars to a new level of deliciousness.

• Personalize with Nuts: Feel free to swap in your favorite nuts or seeds for added crunch—this customization makes the bars uniquely yours!

Rocky Road Crunch Bars Variations

Feel free to let your creativity shine with these scrumptious twists on the classic Rocky Road Crunch Bars!

  • Dairy-Free: Swap the dark chocolate and butter for coconut oil and dairy-free chocolate for a plant-based treat. They'll be equally delicious and loved by everyone!
  • Nut-Free: Omit the nuts altogether or replace them with pumpkin seeds for added crunch without the nut allergies. Enjoy a safe sweet treat everyone can share!
  • Fruit Boost: Add dried cranberries or cherries for a burst of fruity flavor that complements the chocolate beautifully. It's a perfect sweet-and-tart surprise in every bite!
  • Spicy Kick: Sprinkle a pinch of cayenne pepper into the chocolate mix for a subtle heat that complements sweetness. A thrilling twist for those who love a little heat in their treats!
  • Granola Crunch: Toss in some granola with the biscuits for an extra layer of texture and flavor. It adds a lovely, hearty crunch to every chewy bite.
  • Gourmet Touch: Drizzle some melted white chocolate over the top before serving for an extra classy finish and a touch of sweetness. Your guests will definitely be impressed!
  • Oreo Version: Use crushed Oreos instead of rich tea biscuits for a fun, chocolatey base. The cookies’ creamy centers will elevate the flavor profile wonderfully.
  • Tropical Fusion: Add shredded coconut or crushed pineapple for a tropical twist that brightens the chocolate flavor. It’s like a beach vacation in each bite!

For more ideas to elevate your dessert spreads, consider pairing these treats with delightful bites like Sweet Potato Casserole or the iconic Taco Bell Crunchwrap for an unforgettable gathering!

Rocky Road Crunch Bars Recipe FAQs

How do I select the best chocolate for my Rocky Road Crunch Bars?
Absolutely! I recommend using high-quality dark chocolate for a richer flavor. Look for chocolate that has at least 60% cocoa content for a deep taste. If you're leaning towards a sweeter profile, you can also opt for milk or white chocolate, but dark chocolate truly enhances the overall taste experience.

What’s the best way to store leftover Rocky Road Crunch Bars?
For optimal freshness, store your Rocky Road Crunch Bars in an airtight container at room temperature for up to 1 week. If it's particularly warm, you might want to refrigerate them, where they can last for up to 2 weeks. Just be sure to allow them a few minutes at room temperature before serving, so they regain their perfect texture.

Can I freeze my Rocky Road Crunch Bars, and if so, how?
Absolutely! If you're looking to store them longer, these bars freeze beautifully for up to 1 month. Wrap each bar individually in plastic wrap or foil, then place them in a freezer-safe bag to prevent freezer burn. When you’re ready to enjoy, simply take out the desired number of bars and let them thaw at room temperature for about 15-20 minutes.

What should I do if my chocolate mixture is too thick?
If you find your mixture is a bit too thick after melting the chocolate and butter, don’t worry! You can easily fix it by adding a small amount of vegetable oil or melted butter—1 teaspoon at a time—until you achieve a smoother consistency. This will help the chocolate combine better with the biscuits and marshmallows.

Are there any allergy considerations when making Rocky Road Crunch Bars?
Very! Always be mindful of allergies, especially if you're adding nuts. If you're making these for a group, consider using seeds like pumpkin or sunflower to keep it nut-free. Additionally, check that your chocolate and other ingredients are free from allergens like gluten or dairy, depending on your guests' dietary needs.

Rocky Road Crunch Bars

Rocky Road Crunch Bars: Irresistible No-Bake Chocolate Bliss

No-bake Rocky Road Crunch Bars are a delightful combination of creamy chocolate, crunchy biscuits, and marshmallows, perfect for sharing.
Print Recipe Pin Recipe
Prep Time 15 minutes mins
Cook Time 7 minutes mins
Chill Time 4 hours hrs
Total Time 4 hours hrs 22 minutes mins
Servings: 12 bars
Course: Dessert
Cuisine: American
Calories: 230
Ingredients Equipment Method Nutrition Notes

Ingredients
  

For the Base
  • 200 g Dark Chocolate Can substitute with milk or white chocolate.
  • 100 g Butter Unsalted preferred.
  • 200 g Rich Tea Biscuits Can swap with digestive biscuits or graham crackers.
For the Mix-Ins
  • 150 g Mini Marshmallows Consider freeze-dried for different texture.
  • 100 g Nuts (optional) Can substitute with seeds or omit.
  • 100 g Dried Fruits (optional) Cranberries or cherries recommended.
For Serving
  • 50 g Icing Sugar Optional for dusting.

Equipment

  • Heatproof bowl
  • Saucepan
  • Baking tray
  • Parchment Paper
  • Spatula
  • Sharp Knife

Method
 

Step-by-Step Instructions
  1. In a heatproof bowl, combine dark chocolate and butter over simmering water, stirring for 5–7 minutes until melted and smooth.
  2. Let the mixture cool for 3 minutes, then fold in crushed biscuits and marshmallows, mixing for 2–3 minutes.
  3. Prepare a baking tray lined with parchment paper and pour in the mixture, pressing down to compact it evenly.
  4. Chill in the refrigerator for at least 4 hours, or overnight for best firmness.
  5. Once set, lift out and cut into rectangular bars. Dust with icing sugar before serving.

Nutrition

Serving: 1barCalories: 230kcalCarbohydrates: 30gProtein: 2gFat: 12gSaturated Fat: 7gPolyunsaturated Fat: 0.5gMonounsaturated Fat: 4gCholesterol: 20mgSodium: 50mgPotassium: 90mgFiber: 1gSugar: 18gVitamin A: 500IUCalcium: 30mgIron: 1mg

Notes

Allow chocolate to cool before adding marshmallows to prevent melting. Use high-quality chocolate for better flavor.

Tried this recipe?

Let us know how it was!

Blackberry Pistachio Dream Bars: A Slice of Summer Bliss

August 24, 2025 by Grace Snow Leave a Comment

As I strolled through the vibrant farmers' market, the sweet, tart aroma of fresh blackberries beckoned me. That’s when I knew I had to whip up a batch of Blackberry Pistachio Dream Bars. This delightful dessert combines the lusciousness of juicy blackberries with the nutty crunch of pistachios, delivering a sweet escape that delights both the eyes and the palate. Not only are these bars stunningly beautiful, but they’re also incredibly easy to make, fitting perfectly into even the busiest schedules. With their soft, chewy base and creamy topping, they embody everything we love about homemade treats—comforting yet versatile enough to impress at gatherings. Intrigued? Let’s dive into this irresistible recipe and bring a taste of summer right into your kitchen!

Why Are These Bars So Irresistible?

Delightfully Easy: The process is simple and requires minimal prep time, making these Blackberry Pistachio Dream Bars perfect for both novice bakers and seasoned chefs alike.

Unique Flavor Fusion: The delightful combination of tangy blackberries and crunchy pistachios creates a mouthwatering experience that’s hard to resist.

Versatile Option: Customize your bars with variations like Mixed Berry Bliss or a decadent chocolate drizzle to suit any taste.

Perfectly Textured: The chewy base pairs beautifully with the creamy topping, providing a satisfying contrast with every bite.

Visual Appeal: These stunning bars are not only a treat to taste but also a feast for the eyes, making them ideal for parties or special occasions.

Make-Ahead Friendly: Prepare them in advance for stress-free entertaining without compromising on flavor or freshness.

Blackberry Pistachio Dream Bars Ingredients

For the Base

  • All-purpose flour – Provides structure for the base; substitute with gluten-free flour for a gluten-free option.
  • Rolled oats – Adds texture and chewiness; ensure oats are certified gluten-free if necessary.
  • Brown sugar – Sweetness and moisture; can be replaced with coconut sugar for a less processed option.
  • Granulated sugar – Additional sweetness; use less if you prefer a less sweet bar.
  • Baking powder – Helps the base rise; vital for texture, no substitutions needed.
  • Salt – Enhances flavors; essential for balancing the sweetness of the bars.
  • Unsalted butter – Provides richness and binds the base; can swap with coconut oil for a dairy-free version.

For the Blackberry Layer

  • Fresh blackberries – The primary flavor component; frozen blackberries can be used, but thaw and drain excess moisture.
  • Cornstarch – Thickens the blackberry layer; substitute with arrowroot powder if desired.
  • Lemon juice – Adds brightness and acidity to the mixture; lime juice can be an alternative.

For the Topping

  • Pistachios – Crunchy topping for a delightful texture; can replace with any favorite nut such as almonds or walnuts.
  • Cream cheese – Adds richness and creaminess to the topping; use a plant-based cream cheese for a vegan option.
  • Powdered sugar – Sweetens the cream cheese layer; can reduce quantity for less sweetness.
  • Vanilla extract – Enhances flavors; no substitutions needed for added depth.

These Blackberry Pistachio Dream Bars will surely become a cherished treat in your home!

Step‑by‑Step Instructions for Blackberry Pistachio Dream Bars

Step 1: Preheat and Prepare
Begin by preheating your oven to 350°F (175°C). Line an 8x8-inch baking pan with parchment paper, allowing some overhang for easy removal later. This preparation will ensure your Blackberry Pistachio Dream Bars are perfectly shaped and easy to slice once baked.

Step 2: Mix the Dry Ingredients
In a large mixing bowl, combine all-purpose flour, rolled oats, brown sugar, granulated sugar, baking powder, and salt. Whisk these dry ingredients together until they are evenly distributed. The mixture should look sandy and dry, signaling that it's thoroughly combined and ready for the next step.

Step 3: Incorporate the Butter
Melt the unsalted butter and pour it into the dry ingredients. Use a fork or your hands to mix until the mixture becomes crumbly, resembling wet sand. It should hold together slightly when pressed. This crumbly texture is key to forming the delicious base for your Blackberry Pistachio Dream Bars.

Step 4: Bake the Base
Transfer the crumbly mixture into your prepared baking pan, spreading it evenly across the bottom. Press it down firmly to create a compact layer. Bake in the preheated oven for 15 minutes, or until it’s lightly golden around the edges. Keep an eye on it to avoid overbaking, which can harden the base.

Step 5: Prepare the Blackberry Filling
While the base bakes, combine fresh blackberries, granulated sugar, cornstarch, and lemon juice in a medium saucepan. Cook over medium heat for about 5-7 minutes, stirring gently. You’ll know it’s ready when the blackberries soften and the mixture thickens into a luscious sauce that bursts with color and flavor.

Step 6: Spread the Blackberry Layer
Once thickened, carefully pour the blackberry mixture over your baked base. Use a spatula to spread it evenly, ensuring each bite of your Blackberry Pistachio Dream Bars will be beautifully fruity and sweet. The vibrant color of the blackberries will create a stunning visual contrast.

Step 7: Make the Cream Cheese Topping
In a clean bowl, combine softened cream cheese, powdered sugar, and vanilla extract. Use an electric mixer or whisk to blend until smooth and creamy, which should take about 2-3 minutes. This mixture will add a rich finish on top of the fruity layer, enhancing the overall texture of the dessert.

Step 8: Assemble and Top
Gently spread the cream cheese mixture over the blackberry layer, being careful not to disturb the fruit mixture underneath. Once spread evenly, sprinkle chopped pistachios on top for that delightful crunch. They will not only add flavor but also create an eye-catching finish to your Blackberry Pistachio Dream Bars.

Step 9: Bake Again
Return the assembled bars to the oven and bake for an additional 15 minutes. The topping should set and become slightly firm, indicating that it is ready. Keep a close watch so that it doesn’t overbake; a slight jiggle in the center is perfectly fine.

Step 10: Cool and Chill
After baking, allow the bars to cool in the pan on a wire rack for about 1 hour. Once cooled, refrigerate them for an hour to make slicing easier. This step deepens the flavors and helps the bars firm up beautifully.

Step 11: Slice and Serve
Once chilled, lift the bars out of the pan using the parchment overhang. Slice into squares with a sharp knife, cleaning the knife between cuts for neat edges. These Blackberry Pistachio Dream Bars are now ready to impress family and friends with their beautiful layers and delightful taste.

Blackberry Pistachio Dream Bars Variations

Feel free to customize your Blackberry Pistachio Dream Bars with these exciting twists that will delight your taste buds!

  • Mixed Berry Bliss: Substitute blackberries with a mix of strawberries, blueberries, and raspberries for a colorful, fruity explosion.
  • Chocolate Drizzle: Elevate your bars by adding a decadent drizzle of melted dark chocolate on top, making each bite heavenly. A perfect match for dessert lovers!
  • Lemon Zest Addition: Add lemon zest to the blackberry layer for a bright and zesty flavor that complements the sweet and tart profile beautifully.
  • Vegan Option: Use plant-based cream cheese and coconut oil to create a delicious vegan version without sacrificing taste. This twist opens up the goodness for everyone!
  • Nutty Alternatives: Swap pistachios for your favorite nuts like almonds or walnuts for a different crunch. Each nut carries a unique flavor, adding to the taste adventure!
  • Coconut Flakes: Sprinkle unsweetened coconut flakes over the cream cheese layer before baking for a tropical flair that brings summer vibes to every bite.
  • Spicy Kick: For those who crave heat, add a pinch of cayenne pepper to the blackberry filling for a surprising, sweet-spicy blend. It’s an unexpected twist you won't want to miss!
  • Maple Syrup Substitute: Swap granulated sugar for maple syrup in the cream cheese layer for a deep, caramelly flavor that rounds out the sweetness perfectly.

Explore these variations, and don’t hesitate to mix and match to create your own signature version of these Blackberry Pistachio Dream Bars!

Make Ahead Options

These Blackberry Pistachio Dream Bars are a fantastic choice for meal prep, allowing you to savor homemade goodness without the last-minute rush! You can prepare the base and blackberry layer up to 24 hours in advance by completing steps 1-5, then cover and refrigerate them. The cream cheese topping can also be made up to 3 days ahead; simply store it in an airtight container in the fridge until you’re ready to assemble. When it’s time to serve, just spread the topping over the blackberry layer, sprinkle with pistachios, and finish baking. By prepping ahead, you’ll enjoy the same delightful flavors while saving precious time for busy weeknights!

Tips for the Best Blackberry Pistachio Dream Bars

Use Fresh Ingredients: Opt for the freshest blackberries and pistachios you can find, as they significantly enhance the flavor and overall quality of the bars.

Don’t Overmix: When combining your base and cream cheese mixture, aim for just the right consistency. Overmixing can lead to a tough texture instead of the delightful creaminess you desire.

Watch the Baking Time: Keep an eye on the bars as they bake; overbaking can lead to a hard crust. Look for a golden color and a slightly jiggly center to know they’re done.

Cool Completely: Let the bars cool for at least an hour before refrigerating. This helps set the layers properly and makes slicing easier, ensuring your Blackberry Pistachio Dream Bars look as good as they taste.

Store Wisely: Keep leftovers in an airtight container in the fridge for up to five days. This will help maintain their freshness and deliciousness for later enjoyment.

What to Serve with Blackberry Pistachio Dream Bars

Indulging in these vibrant bars is just the beginning—pair them with delightful sides and drinks for a complete dessert experience.

  • Vanilla Ice Cream: A scoop of creamy vanilla ice cream balances the tartness of the bars, creating a heavenly combination that's hard to resist. The cold, smooth texture provides a delightful contrast to the chewy base.

  • Whipped Cream: A dollop of fresh whipped cream adds a light, airy quality, enhancing the overall richness while making each bite feel indulgent and luxurious.

  • Fresh Mint Leaves: Adding a few sprigs of fresh mint not only looks beautiful but brings a burst of refreshing flavor that complements the sweetness of the bars. The aroma of mint enhances that summertime vibe.

  • Sparkling Lemonade: A glass of bubbly lemonade pairs perfectly with the bars, providing a refreshing zing that enhances the fruity flavors. This bright beverage adds a pop of fun to your dessert table.

  • Berry Salad: A simple fruit salad featuring mixed berries can elevate the dining experience, adding freshness and a pop of color while tying back to the blackberry flavor.

  • Dark Chocolate Drizzle: For those who crave extra indulgence, a drizzle of melted dark chocolate over each bar adds rich depth and an enticing visual.

  • Coffee or Espresso: A warm cup of coffee or a shot of espresso balances the sweetness and rounds out your dessert experience, offering a rich flavor that perfectly complements the creamy layers.

Elevate this treat into a full dessert experience with these delicious pairings!

How to Store and Freeze Blackberry Pistachio Dream Bars

Room Temperature: Allow bars to cool completely before storing them in an airtight container. They can be kept at room temperature for up to 3 days.

Fridge: For longer shelf life, store your Blackberry Pistachio Dream Bars in the refrigerator in an airtight container, where they'll stay fresh for up to 5 days.

Freezer: If you want to enjoy these bars later, freeze them tightly wrapped in plastic wrap and stored in a freezer-safe container for up to 3 months. Thaw in the fridge overnight before serving.

Reheating: If you prefer them warm, you can reheat individual slices in the microwave for about 10-15 seconds. Enjoy the delightful blend of flavors fresh as ever!

Blackberry Pistachio Dream Bars Recipe FAQs

What type of blackberries should I use for this recipe?
I recommend using fresh blackberries for the best flavor and texture. If fresh ones aren’t available, frozen blackberries can be a great alternative; just be sure to thaw them in advance and drain any excess moisture to avoid a watery filling.

How should I store leftover Blackberry Pistachio Dream Bars?
For optimal freshness, store your bars in an airtight container in the refrigerator. They’ll stay delicious for up to 5 days. If you have more bars than you can consume in that time, consider freezing them for later enjoyment!

Can I freeze Blackberry Pistachio Dream Bars?
Absolutely! To freeze, wrap the bars tightly in plastic wrap and place them in a freezer-safe container. They can be frozen for up to 3 months. When you're ready to enjoy them, simply thaw them in the fridge overnight to retain their wonderful texture and flavor.

What should I do if my crust turns out too hard?
If you find your crust has become hard, it’s likely overbaked. Make sure to monitor the baking time closely, aiming for a light golden color. If you suspect it's overbaked, you can try cooling it down and serving it with a scoop of ice cream to offset the hardness.

Are there any allergy considerations with these bars?
Yes, this recipe contains gluten (from the all-purpose flour and oats) and dairy (from the butter and cream cheese). For a gluten-free option, substitute the flour with a gluten-free blend and ensure your oats are certified gluten-free. For a dairy-free version, swap the unsalted butter for coconut oil and use plant-based cream cheese.

Can I customize the toppings?
Very! Feel free to get creative with your toppings. Besides pistachios, you can use chopped almonds, walnuts, or even shredded coconut. Additionally, drizzling melted chocolate on top would give these bars an even more indulgent touch!

Blackberry Pistachio Dream Bars

Blackberry Pistachio Dream Bars: A Slice of Summer Bliss

Enjoy the delightful Blackberry Pistachio Dream Bars, a perfect summer dessert that combines tangy blackberries and crunchy pistachios.
Print Recipe Pin Recipe
Prep Time 30 minutes mins
Cook Time 30 minutes mins
Cooling Time 1 hour hr
Total Time 2 hours hrs
Servings: 16 bars
Course: Dessert
Cuisine: American
Calories: 250
Ingredients Equipment Method Nutrition Notes

Ingredients
  

For the Base
  • 1 cup all-purpose flour Substitute with gluten-free flour for a gluten-free option.
  • 1 cup rolled oats Ensure oats are certified gluten-free if necessary.
  • 3/4 cup brown sugar Can be replaced with coconut sugar for a less processed option.
  • 1/4 cup granulated sugar Use less if you prefer a less sweet bar.
  • 1 teaspoon baking powder Helps the base rise; no substitutions needed.
  • 1/2 teaspoon salt Essential for balancing the sweetness of the bars.
  • 1/2 cup unsalted butter Can swap with coconut oil for a dairy-free version.
For the Blackberry Layer
  • 2 cups fresh blackberries Frozen blackberries can be used; thaw and drain excess moisture.
  • 2 tablespoons cornstarch Substitute with arrowroot powder if desired.
  • 1 tablespoon lemon juice Lime juice can be an alternative.
For the Topping
  • 1/2 cup pistachios Can replace with any favorite nut such as almonds or walnuts.
  • 8 oz cream cheese Use a plant-based cream cheese for a vegan option.
  • 1 cup powdered sugar Can reduce quantity for less sweetness.
  • 1 teaspoon vanilla extract No substitutions needed for added depth.

Equipment

  • 8x8-inch baking pan
  • Mixing Bowl
  • Saucepan
  • Spatula
  • Whisk
  • Electric mixer or whisk

Method
 

Step-by-Step Instructions
  1. Preheat your oven to 350°F (175°C) and line an 8x8-inch baking pan with parchment paper.
  2. In a large mixing bowl, combine all-purpose flour, rolled oats, brown sugar, granulated sugar, baking powder, and salt. Whisk until evenly distributed.
  3. Melt the unsalted butter and pour it into the dry ingredients. Mix until crumbly.
  4. Transfer the mixture into the prepared baking pan, spreading it evenly and pressing down firmly. Bake for 15 minutes or until lightly golden.
  5. Combine fresh blackberries, granulated sugar, cornstarch, and lemon juice in a medium saucepan. Cook over medium heat for 5-7 minutes until thickened.
  6. Pour the blackberry mixture over the baked base and spread evenly.
  7. In a clean bowl, combine softened cream cheese, powdered sugar, and vanilla extract. Blend until smooth and creamy.
  8. Spread the cream cheese mixture over the blackberry layer and sprinkle chopped pistachios on top.
  9. Bake the assembled bars for an additional 15 minutes until the topping sets slightly.
  10. Allow the bars to cool in the pan for about 1 hour, then refrigerate for an hour before slicing.
  11. Lift the bars out of the pan using the parchment overhang and slice into squares.

Nutrition

Serving: 1barCalories: 250kcalCarbohydrates: 30gProtein: 3gFat: 13gSaturated Fat: 6gPolyunsaturated Fat: 3gMonounsaturated Fat: 3gCholesterol: 20mgSodium: 100mgPotassium: 150mgFiber: 2gSugar: 15gVitamin A: 200IUVitamin C: 5mgCalcium: 40mgIron: 1mg

Notes

Using the freshest blackberries and pistachios significantly enhances the flavor. Avoid overmixing to maintain a tender texture. Watch the baking time closely to prevent hardening of the crust. Store leftovers in an airtight container in the fridge for up to five days.

Tried this recipe?

Let us know how it was!

Lemon and Basil Granita: A Refreshing Summer Delight

August 24, 2025 by Grace Snow Leave a Comment

As the sun blazes overhead and the days stretch longer, I find myself dreaming of cool, refreshing treats that capture the essence of summer. One such delight is my Lemon and Basil Granita, a frozen dessert that elegantly combines zesty lemon with the aromatic allure of fresh basil. This recipe is not only a breeze to whip up—perfect for those lazy afternoons—but it also doubles as a stunning palate cleanser or an enchanting end to a gathering. With just a handful of fresh ingredients, you can create a dessert that feels sophisticated yet effortlessly simple. Who's ready to elevate their summer dessert game with this magical combo?

Why is Lemon and Basil Granita Special?

Simplicity at its Finest: With just a few fresh ingredients and minimal prep time, this granita is perfect for even the busiest of home cooks. Bright, Bold Flavors: The tangy lemon paired with aromatic basil creates a refreshing taste that dances on your palate. Versatile Treat: Enjoy it as a dessert, a palate cleanser, or even a fancy cocktail mixer! Ideal for Summer Gatherings: Impress your friends at your next BBQ with this elegant yet effortless dish. Make-Ahead Friendly: Prep it in advance and wow your guests, just like you would with delightful Chickpea Spinach Curry or Lemon Chicken Soup, and save time for yourself! This refreshing dessert is the summer treat you didn’t know you needed!

Lemon and Basil Granita Ingredients

For the Syrup

  • Water – This ingredient serves as the base for your icy creation.
  • Granulated Sugar – Adds a touch of sweetness; consider substituting with honey for a unique twist.

For the Granita Mix

  • Fresh Lemon Juice – The star flavor that brings brightness; about 4-6 lemons will yield 1 cup.
  • Fresh Basil Leaves – Delivers aromatic herbal notes; use tightly packed leaves for the best flavor.
  • Lemon Zest – Enhances citrus notes; you’ll need the zest of 2 lemons for a zesty kick.
  • Salt – Just a pinch will balance the sweetness and highlight the bright flavors.

Ready to dive into this zesty adventure? Lemon and Basil Granita awaits your touch!

Step‑by‑Step Instructions for Lemon and Basil Granita

Step 1: Make the Syrup
In a medium saucepan, combine 1 cup of water and 1 cup of granulated sugar. Over medium heat, stir until the sugar completely dissolves, about 3-5 minutes. Once dissolved, remove from heat and set the syrup aside to cool to room temperature. This simple syrup will be the base for your Lemon and Basil Granita, so let it rest while you gather the remaining ingredients.

Step 2: Prepare the Mixture
Once your syrup has cooled, it's time to bring the flavors together. In a blender, combine the cooled syrup, 1 cup of fresh lemon juice, tightly packed fresh basil leaves, the zest of 2 lemons, and a pinch of salt. Blend on high until fully smooth and fragrant, about 30 seconds. The zesty, herbal aroma is a sure sign that you’re on the right track to creating a refreshing Lemon and Basil Granita.

Step 3: Strain the Mixture
To achieve the perfect texture for your granita, pour the blended mixture through a fine-mesh sieve into a shallow dish. Use a spatula to press the liquid through while keeping the solids behind, ensuring a silky smooth granita base. This step not only helps eliminate any basil bits but also enhances the overall elegance of your Lemon and Basil Granita.

Step 4: Freeze the Mixture
Once strained, place the dish in the freezer. Every 30 minutes, use a fork to scrape and fluff the mixture, breaking apart any icy clumps. Continue this process for about 2 to 3 hours. The granita is ready when it’s light, fluffy, and has a beautiful grainy texture that catches the light, promising an icy delight to beat the summer heat.

Step 5: Serve with Style
To serve your refreshing Lemon and Basil Granita, fluff it one last time with a fork, creating those delightful icy crystals. Scoop the granita into chilled bowls or glasses, garnishing with additional basil or lemon zest for a touch of elegance. Enjoy this vibrant dessert immediately to savor all its zesty, herbal flavors, perfect for warm summer days!

Expert Tips for Lemon and Basil Granita

  • Use Fresh Ingredients: Fresh lemons and basil are essential for maximum flavor; avoid dried herbs which can taste too intense.
  • Adjust Sweetness: Before freezing, taste your mixture and add extra sugar or lemon juice as needed to suit your palate.
  • Freezing Technique: Use a shallow dish to allow the mixture to freeze evenly, ensuring that your Lemon and Basil Granita has the perfect texture.
  • Fluff Regularly: Don’t forget to scrape the mixture every 30 minutes while freezing; this creates the light, airy texture that’s the hallmark of a great granita.
  • Serving Tip: For an extra touch, serve the granita in chilled glasses and add a sprig of fresh basil or a slice of lemon for an appealing presentation.

How to Store and Freeze Lemon and Basil Granita

Fridge: Store any leftover Lemon and Basil Granita in an airtight container for up to 1–2 weeks to maintain its flavor and texture.

Freezer: Keep the granita tightly sealed in the freezer. It's best consumed within 1–2 weeks; however, it can last longer if stored properly.

Reheating: If the granita becomes too solid, let it sit at room temperature for a few minutes before fluffing it gently with a fork to restore its light, airy texture.

Serving Tip: When ready to serve, consider scooping the granita into chilled bowls for a refreshing presentation that invites everyone to enjoy this delightful treat!

Lemon and Basil Granita Variations

Feel free to get creative and customize your Lemon and Basil Granita to suit your taste buds and summer vibes!

  • Herb Infusion: Blend in fresh mint along with basil for an extra layer of freshness. This twist brightens the granita and adds a lovely aromatic flair.
  • Fruit Additions: Mix in pureed fruits like strawberries or watermelon for a delightful splash of color and flavor. The result is a sweeter, visually stunning granita that’s simply irresistible!
  • Citrus Blend: Swap the lemon juice with orange or grapefruit juice for a citrusy twist that refreshes the palate in a new way. Each option brings its own unique burst of brightness, keeping things exciting.
  • Spicy Kick: Add a slice of jalapeño when simmering the syrup for a subtle heat that perfectly complements the zesty citrus. This will elevate your granita to a daring, gourmet delight!
  • Berry Bliss: Incorporate blended blueberries or raspberries into the mixture for a stunning color contrast and a burst of juicy flavor. It’s like summer in a cup!
  • Creamy Twist: Fold in a little coconut cream before freezing for a rich, tropical feel that’s reminiscent of a smooth sorbet. Indulge your senses with this luscious variation!
  • Sweetener Swap: Experiment with maple syrup instead of granulated sugar for a deeper, more complex sweetness. It adds a touch of warmth that beautifully complements the citrus flavor.
  • Garnish Ideas: Pair with candied citrus peel or a sprig of basil for an elegant presentation that matches the sophisticated yet simple nature of this granita. This final touch can really impress your guests!

With these variations, your Lemon and Basil Granita will never feel boring, just like the joys of summer. Try some culinary combinations, and don’t forget to share your creations!

What to Serve with Lemon and Basil Granita

Imagine a sun-kissed day where a refreshing, icy treat like this granita is the star of your dessert table.

  • Creamy Coconut Sorbet: This additional frozen treat offers a smooth contrast to the icy texture of the granita, while tropical coconut enhances the overall summer vibe.

  • Grilled Peaches: The caramelization of sweet peaches pairs beautifully with the zesty granita. The warm, juicy fruit creates a delightful temperature contrast.

  • Lemon and Basil Spritzer: This refreshing drink complements the granita's flavors, blending sparkling water with light lemonade and a hint of basil for a layered experience.

  • Chocolate Mousse: Rich, velvety chocolate balances the citrusy brightness of the granita perfectly, creating a luxurious dessert duo.

  • Fresh Berries: The tartness of berries, such as raspberries or blueberries, not only matches the granita's refreshing qualities but also adds vibrant color to your plate.

  • Pistachio Biscotti: Crumbly, nutty biscotti add texture and a slight salty flavor that pairs wonderfully with the icy sweetness of the granita for a satisfying finish.

  • Sparkling Wine: A glass of bubbly prosecco or a dry sparkling wine elevates the whole dessert experience, providing effervescence that enhances the lemony zest.

Each of these pairing options highlights the fresh, citrusy notes of the Lemon and Basil Granita while creating a delightful spread that will surely impress your guests!

Make Ahead Options

These Lemon and Basil Granita are a fantastic choice for meal prep, making your summer gatherings effortless! You can prepare the syrup (water and sugar) and blend the lemon juice, basil, lemon zest, and salt up to 24 hours in advance. Simply strain the mixture and refrigerate it until you're ready to freeze. To maintain quality, it's best to store the prepped mixture in an airtight container to prevent any absorption of odors. When you're ready to serve, pour the mixture into a shallow dish and proceed to freeze as instructed, scraping with a fork every 30 minutes until fluffy. You'll have this delicious, refreshing dessert ready to impress without any last-minute fuss!

Lemon and Basil Granita Recipe FAQs

What type of lemons should I use for the Lemon and Basil Granita?
Absolutely! Fresh, ripe lemons are best for this recipe. Look for lemons that are firm and heavy for their size, which indicates juiciness. Avoid any with dark spots or wrinkles, as they may be past their prime.

How should I store leftover Lemon and Basil Granita?
You can store any leftover granita in an airtight container in the fridge for up to 1–2 weeks. Just make sure the container is tightly sealed to preserve its texture and flavor. If it becomes too hard, allow it to sit at room temperature for about 5 minutes before fluffing it with a fork.

Can I freeze Lemon and Basil Granita for a longer period?
Yes, you can! For optimal flavor and texture, store the granita in the freezer, keeping it tightly sealed. While it's best consumed within 1–2 weeks, it can last for up to 3 months if properly stored. Just remember to let it sit out for a few minutes before serving if it becomes solid.

What should I do if my granita turns out icy and not fluffy?
If your Lemon and Basil Granita isn’t as fluffy as you'd like, it could be due to not scraping it frequently enough while freezing. For a light, airy texture, be proactive and scrape with a fork every 30 minutes for 2-3 hours. If it’s too icy, try blending it briefly before serving to restore some smoothness.

Is this recipe suitable for people with allergies?
Great question! This granita is naturally gluten-free and dairy-free, but it's essential to check for any personal allergies, especially with the fresh basil. If someone is allergic to citrus or basil, you can experiment with different fruits or herbs, like strawberries or mint, to create a personalized version of a granita.

Can pets safely consume Lemon and Basil Granita?
Definitely not! While the ingredients in small quantities like lemon and basil aren’t toxic, the sugar content can be harmful to pets. It's best to keep this treat strictly for human enjoyment.

Lemon and Basil Granita

Lemon and Basil Granita: A Refreshing Summer Delight

Lemon and Basil Granita combines zesty lemon with aromatic basil for a refreshing summer treat.
Print Recipe Pin Recipe
Prep Time 10 minutes mins
Cook Time 5 minutes mins
Freezing Time 3 hours hrs
Total Time 3 hours hrs 15 minutes mins
Servings: 4 servings
Course: Dessert
Cuisine: Italian
Calories: 90
Ingredients Equipment Method Nutrition Notes

Ingredients
  

For the Syrup
  • 1 cup Water
  • 1 cup Granulated Sugar Can substitute with honey for a twist.
For the Granita Mix
  • 1 cup Fresh Lemon Juice About 4-6 lemons.
  • 1 cup Fresh Basil Leaves Use tightly packed leaves.
  • 2 units Lemon Zest Zest of 2 lemons.
  • 1 pinch Salt Just a pinch.

Equipment

  • Medium saucepan
  • Blender
  • Fine-mesh sieve
  • Shallow dish

Method
 

Step-by-Step Instructions
  1. In a medium saucepan, combine 1 cup of water and 1 cup of granulated sugar over medium heat. Stir until the sugar dissolves, about 3-5 minutes. Remove from heat and let cool.
    Lemon and Basil Granita
  2. In a blender, combine the cooled syrup, the fresh lemon juice, basil leaves, lemon zest, and a pinch of salt. Blend until smooth, about 30 seconds.
    Lemon and Basil Granita
  3. Pour the blended mixture through a fine-mesh sieve into a shallow dish, pressing the liquid through to remove solids.
    Lemon and Basil Granita
  4. Place the dish in the freezer and scrape the mixture with a fork every 30 minutes for 2-3 hours until fluffy.
    Lemon and Basil Granita
  5. Fluff the granita one last time and serve in chilled bowls garnished with basil or lemon zest.
    Lemon and Basil Granita

Nutrition

Serving: 1cupCalories: 90kcalCarbohydrates: 24gSodium: 5mgPotassium: 50mgSugar: 24gVitamin C: 30mg

Notes

Use fresh lemons and basil for maximum flavor. Adjust sweetness to taste before freezing.

Tried this recipe?

Let us know how it was!

Delight in Vegan Pumpkin Filo Pie for Cozy Fall Gatherings

August 24, 2025 by Grace Snow Leave a Comment

As the leaves turn golden and the air cools, there's something truly enchanting about the flavors of fall. That’s where my Easy Vegan Pumpkin Filo Pie comes in, encasing a luscious, spiced pumpkin filling in delicate, flaky layers of filo pastry. Not only is this pie a stunning centerpiece for any gathering, but its simple preparation makes it a go-to for both seasoned chefs and those new to the kitchen. It dazzles without the fuss, making it perfect for cozy dinners or festive celebrations. Plus, it's a plant-based delight that everyone can enjoy! Are you ready to bring a touch of autumn into your kitchen?

Why Is This Vegan Pumpkin Filo Pie Special?

Unforgettable Taste: The fusion of creamy pumpkin filling and crispy filo creates a mouthwatering contrast that’s utterly addictive.

Effortlessly Elegant: Impress your guests with a stunning dessert that looks as beautiful as it tastes, all without hours of preparation.

Versatile Options: Feel free to customize your pie with variations like a chocolate swirl or nutty additions—perfect for any occasion!

Health-Conscious Indulgence: This pie is lower in saturated fat and cholesterol compared to traditional options, making it guilt-free.

Perfect for Any Gathering: Whether it’s a holiday feast or a casual dinner, this pie is sure to be a crowd-pleaser that everyone loves.

If you’re looking for more tantalizing fall flavors, consider trying my Pumpkin Cinnamon Roll Muffins for a delightful morning treat!

Vegan Pumpkin Filo Pie Ingredients

For the Filo Pastry
• Filo Pastry – This forms the crispy outer layer; keep it covered with a damp towel to prevent drying; gluten-free versions are available.
• Melted Coconut Oil – Brushing with this adds flavor and moisture; you can substitute with olive oil or vegan butter if desired.

For the Pumpkin Filling
• Pumpkin Puree – The star ingredient that gives this pie its delightful flavor; using fresh roasted pumpkin enhances the taste.
• Coconut Milk – Provides creaminess to the filling; almond or soy milk can work as substitutes, though the texture will be different.
• Brown Sugar – Adds sweetness and depth; feel free to swap it with coconut sugar or maple syrup for varied flavors.
• Vanilla Extract – Enhances the overall flavor; almond extract can easily replace it if you’re looking for a unique twist.
• Spices (cinnamon, nutmeg, ginger, allspice) – These create the quintessential autumn flavors; adjust according to your taste preferences.
• Salt – Enhances the overall flavor profile.
• Cornstarch – Acts as a thickening agent for the filling; arrowroot or tapioca flour can also be used in its place.
• Maple Syrup – Offers added sweetness and depth; for non-vegan options, honey can be used.

Feel free to experiment and make this Vegan Pumpkin Filo Pie uniquely yours while keeping that warm, spiced flavor that everyone will love!

Step‑by‑Step Instructions for Vegan Pumpkin Filo Pie

Step 1: Preheat the Oven
Begin by preheating your oven to 375°F (190°C). This temperature will ensure that your Vegan Pumpkin Filo Pie bakes evenly and achieves that beautifully golden crust. While the oven heats up, gather your ingredients and prepare to create a fantastic filling.

Step 2: Prepare the Filling
In a mixing bowl, combine pumpkin puree, coconut milk, brown sugar, vanilla extract, cinnamon, nutmeg, ginger, allspice, salt, cornstarch, and maple syrup. Whisk together until the mixture is smooth and well combined, creating a delightful spiced pumpkin filling that will be the star of your pie.

Step 3: Unroll the Filo Pastry
Unroll the filo pastry sheets carefully, keeping them covered with a damp towel to prevent them from drying out. This crucial step will help maintain the pastry's crispness as you layer it in your pie dish. Ensure you have your melted coconut oil ready for brushing each layer.

Step 4: Grease the Pie Dish
Take a 9-inch pie dish and brush a thin layer of melted coconut oil across the bottom and sides. This will not only prevent sticking but also add delightful moisture to your Vegan Pumpkin Filo Pie, enhancing the flavors with each bite.

Step 5: Layer the Filo
Begin layering the filo pastry by placing 6-8 sheets into the pie dish, brushing each layer lightly with melted coconut oil. This will create a flaky, crispy crust to hold your luscious filling. Overlapping the sheets allows for a nice texture and supports the filling once baked.

Step 6: Add the Pumpkin Filling
Pour the prepared pumpkin filling over the layered filo sheets in the pie dish. Use a spatula to spread it evenly, ensuring every corner is filled with that rich, spiced goodness that characterizes your Vegan Pumpkin Filo Pie.

Step 7: Top with More Filo
Now, add another 6-8 layers of filo pastry on top of the filling, again brushing each sheet with melted coconut oil. This creates a beautiful, crispy layer that will bake up perfectly, complementing the creamy pumpkin underneath.

Step 8: Trim and Seal Edges
Fold any excess filo over the edges of the pie to create a neatly sealed crust. Brush the folded edges with additional melted coconut oil to encourage browning. This step is essential for keeping your filling enclosed during baking while adding an appealing finish.

Step 9: Bake the Pie
Carefully place the pie in the preheated oven and bake for 40-45 minutes. Keep an eye on it during the last few minutes; you're looking for a deep golden-brown color and a firm filling that is set in the center, indicating your Vegan Pumpkin Filo Pie is ready.

Step 10: Cool and Serve
Once baked, remove the pie from the oven and allow it to cool for 15-20 minutes before slicing. This rest period is important for the filling to firm up slightly, making it easier to serve. Enjoy your delicious Vegan Pumpkin Filo Pie warm!

Make Ahead Options

Preparing the Vegan Pumpkin Filo Pie ahead of time is a fantastic way to ease your kitchen workload and save valuable time on busy evenings! You can make the filling and store it in an airtight container in the refrigerator for up to 3 days. Additionally, you can layer the filo pastry in your pie dish and brush it with coconut oil, covering it tightly with plastic wrap to keep it fresh for up to 24 hours. When you're ready to bake, pour the chilled filling into the layered pastry, top with additional filo, and proceed to bake as instructed. This ensures your pie will taste just as delicious, allowing you to enjoy that rich pumpkin flavor with minimal effort!

How to Store and Freeze Vegan Pumpkin Filo Pie

Fridge: Keep leftover Vegan Pumpkin Filo Pie covered in the refrigerator for up to 3-4 days. This helps maintain its delicious flavors and texture.

Freezer: For longer storage, wrap individual slices tightly in plastic wrap or aluminum foil, then place them in an airtight container. They can be frozen for up to 2 months.

Thawing: When ready to enjoy, thaw slices in the refrigerator overnight. Reheat them in the oven at 350°F (175°C) for about 10-15 minutes to restore that delightful crispiness.

Serving: For the best flavor experience, enjoy the pie warm—an irresistible treat that will warm your heart on chilly fall days!

Expert Tips for Vegan Pumpkin Filo Pie

• Fresh Ingredients: Use fresh pumpkin puree for the best taste and nutrition; it enhances the overall flavor of your Vegan Pumpkin Filo Pie.

• Keep Filo Covered: Always cover unused filo pastry with a damp towel while preparing; it dries out quickly and can become hard to work with.

• Brush Generously: Don’t skimp on melting coconut oil between layers; this adds moisture and creates the perfect flaky texture that elevates your pie.

• Bake Thoroughly: Ensure your pie bakes until it's deeply golden brown; underbaking can lead to a soggy texture that ruins the experience.

• Cooling Time: Allow the pie to cool for 15-20 minutes before slicing; this helps the filling set up better for easier serving.

Vegan Pumpkin Filo Pie Variations

Feel free to let your creativity shine as you explore scrumptious twists on this delightful recipe!

  • Chocolate Swirl: Add 2 tablespoons of cocoa powder to the filling for a rich, decadent chocolate flavor. The combination of pumpkin and chocolate is a match made in heaven!

  • Nutty Addition: Fold in 1/2 cup of chopped walnuts or pecans for a delightful crunch. The added texture not only enhances flavor but makes each slice even more satisfying.

  • Tropical Flavor: Mix in 1/2 cup of shredded coconut to the filling for a unique, island-inspired twist. This adds a hint of sweetness and chewiness that perfectly complements the warm spices.

  • Savory Version: Swap the sweet spices for 1 cup of sautéed mushrooms and spinach to create a savory pie. This twist is perfect for brunch or as a side dish at dinner gatherings.

  • Spiced Apple Layer: Add thinly sliced apples mixed with cinnamon and sugar beneath the pumpkin filling. The apples create a delightful contrast of flavors that’ll surprise your guests!

  • Maple Pecan Topping: Top the pie with a mixture of 1/2 cup crushed pecans and 1/4 cup maple syrup before baking. This creates a delightful caramelized topping that adds sweetness and crunch.

  • Herb-Infused: Incorporate fresh herbs like rosemary or thyme into the filling for a unique taste. Just a teaspoon of finely chopped herbs can elevate your pie to a whole new level.

  • Citrus Zing: Mix in the zest of one orange or lemon for a citrus kick that brightens the filling. It adds a refreshing contrast to the rich pumpkin flavor, making each bite more vibrant.

And if you’re still craving more creative ideas, make sure to check out my delightful Pumpkin Cinnamon Roll Muffins and see how they differ while still celebrating those beloved fall flavors!

What to Serve with Vegan Pumpkin Filo Pie

As the cozy aroma of pumpkin fills your kitchen, envision the perfect accompaniments to elevate your dining experience.

  • Coconut Whipped Cream: A dollop of this creamy topping adds a luscious texture and enhances the warm spices in the pie.
  • Spiced Chai Latte: This chai's warm, aromatic spices beautifully echo the flavors of your pie, creating a comforting beverage pairing.
  • Candied Pecans: These crunchy, sweet nuts offer a delightful contrast to the soft pumpkin filling, adding texture and extra flavor dimensions.
  • Crispy Brussels Sprouts: Roasted until golden, these savory bites provide a crunchy, earthy complement to your rich dessert.
  • Fresh Salad: A vibrant salad with mixed greens and a light vinaigrette brings a refreshing crunch that balances the silky filling.
  • Cinnamon Sugar Pita Chips: These sweet, crunchy chips are delightful for dipping into the pie, adding an extra layer of fun to your dessert experience.
  • Warm Apple Cider: A cup of spiced cider brings cozy fall flavors to the table, completing the experience of a cozy gathering.
  • Vegan Vanilla Ice Cream: The creaminess and coolness of this dessert contrast beautifully with the warm, flaky pie, creating a comforting duo.

Vegan Pumpkin Filo Pie Recipe FAQs

How do I choose the right pumpkin puree?
Absolutely! For the best flavor, I recommend using fresh roasted pumpkin. If you're short on time, look for canned pumpkin puree that contains 100% pumpkin with no additives. Avoid pumpkin pie filling, as it often has added sugars and spices that can throw off your pie’s flavor profile.

How do I store leftover Vegan Pumpkin Filo Pie?
To keep your pie fresh, cover it tightly with plastic wrap or store it in an airtight container. It will last in the refrigerator for up to 3-4 days. Just reheat individual slices in the oven for that perfect crispy texture!

Can I freeze Vegan Pumpkin Filo Pie?
Yes, you absolutely can! For freezing, wrap individual slices tightly in plastic wrap or aluminum foil, then place them in an airtight container. They can be frozen for up to 2 months. When you’re ready to enjoy, just thaw in the fridge overnight, then reheat at 350°F (175°C) for about 10-15 minutes.

What if my filo pastry starts to dry out while preparing?
Very! If you notice any dry or cracked sheets, you can mist or brush them lightly with water or melted coconut oil to help rehydrate them, making them more pliable. Always keep unused sheets covered with a damp towel while you work to prevent drying.

Are there any dietary considerations for this recipe?
Absolutely! This recipe is vegan and can be made gluten-free by using gluten-free filo pastry. Additionally, if you have nut allergies, you might want to substitute the coconut milk with rice milk or oat milk. Always be mindful of the ingredients to cater to dietary restrictions!

How can I make my Vegan Pumpkin Filo Pie even fluffier?
You can enhance the texture of the filling by whisking in 1-2 tablespoons of aquafaba (the liquid from canned chickpeas) along with your other ingredients. This creates a fluffier consistency that will make your pie even more delightful!

Vegan Pumpkin Filo Pie

Delight in Vegan Pumpkin Filo Pie for Cozy Fall Gatherings

Enjoy a delicious Vegan Pumpkin Filo Pie, a perfect cozy fall dessert that everyone can savor.
Print Recipe Pin Recipe
Prep Time 30 minutes mins
Cook Time 45 minutes mins
Cooling Time 20 minutes mins
Total Time 1 hour hr 35 minutes mins
Servings: 8 slices
Course: Dessert
Cuisine: Vegan
Calories: 250
Ingredients Equipment Method Nutrition Notes

Ingredients
  

For the Filo Pastry
  • 1 pack Filo Pastry Keep covered with a damp towel
  • 1/2 cup Melted Coconut Oil Substitute with olive oil or vegan butter if desired
For the Pumpkin Filling
  • 1 cup Pumpkin Puree Fresh roasted pumpkin enhances the taste
  • 1/2 cup Coconut Milk Almond or soy milk can work as substitutes
  • 1/2 cup Brown Sugar Can be swapped with coconut sugar or maple syrup
  • 1 tsp Vanilla Extract Almond extract can replace it
  • 1 tsp Cinnamon
  • 1/2 tsp Nutmeg
  • 1/2 tsp Ginger
  • 1/2 tsp Allspice
  • 1/4 tsp Salt
  • 1 tbsp Cornstarch Arrowroot or tapioca flour can be used instead
  • 1/4 cup Maple Syrup Honey can be used for non-vegan options

Equipment

  • Mixing Bowl
  • Whisk
  • 9-inch pie dish
  • Spatula
  • Oven

Method
 

Step-by-Step Instructions
  1. Preheat your oven to 375°F (190°C).
  2. In a mixing bowl, combine pumpkin puree, coconut milk, brown sugar, vanilla extract, spices, salt, cornstarch, and maple syrup. Whisk until smooth.
  3. Unroll the filo pastry sheets carefully and keep covered with a damp towel.
  4. Brush a 9-inch pie dish with melted coconut oil.
  5. Layer 6-8 sheets of filo pastry into the pie dish, brushing each layer with melted coconut oil.
  6. Pour the pumpkin filling over the layered filo sheets and spread evenly.
  7. Top with another 6-8 layers of filo pastry, brushing each with melted coconut oil.
  8. Trim and fold any excess filo over the edges of the pie and brush with melted coconut oil.
  9. Bake for 40-45 minutes until golden brown and firm in the center.
  10. Let cool for 15-20 minutes before slicing and serving.

Nutrition

Serving: 1sliceCalories: 250kcalCarbohydrates: 35gProtein: 3gFat: 12gSaturated Fat: 8gPolyunsaturated Fat: 1gMonounsaturated Fat: 3gSodium: 150mgPotassium: 200mgFiber: 2gSugar: 10gVitamin A: 100IUVitamin C: 10mgCalcium: 2mgIron: 6mg

Notes

Serve warm for the best experience. The pie can be customized with variations such as chocolate swirls or nutty additions.

Tried this recipe?

Let us know how it was!

Sweet and Easy 3-Ingredient Oreo Balls Everyone Will Love

August 24, 2025 by Grace Snow Leave a Comment

Just the other day, my kitchen turned into a mini sweet shop as I whipped up a batch of 3-Ingredient Oreo Balls. With just a few simple ingredients, these delightful no-bake treats transformed into creamy, chocolaty bites of joy, perfect for any occasion. What I love most is their versatility; you can jazz them up with toppings or even create flavor variations like Peanut Butter or Minty Chocolate Oreo Balls! Not only are they easy to make and kid-friendly, but they also cater to those of us who crave a homemade dessert without spending hours in the kitchen. Whether you’re hosting a party, looking for a fun family activity, or want to impress your friends with minimal effort, these Oreo Balls are the answer. So why not dive into the world of sweet creativity and discover how you can personalize these irresistible treats? What flavor combination will you try first?

Why Are These Oreo Balls a Must-Try?

Simplicity makes these treats a breeze to whip up in no time! Versatile in nature, you can easily customize them with various toppings or flavor profiles like Peanut Butter or Espresso. Kid-Friendly and fun, they make for an engaging kitchen activity with the little ones. Rich and Decadent, these Oreo Balls pack a creamy punch with every bite, satisfying any sweet tooth. Plus, they’re a great way to impress guests without the stress—just put them out on a tray, and let the compliments roll in!

3-Ingredient Oreo Balls Ingredients

For the Oreo Mixture
• Oreo Cookies – The base of your 3-Ingredient Oreo Balls, providing rich flavor and structure.
• Cream Cheese – Adds the perfect creaminess to bind everything together; use softened for easy mixing.

For the Chocolate Coating
• Chocolate (Milk, Dark, or White) – Coats the balls for a luscious finish; experiment with smoked dark chocolate for depth!

For Optional Toppings
• Rainbow Sprinkles – Add a pop of color on top for a festive look.
• Shredded Coconut – Roll your coated balls in this to achieve a tropical twist.
• Chopped Nuts – For a crunchy contrast that complements the creamy texture.

These simple yet delicious ingredients make your 3-Ingredient Oreo Balls customizable for any occasion!

Step‑by‑Step Instructions for 3-Ingredient Oreo Balls

Step 1: Crush the Oreos
Start by placing your Oreo cookies in a food processor. Pulse them until they are finely crumbled, resembling sand, which should take about 30 seconds. If you don’t have a food processor, you can place the cookies in a zip-top bag and crush them with a rolling pin. The finer the crumbs, the smoother your 3-Ingredient Oreo Balls will be!

Step 2: Mix the Ingredients
In a large mixing bowl, combine the crushed Oreos with softened cream cheese. Using a spatula or your hands, mix thoroughly until the mixture is well-blended and smooth, about 2-3 minutes. You’ll know it’s ready when there are no visible cream cheese lumps, and the mixture holds together well. This creamy base is what makes the Oreo Balls simply irresistible!

Step 3: Form the Balls
Take about a tablespoon of the Oreo mixture and roll it into a ball about 1-inch in diameter. Place each ball on a parchment-lined baking sheet to prevent sticking. Continue this process until you’ve rolled all the mixture, feeling free to adjust sizes for your preference. The uniformity of the balls will ensure even coating later!

Step 4: Chill to Set
Once formed, place the baking sheet in the refrigerator and chill the Oreo Balls for at least 30 minutes. This step is crucial as it helps the balls firm up, making them easier to coat in chocolate later. You’ll know they’re ready when they feel solid to the touch.

Step 5: Melt the Chocolate
While the Oreo Balls chill, melt your chocolate in a microwave-safe bowl. Microwave it in 30-second intervals, stirring in between until completely smooth and melted—this should take about 1-2 minutes total. Be sure to keep an eye on the chocolate to avoid burning; the right consistency will be glossy and flowing.

Step 6: Coat the Balls
After the Oreo Balls have chilled, remove them from the refrigerator. Dip each ball into the melted chocolate, ensuring it’s completely coated. Let the excess chocolate drip off before returning the coated balls to the parchment-lined baking sheet. You can also use a fork for a neat finish, making sure they are perfectly covered!

Step 7: Add Toppings
Before the chocolate sets, sprinkle your desired toppings, such as rainbow sprinkles, chopped nuts, or shredded coconut, onto the wet chocolate coating. This step adds a lovely decorative touch to your 3-Ingredient Oreo Balls. Be creative—each topping adds a burst of flavor and color!

Step 8: Final Chill
Once all the Oreo Balls are coated and topped, return the baking sheet to the refrigerator for another 15-20 minutes. This allows the chocolate coating to fully harden. You’ll know they’re ready when the chocolate feels firm to the touch, giving your treats that satisfying outer crunch!

How to Store and Freeze 3-Ingredient Oreo Balls

Fridge: Store your 3-Ingredient Oreo Balls in an airtight container in the refrigerator for up to one week. This keeps them fresh and delicious while preserving their creamy texture.

Freezer: For longer storage, you can freeze these treats for up to three months. Place them in a single layer on a baking sheet until frozen, then transfer to an airtight container.

Thawing: To enjoy your frozen Oreo Balls, simply transfer them to the fridge for several hours before serving. This ensures they retain their delightful consistency.

Reheating: These no-bake treats are best enjoyed cold, so there's no need to reheat—just take them out, serve, and watch everyone enjoy!

3-Ingredient Oreo Balls Variations

Feel free to get creative and make these delicious Oreo Balls your own with some fun twists and substitutions!

  • Peanut Butter Twist: Mix in ½ cup of creamy peanut butter for a rich, nutty flavor. The creaminess of the peanut butter combines beautifully with the original ingredients, creating a decadent variation everyone will adore.

  • Minty Delight: Swap regular Oreos for mint-flavored ones and add a few drops of mint extract for a refreshing kick. This variation adds an exciting green glow and evokes a classic mint chocolate experience that's especially delightful around the holidays.

  • Coconut Coating: After dipping in chocolate, roll the balls in shredded coconut for an island-inspired treat. The chewy coconut adds texture while complementing the chocolate and creamy interior luxuriantly.

  • Espresso Flavor: Stir in a teaspoon of instant espresso to the Oreo mixture for a delightful coffee twist. This not only enhances the flavor but also gives a subtle caffeine boost that pairs well with dessert!

  • Rainbow Sprinkles: Top your chocolate-coated balls with rainbow sprinkles for a whimsical finish. Kids, in particular, will love this colorful touch that brings joy to any occasion, making them perfect for birthday parties or celebrations.

  • Choco-Nut Crunch: Sprinkle chopped nuts onto the wet chocolate coating for a satisfying crunch. Almonds or hazelnuts work wonders here; the added texture elevates the experience!

  • Spicy Heat: Add a pinch of cayenne pepper or chili powder to the chocolate coating for unexpected warmth. This sweet-spicy combination will surprise and delight adventurous eaters!

  • Fruit Flavored: Incorporate crushed freeze-dried strawberries or raspberries into the Oreo mixture for a fruity twist. The berries add a touch of natural sweetness and color that enhances the overall flavor profile.

With these variations, you're sure to find the perfect combination that resonates with your taste buds and makes your 3-Ingredient Oreo Balls even more special! If you get inspired by any of these variations, be sure to share your creations too—there's always room for a little extra sweetness!

What to Serve with 3-Ingredient Oreo Balls

Imagine a dessert spread bursting with color and flavor, inviting family and friends to indulge in sweet delights.

  • Creamy Vanilla Ice Cream: A scoop of vanilla ice cream balances the rich chocolate and creamy texture of the Oreo Balls, creating a delightful contrast with every bite.
  • Fresh Berries: The tartness of fresh raspberries or strawberries cuts through the sweetness perfectly, adding a refreshing pop to your dessert platter.
  • Coffee or Espresso: Serve these treats alongside a warm cup of coffee or a shot of espresso for a delightful dessert experience that satisfies cravings and enhances flavors.
  • Chocolate Dipped Fruit: Pairing with chocolate-covered strawberries or bananas elevates the chocolate-happiness of the Oreo Balls, creating a symphony of flavors.
  • Nutty Trail Mix: A handful of nutty trail mix adds an unexpected crunch that complements the smoothness of the Oreo Balls, introducing pleasing textures.
  • Whipped Cream: A dollop of homemade whipped cream is perfect for dipping the Oreo Balls, giving them a light, airy touch while enhancing their richness.
  • Mint Tea: Herbal mint tea offers a soothing beverage choice that refreshes the palate after indulging in the chocolaty richness of your Oreo Balls.
  • Mini Cheesecake Cups: Serve mini cheesecake cups on the side for a decadent duo—a creamy dessert experience that harmonizes beautifully with the Oreo Balls.
  • Dark Chocolate Ganache: Drizzle or serve a side of ganache for a luxe touch; the semi-sweet chocolate enhances the flavor, turning your dessert into an indulgent event.

Expert Tips for 3-Ingredient Oreo Balls

  • Chocolate Check: Ensure your chocolate is smooth and not too thick. If it's too thick, it'll be hard to coat the balls evenly.

  • Cream Cheese Temp: Always use softened cream cheese. Cold cream cheese will result in a lumpy mixture, making it difficult to blend with the Oreos.

  • Consistent Sizes: Use a cookie scoop to form uniform balls. This helps with even cooking and makes for a beautiful presentation in your 3-Ingredient Oreo Balls.

  • Chill Time Matters: Don’t skip the chilling steps. This helps the Oreo Balls firm up and makes coating with chocolate easier.

  • Experiment Boldly: Feel free to mix and match toppings—try adding a sprinkle of sea salt for a sweet-savory twist, or go for crushed candies for extra crunch!

Make Ahead Options

These 3-Ingredient Oreo Balls are a fantastic option for busy home cooks looking to save time without sacrificing flavor! You can prepare the Oreo mixture and roll it into balls up to 24 hours in advance—just store them in an airtight container in the refrigerator. This way, they remain firm and ready for coating. When you're ready to finish, simply melt your chocolate, coat the chilled balls, and add your desired toppings. If you want to get even more organized, you can coat the balls and refrigerate them for an additional up to 3 days before serving—ensuring that they stay just as delicious and satisfying!

3-Ingredient Oreo Balls Recipe FAQs

What type of Oreos should I use for the best results?
Absolutely, for the best flavor and texture, I recommend using original Oreo cookies. If you’re looking for a gluten-free option, you can substitute them with gluten-free chocolate sandwich cookies; they work beautifully in this recipe!

How long can I store these Oreo Balls?
You can keep your 3-Ingredient Oreo Balls fresh by storing them in an airtight container in the refrigerator for up to one week. This keeps them deliciously creamy!

Can I freeze 3-Ingredient Oreo Balls, and if so, how?
Yes, you can freeze your Oreo Balls for up to three months! To do this, place them in a single layer on a baking sheet until they’re solid. After freezing, transfer them to an airtight container or zip-top bag, separated by layers of parchment paper to prevent sticking.

What if my mixture is too crumbly or too wet?
If you find your Oreo mixture is too crumbly, try adding more softened cream cheese, a tablespoon at a time, until it comes together. On the flip side, if it’s too wet, you might need to add a little more crushed Oreo cookie to balance it out. Mix and adjust as needed to achieve a smooth, moldable consistency!

Are these Oreo Balls suitable for kids and those with allergies?
Absolutely! These 3-Ingredient Oreo Balls are kid-friendly and a great way to involve the little ones in baking. However, be mindful of any allergies—such as gluten or dairy. You can easily adapt them by using gluten-free Oreos and dairy-free cream cheese alternatives if needed.

What toppings can I use to customize my Oreo Balls?
The more the merrier! You can choose from a variety of toppings like rainbow sprinkles, shredded coconut, or crushed nuts. The sky's the limit—get creative and have fun mixing different flavors and textures for a unique twist!

3-Ingredient Oreo Balls

Sweet and Easy 3-Ingredient Oreo Balls Everyone Will Love

These 3-Ingredient Oreo Balls are delightful no-bake treats, perfect for any occasion.
Print Recipe Pin Recipe
Prep Time 15 minutes mins
Chilling Time 30 minutes mins
Total Time 45 minutes mins
Servings: 12 balls
Course: Dessert
Cuisine: American
Calories: 150
Ingredients Equipment Method Nutrition Notes

Ingredients
  

For the Oreo Mixture
  • 1 package Oreo Cookies Crushed finely
  • 8 oz Cream Cheese Softened
For the Chocolate Coating
  • 12 oz Chocolate (Milk, Dark, or White) Melted
For Optional Toppings
  • 1/4 cup Rainbow Sprinkles
  • 1/4 cup Shredded Coconut
  • 1/4 cup Chopped Nuts

Equipment

  • Food Processor
  • Mixing Bowl
  • Parchment Paper
  • Microwave-safe bowl

Method
 

Step-by-Step Instructions
  1. Start by placing your Oreo cookies in a food processor. Pulse them until finely crumbled, resembling sand, about 30 seconds.
  2. In a large mixing bowl, combine the crushed Oreos with softened cream cheese. Mix until well-blended and smooth, about 2-3 minutes.
  3. Roll about a tablespoon of the mixture into balls, about 1 inch in diameter, and place on a parchment-lined baking sheet.
  4. Refrigerate the baking sheet with the balls for at least 30 minutes to help them firm up.
  5. Melt the chocolate in a microwave-safe bowl in 30-second intervals, stirring until smooth, about 1-2 minutes.
  6. Dip each ball into the melted chocolate, ensuring it's completely coated, and let excess drip off before placing back on the sheet.
  7. Sprinkle desired toppings onto the wet chocolate coating before it sets.
  8. Return the baking sheet to the refrigerator for another 15-20 minutes for the chocolate to harden.

Nutrition

Serving: 1ballCalories: 150kcalCarbohydrates: 21gProtein: 2gFat: 7gSaturated Fat: 4gPolyunsaturated Fat: 1gMonounsaturated Fat: 2gCholesterol: 10mgSodium: 95mgPotassium: 60mgFiber: 1gSugar: 13gVitamin A: 50IUCalcium: 20mgIron: 0.5mg

Notes

Store in an airtight container in the refrigerator for up to one week or freeze for up to three months. Thaw in the fridge before serving.

Tried this recipe?

Let us know how it was!

Irresistibly Chewy Salted Caramel Rice Krispie Treats

August 24, 2025 by Grace Snow Leave a Comment

The first bite of these Salted Caramel Rice Krispie Treats is like a warm hug on a rainy day, a perfect blend of sweet and salty that makes my heart sing. This quick and easy dessert is a delightful twist on the classic treat, bringing that gooey marshmallow goodness and crispy crunch together in just under 30 minutes—ideal for busy afternoons or spontaneous gatherings. What I love most is how customizable these treats can be; you can mix in your favorite toppings or even experiment with different flavors of caramel. Whether you’re serving them at a party or enjoying them with family, these treats promise smiles all around. So, are you ready to dive into this scrumptious adventure with me?

Why Are These Salted Caramel Treats Irresistible?

Quick and Easy: With just under 30 minutes prep time, these treats are perfect for busy weeks or last-minute guest visits.

No Baking Required: Forget the oven! These Salted Caramel Rice Krispie Treats come together on the stovetop, making it a delightful, hassle-free dessert.

Customizable Fun: The recipe allows for endless variations. Toss in chocolate chips or dried fruits to make them uniquely yours.

Family-Friendly: Kids and adults alike adore these sweet bites—making them a hit for every gathering. If you love quick desserts, this treat is right up your alley!

Perfectly Balanced: The blend of sweet marshmallows and rich salted caramel creates a taste that will satisfy any craving. It’s a delightful twist that you won’t want to miss!

For more delightful dishes, check out my Furikake Fried Rice or the refreshing Lime Chicken Rice—both perfect for keeping your dining experience exciting!

Salted Caramel Rice Krispie Treats Ingredients

For the Base
• Rice Krispies cereal – Provides the perfect crunch and structure; feel free to swap with Cocoa Puffs for a chocolatey twist.
• Granulated sugar – Sweetens the mixture and helps create that chewy texture everyone loves.
• Light corn syrup – Binds everything together while adding a touch of extra sweetness.
• Creamy peanut butter (or other nut butter) – Adds richness and a hint of nuttiness; choose almond butter for a nut-free option.
• Vanilla extract – Enhances the overall flavor, taking your treats to the next level.
• Mini marshmallows – Introduces that beloved chewiness; opt for larger marshmallows if you prefer a gooier result.

For the Flavor
• Salted caramel sauce – Provides that signature flavor for the Salted Caramel Rice Krispie Treats; use store-bought or homemade for convenience.
• Salt – Balances the sweetness, just adjust to your taste preferences.

For Garnishing
• Additional salted caramel for drizzling (optional) – Adds an extra layer of flavor and visual appeal.
• Sea salt flakes for garnish (optional) – Elevates presentation and enhances the sweet-salty contrast.

Step‑by‑Step Instructions for Salted Caramel Rice Krispie Treats

Step 1: Prepare the Baking Dish
Start by greasing a 9x13-inch baking dish with butter or non-stick spray. This will ensure your Salted Caramel Rice Krispie Treats release easily after setting. Use a generous amount, especially on the corners, so the treats don’t stick as they cool.

Step 2: Heat Sugar and Syrup
In a medium saucepan over medium heat, combine granulated sugar and light corn syrup. Stir frequently while the mixture begins to boil—this should take about 5-7 minutes. You’ll know it’s ready when it has thickened slightly and turns a bubbly golden color, so keep an eye on it to prevent burning.

Step 3: Incorporate Peanut Butter
Once your syrup mixture is boiling, promptly remove it from the heat. Stir in the creamy peanut butter until fully melted and well incorporated, which should take about 1-2 minutes. This delicious step brings richness to your Salted Caramel Rice Krispie Treats, mixing well with your syrup for a luscious flavor.

Step 4: Add Vanilla
Next, mix in the vanilla extract, stirring until the mixture is completely smooth. This addition will enhance the depth of flavor in the treats and should take just about 30 seconds. Be sure to scrape the sides of the pan to combine everything evenly for that delicious salted caramel goodness.

Step 5: Combine with Cereal
In a large mixing bowl, pour the Rice Krispies and mini marshmallows together. Drizzle the warm peanut butter caramel mixture over them and gently fold everything together. Continue mixing for about 2-3 minutes until every Rice Krispie is evenly coated, ensuring that the marshmallows are incorporated for that chewy texture.

Step 6: Press into the Dish
Transfer the mixture to your prepared baking dish, pressing it down evenly with a spatula or your wet hands. Make sure to really pack it down for compact Salted Caramel Rice Krispie Treats, which will help them hold their shape once cooled. This should take around 3-4 minutes for an even surface.

Step 7: Add Caramel and Salt
While the mixture is still warm, drizzle additional salted caramel sauce on top to create a beautiful finish. Then, sprinkle sea salt flakes over the caramel for that perfect sweet and salty balance. Allow the treats to cool for about 15 minutes at room temperature, giving them time to set before cutting.

Make Ahead Options

These Salted Caramel Rice Krispie Treats are perfect for meal prep, allowing you to enjoy deliciousness without the last-minute rush! You can prepare the cereal and marshmallow mix up to 24 hours in advance. Simply follow the recipe steps up to pressing the mixture into the baking dish, then cover and refrigerate. When you're ready to serve, drizzle on the salted caramel and sprinkle with sea salt flakes. This final touch ensures your treats maintain their delightful taste and texture. For longer storage, these treats can be made in batches and stored in an airtight container at room temperature for up to 3 days.

Storage Tips for Salted Caramel Rice Krispie Treats

Room Temperature: Store your Salted Caramel Rice Krispie Treats in an airtight container at room temperature for up to 3-5 days to maintain their delightful texture.

Fridge: If you prefer a slightly firmer texture, you can refrigerate the treats, but be sure to shield them with parchment paper or wax paper to prevent them from sticking together.

Freezer: For longer storage, wrap the treats individually in plastic wrap and place them in a freezer bag. They can be frozen for up to 2 months. Thaw at room temperature before enjoying!

Reheating: If they've been refrigerated, let them sit out for a few minutes before serving. You can also briefly microwave them for 5-10 seconds for that gooey, fresh-out-of-the-pan experience!

What to Serve with Salted Caramel Rice Krispie Treats

Dive into the world of delightful pairings that elevate your Salted Caramel Rice Krispie Treats into a full-on dessert experience.

  • Chilled Milk: A classic pairing that complements the sweetness of the treats. Sipping milk enhances the flavors and offers a nostalgic comfort.
  • Rich Hot Chocolate: The warmth of hot chocolate contrasts beautifully with the cool texture of the treats, making each bite feel indulgent.
  • Fresh Berries: Juicy strawberries, raspberries, or blueberries provide a fresh and tangy burst, balancing the sweetness with their natural tartness.
  • Coffee or Espresso: A bold cup of coffee or a shot of espresso can sharpen and elevate the sweetness, creating a delightful flavor contrast for grown-up taste buds.
  • Vanilla Ice Cream: The creamy coolness of vanilla ice cream elevates those chewy textures and creates a luxurious dessert similar to affogato.
  • Chocolate Sauce Drizzle: For chocolate lovers, drizzling warm chocolate sauce adds a rich decadence, making every bite unforgettable.
  • Salted Caramel Brownies: If you're feeling adventurous, serve alongside gooey brownies for a layered dessert experience that everyone will love.
  • Mini Cupcakes: Offer an assortment of mini cupcakes with flavors like chocolate or vanilla for an enticing dessert platter that charms guests.
  • Nutty Trail Mix: Add a crunchy scene with a homemade nut and dried fruit mix. The textures and flavors synergize perfectly with the rice krispie treat’s chewiness.

Salted Caramel Rice Krispie Treats Variations

Invite your creativity to dance in the kitchen with these delightful twists on the classic treat!

  • Chocolate Lovers: Fold in some chocolate chips or chunks into the warm mixture for a rich, sweet addition. The combination of salted caramel and chocolate will have your taste buds tingling with joy!

  • Nutty Delight: Stir in your favorite chopped nuts, such as almonds or pecans, for added crunch. The nutty flavors blend beautifully with the caramel, creating a satisfying texture.

  • Fruity Flavor: Add a handful of dried fruits like cranberries or apricots to enhance the sweet and tart contrast. The colorful pops of fruit will delight every bite and bring a fruity freshness.

  • Marshmallow Fluff: Swap out mini marshmallows for marshmallow fluff for a richer, gooey texture that lends an extra layer of chewiness. This variation creates an ultra-soft treat that melts in your mouth.

  • Coconut Bliss: Add shredded coconut for a tropical twist. Its subtle sweetness pairs wonderfully with the salted caramel, giving your treats an exotic flair that will remind you of faraway beaches.

  • Spicy Kick: If you're feeling adventurous, sprinkle in some crushed red pepper flakes or cayenne pepper for a surprising spicy contrast. The heat beautifully complements the sweetness, creating a unique taste sensation.

  • Caramel Drizzle: Elevate your treats even further by drizzling in different caramel sauces, like chocolate or vanilla, for a layered flavor experience. This extra touch will make your treats irresistible at any gathering.

  • Peanut Butter Swirl: Mix in a swirl of additional peanut butter right before pressing the mixture into the dish. The added richness will take your Salted Caramel Rice Krispie Treats to a whole new level, blending salty and sweet beautifully.

For more delightful flavor combinations, don’t forget to try my One Pot Salmon and Shiitake Rice or the zesty Honey BBQ Chicken Rice. Each dish is sure to bring smiles and deliciousness to your dining table!

Expert Tips for Salted Caramel Rice Krispie Treats

  • Use Fresh Ingredients: Start with fresh marshmallows and quality Rice Krispies for the best flavor and texture. Stale ingredients can lead to a less satisfying treat.

  • Avoid Stickiness: Wet your hands before pressing down the mixture in the dish. This prevents sticking and helps achieve a perfectly packed treat.

  • Be Patient: Allow the mixture to cool adequately before cutting. If it's too warm, the treats may fall apart instead of holding their shape.

  • Customize Wisely: Feel free to swap toppings, but avoid adding too many wet ingredients; it may alter the texture of your Salted Caramel Rice Krispie Treats.

  • Experiment with Caramels: Try different flavors of salted caramel sauce, like mocha or vanilla, to create new delicious twists on your treats.

Salted Caramel Rice Krispie Treats Recipe FAQs

What type of Rice Krispies should I use?
It's best to use fresh Rice Krispies cereal for optimal crunch and flavor. If you're feeling adventurous, try substituting them with Cocoa Puffs or Fruity Pebbles for a twist in flavor and color!

How should I store Salted Caramel Rice Krispie Treats?
Store your treats in an airtight container at room temperature for 3-5 days to keep their delightful texture intact. If they start to get a bit hard, pop them in the microwave for a few seconds to bring back their gooey goodness.

Can I freeze Salted Caramel Rice Krispie Treats?
Absolutely! To freeze, wrap the treats individually in plastic wrap and then place them in a freezer bag. They can be frozen for up to 2 months. When you're ready to enjoy, just thaw them at room temperature, and they'll taste as good as fresh.

What if my treats are too sticky?
If your mixture ends up sticky, it might be due to overcooking the sugar syrup or not having enough Rice Krispies. To troubleshoot, you can add a bit more Rice Krispies until your desired texture is reached. Also, wetting your hands while pressing the mixture into the dish will help reduce stickiness!

Are these treats safe for kids with nut allergies?
Yes, you can make these Salted Caramel Rice Krispie Treats nut-free by substituting the peanut butter with sunflower seed butter or a similar spread. Always check ingredient labels to ensure there are no traces of nuts, especially in items like the caramel sauce or marshmallows.

Can I make these treats ahead of time?
Certainly! You can prepare these treats a day in advance. Just store them in an airtight container at room temperature. Remember to allow them to cool completely before cutting to maintain their shape and texture. Enjoy your pre-prepped deliciousness!

Salted Caramel Rice Krispie Treats

Irresistibly Chewy Salted Caramel Rice Krispie Treats

These Salted Caramel Rice Krispie Treats are a quick and easy dessert that blends sweetness and saltiness perfectly.
Print Recipe Pin Recipe
Prep Time 15 minutes mins
Cook Time 10 minutes mins
Cooling Time 15 minutes mins
Total Time 40 minutes mins
Servings: 12 treats
Course: Dessert
Cuisine: American
Calories: 200
Ingredients Equipment Method Nutrition Notes

Ingredients
  

Base
  • 6 cups Rice Krispies cereal Feel free to swap with Cocoa Puffs for a chocolatey twist.
  • 1 cup Granulated sugar Sweetens the mixture.
  • 1/2 cup Light corn syrup Helps bind everything together.
  • 1/2 cup Creamy peanut butter Can substitute with almond butter for nut-free.
  • 1 teaspoon Vanilla extract Enhances overall flavor.
  • 4 cups Mini marshmallows Opt for larger marshmallows if preferred.
Flavor
  • 1 cup Salted caramel sauce Store-bought or homemade.
  • 1/2 teaspoon Salt Adjust to taste.
Garnishing
  • 1/2 cup Additional salted caramel For drizzling (optional).
  • 1 teaspoon Sea salt flakes For garnish (optional).

Equipment

  • Medium saucepan
  • large mixing bowl
  • Spatula
  • 9x13-inch baking dish

Method
 

Step-by-Step Instructions
  1. Grease a 9x13-inch baking dish with butter or non-stick spray.
  2. In a medium saucepan, over medium heat, combine granulated sugar and light corn syrup. Stir over heat until it boils and thickens.
  3. Remove from heat and stir in the creamy peanut butter until melted and combined.
  4. Mix in the vanilla extract until smooth.
  5. In a large mixing bowl, pour the Rice Krispies and mini marshmallows. Drizzle the warm peanut butter caramel mixture over them and gently fold together.
  6. Transfer the mixture to the prepared baking dish, pressing it down evenly.
  7. Drizzle additional salted caramel sauce on top and sprinkle with sea salt flakes. Allow to cool for about 15 minutes.

Nutrition

Serving: 1treatCalories: 200kcalCarbohydrates: 30gProtein: 2gFat: 9gSaturated Fat: 2gSodium: 100mgPotassium: 50mgSugar: 18gCalcium: 1mgIron: 1mg

Notes

Store in an airtight container at room temperature for 3-5 days. Refrigerate for a firmer texture if desired.

Tried this recipe?

Let us know how it was!
  • « Previous Page
  • 1
  • …
  • 44
  • 45
  • 46
  • 47
  • 48
  • 49
  • Next Page »

Welcome!

Hi, I’m Grace, a Sydney-based home cook with a passion for bold flavors and trending ingredients. Whether you’re a busy beginner or a seasoned foodie, you’ll find dishes here that are fresh, fun, and full of flavor.

More about me

Popular Recipes

  • Cheesy Chicken Garlic Bread Sandwich
    Cheesy Chicken Garlic Bread Sandwich for Cozy Family Moments
  • Easy Chicken Ranch Wraps
    Easy Chicken Ranch Wraps: Quick, Creamy & Totally Satisfying
  • Chicken Caesar Sandwiches
    Delicious Chicken Caesar Sandwiches for Quick Comfort Food
  • best Cuban sandwich
    The Best Cuban Sandwich You’ll Want Every Weeknight!

Footer

↑ back to top

About

  • Privacy Policy
  • Disclaimer
  • Terms & Conditions

Newsletter

  • Sign Up! for emails and updates

Contact

  • About me
  • Contact me

Copyright © 2025 TastyTrendIngredients