tastytrendingredients

  • Home
  • Recipes
    • Appetizers
    • Breakfast
    • Dessert
    • Dinner
    • Drinks
    • Salads
    • Snacks
    • Soups
  • About me
  • Contact me
menu icon
go to homepage
  • Home
  • Recipes
    • Appetizers
    • Breakfast
    • Dessert
    • Dinner
    • Drinks
    • Salads
    • Snacks
    • Soups
  • About me
  • Contact me
search icon
Homepage link
  • Home
  • Recipes
    • Appetizers
    • Breakfast
    • Dessert
    • Dinner
    • Drinks
    • Salads
    • Snacks
    • Soups
  • About me
  • Contact me
×

Moist Pineapple Carrot Cream Cake: A Tropical Treat You’ll Love

September 23, 2025 by Grace Snow Leave a Comment

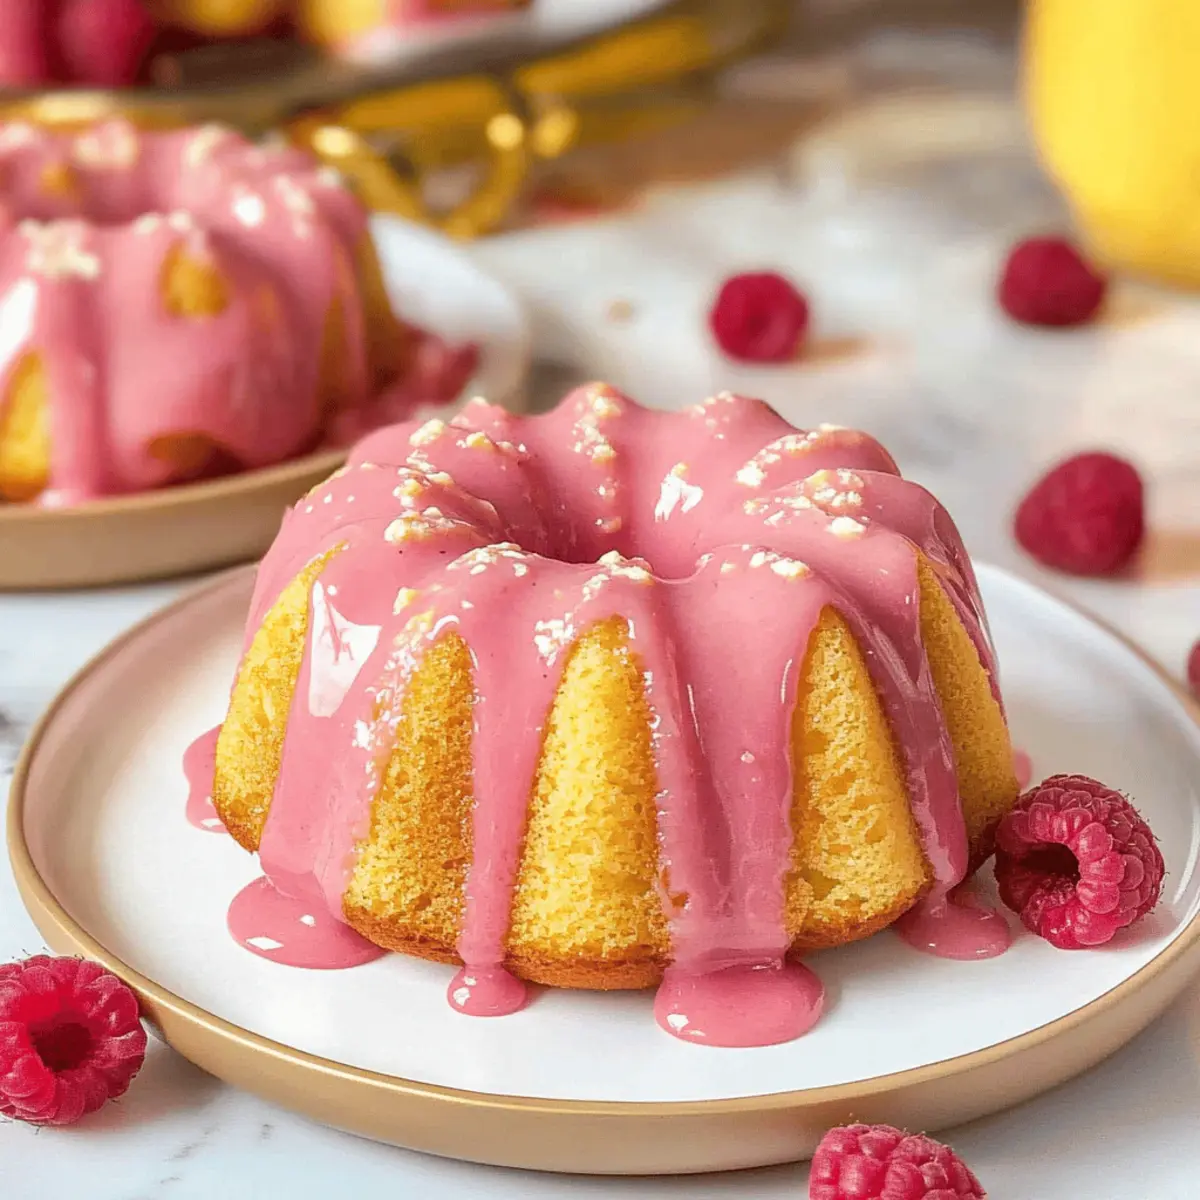
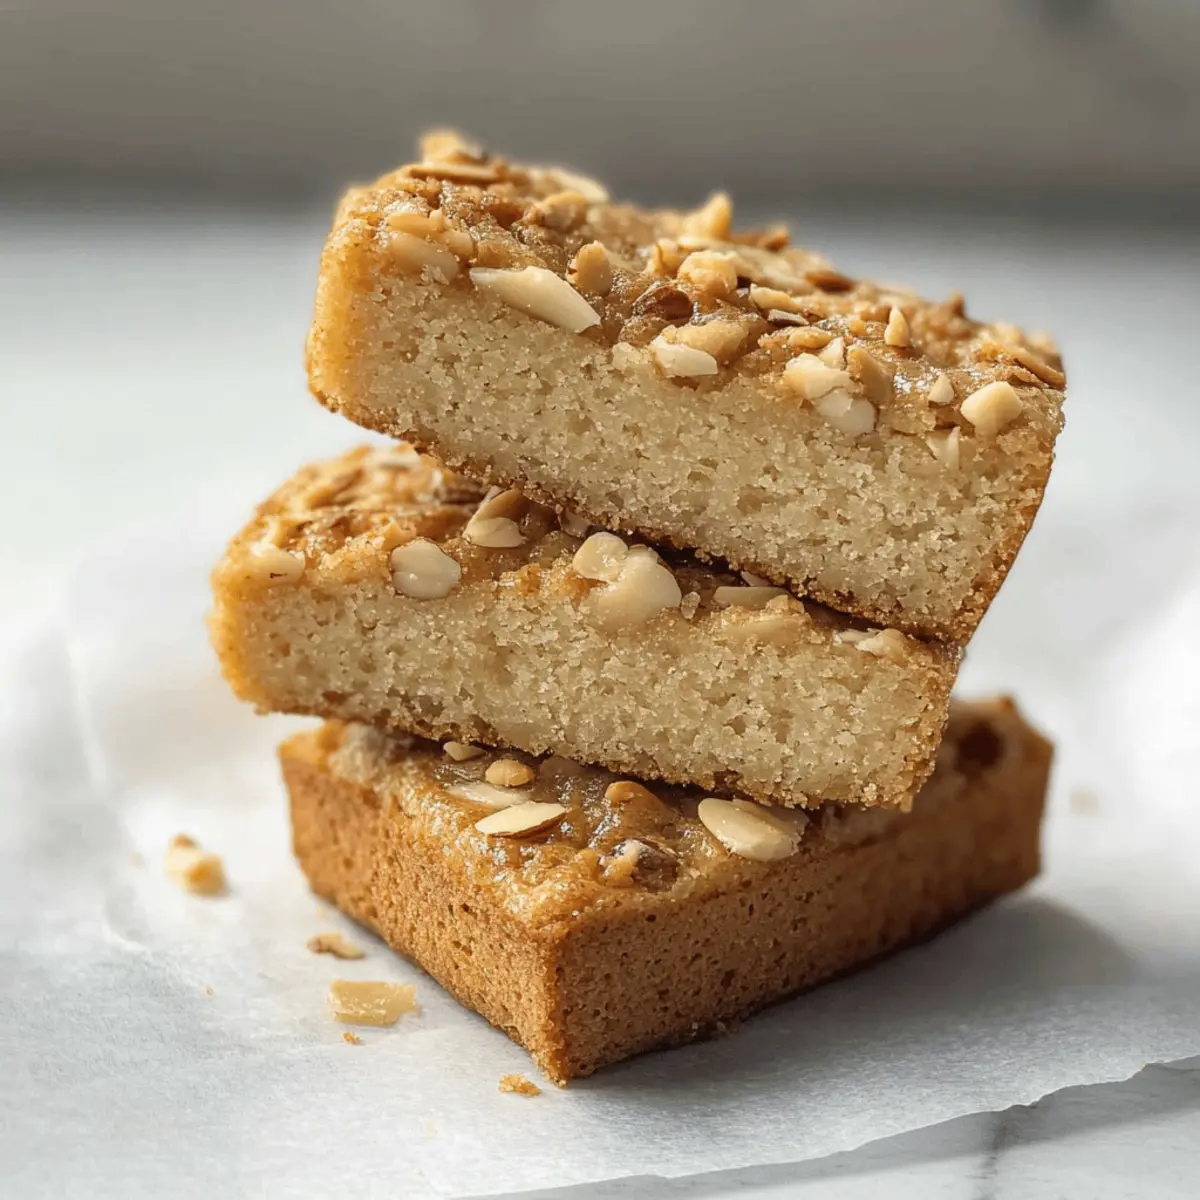
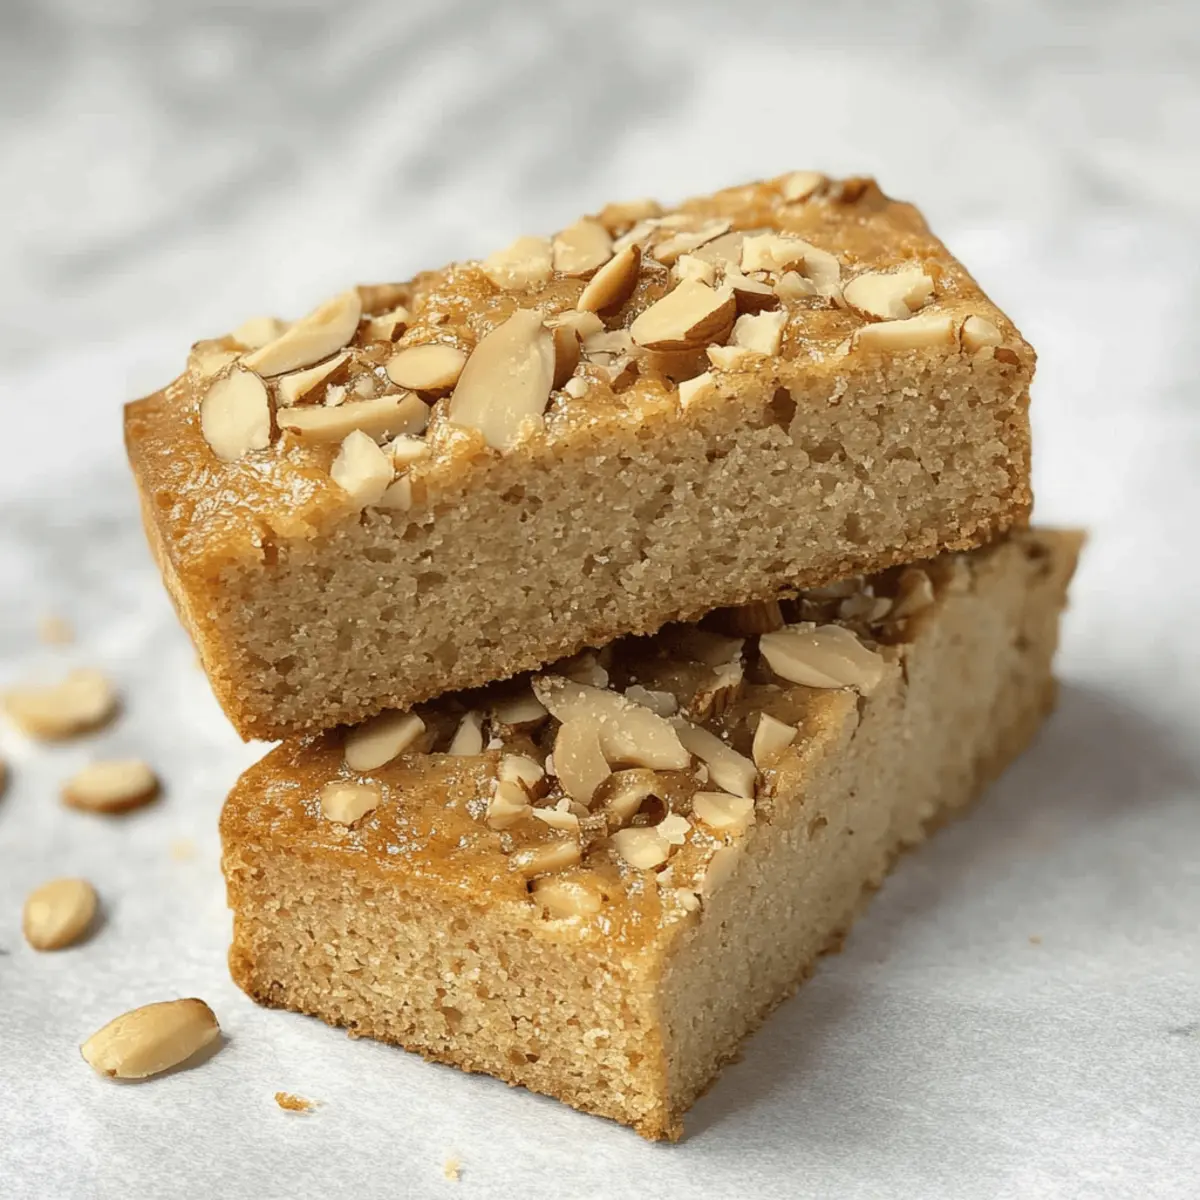
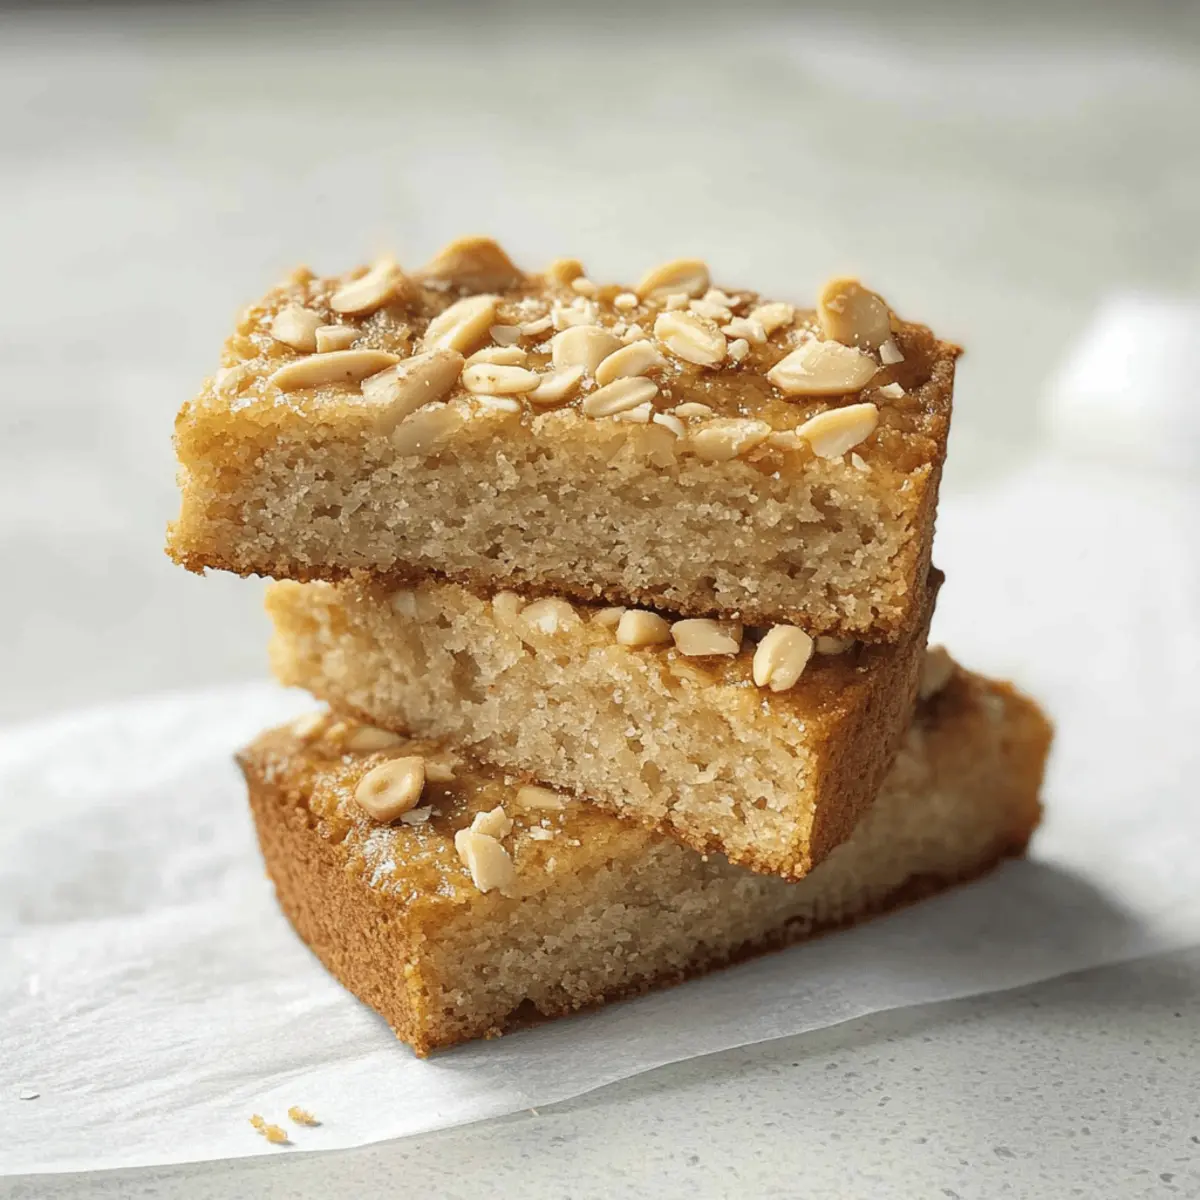
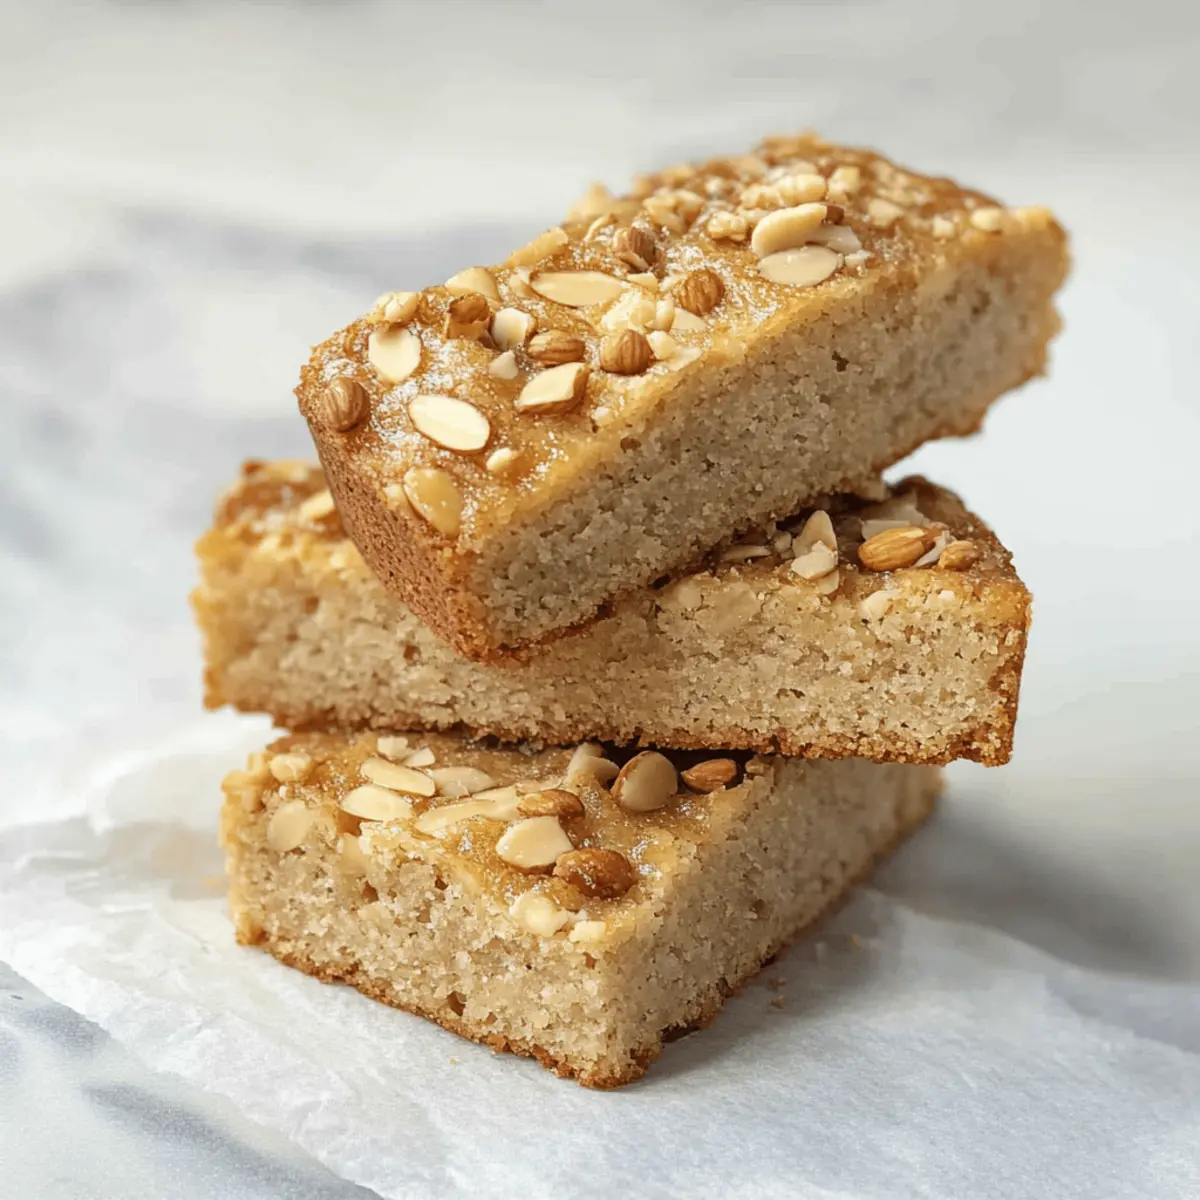
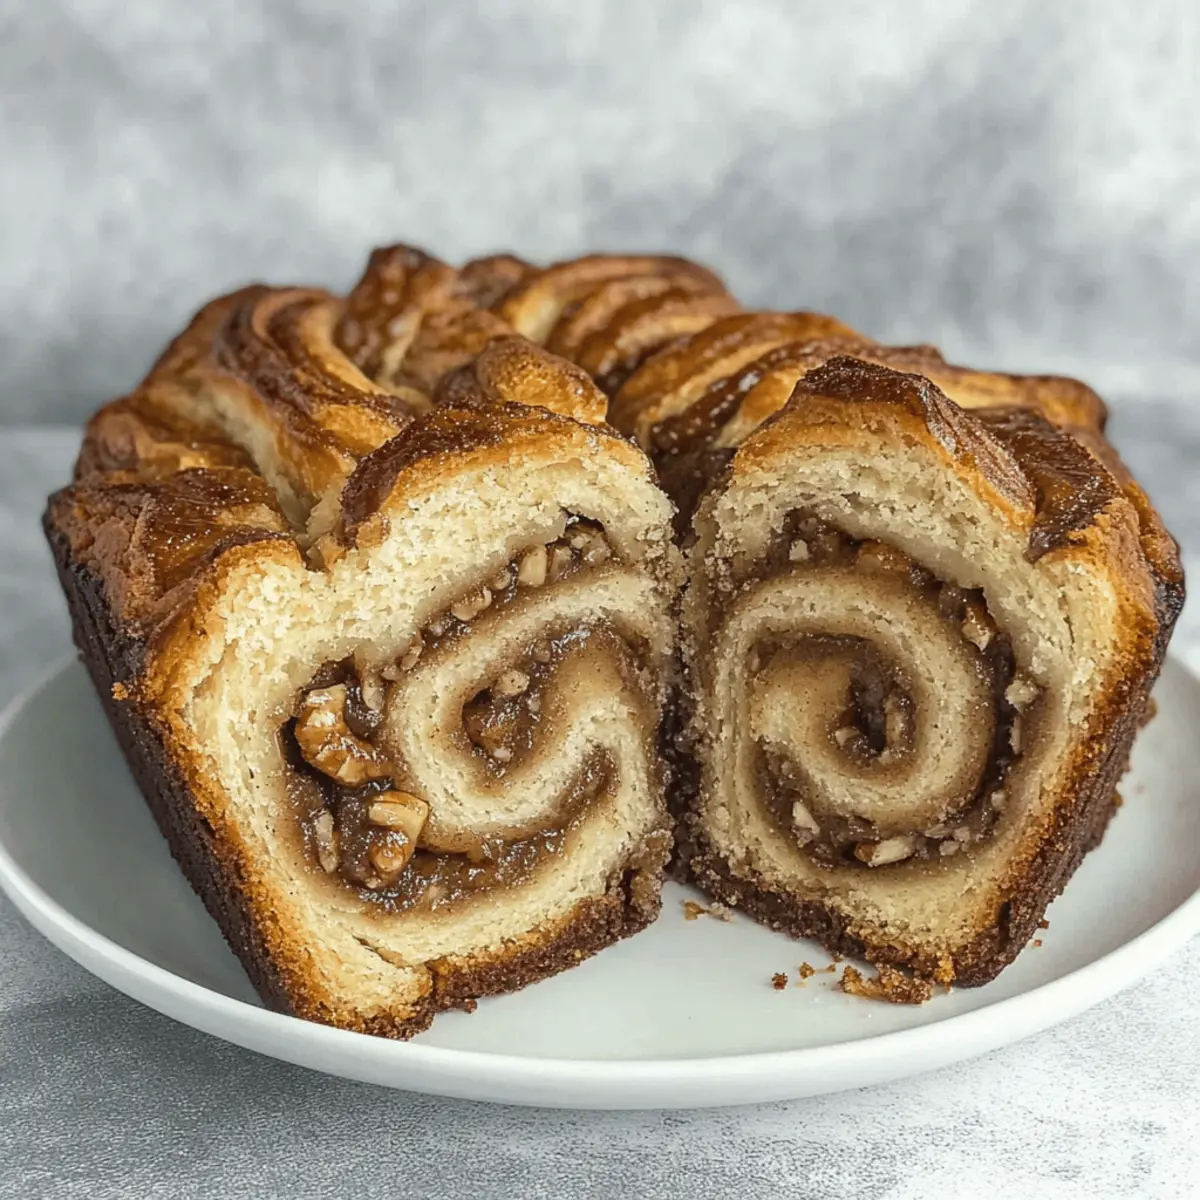
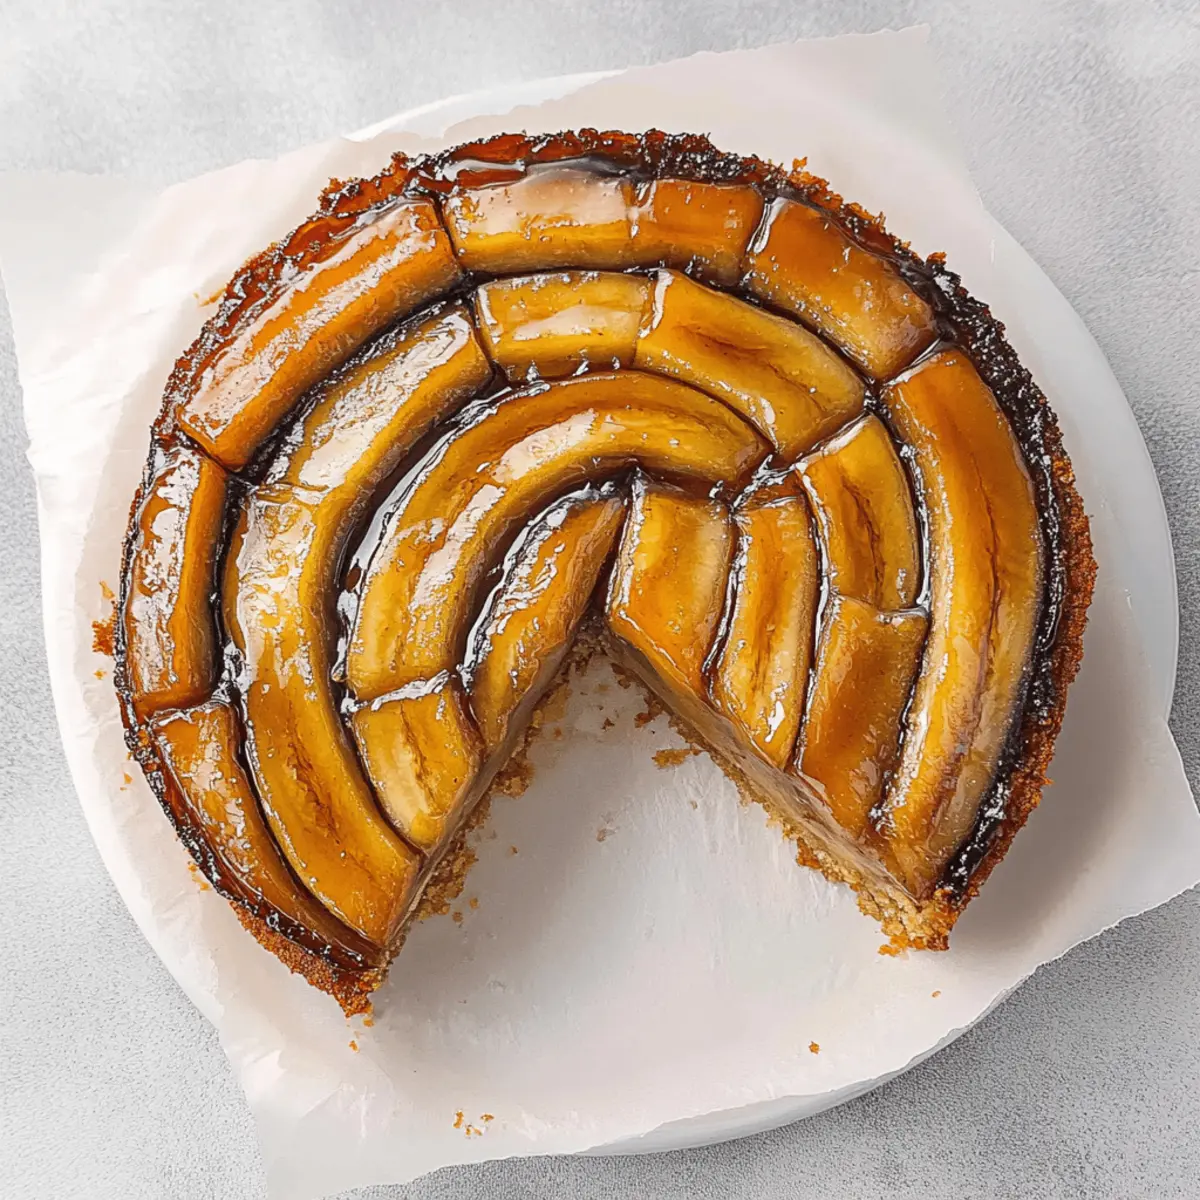
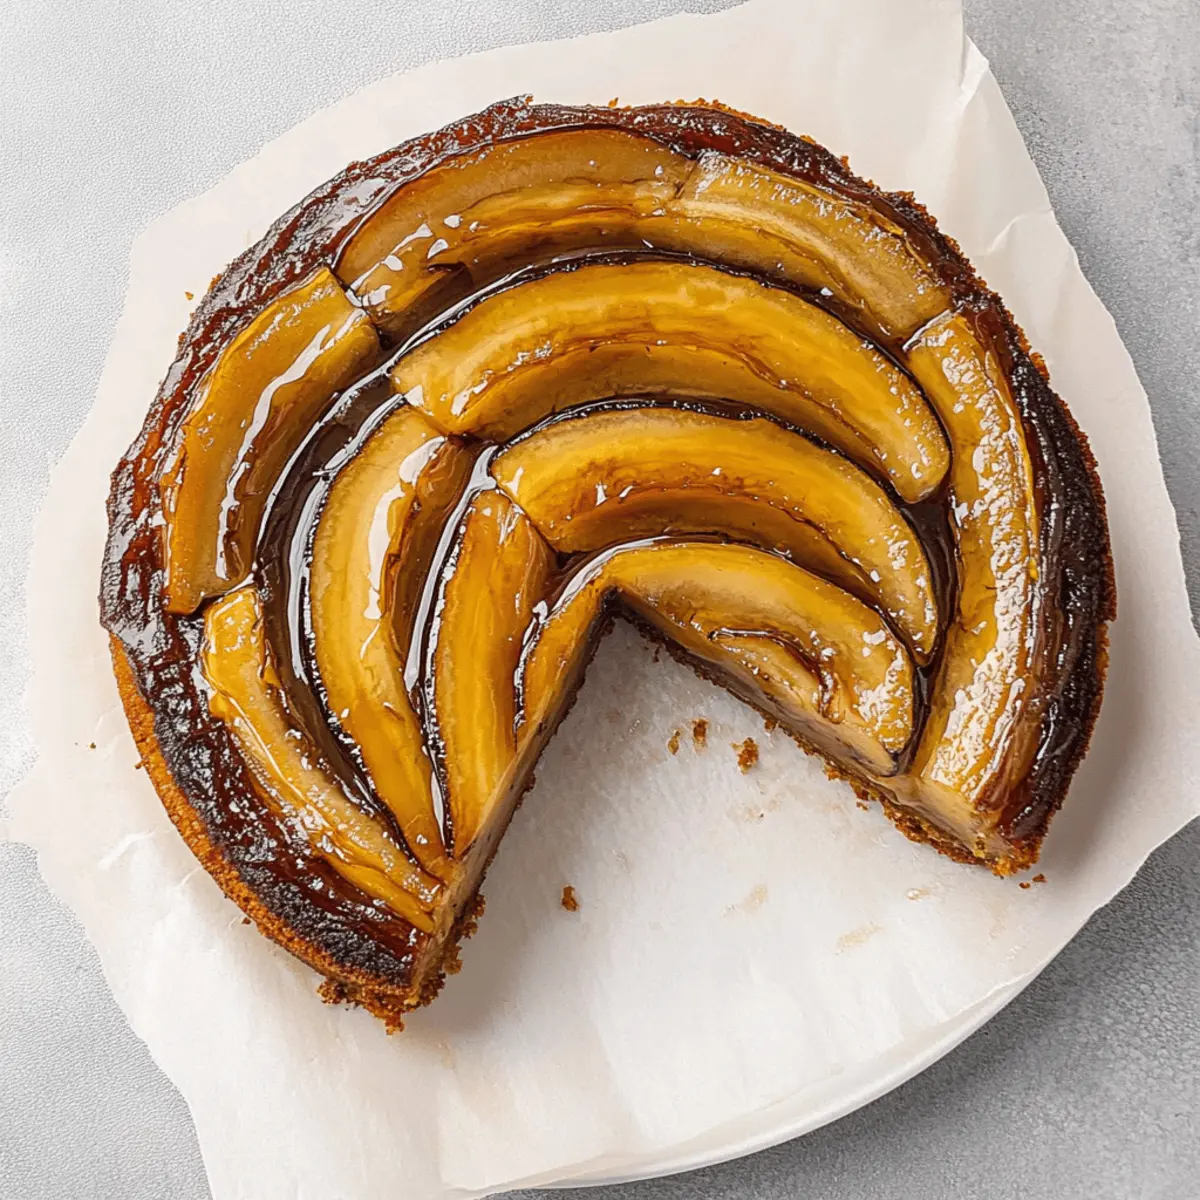
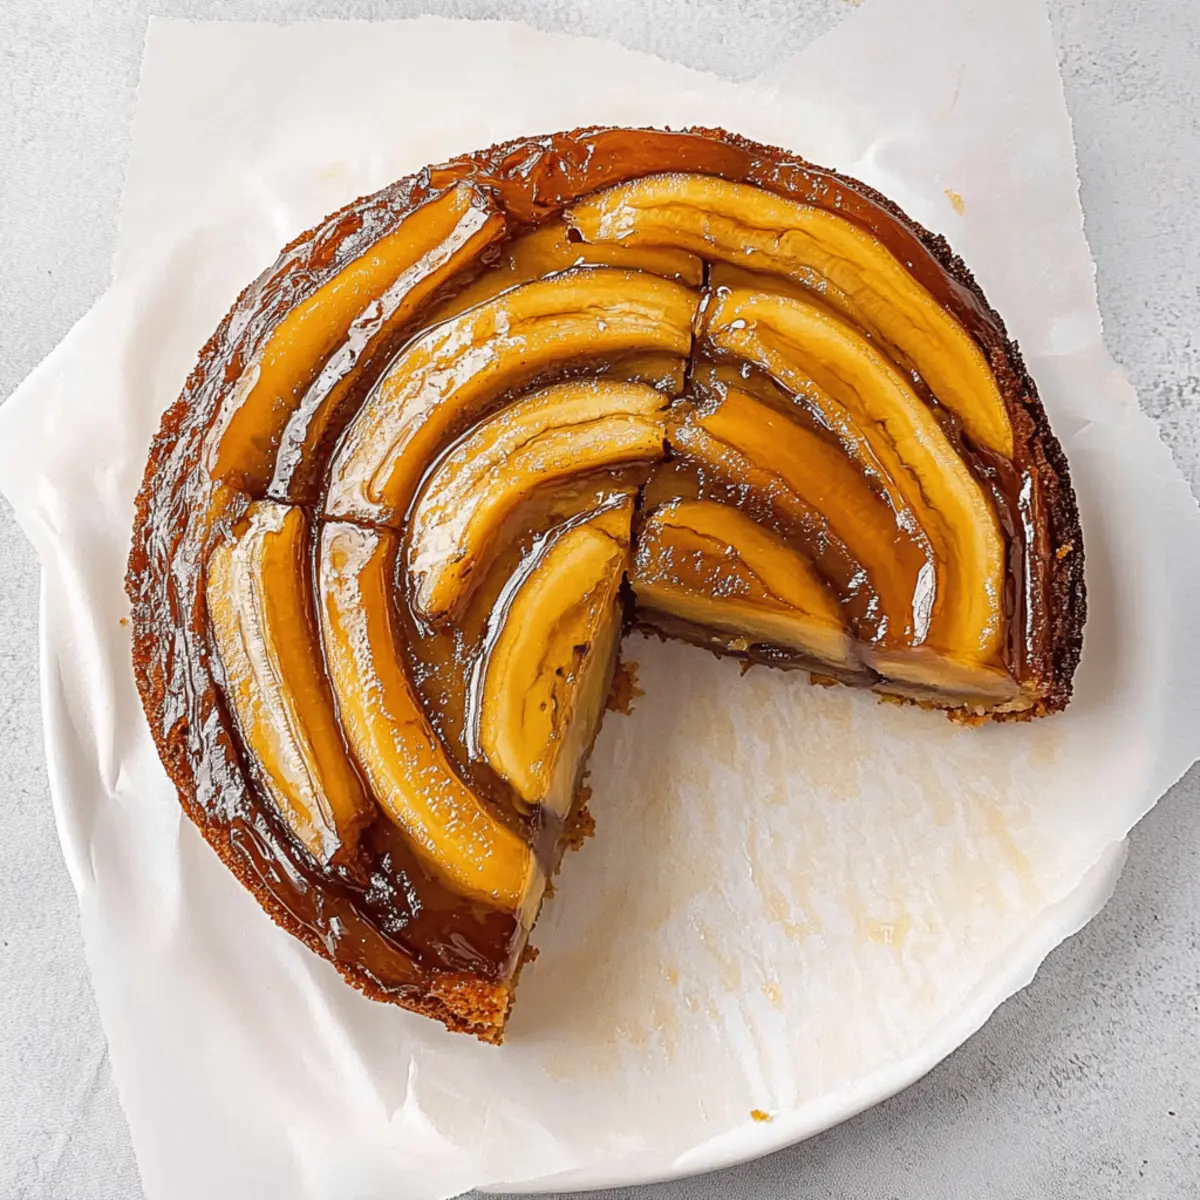
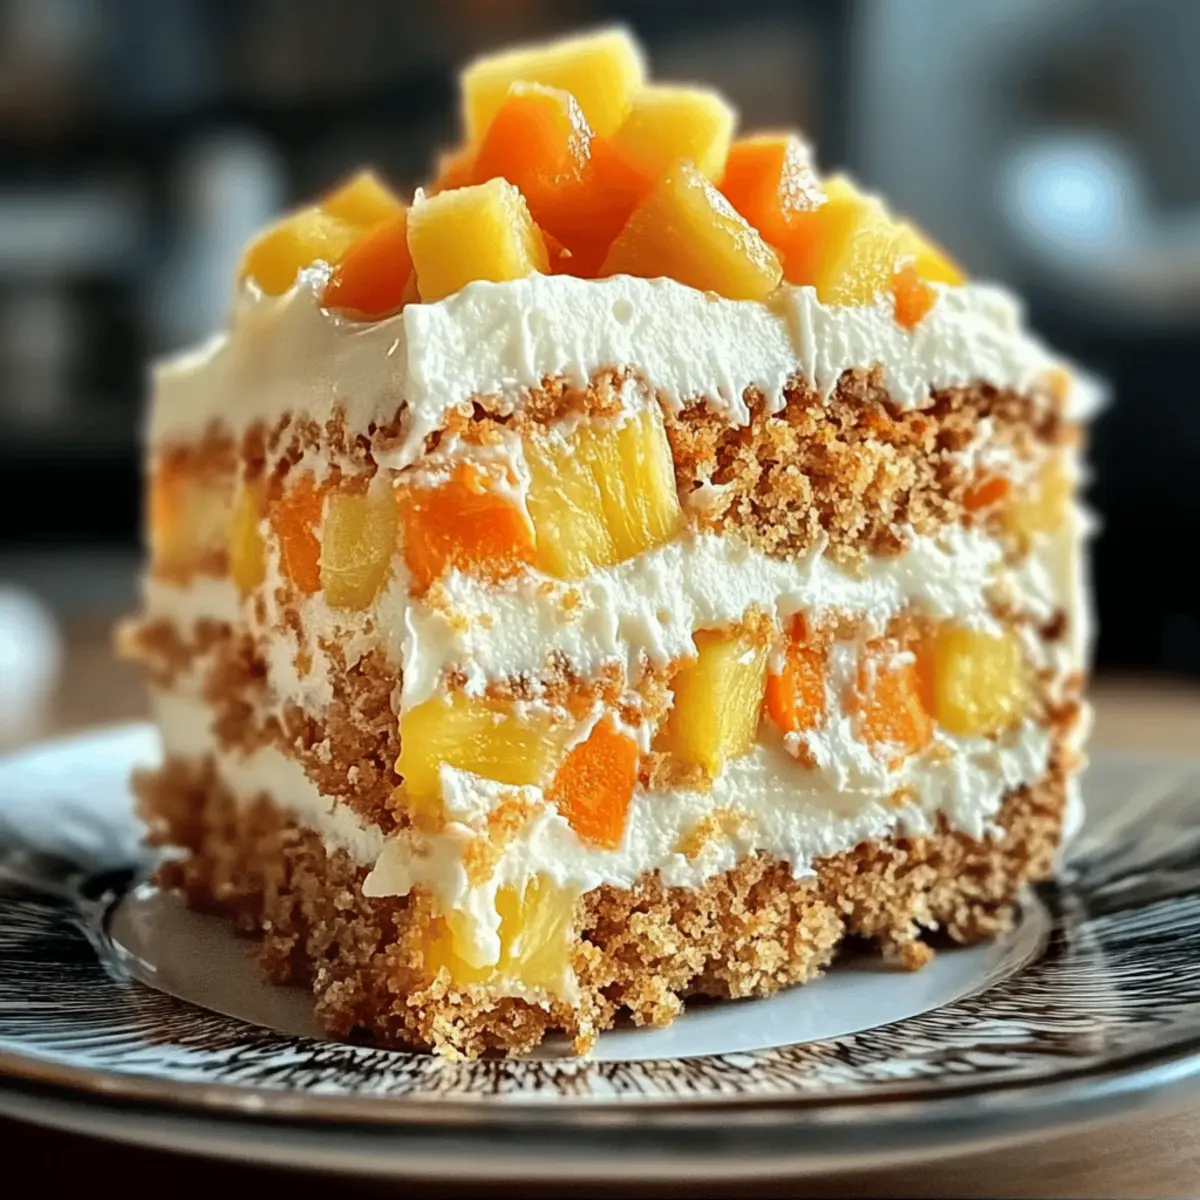
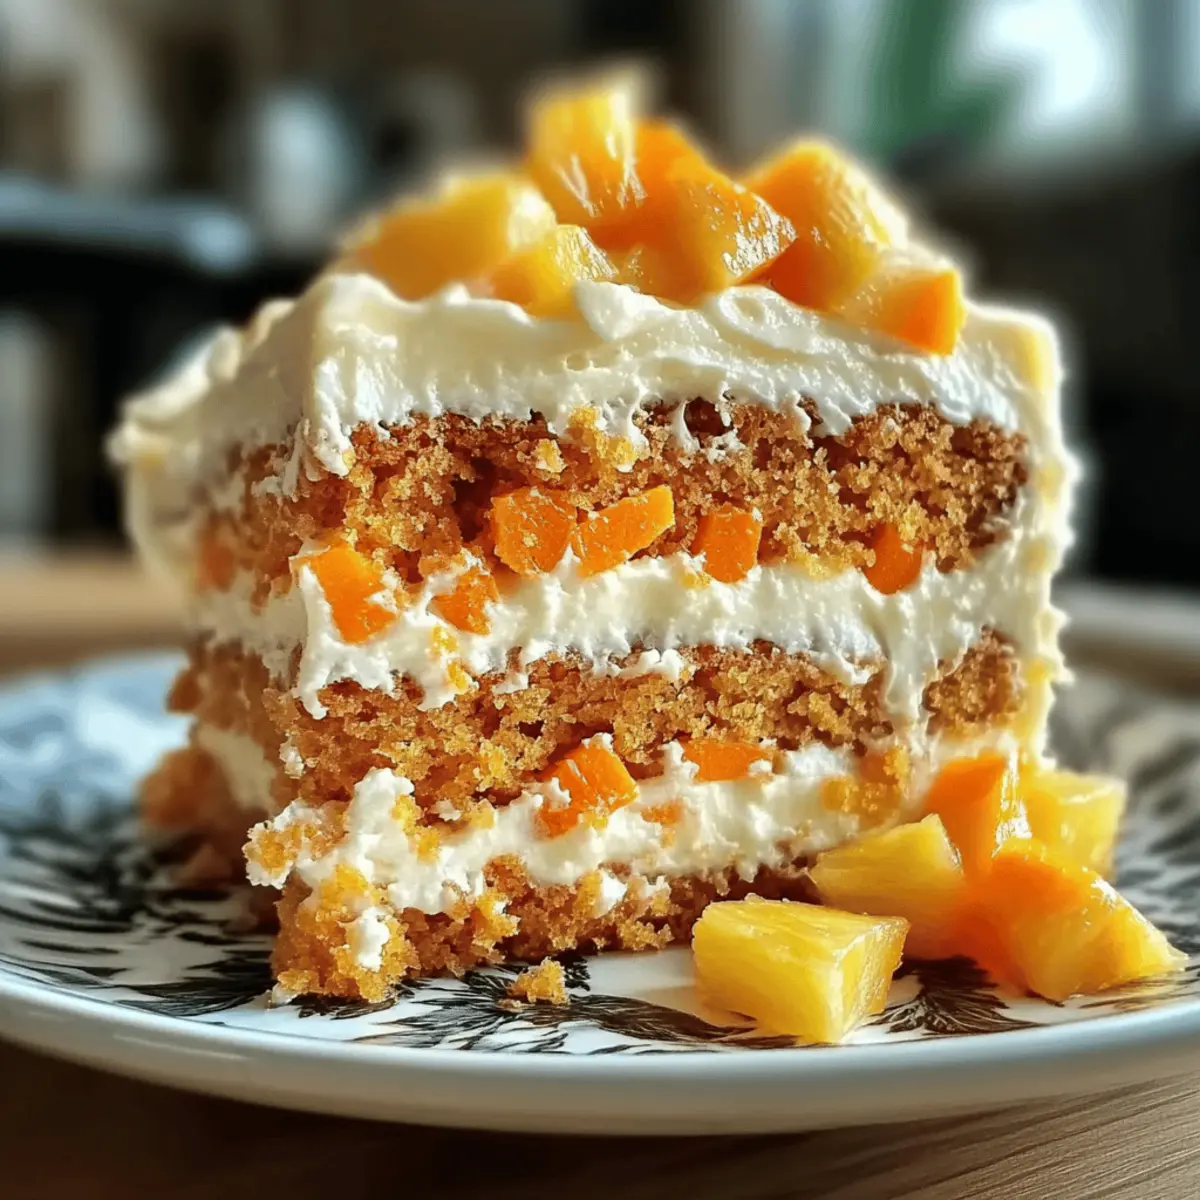
The warm aroma of freshly baked cake wafted through my kitchen as I prepared to dive into a tropical delight: the Hawaiian Pineapple Carrot Cream Cake. This inviting dessert combines subdued sweetness from fresh carrots with the zesty burst of crushed pineapple, creating a perfectly moist cake, ideal for any home chef yearning for a sweet escape. Not only is it beginner-friendly, but it also makes for an unforgettable crowd-pleaser at any gathering. The creamy cream cheese frosting adds a luxurious touch, balancing the cake's flavors beautifully. Curious to find out how to create this delectable treat that will have everyone asking for seconds? Let’s get started!

Why is this cake a must-try?

Beginner-Friendly: This recipe is perfect for novice bakers, requiring minimal skills yet delivering impressive results.

Tropical Twist: The combination of sweet carrots and crushed pineapple creates a refreshing flavor profile that transports you to a sunny beach with every bite.

Irresistibly Moist: With a rich cream cheese frosting, this cake remains incredibly moist, ensuring it’s an instant favorite at any gathering.

Quick to Make: Ready in just over an hour, this cake allows you to enjoy a delicious dessert without spending the entire day in the kitchen.

Customizable: The option to add walnuts or substitute ingredients makes it versatile, catering to various tastes and dietary preferences.

For more delightful offerings, don't miss out on my Chocolate Pudding Cake or try the refreshing Peaches Cream Cookies!

Pineapple Carrot Cream Cake Ingredients

• Gather these simple ingredients to make your delicious dessert!

For the Cake

  • All-purpose flour – Provides structure and texture for the cake. Substitution: Gluten-free flour blend for a gluten-free option.
  • Baking soda and powder – Leavening agents that help the cake rise.
  • Cinnamon – Adds warm, spicy flavor to enhance the cake.
  • Salt – Balances sweetness and enhances flavor.
  • Granulated sugar – Sweetens the cake; contributes to texture.
  • Brown sugar – Adds moisture and a slight caramel flavor.
  • Eggs – Bind ingredients and provide moisture. Use aquafaba (from chickpeas) for a vegan alternative.
  • Vegetable oil – Keeps the cake moist. Can substitute with melted coconut oil for a tropical touch.
  • Vanilla extract – Contributes to the overall flavor profile.
  • Grated carrots – Essential for moisture and texture, providing natural sweetness. Use freshly grated for best results.
  • Crushed pineapple, drained – Adds tropical flavor and moisture. Canned pineapple works; be sure to drain thoroughly.
  • Chopped walnuts (optional) – Adds crunch and nutty flavor. Omit for a nut-free version.

For the Cream Cheese Frosting

  • Cream cheese – Core ingredient for the frosting; provides tanginess and creaminess.
  • Unsalted butter – Adds richness to the frosting.
  • Powdered sugar – Sweetens and thickens the frosting; helps achieve a smooth texture.
  • Vanilla extract (for frosting) – Enhances the flavor of the frosting.
  • Pineapple juice (optional, for frosting) – Adds additional tropical flavor.

Gather these ingredients, and you'll be ready to bake a Pineapple Carrot Cream Cake that your friends and family will love!

Step‑by‑Step Instructions for Pineapple Carrot Cream Cake

Step 1: Preheat and Prepare Pans
Preheat your oven to 350°F (175°C) and prepare two 9-inch cake pans by greasing them with butter or cooking spray, then dusting them with flour. This ensures your Pineapple Carrot Cream Cake will slide out easily after baking. Set the prepared pans aside while you mix the batter.

Step 2: Mix the Wet Ingredients
In a large mixing bowl, whisk together the granulated sugar, brown sugar, eggs, vegetable oil, and vanilla extract until the mixture is smooth and well combined, taking about 2-3 minutes. The sugars should be fully dissolved, and the texture should look slightly creamy at this point, providing a rich base for your cake.

Step 3: Incorporate Carrots and Pineapple
Gently stir in the freshly grated carrots and the well-drained crushed pineapple into your wet mixture. Ensure that both ingredients are evenly distributed throughout the mixture to enhance the moisture and flavor of the Pineapple Carrot Cream Cake. This should take about 1-2 minutes of mixing.

Step 4: Combine the Dry Ingredients
In a separate bowl, whisk together the all-purpose flour, baking soda, baking powder, cinnamon, and salt. Gradually add this dry mixture to the wet bowl, mixing gently until just combined—avoid overmixing to keep your cake light and fluffy. You should see no dry flour remaining, but small lumps are perfectly fine.

Step 5: Add Walnuts (if using)
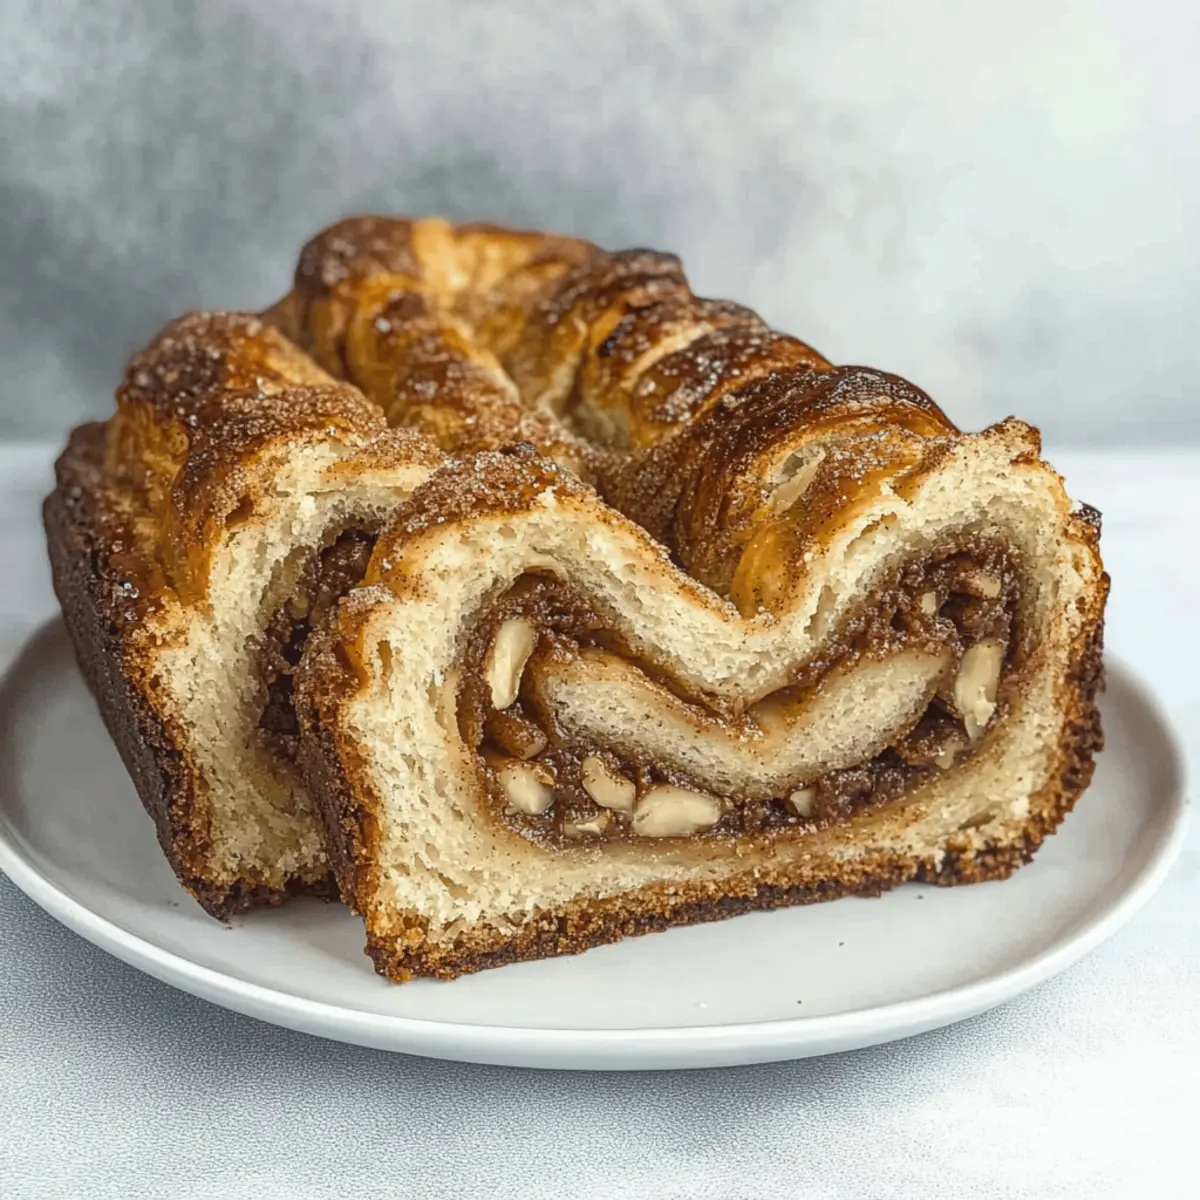
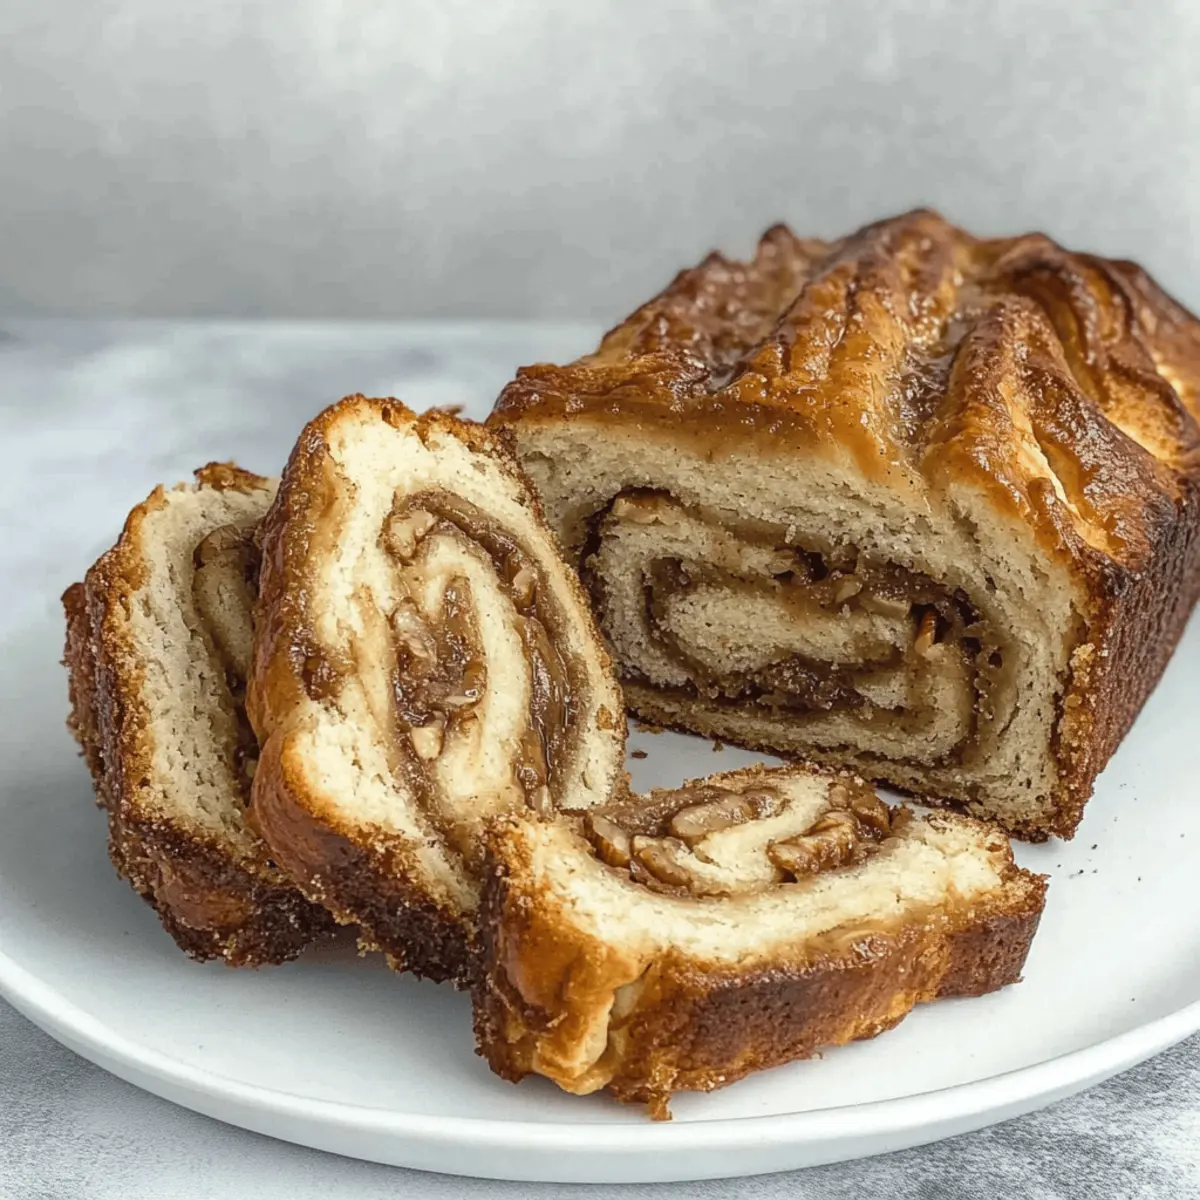
If you'd like some extra crunch, fold in the chopped walnuts gently, ensuring they are evenly dispersed in the batter. This step adds a delightful texture to your Pineapple Carrot Cream Cake, but feel free to skip this step if you prefer a nut-free version or if someone has a nut allergy.

Step 6: Bake the Cake
Divide the batter evenly between the two prepared cake pans. Place them in the preheated oven and bake for 30 to 35 minutes. The cakes are ready when a toothpick inserted into the center comes out clean, and the edges are lightly golden. Keep an eye on them closer to 30 minutes to avoid overbaking.

Step 7: Cool the Cakes
Once baked, remove the cake pans from the oven and let them cool in the pans for about 10 minutes. After that, gently transfer the cakes to a wire rack to cool completely. Cooling is crucial, as it prevents the frosting from melting into the cake later on.

Step 8: Prepare the Frosting
In a medium bowl, beat together the cream cheese and unsalted butter until the mixture is smooth and creamy, taking about 2-3 minutes. Gradually add the powdered sugar, mixing until fluffy and well combined. The frosting should be light and easy to spread, perfect for the Pineapple Carrot Cream Cake.

Step 9: Flavor the Frosting
Once the frosting reaches the desired consistency, stir in the vanilla extract and optional pineapple juice for an extra layer of flavor. This will enhance the tropical notes of the cake and give your frosting a delightful twist.

Step 10: Frost the Cake Layers
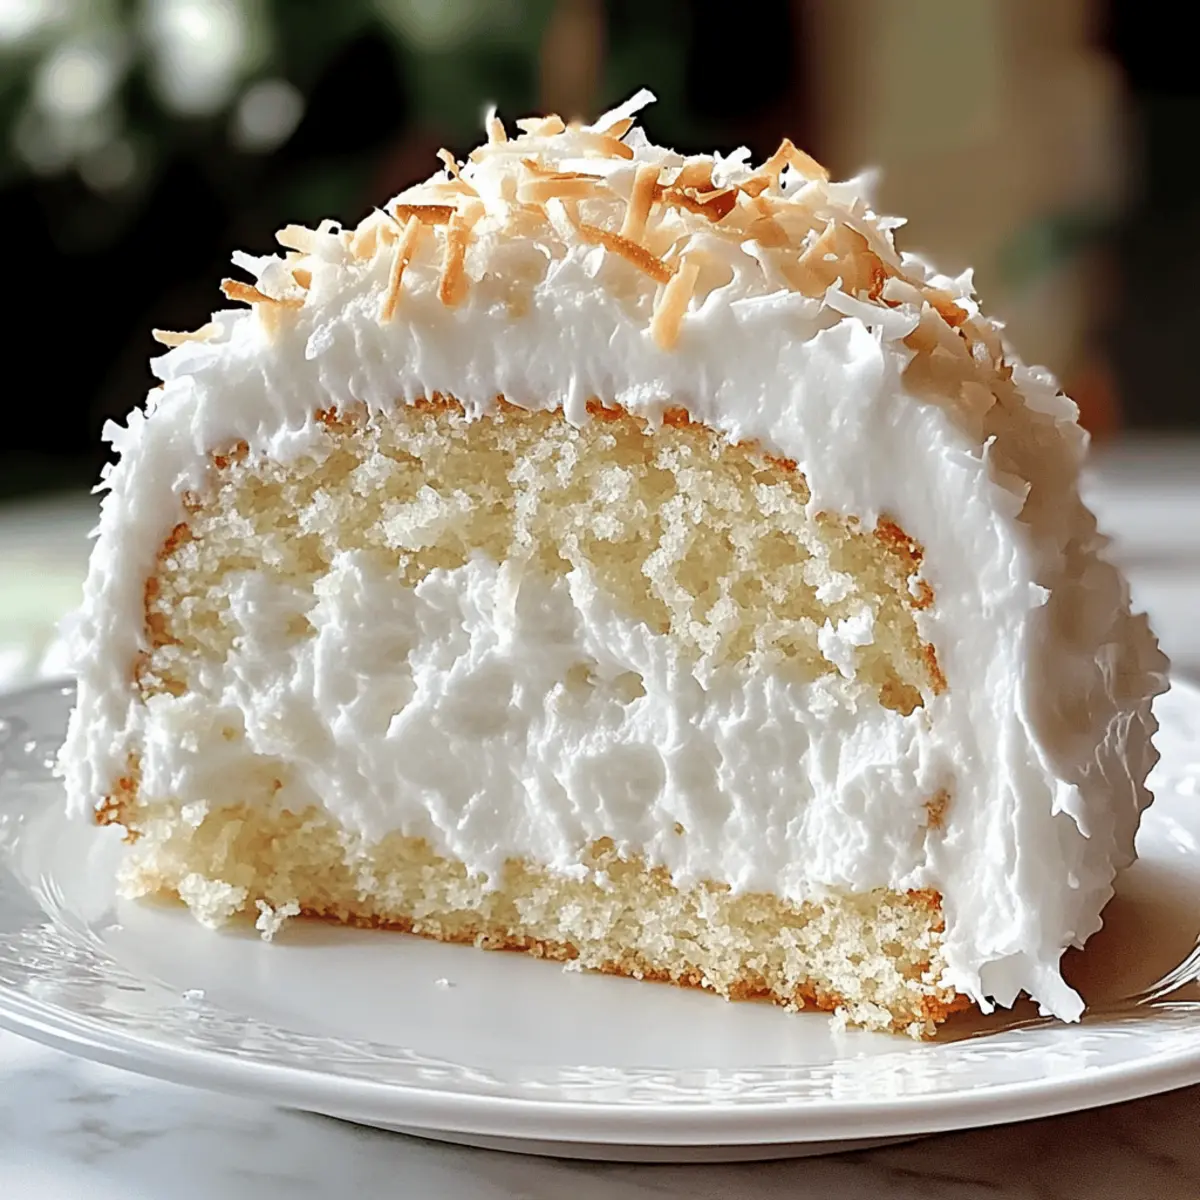
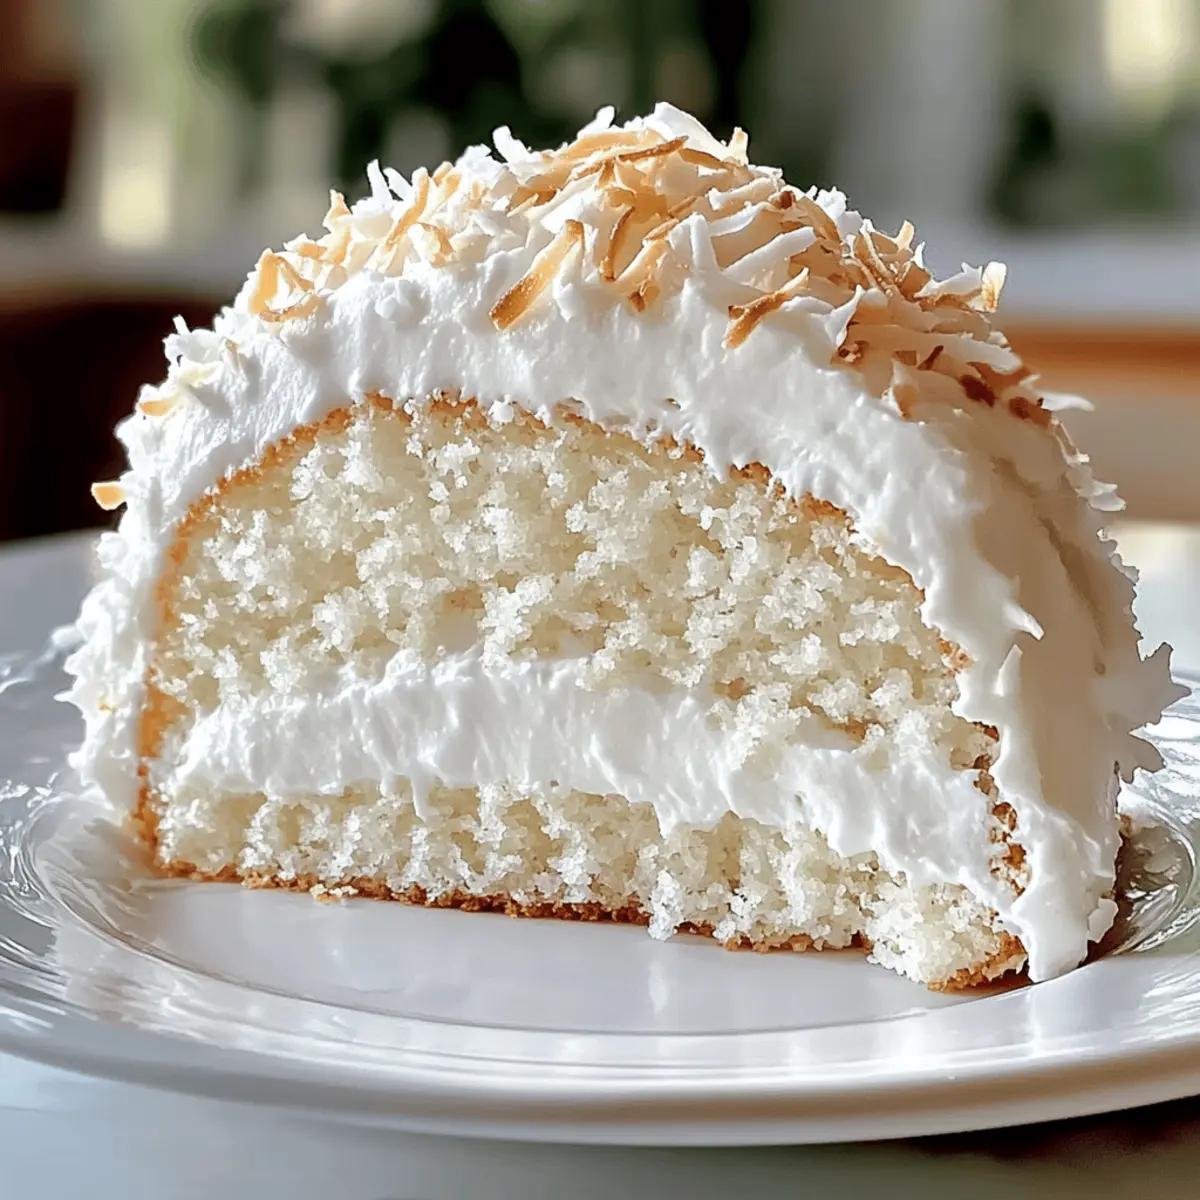
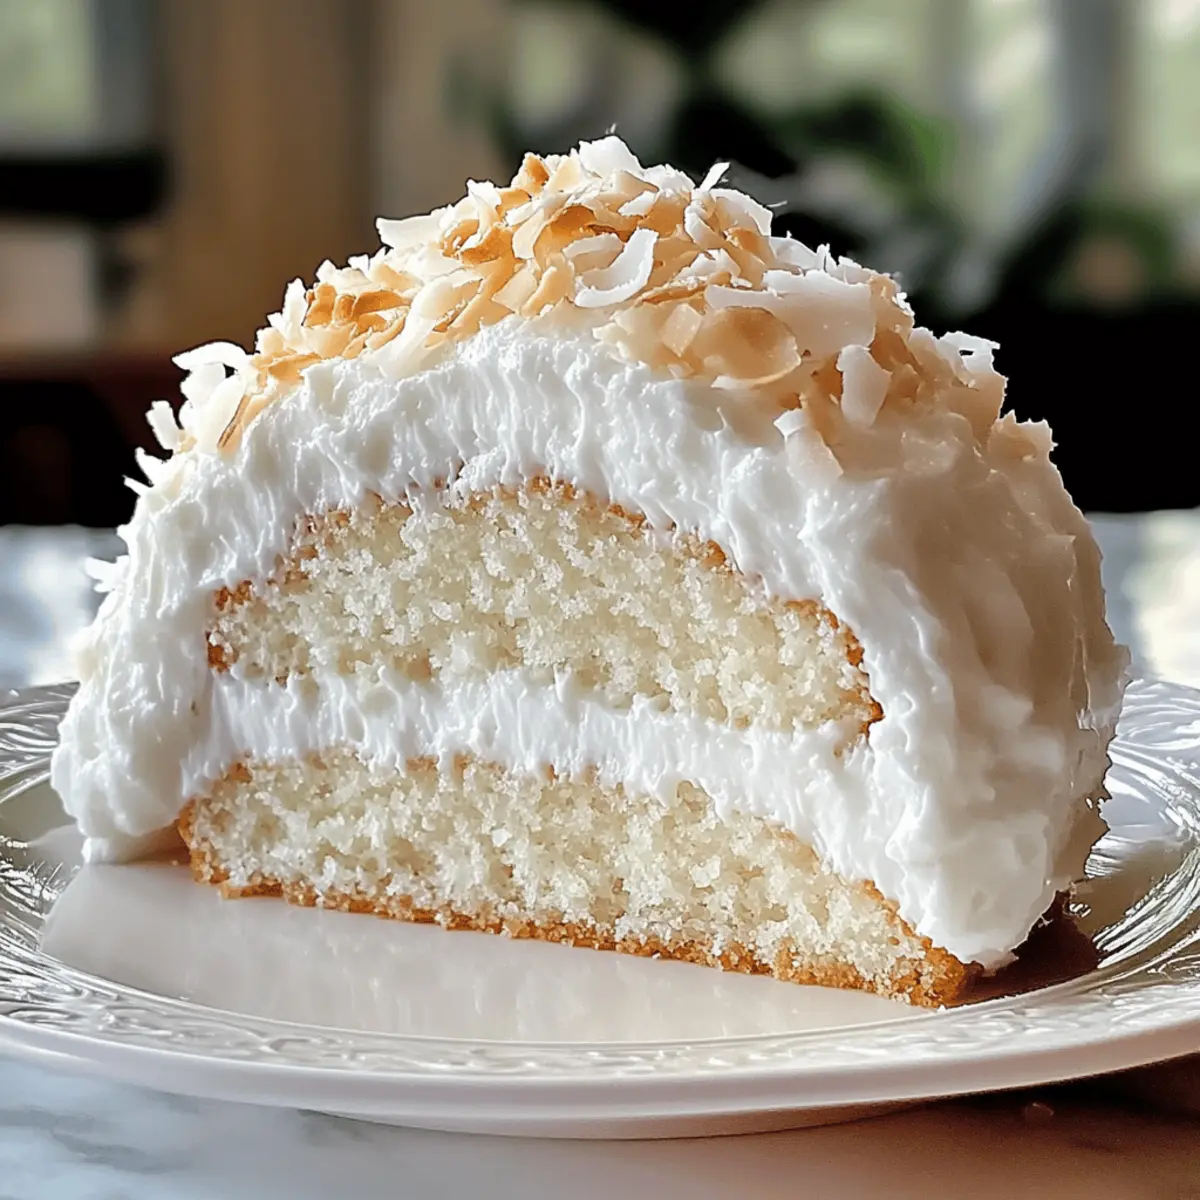
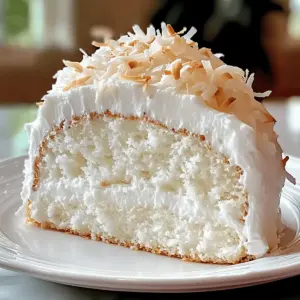
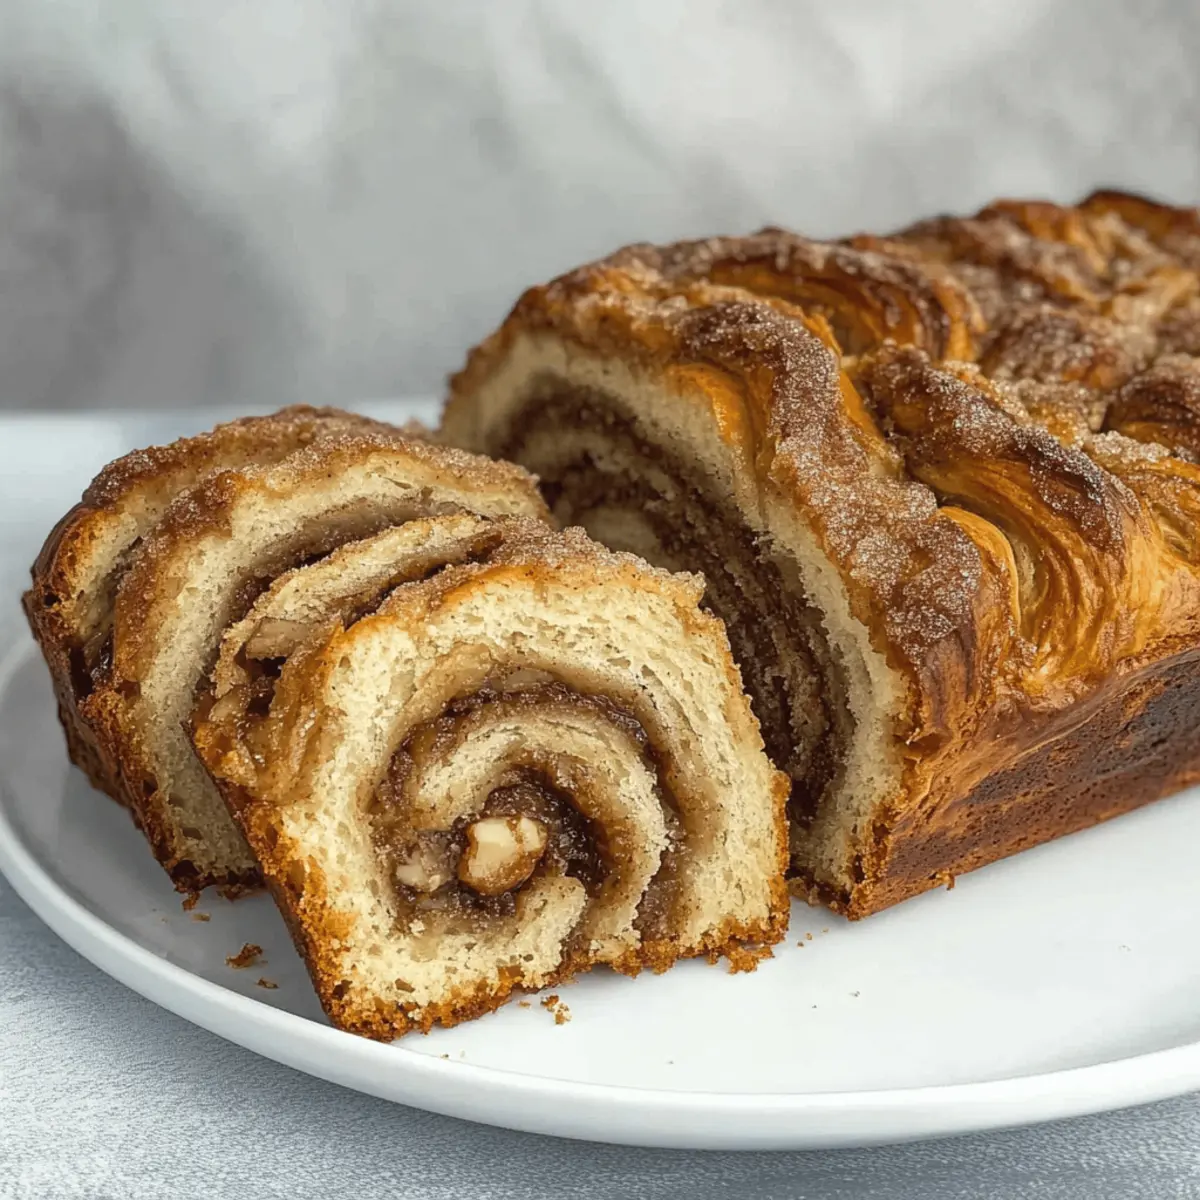
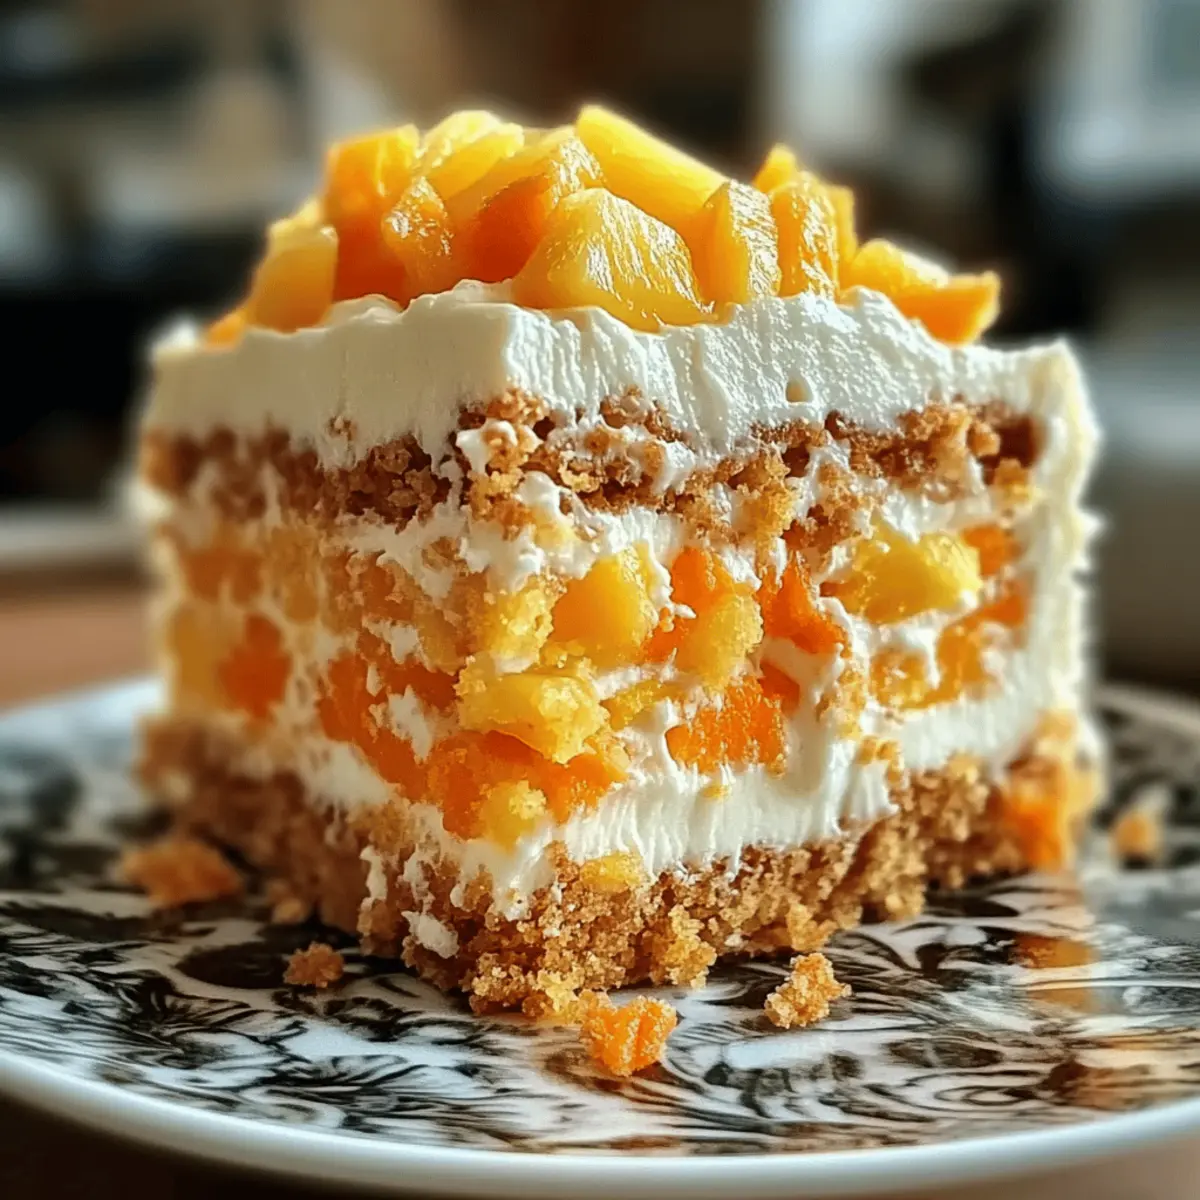
Place one cooled cake layer on a serving plate, and generously spread a layer of frosting on top. Add the second cake layer on top, then frost the top and sides of the entire cake for a beautiful finish. Be sure to smooth the frosting for an appealing appearance, showcasing your Pineapple Carrot Cream Cake!

Step 11: Garnish and Serve
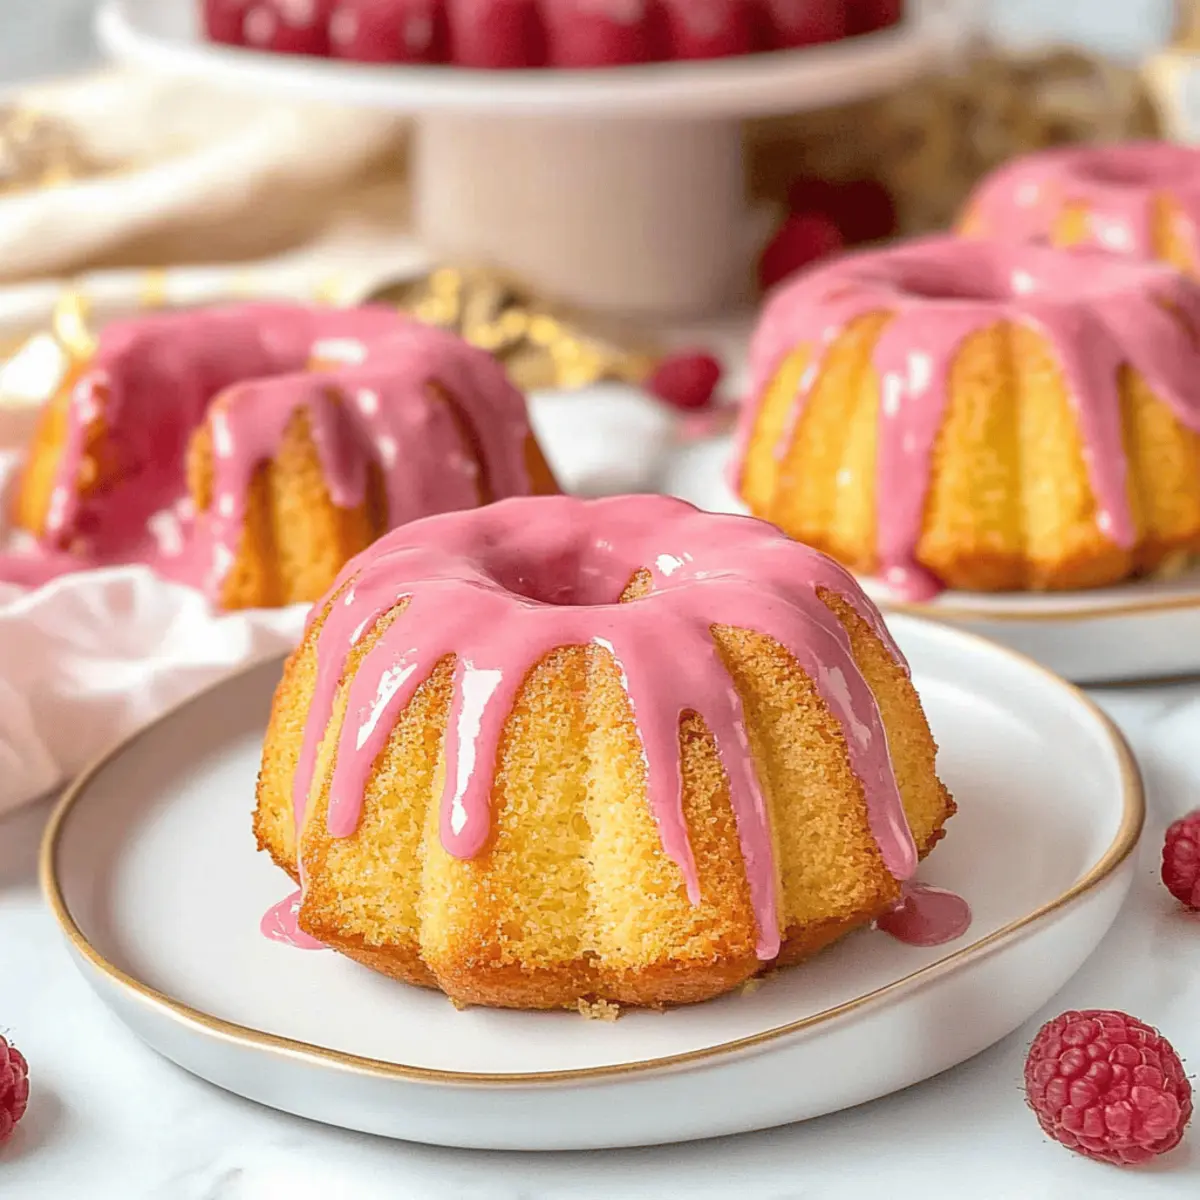
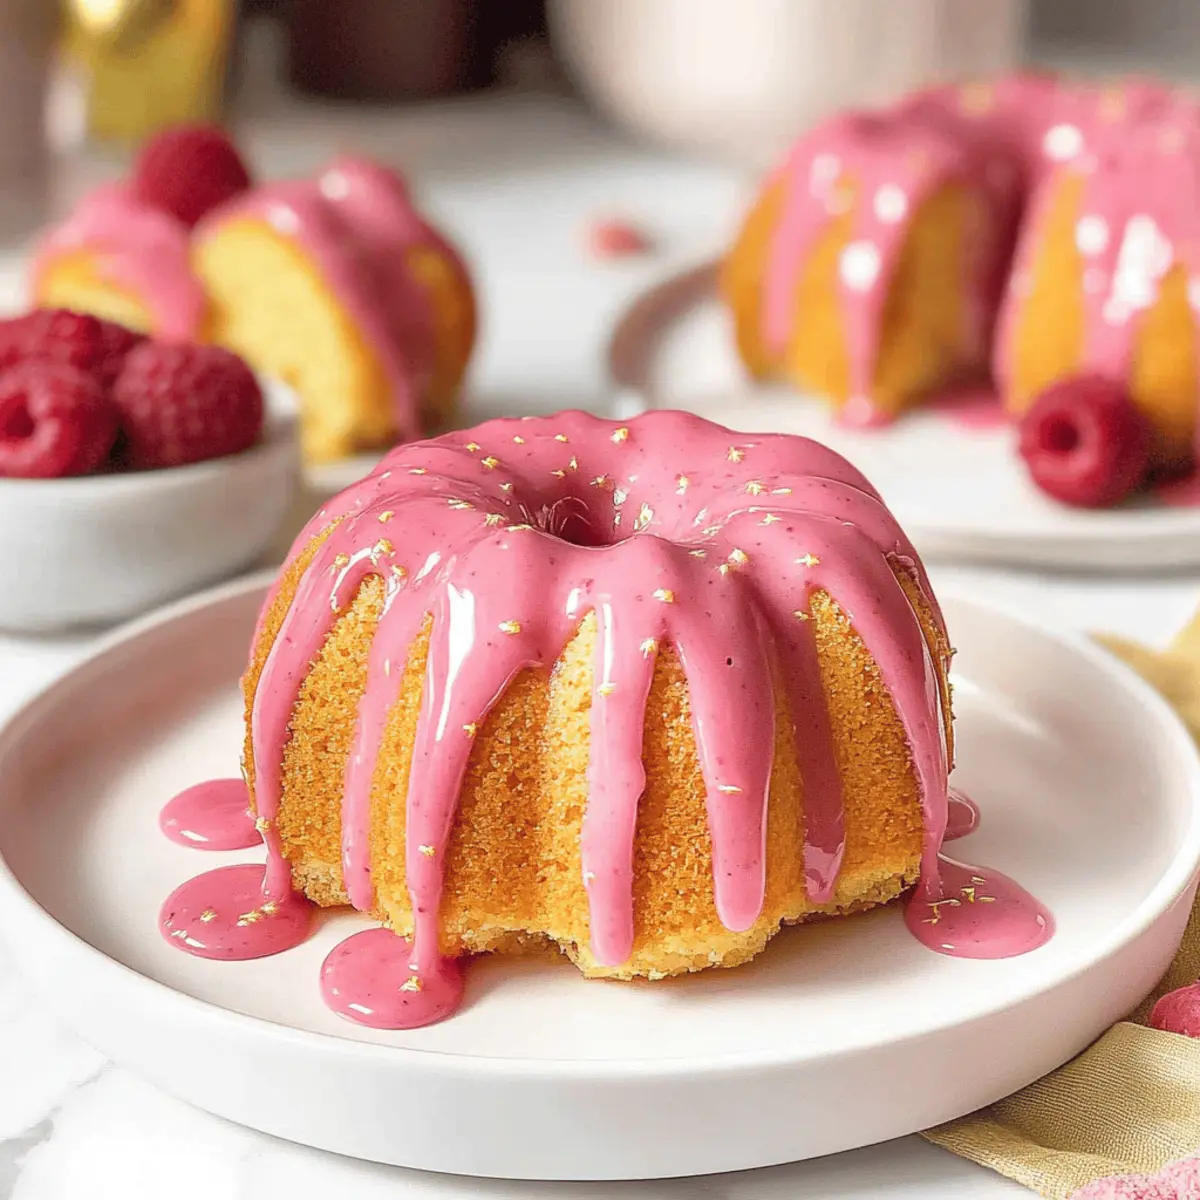
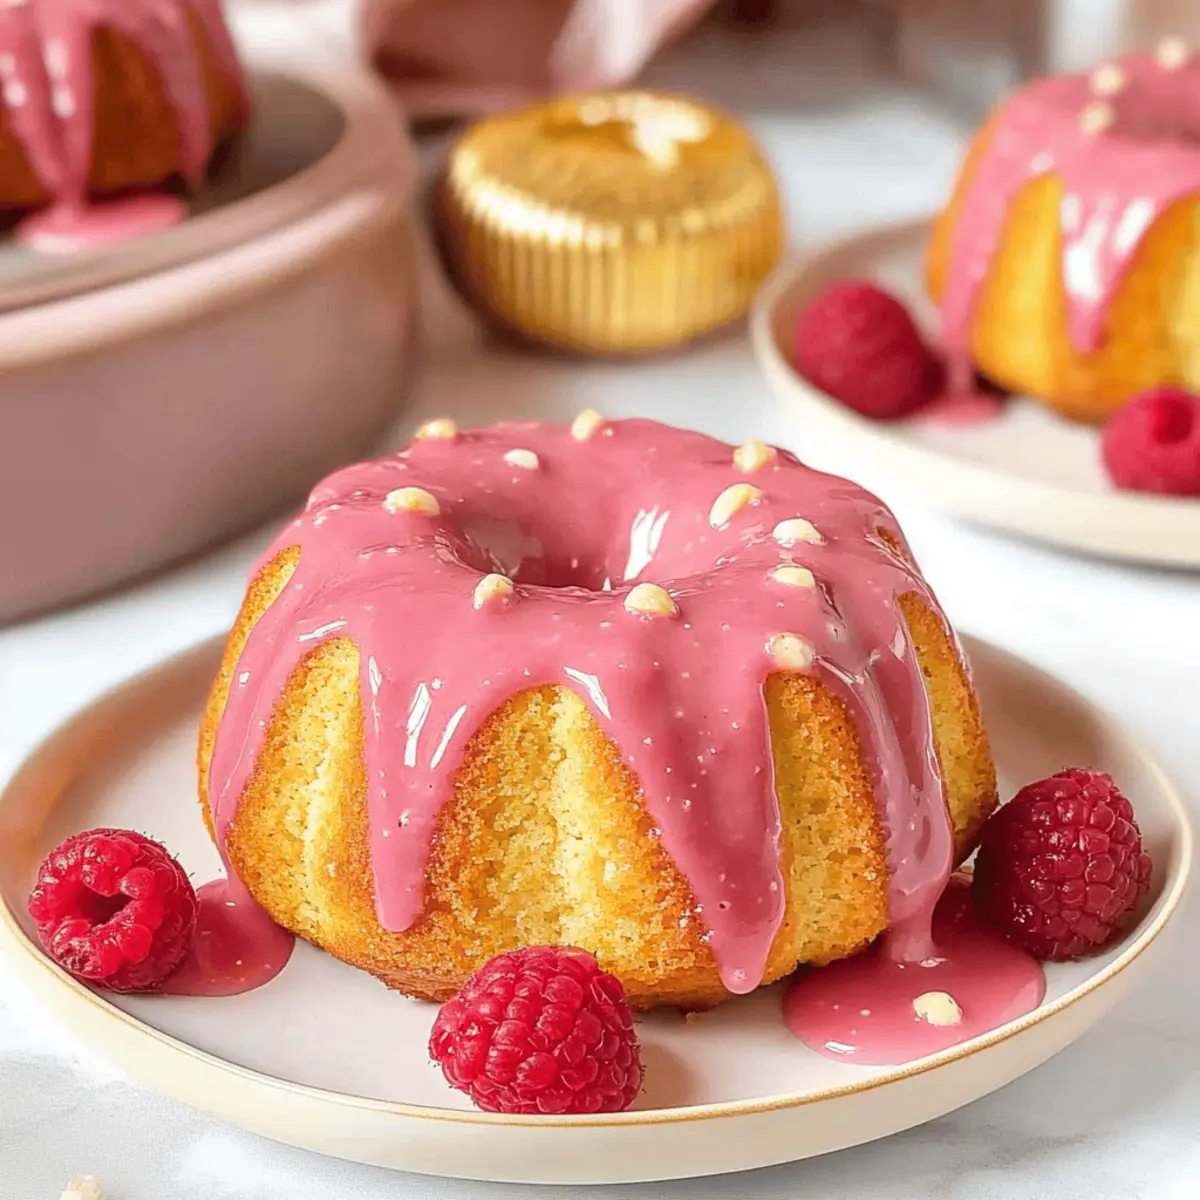
To elevate the presentation, garnish your cake with additional walnuts or pineapple slices on top, if desired. This adds a lovely visual touch and hints at the delicious flavors within. Now, your Pineapple Carrot Cream Cake is ready to be sliced and shared with family and friends!

What to Serve with Pineapple Carrot Cream Cake

The allure of this tropical delight is simply irresistible, and finding the perfect accompaniments can turn a sweet treat into a delightful experience.

  • Fresh Fruit Salad: A medley of seasonal fruits adds a refreshing contrast, bringing out the cake's tropical flavors and enhancing its natural sweetness.

  • Whipped Cream Topping: Light and airy whipped cream dolloped on top provides a creamy softness that beautifully complements the moist cake texture.

  • Herbal Tea: A warm cup of chamomile or mint tea enhances the cake’s flavors while adding a soothing, calming vibe to your dessert experience.

  • Coconut Ice Cream: Creamy and decadent, this dessert addition brings a tropical flair, pairing perfectly with the pineapple in each slice of cake. The contrast in temperature and texture is divine!

  • Chocolate Drizzle: A light drizzle of melted chocolate not only adds an elegant touch but offers a rich and unexpected juxtaposition to the cake's sweetness.

  • Pineapple Mojito: This refreshing cocktail will elevate your dessert party, infusing zesty citrus and mint notes that harmonize beautifully with the cake's flavors.

Enjoy these pairings as they bring depth and excitement to the vibrant flavors of your Pineapple Carrot Cream Cake!

Expert Tips for Pineapple Carrot Cream Cake

  • Fresh Ingredients Matter: Use freshly grated carrots and well-drained crushed pineapple for the best moisture and flavor. Avoid canned carrots, as they can affect texture.

  • Mind the Mixing: Overmixing the batter can lead to a dense cake. Mix until just combined for a light, fluffy texture in your Pineapple Carrot Cream Cake.

  • Cool Before Frosting: Let the cake layers cool completely before frosting to prevent the icing from melting. A well-cooled cake makes for a perfectly frosted dessert.

  • Flavor Boost: Consider adding a pinch of nutmeg or coconut extract to your frosting for an extra layer of tropical flavor.

  • Check for Doneness: Test your cake with a toothpick inserted in the center; it should come out clean or with a few crumbs, ensuring a moist but fully baked cake.

Make Ahead Options

These Pineapple Carrot Cream Cakes are perfect for meal prep enthusiasts! You can bake the cake layers up to 3 days in advance. Just allow them to cool completely, wrap them tightly in plastic wrap, and store them in the refrigerator to maintain their moisture. The frosting can also be prepared up to 24 hours ahead; simply refrigerate in an airtight container and give it a quick stir before use. When you're ready to serve, frost the chilled layers and garnish as desired. This method allows you to create a show-stopping dessert with minimal effort, ensuring your cake is just as delicious as if it were freshly made!

Pineapple Carrot Cream Cake Variations

Feel free to get creative and customize your Pineapple Carrot Cream Cake with these delightful variations that enhance flavor and texture!

  • Nut-Free: Omit walnuts entirely for a cake that’s safe for nut allergies. You won’t miss the crunch but will still enjoy the moistness of this tropical treat.

  • Gluten-Free: Substitute all-purpose flour with a gluten-free flour blend to make this cake gluten-free. It’s an easy switch that doesn’t compromise flavor or texture!

  • Tropical Layering: For an added burst of flavor, layer a thin spread of crushed pineapple between the cake layers. This will elevate the tropical experience, making each slice a juicy delight.

  • Applesauce Substitute: Replace half the vegetable oil with unsweetened applesauce for a lighter cake that maintains moisture. This twist adds natural sweetness while keeping calories down.

  • Spicy Kick: Incorporate a pinch of nutmeg along with the cinnamon for a spicy depth. This little addition can surprise your taste buds and bring a warm twist!

  • Coconut Flour: Swap out a portion of the all-purpose flour for coconut flour to introduce a subtle coconut flavor. This will give your cake an extra flair that pairs beautifully with pineapple.

  • Cream Cheese Upgrade: Mix in some crushed pineapple along with a dash of coconut extract into your cream cheese frosting for an upgraded tropical flavor. It’s a creamy indulgence you won't forget!

  • Fruity Frosting: Top your cake with a fluffy whipped cream made with coconut cream, drizzling some extra pineapple juice for a refreshing change. It adds a lightness that perfectly complements the cake's richness.

With these variations, your Pineapple Carrot Cream Cake can evolve into a new family favorite every time you bake! If you're in the mood for more delightful desserts, try my moist Chocolate Pudding Cake or the refreshing Ice Cream Cake for a delicious treat!

Storage Tips for Pineapple Carrot Cream Cake

Fridge: Store your cake in an airtight container for up to 5 days to keep it moist and fresh. Ensure the frosting is well-covered to avoid drying out.

Freezer: Wrap individual slices tightly in plastic wrap and place them in a freezer-safe bag for up to 3 months. Thaw slices in the fridge before serving for the best texture.

Reheating: If you prefer warm cake, gently reheat individual slices in the microwave for about 15-20 seconds or until just warmed through. Enjoy your Pineapple Carrot Cream Cake even after storing!

Pineapple Carrot Cream Cake Recipe FAQs

What should I look for when selecting ingredients like carrots and pineapple?
Absolutely! For the best results, use fresh, firm carrots that are bright orange and free from dark spots or blemishes. When choosing pineapple, opt for canned crushed pineapple that has been thoroughly drained to avoid excess moisture, or use fresh pineapple that’s ripe but not overly soft.

How should I store the Pineapple Carrot Cream Cake after baking?
To keep your cake deliciously moist and fresh, store it in an airtight container in the refrigerator for up to 5 days. Make sure the frosting is covered well to prevent it from drying out. Enjoy it chilled or at room temperature for a delightful dessert!

Can I freeze individual slices of the Pineapple Carrot Cream Cake?
Very! To freeze individual slices, wrap each slice tightly in plastic wrap, and place them in a freezer-safe bag. They can be frozen for up to 3 months. When you're ready to indulge again, simply thaw them in the fridge overnight to maintain their texture.

What should I do if my cake comes out dense?
If your cake ends up dense, it could be due to overmixing the batter. Always mix until just combined when adding dry ingredients to avoid a heavy texture. Also, make sure your leavening agents aren’t expired, as they help the cake rise. If needed, you can lighten it up by replacing part of the oil with unsweetened applesauce in future batches.

Is this cake safe for people with allergies?
While this Pineapple Carrot Cream Cake contains common allergens like gluten and dairy, you can easily modify it! For a nut-free option, simply omit the walnuts. To make it gluten-free, use a gluten-free flour blend, and for a vegan twist, substitute eggs with aquafaba (the liquid from chickpeas) and use a dairy-free cream cheese for the frosting. Ensure all ingredients align with dietary needs for a safe and yummy dessert!

Pineapple Carrot Cream Cake

Moist Pineapple Carrot Cream Cake: A Tropical Treat You’ll Love

This Moist Pineapple Carrot Cream Cake is a delightful dessert combining sweet carrots and zesty pineapple, making it a must-try for any occasion.
Print Recipe Pin Recipe
Prep Time 15 minutes mins
Cook Time 35 minutes mins
Cooling Time 10 minutes mins
Total Time 1 hour hr
Servings: 12 slices
Course: Dessert
Cuisine: Hawaiian
Calories: 350
Ingredients Equipment Method Nutrition Notes

Ingredients
  

For the Cake
  • 2 cups all-purpose flour Substitution: Gluten-free flour blend for a gluten-free option.
  • 1 teaspoon baking soda
  • 1 teaspoon baking powder
  • 1 teaspoon cinnamon
  • 1/2 teaspoon salt
  • 1 cup granulated sugar
  • 1/2 cup brown sugar Adds moisture and a slight caramel flavor.
  • 3 large eggs Use aquafaba (from chickpeas) for a vegan alternative.
  • 1 cup vegetable oil Can substitute with melted coconut oil for a tropical touch.
  • 1 teaspoon vanilla extract
  • 2 cups grated carrots Use freshly grated for best results.
  • 1 cup crushed pineapple, drained Canned pineapple works; be sure to drain thoroughly.
  • 1/2 cup chopped walnuts (optional) Omit for a nut-free version.
For the Cream Cheese Frosting
  • 8 oz cream cheese
  • 1/2 cup unsalted butter
  • 4 cups powdered sugar
  • 1 teaspoon vanilla extract (for frosting)
  • 2 tablespoons pineapple juice (optional, for frosting) Adds additional tropical flavor.

Equipment

  • 9-inch cake pans
  • Mixing bowls
  • Whisk
  • Spatula
  • measuring cups
  • Measuring Spoons
  • wire rack

Method
 

Step-by-Step Instructions
  1. Preheat your oven to 350°F (175°C) and prepare two 9-inch cake pans by greasing them with butter or cooking spray, then dusting them with flour.
  2. In a large mixing bowl, whisk together the granulated sugar, brown sugar, eggs, vegetable oil, and vanilla extract until smooth.
  3. Gently stir in the grated carrots and drained crushed pineapple.
  4. In a separate bowl, whisk together the all-purpose flour, baking soda, baking powder, cinnamon, and salt, then gradually add to the wet mixture.
  5. If using, fold in the chopped walnuts.
  6. Divide the batter evenly between the two prepared cake pans and bake for 30 to 35 minutes.
  7. Once baked, let the cakes cool in the pans for about 10 minutes, then transfer them to a wire rack to cool completely.
  8. In a medium bowl, beat together the cream cheese and unsalted butter until smooth, then gradually mix in the powdered sugar.
  9. Stir in the vanilla extract and optional pineapple juice.
  10. Place one cooled cake layer on a serving plate, frost the top, add the second layer, then frost the top and sides of the cake.
  11. Garnish with walnuts or pineapple slices, if desired.

Nutrition

Serving: 1sliceCalories: 350kcalCarbohydrates: 45gProtein: 3gFat: 16gSaturated Fat: 8gPolyunsaturated Fat: 2gMonounsaturated Fat: 2gCholesterol: 70mgSodium: 250mgPotassium: 200mgFiber: 1gSugar: 32gVitamin A: 500IUVitamin C: 3mgCalcium: 50mgIron: 1mg

Notes

Use freshly grated carrots and well-drained crushed pineapple for best results. Let cake layers cool completely before frosting to prevent melting.

Tried this recipe?

Let us know how it was!

Churro Saltine Toffee: Sweet, Crunchy Bliss Awaits You

September 23, 2025 by Grace Snow Leave a Comment

In just 25 minutes, you can whip up a dessert that dazzles and delights like no other—the Churro Saltine Toffee. Picture the satisfying crunch of saltine crackers enveloped in buttery toffee, all enhanced by the warm, cozy notes of cinnamon that tickle the senses. This delightful treat marries the beloved flavors of churros with an innovative twist, making it a crowd-pleaser that's perfect for coffee breaks or sweet gifts. One of the best perks? It’s quick and easy to make, which means you can enjoy the fun of homemade baking without spending hours in the kitchen. Plus, it’s a treat that everyone will love, from kids to adults alike! Are you ready to dive into this irresistible combination?

Why is Churro Saltine Toffee a Must-Try?

Easily Prepared: Whipping up this dessert takes just 25 minutes, making it a perfect choice for those unexpected cravings or last-minute gatherings.

Deliciously Unique: The delightful blend of churro flavors adds a fun twist to traditional toffee, leaving your taste buds in pure bliss.

Crowd-Pleasing Appeal: This treat is a guaranteed hit at parties, potlucks, or cozy movie nights. Everyone, young and old, will be reaching for seconds!

Customizable Options: Don’t have saltines? Swap them for graham crackers or pretzel crisps to cater to your preferences.

Perfect Gift Idea: Wrapped in a cute box, this toffee makes for an impressive homemade gift, showcasing your culinary creativity.

Dive into this sweet shortcut and elevate your dessert game—your friends and family will be thanking you!

Churro Saltine Toffee Ingredients

• All the essentials for a tasty treat!

For the Base

  • Saltine Crackers – Provide a crunchy base; substitute with graham crackers or pretzel crisps for a fun twist.

For the Toffee

  • Unsalted Butter – Adds richness and helps form toffee; use vegan butter for a dairy-free option.
  • Brown Sugar – Creates that signature caramel flavor; light brown sugar works as a substitute if necessary.

For the Topping

  • Semi-Sweet Chocolate Chips – Offers sweetness and richness, you can opt for dark chocolate for less sweetness.
  • Granulated Sugar – Adds sweetness to the cinnamon-sugar topping; can be omitted for a lighter option.
  • Cinnamon – Enhances the churro flavor; nutmeg can be used as an intriguing alternative.
  • Sea Salt – Balances the sweetness and elevates flavor; flaky sea salt is ideal for garnish.

Now you’re all set with the ingredients for your delightful Churro Saltine Toffee! Enjoy creating this sweet, crunchy bliss!

Step‑by‑Step Instructions for Churro Saltine Toffee

Step 1: Preheat and Prepare
Start by preheating your oven to 400°F (200°C). Meanwhile, line a baking sheet with parchment paper, ensuring it’s large enough to hold all the saltine crackers. This makes cleanup a breeze later! Get your baking sheet ready so you can assemble your Churro Saltine Toffee quickly.

Step 2: Arrange the Crackers
Once your baking sheet is prepared, lay the saltine crackers in a single layer, covering the entire surface. It's okay if they touch, but make sure not to overlap them. This step is crucial, as the crunchy base will hold all the delicious toffee later.

Step 3: Make the Toffee Mixture
In a medium saucepan, combine the unsalted butter and brown sugar over medium heat. Stir continuously until the mixture starts to boil, which should take about 5 minutes. You want the toffee to become bubbly and thick, so keep an eye on it for that perfect caramel color.

Step 4: Pour Over Crackers
Once the toffee mixture has reached a boil, carefully pour it evenly over the arranged saltine crackers. Use a spatula to spread it gently, ensuring each cracker is coated. Bake this masterpiece for 5 to 7 minutes or until it’s bubbly all over and golden brown, keeping close watch to avoid burning.

Step 5: Add the Chocolate
After removing the baking sheet from the oven, immediately sprinkle semi-sweet chocolate chips over the hot toffee. The heat will melt the chocolate, creating a rich, glossy layer that enhances the flavors of your Churro Saltine Toffee. Allow it to sit for 2 to 3 minutes until the chocolate appears shiny.

Step 6: Sprinkle Cinnamon Sugar
While the chocolate is still warm, combine granulated sugar and cinnamon in a small bowl. Evenly sprinkle this sweet mixture over the melted chocolate, which will add that delightful churro flavor. The combination of cinnamon and chocolate creates a heavenly aroma that fills your kitchen!

Step 7: Finish with Sea Salt
To elevate the sweetness, lightly sprinkle flaky sea salt over the entire toffee treat. The salt will enhance the flavors, creating a perfect balance against the chocolate and toffee. It’s the finishing touch that makes your Churro Saltine Toffee truly unforgettable.

Step 8: Cool and Serve
Allow the toffee to cool completely at room temperature for about 30 minutes. Once set, gently break it into pieces. Your Churro Saltine Toffee is now ready to be served as a delightful treat that will surely impress your family and friends!

What to Serve with Churro Saltine Toffee

Looking to elevate your dessert experience? Discover delightful pairings that enhance the sweet, crunchy bliss of this irresistible treat!

  • Vanilla Ice Cream: The creamy, cool texture complements the crunchy toffee, creating a heavenly contrast that melts in your mouth.

  • Coffee: A warm cup of coffee boosts the flavors while enhancing the dessert's rich toffee and cinnamon notes—perfect for a cozy evening.

  • Spicy Hot Chocolate: For a fun twist, enjoy your toffee with a cup of rich hot chocolate spiced with cayenne or chili powder, enhancing the sweetness.

  • Churro Bites: Keep the churro vibes going with crispy churro bites coated in cinnamon sugar—because two treats are better than one!

  • Fruit Salad: A fresh, citrusy fruit salad adds brightness and balance, cutting through the sweetness and making the meal feel lighter.

  • Milk: Classic and comforting, pairing your toffee with a cold glass of milk is a nostalgic choice that simply works every time.

  • Nutty Cookie Crumble: Sprinkle some crushed cookies or nuts on top of your toffee for added crunch and flavor—think almond or pecan for a delicious contrast.

  • Sparkling Water: A refreshing bubbly drink cleanses the palate between bites, making every mouthful of your Churro Saltine Toffee enjoyable.

  • Caramel Sauce: Drizzle extra caramel sauce for a decadent touch that intensifies the already delightful flavors of your sweet treat!

Storage Tips for Churro Saltine Toffee

Room Temperature: Store your Churro Saltine Toffee in an airtight container at room temperature for up to 1 week to maintain its delicious crunch and flavor.

Fridge: If you prefer a longer shelf life, refrigerate the toffee for up to 2 weeks. Just ensure it’s sealed tightly to prevent moisture absorption.

Freezer: For even extended storage, freeze your toffee in a freezer-safe container for up to 3 months. Thaw it at room temperature before serving for the best texture.

Reheating: If you like it warm, briefly pop pieces in the microwave for about 10 seconds to bring back that gooey goodness without melting the chocolate completely.

Expert Tips for Churro Saltine Toffee

  • Perfect Boil: Ensure your butter and sugar mixture reaches a full boil before pouring it over the crackers; this is key for achieving that delicious toffee consistency.

  • Watch the Clock: Keep a close eye on the baking time; overbaking can result in burnt toffee. Aim for that perfect golden brown!

  • Chocolate Magic: For a silky chocolate finish, sprinkle chocolate chips immediately after baking while the toffee is still hot—let the heat do the melting!

  • Cinnamon Boost: Add a touch of vanilla extract to the toffee mixture for an extra hint of flavor that complements the churro essence beautifully.

  • Cooling Time: Allow ample cooling time after baking; breaking it apart too soon can lead to messy pieces. Be patient for a perfectly textured treat.

Make Ahead Options

These Churro Saltine Toffee treats are perfect for meal prep and can save you time during busy weeks! You can prepare the toffee mixture and spread it over the saltines up to 24 hours in advance. Simply cover the baking sheet tightly with plastic wrap and refrigerate to maintain freshness. When you're ready to finish the recipe, just pop the tray in the oven to bake for 5 to 7 minutes. After baking, sprinkle the chocolate chips and cinnamon sugar topping as detailed in the original recipe—your Churro Saltine Toffee will taste just as delightful and remain a crowd-pleaser! This way, you can indulge without the stress on the day of serving.

Variations & Substitutions for Churro Saltine Toffee

Feel free to get creative with your Churro Saltine Toffee! Your taste buds will thank you for exploring these delightful twists.

  • Graham Crackers: Swap saltines for graham crackers for a sweeter, softer base. The honey notes will harmonize beautifully with the toffee.

  • Peanut Butter Drizzle: Add a touch of melted peanut butter over the chocolate for a nutty twist that adds creamy richness and depth. Your peanut butter-loving friends will adore this variation!

  • Spiced Upgrade: Replace cinnamon with pumpkin pie spice for a seasonal flair that brings warmth and cozy vibes, perfect for fall gatherings.

  • Nutty Crunch: Toss in chopped pecans or almonds on top for added texture that enhances the crunch factor. Not only does it look lovely, but the nuts also contribute a wonderful flavor contrast.

  • Heat It Up: Add a sprinkle of cayenne pepper or chili powder to the cinnamon-sugar topping for a delightful kick that complements the sweetness.

  • Dark Chocolate Lovers: Use dark chocolate chips instead of semi-sweet for a more sophisticated flavor profile that balances the sweetness nicely. This creates an elegant dessert everyone will crave.

  • Coconut Flakes: Mix in some toasted coconut flakes to the topping for an exotic twist that adds a delightful chewiness.

  • Cereal Mix: Incorporate crispy rice cereal in the toffee layer for an extra crunch reminiscent of childhood treats. It's a fun and nostalgic touch!

With these variations, every batch of Churro Saltine Toffee can be uniquely yours! Whether you want to amplify flavors or introduce new textures, the options are vast. For additional texture ideas, check out how to incorporate flavors from a favorite chocolate bark recipe.

Churro Saltine Toffee Recipe FAQs

How do I select the best saltine crackers for this recipe?
Absolutely! Look for saltine crackers that are fresh and crisp, avoiding any with broken pieces or excessive crumbs in the packaging. These maintain the crunchiness required for the base. If you're feeling adventurous, try substituting saltines with graham crackers or pretzel crisps for a fun twist!

How should I store leftover Churro Saltine Toffee?
To keep your Churro Saltine Toffee fresh, store it in an airtight container at room temperature for up to 1 week. If you want to extend its shelf life, refrigerate it for up to 2 weeks, ensuring it's tightly sealed to prevent moisture from compromising its delightful crunch.

Can I freeze Churro Saltine Toffee, and how?
Yes, you can! To freeze your Churro Saltine Toffee, follow these simple steps: wrap it tightly in plastic wrap or place it in a freezer-safe container to minimize exposure to air. It can be stored in the freezer for up to 3 months. When you're ready to enjoy it, simply thaw it at room temperature for about 30 minutes for the best texture.

What should I do if my toffee mixture doesn’t boil properly?
Very! If your toffee mixture isn't boiling, make sure you're using medium heat and continuously stirring to help the butter and sugar combine. It might take a few extra minutes, but be patient! You want a full, bubbly boil to achieve that perfect caramel-like consistency before pouring it over the crackers.

Is this recipe suitable for people with nut allergies?
Indeed! The base recipe contains no nuts, making it suitable for those with nut allergies. However, if you decide to customize with optional nuts, like pecans or almonds, just be sure to let everyone know about those additions to keep everyone safe and enjoying!

Churro Saltine Toffee

Churro Saltine Toffee: Sweet, Crunchy Bliss Awaits You

Churro Saltine Toffee is a sweet and crunchy dessert that combines the flavors of churros with buttery toffee, perfect for parties and gifts.
Print Recipe Pin Recipe
Prep Time 10 minutes mins
Cook Time 15 minutes mins
Cooling Time 30 minutes mins
Total Time 55 minutes mins
Servings: 12 pieces
Course: Dessert
Cuisine: American
Calories: 150
Ingredients Equipment Method Nutrition Notes

Ingredients
  

For the Base
  • 1 package Saltine Crackers Can substitute with graham crackers or pretzel crisps
For the Toffee
  • 1 cup Unsalted Butter Use vegan butter for a dairy-free option
  • 1 cup Brown Sugar Light brown sugar works as a substitute
For the Topping
  • 1 cup Semi-Sweet Chocolate Chips Can opt for dark chocolate
  • 1/4 cup Granulated Sugar Can be omitted for a lighter option
  • 2 teaspoons Cinnamon Nutmeg can be used as an alternative
  • 1 teaspoon Sea Salt Flaky sea salt is ideal for garnish

Equipment

  • Oven
  • Baking Sheet
  • Parchment Paper
  • Medium saucepan
  • Spatula

Method
 

Preparation Steps
  1. Preheat your oven to 400°F (200°C) and line a baking sheet with parchment paper.
  2. Lay the saltine crackers in a single layer on the baking sheet.
  3. Combine the unsalted butter and brown sugar in a medium saucepan over medium heat and stir until it starts to boil, about 5 minutes.
  4. Pour the toffee mixture evenly over the arranged saltine crackers and bake for 5-7 minutes until bubbly and golden brown.
  5. Remove from the oven and immediately sprinkle chocolate chips over the hot toffee, allowing them to melt.
  6. Mix granulated sugar and cinnamon in a small bowl and sprinkle over the melted chocolate.
  7. Lightly sprinkle flaky sea salt over the entire toffee.
  8. Allow the toffee to cool completely for about 30 minutes before breaking it into pieces.

Nutrition

Serving: 1pieceCalories: 150kcalCarbohydrates: 20gProtein: 1gFat: 7gSaturated Fat: 4gMonounsaturated Fat: 3gCholesterol: 15mgSodium: 120mgPotassium: 50mgSugar: 10gVitamin A: 300IUCalcium: 10mgIron: 0.5mg

Notes

Store in an airtight container at room temperature for up to 1 week; refrigerate for up to 2 weeks or freeze for up to 3 months.

Tried this recipe?

Let us know how it was!

Decadent Date Caramels: Guilt-Free Indulgence Awaiting You

September 21, 2025 by Grace Snow Leave a Comment

You won’t believe how easy it is to make homemade candy that’s both delicious and healthy! These 4-Ingredient Date Caramels are a game changer, transforming simple ingredients into a chewy, chocolate-covered indulgence that you can feel good about. Not only are they incredibly quick to whip up, but they cater to various dietary needs, being vegan, gluten-free, and refined sugar-free. Perfect for snacking or gifting, these little squares of joy are sure to satisfy your sweet cravings without all the guilt. Who knew a homemade treat could be this effortless? Ready to take your candy game to the next level? Let’s dive in!

Why make date caramels at home?

Incredibly Easy: This recipe requires only four simple ingredients, making it a breeze for both beginners and seasoned chefs alike.

Healthy Choice: These date caramels are vegan, gluten-free, and refined sugar-free, promoting a guilt-free indulgence you can feel good about.

Decadent Flavor: Experience a delightful blend of rich chocolate and natural sweetness from Medjool dates, offering a satisfying treat without compromise.

Versatility for Everyone: Customize to your taste with different nut butters or toppings, making them suitable for various dietary needs.

Perfect Snack or Gift: Whether for a party or a personal treat, these caramels are sure to impress and are a great addition to any dessert platter. For more easy dessert ideas, check out our guide on no-bake treats.

Date Caramel Ingredients

• To create your delightful date caramels, gather these simple ingredients!

For the Caramels

  • Medjool Dates – Provides natural sweetness and a chewy texture; make sure they’re pitted and soft for the best results.
  • Almond Butter (or Seed Butter) – Adds creaminess and helps bind the mixture; for a nut-free option, sunflower seed butter works perfectly.
  • Coconut Oil – Aids in softening the mixture and is crucial for coating the caramels; use melted coconut oil for easier blending.

For the Chocolate Coating

  • Chocolate Chips (or Chocolate Bar) – This gives a rich and decadent outer layer; any dark chocolate variety will enhance the flavors beautifully.
  • Additional Coconut Oil – Used for melting chocolate, ensuring a smooth coating; it’s key for that glossy finish on your date caramels.

These easy-to-find ingredients will help you create the perfect date caramels that are both indulgent and guilt-free!

Step‑by‑Step Instructions for Date Caramels

Step 1: Soak the Dates
Begin by placing your pitted Medjool dates in a bowl and covering them with very hot water. Allow them to soak for about 10 minutes, which will soften the dates, making them easier to blend. Ensure they look plump and tender; this is key to achieving that smooth, chewy consistency in your date caramels.

Step 2: Blend the Mixture
After soaking, drain the dates and transfer them to a food processor. Add almond butter and melted coconut oil to the processor. Blend for around 1-2 minutes until the mixture is smooth and creamy, stopping occasionally to scrape down the sides. You want a homogenous, thick paste that will form the base of your delightful date caramels.

Step 3: Freeze to Firm Up
Line a loaf pan with parchment paper to prevent sticking, and transfer the blended date mixture into the pan. Spread it evenly with a spatula to ensure a consistent thickness. Place the pan in the freezer for 2-3 hours, until the mixture is firm to the touch; this will allow for easy cutting into squares later.

Step 4: Cut the Caramels
Once the date caramel mixture is fully firm, remove it from the freezer. Carefully lift the parchment paper out of the pan and place it on a cutting board. Use a sharp knife to cut the mixture into 12 even squares. These will be your delicious date caramels; set them aside as you prepare the chocolate coating.

Step 5: Melt the Chocolate
In a microwave-safe bowl, combine chocolate chips and the remaining coconut oil. Microwave in 30-second intervals, stirring in between, until the mixture is completely melted and smooth, which typically takes about 1-2 minutes total. The chocolate should have a glossy look—this will create a luxurious coating for your date caramels.

Step 6: Coat the Caramels
Take each square of date caramel and dip it into the melted chocolate, ensuring all sides are fully coated. Allow any excess chocolate to drip off before transferring the chocolate-covered dates onto a parchment-lined plate. Repeat the process until all squares are beautifully coated, creating that tempting layer of chocolate around your date caramels.

Step 7: Chill to Set
Once all the caramels are coated in chocolate, place the plate in the fridge for about 1 hour. This chilling time allows the chocolate to harden, giving your date caramels that delectable snap. After an hour, the treats will be ready to serve or to be stored for later indulgence!

Make Ahead Options

These 4 Ingredient Date Caramels are perfect for meal prep enthusiasts! You can prepare the date caramel mixture up to 3 days in advance; simply blend the soaked dates, almond butter, and coconut oil, then freeze it in a lined loaf pan as instructed. Once firm, cut into squares and dip in chocolate when you're ready to enjoy them. For optimal quality, store the squares in an airtight container in the fridge between layers of parchment paper to prevent sticking. When it's time to serve, just melt the chocolate and coat the caramels — you'll have a delicious, homemade treat ready to impress, all with minimal effort!

Date Caramels Variations & Substitutions

Feel free to elevate your date caramels with these delightful twists, perfect for satisfying every palate!

  • Nut-Free: Use sunflower seed butter instead of almond butter for a tasty, nut-free option. This will keep the caramel creamy and delicious while accommodating dietary restrictions.

  • Sea Salt Topping: Sprinkle a pinch of sea salt on top of the chocolate-covered date caramels for a burst of flavor. The contrast of sweet and salty amplifies the indulgence!

  • Flavor Infusion: Add a teaspoon of vanilla extract to the date mixture before blending for an aromatic layer of flavor that beautifully complements the chocolate.

  • Mix-In Wonders: Stir in some chopped nuts or dried fruits like cranberries or apricots into the caramel mixture for an added crunch and natural sweetness. These additions make each bite more exciting!

  • Coconut Twist: Incorporate shredded coconut into the blended mixture for a tropical flair. This will give your date caramels a chewy texture that complements the chocolate perfectly.

  • Spicy Kick: Adding a sprinkle of cayenne pepper or cinnamon to the chocolate coating or the caramel mixture will bring an unexpected warmth to the sweetness. It’s a delightful balance that will surprise and please your taste buds!

  • Chocolate Variety: Experiment with white chocolate or milk chocolate as a coating. This simple switch can create a whole new taste experience while keeping the delightful caramel intact.

These variations are just the beginning of your creativity! For more ways to enjoy chocolate treats, be sure to check out our guide on no-bake desserts.

Expert Tips for Date Caramels

  • Choose Soft Dates: Make sure your Medjool dates are fresh and very soft for the best blending results. If they’re dry or hard, soak them a bit longer in hot water.

  • Perfect Consistency: If your mixture seems too thick to blend smoothly, add a little more melted coconut oil to achieve the desired creamy texture in your date caramels.

  • Avoid Sticking: Line your loaf pan with parchment paper before pouring in the date mixture. This simple step ensures easy removal and clean squares.

  • Chill Adequately: Don’t skip the freezing step! Allow the date mixture to chill fully before cutting—this makes for neat, perfect squares that hold their shape beautifully.

  • Smooth Chocolate Coating: Stir the chocolate occasionally as it melts. This ensures it remains smooth and helps prevent burning, giving your date caramels a glossy finish.

  • Storage Tips: Store your chocolate-covered date caramels in an airtight container in the fridge or freezer to keep them fresh and prevent the chocolate from melting.

What to Serve with 4-Ingredient Date Caramels

Elevate your treat experience with these delightful pairings that will enhance the sweet, chewy indulgence of your date caramels.

  • Fresh Berries: Juicy strawberries or tart raspberries provide a refreshing contrast, enhancing the sweetness with a burst of acidity.

  • Nutty Granola: Crunchy granola not only adds texture but also complements the rich flavors of the date caramels, making for a satisfying snack mix.

  • Coconut Whipped Cream: This light, airy topping pairs beautifully, offering a creamy contrast that accentuates the caramel’s chewy texture.

  • Herbal Tea: A warm cup of chamomile or mint tea cleanses the palate and highlights the sweetness of the caramels, perfect for a cozy evening.

  • Dark Chocolate Drizzle: Enhance the experience by drizzling extra melted dark chocolate over your caramels, adding a gourmet touch and amplifying richness.

  • Sliced Apples: The crunch and freshness of crisp apple slices create a refreshing balance to the caramel's richness, making for a delightful combination.

  • Chia Seed Pudding: A simple vanilla or coconut chia pudding introduces a creamy texture and nutritional boost, wonderfully complementing the sweet treat.

Each pairing not only amplifies the joy of enjoying these date caramels but also creates a well-rounded tasting experience!

How to Store and Freeze Date Caramels

Fridge: Keep your date caramels in an airtight container in the fridge, where they will stay fresh for up to 2 weeks. This will help maintain their chewy texture and chocolate coating.

Freezer: For longer storage, place the date caramels in a freezer-safe container or a zip-top bag, separated by parchment paper. They can last up to 3 months in the freezer; simply thaw in the fridge before enjoying.

Room Temperature: It’s best to avoid keeping the date caramels at room temperature, as the chocolate may melt. If serving, keep them chilled until ready to impress your guests!

Reheating: If you prefer a warm treat, gently microwave a caramel for a few seconds to soften it before enjoying. Just be cautious not to overheat, as this may alter the texture.

4 Ingredient Date Caramels Recipe FAQs

How do I know if my Medjool dates are ripe?
Absolutely! When selecting Medjool dates, look for plump, soft, and shiny appearances. They should not have any dark spots or feel dry to the touch. If they seem a bit hard, soaking them in hot water for 10 minutes can revive their softness!

What is the best way to store date caramels?
To keep your delicious date caramels at their freshest, store them in an airtight container in the fridge. They can last up to 2 weeks while maintaining their chewy texture and chocolate coating. Remember, keep them chilled to avoid melting!

Can I freeze date caramels, and how do I do it?
Very! To freeze your date caramels, place them in a freezer-safe container or zip-top bag, ensuring to separate layers with parchment paper to prevent sticking. They can be stored for up to 3 months. When you’re ready to enjoy, simply thaw them in the fridge overnight!

What should I do if my chocolate coating isn’t smooth?
If your chocolate doesn't come out smooth, it might be overheating. Instead, melt it in 30-second intervals, stirring in between. This ensures gradual melting and maintains a glossy finish. If it’s still too thick, adding a teaspoon of coconut oil can help achieve that creamy consistency.

Are these date caramels safe for people with allergies?
Yes! These date caramels are naturally gluten-free and vegan, making them a great option for many dietary restrictions. However, be cautious with nut allergies if you're using nut butters. Opt for seed butter alternatives like sunflower for a nut-free treat. Always check packaging for cross-contamination warnings!

What if my date mixture is too thick to blend?
No problem! If your date mixture feels thick or crumbly, simply add another tablespoon of melted coconut oil. Blend again until you reach a smooth consistency. It’s essential for the perfect chewy texture in your date caramels, so don’t hesitate to adjust as needed!

Date Caramels

Decadent Date Caramels: Guilt-Free Indulgence Awaiting You

These Date Caramels are a guilt-free treat, combining simple ingredients into a deliciously healthy candy option.
Print Recipe Pin Recipe
Prep Time 10 minutes mins
Cook Time 20 minutes mins
Freezing Time 2 hours hrs
Total Time 2 hours hrs 30 minutes mins
Servings: 12 squares
Course: Dessert
Cuisine: Vegan
Calories: 120
Ingredients Equipment Method Nutrition Notes

Ingredients
  

For the Caramels
  • 2 cups Pitted Medjool Dates Soft for best results
  • 1/2 cup Almond Butter or Seed Butter for nut-free option
  • 2 tablespoons Coconut Oil Melted
For the Chocolate Coating
  • 1 cup Chocolate Chips or Chocolate Bar
  • 1 tablespoon Coconut Oil for melting chocolate

Equipment

  • Food Processor
  • Loaf pan
  • Microwave-safe bowl
  • Parchment Paper
  • Spatula
  • Sharp Knife

Method
 

Preparation Steps
  1. Soak the Pitted Medjool Dates in very hot water for 10 minutes to soften.
  2. Drain the dates and blend them with almond butter and melted coconut oil until smooth.
  3. Transfer the mixture to a lined loaf pan, spread evenly, and freeze for 2-3 hours.
  4. Cut the set mixture into 12 squares.
  5. Melt chocolate chips and remaining coconut oil in the microwave in 30-second increments.
  6. Dip each square in melted chocolate, ensuring full coverage, and transfer to a parchment-lined plate.
  7. Chill the coated caramels in the fridge for 1 hour to harden the chocolate.

Nutrition

Serving: 1squareCalories: 120kcalCarbohydrates: 14gProtein: 2gFat: 7gSaturated Fat: 4gPolyunsaturated Fat: 1gMonounsaturated Fat: 2gSodium: 1mgPotassium: 180mgFiber: 2gSugar: 10gCalcium: 2mgIron: 4mg

Notes

For best results, use fresh, soft dates and store in an airtight container in the fridge or freezer. Microwave for a few seconds to soften before serving if desired.

Tried this recipe?

Let us know how it was!

Coconut Cloud Cake Recipe: Your New Favorite Dessert Adventure

September 21, 2025 by Grace Snow Leave a Comment

As I stood in my kitchen, the sweet aroma of baked coconut wafted through the air, taking me back to sun-soaked beach vacations. This Coconut Cloud Cake Recipe is my go-to for bringing a slice of paradise into any gathering or quiet afternoon. With its incredibly soft, pillow-like sponge layers drenched in coconut richness and topped with a creamy frosting that invites second helpings, this dessert is bound to impress. Plus, it’s simple enough for even novice bakers to master—perfect for those craving a homemade treat without the fuss. So, are you ready to elevate your baking game and transport your taste buds to a tropical haven?

Why will you adore this cake?

Decadent, Tropical Flavor: Each bite of this Coconut Cloud Cake whisks you away to a warm beach, packed with rich coconut goodness.

Effortless Preparation: With straightforward steps, even novice bakers can impress loved ones without breaking a sweat.

Versatile Treat: Whether for birthdays, holidays, or everyday celebrations, this cake fits every occasion perfectly.

Mouthwatering Frosting: Topped with creamy coconut frosting and toasty shredded coconut, it delivers a delightful contrast in textures that will leave everyone wanting more.

For a similar indulgence, check out my recipes for Chocolate Pudding Cake or German Chocolate Poke Cake!

Coconut Cloud Cake Ingredients

  • For the Cake
    • All-Purpose Flour – Provides structure; substitute with a gluten-free blend for a gluten-free version.
    • Baking Powder – Leavening agent that helps the cake rise; no substitutes recommended.
    • Salt – Enhances flavor; it’s a key ingredient for balance.
    • Butter (softened) – Adds moisture and flavor; ensure it's at room temperature for better mixing.
    • Granulated Sugar – Sweetness and moisture retention; reduce for a less sweet version.
    • Eggs – Binds ingredients and adds structure; make sure they are at room temperature for even mixing.
    • Vanilla Extract – Adds aromatic sweetness; no substitutes recommended.
    • Coconut Extract – Intensifies coconut flavor; crucial for that rich taste.
    • Coconut Milk – Contributes to the cake's moistness and coconut richness; almond milk or whole milk can be used as alternatives.

  • For the Frosting
    • Heavy Cream – Used for frosting; creates a light texture, so chill before whipping for best results.
    • Cream Cheese – Adds a creamy base to the frosting; ensure it is softened for easy mixing.
    • Powdered Sugar – Sweetens and stabilizes the frosting; adjust for desired sweetness.

  • For the Topping
    • Shredded Coconut – Adds texture and flavor; toast for extra depth and to enhance its natural sweetness.

This Coconut Cloud Cake recipe is sure to be a delightful treat that transports your taste buds to a sunny getaway!

Step‑by‑Step Instructions for Coconut Cloud Cake Recipe

Step 1: Prep the Oven and Pans
Begin by preheating your oven to 350°F (175°C). While the oven heats, grease two 9-inch round cake pans and line the bottoms with parchment paper to ensure easy removal. This step sets the stage for your Coconut Cloud Cake, making sure it bakes evenly and doesn’t stick.

Step 2: Mix the Dry Ingredients
In a large mixing bowl, whisk together 2 cups of all-purpose flour, 1 tablespoon of baking powder, and a pinch of salt. This dry mixture is fundamental for the cake's structure. Ensure there are no lumps for a smooth batter; a well-mixed dry blend is key to a fluffy Coconut Cloud Cake.

Step 3: Cream Butter and Sugar
In a separate mixing bowl, beat together 1 cup of softened butter and 1 cup of granulated sugar using an electric mixer on medium speed for about 3–4 minutes, or until the mixture becomes light and fluffy. Gradually add in 4 room-temperature eggs, one at a time, mixing well after each addition to fully incorporate air.

Step 4: Combine Wet Ingredients
Next, add 2 teaspoons of vanilla extract and 1 teaspoon of coconut extract to the creamed butter and sugar. Mix these in until well blended. Then, alternately incorporate the dry ingredients and 1 cup of coconut milk into the mixture in three parts. Mix gently until just combined, aiming for a smooth batter without overmixing.

Step 5: Bake the Cakes
Evenly divide the batter between the prepared cake pans, gently smoothing the tops with a spatula. Bake for 25–30 minutes, or until a toothpick inserted into the center comes out clean. Once done, remove the pans from the oven, allow them to cool in the pans for about 10 minutes, then transfer the cakes to a wire rack to cool completely.

Step 6: Prepare the Frosting
For the frosting, start by beating 8 ounces of softened cream cheese until it’s smooth. Gradually add in about 2 cups of powdered sugar and mix until the frosting achieves a silky texture. In a separate bowl, whip 1 cup of heavy cream to stiff peaks, then gently fold it into the cream cheese mixture along with the remaining vanilla and coconut extracts.

Step 7: Assemble the Cake
Place one cooled cake layer on a serving plate, and generously spread frosting over the top. Carefully position the second layer on top, creating a delightful two-tiered effect. Use the remaining frosting to cover the sides and top of the cake, ensuring each inch is decorated with the creamy coconut frosting.

Step 8: Add the Finishing Touch
To finish, sprinkle a layer of shredded coconut on top, ideally using toasted coconut for extra flavor. This enhances the presentation and texture of your Coconut Cloud Cake. Refrigerate the entire cake for at least one hour, allowing the frosting to set perfectly before slicing into this delightful treat.

Storage Tips for Coconut Cloud Cake

  • Room Temperature: Store the Coconut Cloud Cake in an airtight container at room temperature for up to 3–4 days for the best flavor and texture.

  • Refrigeration: If you prefer a chilled dessert, the cake can be kept in the fridge for up to a week in an airtight container. Just let it come to room temperature for a few minutes before serving.

  • Freezer: For longer storage, freeze the unfrosted cake layers individually wrapped in plastic wrap and foil for up to 2 months. Thaw in the fridge overnight before frosting.

  • Reheating: If you’ve frozen frosted cake, allow it to thaw in the fridge, then serve cold, or microwave individual slices for 10-15 seconds for a warm treat.

Expert Tips for Coconut Cloud Cake

  • Room Temperature Ingredients: Ensure all ingredients, especially butter and eggs, are at room temperature for better blending and fluffiness in your Coconut Cloud Cake.

  • Gentle Folding: When combining whipped cream into the frosting, be gentle. This maintains the airy texture that makes it melt in your mouth.

  • Avoid Sinking: Don’t open the oven door too frequently while baking. This can cause your cakes to sink in the center, compromising that beautiful rise you want.

  • Perfectly Toasted Coconut: For maximum flavor, toast your shredded coconut lightly before adding it as a topping. It not only enhances taste but also adds a lovely crunch.

  • Make-Ahead Magic: If time allows, bake the cake layers a day ahead. Store them properly until you’re ready to frost and assemble for a stress-free baking experience!

What to Serve with Coconut Cloud Cake

Indulging in Coconut Cloud Cake opens up a world of delicious pairing possibilities that will elevate your dessert experience.

  • Fresh Fruit Salad: A colorful mix of berries and tropical fruits adds a refreshing contrast and complements the coconut flavor beautifully.
  • Coconut Sorbet: This icy treat takes the coconut theme to another level, providing a cool, creamy counterpart that’s perfect for warm days.
  • Whipped Cream: Lightly sweetened whipped cream adds a fluffy texture that enhances the cake’s richness, making each bite even more decadent.
  • Chocolate Ganache: Drizzling a rich chocolate ganache over the cake creates an exquisite flavor combination that balances sweetness with deep cocoa richness.
  • Almond Biscotti: The crunchy texture of these cookies offers a delightful contrast to the soft cake, making for an enjoyable munching experience.
  • Mango Mousse: A light mango mousse is airy and fruity, creating a beautiful harmony of flavors with the tropical essence of the cake.
  • Iced Coffee: A chilled brew complements the dessert’s sweet note with a subtle bitterness, making it a perfect drink option for a cozy afternoon.
  • Lemonade: The zesty freshness of lemonade brings a bright twist to the meal, cutting through the cake's richness for a truly refreshing sip.

Make Ahead Options

Preparing the Coconut Cloud Cake ahead of time is a fantastic way to save time, especially during busy weeks! You can bake the cake layers up to 24 hours in advance. Once they are completely cooled, wrap each layer tightly in plastic wrap and store them at room temperature. The frosting can also be made a day ahead; simply store it in an airtight container in the refrigerator. When you're ready to assemble, just bring the layers to room temperature, spread the frosting between them, and cover the cake as directed. This ensures that your Coconut Cloud Cake remains just as delicious, offering a stress-free treat for any occasion!

Coconut Cloud Cake Recipe Variations

Feel free to unleash your creativity and personalize this delightful treat to suit your tastes and dietary needs!

  • Gluten-Free: Use a gluten-free baking blend instead of all-purpose flour for a delicious gluten-free version.

  • Reduced Sugar: Cut back on the powdered sugar in the frosting to create a delightful balance of sweetness without overwhelming your taste buds.

  • Fresh Coconut: Swap out shredded coconut for fresh grated coconut for a more natural flavor and a softer texture that complements the cake beautifully.

  • Nutty Surprise: Introduce a layer of toasted almonds or pecans in between the cake layers for a satisfying crunch and additional flavor.

  • Coconut Cream: For a richer frosting, substitute half the heavy cream with coconut cream for an extra creaminess that's simply irresistible.

  • Fruity Twist: Add a layer of your favorite fruit, like pineapple or mango, between the cake layers to introduce a refreshing burst of flavor to each slice.

  • Chocolate Drizzle: Drizzle some melted dark chocolate on top of the cake for a decadent twist that pairs wonderfully with coconut.

  • Tropical Heat: Add a pinch of cayenne or crushed red pepper flakes to the frosting for a surprising touch of heat that contrasts beautifully with the sweetness.

For another scrumptious dessert that's sure to impress, take a look at my Chocolate Pudding Cake or explore the delicious layers of German Chocolate Poke Cake!

Coconut Cloud Cake Recipe FAQs

What is the best way to select ripe coconuts for baking?
When selecting coconuts, look for ones that feel heavy for their size, indicating good water content. Shake gently; if you hear sloshing, it’s fresh. The shell should be free from dark spots or cracks. To use, remove the meat and shred it for your cake—fabulous!

How should I store my Coconut Cloud Cake?
Absolutely! You can store the Coconut Cloud Cake in an airtight container at room temperature for 3 to 4 days. If you prefer it chilled, pop it in the fridge for up to a week. Just let it come to room temperature for optimal flavor when serving!

Can I freeze the Coconut Cloud Cake, and if so, how?
Yes, you can! To freeze the Coconut Cloud Cake, first wrap unfrosted cake layers tightly in plastic wrap, then in aluminum foil to prevent freezer burn. They can be frozen for up to 2 months. When ready to enjoy, thaw them overnight in the fridge before frosting and serving for the best texture.

What are some common pitfalls when making Coconut Cloud Cake?
One common pitfall is overmixing the batter, which can make the cake dense. Mix until just combined, and ensure all your ingredients are at room temperature for even mixing and fluffiness. It's also crucial to avoid opening the oven door too often, as this can cause the cake to sink.

Are there any dietary considerations for this Coconut Cloud Cake?
While this recipe isn't specifically gluten-free, you can substitute all-purpose flour with a gluten-free blend for a delicious alternative. Also, if you or your guests are allergic to coconut, consider using vanilla and almond flavors instead—but be aware, it won’t impart the same tropical essence!

What’s the best way to ensure my whipped cream holds its shape in the frosting?
To ensure your whipped cream maintains its structure in the frosting, chill your mixing bowl and beaters beforehand. Whip it to stiff peaks before gently folding it into the cream cheese mixture. This method keeps the frosting light and airy, which is perfect for your Coconut Cloud Cake!

Coconut Cloud Cake Recipe

Coconut Cloud Cake Recipe: Your New Favorite Dessert Adventure

Discover the Coconut Cloud Cake recipe, a delightful dessert that transports your taste buds to a tropical paradise.
Print Recipe Pin Recipe
Prep Time 30 minutes mins
Cook Time 30 minutes mins
Cooling Time 1 hour hr
Total Time 2 hours hrs
Servings: 12 slices
Course: Dessert
Cuisine: Tropical
Calories: 350
Ingredients Equipment Method Nutrition Notes

Ingredients
  

For the Cake
  • 2 cups all-purpose flour substitute with a gluten-free blend for a gluten-free version
  • 1 tablespoon baking powder no substitutes recommended
  • 1 teaspoon salt enhances flavor
  • 1 cup butter (softened) ensure it's at room temperature
  • 1 cup granulated sugar reduce for a less sweet version
  • 4 eggs make sure they are at room temperature
  • 2 teaspoons vanilla extract no substitutes recommended
  • 1 teaspoon coconut extract crucial for rich taste
  • 1 cup coconut milk almond milk or whole milk can be used as alternatives
For the Frosting
  • 1 cup heavy cream chill before whipping for best results
  • 8 ounces cream cheese ensure it is softened
  • 2 cups powdered sugar adjust for desired sweetness
For the Topping
  • 1 cup shredded coconut toast for extra flavor

Equipment

  • Mixing bowls
  • Electric mixer
  • 9-inch Round Cake Pans
  • Parchment Paper
  • Whisk
  • Spatula

Method
 

Step-by-Step Instructions
  1. Preheat your oven to 350°F (175°C). Grease two 9-inch round cake pans and line with parchment paper.
    Coconut Cloud Cake Recipe
  2. In a large mixing bowl, whisk together the dry ingredients: flour, baking powder, and salt.
    Coconut Cloud Cake Recipe
  3. Beat together softened butter and granulated sugar until light and fluffy. Gradually add eggs, mixing well after each.
    Coconut Cloud Cake Recipe
  4. Add vanilla and coconut extracts to the butter-sugar mixture, then alternately mix in dry ingredients and coconut milk until just combined.
    Coconut Cloud Cake Recipe
  5. Divide the batter between prepared pans and bake for 25–30 minutes or until a toothpick comes out clean.
    Coconut Cloud Cake Recipe
  6. For the frosting, beat cream cheese until smooth, add powdered sugar, then incorporate whipped heavy cream and remaining extracts gently.
    Coconut Cloud Cake Recipe
  7. Assemble the cake by layering frosting between the cooled cake layers and covering the entire cake with frosting.
    Coconut Cloud Cake Recipe
  8. Sprinkle toasted shredded coconut on top and refrigerate for at least one hour before serving.
    Coconut Cloud Cake Recipe

Nutrition

Serving: 1sliceCalories: 350kcalCarbohydrates: 45gProtein: 3gFat: 17gSaturated Fat: 10gPolyunsaturated Fat: 1gMonounsaturated Fat: 4gCholesterol: 75mgSodium: 180mgPotassium: 200mgFiber: 1gSugar: 30gVitamin A: 500IUCalcium: 50mgIron: 1mg

Notes

Ensure all ingredients are at room temperature for best results. Gently fold whipped cream into frosting for airy texture.

Tried this recipe?

Let us know how it was!

Muddy Buddy Rice Krispies: No-Bake Sweet Crunchy Bliss

September 21, 2025 by Grace Snow Leave a Comment

As I stood in my kitchen, the warm, sweet scent of melting chocolate filled the air, instantly lifting my spirits. In just a matter of minutes, I was about to create a no-bake treat that would bring smiles to everyone at the table: Muddy Buddy Rice Krispies. This delightful combination of crispy Rice Krispies, creamy peanut butter, and rich chocolate is not only irresistibly crunchy but also incredibly easy to whip up. Whether you’re hosting a gathering or simply craving a sweet snack, this quick dessert is a perfect choice that allows for carefree family fun without the fuss of baking. Plus, since they’re vegetarian, there's something for everyone to enjoy! Curious to see how simple it is to create this delightful treat? Let’s dive into the recipe!

Why Are Muddy Buddy Rice Krispies Irresistible?

Quick and Easy: You’ll love that this delicious treat requires no baking—perfect for those busy days when you want a sweet fix without the oven!

Crowd-Pleaser: With their crunchy texture and rich chocolate-peanut butter flavor, these treats are bound to impress guests at parties or family gatherings.

Versatile Options: Feeling creative? You can easily swap out ingredients—try almond butter for a nut-free version or add mini marshmallows for extra sweetness!

Kid-Friendly Fun: It’s a fantastic opportunity for the whole family to get involved in the kitchen, creating delightful memories together while mastering this fun recipe.

Satisfy Your Sweet Tooth: If you’re looking for a sweet and satisfying snack that truly delivers, you might also enjoy trying these variations: Furikake Fried Rice or for something savory, check out Bbq Chicken Rice.

Muddy Buddy Rice Krispies Ingredients

For the Base
• Rice Krispies Cereal – A light, crispy cereal that forms the foundation of this treat; you can substitute Chex cereal for a different crunch.
• Chocolate Chips – Provides that essential chocolaty sweetness; dark chocolate can be used for a richer flavor and added antioxidants.
• Creamy Peanut Butter – Offers a rich, nutty flavor while adding healthy fats; consider almond or sunflower seed butter for nut-free alternatives.
• Unsalted Butter – Melts into the mixture for richness and a smooth texture; margarine works great for a dairy-free version.
• Vanilla Extract – Adds a hint of depth to the flavor; if you're out, it's okay to skip it!

For the Coating
• Powdered Sugar – Sprinkles on top for a sweet finish; feel free to reduce the amount if you prefer a less sweet treat or swap for a sugar alternative.

Muddy Buddy Rice Krispies create a delightful combination of textures and flavors that are sure to please everyone!

Step‑by‑Step Instructions for Muddy Buddy Rice Krispies

Step 1: Melt the Chocolate and Peanut Butter
Begin by gathering a microwave-safe bowl and adding in your chocolate chips and creamy peanut butter. Microwave the mixture in 30-second intervals, stirring after each time, until it becomes a smooth and glossy consistency—this should take about 1 to 2 minutes total. Be mindful not to overheat, as burnt chocolate is not what we want for our Muddy Buddy Rice Krispies.

Step 2: Incorporate Butter and Vanilla
Once your chocolate and peanut butter mixture is perfectly melted, stir in the unsalted butter and a splash of vanilla extract. Mix thoroughly until everything is well combined and the texture is creamy. This step will add richness to the Muddy Buddy Rice Krispies, ensuring every bite is indulgent and delicious.

Step 3: Coat Rice Krispies
In a large mixing bowl, pour in the Rice Krispies cereal. Gently drizzle the melted chocolate-peanut butter mixture over the top. Using a spatula, carefully fold the two mixtures together. Make sure every piece of Rice Krispies is coated well without crushing them—this is key for achieving that perfect crunchy texture!

Step 4: Cool and Set
Prepare a lined baking sheet or pan by spreading the coated Rice Krispies mixture evenly across it. Use a spatula to press down slightly for an even surface. Allow your mixture to cool for about 15 to 20 minutes at room temperature, letting the chocolate set for a delightful finish.

Step 5: Add Powdered Sugar
Once set, transfer the Rice Krispies mixture to a large resealable bag. Add the powdered sugar, seal the bag, and shake it gently until all the goodies are coated. Alternatively, you can sprinkle the powdered sugar evenly over the top for a lighter coating—both methods will add a sweet touch to your Muddy Buddy Rice Krispies.

Step 6: Serve and Enjoy
After coating, you can cut the mixture into squares or break it into fun pieces with your hands for serving. Place them on a serving platter and watch as everyone dives in with excitement! These no-bake Muddy Buddy Rice Krispies are a delightful treat for any occasion, and they're best enjoyed within a week for ultimate freshness.

Muddy Buddy Rice Krispies Variations

Feel free to get creative and make this delightful treat your own in a few simple ways!

  • Different Cereal: Swap Rice Krispies for Chex cereal or cornflakes to add unique textures and flavors. Each choice offers a delightful crunch that brings variety to your treats.

  • Nut-Free Option: Substitute creamy peanut butter with almond or sunflower seed butter for a nut-free version. This way, everyone can join in on the deliciousness without worry!

  • Sugar-Free Sweetness: Use a sugar alternative like stevia or monk fruit to reduce the sweetness. You’ll still capture that delightful taste without all the sugar!

  • Chocolate Variety: Experiment with dark chocolate for a richer flavor or white chocolate for a sweeter twist. It opens up a whole new realm of sweetness!

  • Add Crunch: Mix in pretzels or crushed graham crackers before coating. The added crunch creates an exciting texture that makes every bite memorable.

  • Fun Flavors: Toss in mini marshmallows or flavored chips, such as caramel or butterscotch, to amplify the treat's sweetness and create a mouth-watering flavor explosion.

  • Spicy Kick: Add a sprinkle of cayenne pepper or chili powder to the melted mixture for a hint of heat. This delightful surprise will elevate the overall taste experience!

  • Garnish Ideas: Top your squares with chocolate drizzle or colorful sprinkles for an attractive presentation. It’s all about that added visual and flavorful appeal!

For those looking for even more culinary inspiration, don’t forget to check out One Pot Salmon and Shiitake Rice or savory Lime Chicken Rice, which can bring a world of flavor to your meal planning!

What to Serve with Muddy Buddy Rice Krispies

As you prepare these delightful treats, consider a few tasty accompaniments that will elevate your dessert experience and delight everyone at the table.

  • Milkshake Bliss: A classic chocolate milkshake pairs perfectly with the crunchy textures, adding a creamy richness that complements the chocolatey goodness.
  • Fresh Fruit Salad: Bright and refreshing, a fruit salad with berries and melons balances the sweetness of the Rice Krispies. This combo offers a burst of flavor that’s delightful for the palate.
  • Coffee or Espresso: Enjoy a warm cup of coffee or a shot of espresso alongside these treats. The robust flavors enhance the chocolate and peanut butter duo, making for a wonderful afternoon pick-me-up.
  • Creamy Ice Cream: Serve a scoop of vanilla or chocolate ice cream on the side for a decadent treat. The cold creaminess contrasts beautifully with the sweet crunch of the Muddy Buddy Rice Krispies.
  • Chocolate Dipped Pretzels: For a fun, salty-sweet pairing, chocolate-dipped pretzels provide an extra crunch and playful element that works wonderfully with the treats’ texture.
  • Nutty Granola Bars: A chewy granola bar with nuts adds another layer of flavor and texture. This combination makes for a satisfying snack that is both sweet and wholesome.
  • Homemade Whipped Cream: Light and airy, a dollop of homemade whipped cream can elevate your dessert experience, adding an indulgent touch that’s hard to resist.
  • Sparkling Water: For a refreshing drink, sparkling water with a slice of lemon or lime cleanses the palate, making it perfect for enjoying with sweet treats.
  • Chocolate Drizzled Rice Cakes: For a fun twist, offer rice cakes drizzled with chocolate as a crunchy side. They add an interesting texture contrast and extra chocolatey goodness to your dessert table!

Expert Tips for Muddy Buddy Rice Krispies

Watch the Heat: Ensure you melt the chocolate and peanut butter gently; overheating can lead to burning, ruining the texture of your Muddy Buddy Rice Krispies.

Perfect Coating: Gently fold the Rice Krispies in the melted mixture to avoid crushing them; this is key to maintaining that perfect crunch!

Sweetness Control: Feel free to adjust the sweetness—try dark chocolate or cut back on powdered sugar for a less sugary treat.

Add Fun Mix-ins: For extra texture and flavor, consider tossing in mini marshmallows, chopped nuts, or pretzels before coating your Muddy Buddy Rice Krispies.

Storage Tips: Store your treats in an airtight container at room temperature; they'll stay fresh for about a week, although they’re unlikely to last that long!

How to Store and Freeze Muddy Buddy Rice Krispies

Room Temperature: Store in an airtight container at room temperature for optimal freshness; they can last for up to 1 week, though they're likely to be eaten much sooner!

Freezer: For longer storage, you can freeze Muddy Buddy Rice Krispies. Place them in a single layer on a baking sheet to freeze until solid, then transfer them to an airtight container or freezer bag for up to 2 months.

Reheating: If frozen, simply allow them to thaw at room temperature for about 30 minutes before serving. No need to reheat, as they taste delightful chilled or at room temperature.

Coating Tip: If you prefer extra sweetness, consider adding a fresh dusting of powdered sugar after thawing for that perfect sugary finish!

Make Ahead Options

These Muddy Buddy Rice Krispies are perfect for meal prep enthusiasts! You can prepare the chocolate and peanut butter mixture up to 3 days in advance; simply store it in an airtight container in the refrigerator to maintain its quality. Additionally, you can coat the Rice Krispies in the melted mixture and allow them to set—this can also be done up to 24 hours ahead of time. When you're ready to serve, just shake the cooled treats in powdered sugar or sprinkle it on top for a delightful finish. This way, you’ll have a no-bake dessert ready to impress your family or guests with minimal effort!

Muddy Buddy Rice Krispies Recipe FAQs

What type of Rice Krispies should I use?
Absolutely, you can use classic Rice Krispies for a crispy base, but I also recommend Chex cereal or even cornflakes for a different crunch! These alternatives can bring unique textures that make your Muddy Buddy Rice Krispies even more delightful.

How should I store my Muddy Buddy Rice Krispies?
To keep them fresh, store your Muddy Buddy Rice Krispies in an airtight container at room temperature. They can last for up to 1 week this way. Just remember to keep them out of direct sunlight to prevent them from losing their delightful crunch!

Can I freeze my Muddy Buddy Rice Krispies?
Yes, definitely! To freeze, place your Muddy Buddy Rice Krispies in a single layer on a baking sheet and freeze until solid. After that, transfer them to an airtight container or a freezer bag. They can last for up to 2 months in the freezer. When you're ready to enjoy them, simply let them thaw at room temperature for about 30 minutes.

What should I do if the chocolate mixture is too thick?
If your mixture becomes too thick to coat the Rice Krispies evenly, don't fret! Simply add a little extra melted butter or a splash of vegetable oil to thin it out. This will help achieve the perfect consistency for coating, ensuring that each puff of Rice Krispies gets its delectable chocolatey envelope.

Are these Muddy Buddy Rice Krispies safe for allergies?
Great question! If you're looking for nut-free options, consider substituting the creamy peanut butter with almond or sunflower seed butter. Just be sure to check the labels for any potential allergens. They are vegetarian-friendly and can easily be made to accommodate various dietary needs.

Can I add other mix-ins to my Muddy Buddy Rice Krispies?
Very much so! Feel free to mix in some mini marshmallows, chopped nuts, or even pretzels before coating for added texture and flavor! This makes your Muddy Buddy Rice Krispies even more exciting and unique. Enjoy experimenting!

Muddy Buddy Rice Krispies

Muddy Buddy Rice Krispies: No-Bake Sweet Crunchy Bliss

Muddy Buddy Rice Krispies are a delicious no-bake dessert combining crispy cereal, peanut butter, and chocolate.
Print Recipe Pin Recipe
Prep Time 10 minutes mins
Cook Time 2 minutes mins
Cooling Time 20 minutes mins
Total Time 32 minutes mins
Servings: 12 squares
Course: Dessert
Cuisine: American
Calories: 150
Ingredients Equipment Method Nutrition Notes

Ingredients
  

For the Base
  • 6 cups Rice Krispies Cereal Can substitute Chex cereal.
  • 1 cup Chocolate Chips Dark chocolate can be used.
  • 1 cup Creamy Peanut Butter Almond or sunflower seed butter for nut-free.
  • 1/4 cup Unsalted Butter Margarine for dairy-free.
  • 1 teaspoon Vanilla Extract Optional.
For the Coating
  • 1 cup Powdered Sugar Adjust to desired sweetness.

Equipment

  • Microwave-safe bowl
  • Spatula
  • large mixing bowl
  • Baking sheet or pan
  • Resealable Bag

Method
 

Step-by-Step Instructions for Muddy Buddy Rice Krispies
  1. Melt the chocolate and peanut butter in a microwave-safe bowl, stirring every 30 seconds until smooth.
  2. Incorporate unsalted butter and vanilla extract, stirring until creamy.
  3. Coat Rice Krispies by drizzling the melted mixture over them and gently folding together.
  4. Spread the mixture onto a lined baking sheet and cool for 15-20 minutes.
  5. Add powdered sugar and shake in a resealable bag or sprinkle on top to coat.
  6. Cut or break into pieces, serve, and enjoy!

Nutrition

Serving: 1squareCalories: 150kcalCarbohydrates: 21gProtein: 2gFat: 7gSaturated Fat: 3.5gPolyunsaturated Fat: 1gMonounsaturated Fat: 3gCholesterol: 10mgSodium: 80mgPotassium: 60mgSugar: 11gVitamin A: 100IUCalcium: 20mgIron: 0.5mg

Notes

Store in an airtight container for up to 1 week at room temperature. For longer storage, freeze for up to 2 months.

Tried this recipe?

Let us know how it was!

Mini Bundt Cakes That Burst with Flavor and Joy

September 20, 2025 by Grace Snow Leave a Comment

The tantalizing aroma of freshly baked Mini Bundt Cakes wafts through my kitchen, instantly transporting me to cozy afternoons spent with friends over tea. These delightful little desserts are not just a treat for the taste buds; they are a canvas for creativity, inviting you to explore flavors like zesty citrus or rich chocolate. Best of all, they come together in no time, making them perfect for any occasion, from festive celebrations to casual get-togethers. With a luscious raspberry white chocolate glaze that drizzles beautifully over the top, each bite is a symphony of sweetness and decadence. Ready to elevate your dessert game? Let’s dive into this irresistible recipe and bring a touch of homemade magic to your table!

Why are Mini Bundt Cakes So Irresistible?

Versatile Flavors: These cakes allow for endless flavor adaptations. Whether you crave chocolate or citrus, the options are limitless!

Quick to Prepare: With minimal prep time, you’ll have delightful mini treats ready in no time—perfect when unexpected guests arrive!

Crowd-Pleasing Treat: They make stunning centerpieces at any gathering! Serve them at parties, afternoon teas, or simply treat yourself.

Decadent Texture: Each cake boasts a moist crumb with a luxurious raspberry white chocolate glaze, creating an unforgettable bite!

Easy Customization: Want to experiment? Try different glazes or mix-ins, like nuts or berries, for added fun—your guests will love the surprises!

For a delightful pairing, consider showcasing these mini cakes alongside Mini Tropical Pavlovas for a gorgeous dessert spread!

Mini Bundt Cakes Ingredients

• Perfect for delightful baking adventures!

For the Batter

  • Unsalted Butter – Adds richness and moisture; make sure it's softened for easy mixing.
  • Granulated Sugar – Sweetens the batter and contributes to its fluffy texture; feel free to reduce if you prefer less sweetness.
  • Vanilla Extract – Enhances the flavors; for the purest taste, opt for pure vanilla.
  • Eggs – Essential for structure and moisture; use room temperature eggs for best results.
  • Greek Yogurt – Keeps the cake moist and tender; plain yogurt or sour cream can be used as a substitute.
  • All-Purpose Flour – Provides the main structure; for gluten-free options, try blending with almond flour.
  • Baking Powder – Helps the cakes rise; ensure it's fresh for optimal results.
  • Baking Soda – Collaborates with acidic ingredients for a perfect rise; never skip this!
  • Salt – Balances the sweetness and enhances flavors; it's a must for delicious cakes.

For the Glaze

  • White Chocolate – Forms the creamy base of the glaze; choose a high-quality chocolate for the best flavor.
  • Heavy Cream – Adds creaminess to the glaze; substitute with full-fat coconut milk if desired.
  • Raspberry Puree – Infuses a natural fruity flavor; frozen raspberries work wonderfully when fresh are unavailable.
  • Unsalted Butter – Ensures a smooth and glossy glaze; using high-quality butter makes a difference.

With these Mini Bundt Cakes ingredients at hand, you’re all set to create an irresistible dessert that impresses!

Step‑by‑Step Instructions for Mini Bundt Cakes

Step 1: Preheat and Prepare
Begin by preheating your oven to 175°C (350°F) to ensure even baking. While it warms, grease your mini bundt pan thoroughly using cooking spray or softened butter to prevent sticking. A well-prepared pan is essential for the perfect release of your Mini Bundt Cakes, so take your time with this step.

Step 2: Cream Butter and Sugar
In a large mixing bowl, combine ½ cup of room temperature unsalted butter and ¾ cup of granulated sugar. Using an electric mixer, beat them together on medium speed until the mixture is light and fluffy, approximately 3-4 minutes. This creates a rich base for your cakes that enhances their texture and flavor.

Step 3: Incorporate Wet Ingredients
Add the eggs, one at a time, mixing well after each addition to fully integrate them. Then, introduce ⅓ cup of Greek yogurt and ½ teaspoon of vanilla extract, blending until smooth. These ingredients contribute to the moistness and delightful flavor of your Mini Bundt Cakes, so be sure to mix thoroughly.

Step 4: Combine Dry Ingredients
In a separate bowl, sift together 1½ cups of all-purpose flour, ½ teaspoon of baking powder, ½ teaspoon of baking soda, and ¼ teaspoon of salt. Gently fold the dry mixture into the wet ingredients until just combined, being careful not to overmix. This preserves the delicate crumb structure that makes your cakes so enjoyable.

Step 5: Fill the Bundt Pan
Spoon the batter into the prepared mini bundt pan, filling each cavity about ¾ full. Use a spatula to smooth the tops for even baking. Place the pan in the preheated oven and bake for about 25 minutes or until a toothpick inserted in the center comes out clean. Keep an eye on the cakes toward the end of the baking time.

Step 6: Cool and Release
Once baked, remove the mini bundt pan from the oven and allow it to cool for approximately 10-15 minutes. Gently run a knife around the edges to loosen the cakes. Carefully invert the pan onto a wire rack to release the cakes, allowing them to cool completely. Waiting helps the flavors to set properly before glazing.

Step 7: Prepare the Glaze
While your Mini Bundt Cakes cool, prepare the raspberry white chocolate glaze. In a small saucepan, melt ½ cup of white chocolate with ¼ cup of heavy cream over low heat, stirring until smooth. Then, add ¼ cup of strained raspberry puree and 1 tablespoon of unsalted butter. Mix until glossy, creating a luscious glaze.

Step 8: Glaze the Cakes
Once the cakes are completely cool, drizzle the raspberry white chocolate glaze over the top of each mini bundt cake. Let the glaze set for about 10-15 minutes before serving to allow it to firm up slightly. This step adds a striking finish and enhances the flavor profile of your delightful Mini Bundt Cakes.

What to Serve with Mini Bundt Cakes with Raspberry White Chocolate Glaze

Elevate your dining experience with delightful pairings that complement each luscious bite of these mini desserts.

  • Fresh Berries: A medley of strawberries, blueberries, and raspberries can add a burst of freshness, enhancing the fruitiness of the glaze.
  • Zesty Lemon Curd: The tangy sweetness of lemon curd offers a refreshing contrast, making each bite of the bundt cakes feel rejuvenating and bright.
  • Creamy Vanilla Ice Cream: Serving these cakes with a scoop of vanilla ice cream creates a rich and creamy balance that melts in your mouth, harmonizing flavors beautifully.
  • Sparkling Raspberry Lemonade: A bubbly drink adds a fun, refreshing twist, perfect for gatherings. Its effervescence enhances the sweetness of the cakes.
  • Chocolate Ganache: Drizzling a rich chocolate ganache will deepen the dessert's indulgence, offering a luxurious pairing to those chocolate cravings.
  • Herbal Tea: A warm cup of herbal tea pairs perfectly, providing a soothing balance to the sweetness of the bundt cakes; try chamomile or mint for a calming effect.
  • Whipped Cream: Light and airy whipped cream can elevate your cakes further, offering a creamy texture that perfectly complements the raspberry glaze. It’s a classic, for a reason!
  • Cheesecake Bites: Serving a few mini cheesecake bites alongside can provide a delightful contrast in flavors and textures, creating an irresistible dessert platter.

Pair any of these delightful accompaniments with your Mini Bundt Cakes to create a memorable culinary experience!

Expert Tips for Mini Bundt Cakes

  • Room Temperature Ingredients: Make sure all ingredients, especially butter and eggs, are at room temperature. This helps create a smoother batter and ensures even baking.

  • Avoid Overmixing: When folding dry ingredients into the wet, mix just until incorporated. Overmixing can lead to dense Mini Bundt Cakes, so be gentle!

  • Adjust Baking Time: Keep an eye on your cakes as they bake; ovens vary. Start checking for doneness at around 20 minutes to ensure they don't overbake.

  • Cool Completely: Let the cakes cool completely before glazing. If they're warm, the glaze will melt, losing that beautiful, drizzled effect.

  • Use Quality Chocolate: For the best flavor, use high-quality white chocolate in your glaze. It makes a significant difference in the overall indulgence of these cakes.

Mini Bundt Cakes Variations & Substitutions

Feel free to explore the delightful world of customization with these Mini Bundt Cakes, inviting your taste buds to a flavorful adventure!

  • Chocolate: Replace 20% of the flour with cocoa powder for rich, chocolatey goodness. Marbling the batters can create an eye-catching dessert.
  • Citrus: Add lemon or orange zest into the batter to brighten the flavor. A little zest goes a long way in lifting the overall appeal!
  • Berry Burst: Mix in fresh or frozen raspberries, blueberries, or strawberries for a fruity explosion. The added fruit will bring bursts of flavor in every delightful bite.
  • Glaze Variations: Swap raspberry puree for lemon juice or matcha powder in the glaze for exciting twists. Each version provides a unique taste and aesthetic that will wow your guests.
  • Nutty Touch: Fold in almond or pistachio flour instead of regular flour for a nutty, delightful crunch. This not only enhances flavor but adds a lovely texture.
  • Spicy Kick: Incorporate a pinch of cayenne or cinnamon to the batter for a subtle warmth. It's an unexpected surprise that will keep people guessing!
  • Different Glazes: Experiment with coffee glaze or even a mojito infusion for a refreshing twist to your Mini Bundt Cakes. Each glaze offers a new personality to your dessert.
  • Vegan Option: Swap eggs with flaxseed meal and use plant-based butter. The result will be just as satisfying for those following a vegan lifestyle.

For a delightful pairing, you might also want to consider serving these Mini Bundt Cakes alongside Mini Tropical Pavlovas for a gorgeous dessert spread!

Make Ahead Options

These Mini Bundt Cakes are fantastic for meal prep enthusiasts! You can prepare the batter up to 24 hours in advance by mixing all the wet and dry ingredients separately and refrigerating them until you’re ready to bake. Alternatively, bake the cakes a day ahead and store them in an airtight container at room temperature for up to three days or in the refrigerator to keep them fresh. To maintain their moist texture, avoid glazing until you're ready to serve; simply reheat the cakes slightly in the oven if desired, and then drizzle with the freshly made raspberry white chocolate glaze. This method ensures you'll have delightful cakes ready with minimal effort on busy days!

Storage Tips for Mini Bundt Cakes

Room Temperature: Store mini bundt cakes in an airtight container at room temperature for up to 2 days. Enjoy their fresh taste while they’re still soft and moist!

Fridge: If you want to keep them longer, refrigerate the mini bundt cakes in a sealed container for up to 5 days. Their flavor remains delightful, just make sure to bring them to room temperature before serving.

Freezer: For longer storage, freeze the unglazed mini bundt cakes for up to 2 months. Wrap them tightly in plastic wrap and aluminum foil to prevent freezer burn.

Reheating: To enjoy frozen cakes, thaw them in the fridge overnight, and if desired, warm them in the oven at 160°C (320°F) for about 10 minutes before glazing. Each bite of these mini bundt cakes will still be a delicious treat!

Mini Bundt Cakes with Raspberry White Chocolate Glaze Recipe FAQs

How do I choose the best raspberries for the glaze?
Absolutely! When selecting raspberries, look for plump, vibrant berries with no dark spots or mushiness, which indicates ripeness. Fresh raspberries tend to be fragrant and have a deep color. If fresh ones aren't available, frozen raspberries are a great alternative—just thaw and drain any excess liquid before making your glaze.

What is the best way to store leftover Mini Bundt Cakes?
To keep your Mini Bundt Cakes fresh, store them in an airtight container at room temperature for up to 2 days. If you want to preserve them longer, refrigerate them for up to 5 days. Just remember to let them return to room temperature before diving in for the best flavor!

Can I freeze Mini Bundt Cakes?
Yes! It’s very easy to freeze these delightful cakes. Before glazing, wrap each unglazed Mini Bundt Cake tightly in plastic wrap and then in aluminum foil to prevent freezer burn. They can be stored in the freezer for up to 2 months. When ready to enjoy, simply thaw them in the fridge overnight, and if you’d like them warm, give them about 10 minutes in a 160°C (320°F) oven before adding the glaze.

What if my cakes don’t rise properly?
If your Mini Bundt Cakes don’t rise, the culprit could be expired leavening agents—baking powder or baking soda. Always double-check their freshness before baking! Additionally, ensure you’re not overmixing the batter after adding the dry ingredients, as this can lead to dense cakes. Gentle folding keeps the airy texture intact.

Are these Mini Bundt Cakes suitable for people with nut allergies?
While the base recipe is nut-free, be cautious if you're using alternative flours or add-ins, such as nut flours for variations. It's wise to keep the kitchen and all utensils clean to avoid cross-contamination. Always double-check ingredient labels, especially with glazes or pre-packaged items!

Mini Bundt Cakes

Mini Bundt Cakes That Burst with Flavor and Joy

Indulge in mini bundt cakes that are truly irresistible, combining versatile flavors and delightful textures for any occasion.
Print Recipe Pin Recipe
Prep Time 15 minutes mins
Cook Time 25 minutes mins
Cooling Time 15 minutes mins
Total Time 55 minutes mins
Servings: 12 cakes
Course: Dessert
Cuisine: American
Calories: 210
Ingredients Equipment Method Nutrition Notes

Ingredients
  

For the Batter
  • 1/2 cup Unsalted Butter softened
  • 3/4 cup Granulated Sugar reduce for less sweetness
  • 1/2 teaspoon Vanilla Extract opt for pure vanilla
  • 2 large Eggs room temperature
  • 1/3 cup Greek Yogurt or plain yogurt
  • 1 1/2 cups All-Purpose Flour or blend with almond flour
  • 1/2 teaspoon Baking Powder ensure it's fresh
  • 1/2 teaspoon Baking Soda
  • 1/4 teaspoon Salt
For the Glaze
  • 1/2 cup White Chocolate high-quality
  • 1/4 cup Heavy Cream or full-fat coconut milk
  • 1/4 cup Raspberry Puree strained
  • 1 tablespoon Unsalted Butter high-quality

Equipment

  • Mini Bundt Pan
  • Mixer
  • Saucepan
  • Mixing bowls

Method
 

Step-by-Step Instructions
  1. Preheat your oven to 175°C (350°F) and grease the mini bundt pan.
  2. In a large bowl, beat the butter and sugar together for 3-4 minutes until fluffy.
  3. Add eggs one at a time, then mix in the yogurt and vanilla until smooth.
  4. Sift together the flour, baking powder, baking soda, and salt, then fold into wet ingredients.
  5. Fill the bundt pan 3/4 full and bake for about 25 minutes.
  6. Cool for 10-15 minutes, then release from the pan onto a wire rack.
  7. Melt the chocolate and cream over low heat, then stir in the raspberry puree and butter to create the glaze.
  8. Drizzle the glaze over cooled mini bundt cakes and let set for 10-15 minutes before serving.

Nutrition

Serving: 1cakeCalories: 210kcalCarbohydrates: 30gProtein: 3gFat: 10gSaturated Fat: 6gPolyunsaturated Fat: 1gMonounsaturated Fat: 2gCholesterol: 30mgSodium: 150mgPotassium: 100mgFiber: 1gSugar: 15gVitamin A: 5IUVitamin C: 2mgCalcium: 2mgIron: 4mg

Notes

Ensure all ingredients are at room temperature for best results. Avoid overmixing to maintain a light texture.

Tried this recipe?

Let us know how it was!

Irresistible French Financiers: Delightful Nutty Teacakes

September 20, 2025 by Grace Snow Leave a Comment

As I stepped into the world of French pastries, a magical discovery awaited me: French Financiers. These tiny teacakes, with their delicate texture and rich nutty flavors, encapsulate the essence of elegance in every bite. With almond, hazelnut, and pistachio variations, they offer a delicious twist to traditional desserts, making them perfect for any occasion. Not only are they quick to whip up—ideal for busy bakers—but they also bring a gluten-free option that doesn’t compromise on taste or texture. Whether paired with afternoon tea or savored as a sweet snack, French Financiers will charm your taste buds and elevate your dessert game. Curious about how to make these delightful bites at home? Let’s dive into the baking adventure together!

Why are French Financiers so special?

Delicate Texture: These little teacakes are incredibly light, thanks to their unique blend of nut flours and whipped egg whites, ensuring each bite is melt-in-your-mouth perfection.

Three Irresistible Flavors: Choose from almond, hazelnut, or pistachio to cater to your flavor cravings or impress guests with a variety platter!

Quick & Easy: This recipe is perfect for busy home bakers; with just a few simple steps, you can create gourmet treats in no time.

Gluten-Free Adaptation: With easy swaps, you can make these financiers gluten-free, making them accessible for everyone.

Perfect for Any Occasion: Whether served warm with coffee for brunch or as an elegant afternoon snack, these financiers elevate any gathering.

Discover more French-inspired delights like our Cherry Clafoutis French dessert for a full European experience!

French Financier Ingredients

For the Batter
• Unsalted Butter – Essential for making brown butter, which imparts a deep, nutty flavor to your financiers.
• Egg Whites – Provide structure and create a light texture; about 5 egg whites are needed for this delicious recipe.
• Icing Sugar – Adds the perfect sweetness while helping to create a smooth batter that’s irresistible.
• All-Purpose Flour – Offers structure; a total of 75g is divided among the different flavors for each batch.
• Nut Flour (Almond, Hazelnut, or Pistachio) – The heart of the flavors; choose based on your desired taste for these fantastic French financiers.
• Salt – A pinch enhances flavors and balances the sweetness for a well-rounded dessert experience.

For Toppings (Optional)
• Chopped Nuts – Use any of the same nuts you choose for flour, sprinkled on top for added texture and flavor.

Step‑by‑Step Instructions for French Financiers

Step 1: Make Brown Butter
In a small saucepan, melt 100g of unsalted butter over medium heat. Stir frequently until it becomes foamy and turns a rich golden brown, roughly 5–8 minutes. Watch closely to prevent burning, then remove it from the heat and let it cool slightly while retaining that nutty aroma; this brown butter is key to perfecting the flavor of your French financiers.

Step 2: Prepare Batter
In a mixing bowl, whisk together 5 egg whites until they become frothy and slightly increase in volume, about 2–3 minutes. Slowly incorporate 150g of icing sugar, ensuring it dissolves completely for a smooth batter. Gently mix in the cooled brown butter, allowing the rich flavors to meld together as you prepare for the next step in crafting these delightful teacakes.

Step 3: Divide & Flavor
Now, divide the batter into three bowls to create your three flavors of French financiers. Fold in 25g of almond flour into one bowl, 25g of hazelnut flour into another, and 25g of pistachio flour into the last, mixing each thoroughly. Remember to add a pinch of salt to each bowl; this enhances the flavors and enriches your nutty teacakes, making them all the more irresistible.

Step 4: Chill Batter
To achieve a fabulous texture, transfer each flavored batter into separate piping bags. Place them in the fridge and chill for about 1 hour. This chilling step is crucial, as it helps the concoction firm up, resulting in light and airy French financiers when baked, with a beautiful rise and lovely shape.

Step 5: Prepare Baking Tin
While the batter is chilling, preheat your oven to 175°C (347°F). Prepare your financier tin by brushing it generously with melted butter to ensure easy release after baking. Optionally, dust the tin lightly with flour or use a silicone mold to eliminate any prep, making it simple to turn out your dainty teacakes after they are baked to perfection.

Step 6: Pipe & Bake
Once the batter is chilled, carefully pipe it into the prepared molds, filling each cavity about three-quarters full, allowing room for expansion. If desired, sprinkle the tops with chopped nuts for added crunch and flavor. Bake the French financiers in the preheated oven for about 20 minutes, or until they turn golden brown around the edges; they should spring back when lightly pressed.

Step 7: Cool & Serve
After baking, remove the financiers from the oven and allow them to cool in the tin for about 5 minutes. This short cooling time helps them set while still warm. Gently remove them from the tin, placing them on a wire rack to cool completely. Enjoy these delightful French financiers warm or at room temperature, perfect for pairing with tea or coffee.

Expert Tips for French Financiers

  • Brown Butter Watch: Monitor your brown butter closely to achieve the perfect nutty flavor; keep it on medium heat and remove just before it darkens too much.

  • Chill Your Batter: Chilling the batter is essential for achieving the light and airy texture that French financiers are known for; don't skip this step!

  • Scale for Precision: Use a digital scale to measure your ingredients accurately; this ensures consistent results every time you make these delightful nutty teacakes.

  • Oven Temperature Check: Consider investing in a digital oven thermometer to maintain the right temperature while baking; small deviations can lead to over- or under-baked financiers.

  • Experiment with Flavors: Don’t hesitate to explore other flavors or toppings; a hint of citrus zest or a drizzle of chocolate can make joyful surprises—make these financiers truly yours!

French Financiers Variations & Substitutions

Feel free to get creative and make this delightful recipe truly your own with these simple variations.

  • Nut-Free:
    Replace nut flours with an equal weight of all-purpose flour to make a classic version safe for nut allergies.

  • Chocolate Twist:
    Add 25g of cocoa powder to the batter for a rich, chocolatey rendition that pairs beautifully with coffee.

  • Citrus Zest:
    Incorporate lemon or orange zest into the batter for a refreshing, citrusy burst that brightens every bite.

  • Spicy Kick:
    For a hint of warmth, add a dash of ground cinnamon or a pinch of cayenne pepper to elevate the flavor profile.

  • Gluten-Free Delight:
    Swap all-purpose flour with a gluten-free flour blend, adjusting the amounts based on consistency, ensuring everyone can enjoy these treats.

  • Fancy Toppings:
    After piping, top with a mix of chopped nuts and a drizzle of melted dark chocolate for an elegant finish.

  • Flavorful Infusions:
    Experiment with adding a splash of almond extract or vanilla bean paste to deepen the flavors and create a delightful aroma.

Explore even more stunning French desserts like our scrumptious Cherry Clafoutis French for an extraordinary sweet table!

Make Ahead Options

French Financiers are a delightful choice for meal prep, allowing you to savor the luxury of homemade treats without the last-minute rush! You can prepare the batter up to 24 hours in advance and refrigerate it in piping bags. This chilling not only enhances the flavor but ensures a light, airy texture. If you prefer, you can also bake the financiers ahead of time and store them in an airtight container at room temperature for up to 3 days. To regain that fresh-baked flavor, gently warm them in the oven before serving. These make-ahead tips will help you enjoy stress-free baking and treat your loved ones to exquisite French Financiers anytime!

How to Store and Freeze French Financiers

Airtight Container: Store your French Financiers in an airtight container at room temperature for up to 2 days to maintain their delightful texture and flavor.

Refrigeration: If you must refrigerate, place them in the container and consume within 3–4 days. Just remember that refrigeration may alter their light crunch slightly.

Freezing: For longer storage, freeze your financiers in a single layer on a baking sheet, then transfer to a sealed bag or container. They can be kept frozen for up to 1 month.

Reheating: When ready to enjoy, thaw them at room temperature or warm briefly in the oven at 150°C (302°F) for a few minutes to restore their freshness and lightness.

What to Serve with French Financiers

Indulge in a delightful culinary experience that perfectly complements the luxurious flavors of these nutty teacakes.

  • Fresh Berries: Juicy strawberries or raspberries add a vibrant pop of color and sweet-tart freshness that beautifully contrasts the rich financiers.

  • Classic Earl Grey Tea: The subtle bergamot notes in Earl Grey provide an aromatic pairing, enhancing the nutty flavor profile of the financiers remarkably well.

  • Whipped Cream: Lightly sweetened whipped cream adds creamy texture, serving as a luscious counterpoint to the delightful airiness of the financiers.

  • Chocolate Ganache: A dollop of smooth chocolate ganache introduces a rich, indulgent element that creates a delightful harmony with the nuttiness of the cakes.

  • Iced Coffee: A refreshing glass of iced coffee brings a beautiful bitterness to balance out the sweetness, making it an ideal companion for afternoon snacking.

  • Fruit Compote: A homemade compote, like a tart cherry or apricot, provides a tangy element that brightens the rich flavors of the financiers, making each bite exciting.

  • Almond Milk Lattes: For a modern twist, serve your financiers alongside almond milk lattes; the nutty base will enhance the overall nut flavor experience.

Savor these pairings to elevate your French Financiers and create a memorable dessert experience!

French Financiers Recipe FAQs

How do I choose the right nut flour for my financiers?
Absolutely! For your French Financiers, using nut flour is essential for authentic flavor. Opt for almond flour for a classic taste, or hazelnut and pistachio for a delightful twist. When selecting your nut flour, look for fine textures without any lumps, ensuring a smooth batter. Freshness is key; older flours may lose flavor, so check for any rancid smells or dark spots on the packaging.

What is the best way to store French Financiers?
Great question! To keep your French Financiers fresh, store them in an airtight container at room temperature for up to 2 days. If you prefer them chilled, they can last in the fridge for about 3–4 days. Just keep in mind that refrigerating might affect their delightful crispiness, so it’s best enjoyed at room temperature.

Can I freeze French Financiers? If so, how?
Yes, you can definitely freeze your delectable French Financiers! Start by placing them in a single layer on a baking sheet and freeze until solid. Once frozen, transfer them to a sealed freezer bag or an airtight container. They can be stored for up to 1 month. When you're ready to enjoy them, simply thaw at room temperature or warm them in the oven at 150°C (302°F) for a few minutes to revive their texture!

What should I do if my financiers don't rise properly?
Oh no! If your financiers are not rising as expected, it could be due to a couple of factors. First, ensure that your egg whites are whipped until they're frothy and have doubled in volume; this helps create the lightness necessary for proper rise. Also, be careful not to overmix the batter after adding the nut flour; gentle folding ensures air remains trapped in the batter for optimal puffiness. Lastly, always double-check your oven temperature; a too-cool oven can result in flat financiers.

Are French Financiers gluten-free?
Yes, they can be! If you want to make your French Financiers gluten-free, simply replace the all-purpose flour with a gluten-free flour blend. I recommend choosing one that contains a combination of rice flour, tapioca starch, and potato starch for the best results. Just be sure to adjust the amounts as needed, and keep an eye on the texture during baking!

French Financiers

Irresistible French Financiers: Delightful Nutty Teacakes

Discover the delicate elegance of French Financiers, nutty teacakes perfect for any occasion.
Print Recipe Pin Recipe
Prep Time 15 minutes mins
Cook Time 20 minutes mins
Chilling Time 1 hour hr
Total Time 1 hour hr 35 minutes mins
Servings: 12 teacakes
Course: Dessert
Cuisine: French
Calories: 150
Ingredients Equipment Method Nutrition Notes

Ingredients
  

For the Batter
  • 100 g Unsalted Butter For making brown butter.
  • 5 large Egg Whites Provides structure and light texture.
  • 150 g Icing Sugar Adds sweetness and smoothness.
  • 75 g All-Purpose Flour
  • 25 g Almond Flour For almond flavor variation.
  • 25 g Hazelnut Flour For hazelnut flavor variation.
  • 25 g Pistachio Flour For pistachio flavor variation.
  • 1 pinch Salt Enhances flavors.
For Toppings (Optional)
  • as needed Chopped Nuts For added texture and flavor.

Equipment

  • Mixing Bowl
  • Whisk
  • Saucepan
  • financier tin
  • piping bags

Method
 

Step-by-Step Instructions for French Financiers
  1. In a small saucepan, melt 100g of unsalted butter over medium heat until it becomes foamy and turns golden brown, about 5-8 minutes. Let it cool slightly.
  2. In a mixing bowl, whisk together 5 egg whites until frothy. Slowly incorporate 150g of icing sugar until dissolved. Mix in the cooled brown butter.
  3. Divide the batter into three bowls and fold in 25g of almond flour, hazelnut flour, and pistachio flour into each, respectively, adding a pinch of salt to each.
  4. Transfer each batter into piping bags and chill for about 1 hour.
  5. Preheat your oven to 175°C (347°F). Brush your financier tin with melted butter.
  6. Pipe the chilled batter into the molds, filling each cavity about three-quarters full. Optionally sprinkle with chopped nuts and bake for 20 minutes until golden brown.
  7. Let the financiers cool in the tin for 5 minutes, then remove and cool completely on a wire rack.

Nutrition

Serving: 1teacakeCalories: 150kcalCarbohydrates: 10gProtein: 2gFat: 10gSaturated Fat: 5gPolyunsaturated Fat: 2gMonounsaturated Fat: 3gCholesterol: 30mgSodium: 50mgPotassium: 80mgFiber: 1gSugar: 6gVitamin A: 300IUCalcium: 20mgIron: 1mg

Notes

Monitor the brown butter closely and chill the batter for the best texture. Use accurate measurements for consistent results.

Tried this recipe?

Let us know how it was!

Irresistible Walnut Babka Recipe for Cozy Baking Days

September 20, 2025 by Grace Snow Leave a Comment

As I pulled the warm, golden loaf from the oven, the rich aroma of cinnamon and toasted walnuts wrapped around me like a cozy hug. This Walnut Babka, a cherished traditional Jewish dessert, is not just a feast for the senses; it’s an inviting introduction to the art of yeast baking, perfect for both newbies and seasoned bakers alike. With its soft, buttery texture and the delightful sweetness of cinnamon-infused walnut filling, this recipe promises to elevate any gathering. Plus, it’s a wonderful treat to prepare ahead of time for those busy weekends or festive occasions. Ready to dive into making something truly special from scratch? Let’s get started!

Why is Walnut Babka a Must-Try?

Incredible Aroma: The moment you bake this Walnut Babka, your kitchen transforms into a cozy bakery, inviting everyone in with its intoxicating scent of cinnamon and butter.
Perfect for Sharing: This beautiful braided bread is not just delicious; it serves as a stunning centerpiece for gatherings. Imagine serving it at brunch alongside fresh coffee or tea!
Beginner-Friendly: With simple ingredients and clear steps, even novice bakers can master this delightful treat. It’s a great entry point into yeast-leavened dough that builds confidence.
Versatile Options: While this recipe shines with the traditional walnut filling, feel free to get creative! You can easily swap in chocolate or other nuts to suit your taste.
Make-Ahead Convenience: This Walnut Babka can be prepared in advance, giving you a hassle-free option for your busy days. It's perfect for leisurely weekend breakfasts or holiday festivities! For more delicious baked goods, check out my Skillet Pasta Feta.

Walnut Babka Ingredients

For the Dough
• Whole Milk – Ensure it’s lukewarm to properly activate the yeast.
• Granulated Sugar – This adds sweetness and helps with yeast activation.
• Fresh Yeast – Leavens the dough; substitute with instant dry yeast if necessary.
• Egg Yolk – Enriches the dough for added color and flavor.
• Egg – Works alongside the yolk for a richer texture.
• Bread Flour – The high protein content provides structure; avoid using cake flour.
• Salt – Enhances flavor and controls yeast activity.
• Unsalted Butter – Should be at room temperature for easy incorporation.

For the Filling
• Walnuts – The star of the filling; roast and chop for maximum flavor and texture.
• Cinnamon – Adds a warm aroma, complementing the rich walnut flavor.

For the Syrup
• Water – Used to create a glossy glaze for the baked babka.
• Lemon Juice – Adds a bright note to balance the sweetness of the syrup.

Get ready to indulge in the warmth of homemade Walnut Babka, a delightful and timeless treat!

Step‑by‑Step Instructions for Walnut Babka

Step 1: Prepare Yeast Mixture
Begin by heating 1 cup of whole milk in a saucepan until it is lukewarm (about 110°F). In a mixing bowl, combine half of the granulated sugar with the warm milk, then sprinkle in 2 teaspoons of fresh yeast. Allow it to sit undisturbed for about 5-10 minutes, until foamy, indicating that the yeast is active and ready for your Walnut Babka dough.

Step 2: Mix Dough
In a stand mixer fitted with a dough hook, combine the yeast mixture, 1 egg, 1 egg yolk, 3 cups of bread flour, and 1 teaspoon of salt along with the remaining sugar. Mix on low speed until the ingredients come together, then increase the speed and knead for about 5-8 minutes, until the dough is smooth and elastic, showcasing a soft, cohesive texture.

Step 3: Incorporate Butter
With the mixer running, gradually add 1/2 cup of room-temperature unsalted butter, one tablespoon at a time. Continue kneading for another 10 minutes, allowing the butter to fully incorporate into the dough. You’ll know it's ready when the dough is shiny and elastic, pulling away from the sides of the bowl, making it perfect for your Walnut Babka.

Step 4: First Rise
Transfer the dough to a lightly oiled bowl, cover it tightly with plastic wrap, and refrigerate overnight for approximately 12 hours. This slow fermentation will enhance the flavor and texture of your Walnut Babka, resulting in a beautifully soft and flavorful bread.

Step 5: Prepare Filling
While the dough rests, prepare the filling by mixing together 1 cup of finely chopped walnuts, 1/4 cup of granulated sugar, 1 tablespoon of ground cinnamon, and 1/4 cup of melted butter in a bowl. Stir until well combined and let it cool to room temperature; this flavorful mix will add a delightful crunch and sweetness to your Walnut Babka.

Step 6: Roll Out Dough
After the refrigeration period, lightly flour your surface and roll out the chilled dough into a rectangle measuring about 12x18 inches. Aim for a thickness of about 1/4 inch. The dough should feel soft and pliable, making it easy to layer with the filling, ensuring a rich texture in your Walnut Babka.

Step 7: Spread Filling & Shape
Evenly spread the walnut filling over the entire surface of the rolled-out dough. Starting from one long edge, tightly roll the dough into a log, pinching the seams to seal. Using a sharp knife, cut the log in half lengthwise, exposing the filling. Twist the two pieces together, creating a braided look, and shape it into a loaf.

Step 8: Second Rise
Place the shaped dough into a greased loaf pan and cover it loosely with a kitchen towel. Let it rise at room temperature for 1 to 2 hours, or until it has doubled in size. This second rise is crucial for achieving that fluffy texture in your Walnut Babka, so be patient and watch it grow!

Step 9: Preheat Oven & Bake
While the babka is rising, preheat your oven to 350°F (175°C). Once fully risen, bake the Walnut Babka in the center of the oven for about 35-40 minutes or until it turns golden brown and a toothpick inserted in the center comes out clean. Keep an eye on it to ensure a perfect bake!

Step 10: Make Syrup & Glaze
While the babka bakes, prepare the syrup by simmering 1/4 cup of water with 1/4 cup of granulated sugar and a splash of lemon juice in a small saucepan. Allow it to boil for about 5 minutes until slightly thickened. As soon as the babka comes out of the oven, brush the syrup generously over the warm loaf for a beautiful, glossy finish.

How to Store and Freeze Walnut Babka

Room Temperature: Store your freshly baked Walnut Babka in an airtight container at room temperature for up to 3 days to maintain its delightful softness.

Fridge: If you need to keep it longer, wrap the babka tightly in plastic wrap and place it in the fridge, where it will stay fresh for about a week.

Freezer: For longer storage, slice the babka and freeze it in a freezer-safe bag for up to 3 months. Thaw overnight in the fridge before enjoying!

Reheating: To revive its warmth and texture, reheat slices in a toaster or oven at 350°F (175°C) for about 5-10 minutes until warmed through.

What to Serve with Walnut Babka

Imagine a delightful spread that complements the rich, cinnamon-swathed layers of Walnut Babka, each option adding a new dimension to your homemade feast.

  • Fresh Fruit Salad: A vibrant mix of seasonal berries and citrus that brightens the palate and balances the sweetness of the babka.
  • Classic Coffee: A warm cup of your favorite brew enhances the comforting flavors of the babka, making for a cozy indulgence.
  • Whipped Cream Cheese Spread: Lightly sweetened cream cheese with a hint of vanilla provides a creamy contrast to the baked bread's fluffiness.
  • Maple Syrup Drizzle: Just a touch of natural sweetness over warm slices offers a luxurious twist, adding depth to every bite.
  • Dark Chocolate Shavings: A sprinkle of chocolate adds elegance; its bitterness beautifully contrasts with the sweet filling.
  • Tea Infused with Spices: A warm chai or spiced herbal tea creates a lovely aromatic experience, enhancing the cozy vibe.
  • Honey Glaze: Drizzling a bit of honey on top amplifies sweetness while adding a silky texture to each slice.
  • Ice Cream Scoop: A scoop of vanilla or nut-based ice cream turned into a decadent dessert, perfect for impressing guests.
  • Light Pastry Cream: A dollop of this sweet custard brings an extra layer of richness while keeping things light and airy.

Make Ahead Options

These Walnut Babka are perfect for meal prep enthusiasts! You can prepare the dough and refrigerate it overnight for up to 24 hours before baking, allowing the flavors to deepen beautifully. After mixing the dough in Step 2, simply cover it tightly with plastic wrap and let it rest in the fridge. You can also prepare the filling (Step 5) a day in advance—just store it in an airtight container at room temperature until you’re ready to use it. When you're ready to enjoy your Walnut Babka, let the dough come to room temperature for about 30 minutes, shape it, and then proceed with the second rise (Step 8) before baking to serve a fresh, delightful treat with minimal effort!

Expert Tips for Walnut Babka

  • Temperature Matters: Always ensure the whole milk is lukewarm. Too hot or too cold milk can inhibit yeast activation, affecting your Walnut Babka's rise.
  • Knead Properly: Knead until the dough is smooth and elastic. If the dough feels too sticky, don't add excessive flour; it will come together.
  • Proofing is Key: Allow the dough to fully rise before baking. A well-proofed dough will ensure a light and fluffy texture.
  • Stay Cool: When shaping the babka, keep the dough cool. If it warms up too much, consider chilling it briefly in the freezer to maintain its structure.
  • Flavor Combinations: Feel free to experiment with fillings! Swap in chocolate or dried fruits for a fun twist on the classic Walnut Babka flavor.

Walnut Babka Variations & Substitutions

Feel free to let your creativity shine and make this Walnut Babka your own with these delightful variations!

  • Nut Alternatives: Substitute walnuts with pecans or hazelnuts for a unique crunch and flavor. Each nut brings its own exciting taste profile, so experiment and find your favorite!

  • Chocolate Delight: Swirl in your choice of chocolate, whether dark, milk, or white, to infuse every slice with a rich, indulgent twist. Chocolate and walnuts are a match made in heaven, elevating this babka into a decadent dessert.

  • Fruity Filling: Add dried cherries, raisins, or cranberries alongside the walnuts for a sweet and tangy surprise in every bite. The combination of nuts and fruits creates a wonderful texture and extra flavor layers.

  • Spice It Up: Elevate the filling by mixing in a touch of nutmeg or cardamom along with the cinnamon, adding warmth and complexity. These spices will bring your Walnut Babka to a whole new aromatic level, tempting everyone long before it's even baked.

  • Vegan Version: Replace the eggs with a flaxseed mixture and use almond milk to create a vegan-friendly babka without losing the traditional taste. Just blend 1 tablespoon of flaxseed meal with 2.5 tablespoons of water and let it sit for 5 minutes to thicken before mixing into the dough.

  • Gluten-Free Option: Opt for a gluten-free flour blend specifically for baking bread to convert this savory treat for those with dietary restrictions. Just ensure to add extra moisture since gluten-free flours can absorb more liquid.

  • Extra Crunch: For an added bite, sprinkle chopped nuts on top of the babka before giving it that beautiful glaze. It not only enhances the texture but also creates an appealing visual when serving.

  • Maple Glaze: Instead of a lemon-infused syrup, try using maple syrup to drizzle over the warm babka for a sweet spin. The rich maple flavor complements the ingredients beautifully, perfect for cozy mornings with coffee.

Feel free to follow along with my Skillet Pasta Feta recipe as a delightful side to this sweet, yet savory creation!

Walnut Babka Recipe FAQs

How do I select ripened walnuts for the filling?
When selecting walnuts, look for ones that are raw and unsalted. They should be plump, with no dark spots all over, indicating freshness. Roasting raw walnuts at 350°F (175°C) for 8-10 minutes enhances their flavor, giving your Walnut Babka an irresistible nutty crunch.

How should I store my Walnut Babka once baked?
Store your Walnut Babka in an airtight container at room temperature for up to 3 days to keep it soft. If you want to extend its life, wrap it tightly in plastic wrap and refrigerate it, where it can last up to a week.

Can I freeze Walnut Babka, and if so, how?
Absolutely! To freeze your Walnut Babka, first slice it into pieces or leave it whole. Wrap it tightly in plastic wrap and place it in a freezer-safe bag, ensuring as much air is removed as possible. It will keep well for up to 3 months. To enjoy, simply thaw it overnight in the fridge and reheat slices in a toaster or oven at 350°F (175°C) for about 5-10 minutes.

What should I do if my babka doesn’t rise properly?
If your Walnut Babka doesn't rise, it may be due to inactive yeast. Always make sure your yeast is fresh and your milk temperature is just right—lukewarm, around 110°F (43°C). If it’s too hot or too cold, your dough won’t rise correctly. You can try letting it rise in a warmer spot or extending the rising time.

Is this recipe suitable for those with nut allergies?
This Walnut Babka recipe contains walnuts, making it unsuitable for anyone with a nut allergy. However, you can substitute the walnuts with seeds like pumpkin or sunflower seeds for a similar texture and flavor but without the allergens.

Can I use instant dry yeast instead of fresh yeast?
Of course! If you're using instant dry yeast instead of fresh, substitute it at a ratio of about 1 to 3. That means you'll need approximately 2 teaspoons of instant dry yeast for this recipe. Simply mix it with the flour directly, skipping the initial yeast-proofing step.

Walnut Babka

Irresistible Walnut Babka Recipe for Cozy Baking Days

This Walnut Babka is a delightful traditional dessert, perfect for cozy baking days and gatherings.
Print Recipe Pin Recipe
Prep Time 2 hours hrs
Cook Time 40 minutes mins
Refrigeration Time 12 hours hrs
Total Time 14 hours hrs 40 minutes mins
Servings: 12 slices
Course: Dessert
Cuisine: Jewish
Calories: 300
Ingredients Equipment Method Nutrition Notes

Ingredients
  

For the Dough
  • 1 cup Whole Milk Lukewarm
  • 1/2 cup Granulated Sugar
  • 2 teaspoons Fresh Yeast Or instant dry yeast
  • 1 large Egg Yolk
  • 1 large Egg
  • 3 cups Bread Flour High protein content
  • 1 teaspoon Salt
  • 1/2 cup Unsalted Butter Room temperature
For the Filling
  • 1 cup Walnuts Finely chopped, roasted
  • 1 tablespoon Cinnamon
  • 1/4 cup Granulated Sugar
  • 1/4 cup Melted Butter
For the Syrup
  • 1/4 cup Water
  • 1/4 cup Granulated Sugar
  • 1 tablespoon Lemon Juice

Equipment

  • Stand Mixer
  • Saucepan
  • Mixing Bowl
  • Loaf pan
  • Rolling Pin
  • plastic wrap

Method
 

Preparation
  1. Heat whole milk in a saucepan until lukewarm (about 110°F). Combine half of the sugar with the warm milk and sprinkle in fresh yeast. Let sit for 5-10 minutes until foamy.
  2. In a stand mixer, combine the yeast mixture, egg, egg yolk, bread flour, and salt along with the remaining sugar. Mix on low speed until combined, then knead for 5-8 minutes until smooth and elastic.
  3. Gradually add room-temperature unsalted butter, one tablespoon at a time, kneading for another 10 minutes until shiny and elastic.
  4. Transfer the dough to an oiled bowl, cover with plastic wrap, and refrigerate overnight for about 12 hours.
  5. Prepare the filling by mixing chopped walnuts, granulated sugar, ground cinnamon, and melted butter in a bowl. Let it cool to room temperature.
  6. Roll out the chilled dough into a rectangle (12x18 inches and 1/4 inch thick).
  7. Spread walnut filling over the dough. Roll tightly from one long edge and pinch seams to seal. Cut the log in half lengthwise and twist the two halves together.
  8. Place the shaped dough in a greased loaf pan and cover loosely. Let it rise at room temperature for 1 to 2 hours until doubled in size.
  9. Preheat the oven to 350°F (175°C). Bake the Walnut Babka for 35-40 minutes until golden brown and a toothpick comes out clean.
  10. Make the syrup by simmering water, granulated sugar, and lemon juice in a saucepan for 5 minutes until slightly thickened. Brush over warm babka after baking.

Nutrition

Serving: 1sliceCalories: 300kcalCarbohydrates: 40gProtein: 6gFat: 14gSaturated Fat: 8gPolyunsaturated Fat: 2gMonounsaturated Fat: 4gCholesterol: 100mgSodium: 200mgPotassium: 150mgFiber: 2gSugar: 12gVitamin A: 5IUCalcium: 2mgIron: 8mg

Notes

Store in an airtight container at room temperature for up to 3 days. Wrap tightly for fridge storage up to a week, or freeze for up to 3 months.

Tried this recipe?

Let us know how it was!

Caramelized Banana Upside Down Cake for Cozy Moments

September 20, 2025 by Grace Snow Leave a Comment

As the sweet scent of caramel wafts through the kitchen, I can’t help but feel a sense of warmth wash over me. There’s something magical about transforming simple bananas into a stunning, caramelized topping for a cake, and today, I'm excited to share my Easy Caramelized Banana Upside Down Cake recipe with you. This delightful dessert not only boasts a moist, yogurt-infused cake but also offers a fun twist on a classic favorite—perfect for that cozy family gathering or an indulgent treat after a long day. With minimal prep time and a stunning presentation, it’s sure to impress everyone at the table. Are you ready to bake a slice of happiness right at home? Let’s dive into this delicious journey!

Why Is This Cake a Must-Try?

Moist, Fluffy Texture: The combination of yogurt and butter results in a cake that is irresistibly tender.

Easy to Make: With simple ingredients and straightforward steps, even baking novices can create a stunning dessert.

Gorgeous Presentation: The caramelized bananas on top look and taste spectacular, making it a showstopper for gatherings.

Versatile Options: Swap bananas for other fruits like pineapple or strawberries for unique flavor twists—perfect when catering to different tastes!

Crowd-Pleasing Flavor: Everyone loves a sweet, comforting dessert, and this cake pairs beautifully with a scoop of vanilla ice cream or a drizzle of cream, making it a hit at any celebration.

Don’t forget to check out my Ice Cream Cake for another delicious treat!

Caramelized Banana Upside Down Cake Ingredients

  • For the Cake
    • Unsalted Butter (150 g / ½ cup) – Use room temperature butter for easier blending and optimal moisture.
    • Granulated Sugar (200 g / 1 cup) – Provides sweetness and structure; mixing with brown sugar can enhance flavor depth.
    • Vanilla Extract (1½ teaspoons) – Introduces a lovely aromatic sweetness to the cake.
    • Eggs (2, room temperature) – Essential for the cake’s structure and moisture.
    • Thick Greek or Turkish Yogurt (110 g / ½ cup) – Contributes to the cake's moistness while adding a slight tangy flavor.
    • Whole Milk (45 g / ⅓ cup) – Ensures the batter achieves a perfect consistency.
    • All-Purpose Flour (240 g / 2 cups) – Provides backbone to the cake; measure accurately for the best results.
    • Baking Powder (1½ teaspoons) – Acts as a leavening agent to help the cake rise.
    • Salt (½ teaspoon) – Enhances all the flavors in the cake.

  • For the Caramel Topping
    • Bananas (3-4, cut horizontally) – The star of the dessert; choose firm, ripe bananas for the best presentation after baking.
    • Sugar (60 g / ⅓ cup) – Ideal for caramelizing the bananas; brown sugar can be used for a richer flavor.
    • Unsalted Butter (60 g / ⅓ cup) – Necessary for the caramel mixture, adding richness.

  • For the Optional Glaze
    • Brown Sugar (optional for glaze) (40 g / ⅓ cup) – Adds extra sweetness and shine when mixed with water (40 g / ⅓ cup) for syrup.

This delicious Caramelized Banana Upside Down Cake is perfect for a cozy dessert evening!

Step‑by‑Step Instructions for Caramelized Banana Upside Down Cake

Step 1: Preheat the Oven
Begin by preheating your oven to 175°C (347°F) without using the fan. This ensures an even, gentle heat perfect for baking your Caramelized Banana Upside Down Cake. Allow the oven to fully reach this temperature before moving on to the next steps, as this is crucial for proper rising and texture.

Step 2: Prepare the Caramel Topping
Slice 3-4 firm bananas horizontally and arrange them cut-side down in a greased springform pan. In a small saucepan, combine 60 g of sugar and 60 g of unsalted butter over low to medium heat. Stir gently for about 1-2 minutes until the mixture is bubbly and light golden in color, then pour it evenly over the bananas.

Step 3: Make the Cake Batter
In a large mixing bowl, cream together 150 g of unsalted butter and 200 g of granulated sugar using an electric mixer for about 3-5 minutes until the mixture is light and fluffy. This creates air pockets that will contribute to the cake’s moistness. Gradually add in 1½ teaspoons of vanilla extract and 2 room-temperature eggs, mixing well after each addition to incorporate smoothly.

Step 4: Mix Dry Ingredients
In a separate bowl, sift together 240 g of all-purpose flour, 1½ teaspoons of baking powder, and ½ teaspoon of salt. This step is vital to ensure your dry ingredients are evenly distributed and free of lumps, which helps create a uniform batter for your Caramelized Banana Upside Down Cake.

Step 5: Combine Wet Ingredients
In another bowl, whisk together 110 g of thick Greek yogurt and 45 g of whole milk until smooth. Gradually fold this mixture into your egg mixture, alternating with the sifted dry ingredients. Stir gently until just combined, being careful not to overmix, as this helps retain the cake's fluffy texture.

Step 6: Pour Batter Over Bananas
Carefully pour the batter over your beautifully arranged caramelized bananas in the springform pan. Use a spatula to spread the batter evenly to cover all the bananas fully. This will create a beautiful, sweet base for your Cake once it is flipped out after baking.

Step 7: Bake the Cake
Place the pan in the preheated oven and bake for approximately 1 hour. To check for doneness, insert a toothpick into the center; it should come out clean with a few moist crumbs attached. Keep an eye on the cake towards the end of baking to prevent over-baking.

Step 8: Cool and Flip
Once baked, remove the cake from the oven and allow it to cool completely in the pan on a wire rack. This cooling step is crucial to prevent breakage when flipping. After about 30-40 minutes, gently run a knife around the edges and carefully flip the cake onto a serving plate to showcase the stunning caramelized bananas. For a shiny finish, brush with optional brown sugar syrup glaze if desired.

Make Ahead Options

These Caramelized Banana Upside Down Cakes are perfect for meal prep enthusiasts wanting to save time on busy days! You can prepare the caramel topping with the bananas, and cover it tightly in the refrigerator for up to 24 hours before baking; this allows the flavors to meld and enhances sweetness. Additionally, you can mix the cake batter ahead of time and store it separately in the fridge for up to 3 days. When you’re ready to bake, simply pour the batter over the cold caramelized bananas and follow the baking instructions as usual. This way, you’ll have a delectable dessert with minimal effort, just as delicious as if you made it fresh!

What to Serve with Easy Caramelized Banana Upside Down Cake

If you're looking to create a delightful dessert spread, let’s explore the perfect pairings that elevate this sweet, moist treat.

  • Whipped Cream: A dollop of airy, sweet whipped cream adds a light, creamy contrast to the dense cake and balances the sweetness of caramelized bananas.

  • Vanilla Ice Cream: A scoop of rich vanilla ice cream melts beautifully over the warm cake, creating a comforting, nostalgic dessert experience that guests will love.

  • Caramel Sauce Drizzle: Enhance the caramel notes by drizzling warm caramel sauce on top; it provides both flavor depth and a beautiful presentation on your dessert plate.

  • Fresh Berries: A side of fresh strawberries or raspberries introduces a tart contrast to the sweetness, brightening up each bite with a burst of freshness.

  • Coffee or Espresso: A warm cup of coffee or a shot of espresso pairs perfectly with dessert; the bitter notes complement the cake's sweetness, making it a perfect after-dinner treat.

  • Chopped Nuts: Consider sprinkling some toasted pecans or walnuts over the top; they bring a delightful crunch and earthy flavor that nicely contrasts the tender, moist cake.

  • Coconut Whipped Cream: For a tropical twist, serve with whipped coconut cream; its subtle flavor adds a unique flair that will surprise and delight your guests.

Expert Tips for Caramelized Banana Upside Down Cake

  • Room Temperature Ingredients: Make sure your butter, eggs, and yogurt are at room temperature to ensure proper mixing and a fluffy texture in your Caramelized Banana Upside Down Cake.

  • Watch Your Bananas: Choose firm, ripe bananas; overripe bananas can become mushy and unattractive post-baking. The goal is striking caramelized perfection!

  • Preheating Matters: Always preheat your oven fully before placing your cake inside. This helps the cake rise properly and achieve that delightful fluffy texture.

  • Avoid Overmixing: When combining wet and dry ingredients, mix until just combined to prevent the cake from becoming dense. Gently folding in helps maintain its lightness.

  • Cooling is Key: Allow the cake to cool completely in the pan before flipping it. This step prevents breakage and ensures the caramelized bananas stay intact for a beautiful presentation.

Caramelized Banana Upside Down Cake Variations

Feel free to put your personal spin on this delightful dessert to suit your taste buds!

  • Tropical Twist: Substitute bananas with pineapple slices for a summery flair that brings a tropical vibe to your cake.

  • Berry Good: Swap bananas for strawberries or raspberries, creating a fresh and vibrant topping that adds a pop of color and flavor.

  • Nutty Crunch: Add chopped walnuts or pecans to the batter or sprinkle them on top before baking for a delightful crunch.

  • Spice It Up: Incorporate a teaspoon of cinnamon or nutmeg in the batter for warm, aromatic notes that complement the sweetness beautifully.

  • Chocolate Drizzle: Drizzle melted chocolate over the cooled cake for a rich, indulgent touch that chocolate lovers will adore.

  • Gluten-Free Option: Replace all-purpose flour with a 1:1 gluten-free flour blend, perfect for those needing a gluten-free dessert!

  • Dairy-Free Delight: Use coconut yogurt and almond milk instead of yogurt and milk for a light dairy-free version that maintains moisture.

  • Heat It Up: Add a pinch of cayenne pepper or a dash of chili powder to the batter for a surprising kick that pairs well with the sweetness.

Once you've had a bite of this luscious cake, you might be tempted to explore other dessert options, like my delightful Chocolate Pudding Cake or the show-stopping Ice Cream Cake. Enjoy your delicious culinary adventure!

How to Store and Freeze Caramelized Banana Upside Down Cake

Fridge: Store the cake covered in the fridge for up to 3 days to retain its moisture and flavor. Ensure it’s in an airtight container to prevent drying.

Freezer: Wrap your sliced cake in plastic wrap, then in aluminum foil, and freeze for up to 2 months. Thaw in the fridge overnight before serving.

Reheating: To revive the cake's warmth, place individual slices in the microwave for 15-20 seconds or warm in a preheated oven at 175°C (347°F) for about 10 minutes.

Room Temperature: If consumed within a day, you can keep the cake covered at room temperature, but be mindful of humidity which may affect the cake texture.

Caramelized Banana Upside Down Cake Recipe FAQs

How do I choose the right bananas for this recipe?
Absolutely! For the best caramelization, select firm, slightly ripe bananas. Overripe bananas may become mushy and unattractive during baking, losing their appealing shape. Look for bananas with minimal dark spots, as these indicate they are still perfectly ripe but not overly soft.

What’s the best way to store leftover cake?
I often recommend storing any leftover Caramelized Banana Upside Down Cake in an airtight container in the fridge for up to 3 days. This keeps the cake fresh and retains its moist texture. If you'd prefer, you can also keep it covered at room temperature for the same duration, but be cautious about humidity and temperature changes, which could affect the cake's quality.

Can I freeze the Caramelized Banana Upside Down Cake?
Certainly! To freeze, slice the cake into portions and wrap each piece tightly in plastic wrap, followed by aluminum foil. This method ensures optimal protection against freezer burn. The cake can be frozen for up to 2 months. When you're ready to enjoy it, simply thaw in the fridge overnight and reheat individual slices in the microwave for about 15-20 seconds for a delightful treat!

What should I do if my cake sinks in the middle?
Very! If your cake sinks, it could stem from overmixing, too much batter for the pan size, or incorrect oven temperature. To troubleshoot, ensure that you don't overmix the wet and dry ingredients. Check your oven's temperature with a thermometer, and make sure you follow the recipe's suggested baking time and temperatures closely.

Does this recipe cater to specific dietary considerations?
That's a great question! This Caramelized Banana Upside Down Cake contains gluten, dairy, and eggs, which may not suit everyone. For a gluten-free version, consider using a gluten-free flour blend; just make sure to adjust any other ingredients accordingly. If you have allergies to bananas, you can substitute them with other fruits, like pineapple or strawberries, ensuring they adhere to similar preparation methods for the caramel layer.

Caramelized Banana Upside Down Cake

Caramelized Banana Upside Down Cake for Cozy Moments

This Caramelized Banana Upside Down Cake is a delightful dessert with a moist texture and a stunning presentation, perfect for any cozy gathering.
Print Recipe Pin Recipe
Prep Time 20 minutes mins
Cook Time 1 hour hr
Cooling Time 40 minutes mins
Total Time 2 hours hrs
Servings: 8 slices
Course: Dessert
Cuisine: American
Calories: 350
Ingredients Equipment Method Nutrition Notes

Ingredients
  

For the Cake
  • 150 g Unsalted Butter Use room temperature butter for easier blending and optimal moisture.
  • 200 g Granulated Sugar Provides sweetness and structure; mixing with brown sugar can enhance flavor depth.
  • 1.5 teaspoons Vanilla Extract Introduces a lovely aromatic sweetness to the cake.
  • 2 units Eggs Essential for the cake’s structure and moisture.
  • 110 g Thick Greek or Turkish Yogurt Contributes to the cake's moistness while adding a slight tangy flavor.
  • 45 g Whole Milk Ensures the batter achieves a perfect consistency.
  • 240 g All-Purpose Flour Provides backbone to the cake; measure accurately for the best results.
  • 1.5 teaspoons Baking Powder Acts as a leavening agent to help the cake rise.
  • 0.5 teaspoon Salt Enhances all the flavors in the cake.
For the Caramel Topping
  • 3-4 units Bananas The star of the dessert; choose firm, ripe bananas for the best presentation after baking.
  • 60 g Sugar Ideal for caramelizing the bananas; brown sugar can be used for a richer flavor.
  • 60 g Unsalted Butter Necessary for the caramel mixture, adding richness.
For the Optional Glaze
  • 40 g Brown Sugar (optional for glaze) Adds extra sweetness and shine when mixed with 40 g of water for syrup.

Equipment

  • Springform pan
  • Mixing bowls
  • Electric mixer
  • Saucepan

Method
 

Step-by-Step Instructions
  1. Preheat your oven to 175°C (347°F) without using the fan.
  2. Slice 3-4 firm bananas horizontally and arrange them cut-side down in a greased springform pan. In a small saucepan, combine 60 g of sugar and 60 g of unsalted butter over low to medium heat. Stir gently for about 1-2 minutes until bubbly and light golden, then pour it evenly over the bananas.
  3. In a large mixing bowl, cream together 150 g of unsalted butter and 200 g of granulated sugar using an electric mixer for about 3-5 minutes until light and fluffy.
  4. Sift together 240 g of all-purpose flour, 1.5 teaspoons of baking powder, and 0.5 teaspoon of salt in a separate bowl.
  5. In another bowl, whisk together 110 g of thick Greek yogurt and 45 g of whole milk until smooth. Gradually fold this into your egg mixture, alternating with the sifted dry ingredients.
  6. Pour the batter evenly over the caramelized bananas in the springform pan.
  7. Bake in the preheated oven for approximately 1 hour. Check for doneness by inserting a toothpick into the center.
  8. Cool completely in the pan on a wire rack, then carefully flip the cake onto a serving plate.

Nutrition

Serving: 1sliceCalories: 350kcalCarbohydrates: 48gProtein: 4gFat: 16gSaturated Fat: 10gPolyunsaturated Fat: 1gMonounsaturated Fat: 5gCholesterol: 80mgSodium: 200mgPotassium: 180mgFiber: 1gSugar: 28gVitamin A: 500IUVitamin C: 5mgCalcium: 50mgIron: 1mg

Notes

Ensure room temperature ingredients for a fluffier cake, and remember to watch your bananas for the best caramelization.

Tried this recipe?

Let us know how it was!

Delicious Earl Grey Macarons with Zesty Lemon Curd Filling

September 20, 2025 by Grace Snow Leave a Comment

As I stood in my kitchen, the warm aroma of freshly baked macarons filled the air, whisking me away to quaint Parisian cafes. These delightful Earl Grey macarons, infused with the fragrant notes of bergamot, are a true celebration of elegance in dessert form. Paired with a zesty lemon curd filling, they offer an inviting balance that both tea lovers and dessert aficionados will adore. What’s more, this recipe isn’t just about gratifying your sweet tooth; it’s also a perfect way to impress at your next gathering, providing a quick, yet refined, treat that’s suitable for any occasion. The joy of mastering the macaron technique can turn any home chef's day around, making it a rewarding experience that you won’t easily forget. Are you ready to elevate your baking game with these irresistible treats?

Why are these Macarons a Must-Try?

Elevating Treats: These Earl Grey macarons transform a classic French dessert with the delightful hint of bergamot. Unique Flavor Combination: The infusion of tea in the shells paired with tangy lemon curd creates an exciting flavor profile. Appealing Presentation: Their colorful aesthetic makes these macarons perfect for impressing guests at events or simply for your afternoon tea. Mastering Technique: Engaging in the macaron-making process can elevate your baking skills. Plus, quick and rewarding; they come together in a reasonable timeframe, leaving you with a sweet moment of triumph after your first successful batch! For more delightful ideas, check out our variations on macarons.

Earl Grey Macaron Ingredients

• Embrace the joy of cooking with these delicious Earl Grey macarons!

For the Macaron Shells

  • Almond Flour – Provides structure and texture; ensure it's finely ground for the best results.
  • Earl Grey Loose Tea – Infuses aromatic flavor; feel free to substitute with another flavored tea if desired.
  • Powdered Sugar – Sweetens the shells; you can use granulated sugar, but it may affect the texture.
  • Egg Whites – Essential for a stable meringue; make sure they are at room temperature for optimal aeration.
  • Granulated Sugar – Stabilizes the meringue when combined in the sugar syrup.
  • Water – Used to make the sugar syrup for meringue creation.

For the Lemon Curd Filling

  • Egg Yolks – Provide richness for the lemon curd; use fresh for the best flavor.
  • Lemon Juice – Adds a bright, tangy flavor; freshly squeezed is ideal, with about 5 lemons needed.
  • Lemon Zest – Enhances the lemon flavor within the curd.
  • Unsalted Butter – Contributes creaminess to the curd; can be substituted with a vegan alternative.
  • Gelatin Sheet – Stabilizes the lemon curd; opt for agar-agar as a vegetarian substitute if needed.

For Decoration

  • Melted White Chocolate & Yellow Food Coloring – Great for presentation; you can replace chocolate with a colored glaze for a cute touch.

Step‑by‑Step Instructions for Earl Grey Macarons

Step 1: Prep Ingredients
Begin your delightful journey by measuring all dry ingredients—almond flour, powdered sugar, and Earl Grey tea. Ensure your egg whites are at room temperature, which is crucial for achieving a stable meringue. This preparation sets the foundation for your Earl Grey macarons, ensuring everything is organized and ready to go.

Step 2: Make Sugar Syrup
In a small saucepan, combine granulated sugar and water, then place it over medium heat. Allow the mixture to heat until it reaches a temperature of 118°C-120°C (244°F-248°F), using a candy thermometer for precision. As the syrup boils and begins to thicken, keep an eye on it; this step is essential for stabilizing your meringue for the macarons.

Step 3: Whip Egg Whites
Using a stand mixer fitted with a whisk attachment, start whisking the egg whites on medium speed until foamy. Gradually add the superfine sugar as you continue whisking until soft peaks form. This step is crucial for achieving the perfect texture in your Earl Grey macaron shells, so watch for a fluffy consistency that holds soft peaks but isn’t yet stiff.

Step 4: Incorporate Syrup
Once your sugar syrup reaches the right temperature, carefully remove it from heat. While continuously whisking the egg whites on high speed, slowly pour in the hot syrup. Continue whisking until the meringue reaches stiff peaks and loses its glossy sheen, which usually takes about 5-8 minutes. This step is vital for creating the structure of your macarons.

Step 5: Mix Dry Ingredients
In a separate bowl, combine the almond flour, powdered sugar, and Earl Grey tea. Pulse the mixture a few times in a food processor until finely ground and well blended. This helps to aerate the dry ingredients, ensuring your Earl Grey macarons turn out light and delicate, free from lumps that could hinder their rise.

Step 6: Fold Mixtures
Gently fold the whipped meringue into the almond mixture using a spatula. This is where precision matters: fold until you reach the ribbon stage, which should take about 30-40 strokes. The final mixture should flow smoothly and resemble molten lava without any lumps. This step ensures your macarons achieve that beautiful, smooth surface.

Step 7: Pipe Shells
Prepare a piping bag fitted with a round tip, then fill it with the macaron batter. On a silicone mat or parchment-lined baking tray, pipe equal-sized rounds (about 3 cm in diameter), leaving space between each. This step is crucial for forming the perfect Earl Grey macaron shells; take your time to ensure even sizes for uniform baking.

Step 8: Rest Shells
Let the piped macarons rest at room temperature for 25-40 minutes, or until a skin forms on the surface. You’ll know they are ready when they are dry to the touch and a slight touch does not leave a mark. This step is essential to prevent cracks during baking and allows the macarons to rise properly.

Step 9: Bake
Preheat your oven to 155°C (311°F). Once ready, bake the macarons for 14-15 minutes, rotating the tray halfway through to ensure even baking. You’ll know they’re done when they have a slight sheen and lift easily from the mat. This baking step transforms the batter into the beautiful Earl Grey macarons you desire.

Step 10: Cool
Once out of the oven, allow the macarons to cool on the baking tray for about 5 minutes before transferring them to a wire rack. They must cool completely to maintain their delicate structure. Patience is key here, as this cooling step is essential for easy removal without breaking.

Step 11: Make Lemon Curd
In a heatproof bowl, whisk together egg yolks, lemon juice, and sugar over simmering water. Stir constantly until thickened, approximately 10-15 minutes. Once thick, remove from heat and incorporate the butter and softened gelatin, stirring until smooth. This lemon curd filling adds the perfect tangy contrast to your sweet Earl Grey macarons.

Step 12: Fill Macarons
Fit another piping bag with the lemon curd and pipe a small dollop onto the flat side of half the macarons. Gently press another shell on top to create a sandwich. This step enhances the flavors and textures, making every bite of your Earl Grey macarons delightful with zesty lemon.

Step 13: Decorate
Optionally, melt some white chocolate and add yellow food coloring for a charming decoration. Drizzle or dip the topped macarons in the melted chocolate, then dust with a little Earl Grey tea for an elegant touch. This decorative step not only adds flavor but also enhances presentation for an inviting treat.

Step 14: Aging
To achieve the best texture, refrigerate the filled macarons for at least 12 hours. This aging allows the flavors to meld and the filling to soften the macaron shells, making them irresistibly chewy and delicious. This essential aging step transforms your delectable Earl Grey macarons into a refined dessert perfect for any occasion.

Expert Tips for Earl Grey Macarons

  • Temperature Matters: Make sure your egg whites are room temperature; this maximizes aeration for the meringue, leading to better Earl Grey macarons.
  • No Overmixing: When folding the meringue into the dry ingredients, stop as soon as you reach the ribbon stage. Overmixing can deflate your batter, resulting in unwanted texture.
  • Resting is Key: Don’t skip the resting time after piping your shells; this crucial step helps form a skin that prevents cracking during baking.
  • Consistent Sizes: Use a template under your parchment paper to pipe evenly sized shells. Uniformity is vital for even baking and presentation.
  • Don’t Rush Cooling: Allow macarons to cool completely before filling to maintain their delicate texture and prevent breaking during assembly.
  • Aging Enhances Flavor: Refrigerate filled macarons for at least 12 hours before serving; this aging process brings out the best flavors and perfects the texture.

Storage Tips for Earl Grey Macarons

  • Room Temperature: Macarons are best enjoyed fresh, so consume them within a few hours of assembly. If left out, they should be eaten within the day for optimal texture.
  • Fridge: Store filled Earl Grey macarons in an airtight container in the refrigerator for up to 5 days. This keeps them fresh and maintains the delightful balance of flavors.
  • Freezer: For longer storage, freeze unfilled macaron shells in an airtight container. They can last up to 2 months; just ensure to thaw them completely before filling.
  • Reheating: If you prefer warm macarons, briefly heat them in a microwave for 5-10 seconds, but be cautious as this can affect their texture.

What to Serve with Earl Grey Macarons with Lemon Curd Filling

Elevate your baking experience by exploring delightful pairings that enhance each luscious bite of these unique macarons.

  • English Breakfast Tea: This robust tea complements the bergamot in the macarons while offsetting the tanginess of the lemon curd with its hearty flavor.
  • Scones with Clotted Cream: Light, flaky scones add a rustic touch and pair perfectly for a classic afternoon tea experience, balancing textures beautifully.
  • Fruit Salad: A fresh medley of berries and citrus fruits adds a vibrant touch and brightens the palate between bites of the sweet, creamy macarons.
  • Champagne or Prosecco: The bubbly effervescence cuts through the richness of the macarons, creating an elegant pairing that’s sure to impress at any gathering.
  • Lemonade or Herbal Iced Tea: Both beverages provide a complementary citrus twist, offering a refreshing contrast to the decadent treat and inviting a casual vibe.
  • Miniature Cheesecakes: Opt for lemon or berry-flavored cheesecakes to echo the flavors in the macarons while adding a creamy texture, making for delightful bites.
  • Butter Cookies: Lightly sweet, crisp butter cookies provide a lovely contrast in texture, making the macaron experience even more enjoyable for guests.
  • Chocolate-Covered Strawberries: The richness of chocolate and freshness of strawberries create a beautifully indulgent balance next to the delicate macaron.

Make Ahead Options

These Earl Grey macarons are perfect for meal prep enthusiasts looking to save time on busy days! You can prepare the macaron shells up to 24 hours in advance. Simply bake and cool them completely, then store the shells in an airtight container at room temperature to maintain their crispiness. The lemon curd filling can also be made up to 3 days ahead; refrigerate it in a covered container. When you're ready to serve, fill the macarons with the lemon curd and allow them to age in the fridge for at least 12 hours for optimal texture and flavor blending. This way, you’ll always have delightful treats ready at a moment's notice!

Earl Grey Macarons Variations & Substitutions

Feel free to play around with these delightful variations and substitutions to make the recipe your own! Each twist promises to accentuate your culinary creativity and excitement.

  • Flavored Tea: Substitute Earl Grey with chai or jasmine tea for a new aromatic experience. The fragrant infusion will create a unique pairing with the lemon curd filling.
  • Fruity Curd: Swap the lemon curd for passionfruit or raspberry curd to add an exciting burst of flavor that complements the floral notes of the macaron shells beautifully.
  • Vegan Option: Use aquafaba (the liquid from chickpeas) instead of egg whites to make this treat entirely plant-based, while still achieving that coveted meringue texture.
  • Chocolate Twist: Incorporate cocoa powder into the macaron shells for a rich chocolate version, perfect if you're a chocoholic at heart. Pair it with a raspberry or orange curd for a complementary pairing!
  • Nut-Free Alternative: Use sunflower seed flour in place of almond flour to cater to nut allergies; it offers a slightly different flavor with a beautiful result.
  • Spice Up: Add a pinch of cardamom or cinnamon to the shell mixture for a warm twist that enhances the overall taste experience. These spices work wonderfully with the bergamot undertones.
  • Zesty Kick: Mix in some zest from an orange or lime into the lemon curd for a refreshing citrus twist that brightens up each bite!
  • Different Fillings: Experiment with alternate fillings like a pastry cream or whipped cream cheese mixed with herbs for a savory touch. Pairing with rosemary or thyme can bring a unique charm to your desserts.

Remember, the beauty of baking lies in the exploration of flavors! If you need more guidance or inspiration, check out our tips on perfecting macaron techniques and crafting unique curds. Happy baking!

Earl Grey Macarons with Tangy Lemon Curd Filling Recipe FAQs

What should I look for when selecting Earl Grey tea?
Absolutely! When selecting Earl Grey tea, choose a high-quality loose leaf that prominently features bergamot oil. Look for leaves with a rich aroma and vibrant color, as these ensure a more robust infusion in your macarons. If you're uncertain, a good rule of thumb is to opt for brands known for their tea blends. Freshness matters here, so check the packaging date!

How should I store my Earl Grey macarons?
For the best taste, store your filled Earl Grey macarons in an airtight container in the fridge for up to 5 days. This prevents them from drying out and maintains that beautiful creamy lemon filling. If you prefer to keep them longer, consider separating the shells and filling, then storing the unfilled shells at room temperature.

Can I freeze the macarons, and what’s the best way?
Very! You can absolutely freeze unfilled macaron shells for longer preservation. To do this, place them in an airtight container, layer them carefully with parchment paper between each layer, and freeze for up to 2 months. When you're ready to fill them, allow them to thaw in the fridge overnight and pipe in your lemon curd once they're at room temperature.

What should I do if my macarons crack while baking?
Don't worry; this happens to the best of us! Cracks can occur if your macarons didn't rest long enough before baking, so make sure they form a skin that’s dry to the touch. Also, ensure your oven temperature is accurate; using an oven thermometer can help you achieve consistent results. If you're still having issues, try lowering your baking temperature by 10-15 degrees and extend the baking time slightly.

Are these macarons pet-friendly?
The ingredients in these Earl Grey macarons, specifically the lemon and tea, are not suitable for pets, particularly dogs and cats. If you're considering sharing a treat, stick with pet-safe snacks instead. Always err on the side of caution with your furry friends!

Can I make these macarons vegan or gluten-free?
You can definitely adapt them! For a vegan version, replace the egg whites with aquafaba (the liquid from canned chickpeas); use about 3 tablespoons for each egg white. For the lemon curd, swap the eggs and butter with a plant-based alternative like coconut cream and cornstarch to thicken. For gluten-free considerations, ensure your almond flour is certified gluten-free and that all other ingredients (like food coloring) are also safe. Enjoy experimenting!

Earl Grey Macarons

Delicious Earl Grey Macarons with Zesty Lemon Curd Filling

This Earl Grey Macarons recipe features a delightful bergamot flavor and a zesty lemon curd filling.
Print Recipe Pin Recipe
Prep Time 30 minutes mins
Cook Time 15 minutes mins
Resting Time 40 minutes mins
Total Time 1 hour hr 25 minutes mins
Servings: 24 macarons
Course: Dessert
Cuisine: French
Calories: 90
Ingredients Equipment Method Nutrition Notes

Ingredients
  

For the Macaron Shells
  • 120 g Almond Flour Ensure it's finely ground
  • 2 tbsp Earl Grey Loose Tea Can substitute with another flavored tea
  • 200 g Powdered Sugar Can use granulated sugar but may affect texture
  • 100 g Egg Whites Room temperature for optimal aeration
  • 200 g Granulated Sugar Stabilizes meringue
  • 50 ml Water Used for making sugar syrup
For the Lemon Curd Filling
  • 4 large Egg Yolks Use fresh for best flavor
  • 150 ml Lemon Juice Freshly squeezed, about 5 lemons needed
  • 1 tbsp Lemon Zest
  • 100 g Unsalted Butter Can substitute with a vegan alternative
  • 1 sheet Gelatin Sheet Opt for agar-agar as a vegetarian substitute
For Decoration
  • 50 g Melted White Chocolate Replace with colored glaze if desired
  • 1 dash Yellow Food Coloring

Equipment

  • Stand Mixer
  • piping bag
  • candy thermometer
  • Food Processor
  • Silicone Mat or Parchment Paper

Method
 

Step-by-Step Instructions for Earl Grey Macarons
  1. Begin your delightful journey by measuring all dry ingredients—almond flour, powdered sugar, and Earl Grey tea. Ensure your egg whites are at room temperature.
  2. In a small saucepan, combine granulated sugar and water, then place it over medium heat until it reaches 118°C-120°C (244°F-248°F).
  3. Using a stand mixer, whisk the egg whites on medium speed until foamy. Gradually add the superfine sugar until soft peaks form.
  4. Once the sugar syrup reaches the right temperature, remove it from heat and pour it into the egg whites while whisking.
  5. Combine the almond flour, powdered sugar, and Earl Grey tea in a separate bowl and pulse in a food processor.
  6. Gently fold the whipped meringue into the almond mixture until it reaches the ribbon stage.
  7. Prepare a piping bag and pipe equal-sized rounds (about 3 cm in diameter) on a baking tray.
  8. Let the piped macarons rest at room temperature for 25-40 minutes, until dry to the touch.
  9. Preheat your oven to 155°C (311°F) and bake the macarons for 14-15 minutes.
  10. Allow the macarons to cool on the baking tray for about 5 minutes before transferring them to a wire rack.
  11. Whisk together egg yolks, lemon juice, and sugar in a heatproof bowl over simmering water until thickened.
  12. Incorporate butter and softened gelatin into the lemon curd, stirring until smooth.
  13. Pipe a small dollop of lemon curd onto half of the macarons and press another shell on top.
  14. Melt white chocolate and add yellow food coloring for decoration, then drizzle over the macarons.
  15. Refrigerate filled macarons for at least 12 hours before serving to allow flavors to meld.

Nutrition

Serving: 1macaronCalories: 90kcalCarbohydrates: 10gProtein: 1gFat: 5gSaturated Fat: 3gMonounsaturated Fat: 2gCholesterol: 15mgSodium: 5mgPotassium: 20mgSugar: 8gVitamin A: 100IUVitamin C: 1mgCalcium: 10mgIron: 0.2mg

Notes

Macarons are best enjoyed fresh, ideally within hours of assembly. For longer storage, refrigerate or freeze appropriately.

Tried this recipe?

Let us know how it was!
  • « Previous Page
  • 1
  • …
  • 39
  • 40
  • 41
  • 42
  • 43
  • …
  • 49
  • Next Page »

Welcome!

Hi, I’m Grace, a Sydney-based home cook with a passion for bold flavors and trending ingredients. Whether you’re a busy beginner or a seasoned foodie, you’ll find dishes here that are fresh, fun, and full of flavor.

More about me

Popular Recipes

  • Cheesy Chicken Garlic Bread Sandwich
    Cheesy Chicken Garlic Bread Sandwich for Cozy Family Moments
  • Easy Chicken Ranch Wraps
    Easy Chicken Ranch Wraps: Quick, Creamy & Totally Satisfying
  • Chicken Caesar Sandwiches
    Delicious Chicken Caesar Sandwiches for Quick Comfort Food
  • best Cuban sandwich
    The Best Cuban Sandwich You’ll Want Every Weeknight!

Footer

↑ back to top

About

  • Privacy Policy
  • Disclaimer
  • Terms & Conditions

Newsletter

  • Sign Up! for emails and updates

Contact

  • About me
  • Contact me

Copyright © 2025 TastyTrendIngredients